Brag Posts Submitted for This Month's Contest


brag post contest

Want to enter this contest?  Click here for all the details.


Folding Workbench

Submitted by MrsCordz on Fri, 10/11/2019 - 07:47

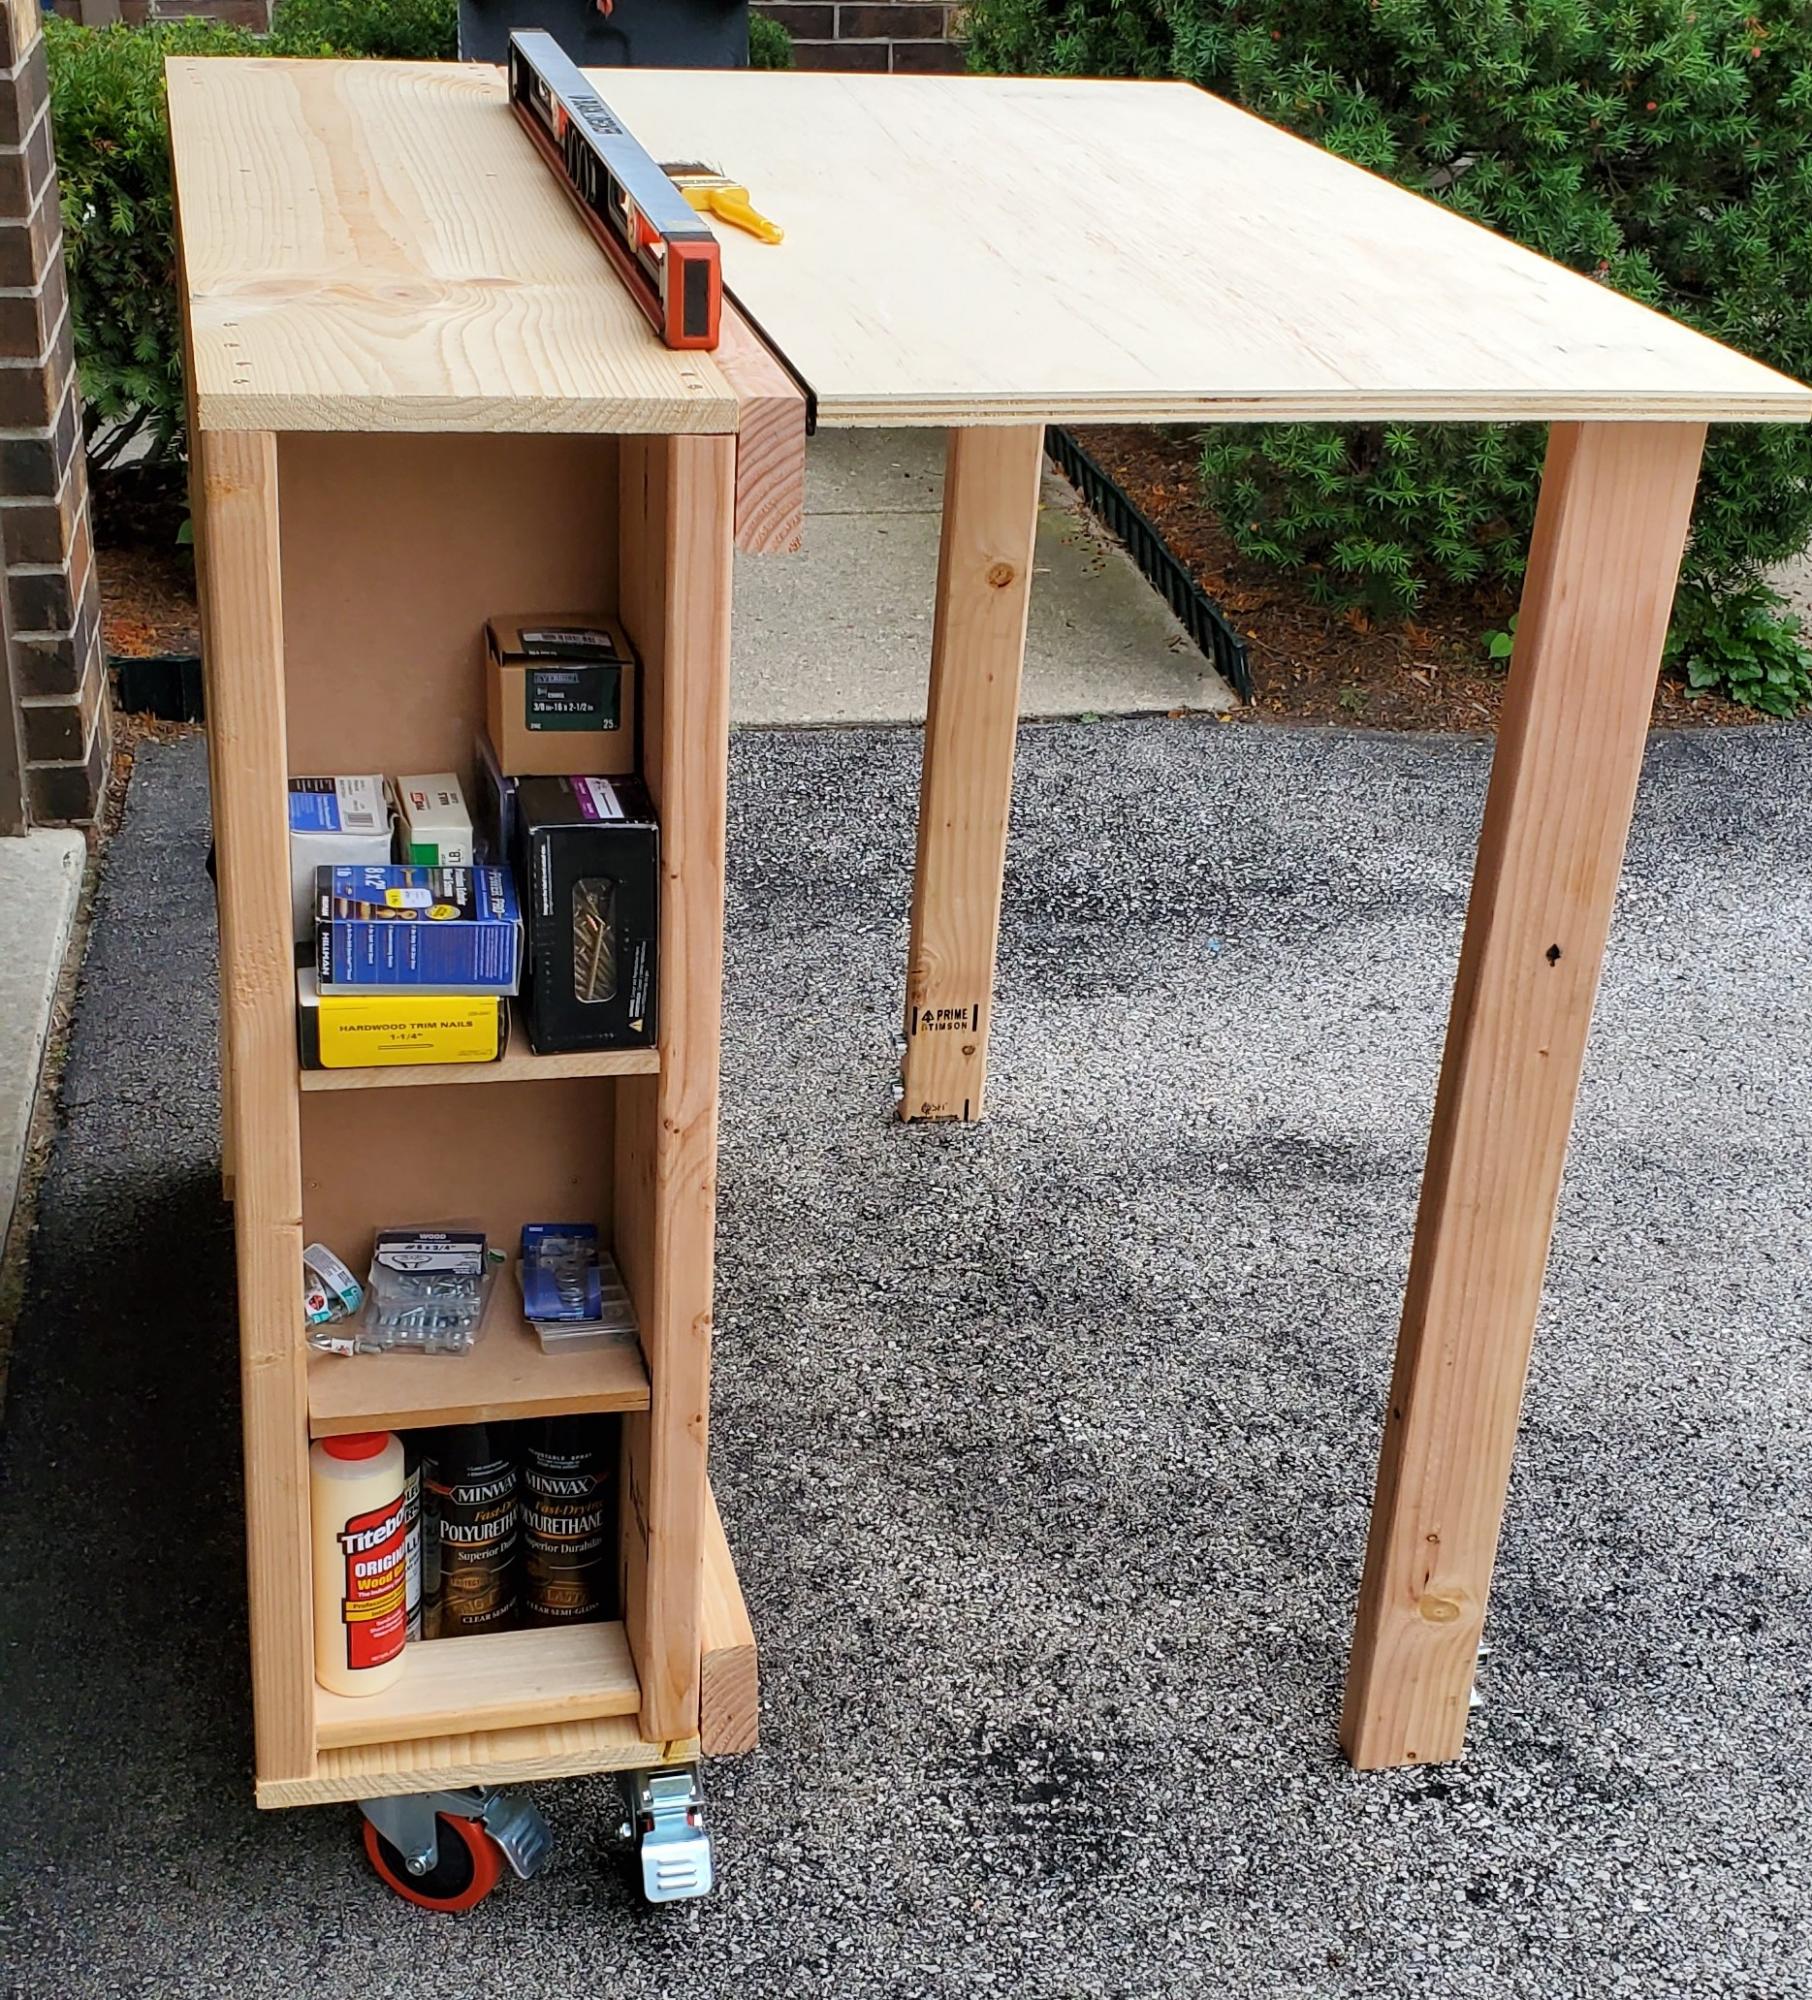
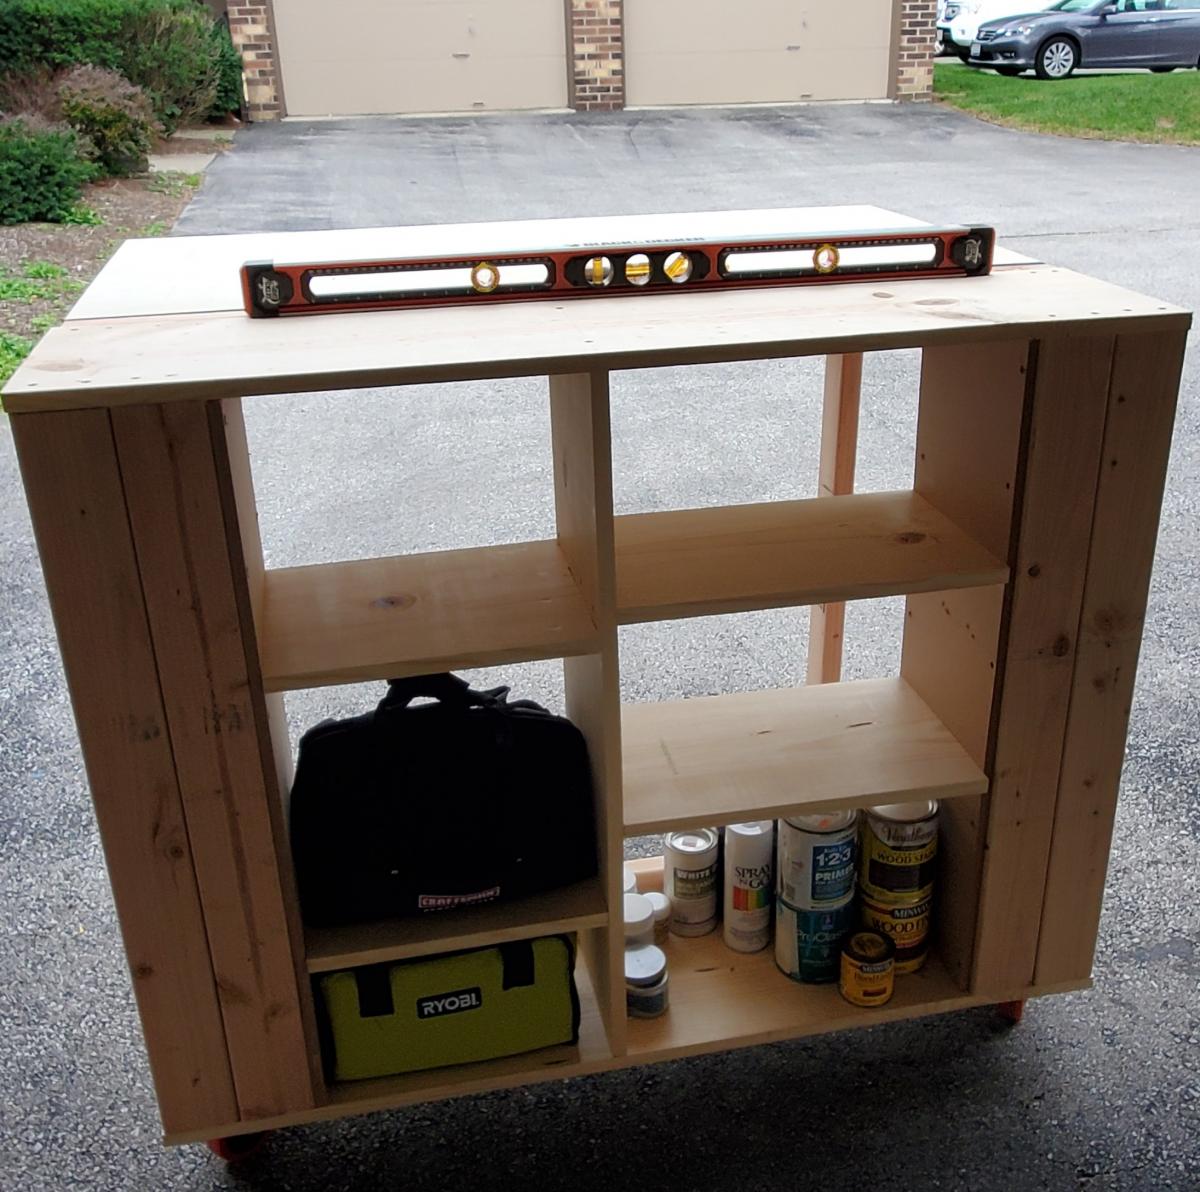
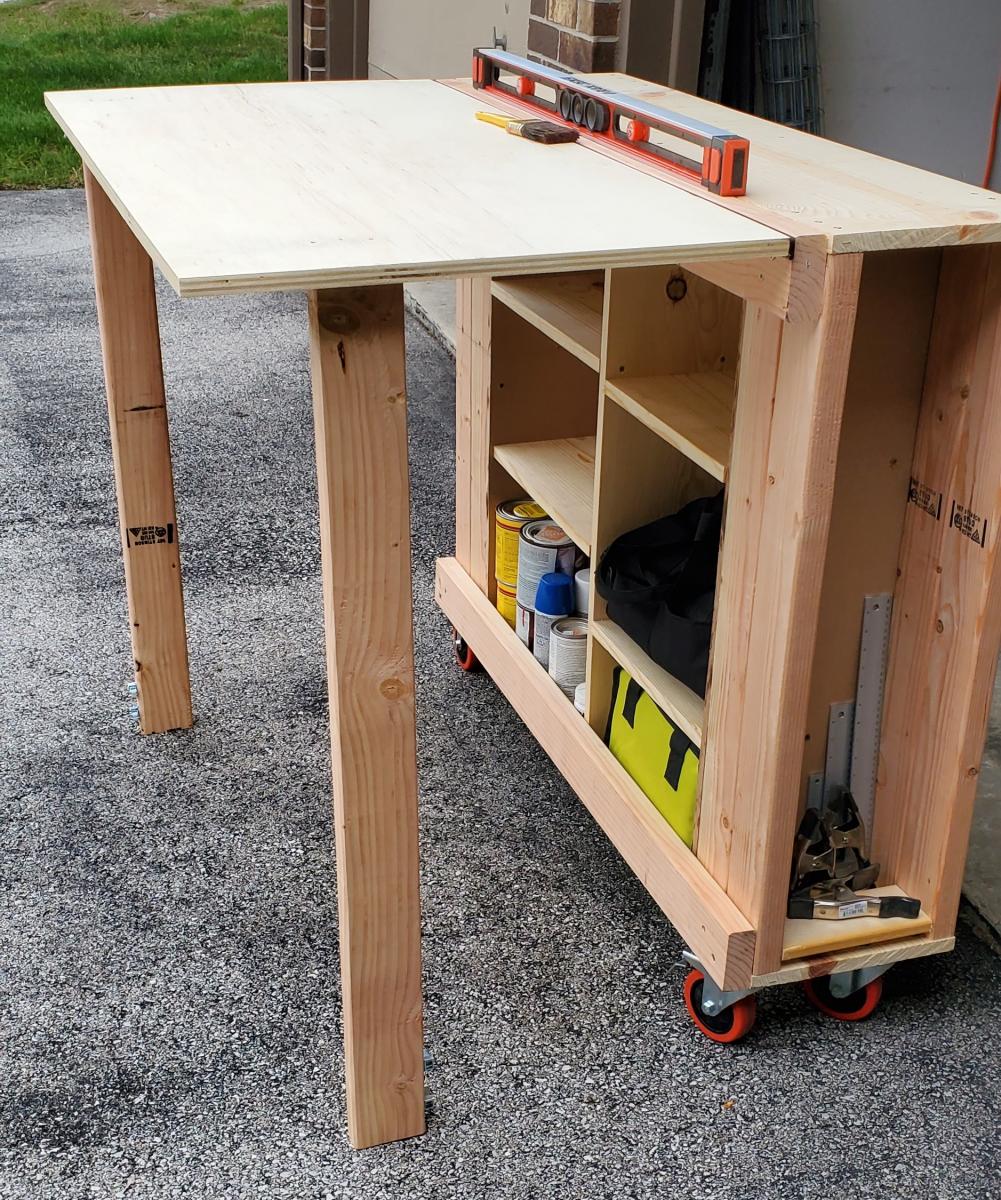
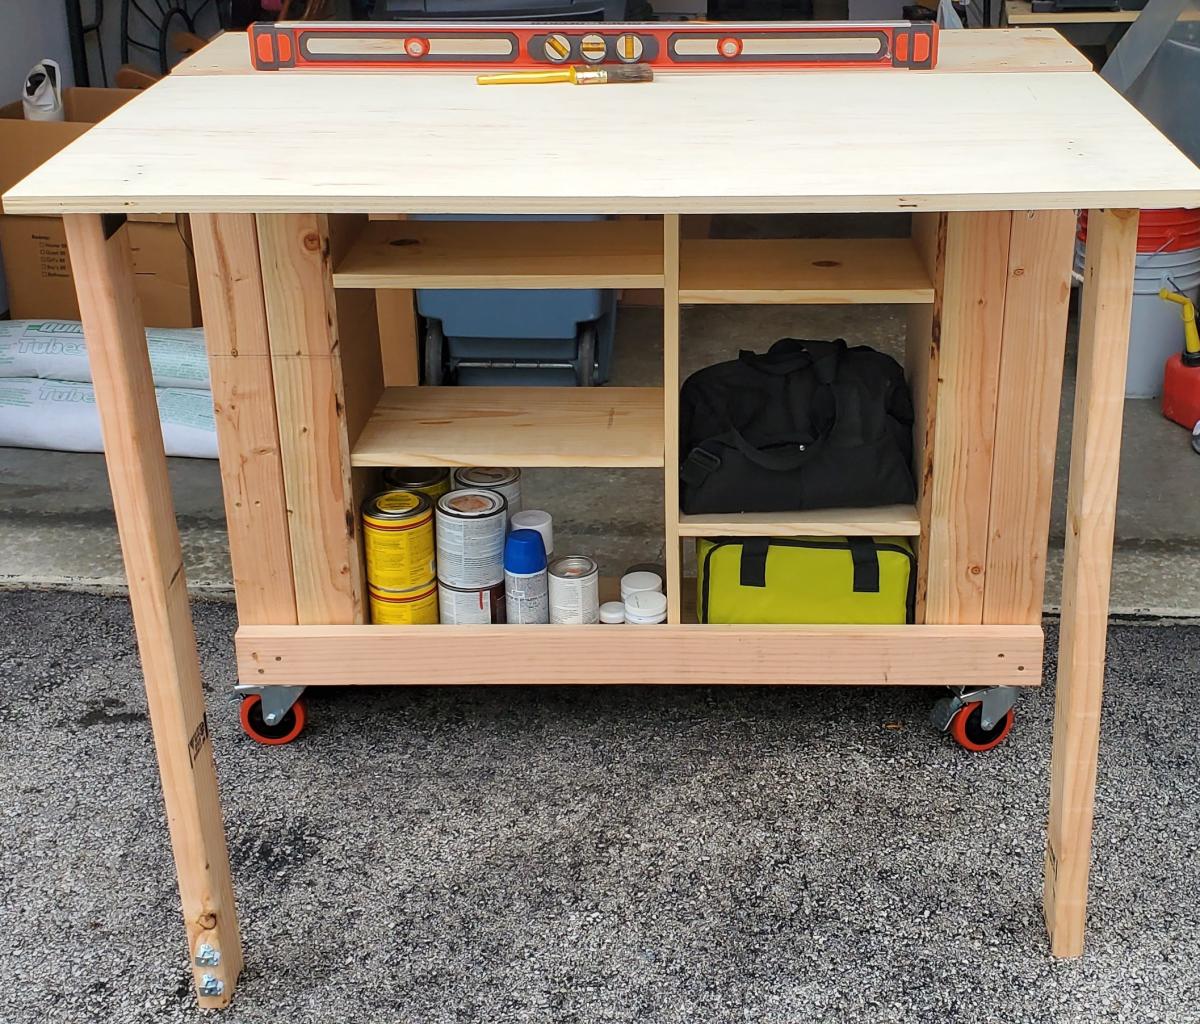
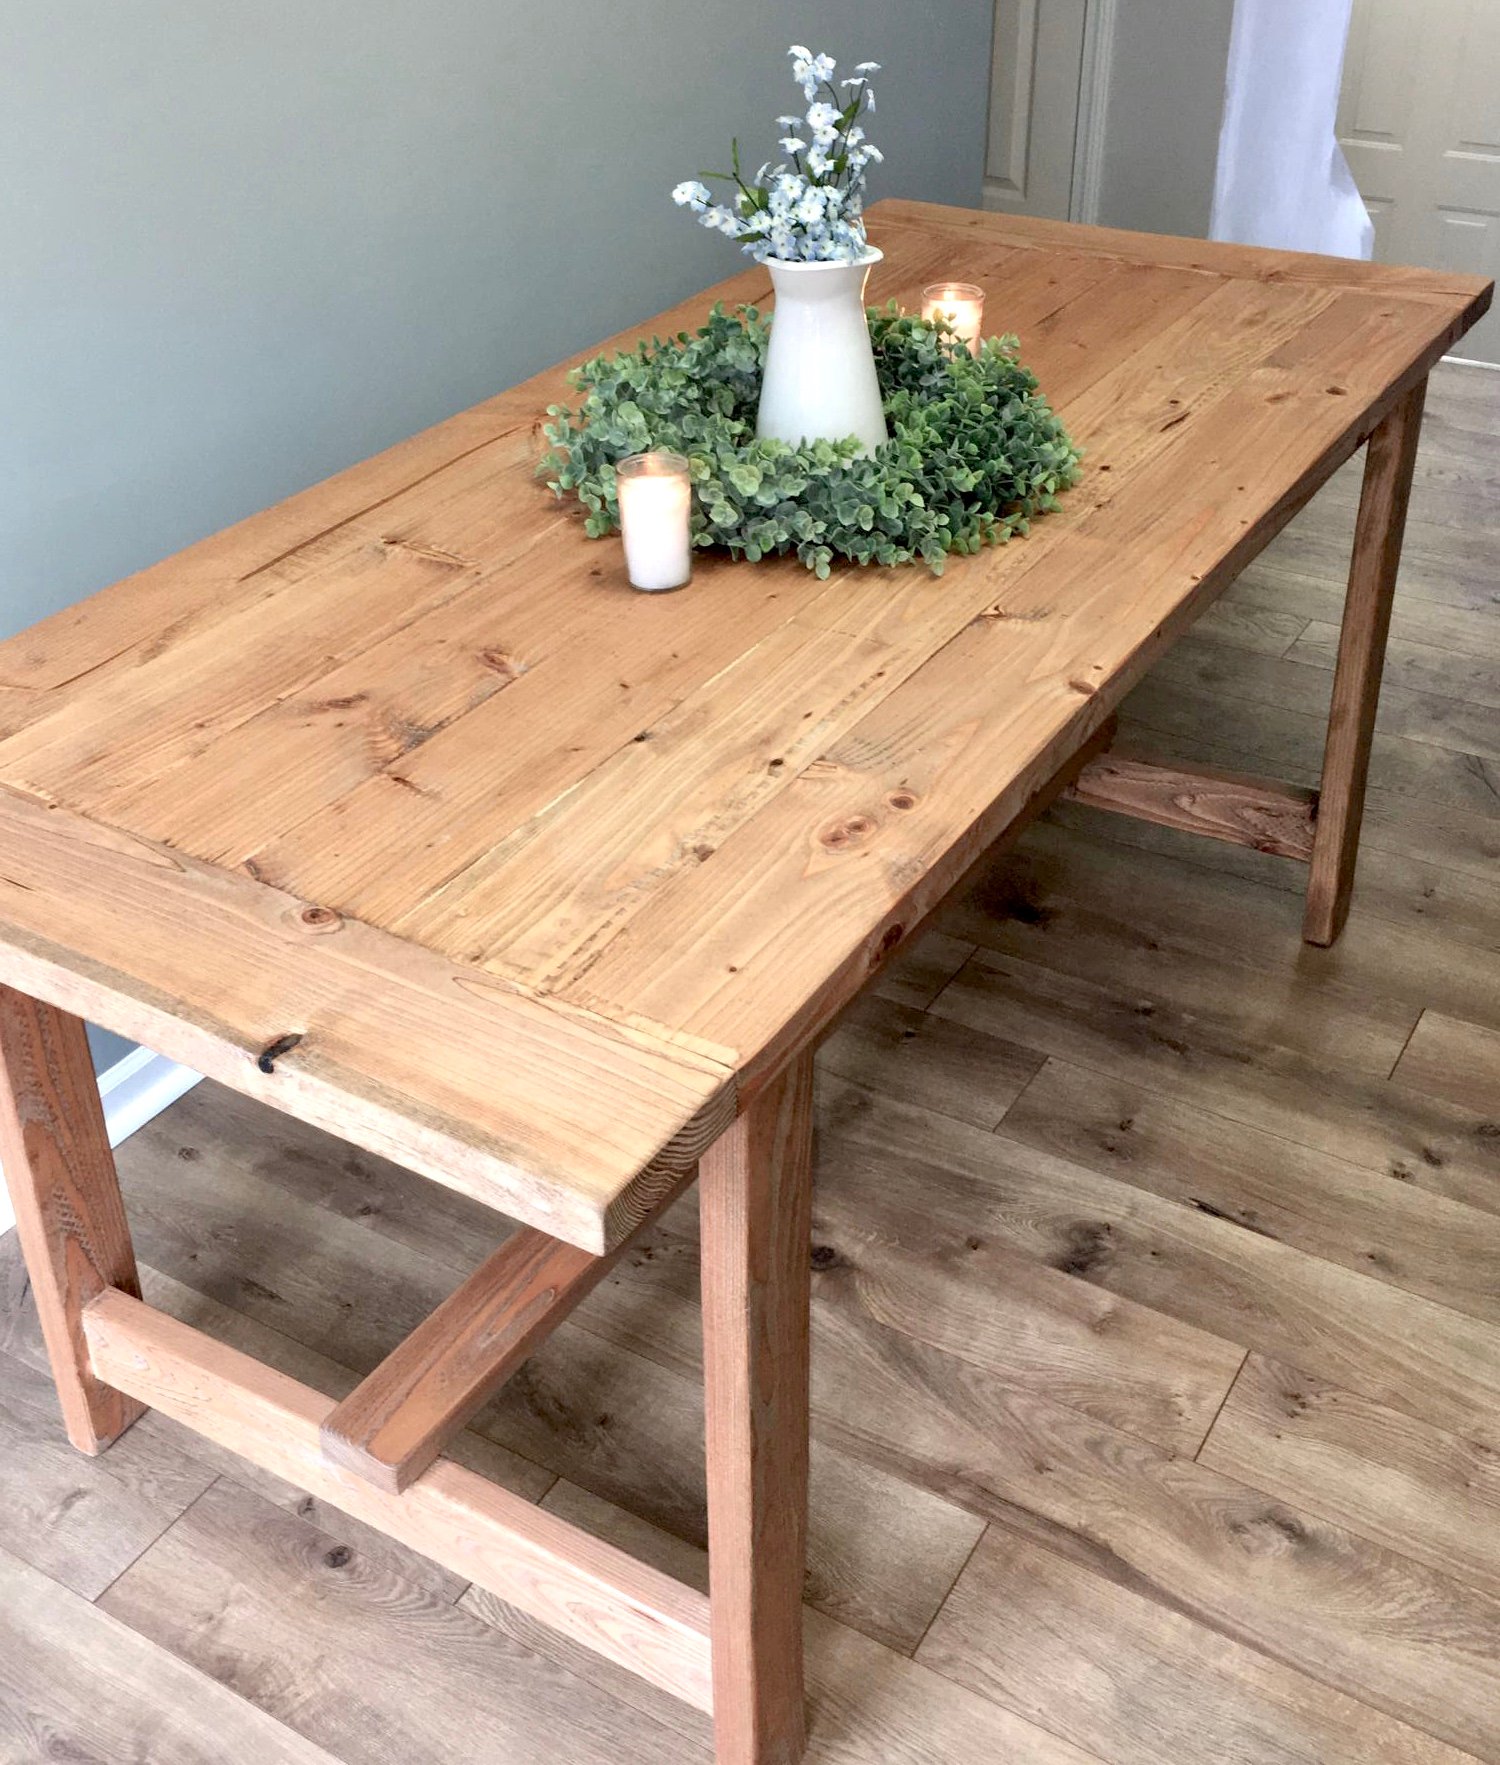
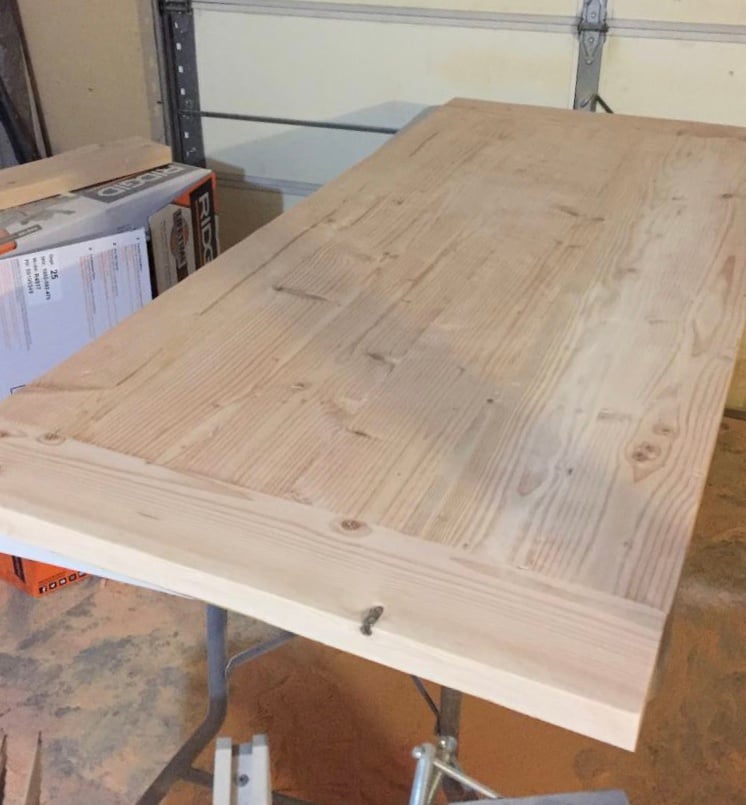
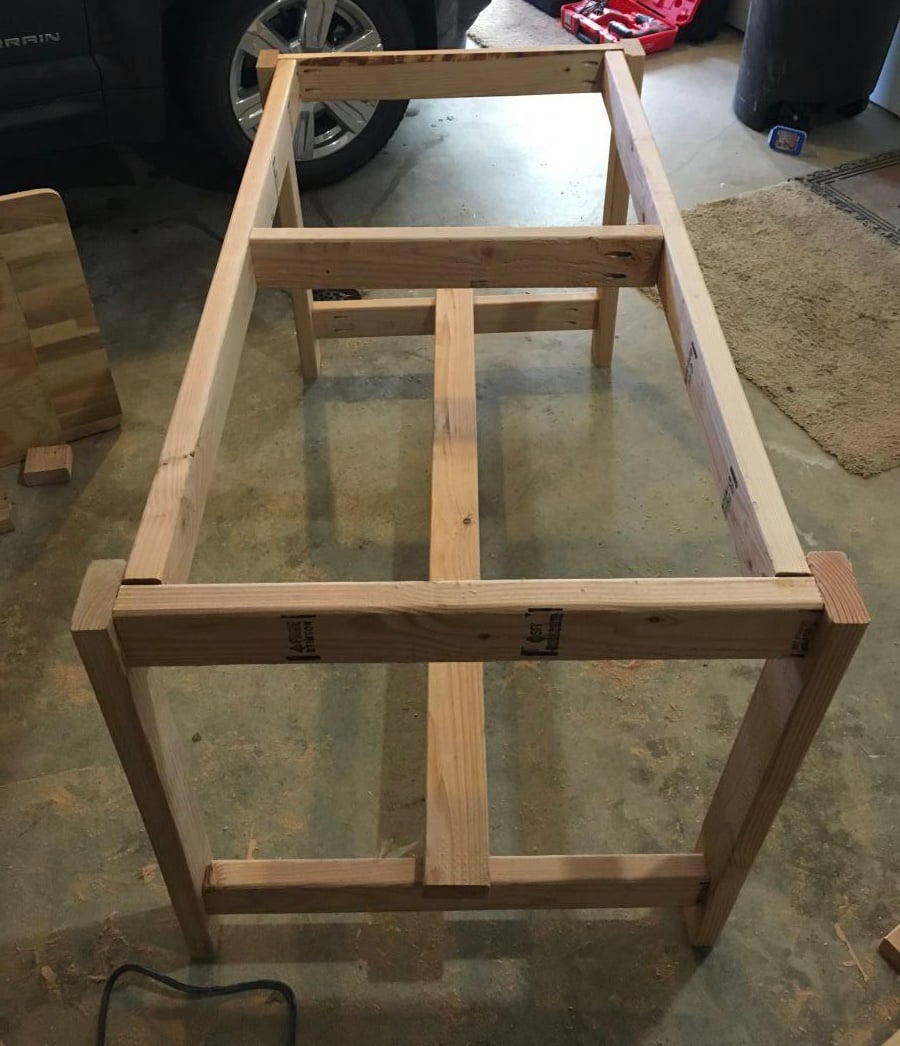
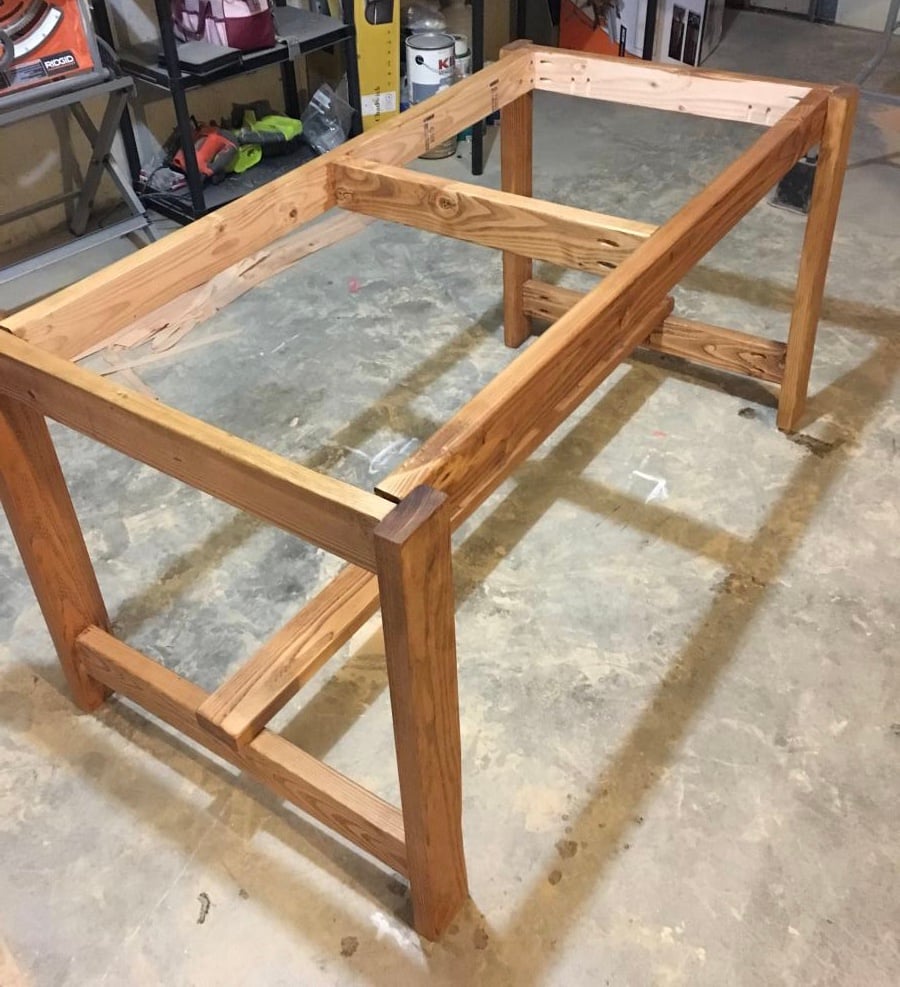
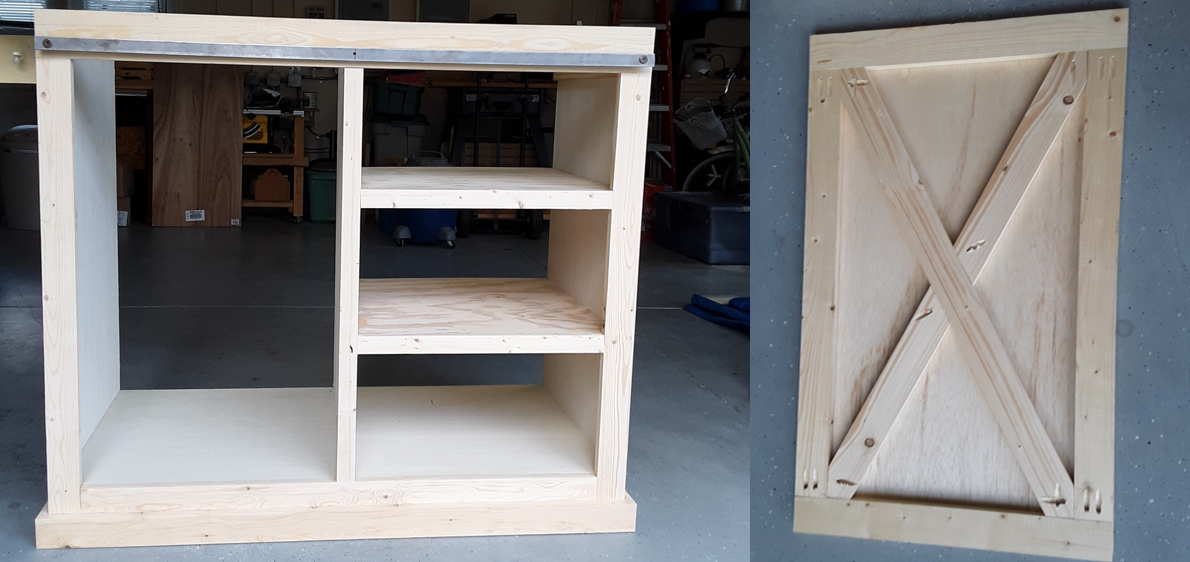
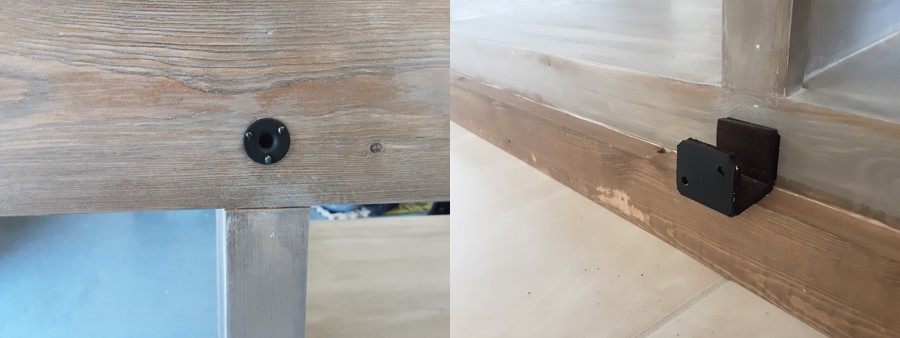
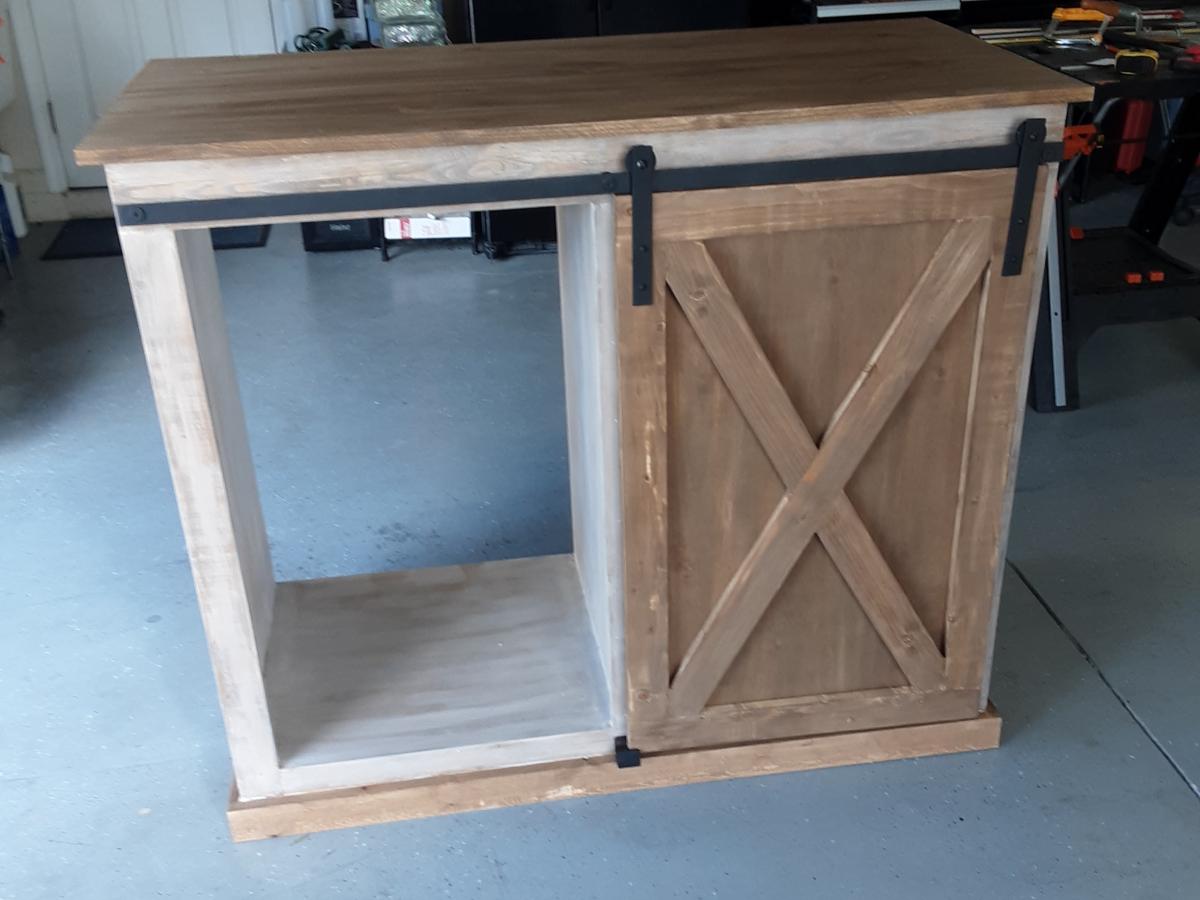
We chose this project because we have a small garage and space is at a premium.  The dimensions of this build fit well in our limited space and allowed us to organize items such as paint, stain, screws and nails into one central location. I chose 2x4's on the sides to give it a more stable feel. Our garage and parking lot are all sloped and with the 2x4's this prevented the twisting. It feels solid and the wheels are smooth. We picked everything up at Home Depot. The screws that came with the hinges are to long and my husband used the Dremel to grind them down. You could just buy shorter screws.  This is one of my firsts builds and I've definitely learned a lot of lessons along the way. Measure, measure, then measure again before you cut a piece and use a level surface to make level pieces. Overall, everyone in my family played a part in helping me build this piece and so I love it and will cherish this piece and the memories always. Thanks Ana for all your fun videos, sharing your life with your family, and providing resources like this plan to us for free. I'm thankful for my son who bought me a compound miter saw for Mother's Day and other family for buying me a Ryobi circular saw. I'm truly blessed and loved. Thanks

Built from Plan(s)
Estimated Cost
120
Estimated Time Investment
Weekend Project (10-20 Hours)
Finish Used
I'm leaving it in the raw due to the nature of the piece. I may put a clear coat on it later.
Recommended Skill Level
Beginner

Comments

Full size loft

Submitted by Anonymous (not verified) on Tue, 10/01/2019 - 18:46

Built a full size loft bed for my kids but wanted something safer than having them climb up and down a ladder so used the Camp Loft Bed plans to add the platform and stairs. It is much easier for the kids. Going to finish by covering the platform and stairs with carpet.

Estimated Cost
180
Estimated Time Investment
Day Project (6-9 Hours)

Comments

King Bed Frame for adjustable base

Submitted by Anonymous (not verified) on Tue, 10/08/2019 - 05:50

I could not find a frame which would accommodate my new adjustable king base. Modified Anna's plans by increasing the height of the headboard and footboard. Finished with chalk paint and antique finish for a rustic look. Side rails attached with mortises to allow for moving bed in 4 pieces if needed. Love my new bed

Estimated Cost
$300
Estimated Time Investment
Weekend Project (10-20 Hours)
Finish Used
Chalk paint (purchased from Habitat for Humanity re-store) using recycled paint. Finished with three coats of Annie Sloan wax
Recommended Skill Level
Intermediate

Comments

khowe791

Sat, 11/30/2019 - 03:31

Hi! We are making this headboard this weekend. We want to increase the headboard height and footboard as well. Do you happen to know the cut measurements or how you adjusted the height of the 1x6 (or 1x8 as others used) to make it work? Yours looks perfect! Thank you in advance for any feedback! 

Geo Thermal Anna White Greenhouse w/ Aquaponics system coming!

Submitted by Anonymous (not verified) on Fri, 10/18/2019 - 20:08

My Annawhite design with geothermal improvements. It will also have a 1000 gallon Aquaponics system inside!

Built from Plan(s)
Estimated Cost
$7000.00!
Estimated Time Investment
Week Long Project (20 Hours or More)
Finish Used
This thing has taking me all summer to build! :-) Cry
Recommended Skill Level
Intermediate

Coffee Bar barn door console

Submitted by Anonymous (not verified) on Wed, 10/02/2019 - 12:15

Modified Grady barndoor console into a coffee bar with chalkboard upper piece

Built from Plan(s)
Estimated Cost
200
Estimated Time Investment
Weekend Project (10-20 Hours)
Finish Used
Sherwin Williams Gauntlet Grey paint
Minwax dark oak stain
Chalkboard paint valspar
Recommended Skill Level
Intermediate

Comments

ruggedcrosscus…

Wed, 11/18/2020 - 19:01

This piece was built by my hisband Mo Coomer. Our little shop is called Rugged Cross Custom Designs. It states submitted by anonymous.

Rustic Farmhouse Vanity

Submitted by jameslee on Thu, 10/10/2019 - 16:23

My master bathroom was my first DIY remodel. I took this room down to the studs and built it back up. I struggled to find the perfect vanity that felt strong and sturdy and could not find one. I needed a wide vanity to accommodate this 3 foot wide vessel sink. I found Ana White and this plan online and fell in love! This was my first build and I’ve become addicted to wood working since. As my first build, this took me most of a day to build and assemble drawers. Sanded and painted with a flat finish! I love it! Thank you Ana!

Estimated Cost
$200
Estimated Time Investment
Day Project (6-9 Hours)
Finish Used
General Finishes milk paint in Seagull Gray with a high performance flat finish. Hardware and sink found on Amazon.
Recommended Skill Level
Beginner

Comments

Outdoor sectional

Submitted by Anonymous (not verified) on Wed, 10/02/2019 - 04:17

Made the outdoor sectional. The coffee table was made out of left over pieces!

Estimated Cost
$260
Estimated Time Investment
Weekend Project (10-20 Hours)
Finish Used
We used a semi transparent stain applied with brush. We would recommend a hand sprayer instead.
Recommended Skill Level
Beginner

Comments

2x4 Outdoor Sectional and Coffee Table

Submitted by Anonymous (not verified) on Tue, 10/01/2019 - 17:56

I followed the instructions on the Ana White website, and followed a few of the commenters ideas to reduce the size slightly to minimize the wood costs. I used pocket holes wherever I could to try and reduce the amount of visible screw heads. The cushions were purchased at Big Lots and the cedar was purchased at the big home improvement store. My 5 year old and I worked on this and are so proud of how it turned out.

Estimated Cost
$250
Estimated Time Investment
Day Project (6-9 Hours)
Finish Used
Teak Oil
Recommended Skill Level
Intermediate

Comments

Seasonal And Holiday

Farmhouse Bed and Night Tables

Submitted by frmoody on Tue, 10/01/2019 - 18:44

A friend of mine wanted a new queen bed in a rustic, weather grey look. I have built many projects from Ana's site and decided on the Farmhouse Bed. The plans were perfect and building the bed didn't take me long. The time consuming part was the finish. I really wanted an old, weather wood look so the entire bed and night tables were first stained with a dark Kona stain. Once this dried I applied two coats of a watered down (50:50) light grey paint. The thinner paint made it easier to sand. Once this was completely dry I used a medium grit sanding sponge and selectively sanded everything. This took a while. Once complete I carefully cleaned all pieces and then applied three coat of semi-gloss varathane. The bed is incredibly solid with the 2 x 4 slats and will last a few generations. As always great plans from Ana.

Estimated Cost
$300 for materials
Estimated Time Investment
Weekend Project (10-20 Hours)
Finish Used
Varathane Kona, Beauti-Tone Designer Satin "My Favourite Sweater", Varathane Diamond Finish Water Based Interior Semi-gloss.
Recommended Skill Level
Intermediate

Comments

Kitchen Cabinets

Submitted by Anonymous (not verified) on Wed, 10/02/2019 - 21:30

I followed the kitchen cabinet building plans to build all new upper cabinets up to my ceiling. I built all new drawers with soft close drawer slides also and built the refrigerator enclosure cabinet.I did the entire remodel myself including the new doors out of MdF.

Finish Used
Emerald urethane paint
BIN Shellac Primer

Comments

Ana White

Tue, 11/05/2019 - 10:41

We are so thrilled to let you know your entry WON the Best Brag contest!  There were many amazing entries, and it was tough to choose.

Look out for an email from us shortly!

Cedar shed with planter box stairs

Submitted by Anonymous (not verified) on Tue, 10/29/2019 - 16:29

Cedar shed with planter box stairs. Both plans modified slightly to fit my needs. Siding is tongue and groove cedar. All other wood is brown pressure treat. Planter box stairs were sized and positioned to hide cement posts. Sorry for only one photo. Finally finished and ran out of time with good weather here in Canada. Will post more with weather permits. Thanks again for your plans. I've also built night stands and a farmhouse dining table.
Not sure if I linked the proper stairs plan. Was https://www.ana-white.com/woodworking-projects/outdoor-planter-steps-or…

Estimated Cost
600
Estimated Time Investment
Weekend Project (10-20 Hours)
Finish Used
No finishing here. Cedar siding was ripped to use as trim accents
Recommended Skill Level
Intermediate

Comments

Cabin loft bunk bed

Submitted by Anonymous (not verified) on Wed, 10/02/2019 - 08:49

Elevated loft bed for my two boys! Easy build with the plans from Ana White! I modified this version and elevated it so I could fit my youngest underneath. It was my first time using a Kreg Jig and I’m obsessed now. I would recommend buying top quality wood and increasing all numbers by 2-3 inches to make getting the mattress in easier. I would also recommend a lower profile mattress than I used. Happy Building!

Built from Plan(s)
Estimated Cost
$300
Estimated Time Investment
Weekend Project (10-20 Hours)
Finish Used
I used SW marshmellow and stained the roof walnut. Ladder is made out of steel piping that I spray painted (with primer) black.
Recommended Skill Level
Beginner

Comments

Ana White Barn Door Entertainment Center / Closet

Submitted by Anonymous (not verified) on Wed, 10/02/2019 - 17:07

After many months of trying to find the perfect piece of furniture for our bedroom, I stumbled upon Ana White’s barn door entertainment center. I loved it so much that instead, we turned it into an armoire for our bedroom. Behind the barn doors are shelves that holds our clothes, and in the center we added simple pull out drawers. The center space was perfect for our tv. We had to rework the size of the piece and it is 7 feet instead of the 8 feet that the plan called for. This is my favorite build (we have done a lot of them)!

Built from Plan(s)
Estimated Cost
$600-$650
Estimated Time Investment
Week Long Project (20 Hours or More)
Finish Used
Behr Graphite grey
Recommended Skill Level
Intermediate

Comments

Outdoor Pool Cabana

Submitted by Anonymous (not verified) on Thu, 10/31/2019 - 20:21

I wanted a huge cabana for my outdoor pool area to have a place guests could kick back and relax if they weren’t swimming. I took the plans from the one arm and armless outdoor sofas and modified the plan to include posts and a lattice top for shade. This inspired plan was finished off with cushions from at home and features seating comfortably for 9. Everyone loves this area in the backyard to kick back! At night we have solar lights twinkle at the top and they complete the project perfectly with a soft twinkle.

Estimated Cost
$250 before cushions
Estimated Time Investment
Weekend Project (10-20 Hours)
Finish Used
Nothing yet. Needed to wait for the pretreated wood to finish drying out.
Recommended Skill Level
Intermediate

Comments

Seasonal And Holiday

Farmhouse Pantry

Submitted by Anonymous (not verified) on Sun, 10/20/2019 - 06:13

The Barn door cabinet / pantry is one of my favorite Ana White plans. This is the second one I’ve made and this time I challenged myself to use almost all repurposed materials. I wanted to use old doors so I adjusted the plans around them. He sides are an old door I cut in half and the main sliding door is also an old find I cleaned up. The shelves are actually old flat cabinet doors that I covered in laminate flooring (remnant box for $5). I like using laminate flooring to add character and protect high traffic areas from wear and tear. On the right side I added a display counter for your coffee center, tv, or microwave. I added a sconce because everything is cooler with a sconce! I used 2 sheets of galvanized tin on the back. My favorite feature though is the recycling center I added at the bottom. I just made some simple door frames with 1x4s stripped in half and then covered them in chicken wire and old Pioneer seed sacks.
I love Ana Whites Pantry design because it adds soo much storage and is completely customizable!

Built from Plan(s)
Estimated Cost
300
Estimated Time Investment
Weekend Project (10-20 Hours)
Finish Used
I used Rustoleums white linen chalk paint and Rustoleums matte finish. I used polyacrylic to seal the butcher block counter in satin.
I use two coats of paint and then sand with a 220 grit sandpaper to make the paint smooth as butter. I apply extra pressure on all edges to distress. I then add two coats of the matte finish.
Recommended Skill Level
Intermediate

Comments

Refreshment center console with barn door

Submitted by calcowoods on Sat, 10/19/2019 - 07:10

My wife and I built this Refreshment Console as a birthday present for our daughter. She had previously purchased a beverage refrigerator and wanted us to adapt it inspired by your barn door console project. Thus, we modified your plan to accommodate the height of the refrigerator. Also, she wanted three shelves with a closed back on the right side of the cabinet. Simply plan adjustments were all that was needed.

Using your plans, material list and excellent video we were able to construct the barn door rails and hangers using 1 ½ inch fender washers which sandwiched three 1-inch fender washers.  The metal bar was sized to fit the top of the cabinet and connected to the top trim board using spacers, washers and bolts.  As we decided to place a middle support for the bar, we added a t-nut into a center plywood partition so that we could use the same bolts, spacers and washers to support the rail.   

As we were following a rustic theme, we decided to add the X Braces to the barn door and used a project panel board as the top. The barn door is guided at the bottom using a simple U shaped metal bracket that we lined with felt for a smooth glide.

Estimated Cost
$100
Estimated Time Investment
Weekend Project (10-20 Hours)
Finish Used
Top, barn Door and Bottom Trim treated with one coat of Varathane Aged Wood Accelerator using a rag to create a rustic brown look.
Cabinet carcass and surrounding trim painted with one coat of Behr Premium Plus Ultra Satin Finish Metropolis Grey.
Entire cabinet finished using MinWax Paste Finishing Wax Natural applied with a rag and buffed for a durable finish.
Recommended Skill Level
Intermediate

Laundry station

Submitted by Anonymous (not verified) on Thu, 10/31/2019 - 10:54

This plan was a lot of fun!! I have been wanting a laundry sorter for some time now and this one fits in my laundry room perfectly!!
The pull out works awesome!!

Built from Plan(s)
Estimated Cost
$80 lumber/slides/stain/clear/bins
Estimated Time Investment
Afternoon Project (3-6 Hours)
Finish Used
I used a 1:1 ratio of dark walnut and weathered oak
Recommended Skill Level
Beginner

Camp Loft Bed

Submitted by MommaBlue on Tue, 10/08/2019 - 10:58

I built this bed for my 8 year old son's room "face lift." His only request was to have a place to hang out, but being his room was so small, that was a struggle! The loft bed allowed us to make a cozy little hangout - the poor guy can't get rid of his siblings now!

I added a few extra inches to the height of the Camp Loft plan, I also added the pipe hand rail for additional safety and give his room a little older boy vibe! It was a very easy build, the staining/sealing took the longest. The stairs make it much easier to change sheets and getting up and down for those of us who aren't 8 year olds :).

Estimated Time Investment
Day Project (6-9 Hours)
Finish Used
I used a mixture of Varathane Weathered Gray and Minwax Special Walnut. It is about 3/4 Gray and 1/4 Walnut.
Recommended Skill Level
Beginner

Powder Room Vanity

Submitted by Anonymous (not verified) on Tue, 10/01/2019 - 18:50

We're building a new house. Instead of paying hundreds to thousands on a Pottery Barn vanity I built this one! I love how it turned out!

Estimated Cost
$40
Estimated Time Investment
Day Project (6-9 Hours)
Finish Used
Miniwax provincial
Recommended Skill Level
Beginner

Comments

Richie1

Sat, 04/02/2022 - 13:56

@anonymous,

Wow!! Very nice.
Do you have the plans for this build?

MLC

Tue, 01/12/2021 - 09:51

We are remodeling our small bathroom. I really like what you built? Would you share any plans you have in how you made it?

Wall Mounted Hutch

Submitted by Anonymous (not verified) on Wed, 10/02/2019 - 06:48

I wanted a china hutch in my dining room, but did not have the space. Instead, I built a wall-mounted hutch, which provided room for the dining room chairs to slide back from the table. I altered the plans to make the hutch less deep and added a trim piece along the bottom. My favorite part about this hutch is decorating it for every holiday and season. Thank you Ana White!

Built from Plan(s)
Estimated Cost
75
Estimated Time Investment
Day Project (6-9 Hours)
Finish Used
China hutch and home decor
Recommended Skill Level
Intermediate

Comments

Ana White

Mon, 11/04/2019 - 12:23

Thanks so much for submitting this brag post!  It was selected randomly for a $100 gift card - look out for that in your inbox shortly!  Ana

Seasonal And Holiday

Cabin Bed Bunk Beds

Submitted by cpedraza on Wed, 10/30/2019 - 20:26

Fell in love with Cabin Bed by Jen Woodhouse but really needed bunk beds for my grand kids. So I modified the plans just a little. 

Built from Plan(s)
Estimated Cost
350
Estimated Time Investment
Week Long Project (20 Hours or More)
Finish Used
Varathane Weathered Gray Premium Fast Dry Interior Wood Stain
Recommended Skill Level
Intermediate