Search Results
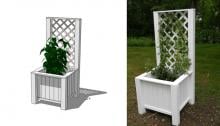
… ask for help if you need it. Good luck! … Step 1) Build front wall of box. Line 6 1x4@20" side by side. Line up 1 1x2@21" trim piece … If you don't want to see the fasteners from the front/outside of the box, attach them from the wall boards into the trim piece. … Step 2) … If you don't want to see the fasteners from the front/outside of the box, attach them from the wall boards into the trim piece. … Step 3) …
Read More
Project Plan
… holes and using two wood screws so that the two L-shapes become a box. Repeat for E/F and G/H and for I/J and K/L. You will have three … six 2×6 @ 19” pieces. … On one of the boxes, line up four 2×6 @ 60” (box base, M, N, O & P) pieces side by side. Drill two holes in each piece from the bottom piece into the box end piece. Repeat for all four boards so that one of the three boxes …
Read More
Project Plan
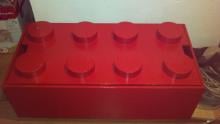
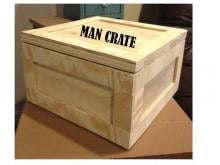
… jig to assemble. We used wood glue, and nails to construct the outer box. … Once the outer box is assembled, we used some scrap pieces of 3/4 ply wood to give us a … of the paint. … Fill with Lego's and go Play. … Lego Build and Store Toy box …
Read More
Project Plan

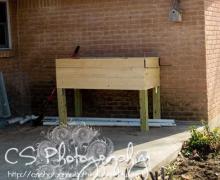
… and predrill all of your screw holes before fastening. … Build the Box. Using the 2″ screws and glue, fasten the sides to the bottom … Back Supports. Fasten the back supports to the box, flush with the top and back. Also fasten through the bottom of the box into the bottom support. Use 2″ screws and glue. … Front Support. …
Read More
Project Plan
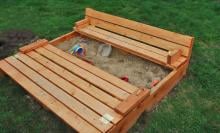
… fun, and ask for help if you need it. Good luck! … Create a basic box, insetting the short sides as shown above. You can either use pocket … at least 1" inset from the edge to allow for them to fold into the box nicely. (you'll be making two of these) … I have NO idea how to add … to do with the seat "up"). Make sure to space the 1/2" apart. … Sand Box with Built-In Seats …
Read More
Project Plan

… plan requests I had as the author of Knock-Off Wood was for simple toy bins, like these from Pottery Barn Kids . And while simple in … out little pentagon shaped pieces from plywood (four of them per toy bin) and then finishing edges with edge banding. Time and … using 1x3 boards for the sides, joining 5 rows of 1x3 to build the box. That's about 100 Pocket Holes drilled with the Kreg Jig JR. I built …
Read More
Project Plan
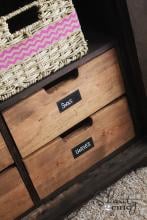
… build yours to fit - so take a second to measure the inside of your toy armoire and check to see if it's about 1/2" larger than the insert. … but not so tight it's a battle to get it in. Then build the basic box for the drawers. Because we will be adding drawers, you must be very … drawers into box. … Attach faces to front. Finish and insert into the toy armoire! … Toy or TV Armoire Drawer Insert …
Read More
Project Plan
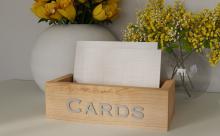
… and nails. … Glue and nail the front and back to the sides. … Card Box for Weddings and Parties - Free Plans …
Read More
Project Plan
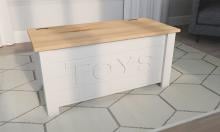
… they do. Use the 2" self tapping screws to attach the bottom on the toy box. For added strength, also nail and glue from the outsides of the … also recommend felt pads or bumpers to soften the close. … Farmhouse Toy Box …
Read More
Project Plan
… and back as shown. Use glue and 1 ¼” finish nails. … Attach bottom to box, keeping outside edges flush. Use glue and 1¼” finish nails. … Attach upper and lower trim to sides of box, keeping top and outside edges flush. Use glue and 5/8” brad nails. … Attach upright trims to sides of box, keeping outside edges flush. You should measure and cut these to …
Read More
Project Plan