Community Brag Posts

Toy Box

Submitted by frmoody on Mon, 11/01/2021 - 08:37

This was a pretty simple build. I got the soft close hinges at Lee Valley for only $12.00 CAD. Stained the dark areas with three coats of Minwax Ebony stain and then finished with three coats of Varathane Satin. The only thing I would change in the next one is to secure the front and back board with pocket screws in a couple of locations to keep them straight.

Built from Plan(s)

Comments

Table turned cabinet

I had an old table that was in my basement.  I wanted to re-do my craft room.  I have been thinking and thinking about it.  So when I saw Ana’s link to her drawer organizer – and how to install drawer slides – I thought – ok – now it’s time to do it.


I spent about a week drafting plans, making measurements.  At first I was going to recycle the metal sliders I had left over from the kids dressers…but there wasn’t enough – and to do 12 drawers would be more money than I wanted to spend.


So – a trip to home depot – I was able to take this table that was just collecting junk – literally – to an organized and functional crafting cabinet – with huge deep drawers.  There are 12 drawers in total.  They are all 6 inch in height, 26 inches deep, and then there are 8 that are 16 inches wide, and 4 that are 12 inches wide.


Here are some before and after pictures – I have all the details on the build on my blog.  I wouldn’t have been able to do it without Ana.  Her plans and continual inspiration!

Estimated Cost
Around $80
Estimated Time Investment
Afternoon Project (3-6 Hours)
Finish Used
On the fronts of the drawers only. Sanded, primed and painted with high gloss white.
Recommended Skill Level
Intermediate

Rustic X End Table

Submitted by dzubakj on Mon, 06/10/2013 - 08:40

I altered the dimensions slightly so that it wouldn't be overbearing in my living room. It is much shorter than the plan suggests, and the length and width are also changed. I used framing 2x4 and 2x6 lumber, so I had to sand the heck out of it to make it nice and smooth. It looks great next to the console table. Good plan.

Estimated Cost
60
Estimated Time Investment
Weekend Project (10-20 Hours)
Finish Used
I went with the steel wool in vinegar finish with two coats of light brown Briwax over that (applied with steel wool). I really liked the steel wool and vinegar finish, but if you have never used it before be careful, it is a bit tricky to apply evenly. Also, it goes through several changes while it dries. I started panicking a little before it was fully fry because it was not turning out how I suspected at all. After a few more minutes it looked much better, and the wax brought out just enough brown to make it exactly what I wanted.
Recommended Skill Level
Starter Project

Castle Bed

Submitted by AndyH on Wed, 05/13/2015 - 08:00

Friends asked me to design a princess/castle bed for their daughter. It needed to fit a single/twin size mattress and fit a 61 inch space they had so I designed the overall width to be 60 inches.

It is all made from solid planks apart from the two big shelves in the headboard which are plywood.

They wanted the sides close to the headboard to be raised as well so their little girl didn't roll out the bed.

Not added the slats yet as it is off to the paint shop to be sprayed Pink!! I will post more photos once painted and will also post plans soon once finished them.

Hope the little girl likes it when she sees it.

Estimated Cost
$350
Estimated Time Investment
Week Long Project (20 Hours or More)
Finish Used
Will be spray painted pink. I will post more pictures once painted.
Recommended Skill Level
Intermediate

Comments

Vespa ride-on

I made the plans a little different. I had more support to the front, made the base wider, and added swivel wheels instead of rockers.

Built from Plan(s)
Estimated Cost
$20
Estimated Time Investment
Weekend Project (10-20 Hours)
Recommended Skill Level
Beginner

Farmhouse potting bench by Rocky Acres Woodworks

Submitted by Anonymous (not verified) on Sat, 11/06/2021 - 07:17

I used 1x4 for the top and stained with dark walnut danish oil

Built from Plan(s)

Comments

Playhouse Loft Bed

This is my first KOW project...I built the playhouse loft bed for my daughter, Kayla.  She named it Lofty Cottage.  I used leftover pink paint from painting her table and chair set for the inside of the playhouse.  I made the letterbox from scraps and the half-door from the door cutout.  I added hardware that matches the hardware on her other furniture.  I made the banner by hand and hand painted the birdhouse and the sign.  She loves it!  Thanks for the great plans Ana!  Can't wait to start on something new now!

Recommended Skill Level
Intermediate

Barn Greenhouse on the Penninsula!

Submitted by klatz on Fri, 05/15/2015 - 09:08

Super easy to follow and build! We went with treated lumber from Home Depot and have around $1500 into the project. Will be looking at adding an automatic fan and thermostat next year. Benches on one side for starters and a raised bed on the other side.

Built from Plan(s)
Estimated Cost
$1500
Estimated Time Investment
Week Long Project (20 Hours or More)
Recommended Skill Level
Intermediate

Comments

MartiB8

Fri, 06/12/2020 - 11:00

What a fabulous job! I love the red door for a pop of color. And the thermometer is a brilliant idea. I'm modifying this plan to better fit my yard. Thanks for sharing!

Bluebird Birdhouse Made From Pallets

Submitted by mtairymd on Sat, 11/25/2017 - 15:20

Build Instructions: https://www.instructables.com/id/Bluebird-Birdhouse-Made-From-Pallets/

This is a very easy project to make for attracting bluebirds to your yard. I wanted to reuse some of the wood I have from with the pallets I broke apart last year. This project uses a combination of industrial strength pallets made from 2x6s and standard pallets which provide slats in the 3/8" to 1/2" thick range. As for the house, I tried to hit the basic bluebird birdhouse dimensions for this build:

  • Hole Entry Size: 1.5"
  • Hole Distance Above Floor: 6" to 7"
  • Floor Dimensions: 4"x 4" to 5" x 5"

Feel free to leave the birdhouse exterior to weather unfinished or stain/paint it. I finished the house with a combination of stain for the bottom and sides and green paint for the roof.

Estimated Cost
$2
Estimated Time Investment
Afternoon Project (3-6 Hours)
Finish Used
Dark Cherry & Paint
Recommended Skill Level
Beginner

Tryde Coffee Table

Submitted by bishop2001 on Fri, 06/14/2013 - 07:00

Tryde Coffee Table made of mahogany and stained used several layers of boiled linseed oil and a few top coat layers of wipe on satin polyurethane. It came out really nice. This is my first project.

Estimated Time Investment
Week Long Project (20 Hours or More)
Finish Used
boiled linseed oil
Recommended Skill Level
Beginner

Comments

Dress up Center

Submitted by Kassidy_D on Wed, 11/24/2021 - 09:50

Project #2 in the bag! I haven't personalized because I am still considering making another at 36" wide to better fit her room and giving this one away. Very pleased with how it turned out! Still learning!

Comments

Kids Adirondack chairs

Submitted by redhead_61 on Fri, 04/08/2011 - 13:39

This was admittedly a little harder than I thought.  The first one turned out short of perfection trying to get things looking great.  The second one was better using a level and being more careful.  However, the fact that my nail gun totally went out halfway through made the project a long one.  But my kids LOVE them and they look so cute and luxurious out in my grass.  I love it. 

Built from Plan(s)
Estimated Cost
$10
Estimated Time Investment
Afternoon Project (3-6 Hours)
Finish Used
off white paint and poly
Recommended Skill Level
Beginner

King storage bed

Submitted by Ken Kelly on Sat, 06/15/2013 - 22:43

This King size storage bed has 6 large pullout drawers. It's made by the plans we got from Ana's queen size and Twenty five to life's plans we found on this site(THANK YOU). Just like they say in their plans I'm not sure how much I actually spent because I made some mistakes and had to rebuild my bottom piece. But I loved putting this together, and it's worth every penny and beyond. The compliments from visitors and the swollen chest pride I get when I hear my wife say, "My husband built this for us." Can't put a price on that.

Estimated Cost
Around 200-250
Estimated Time Investment
Week Long Project (20 Hours or More)
Finish Used
Min-wax stain and polyurethane.
Recommended Skill Level
Intermediate

Turned leg table made in India

I loved working on this project and my sincerest thanks to Ana and Elisha for this design. The picture is missing one drawer handle, because, erm, I lost it. I didn't want to wait to find it before posing this brag :).

Built from Plan(s)
Recommended Skill Level
Intermediate

Comments

Doll cradle

Submitted by JBachelor on Sun, 12/17/2017 - 20:14

My husband and I used your plans to make this cradle... He built it, and I painted it.  I’m so excited to give it to our granddaughter for Christmas!!

Estimated Cost
We used wood and paint we already had, so it was basically free.
Estimated Time Investment
Weekend Project (10-20 Hours)
Recommended Skill Level
Beginner

Comments

JBachelor

Sun, 12/17/2017 - 20:52

I put that it took 10-20 hours... that was mostly the painting and drying time between each coat, and doing the A for her name.

Mid Century Modern Changing Table

Submitted by Mizthng67 on Tue, 06/18/2013 - 08:54

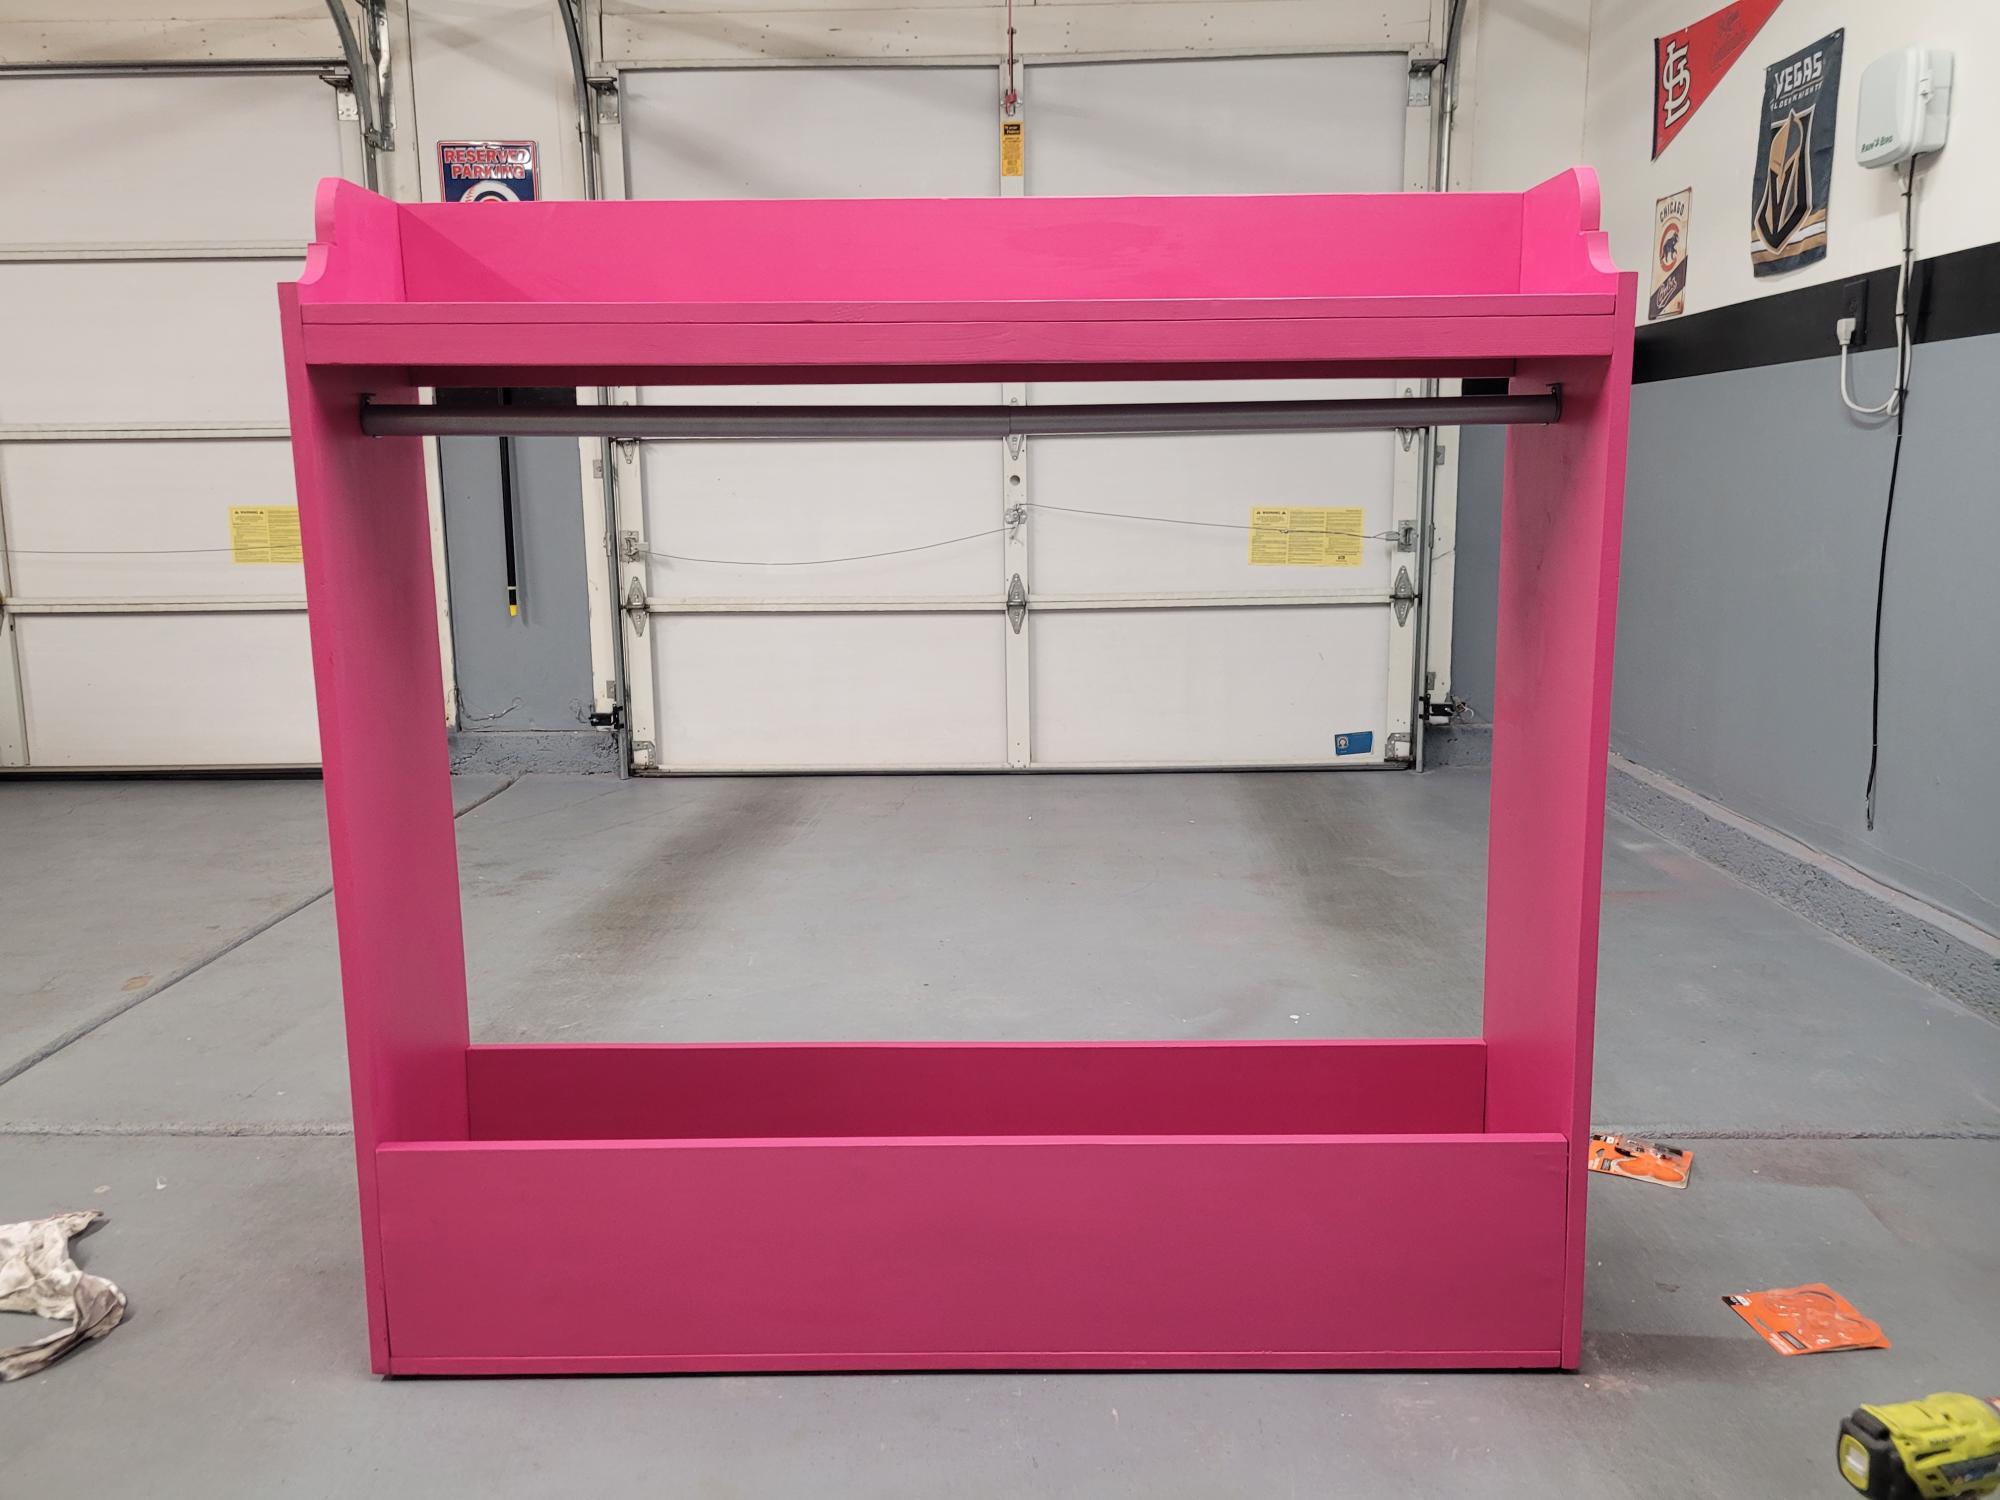
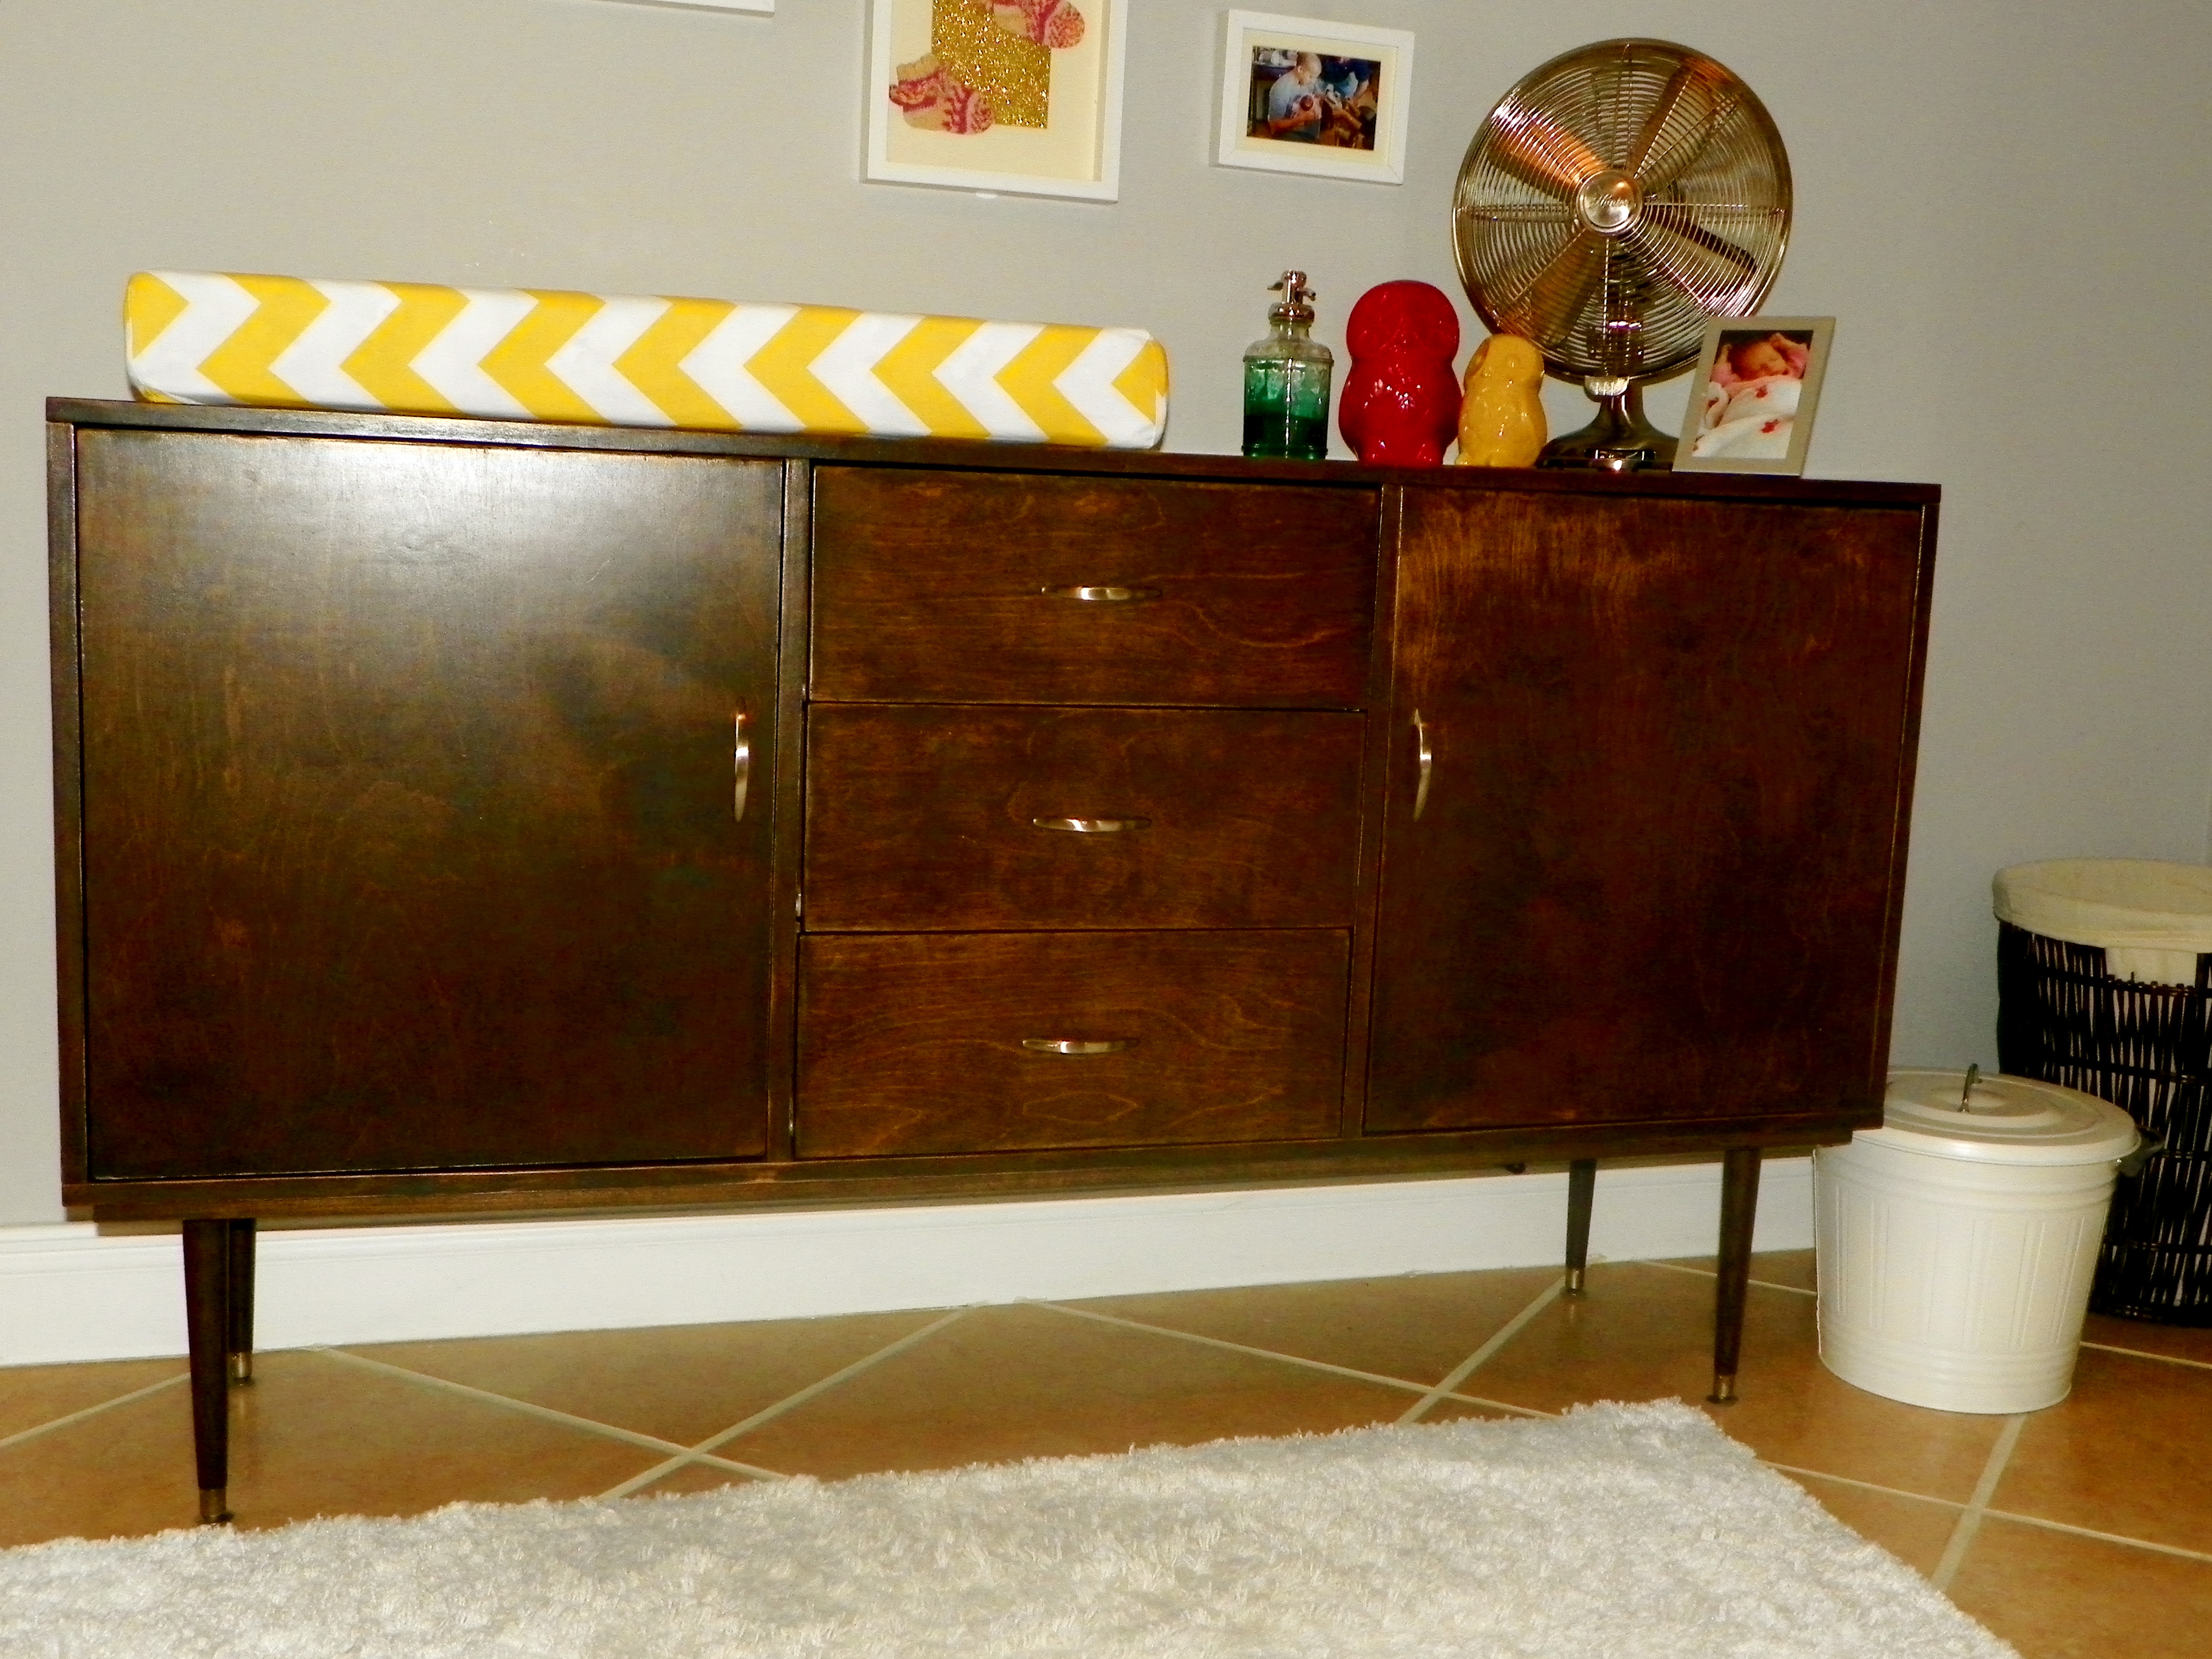
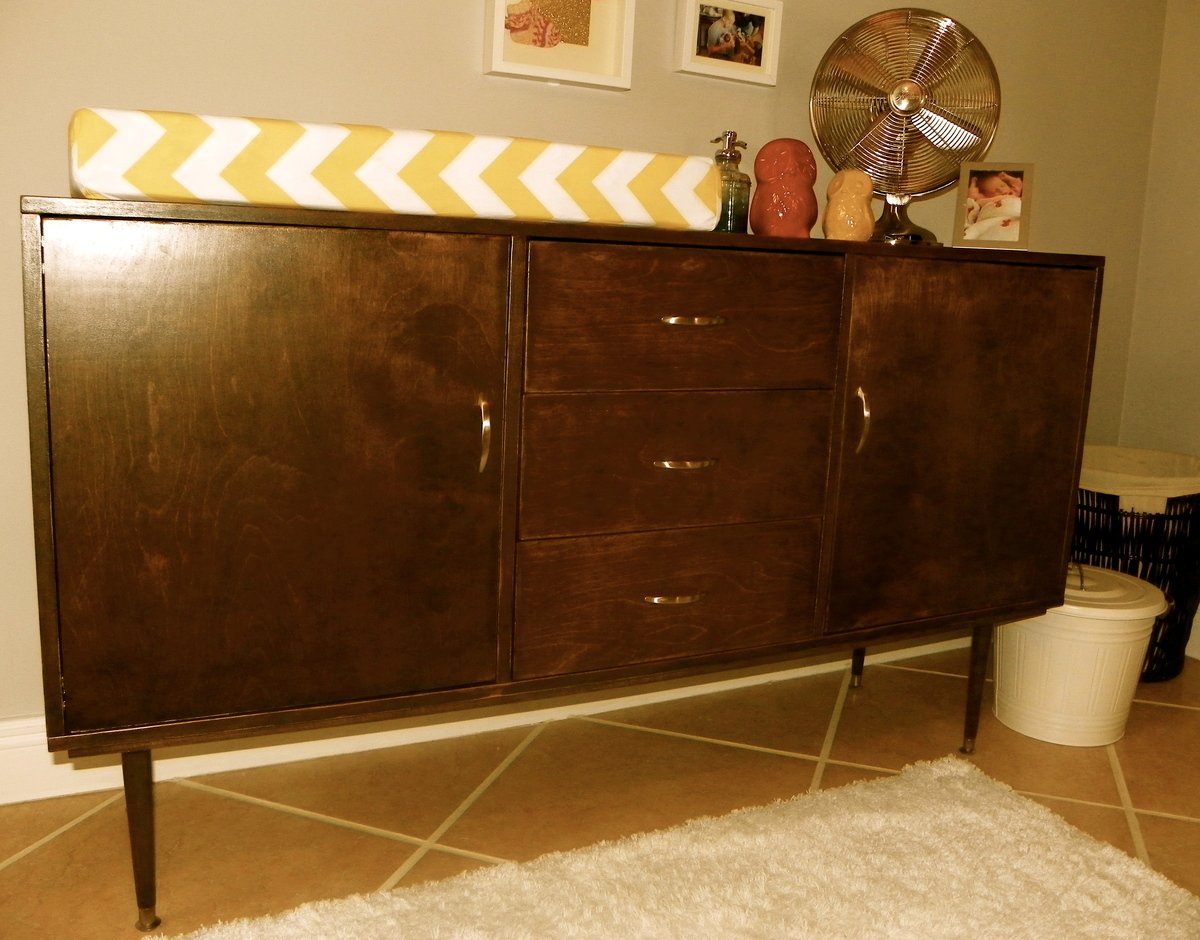
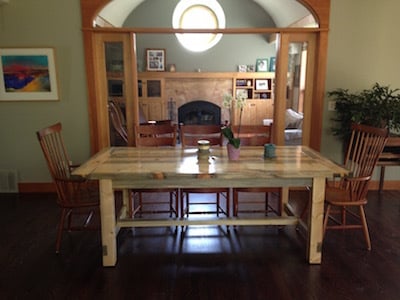
I had been looking everywhere for an antique Mid Century Modern buffet table to use as a changing table for my daughter but found that these vintage pieces ran about $1200 to $3000 and still needed refinishing. That was out of my price range so I came here and found plans for a console table that had the look I was going for.

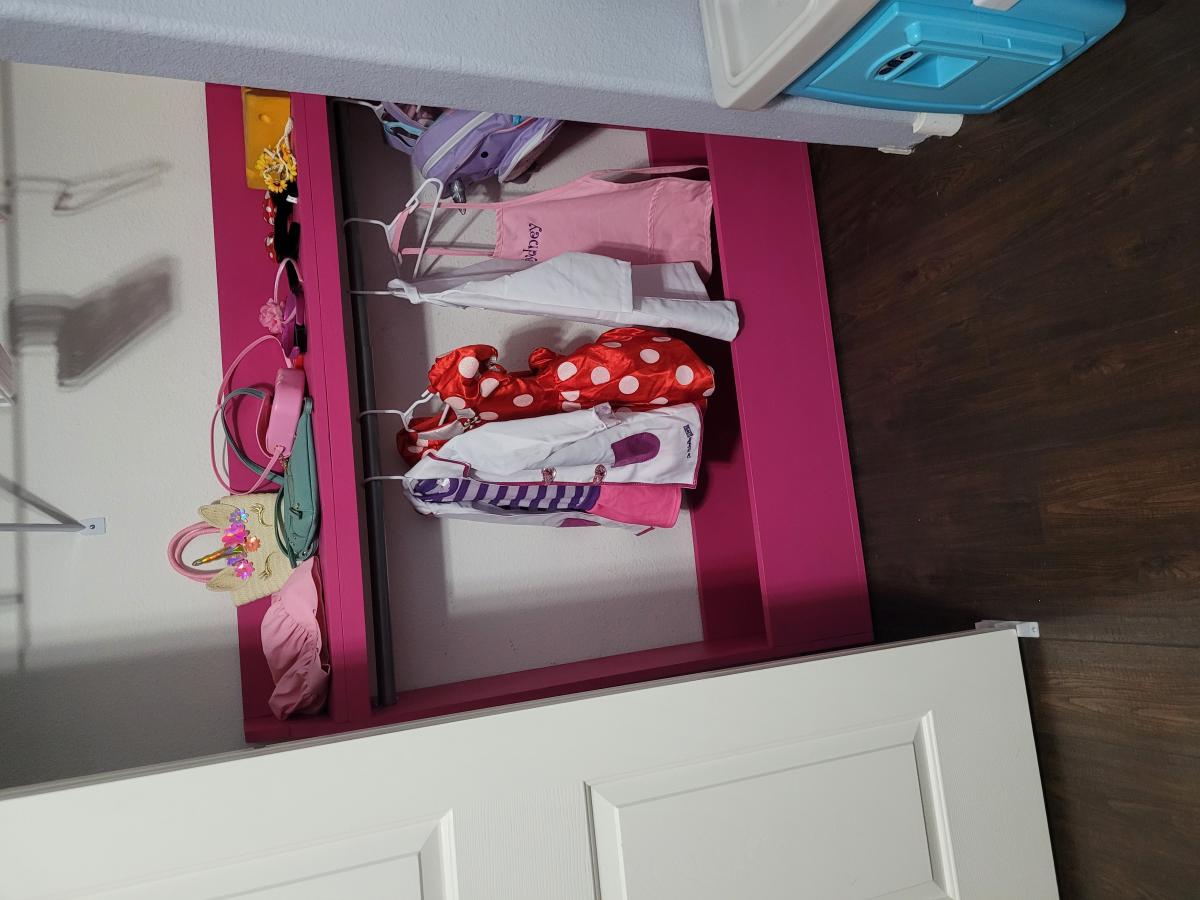
The plan I found was too short in length and height so I reworked them a little to fit my needs. I just added a second cabinet in the same dimensions as the first onto the other end of the drawers to increase the length and bought 12" legs instead of 6" ones to increase the height. I used the same hardware that was recommended in the original plans but added a magnetic door stopper to make the cabinet doors flush with the frame when closed. I also added dowel rods in the cabinets because my daughter doesn't have a closet and I needed a place to hang her clothes.

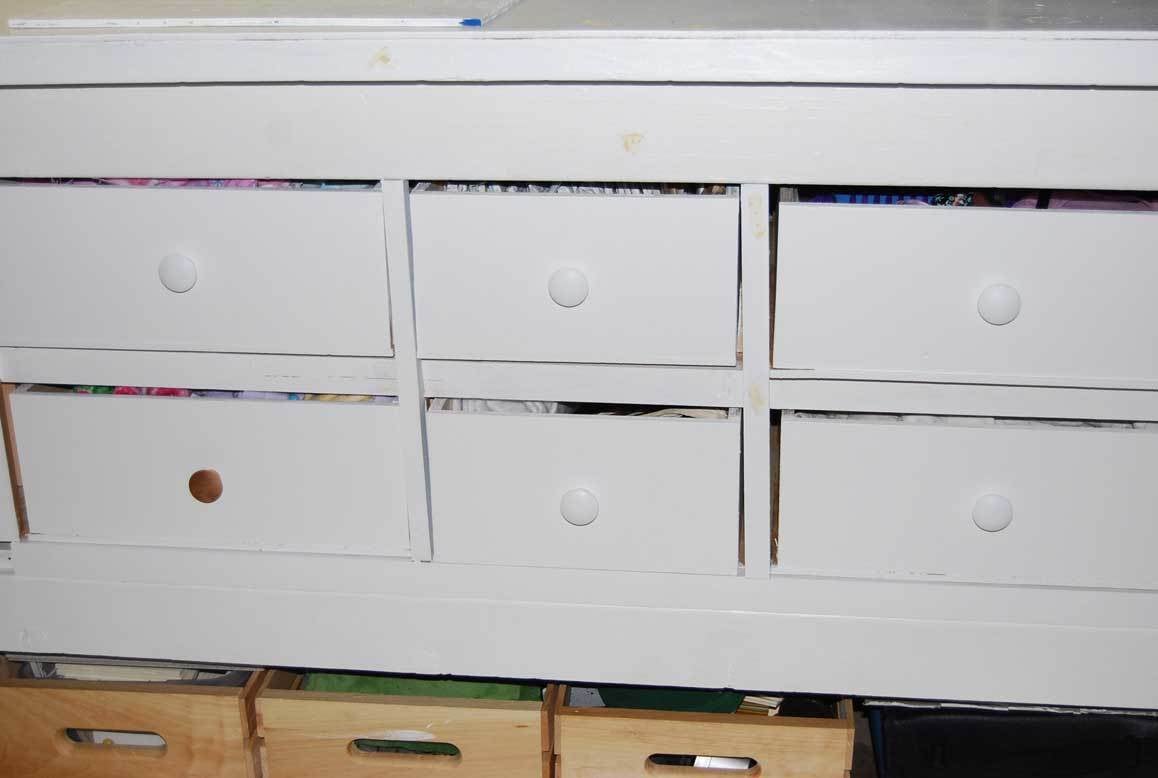
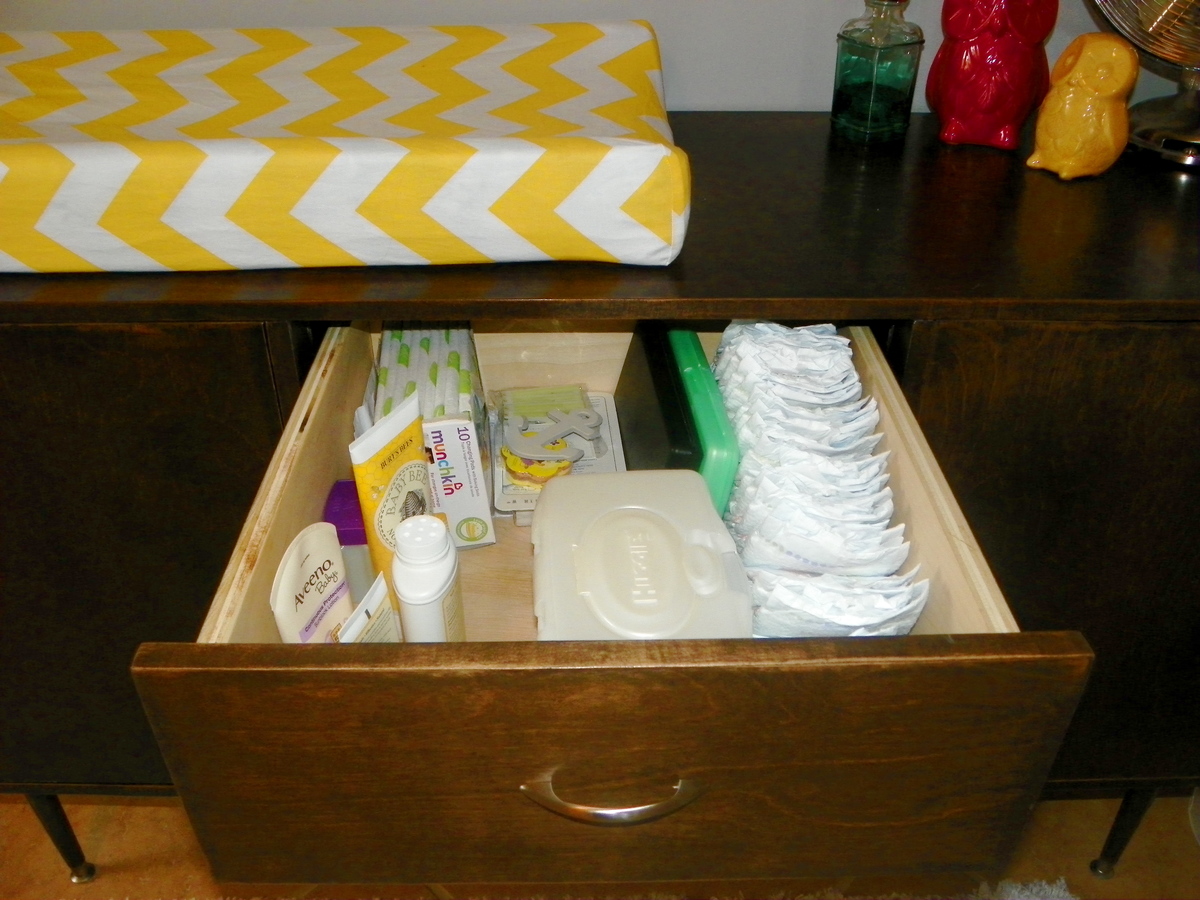
It is great to have 2 cabinets because the left side holds clothes that are too big for her and the right holds all of the clothes she wears now. The drawers are nice and deep so I can put all her changing stuff like diapers and lotion in the top and fit all her socks, diaper covers, and pajamas in the other drawers.

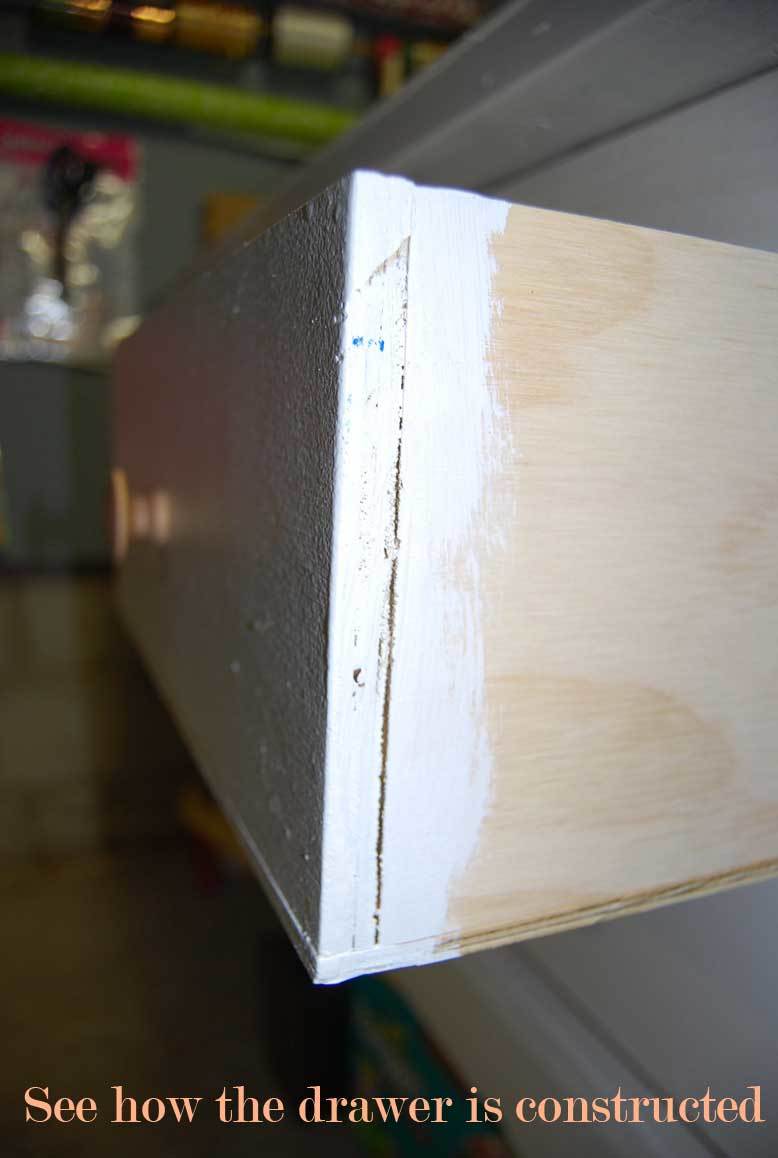
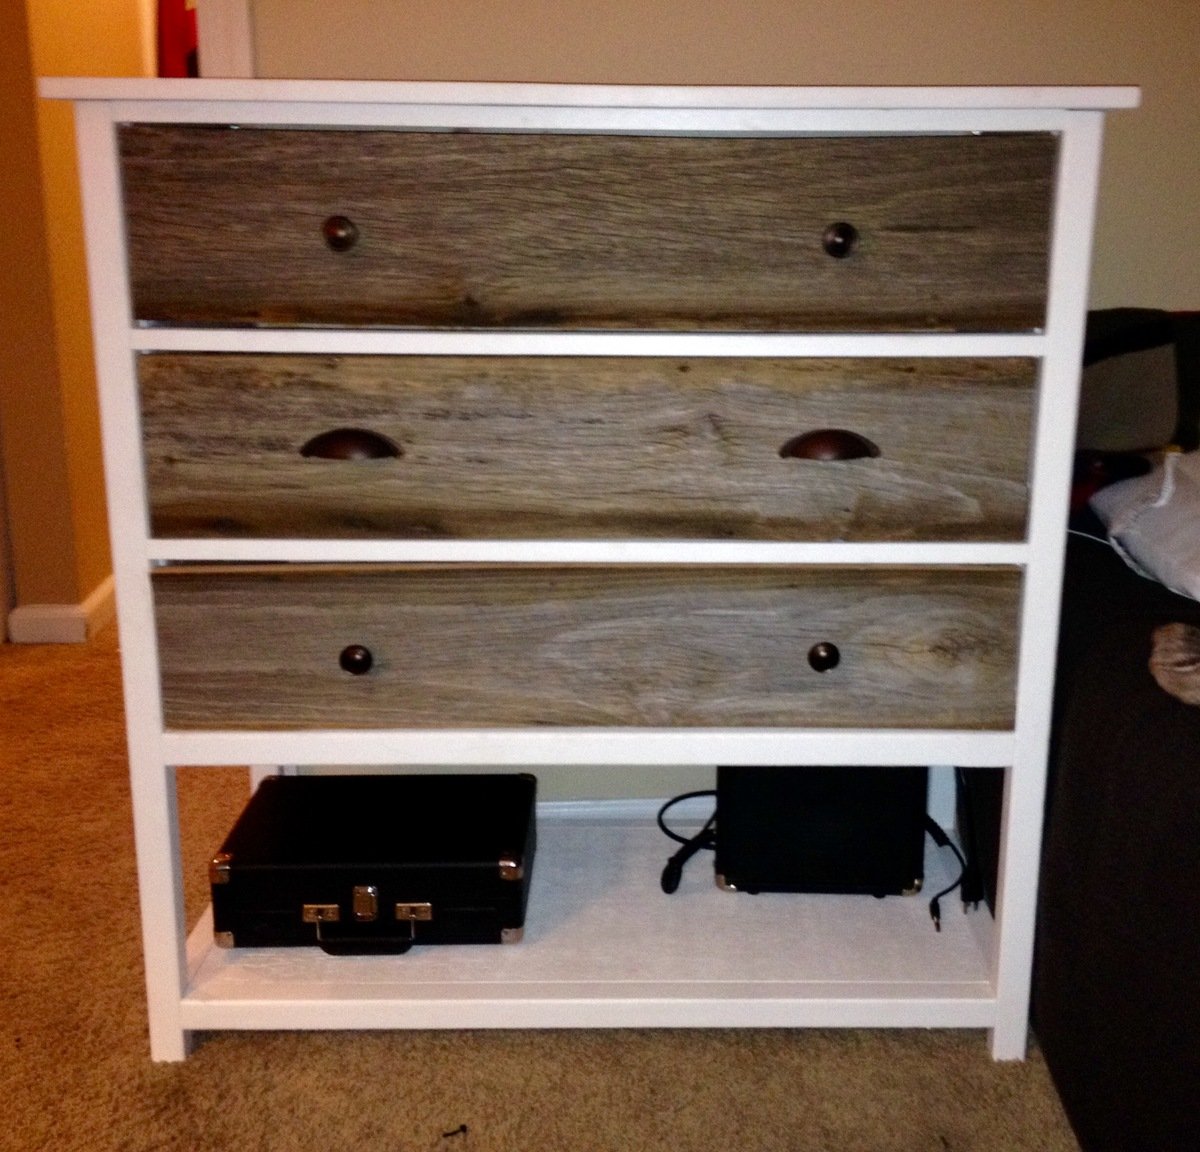
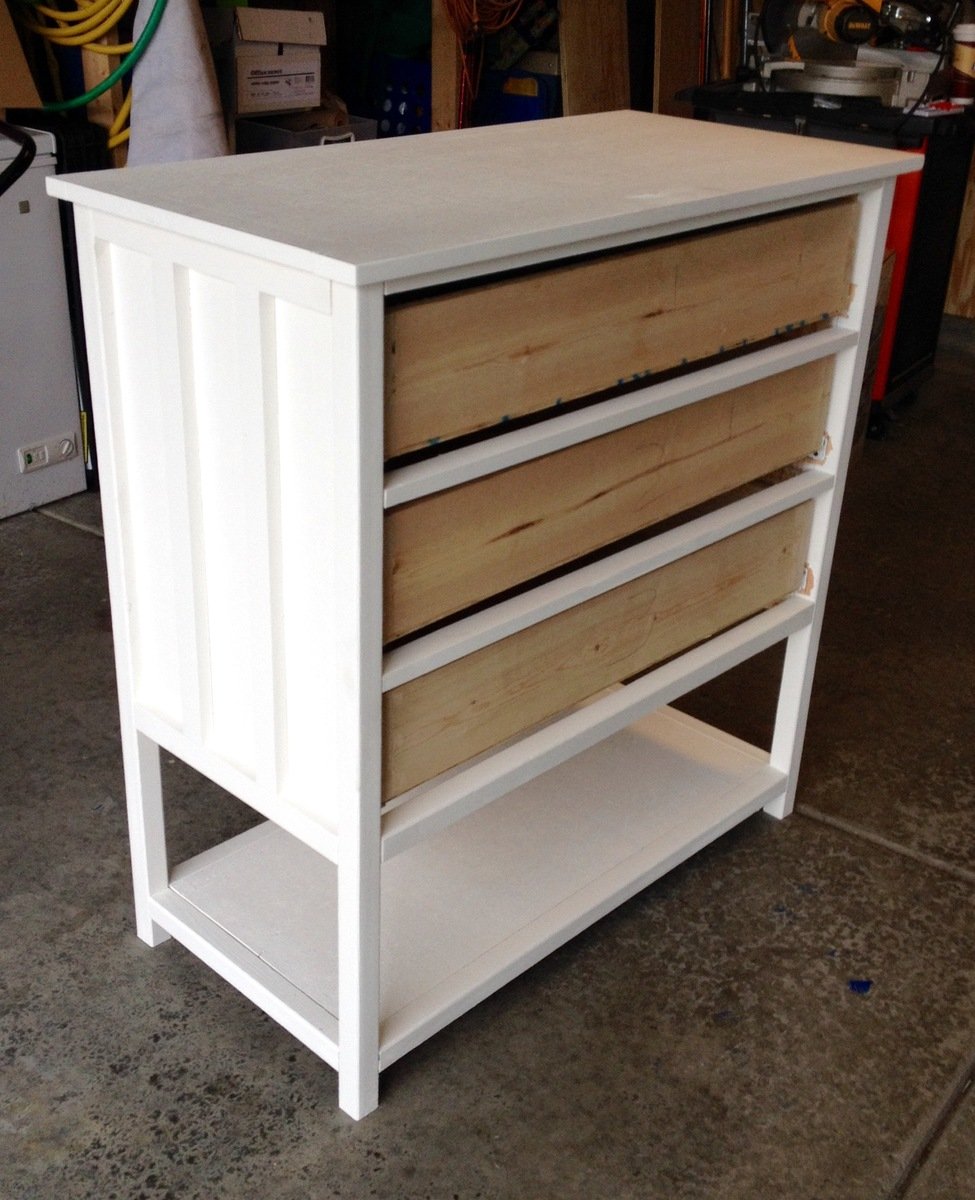
I will say that I used 1x6's to make the drawers first but found that I am really bad at picking straight boards as there were a lot of gaps between the sides and the bottom of the drawer. I went back and used scrap pieces of 3/4" plywood for the drawer sides and they came out much better with no gaps, plus, the exposed top of the drawer sides look better.

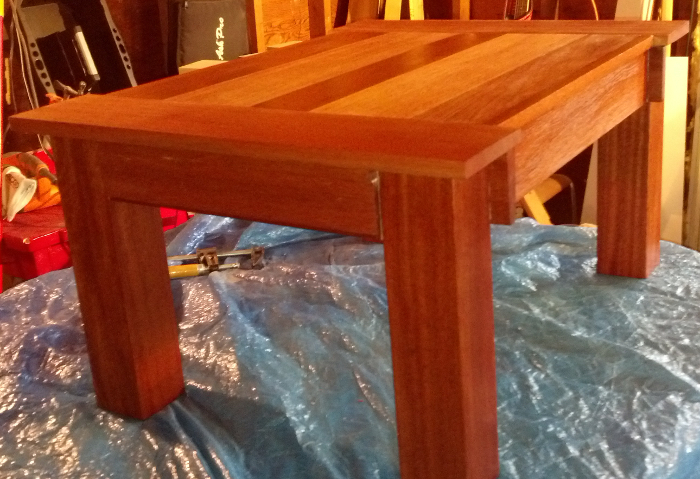
This was a fairly fast project. I put it as a weekend project due to the down time between staining and poly coats. It was my first time working with edge banding and I loved it. It was super easy and kind of relaxing! Over-all, this project was easy and fun! This table meets all of my needs AND it looks great! Thanks Ana for the plans and thanks Brooke for the inspiration and tips!

Estimated Cost
$200
Estimated Time Investment
Weekend Project (10-20 Hours)
Finish Used
1 coat of Rustoleum Ultimate Wood Stain in Kona followed by 3 coats of matte poly.
Recommended Skill Level
Beginner

Comments

dyank021

Tue, 09/23/2014 - 11:05

I am so impressed. Where did you get the beautiful hardware and gold rimmed midcentury feet?

Small Dresser - Barn Wood Drawer Face

Submitted by CustomPulp on Wed, 05/27/2015 - 06:25

My son needed a dresser that would fit a small space (no more than 40 inches wide). I modified the Cabin Collection plans to fit the small space. Looking at the plan, I wanted to brighten up the wood and opted not to stain. Instead I purchased an airless sprayer and was very pleased with the finish. For the drawer faces, I found old barn wood. The barn wood was a little tricky because some of the boards were warped. I brushed the wood with a stiff nylon brush to bring out the deep grain texture of the wood. Finally, purchased bronze finished drawer handles. Very pleased with the outcome. Thanks for the plans. Can't wait to start my next project.

Estimated Cost
Lumber $90.00. Barn wood drawer fronts were free (driving around in the country looking for barns that have collapsed. Farmer agreed to give me enough lumber for 3 dressers). Promised I would mention his name in the post. Thanks, Jerry Parker!!!
Estimated Time Investment
Weekend Project (10-20 Hours)
Finish Used
Valspar interior - Dove White
Minwax Clear Polyurethane - Drawers
Drawer Fronts were not finished
Recommended Skill Level
Intermediate

Christmas Tree Wall Shelf

Submitted by PhD_Phil on Wed, 12/20/2017 - 10:44

Christmas Tree Wall Shelf

Stockings hung using cabinet/drawer pull knobs that I found on Amazon

Built from Plan(s)
Estimated Cost
<$20
Estimated Time Investment
Day Project (6-9 Hours)
Recommended Skill Level
Beginner

Garage Shelving

Submitted by NLough on Thu, 12/16/2021 - 08:42

I made these shelves - following the plans on the site - with my kids who helped with the painting. What a straight forward way to organize the garage and have fun introducing kids to building. The shelves are deep enough for storage tubs, access items easily and are very sturdy. I would fully recommend this plan to get things sorted in your garage and have more room for other projects!

Comments

Farm House Table

Submitted by tedwarm on Fri, 05/29/2015 - 05:50

I used local Colorado beetle killed pine. I based the table on Anna's Farm House Table plans. I used the bread ends to create pull outs for 11 inch extensions on each end.

Estimated Cost
$350, not counting the planer that burned out during the milling of the wood.
Estimated Time Investment
Week Long Project (20 Hours or More)
Finish Used
seven layers satin wipe on poly, two layers finish wax using steel wool
Recommended Skill Level
Intermediate