Farm house tables

Built using the farmhouse table plans
Built from Plan(s)
Recommended Skill Level
Beginner
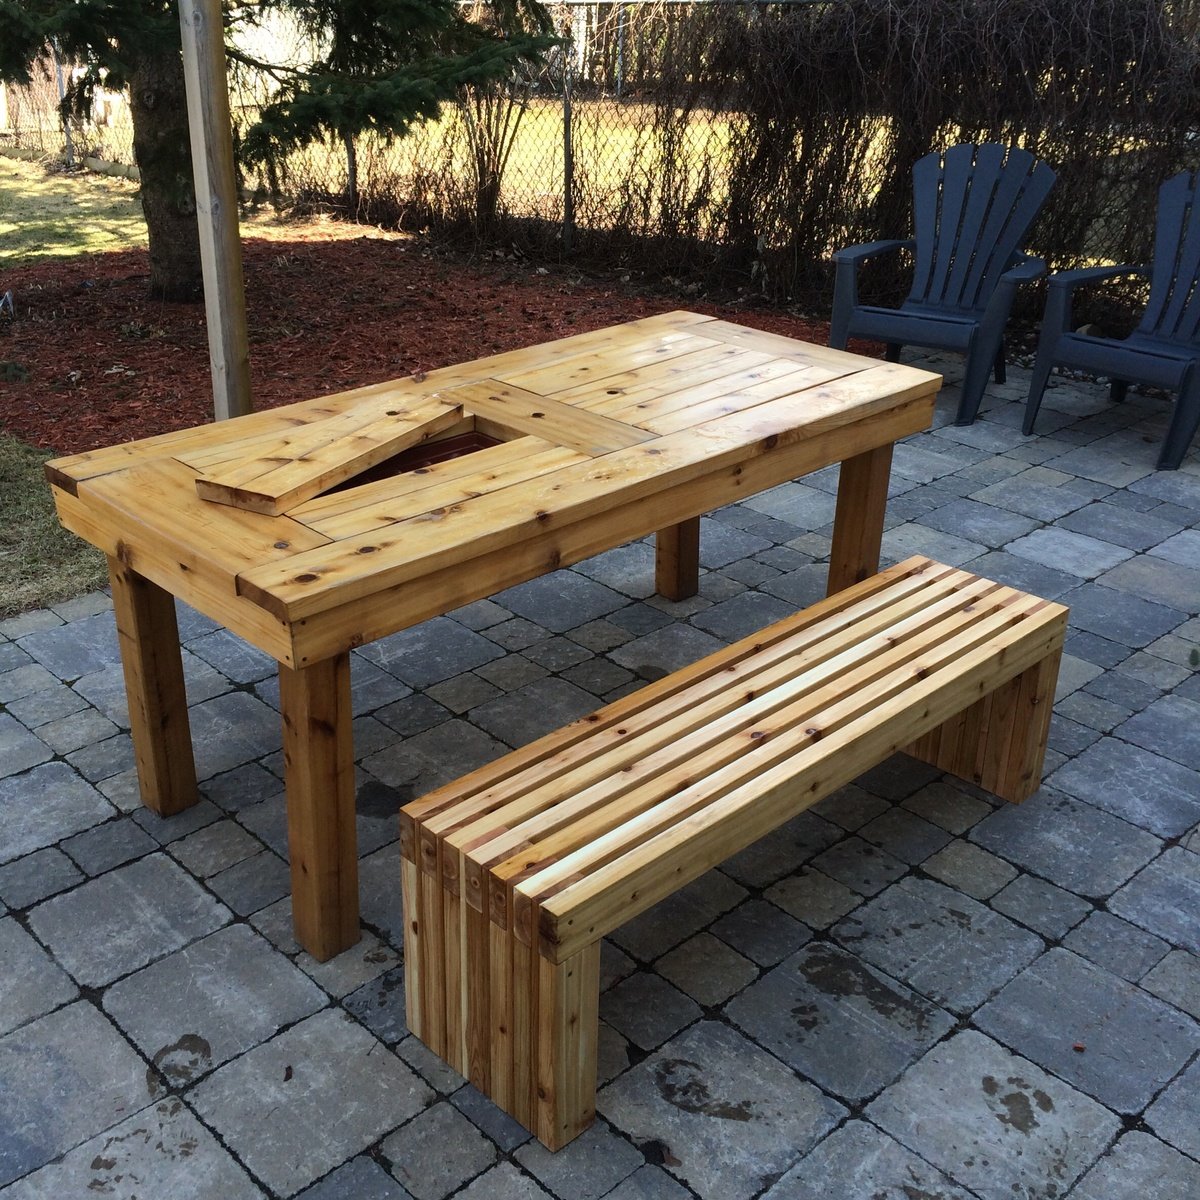
Built using the farmhouse table plans
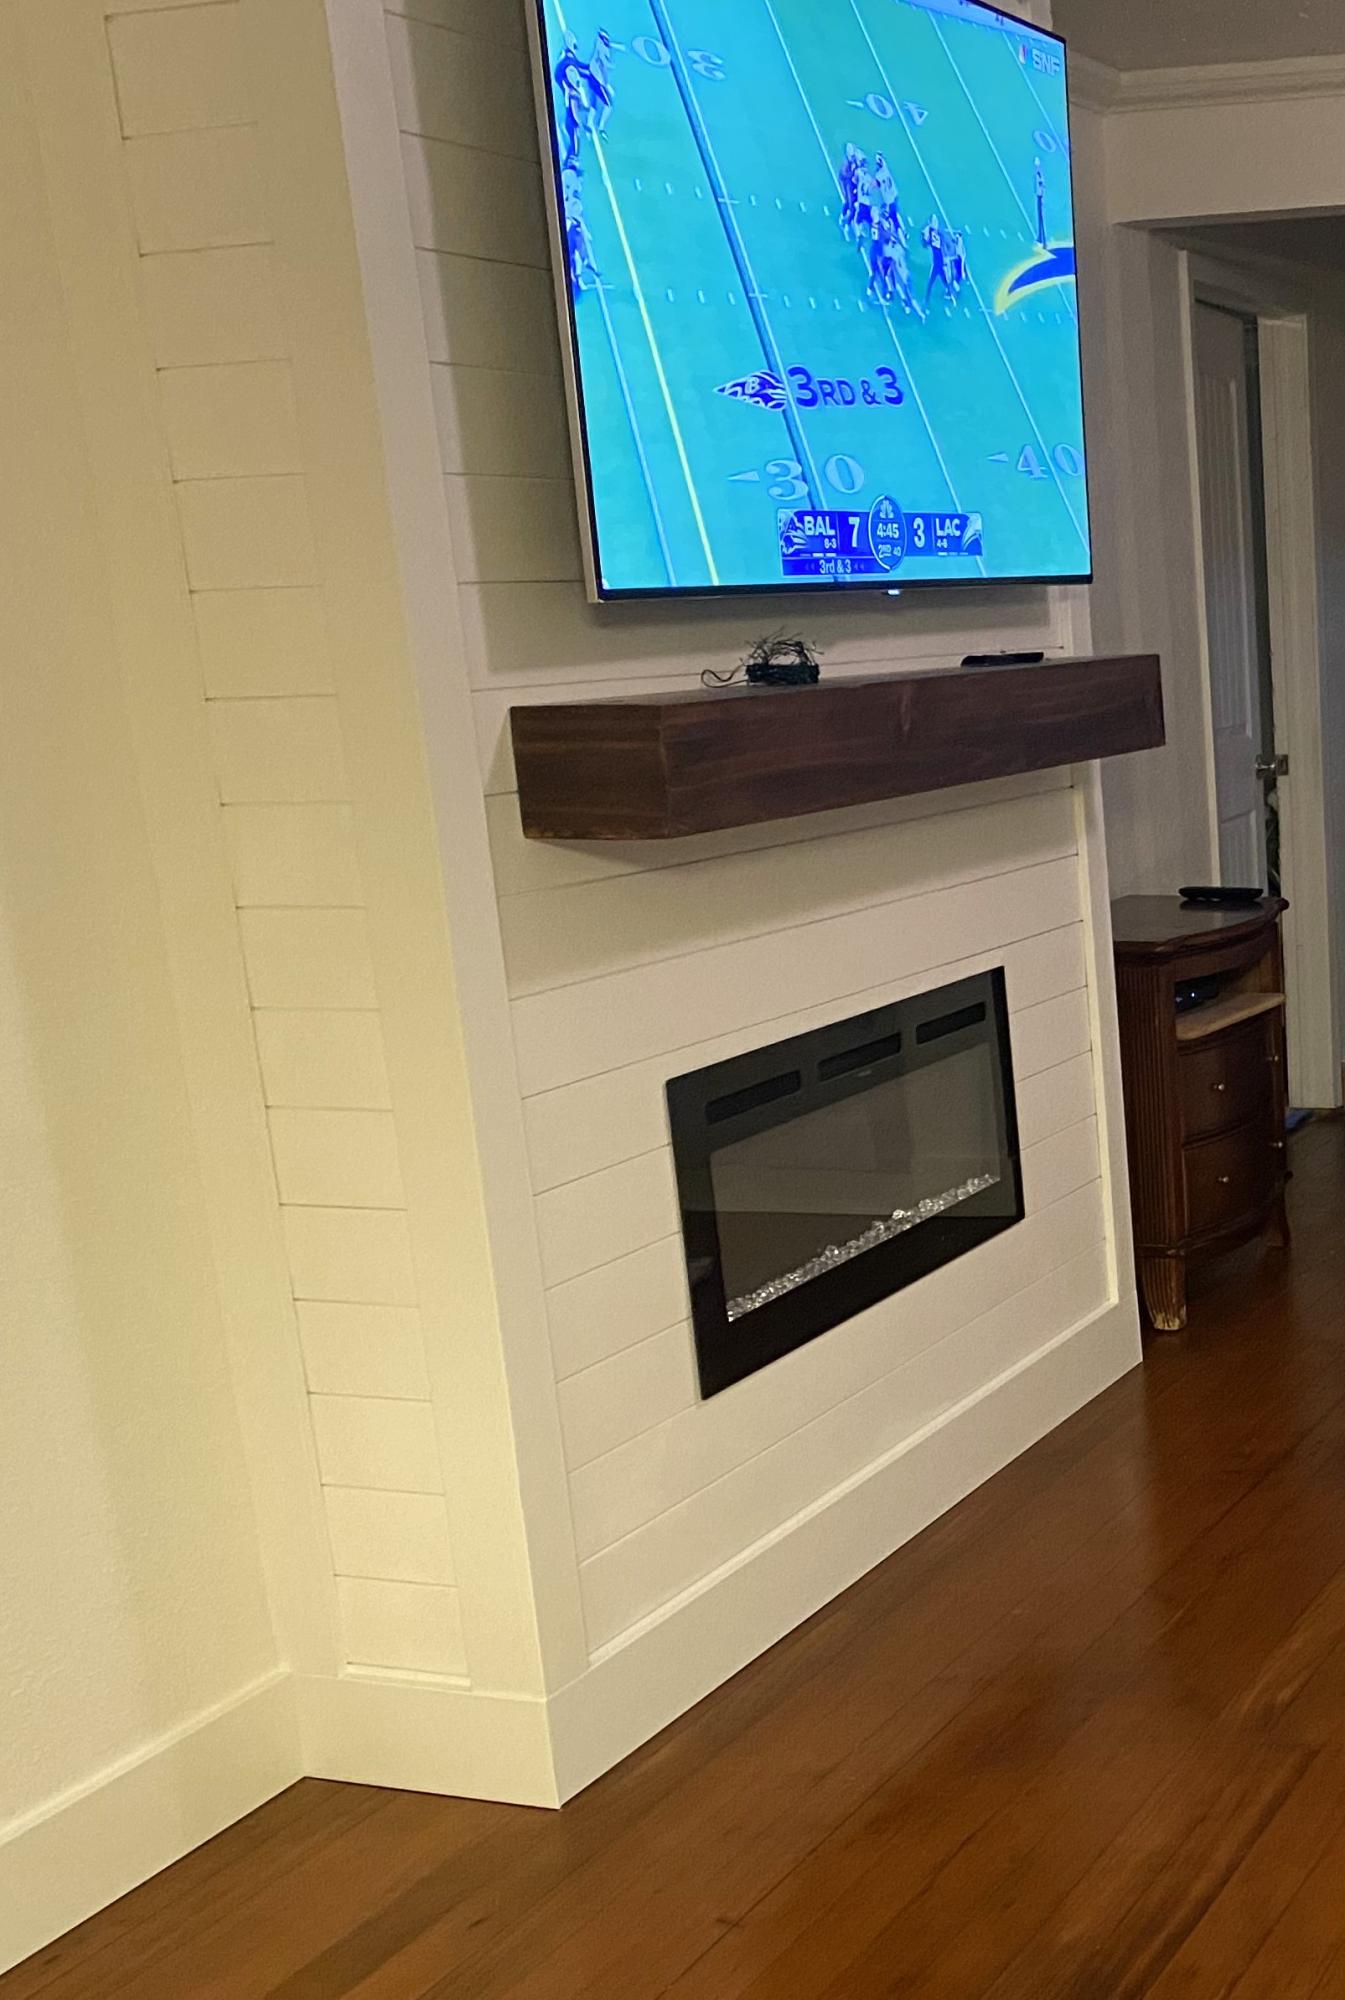
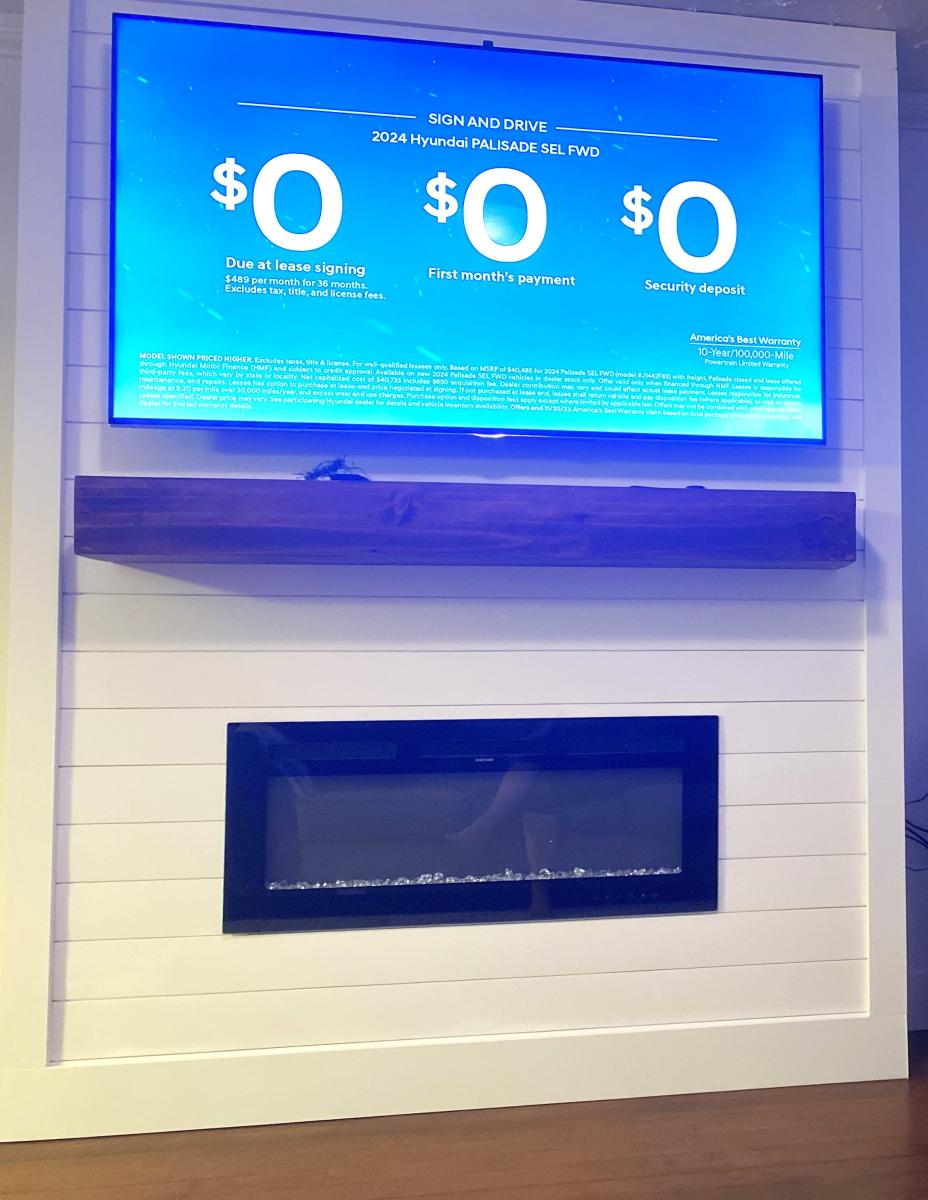
Added this easy to do built in fireplace to a plain, ugly wall. Now it’s just….WOW! Thanks Ana for the idea and inspiration. DIYers 🤘
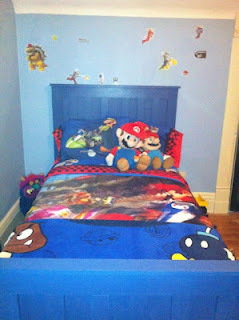
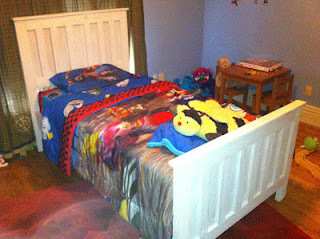
This one started out in a lovely whitewash...then Kids happened.
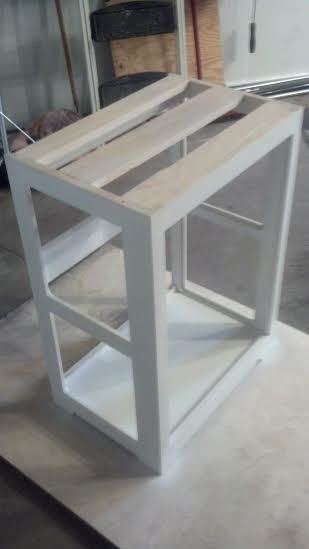
Very easy plan to put together, my little client loves it!
Tue, 06/19/2012 - 13:11
I like what you have done with this it looks amazing!! (as do you!!)
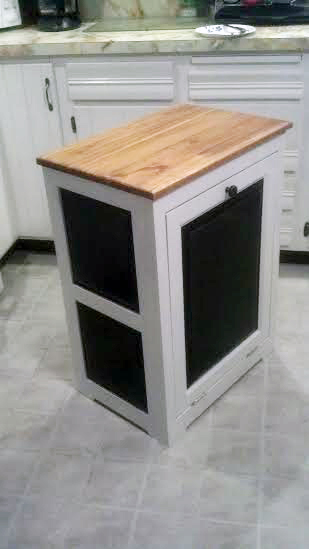
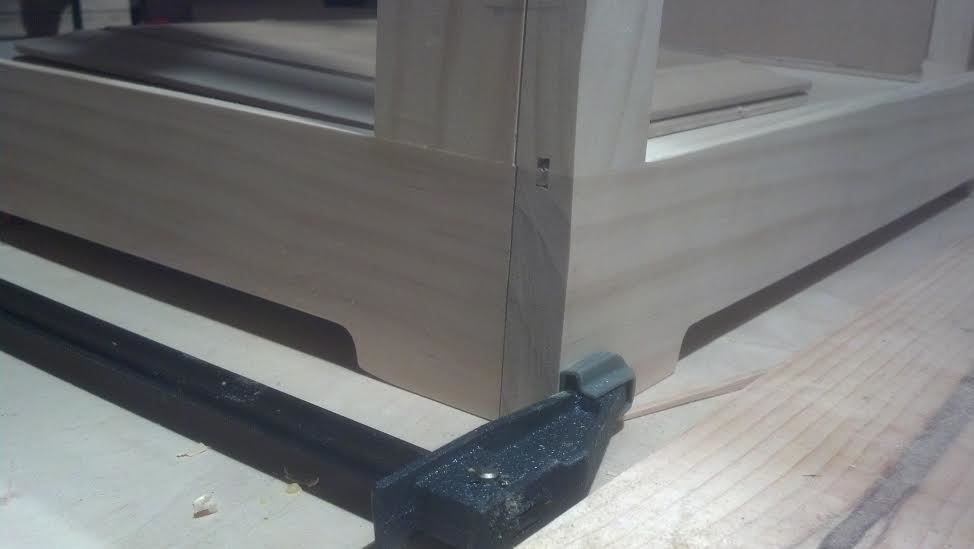
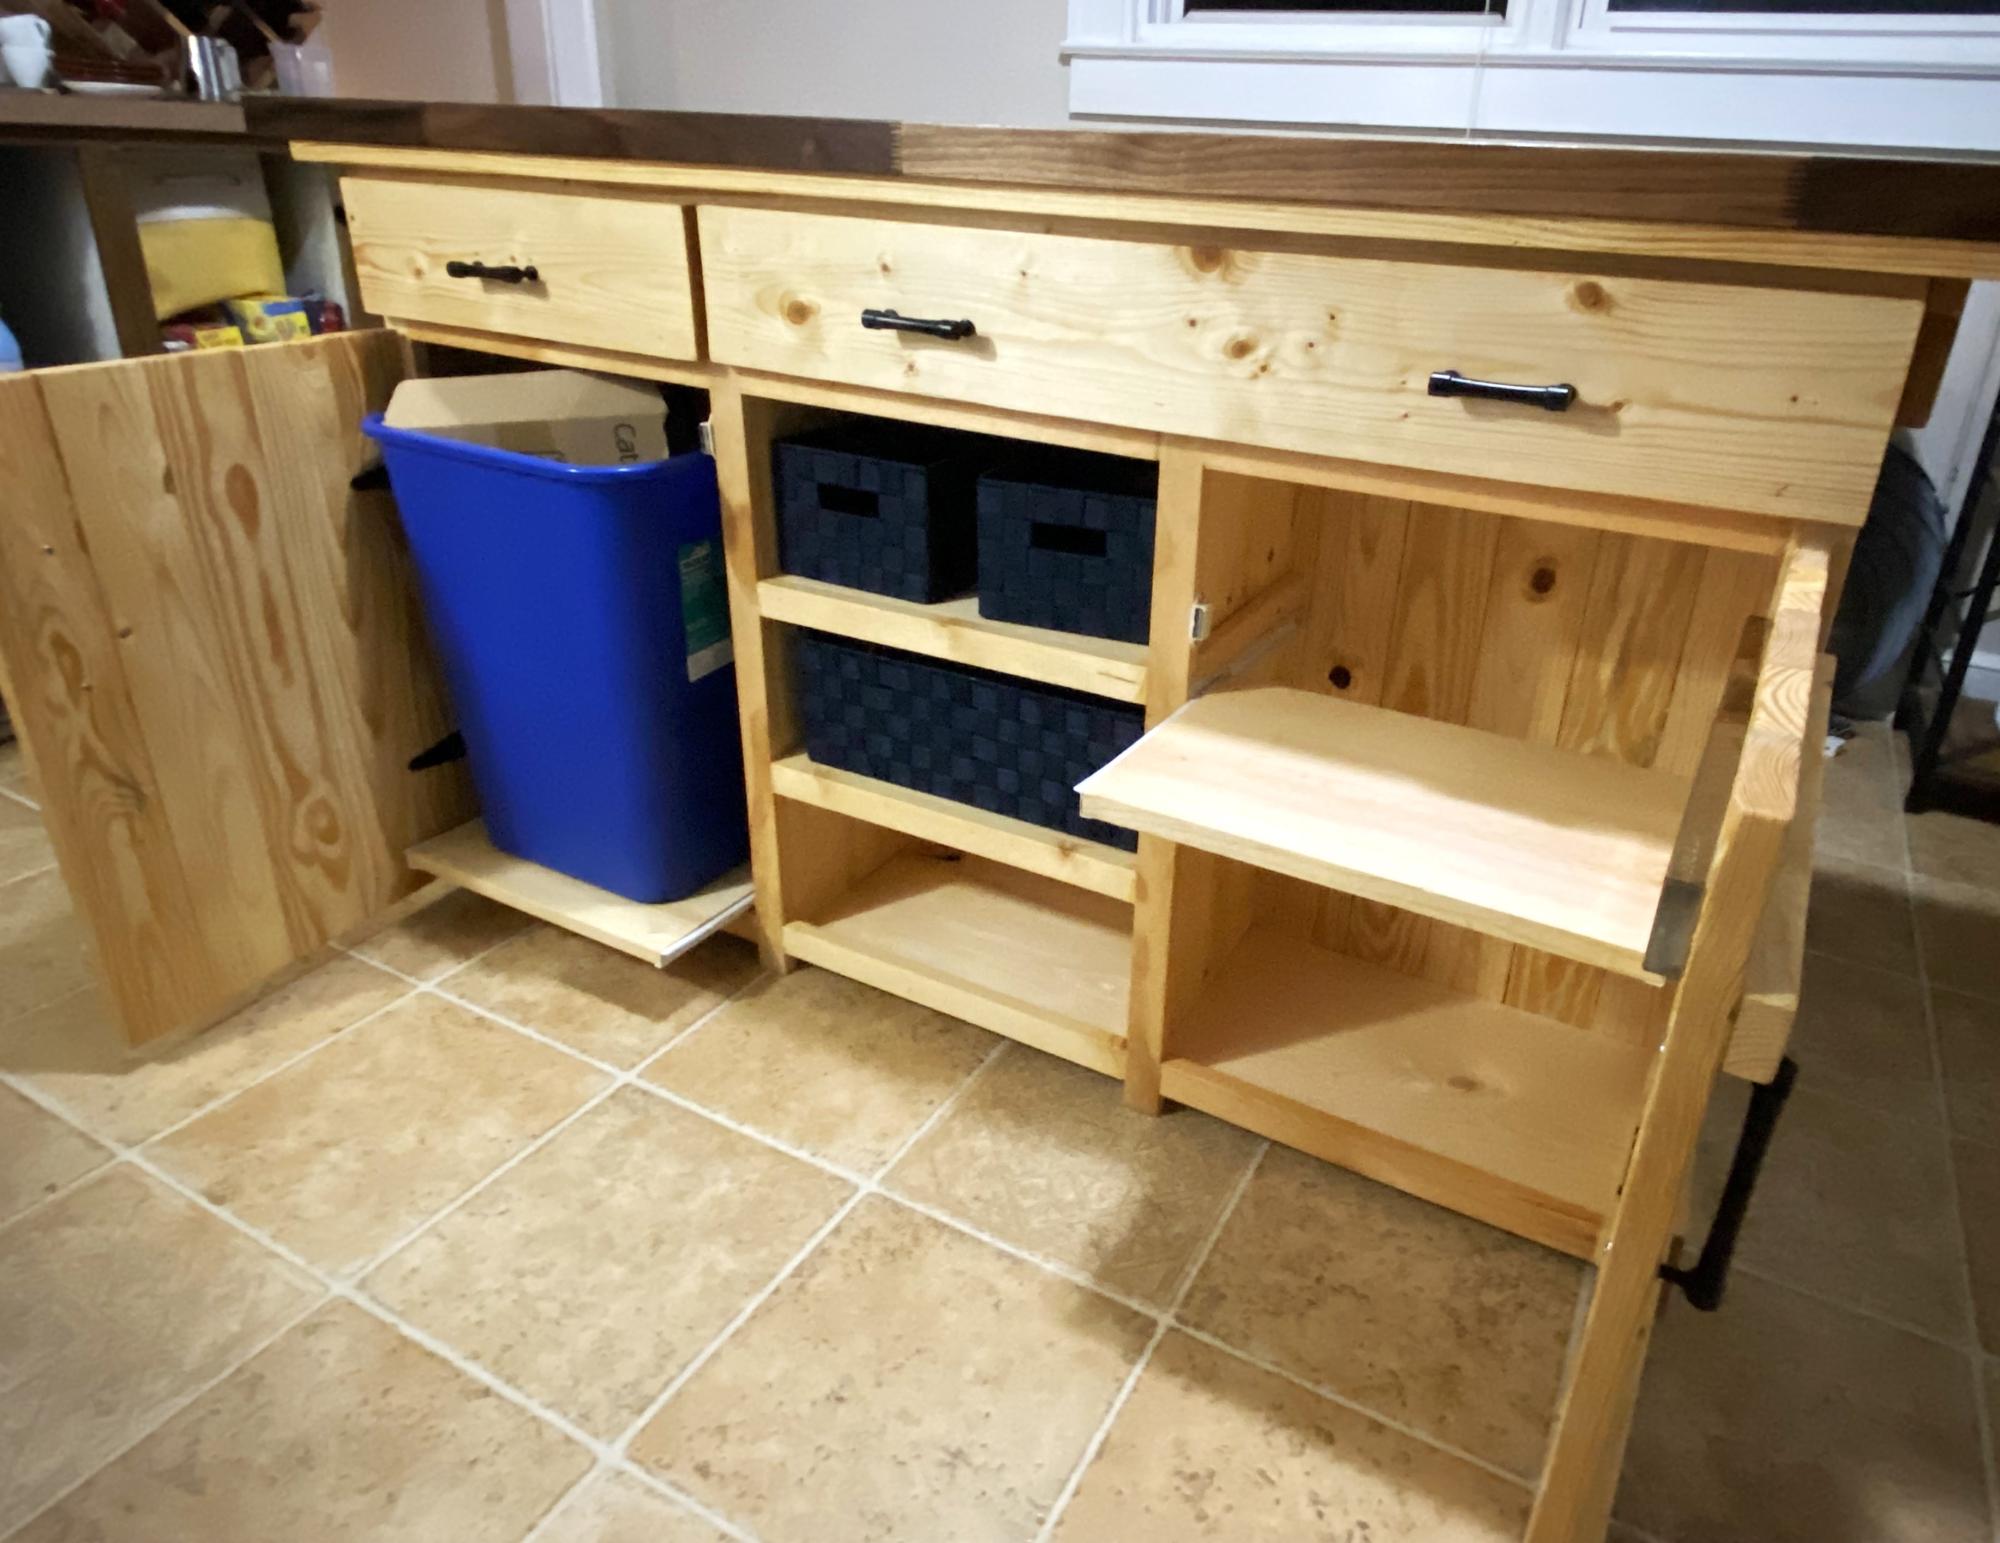
Well this is my first project and it took me a long time. I have to think way to long before I actually do something. I redrew the drawings to fit my garbage can but it still didn't fit.
Oh well, it was a good idea at the time.
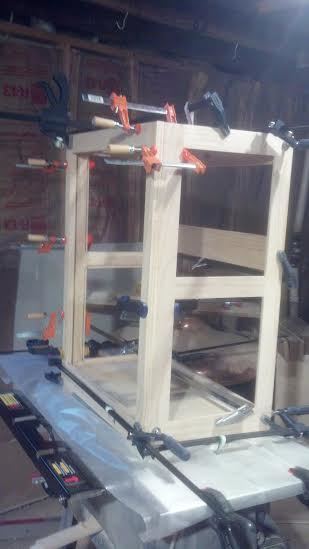
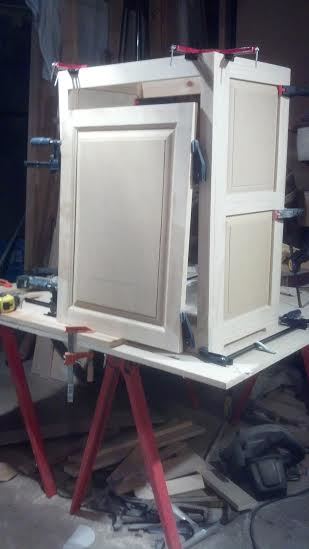
I used a biscuit joiner and glue to put everything together. For the door I used rail and stile bits. The panels are made of MDF, I used a bit made just for raised panel doors on the router table to make them, Oh by the way MDF makes a very big dusty mess, Please wear a mask it has to be really bad to breath.
I also added a slow close piece that is mainly used on kitchen cabinets, I just had to do that and it works very well.
Thanks Ana for such a helpful website
Chuck

Sat, 04/12/2014 - 07:01
You did a beautiful job on this! The finishing is lovely, and those raised panels are impressive!
Thu, 04/17/2014 - 15:51
Thank You JoanneS
I am on my next project now. I need a place to hang my coats and not see all of the shoes, lost almost everything in a divorce including almost all my tools.
LOL
A small price to pay for serenity.
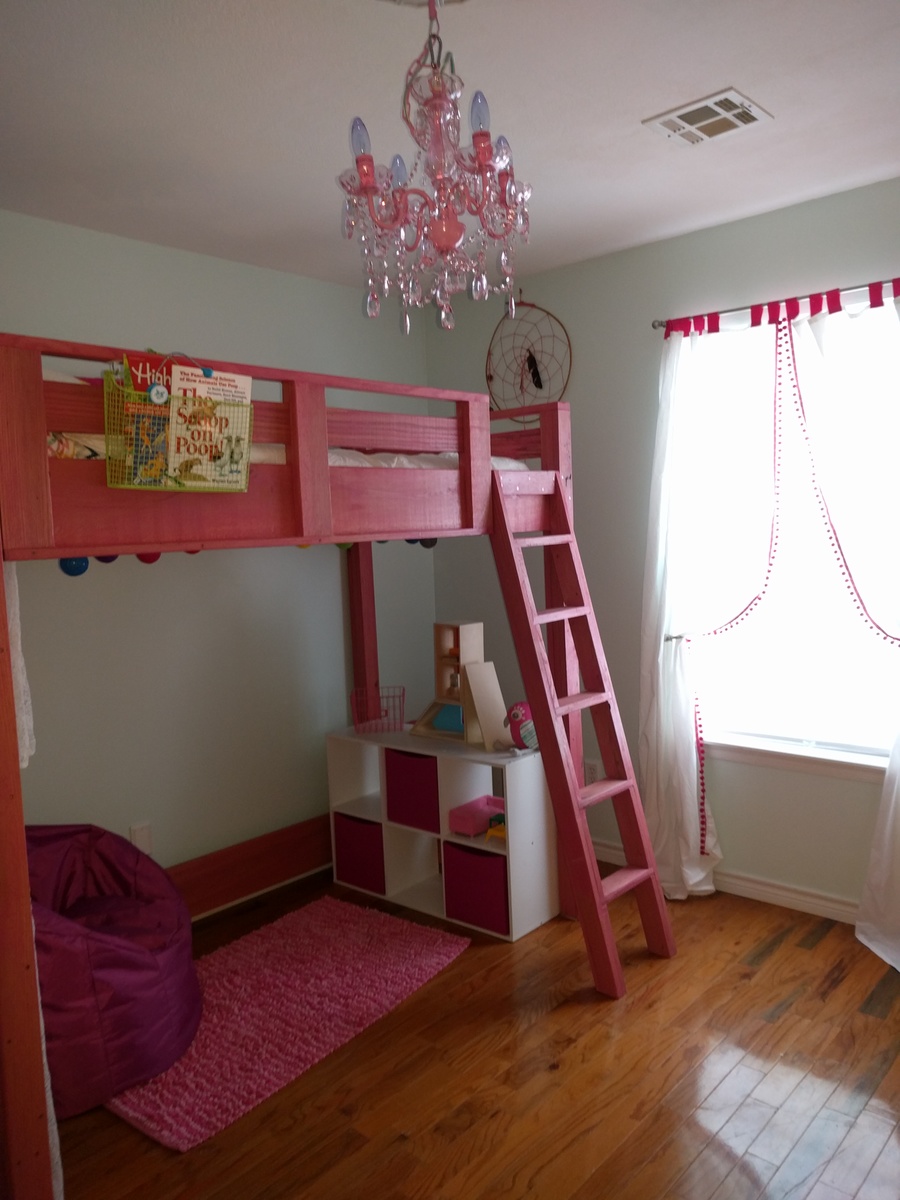
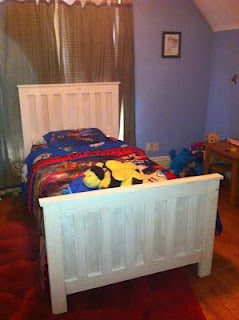
My husband built this bed with hand planed white oak. Such a wonderful addition to her big girl room.

Super fun and easy project! I had to cut down the length of the table to 6 ft to fit the space in the house. I also did 2x8 tops on the bench for more surface area. I will def be building an ana white project again!
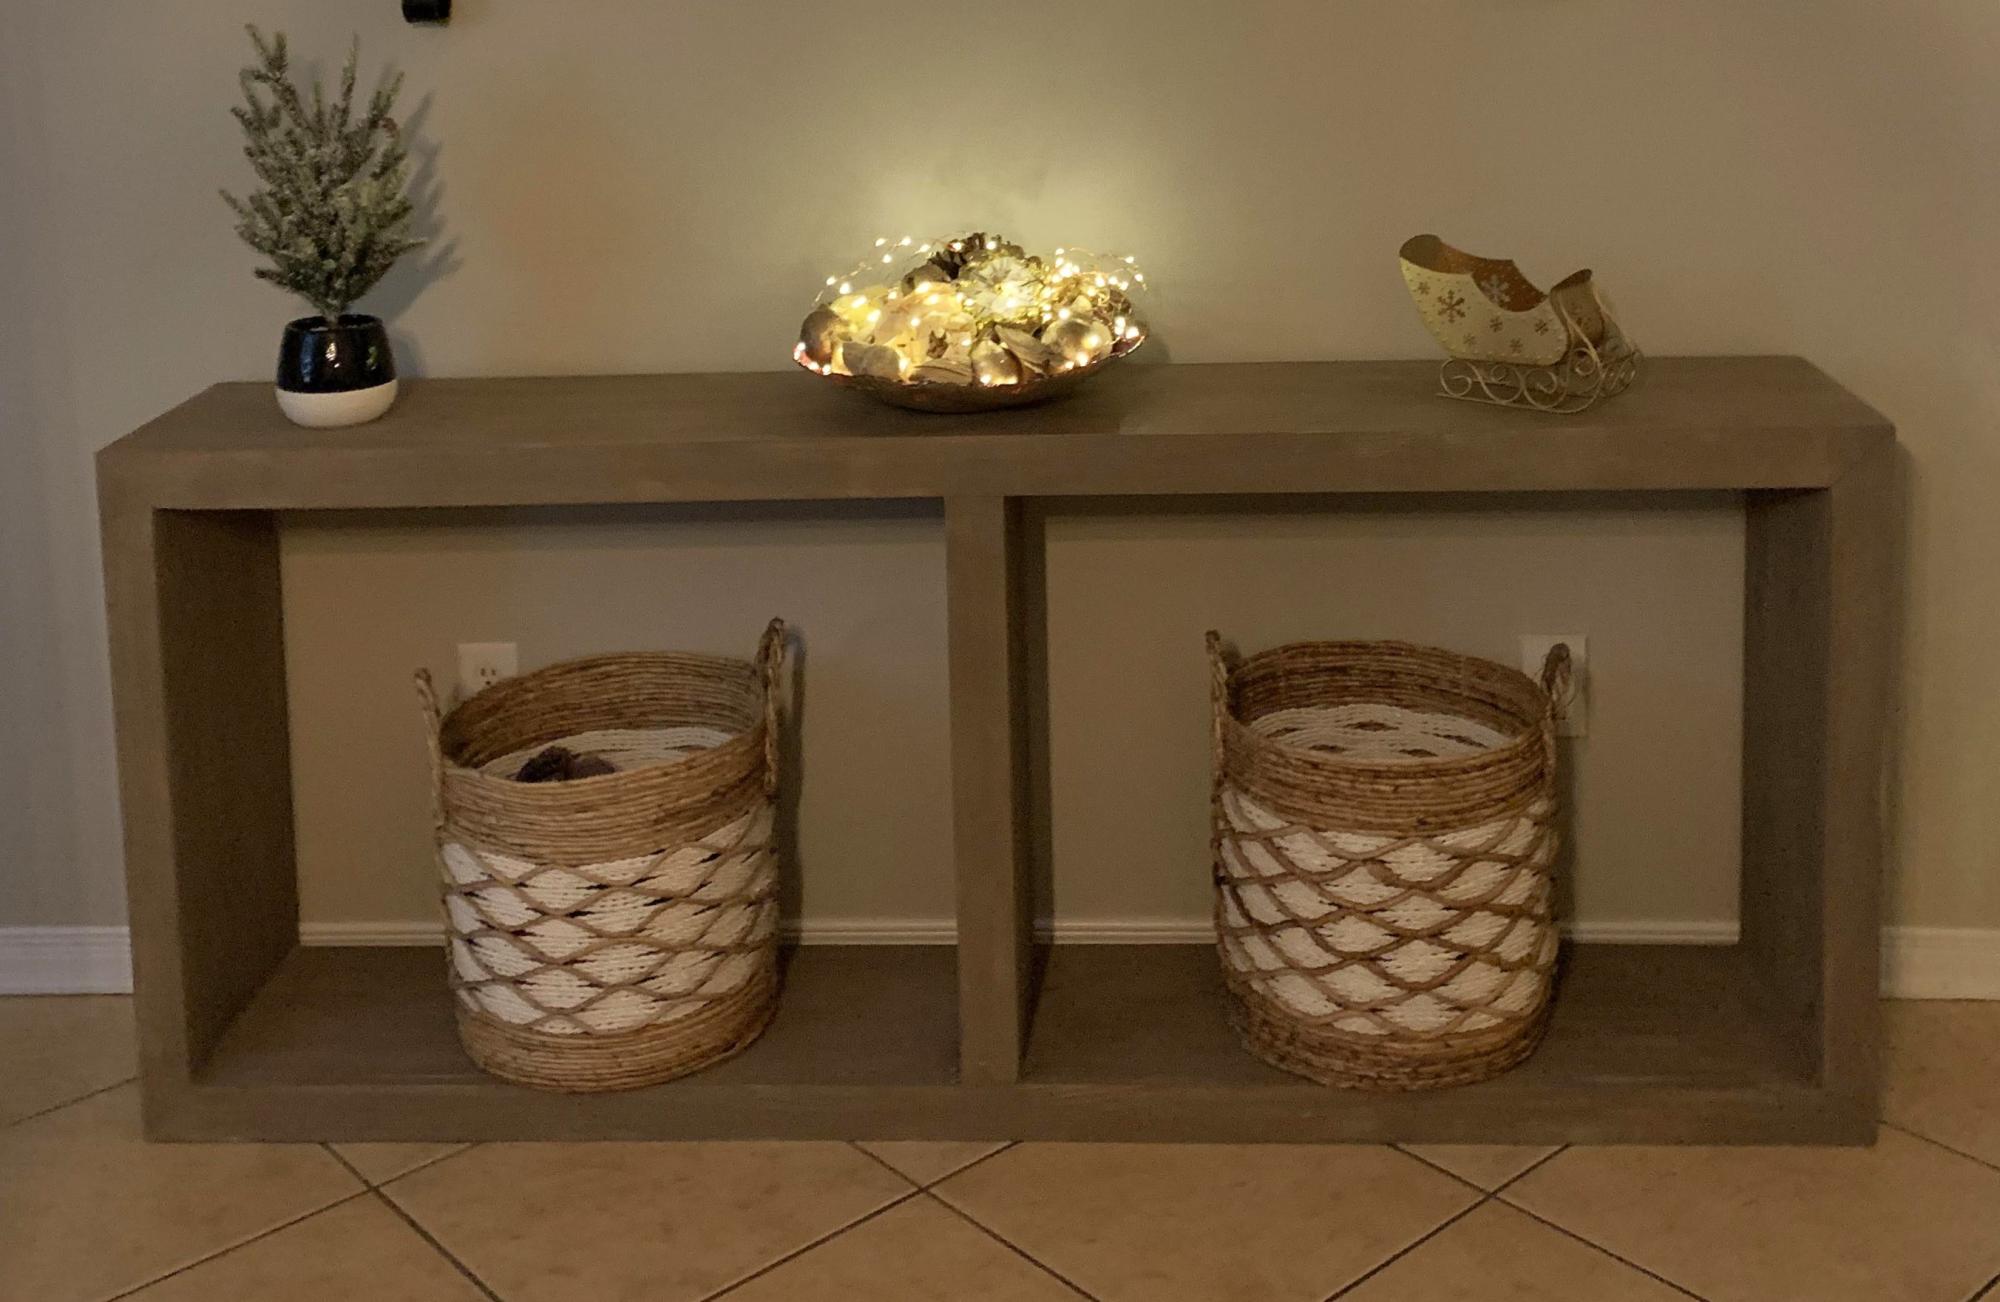
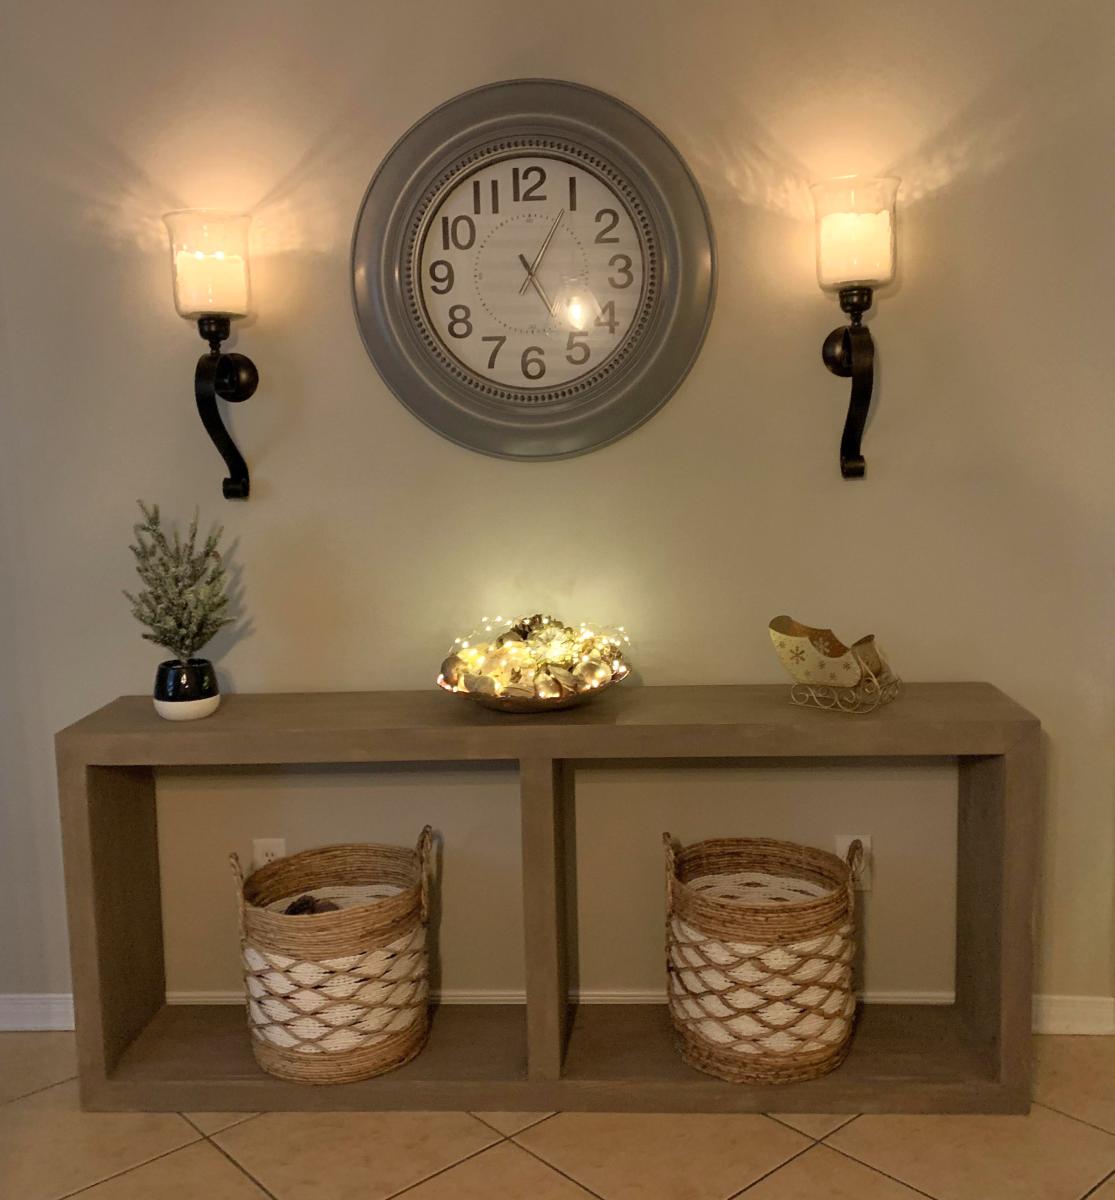
DIY Waterfall Console
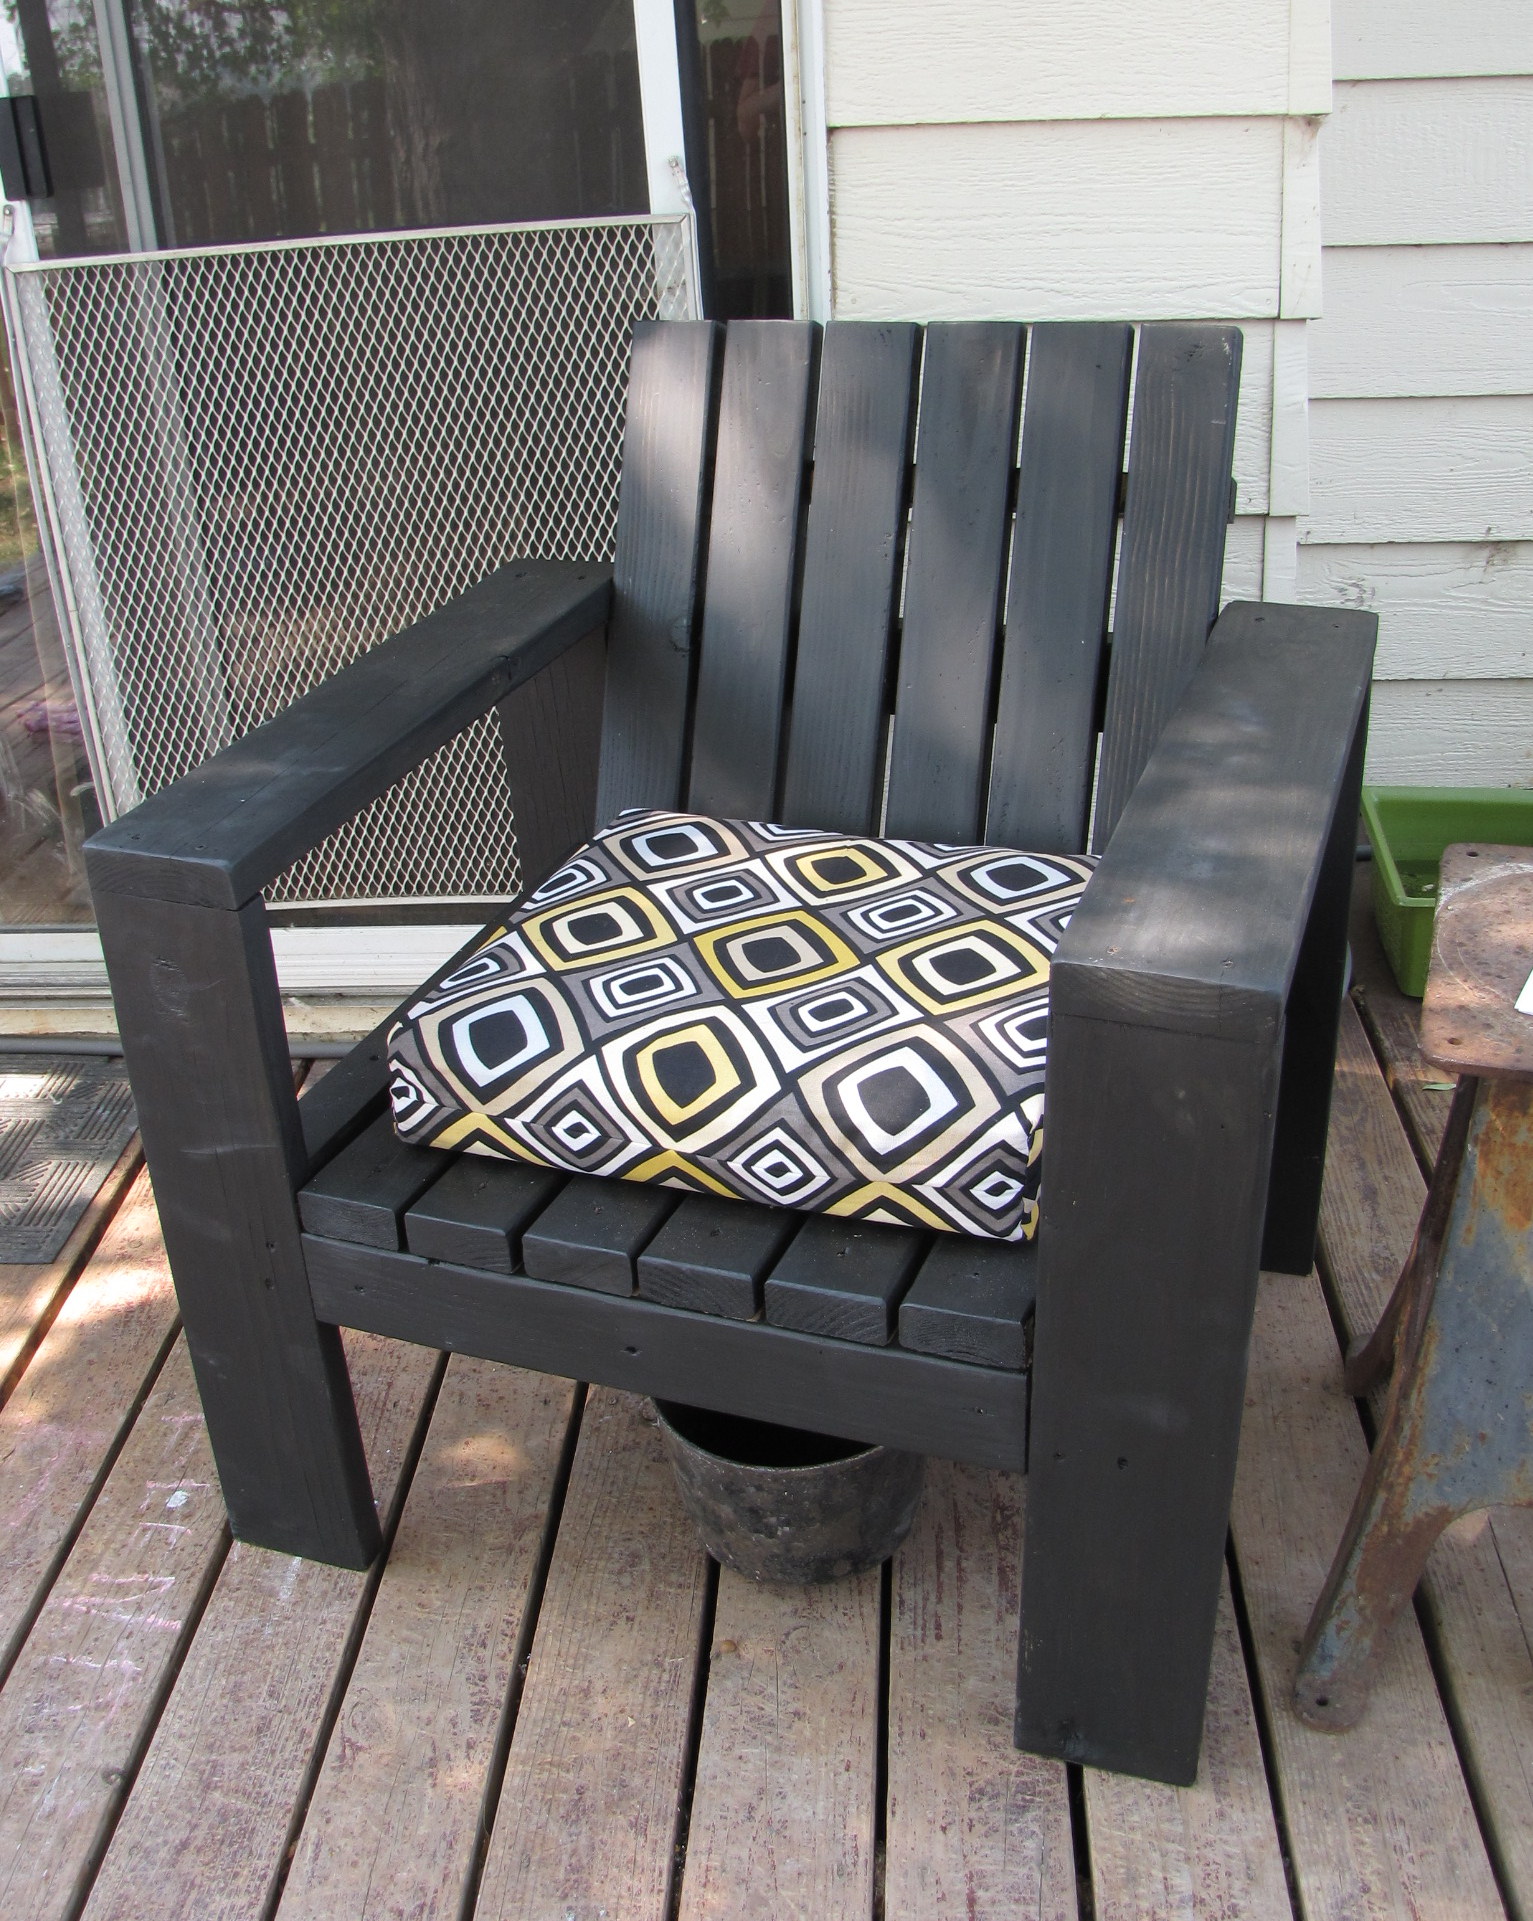
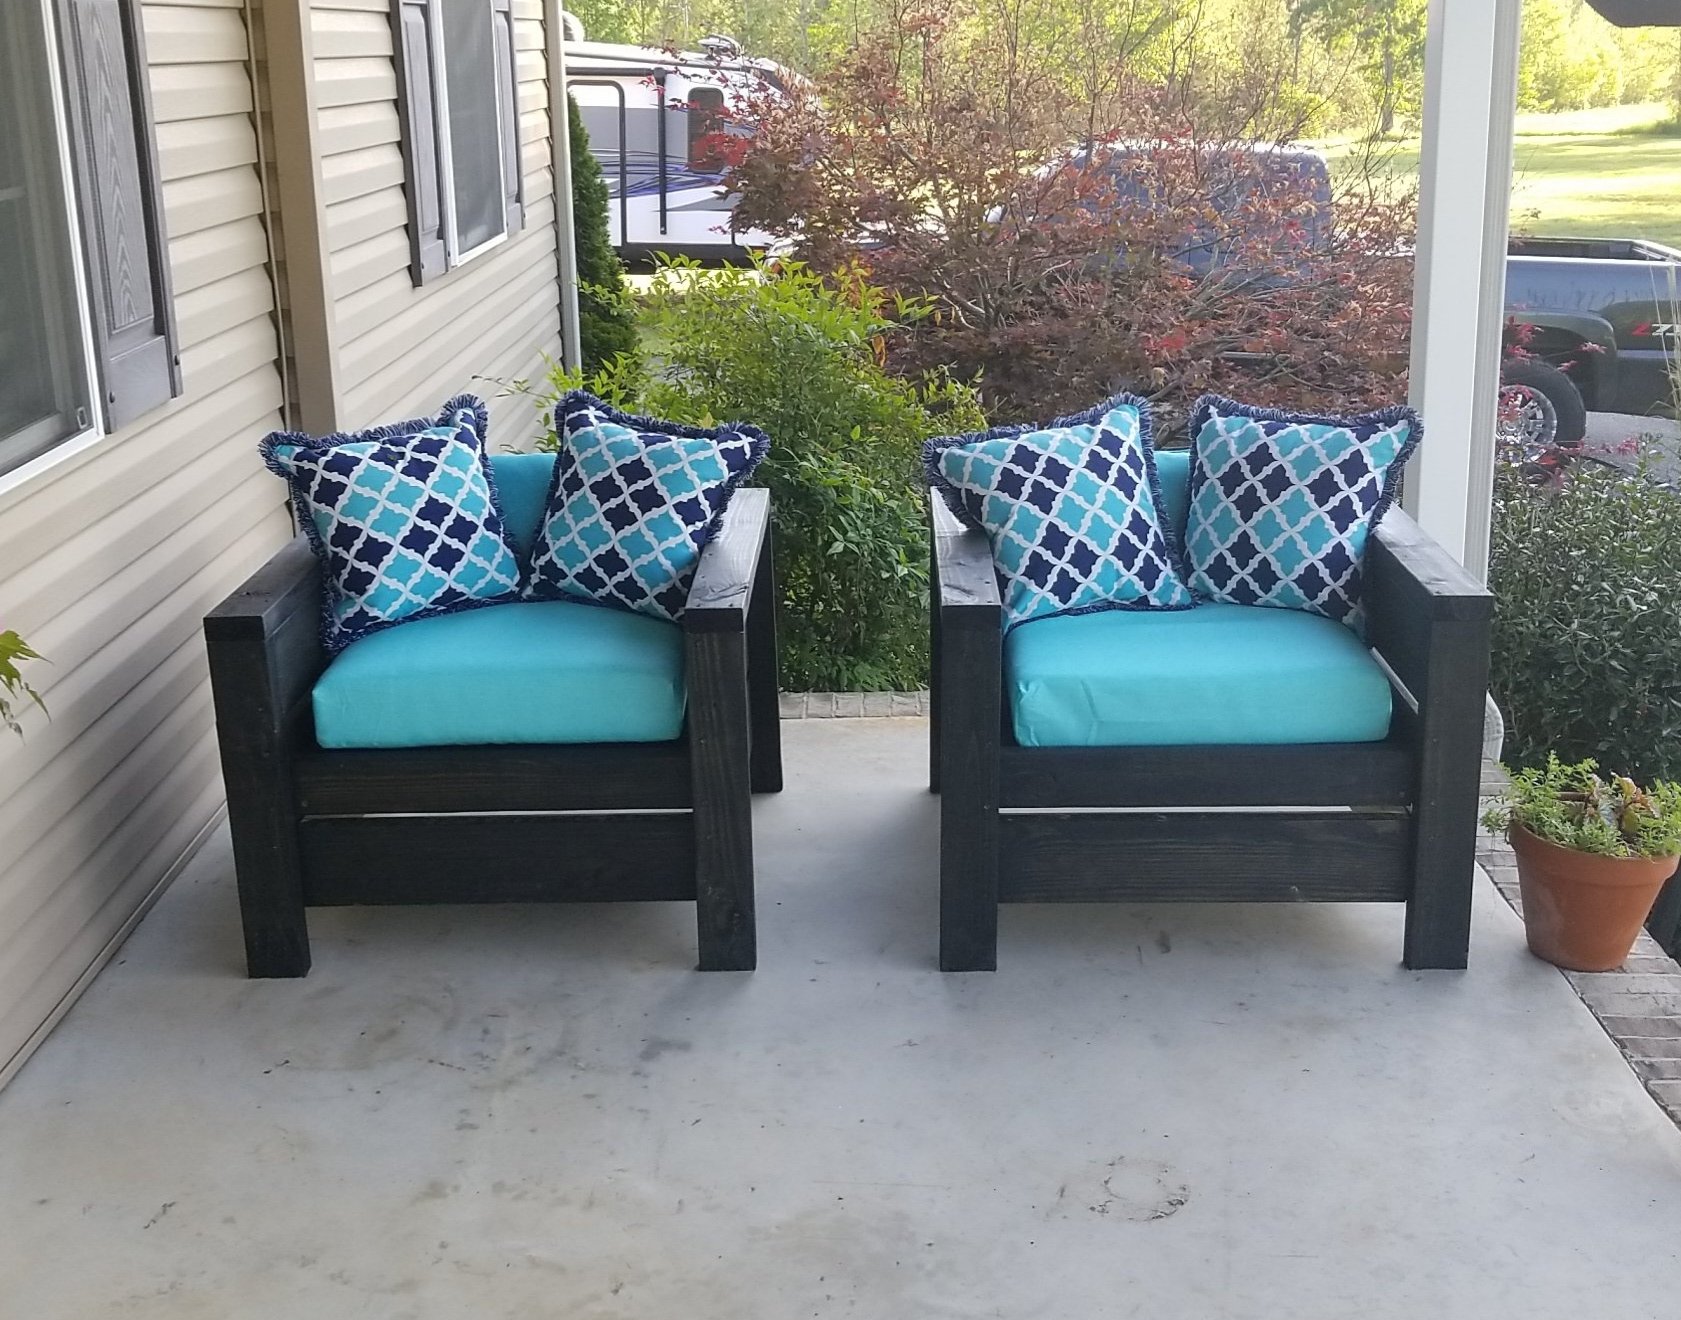
Loved building this chair. Super simple to put together and very sturdy once everything came together.
I modified it to create a larger and taller chair, using 2x6 and 2x4 lumber. Because of this change I felt like my math challenged brain was completing some sort of quiz, but to keep things simple I cut the pieces step by step recalculating lengths as I went.
I marked up the plan as I went, so if anyone is interested just let me know & I'll add the changes.
http://radcrafter.com/2012/06/simple-outdoor-chair-beefed-up/
Sun, 08/19/2012 - 08:29
I would love to see your changes and build the beefier version! Please share!
Thu, 07/26/2018 - 07:05
I have a large (400+) family member who I need to make chairs for. This plan looks perfect (even though I will have to probably adjust width and add additional support) Can you please send me your plans?

Sat, 08/10/2019 - 21:14
Hi just joined your website. This is exactly what I was looking to build. Any chance plans will be shared?
Thanks.

In reply to Plans on the horizon? by tintin66
Sun, 08/11/2019 - 10:25
Hi, yes, I am planning to update this collection of plans to include the "beefed" up modifications. It may be a few weeks though.
Cost: $45
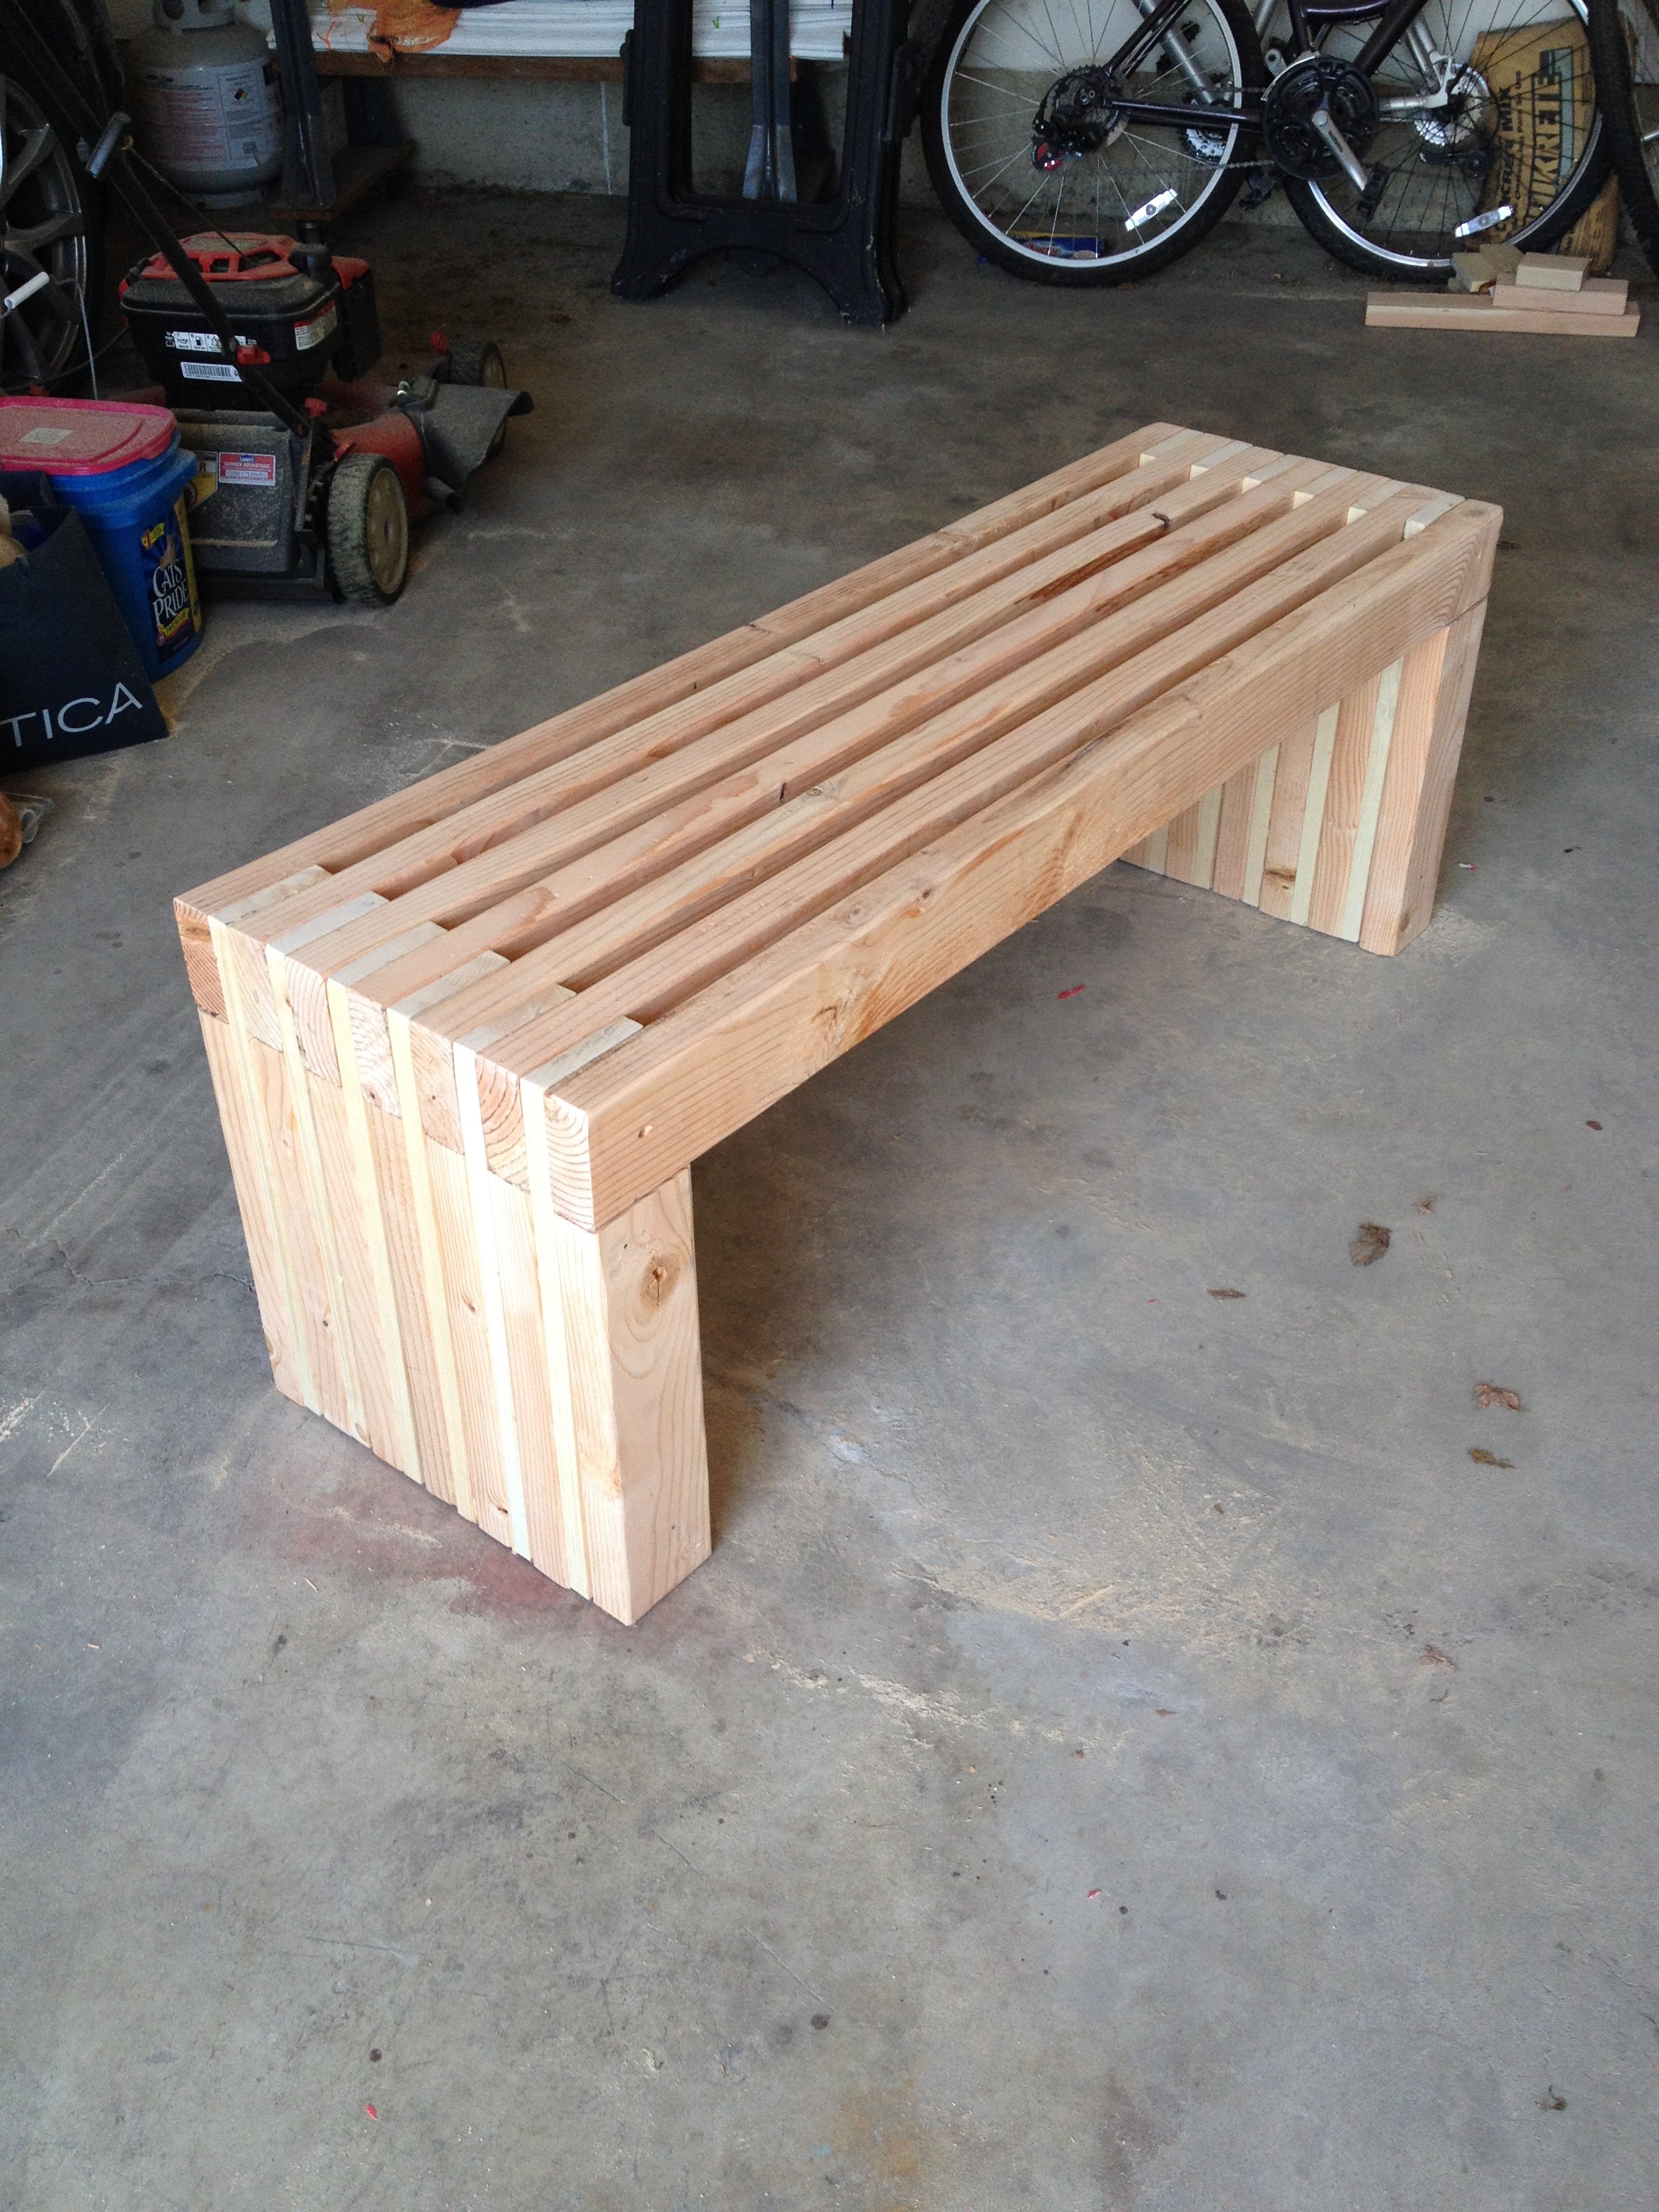
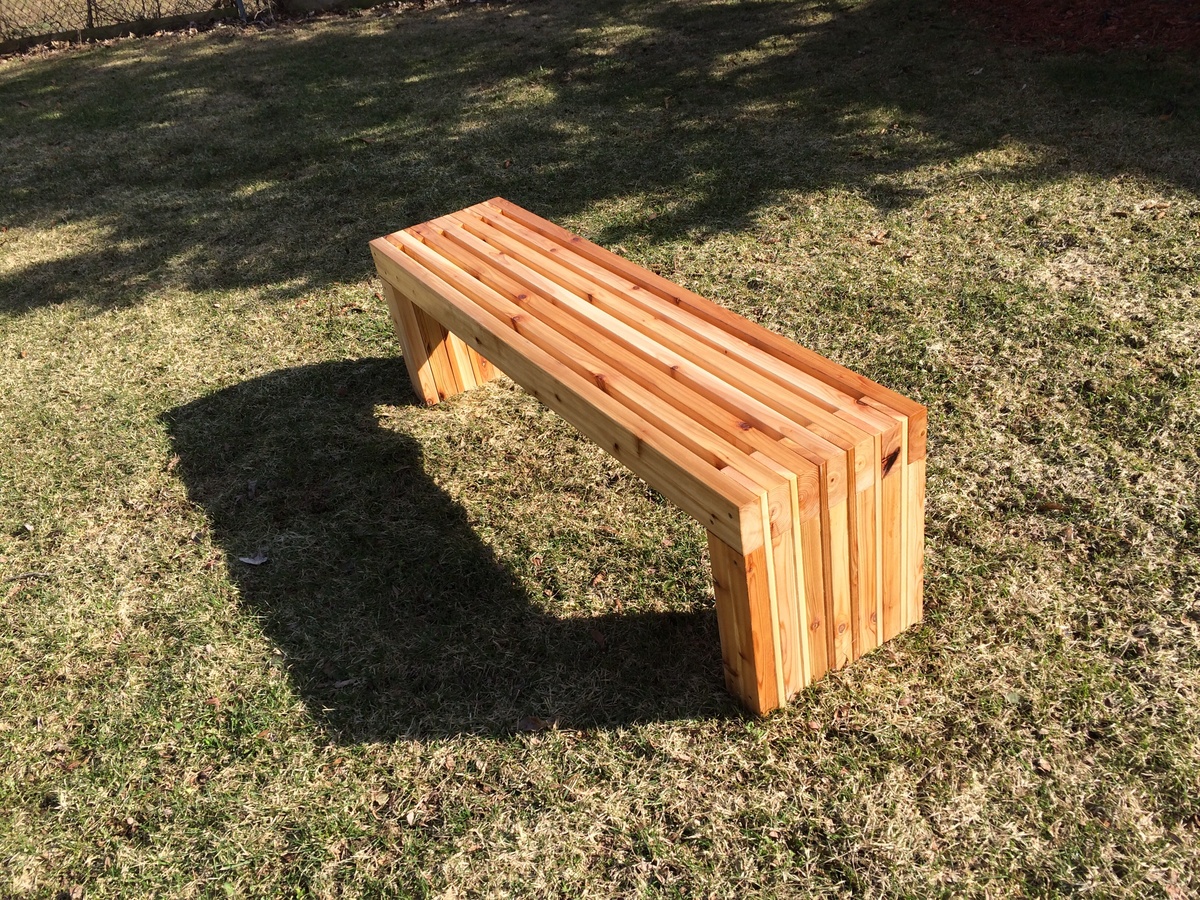
Made this bench smaller than the plan so it measures 48" X 18". Using it in a spare bedroom so it will eventually get stained to match the wood furniture.

Mon, 12/04/2017 - 09:17
That was my idea as well, to shorten it. My wife just asked me if we could part with a few chairs on the back side of our dining room table and if i would make a bench or two across the back wall. Well "of course" i said hahah!! Nice job on yours!! :{)
Sun, 09/13/2020 - 06:45
That's really beautiful. I think I'll look up the plans and try make one myself.
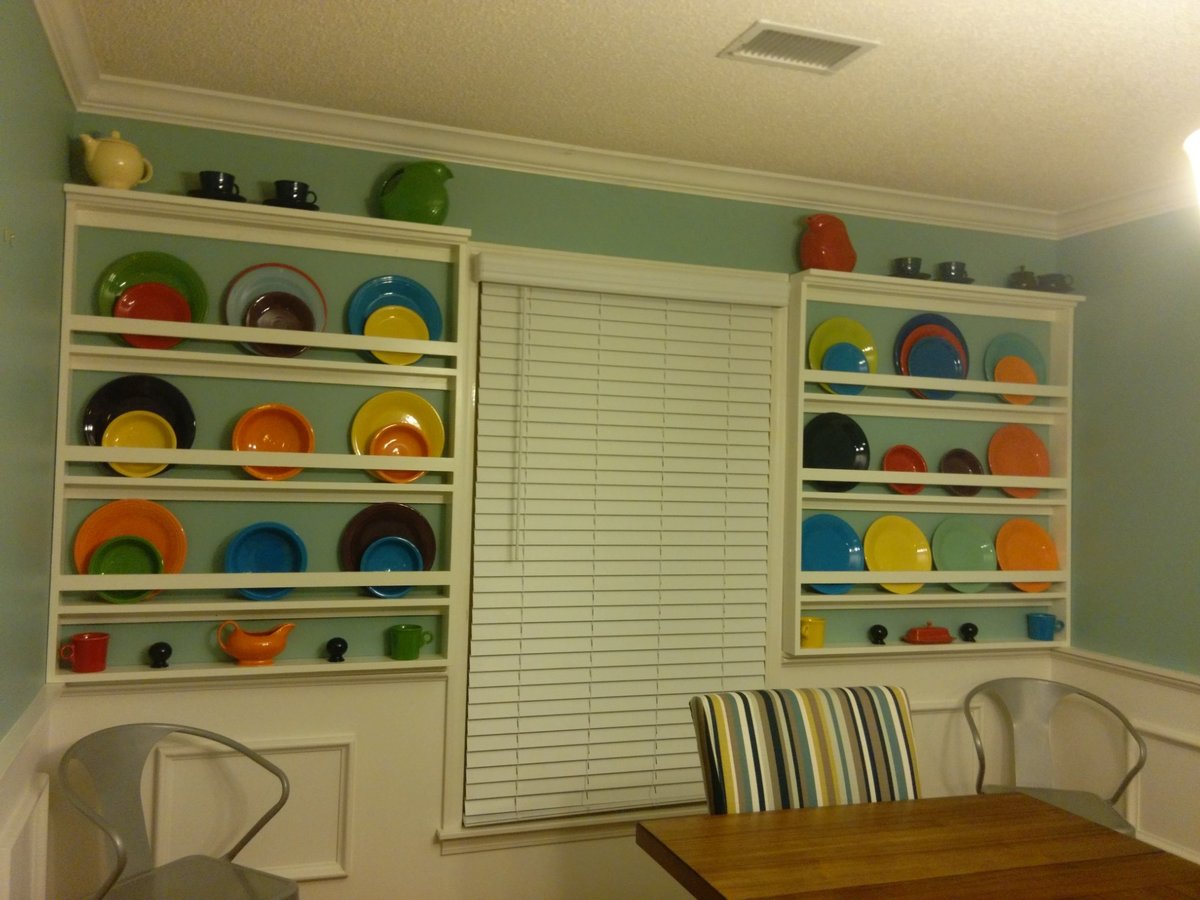
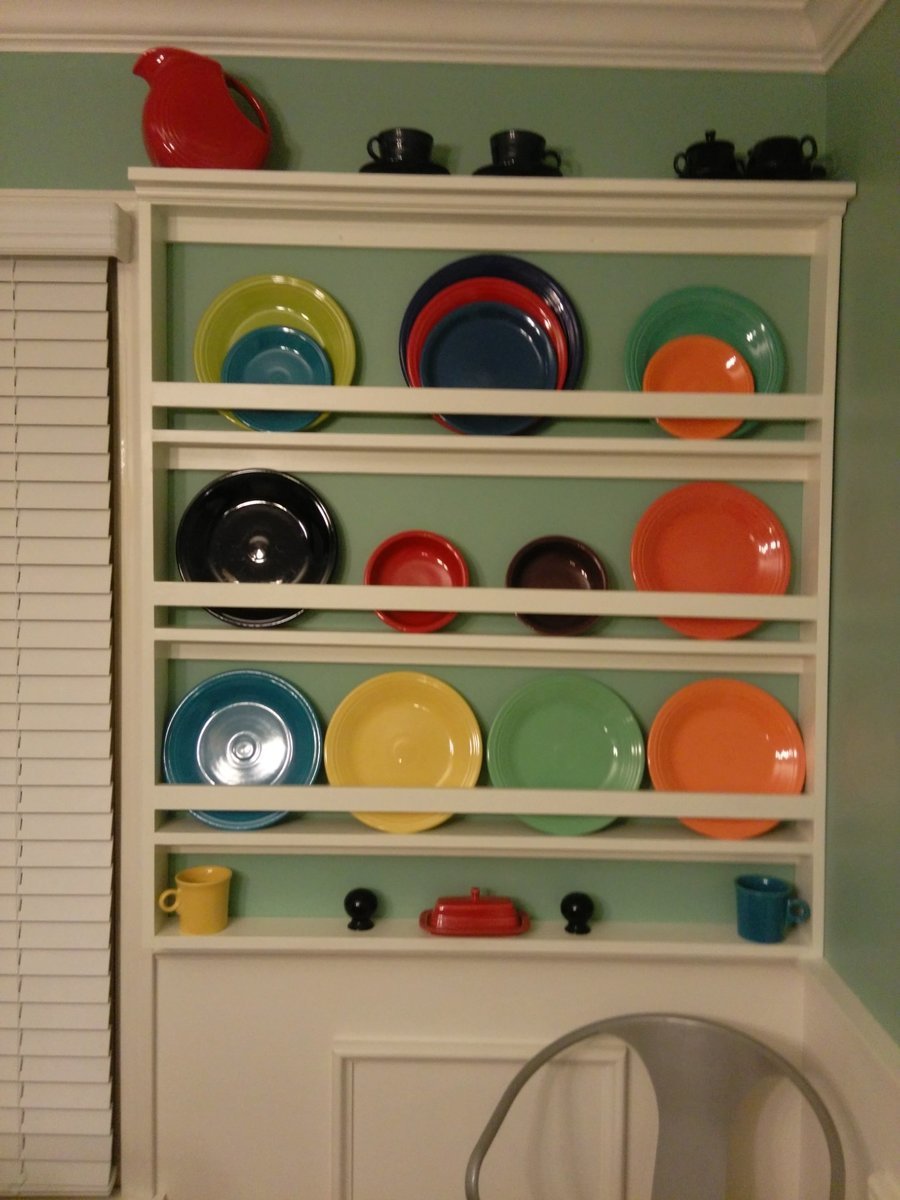
We took the plans and customized them to fit the area around our windows in the dining room. We also added a 1x6 to the top so we could fit larger items and added a trim piece. We made the shelves different heights to accommodate our plates and added a shorter shelf on the bottom
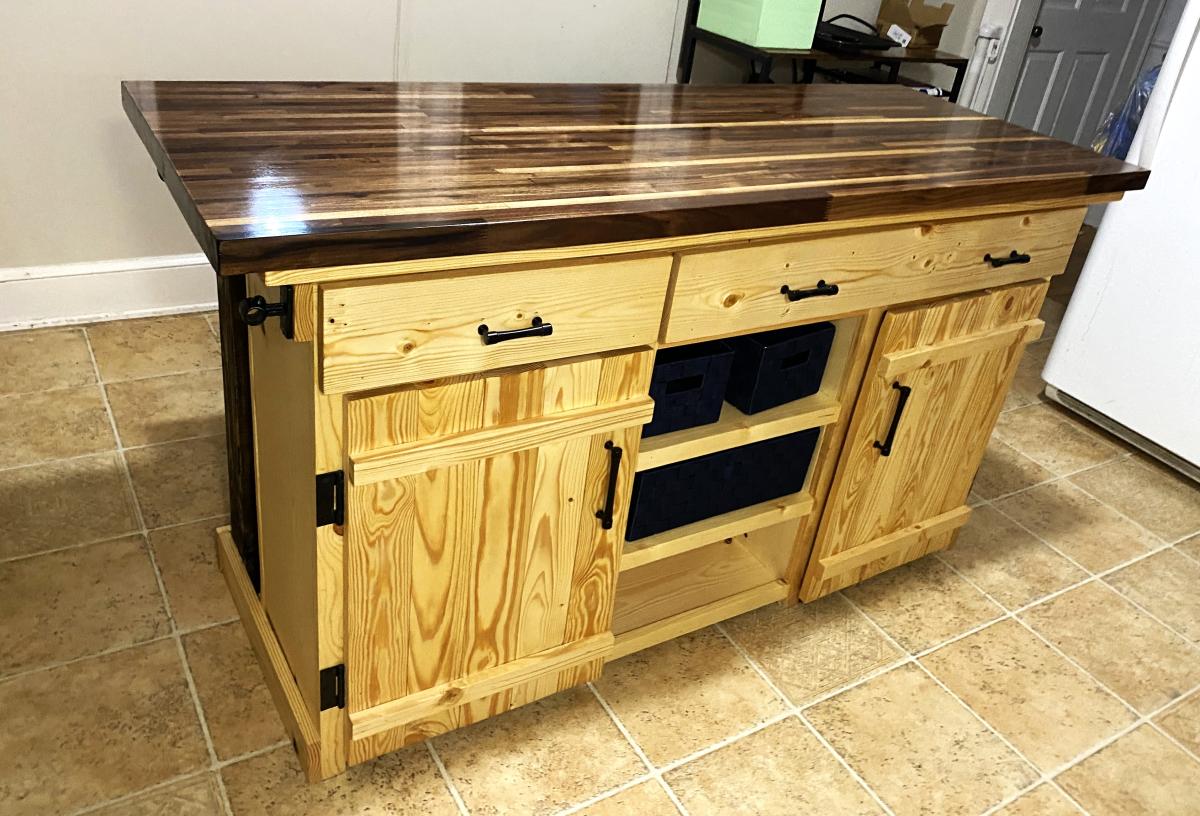
My 15 year old son built this for me!
This was a labor of love for my son’s Christmas gift. He wants to be a chef and all he has wanted was an island in our kitchen. Thanks Ana for such an amazing and simple (enough) plan.
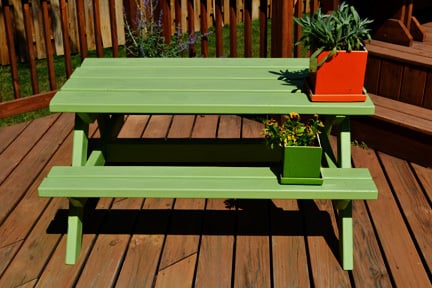
This ended up being a very easy project to complete; Ana's instructions were very straightforward. I probably spent four hours altogether on the project, although that was spread over the course of several days. We had several 2x4s left over from other projects, and I was able to use a quart of exterior Behr Premium Plus Ultra (with primer included) that didn't get used for its intended project. So altogether, we spent about $20. You can't even buy a plastic kids' picnic table for that price! As for advice, I found that the best way to avoid wobbling was to firmly attach three of the legs while leaving the fourth leg somewhat lose. Upon flipping the table, you should be able to move that fourth leg into a place that prevents wobbles before firmly screwing it in as well. I painted all the boards before assembling the table, and I feel like that is the best approach, as the space in between boards is slim.
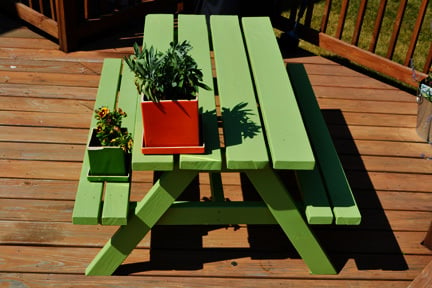
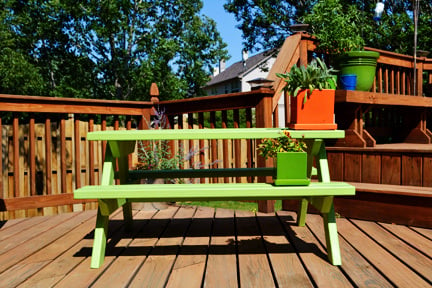
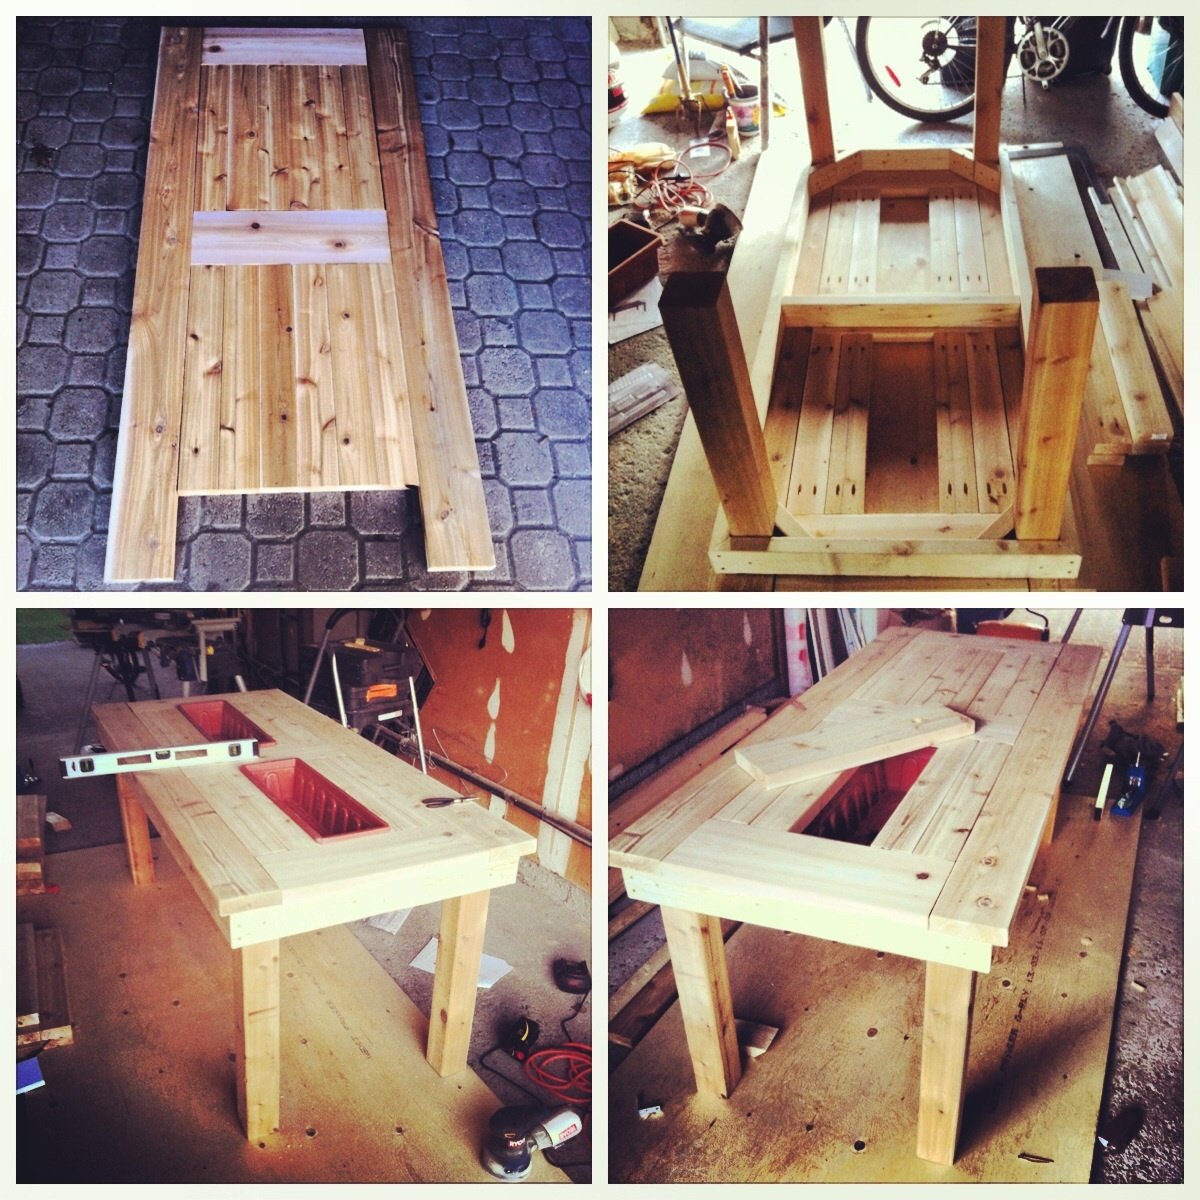
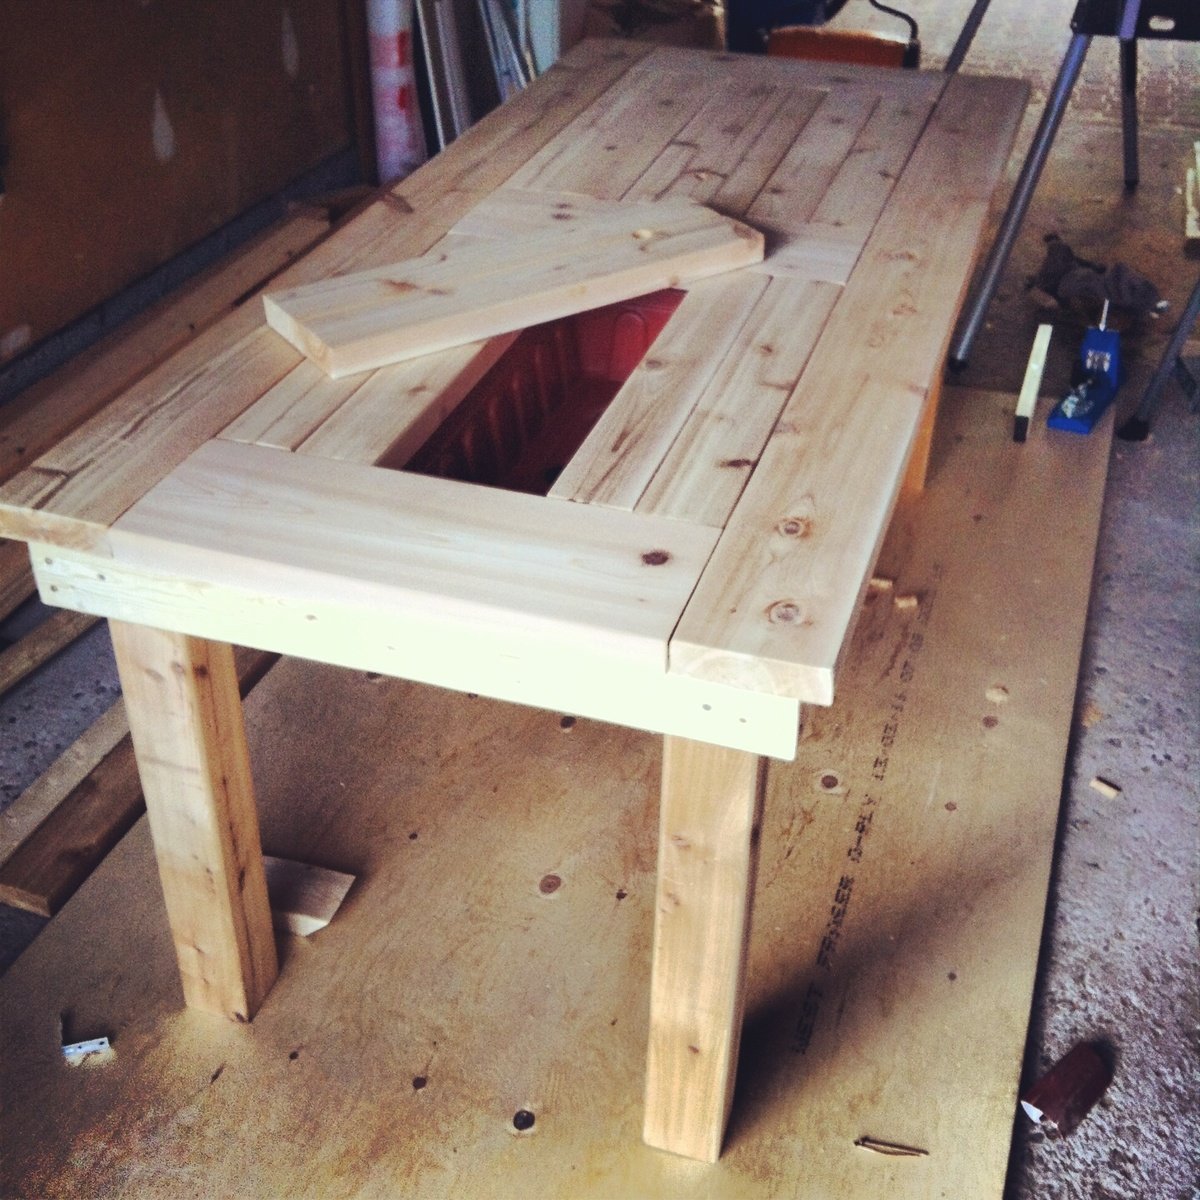
Great projects for any beginner. Make sure you're working on a level surface for the table. I purchased simple planter boxes from a local hardware store, and worked around those. For the bench, my only suggestion is to verify you are square at each step- other than that it's pretty straightforward.
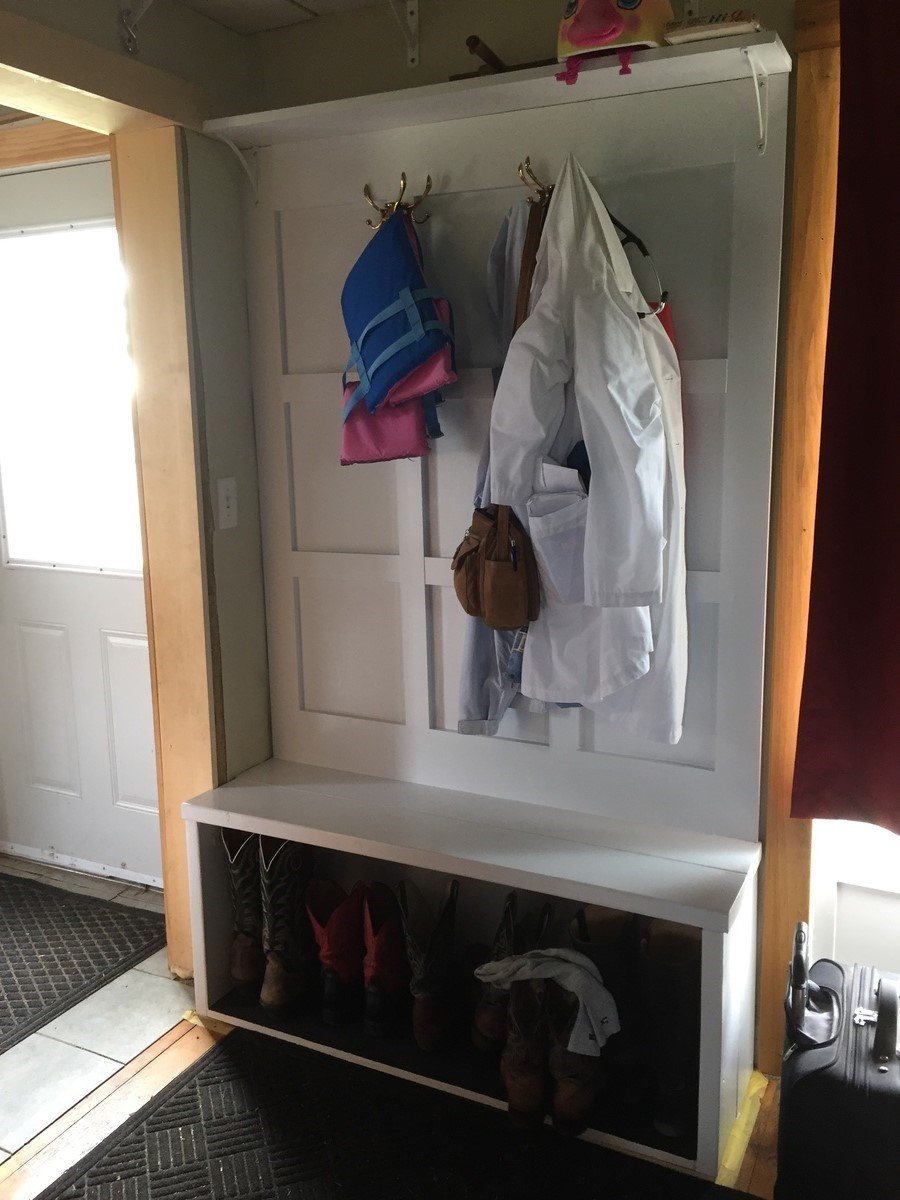
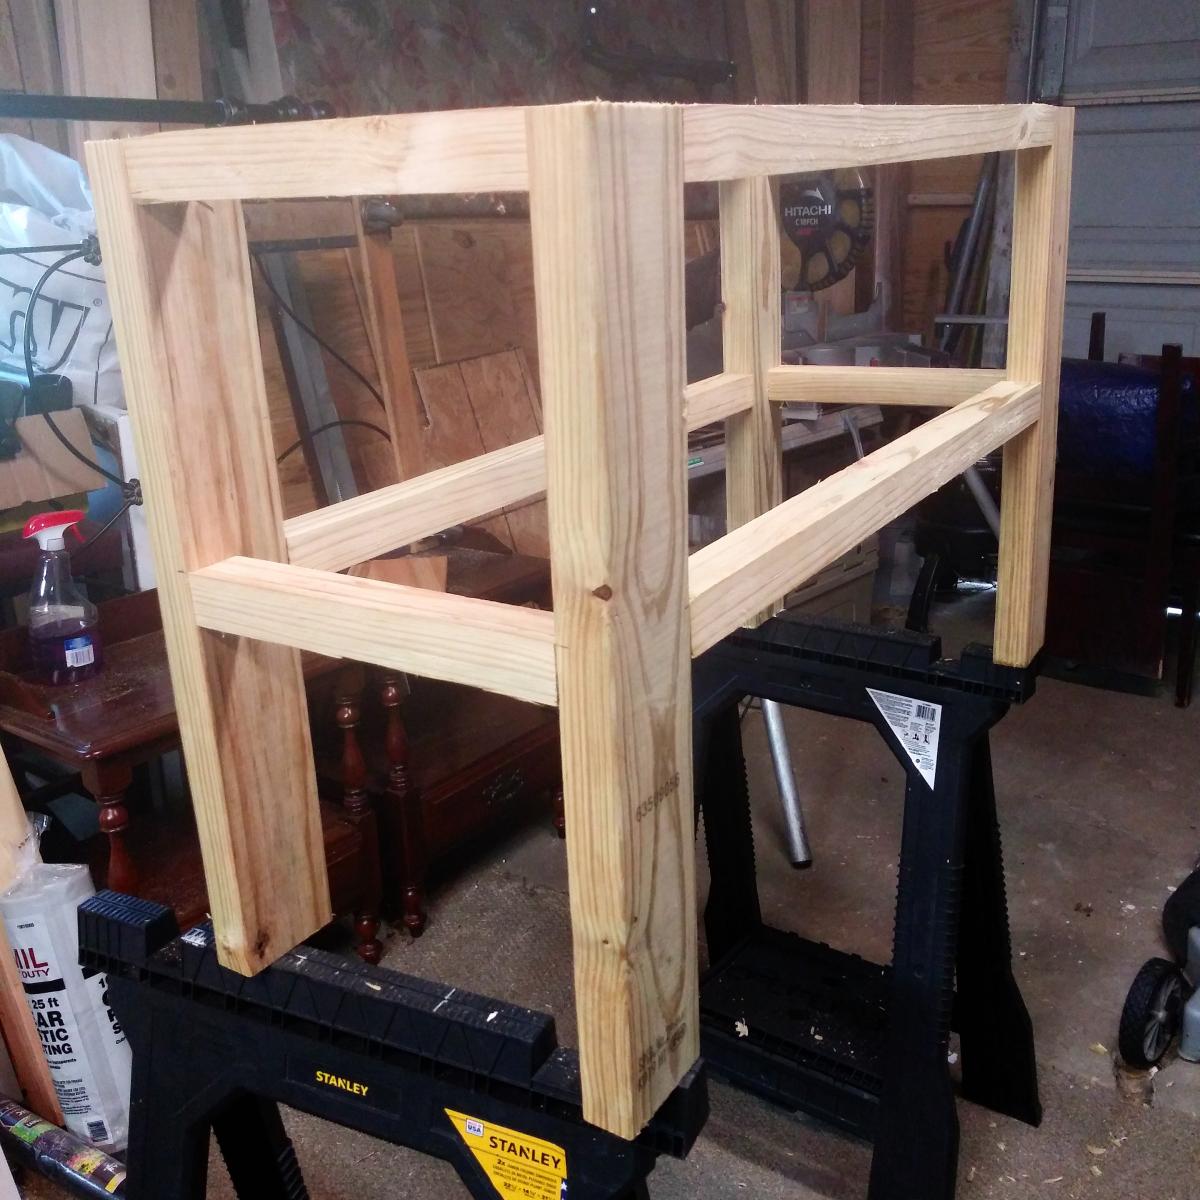
Altered plan somewhat to make it heavy duty seating when needed. 18" inside height is necessary for hubby's boots especially. Room for my lab coat too! It suits our 100 year old, nearly closet-less farmhouse well.
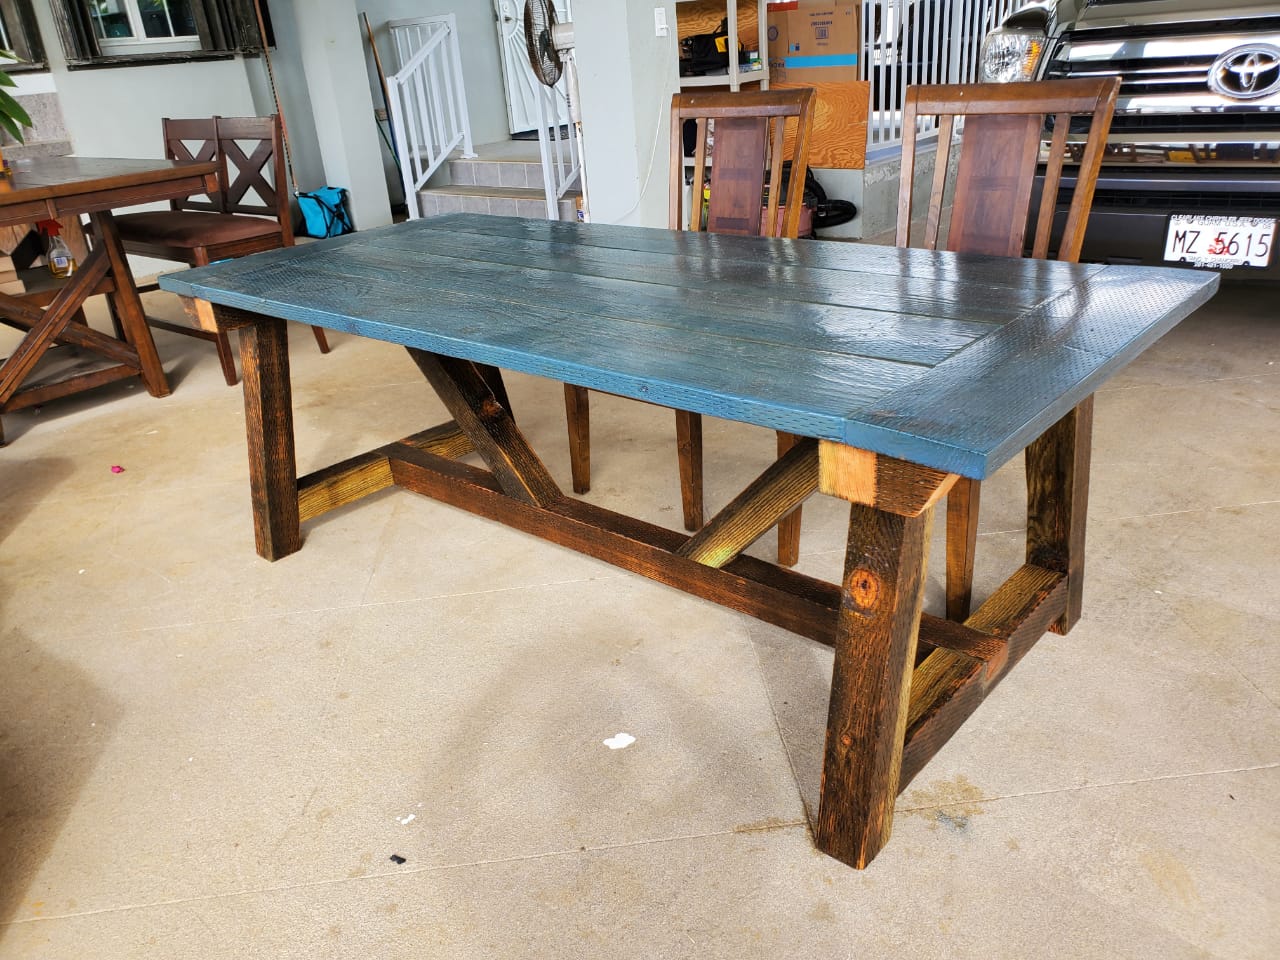
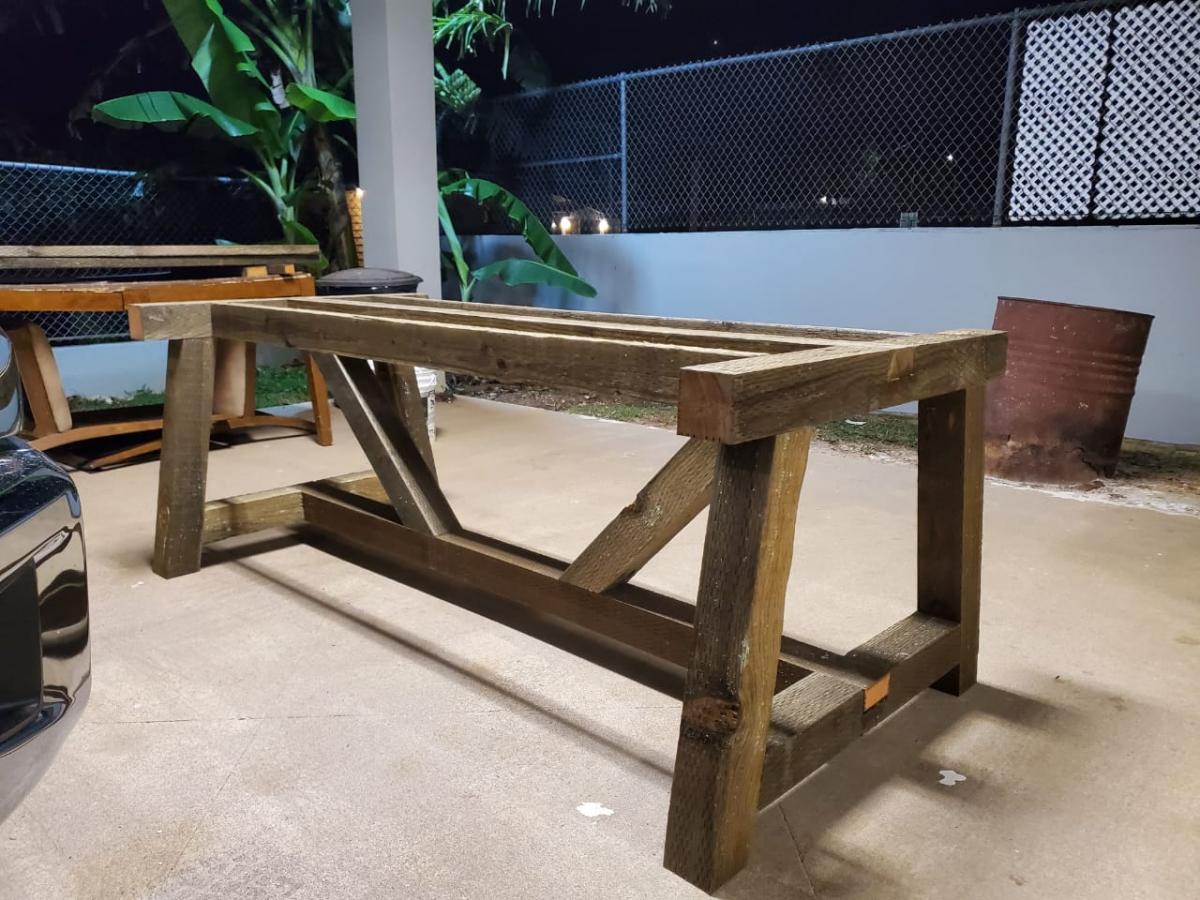
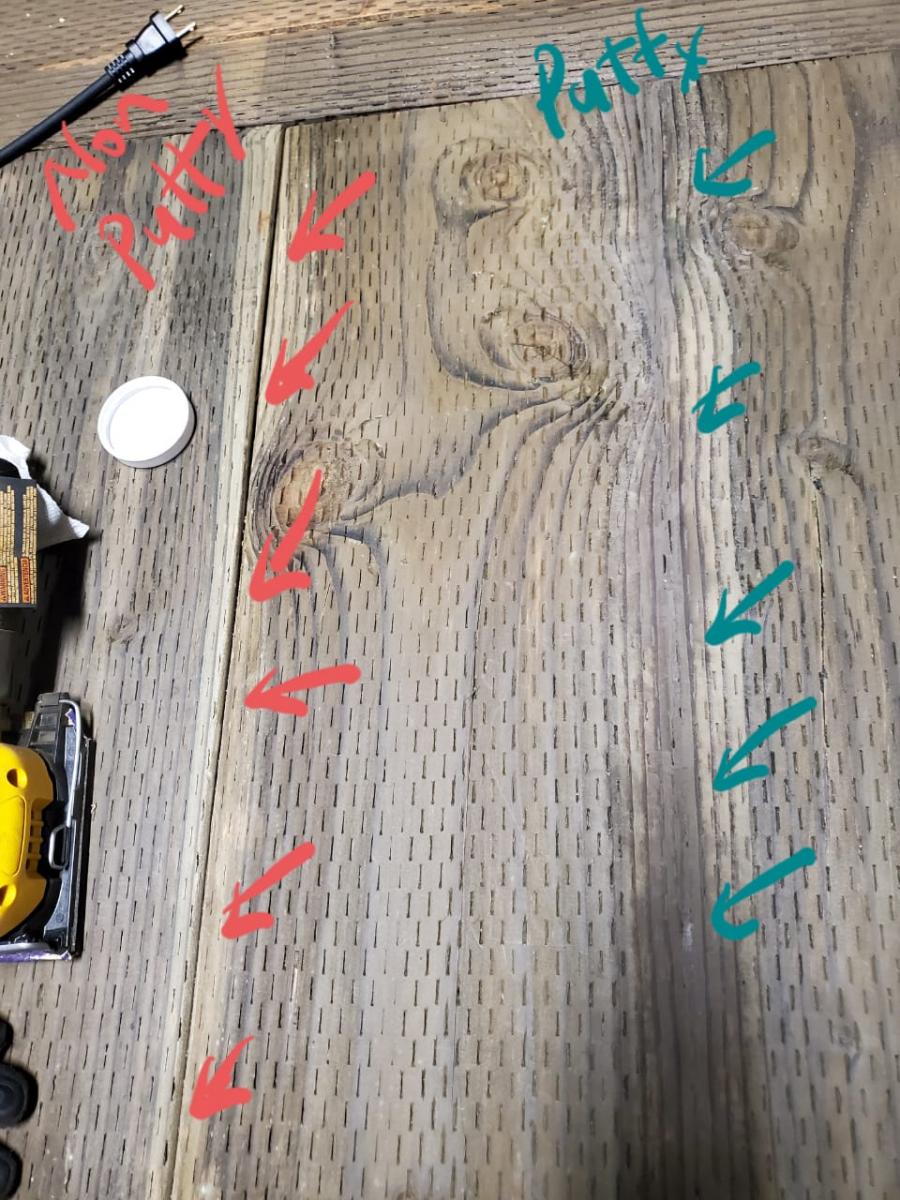
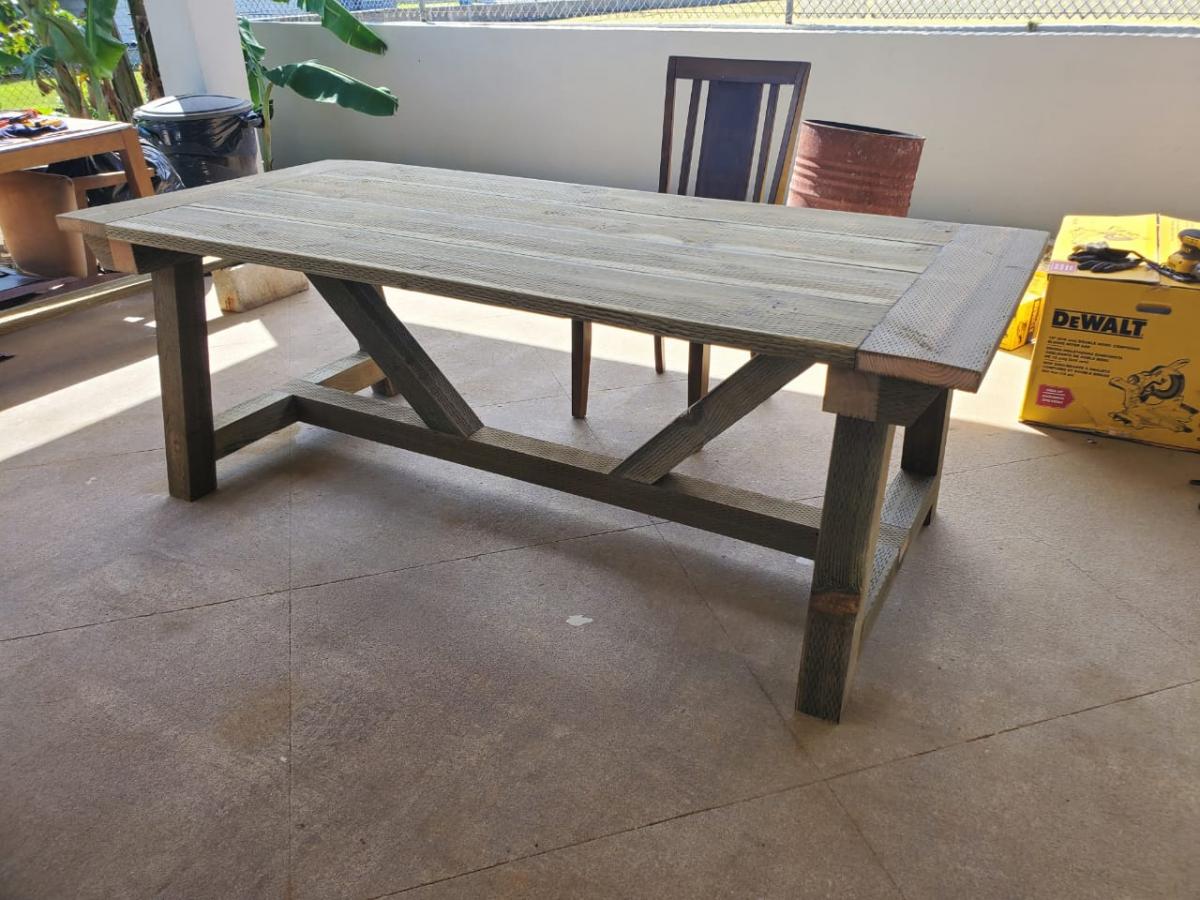
Hafa Adai everyone. This is my first real woodworking project. I followed the plans for the Truss Farmhouse Table almost exactly as written. One thing I felt it needed was more support for the 10" breadboard ends. I added spare pieces of 4x4 cut to 5" with an 80 degree angle at one end to each corner of the tabletop base. This made the breadboard ends feel very secure and well supported.
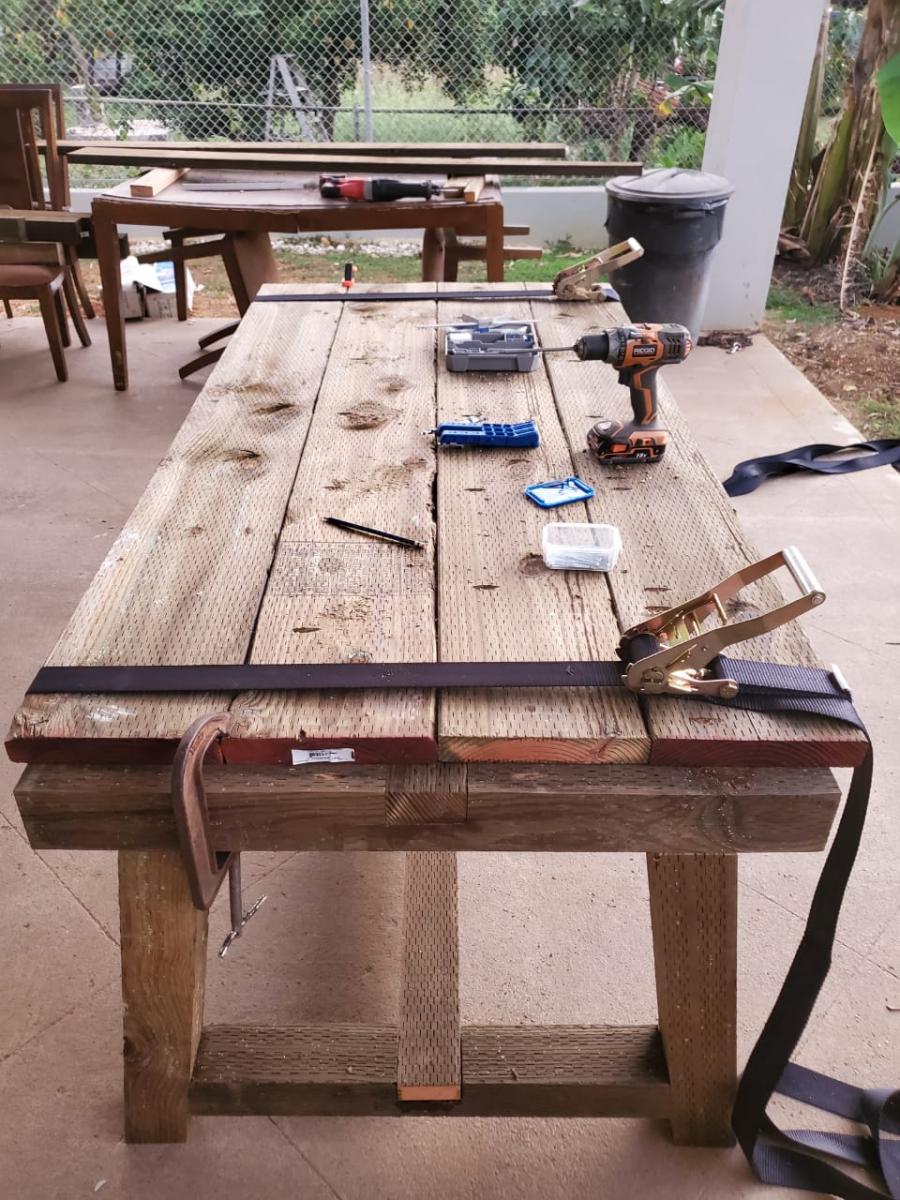
Since I didn't have a table saw to rip the tabletop panels for clean edges, I used wood putty (not wood filler) to fill in the gaps from the 2x10 panels after I secured them together. Tip: I saw someone use ratchet straps to hold the table top tightly together when securing with screws in the absence of long clamps. Worked great.
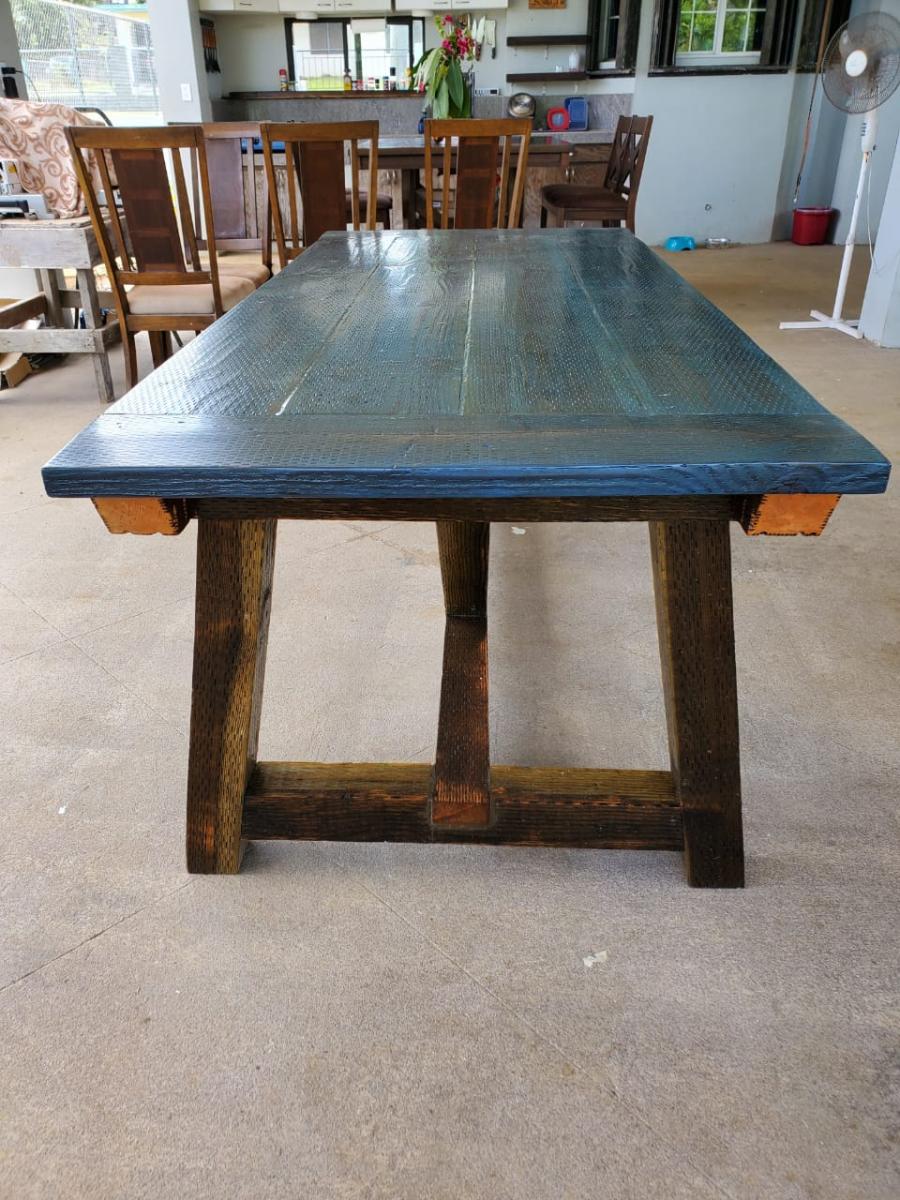
The only thing I would do different is choose a wood without the treated staple marks for the table top. But since its an outdoor table its not too bad a look. Overall, it was a great learning experience and a very fun project to build.

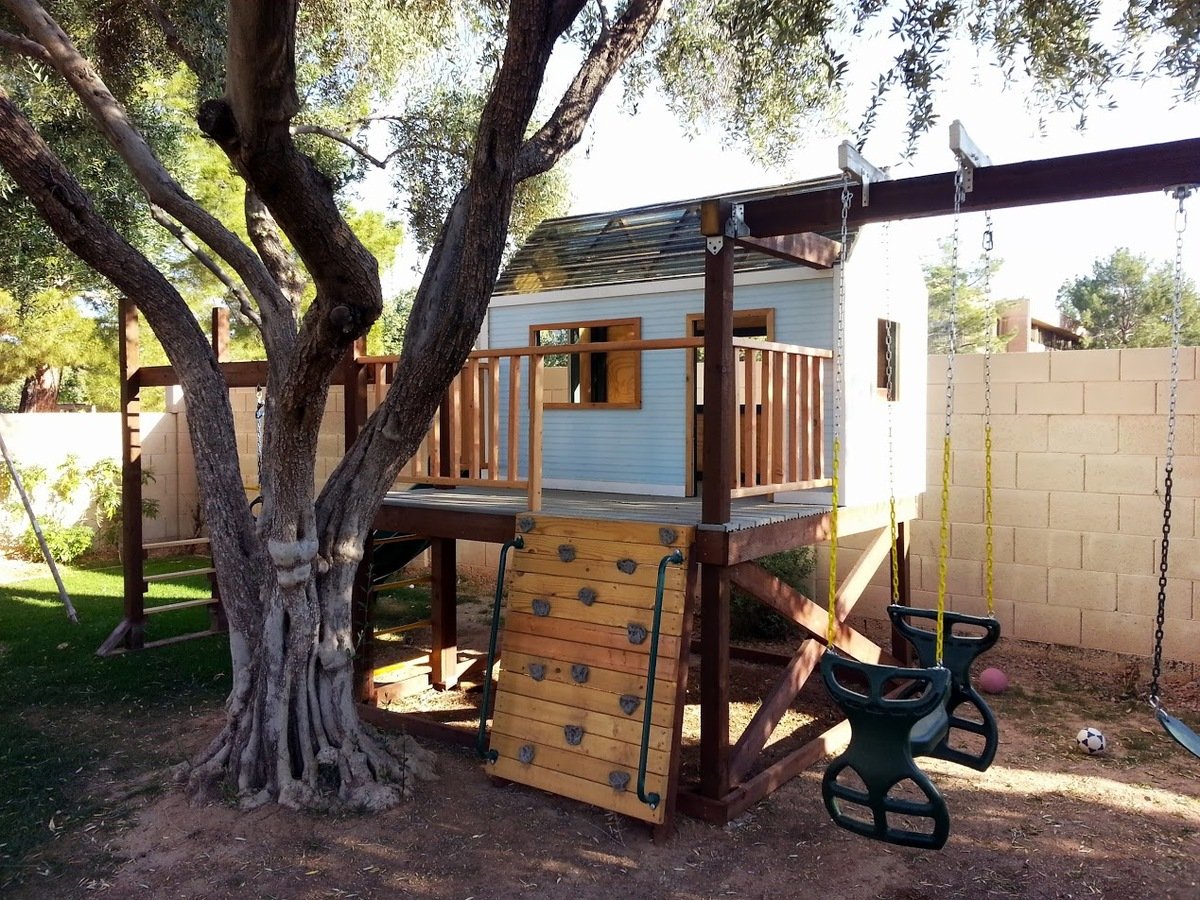
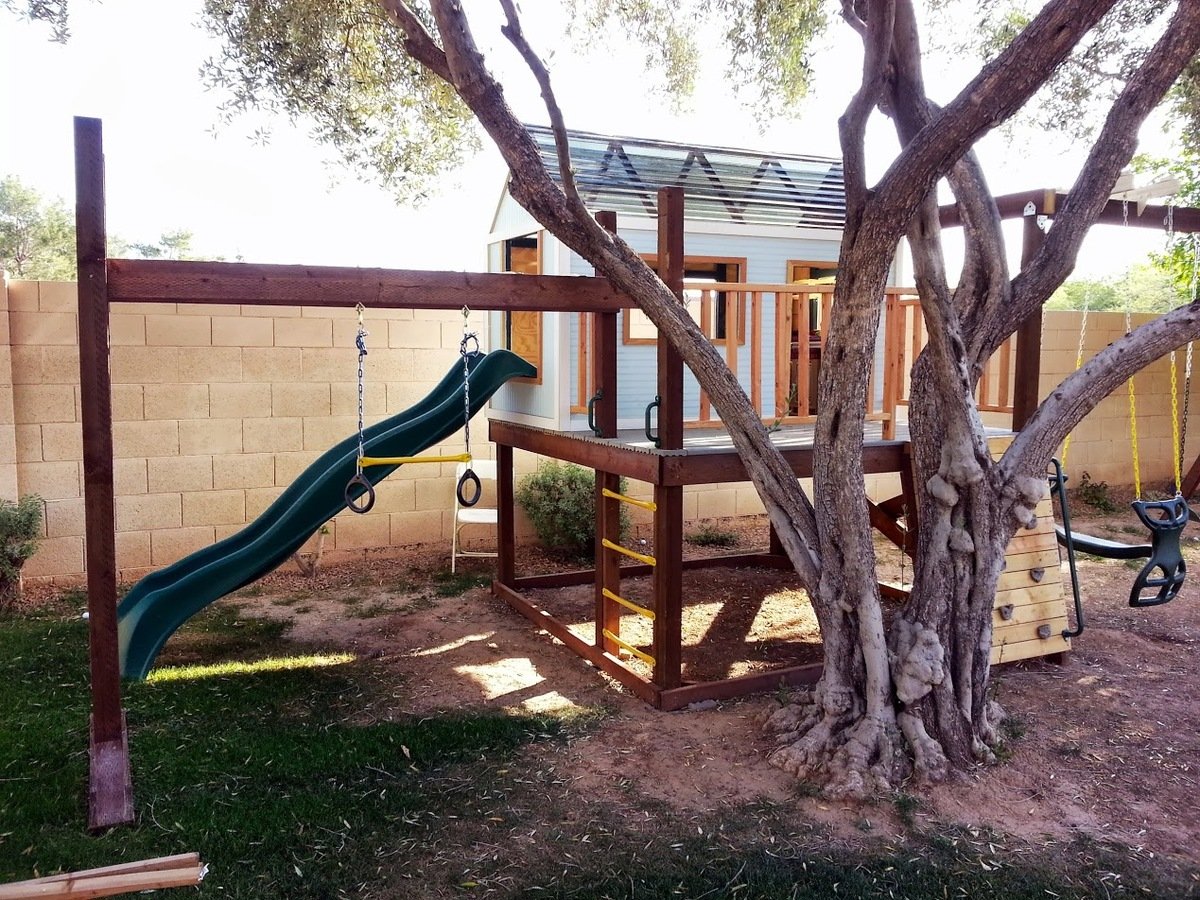
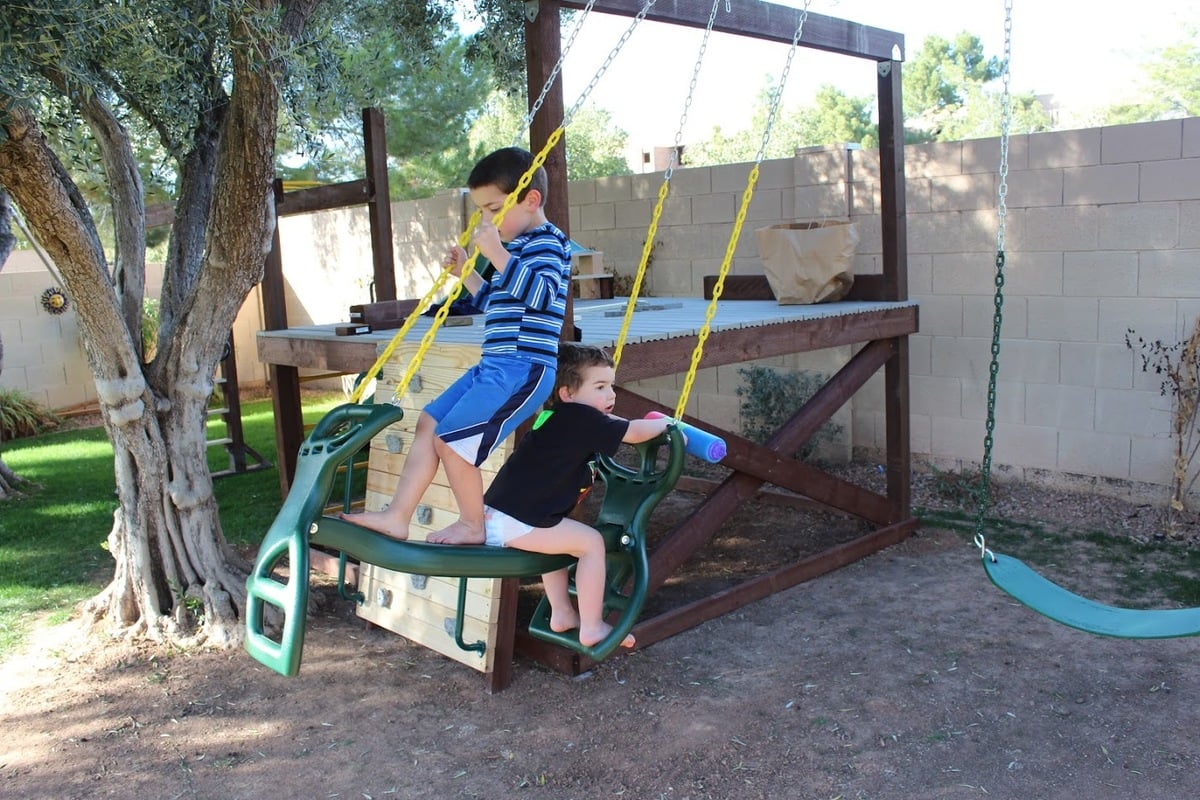
This project was started on spring break and I finished it at the beginning of summer. Total cost was about $900. I built it pretty much by myself and my wife painted the playhouse. Overall about 70 hours of labor went into it. Great plan and instructions. Thanks Ana! I love this site.
My second building project... this one took quite a while, building in the evenings after the kids went to bed.
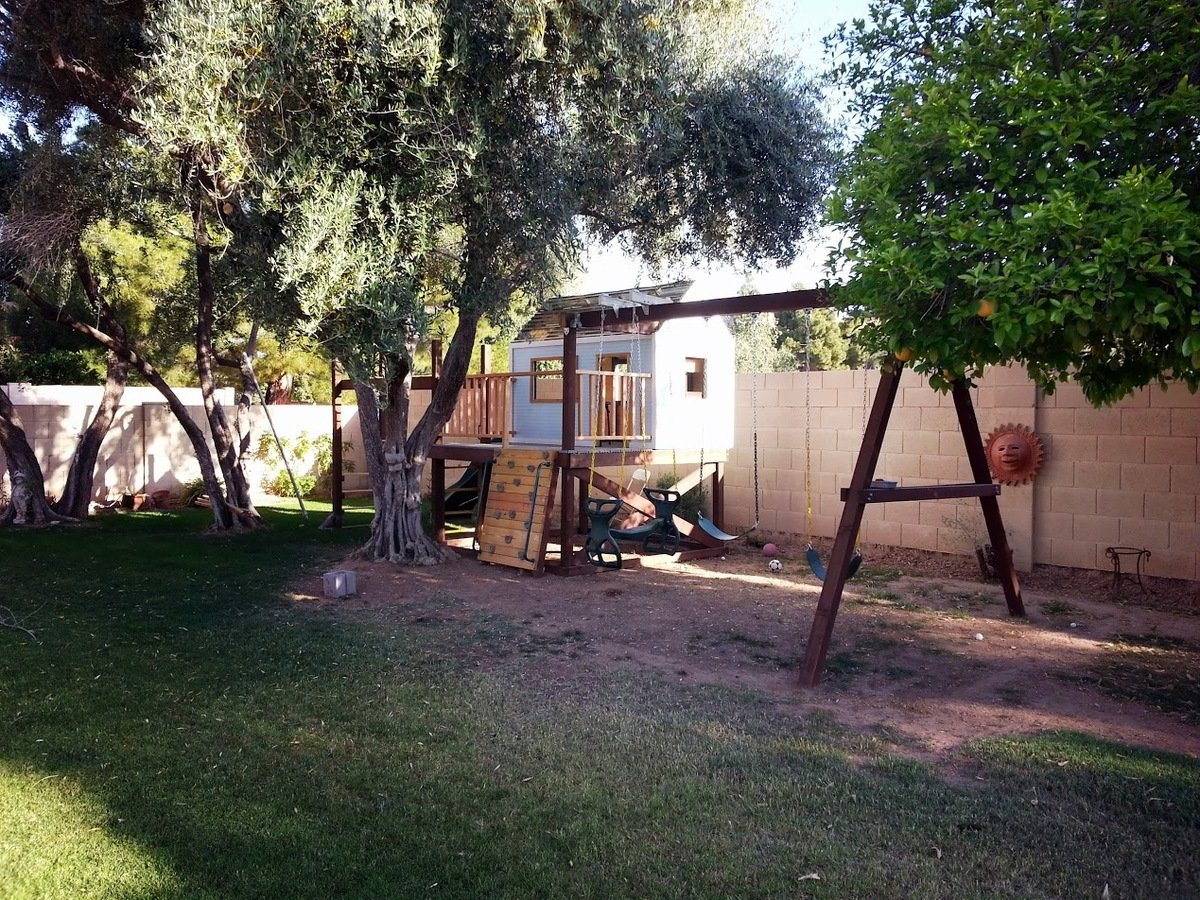
The playhouse is based off of Ana's Playhouse Building series, with some modifications to fit the space in my backyard and accommodate climbing wall, monkey bars, and slide.
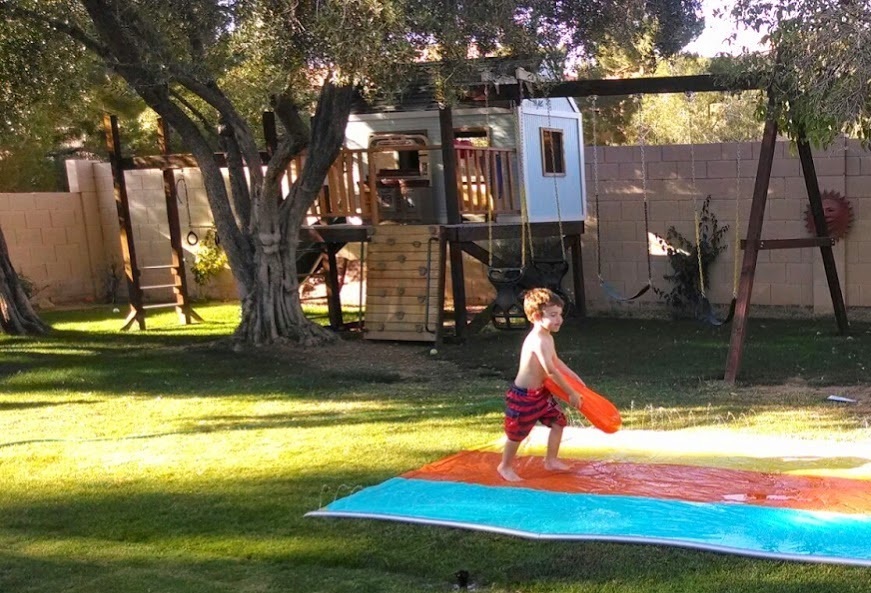
To put the main deck structure into the ground for sturdiness while protecting from moisture, I dug out 5 holes to fit single hole cinder blocks (4 corners plus an extra 4x4 for the monkey bars; you can see an leftover block on the ground in one of the pictures). I placed some brick in the holes, then the cinder blocks on top. I then partially filled the cinder blocks with sand, put the pre-built deck in the cinder block holes (with help - it's heavy!), and then filled the rest of the cinder block holes with sand. It's worked remarkably well - the deck has been up for about a year now. I also sprayed some clear waterproof sealant on the bottom part of each beam near the ground for extra protection (deck, monkey bars, climbing walls, and swingset A-frame). This has allowed me to still run sprinklers near/around the playset and even grow grass underneath the swings!
Materials used:
* Playhouse: pine, plywood, Suntuf solar grey polycarbonate corrugated roofing panels (I live in Arizona, so little rain to worry about but lots of heat - the sheeting lets light in but blocks most of the UV rays, corrugated shape also provides venting at top when placed sideways)
* Deck/Swingset/Monkey bars: treated lumber, composite decking, pine for railings, monkey bars purchased from Amazon
* Climbing wall: pine, treated lumber, handholds/railing bought off ebay/Amazon
* Swings/slide/bongos/wheel, telescope: purchased from Amazon
Modifications:
* Turned playhouse 90 degrees to be in back of the deck, with swingset coming off the side. This meant the support beam for the swingset had to pass through the playhouse - modified the frame for that wall slightly and created a notch for the beam to pass through.
* Slide comes out one end of playhouse - made the "window" on that end larger than the plans called for in order to give room for the slide.
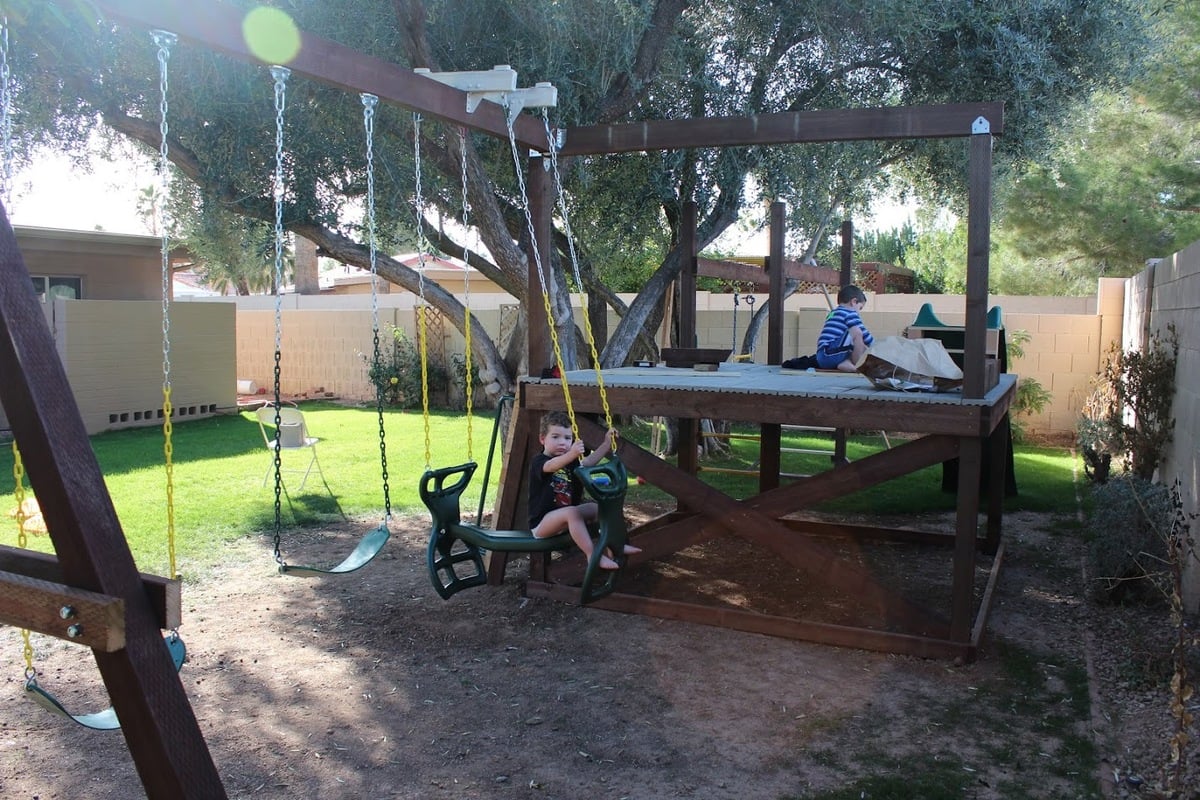
* Monkey bars come off one side of the deck - used extra 4x4 here to create support for the bars, and used extra bars to make a ladder on this side
* Climbing wall instead of ladder for main entrance
* Put large window in back wall of the playhouse
* Added cross bracing to side of decking on swingset end to make it more solid/cut down on sway when swinging
Tue, 04/29/2014 - 20:41
This is phenomenal - just the plan & design we've been looking for. Can you upload a few more pictures? Any sketches you can provide? Shopping list? Really great job - I hope your kids love it. It looks awesome.
Wed, 09/10/2014 - 14:03
Thanks! It's certainly nestled in right behind that tree - I originally was going to place it in between that tree and another one but then decided to just place it behind them in order to take better advantage of shade (critical in AZ) and fit in everything I wanted to put on it (monkey bars, swings, slide, climbing wall)

Mon, 07/08/2019 - 00:48
We've been looking at these type of players for our son, and good grief! Prices are astronomical for playsets that are NOTHING like this. This absolutely an amazing place for those boys to make memories. You're amazing! Do you mind if I ask what it cost once it was finished? I never imagined that it would cause a tic in my eye to look at the kids from Lowe's or anywhere else for that matter.
Tue, 08/20/2019 - 10:14
I don't remember how much it cost in the end... but probably around $900? That may include getting some tools that I needed but didn't have at the time. The slide was the most expensive single piece I bought - I think I got it from Amazon.
When it was all done, I remember thinking that what I got for my money was *way* beyond what I would have gotten by purchasing a kit or a pre-built play structure. Plus, by going my own way, I was able to build it to fit my space and the needs/abilities of my kids.
While the whole thing is big and looks like an intimidating build, it really isn't bad - the platform is a fairly blank base to design everything else off of, and is incredibly sturdy. Everything else is a discrete part that branches off of the platform and can be planned out as you need. Adding the monkey bars required putting in a 5th upright (the first 4 are the corners), but that was an easy modification since I knew I wanted it before building the platform. The playhouse just sat on top of the platform (screwed down, of course).
Sat, 08/01/2020 - 20:40
Hello. This is pretty cool, probably the best modification that I am looking for from Ana's default plans. Could you please add some more detail on the right side wall, and how you incorporated the support beam through the playhouse? (with maybe a picture from inside of that wall). And secondly, if you can add the dimensions for the monkey bar setup on the left side of the deck? Thanks, much appreciated
Was made using 2x4 plans from Ann-white web page. Thanks for the idea
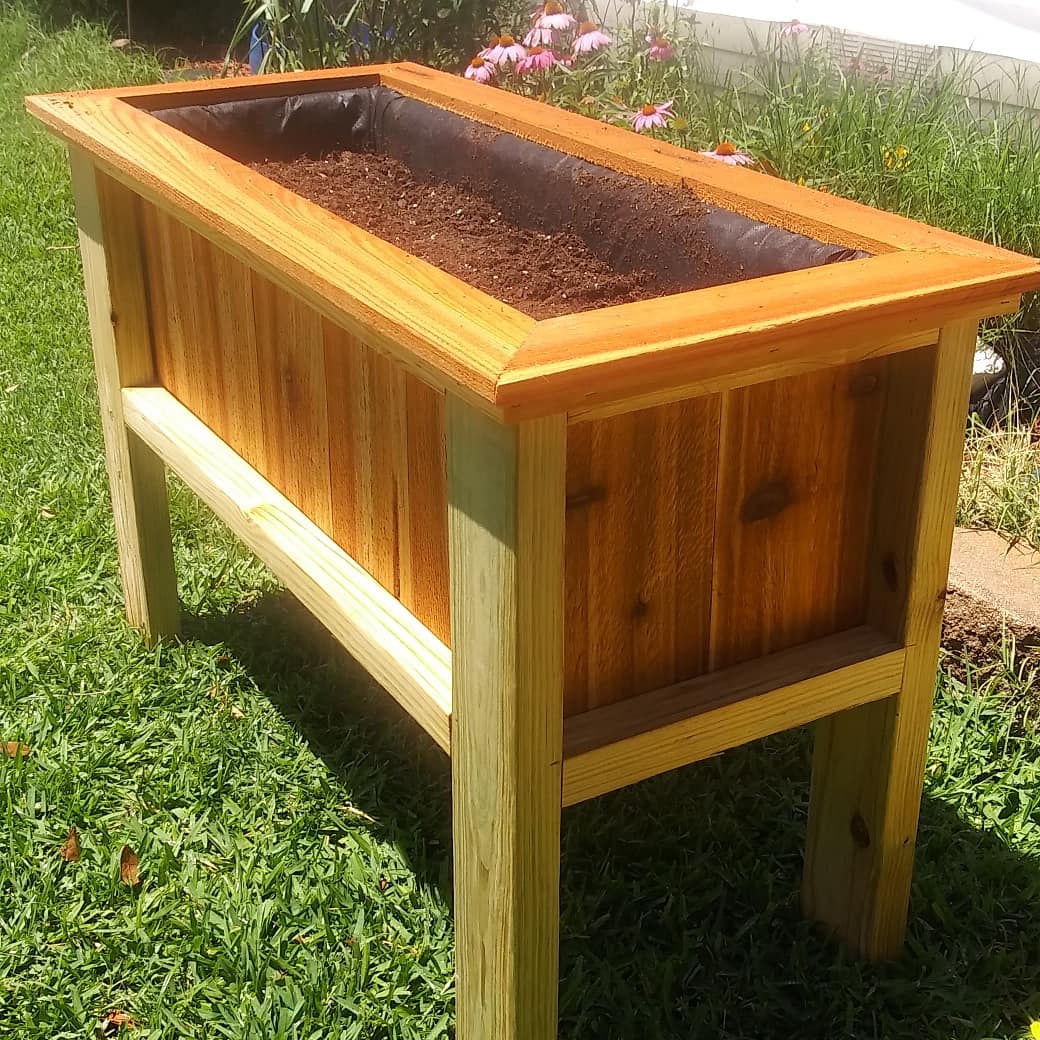
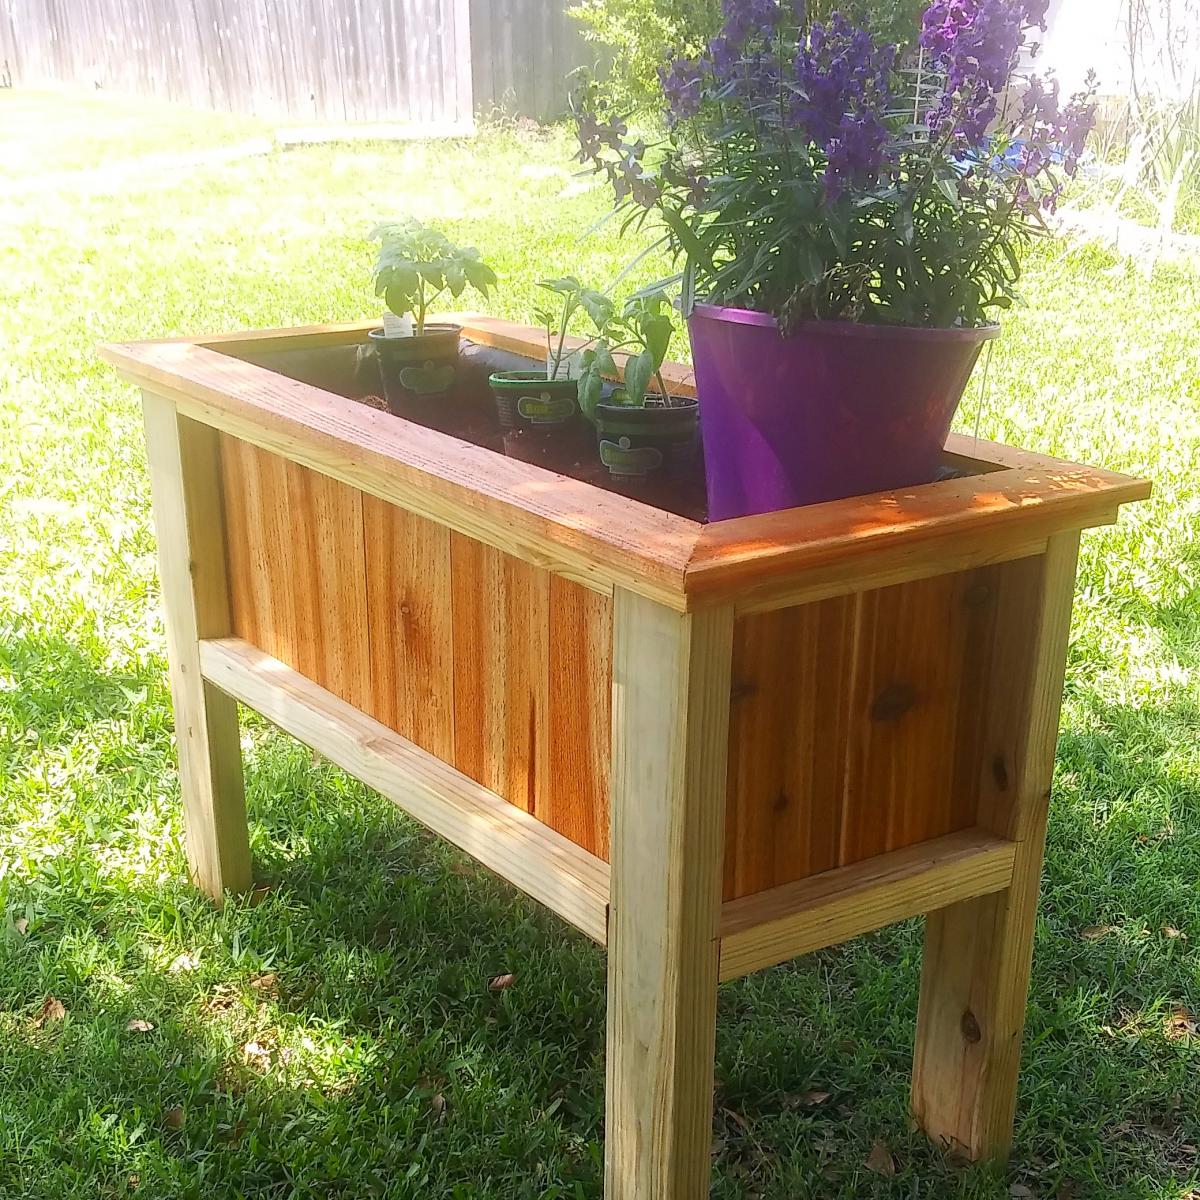
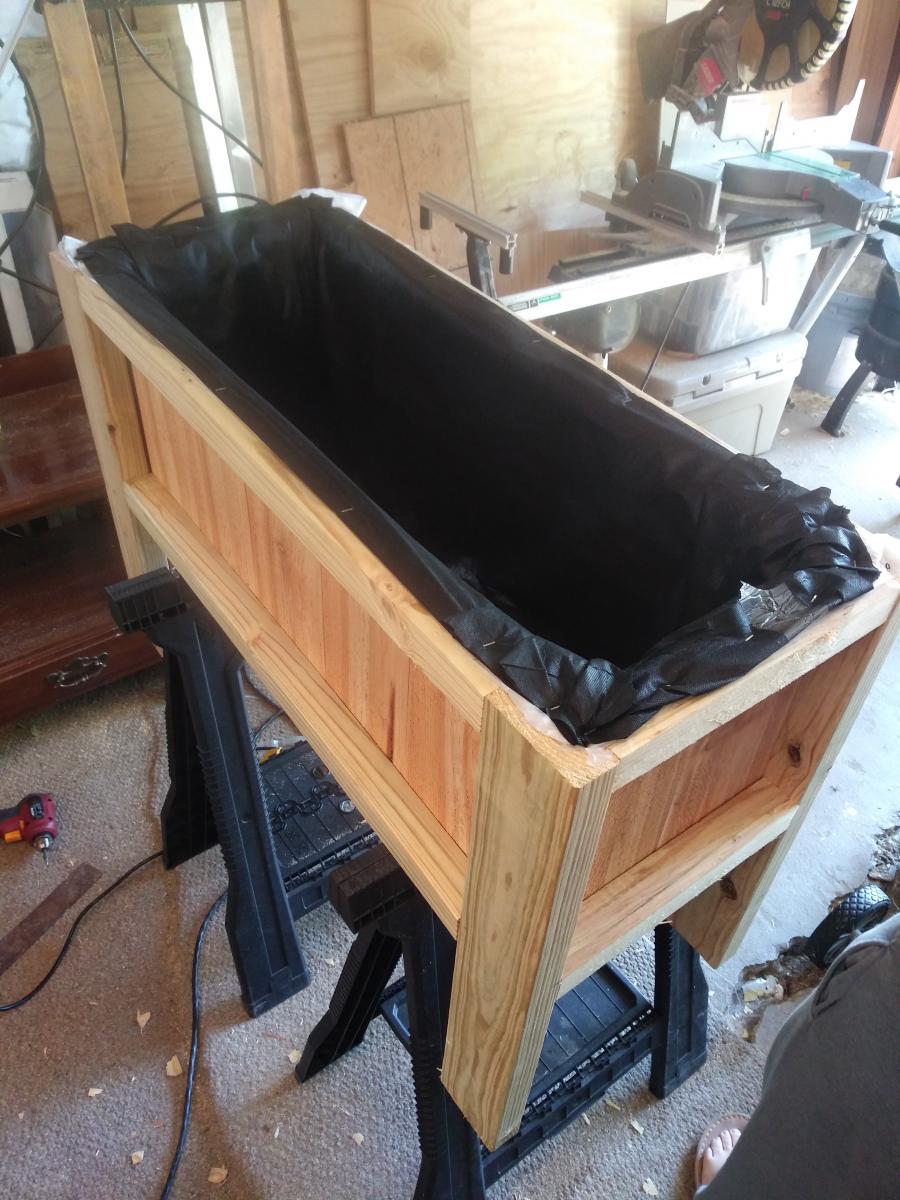
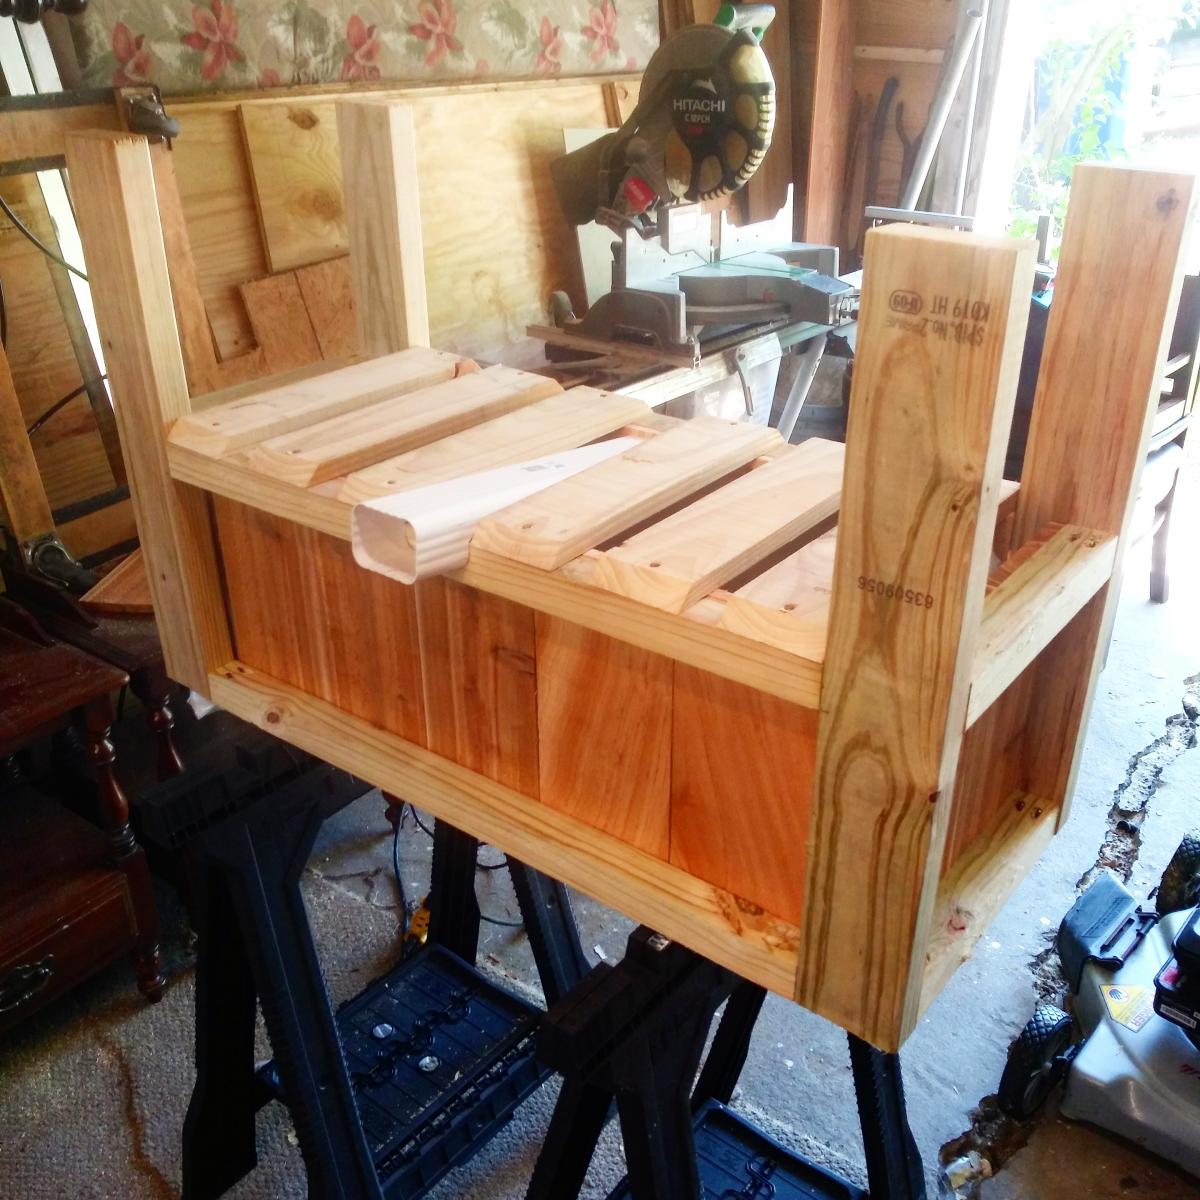
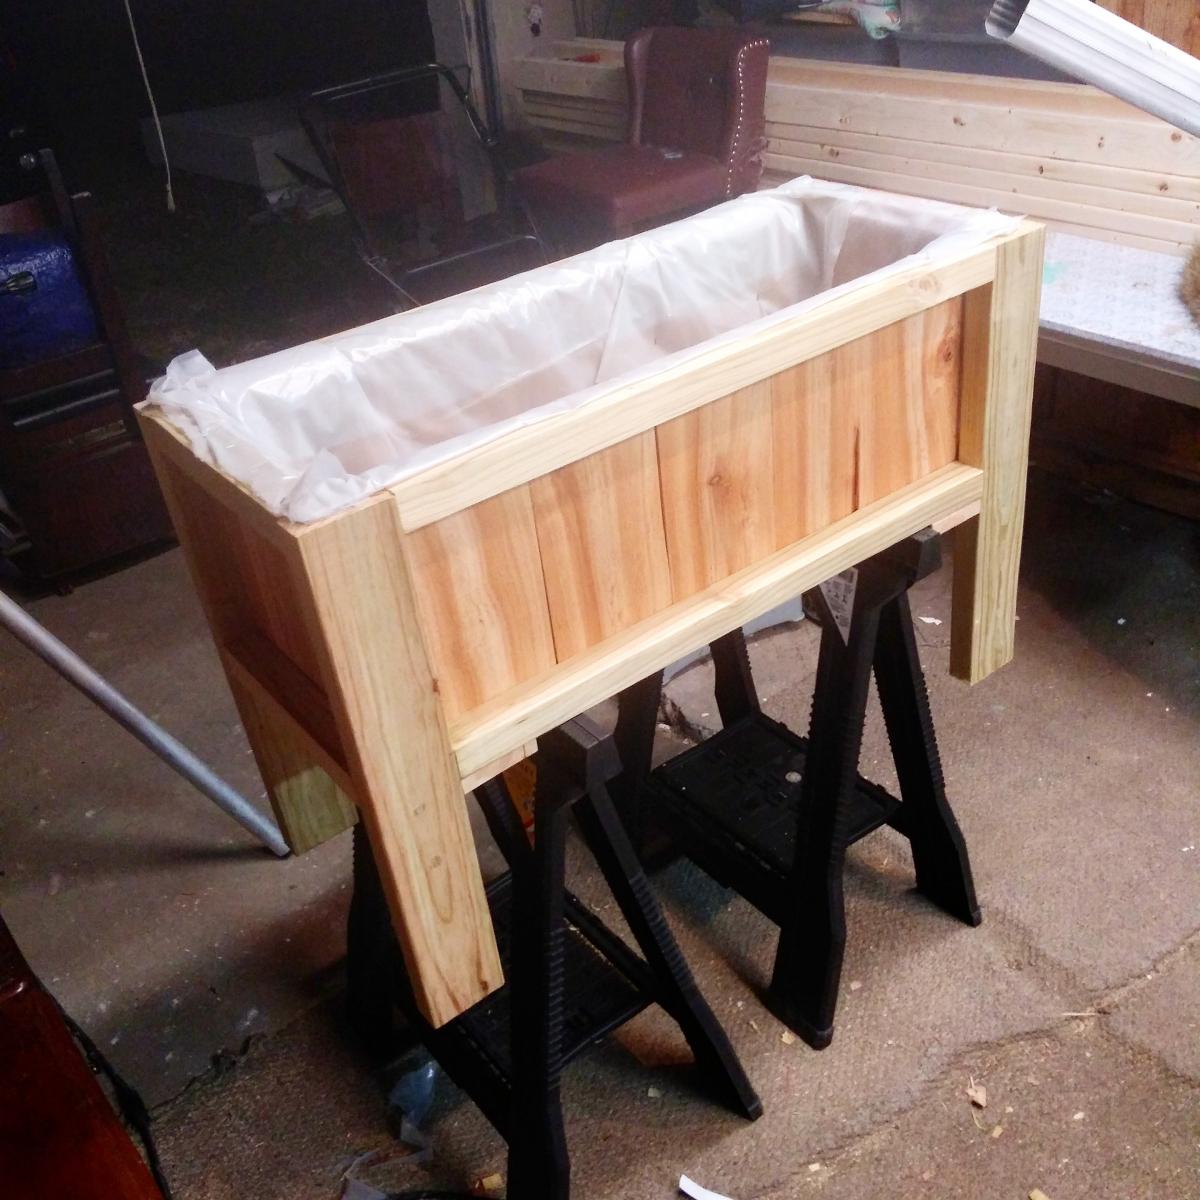
This is a cedar and treated lumber raised planter that holds over two cubic foot of potting soil and has a built-in drain out the back so your feet do not get wet. The treated lumber is used only for the frame, no dirt or water touch any wood.
The inner dimensions are 12"x12"x32", and it stands 24" tall. There is a seamless double layer of 4 mil plastic that opens into the drain only and is siliconed. There is also a seamless black mesh inside to keep the soil and nutrients from washing away.