Community Brag Posts

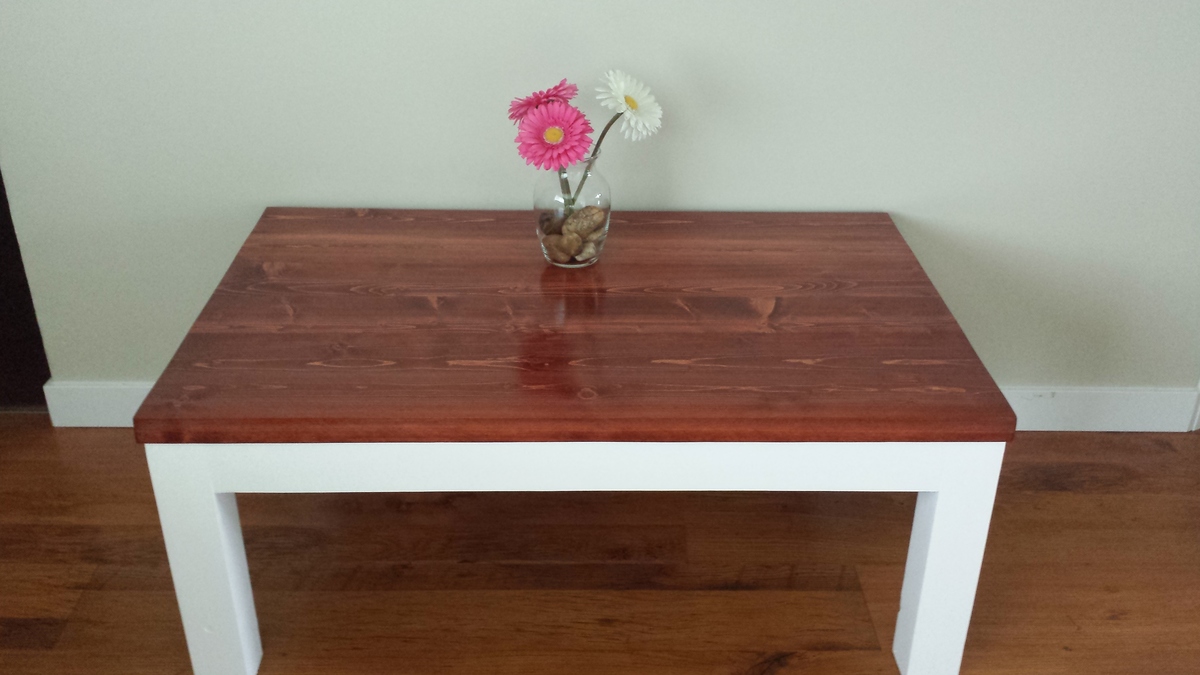
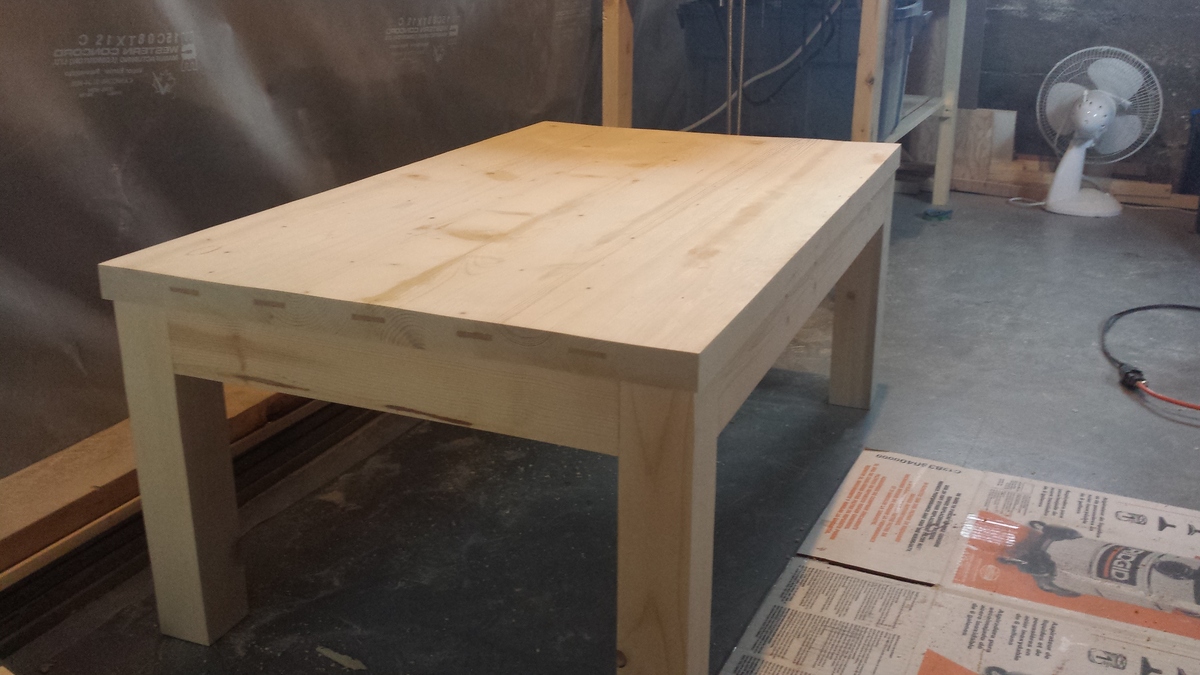
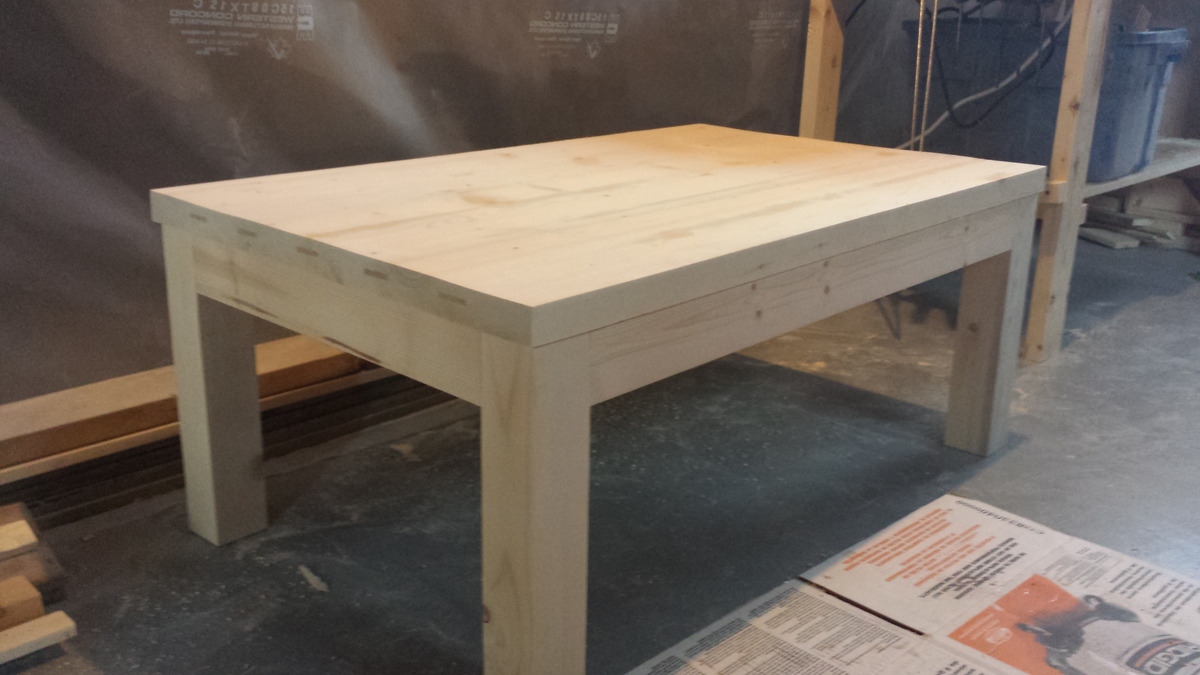
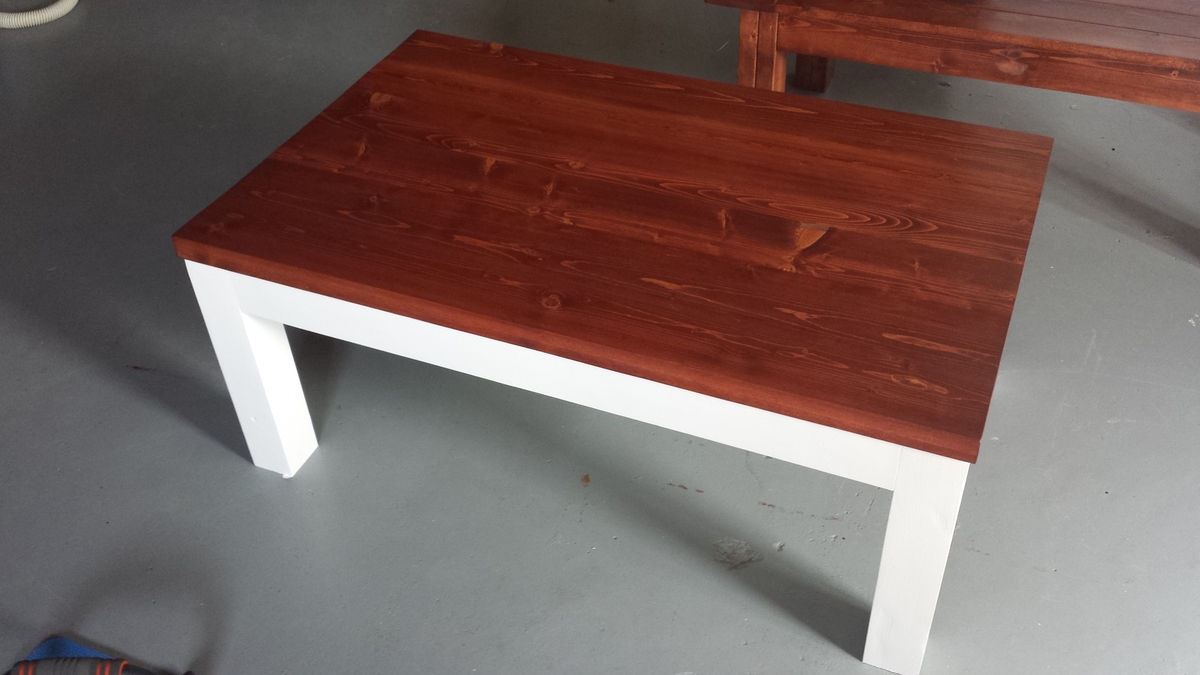
Modified Version Of Tryde Coffee Table
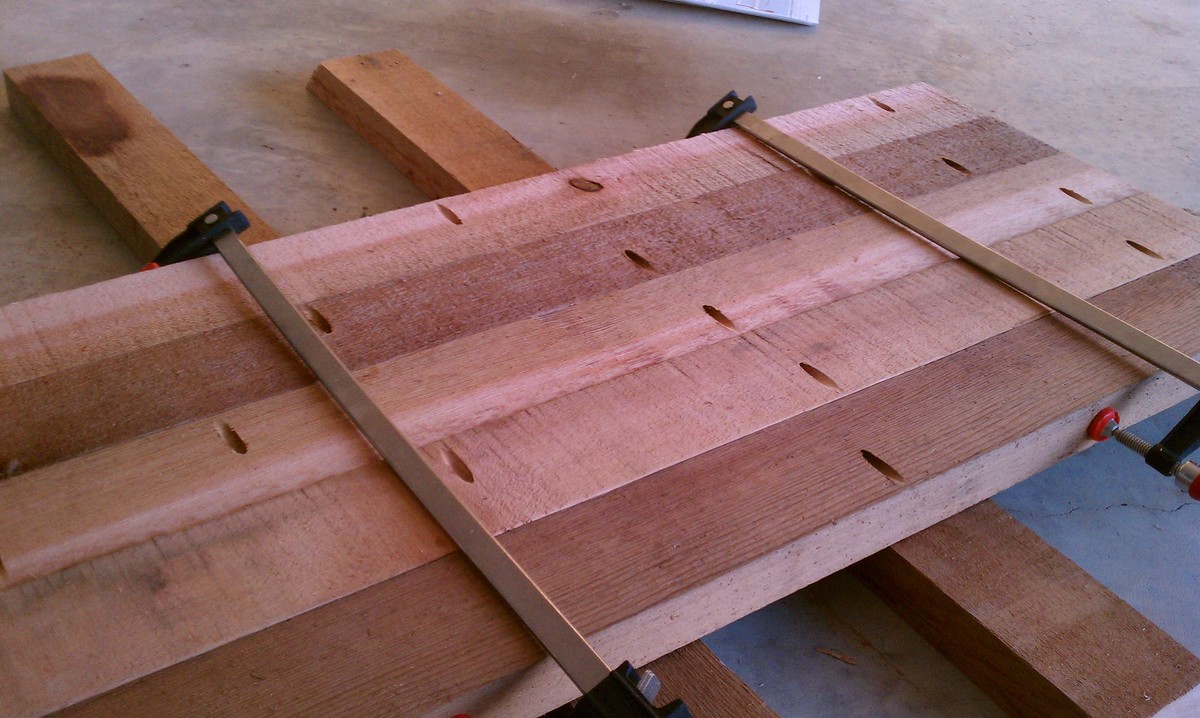
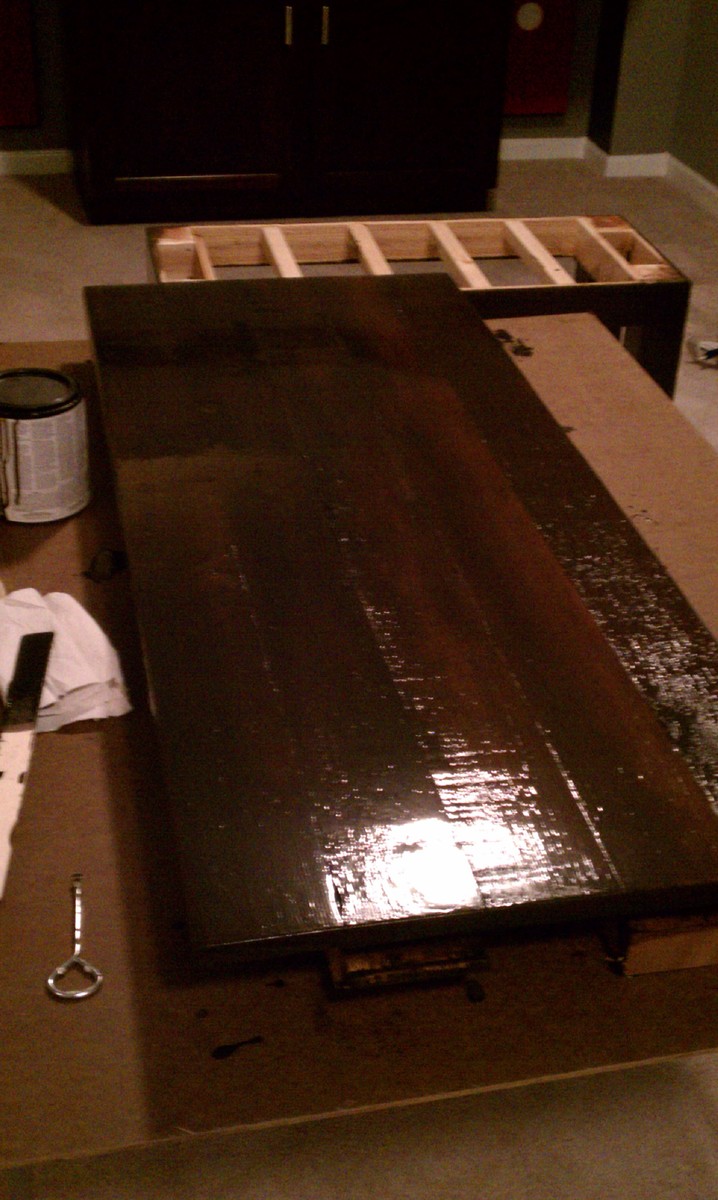
This is my first project attempt from Ana's plans. I had to modify it greatly to fit my space accordingly. The room where it made its home only has a love seat and a recliner. The space also isn't that deep, so i made the table aprox 45" x 19" x 18" high. I also built a completely different top to this table as well. I felt this fit our personal style a little bit better. So being that this was my first project, it was a little more challenging due to all the measurements had to be changed. I wish that I could have just folloed Ana's plans to the tee, would have been a little easier. So after I assembled the basic frame, i assembled the top using pocket hole screws, glue and clamps. I used three coats of stain, with sanding between coats, two coats of clear Satin laqcuer and finished it off with a paste wax. Buffed the table with a cheesecloth and microfiber towel and then introduced my living space with a new, handmade table. My next builds should go a little quicker because I will follow the building plans exactly as they show. I hope you all like the table and look forward to hearing your comments on them, good or bad. Any suggestions to help me along the way would be greatly appreciated. Thanks for taking time out of your day to read this and again, I hope you enjoyed my first real, finished furniture piece.
Dennis
Check out all pics from this project in my Google Web Album by clicking on the blog link
Built from Plan(s)
Estimated Cost
Around $150.00. That included materials and some new tools(sander, clamps, pocket hole jig)
Estimated Time Investment
Week Long Project (20 Hours or More)
Finish Used
2 coats of Dark Oak stain, 2 coats of clear satin lacquer and wood paste wax for finish
Recommended Skill Level
Beginner
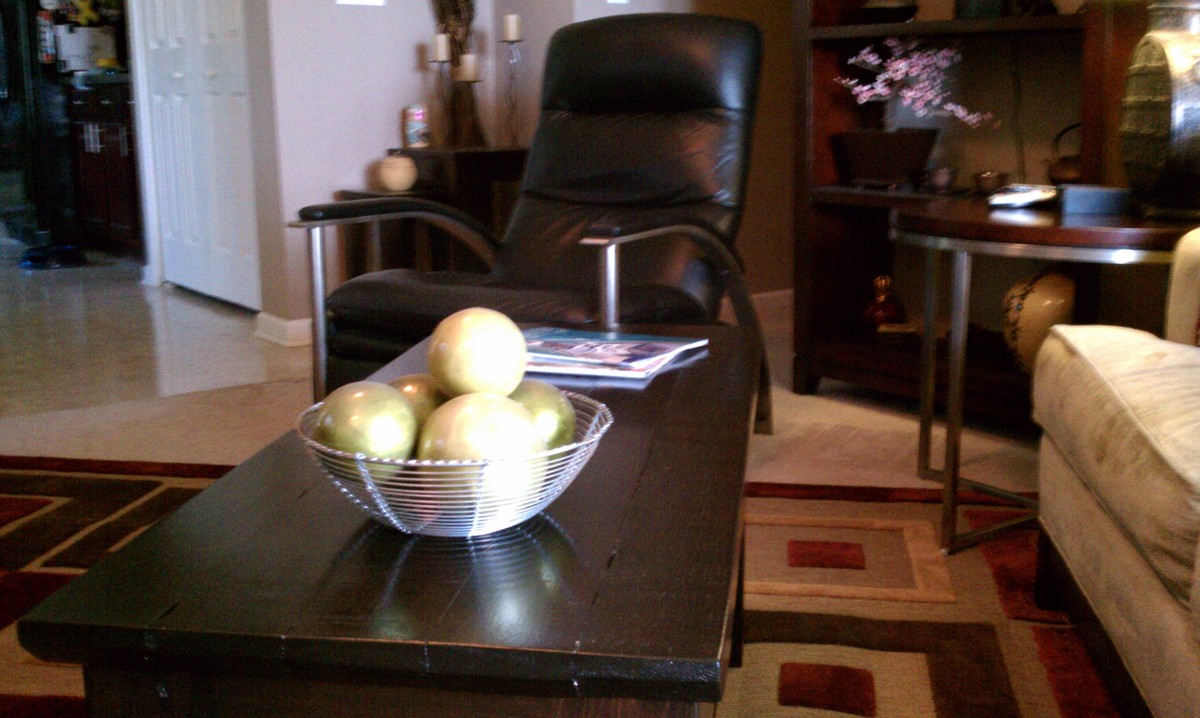
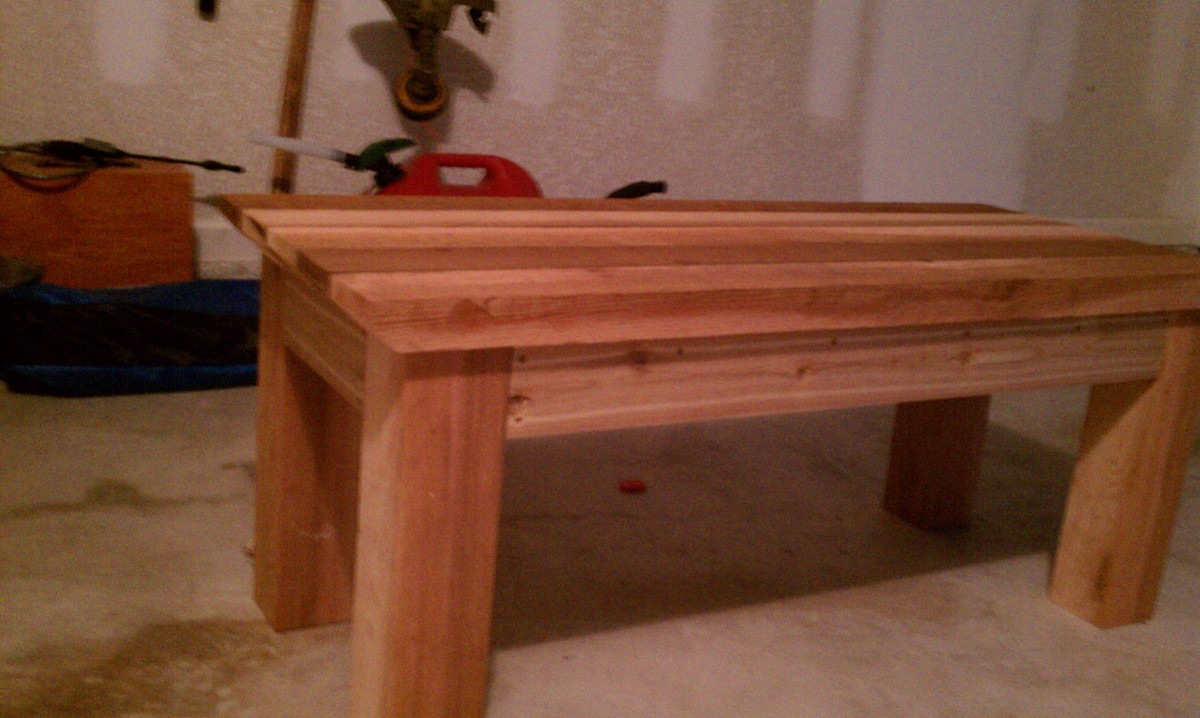
Coffee table
Used the ideas from the kitchen island plan and coffee table plan to come up with a more elegant coffee table.
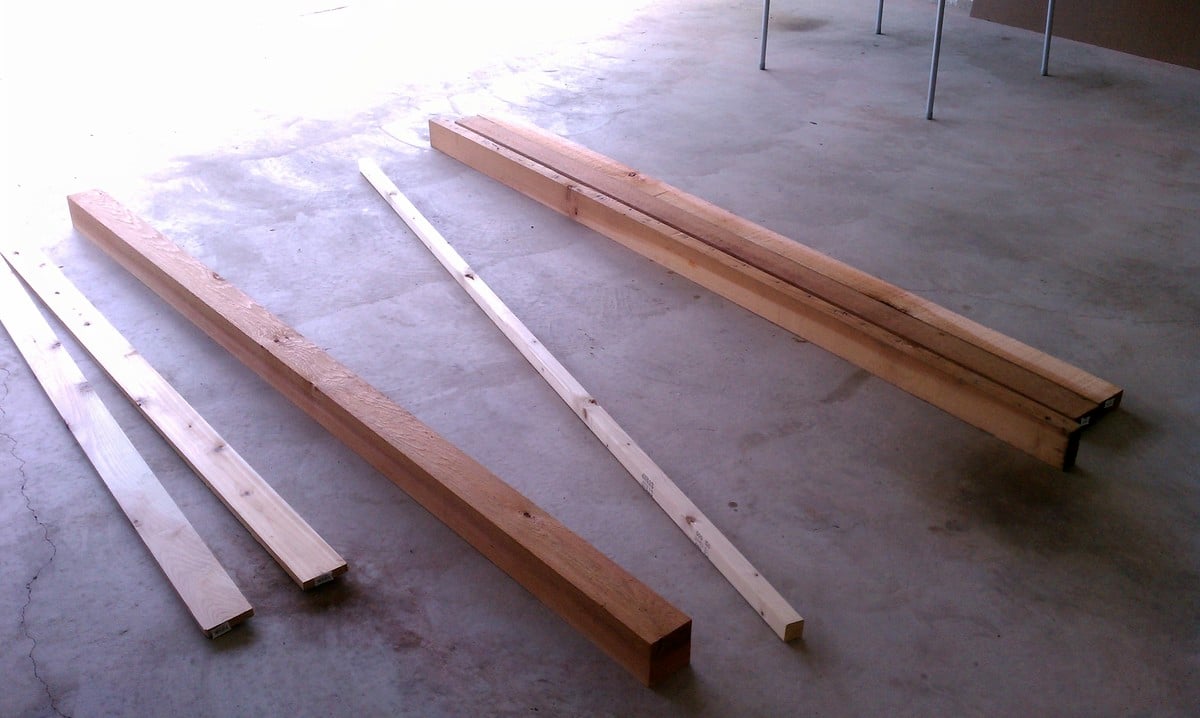
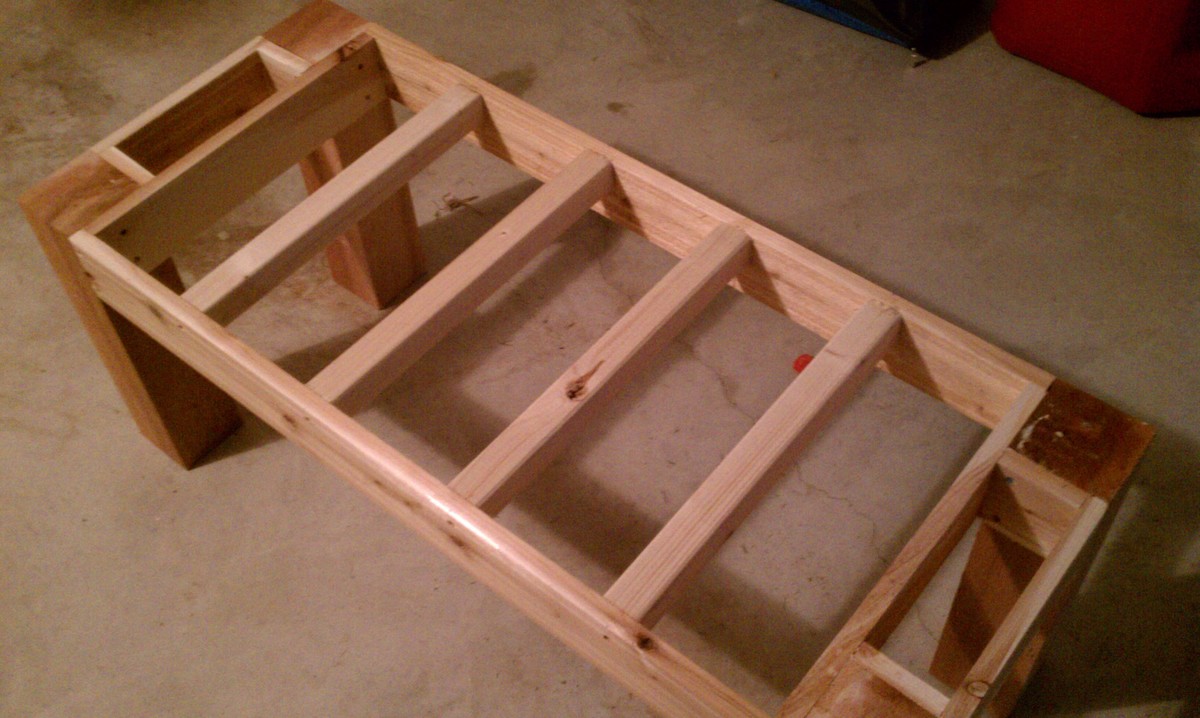
I made the legs from joined 2x6's cut down to 3x3. Mortised the rails in the legs for a really solid construction, and that way I could also eliminate any excess framing inside the table, and no screws. I was able to salvage all the wood for the legs and rails from a pile of scrap construction lumber.
Joined the top with fir strips between each 2x6 piece. The 2x6's and fir slats were purchased from a hardware store as I don't have a planer to clean up the surface of such wide boards...
Built from Plan(s)
Estimated Cost
$40-80
Estimated Time Investment
Weekend Project (10-20 Hours)
Finish Used
Minwax Red Cherry stain, white furniture paint.
Recommended Skill Level
Intermediate
Comments
Fri, 06/26/2015 - 19:21
Nice looking table. No one
Nice looking table. No one would guess that was made from 2x6's!
Mini Farmhouse Bedside Table
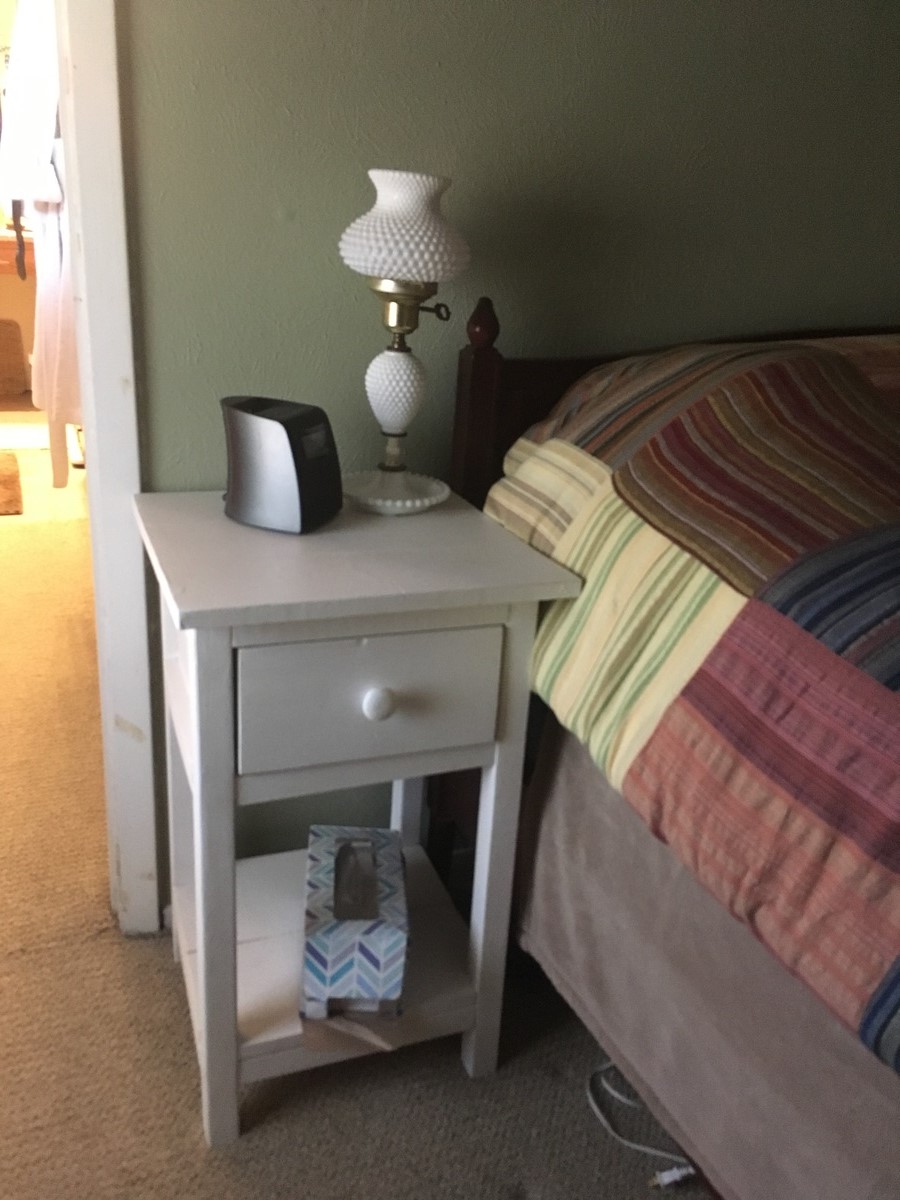
Fun and quick. Used a Kreg jig for this project, and finished with Amy Howard paint, along with the wax.
Built from Plan(s)
Estimated Cost
About $40 each, I did use 3 - 1X6’s for table top on each one, and built two matching tables.
Estimated Time Investment
Day Project (6-9 Hours)
Finish Used
Amy Howard chalk paint, along with the light wax
Recommended Skill Level
Beginner
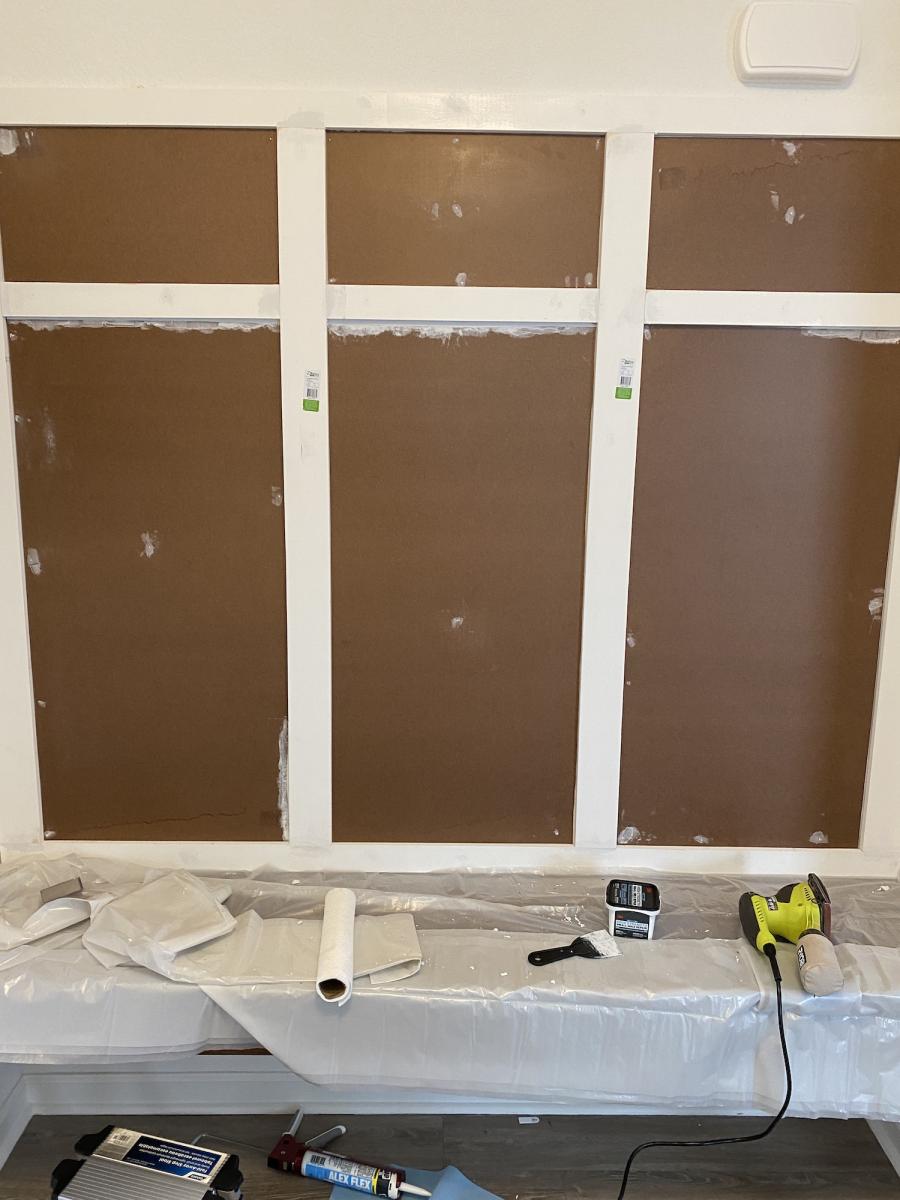
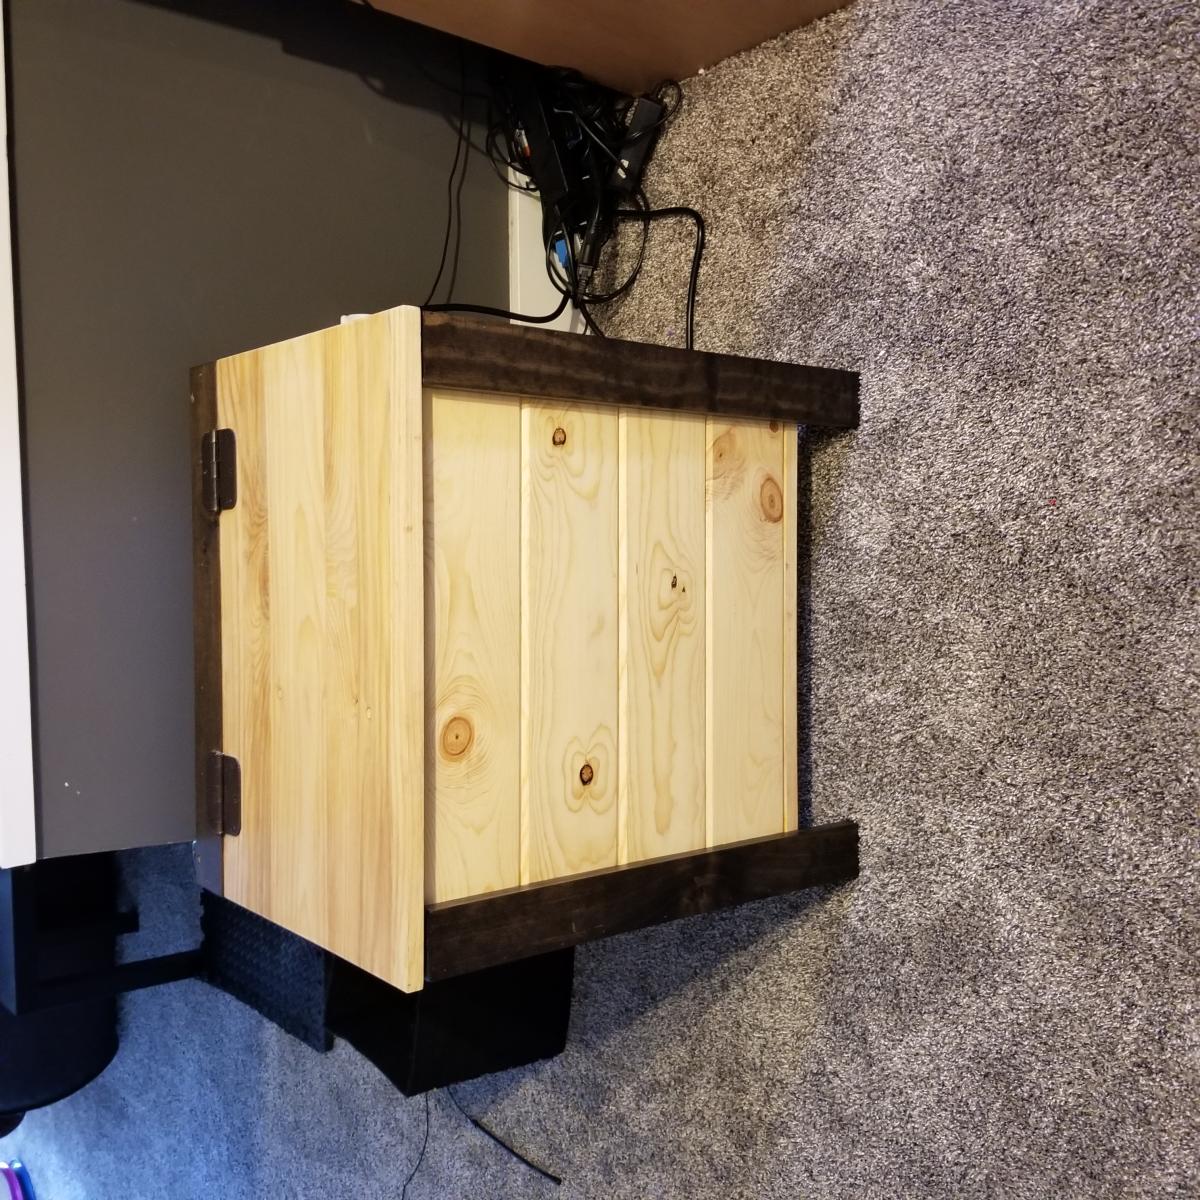
Floating Bench (Walnut bench Board and Batten Wall)
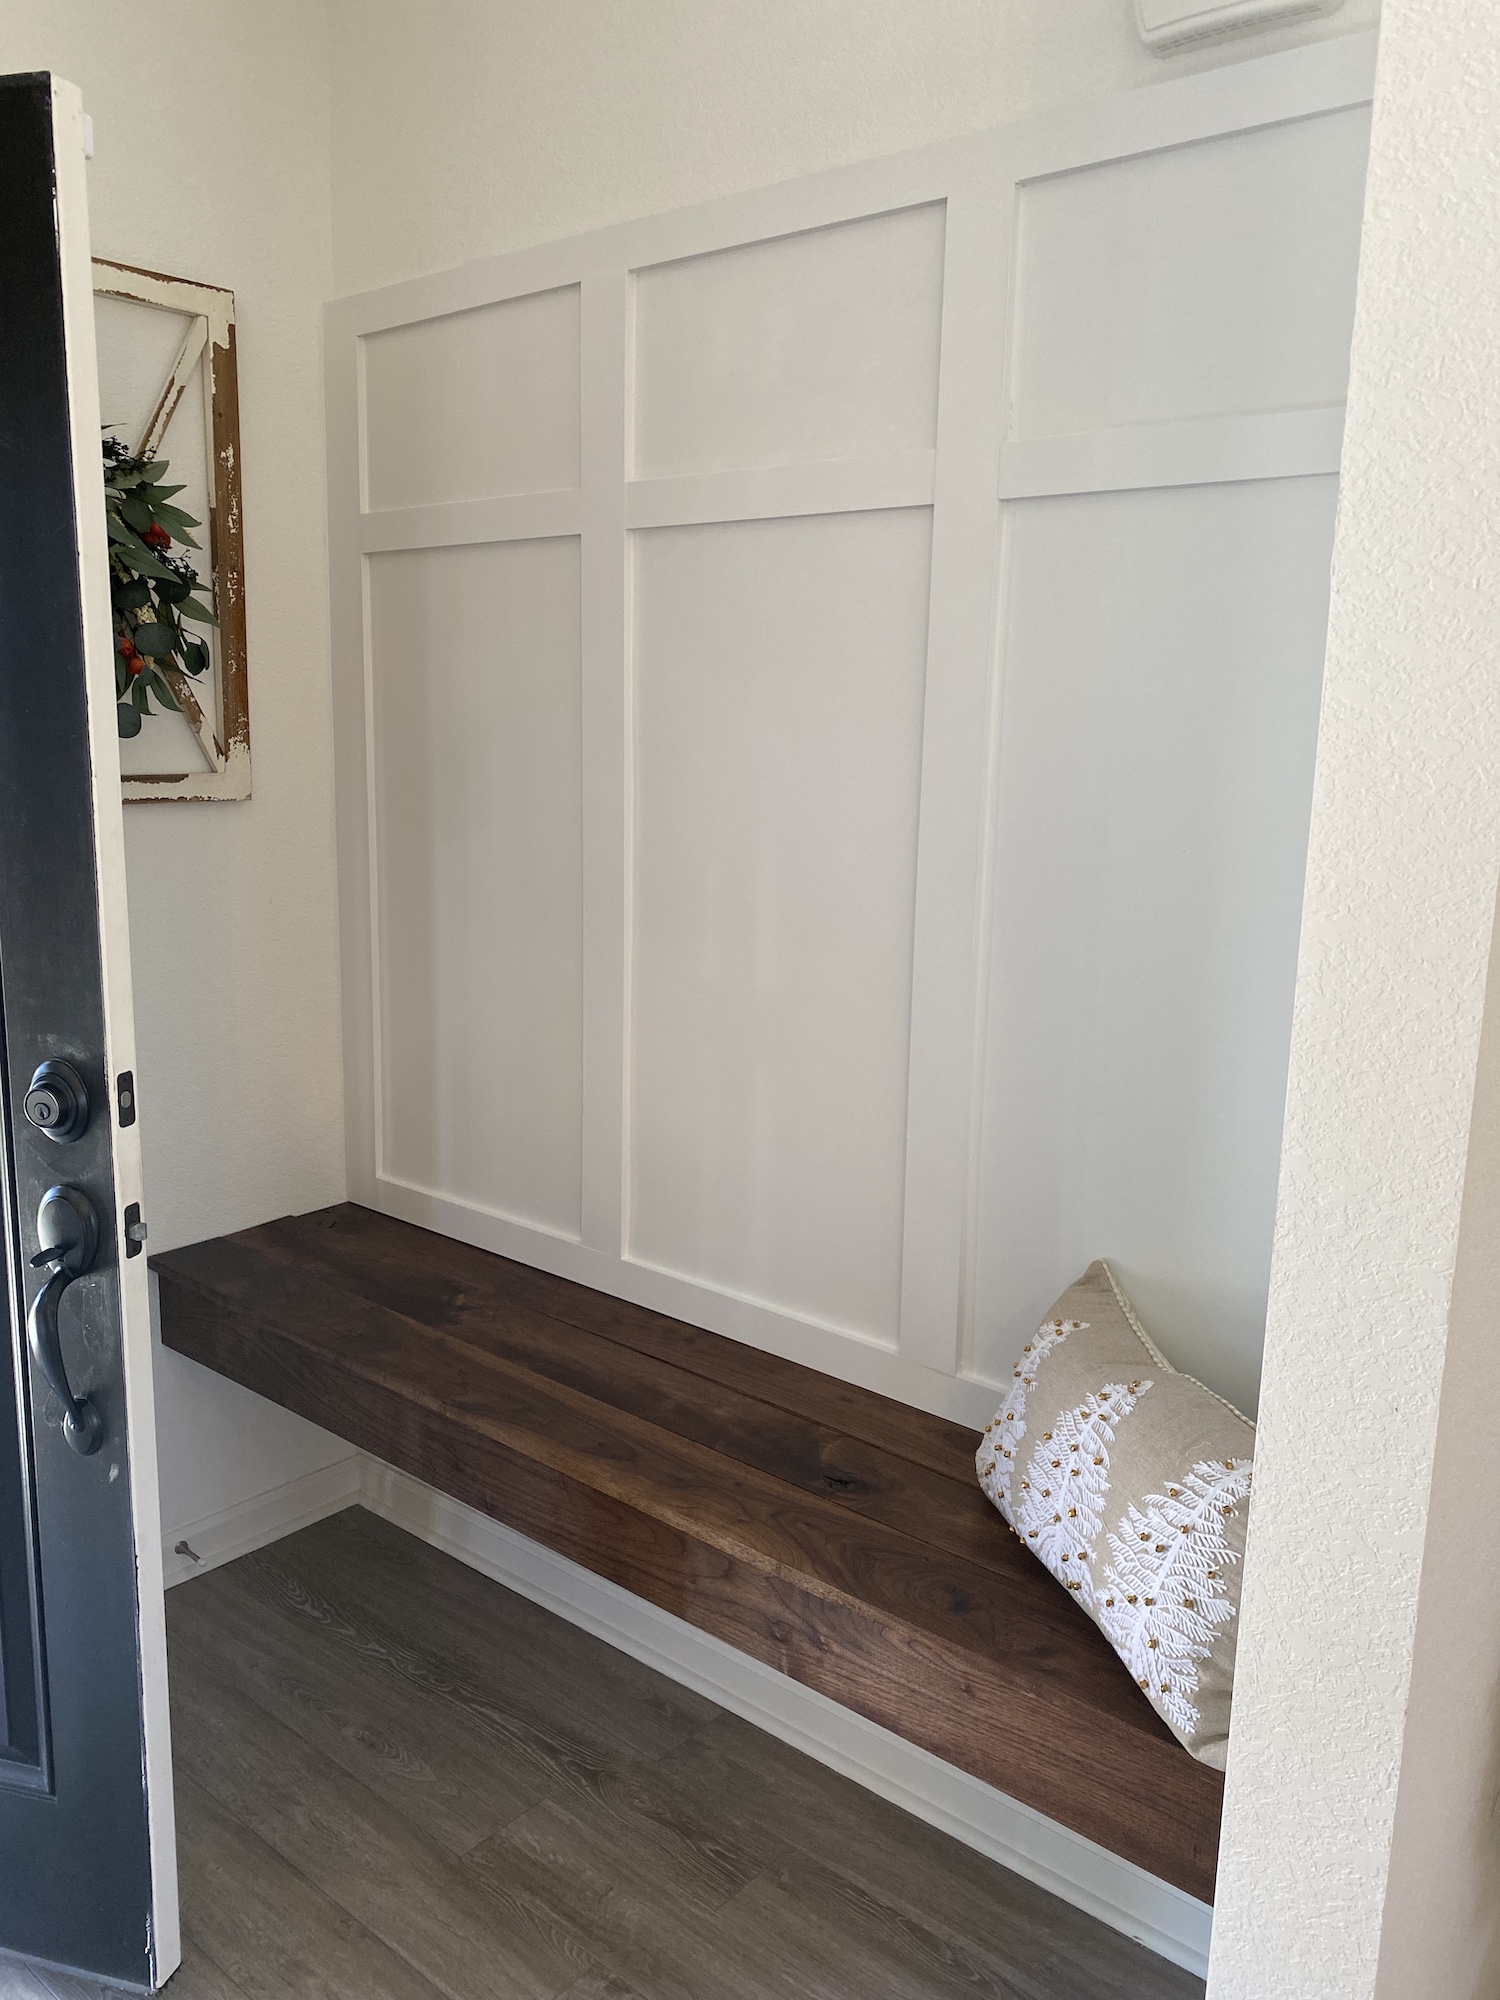
Followed the instructions in the original blog. I would like to thank Ana for the blog. It was the inspiration I needed. This project was challenging for a rookie like myself. The plan is basically the same as the original post from Ana.
Materials:
4" Vertical MDF primed boards
3" Horizontal MDF primed boards
Our wall has texture so we had to use tempered board to make it nice and smooth.
Half inch plywood for under the bench seat.
2x4 for the bench frame
I ordered furniture quality Black American Walnut from a sawmill for the floating bench (not cheap but worth it). I stained it with one coat of Watco Black Walnut just for protection (took 10 minutes to do super easy) let it dry for 24 hours at least.
Challenges:
1. The wall on the right side of the bench did not have a stud just a corner stud, I was not going to risk this bench support so I put the bench support on the one corner stud and installed a hidden strong tie: https://www.homedepot.com/p/Simpson-Strong-Tie-CF-4-15-16-in-x-6-in-Con…
This provided the support that the missing stud would've. Now the bench is structurally sound.
2. Walnut uneven cuts from the sawmill, I had to use a plane to bring the planks closer together didn't want huge gaps.
3. Outlet in the way. City code mandates to remove outlet leaving access to it. We decided to build above the outlet making the bench a bit higher than we wanted it but still worked out, now we still have an accessible outlet under the bench.
Built from Plan(s)
Comments
Thu, 12/30/2021 - 11:21
Gorgeous floating bench!
Thank you for sharing, that looks amazing, just shared to our Facebook page:)
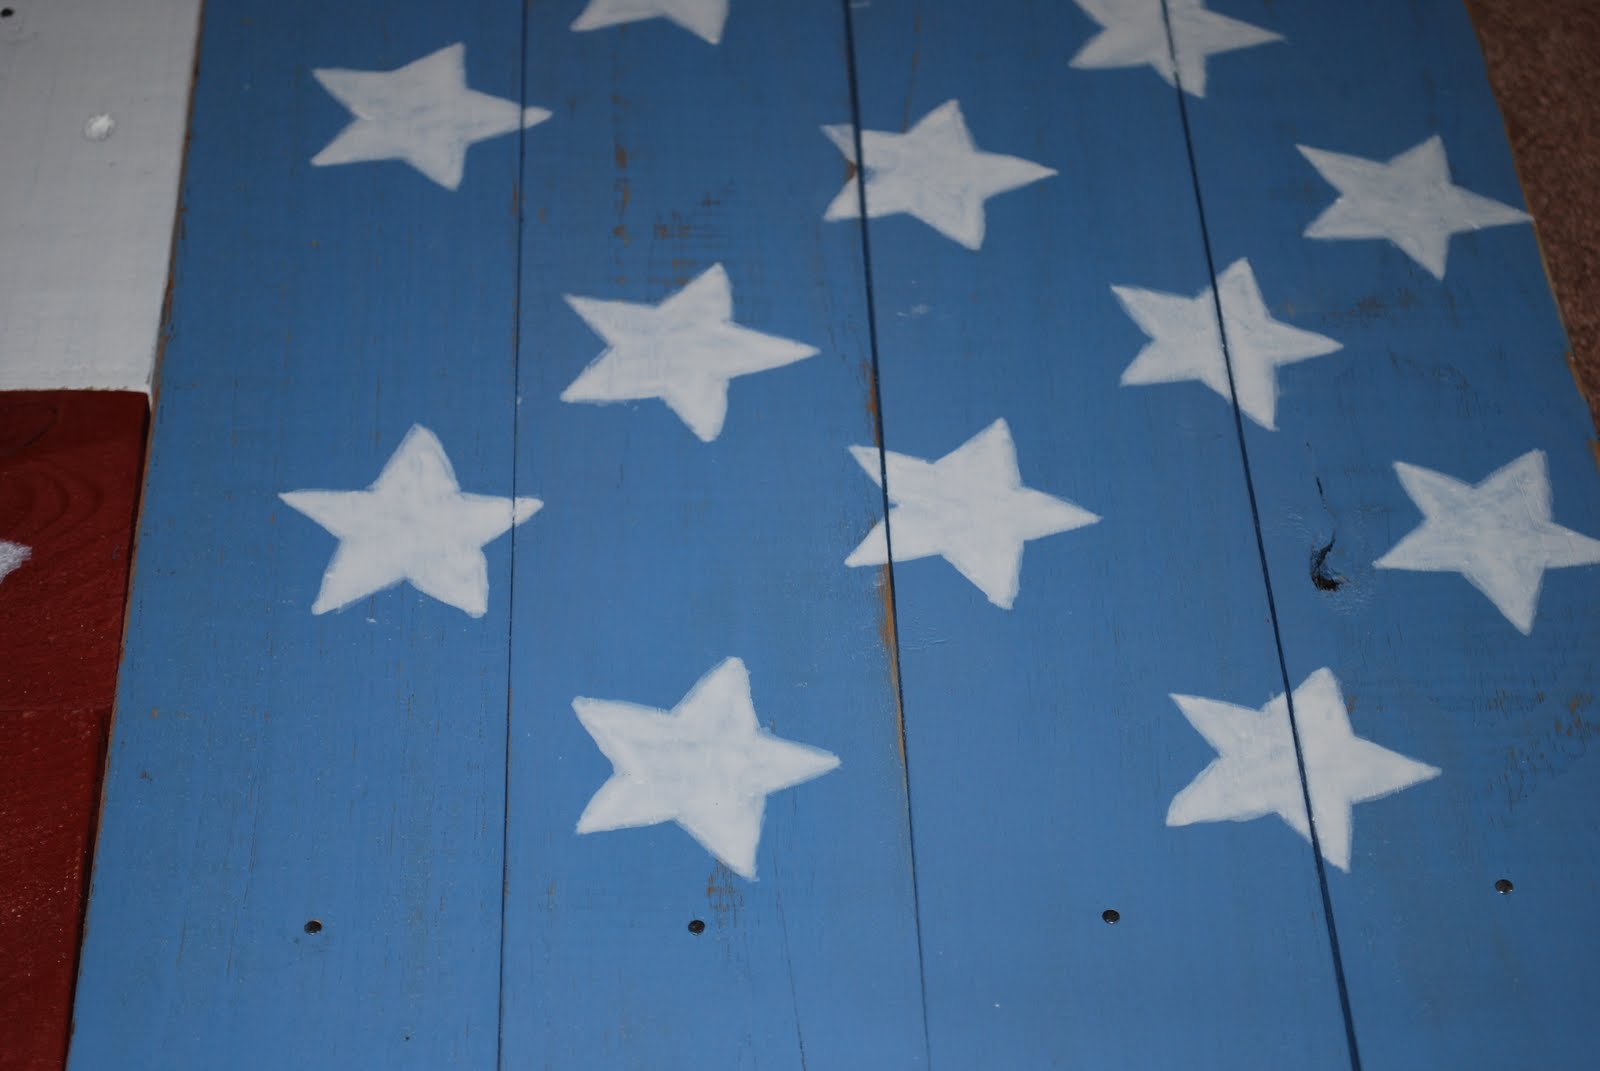
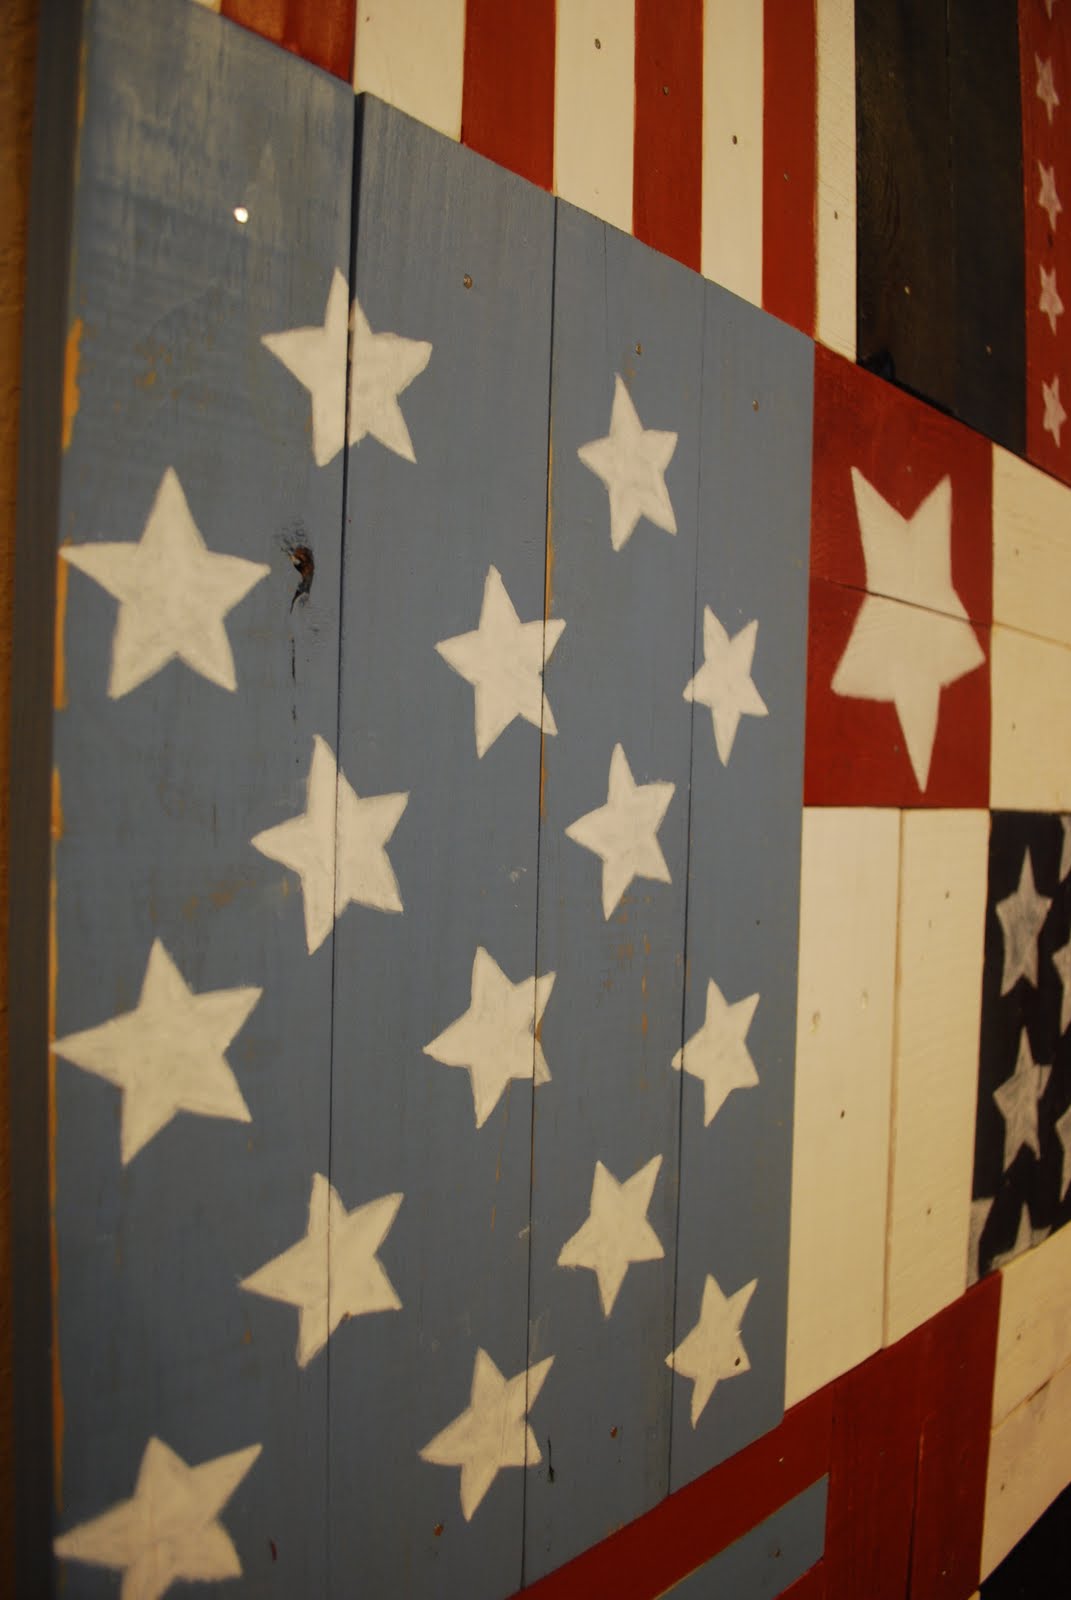
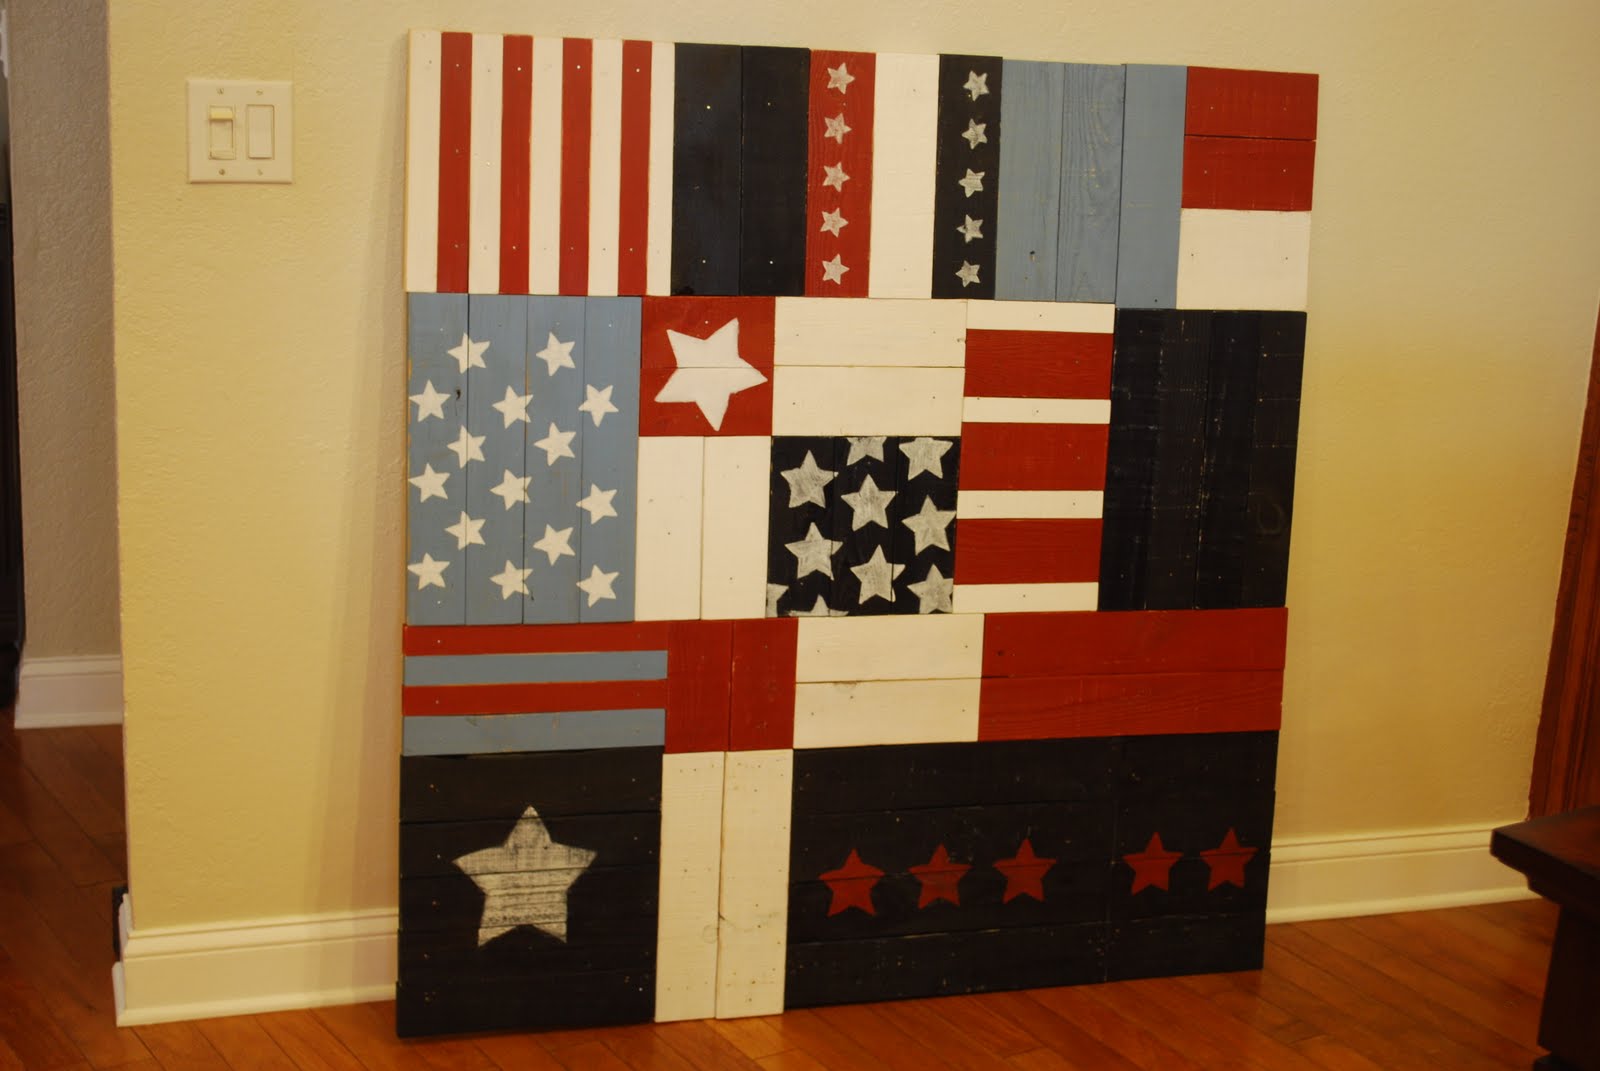
Liberty Wall Art

I built this after going dumpster diving for pallets. We went through and broke up all of the pallets and basically made this entire big piece for the cost of the stain, nails, and backing.


Estimated Cost
$30
Estimated Time Investment
Afternoon Project (3-6 Hours)
Finish Used
I used minwax's water based stain in red, white, and blue.
Recommended Skill Level
Starter Project
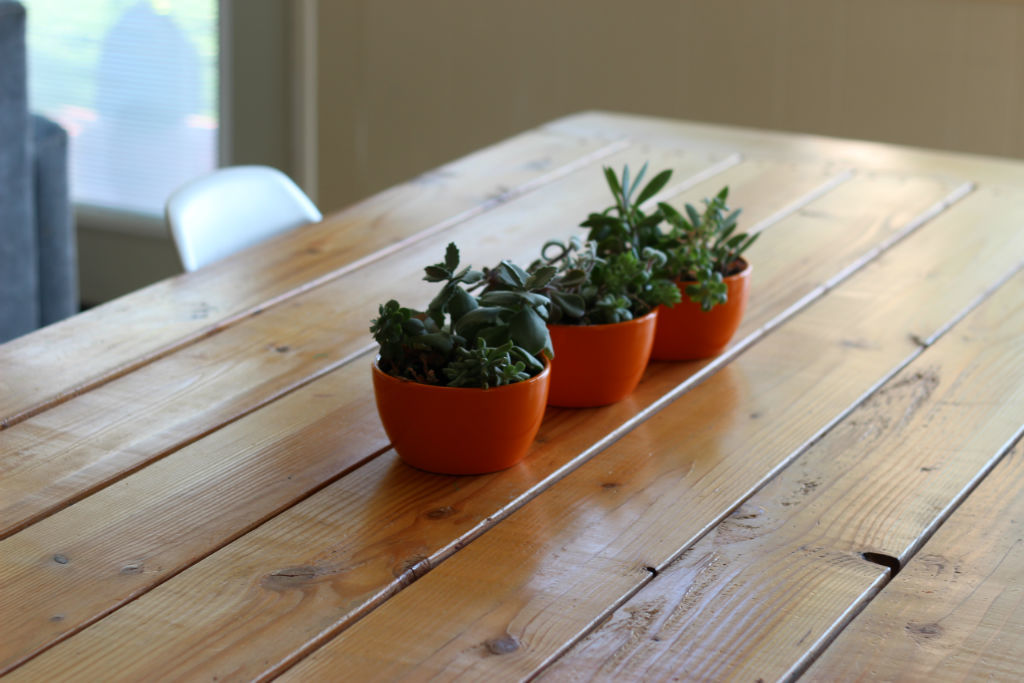
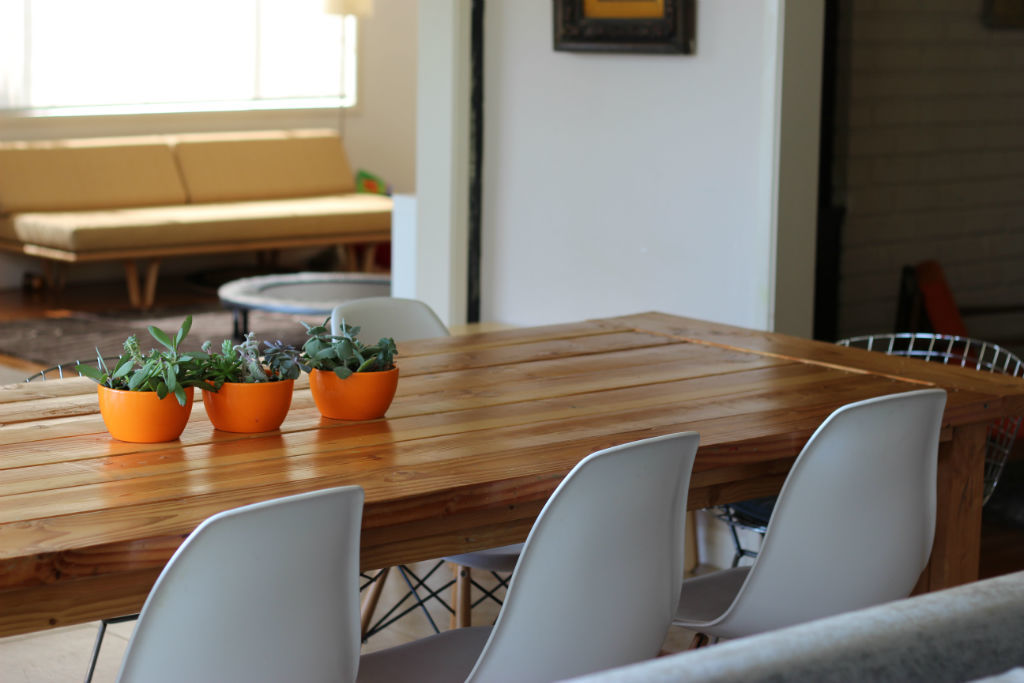
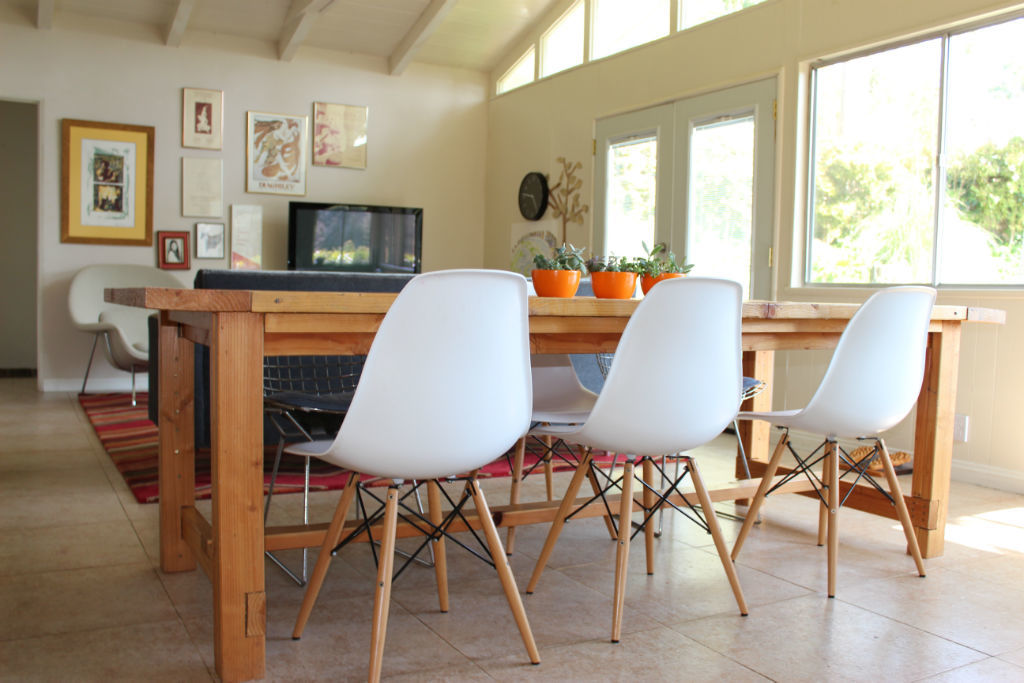
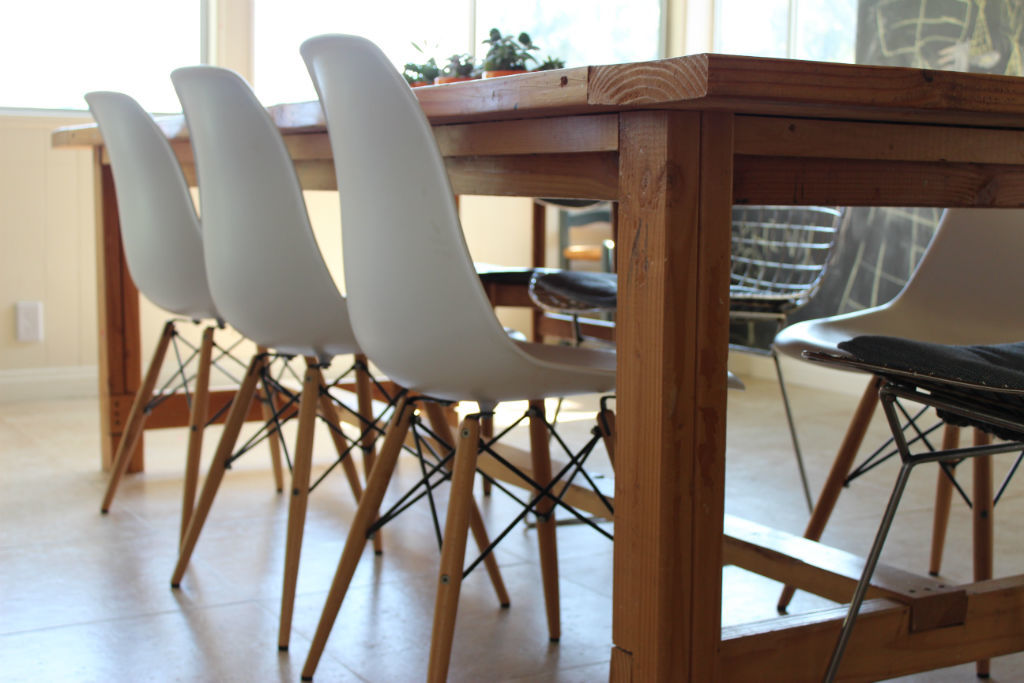
Farm House Table
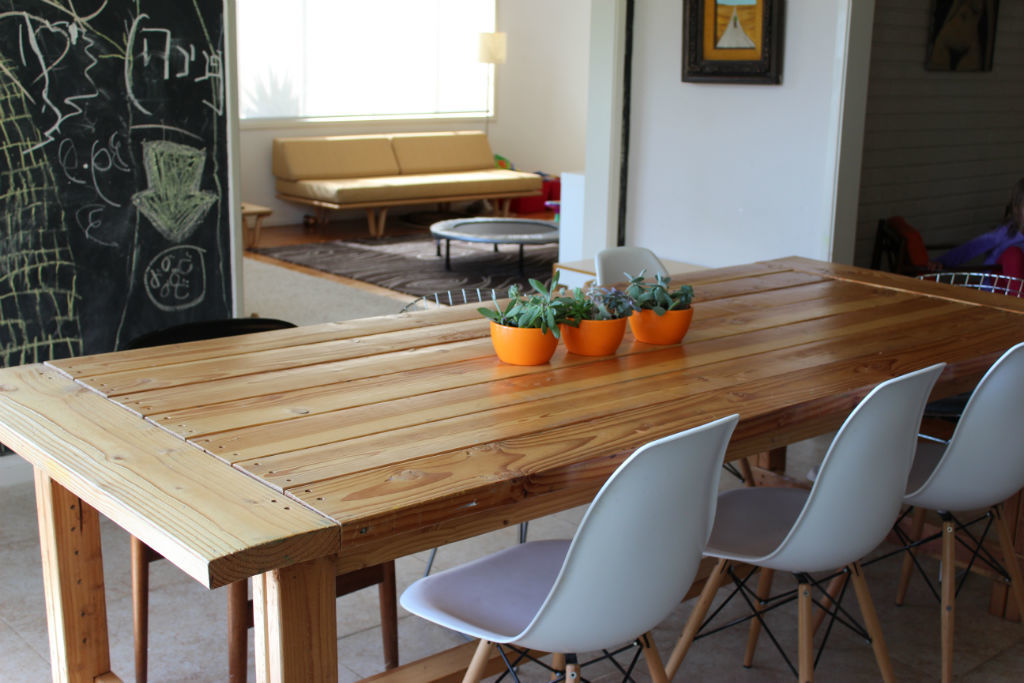
Inspired by Ana and driven by a desperate desire to nest, I made this table in my first-trimester. We live at this table. It's where we eat, play, and craft. On special occasions we stand on top of it, and sometimes we even eat under it. We love the way it looks in our mid-century ranch house with modern chairs. Thank you, Ana!
Built from Plan(s)
Estimated Cost
$100
Estimated Time Investment
Week Long Project (20 Hours or More)
Finish Used
natural water-based poly
Recommended Skill Level
Beginner
Comments
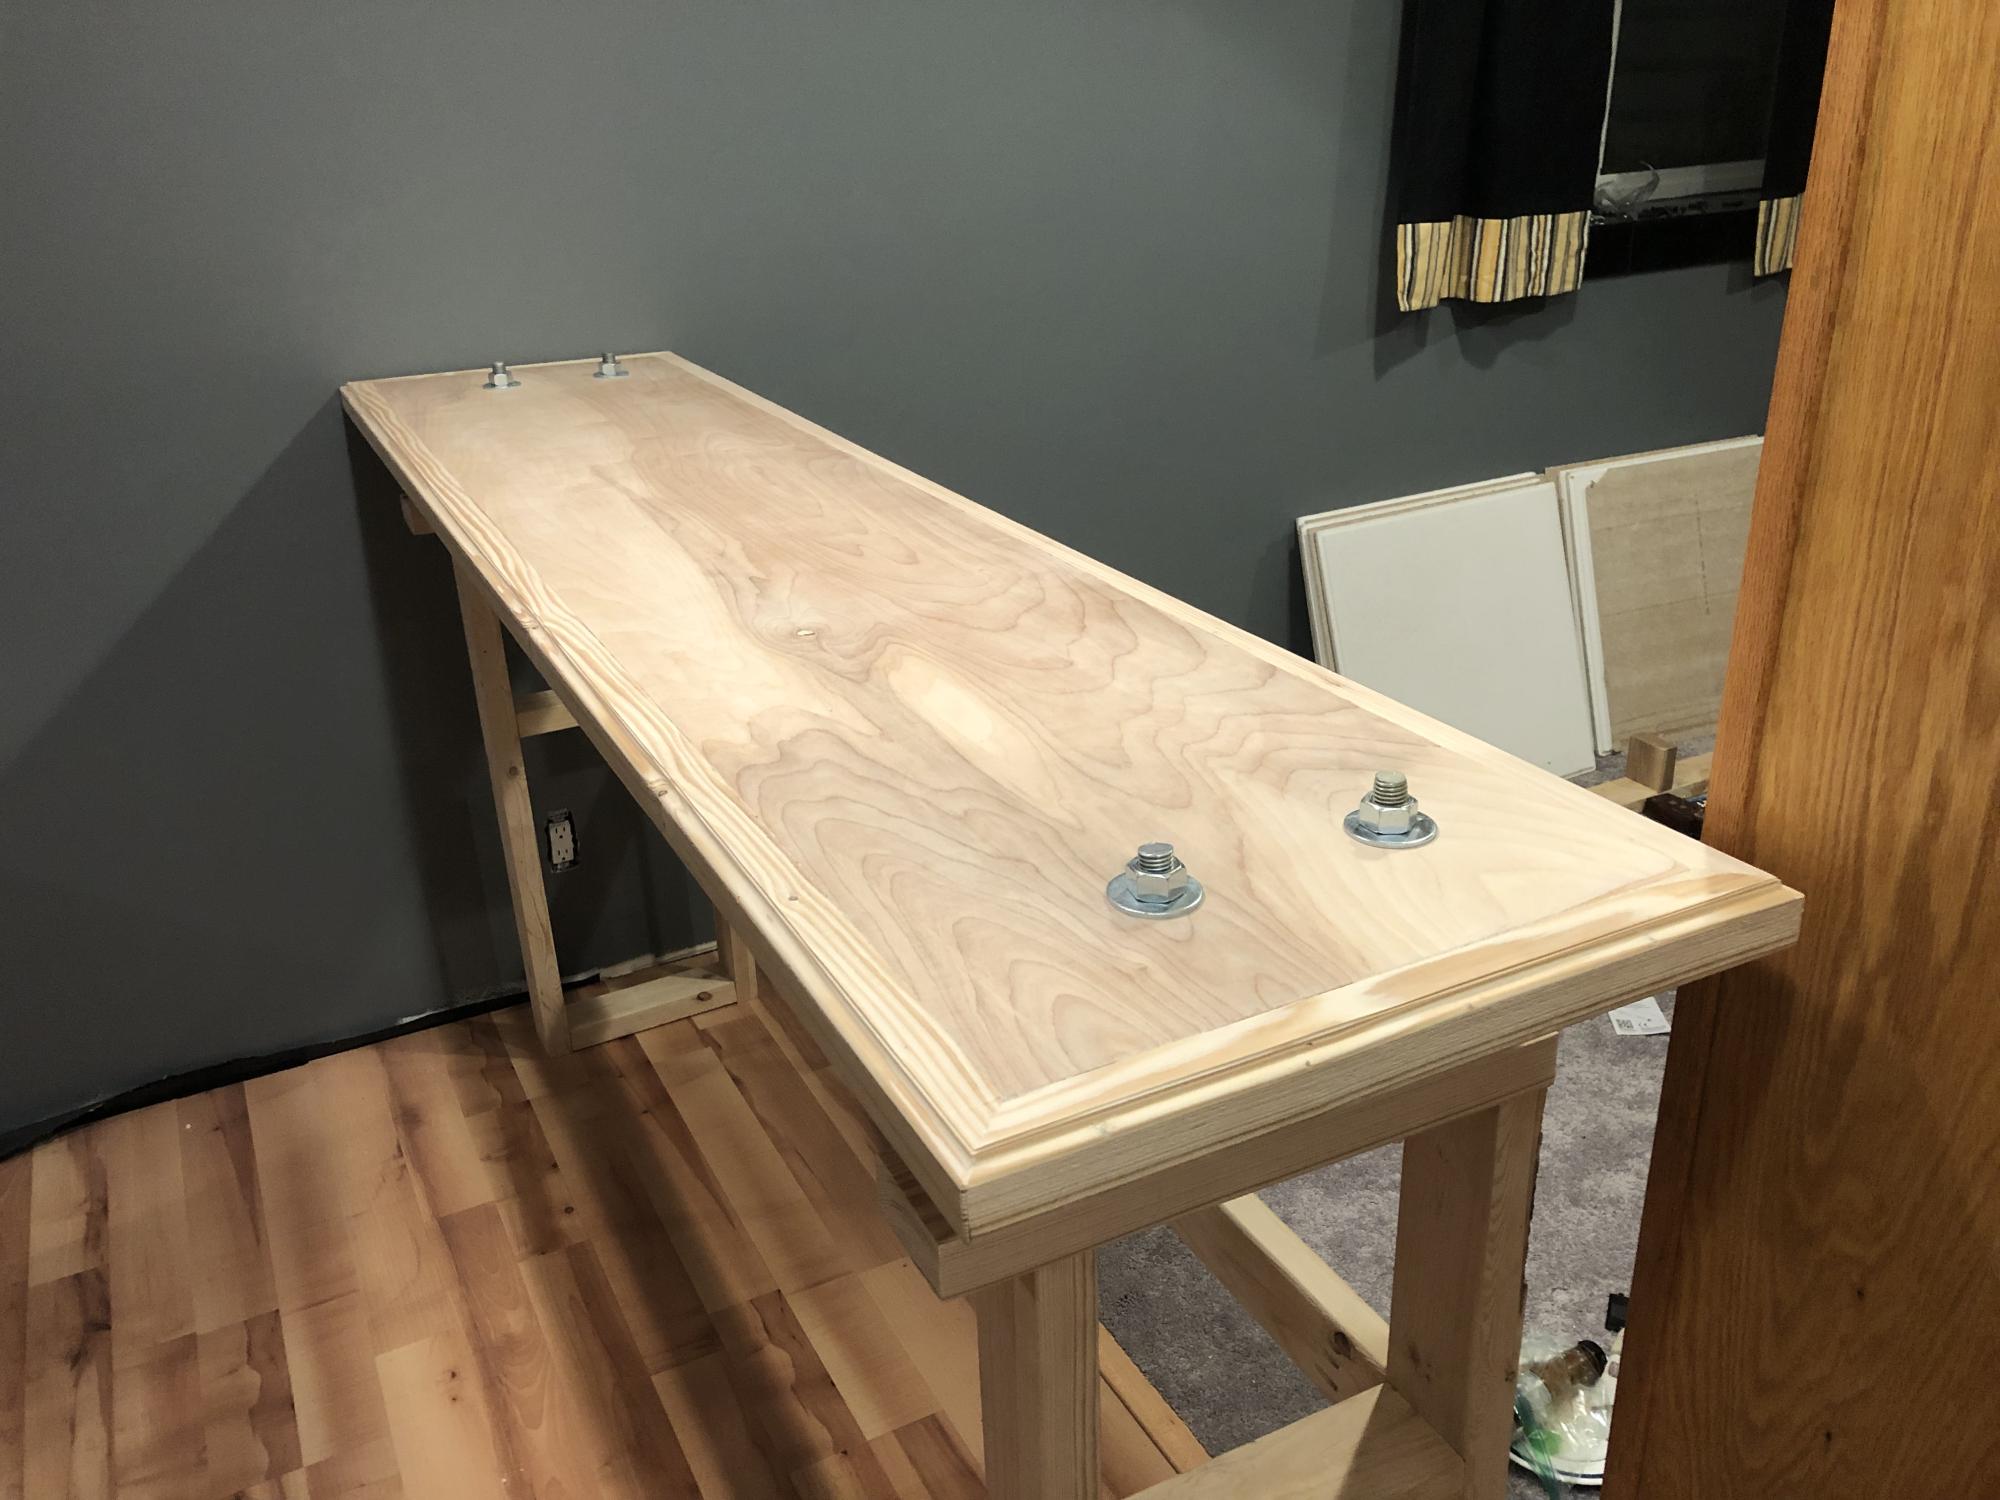
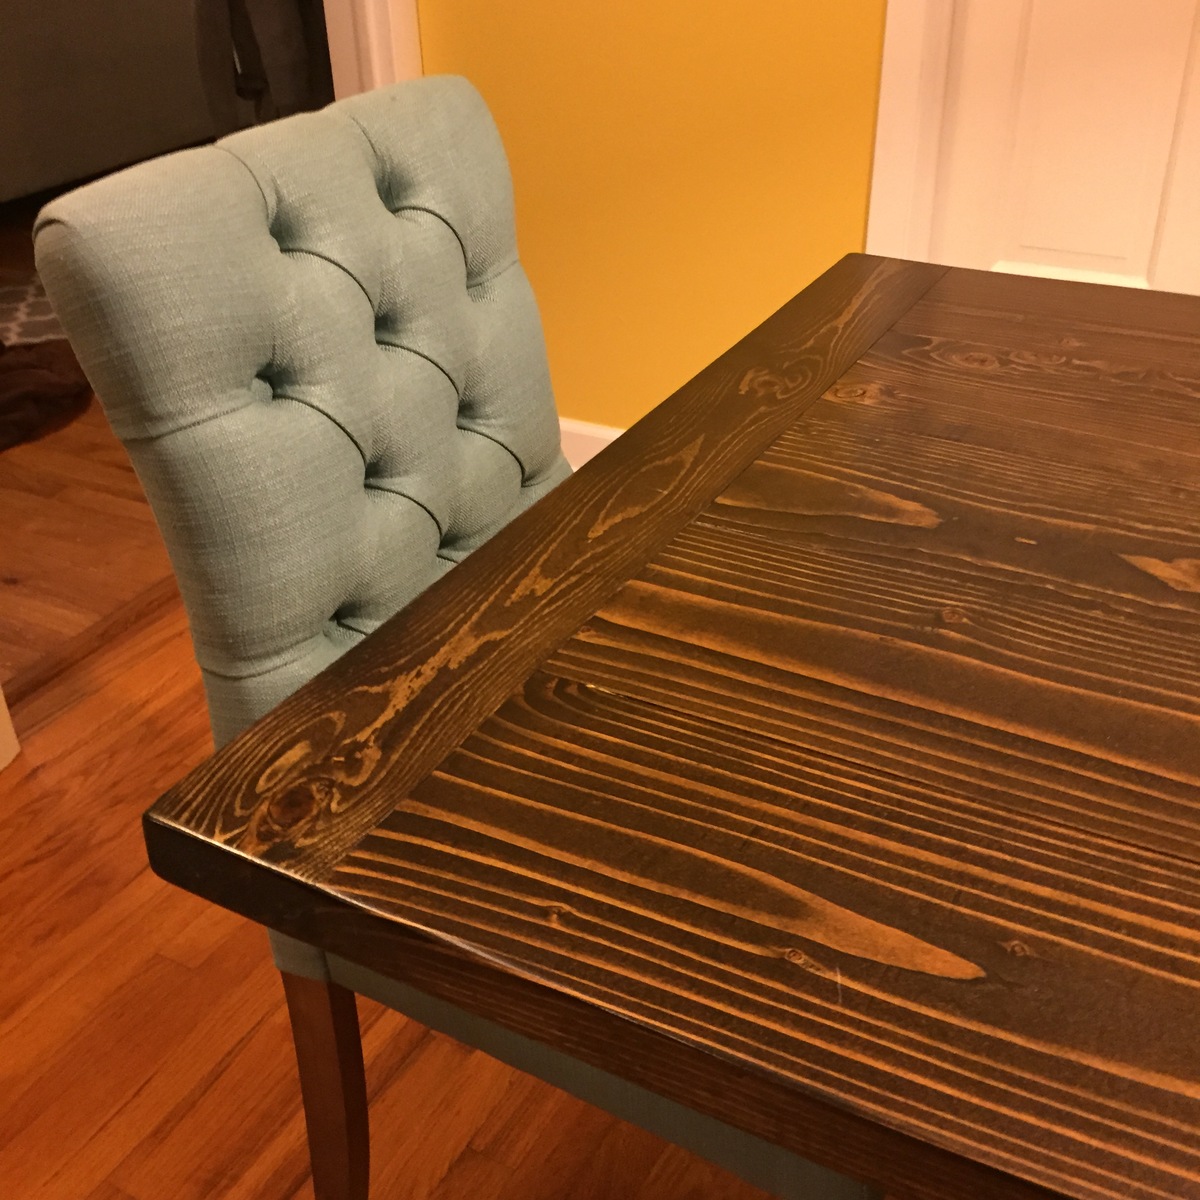
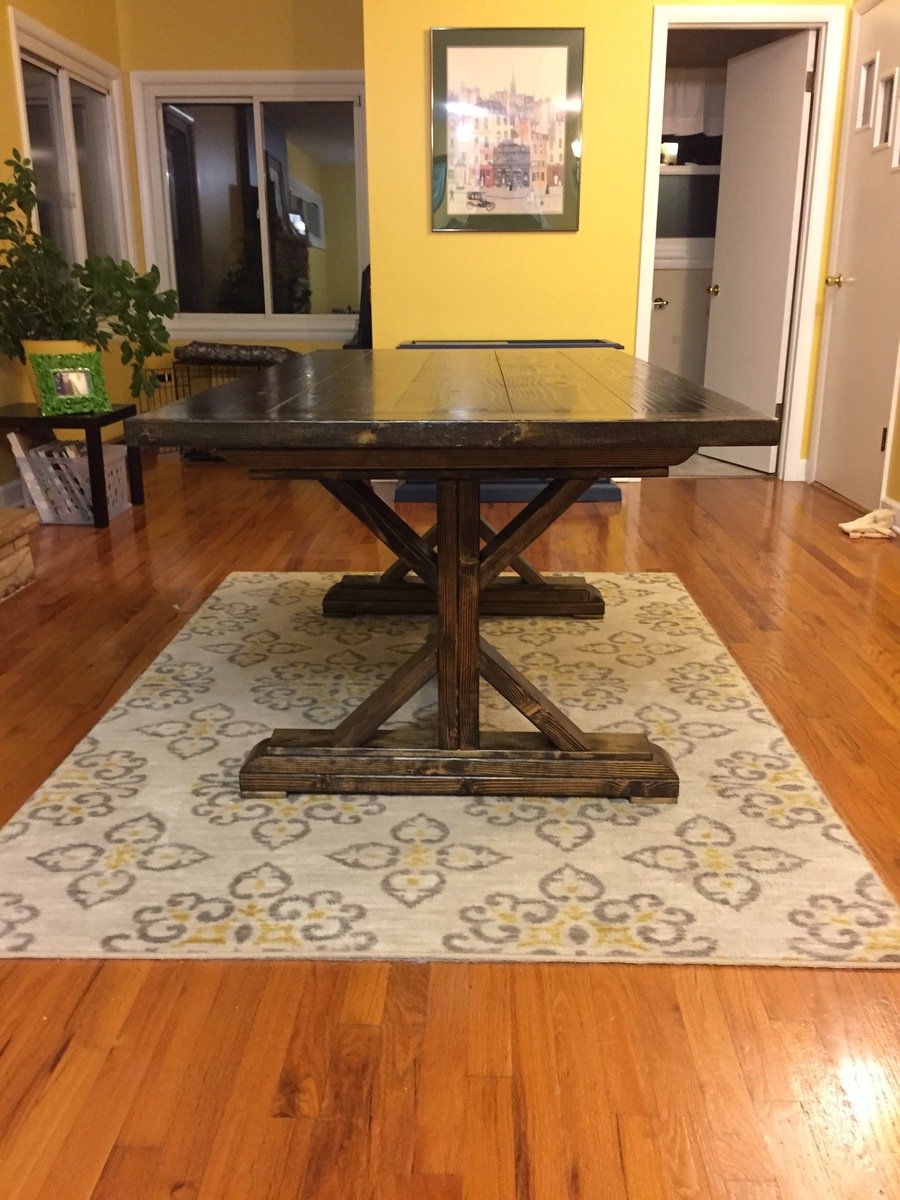
Modified Fancy X Farmhouse Table
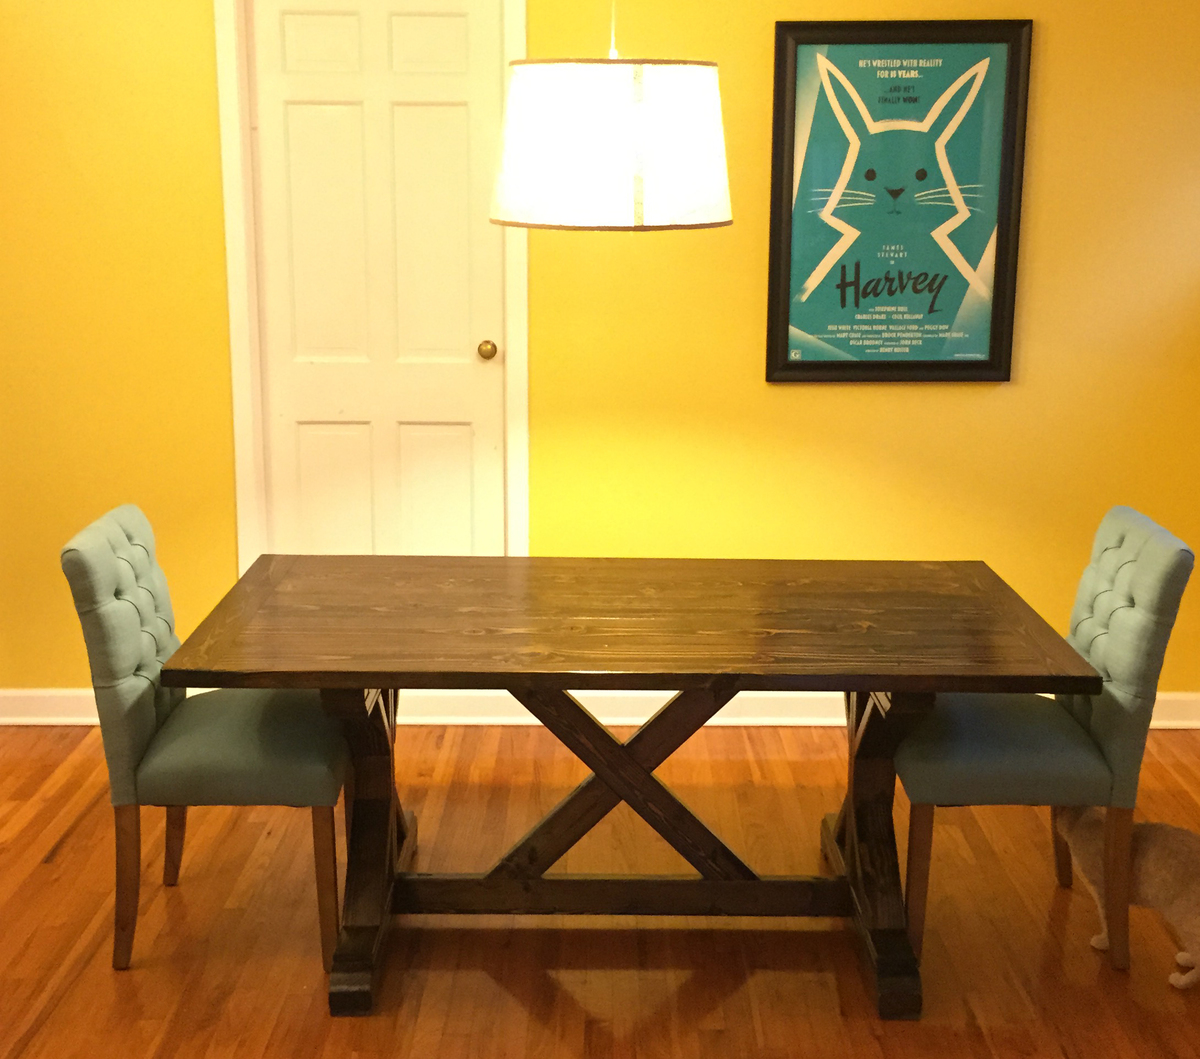
I modified the Fancy X Farmhouse Table plan to shorten the table to 6 ft instead of 8 ft and added breadboard-style ends. Jacobean stain.
Built from Plan(s)
Estimated Cost
$100
Estimated Time Investment
Weekend Project (10-20 Hours)
Finish Used
Jacobean
Recommended Skill Level
Beginner
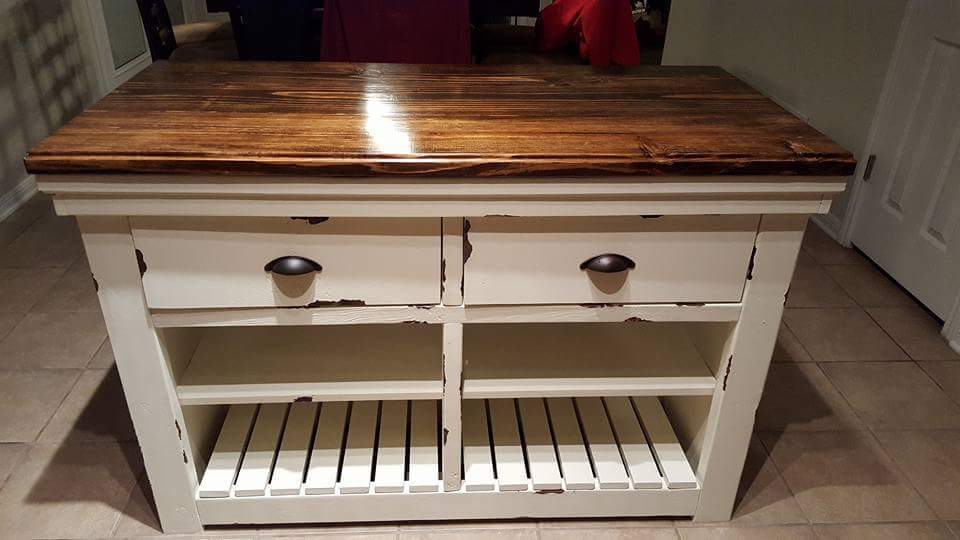
Rustic X Kitchen Island Modified
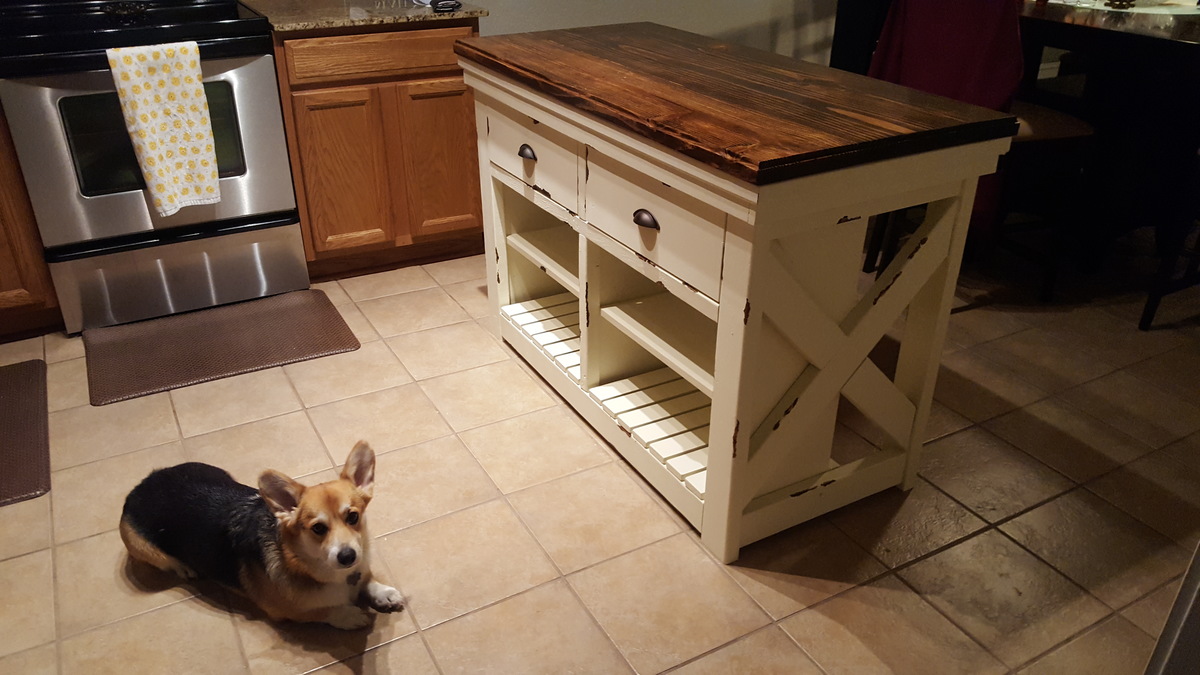
My wife didn't want casters installed, but she wanted the overall height to be similar to the dimensions in the plan. I used 2x4's to add a tiered layer on top of the island, underneath the countertop. Turned out great...thank you Ana White!
Built from Plan(s)
Estimated Cost
$200
Estimated Time Investment
Weekend Project (10-20 Hours)
Finish Used
Sherwin Williams - Antique White
Minwax - Expresso
Minwax - Expresso
Recommended Skill Level
Beginner
Play vanity
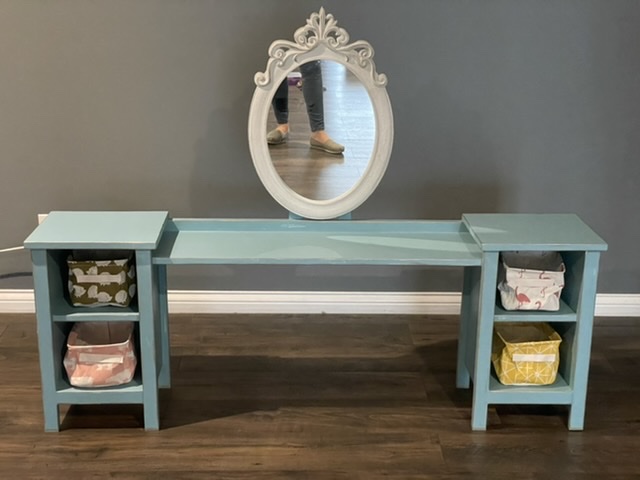
Made this for my niece for Christmas, she loves it!
Built from Plan(s)
Comments
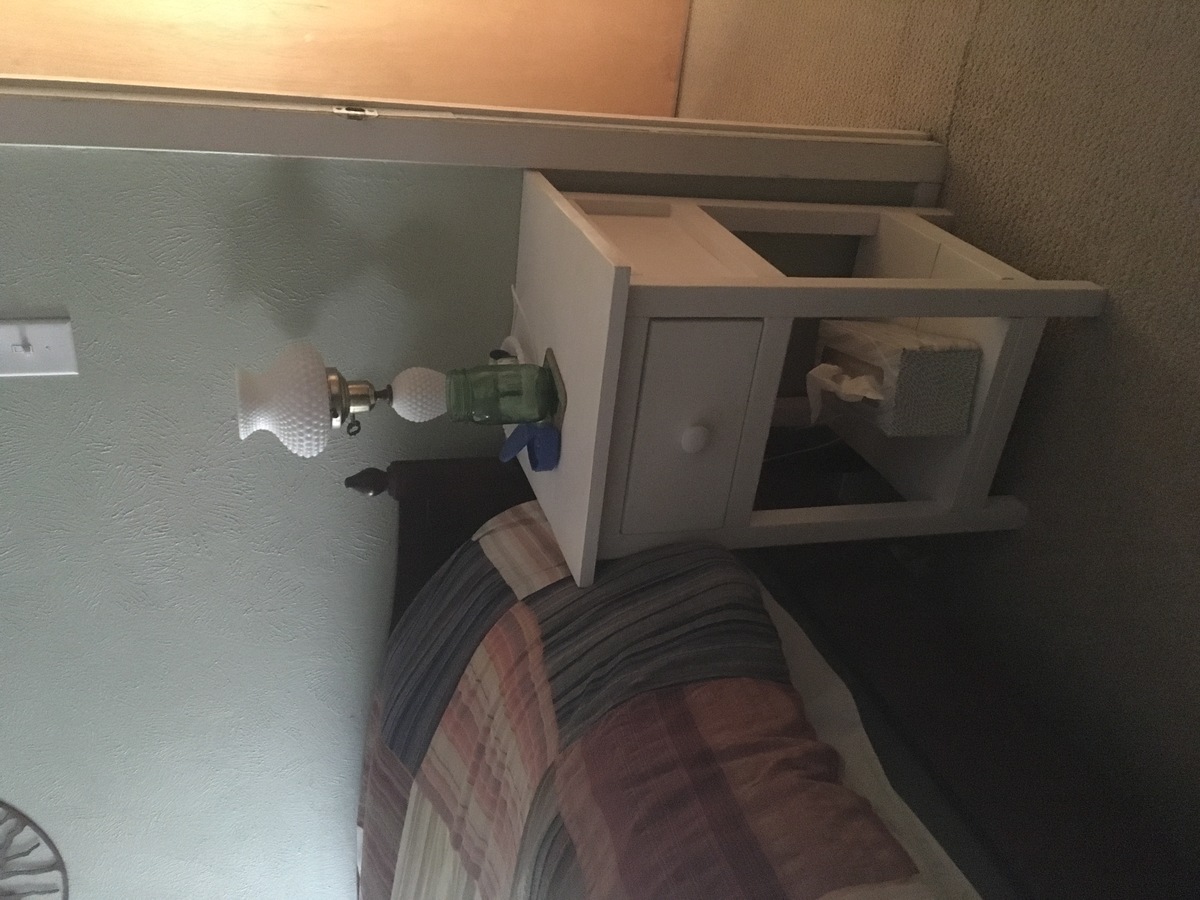
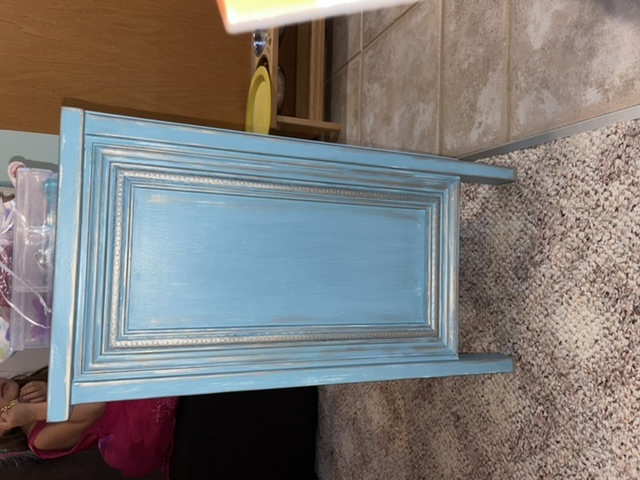
Using Spindles; Shown with the Farmhouse Bedside Table

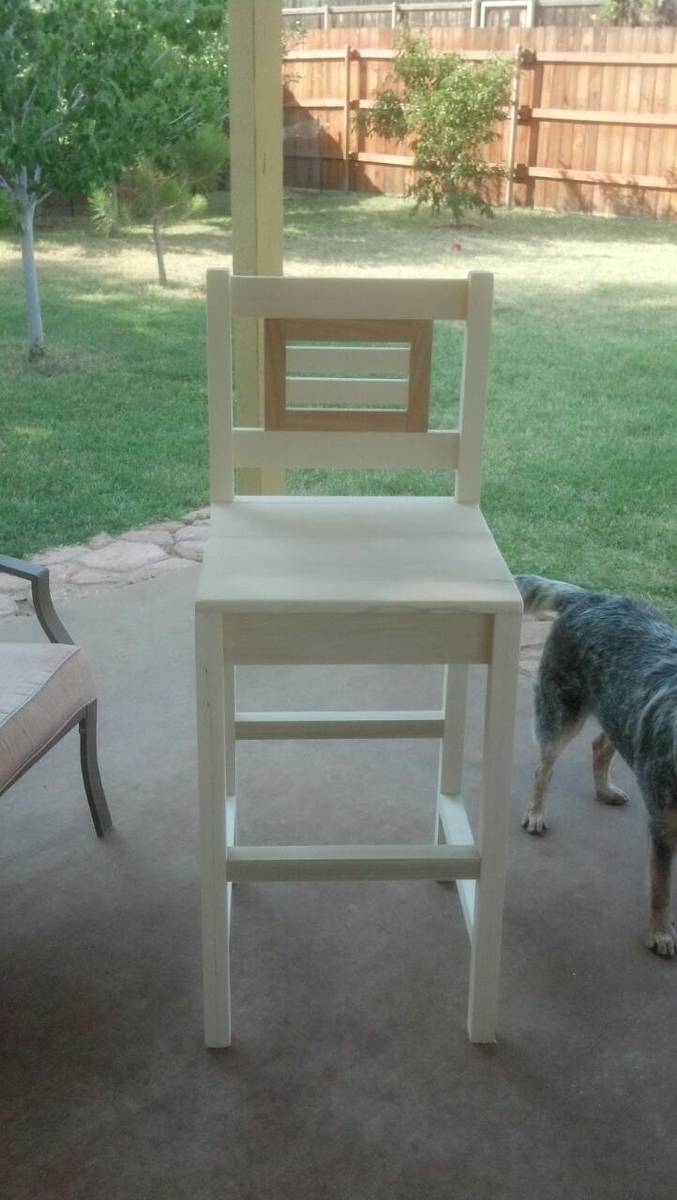
When a plan calls for a 2 x 2, you may be able to add a little extra detail by including spindles. I was able to with the Farmhouse Bedside Table! The top of each leg is a plain old 2 x 2, to accommodate the drawer section. Just below that is a spindle with the top squared-off section cut off. The bottom of that spindle is attached to the top of another, where both were squared off and the same dimensions. This "ugly" joint is why the piece of furniture is painted instead of stained--even then, because of variable grains, this specific seam can be seen on close inspection. You can potentially stain furniture that has spindles if you can match the grains and are not connecting two ends that have exact dimensions, which would create an even more obvious seam on stained furniture. Where I joined two pieces of differing dimensions (example: circle to square), there is no visible seam.
To accommodate the specific spindles I wanted to use, the main dimensions that had to be changed were merely the height of the cross bars and shelf. However, with cuts, I waited and cut them (and had larger ones cut at stores) as I went, to help get them to be more exact since the 2 x 2s were slightly off from the spindles' squared-off area.
This all may sound complicated, but it wasn't!
To get the correct leg height, I first cut one end off two spindles and put them together with the two intact ends meeting. The resulting dimensions were subtracted from the required leg height of 26 1/4", leaving the length to cut the 2 x 2 at. This required a lot of measuring, being sure that the legs would be "squared off" in the areas for the drawer and shelf.
To make the "joints" between the legs--each of which is three pieces (!), I used 1/4" x 1 1/2" dowel pins. These are readily available even in craft stores. These aren't the same as dowel rods--they have grooves in them. Next, drill holes the dimensions of the dowels in the exact middle of each leg piece, and put glue inside the hole and around the top of the smallest-dimensioned piece. Connecting and clamping as you go, this will create stronger joints than just using glue.
After the legs were made, I followed the instructions as indicated, being careful to measure before each cut and adjust the measurements where needed.
For another example of how you can use spindles, here's a cat feeder I designed and built back in January:
http://flattops.webs.com/petfeeder.html (Purchased ones in real wood are usually over $100!)
Though it's far from perfect, I'm really happy with how the table turned out--and hope that my experience may inspire you to give spindles a try! I'd love to know how you use them!


Built from Plan(s)
Estimated Cost
Under $100
Estimated Time Investment
Week Long Project (20 Hours or More)
Finish Used
1) Paint on primer, and use a roller to smooth (with all paint coats);
2) Paint on Painter's Touch by Rustoleum in "Heirloom White";
3) Sand;
4) Paint;
5) Spatter on black craft paint;
6) Sand edges down to bare wood, and some surface areas;
7) Put water in brown craft paint, and use as a stain in sanded-off areas, wiping off excess with paper towels. Use some to make stains on other areas;
8) Hammer in random spots with a meat cleaver;
9) Varnish with one coat of semi-gloss
Recommended Skill Level
Intermediate
Lydia Puppy (Toddler) Bed
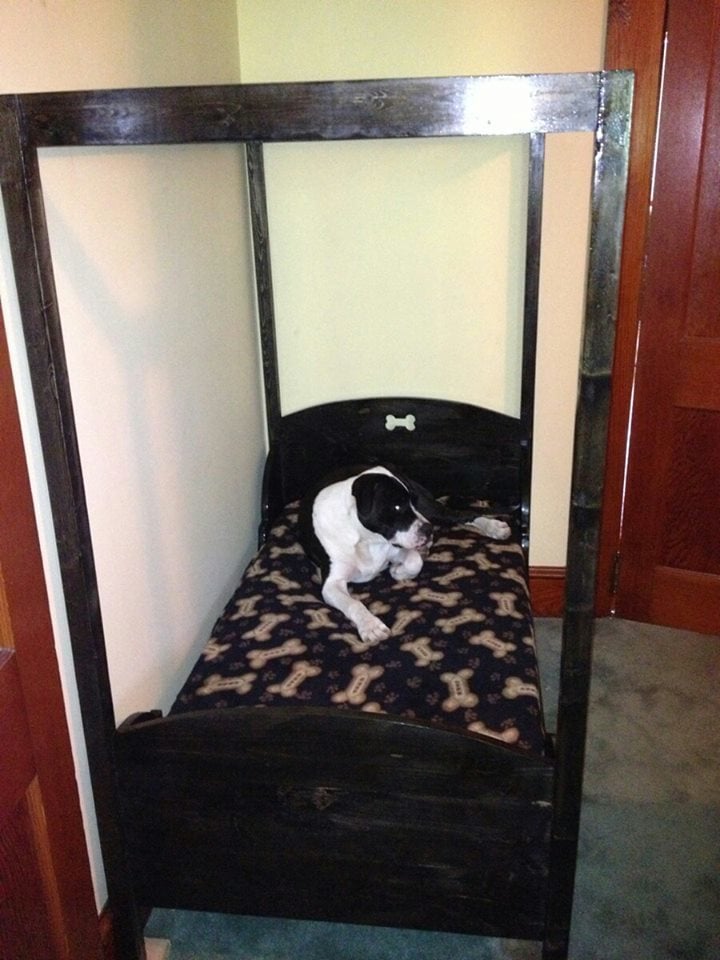
Our puppy needed to move out of our bed, and I love the looks of the Lydia toddler bed, so we made this one for her!! It's fantastic and I'm so happy with how it all turned out! It was Mike's first time using a Kreg Jig and he loves it!
Built from Plan(s)
Estimated Cost
$60
Estimated Time Investment
Weekend Project (10-20 Hours)
Finish Used
Ebony Miniwax Stain, one coat of poly
Recommended Skill Level
Beginner
Comments
Fri, 07/12/2013 - 13:52
Great Job! I love this and
Great Job! I love this and may need to make one for my dog. Did you have to make any modifications to the plan?
patio sofa from 2x4s

Used 2x4x10s instead of 2x4x6s. Shortened the length of the seat and legs by a tiny bit and was able to save a bit of money and waste less lumber by making better use of fewer pieces of lumber.
Estimated Cost
$90 for lumber and screws
$130 for cushions from IKEA
$130 for cushions from IKEA
Estimated Time Investment
An Hour or Two (0-2 Hours)
Finish Used
None
Recommended Skill Level
Starter Project
Made 14 crayon blocks as Xmas gifts!

I made 14 personalized crayon blocks from Ana White's plan for Christmas presents. It was affordable, easy, and everyone loved them! I'm not sure who loved them more, the adults or the kids. I made them for preschool classmates, friends, nieces, and nephews.
I am a mom of a 1 year old and 3 year old so it's hard to estimate how much time it took me. I worked in half hour shifts during naptimes over a couple of weeks. It's totally doable!
Here are some tips:
- Buy pine wood with sharp edges. Some of my wood had slightly rounded edges and that made for bigger grooves on the sides. These were the ones that were harder to paint the letters.
- I followed the size dimensions for everything except the holes. I tried several times with Ana's plans, but the wood just kept cracking. I narrowed it down to just 26 crayon holes and spaced it about an inch from either end. This worked perfectly for me 14x!
- I tried many ways to drill the holes. My winning combination was to start each hole with a spade drill bit (drilled 75% through) and then finished it off with a regular spiral drill bit of the same size. I found it cracked way less on the backside if I didn't use the spade bit all the way through.
- I used a simple piece of sandpaper to lightly sand in the holes.
LETTERING
I have a Silhouette machine. I cut out the words/names on vinyl, weeded out the letters and stuck them on the wood as a stencil. I wrote their name on one side and "crayons" on the other. Then I rubbed clear kraft glue in the letters to "fill the gaps" so no paint would leak through. Then I painted over the glue and wood with acrylic craft store paint. Worked perfectly. Looks crisp. Some of the moms thought they were stickers. I finished with a matte clear spray finish.
What does NOT work:
-I tried the method of printing on paper, tracing with pencil, and then hand painting. Mine looked awful. Maybe I just don't have a steady enough hand.
-I tried using permanent marker instead of paint. Nope. It seeps into the wood and leaves you without crisp lines.
-I also tried cutting the letters on vinyl, sticking them on the wood then putting a clear coat on top. This was OK... but it didn't look as good as painted.
Hope this can help someone!


Estimated Cost
I estimate this cost between $3-$4 per crayon block (assuming you already have the tools). Most of that cost was buying the crayons.
Estimated Time Investment
Afternoon Project (3-6 Hours)
Recommended Skill Level
Beginner
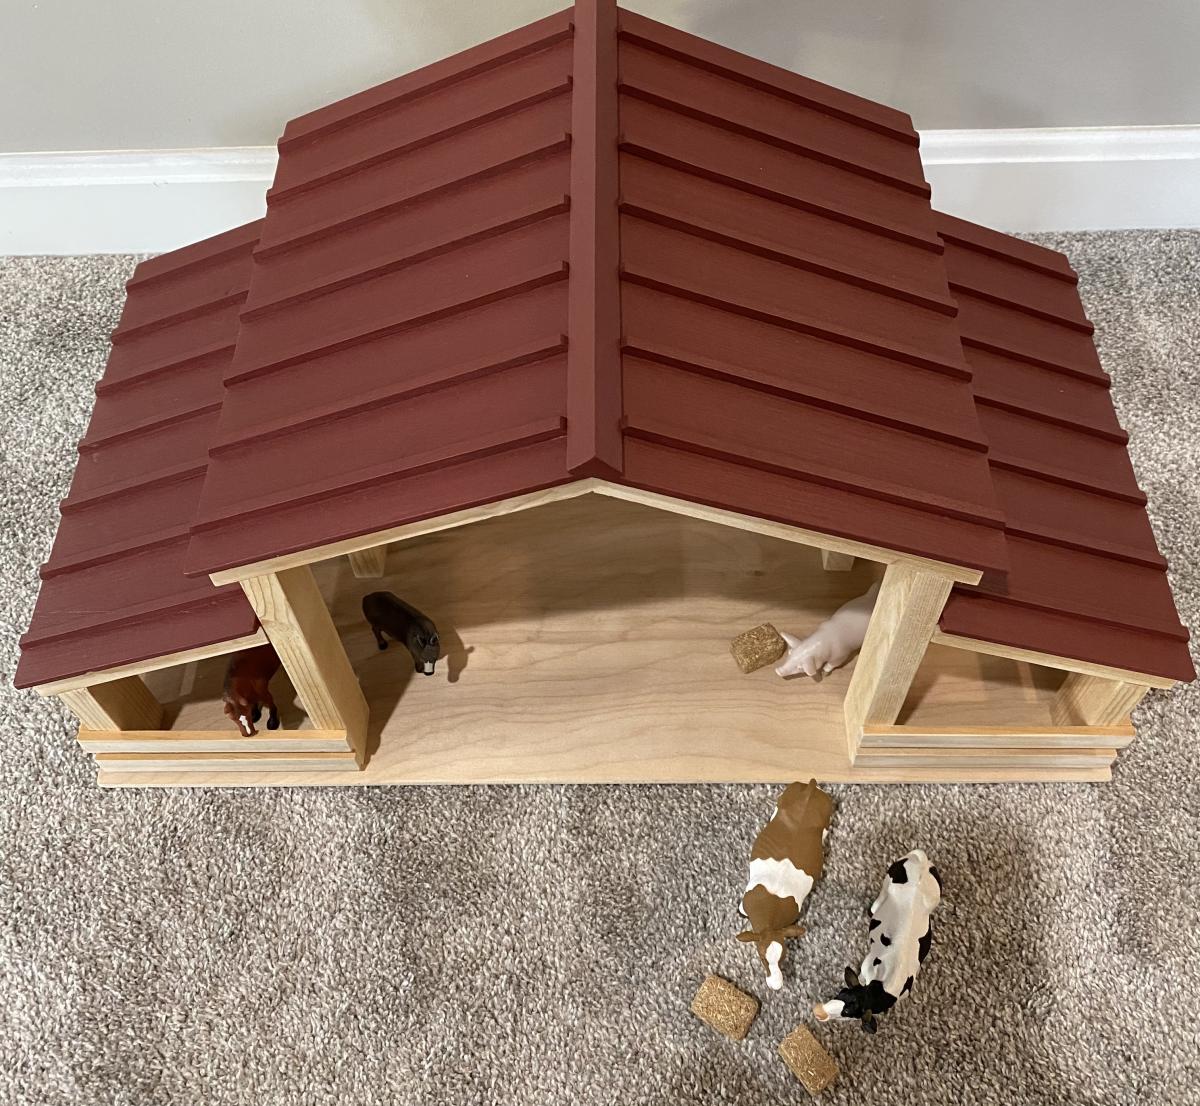
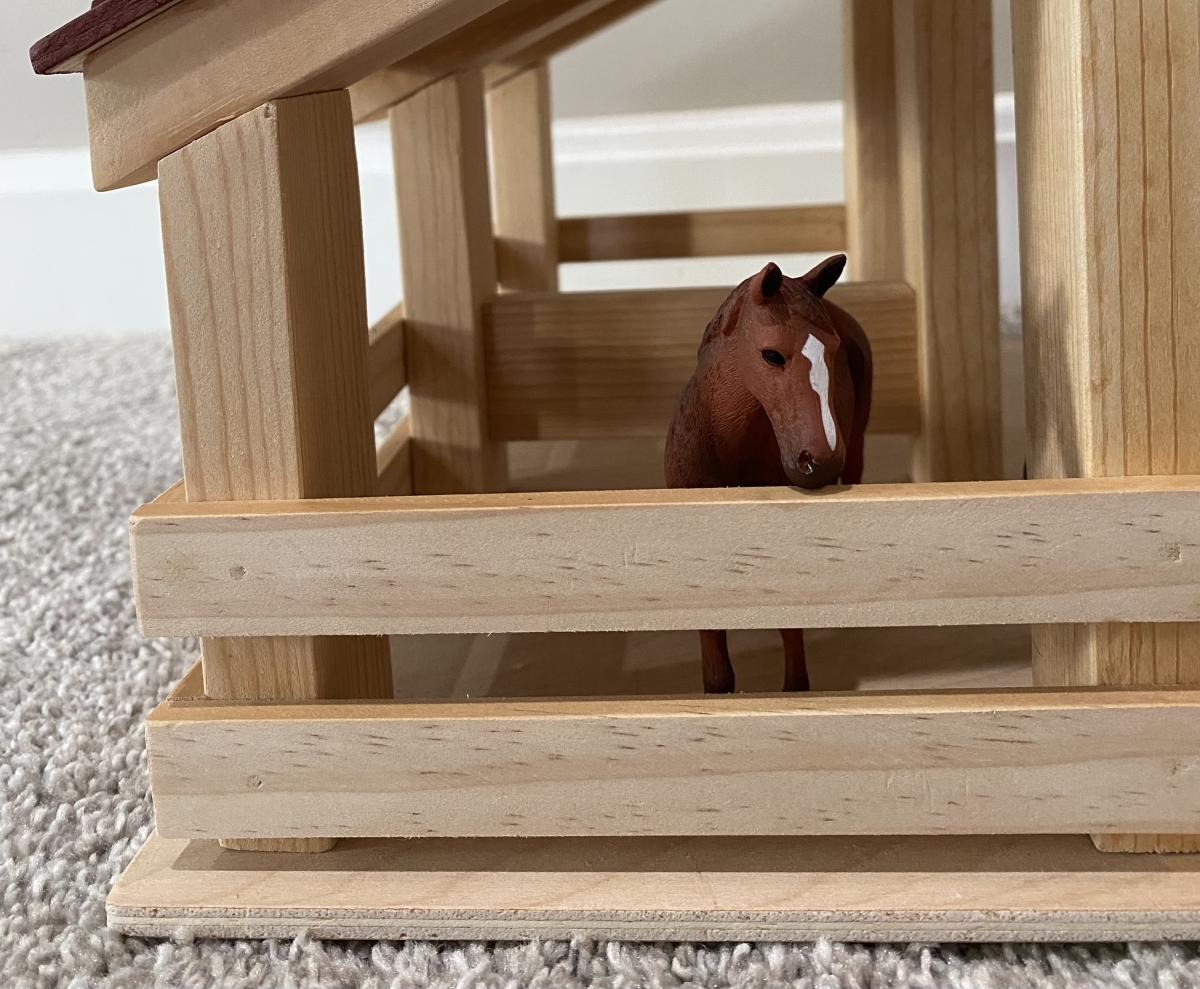
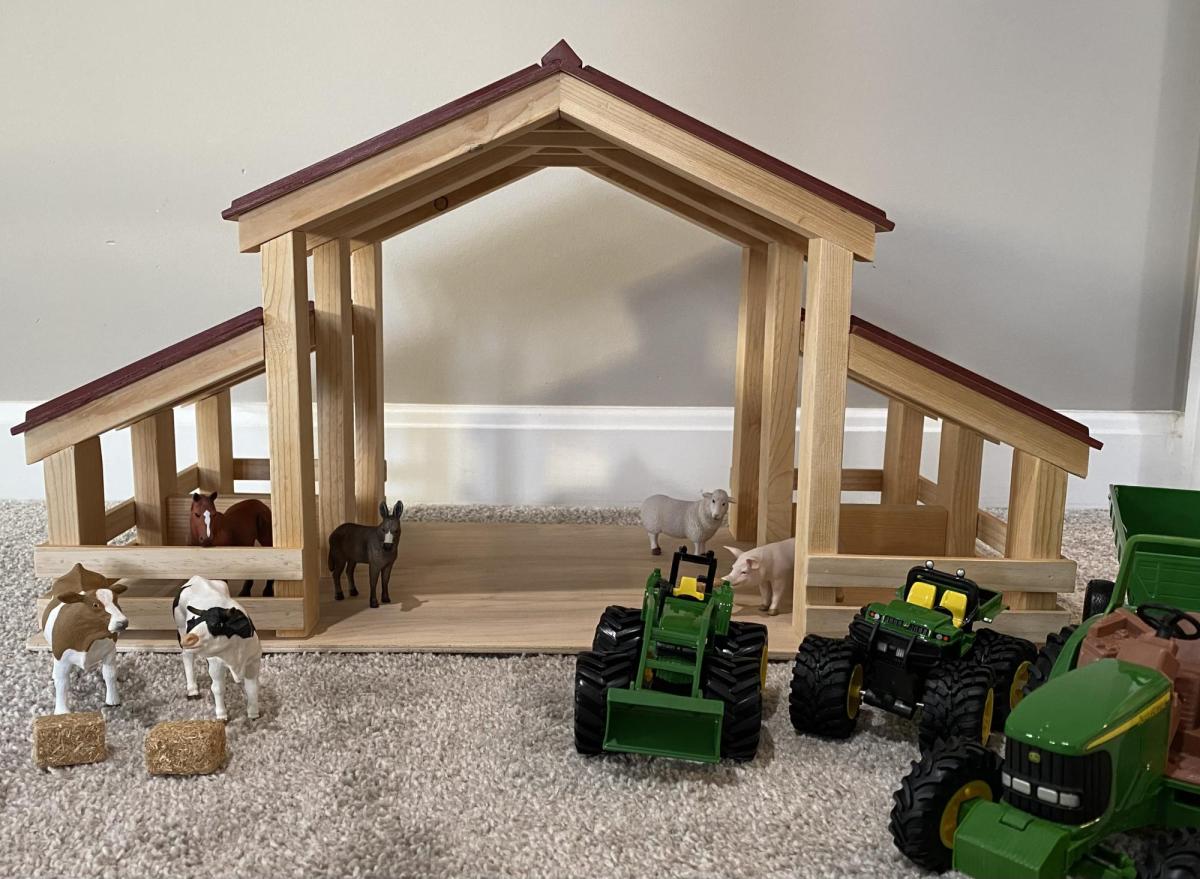
Toy Barn
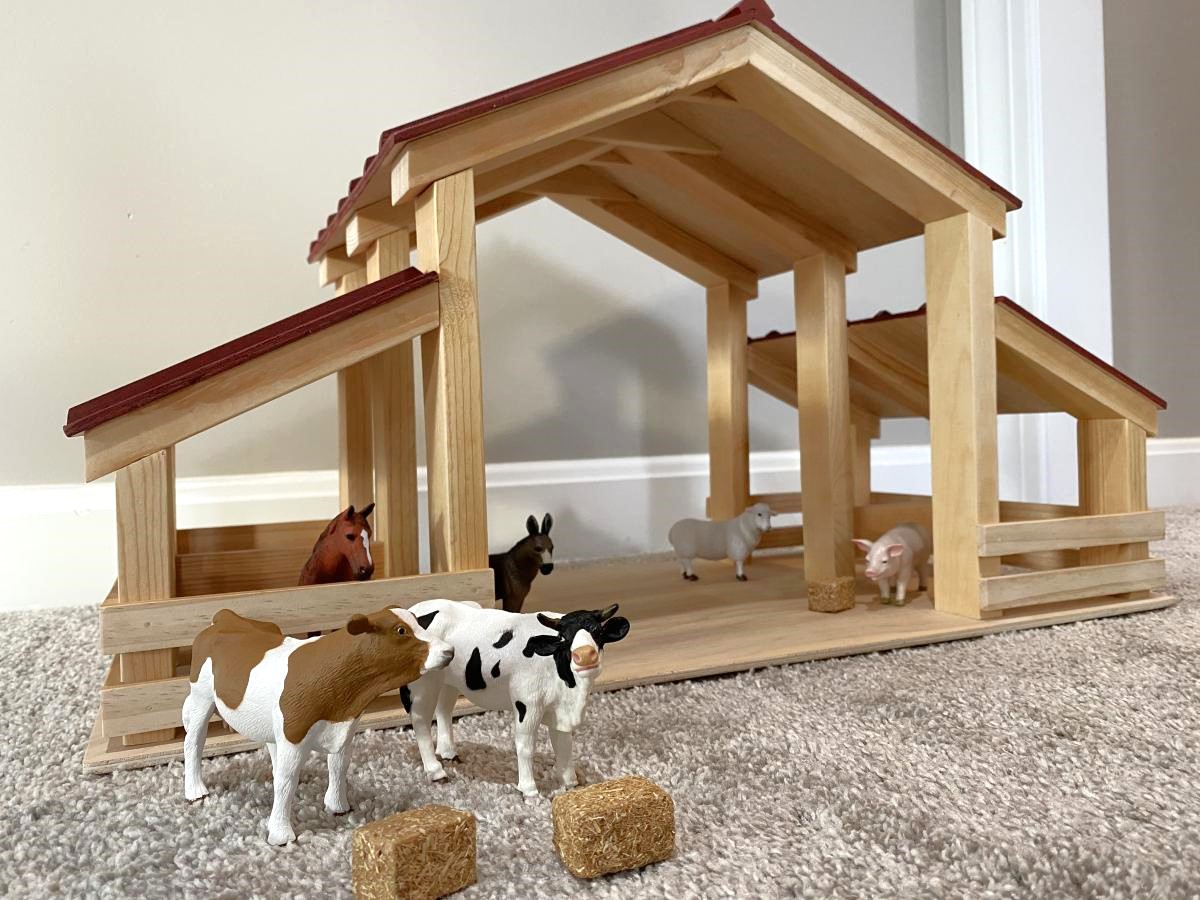
When I spotted this plan on Instagram, I knew I had to make it for my grandsons for Christmas. Instructions were easy to follow and I had fun rounding up the animals, tractors, etc.
Built from Plan(s)
Comments
Sat, 01/08/2022 - 15:36
So awesome!
Well done, that will be loved and enjoyed for many years to come!
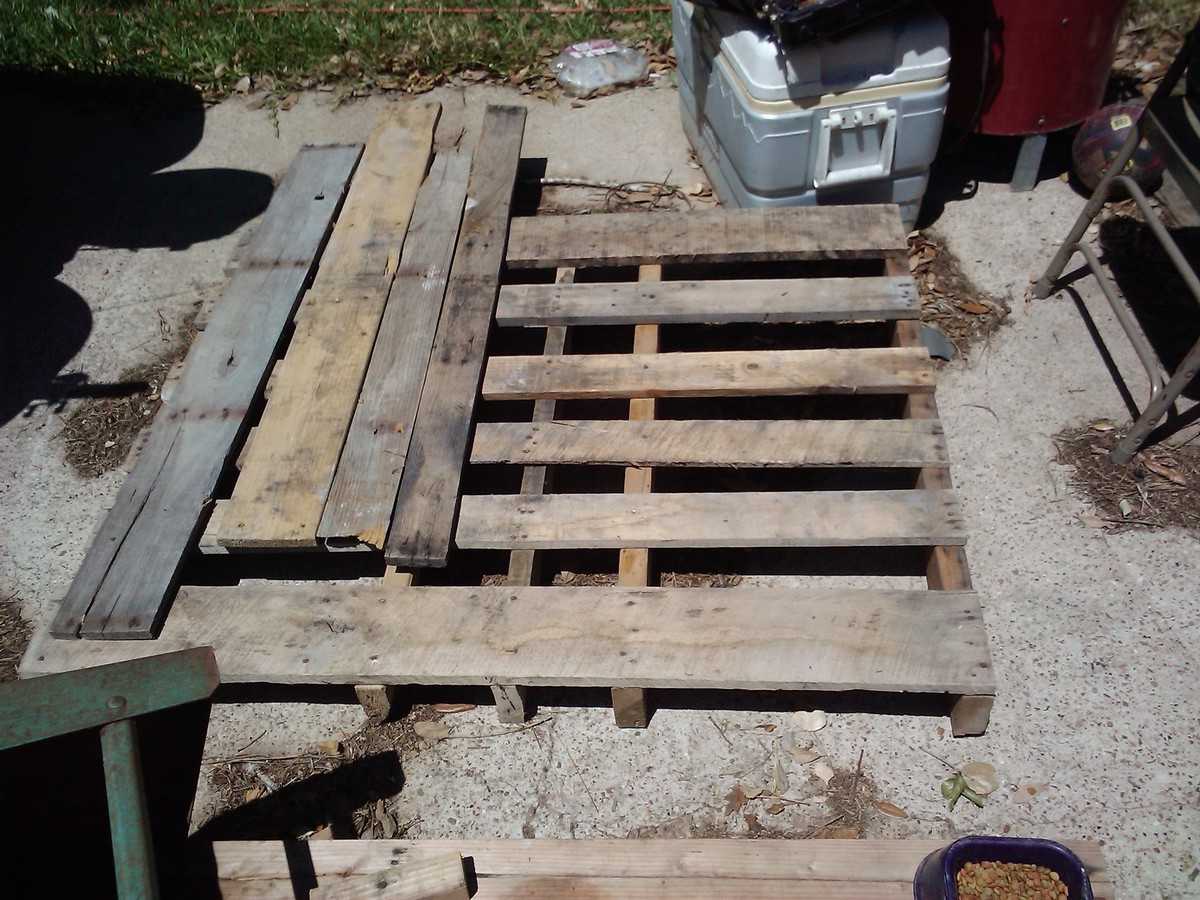
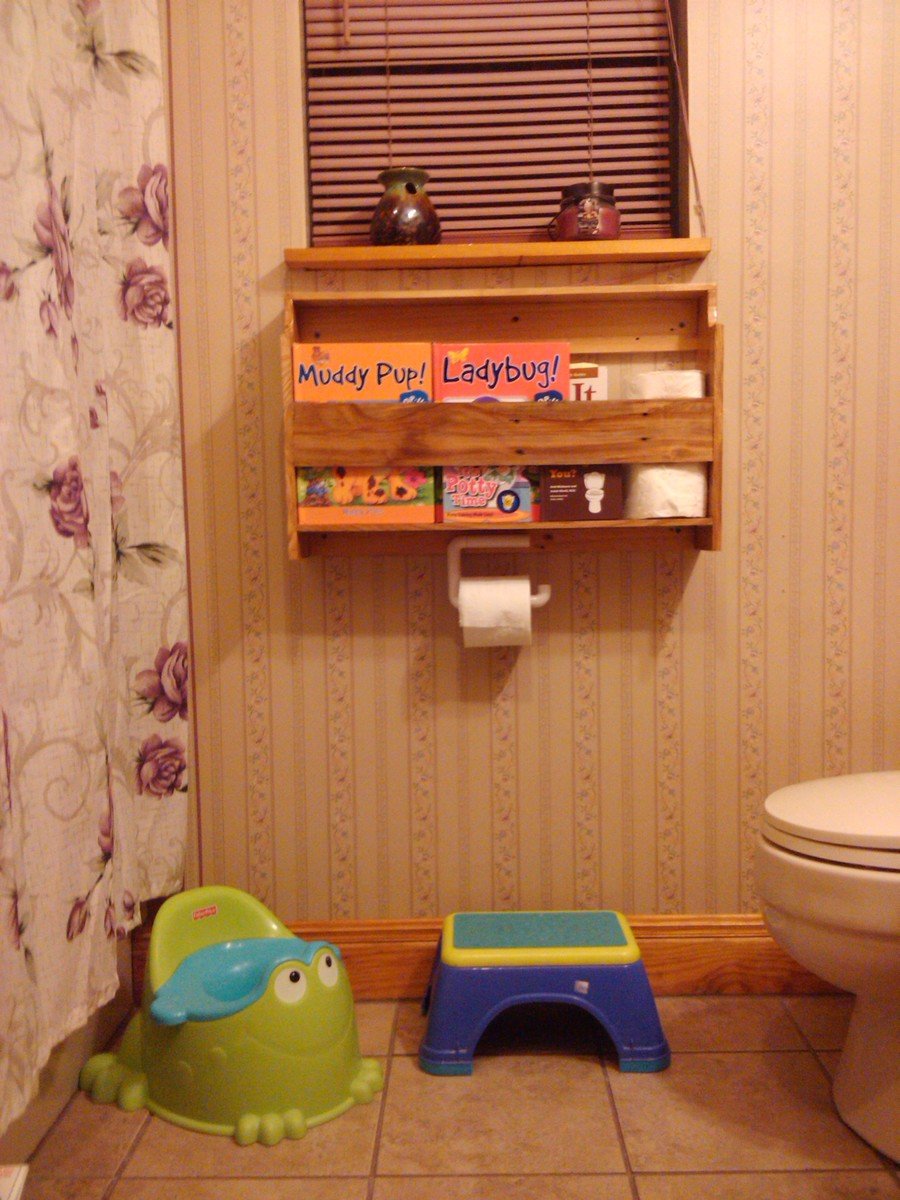
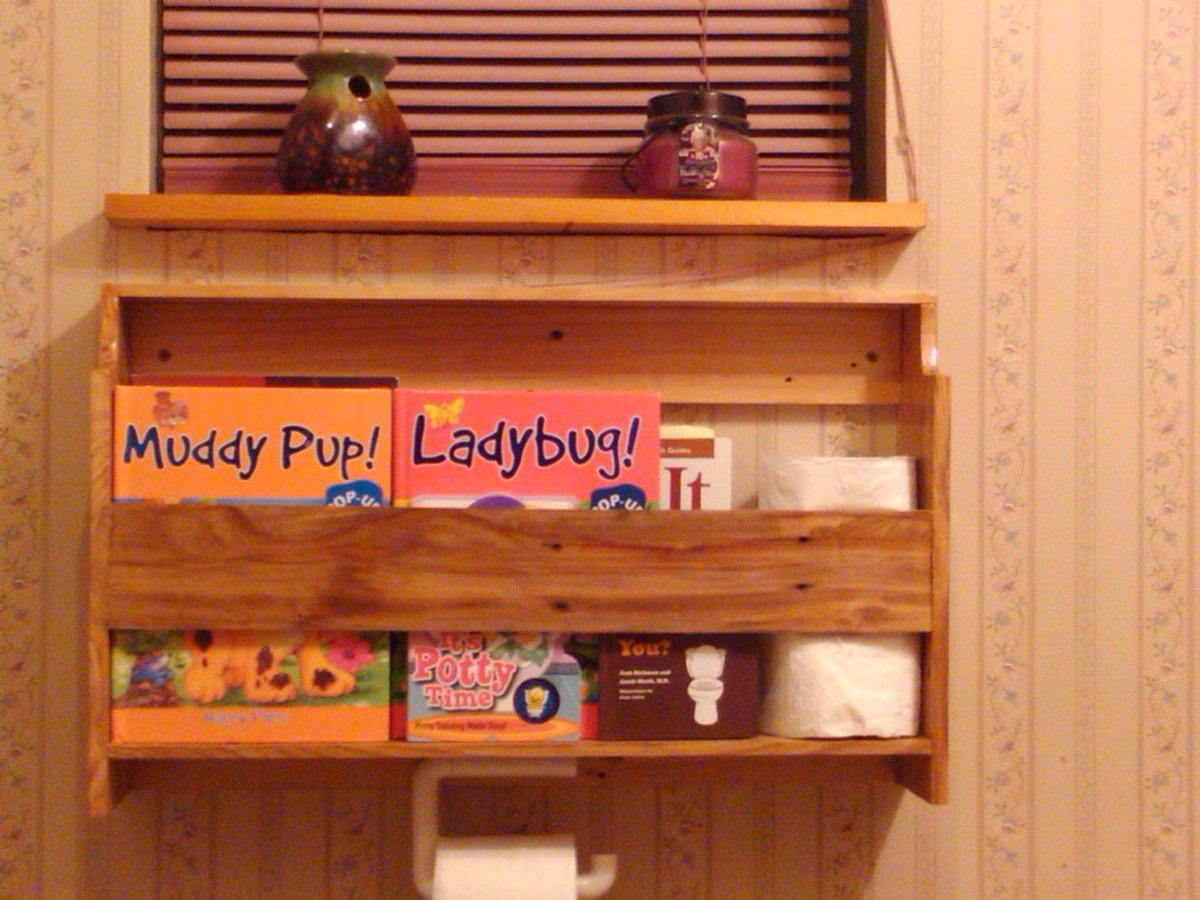
I Love Reclaimed Wood from Pallets
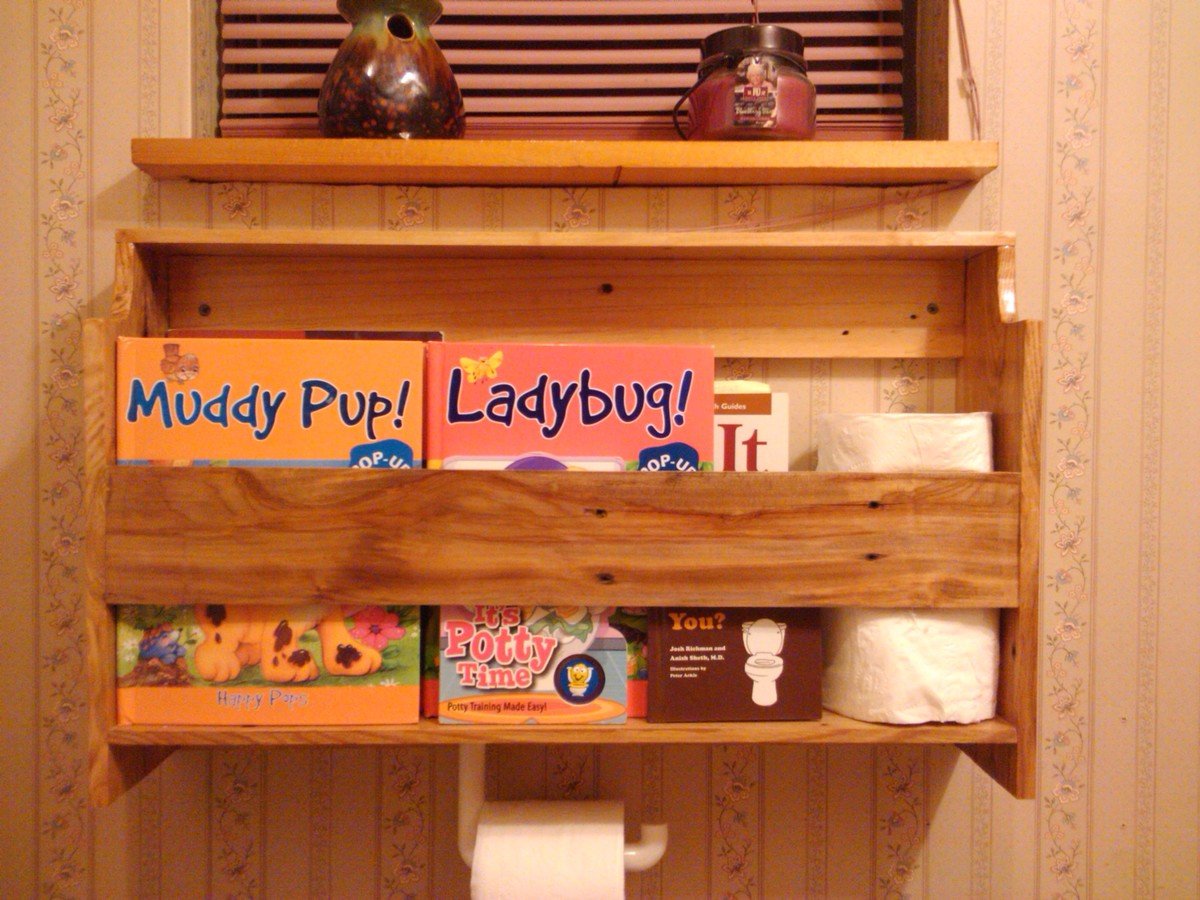
My husband and I made a toddler picnic table for the grandbabies out of reclaimed wood from pallets. I have a bench sander that I used for a lot of that wood, but wow what a lot of work. So for Mother's Day, I asked for a Dewalt thickness planer, and I have to say I think that's been one of my best purchases in a while.
I had no idea how beautiful some of that pallet wood could actually be until I started running it through the planer.
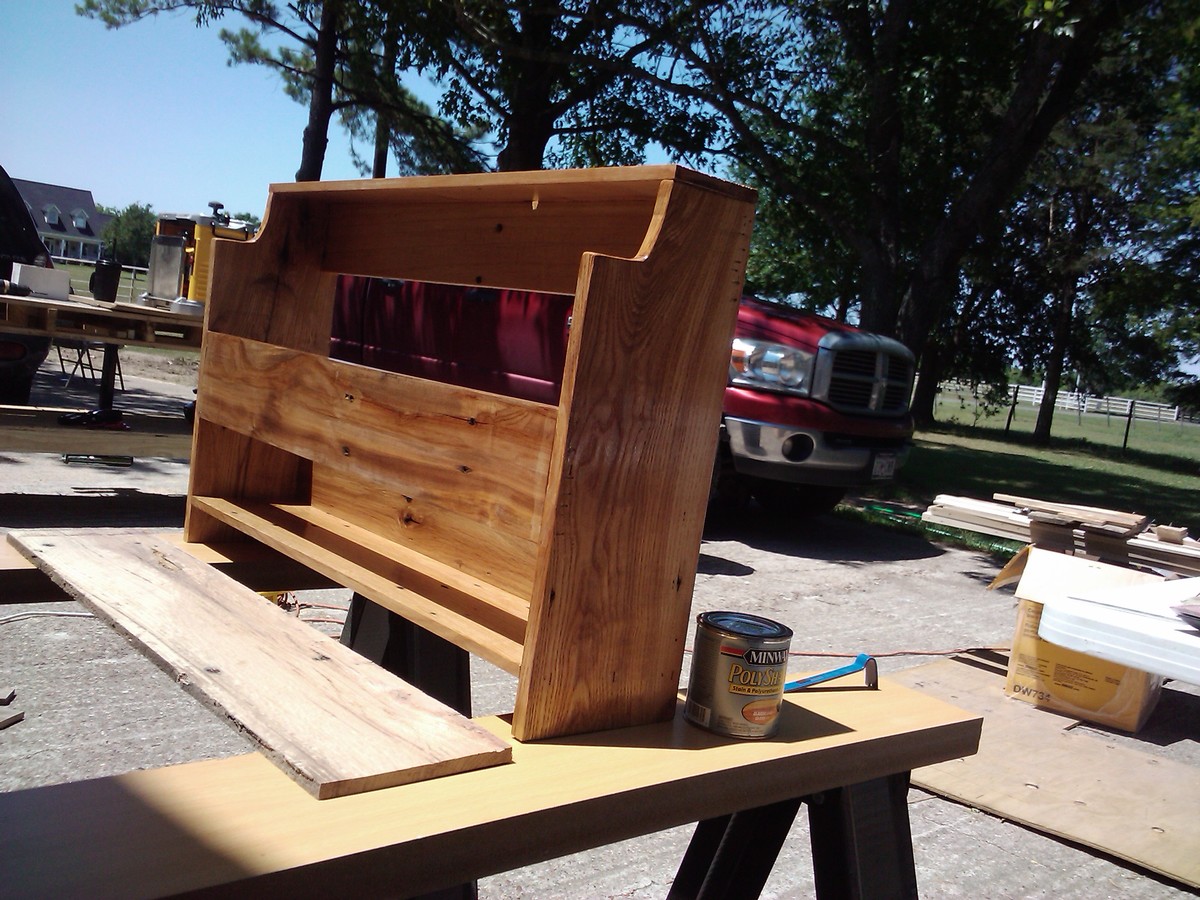
I needed a book / magazine shelf in my guest bathroom so I used a plan submitted by a guest, modified it a little and used my reclaimed wood.(Flat Wall Bookholders) I used an oak poly stain in order to bring the grain out some. I couldn't be happier!
Thanks Ana!

Estimated Cost
Free, I had everything I needed.
Estimated Time Investment
Afternoon Project (3-6 Hours)
Finish Used
Minwax PolyShades Classic Oak
Recommended Skill Level
Starter Project
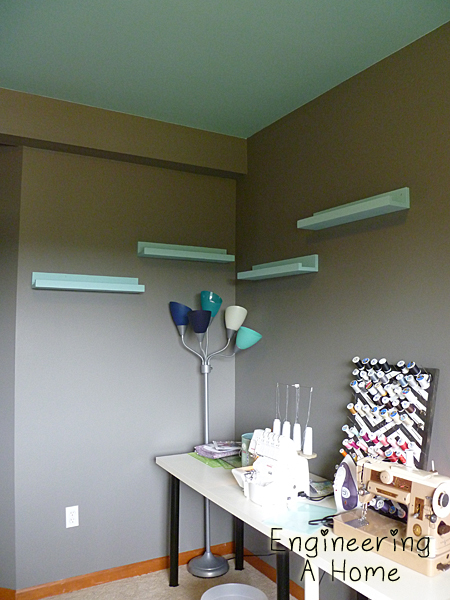
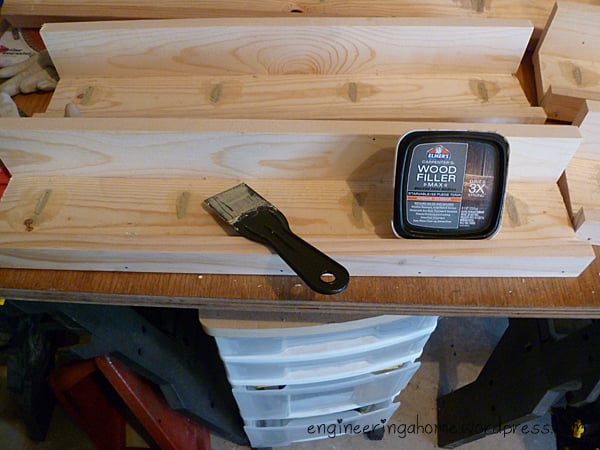
Teal Blue Picture Ledges

At first I was going to stain these ledges so I only used pocket holes to attach the back of the shelf and I attached the front using small finish nails. The back and the bottom are made from a 1x3 and the front is a 1x2.
Check out my blog post for more information.
Built from Plan(s)
Estimated Cost
$15
Estimated Time Investment
Afternoon Project (3-6 Hours)
Finish Used
Eggshell Interior Paint
Recommended Skill Level
Starter Project
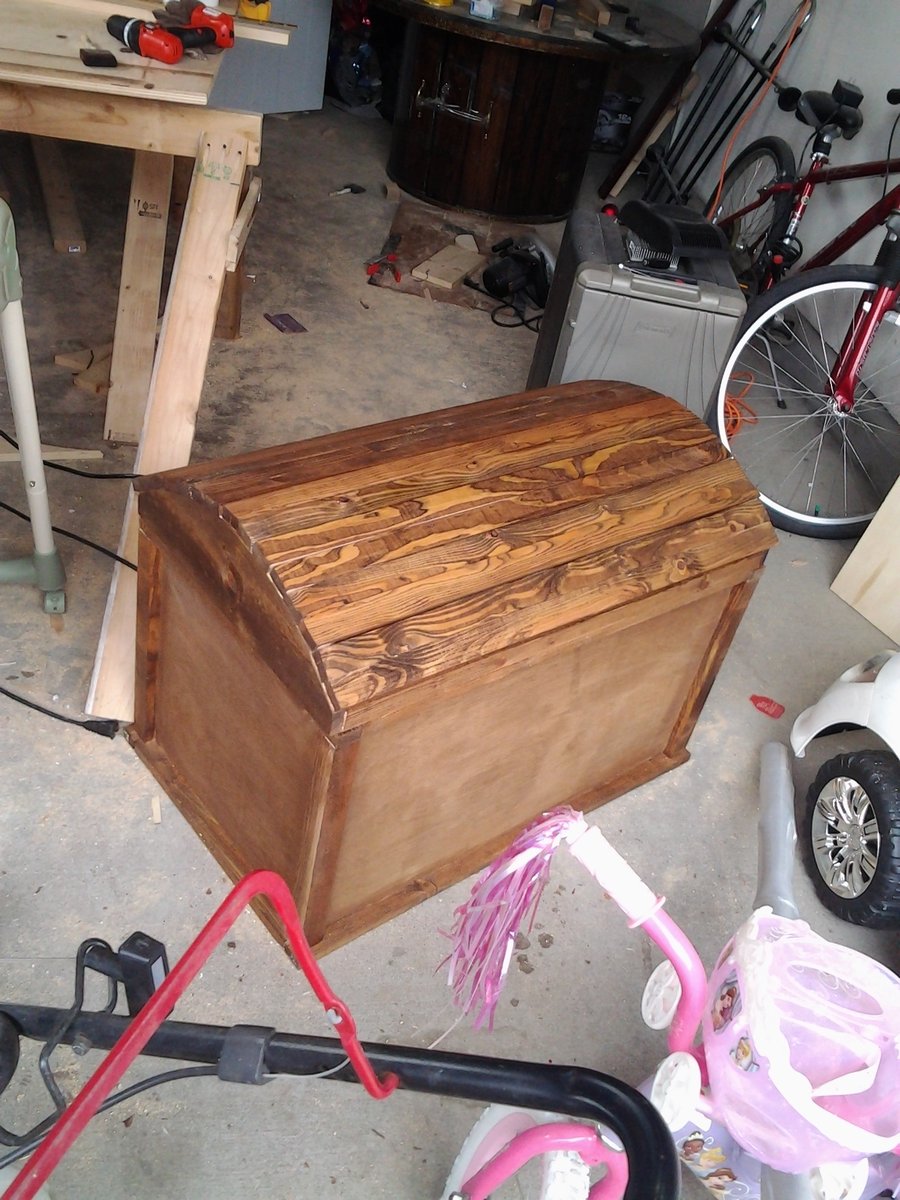
Pirate toy chest

Husband and I built this chest in a weekend for Son's under the sea themed nursery. Easy plans to follow for a great project!
Built from Plan(s)
Estimated Cost
$100
Estimated Time Investment
Weekend Project (10-20 Hours)
Finish Used
Minwax stain in Provincial
Recommended Skill Level
Intermediate
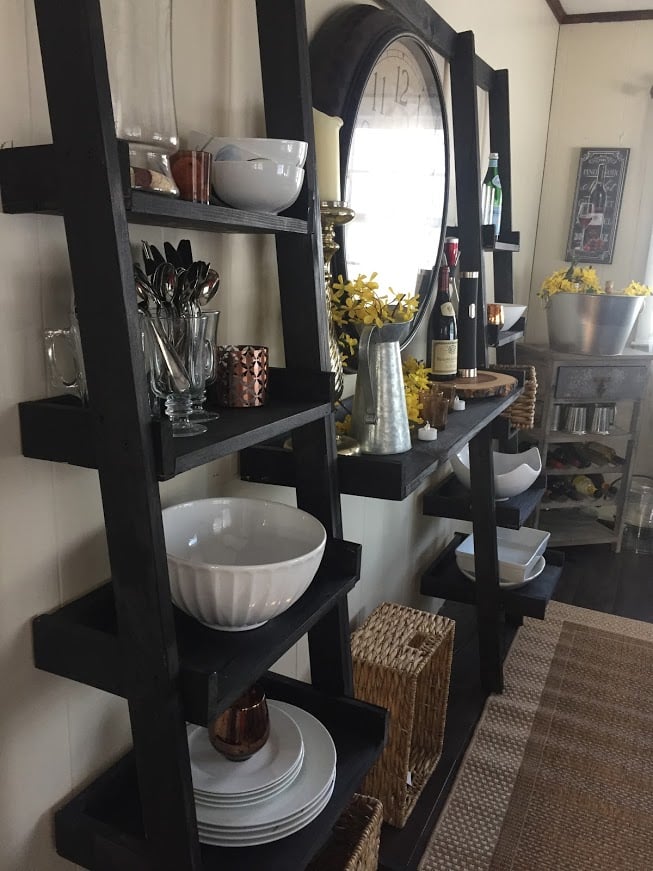
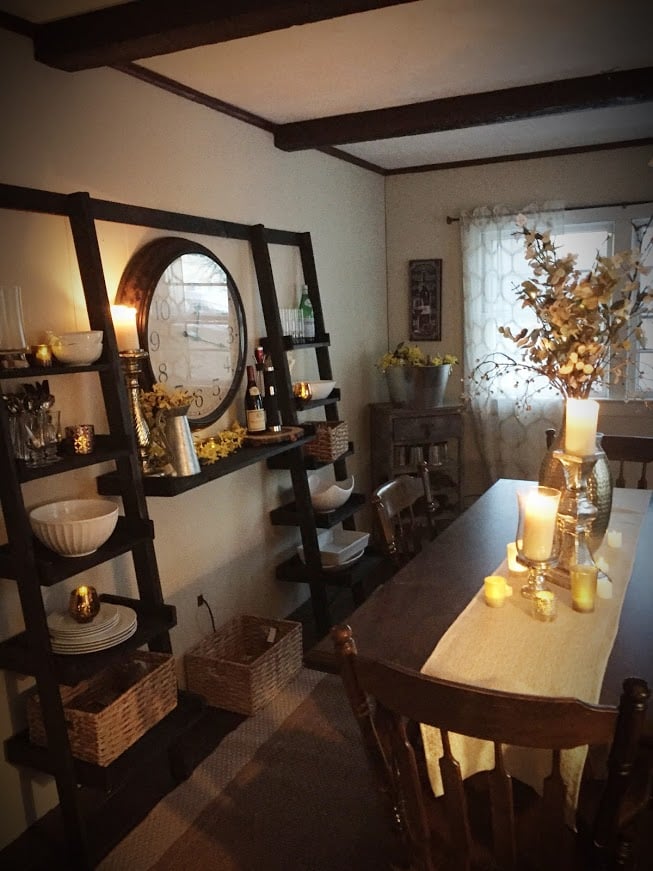
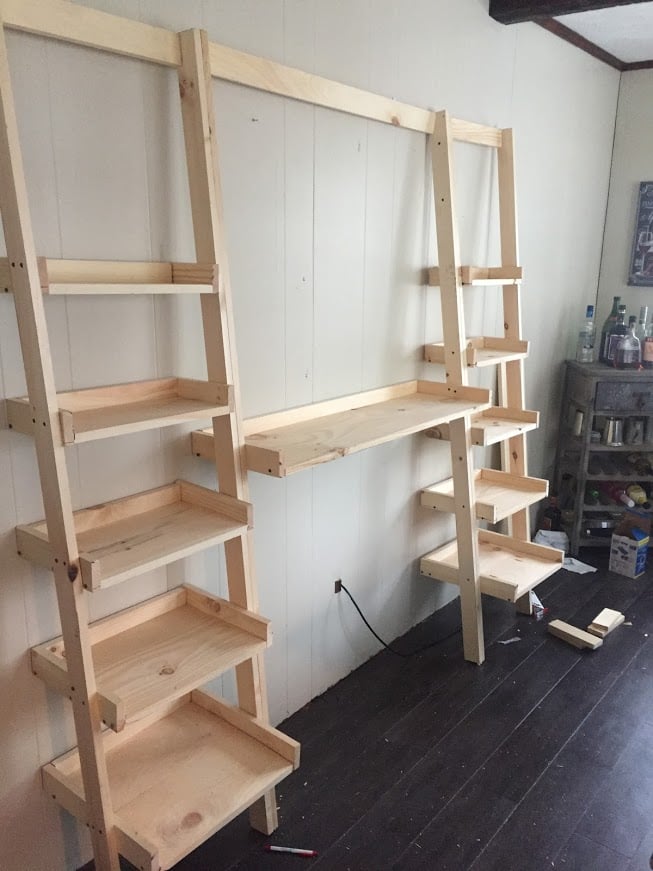
Leaning Ladder Wall Bookshelf
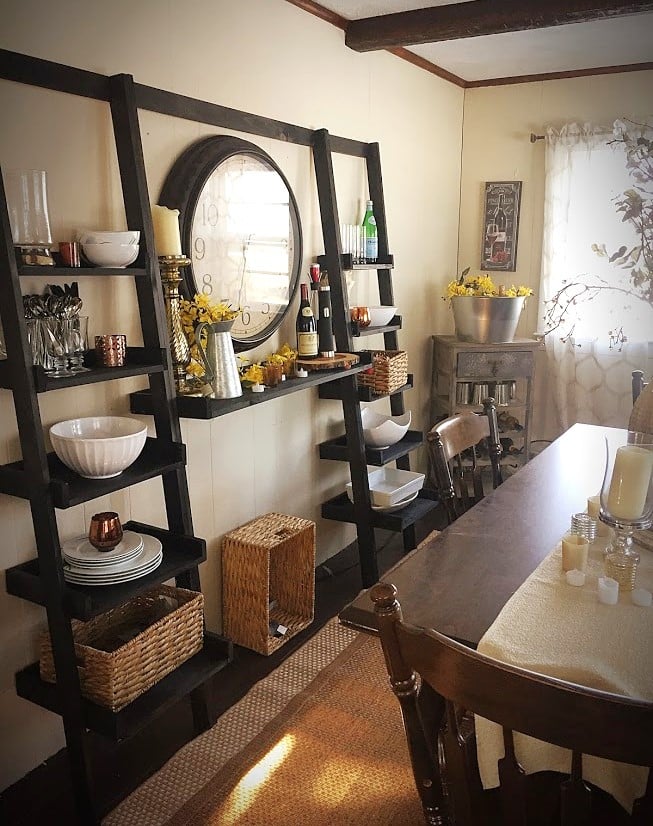
My dining room has no storage and I've been trying to find a place to store all of my bowls, serving dishes, etc; for some time now. I saw a leaning ladder shelf system at Crate and Barrel that I fell in love with but it was $500 which was out of the question. Last summer I built Ana's outdoor couches with absolutely zero experience and they came out great, so I decided to take a chance and try something else. This was my first time using a circular saw, and also my first time using a Kreg Jig! Honestly, halfway through this project I was concerned I bit of more than I could chew but I stayed calm and just kept following the plans. I'm so thrilled with how they came out! I ened up using a scrap piece of the 1 X 12 board for the "desk" piece to make the center a little bigger since I wanted it to serve as a serving board of sorts. I reenforced it with a support board since it was a little longer than the original plan called for. I am beyond thrilled with how this came out, I honestly like it better than the one I saw at C&B since it's custom to my space! This was so easy if I could do it, anyone can. My total cost came to about $130. Not too shabby for a knock off! I'm already on to my next project. I don't think I can buy "factory" furniture again now how much better cost and quality I can get doing it myself! Thanks Ana!
Built from Plan(s)
Estimated Cost
$130
Estimated Time Investment
Weekend Project (10-20 Hours)
Finish Used
I used Minewax Charcoal, at first I thought it was too dark but I've come to like the dark color with the grain showing through. I only did one coat.
Recommended Skill Level
Beginner
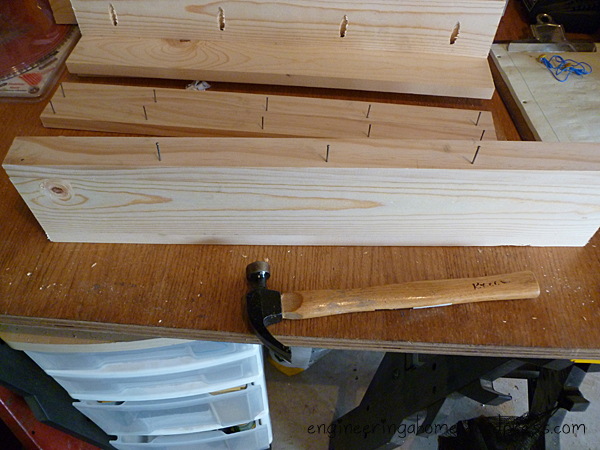
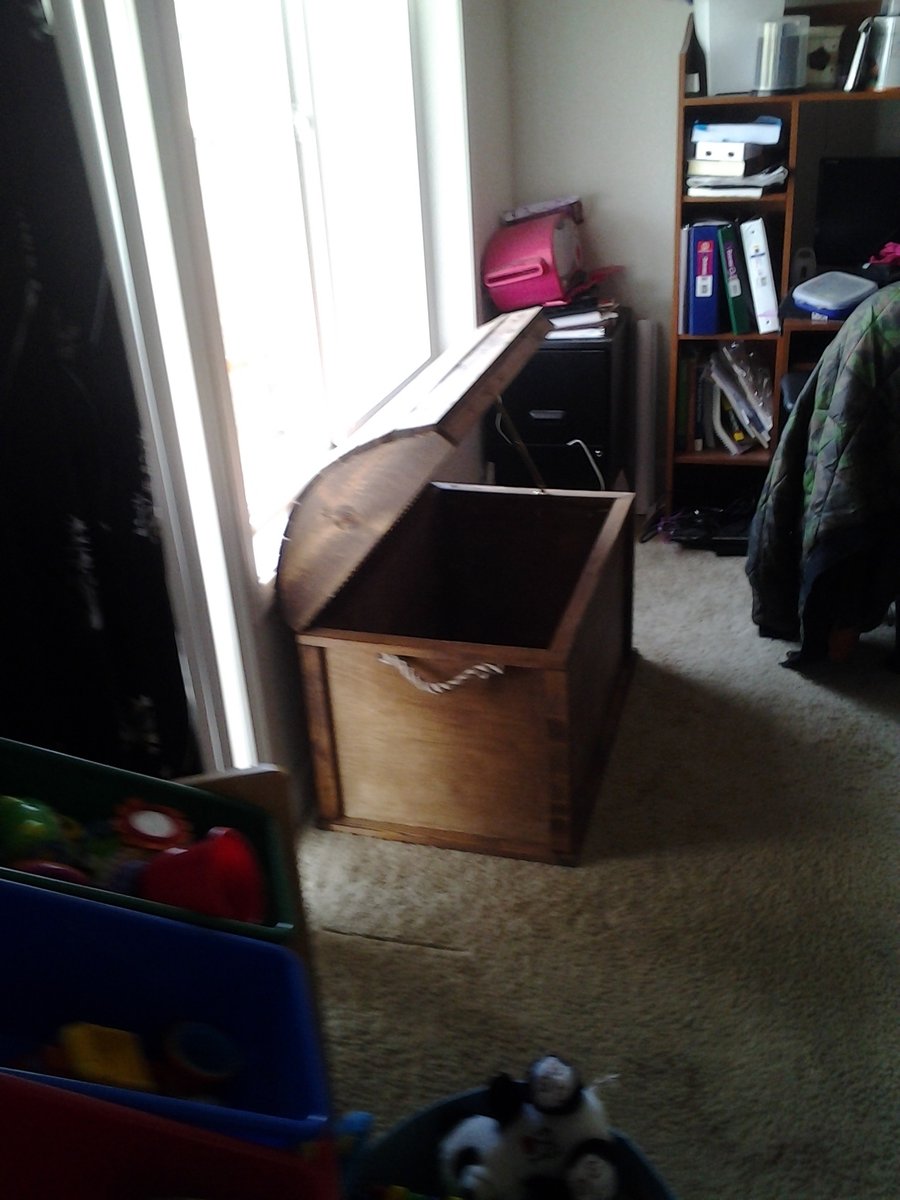
Toy Box

Reconstructed plans to build a toy box for my kids' playroom.
Built from Plan(s)
Comments
Mon, 01/17/2022 - 19:28
Great little toybox!
Sweet mods for a nice little toybox, thanks for sharing!
Comments
Ana White Admin
Mon, 12/27/2021 - 15:57
Nice outdoor table!
Way to go, thank you for sharing!