Modern Farmhouse Coffee Table and Side Table
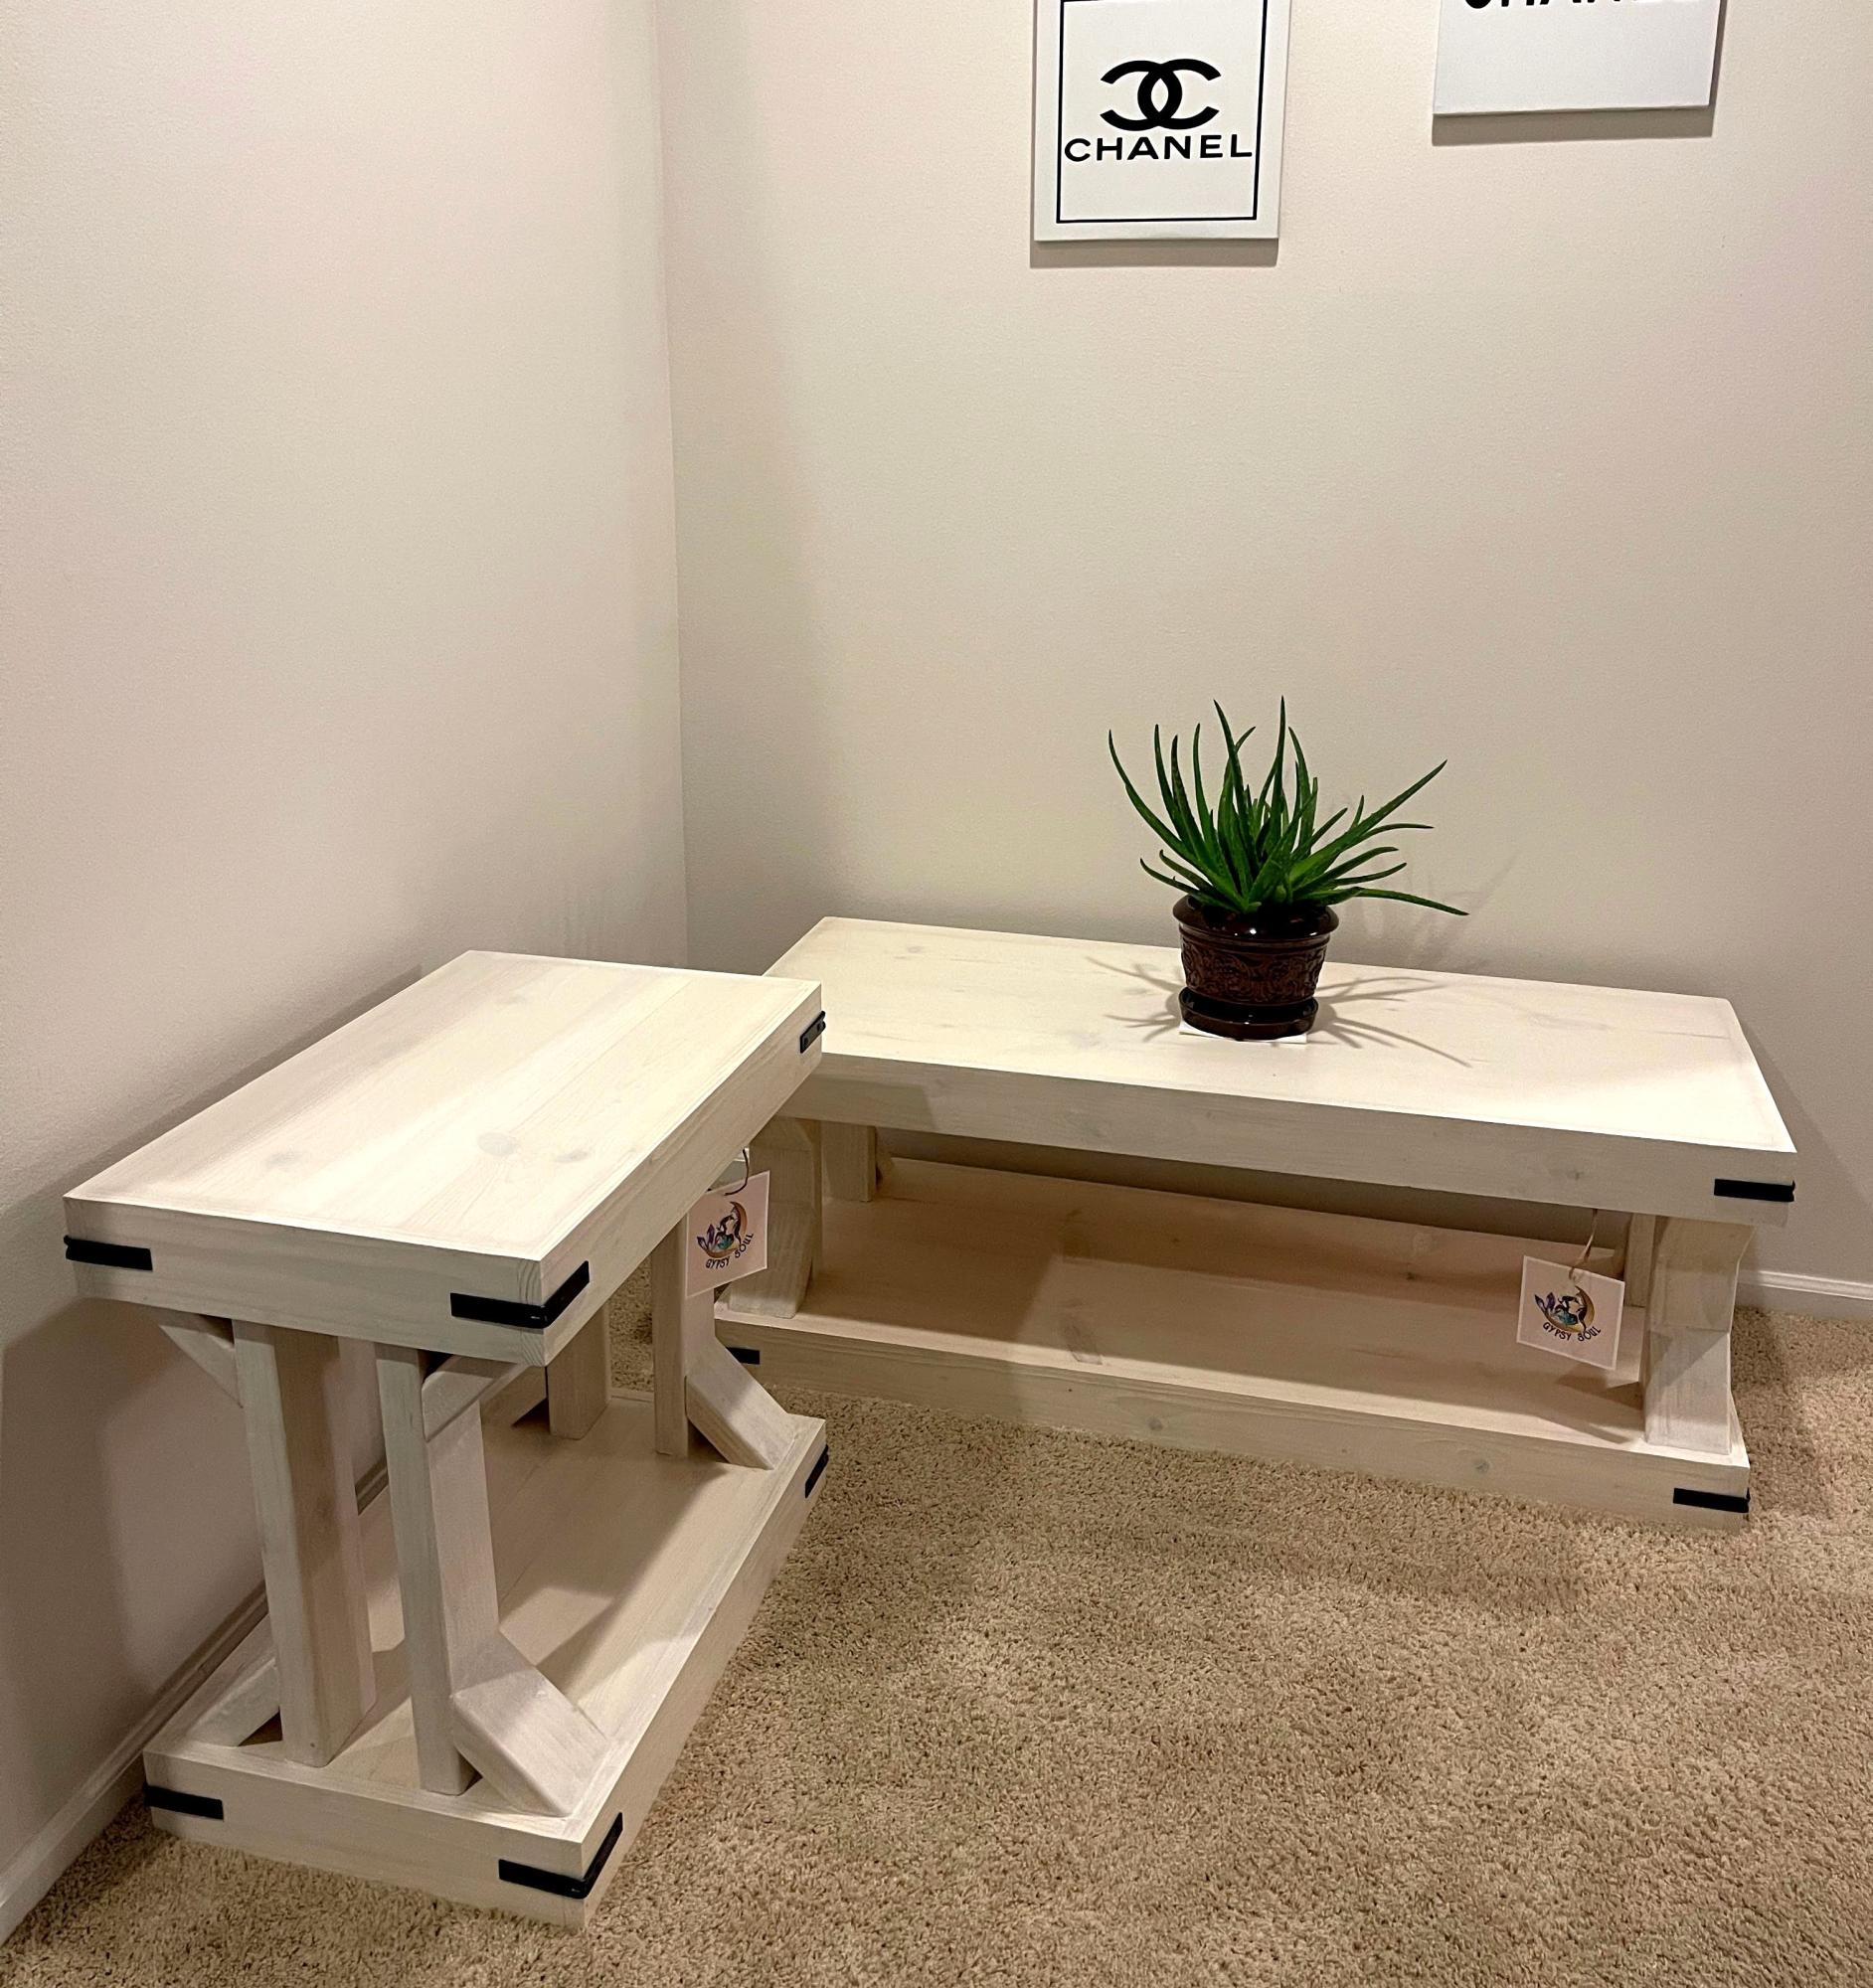
Ana White's plans are super easy and fun to do! I made these for my mom and I really enjoyed doing it. It’s an antique white water base stain.
David Marks
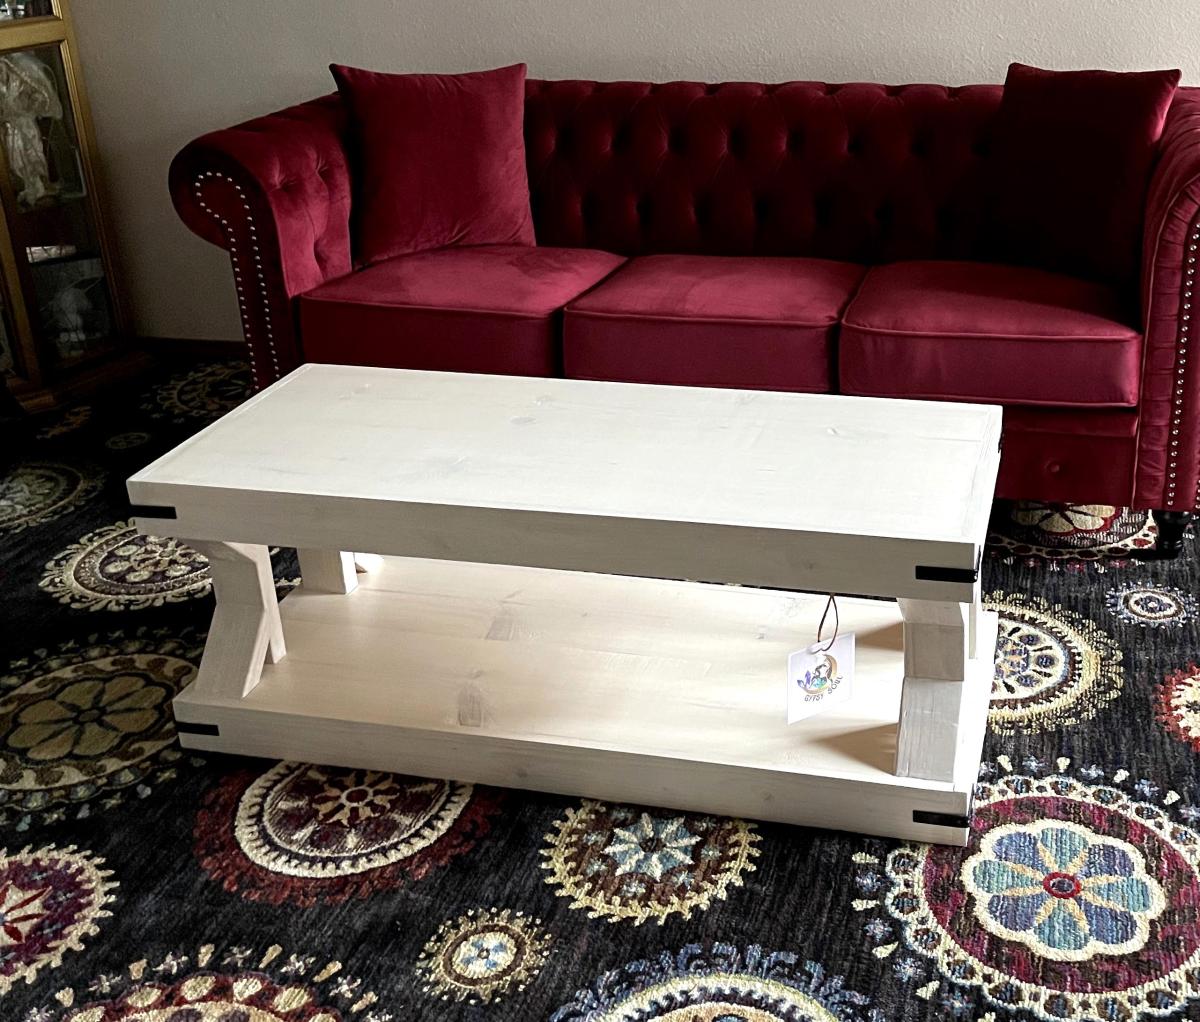
Ana White's plans are super easy and fun to do! I made these for my mom and I really enjoyed doing it. It’s an antique white water base stain.
David Marks
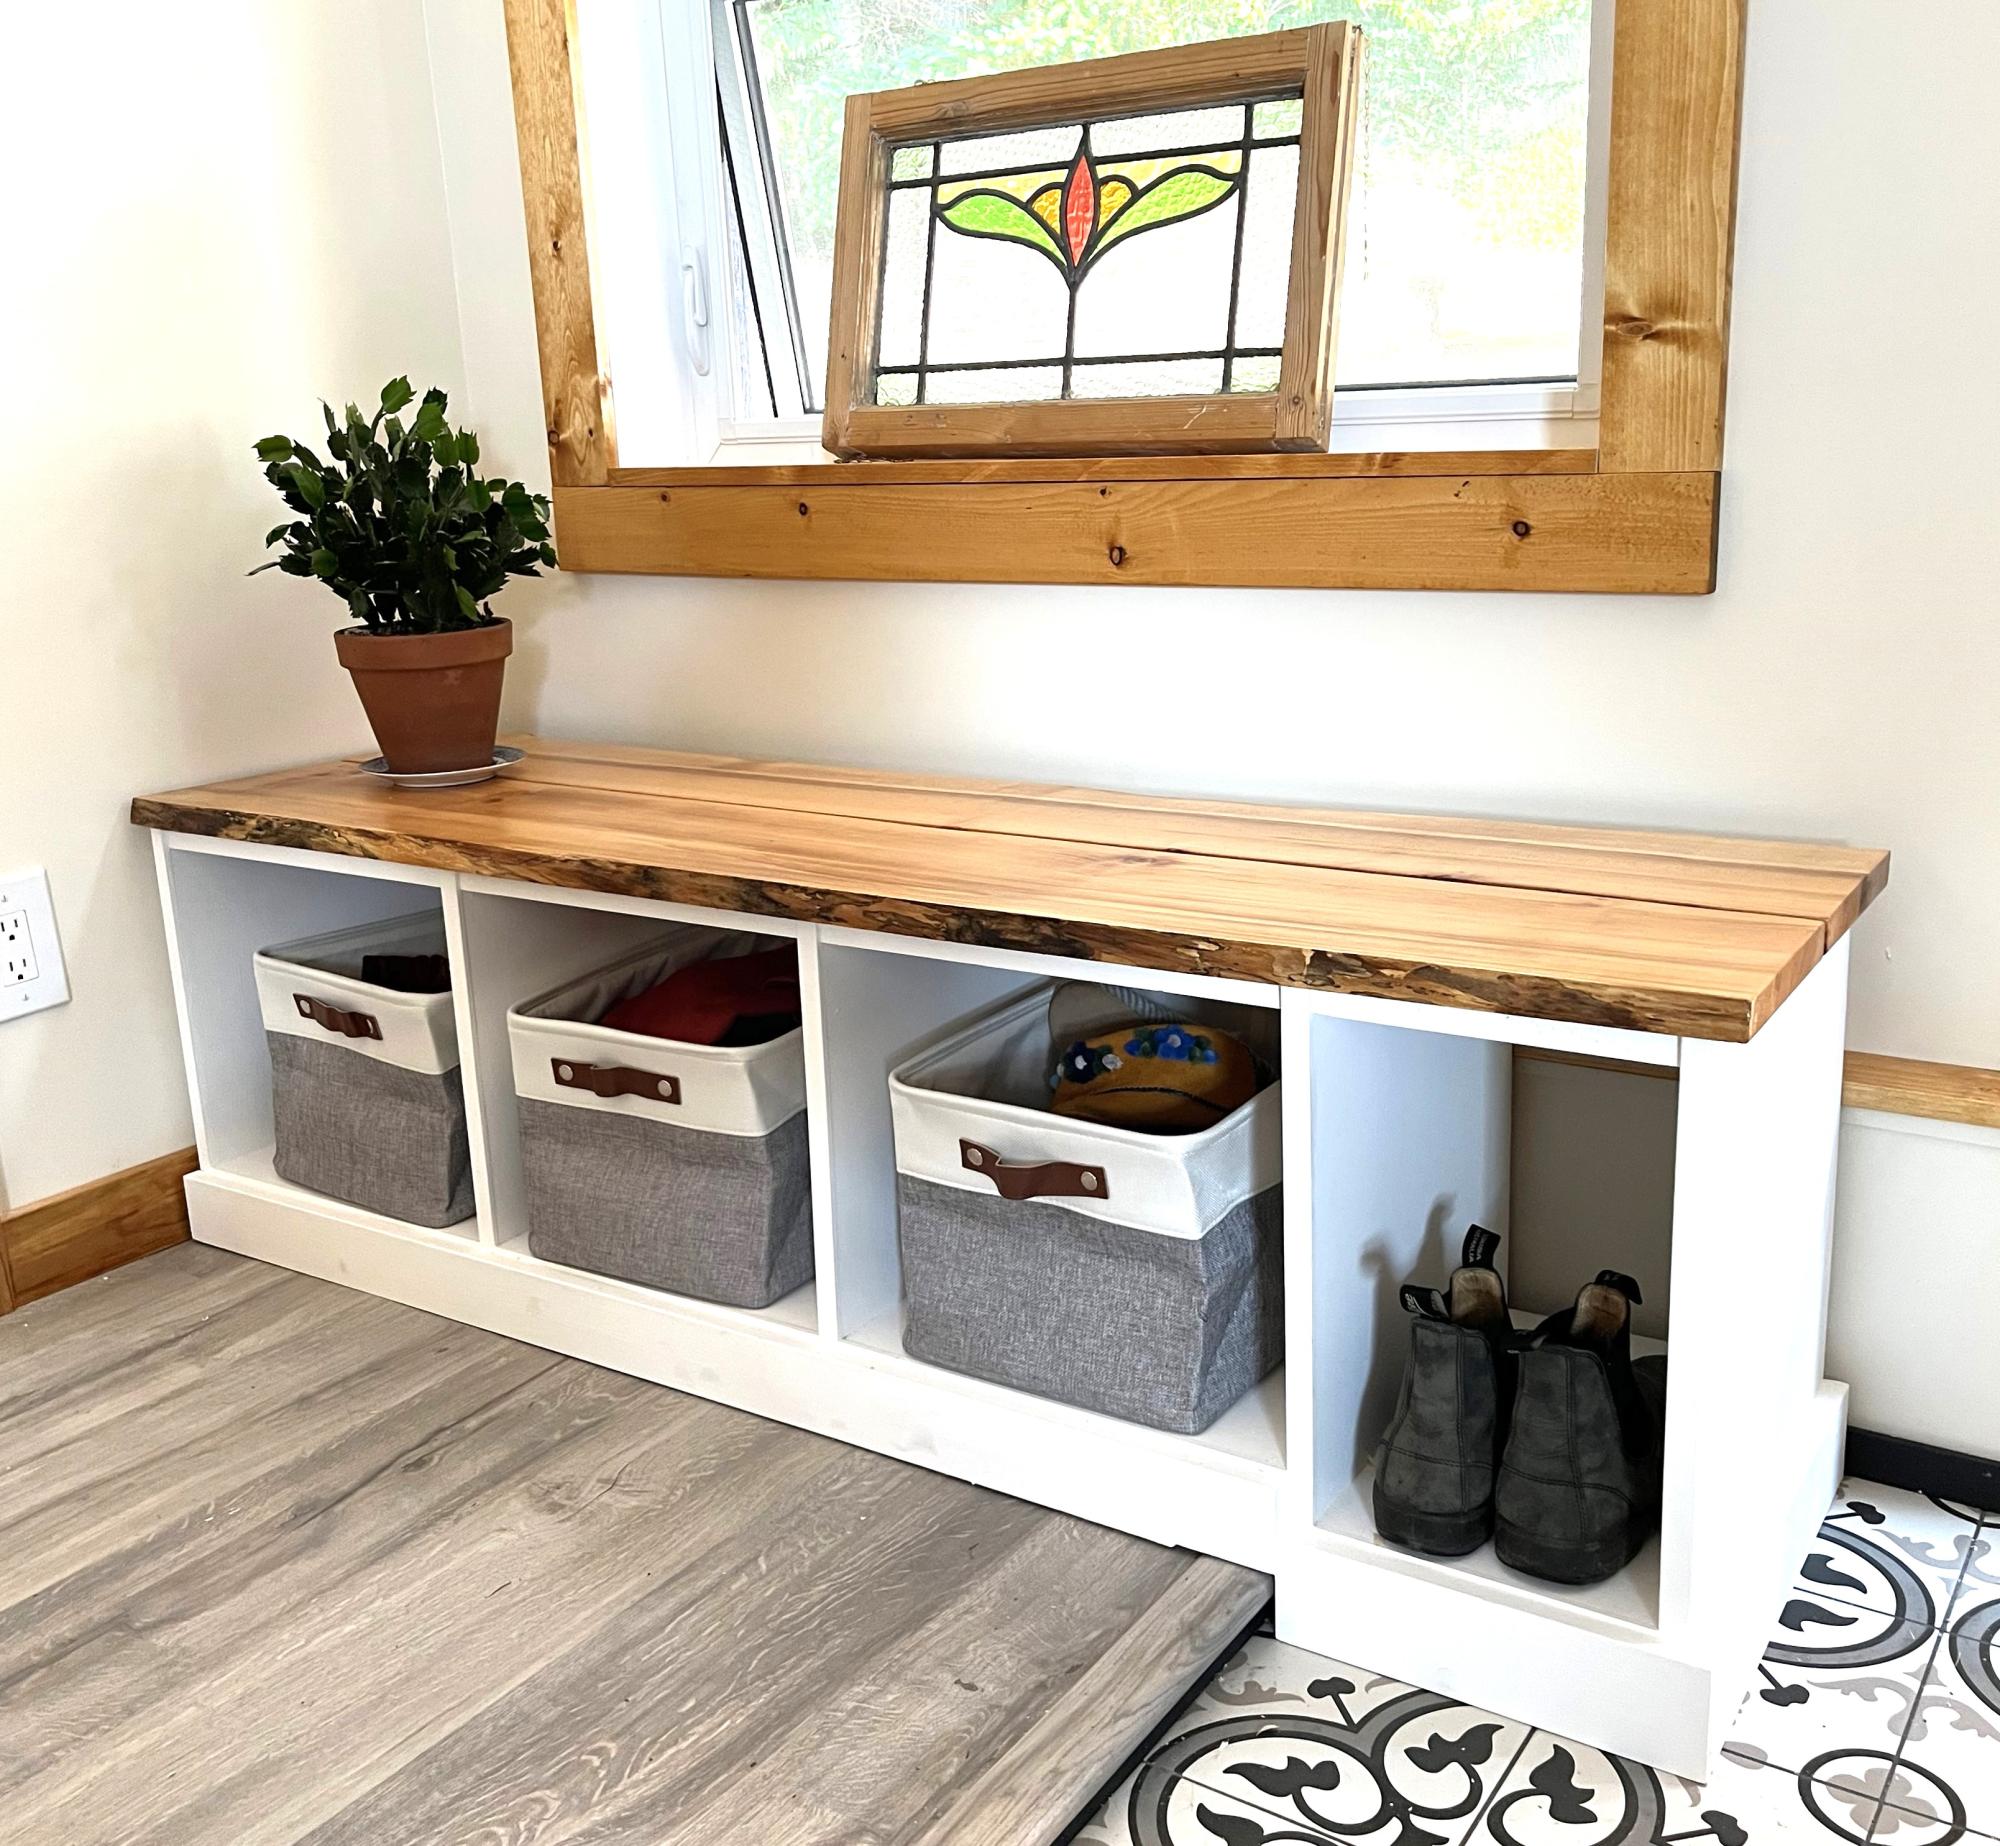
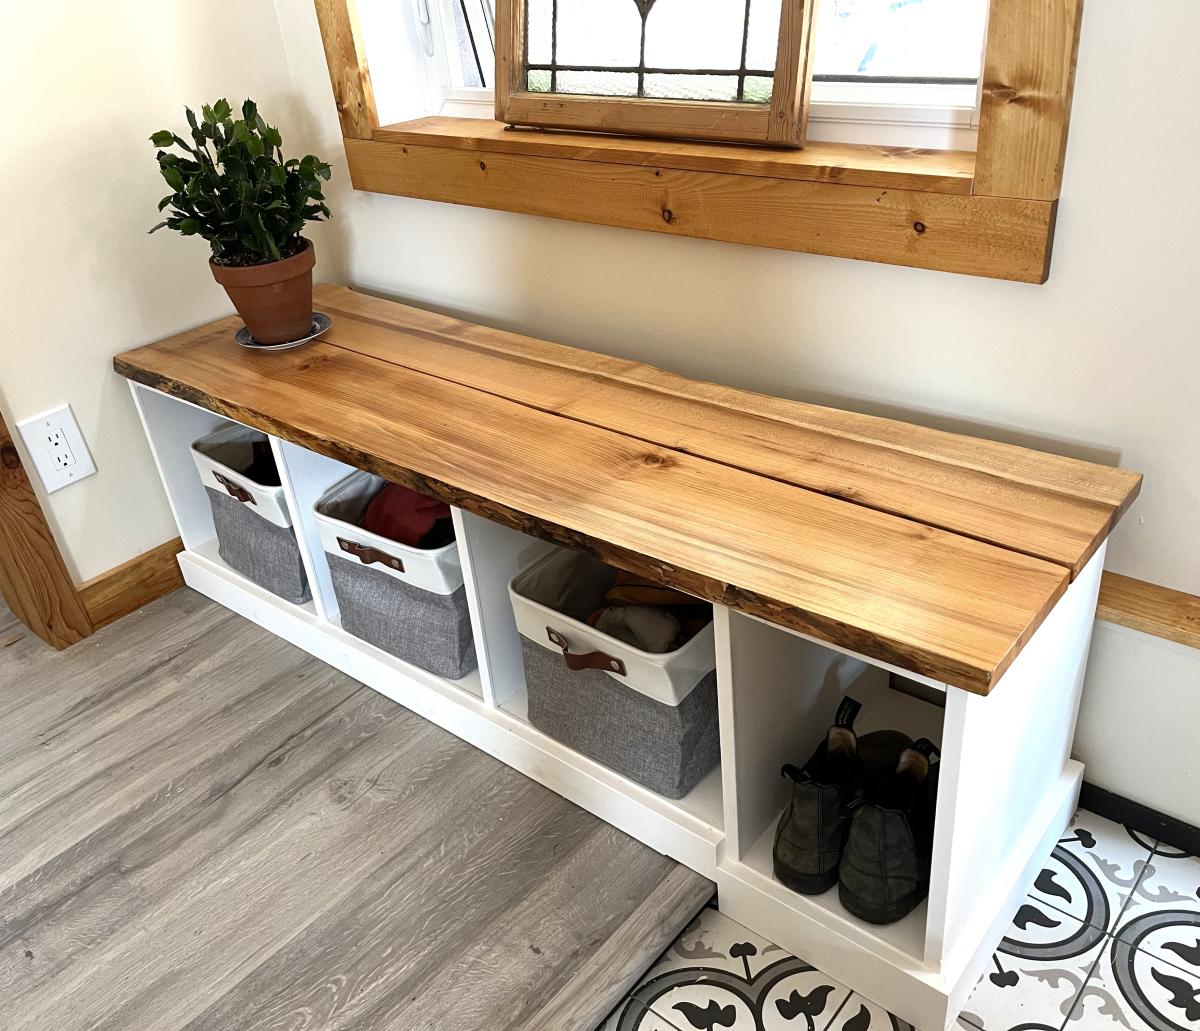
Entryway Bench. I customized the plan with a maple live edge top and a fourth bay that had to be modified to extend the right side of bench down to lower level floor. Worked out perfectly! I am a total amateur woodworker but impressed with how easy it was and how professional it looks.
web: floatingislandsstudio.com
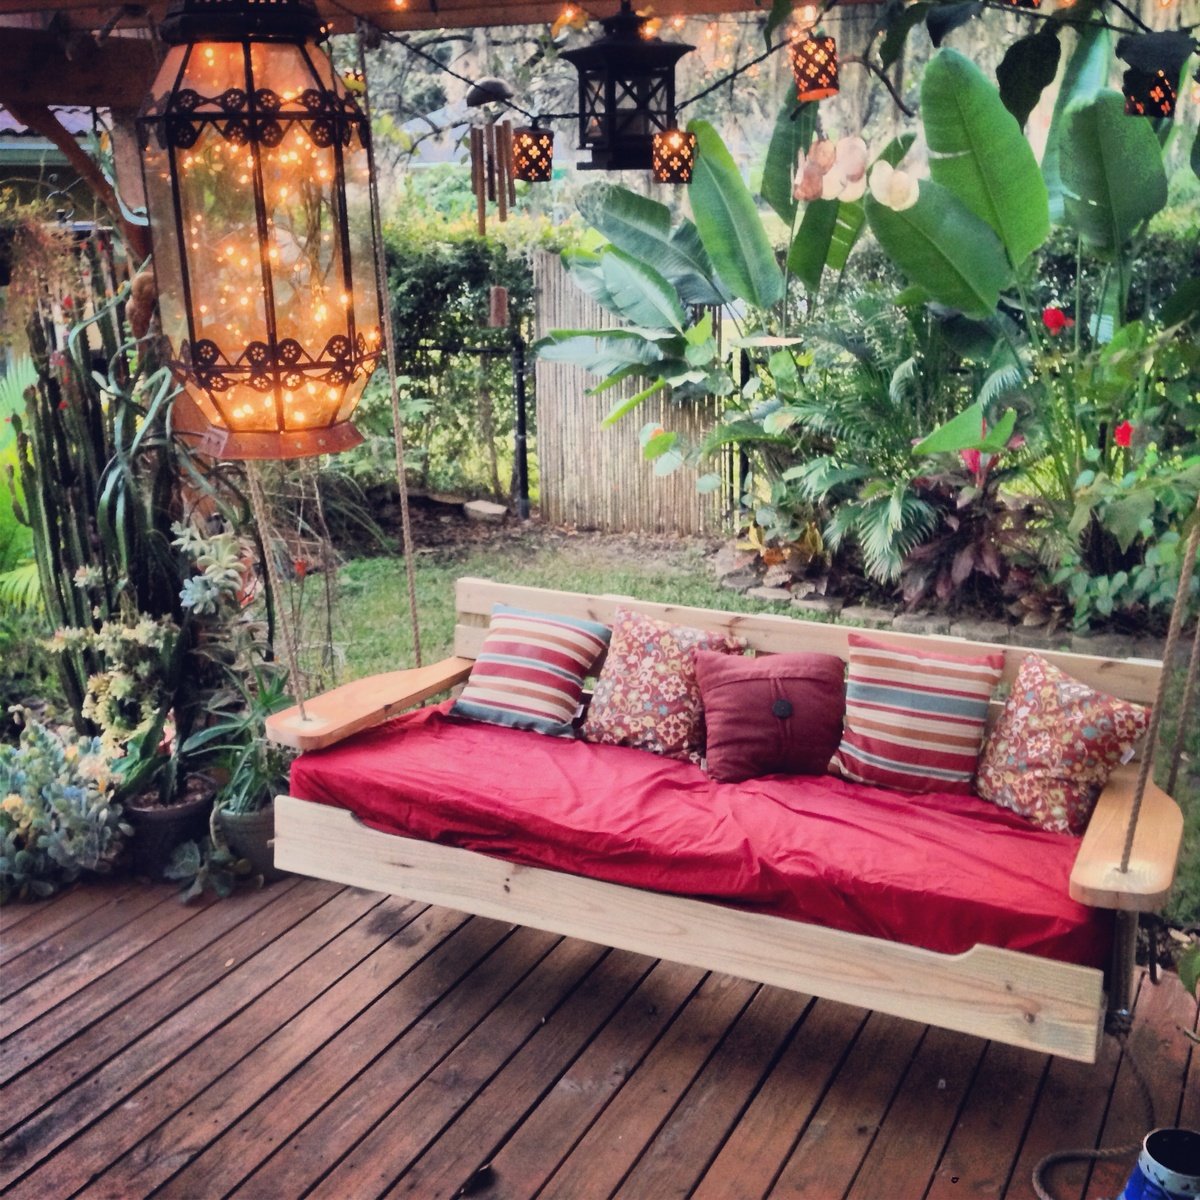
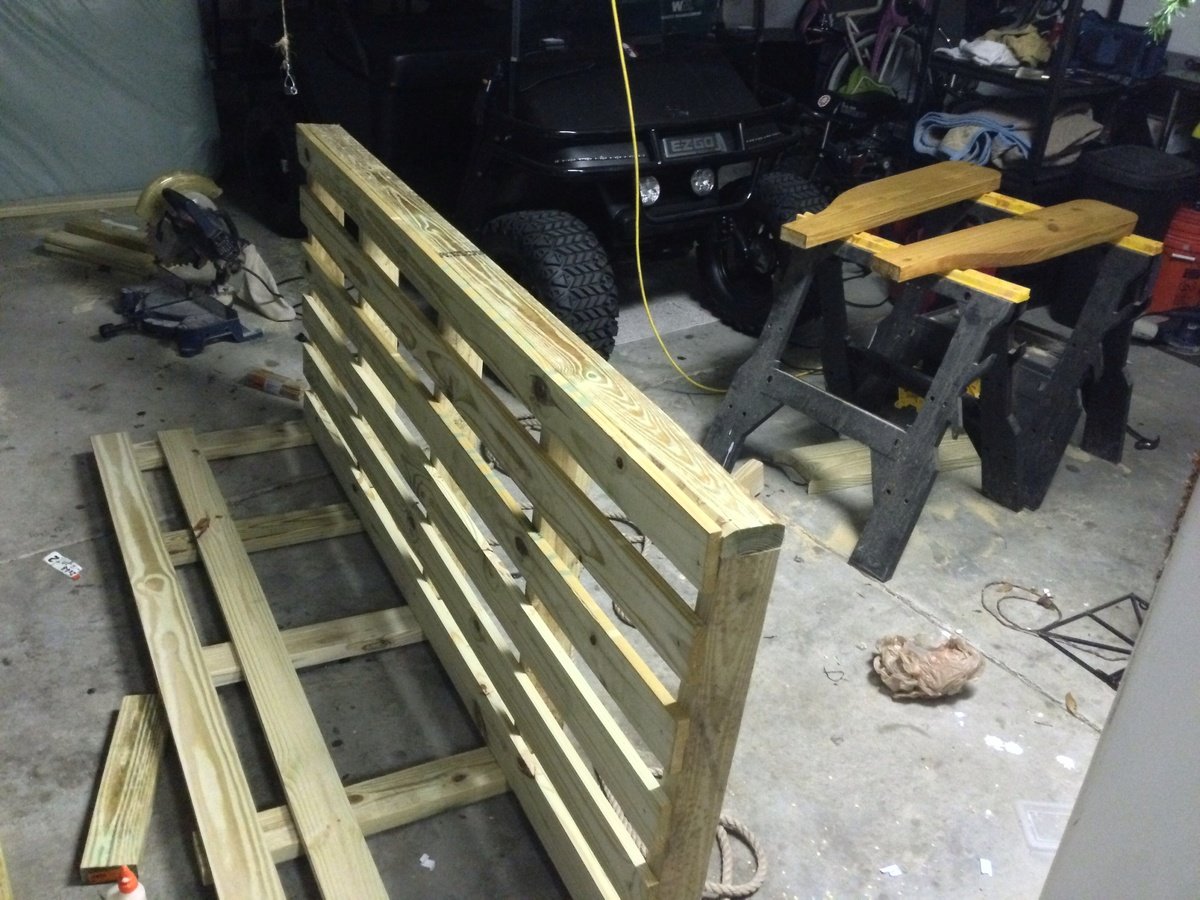
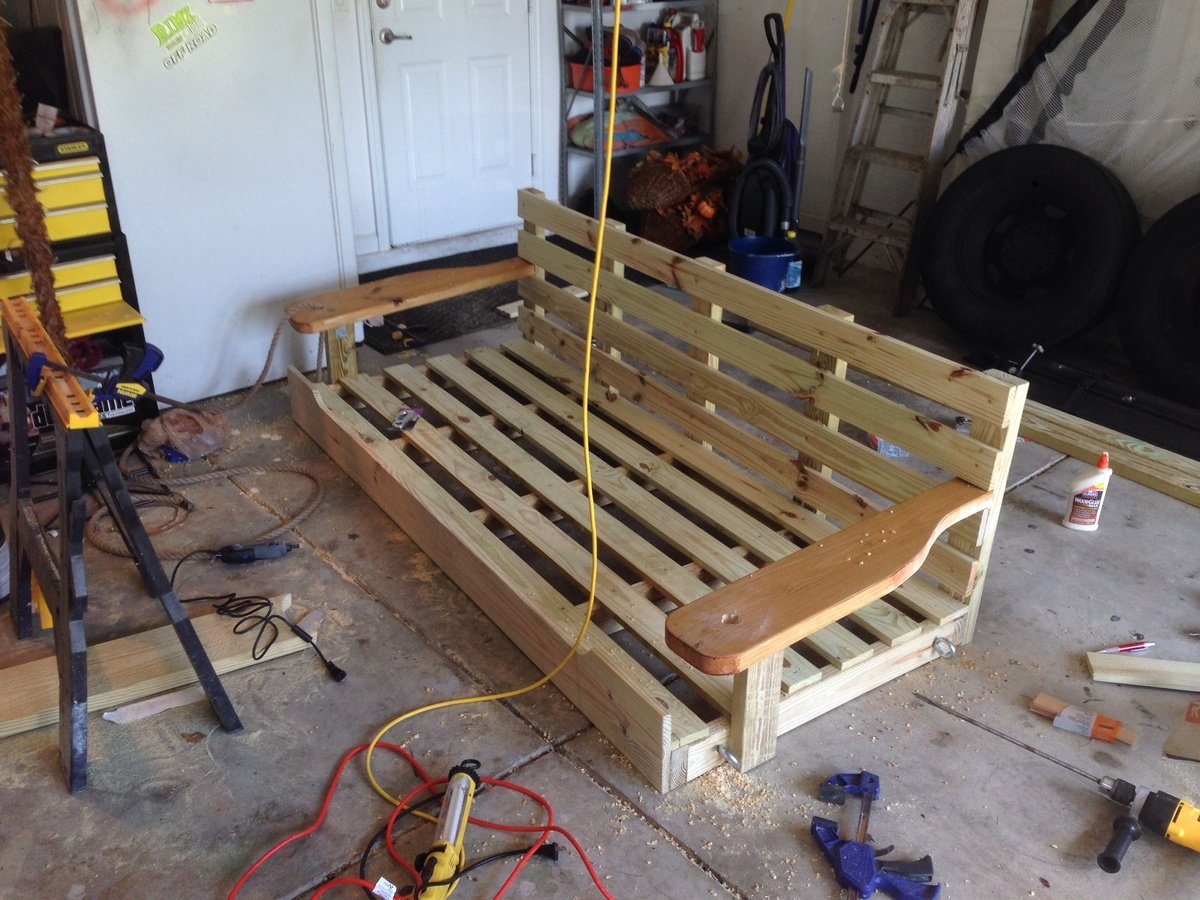
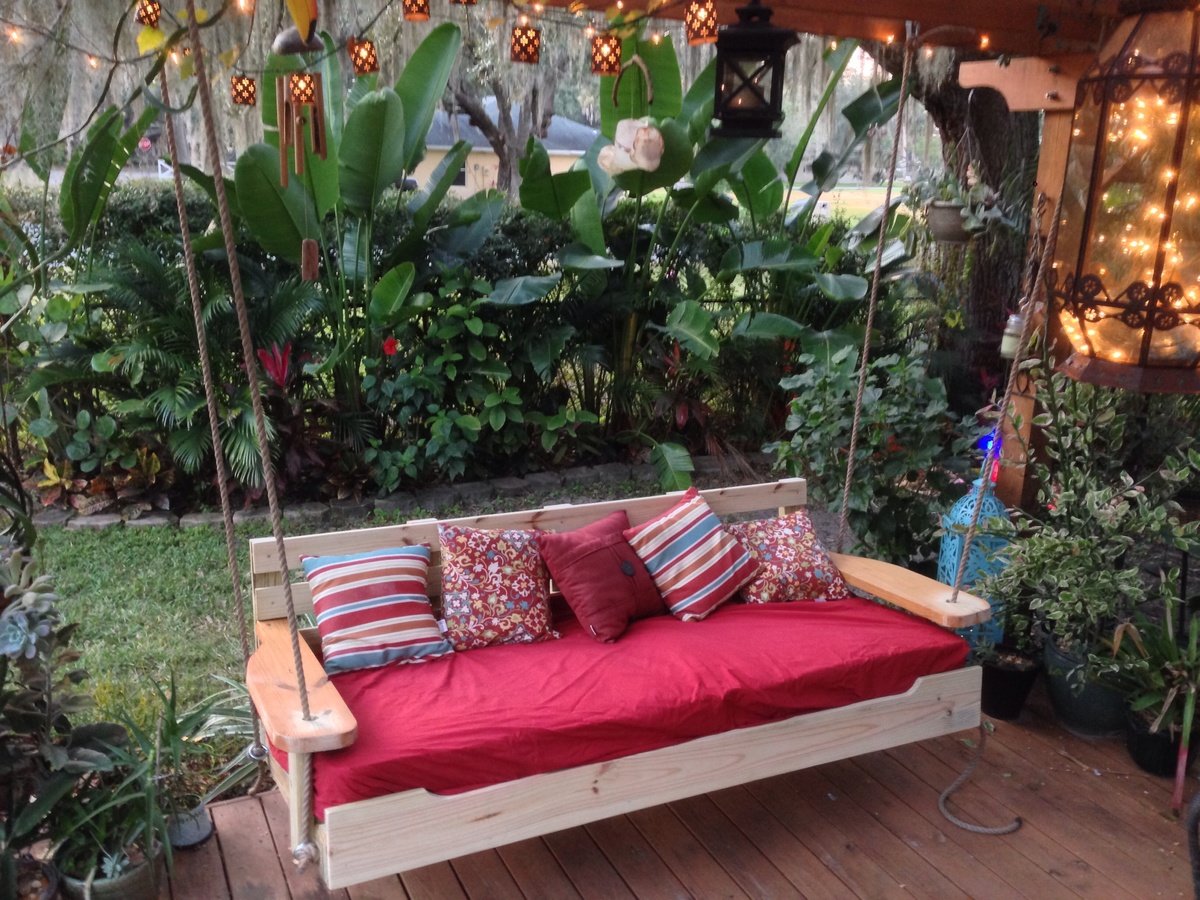
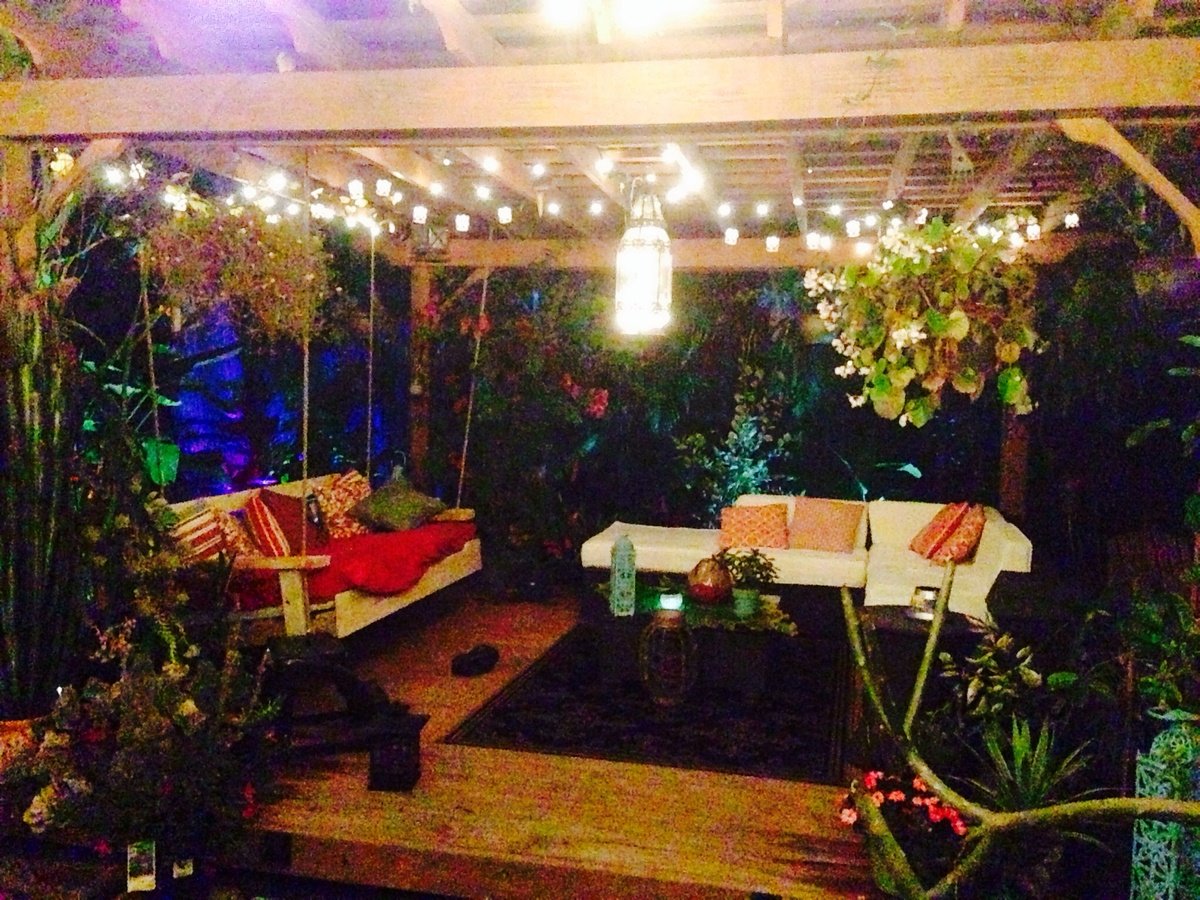
Started off with the original design but enlarged it to fit an oversize single mattress. The mattress cost me $35 from a local faith farm, while the materials came in around $200. I decided to hang under my backyard pergola. Fun and easy project.
Tue, 01/28/2014 - 21:10
Wow this looks so inviting I might just have to make one too! Nice work-- it looks great!
Mon, 04/07/2014 - 22:49
Really lovely! Great job! This will be one of your favorites spots all summer long.
Mon, 07/27/2015 - 22:45
I want this! I just made a couple of plant stands for my front porch. My husband asked me what my next project was, why, a swing bed. (This was only my second project!) I want to put cup holders in those big ole arms! We have a house at the beach in South Alabama, so, you gotta "hydrate." This is an awesome swing. I can't wait to do mine...pillows to rest on, one foot on the concrete pushing me in a slow swing. Cold beverage in my hand or in my cup holder. Yep, southern girl has a new project. Love it!
Perfect for porch sitting!

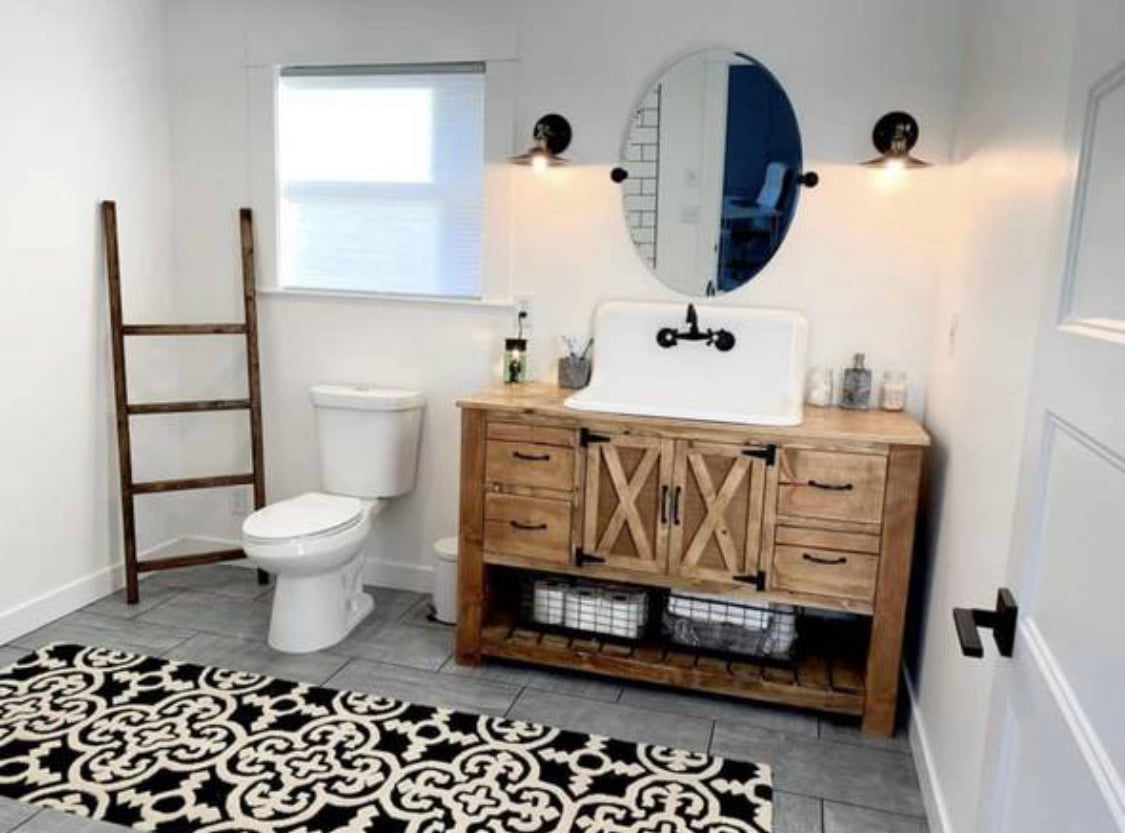
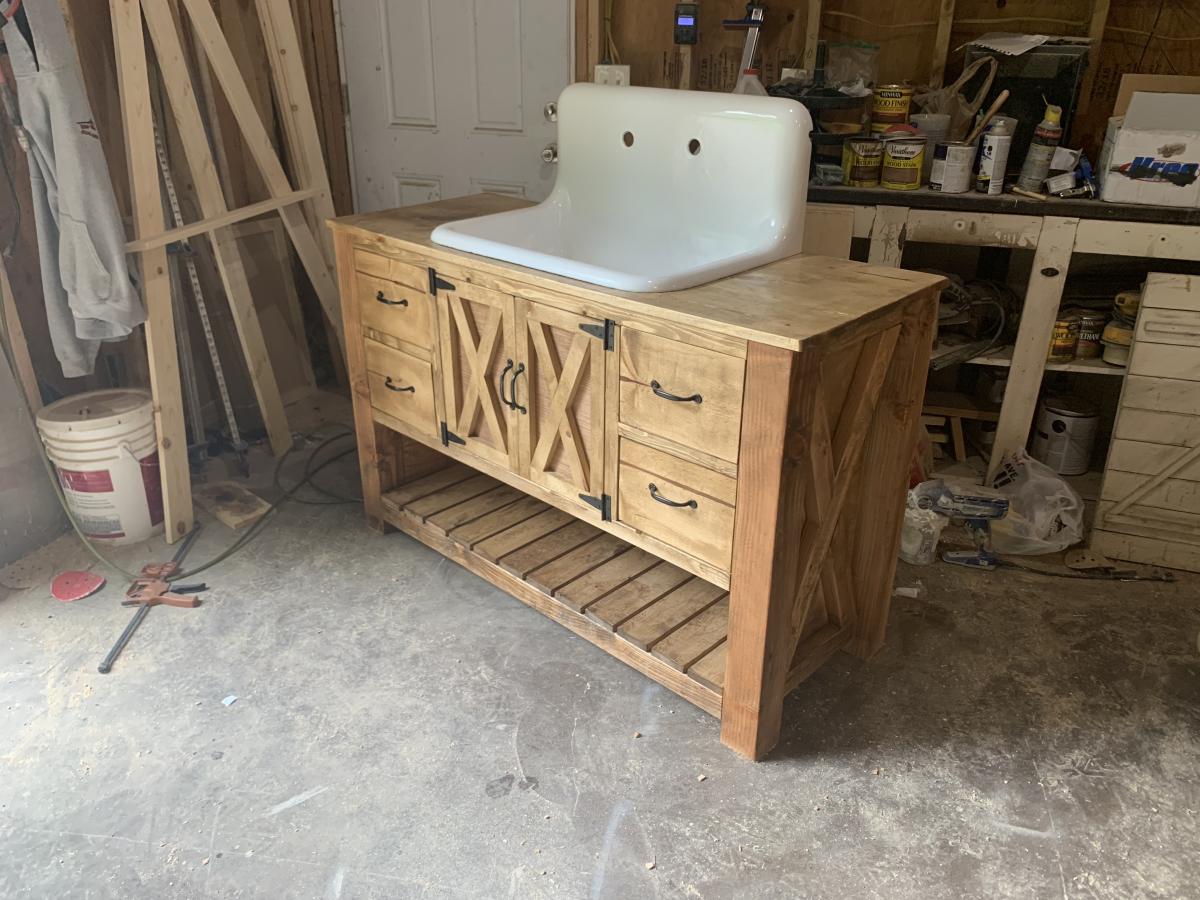
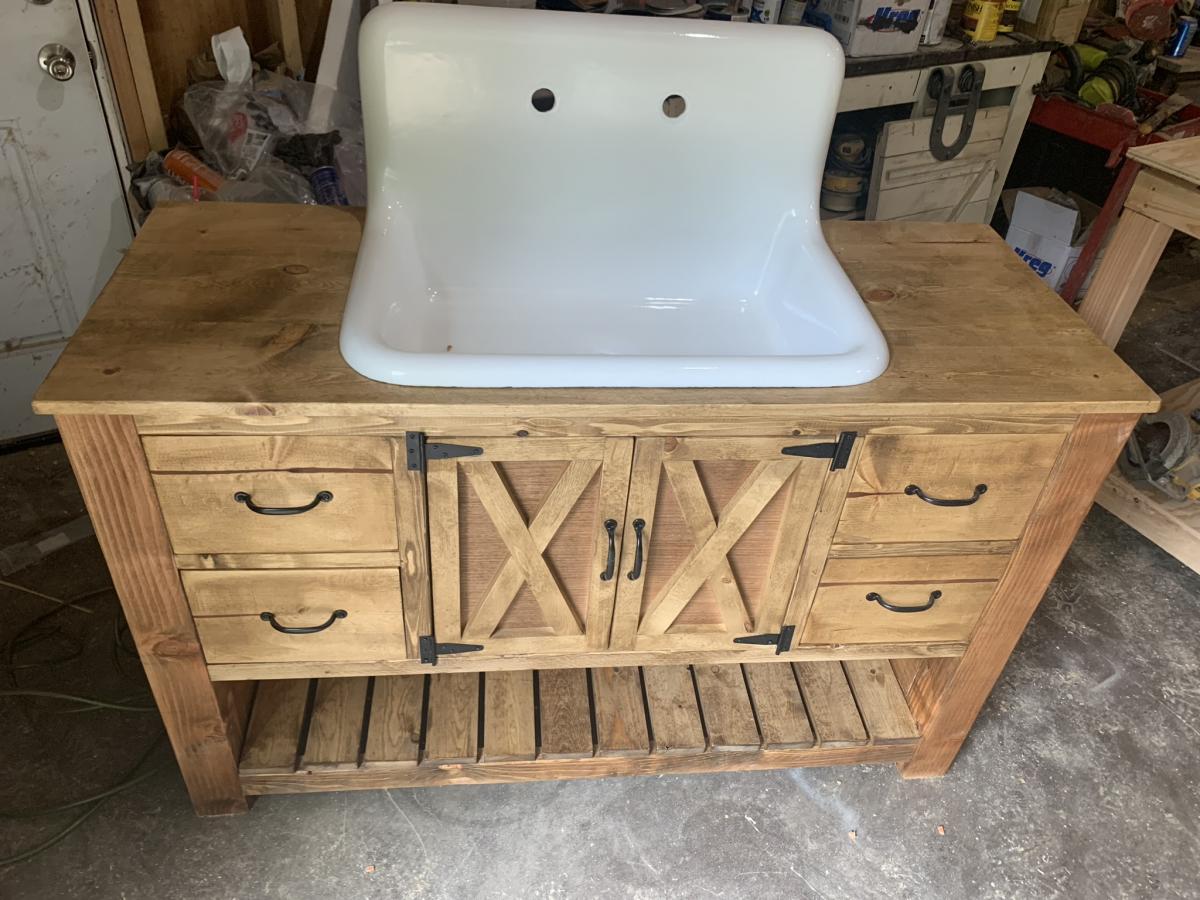
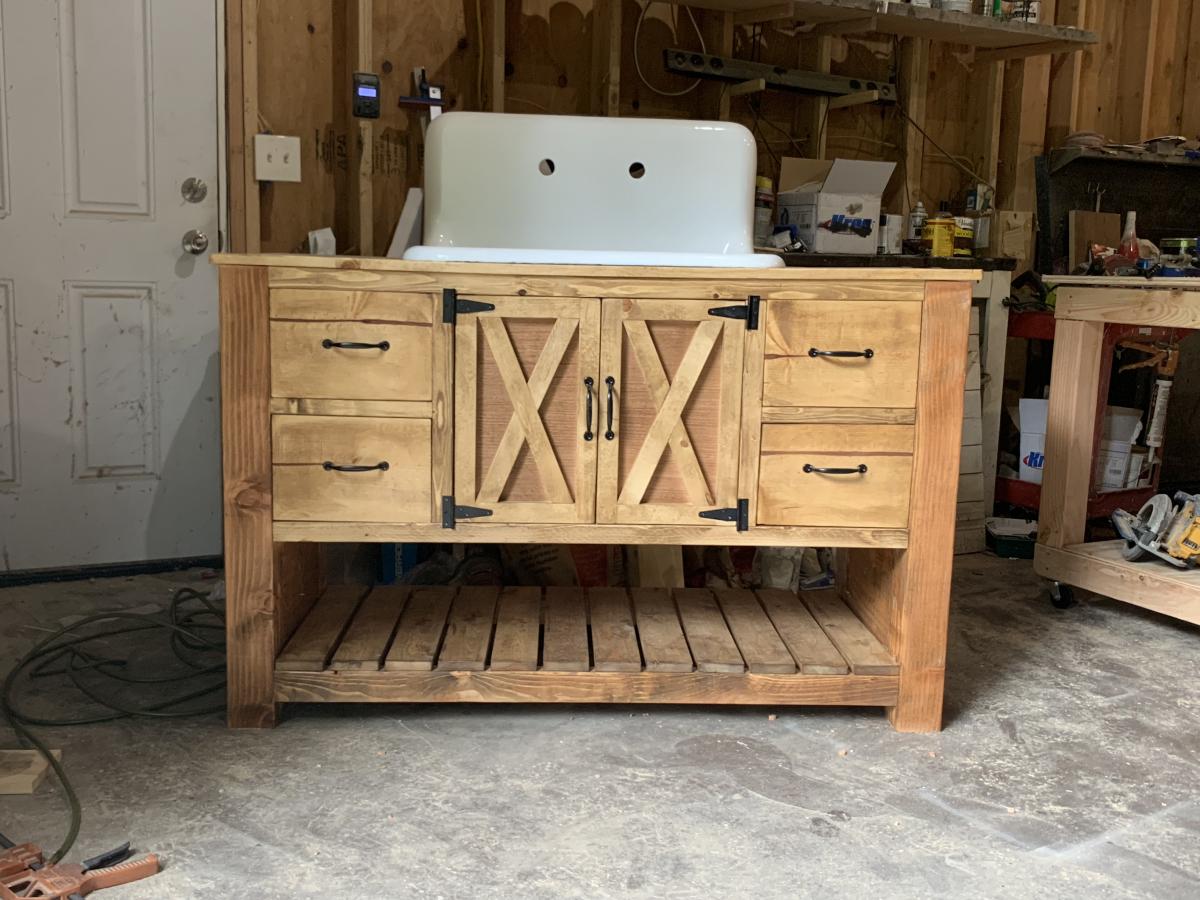
Hand made bathroom vanity check us out on Facebook marney Marie


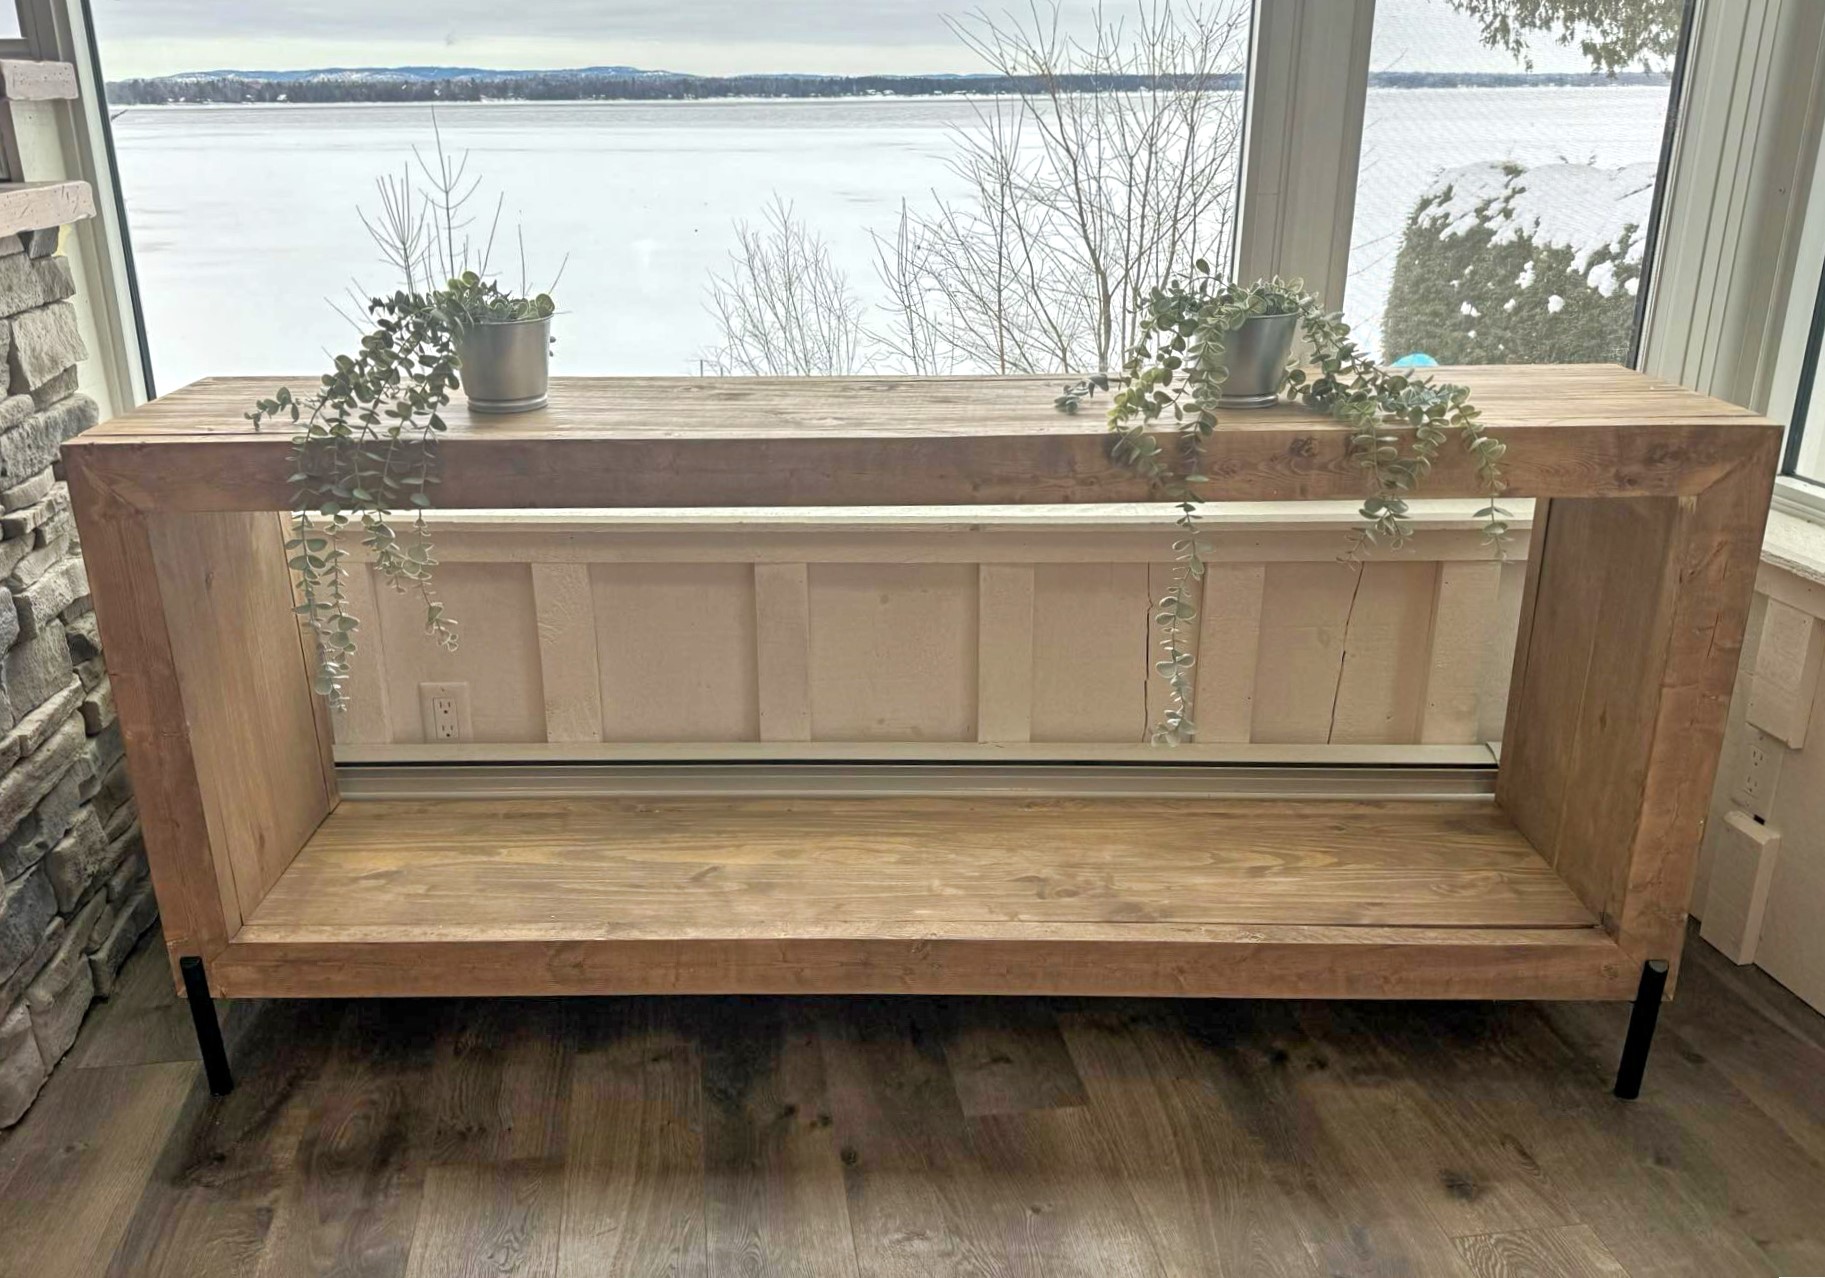
Waterfall console with industrial legs!
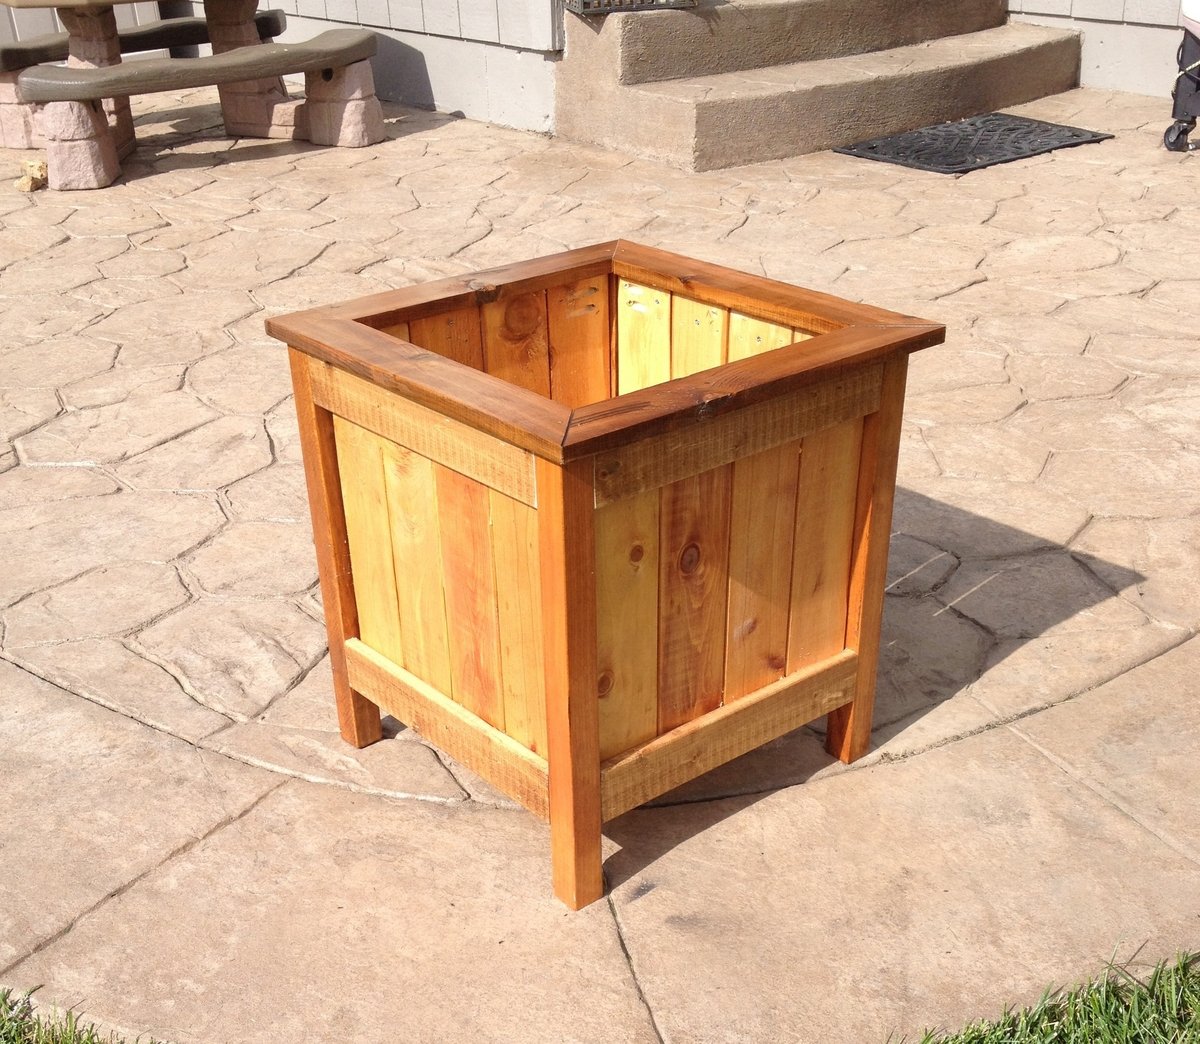
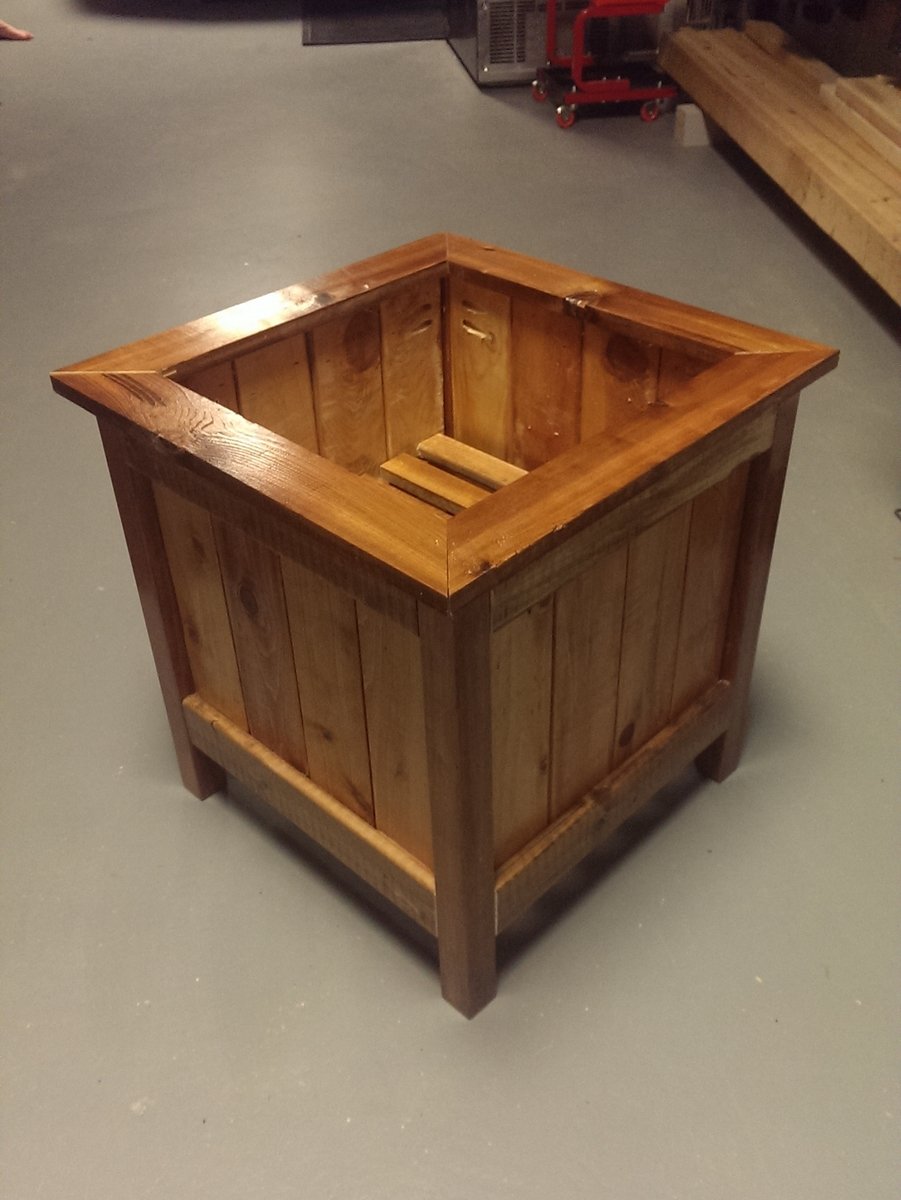
I used the main plan for ideas, but opted to use 3.5 inch pickets instead, which allowed for a smaller planter that wasn't as big. Also chose to miter 1x3s for the top which I think really finishes it off. Sanded everything with a belt sander to 220 grit. Used min wax golden pecan plus three coats of poly inside and out. Finished size was about 17x17. Tile spacers work great to keep the gaps even!

I've been wanting to buy or make a sandbox for my son for a couple of years now. Since seeing this on Ana White I knew I had to make it. My son is 4 yo and I didn't think the 4' square sandbox would be big enough for him, so I made it bigger. Ours is 6' square. Materials: 4@1x8x6' 12@1x6x6' 2x4 - used leftovers from another project 8 hinges 4 handles decking screws Cut lengths: 2@1x8 cut to 71.5 (long sides of the box) 2@1x8 cut to 70.5 (short sides of the box) did not cut the 1x6 boards (top planks) - actually designed the other boards to fit their length to prevent cutting (saving time) (note that original plan uses 1x4 planks - I used 1x6s so I could use the same number of planks but cover a larger area) 4@2x4 cut to 11.5 (arm rests) 4@2x4 cut to 18.5 (back supports) followed instructions for assembly otherwise. At my husbands suggestion we put the handles on the sides and can easily open from either side - prevents having to lean over to the middle to open (back saver) I finished the project in 4 hours including clean up and a couple of small breaks. This is my first Ana White project. It was a lot of fun to build and I hope my son will enjoy it for years to come!

Sat, 09/01/2012 - 20:59
Wow, this is just what I need! I've been wanting to make a sandbox for under the playhouse but the other plan was too small. This would be great for the little guys. Thanks!
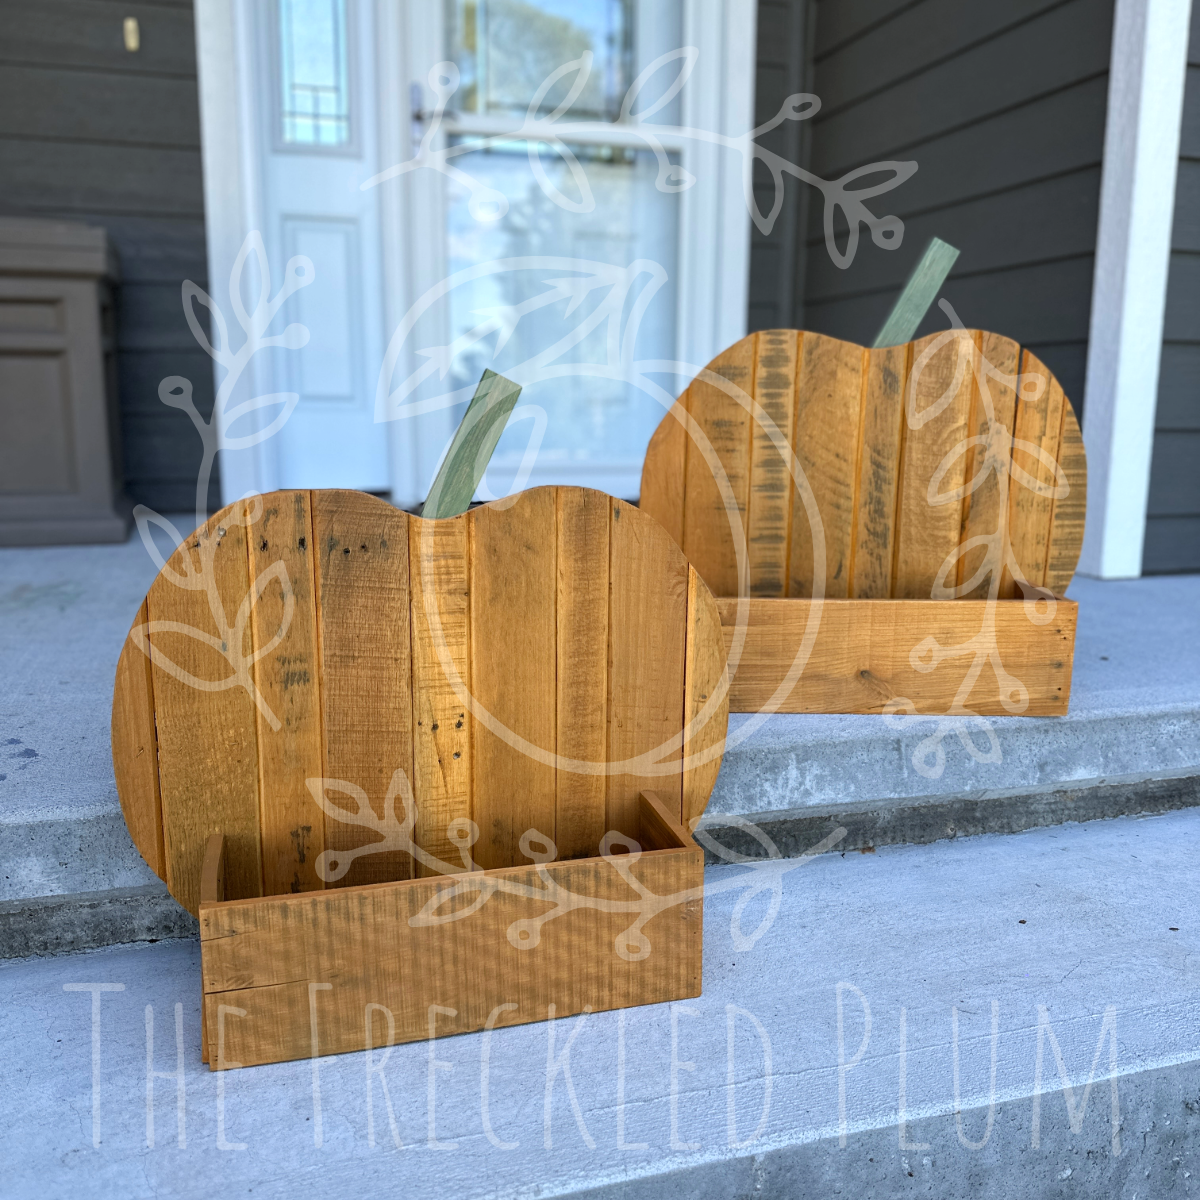
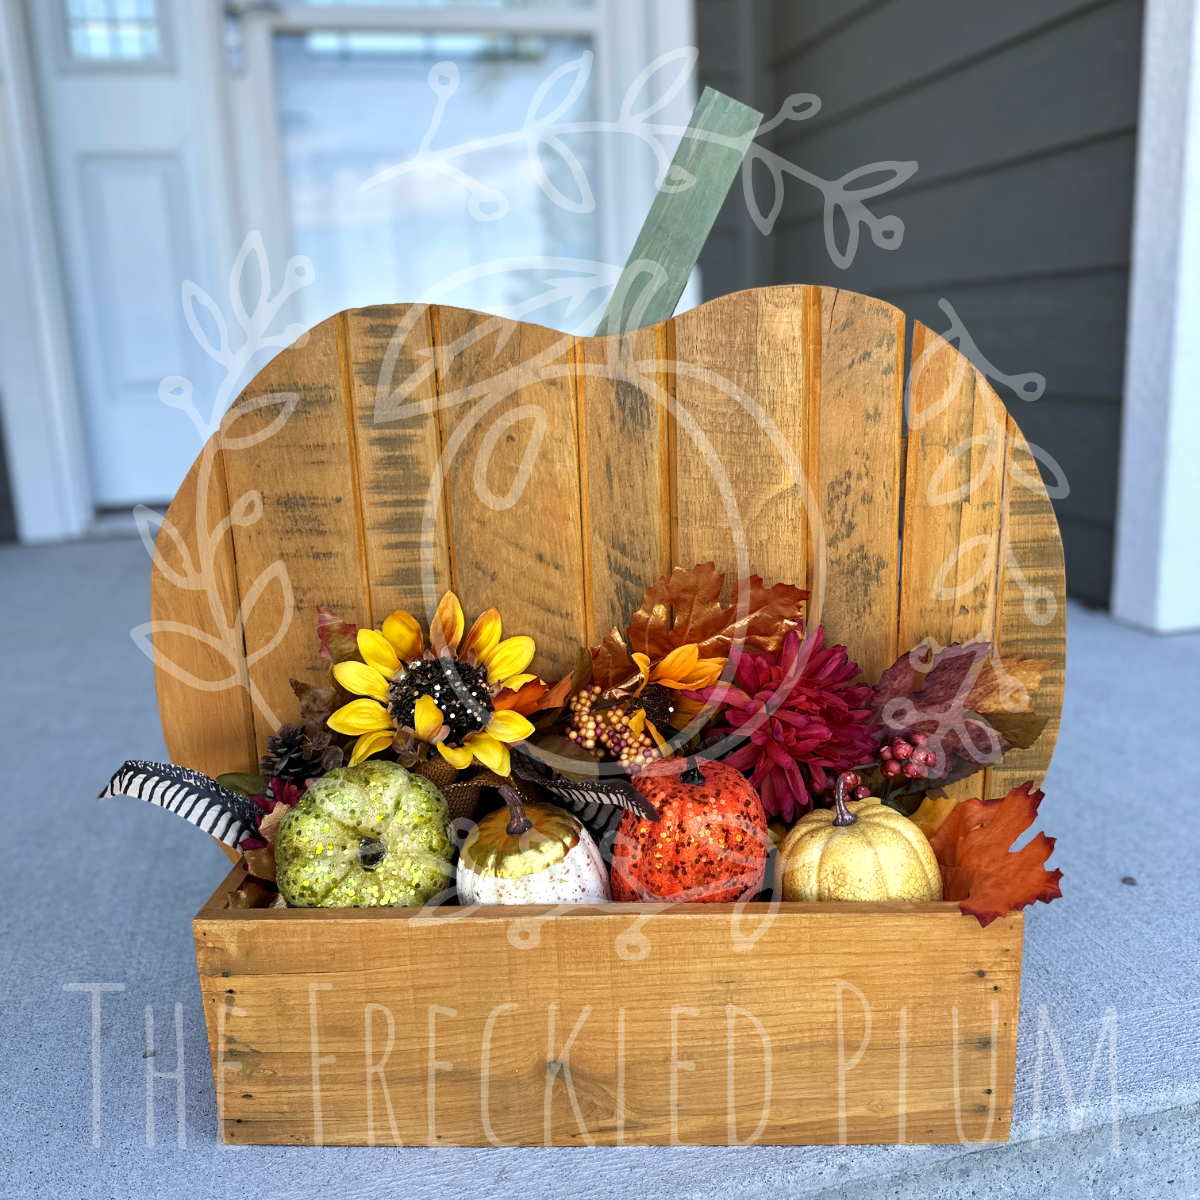
Using Ana White's plans, I created these pumpkin treat holders.
Pallet wood and wood widths
I first tore apart pallets and sanded the tops with 80 grit sandpaper to keep the rustic look. Because of the varying widths of the boards and imperfections from nail and screw holes, I cut some boards at 3" wide and others at 5" wide and created a pattern.
Route the edges
I used a chamfer bit on my router table to route the edges to make them stand out more. I didn't put spaces between the boards, that's why I routed the edges. If you go this route you will need longer 1x2 for the back of your piece.
Cut the shape out
Use a jig saw with a scrolling blade to make smooth work of cutting out the curves.
Get it together
I used exterior wood glue and a brad nailer with 1" nails to hold the project together instead of a hot glue gun.
Finish
The finish is an 8 oz. sample of Behr Premium Waterproofing Exterior Wood Stain and Sealer from The Home Depot. Colors: Bright Tamra semi-transparent #ST-140 and Woodland Green semi-transparent #ST-126.
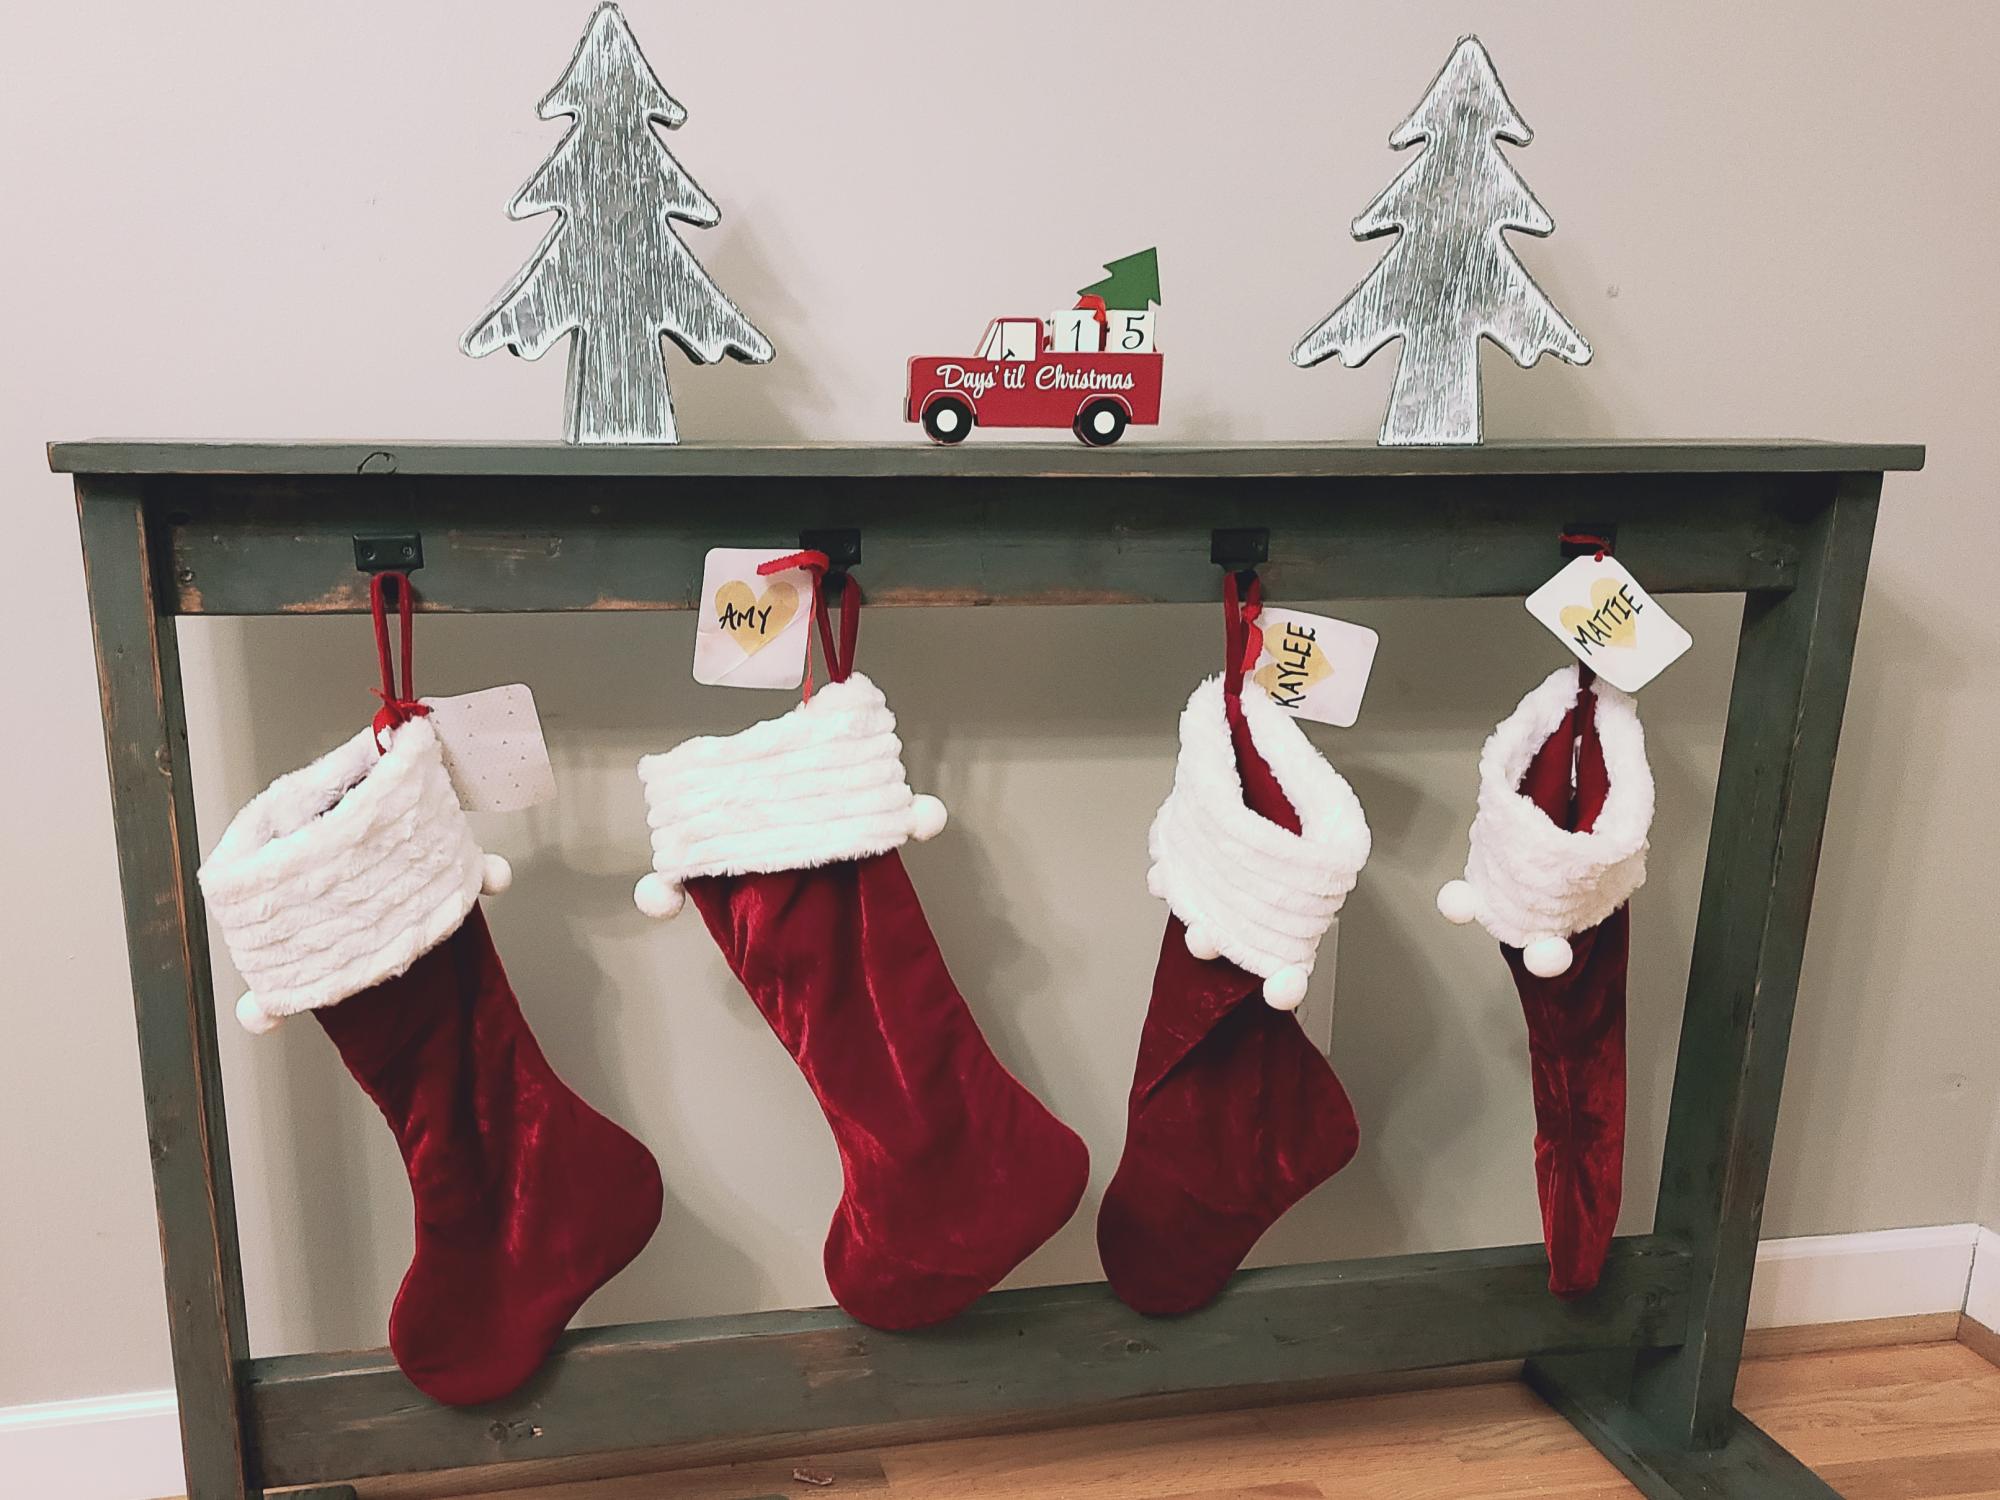
Started built from https://www.ana-white.com/woodworking-projects/stocking-stand plan.
My finished product is mostly the same, except I added a little to beef it up. I added decking board size wood for the feet to give it more stability. Santa leaves heavy things in sticking sometimes. I wanted to be prepared! 😁 I made the top 2x4 flush with the top of the sides and added a 1x6 across the top like a shelf. If I get to do it in time, I'm going to add a 1x8 (or 2x8) stained a dark wood color on top and may add a little trim between it and the 1x6 to beef it up. I love it! Might be able to repurpose someway during the rest of the year. Thanks Ana White for the plans!

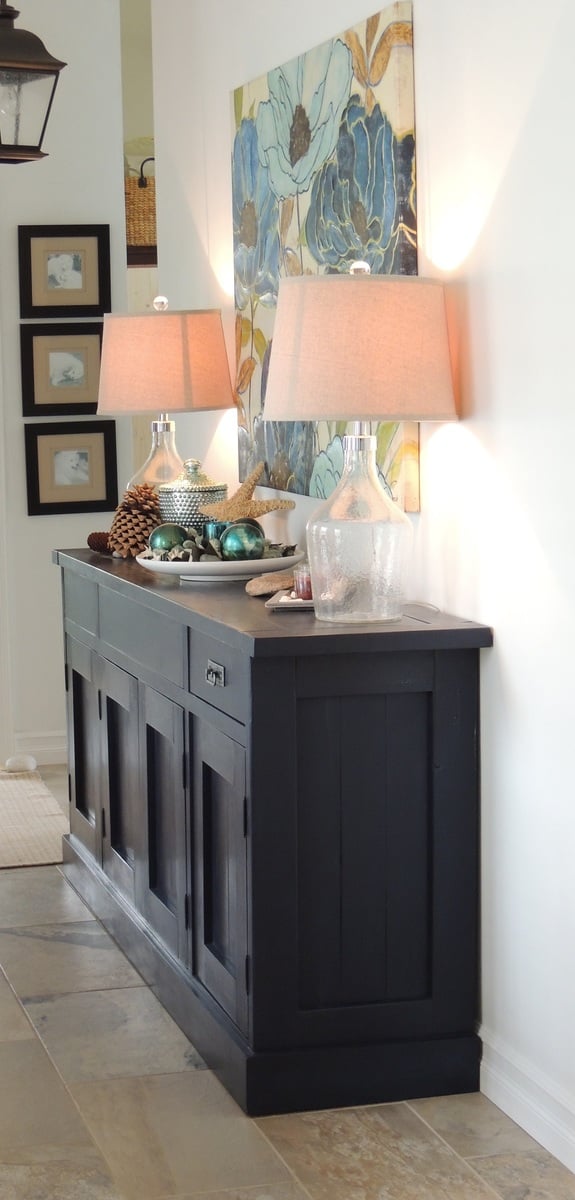
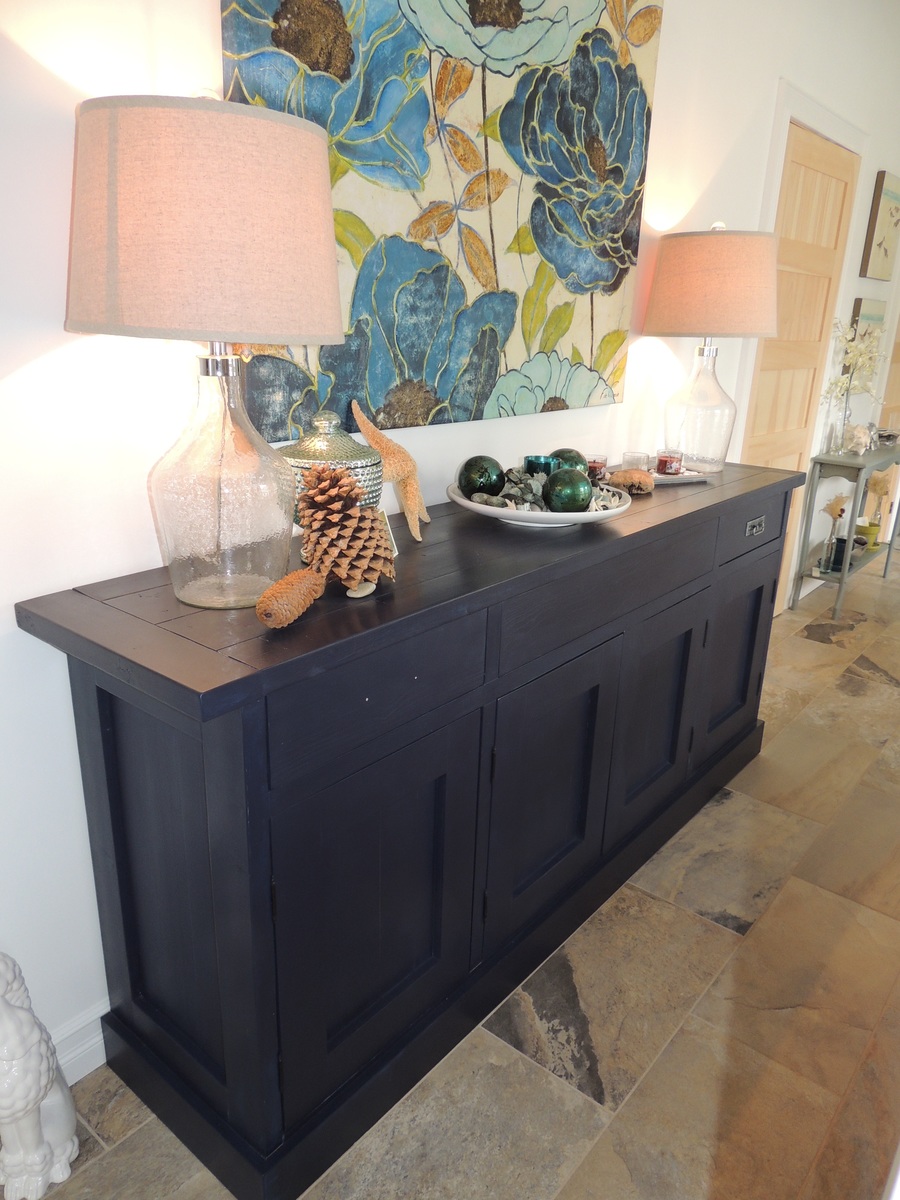
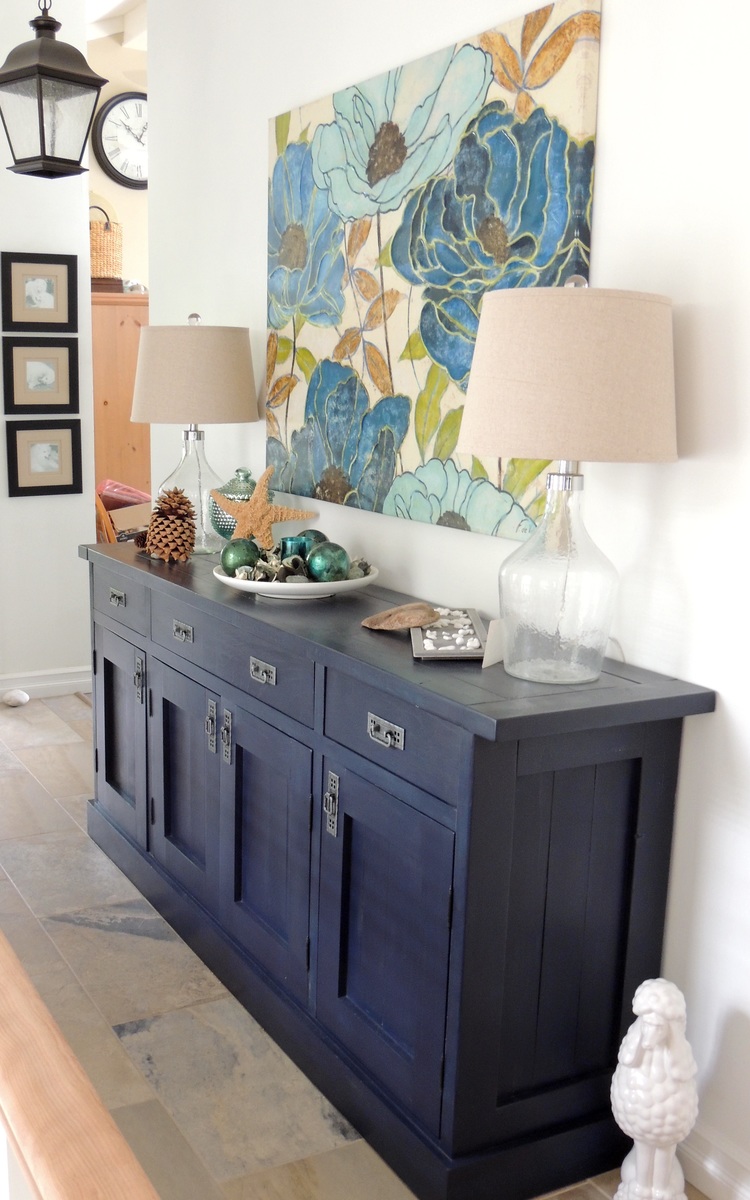
This was my second project and my first piece of furniture I built from Ana's plans. We have a vaulted ceiling in the hallway near my entry and needed a really big piece to fill up the large blank wall. I always hated the space but now I Love It. The Gigantic sideboard is perfect there. I finished it with milk paint and paste wax. If you inspect it closely it is not perfect but for my first piece... I love it and it's supposed to be rustic right!

In reply to Hardware by jillcookie
Sun, 01/04/2015 - 18:08
I got the pulls at Richelieu hardware. Classic Metal Drop Pull - 750
Product #BP750908. http://www.richelieu.com/ca/en/category/decorative-hardware/cabinet-har…
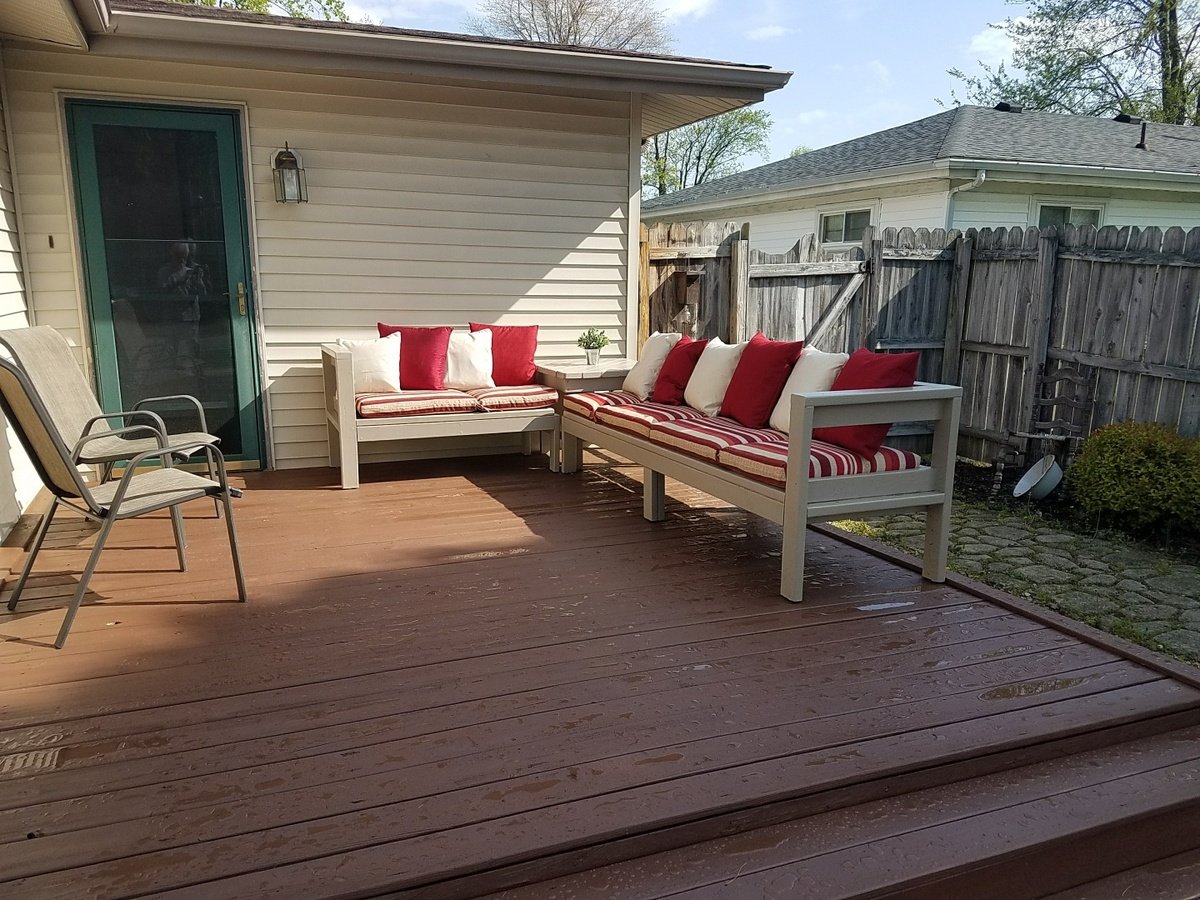
In the plans of selling our home and move from Indiana to Washington, I visited Ana's website I was able to build this easy, simple attractive outdoor furniture to give a little "Curb Appeal" Besides the couchs, I made a corner table. The cushions are made for chairs and the pillows are cheap pillows with new covers that my wife made. Sad thing about this is I hate to leave. I will just have to make another set some day?
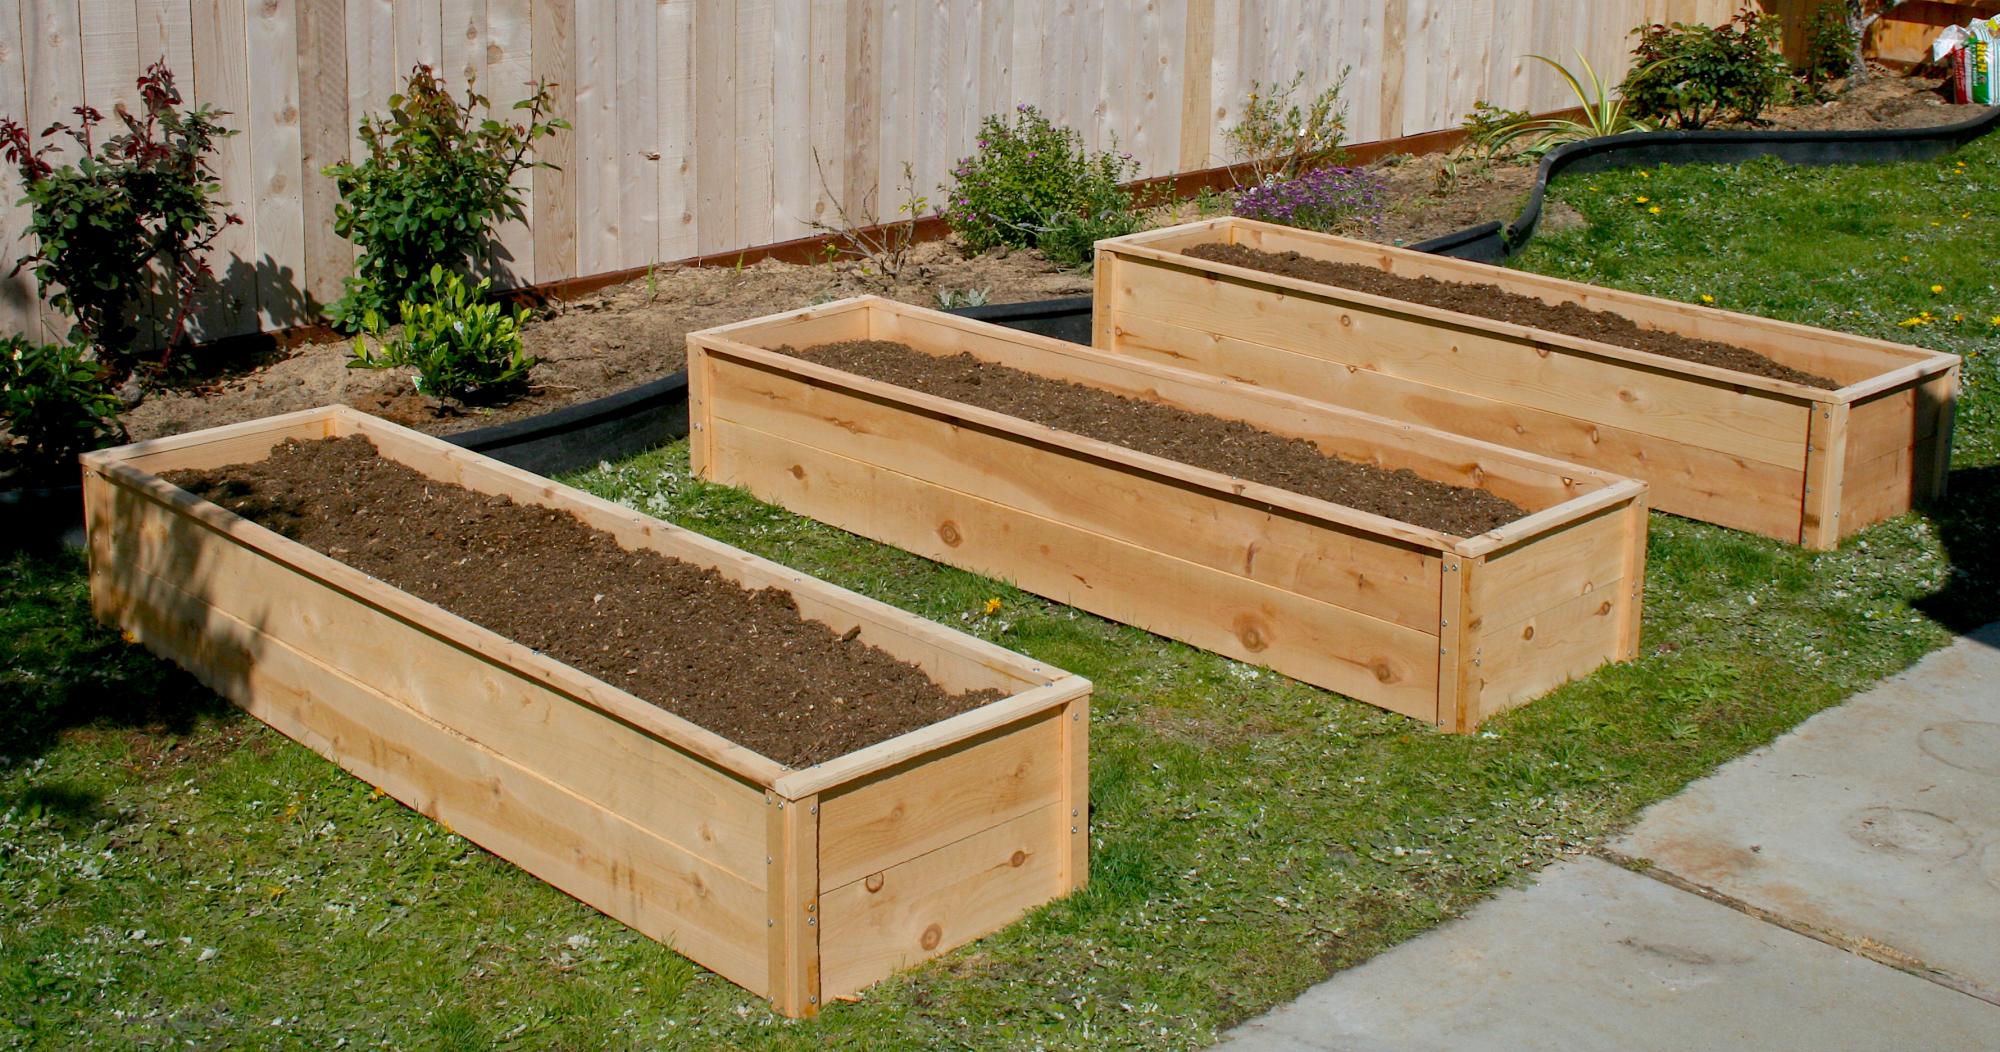
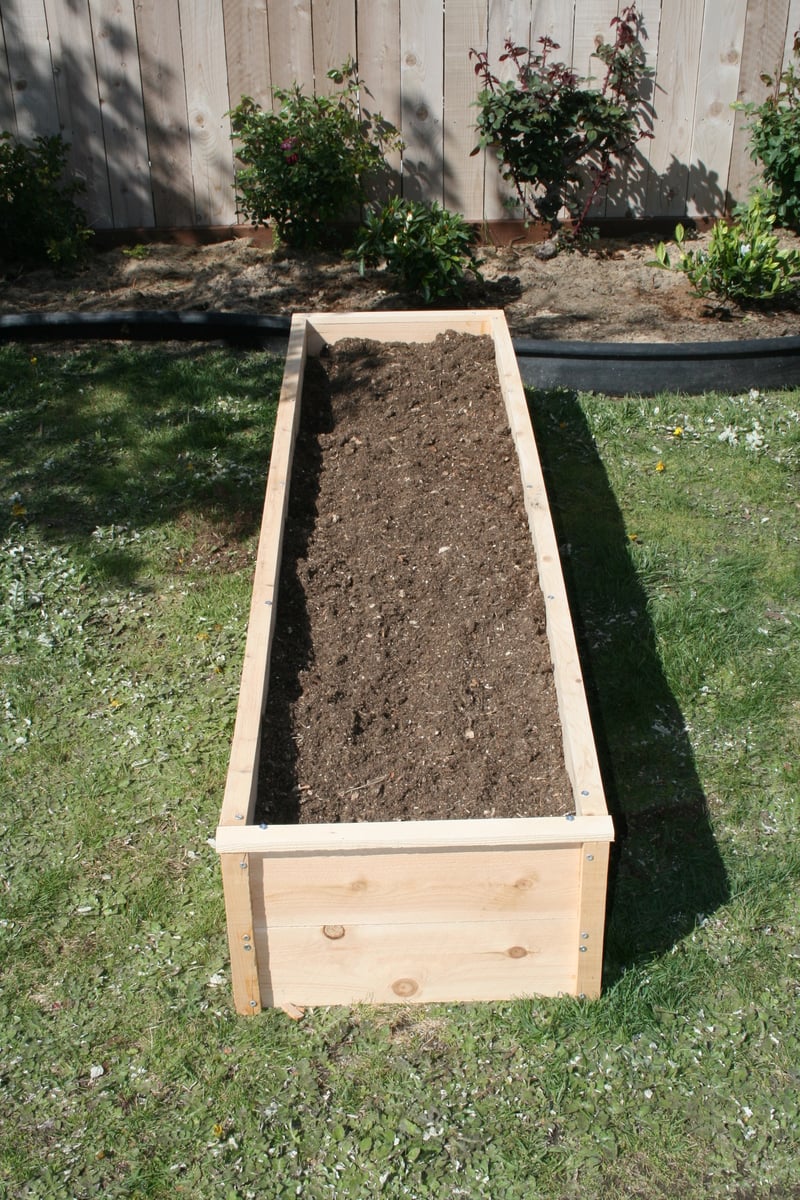
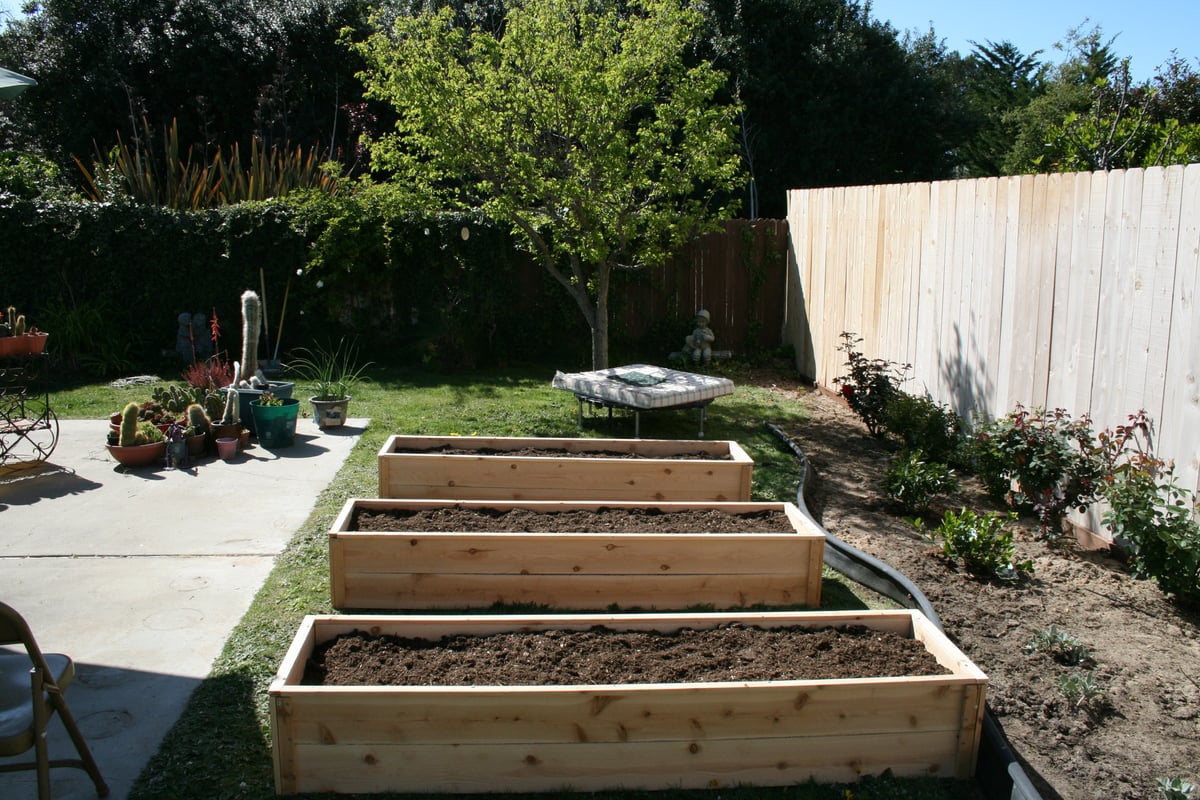
I made these for my 81 year-old Grandma, and I will be making some for my own front yard soon. I followed the plans and ripped the fence boards instead of buying the optional 1x2s. My awesome dad showed me how to use the table saw, but the rest I did all by myself! We decided to leave them unfinished for a natural look. It took me about 7 hours total broken up to make all three, but this is my first project and I was slow. Thanks Ana, for inspiring this working Mom to pick up a hammer and get stuff done!
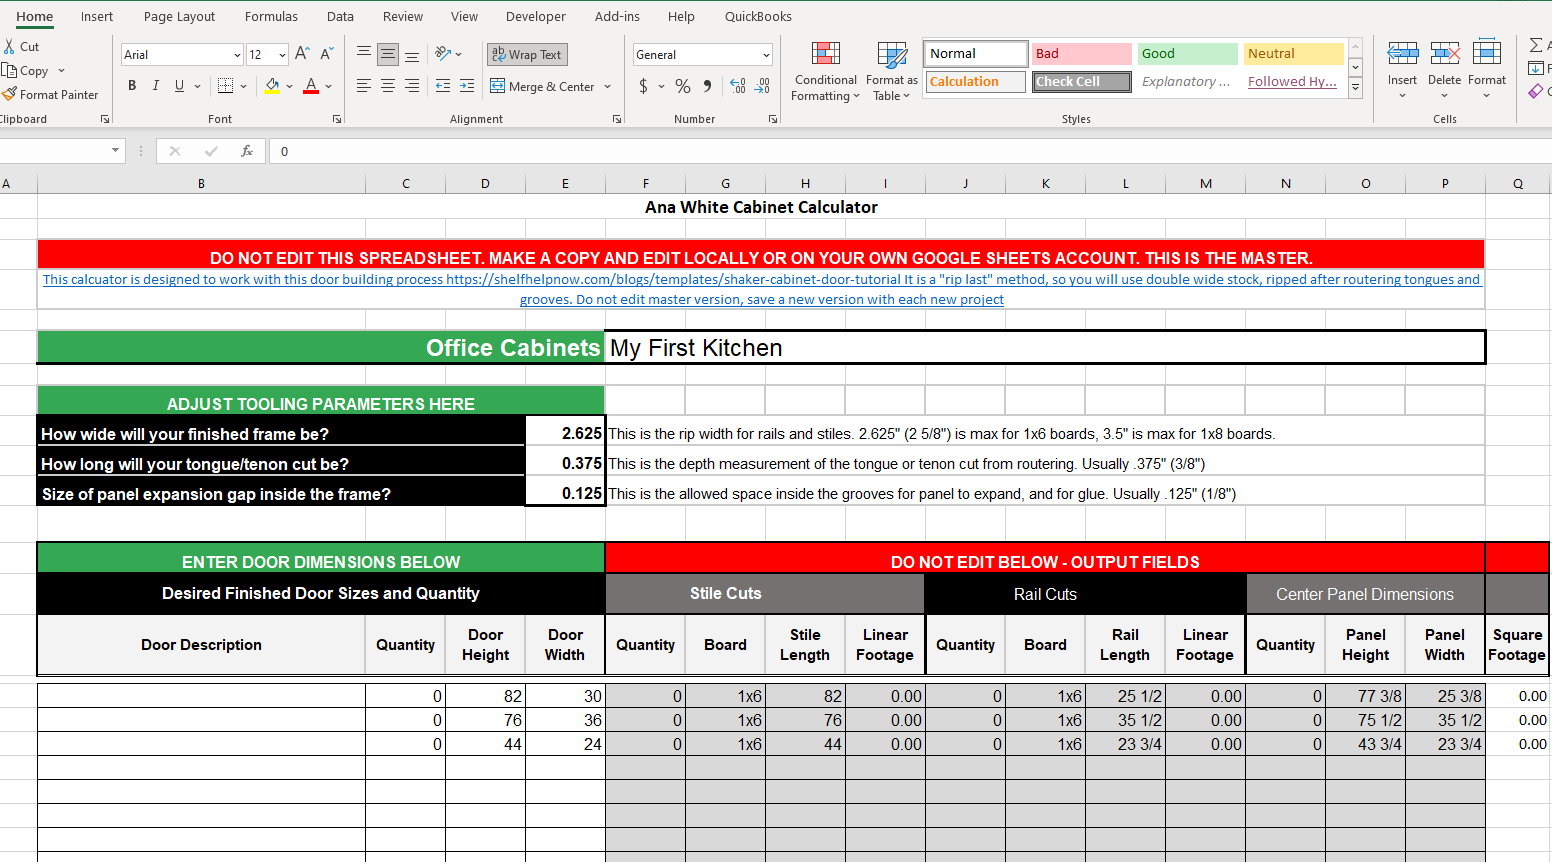
I was trying to use the google sheets cabinet calculator that Ana posted and found that others were accessing and editing the master at the same time. I thought perhaps a Microsoft Excel version of the calculator to download may be useful.
I wasn't able to upload to this site so I've created a Brag Post to link to it on my site.
UPDATE: Ana's website has been updated and the file is now an Excel Spreadsheet which can be downloaded.
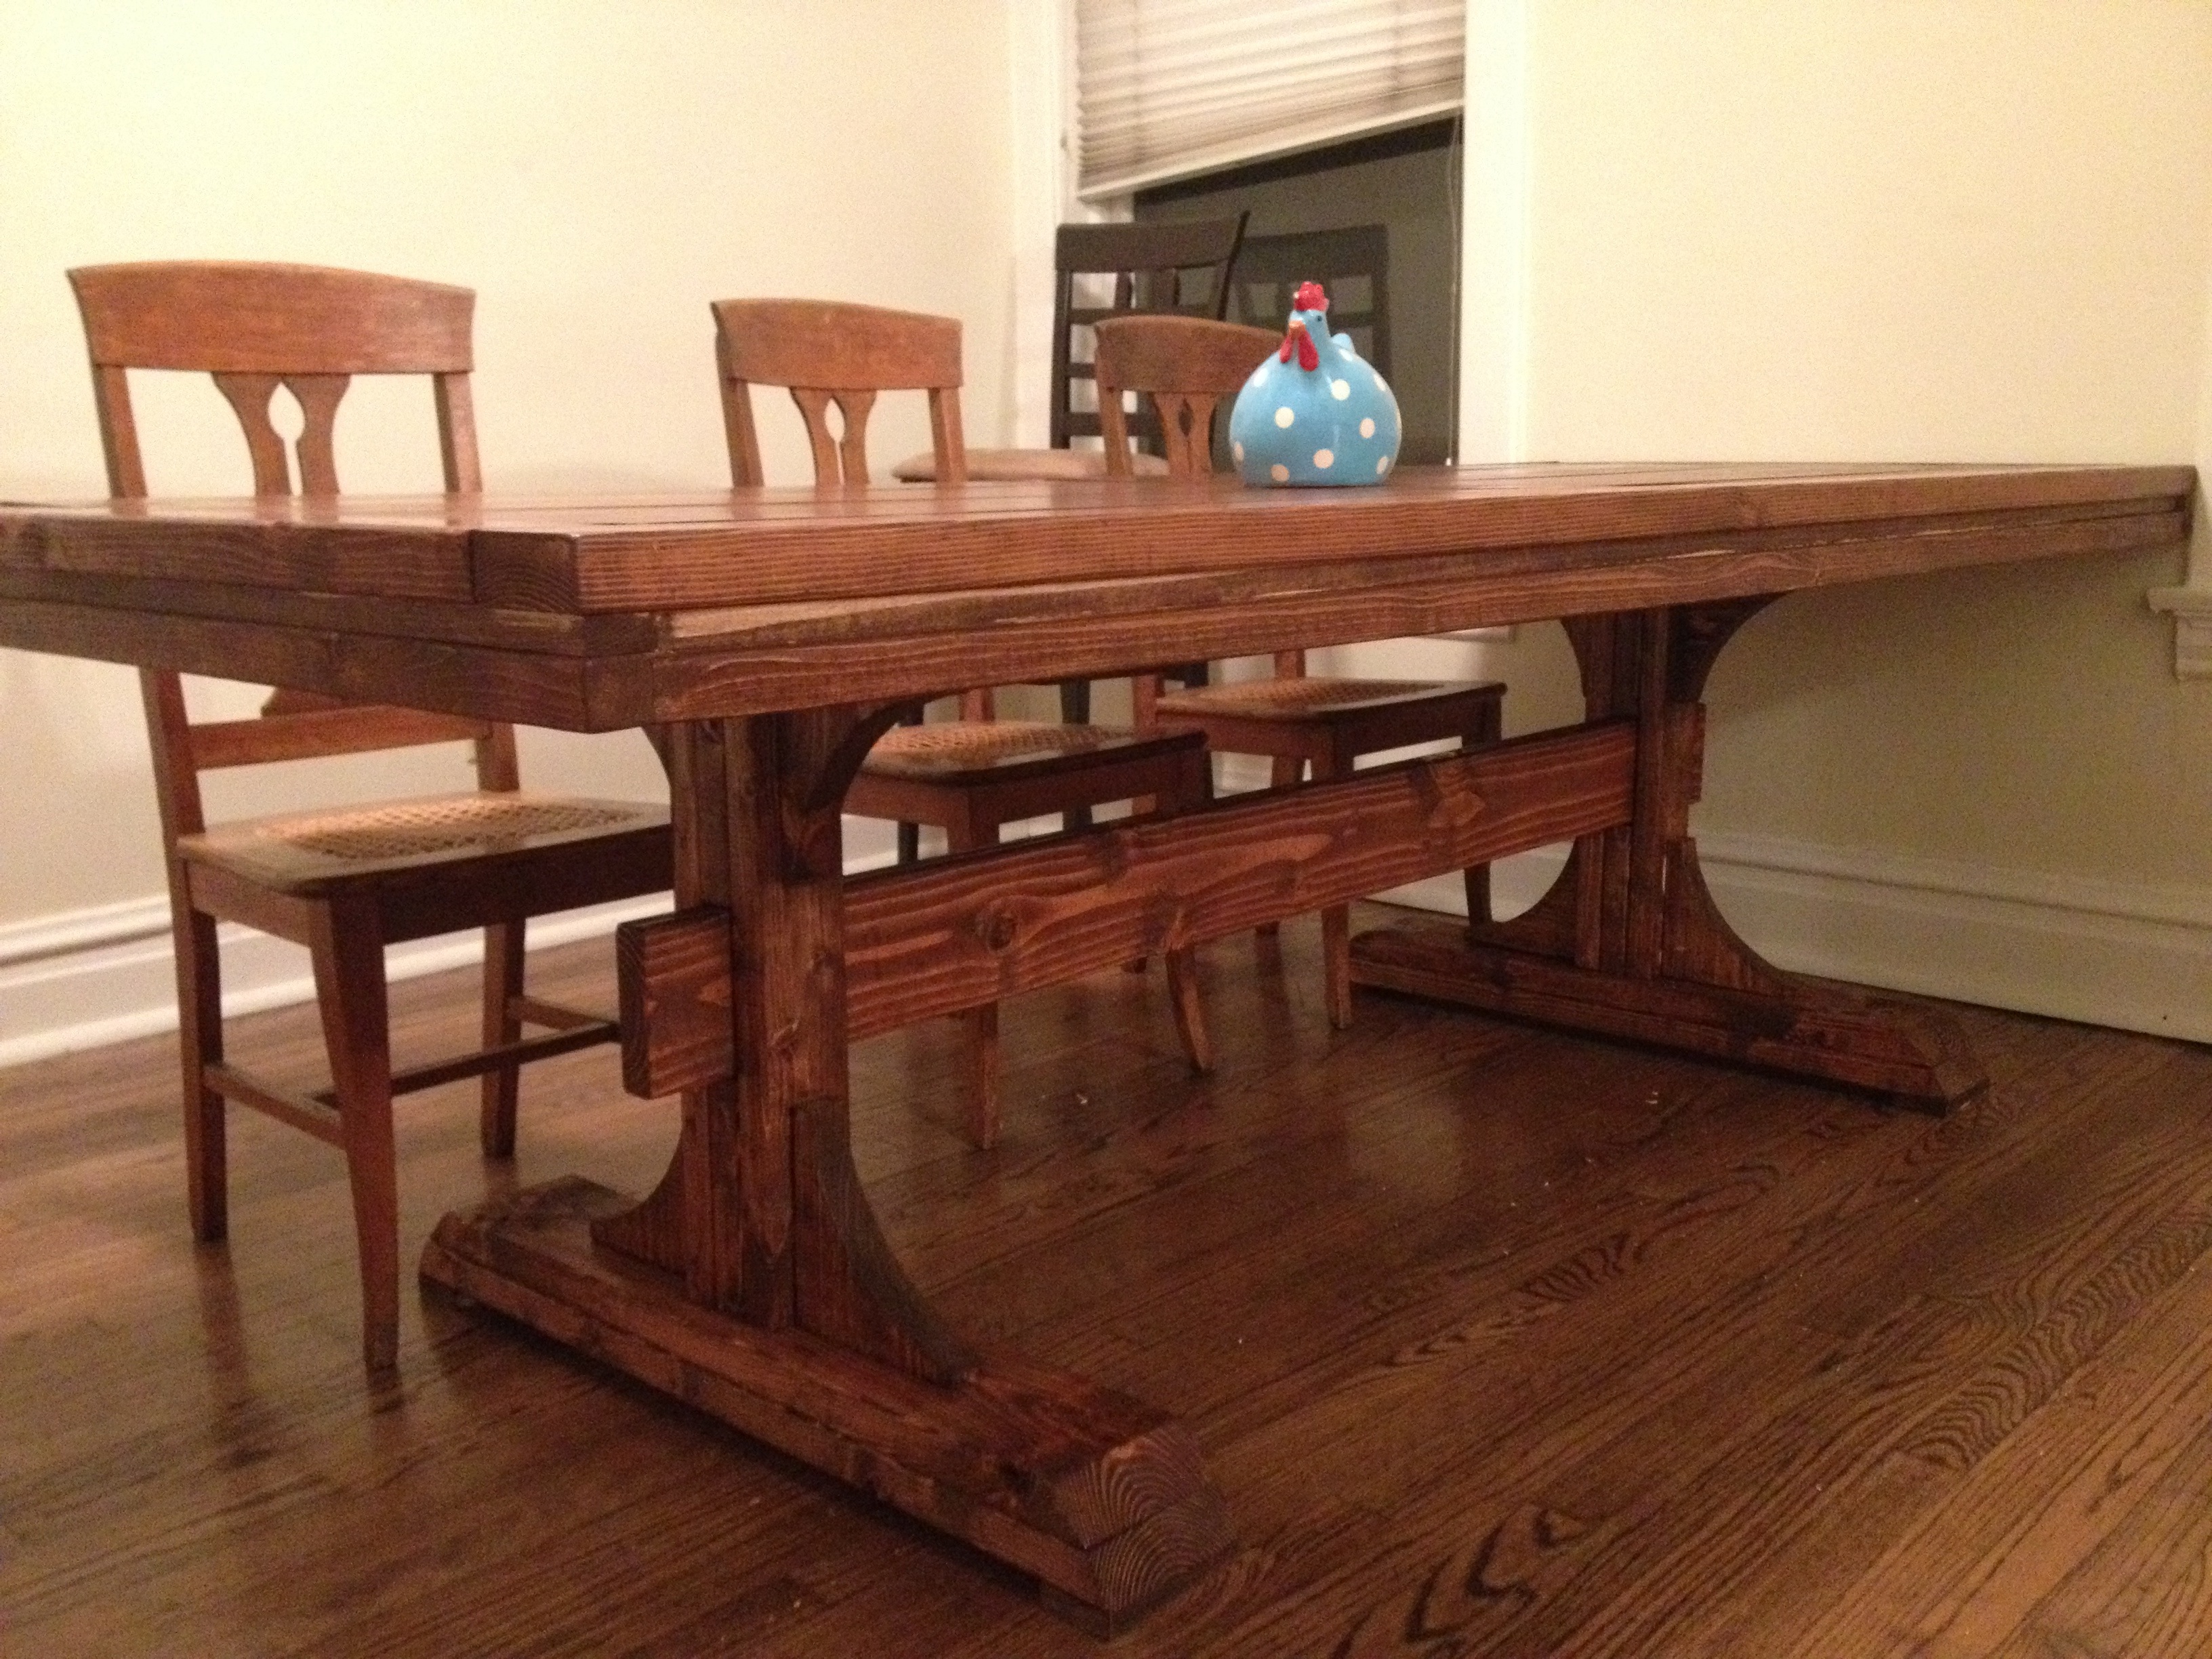
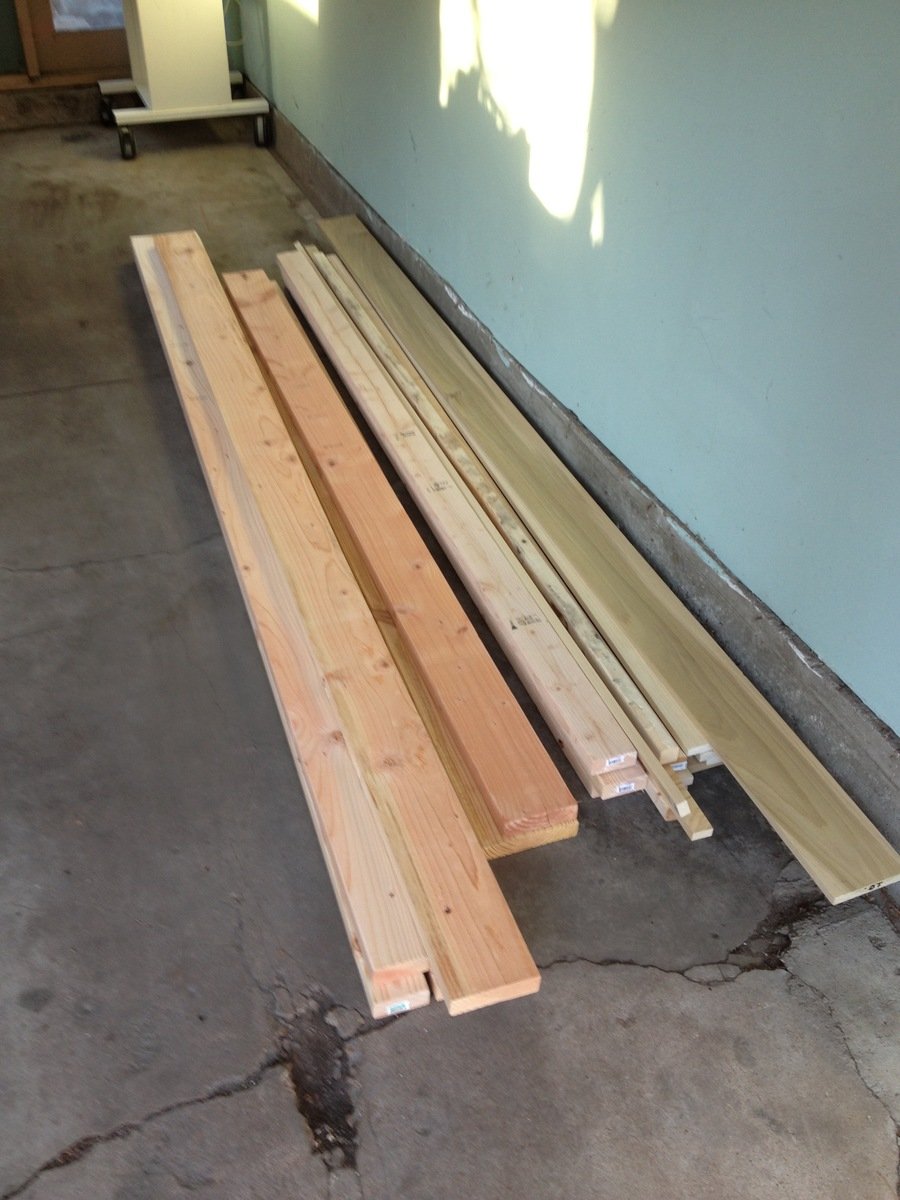
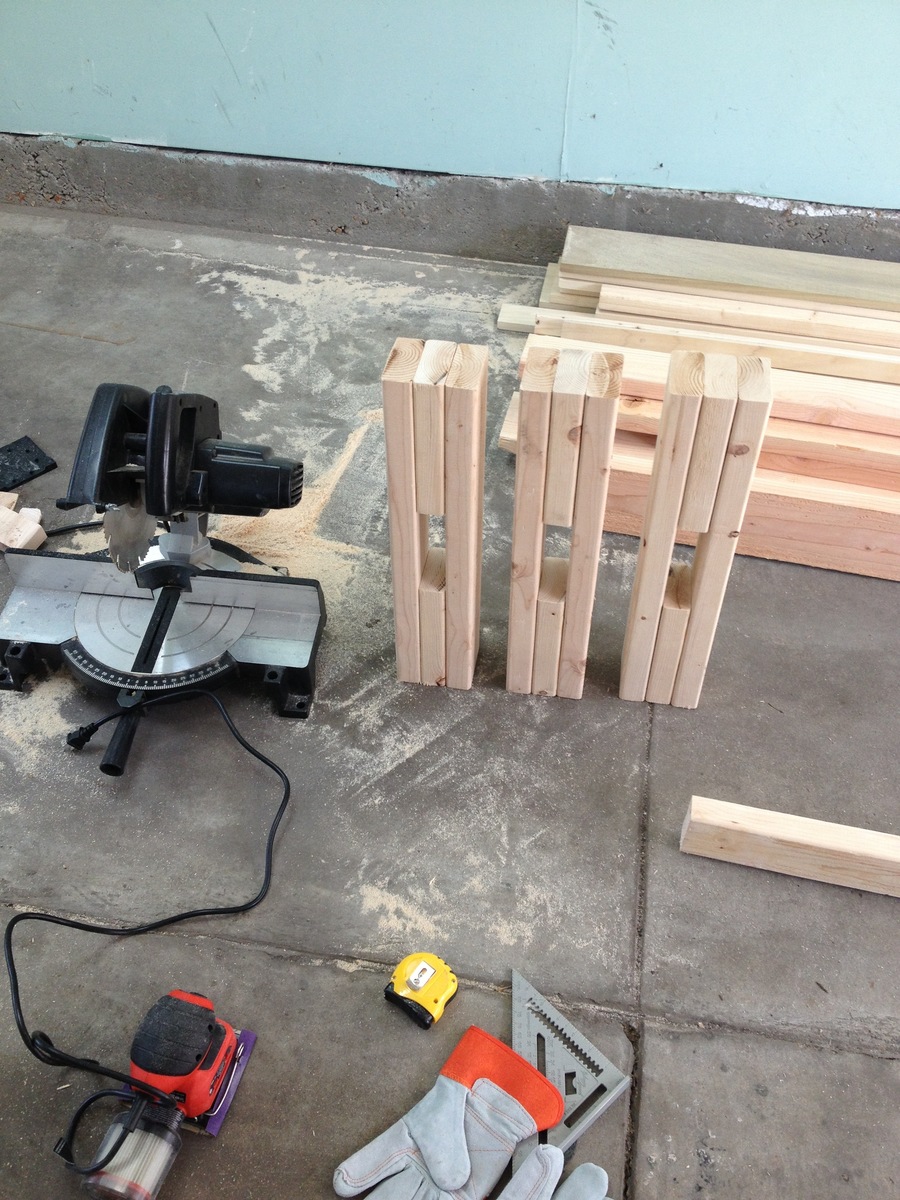
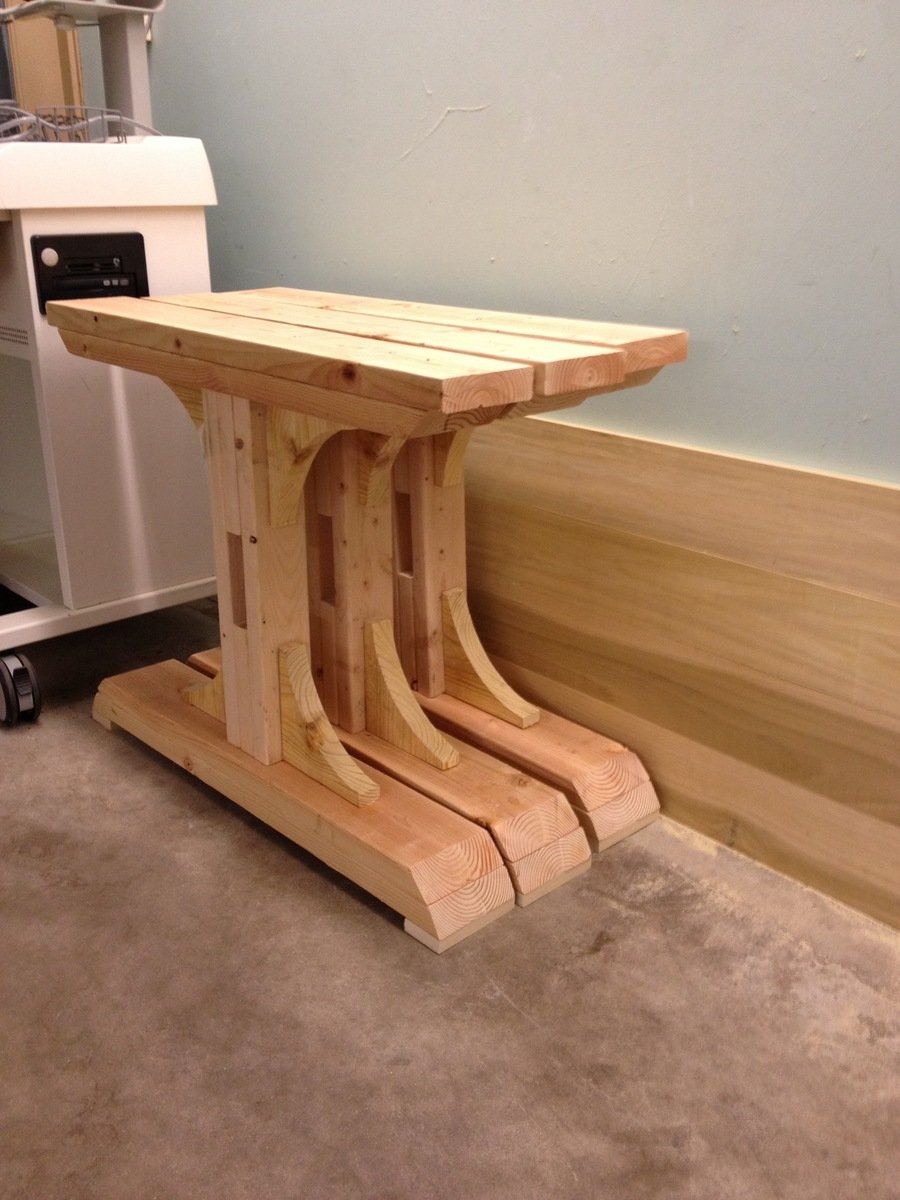
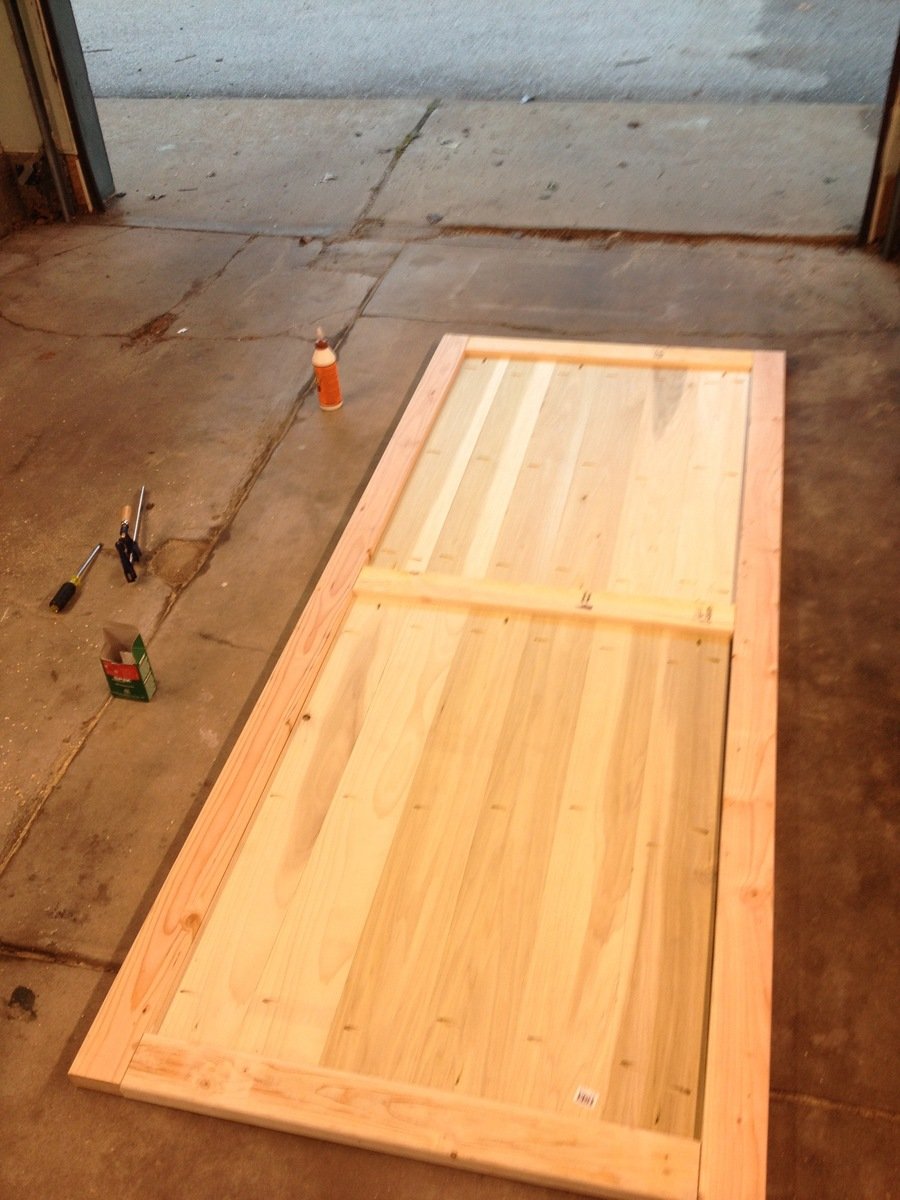
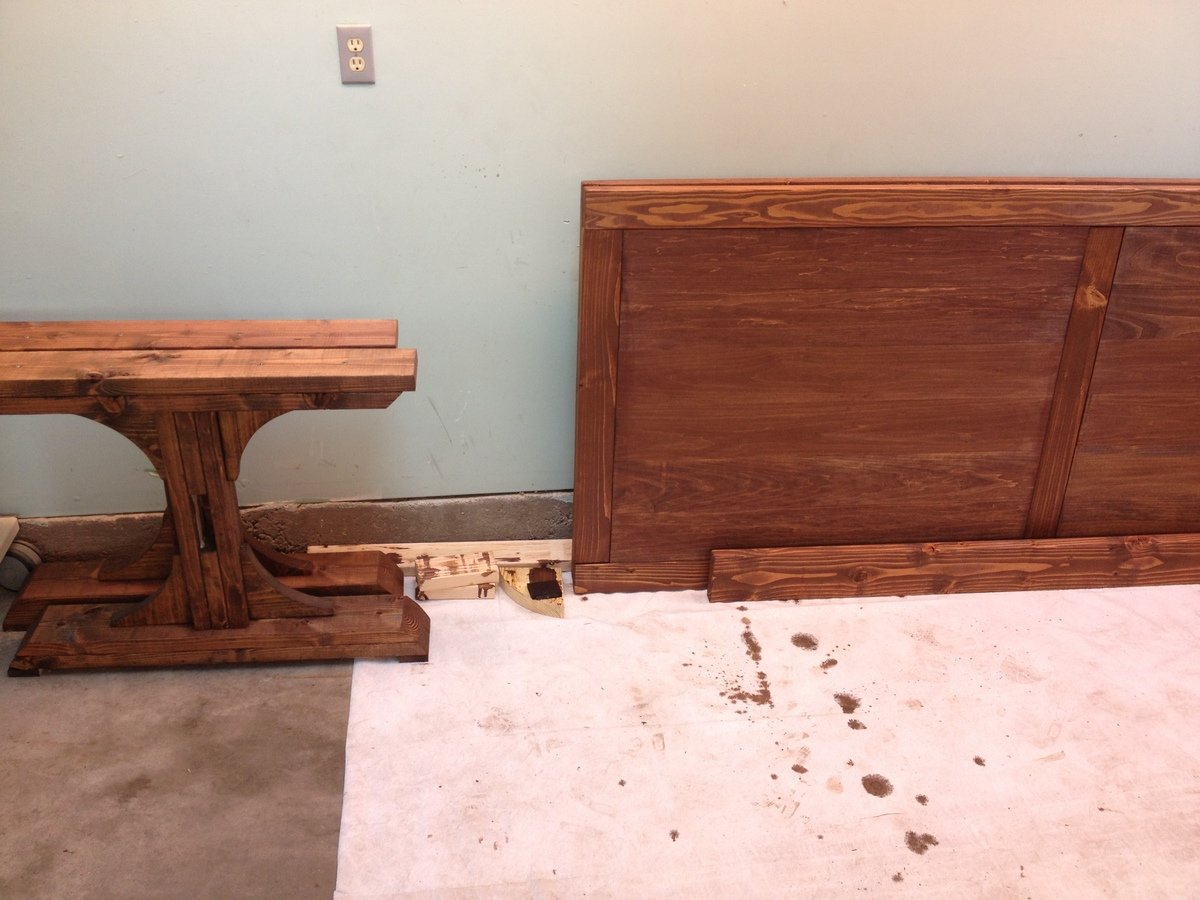
Built from the Triple Pedestal Farmhouse Table plans. Had to size down the plans a little bit to fit into my dining room. Created three pedestal legs but only ended up using two on the final table. Took about 16 hours from start to finish. All of the wood is pine except for the top, which is Poplar. Made a couple of mistakes along the way but am very happy with the way everything turned out. Feel free to ask questions and I will do my best to answer them. Happy Building!
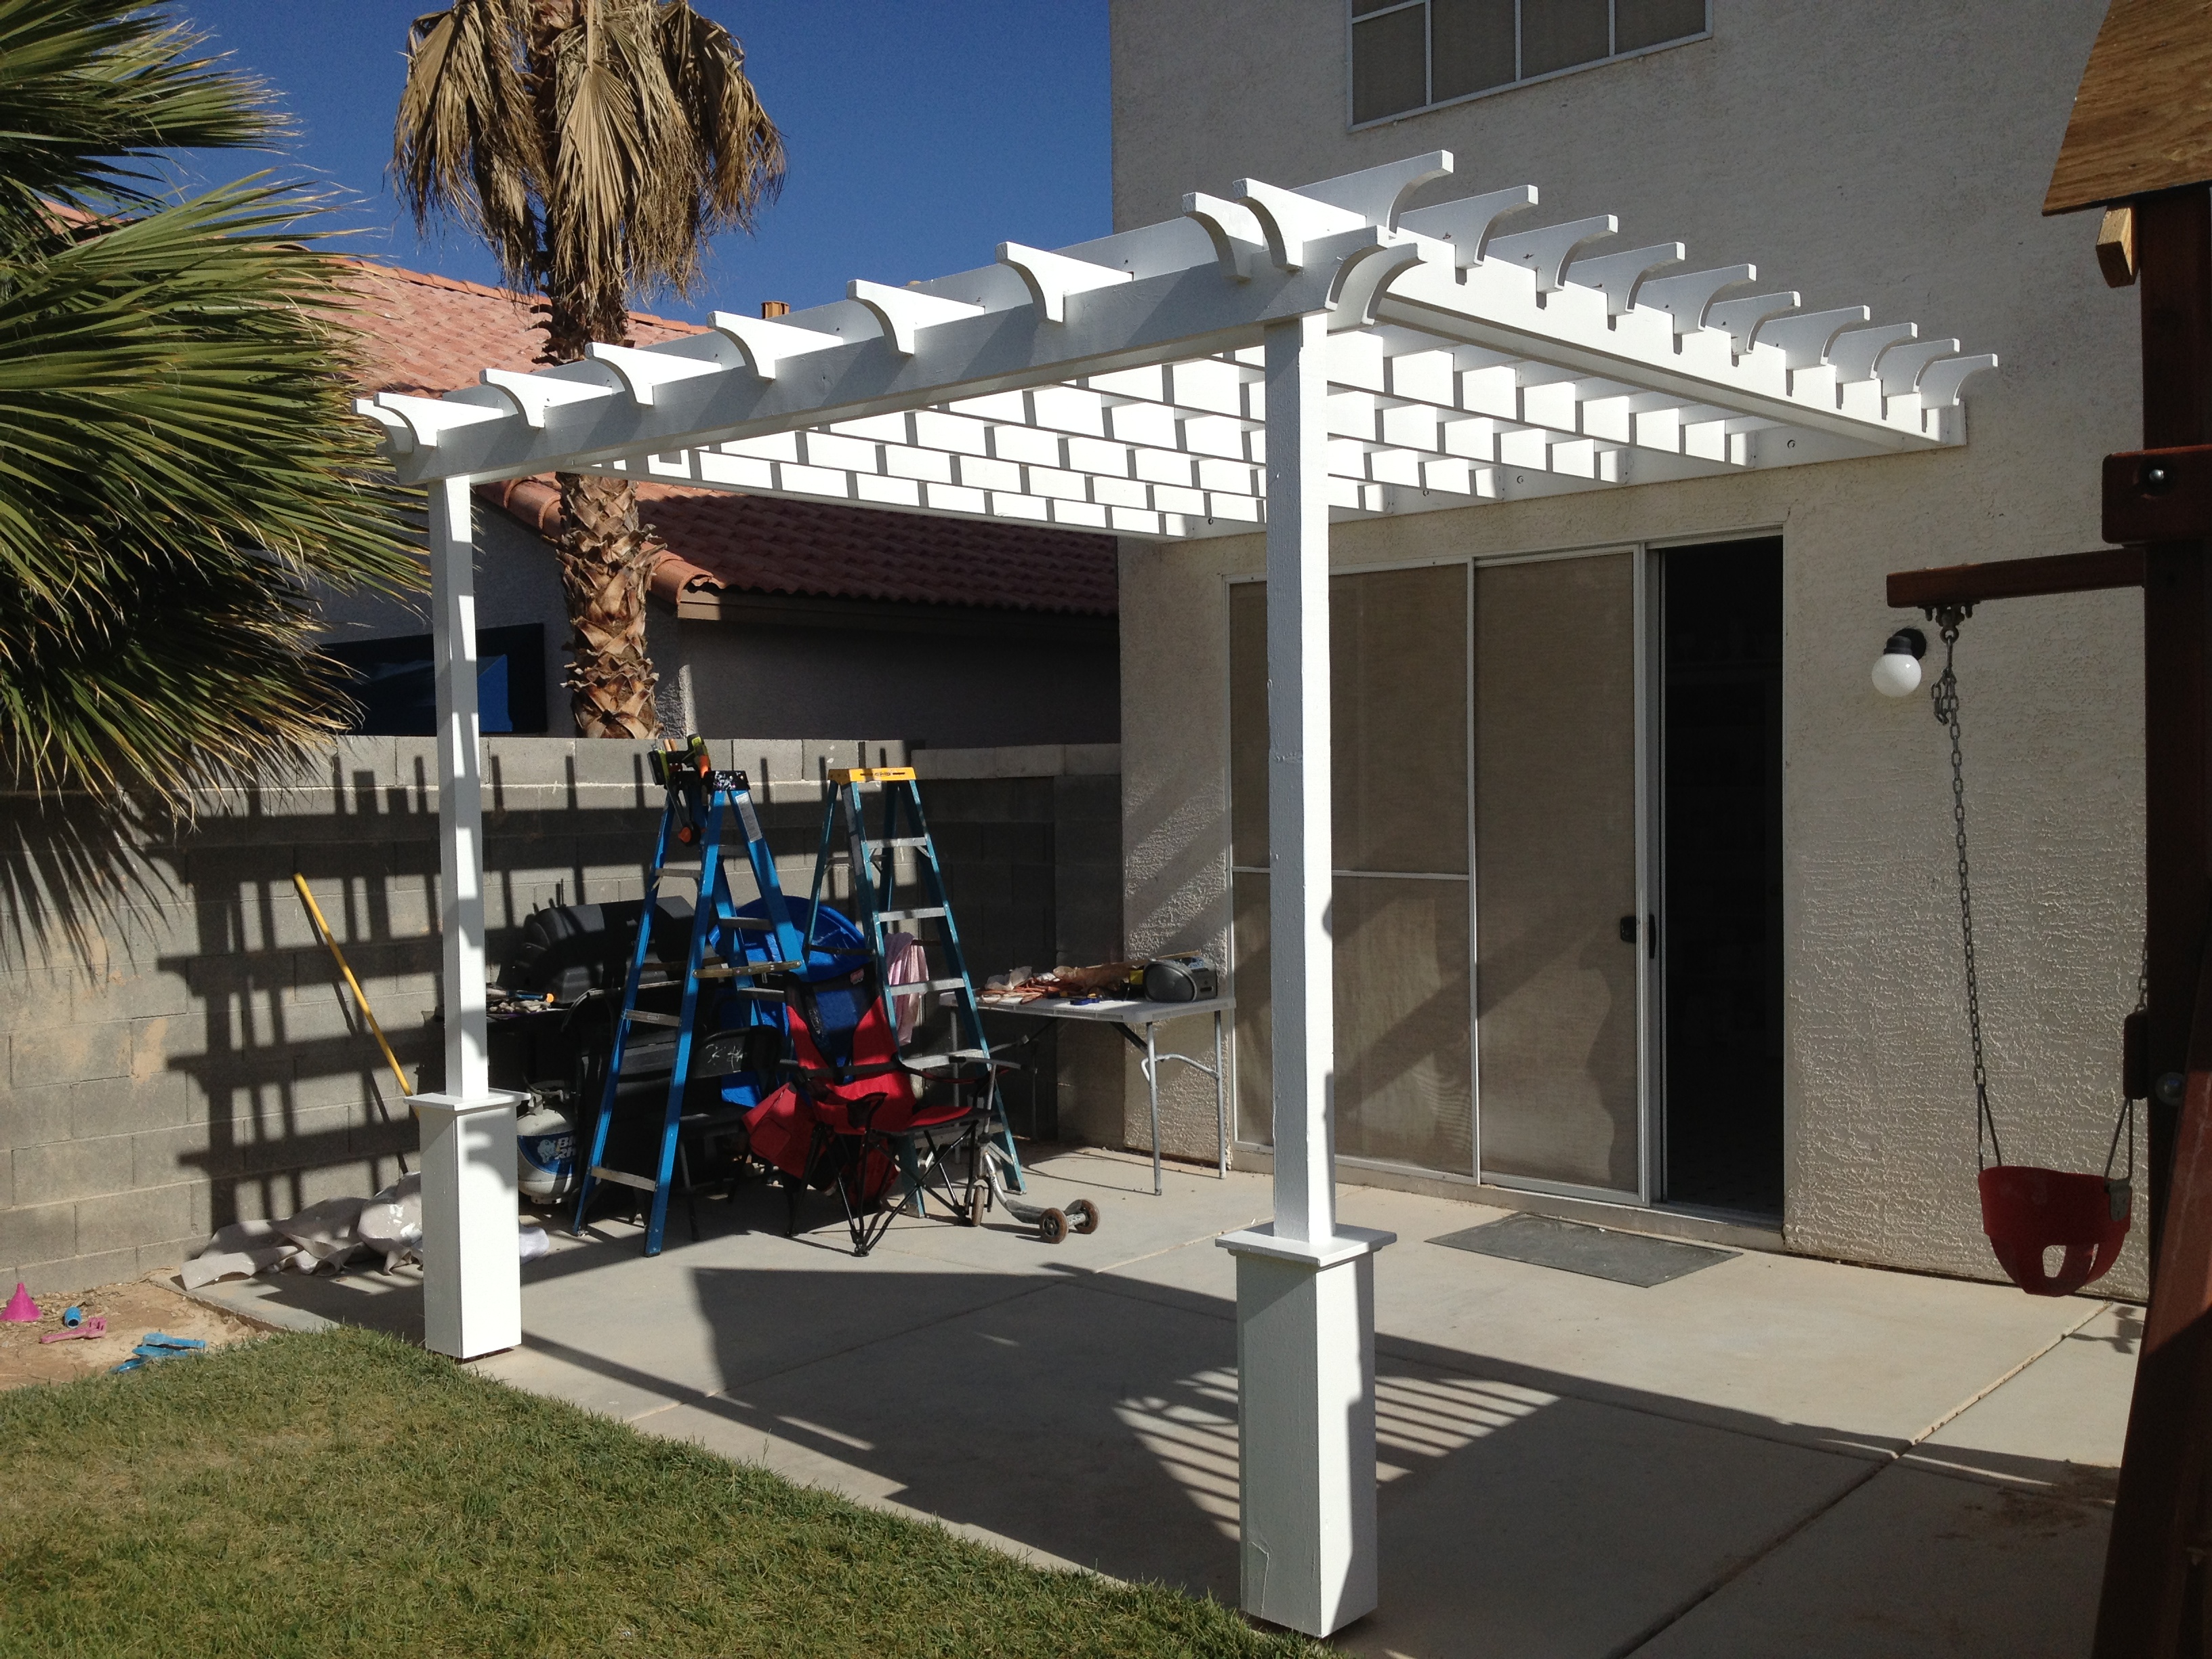
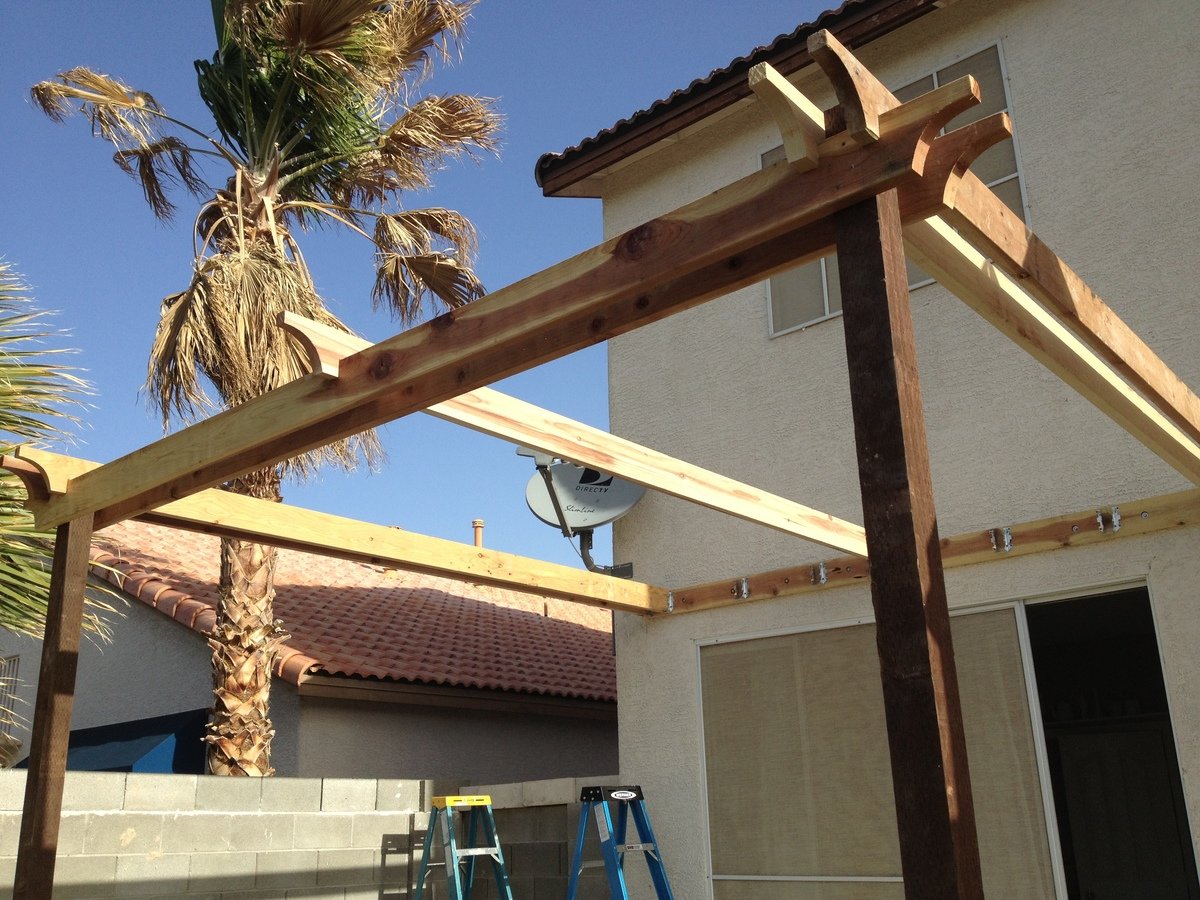
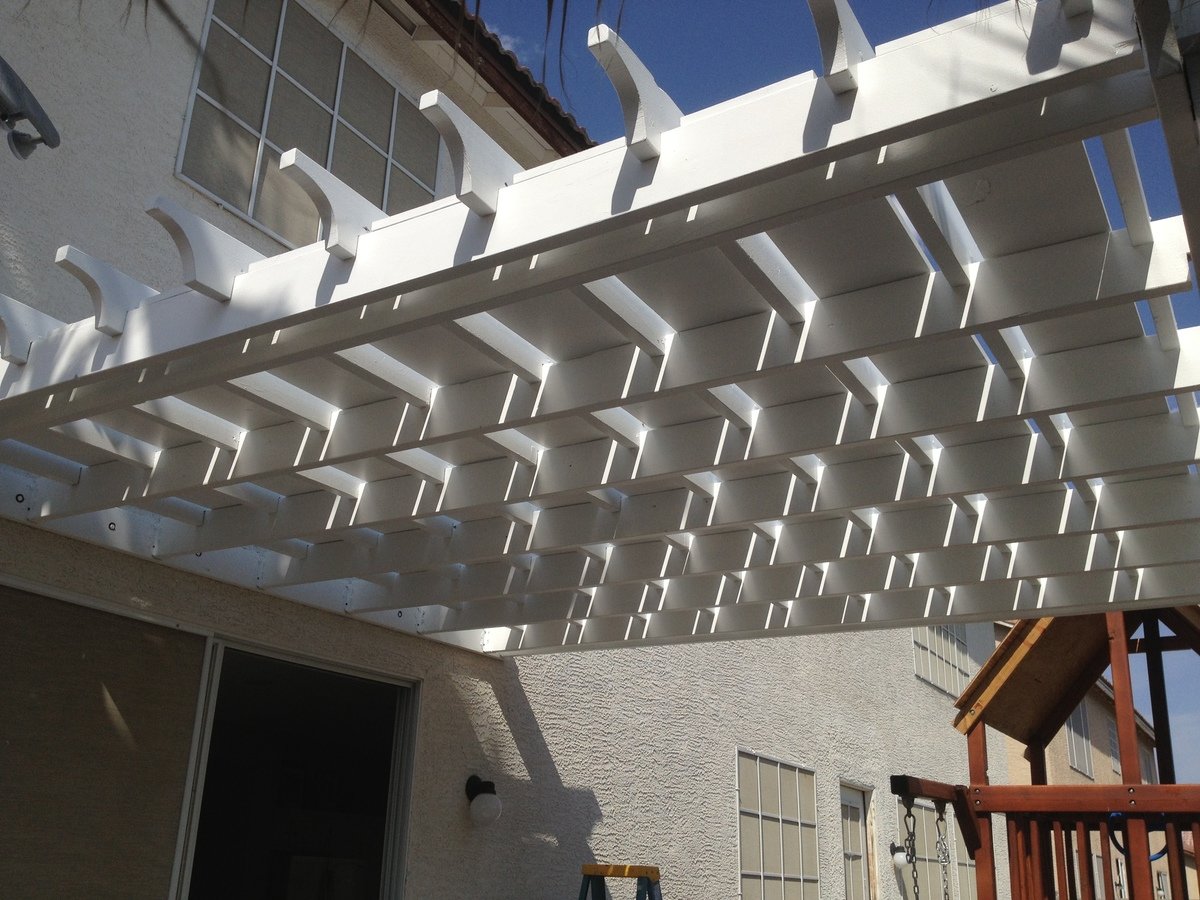
Instead of building a free-standing, 4-poster Pergola, I attached one side directly to the house. There are various Pergola design types and shapes. Simply Google for "pergola" images and decide which design you like best, or combine design ideas together (as I did).
Couple things to consider:
A: Is your Pergola more for decorative purposes or actual shade?
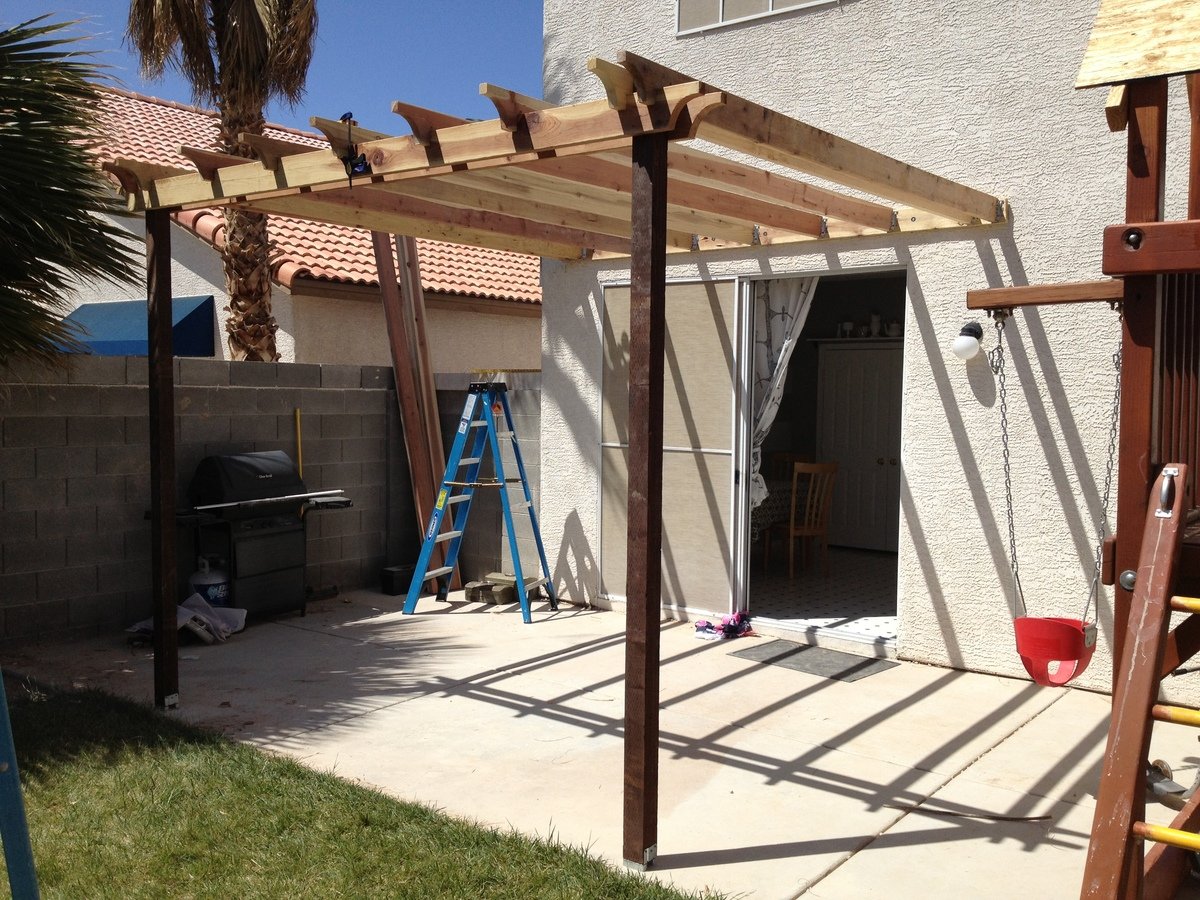
My design was more for actual shade (but with a decorative design), which is why I added the 1in x 12in x 12ft Pine boards between the cross beams at the very end (last picture). If your design is more for decorative purposes, you can space out your support beams and cross beams wider (using less wood and money).
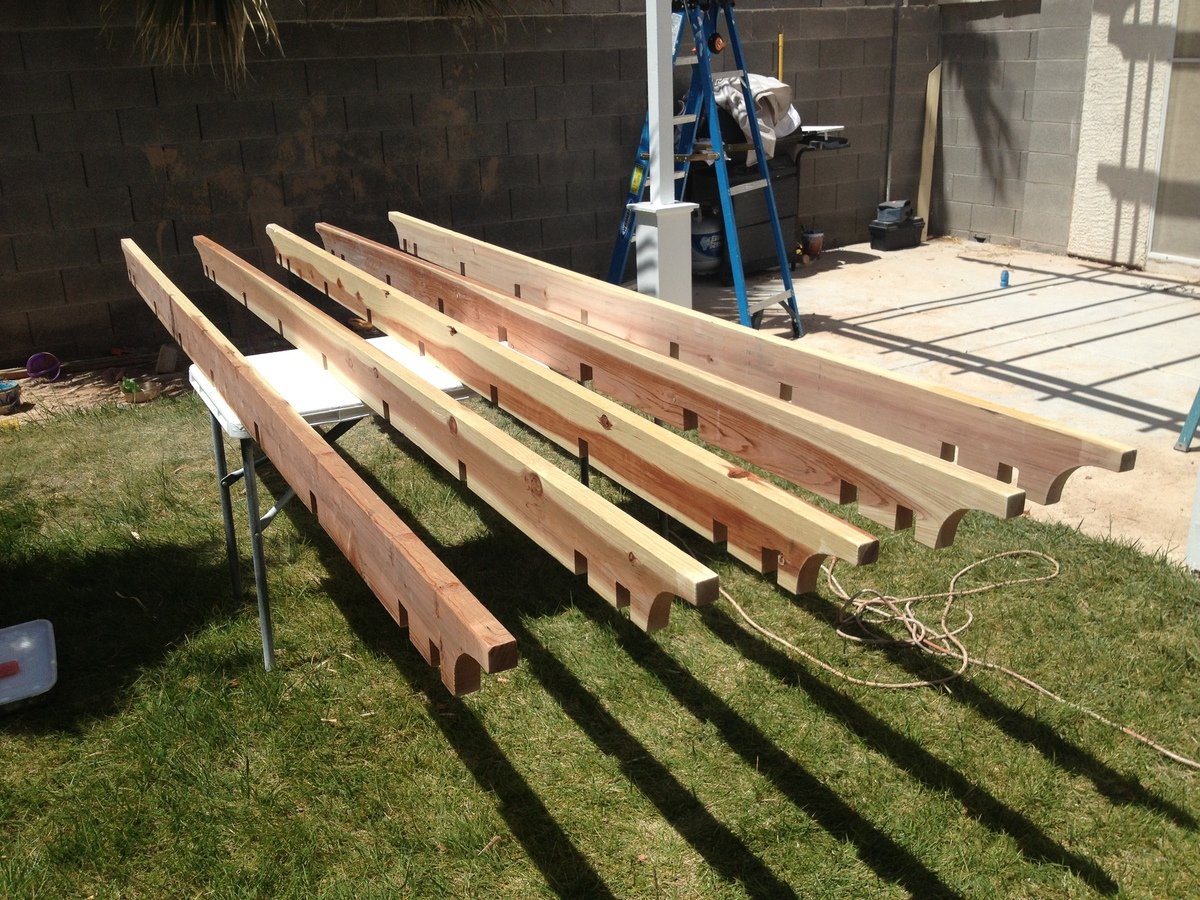
You can also choose to use 2x4s as your support beams with 2x2 cross beams on top (essentially furring strips) either close together or spaced farther apart. This would also reduce the overall cost of your Pergola and make it much lighter as well. I chose to use all 2x6s for both support beams and cross beams.
B: What path does the sun follow across the sky over your Pergola?
If the sun passes directly over your Pergola and you want a lot of shade, you'll obviously need to consider this in your design (i.e., more cross beams that are close together).
C: Do you want your support beams and cross beams to inter-lock (by cutting square notches and assembling them like linking logs), or simply stacked on top of each other? (Again, Googling for Pergola images will help you see the differences in designs.)
I chose to interlock all of my beams by cutting notches and fitting them together. Obviously more time consuming to measure each notch, cut, and chisel them but the stability of inter-locking beams should hold up a little better in the strong winds of Las Vegas.
HOW TO (abbreviated)
Overall Pergola Dimensions: 10ft Height, 12x12ft
Tip: Paint or stain all your wood prior to assembly. Much easier. You can always touch-up scuffs and scrapes after it's built.
1. 2x6x12 installed directly onto the house (thru the stucco into the studs) using 3/8in. x 5in. lag screws. (Tip: Seal the top edge of the 2x6x12 that's against the stucco so water doesn't run behind it and down into the lag screw holes.)
2. Install the 2x6 Double Shear Hangers (as many as you need for your design)
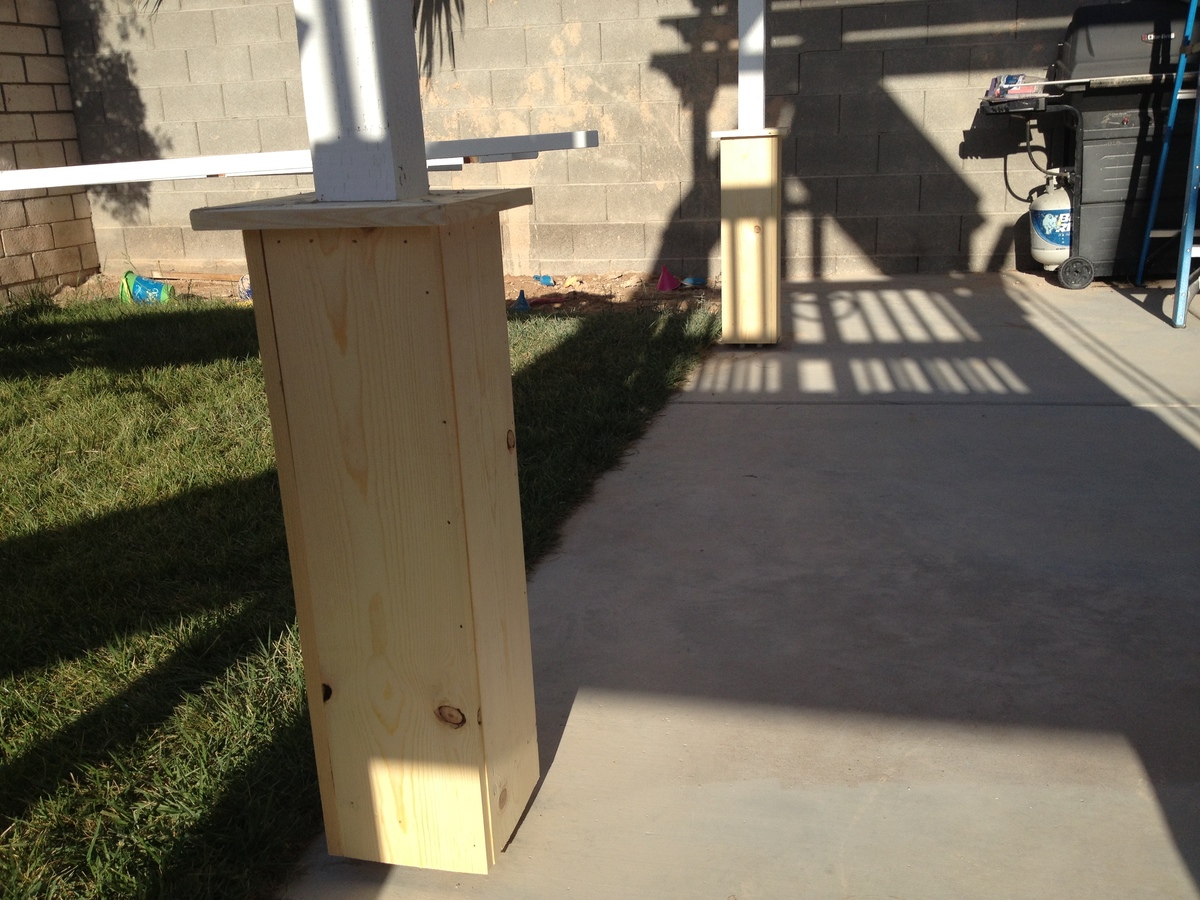
3. 4x4 post anchors secured directly into the cement patio using Tapcon 3/16 in. x 2-3/4 in.cement anchor screws.
4. 4x4x10ft posts screwed on top of the anchors. Ensure level on all sides (use a partner to help hold the posts).
5. Attach the front and side 2x6 beams to the 2 posts (again, use a partner to help hold posts while you're up on the ladder screwing your beams to the posts)
6. Attach the remaining 2x6 support beams.
7. Attach the 2x6 cross beams on top (whether you inter-lock them by cutting notches or simply resting them on top, be sure to toe-nail screw them in with 2in exterior screws).
8. Lay 1x12x12ft pine boards on top in between the cross beams and secure with 2in exterior wood screws.
9. Construct the post bases ("sleeves" or "leggings") which greatly adds to the look, as outlined in the "Weatherly Pergola" plans.
10. Touch-up paint / stain any areas you need.

Thecreativityexchange.com did such a great job with the original project, so of course I had to give it a try! I had only a few minor adjustments in size. I made this one 8ft X 8ft and only using one sheet of pegboard. My amazing wife stained it too with English Walnut!
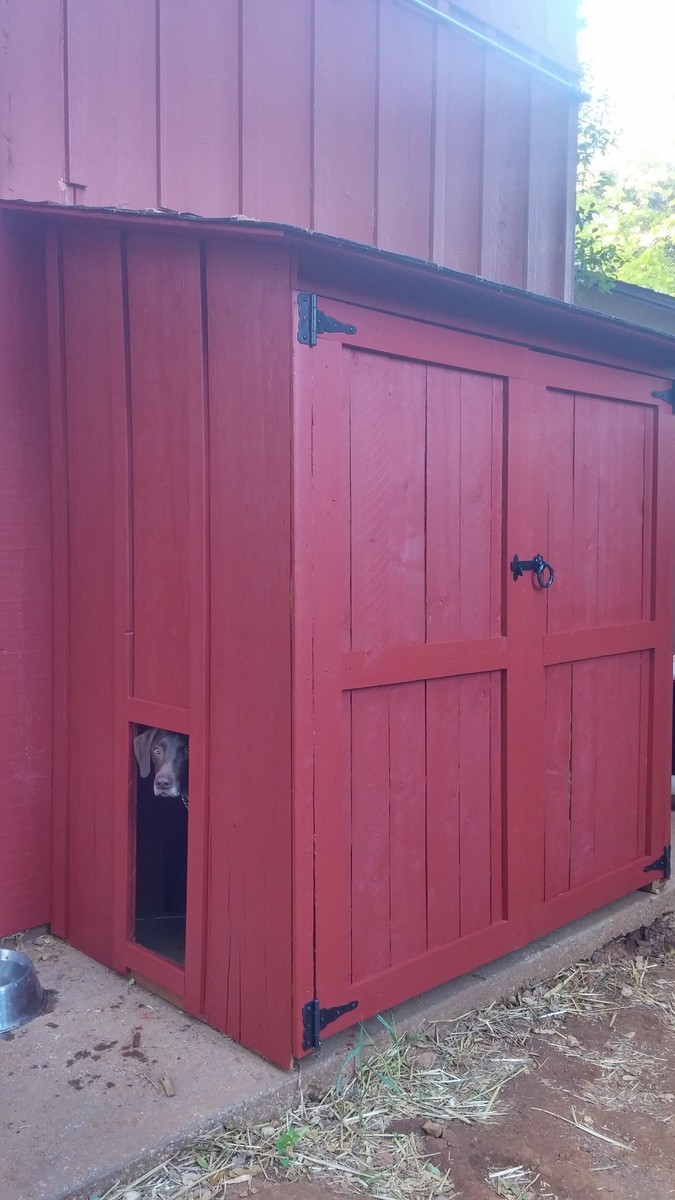
I needed a garden shed (for potting supplies) and a dog house, but I wanted it to look good. I started with Ana's plans, but screwed up a cut and was too lazy to go to the store, so I modified the plan a bit - also we didn't want a lot of venting off the roof.
OUR MODIFICATIONS:
NO BACK WALL - I did not build a back wall, as we pushed it all the way up to the house. (You need to check your codes for this if it's allowed. The way I'm integrating mine w/o breaking the exterior waterproofing of the house and it's unconditioned made mine OK)
DOG HOUSE- I cut away a hole for our dog between the battens. And as you can see - he loves it. He's got his Coolaroo dog bed inside. We also added a 'ceiling' to the lower dog house half, that divides the gardening storage from dog house. The large shelf inside that acts as a dog house ceiling, and above are my un-used pots, hand tools etc. (no worries no chemicals with the puppy)
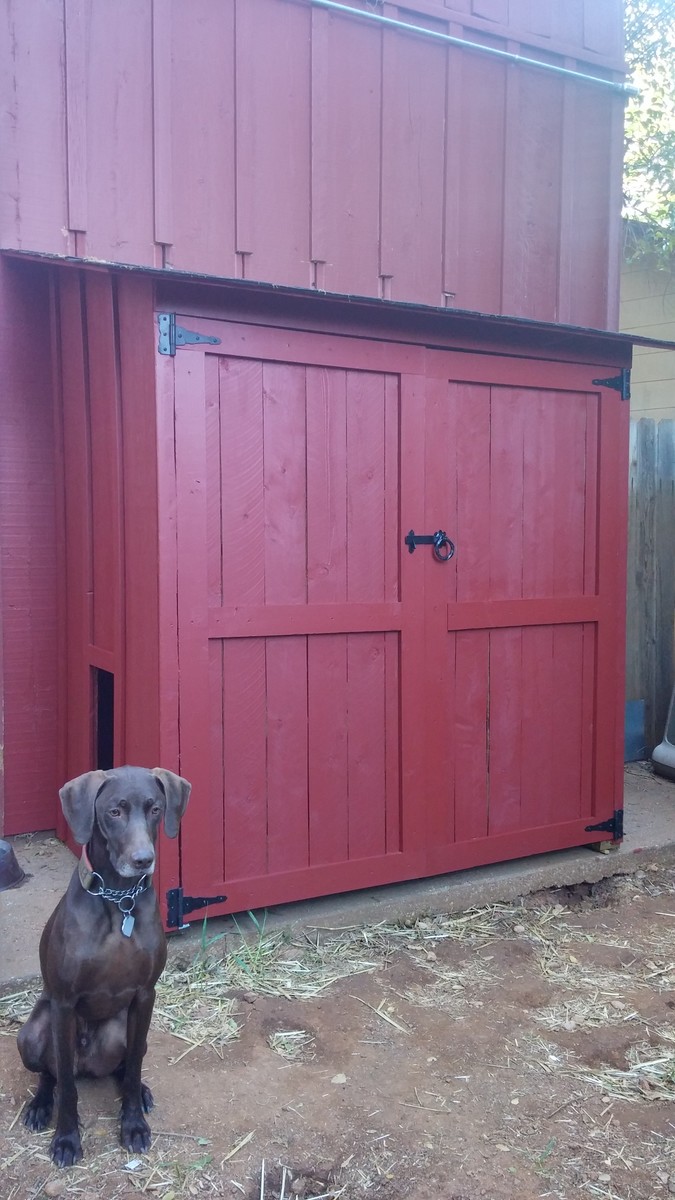
PAINTED EXTERIOR- I painted it red to match the house, and will also be putting garden pavers in front of the doors.
ROOF- We did put an underlayment down on the roof before the asphalt shingles.
LESSON LEARNED- If your dog is a Mama's boy like mine, he may try to climb a ladder to remove you from a roof which he has determined is not OK for you to be up there.
*One concern is - most sidewalks slope away from the house, so we had to shim the sill plate so front of the shed doesn't lean outward causing the doors to pull open constantly. As you can see from the photo I still need to flash at the roof where we cut back our houses' battens.
COST- We live in CA - and this project was more expensive than anticipated, our lumber/roof shingle costs were around $270 alone, and keep in mind we didn't build a back panel. I have very little scrap left over too. When I was nearly done the hinges were an additional $15 a piece, $10 for the latch. And we had the primer and paint in the garage. Underlayment for roof, I already had in the garage too.
TIM-: I started this project on a weekend, but it ended up taking longer; probably because I didn't block out the weekend just for this project. I spread it over the course of a month, so hours wise it probably wasn't as bad as it felt... You do need two people though, and that's where I ran into some trouble, I kept trying to work on it when my husband wasn't home. Probably 24hrs, 3 easy going days. Could probably be done in a weekend if you were dedicated and didn't get distracted (or screw up a cut like I did, which sent me to the drawing board to fix my mistake)

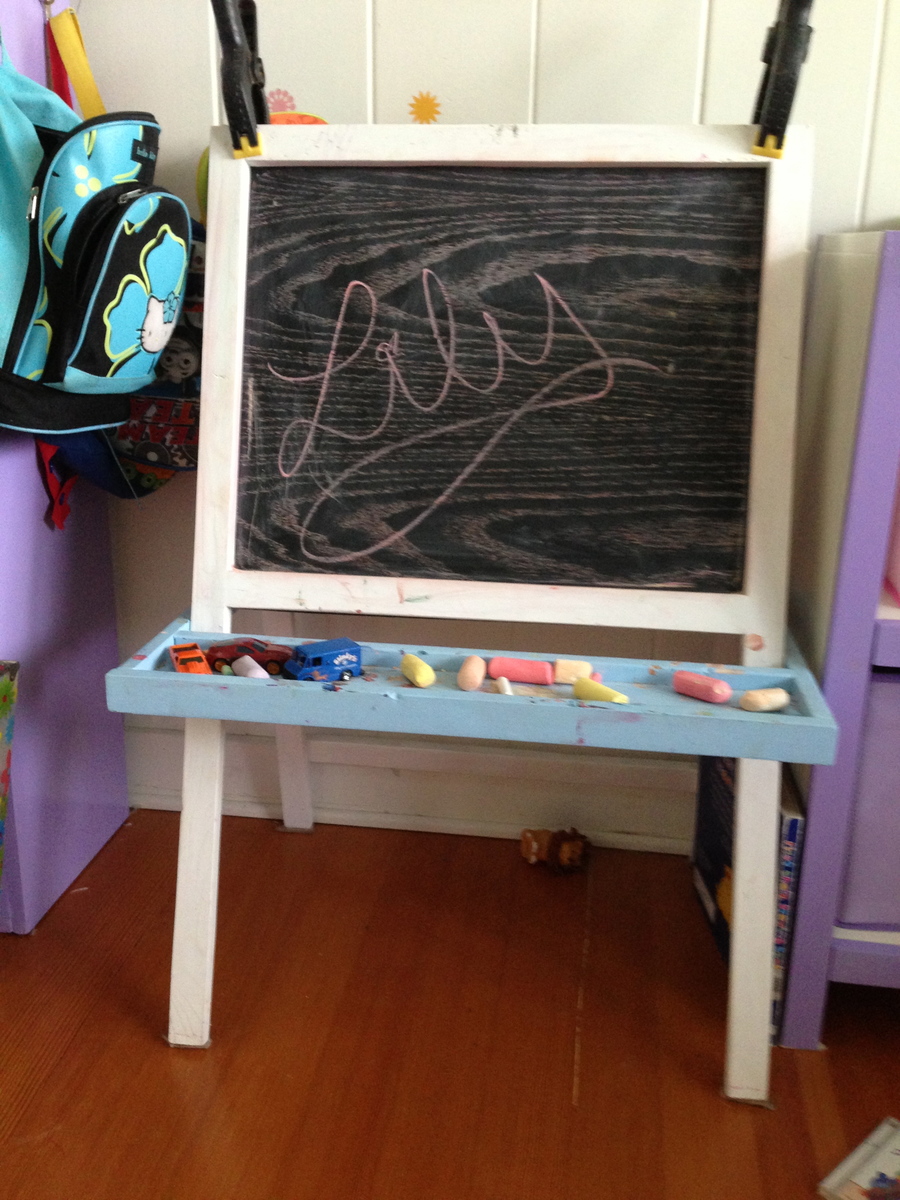
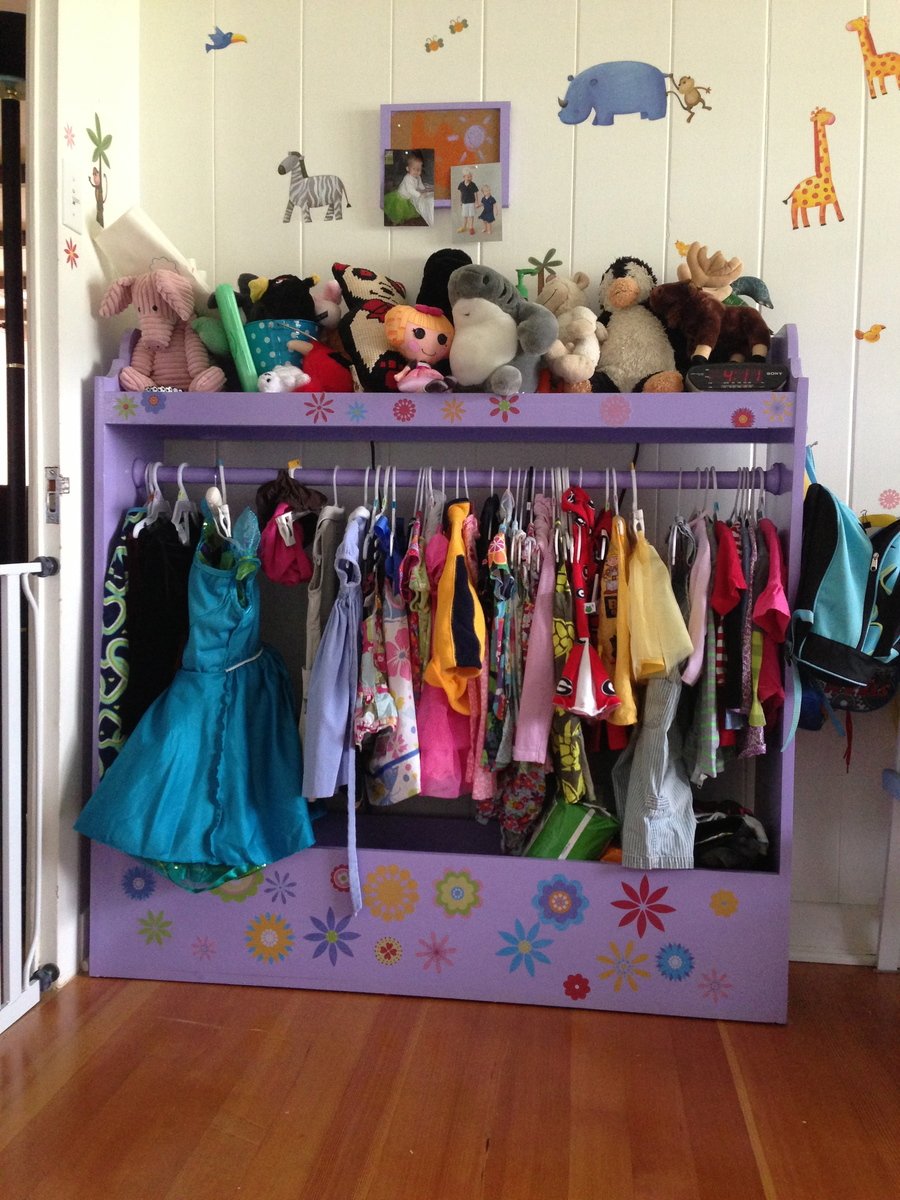
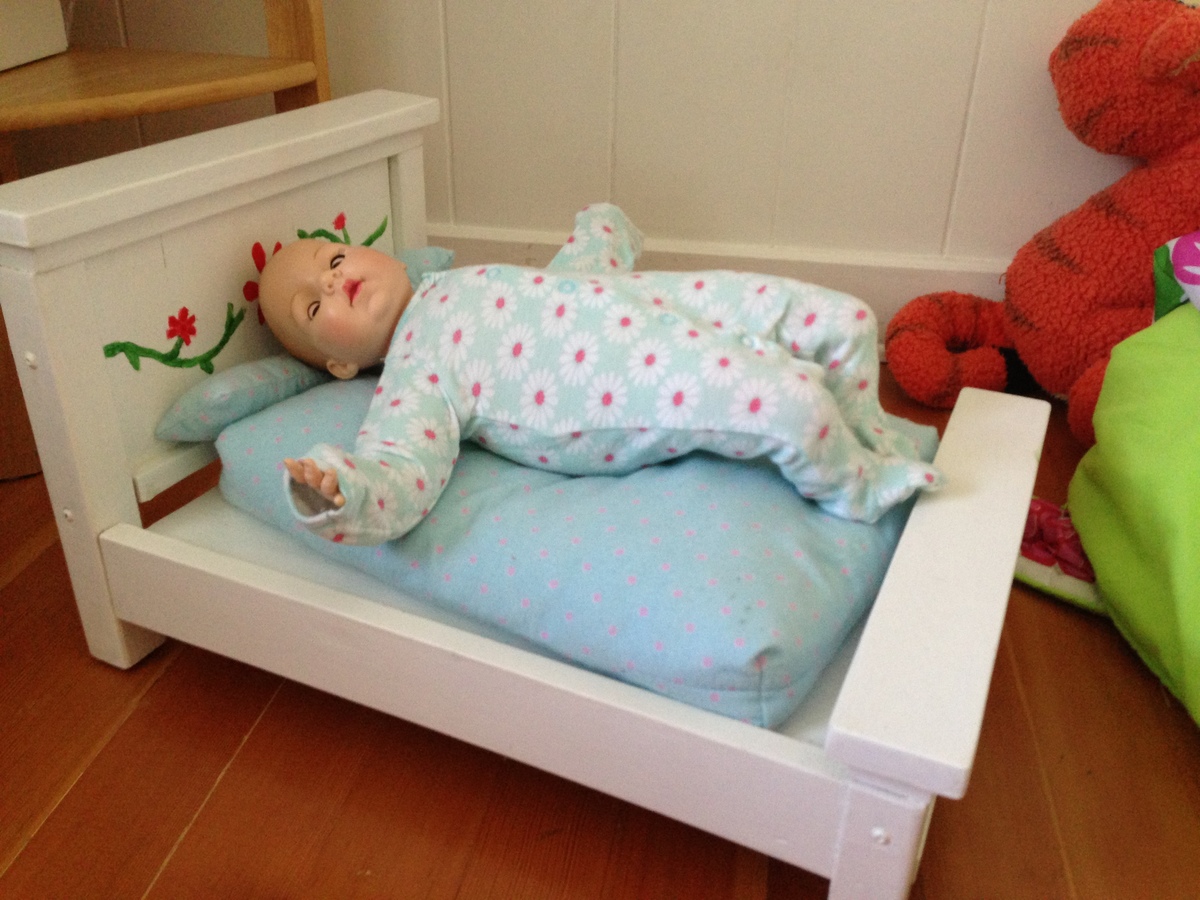
Easy to build, easy to customize, perfect for totes

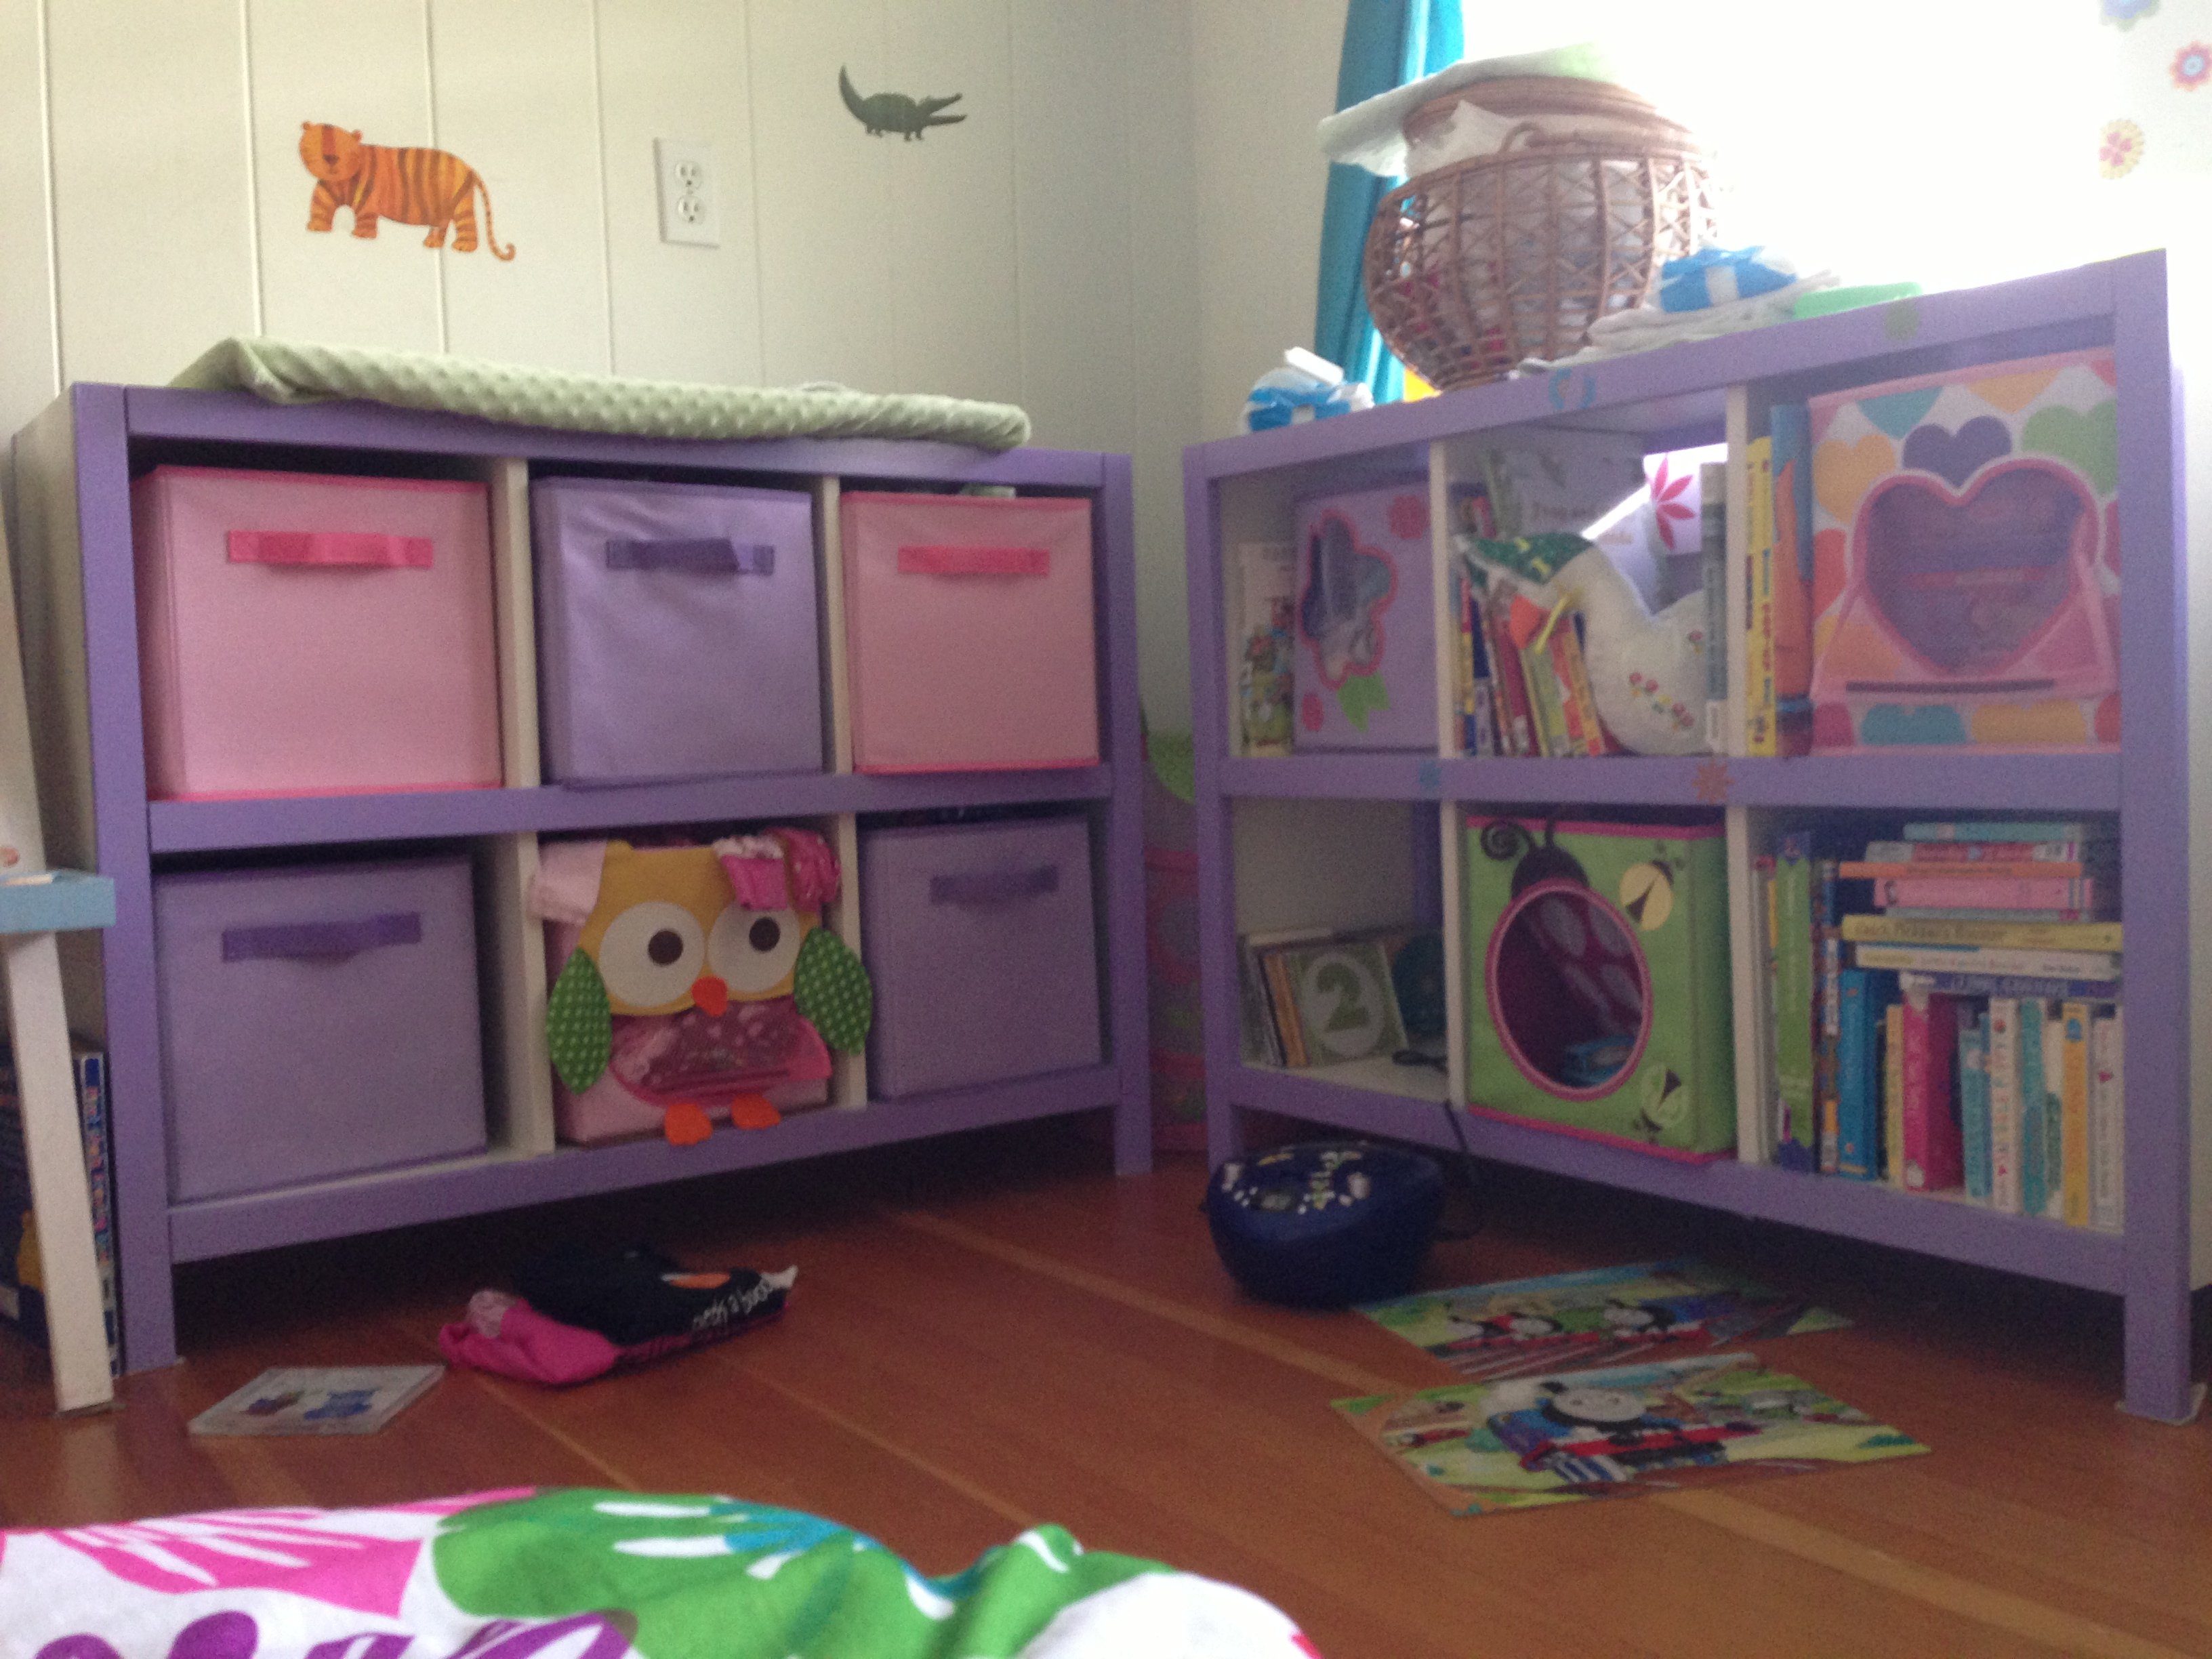
My daughter's room has no closet and is pretty small, and I just couldn't find any furniture I liked around here. But I found tons on Ana-white.com! So, her entire room (except one old bookshelf) is now ana-white originals.... the cubbies hide her clothes and toys; the dress-up center functions as her hanging closet; she colors on the easel (originally made for her brother, but he never used it...); and the doll bed serves as a resting place for several different dolls (sometimes all at once). I think I will build her the dollhouse bookshelf to replace the older bookshelf, and once she's ready for a real bed (as opposed to the mattress on the floor), I'll be building that too! The chalkboard easel was one of my first builds, and I have to say, it still remains one of the most challenging (my screws kept splitting, I had a hard time fitting things together, esp. without another pair of hands....), but watching my daughter scribble all over it nearly every day makes it worth every minute! Building the dress-up center and cubbies took almost no time at all - but it took me over a month to get them finished (sanded, painted and poly'd). Thanks again Ana for the great plans and all your hard work!