Clara Table

Another cute, easy project!
Built from Plan(s)
Another cute, easy project!

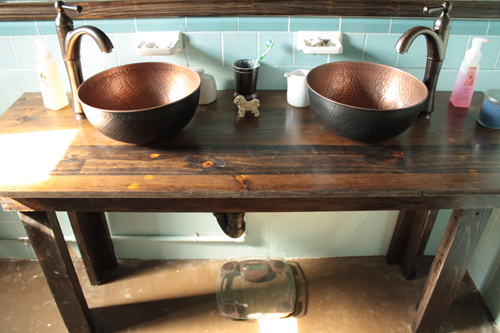
This was my first project working start to finish with my husband, and let's just say that I prefer to build without him! This was a lot of trial and error, but I think in the end it turned out really well. We splurged on the plywood top, the sheet alone was $60, but since we used it on this, 3 benches, and our kitchen island, it was well worth the splurge!
We made the vessel sinks from metal bowls snagged at Target for $17 each. We drilled a hole using a hole-saw bit, and popped in an $8 drain kit from Lowe's. The faucets were given to us by my father-in-law, who's the manager of a plumbing company. I sewed a curtain that I stapled on the inside to hide the plumbing beneath the sinks. I love how it all looks now!
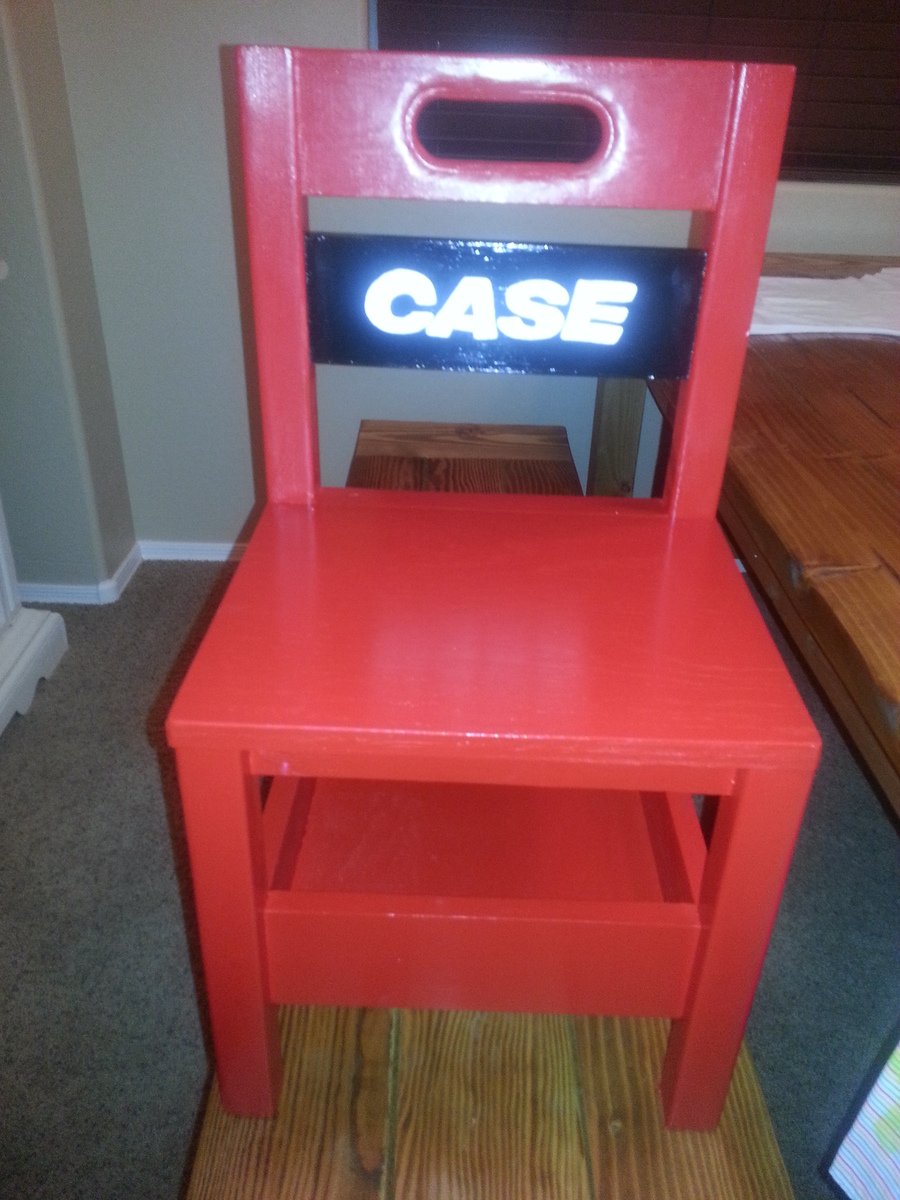
This was a birthday gift for a 1 year old. Yes it's painted like the tractor.
THE MOTIVATION
After a recent washer outage (that I was ultimately able to repair myself), my wife and I talked about eventually replacing our front-loading washer/dryer set. One of the bullets I hate biting is paying the exhorbitant prices for the matching pedestals for new washer/dryer sets.
Having just bought a good set of cordless powertools, and having watched my father when I was a kid build countless household fixtures, window dressings, furniture pieces, etc., I decided to try my hand and construct a permanent platform for our current washer/dryer set, thereby eliminating the need to ever buy manufacturer pedestals again.
The existing pedestals were a standard 15" high, with a storage drawer, which we felt was still not high enough for comfort. And, the washer pedestal drawer was entirely inaccessibl due to the 2" walls on the washer drain pan, so its drawer was totally useless, wasted space.
And, lastly, we really wanted more space for clothes baskets full of laundry, which we generally stacked (full and haphazardly) on top of the machines.
THE CHALLENGES
The largest challenges were mainly logistics, and gravity. The washer/dryer would have to be unavailable for at least 2-3 days while they sat disconnected in the next room waiting for their new home. So I coordinated with the family so they'd know when they needed to have their laundry done, or tough it out until I was done.
There was no way to know for sure what the drain connection for the washer pan looked like until I got the washer out. So it was a small gamble that I'd be able to get the parts needed to extend the drain pipe up to the new platform right when I was ready for them. Fortunately, this was no issue at all.
The biggest challenge turned out to be toward the end when it came time to lift our 230-lb. washer onto the new platform. I seriously considered disassembling the washer to the point that I could remove its molded concrete counter-weights, but instead (and arguably stupidly) elected to use a large hydraulic car jack to raise the washer. This ultimately worked, but I have to STRONGLY ADVISE AGAINST trying this.
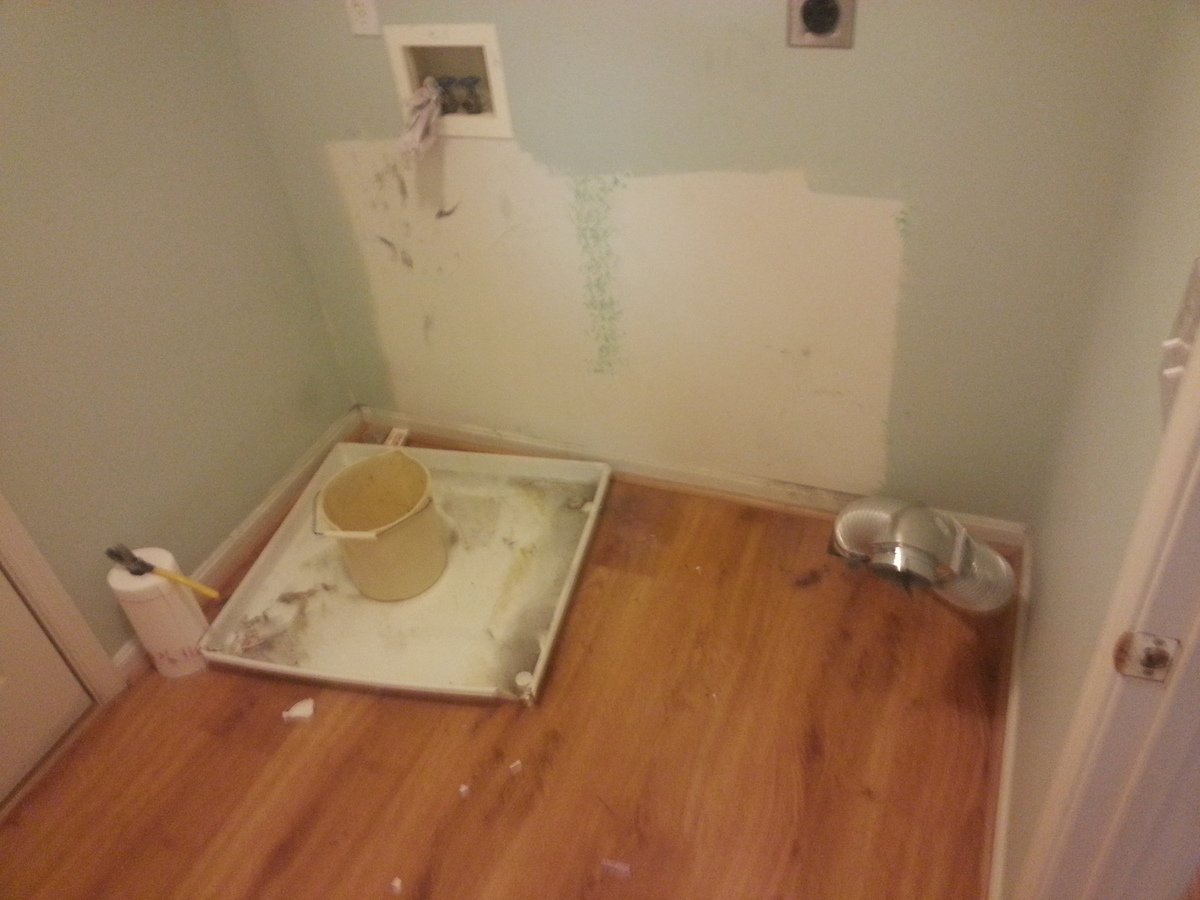
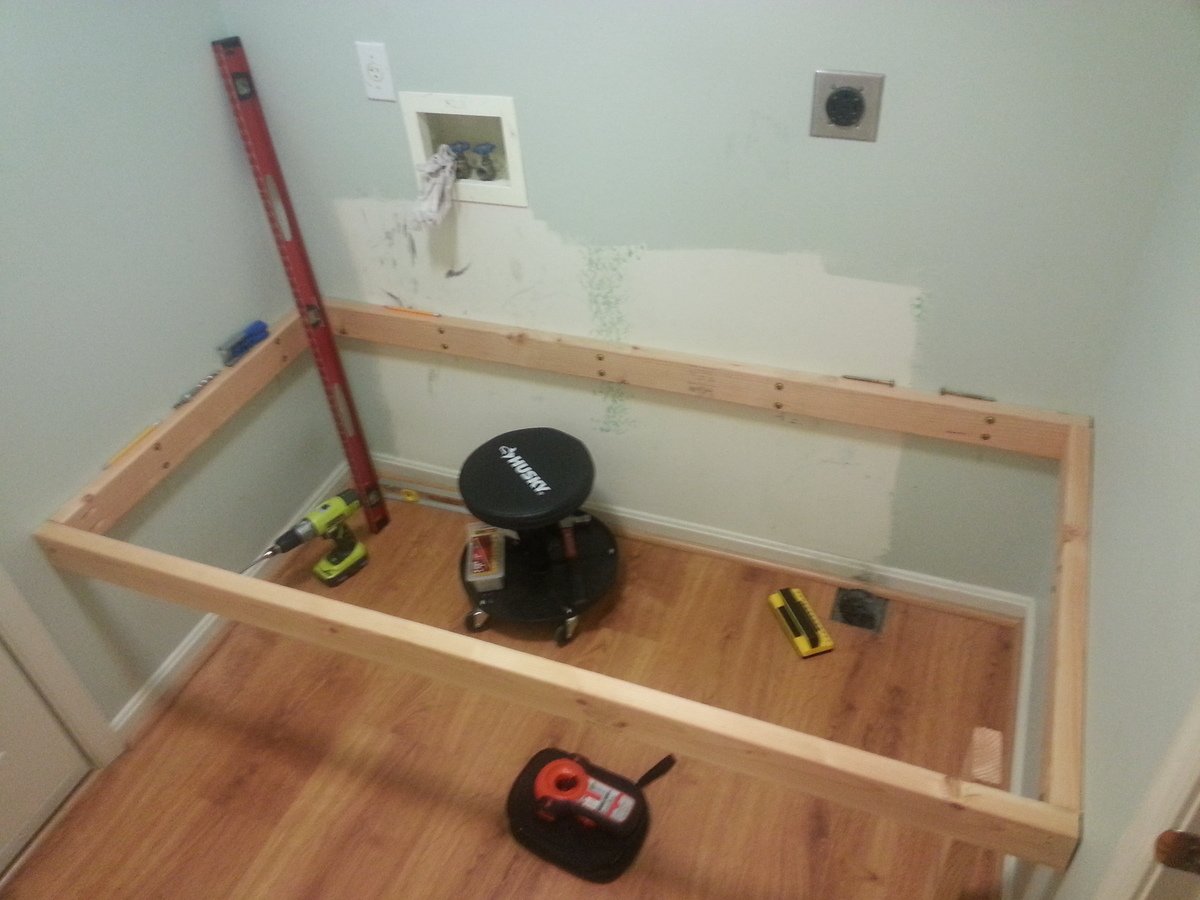
THE SPACE
Our laundry room is also the "mud room" between our kitchen and the garage. It is only large enough for the two machines, and the walk way between the two doors--in total, about 70.5" square. Building the platform from wall-to-wall made the most sense, and minimized framing by fastening edge framing directly to the wall studs.
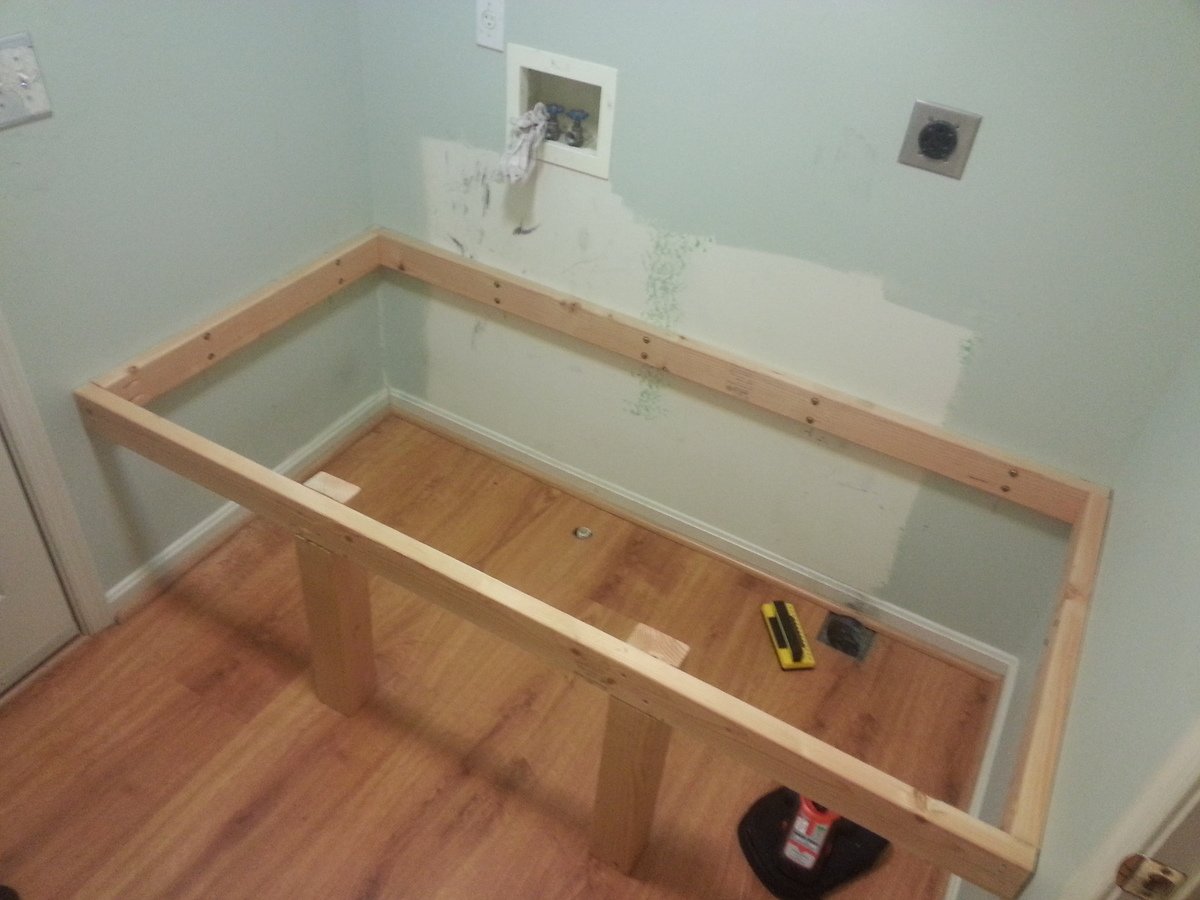
THE PLAN
Pretty basic: 2x4's all around for the edge framing--back and sides fastened directly to the wall studs, and front 2x4 supported by two, notched 4x4 legs. 3/4" plywood for the subsurface, and 1/4" laminate faux-wood flooring on top (left over from reflooring, so it matches the floor below). Bore holes for the washer pan drain and the dryer vent. 1" quarter-round molding on the sides, and 5.5" face piece flush with the top of the molding across the front (spare lauan I had looks perfect). I also made a point of putting the machines on the platform before the face piece since it might have been in the way or damaged.
Anyone will tell you that it's best to at least sketch out what you want to do so you can minimize surprises, forgotten parts, etc. I, of course, did virtually none of that, and made several course changes and corrections along the way. For this project, I was lucky that I didn't need to backtrack at any point, and probably won't learn this lesson any time soon anyway. However, you SHOULD.
TAKE-AWAYS
The main mistake I made was while gathering the platform dimensions for cutting the plywood. It was only blind luck that kept me from having to do it more than once (and having to buy more than one 4x8 sheet). I know that it's actually very unlikely that two adjacent walls are perfectly square, so I made a point to measure the width between the walls at the back and at the front--and, sure enough, found a 1/8" difference--wider at the front. But when I measured and marked the plywood for cutting, I measured both distances from the precut edge, and then cut. By doing this, I inadvertently assumed that one of the back corners was perfectly square.
What I should have done was used a carpenter's square in each back corner to extend a square line from the back edge to the front, and then measured from the square lines to their respective side wall. This would have accounted for neither back corner being square.
Fortunately, my mistake wasn't big enough to keep the plywood from fitting, but it was very, VERY close.
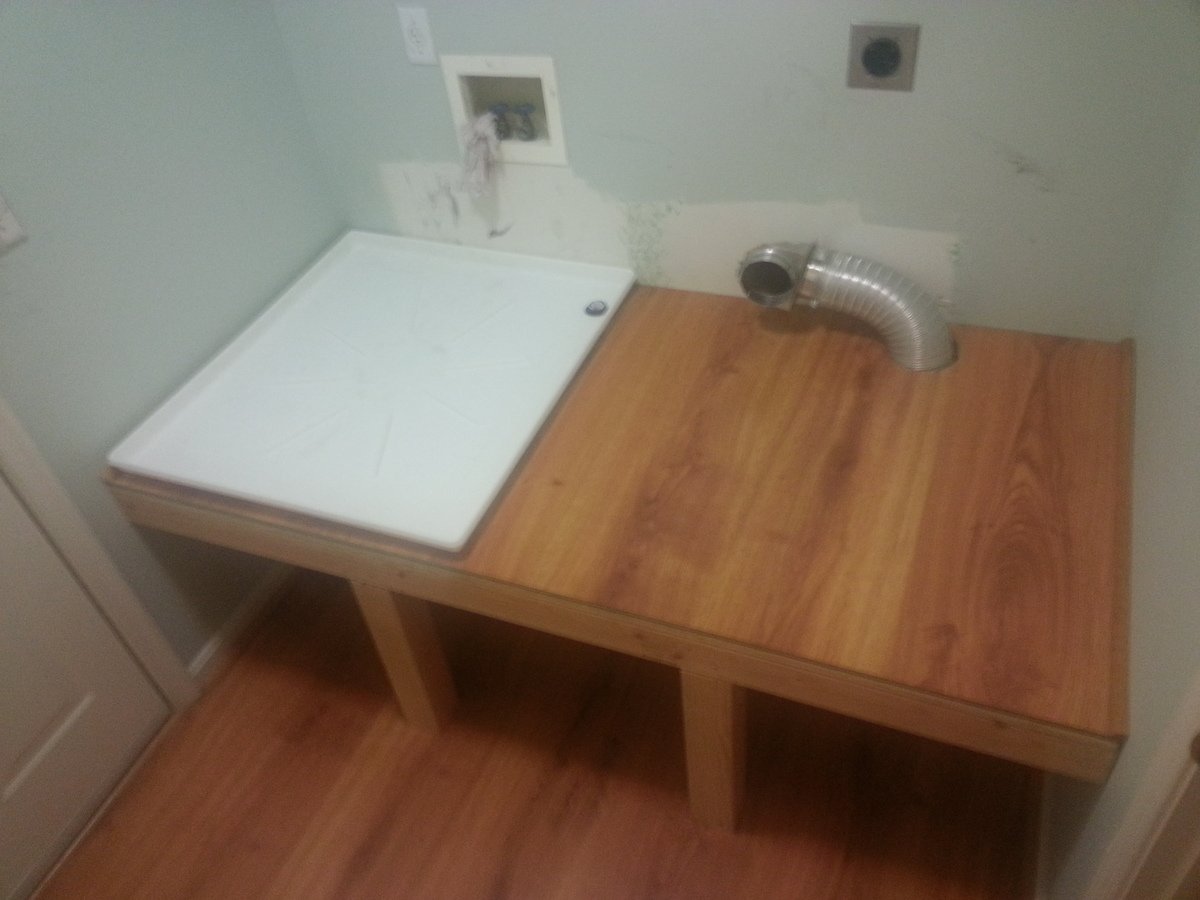
GIDDY
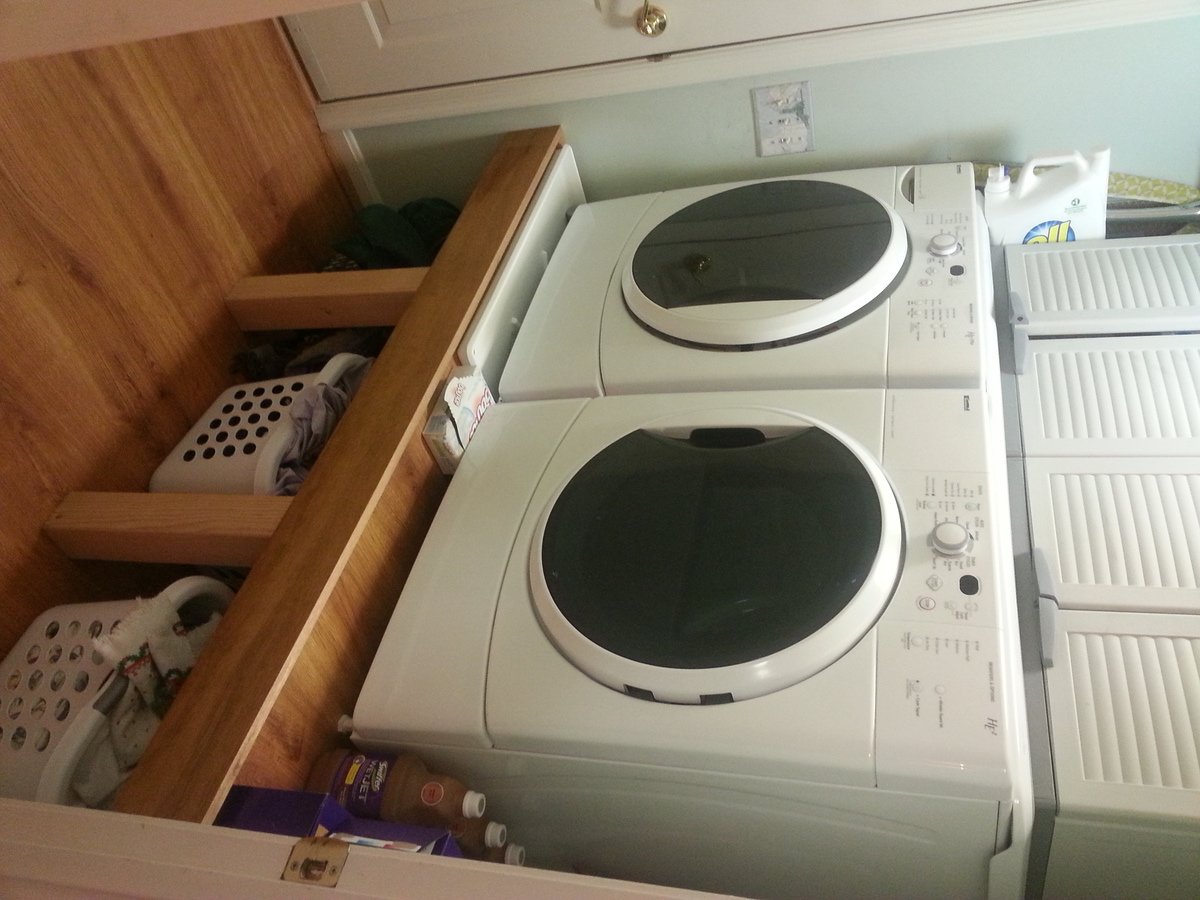
I honestly couldn't be happier with the finished project (or more smug). We've raised the washer/dryer 9" higher than they were (24" off the floor), and we now have basket storage underneath all the way across. I placed two 24" plastic cabinets on top, which still leaves room for the detergent right over the soap inlet on the washer.
And, most importantly, I got to use every powertool I own. Kinda beats "the quick brown fox jumped over the lazy dog" thing, huh?

Fri, 04/17/2015 - 19:54
Thanks for sharing the ins and outs of your project! Looks great!

I built this bench for my niece on her birthday. It as easy and fun to build. My niece and everybody at the party loved it.
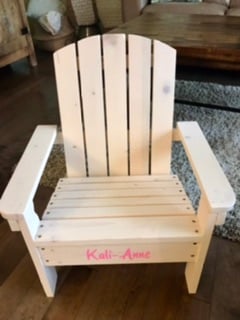
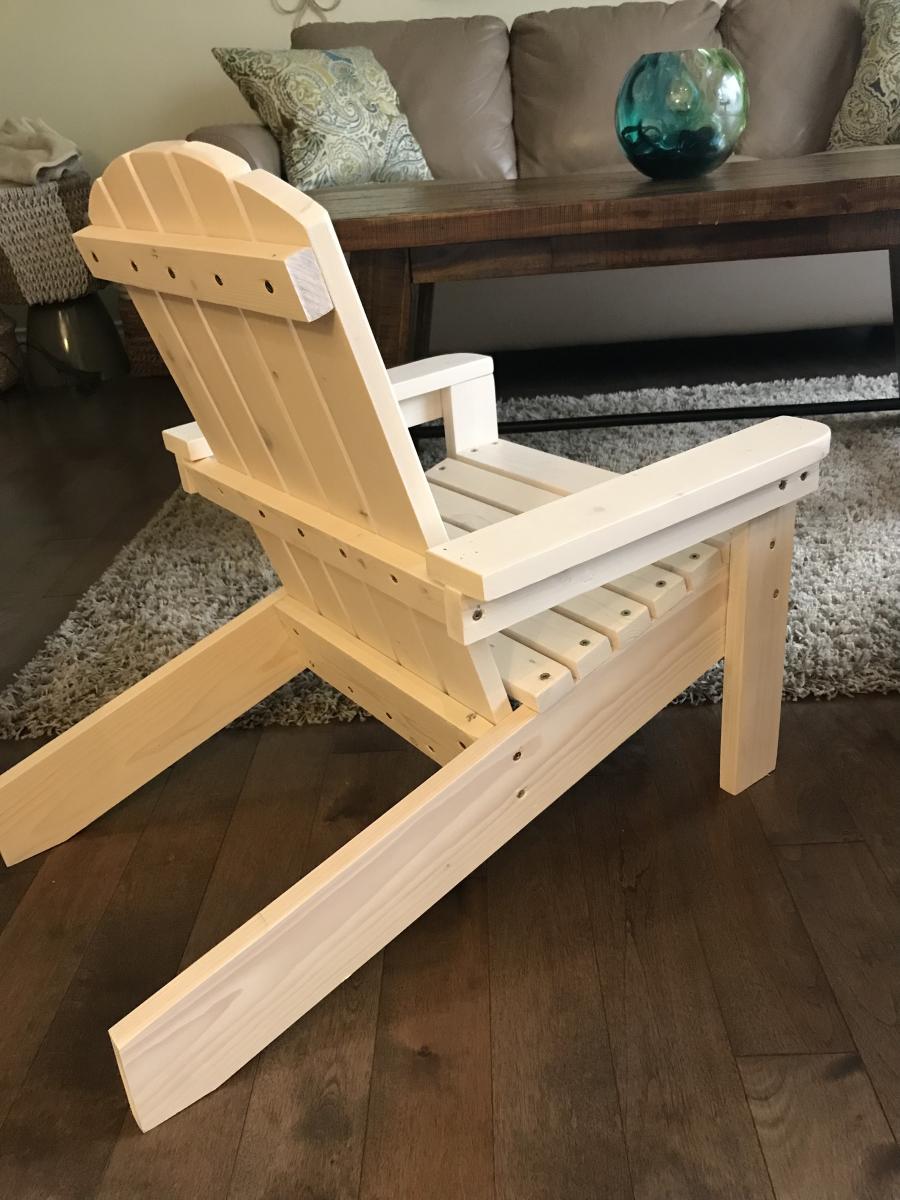
This was my first time building a chair. The plans were so easy to follow. The kids size fits an average child up to about age 5 or 6. If I were to build again I would add a bit of height to the backs so they could fit them even longer. My granddaughters aged 3 & 5 just loved them.
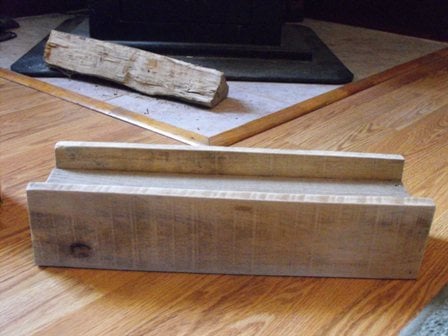
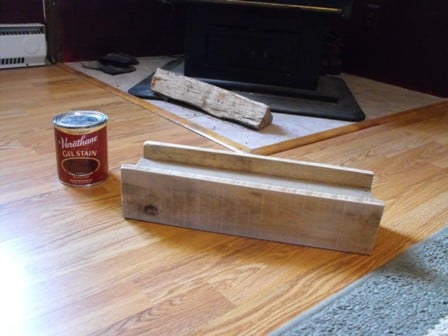
I always have leftover pallet wood lying around. So I decided to whip of a beam ledge as a gift. I ended up wrapping it before I even got a final photo but it was finished in a dark gel stain. I think the next time I make one I will apply a simple Tung oil finish so all the wonderful character can remain.
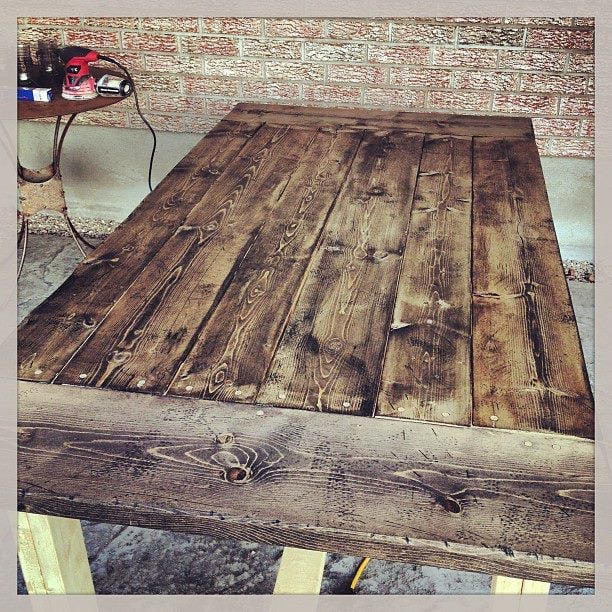
I did a shortened version of the Farm Table, I only had room for a six foot table. I wanted to give it an old-looking feel, so I beat it up a bit and stained it with an ebony stain, then a jacobean. I plan to paint the legs black.


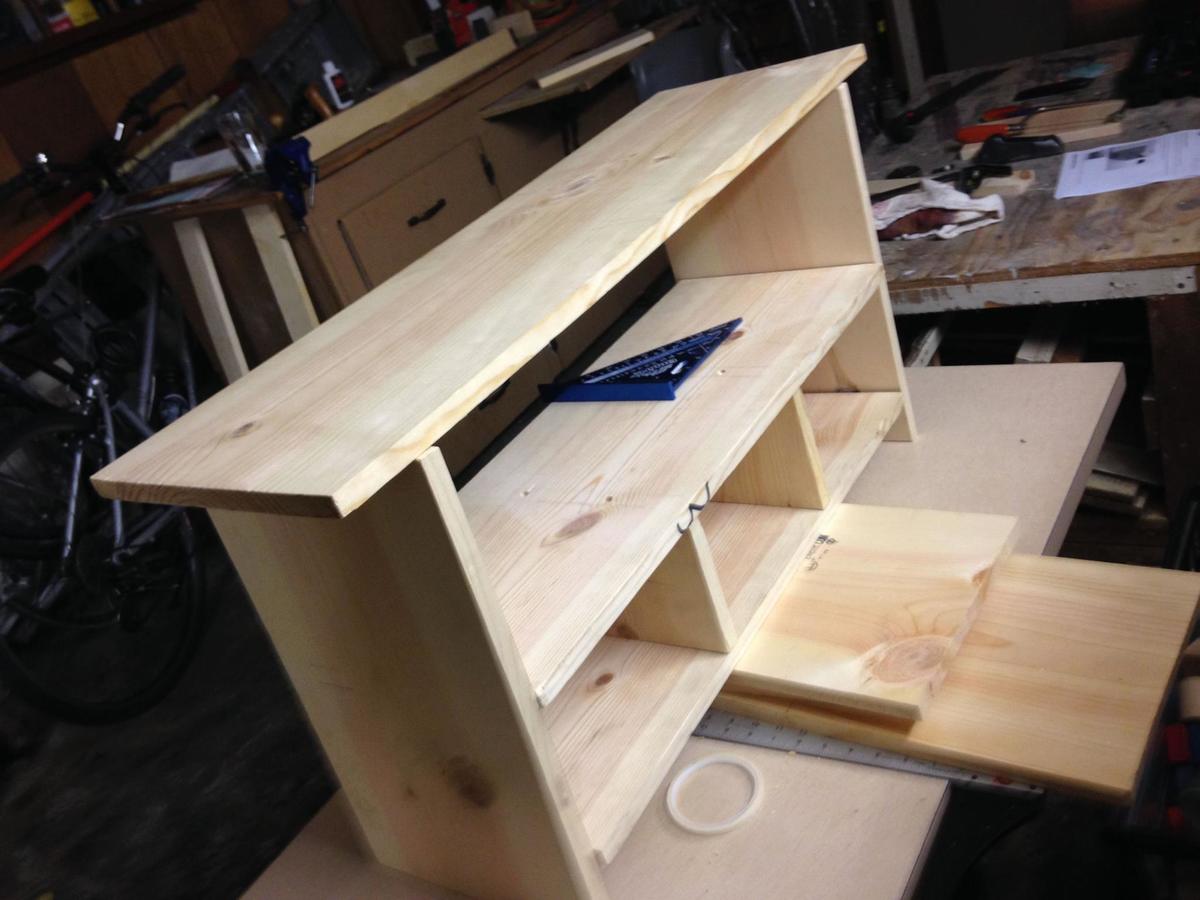
We wanted a bench for our daughter for our front porch, both for sitting and for storage of her rain boots, outdoor toys, etc. I'm definitely a beginner woodworker so I wanted something easy I could tackle in a couple of days with only basic tools, so I chose the Kids' Country Bench project. I liked the version posted here by a user named Jenny Anne, who modified the bench to make three cubbies rather than two on the bottom shelf, so I did the same thing.
It was easy, and the bench turned out great! I used no power tools except for a cordless drill to do the 40+ pilot holes & woodscrews. I don't own a jigsaw and I want to learn hand tools anyway, so I used a coping saw (a kind of miniature hacksaw) to do the curved cuts on the trim & the legs, and used heavy-grit sandpaper to smooth out the wobbles (there were a lot of wobbles).
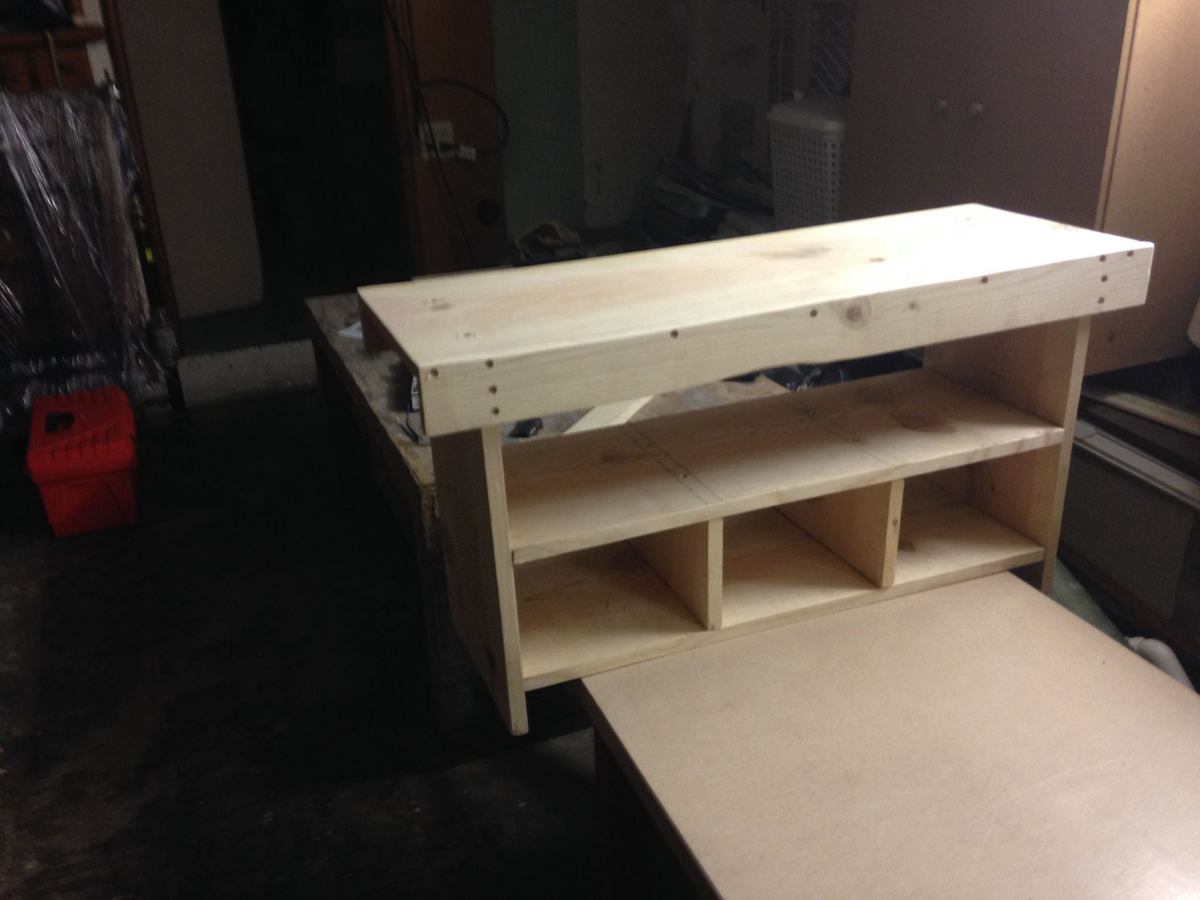
For the rest of the cuts I used a Japanese-style pull saw (a cheap one from Ace Hardware). Cutting all the boards to length with a handsaw was probably the hardest part, and I had a tough time truing the edges. Next time I would probably use a miter box and miter saw to get perfect 90-degree angles, but I got better as I went along, and was able to finish the edges pretty well with a wood file and sandpaper.
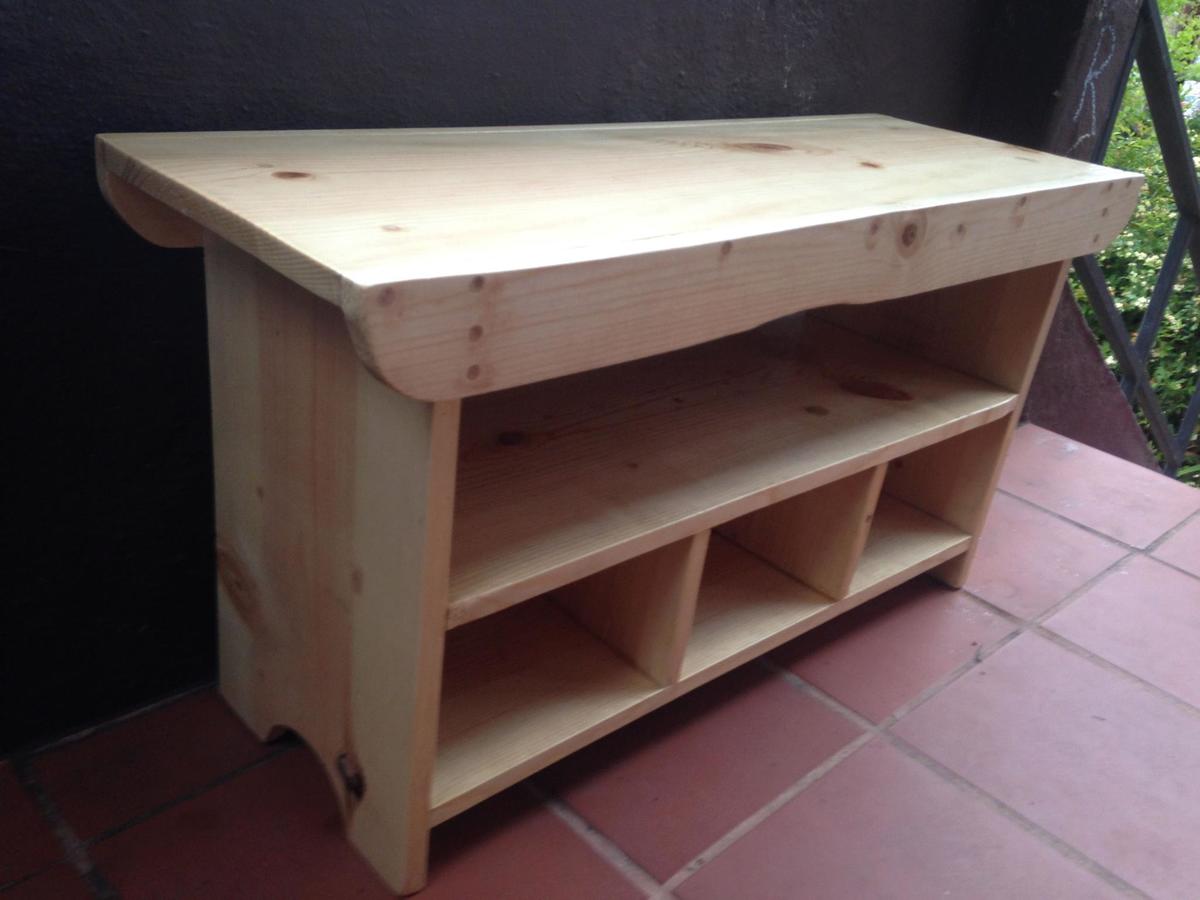
I wanted to stain it a deep red color, but my better half insisted on a clear stain, so I used clear Polycrylic, four coats on the top & outsides, and three coats on the inner & undersides.
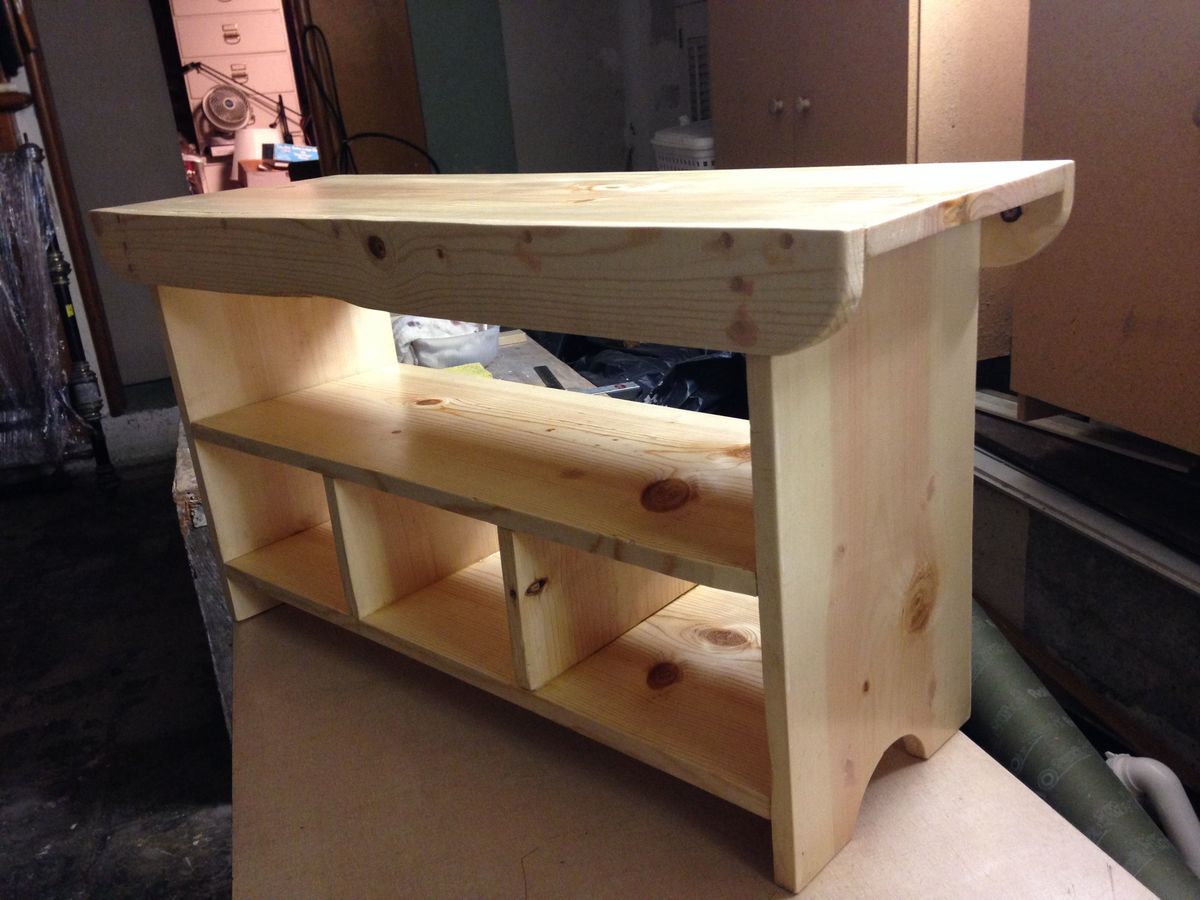
The bench feels pretty sturdy and is definitely strong enough to take my 3-year-old's weight. The trim on the front and back acts as a brace, so it's got some structural integrity. I don't know that I would trust it to hold an adult's full weight for very long -- I probably won't be dancing on it or using it as a stepstool or anything, but for a kid's bench it's solid and level.
The whole build probably took me four sessions in my "workshop" (i.e. my basement), at probably 2-3 hours per session. With woodworking it's definitely true that you learn by doing -- I gained confidence as I went along and am excited to try some more advanced projects!

Shrink size and make double truss small coffee/project table. Select Minwax NATURAL BEIGE water base stain and got very warm, peachy color.

I built the console table and liked it so much I decided to modify the plan to make a whole set. I made two side tables , and a coffee table. This is also the first time I installed drawer hardware. I was a bit intimidated but after watching a “how to” video from Anna it was pretty easy. I’m working on finishing the coffee table now. The stain is weathered oak. They’re finished with gloss lacquer.


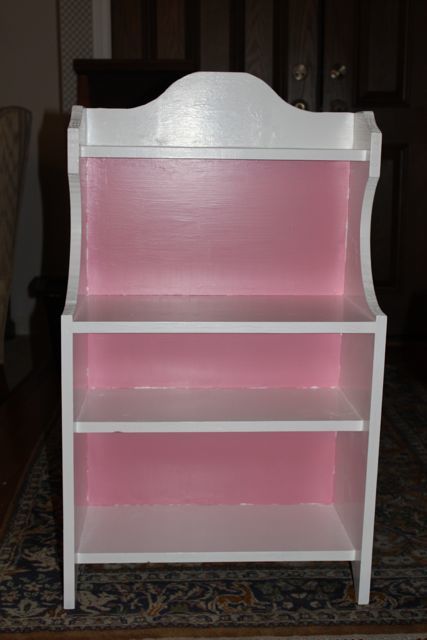
I used Ana's plan to make this pie hutch...in about 45 minutes (except for painting)!! It was lots of fun and my daughter helped paint it afterward. She still plays with this almost every day!
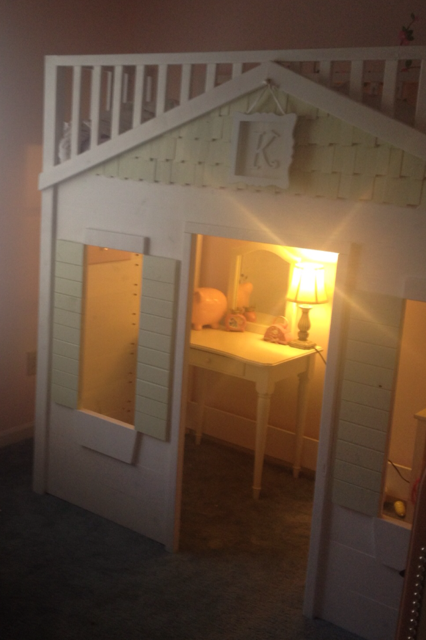
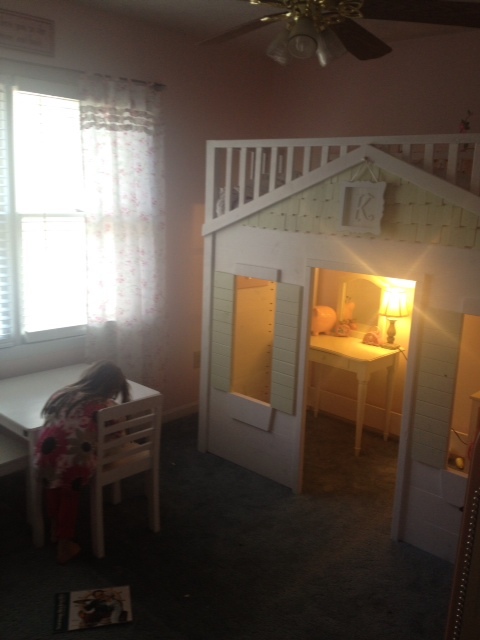
My husband and I made this for our daughter's 6th birthday. She loves it! It took us about a week to complete it. We were able to reclaim the room we had her toys in, since this gave her more room to play in her bedroom. We used wood shims for the shingles, and we made the windows a little narrower than the plans.
Wed, 05/29/2013 - 15:24
You did an amazing job on this bed. It is gorgeous! I have no idea why this posted twice. Sorry!
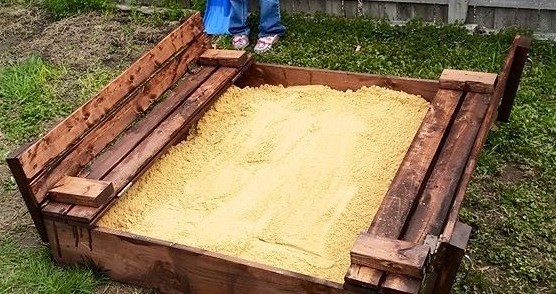
sand box with seats
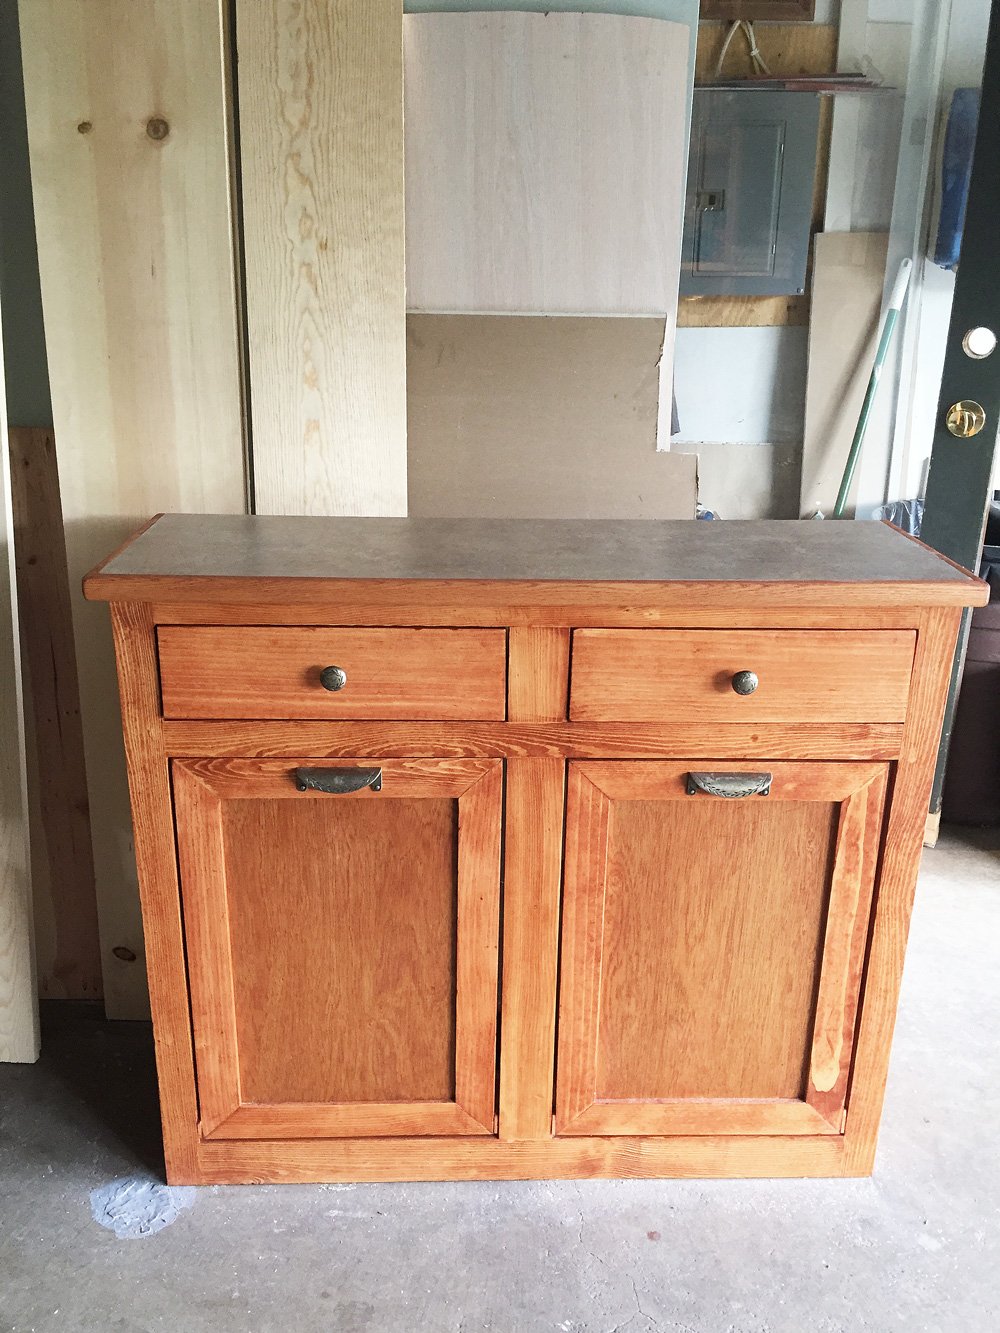
I used Ana's tilt out trash bin plans to help me build this fabulous center for use in my kitchen. I love the way it turned out!
Sat, 04/18/2020 - 19:04
Can i get the dimensions from you? I’m wanting to create the exact same thing with two bins and drawers.

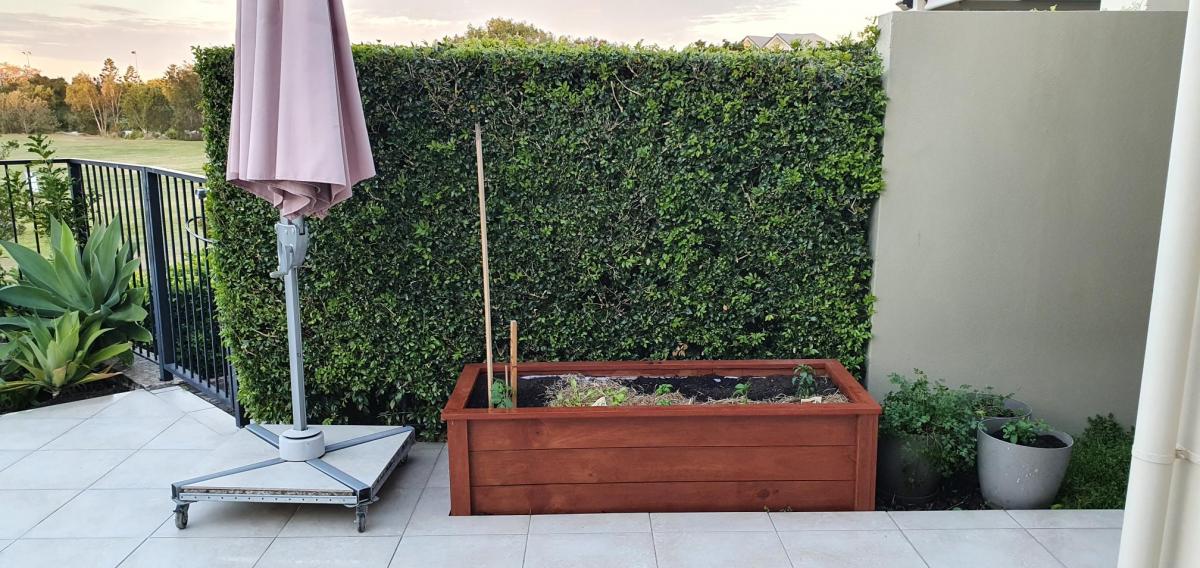
Greeting from from Queensland, Australia.
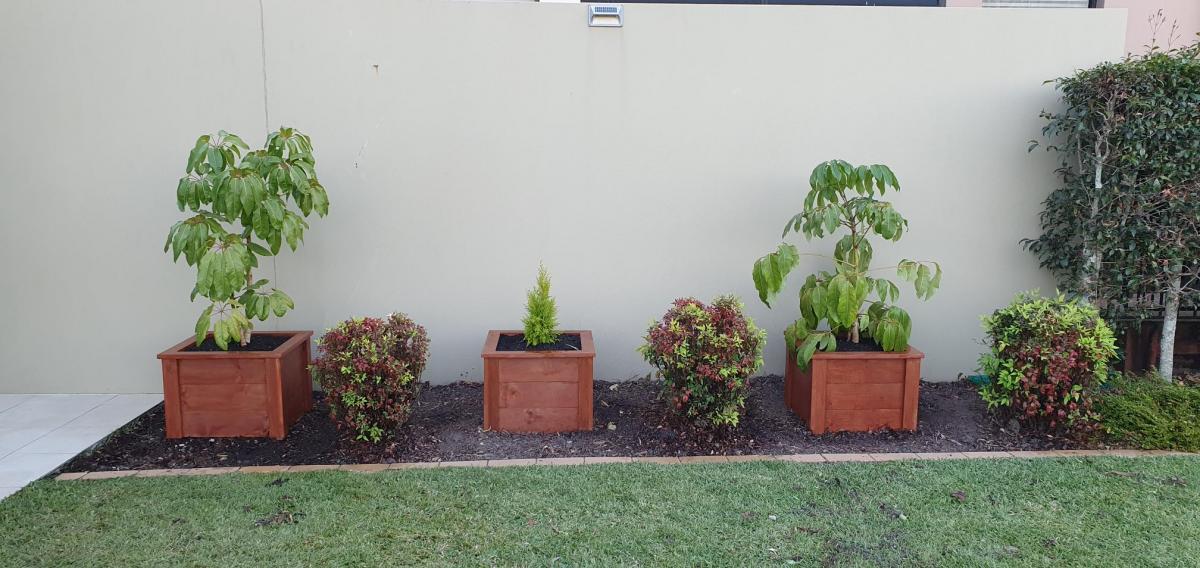
I decided to make a couple of wooden planter boxes for our garden at home, after watching Ana's video on the “Easy Build DIY Planter Box” made from cedar and painted white. I downloaded the plans, and then converted the measurements to metric. I did make a couple of alterations from what was shown in the video. Whilst I do not have a workshop at home, I attend a local "Men's Shed" where there is a large range of woodworking machinery available to use. Firstly, I used rough sawn treated pine 150mm x 25mm boards, which I dressed and cut down to size. The dressed timber looked great once I stained the boxes. Secondly, I have made the boxes without legs, so that they sit directly in the garden, and are filled with potting mix soil.
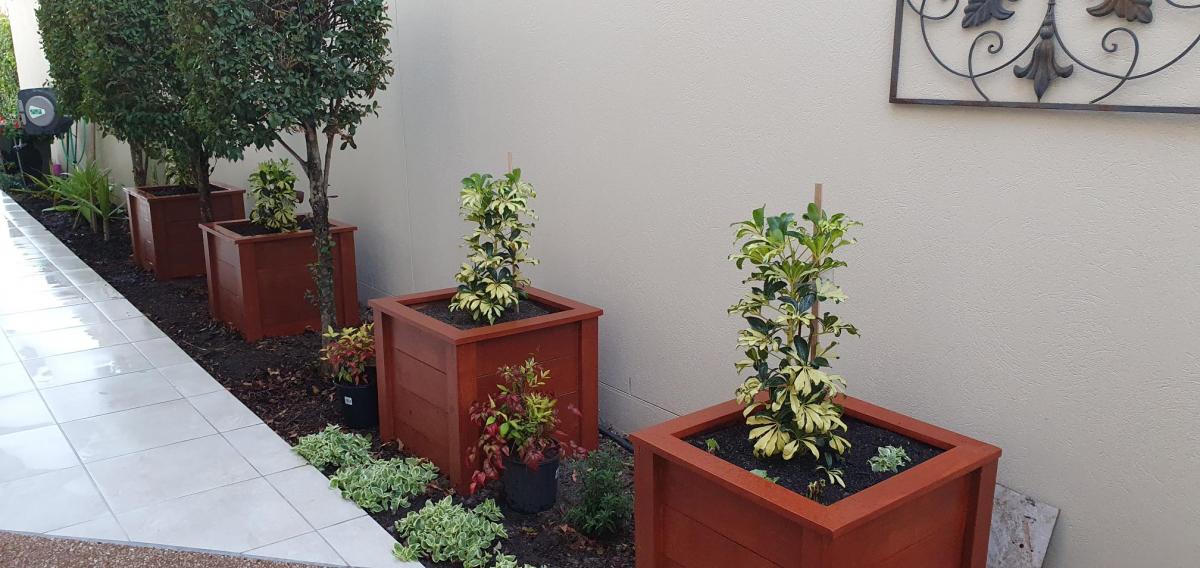
After making the first 2 planter boxes, my wife asked if I could make another couple. After that we decided another 3 planter boxes in a different part of the garden might be nice, so I made these the same. Then I made a longer planter box of the same style for vegetables and herbs.
Thanks so much, Ana, for the great plans and video, as well as the inspiration. Mind you, my planter boxes took a lot longer to build than the time you indicated in your video, but that is fine.
Cheers Noel
Wed, 10/06/2021 - 10:10
WOW, love them mods and how you were able to convert to metric! Thank you for sharing!
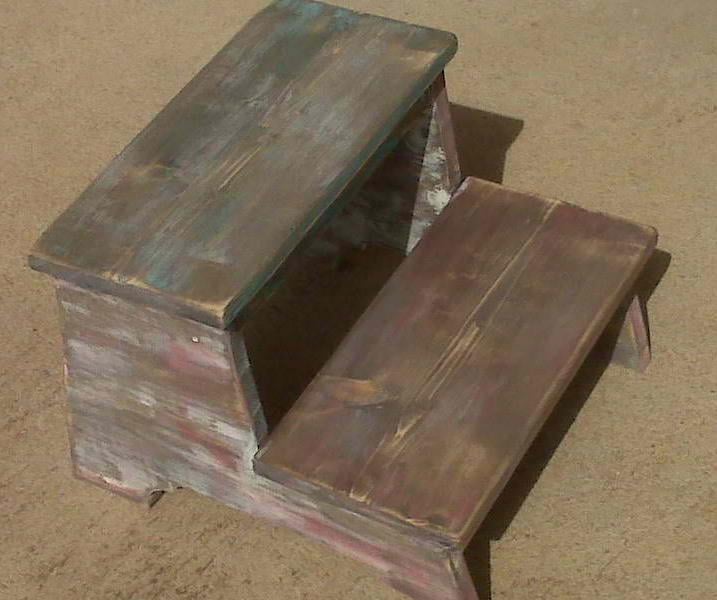
This is my first ever build. Now I have cut wood all my adult life, trim wood and straight cuts for husband. As to actually build something all on my own, this is a first. I started small, and have other things in mind to build up too (excuse the pun). I did have my husband drill the holes with his Kreg Gig. It might look like old barn wood but that was a happy mistake. First I used oak stain, then black stain, white paint, red and turqouise paint. And sanded like crazy, again, Happy Mistake!!
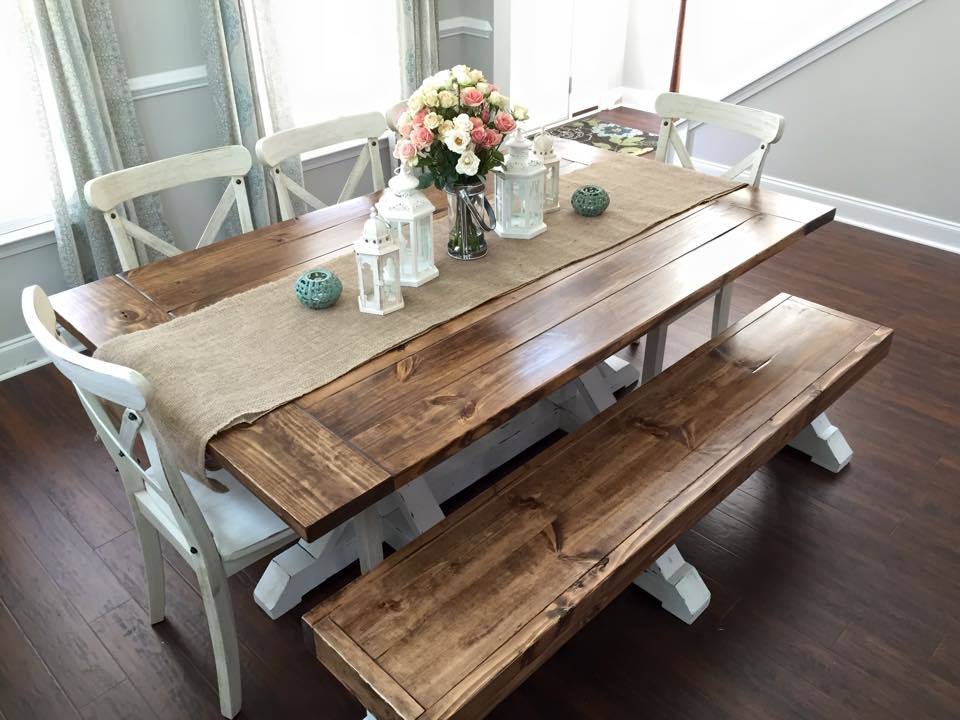
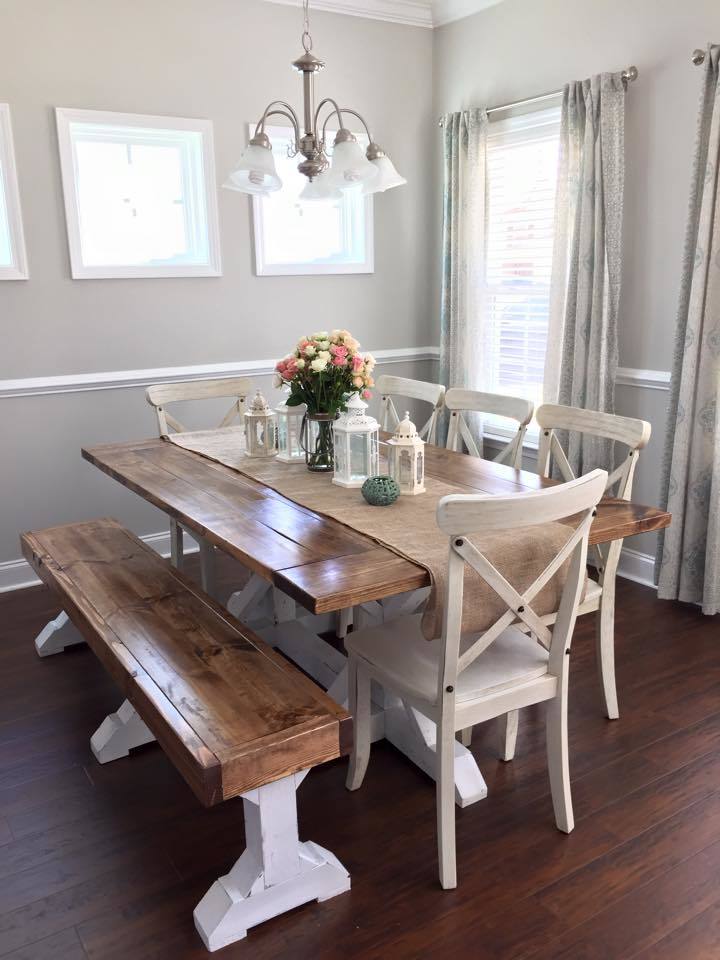
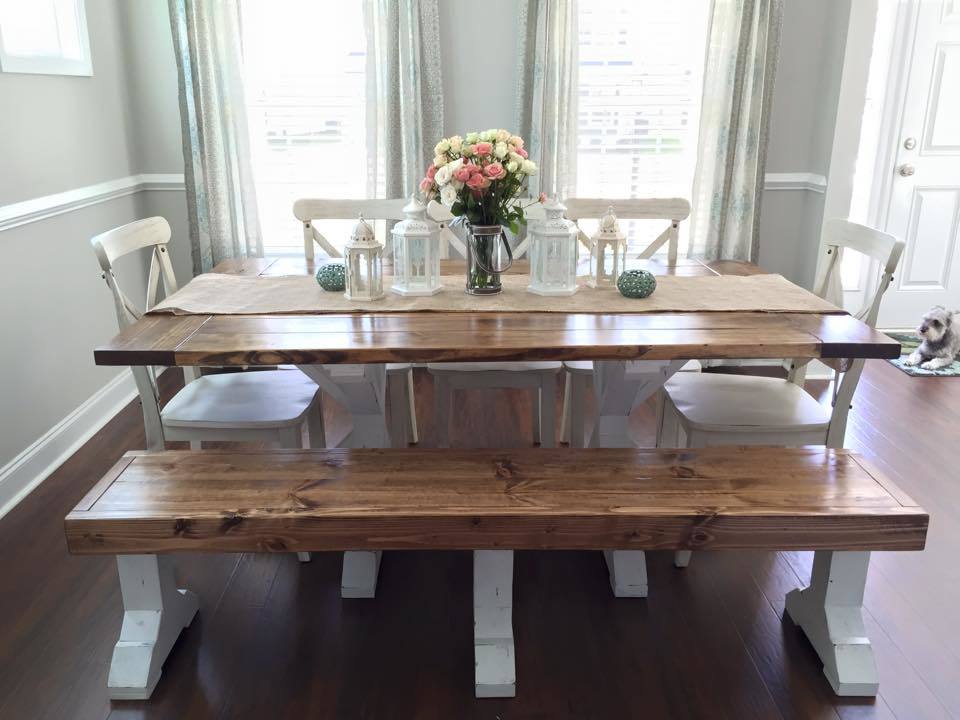
We wanted a farmhouse dining table but didn't want to be confined by 4 corner legs or supports at the end of the table so I combined the farmhouse top from this site with another farmhouse table base that I found at shanty2chic through a link on this site. We couldn't be happier with how it turned out! I didn't follow any of the plans exactly but adjusted them so we had a table that fit well in our dining room, still fit several guests and was a good eating height. The bench was also modified from the plans I found at shanty 2 chic.
Wed, 04/29/2015 - 12:28
Here is a link to the plans I used for the table base: http://www.shanty-2-chic.com/2014/05/restoration-hardware-inspired-dini…
And for the bench: http://www.shanty-2-chic.com/2014/06/diy-benches-for-my-dining-table.ht…
I made some modifications to the table length/width to fit our dining room space better which is just a matter of preference. I then changed the length of the bench to fit our table. Other than those small changes which didn't effect the integrity of the plans, these are what I went by.
Wed, 04/29/2015 - 13:34
Thank you so much! This is exactly what we've been looking for. I love that the legs/base are completely under the table so not to interrupt or block causing wasted space.
Fri, 05/08/2015 - 14:56
We are going to build this same table for our house. I'm curious where the chair came from that you used with the table? Thanks!
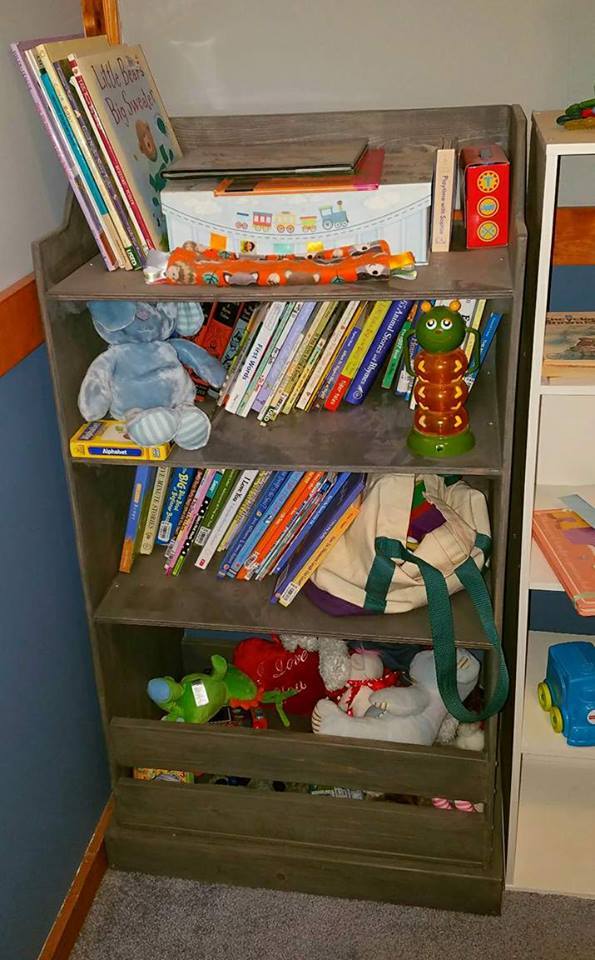
Project was super easy to build, and fits a TON of books and toys. Perfect for our nursery. Stained in Minwax Classic Grey with a satin poly finish.
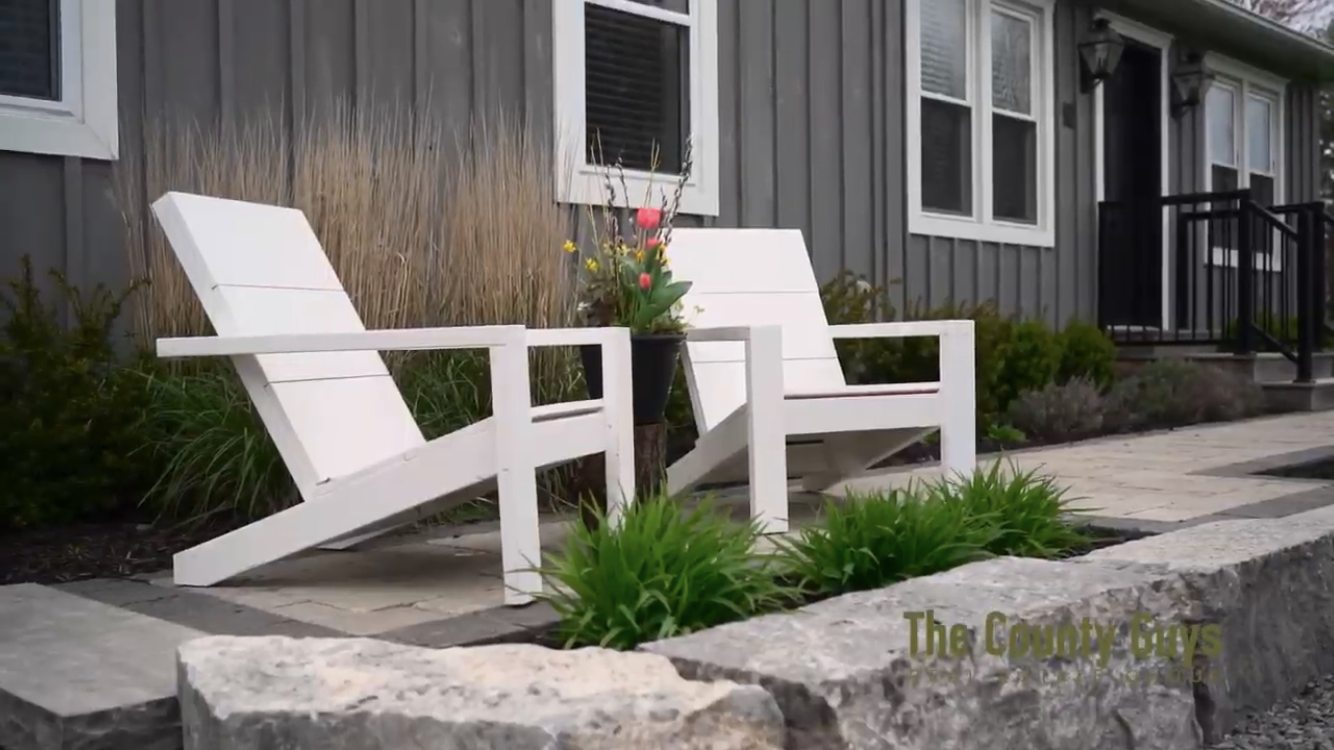
Built these chairs and stained them a solid white. They looked great in front of the house and complemented the gray of the house perfectly! Will definitely make these again (super easy!!) Thanks Ana for the plans!!


Comments
Ana White Admin
Wed, 10/06/2021 - 20:11
Very cute!
That's a great little set, love the finish! Thank you for sharing:)
srodge1
Thu, 10/07/2021 - 21:43
Thanks Ana ... and thanks…
Thanks Ana ... and thanks for all you do! You're the best!!