Community Brag Posts
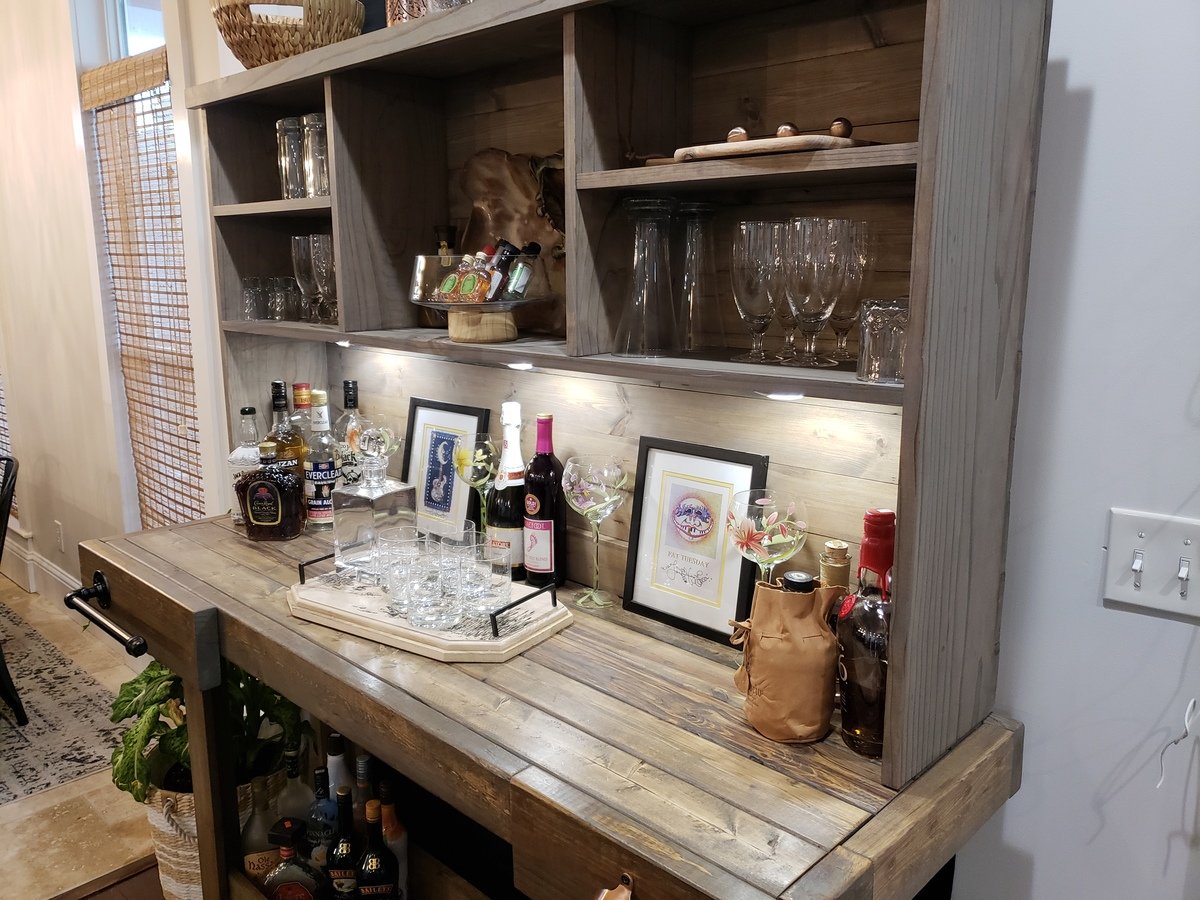
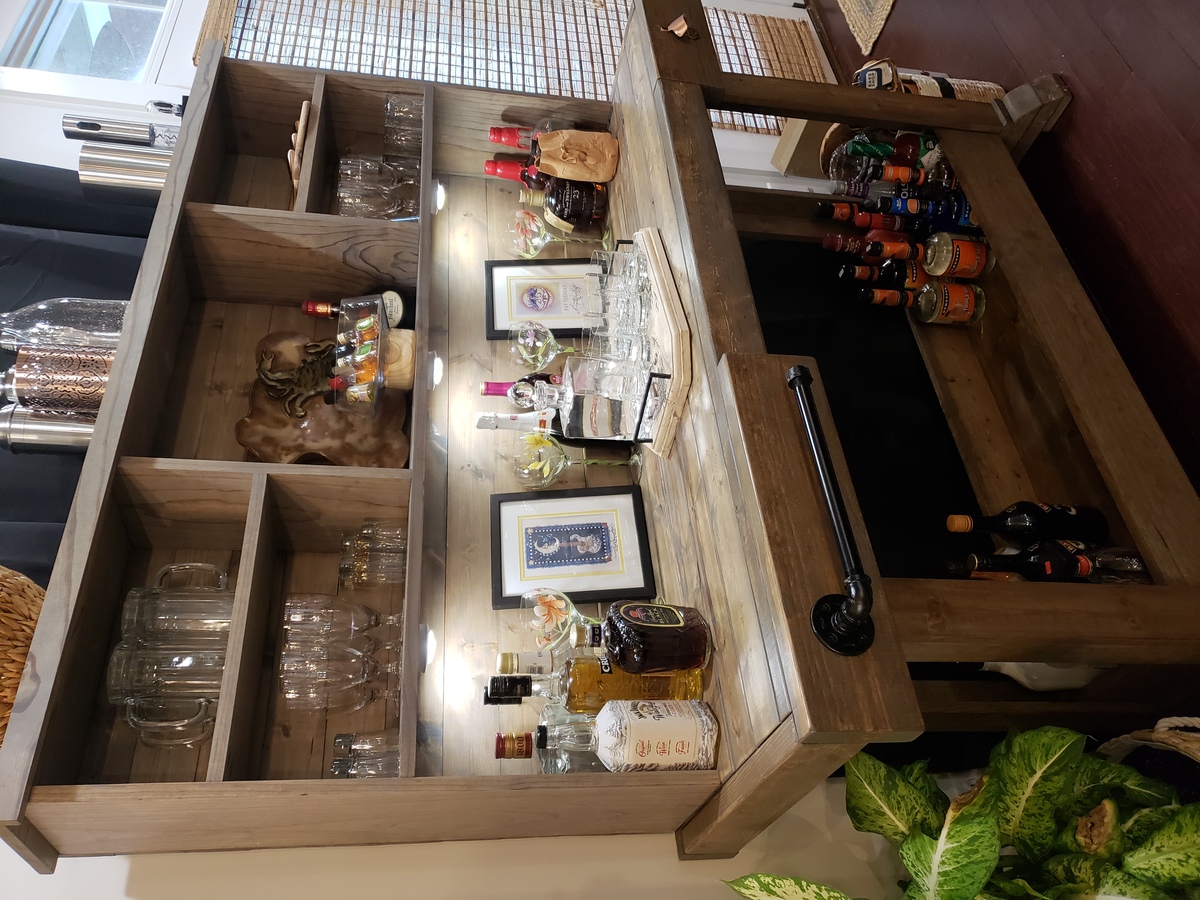
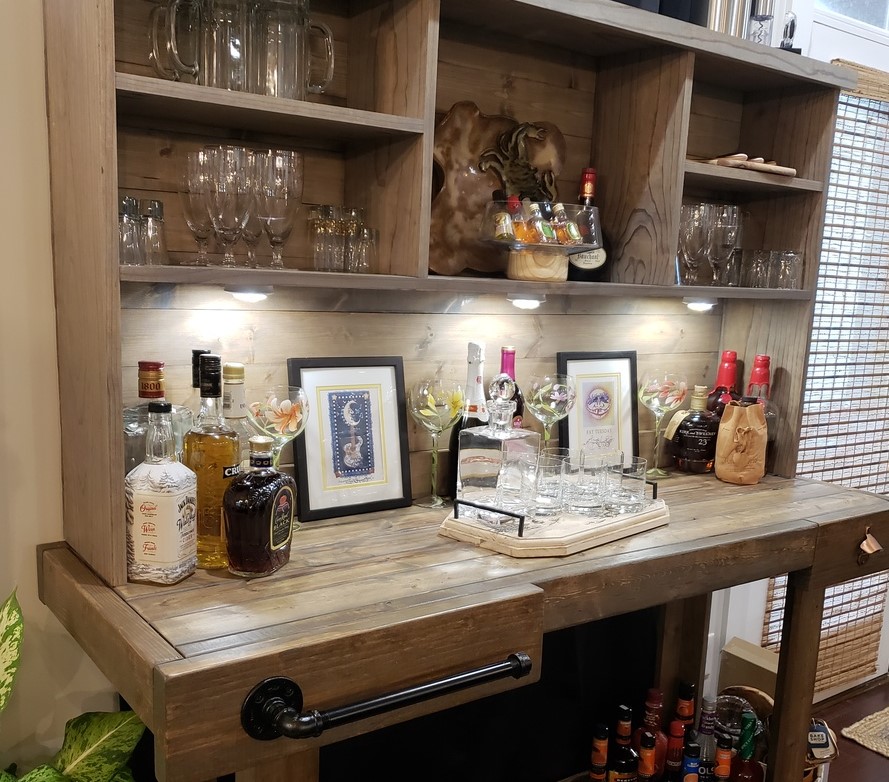
Workbench console and hutch minibar
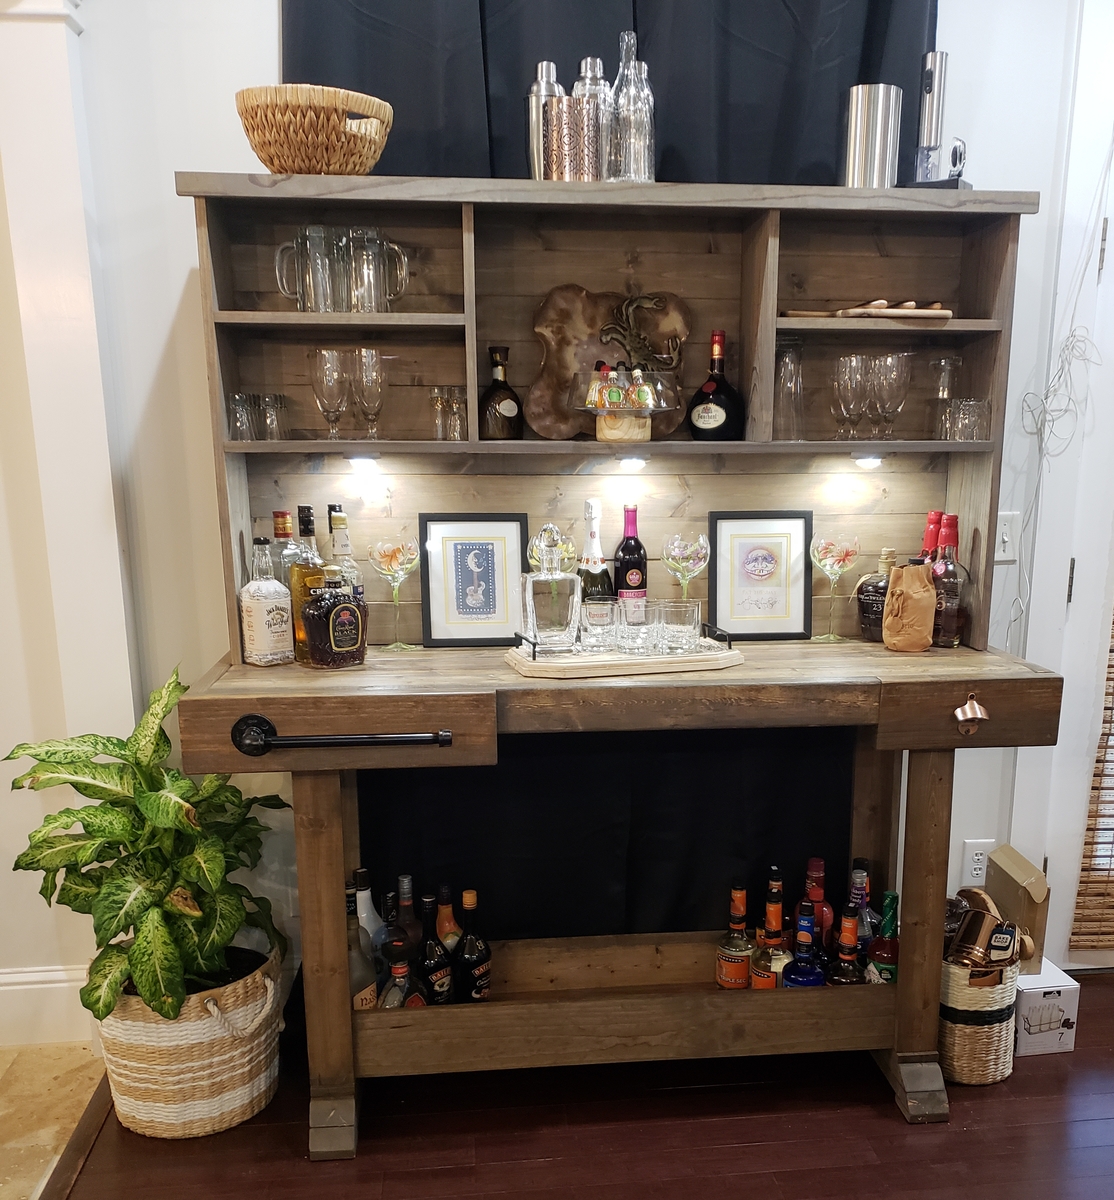
Love my new minibar! Built using select pine for the 1x and stud grade 2x4s.
I used Ana's plan for the Workbench console which is a pottery barn knock off for the Markham Console. The hutch is Ana's plan for the Rustic Hutch. I first stained with dark walnut danish oil and didn't like the color. It was too yellowish. I went over that with minwax grey wash and loved the color. I finished with minwax dark paste wax.
Built from Plan(s)
Estimated Cost
350
Estimated Time Investment
Weekend Project (10-20 Hours)
Finish Used
Dark walnut Danish oil and minwax gray oil based stain. Minwax dark paste wax.
Recommended Skill Level
Intermediate
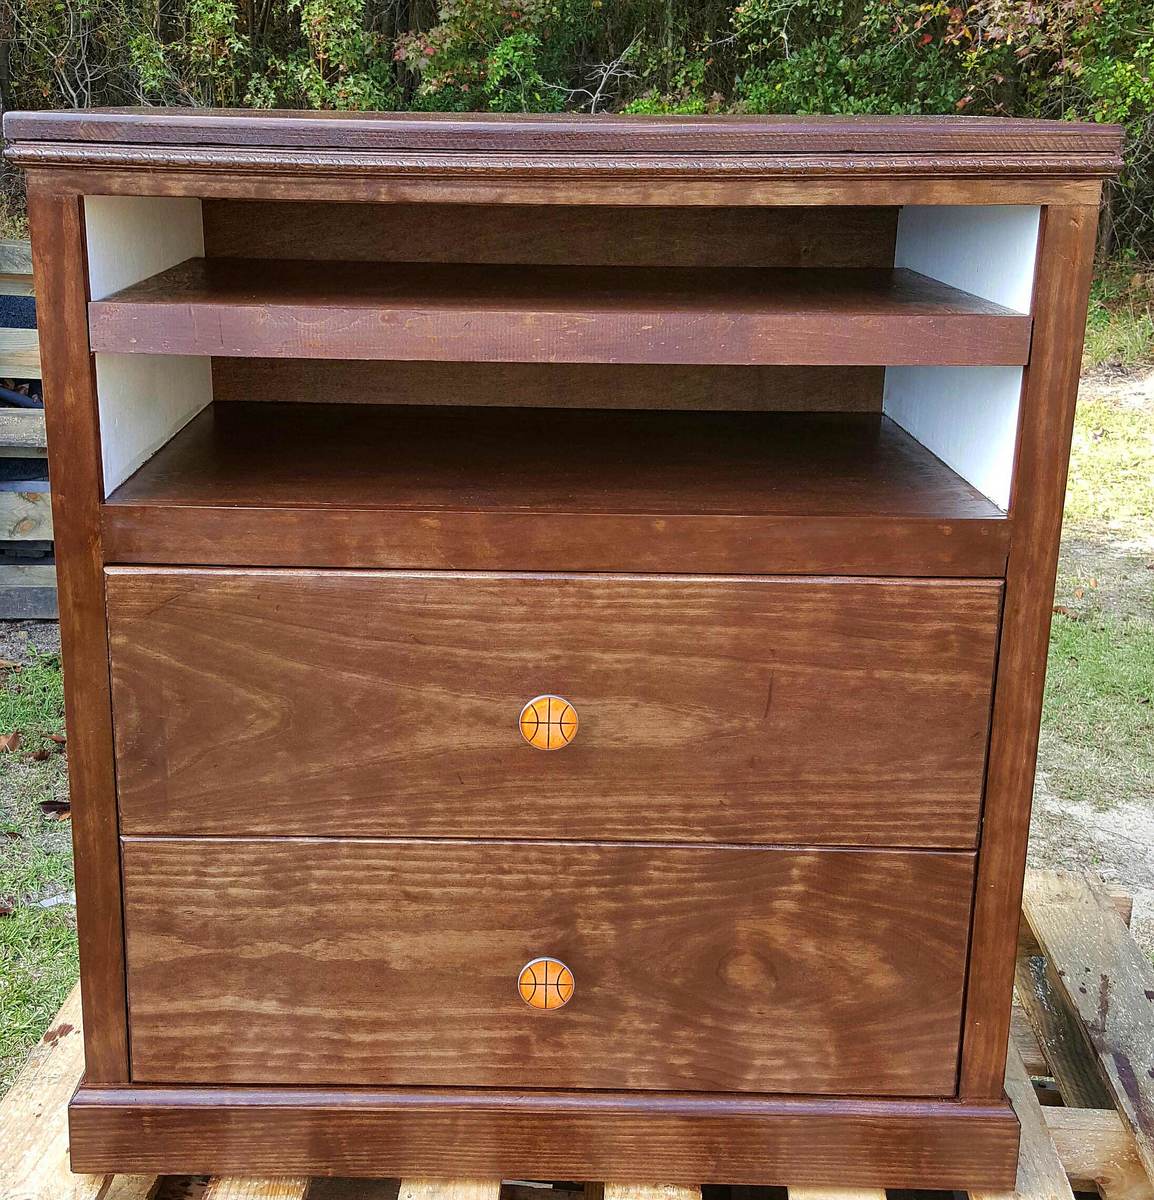
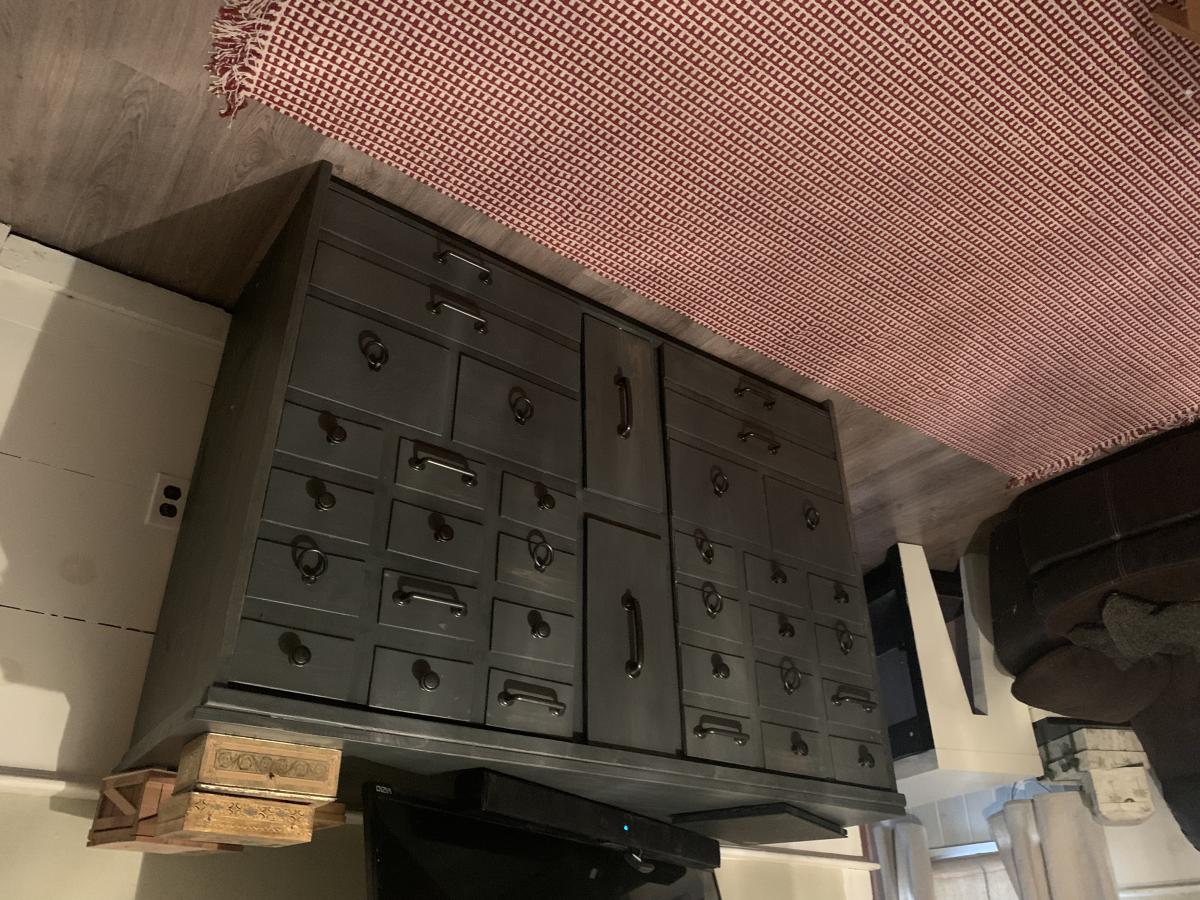
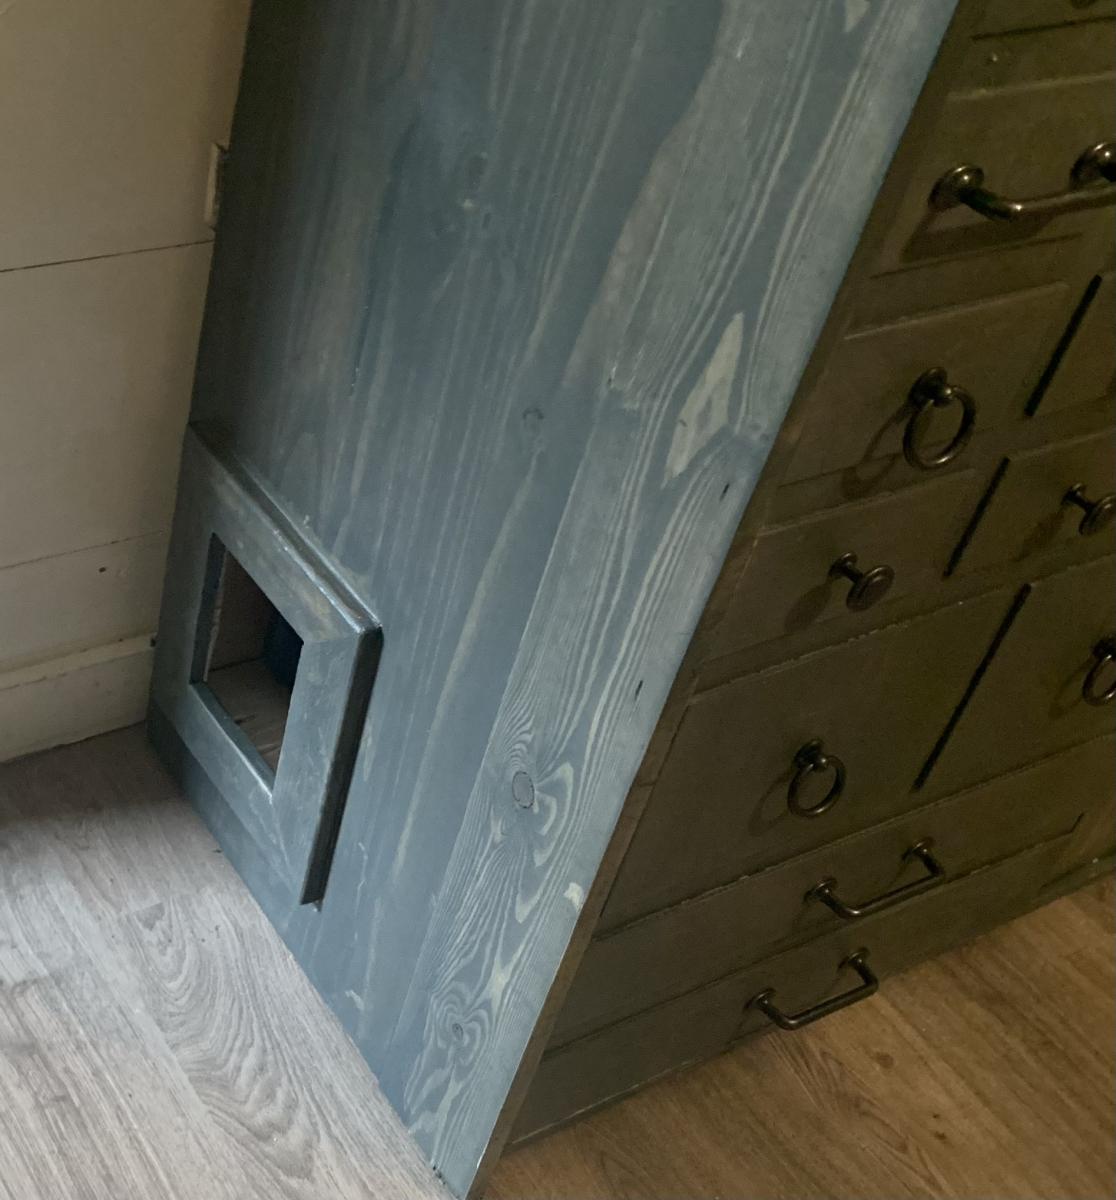
Apothecary cat box console
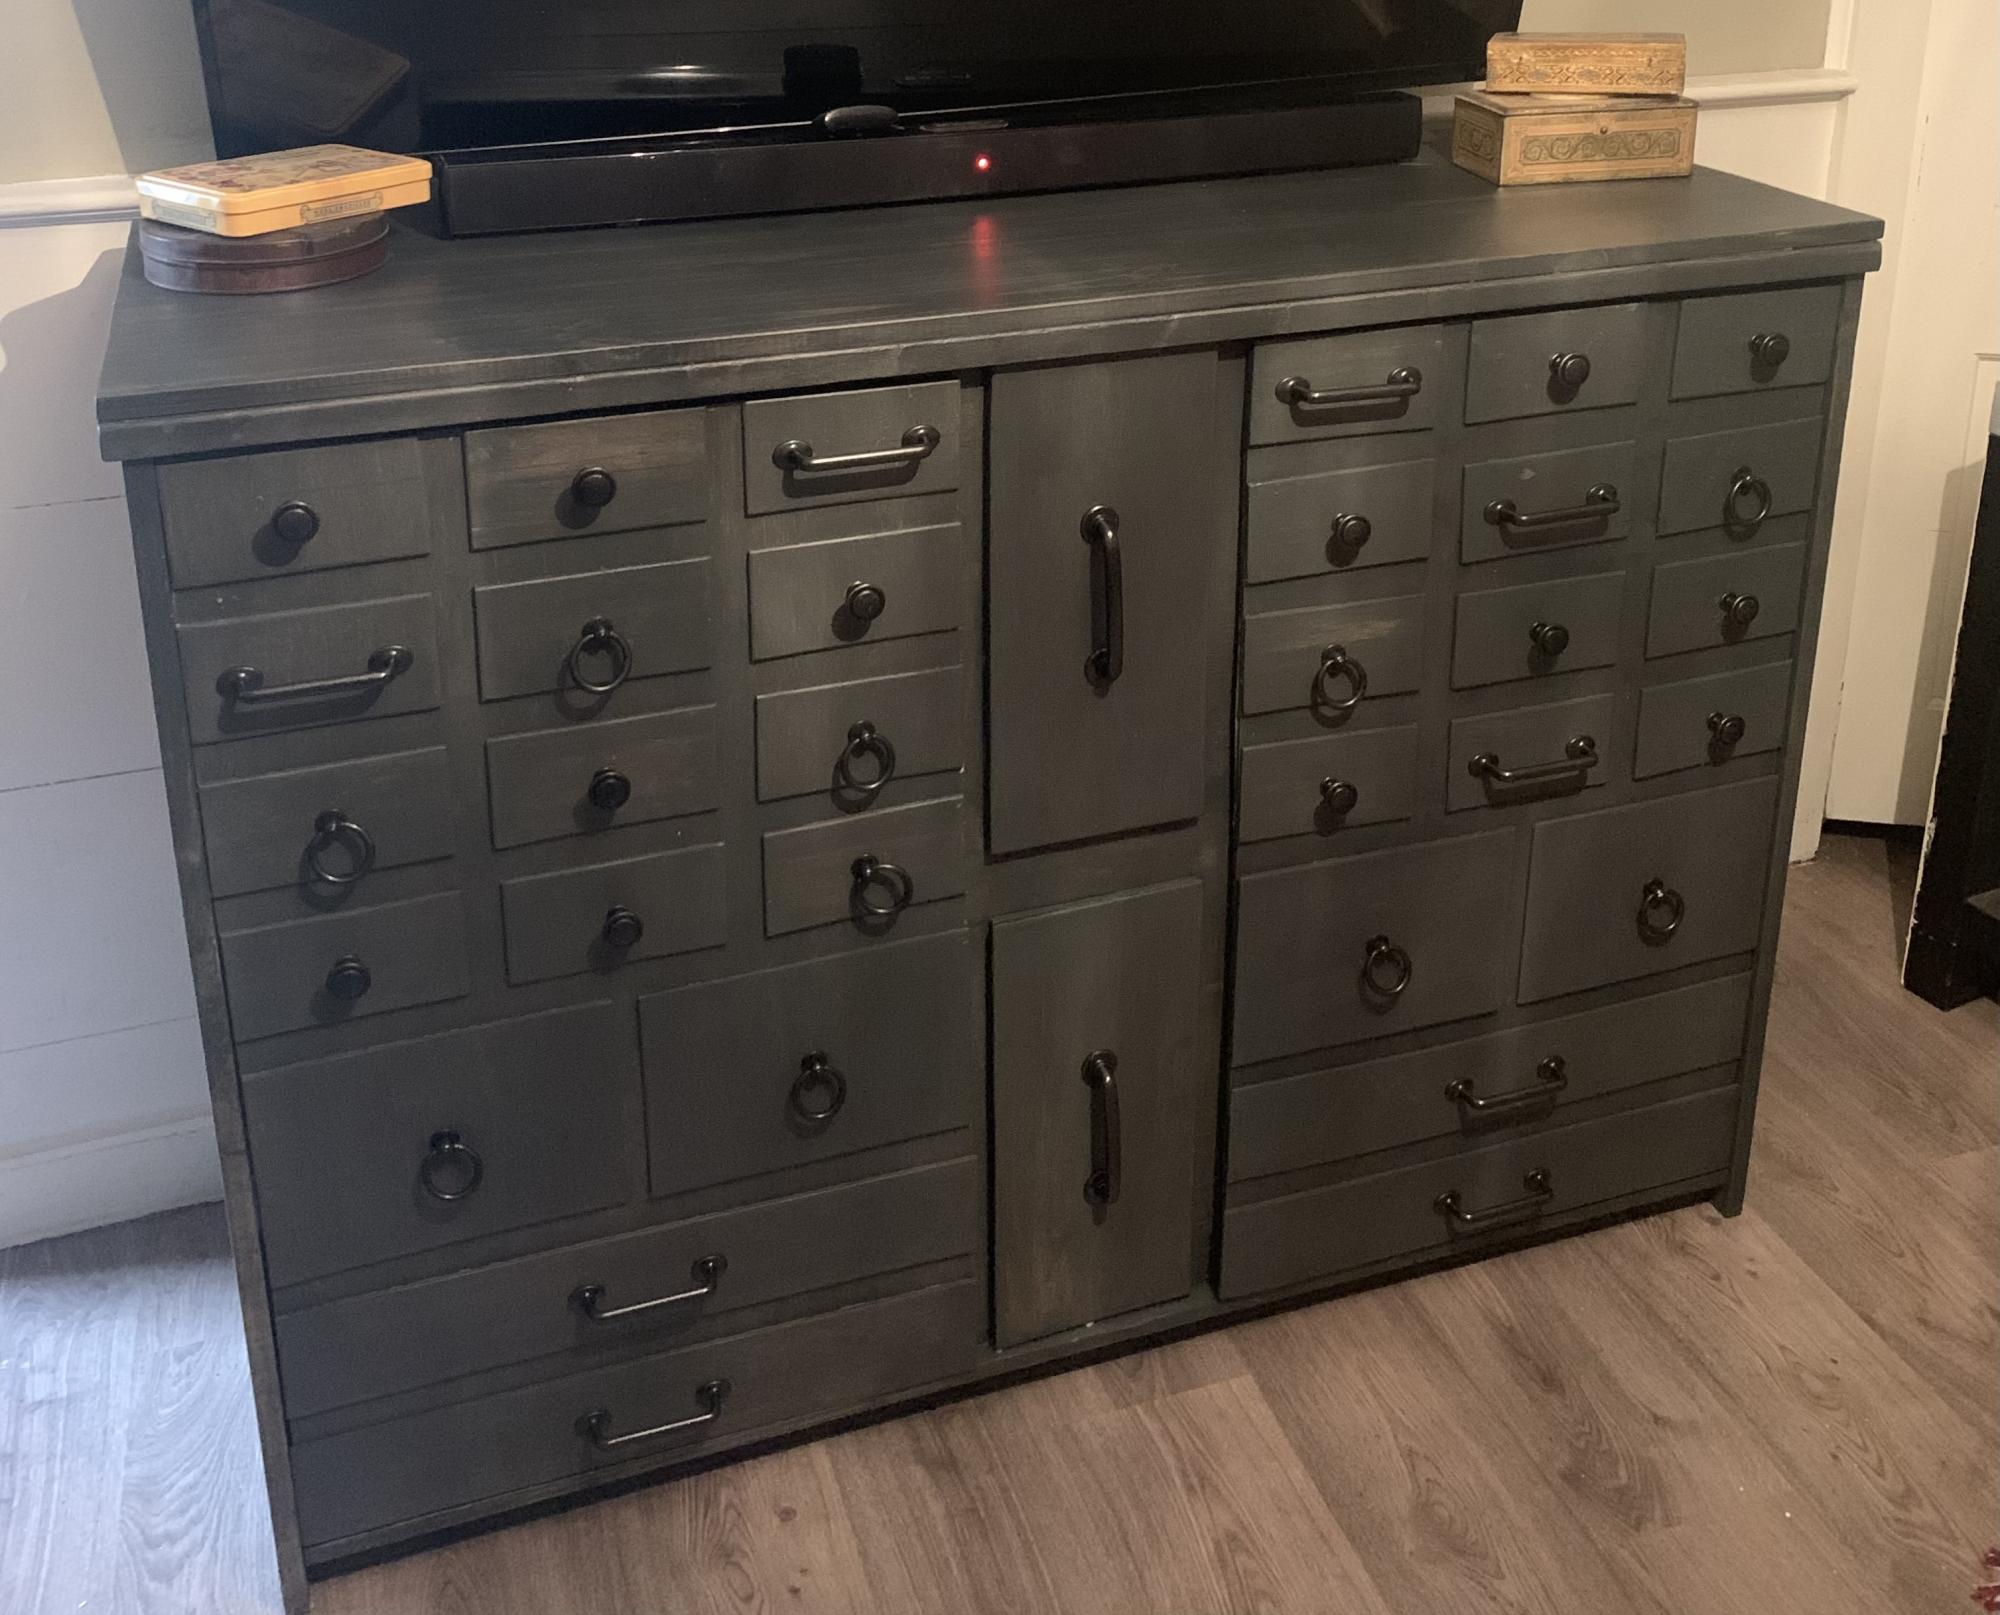
Just used Ana’s plan for apothecary cabinets. Needed mine wider, shallower and taller for use under wall mounted tv and wanted it to reach very high chair rail behind it. As well as hiding tv wires and providing much needed storage I needed to hide a cat box.
Comments
Tue, 09/06/2022 - 11:44
Amazing Console!
Love the look of this, great job incorporating the cat box! Thank you for sharing.
kid clara table modified
I made this table for a baby shower gift for my newest niece. I used the clara plan as a starting point and went from there. I ended up using (2) 2x12x36 for the top kreg jigged together and sanded them completely smooth. I used existing legs from an end table and added the aprons.
I also just shortened the cubbie length to make it short enough to fit on top of the table.
Built from Plan(s)
Estimated Cost
$12- for the 2x12 and a few 2x2, I already had the table legs and the top for the bench
Estimated Time Investment
Afternoon Project (3-6 Hours)
Finish Used
I stained the table top with some oops stain I had picked up for 50 cents and then put 3 coats of poly on top. I painted the legs/aprons with a bubblegum pink and distressed and lightly wiped with stain. Same colors for the bench.
Recommended Skill Level
Beginner
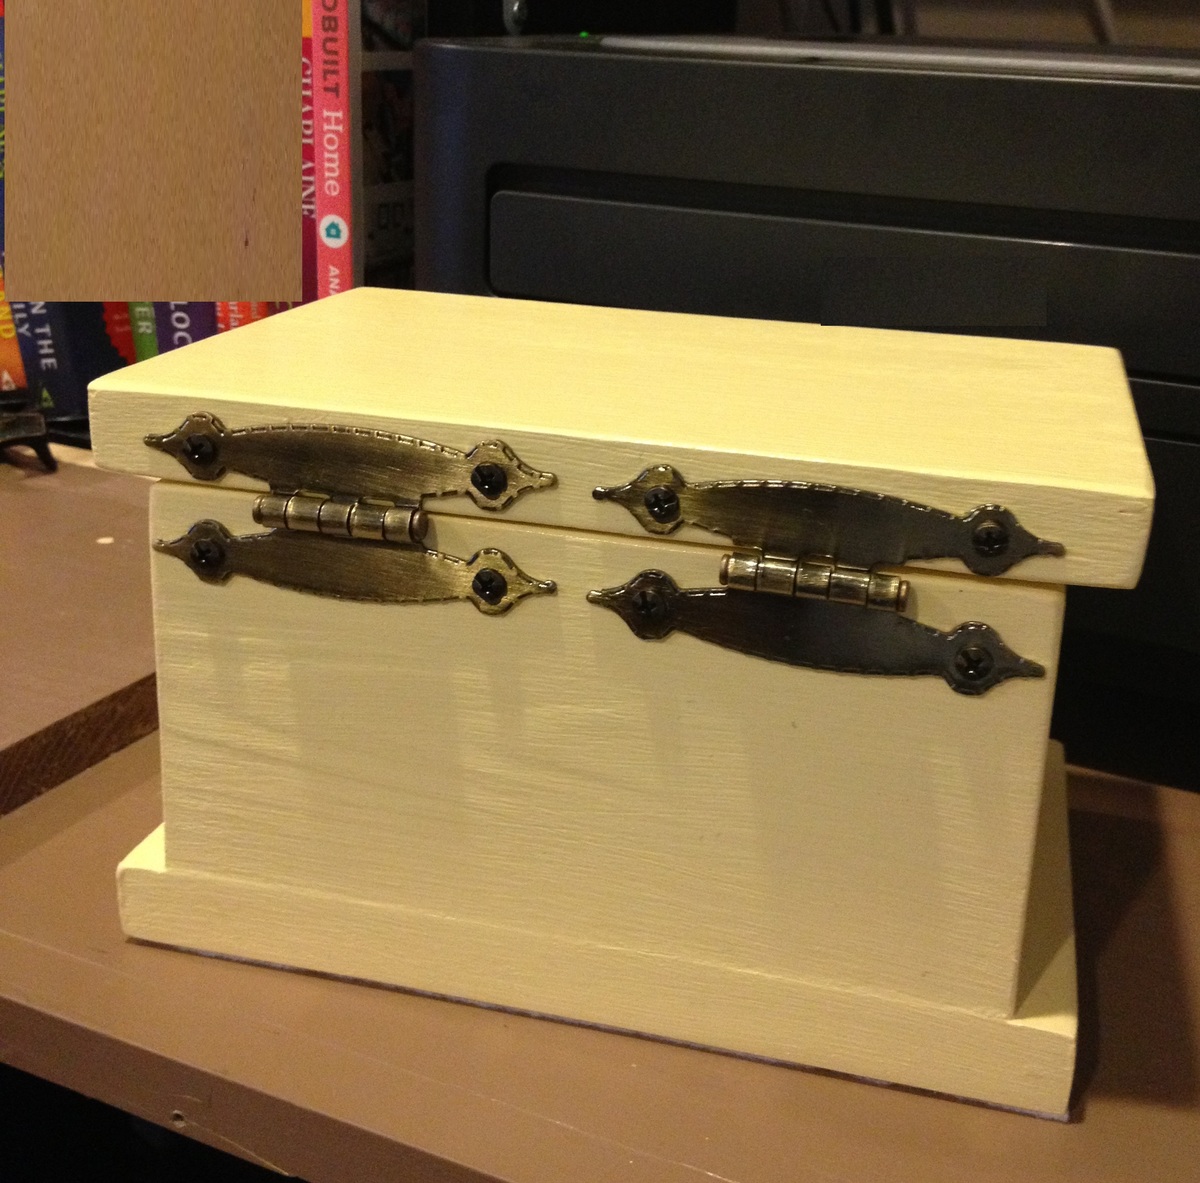
Georgia's Jewelry Box
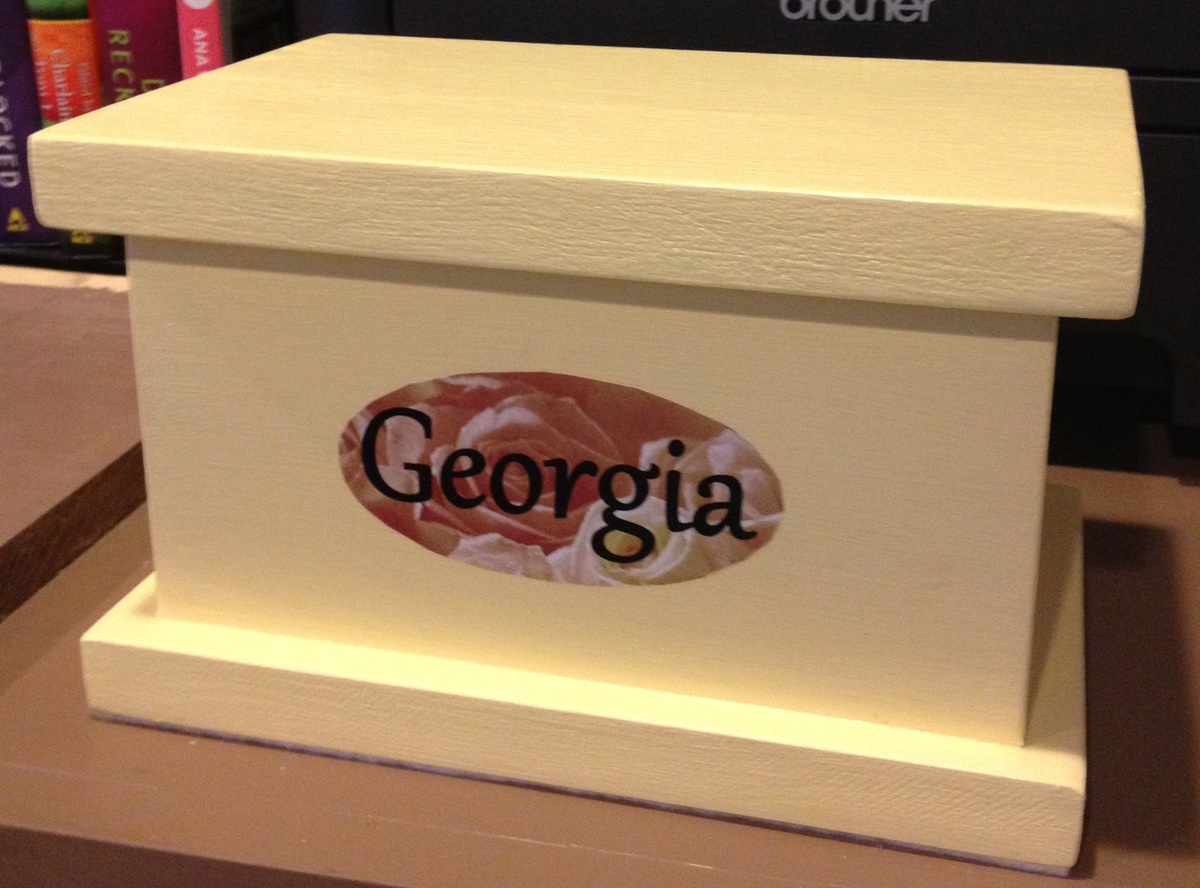
This build is a little jewelry box for a family friend who just had a baby girl named Georgia. Although I've built this box several times for myself and others to use for storage, I hadn't done a plan for it until now. This is from Georgia's Jewelry Box plan.
The wood is 1x4 and 1x6 whitewood scraps. The hinges are flat "H" style hinges from Lowes. I had them for another project and ended up not using them. The hinge color works very well with the light yellow, which I thought would be pretty for a little girl.
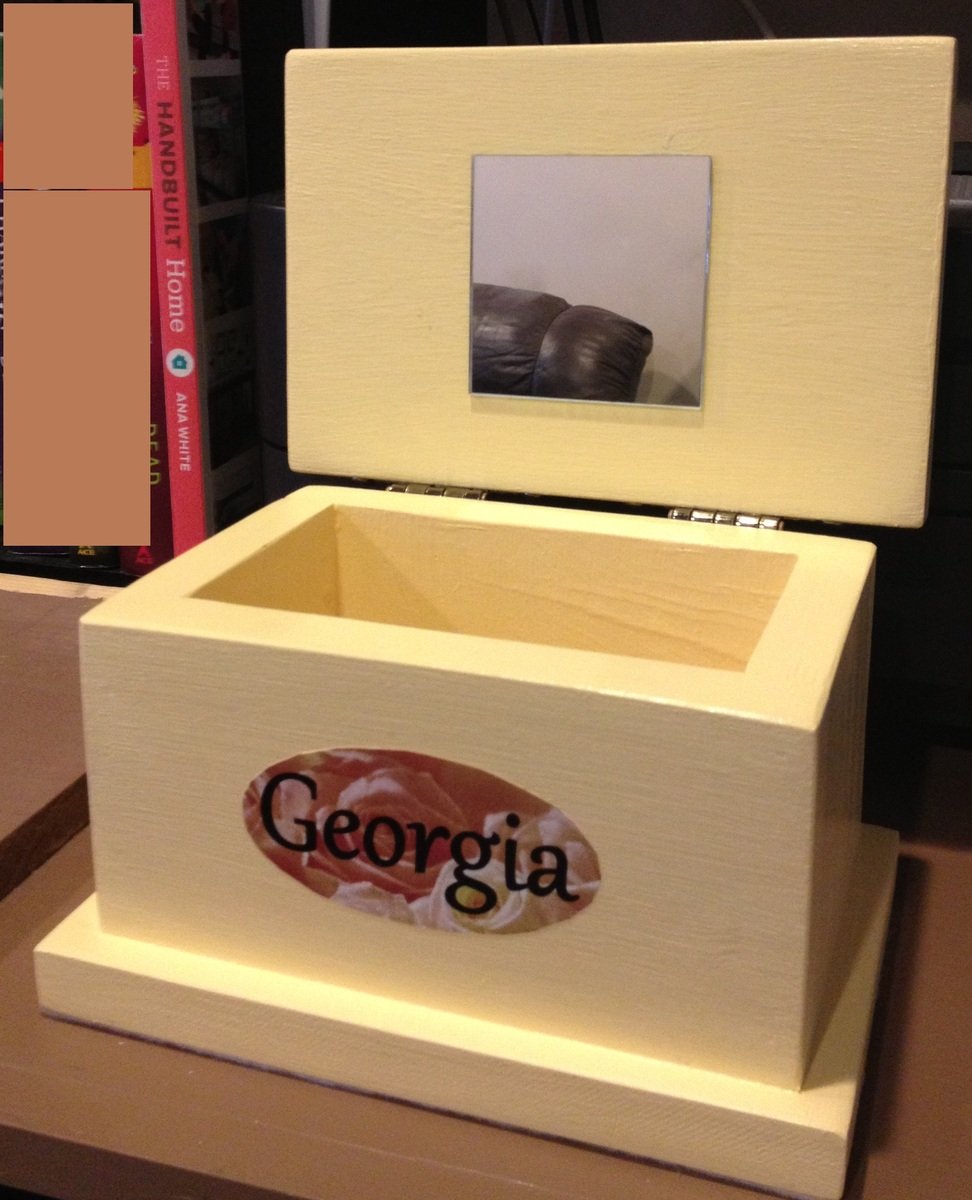
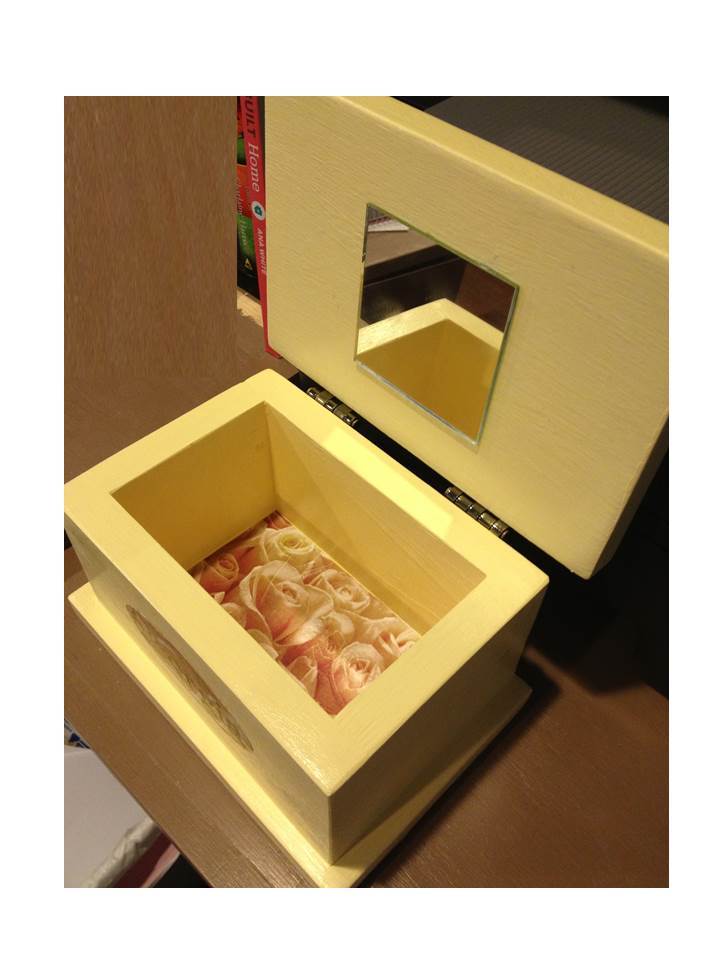
Originally I was going to paint or stencil her name on the front, but ended up printing it on pretty scrapbook paper and attaching with Mod Podge. Also added this paper to the bottom inside the box. Everything is top coated with Mod Podge.
On the inside of the top, I glued a 3" craft mirror (these are available in a 5-pack from Michael's for $1.99).
This was a very easy build. It look less than an hour to cut, build, and sand. The finishing I completed a few minutes at a time throughout the day, but the actual work between drying times wasn't more than an hour.
Built from Plan(s)
Estimated Cost
Wood & Hardware: Free (scrap/already on hand), and I have loads left over from the Finishing materials: $2.98 for paint sample, $1.99 for mirrors, $6.49 for mod podge
Estimated Time Investment
An Hour or Two (0-2 Hours)
Finish Used
2 coats Valspar Hazy Dawn (sanded between coats), name and box bottom are scrapbook paper attached with mod podge, and the top coat is Mod Podge (satin finish)
Recommended Skill Level
Beginner
Comments


Rustic x console
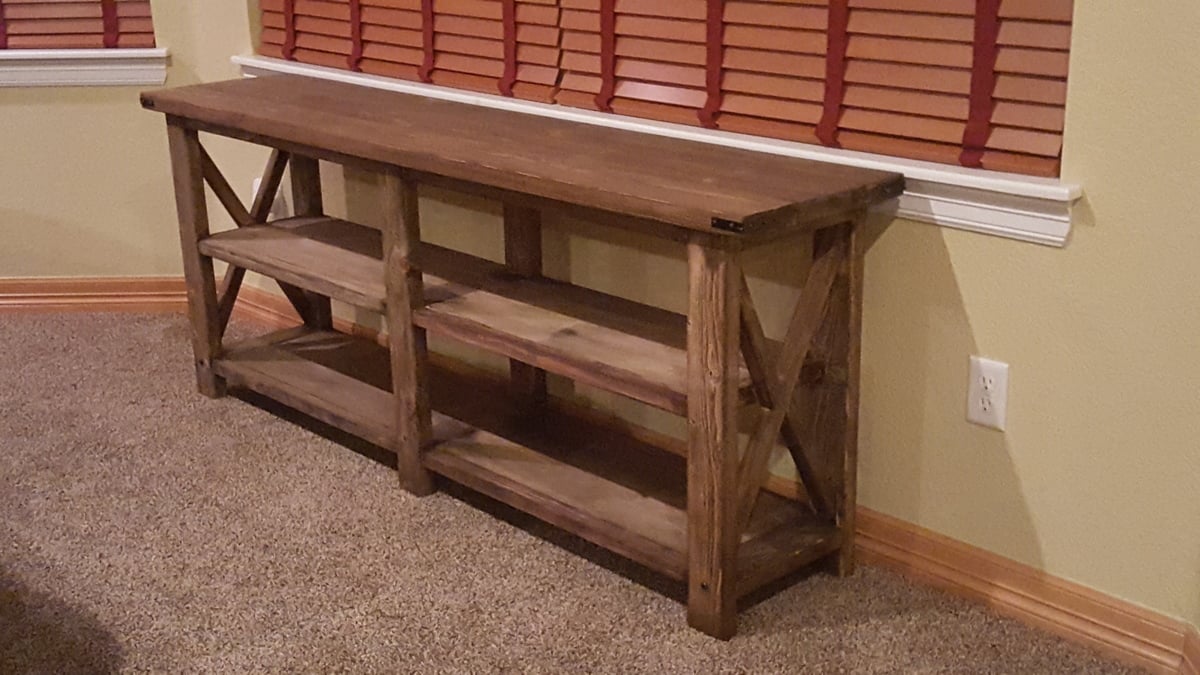
Fairly easy to build in a weekend.
Built from Plan(s)
Estimated Cost
$150
Estimated Time Investment
Week Long Project (20 Hours or More)
Finish Used
Water, Ebony and dark walnut stain
Recommended Skill Level
Intermediate
Grey on White

Used your plans, worked perfectly. First time using the Kreg, gonna use that a lot more!
Estimated Cost
$130
Estimated Time Investment
Weekend Project (10-20 Hours)
Finish Used
Semi gloss ploy
Recommended Skill Level
Beginner
Comments

Wed, 01/02/2019 - 12:48
What a gorgeous room! I love
What a gorgeous room! I love the crisp white of the coffee table with your rug and sectional! Beautiful build, much appreciate you sharing!
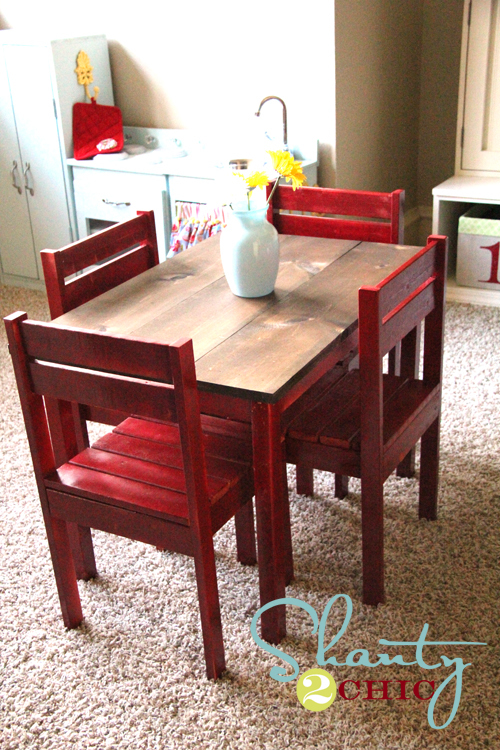
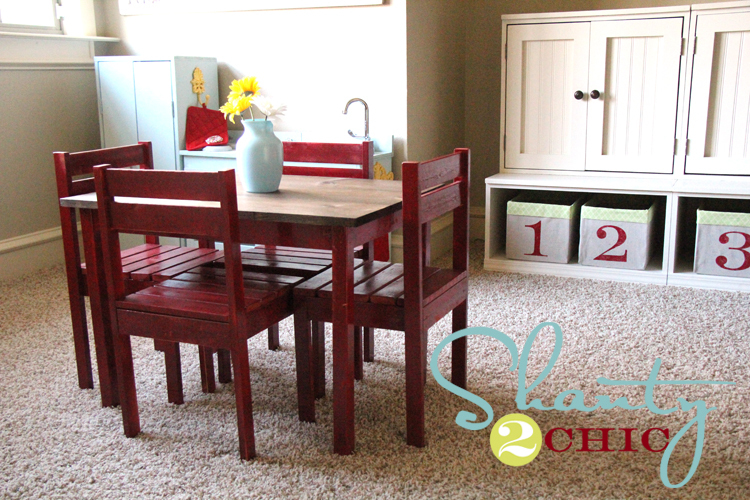
Kids Play Table and Stackable Chairs
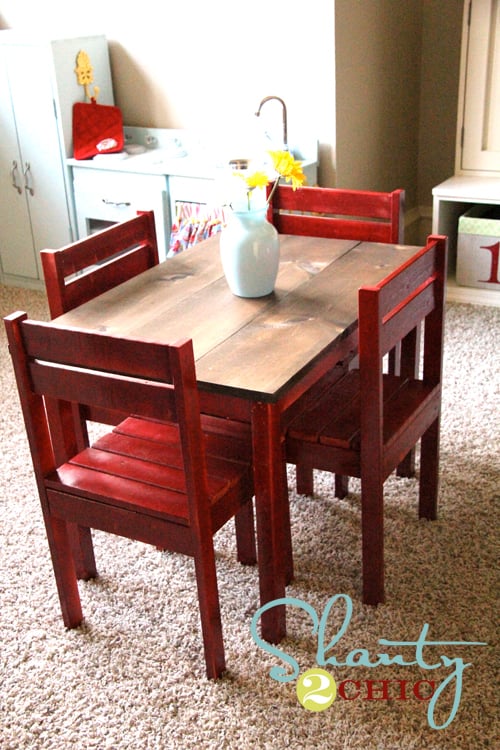
I used Ana's plan for the Clara table and the $4 stackable chairs for this project. I spent a total of $30. I used furring strips to save money. My kiddos love it! You can see more details at http://www.shanty-2-chic.com/2011/08/table-and-chairs-for-the-playroom… !!
Built from Plan(s)
Estimated Cost
$30
Estimated Time Investment
Afternoon Project (3-6 Hours)
Finish Used
Rust-Oleum Colonial Red Spray Paint and Minwax Dark Walnut Stain
Recommended Skill Level
Beginner
playhouse loft bed with storage steps
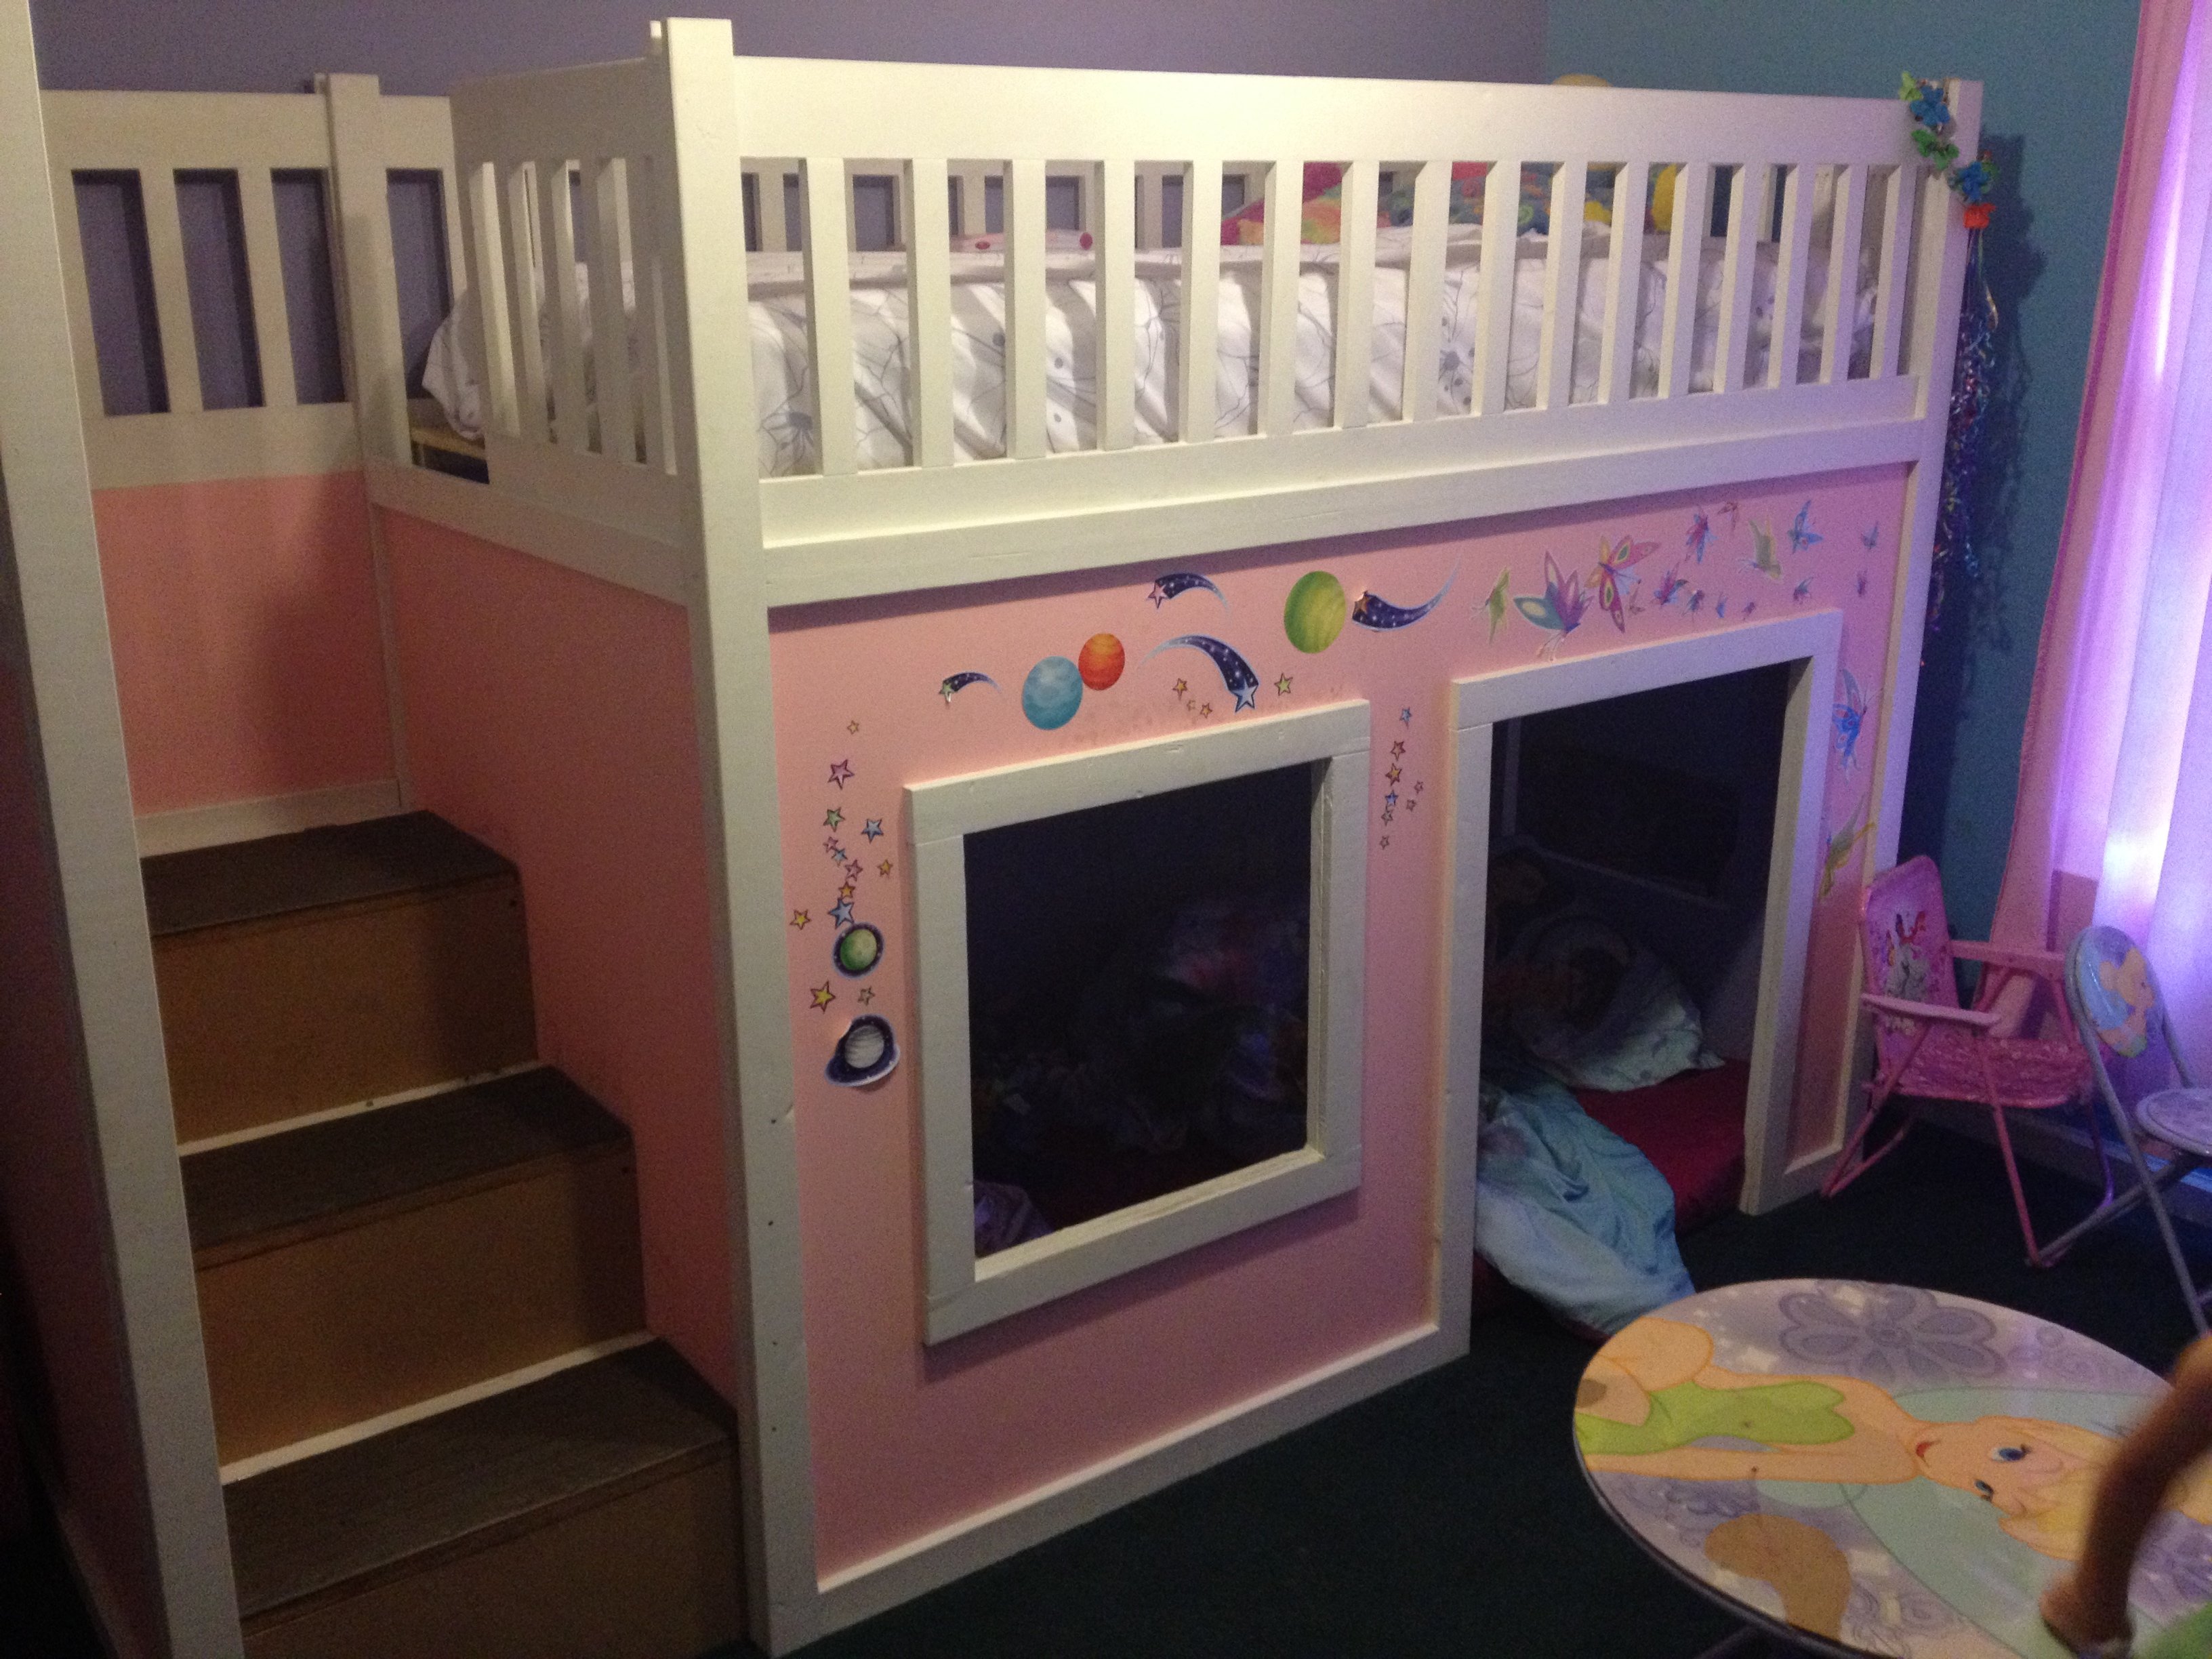
built this a few months ago, but just now getting around to posting it. I could'nt have ever even came close to building something like this without ana. So thank you.
Built from Plan(s)
Estimated Time Investment
Week Long Project (20 Hours or More)
Finish Used
pink paint, and white trim paint
Recommended Skill Level
Intermediate
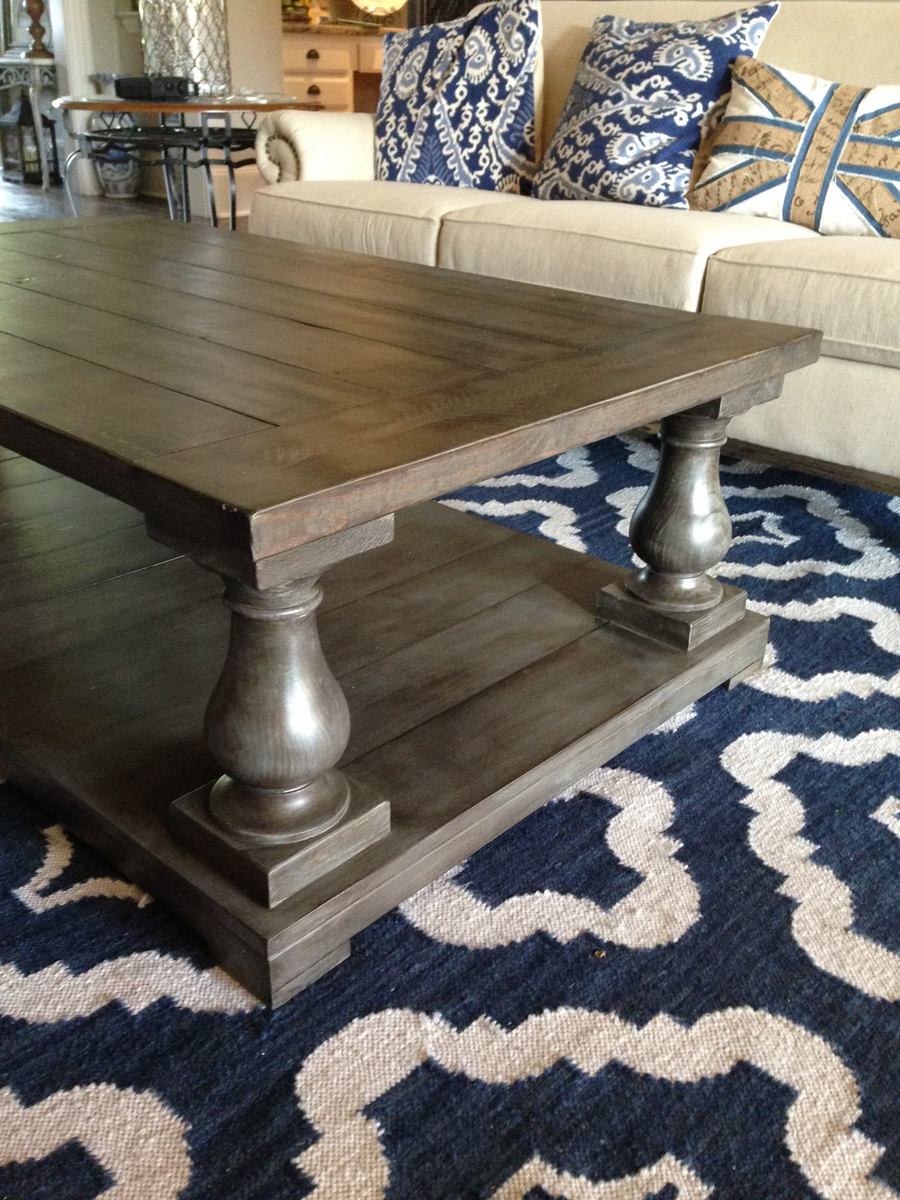
Balustrade Coffee Table
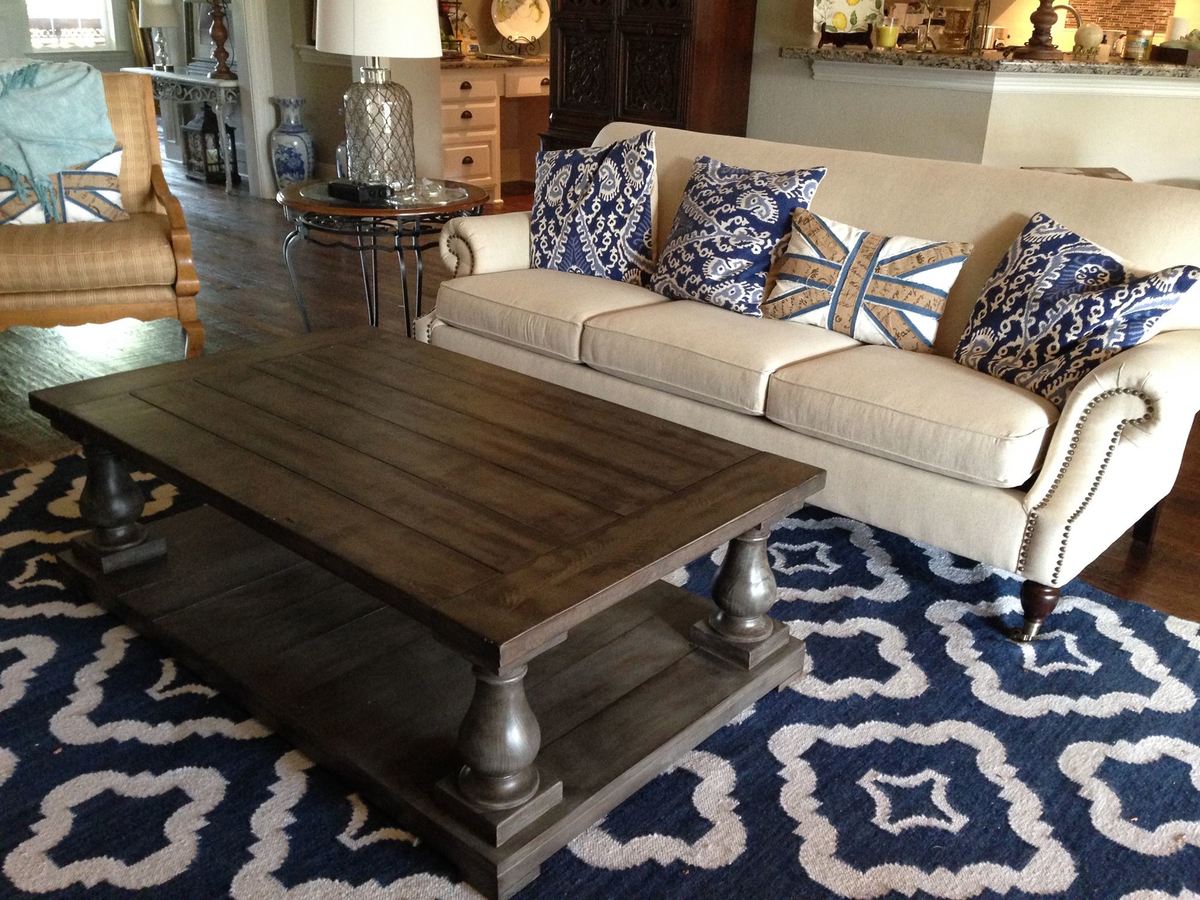
This table was my first build. Once I learned how to use the Kreg Jig and my husband taught me how to use the table and miter saws, I have fallen in love with building furniture. Since building this table, I have built a twin bed, two farm tables, a bench, the kitchen island/rolling server table from Ana's book, and an awesome workbench with red racing wheels! This past weekend I finished my first custom order - an 8-foot Husky leg Farm table using Ana's plan. I now have orders for another balustrade coffee table and an end table using the matching legs from Osborne. THank you Ana!
Built from Plan(s)
Estimated Cost
less than $200
Estimated Time Investment
Weekend Project (10-20 Hours)
Finish Used
An experimental mix of Minwax and Rustoleum stains - gray with expresso and special walnut rub. Minwax poly in matte finish.
Recommended Skill Level
Beginner
Comments
Sat, 02/18/2017 - 12:34
Great job! And I love your sofa.
Where did you get your sofa? This is what I am looking for. And I LOVE the choice of stains.
Tue, 03/13/2018 - 17:01
Love the table And the color
Can you tell me how you applied the 3 different stains to give such a rich color. This is so beautiful.
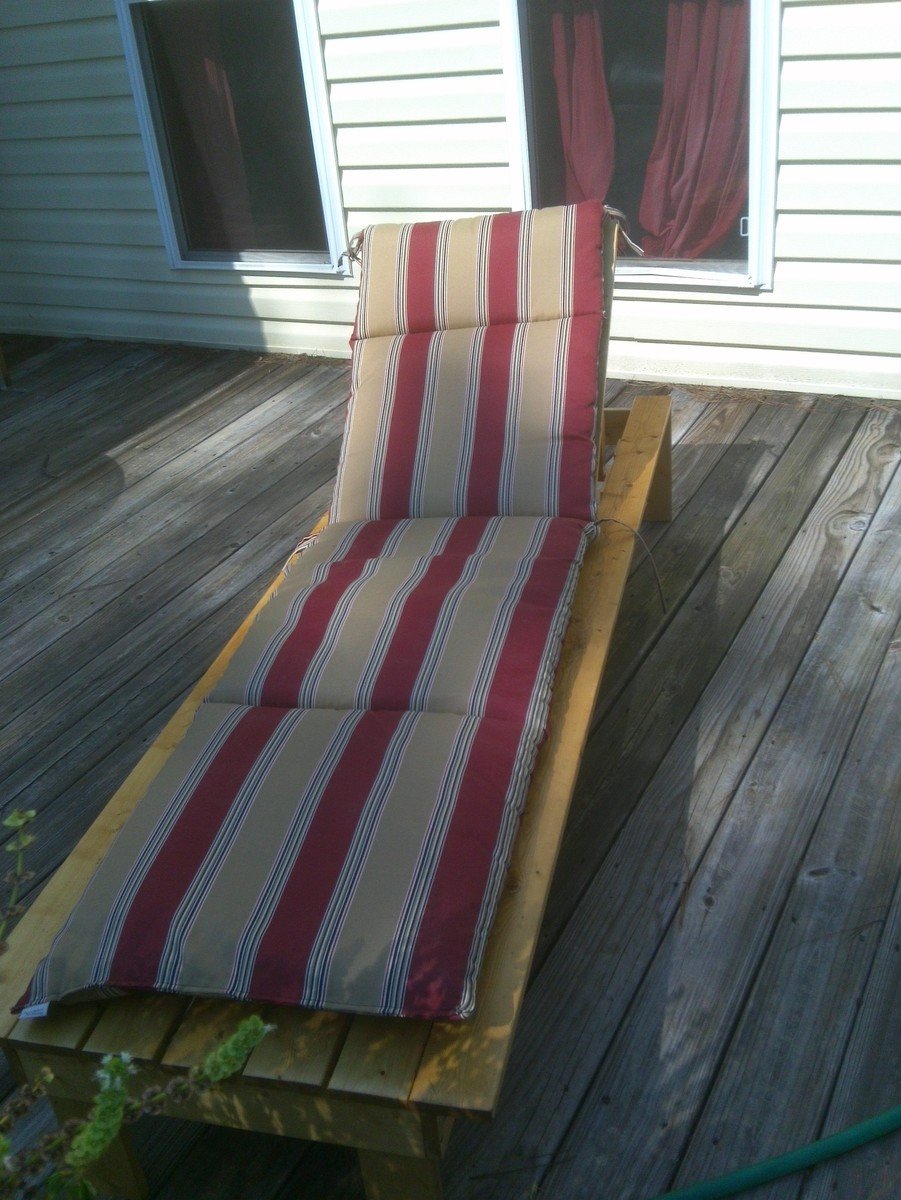
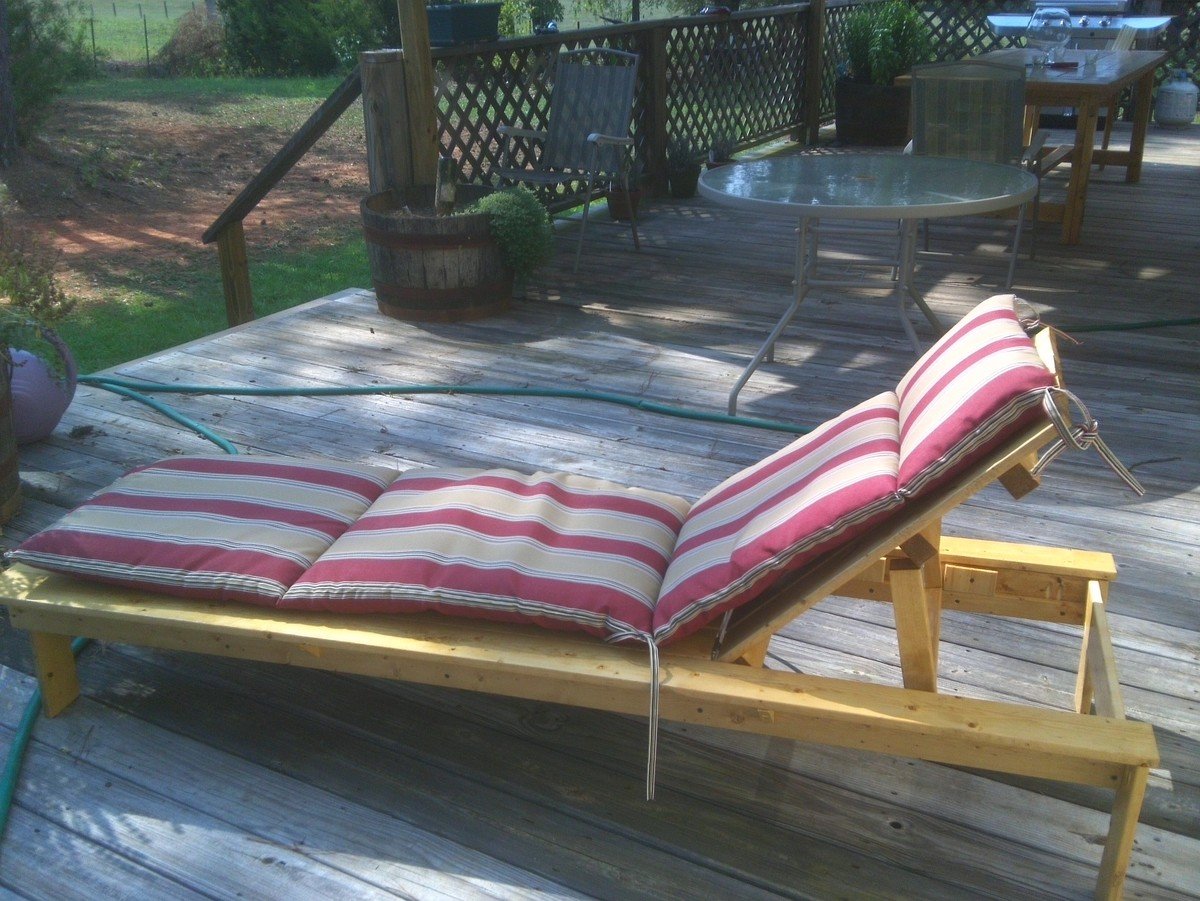
Best Lounger Ever
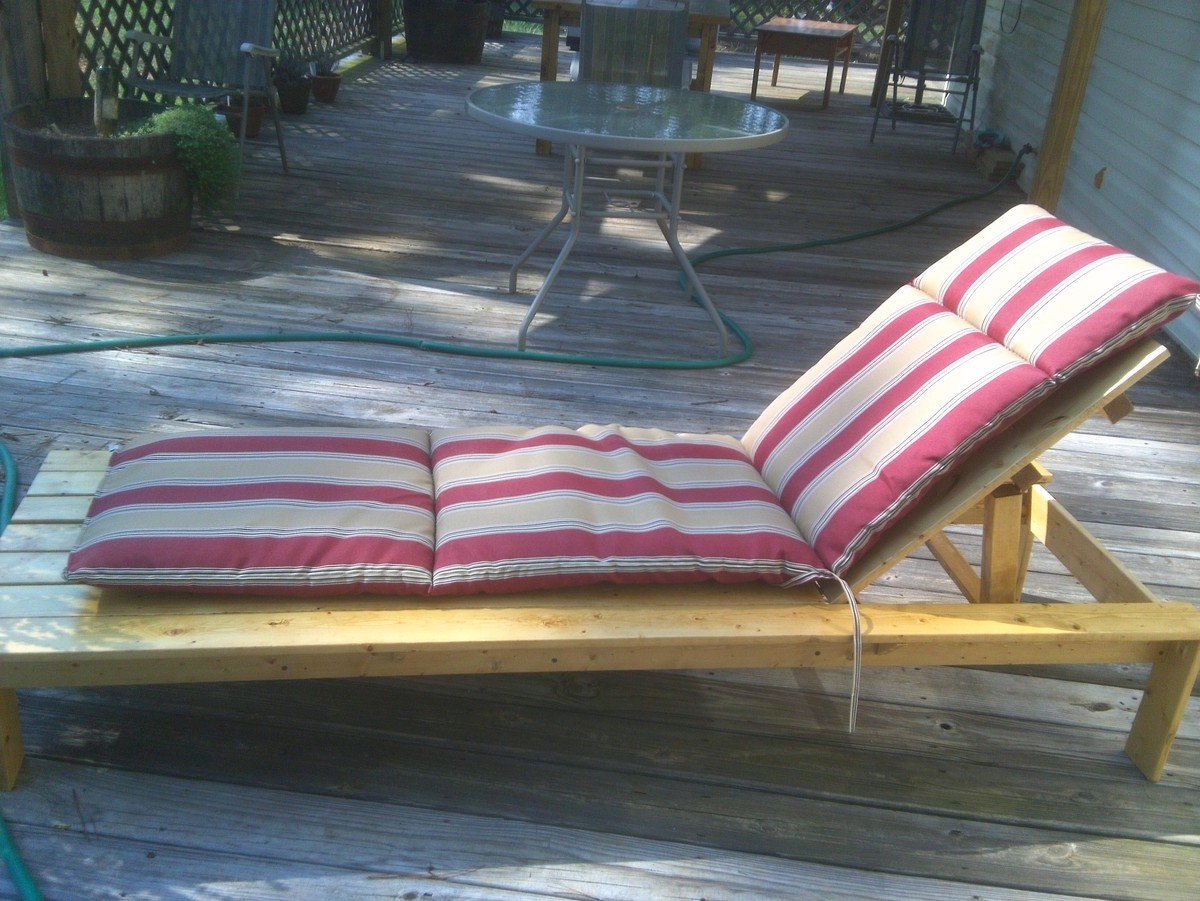
This was my second project from the site. I wanted somewhere to read my book on the back deck. This chair is perfect. When I get tired of reading I can lay it down and take a nap. It is very sturdy and easy to put together. I do recommend using pocket holes to assemble it. I found it much easier.
Built from Plan(s)
Estimated Cost
$70.00
Estimated Time Investment
Day Project (6-9 Hours)
Finish Used
I sanded the seat and sides of the chair. Then stained it with oak and finished it with polyurethane.
Recommended Skill Level
Beginner
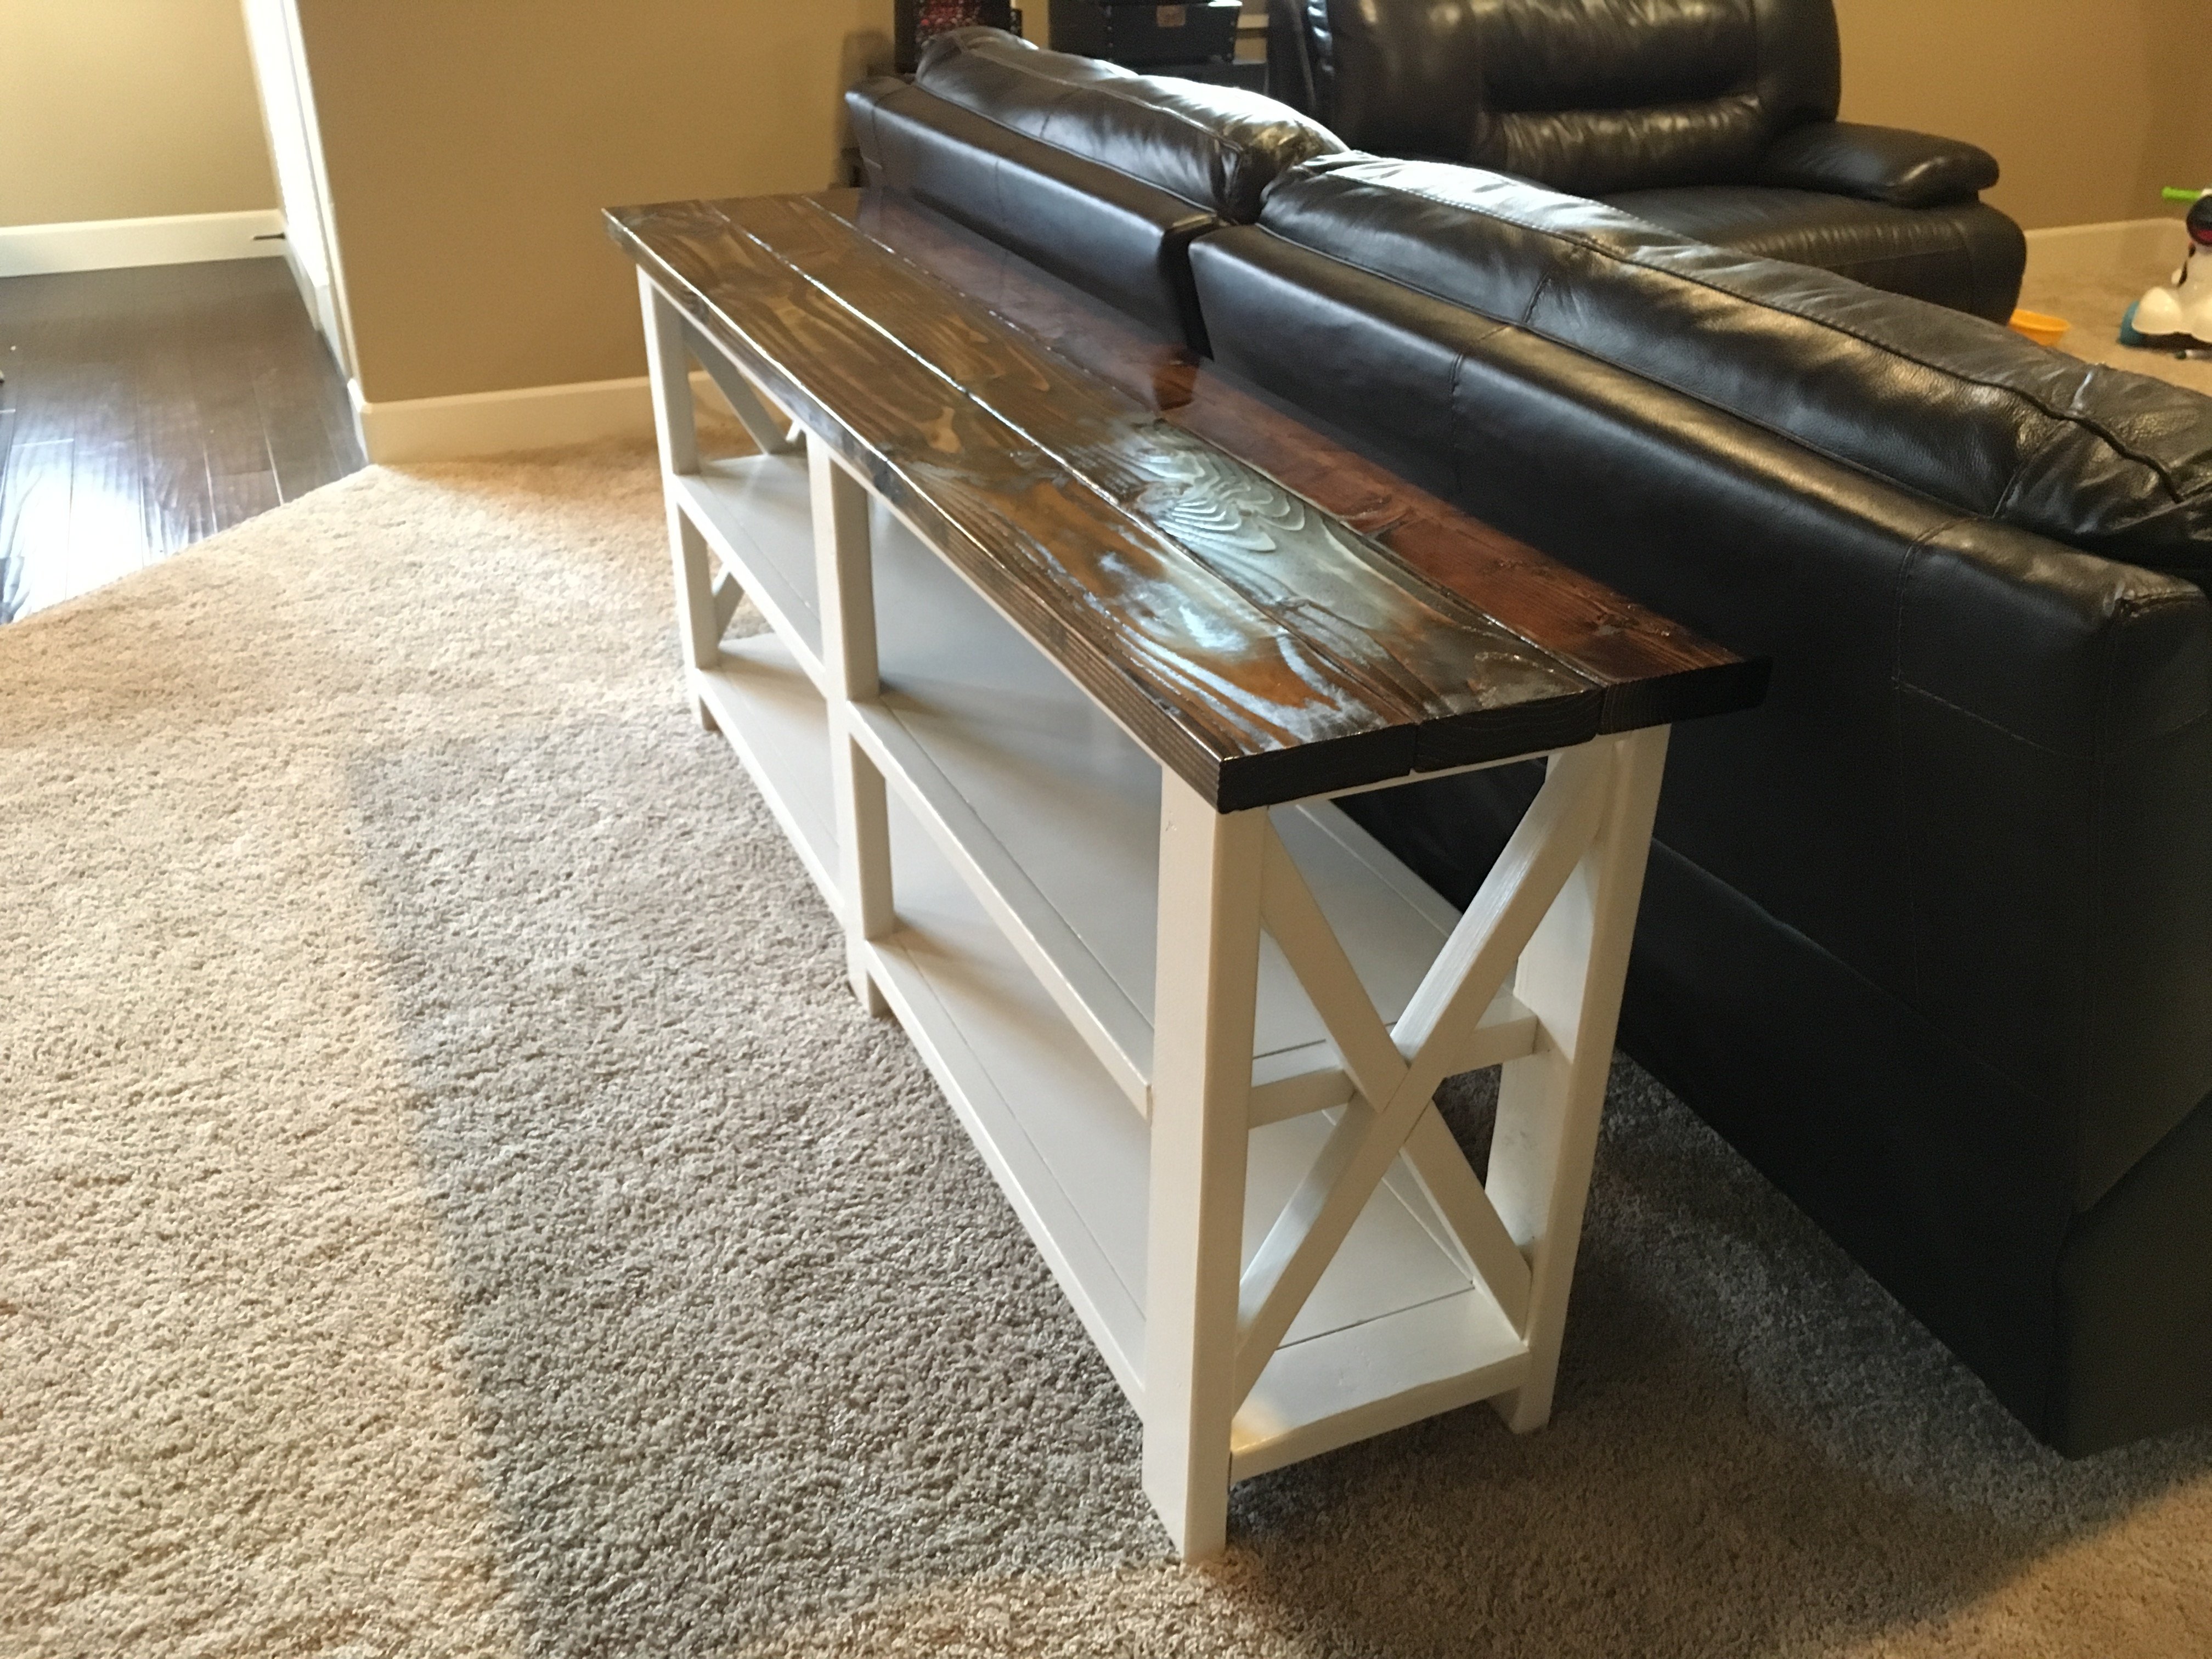
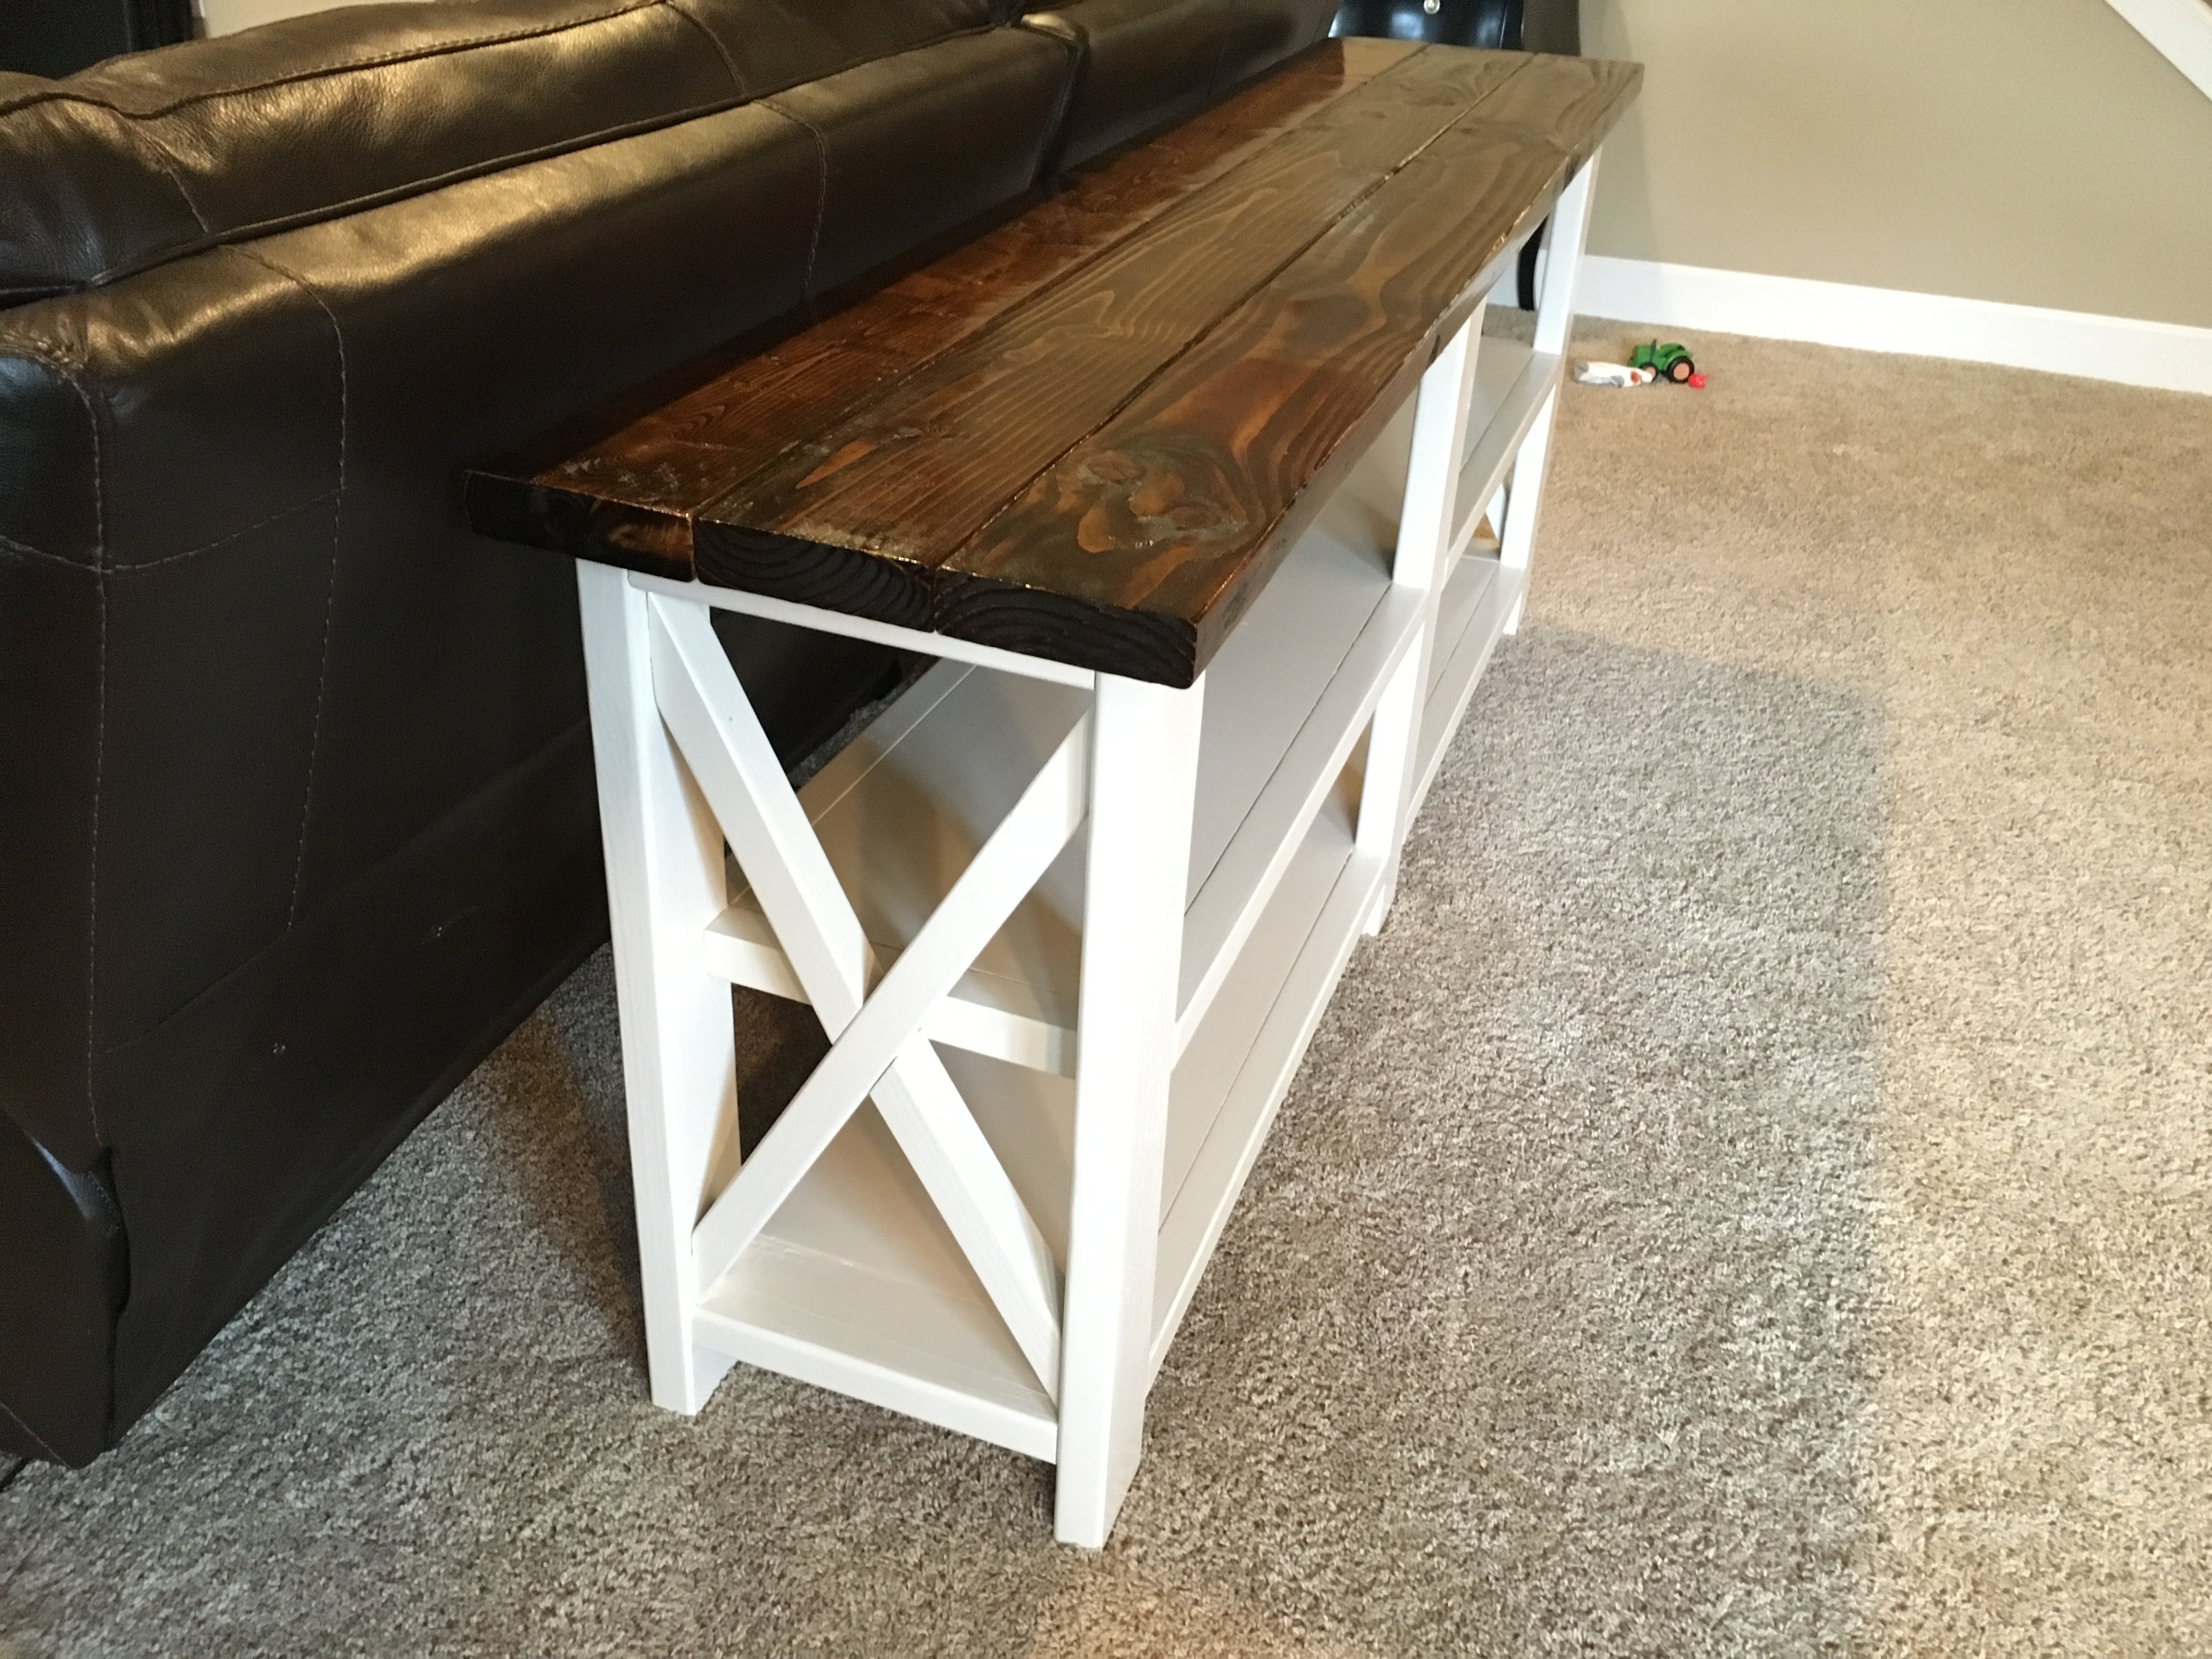
X Console Sofa Table
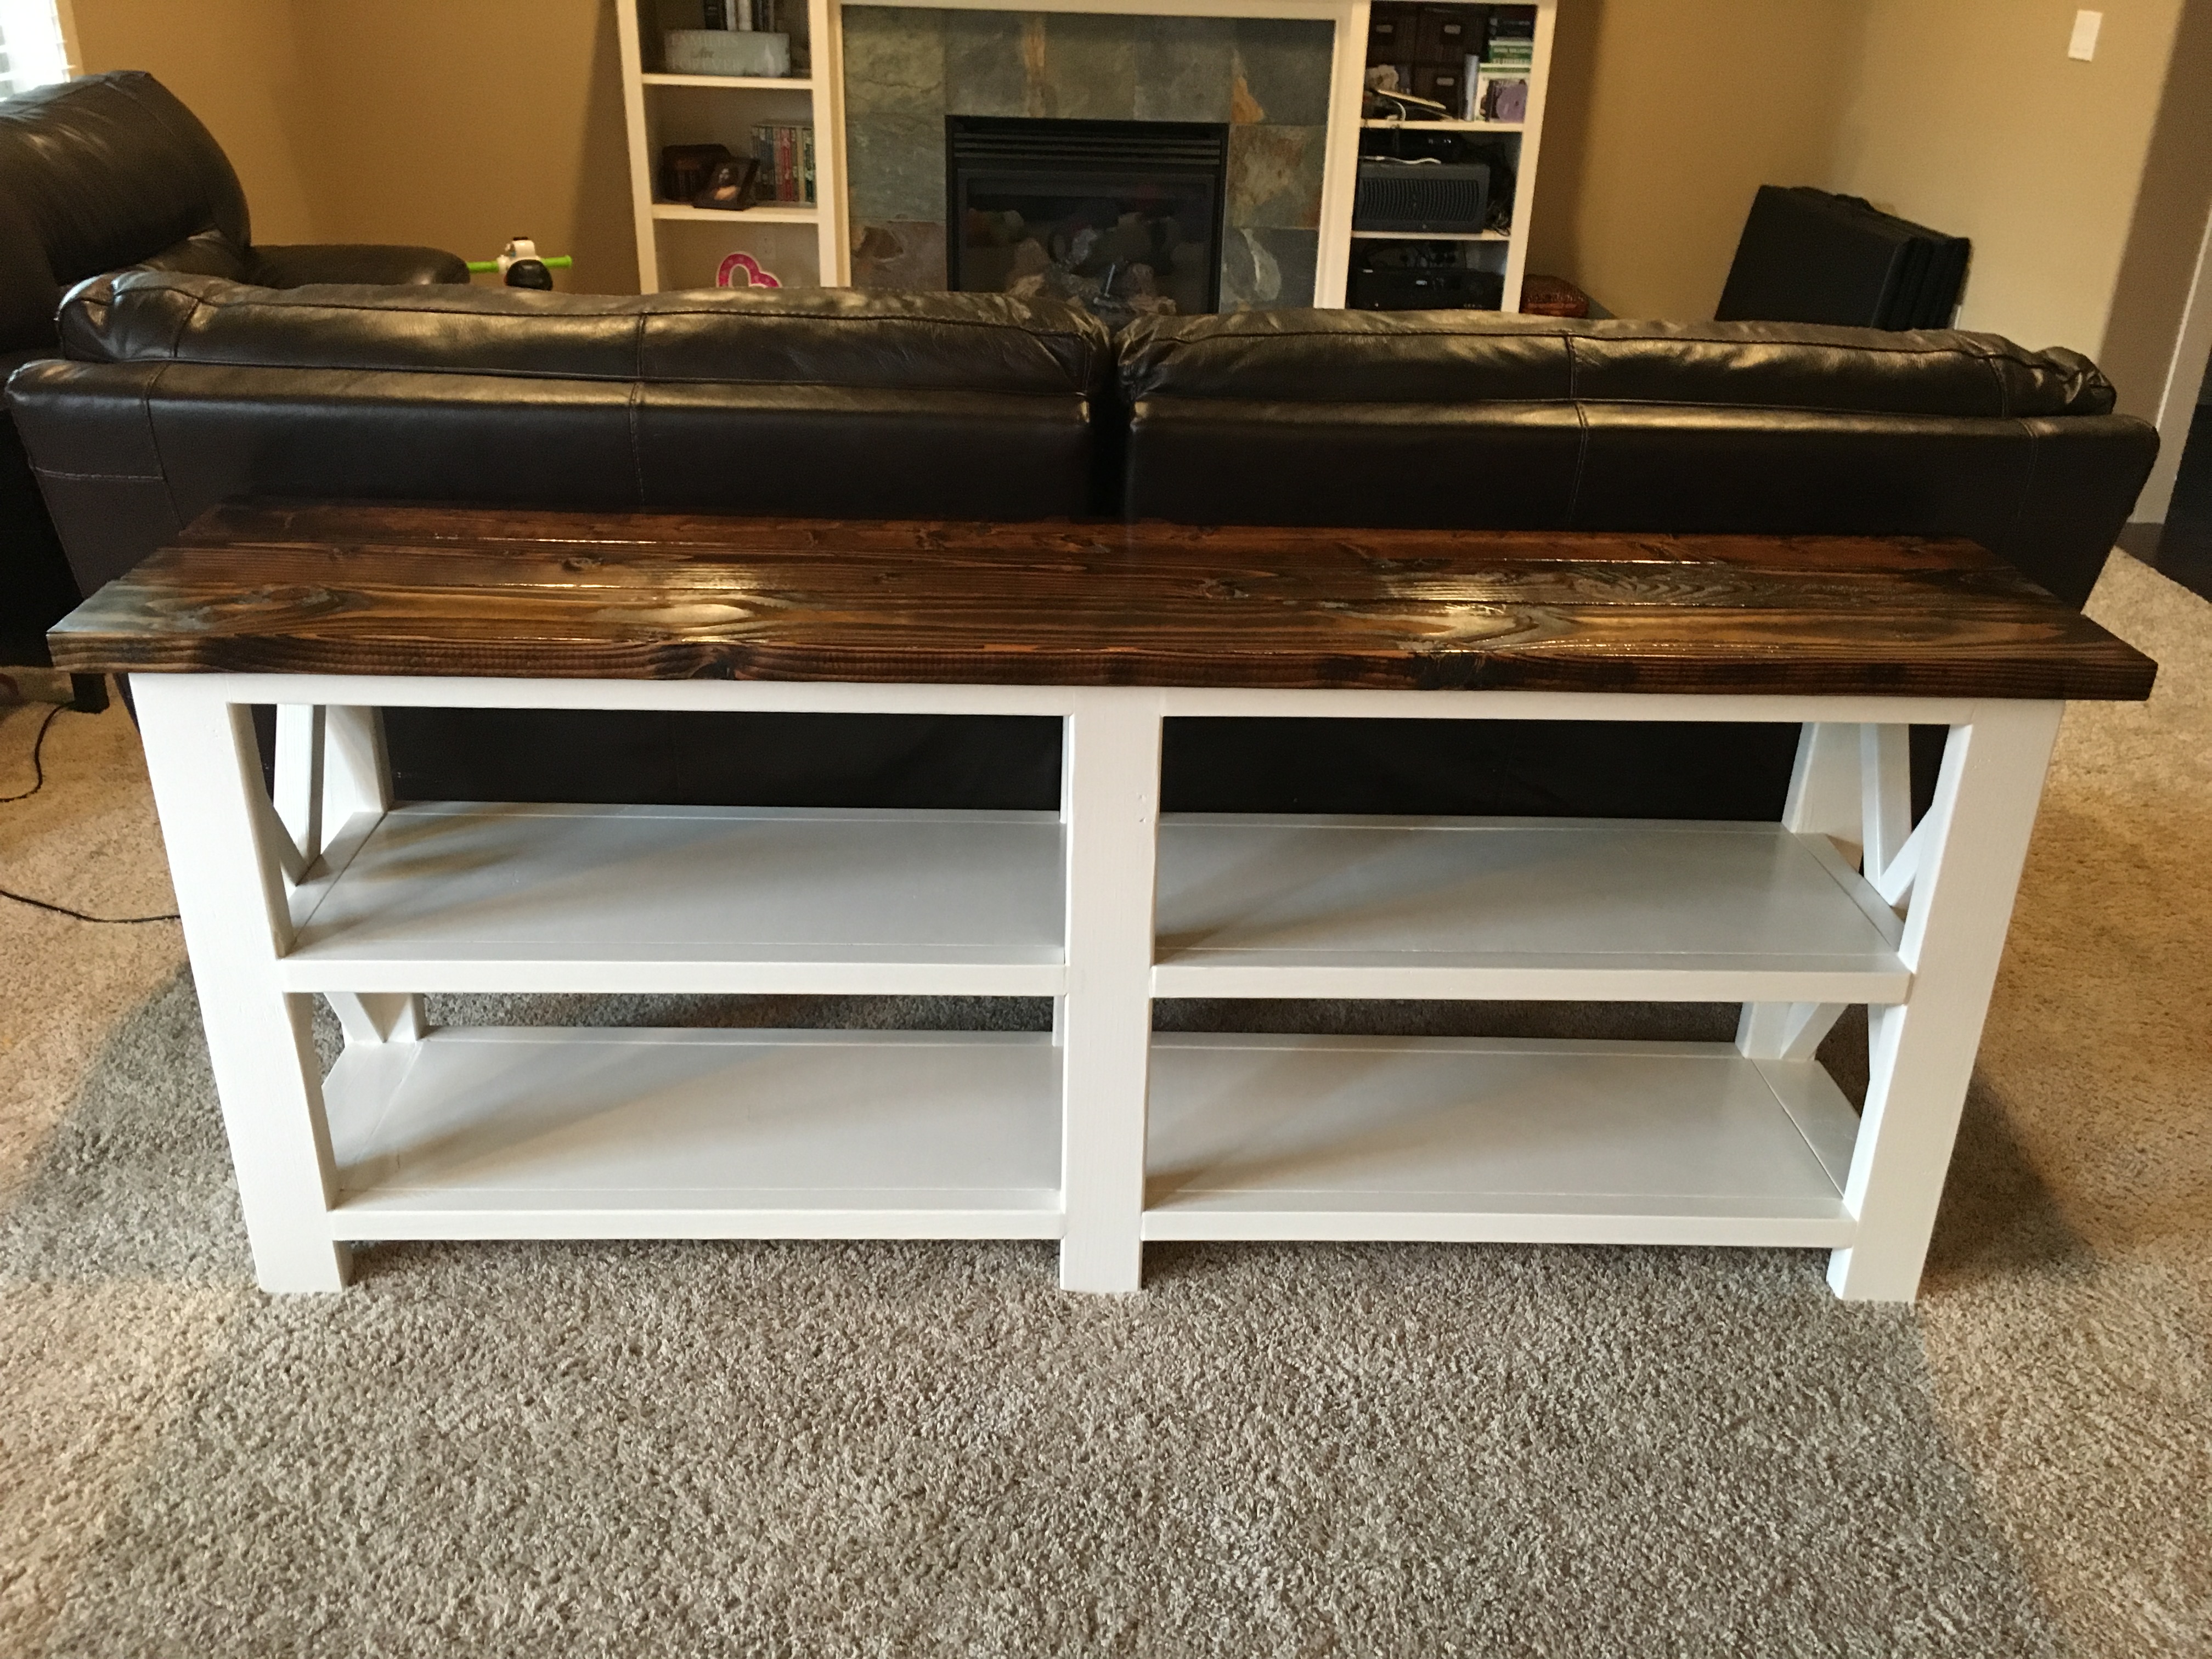
Followed the Rustic X console plan except did not go for the rustic stain look. I am happy with how it turned out, even though this is my first wood furniture type project. I am not much of a handyman.
Built from Plan(s)
Estimated Cost
$130 (wood, stains, paint, screws)
Estimated Time Investment
Week Long Project (20 Hours or More)
Finish Used
Miniwax Clear Polyurethane (top boards) Used 3 coats on the 2x6 boards (top)
Miniwax Clear Polycrylic (all other boards) Used 2 coats over the top of the painted wood.
Sherman Williams Latex Paint - "Pacer White" color. Used 3 coats.
Miniwax Clear Polycrylic (all other boards) Used 2 coats over the top of the painted wood.
Sherman Williams Latex Paint - "Pacer White" color. Used 3 coats.
Recommended Skill Level
Beginner
Comments
Three story doll house

I built this American girl doll house for my daughter. I wanted to give her something to keep her youth alive!


Built from Plan(s)
Estimated Cost
$150-200
Estimated Time Investment
Weekend Project (10-20 Hours)
Finish Used
Light grey paint for all the walls and ceiling. Classic grey stain by Minwax for the floors. I also added baseboards to all the rooms with some small trim I found in the window trim section at Home Depot.
Recommended Skill Level
Intermediate
Comments
Sun, 01/06/2019 - 16:43
What an amazing Christmas
What an amazing Christmas gift! Super dad! Thanks so much for sharing a photo and building! Ana
Sun, 01/06/2019 - 21:46
Thanks Ana! This is her momma
Thanks Ana! This is her momma that built it for her. I wanted to tackle something on my own and challenge myself. Your plans were amazing to work with. Thanks for taking the time to make these plans so easy to understand and follow. She is very happy with the doll house! Happy New Year! -Abbey
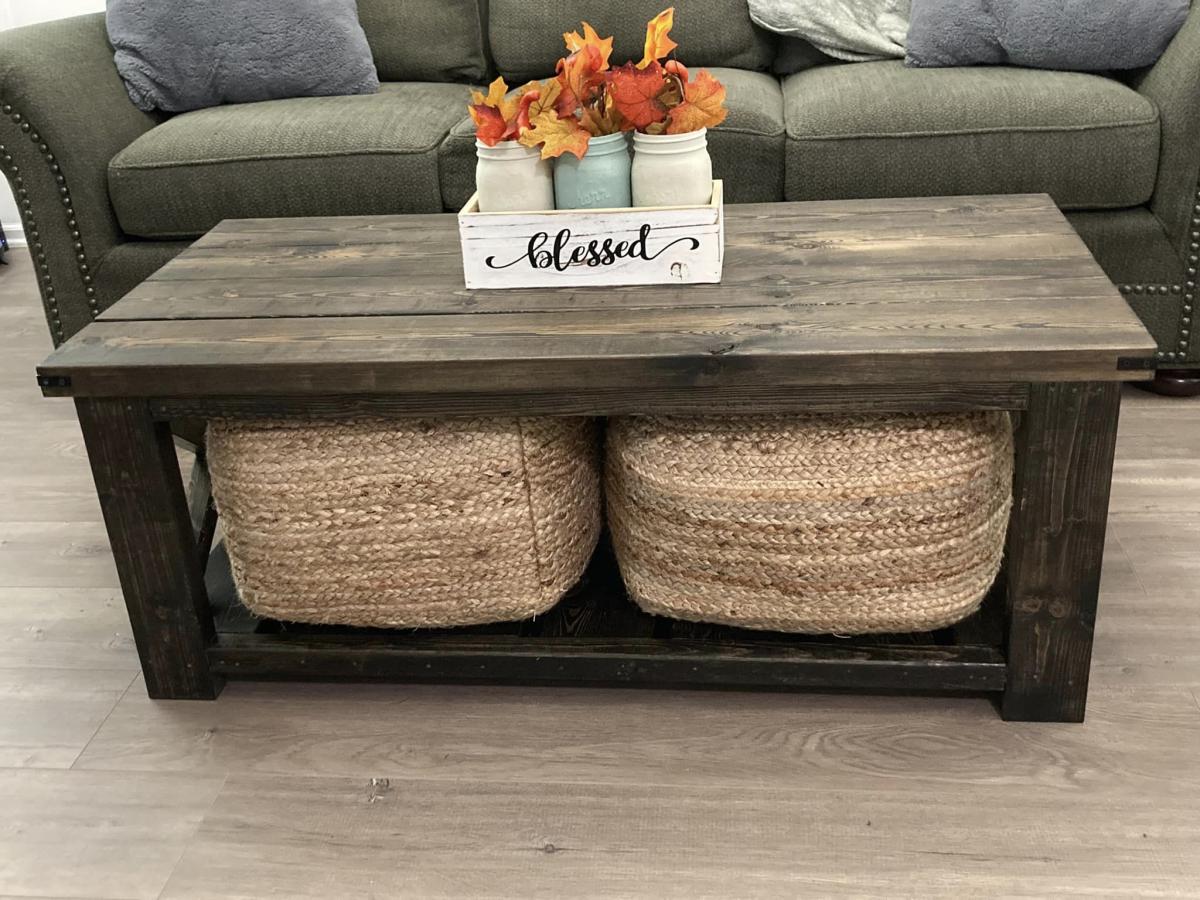
Coffee Table
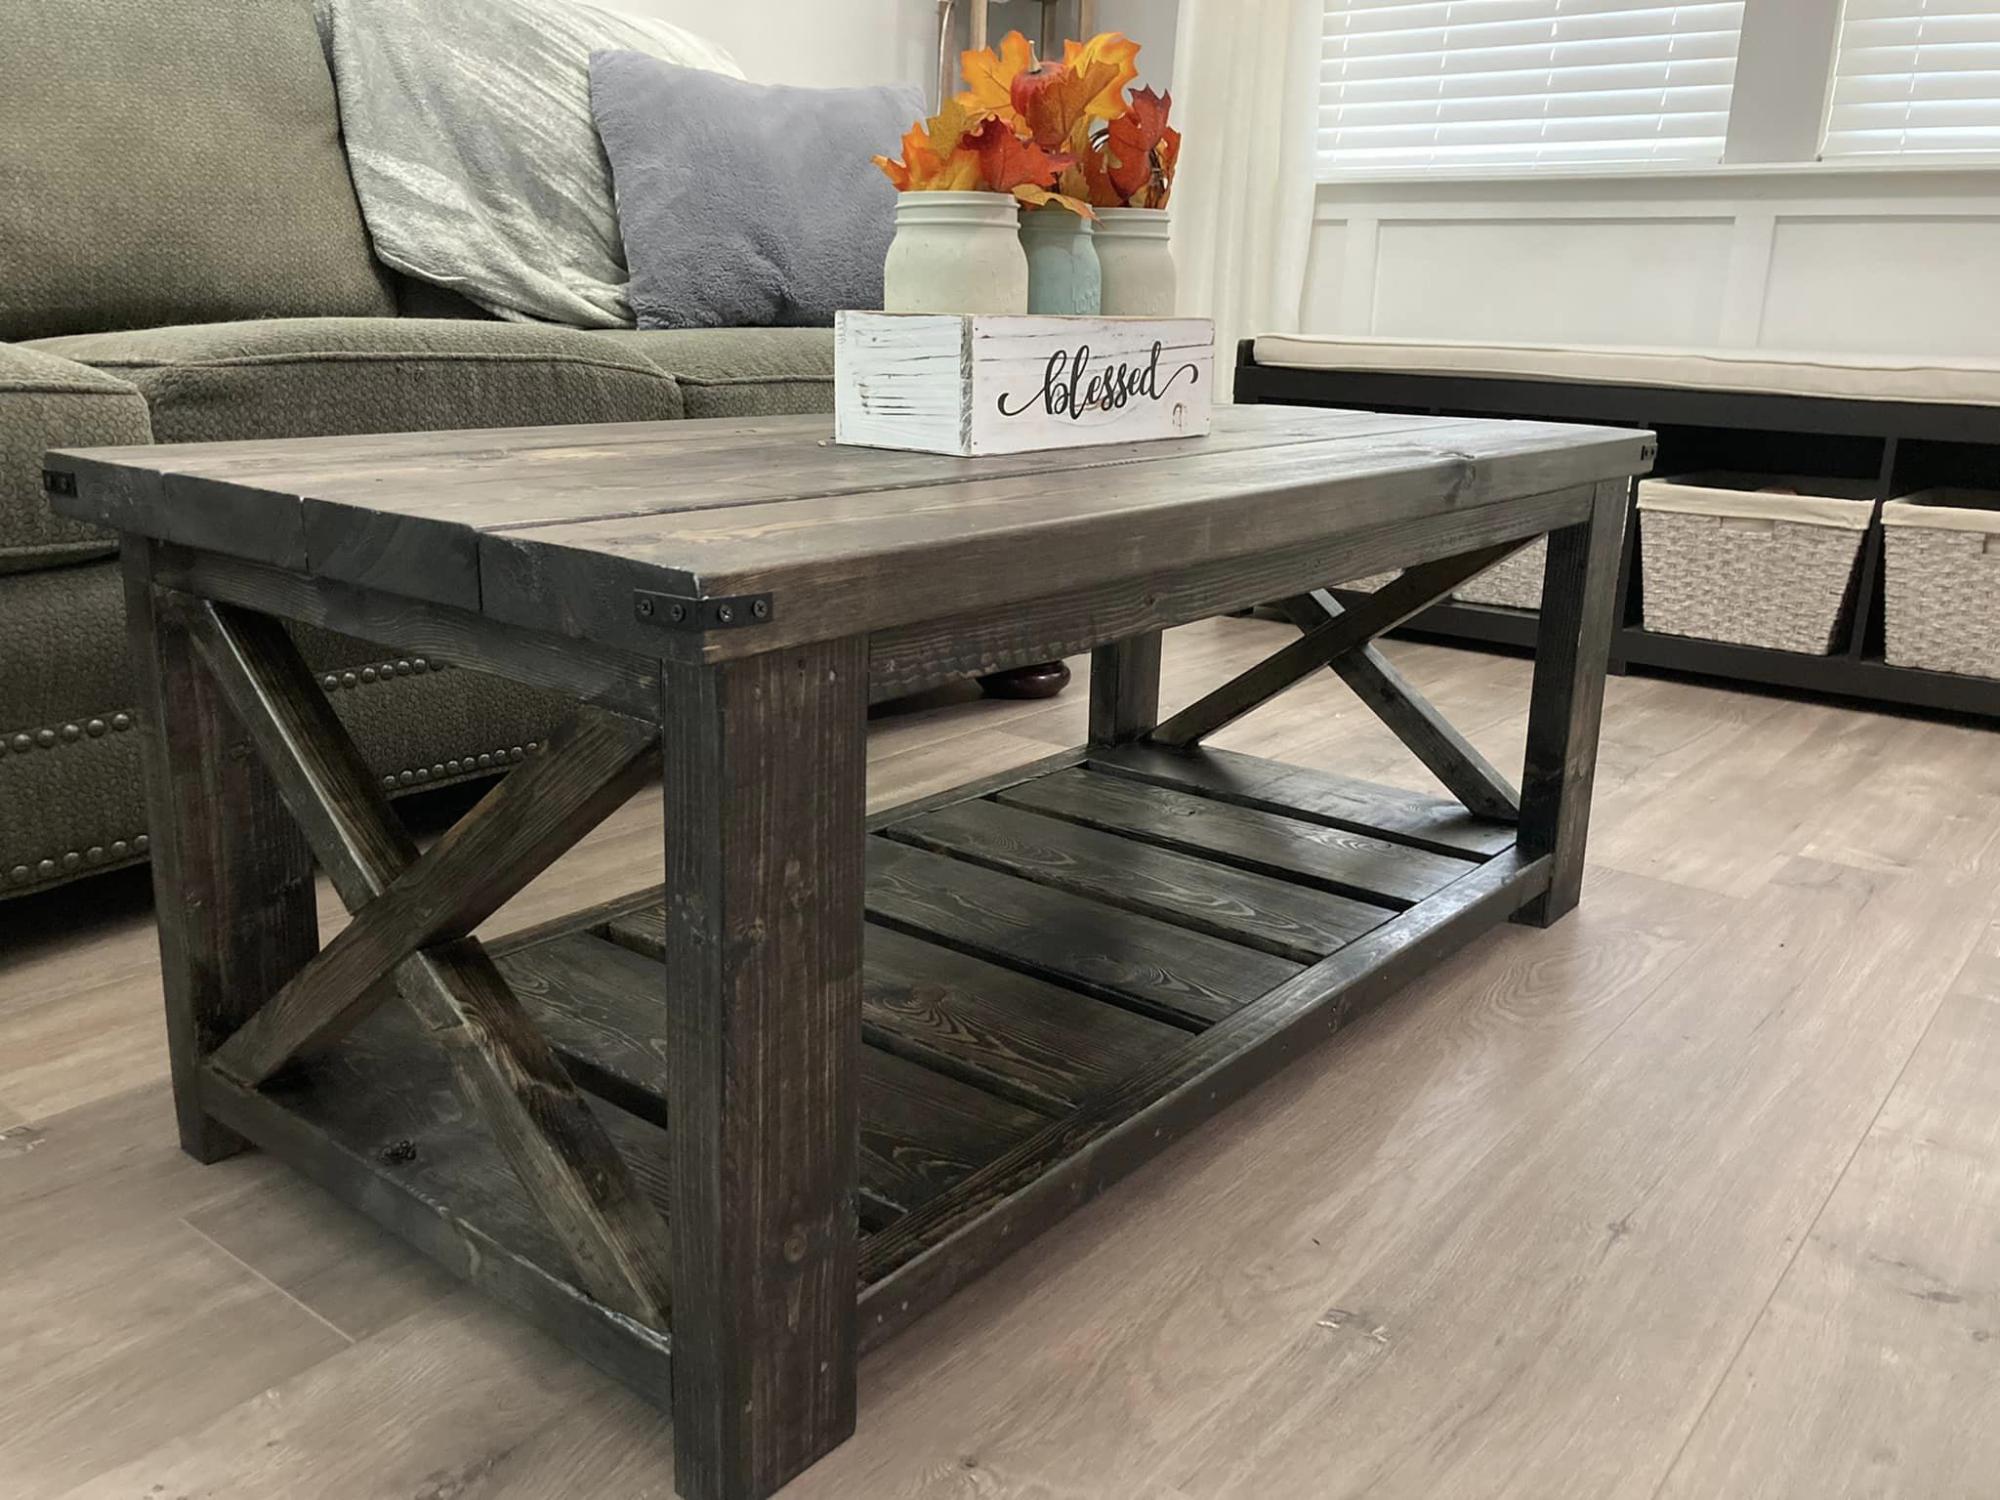
Thank you so much for sharing your plans!! You are so generous! This is my first attempt at building furniture!
Check out my TikTok at - https://www.tiktok.com/@floridagirl092/video/7152573909735427370?is_fro…
Built from Plan(s)
Comments
Seasonal And Holiday
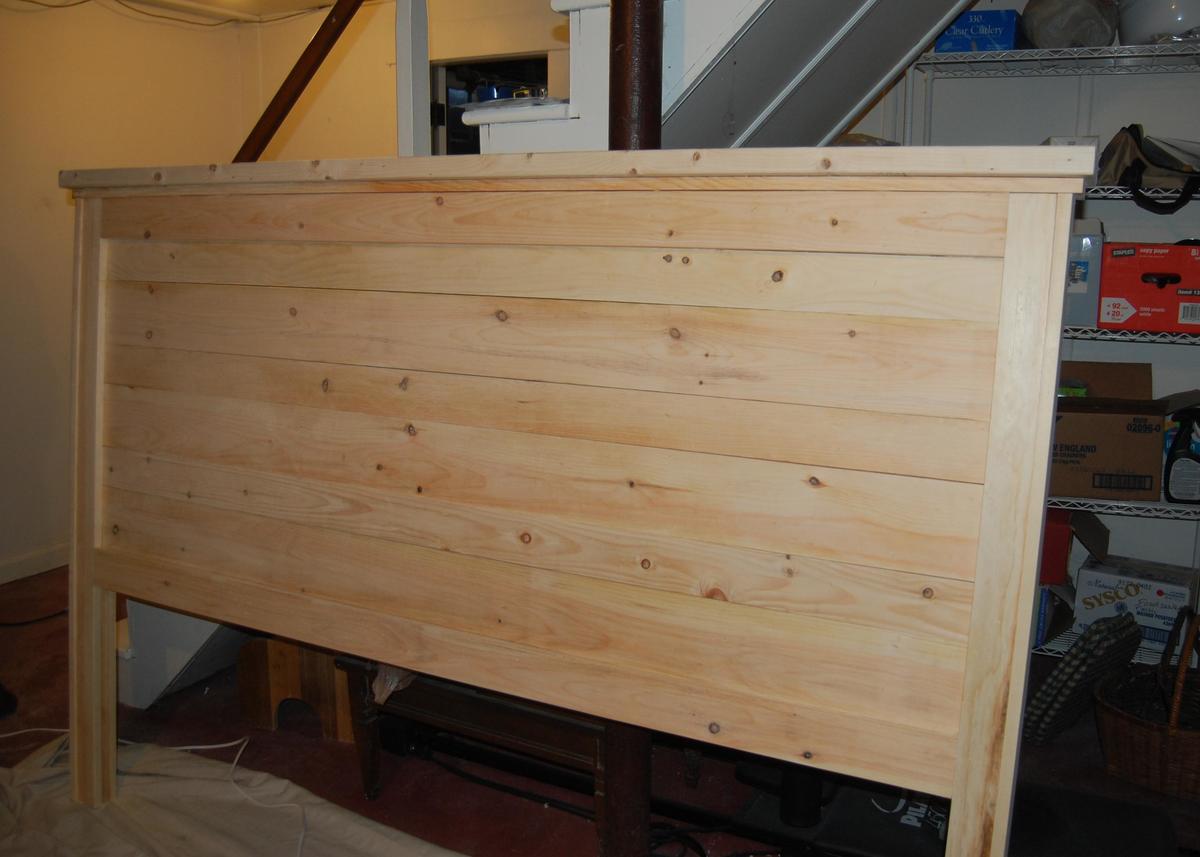
Sarah's Easy Build Headboard in King
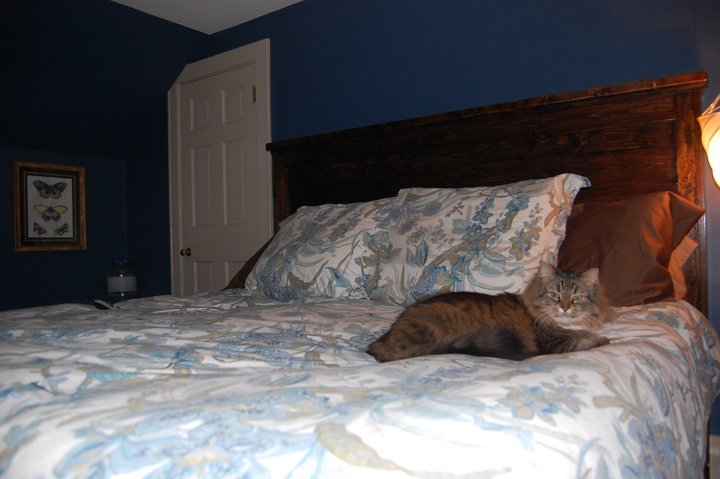
Probably one of the most popular plans, and possibly my favorite...maybe I am biased because it was my first Ana build. Being my first Ana build, and my first carpentry project in several years it took a little longer than I hoped. Mostly nerves I think, and the fact that I am a perfectionist...what others may call picky =0) I really enjoyed building this piece, frustration at times included. It was great to be back in the shop after so many years of apartment living and no space or tools to speak of. A word of caution - once all my hard work was done it almost didn't make it out of the basement, not enough clearance. I was ready to shorten the legs but thankfully after some careful pivoting and ingenuity (my father in laws, not mine) it found its home in our bedroom...and I couldn't be happier! Having been 1 of 4 girls in a high school house carpentry program full of boys it is so inspiring to see so many women building, creating, and loving every minute! Thank you Ana for all you do!
Built from Plan(s)
Estimated Cost
$125.00
Estimated Time Investment
Week Long Project (20 Hours or More)
Finish Used
Minwax Dark Walnut & Gloss Poly
Some of the wood already had some flaws which helped to add to the reclaimed look, and I took liberty and added some gouges with a variety of tools, hitting the wood with the claw and nose of the hammer, screws for scrapes, etc...a great place to take out the aggression I built up when I ran into snags while building.
I sanded and sanded, added several coats of Minwax Dark Walnut stain, and then coated it with two coats of poly gloss. Then I hit the piece with steel wool to cut back the finish slightly and even out some inconsistencies.
Recommended Skill Level
Beginner
Outdoor sectional couch with reclined back
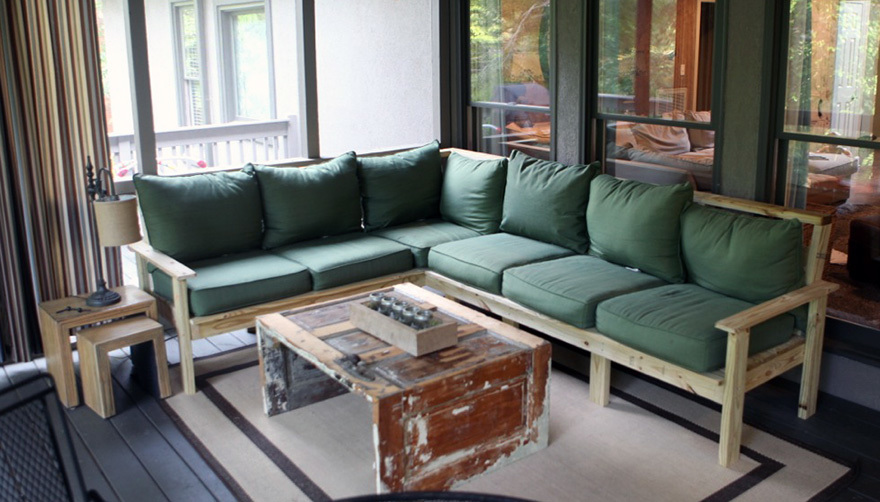
I designed and built this sectional for some friends, and then wrote a how-to about the process! There are free plans for it, and a time-lapse video of it being built at http://www.iliketomakestuff.com/outdoor-sectional/
Estimated Cost
$150 in Lumber
Estimated Time Investment
Day Project (6-9 Hours)
Finish Used
Will be painted once the wood has time to dry out
Recommended Skill Level
Beginner
Curtin rod and shelf over the window
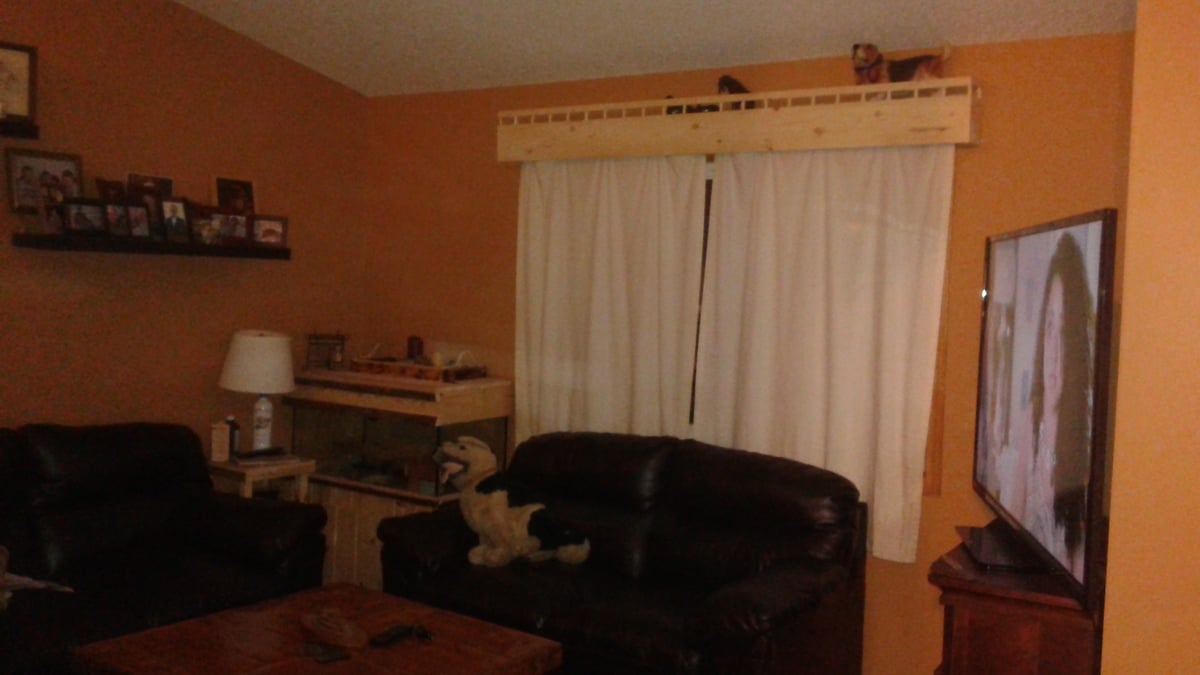
My husband has some cherished knick knacks and I am hoping to give our little home a little charm.
The most difficult part of this project was lining up the dowel holes for the shelf.
2-1x6's cut to the length of the window
2-1x6's cut to 6-1/4" for the sides
1-1x6 cut to 4-3/4" for the center support
Fostner (sp?) Bit at 1" for the dowels, I centered them and put them 2" down on each side and the on each side of the center support
Then I sanded, sanded and then sanded some more.. .
I used the 1/2" fostner bit and spaced the holes 3 3/4" apart on center for the rail and the top.
I cut a 1/2" dowel into 2" pcs.
The rail is a 2x2 that I trimmed down on the table saw, it finished out at 7/8"x1-1/16"
Lots of glue, more sanding and it was complete
Added 3 hillman heavy duty hangers to it and hung it over the living room window.
Estimated Cost
$16
Estimated Time Investment
Afternoon Project (3-6 Hours)
Finish Used
Left raw for now
Recommended Skill Level
Intermediate
jelly cabinet
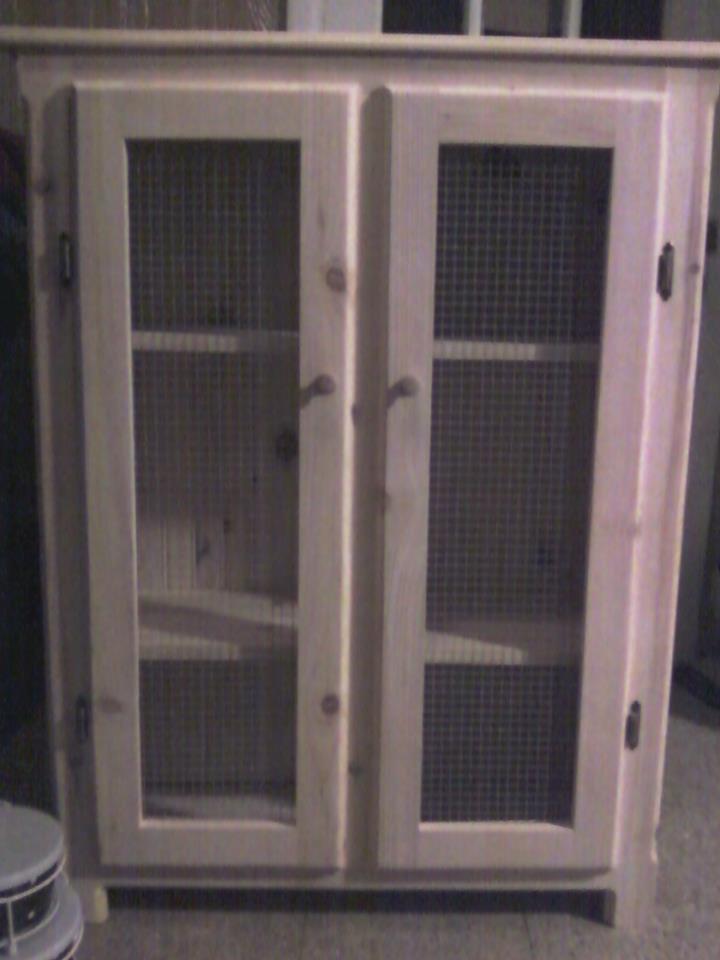
pine jelly cabinet
Built from Plan(s)
Estimated Cost
$70.00
Estimated Time Investment
Week Long Project (20 Hours or More)
Finish Used
none
Recommended Skill Level
Intermediate
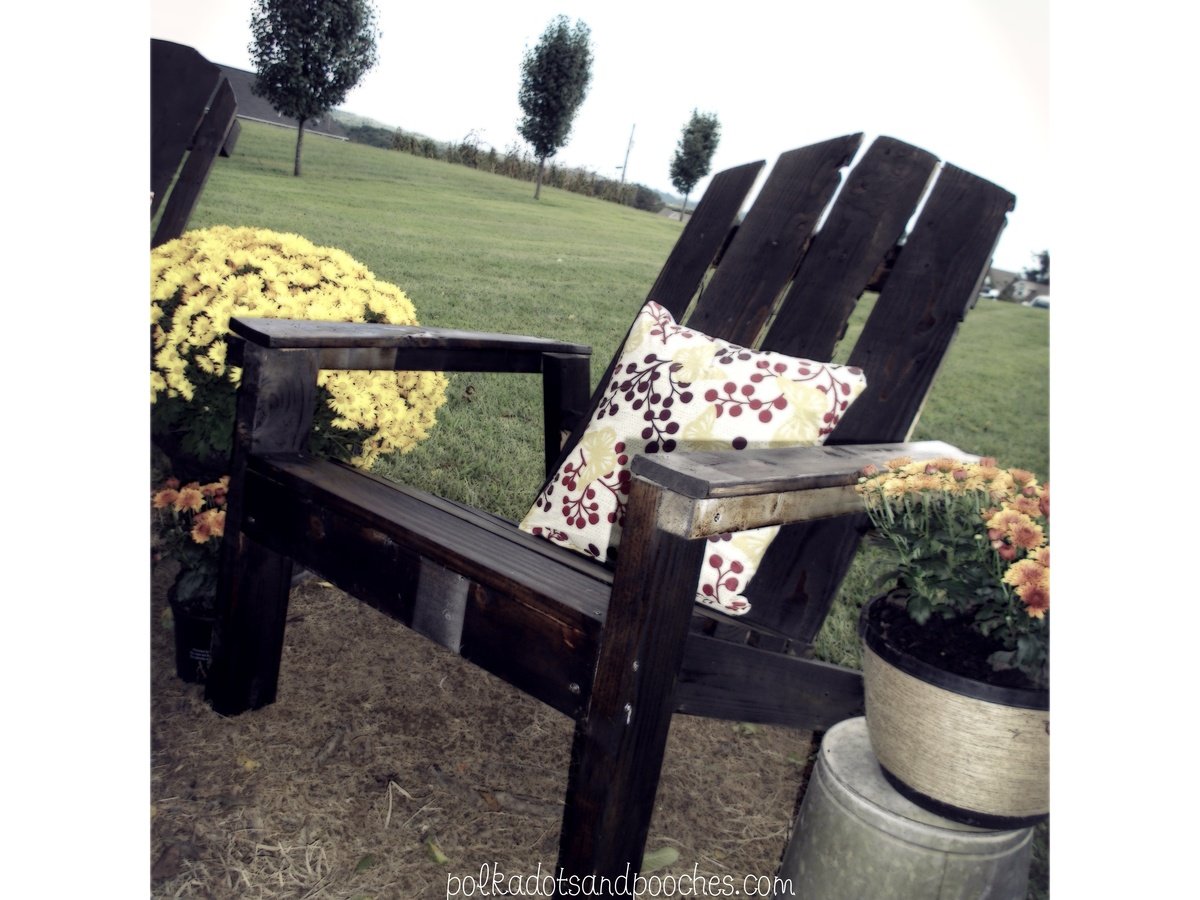
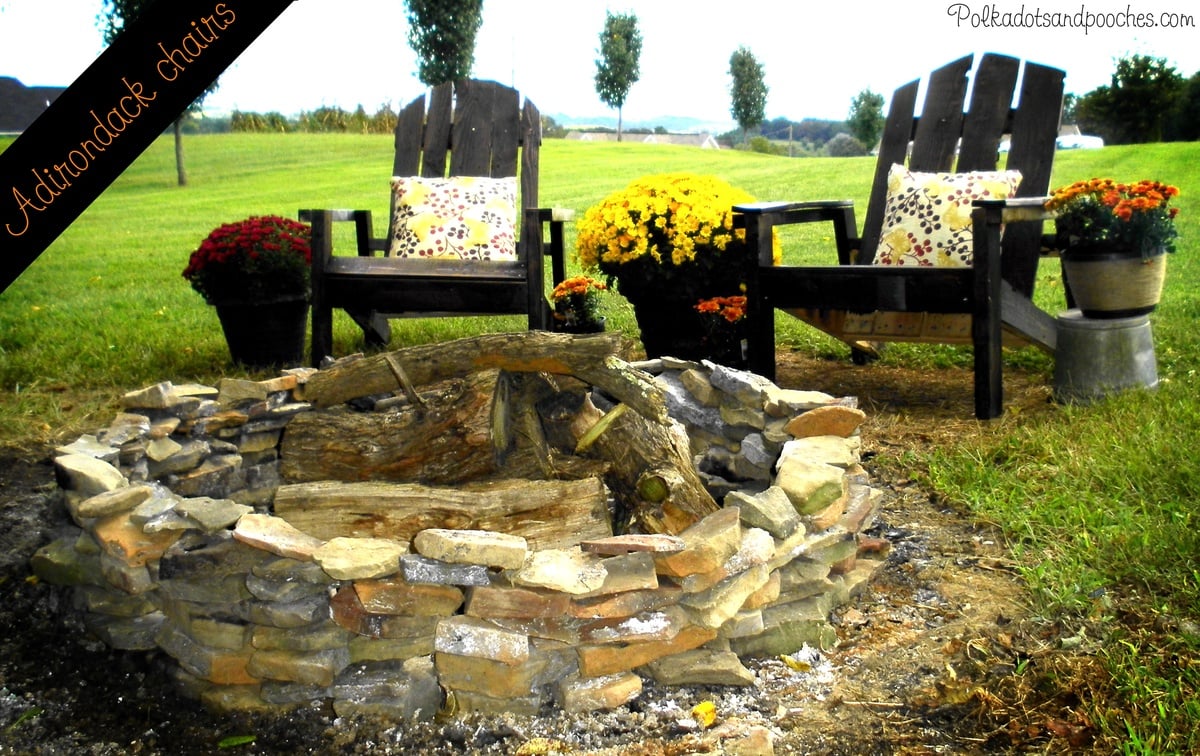
Adirondack Chairs made from Pallets!
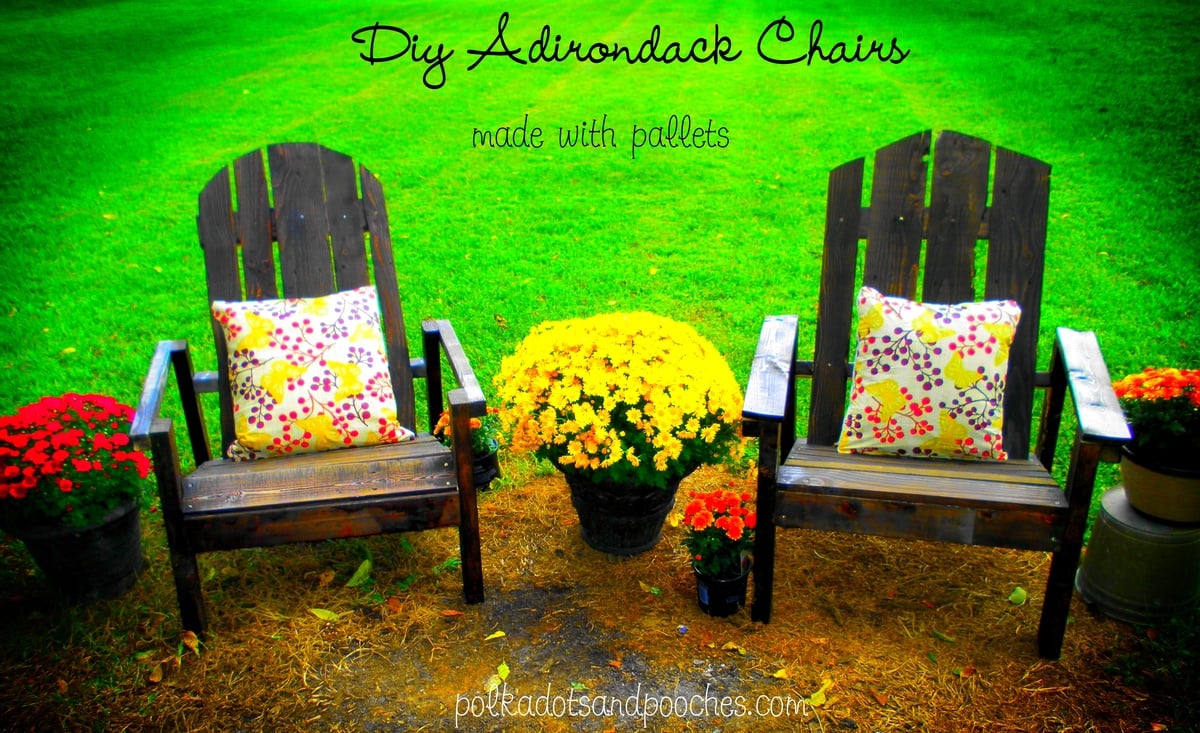
Built these two adirondack chairs from pallet wood that I had at home. Made the perfect seating area for my fire pit. Can't wait to enjoy the fall evenings in my $0 chairs!
Built from Plan(s)
Estimated Cost
0
Estimated Time Investment
Afternoon Project (3-6 Hours)
Finish Used
Dark walnut Stain
Recommended Skill Level
Beginner
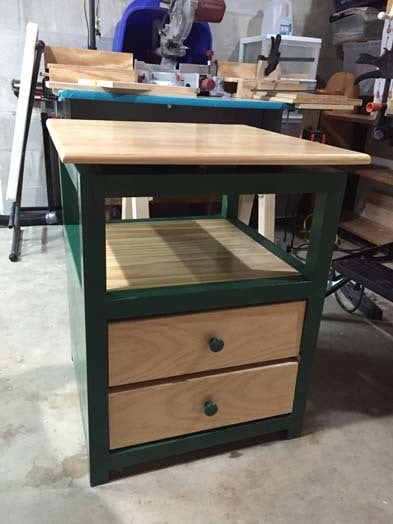
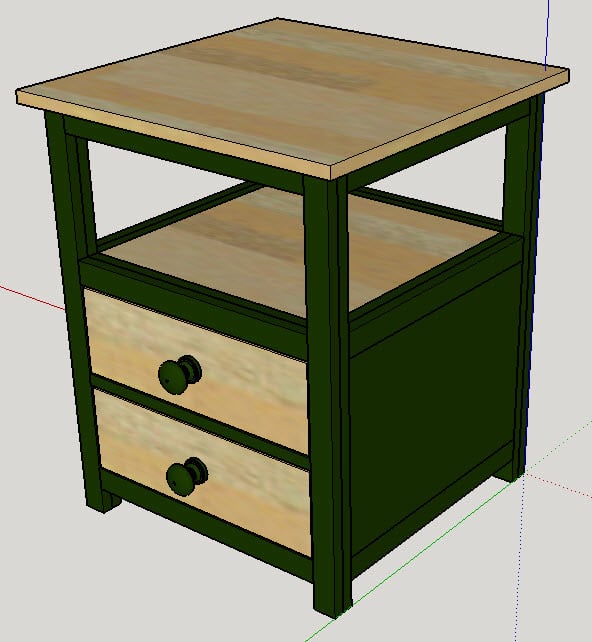
Rhyan End Table - Turtlecove Variant
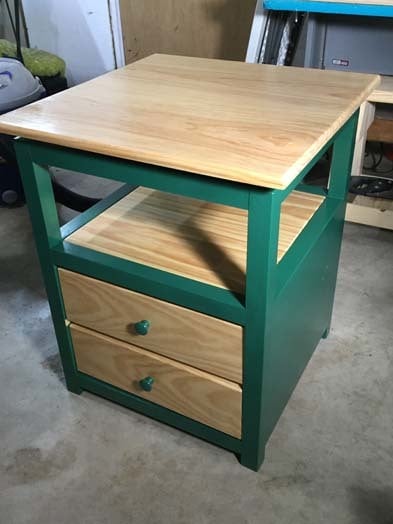
What I really liked about this plan is its versatility. Relatively easy with pocket hole joinery and inexpensive materials, I used paint to match existing furniture and solid wood tops and drawer fronts to add just a touch of elegance.
Built from Plan(s)
Estimated Cost
$150
Estimated Time Investment
Week Long Project (20 Hours or More)
Finish Used
one can green spray paint and General Finishes Top Coat gloss
Recommended Skill Level
Intermediate