Community Brag Posts
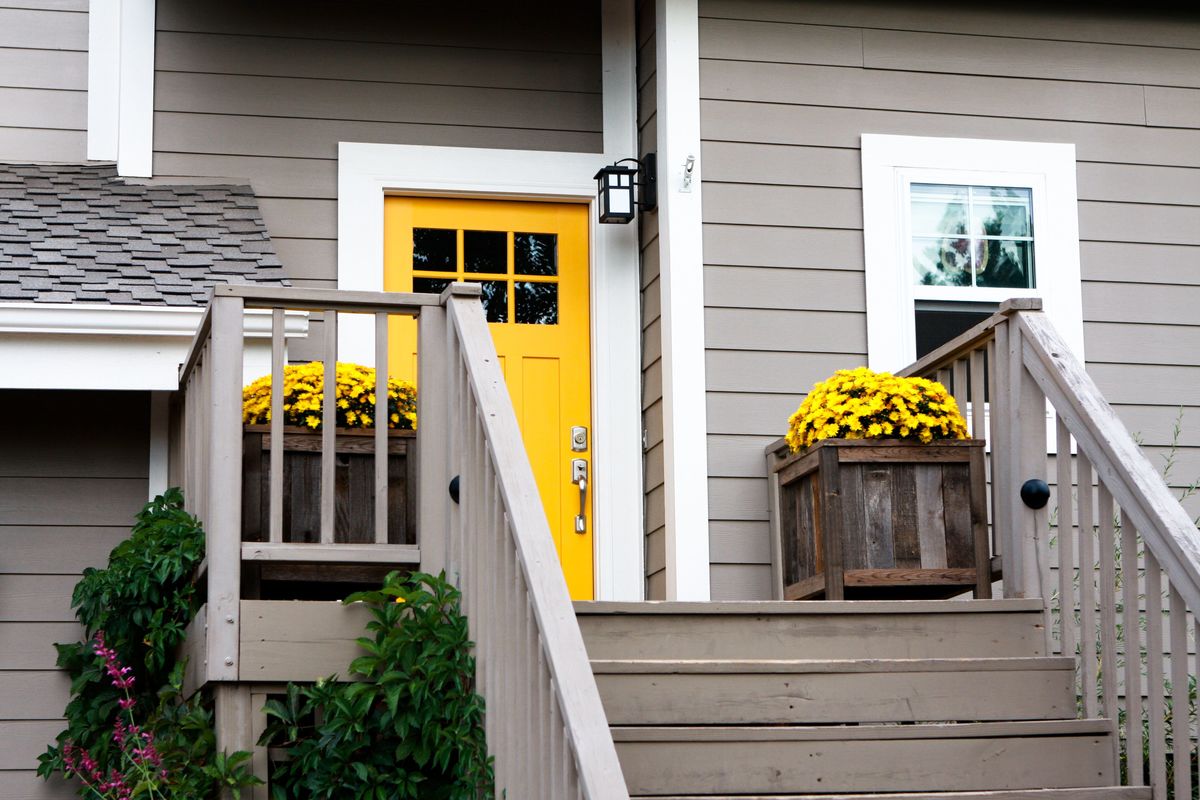
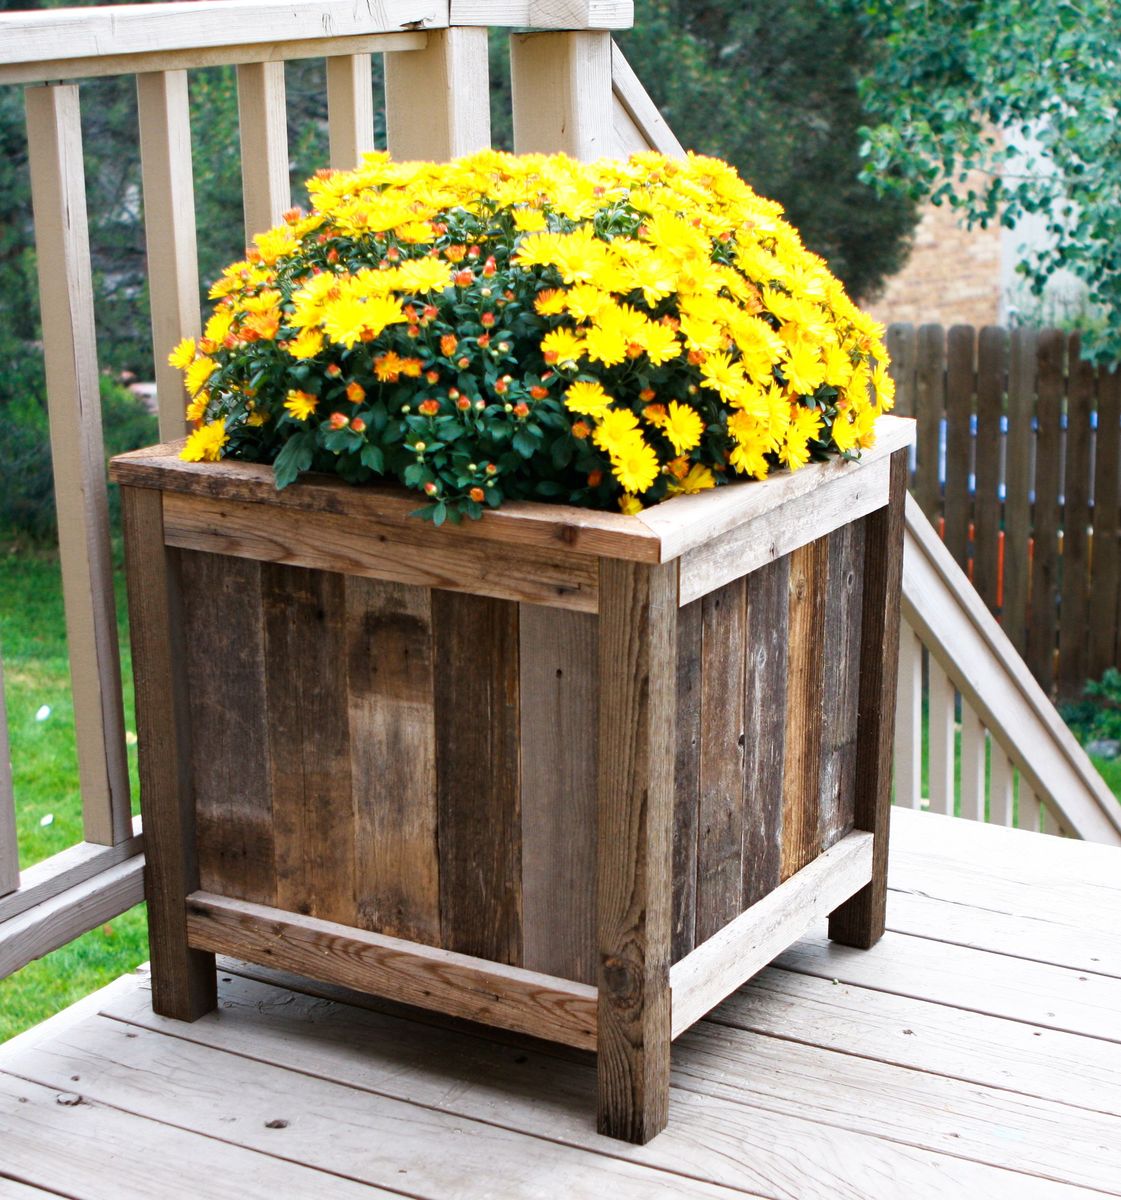
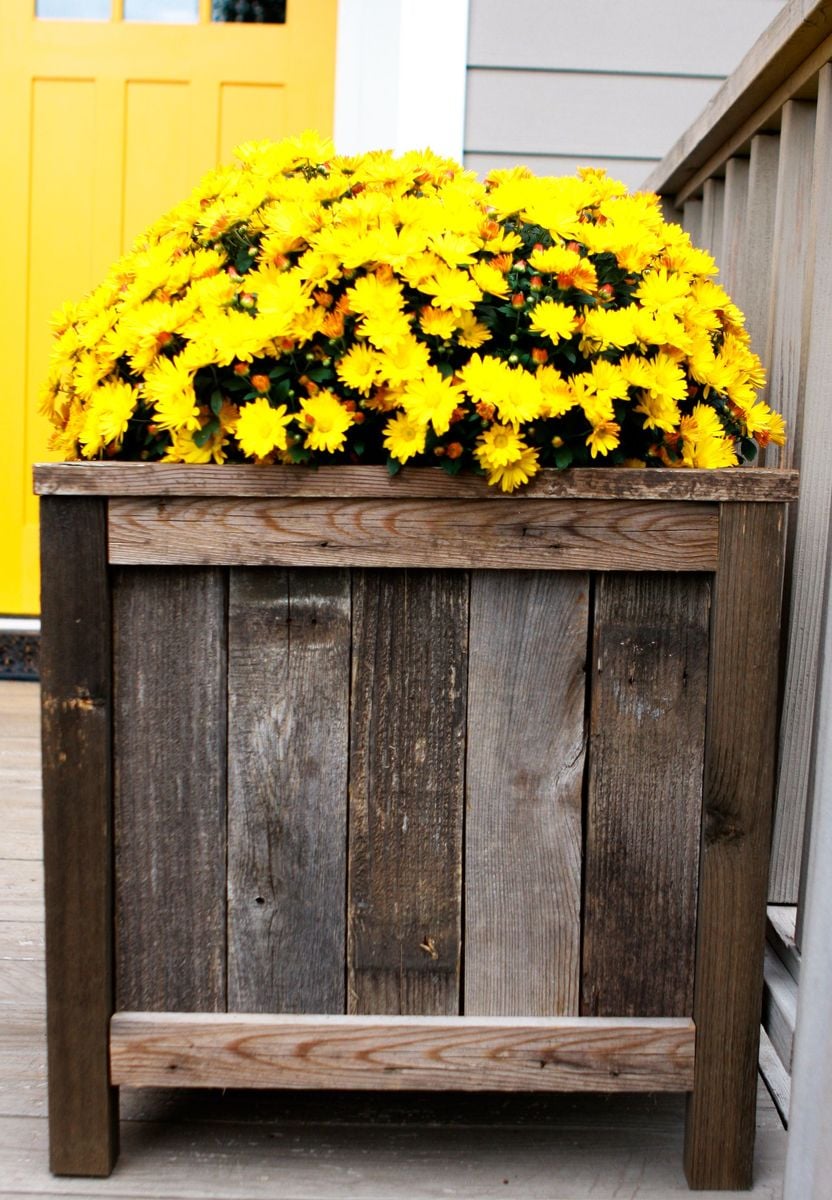
Cedar Planters made from Reclaimed Fence Pickets
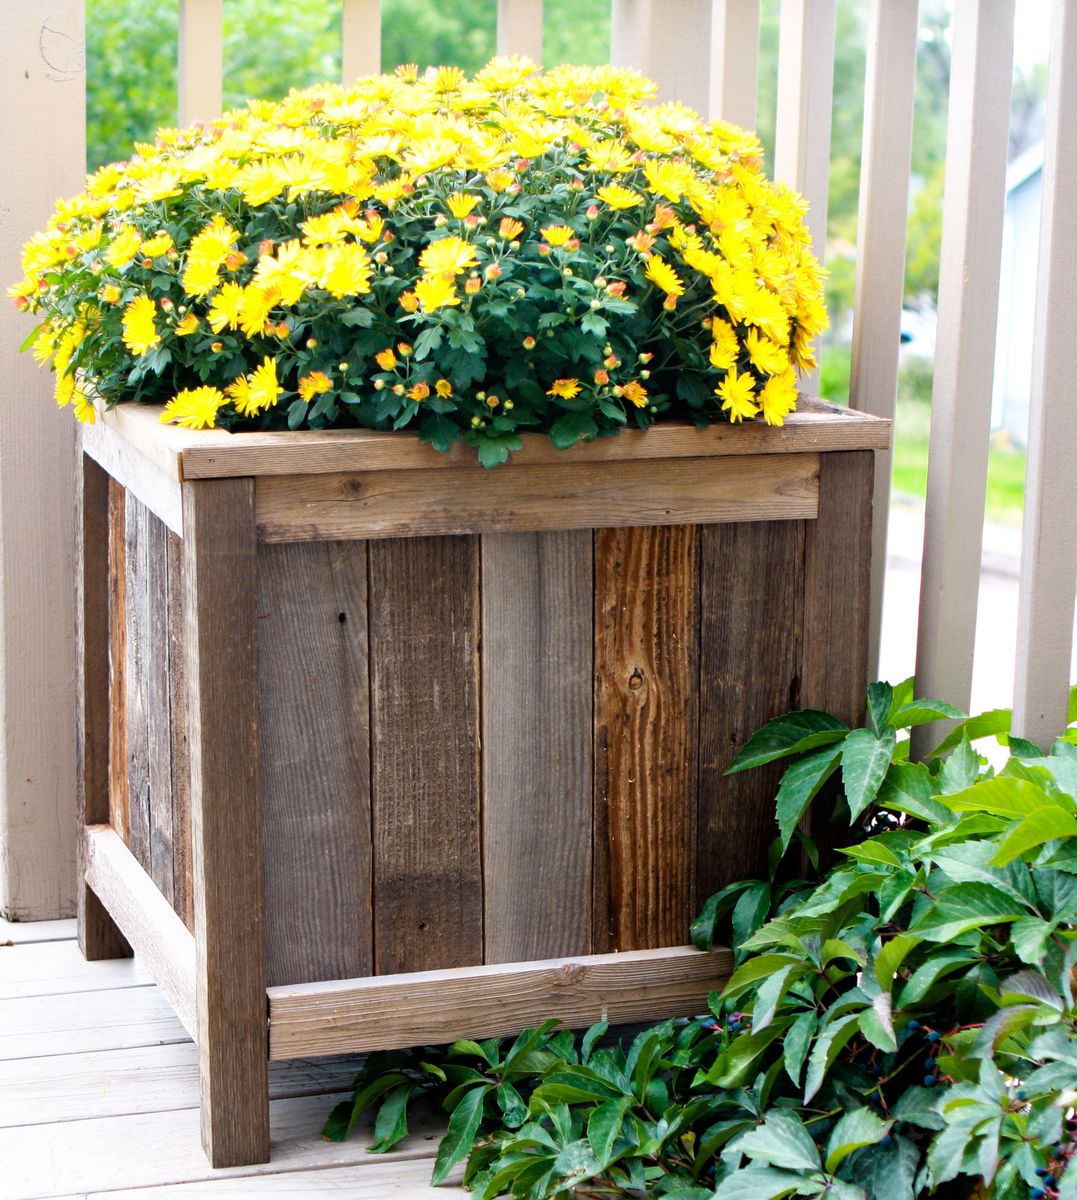
I built Ana's under $20 cedar planters for free. Or, almost free! I had to buy some more wood glue, but I had some of the wood on hand and took some from a friend's pile of old fence wood. It took me about five hours to build both planters from start to finish. See the blog link below for more info.
Pin For Later!

Built from Plan(s)
Estimated Cost
Free
Estimated Time Investment
Afternoon Project (3-6 Hours)
Finish Used
Oxidized the new cedar 2x4s with steel wool/vinegar (http://thefriendlyhome.blogspot.com/2012/07/how-to-oxidize-wood.html). Other than that, no finish.
Recommended Skill Level
Beginner
Comments

Tue, 09/08/2020 - 16:12
This is great. I just tore…
This is great. I just tore down my old fence and have tons of old cedar pickets. I want to make some planters for my new patio.
my planter box
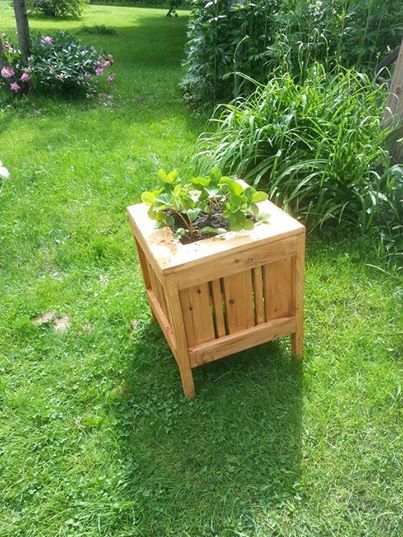
used the plan on this site then modified it.
Built from Plan(s)
Estimated Time Investment
Afternoon Project (3-6 Hours)
Finish Used
woods ceder finish
Recommended Skill Level
Beginner
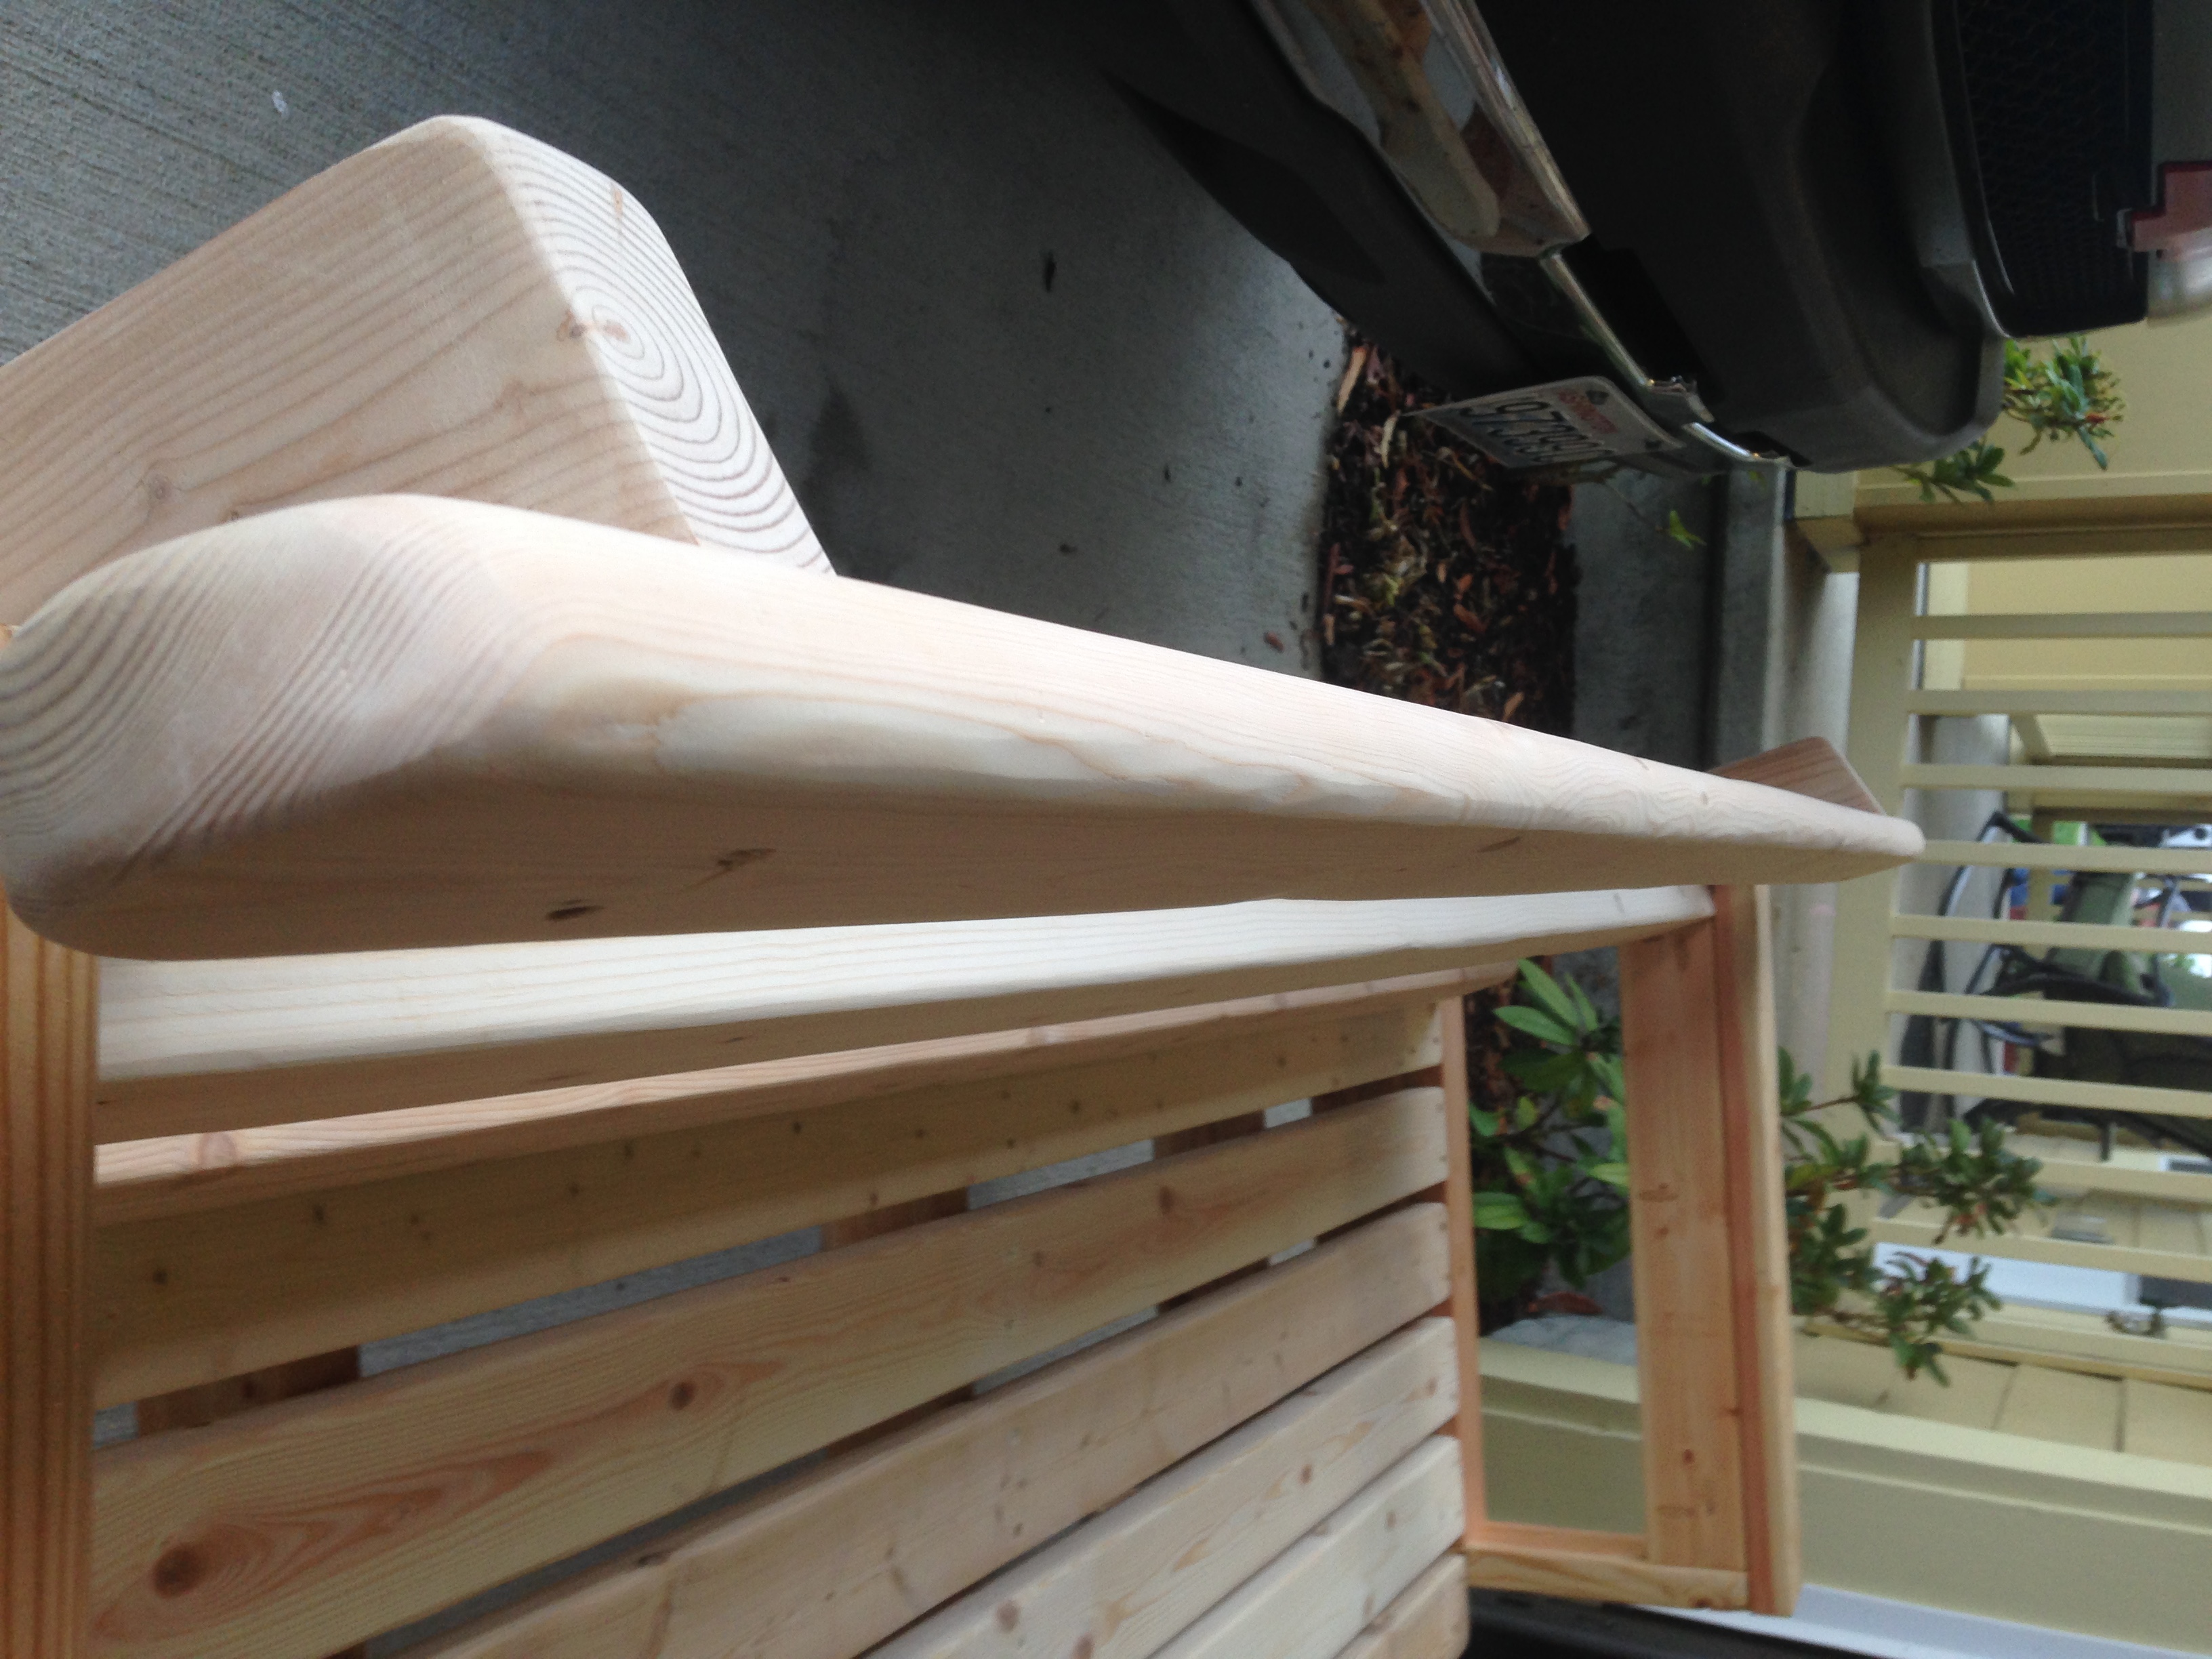
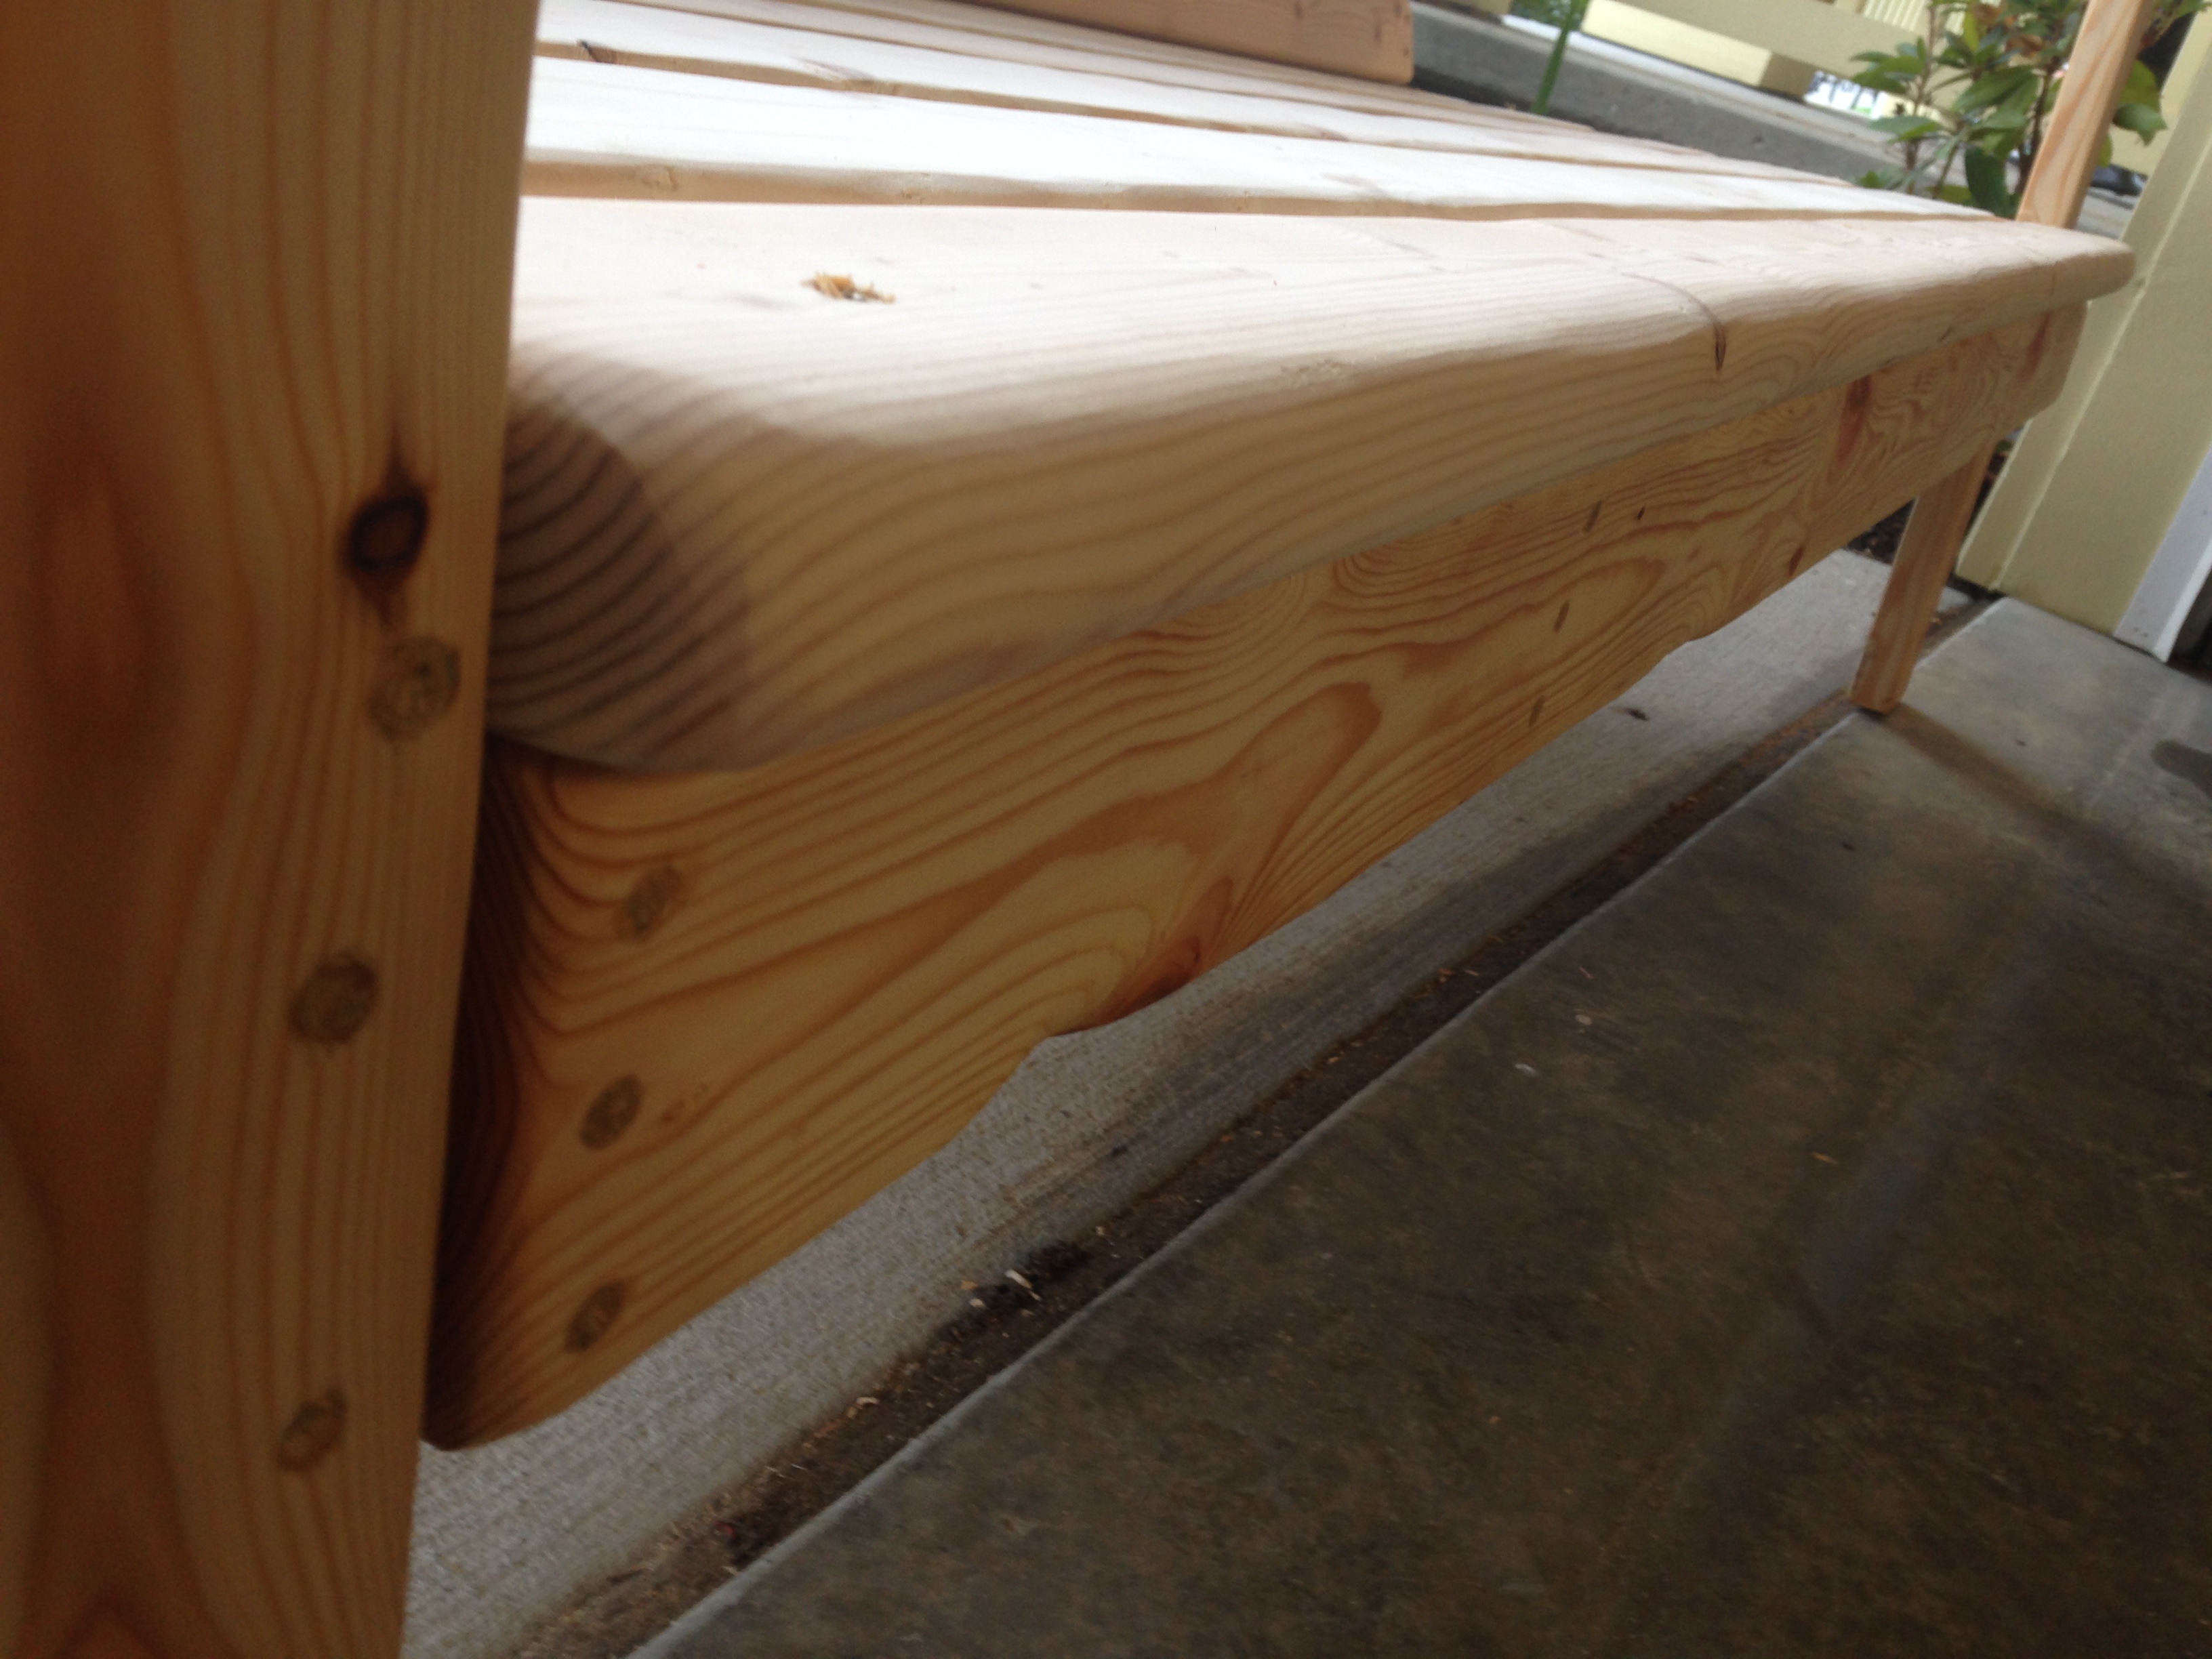
Sectional
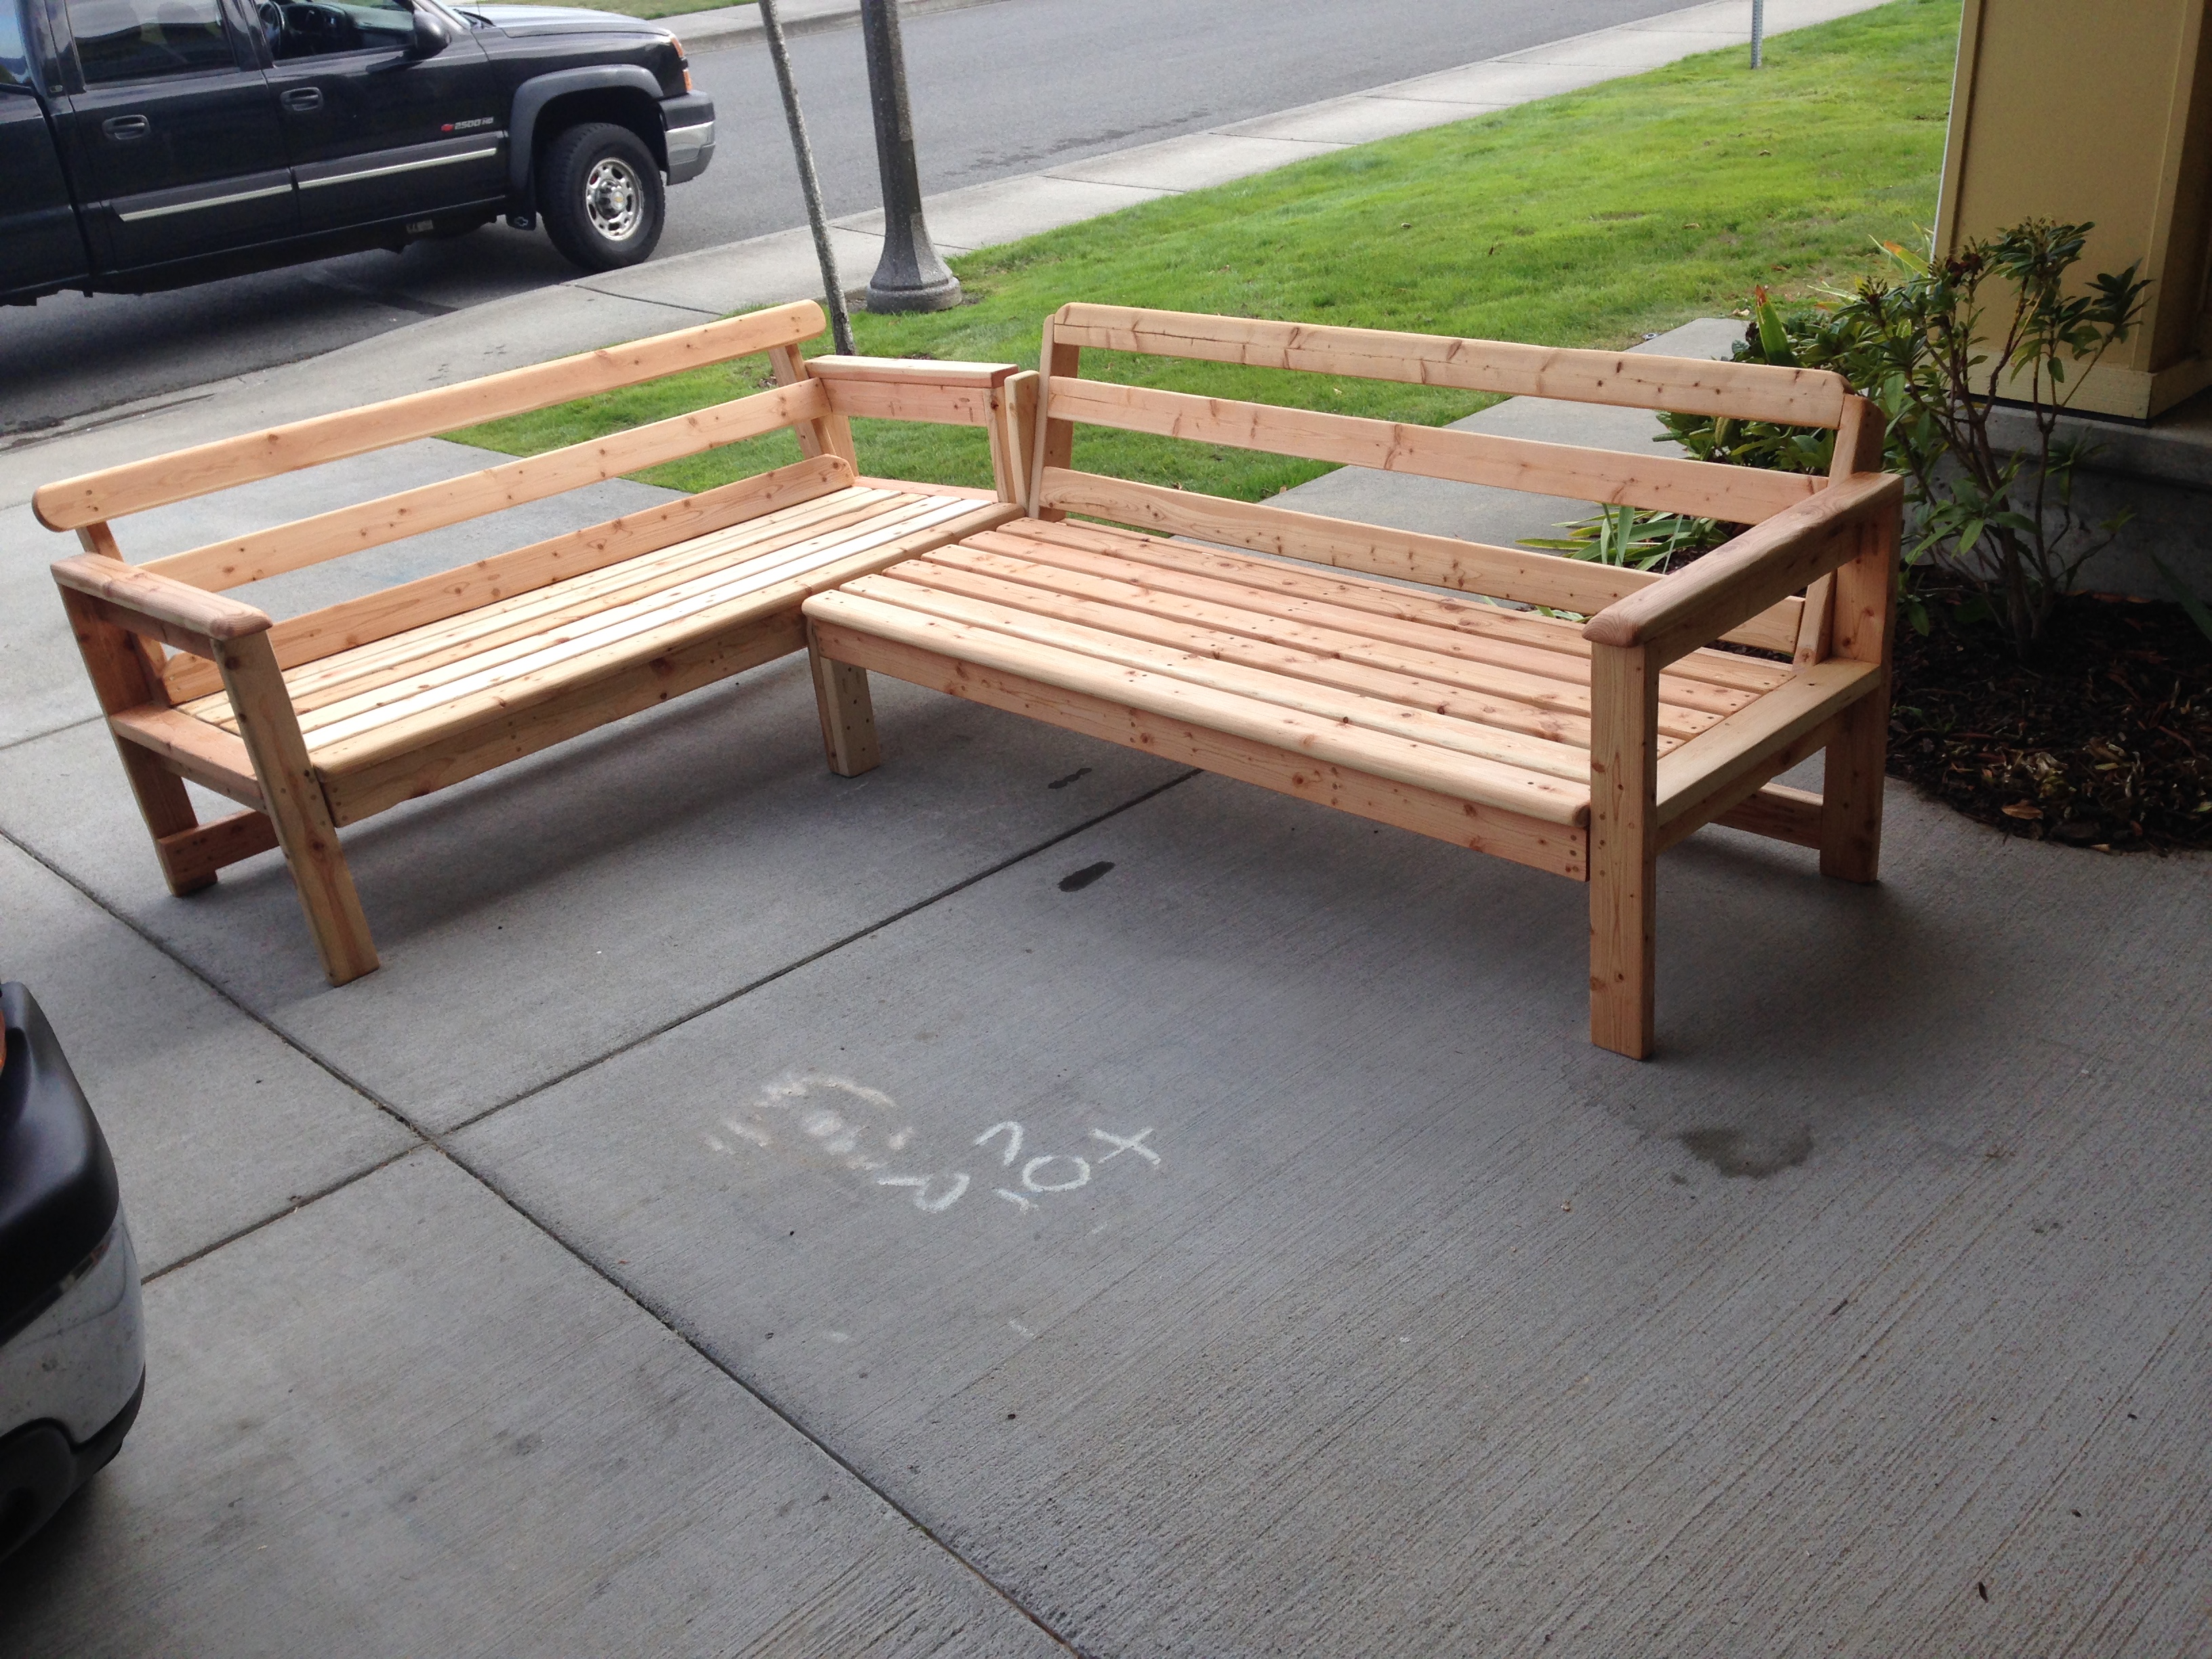
Mostly the same. Made smaller spacing for the seat (used 1x4 for spacing) and gave it a back (18" 15% miter) hand formed the front seat board and a bit of an overhang also hand formed the tops of the seat backs and armrest idea was it would be comfy with or without cushions. Ow and it's all construction grade lumber that I water sealed. Thanks for the idea!

Estimated Cost
$126.00
Estimated Time Investment
Weekend Project (10-20 Hours)
Finish Used
Thompsons clear water seal applied as I was assembled
Recommended Skill Level
Intermediate
Comments

Sun, 09/25/2016 - 09:33
I bet it's super comfy with
I bet it's super comfy with the leaning back! Great job thanks for bragging!
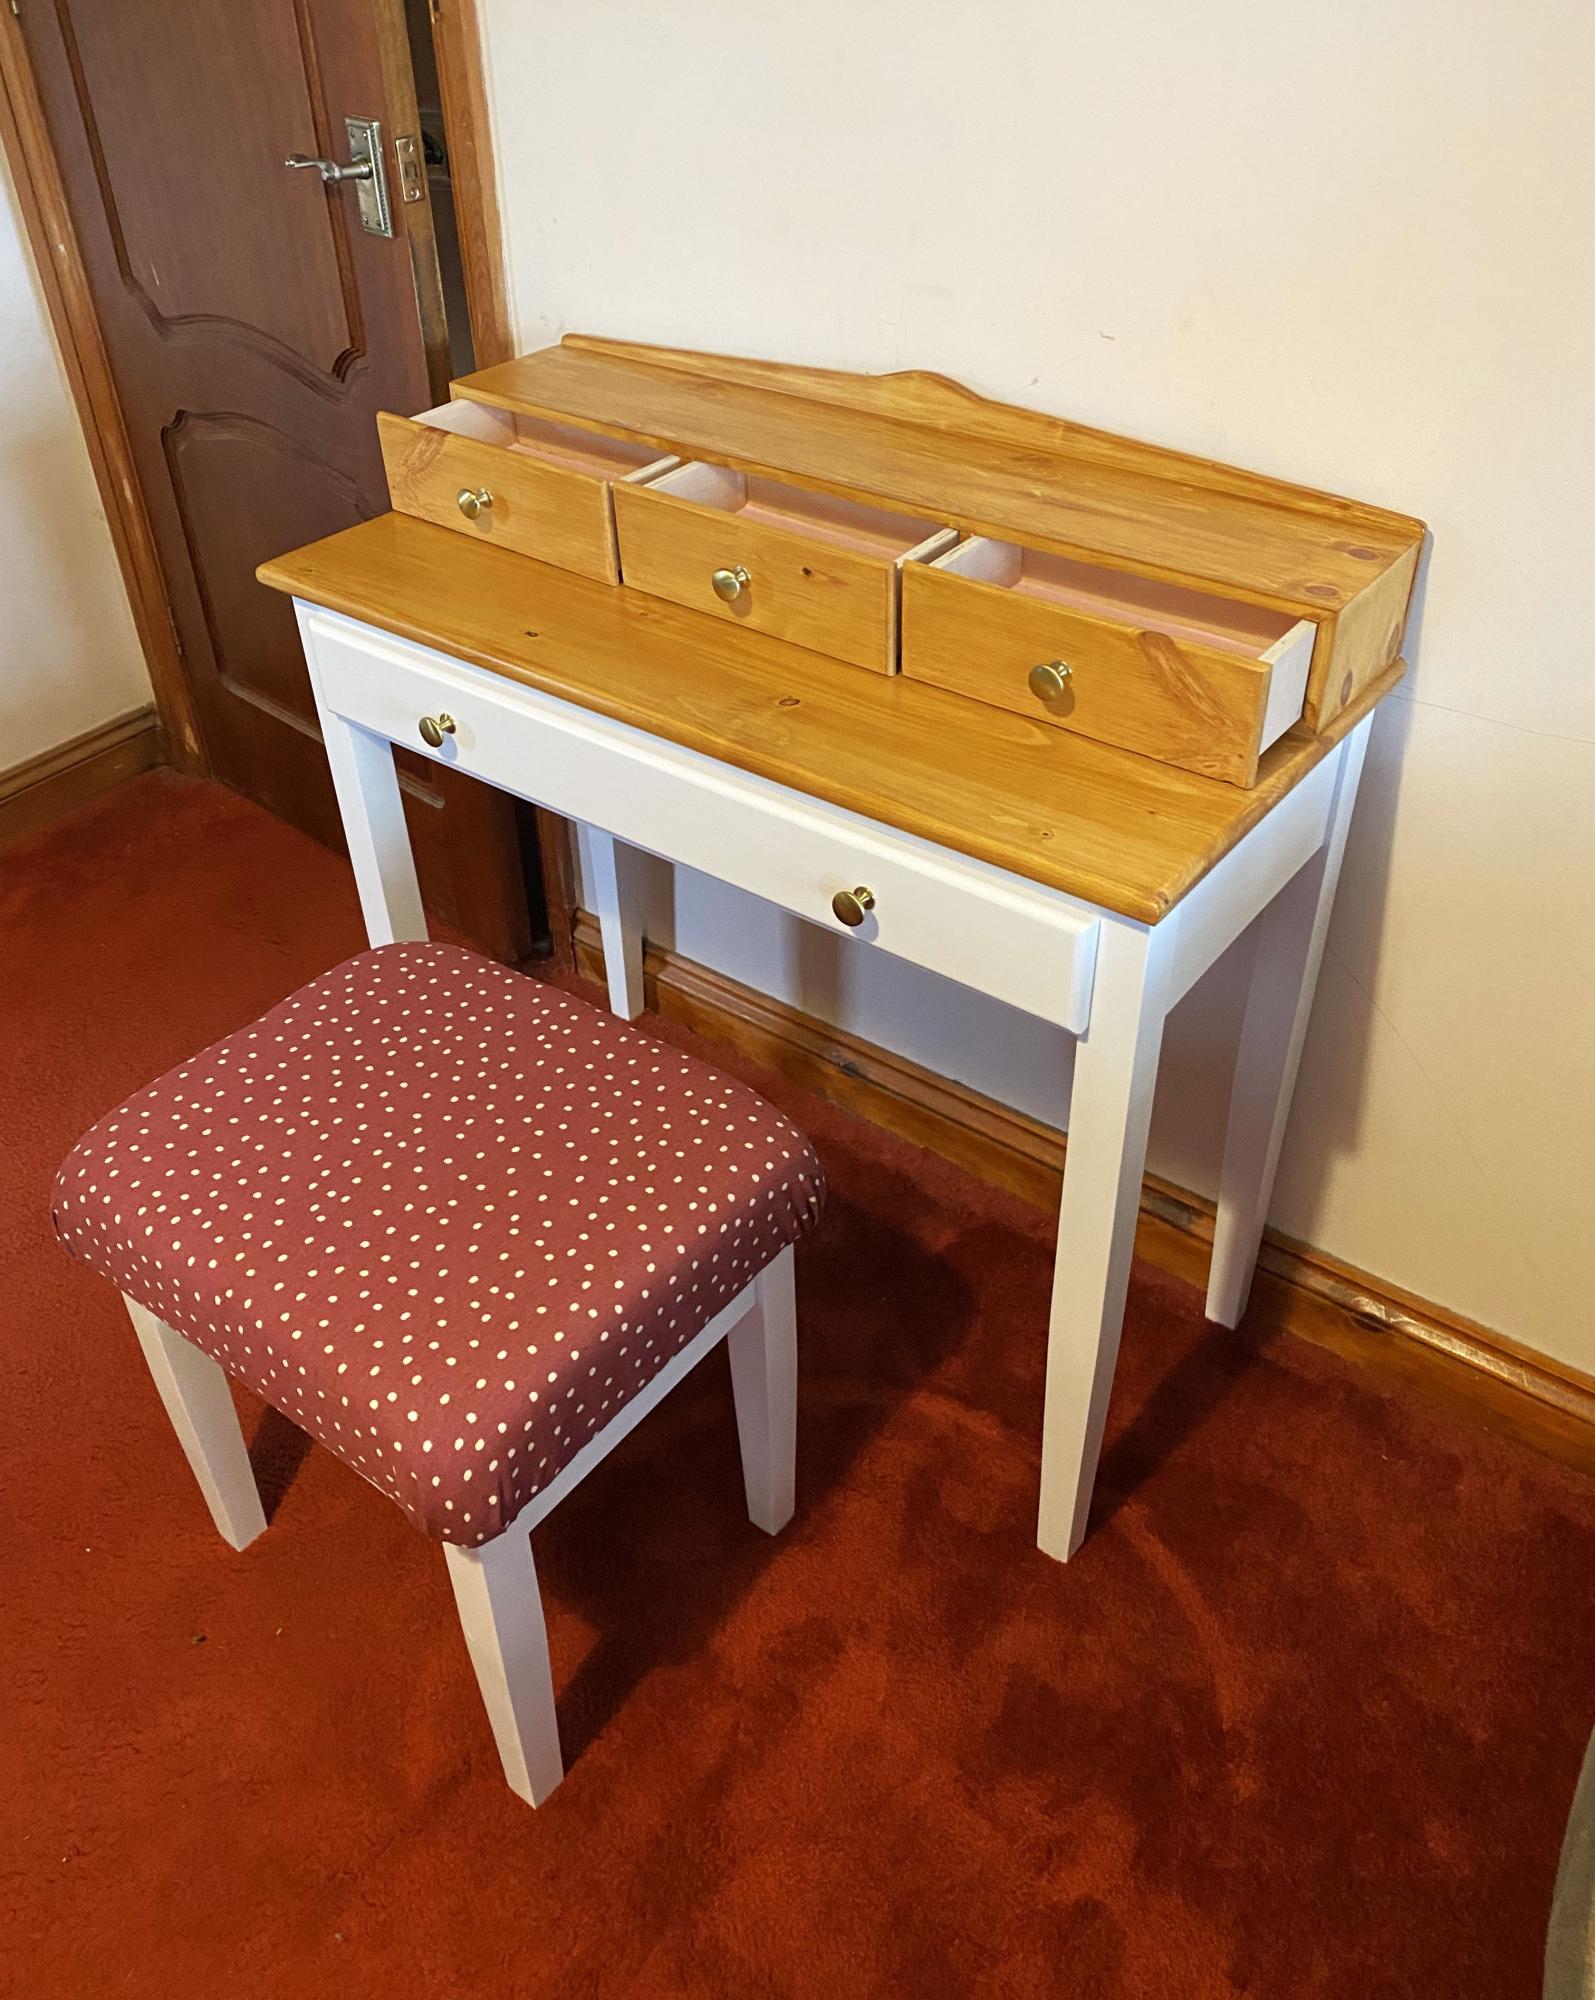
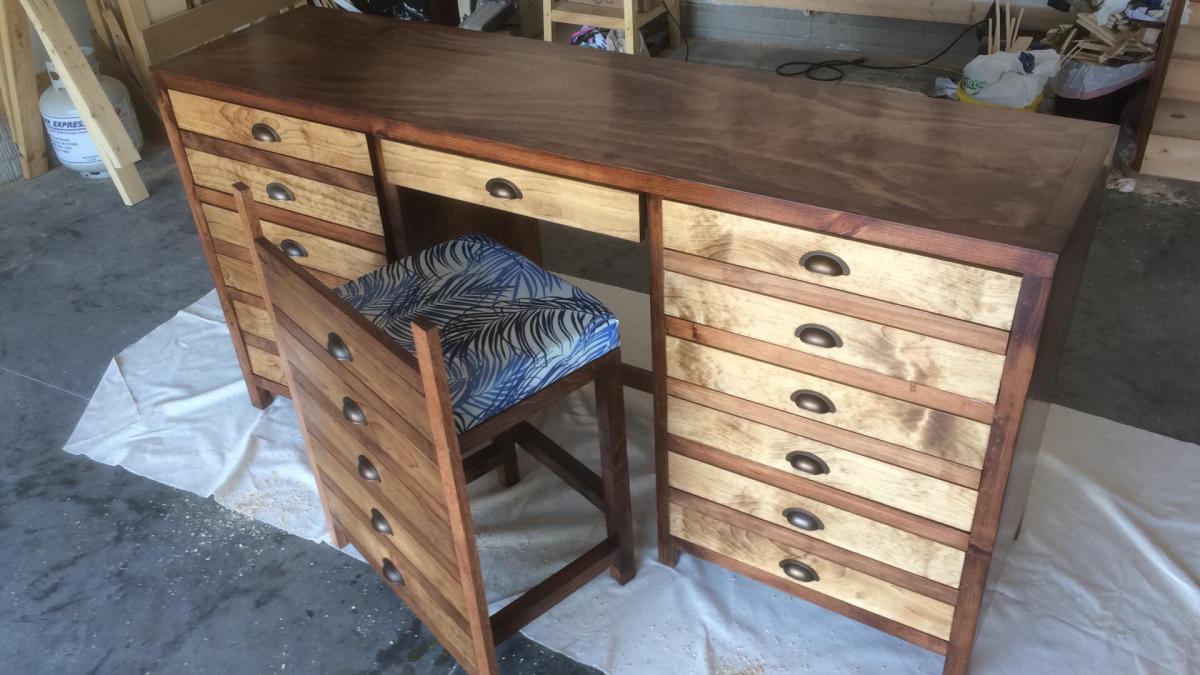
hidden powder station dresser
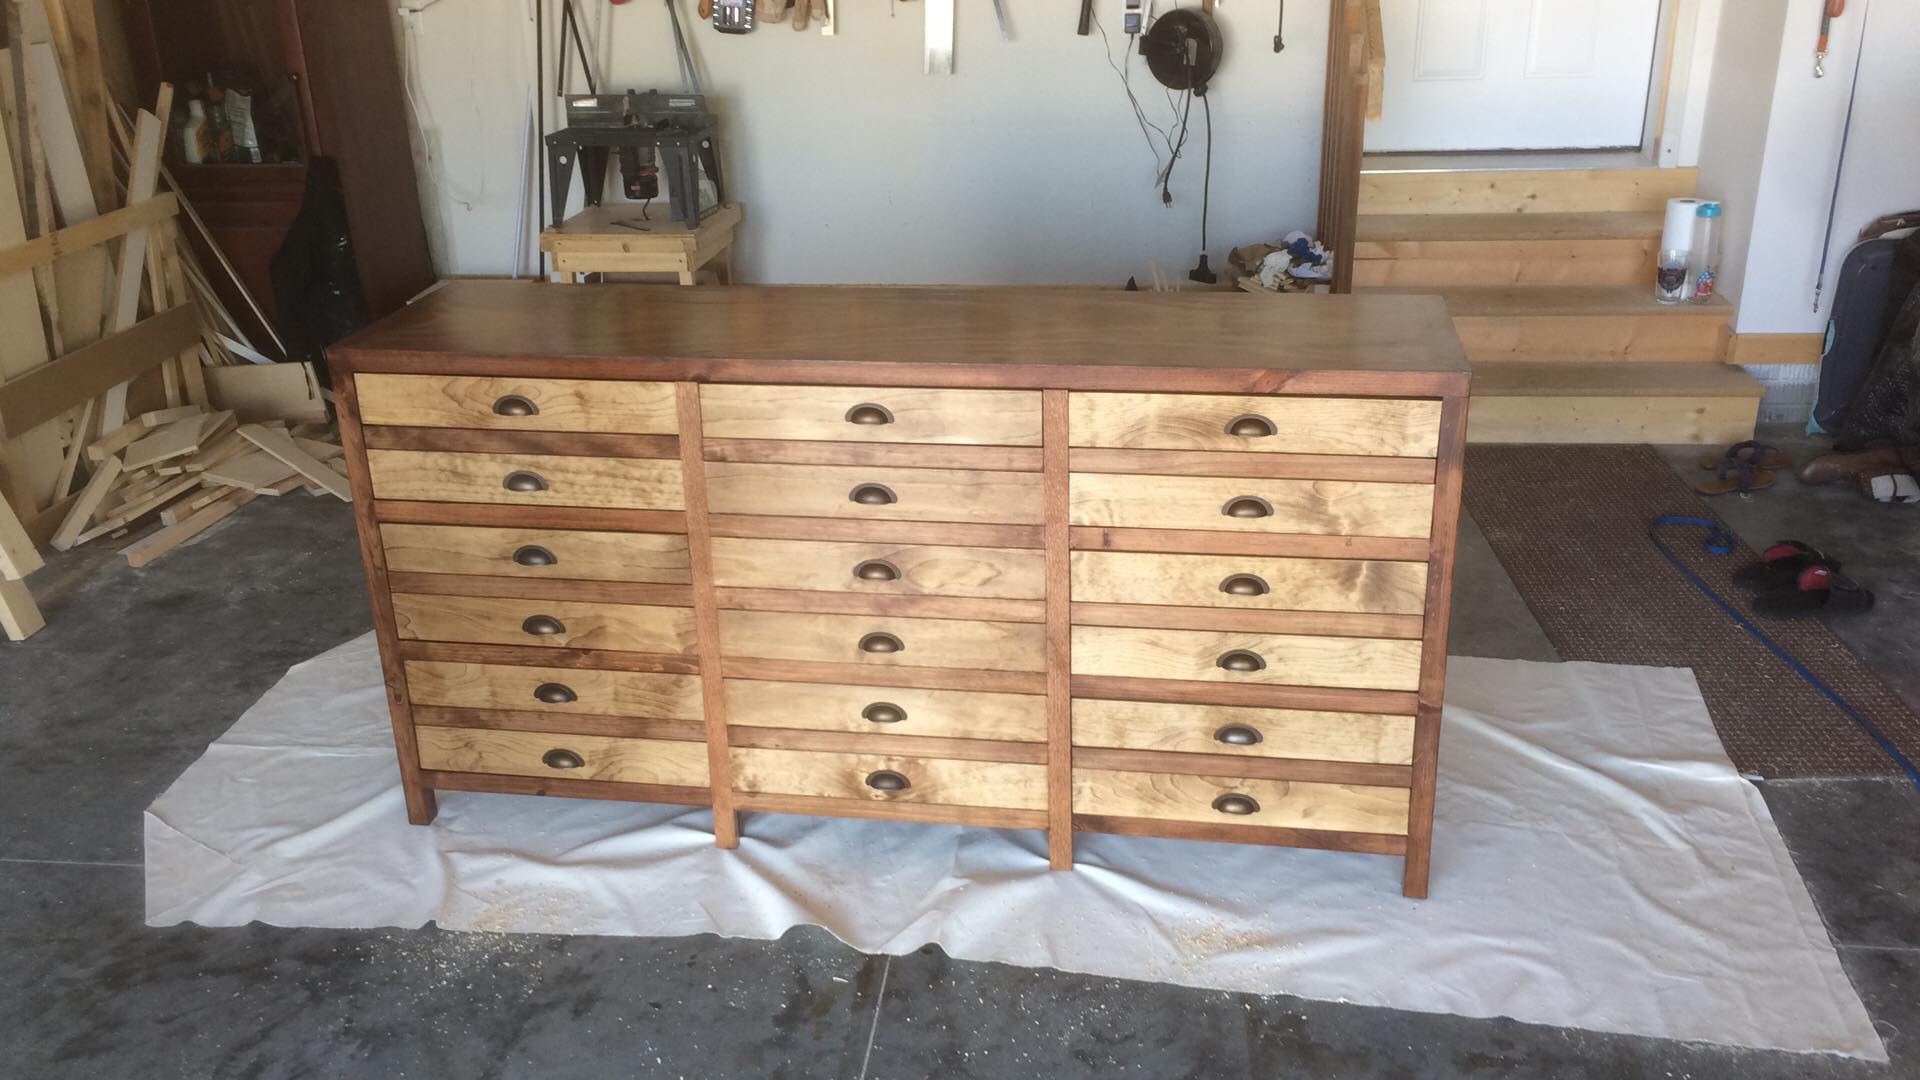
We did some small edit to the original plan. Putting six large drawers and only one chair which was moved to the center. We also extended the chair legs the full length of the cabinet. The outer legs are 2x2s instead of 2 1x2s since no chairs were placed there.
Built from Plan(s)
Estimated Cost
400
Estimated Time Investment
Week Long Project (20 Hours or More)
Finish Used
minwax early american on everything and then red oak stain on all except the drawer fronts and the red oak chair legs. Finished with an oil-based satin polyurethane.
Recommended Skill Level
Intermediate
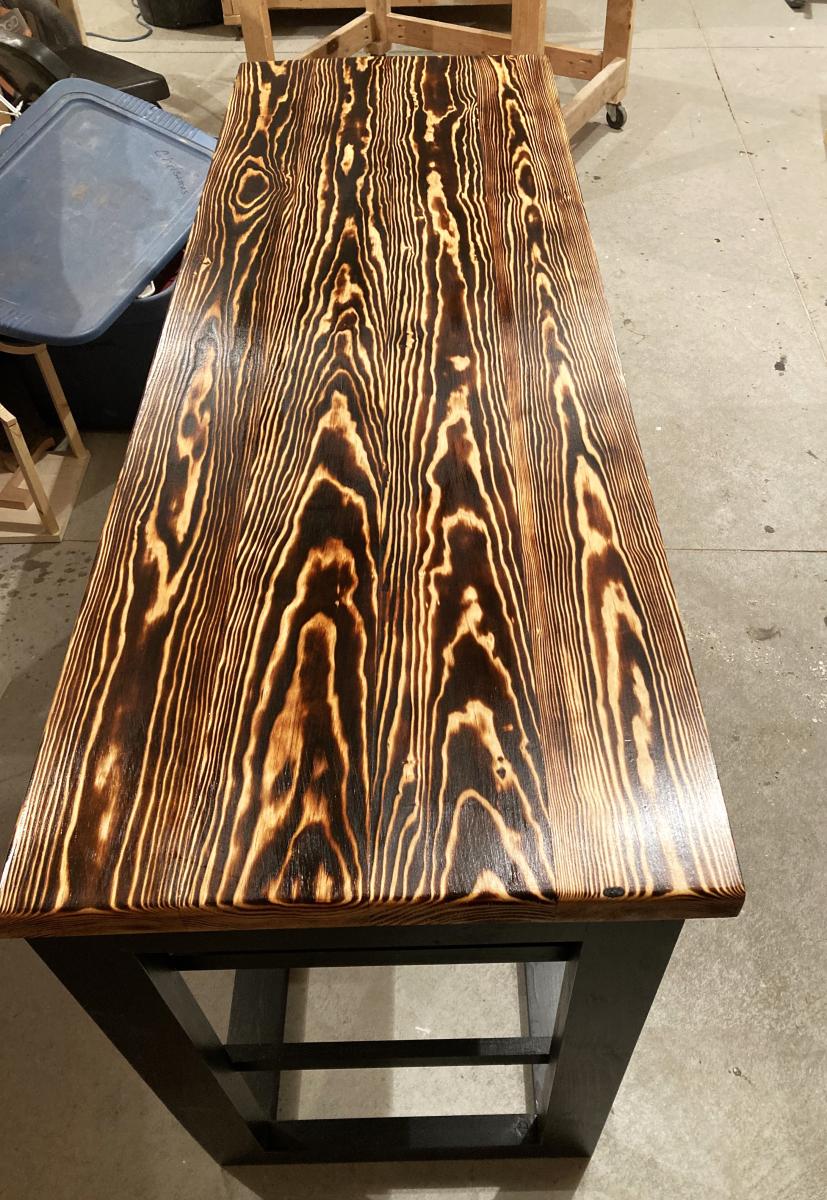
Double Laundry Basket Organizer
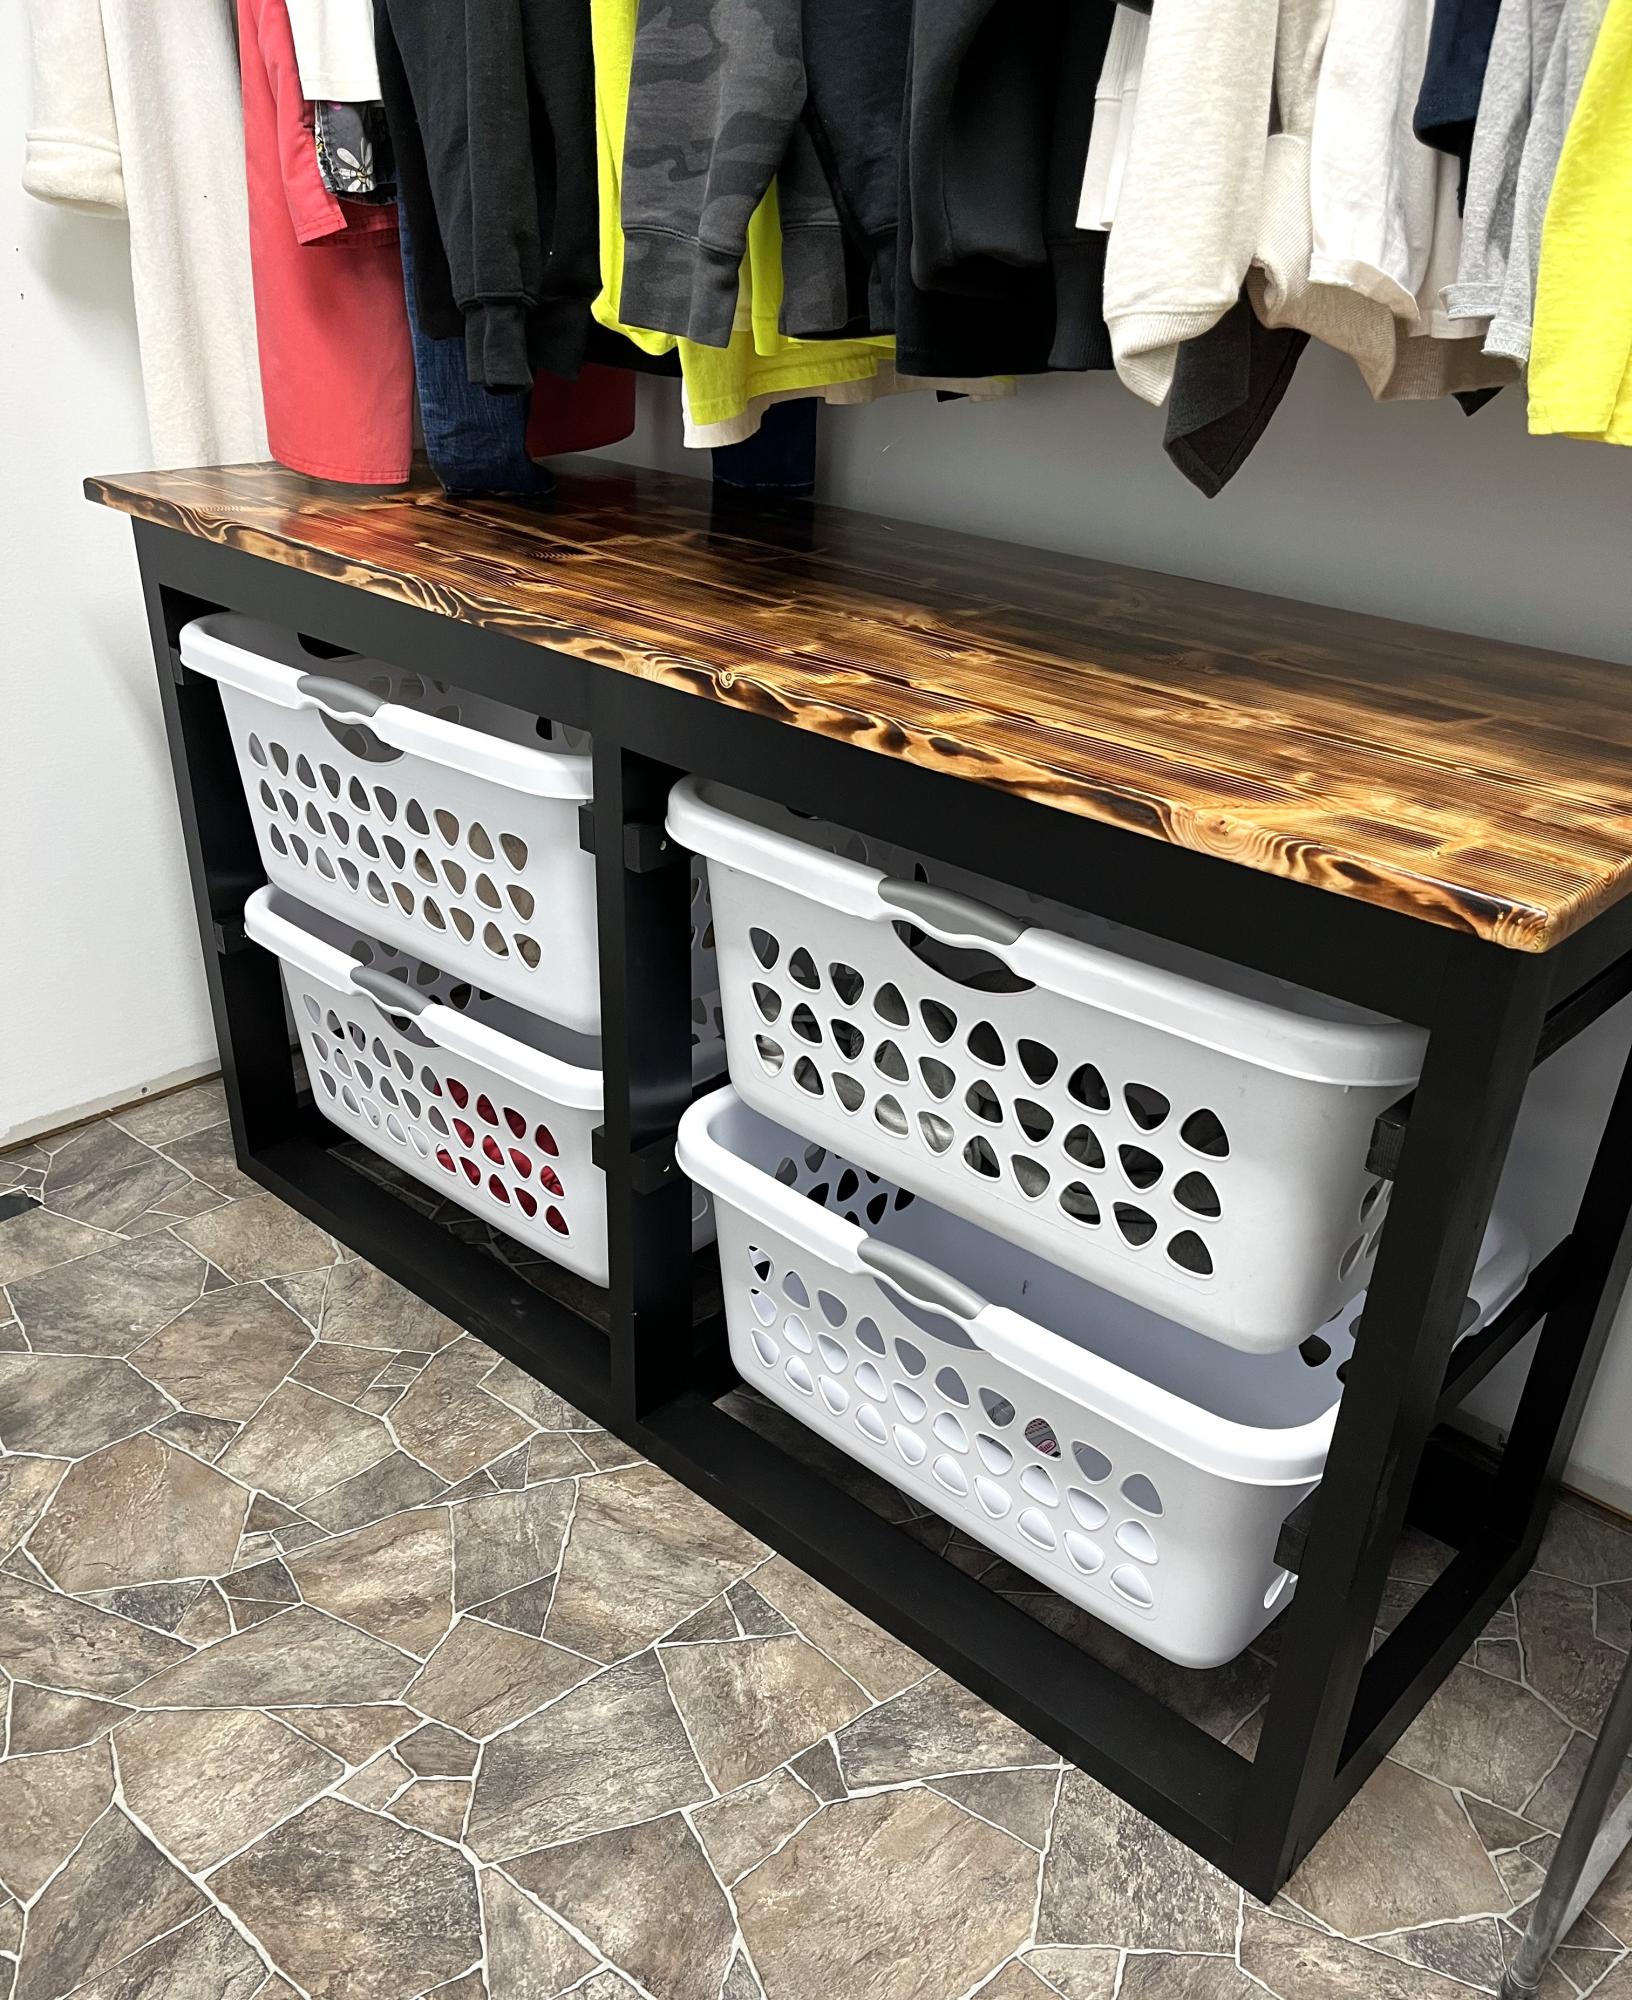
Ana your plans are amazing- here’s how mine turned out, I love it
Arlene
Built from Plan(s)
Simple Wine Hutch
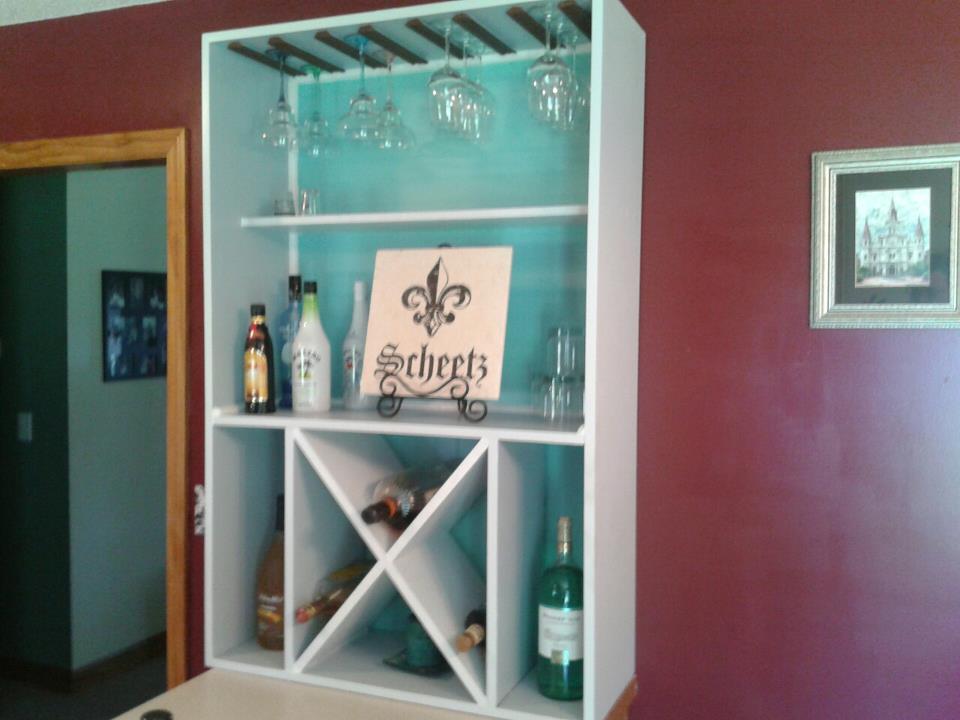
Made from Pine and great for Wine! A couple lengths of pine, some bead board, and coastal accent paint and ...Boooom! Show it off to all your friends and family.
Estimated Time Investment
Day Project (6-9 Hours)
Finish Used
Coastal Paint
Recommended Skill Level
Beginner
Comments
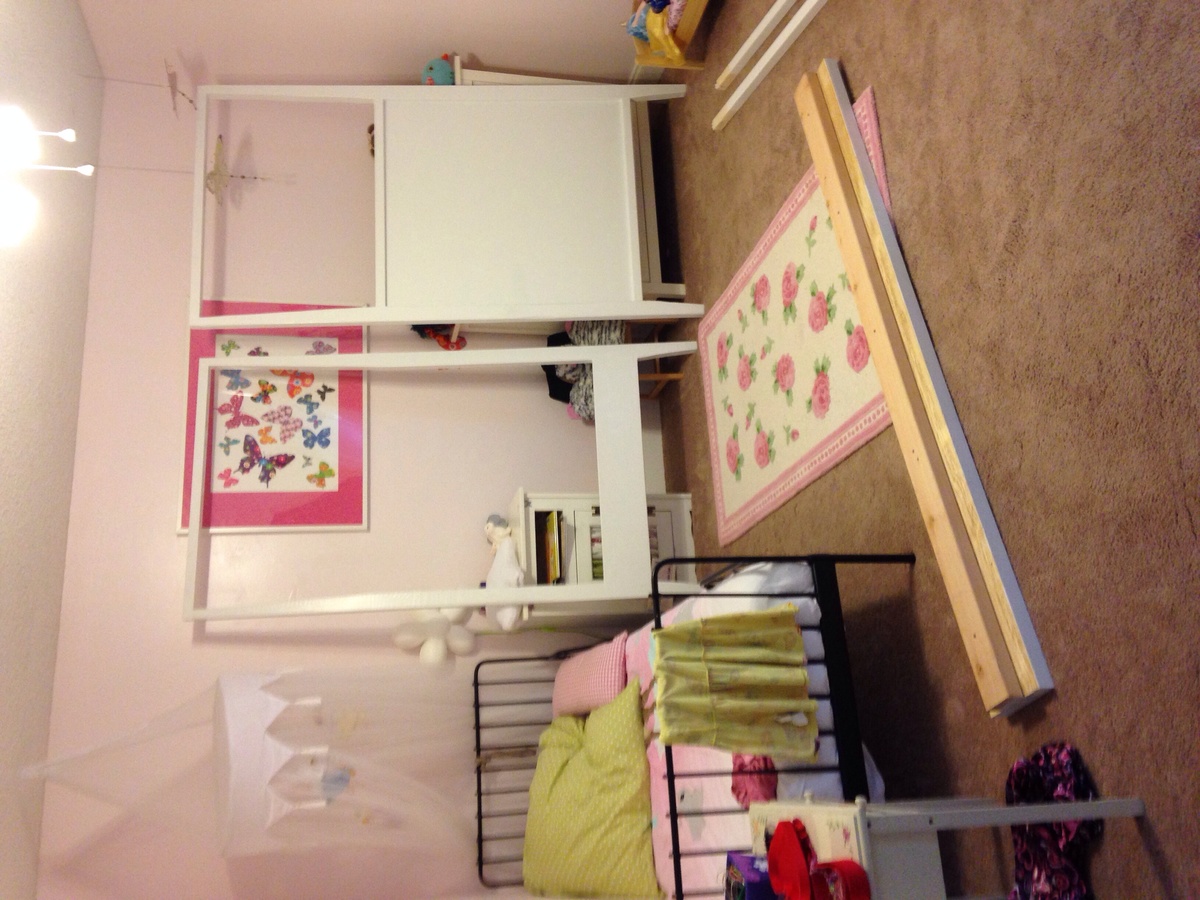
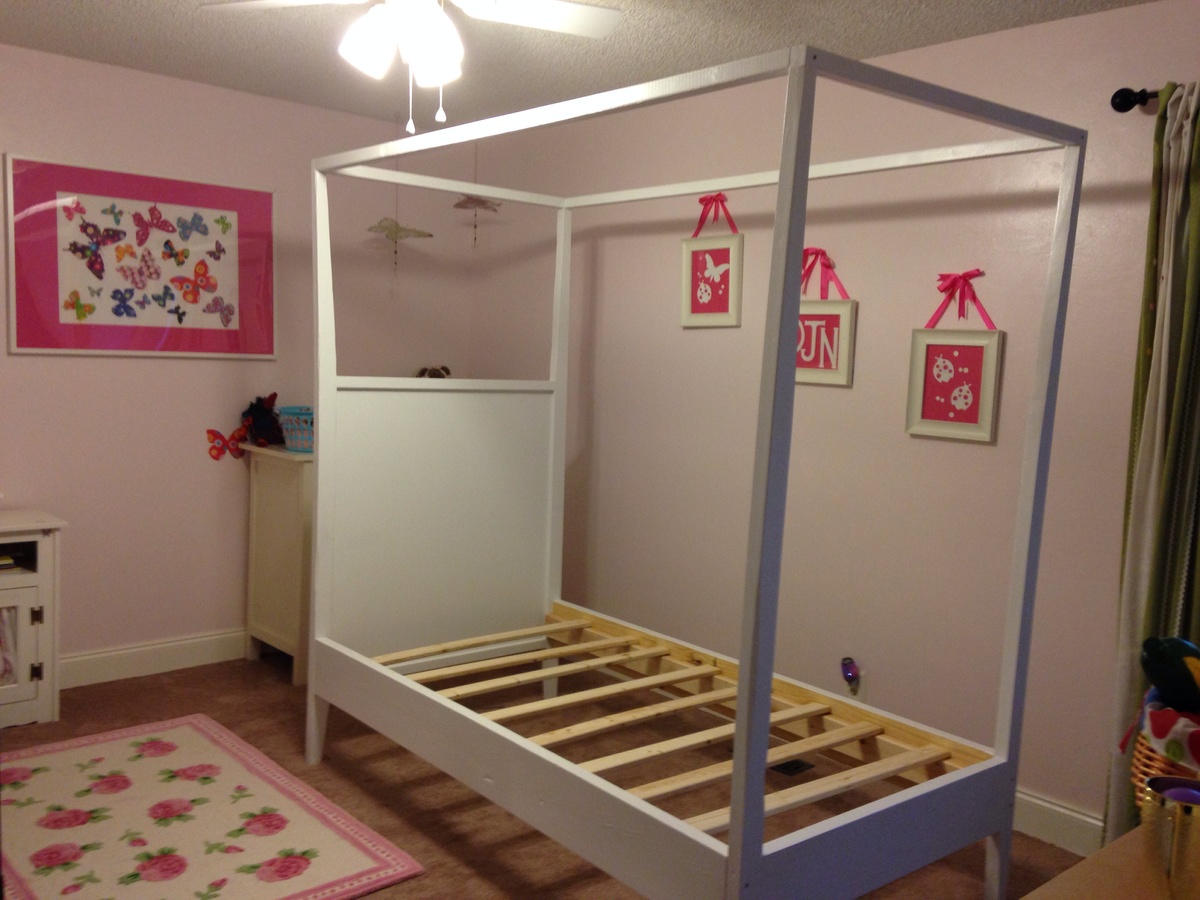
Princess canopy bed
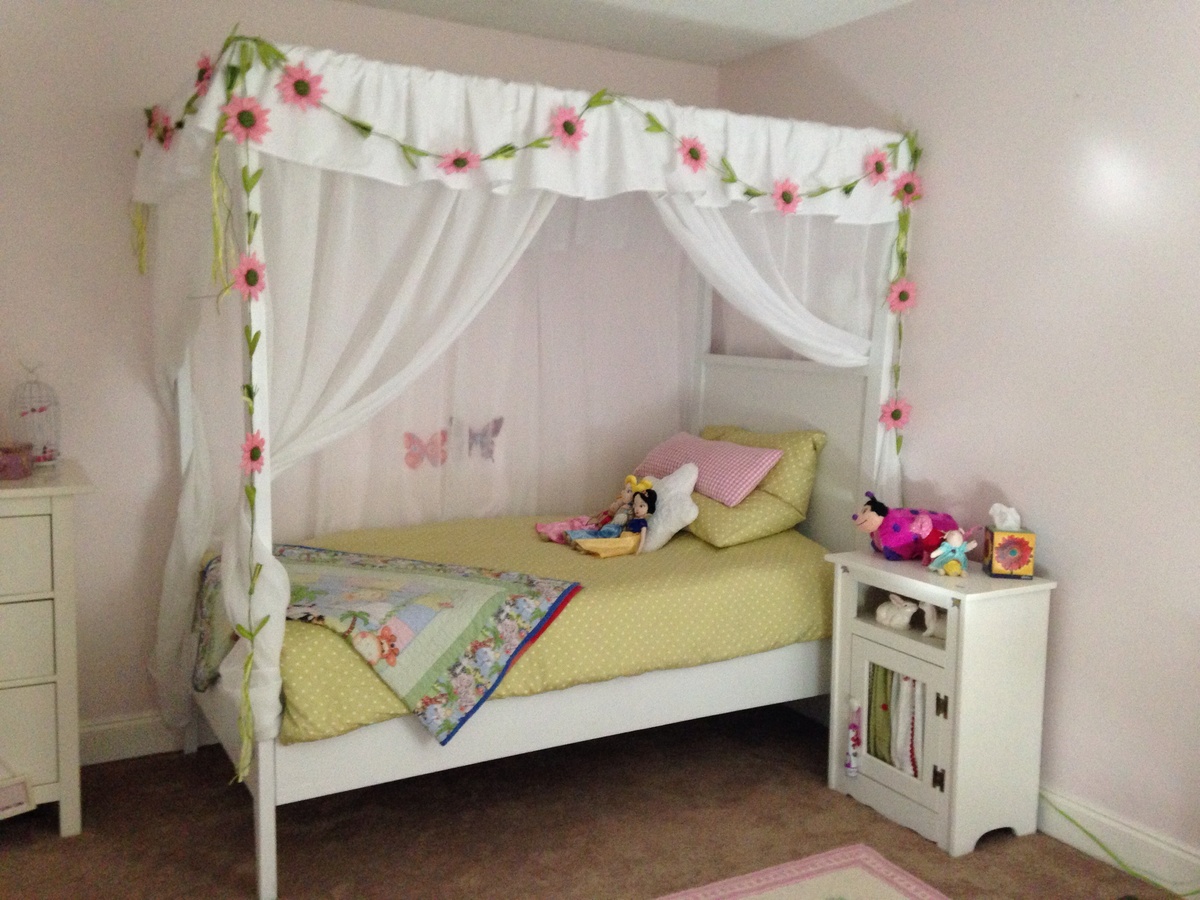
My first ever furniture making attempt . My 5 year old daughter Delilah really wanted a princess canopy bed and we found the perfect one on this site , thank

Built from Plan(s)
Estimated Cost
$70
Estimated Time Investment
Weekend Project (10-20 Hours)
Finish Used
Paint
Recommended Skill Level
Beginner
Comments

Loft Bed

This project was for our 4 year old daughter. We wanted to get her a loft bed, but I wanted to make sure the rails were really tall so she didn't fall out. So, I took some inspirtation from loft beds on this website as well as looking at pictures of beds you can buy. I also added the drawers within the stairs because I wanted to utilize the storage potential. That was the most difficult part as I'm not particularly experienced in making and installing drawers. Off to YouTube tutorials I went and it turned out quite nice. I had to build it in three different parts to get it in her room. It's the actual bed portion, the stairs, and the side wall. Once I got it together, I left the screws showing that I connected it with, which I hate, but when we have to move it out of there, I didn't want to go through a ton of trouble. I used Kreg pocket holes for all of the vertical bed slats which caused a ton of work plugging the holes, cutting off the excess, sanding, and then sanding again and again. But, it was well worth it. We have made her a cozy little nook underneath the bed and added a light since these pictures. Overall, it was a fun project


Estimated Cost
$500-$700
I used maple plywood for the walls which shot the price up a LOT
I used maple plywood for the walls which shot the price up a LOT
Estimated Time Investment
Week Long Project (20 Hours or More)
Finish Used
White paint
Recommended Skill Level
Intermediate
Airplane swing
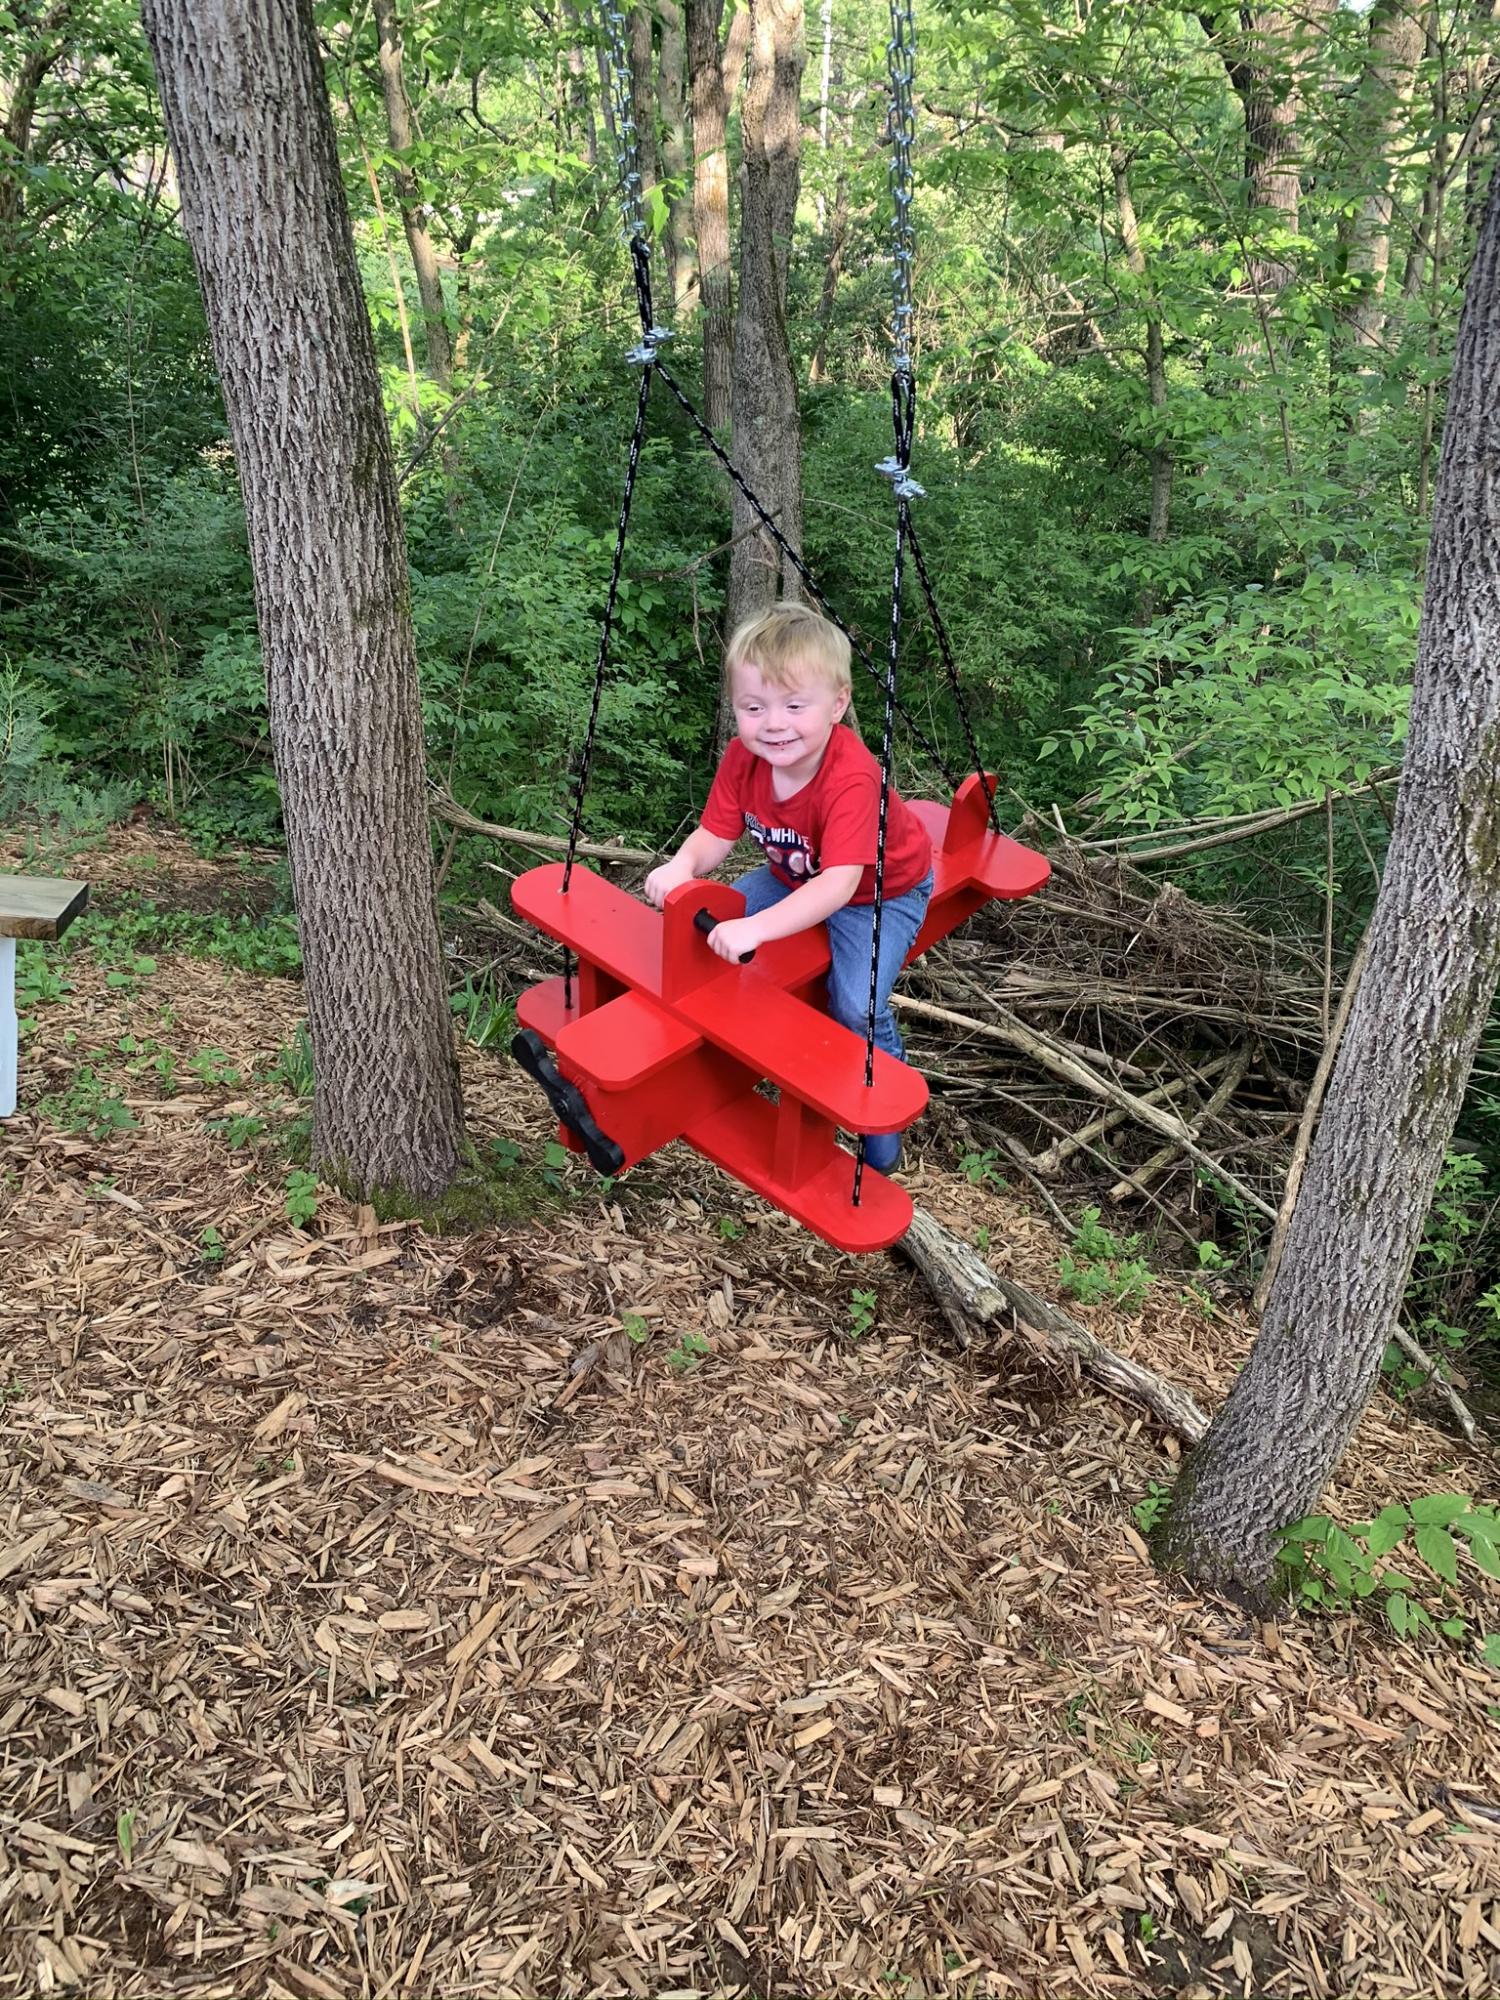
Super fun swing for my son
Built from Plan(s)
Estimated Cost
$50
Estimated Time Investment
Day Project (6-9 Hours)
Finish Used
Rust-Oleum Apple red gloss paint , Rust-Oleum flat black (for propeller / handle )
Recommended Skill Level
Beginner
Cooperoni
Thank for the plans!
Built from Plan(s)
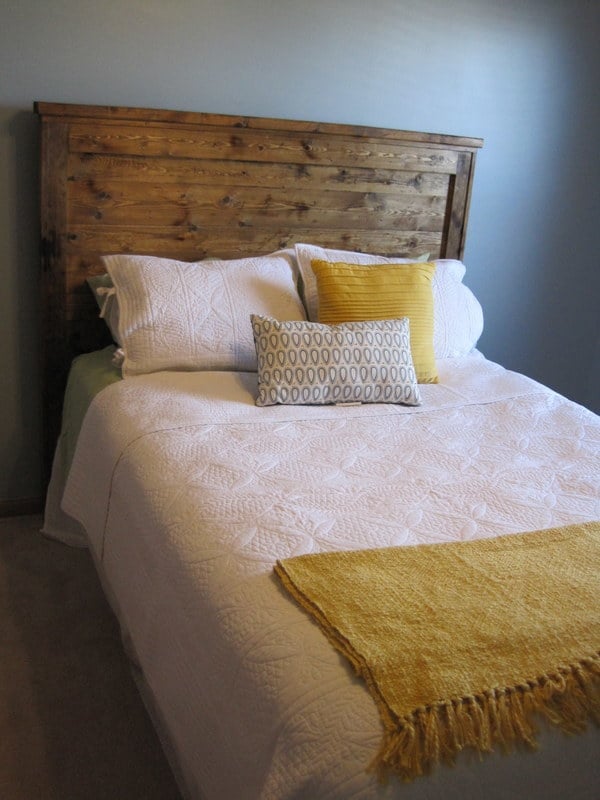
Reclaimed Wood Look Headboard
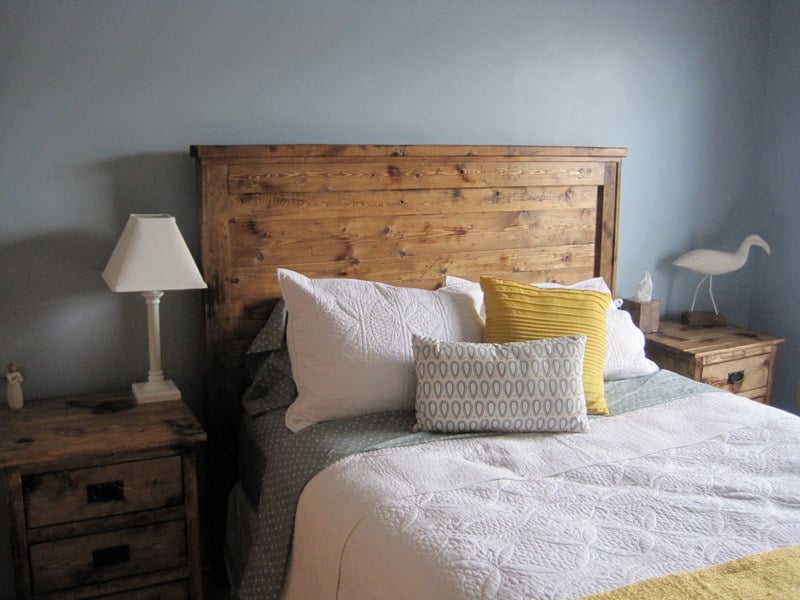
My husband and I had been looking for a great headboard for a bed in our guest room. We found ones we really liked but didn't like the price tag of 800-1500 dollars (not even including shipping!) We stumbled on this site and absolutely fell in love with the reclaimed wood style headboard. It was exactly what we were looking for. Building it just took a few hours. After we distressed the wood using a chain I found at the hardware store (only $1.60), a drill, a creme brulee torch and a hammer, we prepped the wood (sanded and primed), stained and clear coated. I highly suggest not only vacuuming off the wood but also using a tack cloth (so cheap but it makes such a difference) to make sure all of the dust was off. We bolted the headboard into the bed frame. It will be heavy but it is really sturdy and looks great! A good tip is to decide early what you want the front to be - you can chose the best sides of the wood that way!
Built from Plan(s)
Estimated Cost
150.00
Estimated Time Investment
Afternoon Project (3-6 Hours)
Finish Used
We prepped the wood using Minwax pre-stain wood conditioner. We then applied Minwax Provincial stain, waited about 10 minutes and wiped it off with a t-shirt. After we let it dry for the allotted time (we rushed it a bit but were so excited about the new headboard) and then put on a clear-coat finisher.
Recommended Skill Level
Beginner
Comments
Thu, 10/03/2024 - 02:38
Curtain
Hello! Thank you very much for your useful information. I also have a website about home decoration, specifically curtains. If you are interested in this topic, you can visit our website for reference
https://www.dinhthanhphat.vn/man-cua-binh-duong-dep-mau-moi-nhat-2024/
thank you
Seasonal And Holiday
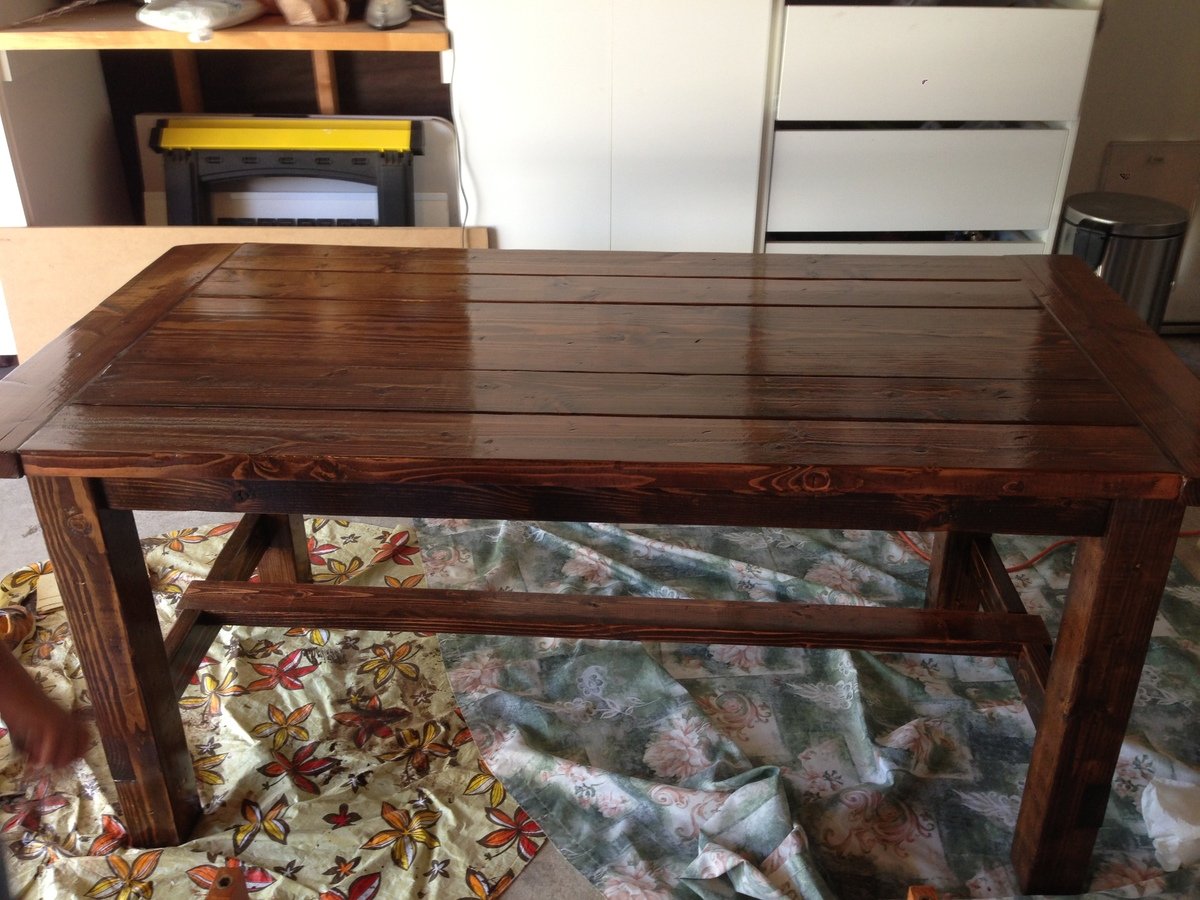
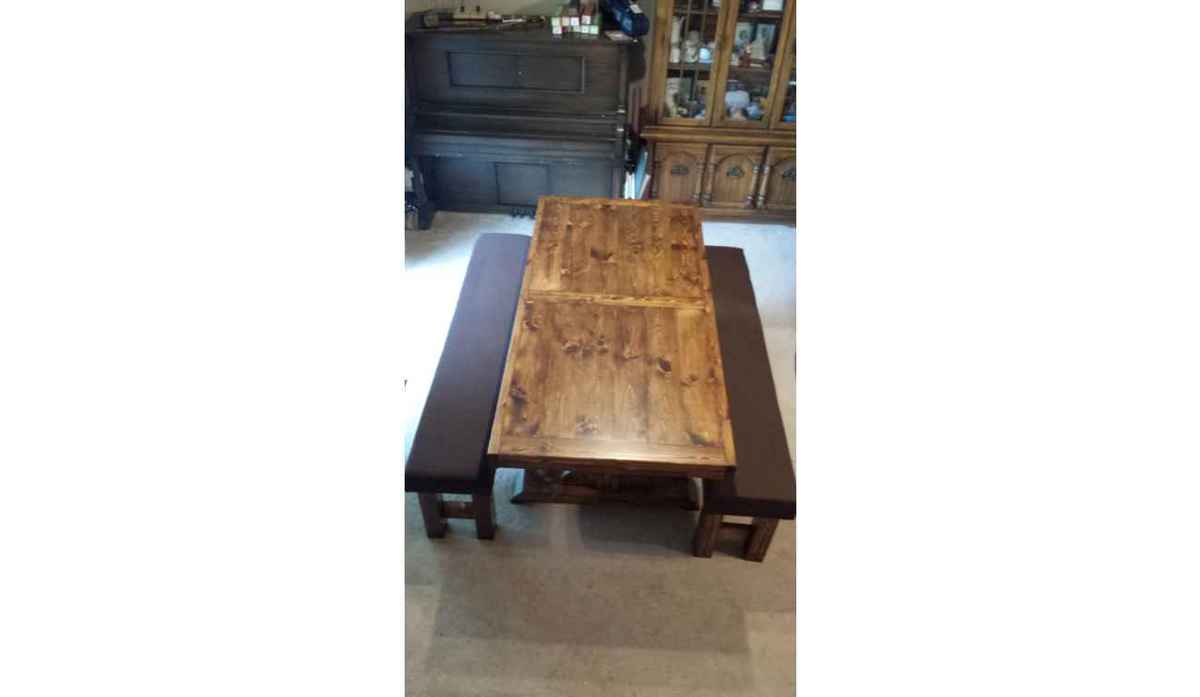
Farmhouse Table
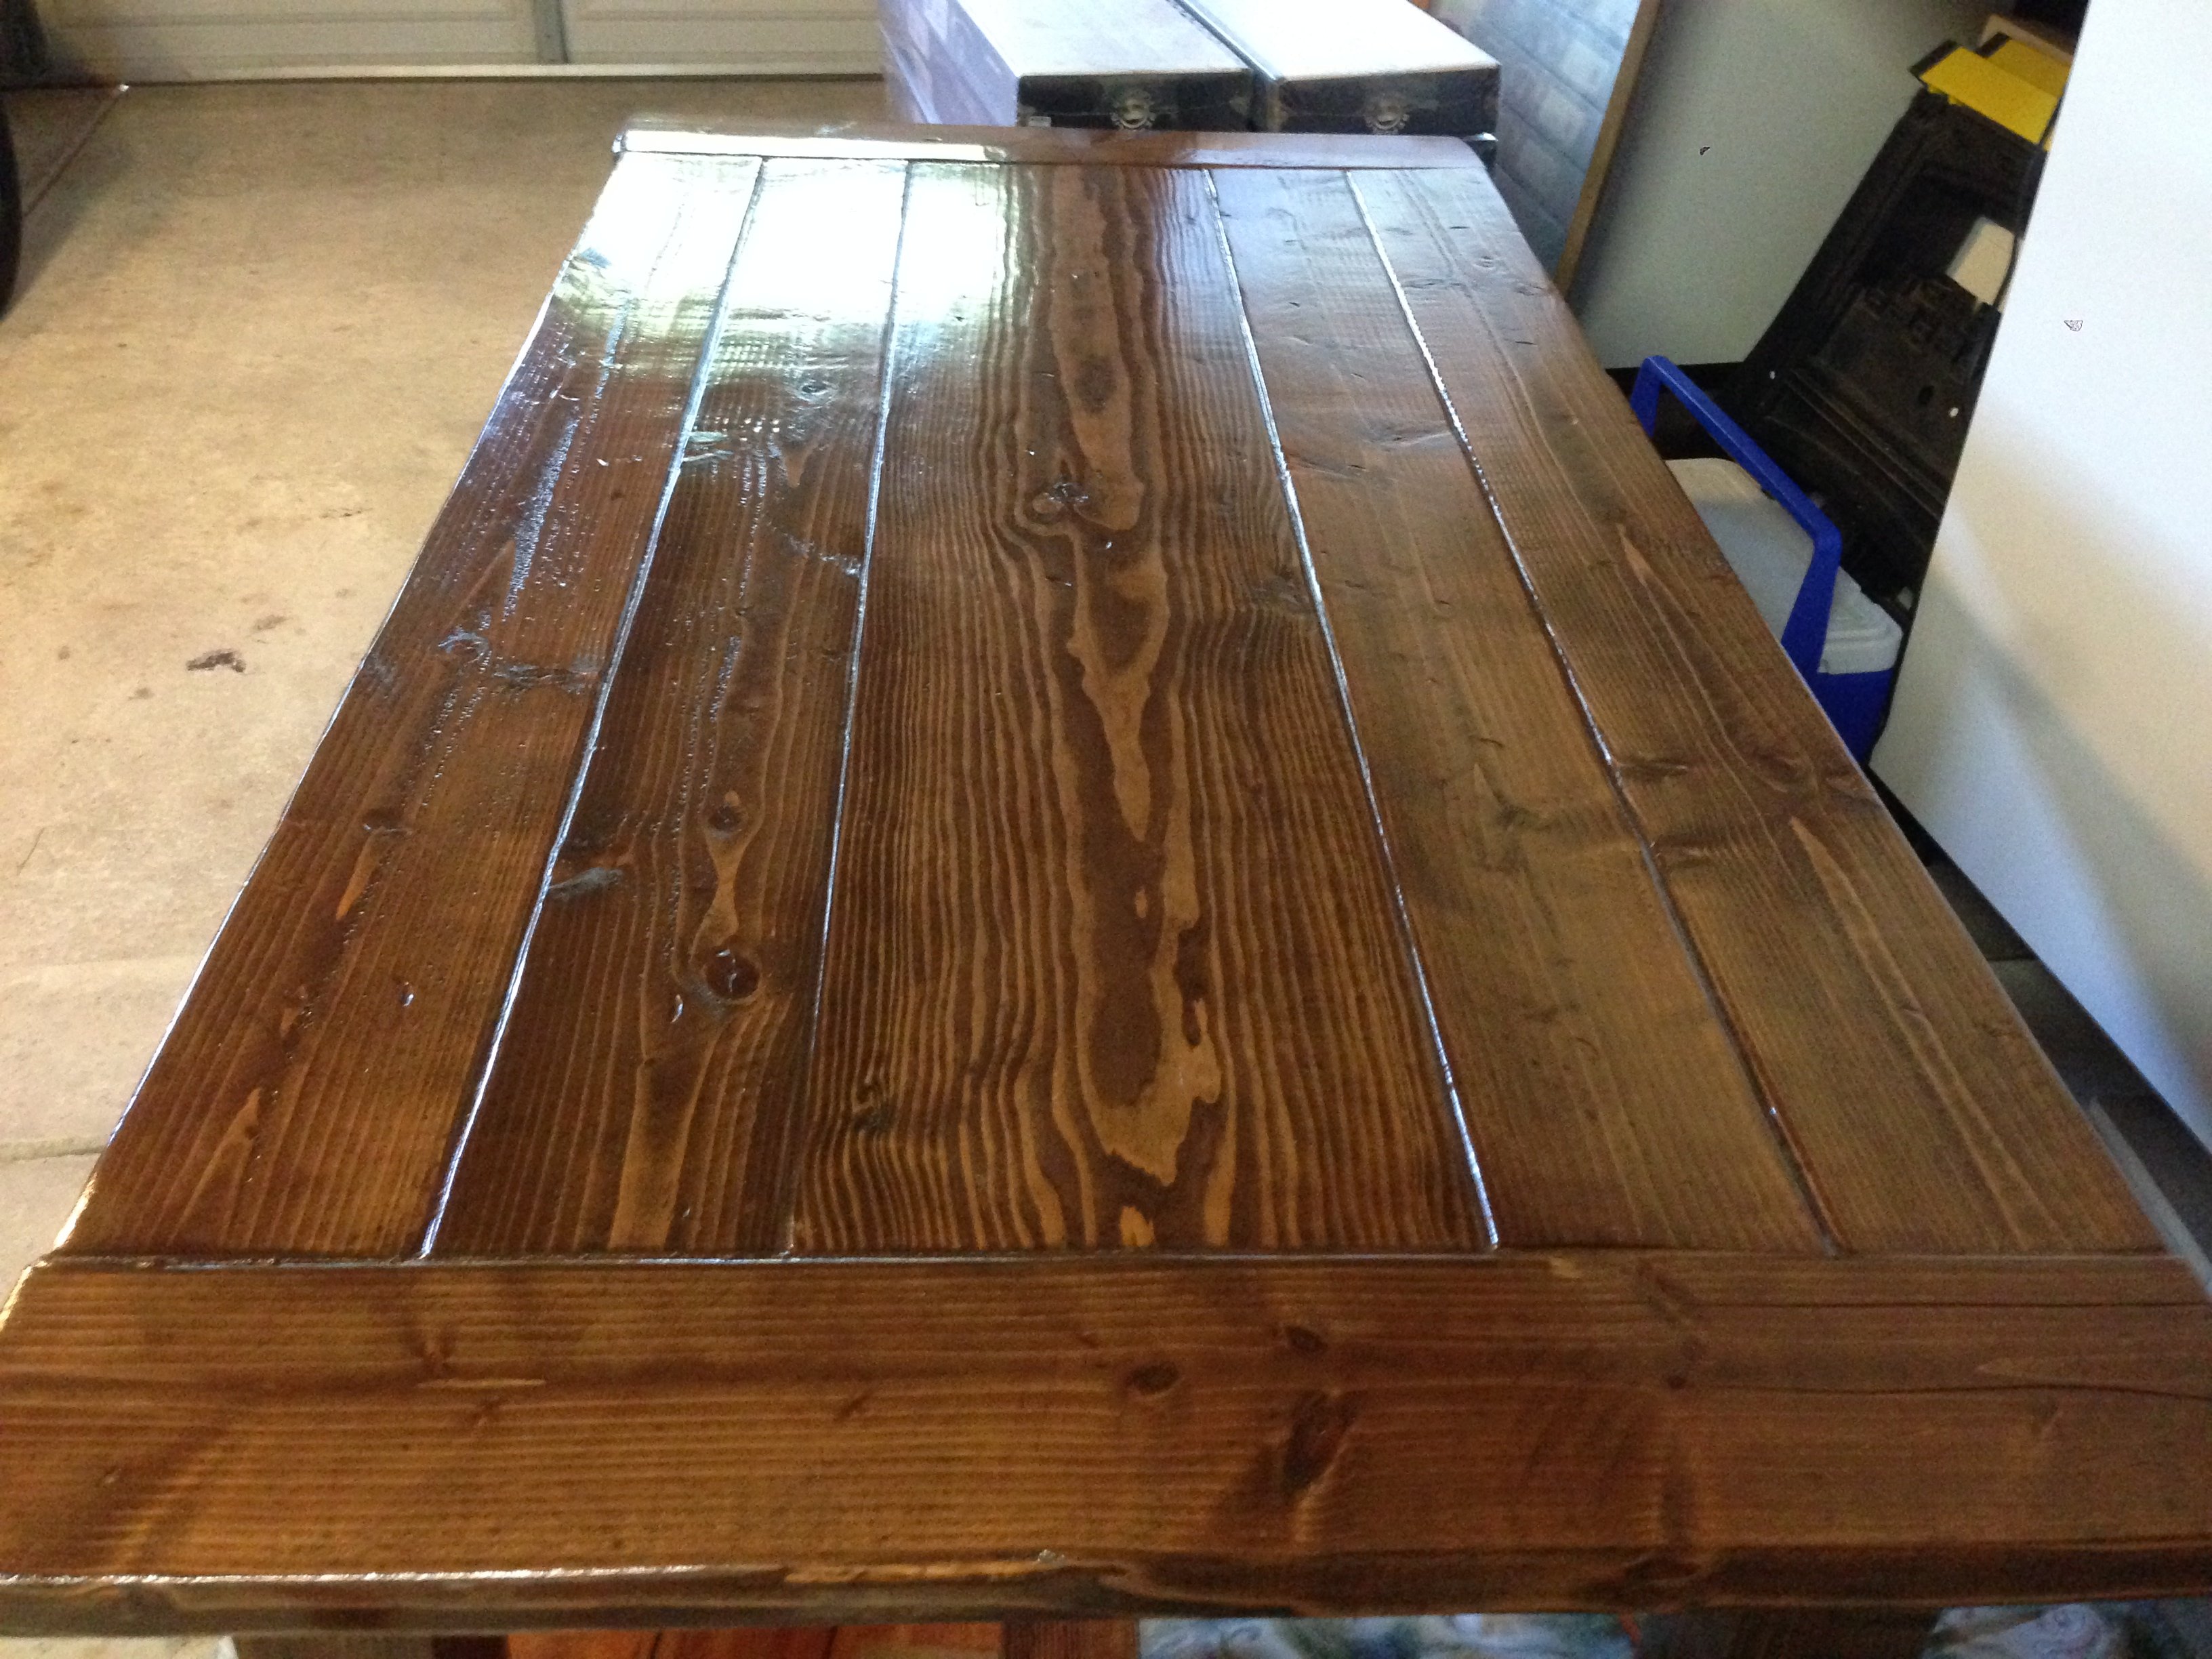
This is my first furniture building project and I was initially nervous that I have taken up more than I can handle. But things turned out just fine. My wife said she would pick this table if it were in a store and that made this project a success. My wife and I both like the distressed look and nothing in the stores impressed us enough. Three weekends worth of effort and we have a gleaming new table exactly as we wished. So, if you're a beginner like me, do not fret. This is a good starter project if you have the right tools.
The basic specs were from this site but I had to change it to suit my size. Also, for the top I used 2X6's throughout except the center piece which is 2X12. I liked this look a little better. I do not know how much work Kreg Jig will save as I have no experience doing it the other way. Kreg jig is not very common and I did not find it in Home Depot. Lowes carried it. With this design note that you cannot put any chairs on the smaller side of the table as the bottom stretchers will obstruct you.
I had to use a hand planer on many occasions to level things out, especially between the table top planks and the breadboards. With construction grade lumber there will always be warps and twists, so this is something you need to plan for.
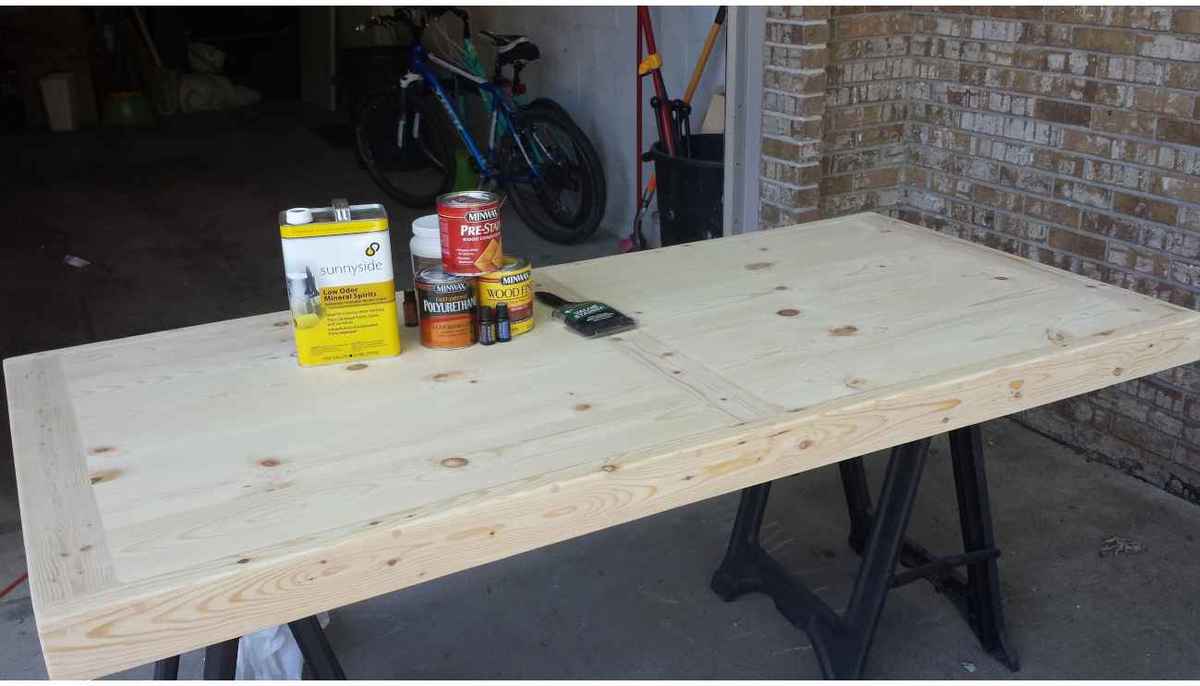
Now to the build part,
Top is all 2X6 with center piece 2X12. Rest as per Ana's plans. Construction grade lumber - Douglas Fir.
I did not sand too much - used 120 Grit throughout - did not sand with anything finer than that and it turned out ok. I did this to retain the feel of the grains. It was fun distressing it. We used hammer, chains and nails, but the best effect was from chiseling on the sides. Practice on spare wood first.
For Finish I used Dark Walnut from Rustoleum. One single coat. Then I wiped on Minwax Red Chestnut on top and quickly wiped it off. That gave it a pop. I used 5 coats of Rustoleum Poly on top. Rustoleum makes a huge difference to your project time as it dries much quicker than minwax. Also one single coat of stain did the job as advertised. Note that Rustoleum Poly is milky in color, but dries clear.
Good luck to your project and hope this helped.
Built from Plan(s)
Estimated Time Investment
Week Long Project (20 Hours or More)
Finish Used
Rustoleum Dark Walnut one coat, Minwax Red Chestnut one very light coat, Rustoleum Poly Gloss finish 5 coats. Distressed look.
Recommended Skill Level
Beginner
Modified Triple Pedestal Farmhouse Table
I modified this plan by removing 1/3 of the table so it would fit our dining room. I used the farmhouse bench plans and "upholstered" them. This is the result. I used construction grade pine. Some of the table was altered by mistake, other bits on purpose. This project took me 40+ hours to complete. Weekends, a afterwork.

Built from Plan(s)
Estimated Cost
$350 including tools
Estimated Time Investment
Week Long Project (20 Hours or More)
Finish Used
I used Minwax Wood Conditioner, Dark Walnut Stain, Clear Semi-gloss polyurethane
Recommended Skill Level
Intermediate
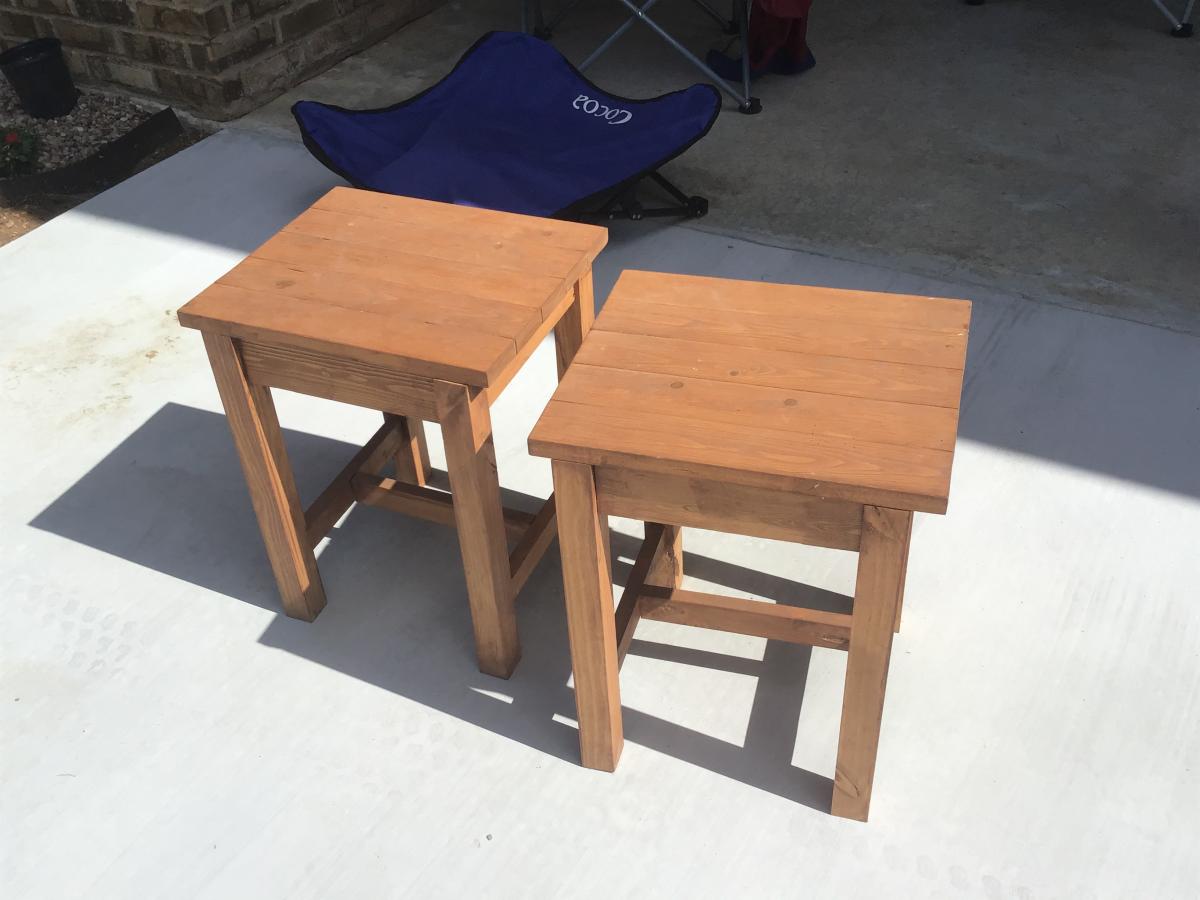
End Table
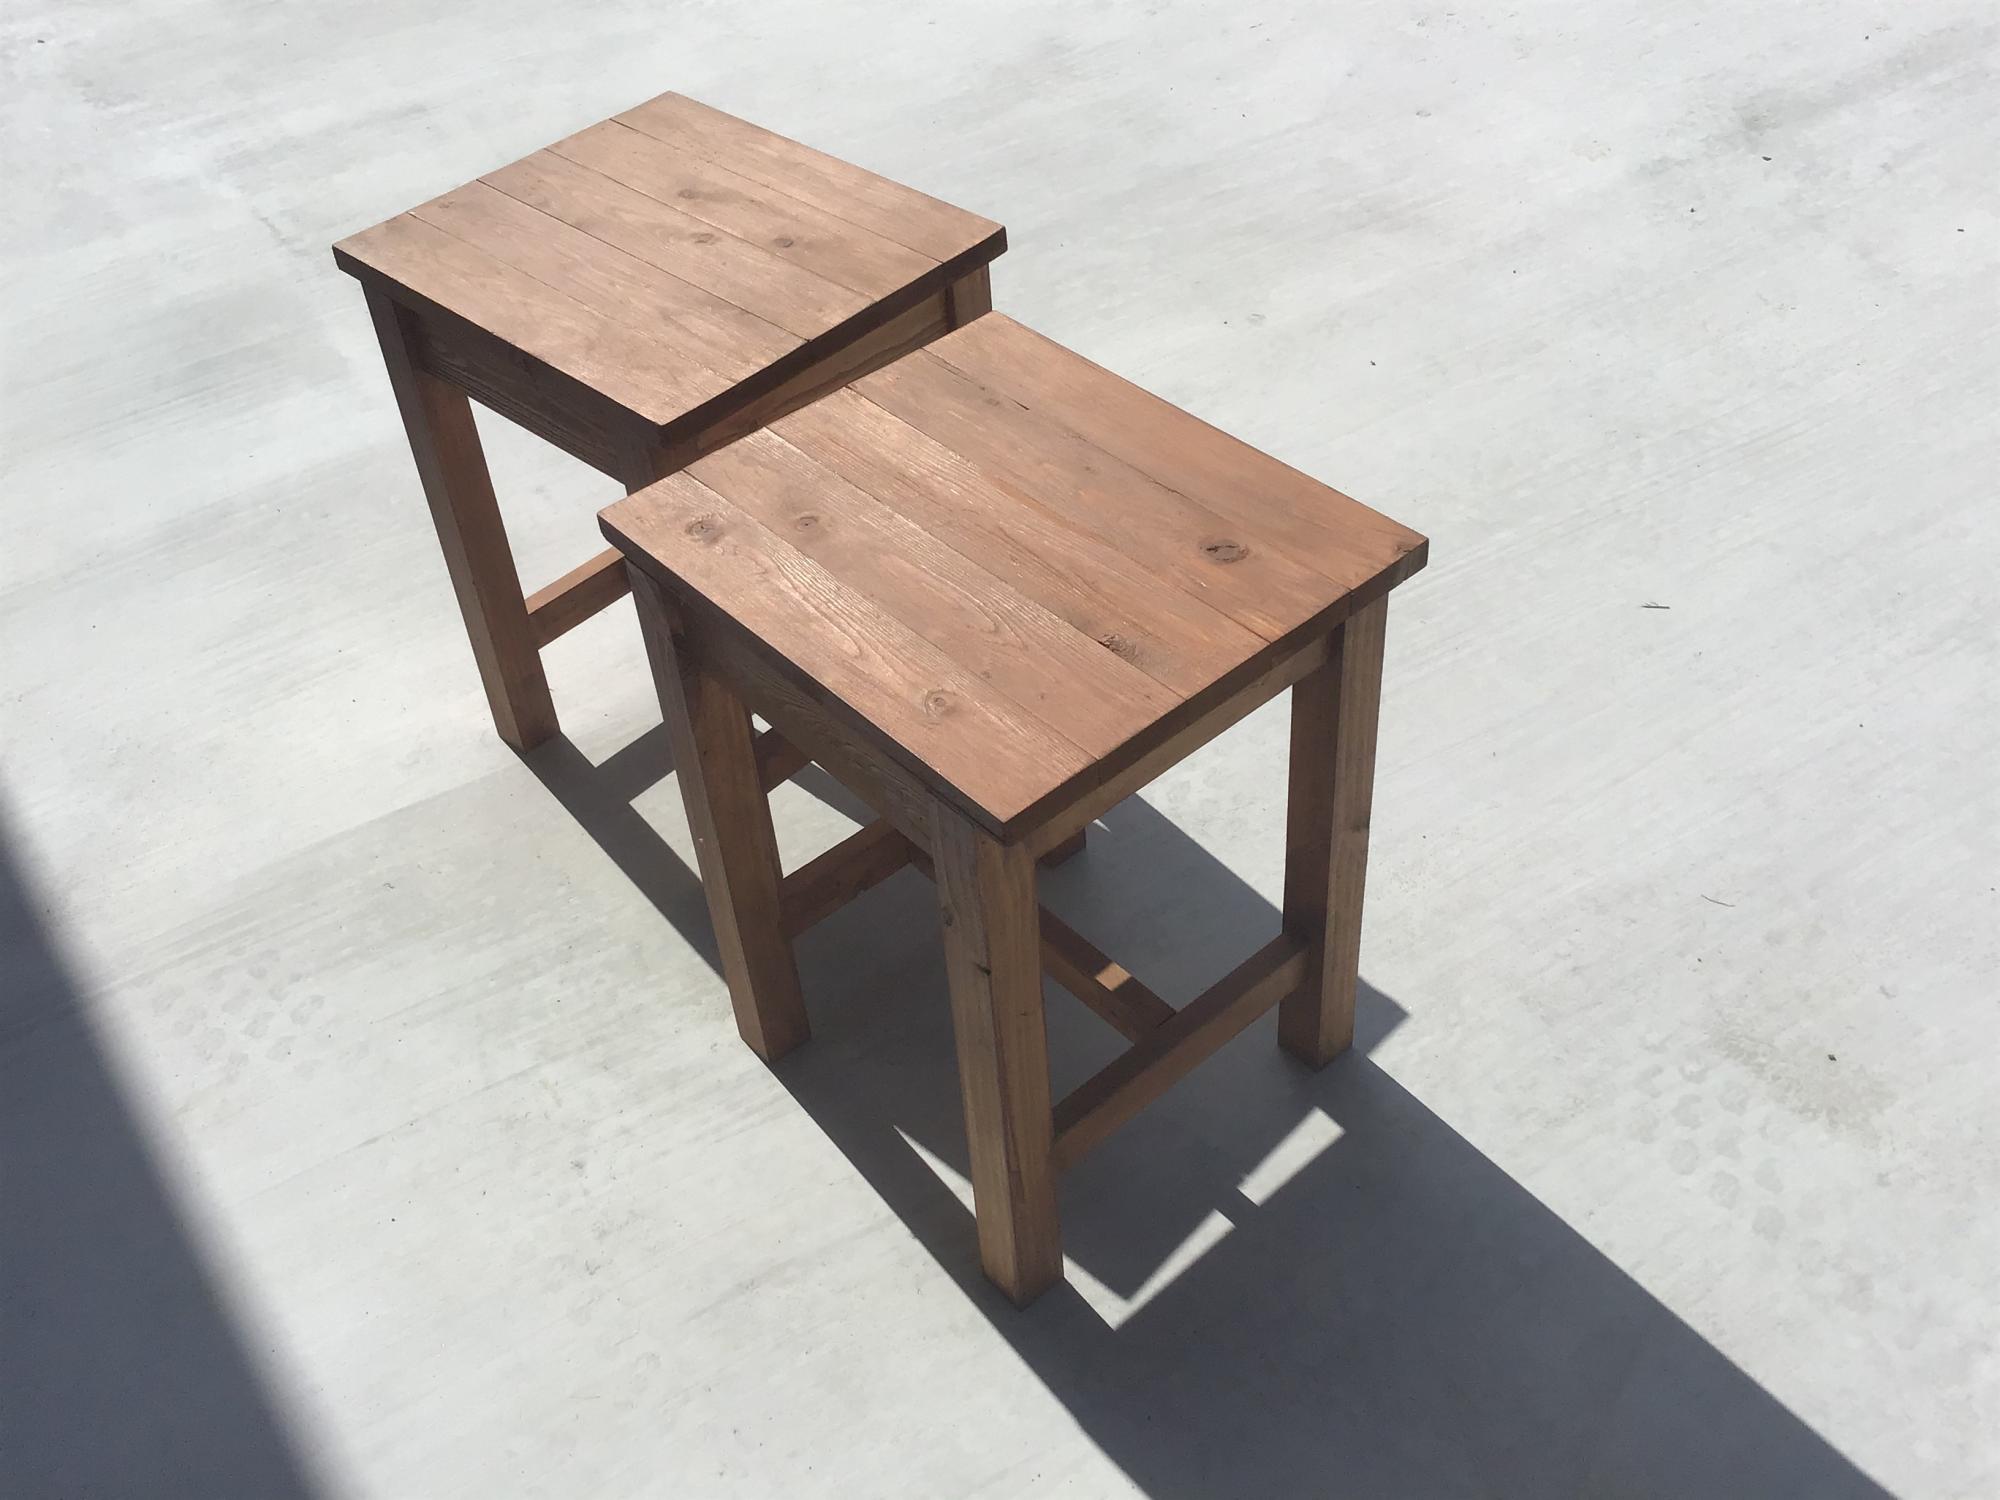
My first wood project.........
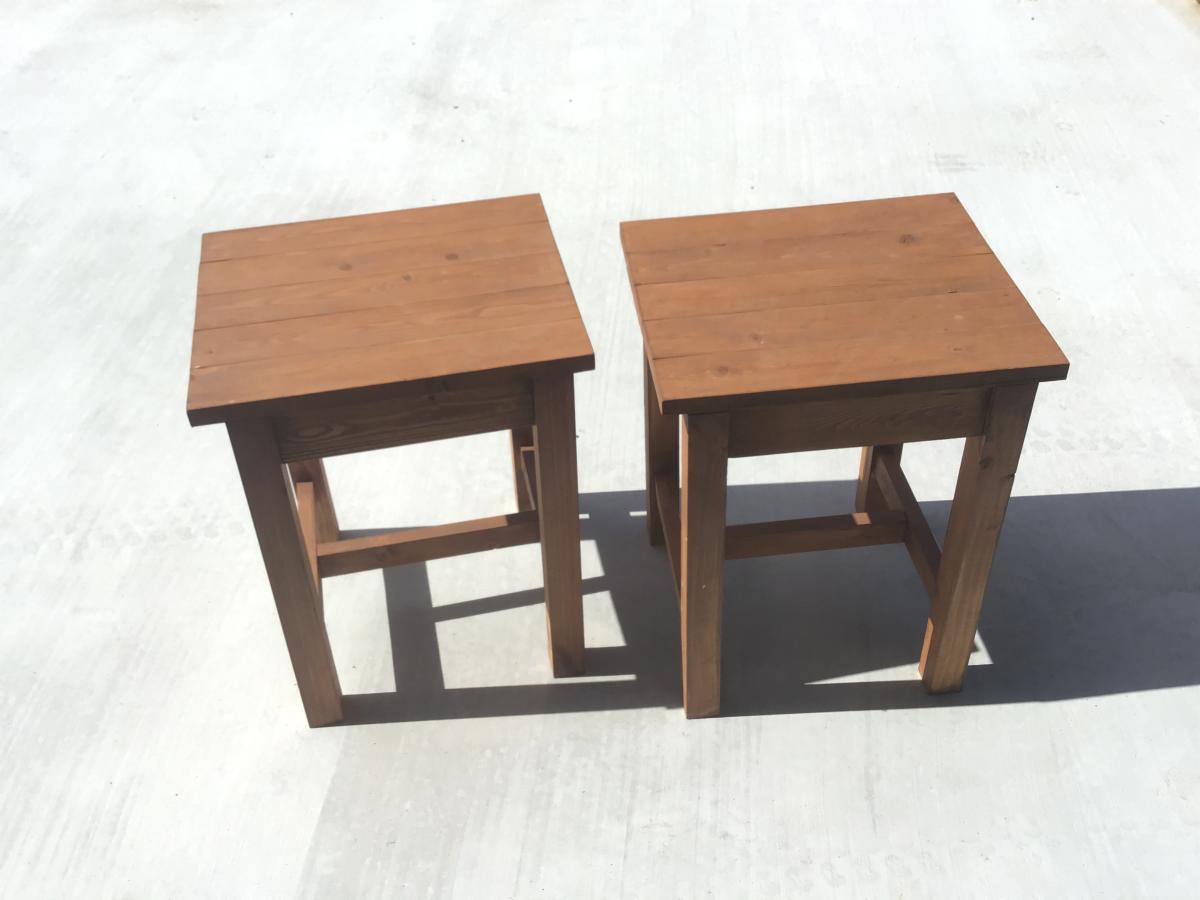
Built from Plan(s)
Recommended Skill Level
Starter Project
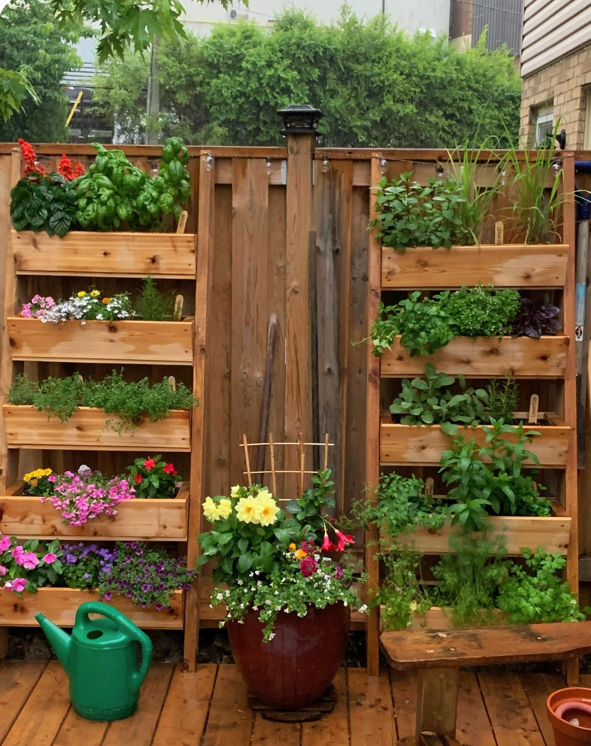
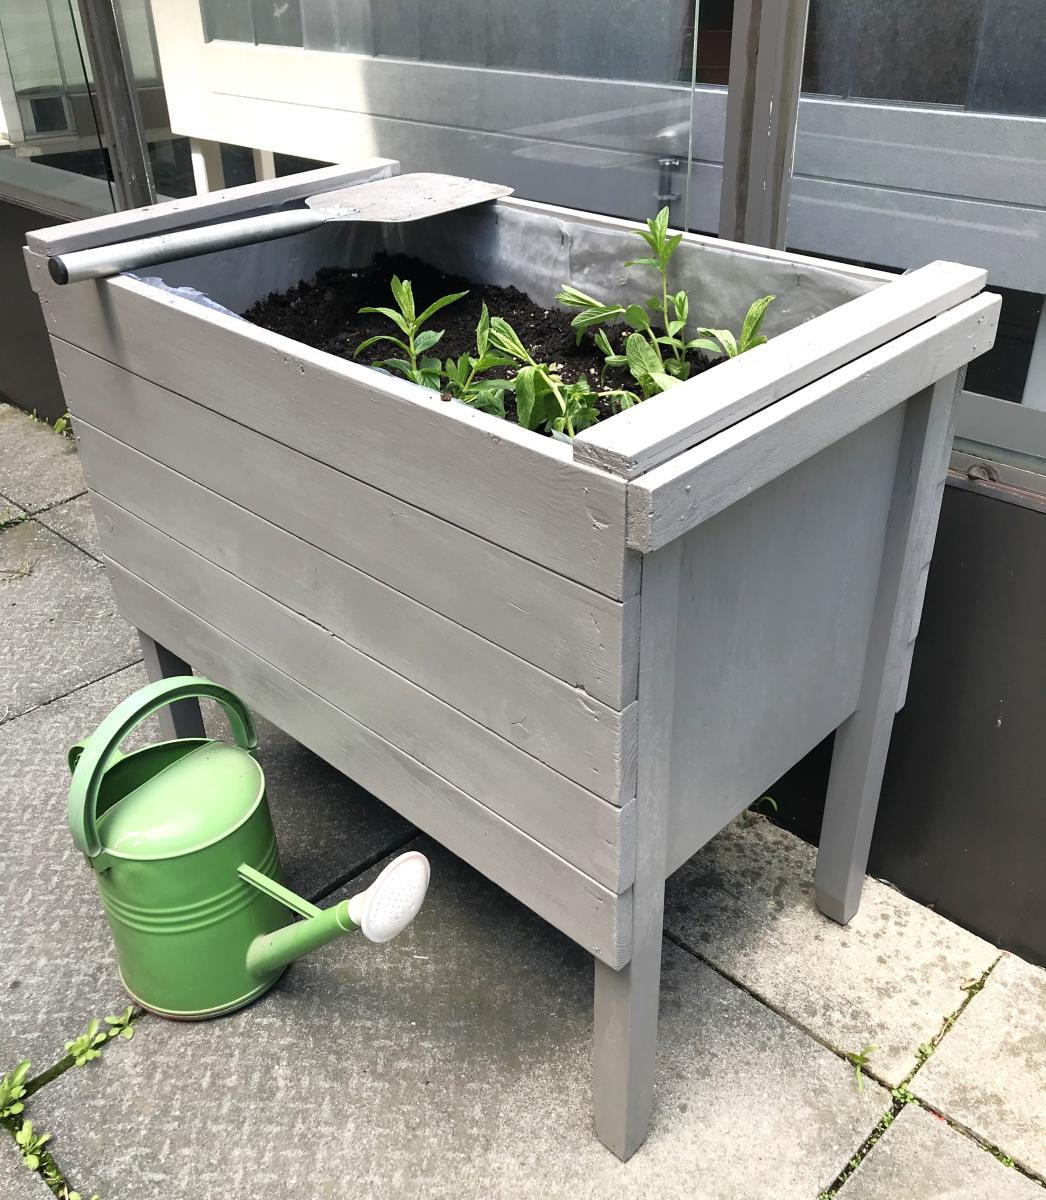
Counter Height Planter

Hello everyone,
I collected unwanted wood and I put them in a good use. Transform them into planters . Many people throw excellent wood . Either, they aren’t aware or they purchased new furniture.
Thank you Mrs. Anna . She has inspired me with her excellent ideas. God bless you
Jean Abinajem
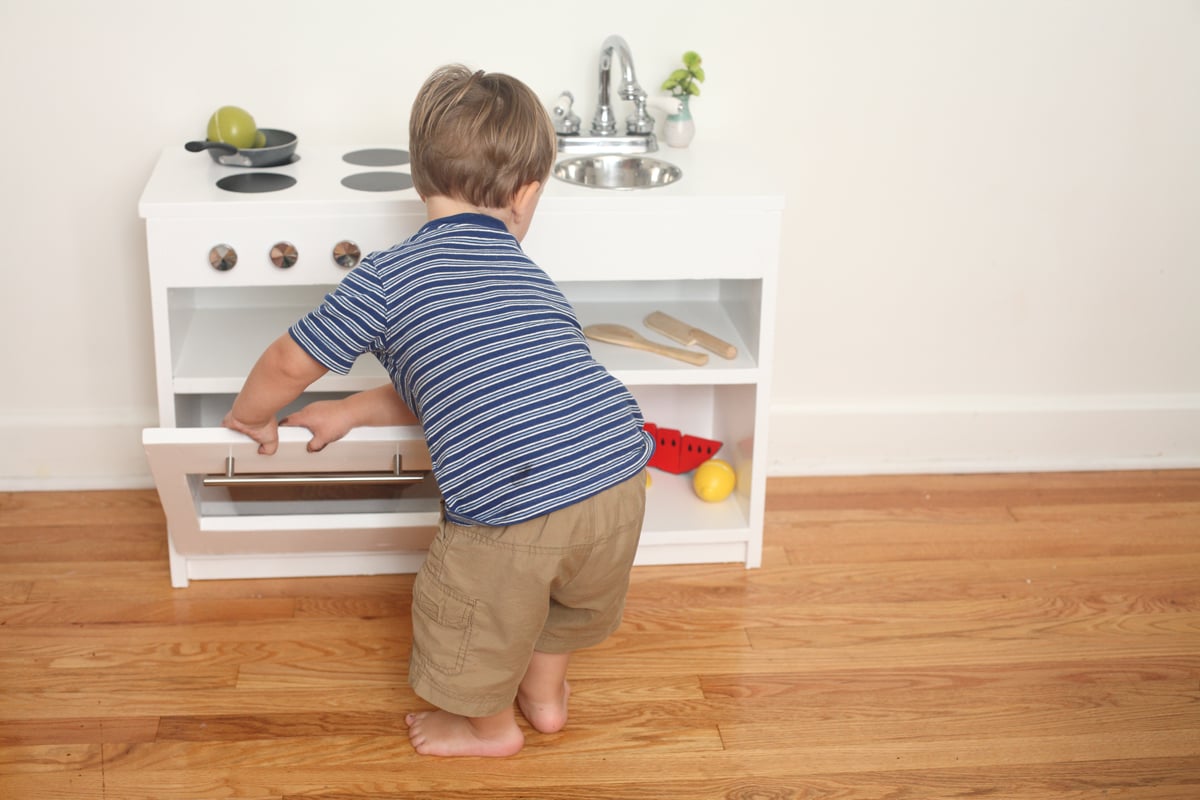
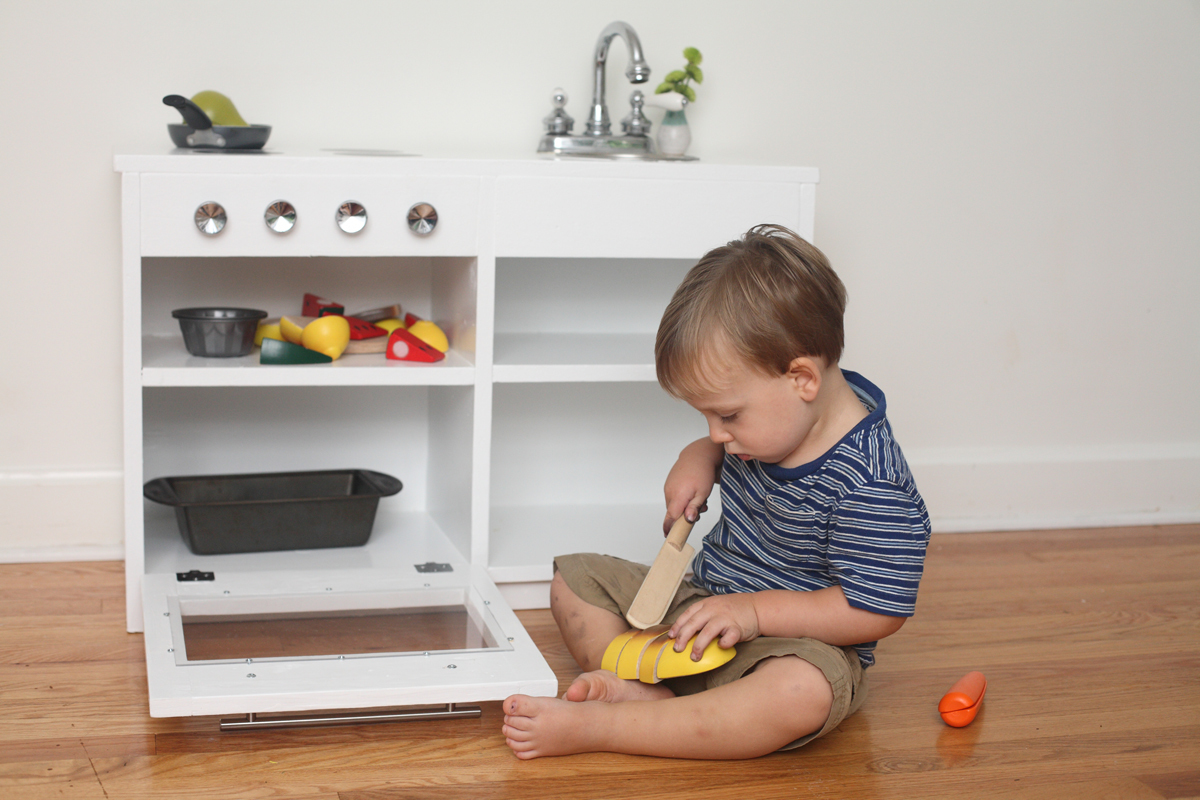
Play Kitchen
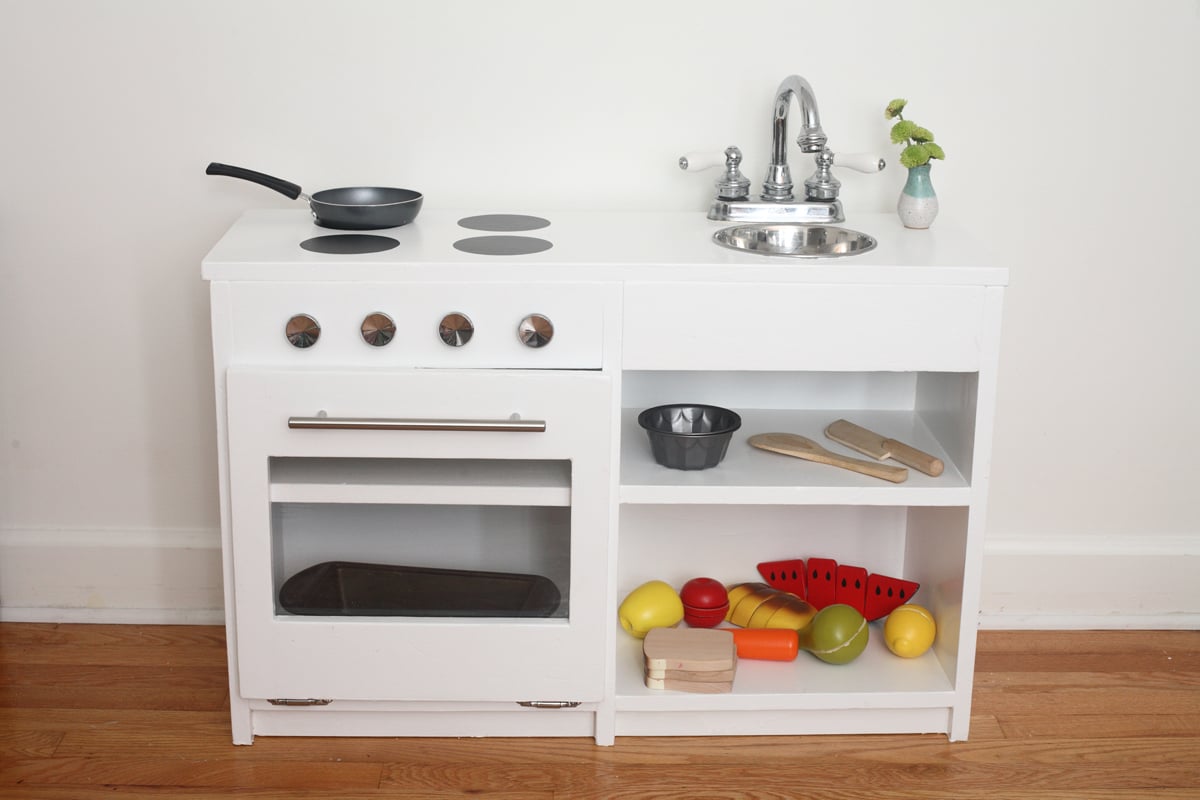
I combined the play sink and play stove into a one-piece kitchen by having them share a side. I found a bathroom faucet at my local Habitat ReStore for $15 (and that included a sink I didn't even need!). Time investment does not include painting. Here's my cost breakdown. Lumber: $25 (I used some scraps.) Faucet: $15 Dog bowl: $7 Hardware: $13 Primer and paint: $19 Screws: $4 Sandpaper: $5 Plexiglass: $3 Prepping dinner while my toddler works in his play kitchen beside me: Priceless.
Built from Plan(s)
Estimated Cost
~$90
Estimated Time Investment
Day Project (6-9 Hours)
Finish Used
Cheap white paint. It dripped like crazy and took forever to dry. My mantra was "It's a toy, it's a toy, it's a toy."
Recommended Skill Level
Intermediate
Comments

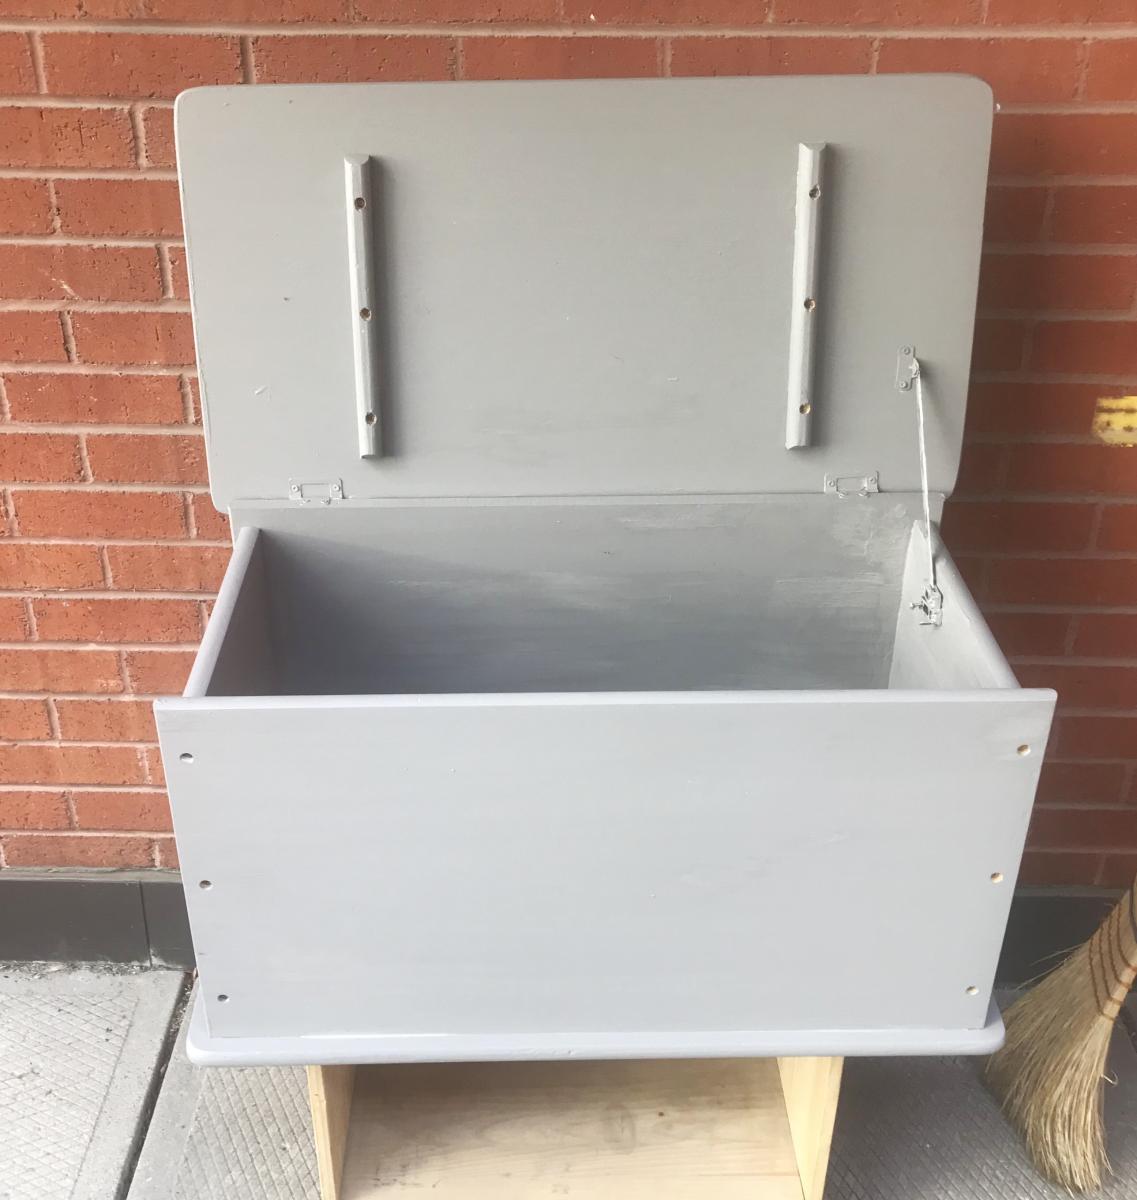
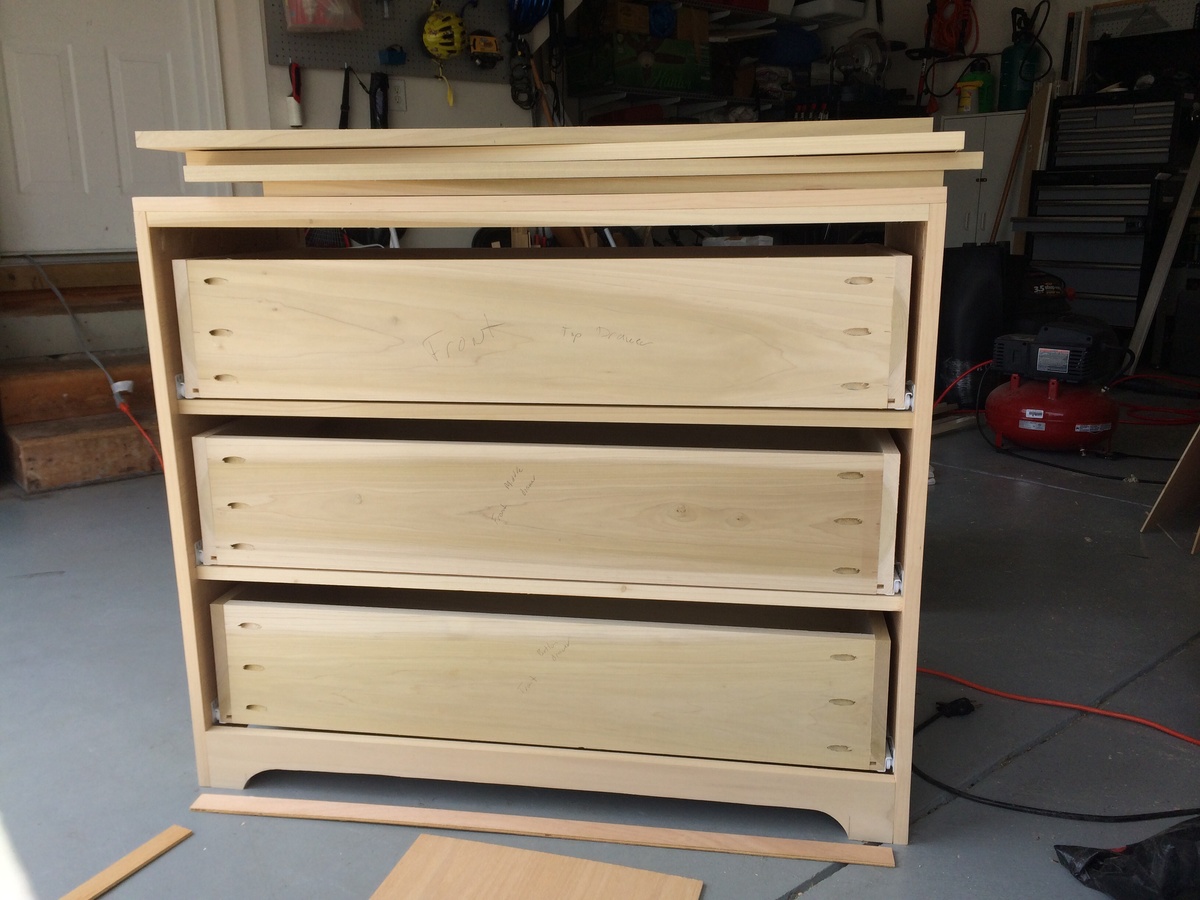
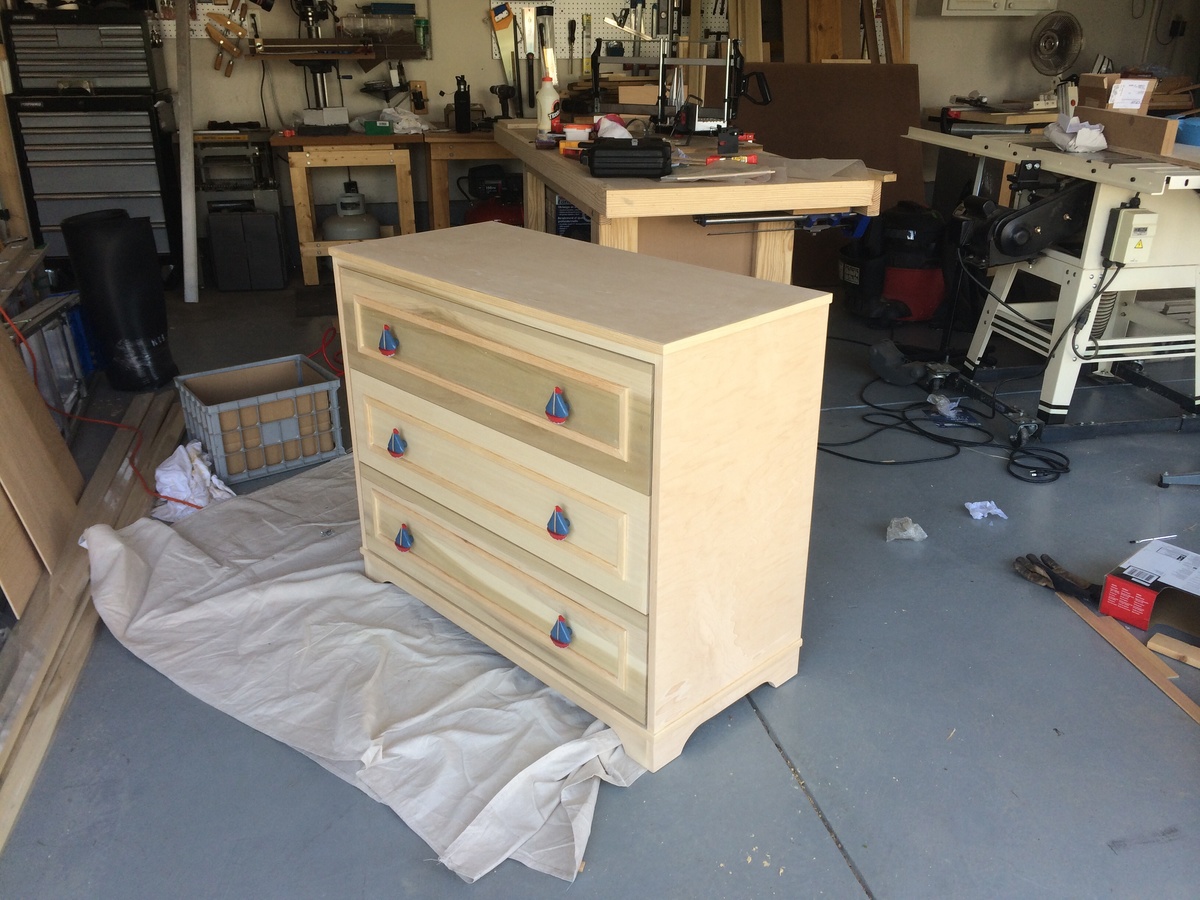
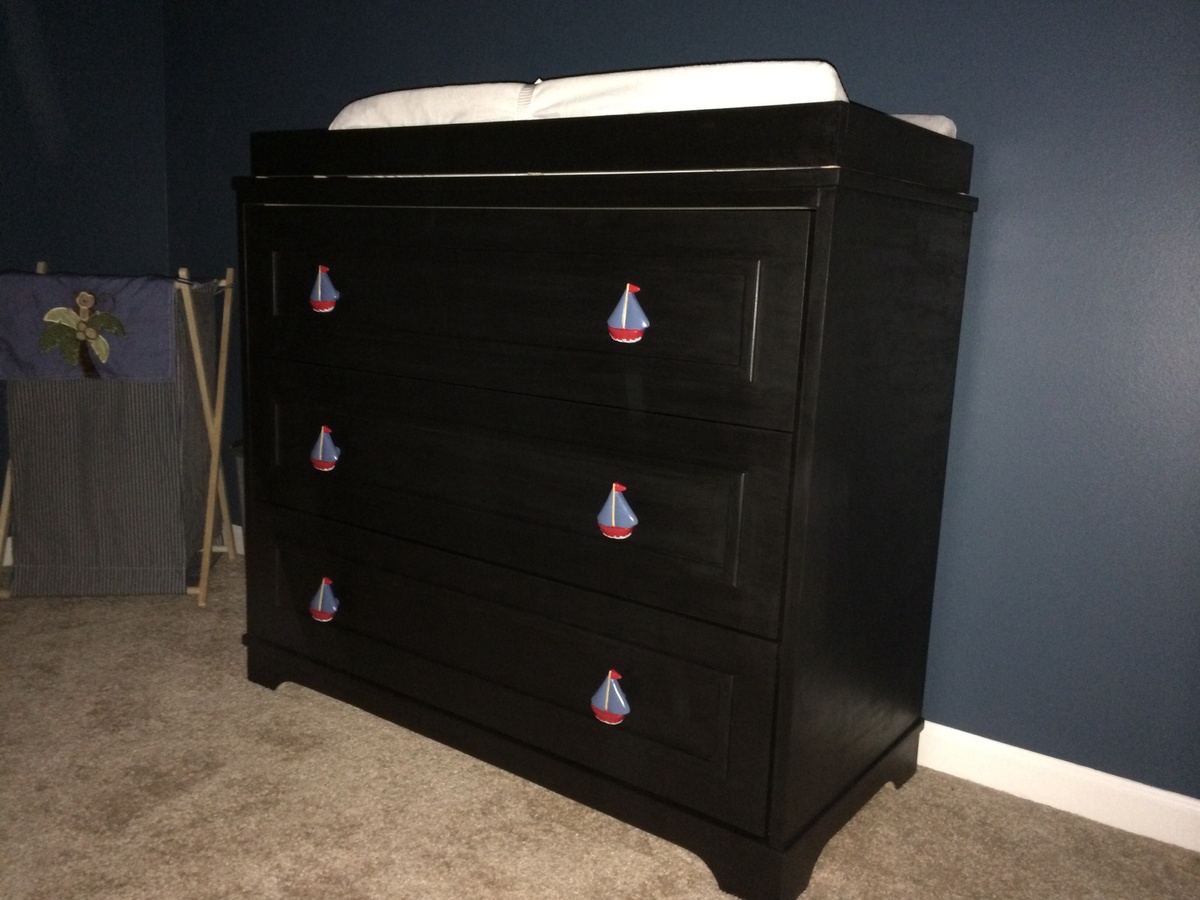
Fillman Dresser/Changing Station
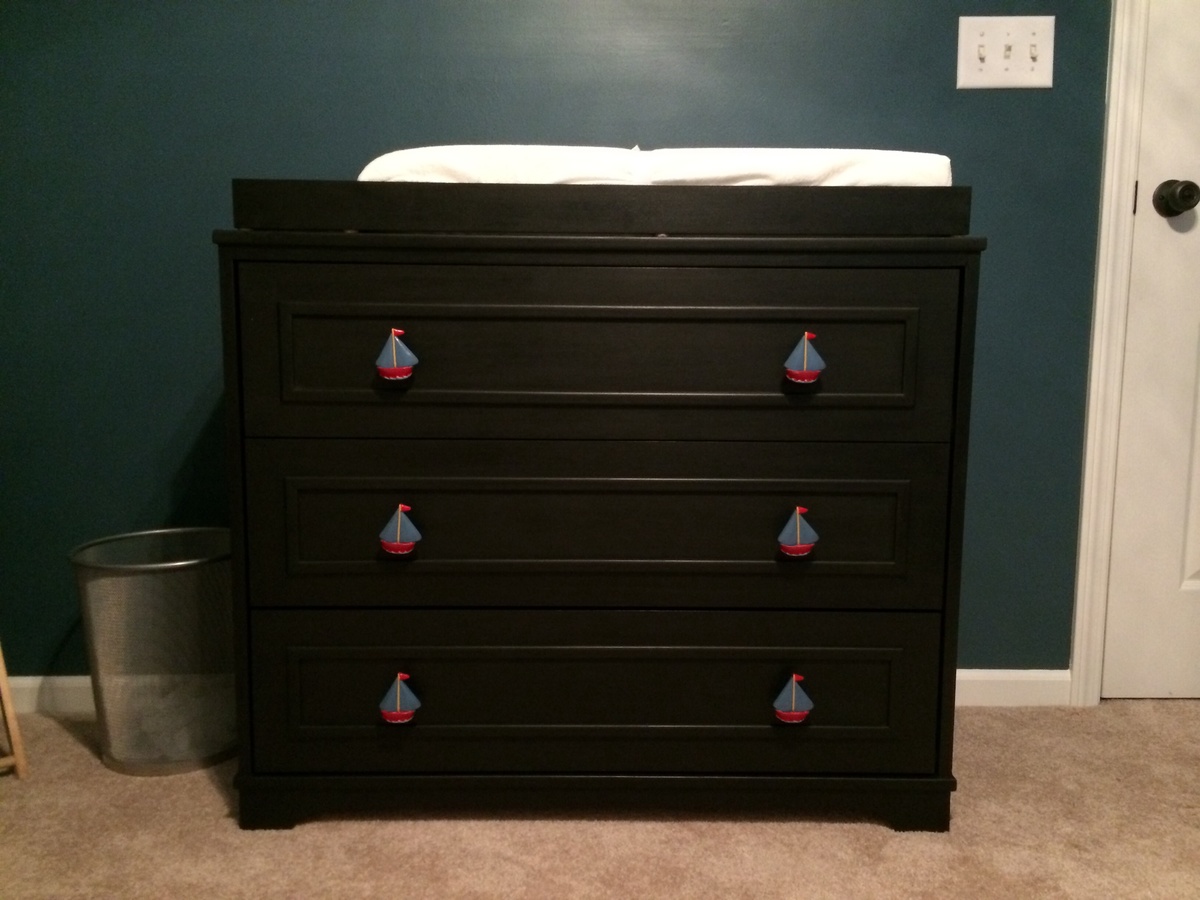
Needed a dresser/changing station for our baby boys nursery. After pricing the "cheap ones" at target ($225). Decided I could build one for much less and much better quality. Found the Fillman Dresser/Changing station plan on Ana's site and felt that was the plan.
One modification I did to make the drawer bottoms stronger was to route a ¼" rabbit ⅜" from the bottom of the drawer to help hold the ¼" plywood.
This was my first time using milk paint and after the first coat I felt I ruined the project because the color was so uneven. Thank goodness for the internet because when I looked milk paint up every site had a "don't panic" paragraph about the first coat going on uneven. Quick sanding and a second coat Made me a believer.
As this was my first project I am very pleased with how it turned out. I learned a number of things to avoid and look forward to my next project.
Thanks Ana for all of the inspiration and ideas.


Built from Plan(s)
Estimated Cost
$140
Estimated Time Investment
Weekend Project (10-20 Hours)
Finish Used
Old Fashioned Milk Paint (Black)
Watco Danish Oil
Watco Danish Oil
Recommended Skill Level
Beginner
LOVE this!!!!
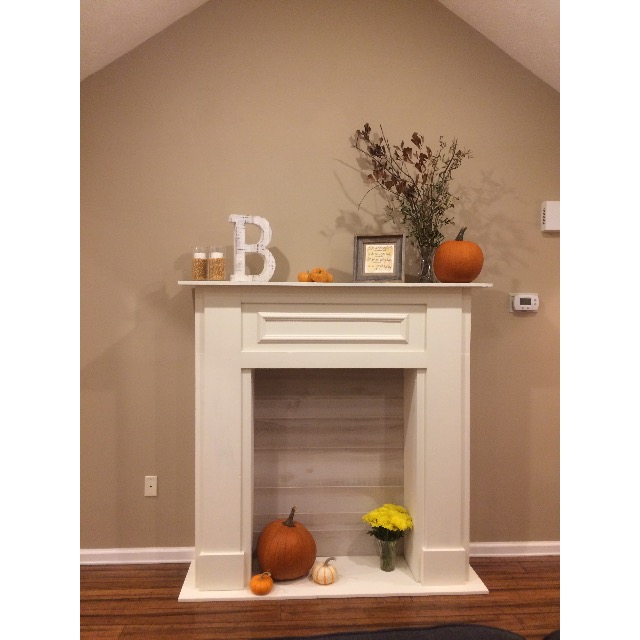
I love how my fireplace turned out!! It took a whole day to make and I did end up scaling the design up to make it a lot bigger. Love how it turned out!!
Estimated Cost
$200
Estimated Time Investment
Day Project (6-9 Hours)
Recommended Skill Level
Intermediate
Comments
12 year old built her bed!
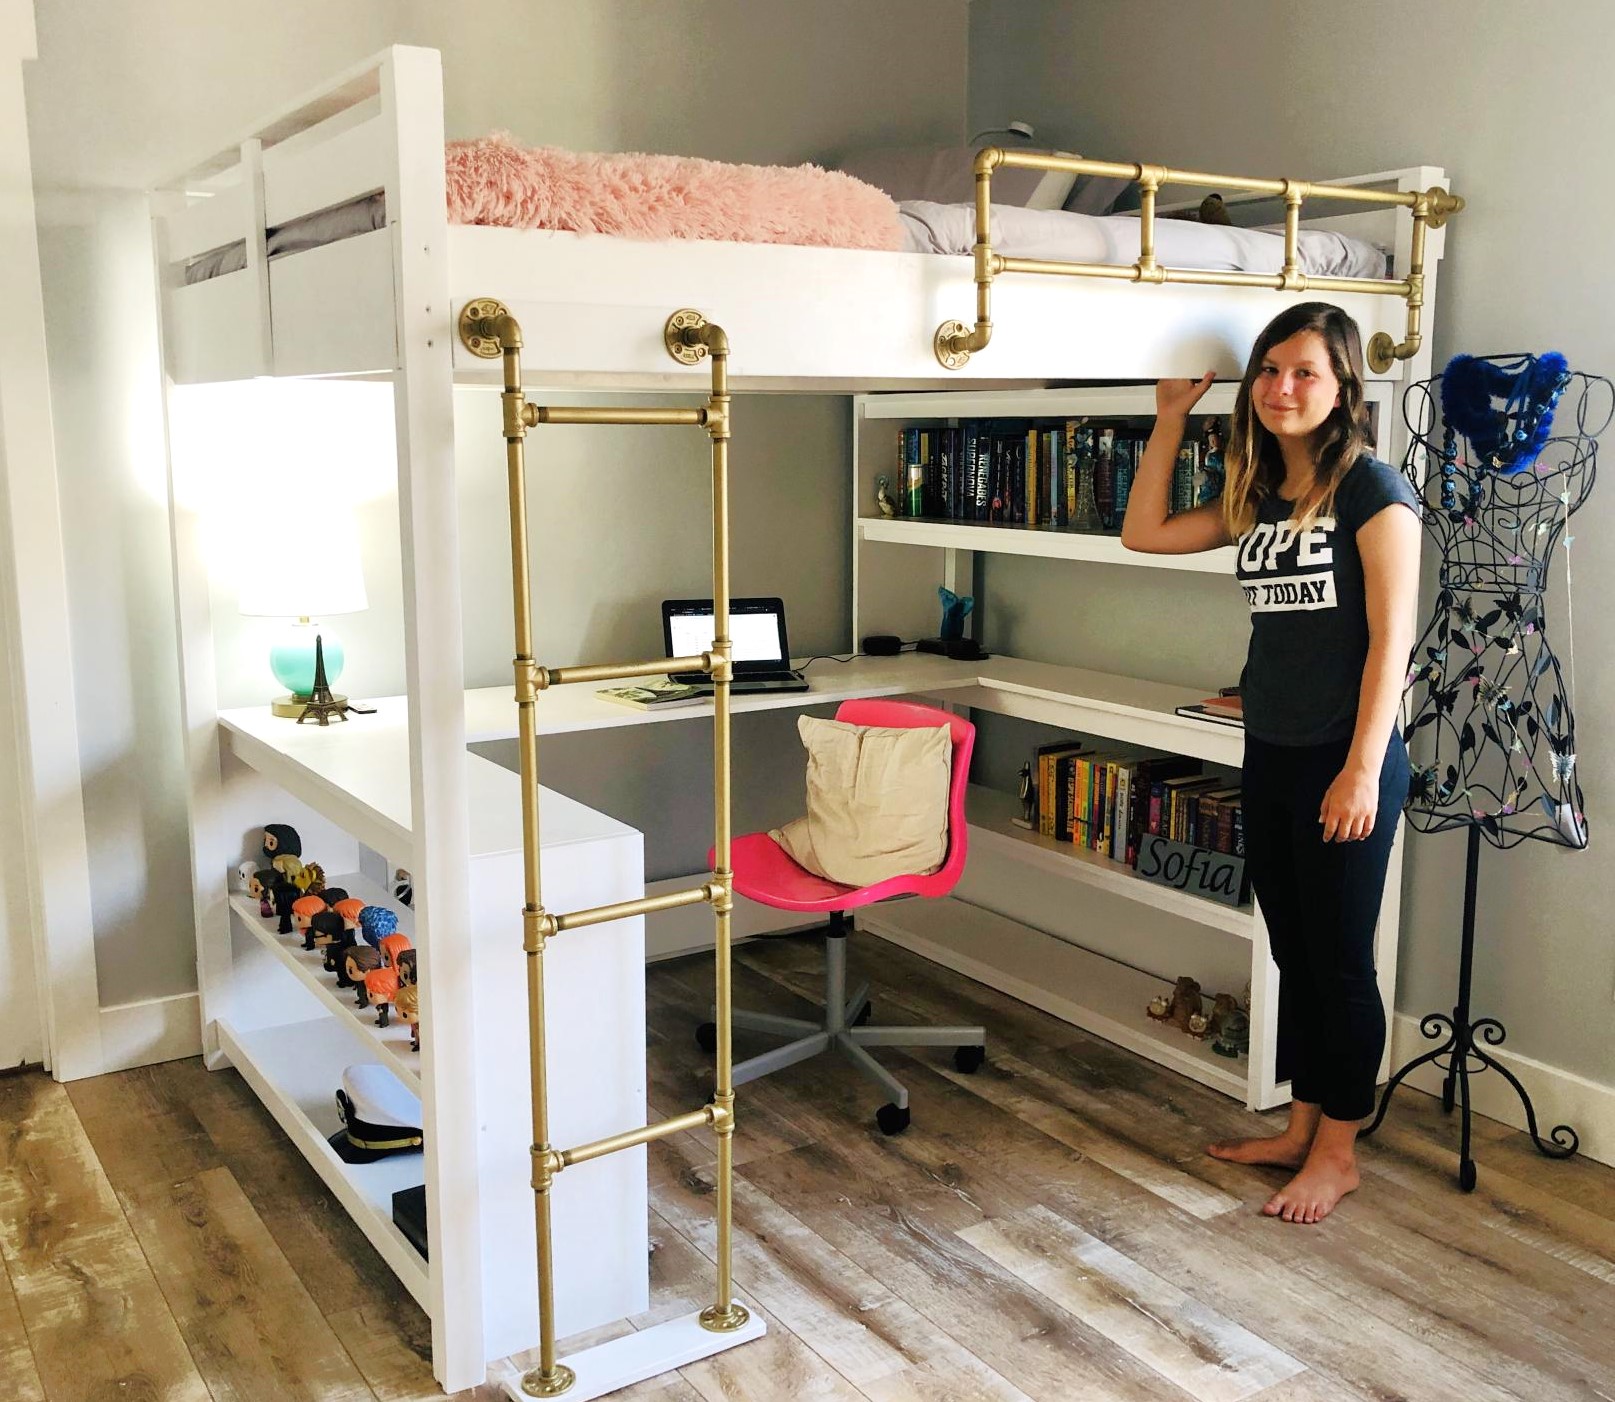
Thanks Ana White for the awesome plans! My daughter decided she wanted a new bed, so I told her I’d help her build one. I am not a carpenter, by any stretch, but I thought it would be some good dad/daughter bonding time. She tweaked your plans, did all the cuts, drilling, sanding, and painting (well, most of the sanding and painting anyway), and tolerated her father with great grace. It turned out pretty well. We couldn’t have done it without your plans! Thanks again! —Gabe
Built from Plan(s)
Estimated Cost
$600.00
Estimated Time Investment
Week Long Project (20 Hours or More)
Finish Used
White semi-gloss interior latex.
Recommended Skill Level
Beginner
Comments
Mon, 04/05/2021 - 10:10
Amazing young lady!
Thank you for sharing, what an awesome build! Love her vision and mods!