Community Brag Posts
Wine gift carrier

Easy and fun project that took part of a day. I made so my wife can give to friends she will be staying with on a girl's trip.
I used Provincial stain on wood I had on hand. I bought handles and it was done.

Built from Plan(s)
Comments
Mon, 08/22/2022 - 17:46
Wonderful gift!
This looks very pretty and I am sure the recipients will love it! Thank you for sharing.
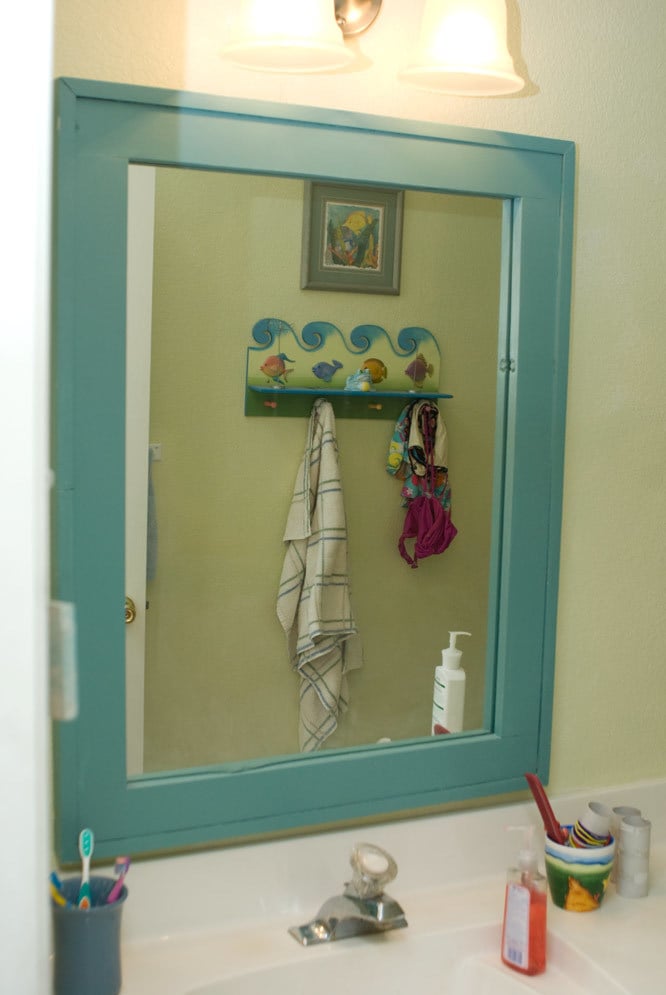
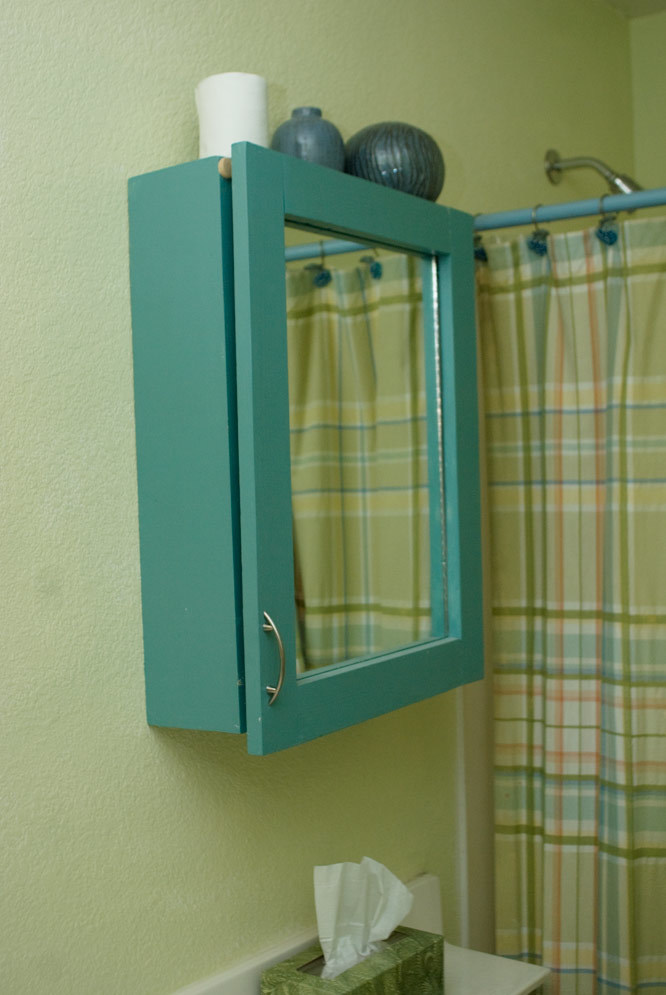
Barnwood frame as a vanity mirror
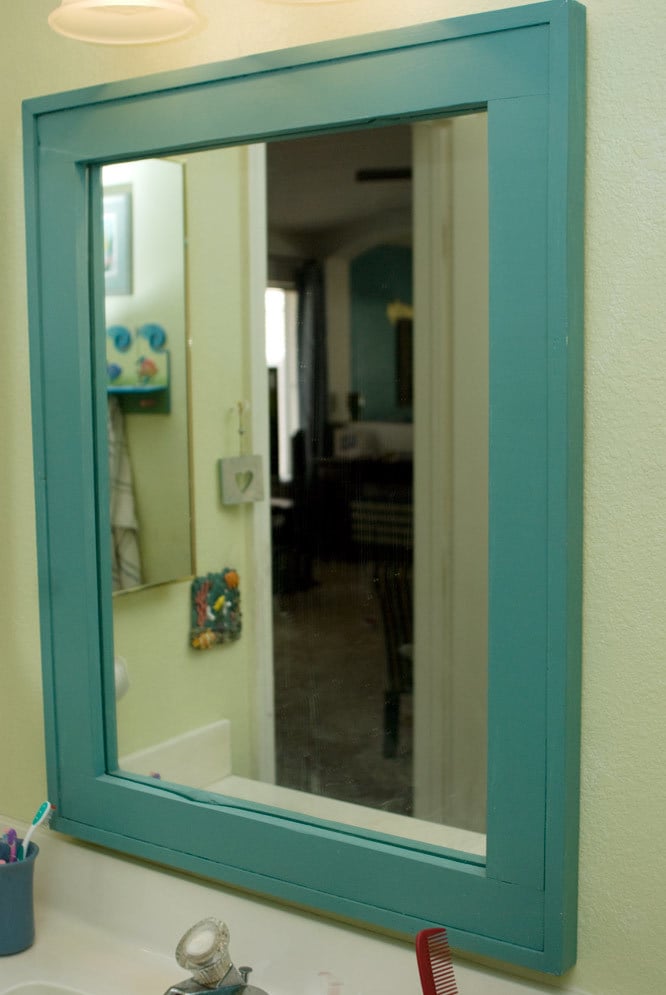
I was watching the DIY network while my neighbor was over one day, and got a hair up my butt to take the builder grade mirror down from my hall bath. I had just gotten a $50 Lowe's gift card for my birthday, so I decided to do a mini bathroom makeover. I had NO plans and no clue what I wanted in there, but the mirror was down so I needed to get GOIN!
I saw the plan for the Barnwood Frame and altered it to use 1x3s as well as 1x2s, and (obviously) made it bigger. I also built a medicine cabinet from 1x6s.
The biggest issue with this whole thing was cutting the mirror to size. I had never done anything like this, so my medicine cabinet mirror is about 1/8" too small for the frame (hid that by using DUCT TAPE on the inside!).
I still plan on building a vanity and changing out the sink in there, but that has to wait until I have the motivation to redo the floors!
Yeah, me and motivation aren't very close...

Built from Plan(s)
Estimated Time Investment
An Hour or Two (0-2 Hours)
Finish Used
I DON'T REMEMBER! But this paint color is so sexy, I DEFINITELY have to find it!
Recommended Skill Level
Beginner
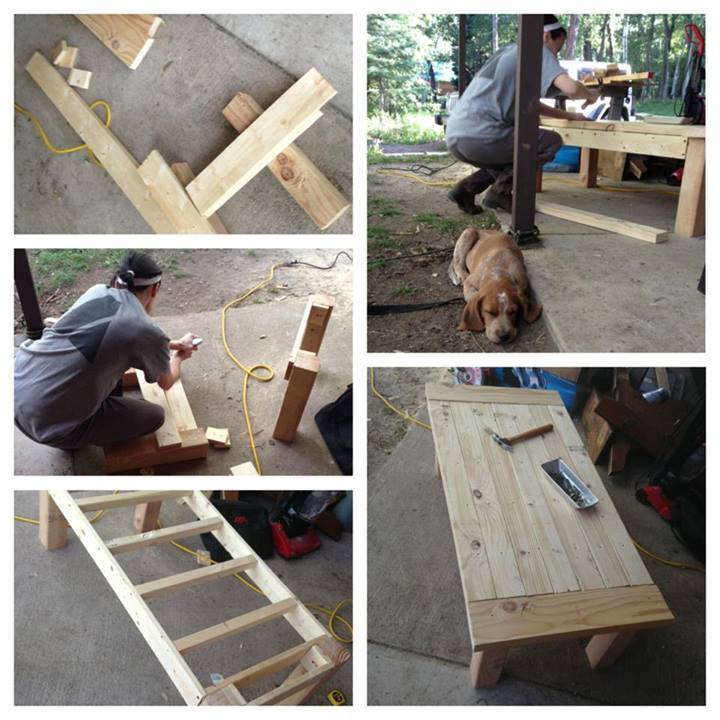
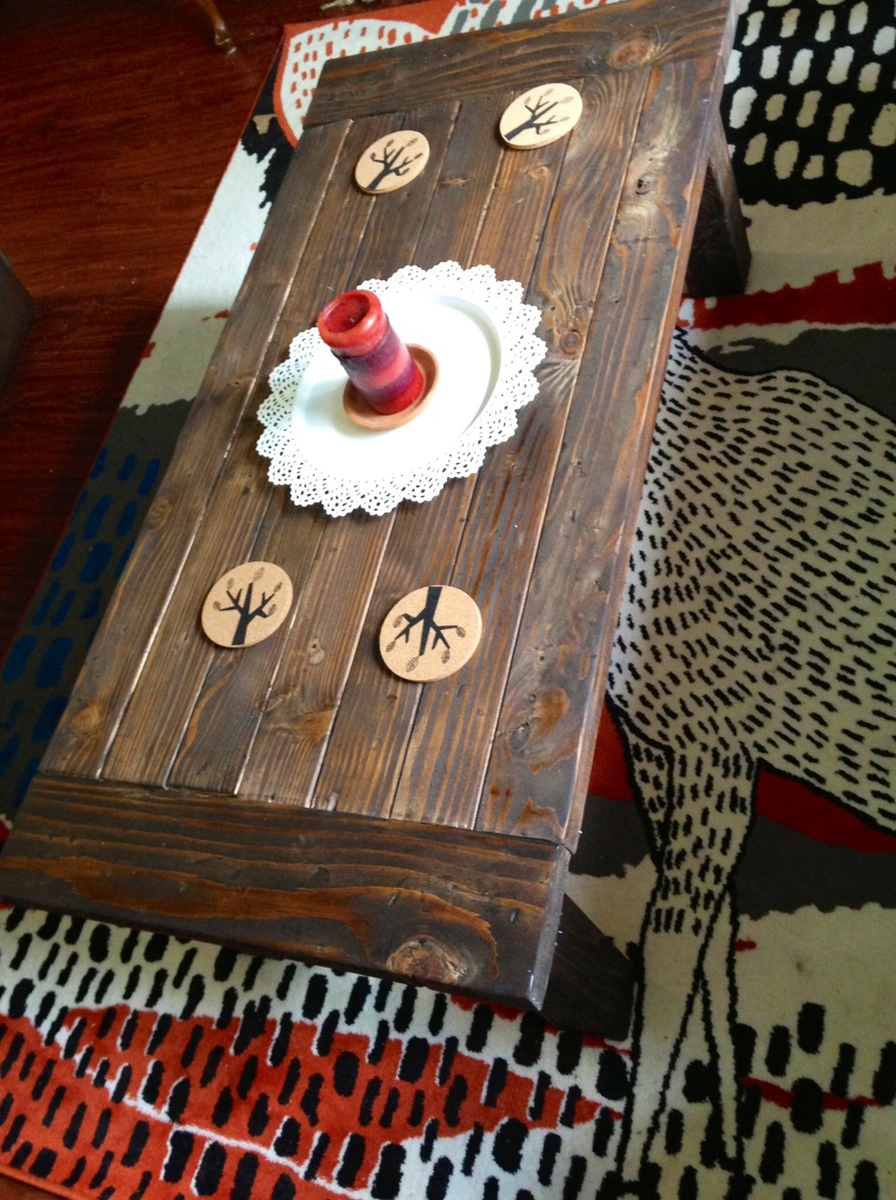
Coffee Table
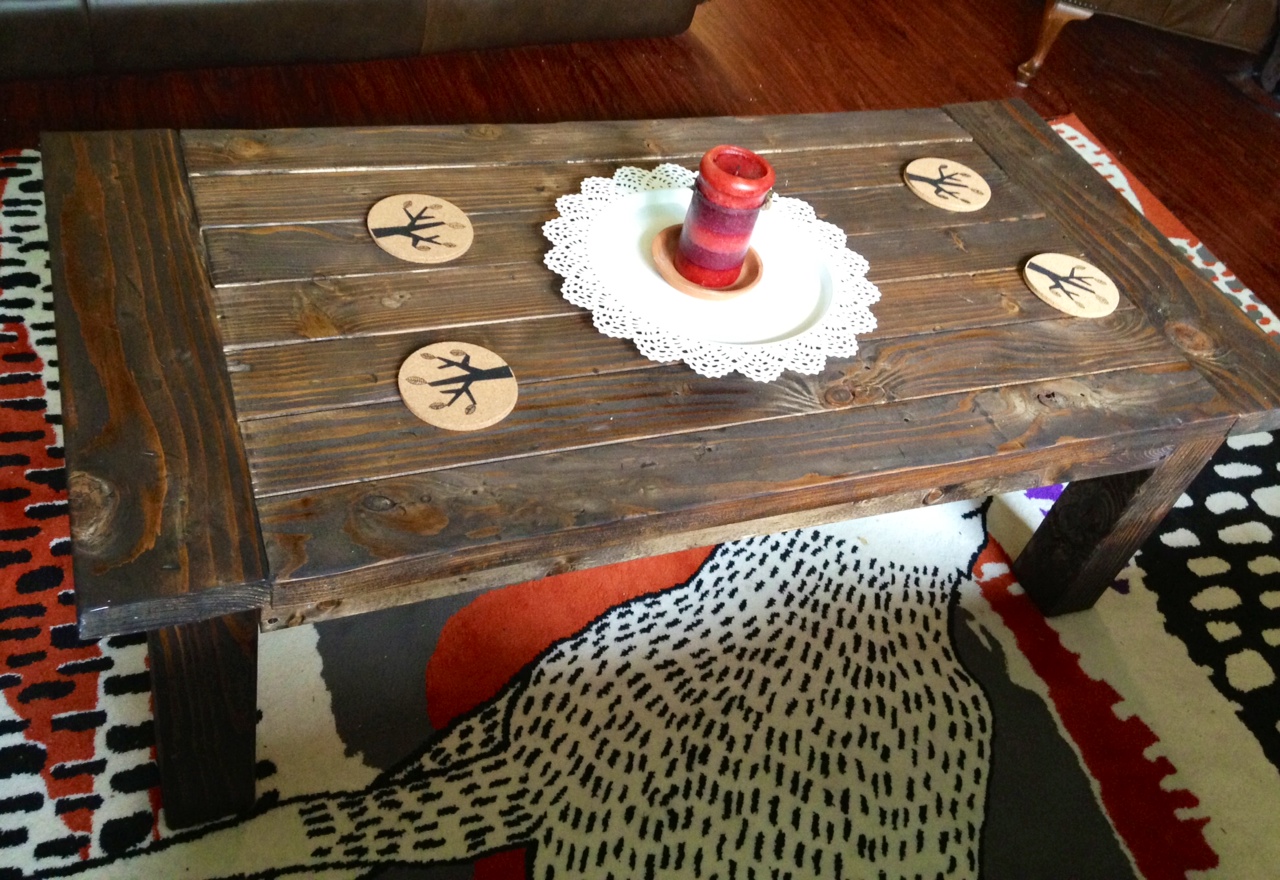
I have been looking for a big enough rustic coffee table for us, and oh boy those cost a lot of money!
My friend told me about ana-white.com website and when I found this Tryde coffee table, I was so happy!
It took me about hour to cut (with help of my husband) and put this coffee table together and then during next weekend I sanded and stained it.
We are having our full house under renovation and it was so nice to have clear plans to follow and get this done without hassle.
Built from Plan(s)
Estimated Cost
I had some left overs from my other projects but I think this cost around 30$
Estimated Time Investment
An Hour or Two (0-2 Hours)
Finish Used
WINWAX dark walnut stain
Recommended Skill Level
Beginner
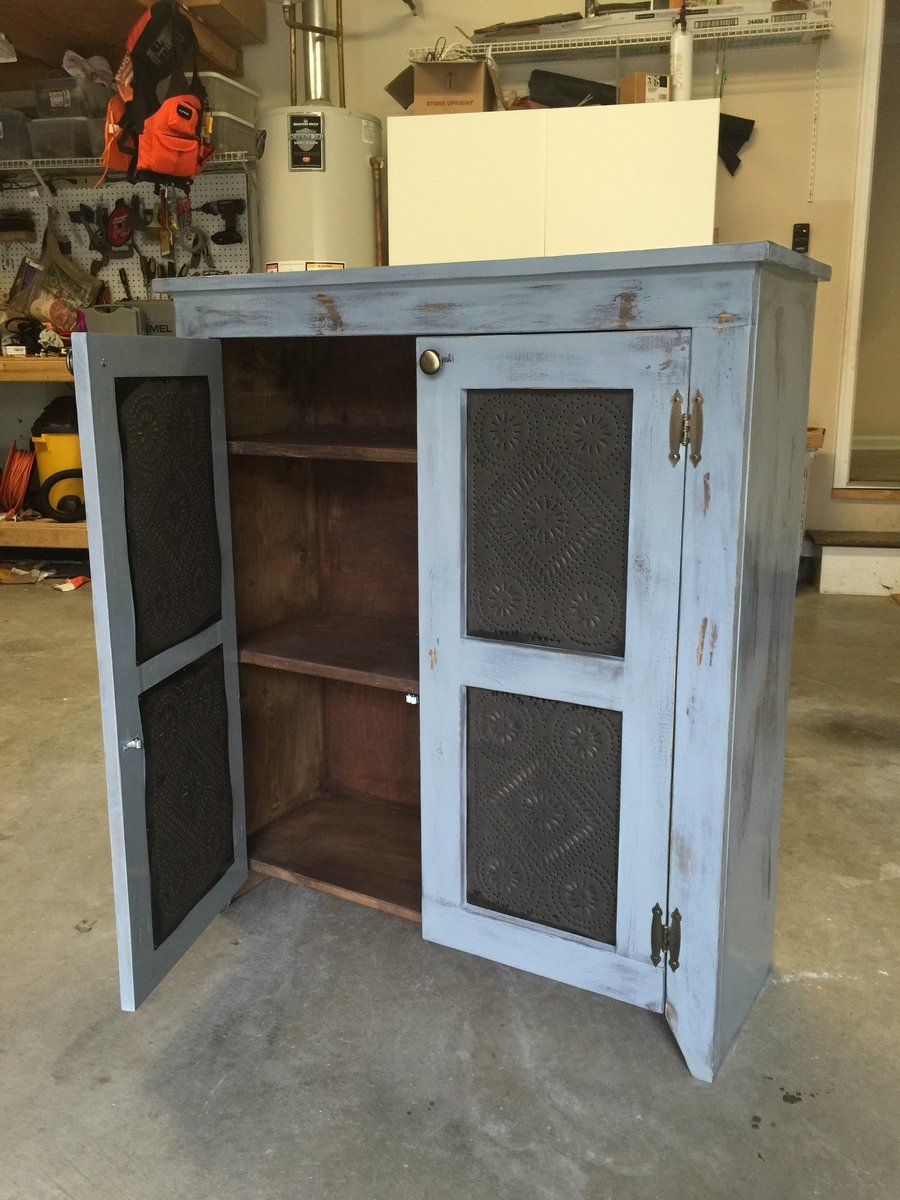
Pie Safe
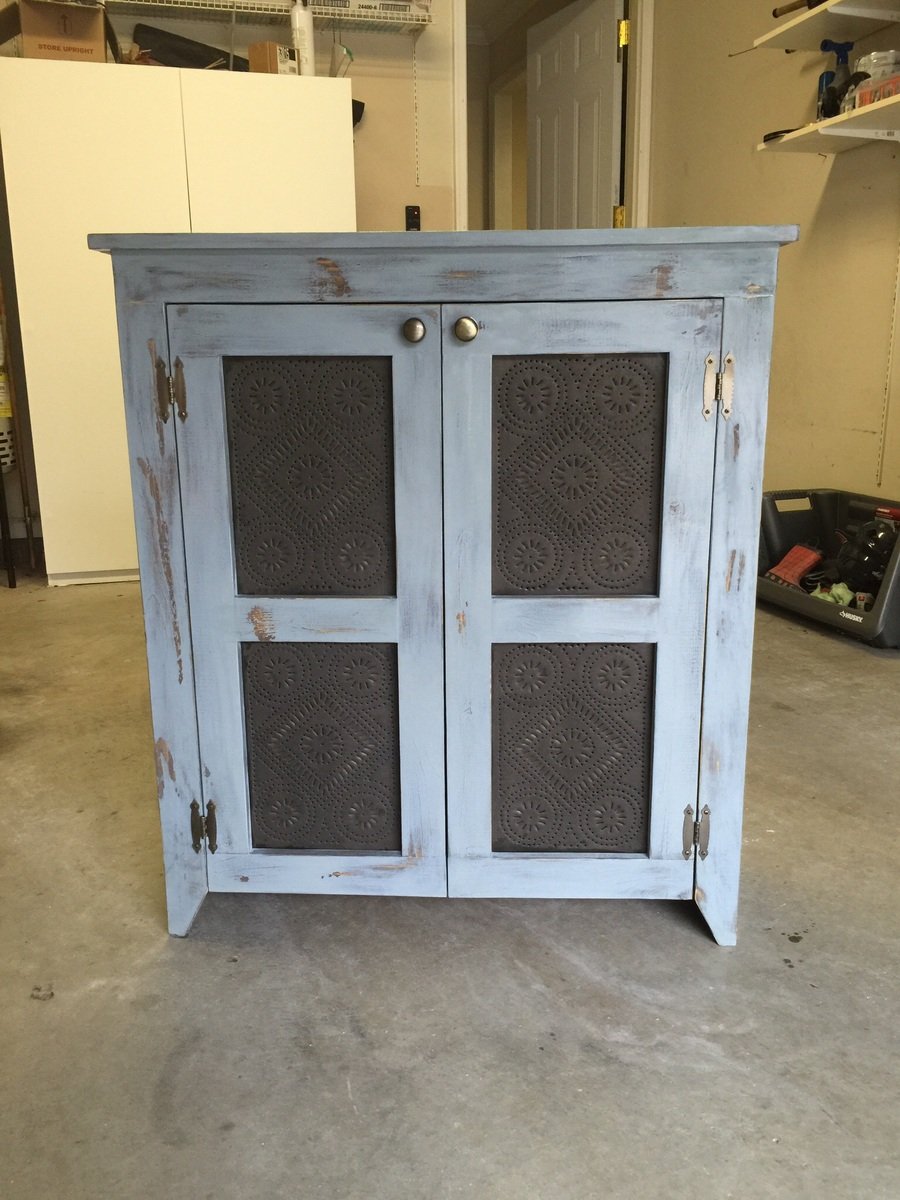
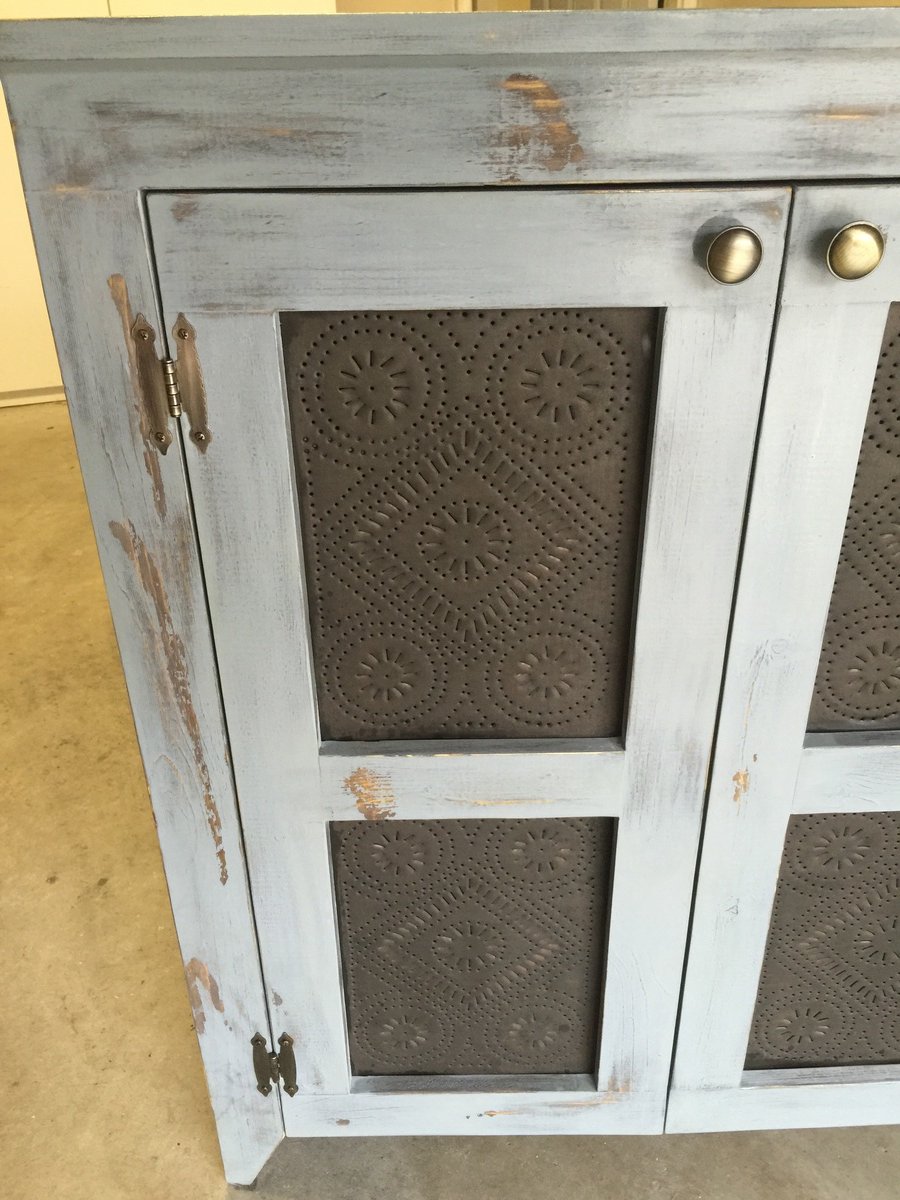
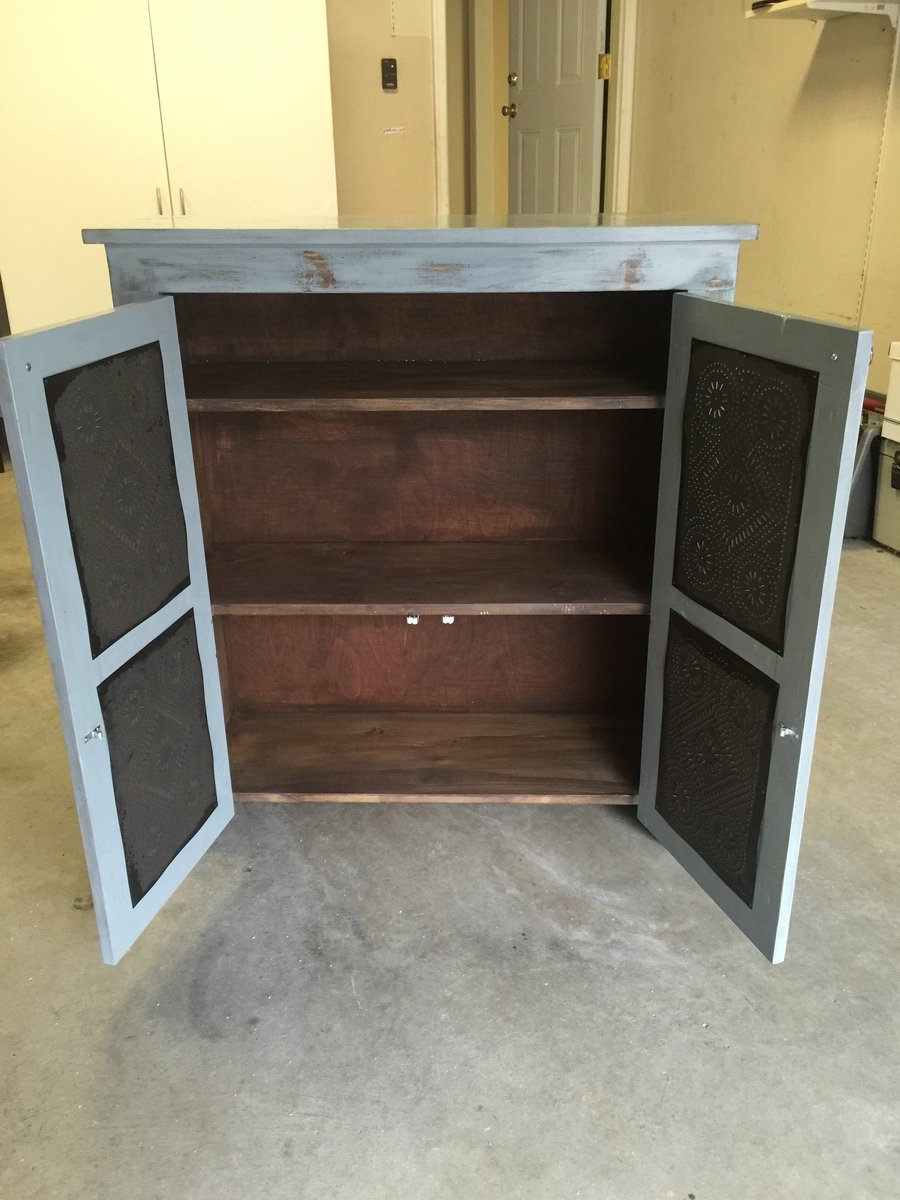
This is my first, of hopefully many projects to come. I modified Patrick's Jelly Cupboard plans to be 40" tall and added the tins to the doors. I used spruce and pine board from a local lumber yard. The finish is Miss Mustard Seed milk paint inside and out. With kids in the house I didn't want to use stain with the heavy chemical smell so I mixed the milk paint with a lot of water to look like a stain. That product is so easy to use and looks great. Needless to say my wife loves her pie safe. Thanks Ana for this site and the inspiration to give this a try. I'm hooked!
Built from Plan(s)
Estimated Cost
$140 including the tins, paint and lumber
Estimated Time Investment
Weekend Project (10-20 Hours)
Finish Used
Miss Mustard Seed Milk Paint - Shutter Gray (exterior), Curio (interior mixed 1 part paint to 3 parts water)
Topcoat - 2 coats of hemp oil
Painted entire piece in Curio first to get the layered look on the distressed finish. 2 coats of Shutter Gray over the Curio.
Topcoat - 2 coats of hemp oil
Painted entire piece in Curio first to get the layered look on the distressed finish. 2 coats of Shutter Gray over the Curio.
Recommended Skill Level
Starter Project
Comments

Sat, 10/31/2015 - 09:36
Beautiful!
This is really beautiful! Might I ask where you got your tin inserts? Thanks!

Tue, 12/01/2015 - 11:13
Tins
Thank you for the comments. I ordered the tins from Irvin's online. They were quick to ship and were packaged well. Here's the link
https://www.irvins.com/category/Kitchen-Cabinet-Punched-Tin-Panels/08_2…
Modified X end tables

I modified the plans for a smaller size and used pallet wood as well as 2x4s and 2x6s ( scraps I had from earlier projects)
Built from Plan(s)
Recommended Skill Level
Beginner
Comments

Wed, 12/26/2018 - 13:41
These are gorgeous! Love the
These are gorgeous! Love the modified size. Thanks so much for bragging!
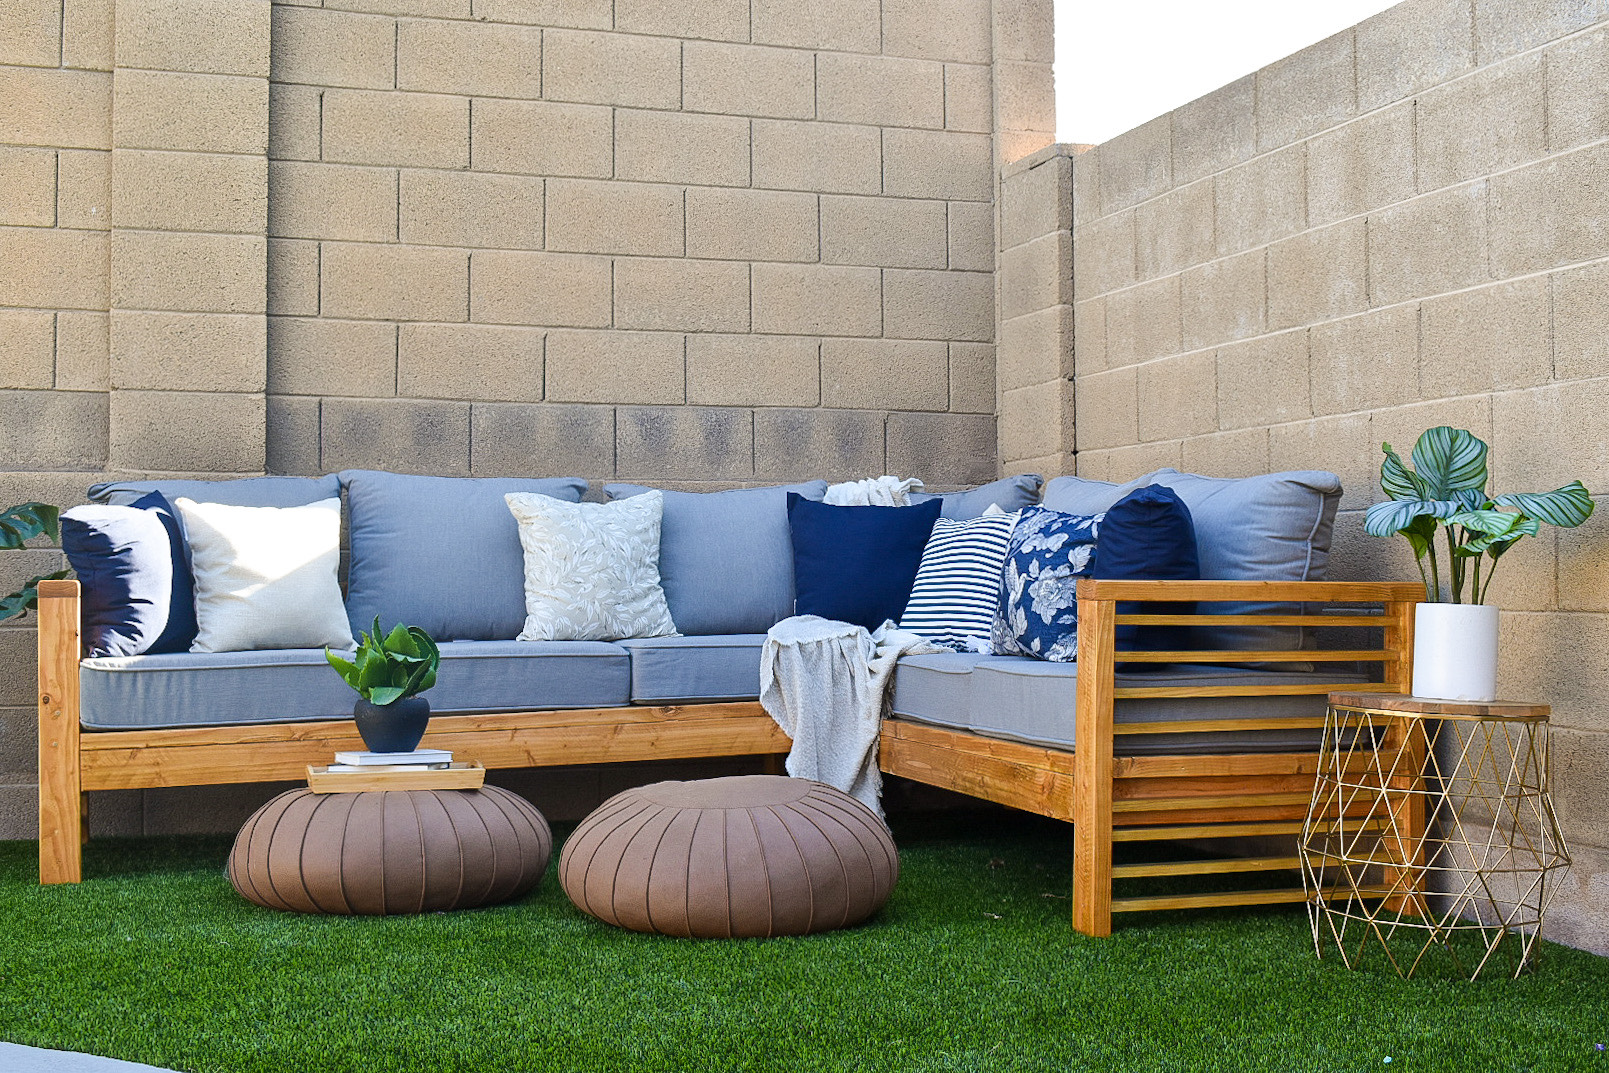
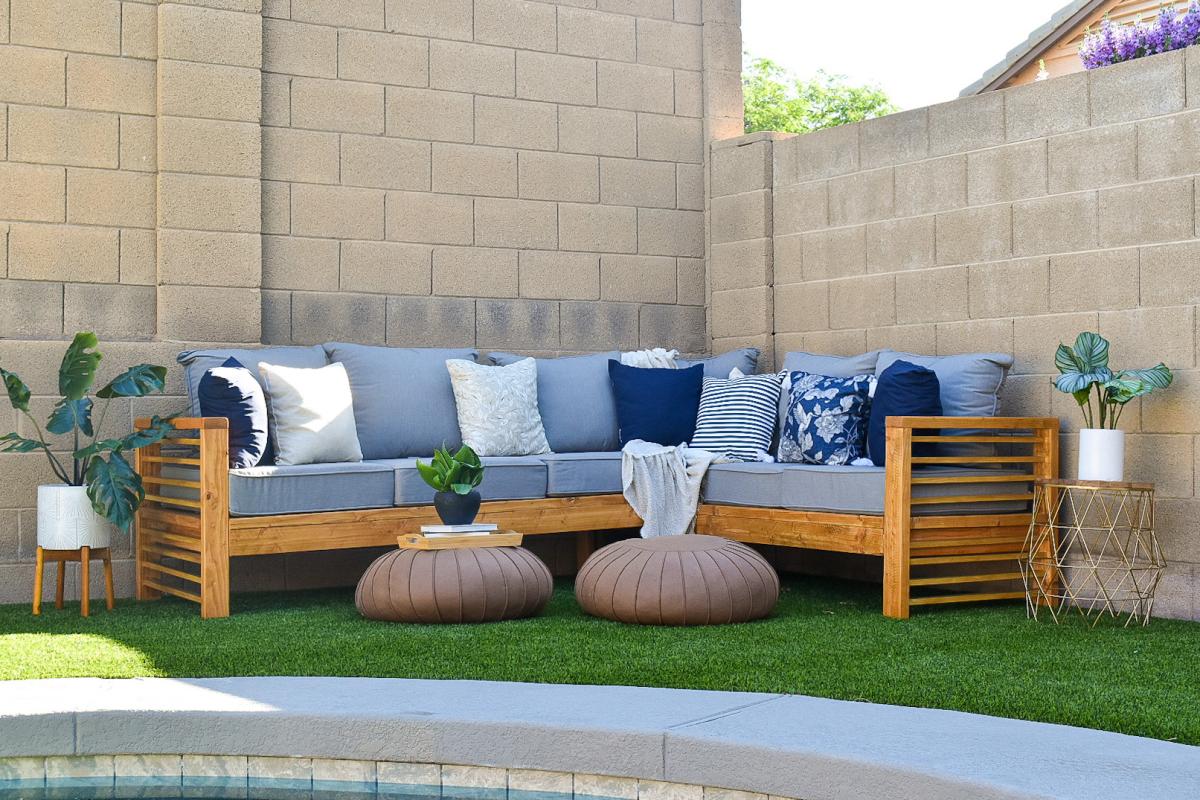
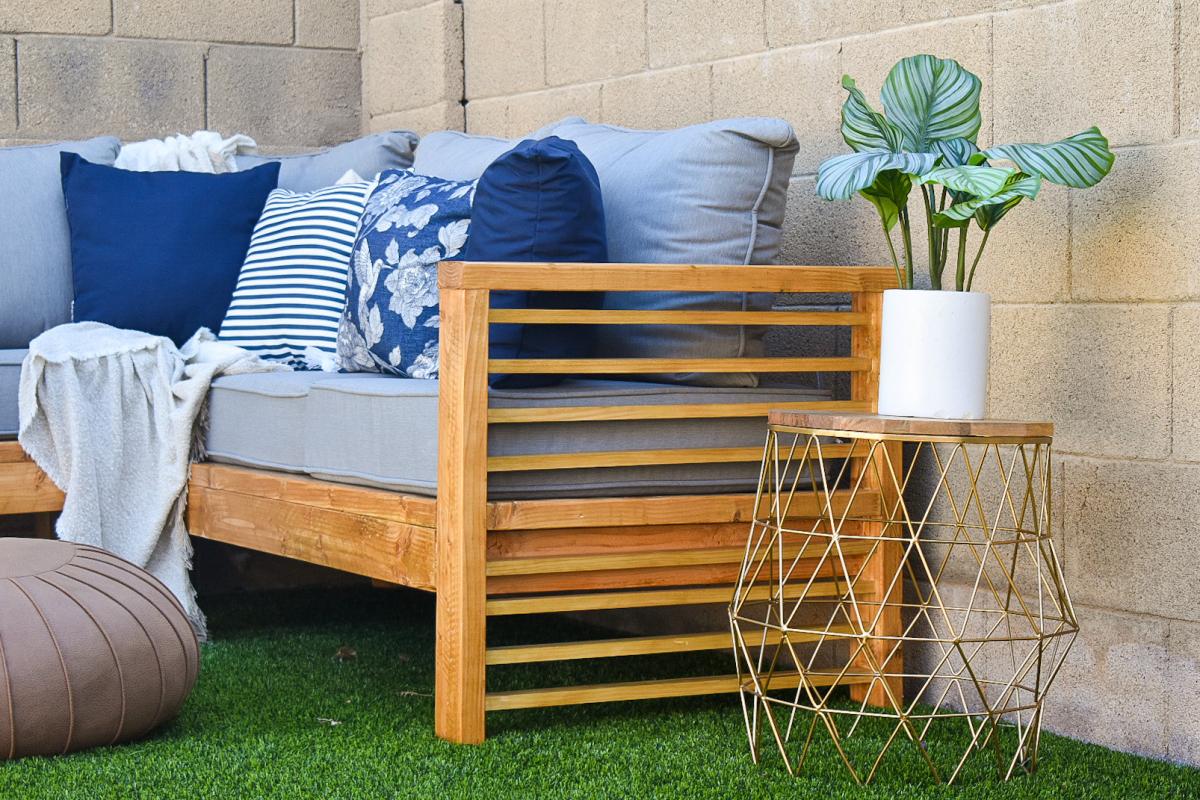
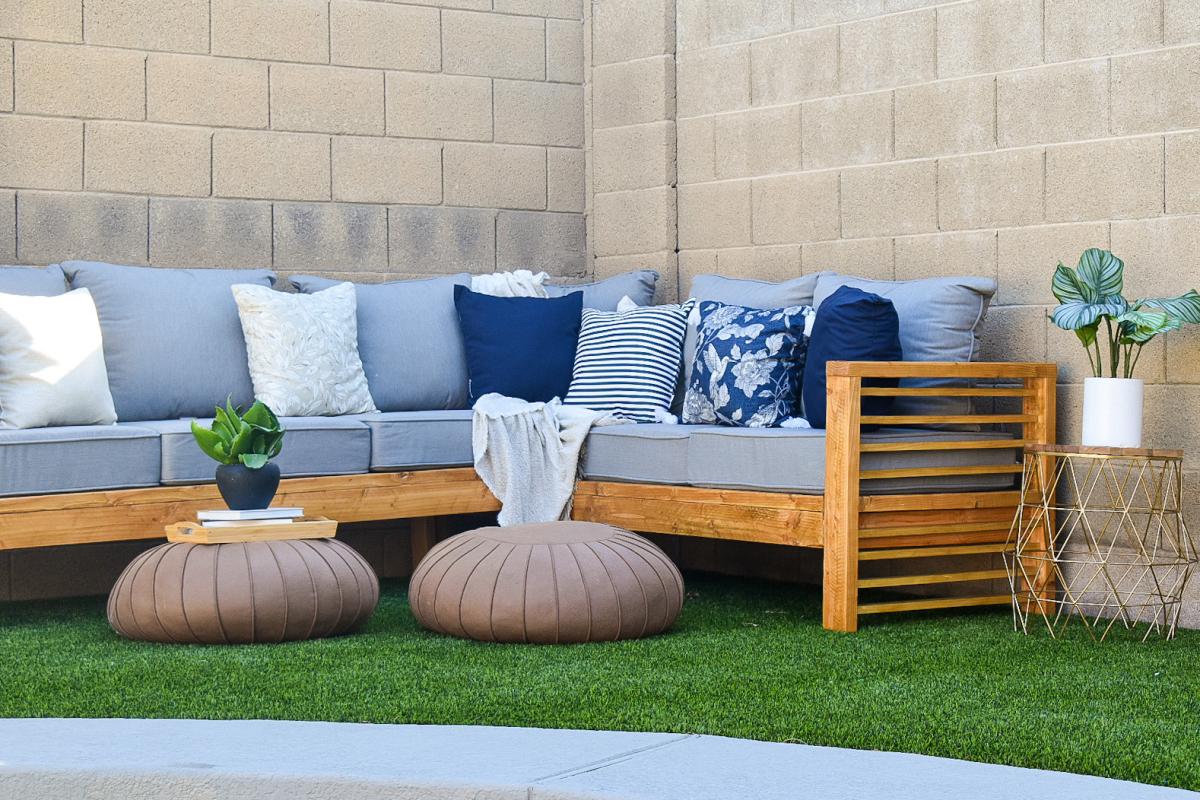
Outdoor Sectional with Slat Design

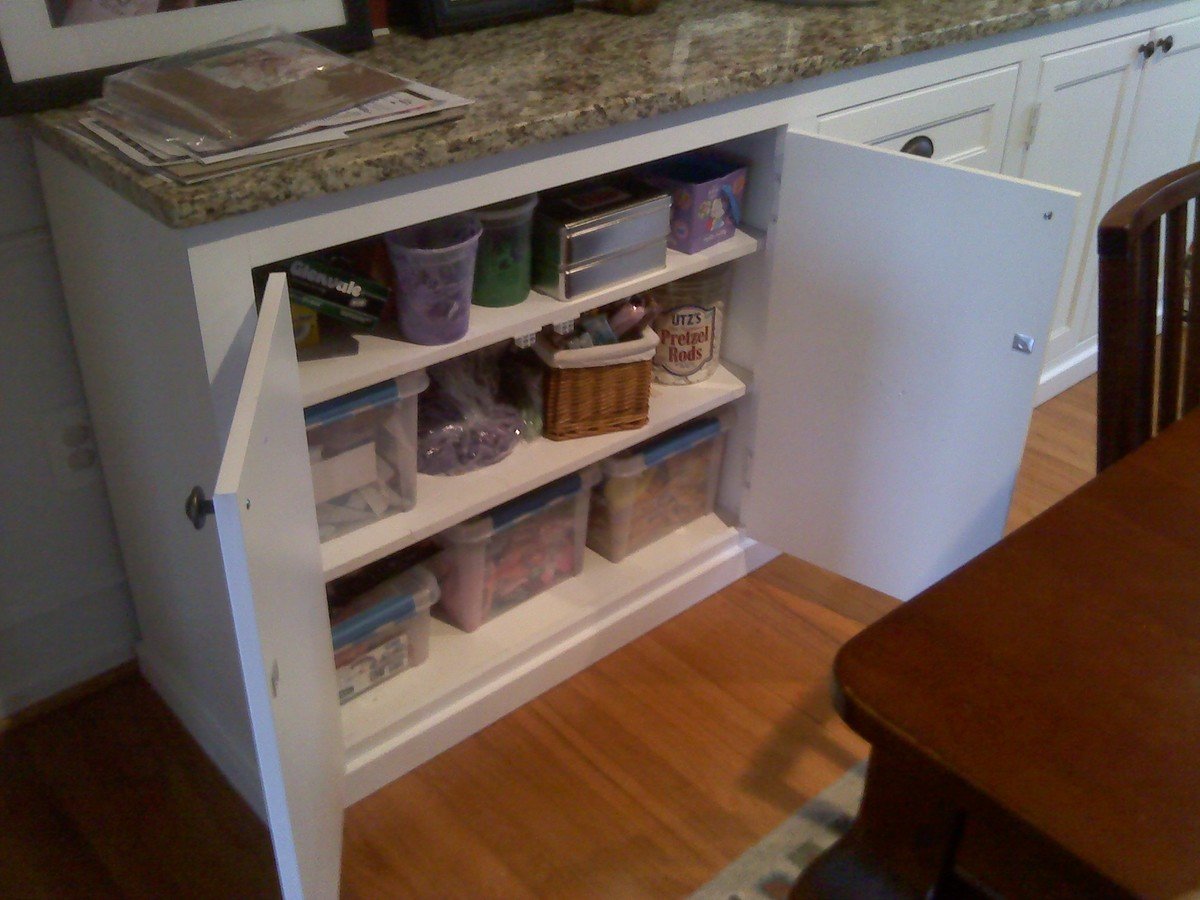
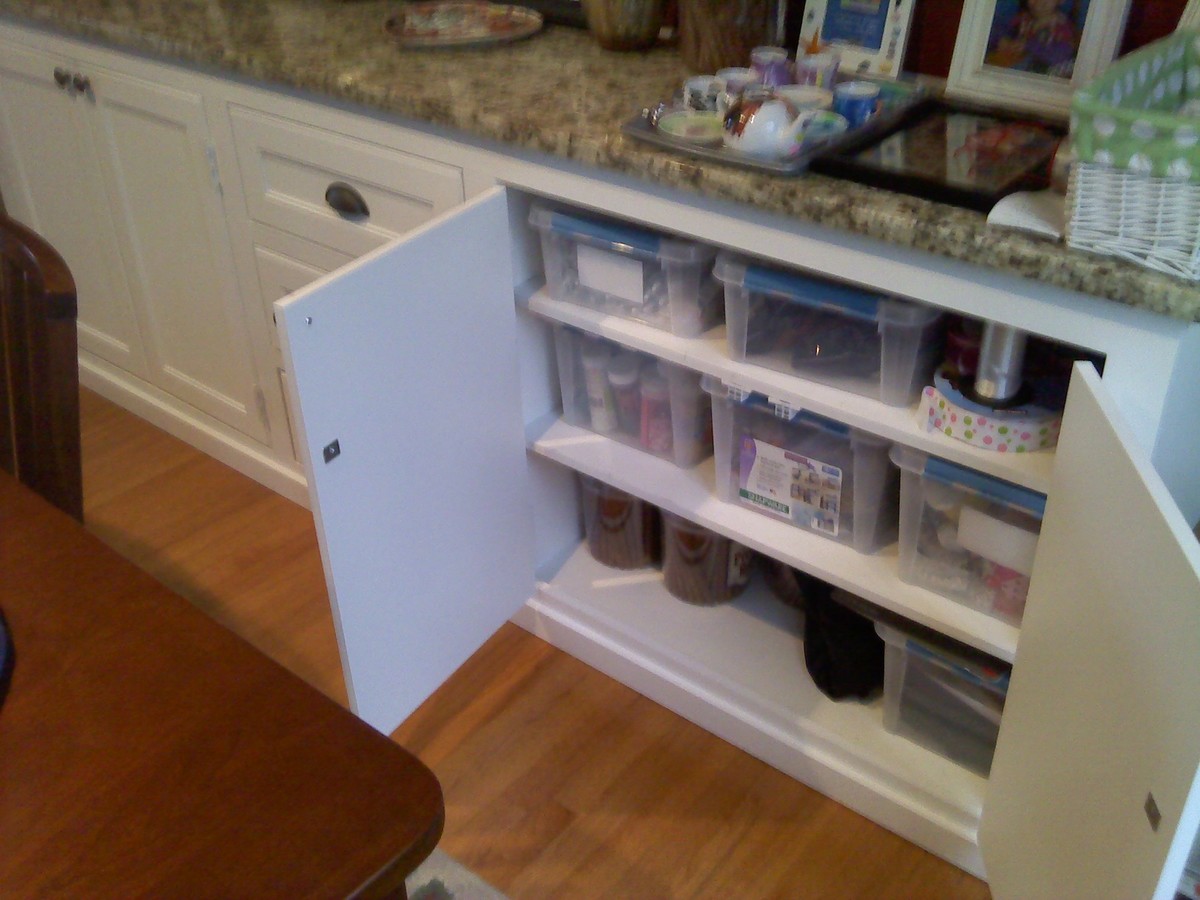
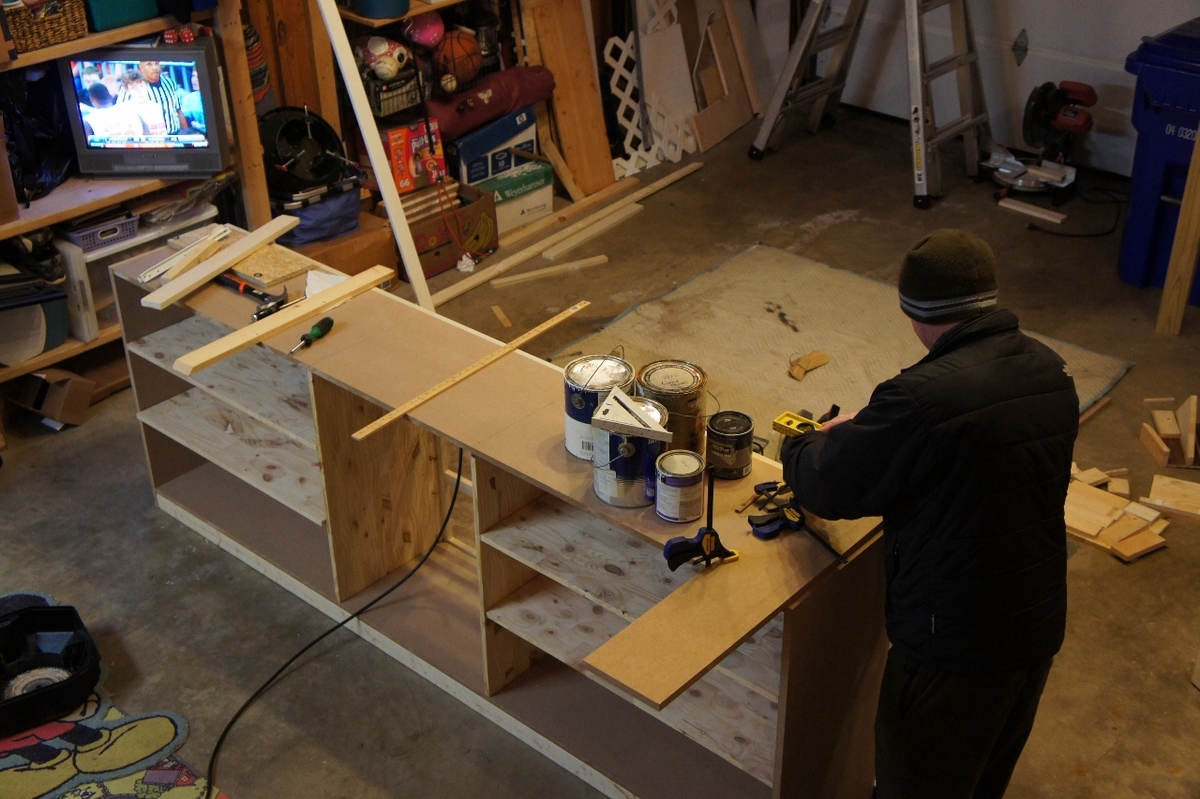
Dining Room Buffet Cabinet

I scoured the web unsuccessfully for months trying to find a cabinet big enough to store everything we needed to store. I wanted something huge and bright and simple, and so I decided to just build away. It's 8'4" long, 18" deep and 36" tall. Topped with a slab of Giallo Napoleon granite and painted a nice plain white. Took me only a few nights to build and paint, thanks to my power nailer and power paint sprayer. Thanks to a great deal on a remnant granite slab, this was just about $400 total start to finish. I winged the entire plan and didn't really use any plans in particular, though I have gathered many great ideas and tips from this site.
Built from Plan(s)
Estimated Cost
$450-500
Estimated Time Investment
Weekend Project (10-20 Hours)
Finish Used
Satin white, nothing special!
Recommended Skill Level
Intermediate
Comments

Sat, 08/13/2011 - 14:51
Beautiful!
Wow - looks great! You would think it was done by a pro! You should be very proud of your finished product.
Tue, 12/04/2018 - 06:43
Where did you find these cabinets ?
Trying to find cabinets like this. Did you buy them or build them?
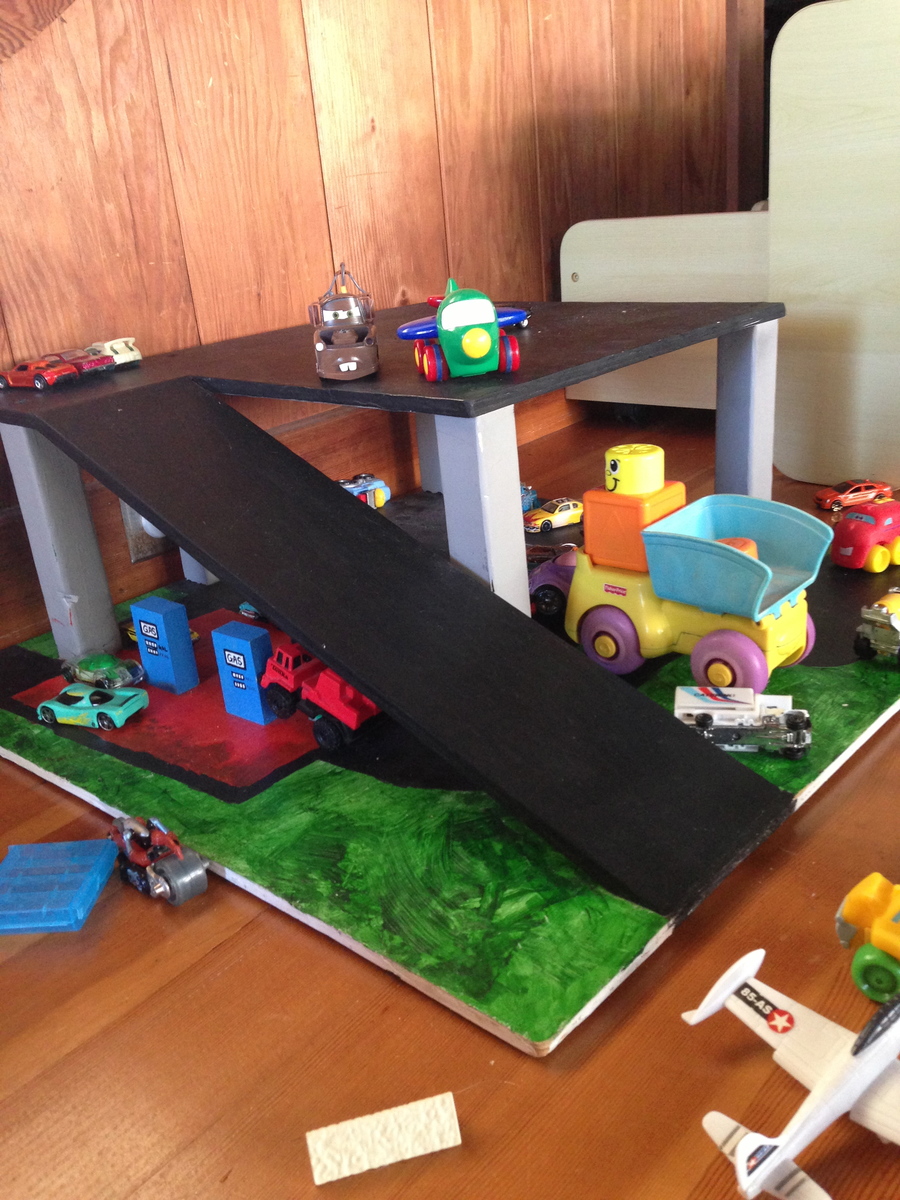
Toy garage
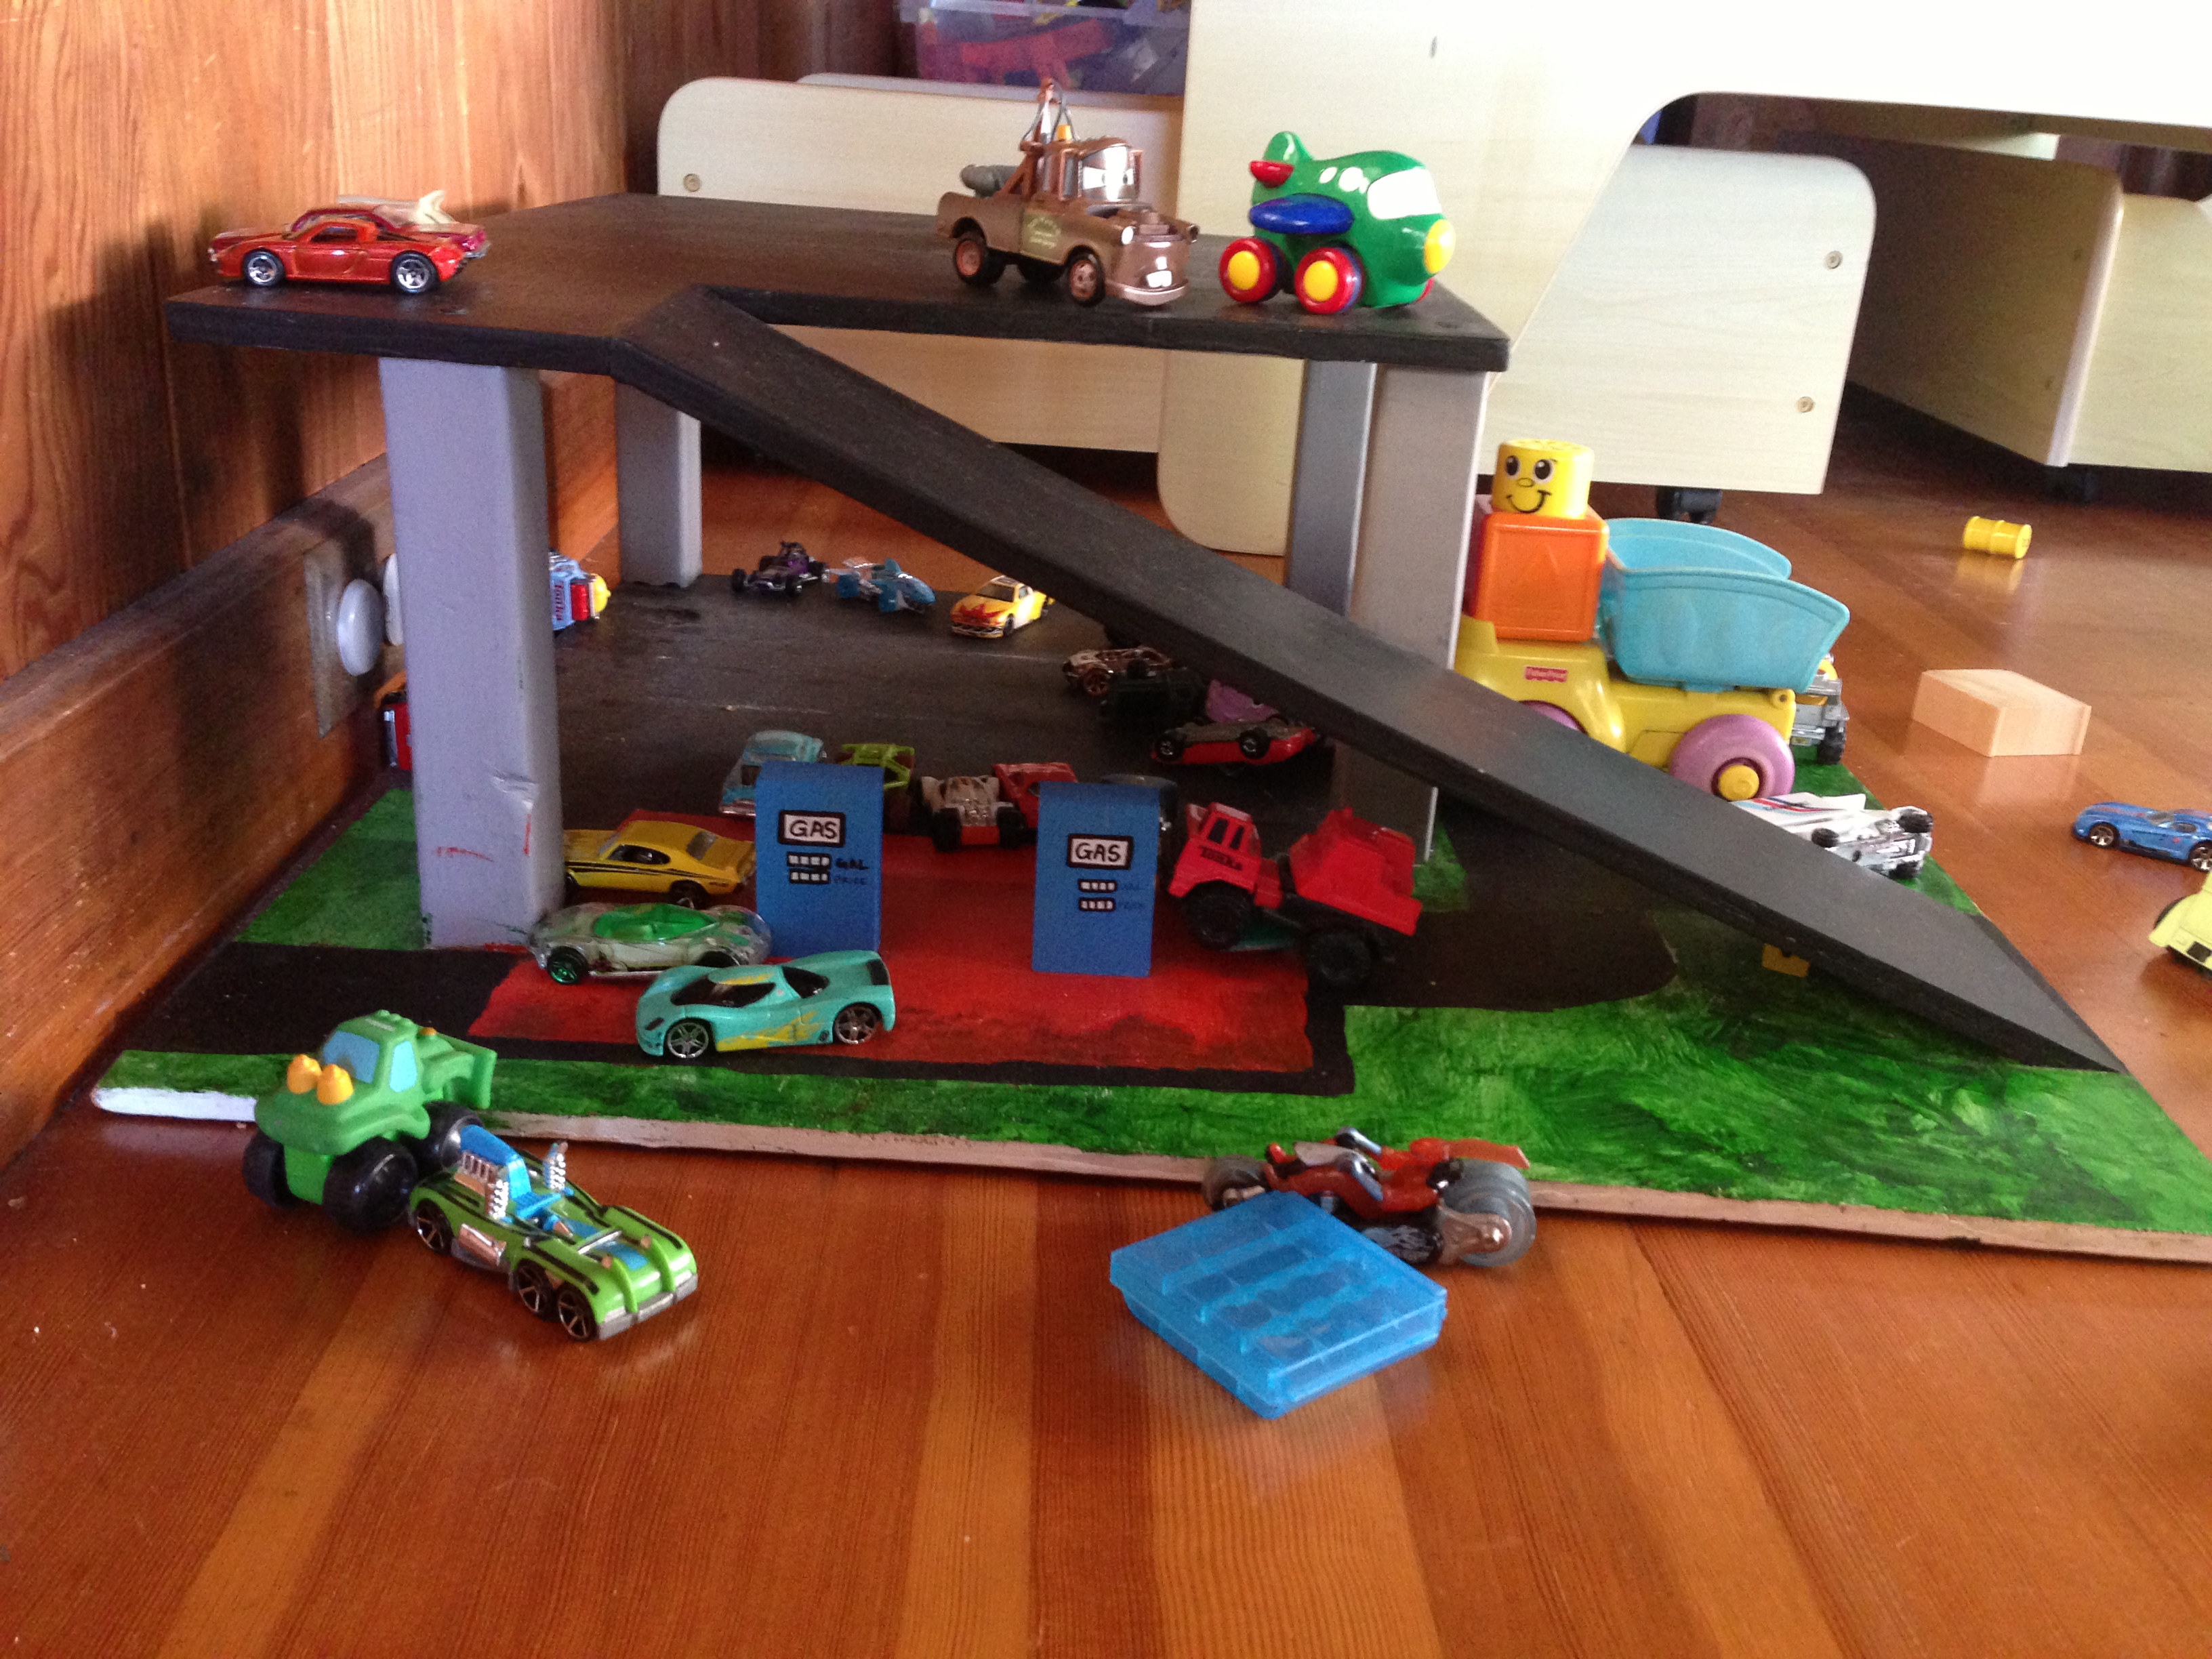
I got inspired by Ana to design my own toy garage - so that there would be somewhere to store all the hot wheels that kept piling up! I have no idea what the angle is for the driveway ramp - it was trial and error with help from my husband, but it's pretty sturdy. Between the mitered cut and the copious amounts of glue, it holds the weight of a 25 lb toddler walking up it (though I try to discourage it!).
I used chalkboard paint and acrylics - so that we can draw parking stalls, lanes, or arrows as desired - my son helped with the painting. So far, the favorite activities are sending the cars down the ramp, one after another...
Estimated Time Investment
Weekend Project (10-20 Hours)
Recommended Skill Level
Beginner
Shabby Chic Platform Bed
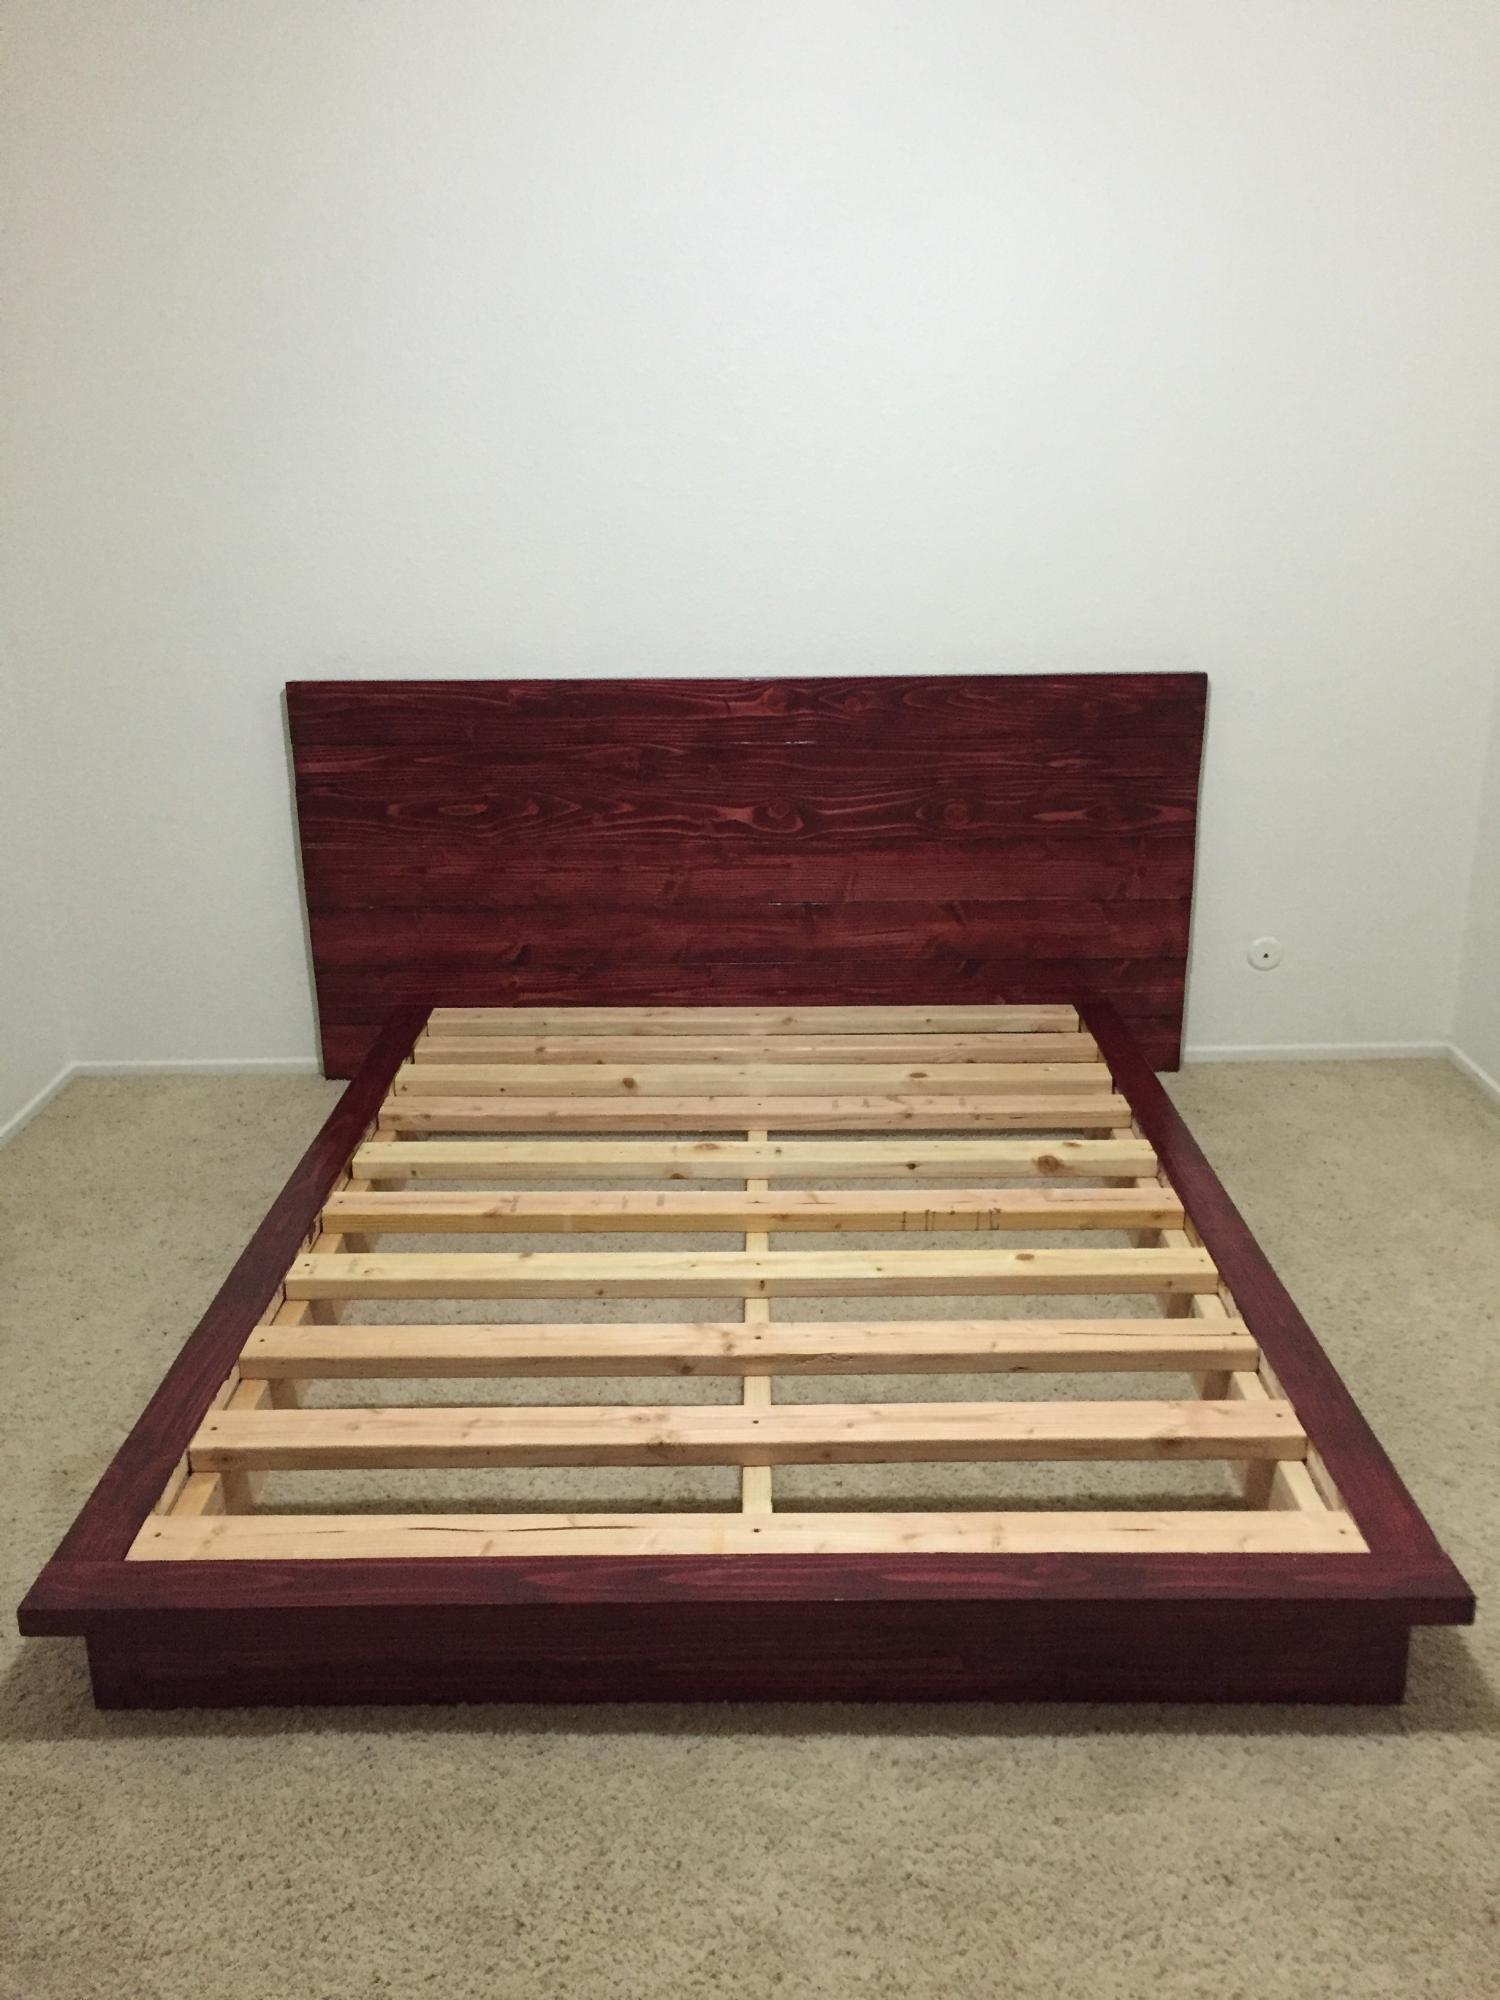
I had a similar bed in grad school that I had purchased from Walmart. I loved the design but despised the quality. I was obviously very happy to find this plan here and had no reason to not invest in the required tools and supplies for my very first woodworking project.
This was very easy to make. I did have a small issue in that some of my lumber was bowed but a little improvisation fixed the problem.
I used pocket screws to join the headboard pieces and also used 4 cleats at the back of the headboard to keep it all together. I did not nail it to the wall stud and I see no sign of warping.
I used a semi-gloss polyurethane finish, but I am not a fan of it and will not use it again. I also did not sand between polyurethane coats and wish I had done so. In future I will use a satin polyurethane finish or wax.
I did not use glue because I would like to take the bed apart if and when I move houses. It is nonetheless a sturdy piece and is held together very well.
In short I am very proud of my very first build and the little imperfections are all lessons well learnt.
Built from Plan(s)
Estimated Cost
~$100
Estimated Time Investment
Weekend Project (10-20 Hours)
Finish Used
2 coats of Varathane cabernet followed by 2 coats of a semi-gloss polyurethane. The headboard has only one coat of the stain followed by 2 coats of the polyurethane.
Recommended Skill Level
Beginner

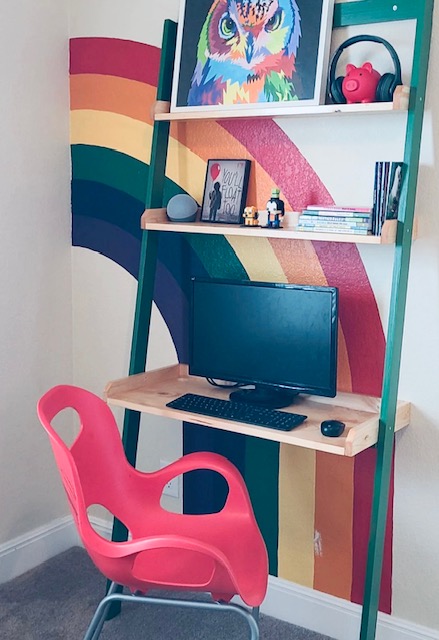
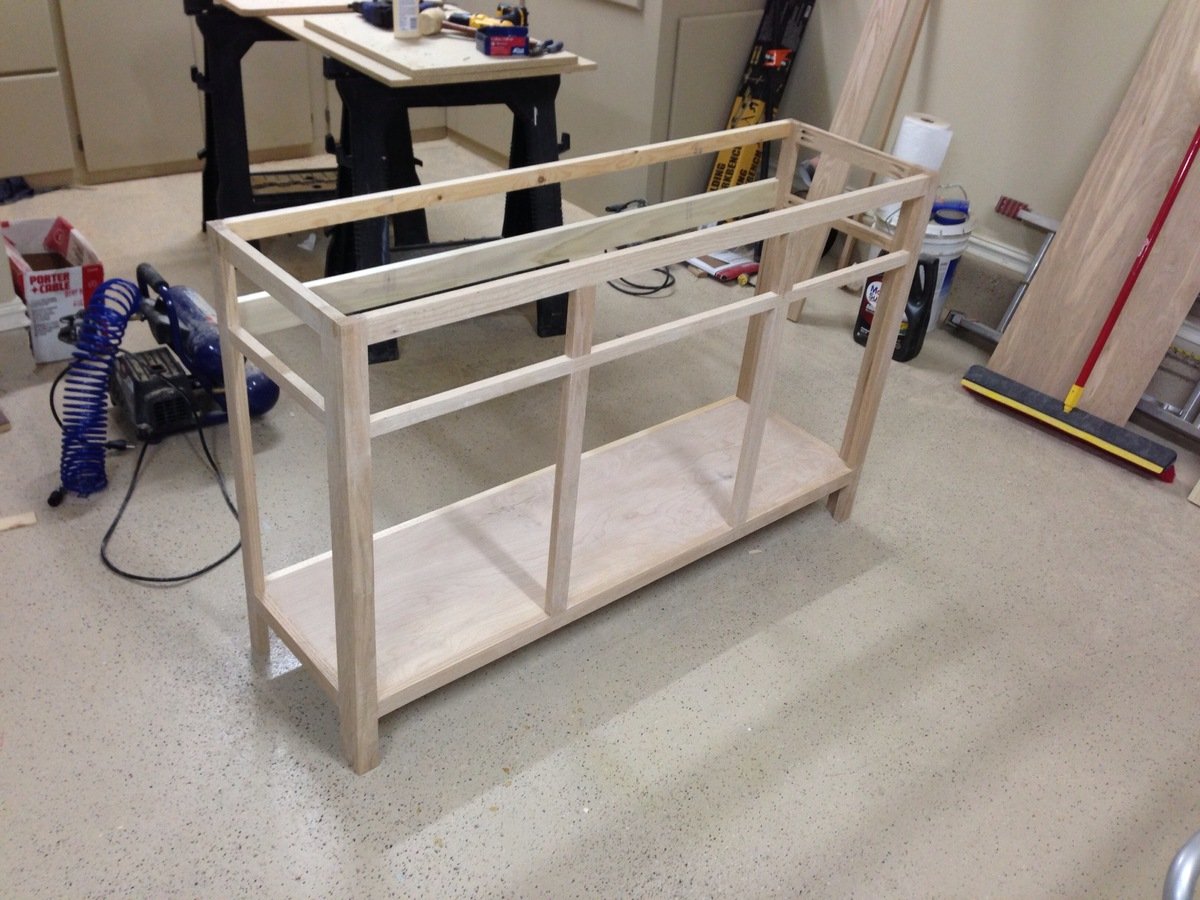
Leaning Desk Study Space
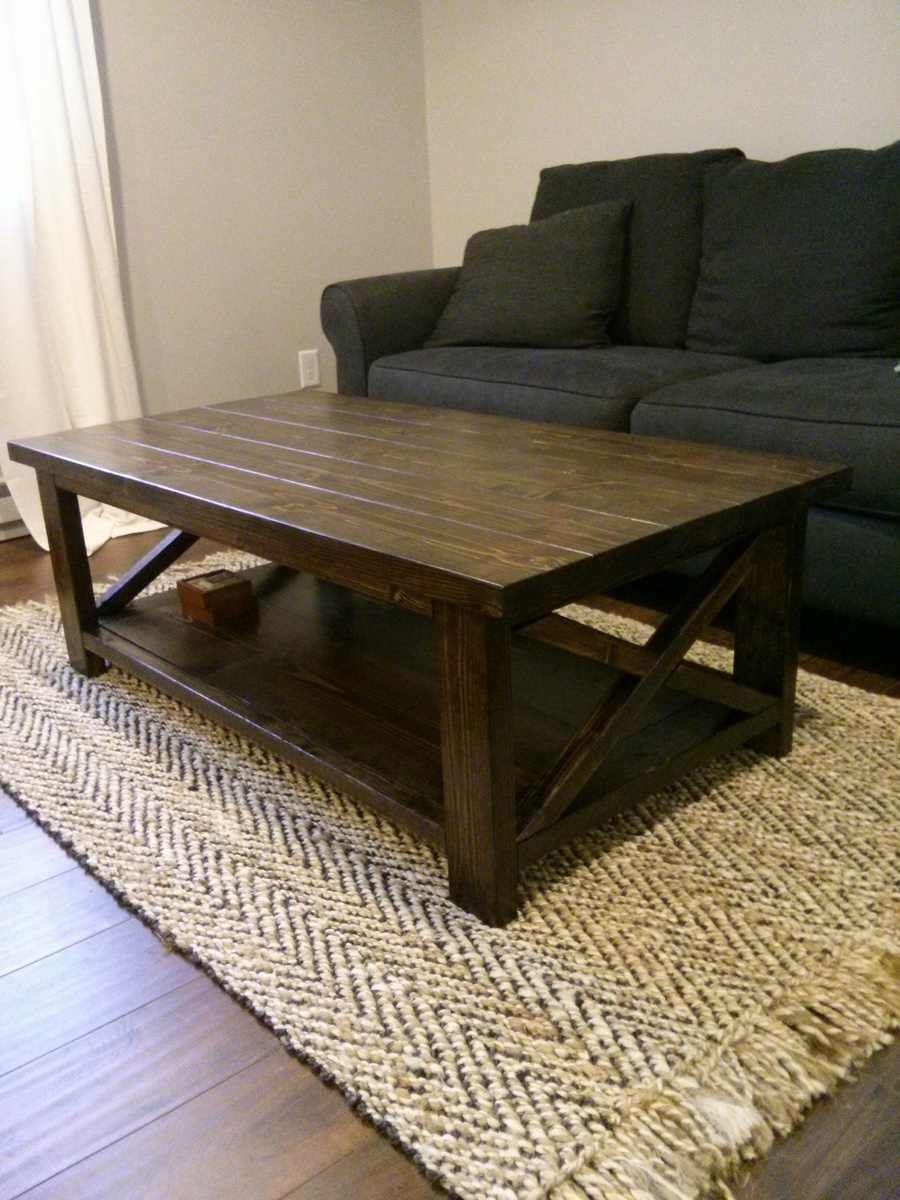
Tryde Coffee Table

You'd think it'd be easier to find a great coffee table but it's not! After looking for several weeks I finally told my wife that I could build us a table cheaper (even accounting for tools) than what we would pay, not to mention we were spending weekends looking for something that doesn't exist.
This table is STURDY - with all the nails and glue in it, it's not going anywhere. I would recommend this to anyone who thinks they'd like it, fairly straight forward directions but there's lots of sanding involved. This is the first thing I've ever built and I think it turned out great.
You can do this just as easily!
Built from Plan(s)
Estimated Time Investment
Weekend Project (10-20 Hours)
Finish Used
Minwax Jacobean
Recommended Skill Level
Beginner
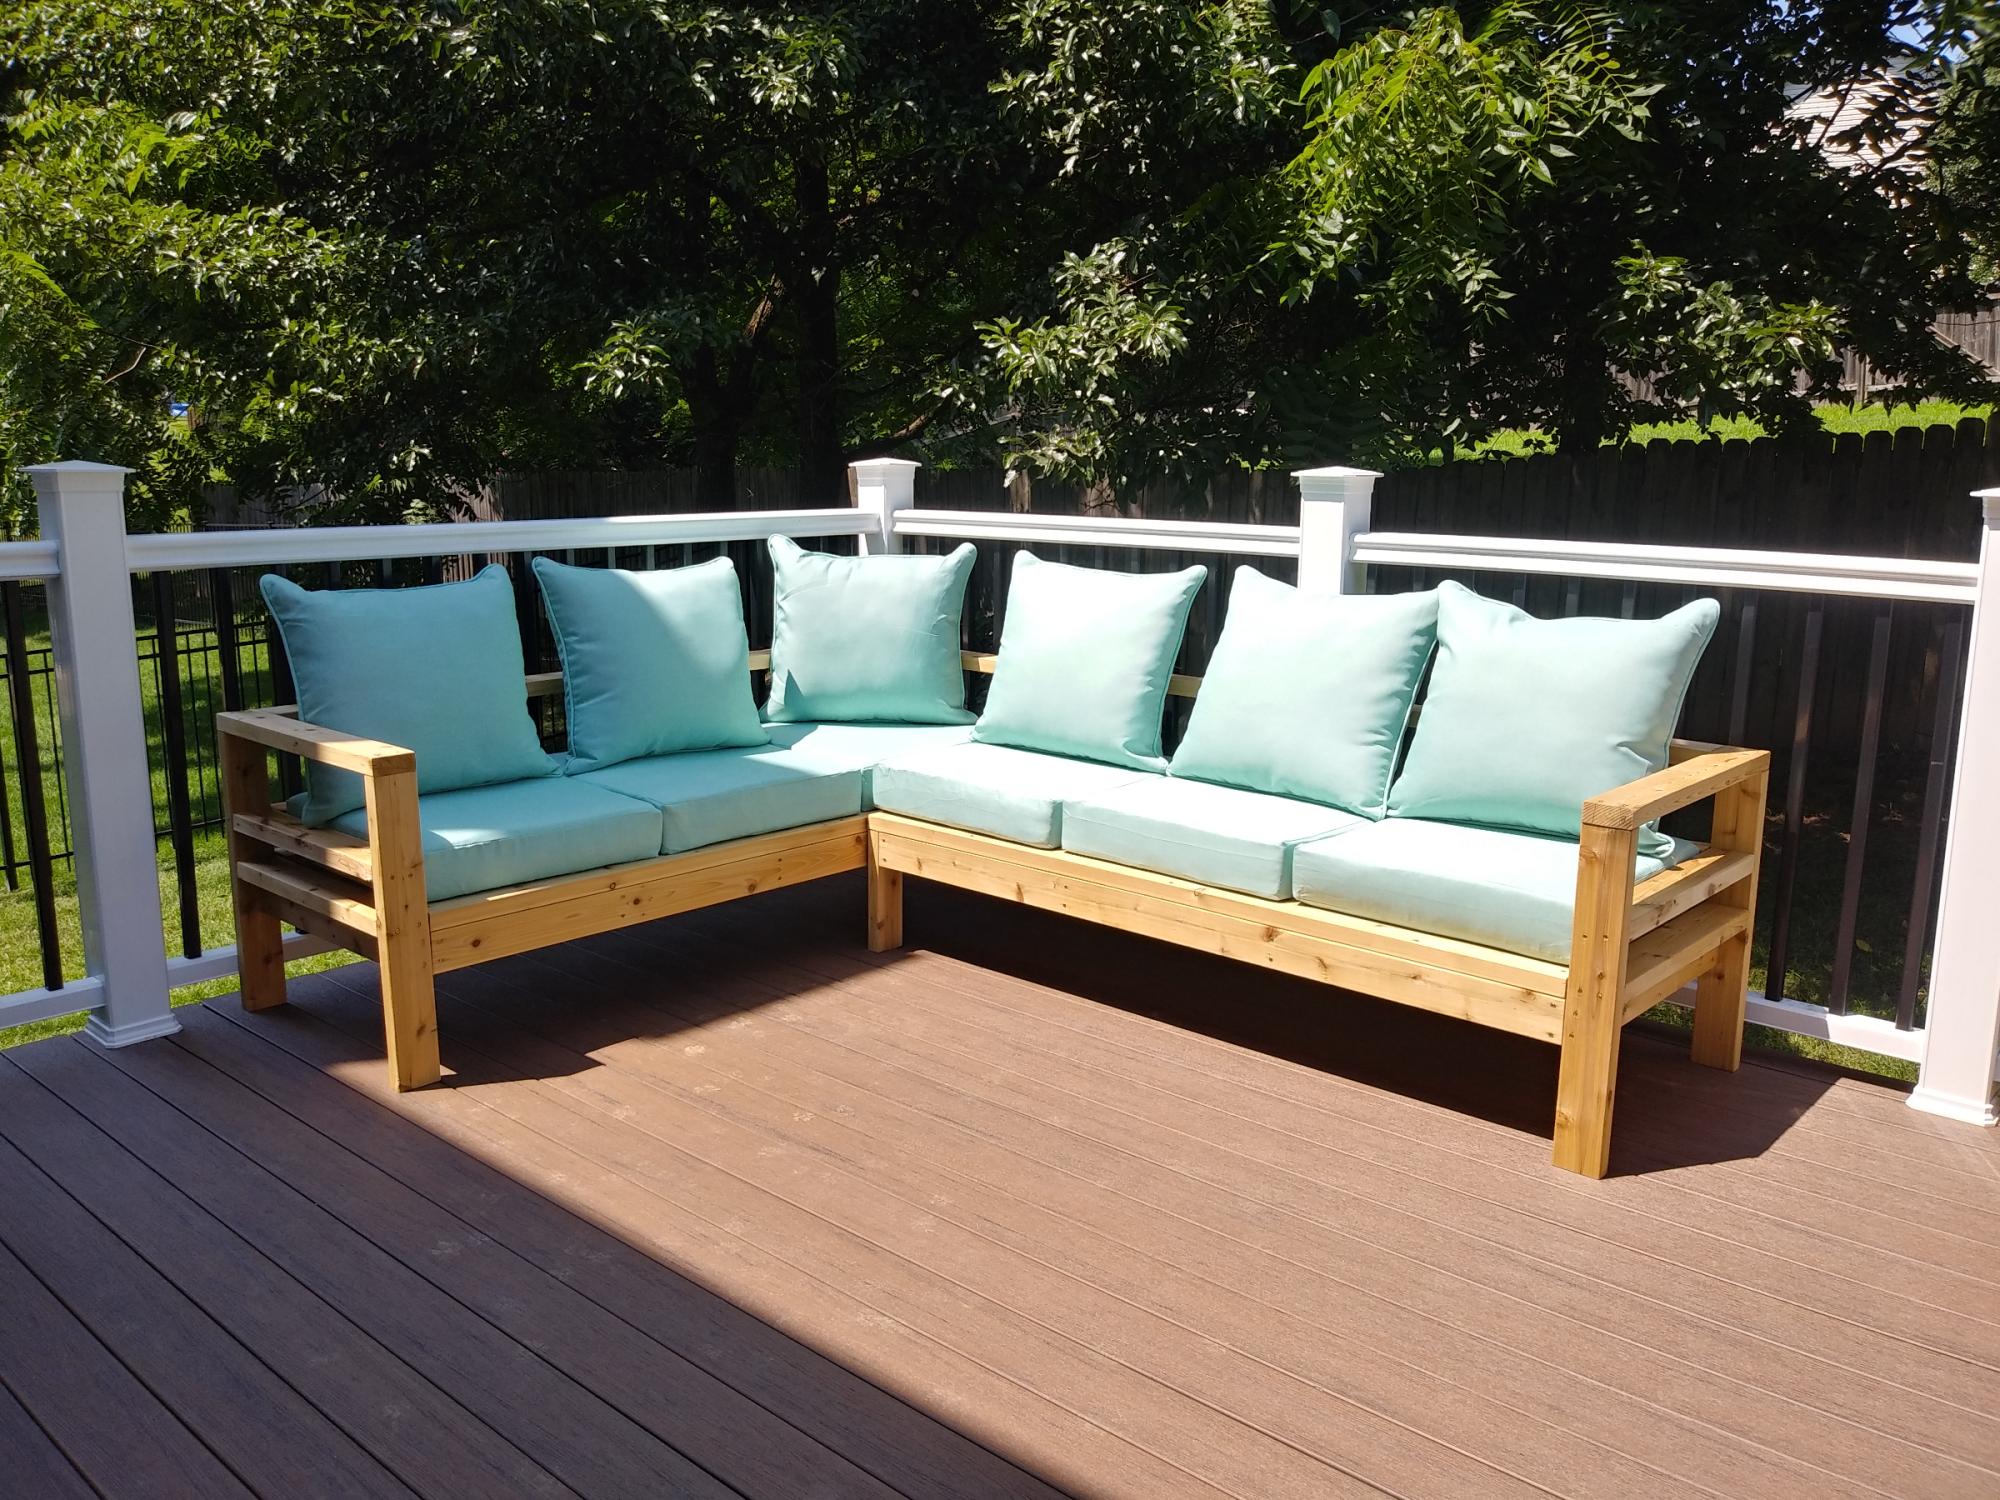
Outdoor Sectional
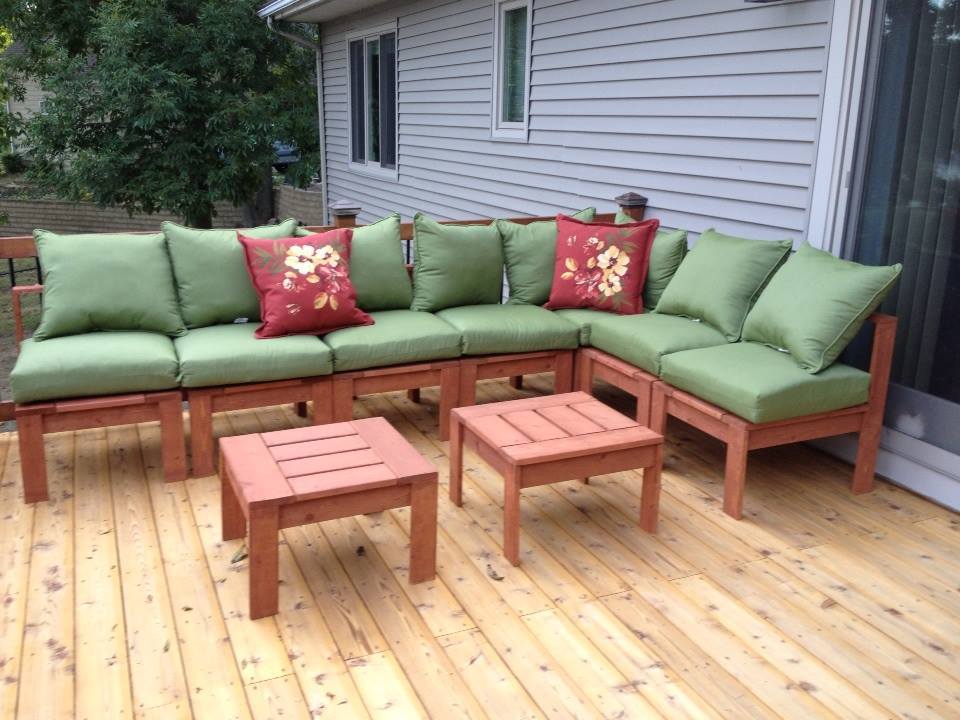
Used 1 x 4 cedar boards for the legs and backs and 1 x 6 cedar deck boards that were left over from when we built the deck it is sitting on. Built 6 armless units and one corner unit. Total the sectional is 10' x 6' with two 2'x2' ottomans. As everyone else states, the cushions were the most expensive part of the project. We purchased these 8 Sunbrella cushion sets from Home Depot for about $600. After cutting all of the pieces it really did not take that long to assemble the units. I ended up building a little "support bridge" that I rested the unit on so I could attach the back legs since the front legs are attached first. This way I knew the legs would end up level without having to measure, attach the back legs and hope that the legs would end up level. With the front legs resting on the ground and the rest of the unit supported by the "bridge" I could set the back legs in place, resting solidly on the ground and attach the legs to the seat, with no measuring needed.
Built from Plan(s)
Estimated Cost
Wood = less than $200, cushions = varies depending on your desires.
Estimated Time Investment
Weekend Project (10-20 Hours)
Recommended Skill Level
Beginner
Comments

Sat, 09/14/2013 - 23:36
Looks like a fantastic and
Looks like a fantastic and inviting place to relax! Amazing job!!
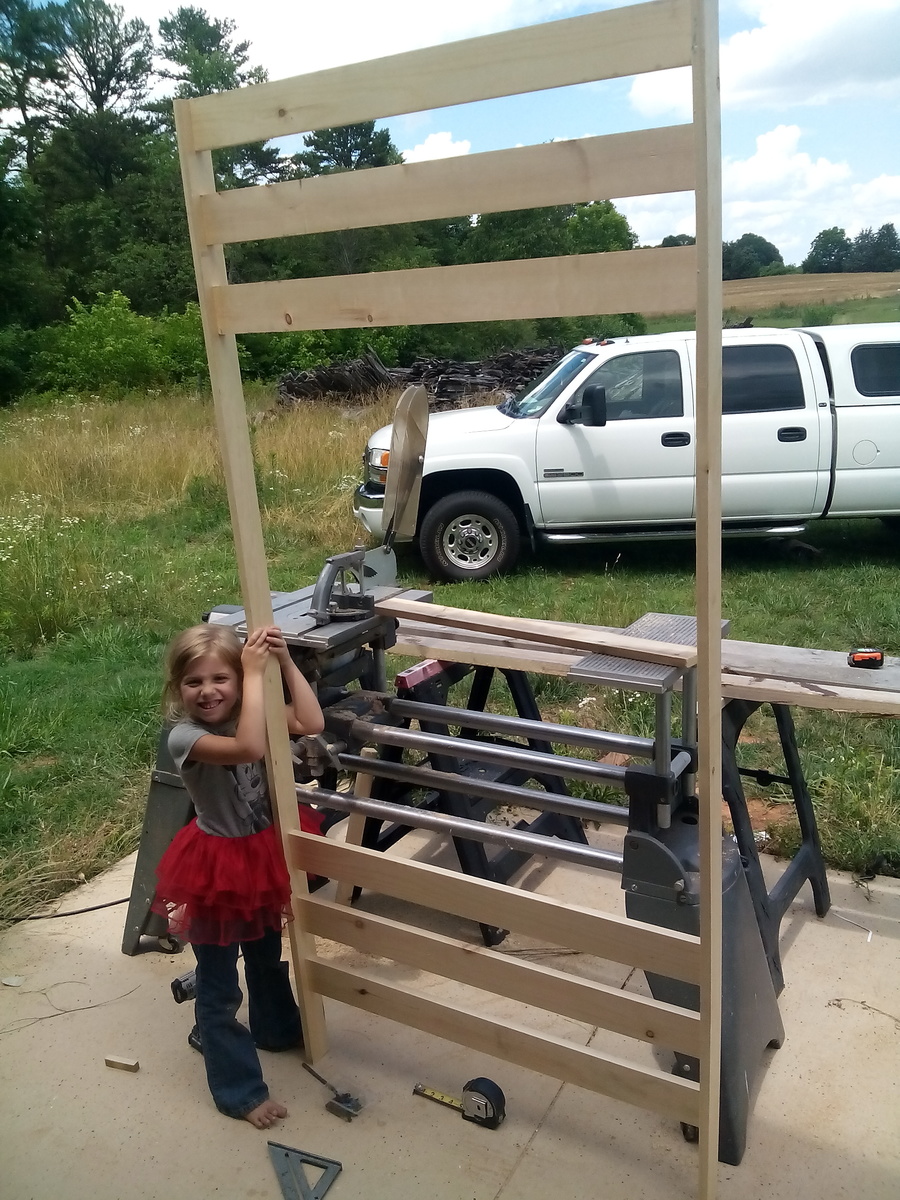
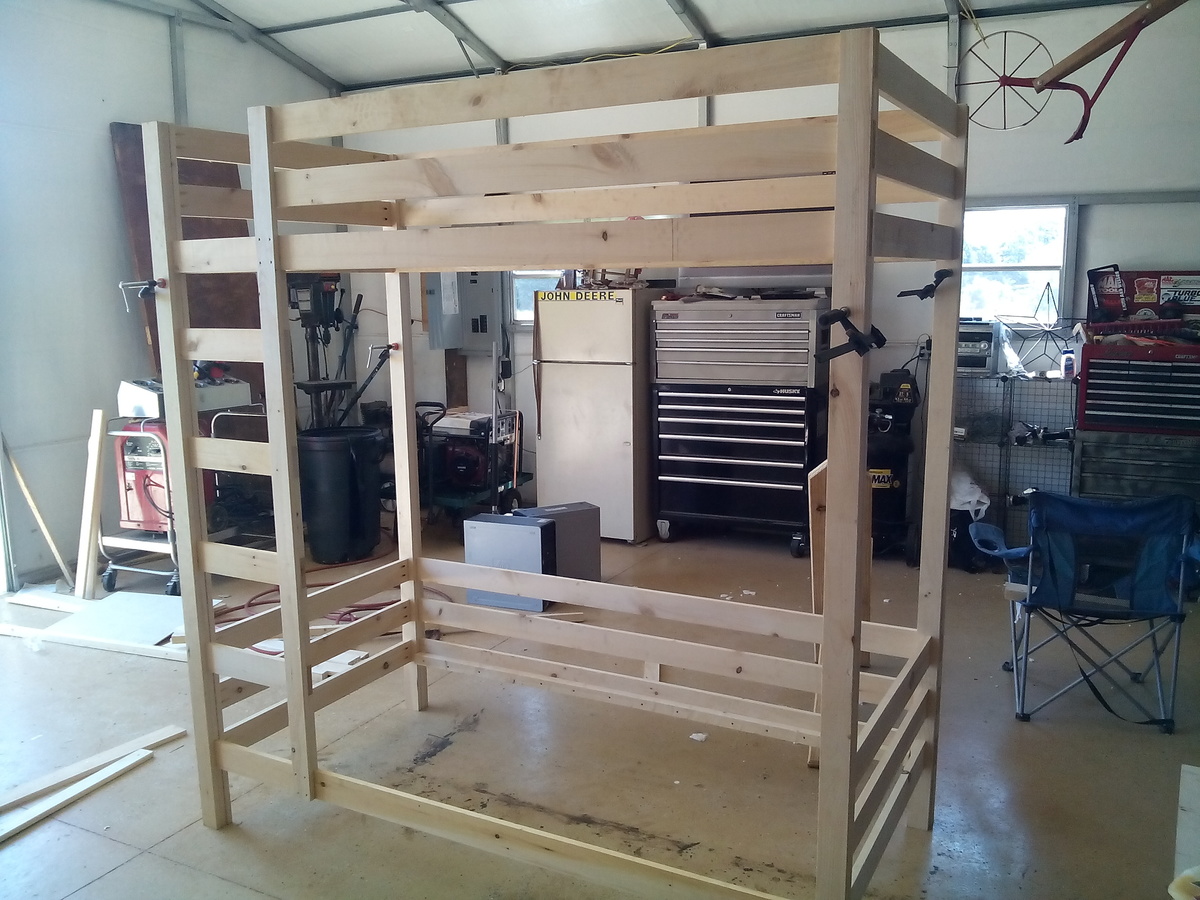
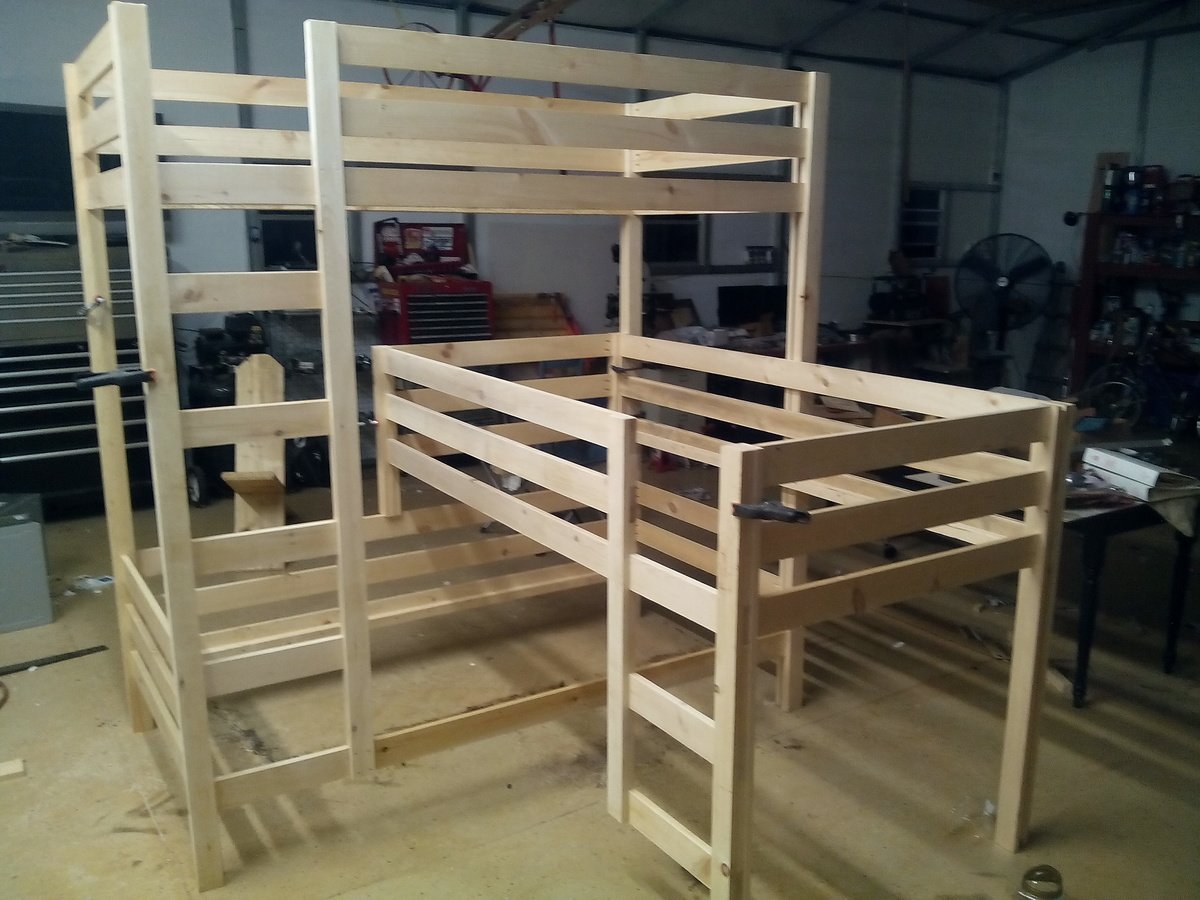
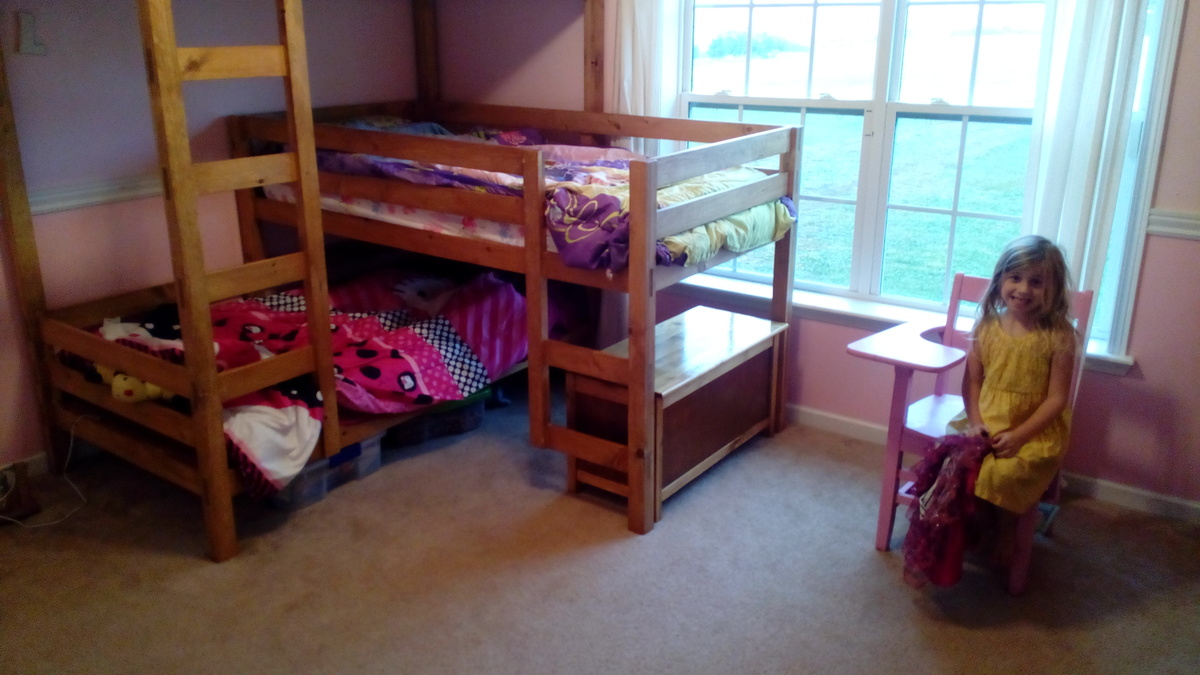
Triple Bunk Bed
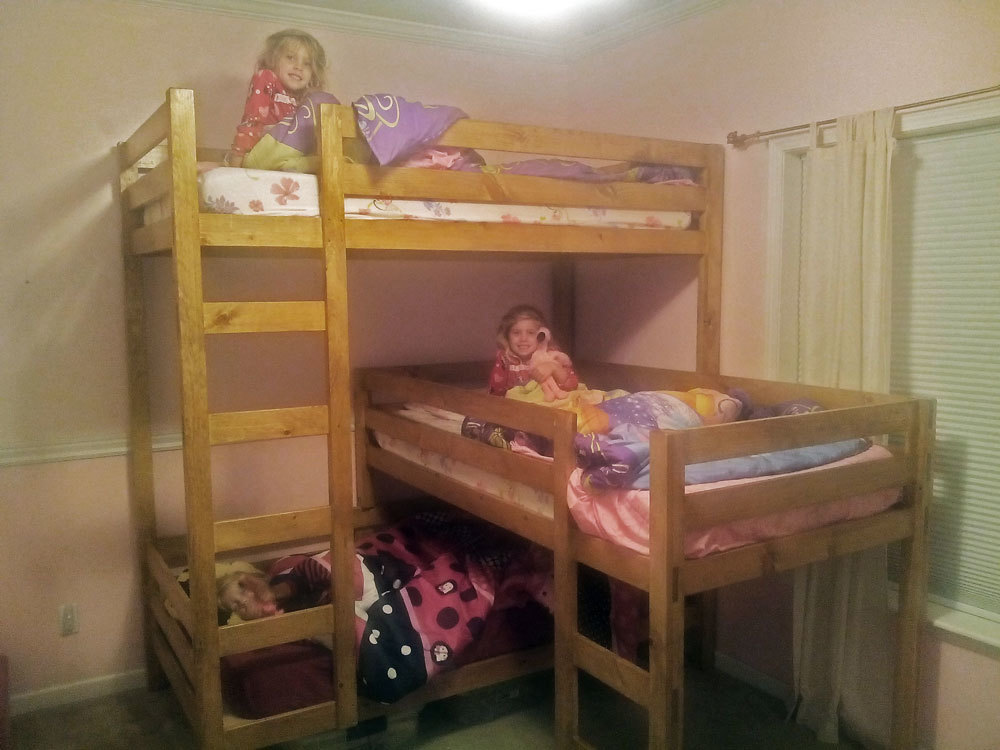
I took the “classic bunk bed” plans and changed them to accommodate my 3 girls. I have 9 ft ceilings so I just stretched the traditional plans out to allow the 3rd bunk to be added. It turned out nice and my girls enjoy it. I also built a matching toy box that is visible in one of the pictures. Please excuse my messy shop. I built this with my 40 year old shopsmith and a kreg jig. Thank you for the plan.
Built from Plan(s)
Estimated Cost
$300 +-
Estimated Time Investment
Weekend Project (10-20 Hours)
Finish Used
Golden oak stain and lots of poly.
Recommended Skill Level
Beginner
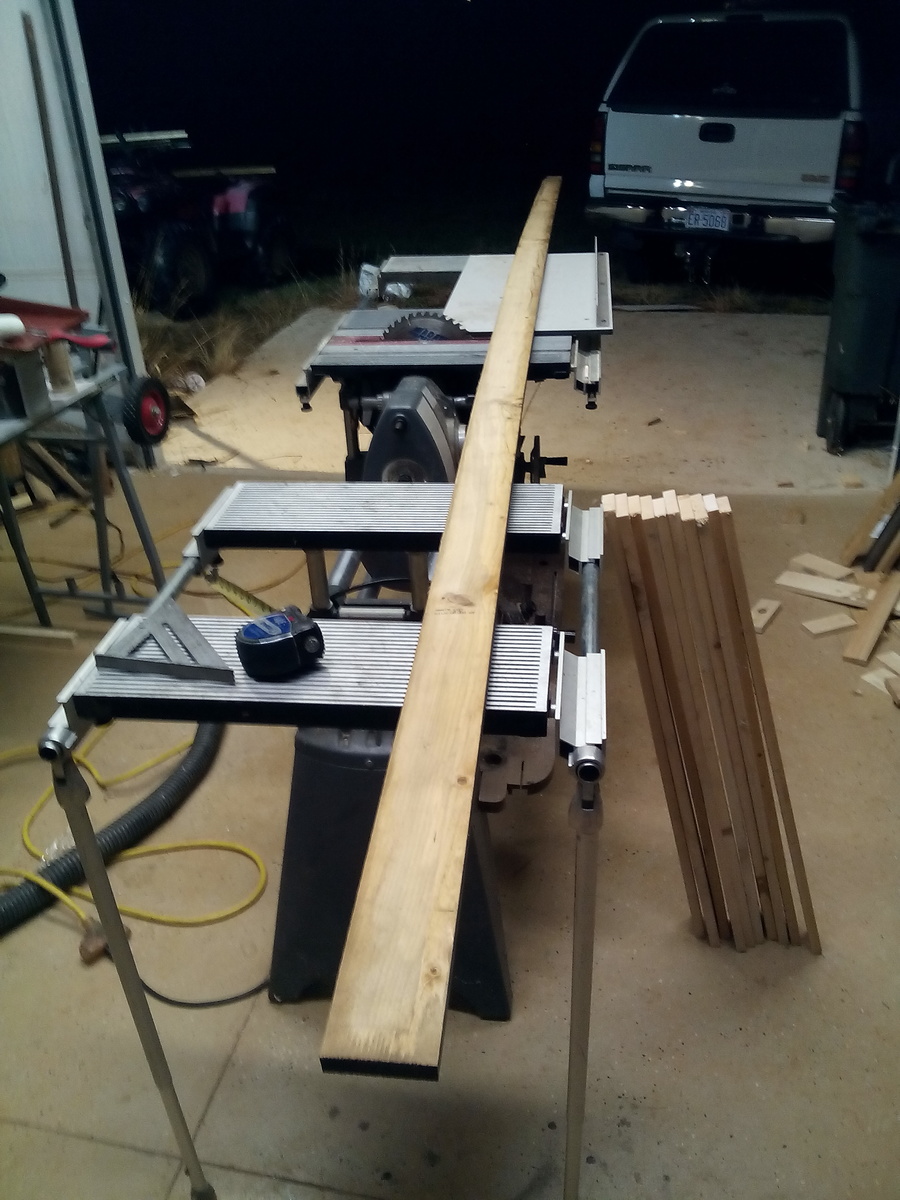
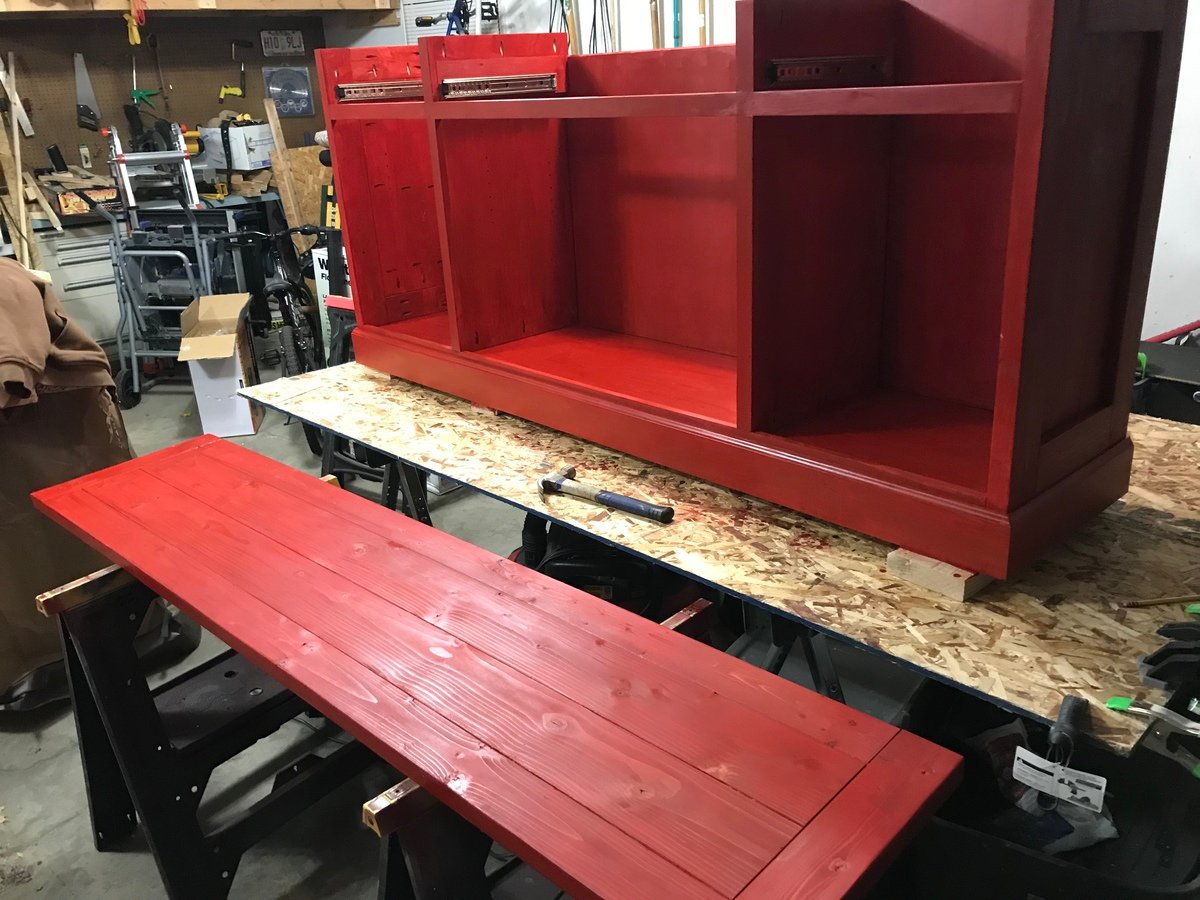
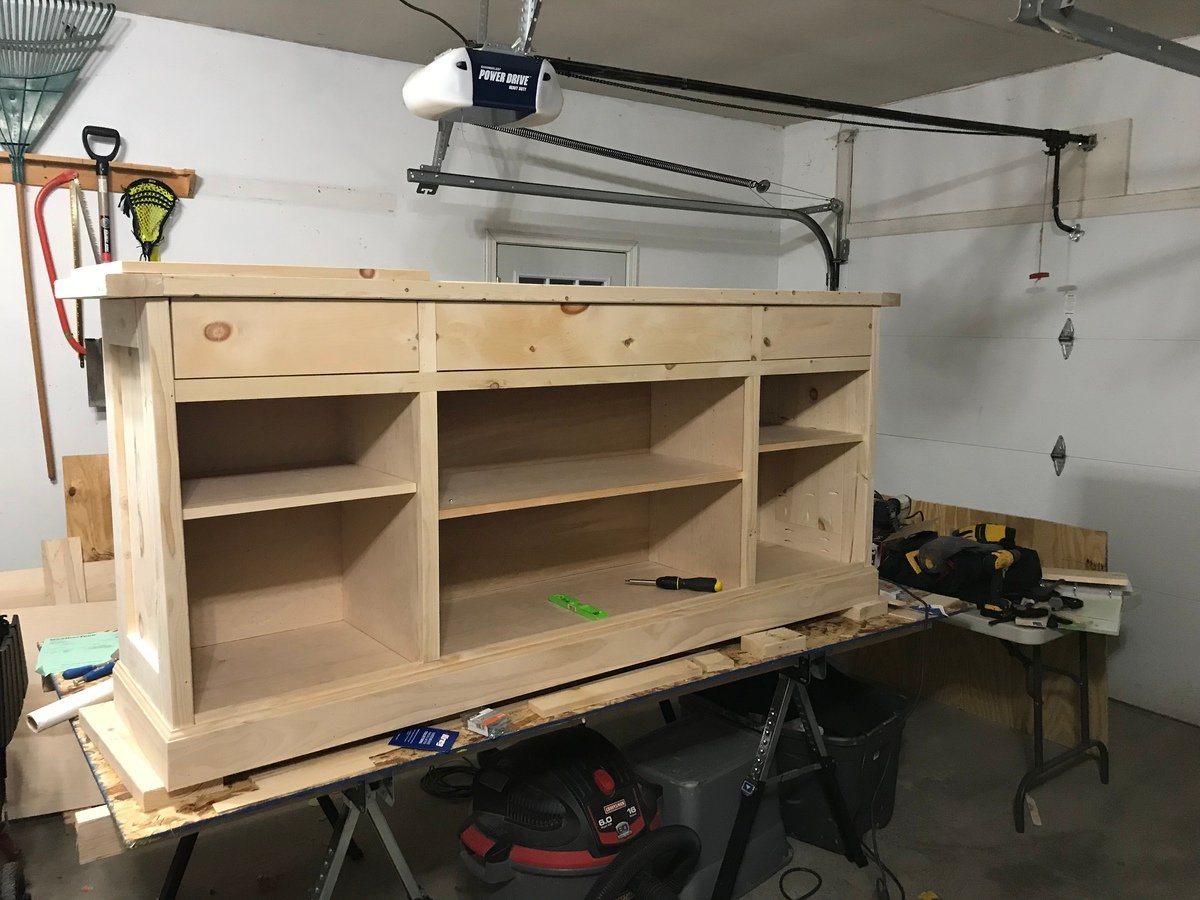
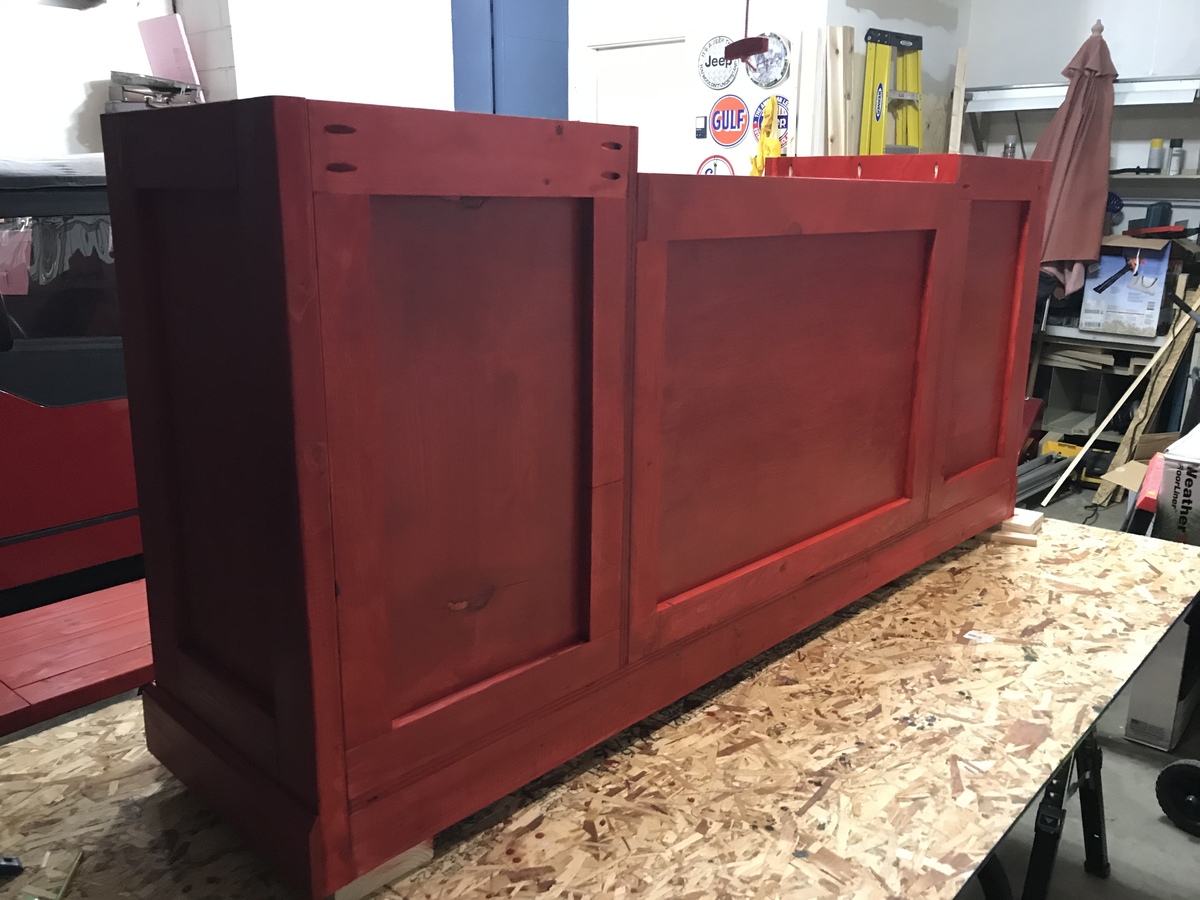
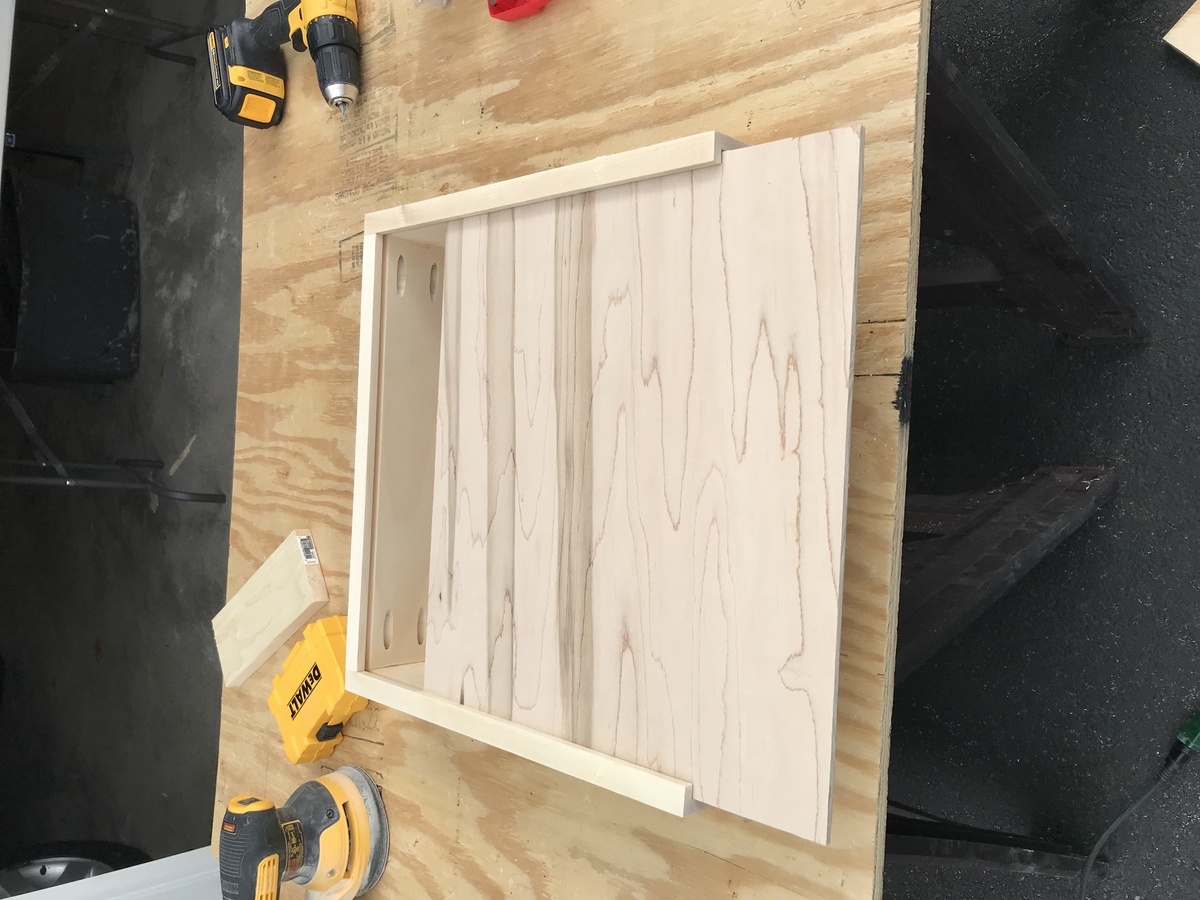
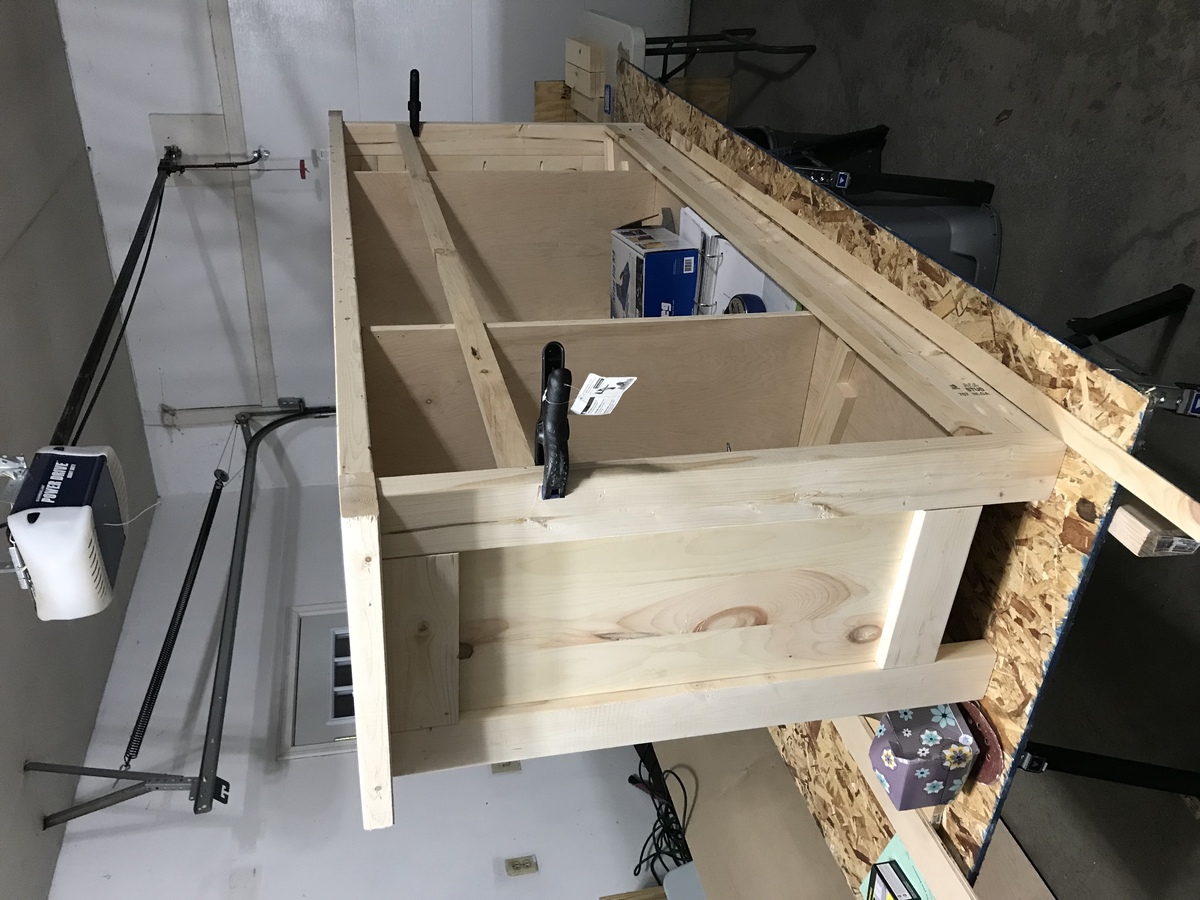
Rustic sideboard

This project was a lot of fun to build. I always learn something along the way. The sideboard filled the one wall in our kitchen, taking the place of a bench and a drop zone for miscellaneous stuff. Now we can keep those things out of view with proper storage spaces.
I routed a channel into the front and side pieces of the drawers so that I could slide the 1/4 plywood bottom in. I then screwed the bottom to the back piece which I ripped down to size. This way if I need to change out the drawer bottom I can just unscrew it from the back and replace it if needed.
i also chose to finish the back up a bit more in case we decided to ever move it off a wall in the future.
Thanks for the great plans Ana!
Built from Plan(s)
Estimated Cost
$300
Estimated Time Investment
Week Long Project (20 Hours or More)
Finish Used
Minwax pre-stain conditioner followed by two coats of Minwax Scarlet stain. I chose not to wipe the stain and let it just dry between coats. I then put a coat of polyurethane over the stain.
Recommended Skill Level
Intermediate
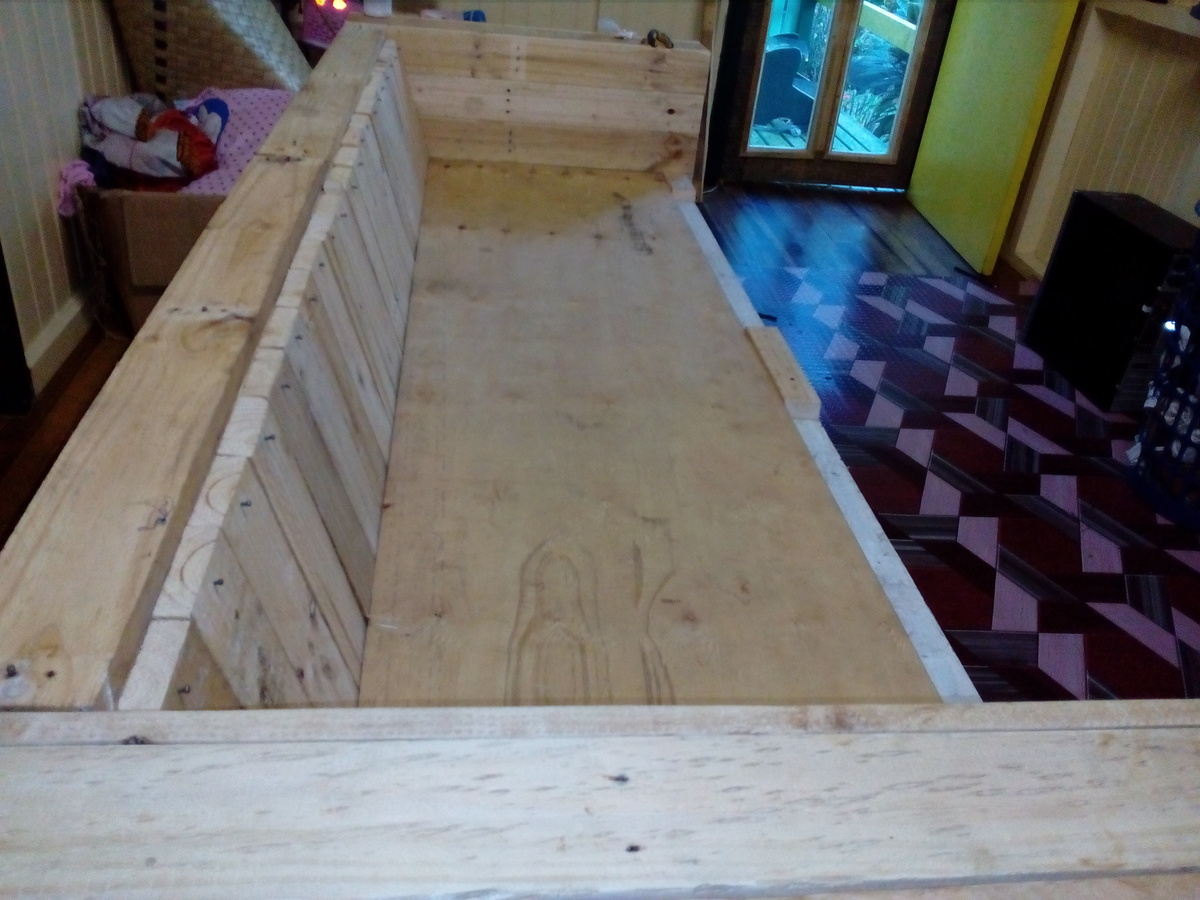
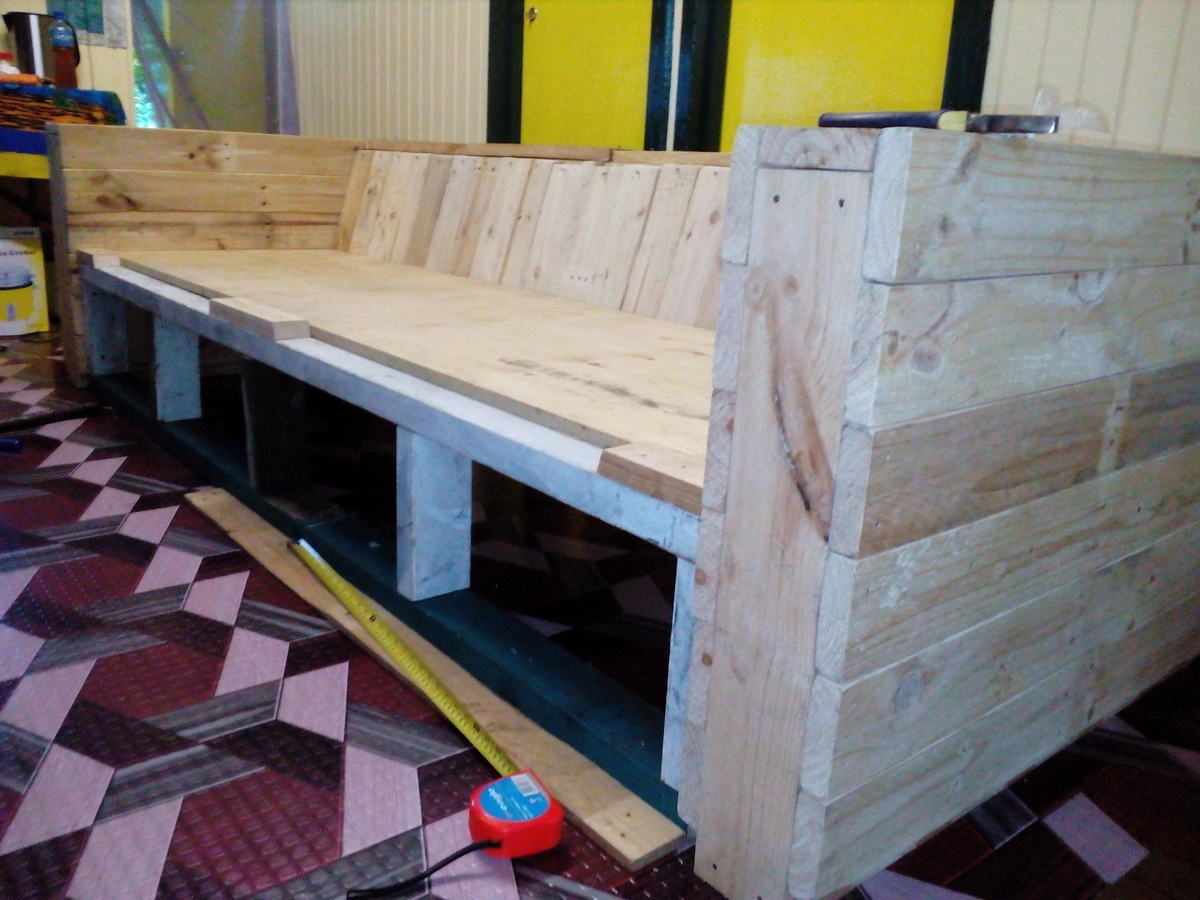
Outdoor Sofa
After we built our deck we needed furniture...so I headed to see what projects Ana White had. These benches were so easy and quick to build and look great on our deck!
Built from Plan(s)
Comments
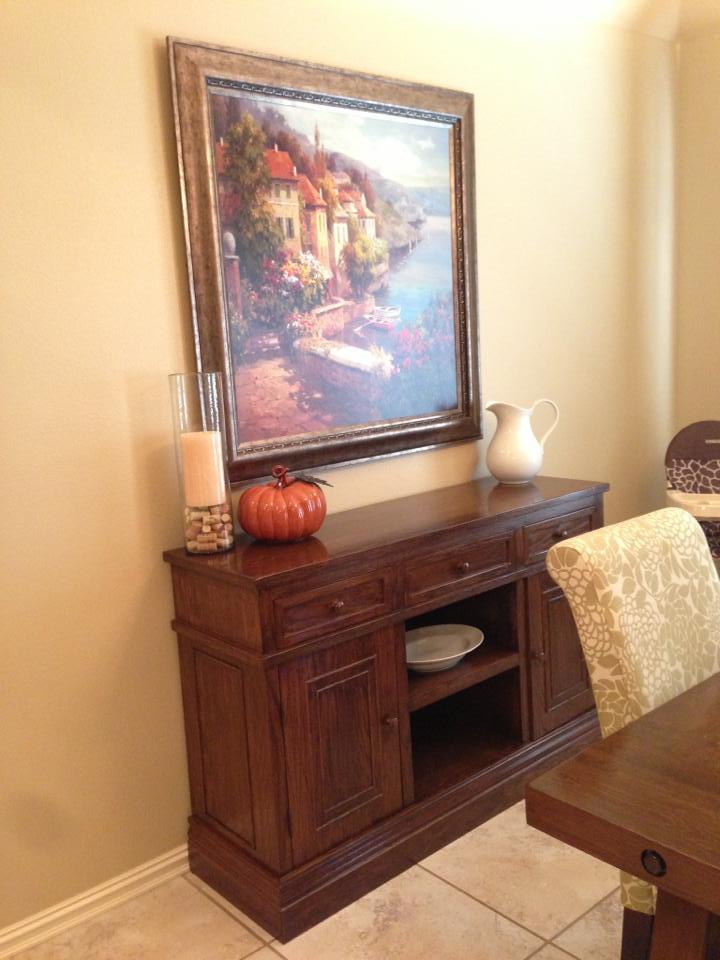
Cortona Buffet - Pottery Barn
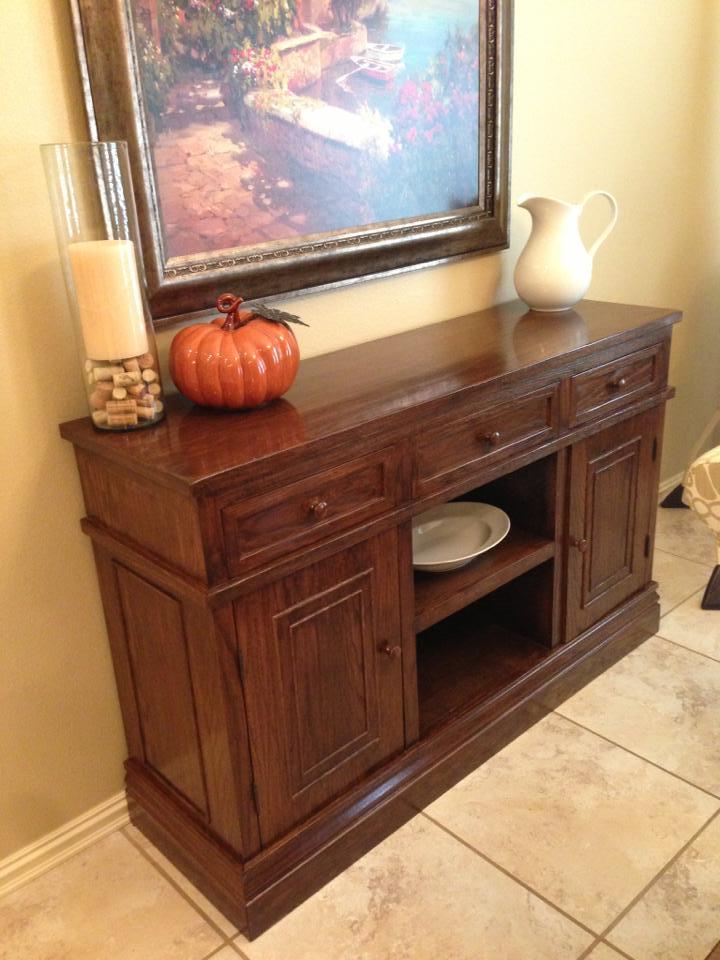
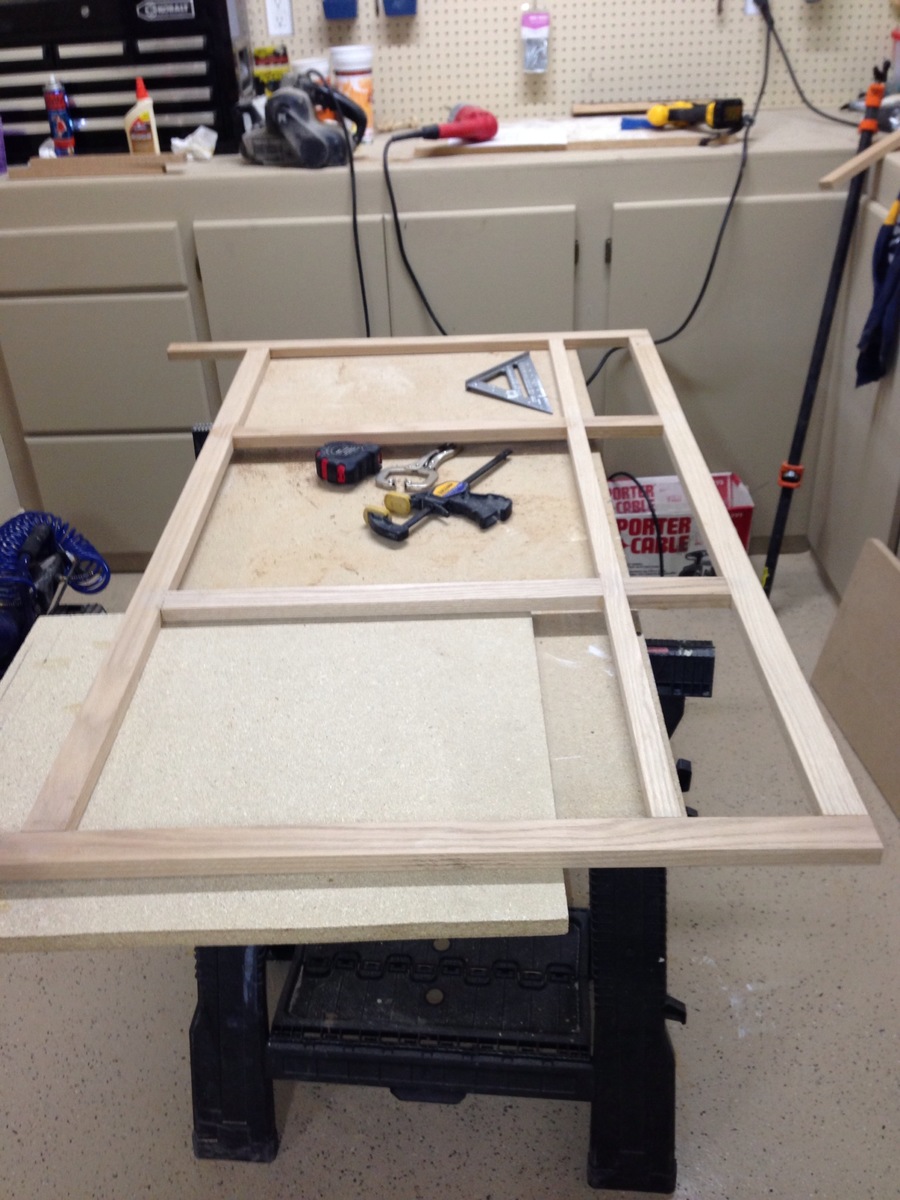
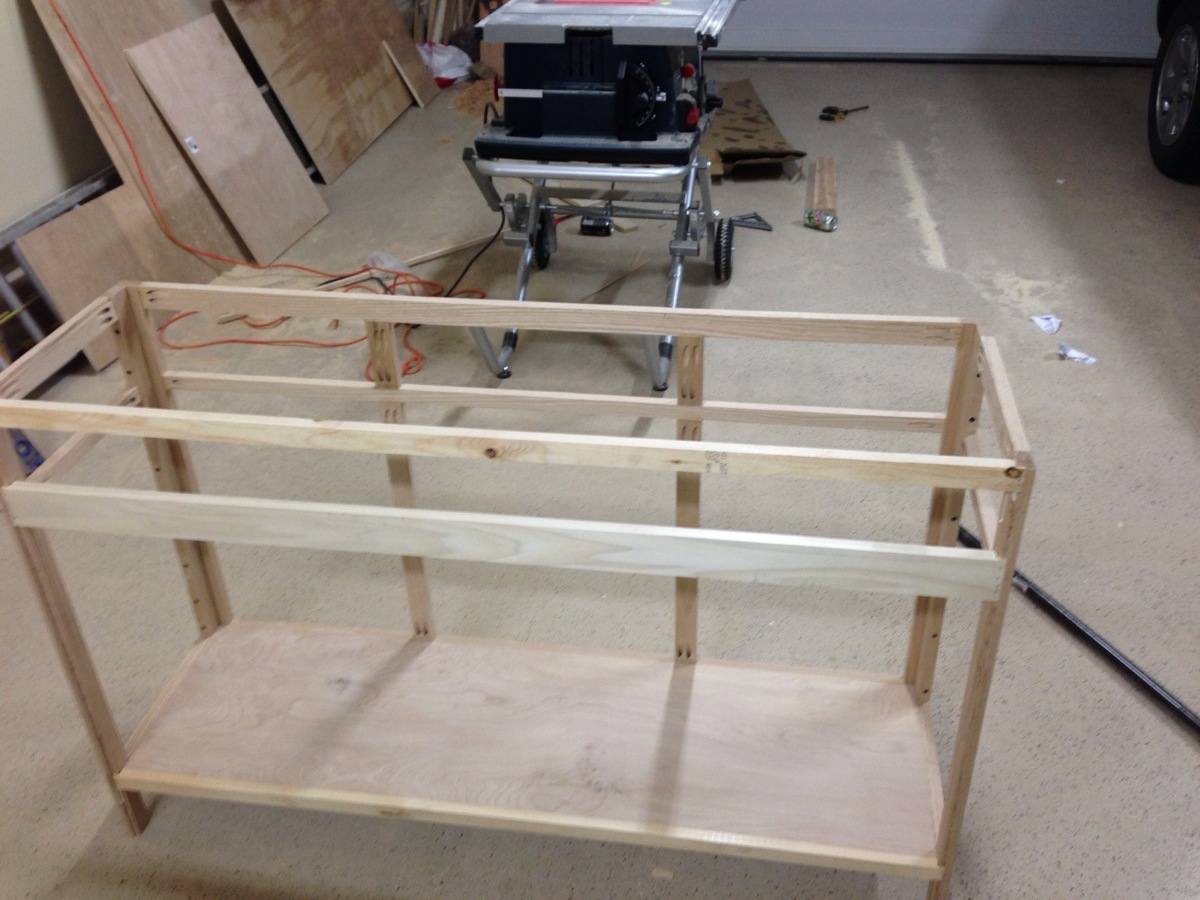
I really like all the furniture at Pottery Barn but hate paying the high prices. I saw their Cortona Buffet on day and decided it would make a great addition to my dining room. I started out by making a simple frame out of oak, put a bottom in it and built the sides. The drawers were inset drawers and i wanted 1/16 of an inch clearance on all sides so I made some simple drawer slides out of wood. You can kind of see them on the last picture. They worked great! Drawers fit perfectly and didn't have to spend extra on drawer slides. The top is 1inch thick oak that I distressed with a variety of tools to try and achieve the same weathered look as the real deal. The only thing I wasn't able to keep the same was the bottom trim. I went to ever custom molding and trim place in town and no one had anything like it. So I settled for a little less ornate piece but I think it came out well. The hardest part of the entire process was making the tiny trim pieces that fit on the door and on the sides. I had to make my own scratch stock and scratch them out of a piece of oak. If you've never had any experience with scratch stock (I didn't) Google it and try it out. You can make some pretty nice custom trim pieces by hand. All in all it was a nice build, now the wife just needs to decorate it!

Estimated Cost
250
Estimated Time Investment
Week Long Project (20 Hours or More)
Finish Used
Rustoleum Dark Walnut, Minwax Poly
Recommended Skill Level
Intermediate
Comments

Wed, 09/11/2013 - 18:14
WOW factor!
This is what I call WOW factor! It is a spectacular build! The way you did the drawers is intriguing. I've seen some wood slides in Rockler, did you build your in that style? The finish and craftsmanship are just awesome. Now I'm off to google 'scratch stock'. Thanks for sharing this wonderful build!

In reply to WOW factor! by JoanneS
Thu, 09/12/2013 - 08:13
Thank you!
Thanks you for the kind words! They are the same idea as the Rockler slides just not with a tapered slide. I built a simple wooden stop to keep the drawers from falling out since the slide wasn't tapered. I think if I had to do it again i'd taper the slides for a little better fit. Thanks again!

Sat, 09/14/2013 - 23:30
I don't mean to sound
I don't mean to sound condescending or anything, but YOU MADE that? That looks like something that was bought not built. I hope that doesn't sound badly, it really is a compliment! It's amazing! I love it! Fantastic quality looking piece, excellent color!!!! LOVE LOVE LOVE!!!
Mon, 09/16/2013 - 08:15
Thanks Tracy! It was a fun
Thanks Tracy! It was a fun build and fits very nicely in my dining area. Just trying to decide what to build next :)
Rustic X Coffee Table
First time builder.
Built from Plan(s)
Recommended Skill Level
Starter Project
Style Wood Slat Closet System with Galvanized Pipes
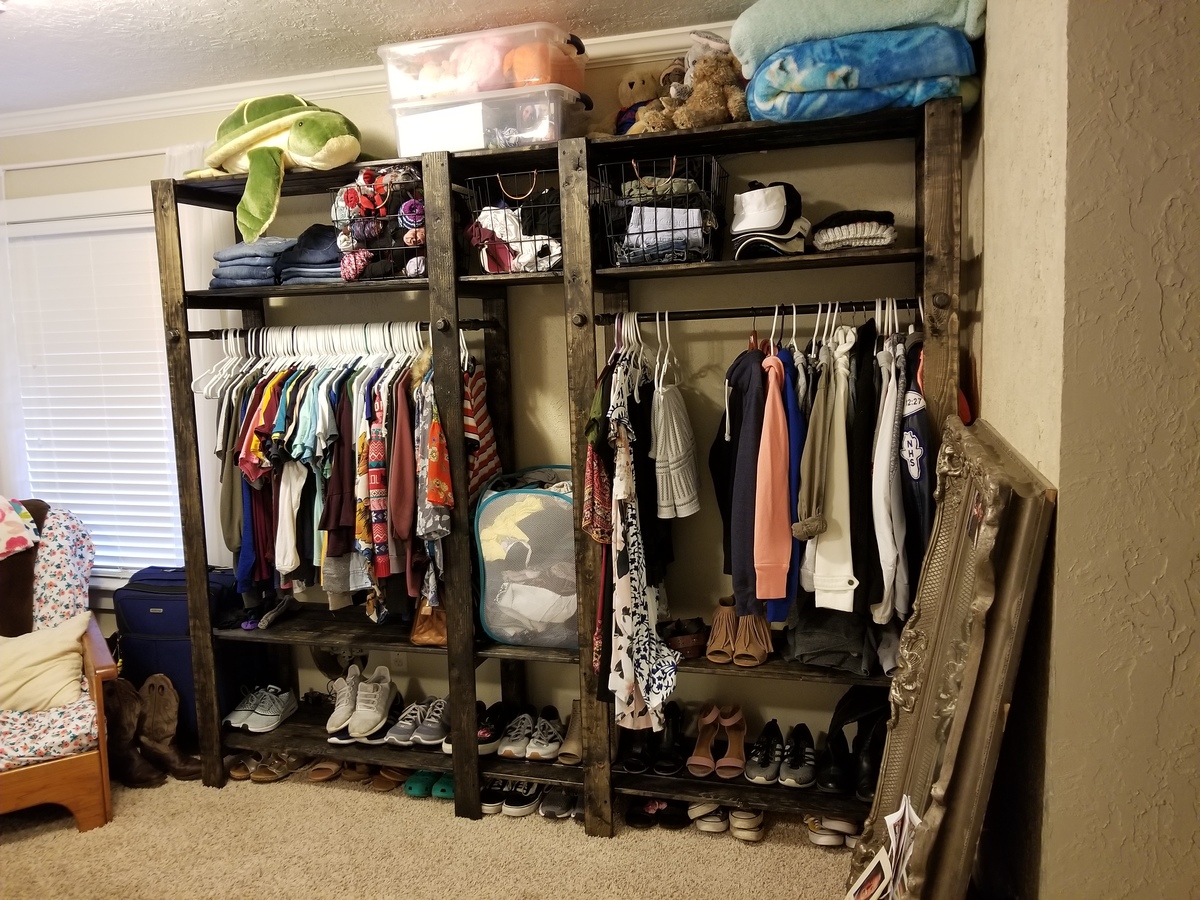
Our 19 year old daughter moved back in with us and we had to put her in our den. This room doesn't have a door or closet. The closet system was priority one. She has a ton of clothes. We followed your plans to the letter, but didn't add the shelving in the middle. She wanted a space to put her dirty clothes basket. This was the perfect solution and super inexpensive and easy to make.
Built from Plan(s)
Estimated Cost
$100
Estimated Time Investment
Weekend Project (10-20 Hours)
Finish Used
Minwax ebony stain. We just put it on and immediately wiped it off. We wanted it dark but not super black.
Recommended Skill Level
Beginner
Comments
Fri, 01/04/2019 - 12:16
This is perfect for your
This is perfect for your daughter! I'm so glad it worked out. Thank you for sharing a photo!
Adirondack Chair
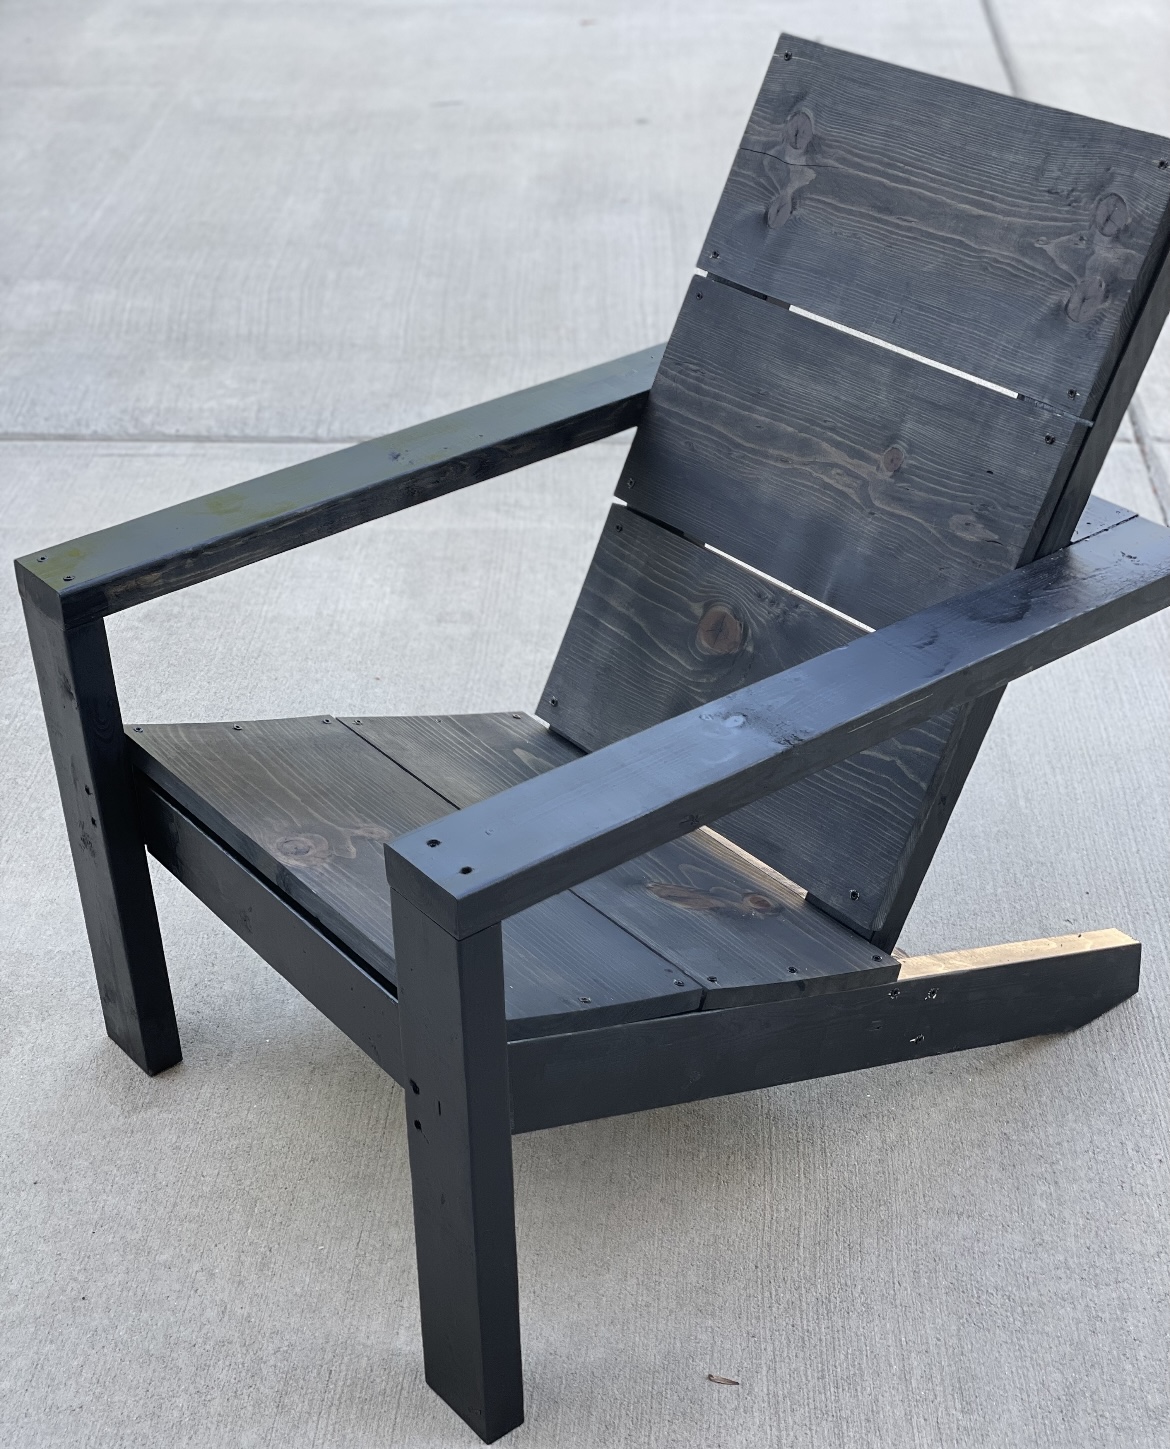
Had so much fun with my first woodworking project and obsessed with the grey/black stain!
Built from Plan(s)
Comments
Mon, 10/03/2022 - 16:31
Great first project!
Love the finish choice! Now sit back and enjoy your first build, can't wait to see what's next:)