Community Brag Posts
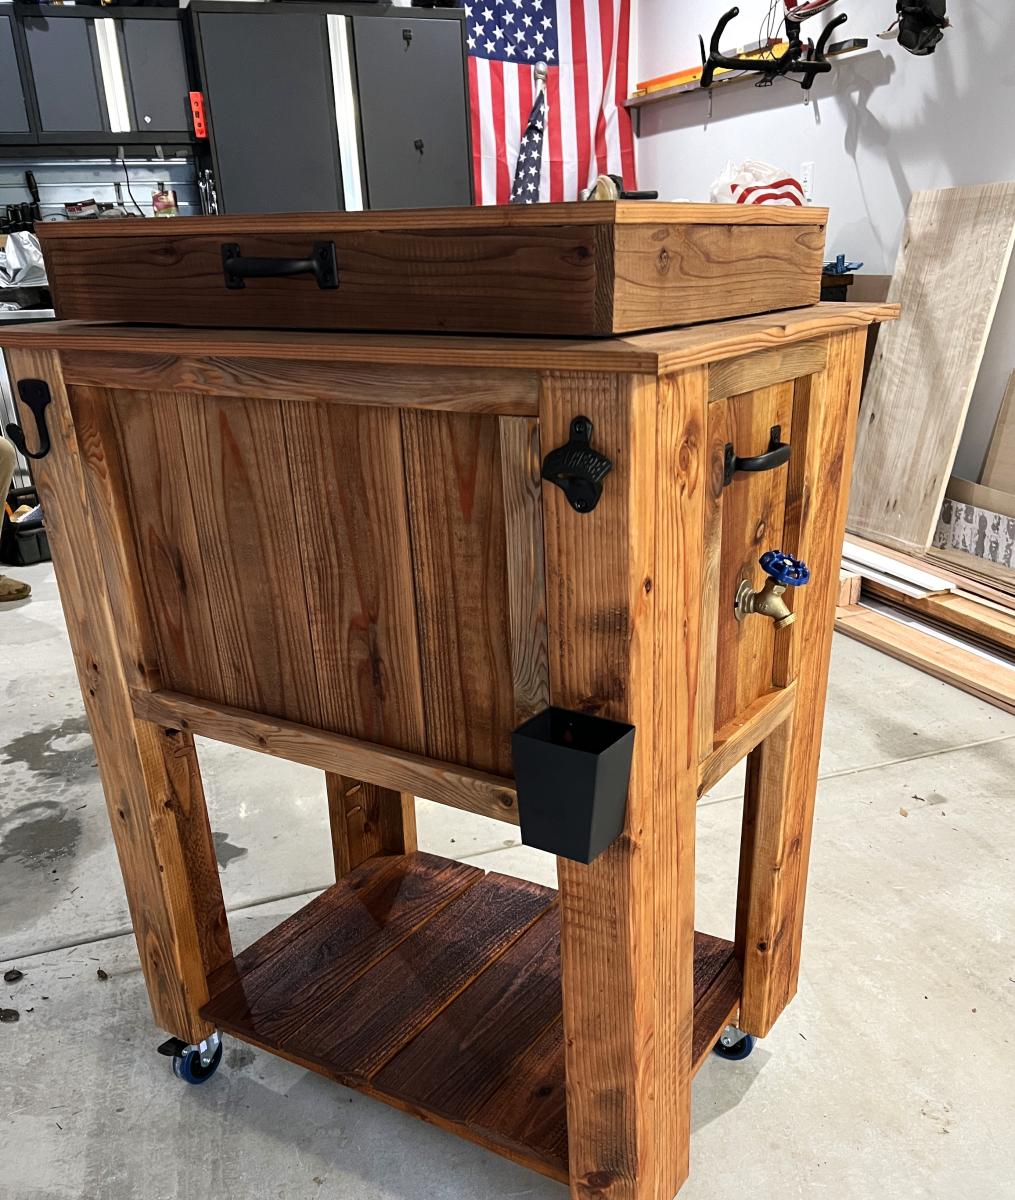
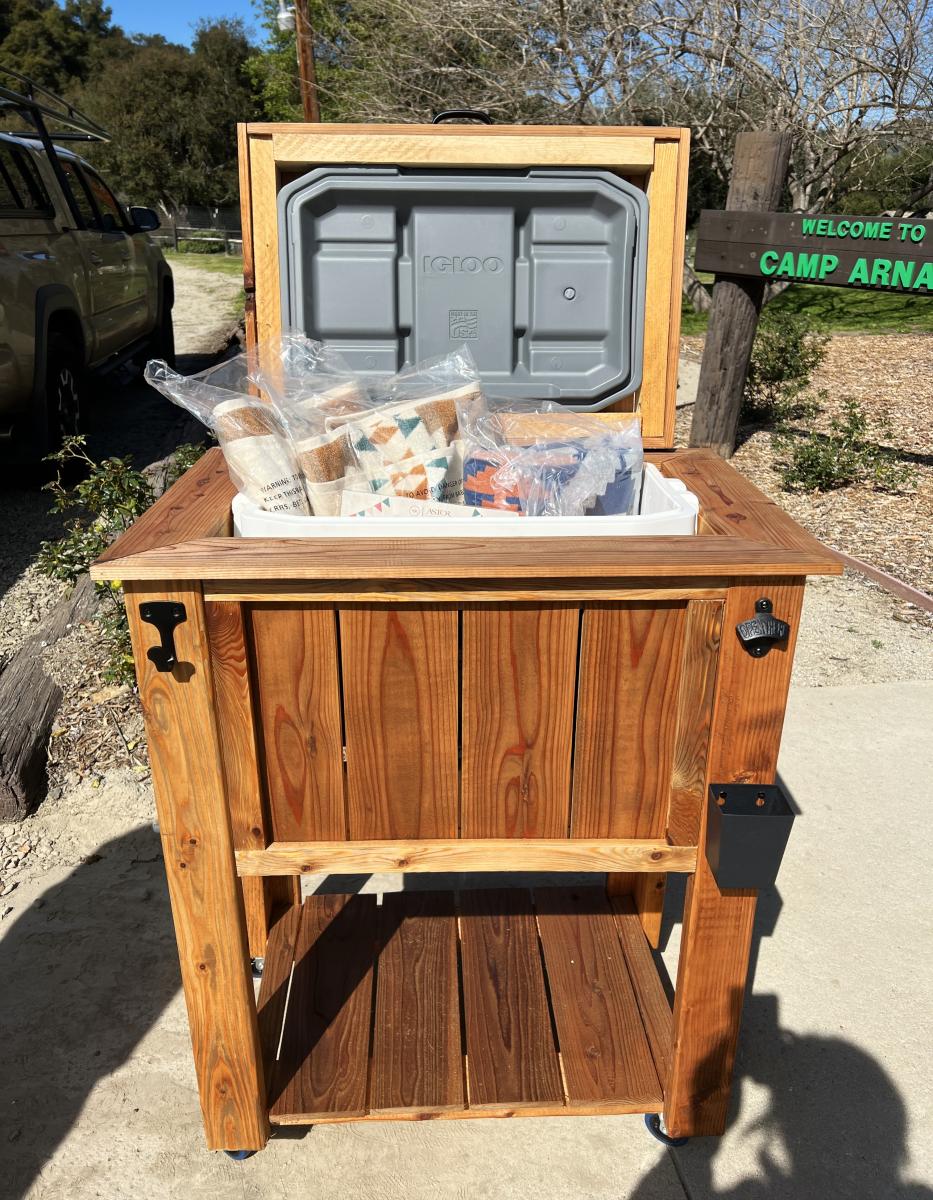
Custom Wood Cooler Stand
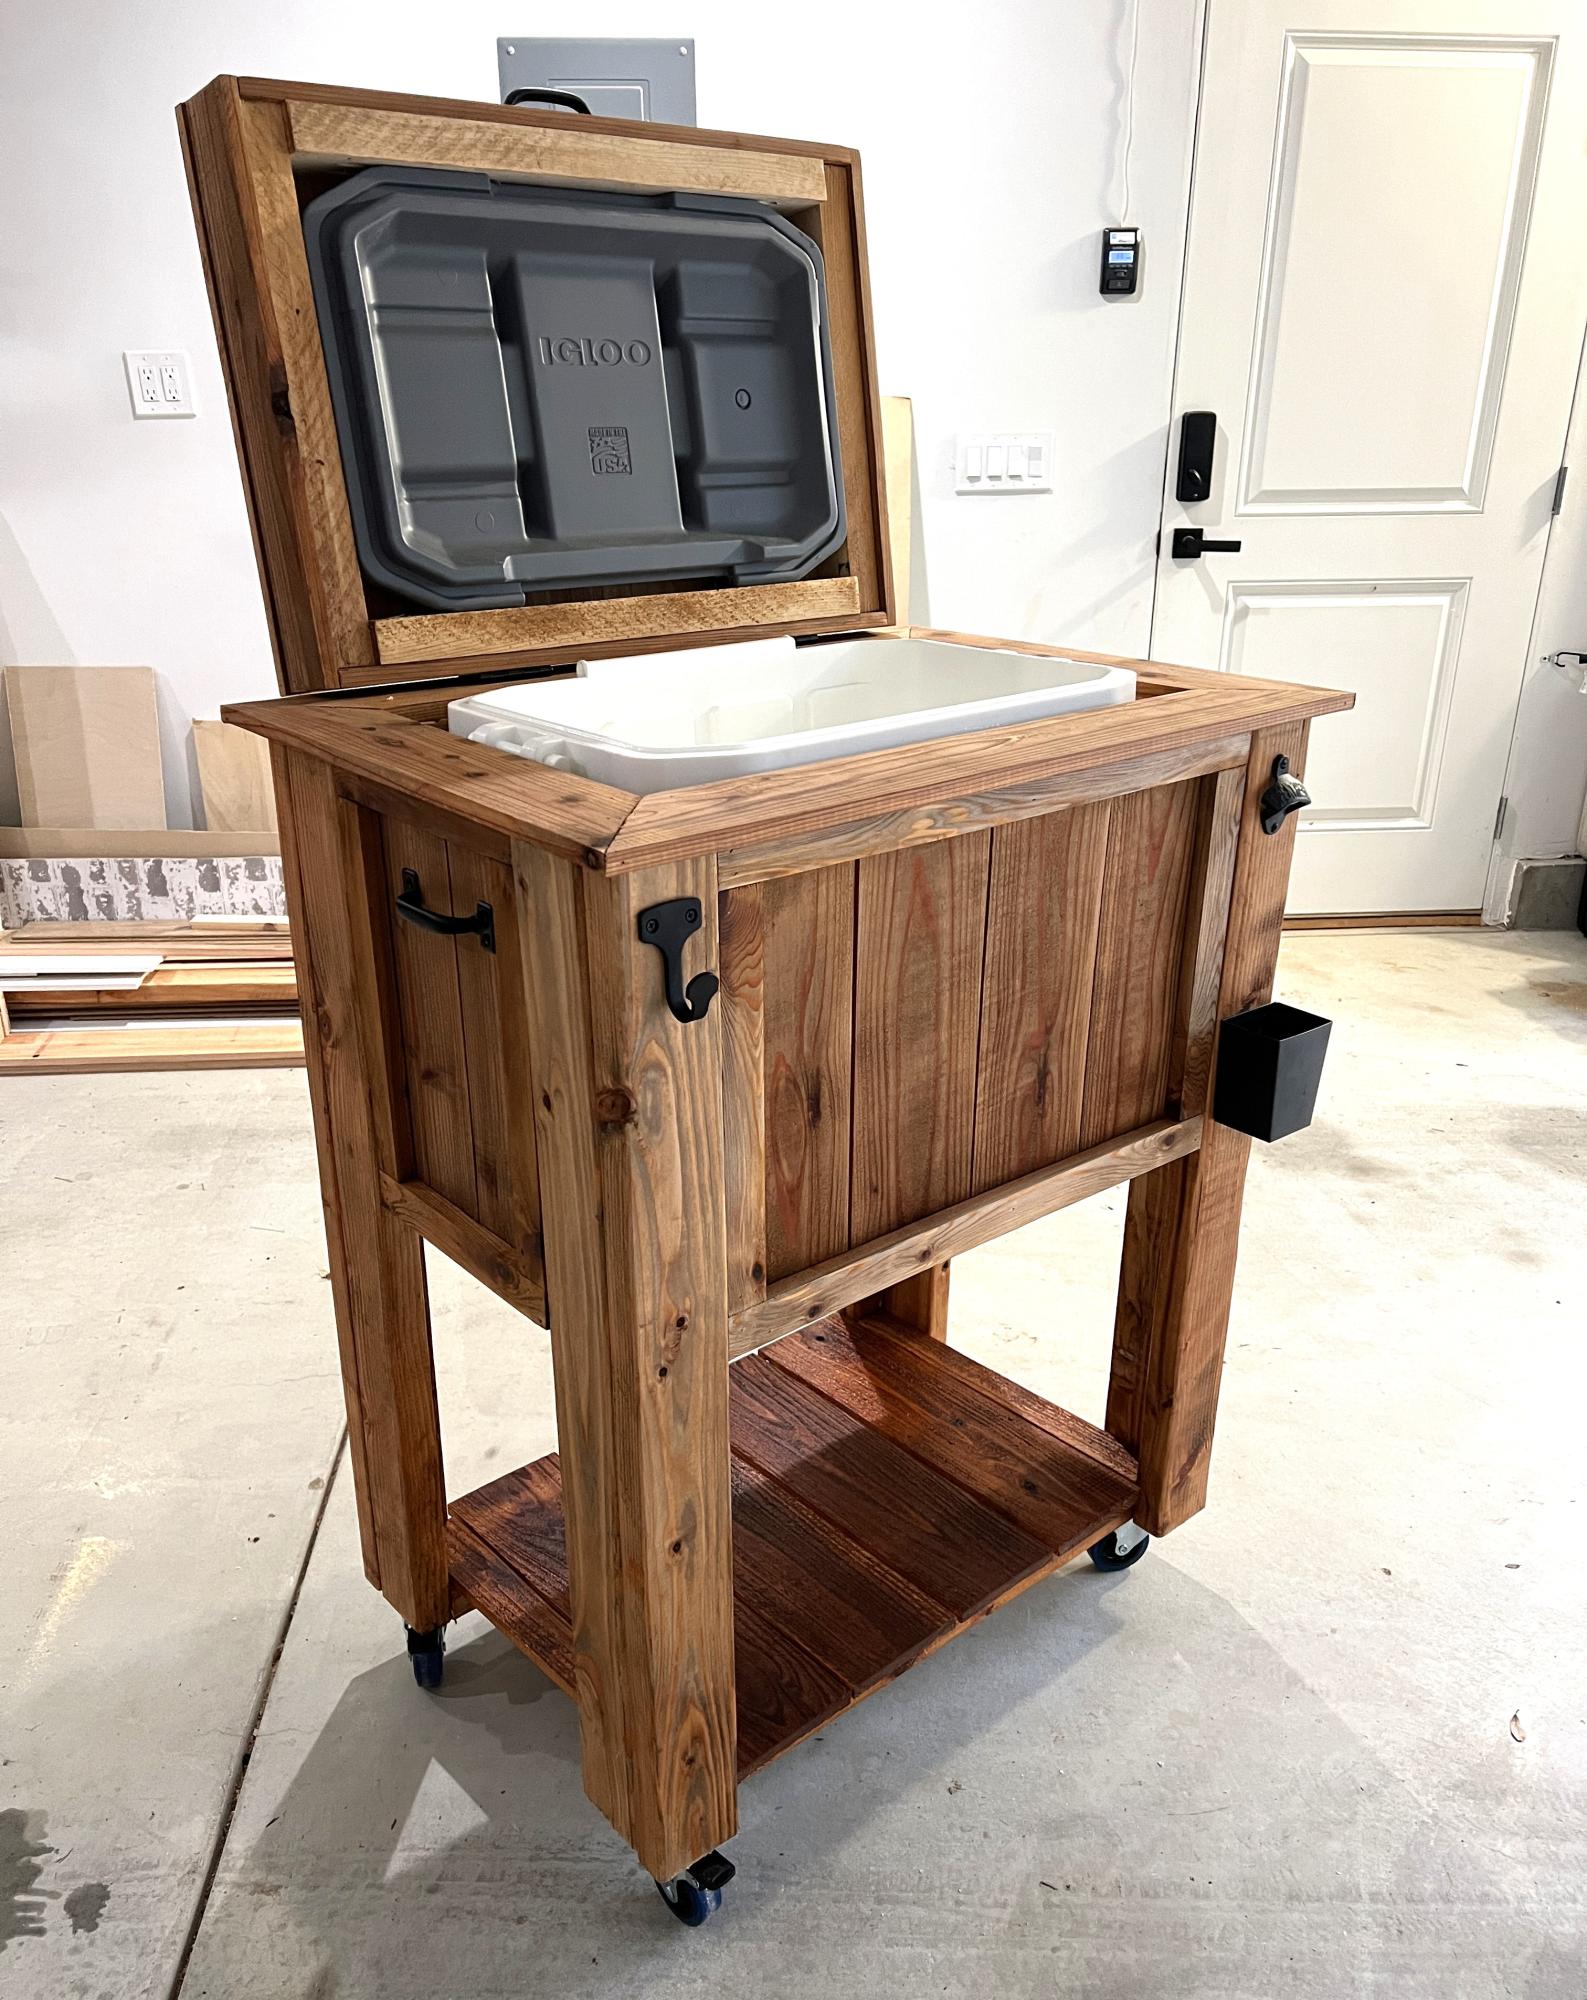
I made this Ice Chest Cart for my son’s schools silent auction. It features a spigot for drainage, bottle opener, hook for a bar towel and I also set it on castors so it can be easily moved.
Built from Plan(s)
Adirondack chairs
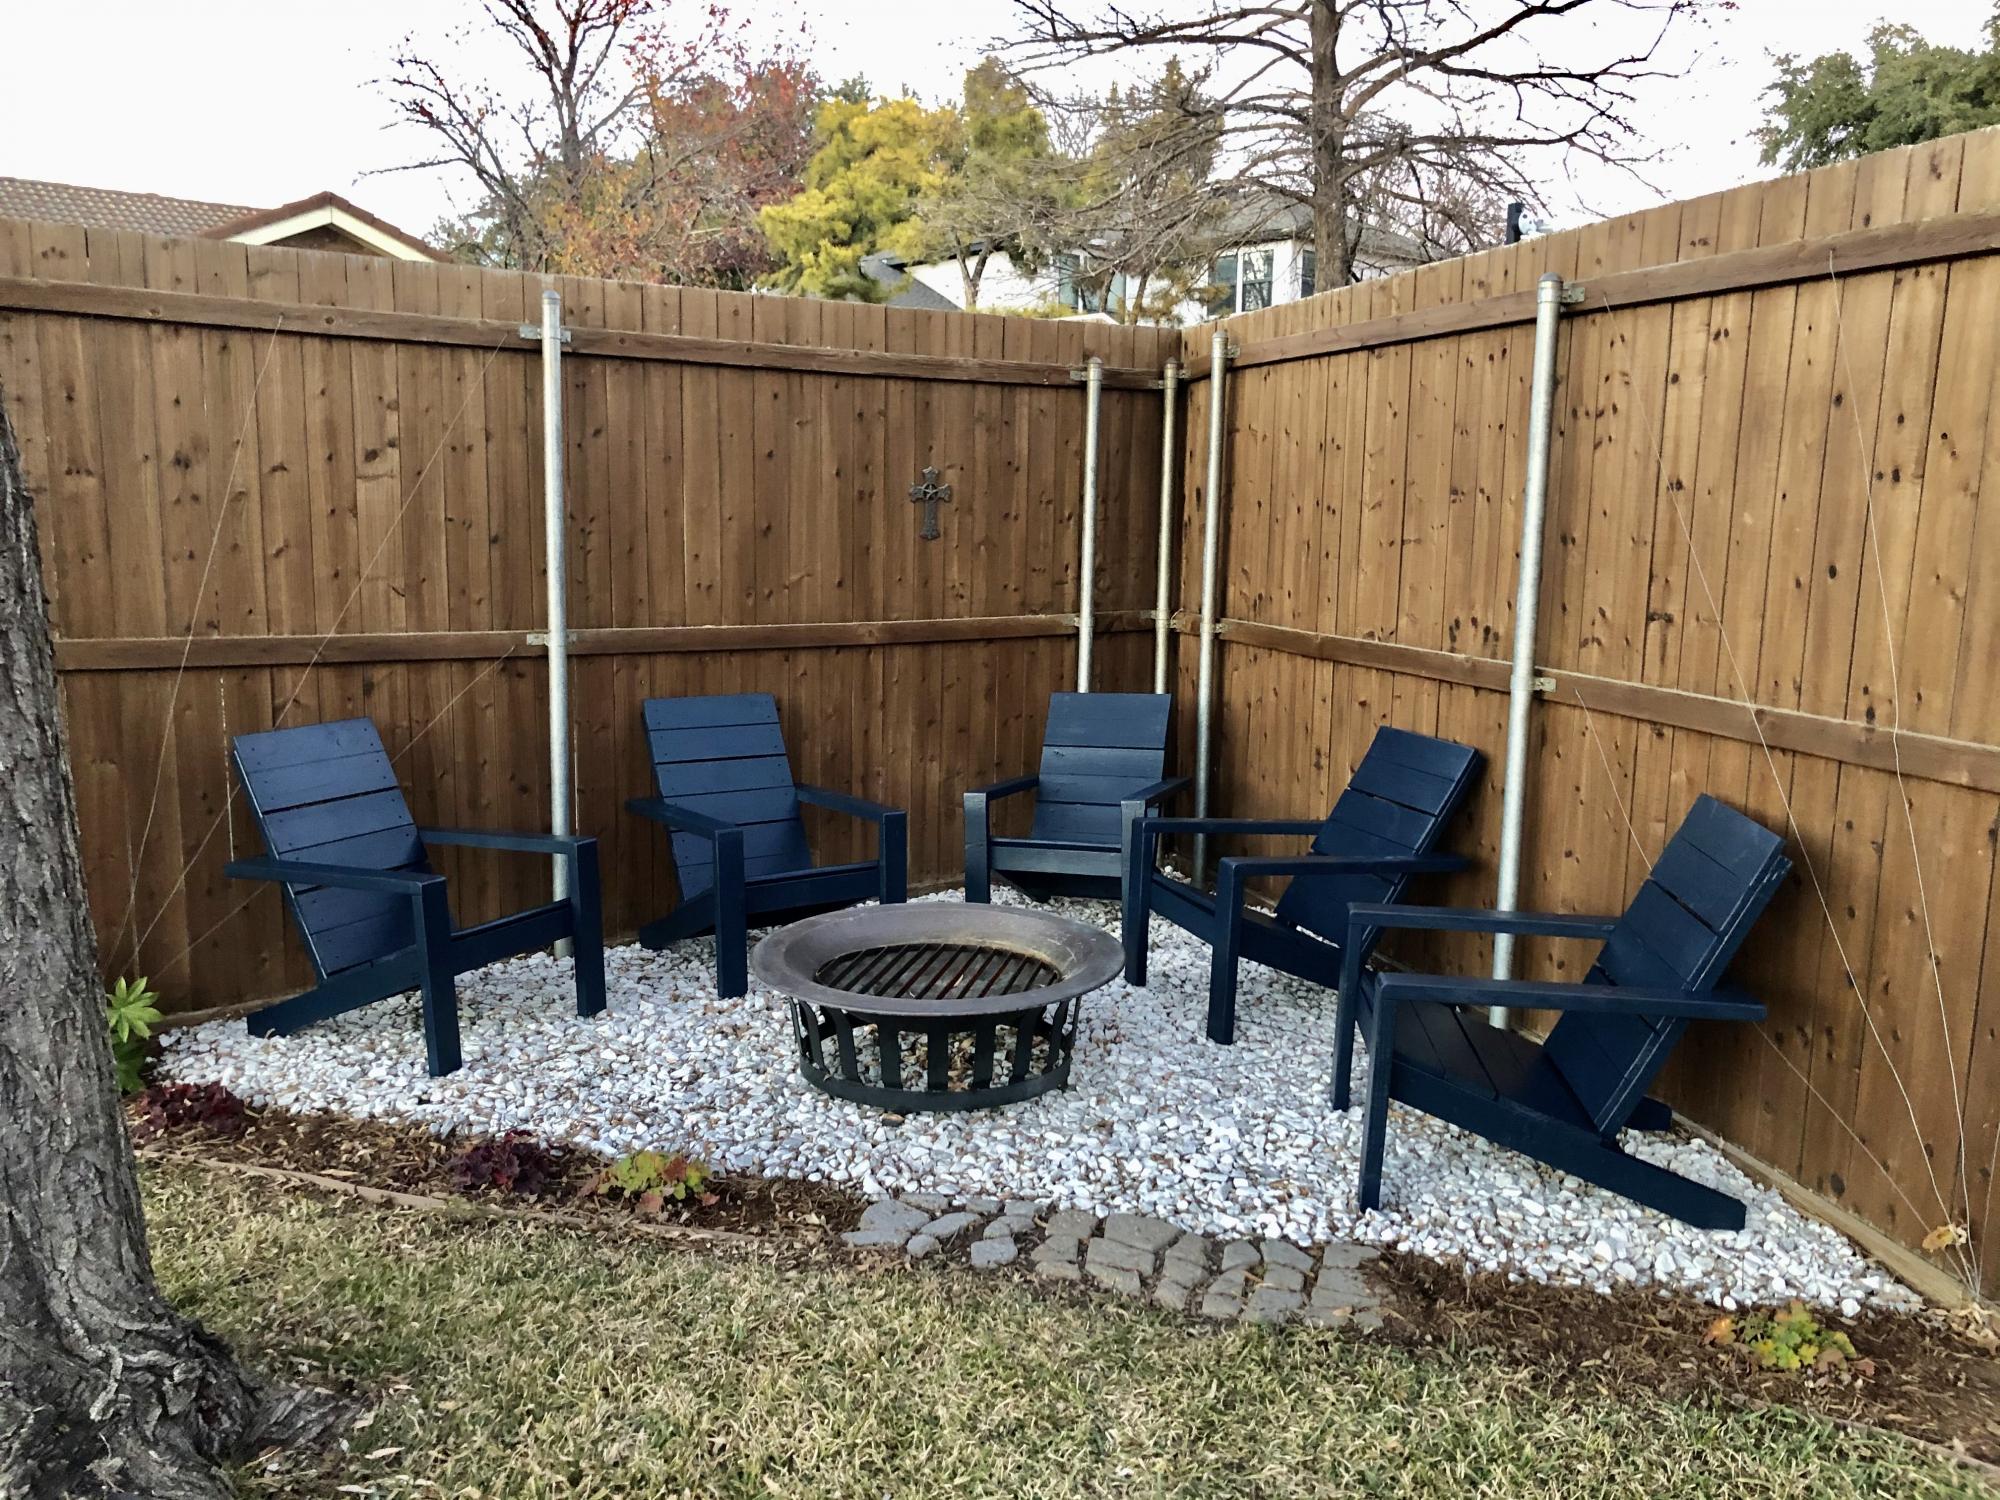
Thanks for the awesome plans Anna! God bless.
Eddie Jimenez
Built from Plan(s)
Comments
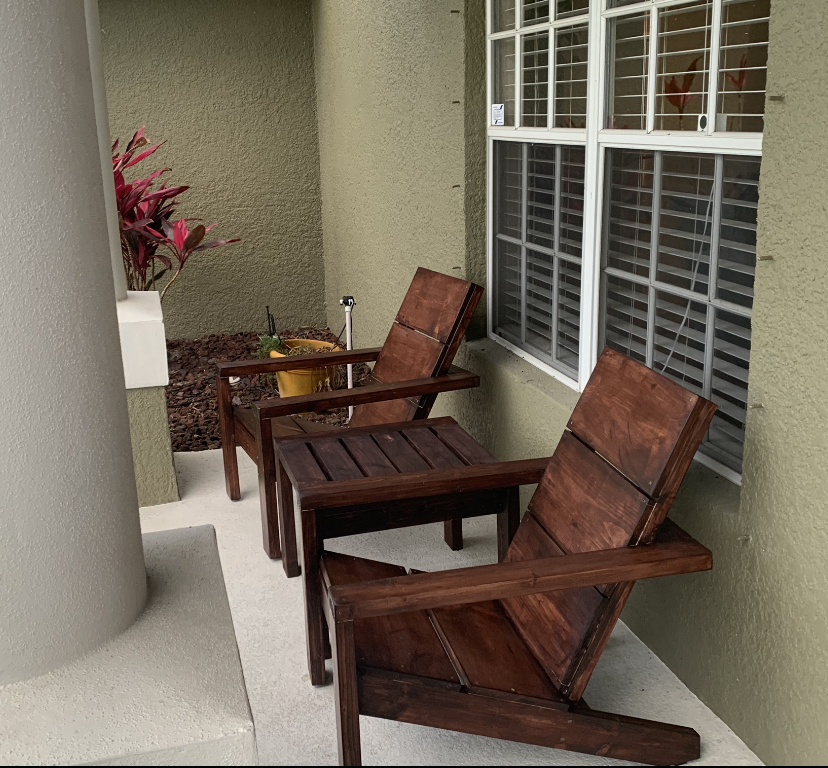
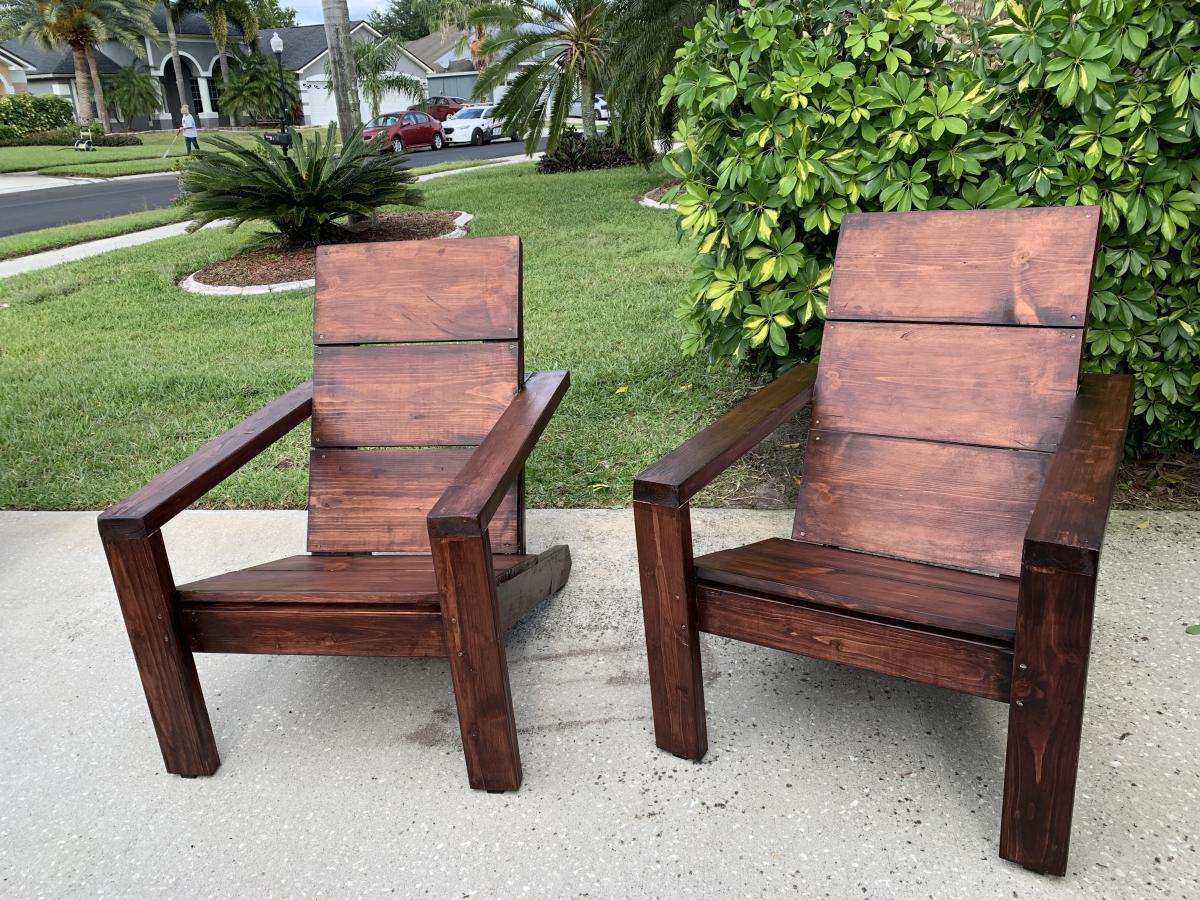
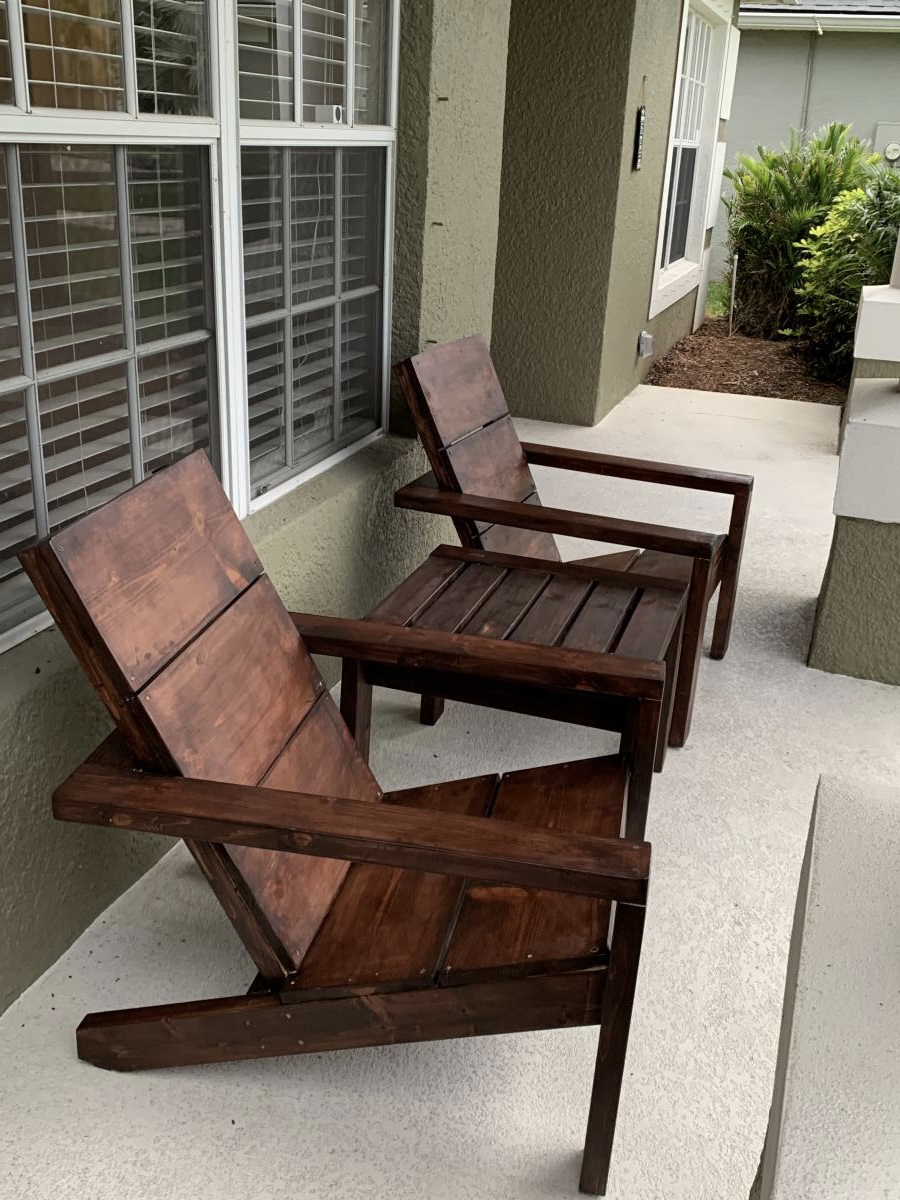
Modern Adirondack Chairs & Outdoor Side Table
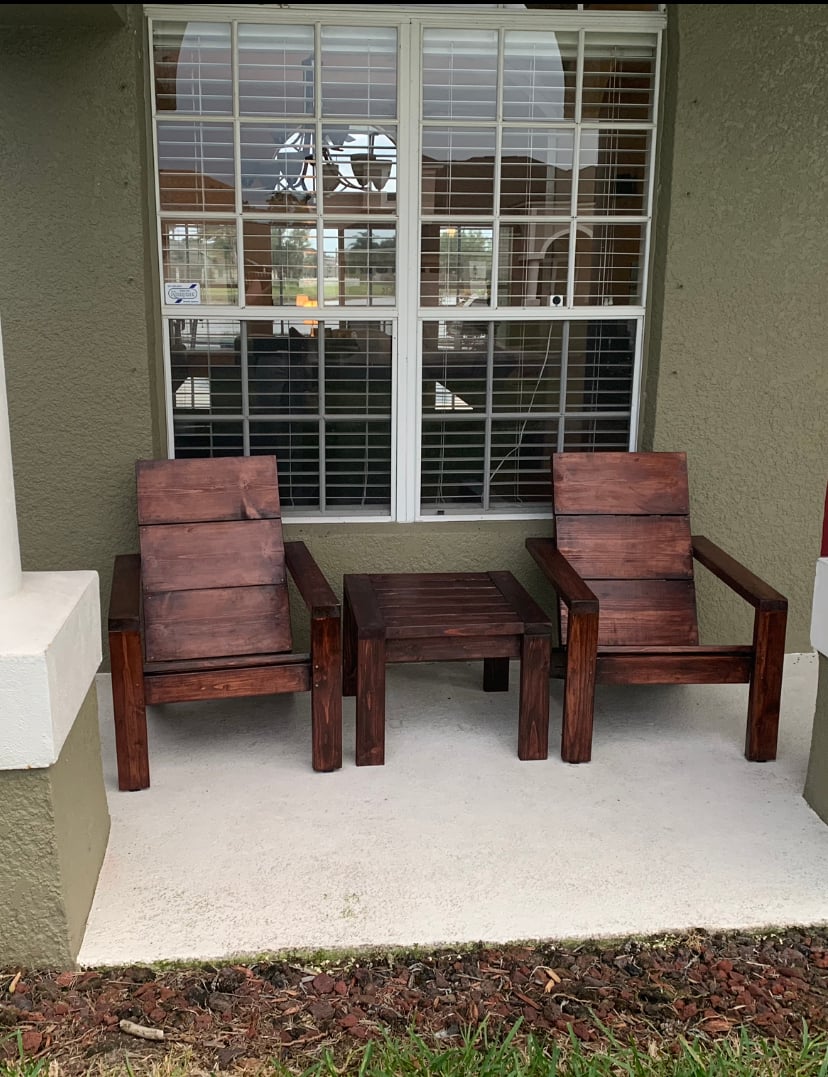
These modern Adirondack chairs were my first wood working project ever and they turned out awesome! I wanted to build a small table to complete the set and Ana’s new side table plans were exactly what I was looking for. I am truly amazed at how easy these projects were to make and how great they look on our front patio. Ana’s step-by-step plans make it so simple. My wife and I can’t wait to build some more of these projects for our backyard lanai and pool area.


Built from Plan(s)
Finish Used
General Finishes Red Mahogany stain
Spar Urethane
Spar Urethane
Comments
Mon, 04/12/2021 - 10:21
First project!
Amazing job on your first build, I see more handmade pieces in your future!
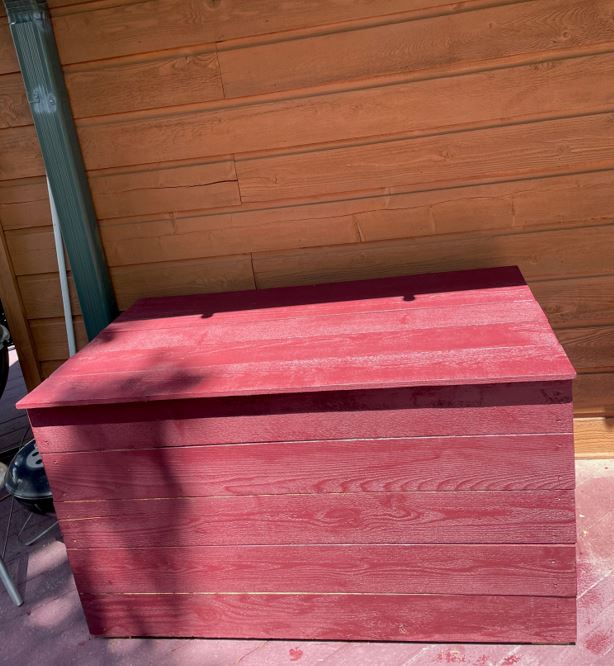
Modern Cedar Outdoor Storage Bench
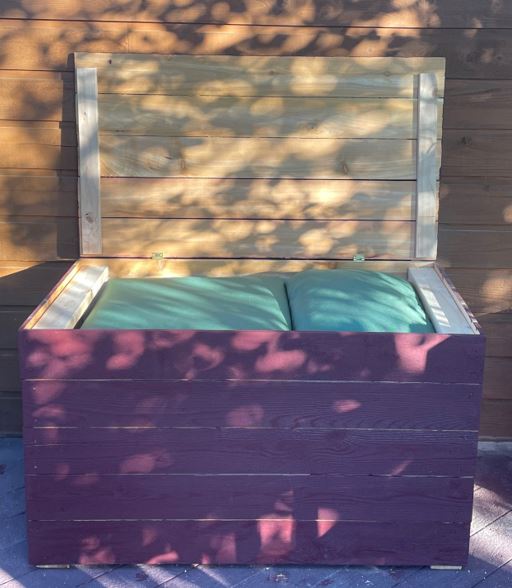
I had built two outdoor chairs with love seat (modified from the sofa plans) with 2x4s. The cushion seats were 24" x 24". Where to store them? I modified the Modern Cedar Outdoor Storage Bench plans to make the box wider, higher, longer to accommodate the cushions. With five boards comprising the top, it's a bit wider than the box so I didn't need to carve in an opening.
Built from Plan(s)
Comments
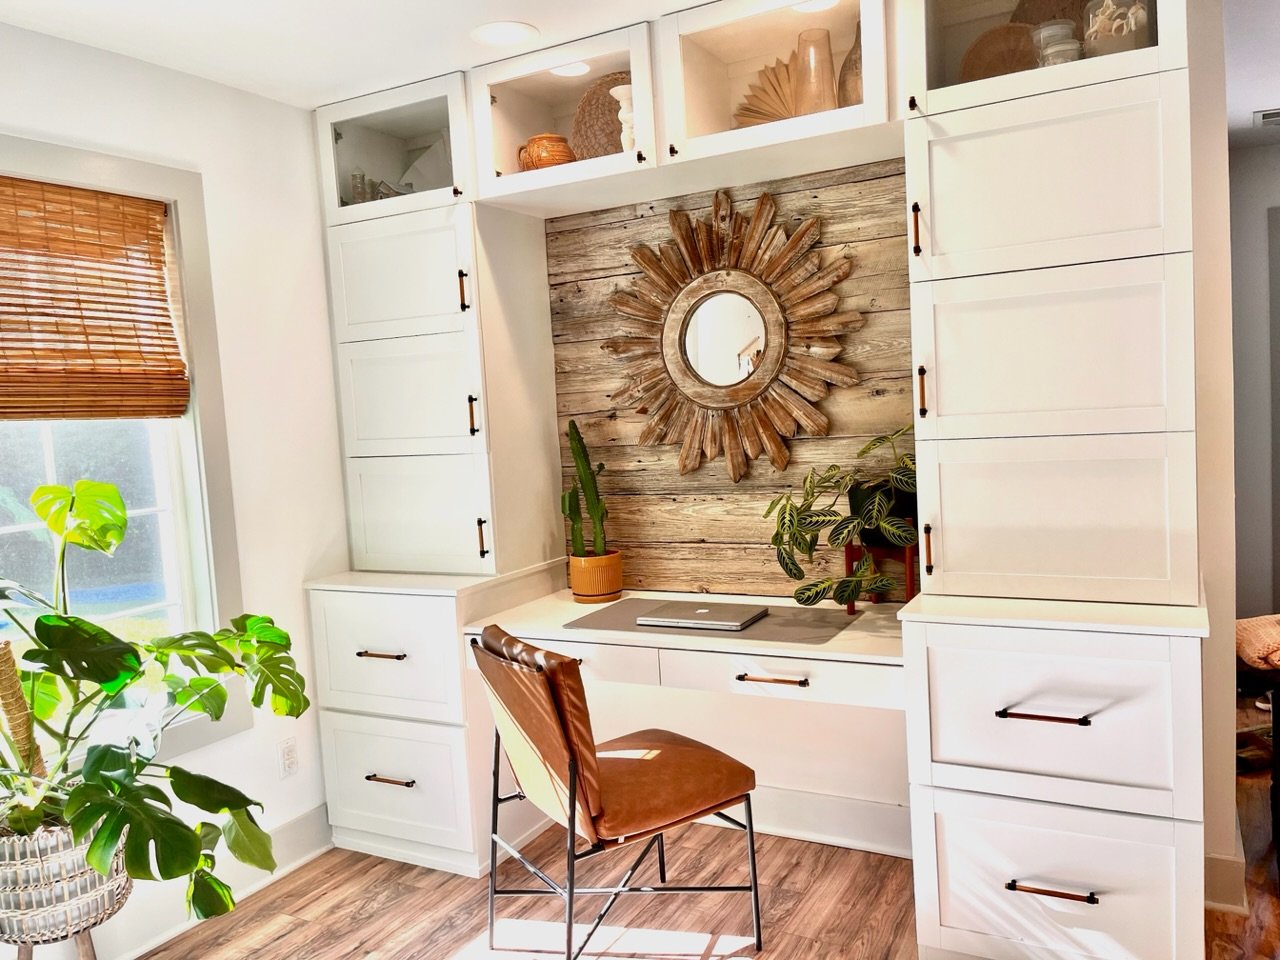
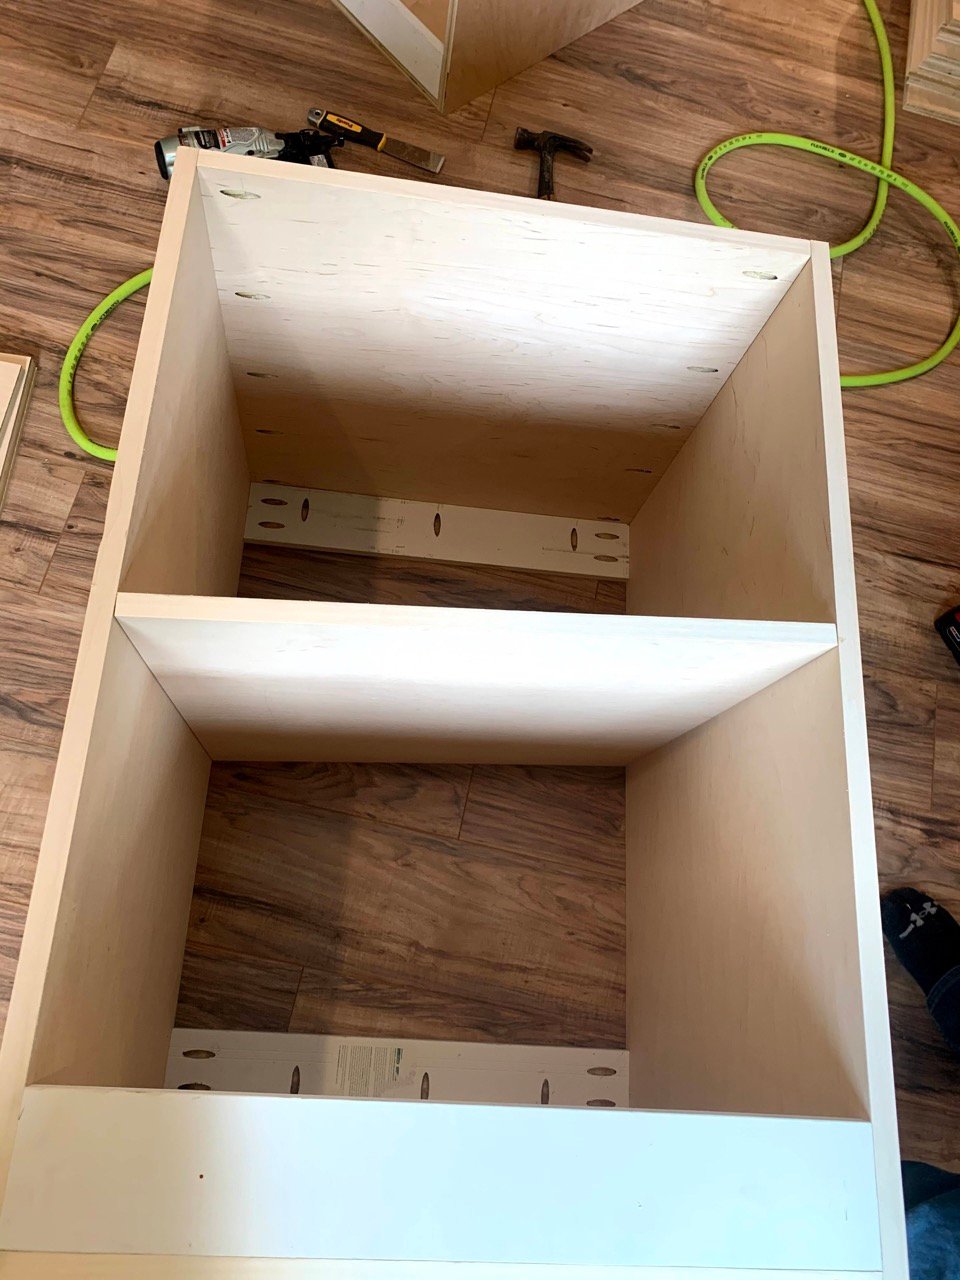
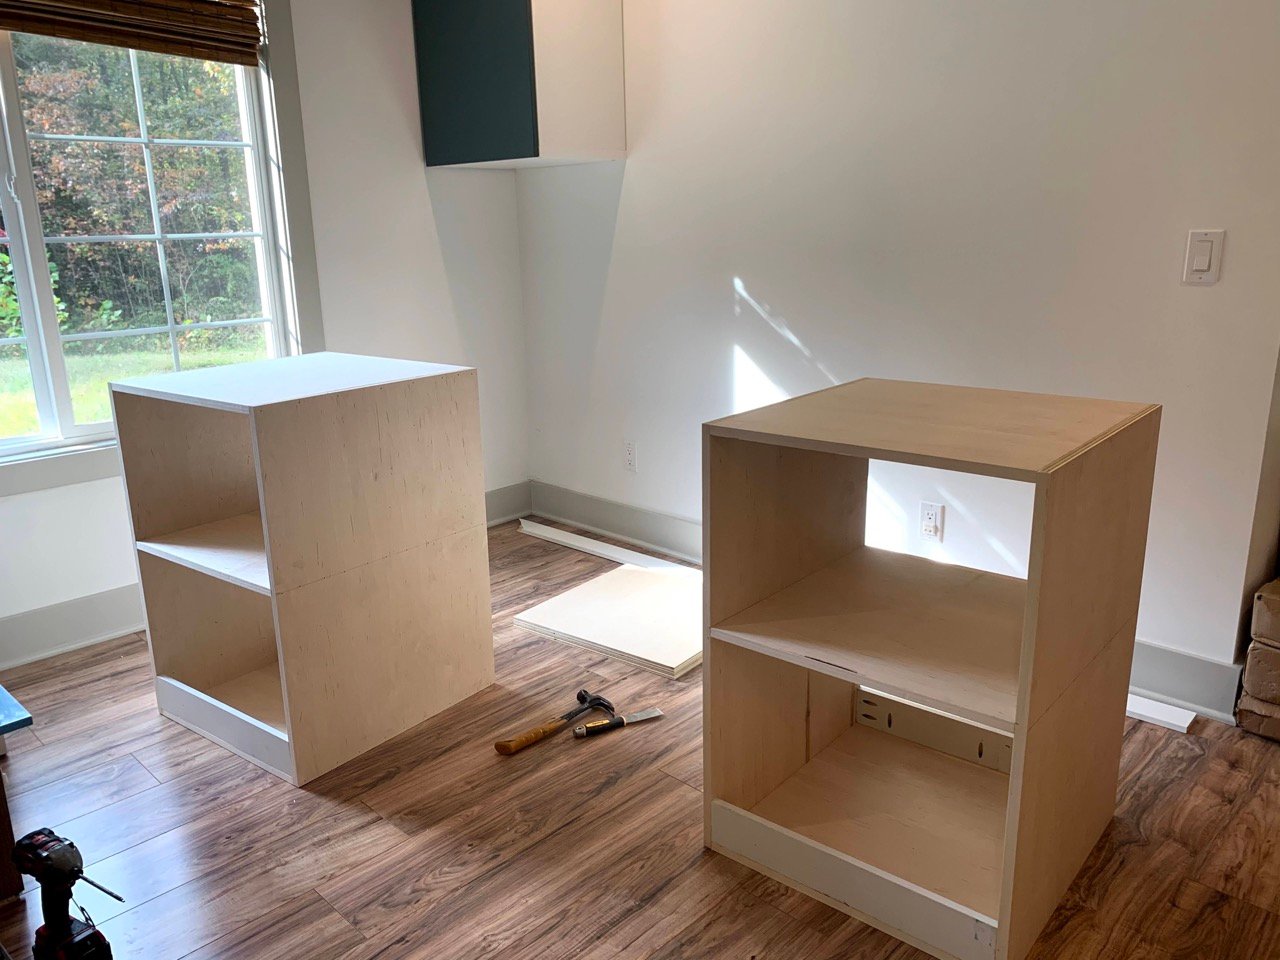
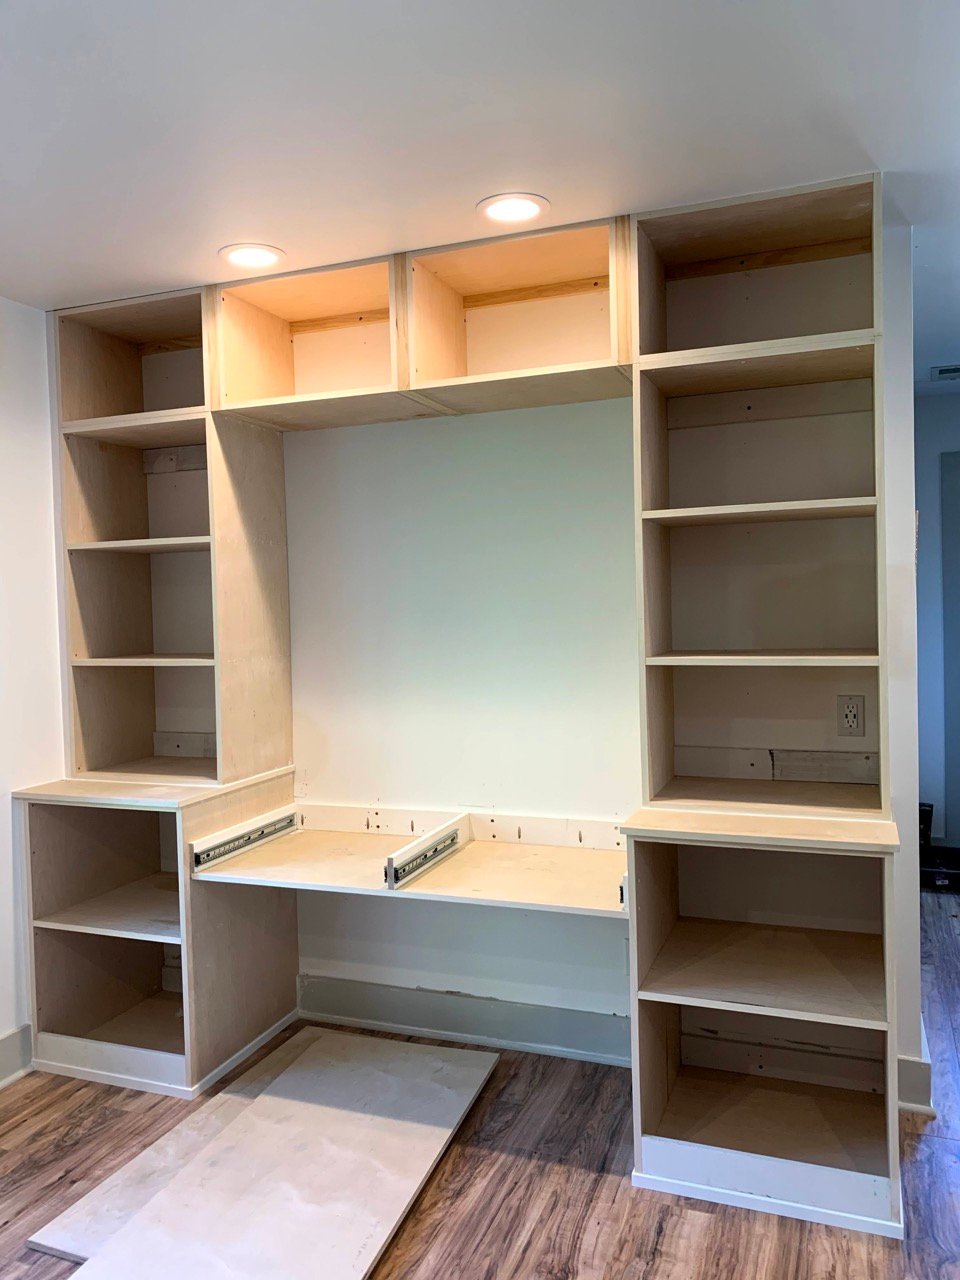
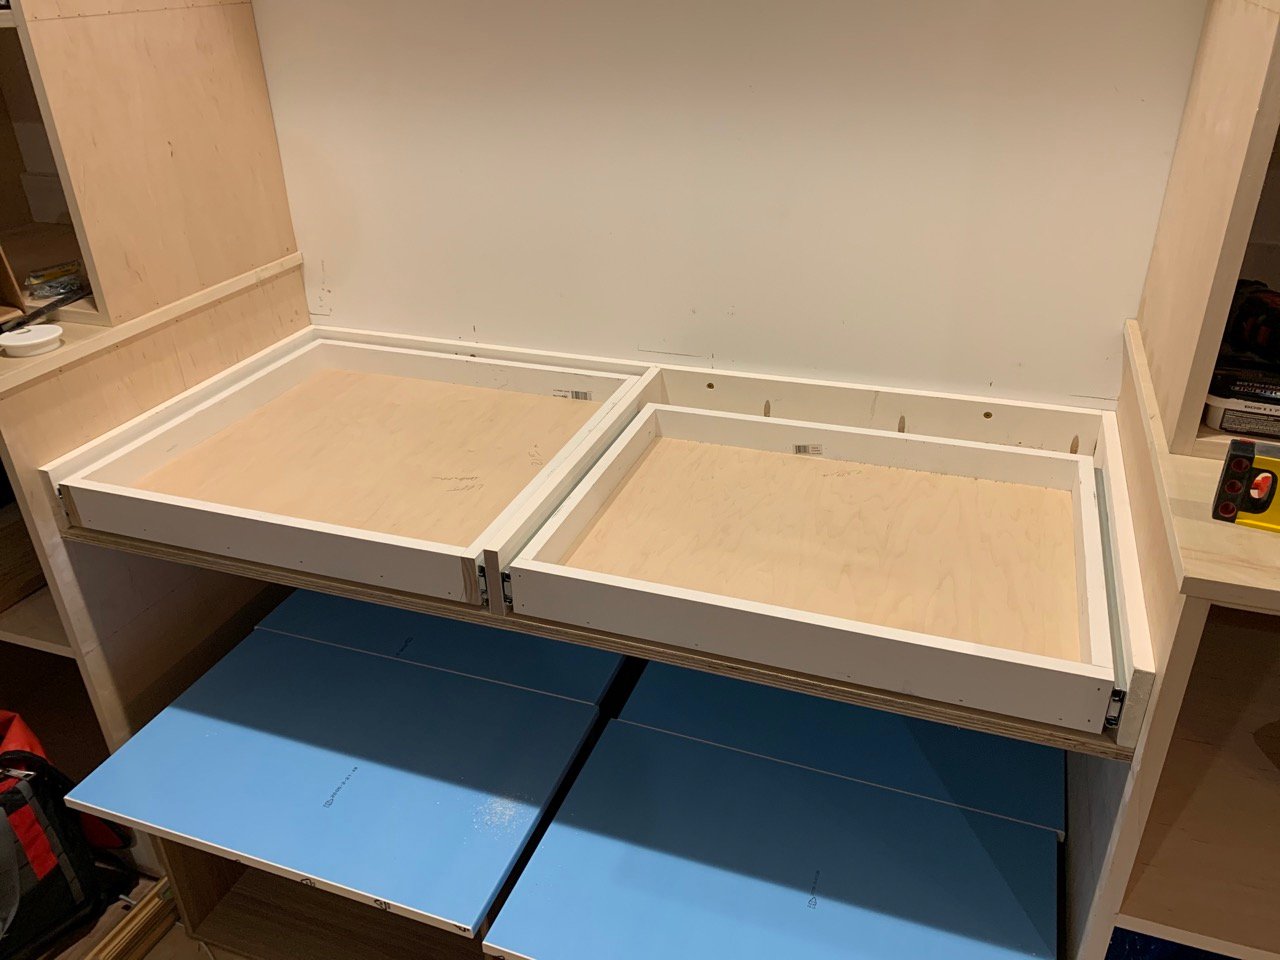
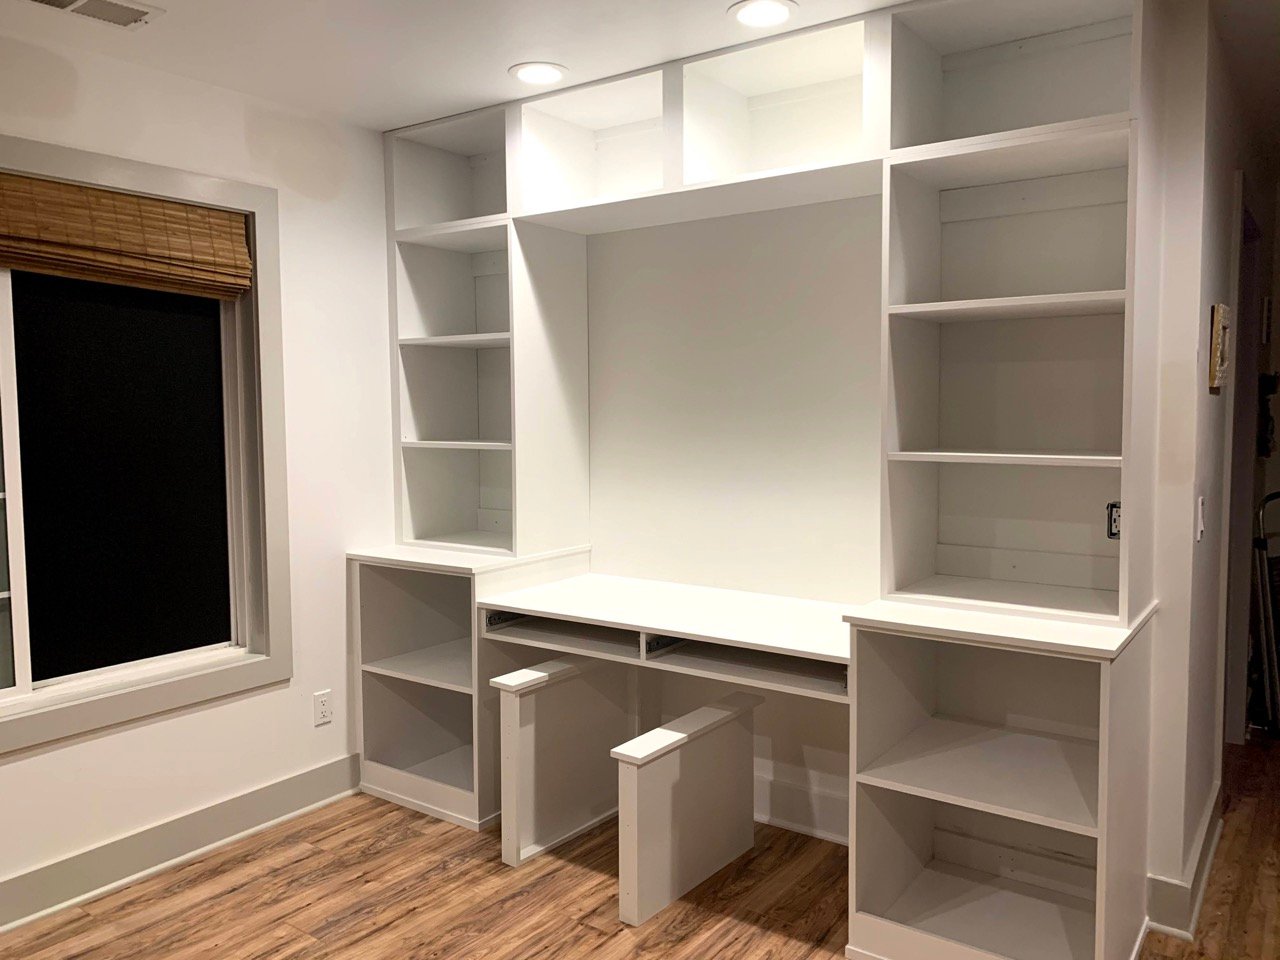
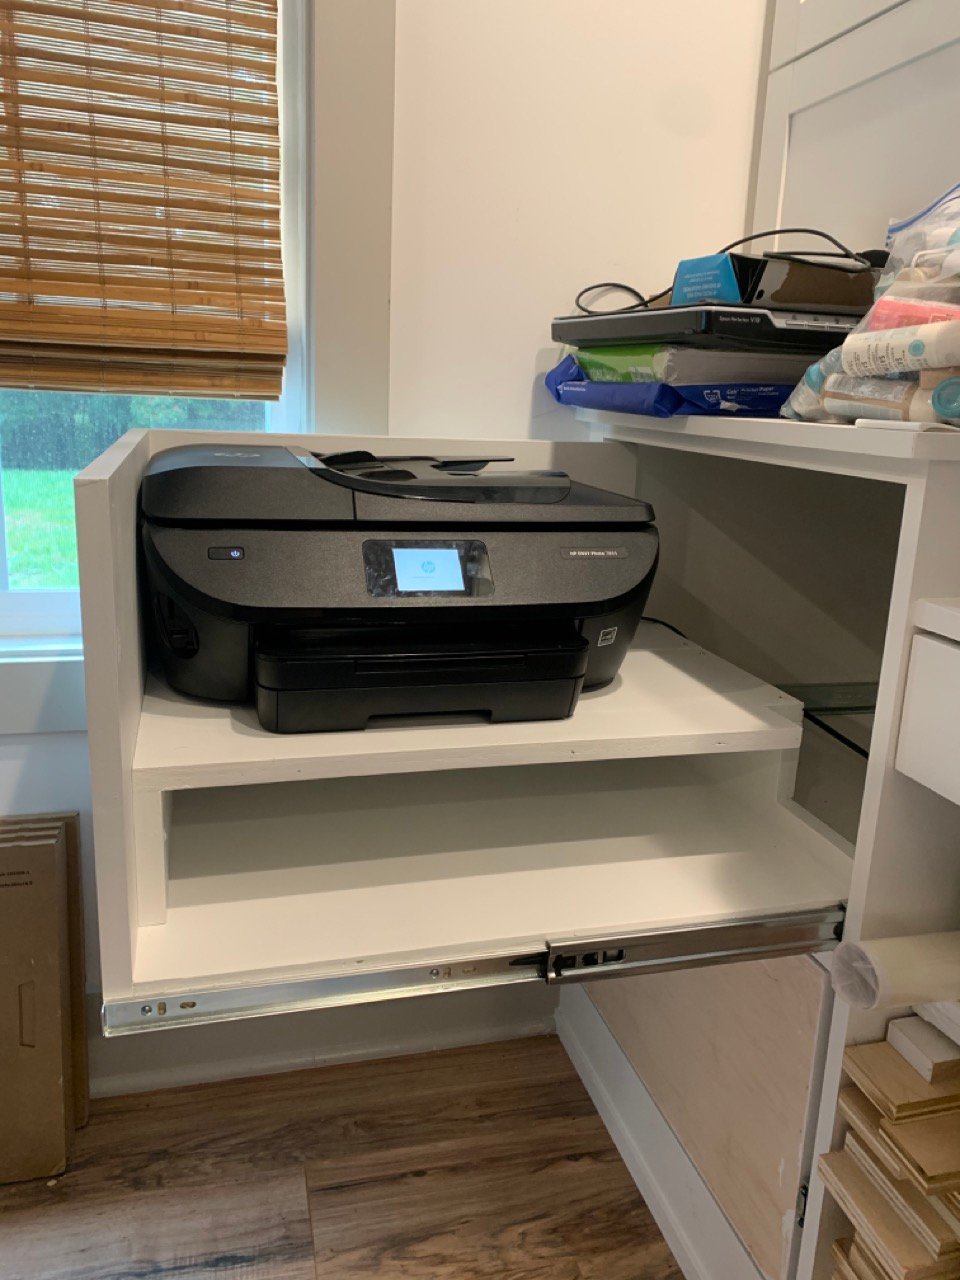
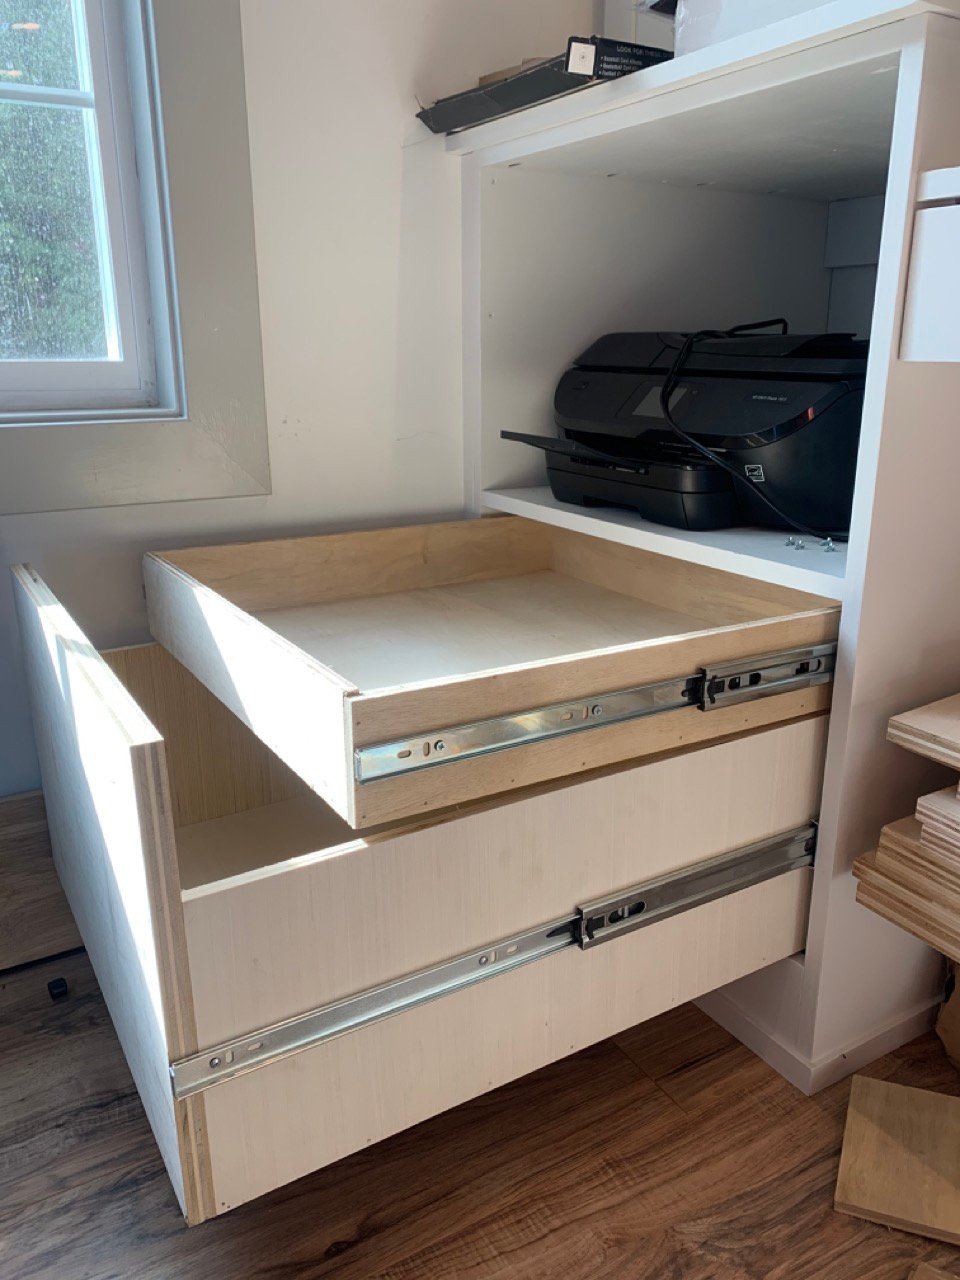
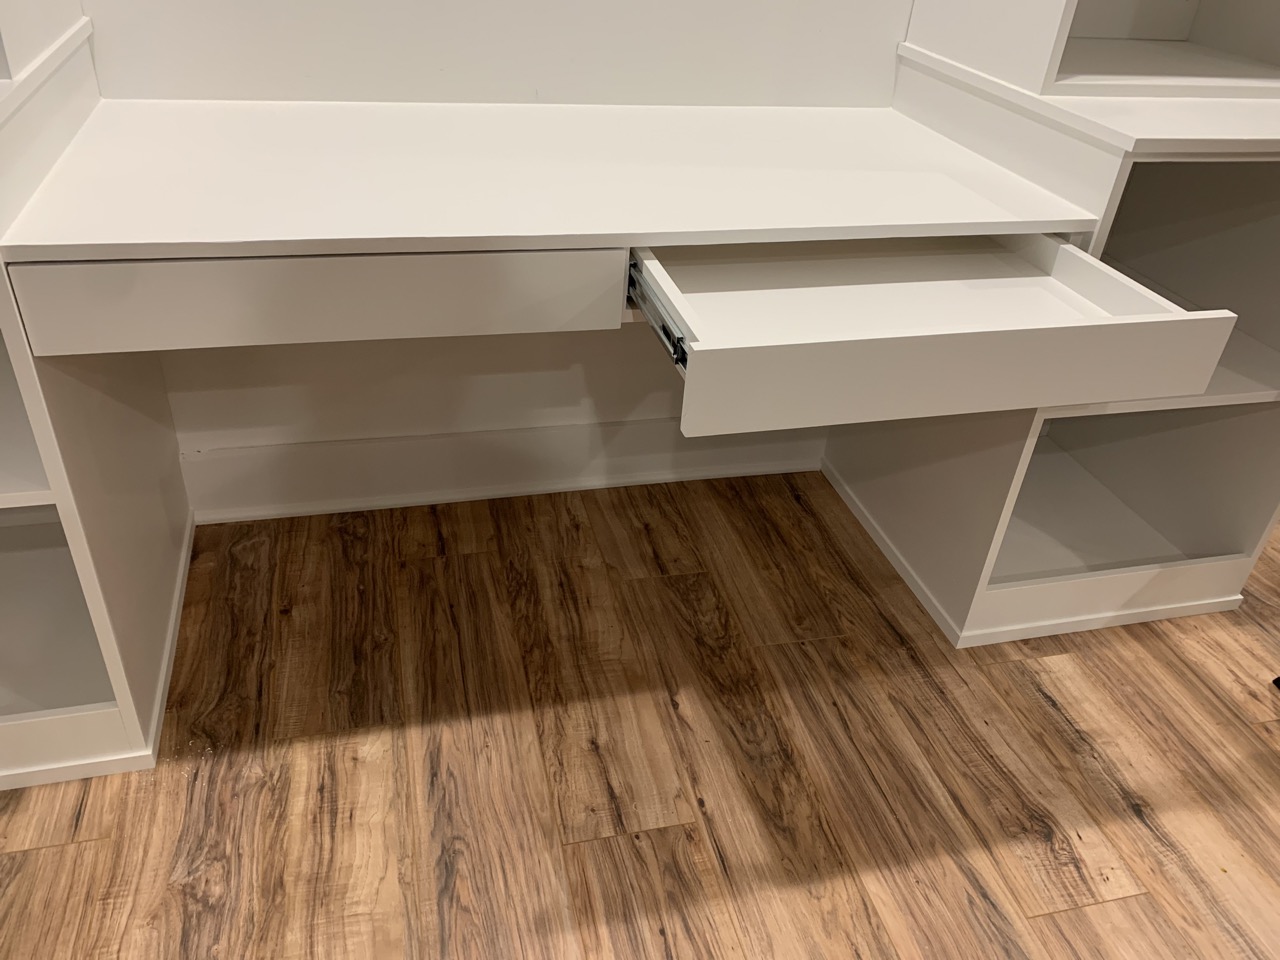
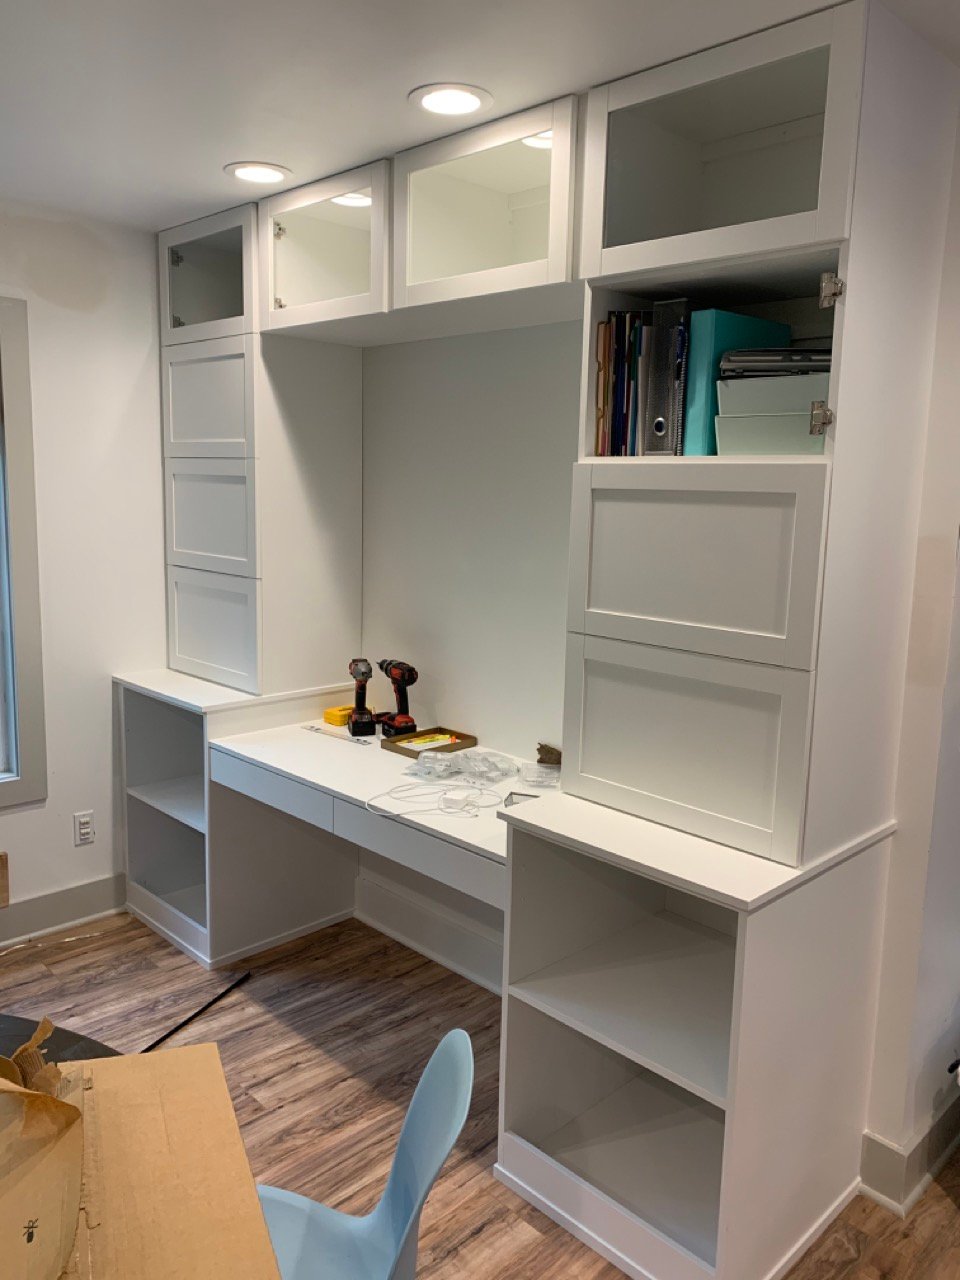
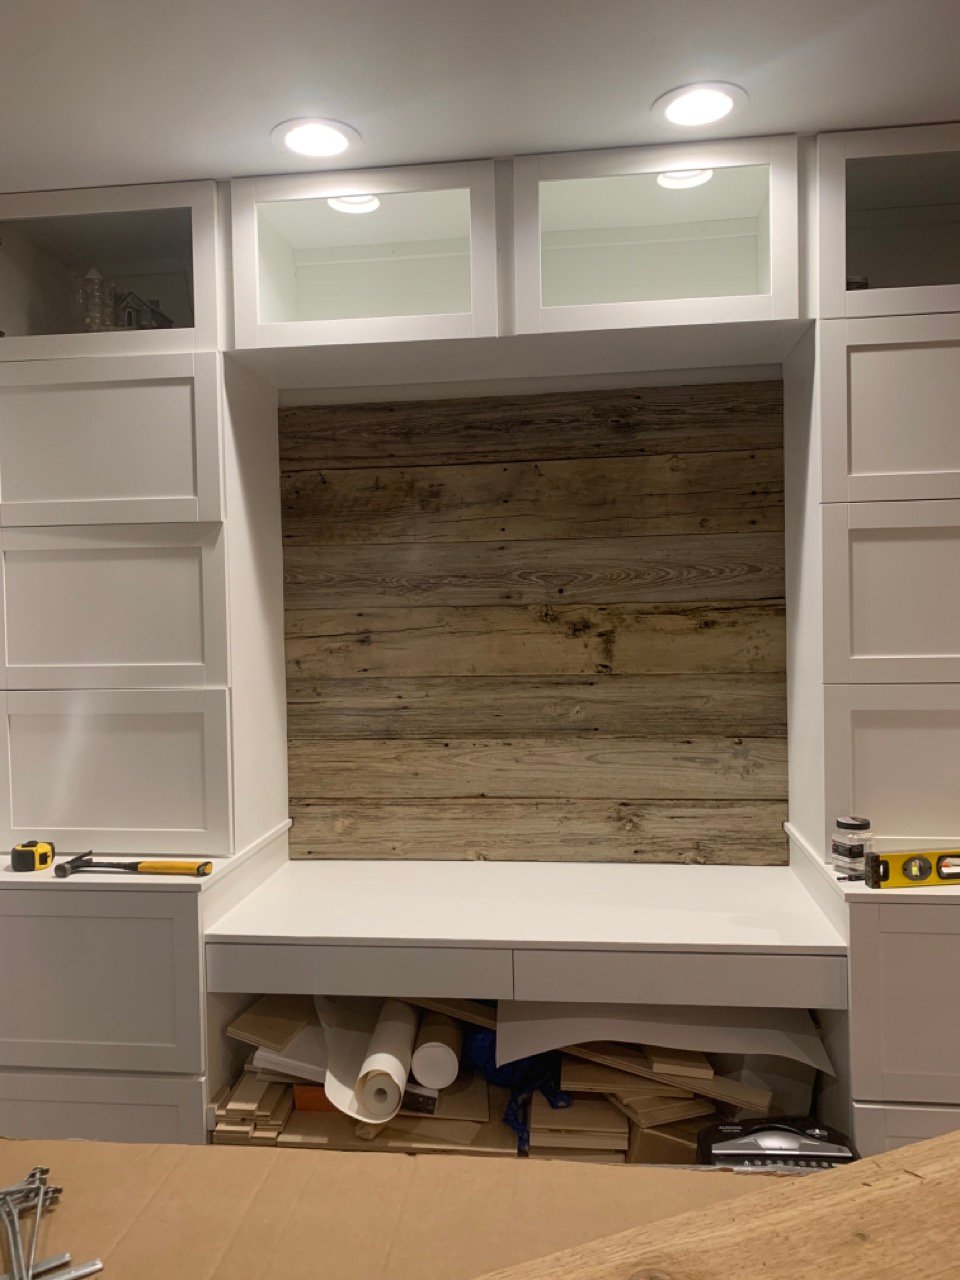
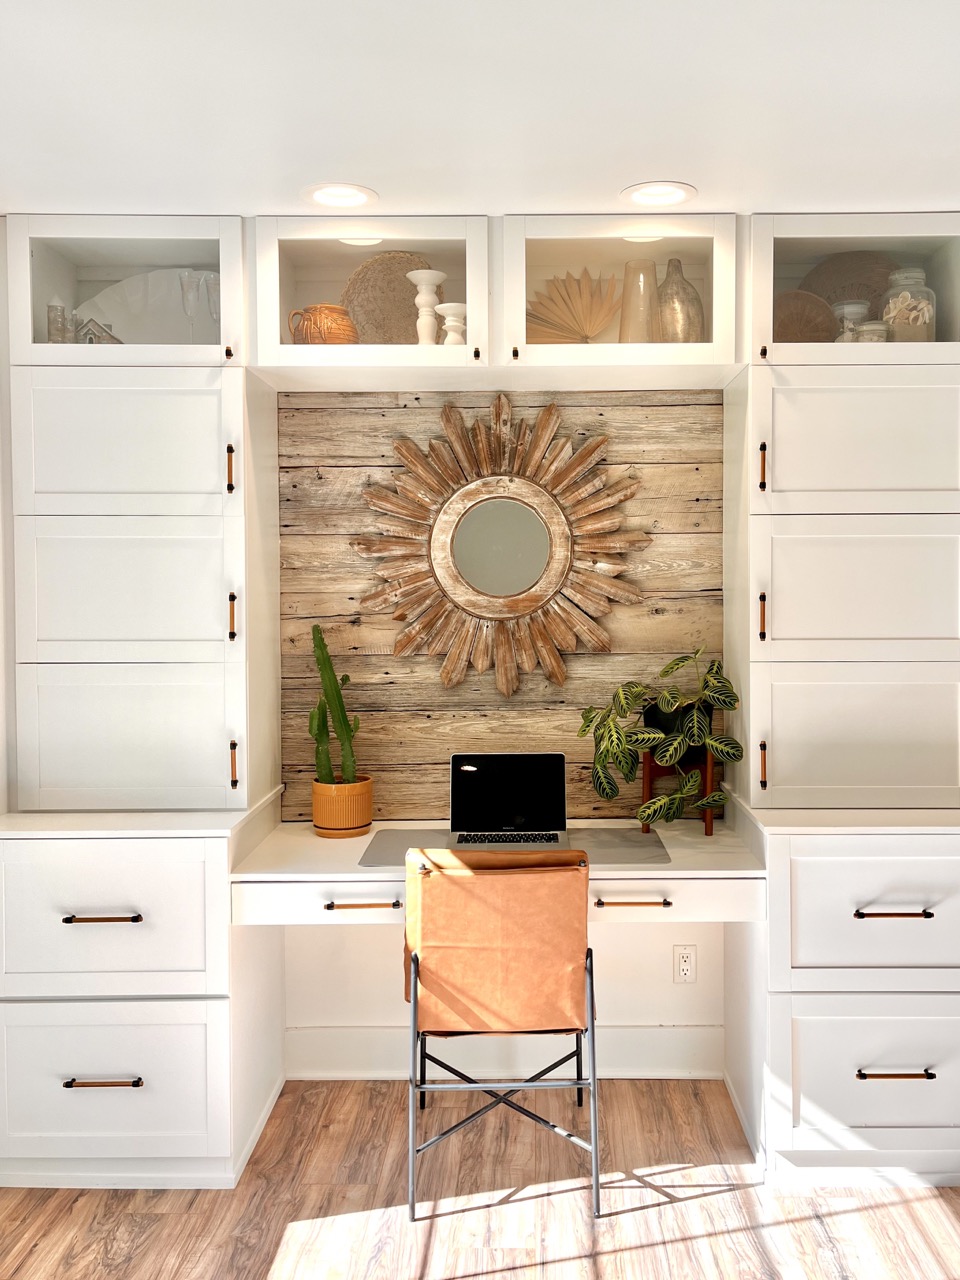
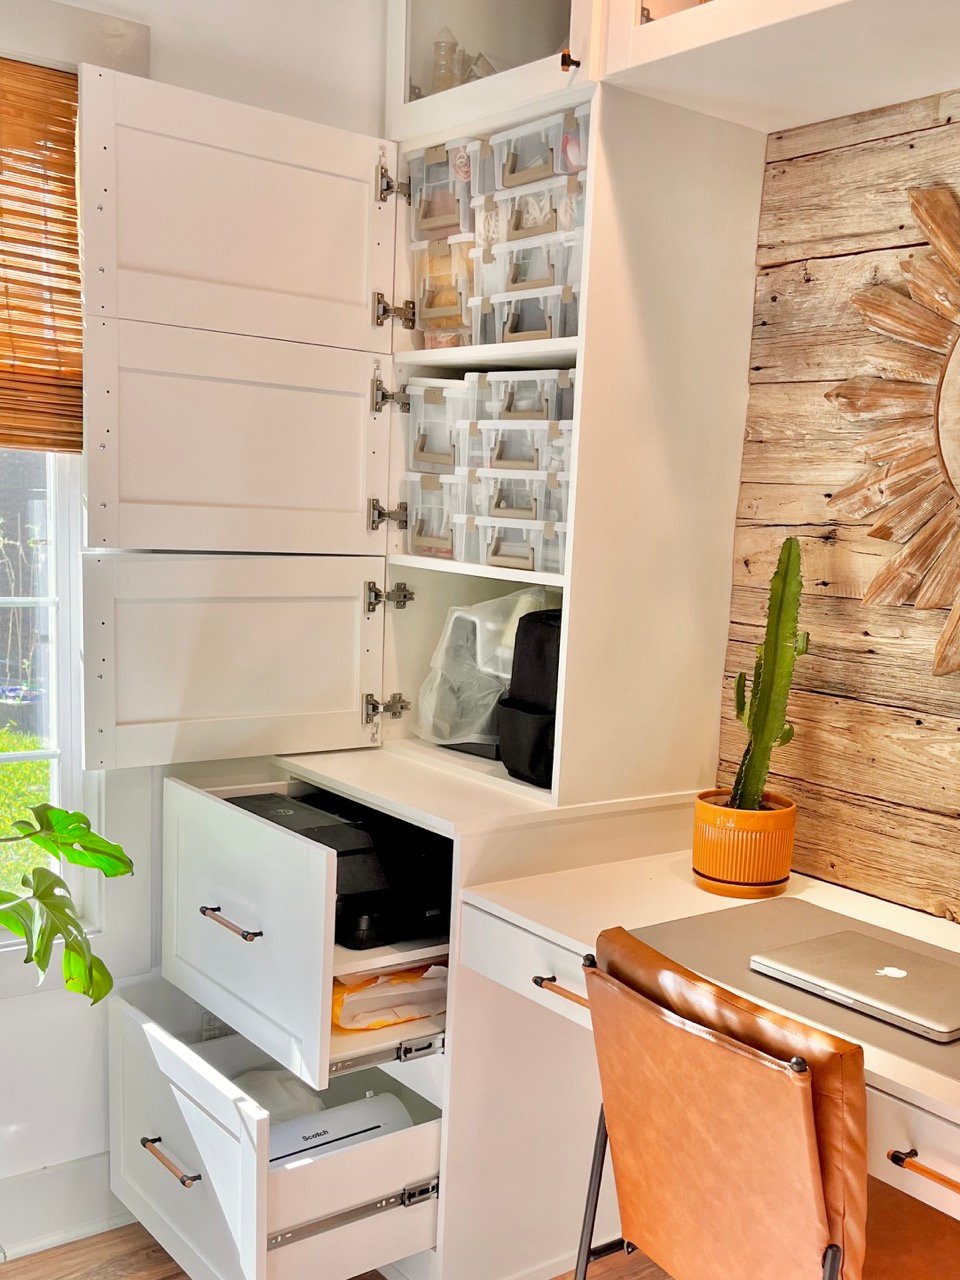
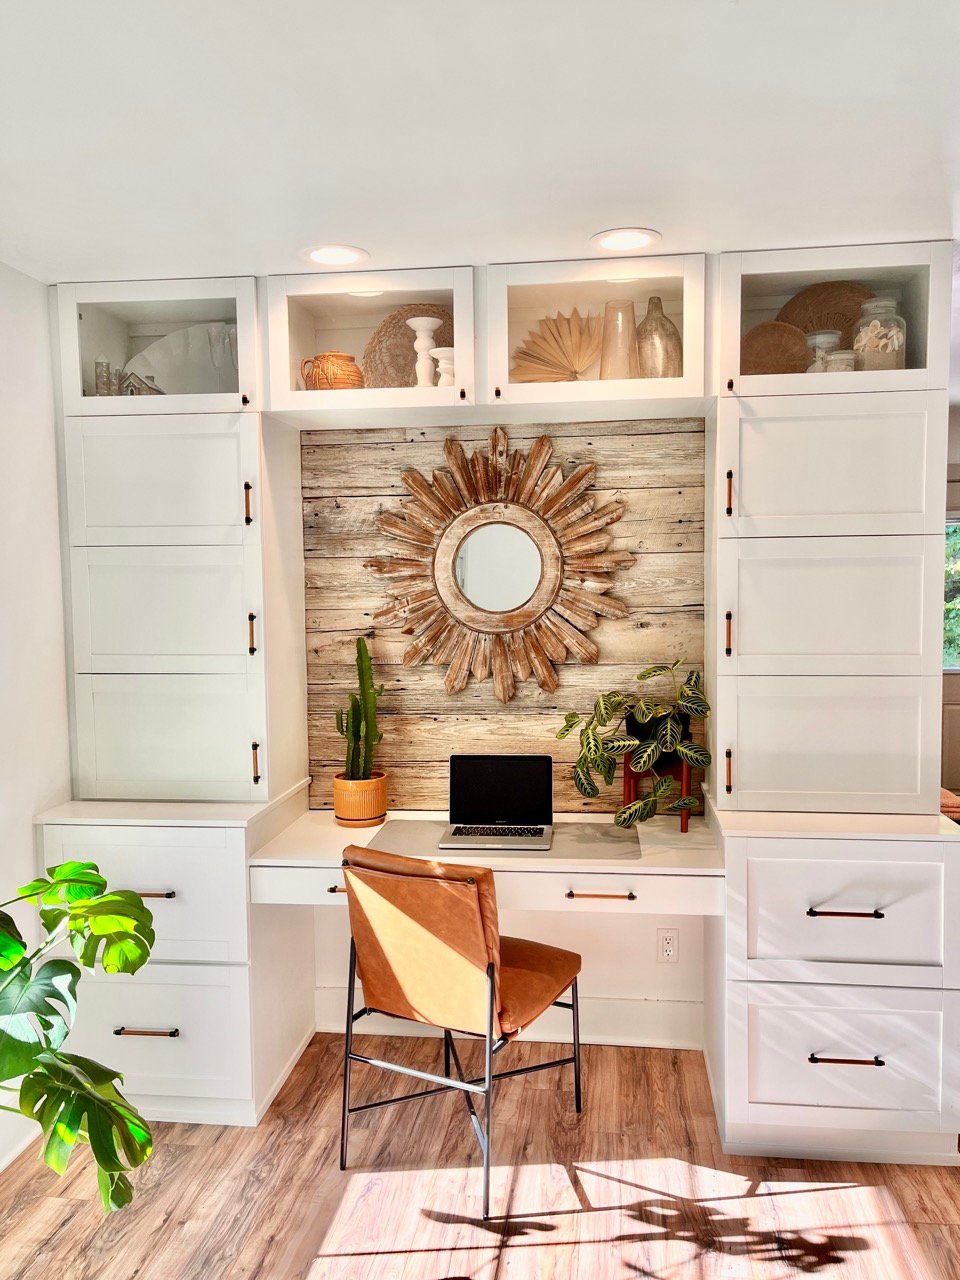
Desk Wall System with IKEA Door Faces

Seasonal And Holiday
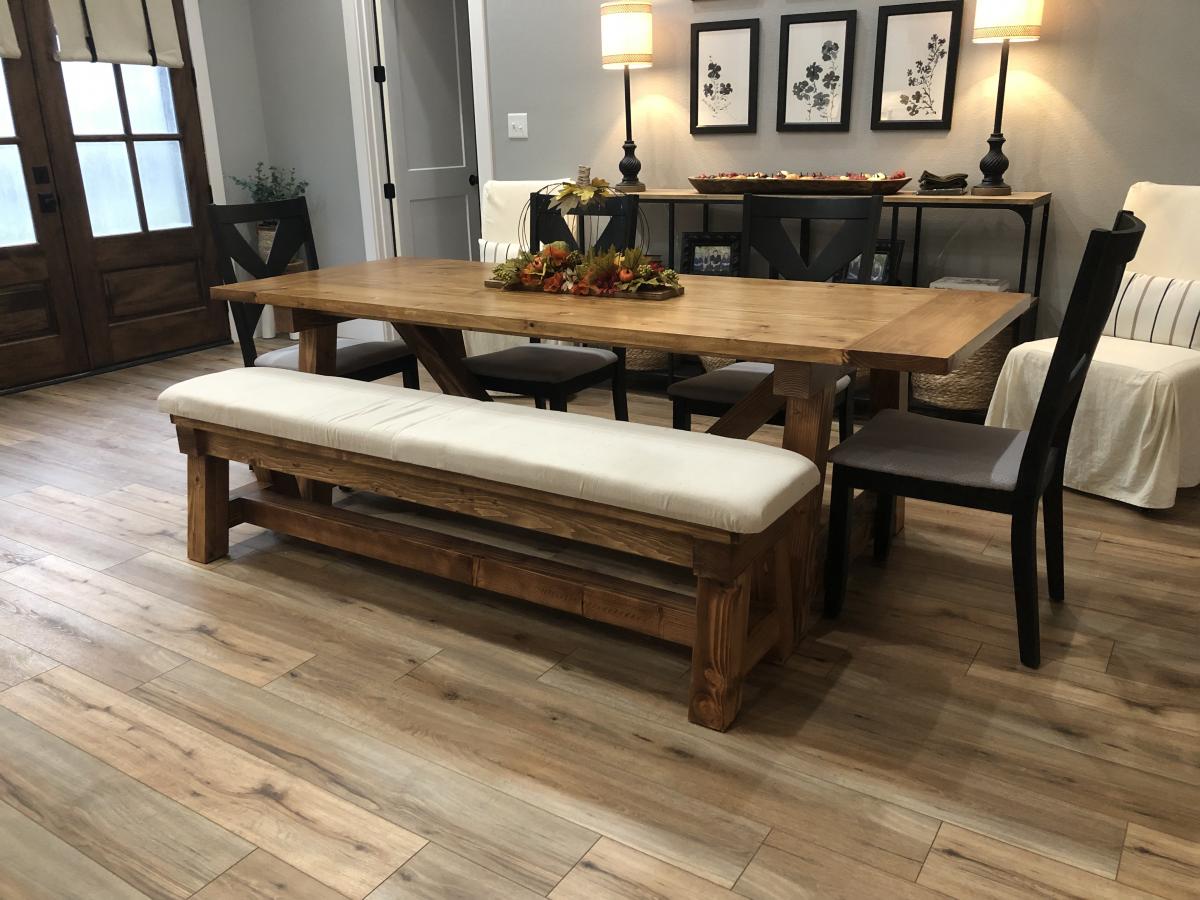
4x4 Truss beam table and bench
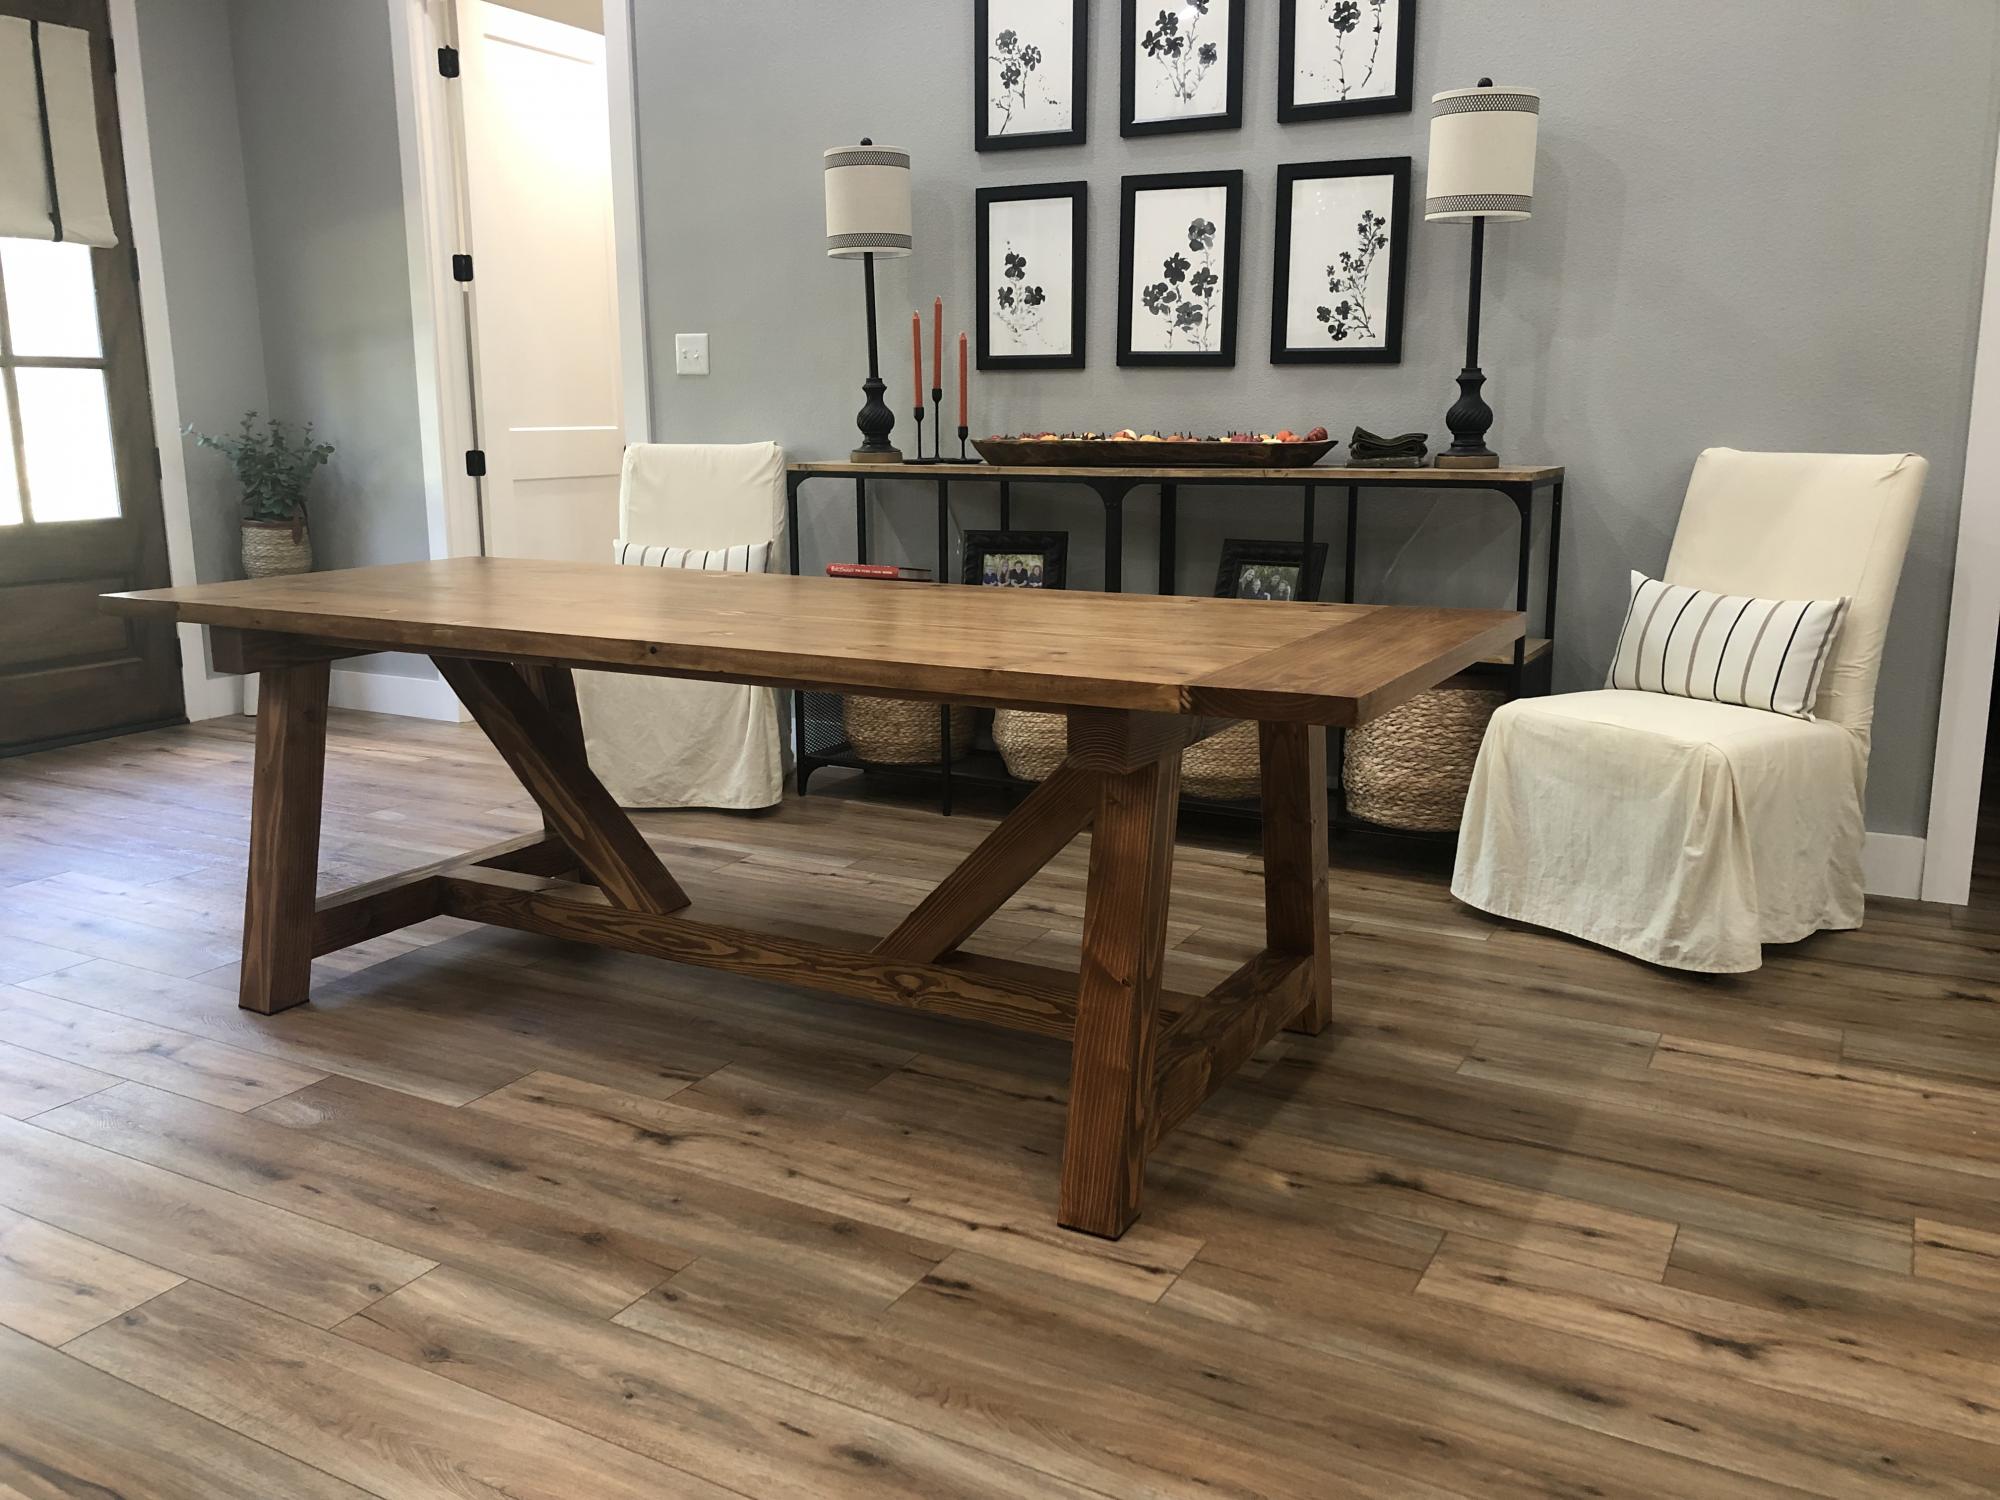
The plans were very easy to follow for non avid woodworkers. We decided to upholster the seat on the bench.
Built from Plan(s)
Comments
Tue, 10/05/2021 - 10:43
Great addition!
Looks professionally done and well built, the upholstered bench is a beautiful addition!
Bunk Beds for 4 to 6
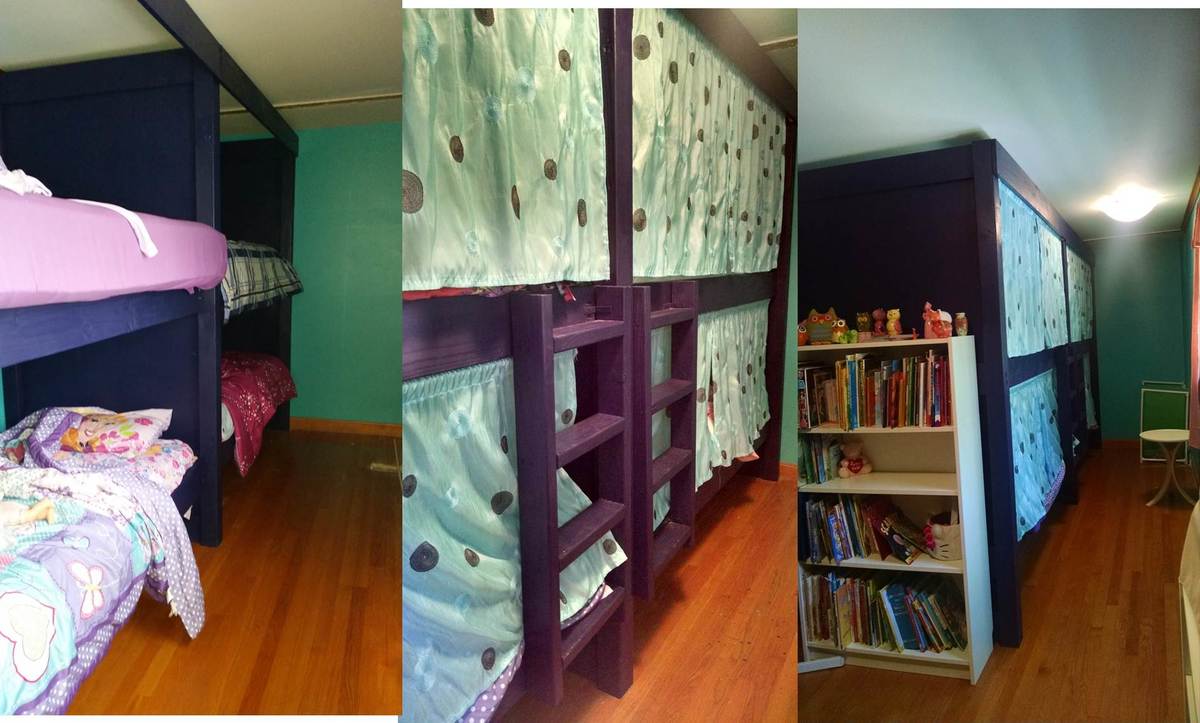
We used the Build a Simple Bed plan and the Bunk Bed from Simple Bed. I modified the plans to build a double bunk bed. We needed a way to fit up to 6 small children in a long, narrow room. Although we haven't built the trundle beds yet, each bunk will also have a trundle bed. The kids especially love their "privacy" curtains!
Built from Plan(s)
Estimated Cost
Under $300
Estimated Time Investment
Weekend Project (10-20 Hours)
Finish Used
paint
Recommended Skill Level
Beginner
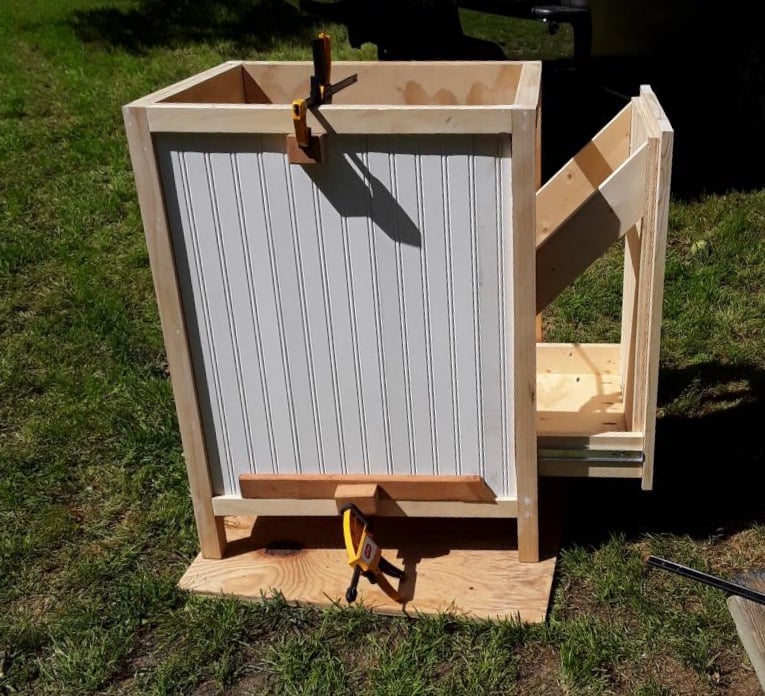
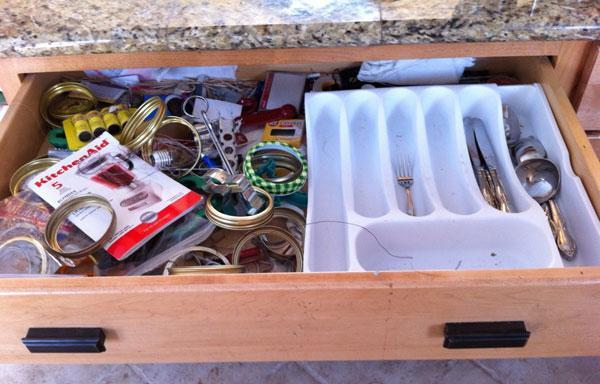
Small kitchen island with slide out double trash cans
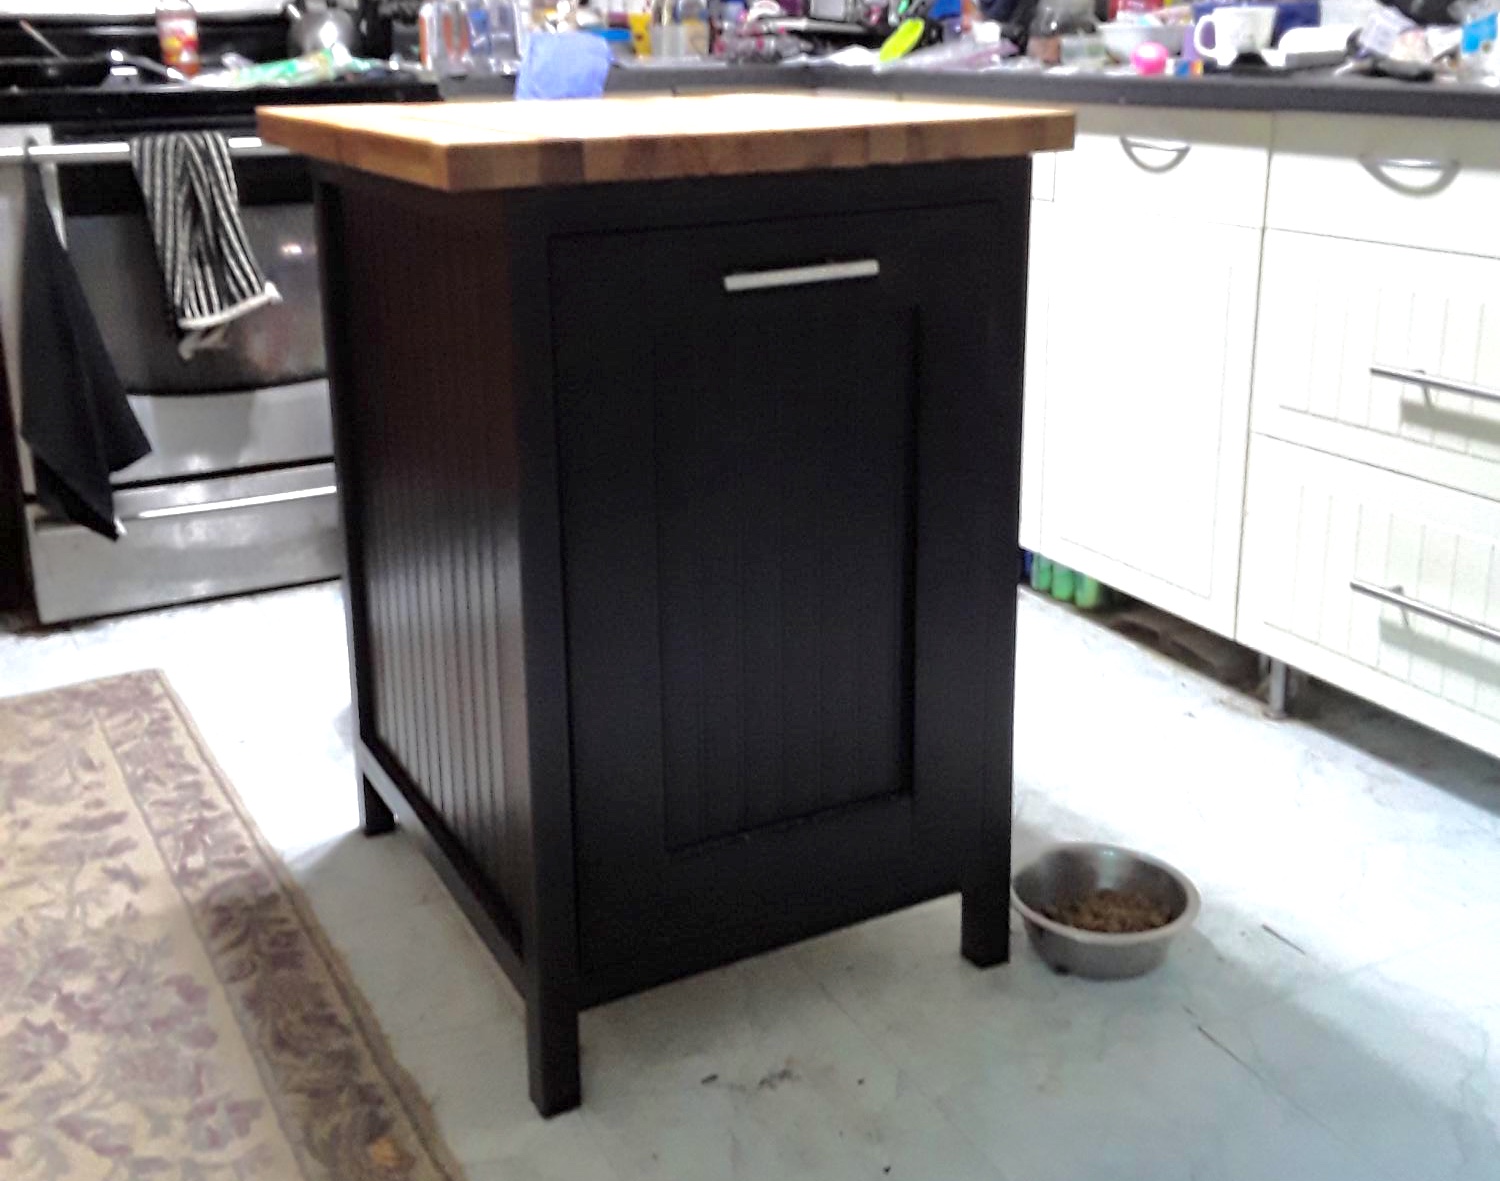
This was a mommy do during work furlough. Wasn't too hard. I have minimal experience with saws, but with hubby help, we got it done. Some of the instructions didn't make sense, but but we were able to figure them out or change them to work. I used bead board on the front and sides that we added over the existing sides. I used a manufactured butcher block that had to be cut down. Looks great and now my trashcans don't walk around the kitchen when the dogs play. The downside, the dog bowls slide under the island. If you have to cut down butcher block, make sure you have the proper blade.
Built from Plan(s)
Estimated Cost
$200.00 because of the manufactured butcher block.
Estimated Time Investment
Weekend Project (10-20 Hours)
Finish Used
Black cabinet paint
Recommended Skill Level
Beginner
Outdoor planter steps or benches
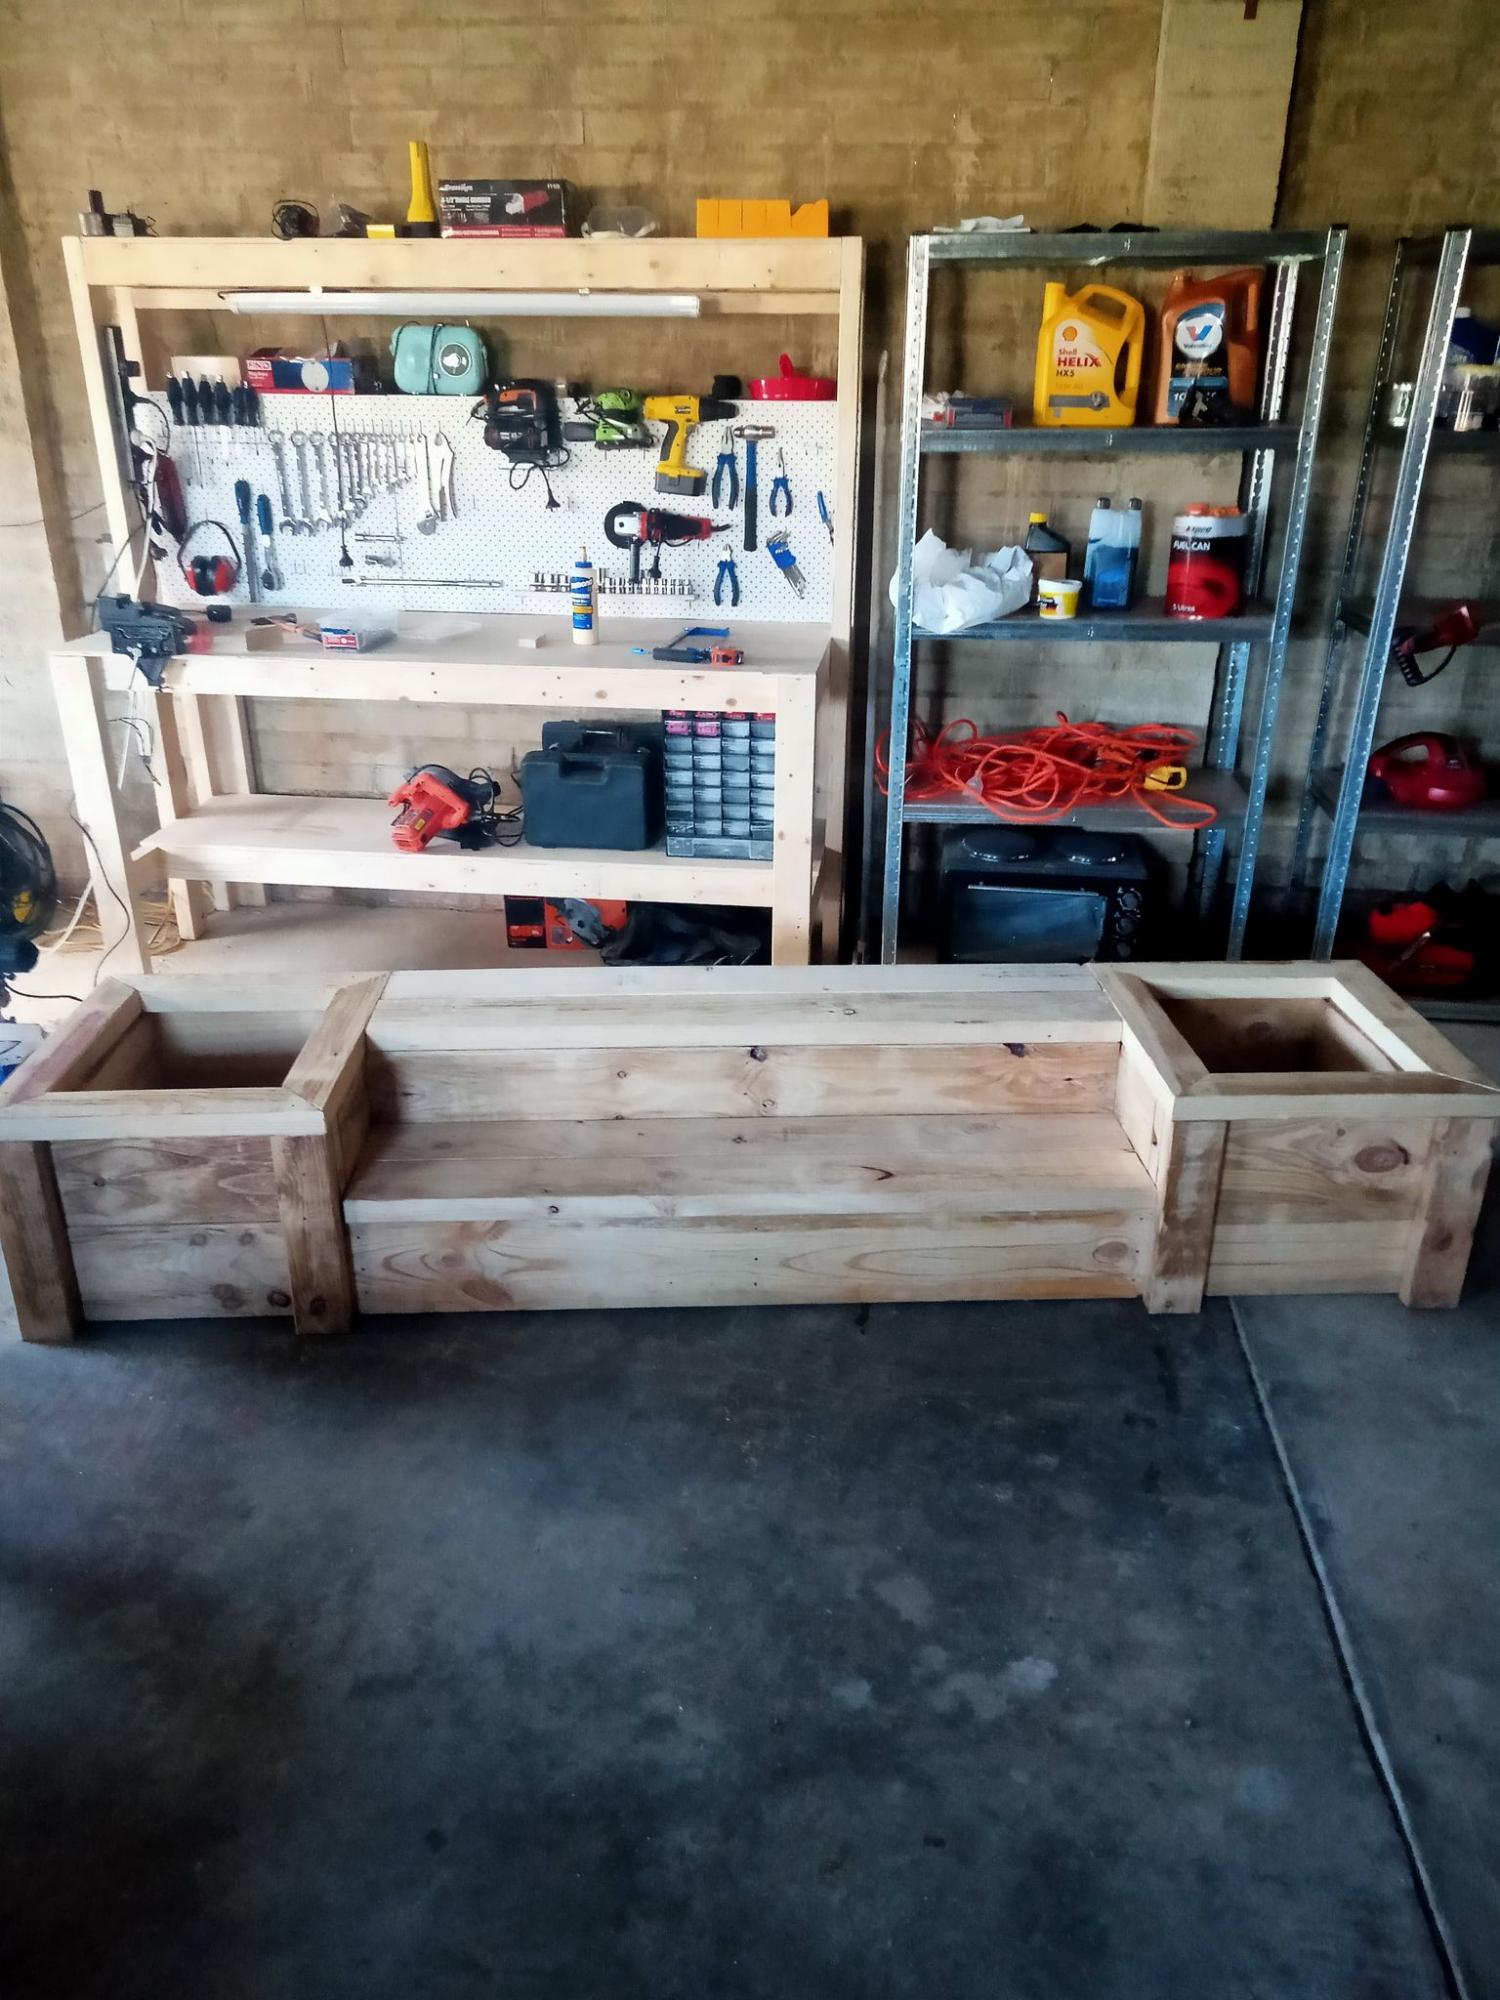
A very enjoyable project. I'm relatively new to diy woodworking projects but these plans make it so much easier.
Thanks.
Built from Plan(s)
Estimated Cost
$250
Estimated Time Investment
Weekend Project (10-20 Hours)
Recommended Skill Level
Intermediate
Comments
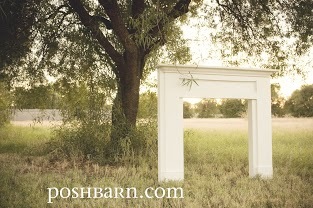
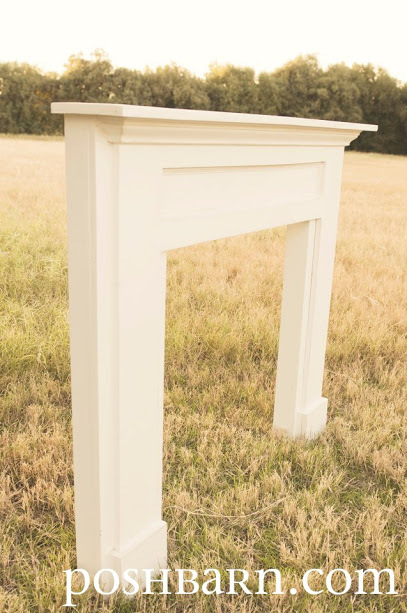
Faux Mantle by Posh Barn
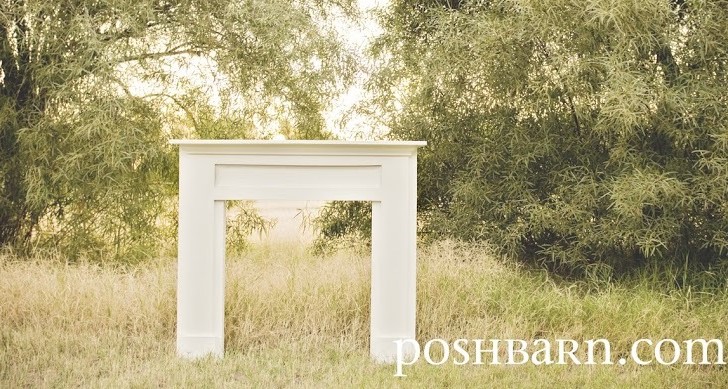
This is such a great project. Easy and fast you still have time to make one for hanging Christmas stockings!
Built from Plan(s)
Estimated Cost
90.00
Estimated Time Investment
Afternoon Project (3-6 Hours)
Finish Used
Cool Grey with some distress
Recommended Skill Level
Beginner
Comments
Seasonal And Holiday
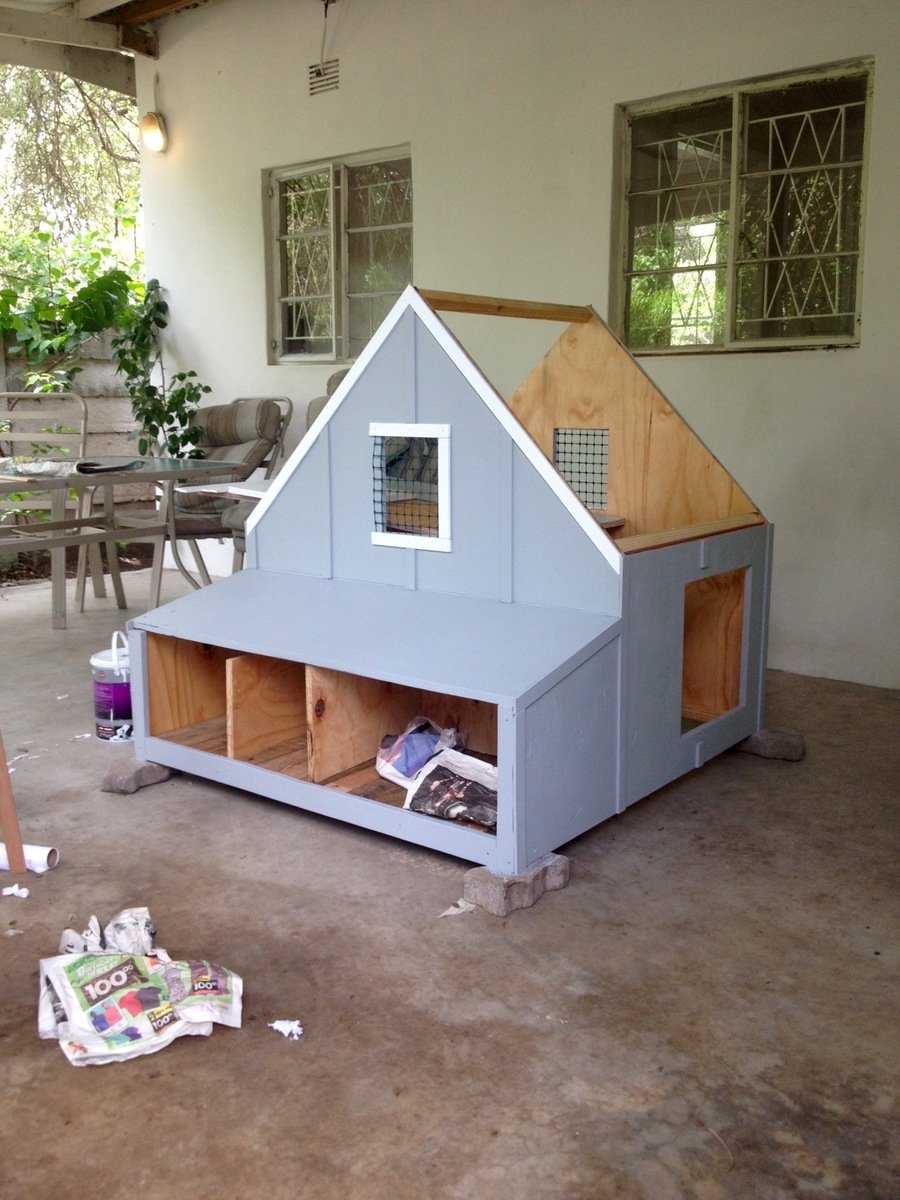
Modified Chicken coop

We live in a termite infested area and as such were nervous about putting wood in contact with the ground. We modified these plans to sit on top of a welded bar frame that is moveable and stands a meter high. The measurements are custom to our welded frame but the shape was based on these plans as was the construction process followed. We dont have a worry about predators so have used a design that doen not have a closed floor - our girls can simply fly or walk up the ladder to the roost and are able to leave the coop when ready in the morning without us opening doors. We are also in a warm environment thus an enclosed coop is not needed.
So far they are happy and are happily laying in the two egg boxes (We left the remaining space closed internally so that we can use it for storage) and as there is no bottom to the coop they poop straight into the run and onto the sand floor.
They are not free ranging yet as we are nervous of our dogs chasing them but once we are happy to let them free range we will use the gate built into the welded run.
Thank you Ana and lady goats for this design - I spent hours (and hours) researching and reading and looking at coop designs before deciding that this cute number was the one we wanted.
From me and my happy hens, thanks again!
Built from Plan(s)
Estimated Cost
$250
Estimated Time Investment
Weekend Project (10-20 Hours)
Finish Used
Exterior was painted with a water based exterior paint over wood primer
Inside was varnished
Inside was varnished
Recommended Skill Level
Beginner
Corner Cupboard
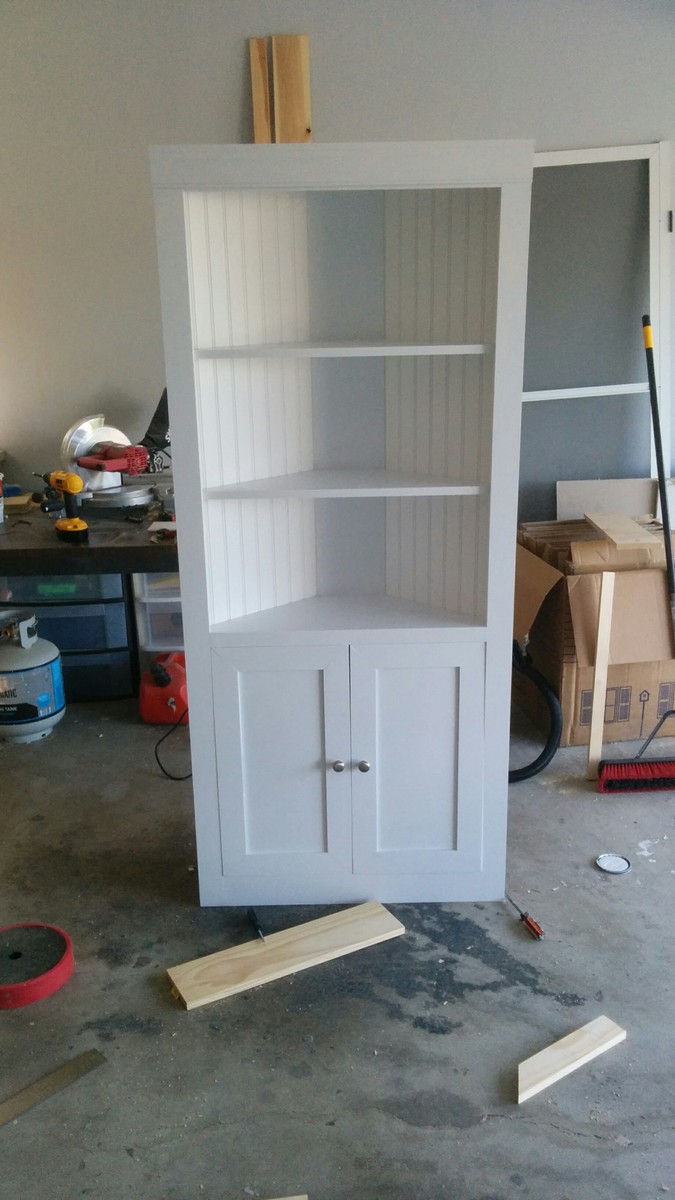
Estimated Cost
100$ before paint/hardware
Finish Used
White Paint
Recommended Skill Level
Intermediate
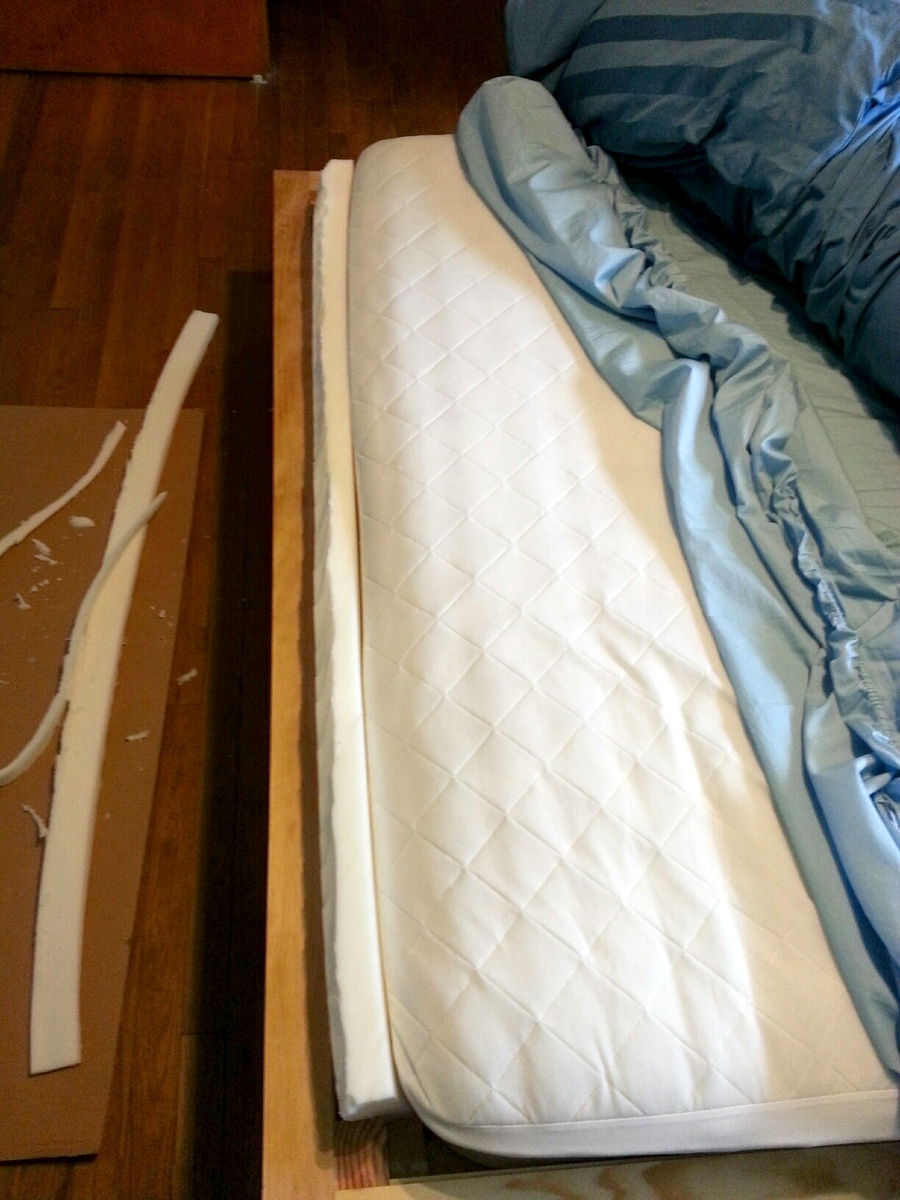
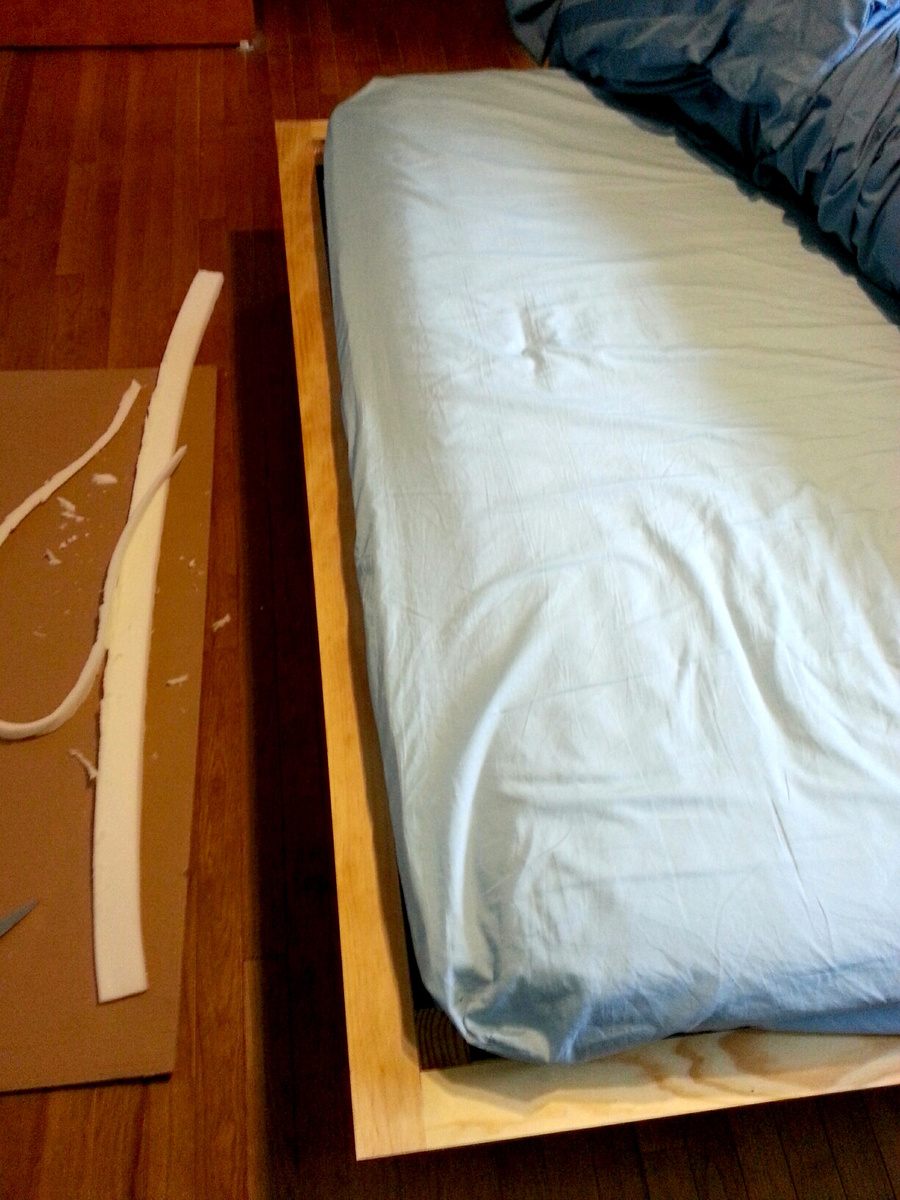
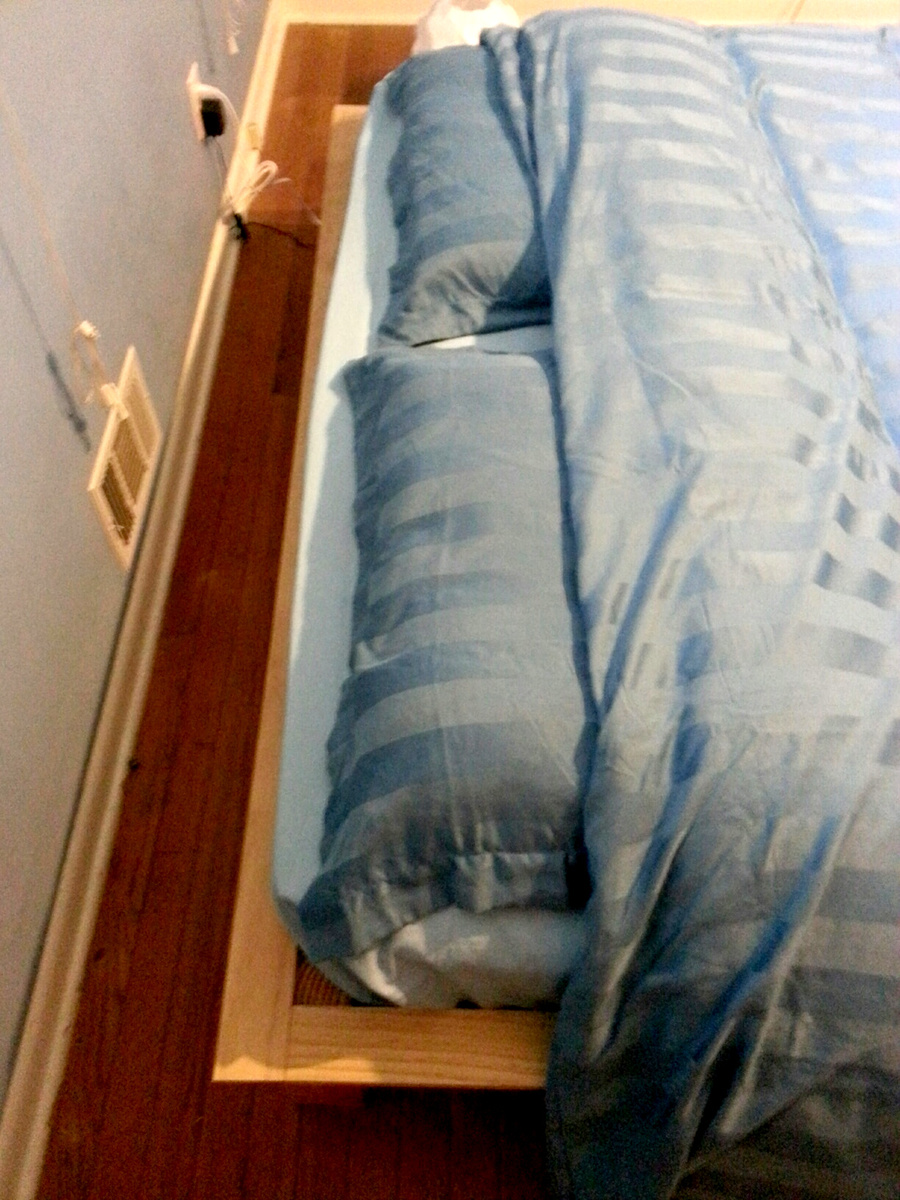
Extra Long Bed
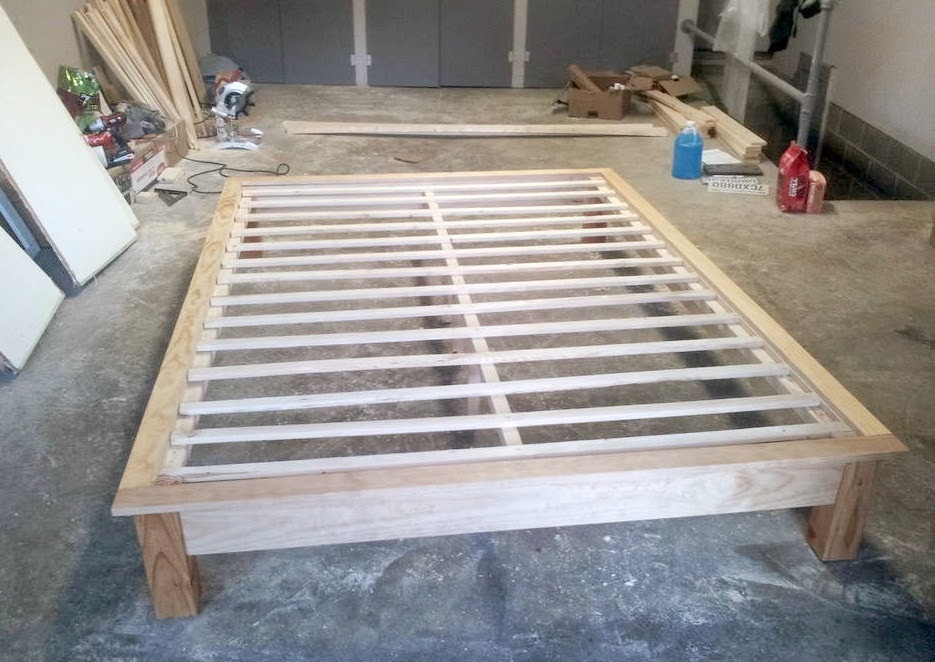
My hubby is 6'5'' tall. Since most matresses are 80 inches long, he mostly ends up with his feet hanging out of the bed (since you don't lay your head down at the very beginning of the mattress, right?). So I tried to solve this problem by making the bed 4'' longer than the plans suggested. I added 2'' of foam on each end of the bed, so now its 84'' long and my hubby fits perfectly!
Thanks for the great plans, I had a blast building my own bed!
Built from Plan(s)
Estimated Time Investment
Weekend Project (10-20 Hours)
Recommended Skill Level
Beginner
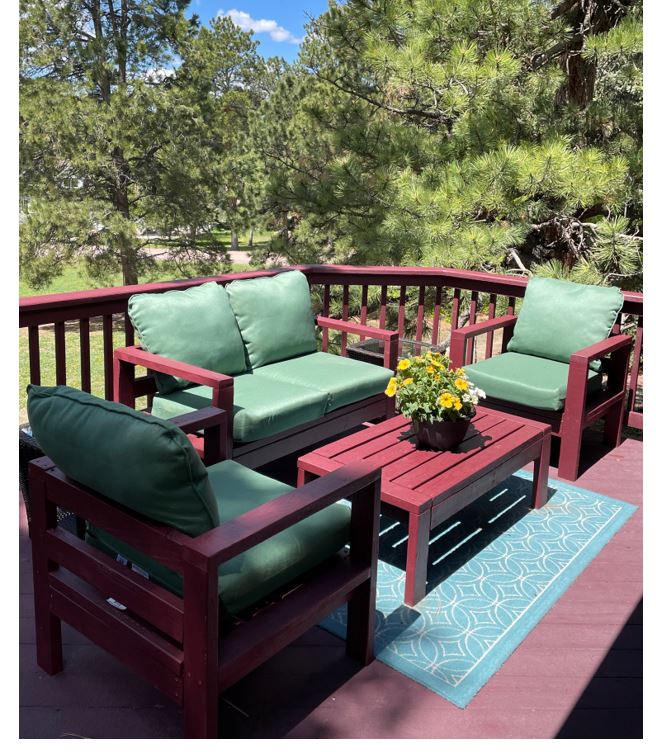
Simple Modern Outdoor Sectional
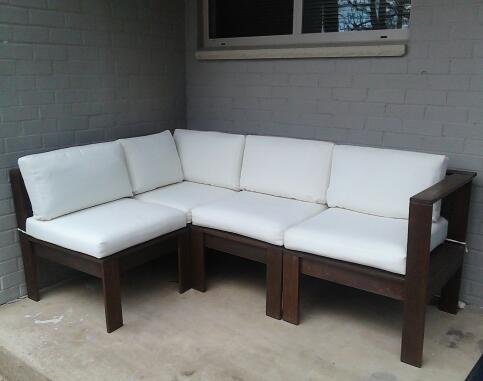
So glad these plans were posted so that I could build my own outdoor sectional. I built two armless and two corner/end pieces. I used cedar with American Walnut stain and clear/satin spar urethane. I purchased the cushions online. They only had 24x24"; so for the back cushions, I used a seam ripper to open the cushion, cut the foam and extra fabric, and re-sew.
Built from Plan(s)
Estimated Cost
500 including cushions
Estimated Time Investment
Week Long Project (20 Hours or More)
Finish Used
American Walnut water-based stain
Clear/Satin spar urethane
Clear/Satin spar urethane
Recommended Skill Level
Beginner
Comments

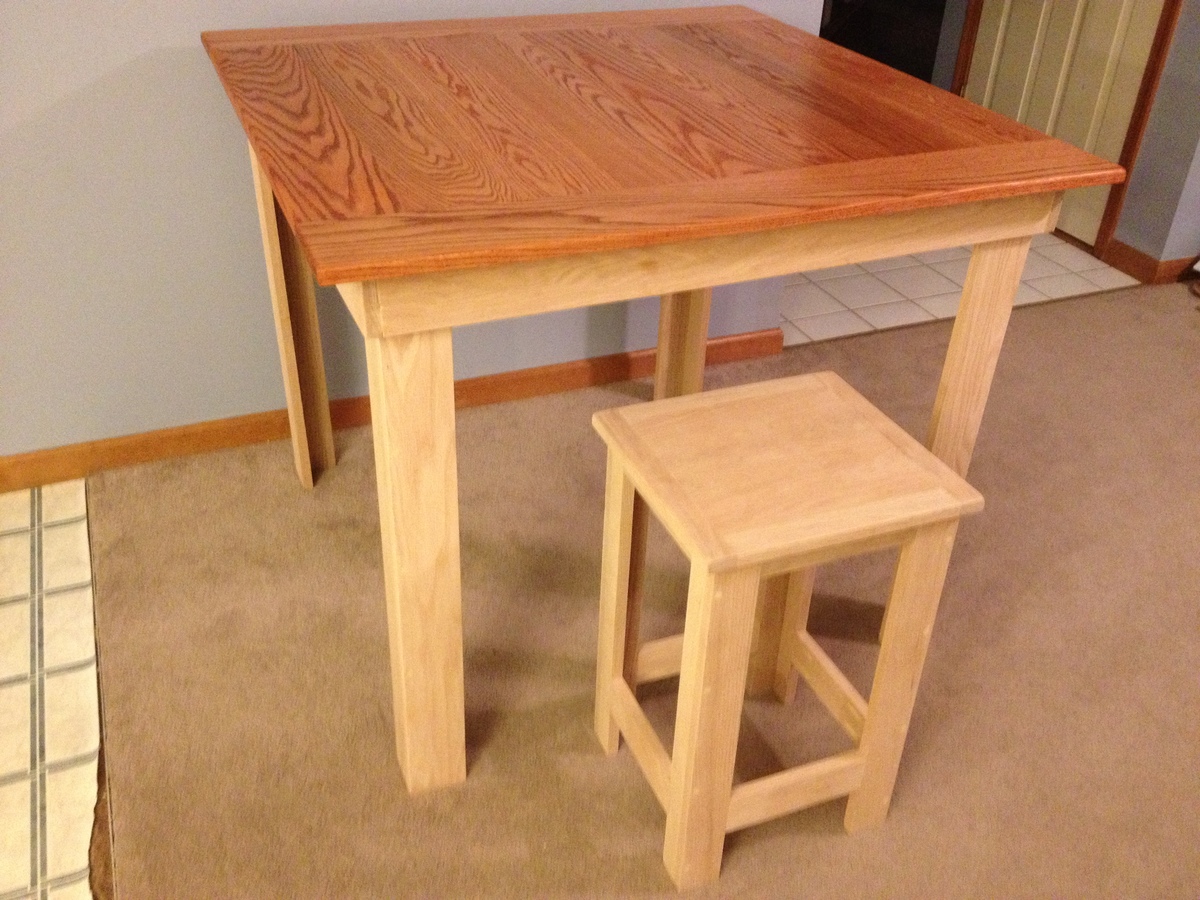
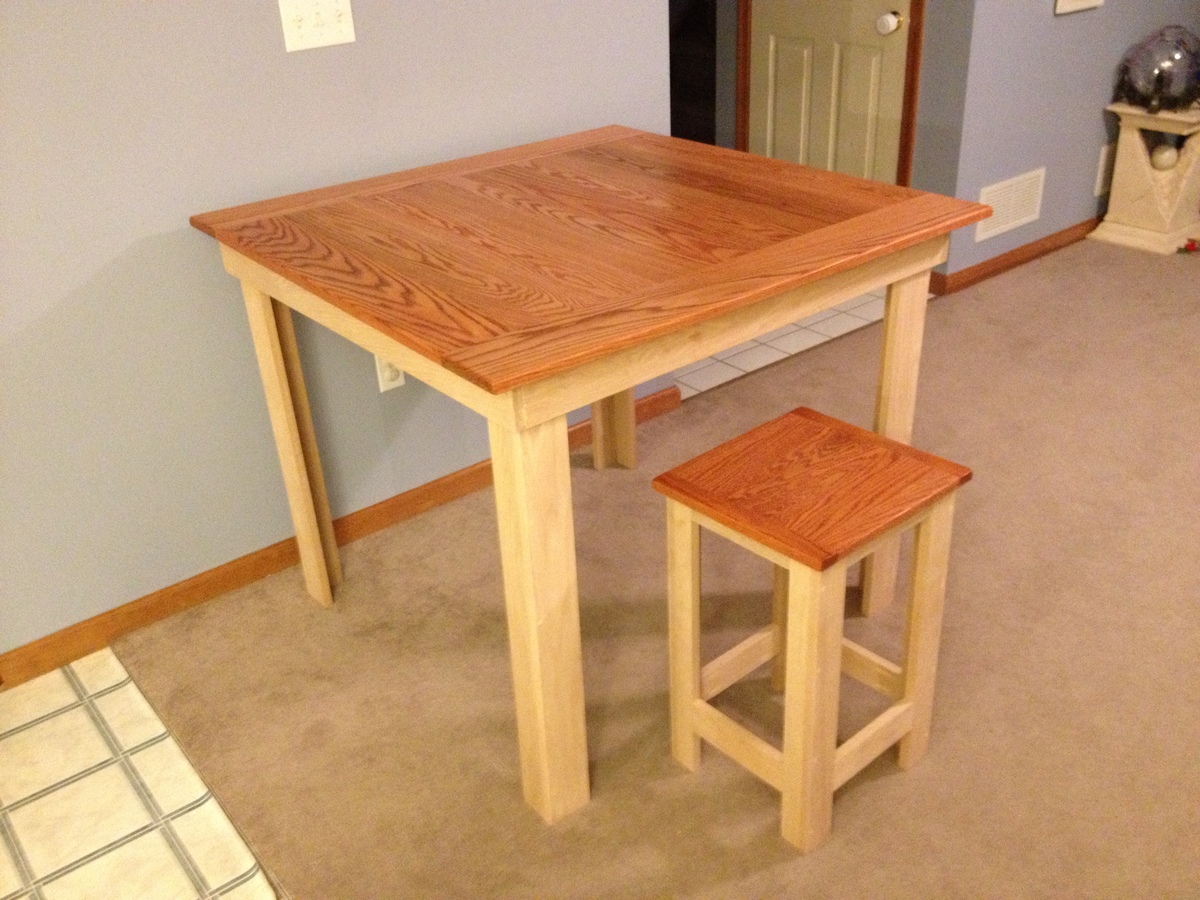
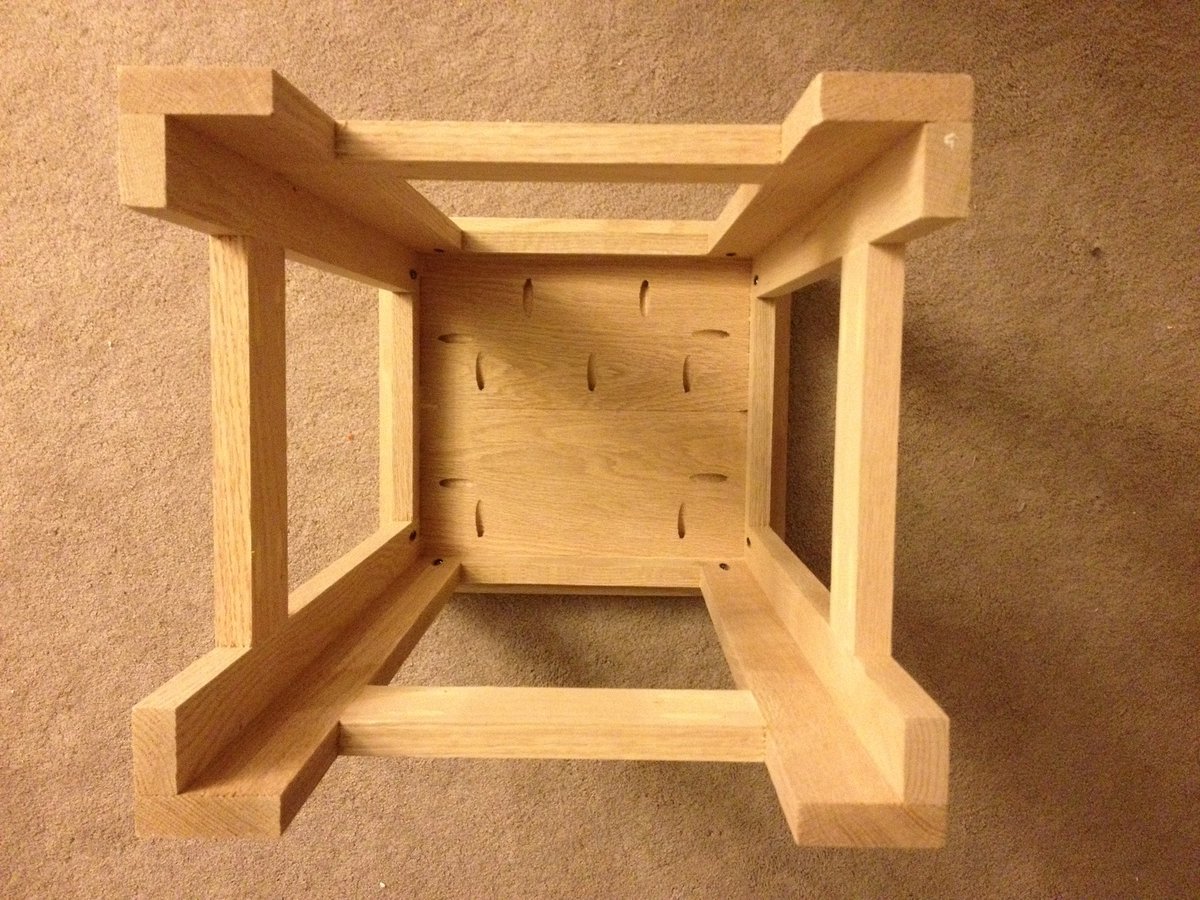
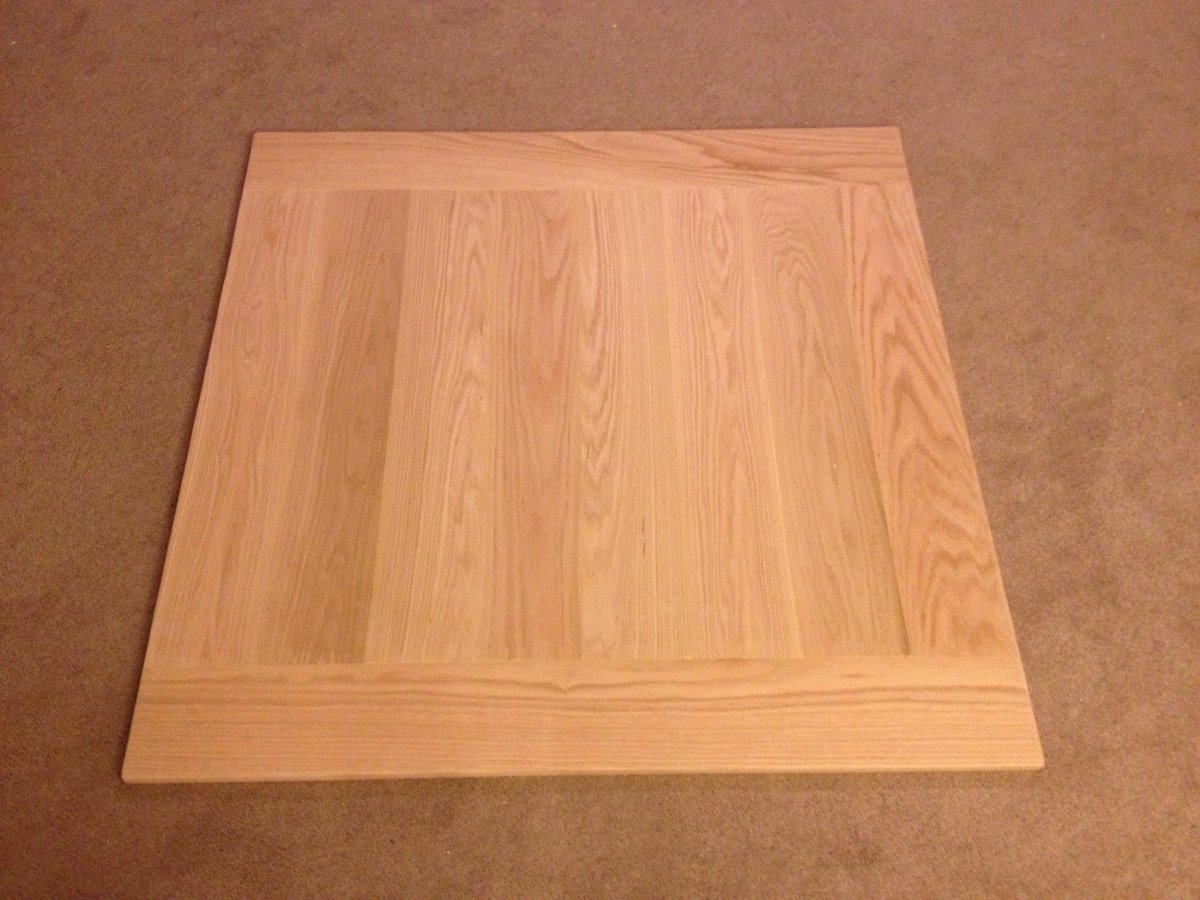
Pub table Stools
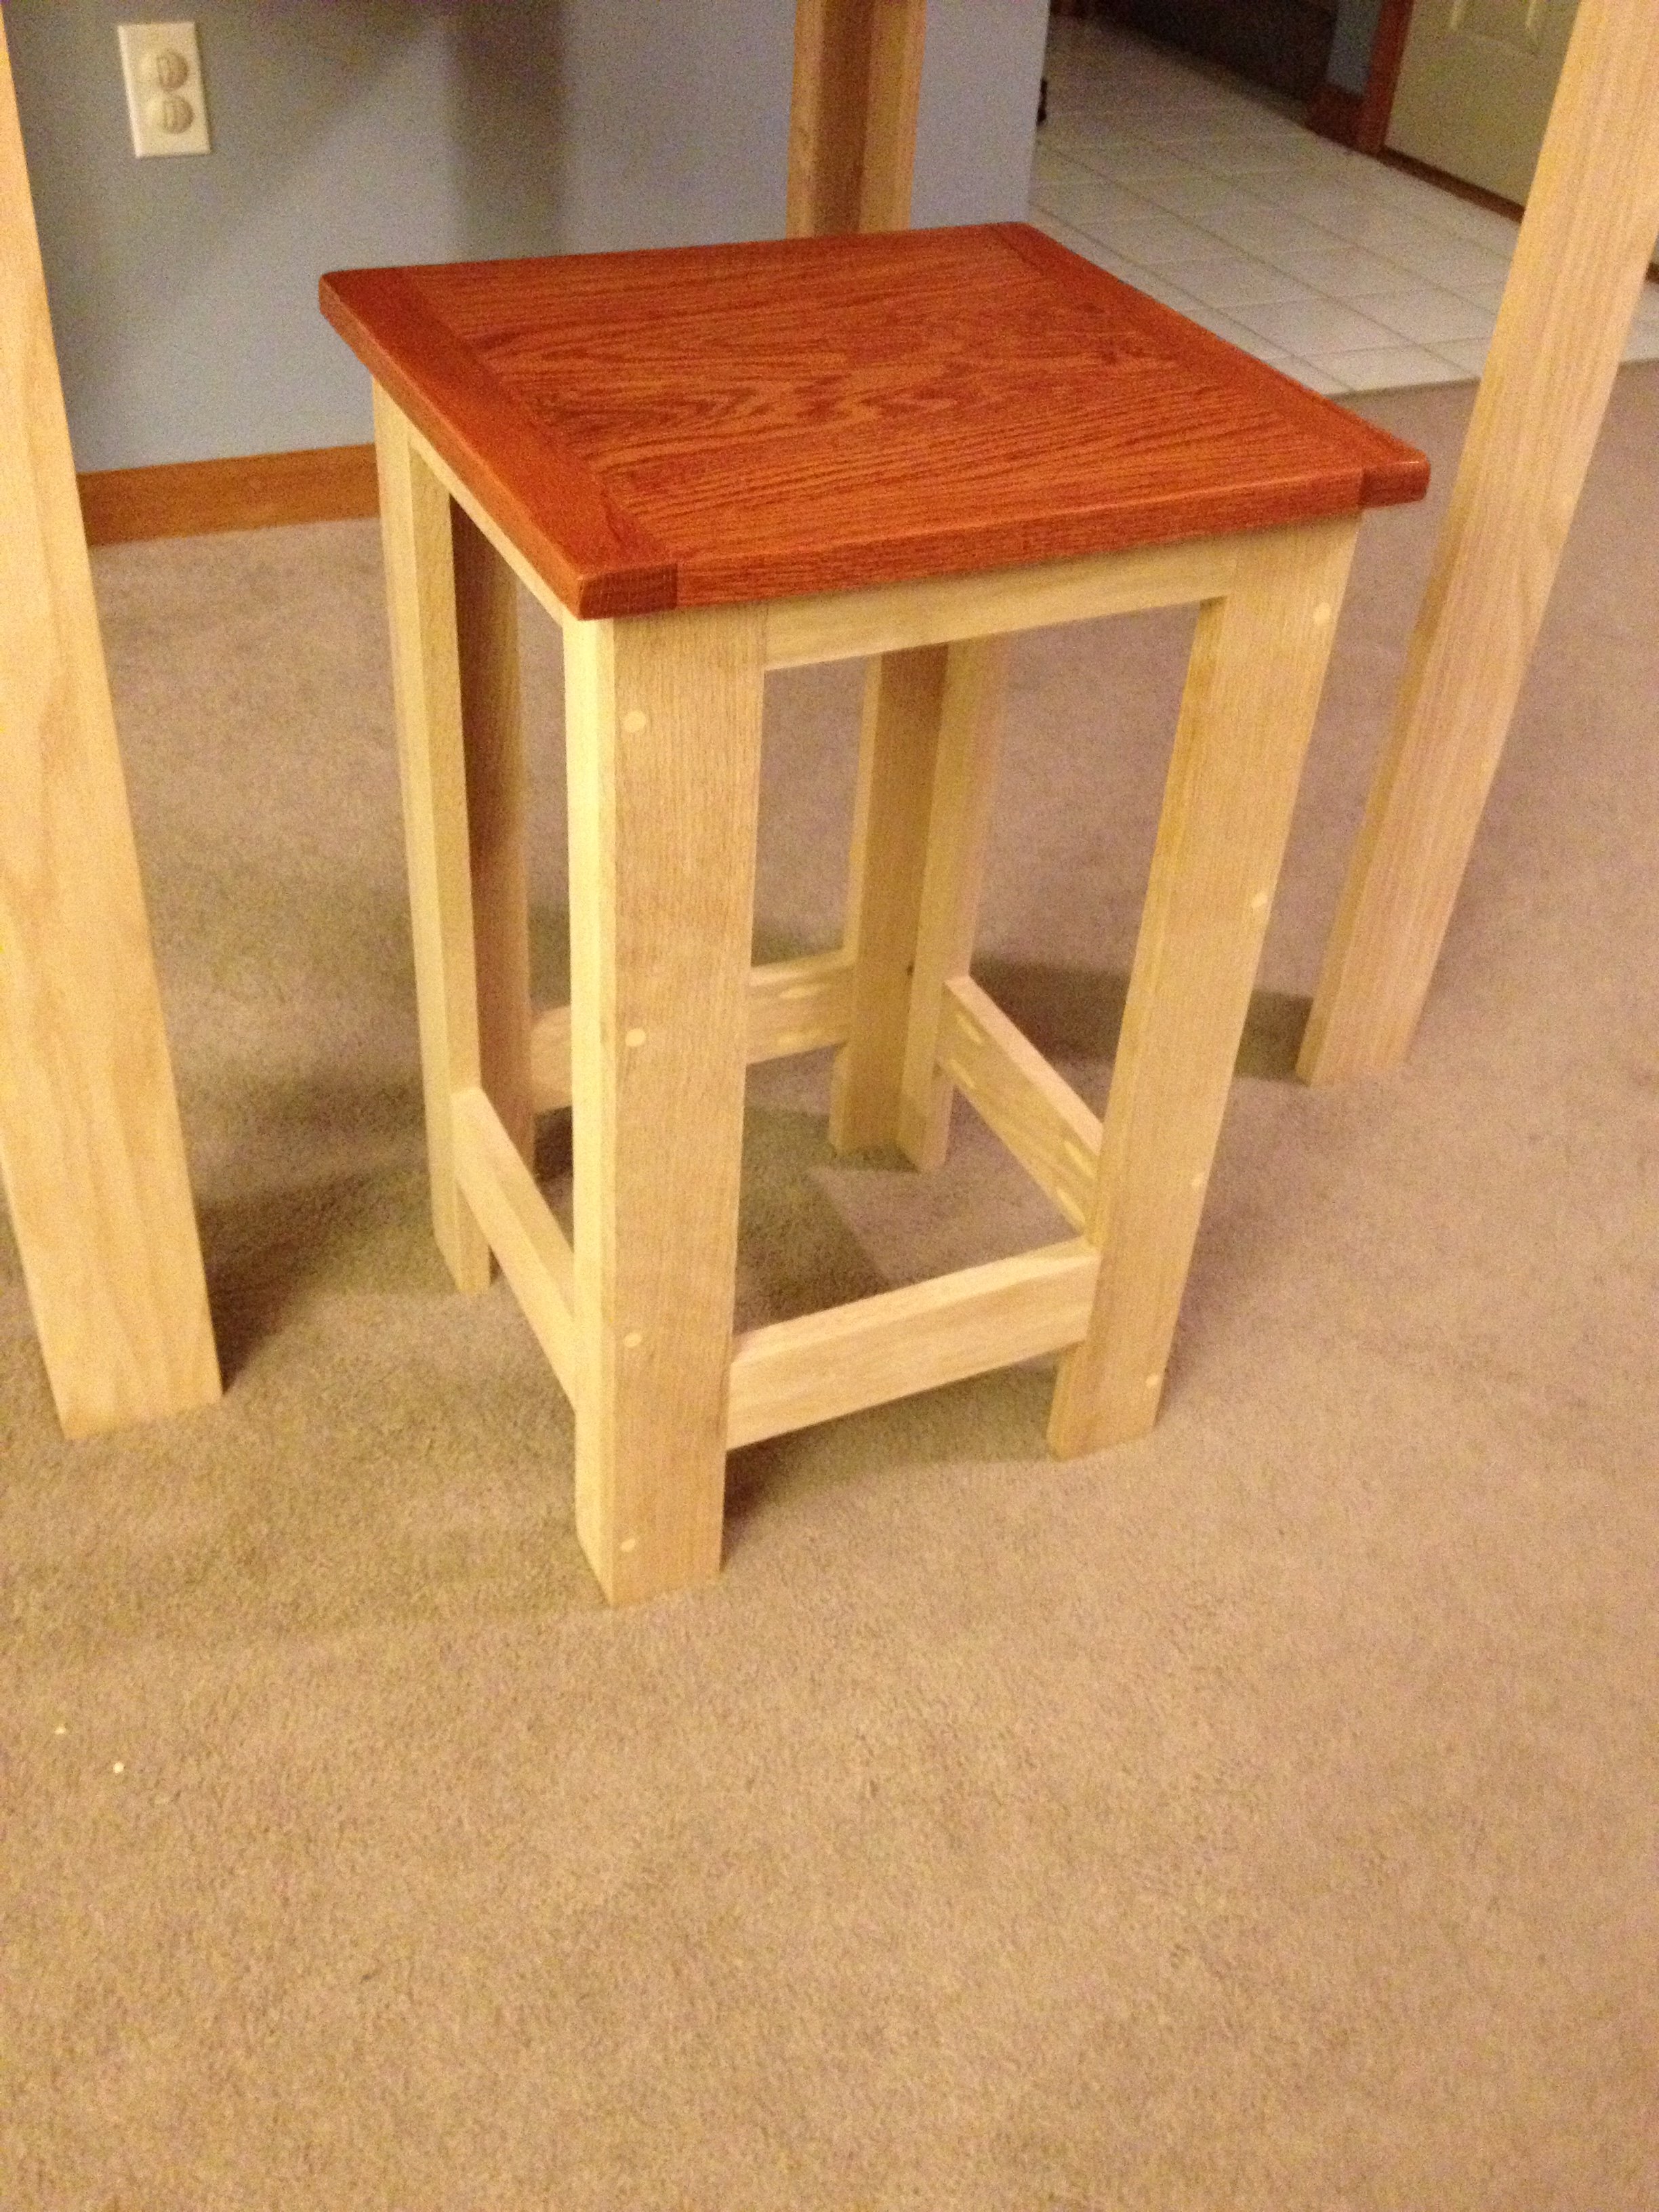
As stated in my table post, I just wasn't happy with what I was finding in the stores as nothing seamed sturdy nor made out of solid material. So I built a pub table and these stools to match.
I combined the stools from multiple projects and eventually just made my own measurements and mimicked the table construction that I made.
Although more expensive, I used Oak so it is sturdy and will take more than normal wear and tear (as I have three young boys under 10)
Built from Plan(s)
Estimated Cost
maybe $40 a stool
Estimated Time Investment
Weekend Project (10-20 Hours)
Finish Used
Rustoleum Traditional Cherry
Minwax Polyacrylic
Minwax Polyacrylic
Recommended Skill Level
Intermediate
Comments
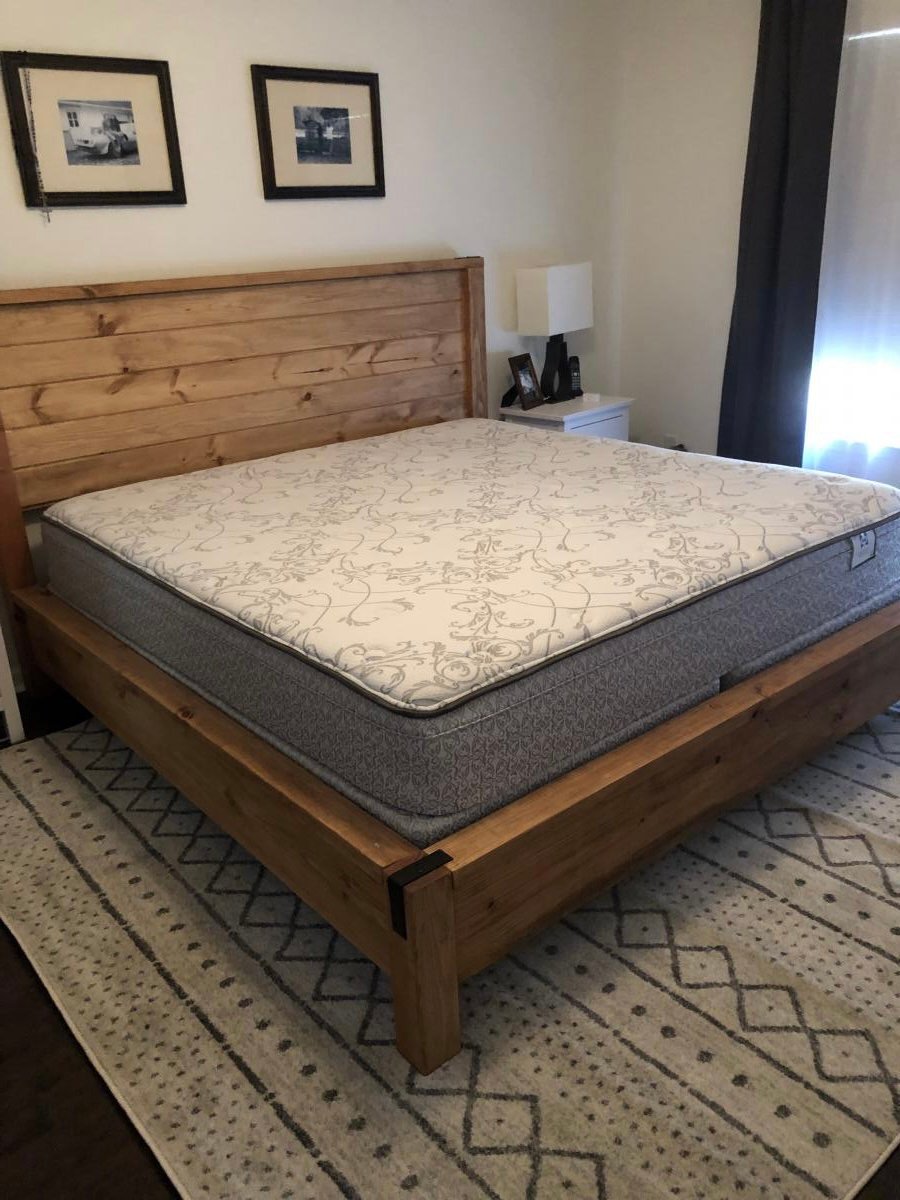
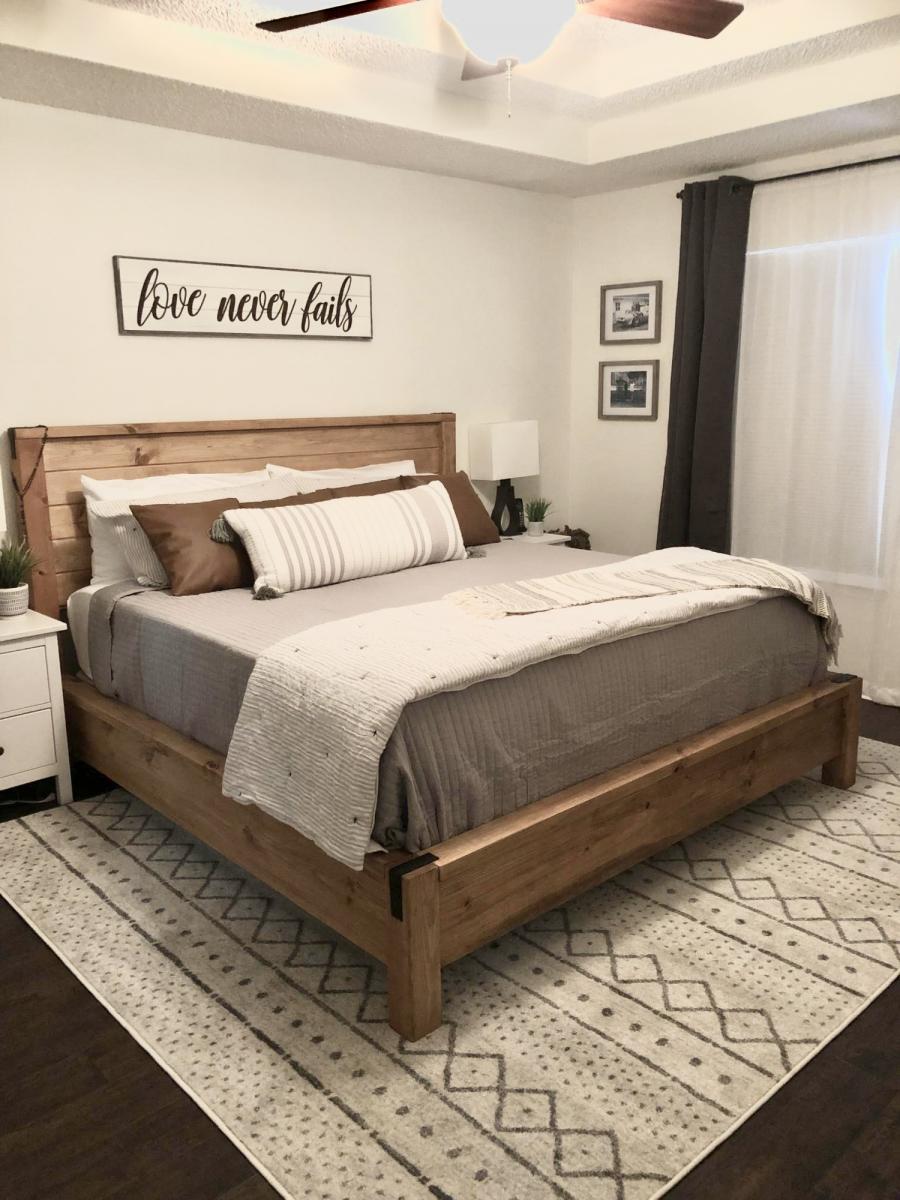
King Modern Farmhouse Bed
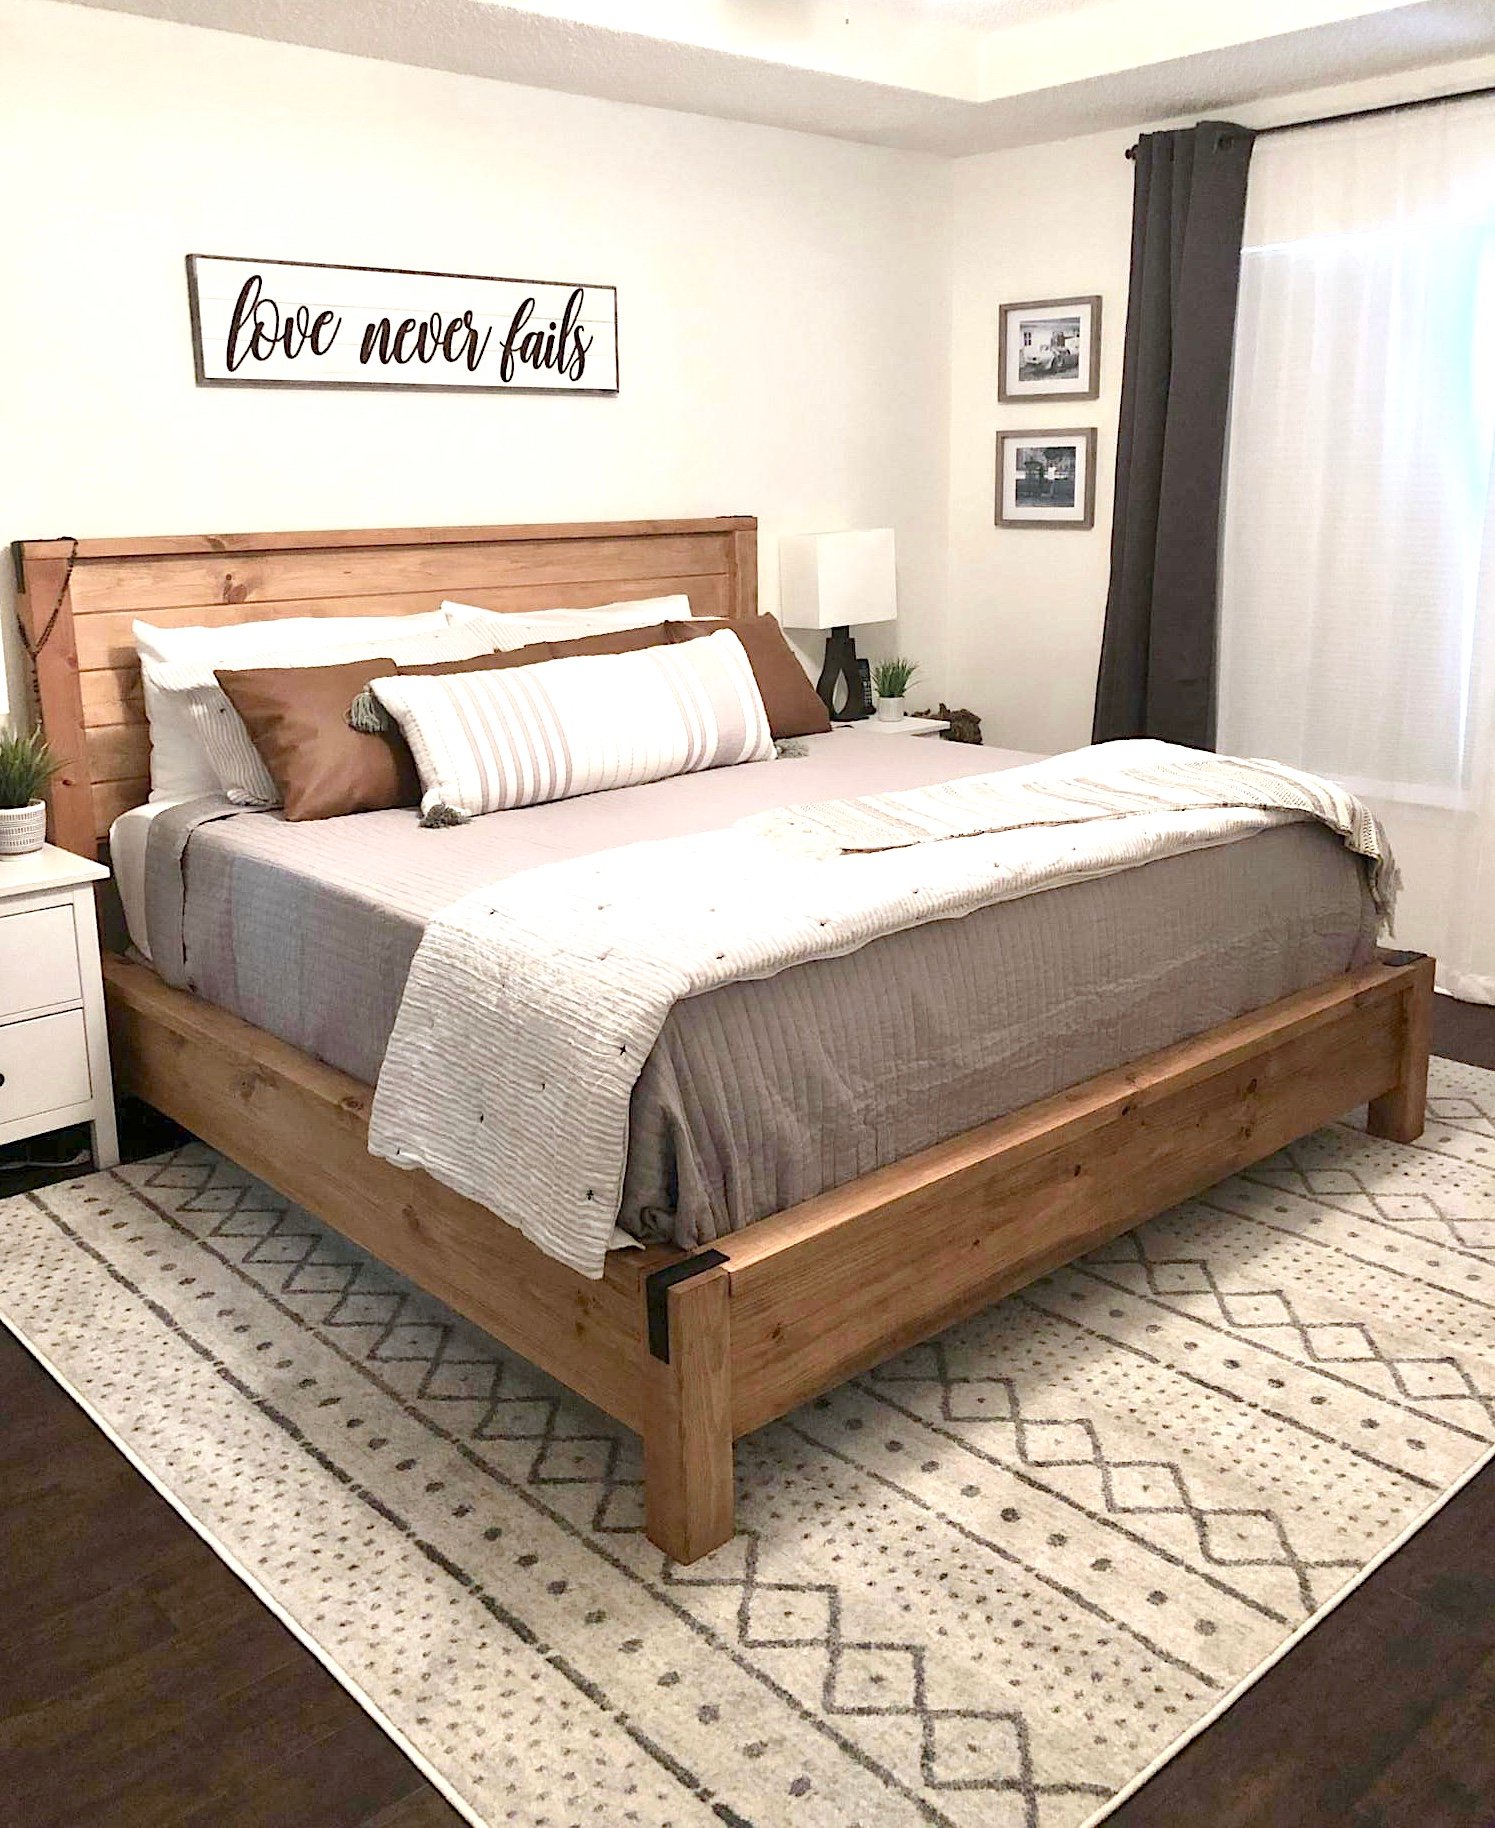
Made this bed from Ana's plans. Modified it with rail so I can add my box spring. Cost was approximately $160 for lumber, screws and stain. Absolutely loved the plans and easy to follow or modify if needed.
Built from Plan(s)
Estimated Cost
160.00
Estimated Time Investment
Afternoon Project (3-6 Hours)
Finish Used
Minwax wood conditioner, Minwax Special Walnut Stain
Recommended Skill Level
Intermediate
Comments
Tue, 02/23/2021 - 20:12
Beautiful work!
This is gorgeous! Is there anyway you could post your modifications? Very nice work!!!
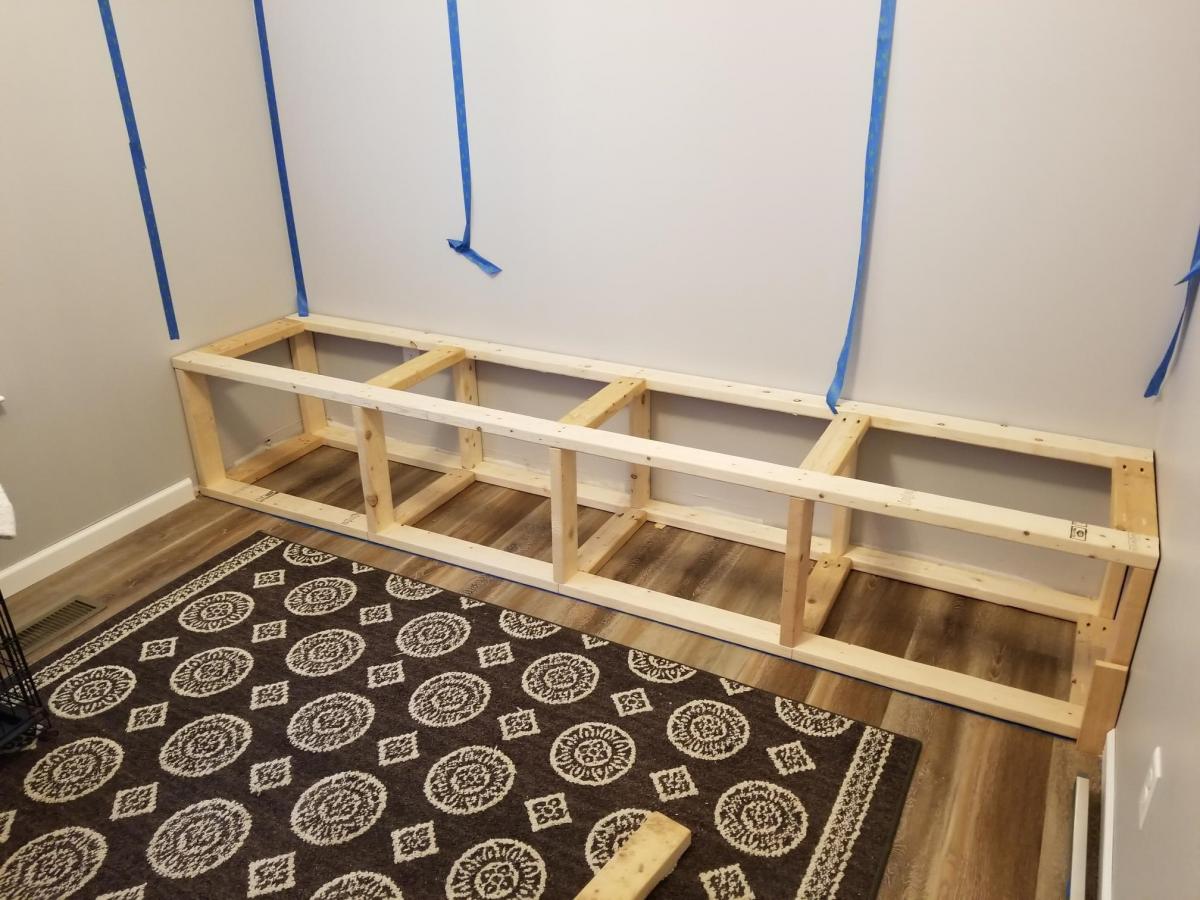
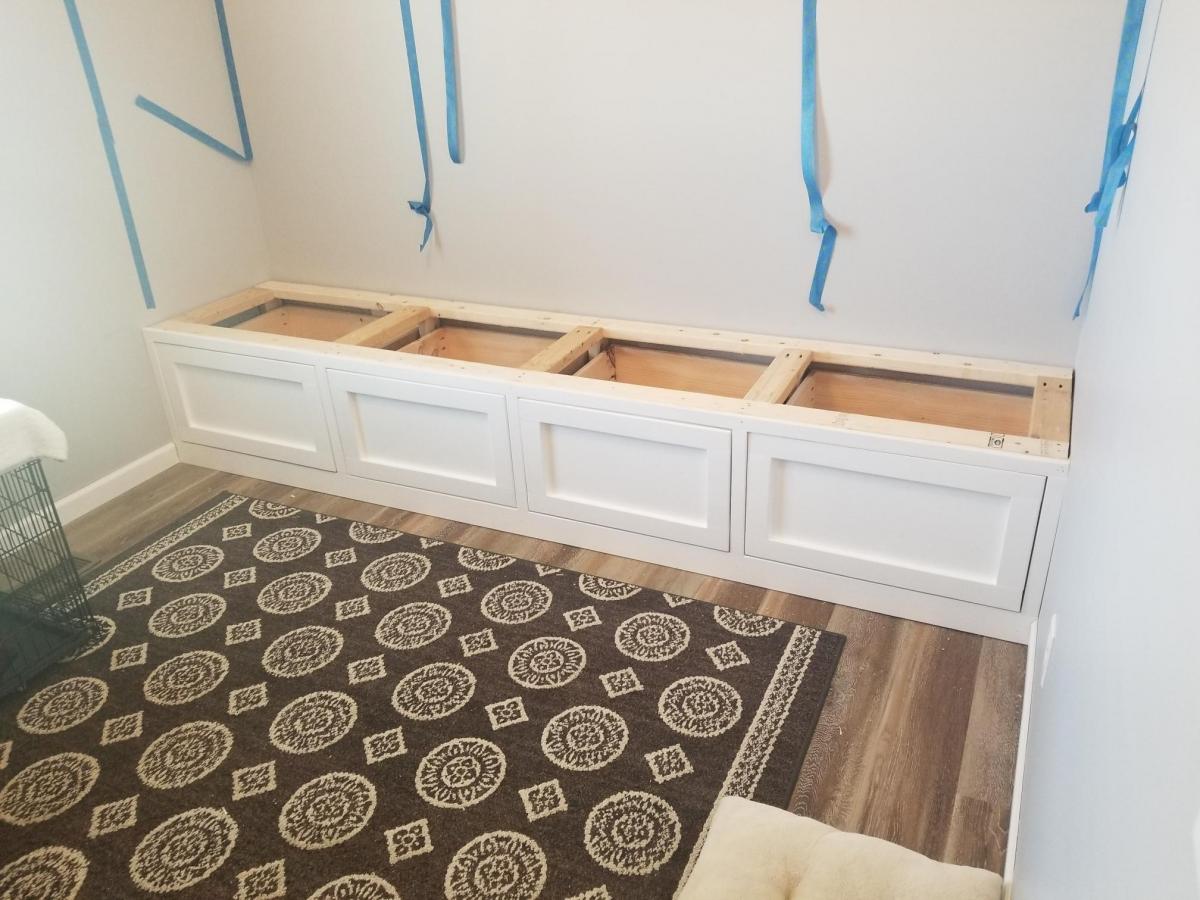
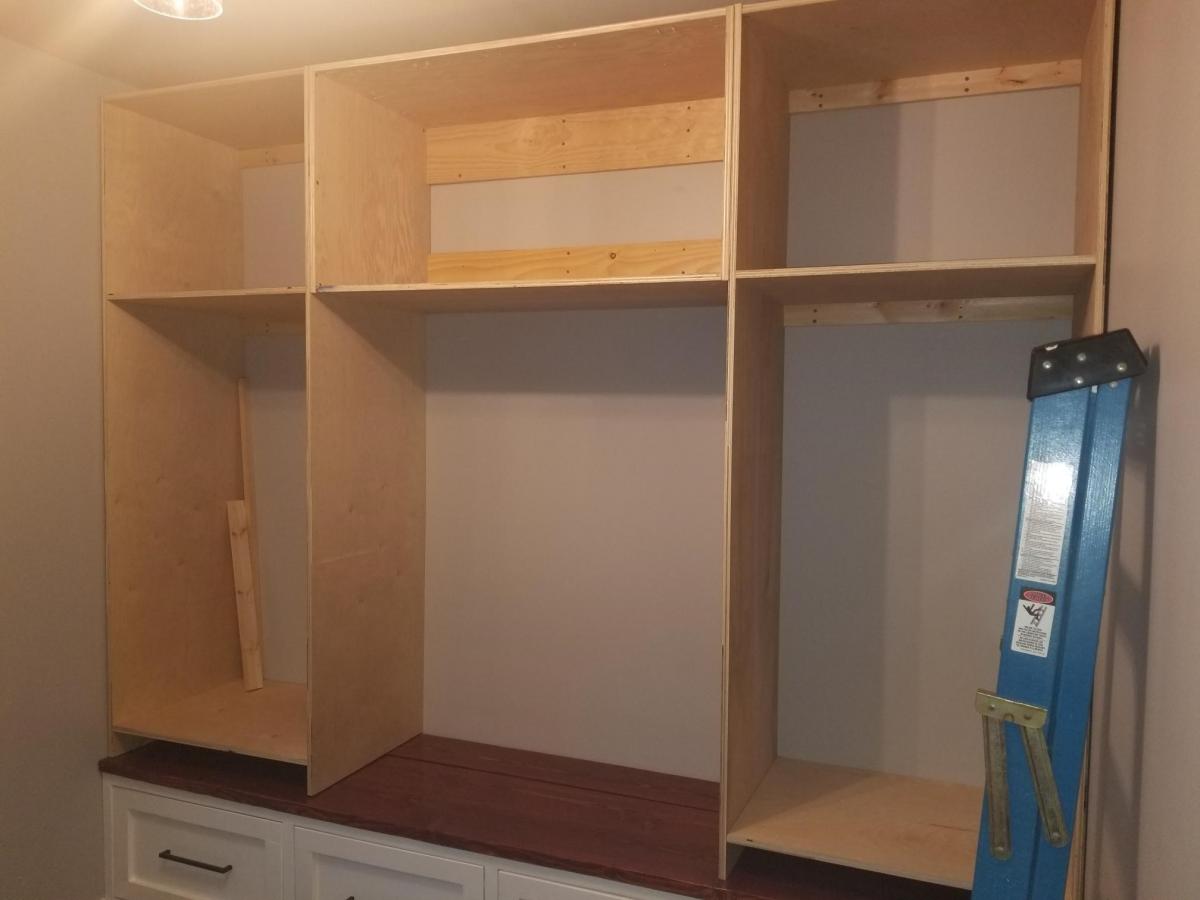
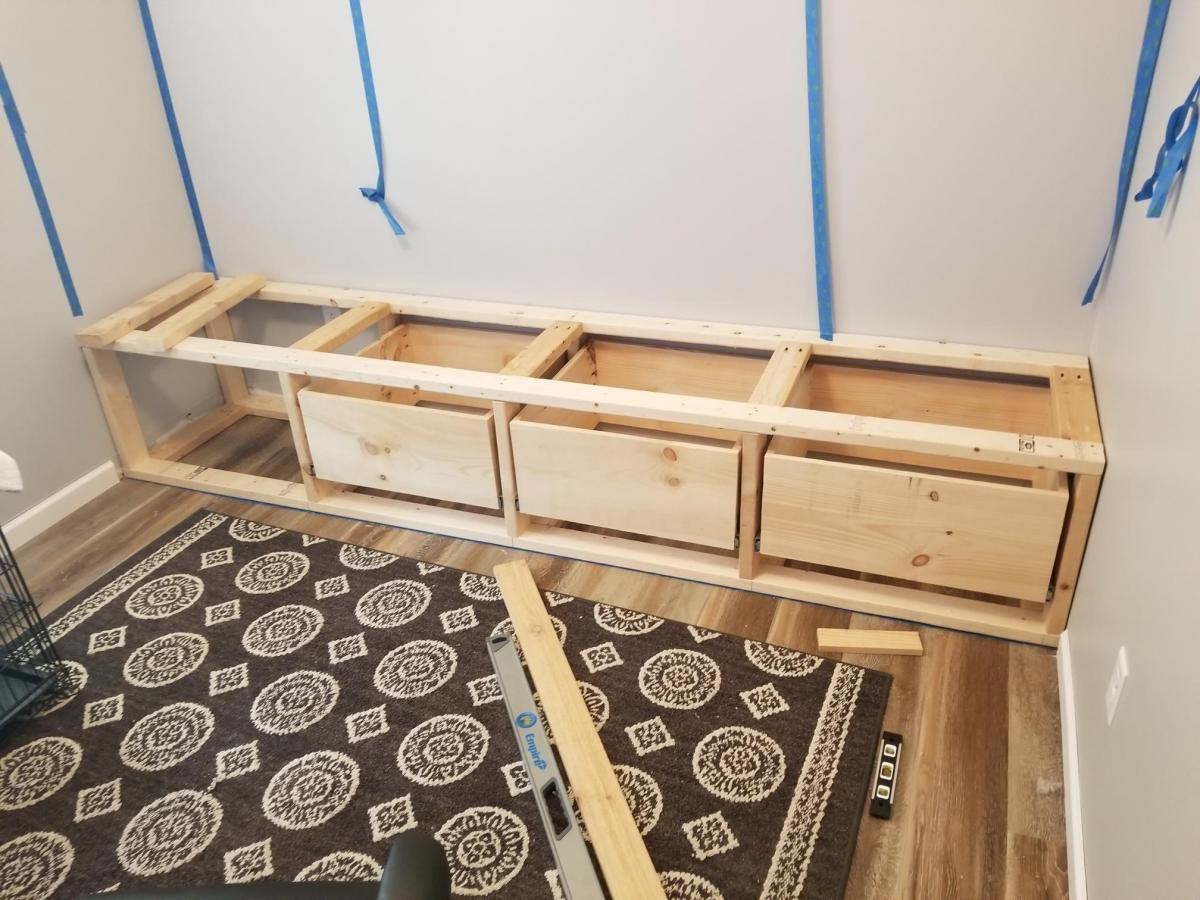
New Mudroom
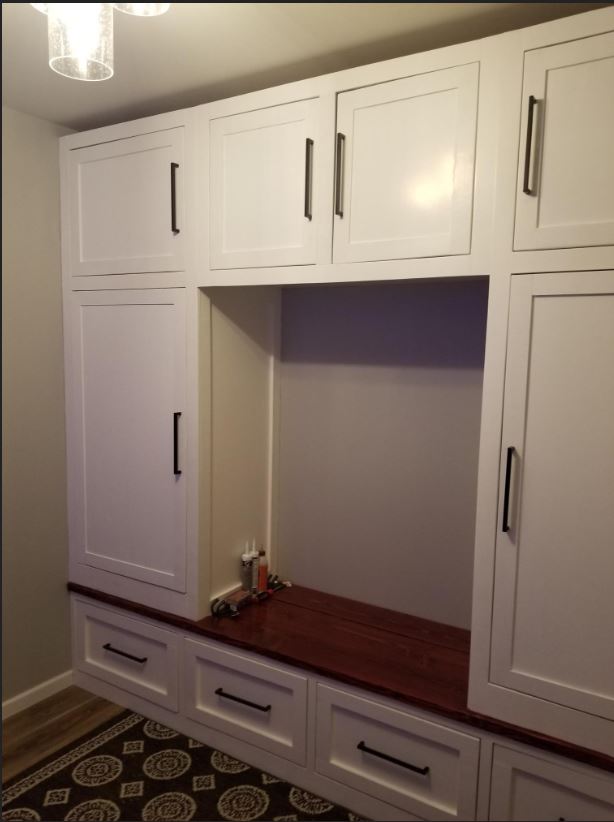
Built this new Mudroom / Office from some plans i found on your website and I absolutely love it! It has turned out better than I Expected and I learned soo many new things when planning and building this out!

Built from Plan(s)
Estimated Cost
$1000
Estimated Time Investment
Week Long Project (20 Hours or More)
Recommended Skill Level
Intermediate
Comments
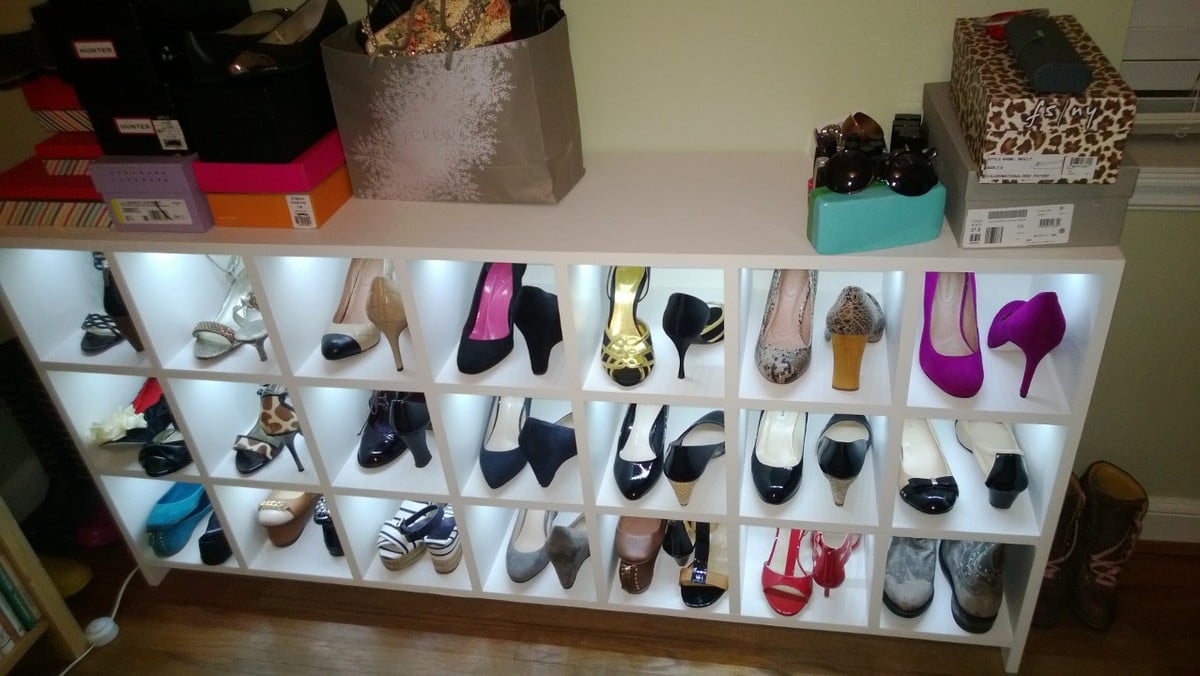
Adapated shoe cubby to on its side with LED lights.
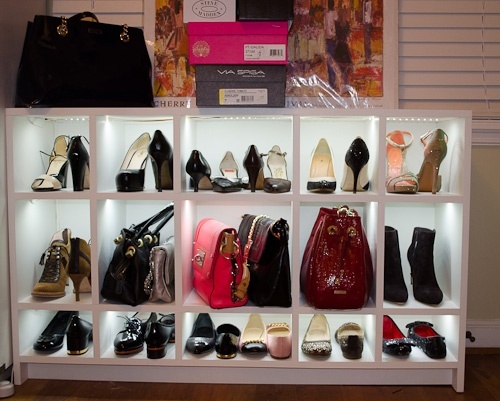
This is an adaption of the shoe shrine shelves. Since I didn't have a closet or other room than the bedroom to put these, I put them on their side. I modeled these off the shoe shrine shelves.
Each cubby is 11 3/4 deep x 8 x8 for the long version. The 2nd version I made was only 48 inches wide and did not divide well so I simply left the center cubby wider. I also made the 48" version to have different height shelves for purses in the middle and flats on the bottom.
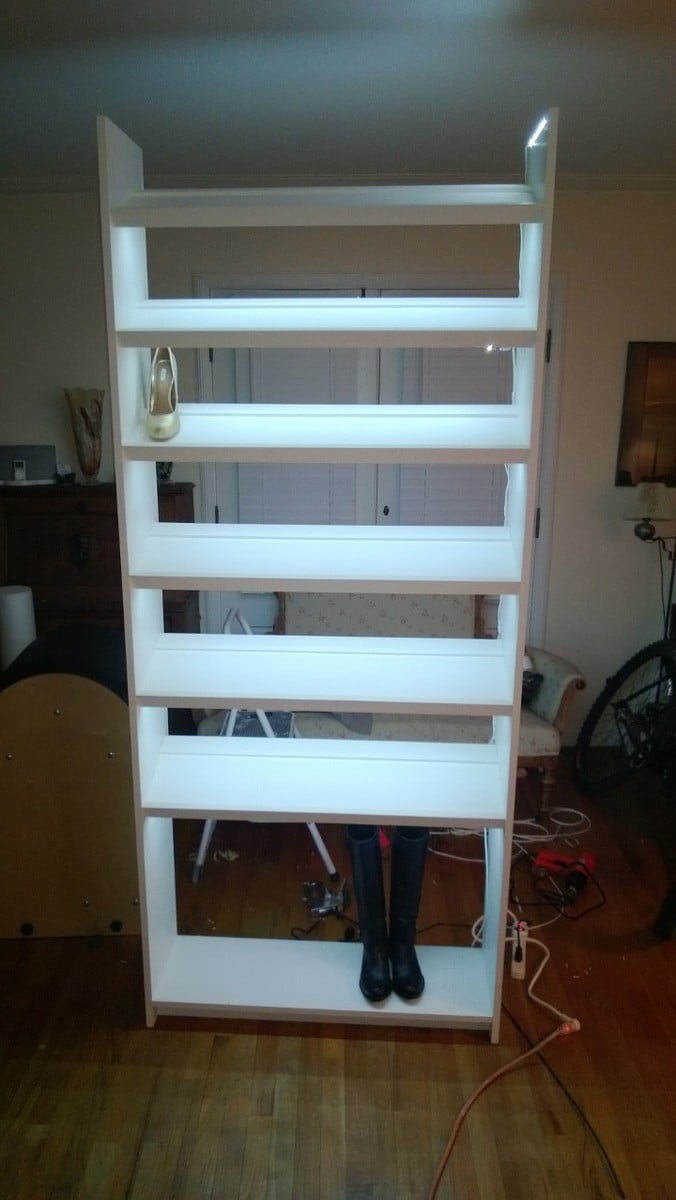
I basically flipped the shoe shrine's on their sides and added LED lights. This also inspired a tall version for a cubby we had upstairs.
I used a panel saw to cut the plywood and then assembled with a Kreg pocket hole jig for horizontal pieces and biscuits for the top and the dividers. I did not want to fill the holes or I would have used Kreg instead of the biscuits.
I used 3/4" paint grade plywood and a 1/4inch back panel.
LED lights came from LED wholesalers on amazon. This step requires electrical knowledge! Not much more than a wiring a light but do not attempt if you are not qualifed to do so. LED strings required a fine tip soldering iron, wire and heat shrink.
Built from Plan(s)
Estimated Time Investment
Week Long Project (20 Hours or More)
Finish Used
Latex Behr Swiss Coffee sprayed on.
Recommended Skill Level
Intermediate
Comments

Fri, 03/22/2013 - 08:18
Great job! Your closet now
Great job! Your closet now looks like a fancy shoe boutique!
Fri, 03/22/2013 - 11:50
Thanks!
The LED's came after we designed them. I was like there is no light where these are going and its hard to see inside the cubbies. This is true for the bottom cubies which are only 5 inches tall. So for 30 bucks a cabinet it was a quick and easy addition that really made them pop. Only downside is it can make the room look like you are in Nordstom's :) so she doesn't leave the lights on regularly.
Thu, 09/18/2014 - 01:42
Nicely done!
Very nicely done. Do you mind telling me more about which particular LED product you used and the process to wire them in? Did you mill out any part of the cabinet to set the lights? How are they activated? Thanks in advance. You can also email me at [email protected]. Much appreciated!
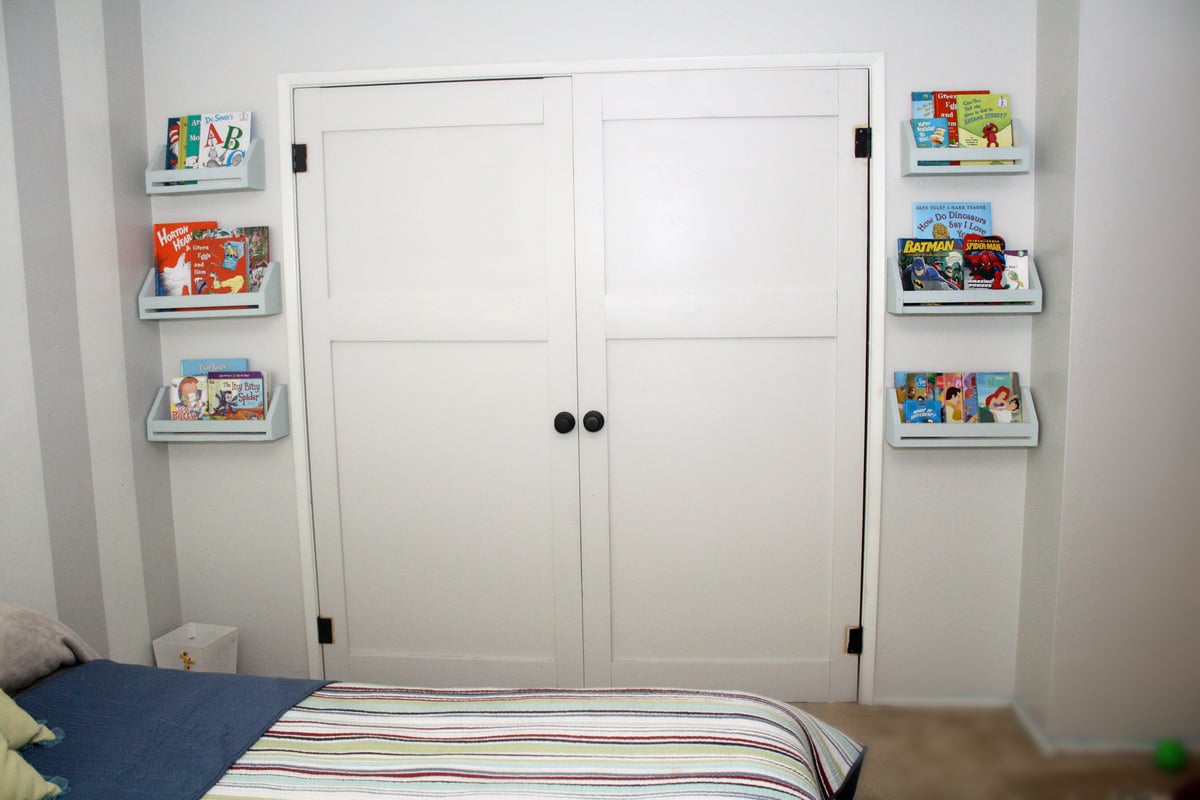
Book shelves
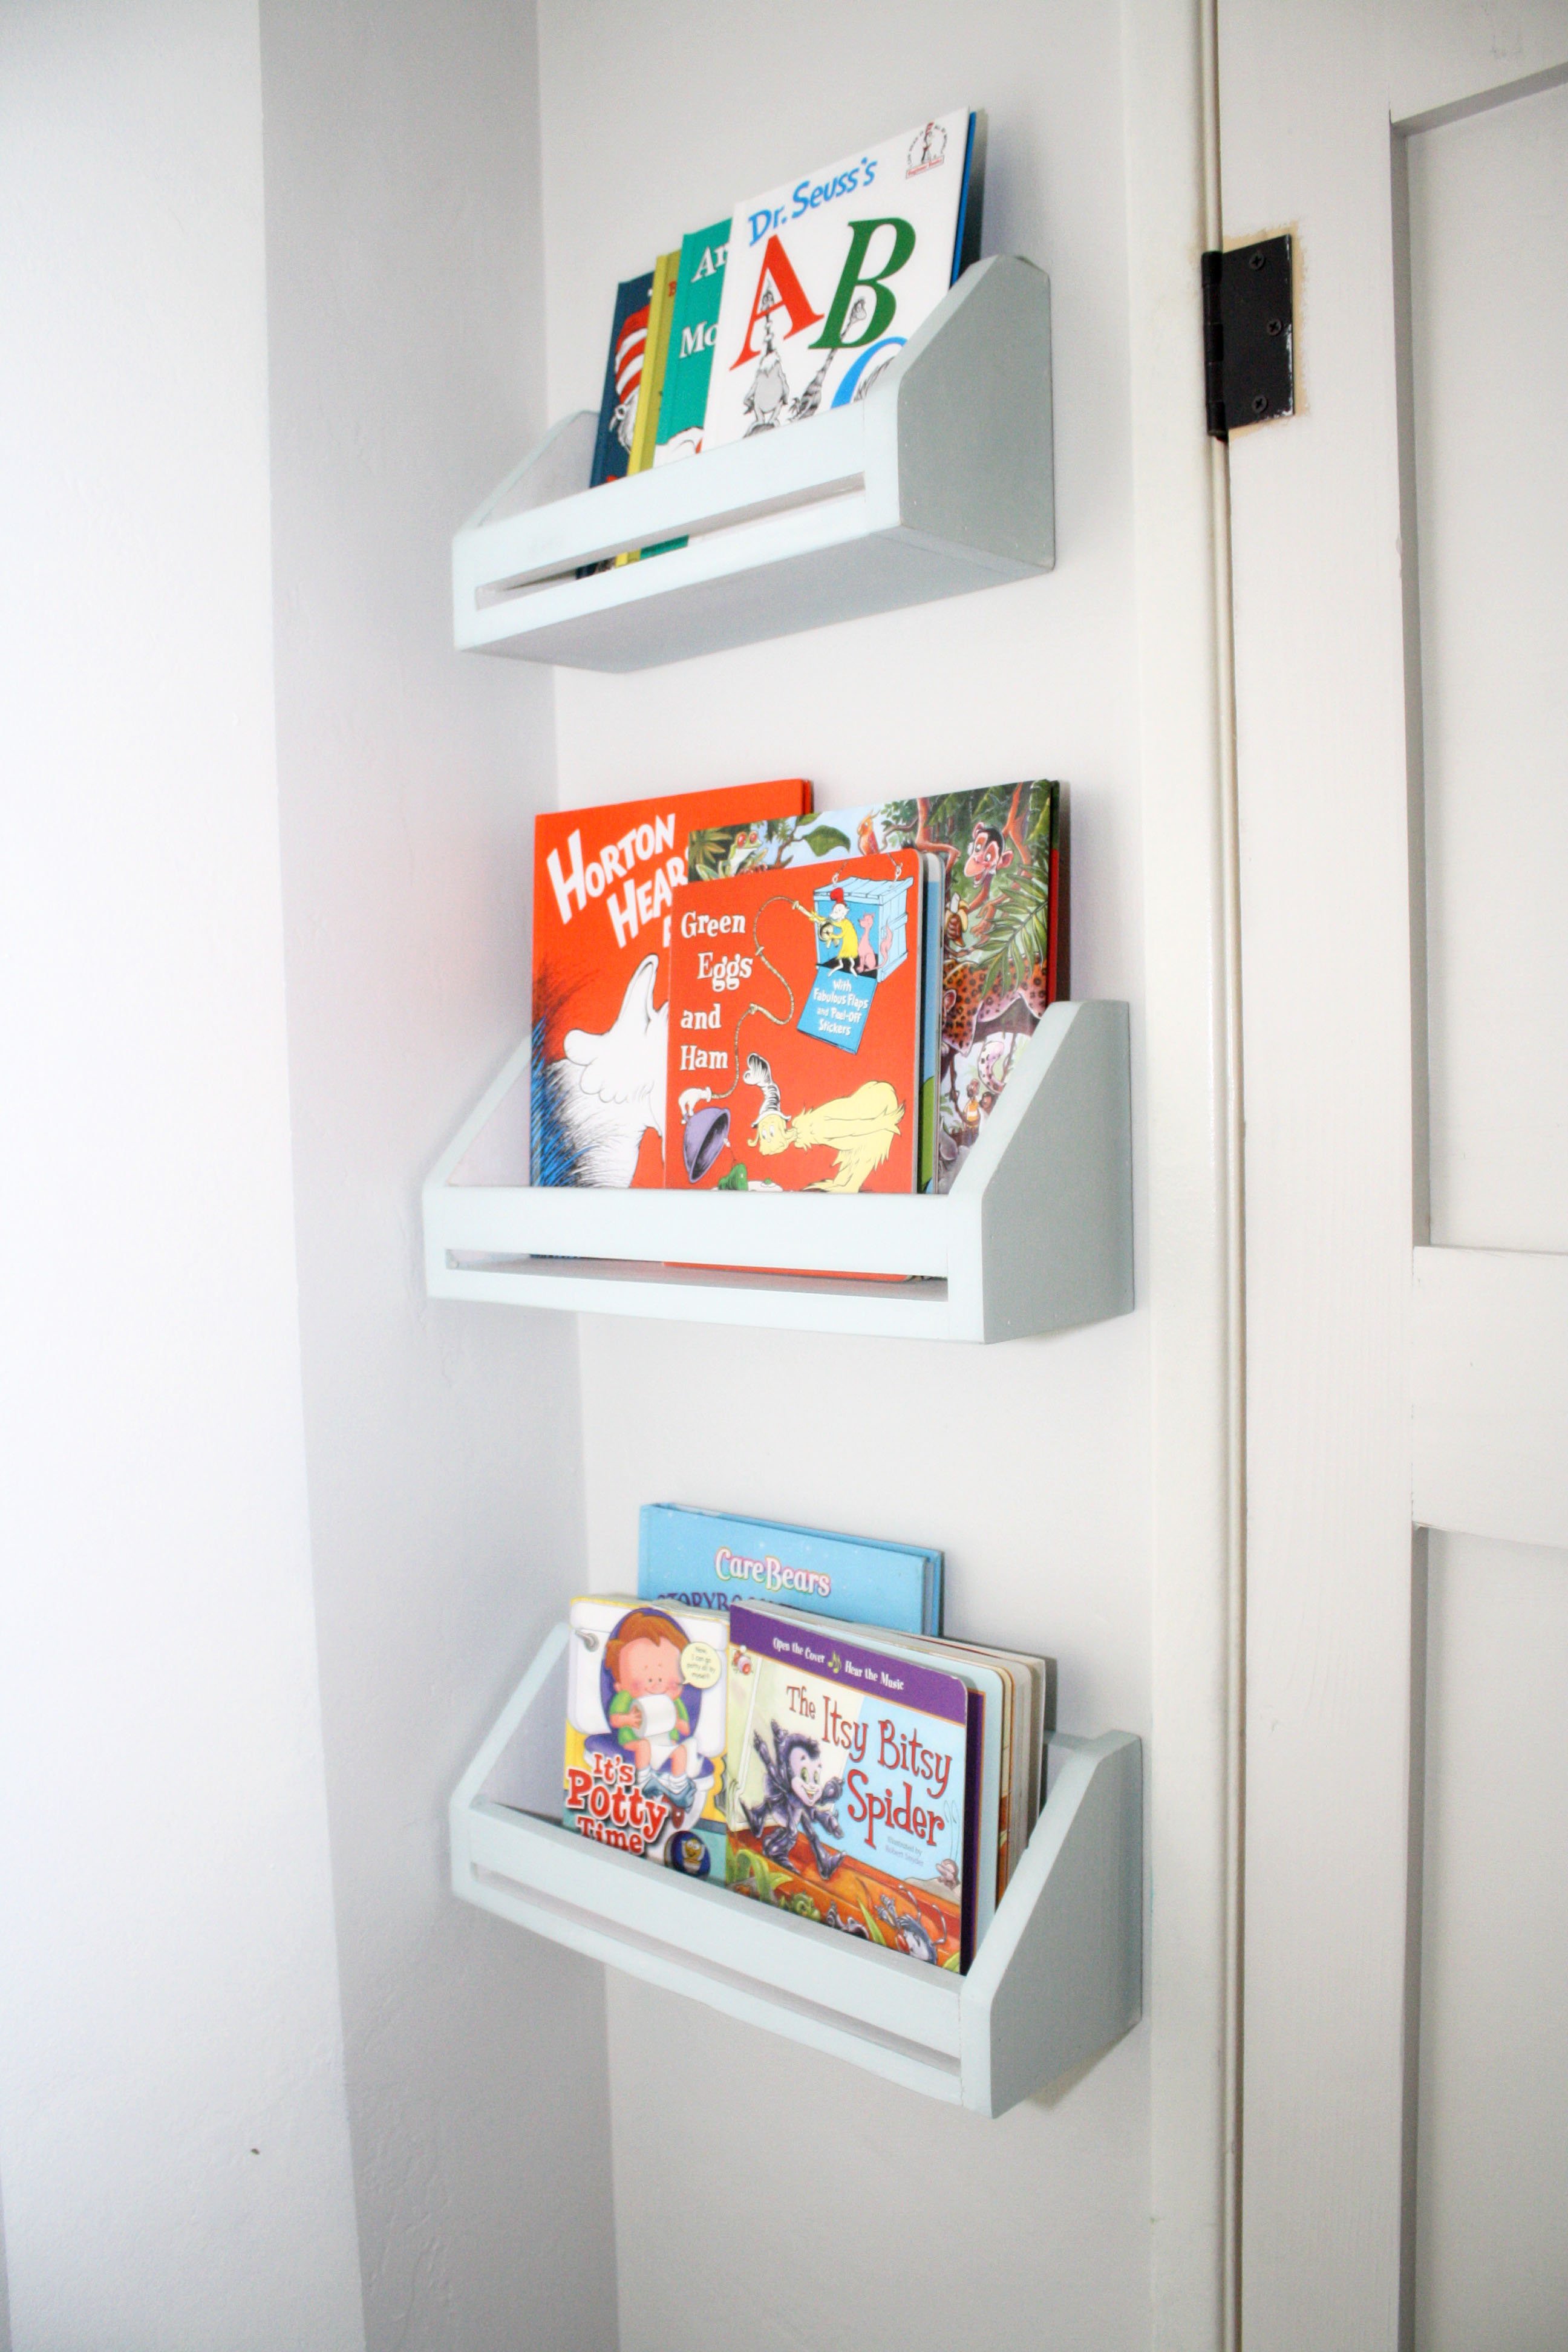
I have had these for a while but never finished with the painting, the most dreadful part...but found some chalk paint that I love, and will always use chalk paint to finish all my projects now.
Built from Plan(s)
Estimated Cost
free- scrap material
Estimated Time Investment
Afternoon Project (3-6 Hours)
Finish Used
I used Annie Sloan Duck Egg and made my own white chalk paint with a recipe found online that worked great with Paris Plaster, water and flar behr paint, I only got a tester for $3, plaster $6. Annie Sloan $65.
Recommended Skill Level
Starter Project
Comments
Wed, 03/27/2013 - 23:38
Cute and functional
Love these. Also love that you mixed up your own chalk paint. :) Shelving in my daughter's room is definitely a toss up between photo ledges and these now.

Thu, 03/28/2013 - 15:54
Thank you, can't wait to
Thank you, can't wait to start on their new bed. ;0)
4x4 Truss Beam Table and bench
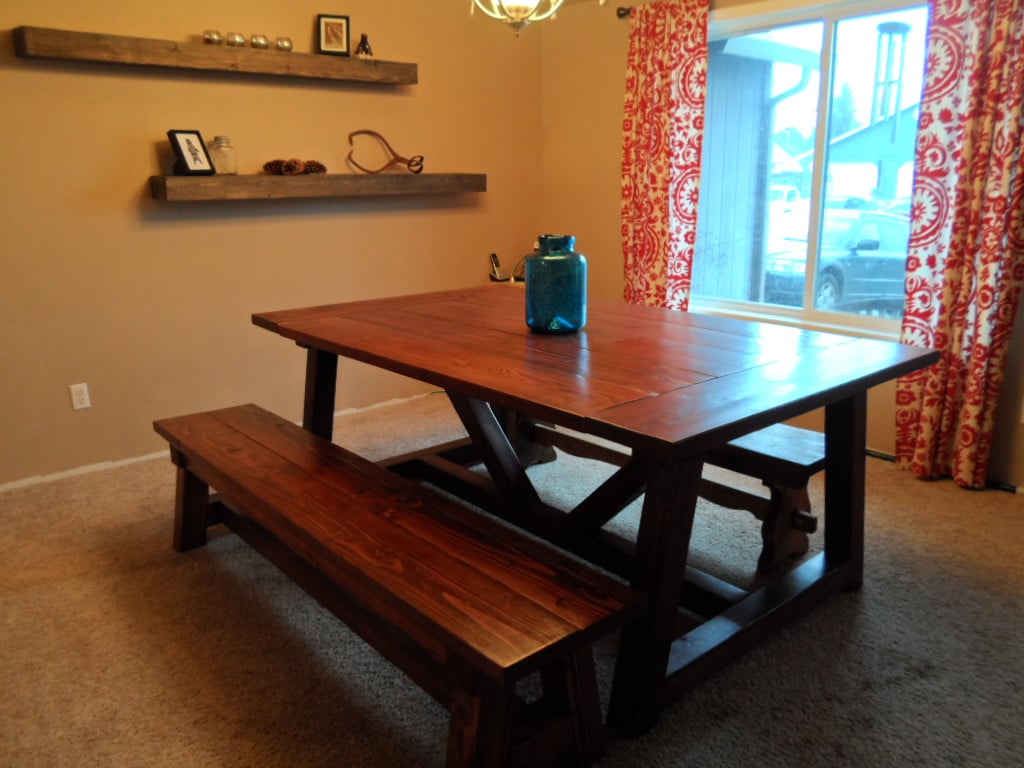
Love this plan and the table and bench turned out exactly as I hoped. I did it by myself except for a little heavy lifting from my sweetheart. I researched the finish online and I am so happy with the results.
Built from Plan(s)
Estimated Cost
With finishing products and screws this was approximately $200
Estimated Time Investment
Week Long Project (20 Hours or More)
Finish Used
Minwax Pre stain conditioner, Minwax English Chestnut *( 2 coats), Varethane Poly *( 3 coats) then #0000 steel wool to smooth the bumps then Minwax Paste wax hand rubbed until the finish was perfect.
Recommended Skill Level
Intermediate
Comments
Tue, 02/10/2015 - 08:19
Looks great!
We have been shopping for tables and cannot find anything we like for a good price. I keep going back to building one myself. Your table top looks great .. nice and flat. Did you follow the plans to a T, did you use a kreg jig?
Tue, 02/10/2015 - 22:13
I did change the dimensions
I did change the dimensions of the top a little. I wanted a wider surface. I did use a kreg jig, it made it a breeze to build. I spent a lot of time on the finish, sanding, using steel wool, and several coats of polyurethane. Thank you for the compliment !