Bathroom Shelf
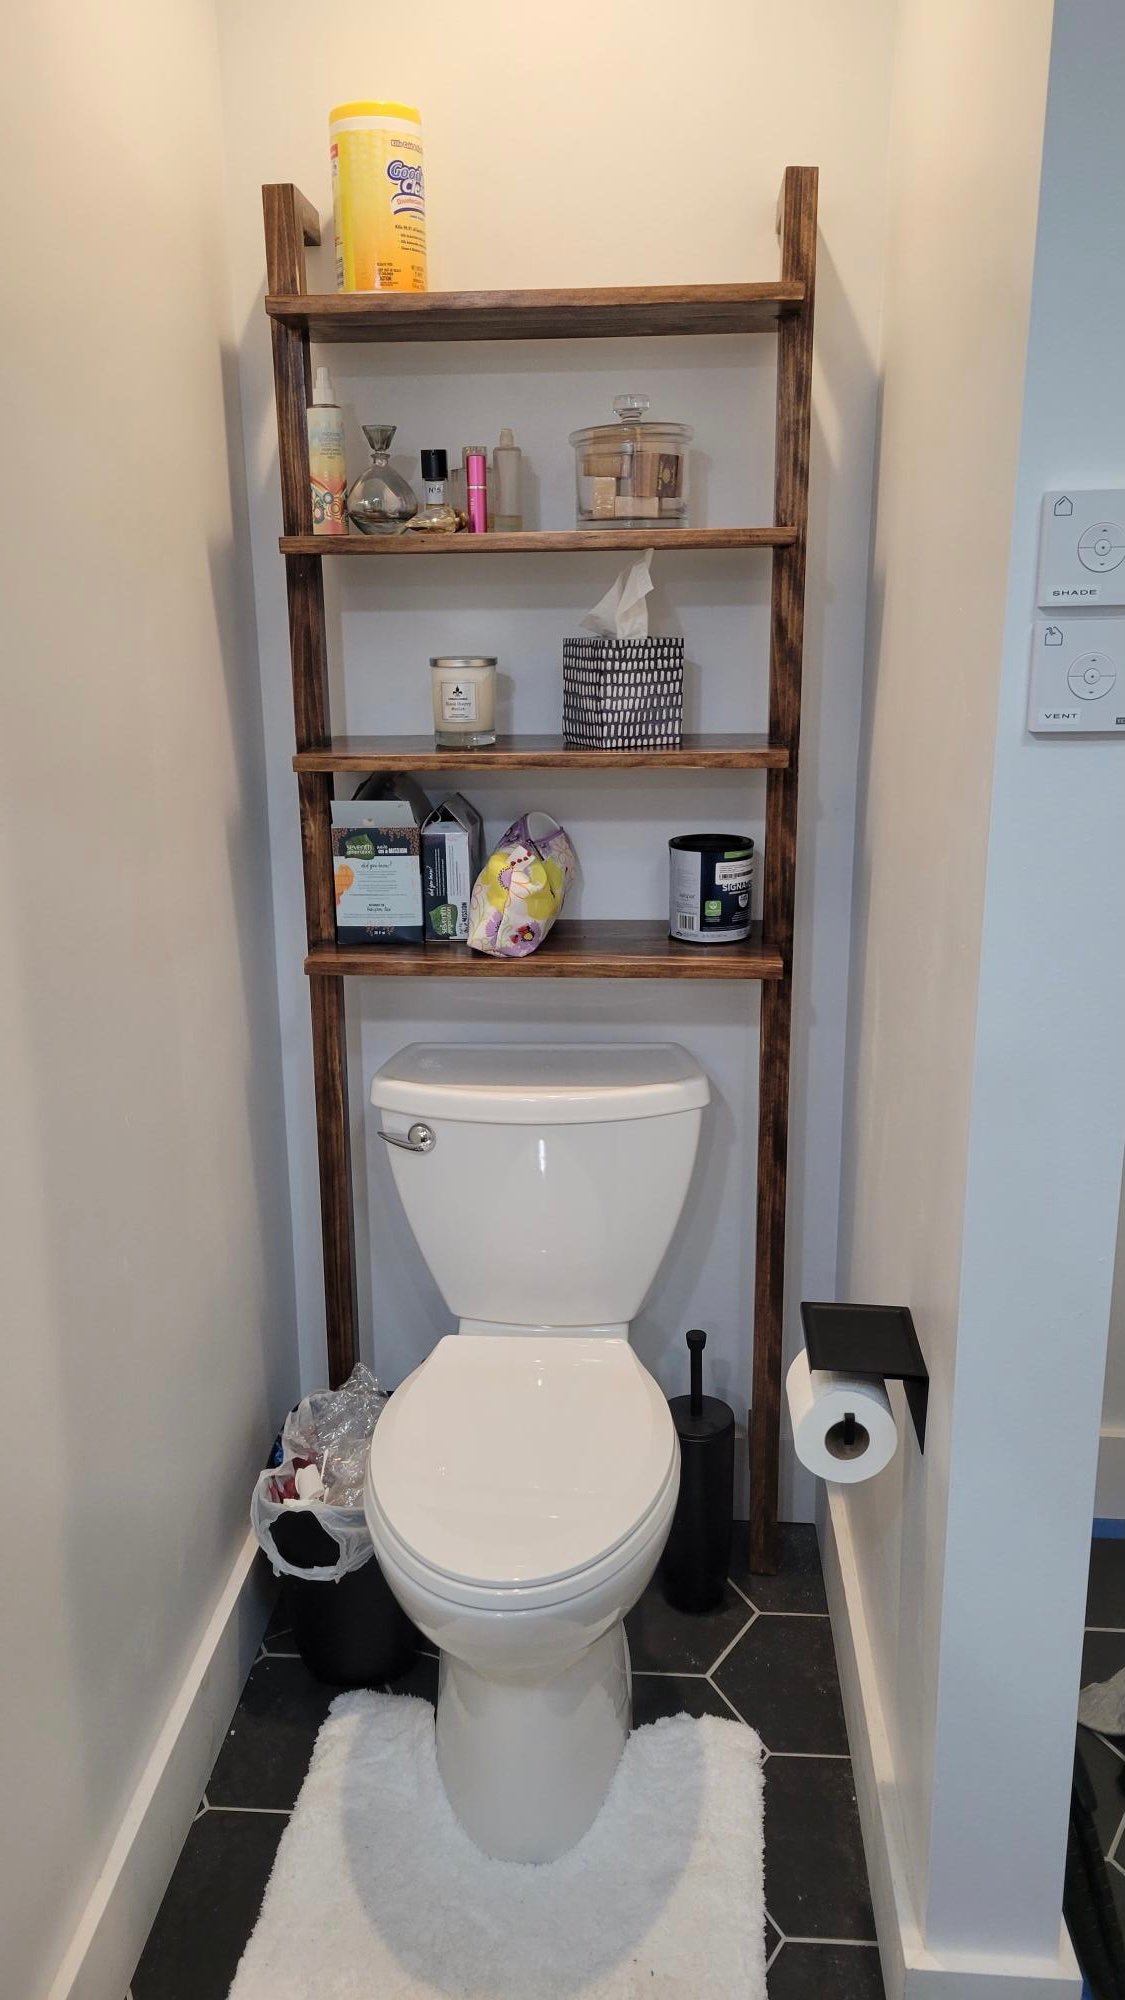
Quick little project
Built from Plan(s)
Quick little project
This project was a blast to make. And, it really is doable and a lot less time then you would think. And finishing it with milk-based paint is even more enjoyable. I used screws and a drill (pre-drill!) and it was wonderful.
Here's some advice for the plan:
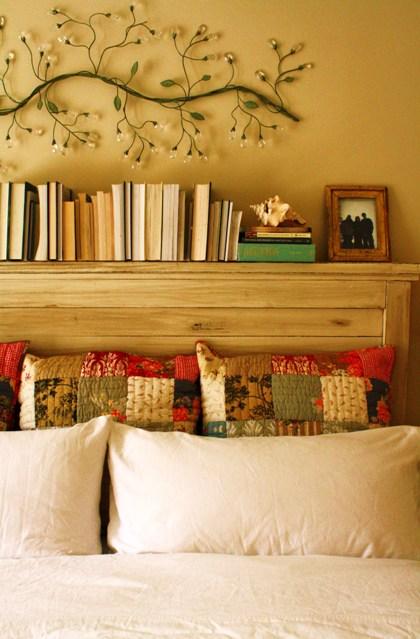
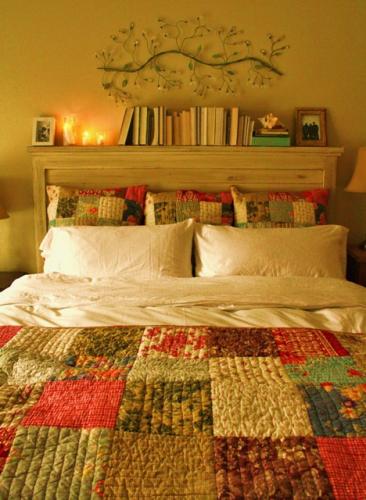
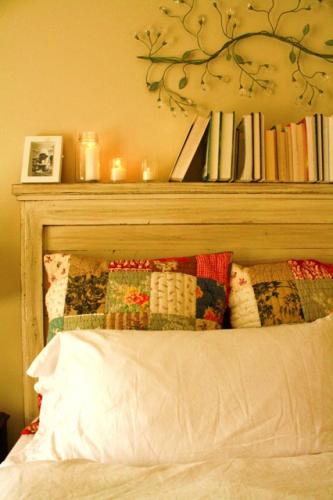
- Mount the back of the headboard with a piece of wood and use a metal support as shown here. Just make sure the board is wide enough to be level with your back trim, or else the metal support won't be even when you screw it down. And when you pre-drill this board, make sure you don't go all the way through, or else you will have holes through the front! It stunk to have to putty them all in, but thank heavens for putty.
- Although the instructions say to make your top 1 x 3" trim to fit in line with the top of the headboard, I made mine one inch longer on both sides, and then the 2 x 4" one inch longer to go on top of that 1 x 3" on both sides. That was just the look I wanted. Although you can get your wood pre-cut, I would recommend cutting it all yourself, especially since you will need these cut afterward once the rest of your headboard is put together.
- Ana's 'get started' tips are very helpful. Be sure to check them out first!
- Make sure, make sure, make sure you dry thoroughly between coats. Patience is a virtue.

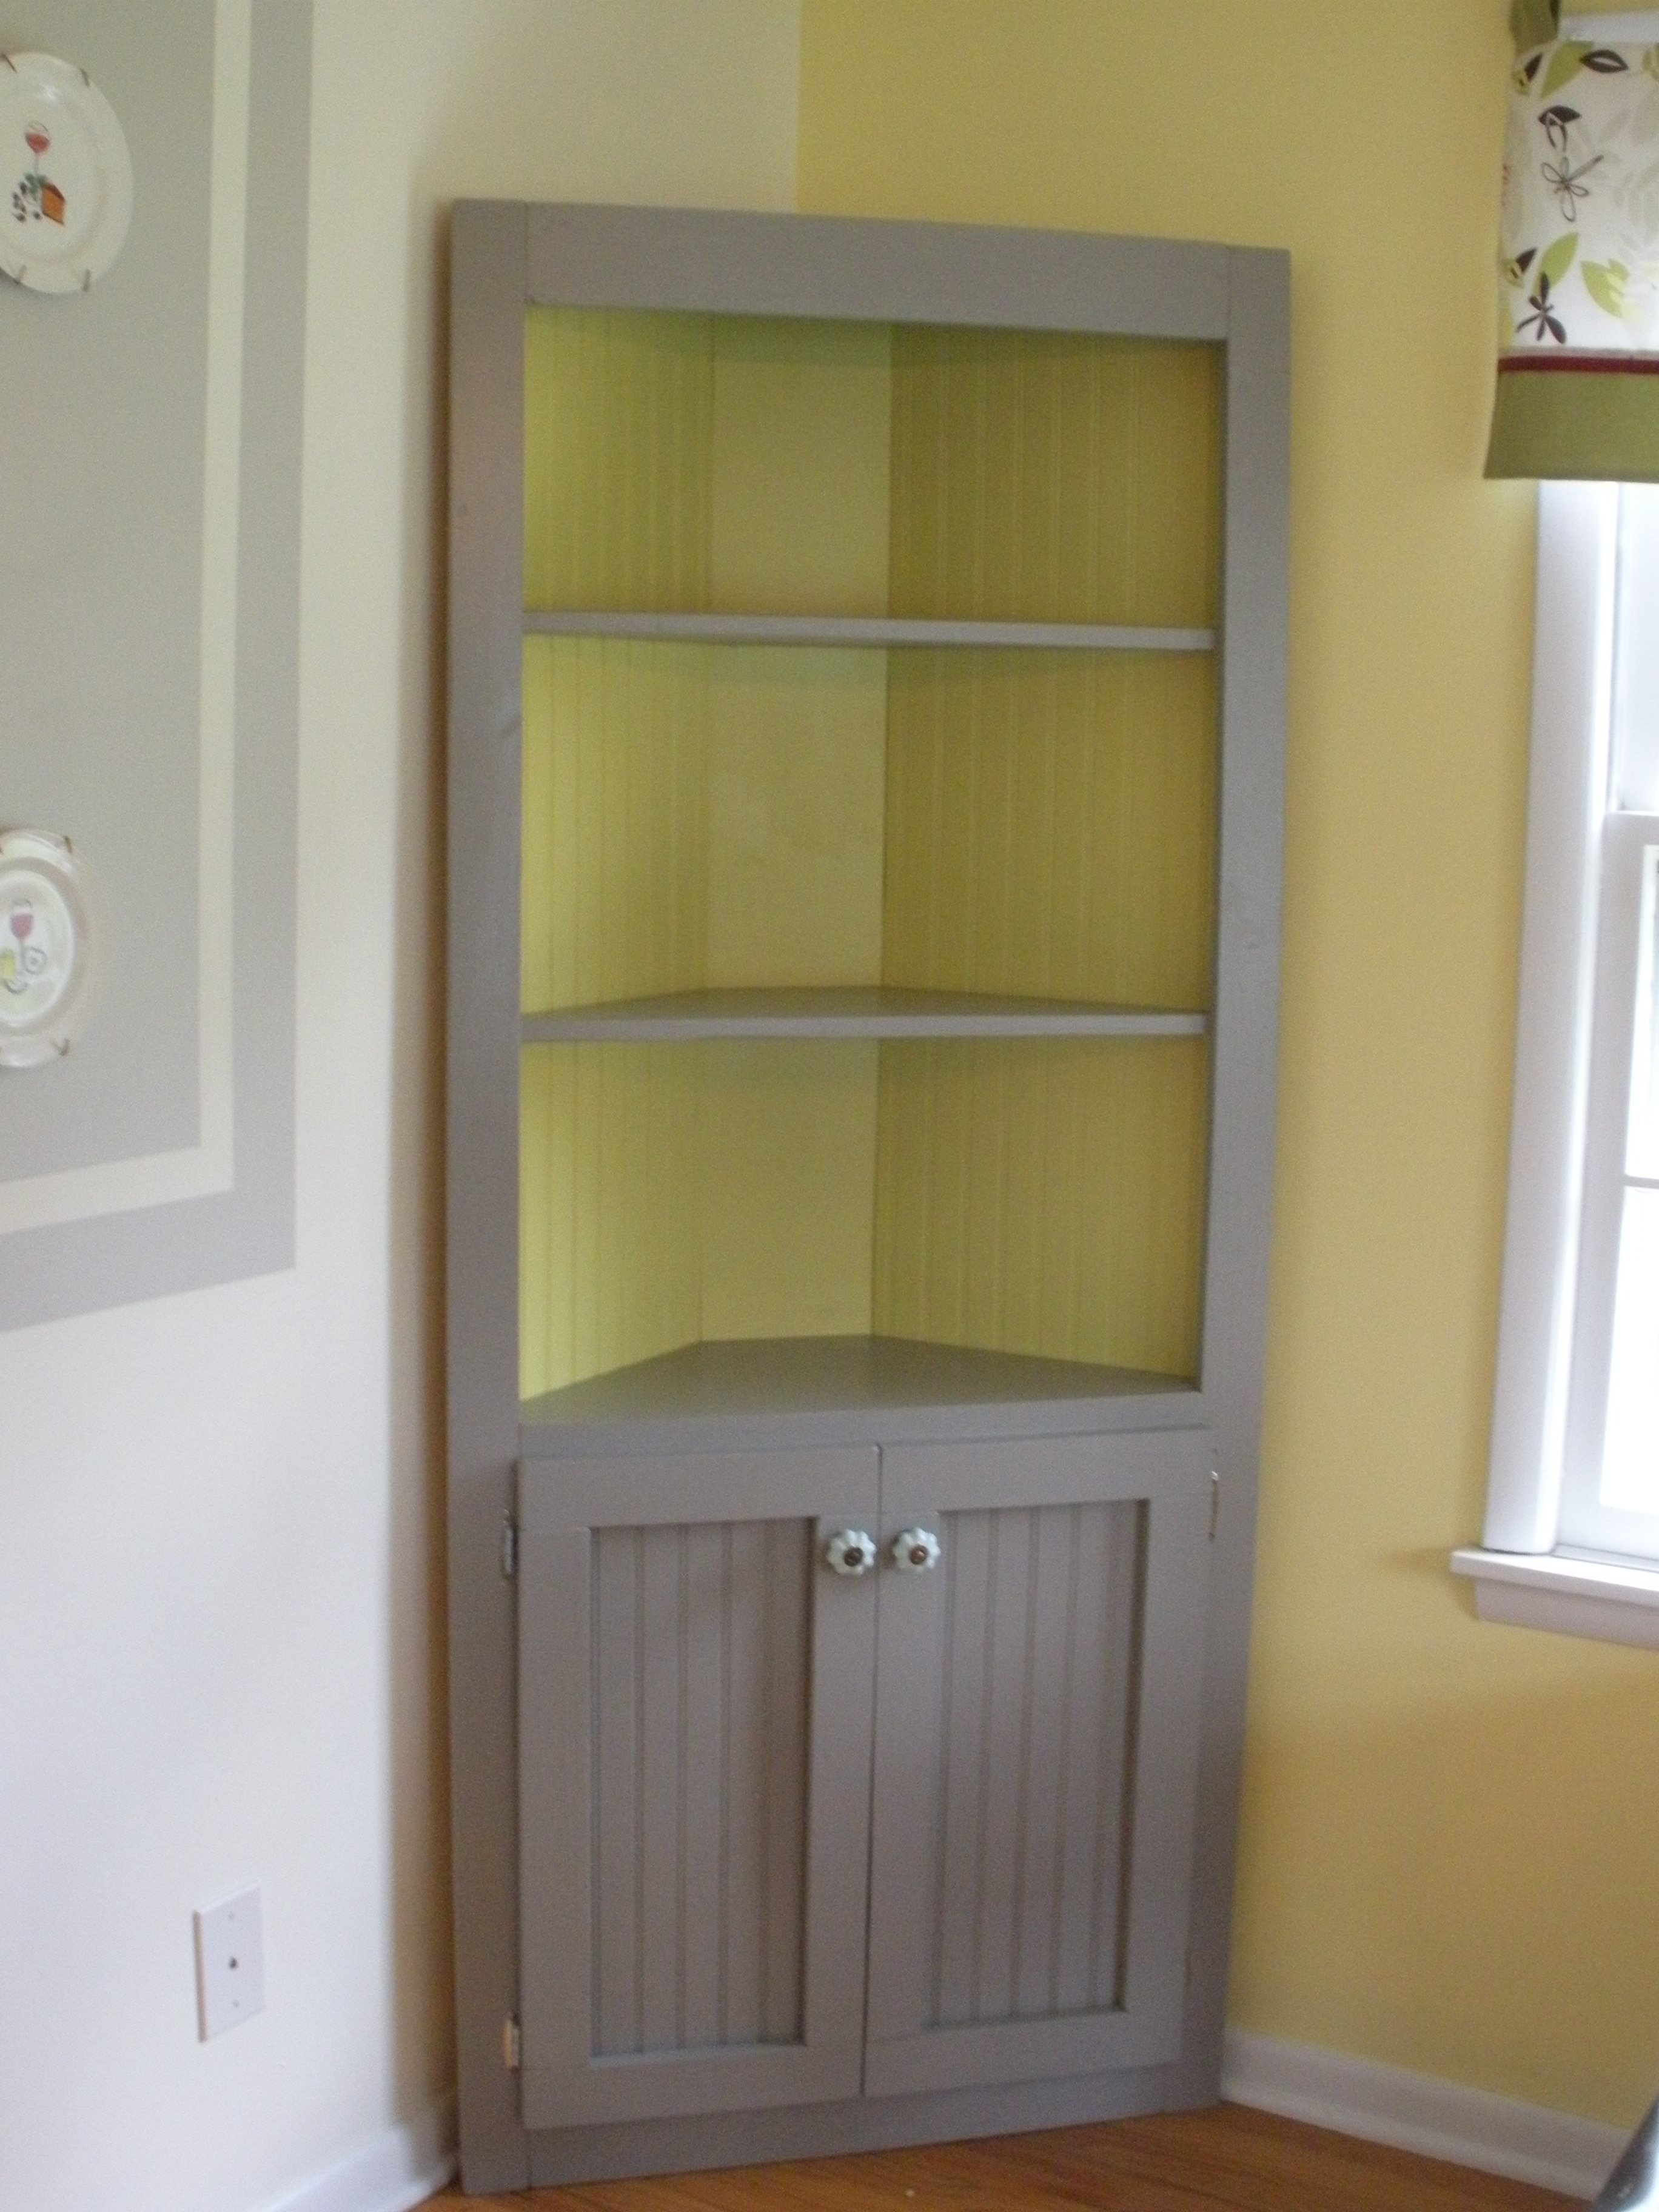
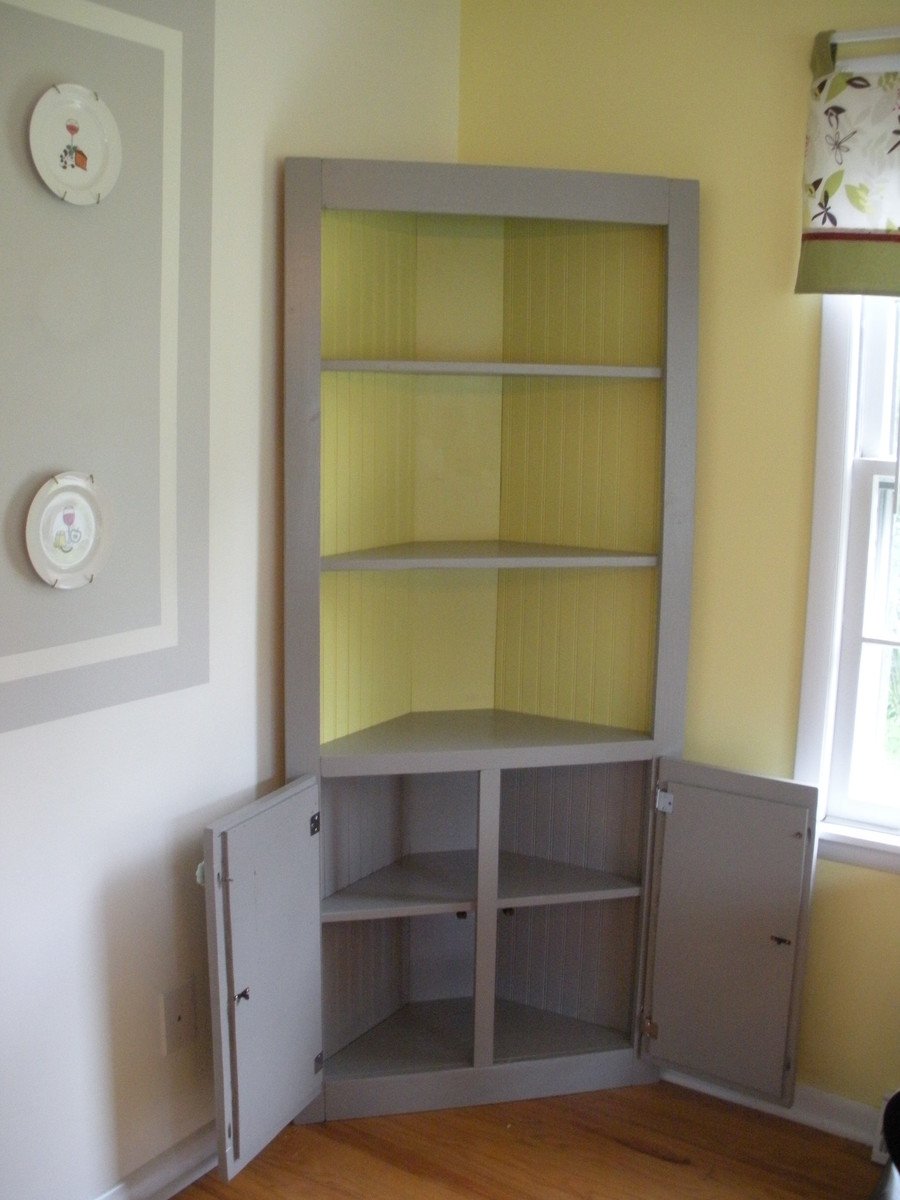
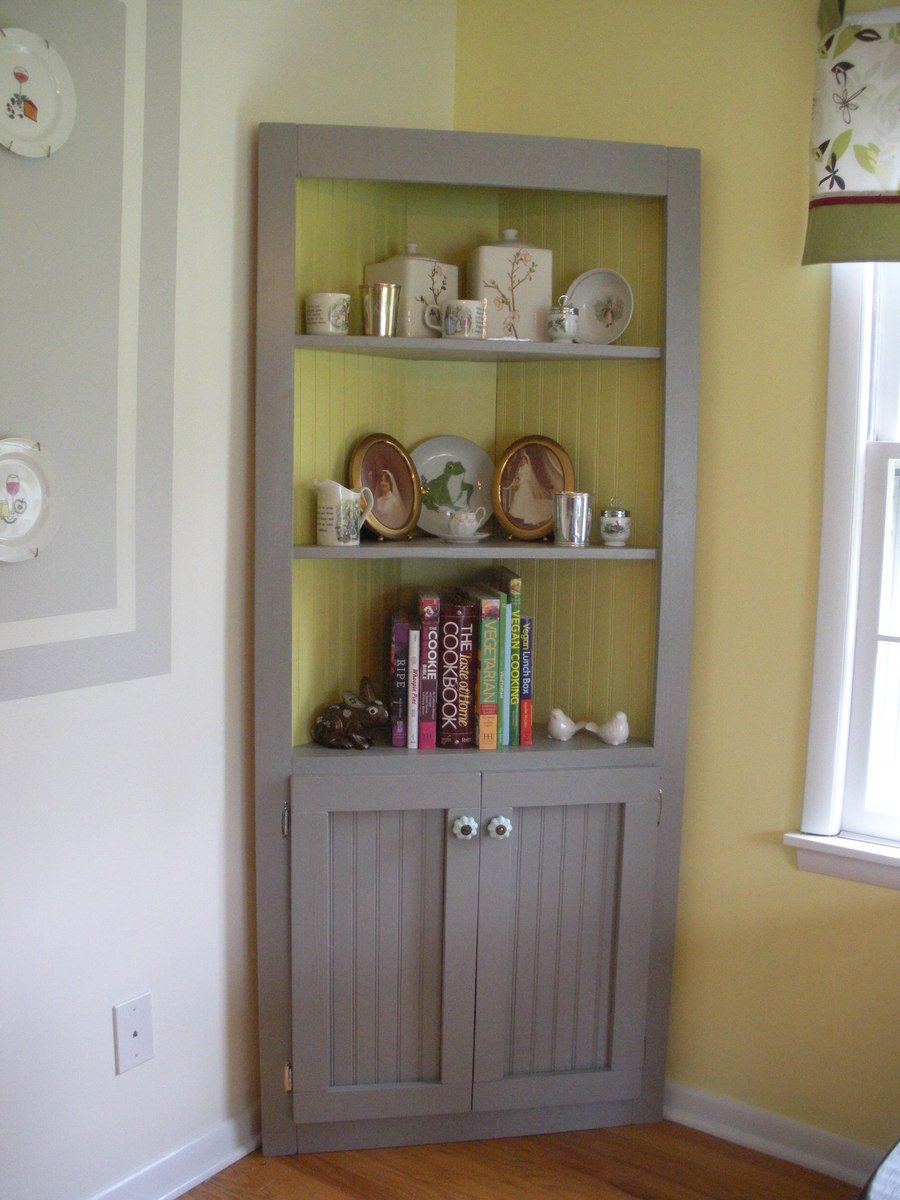
This project took me the majority of a three-day weekend to complete, but it was well worth it! I had the lumber store cut the beadboard panel for me so that it would fit in my car. This was also the first time I built something with doors on it, which was a bit of a learning curve, but came out alright in the end. I used pocket holes to build the face frame, and attached the shelves to the frame first before attaching them to the 1x8 back. I used 1 1/4" pocket hole screws and 2" wood screws. I left off the trim at the top and didn't bother to cut out the footer, but I think it still looks pretty cute.
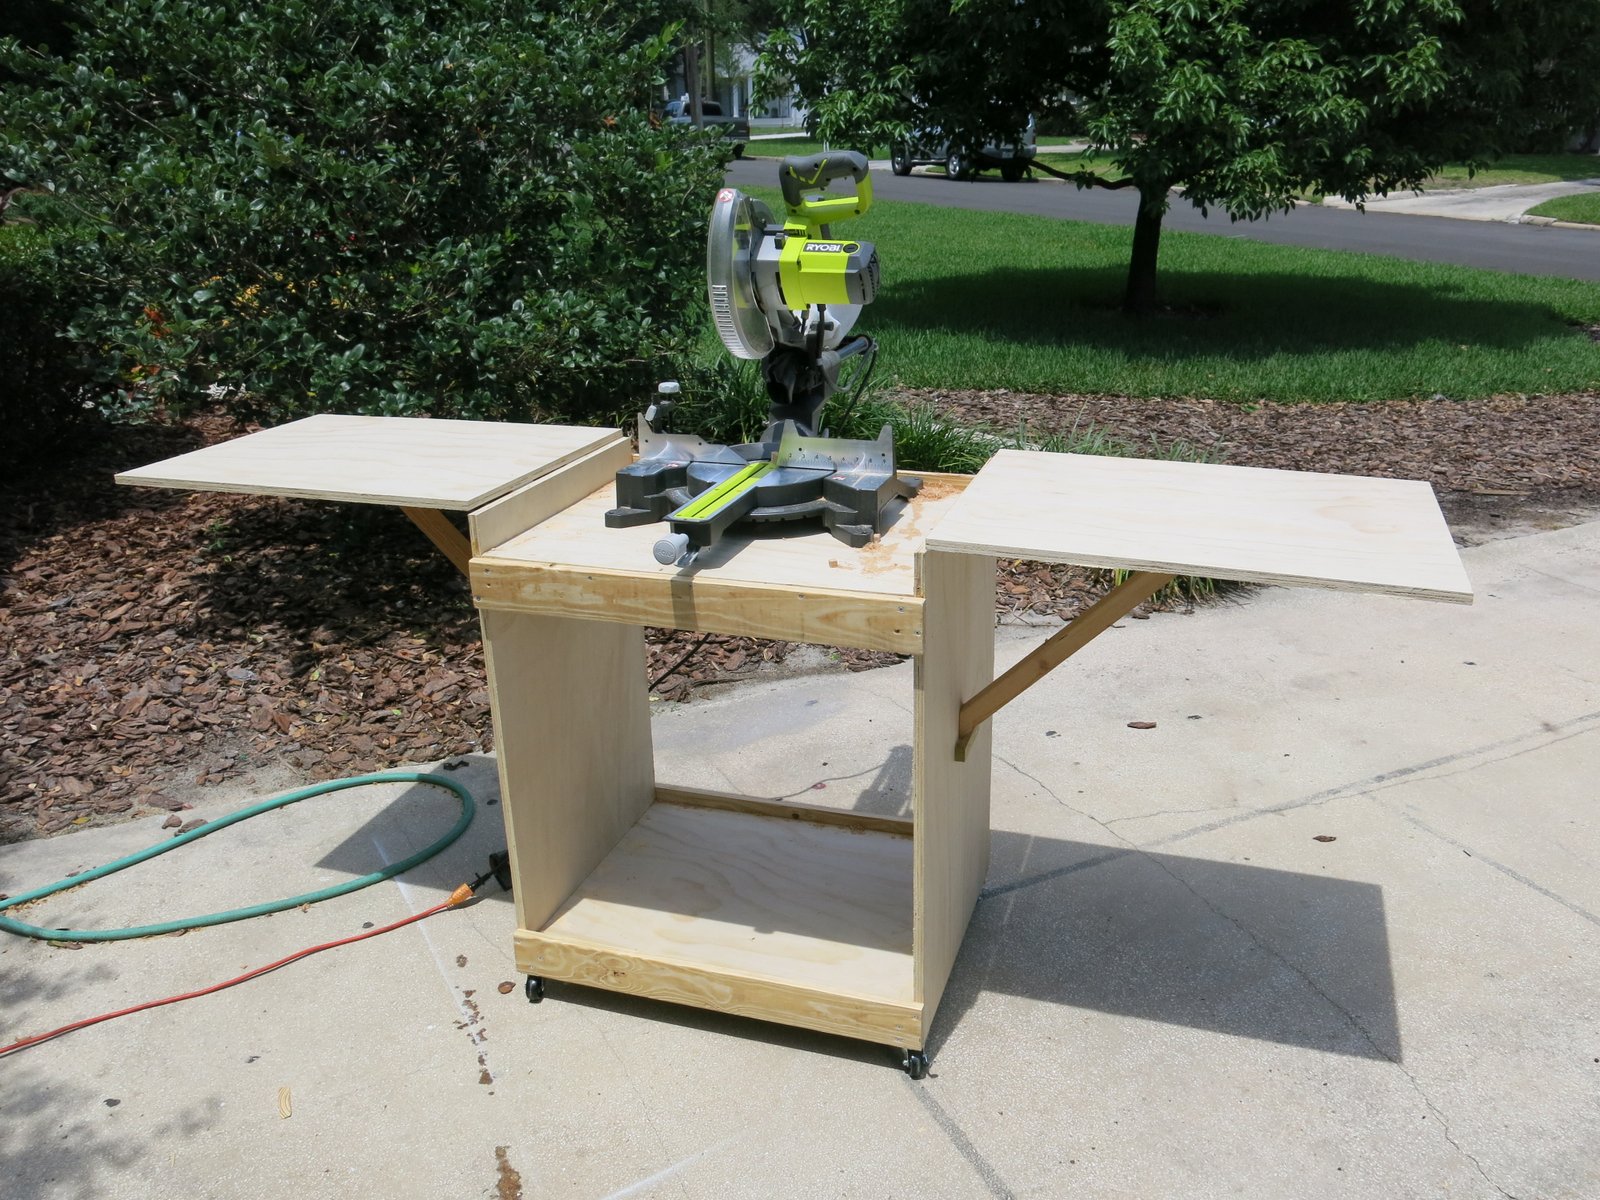
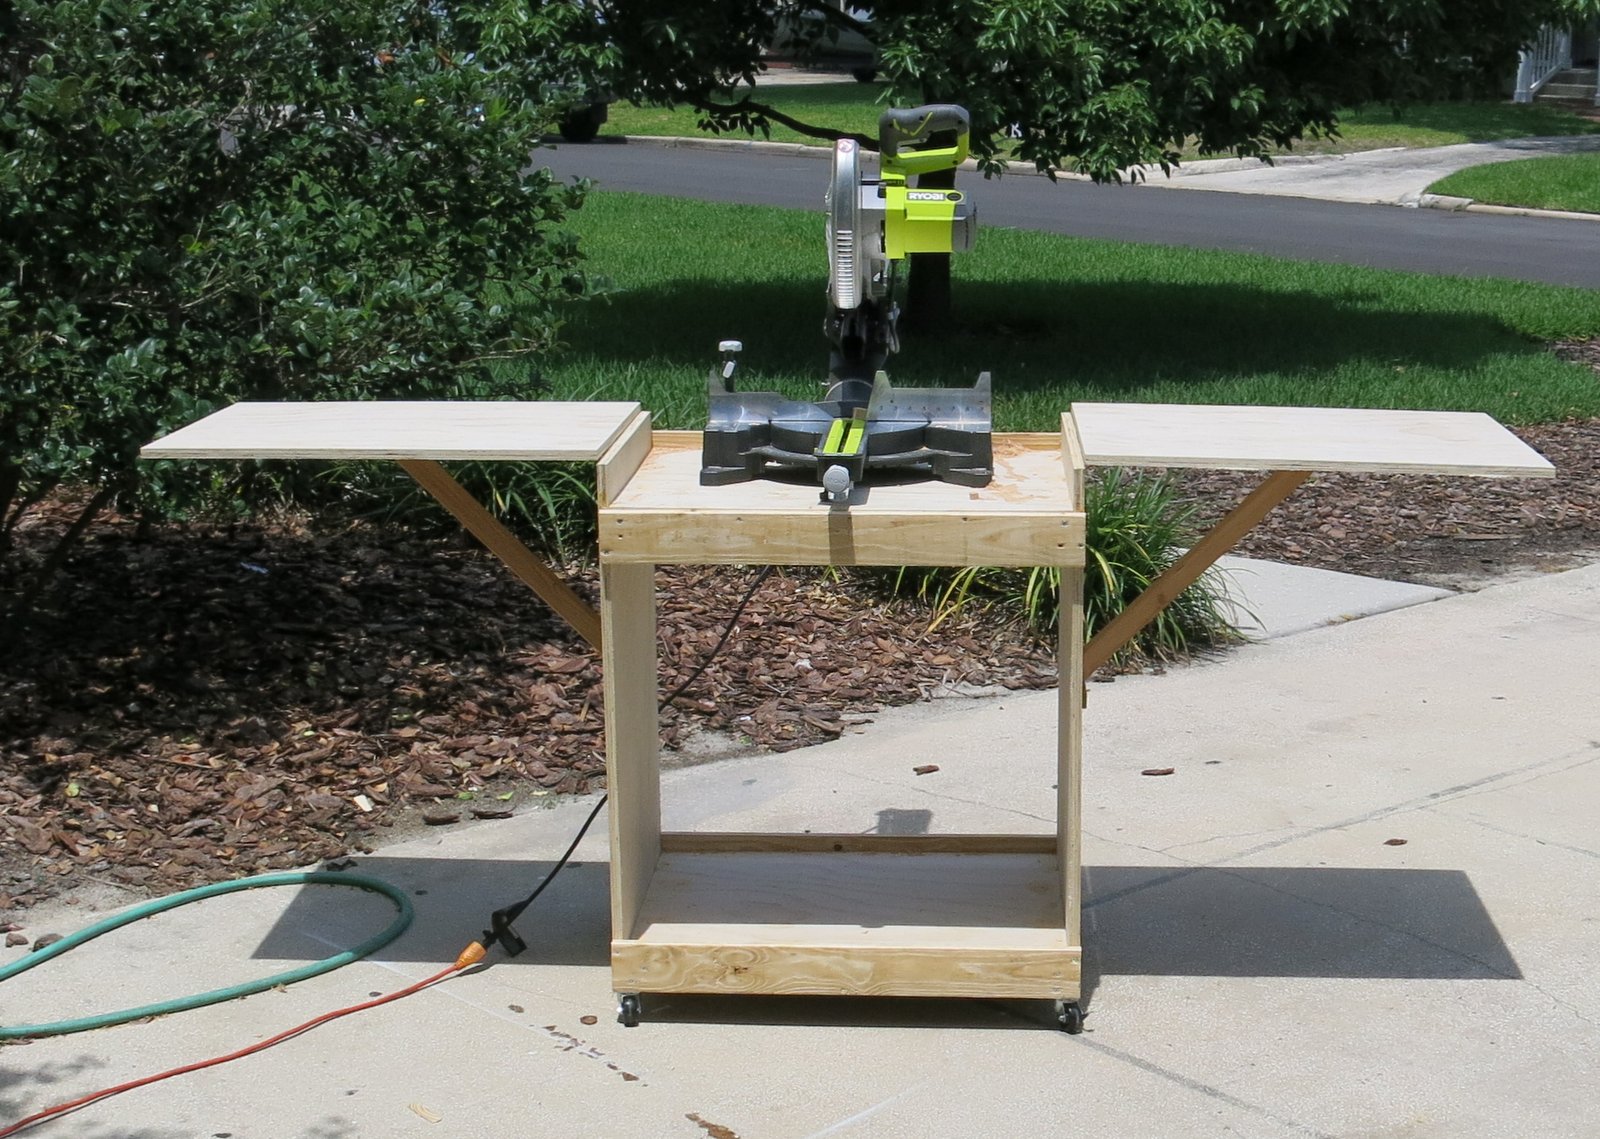
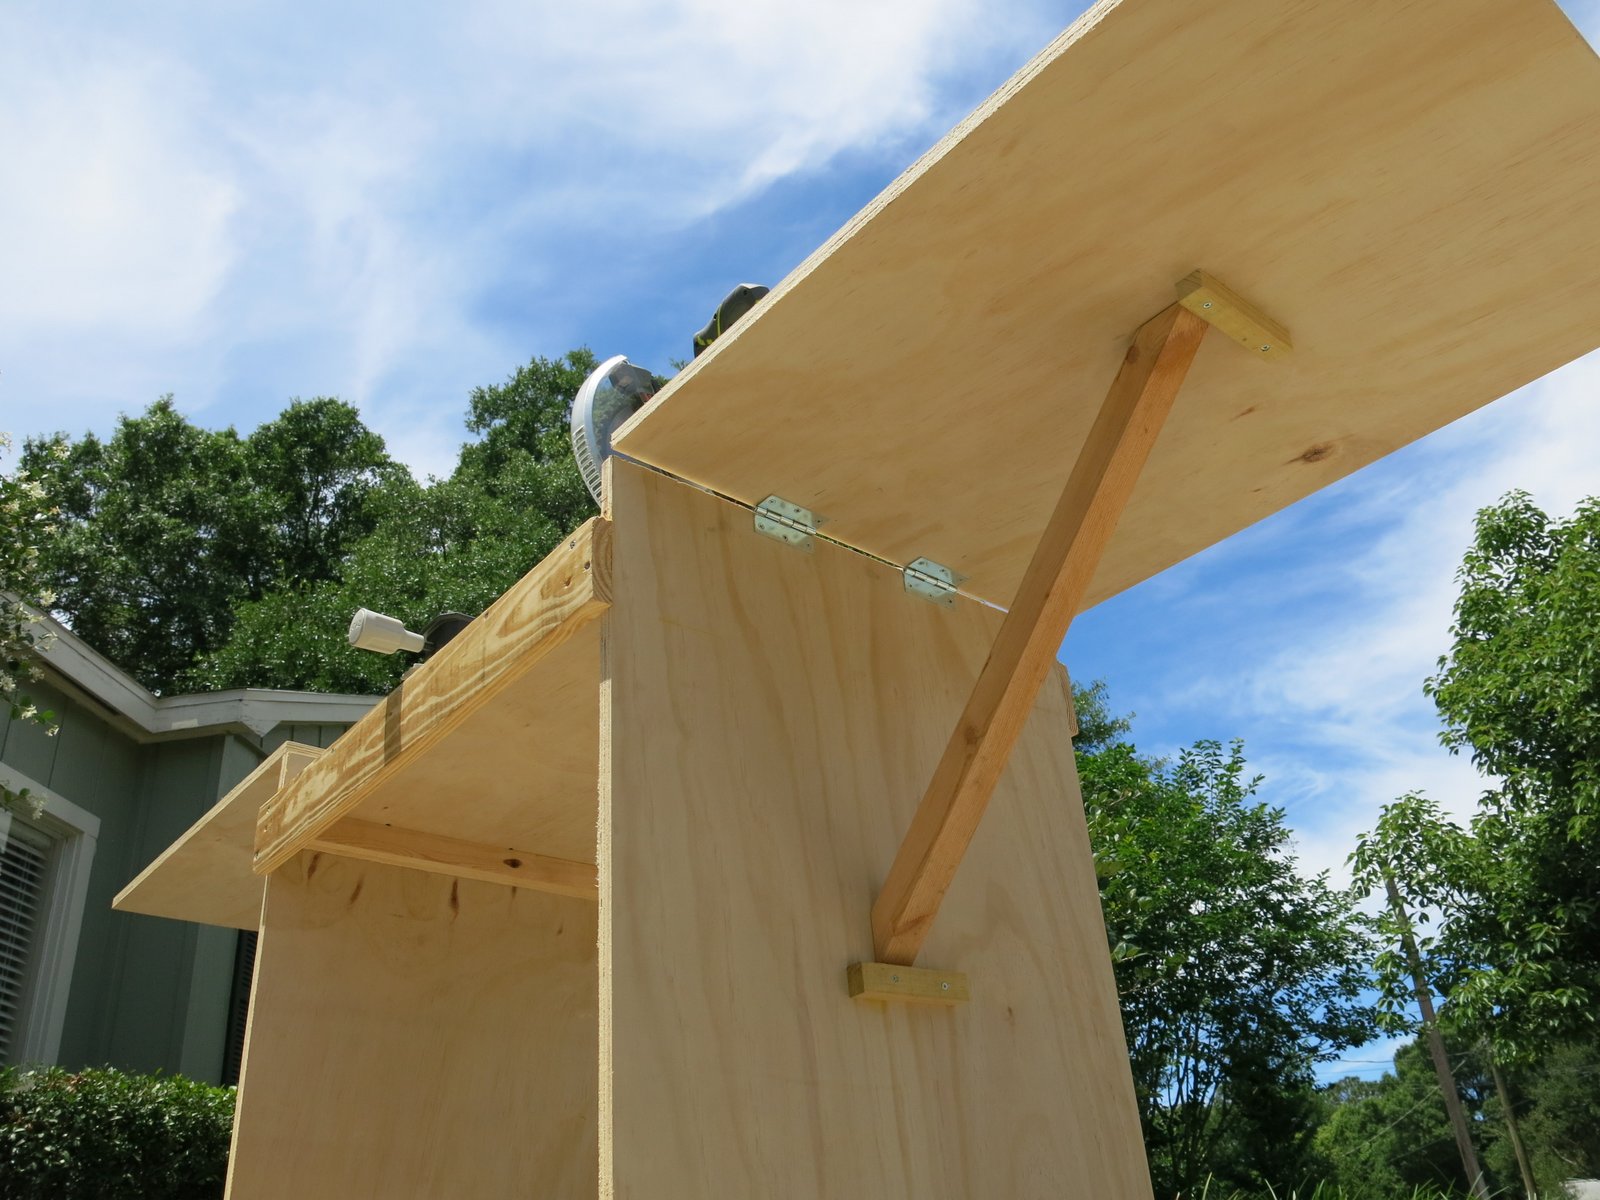
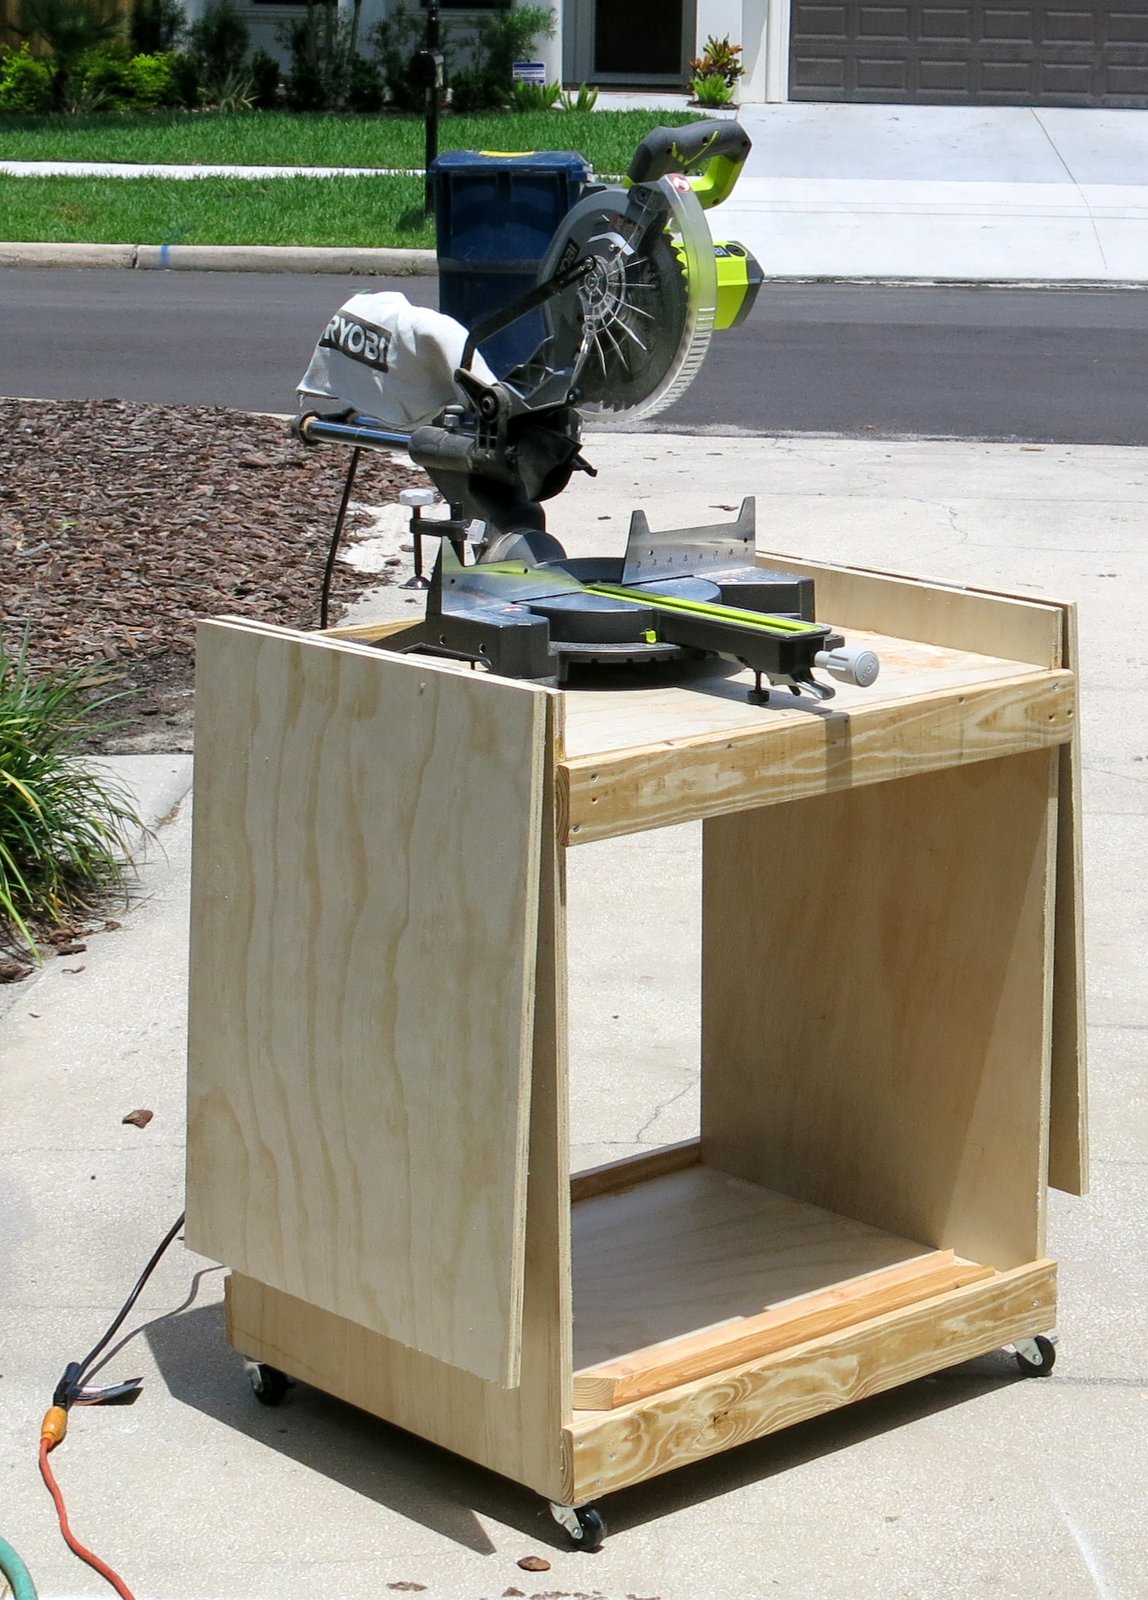
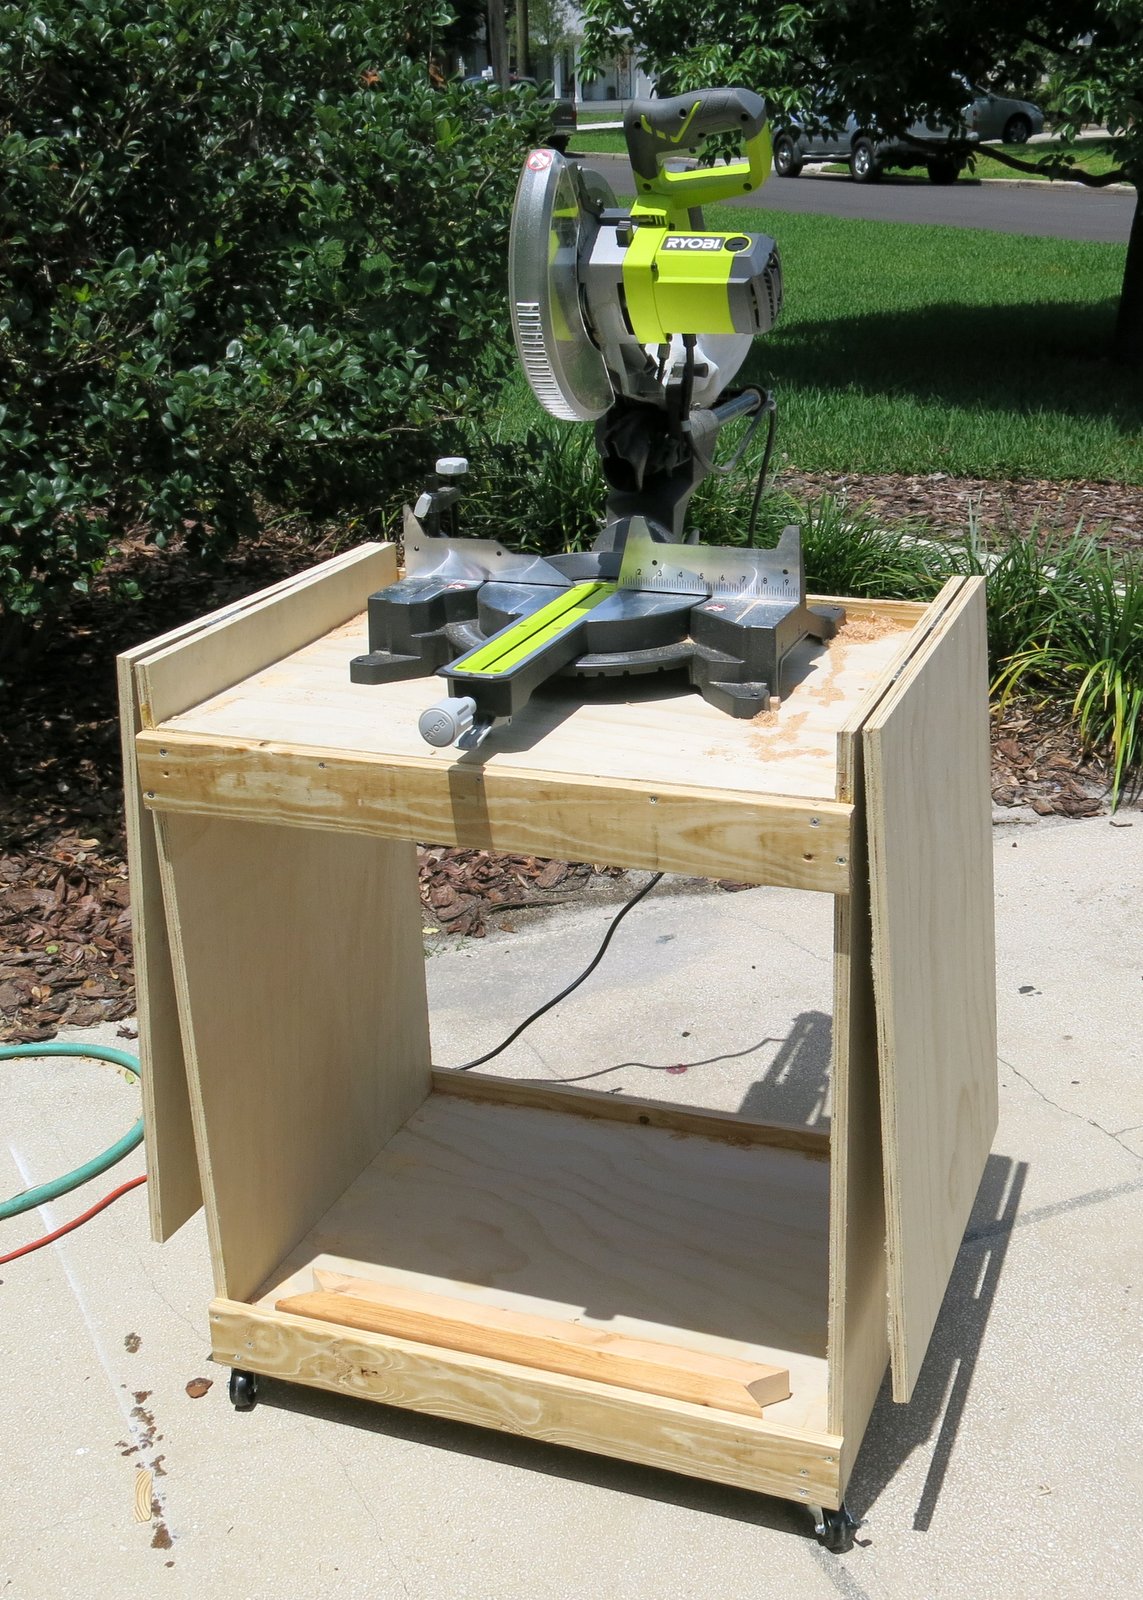
I essentially stuck to the main plan - except to support the wings I used 2X2 boards and standard hinges.
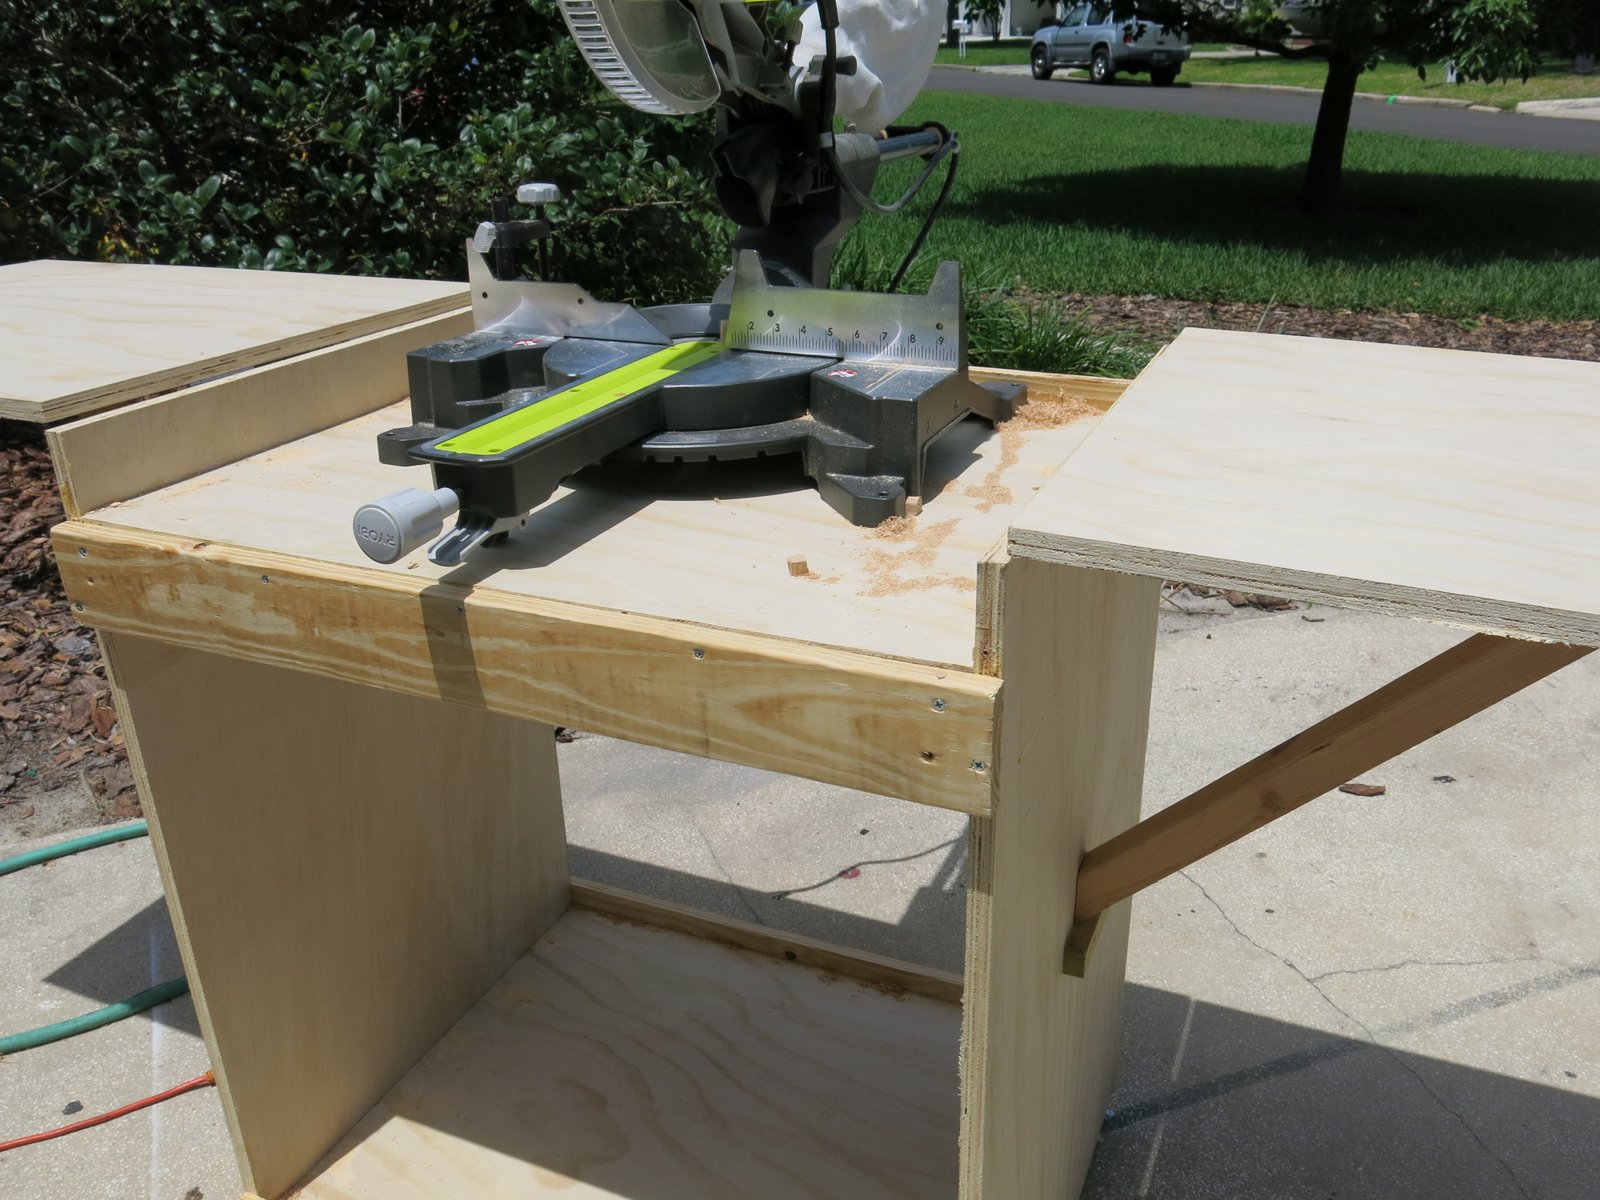
I was worried that there may not be enough space for my Ryobi 10" sliding miter saw because of the slide however, it fits nicely and there is plenty of space.
Thank you for the wonderful plan. This was my first project of this size and I am very happy with the results!
Fri, 05/01/2015 - 08:10
This is great. I am currently getting my Dad's help to turn an old kitchen cabinet into a miter saw cabinet with wings like this. (it was a 1940's solid wood kitchen cabinet we took out of the house when we remodeled). I really like your 2x2 support struts. Have you considered putting a shelf in the middle of your box? It would add extra support and also more room to store stuff.
Sat, 05/02/2015 - 09:09
Good idea. I did consider adding a shelf however I have now decided to use the lower area to store my small router table. I discovered that it would fit in the spot however it leaves not enough room for a shelf.
Mon, 05/18/2020 - 14:12
I know it’s been a while but do you remember the angle you used on the 2x2 supports? I struggle when it comes to cutting angles.

Built this to go along with my son's new Chelsea loft bed so he'd have a place to set a glass of water and some books. I was able to use almost entirely scrap wood, except for the 1x4. Cutting and assembly took less than an hour, and the thing is rock solid. Sealed it with polycrylic, because it will probably get spilled on many, many times. Probably the easiest project I've done, and I think it would make a great starter project for anyone looking to try out using pocket holes for the first time.

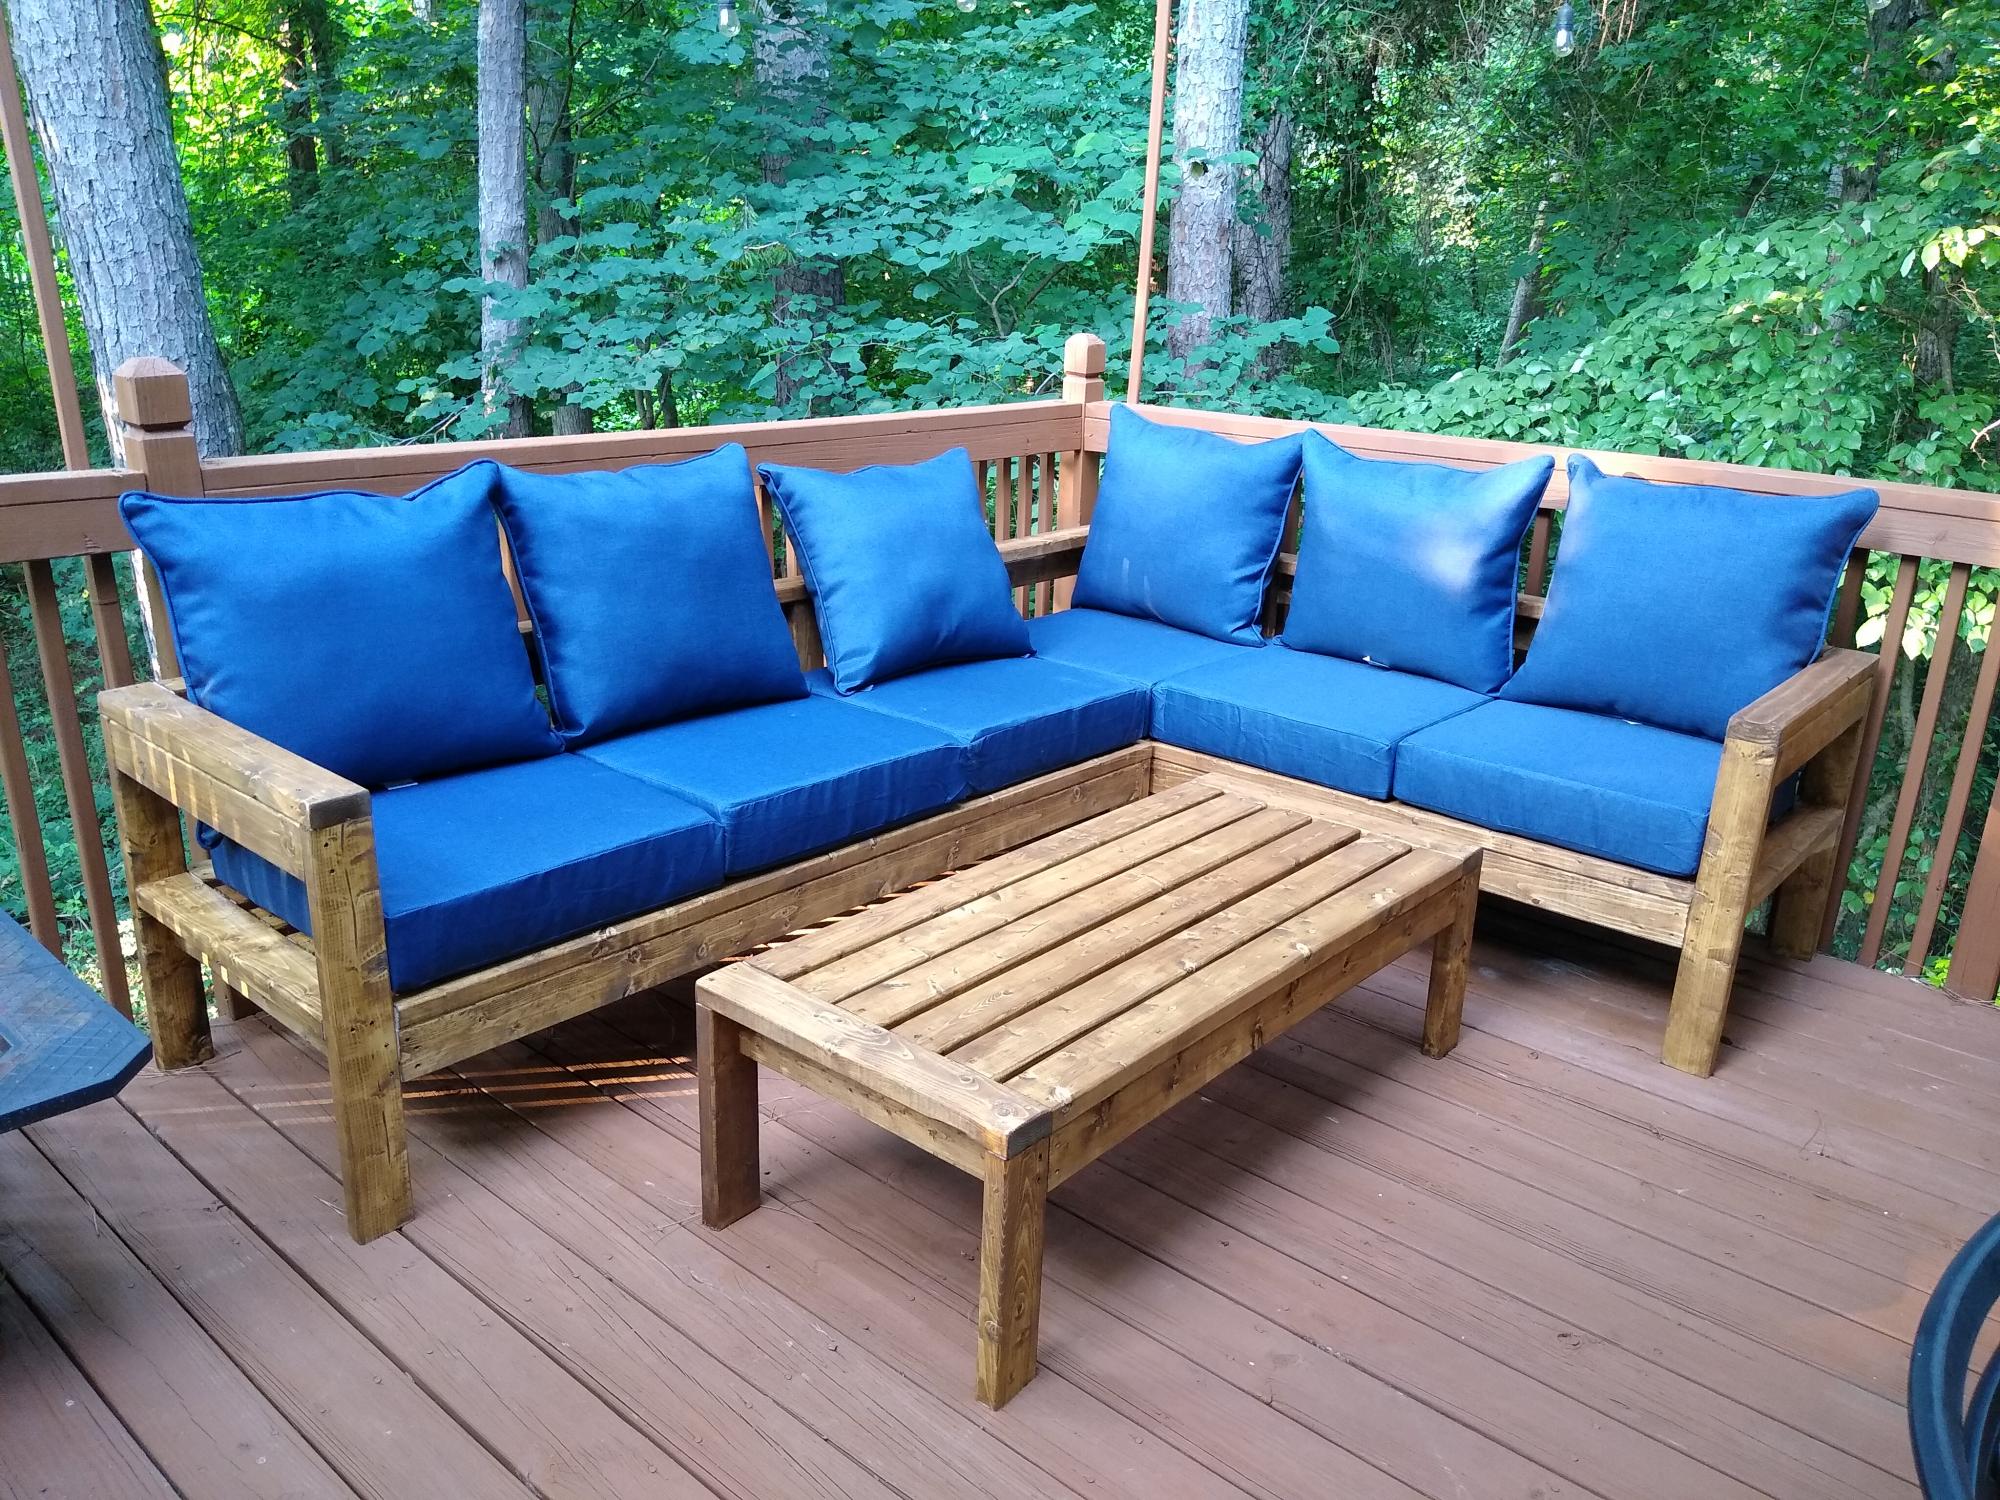
Ana did an awesome job explaining everything in the plans. Make sure you buy your cushions first and build your sectional around your cushion size. I added more 2X4's on the back seat and back rest so the cushions would not slide through the opening and to minimize the feeling of the one 2x4 going across your back. I get so many compliments from this beautiful sectional. Thanks Anna!
Fri, 10/08/2021 - 10:42
Such a perfect addition to a peaceful place, thank you for sharing!
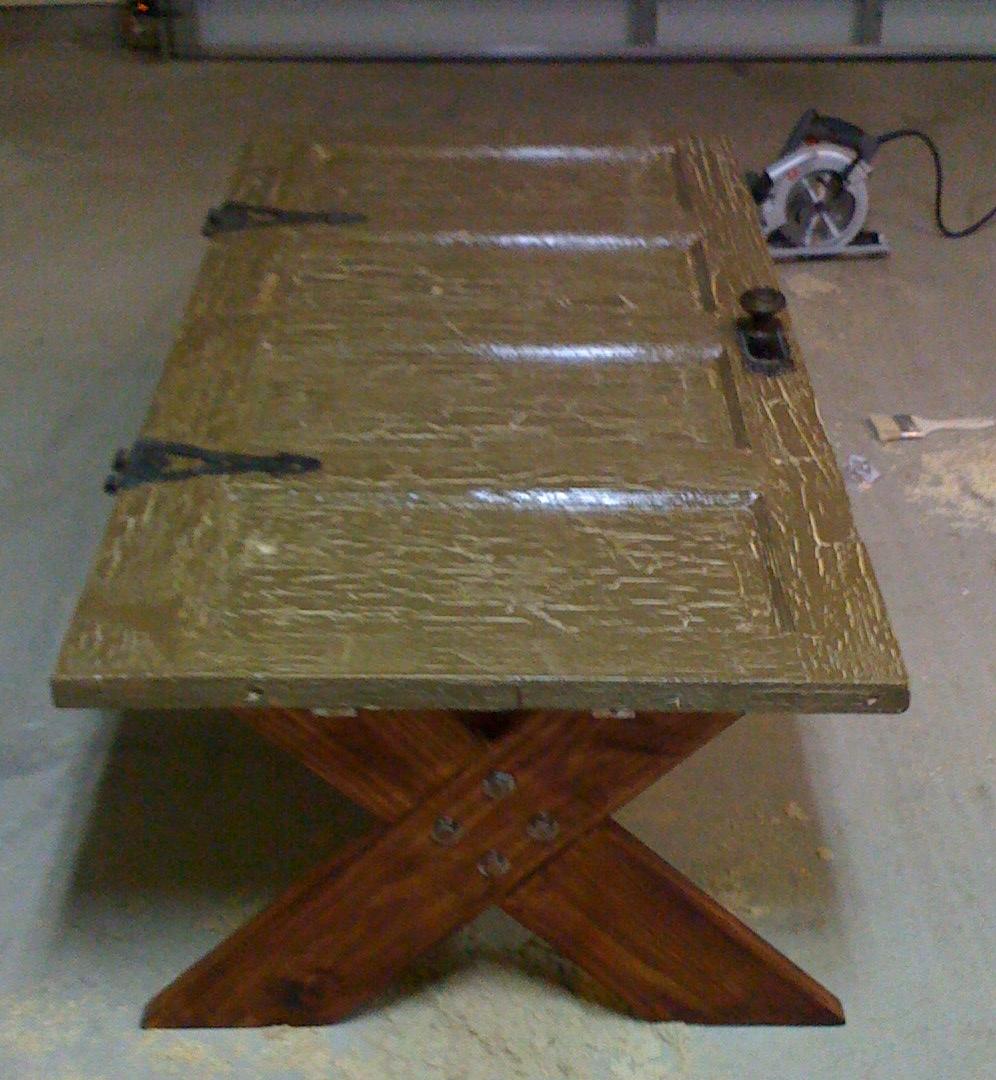
This table was built out of an old 5 panel door and some scrap would that we had lying around. old hinges and knob came from a local antique store. To finish the door my wife crackled the top and clear coated it.
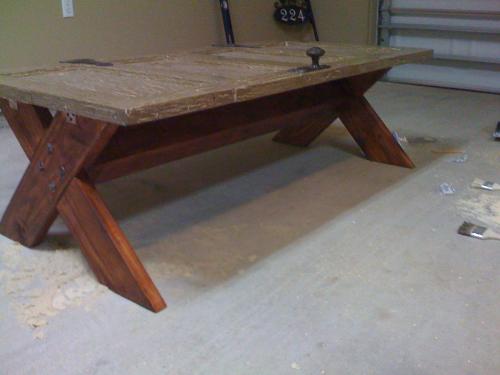
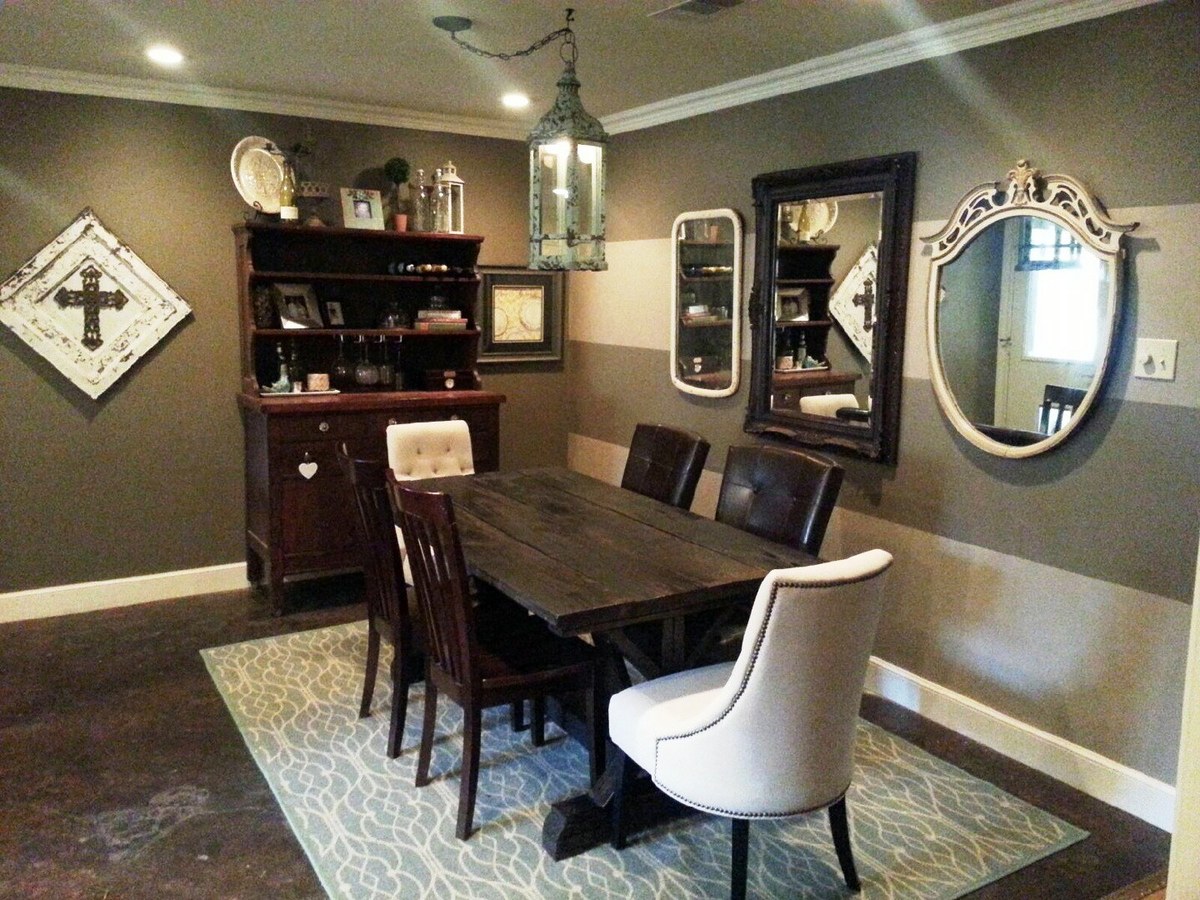
We were able to finish this table after work one afternoon and stain it the next day. (we have a 16 month old also, so you can do it! :) ) I wanted a similar style I had found at World Market that retailed for $700 we were able to complete this entire table for $100 including all hardware and stain. LOVE it so much and get SO many compliments on it. Thanks so much!
Shelby
The Dandy Lion
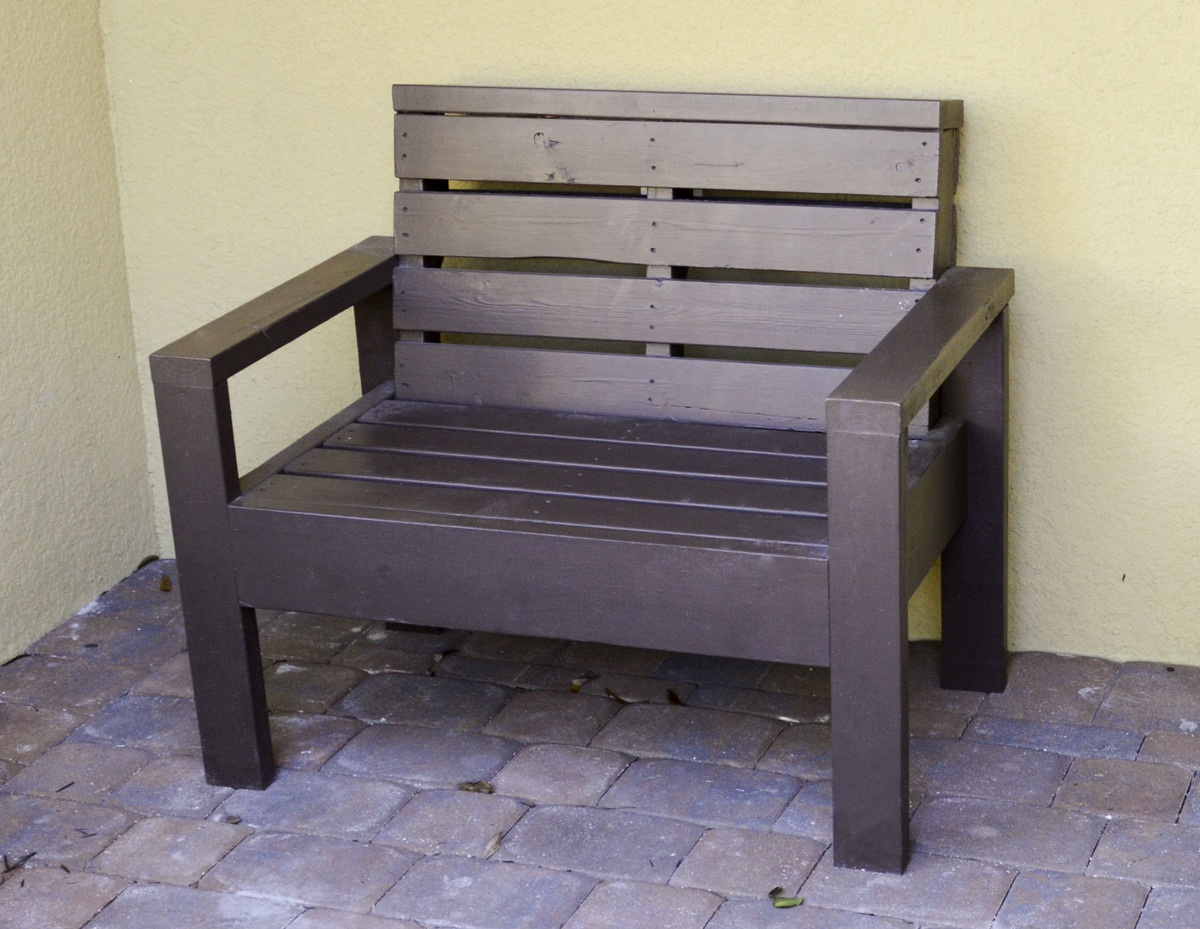
A friend gave me a pallet that I wanted to make into an outdoor bench. I found Ana’s plans for a simple outdoor loveseat and they inspired the frame for the bench. To make the bench I cut the pallet in half and then I adjusted Ana’s plans to make the frame to fit around the pallet.
The pallet was free and I used scrap wood to build the frame so my only cost for this project was paint.

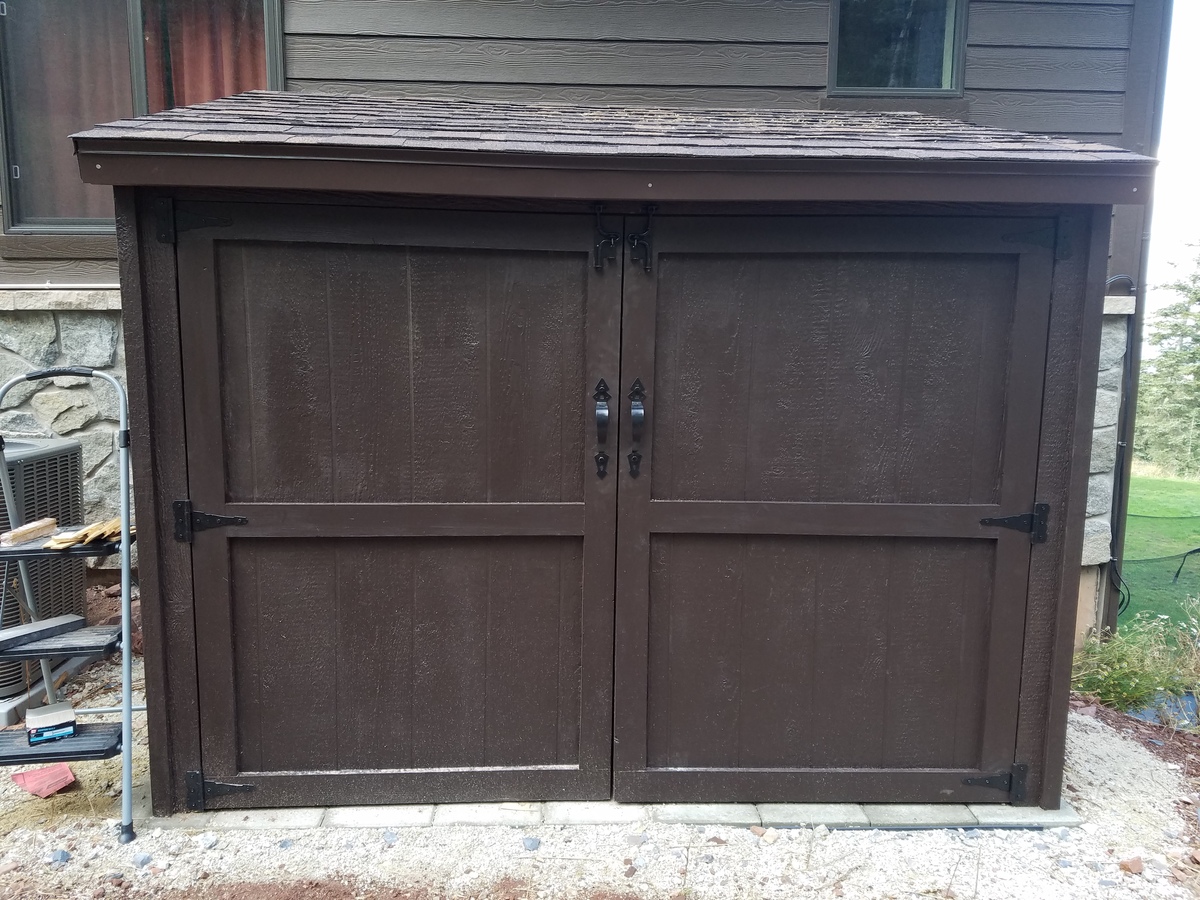
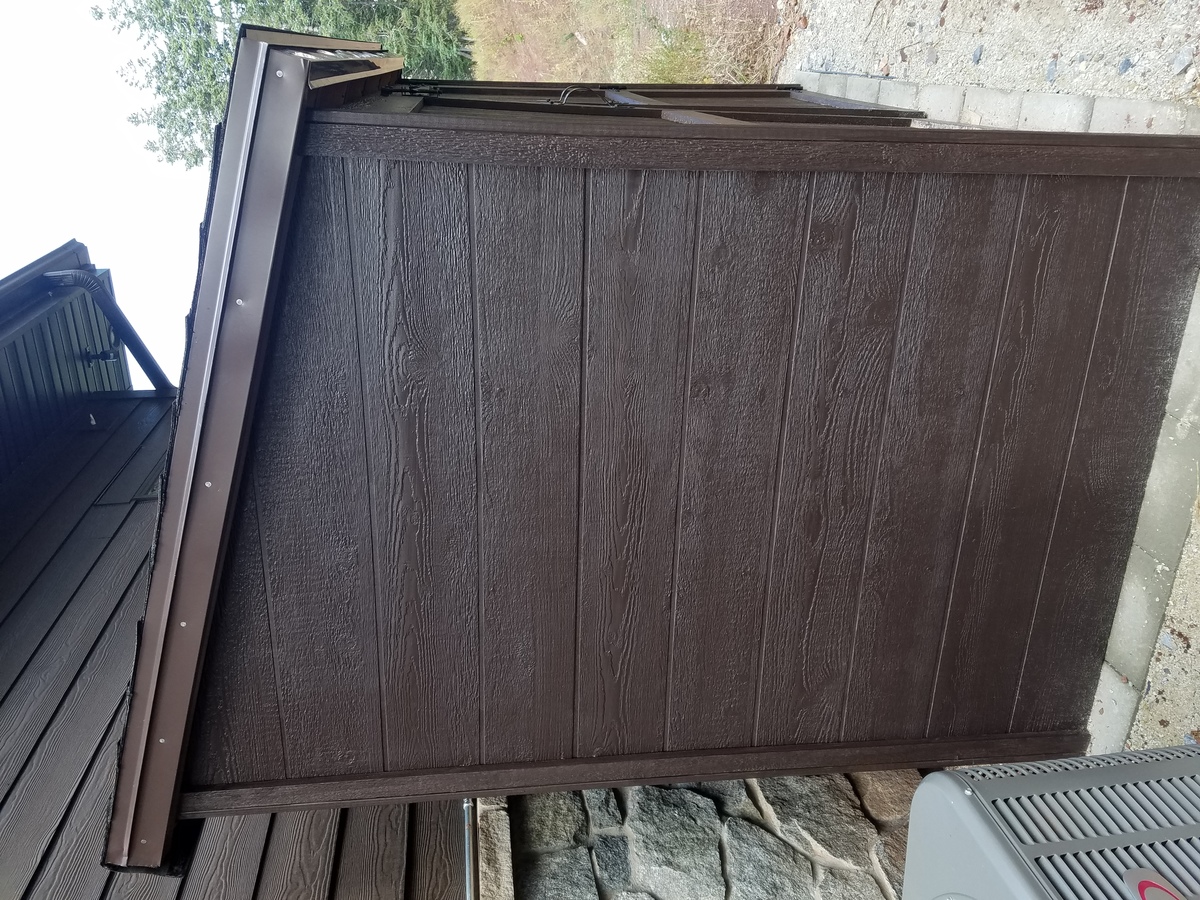
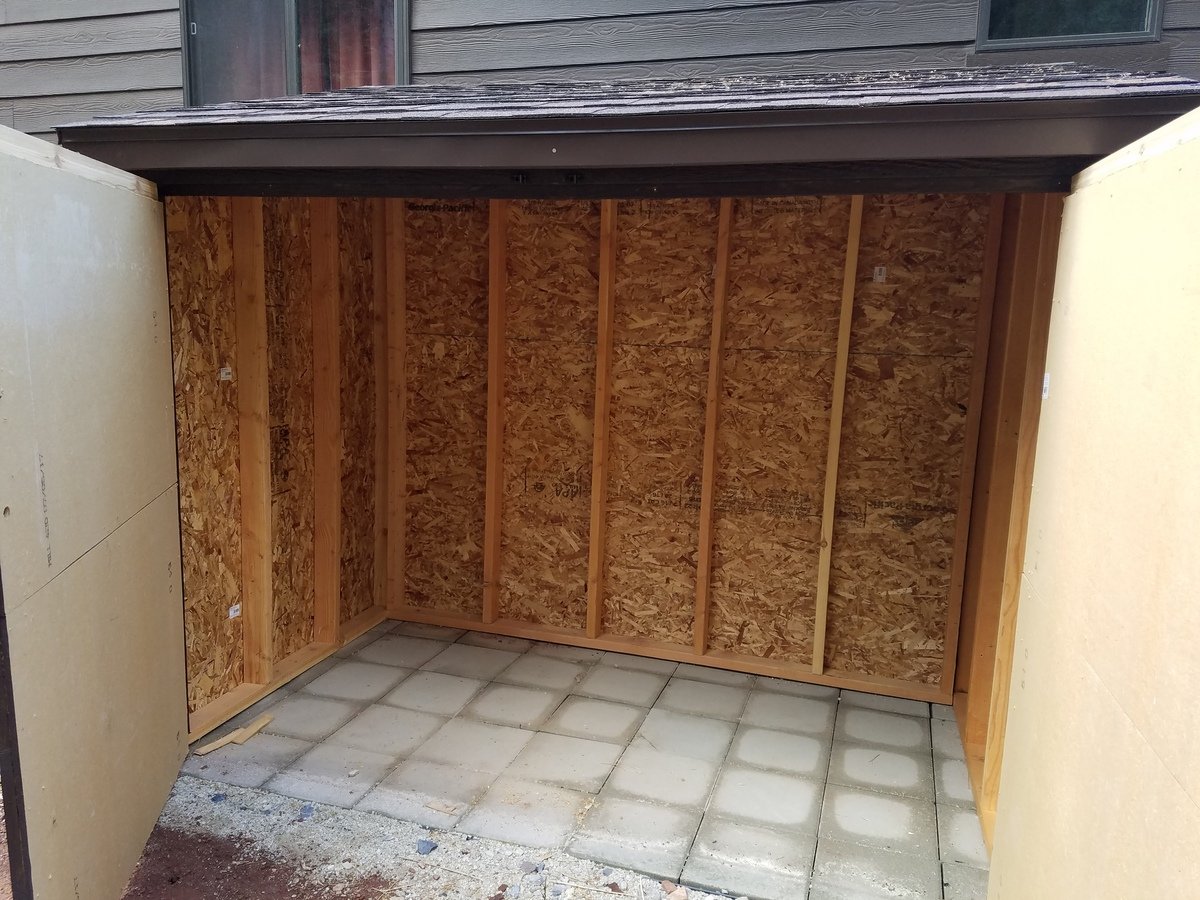
Using your shed plans, modified to use the 2x4s I already had on hand, I designed this 4'x8'x7' shed to match my house. I replaced the ceder fence boards with a hardiboard, but the construction was pretty much the same. My husband and I are so happy with this shed,which looks very similar to the $4000+ sheds we have seen, and it cost us less than $400 to make and matches our house perfectly. Your instructions were great, and I know you saved me a lot of time and trouble. Can't wait to load it up with our snow and gardening equipment! Thank you!
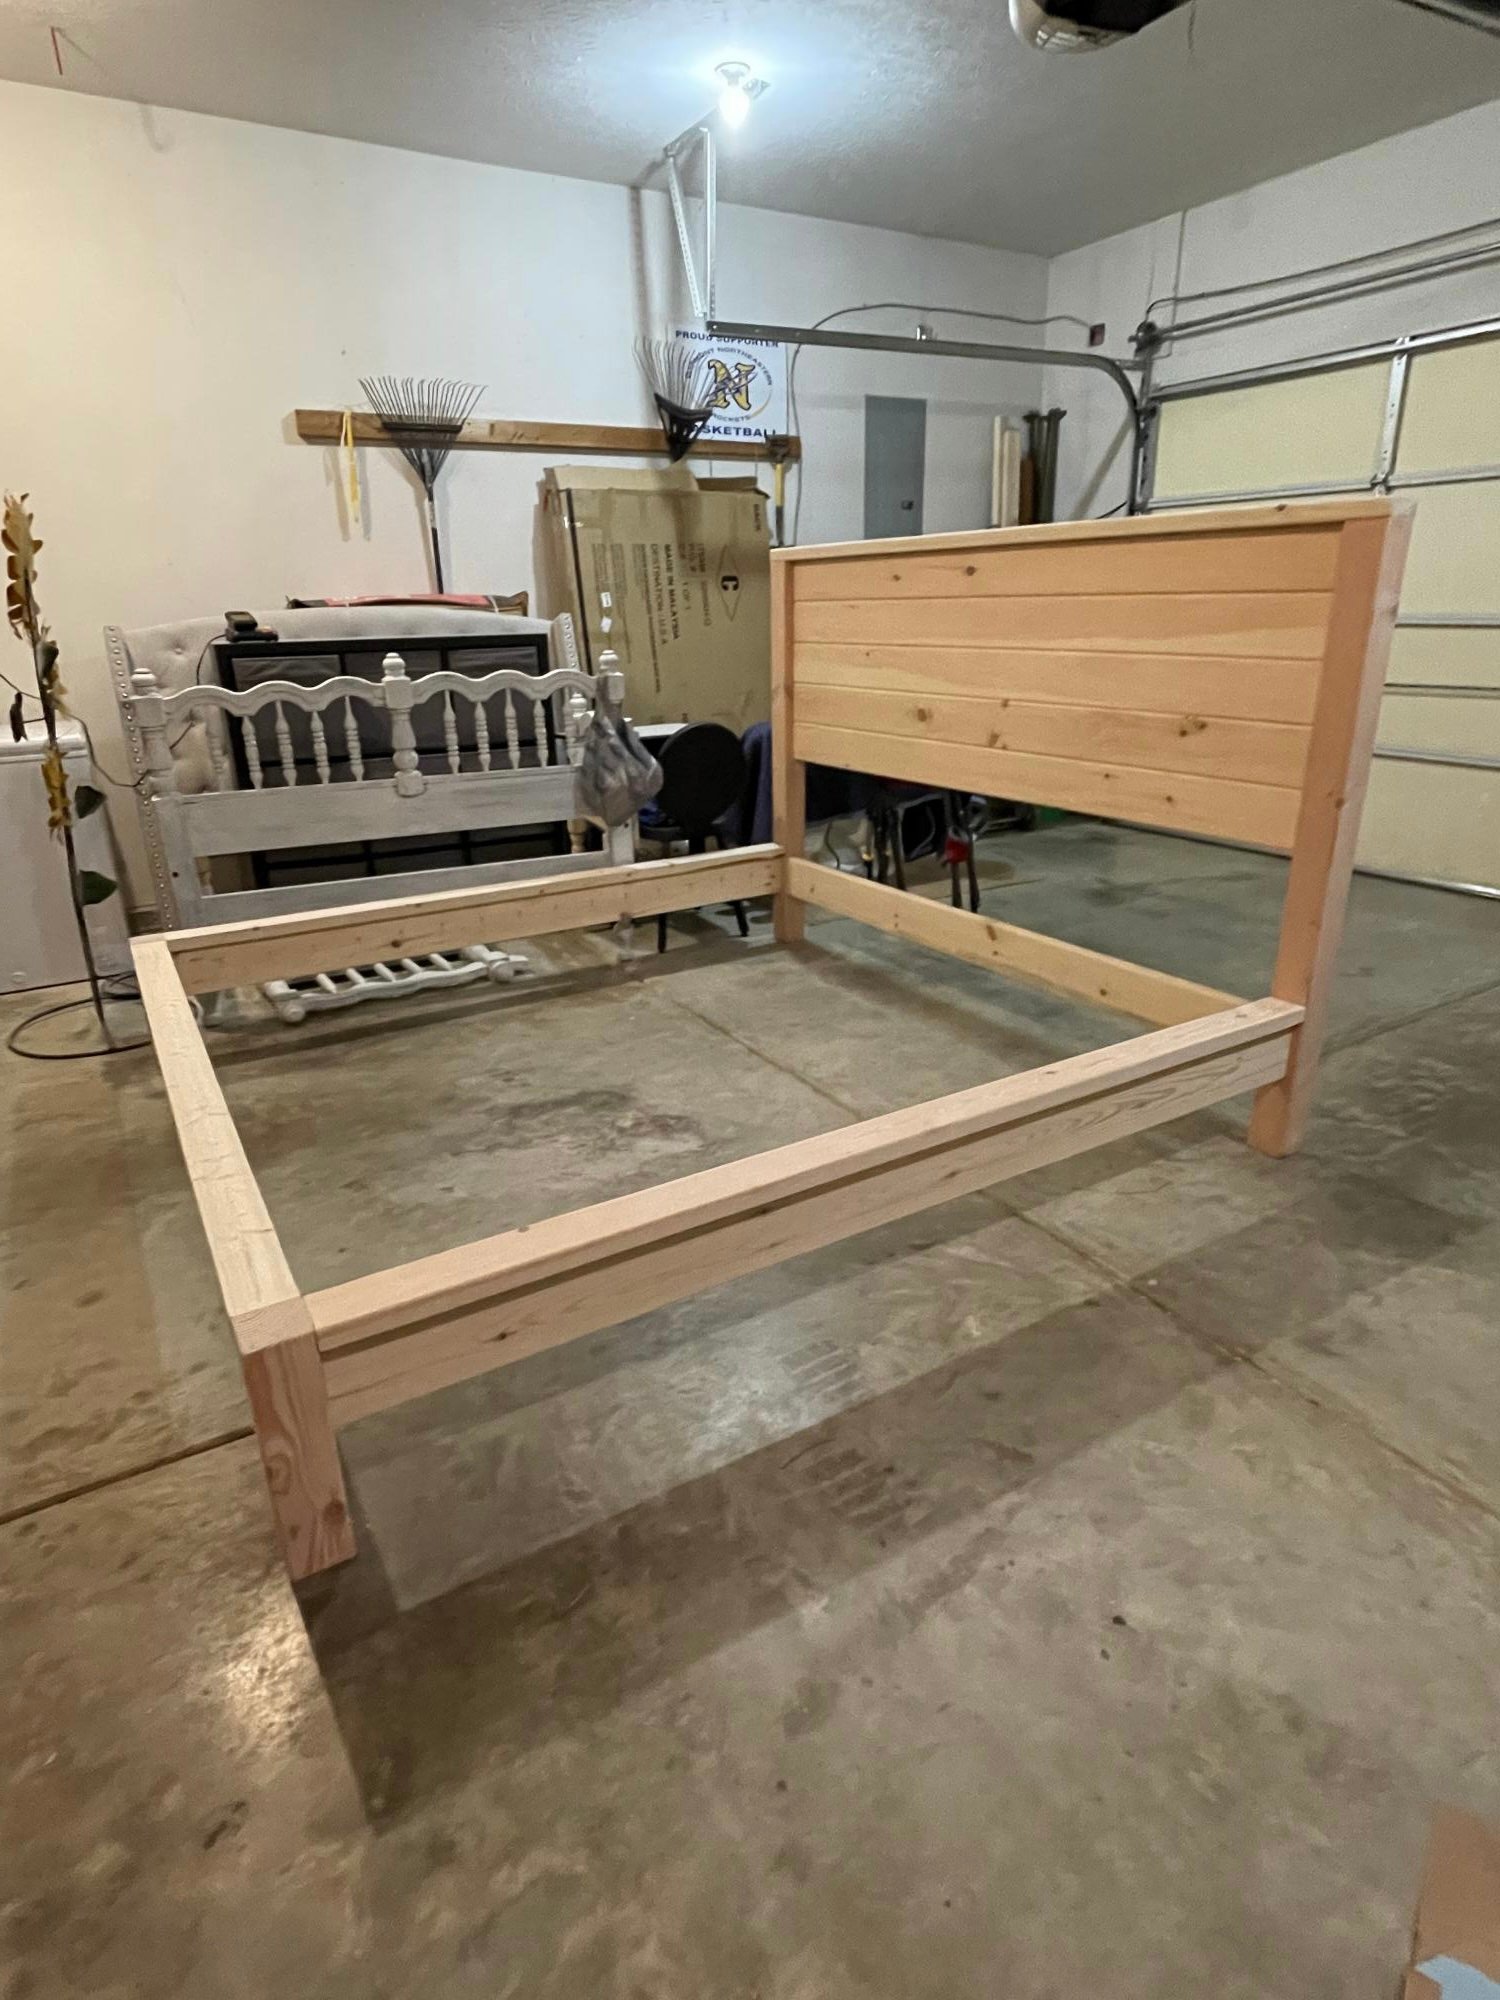
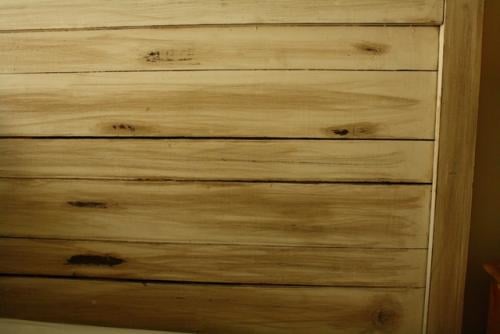
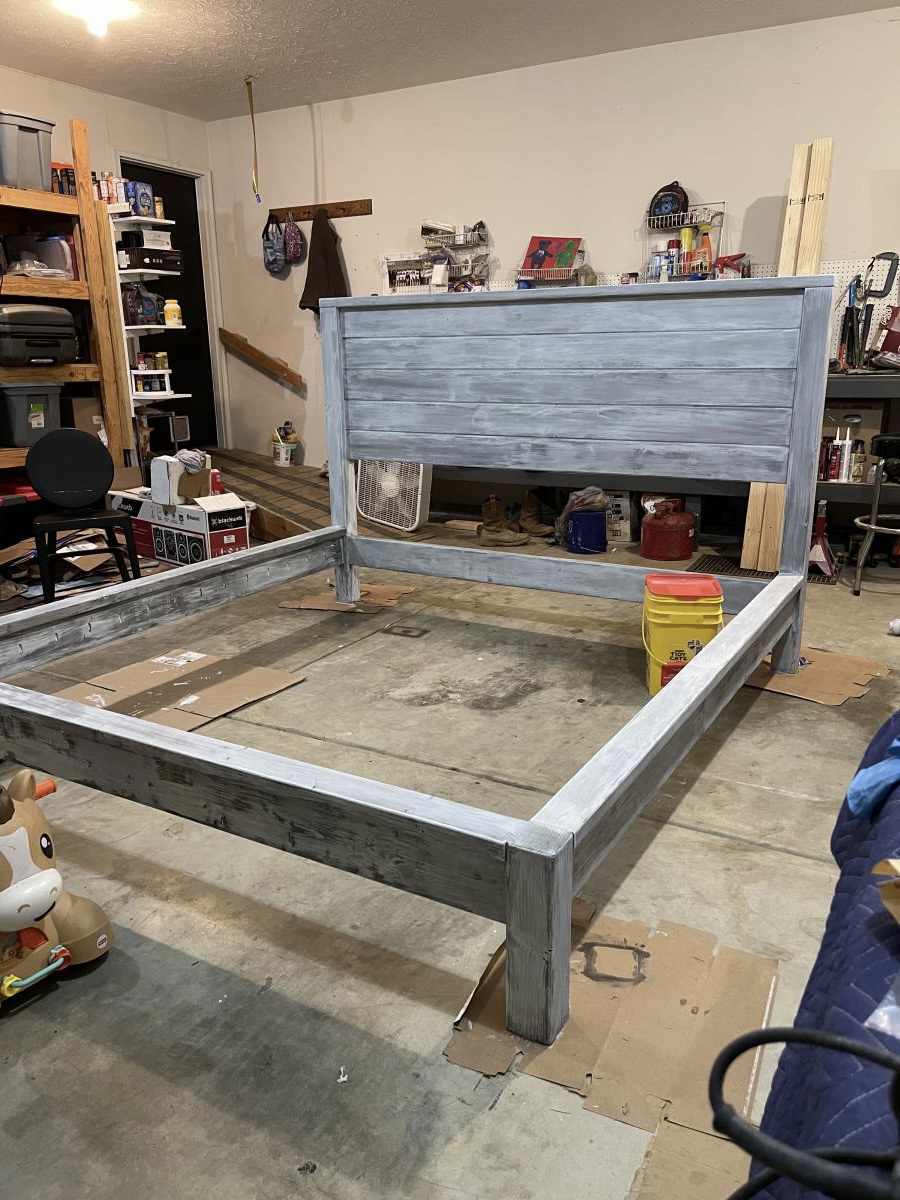
My husband and I made this for our son and daughter-in-law. They absolutely love it! The project took about two days to build, and about three days for the finish (stained and weathered). The photos do not show the slats that support the mattress. The only thing we would have done differently, would have been to use 6 “tongue & groove” on the headboard instead of 5. Otherwise it is a solid bed for certain. And they love it!
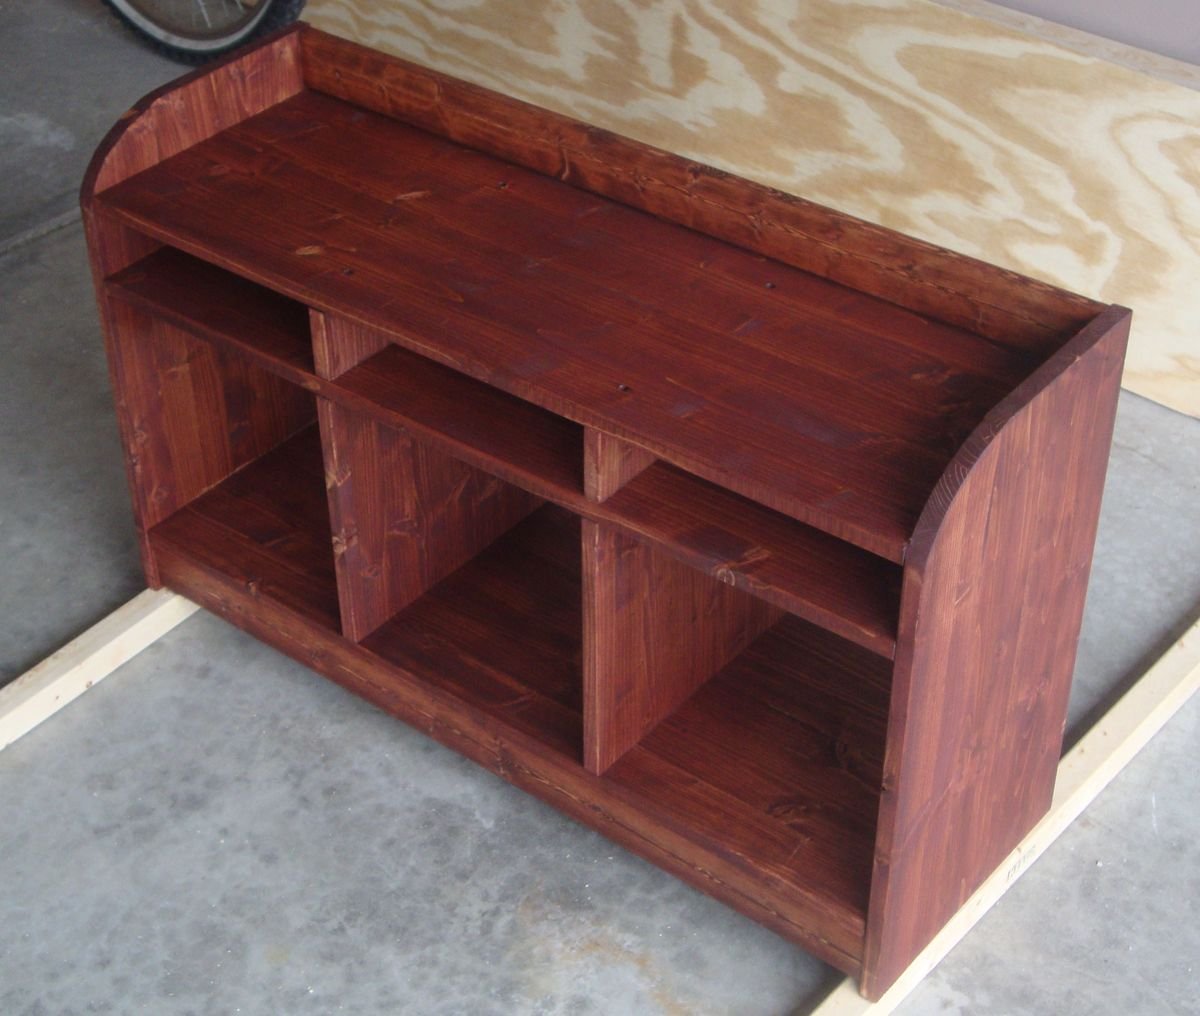
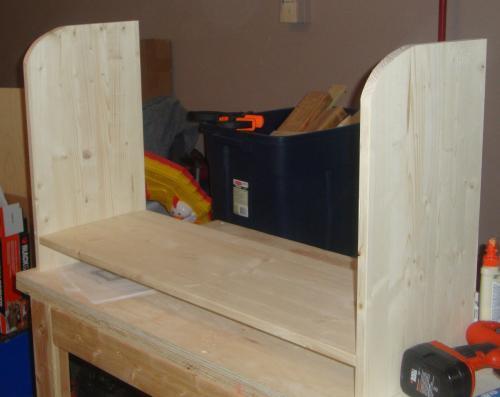
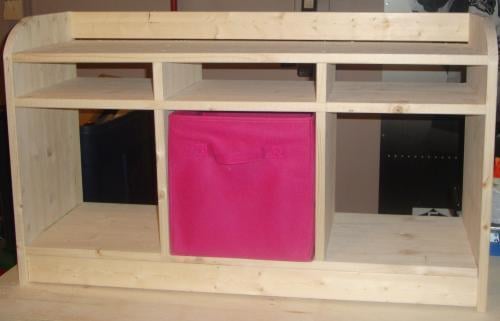
This was a very fun project to work on. One of my first ones, I chose this to replace the store bought cubby book shelf in my daughters room with something she can sit on as well as use for storage.
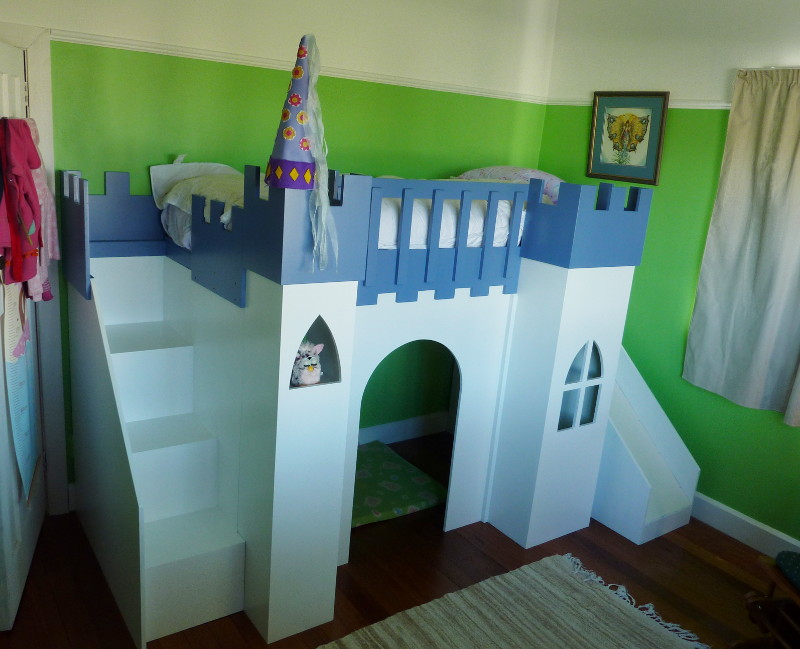
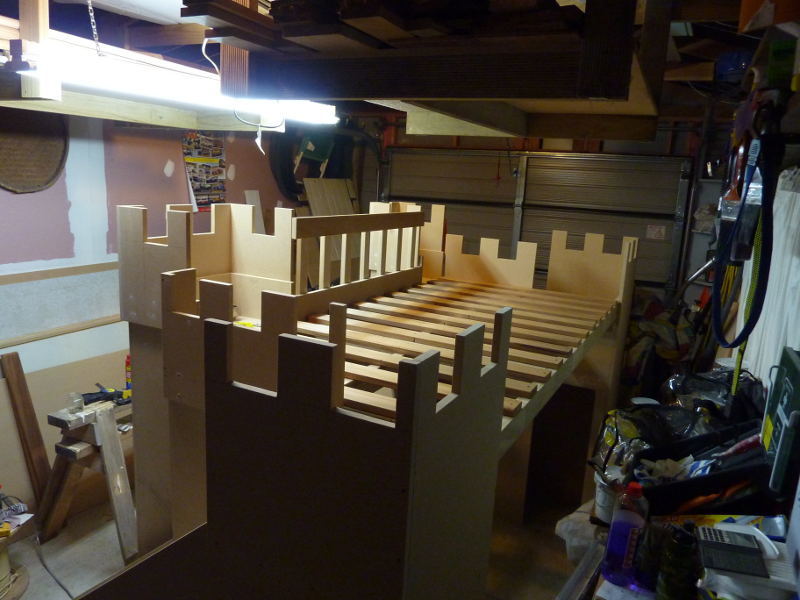
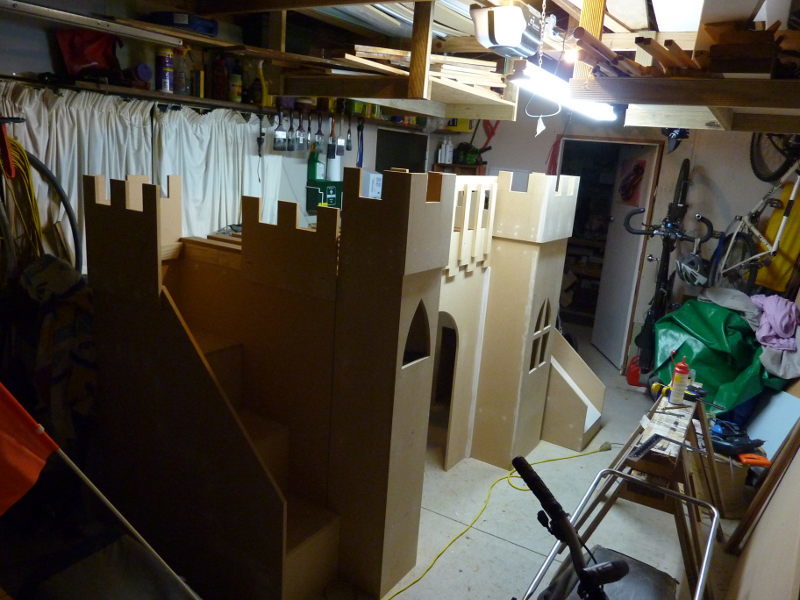
A big thanks to FSMumford for drawing this in Sketchup. I had to re-draw it to take into account metric wood dimensions and bed sizes here in NZ, and also to remove a foot or so from the length.
We just gave it to my daughter today, and already I need to make some modifications. I immediately put some vertical grab rails at the top of the steps and slide. The steps are too big for a toddler (she's 3 today) and I didn't take into account how thick a pillow top mattress is! I really needed to make the end guards higher. In fact, were I to make it again, I'd probably make the towers taller and lower the height of the bed by 8-12 inches. While this would lower interior room, it might make the steps a more reasonable height for a littlie. If you're building for a 5 or 6 year old, this may not be an issue. Also, it would make the angle of the slide shallower (it's a bit steep, I reckon). I used 7 sheets of 16mm MDF but if I'd laid them out like FSMumford did in her plans I would have used less. Our (one car) garage is too small and the whole build process, including painting, was a royal pain in the bum. Fun, but a pain. Speaking of painting, next time (riiiiight) I'd try to paint as much as possible before assembling. I built mine in modules but even so it's hard to get a nice coat of paint on the insides of things. Edges of MDF need to be painted and sanded at least twice to look nice. Don't underestimate the time needed to get a good finish - I spent a third of my build time finishing (mostly, again, due to limited space). A narrow foam roller is great for cutting in but doesn't seem to get enough paint on to cover well on larger areas. In places I have three coats and can still see my pencil marks. I used Dulux Aquanamel.

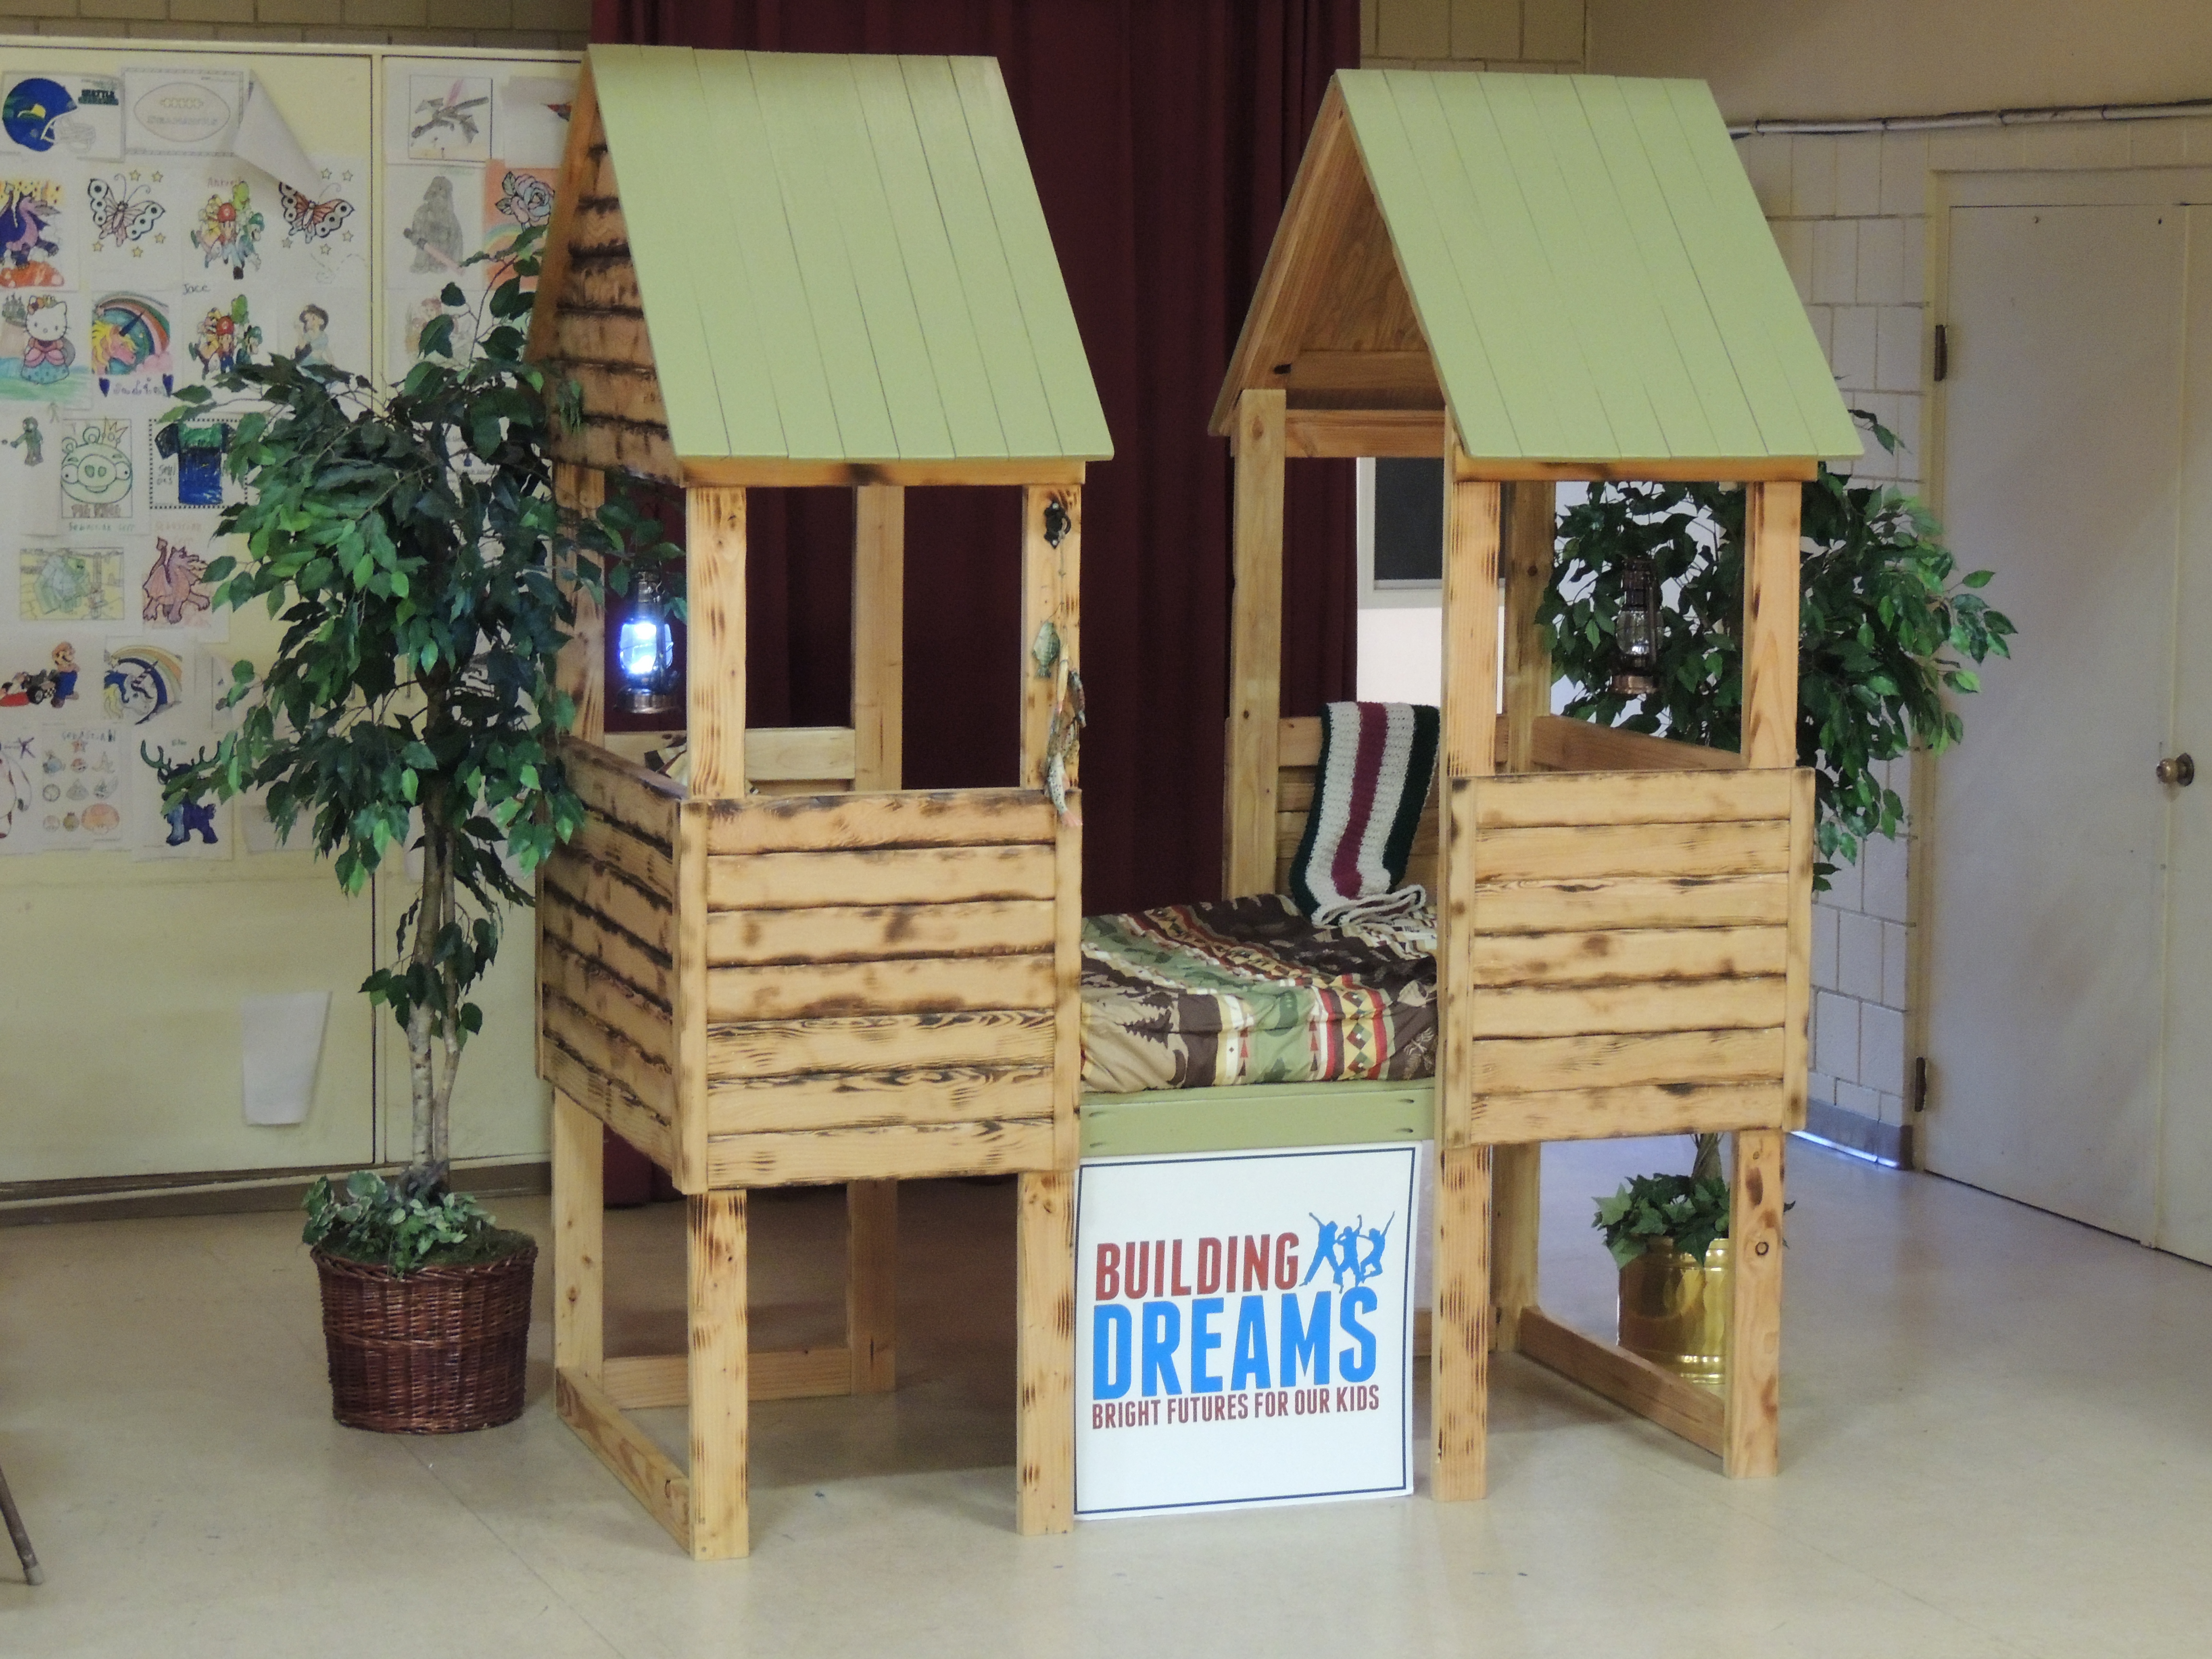
I was looking for something to build for a fundraiser this year and found the Beach Hut Bed plans. I liked the idea of a little house inside a kids room but I wanted to do something a little more rustic. here's what I came up with!!!
The shopping list and cut list is pretty much the same. However, I only used one 1x3 and needed to buy 4 extra 1x4s. I lowered the bed deck about a foot and left half of the walls open for easy parent access. I sorta just winged it as I went. Turened out pretty neat!!!
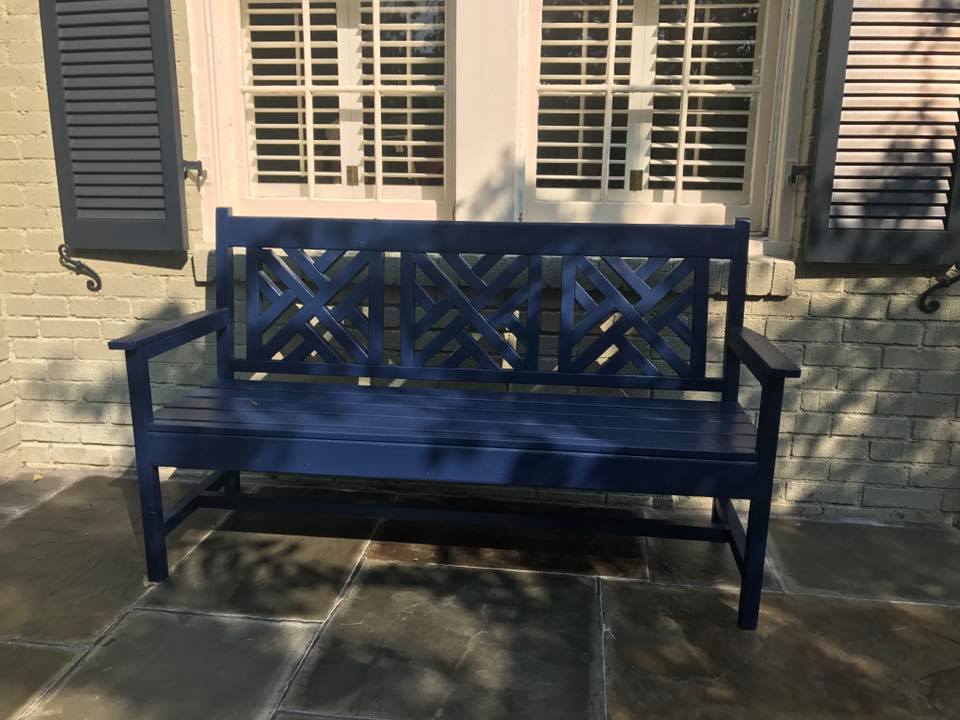
We made our bench 17-1/2 inches longer, just enough for a third panel on the back. We also added 2 braces under the seat slats to give it additional strength. A lot of fun to make! Thanks, Ana!
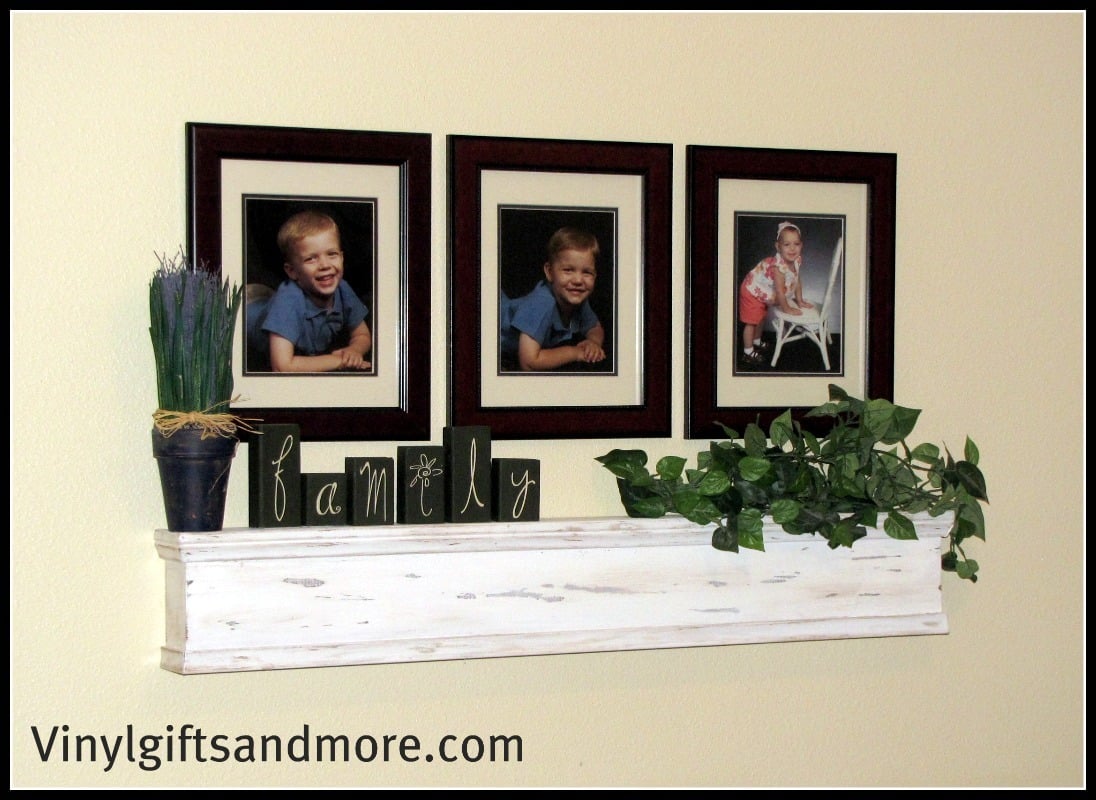
We just bought our first home a few months ago. It is taking me a long time to decorate, because I am more picky about what goes on my walls. I saw this shelf and I knew I had to build it. It was really simple to do. I even did it without my husband, and that is huge for me. I have step by step pictures on how to make this shelf on my blog.
supersaturdayldscrafts.blogspot.com
Ana's Barn Beam Ledges are very simular, but I turned them and added molding to the front.
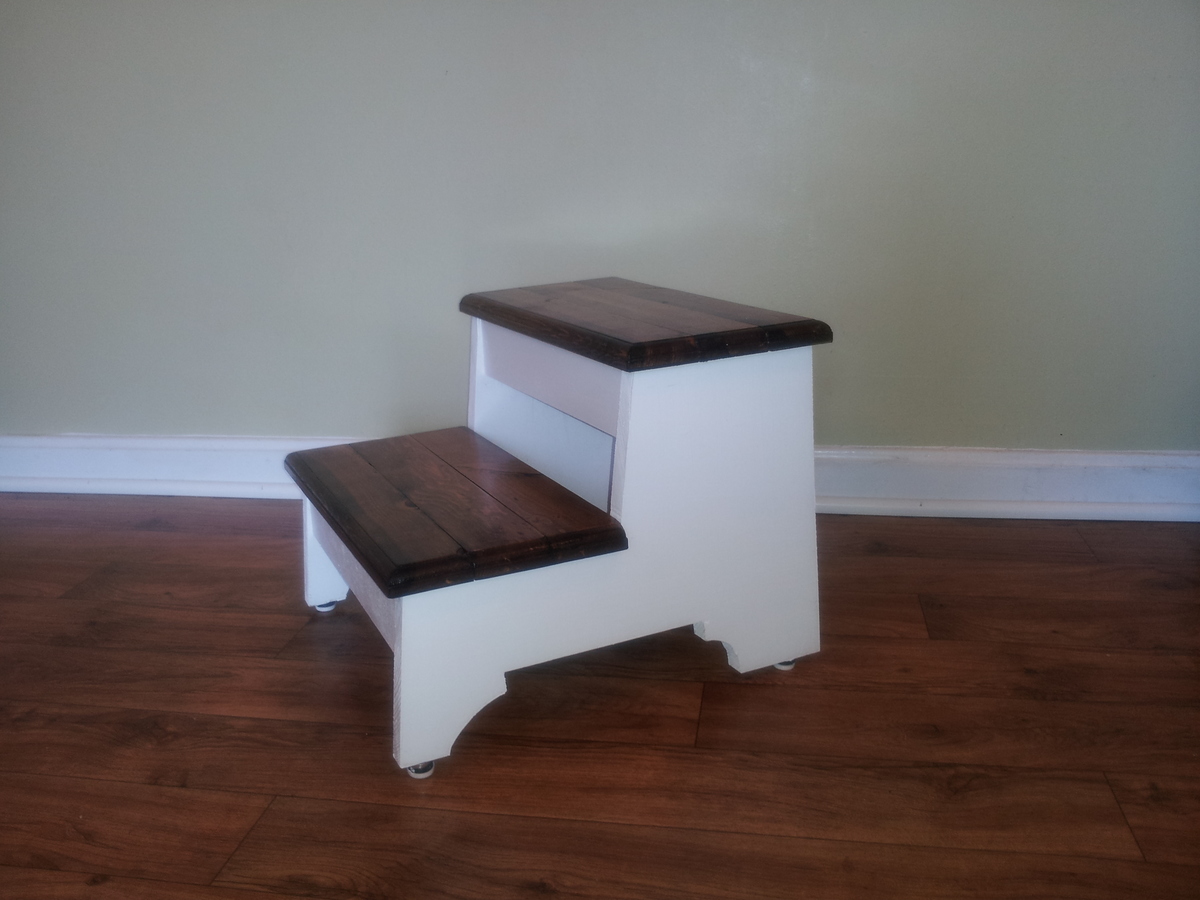
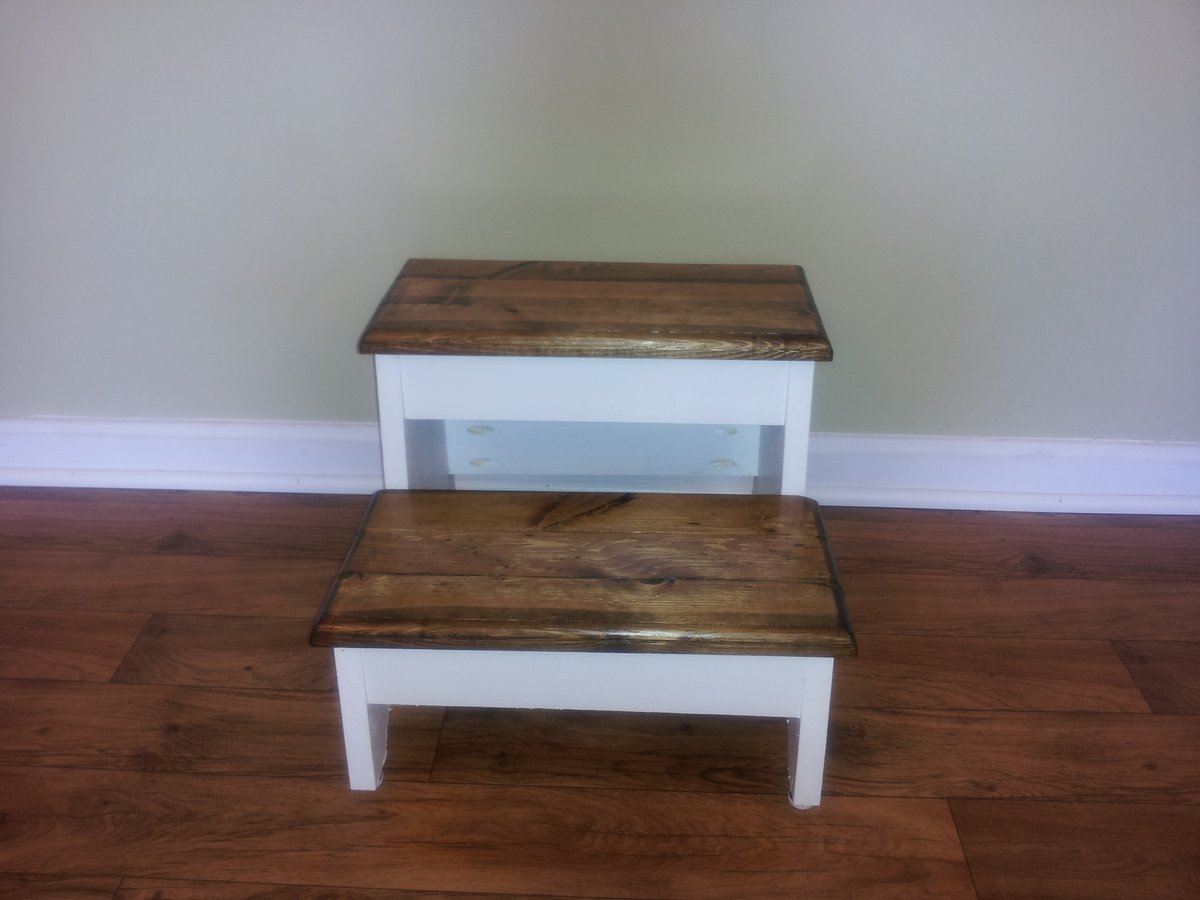
My son is a little short for his age and we have been searching for a stool that he could use to wash his hands by himself. I came across these simple and quick plans for an amazingly, functional stool. I spent about 4 total hours on it, made it from scraps that I already had, it looks great and it hold me too... all 230 lbs.
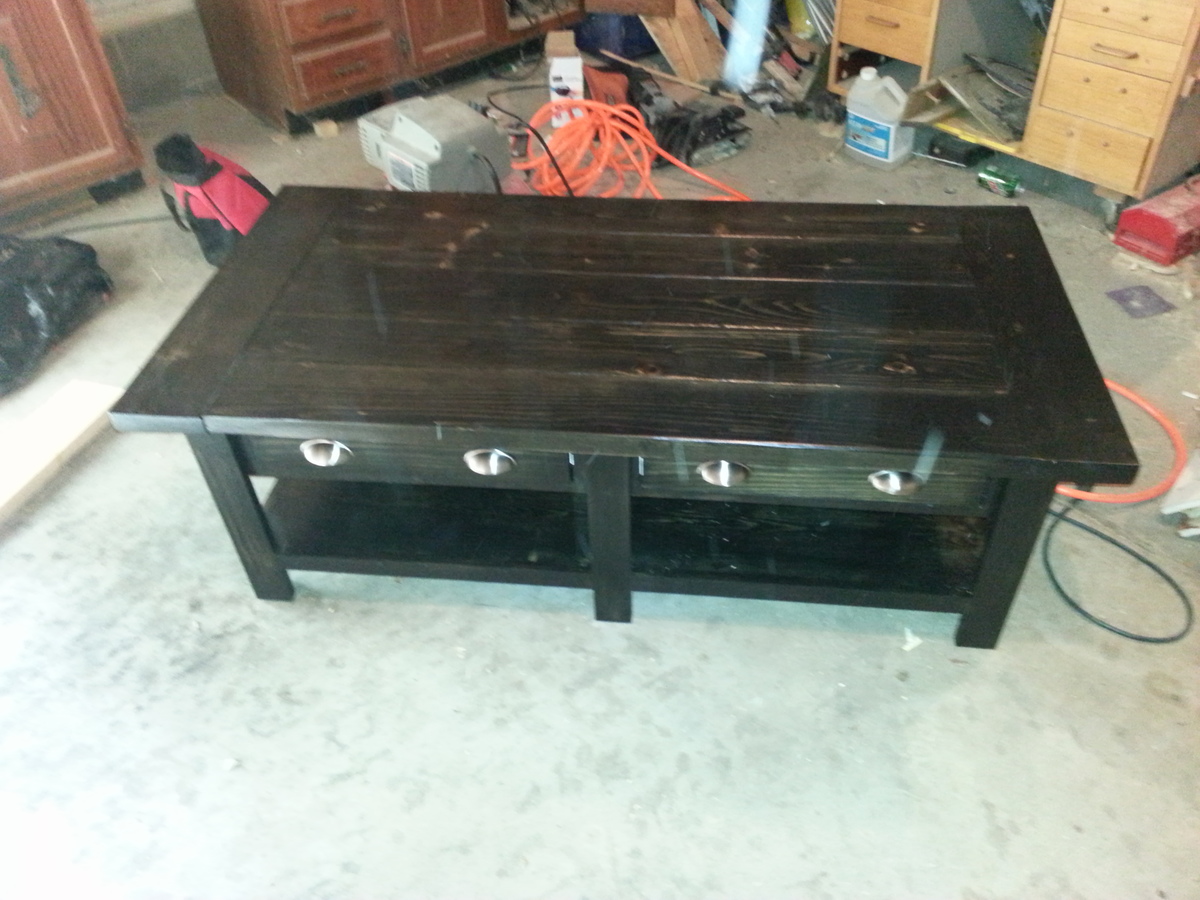
This was one of my first projects. I made it for my daughter who was moving to a new apartment and wanted to replace her college coffee table. It was fairly easy other than keeping everything square so the drawers worked correctly. I finished it with Rust-Oleum Ebony stain and Minwax Satin Poly (3 coats). All the hardware and lumber came from the Orange big box store

These plans were perfect for the small space we had for the kitchen table. Really like how the benches fit under the table too.
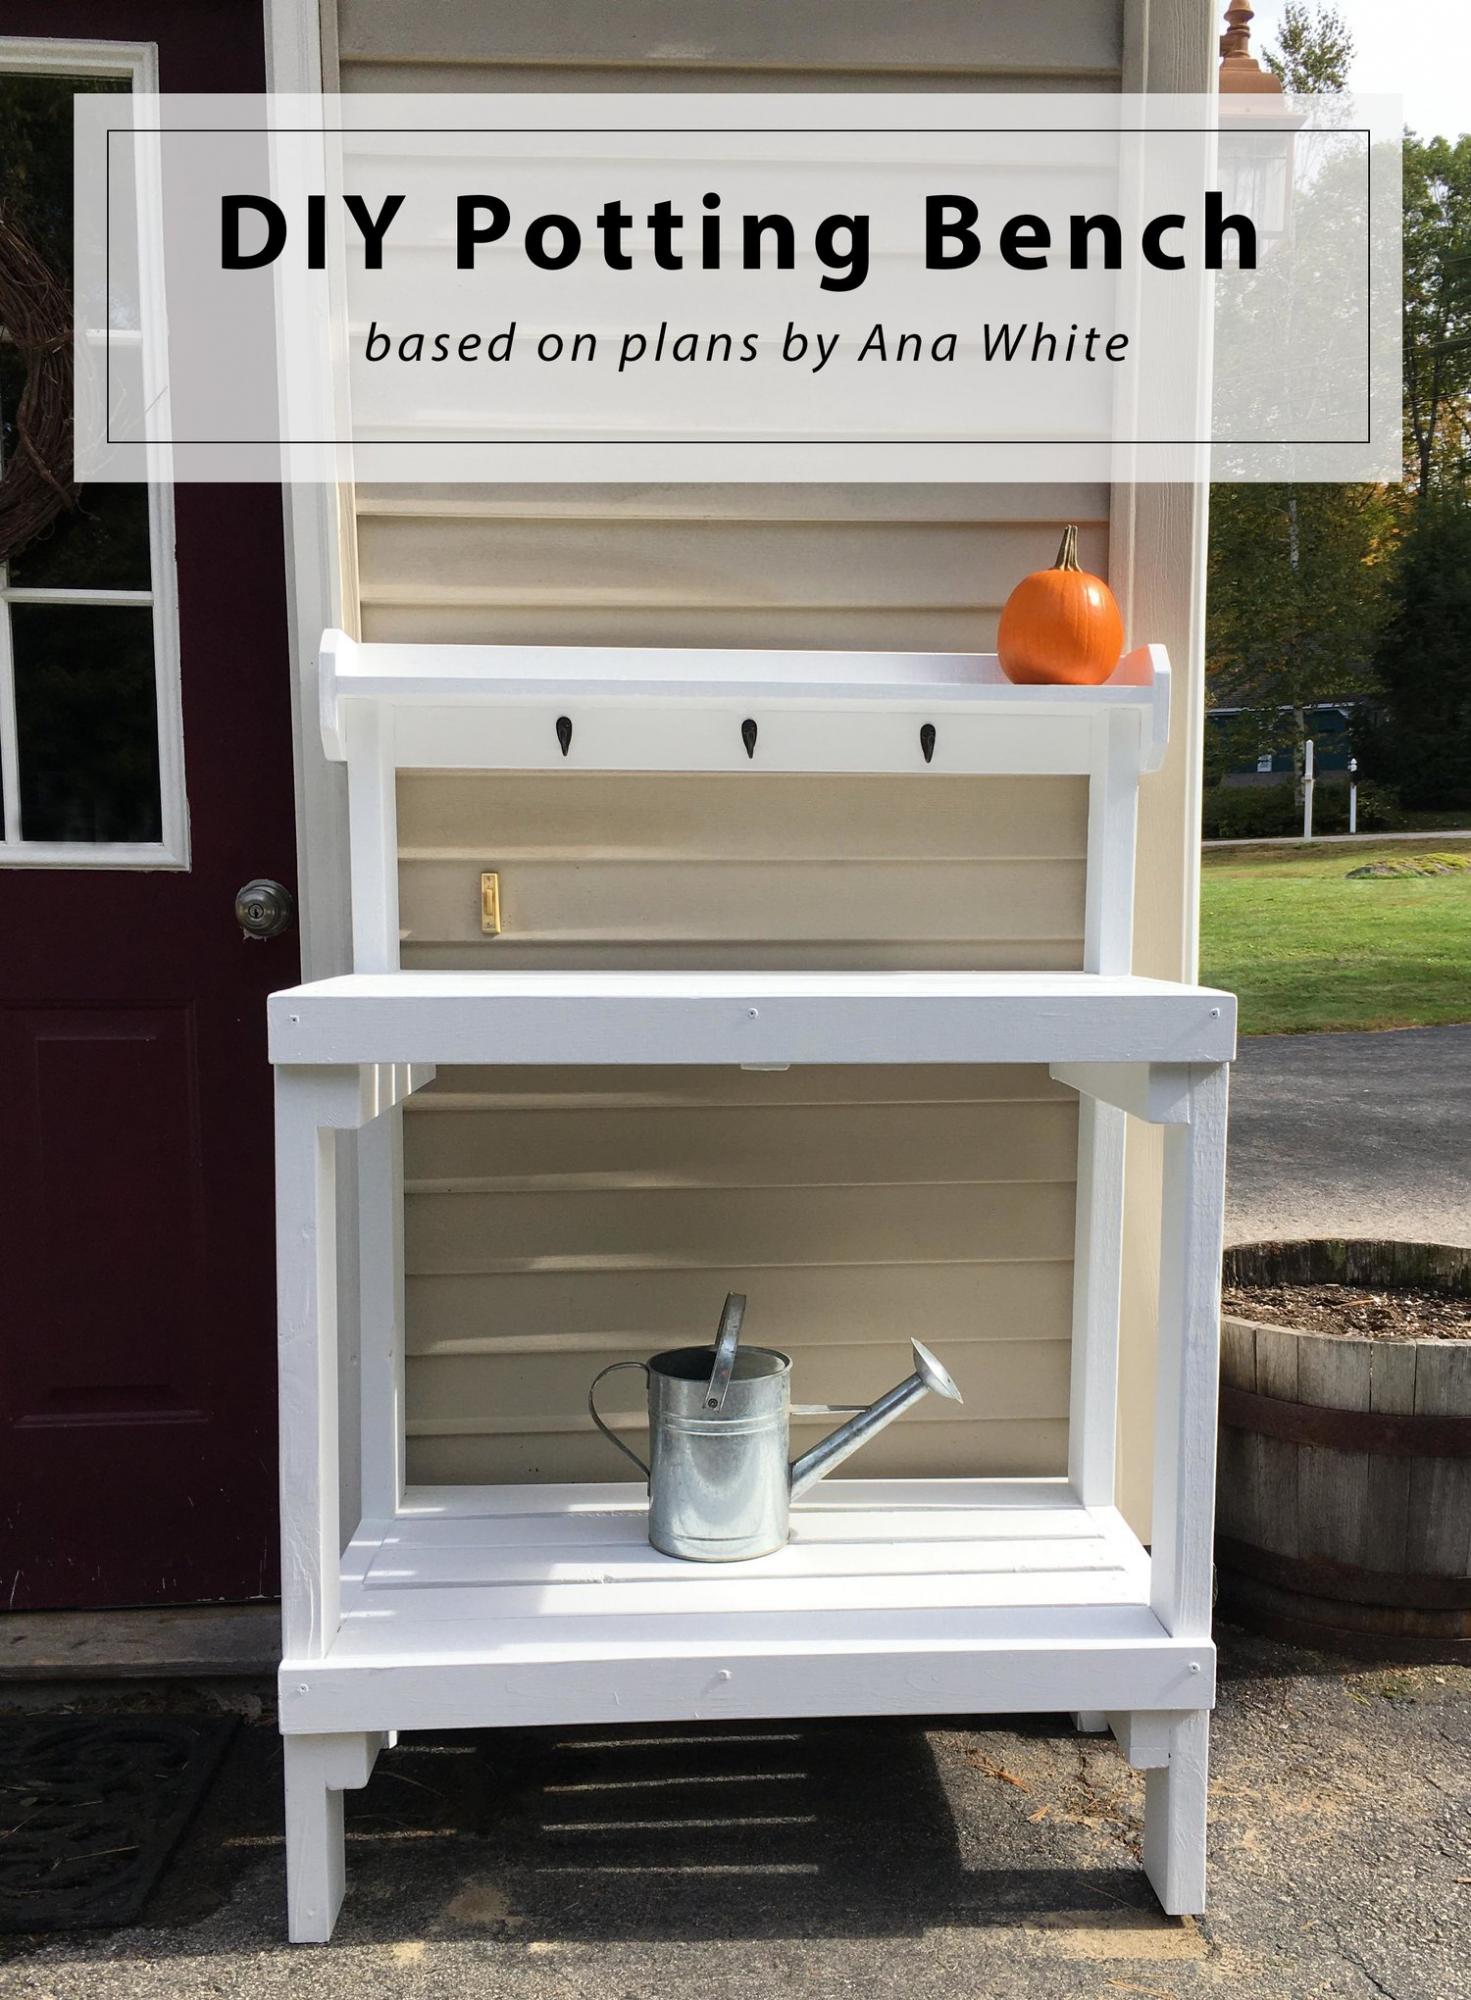
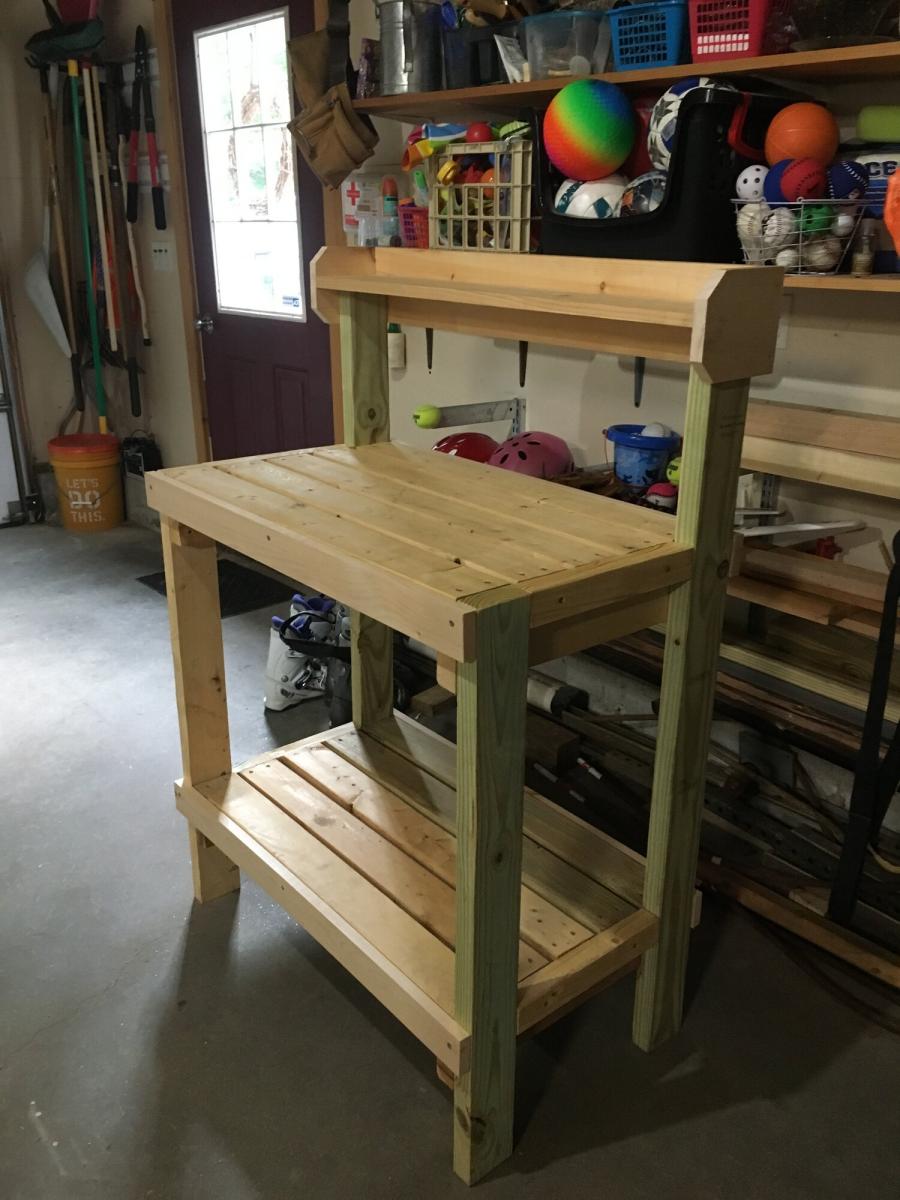
I’ve been wanting a potting bench for a while now - something by the back door to display some decor, use as an outdoor work station, and double as a place for UPS to leave packages. After looking around online and at local stores, I couldn’t find anything that I liked that fit the narrow space - so I did what any #woodworkingmom would do, I decided to build it myself. Please see my blog post for additional photos and lessons learned during this project.
Comments
Ana White Admin
Thu, 10/07/2021 - 06:50
Nice bathroom shelf!
That looks pretty and functional, way to go! Thank you for sharing:)