Distressed Table
![](/sites/default/files/IMG_20170331_175121014_HDR.jpg)
Built this table from the plans. Great table and plans!
This modern farmhouse end table fits my space so well. This was my first project and was completed with glue and nails as I did not have the pocket hole jig initially. I loved this piece so much I made the coordinating coffee table. I would recommend staining/painting prior to assembly.
1st the bookshelf, now the nightstands, soon the bed, then.....my sons toddler room is DONE!
Fri, 03/01/2013 - 07:37
Looks great! How did the A.S. paint do on unfinished wood? Did you prime before hand?
Sat, 03/02/2013 - 08:49
It did fine. I did no prep work before I painted. Since the cans are almost $40 per can I've tried to stretch the paint as far as possible so there is only a thin layer on there. I gave it a lite...and I mean lite sanding after it dried. Since it was such a thin layer you can see some of the wood under but it sort of gives it a antique look. I also added wax (not the A.S. wax) to protect it.
Next time I will be making my own chalk paint for half the cost.
Sat, 04/06/2013 - 05:33
I just wanted to make a note that these night stands are VERY big, actually to the point of looking odd next to the bed I made. I know I could have looked at the dems before hand but never imagined they were this big. I still love them, I just wish they were a bit smaller.
I will be posting the bed I made and the night stands will be in the pic as well so you can see and let me know your thoughts.
My wife and I just finished our version of the Rustic X Console. We had never built a piece of furniture before and after buying the tools could have probably purchased one for the same price, but it was worth it. We added the barn door hardware and made a door to mimic the X design of the ends. Also added back pieces to hide the Wires. Now on to the coffee tabes to match. Fun project. The finish is grey and walnut stain wiped on together and a gray wash over that.
Just modified the size to fit a townhome bedroom. Love that even as a two year old, she is able to climb all over these and not damage it in the least. Though the white walls are now crayon decorated.
I wanted a table that we saw on DIY Pete and it led us to Ana White's plans. It took us almost a month to build, our first build and work/kids/design changes, but it finally has come together.. We did make it longer and wider because we wanted to be able to host family gatherings comfortably. I am in love with this table and how it turned out.. The directions were easy to follow, unless you tweaked the measurements but still, it was a no brainer! Thanks for the fun project!
Ana White 4x4 truss table with matching bench.
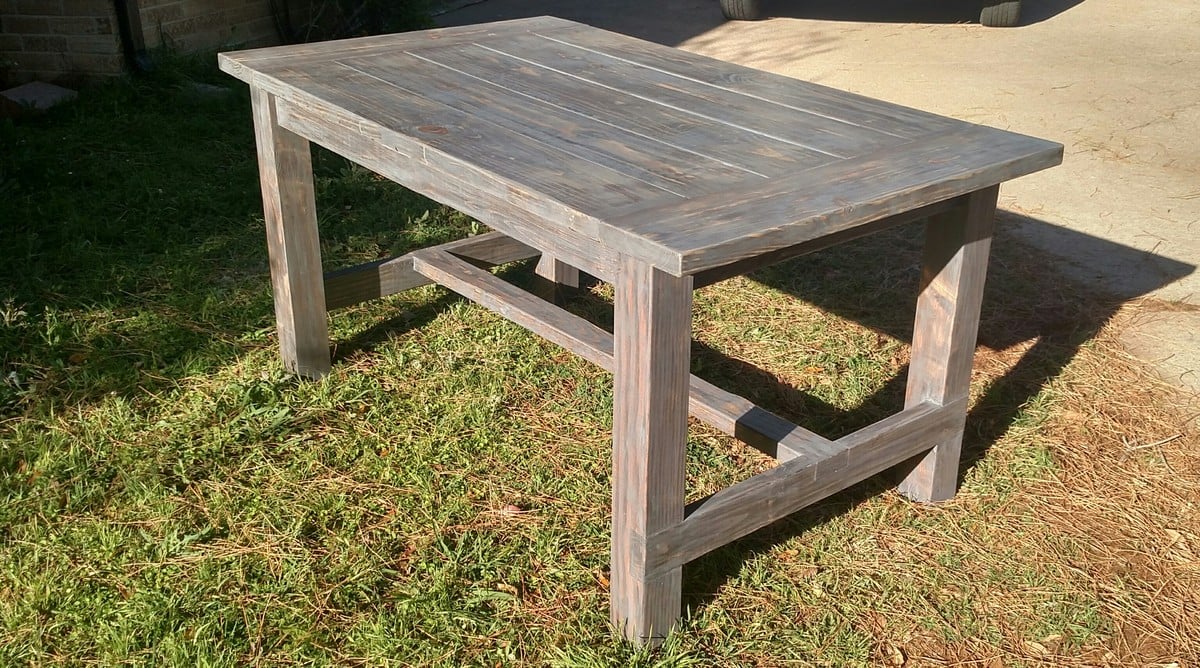
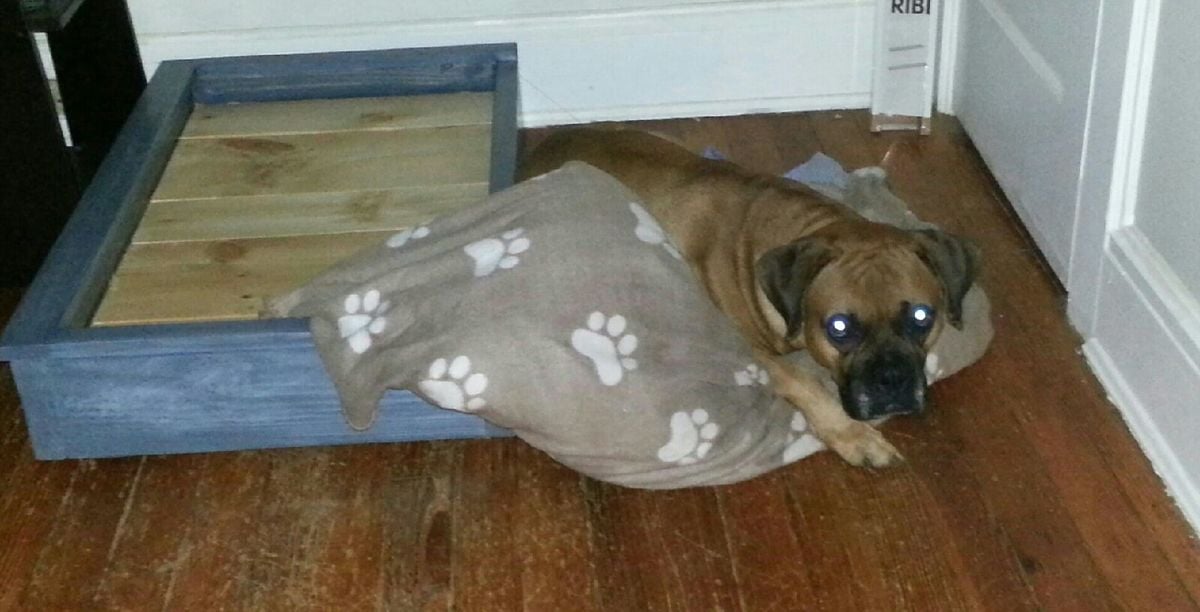
This is the first project that I made using the Kreg Jig. I was a little intimidated at first so with the scraps I had left over after making all my cuts (and a few scraps from other projects) I started with the dog bed so I could get use to making pocket holes etc. That project went great the only modification I made was I skipped the headboard, made the legs lower and the left the molding off one side. It looks great but as you can see in the pic...he still prefers the floor and his pillow.
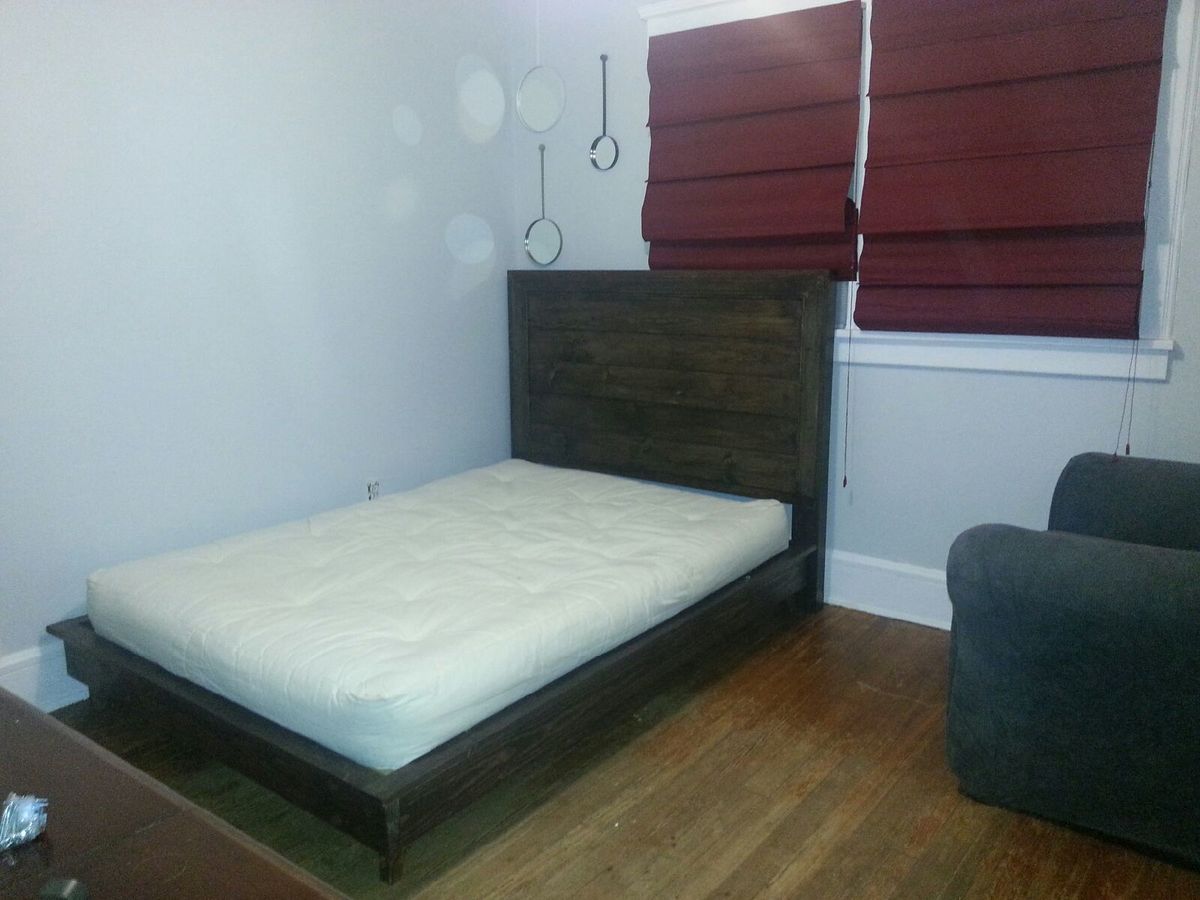
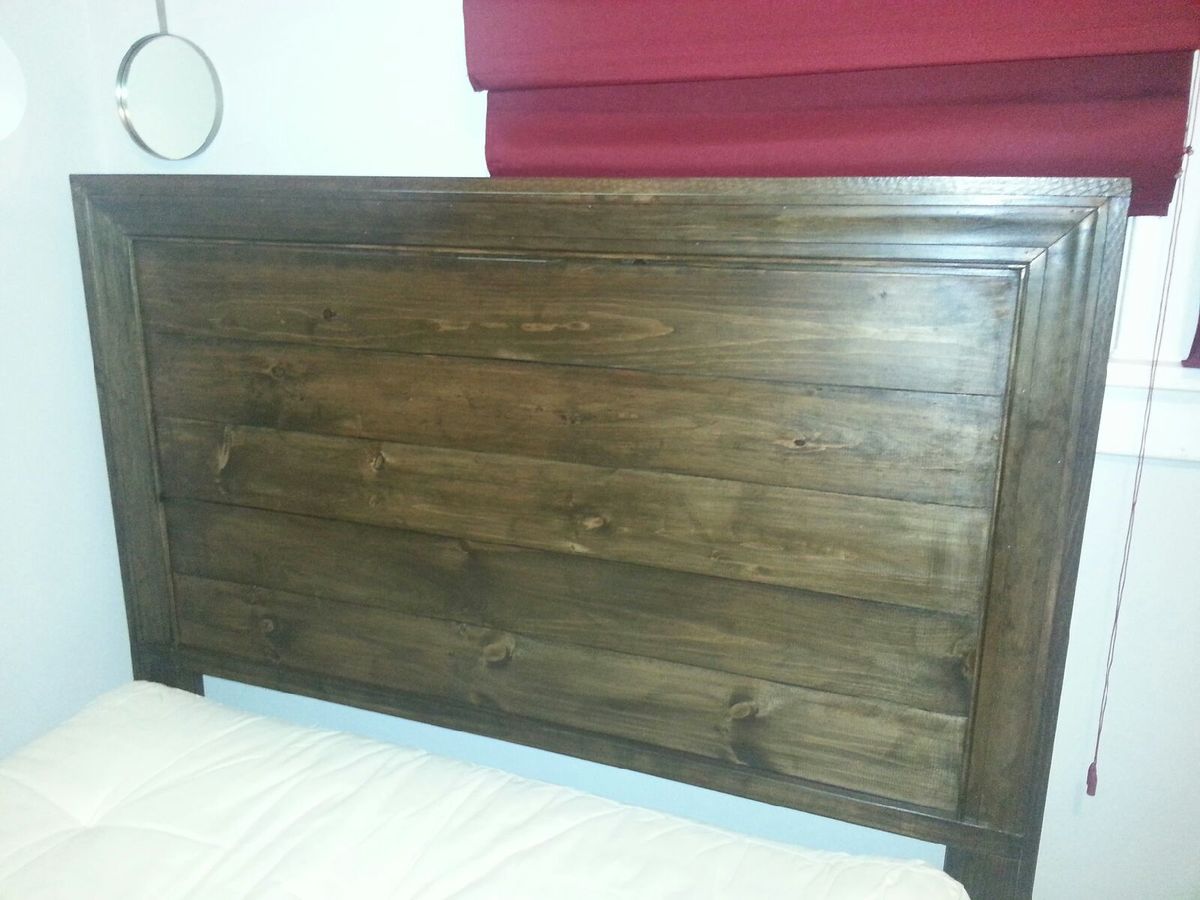
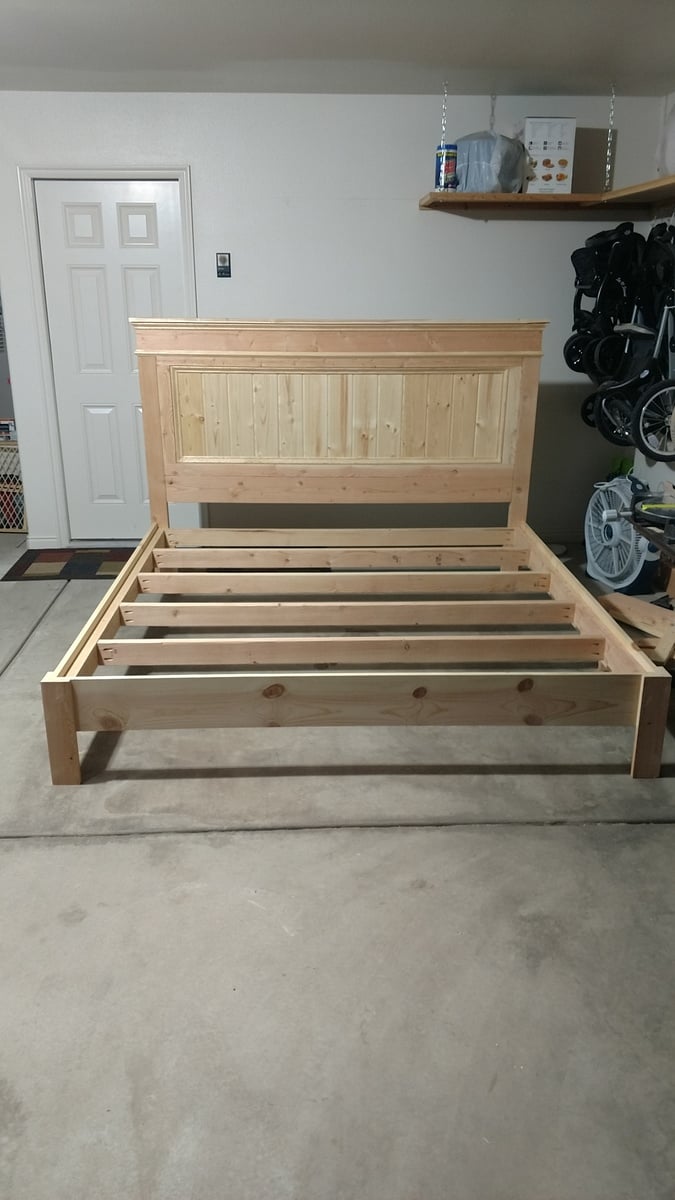
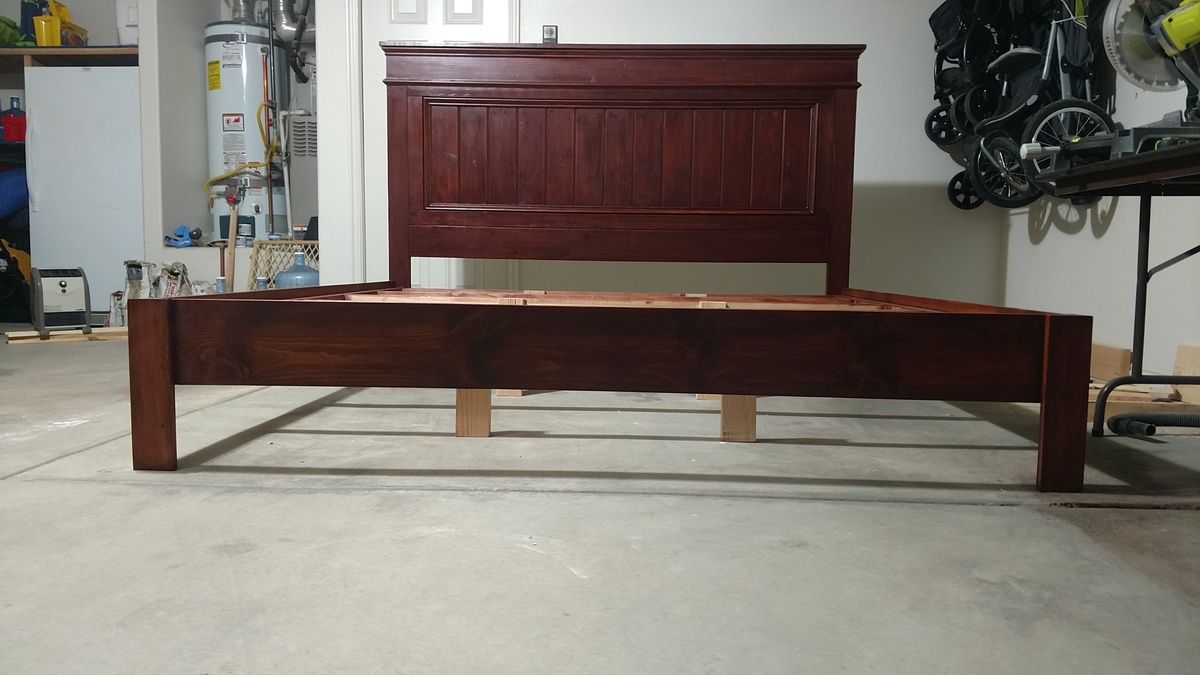
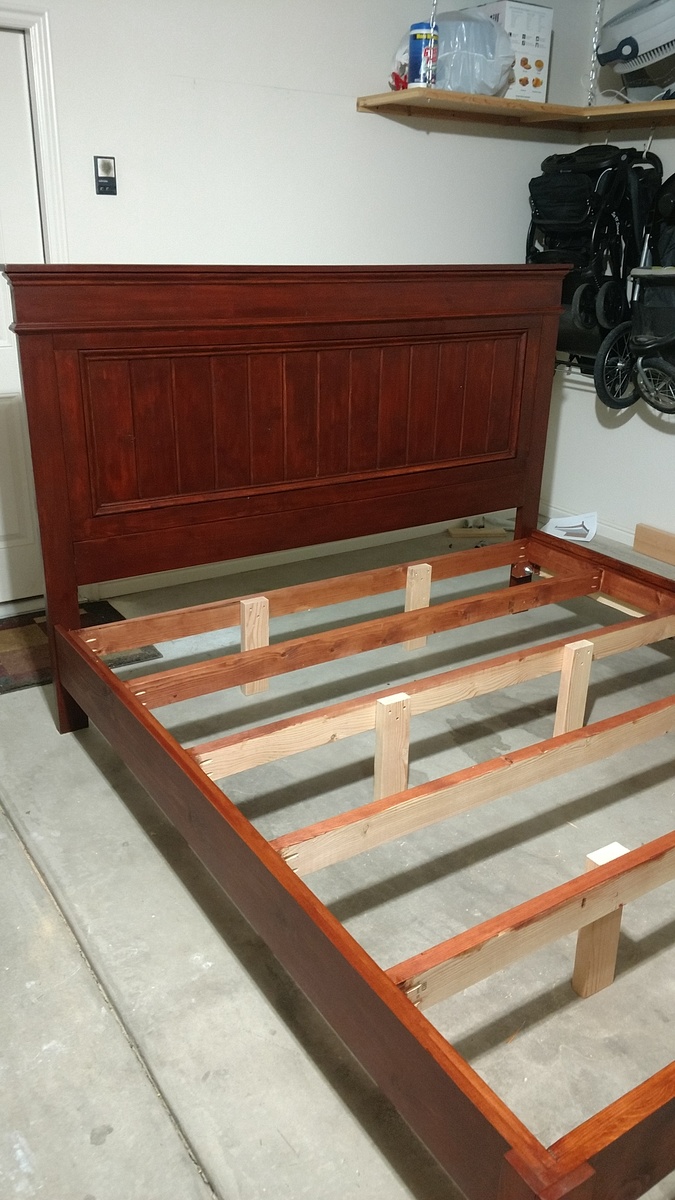
Making the actual bed I learned so much...#1) Its super important to have straight boards...A few of my boards were warped and it made it a bit difficult to join and required a lot of sanding. The directions were very straight forward and easy to follow the only modification I made was to the headboard which I made only 48 inches high so it wouldn't block the window so much and wouldn't over power the room. Also to attach the headboard tot he bed I used surface mount brackets from Rockler which make the headboard easy to remove and very sturdy.
I love it...had our first guest sleep on it last week and they loved how sturdy and comfortable it was.
Thank you Ana for the great plan and this wonderful site...can't wait to start my next project.
My Father built this amazing dollhouse for my daughter as a Christmas present. I loved the tall open look of this design and knew it would be perfect for my four year old! Instead of leaving the doorways open, we added dollhouse windows and doors to make this "bookcase" more into an actual dollhouse. The adorable mice and furniture are from the Danish toy company, Maileg. We hid the dollhouse in the home office on Christmas morning and had my daughter find it as her last present. She fell in love with it and immediately started playing! She has one talented Grandpa and I am so glad to have something like this in our family to be cherished for generations.
Sun, 01/01/2017 - 09:53
I really like what you do, this job is beautiful, congratulations. Happy 2017
These benches were for my Eagle Scout project. They will be used in the IB Garden at my school. The group creating the garden were very pleased with how these benches turned out. Thanks for the plans!
This is the most functional piece of furniture ever designed! I included a shelf on the shredder/recycle bin side to create a shoe cubby which, effectively, took care of the biggest clutter culprits in our entry.
New tryde side table to match a tryde coffee table I recently built. I love the simplicity of the design. Wife likes it too!
The well-laid out plans from this site made it a pleasure to build. I used pine for everything and stained with Rust-Oleum Early American. Also, I did three coats of Minwax Clear Satin Polycrylic. My wife and I decided to use 8 hooks because we have two young children who could not reach the top row of hooks.
Mon, 03/11/2013 - 13:42
This is awesome. There is something very fulfilling to have something this nice in your house that you made. Congrats
This was a great project to do. The hardest part was staining.
This was a fun project. Easy instructions great piece of furniture. It is very sturdy. I'm a beginner at DIY wood projects so this was a rewarding project.
I built the kitchen as a Christmas present. I still need to put the oven door on but still love how it all came out. I just started a blog and as I was posting my latest blog post I realized how obsessed I am with all of your plans!! Thanks so much :) I'm not sure how long it took to build because I only get to work in the garage an hour or two a few nights a week.
This was my first build. I followed Ana's plans. I used Eastern White Pine and applied a pre-stain because pine almost never stains evenly.
I finished the project with a white wash and then a quick water based stain that I wiped off almost immediately. I ended up with a pale tan/grey color with a very subtle peachy color that peeks through in a few places. It doesn't show in the photo very well, but the colors gave me a lot of depth without a ton of wood grain showing.
I made this table in one weekend with my 11 year old son. I was able to teach him how to use the Kreg jig and how to safely use the miter saw. It was a great bonding experience. And, on Monday it was so nice that all of his teachers at school were so impressed by his ability to make such a beautiful piece of furniture. We had seen similar custom-built tables for $2,000 and we made this for less than $150. Thank you so much for the plans and your site.
Katrina O'Con
Natchitoches, Louisiana