Community Brag Posts
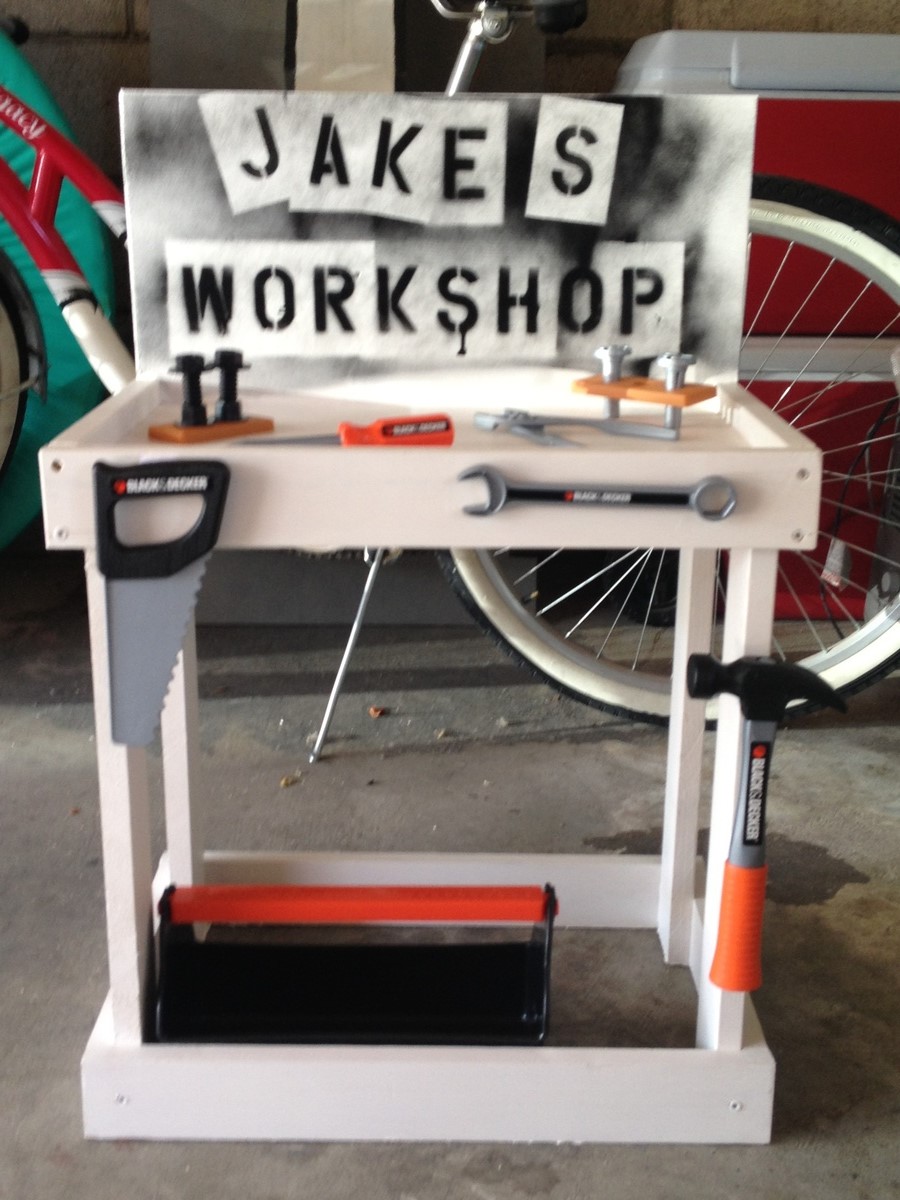
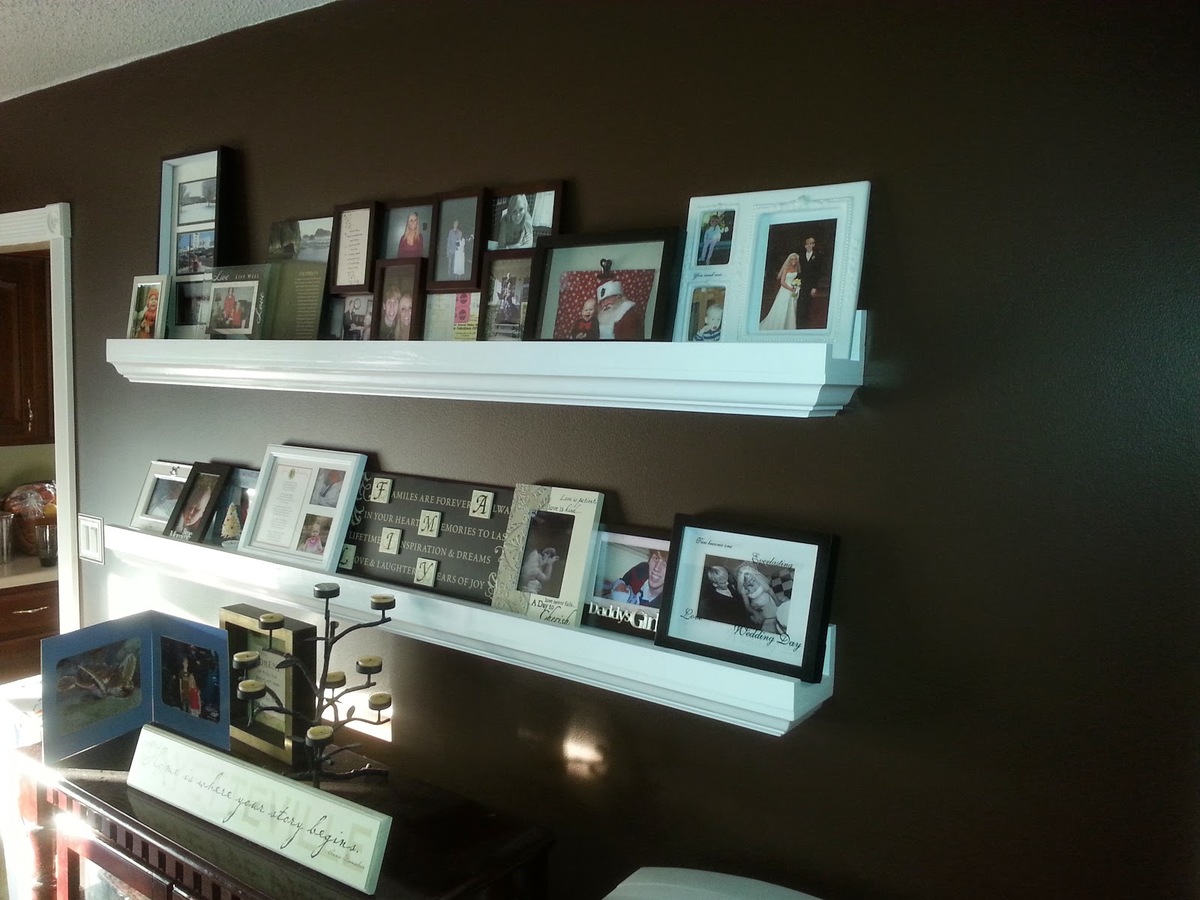
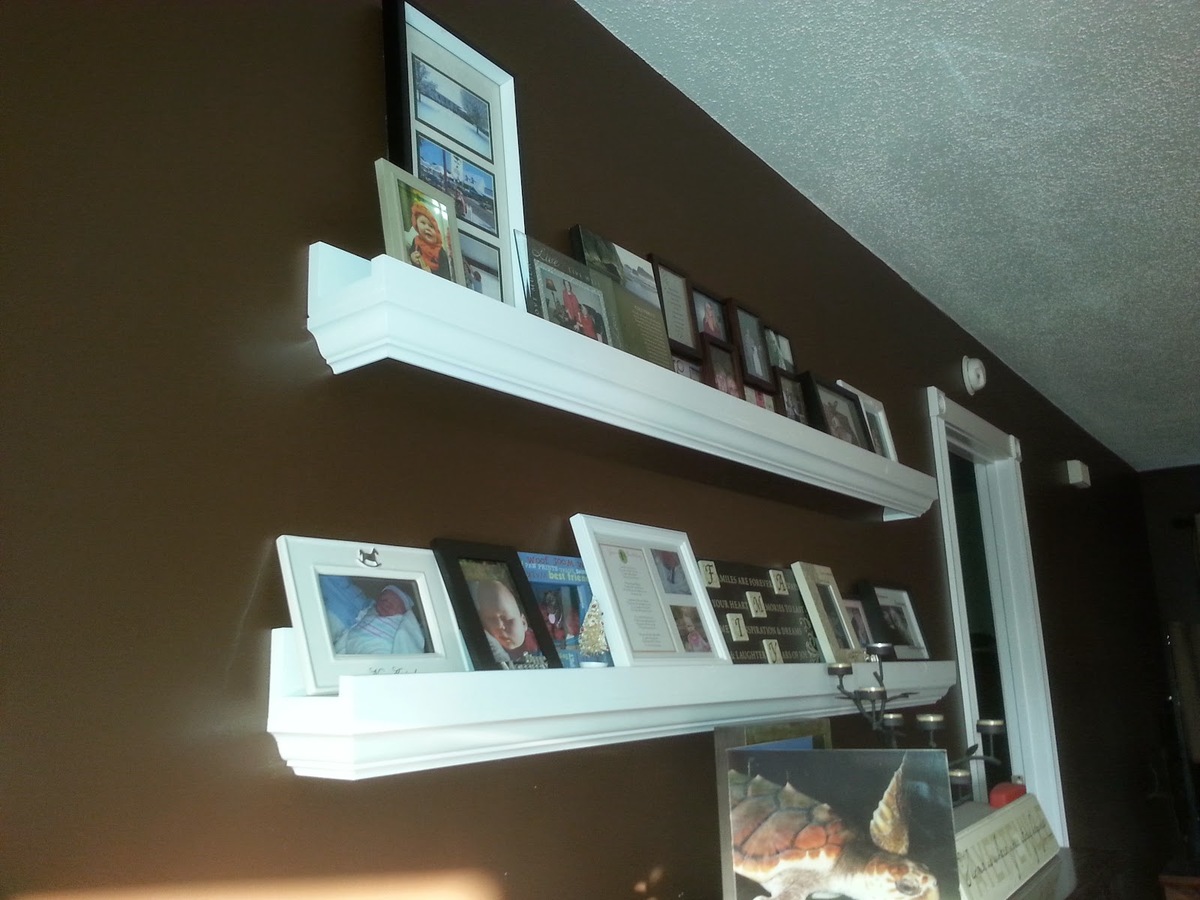
Photo ledges (with crown molding)
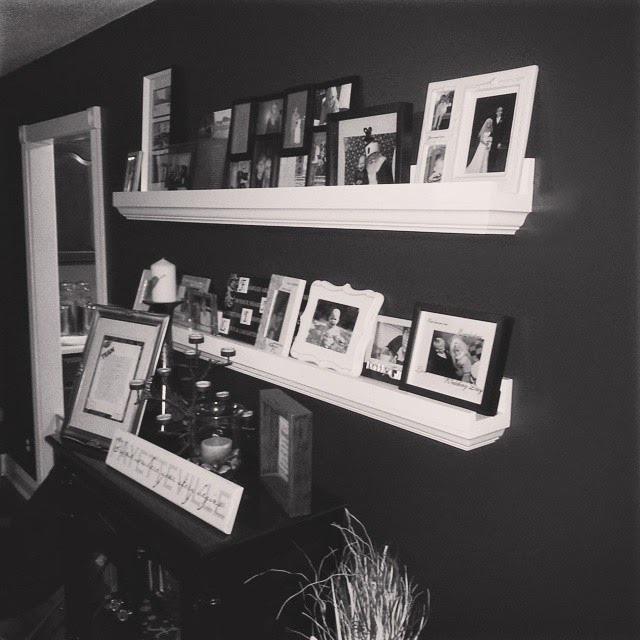
This is a set of photo ledges built for a friend!
Website article: http://www.lanebroswoodshop.com/2015/02/photo-ledges.html
Built from Plan(s)
Estimated Cost
$50 per
Estimated Time Investment
Day Project (6-9 Hours)
Finish Used
High Gloss White
Recommended Skill Level
Beginner
Comments

One arm sectional with table from scraps
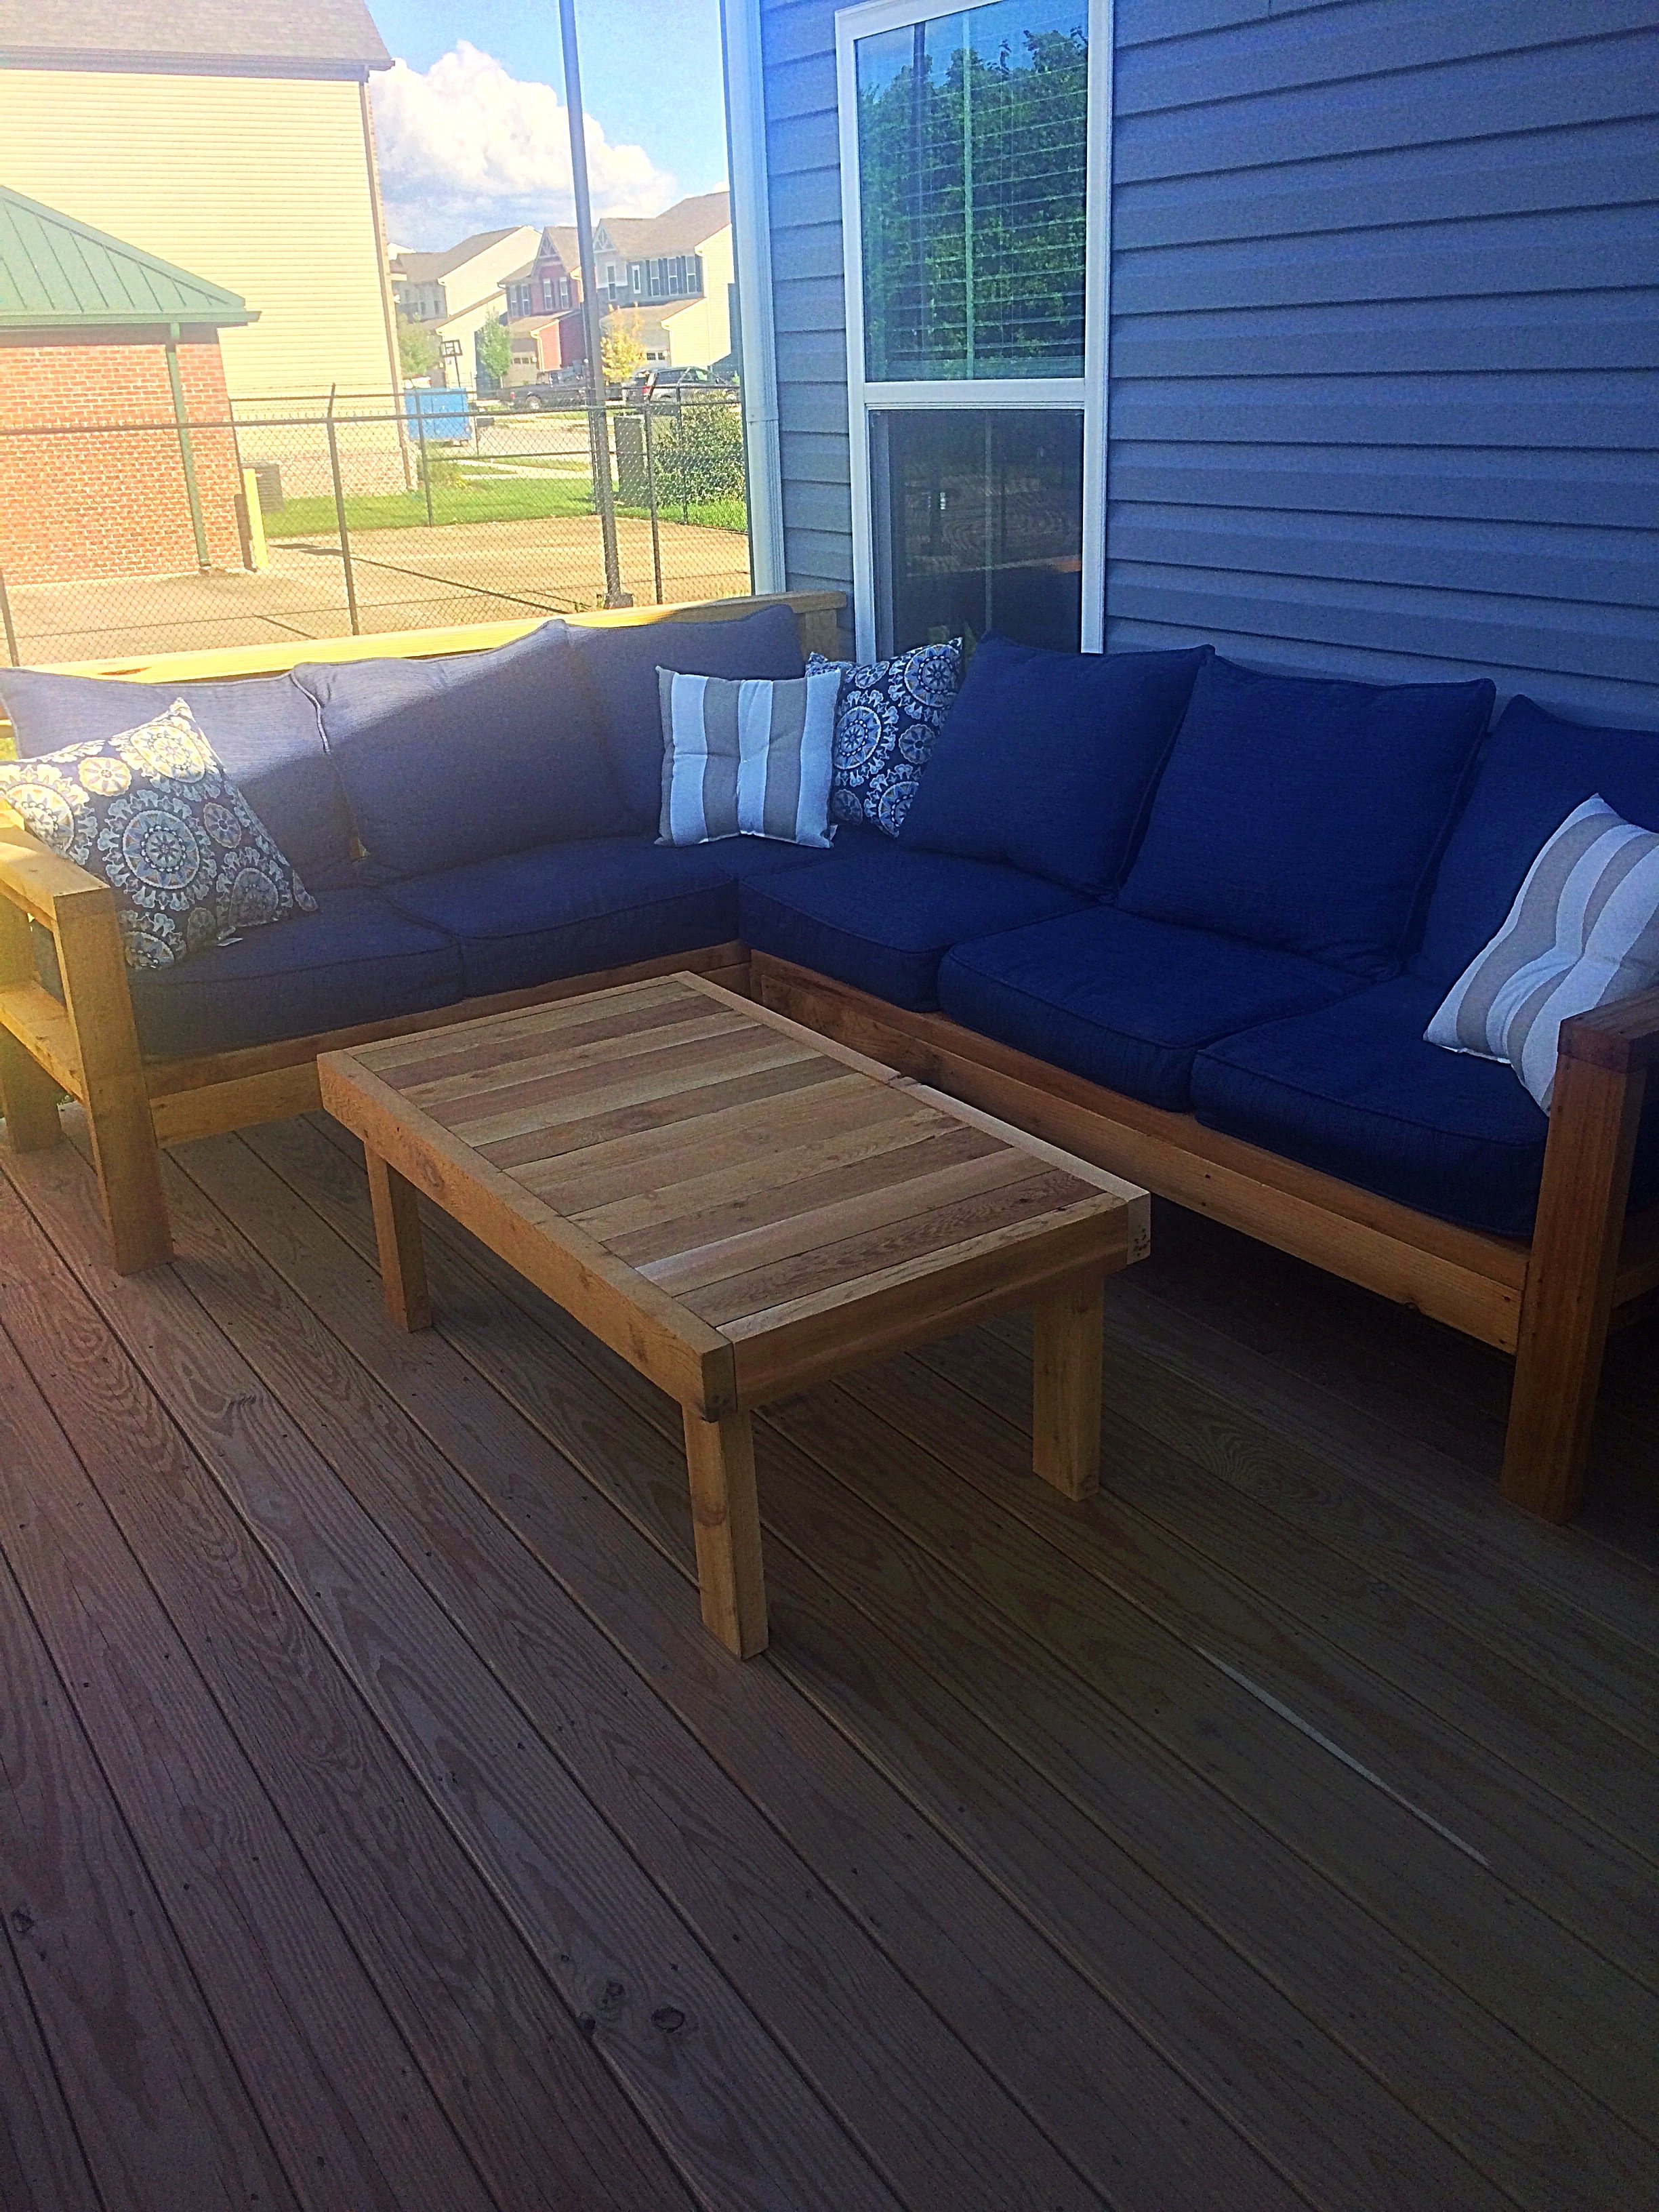
We built the one arm sectional but 8 ft cedar was all we could buy. So with the scraps left over we built the coffee table to match. Couldn't be happier with it.
Built from Plan(s)
Estimated Cost
$250 without cushions
Estimated Time Investment
Weekend Project (10-20 Hours)
Finish Used
None
Recommended Skill Level
Beginner
entry way shelf
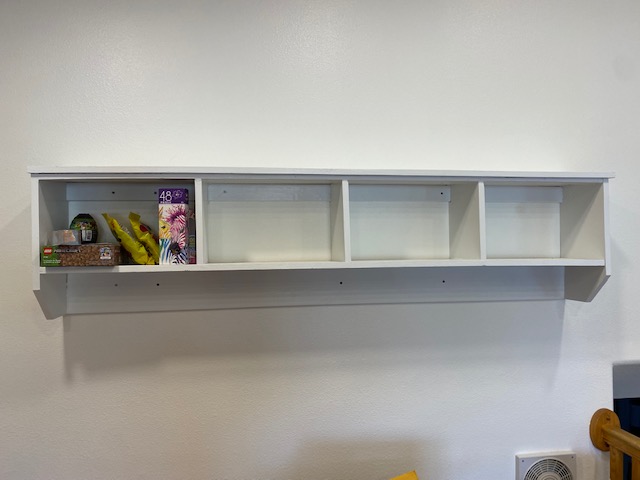
Hey Ana! I just finished the Entry Way Shelf and will be staring on the bench soon. I love your projects and especially that they are free! I'm so cheap I have a hard time parting w/ my money when I don't know something will work out, but yours always do!! I can follow a blueprint and create things based on a model but I don't have the creativity to come up w/ them myself, I'm sure glad you can! LOL! Thanks SOOOO much for sharing and I continue to look forward to the next thing!
Thanks again!
Patrick
Built from Plan(s)
Comments
Amazing Farm Table and Benches
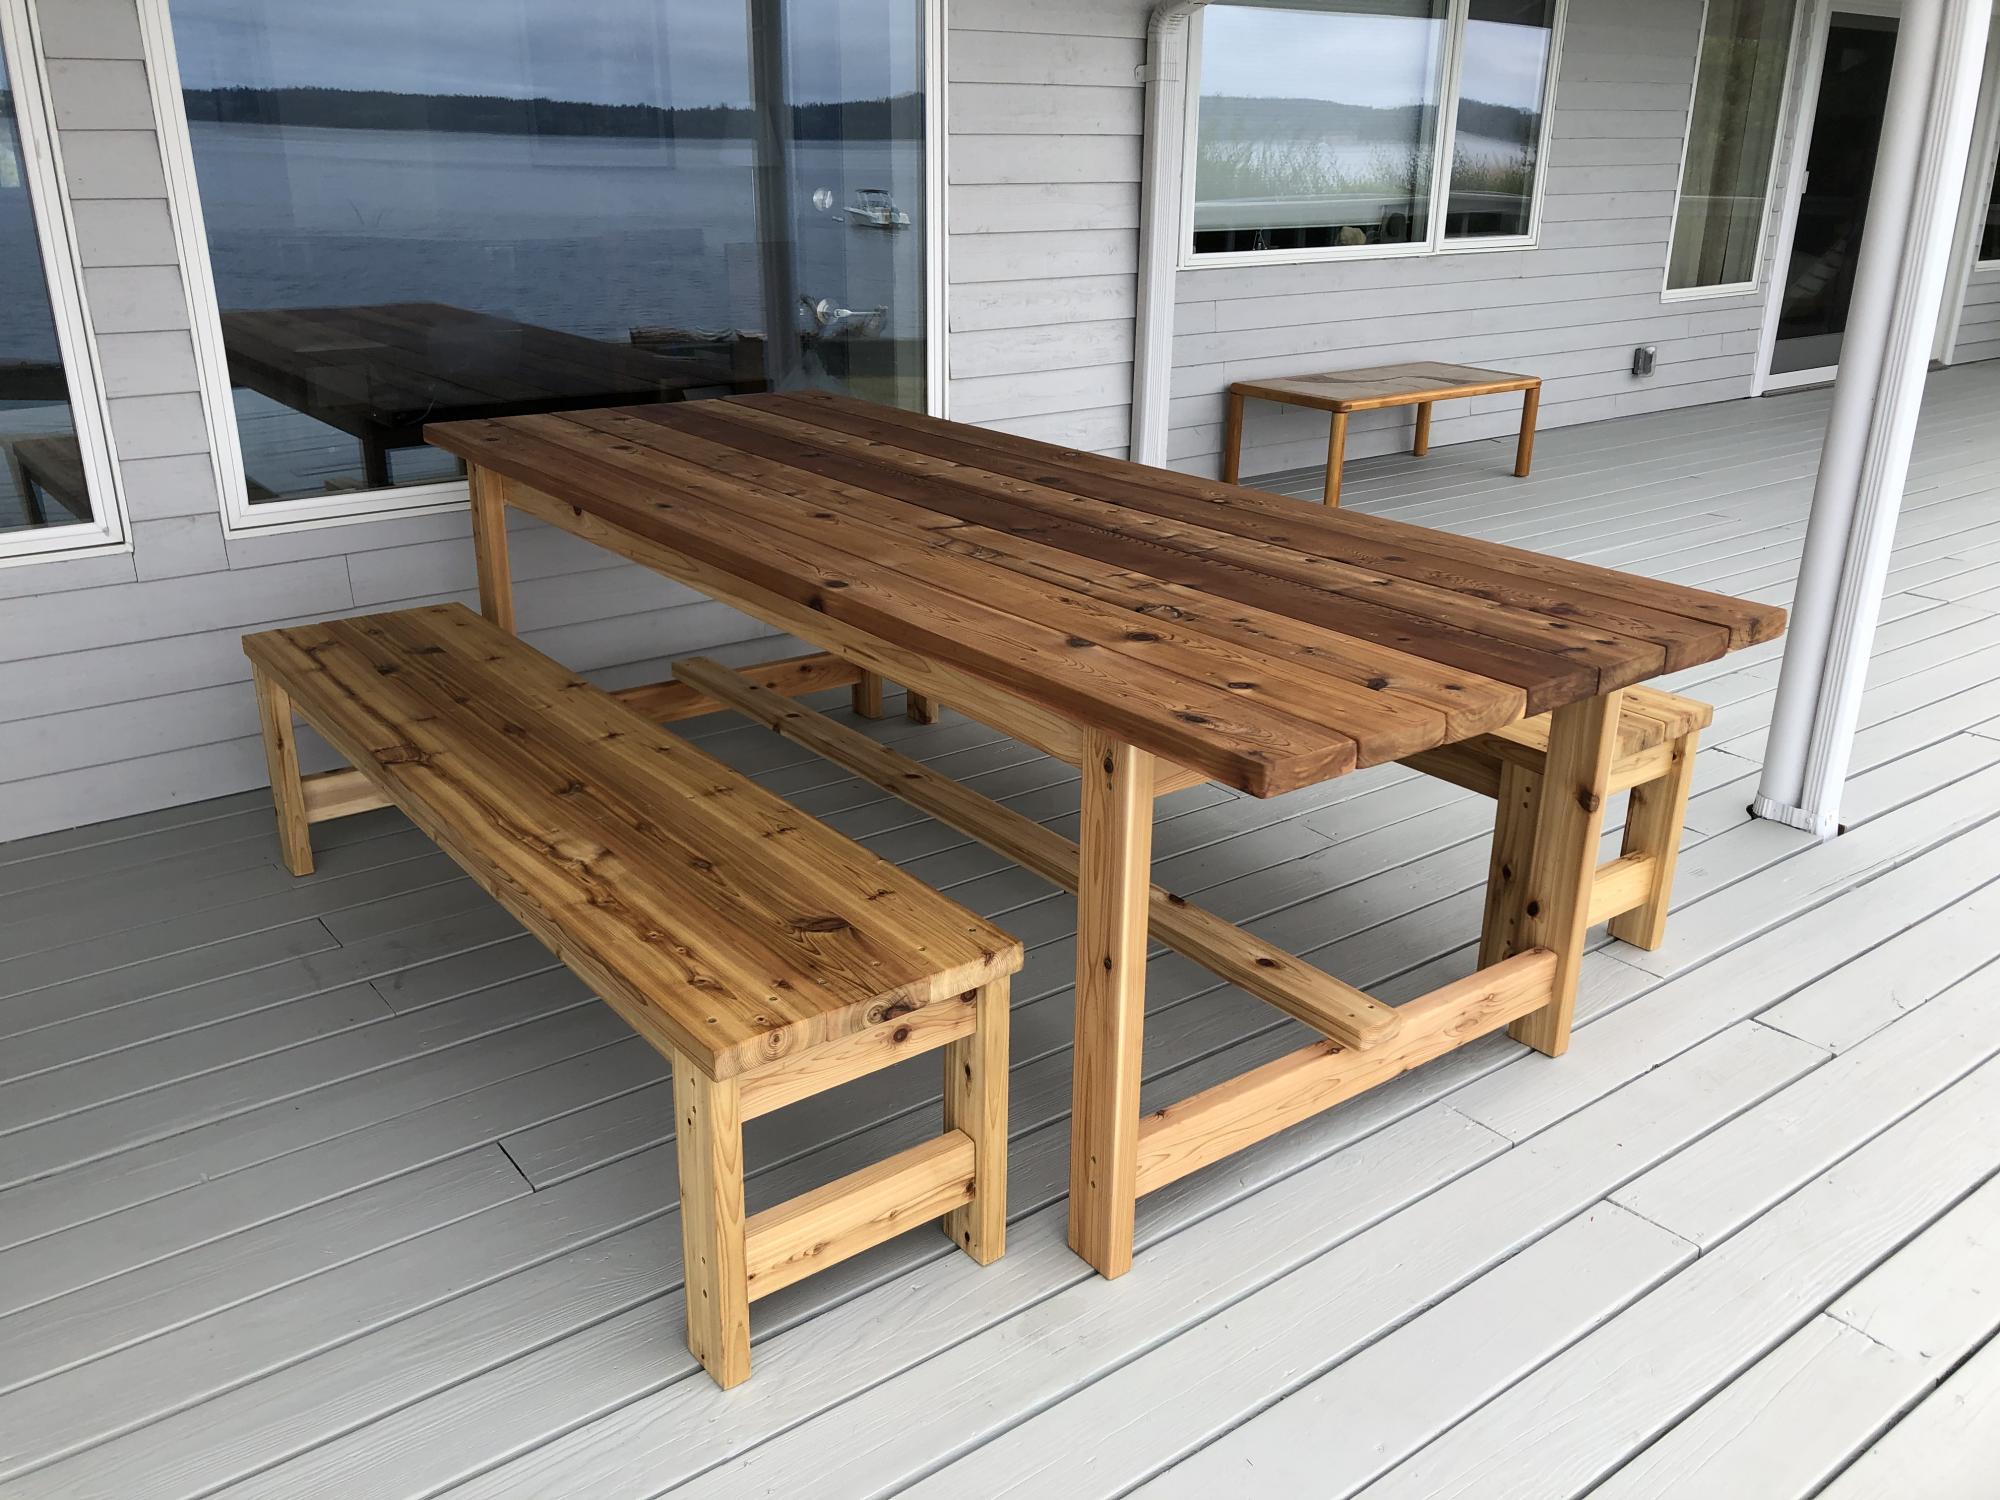
Built this deck dining table and benches from Lowes cedar, and the results way exceeded my expectations! The plans were so well written, it was easy to slightly modify (made both table and benches wider and longer) and the build was very simple. The clear directions helped give me the confidence to do this and we have got so many nice compliments. There was nothing this sturdy and simple even available to buy. I even built a coffee table and bar table after modifying the plans a bit. Thank you Ana!
Comments
Farmhouse table modified
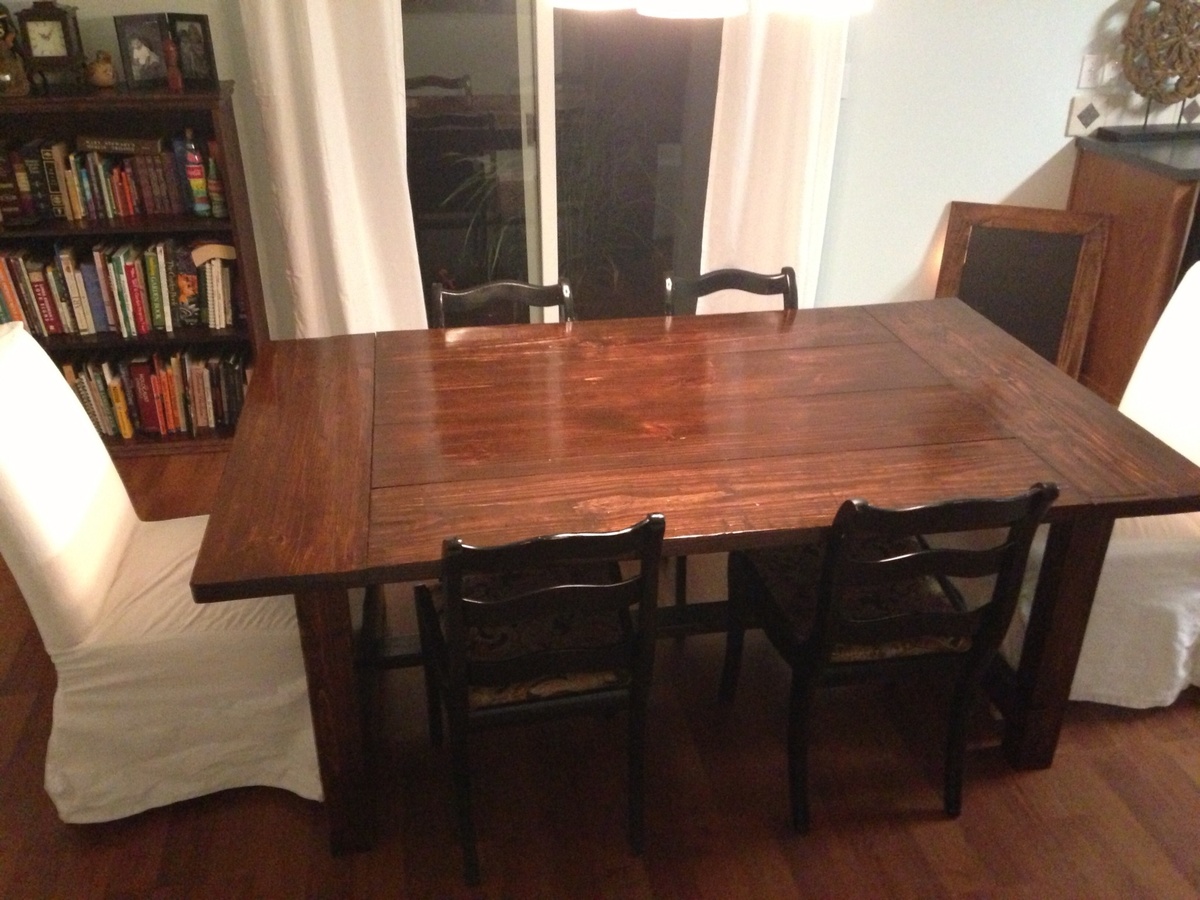
I used the basic plan by Ana, but modified it for the size I needed. Its 2x12 pine with english chestnut stain and tung oil (formby's) finish. I did use 4x4 posts for the legs instead of 2- 2x4's. notching out was the most difficult part. (Should have watched the video by Ana 1st. Lol). I did want some over hang so I cut the leg notches 1/4 shallow so there would be detail. I regret not using the kreg jig on the top, as I have much bigger gaps than I like! But I started buying better tools during this build when I realized mine were not getting the job done. And it definitely makes a huge difference!!! I still have to finish the benches. Just trying to find the time. I can't wait to start the next project!
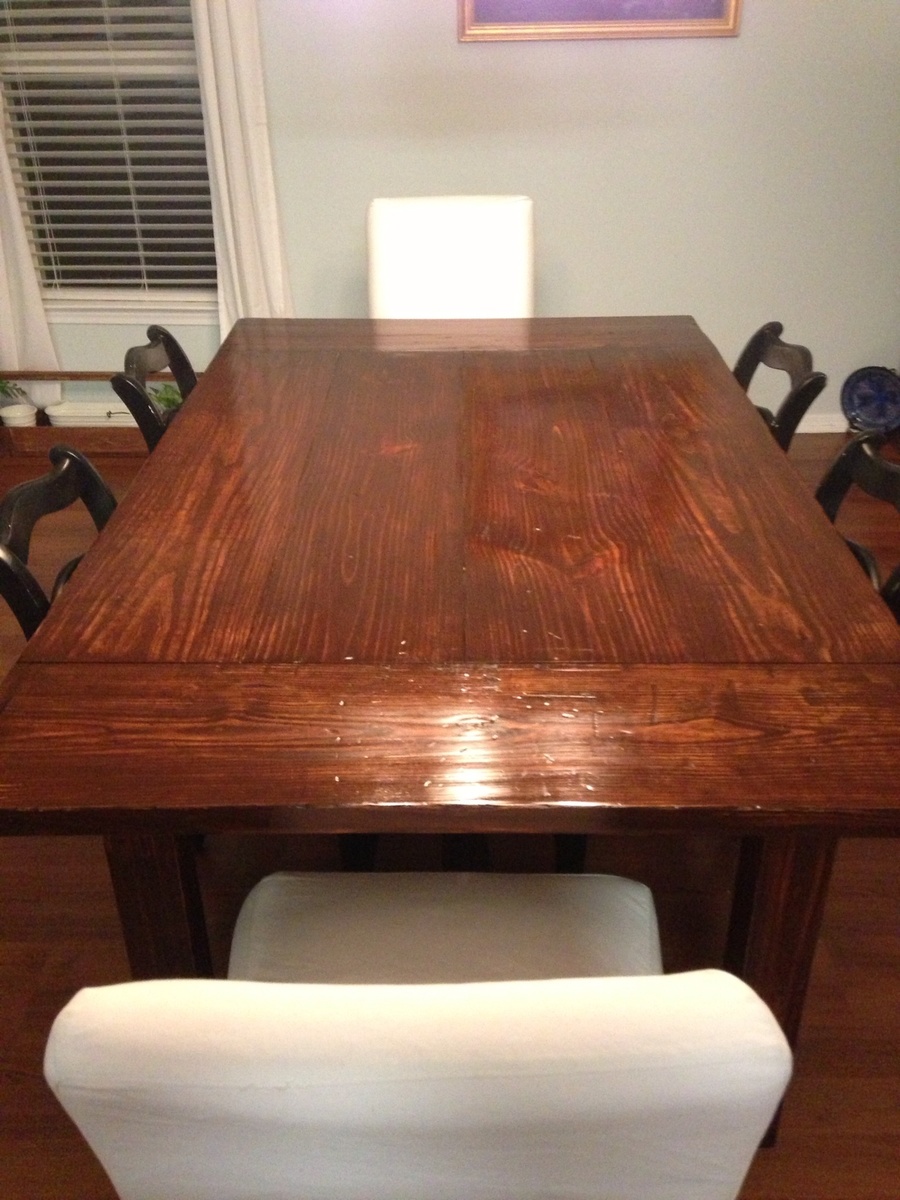
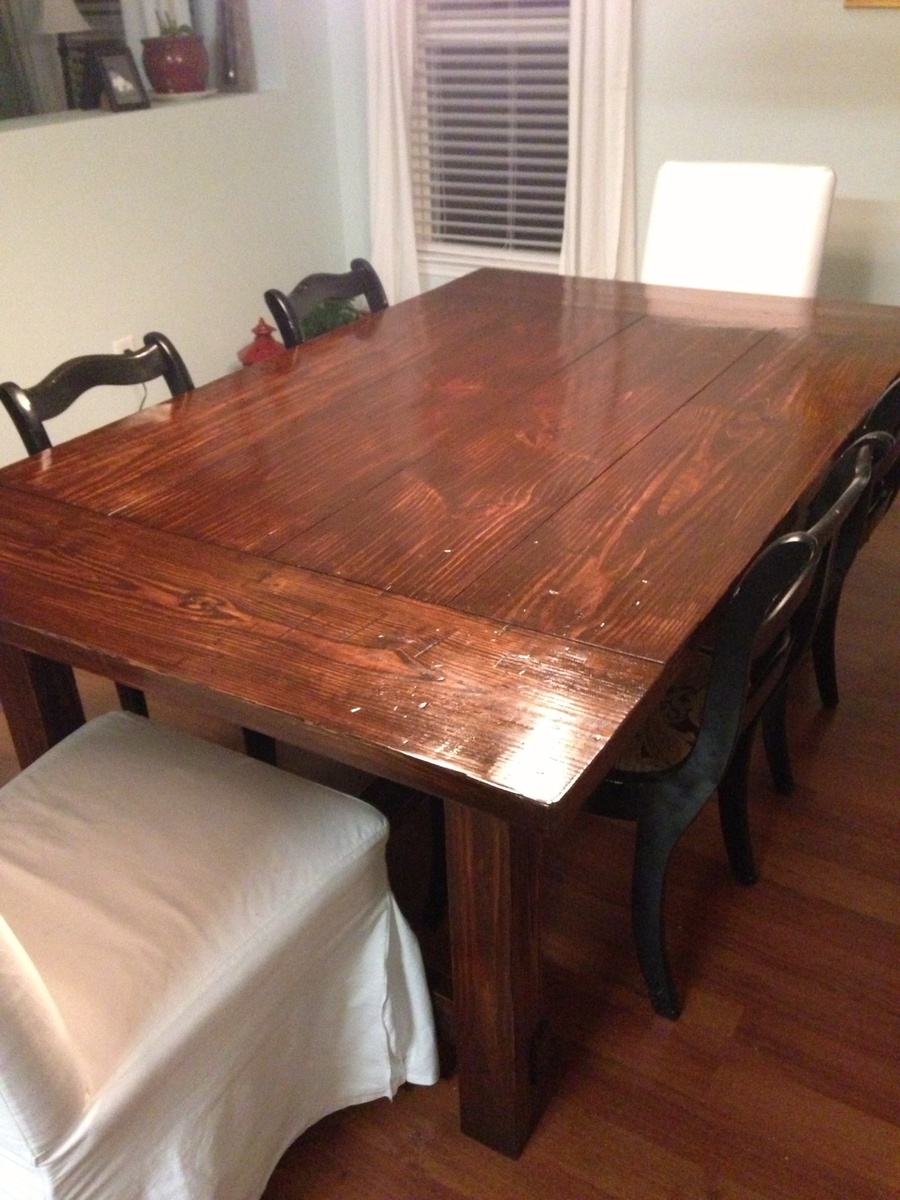
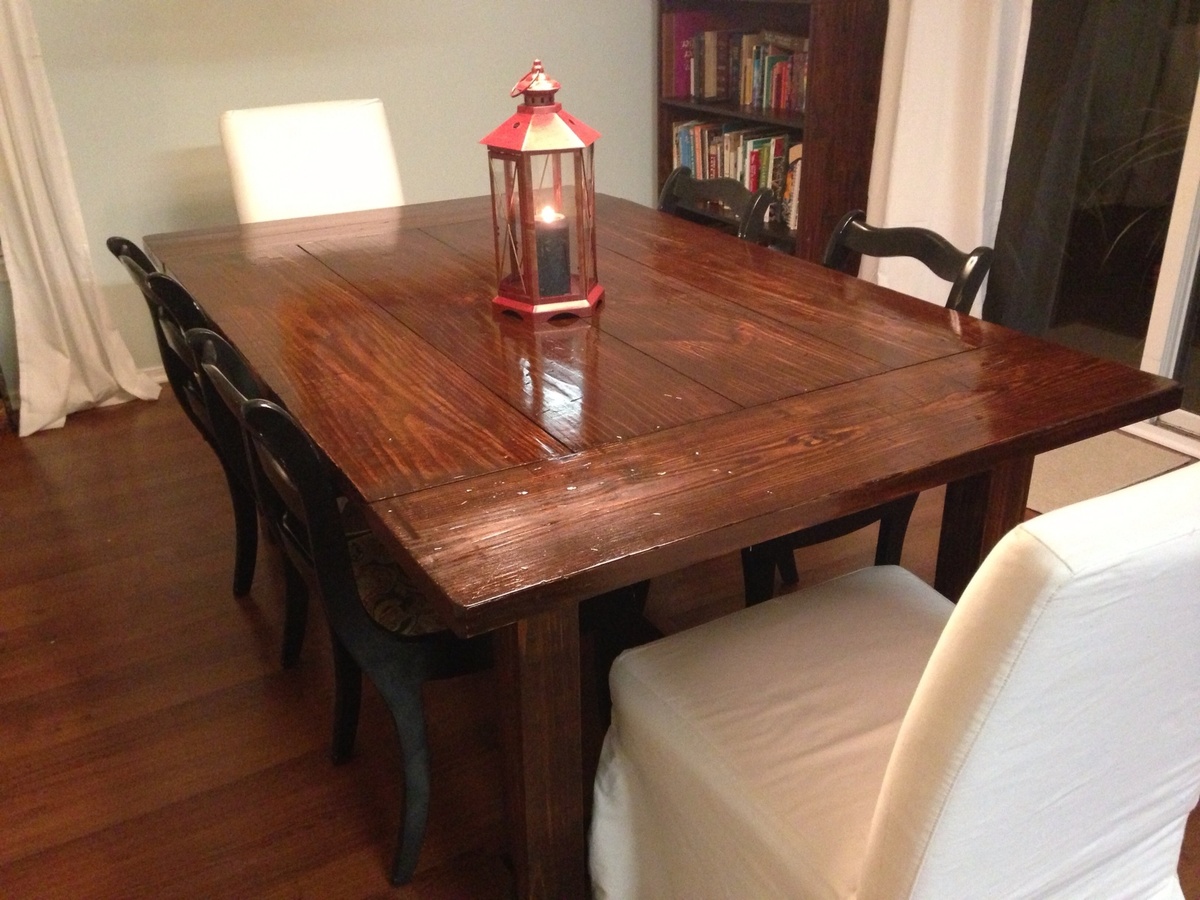
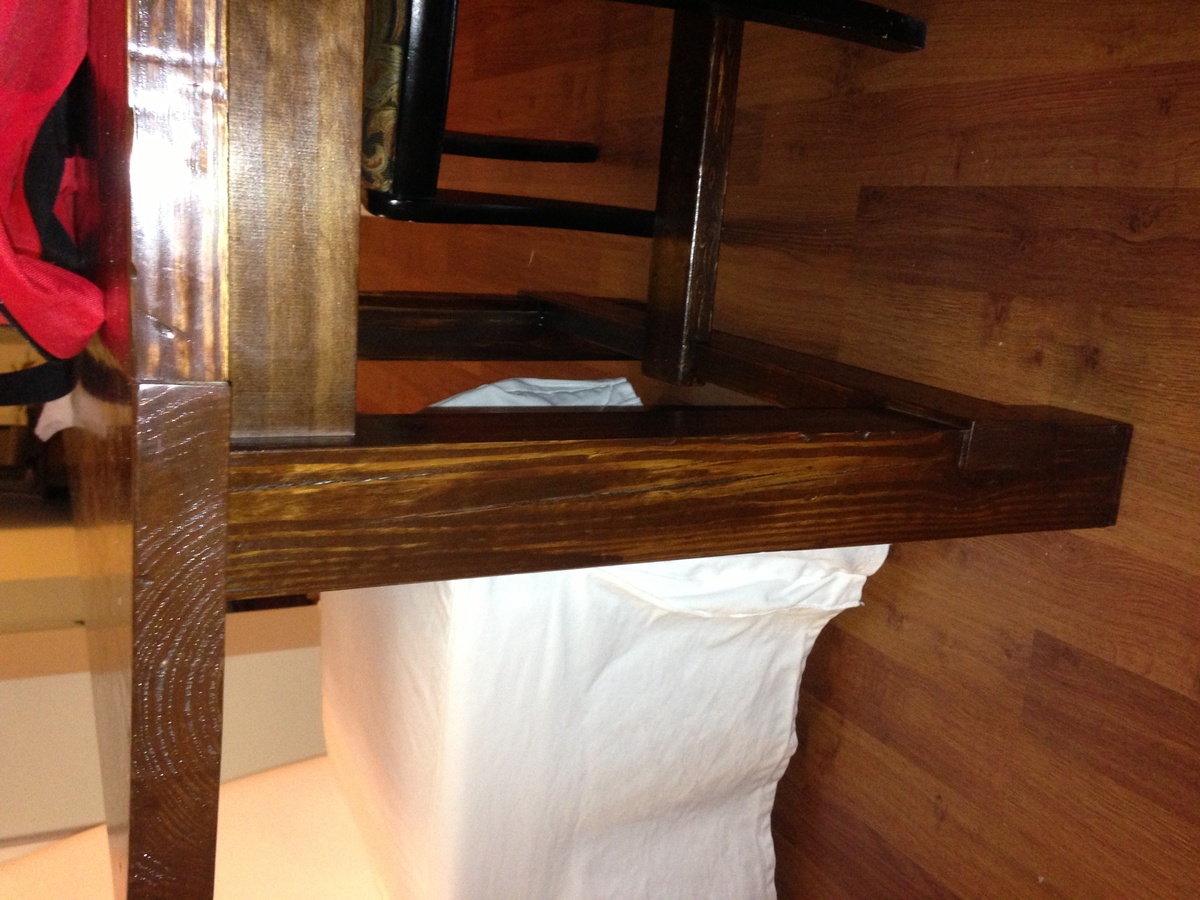
Built from Plan(s)
Estimated Cost
$200
Estimated Time Investment
Week Long Project (20 Hours or More)
Finish Used
English Chestnut with some walnut added. 10 coats of formby's tung oil first in high then low gloss.
Recommended Skill Level
Intermediate
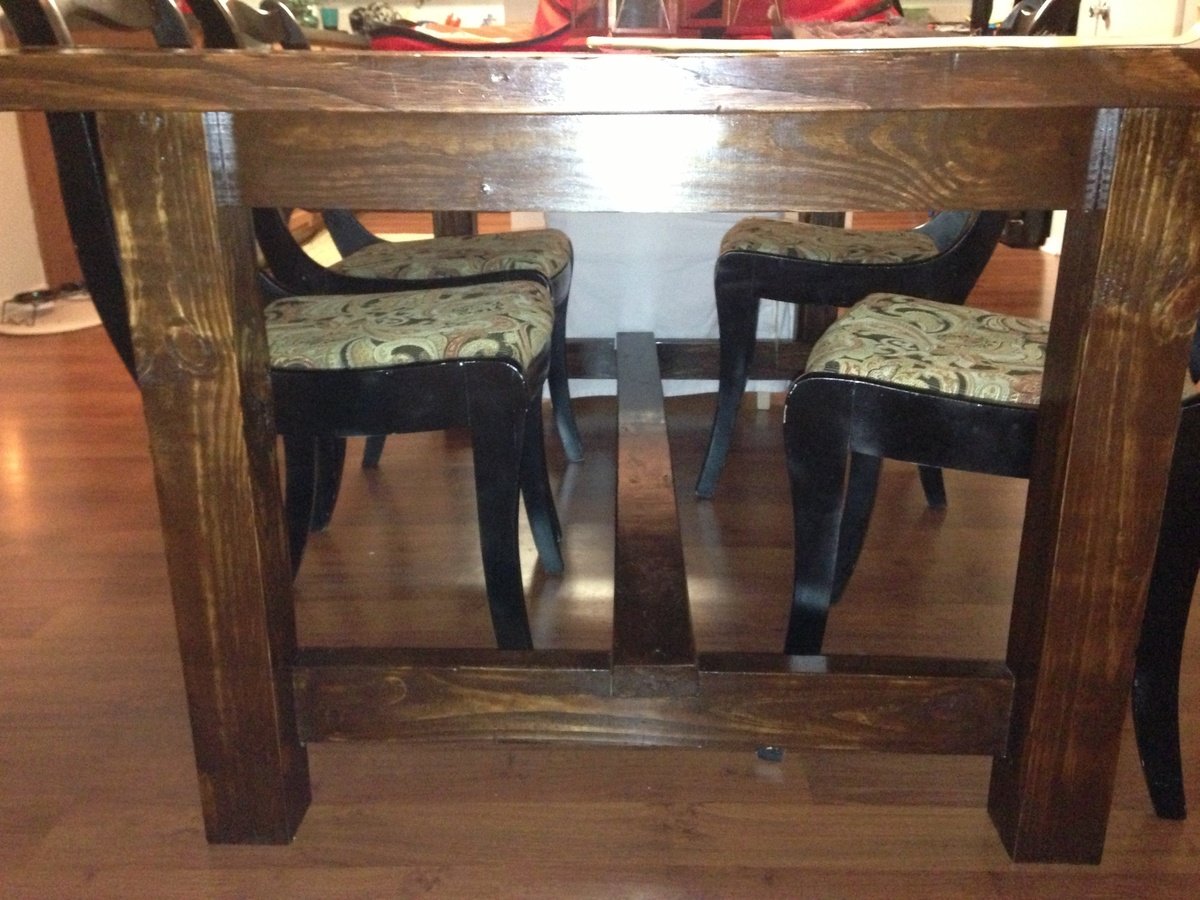
Rustic Burned table
Used the plans for the Rustic X coffee table as a starting point. Left out the X's as they don't appeal to me. Took a butane torch and burned the base and tabletop before staining, and stained the table in alternating stains to give it a really unique appearance. Stains used were Rustoleum Summer Oak, and Minwax Early American, finished with Minwax Semigloss Poly.
Built from Plan(s)
Estimated Cost
$85
Estimated Time Investment
Weekend Project (10-20 Hours)
Finish Used
Rustoleum Summer Oak, Minwax Early American, Minwax Fastdry Poly
Recommended Skill Level
Intermediate
Farmhouse Dining Bench

Hi there! This is Dani from The Project Lady!
I wanted to share my building plan and tutorial for these dining room benches! Total cost is about $20 for lumber per bench!
Head over to my website for step-by-step instructions and pictures!
Happy Building!

Estimated Cost
$20 for lumber
Estimated Time Investment
Afternoon Project (3-6 Hours)
Finish Used
General Finishes Brown Mahogany Gel Stain, Ceramathane Clear-Coat
Recommended Skill Level
Beginner
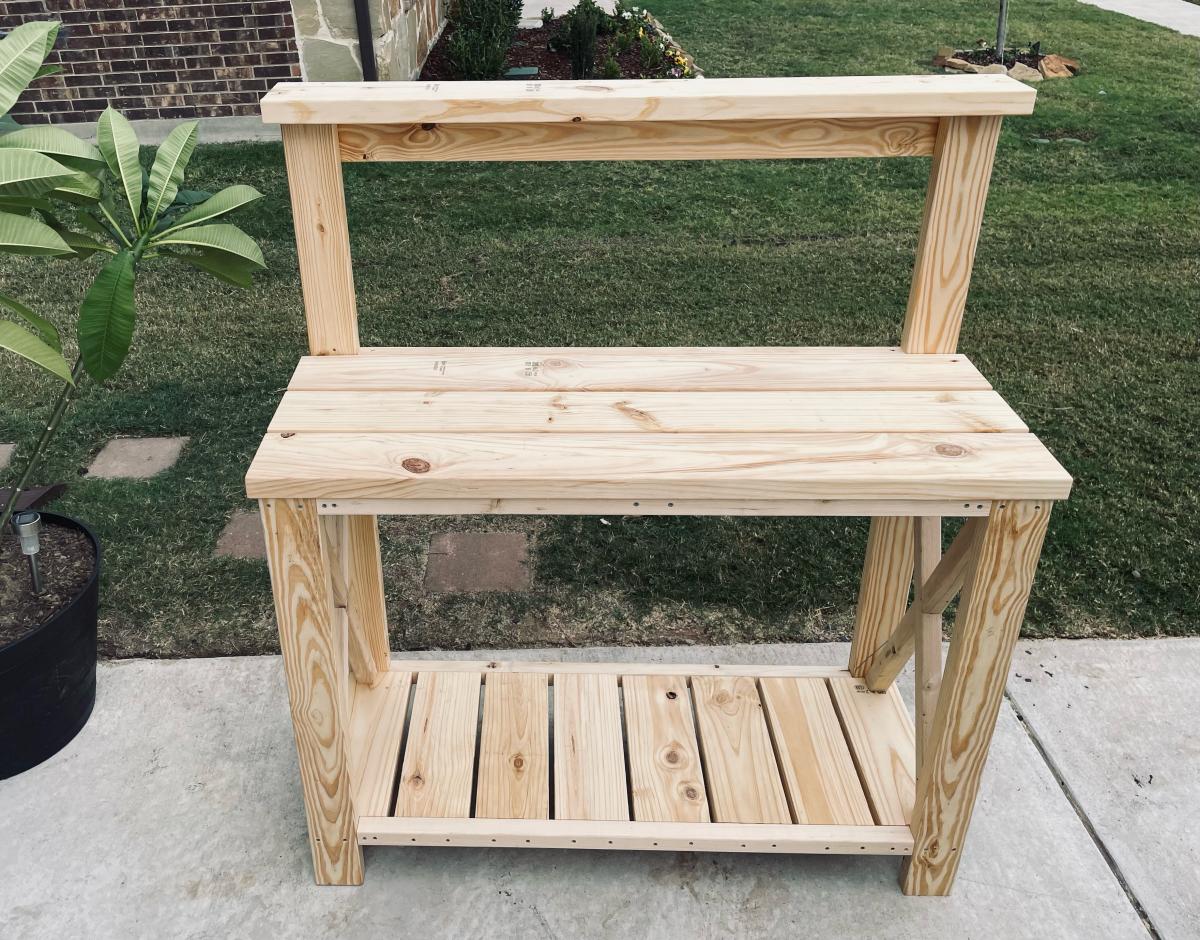
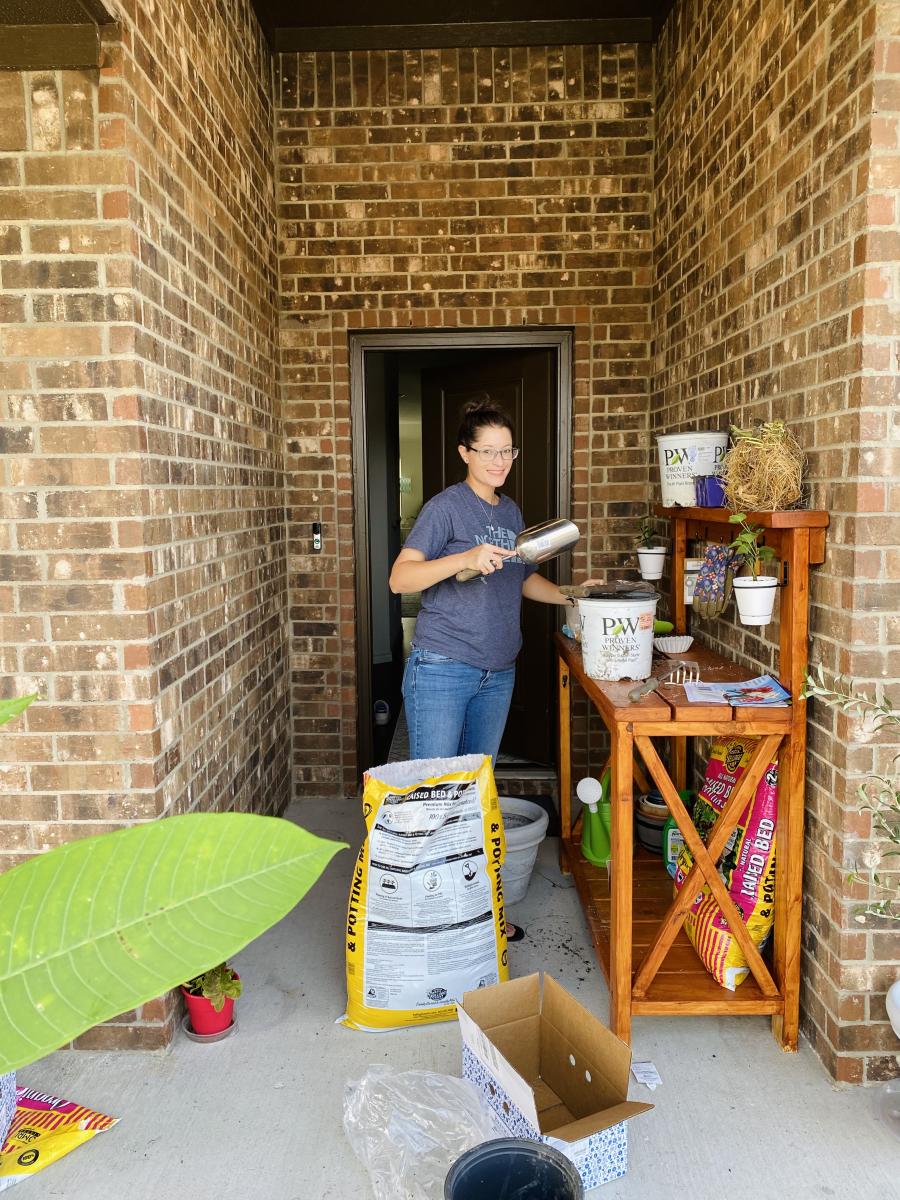
Farmhouse potting bench
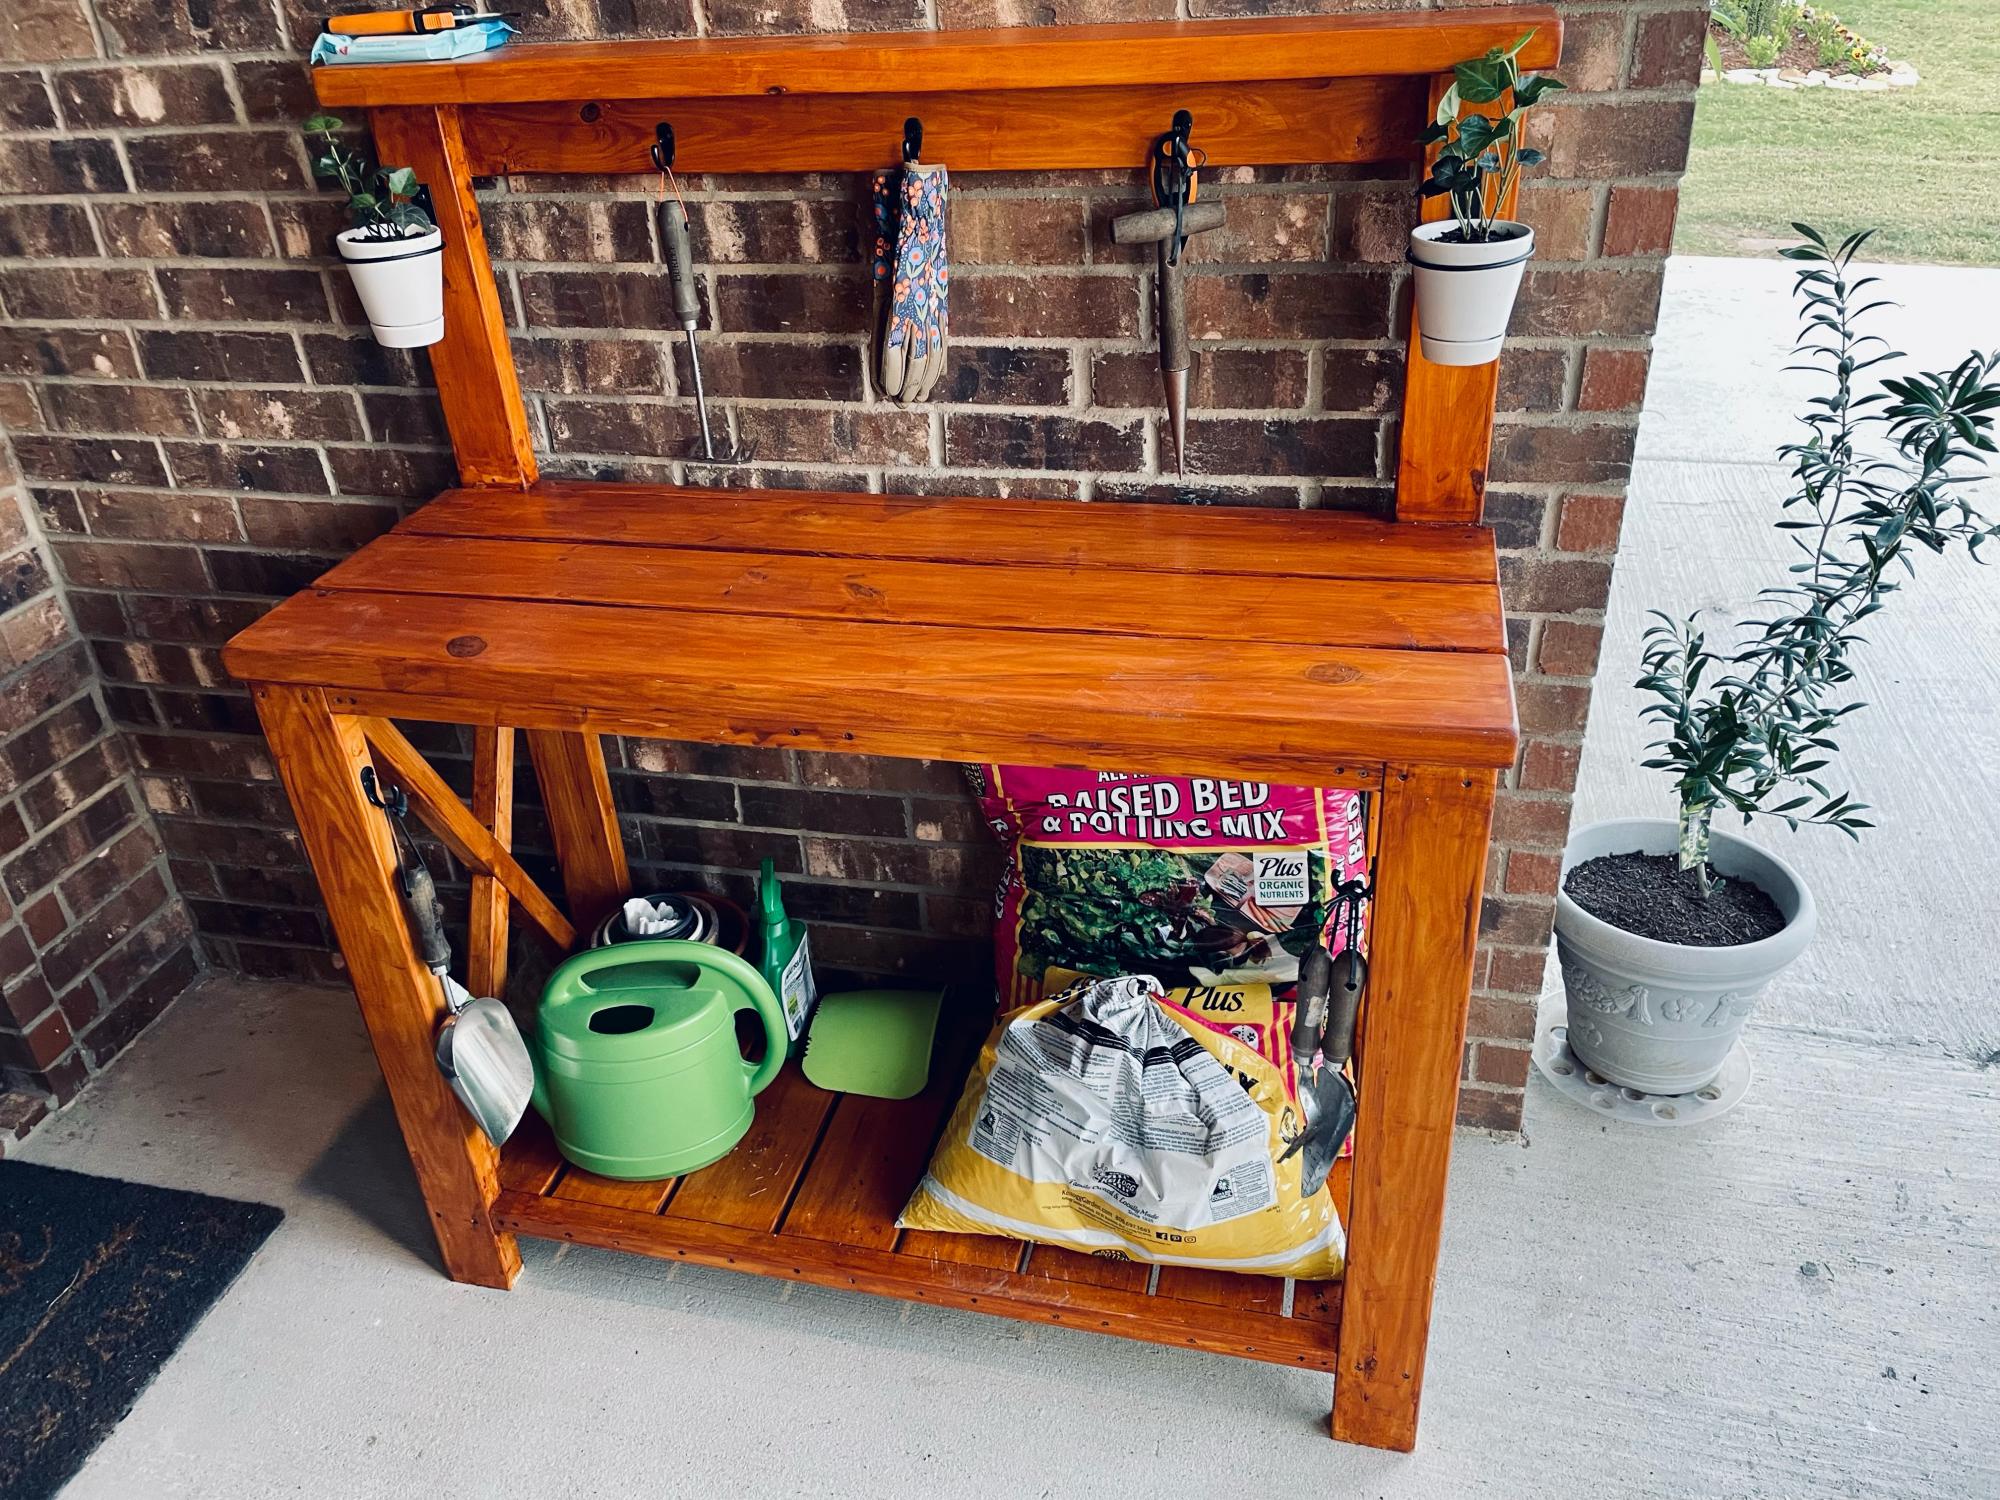
Birthday present for the fiancée. I think it was a hit! :)
Thanks for the plans!
Comments
Garage Pegboard Storage Wall

Thecreativityexchange.com did such a great job with the original project, so of course I had to give it a try! I had only a few minor adjustments in size. I made this one 8ft X 8ft and only using one sheet of pegboard. My amazing wife stained it too with English Walnut!
Built from Plan(s)
Estimated Time Investment
Afternoon Project (3-6 Hours)
Finish Used
English Walnut Stain
Recommended Skill Level
Beginner
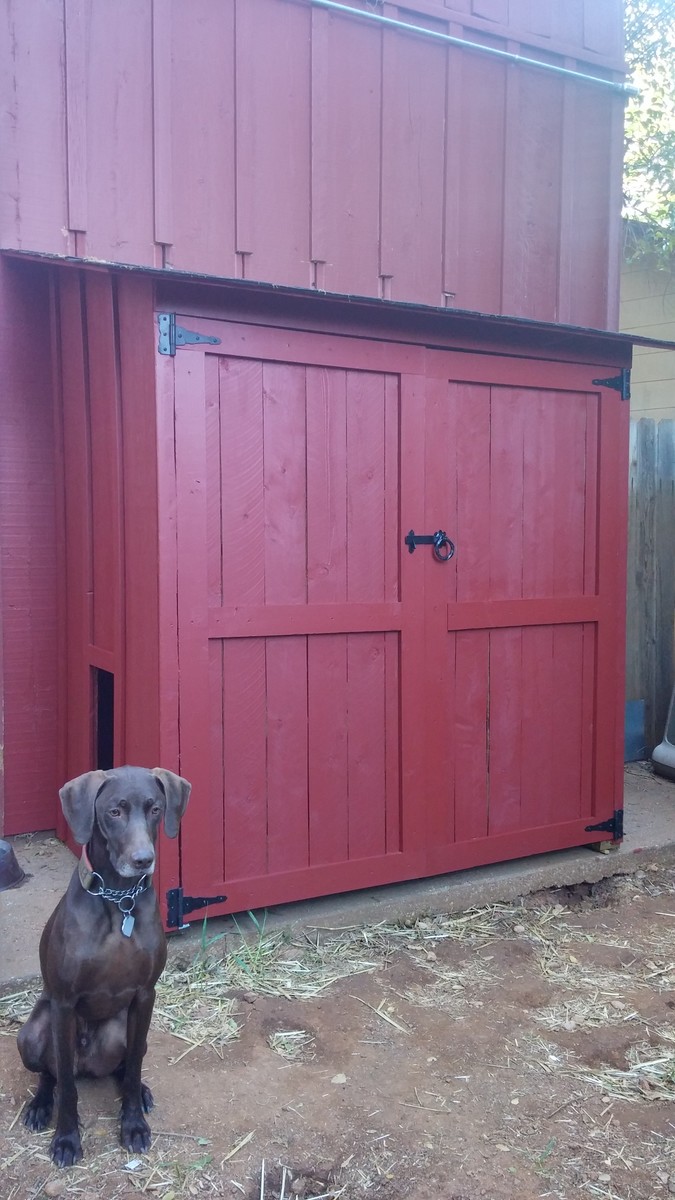
Modified garden shed for a combo dog house
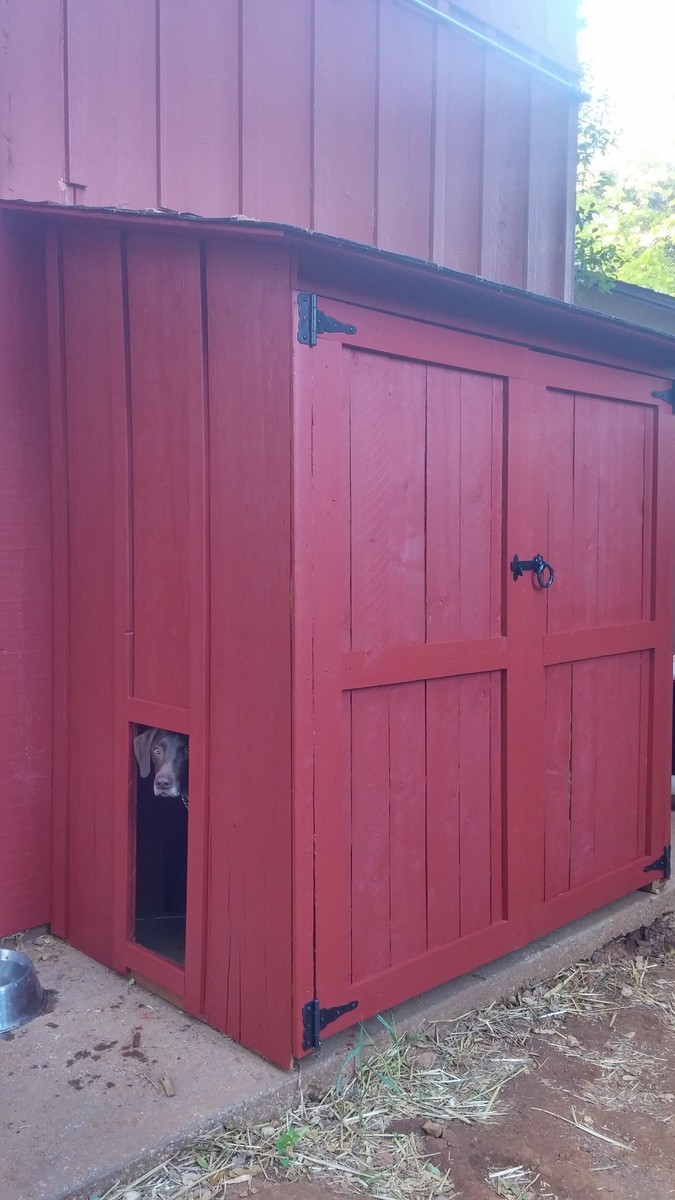
I needed a garden shed (for potting supplies) and a dog house, but I wanted it to look good. I started with Ana's plans, but screwed up a cut and was too lazy to go to the store, so I modified the plan a bit - also we didn't want a lot of venting off the roof.
OUR MODIFICATIONS:
NO BACK WALL - I did not build a back wall, as we pushed it all the way up to the house. (You need to check your codes for this if it's allowed. The way I'm integrating mine w/o breaking the exterior waterproofing of the house and it's unconditioned made mine OK)
DOG HOUSE- I cut away a hole for our dog between the battens. And as you can see - he loves it. He's got his Coolaroo dog bed inside. We also added a 'ceiling' to the lower dog house half, that divides the gardening storage from dog house. The large shelf inside that acts as a dog house ceiling, and above are my un-used pots, hand tools etc. (no worries no chemicals with the puppy)
PAINTED EXTERIOR- I painted it red to match the house, and will also be putting garden pavers in front of the doors.
ROOF- We did put an underlayment down on the roof before the asphalt shingles.
LESSON LEARNED- If your dog is a Mama's boy like mine, he may try to climb a ladder to remove you from a roof which he has determined is not OK for you to be up there.
*One concern is - most sidewalks slope away from the house, so we had to shim the sill plate so front of the shed doesn't lean outward causing the doors to pull open constantly. As you can see from the photo I still need to flash at the roof where we cut back our houses' battens.
COST- We live in CA - and this project was more expensive than anticipated, our lumber/roof shingle costs were around $270 alone, and keep in mind we didn't build a back panel. I have very little scrap left over too. When I was nearly done the hinges were an additional $15 a piece, $10 for the latch. And we had the primer and paint in the garage. Underlayment for roof, I already had in the garage too.
TIM-: I started this project on a weekend, but it ended up taking longer; probably because I didn't block out the weekend just for this project. I spread it over the course of a month, so hours wise it probably wasn't as bad as it felt... You do need two people though, and that's where I ran into some trouble, I kept trying to work on it when my husband wasn't home. Probably 24hrs, 3 easy going days. Could probably be done in a weekend if you were dedicated and didn't get distracted (or screw up a cut like I did, which sent me to the drawing board to fix my mistake)
Built from Plan(s)
Estimated Cost
$350
Estimated Time Investment
Week Long Project (20 Hours or More)
Finish Used
Exterior house primer and paint
Recommended Skill Level
Intermediate
Comments
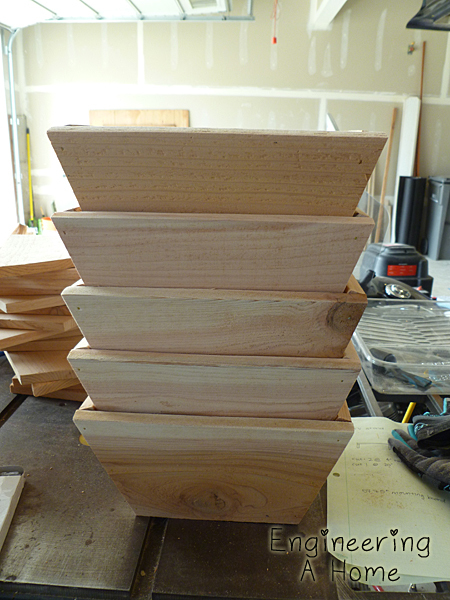
Mother's Day Cedar Planter Boxes
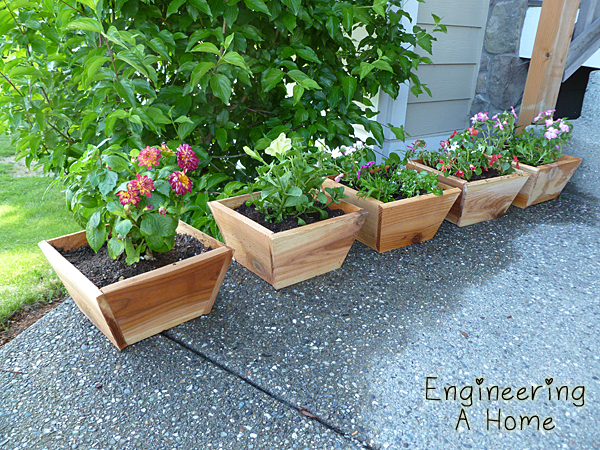
I made some of the cute little cedar boxes to use as planters. I love the size and they were super simple to make.


Built from Plan(s)
Estimated Cost
10
Estimated Time Investment
Afternoon Project (3-6 Hours)
Finish Used
None. Just sanded smooth.
Recommended Skill Level
Starter Project
Triple Pedestal Farmhouse Bench - Modified to 2 pedestals
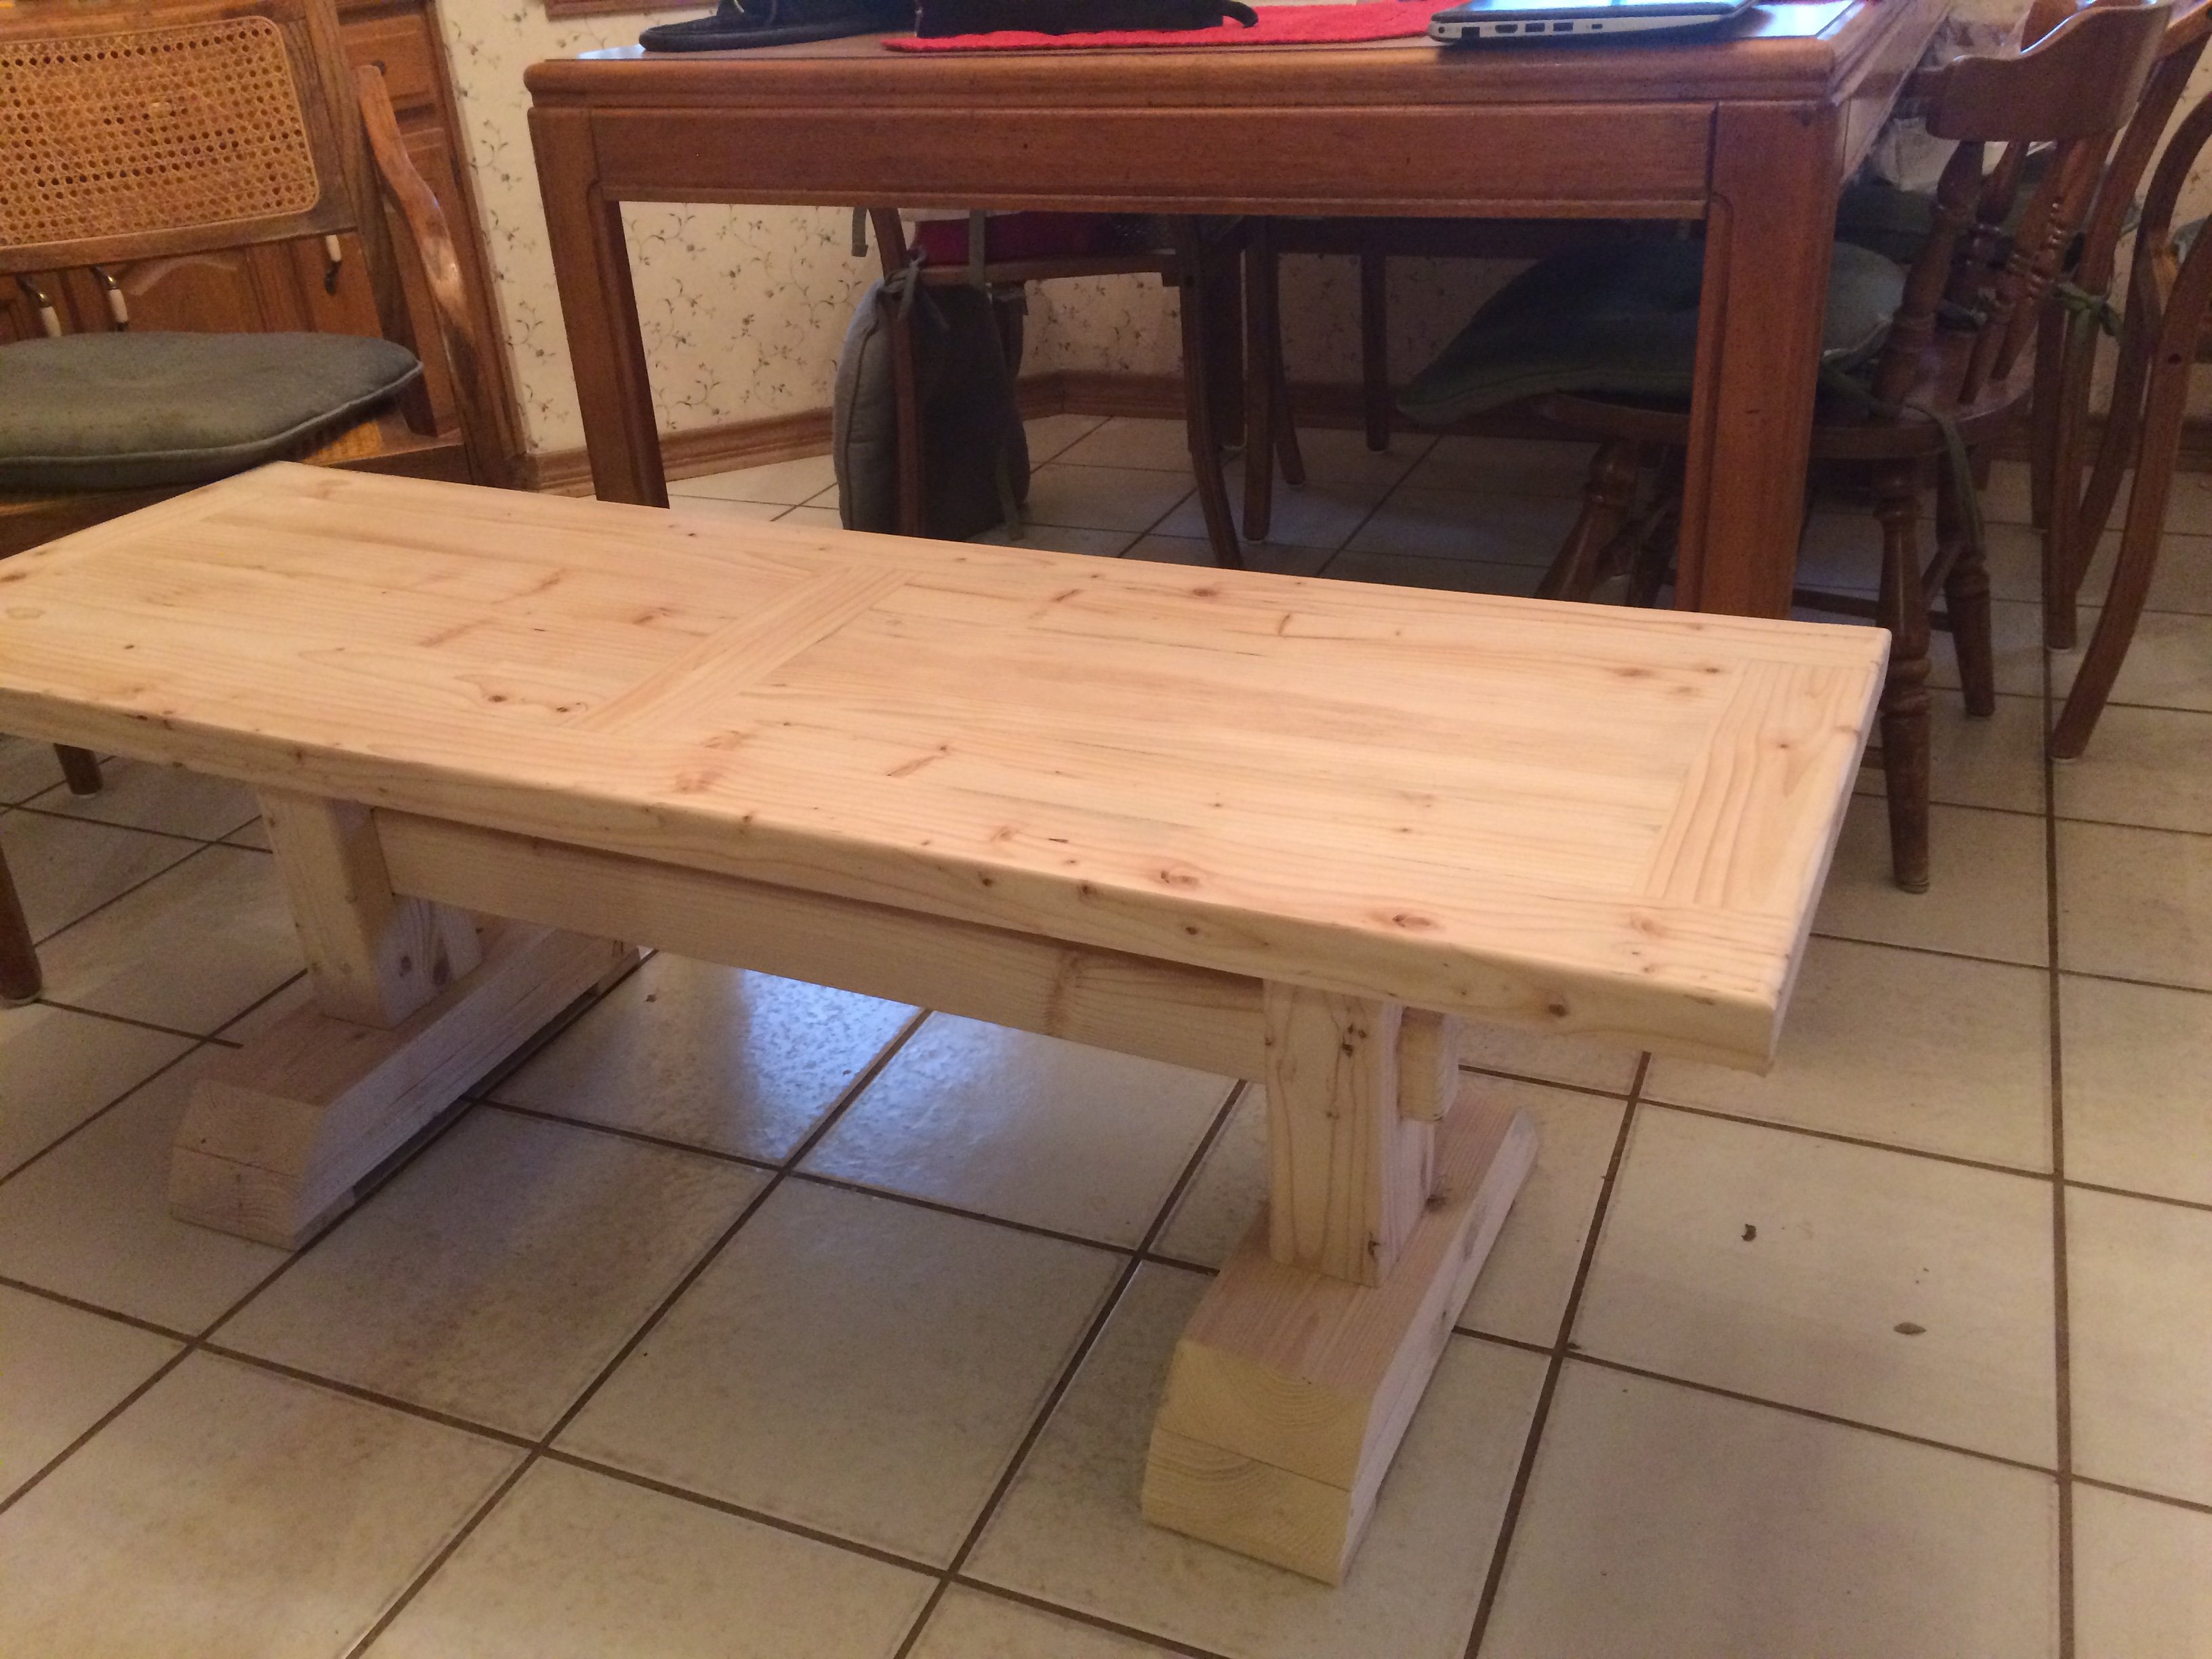
Needed a two seat bench for an existing table. Used biscuits instead of pocket screws to manufacture the seating surface. Cut 1/4" from each edge of the 2x4 (original 1.5" x 3.5" => now 1.5" x 3.0") so the premilled humps would not be evident on the seating surface. The surface now has 6 layers of boards for 6x3=18" width instead of the plans 5x3.5 = 17.5" Great plans, easy to modify!
Built from Plan(s)
Estimated Time Investment
Weekend Project (10-20 Hours)
Finish Used
Will be stained to match rest of table later
Recommended Skill Level
Intermediate
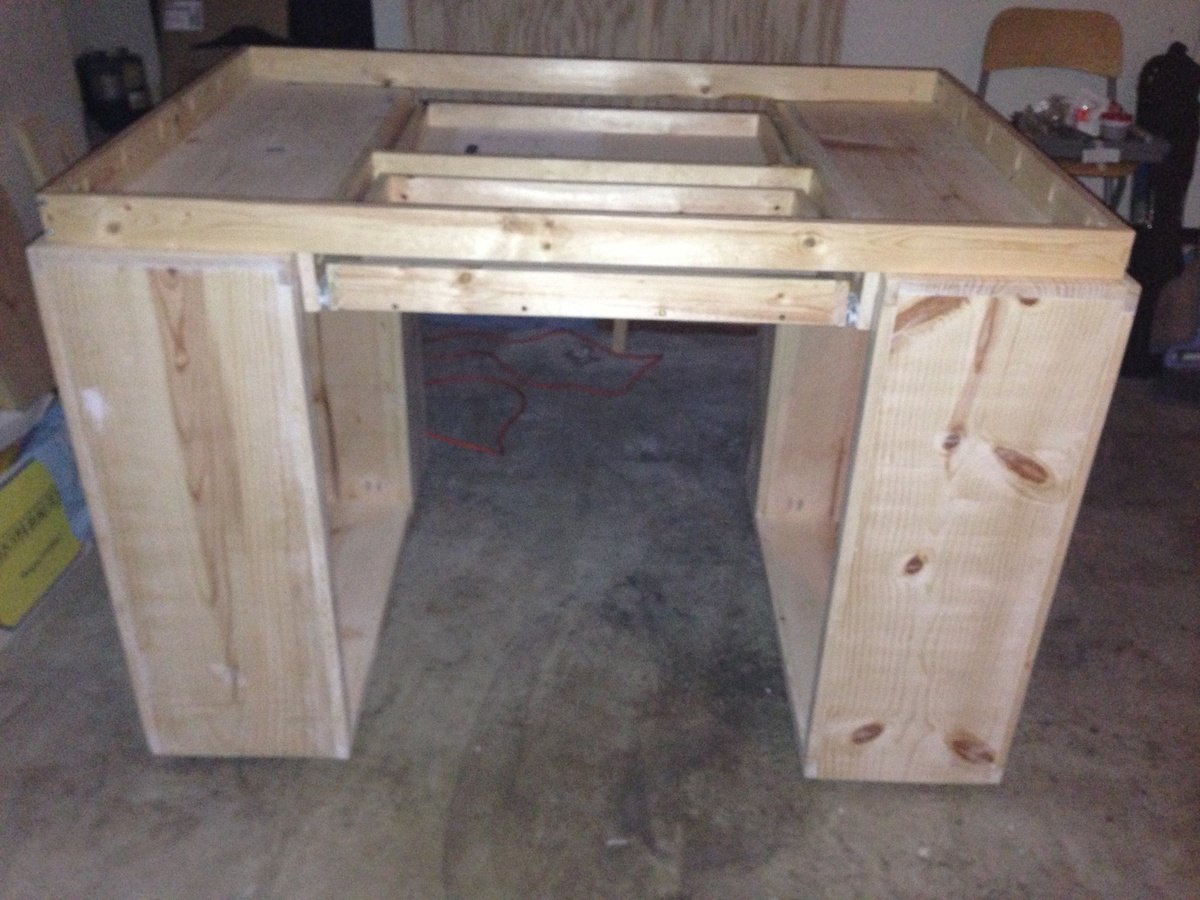
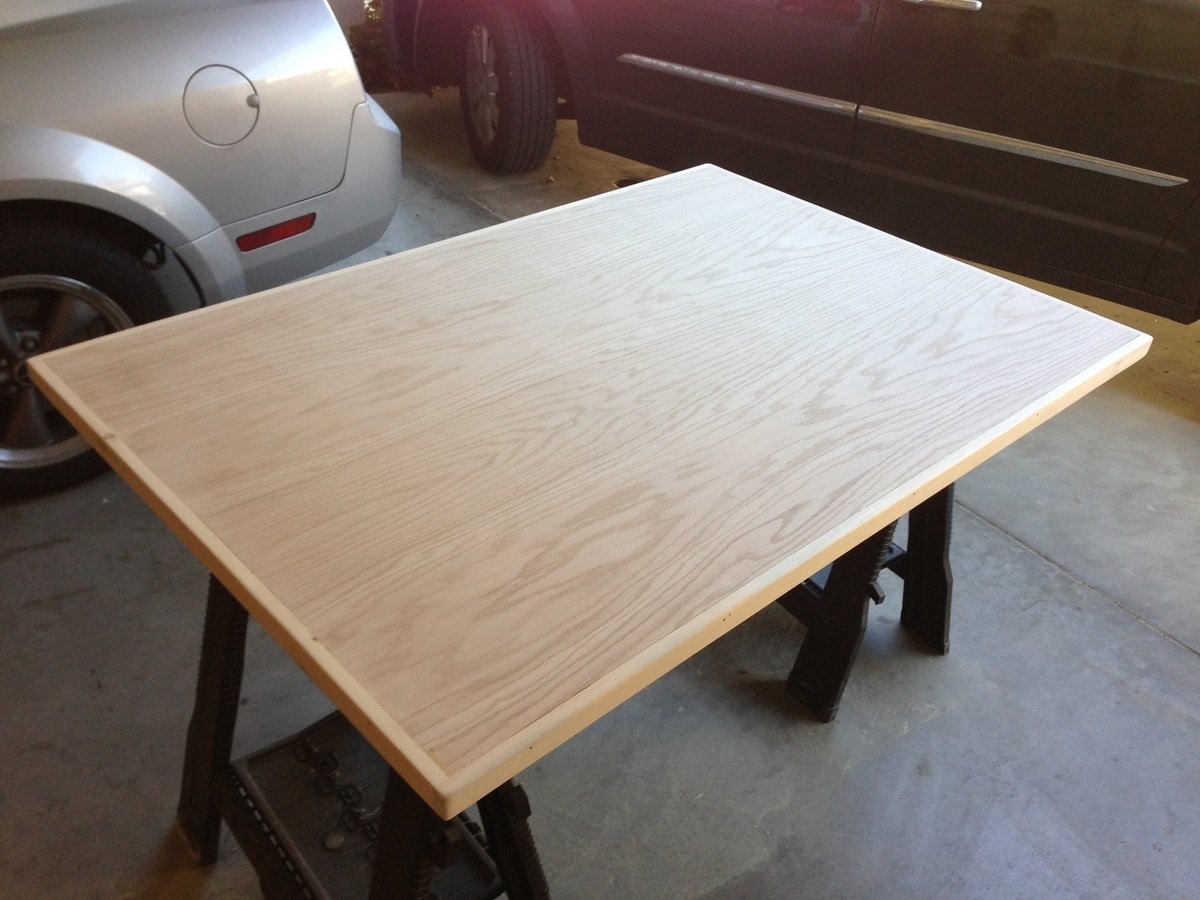
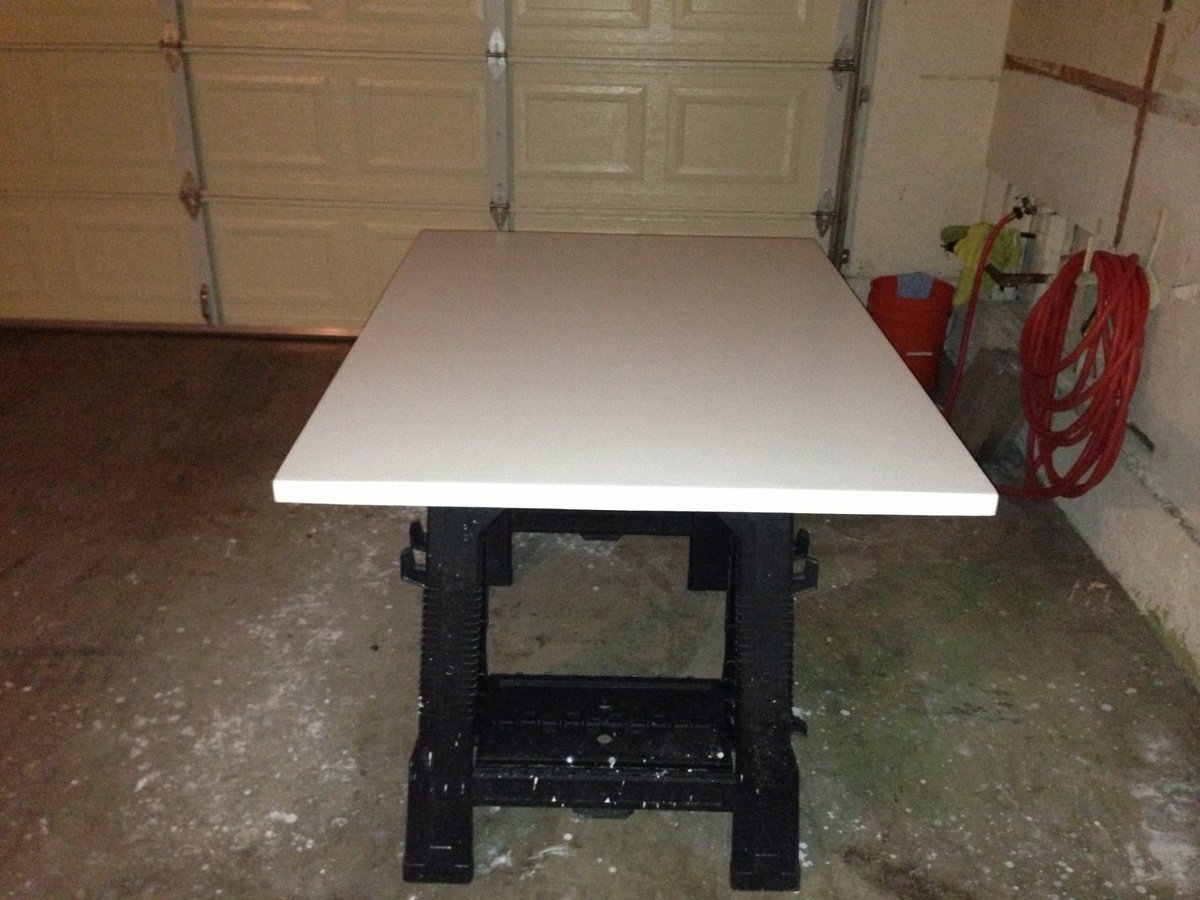
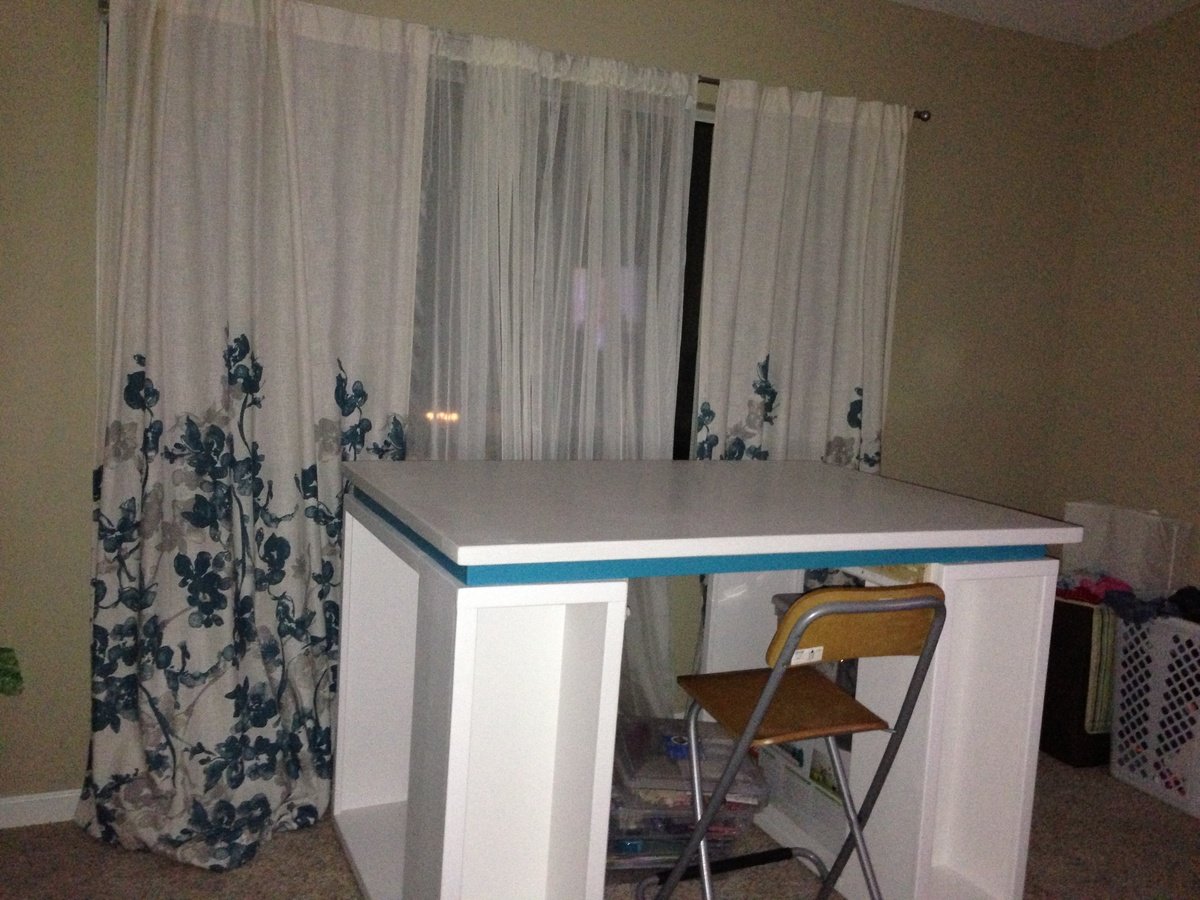
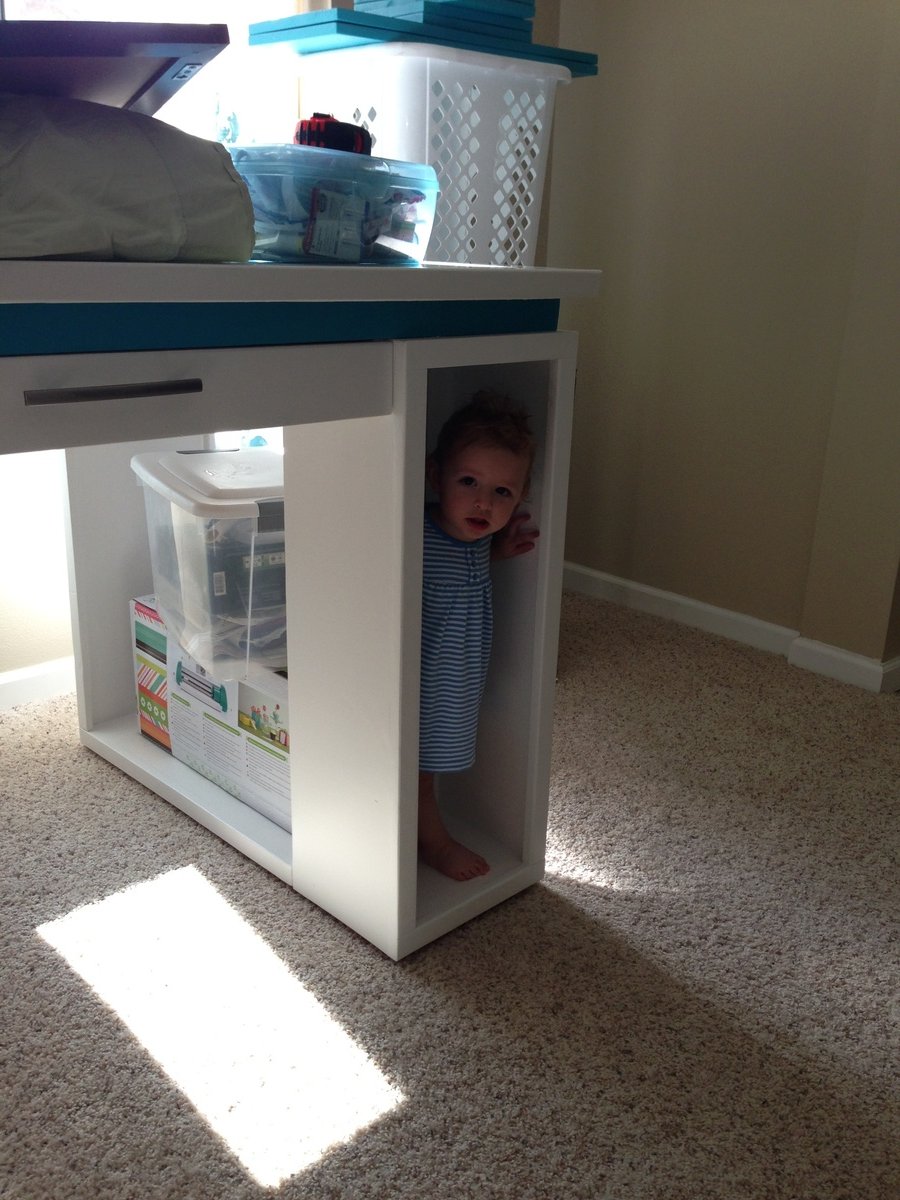
Craft Table
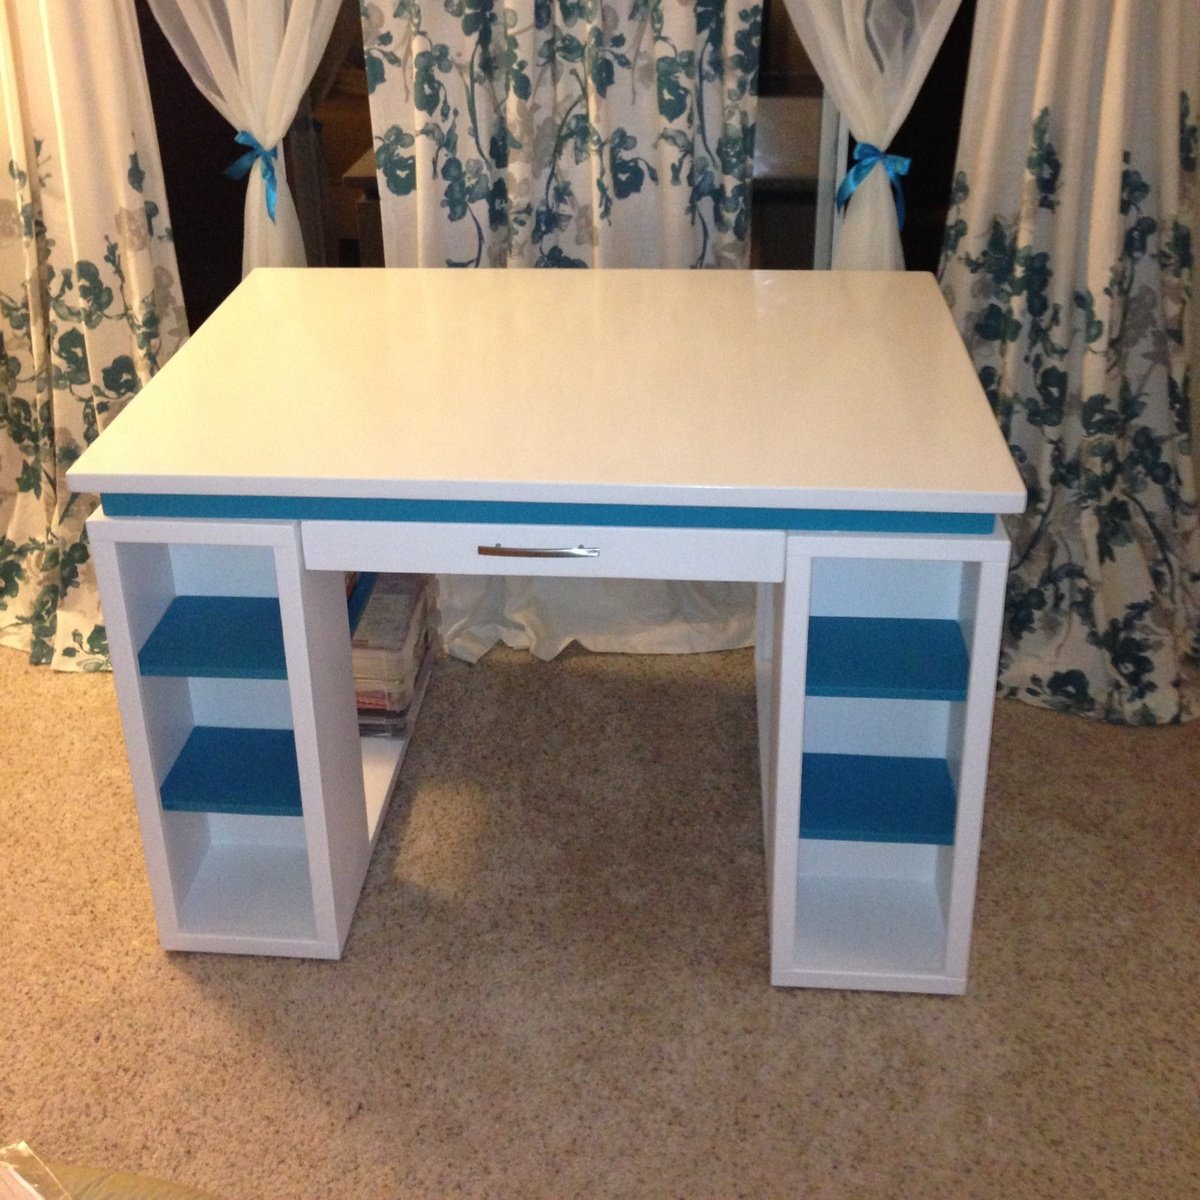
My new Craft Table I built from Ana White's plans. I combined her plans from her Modern Craft Table (http://ana-white.com/2010/09/modern-craft-table) and the desk drawer from her Craft Tabletop for the Modular Collection (http://ana-white.com/2010/02/plans-bedford-project-table-top-with.html). I modified the plans slightly, I added 1x2's aroung the tabletop instead of edge banding or nosing to give it a nice decorative finish. I also used 1 x 3's instead of using 1 x 2's for the floating base for the tabletop so you could see more of the floating base since the 1 x 2's around the tabletop covered up the majority of the floating base from view. I also created a frame for the table top to sit on which also helped stabilized the 2 bookshelves in place, as well as adding support to the frame of the drawers.
Built from Plan(s)
Estimated Cost
$200
Estimated Time Investment
Weekend Project (10-20 Hours)
Finish Used
I used wood filler to fill the holes in the wood and the Kiltz primer as a base. I used Valspar's Swiss Coffee for the white and Valspar's Cool Rain for the accents. On the top of the table I made my own Chalk Paint with 1 cup of paint and 2 tbsp of unsanded grout and a little bit of water recipe from Diane Henkler @ Momtastic (http://www.momtastic.com/home-and-living/home/172917-diy-chalk-qstyleq-paint). Followed by 4 coats of Polycrylic matte finish (making sure to sand each layer eith a 320 grit sand paper. I finished with a small layer of wax buffed on to make it shine.
Recommended Skill Level
Beginner
Comments
Mon, 07/01/2013 - 11:23
Beautiful and clean! Love it.
I love the blue accents! So much better than all white. Nice job on this. I don't know if I'd have the nerve to use it after all that work with the chalk paint :)
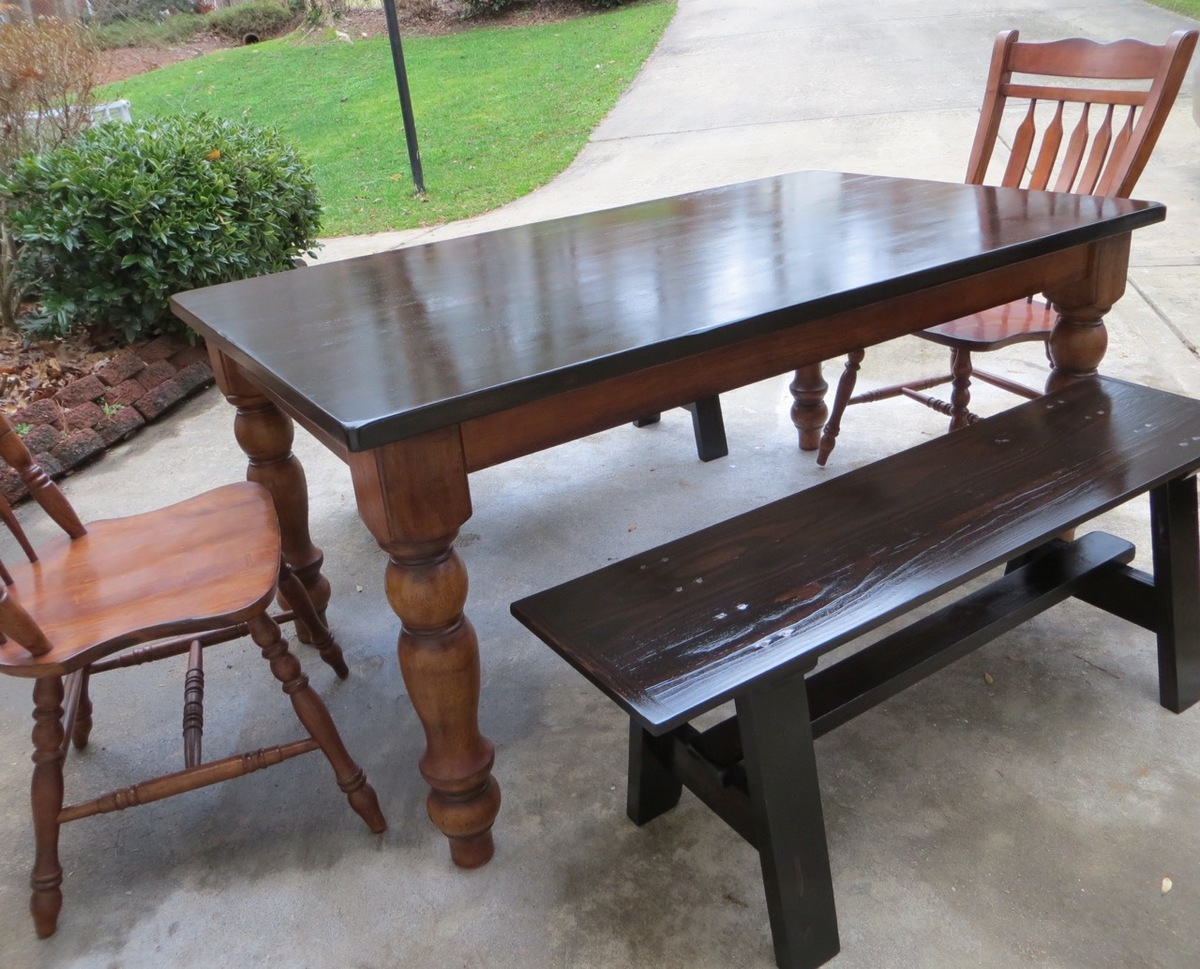
Farm house table and bench
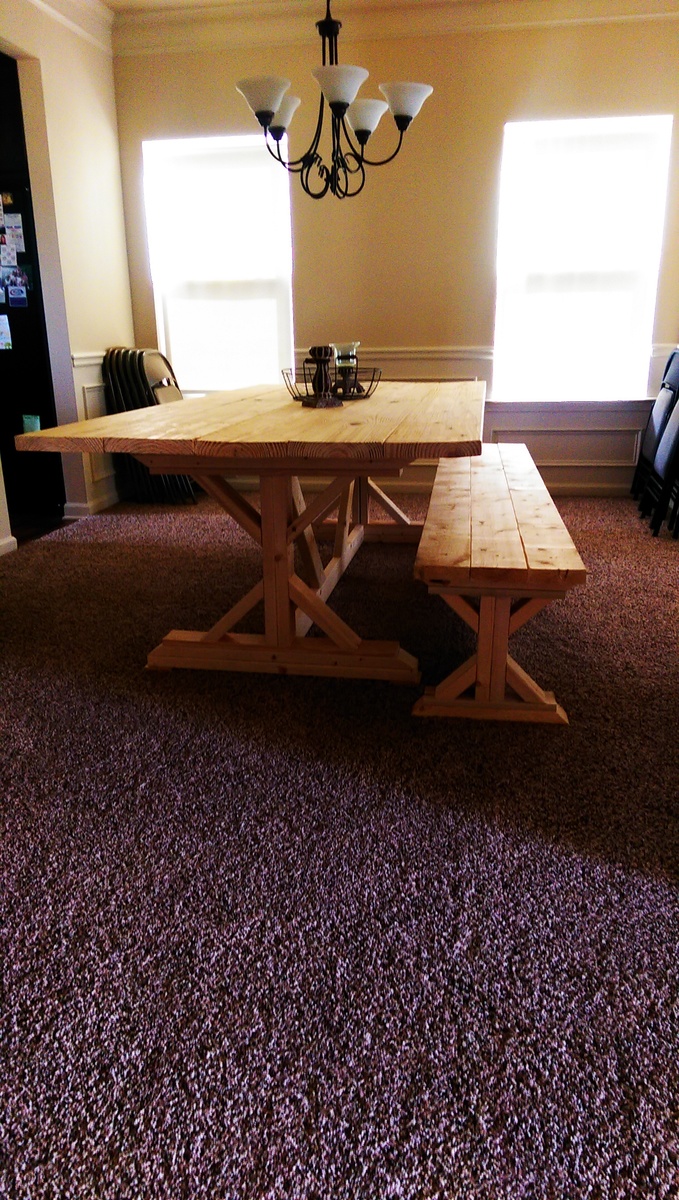
Table and bench before we finished it
Built from Plan(s)
Recommended Skill Level
Beginner
Comments
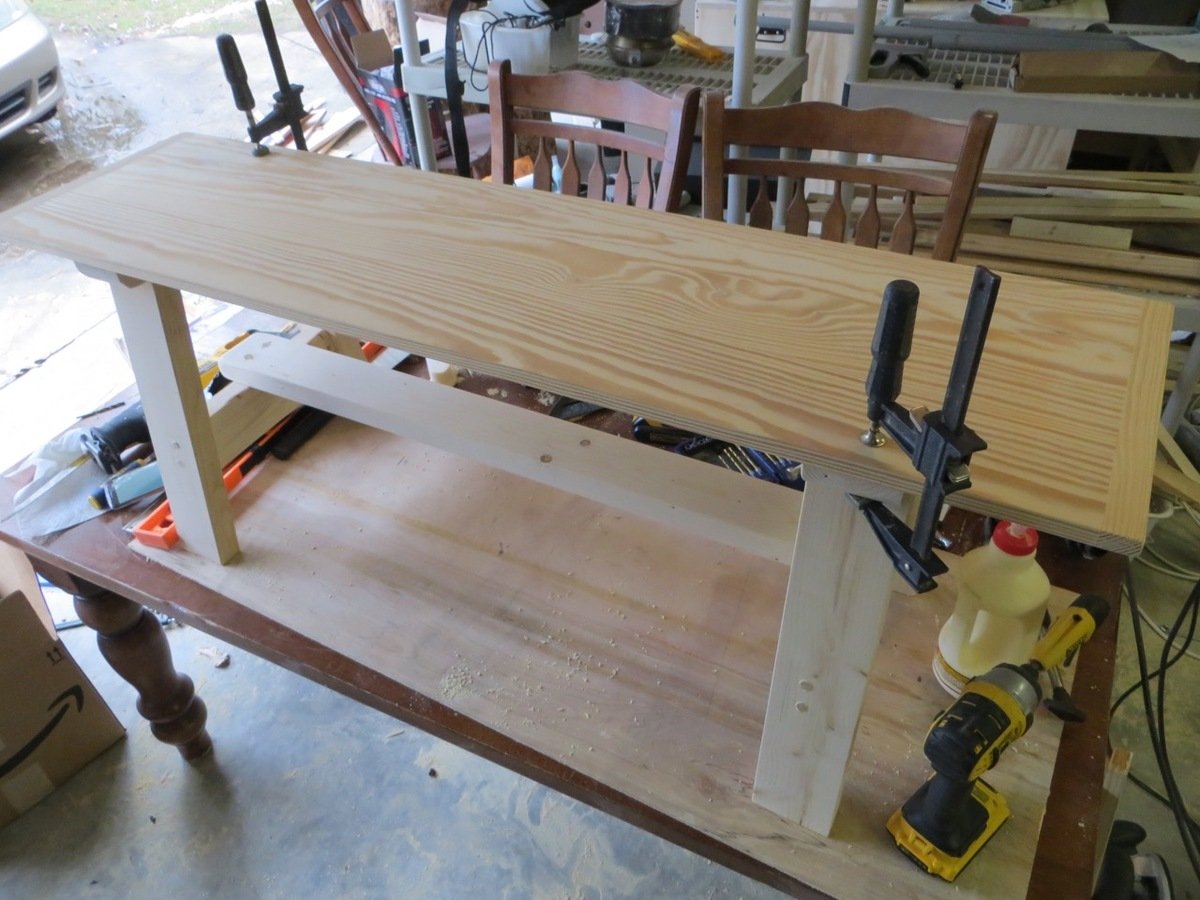
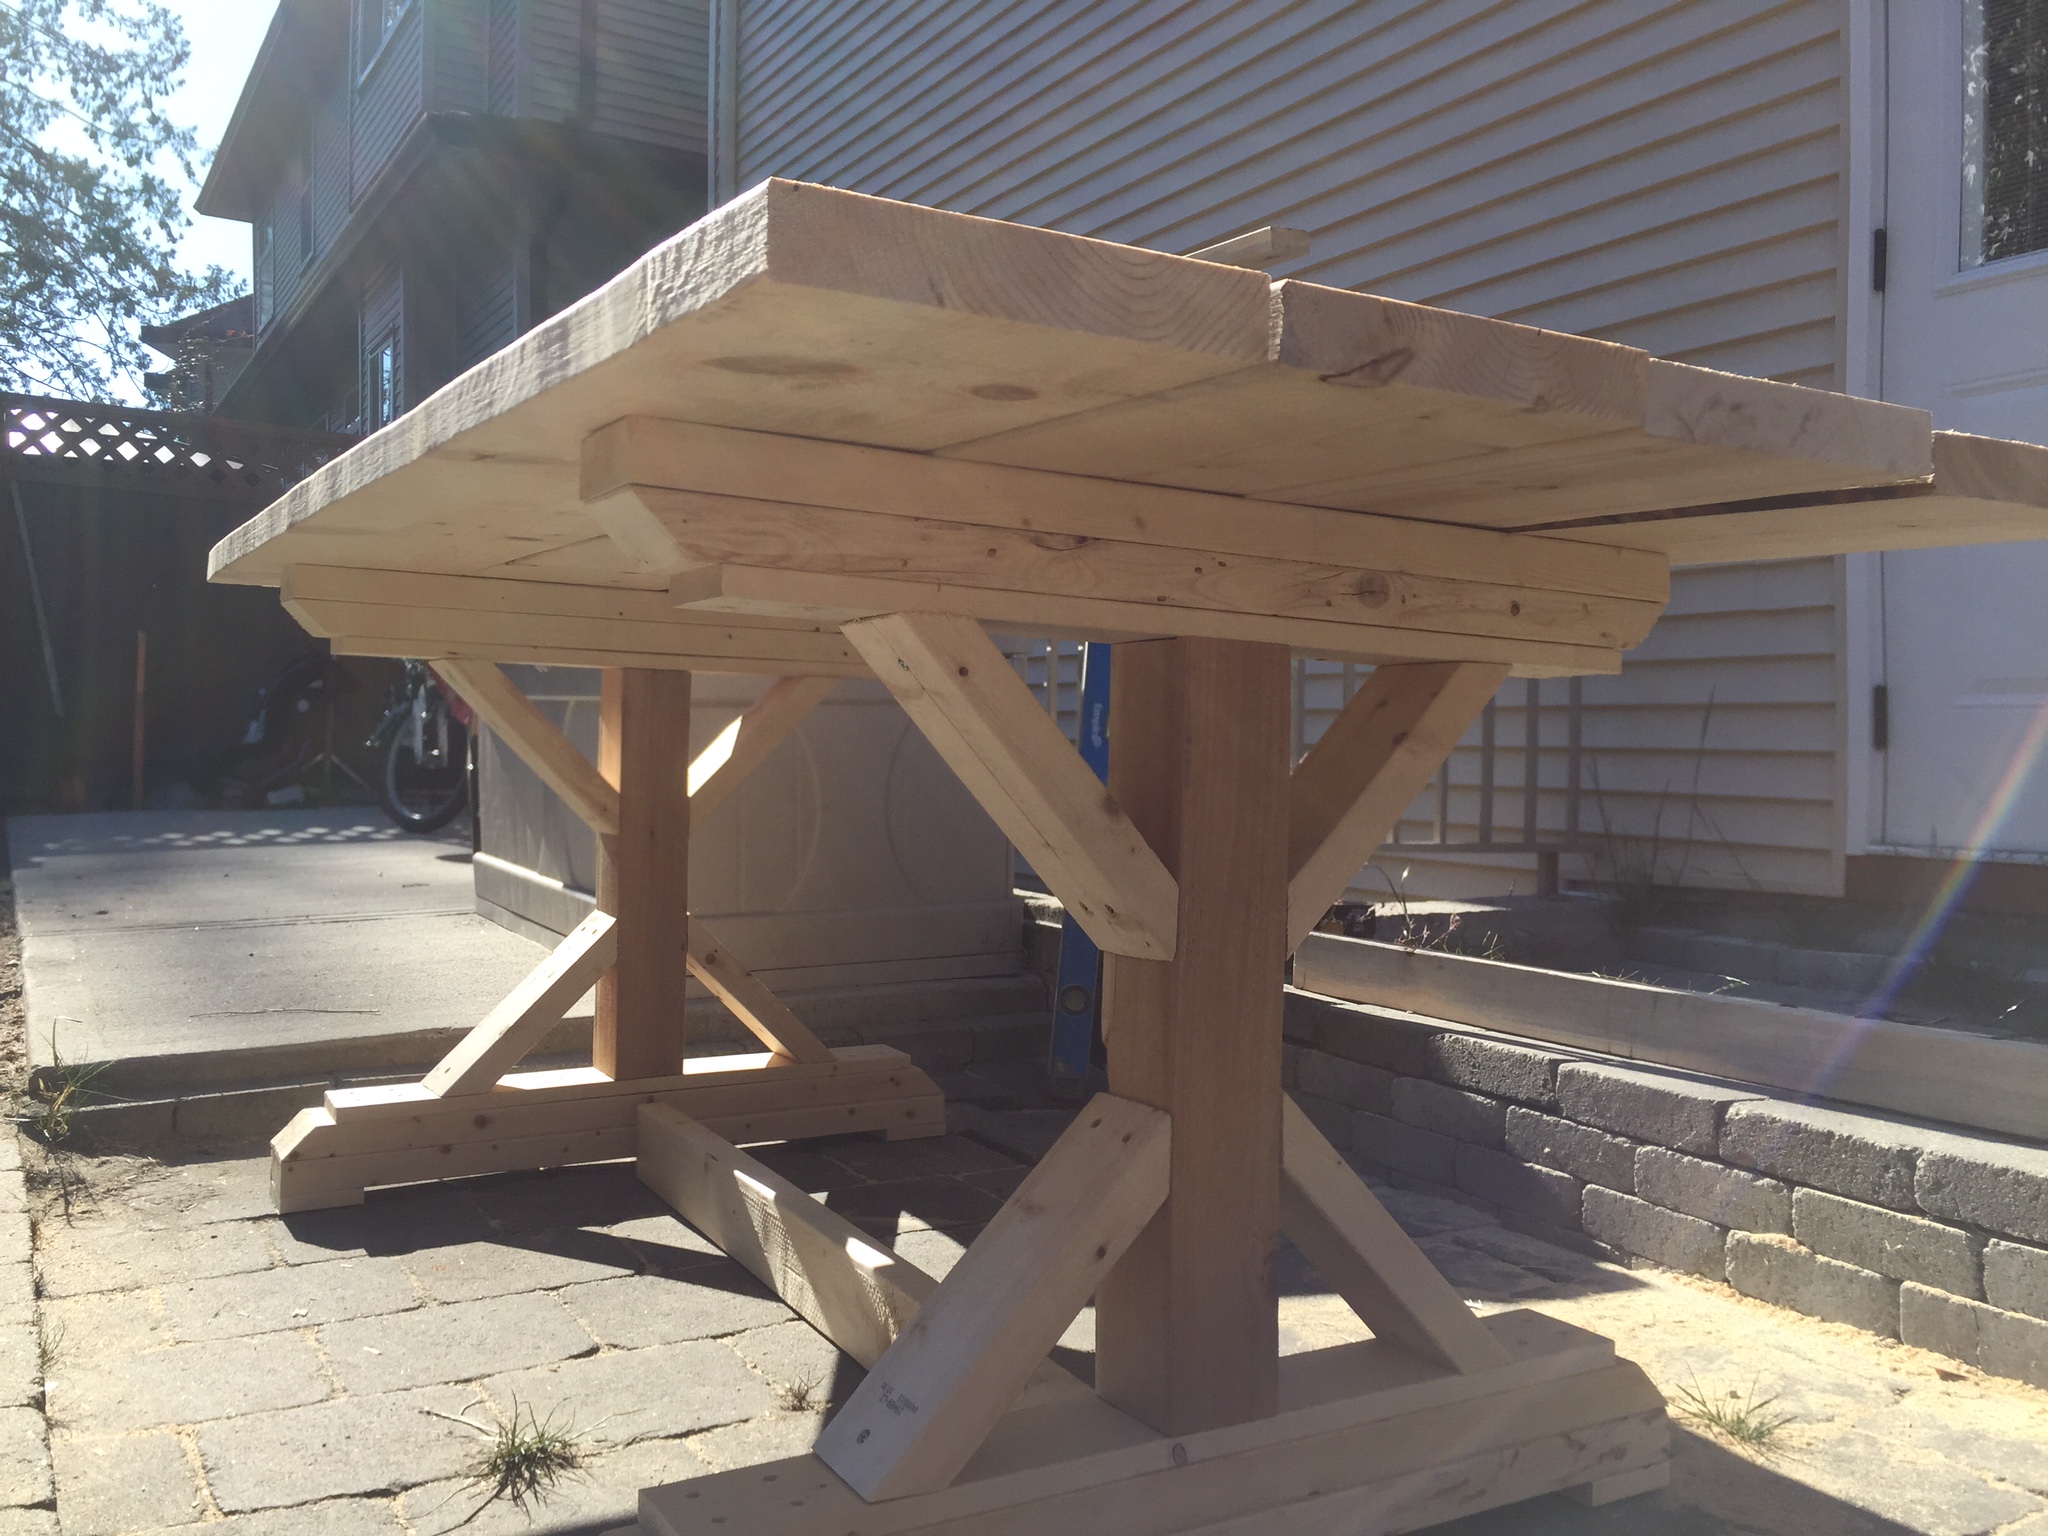
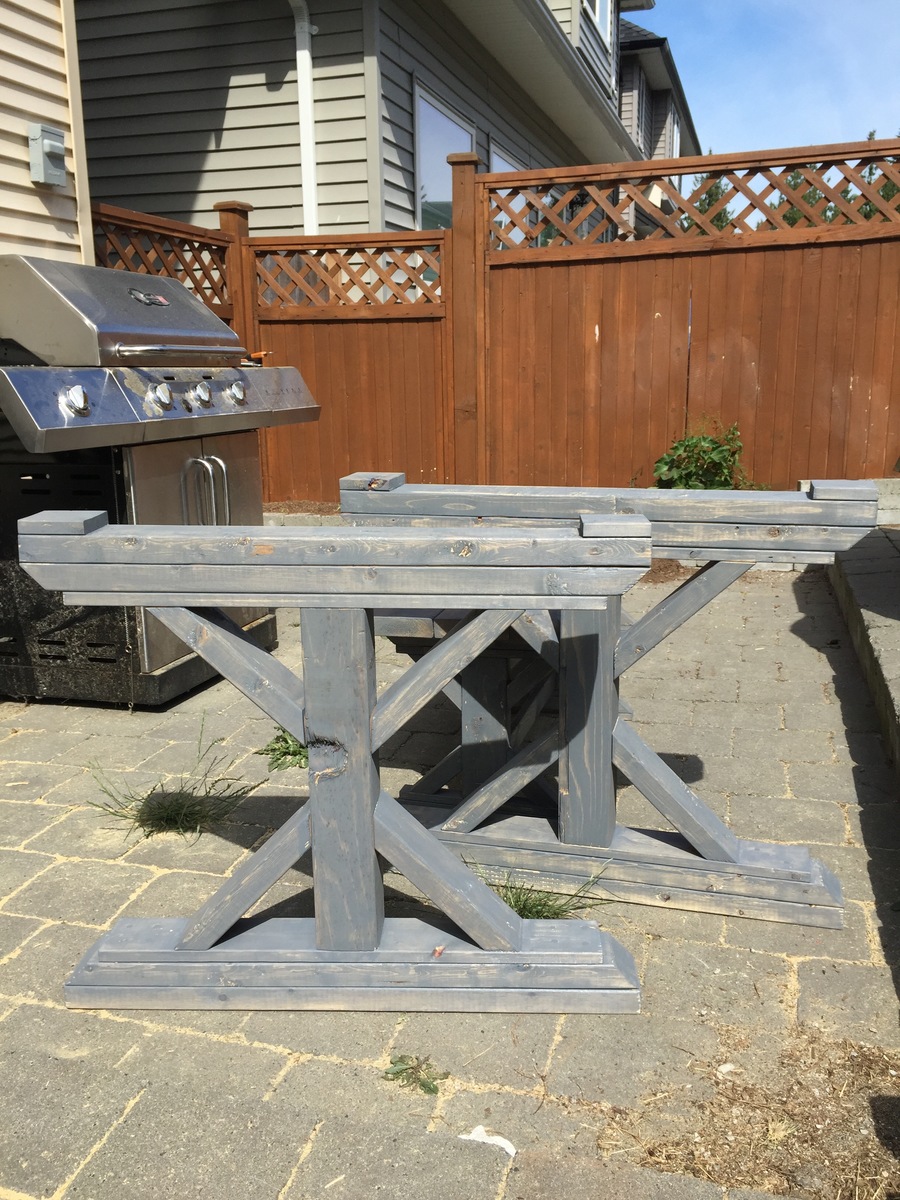
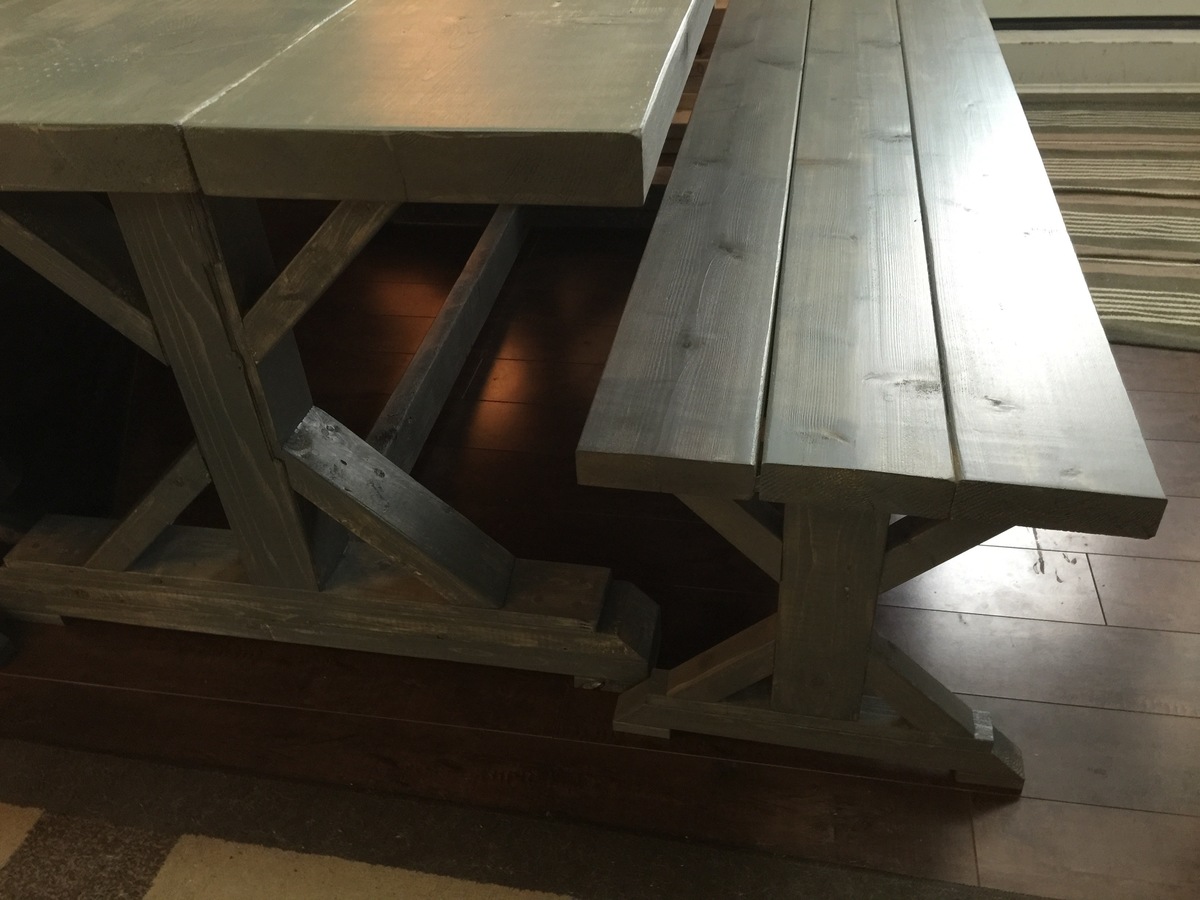
Our 6' Farmhouse X Table (Slightly Modified)
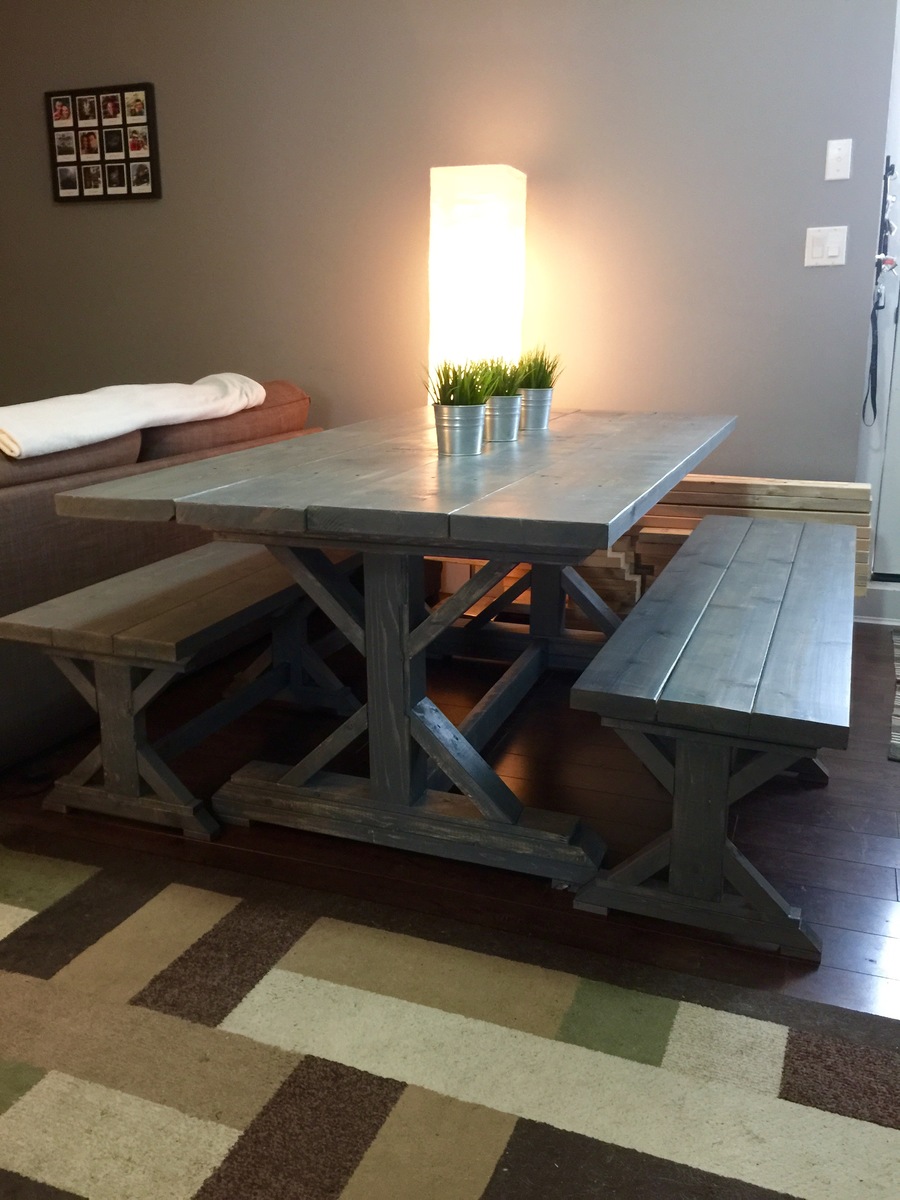
We had been saving up for a table like this one from Restoration Hardware or Urban Barn or West Elm but needless to say it was taking a while (just for the table)... then we stumbled upon @Shanty2Chic on Pinterest and loved the idea.
As far as woodworking/furniture making goes, I have taken a turn at it here and there but this was our first major project and it worked out great. We decided to go with two benches and we're currently hunting for chairs, maybe a DIY as the ones we want are also pretty expensive for what they are!
We bought all the wood, subbing the 96" 2x10s for 72" 2x10s and subbed the 2x4s in the X legs for 4x4s. I like the one piece better than the 2x4s and we attached the X pieces to the 4x4 using 2-1/2" pocket screws. After cutting and sanding, we assembled the table and set out staining it with a brush and a clean rag using the "brush on - wipe off" method which gave us a nice look at the grain pattern. The stain we chose was Varathane Weathered Grey and did one coat which gave us the look we were after. After staining we applied three coats of Varathane Matte Finish clear to allow for that "natural wood feel".


Built from Plan(s)
Estimated Cost
Pocket Kreg - $23, Stain and Clear Coat - $30, All Wood - $270 (Over Bought a few pieces and spent a good amount on the 4x4s otherwise it would be closer to $200). Total = $325
Estimated Time Investment
Week Long Project (20 Hours or More)
Finish Used
Varathane Wethered Grey and Varathane Matte Finish Clear
Recommended Skill Level
Intermediate
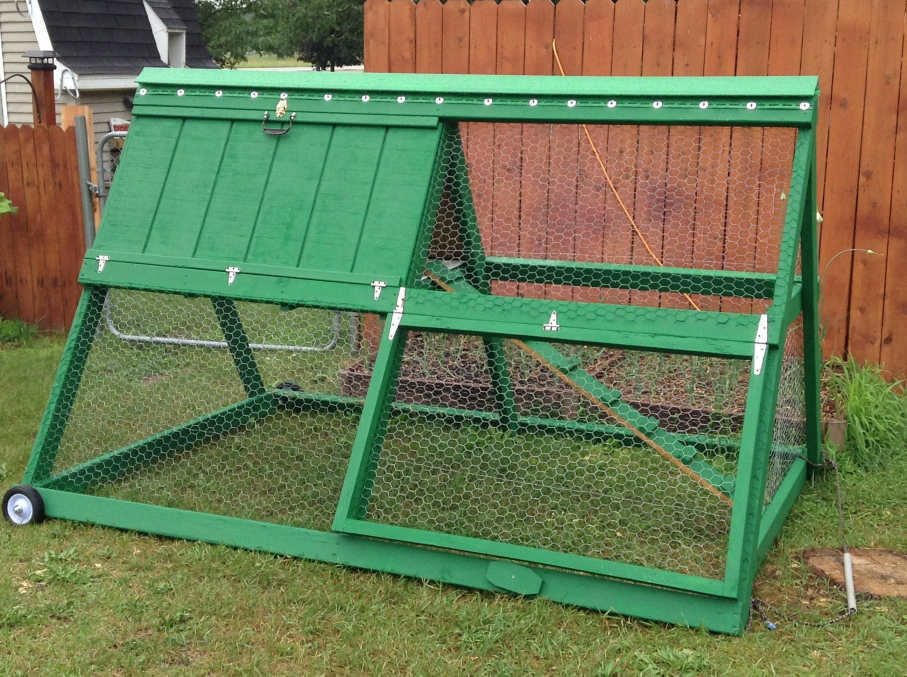
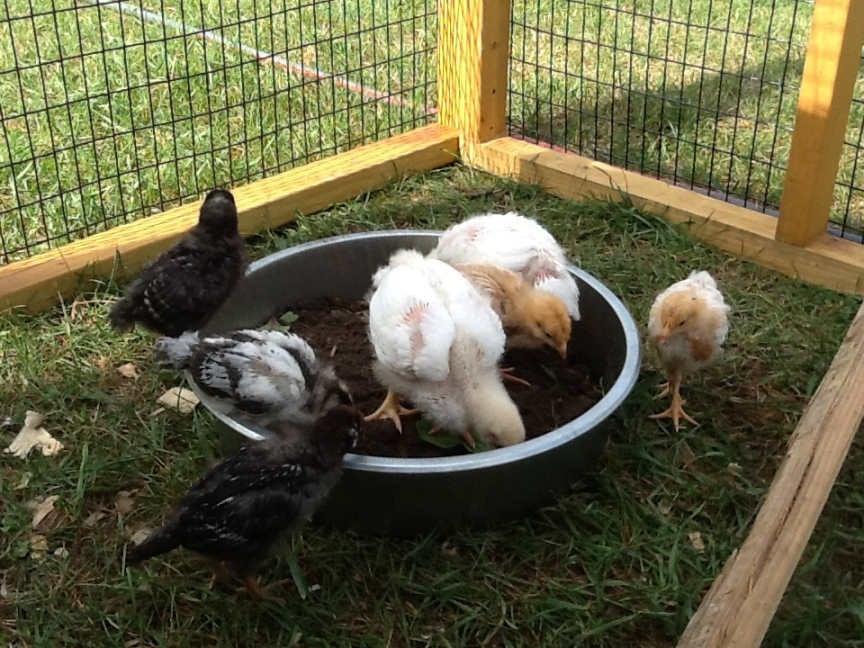
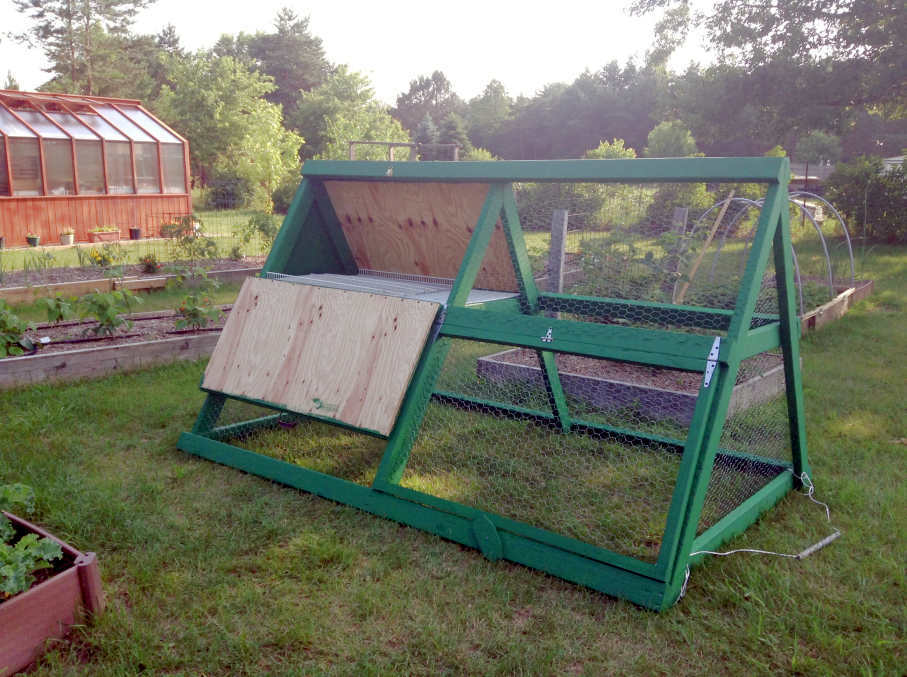
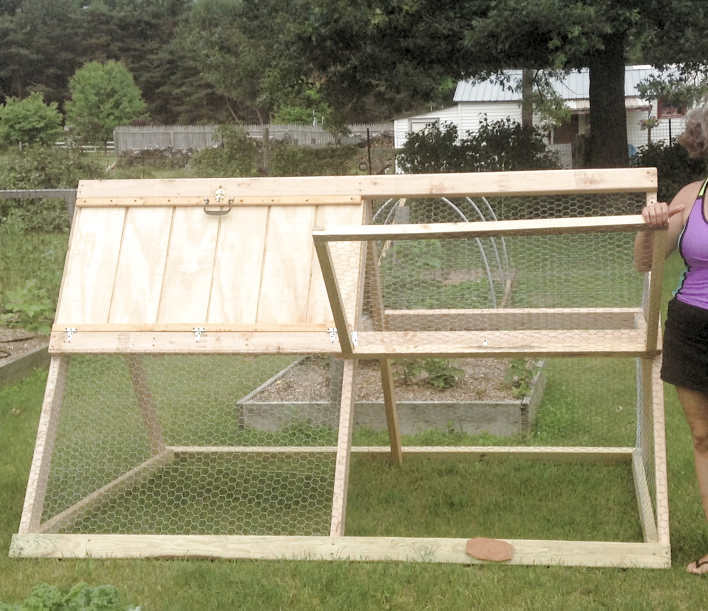
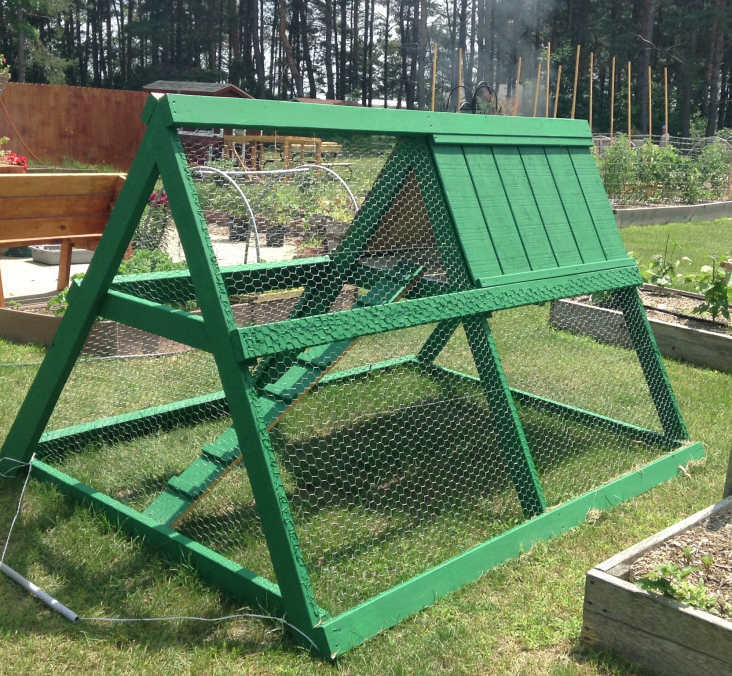
A-Frame Chicken Tractor
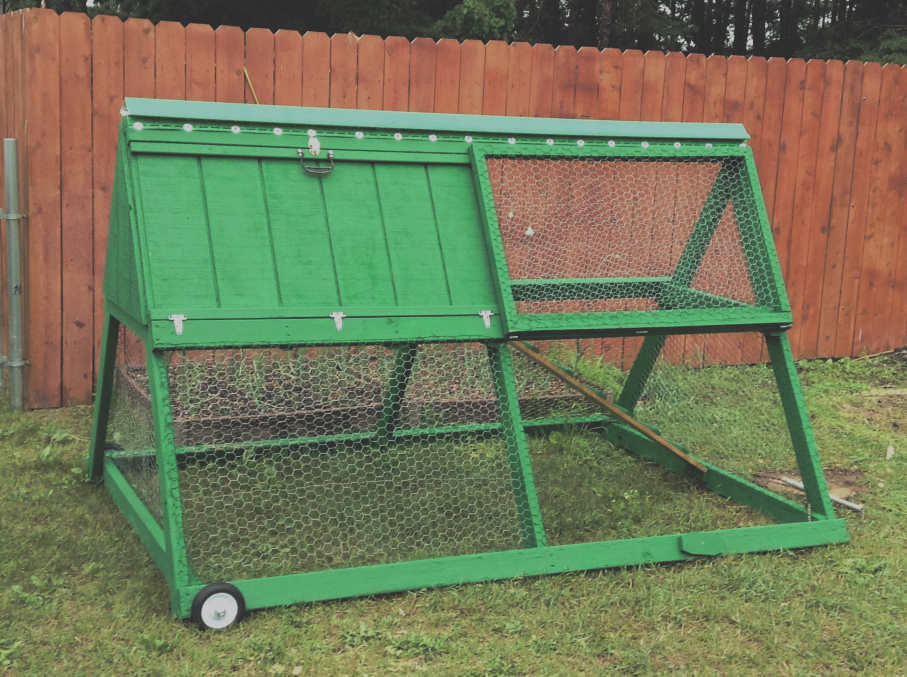
New to raising chickens, but eager to jump right in to it.
We bought a pre-made coop for the main home for our new chicks and it's very nice, not something I could do myself since I'm not yet at that level, but I saw this chicken tractor and thought it would come in handy for what I have in mind so I made up my mind to build it.
The lumber, chicken wire, staples, and wheels are all store bought new and came to about $75. The materials we had on hand were the screws, hinges, plastic coated metal shelving (used in the nesting area, I thought that would make it easy to clean), paint, and the corner piece of vinyl siding for the roof cap (hubby's brilliant idea, and I painted it green with spray paint for vinyl).
I did not try to build it quickly, I don't really know how much time it took me, but if I had to guess I'd guess total time would amount to about 3 afternoons, by myself.
I wanted to leave the top on the one side open with the option to slap on the other boards if/when the need arises. I have the other t1-11 panels that can sit right in those areas because I stapled the chicken wire in a way that would allow it.
I also added a flip up panel as seen in the pictures for access. I didn't want a small door that I would have a hard time getting to things in there. I'm so glad I added this feature, it sure gives plenty of room for me to maintain the food and water dispensers as well as get in there and catch the little chickies :)
I wanted it green to blend into the wooded background in our backyard. I didn't want to take any beauty away from the cedar greenhouse and fencing we added last year, and this tractor would be moved from time to time and I felt this green that we had on hand was perfect to help it blend in rather than stand out.
This thing is heavy! I have a hard time moving it around and usually need my husband to move it so I won't hurt myself. I am considering some options... I don't like the rope I have on it to pull it, any suggestions would be appreciated.
As with the other items I've made with Ana's plans, this was fun and pretty easy to make. I love this site! Soon I will take on my next project, I've bought and gathered the materials, I'm anxious to get started :)
Thank you for looking :)
Built from Plan(s)
Estimated Cost
$75 - $85 for the new materials listed
Estimated Time Investment
Weekend Project (10-20 Hours)
Finish Used
Green exterior paint we had on hand.
Recommended Skill Level
Intermediate
Sturdy Workbench Modified
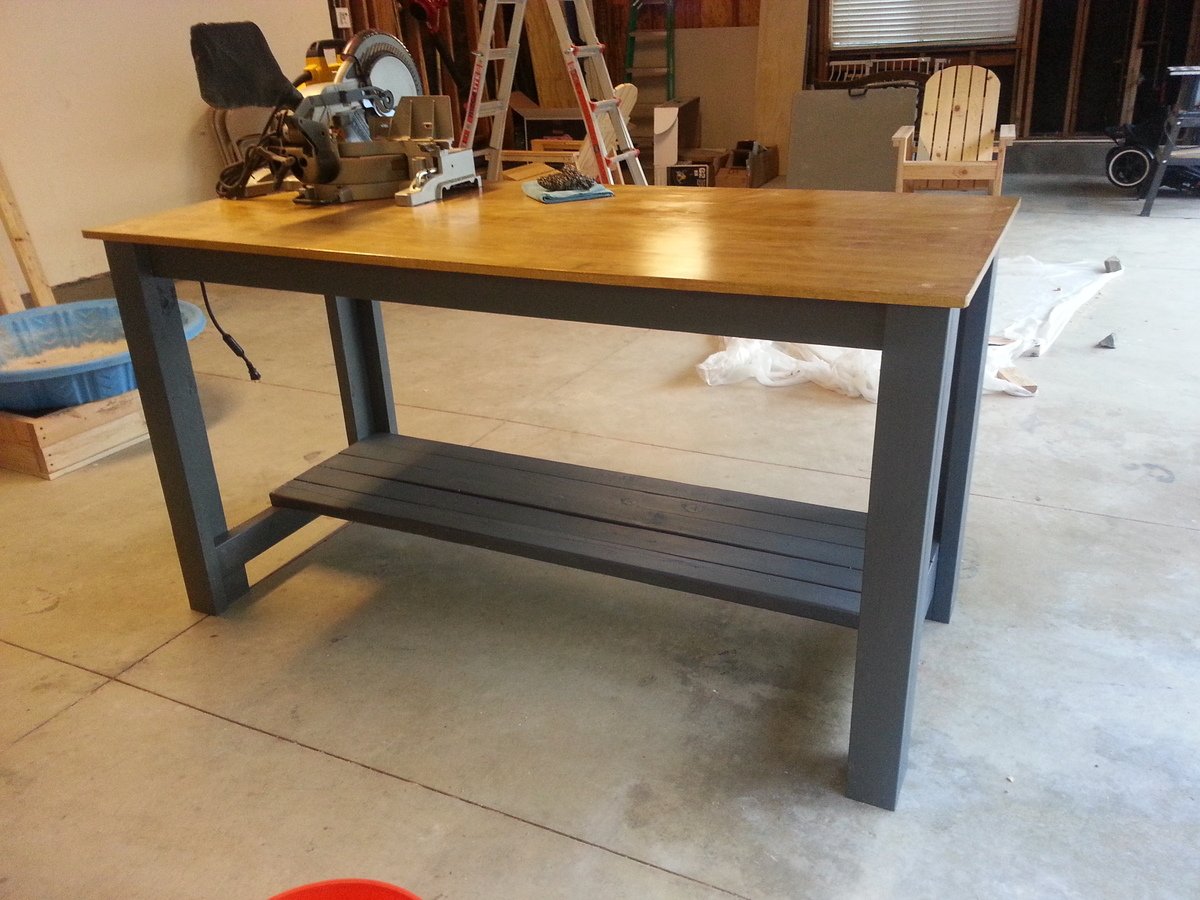
This is a modified version of the sturdy workbench. I made it six feet long, about three feet wide (I can't remember exactly), and 36'' high. Since I'm 6'2'', I needed a bench that didn't keep me constantly bending over.
I used Douglas Fir framing lumber and 3/4'' plywood for the surface. The plywood was a cheap replaceable option since hardwood is extremely expensive in my area. The wood warped a bit after I built it, so its clearly not perfect. But who cares, its a workbench after all...
I used left over paint / stain I had laying around in the garage. The gray is a custom mix interior paint, and the stain is Minwax Golden Oak. I used 1 coat of stain, and three coats of Poly.
Built from Plan(s)
Estimated Cost
$100
Estimated Time Investment
Afternoon Project (3-6 Hours)
Finish Used
Minwax golden oak 1x, conditioner 1x, and poly 3x.
Recommended Skill Level
Starter Project
Comments

Sun, 07/14/2013 - 20:31
Gray and Golden Oak
Looks great. :) I like the gray and golden oak together; two neutrals I would not have thought to pair.
In reply to Gray and Golden Oak by yurra-bazain
Mon, 07/29/2013 - 21:11
Thanks! It definitely stands
Thanks! It definitely stands out in the garage...
Easy and Fast DIY Garage Workshop
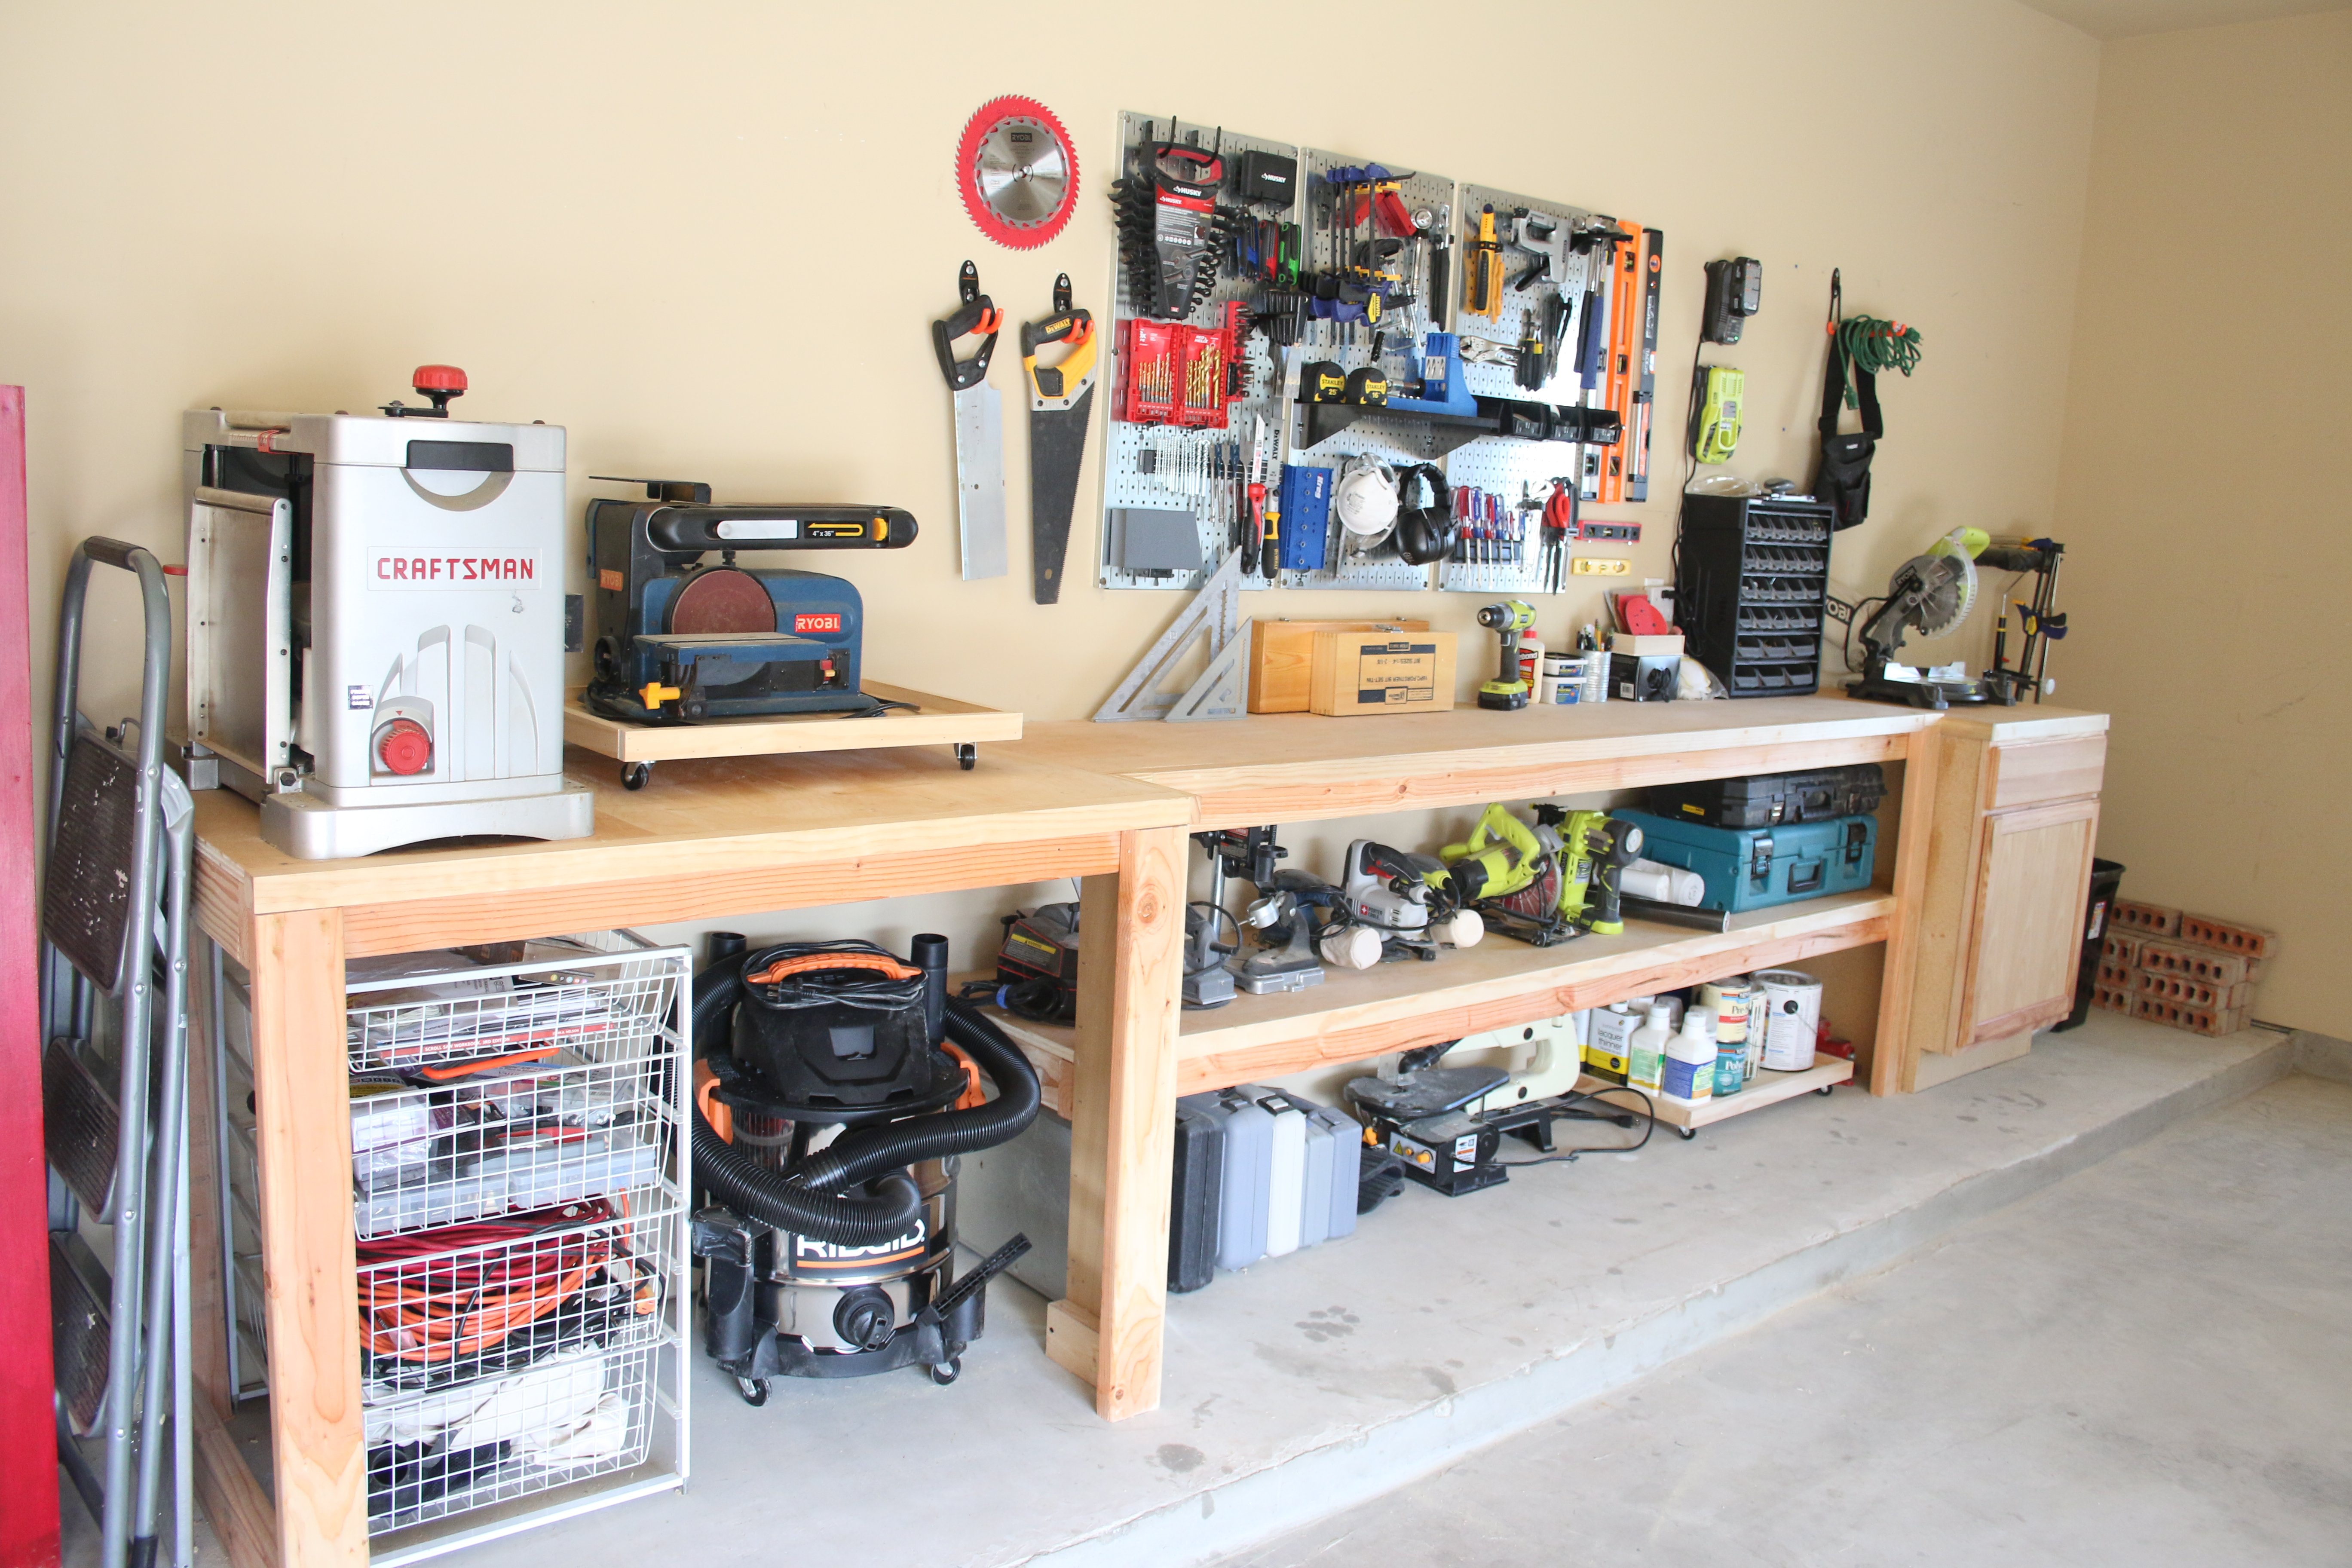
I used these plans and modified the height to create functional countertop and shelving in my garage. I added a little face framing too. Thank you for the inspiration Ana!
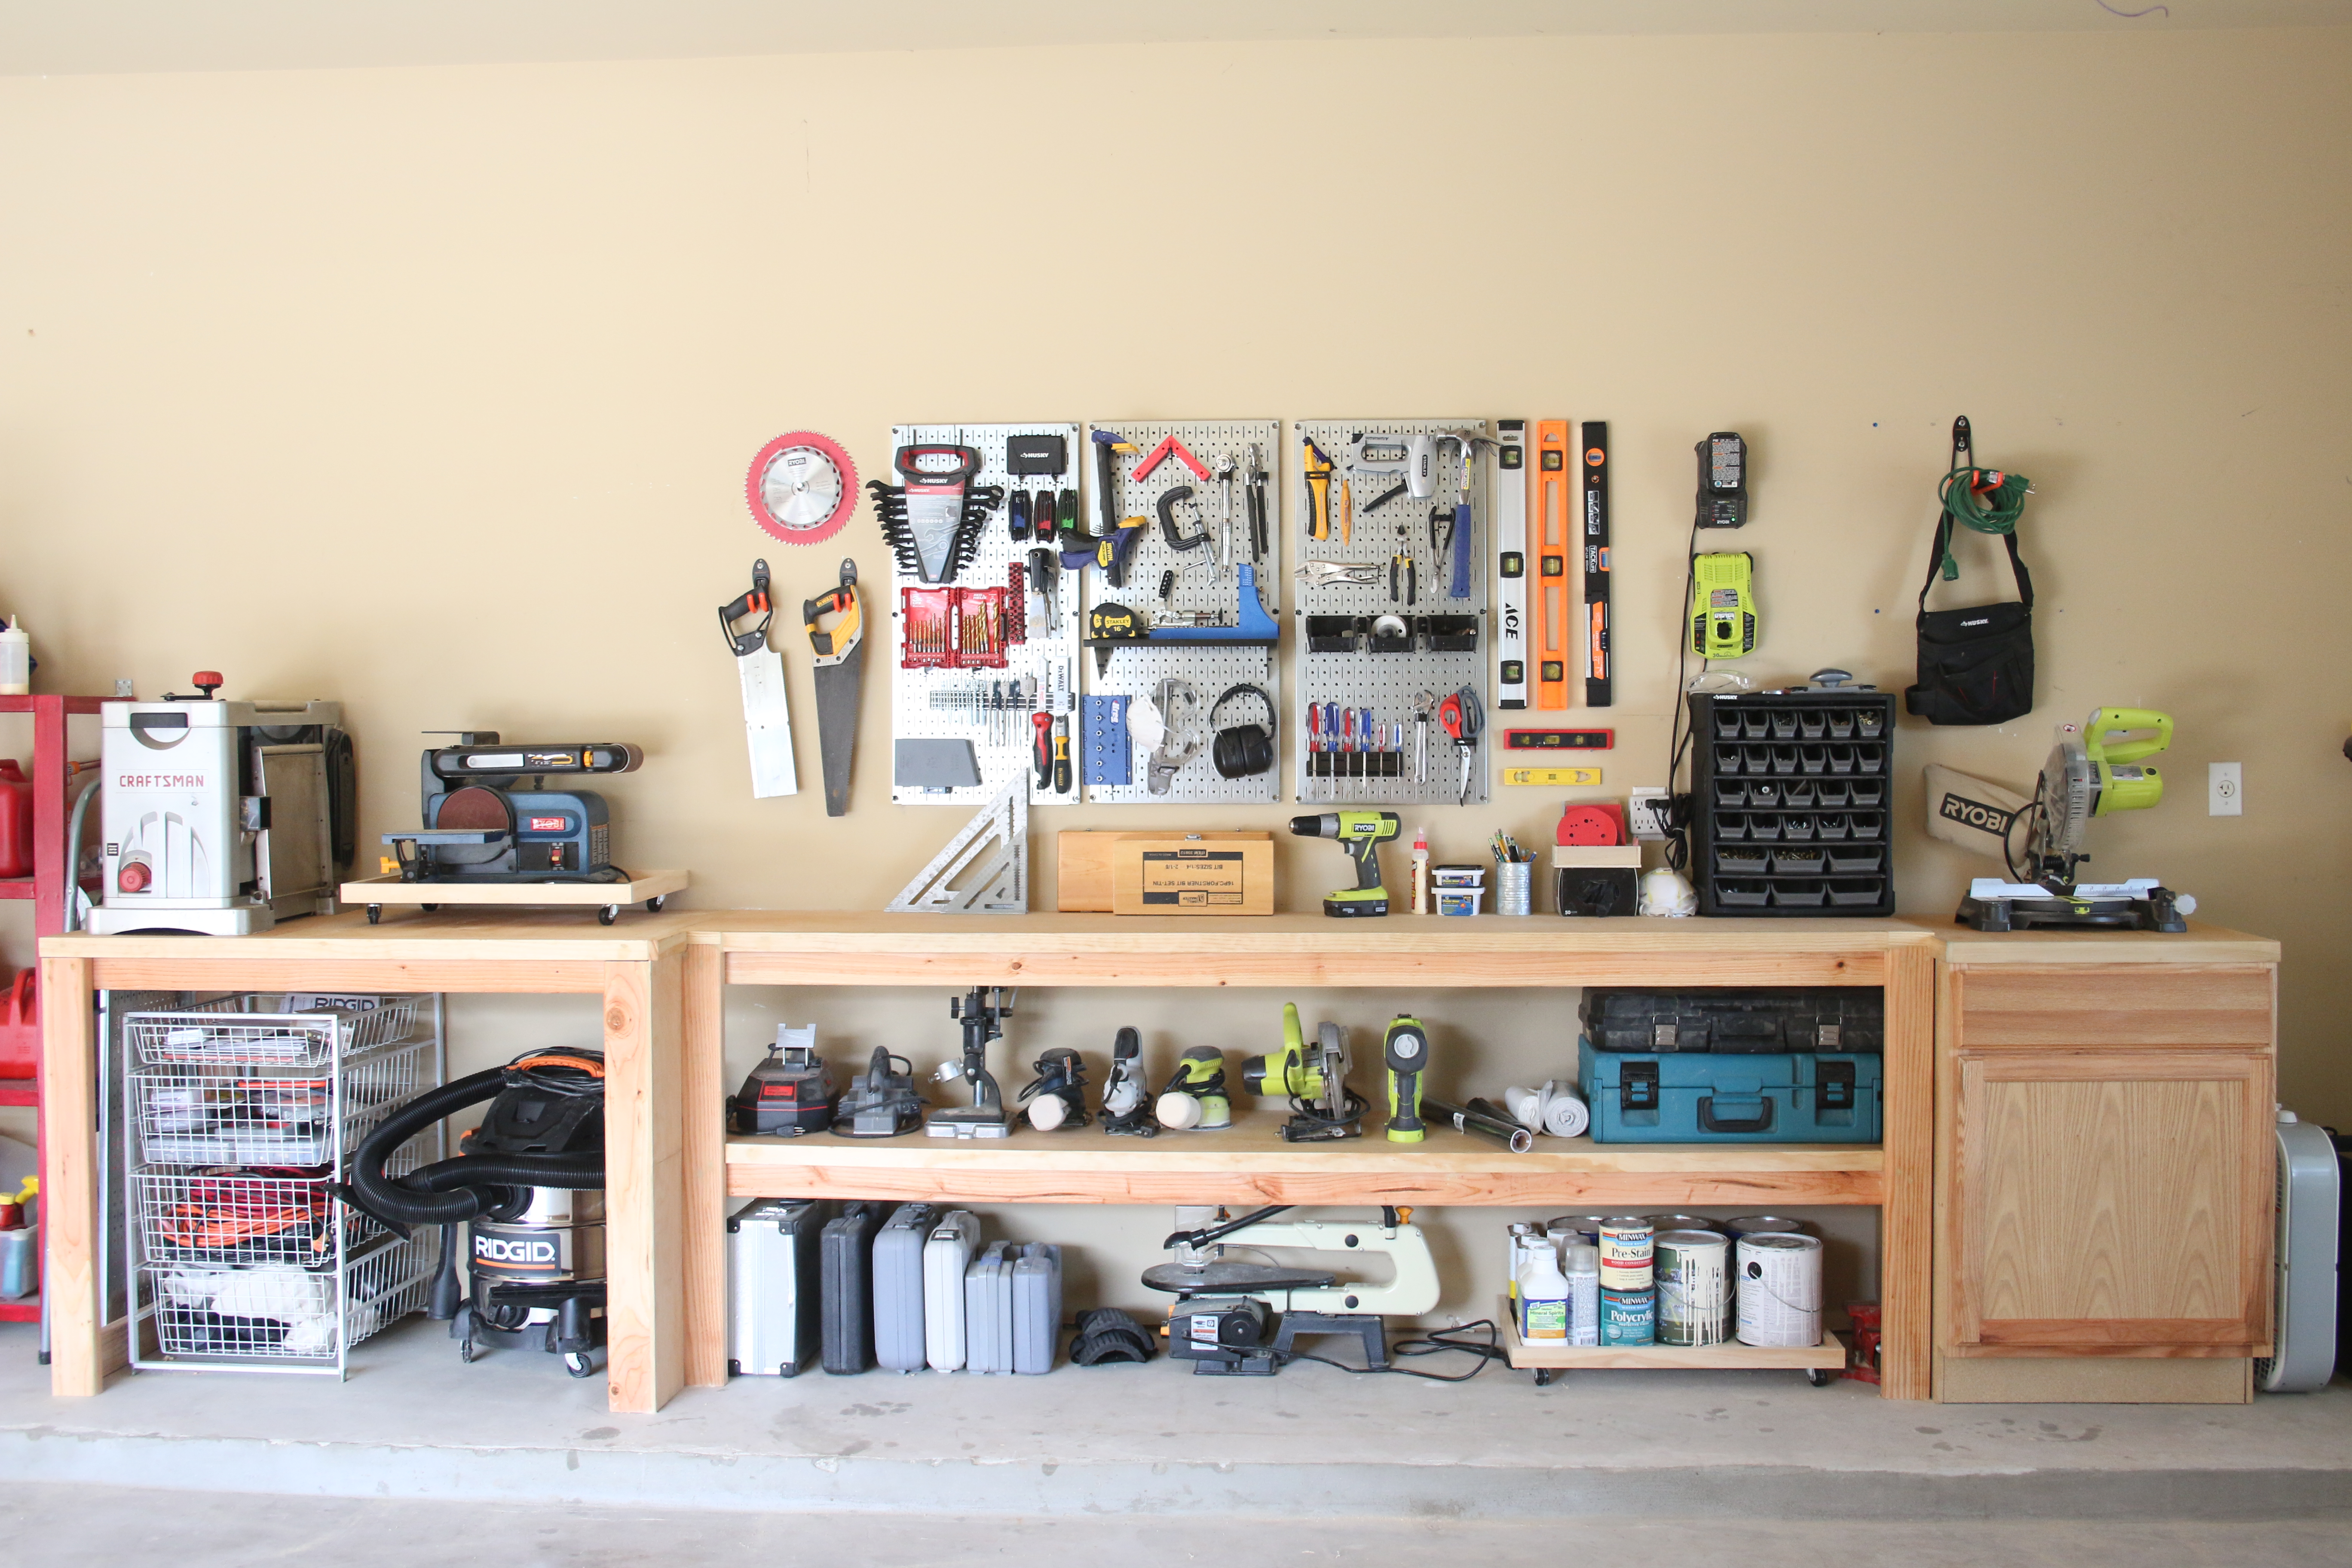
Built from Plan(s)
Estimated Time Investment
Weekend Project (10-20 Hours)
Finish Used
Mineral Oil
Recommended Skill Level
Beginner
Comments
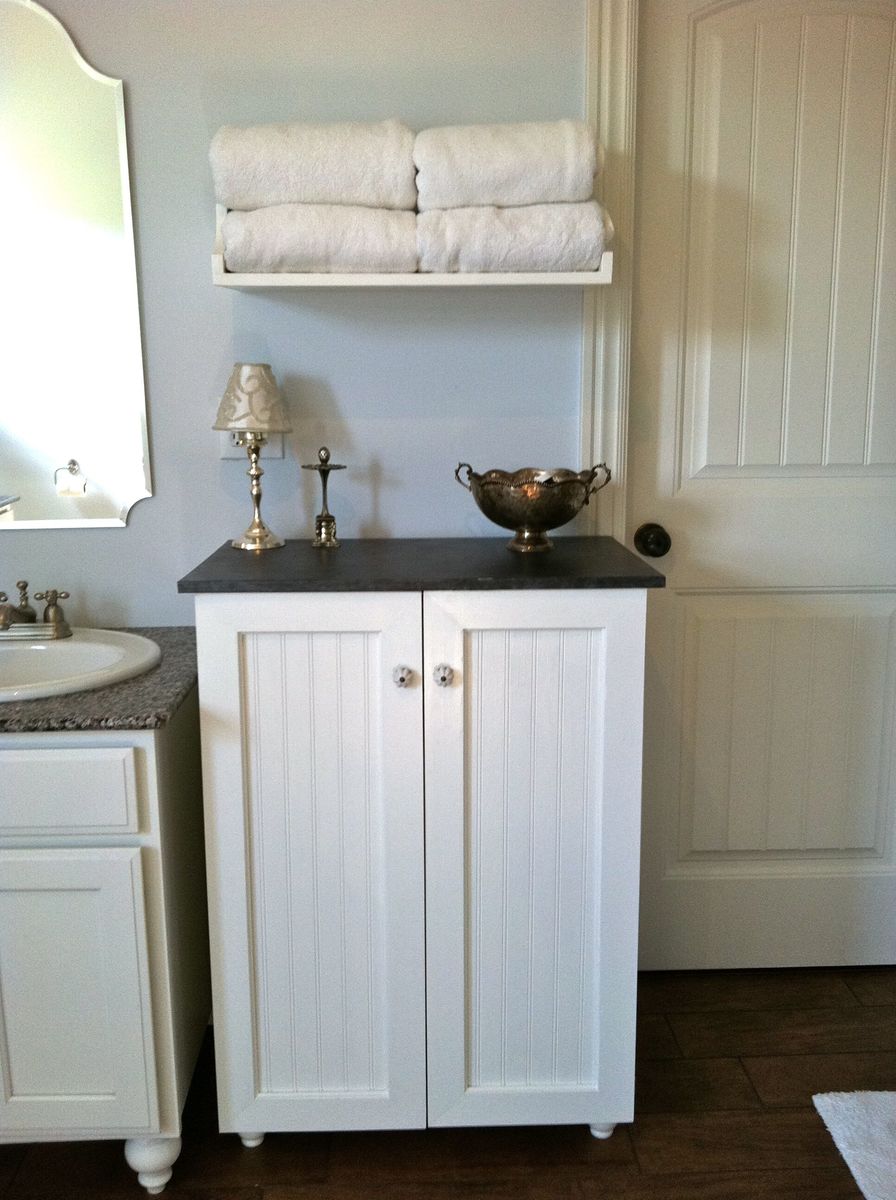
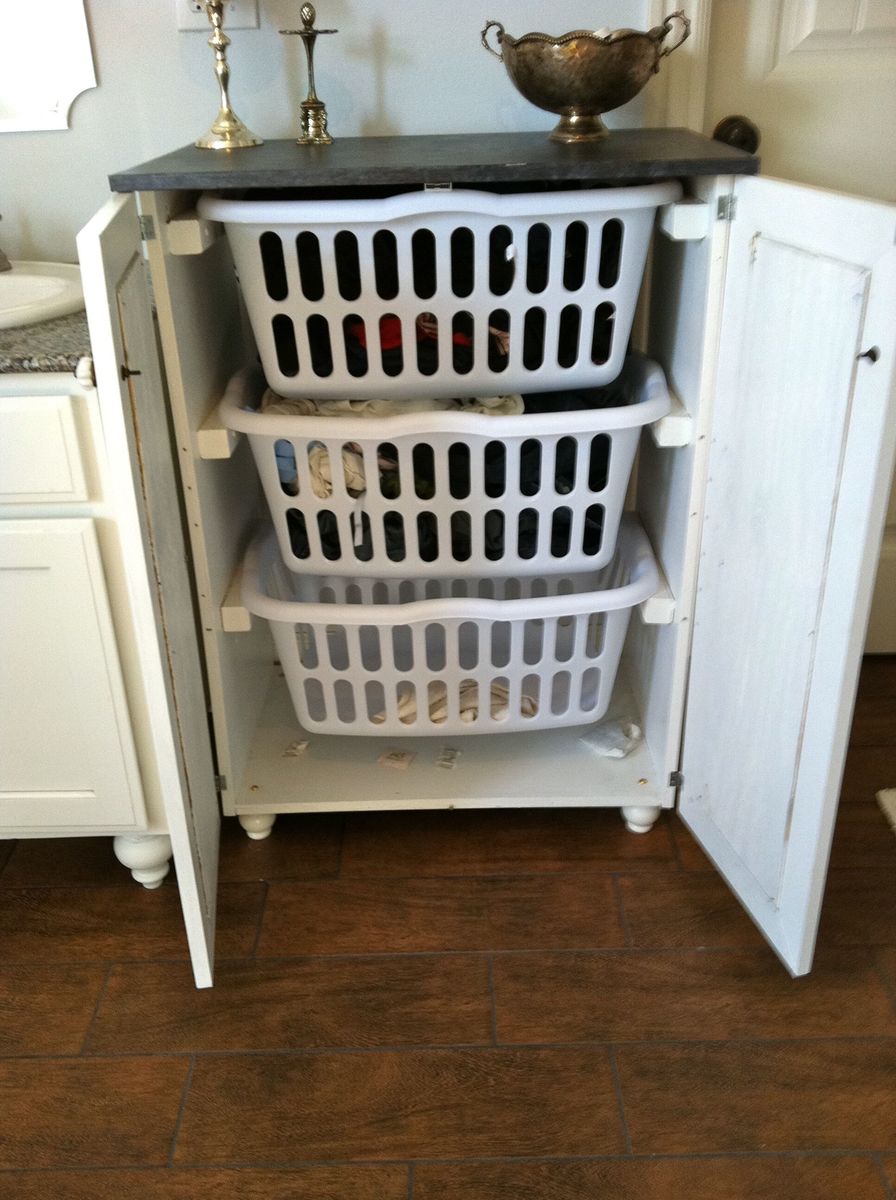
My laundry basket dresser with doors
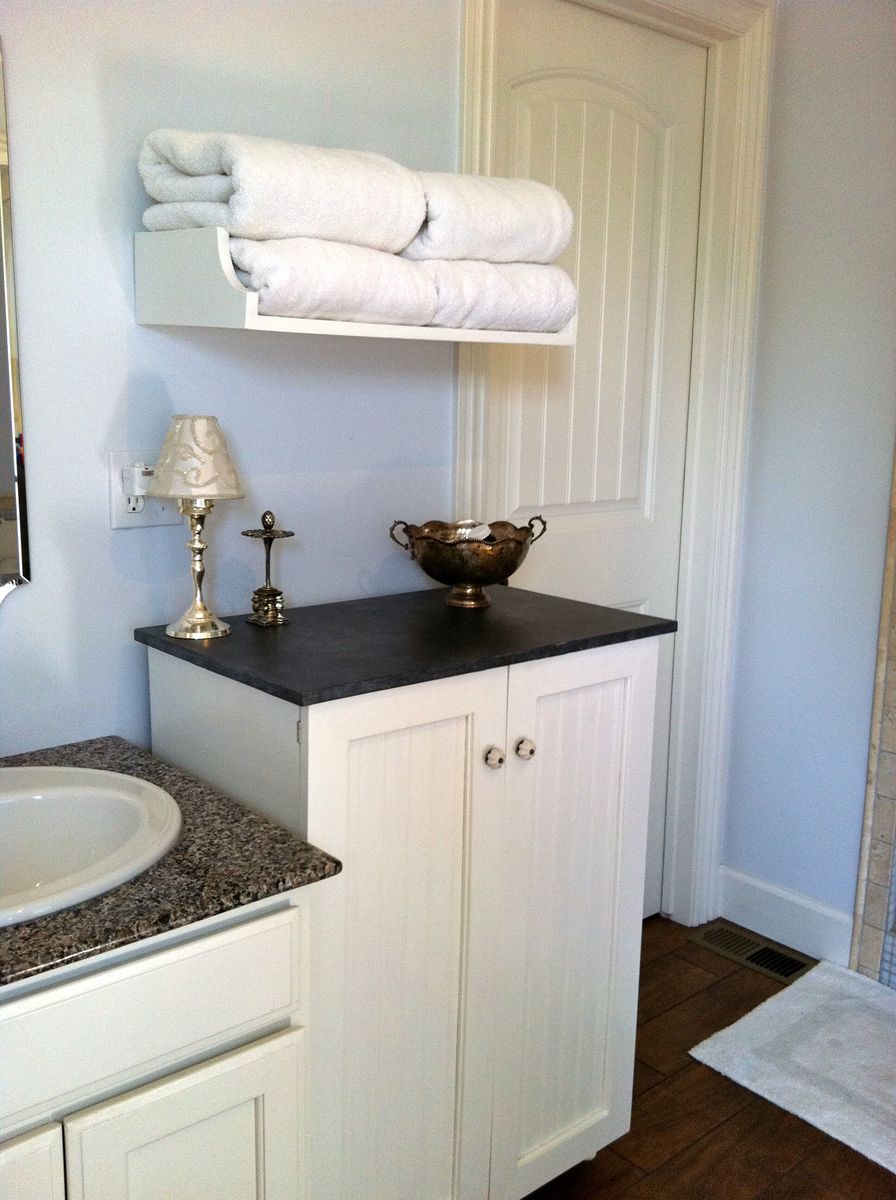
I wanted to use our laundry basket dresser as a collector for dirty laundry in our bathroom, and wanted it to have doors so it would blend in better. I also made the shelf above for our towels. It is painted white with a faux-zinc finish on the top. I made the top slightly larger so it would overhang and added cute little bun feet. My talented friend Carli helped me build the doors (and by helped I mean I handed her things while she impressed me with all her tools and skills!) and frame.
Built from Plan(s)
Estimated Cost
$75-100 (can't remember exactly)
Estimated Time Investment
Weekend Project (10-20 Hours)
Finish Used
white semi-gloss paint, zinc faux finish: layer 1 dark charcoal paint, layer 2 dark pewter metallic glaze, layer 3 white paint thinned with water & rubbed on/off.
Recommended Skill Level
Intermediate
Comments


Fri, 07/29/2011 - 23:37
BEAUTIFUL!!
this is perfect! i totally need a bunch just like this! I love the added doors!
Tue, 10/11/2011 - 20:42
Would you mind sharing the
Would you mind sharing the dimensions for this cabinet? Love this idea!!!! Great job!
Wed, 01/11/2012 - 08:29
I love this idea! I will have
I love this idea! I will have a new bathroom soon and I think this will get used! What are the dimensions, or what style cabinet would you suggest to look for? TIA!
Fri, 02/17/2012 - 05:57
The dimensions are the same
The dimensions are the same as Ana's plan: http://ana-white.com/2010/11/laundry-basket-dresser except that the top is slightly bigger (3/4" overhang on front/sides) to look more like a countertop. On the doors we just made a frame w/ angled pieces, routed a notched line on the back & glued/nailed some beadboard in from the back. Sorry I can't be much more detailed on that, a friend did most of the doors for me!
Sun, 02/19/2012 - 07:42
Baskets Used?
I actually got the plywood to do this project and I was going to add doors. I looked at the baskets suggested but it seems they would stick out the front. I was just curious, did you use different baskets that would fit inside the cabinet or did you make the cabinet slightly deeper?
Sat, 02/25/2012 - 05:36
depth/baskets
Actually I discovered the same problem after it was built. I just didn't put a back on and they stick out a tiny bit in the back. I actually kind of like it that way because it lets some air in (being in the bathroom and putting towels in I could see it getting mildewy without much circulation). But if I had gotten the baskets first I probably would have made it about 2" deeper, then leave some open space, but not all, on the back.
Comments
rhonit
Mon, 05/06/2013 - 04:49
boys play tool bench
To cute, really like the lettering. Not to many boy things to build, hands down one of my favorites!