Canned Good Storage Wall
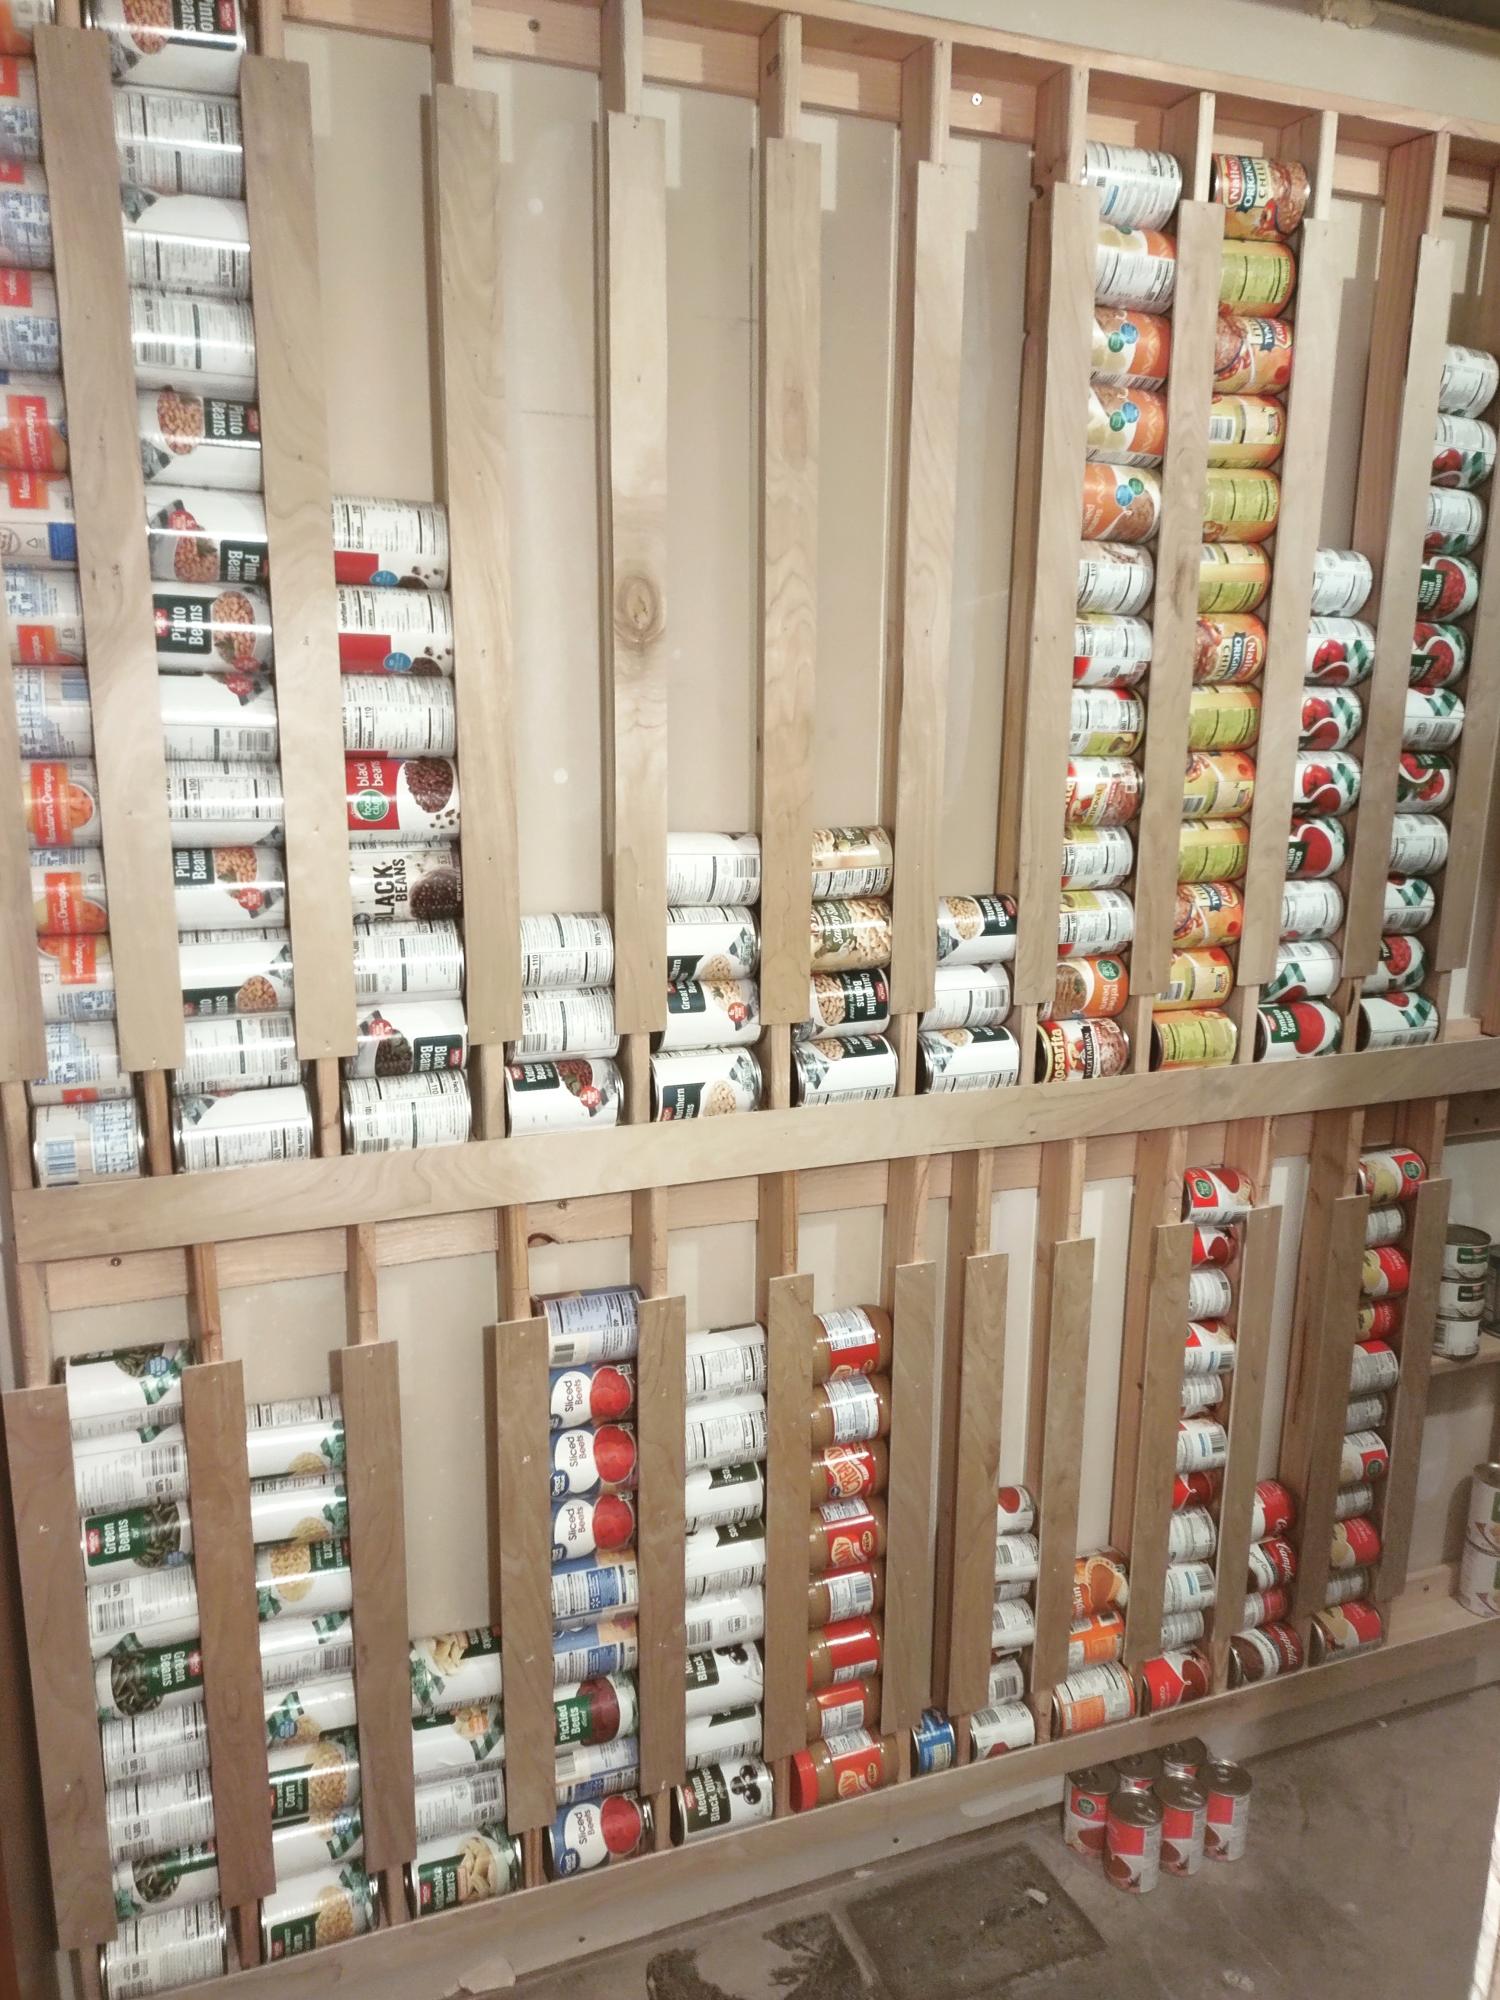
We love our new can storage!
Shayla Shumaker
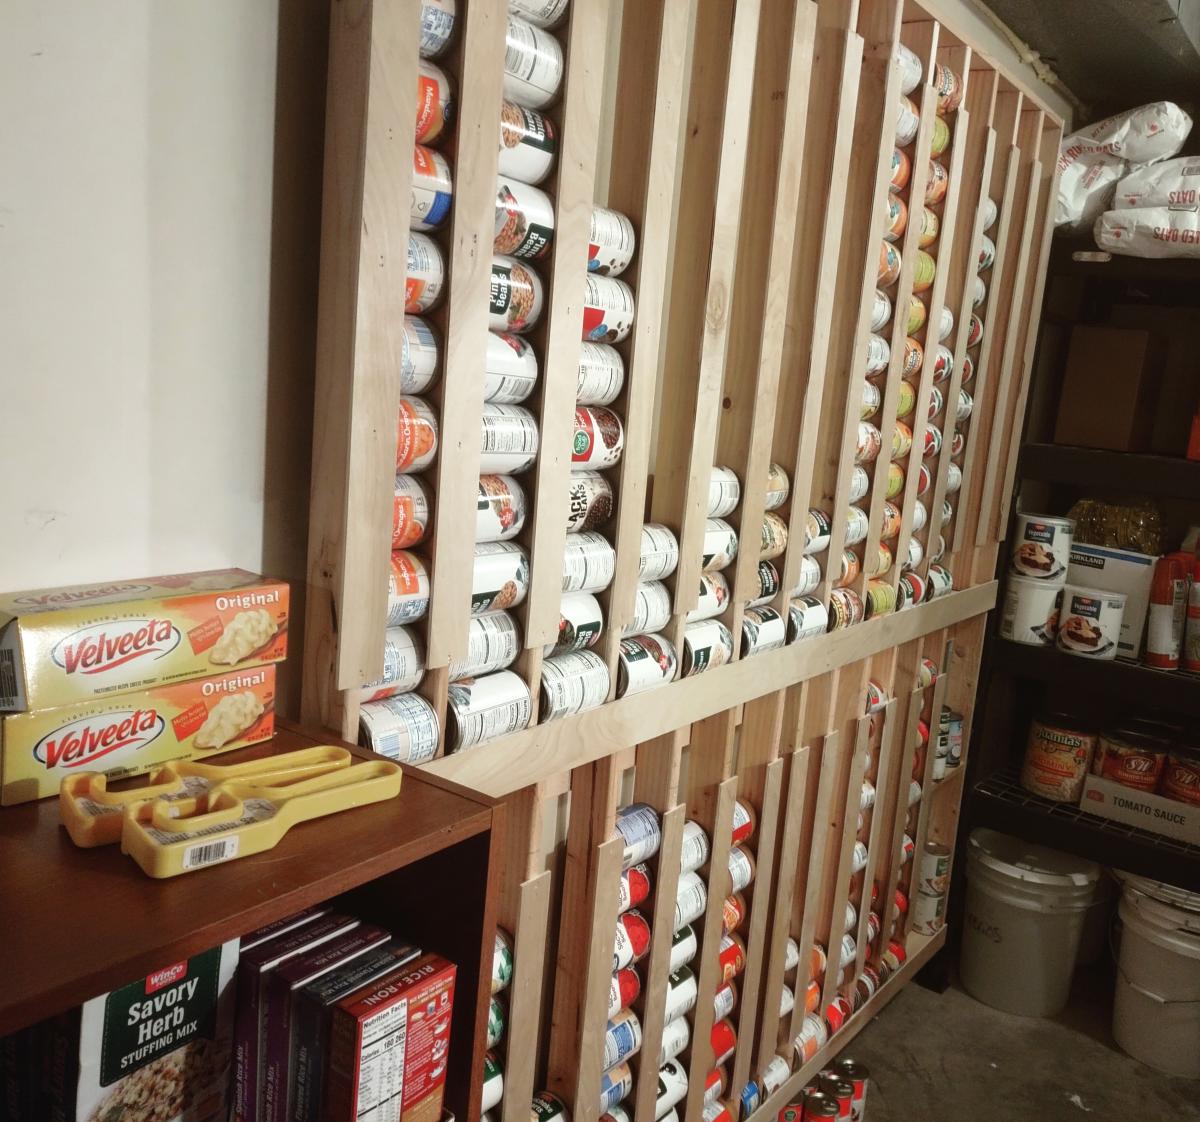
Built from Plan(s)
We love our new can storage!
Shayla Shumaker
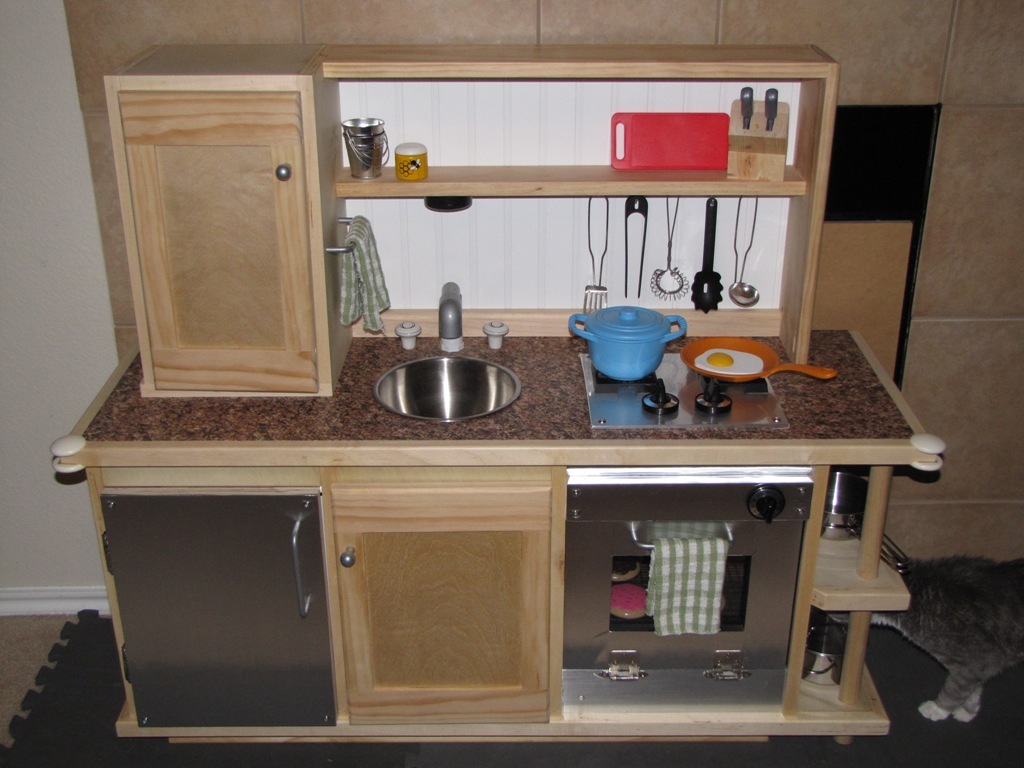
After my wife commented how much our son enjoyed playing with a pretend kitchen during play group, I began thinking about building one of our own. Searching online I found all of the amazing work that had been posted here and drew inspiration from all of the examples already shared.
Yesterday was the grand unveiling and I'm happy to report it was well received. Our son had to be dragged away from it for his bath and bed after hours of opening and closing all of the door and restacking his dishes. Thanks to all of you for the great ideas and the confidence to build on my own!
PS: The Kreg jig is the greatest DIY invention of all time.

Mon, 03/19/2012 - 09:21
Man, this looks like a real kitchen! Love the stove and fridge!!!
Sat, 09/01/2012 - 16:05
The countertop and appliances were both done with just plain old Contact Paper. I found both at Lowe's. Good luck!
My primitive mitre plastic template didn't allow me to get a 60 degree angle so I went with the very simply upright thingies instead! The vinegar, wire wool and tea oxidisation worked a treat and was far easier to apply than stain.


U-shaped breakfast nook custom built for client.
For the bones - I just laid the 2x4's out like studs all the way around. Odd corner in back R, 106 degrees, made for some fun mitreing on molding and plywood.
For the decorative finish, used single-piece paneling, not the wainscoting sheet-panels, to give a fuller look.

This was my first ever piece of furniture that I made and it was so much fun! I’ve got the furniture making bug now!
Melissa Pilcher
Wed, 08/02/2023 - 10:42
Thank you for sharing, so happy you went for it! Can't wait to see what you build next.
I wanted to make my girlfriend a gift for her birthday and came across this shelf. It turned out wonderful and I can't wait to make one for myself now!
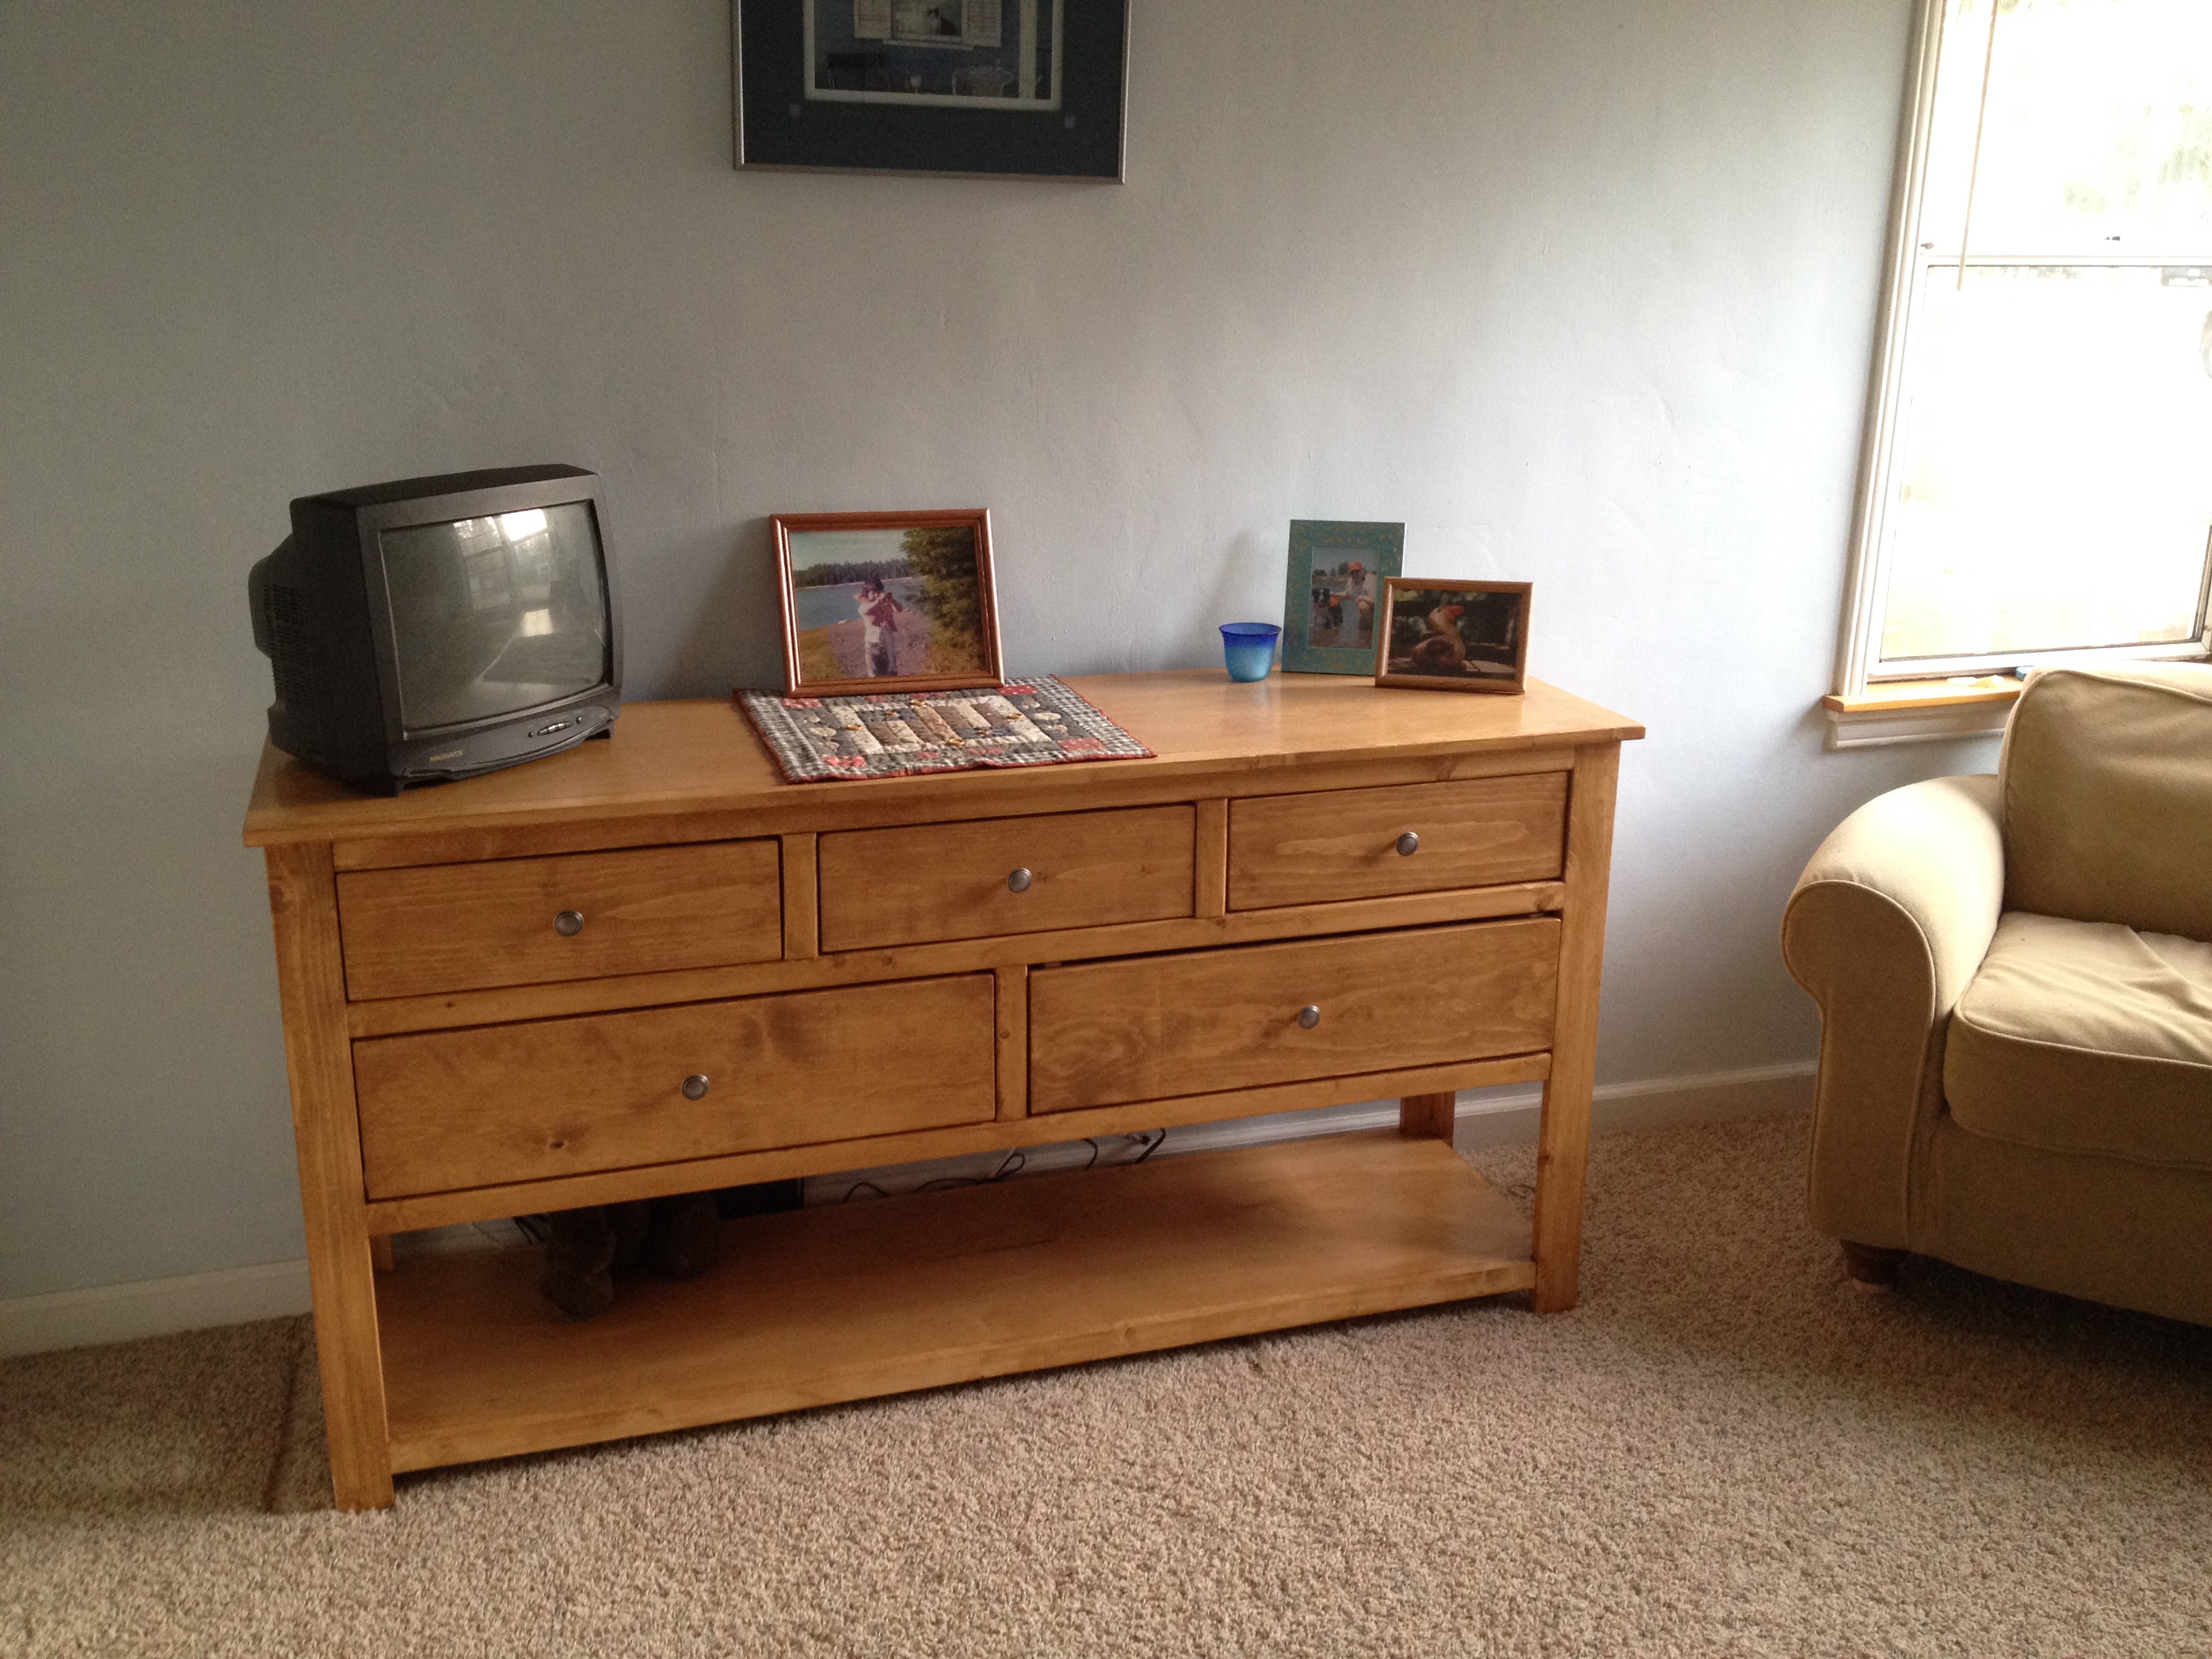
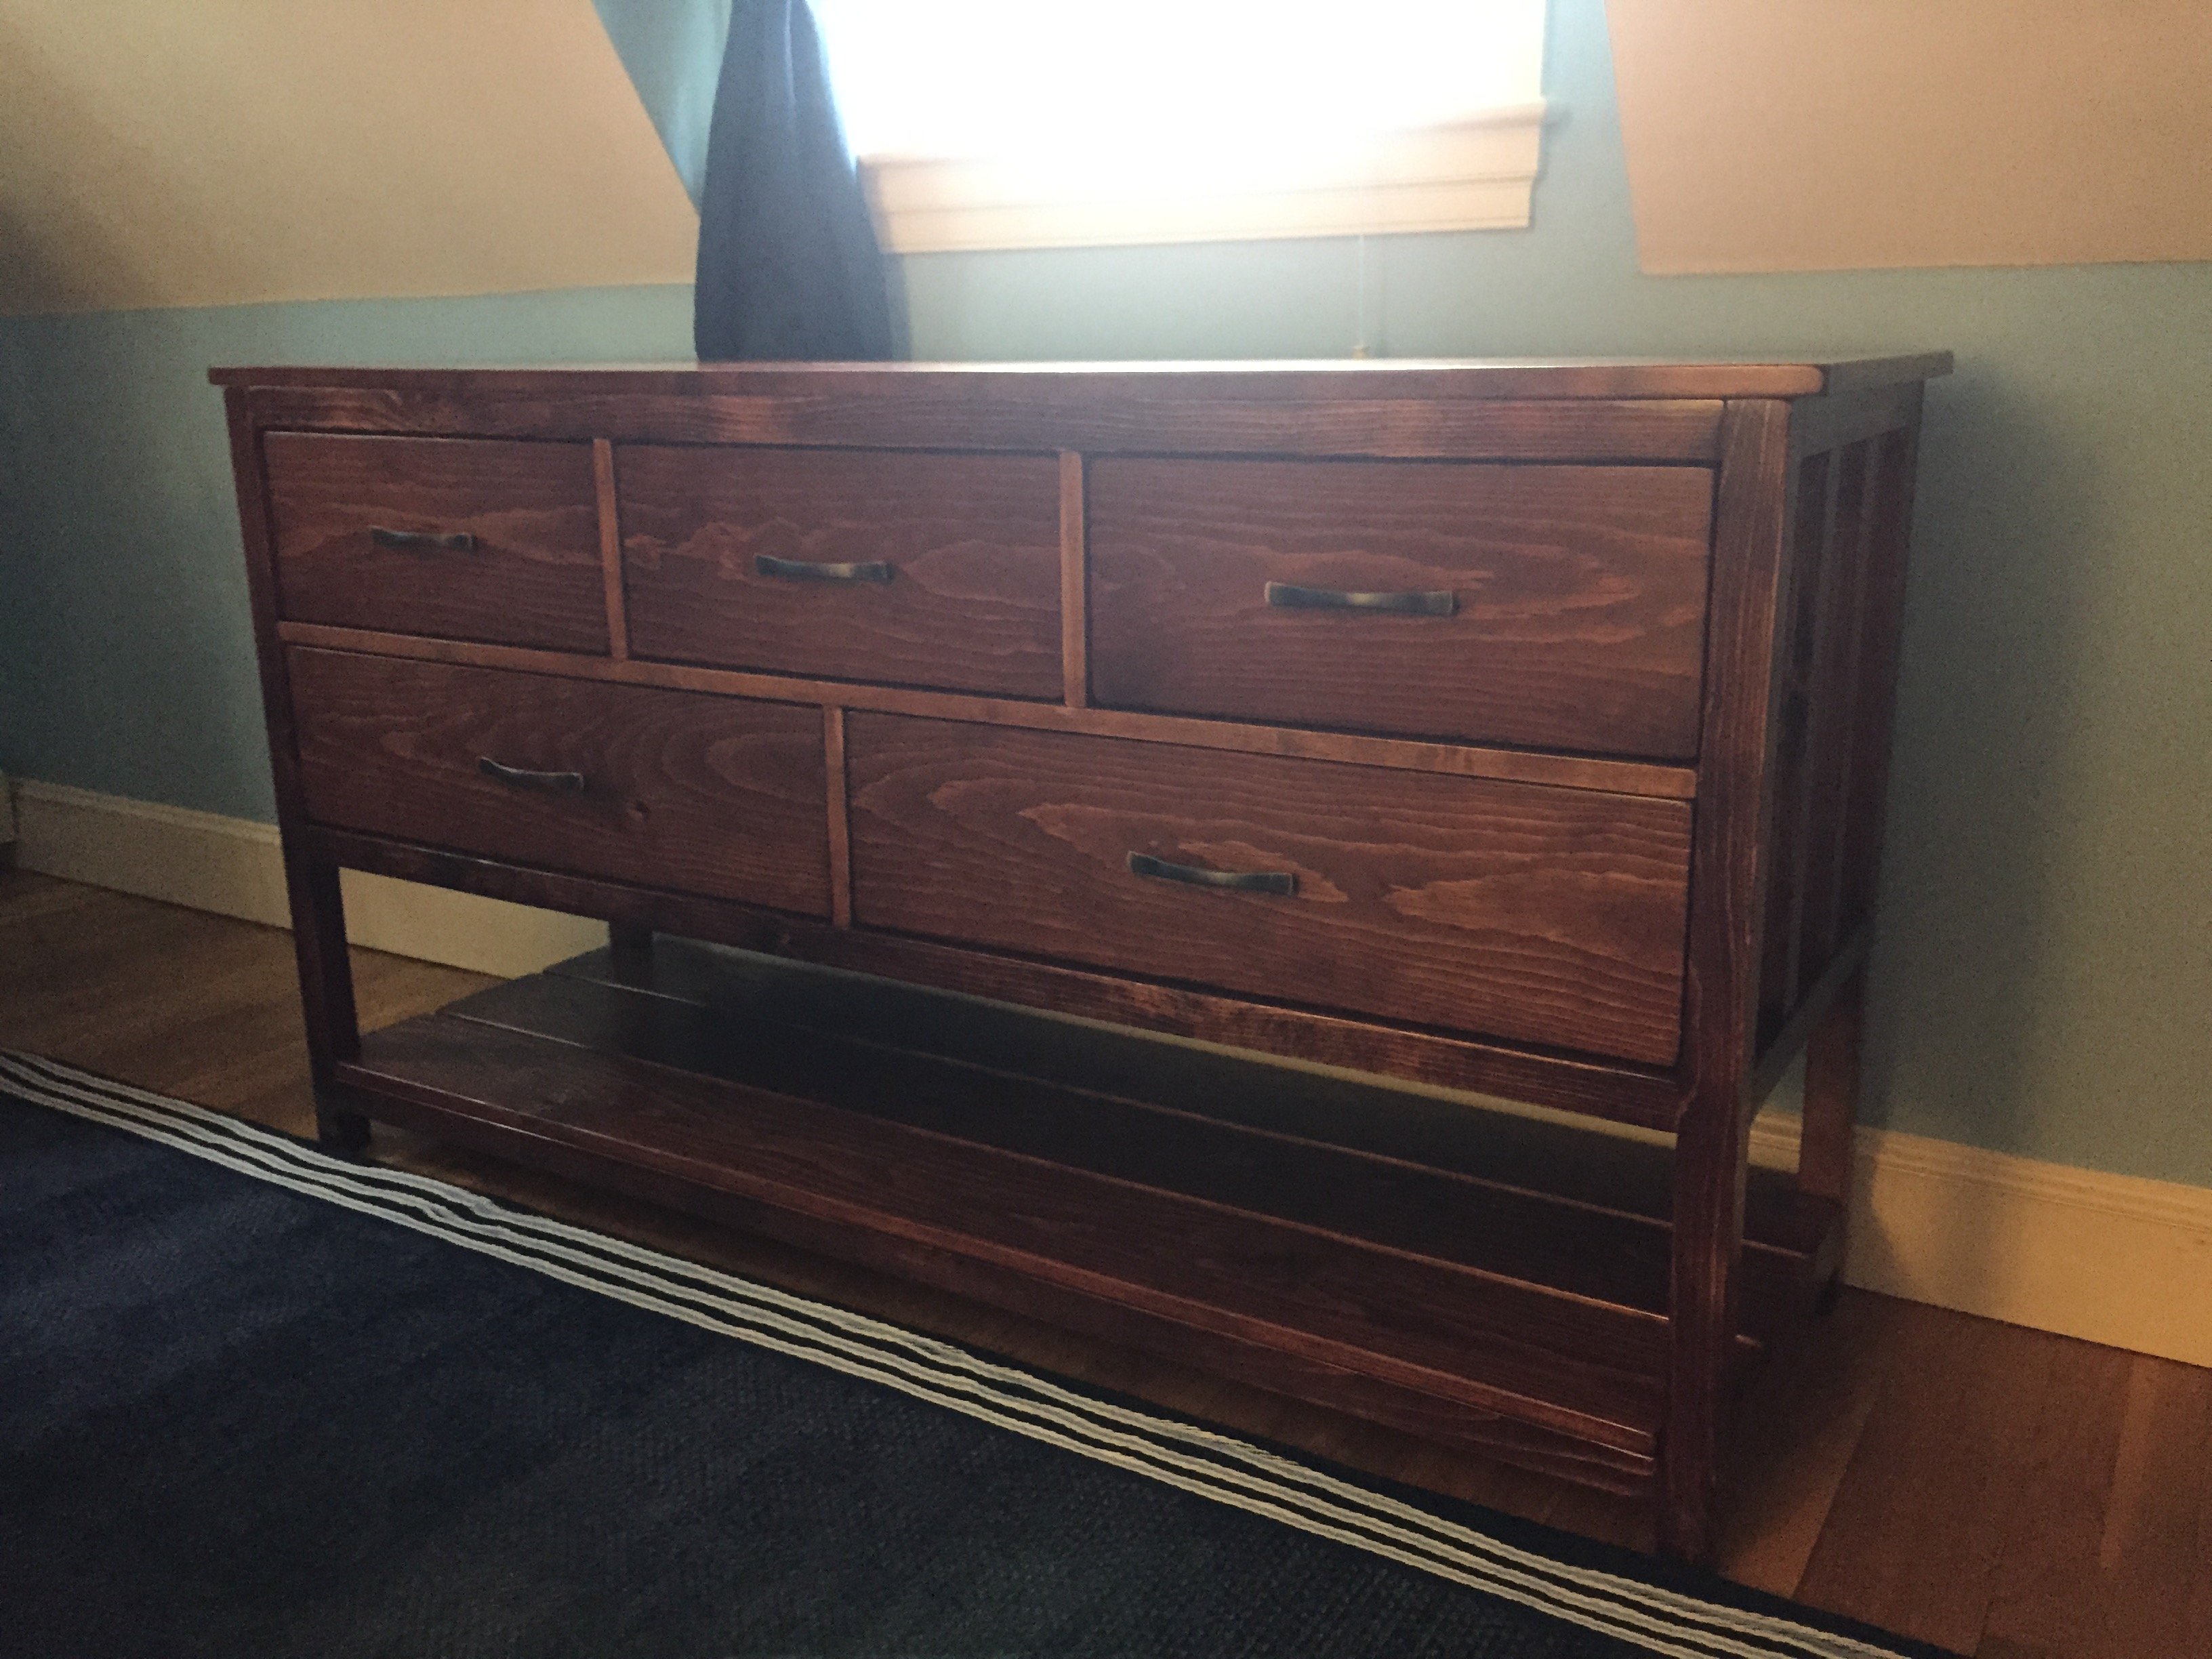
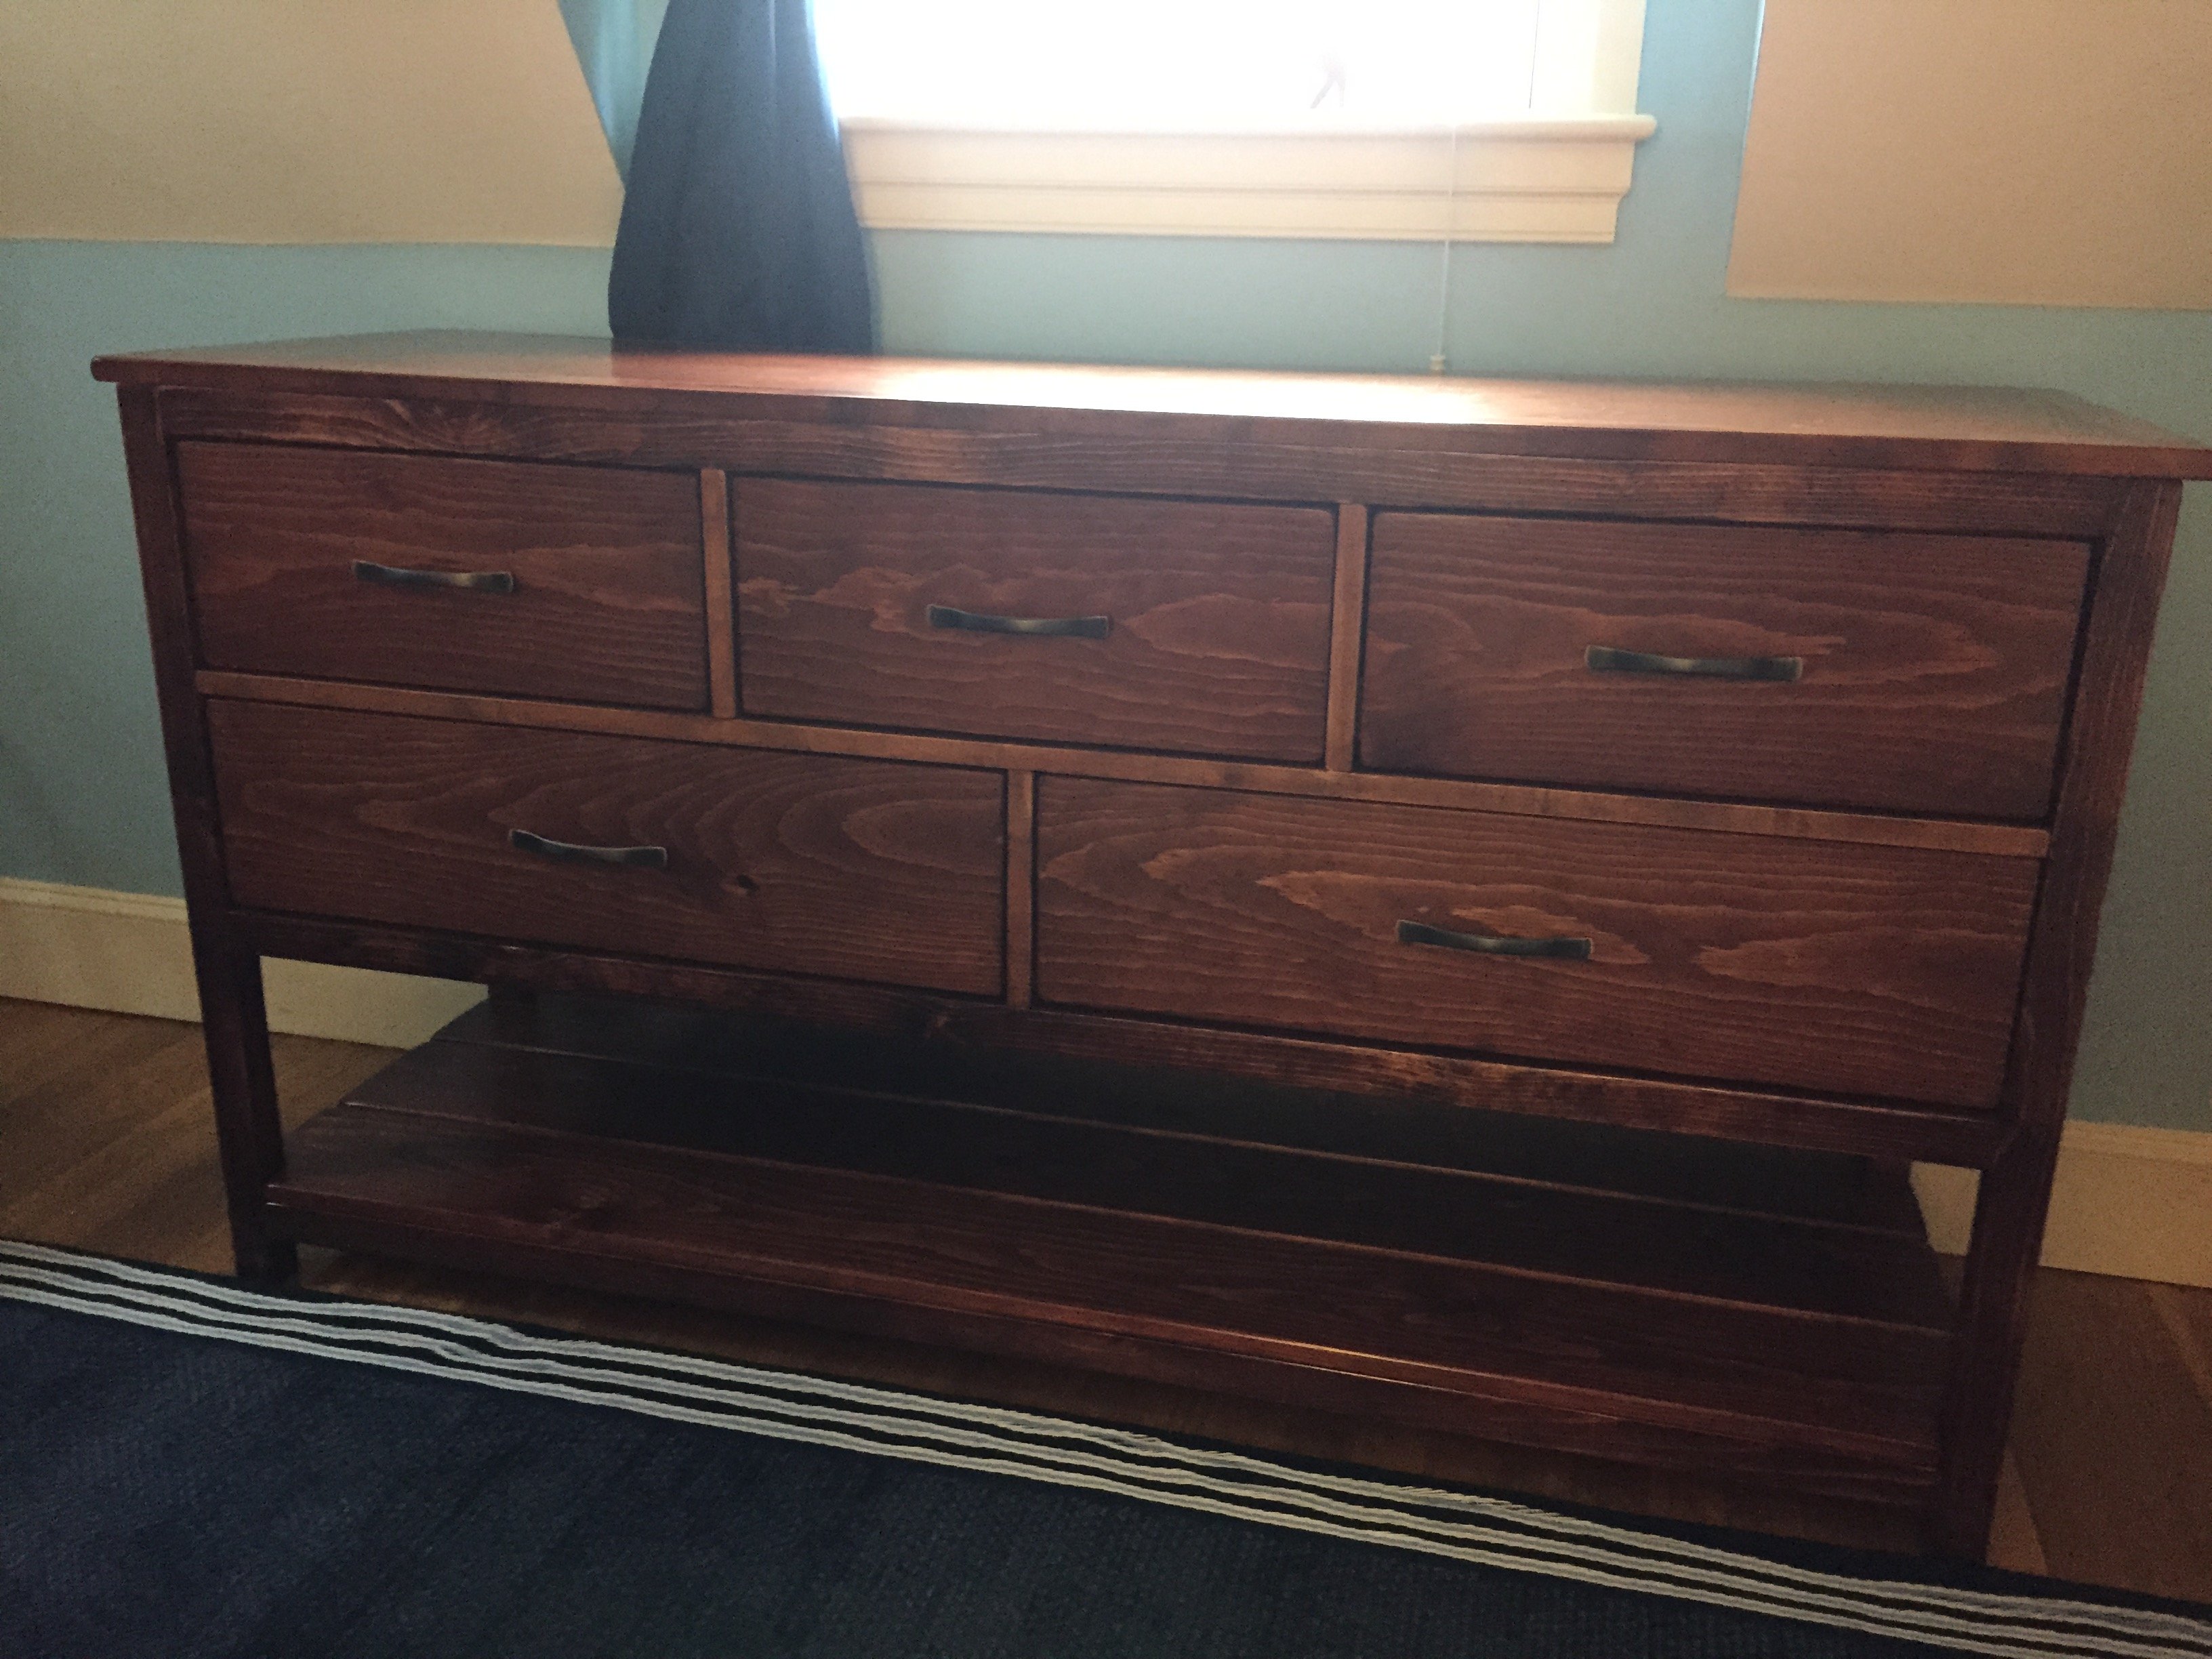
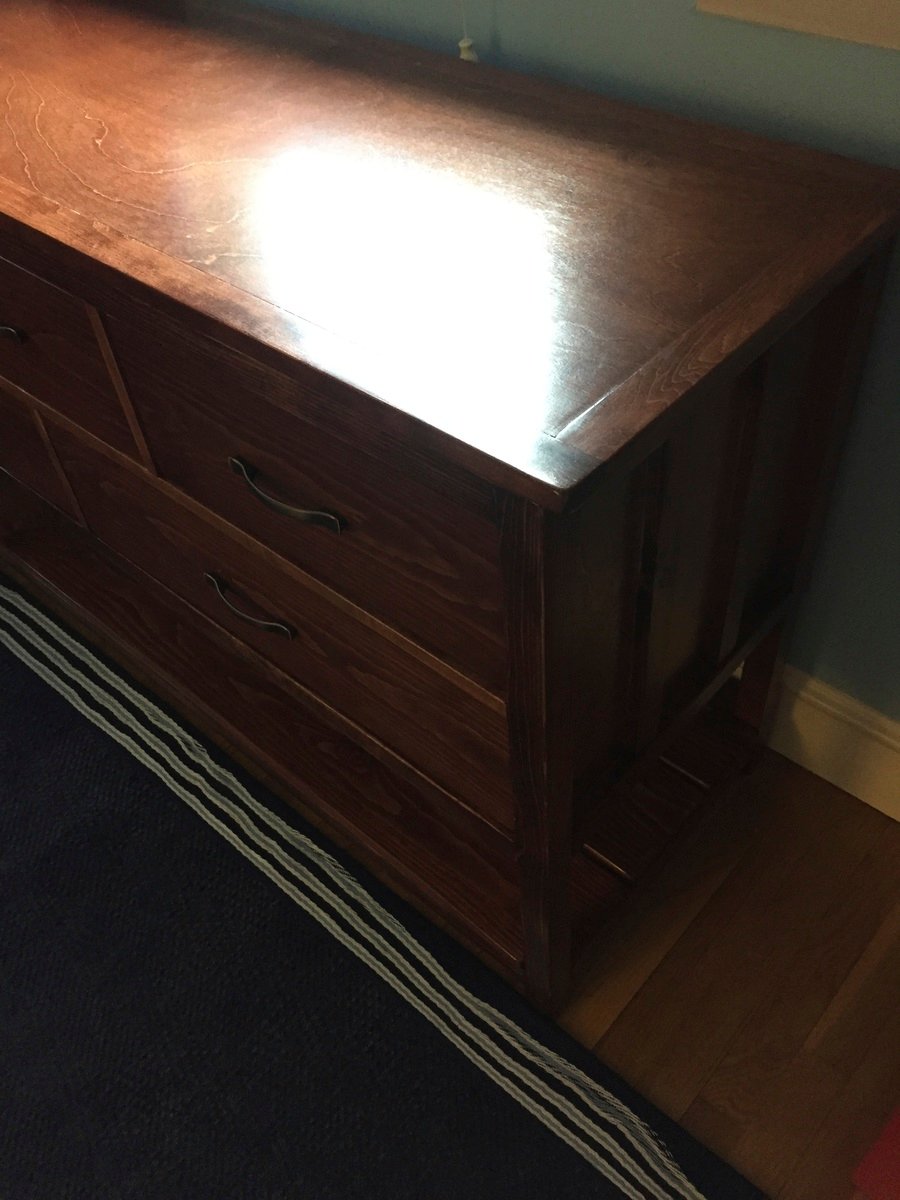
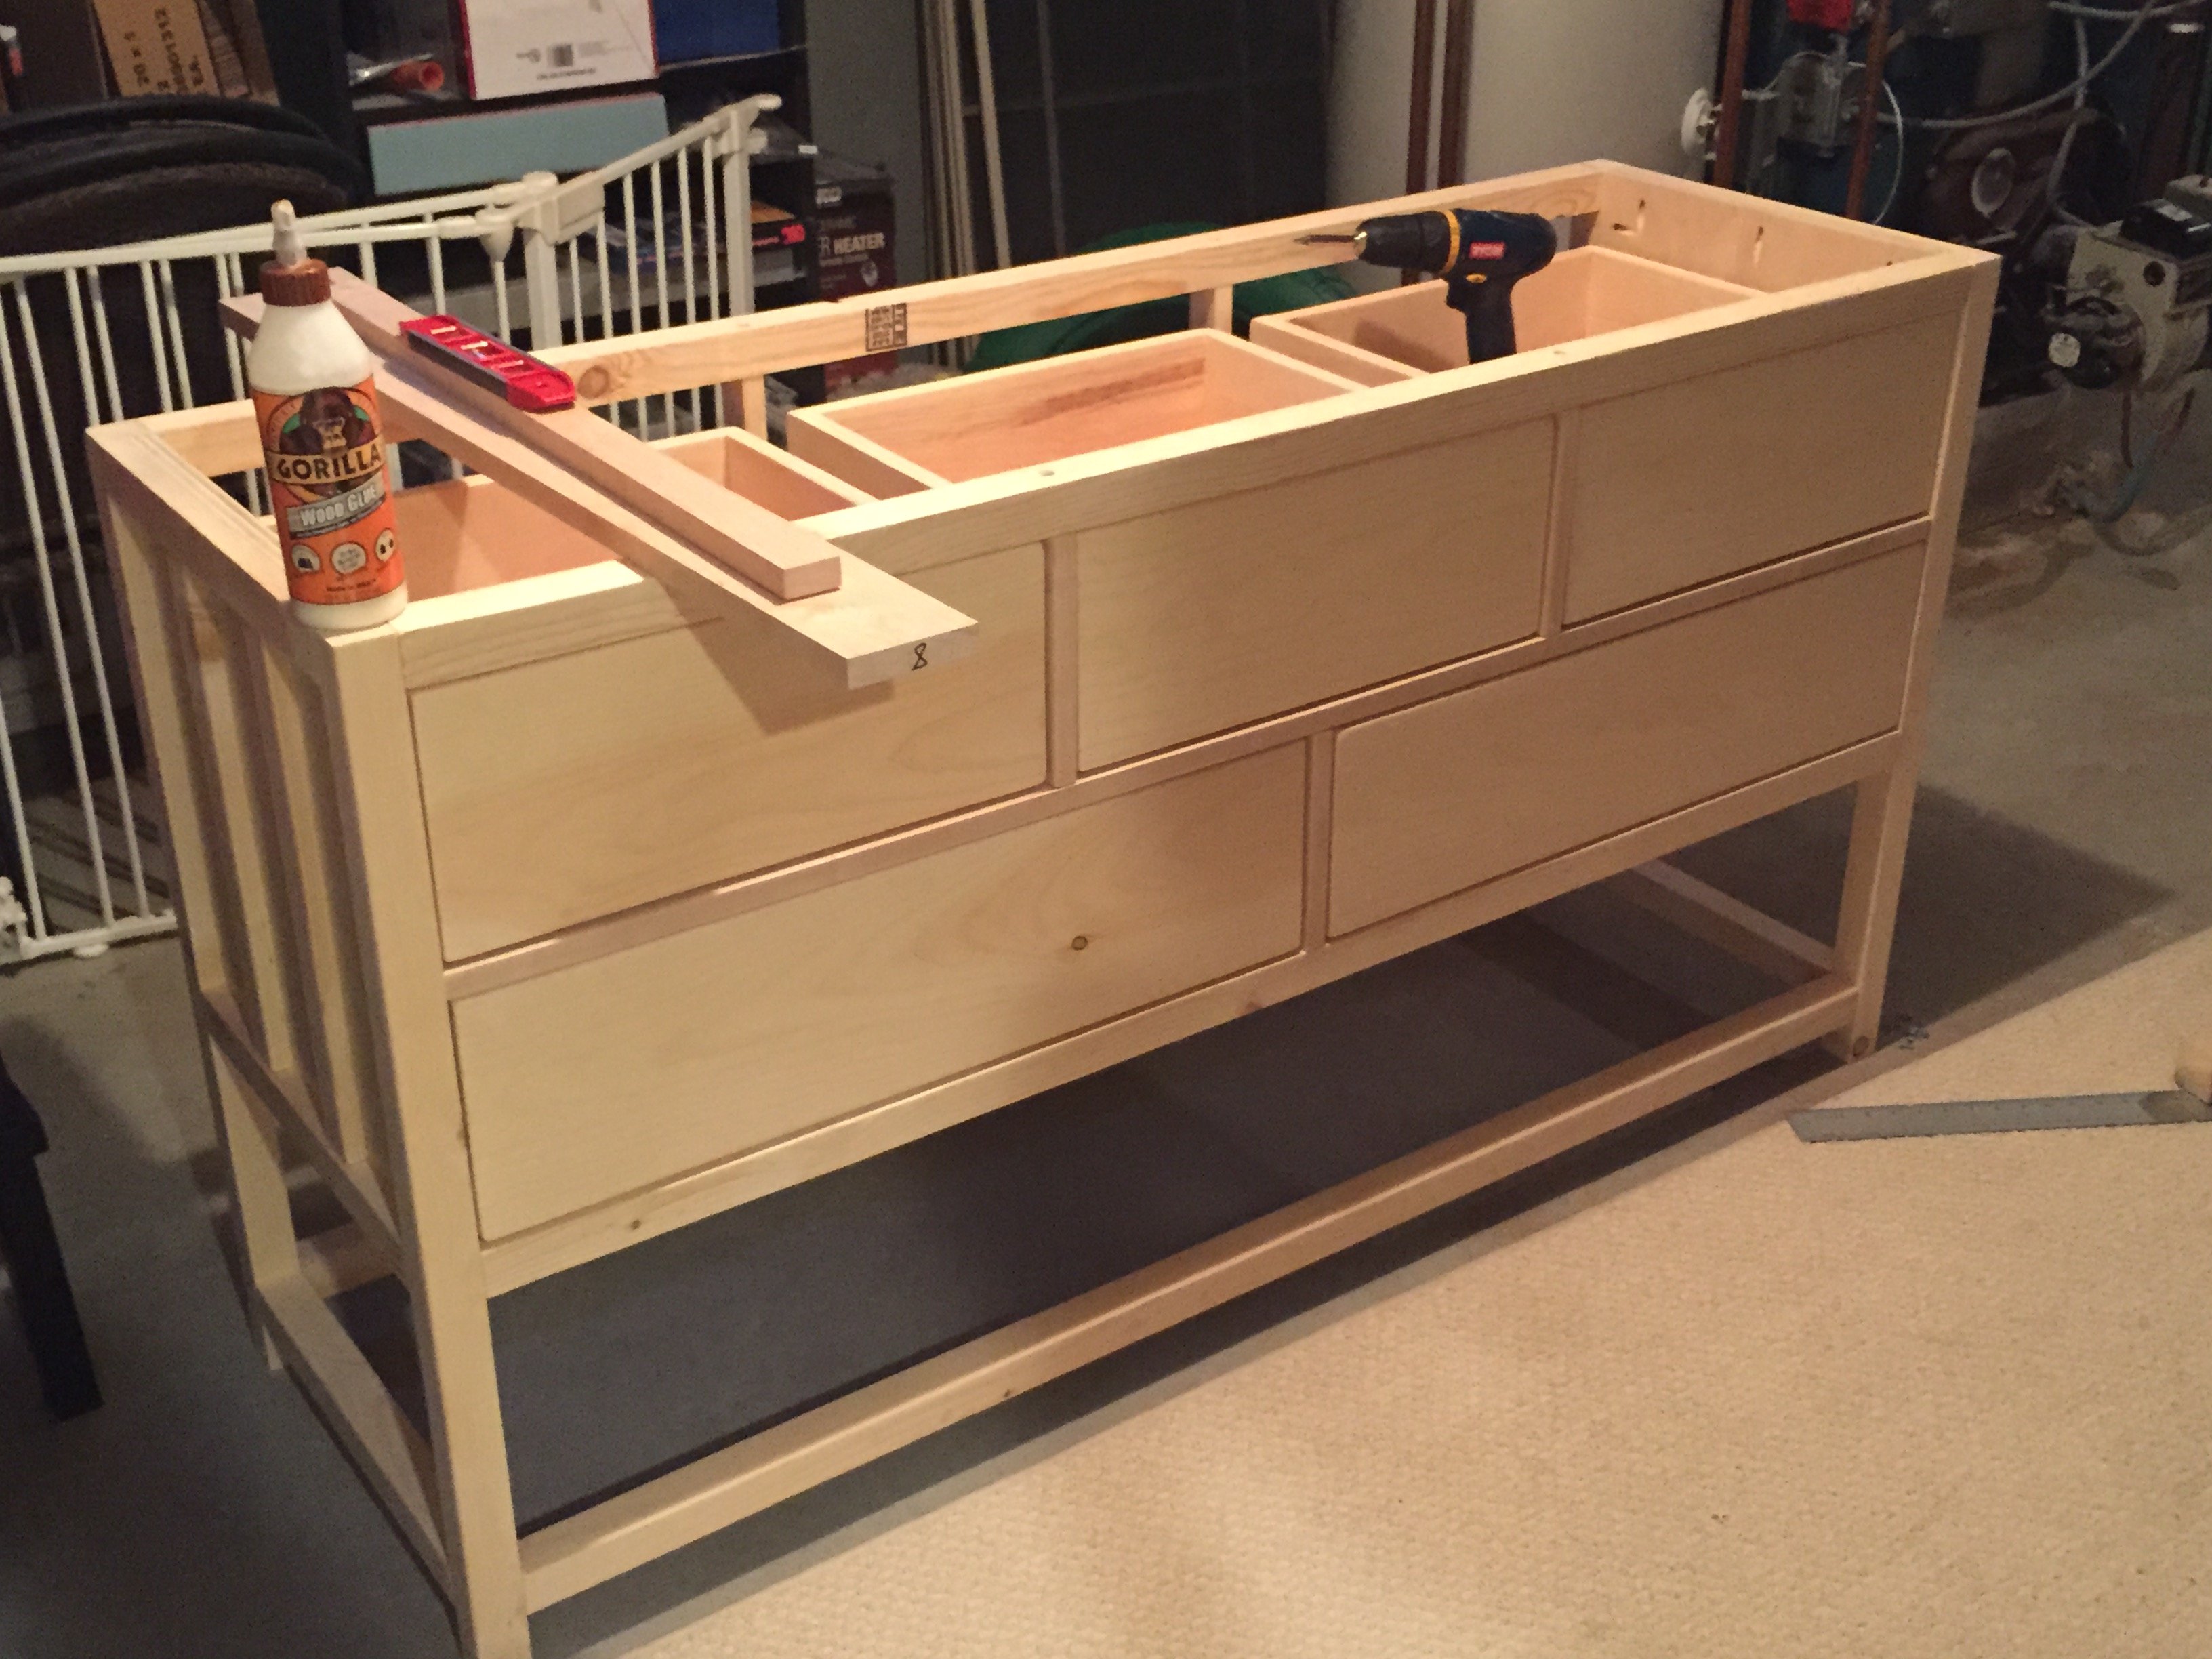
I needed a dresser to match the two farmhouse sidetables I built for the room and this design fit the bill. I really had to take the time to figure out where to place the pocket holes. Finishing is my least favorite part of the process, but I'm glad to have really taken my time. This was a really challenging project and I'm so pleased with the end product. By far, my favorite build yet!
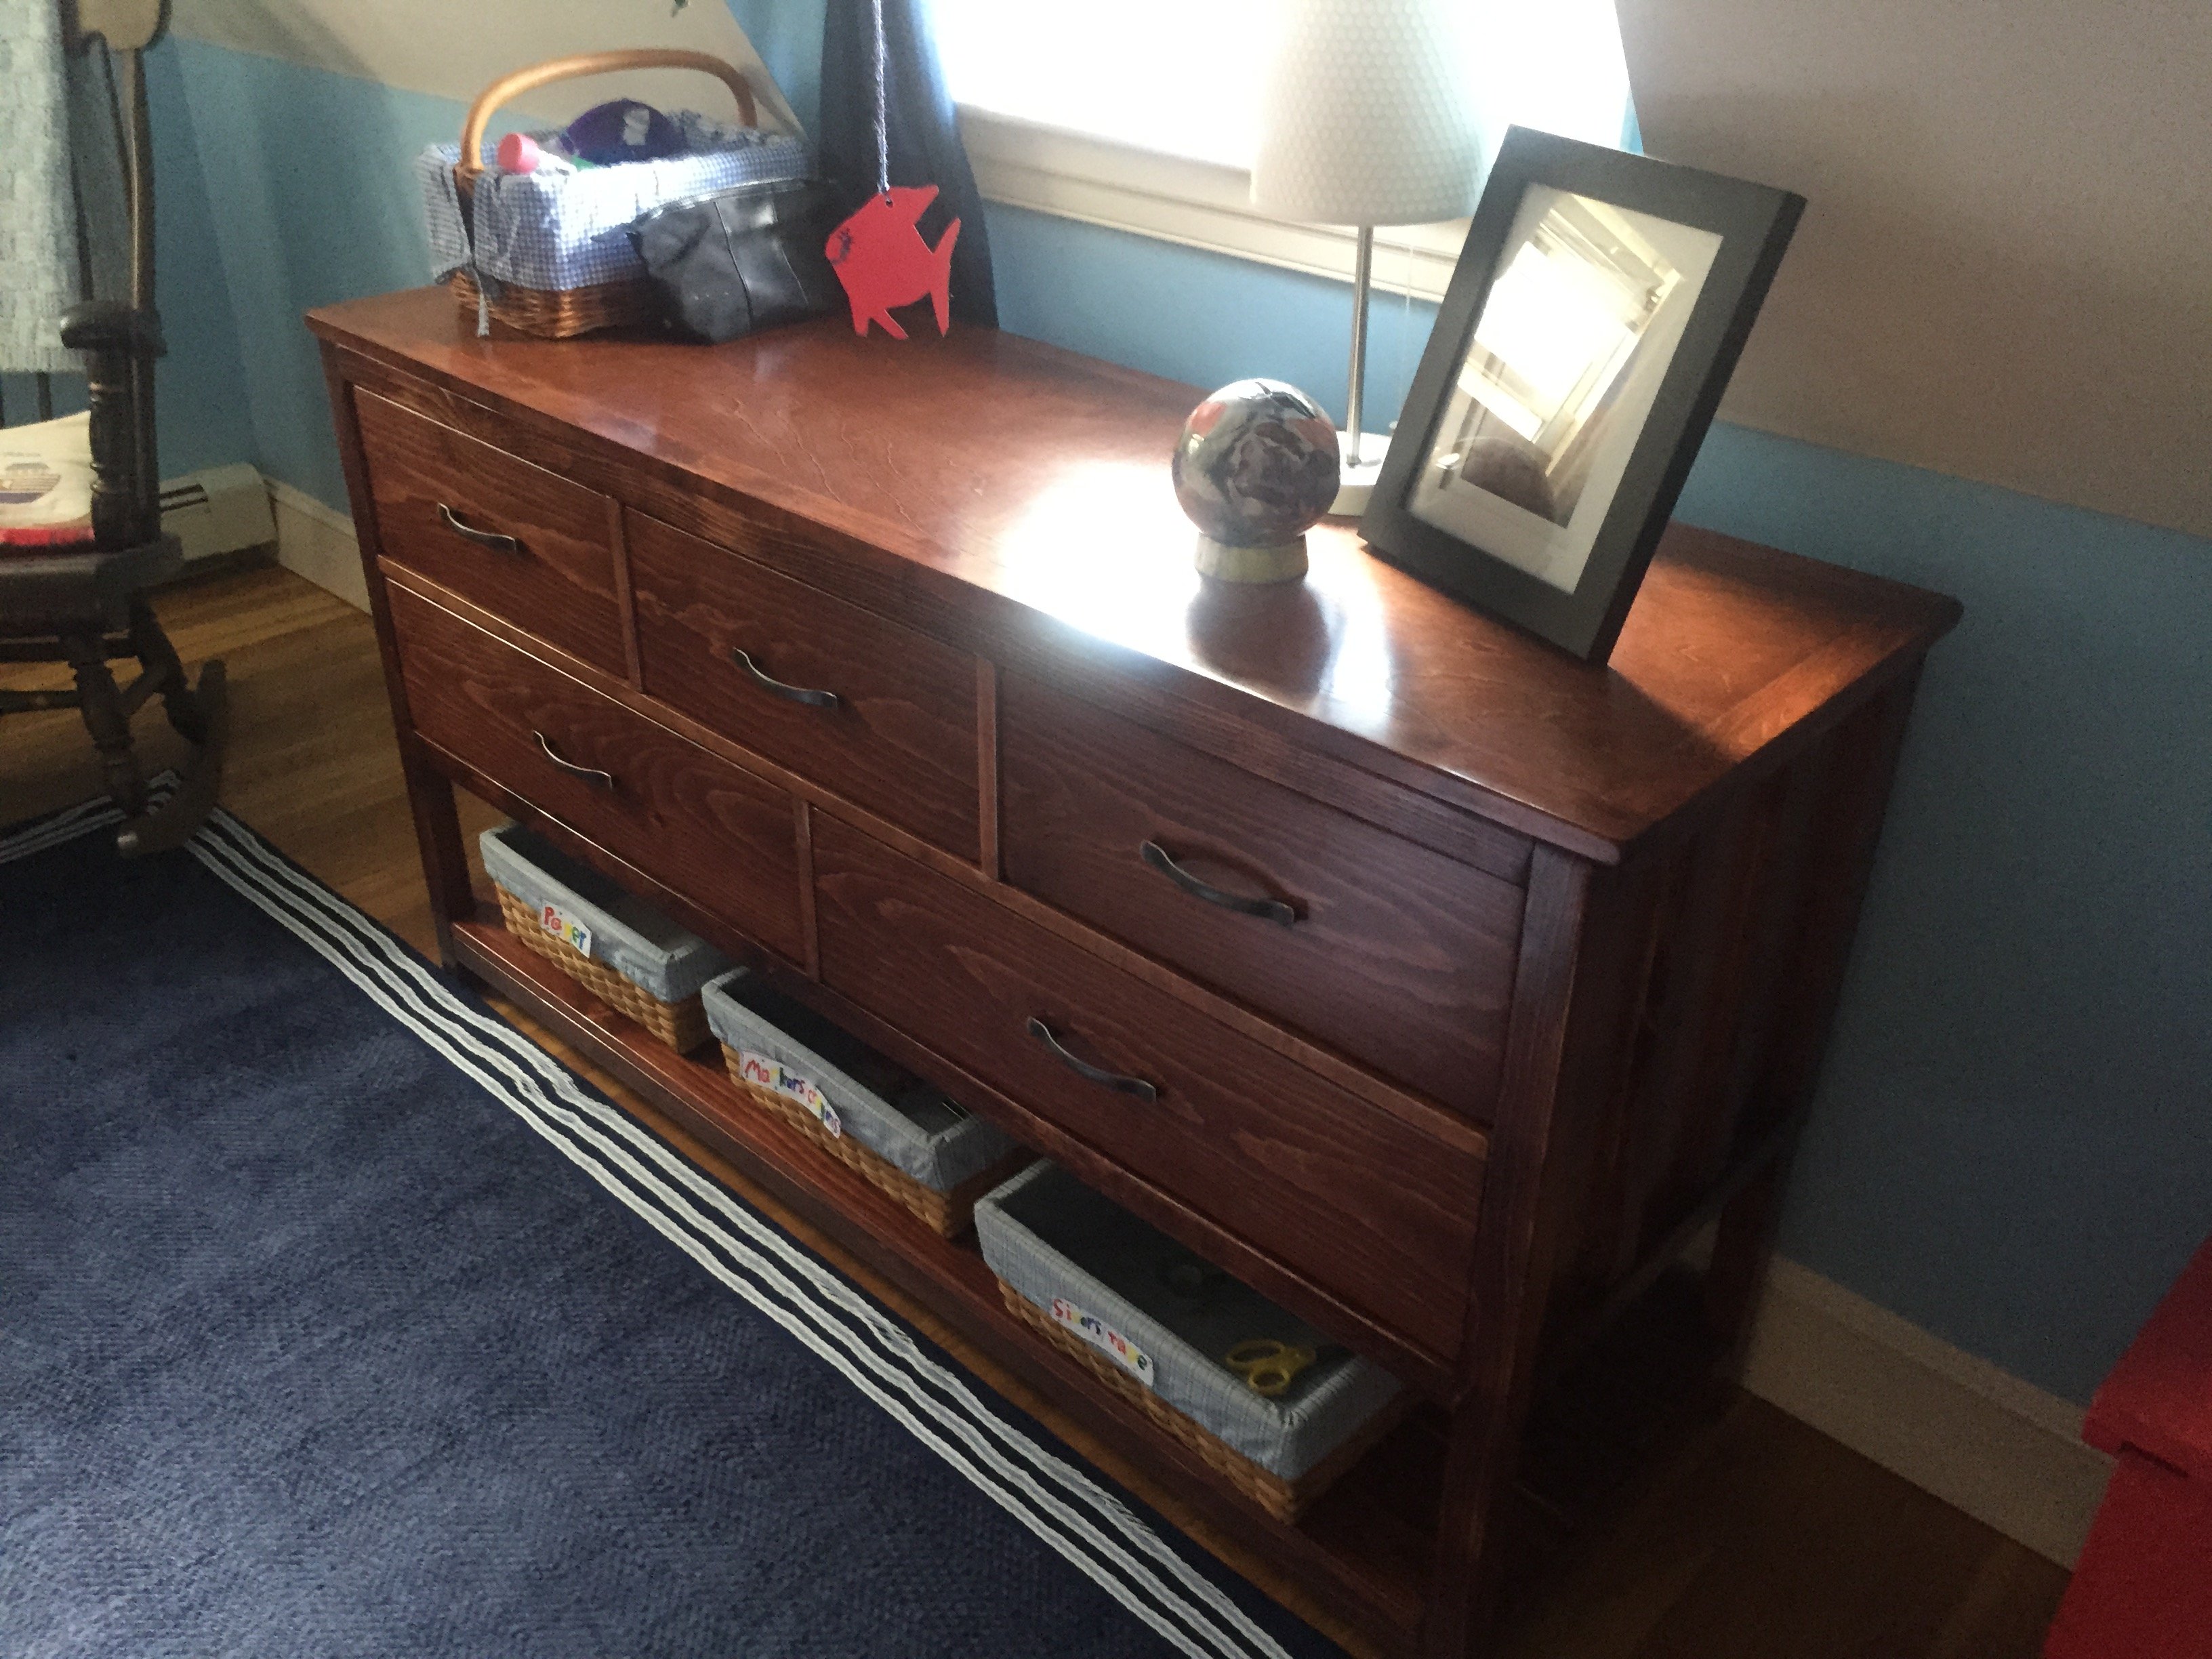
Built from the Wide Cabin Dresser w/ metal slides plans. I used soft-close ball bearing drawer slides instead of the European style ones suggested. The other departure from the plans: I liked the way the three separate boards in the open (bottom) row looked in the Pottery Barn model, hence used that instead of the flat board shown in the plans (and many of the other brag posts).
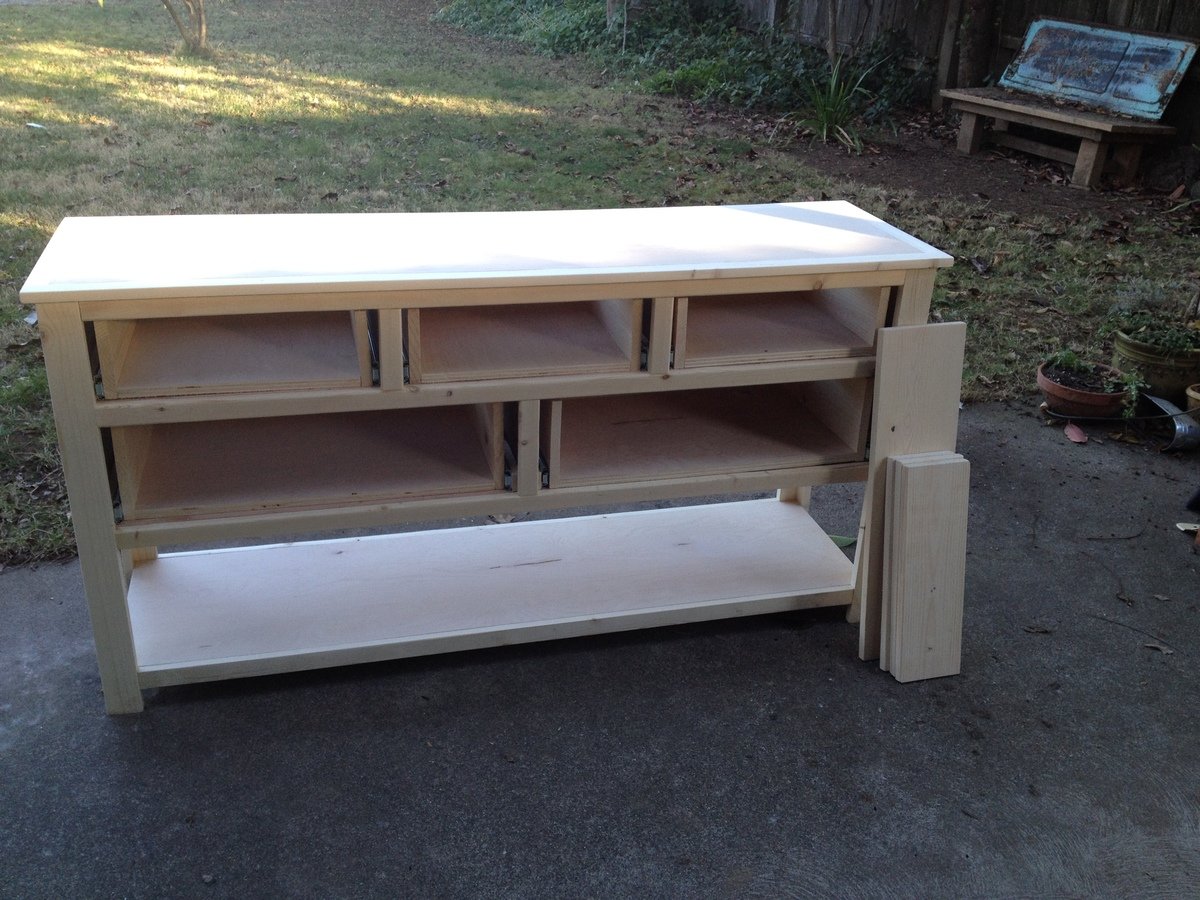
I don't know how people manage to get this done in a single digit number of hours. It took me a single digit number of hours just to get the drawers right and I would still say they're not 100% perfect. Having said this, I rated this project "intermediate" since I'm sure people with more wood-working experience than me (this was my first) would avoid some careless mistakes that I made and which required a few redo's here and there.
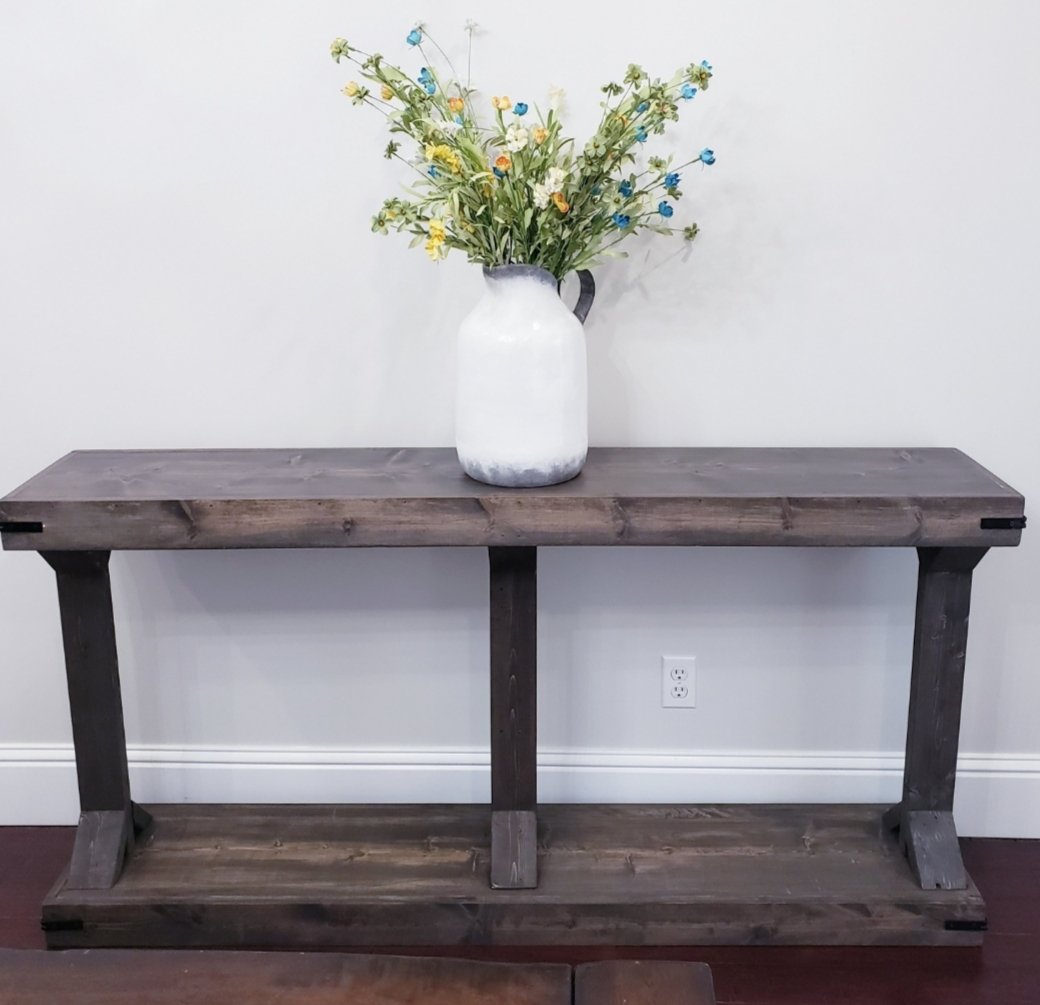
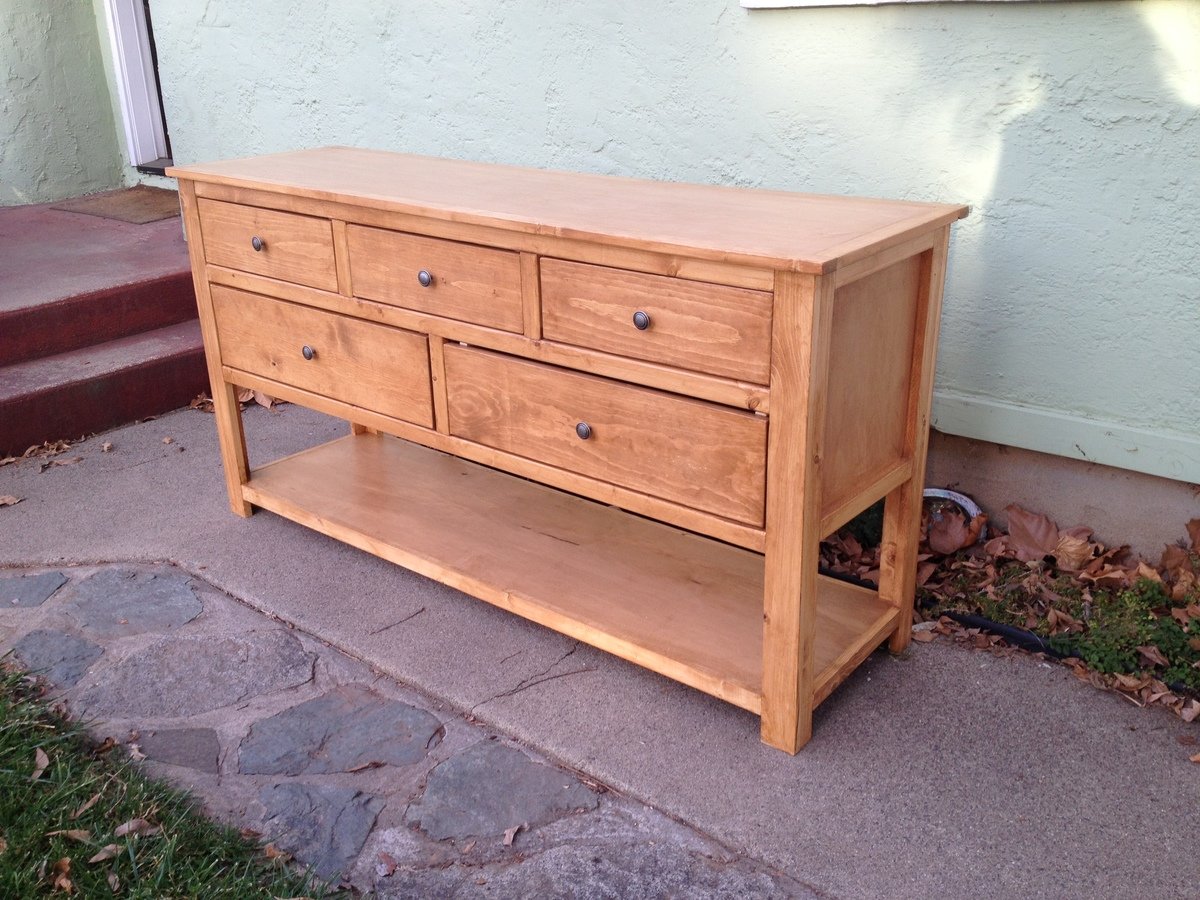
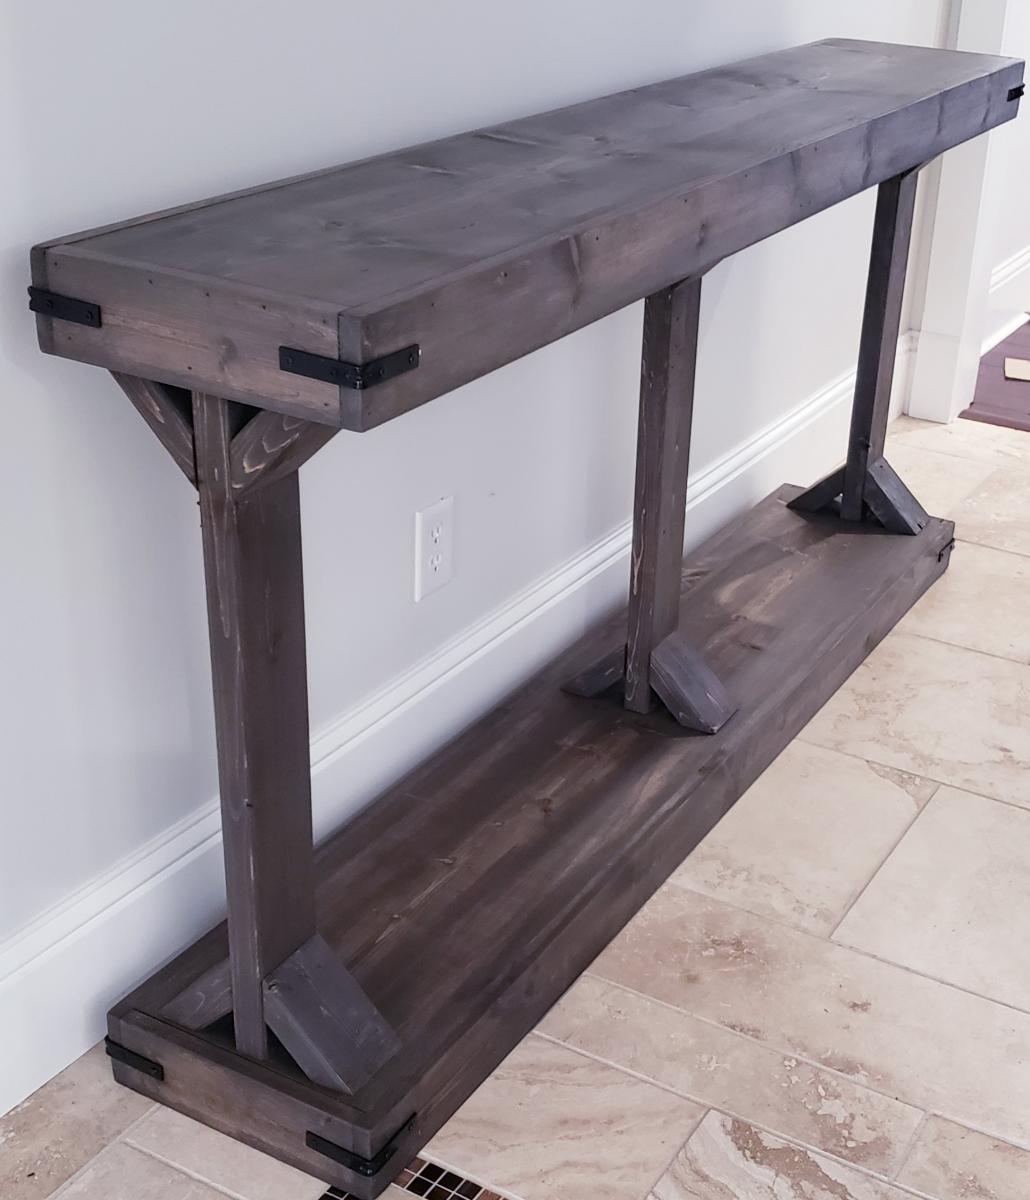
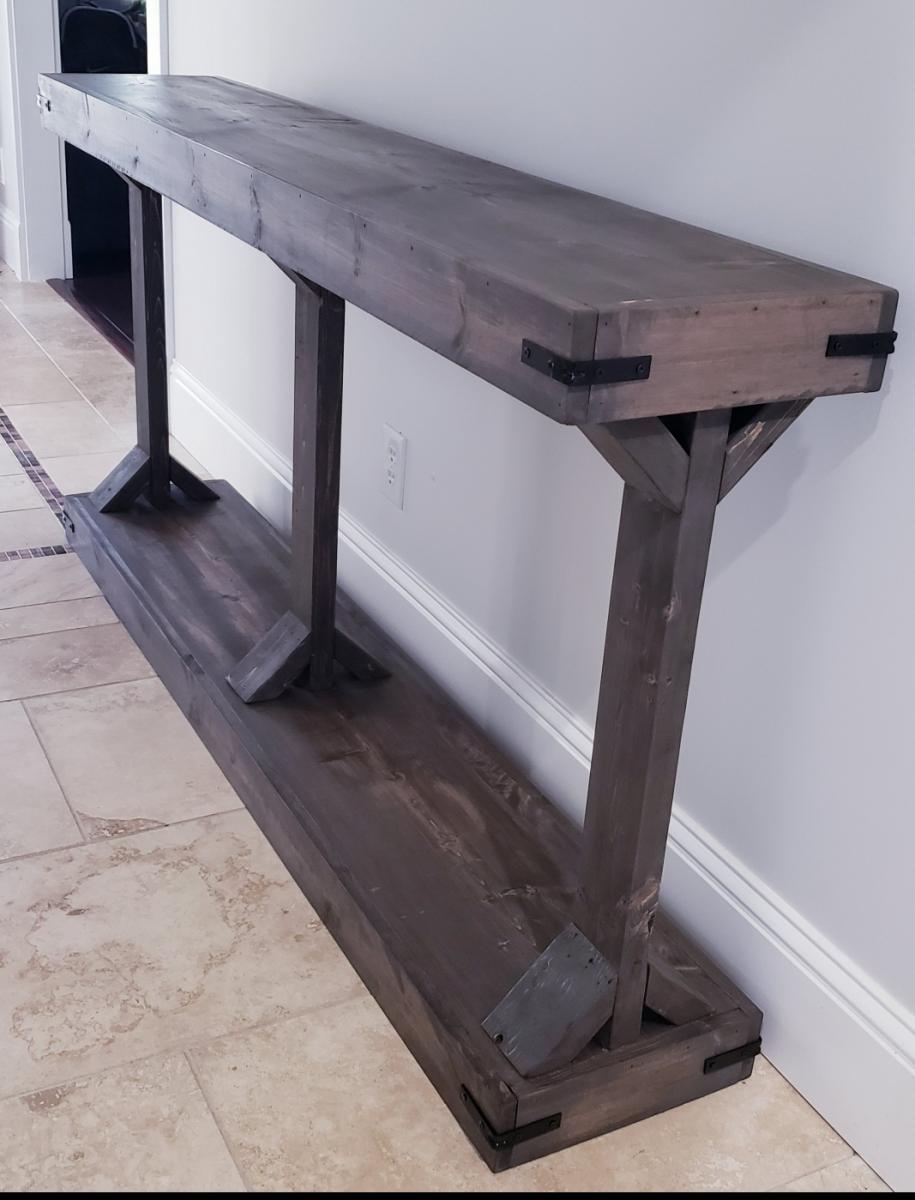
This is a beautiful console table built using the Narrow Console Table (Modern Farmhouse) plan. This is modified to be slightly wider, longer, and taller than the original plan. The dimensions are 68" long, 34" high, and 12.75" wide. The plan was very easy to follow and it was simple to adjust the measurements.
I used Varathane Dark Walnut Stain and once that was dry, I went over that lightly with Varathane Classic Gray stain. The final finish is Minwax Dark Wax and buffed.
More photos available on my facebook wood shop page at the link below.
Thu, 12/05/2019 - 12:06
Beautiful! I really like the finish you did on this table, thanks for sharing the details. I may need to try this myself.
Tue, 02/02/2021 - 19:09
Great color. I have never gone over color 1 with color 2 - I will now try it. Great look!
Tue, 02/02/2021 - 19:13
How do you wipe paint 2 over paint 1? Do you use a cotton cloth?
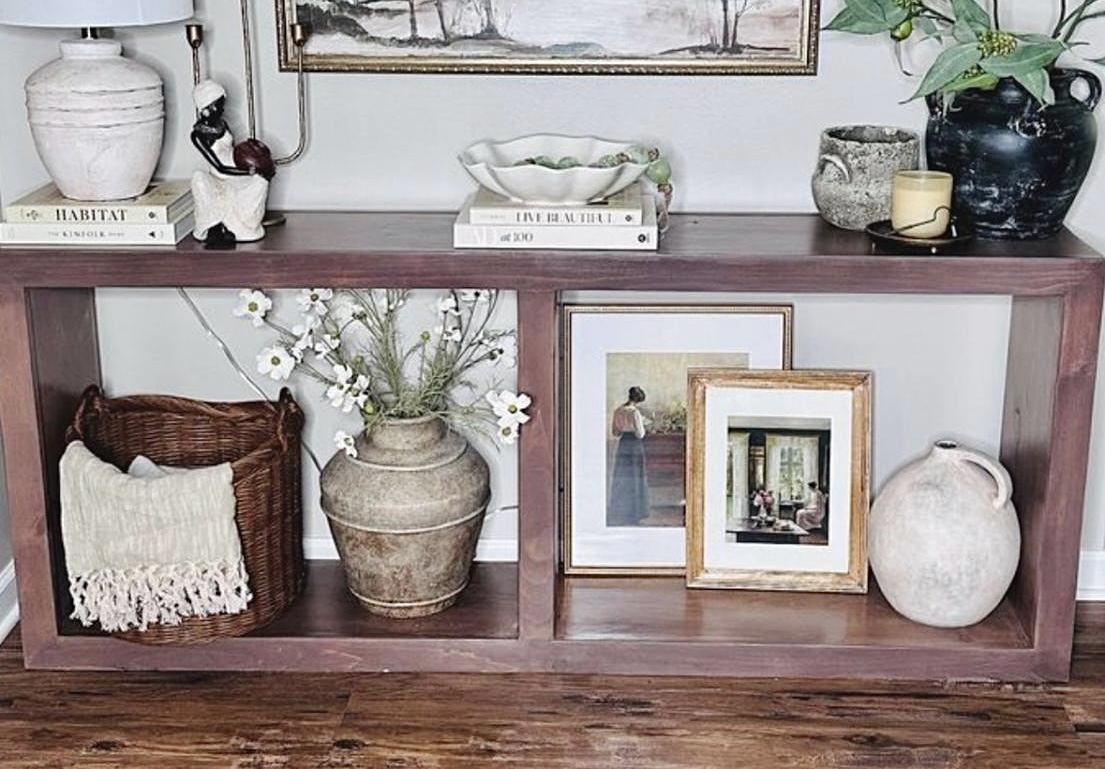
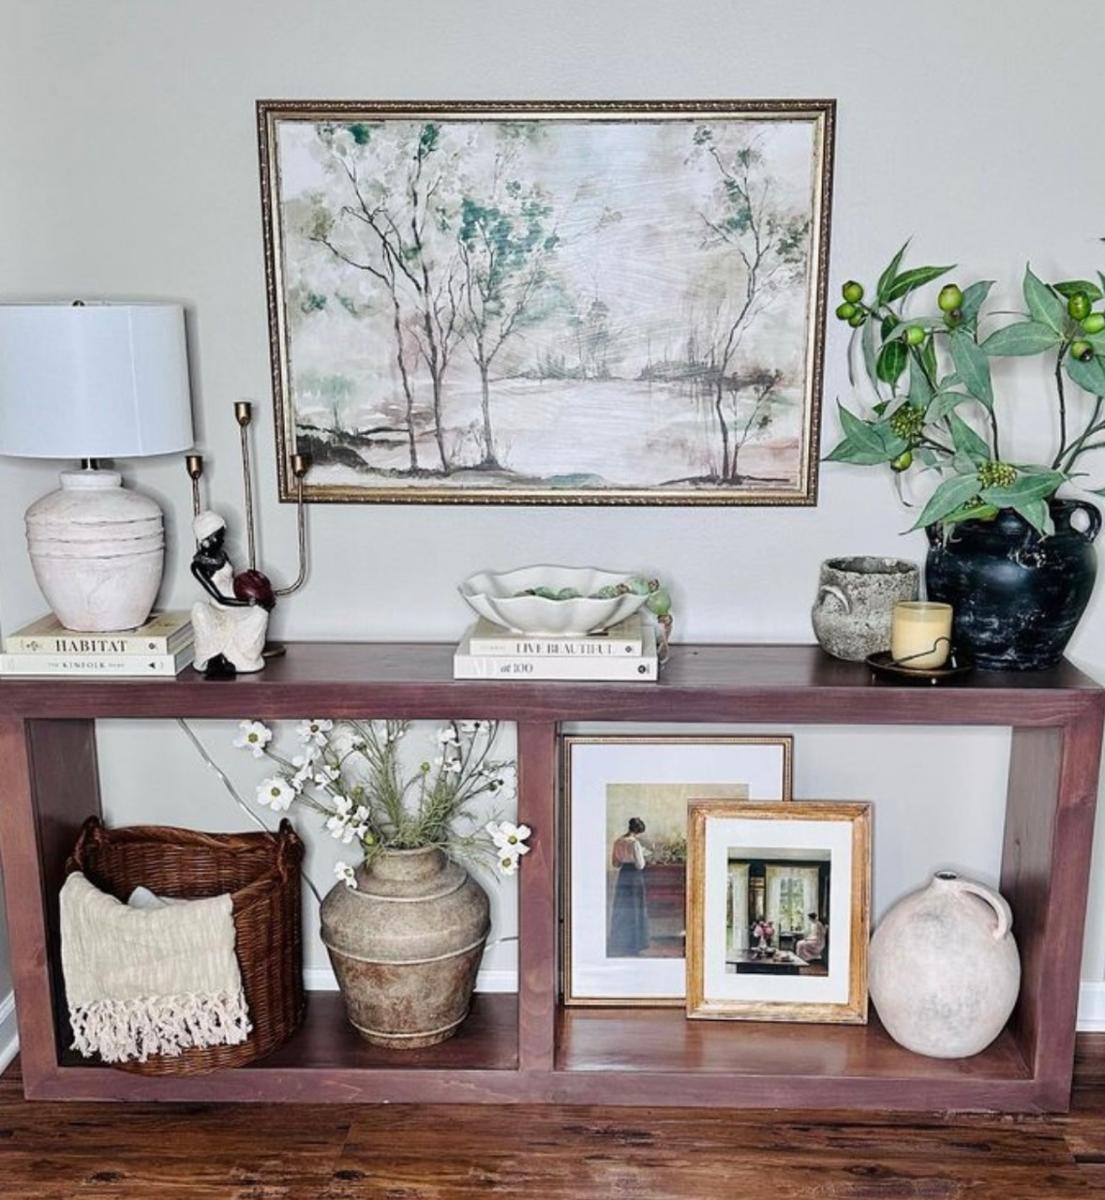
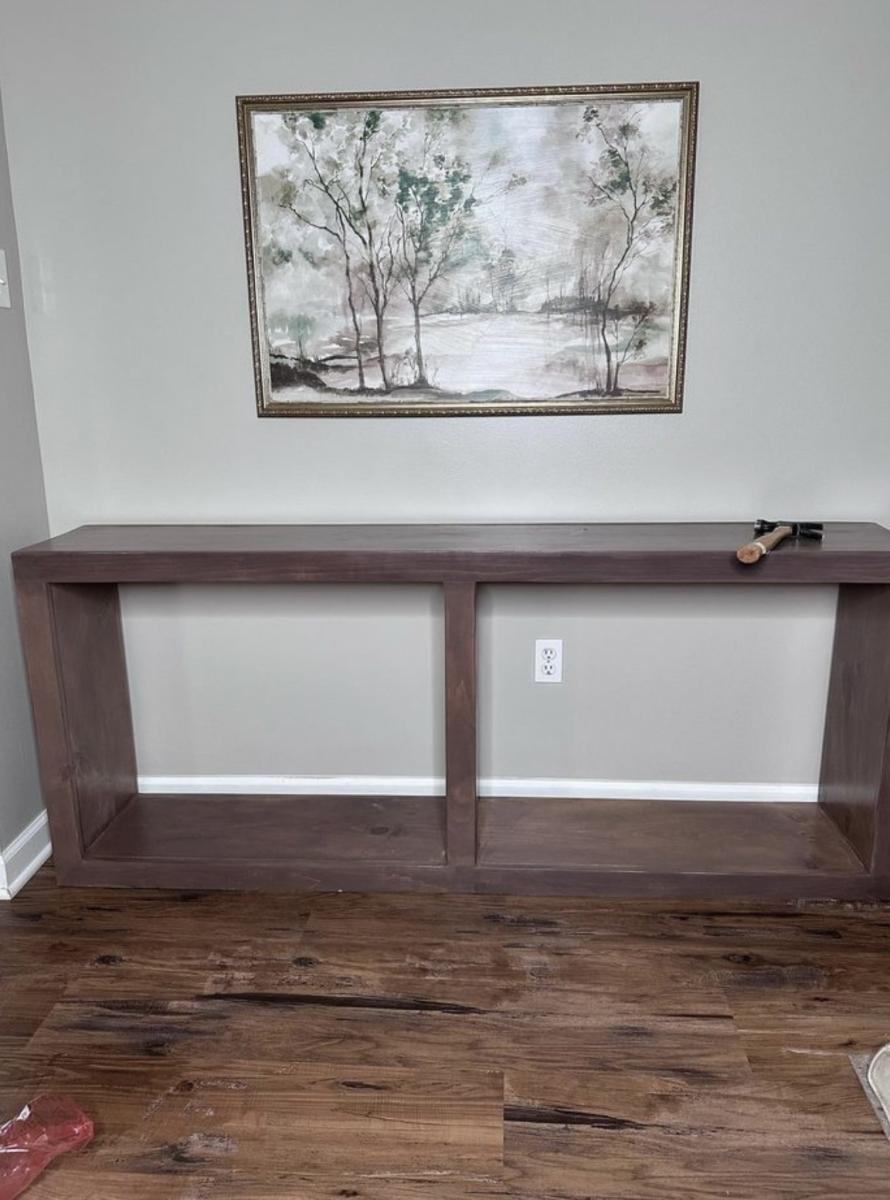
Stunning Waterfall Console Table Build by lipsticksandsawdust on Instagram
Sun, 09/10/2023 - 14:26
Is there a reason you could not use Plywood on this project? With hardwood 1x3?
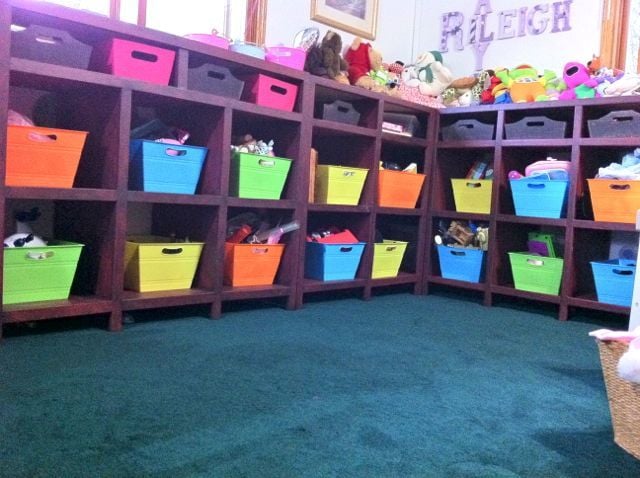
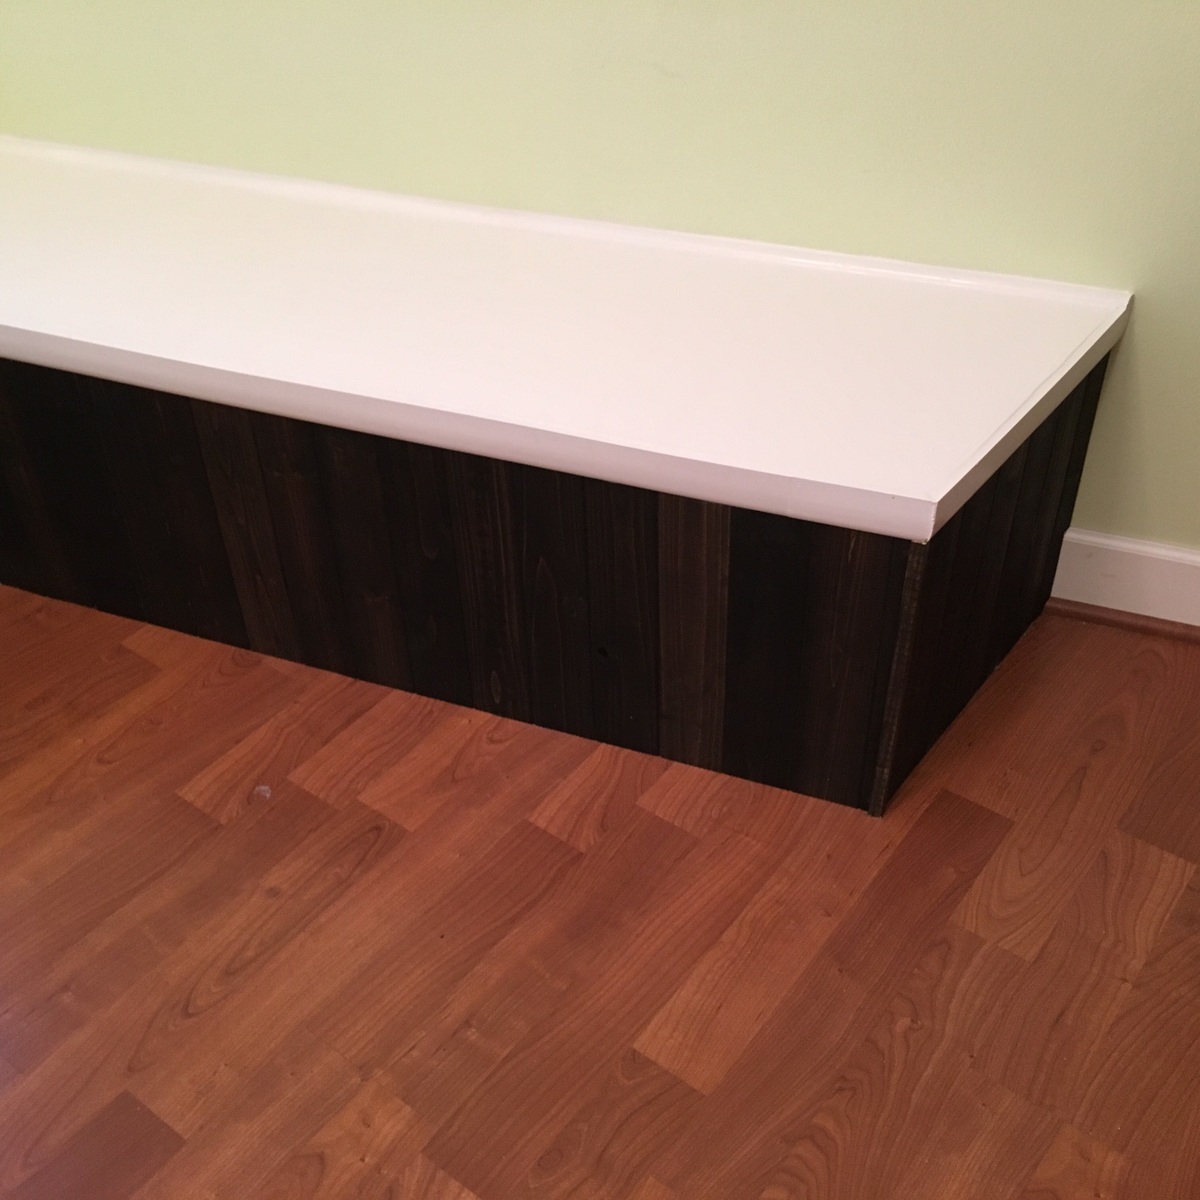
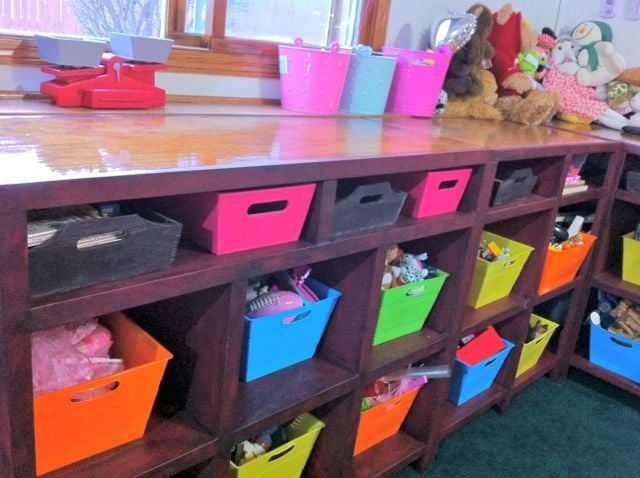
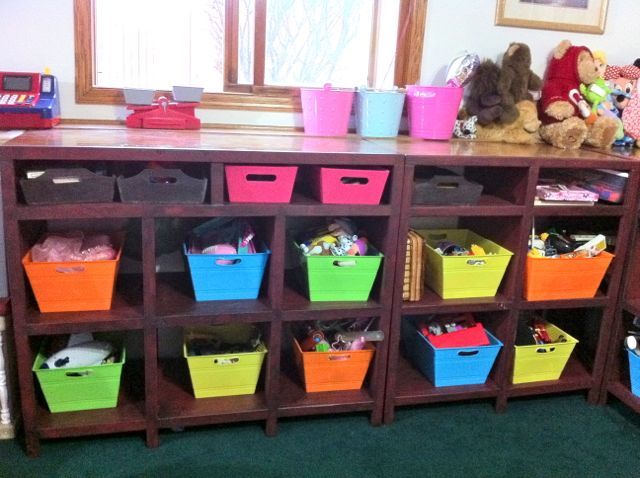
In our basement we have an 8 inch oak ledge on the outside walls. I love the oak finished ledge, but it makes it hard to place furniture up against it. The furniture is either shorter or taller than the ledge and looks awkward. So, I built several storage pieces to fit our area and ledge. I modified a couple of different plans to create our toy storage area. It's so useful and looks great.
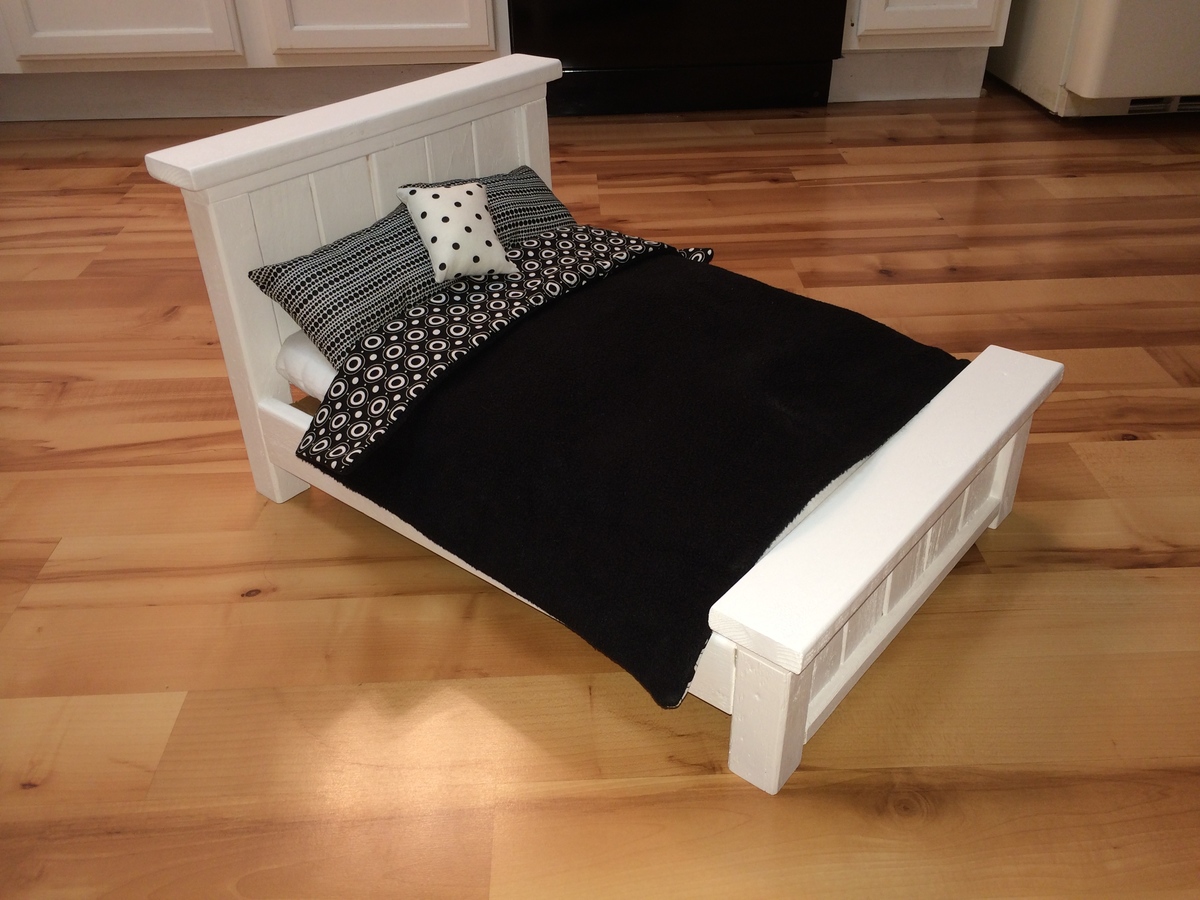
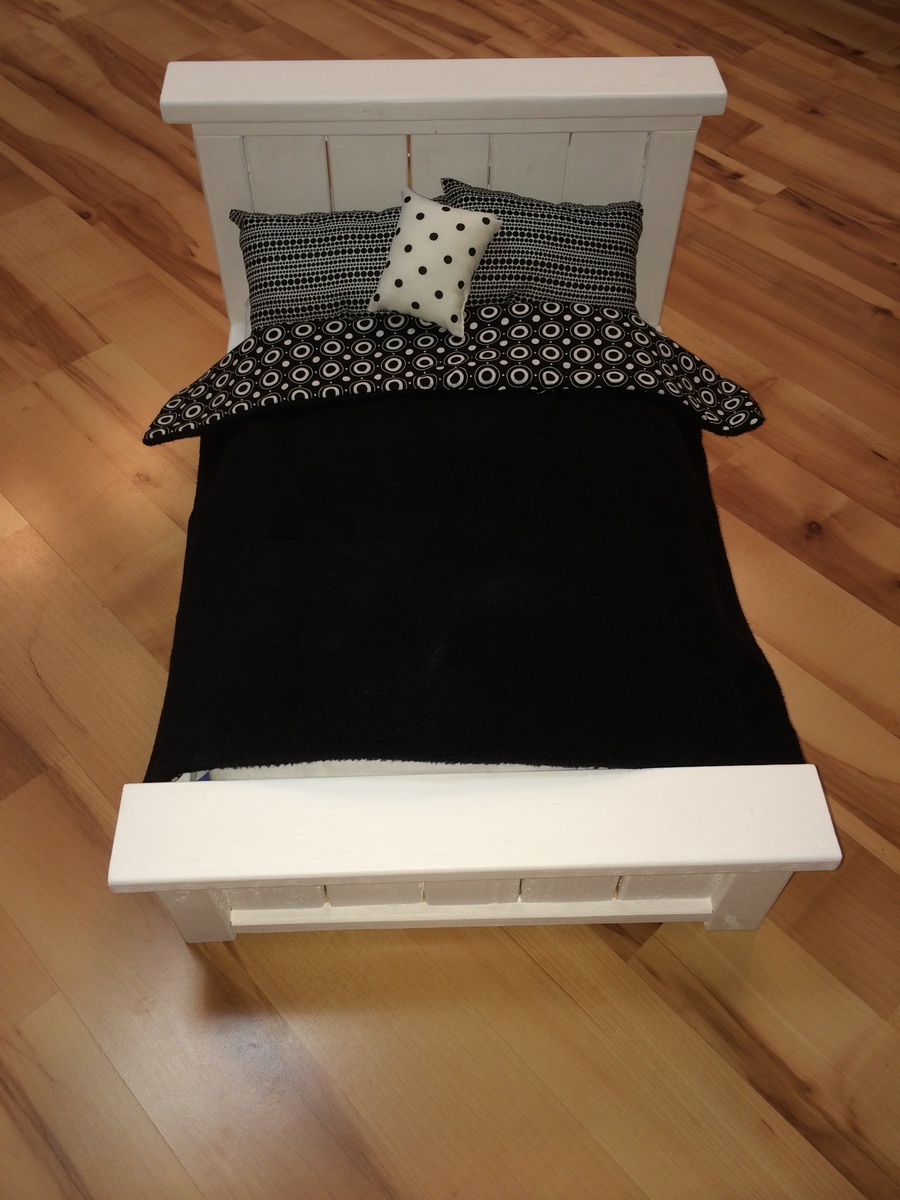
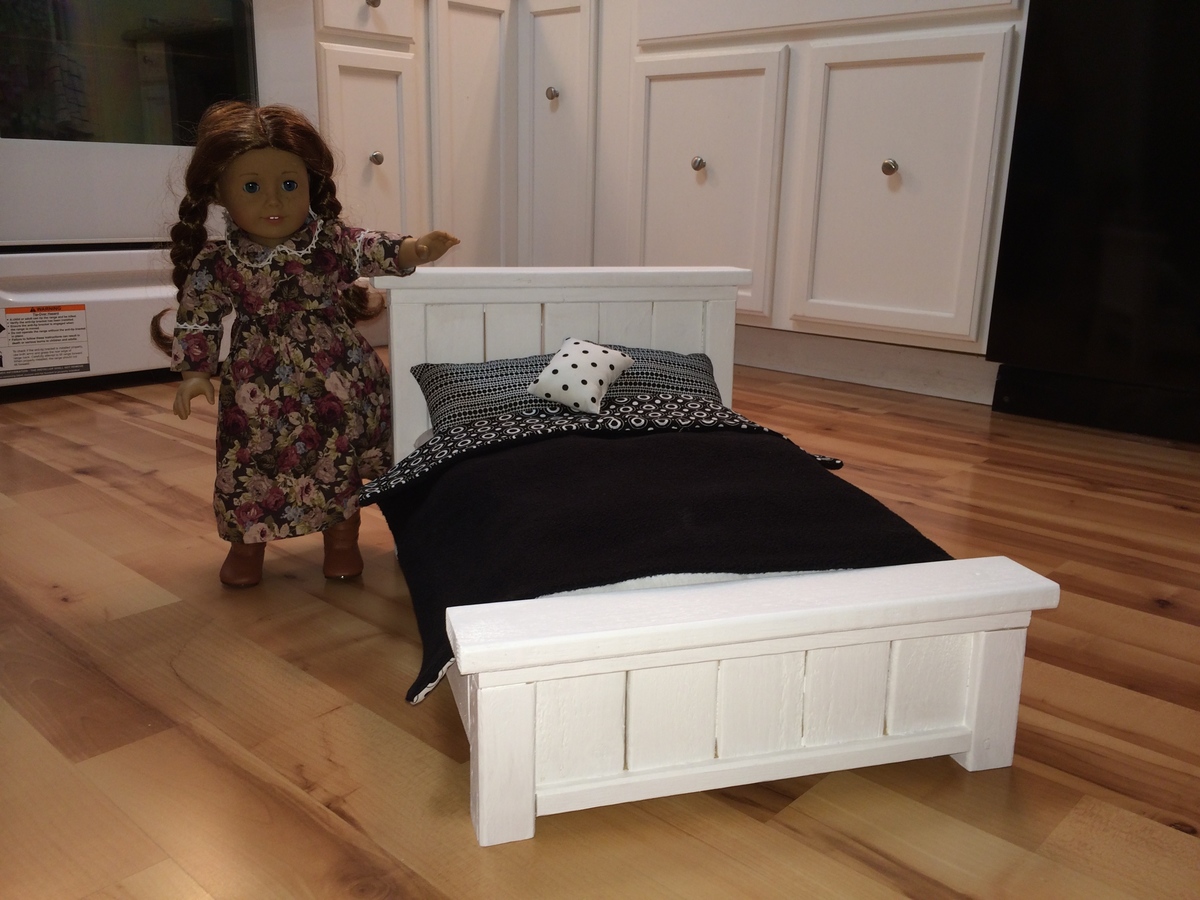
This was my first wood working project. I made this for my little sister for Christmas. It was a great starter project. I may be biased but I think it turned out pretty good.

Mon, 01/13/2014 - 07:31
Looks good! I especially like the black and white bedding. I'd do that for my own bedroom!
Used the design and got really ugly knotty and grainy wood to give it more character, as well as distressed it with a hammer and a 2' chain and hand planned/sanded. Stained Aqua Blue and sanded parts back to bare wood, then restrained with heavy spots and light spots of Wheatherd Gray and did 3 coats of Satin polyurethane.
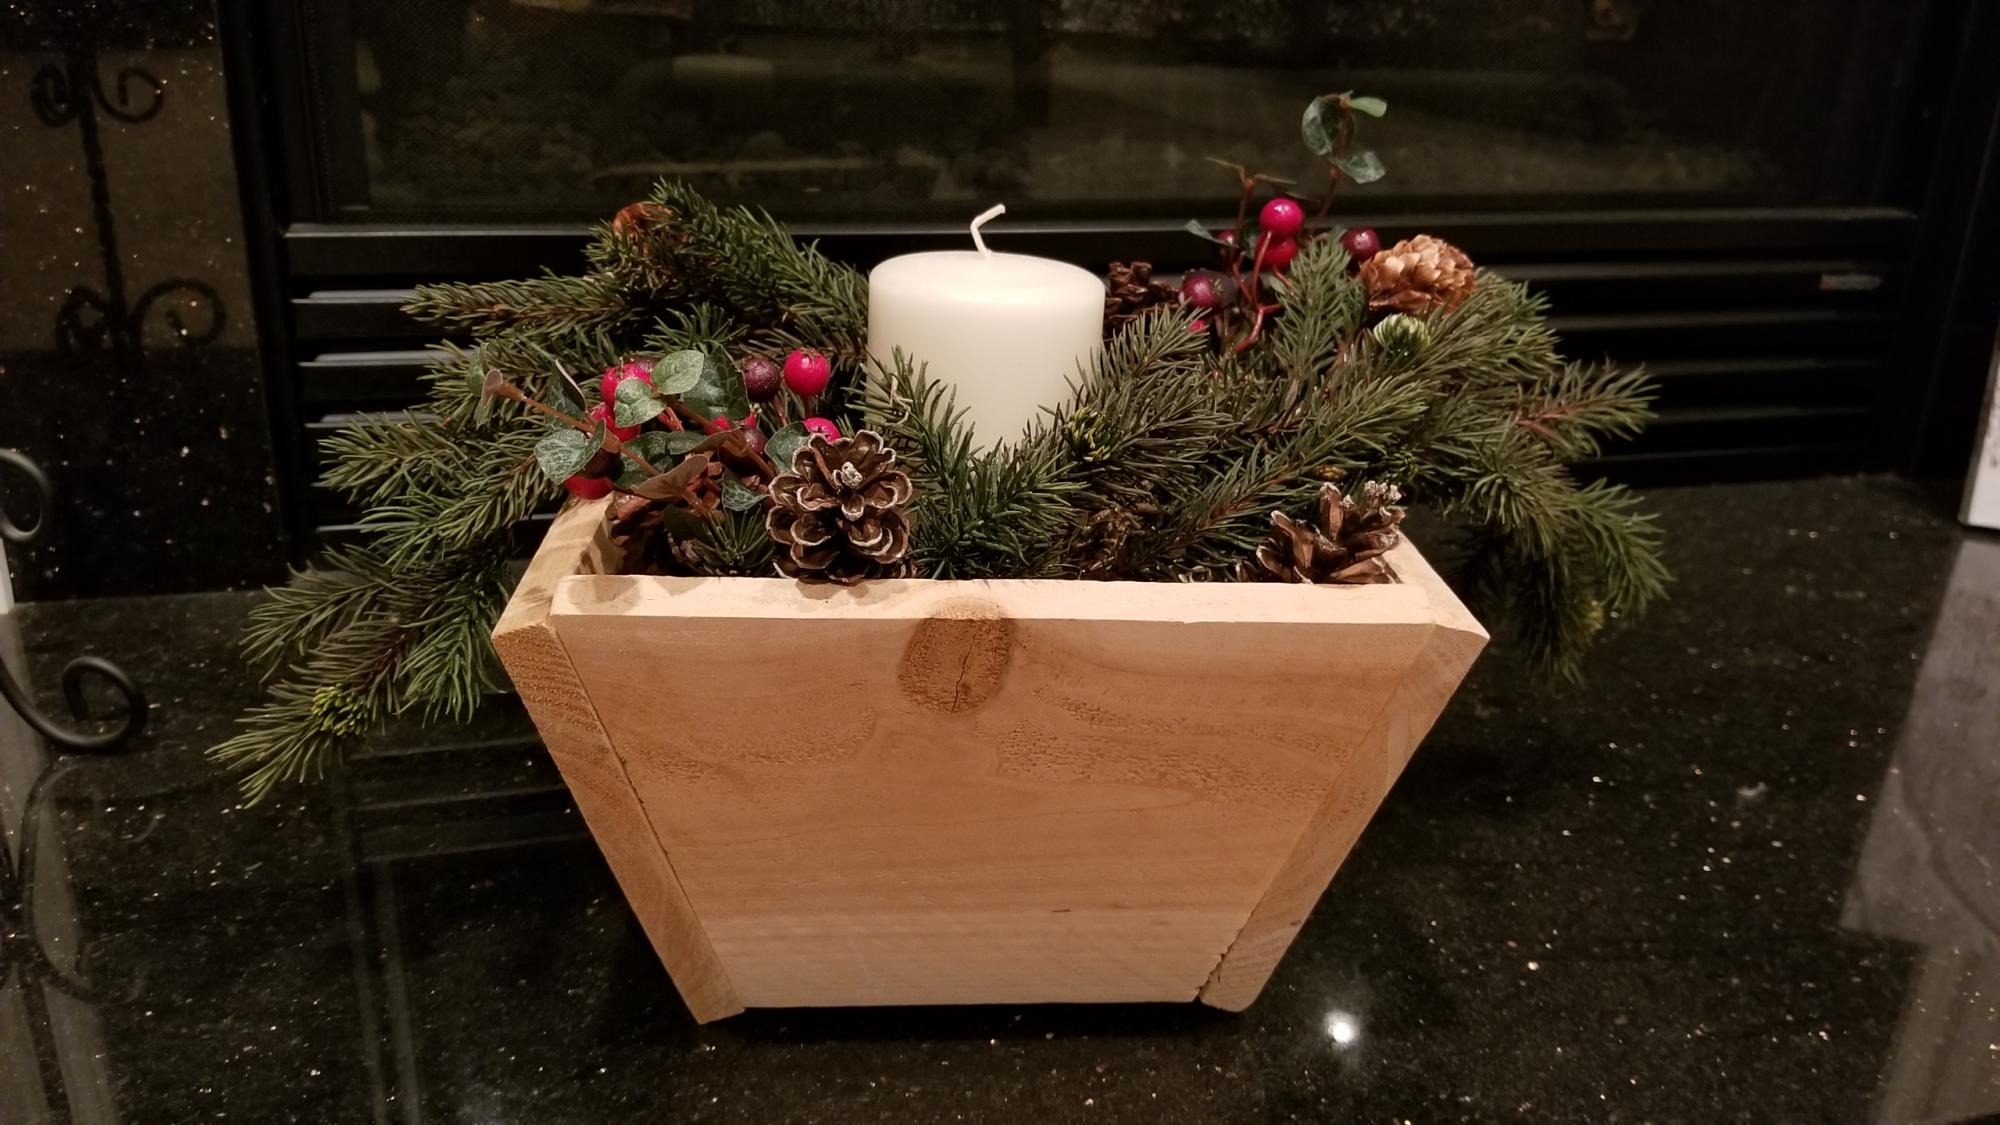
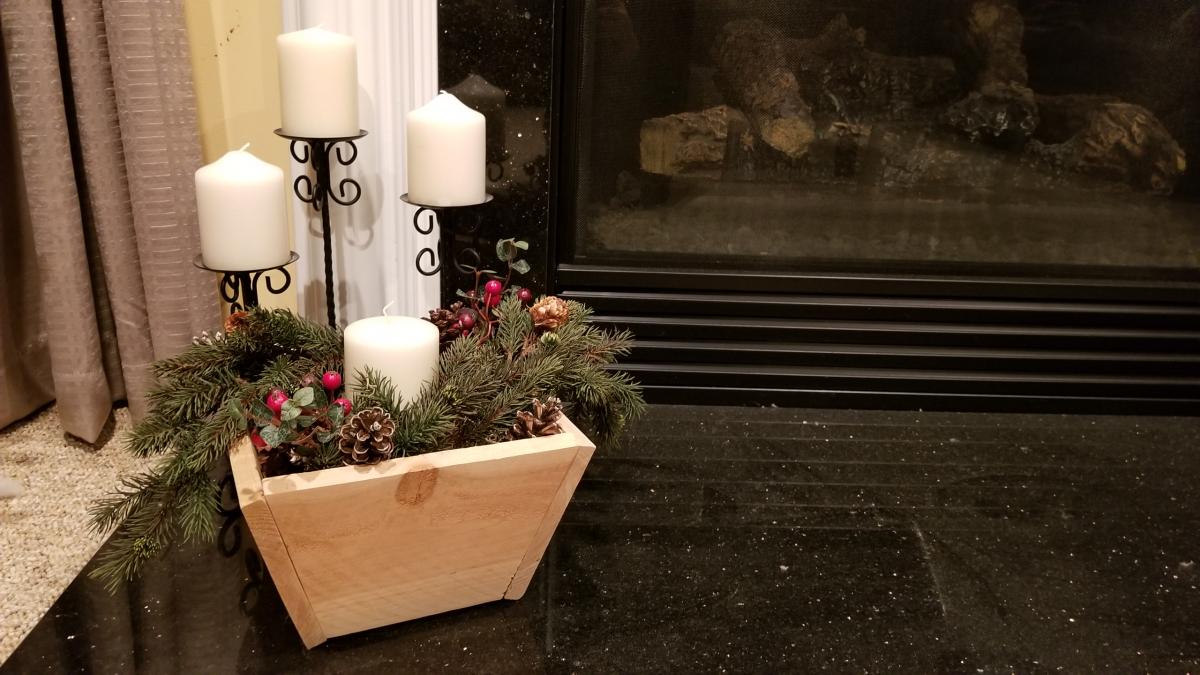
I loved the plans for the cedar planter. It was a quick build and it's such a versatile item. I left the wood natural to give it a more rustic look. I'm planning to make a longer planter to use as a gift basket for Christmas gifts.
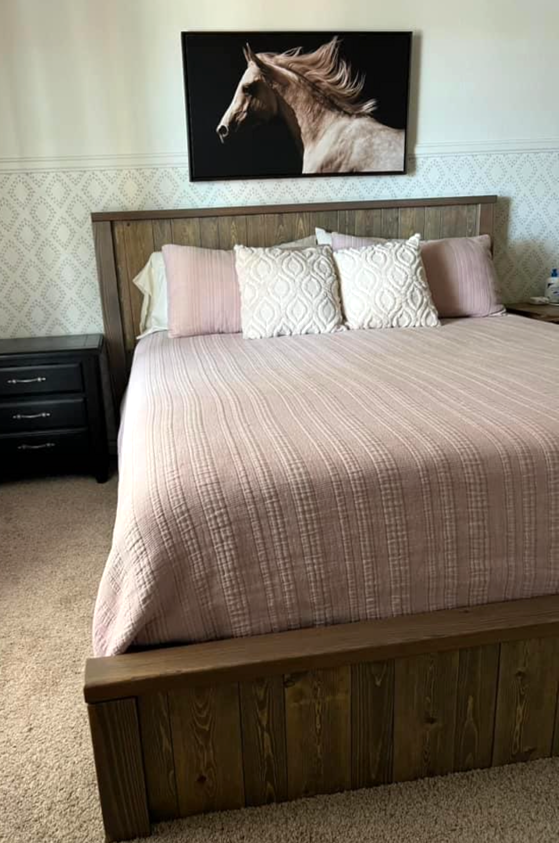
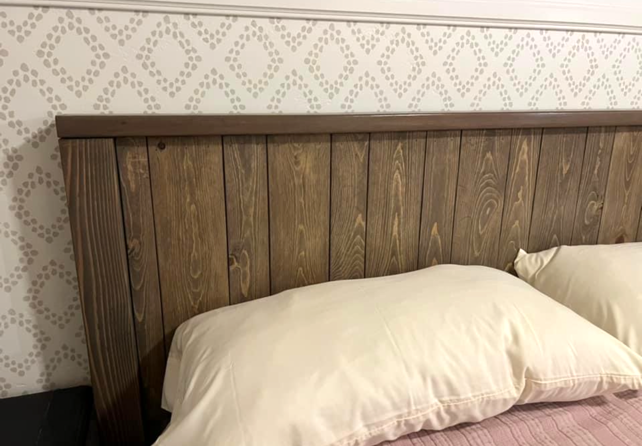
Beautiful Rustic Bed Build by Natalie Riley
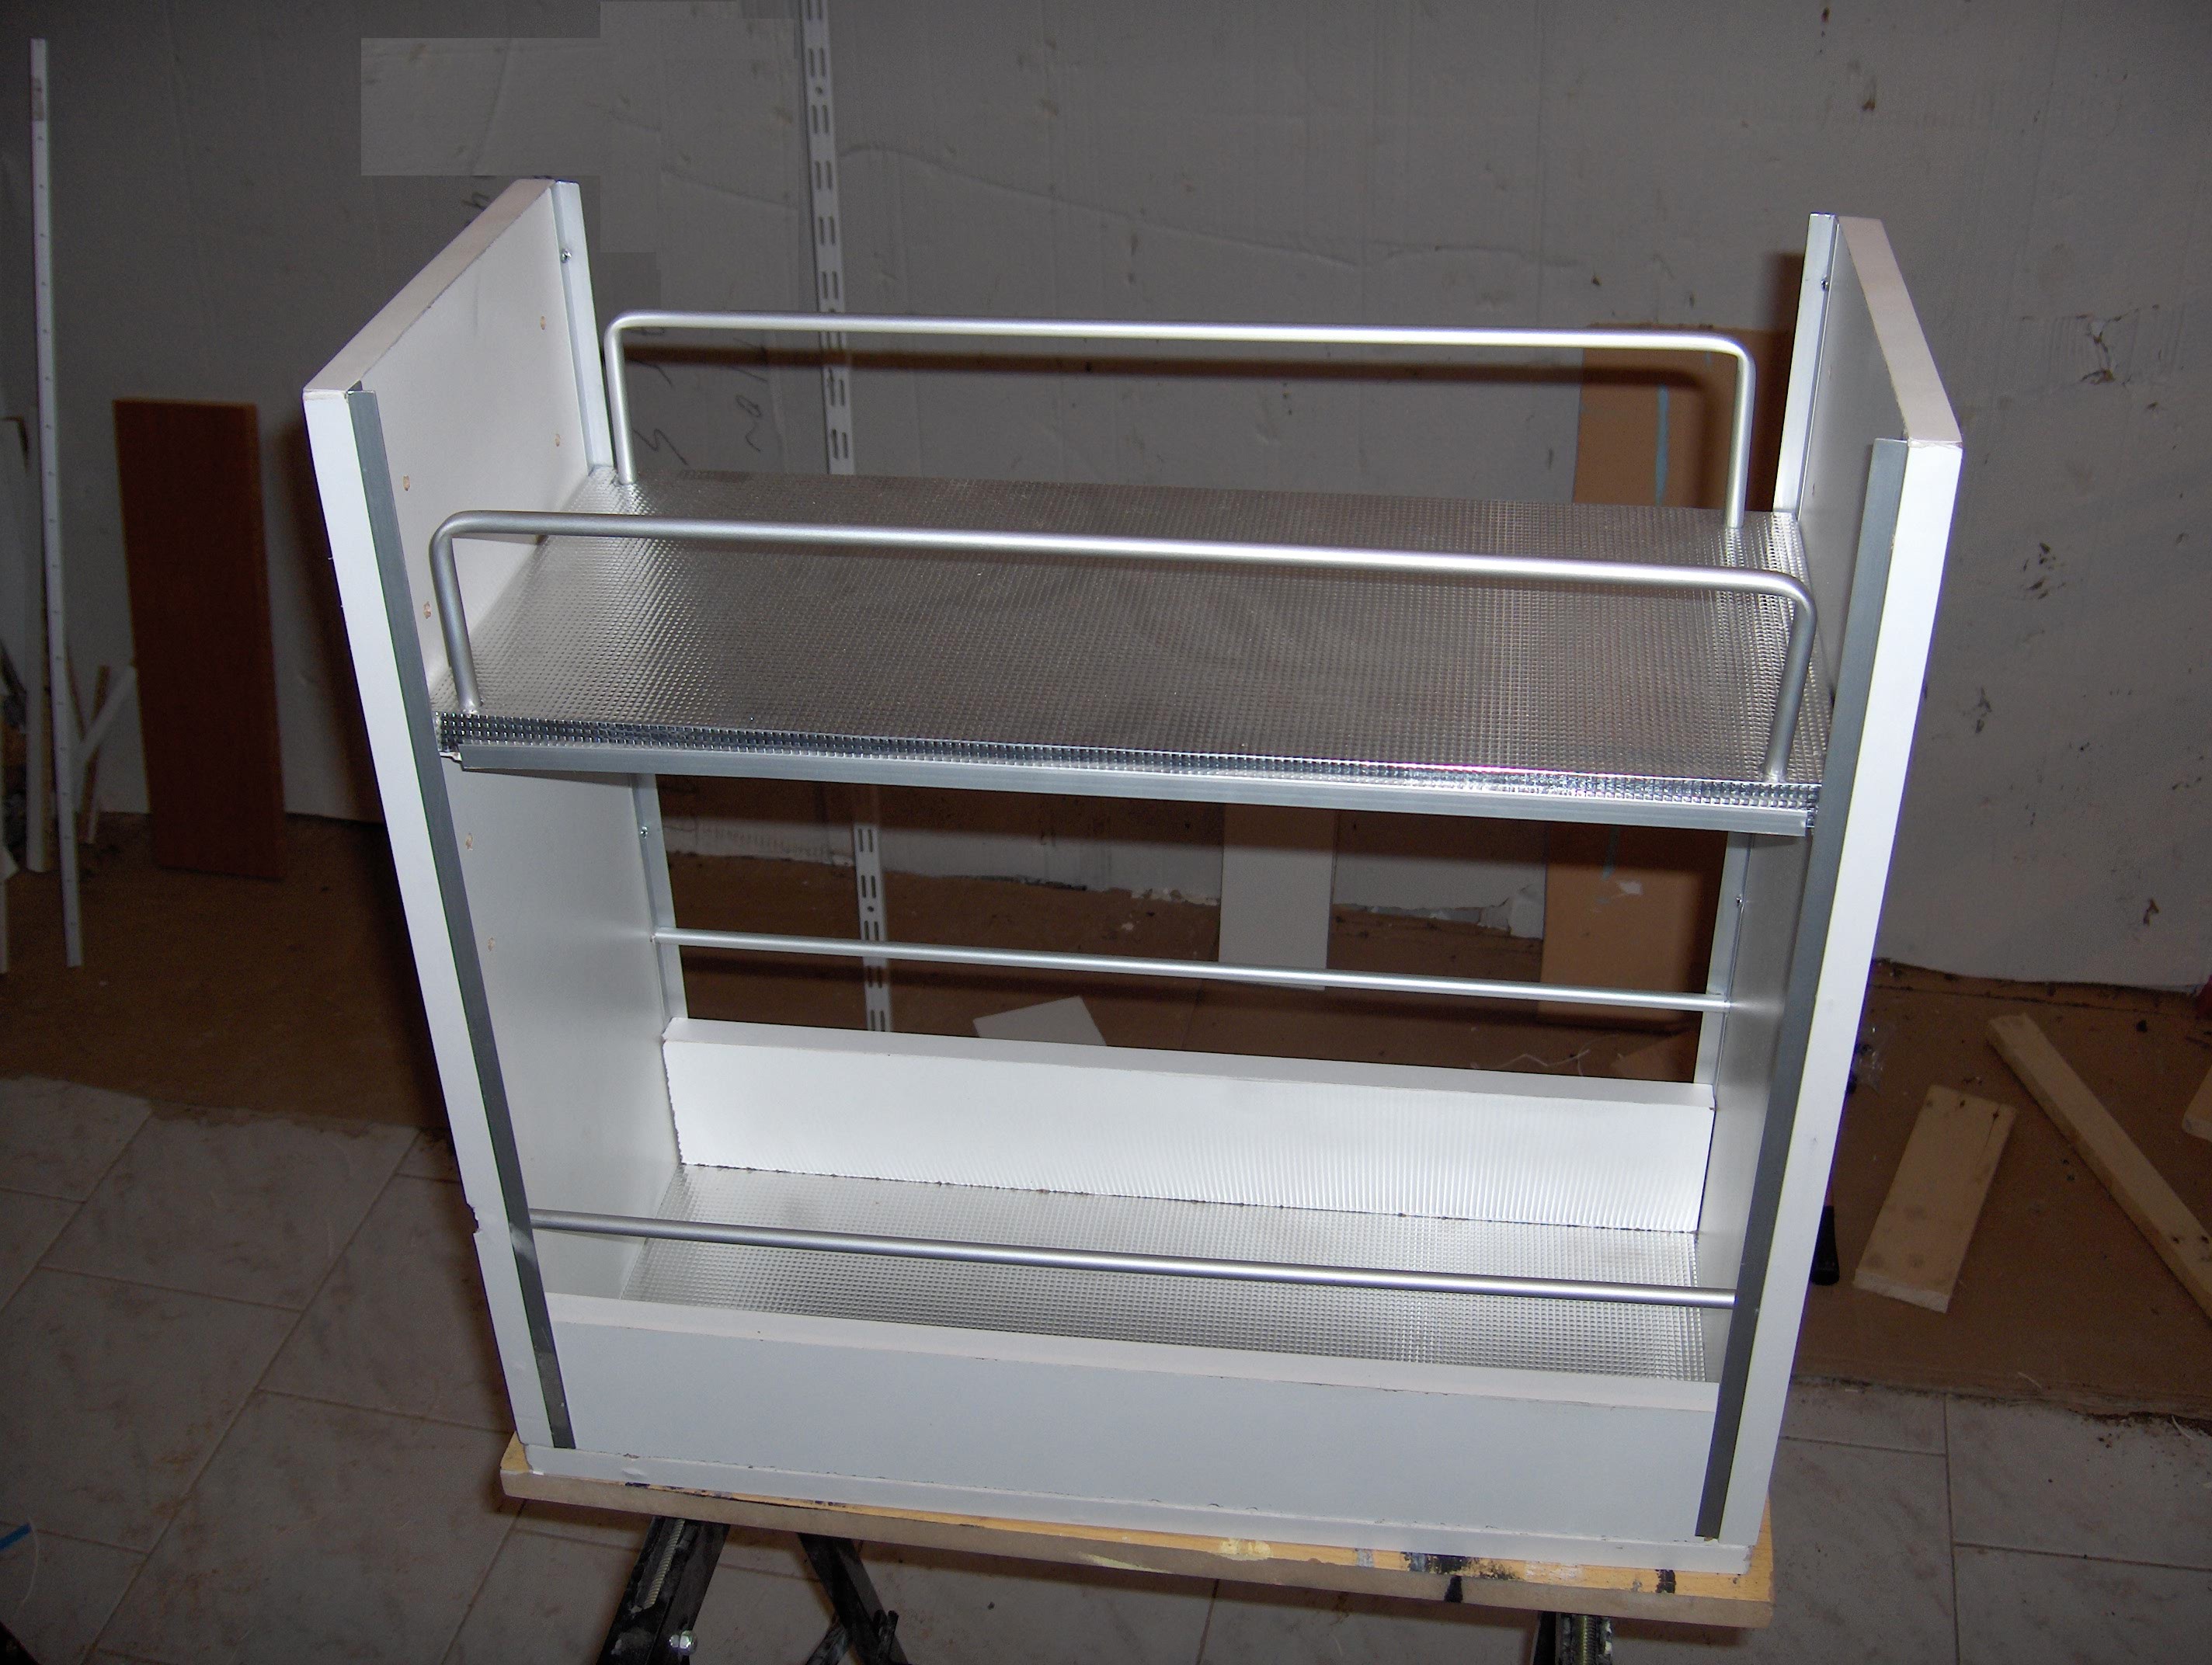
One of the kitchen accessories is
a bottle rack. There are many kinds of bottle
rack depending on the type of bottle (oil or whiskey) and the use of it
(sliding, stable under the sink, in a single cabinet roundtrips etc).
The demands of my own
construction is on bottle rack wagon (ie kitchen pulled out of context), will
find below and next to the sink that will use the entire height of the cabinet
and will have bottles of oil that can be dirty and will therefore be wash.Finally it is two storey with
the second shelf can be moved in height. The dimensions are length
height 50cm. The materials we use are white
melamine 16mm aluminum angle, aluminum tubes and aluminum sheets to dress
racks.
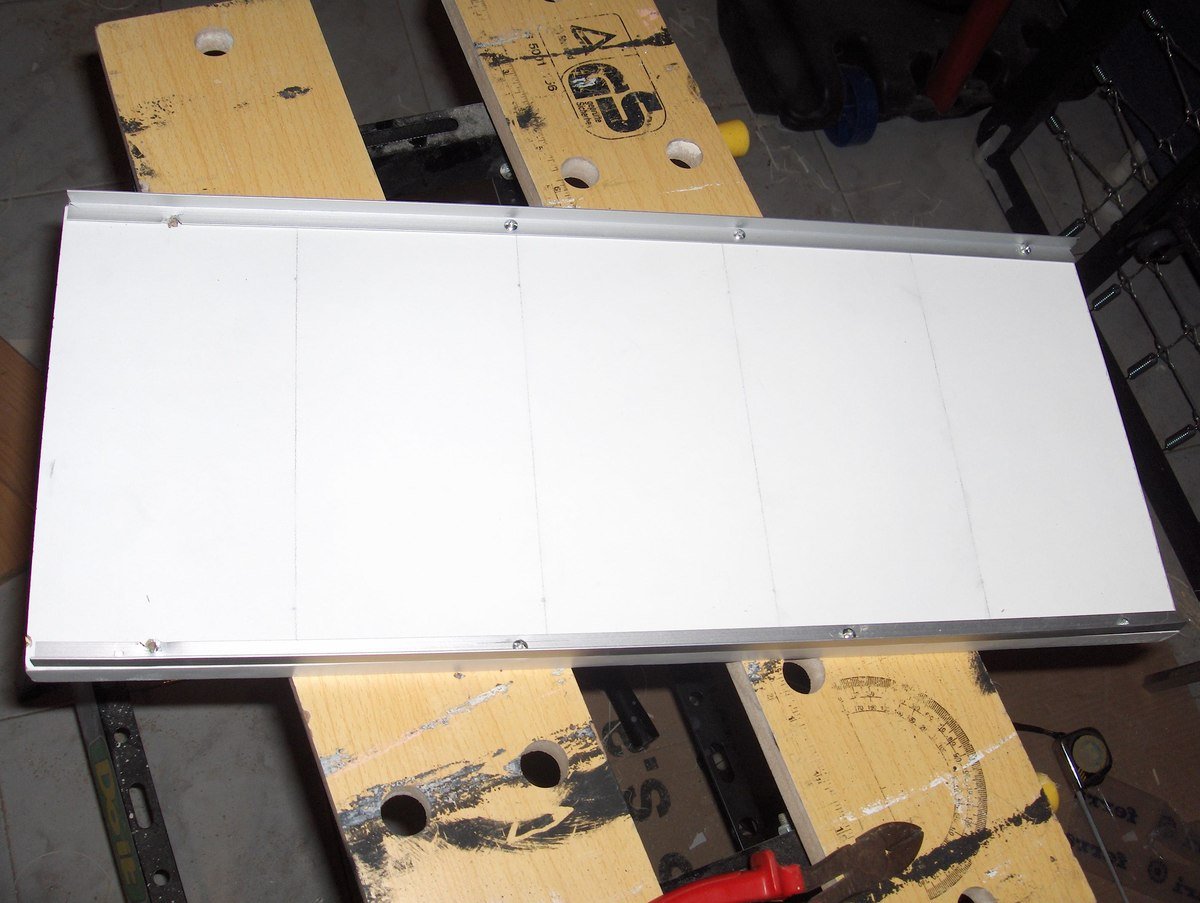
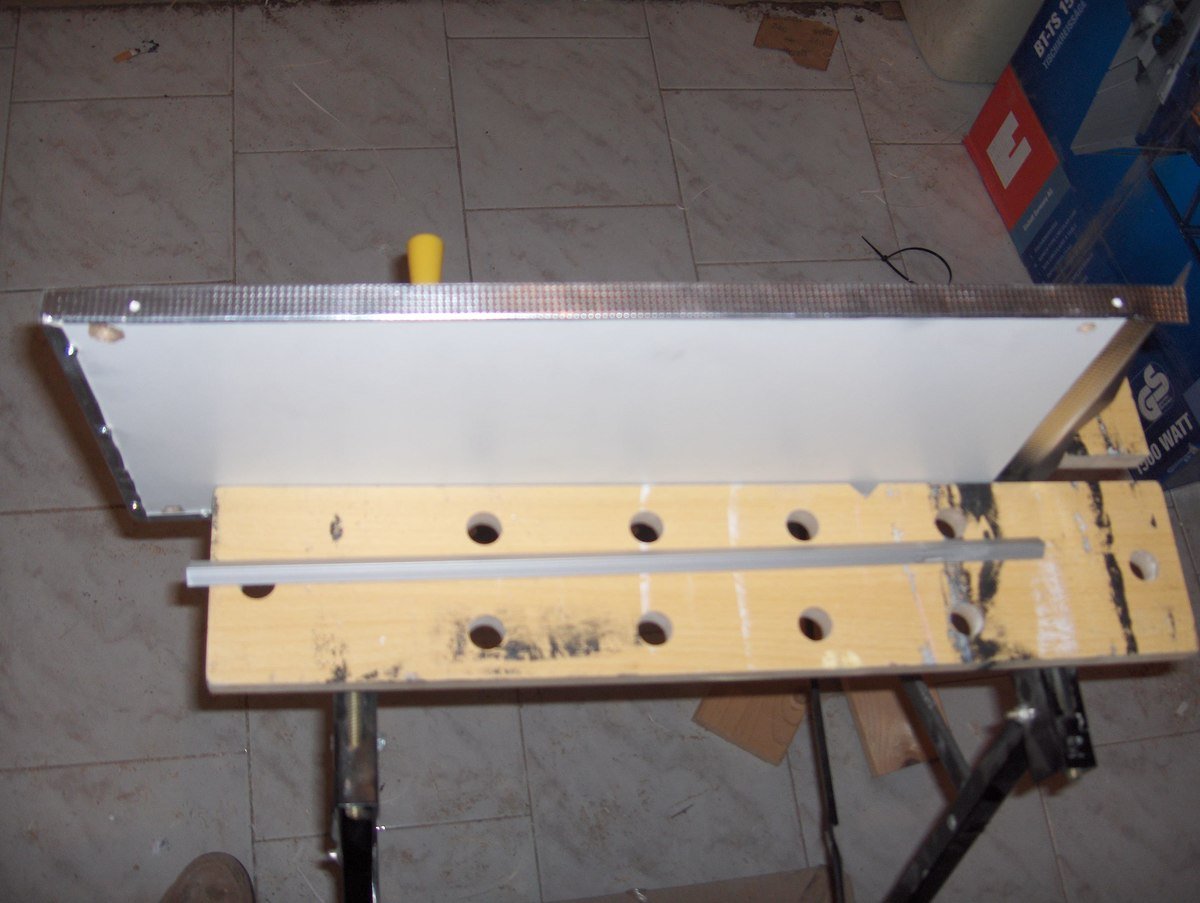
 Materials of Construction
Melamine White 16mm: 4pcs x
(25cm x 50cm)
Aluminum angles (15mmx15mm):
4pcs 4pcs x 50cm x 47cm and
Aluminum tubes 10mm: 2 pcs and
2 x 52cm x 54cm pieces
Aluminum Sheets: 2pcs x 32cm x 57cm
Cost of construction
Melamine
m
euros
Guide Ferrari50 cm 1pc x 9 = 9
euros
Aluminum angles
10
euros
Aluminium tube
11 euros
Aluminum Sheets 8 euros
Mounting rack 1
euros
Total: 45.75 euros

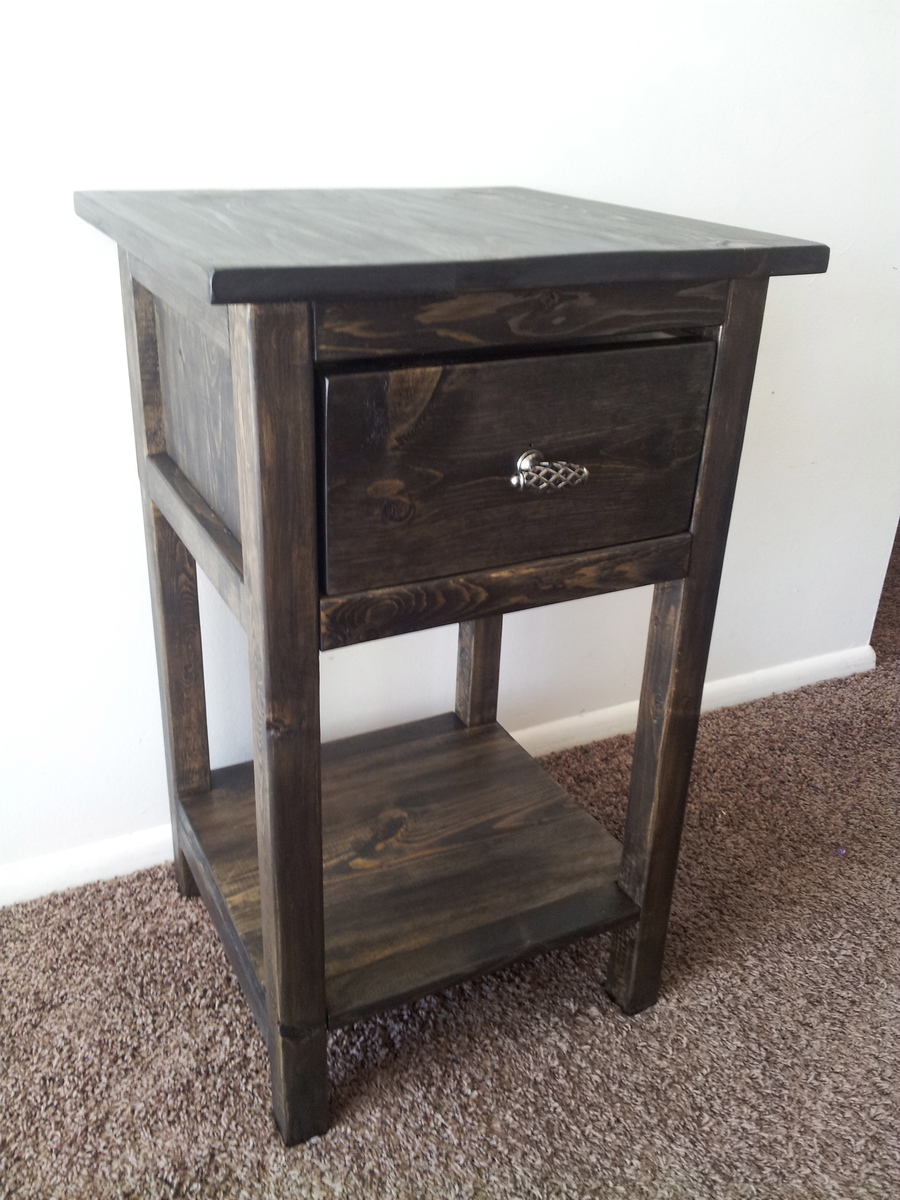
FIRST BUILD!! We've been using metal decorative plant stands as our nightstands, but they're just too wobbly on the carpet in our bedroom, and don't have any storage except the top of them, so when we saw the plans for the Mini Farmhouse Bedside Table, we knew it would be perfect. We don't have a lot of space next to the bed, so we went with the Mini plans, and built 2 of the nightstands, one for each side. We do a lot of projects, and I have refinished furniture for a few years, but we've never built anything from scratch. We have all the tools, so we decided to give it a try. This is our first build, and even though they're not perfect, I think they turned out nice, and we learned a lot that we will bring into future builds. We've already since built a Farmhouse Bench, and are getting lumber this weekend to build a dining table! Thanks to Ana's plans, there are endless possibilities!!
We used 3 pieces of 1x6 for a planked top instead of one large piece of wood, just because we had extra 1x6. Otherwise, we followed the plans pretty close to exact. We bought a Kreg Jig mini before starting on this project, and it's the BEST tool ever!! I want the more expensive kreg jig now, haha I love it!
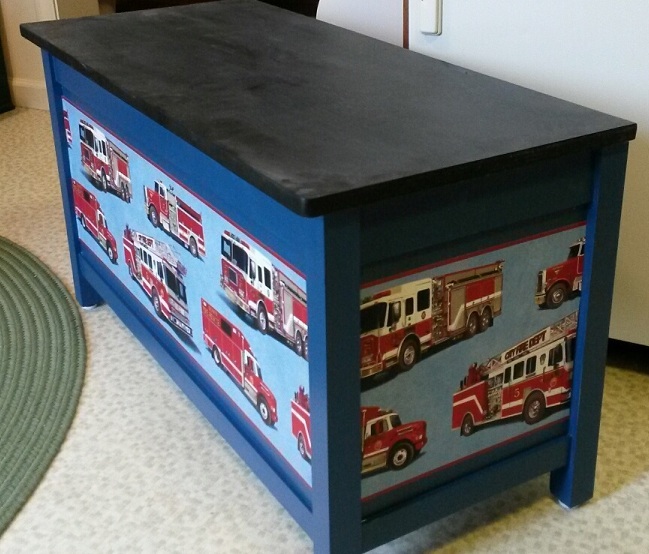
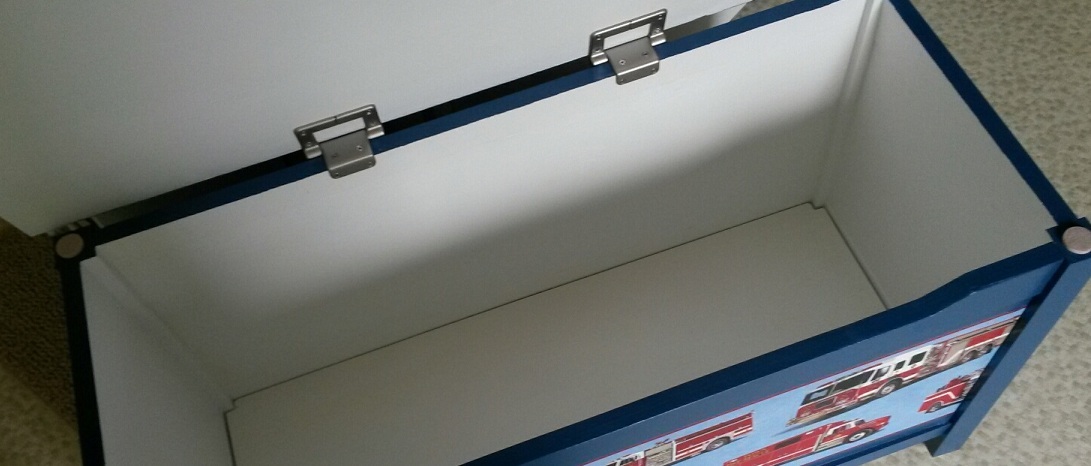
This project cost me approx $160. I added a fire truck wallpaper border across the front and sides, finished the top in chalk board paint, and used torsion hinges from Rockler. Pricey but very nice for a lid. I also added plastic feet to the bottom and felt tabs where the lid touches the four legs. I like finishing details. It took me about a week to complete, mostly because of the time needed for the chalk board paint to set up. Loved the way it came out and hated to part with it! Ana's plans are always easy to follow and turn out great
I made this for my almost 2 year old niece for Christmas this year.
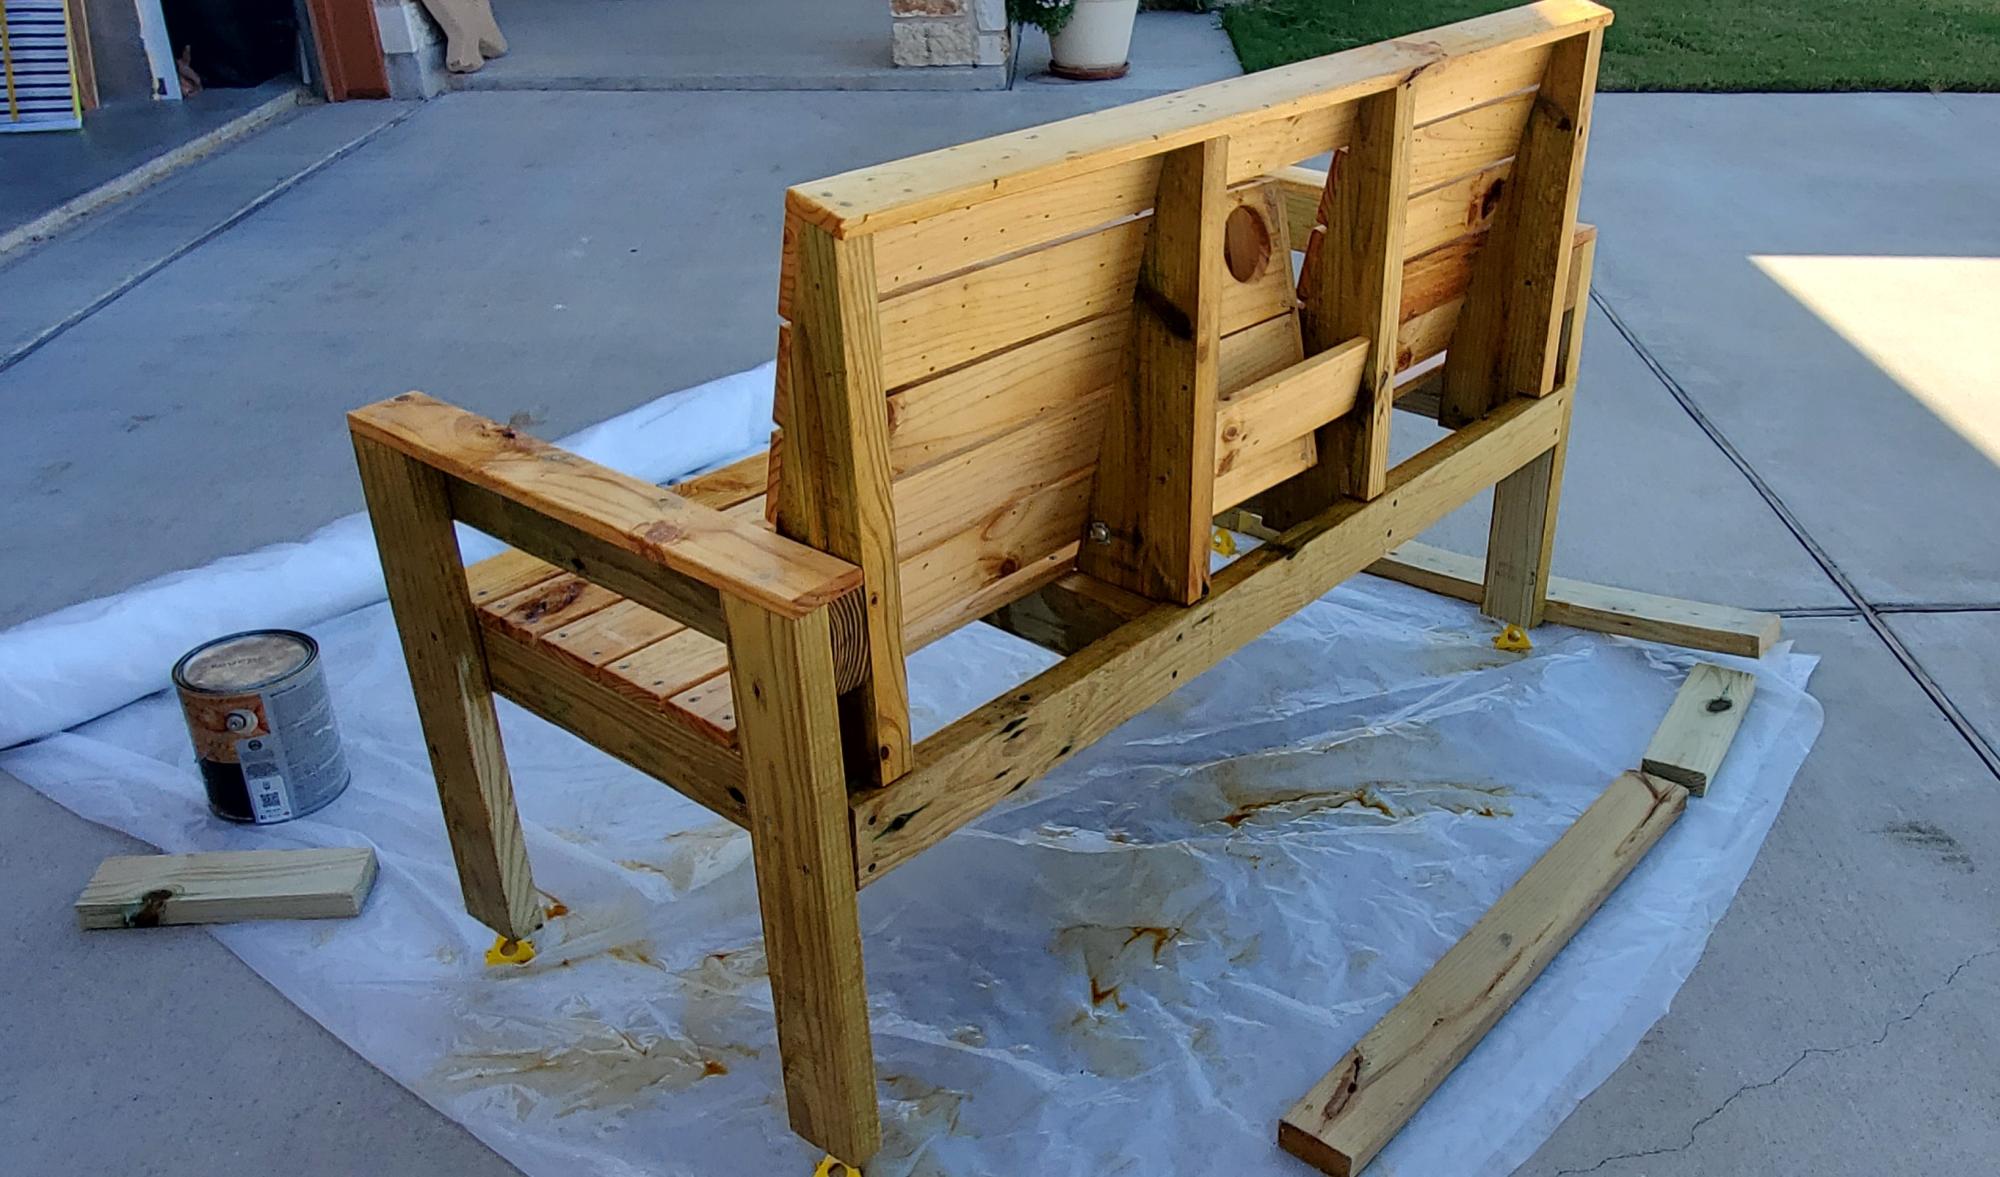
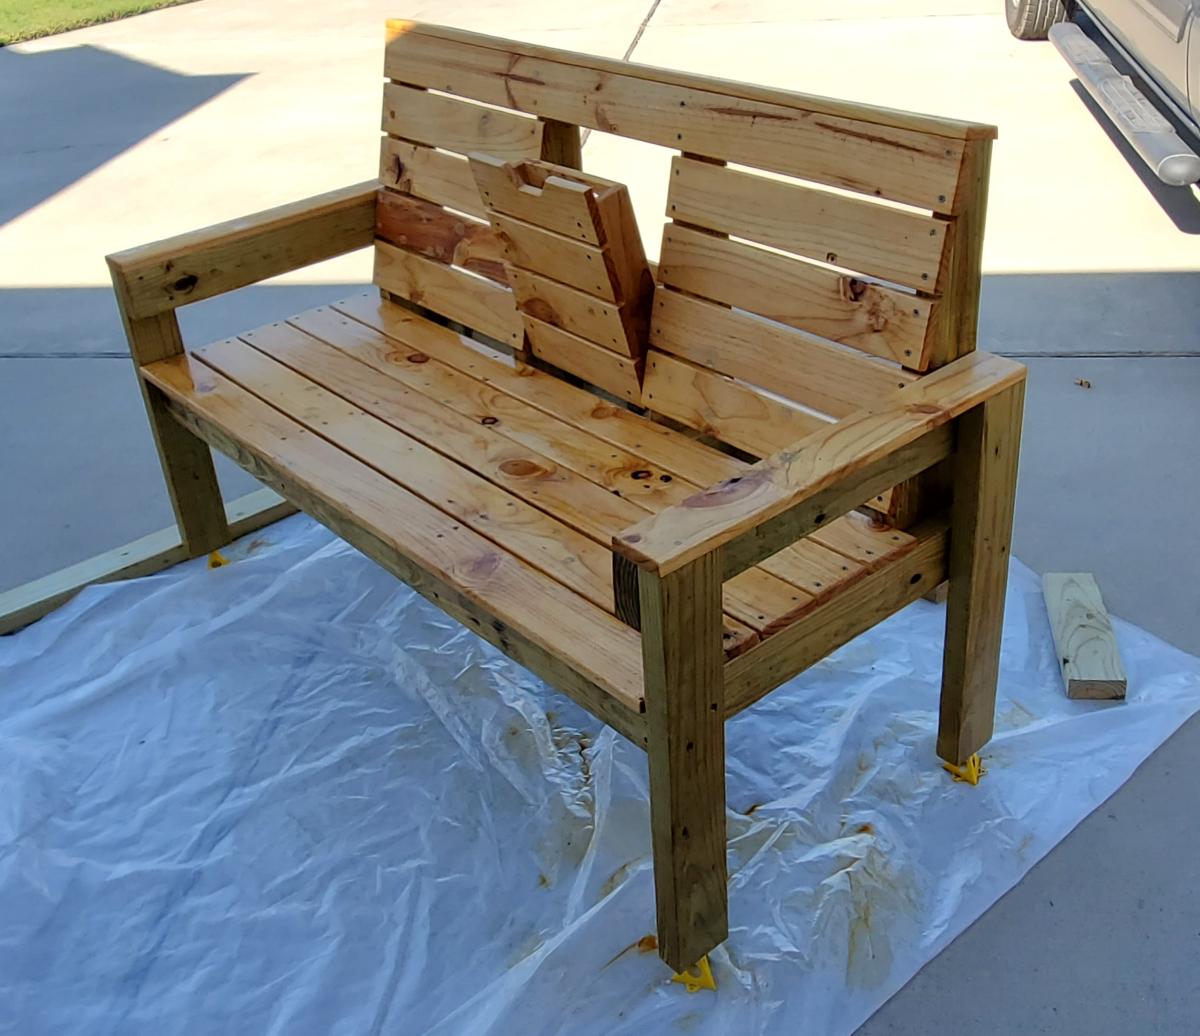
Built this Lazy Bench over the course of one weekend. Had to make some modifications to the way the arm rest / cup holder moves, but overall happy with how it turned out.
When I build this again - I gave this one away as a donation to our local Catholic Radio station - I'll make a bigger point to make sure that all four of the back supports are exactly the same, and that I pre-drill the carriage bolts that secure the cup holder before I start assembling.
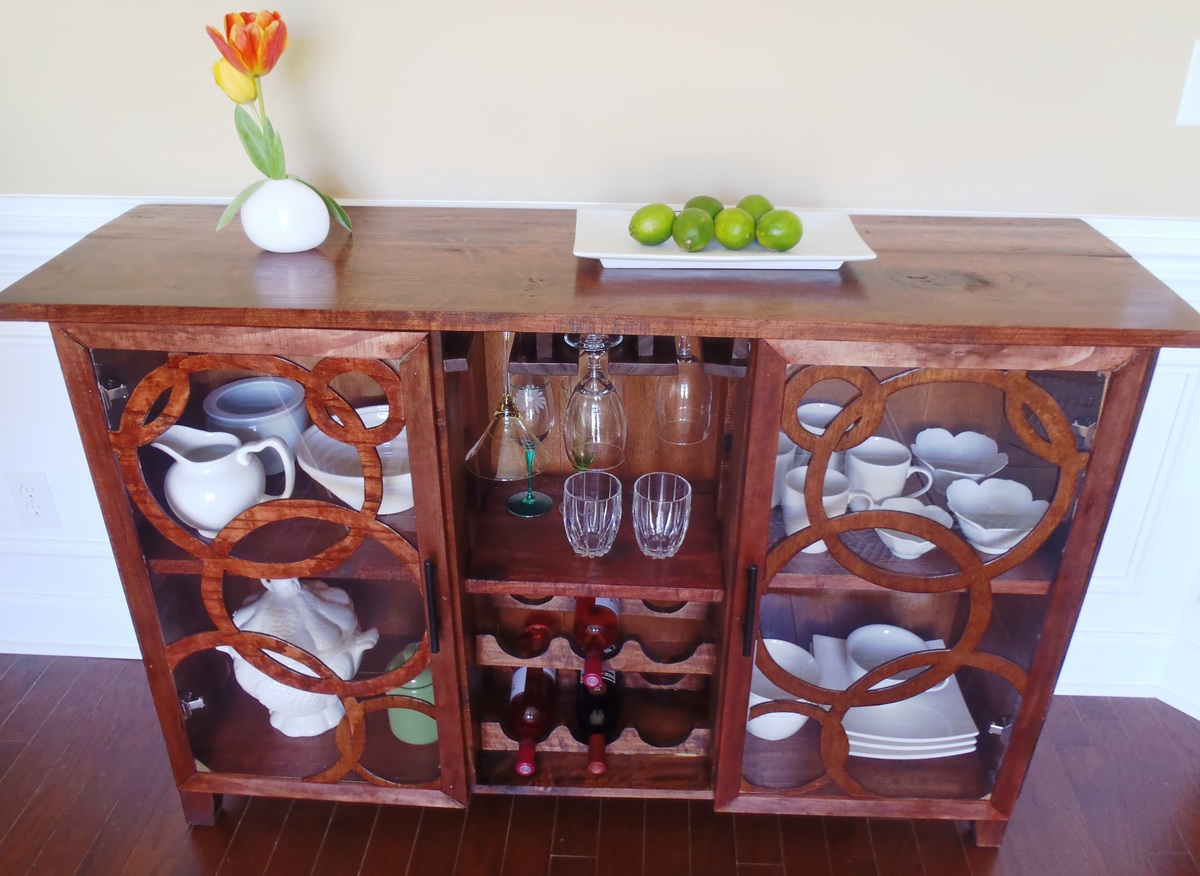
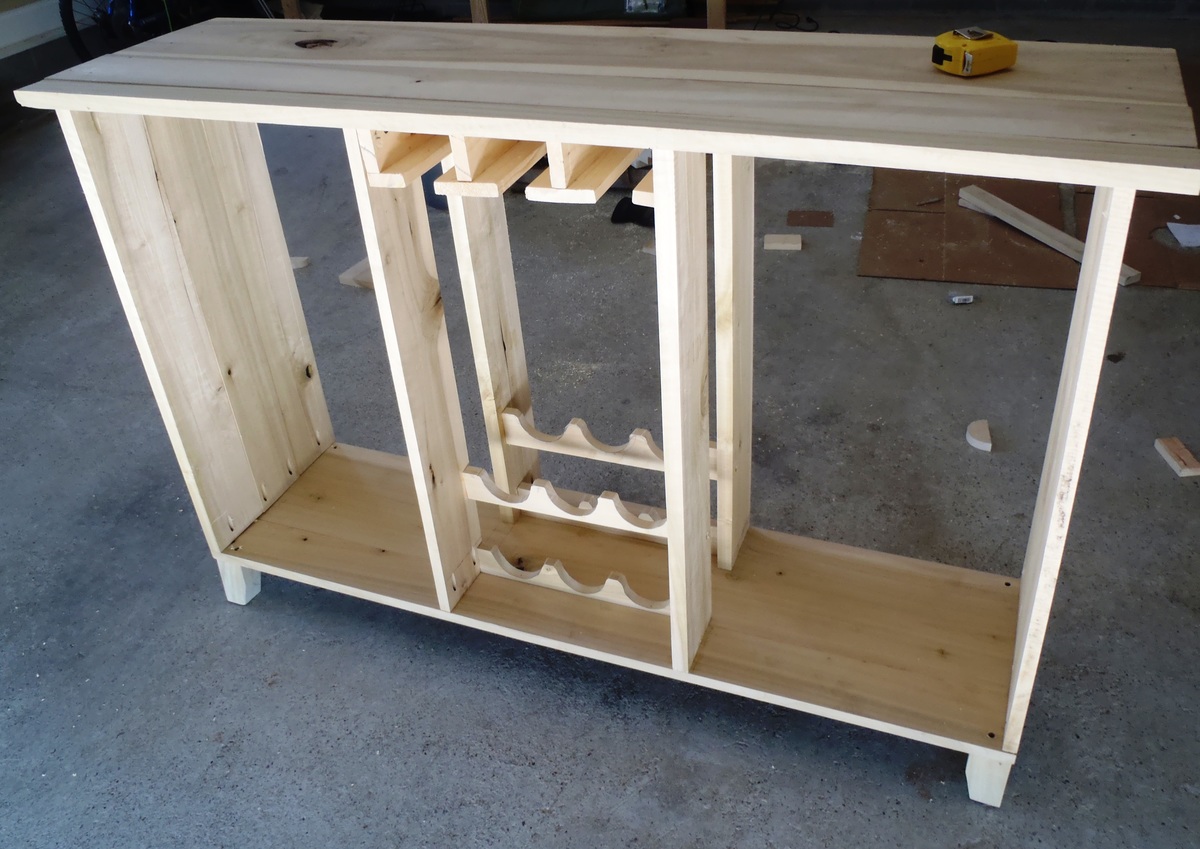
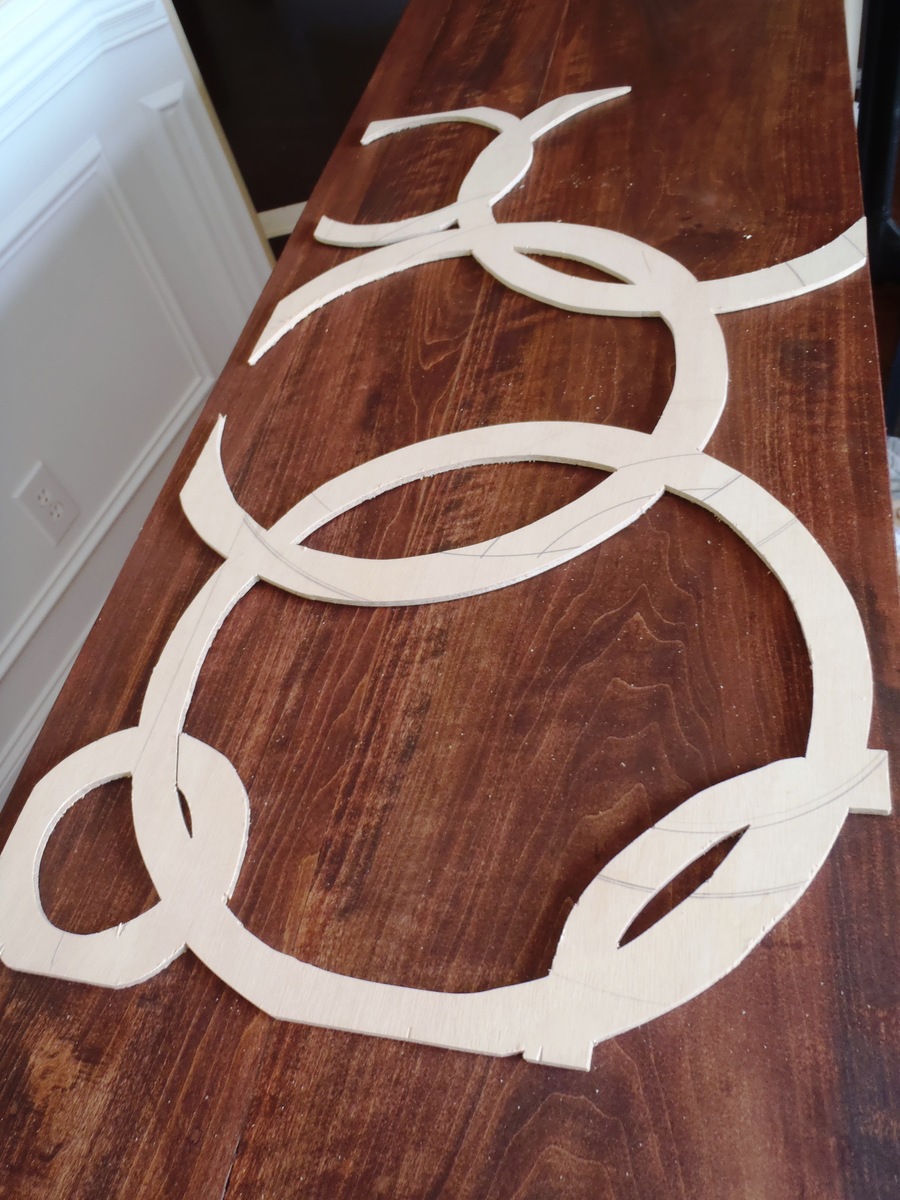
UTtanker
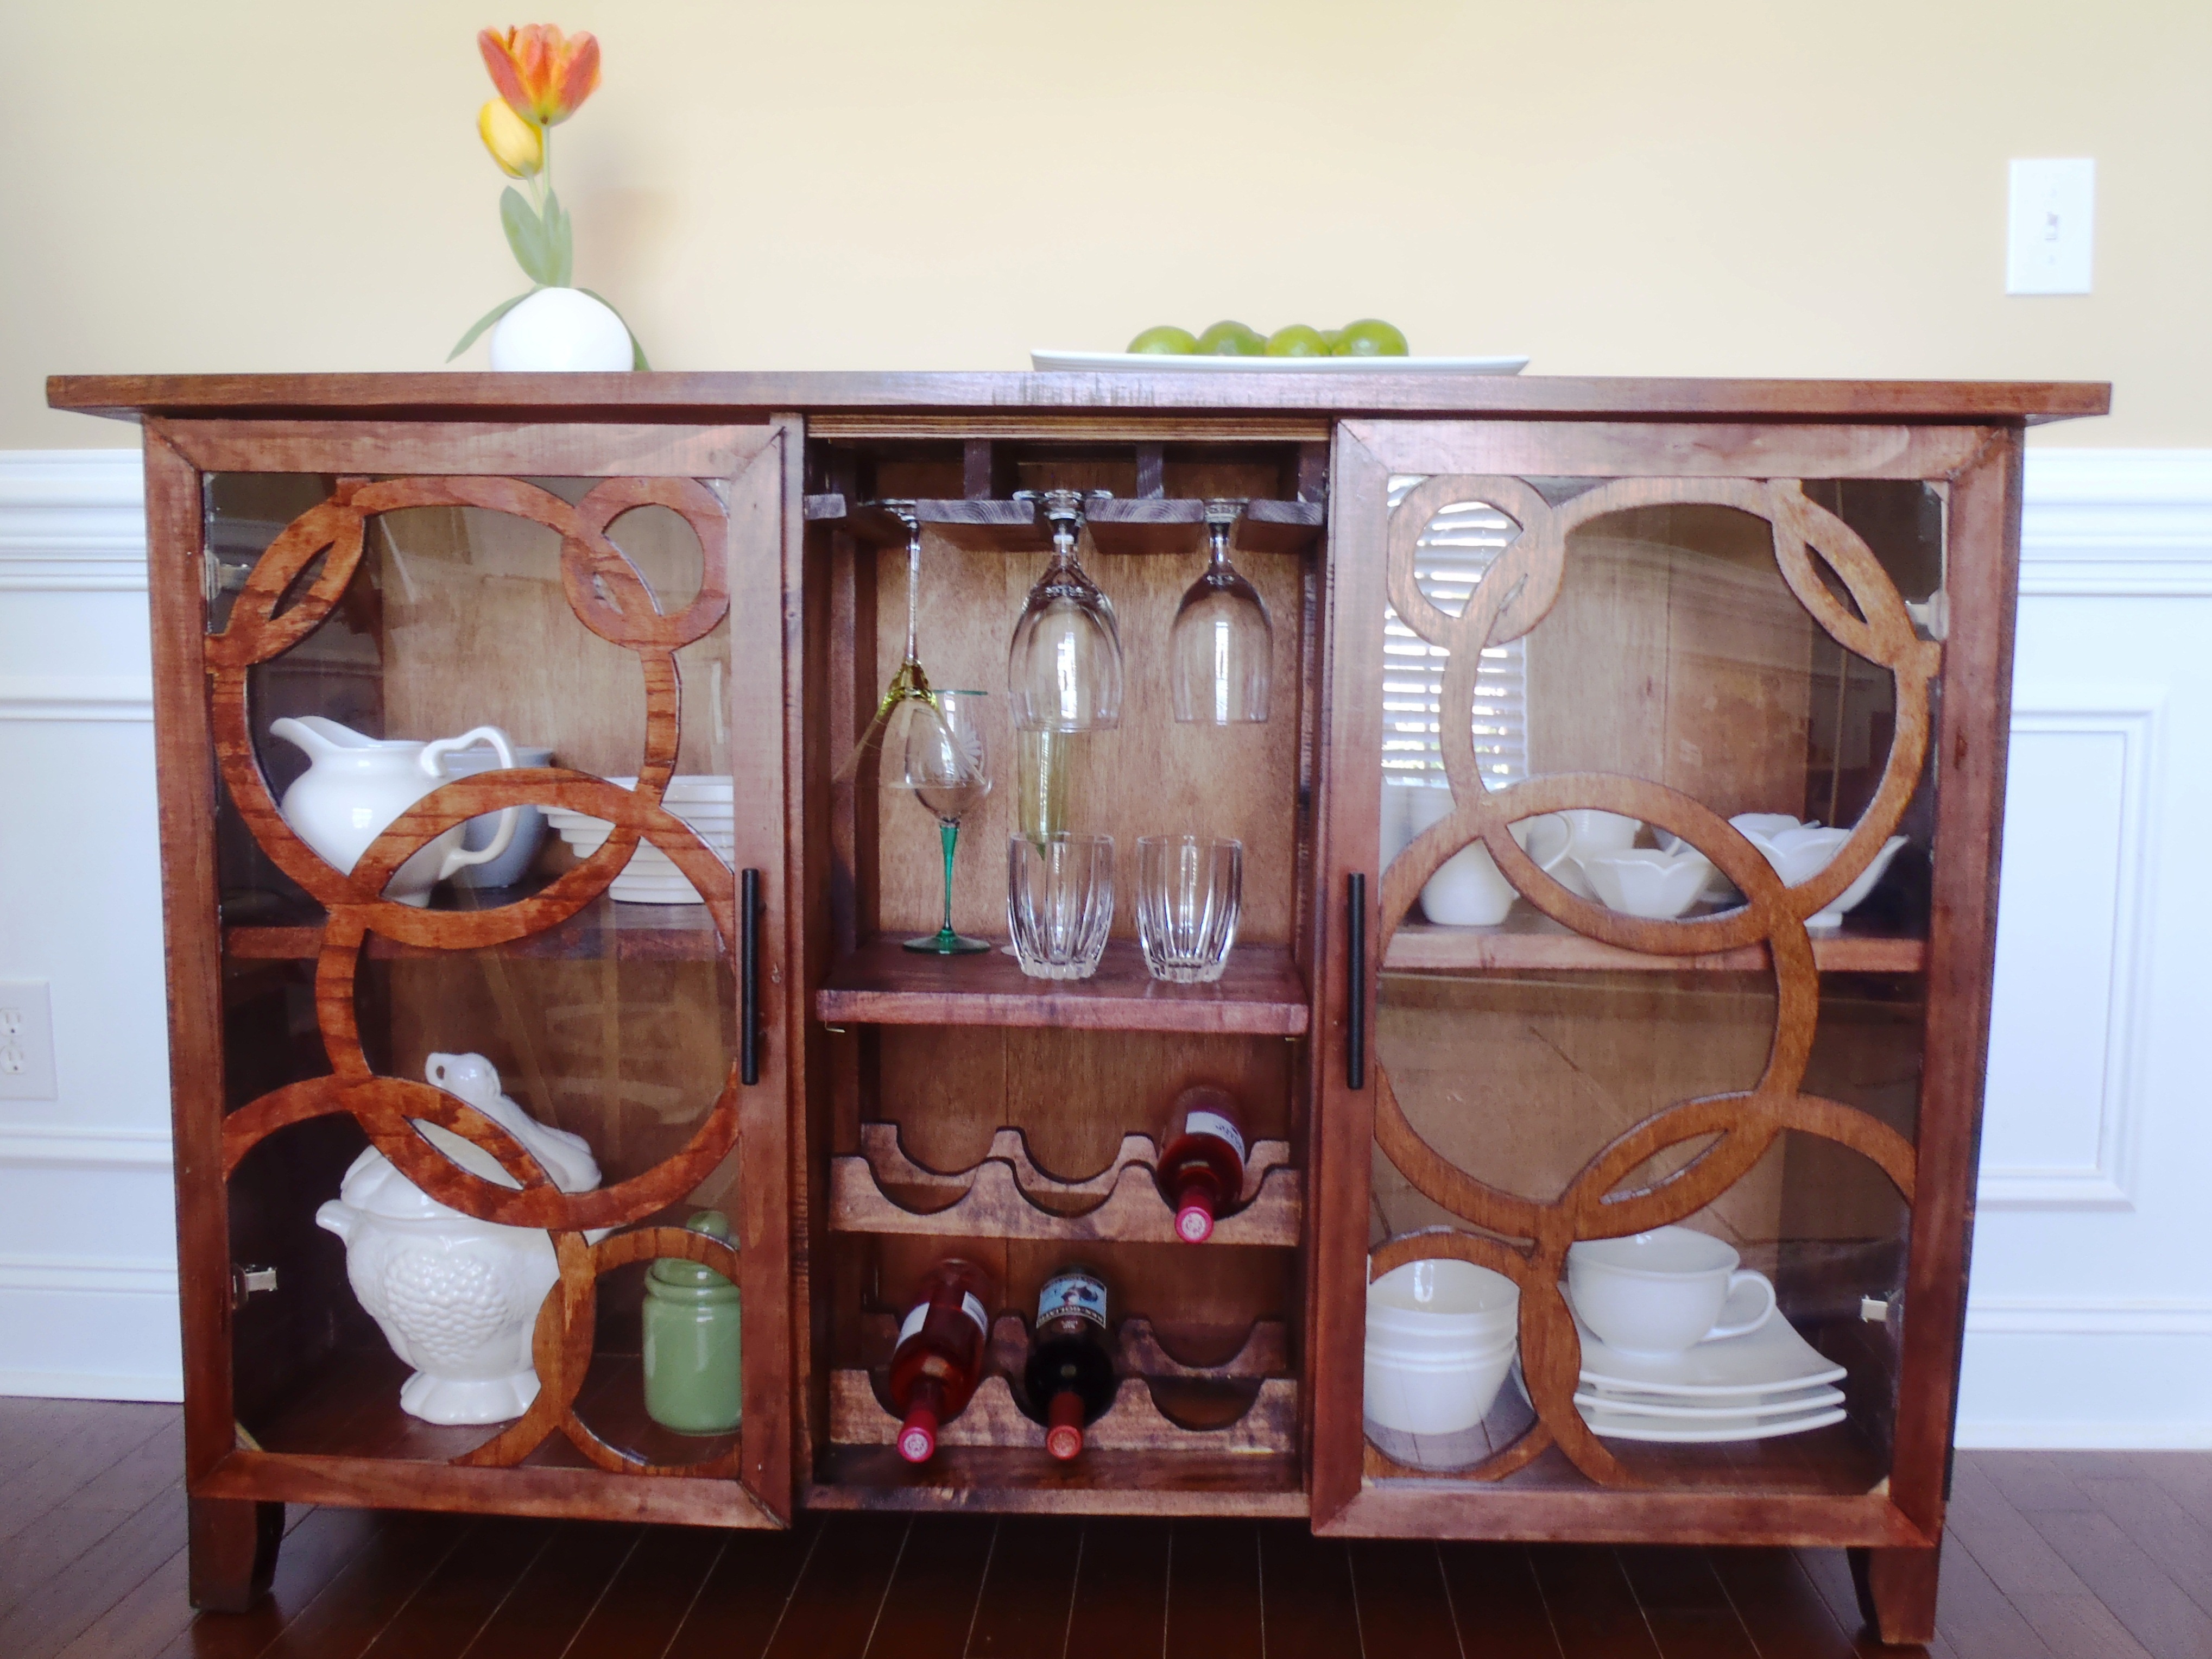
Modified the salsa console by taking the drawer off and stealing some from Patrickhosey's (bragpost). I built it for my dining room. Measures 57-1/2" long X 17" depth X 39" tall.
Sun, 04/01/2012 - 16:52
great job! do you have a template for your circle pattern?

In reply to great job! do you have a by margjack
Mon, 04/02/2012 - 04:47
I don't but it's easy to make, make your door frame first, trace the inside of frame on a plywood sheet and use compass to make all sizes of circles on that sheet. If you don't have compass that's big enough, just use string or thread( like I did on this project), pivot one end, attach the pencil on one end and swing to make circles :)
In reply to That is sooooo cool! by Pam the Goatherd
Mon, 04/30/2012 - 05:24
Love your avatar! so cute, I hope that's not mountain dew in there (just kidding:)