Truss table

I reduced the length by 12 inches to accomodate my space, and I ripped the boards on the table saw so they would be more flush when I assembled the tabletop. Otherwise, I followed the plan exactly. Distressed tabletop before staining.
My mom, dad, husband, and I built this farmhouse table over the course of a couple weeks. The top was barnwood pine and the base was pine lumber. This was my first build and I'm hooked!
I built this as a prototype for myself because my daughter requested one for her dog food cabinet. We are going to build hers together. I'm excited about that.
Craig Morningstar
This was basically half of the entry way palns (I didn't make the top piece). I am yet to have a cushion made for the top but it looks great at the foot of our bed.
Ana's simplest console inspired my first build. I decided to make it a bit wider like one I saw on Shanty 2 Chic's website, and this is what I came up with. So excited about my first build - can't wait for the next!
This project took us four days. The biggest job that took us awhile was sanding and painting.
Due to COVID-19 the first 9 weeks of my children's schooling will be online. When I looked for cheap desks in my area they were completely sold out. I have been a big fan of Ana White's designs since I first discovered her through Pinterest. This was my first furniture build project and while it's not perfect I will definitely be attempting another. I modified the height of the desks to fit my 1st and 5th graders. I also decided to add a second bookcase for extra support and storage. My husband owns a flooring store and he had custom quartz desktops made instead of using wood. We temporarily glued the desktops on versus a more permanent install. This is so when the kids go back to school full time and the desks are no longer needed in our dining room we can remove the bookshelves, finish the tops off in another way and move the bookshelves to their bedrooms! I may still add cork-board to the front section of each desk but I am undecided at the moment.
This bench works great as a piano bench with storage inside for all of the sheet music. I added one little 4x4x.75 piece of wood inside in the middle because I found that the 1x12 seat would flex in the center but after adding that piece of wood it was solid. I also added eye hooks and chain for the top so that it does not flip all the way backwards.
We built this farmhouse table for my Mom's house, to create a space big enough for our growing family to gather at holidays and birthdays. We added to the size- the final dimensions were 82″ (long) x42″ (wide) x 30″(tall). It is a huge, chunky table! My parents prefer natural finishes, so we gave the natural wood several protective coats of polycrylic.
Por ser principiante me tomo 2 fines semanas.
My wife told me she would like a pair of matching dog crates built to fit the space between the wall and the dryer in our laundry room. I built her two crates (25L x 17W x 18H) and painted them to match the colors in the laundry room. They fit the open space exactly and sit on top of each other. The entire project took about 2 days to finish and set me back around $80. They seem to work perfectly for our dogs, both of whom are on the smaller size of medium. They really tie the space together and add a wow factor to an other wise normal laundry room.
This was a custom build for a friend. It's nearly 8 feet long and I used the plans from the classic chair made simple for the back legs and support for the seat. Everything else was customized to fit her needs. =) Lots and lots and lots of pocket holes but this piece turned out better than what was pictured in my head!
Love this shelf. We found we had to pre-drill holes since the wood we used was very dense, but in the end it was still a 1-day project (including buying wood and running other errands). It was perfect for our storage room since we really wanted a shelf to store totes, but didn't want to spend a lot on a room we never go in. In the end we spent $80 on wood, which is far less than comparable metal shelves for $160-$180 elsewhere. In addition this thing is STURDY. Thank you Ana!!
This was the 2nd piece of furniture my husband and I have ever made. We recently moved to the country and I wanted a large, functional piece for our bedroom. I studied Ana's plans for the freestanding garage shelves and then modified those with my own custom ideas - ie, used two 2x8's instead of four 2x4's for the shelves. We bought cheap lumber and had to deal with some twisted boards but in the end, it turned out perfect for our space! The goal was to get the TV at this exact height and to give us some room to display photos, etc. I absolutely love the contrast of the walnut and the espresso stains - we can't stop looking at it! :)
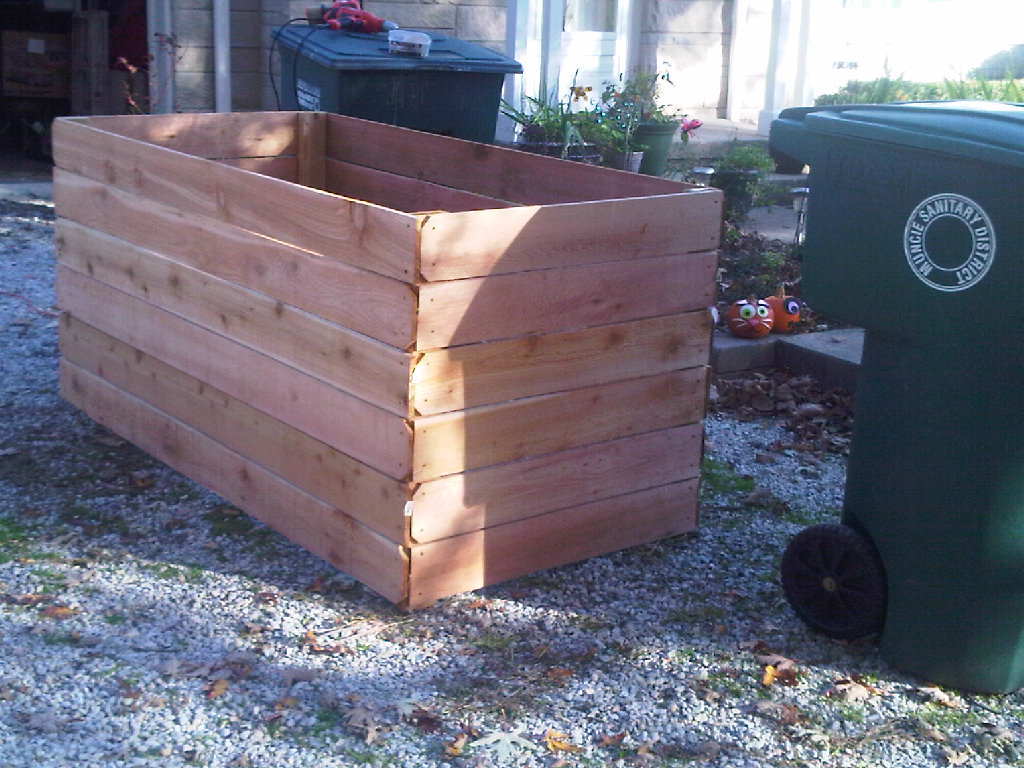
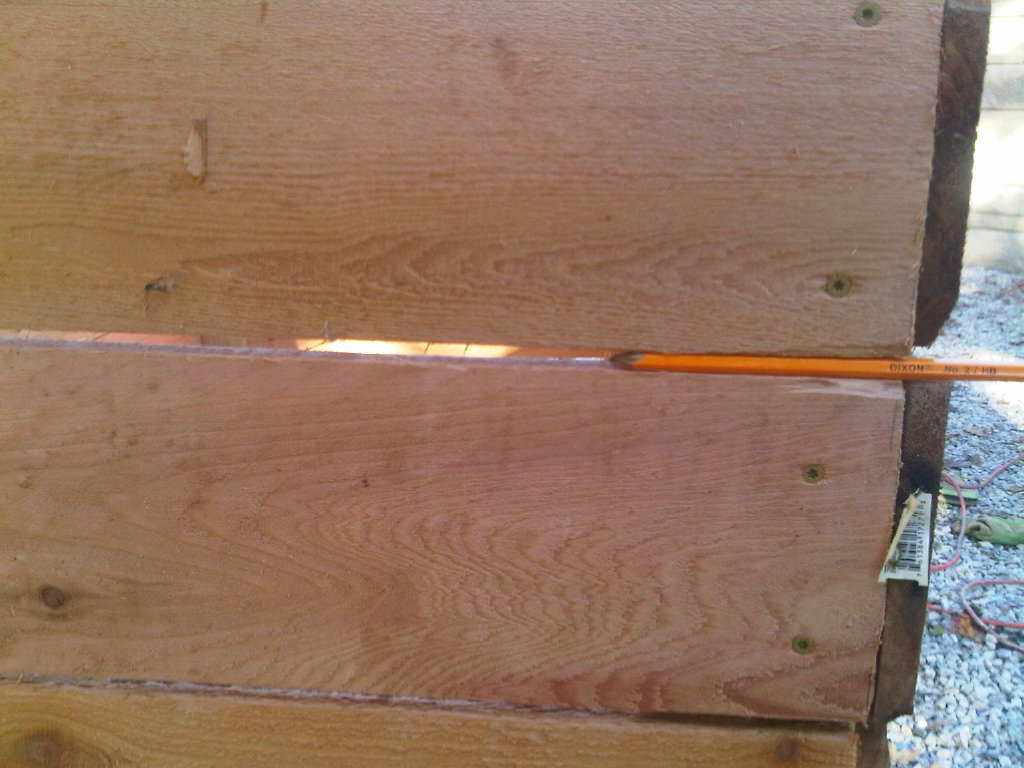
For this project, I used 6 foot cedar fence posts and 8 foot cedar 2x4s. I used a pencil to space the boards and allow extra air flow. More space between boards is acceptable - even to the extent of dropping off one full board and putting an inch between each side rail.
Another option is to make your sides interlocking layers, one or two boards high - http://cedarstackingcompostbin.blogspot.com/
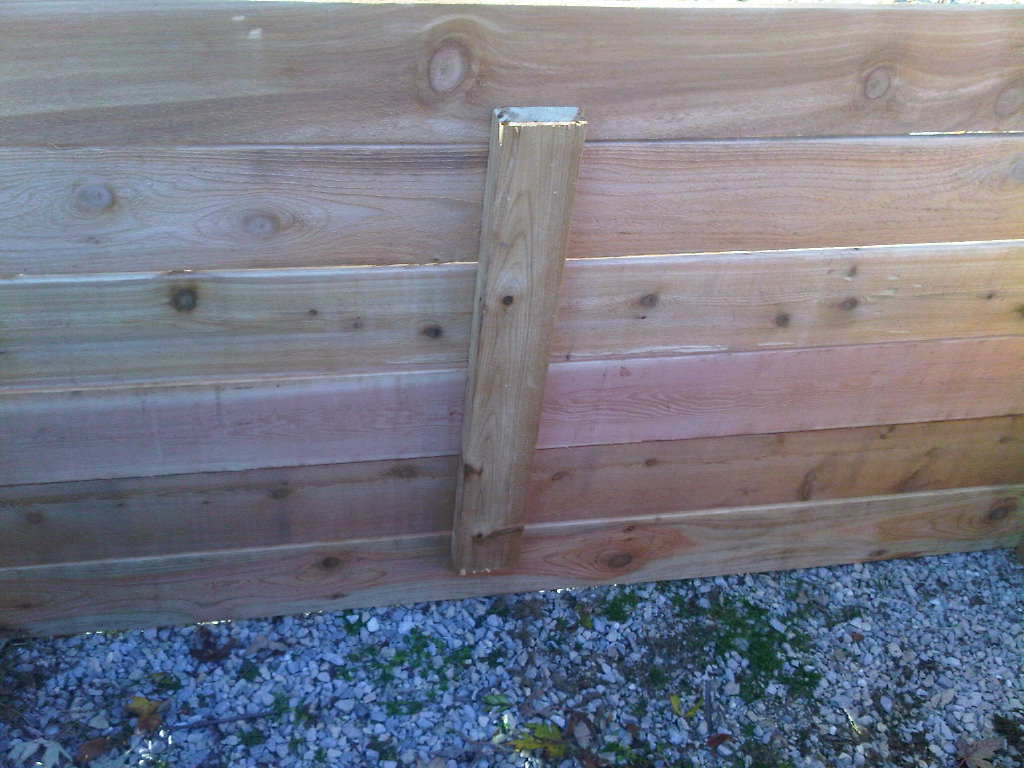
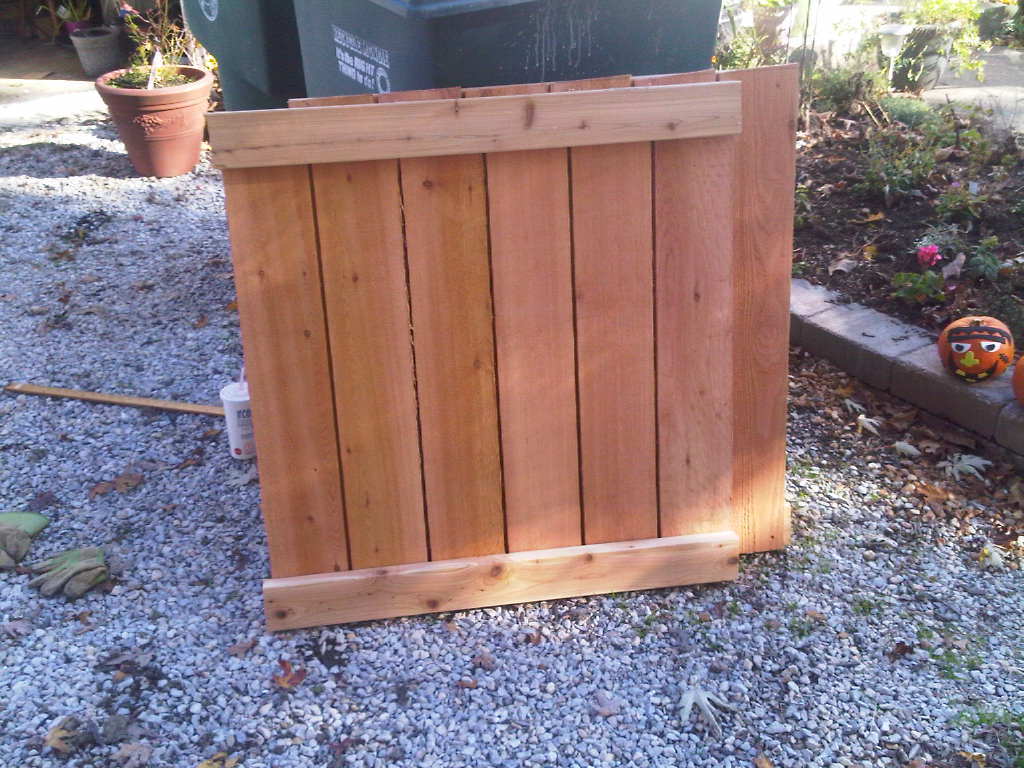
Since I am composting large amounts of leaves and grass clippings, mine is made in one piece. I don't turn my pile often - when I do, I can either lift the whole thing up or move the pile from side to side. I cut the 2x8x8 posts - cut a 3 foot length off of each end. Save the 2 foot center piece to brace the long sides. Affix your 1/2 (3 foot side) and full fence (6 foot side) boards to the 2x4, leaving the desired gap between each board. Affix each board with 2 weather proof screws - I used coated deck screws.
Attach the vertical posts to the inside of the cedar fence boards, including the short 2 foot boards that are just long enough to brace the long sides. I alternated the dog eared sides, so that each corner had one flat and one notched board.
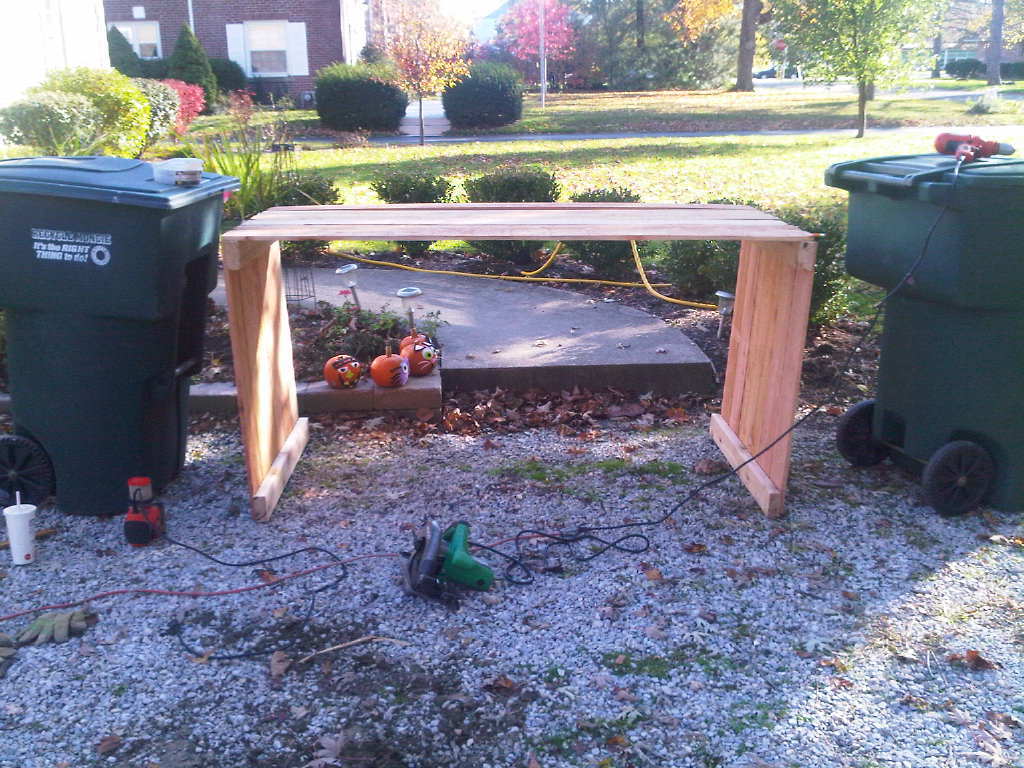
I used 24 cedar fence posts and 16 feet of cedar 2x4. Note, I was able to do this all along. The trash cans acted as supports - no clamps or saw horses needed.
Fri, 12/07/2012 - 18:43
This is a little heavy when finished. I can easily flip it over to turn the compost, but after building it and tiring my arms out with the cutting and drilling, it was a long haul to the back yard to position it. You might be happy with a 3x3 bin, in which case, I suggest making it 1 board shorter and leaving wider spaces - if you think through the math, you can probably get it down to 10-12 cedar fence posts and 1 longer 2x4. Cost would be about $35 that way - cheaper than most compost bins.
I built this buffet table for our dining room using the Gaby Kitchen Island plans. I used some reclaimed boards I salvaged from a trash pile at work for the top and side aprons. I also used old pallet wood for the bottom shelf boards. This gave it the cool, rustic look I was going for and really helped set it apart. Really fun project.
Thank you for the plans. It was a fun build and my girls love it!
Modified the console table by height (approx 39"), length (approx 40"), and eliminated the middle shelf. I can't put an accurate $ estimate since I bought wood for three projects and this was one of them.
I made my first project from your website this week. Here's a picture of the finished work. Thanks for supplying your plans. They are really helpful. - Doug Davis
I needed to do something with the empty space at the bottom of our stairs. I was browsing Ana's site and the Tryde Console Table caught my eye. The next trip down to the farm, I scavenged for the wood I would need to build it. I found some beautiful old brigde timbers that were 9 inches wide so we modified the plans a bit to use 2 of the 9" boards instead of the 4 smaller ones the plans call for. The dimensions were close but we needed to tweak the rest of the project a bit as well to make it all work. For the finish, I just rubbed it with Tung Oil as to not cover up the beauty of the old wood.
Tue, 02/12/2013 - 02:51
Perfectly done...Made in small period and very cheap price. Good work.