Community Brag Posts

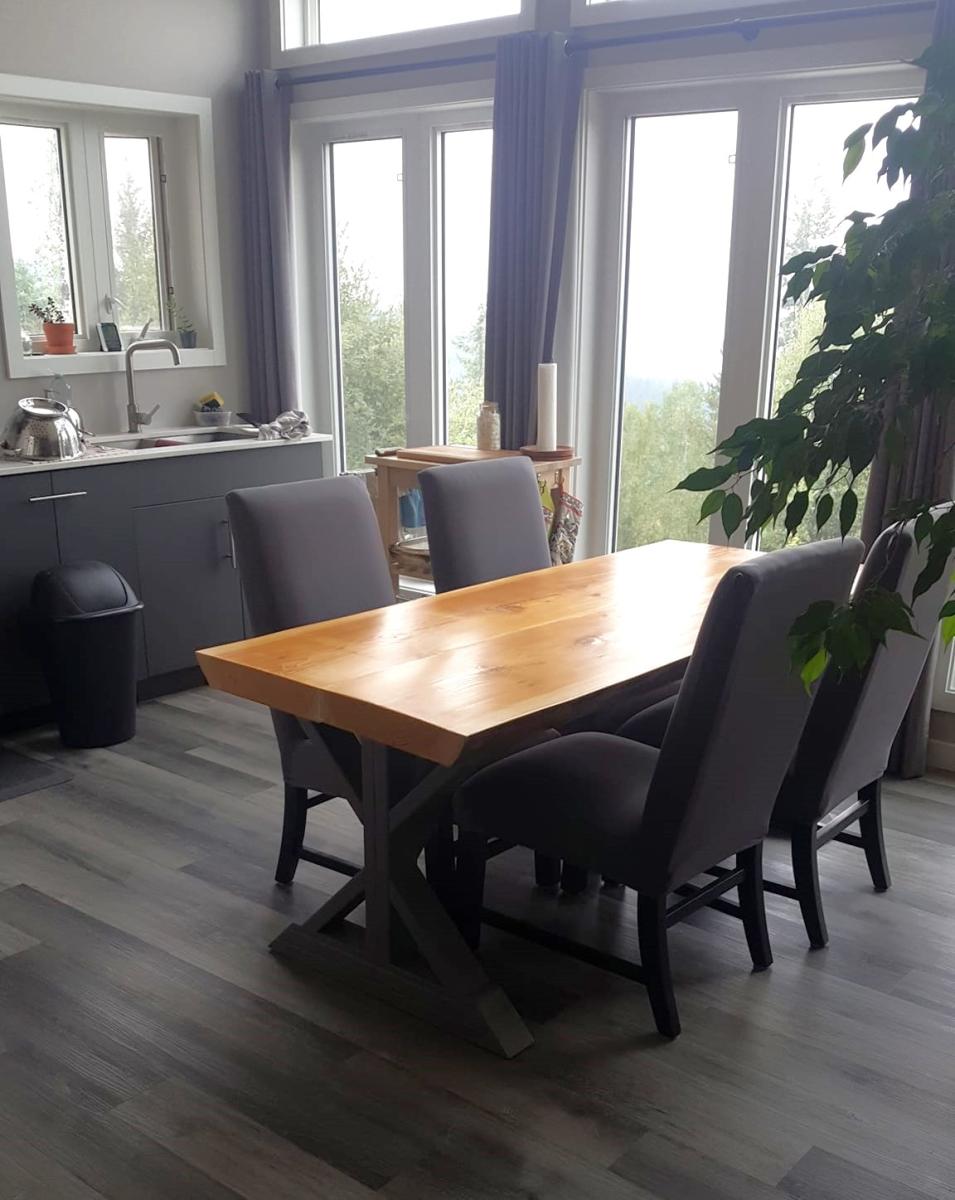
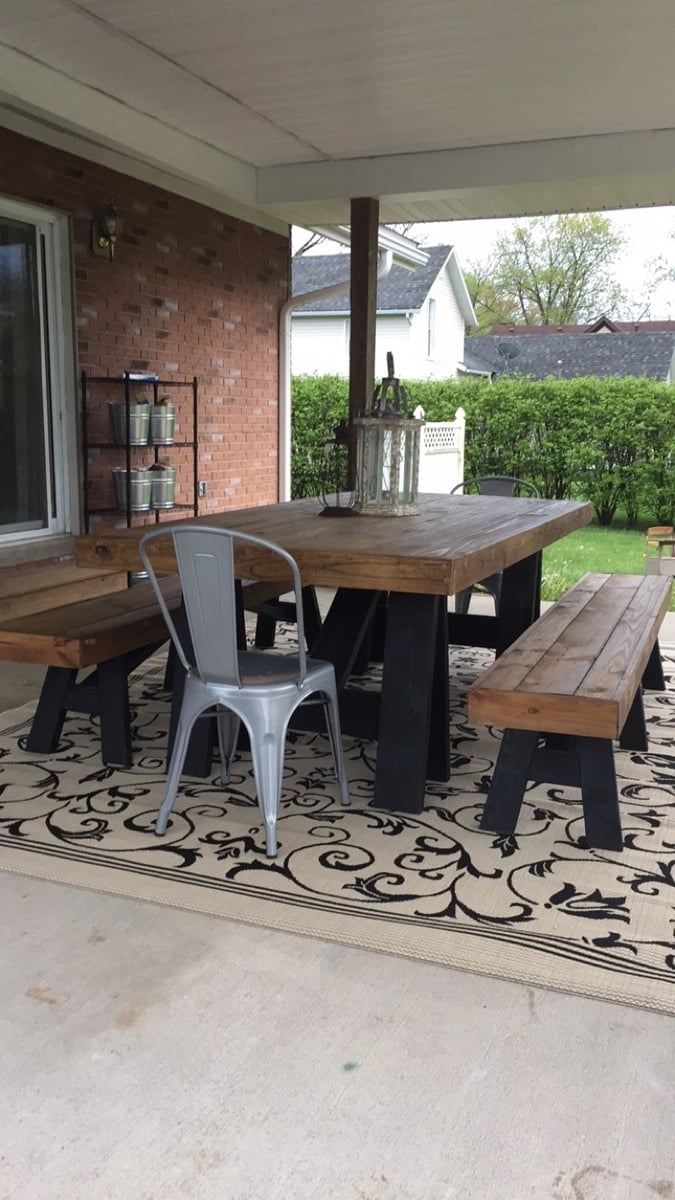
Live Edge Farmhouse Dining Table
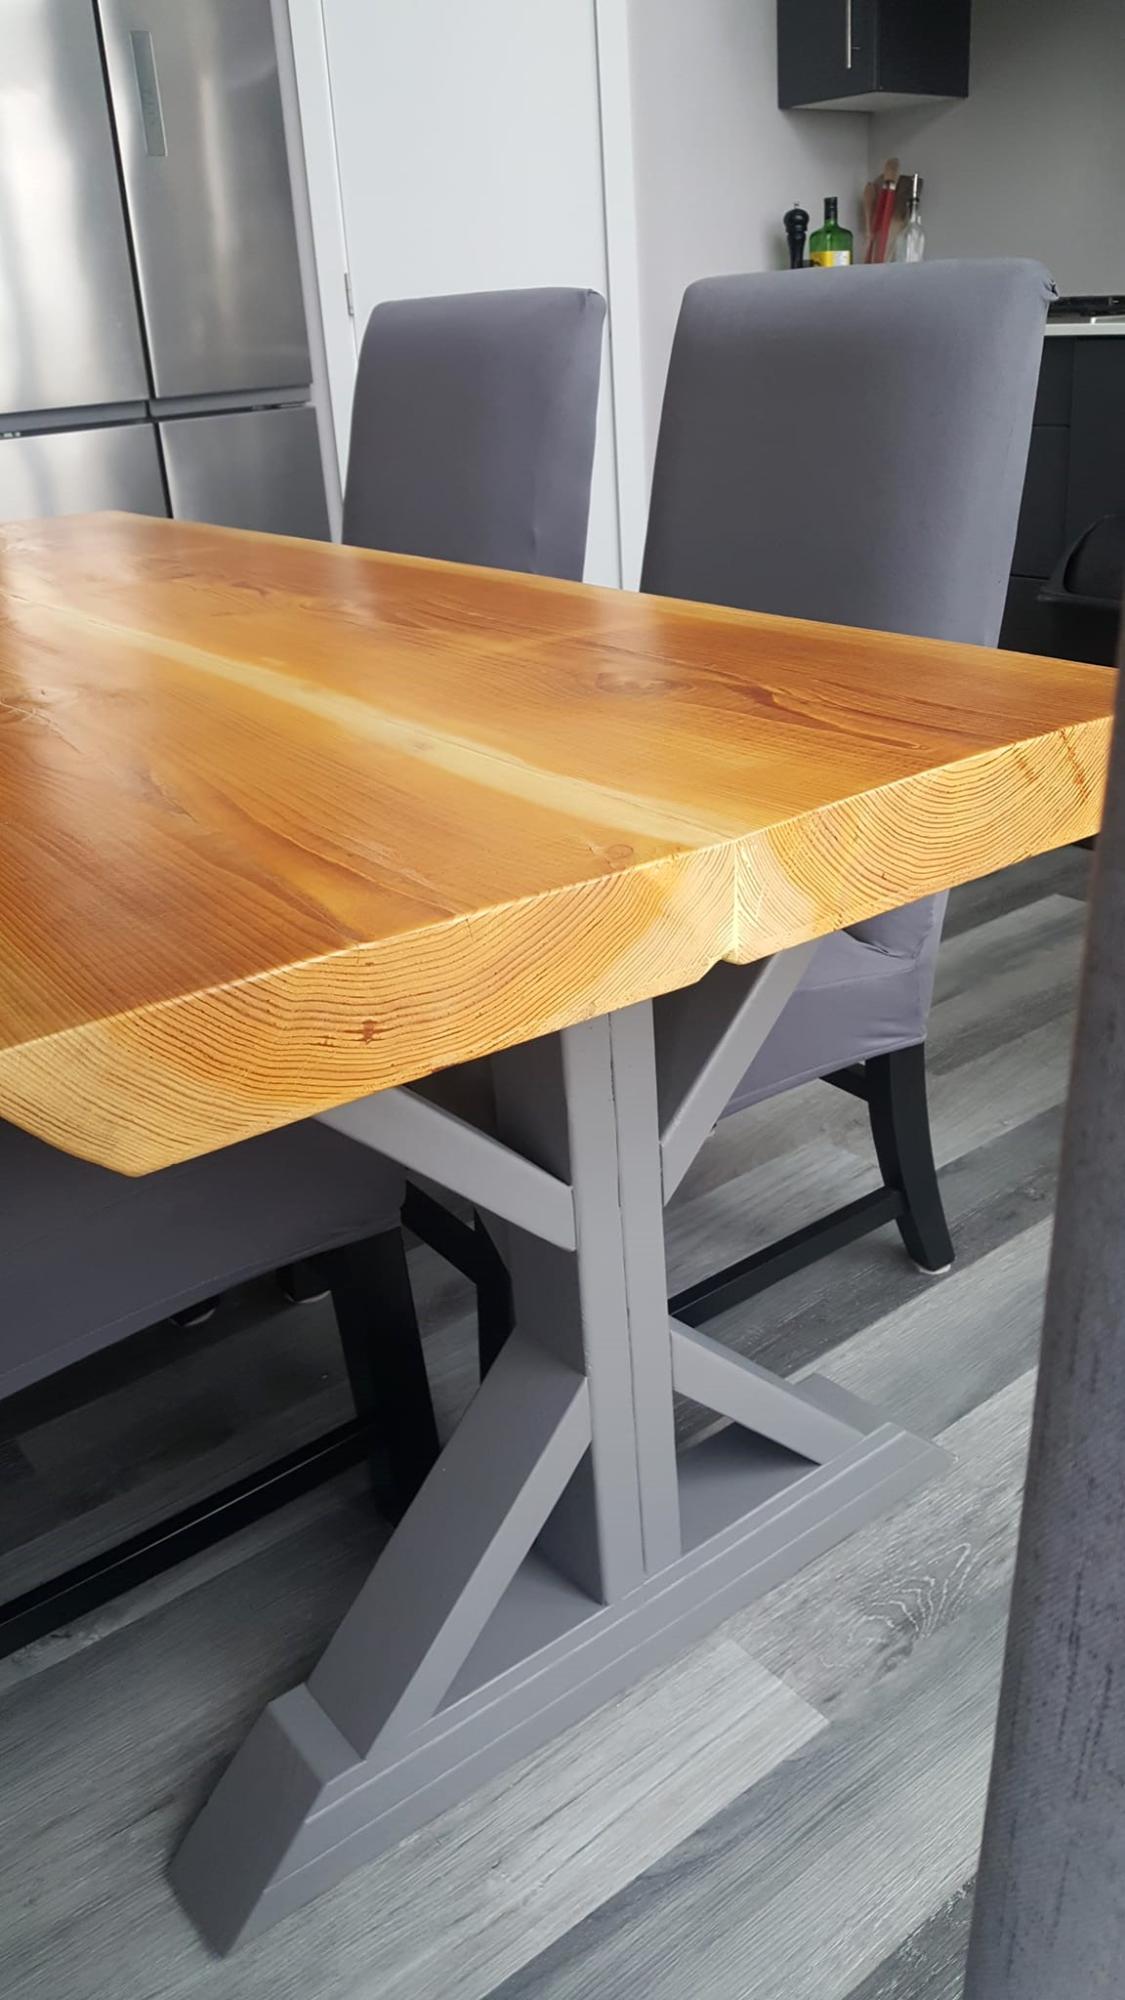
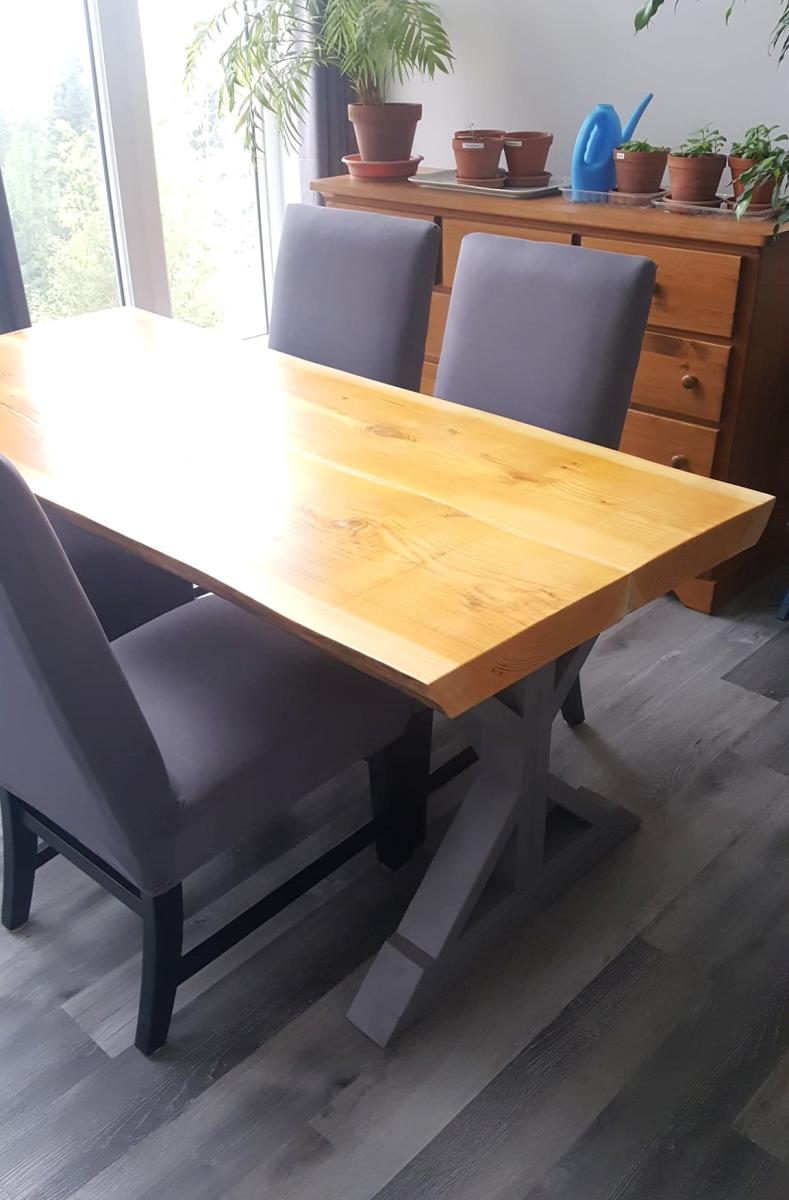
I was scared to try this project because it is listed as "intermediate" and I don't have that much furniture building experience. I originally wanted to do this with live edge, but when I saw how much it was gonna cost, I thought I would just do planks. Lucky me, I found 5 8ft live edge pieces (1 ft wide, 3 inches thick) for CAN $100. Some 2x4 and 1x4 and I was ready to rock and roll. I decided to make the table 6 ft long, so the legs are 5 ft apart. I made the connection a bit different than in the plans, just because I want to be able to stretch our legs underneath. It is as stable as can be. I love Ana White's plans. Great instructions, great cut list and almost no left overs.
Nicky Peeters https://www.facebook.com/nicky.peeters.70
Built from Plan(s)
Pet feeder
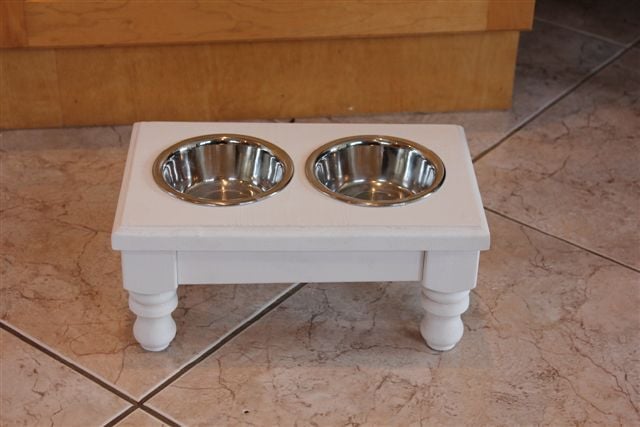
I love my cat, and felt she needed a pretty feeding dish. I stole some old spindles from my sister's garage, cut them down and threw this plan together. It was actually harder than I expected because getting into tight little spaces with my drill to drill in the pocket holes was almost imposible. The wood split, nothing is square and the holes for the dishes are messy...but it doesn't really matter, it looks good from a distance and my cat doesn't judge. Not that I know of, anyway.
Estimated Cost
Free - made from scraps
Estimated Time Investment
An Hour or Two (0-2 Hours)
Finish Used
Flat white paint
Recommended Skill Level
Intermediate
Comments

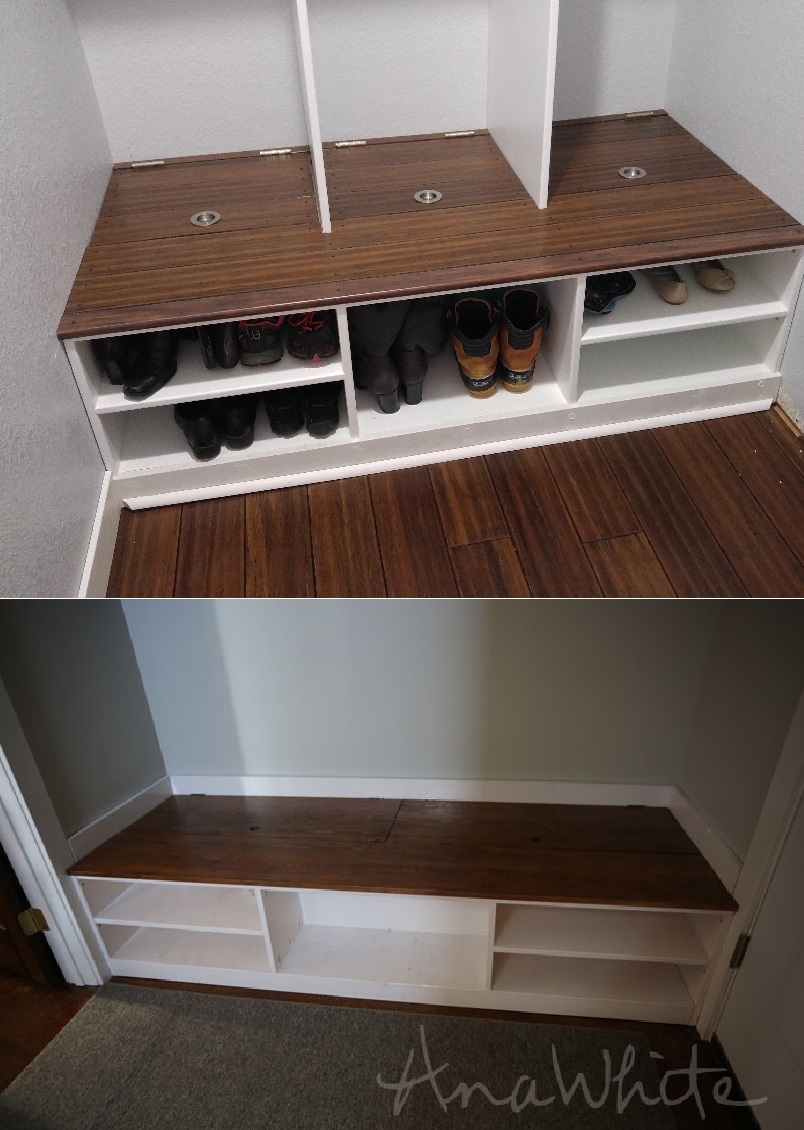
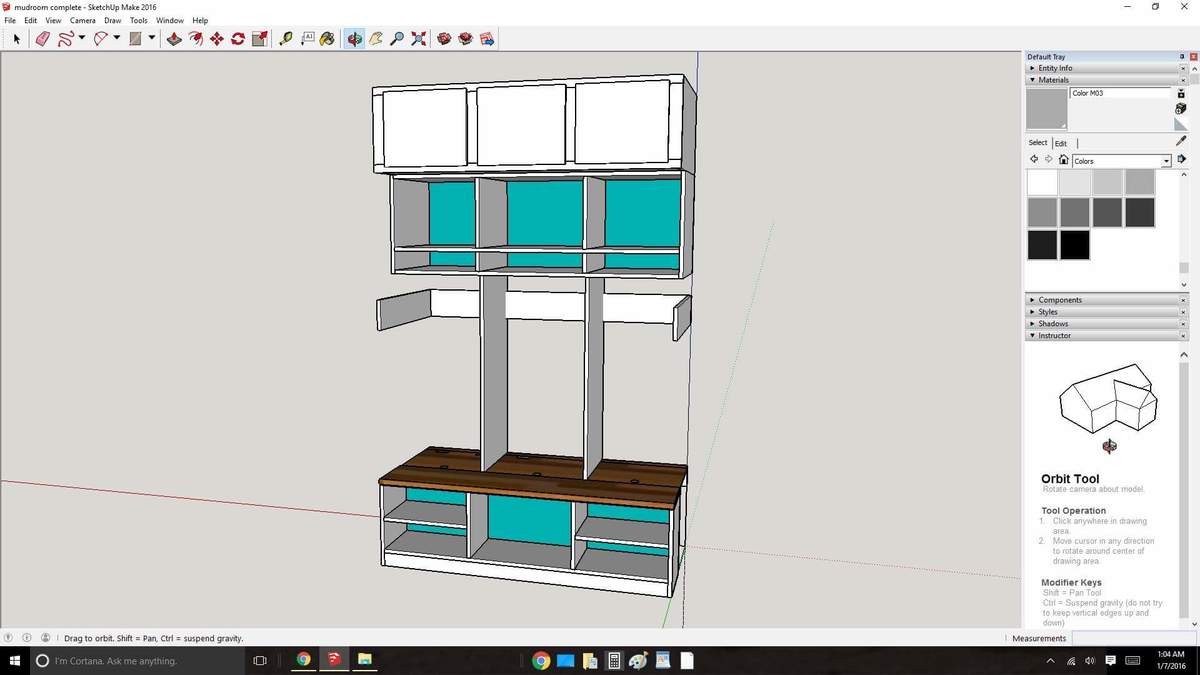
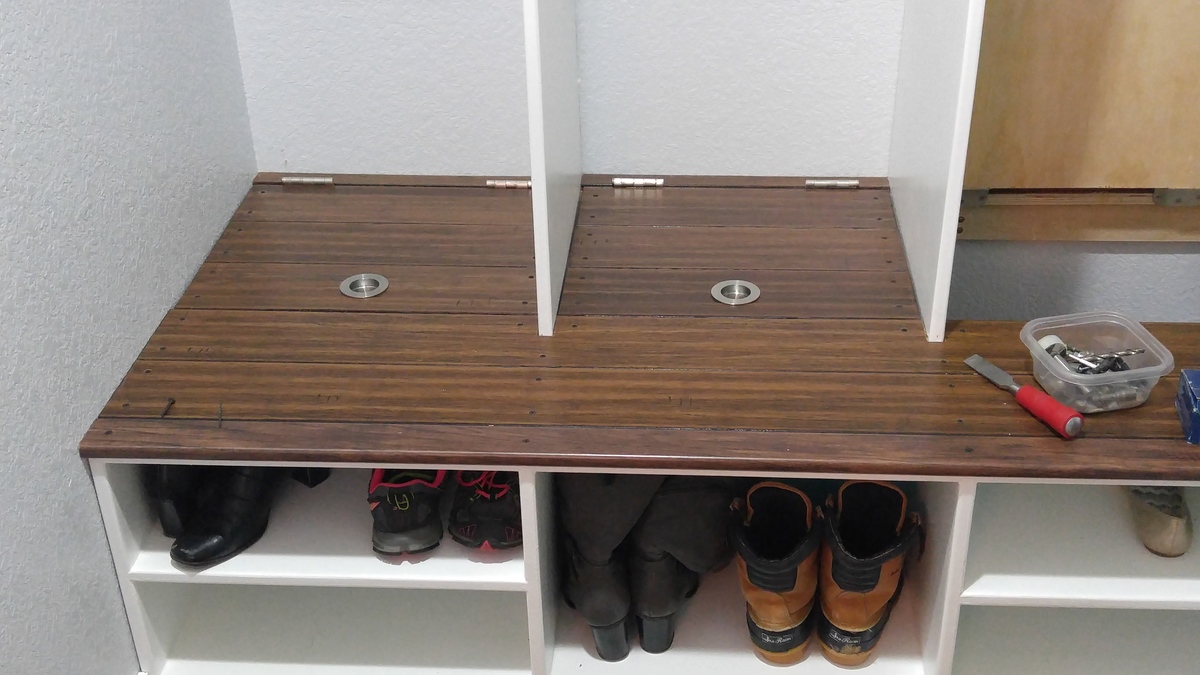
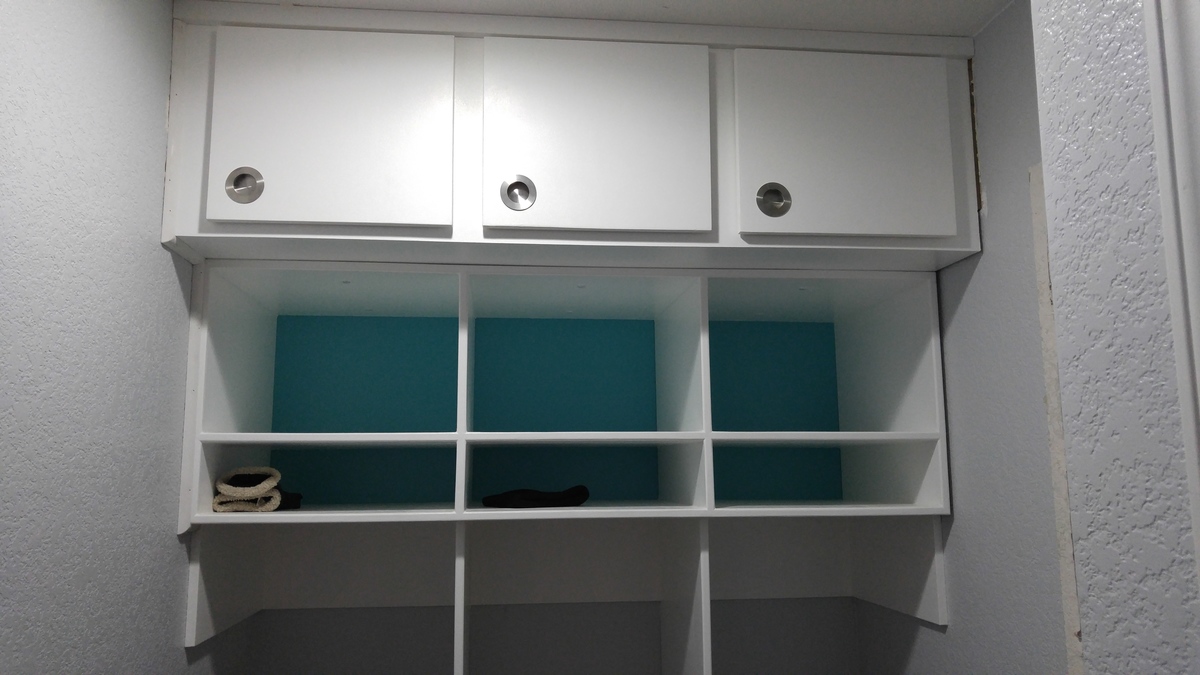
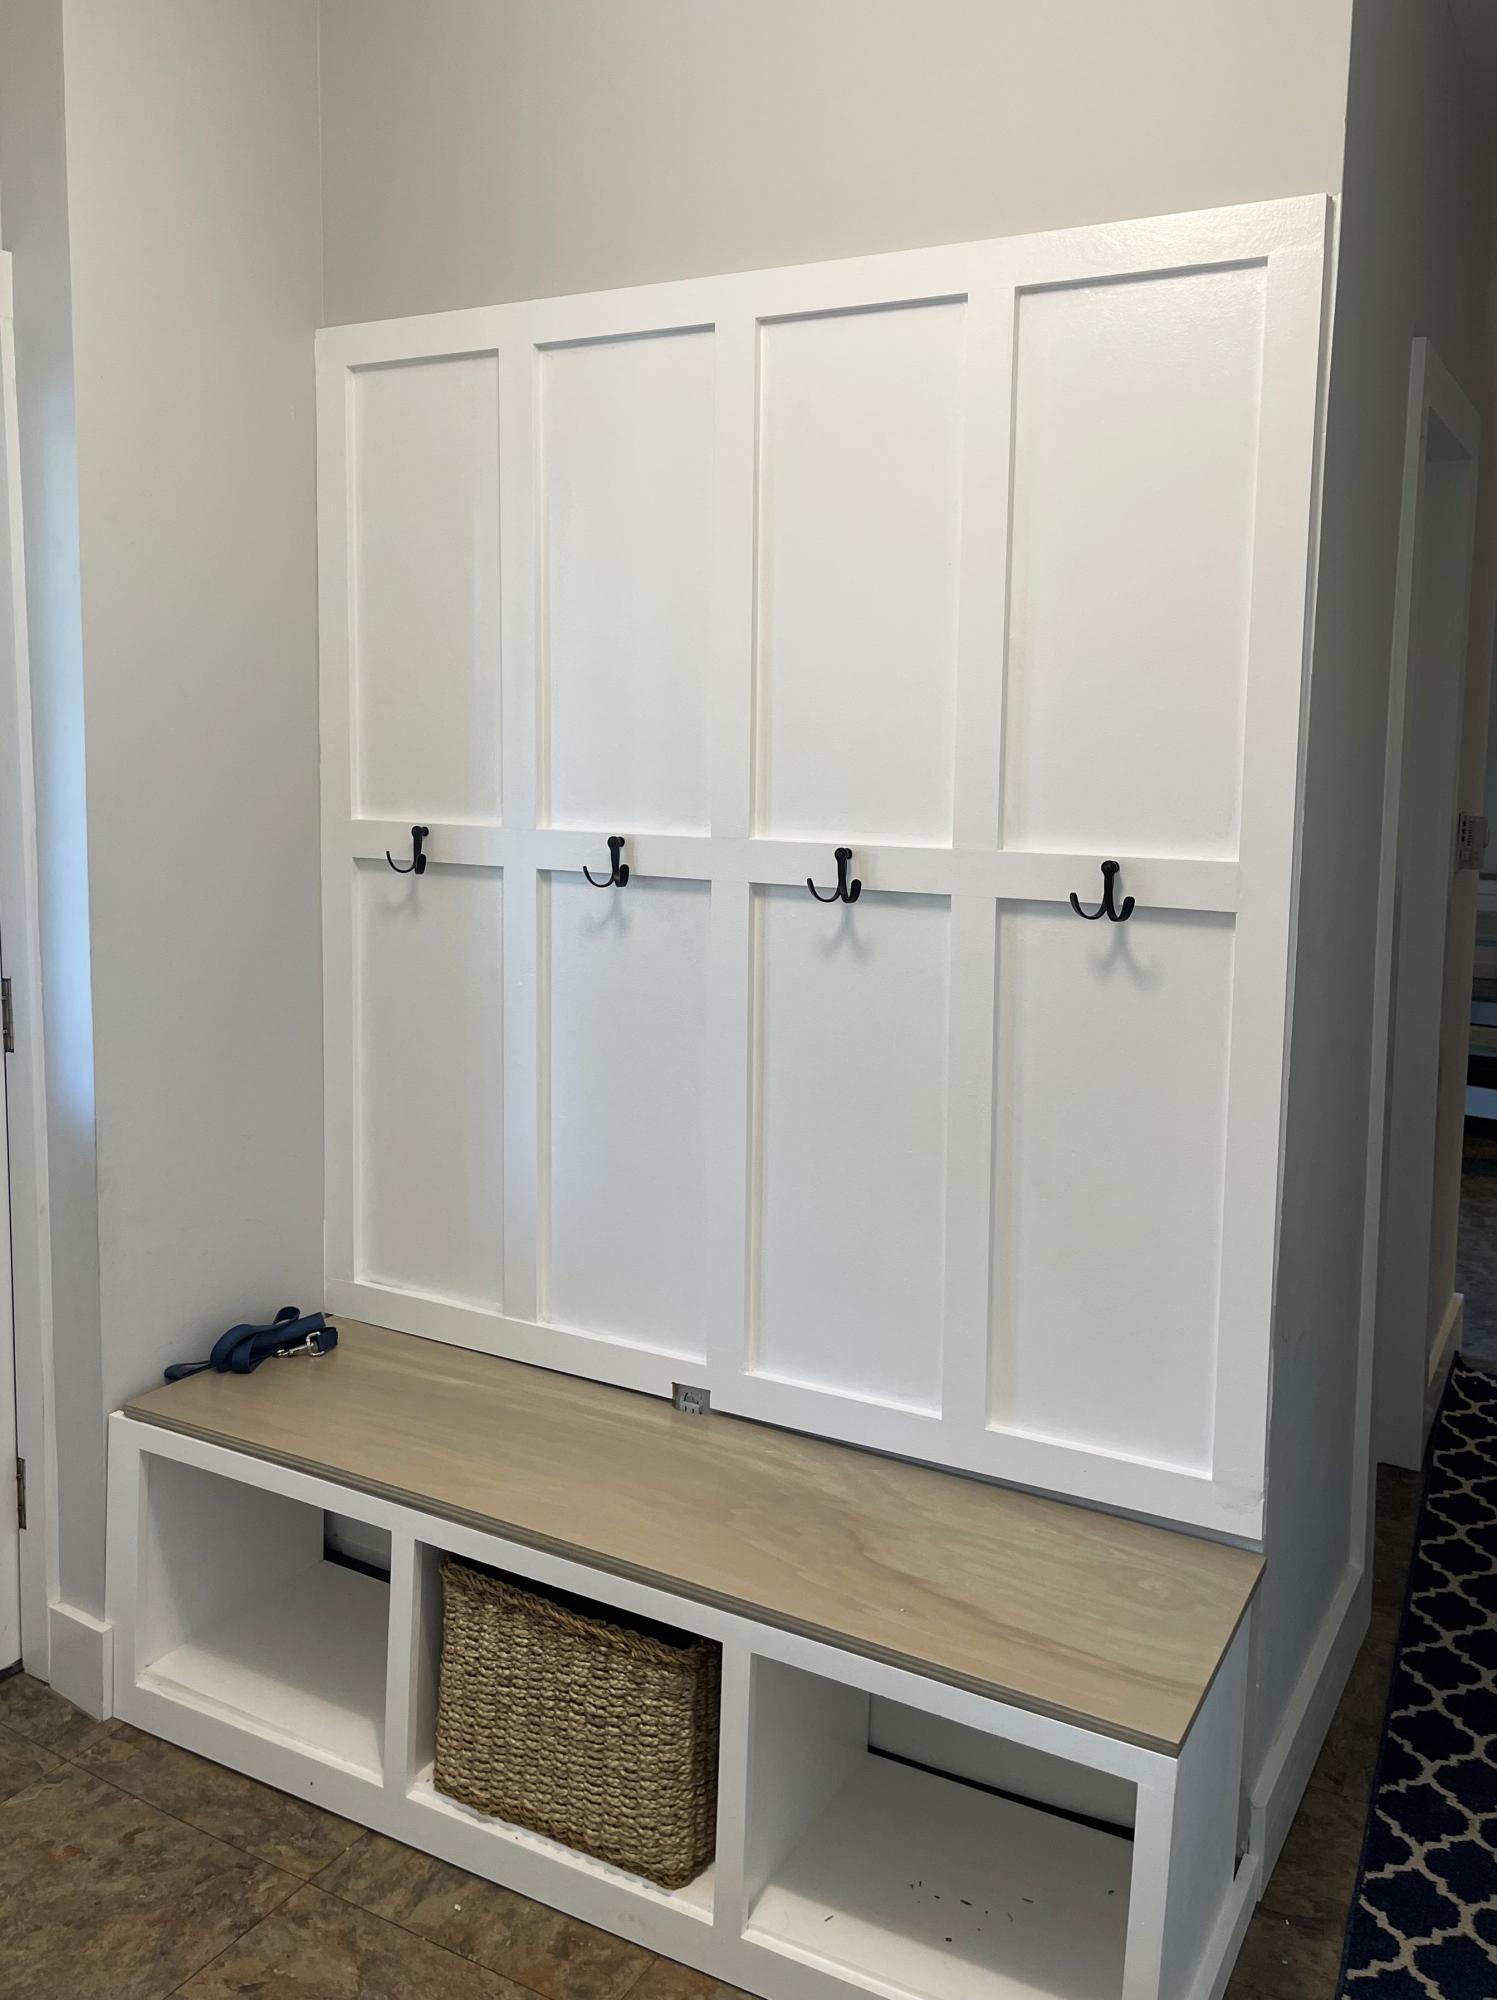
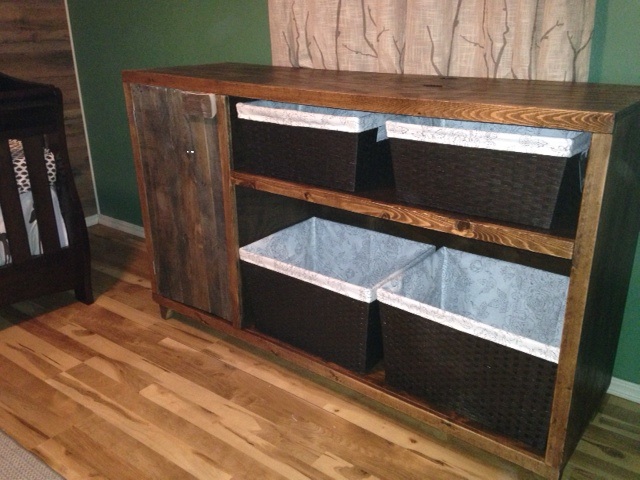
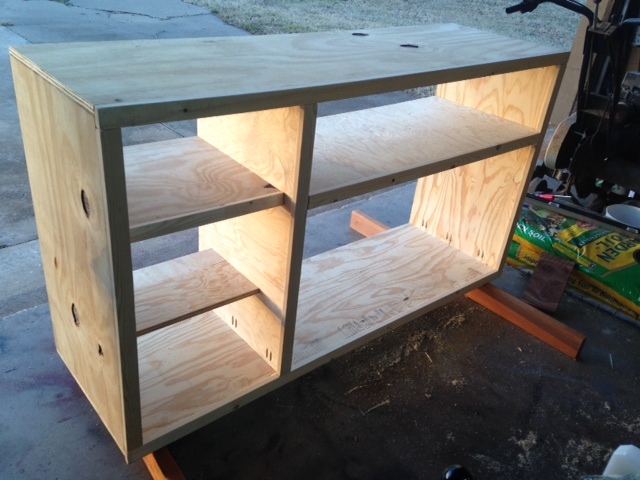
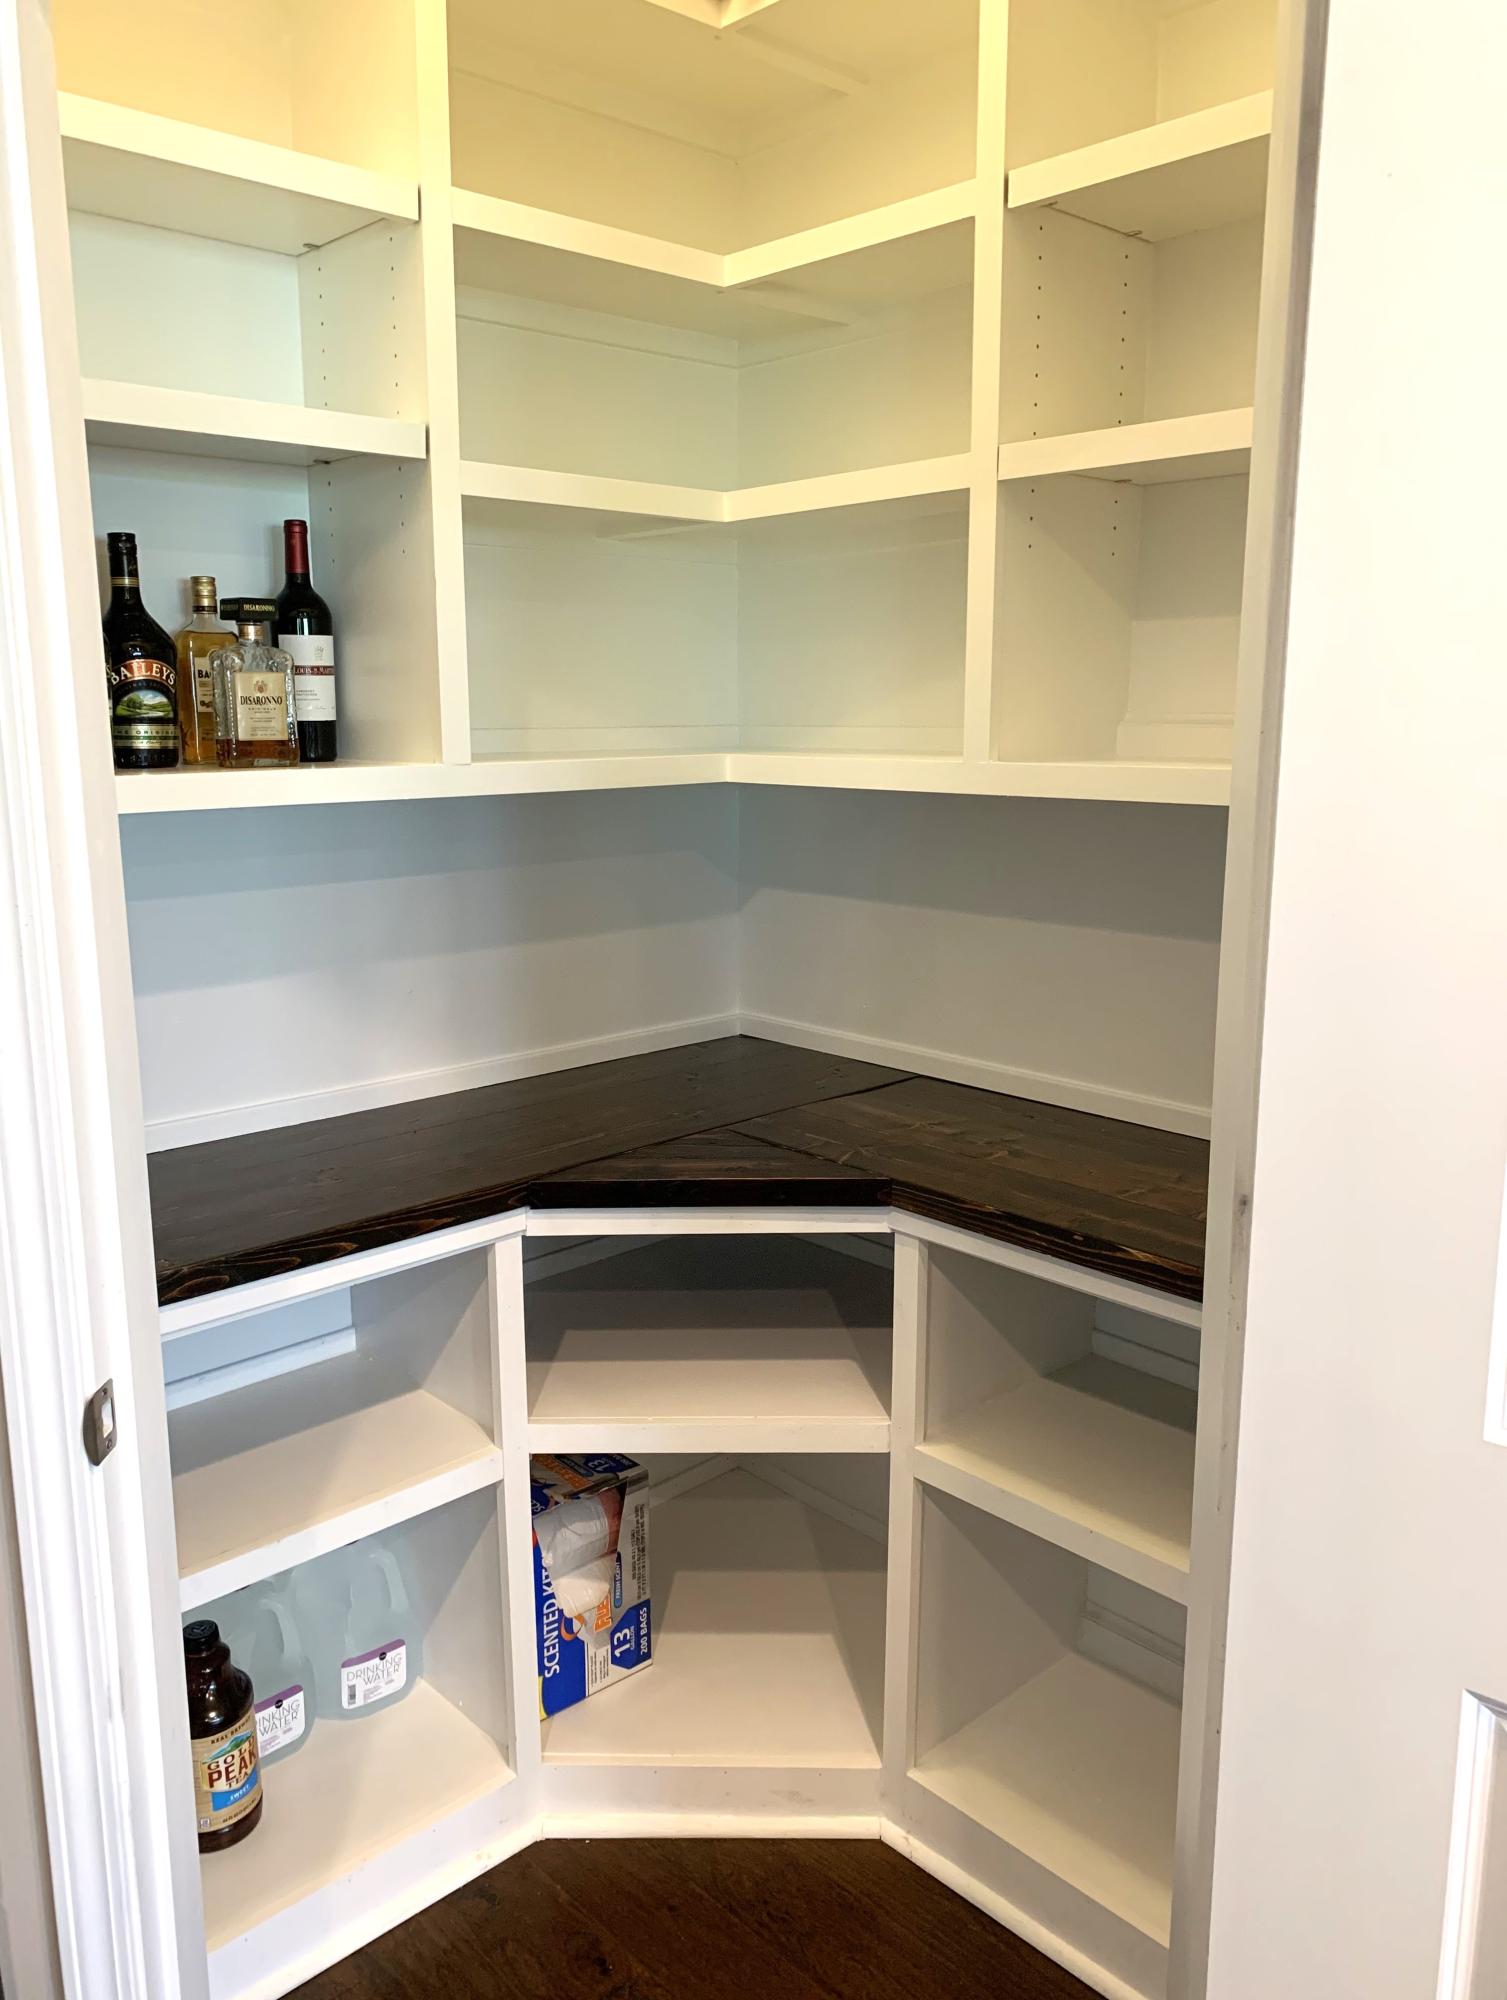
Closet-to-Mudroom Conversion
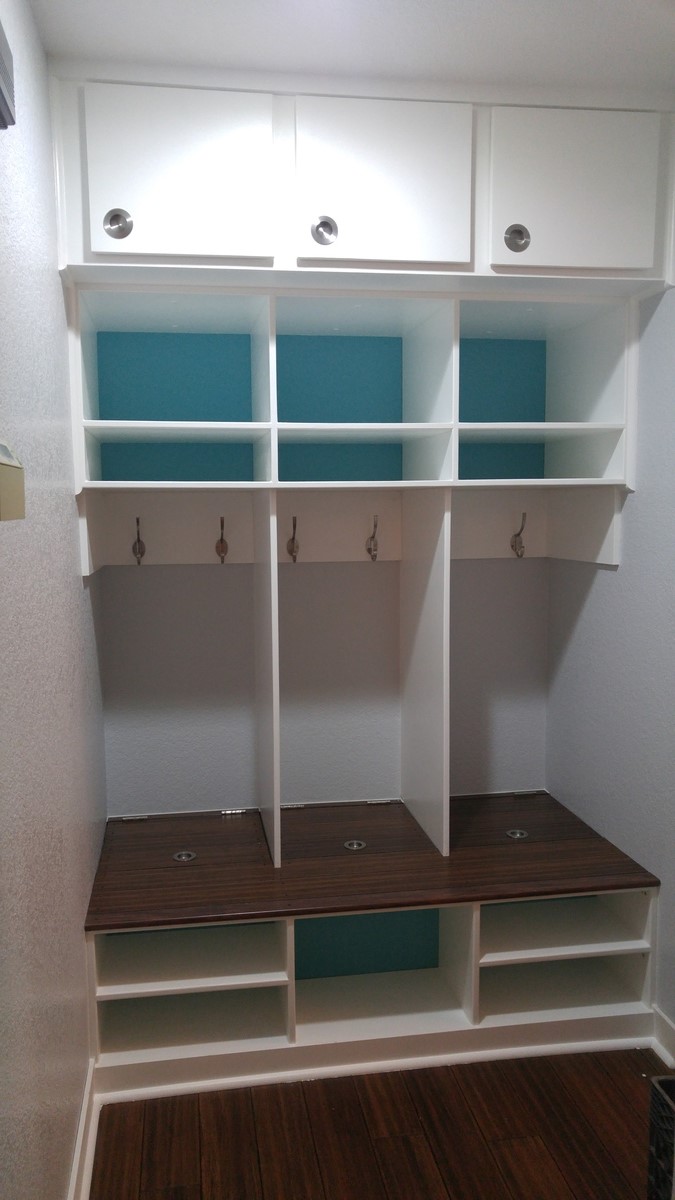
Starting from the Extra Wide Shoe Bench plans, I expanded the upper section considerably. The cabinetry is all cut from hardwood plywood and joined with pocket screws and glue. I don't have a table saw, so a circular saw and straightedge were extensively used.
Estimated Cost
$400.00
Estimated Time Investment
Week Long Project (20 Hours or More)
Finish Used
Gloss paint.
Recommended Skill Level
Intermediate
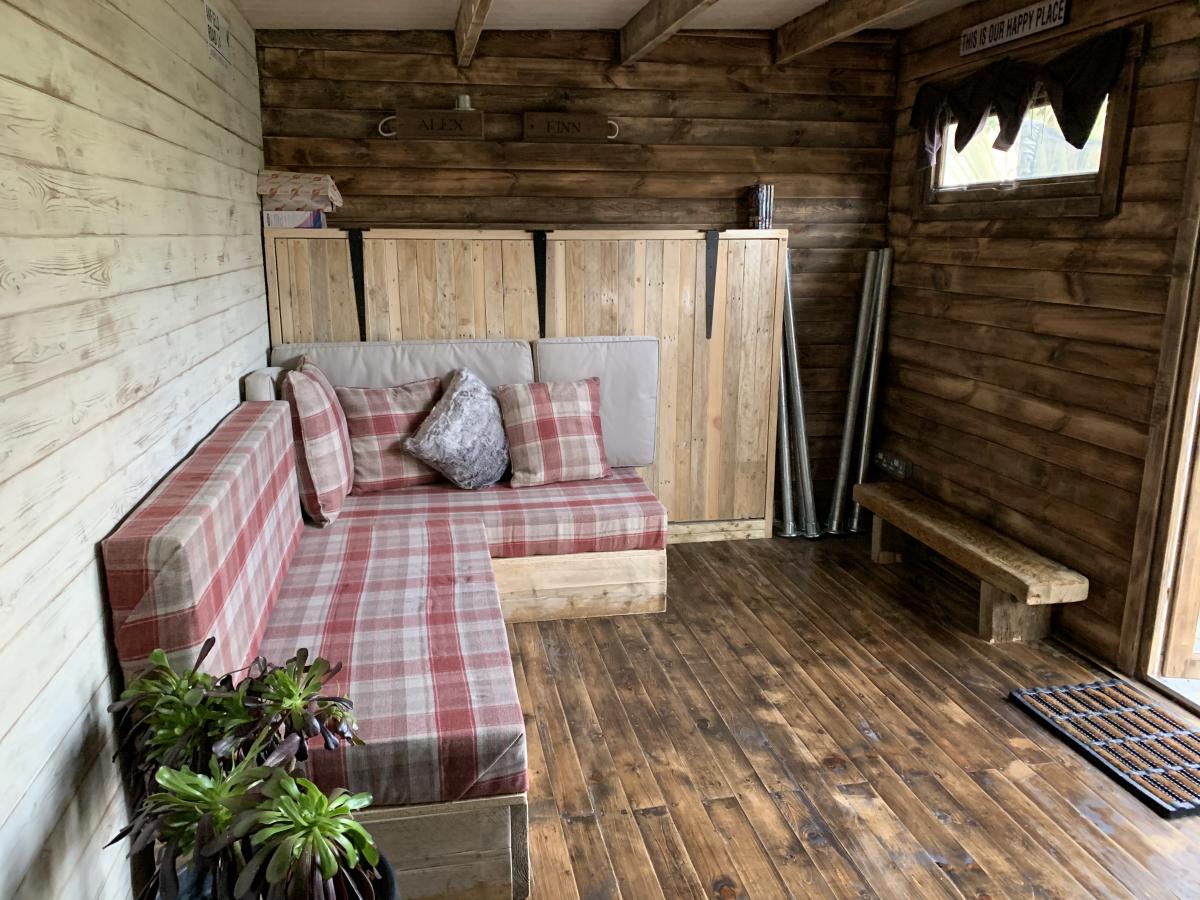
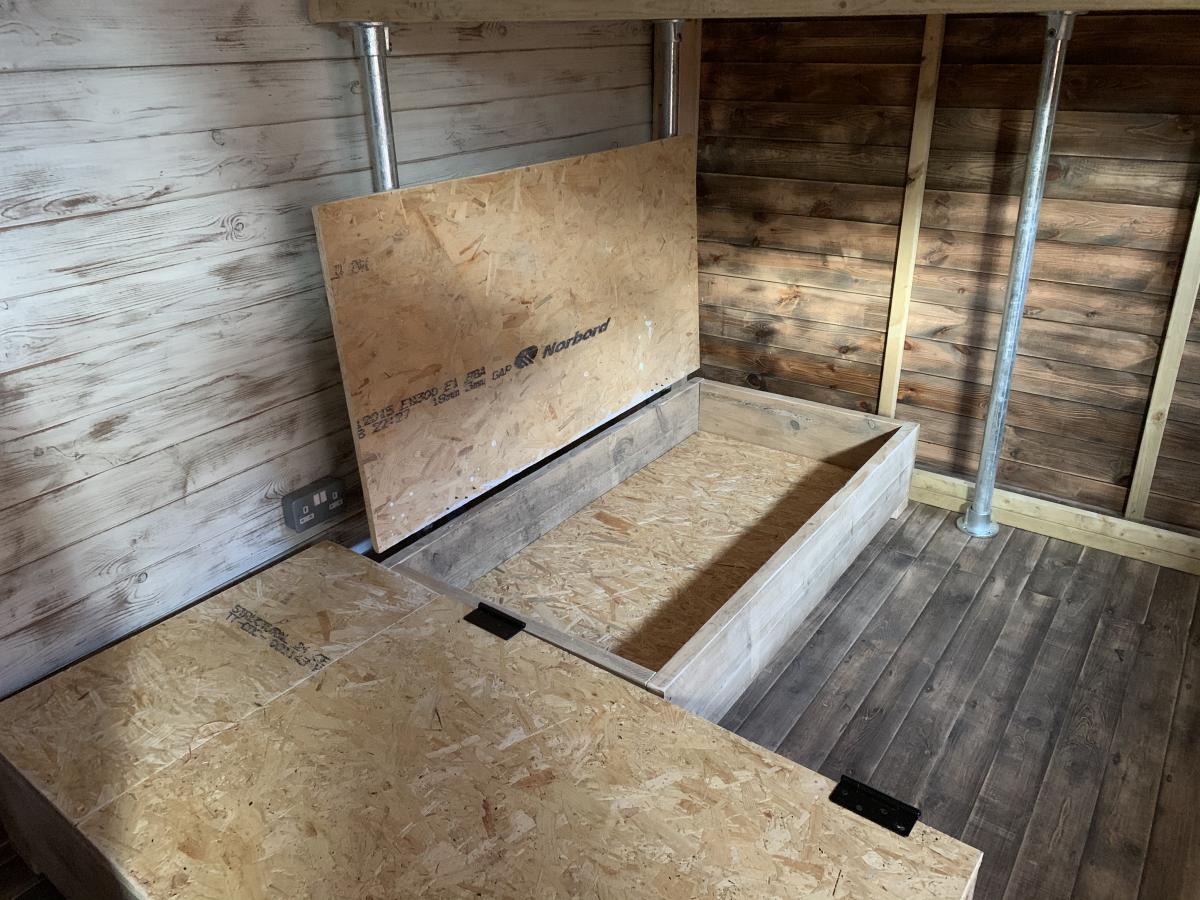
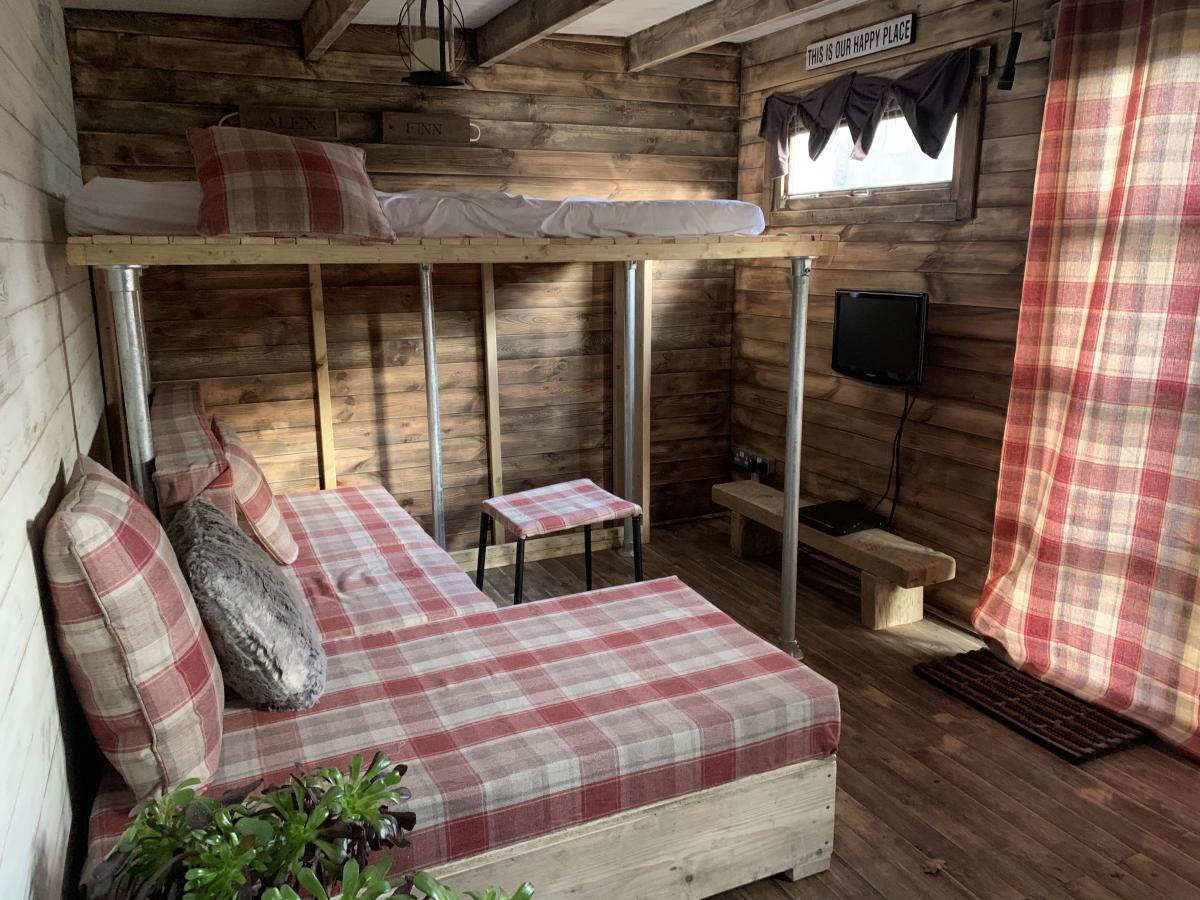
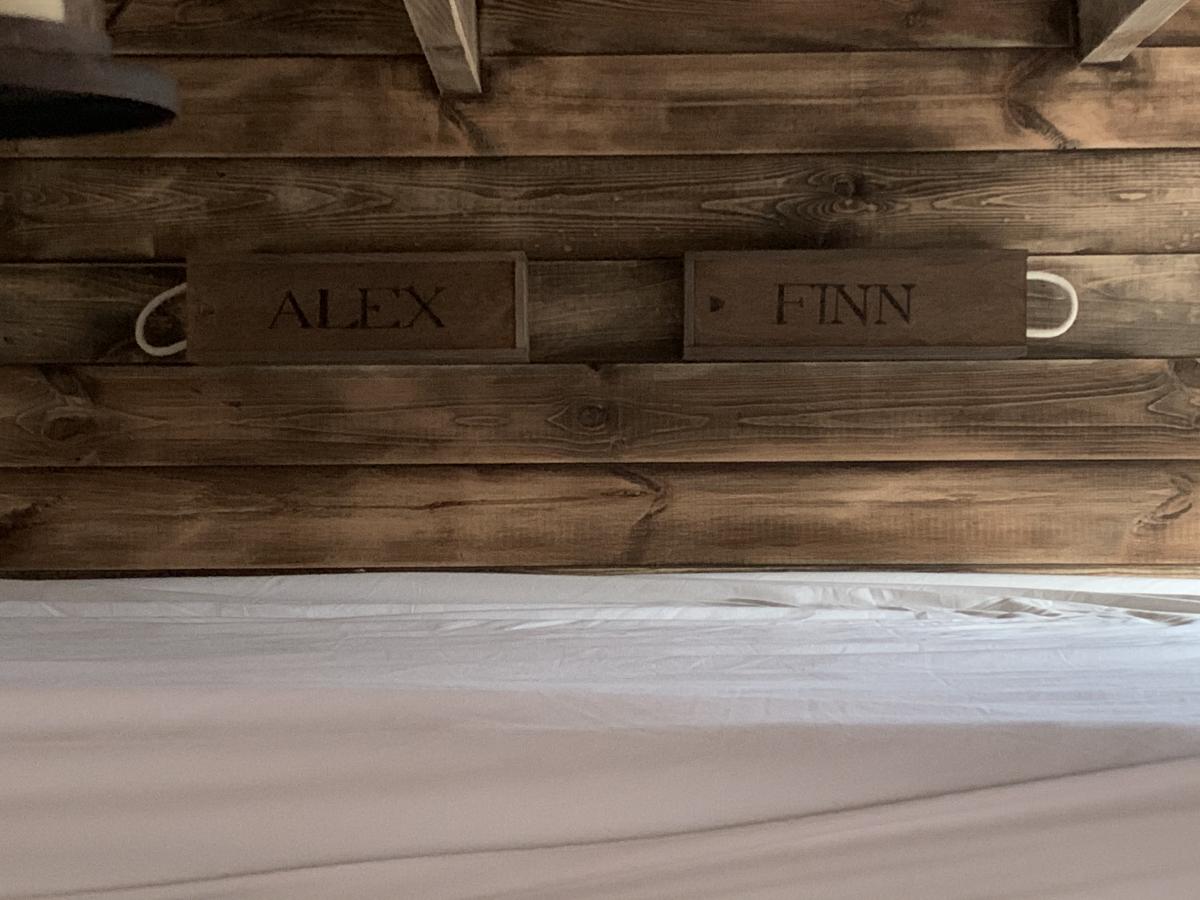
Family Cabin with Flip up bed

Always wanted an Alpine lodge, we live in London so a Garden cabin for the kids (and Dad) will have to do!
flip up bed and storage cabinet (for mattress)
sofa bed, foam cushions with leftover curtains
mini storage boxes from wine boxes
inspired by tiny house (especially the sofa!)
Still more to do. Desk on its way and bulk head lights fitted soon.
no real plans just rough sketches and trial and error
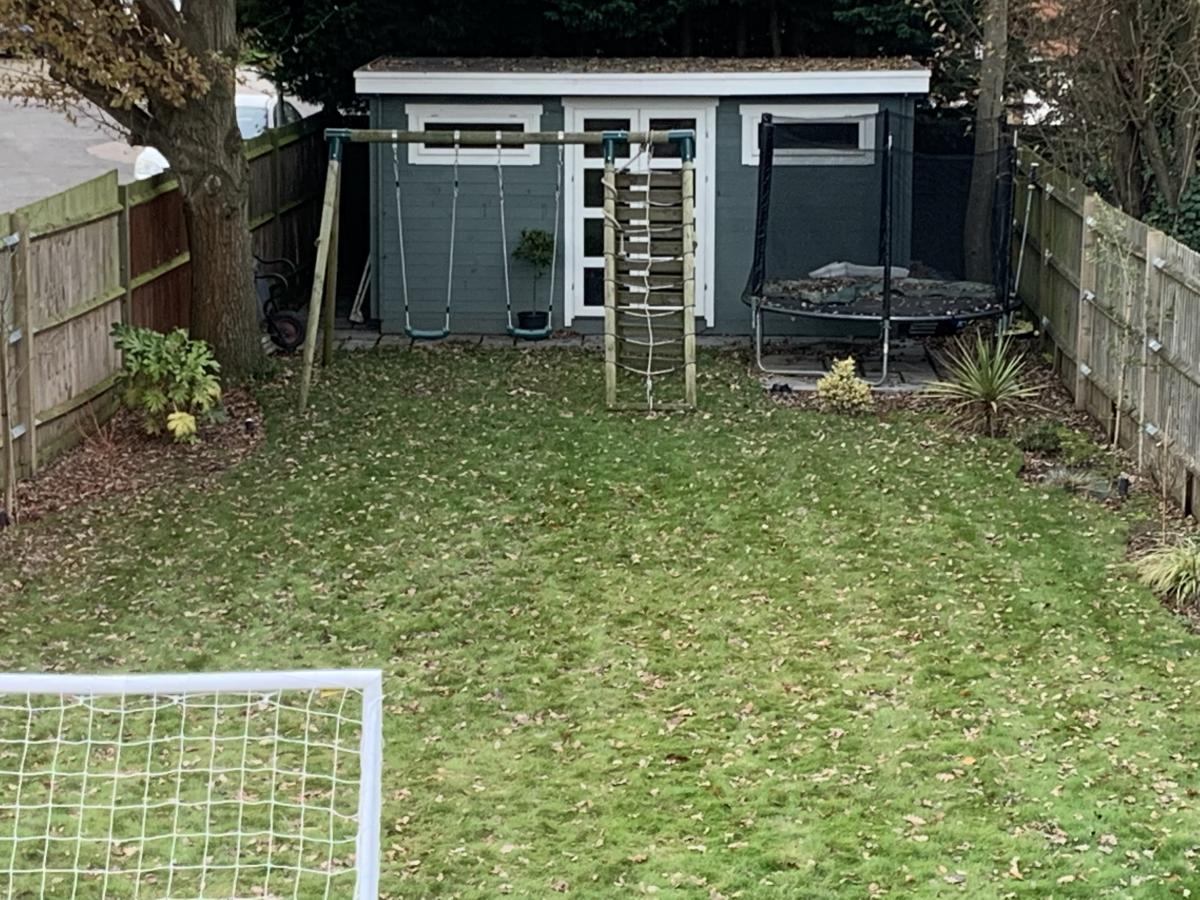
Estimated Cost
£300 for interior
Estimated Time Investment
Week Long Project (20 Hours or More)
Finish Used
Old white paint and fence paint
First Project Blanket Ladder
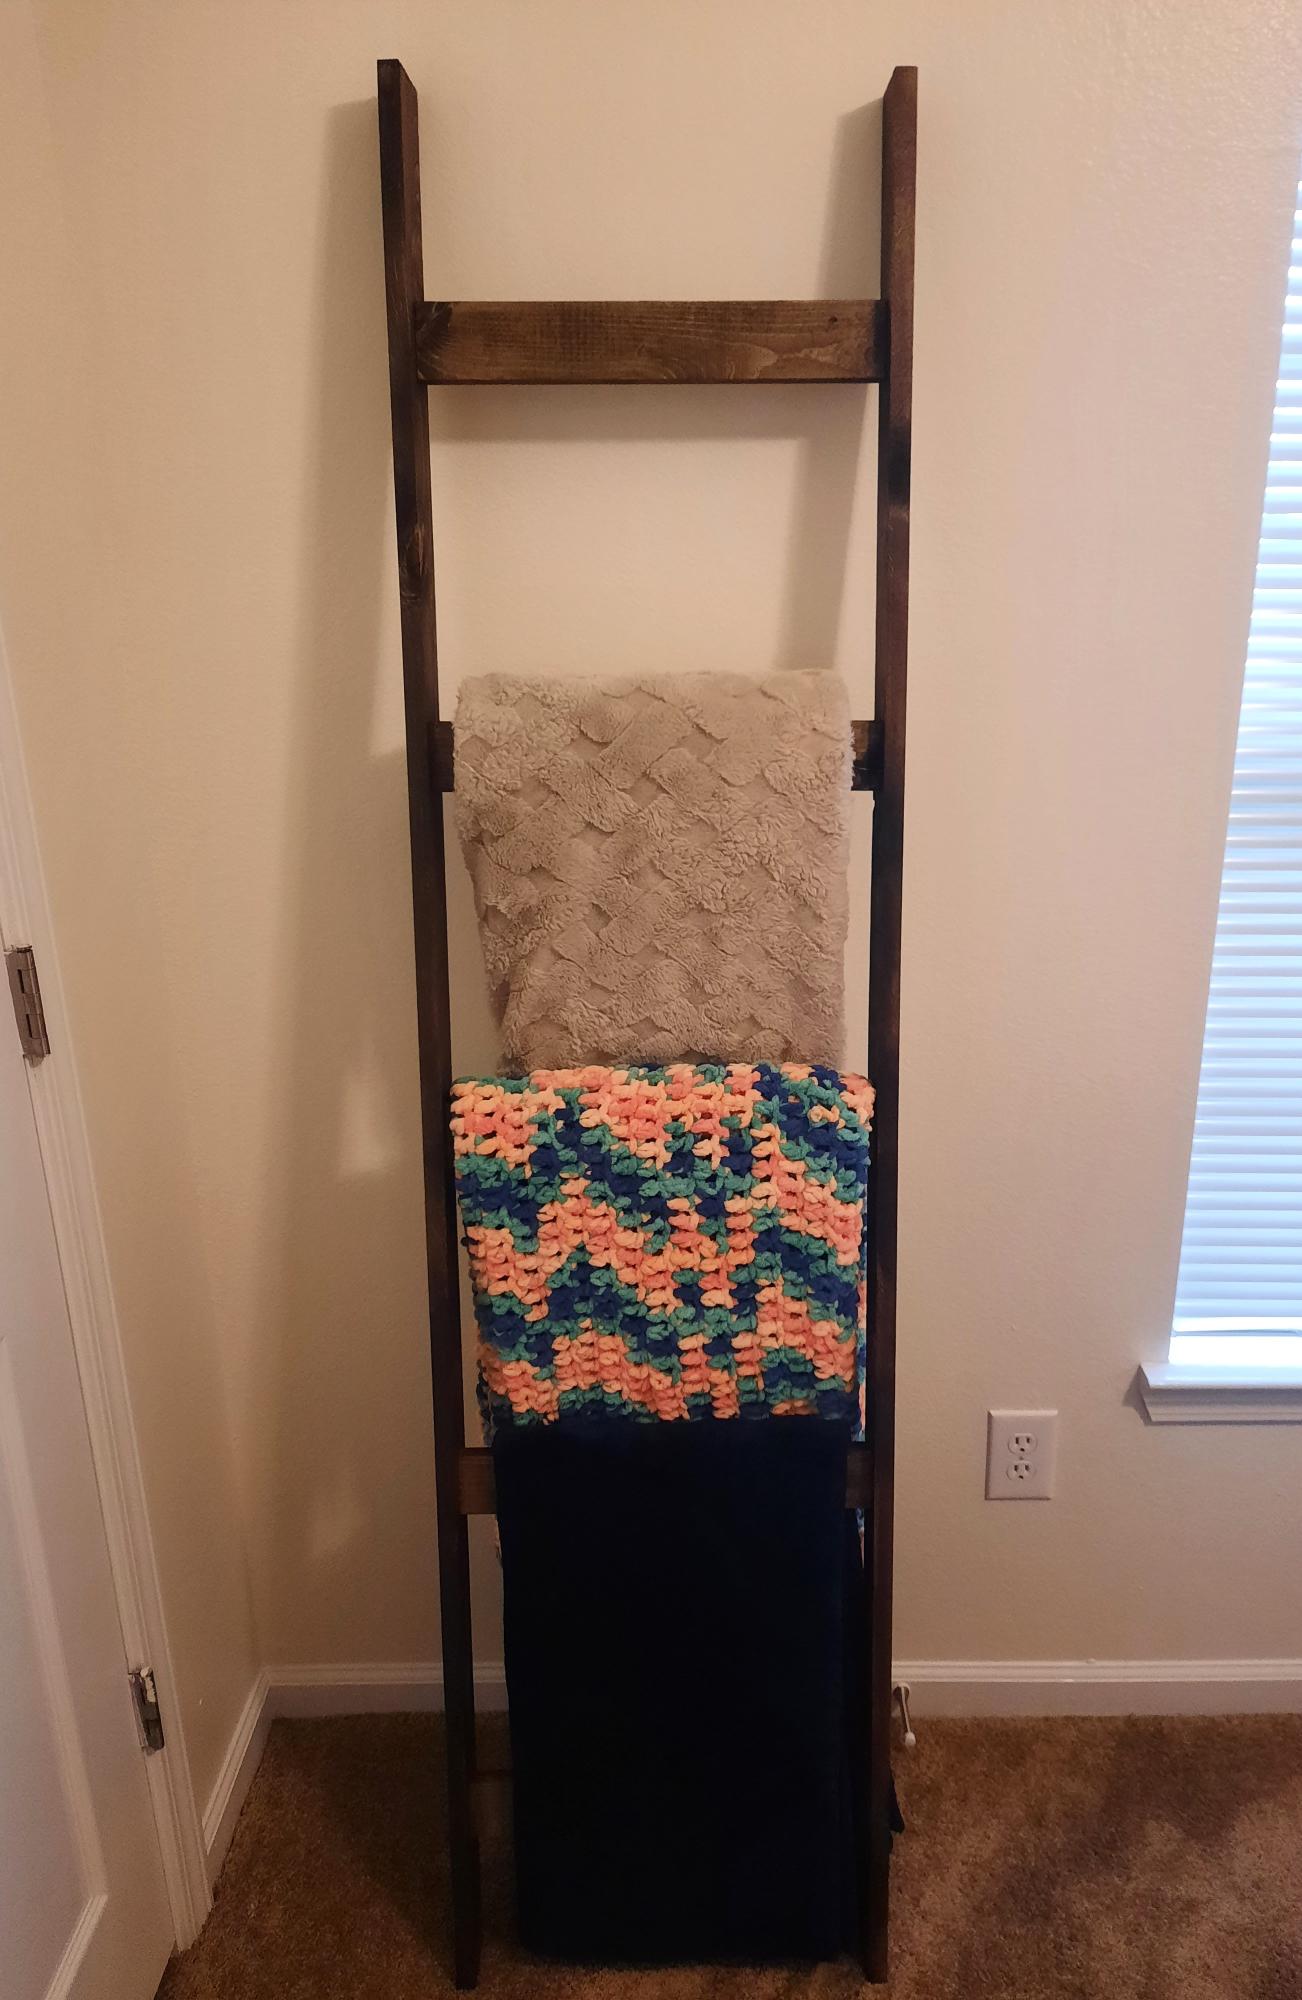
This was my first project and I am so pleased! The stain is beautiful and once I got the hang of it, so easy to complete. I am excited to try a new plan and keep going!!
Laura
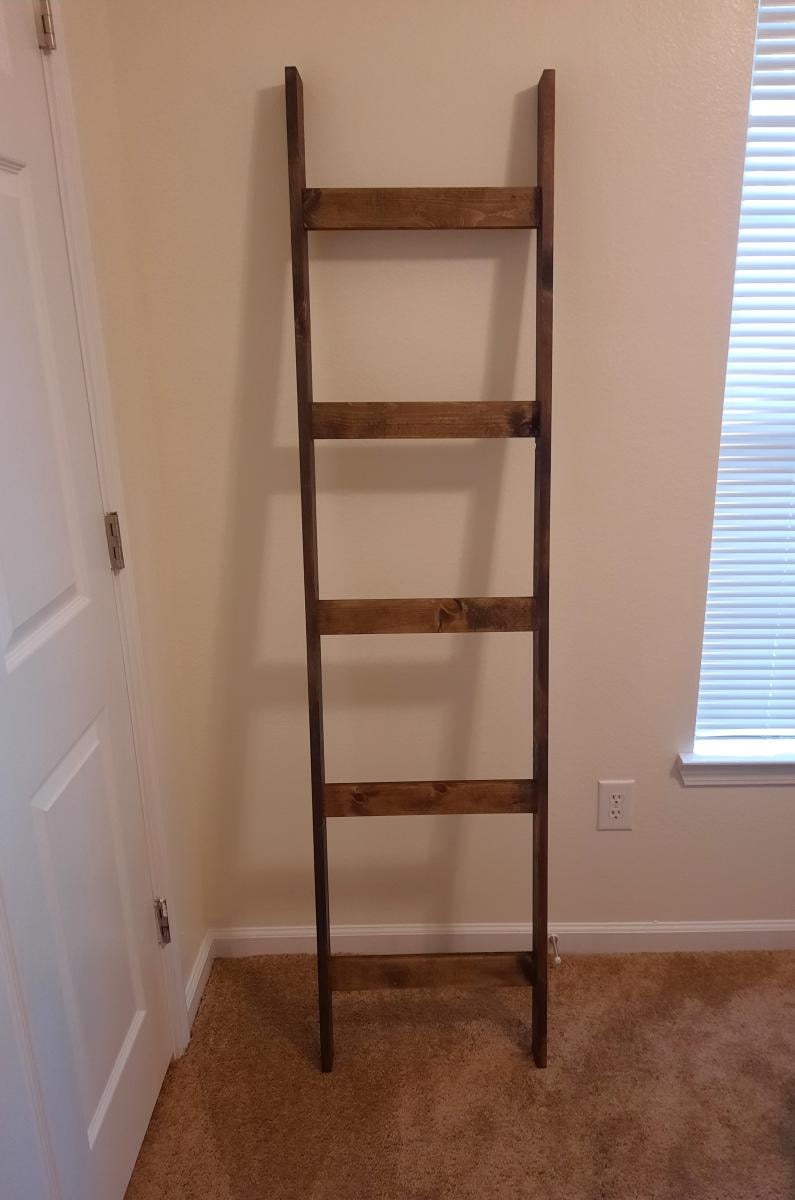
Built from Plan(s)
Junior Size Classic Bunk Bed
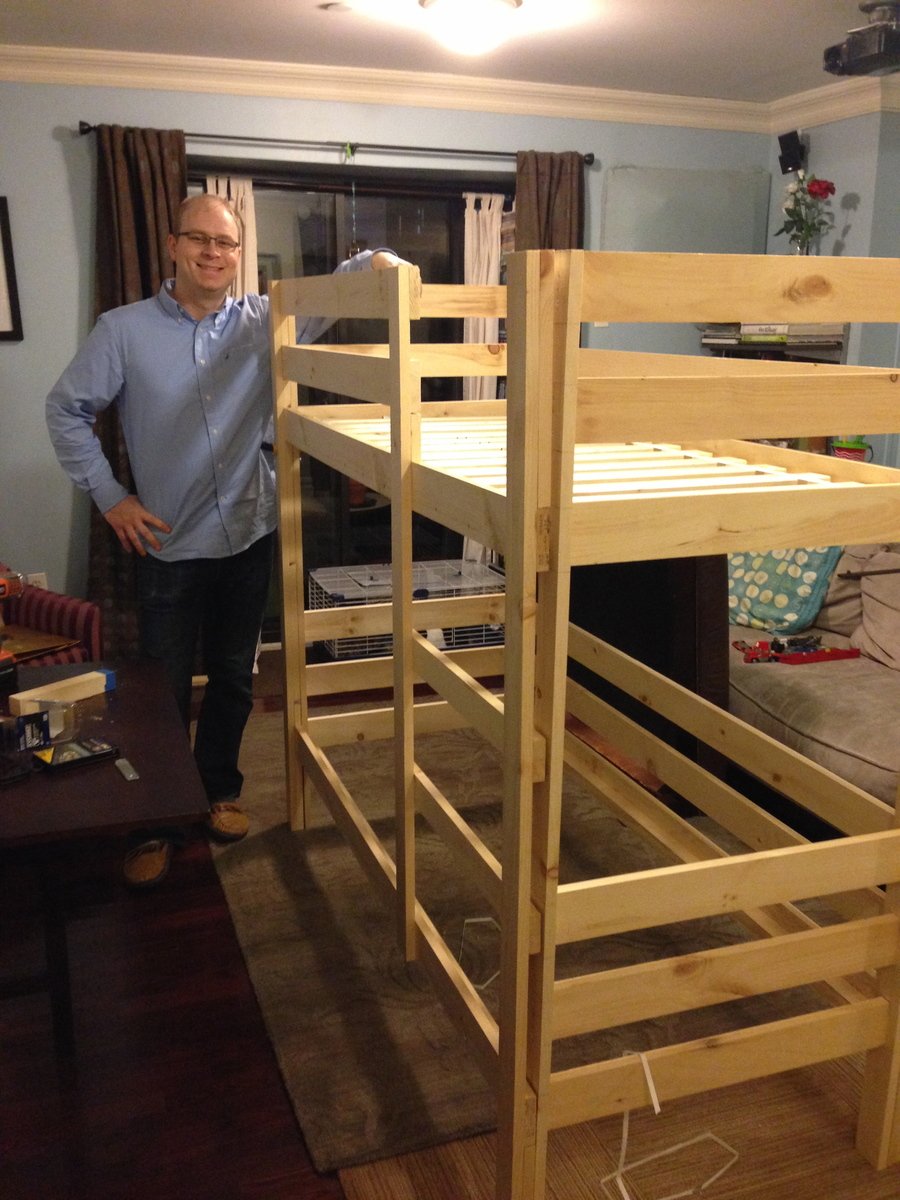
We built this in our living room start to finish - we live in an NYC apartment. Because of the small room size we chose to modify the plans to a small mattress - hoping that it will last our boys until they are about 5 and 7 (currently 2 and almost here). This blog post outlines our buy and cut list for the modified size: http://wp.me/p3DCu3-Kd
Built from Plan(s)
Estimated Cost
$215 (plus $200 for mattresses and bedding)
Estimated Time Investment
Weekend Project (10-20 Hours)
Finish Used
None
Recommended Skill Level
Beginner
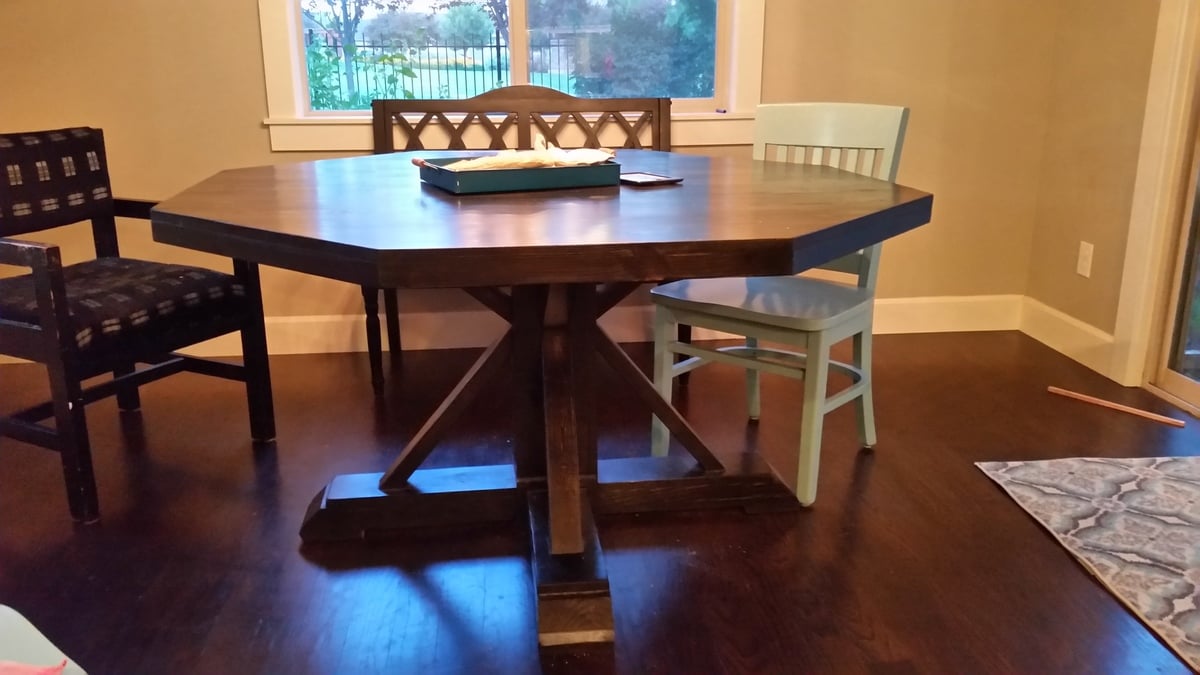
Our Kitchen Table
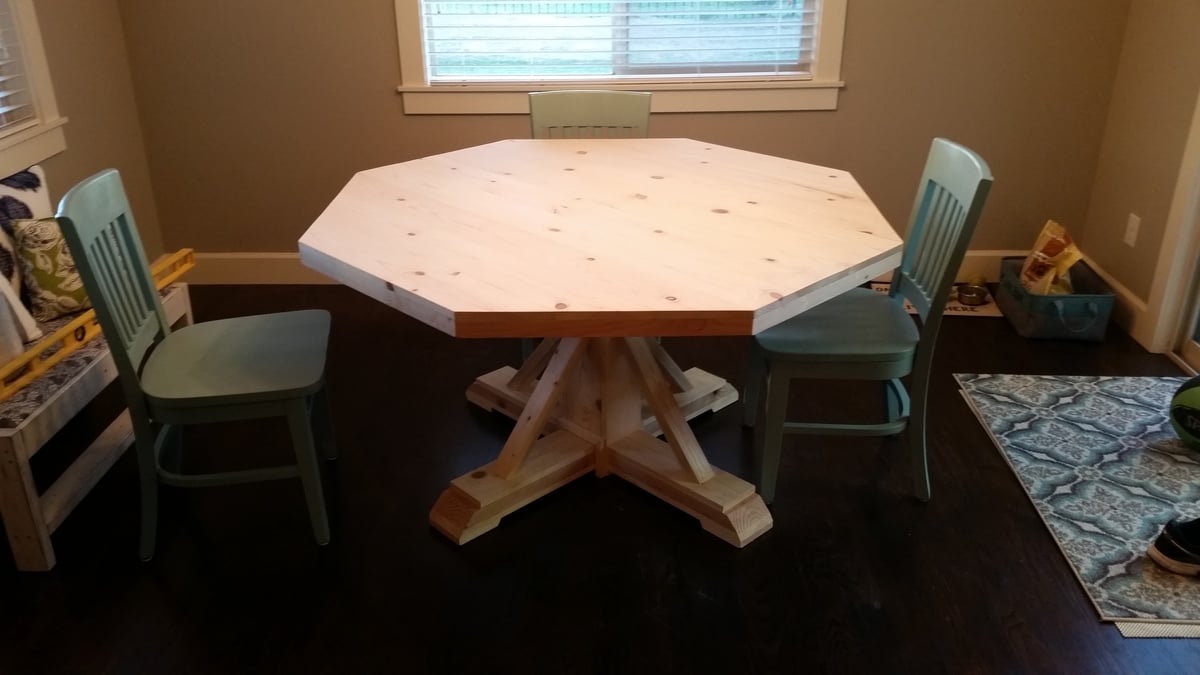
We wanted to build a new kitchen table for the home we moved into. I had just bought a new table saw and needed a project. We searched through a lot of plans and settled on the Benchmark Octagon Table that Ana White had. My 14 y/o son and I built this over a few nights in our garage and my wife did the finishing. We were thrilled how it turned out. It comfortably seats 8 adults (yes we have had 8 adults at it). My wife and I always sit in the bench that is pictured and we easily eat side by side on one end. It is a great project. I would recommend being very careful attaching the table top support to the base column and also reinforcing the joints of the diagonal upper and lower supports to keep the table top from twisting easily. All in all a fantastic project and people are shocked when I tell them my son and I built it, particularly from off the shelf pine.
Built from Plan(s)
Estimated Time Investment
Week Long Project (20 Hours or More)
Finish Used
Dark Walnut Stain and about 5-6 coats of Satin Poly
Recommended Skill Level
Intermediate
Kids table
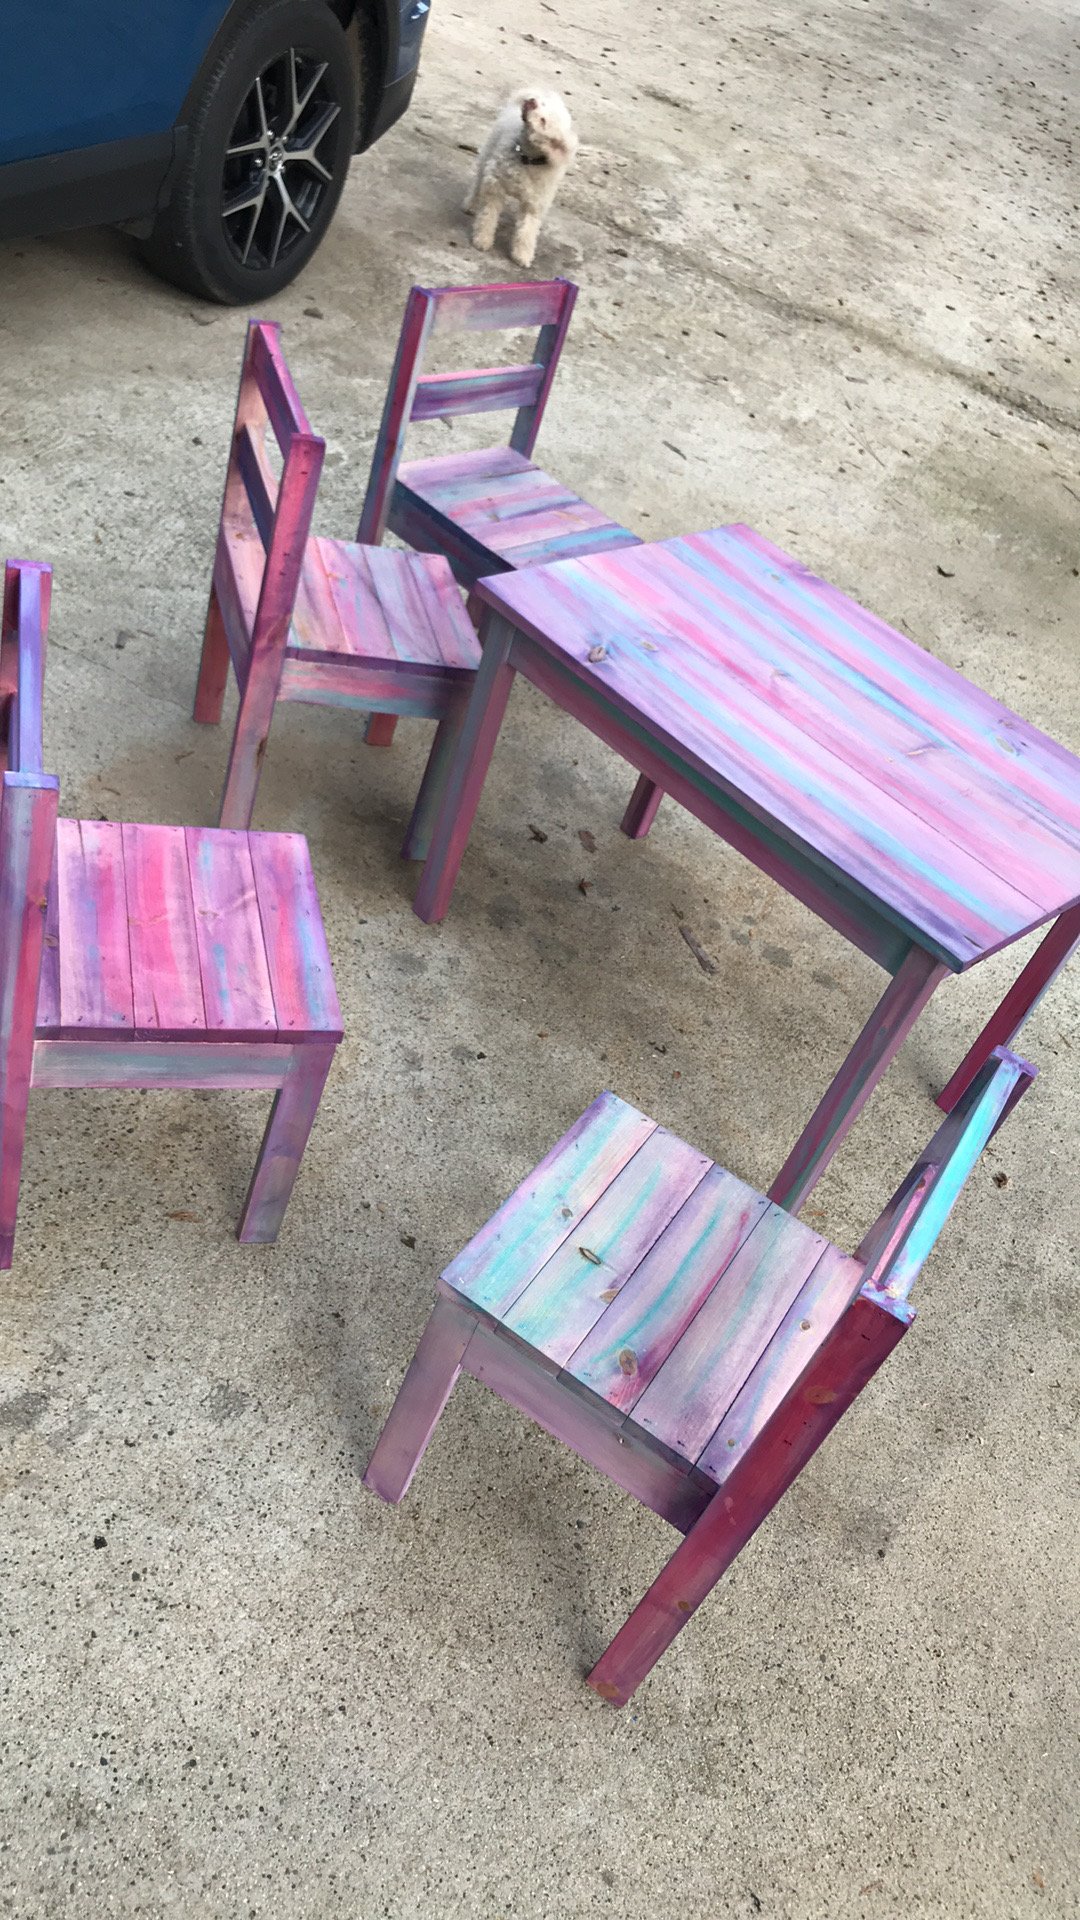
This little table and chairs were so simple to build. My little granddaughter just loved her Christmas present.
Estimated Cost
$50
Estimated Time Investment
Day Project (6-9 Hours)
Finish Used
Unicorn SPiT, pixie punk pink, zia teal and purple mountain majesty. 2 coats of wipe on polycrylic, and 2 coats of furniture wax.
Recommended Skill Level
Beginner
Entry Storage Bench with Board and Batten Panel Wall
First timer here..your plans were great. Added some framing to the front of the bench. Will hide the gap with a cushion. Turns out are floors are rather sloped haha. Thanks!
Fannmann
Built from Plan(s)
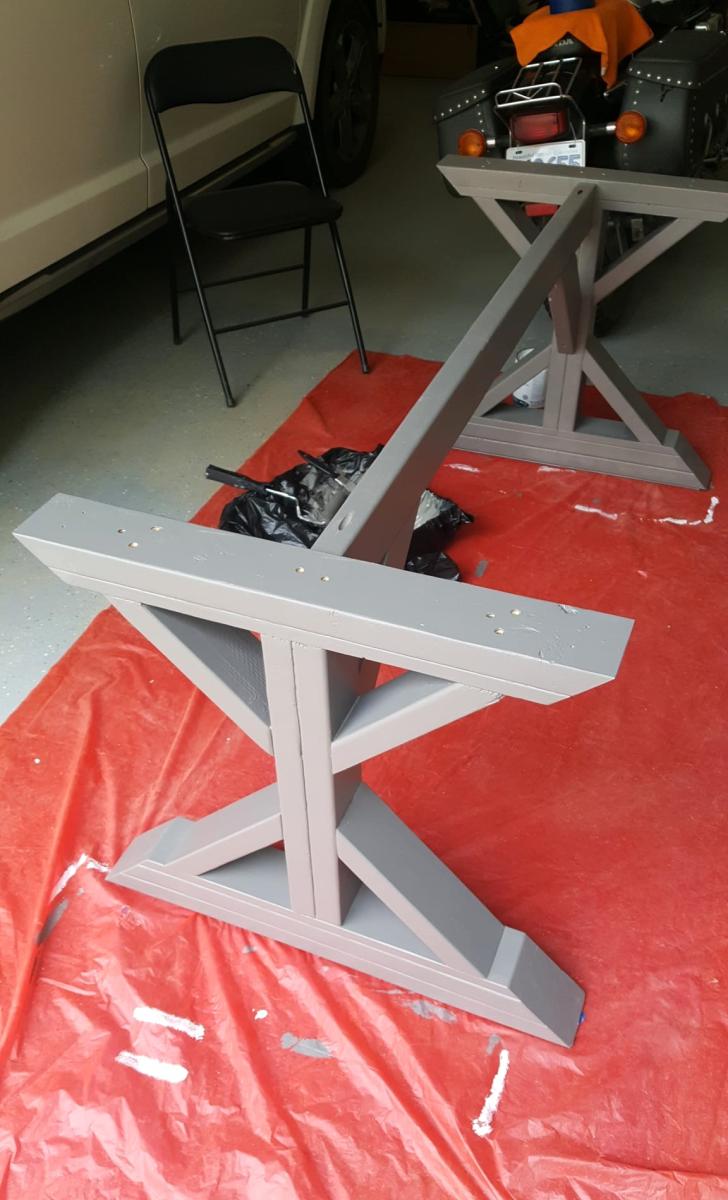
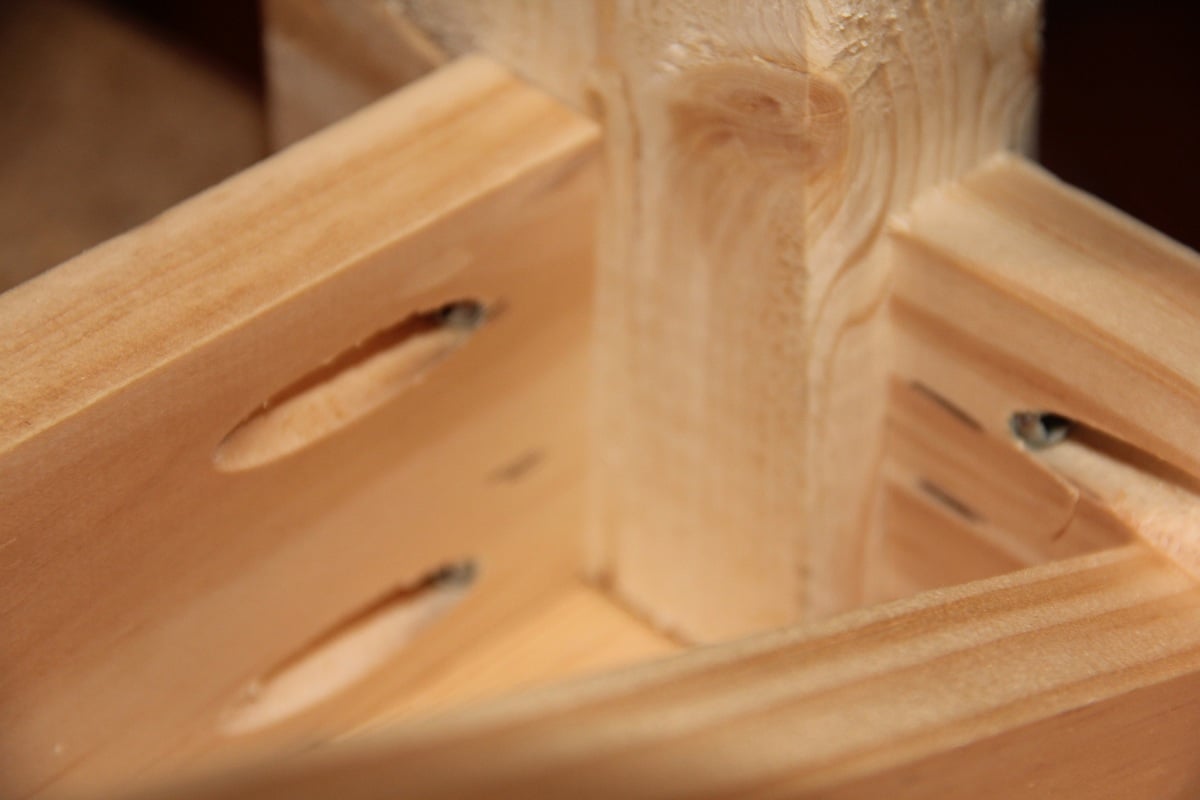
Rustic X Bench
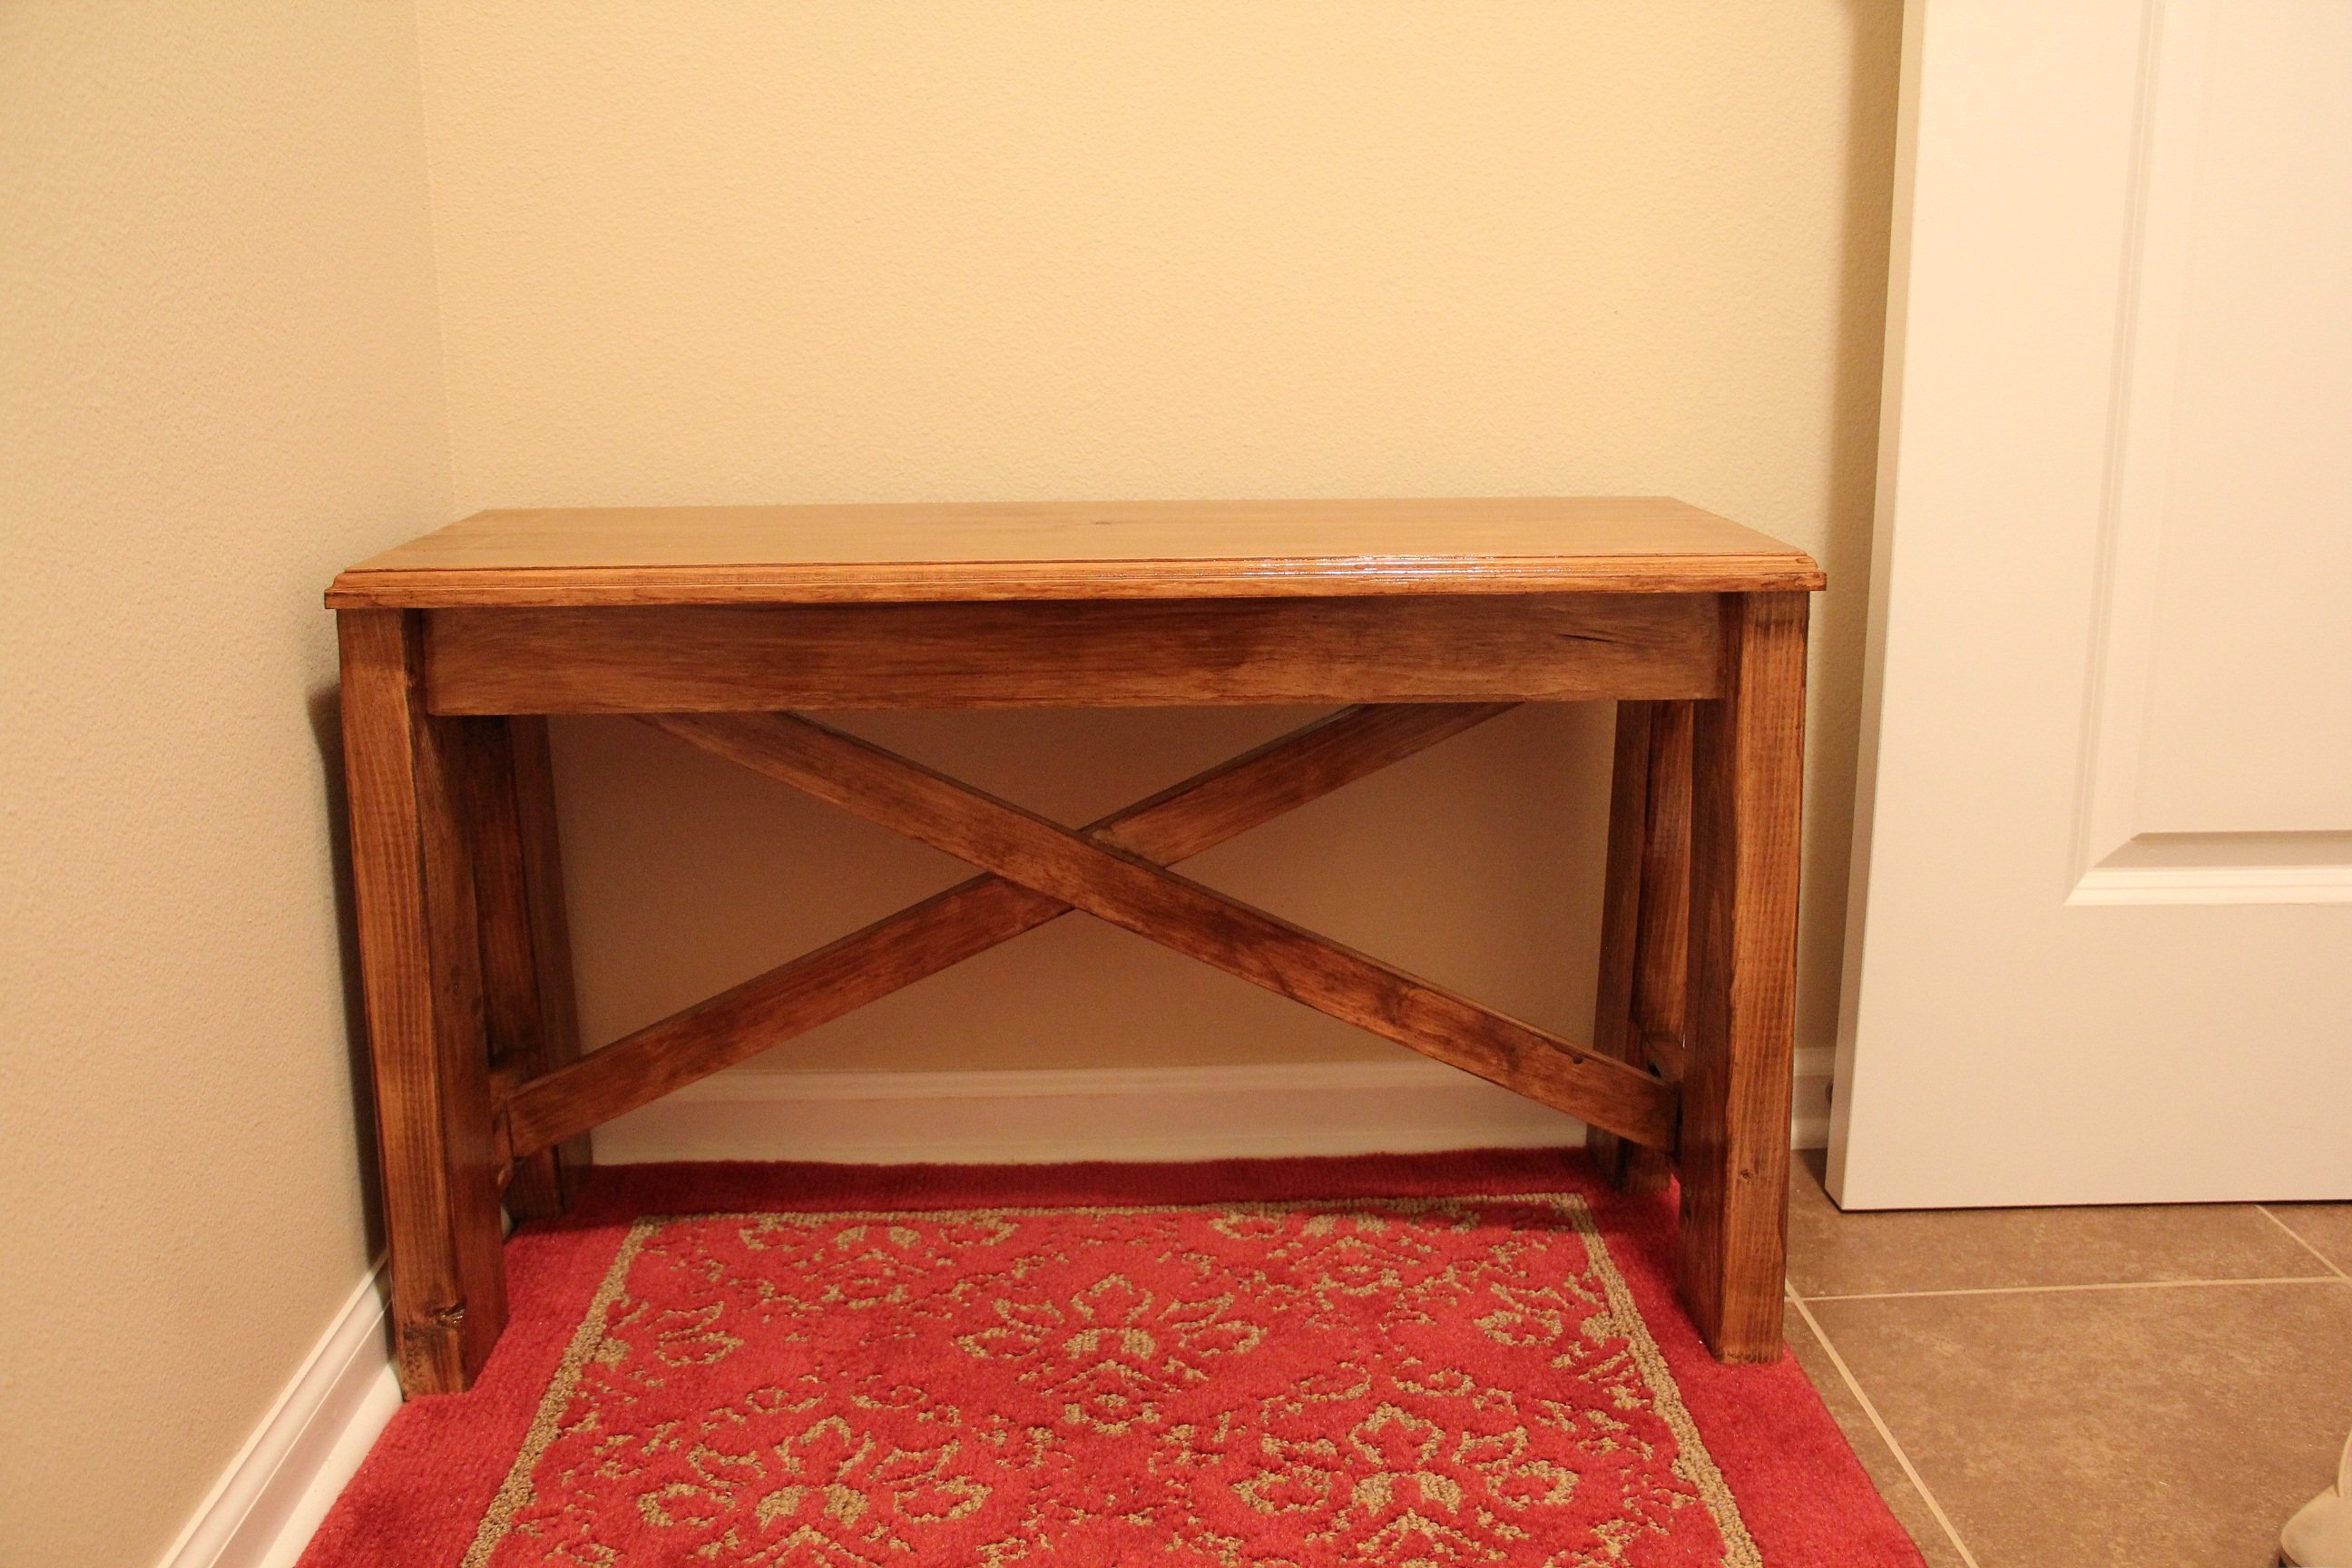
My first real project from your site. This was my first time to use my pocket hole jig. Wow did it work great. The video was great made it very easy to follow the plans
Built from Plan(s)
Estimated Cost
$20.00
Estimated Time Investment
An Hour or Two (0-2 Hours)
Finish Used
Stain and polyurethane one step (2 coats)
Recommended Skill Level
Beginner
Buffet Changing Table
So I altered the Emersen Buffet a little. We needed a changing table and I liked the idea of having the baskets handy for diapers, ect.. I will add the changing pad topper after we get the actual pad.
The door is from a weathered pallet I reclaimed.
I must say this is my first large project of this type. I would have NOT been able to do it without Ana White's site. However, now I feel capable of a lot more.
Thanks so much.
T S
Estimated Cost
Probably less than $80 but even plywood is expensive!
Estimated Time Investment
Weekend Project (10-20 Hours)
Finish Used
Minwax - Special Walnut 2 coats, sand lightly, then coat of polyurethane - satin
Recommended Skill Level
Beginner
First project ever
I challenged my husband who is new to any woodworking project to make me this table! That he did!!


Built from Plan(s)
Estimated Cost
$250 (benches and table)
Estimated Time Investment
Weekend Project (10-20 Hours)
Finish Used
Rustoleum American walnut
Recommended Skill Level
Starter Project
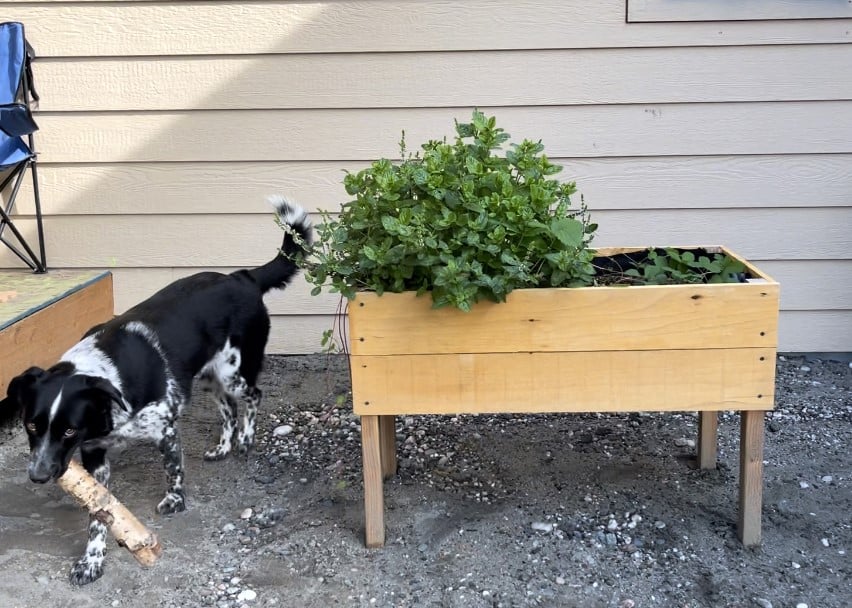
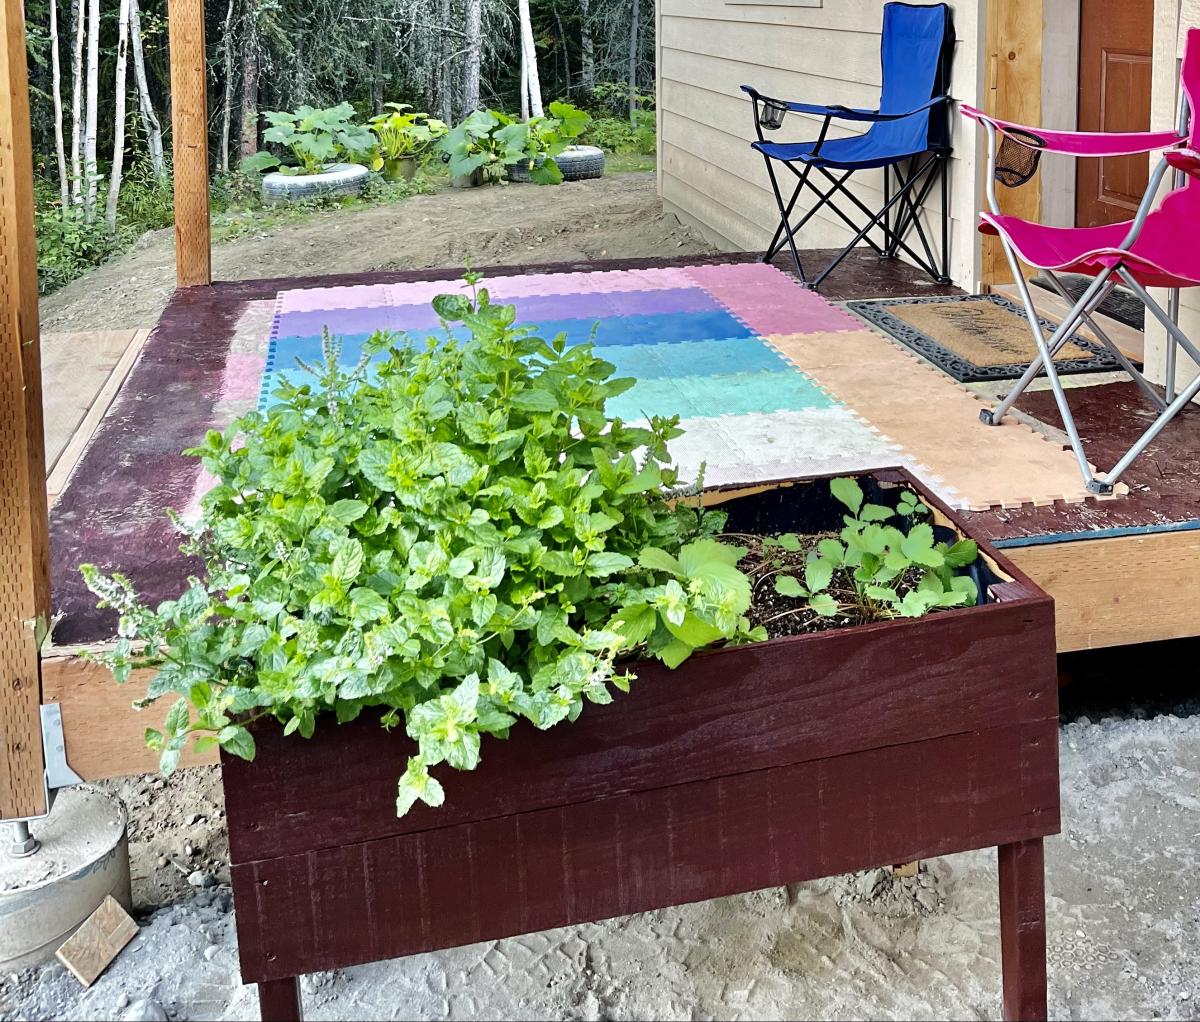
DIY Easy Raised Planter
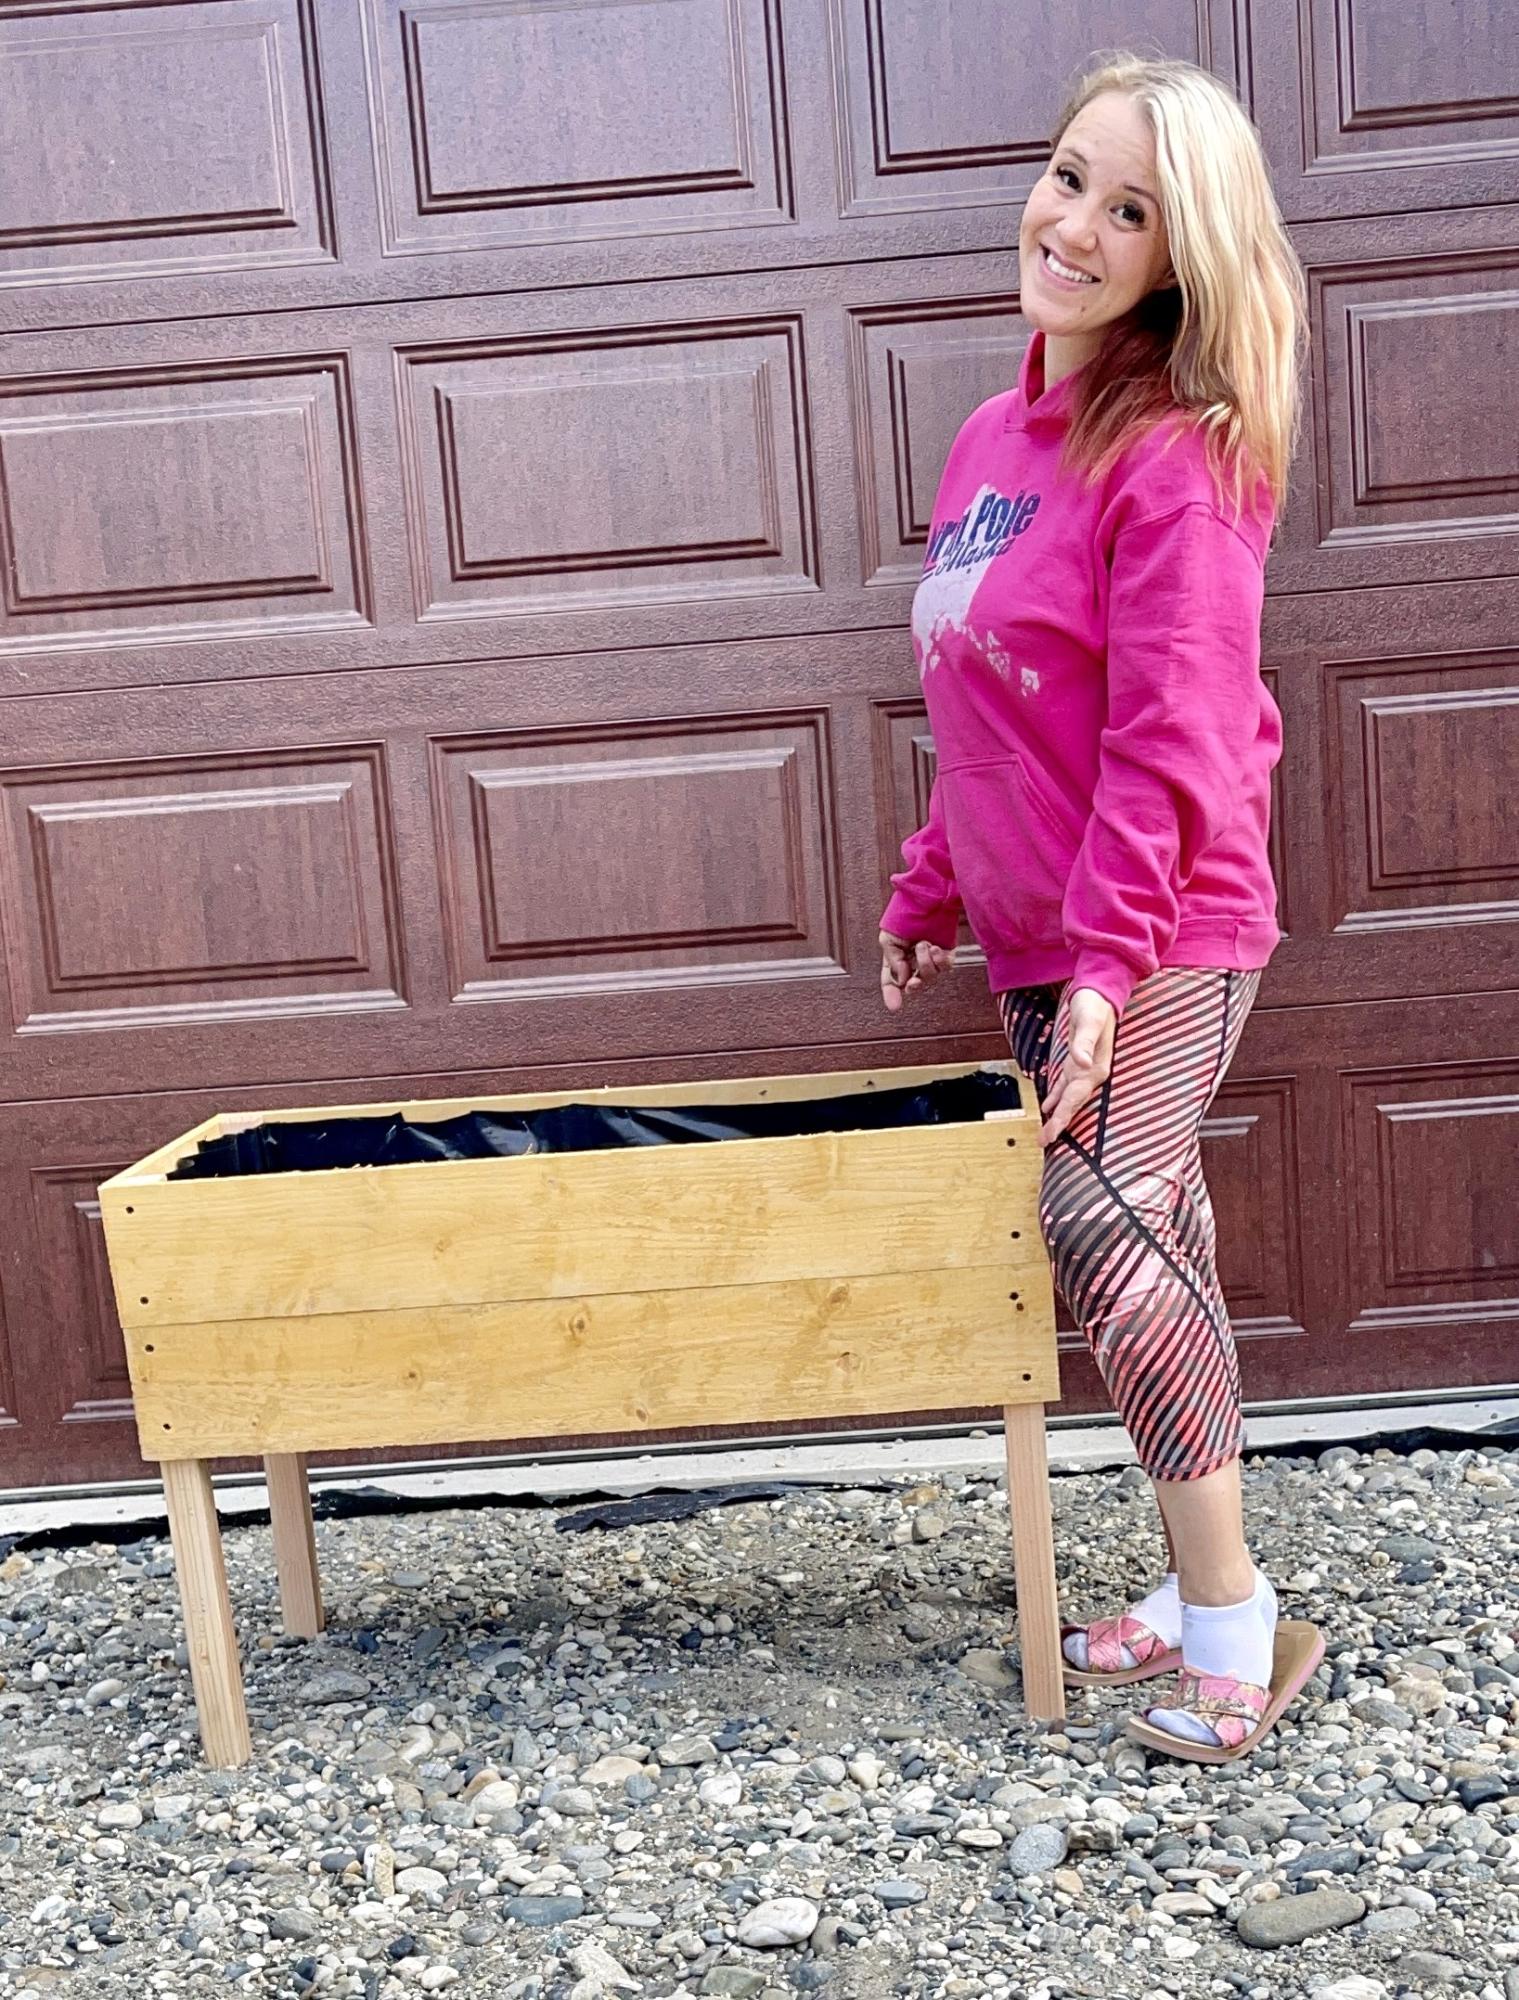
This was my first ever Ana White project!!! I’ve never built anything and really needed a planter for my front door. I loved the size of these and how easy they were to put together. The plans are detailed and easy to follow. I plan to build identical ones next spring for my front yard 😍
Anna Ovchinnikov
Built from Plan(s)
Cabin Bunk Beds

Customized the cabin Bunk bed palns and built this for about $200 and 2 weekends work.
Nuff said!

Built from Plan(s)
Estimated Cost
$200
Estimated Time Investment
Weekend Project (10-20 Hours)
Finish Used
None, unfinished wood rocks
Recommended Skill Level
Intermediate
Comments
Reese Media Cabinet
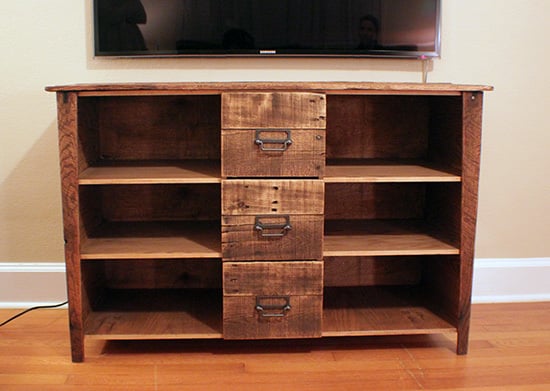
This was a media cabinet that I designed for some friends, and I've got a full how-to and FREE PLANS up on my site at

Estimated Time Investment
Week Long Project (20 Hours or More)
Finish Used
PolyShade Mission Oak - Satin
Recommended Skill Level
Intermediate
Farmhouse Table
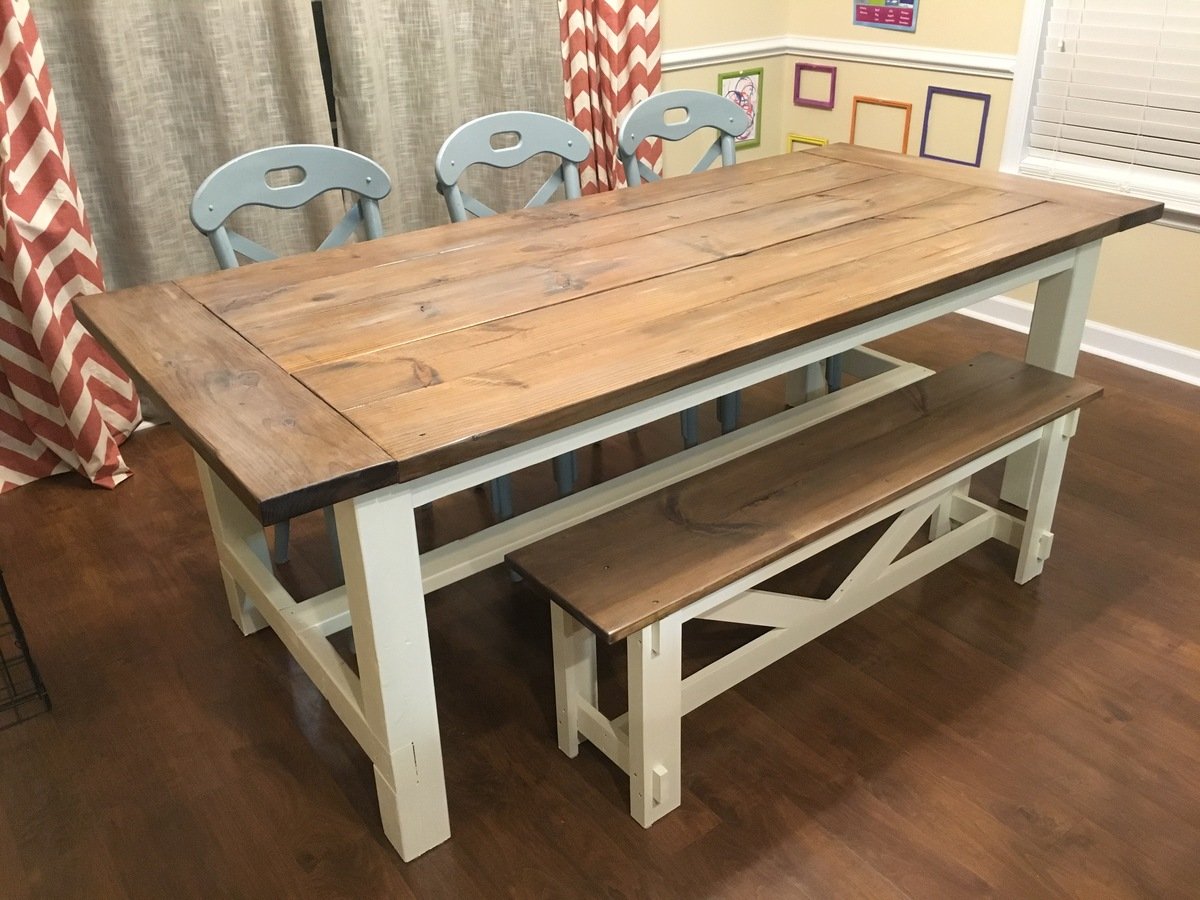
My husband built this following the plans for the farmhouse table and I painted and stained it using 2 different stains and a whitewash. We are so pleased with how it turned out.
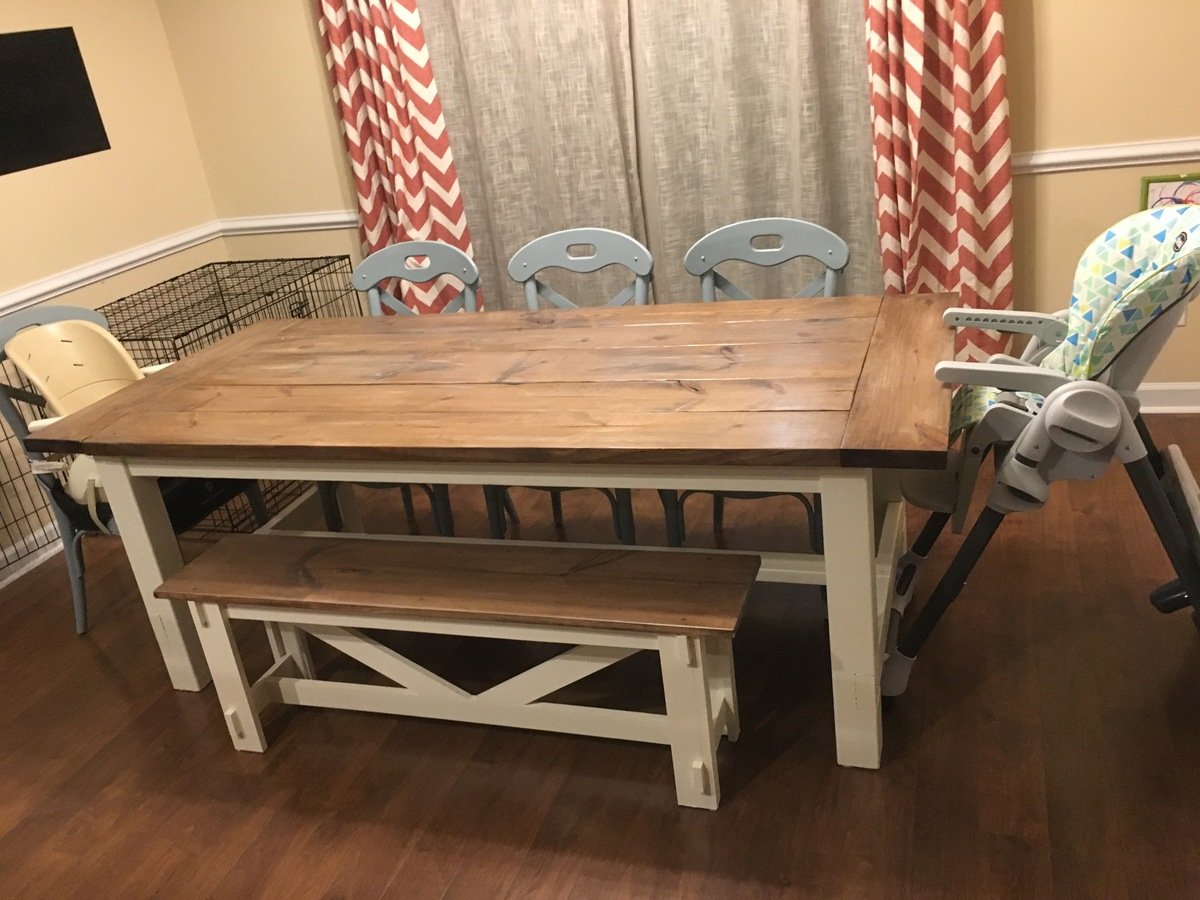
Built from Plan(s)
Recommended Skill Level
Intermediate
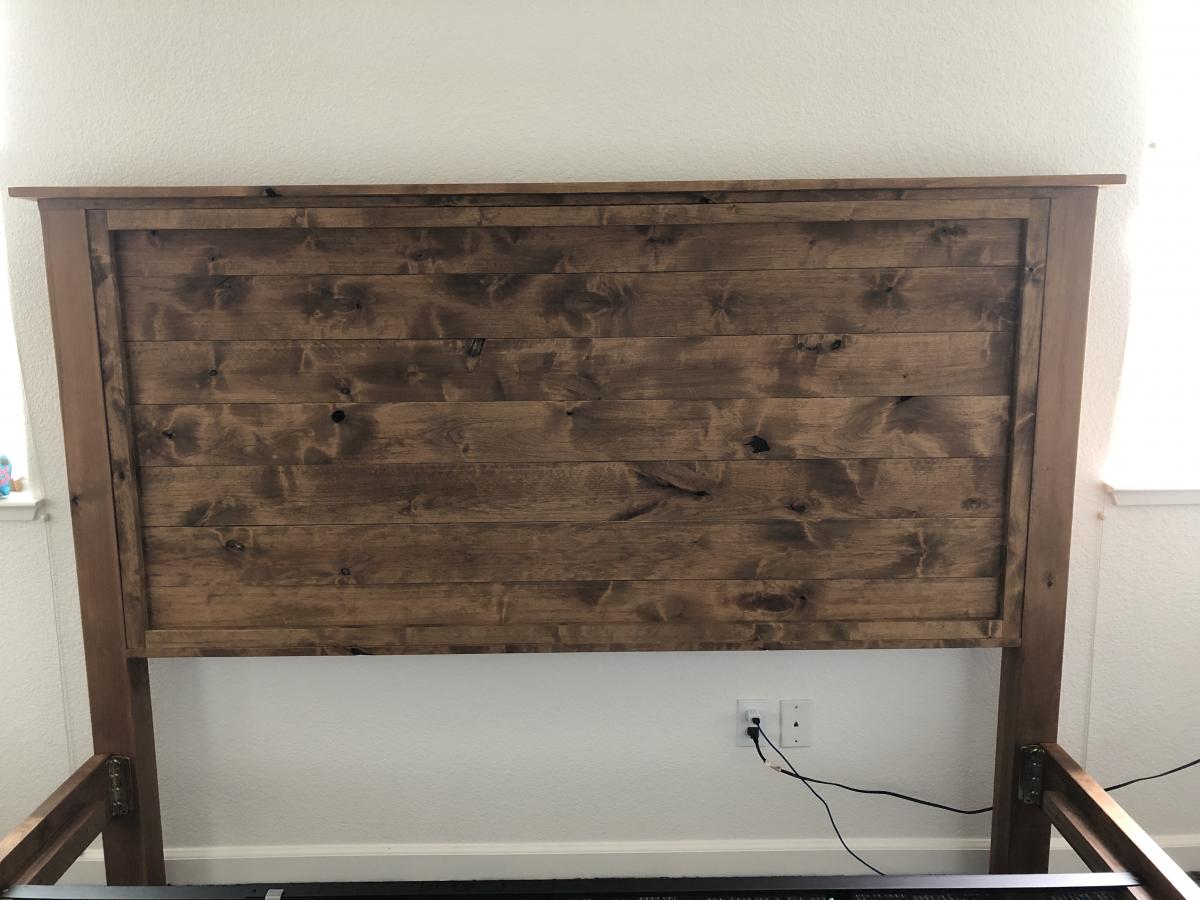
Farmhouse king bed
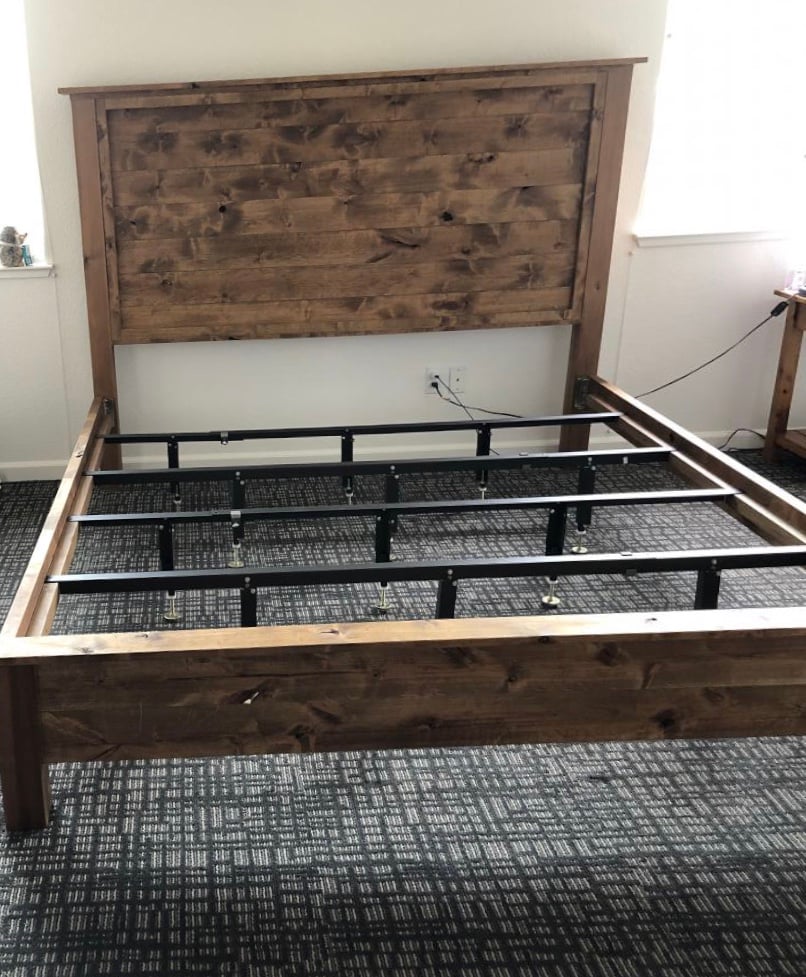
i love the farmhouse look and decided to start changing the furniture in my bedroom. I went shopping and everything I liked was very expensive. I looked online and found DIY plans on Ana’s website. They were an awesome start. I tweaked a few things and absolutely love the end product.
I decided to buy a metal frame and put the mattress on plywood. It’s as solid as a rock!!
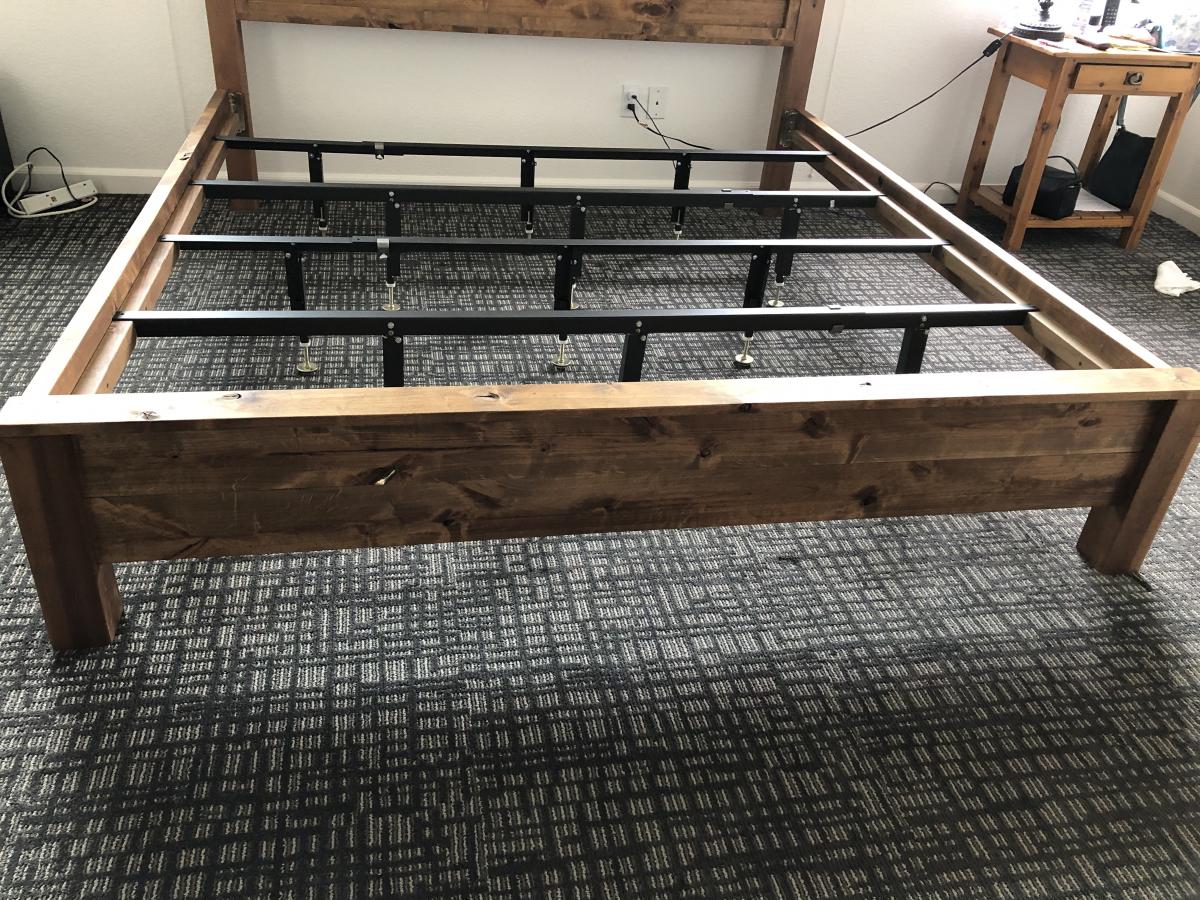
Built from Plan(s)
Estimated Cost
500.00
Estimated Time Investment
Weekend Project (10-20 Hours)
Finish Used
I did one coat of Danish Oil in dark walnut. If you have never used Danish Oil....I highly recommend that you try it. I applied the oil with a foam paint brush and wiped off the excess with an old pillow case. It took about 2 weeks for the smell to lighten up.
The knotty alder is beautiful wood. It sands nice and stains easy.
The knotty alder is beautiful wood. It sands nice and stains easy.
Recommended Skill Level
Intermediate
Comments

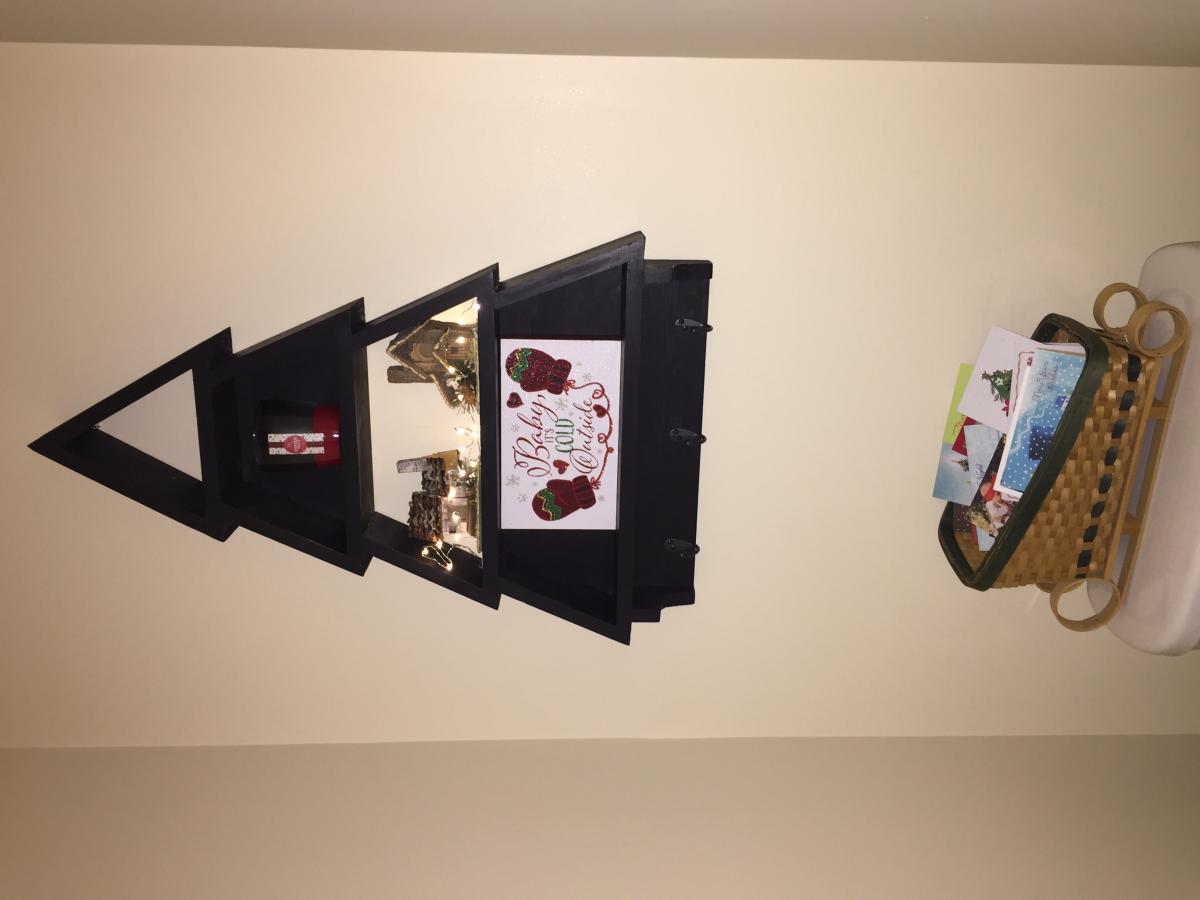
Fri, 01/17/2020 - 21:03
Sorry that some of the…
Sorry that some of the pictures are sideways. I don’t know how to change them.
Baby Doll Crib
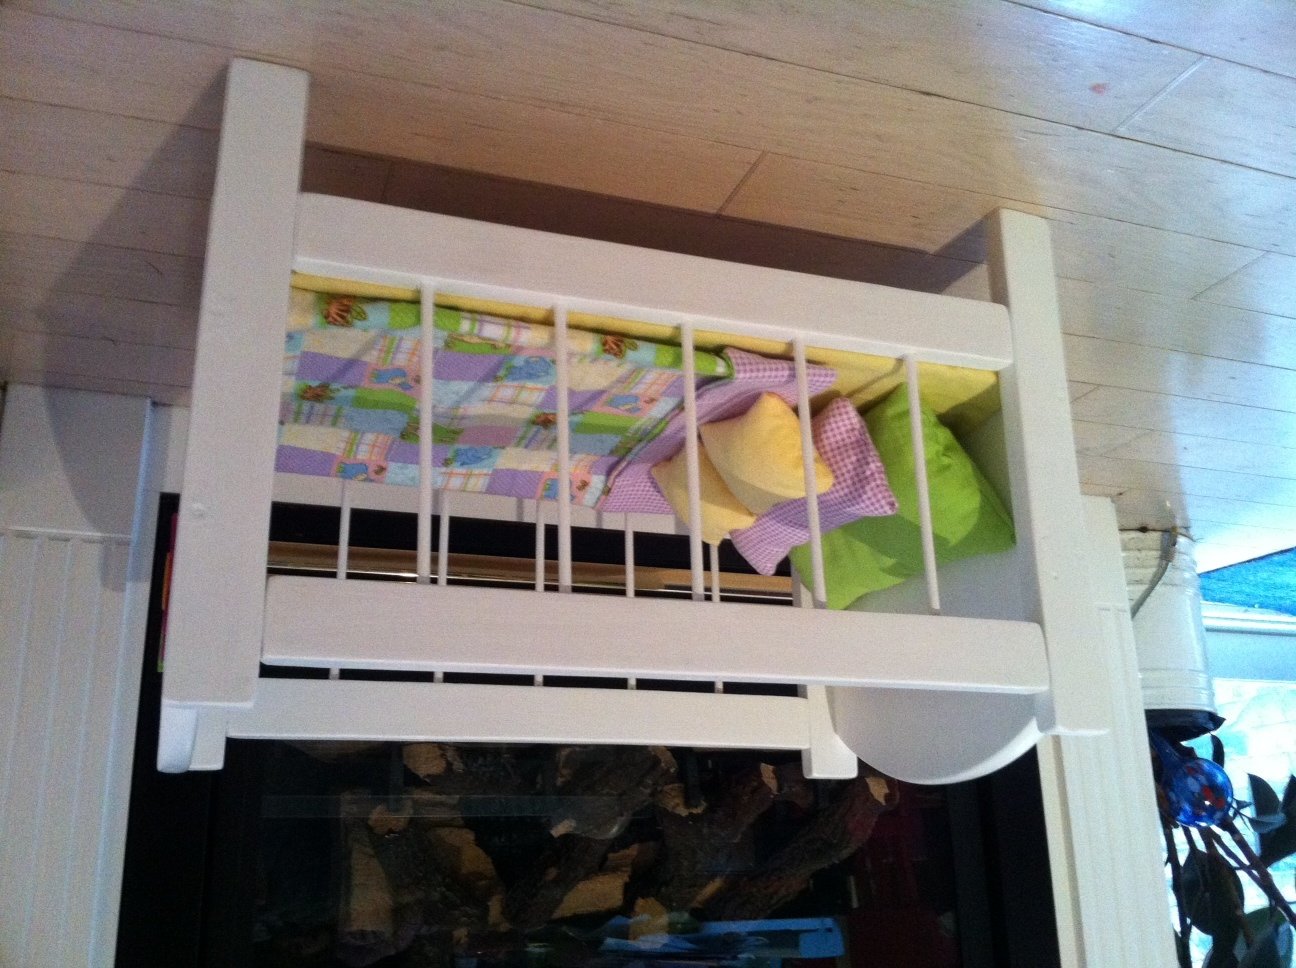
I made this as a birthday present for my two year old neice. It was really easy to make even for a beginner like myself. My five year daughter has been asking me every day if I would make her one "just like it" for her dolls, so I guess I know what I'm doing this weekend!
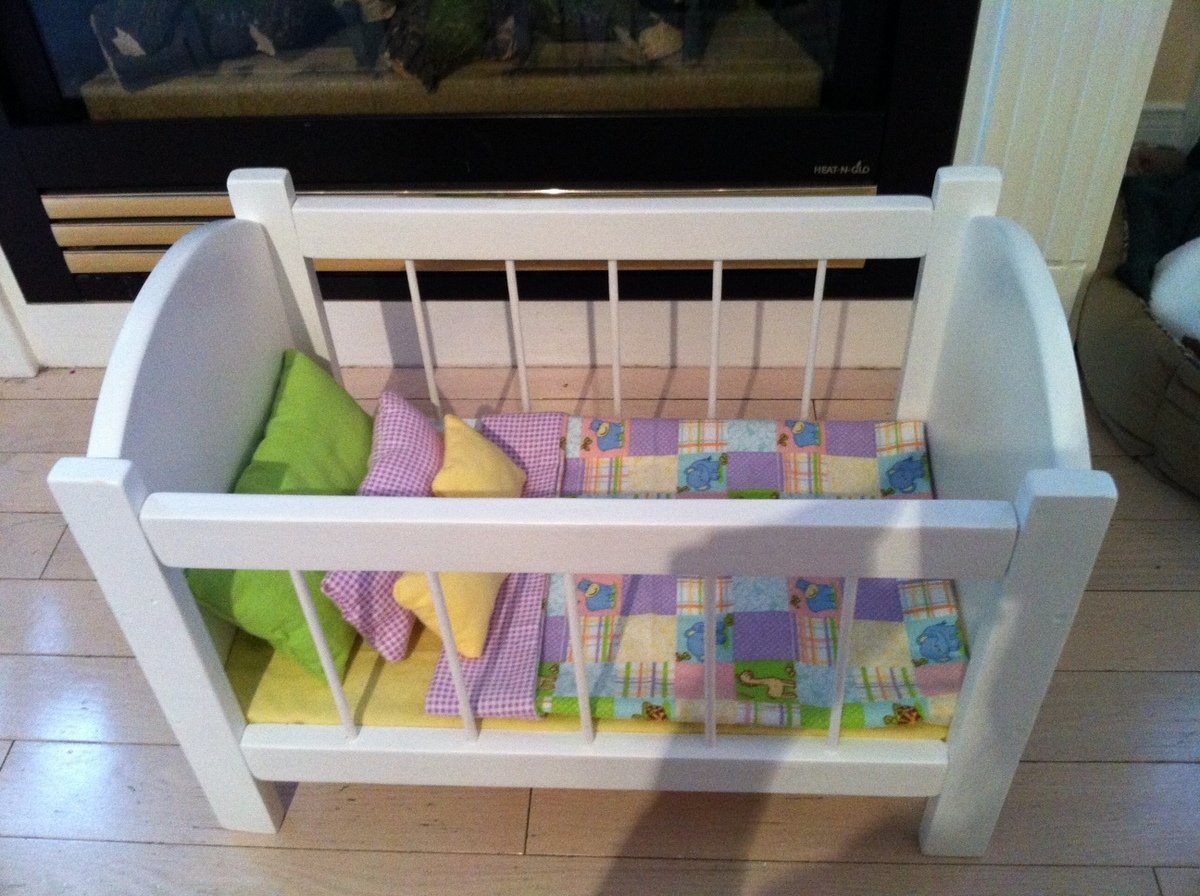
Built from Plan(s)
Estimated Cost
$41 (wood, paint, and fabric)
Estimated Time Investment
Afternoon Project (3-6 Hours)
Recommended Skill Level
Beginner
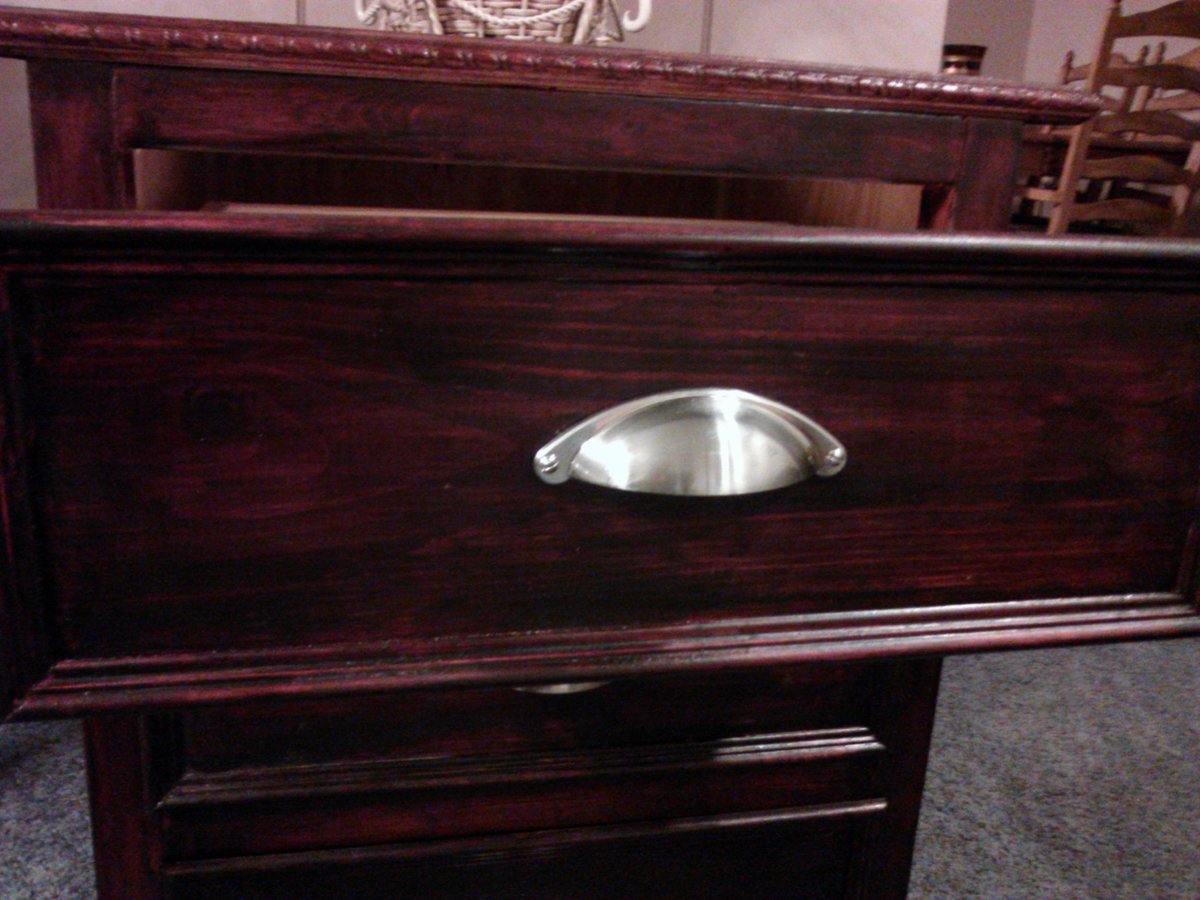
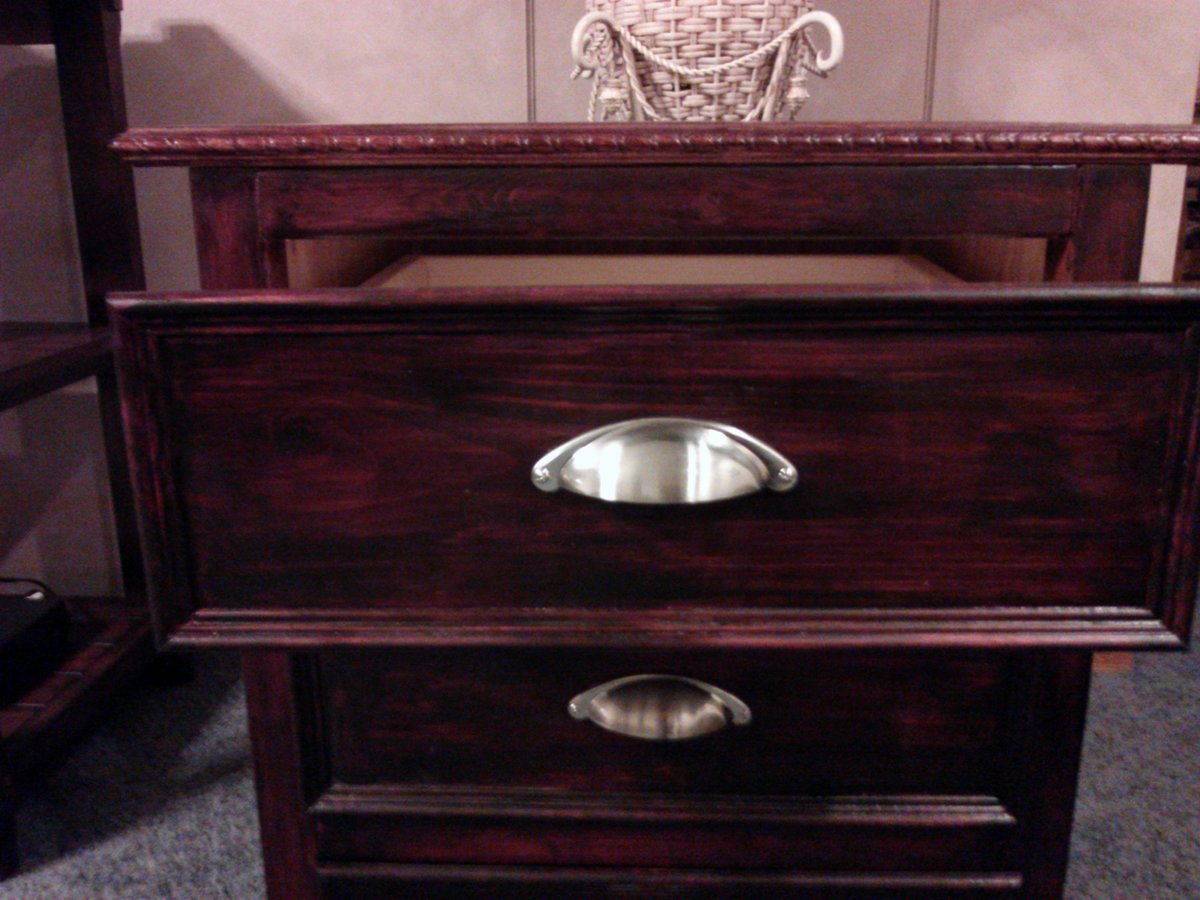
Debbie's Nightstand
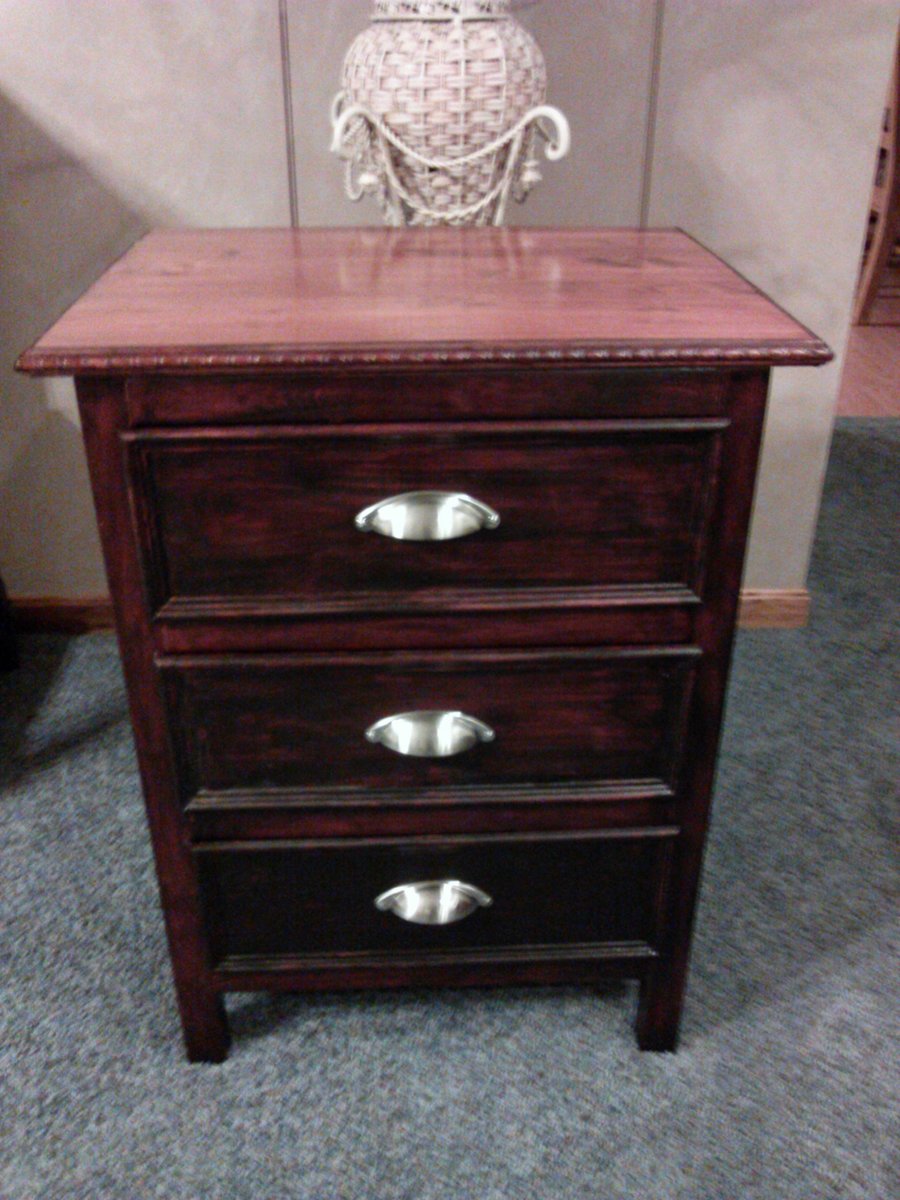
This stain color photographs blotchy looking. It does not look that way in person........
I used beadboard for the sides because I had some left over. I'm glad I did. I really like the way it looks. I also used trim on the outside of all the drawers. It really gives it a polished look. You could also use it if you have uneven gaps where the drawer slides in.
One other thing I did was use a solid piece for the top. I wanted it to be a smooth surface. I then trimmed the top piece with trim that I used on the Fancy Farmhouse Bed I made. I wanted to tie the two pieces together.
I've never made anything with drawers before. It is a bit more challenging, but not that bad if you are careful. However, I am not looking to build anything with drawers again for awhile :>}
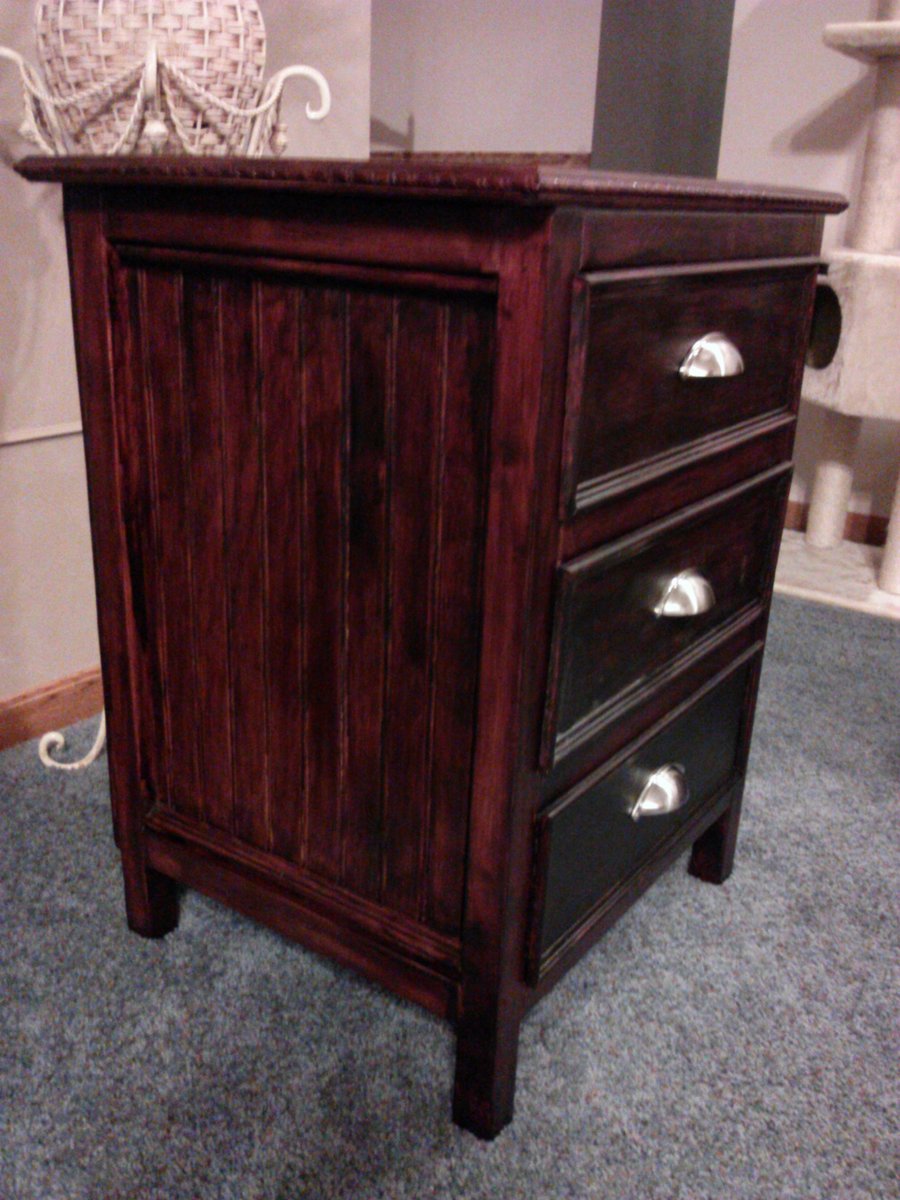
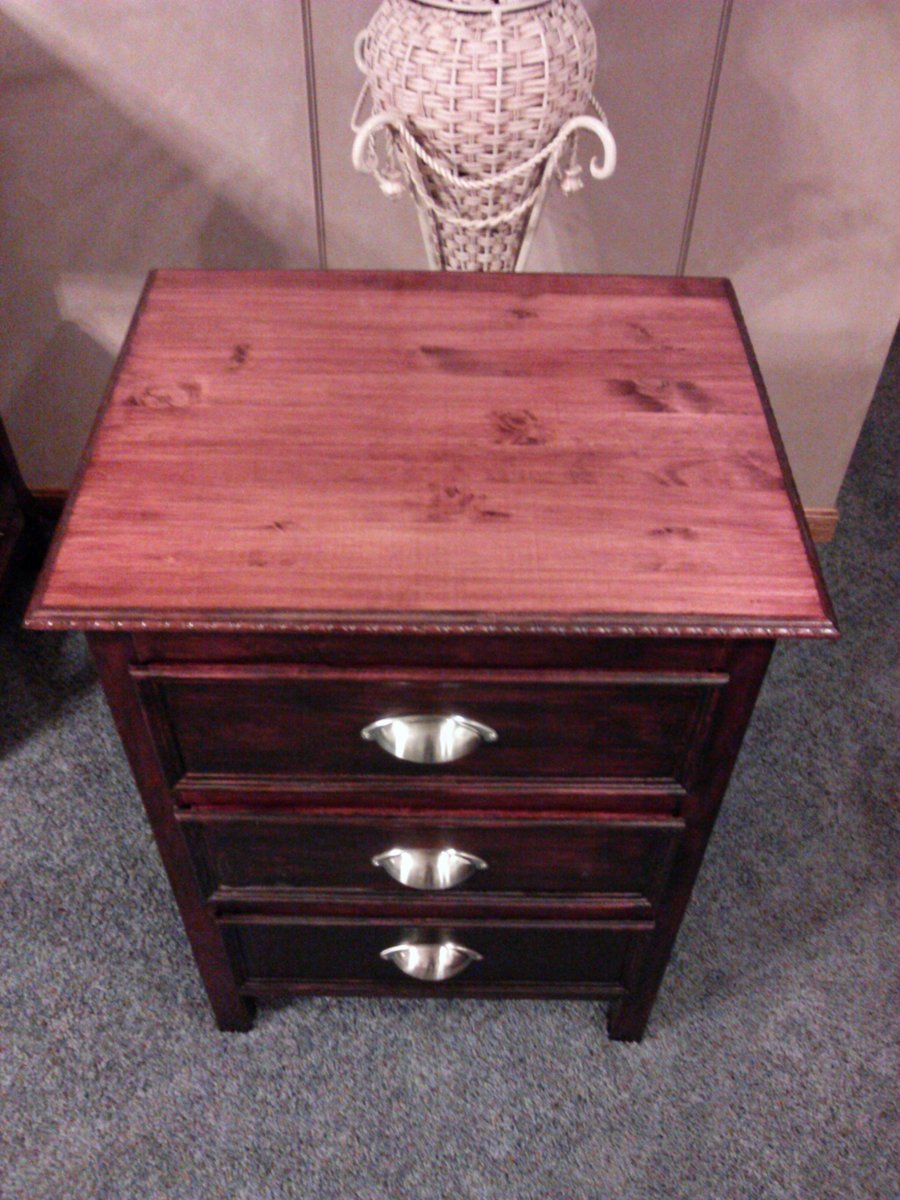
Built from Plan(s)
Estimated Cost
approx. $75 (drawer slides were $6 each, handles were $3.50 each, trim pieces are what really added to my costs)
Estimated Time Investment
Weekend Project (10-20 Hours)
Finish Used
Minwax Polyshades Bombay Mahogany Satin
Recommended Skill Level
Beginner
Comments
Sat, 02/01/2014 - 09:56
$75 Wow!!!
Pretty cheap and all wood. When we bought my daughter's bedroom set,her nightstand cost us an extra $160,and its cheap mdf with an extremely thin wood laminate over it. Wish I had found Ana's site before we purchased it,could have saved a ton and built a bedroom set out of real wood.
Superb job on the nightstand,really like the way the trim u added came out!!