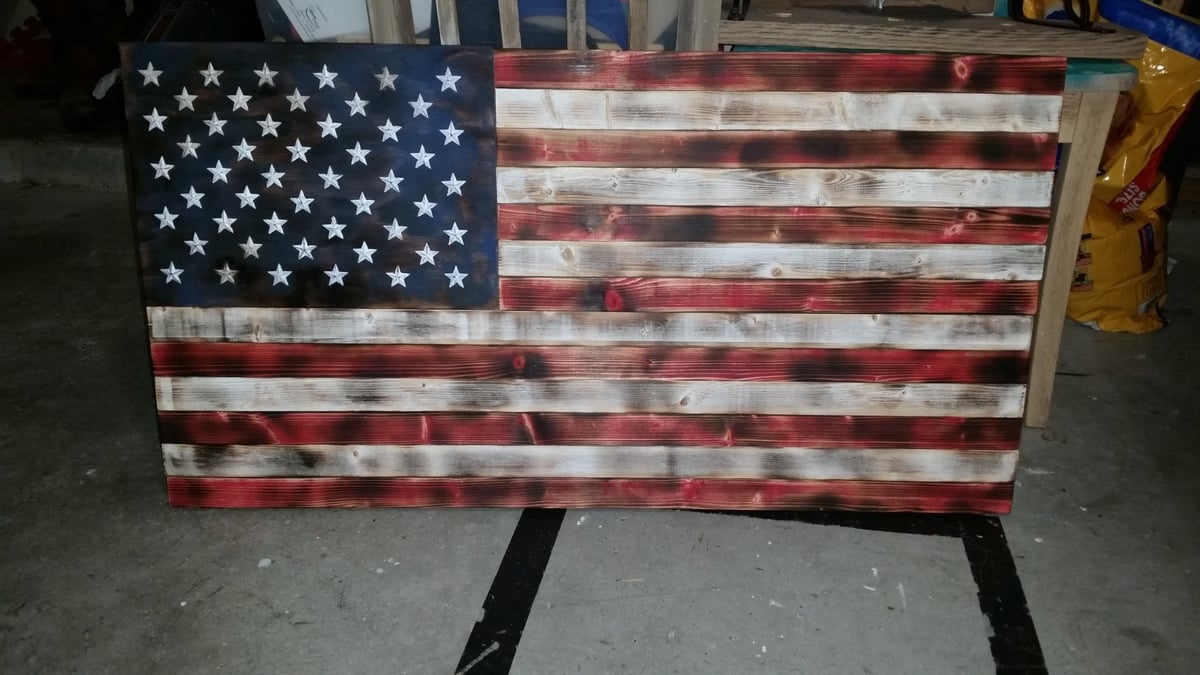
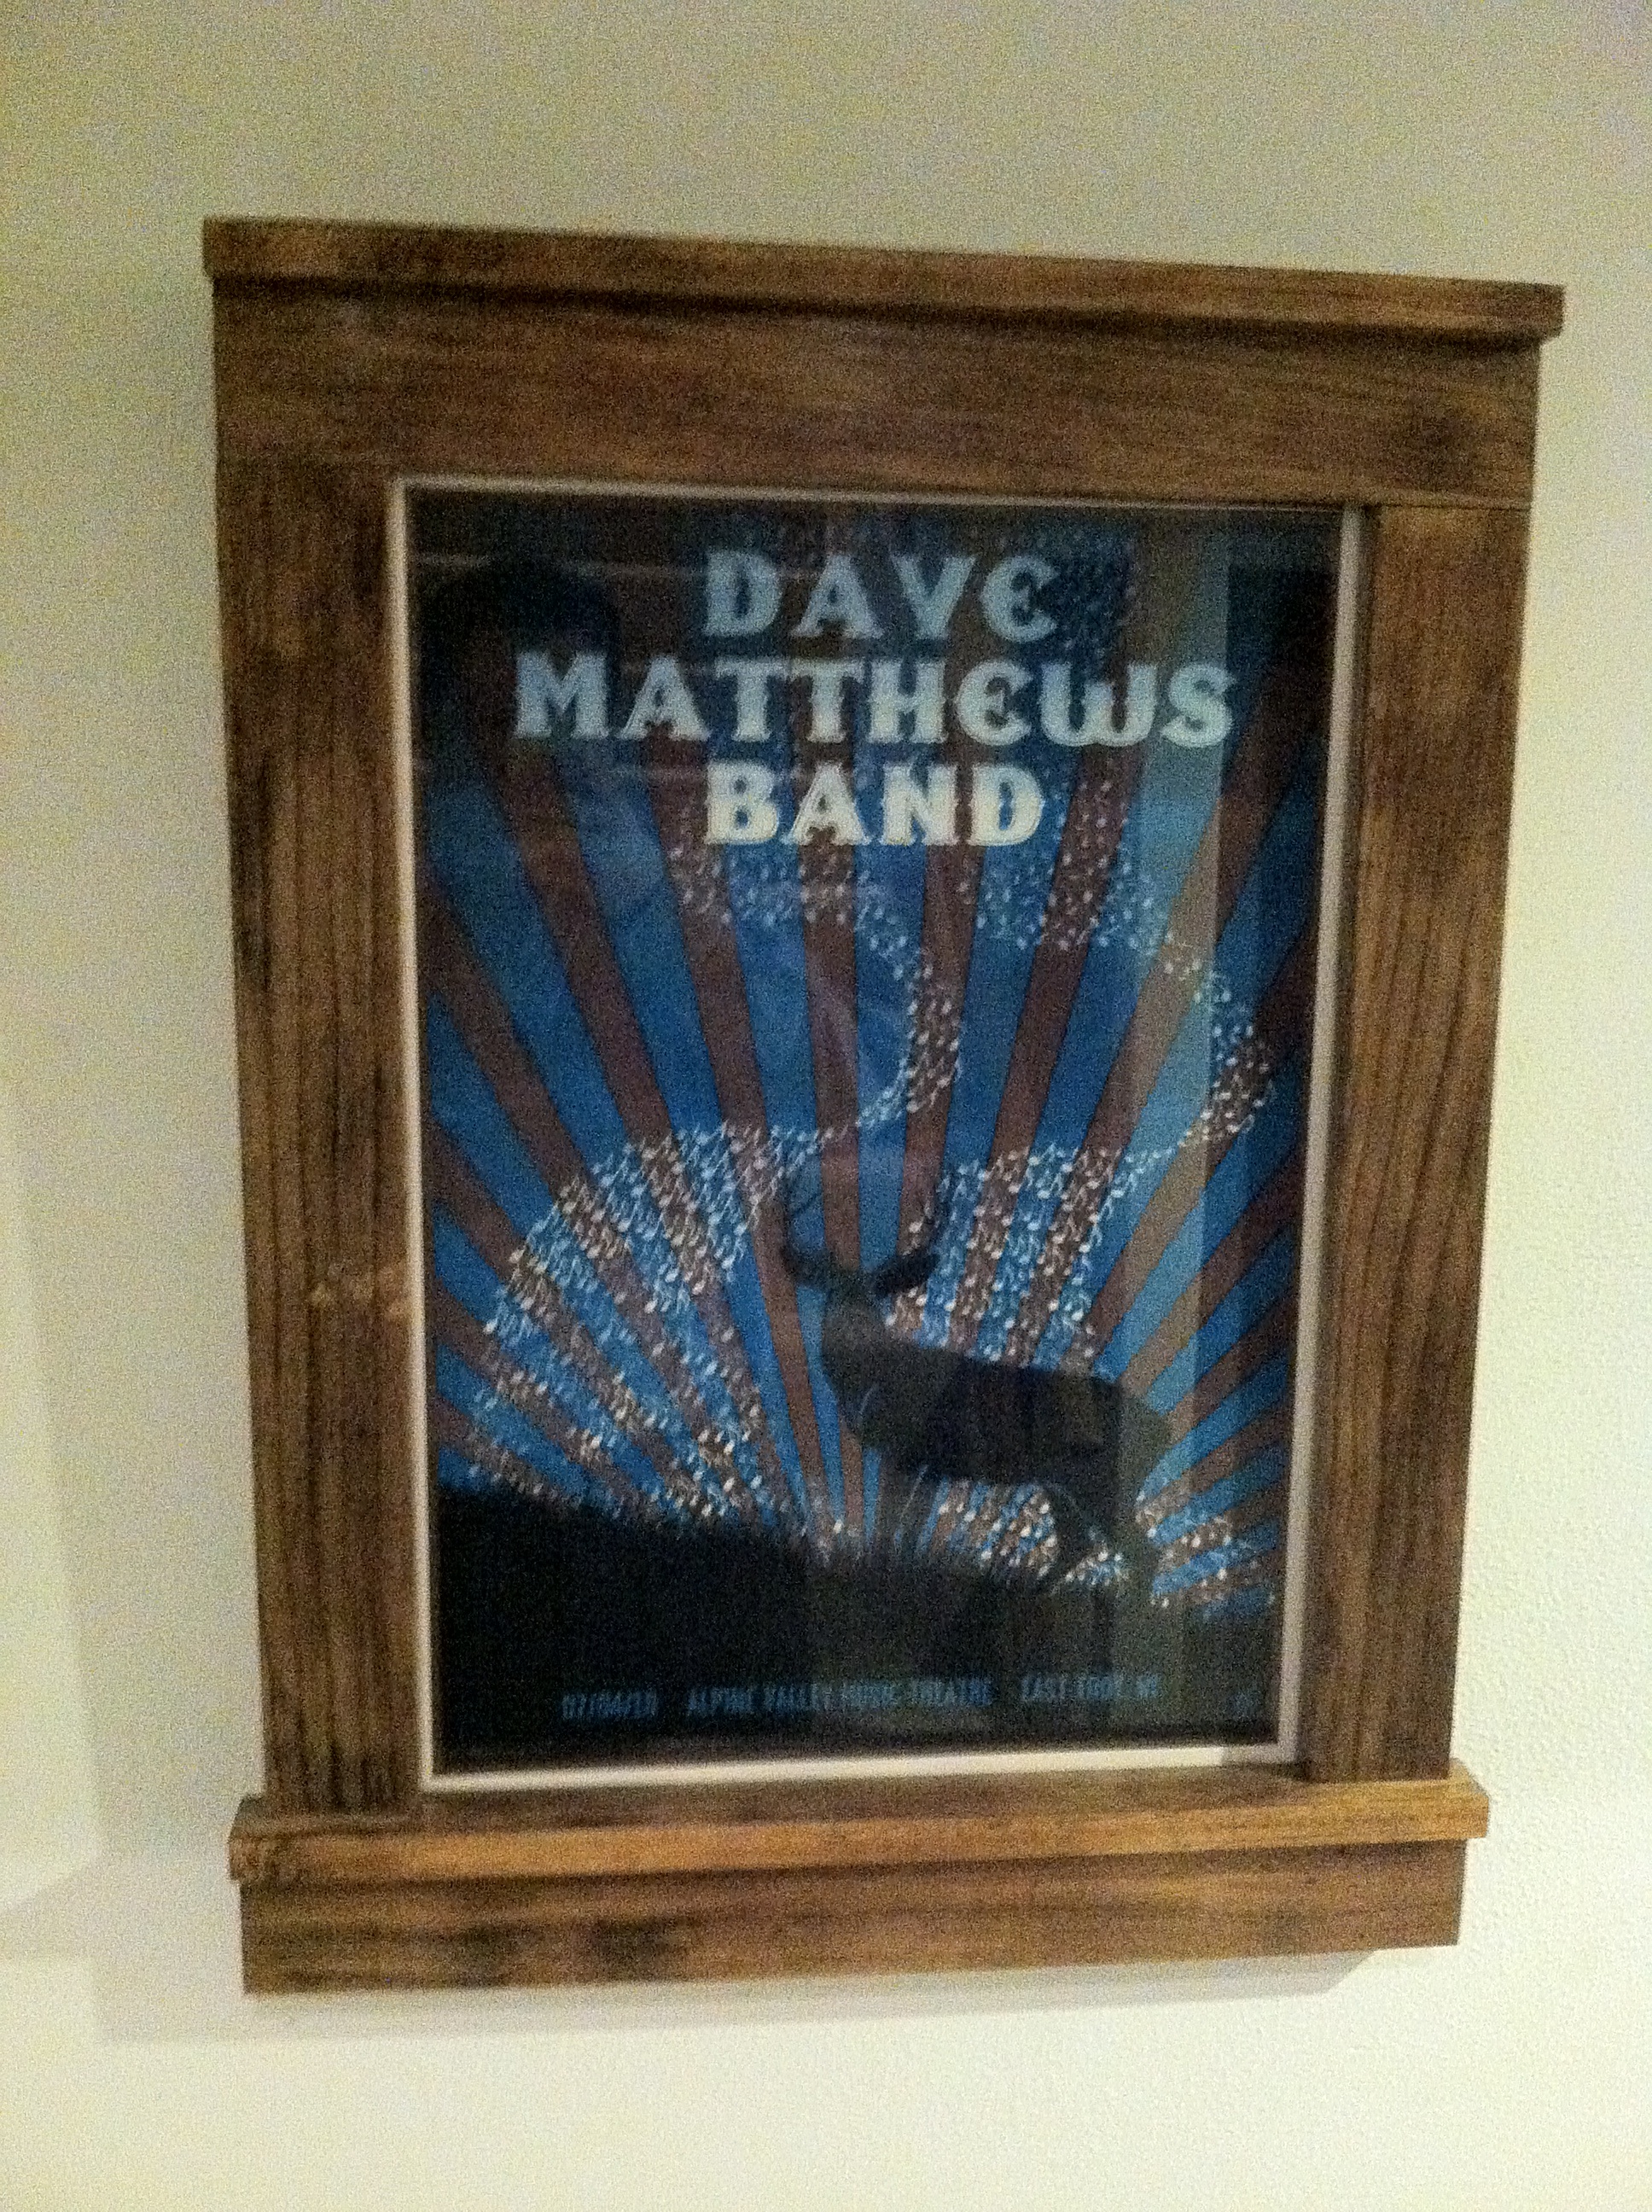
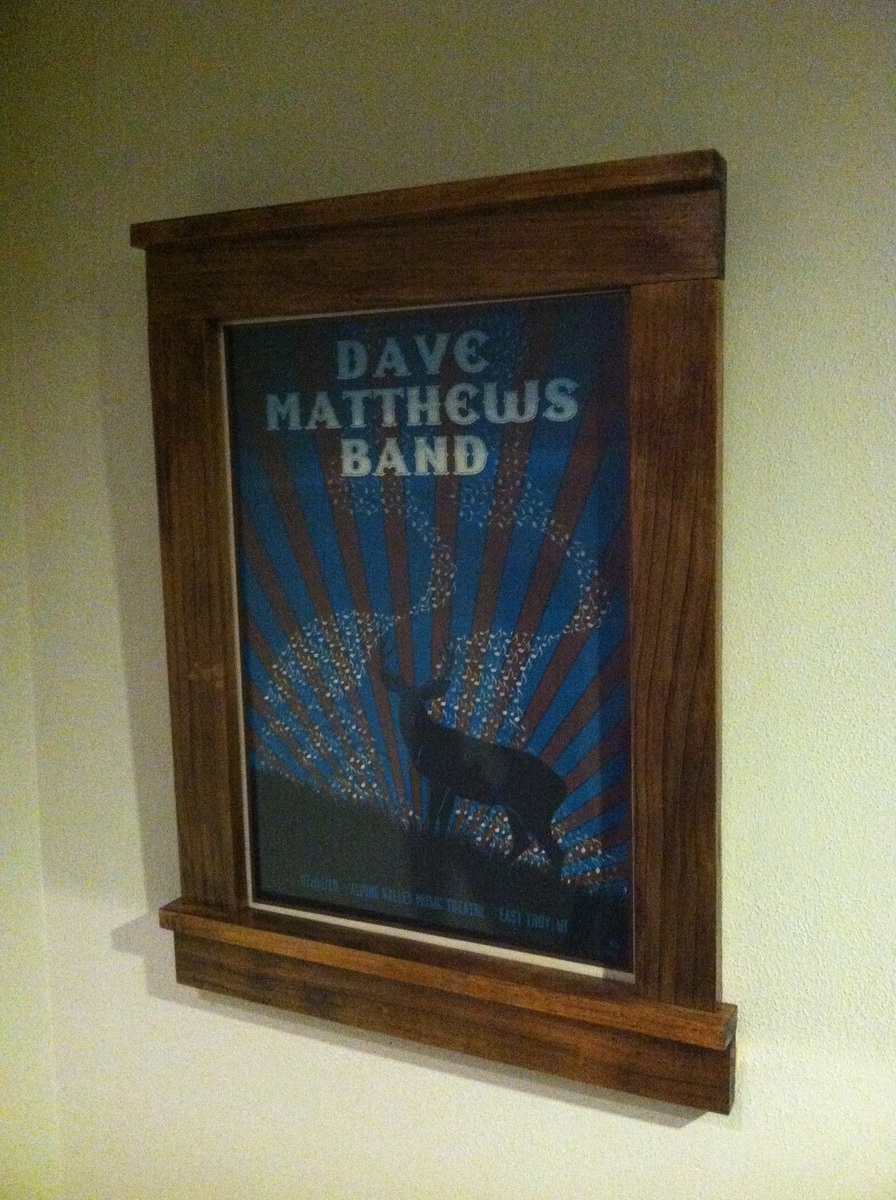
Rustic American Flag
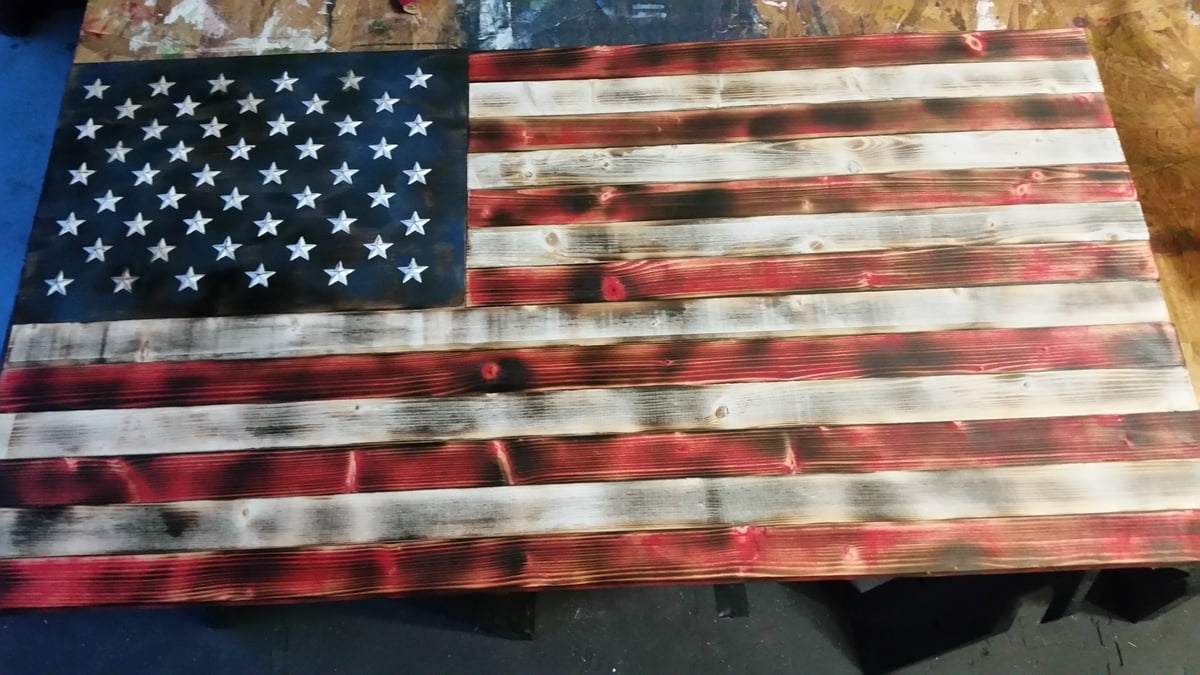
This was a fun build. I used common board for the the stripes and a left over piece of cabnet grade plywood for the union. Whole thing is 37 x 19.5. The stripes are 1.5 wide. I painted all the pieces then sanded then down to expose the grain and give it a worn look. Then I took a handheld propane torch to it. I used small 1 in tin stars which were the most challenging and expensive part of it. I painted them then distressed them with sandpaper. I attached the stars with super glue. All in all a fun project.
Estimated Cost
Wood and paint 30
Tin stars 30
Glue 10
Tin stars 30
Glue 10
Estimated Time Investment
Afternoon Project (3-6 Hours)
Recommended Skill Level
Beginner


Comments
trojan24man
Thu, 05/19/2016 - 07:06
Excellent!
Nice work. Are you hanging it somewhere and if so how?
In reply to Excellent! by trojan24man
Tony Garcia
Fri, 05/20/2016 - 05:49
Thank you. This was a gift
Thank you. This was a gift for my Fath in Law, I think he is going to put it on his patio. I added a lip a the top on the back so it can rest on some anchored screws. Depending on where he puts it though I might add a wire across the back so it will hold a little tighter outside with the wind.
Tony Garcia
Fri, 05/20/2016 - 05:46
It was a gift for my Father
It was a gift for my Father in Law. I think he is going to hang it on his patio. When I built it I added a lip rail along the top so you can rest it on an anchor. If it does go outside I might add a wire across the back so it can catch and won't blow off in high wind.