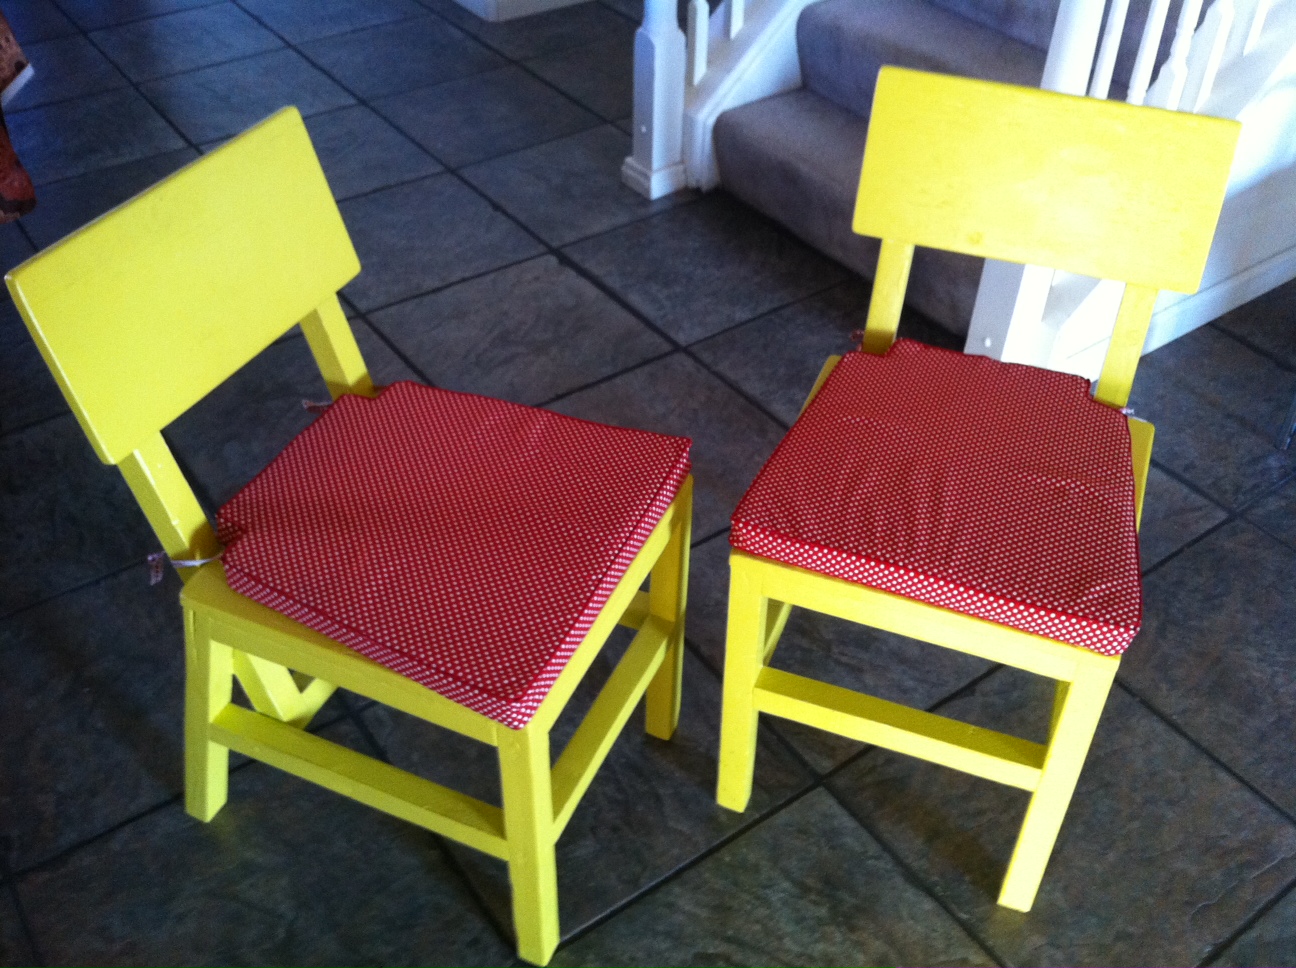
After our Wal-Mart dining room chairs started falling apart (after 8 years of use) I decided it was time to replace those ugly old things with something a bit more unique. The Harriet Chair really caught my eye, so I set out to build it! My wife, Judi, chose the mustard yellow color and we thought it would be cool to add contrast with some red and white polkadot seat pads from IKEA ($9.99 ea.).
These are the first two I've built, with a goal to eventually build a total of 6-8 to fit around a table I also plan on building.
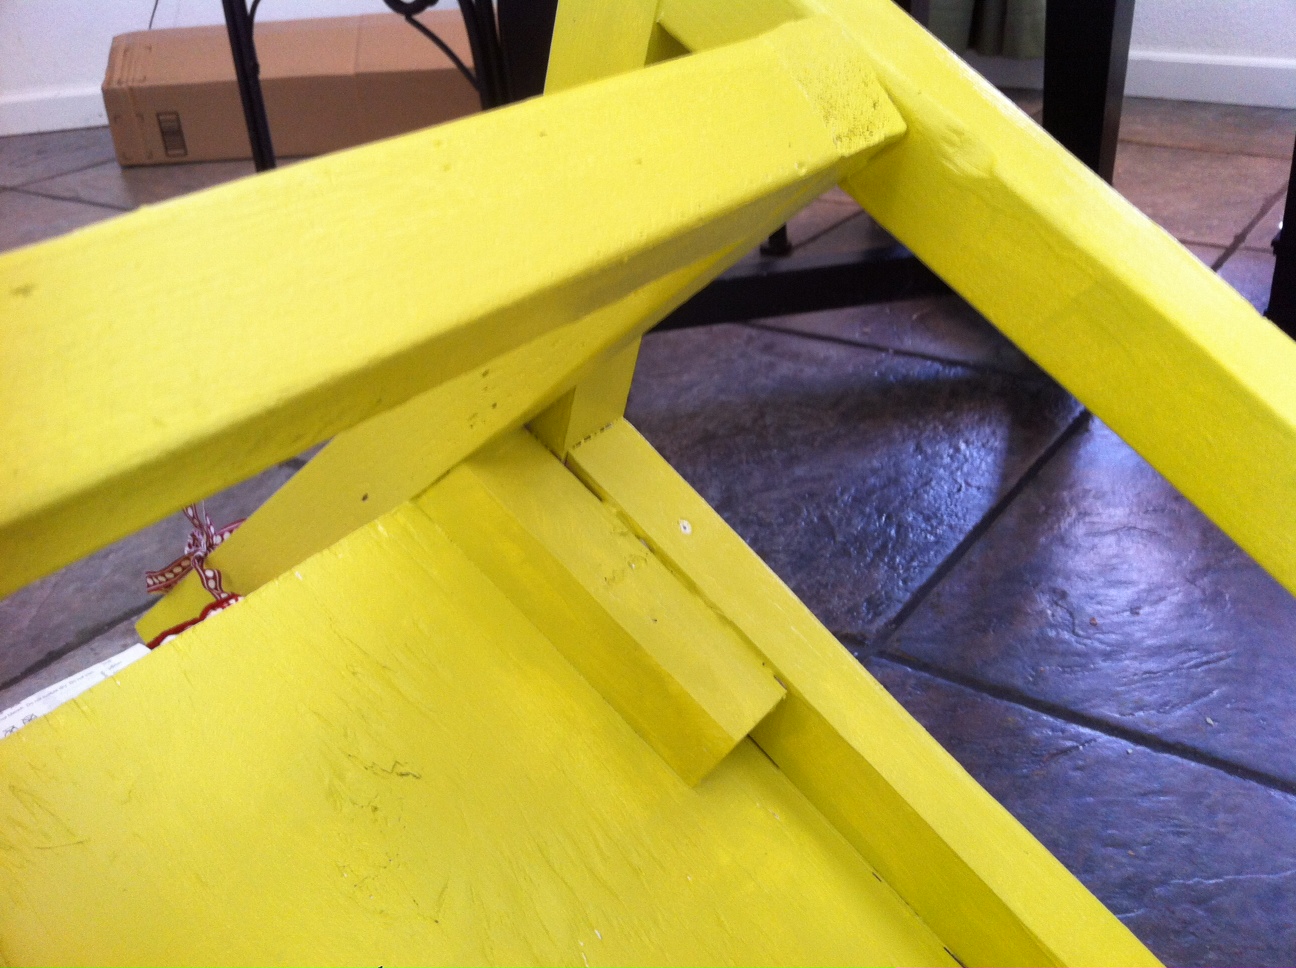
I made the addition of the front support as Judi likes to rest her feet on it. And, as you can see in the second photo, I added a small brace, cut at 15 deg., on the bottom side screwed to each backrest 2x2, and screwed to the underside of the seat (chair is upside down in photo). This gives additional rigidity and support for the backrest and also provides a nice guide to ensure the backrest has an exact 15 deg. angle on every chair. This was at no additional cost as I used scrap 2x2 pieces for it. And best of all this addition stays hidden and in no way changes the original aesthetic of the chair.
The chairs are extremely sturdy, comfortable and look great in our dining room! The only change I will make on the next set is using higher quality plywood as I had to putty this plywood a bit more than I had hoped. Otherwise, what an easy and inexpensive upgrade to our space!


Comments
emmarosemc
Sun, 10/16/2011 - 07:45
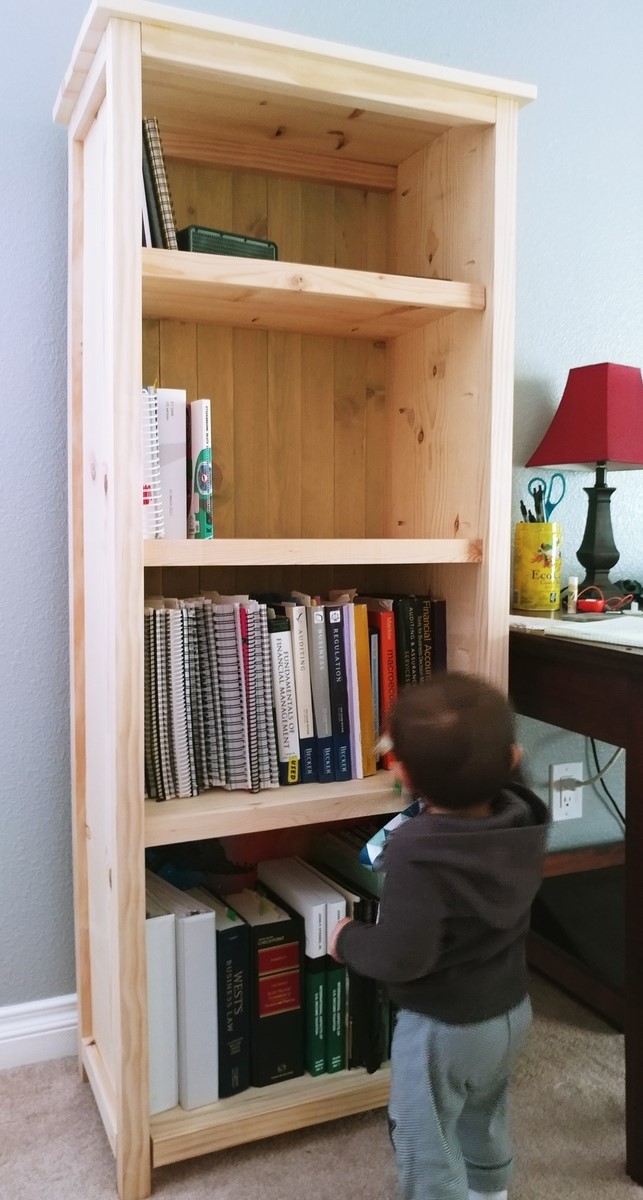
What size lumber did you use?
What size lumber did you use?
Kathryn1
Wed, 10/19/2011 - 16:19
Type of timber
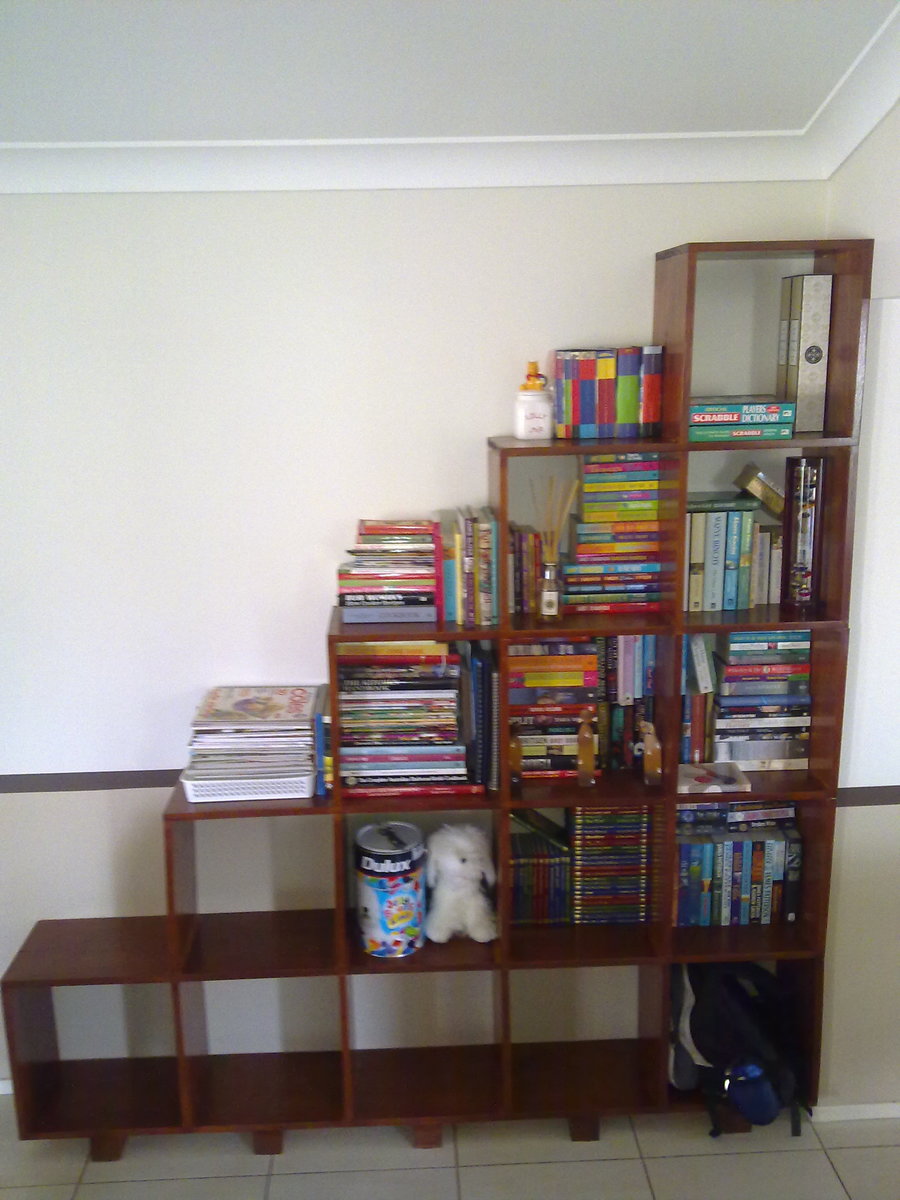
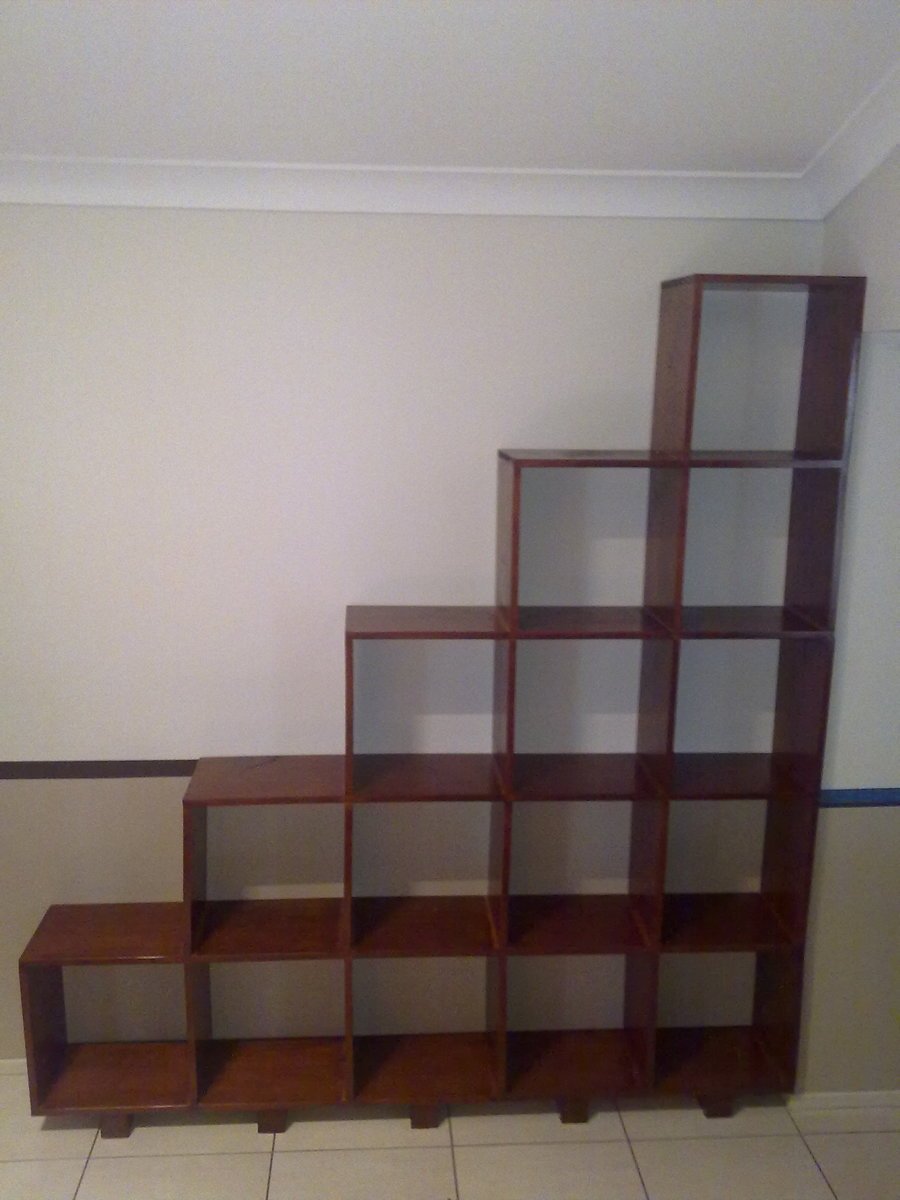
I don't really know how to describe the wood because I'm truly a novice, but here goes:
It's 29cm deep and approximately 2cm thick.
The bottom shelf is 2m long and each cube is 40cm x 40cm. So to build this I got 2x 200cm sheets, 1x 160cm, 1x 120cm, 1x 80cm and 21x 40cm.
I measured and marked then glued and screwed the verticals to the shelves, then used dowel and glue to attach each row to the row below.
I decided to put feet on the bottom so I could lift it above the skirting boards on the floor and have it sit more flush against the wall.
I hope this explains it OK.
claydowling
Sun, 10/16/2011 - 11:58
Lumber size
looks like 1x12, but you could do it with 1x10 just as well.
That's a slick design, too.
Kathryn1
Wed, 10/19/2011 - 16:27
Slick design
Thank you for your comment. I knew I didn't want a standard everyday bookshelf design and when I saw the "25 Cubbies" design my little head started ticking over and this is what I came up with.
I've seen a few similar things around, but nothing fit exactly what I wanted and there was certainly nothing of this size for a reasonable price.
You can imagine my joy when I found this website and the plans that I could modify to build exactly what I wanted.
I'm really very happy with how it worked out!
hammertime
Tue, 10/18/2011 - 08:14
Congrats!
Nicely done. Congrats on your first build!
Kathryn1
Wed, 10/19/2011 - 16:36
Re: Congrats
Thank you for taking the time to post your comment.
I'm really happy with the end result.
I never thought I'd be able to put together something like this. I always knew I could hammer a nail or put in a screw, but to build something that's actually functional and looks kinda good too, I never thought I'd be able to pull it off.
Needless to say, my confidence is now soaring and I'm looking forward to my next few days off work so I can do some more projects for around the house.
My father has asked me where I get my building skills, to which I reply with a grin that I don't know but I always thought I looked a little like the milk man :)