Community Brag Posts
Workshop storage success!
I adapted the garden tool storage project to fit my small space. I used some reclaimed wood as well as 2 x 4s since lumber is so expensive right now. I placed the racks up high to open space close to the ground in our little 12' x 16' workshop.
Built from Plan(s)
Estimated Cost
$16
Estimated Time Investment
An Hour or Two (0-2 Hours)
Finish Used
planning to paint
Recommended Skill Level
Starter Project
Comments
Upcycle Lead Glass Window
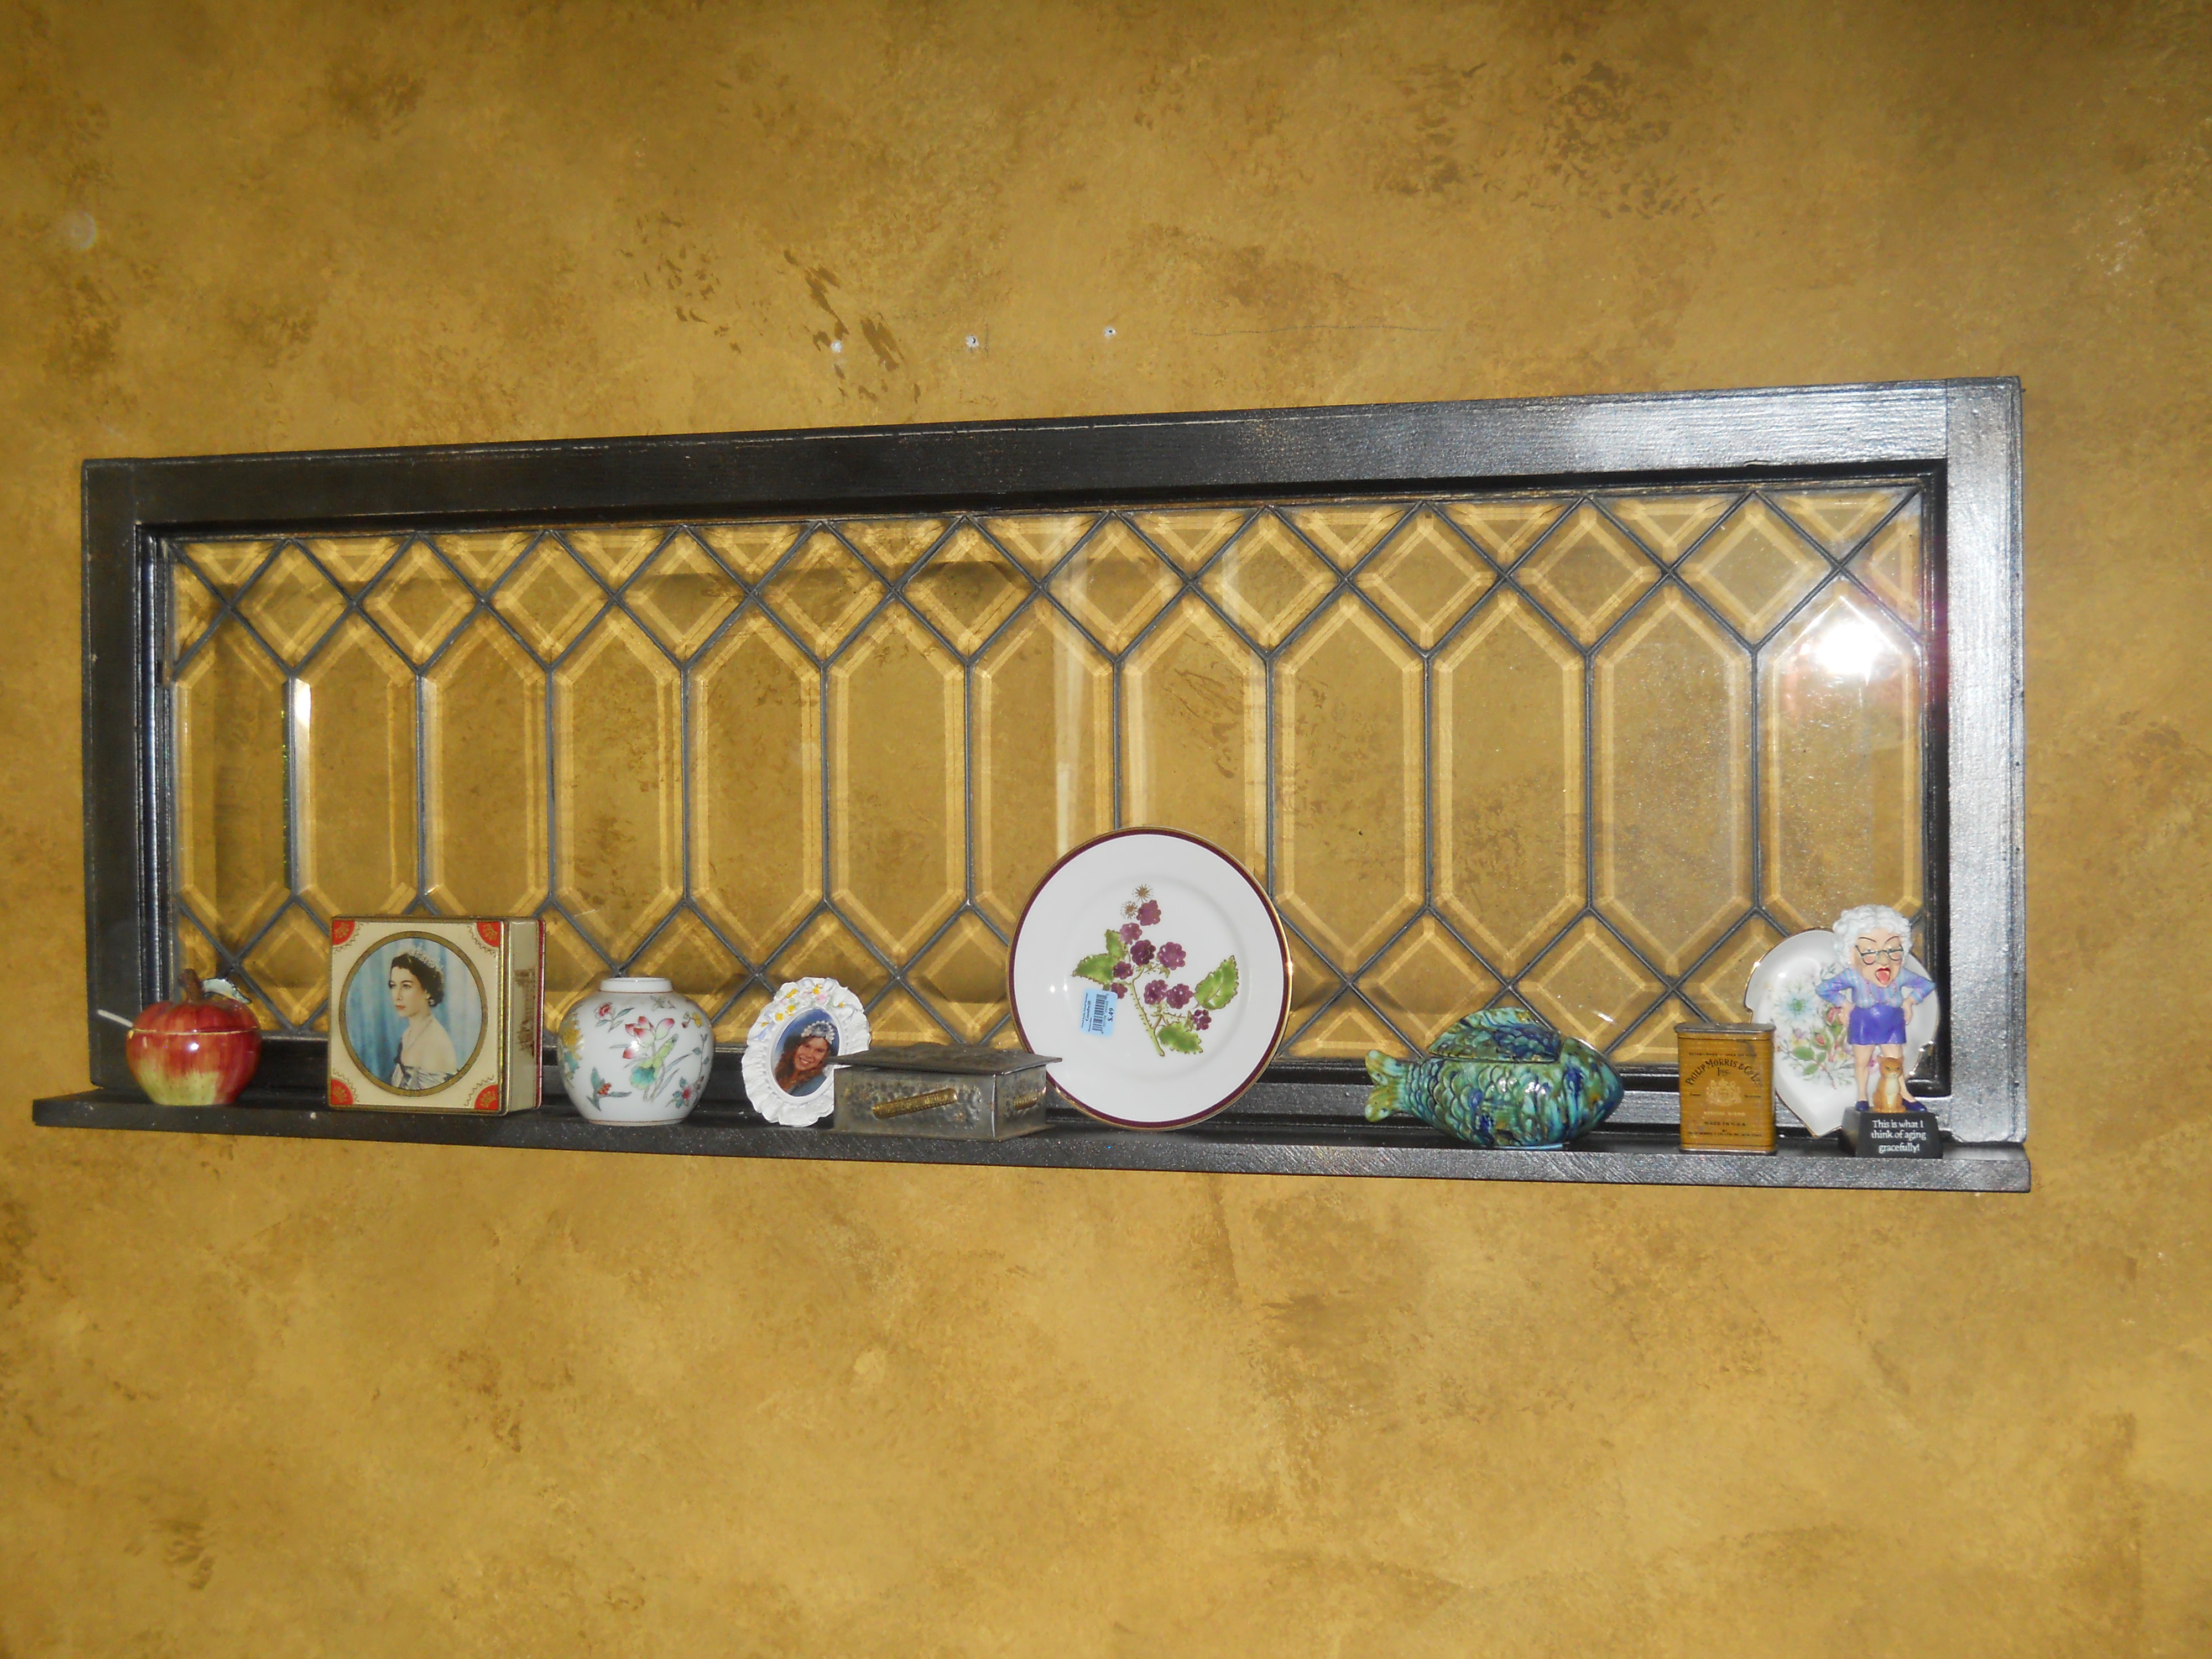
This was a recycle from a window replacement project on my 108 year old home. I removed the leaded glas window from the top of a 4.5 by 4.5 street facing window with a reciprocationg saw, attached a 1x4 pine board with trim screws on the ends and trim nails on the mid-portions. Painted it with satin black with a sweep of gold and pewter for a little dramatic effect, purchased a heavy weight mirror hanging plate and attached to the wall and window back. I'm thinking of backing it with a mirror to improve looks,


Estimated Cost
$15.00 $3.00 for paint, $3.00 for pine board, $9.00 for hanger
Estimated Time Investment
An Hour or Two (0-2 Hours)
Finish Used
1 can of black satin with gold and pewter overlay paints
Recommended Skill Level
Beginner
Comments

Sat, 03/30/2013 - 09:39
Beautiful!
This is just lovely! What a wonderful use for a piece of history, it's now a one of a kind piece of art, and an instant heirloom!
Tryde Coffee Table
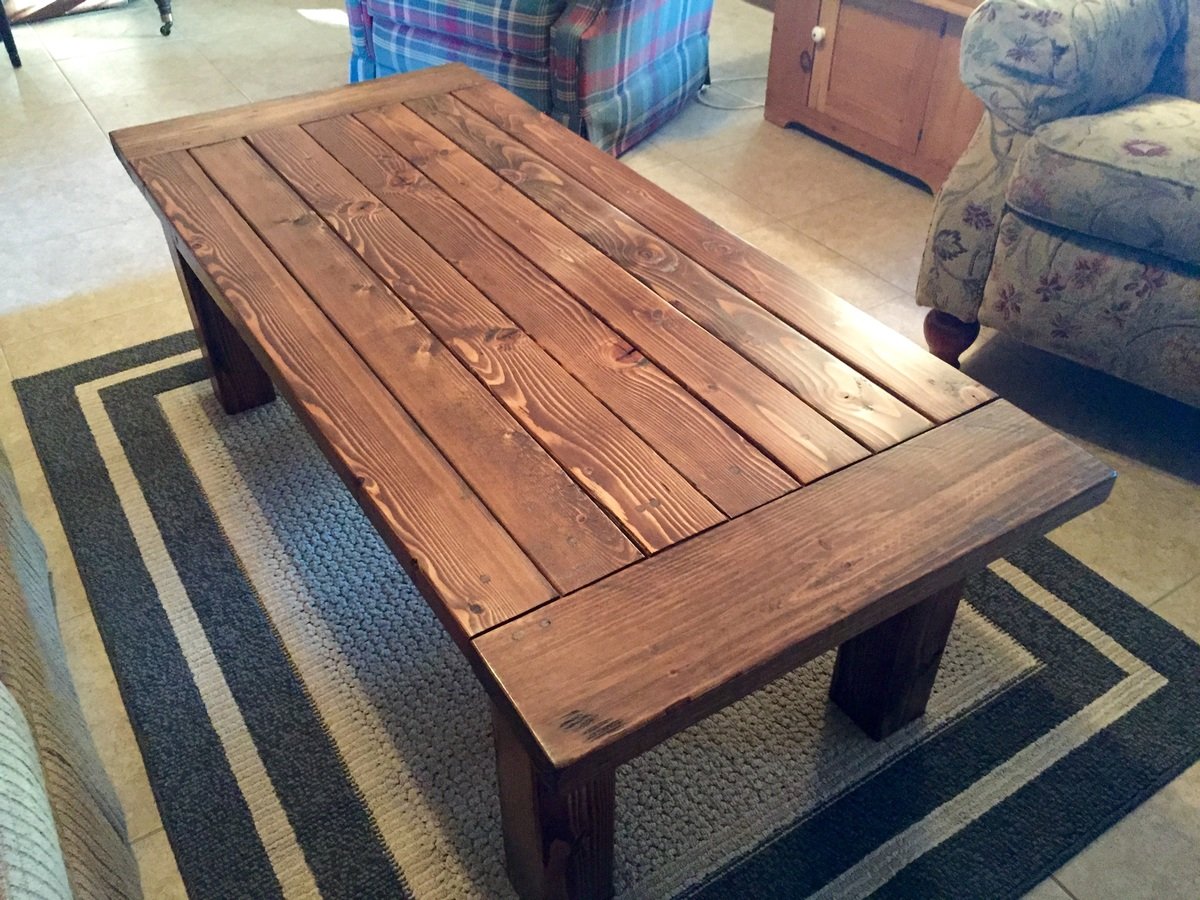
Ana's instructions were very easy to follow. The main problem I had was the 4X4 lumber was S4S, therefore the edges were rounded, which made for awkward joints with the aprons. Other than that, I used wood conditioner before staining and sealing.
Built from Plan(s)
Estimated Cost
<$75
Estimated Time Investment
Weekend Project (10-20 Hours)
Finish Used
Minwax special walnut stain and poly sealant
Recommended Skill Level
Beginner
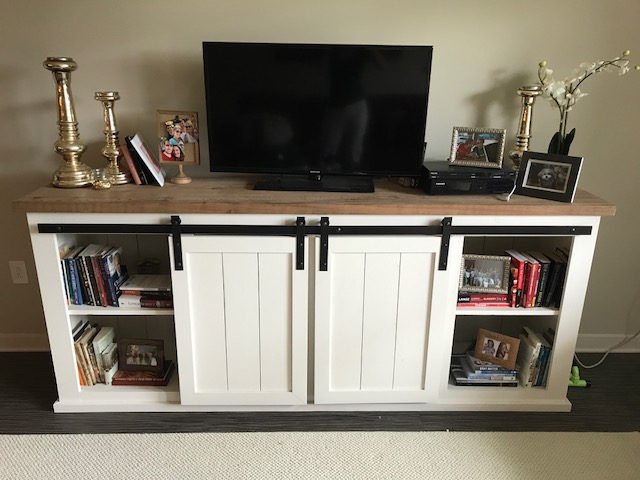
Sliding Barn Door Console Table
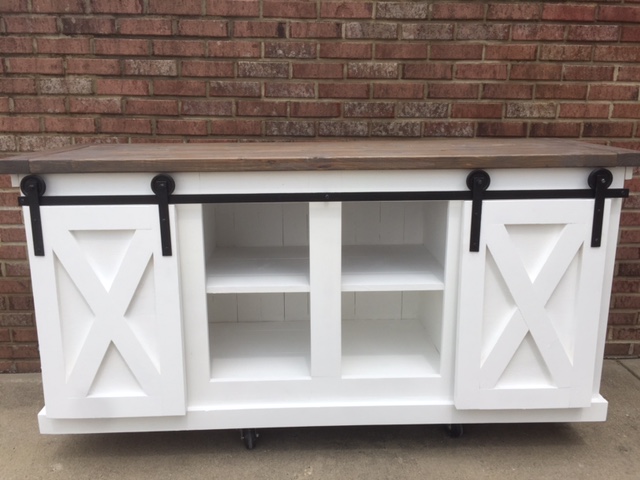
I pretty much followed the plans for this build, with the exception of adding breadboard ends to the top as well as builfing the hardware. I also changed the dimensions a bit and compartmentalized the shelves. The attached photo is of the table on a dolly, ready to load for a customer. I really enjoyed this build and as always, this site is the best for new to experienced woodworkers to use as a resource.
Estimated Cost
$120
Estimated Time Investment
Day Project (6-9 Hours)
Finish Used
Dark Walnut, Classic Grey, and Jacobean from Minwax. I added these colors together without mixing, to give a slight variation of color. I finished the top with two coats of Polycrylic Matte Protective Finish.
Recommended Skill Level
Beginner
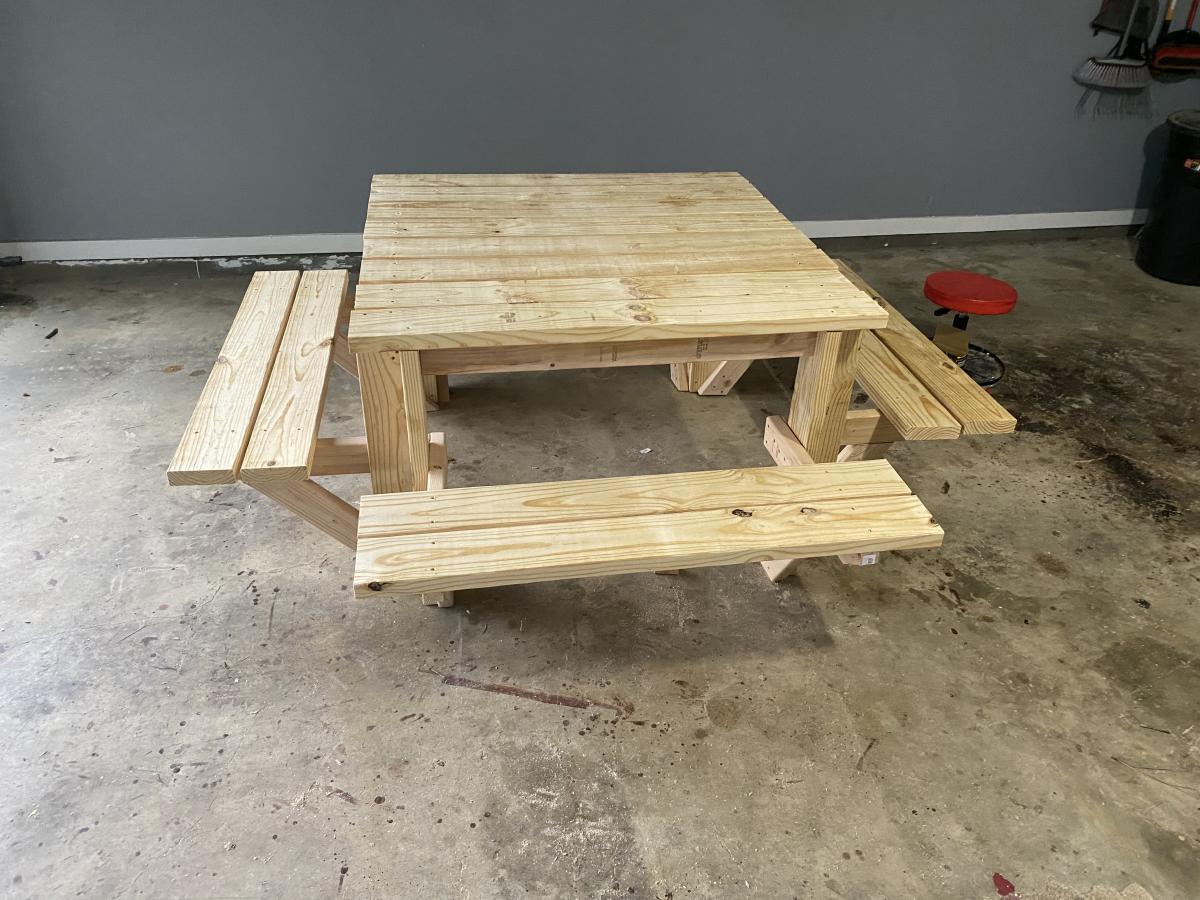
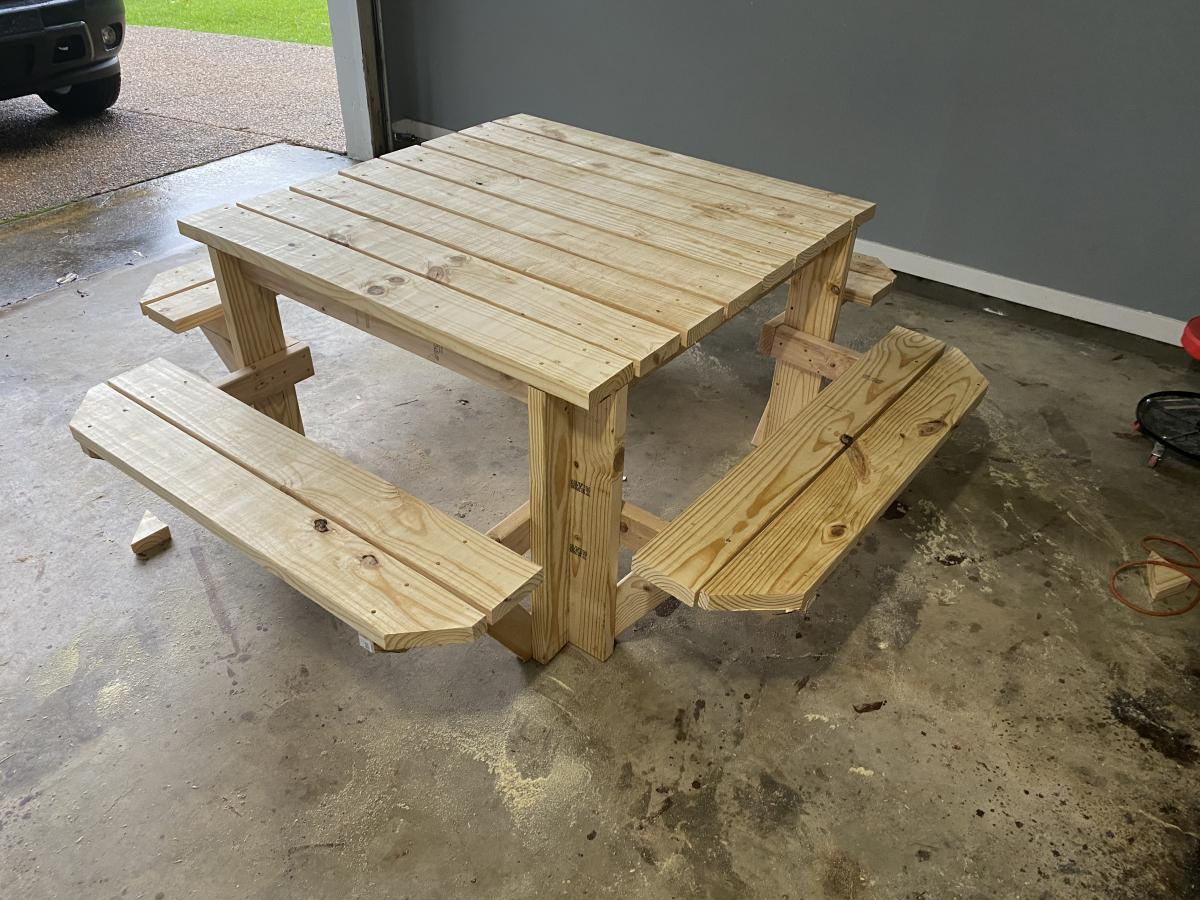
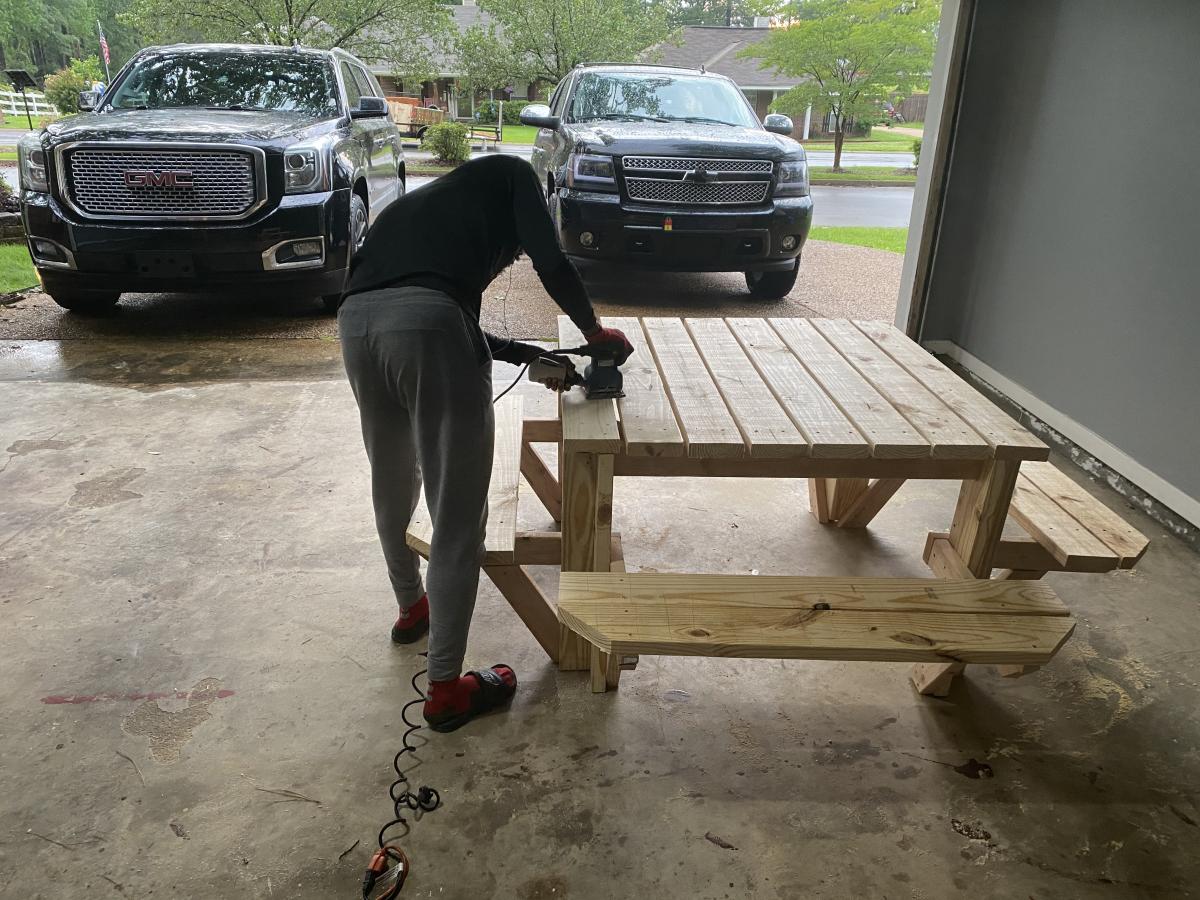
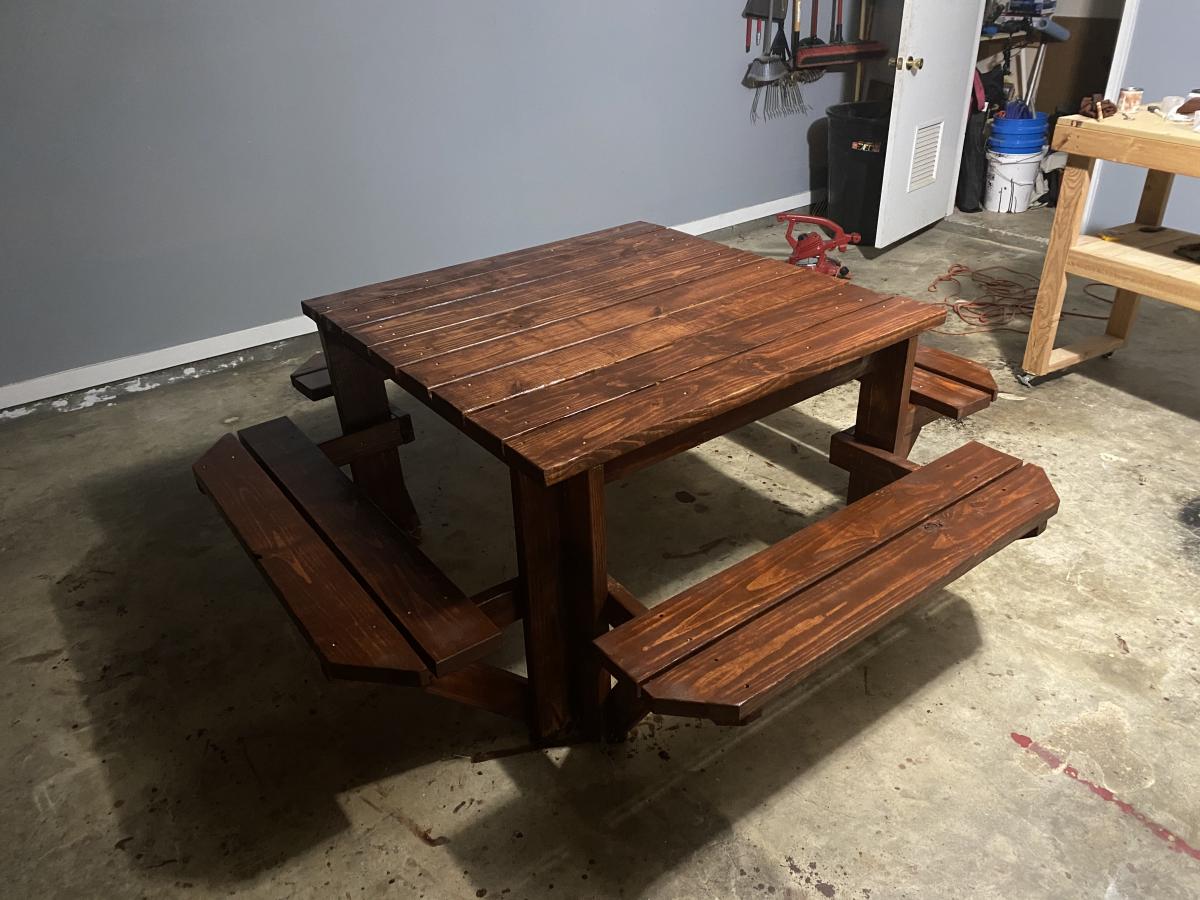
Square Picnic Table
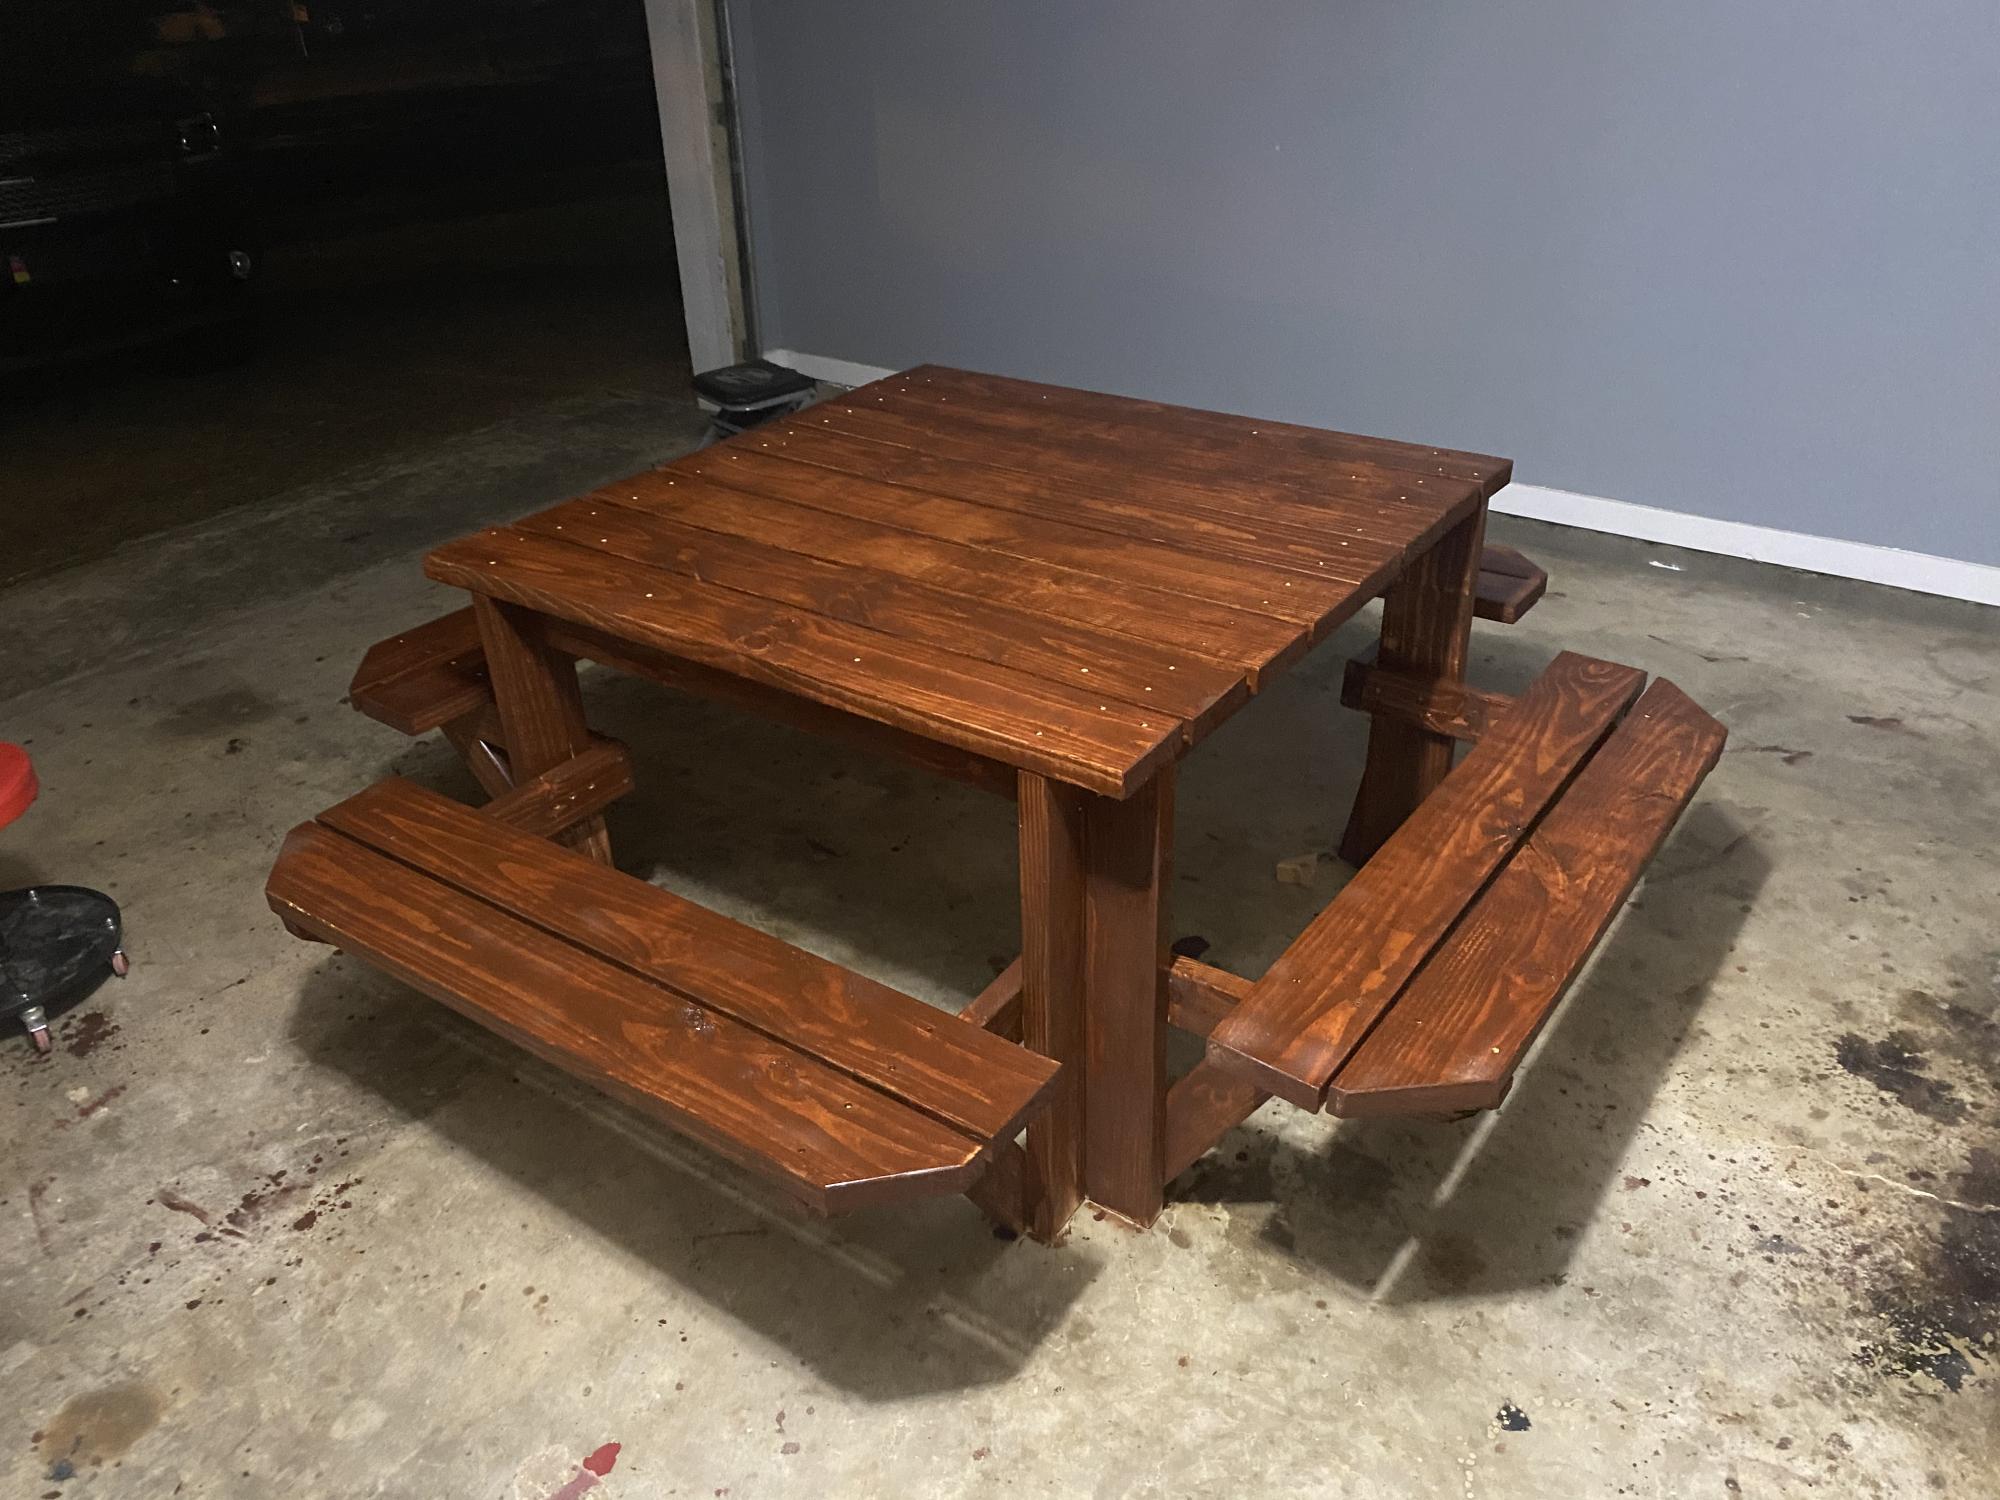
I built this picnic table for my mom’s Mother’s Day/Birthday gift. With the price of lumber being as high as it is I figured this table would be her gift this year. Fairly simple design. Ana was right about pre-sanding and staining. Would’ve made it a lot easier. I applied to coats of external poly for durability. Keep plans coming Ana!
Built from Plan(s)
Estimated Cost
$200
Estimated Time Investment
Weekend Project (10-20 Hours)
Finish Used
Cognac stain
Recommended Skill Level
Intermediate
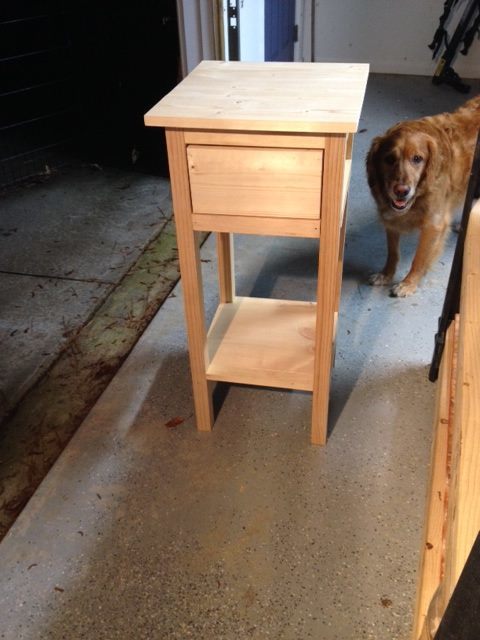
Mini Farmhouse bedside Table
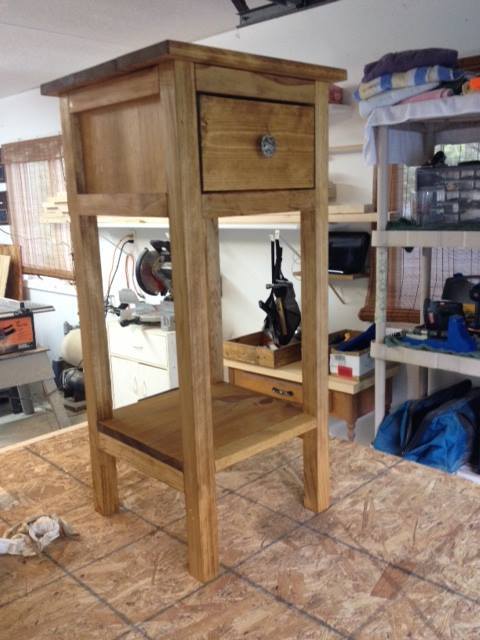
I made this taller to fit my bed.
Built from Plan(s)
Estimated Time Investment
Weekend Project (10-20 Hours)
Finish Used
Golden Oak and poly.
Recommended Skill Level
Intermediate
Rolling Bar Cart

I wanted a BBQ cart for my deck when I am cooking food. Had a lot of left over redwood 2 x 3 and 4 x 4 from various projects. Butcher block was from Ikea.
(My blog is about helping readers find financial independence while owning real estate. Owning homes has helped me become great at DIY projects like this. I found this exact cart at Pottery Barn selling for $400 but I made it for less than $100.)


Estimated Cost
100
Estimated Time Investment
Afternoon Project (3-6 Hours)
Finish Used
Dark stain with clear coat polyurethane
Recommended Skill Level
Intermediate
Comments
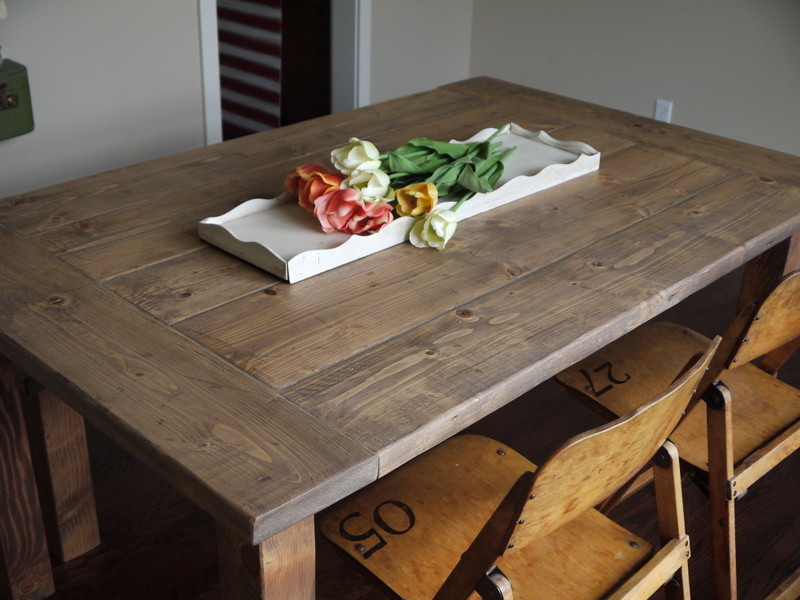
Red Hen Home's Farmhouse Table and Bench
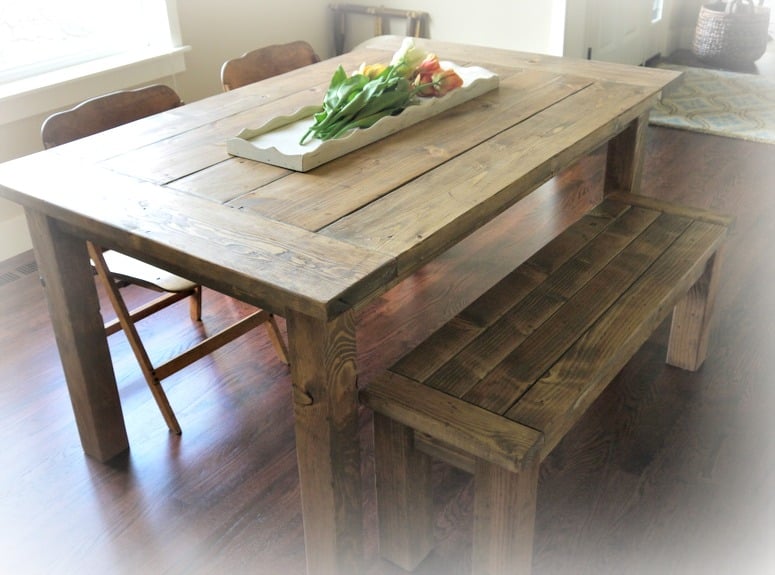
This is the third farmhouse table I built, although it is trifle smaller to fit in a smaller space. I think this one is just about 62” long. I also built a 48” bench to go along with this table, and I think they look so cute together!
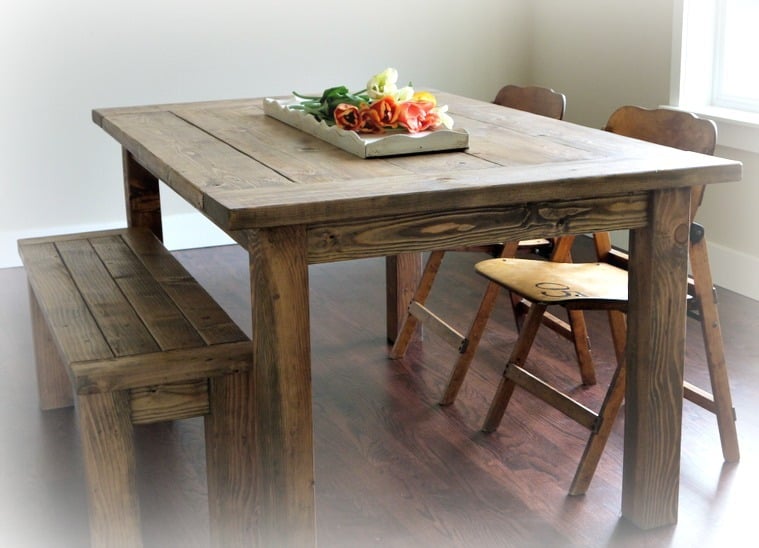
Built from Plan(s)
Estimated Cost
100
Estimated Time Investment
Day Project (6-9 Hours)
Finish Used
Custom mix of Minwax Antique Walnut and Weathered Oak. Finished with hand-rubbed polyurethane, followed by paste wax.
Recommended Skill Level
Beginner
Comments
Tue, 04/16/2013 - 08:59
I love this!
I love your farmhouse tables! Did you make any changes to the plans when you took away the stretchers? I really want to make a table like this soon!
Sun, 12/06/2015 - 06:09
I'd like to know this too, as
I'd like to know this too, as I'm not keen on having the bottle boards.
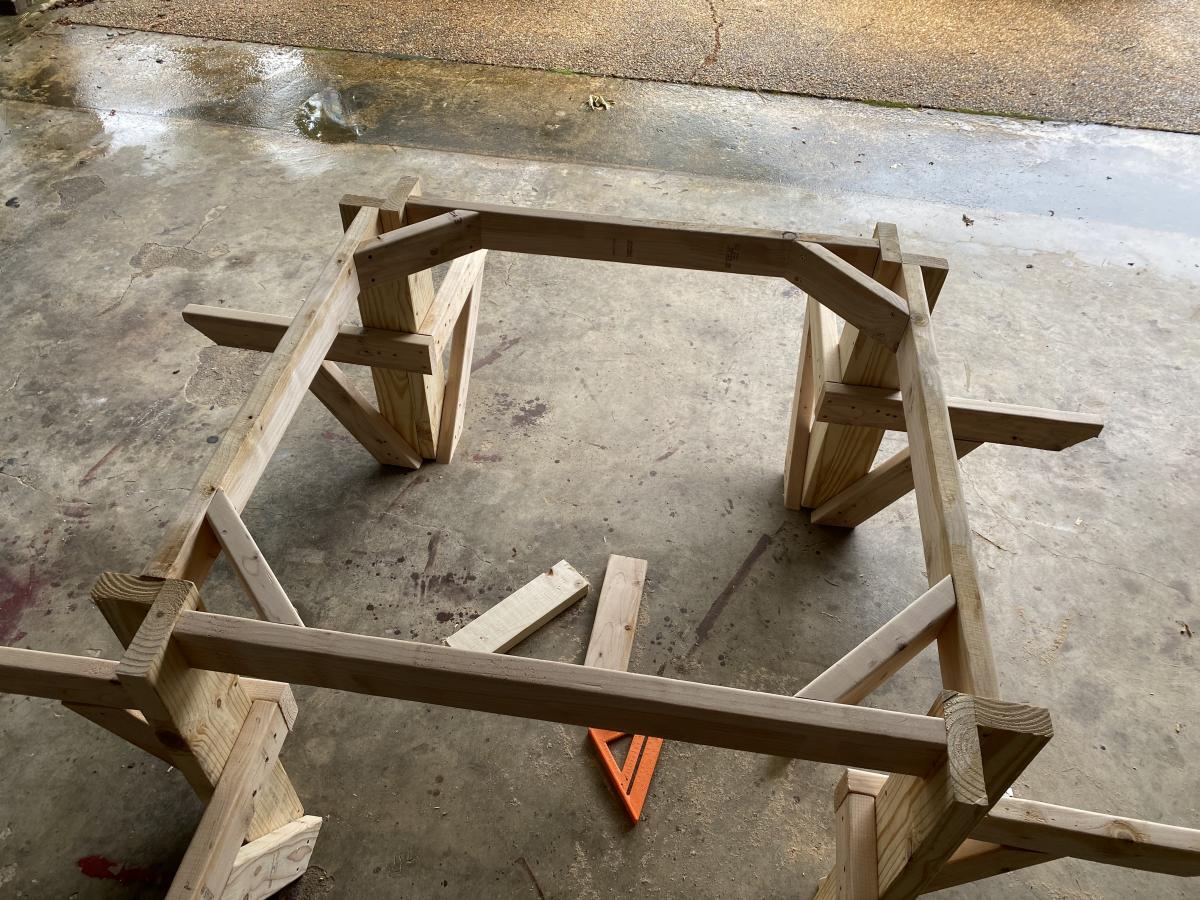
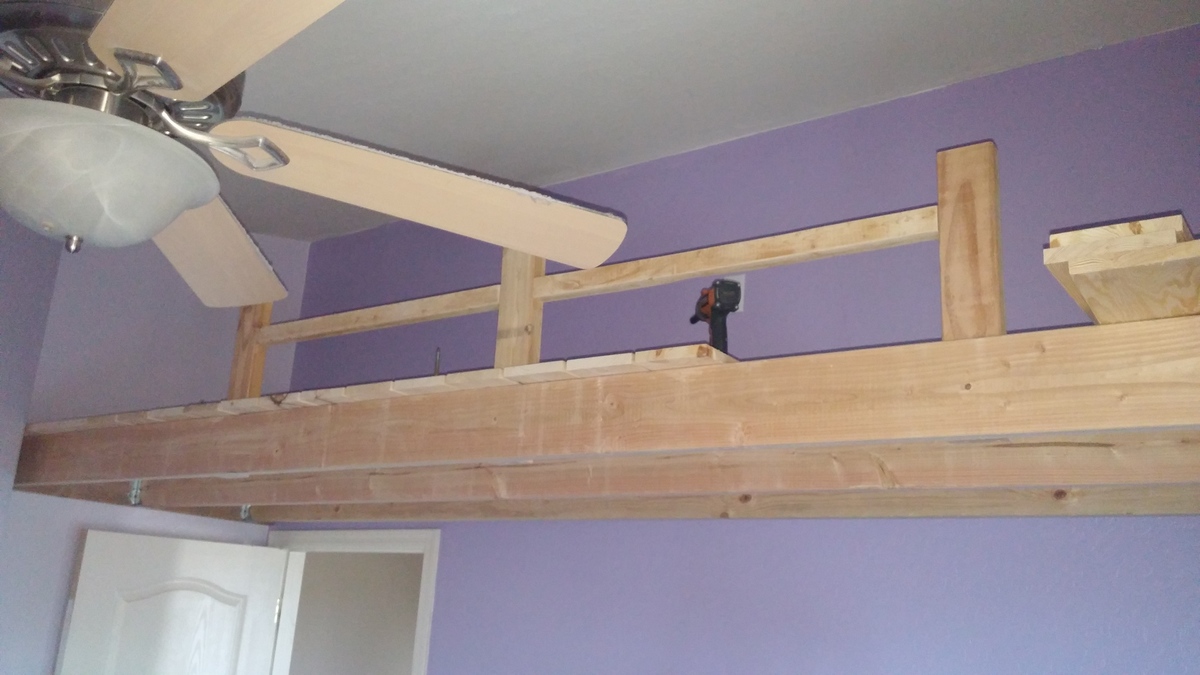
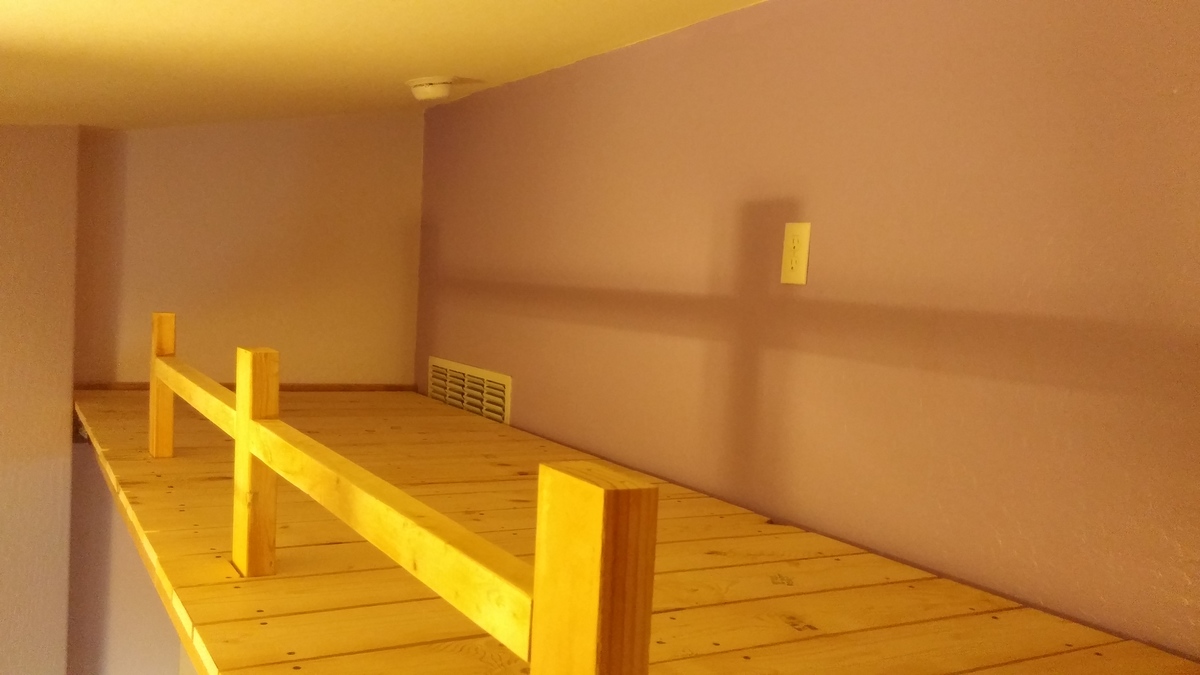
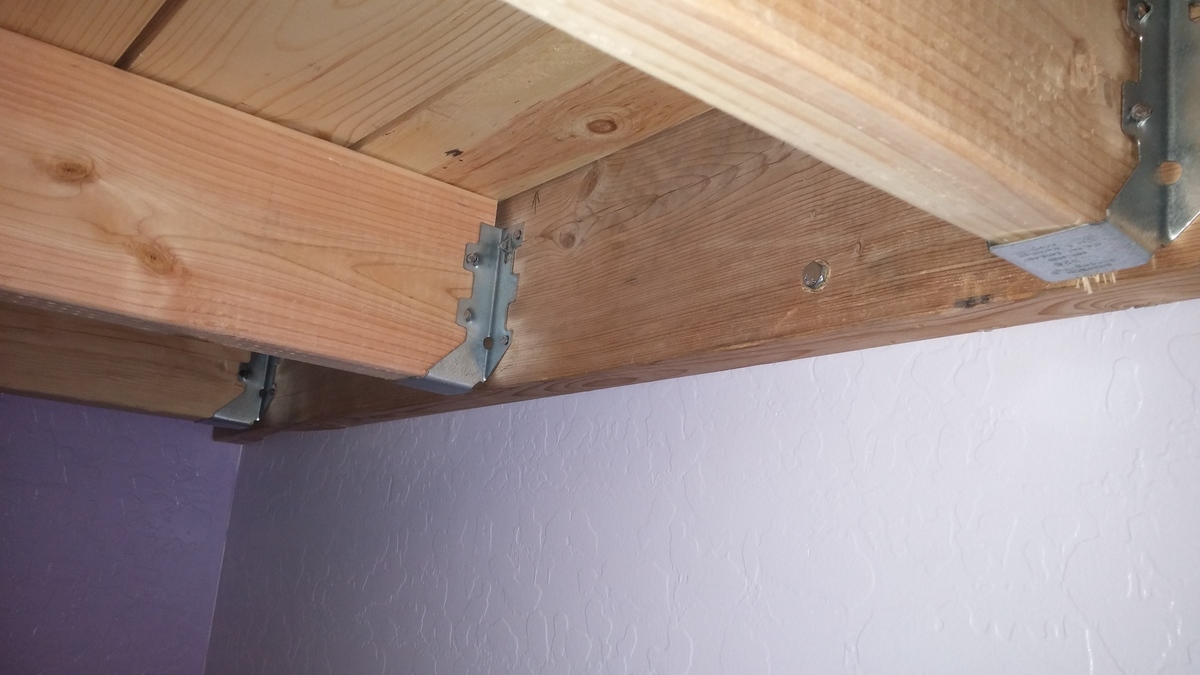
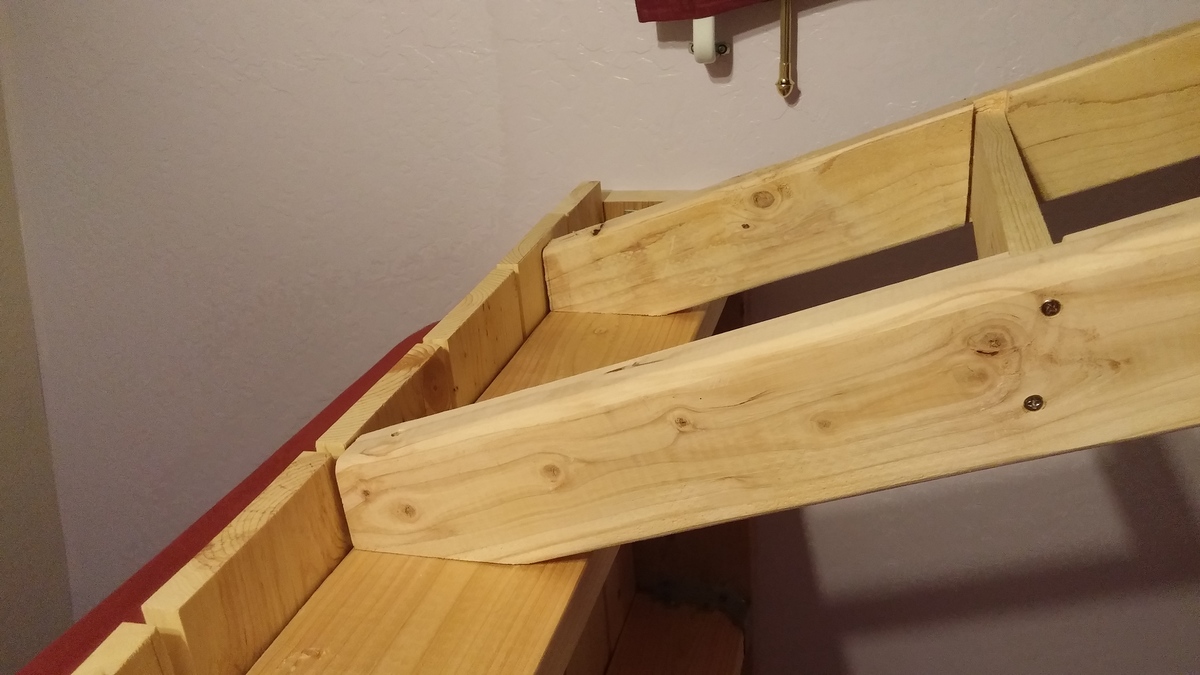
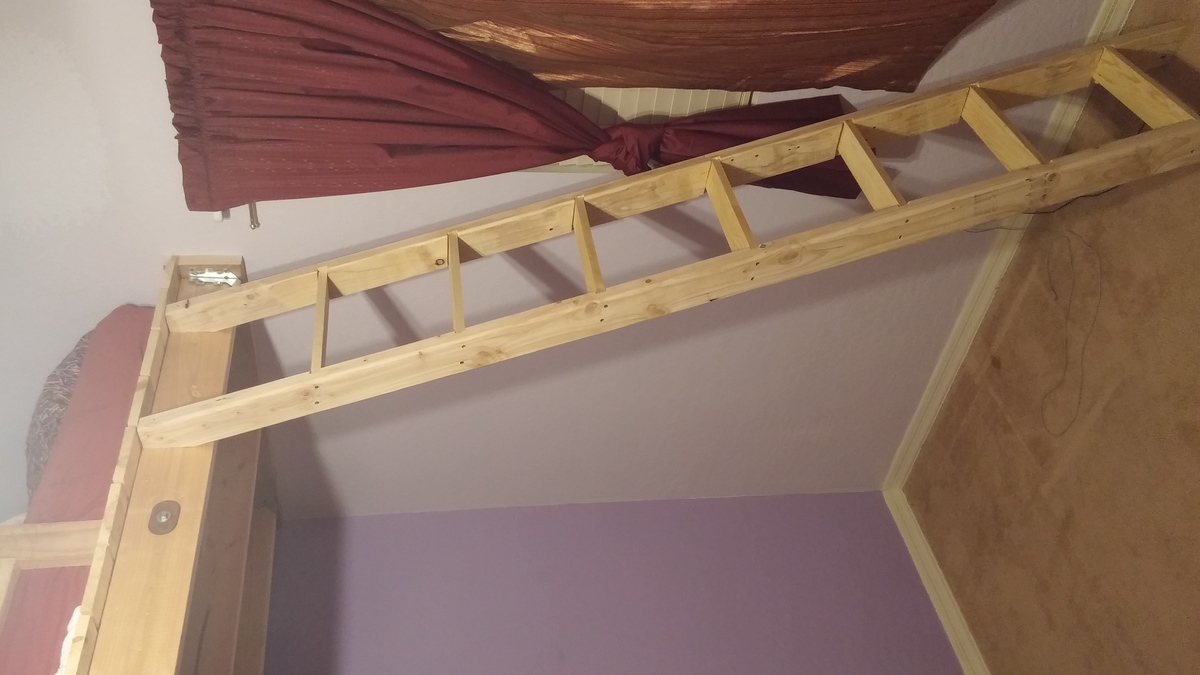
Loft Bed
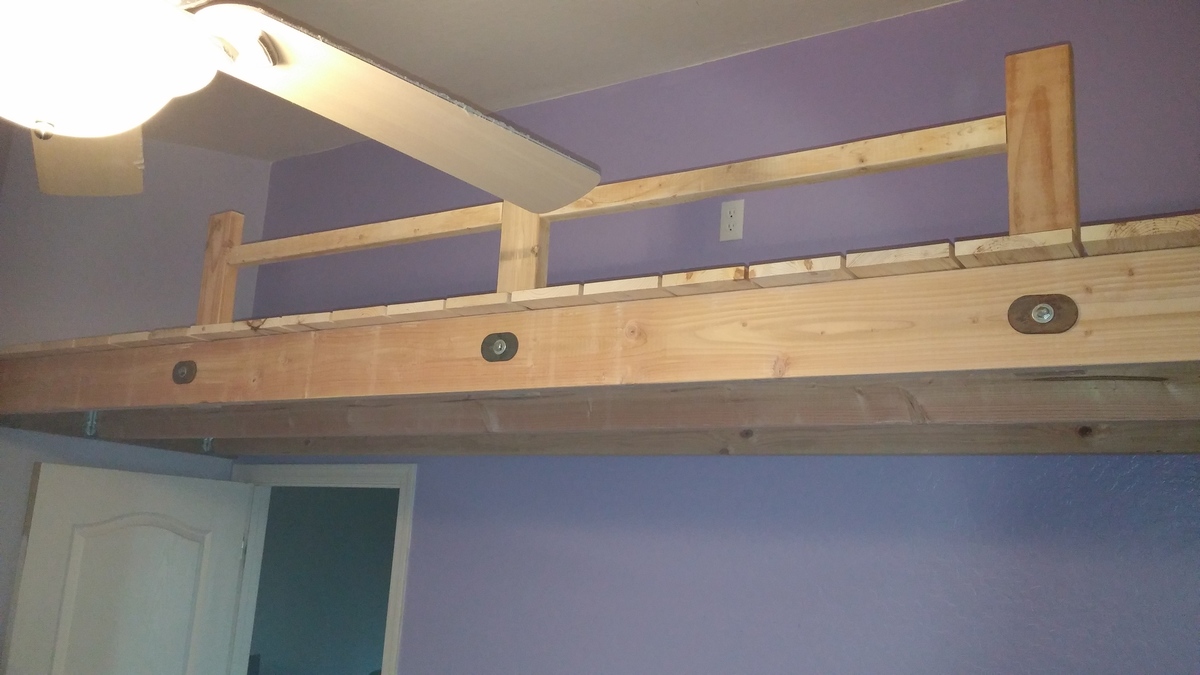
I used 2 x 6's because of the distance (just over 12') I still need to build the ladder but my daughter insisted on sleeping up there anyway as she has been waiting for a few days as I worked om=n building this. No paint or stain yet, not sure how she wants it finished> I will update the photos as I finish the project.
Built from Plan(s)
Estimated Cost
$100-$120
Estimated Time Investment
Day Project (6-9 Hours)
Recommended Skill Level
Beginner
Comments
Sun, 04/05/2015 - 12:31
Weight Limit
Hi there,
Do you know how much weight this bed/loft will hold?
Thanks!
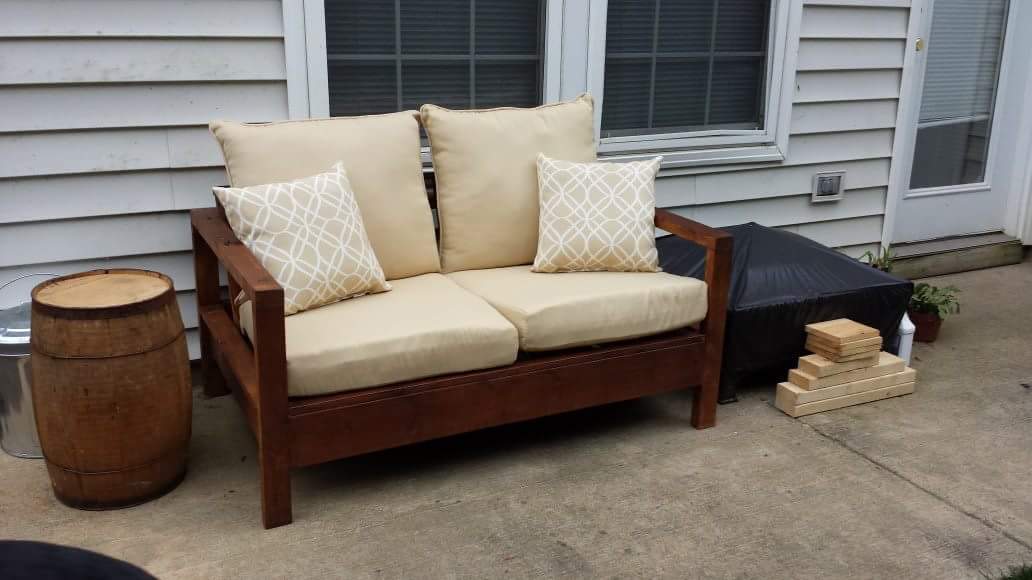
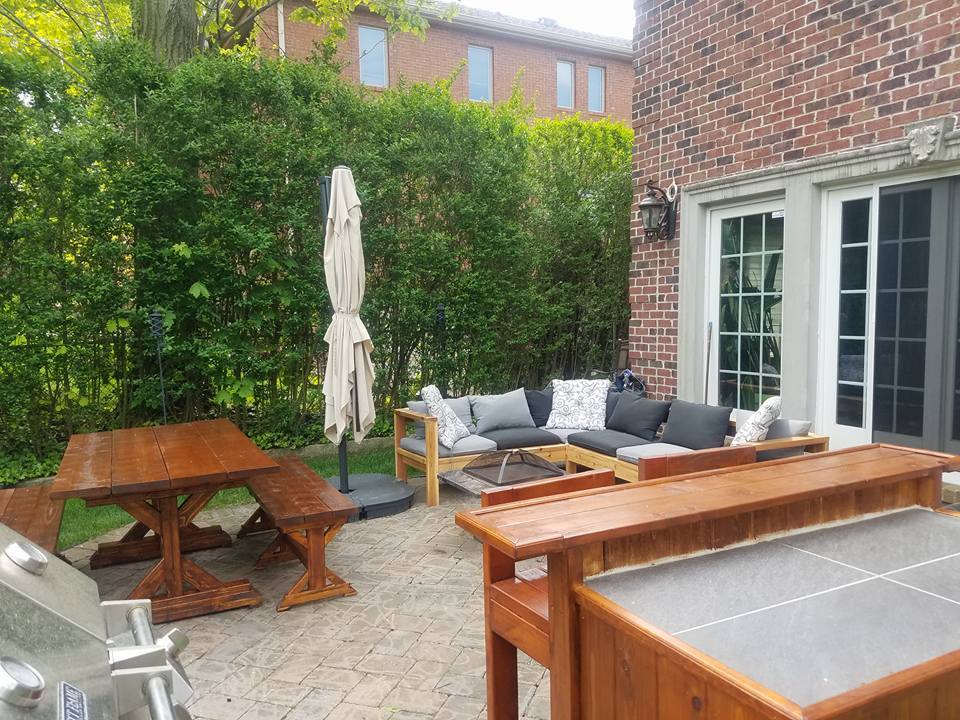
2x4 Sofa, X Fancy Farmhouse Table Bench, and Bar w Stools.
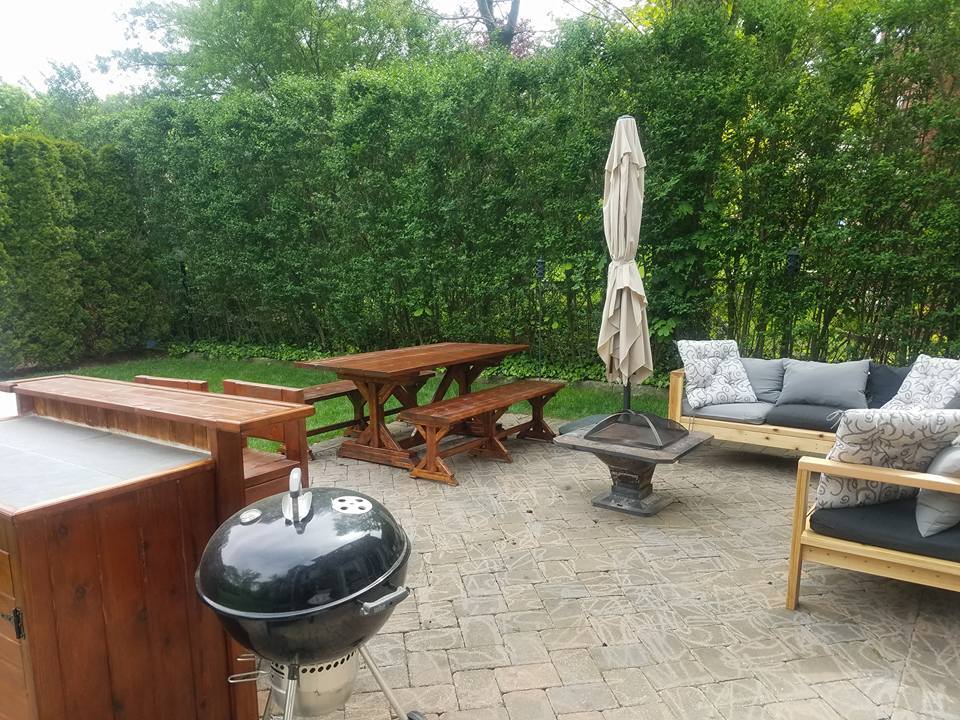
Started with building the 2x4 sectional sofa and the armless sectional. Liked the plans so much starting building the bar from my own design. Than completed the patio renovation with the fancy X farmhouse table and benches. Thank you Ana White for all the inspirations to redo my backyard patio.
Built from Plan(s)
Estimated Cost
Farmhouse Table $100
Farmhouse Bench $60 for both
2x4 Sofa and Armless Sectional $300 (used Cedar 2x4)
Bar and Stools $250
Farmhouse Bench $60 for both
2x4 Sofa and Armless Sectional $300 (used Cedar 2x4)
Bar and Stools $250
Estimated Time Investment
Week Long Project (20 Hours or More)
Finish Used
Cabot Mahogany Outdoor Sealer and Stain
Recommended Skill Level
Intermediate
Clara Table and Chair and a bench
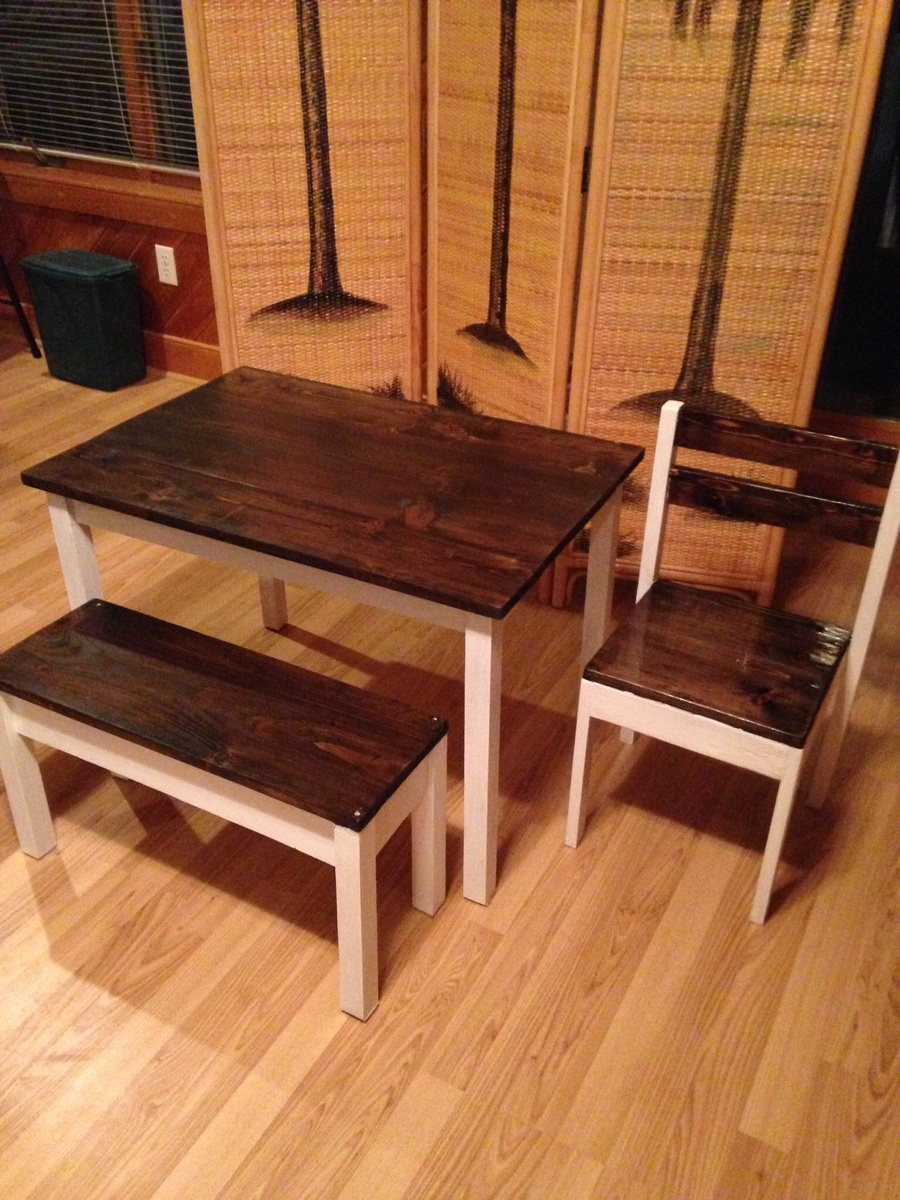
I used a 1 x 12 and 2 1 x 6 for the table top because thats what had on hand. I used Jacobean stain on the top and poly. I used white paint and glaze on the aprons and legs. 2 coats.
Built from Plan(s)
Estimated Time Investment
An Hour or Two (0-2 Hours)
Finish Used
Jacobean stain on top. white paint and glaze on the aprons and legs.
Recommended Skill Level
Starter Project
DIY Double chair bench with table
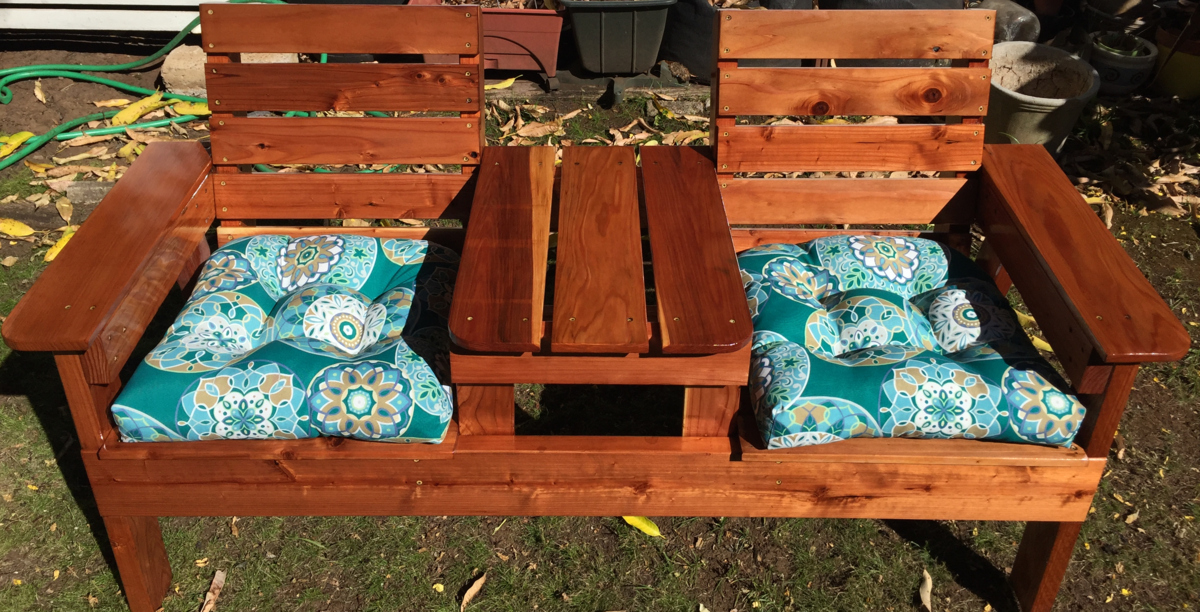
Built from DIY Pete's plans. I'm in Hawaii so lumber here is a lot, and I do mean A LOT more expensive here. I wanted to use cedar but that would have cost me close to $450 just for the lumber here in Hawaii. Spent an entire day running around between local lumber yard, Home Depot, Lowe's, and a recylce lumber yard called Re-Use Hawaii trying to figure out how to cut costs down. Ended up going with redwood as it was a nice wood that was more affordable. I ended up putting 5 coats of Minwax Helmsman spar urethane clear gloss, sanding with 150 then 220 grit sandpaper to get a nice thick and smooth finish. This is my very first build ever and it took me the weekend (about 20 hours) to build. DIY Pete's instructions are pretty good but I have to watch his video a few times which was extremely helpful. The video made this an easy project as it was like having a pro right there with you. Love your website. Can't wait to start on the next project. David M.
Estimated Cost
$300-$350
Estimated Time Investment
Weekend Project (10-20 Hours)
Finish Used
Minwax clear (green can, same one Pete recommended).
Recommended Skill Level
Beginner
Modern Adirondacks
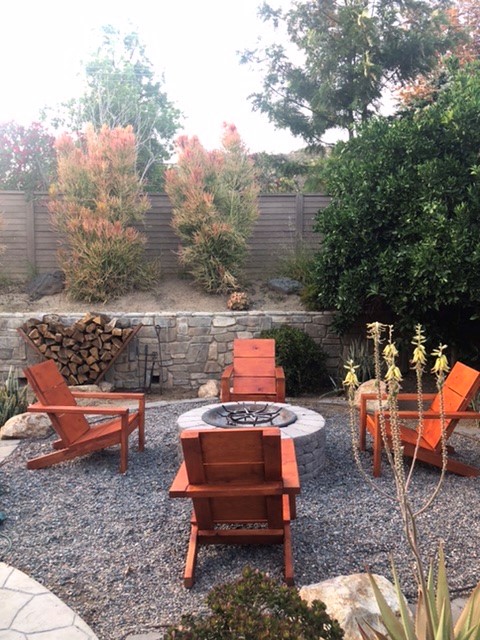
First of all I want to thank Ana for these awesome plans. It wasn't quite as easy as she made it look, but I learned as I went, and the chairs look awesome! Lumber now days is probably 2-3 times more expensive, but good quality chairs like these would probably be around $300 plus if buying!
Estimated Cost
$70 for lumber...and another $10 - $20 for hardware
Estimated Time Investment
Weekend Project (10-20 Hours)
Finish Used
Valspar Cedar toned Stain from Lowe's
Recommended Skill Level
Intermediate
Comments
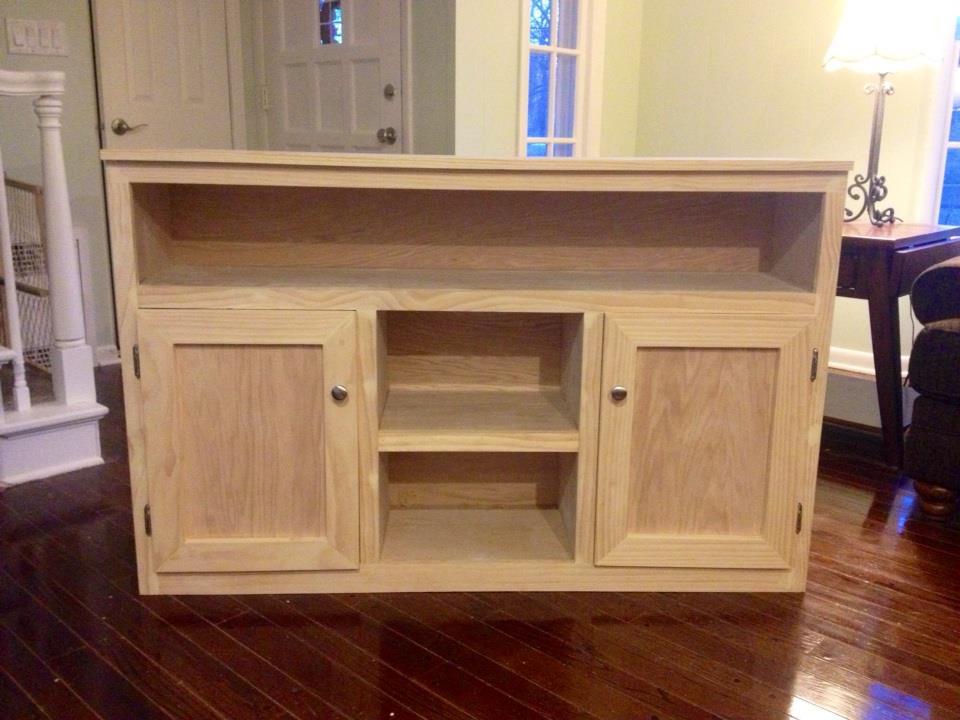
Kitchen Island
My first attempt at serious home project. My daughter needed a Kitchen Island and purchasing one was out of the question.
Not too tough.
Built from Plan(s)
Estimated Cost
220.00
Estimated Time Investment
Week Long Project (20 Hours or More)
Finish Used
MinWax Cherry stain
Recommended Skill Level
Intermediate
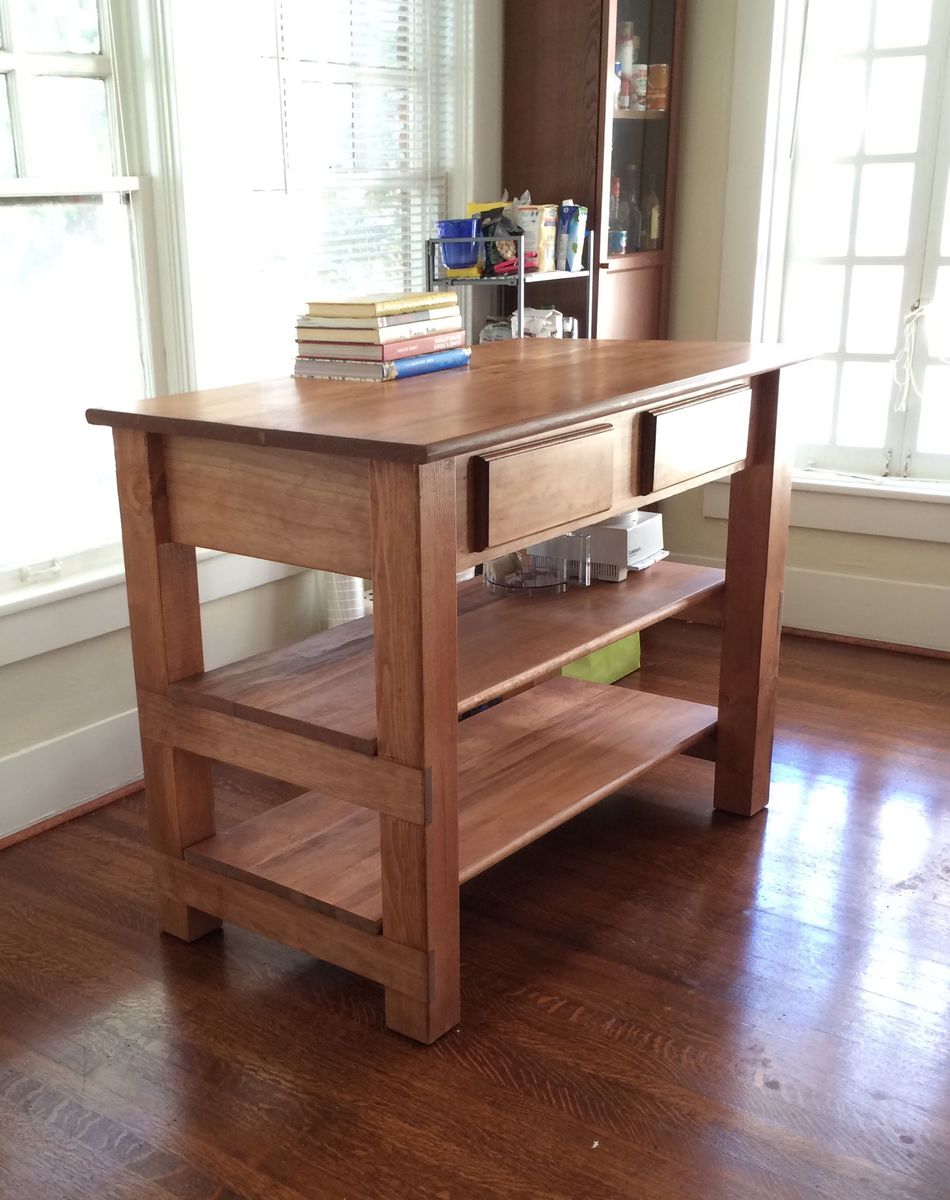
Console Table
I really enjoyed this project. Really happy with how it turned out! I ended up using a thin flexible panel board in a nickelboard pattern for the back to help make it lighter. Easier to transport.

Built from Plan(s)
Estimated Cost
50$
Estimated Time Investment
Weekend Project (10-20 Hours)
Finish Used
I had a left over cedar wood top that I left unfinished.
Spray painted the metal in oil rubbed bronze
White paint for the rest
Spray painted the metal in oil rubbed bronze
White paint for the rest
Recommended Skill Level
Beginner
Modern Geo Bed/Headboard (Queen)
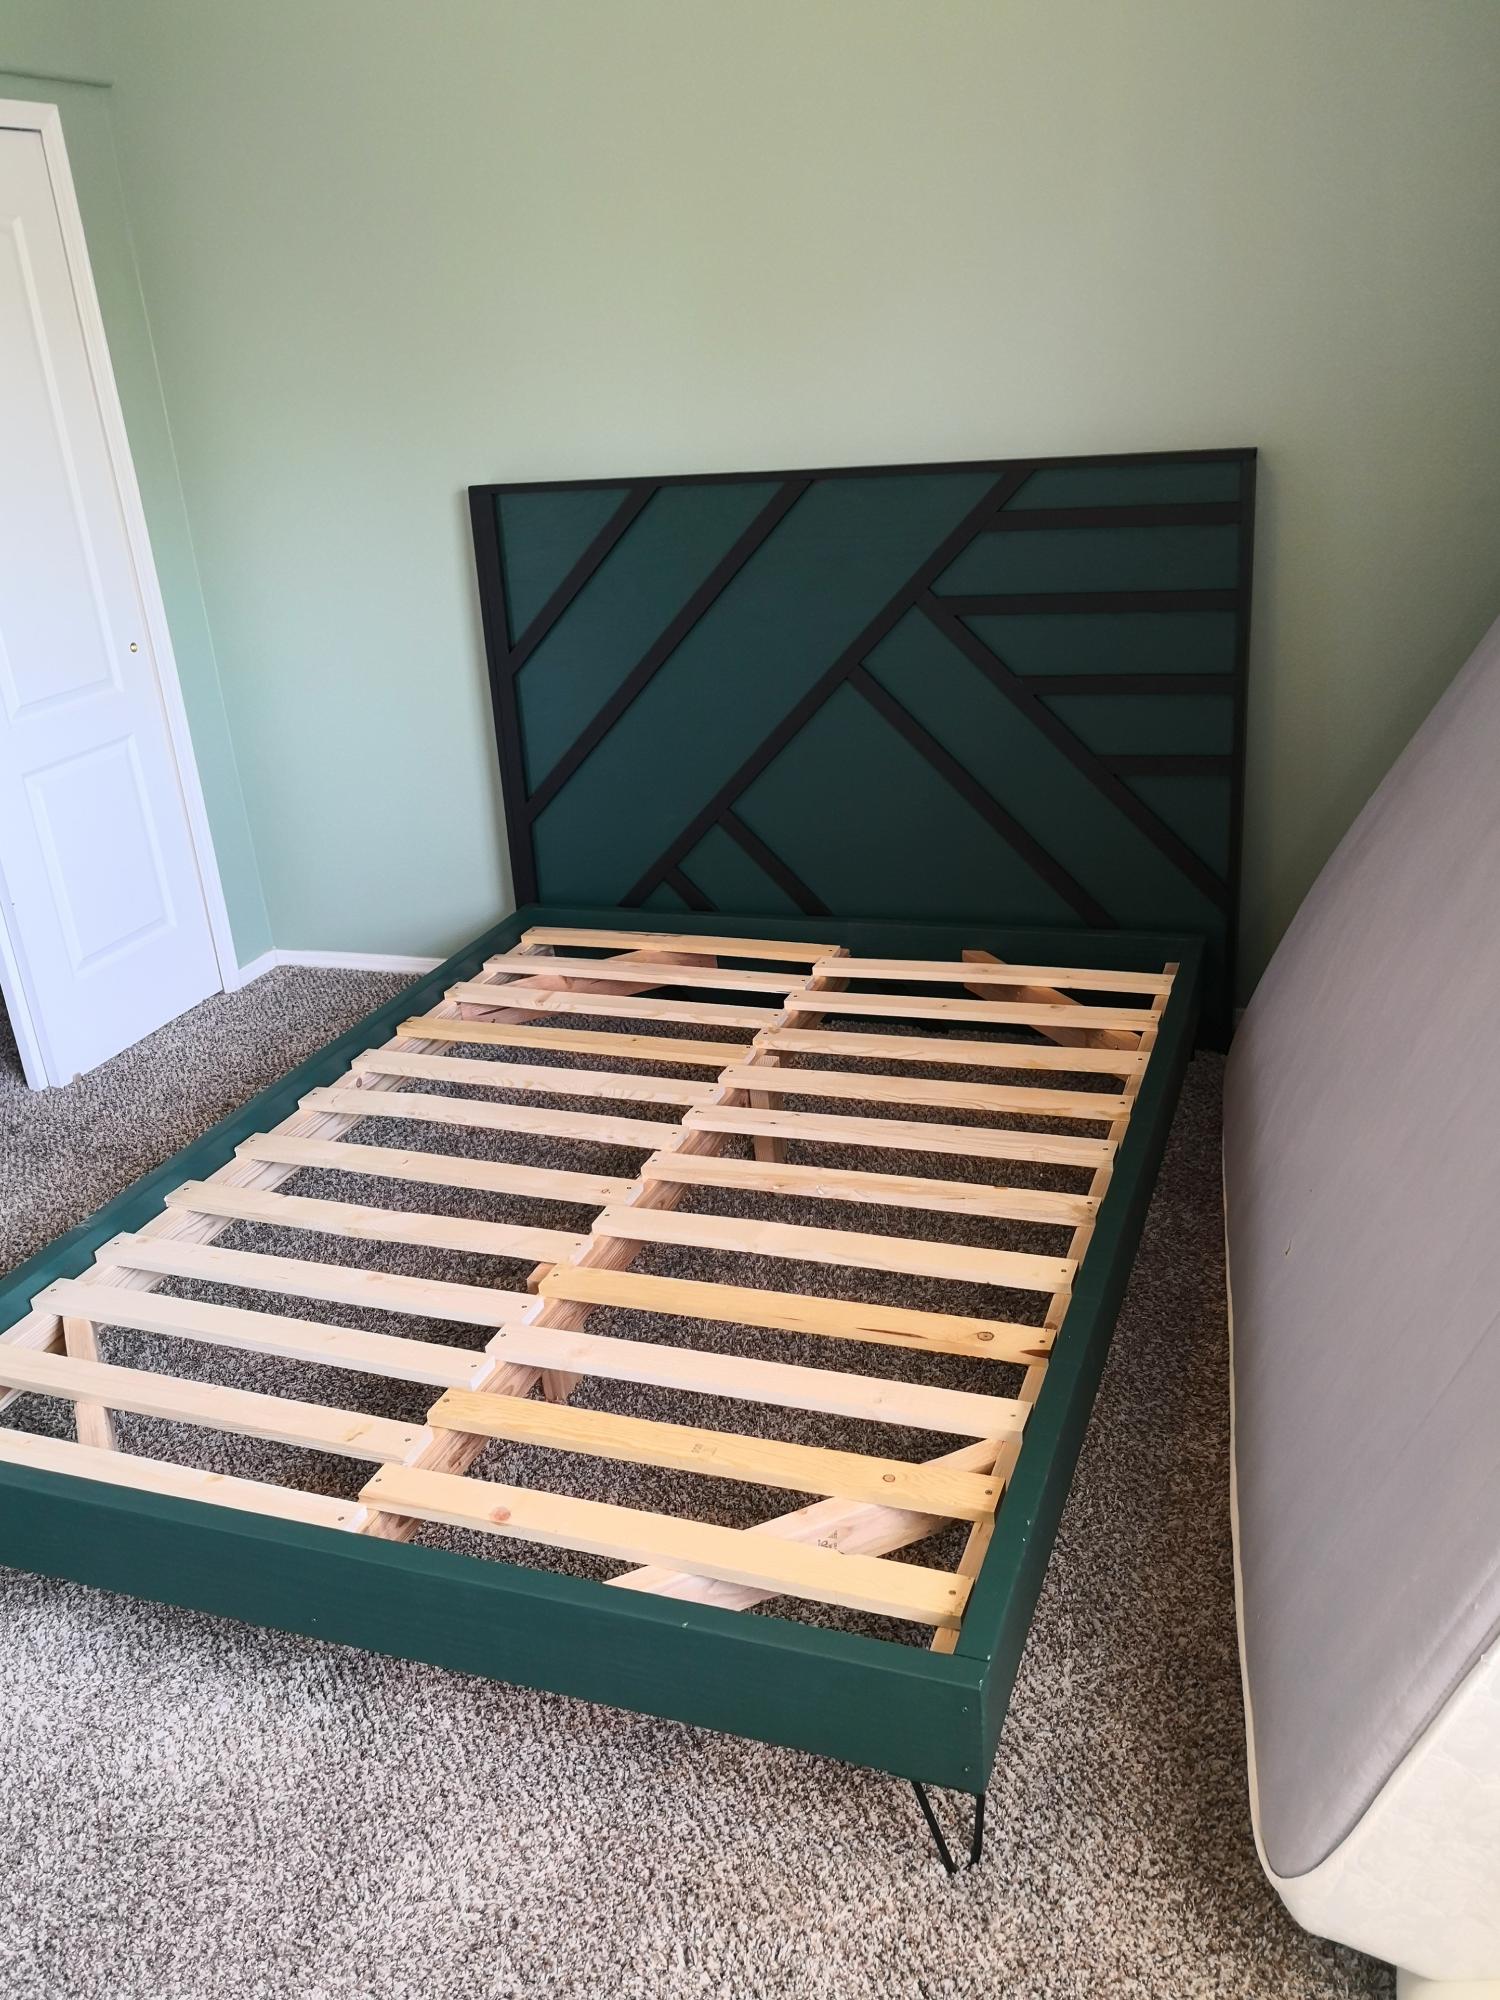
Built from the modern bed and geo headboard plans. I edited the plans so the headboard was roughly the same width as the bed. All I had to do was take off everything to the right of the vertical board. I also flipped upside down to look more like mountains. These are the 6 inch hairpin legs. Enjoy!
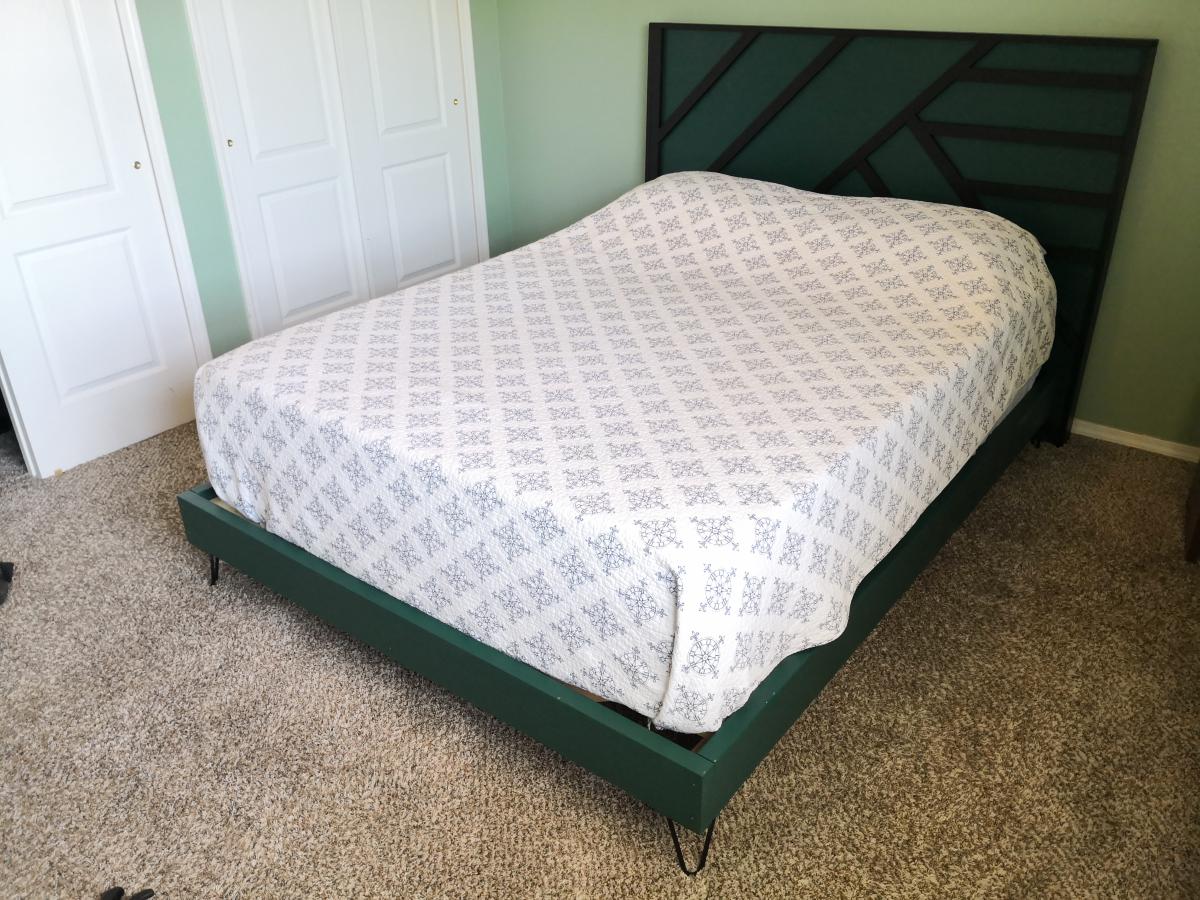
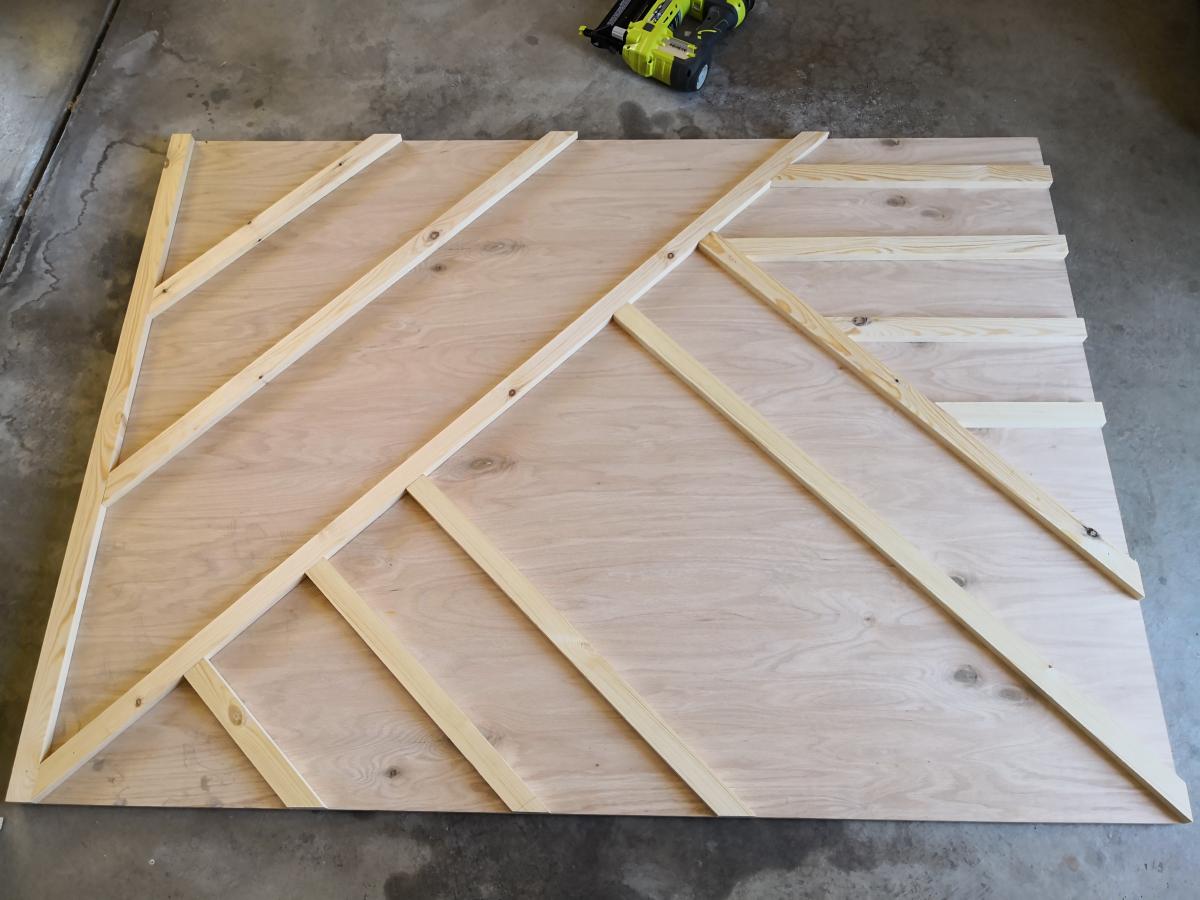
Built from Plan(s)
Estimated Cost
300
Estimated Time Investment
Day Project (6-9 Hours)
Finish Used
Behr Dark everglade, semi gloss. Behr black semi gloss
Recommended Skill Level
Beginner
Comments
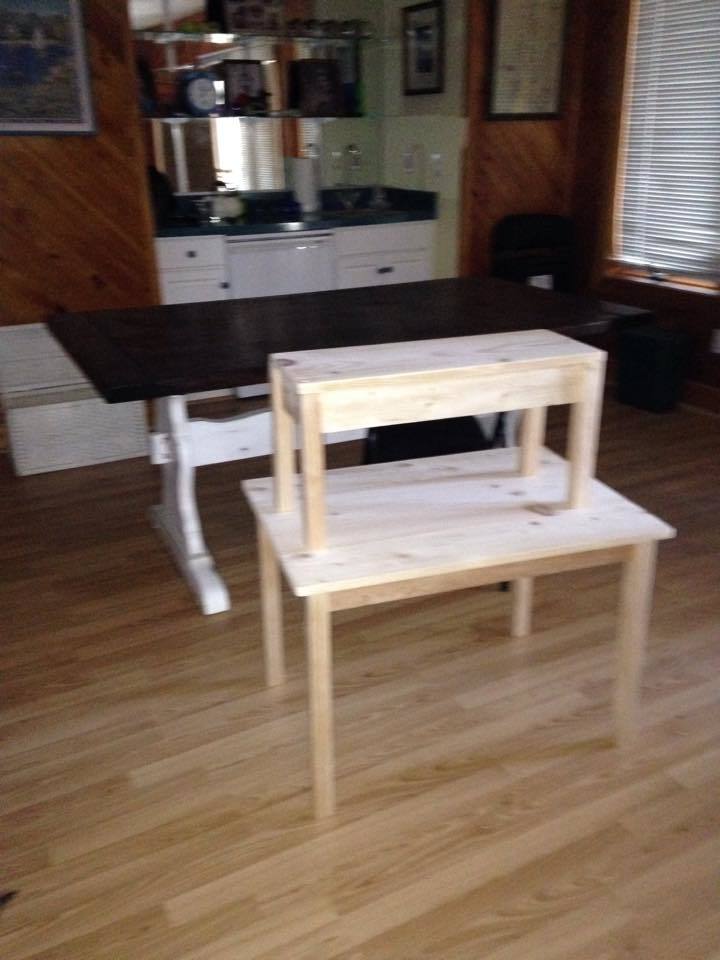
Sideboard with a Slab top
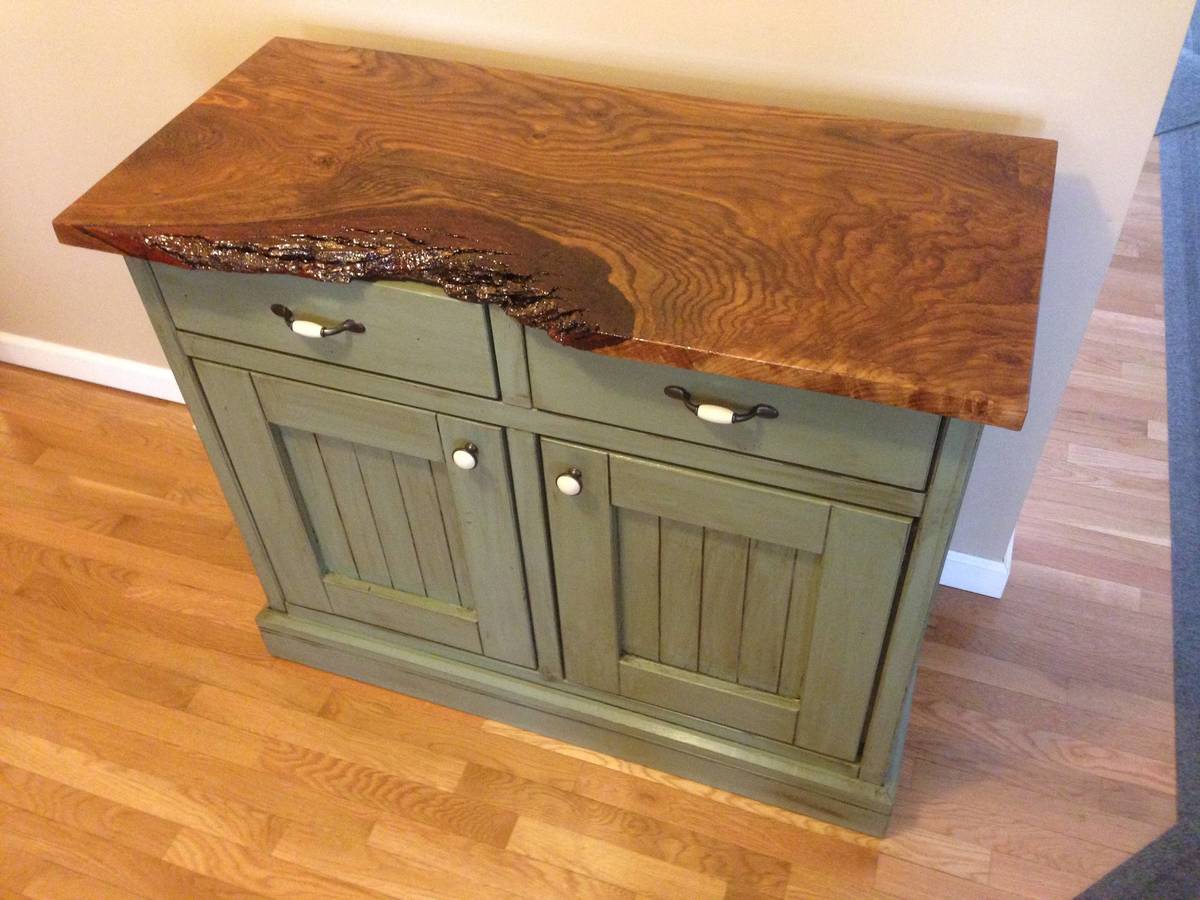
Shortened the design to fit the spot and used a slab of white oak I had laying around.
Built from Plan(s)
Estimated Time Investment
Week Long Project (20 Hours or More)
Finish Used
Base: Dark Stain, Shellac, General Milk Paint, General Glaze, General High Performance Flat.
Top: Boiled linseed oil, Shellac
Top: Boiled linseed oil, Shellac
Recommended Skill Level
Beginner
Comments

Sun, 03/01/2015 - 08:01
I love the live edge piece
I love the live edge piece you added for the top. It brings the perfect rustic element! :)
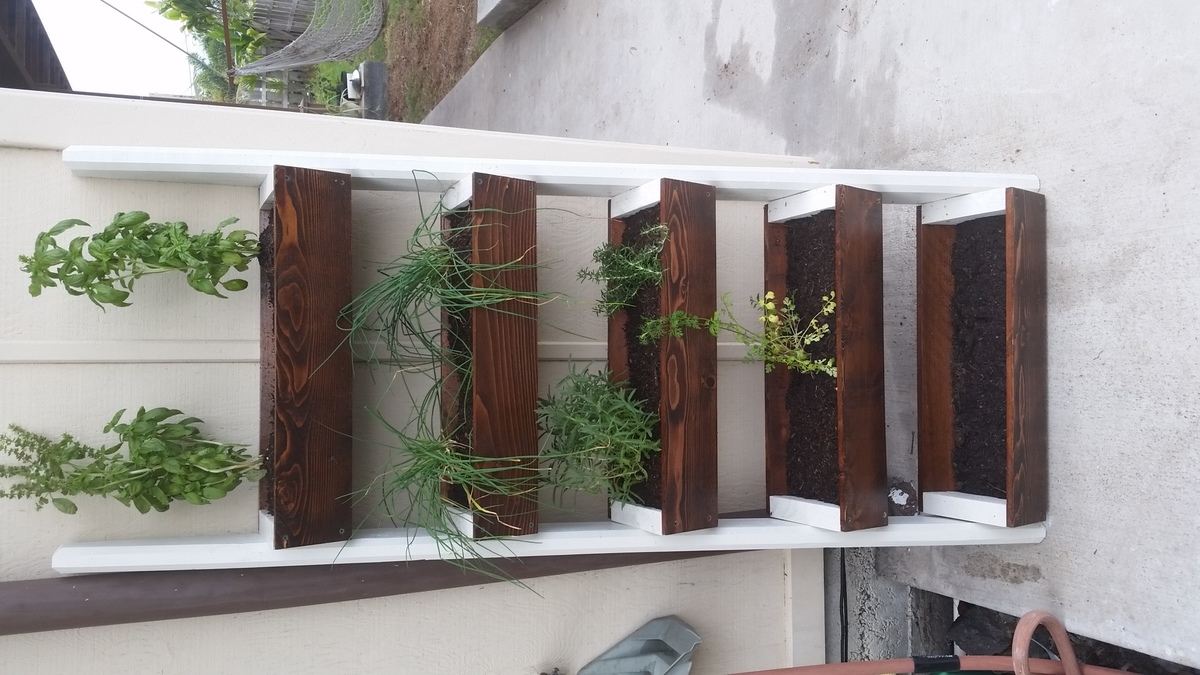
Cedar Vertical Tiered Garden
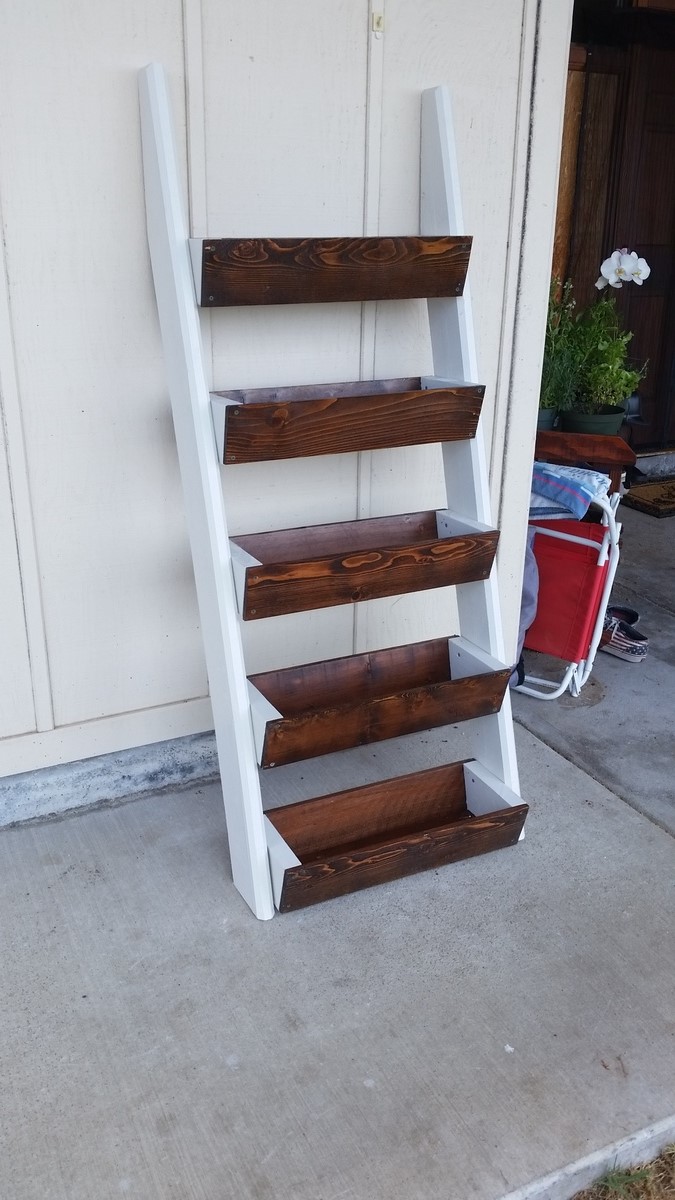
Starting a new garden in a new yard but with limited space this vertical planter was a must.
5 boxes Tiered up 2x6 legs. Changes to the plans Ana White provided include :I added mitered edges to the fronts and backs of each individual box to match the over angle of the legs, slimmed down the box sides to tidy up the look, routed the edges of the legs to sharpen it up and painted and stained/finished to bring the whole project together.
Built from Plan(s)
Estimated Cost
$75.00
Estimated Time Investment
Weekend Project (10-20 Hours)
Finish Used
White Paint, honey stain, semi gloss polyurethane
Recommended Skill Level
Intermediate
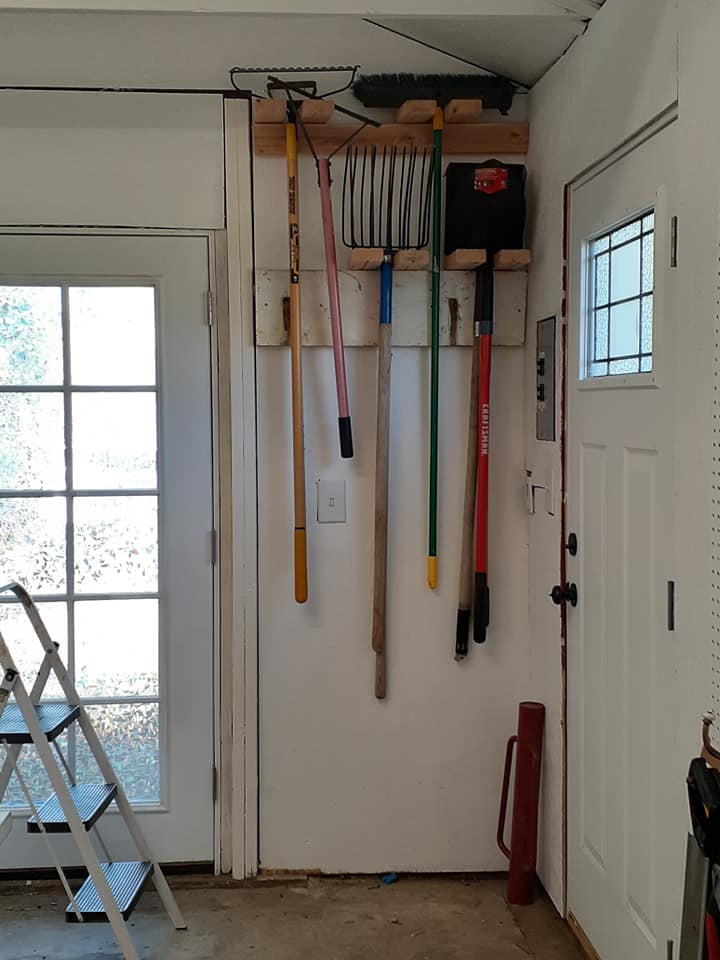
Finally Organizing My Garage - Shelving First
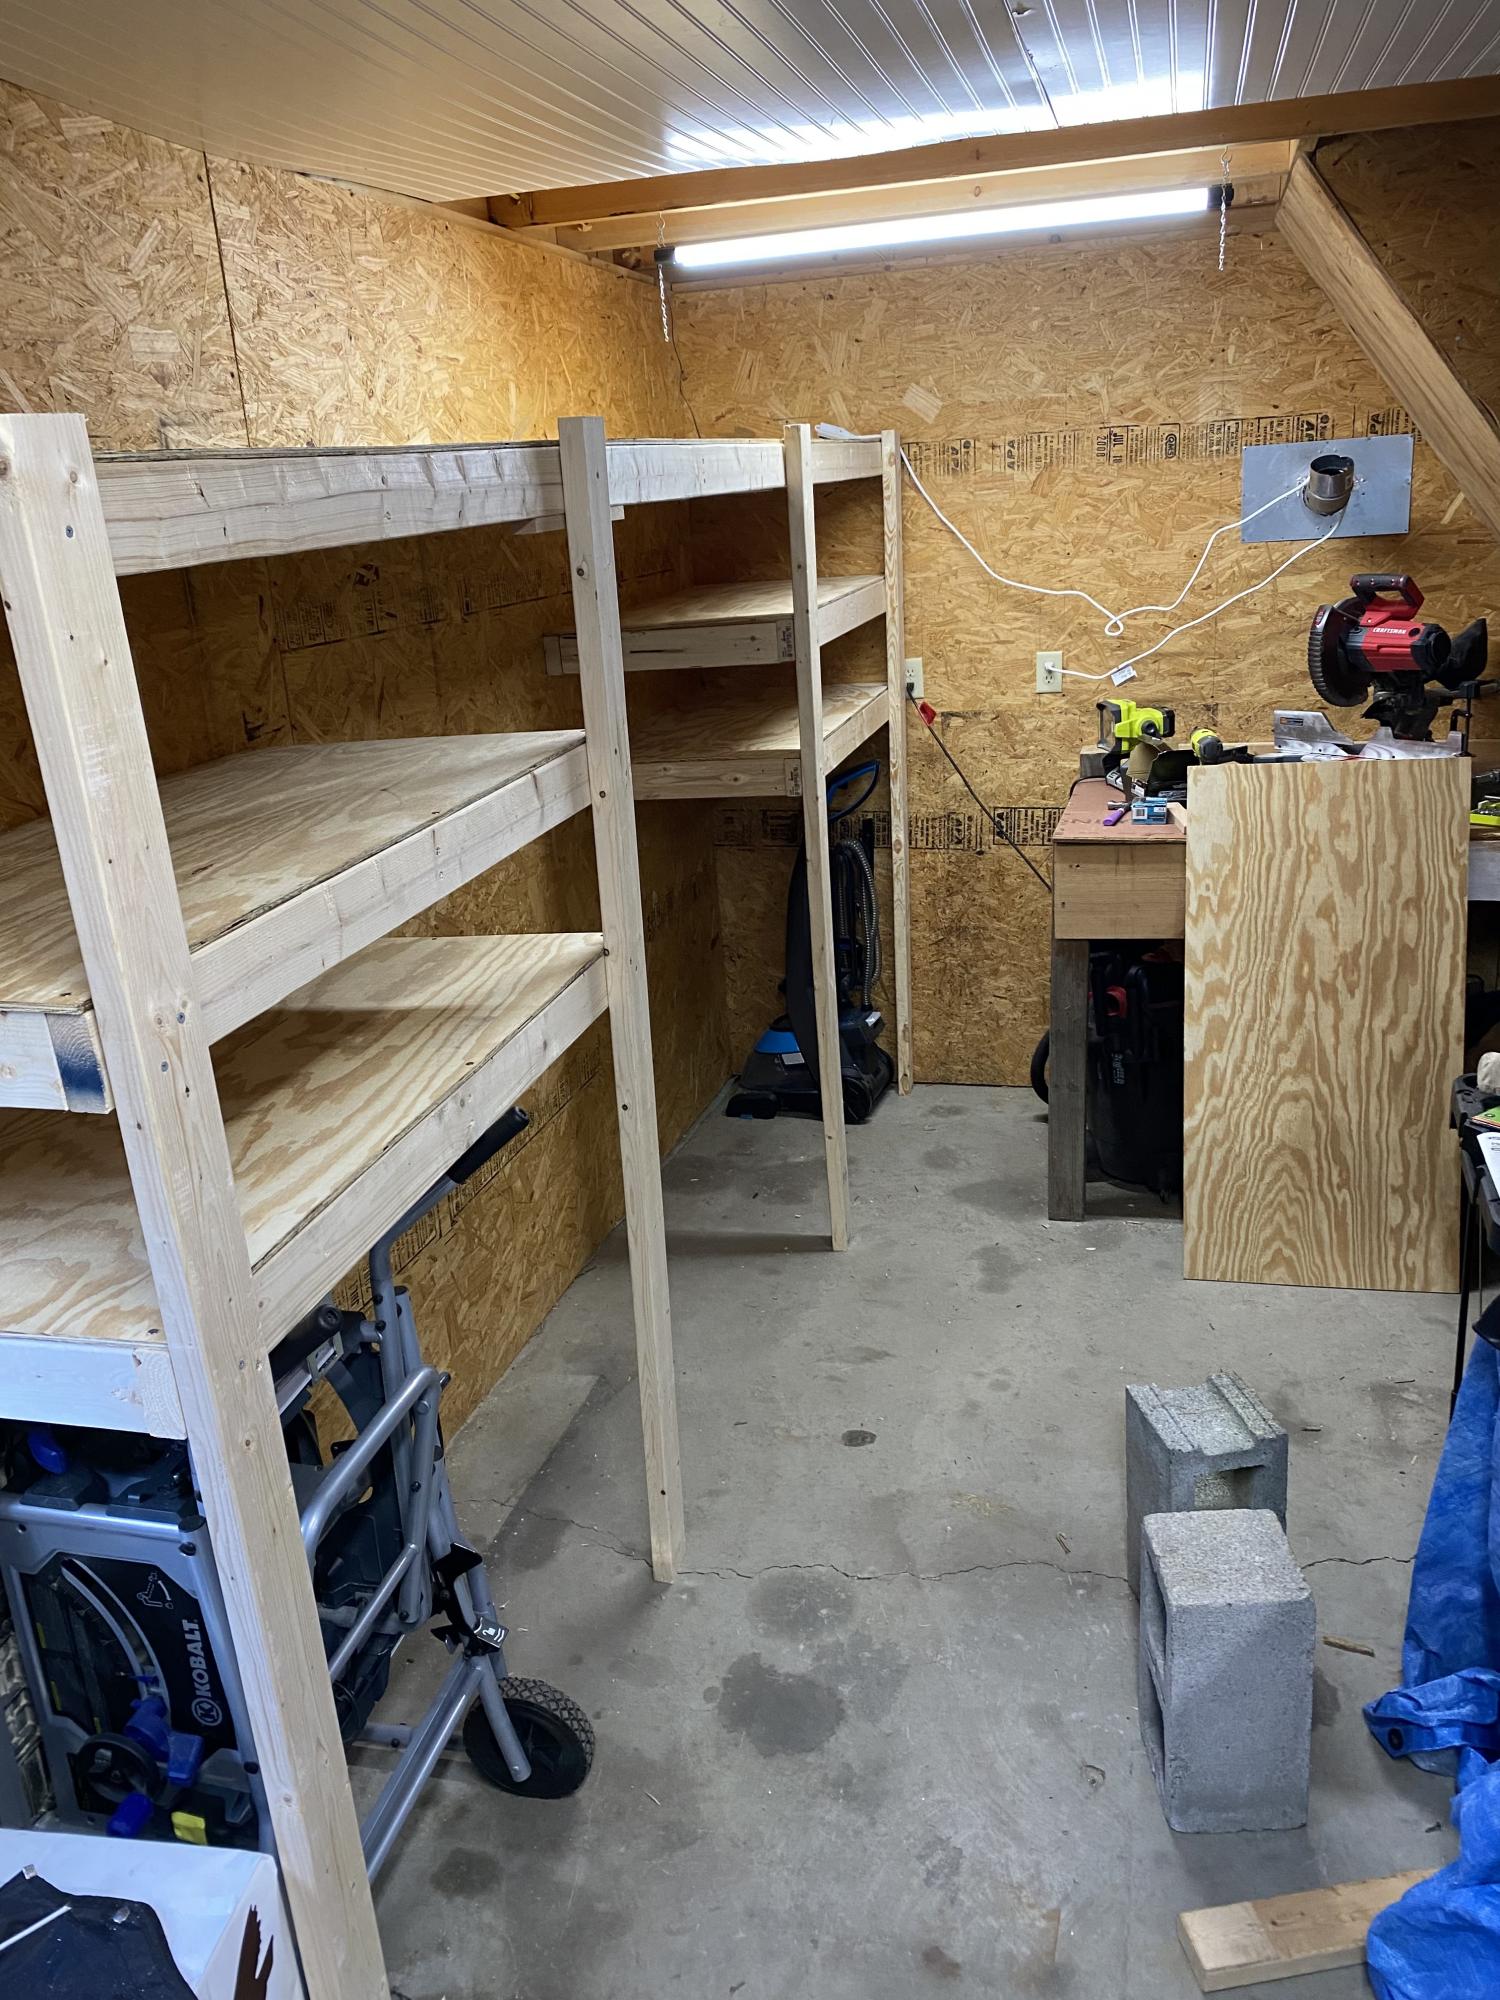
Took every pre-existing bit of rough, thrown up shelving the previous wonder tossed up and the garage walls. Moved the prior owner’s workbench build out of the corner, reinforced it, and relocated it to the center of the back wall. Spent the day building this unit in this corner of the space. Used modified version of plans below. Center gap is for a future build…rolling miter saw cart.
Built from Plan(s)
Estimated Time Investment
Day Project (6-9 Hours)
Recommended Skill Level
Beginner