Community Brag Posts
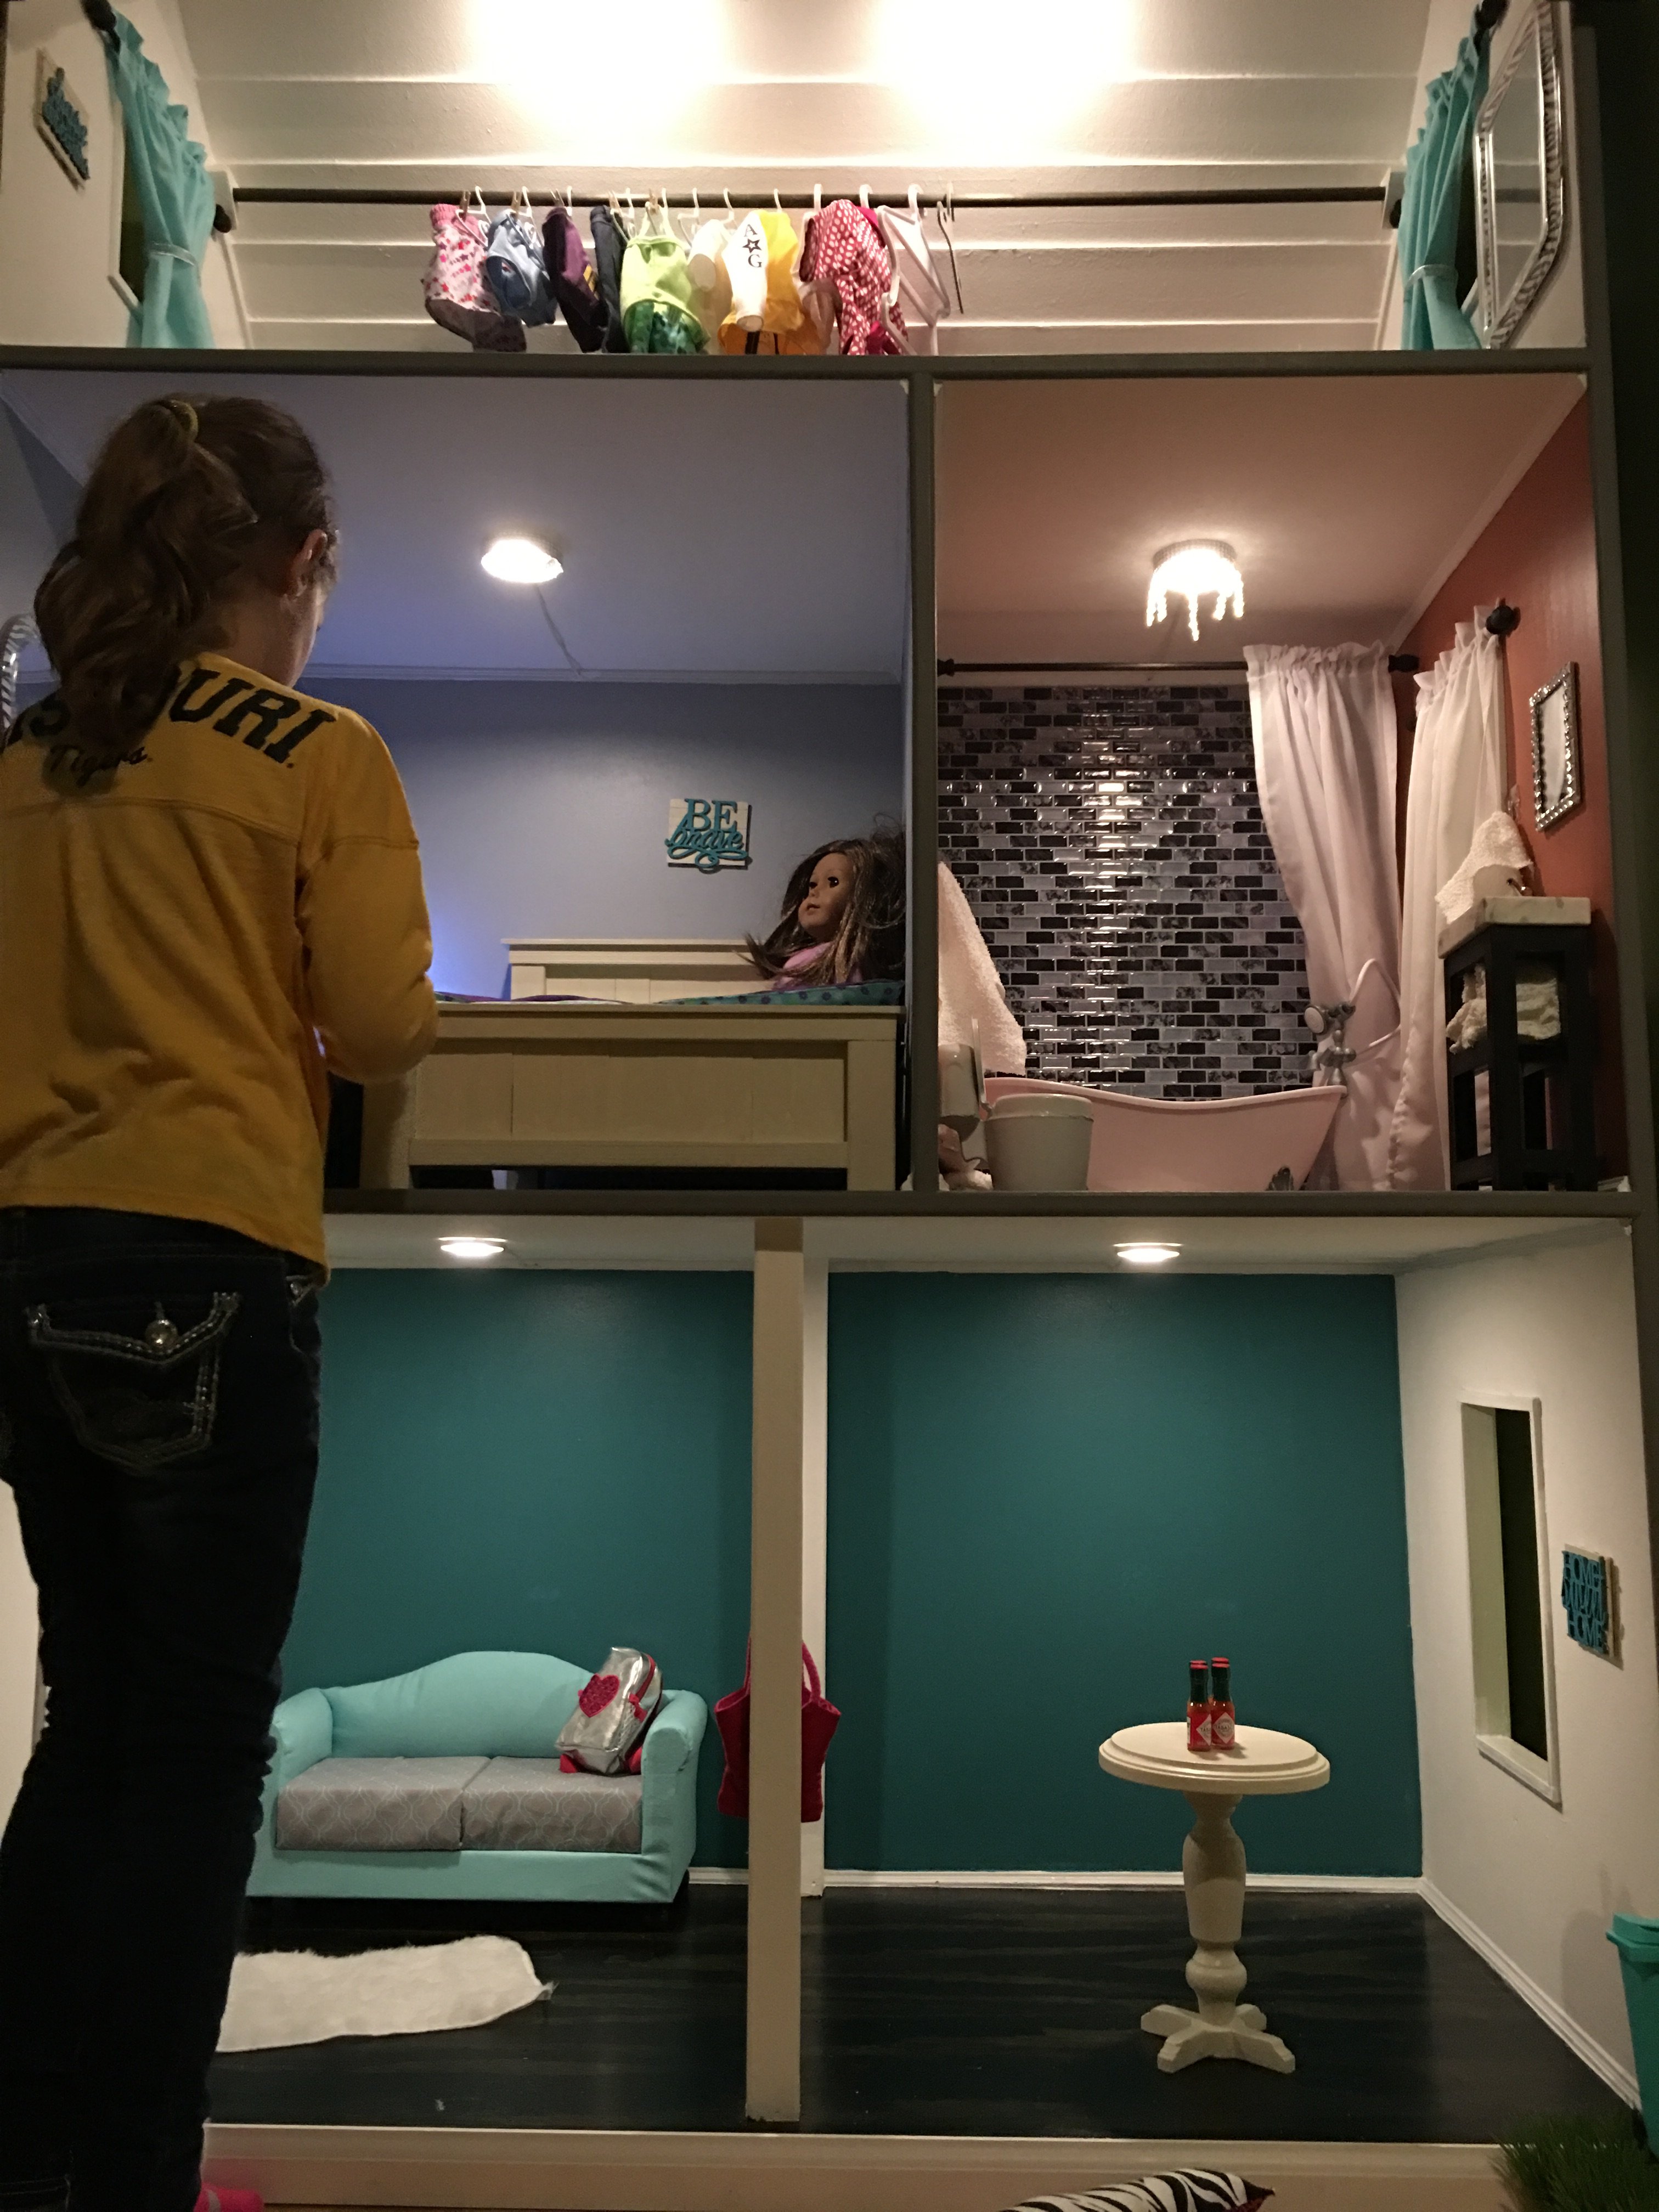
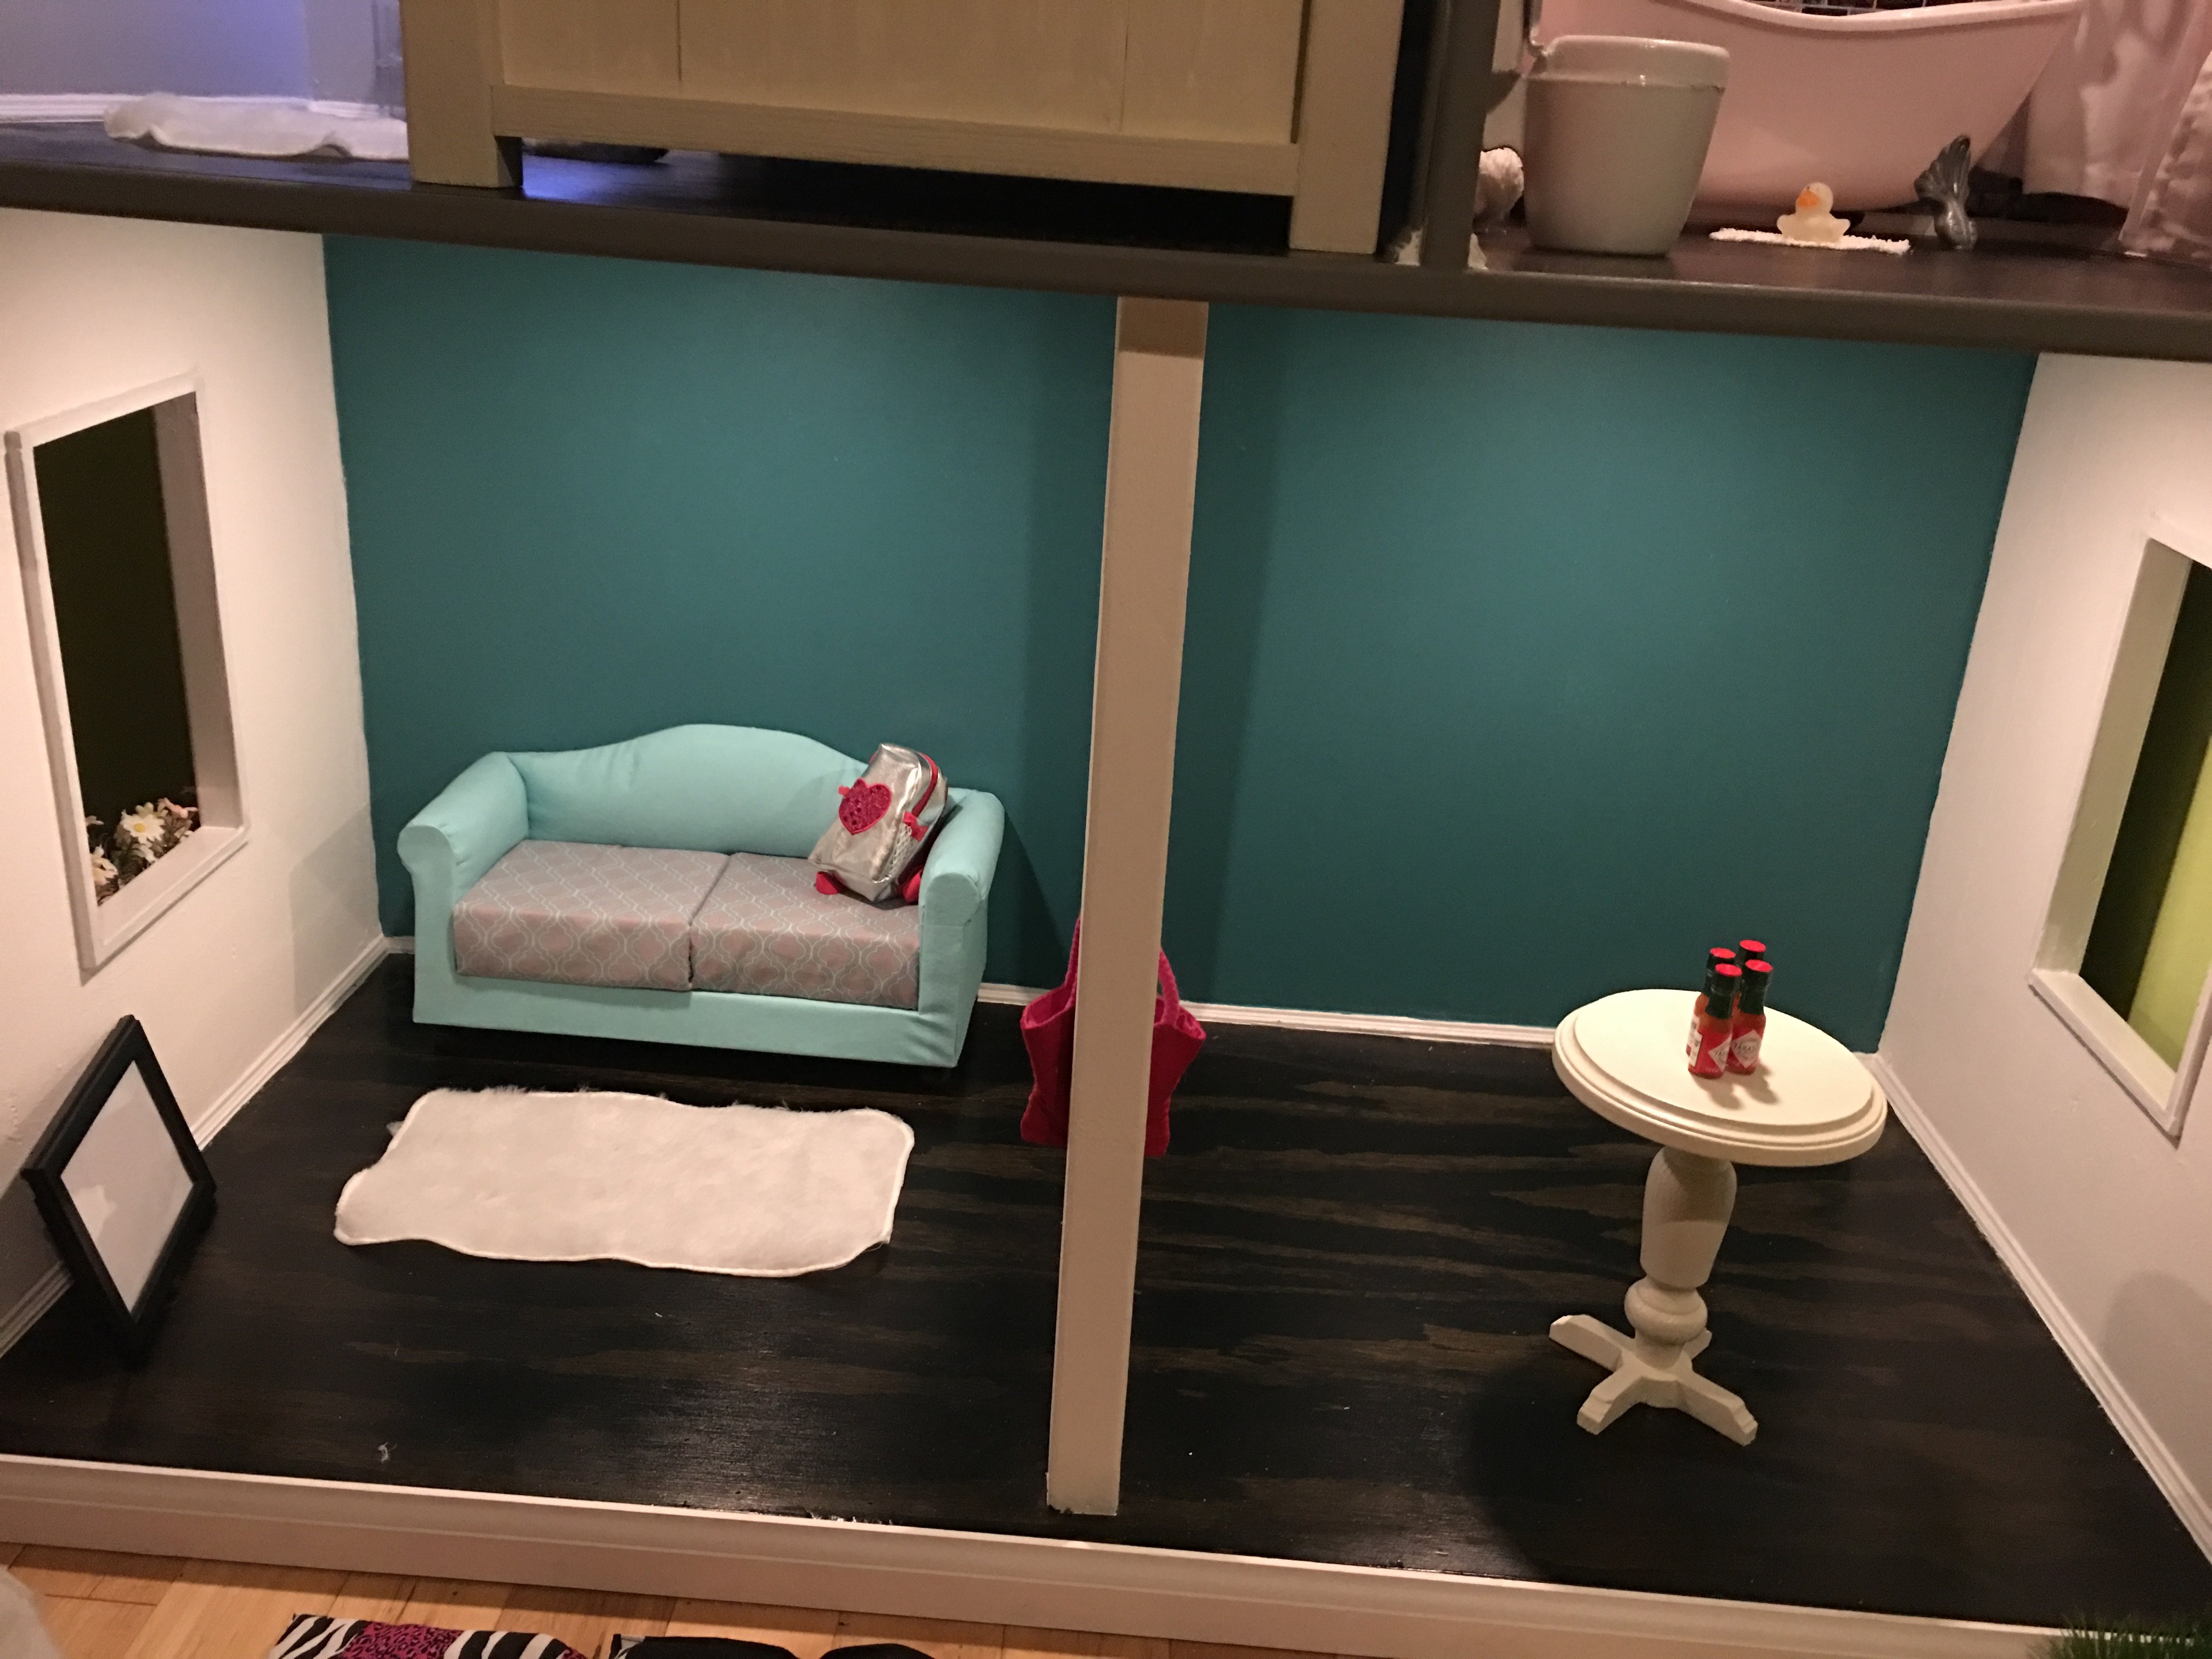
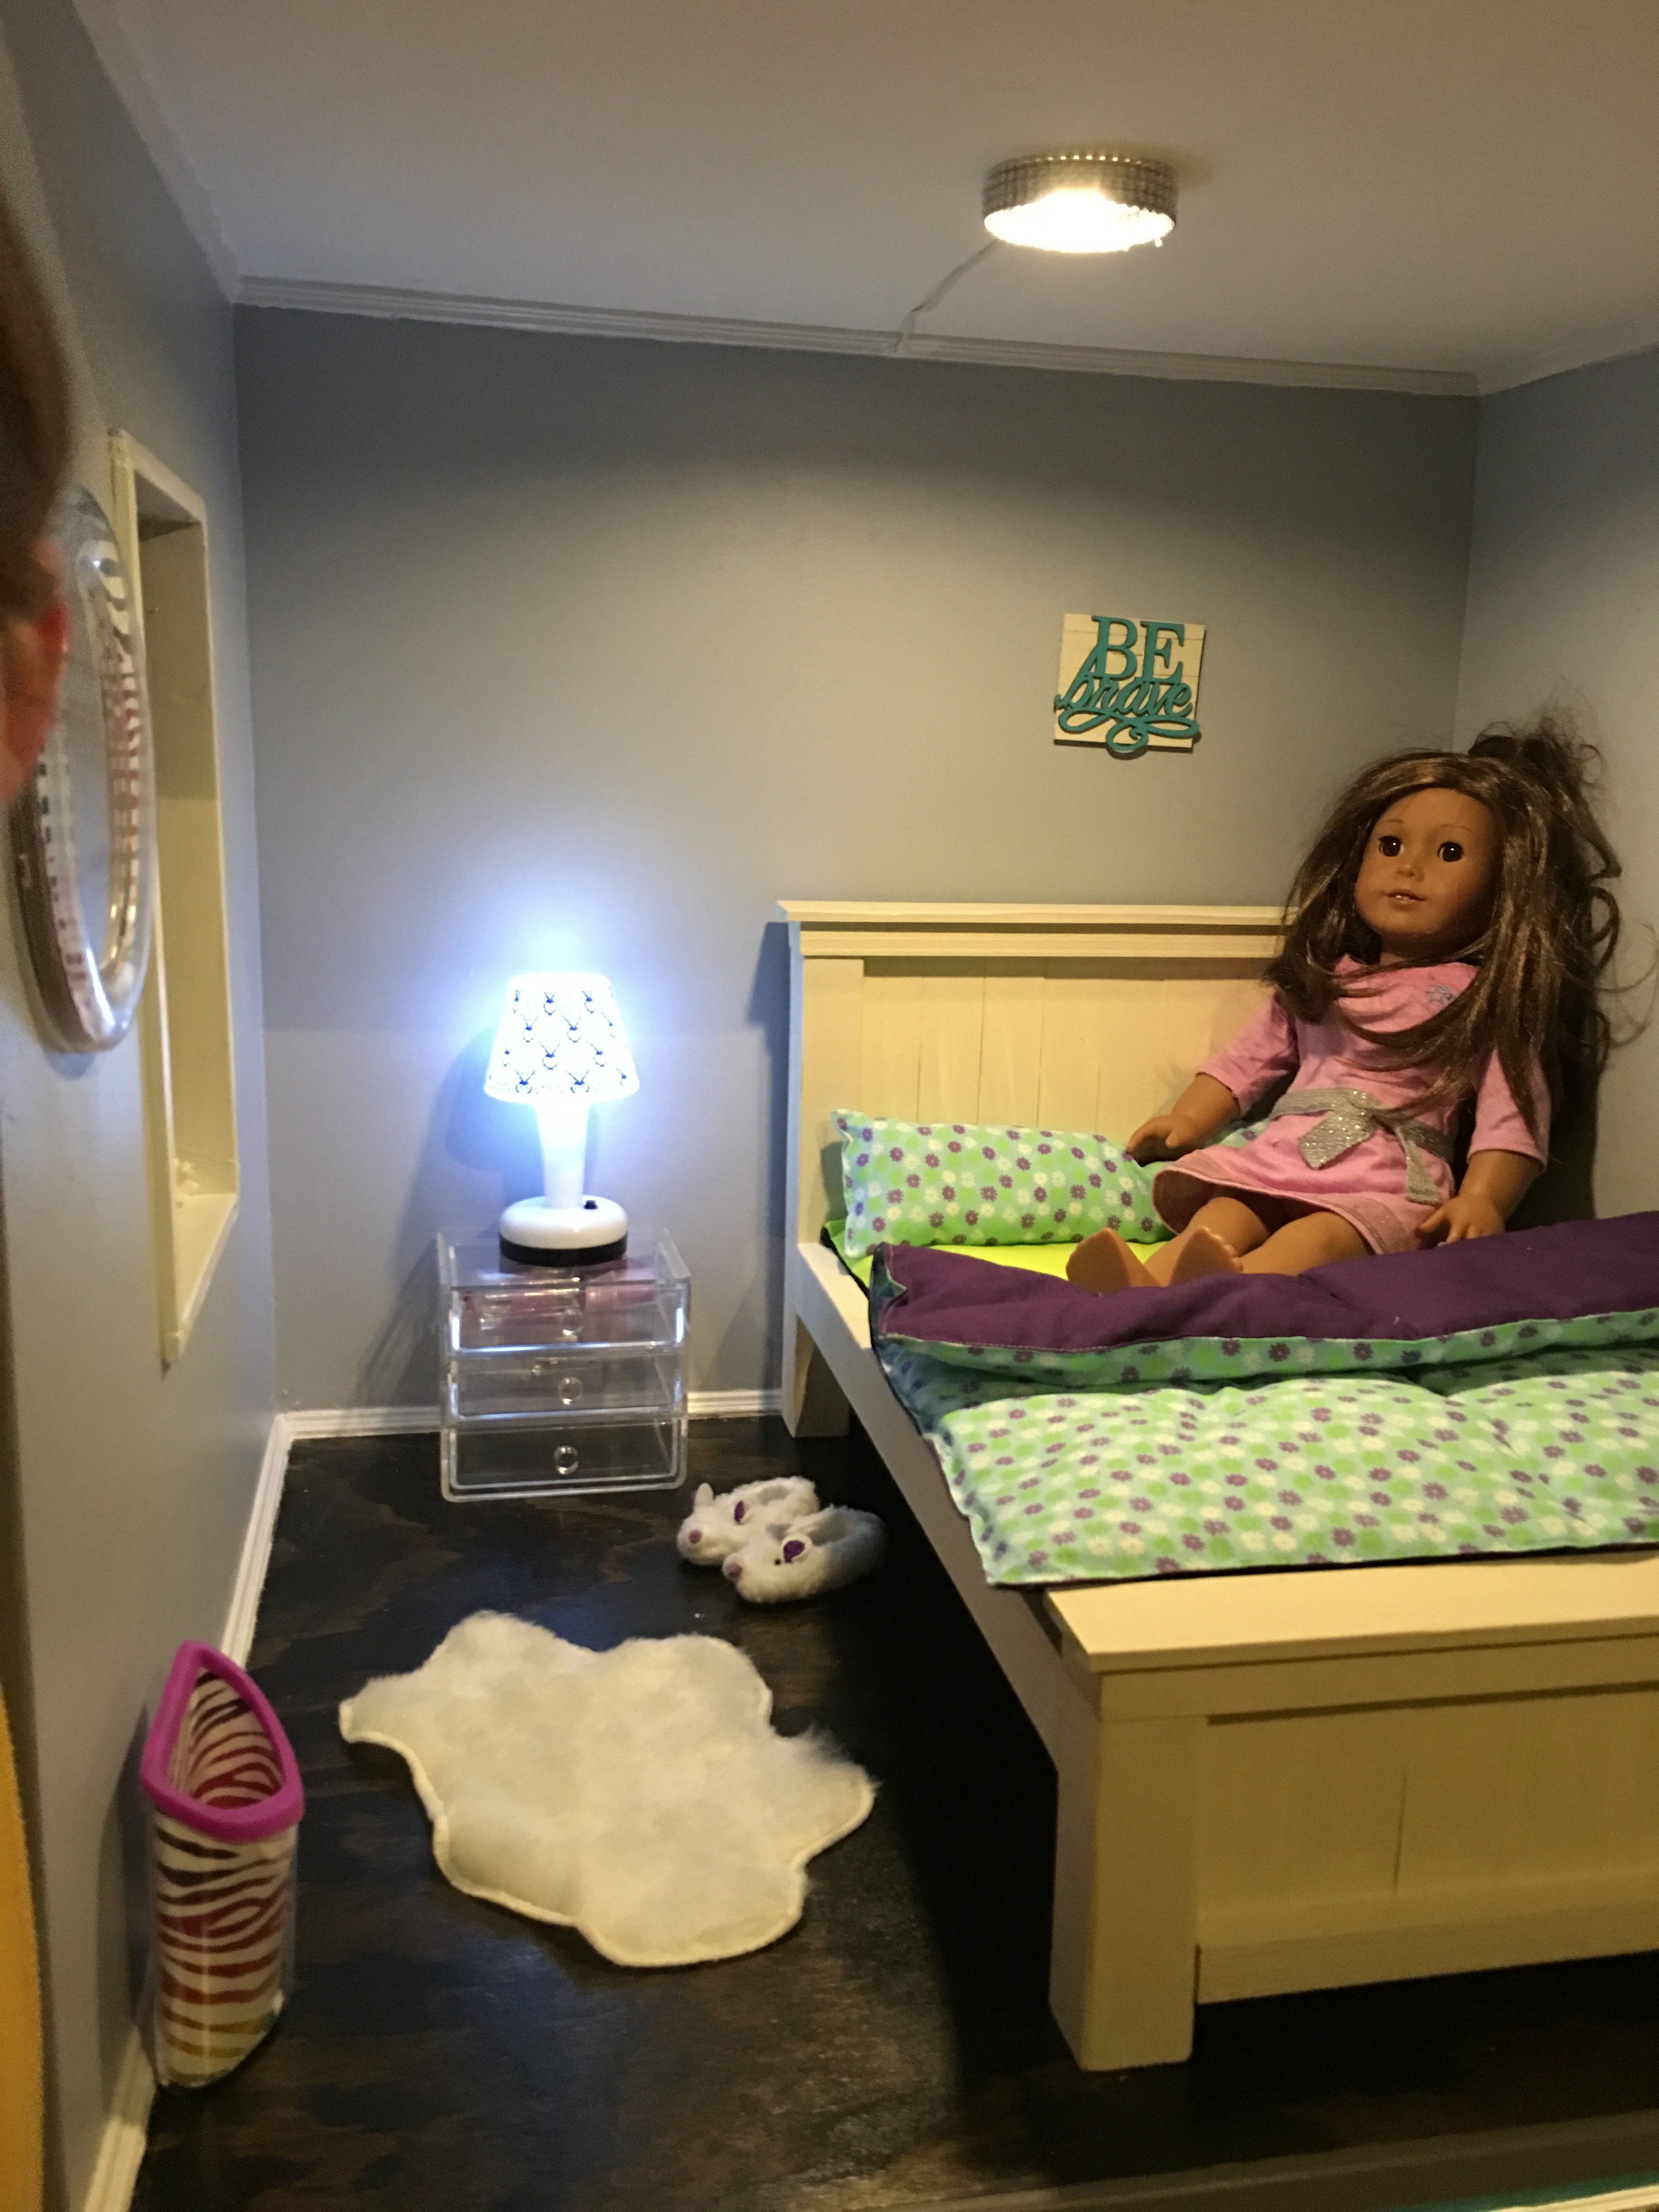
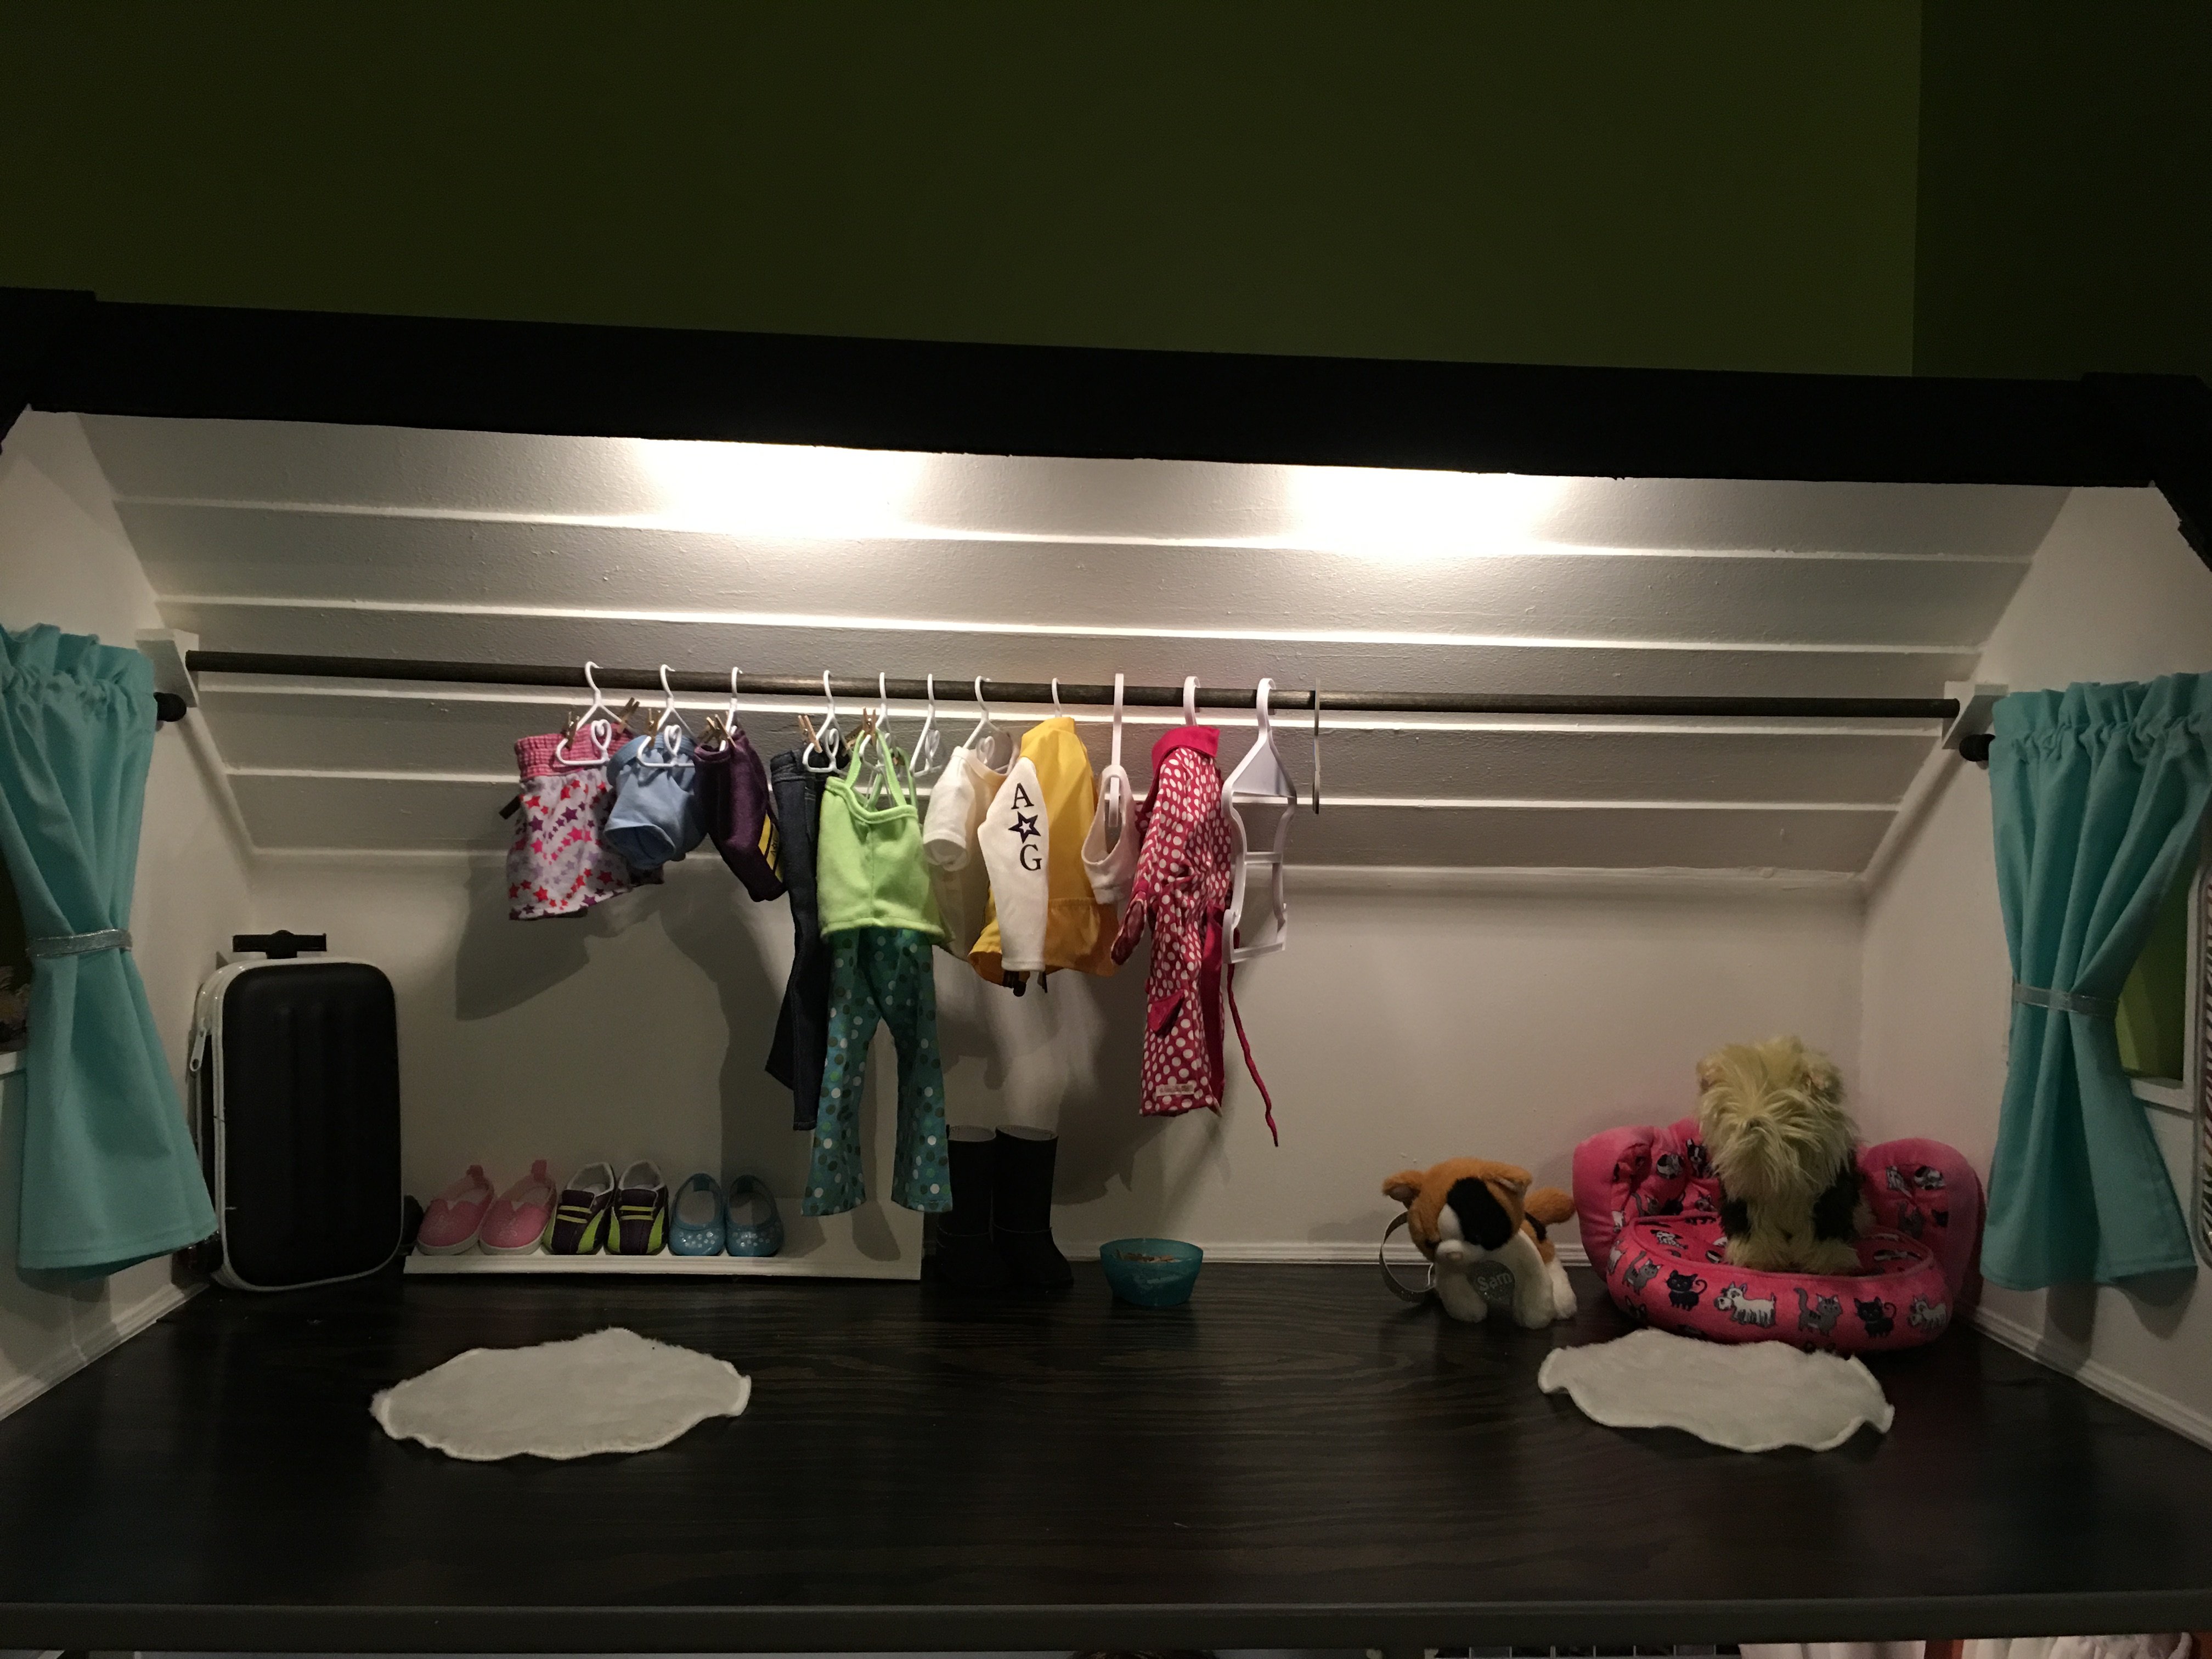
American Girl Dollhouse Masterpiece!
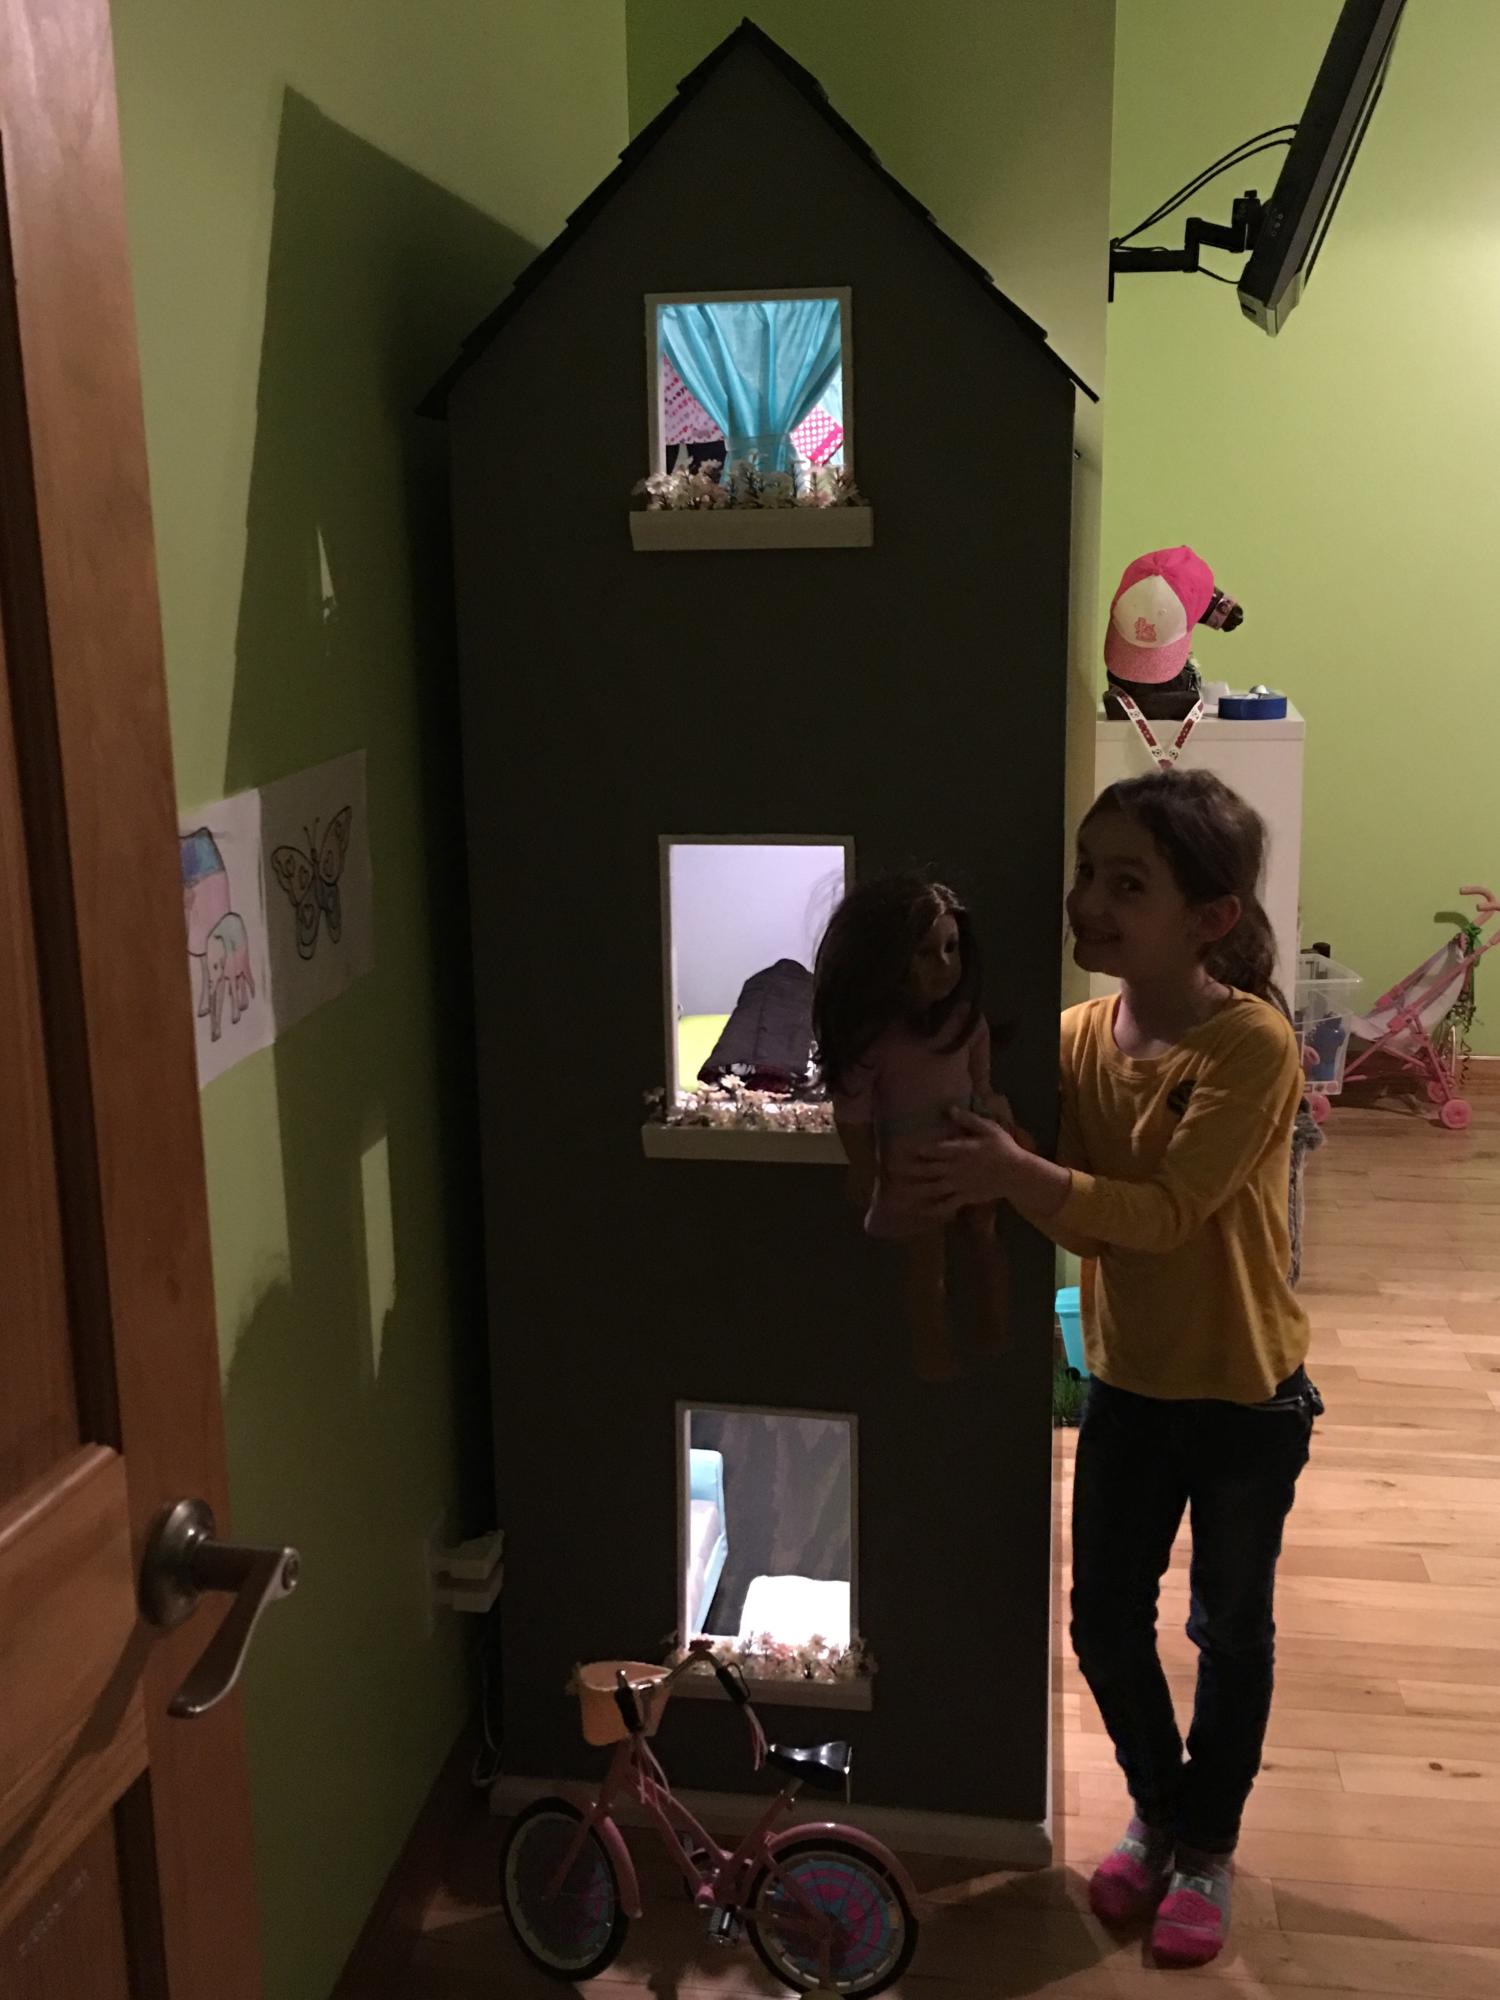
This dollhouse was super easy to make! Harper (the doll) wanted an open concept living/kitchen, and that is the first floor. Second floor are the bedroom and bathroom. Top floor is the closet. The roof is made from 3.5" slats of luan glued together and painted with black sanded paint. Notice the baseboards and crown molding? My granddaughter helped cut windows out with a jig saw. I still owe my granddaughter a garage and patio with pergola, and kitchen appliances and chairs, but that will wait until summer when she can help craft/build them.
Harper's bed is modeled after the farmhouse bed plans available on this site, but I used smaller scrap lumber. I wanted milk paint but was unwilling to pay the high price, so I bought a sample jar of antique ivory paint and watered it down. It turned out great!

Built from Plan(s)
Estimated Time Investment
Week Long Project (20 Hours or More)
Finish Used
Kilz primer, Behr satin indoor paint (leftovers from our house)
Recommended Skill Level
Intermediate
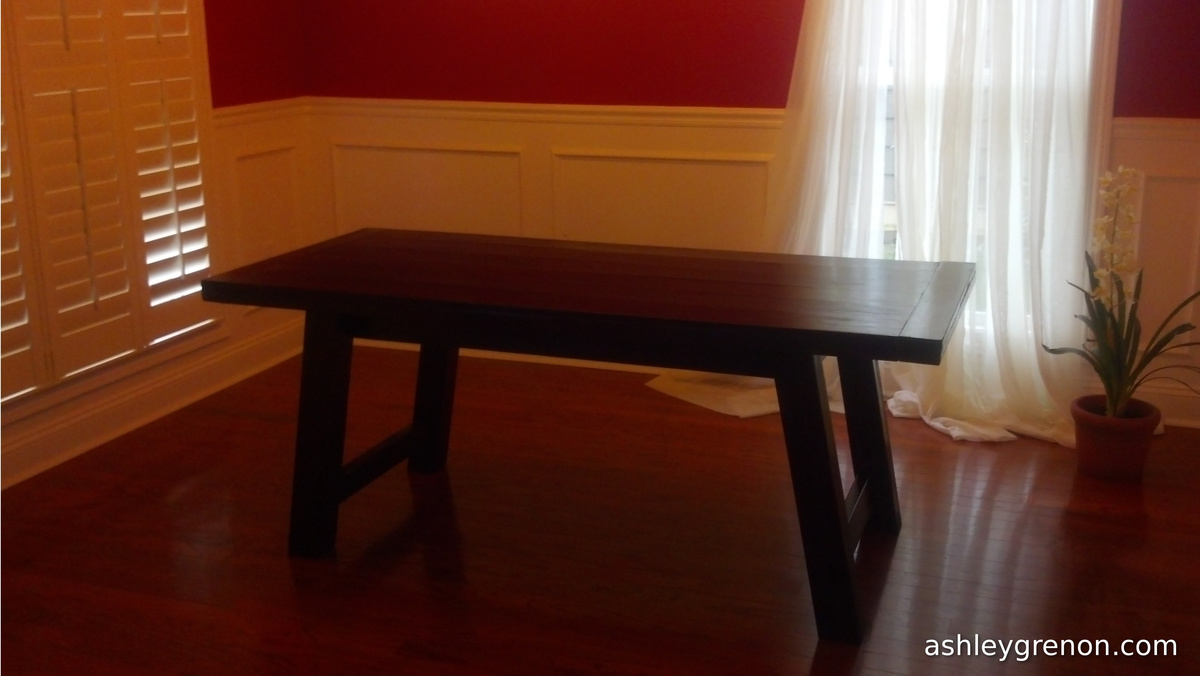
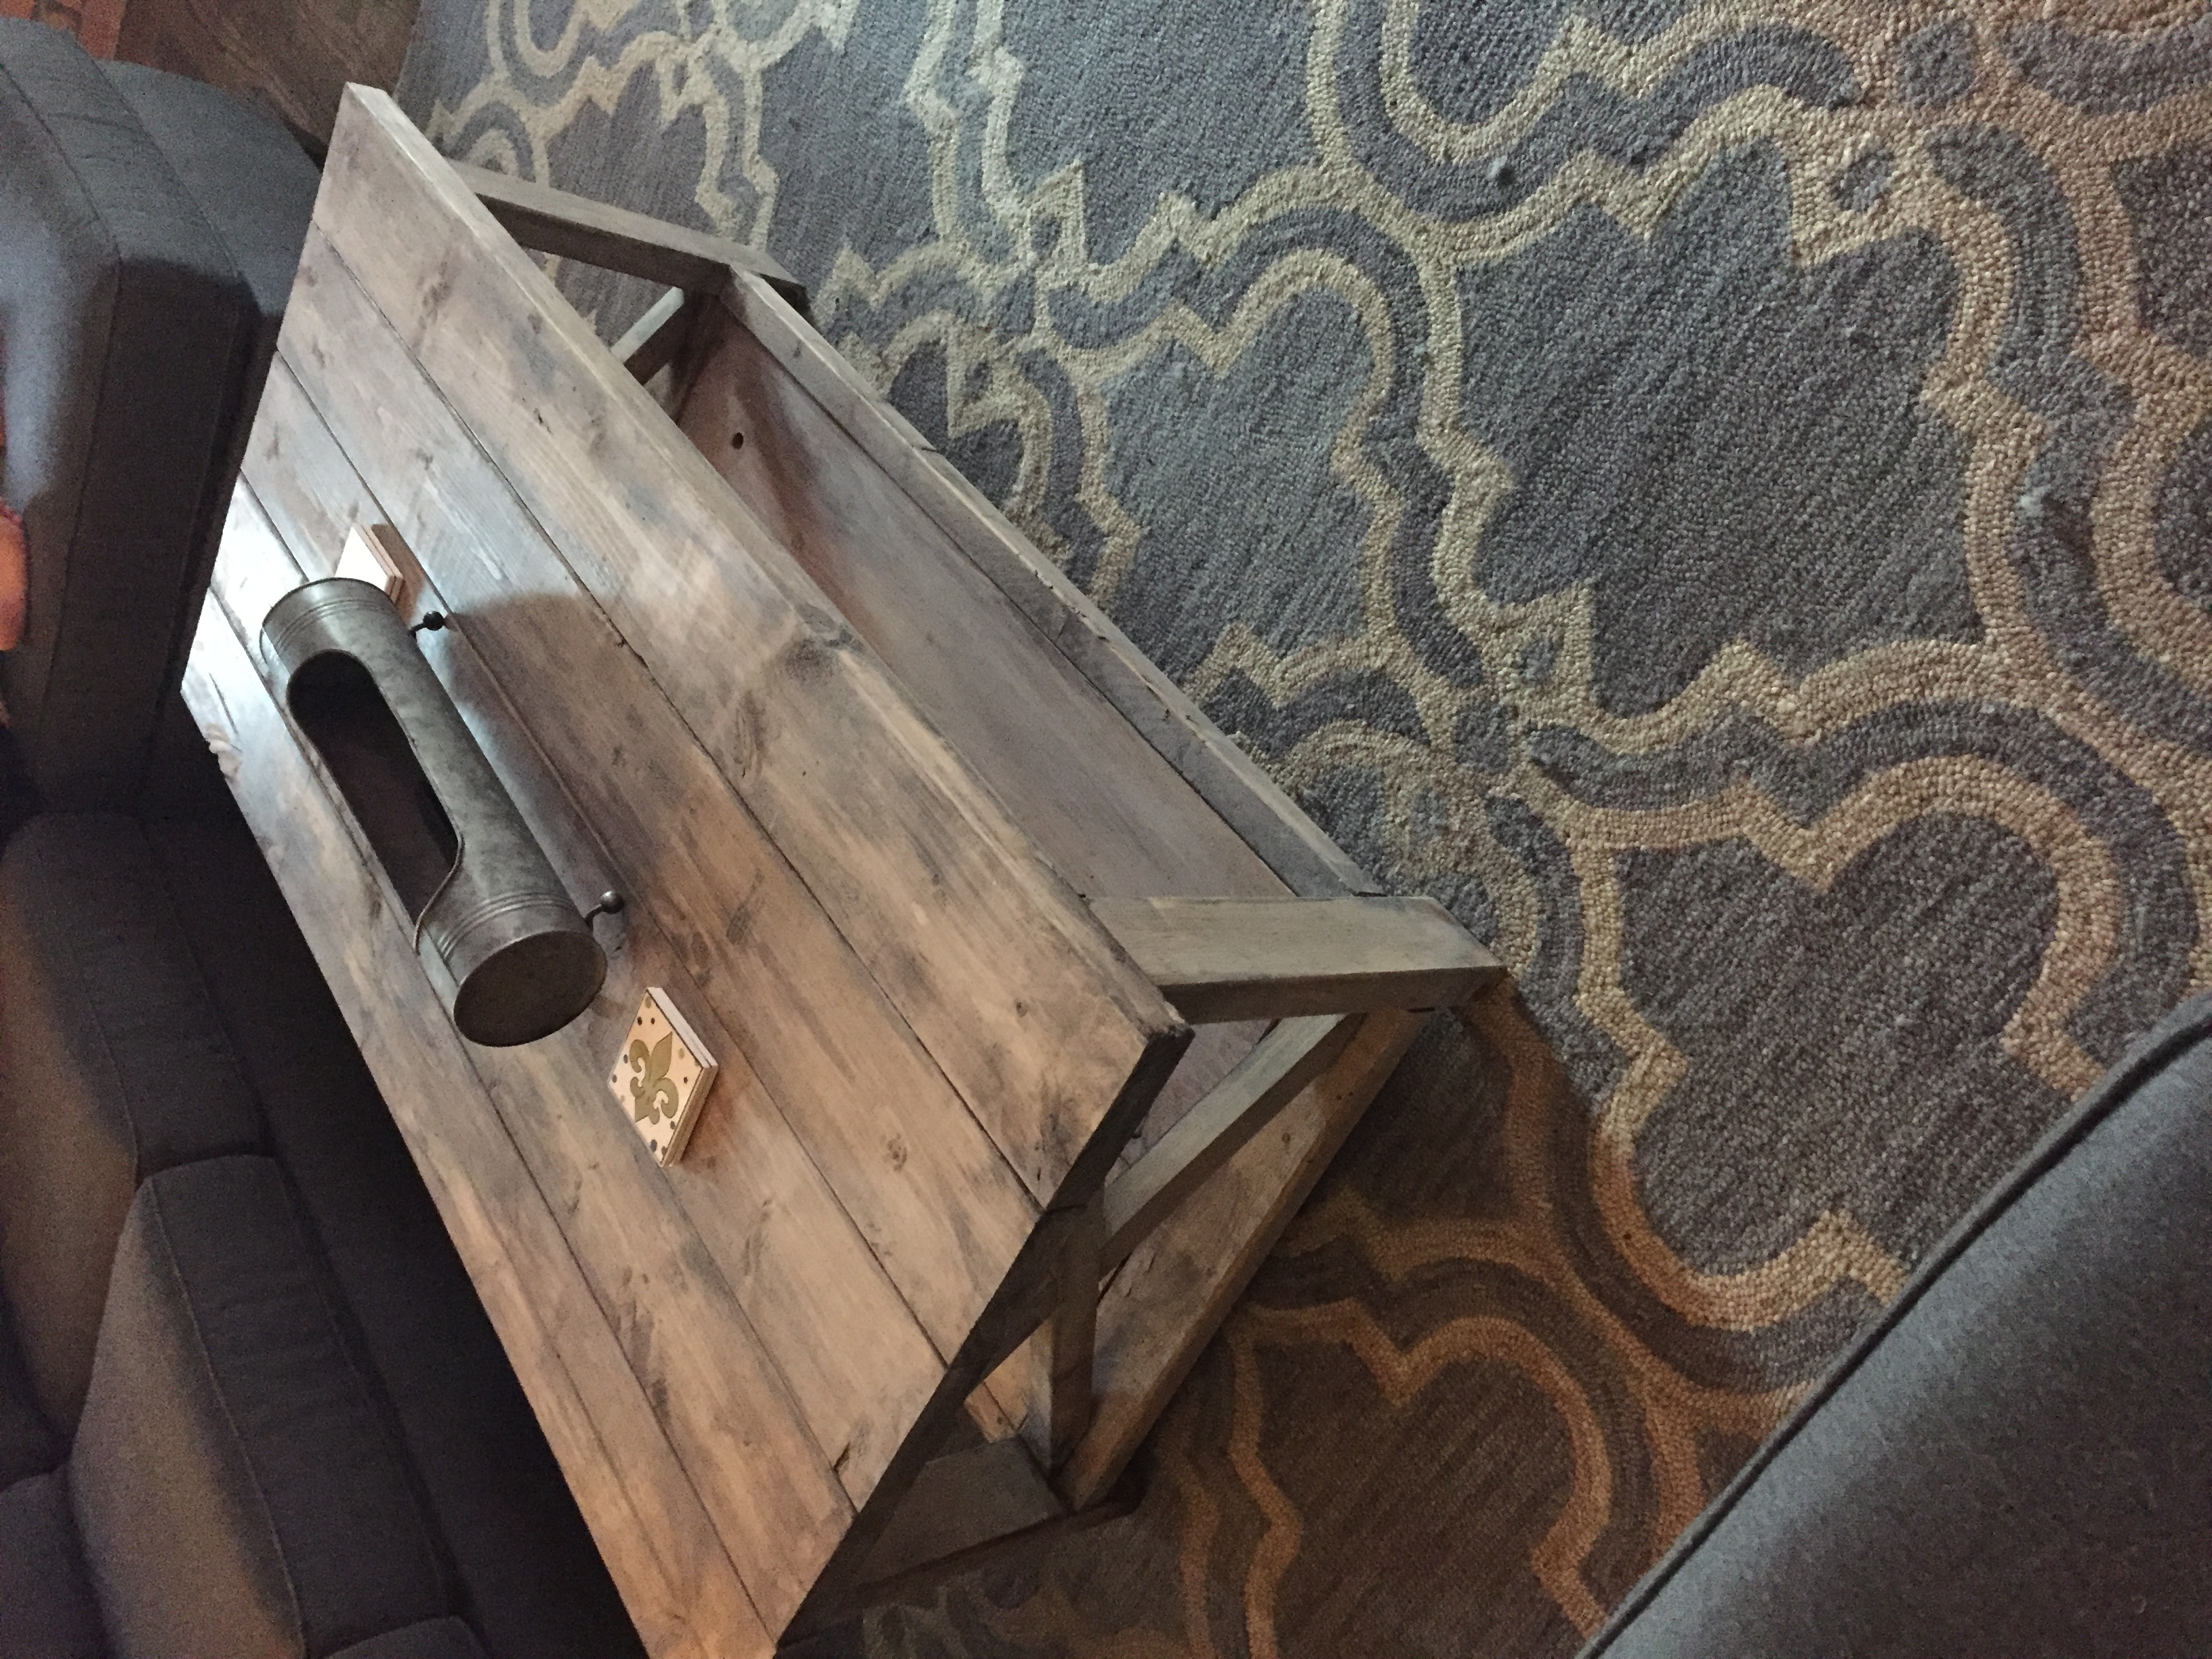
Farmhouse Coffee Table
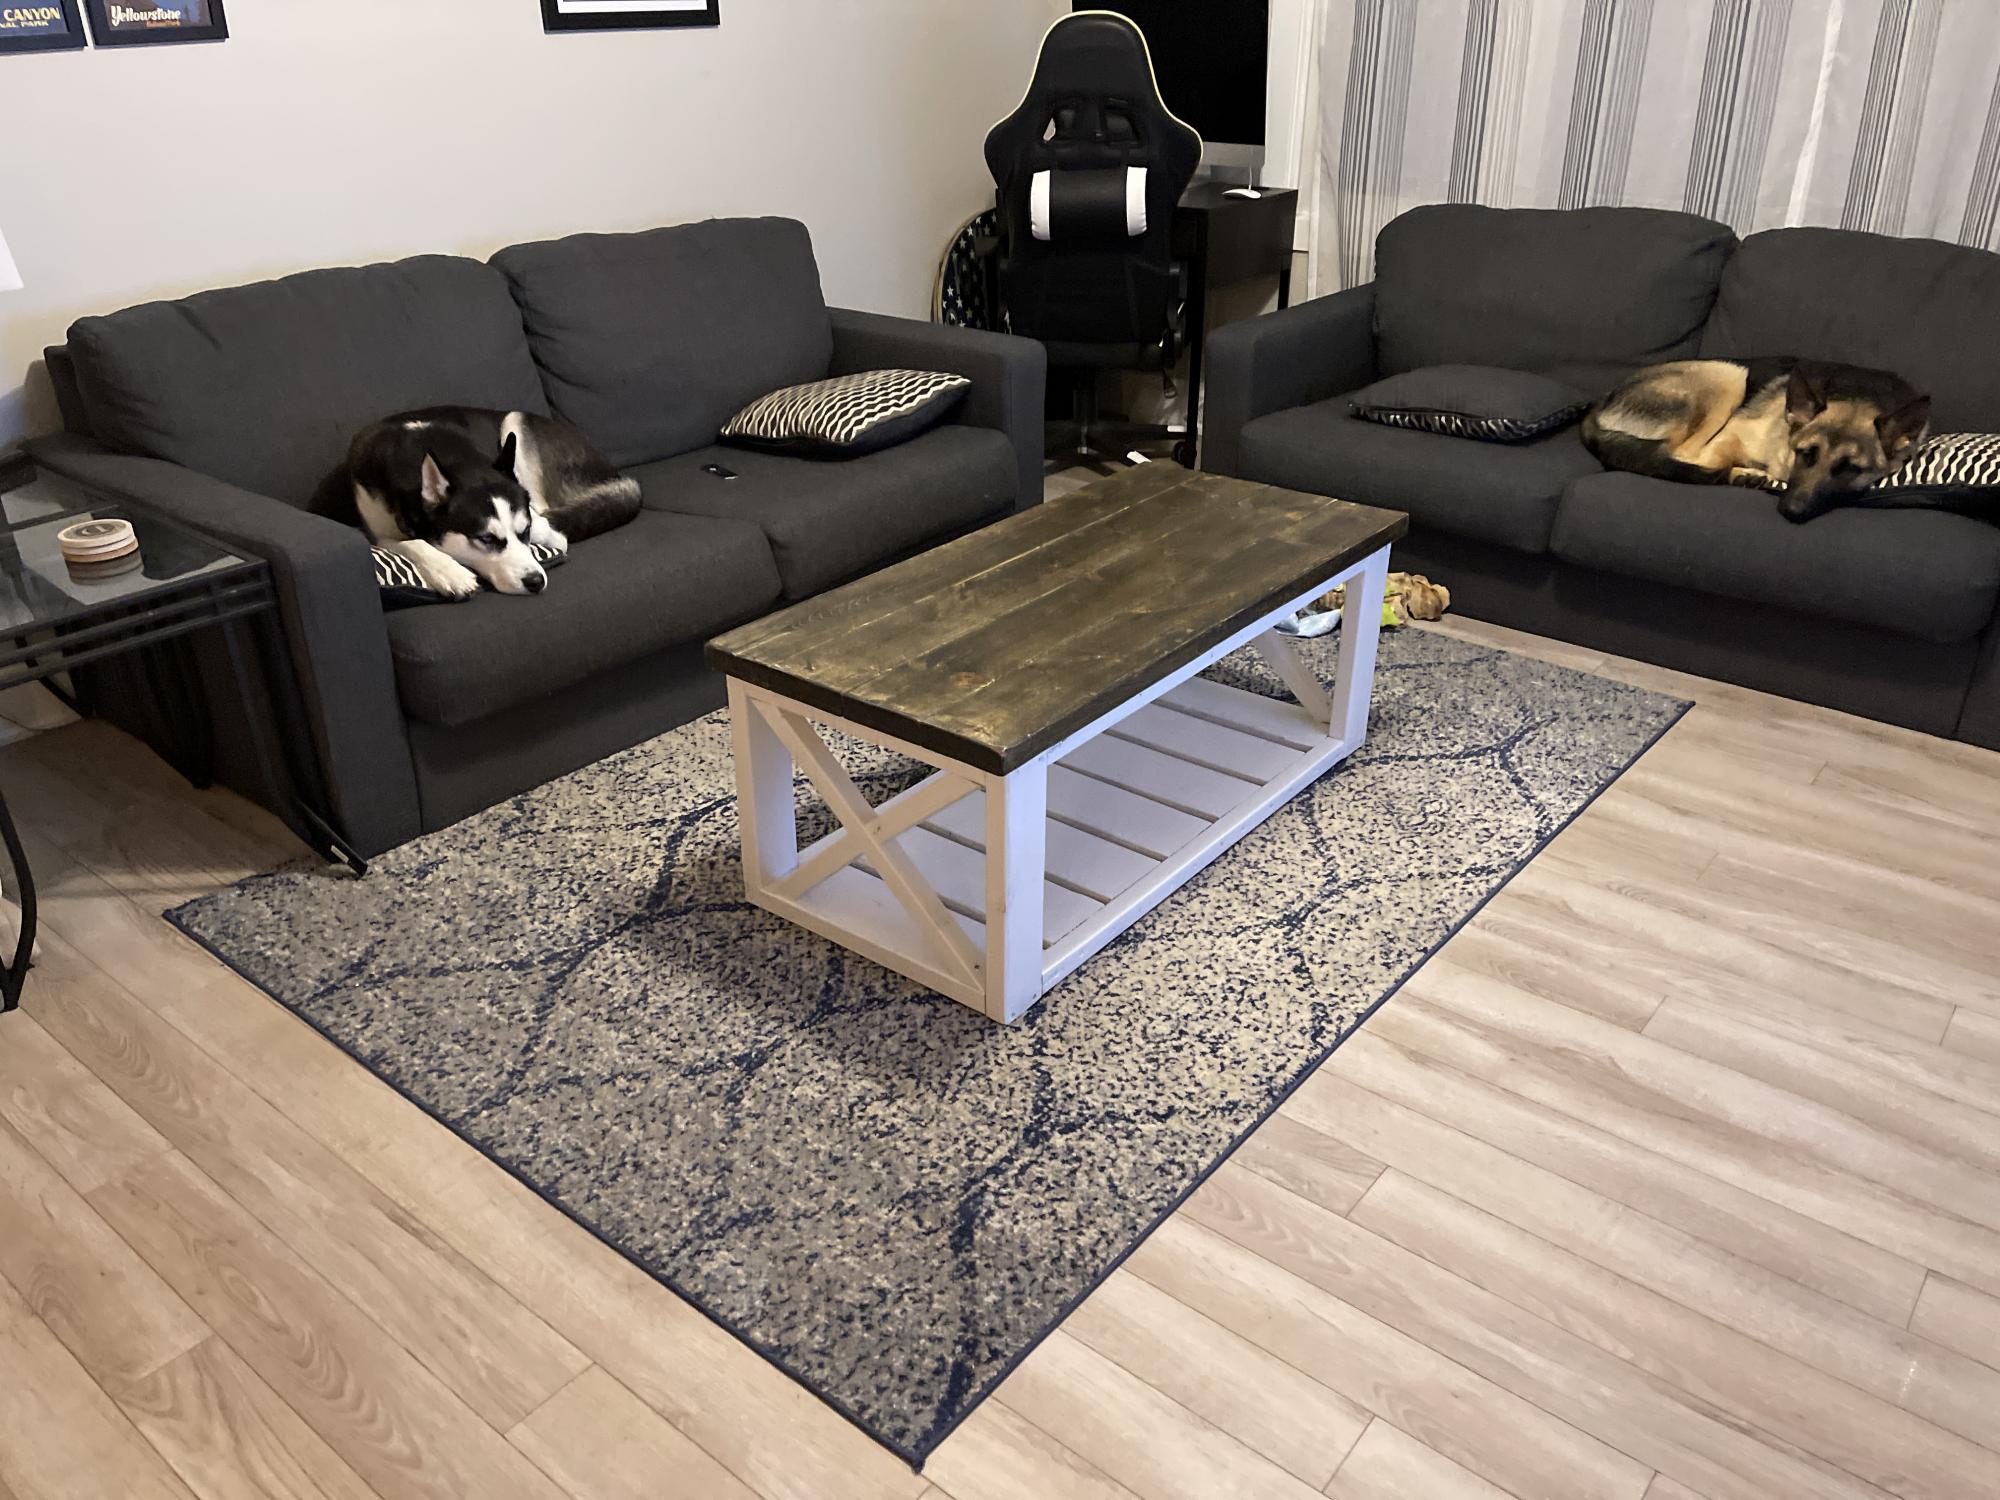
Farmhouse collection
Built from Plan(s)
Estimated Cost
65
Estimated Time Investment
Afternoon Project (3-6 Hours)
Finish Used
Jacobean and white paint
Recommended Skill Level
Beginner
Junk Drawer No More
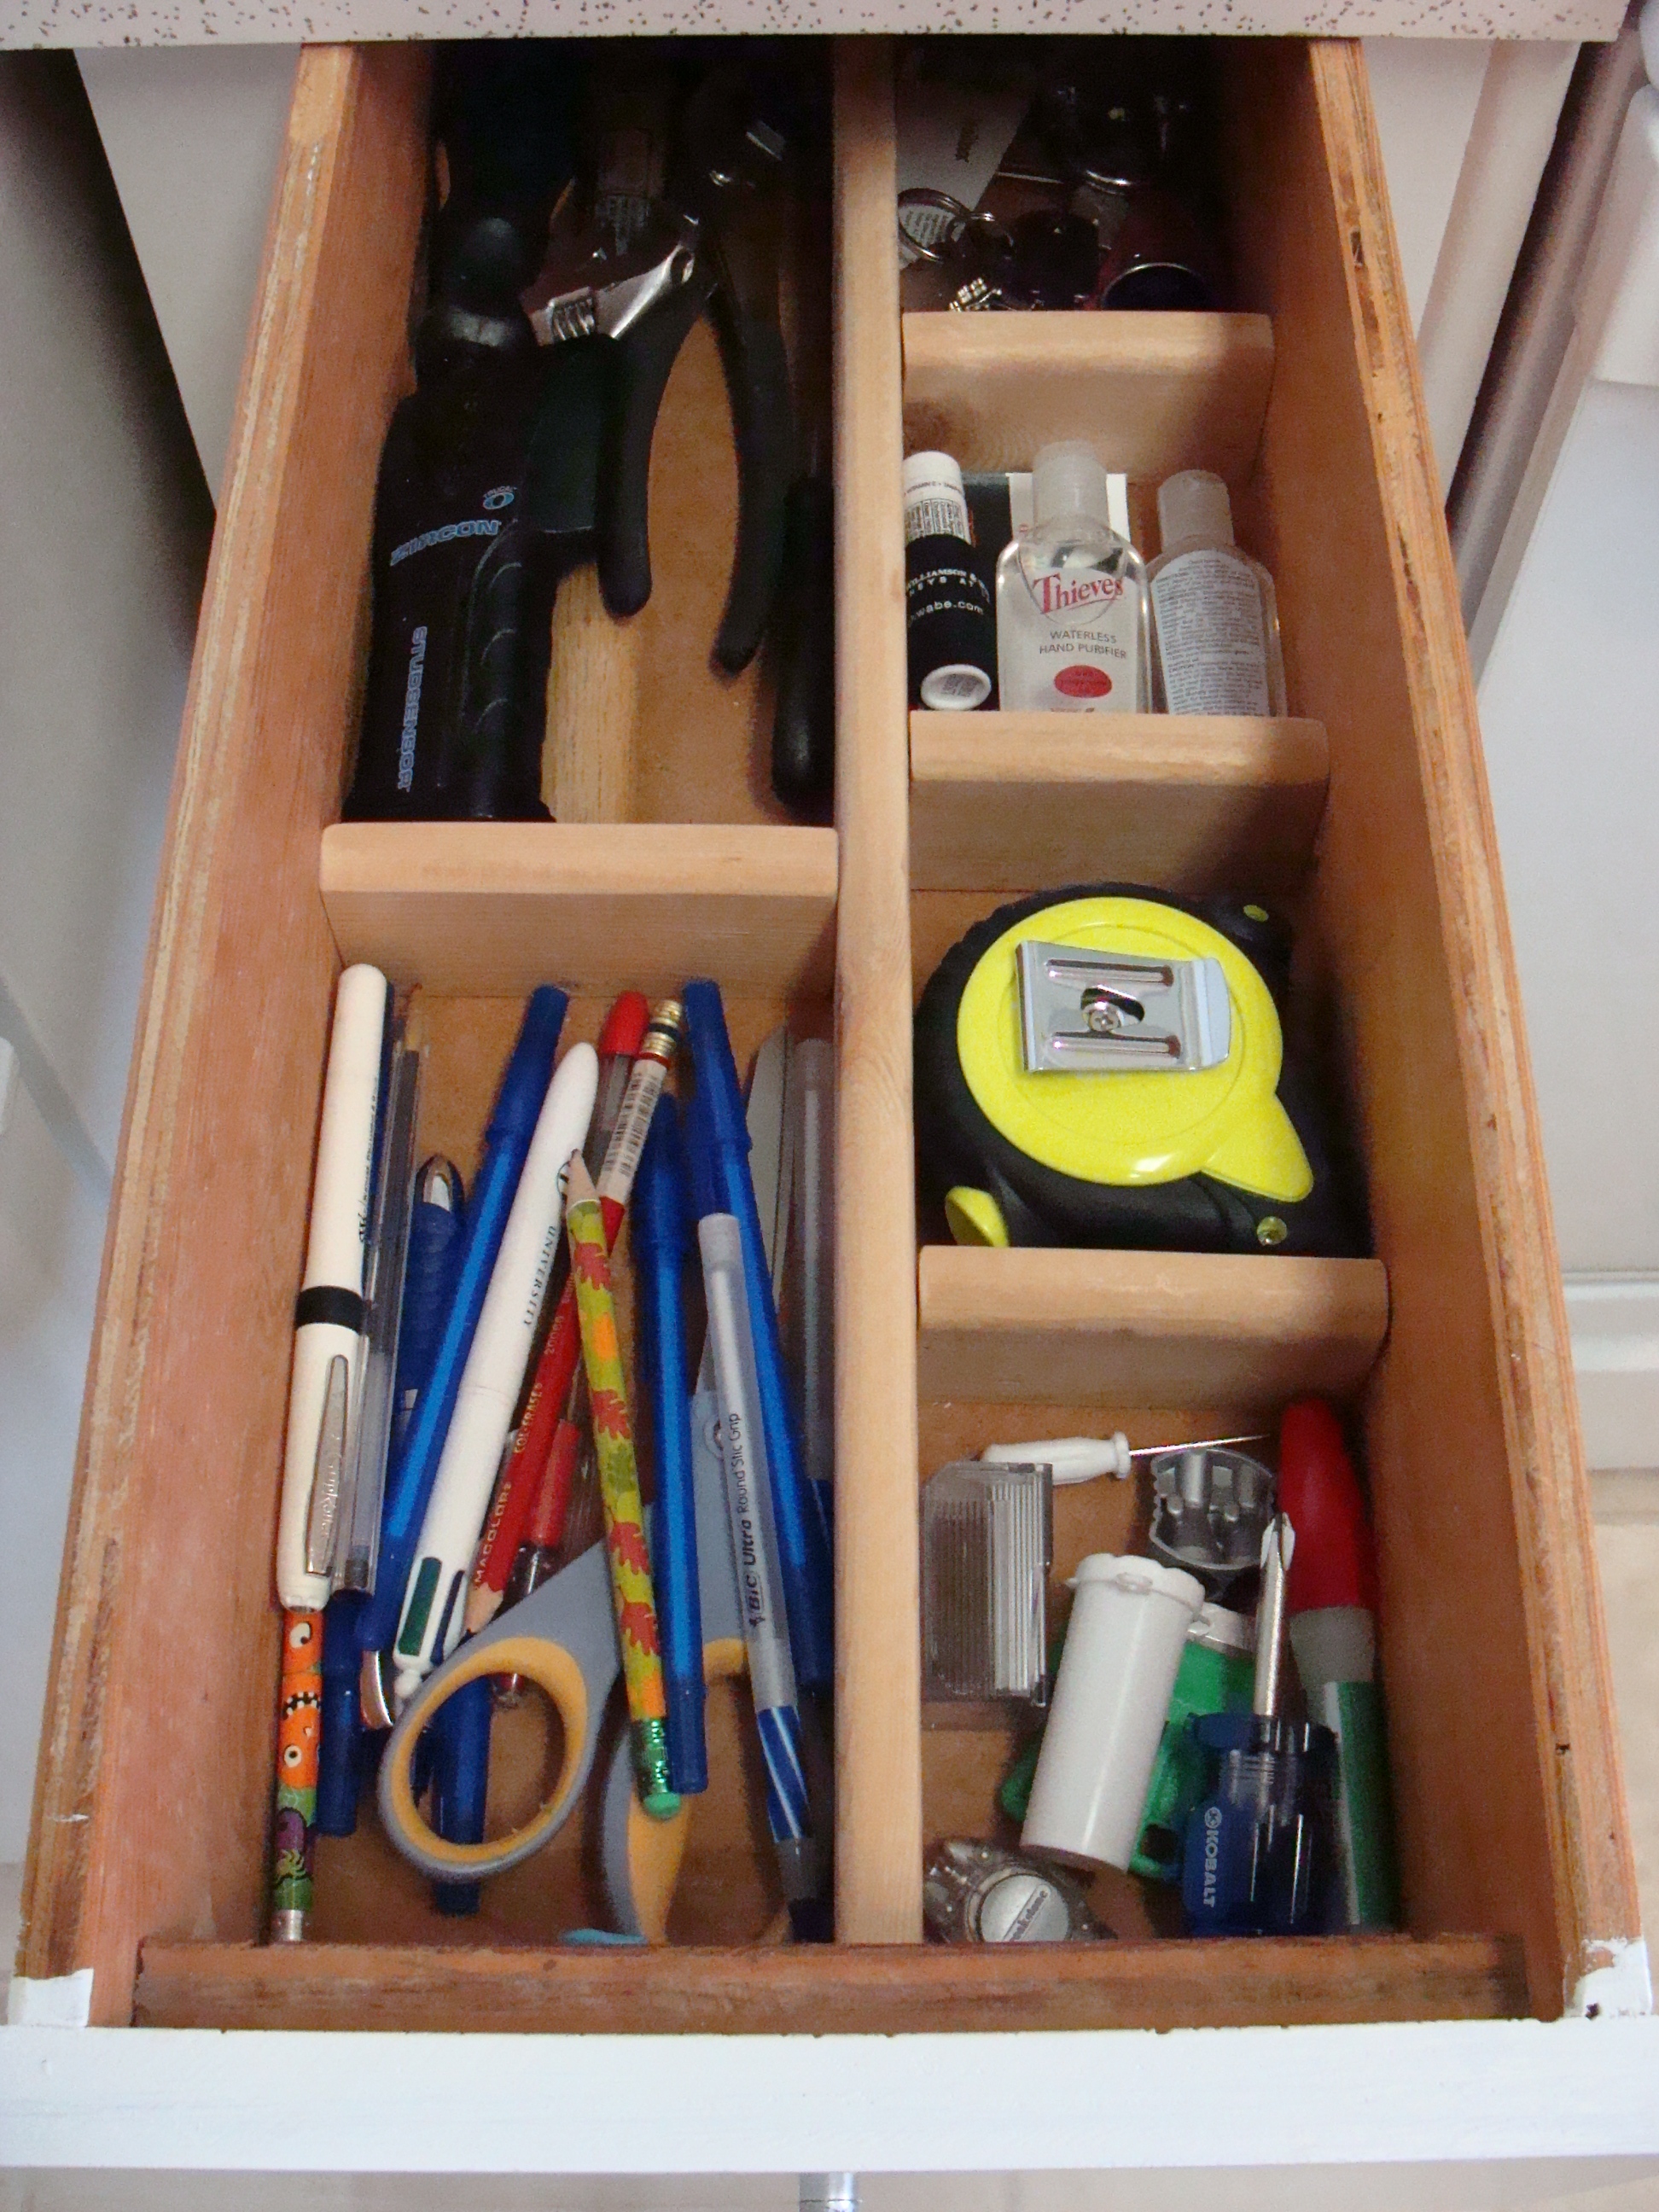
I finally got tired of my junk drawer being messy, so I took 10 minutes today and a piece of scrap wood and made this drawer divider. I even have a dedicated cubby for my tape measure!
Built from Plan(s)
Estimated Cost
nothing
Finish Used
I left it unfinished.
Recommended Skill Level
Starter Project
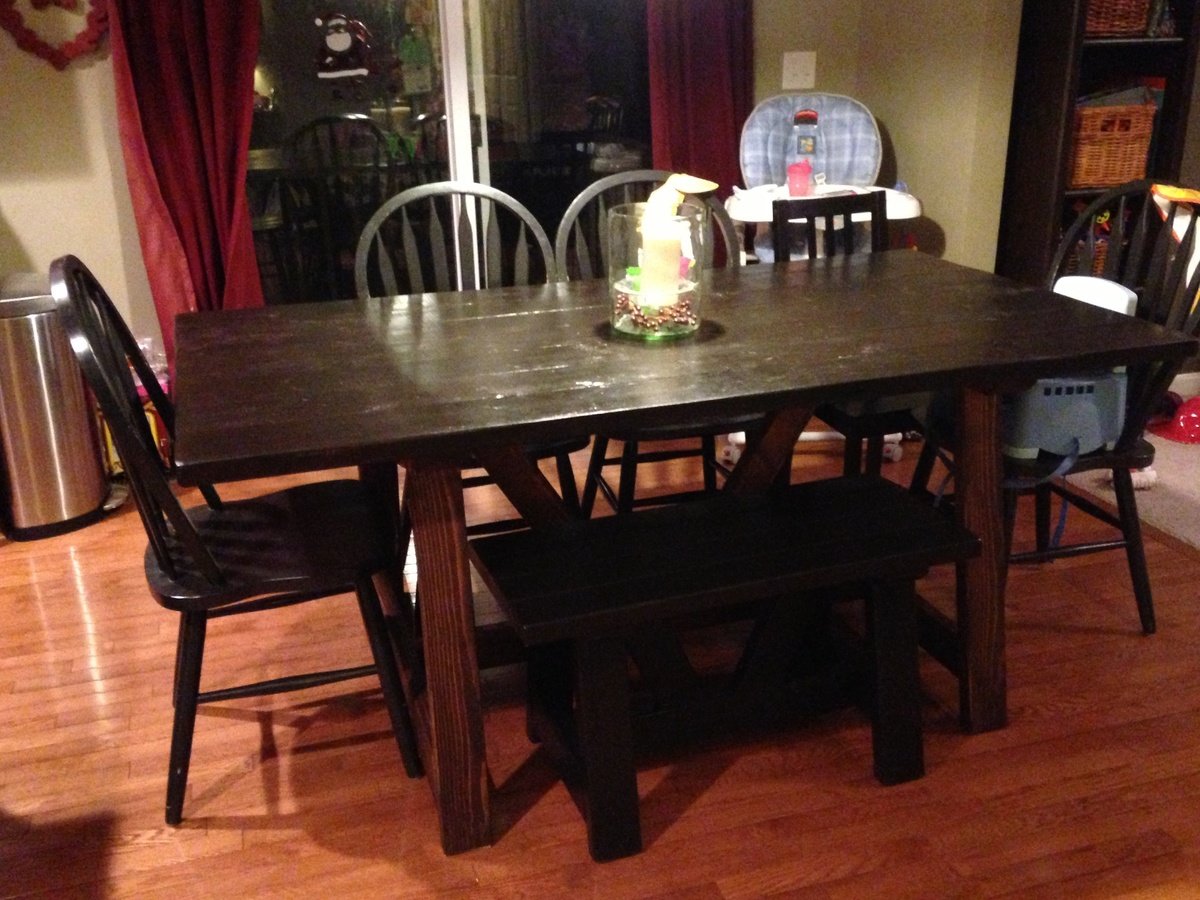
Benchwright Farmhouse Table
This has been our largest project yet! We build this table over the course of several months. Just working on it here and there when we were in the mood or had the chance. You can check out my blog for more details and pictures of the project.
Built from Plan(s)
Estimated Time Investment
Week Long Project (20 Hours or More)
Finish Used
Rust-Oleum's Dark Walnut and Minwax Wipe-On Poly
Recommended Skill Level
Intermediate
Comments

Madison Dresser with a new look :)
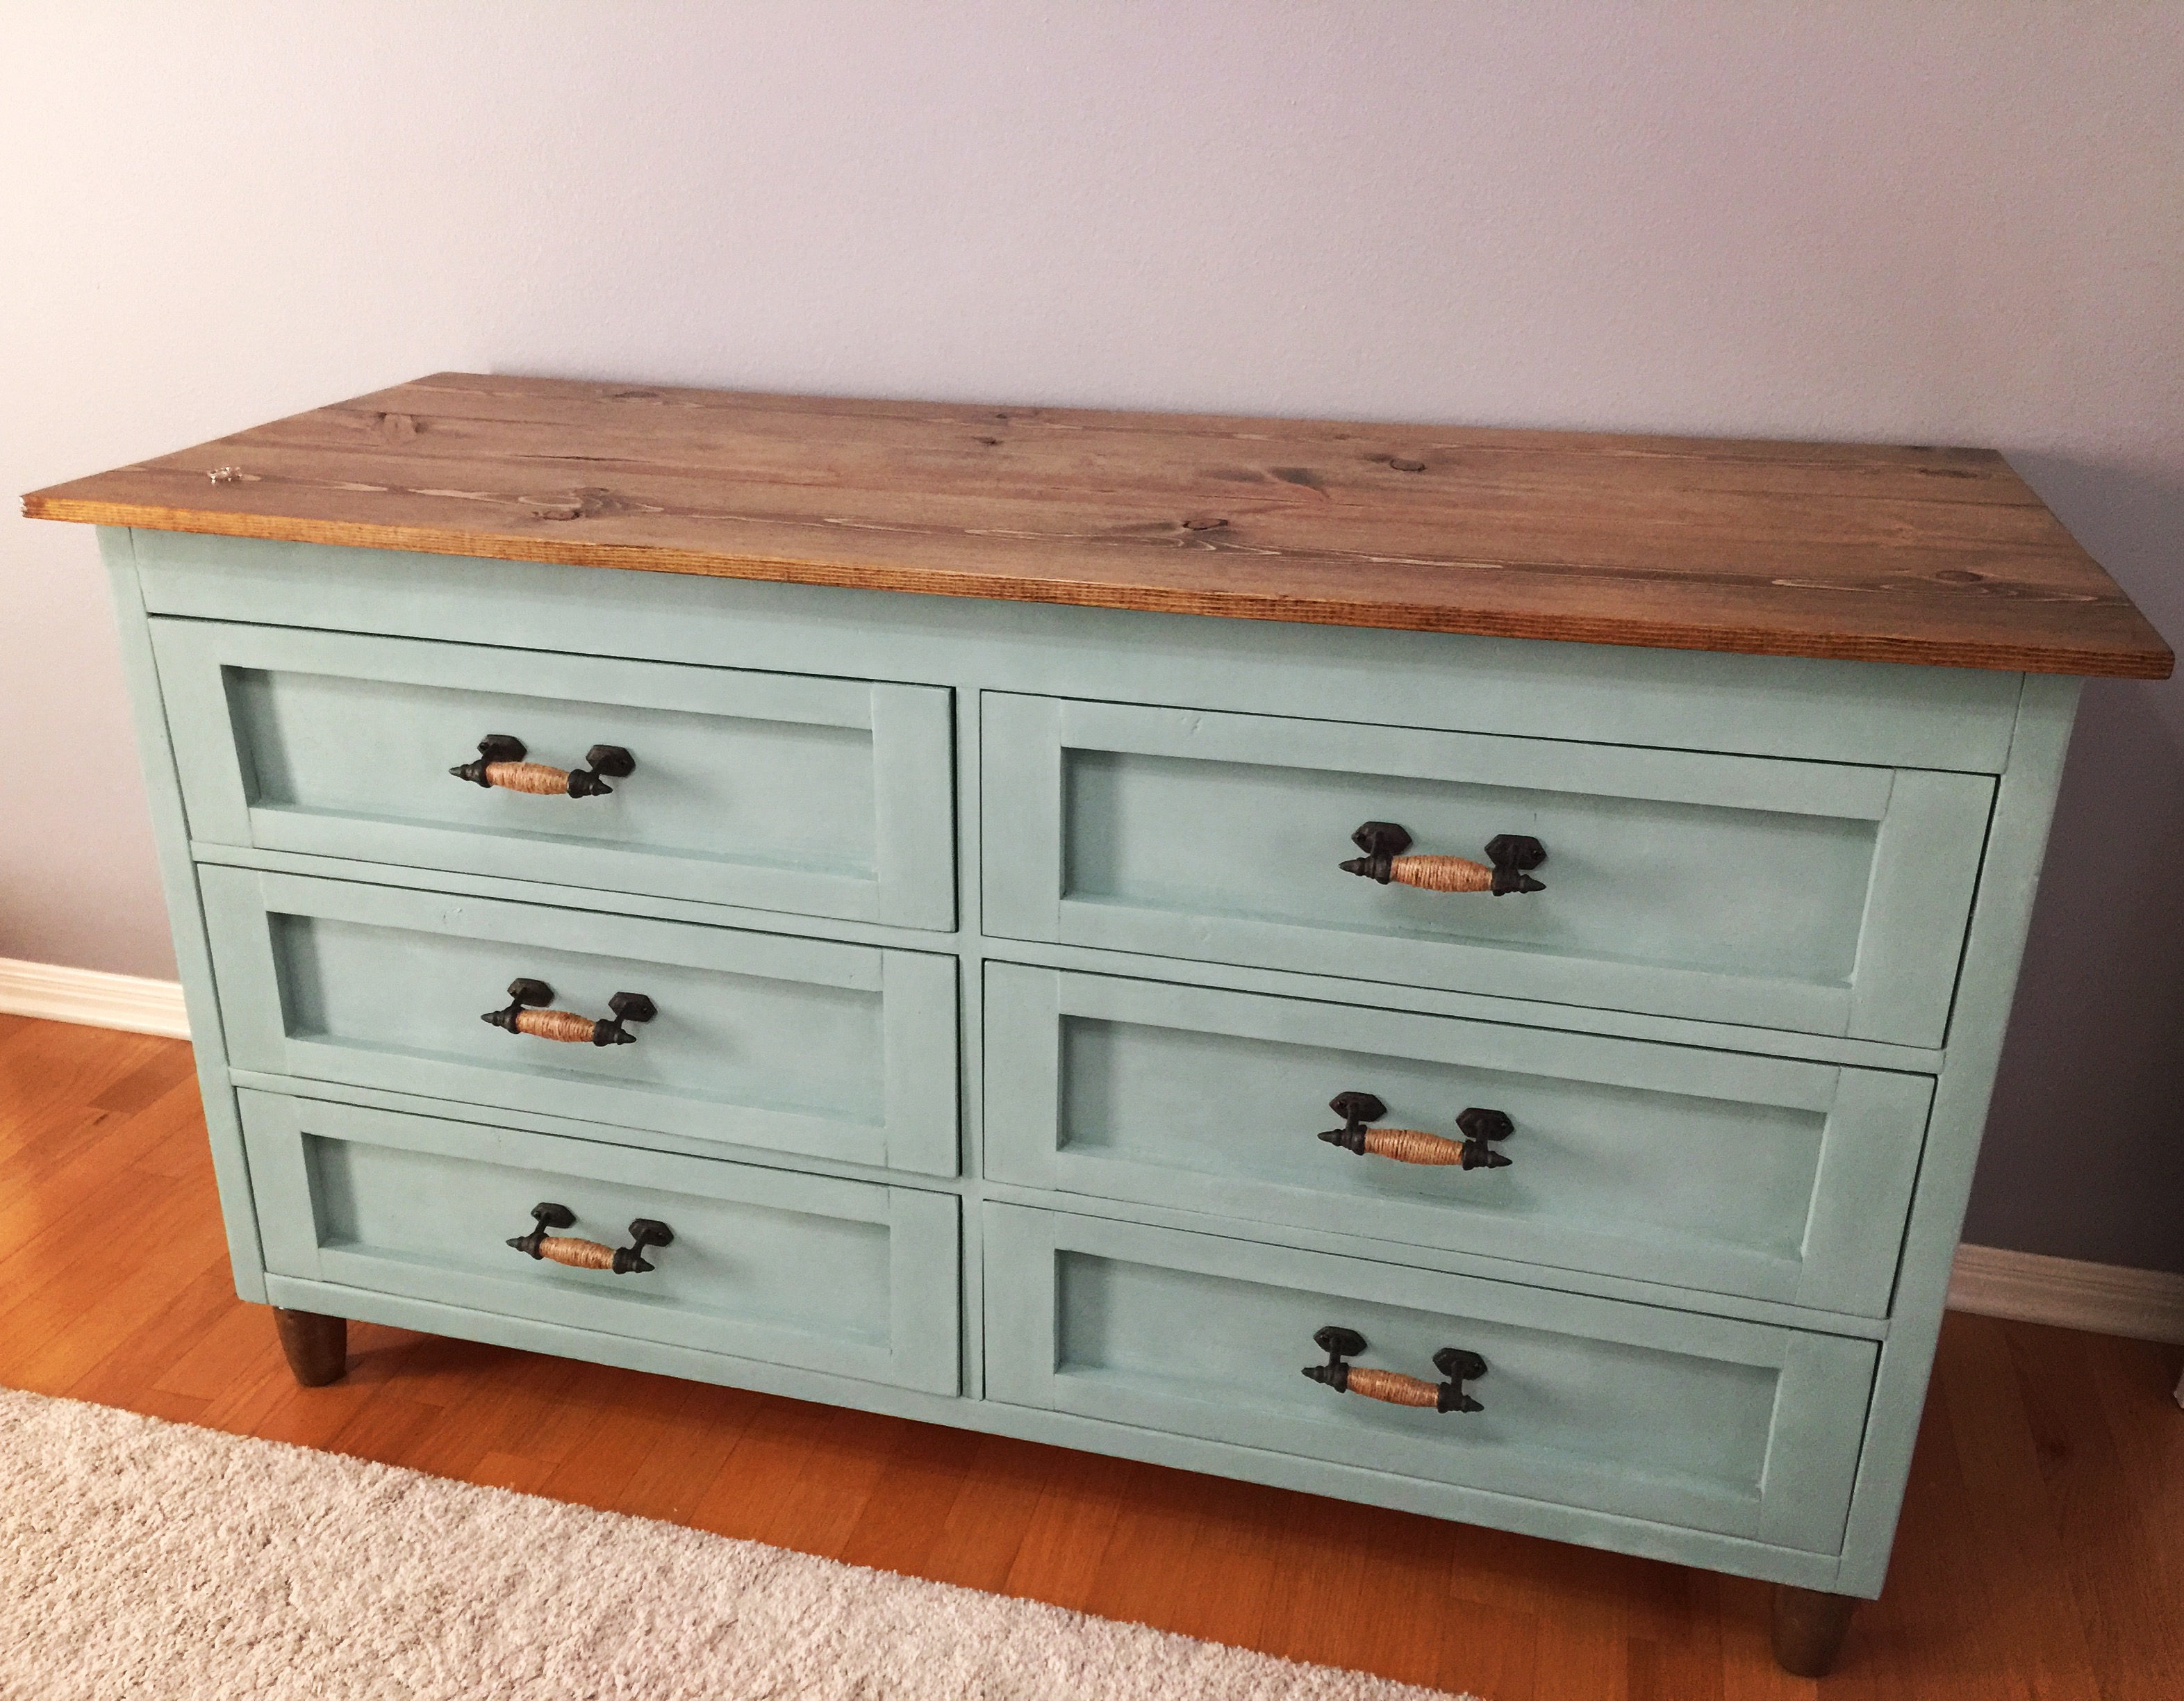
Hope you like it! We used Duck Egg Chalk Paint and a dark walnut stain for the top and legs. We also put in drawer slides instead of doing it the normal way the plans said. (That was harder than we expected but the pay off is well worth it.) Knobs are from Hobby Lobby and we wrapped them in twine to brighten them up!
Built from Plan(s)
Estimated Cost
$350-400 total
Estimated Time Investment
Week Long Project (20 Hours or More)
Finish Used
Duck Egg Chalk paint and clear wax
The top is Dark walnut stain and satin poly
The top is Dark walnut stain and satin poly
Recommended Skill Level
Intermediate
Comments
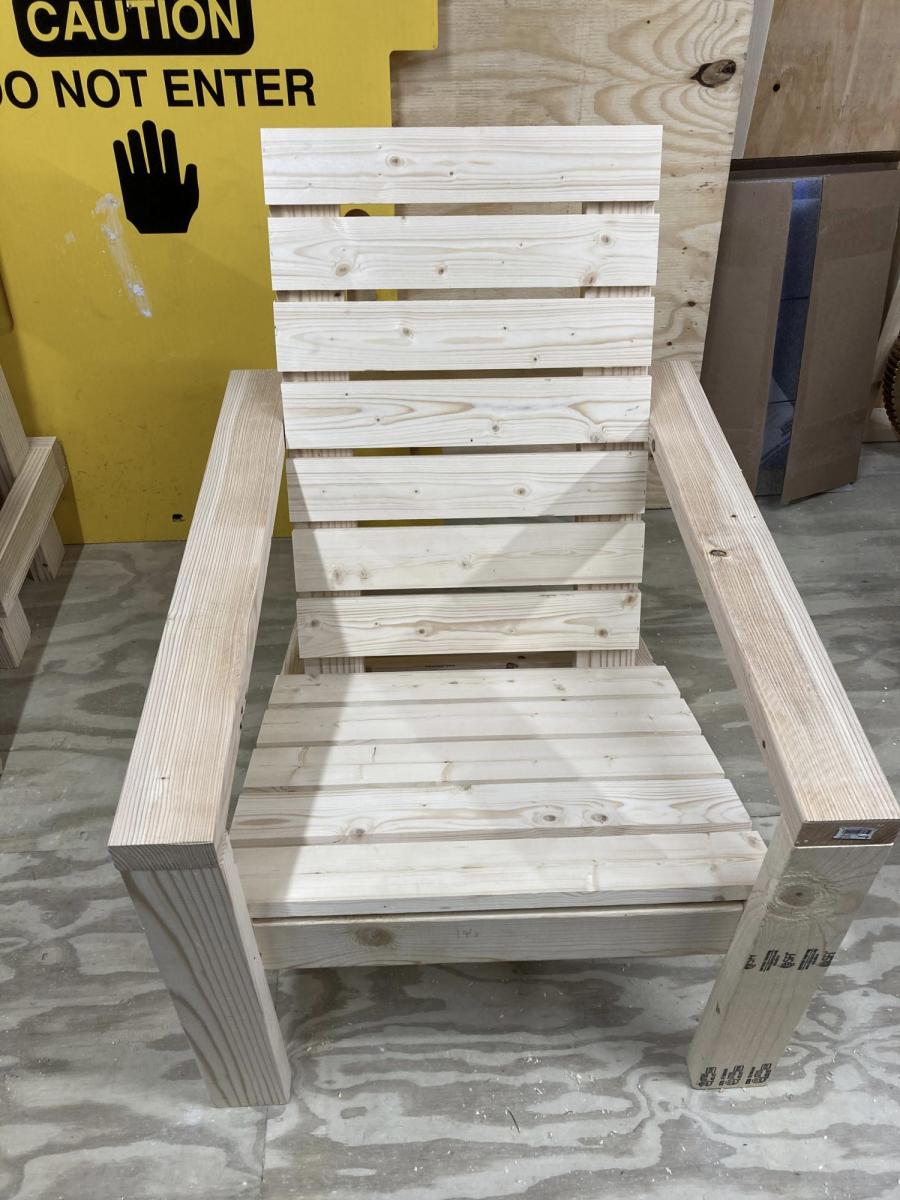
2x4 Adirondack Chair

Built this with my son after watching tutorial. Very comfortable need to sand and stain. Thank you for the info.
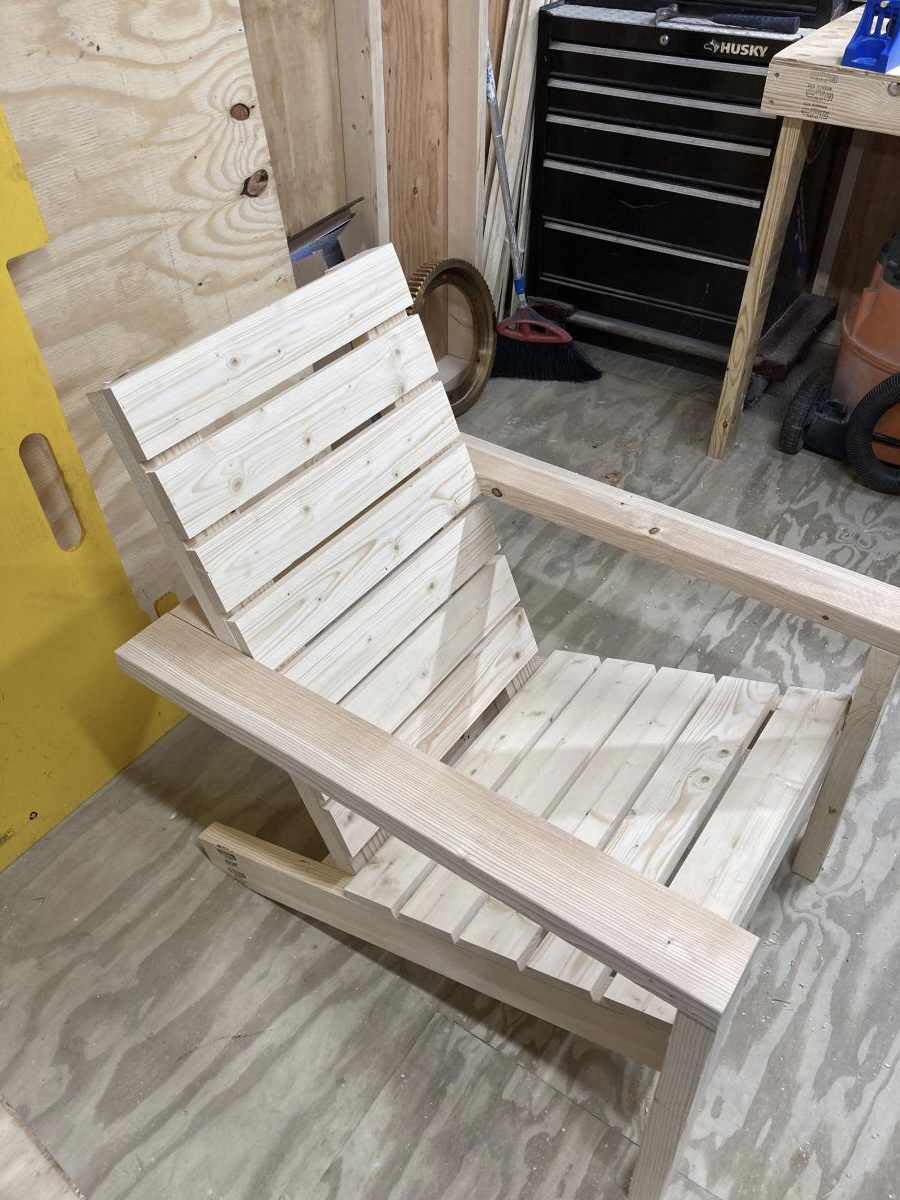
Built from Plan(s)
Estimated Time Investment
An Hour or Two (0-2 Hours)
Recommended Skill Level
Beginner
Farmhouse Dining Table
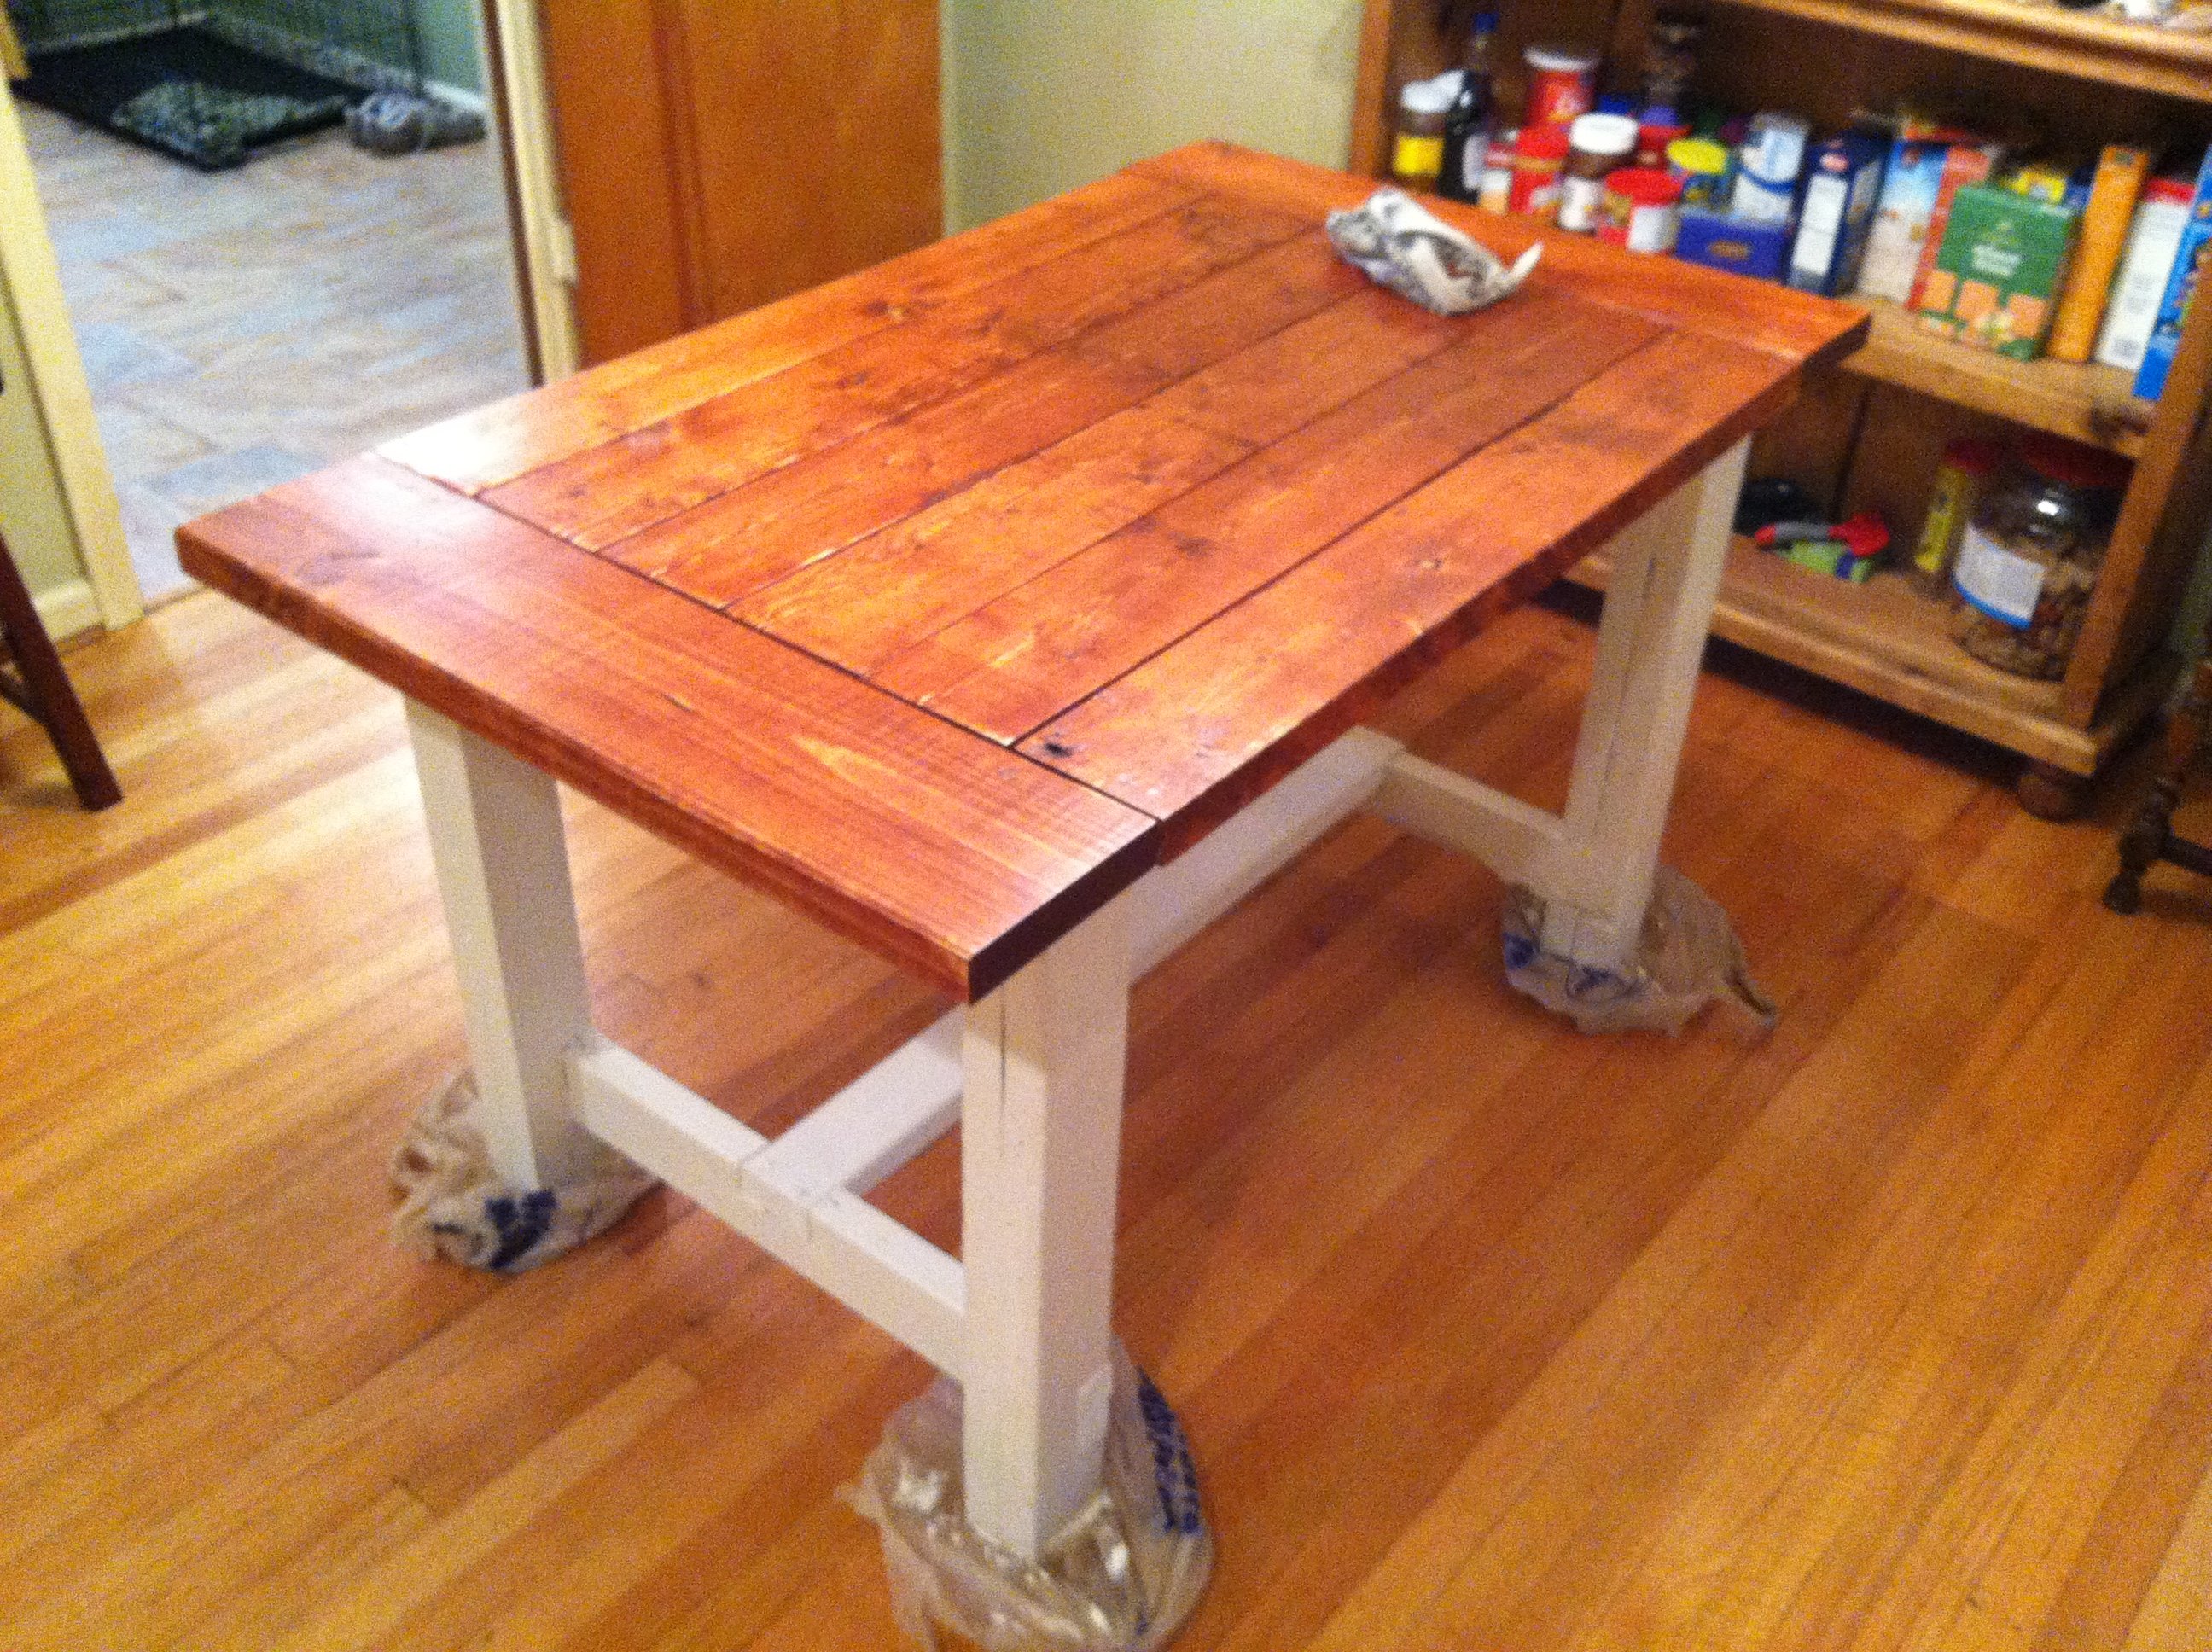
Using the plans provide, I simply changed the measurements needed for my dining room. A really fun build and a great looking end product!
Built from Plan(s)
Estimated Time Investment
Weekend Project (10-20 Hours)
Finish Used
Gunstock Stain with Minwax Satin Polyurethane finish; Behr paint (Bone Folder) on legs
Recommended Skill Level
Intermediate
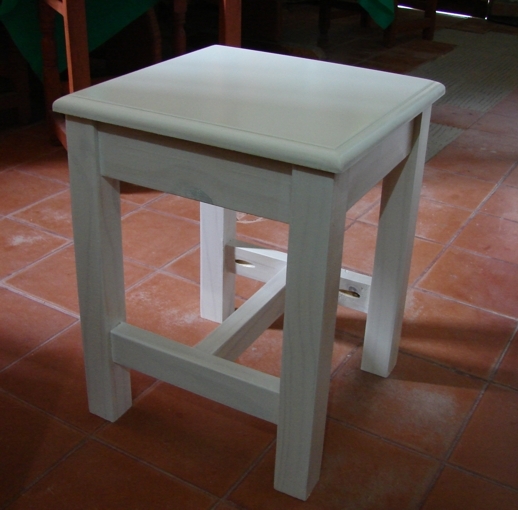
My adirondack stool
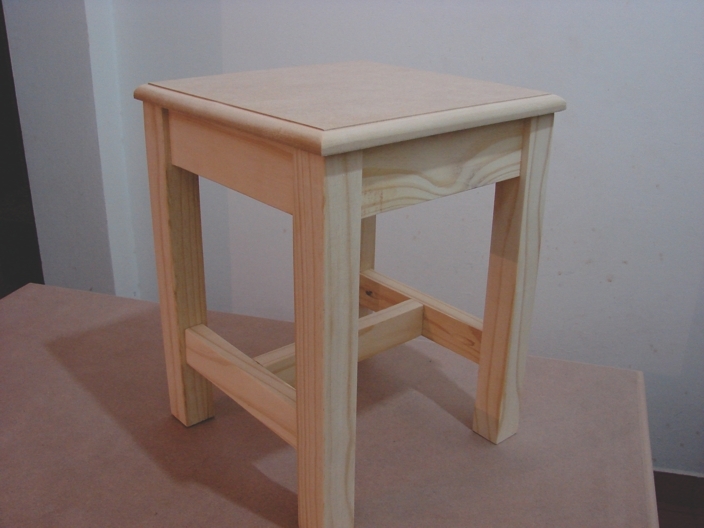
In my country there aren't Kreg jigs; i.e. no Kreg jig, no pocket holes. I obtained a Kreg Jig mini and this is my first build (really, I made four of them)
Built from Plan(s)
Estimated Time Investment
Day Project (6-9 Hours)
Finish Used
Acrylic paint and water-based polyurethane
Recommended Skill Level
Starter Project
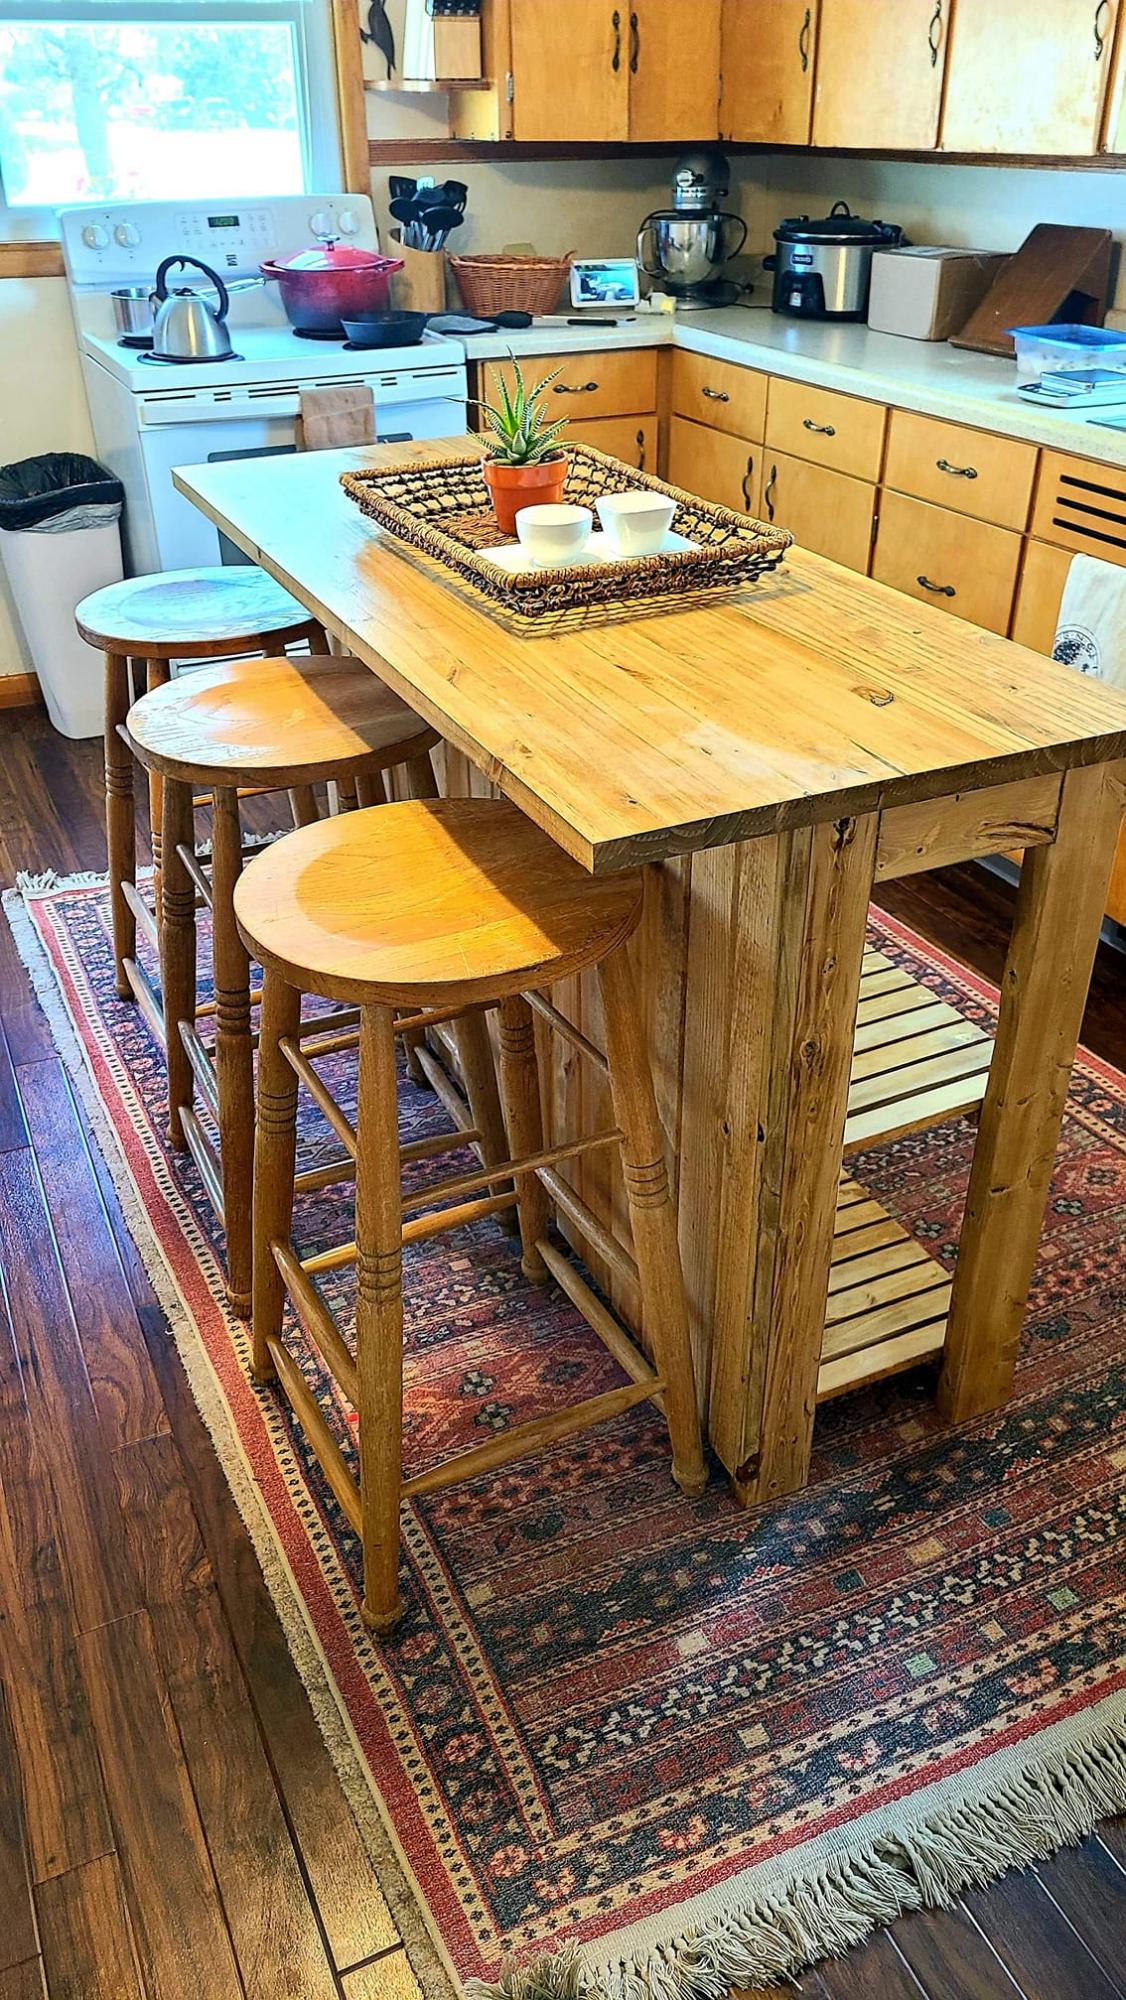
gaby kitchen island plans build!
using the gaby kitchen island plan from ana white I built this over 2 weekends, taking my time! We needed a new, larger side wall island for our laptops, phones, junk, etc and we couldnt love it more. The martha stewart drawer pulls add a nice touch and it all came together quite nicely for our purposes. Thanks so much for taking your time to post such great plans!
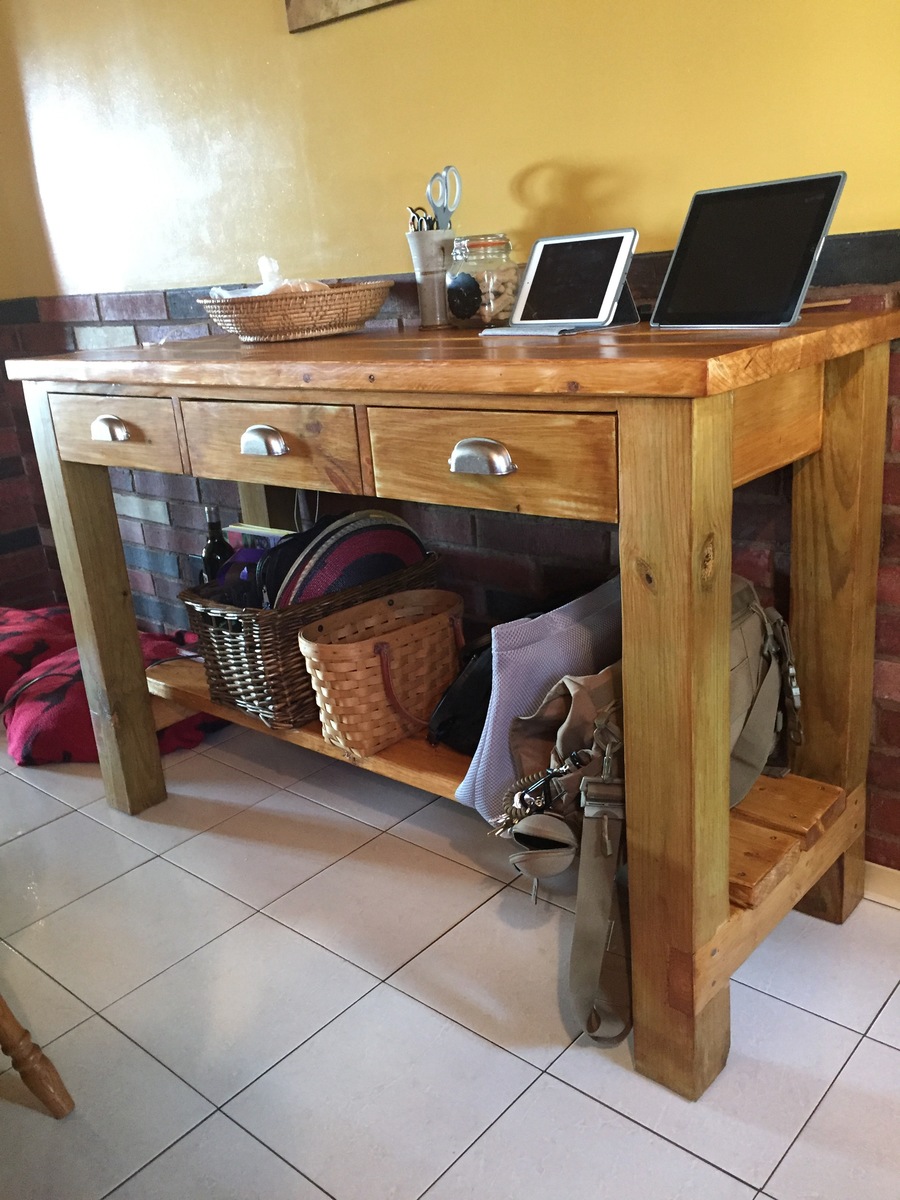
Built from Plan(s)
Estimated Cost
90.00 in wood. I already had the stain and tools
Estimated Time Investment
Weekend Project (10-20 Hours)
Finish Used
summer oak oil based stain with 3 coats of polyurethane
Recommended Skill Level
Intermediate
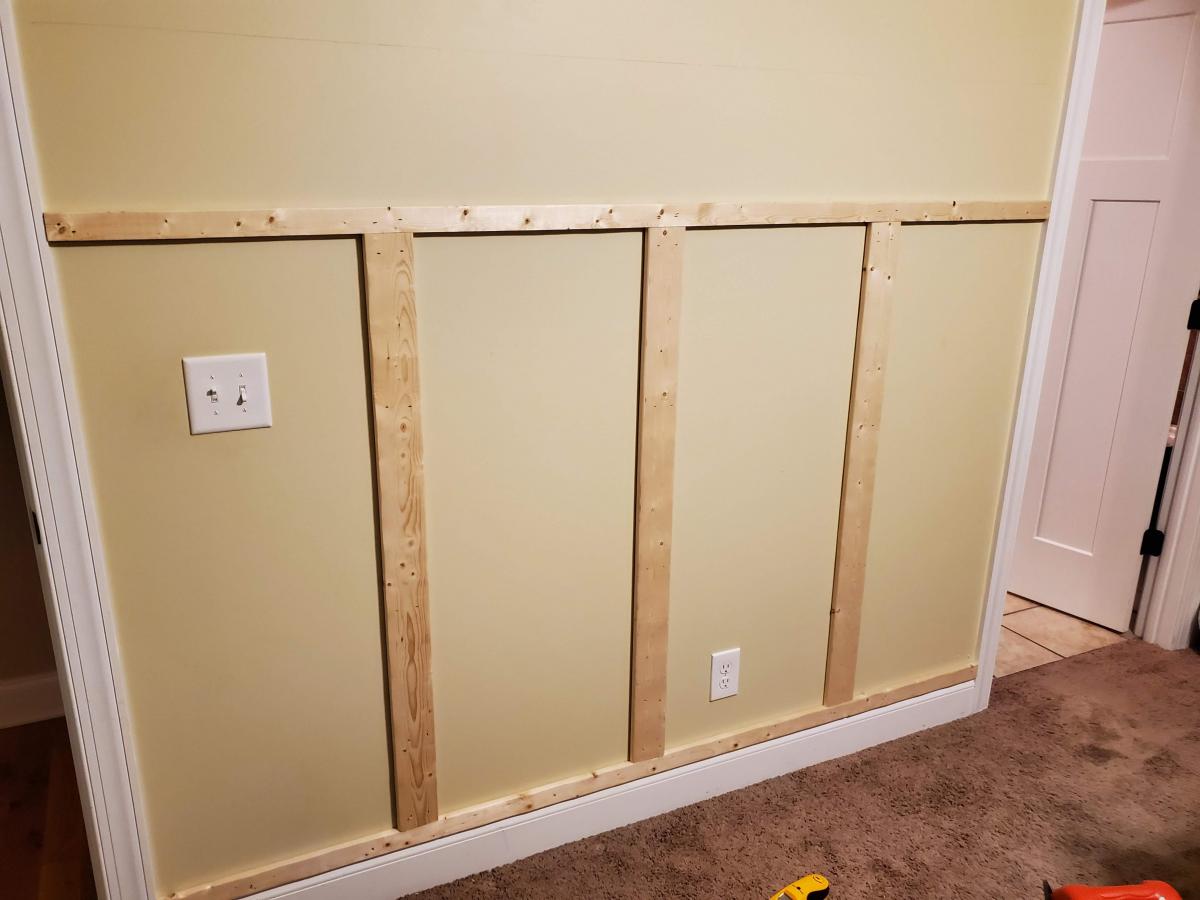
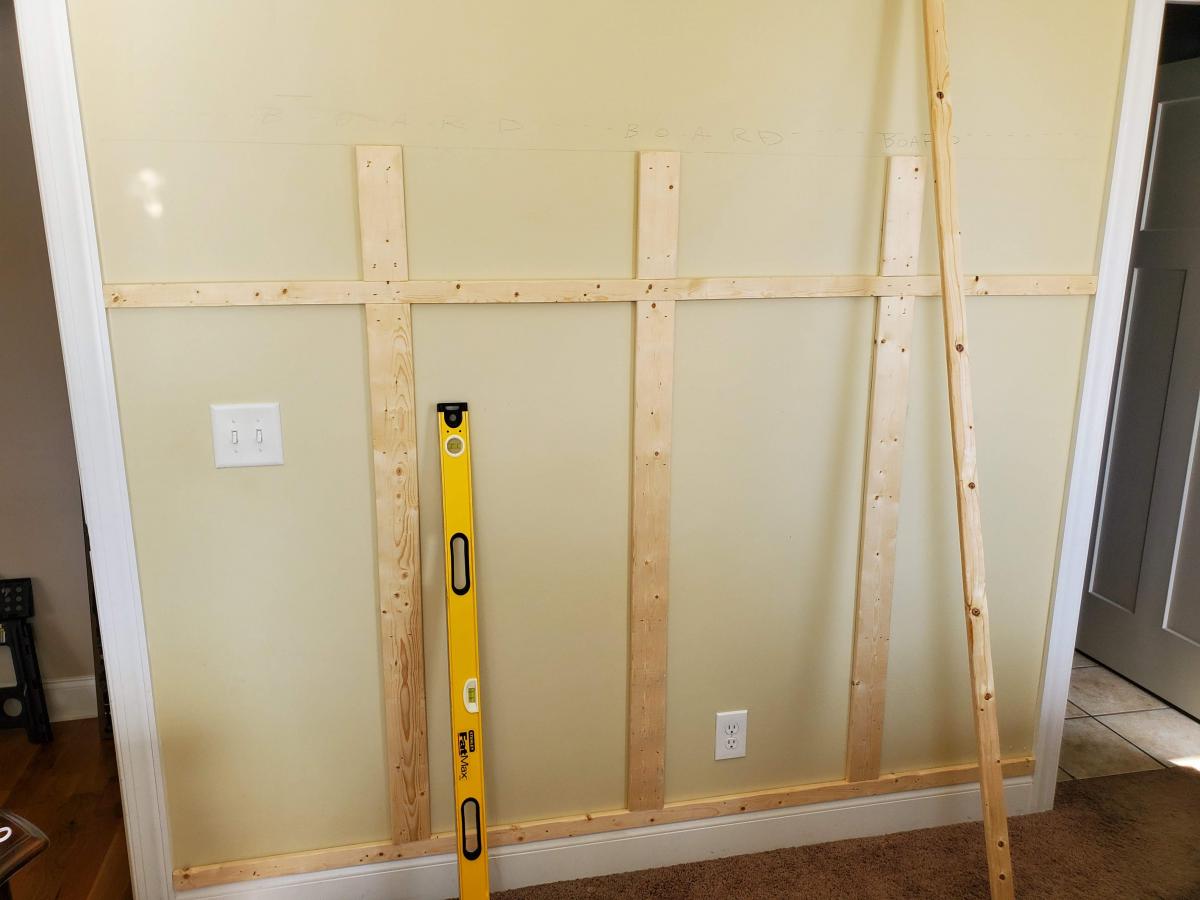
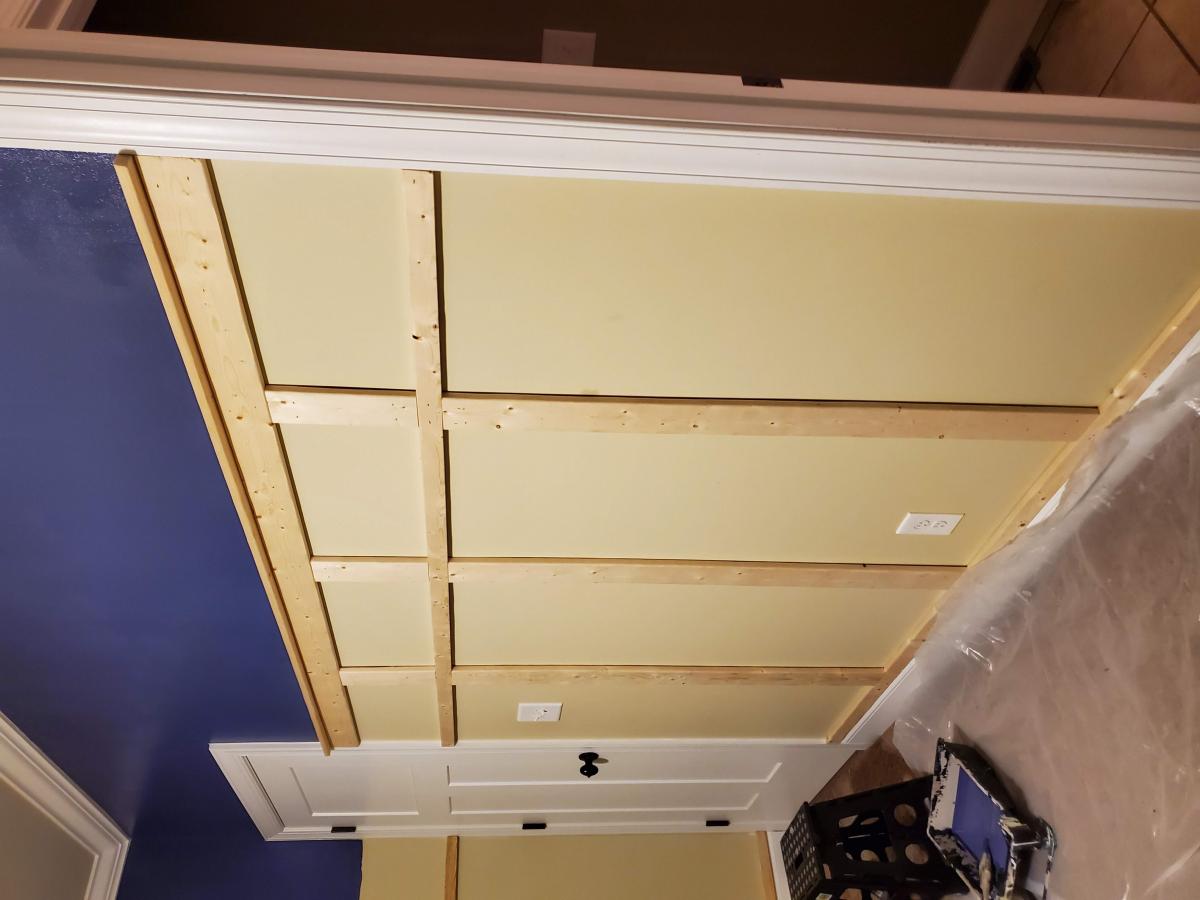
Batten Boards
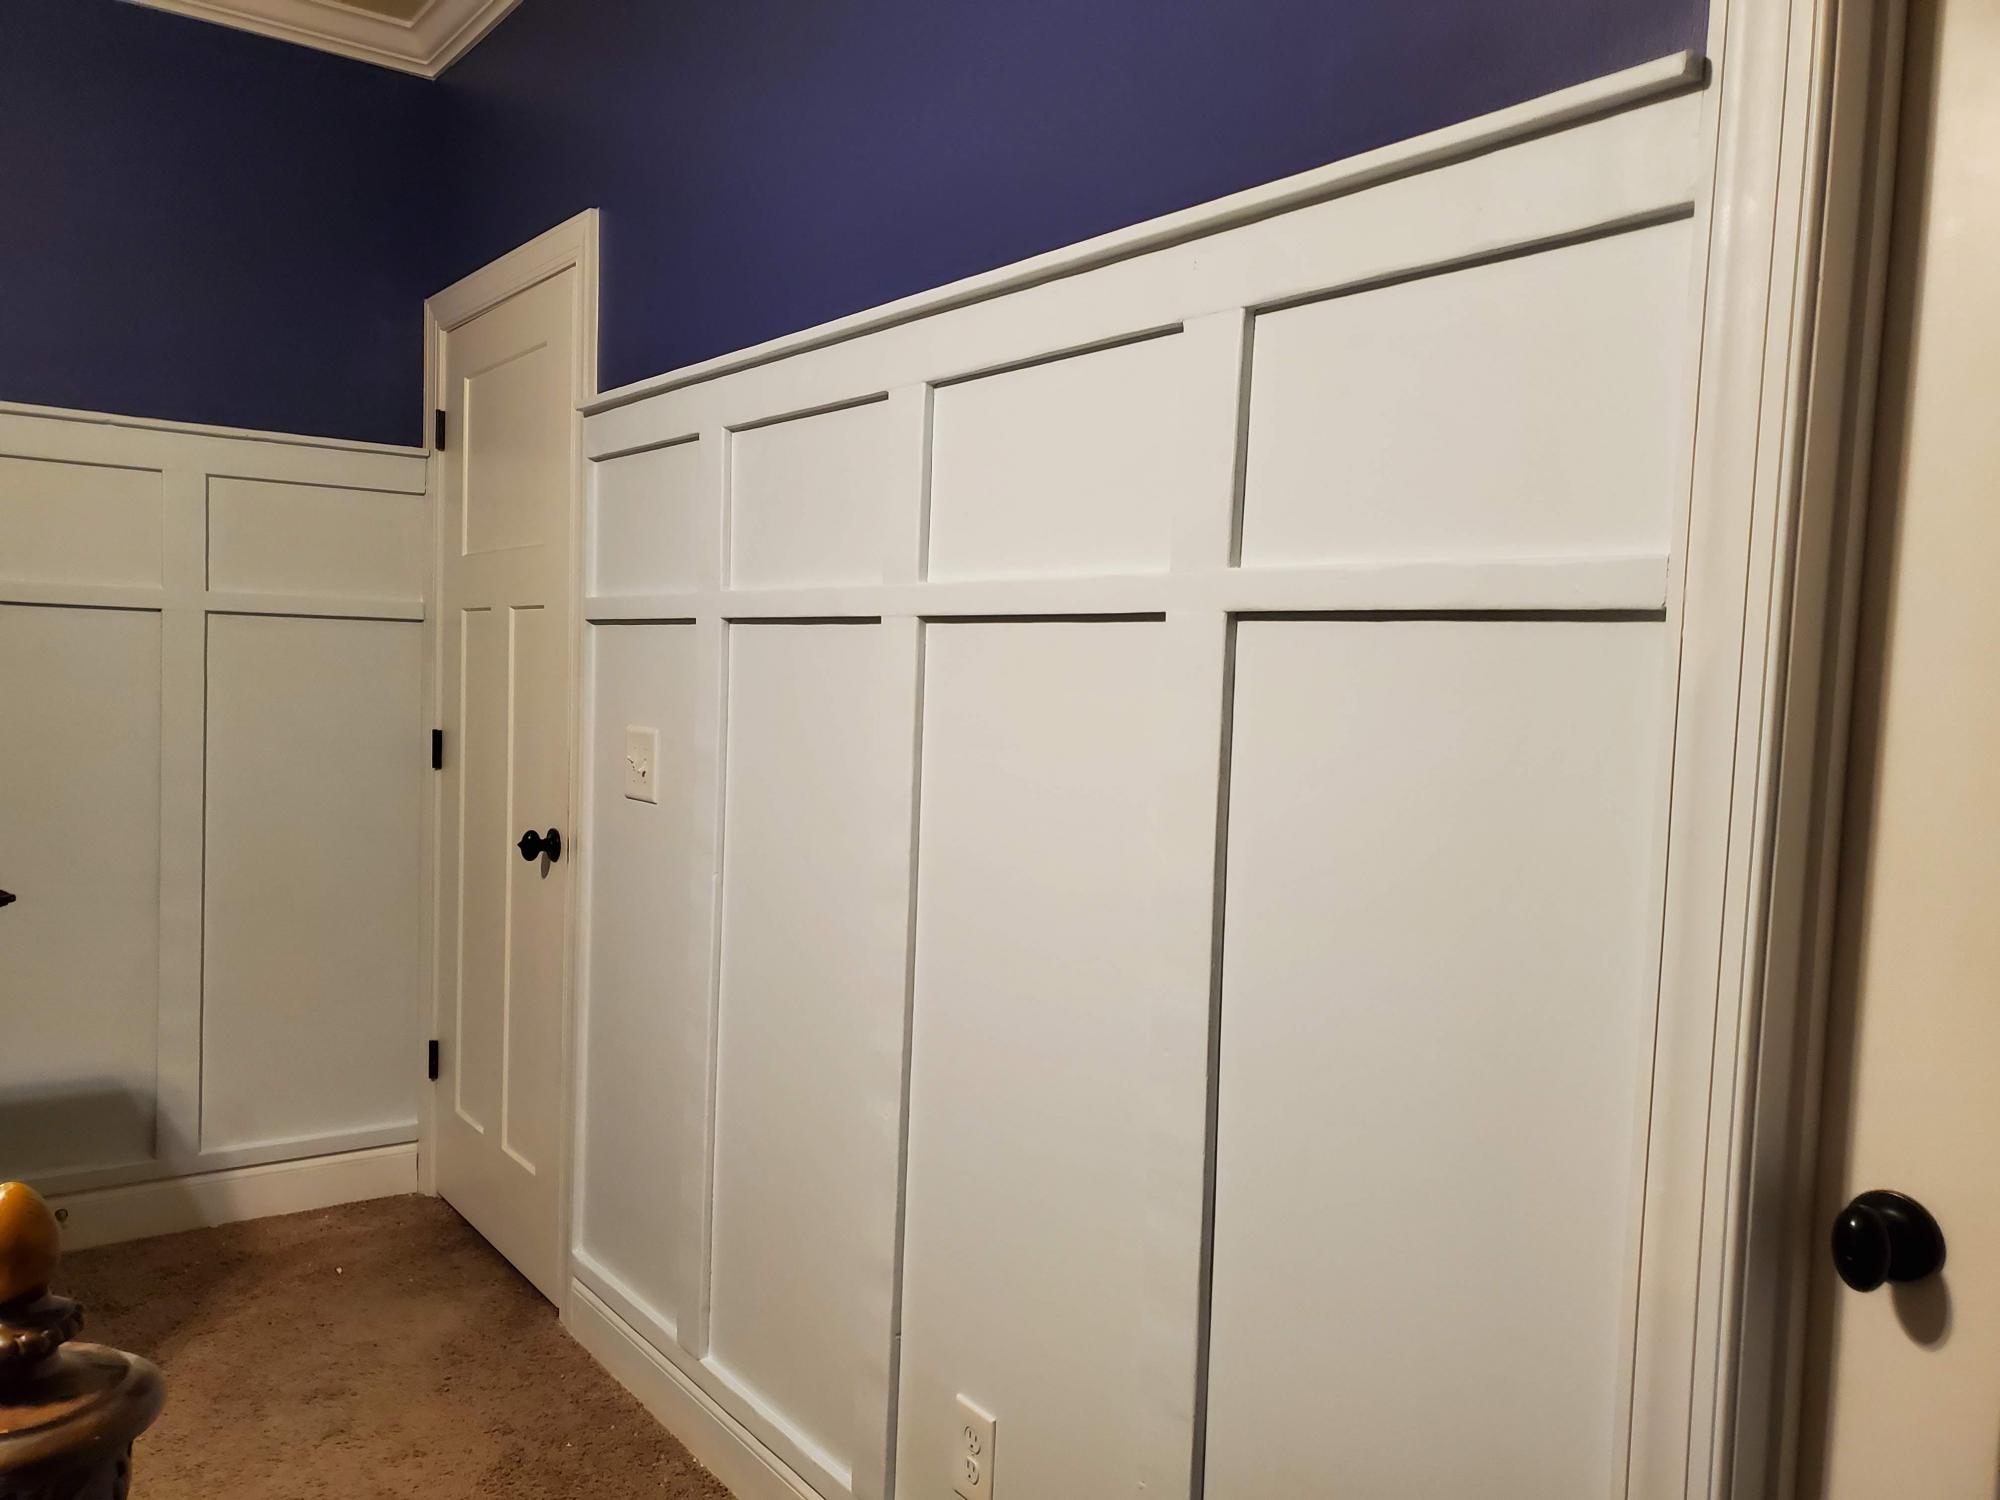
This project was pretty easy up until the nail hole patching, caulking, and sanding. It was still pretty easy, just time consuming. However, if you want something to look nice, it is going to take some time. Bottom line, my wife was ecstatic with her new bedroom and that's good enough for me. It went from bedroom to master suite.
Estimated Time Investment
Day Project (6-9 Hours)
Recommended Skill Level
Beginner
Comments
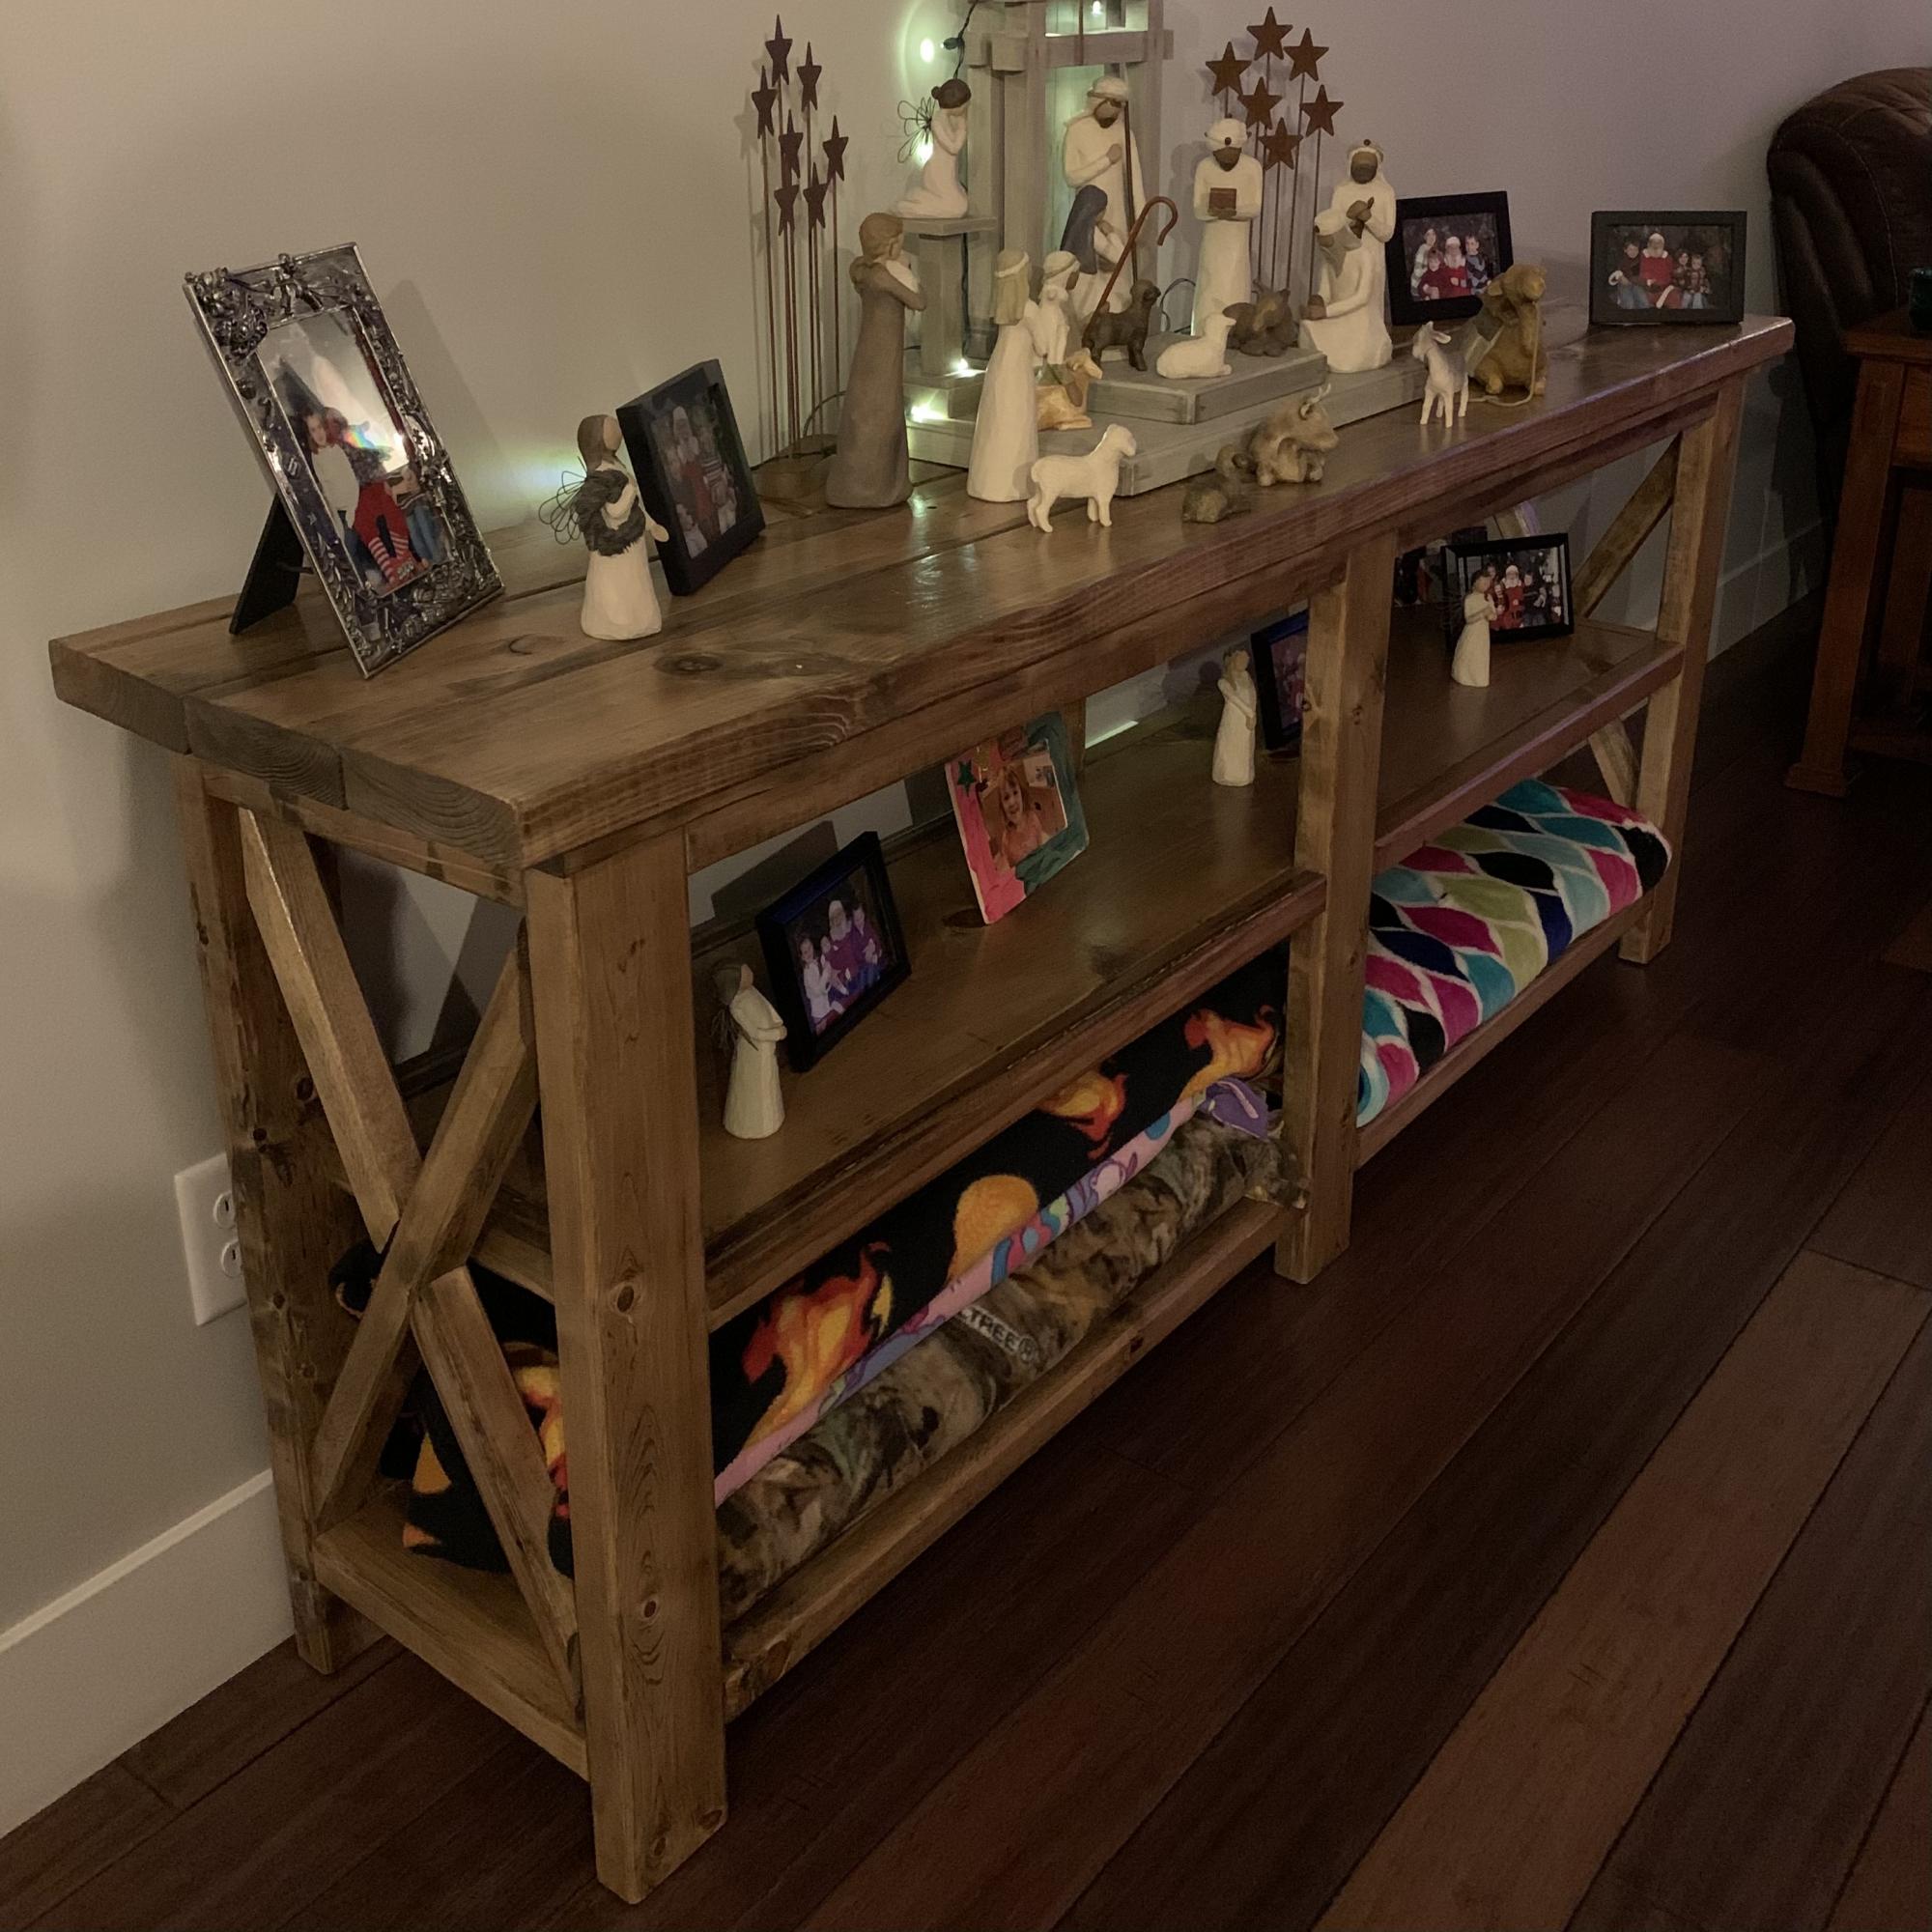
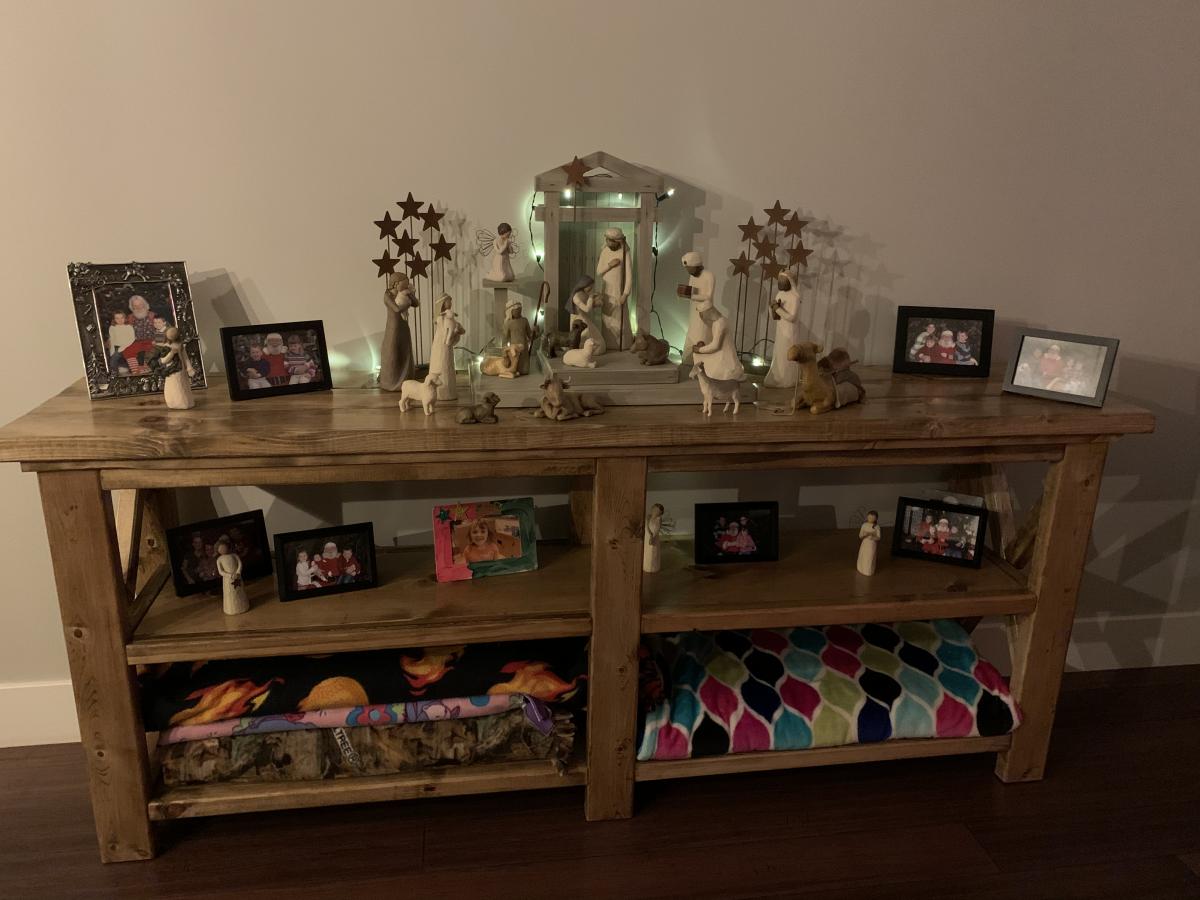
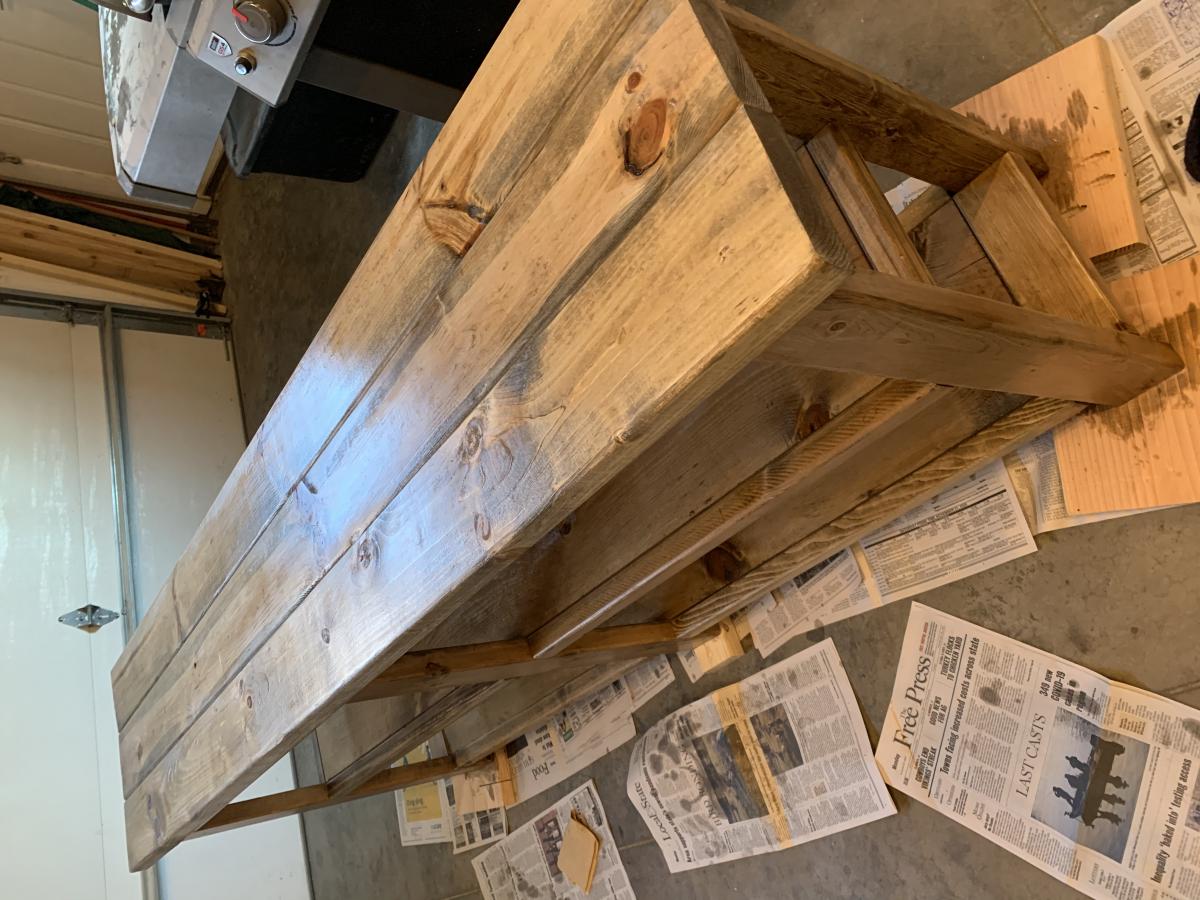
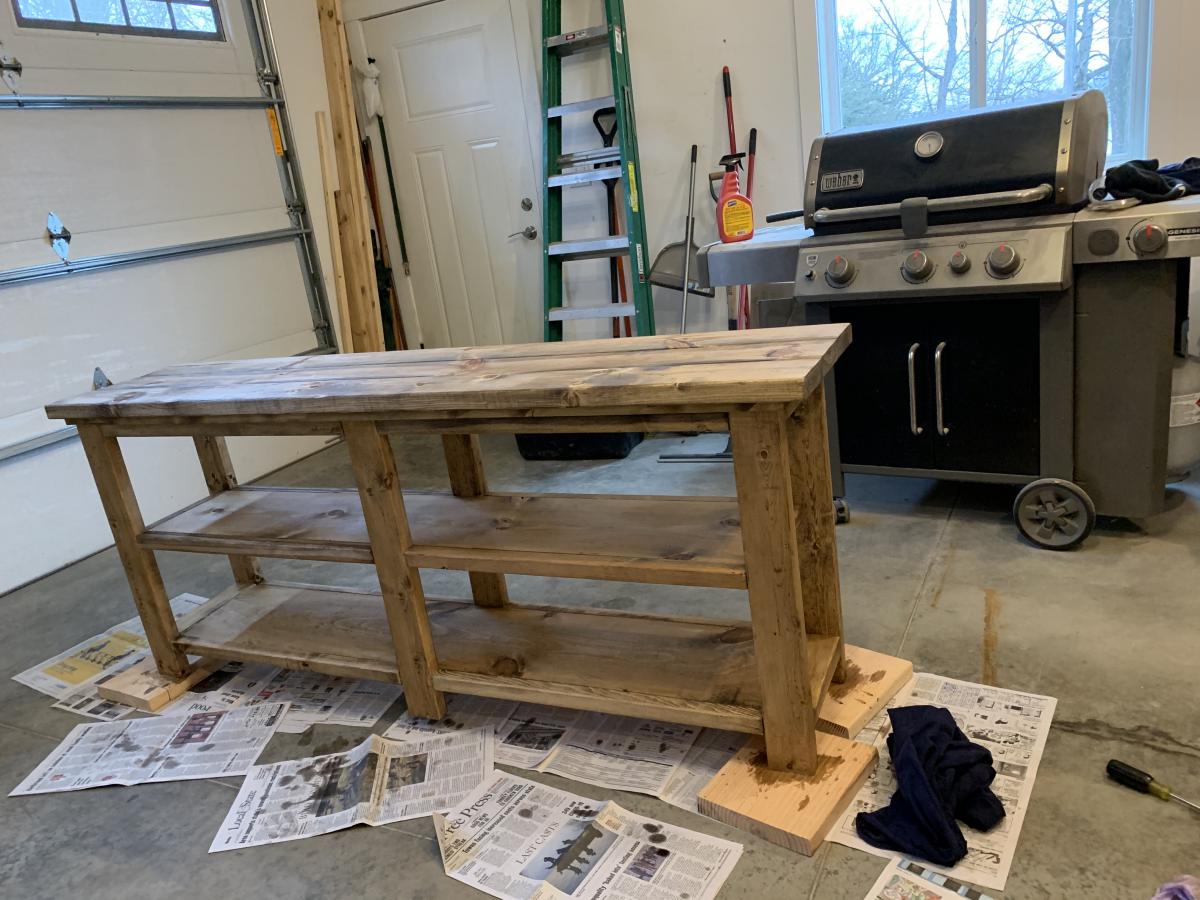
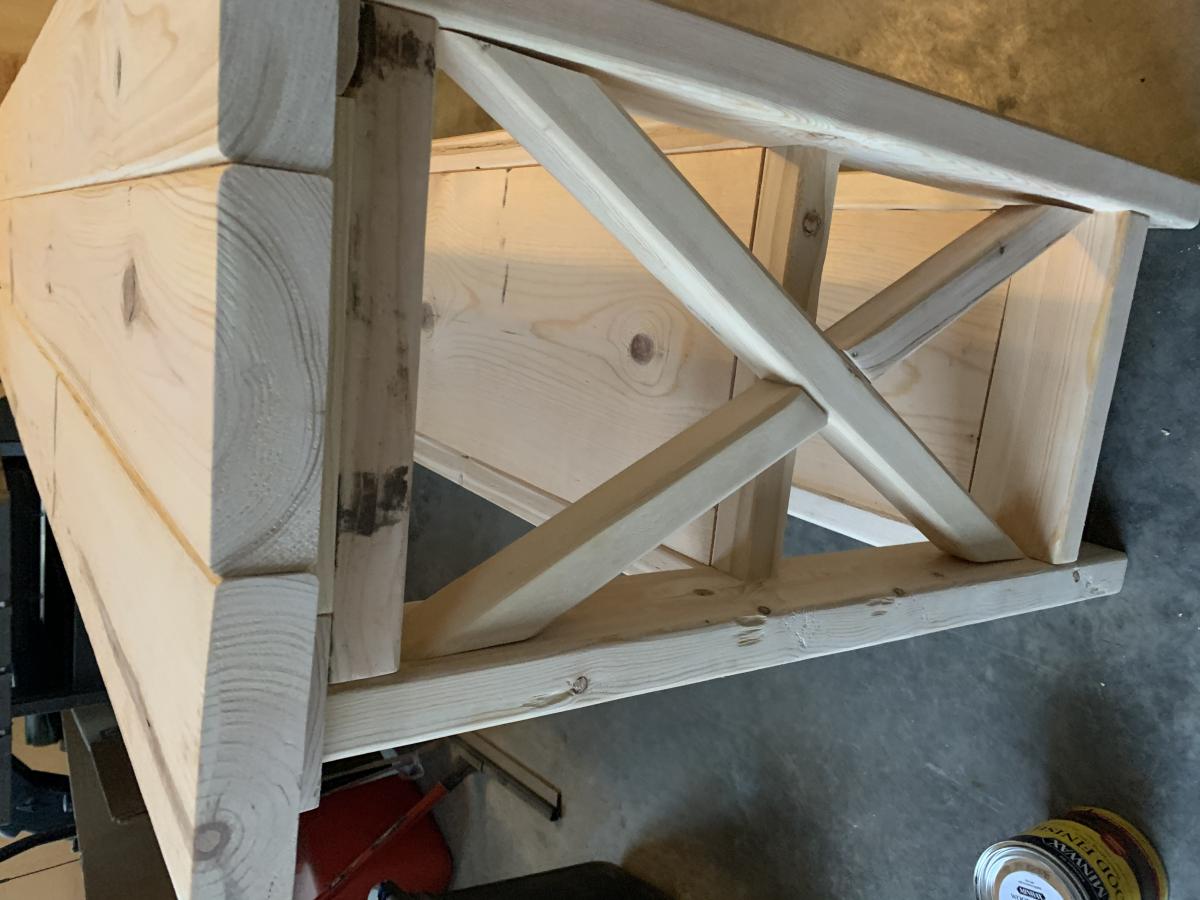
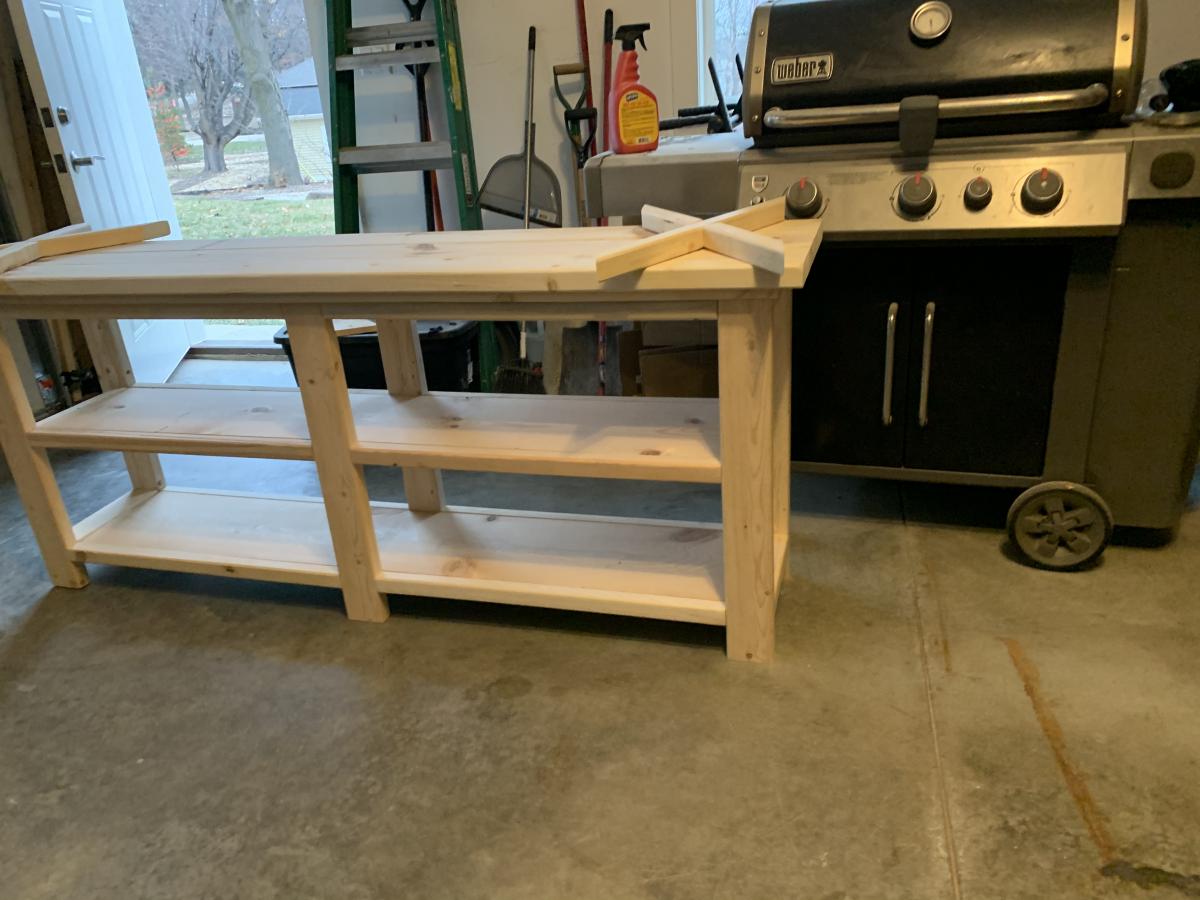
Rustic X coffee table
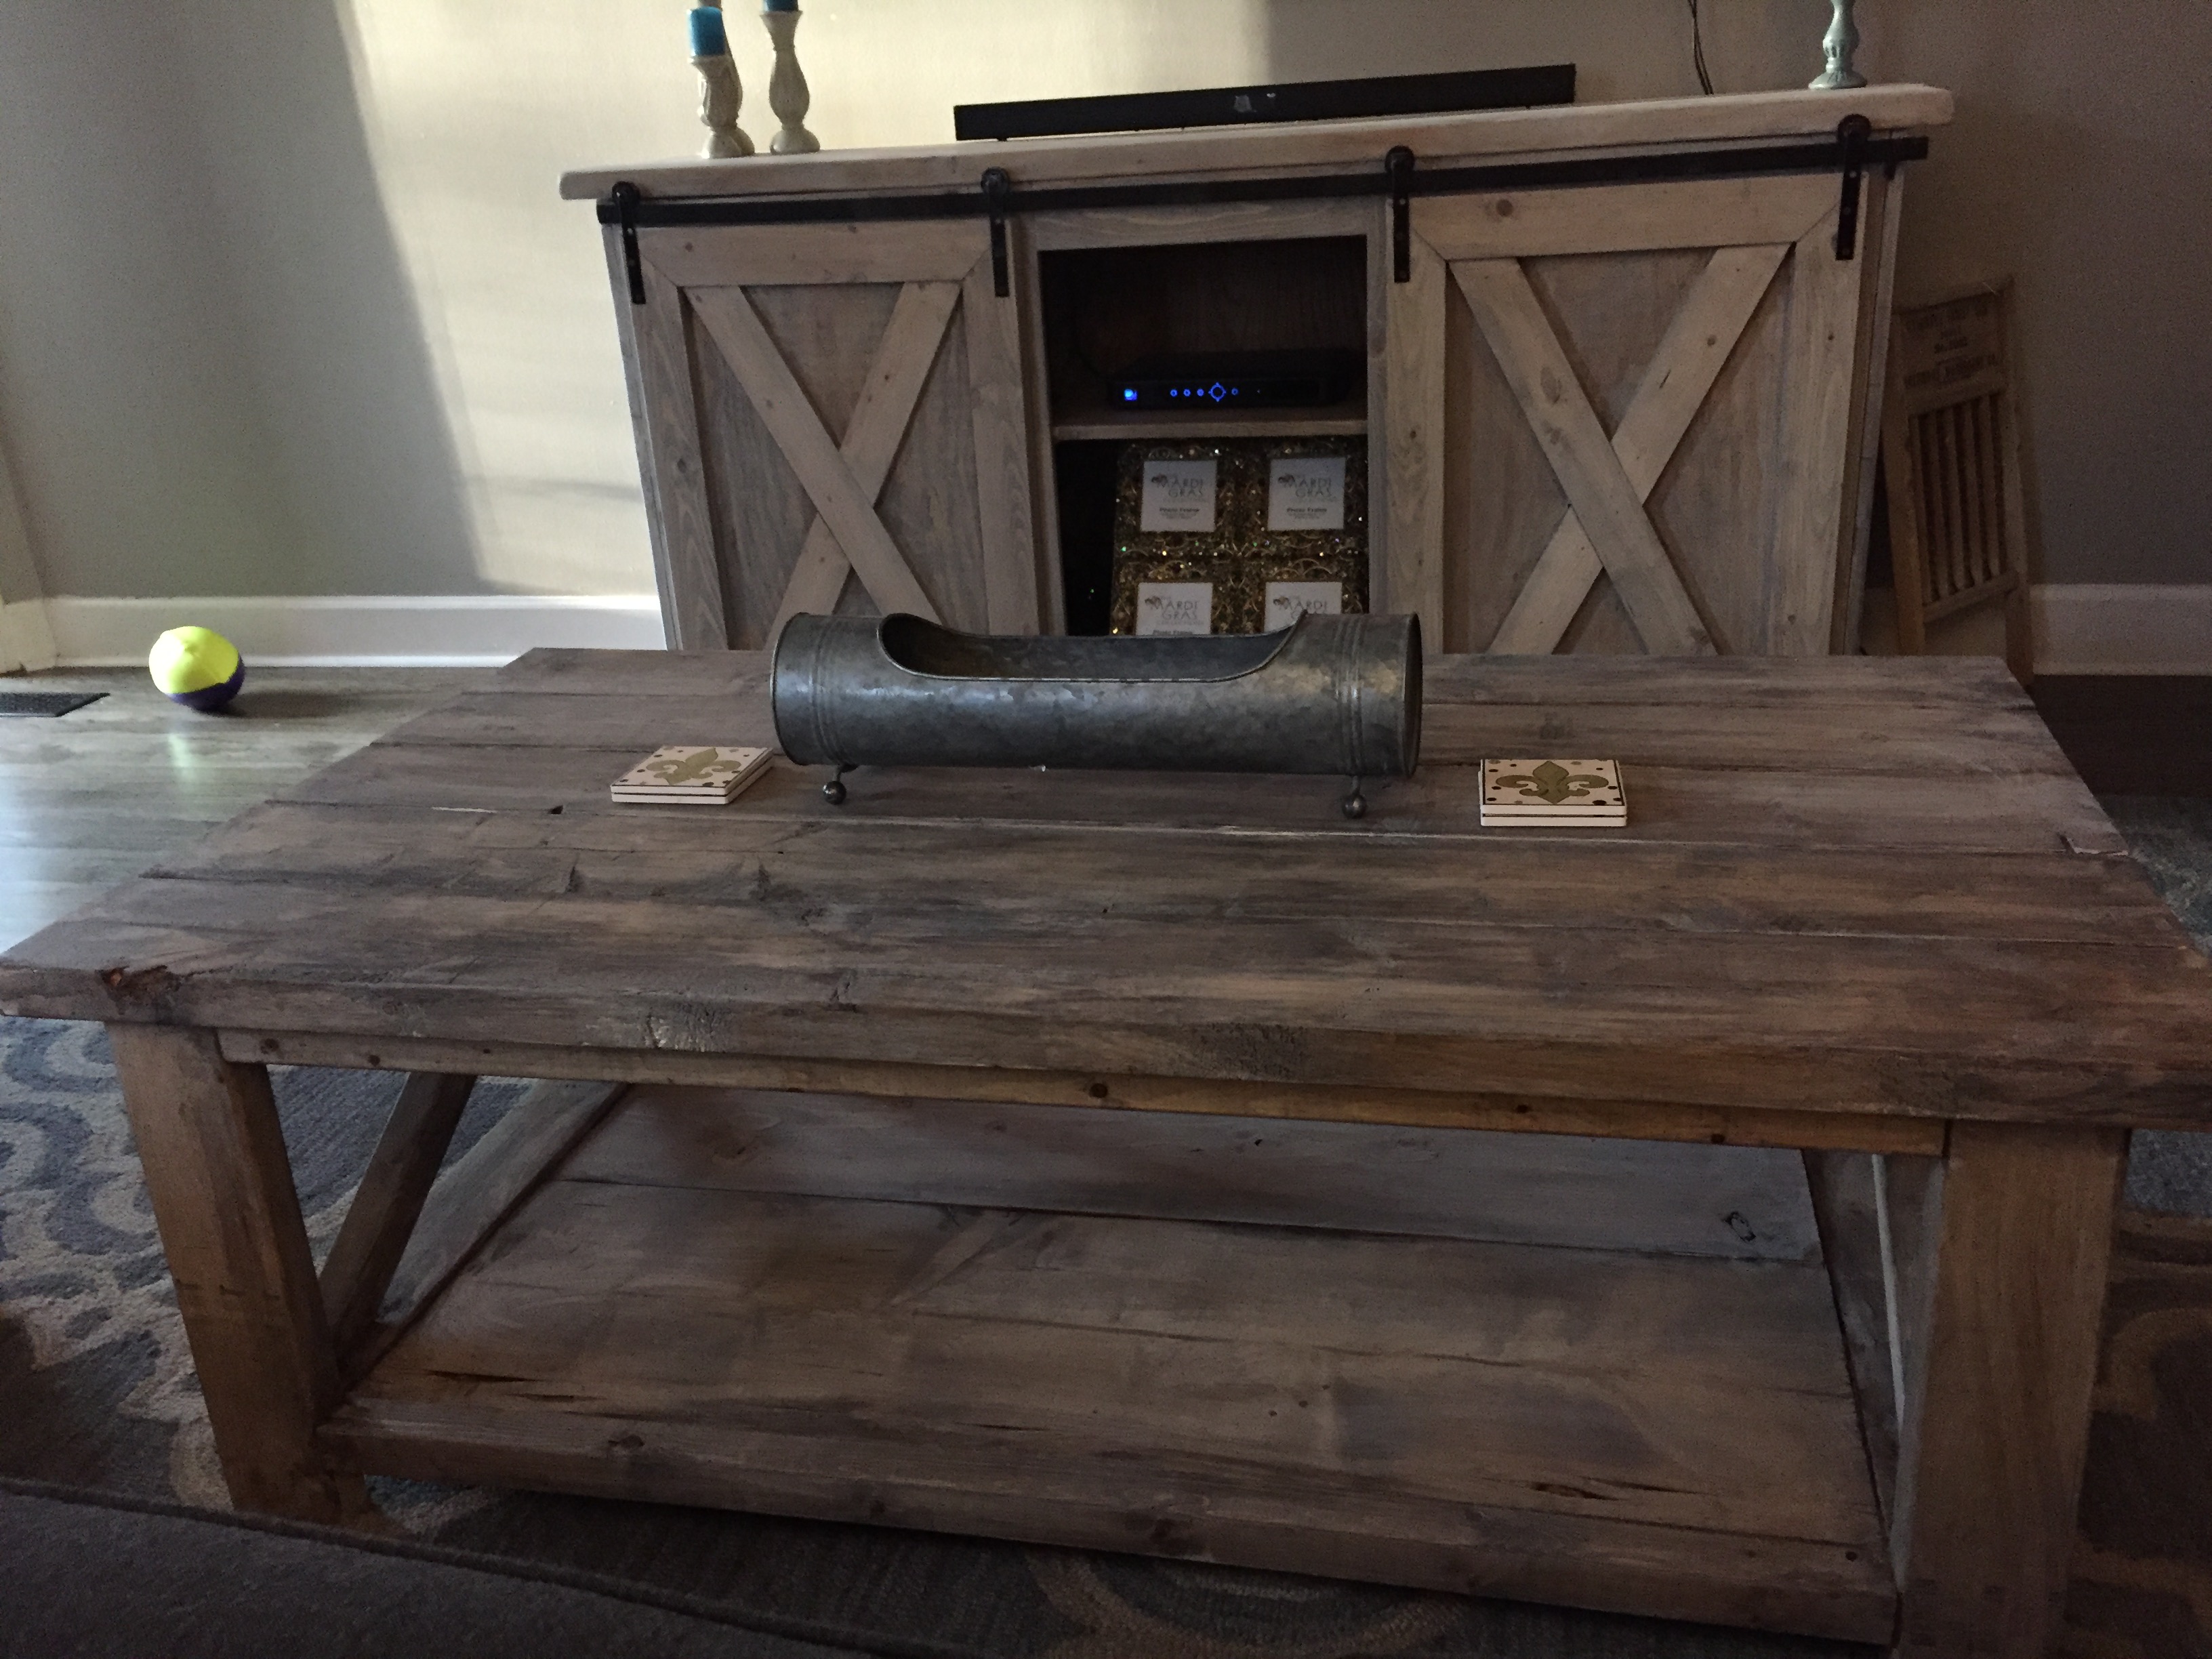
Coffee Table built from these plans: http://www.ana-white.com/2012/07/plans/rustic-x-coffee-table
Media console built from these plans: http://www.ana-white.com/2015/08/free_plans/grandy-sliding-door-console
Built from Plan(s)
Estimated Time Investment
Afternoon Project (3-6 Hours)
Finish Used
Tudor stain from minwax, then used chalk paint diluted with water. Dippped a rag into the water/paint mixture then squeezed it out, wipe on in small sections and then wipe off excess with another damn rag
Recommended Skill Level
Intermediate
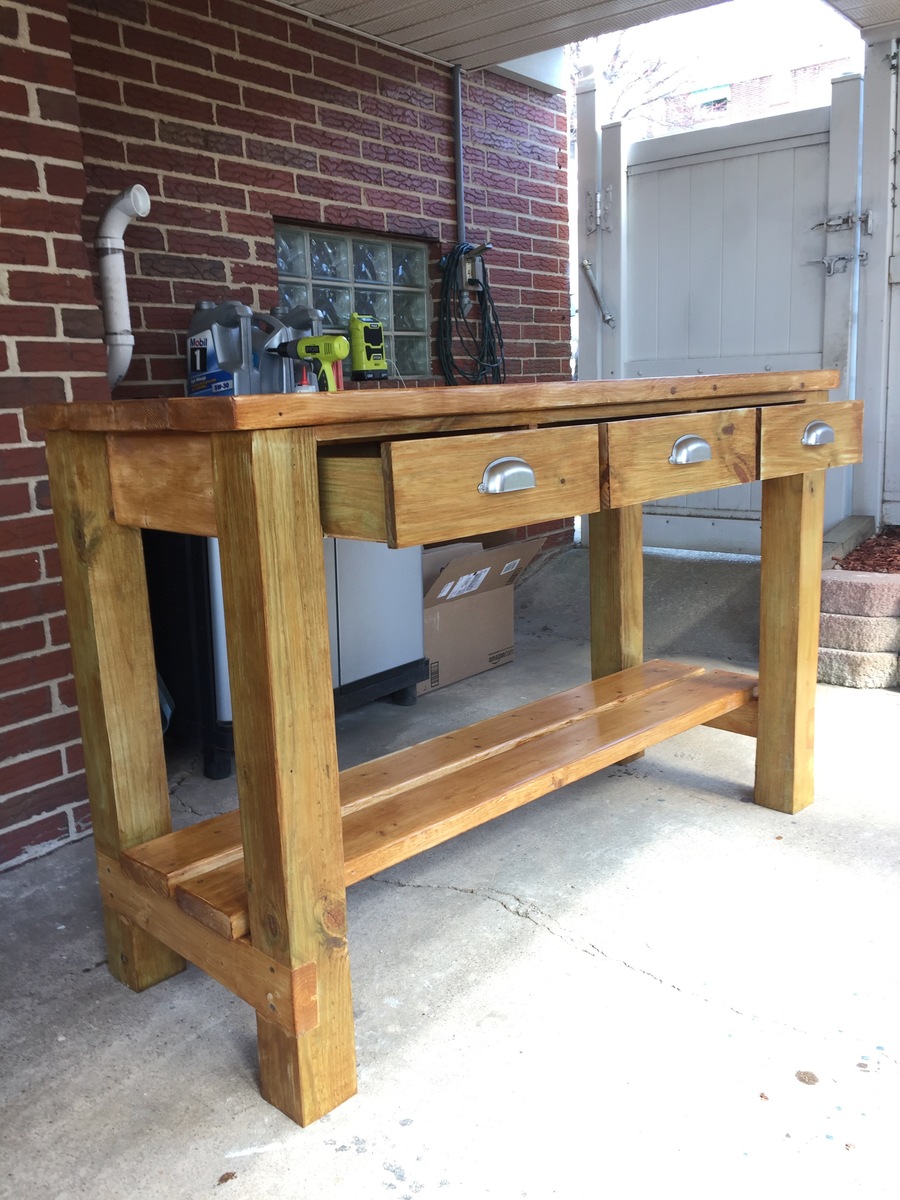
Kitchen Island
I used and modified the easy kitchen island plans. I put a back on it and extended the top to accommodate bar stools.
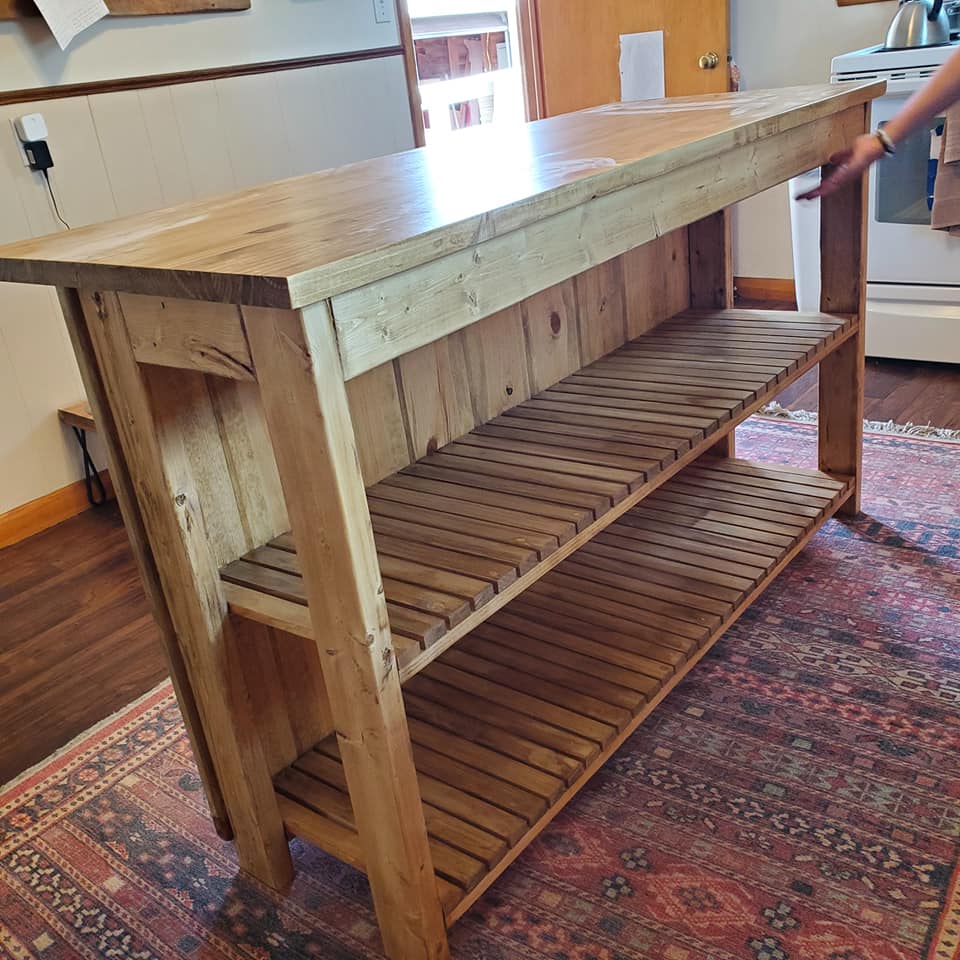
Built from Plan(s)
Estimated Cost
$100
Estimated Time Investment
Weekend Project (10-20 Hours)
Finish Used
Golden oak stain with a polyurethane finish
Recommended Skill Level
Intermediate
Comments
Tue, 12/28/2021 - 18:43
After reviewing the original…
After reviewing the original Easy Kitchen Island plans I’m wondering how you attached the 2x6 boards for the top so it fit onto your base?
Providence Table & Bench
We needed a new table for our growing family but didn't want to spend a fortune.
Found this website, explored some plans & fell in love with the Providence table & bench.
It is great!!
We used the Rustoleum stain in Kona as well & did 3 coats of polyurethane. Unfortunately, the table is VERY rough to the touch. And I can see it becoming a problem. We can't wipe it with a damp paper towel as the roughness shreds the paper towel. Any help here would be greatly appreciated!!!
We think sawdust & debris settled on the table when we stained & sealed with the polyurethane. We did not sand in between polyurethane coats either.
If there's an easy fix (or do over) here, please let us know!
Otherwise, it is such a great piece & has already received many compliments!
We'll be sure to refer to Ana White's site!
Thanks so much!!
Built from Plan(s)
Estimated Cost
$160
Estimated Time Investment
Day Project (6-9 Hours)
Finish Used
Rustoleum in Kona
Recommended Skill Level
Intermediate
Comments
Sat, 02/16/2013 - 15:02
from what I understand, the
from what I understand, the water in the polyurethane raises the wood, so it needs to be sanded after the first coat (at minimum). I'd sand it down, if I were you. Maybe with a high-grit paper, so you don't damage the stain. Then coat, sand again, and coat.
Sun, 02/17/2013 - 16:18
I have had problems with
I have had problems with polyurethane all my own fault mind ya. I do not know how smooth of a surface you had after the stain, but if the surface is now so rough that it rips up paper towels. I would venture to say it started there. Also the coats of polyurethane are so thin it would be very hard to just sand down to the stain without scaring the stain finish. I would try either 0000 steel wool or 220 grit sand paper and do it by hand not sander. The picture I see shows it to be a dark stain so if you do scare it you might be able to touch it up, but my experience with that is just bite the bullet and sand down to bare wood and start over. If you do have to do it over I use 0000 steel wool lightly after I stain and wipe it down good and do your thin coats of poly ( with steel wool between coats ) until you reach the look you are wanting

Mon, 02/18/2013 - 11:22
I learned my lesson about
I learned my lesson about sanding between coats of poly the hard way too! I was able to smooth out the surface of my desk by sanding it lightly with the finest grit sandpaper. If that doesn't smooth it out enough then you are going to have to sand it down further and re-do the poly.
Mason Jar Caddy with Leather Handle
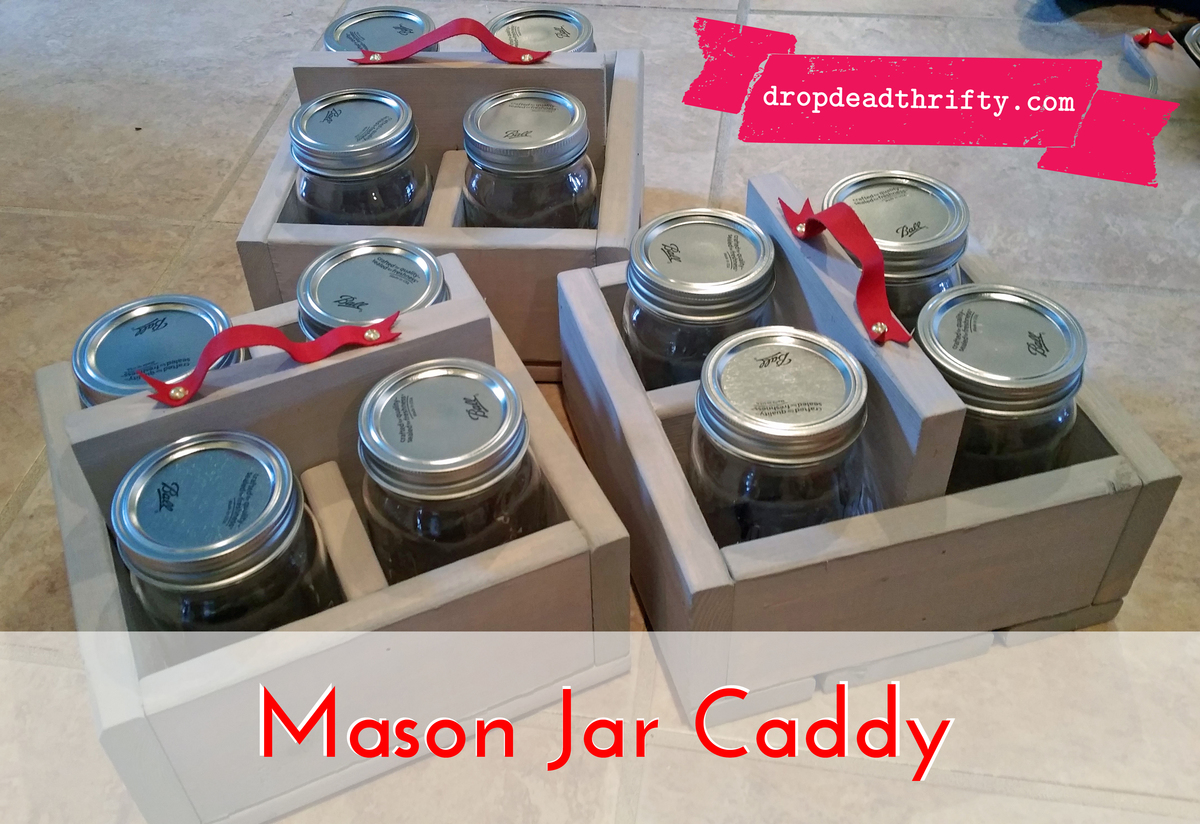
I made this version of Ana's Reclaimed Soda Crate as Christmas gifts for my kids' teachers. Less than $6 per gift! Full instructions can be found on my blog at www.dropdeadthrifty.com

Built from Plan(s)
Estimated Cost
$6
Estimated Time Investment
An Hour or Two (0-2 Hours)
Finish Used
Whitewashing (actually greywashing. Detailed formula can be found on my blog post)
Recommended Skill Level
Starter Project
Comments
Bar Height Farmhouse Table
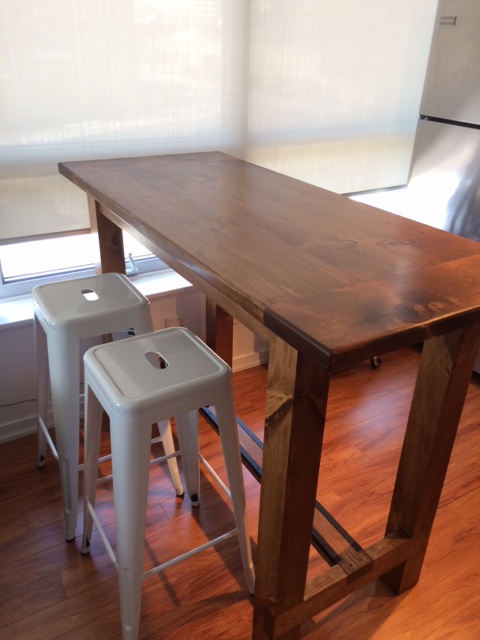
Variation on the Farmhouse Table plans. Built from knotty pine and finished with Minwax Early American stain.
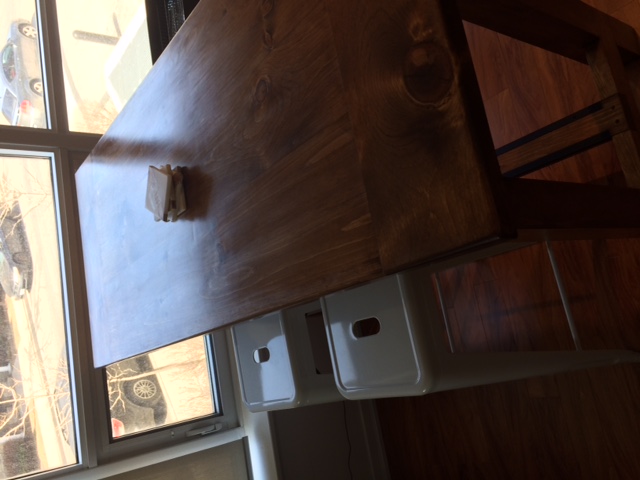
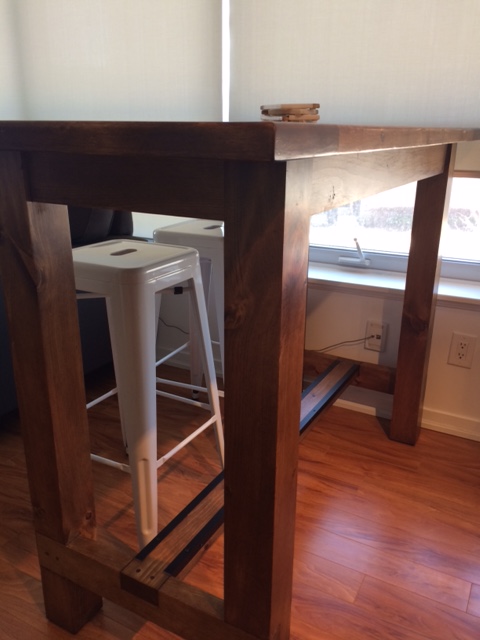
Built from Plan(s)
Estimated Time Investment
Week Long Project (20 Hours or More)
Finish Used
Minwax Early American and Polyurethane Clear Satin
Recommended Skill Level
Intermediate
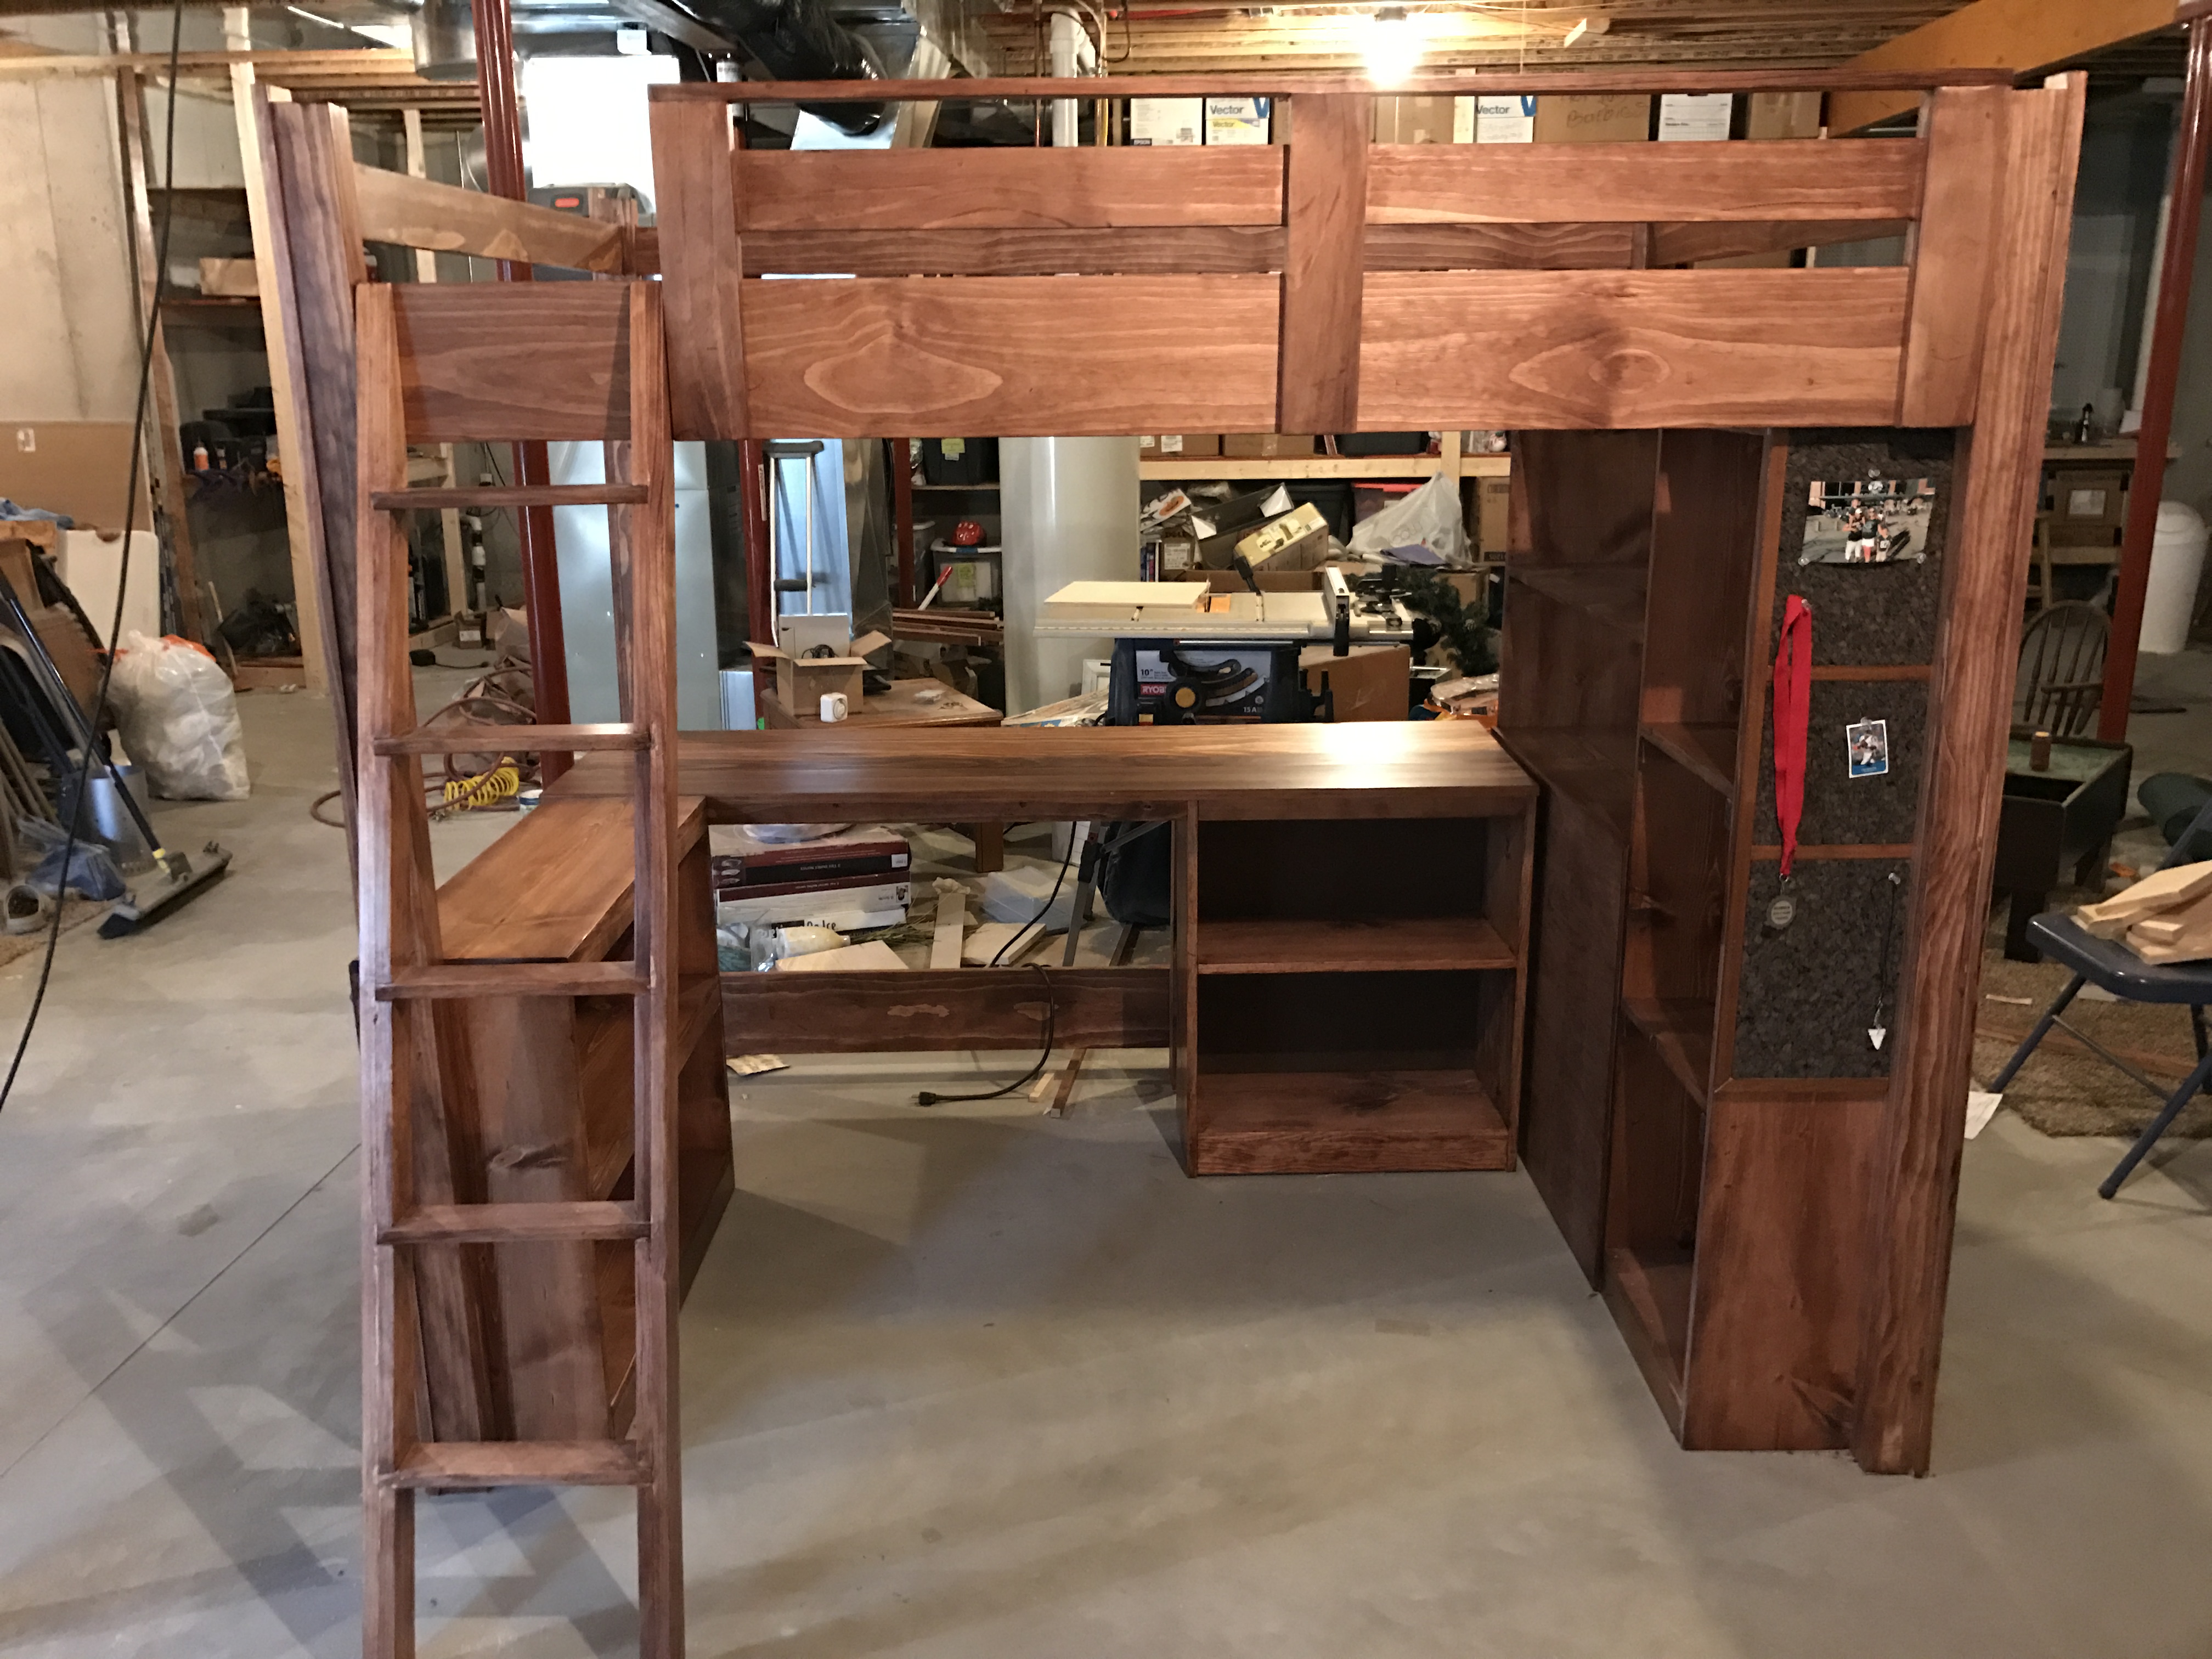
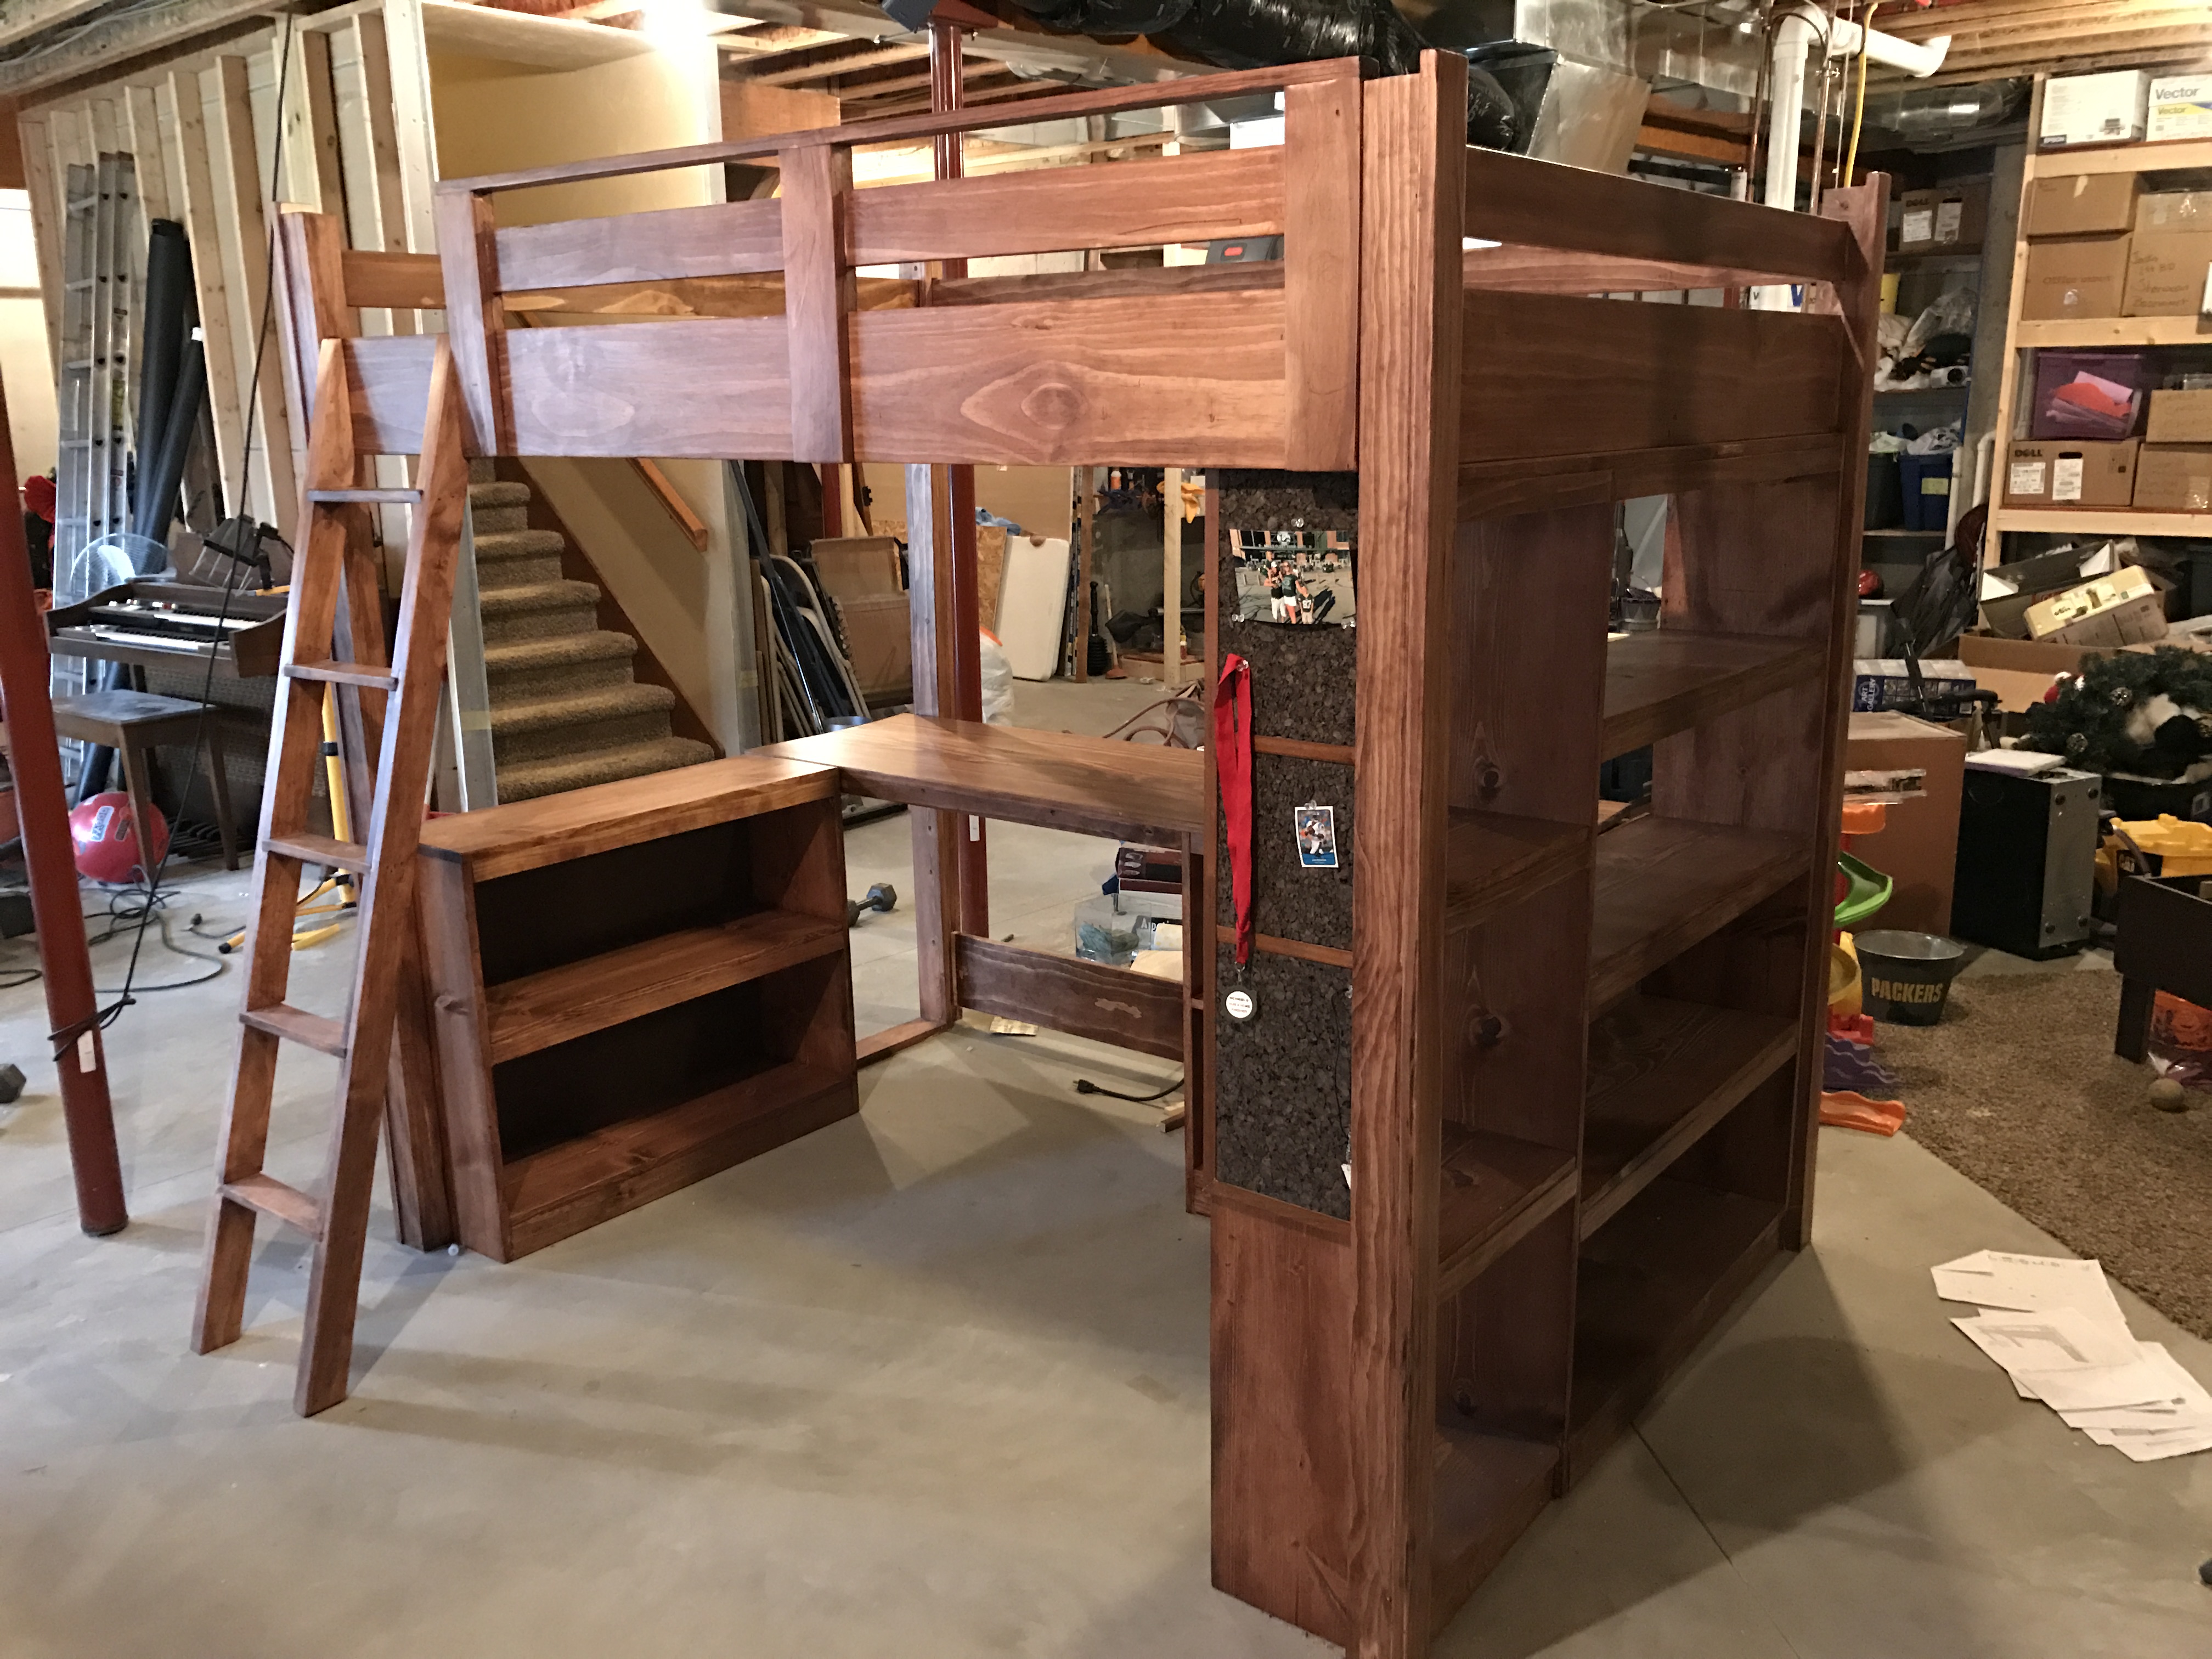
My X desk with drawer
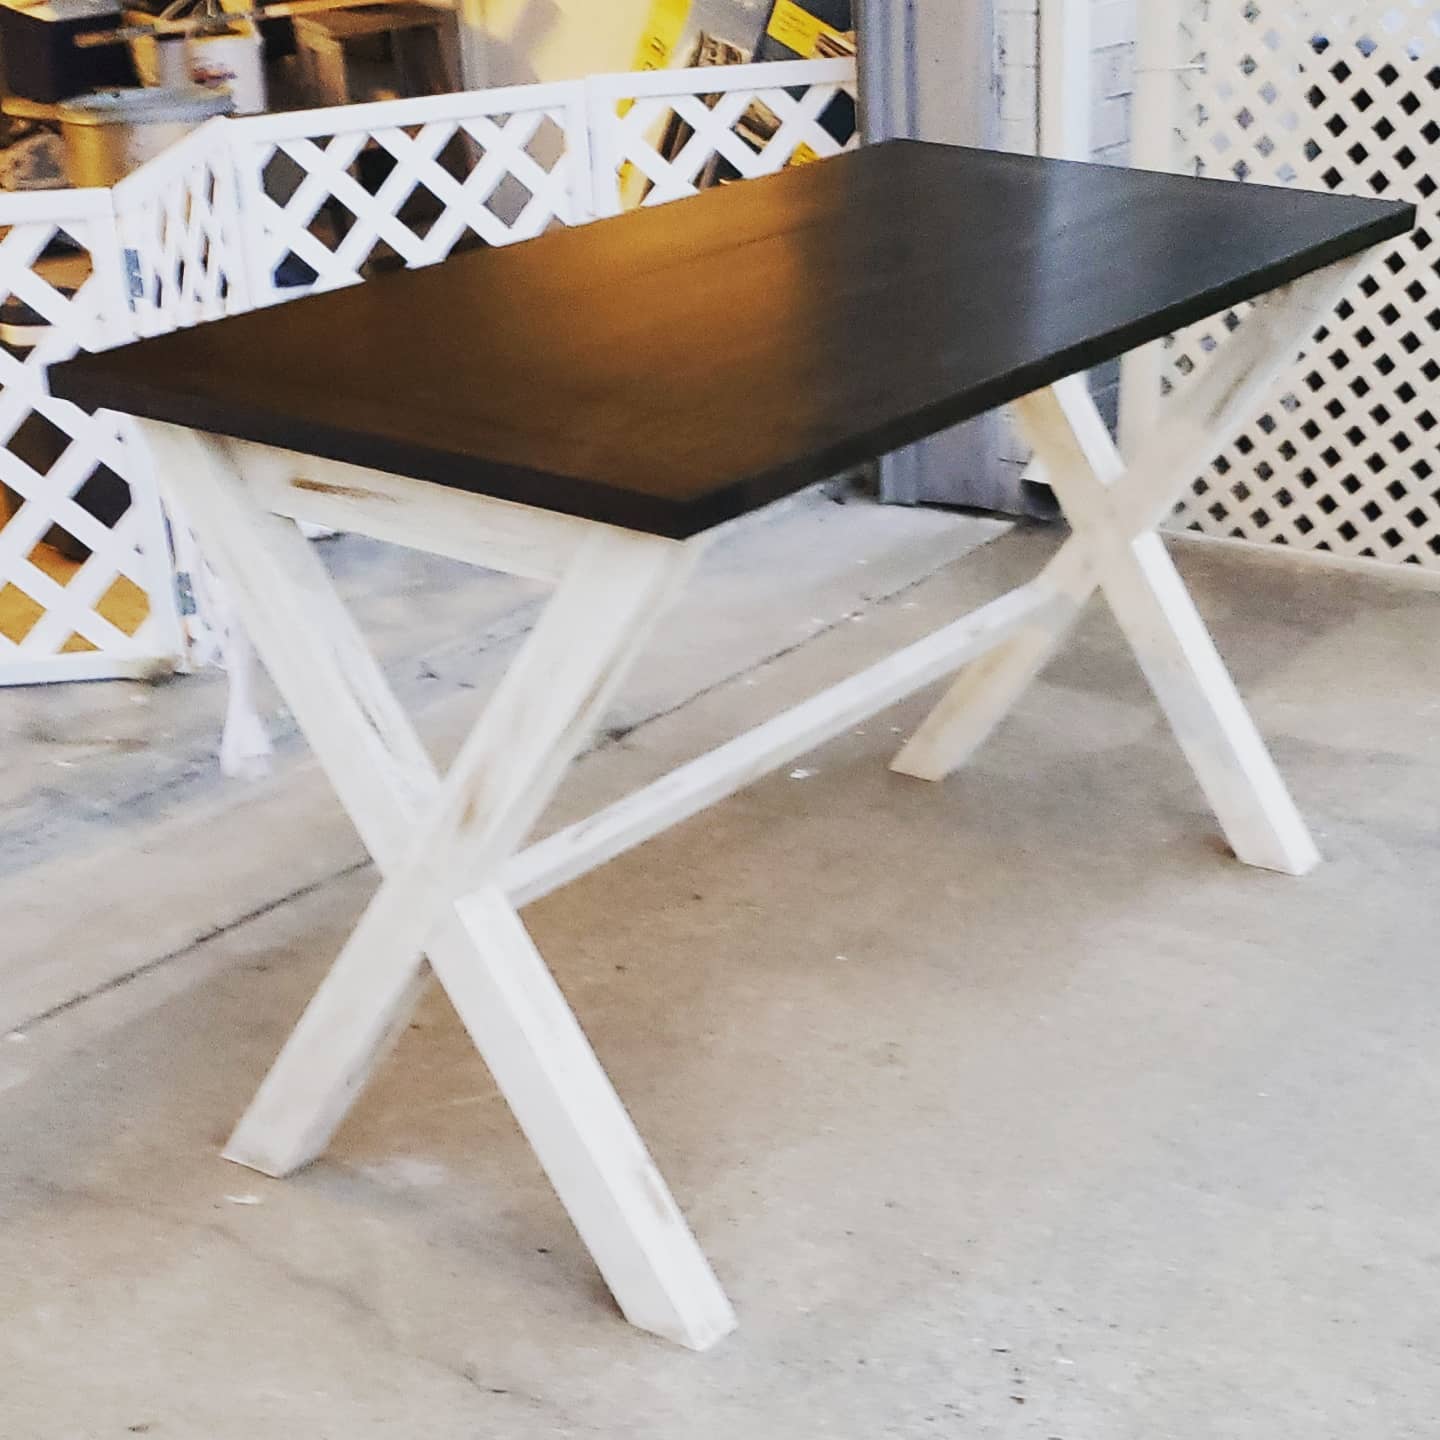
Here is my version of Ana White's X desk with a drawer. This desk was made out of poplar wood.
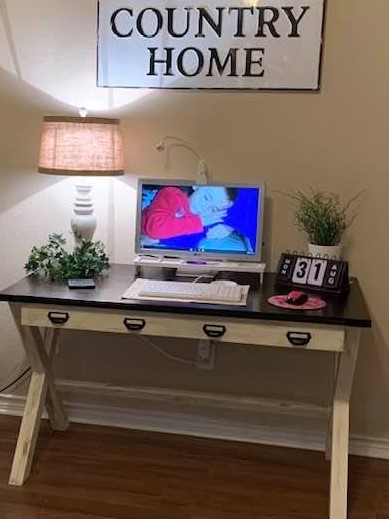
Built from Plan(s)
Comments
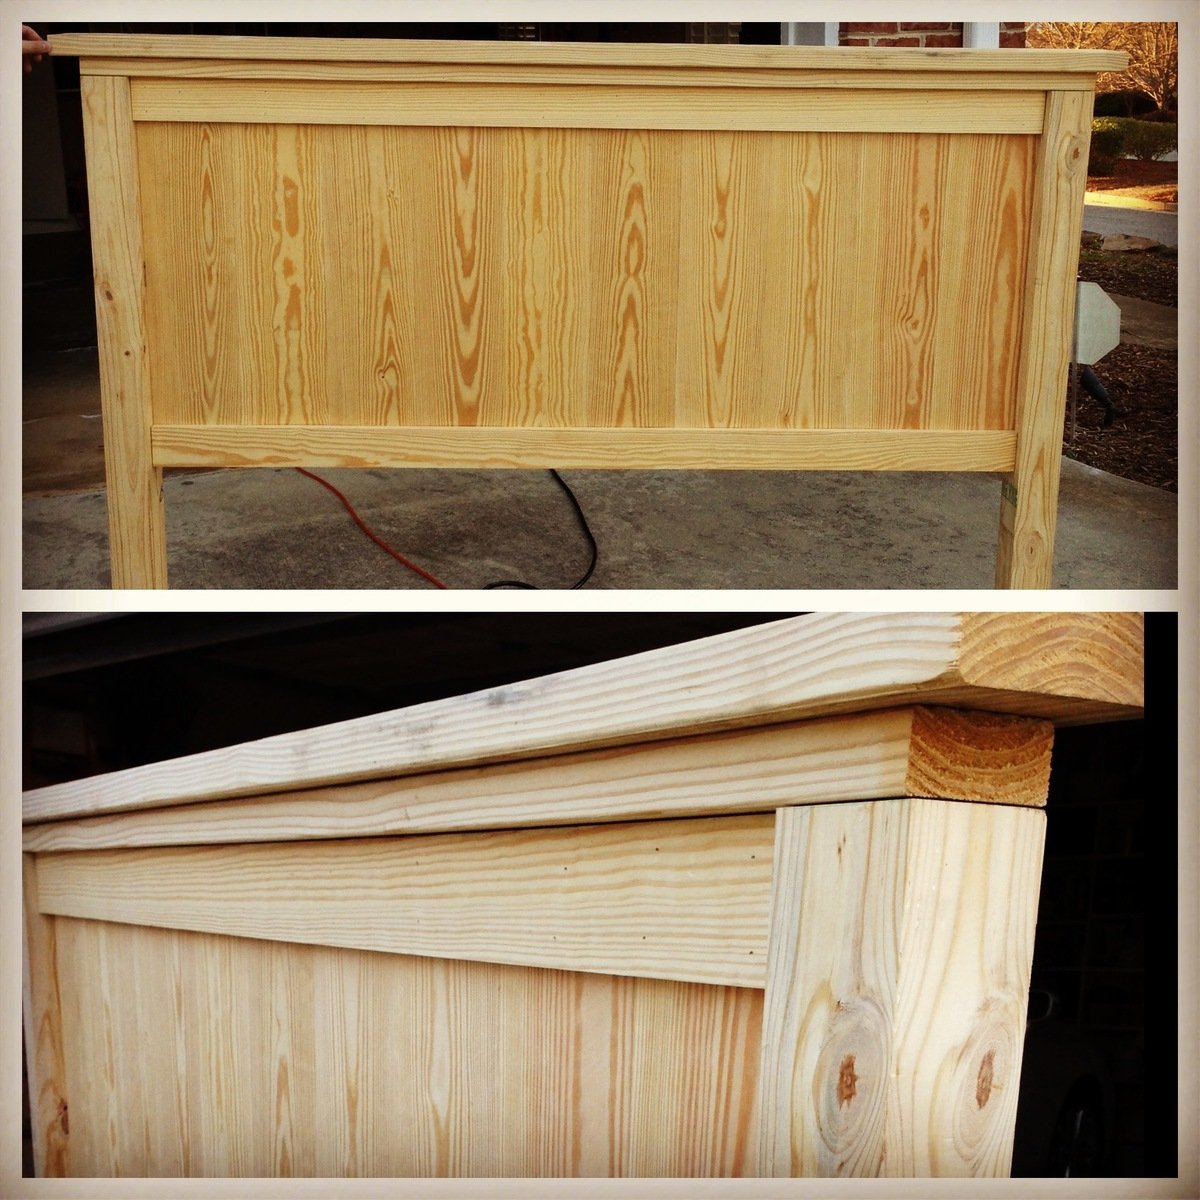
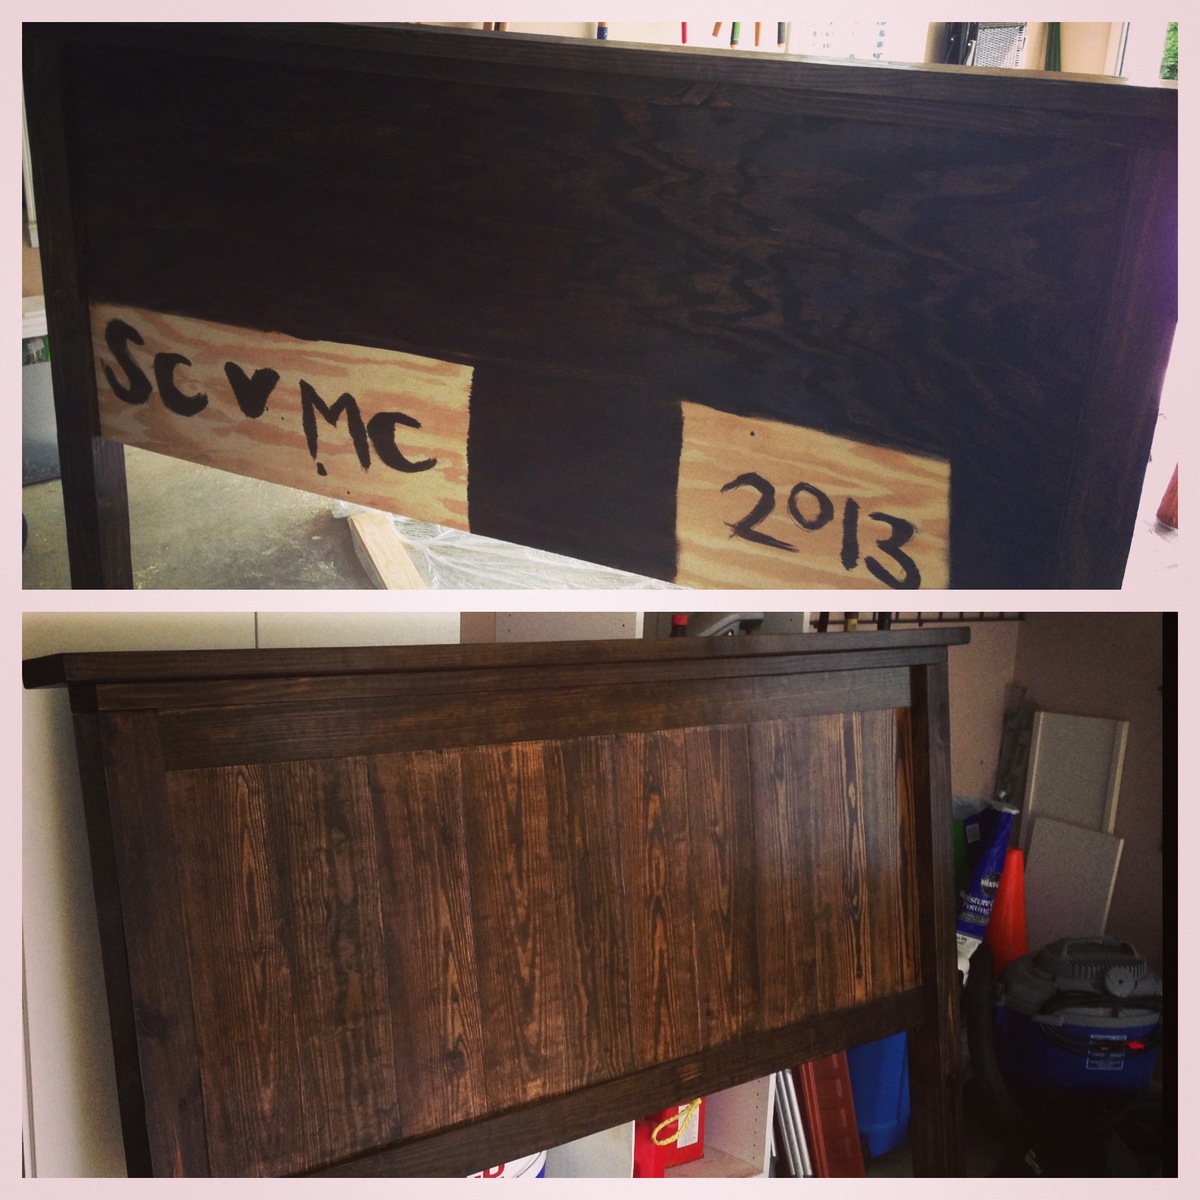
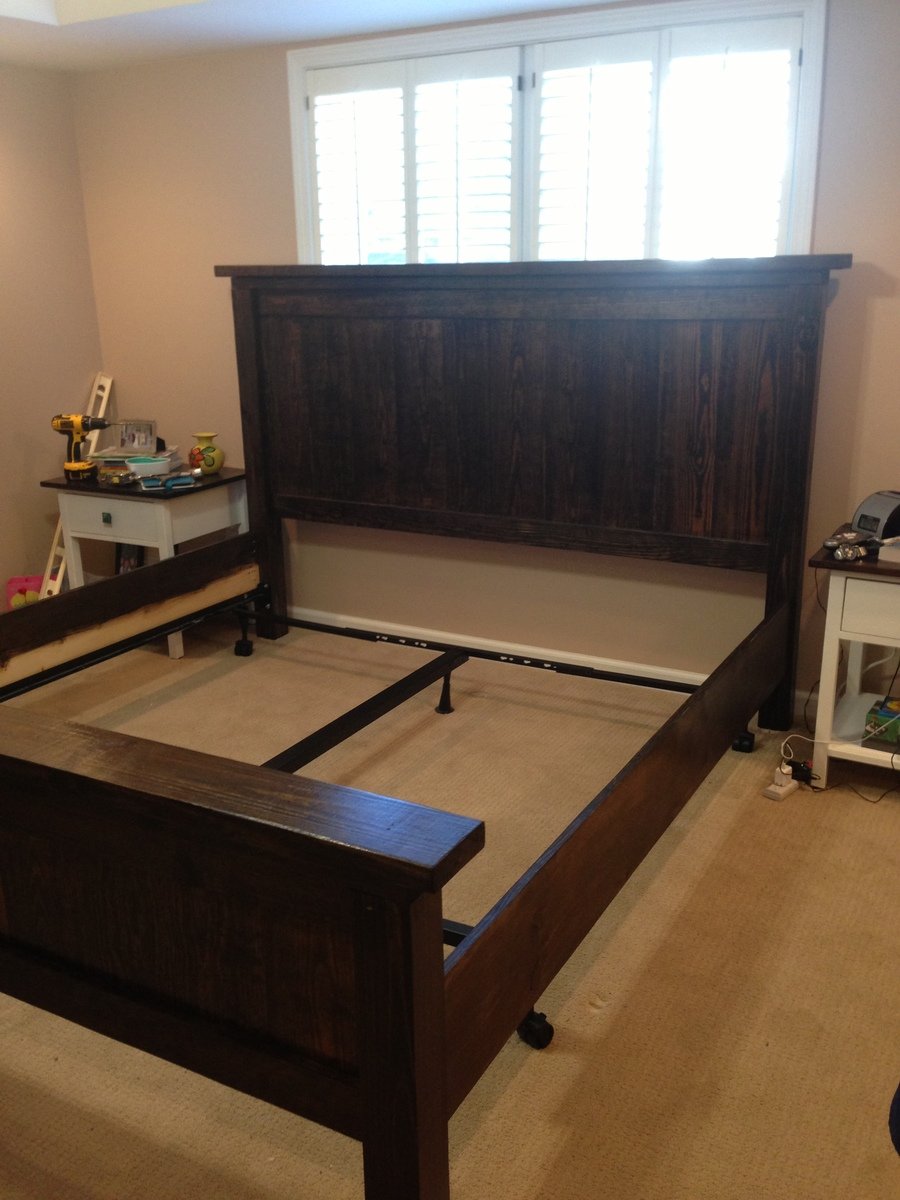
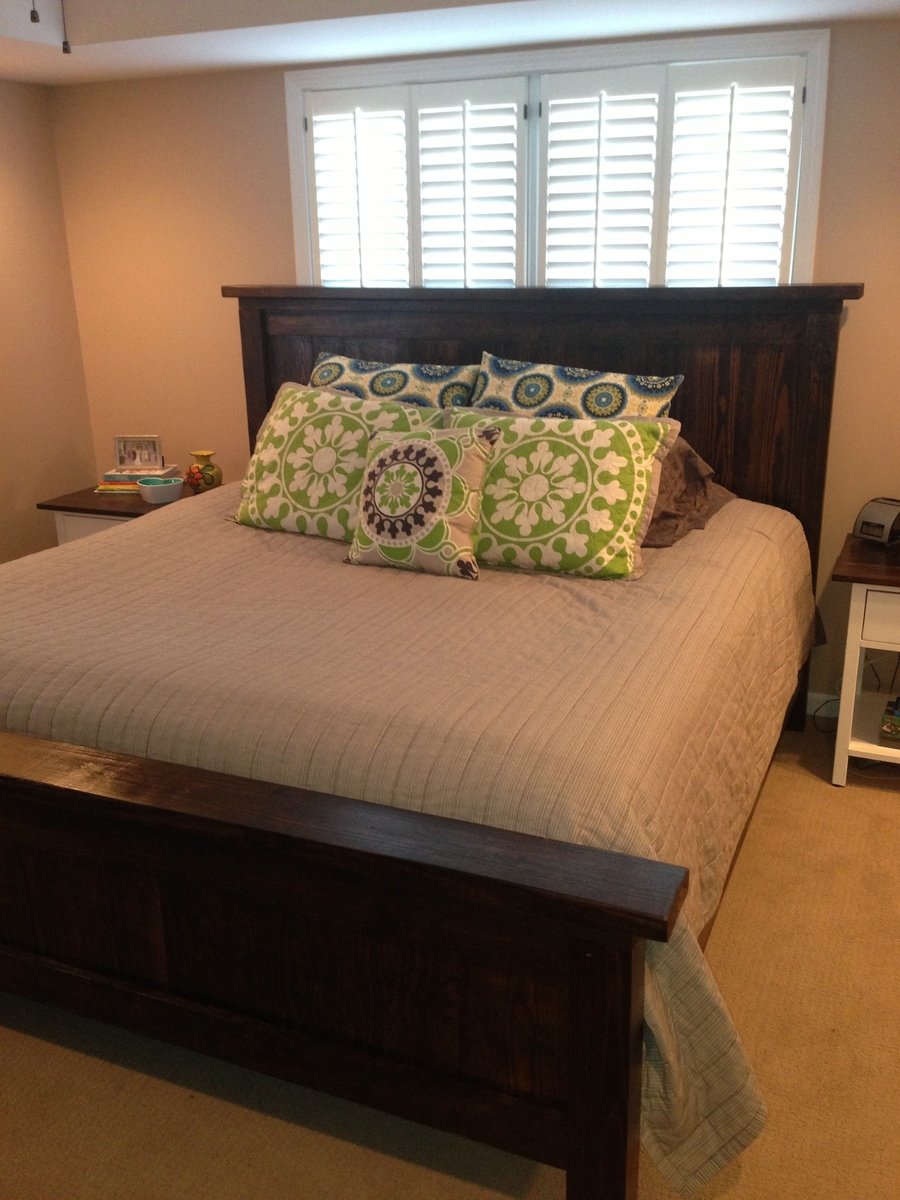
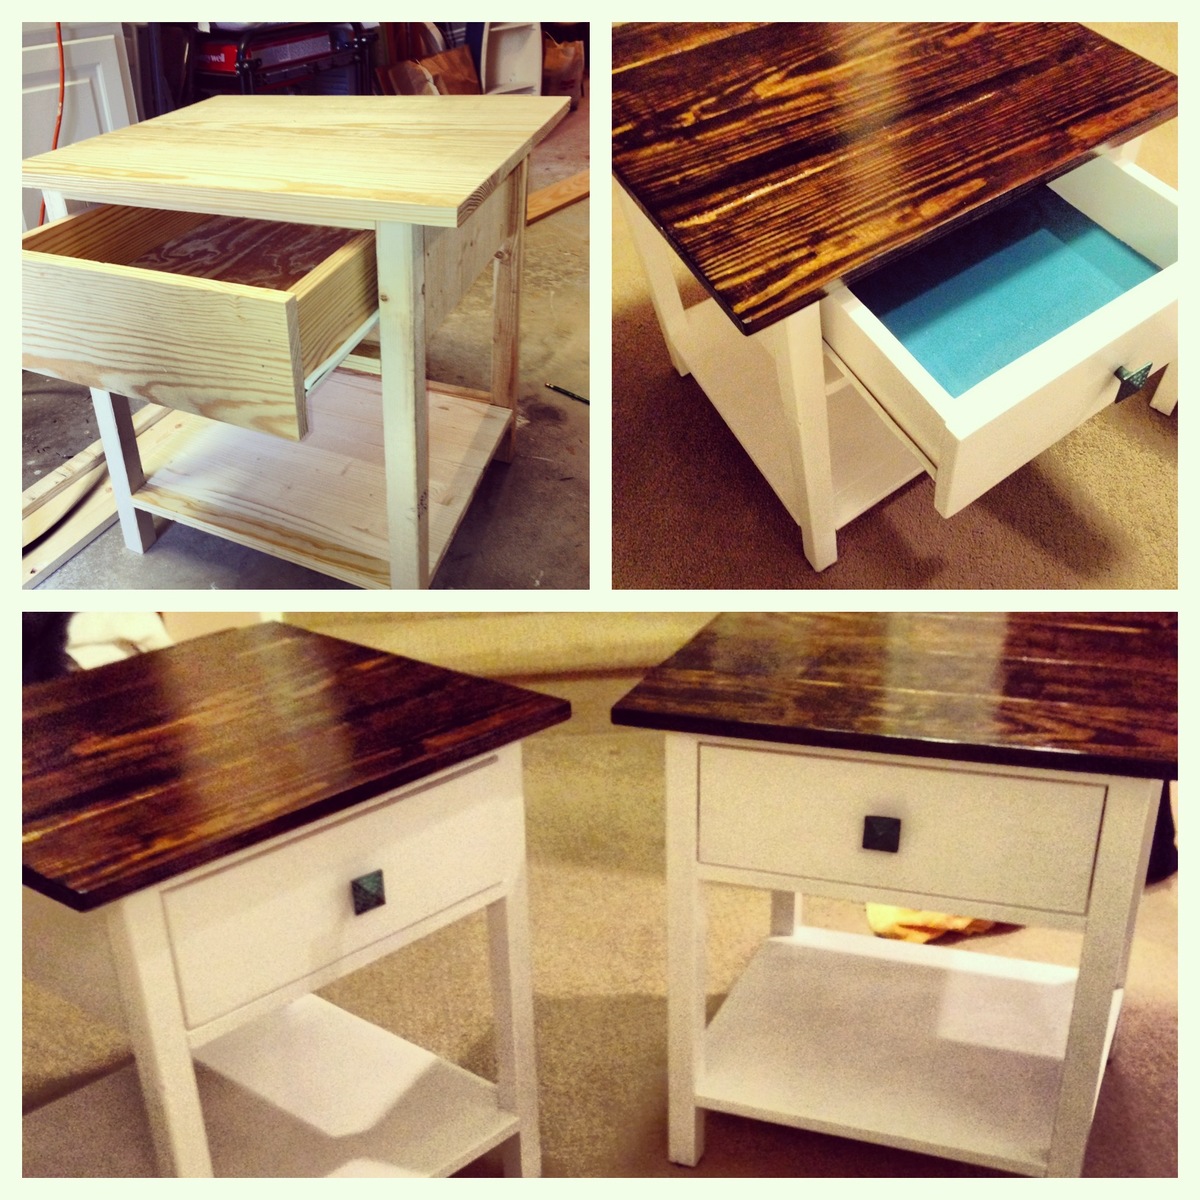
King Size Farm House Bed
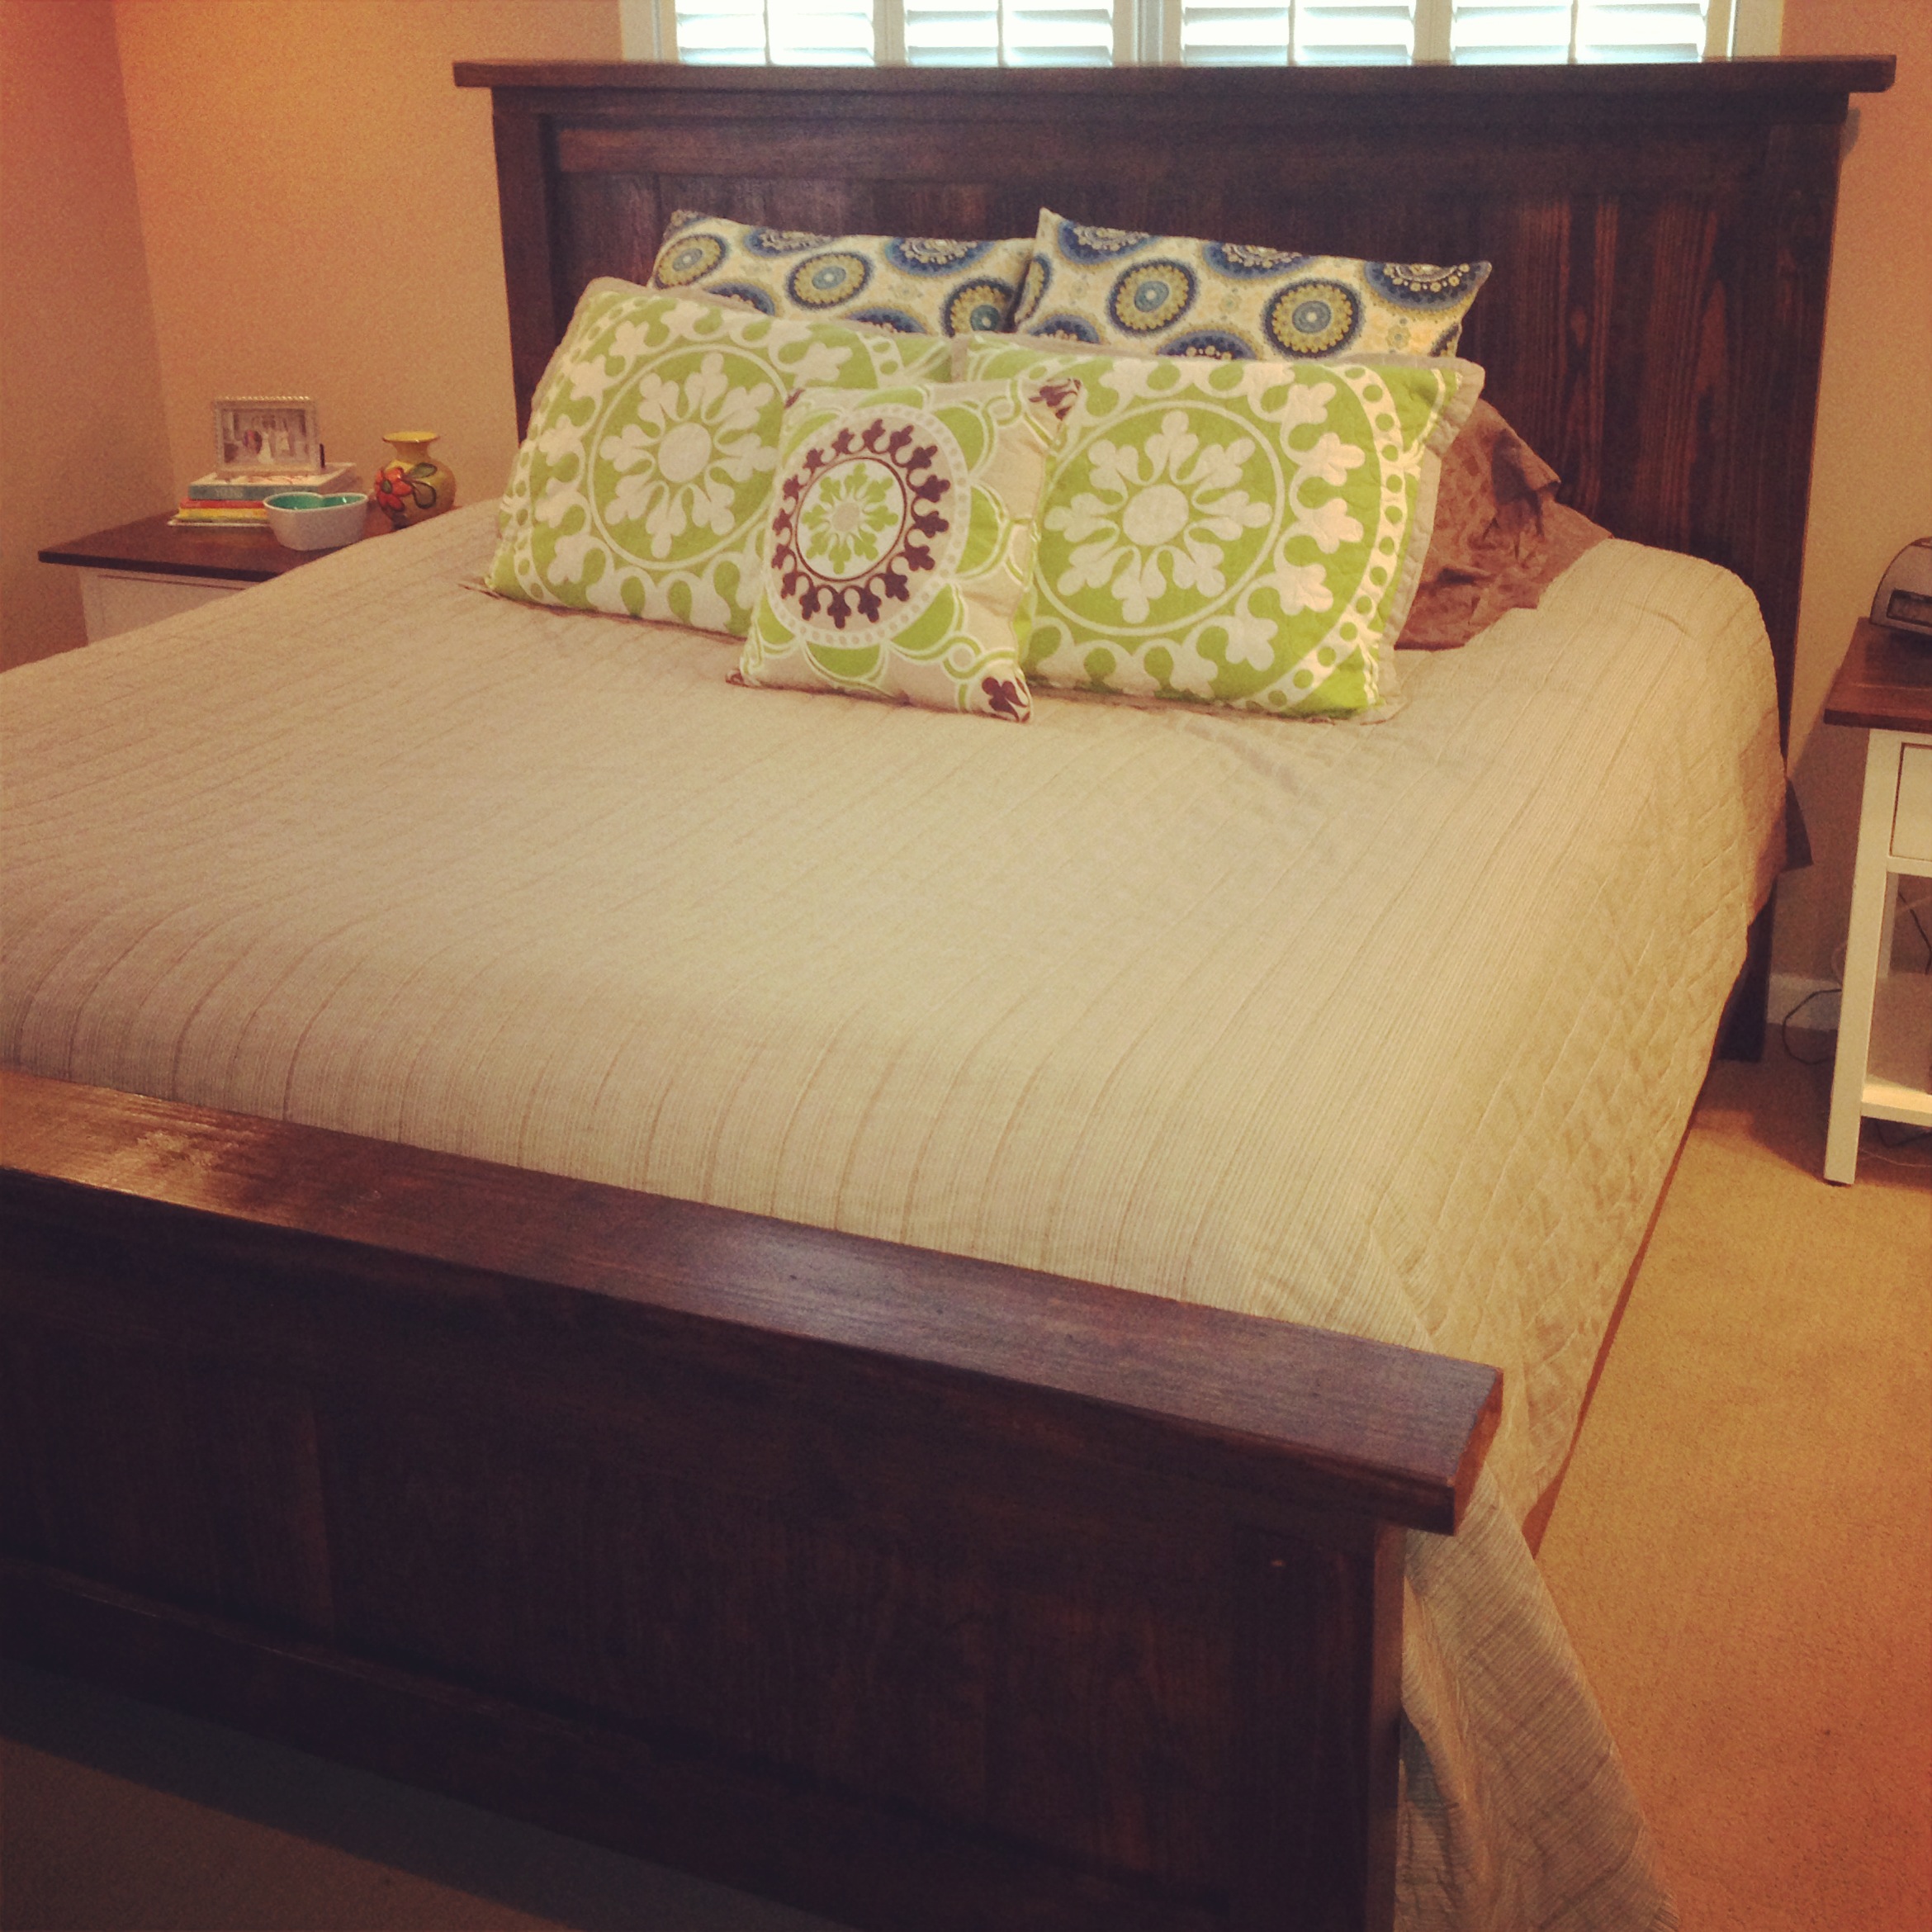
We made this bed after making the farmhouse bedside tables. So now we have a whole new bedroom set for probably less than $600. We love how it all turned out, and the plans were so easy to follow. We built both projects from Ana's book and plan to build a lot more from it too!
**In the book the plans are for a queen size bed, we modified it to fit our King size**
We added a piece of plywood to the back of the headboard and footboard and stained them so that it would cover all the pocket holes. Also, we extended the very top piece of wood that is on both the head and foot boards so there was a two inch overhang instead of just one.
This bed is so sturdy! I think if a tornado ever blows through we could just hang onto the bed and we wouldn't go anywhere! The side rails also give it a nice finished look even though they just essentially cover the box spring and bed rails. The bed still sits on the metal frame that is bolted into the headboard.
Check out the bedside tables we made to go along with it!
http://ana-white.com/2013/02/farmhouse-bedside-tables-2-toned
Built from Plan(s)
Estimated Cost
$400
Estimated Time Investment
Weekend Project (10-20 Hours)
Finish Used
Minwax Dark Walnut- one coat that sat for about 20 minutes before being wiped down
Minwax Water Based Polycrylic- Clear gloss- 2 coats on top of the stain
Minwax Water Based Polycrylic- Clear gloss- 2 coats on top of the stain
Recommended Skill Level
Beginner
Comments
Mon, 09/14/2015 - 10:05
no dimensions?
is there a link that gives the dimensions? When I click on the print friendly or PDF version it doesn't have much on there
Dynamic Raised Garden Bed Plans
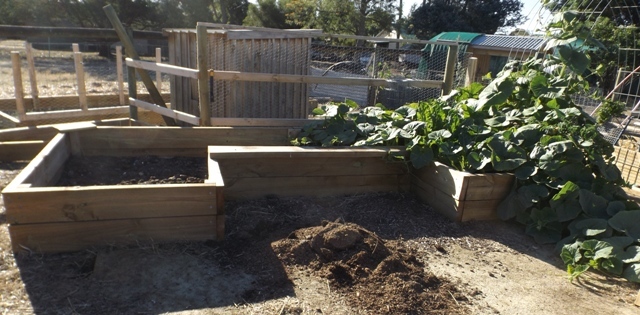
I changed a few things and it's not 100% finished, but far enough along for some production to start. It takes a LOT of dirt to fill this and I only made it 400mm high.
Built from Plan(s)
Estimated Cost
$150-$200
Estimated Time Investment
Weekend Project (10-20 Hours)
Recommended Skill Level
Intermediate
60" Barn Door Console
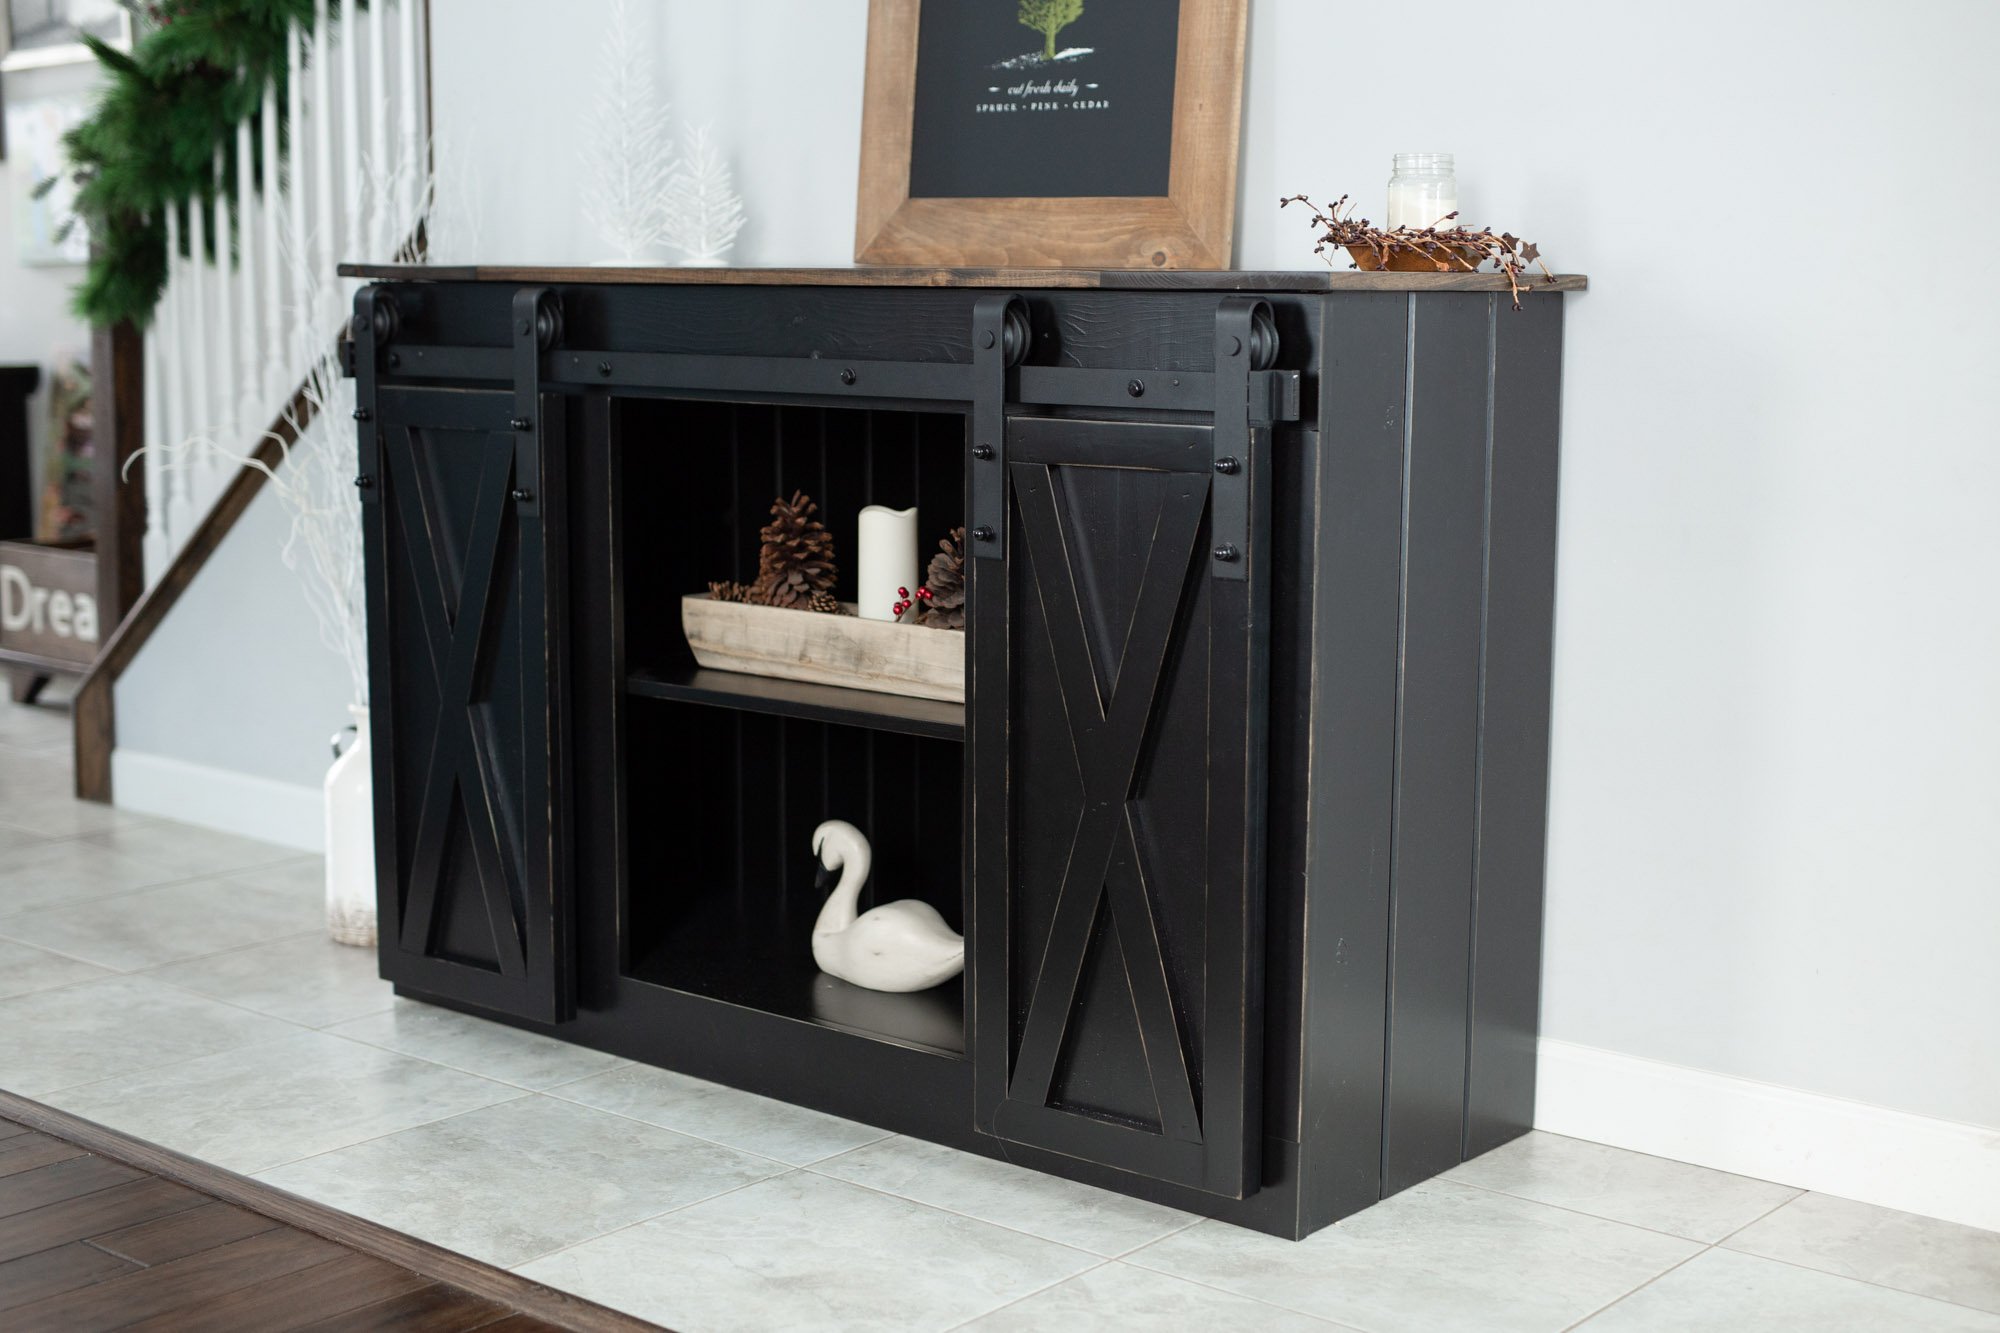
This is my #1, go to, piece to make and sell! I love these plans and I'm so grateful for Ana for posting them!!
Built from Plan(s)
Estimated Cost
$300
Estimated Time Investment
Weekend Project (10-20 Hours)
Finish Used
Professionally painted with Woodwright paint in Black with 20 sheen
Recommended Skill Level
Intermediate
Comments
Ana White Admin
Sat, 01/02/2021 - 13:18
Great build!
Love your project and that you are getting your daughter involved!