Community Brag Posts
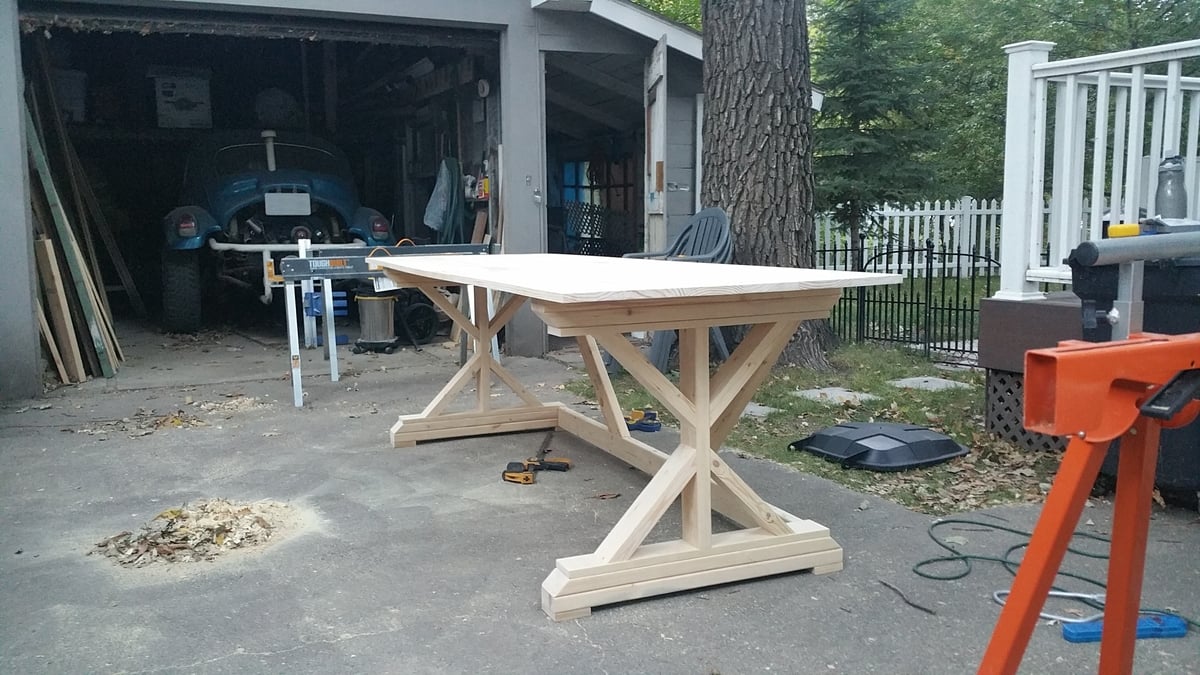
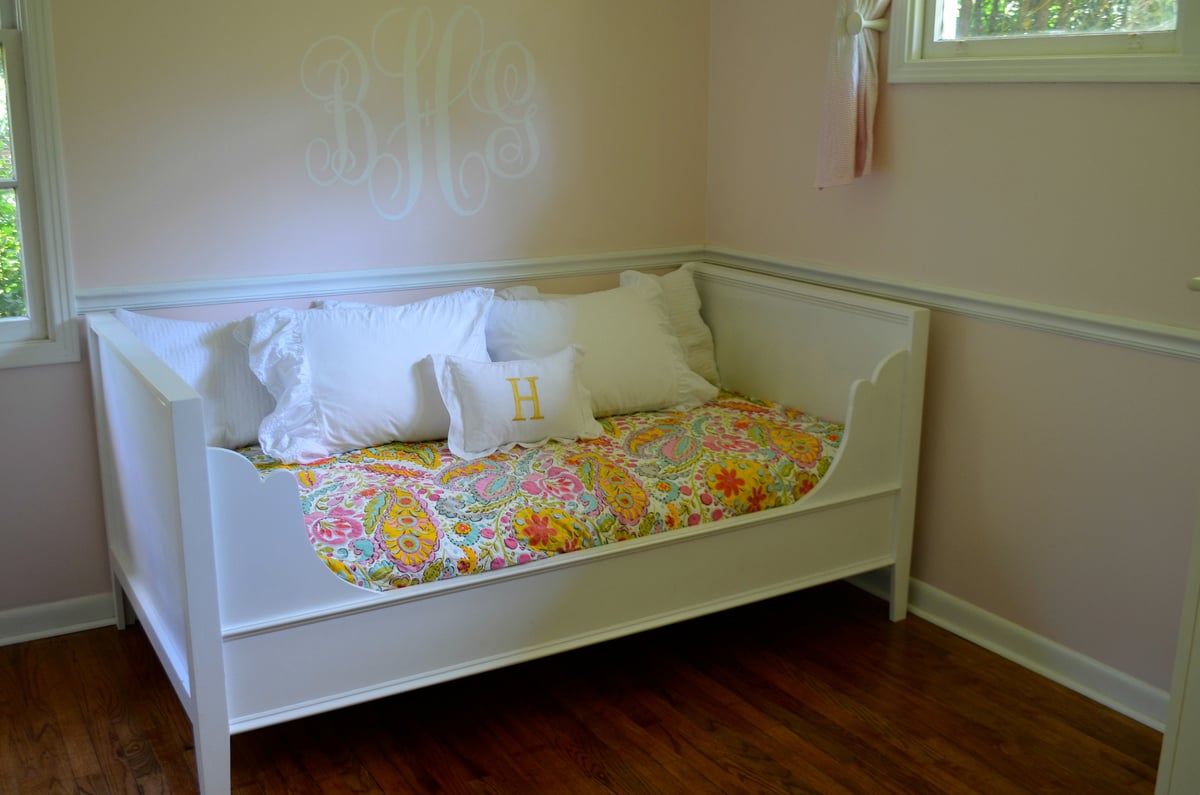
Farmhouse Table

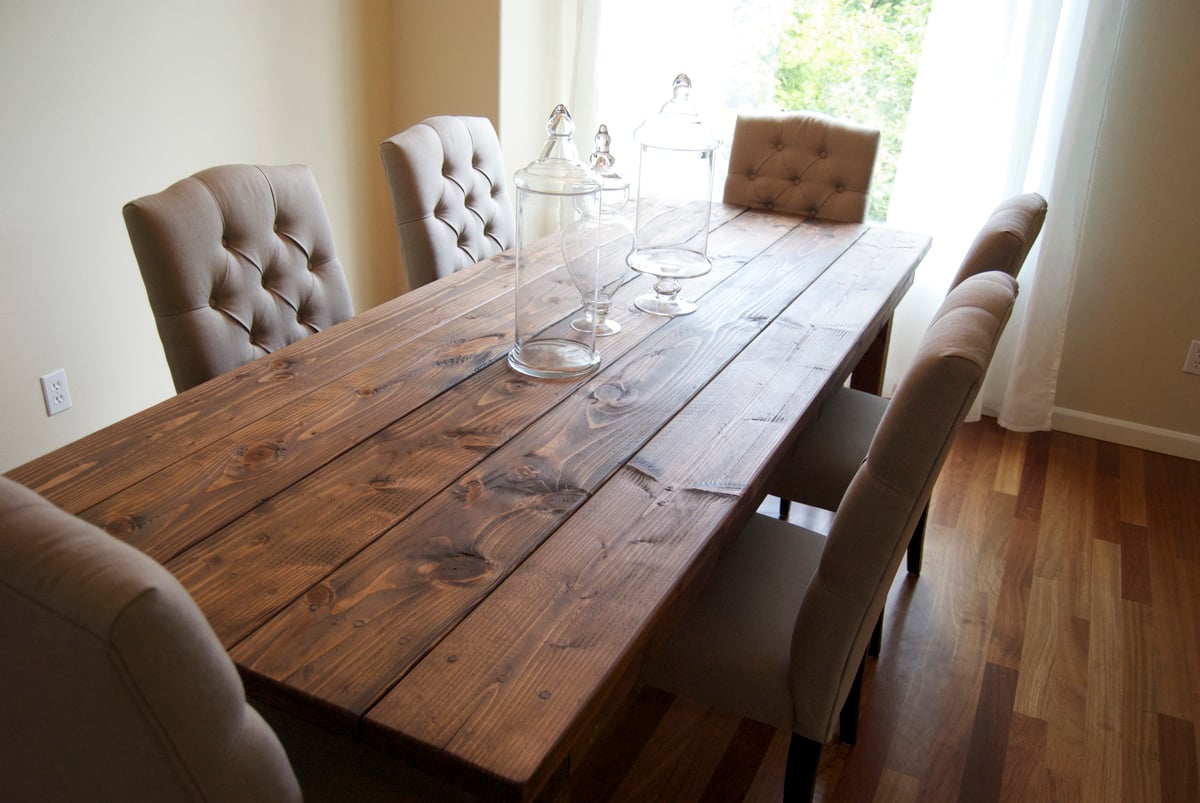
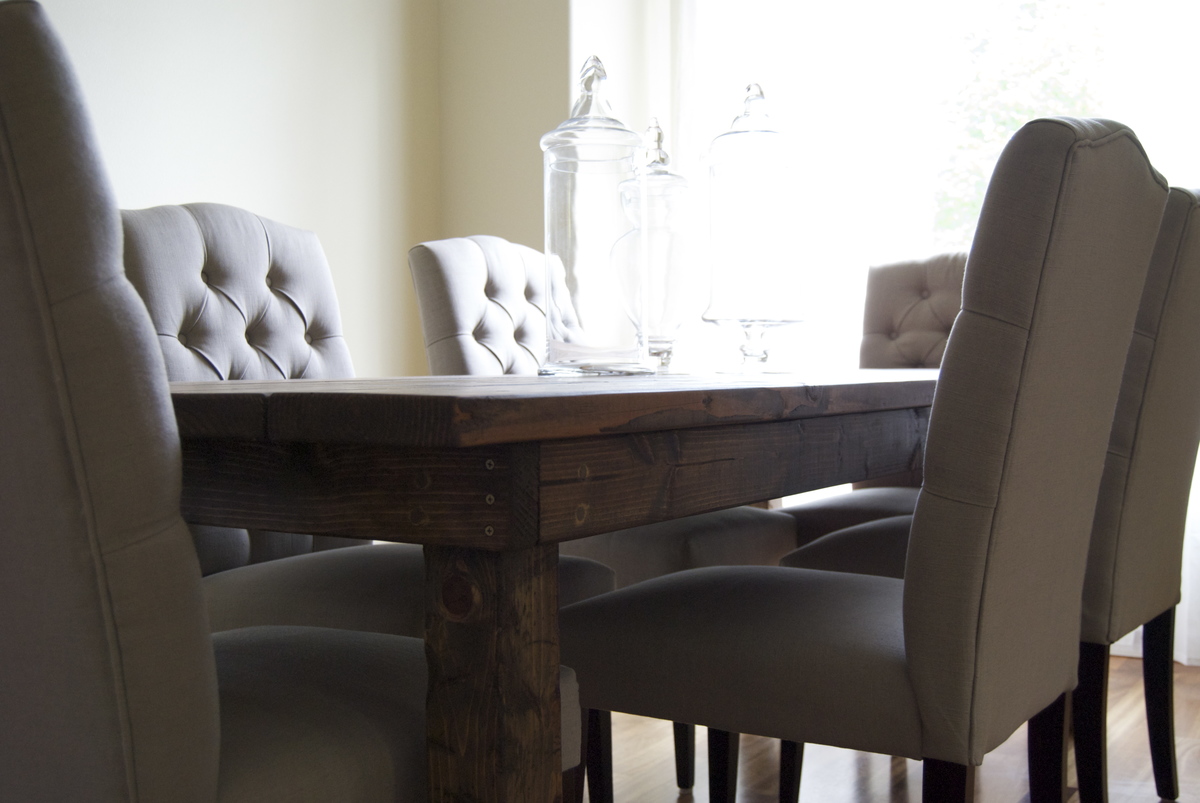
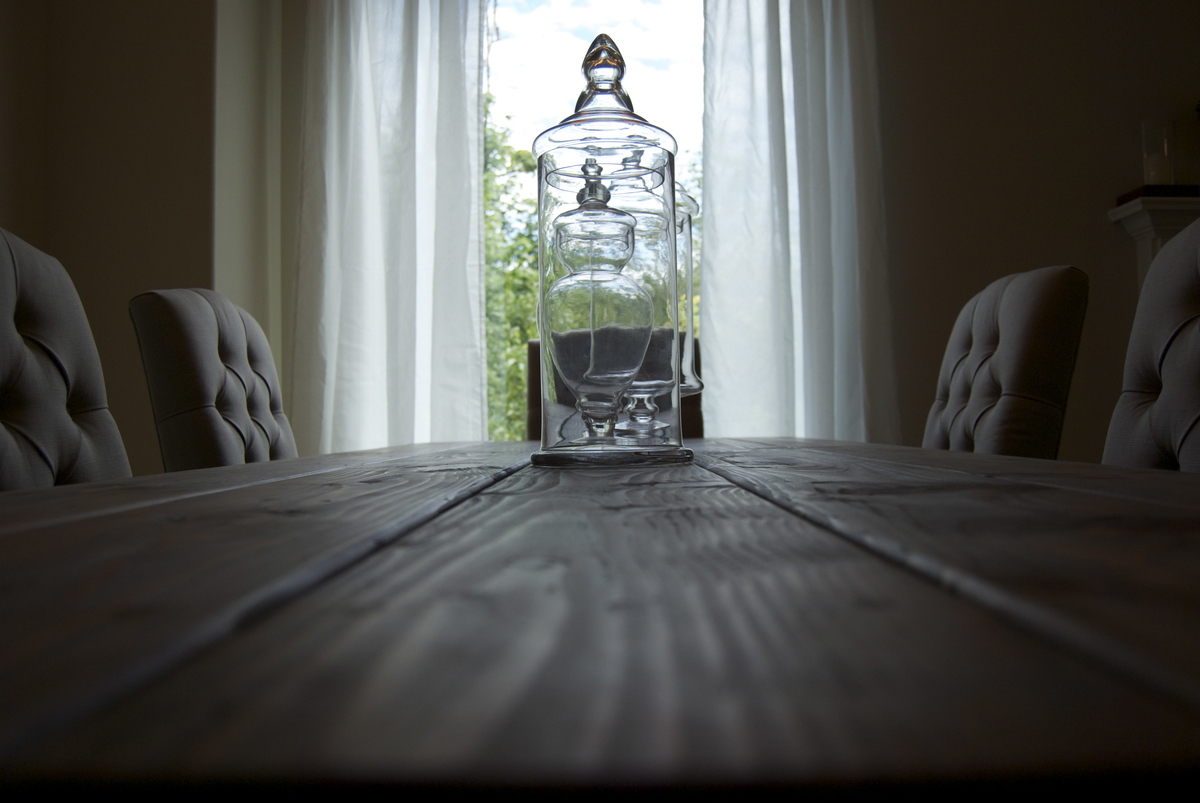
We decided to build the Farmhouse Table after our 30 year old dining table began to crack and just wasn't working so well for our family of 5. This was our first project, so we made a lot of mistakes but also learned a lot. One of the hardest things was finding decent lumber that wasn't warped or split. We also made two Farmhouse Benches but they aren't included in this photo.
Built from Plan(s)
Estimated Time Investment
Weekend Project (10-20 Hours)
Finish Used
Minwax Special Walnut
Recommended Skill Level
Beginner
Wood Working Apron

Thank you soo much for the apron plans. I've used a sewing machine about 5 times in my life, and I didn't know what "stitch in the ditch" or bias tape or trim was, but with the plans and some web searching, I was actually able to sew this apron. It took me considerably longer than others, especially because I don't have an iron, pins, or a seam ripper (ripping a seam took me over an hour). Again, thank you sooo much! I hope to never lose my pen and tape measure at the lumber yard again with this handy creation :)
Built from Plan(s)
Estimated Cost
Less than $6
Estimated Time Investment
Afternoon Project (3-6 Hours)
Recommended Skill Level
Beginner
Comments

Sun, 06/15/2014 - 05:27
Looks great!
Great job on the work apron, Yvonne! Congrats on conquering the sewing machine!

In reply to Looks great! by JoanneS
Tue, 06/17/2014 - 00:27
So much to learn
Thank you, Joanne. :) There is so much I want to learn, and for some reason, I feel like I need to learn it all now, when my life is busier than ever. Hah!

In reply to Amazing job by spiceylg
Fri, 06/27/2014 - 10:55
Like a jigsaw :)
Thank you so much. It reminded me of using a jigsaw, and vice versa. :)
Big Fancy X Desk

Needed a big desk. Made mine at 8' long.
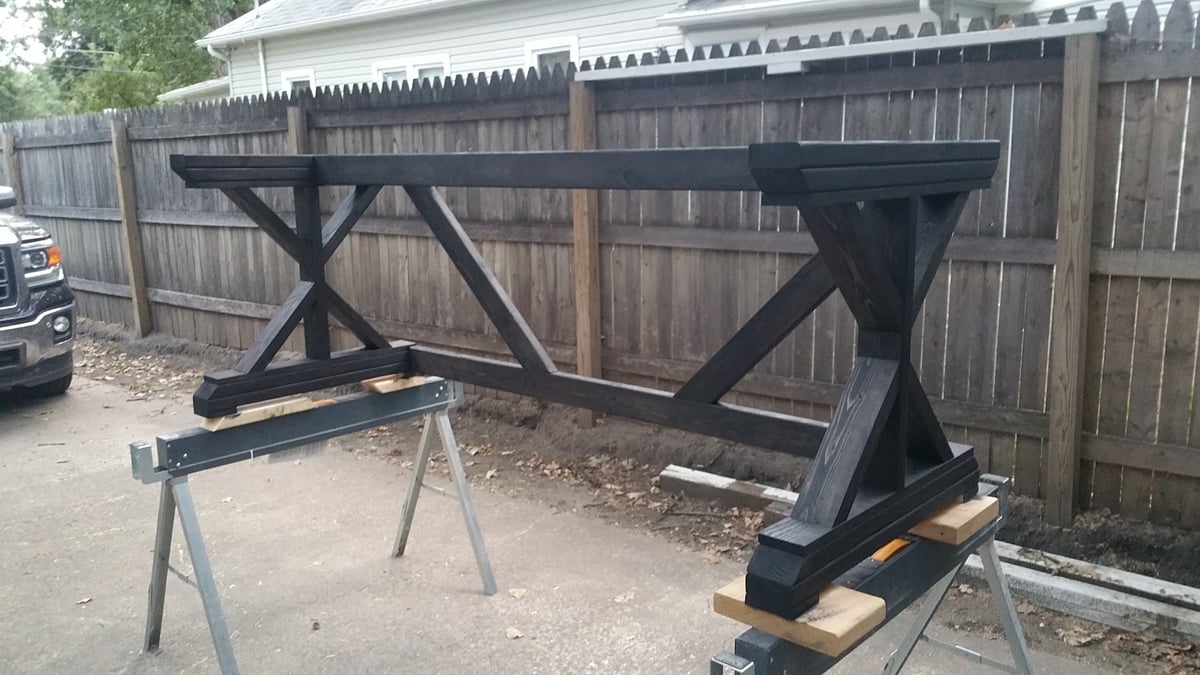
Built from Plan(s)
Estimated Time Investment
Weekend Project (10-20 Hours)
Finish Used
Minwax Ebony
Recommended Skill Level
Beginner
Comments
Tue, 10/04/2016 - 05:47
Looks great!
The desk came out great. I made the same desk, I went with the 2x12x6 dual board top. I like the look of the solid piece on top...will have to try it on the next one.
Modern Adirondack and 2x4 Sofas
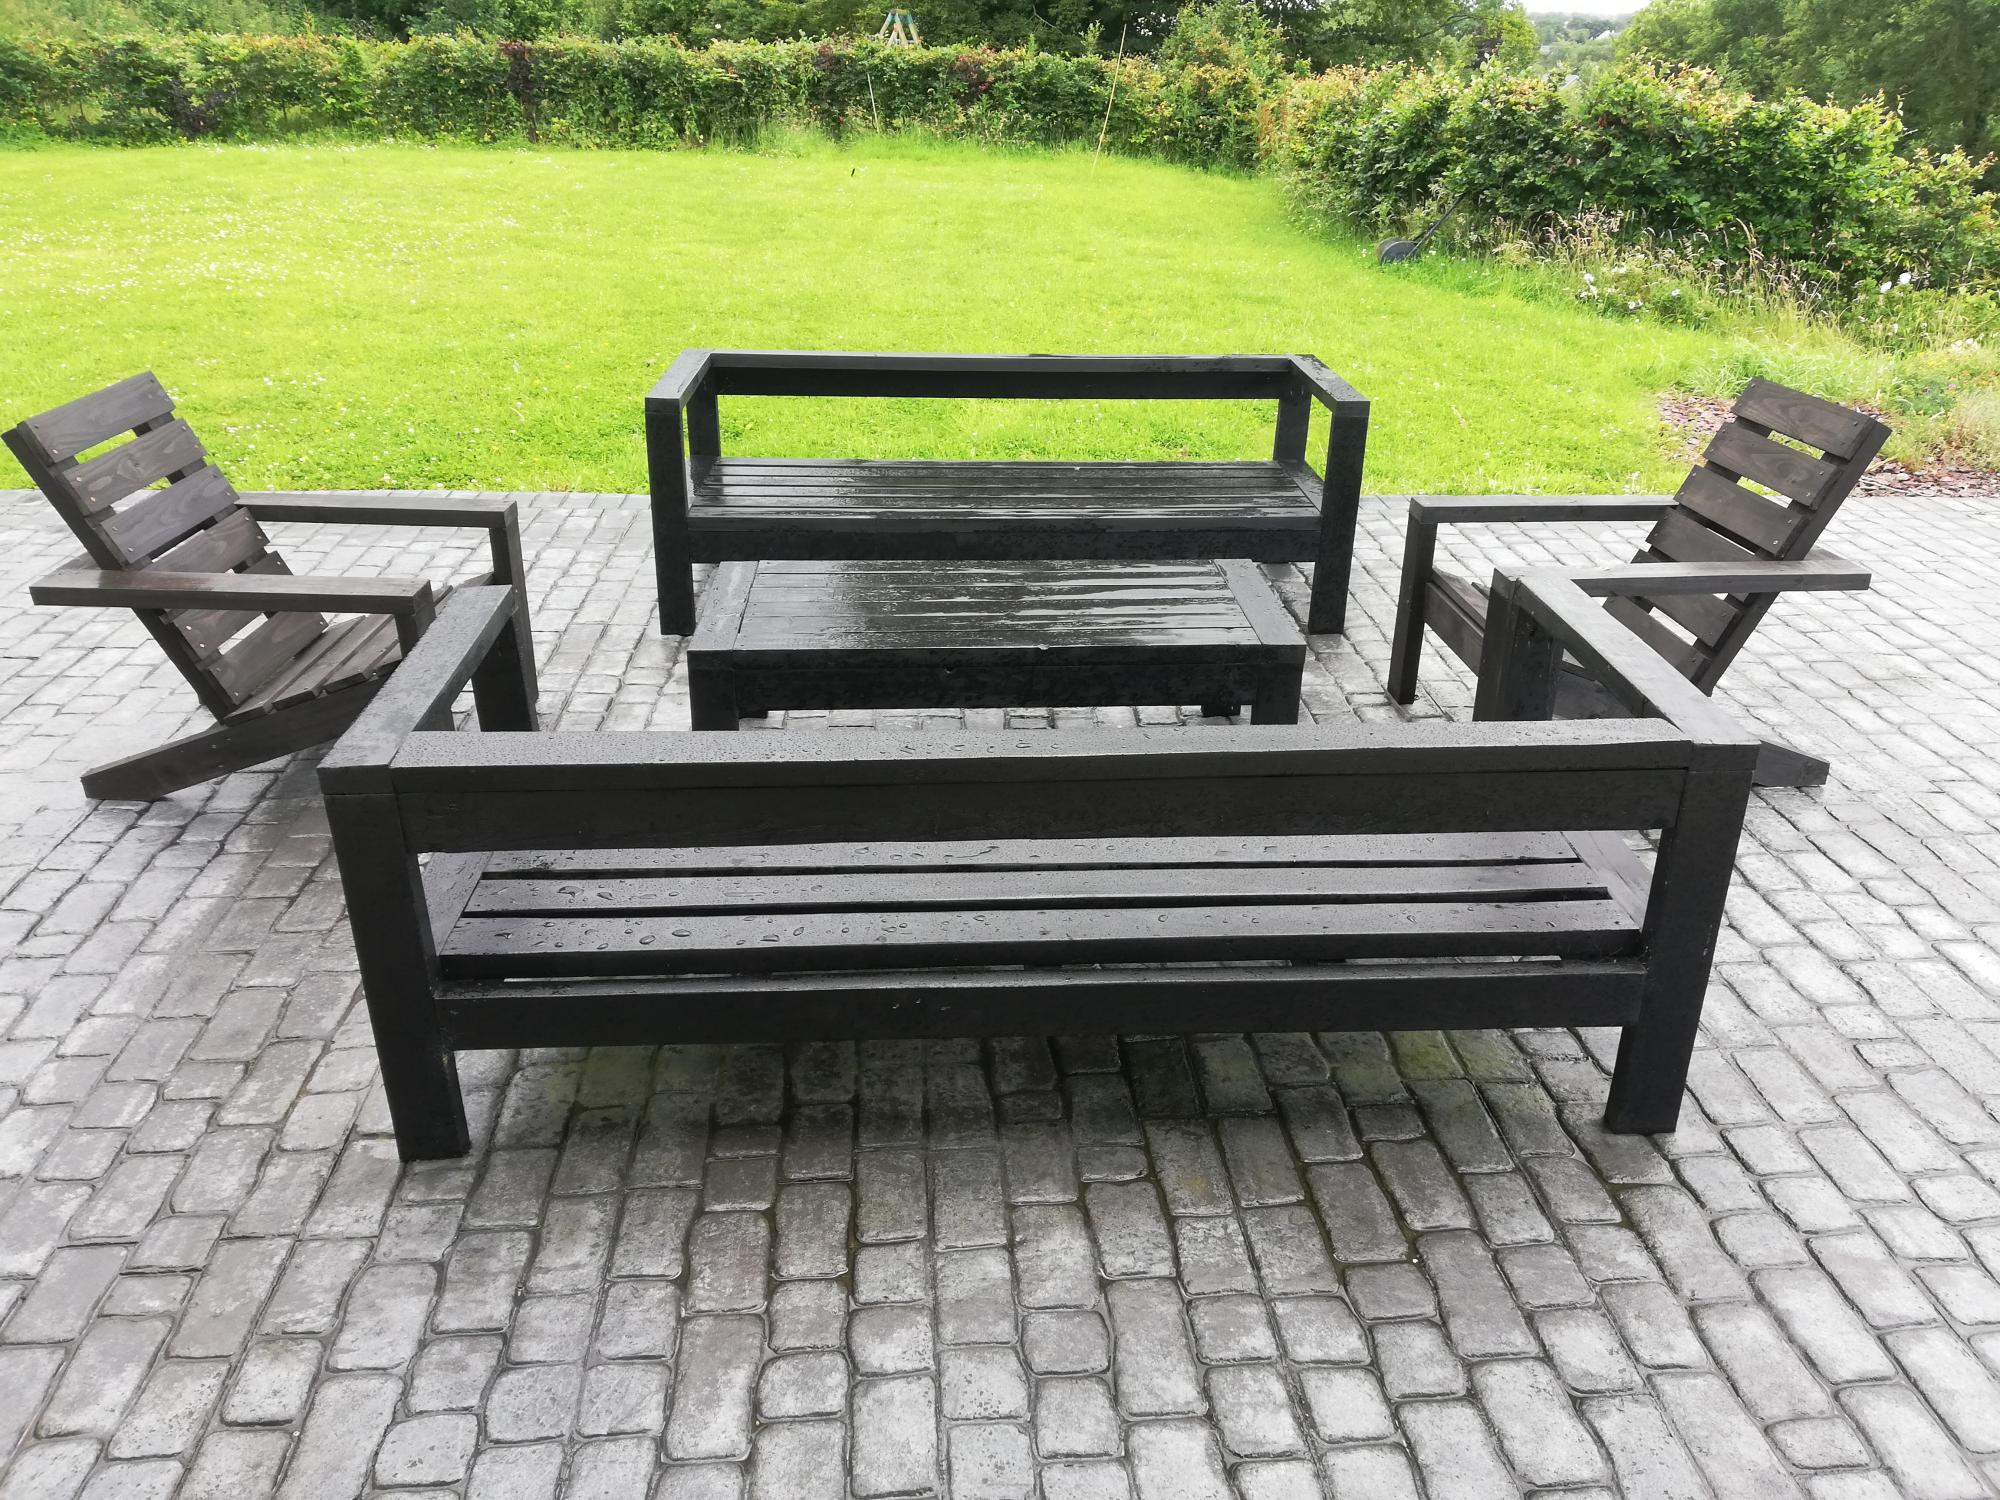
Thanks Ana for your great plans... Unfortunately it hasn't stopped raining since we finished the armchairs! All we need now is the sun :)
We used 4x1 for the seats to match the outdoor sofas.
Built from Plan(s)
Estimated Cost
€200
Estimated Time Investment
Weekend Project (10-20 Hours)
Finish Used
Garden Woodstain
Recommended Skill Level
Beginner
Outdoor Octagon Table
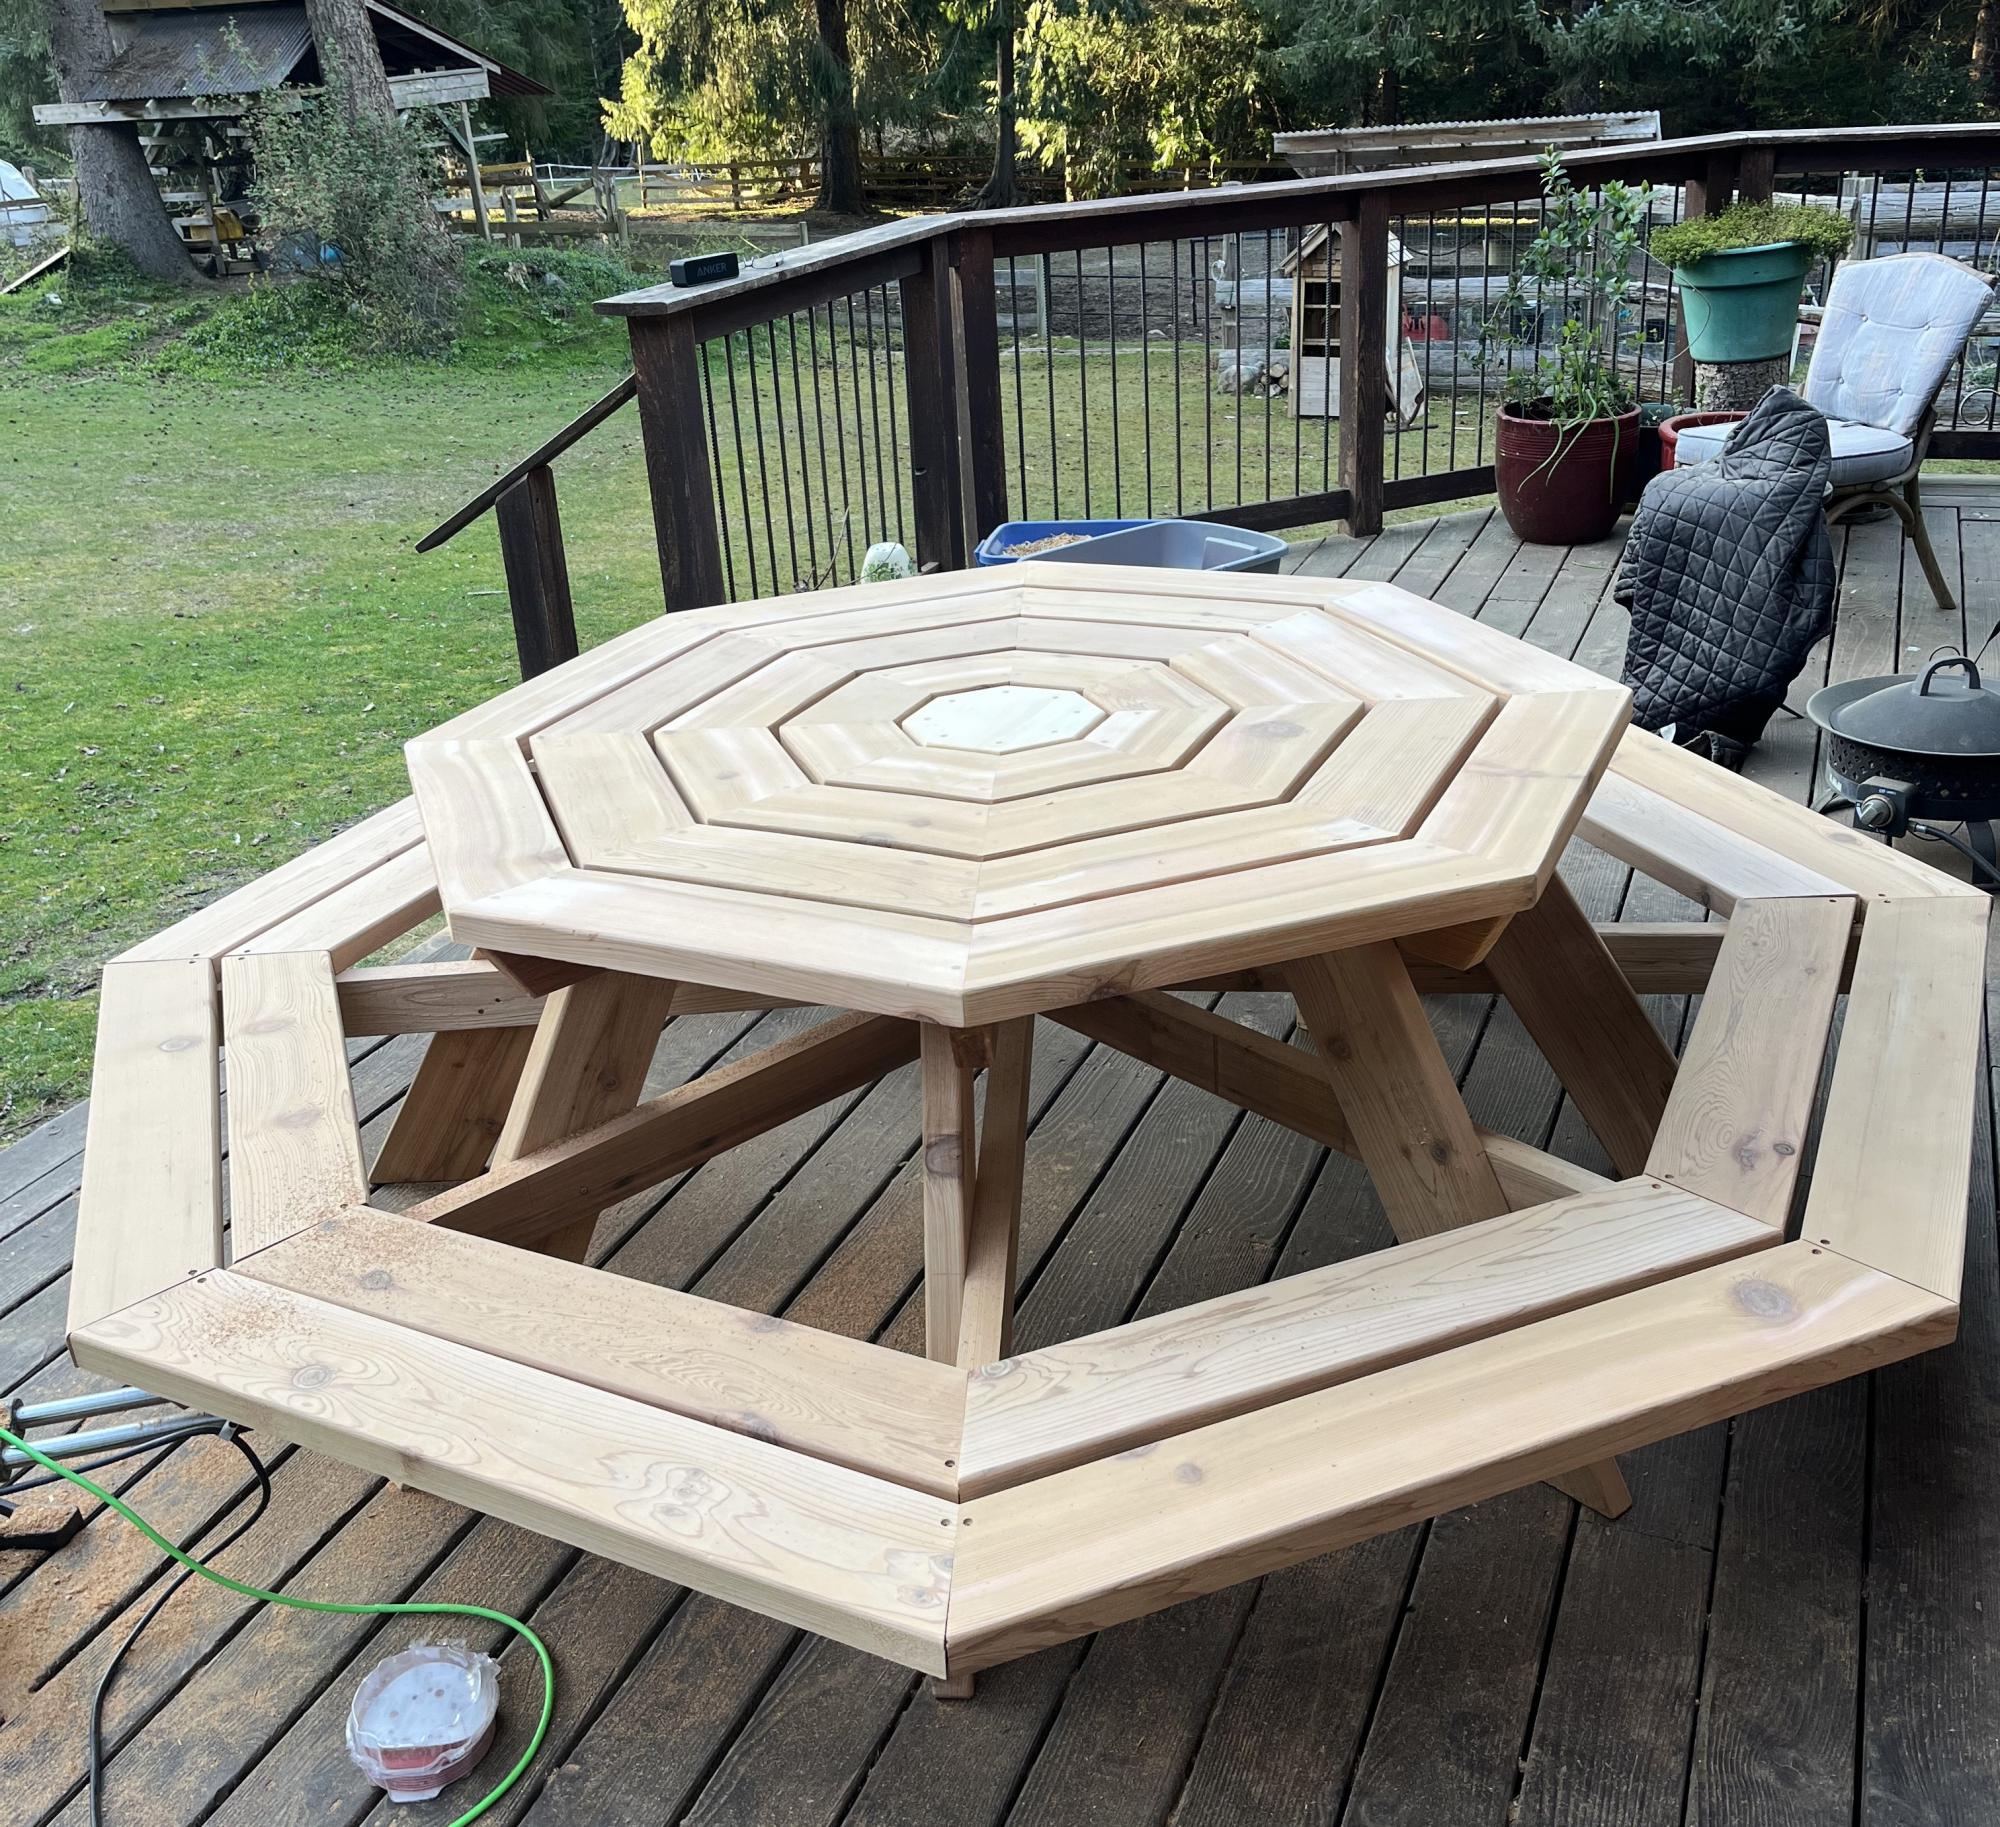
DIY Octagon Picnic Table
Built from Plan(s)
Wall Jewelry Cabinet
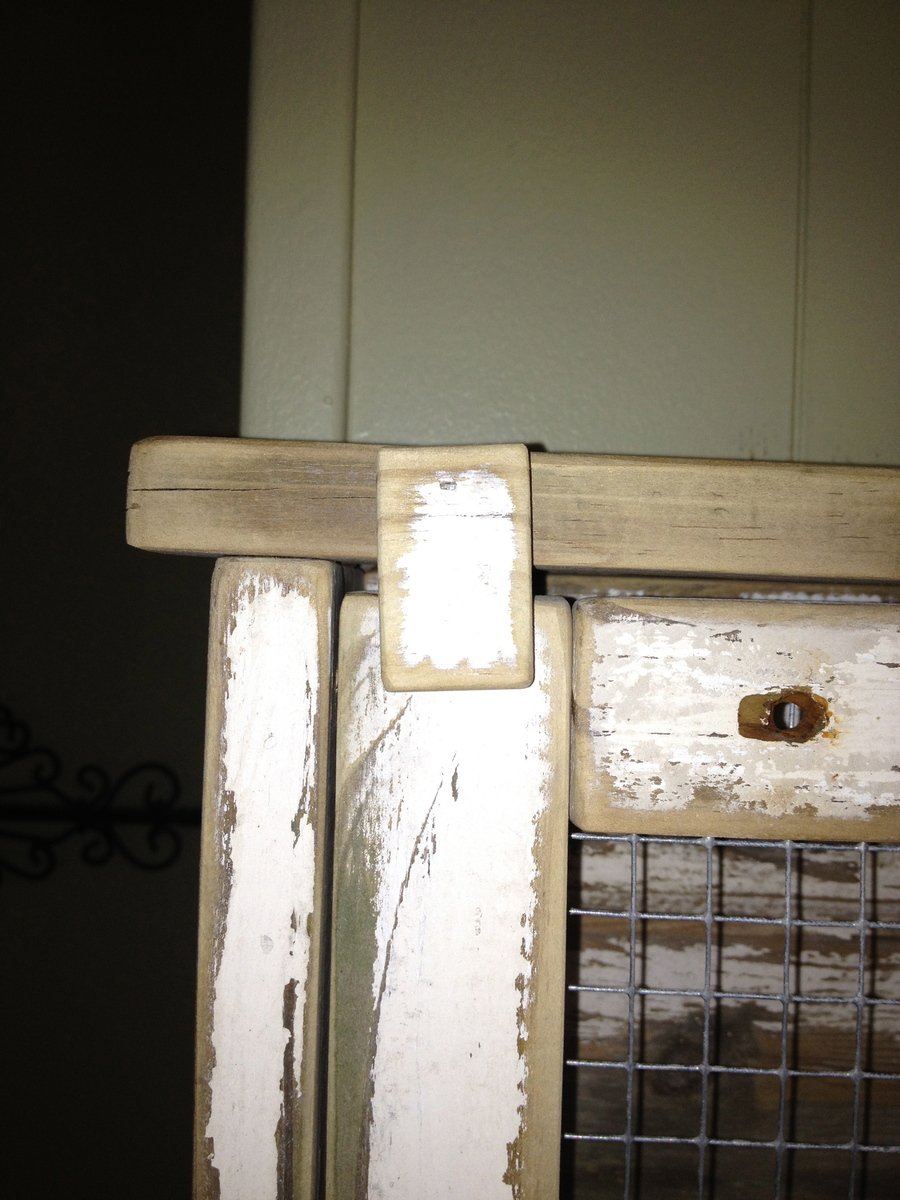
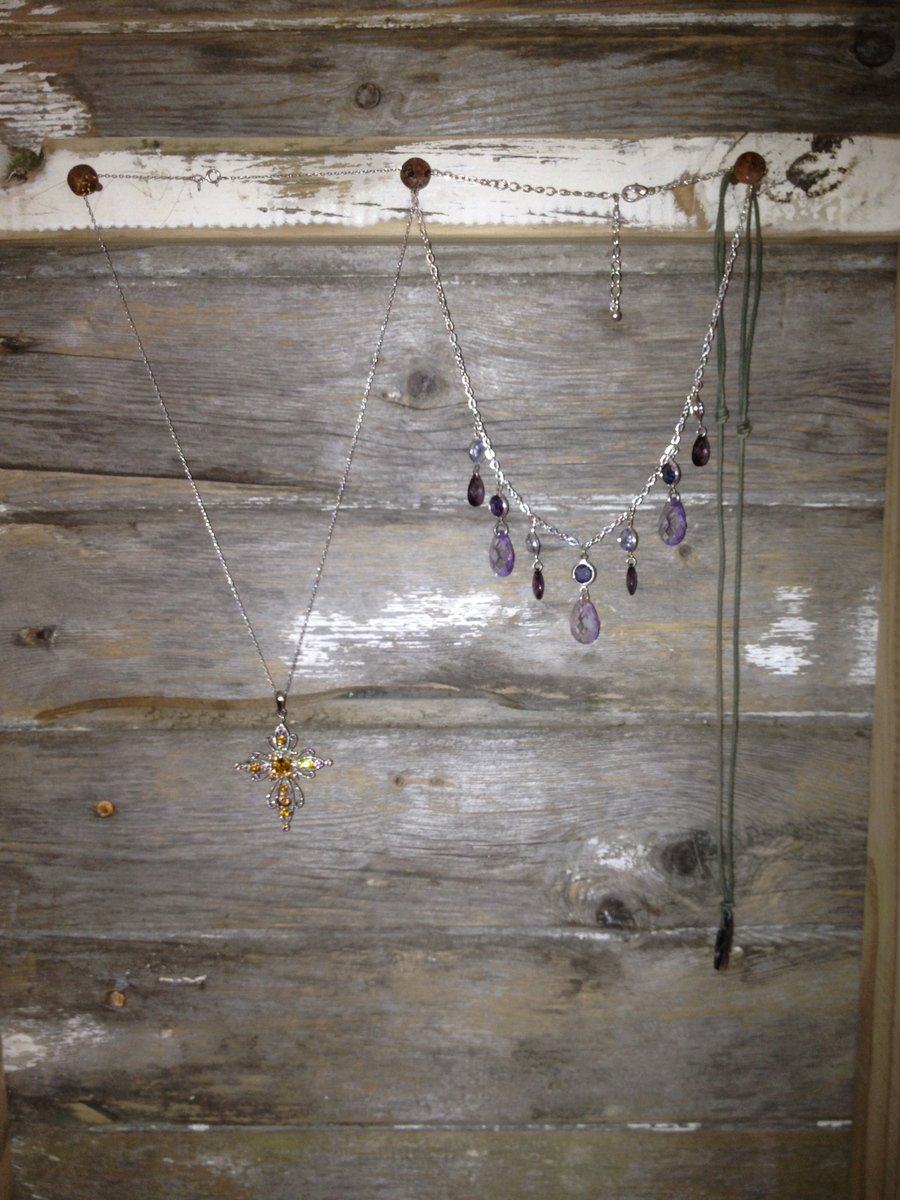
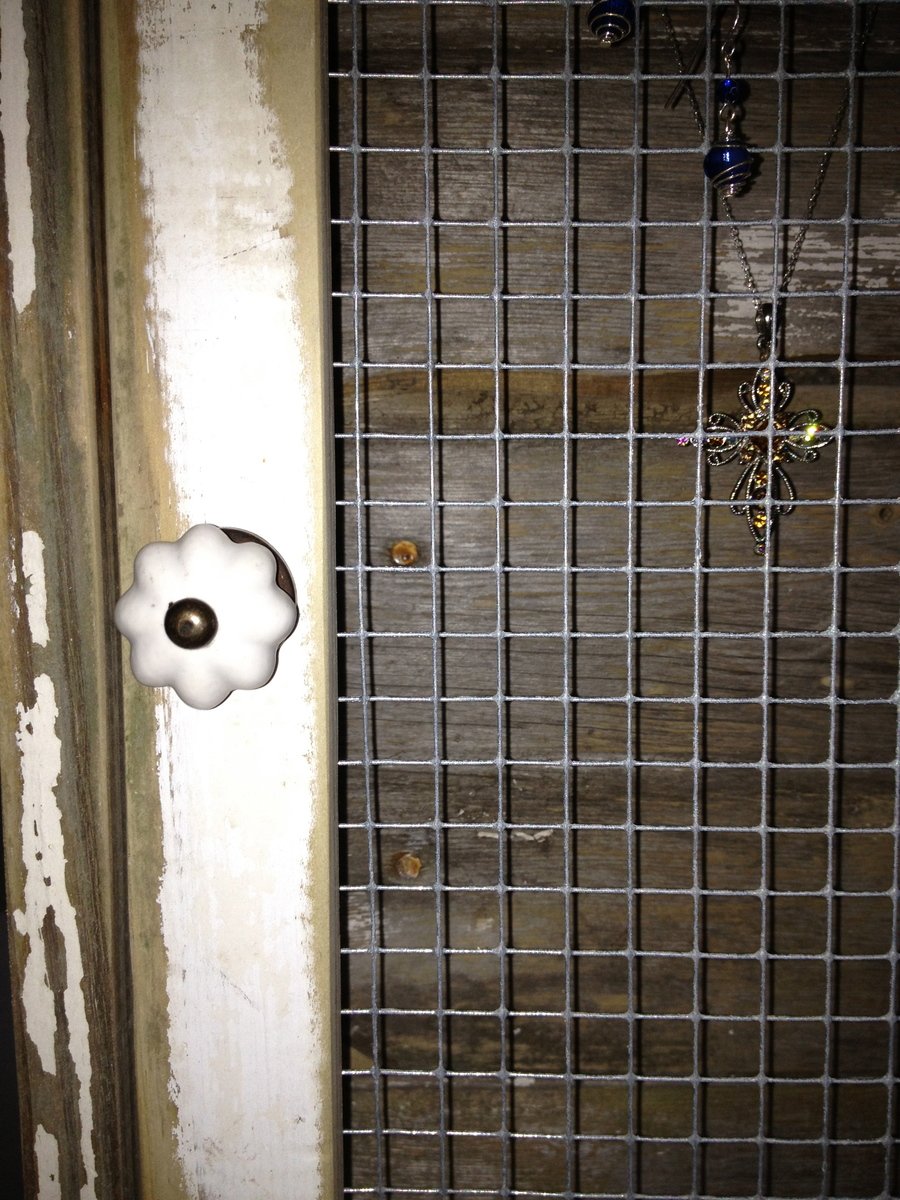
I used the wall jewelry cabinet plan and modified it a bit to fit the materials that I already had in the garage. The whole project was built using salvaged barn wood and siding that was built in the 1800's. It took a little longer to square up the boards and sand them to a friendly feel but I had little to no finishing time in the end. The plans were so spot on that used them almost exactly.! I just added another cross support to the door and used old barn wood tongue and groove for the back. I also fastened a little piece of wood at the top of the door with one brad nail. I did this to keep the door shut in a more attractive way then a clasp or hasp. The little piece swings out of the way with ease. I bought the knob at hobby lobby for 2 dollars and the hinges were less than 2 dollars. The hardware cloth came in a roll that was 24 inches by 25 feet long for 10 dollars. Basic wood working knowledge and tools are super helpful with this project and as is stated in the original plans... a kreg jig makes it so much faster and easier.! Thanks so much for sharing!!
Estimated Cost
about 14 dollars including the hardware cloth.
Estimated Time Investment
Afternoon Project (3-6 Hours)
Finish Used
Just cleaned the wood with compressed air and sanded to a friendly feel being carful not to kill the old look. Thats the only advantage to using old wood... the finish time is short but the prep time is a little more involved.
Recommended Skill Level
Intermediate
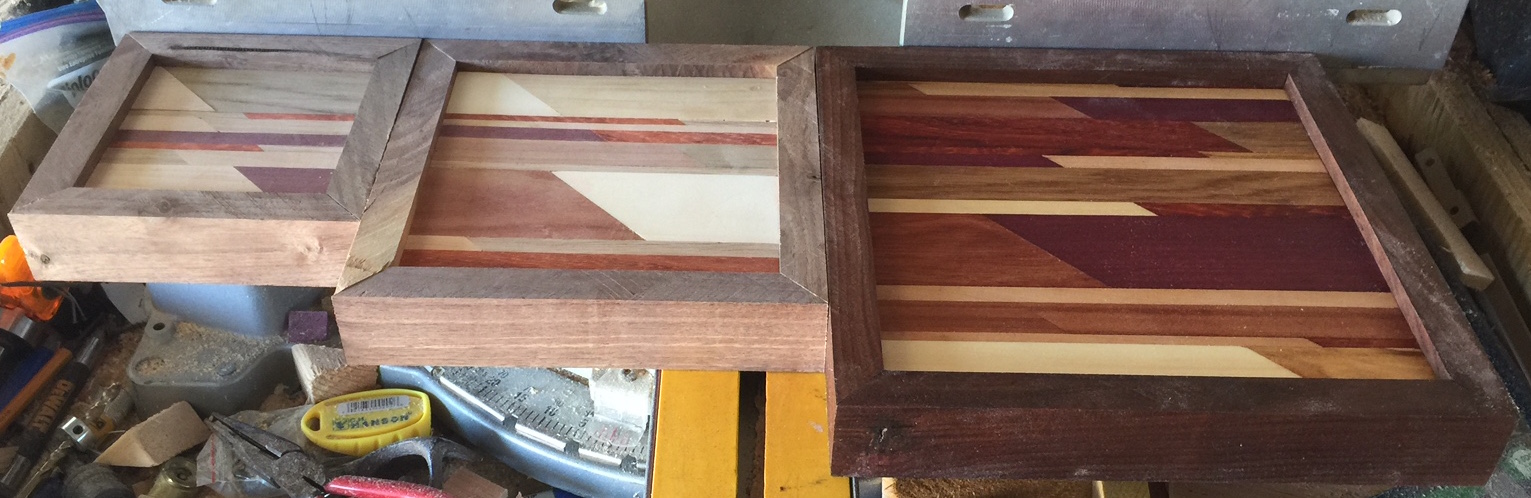
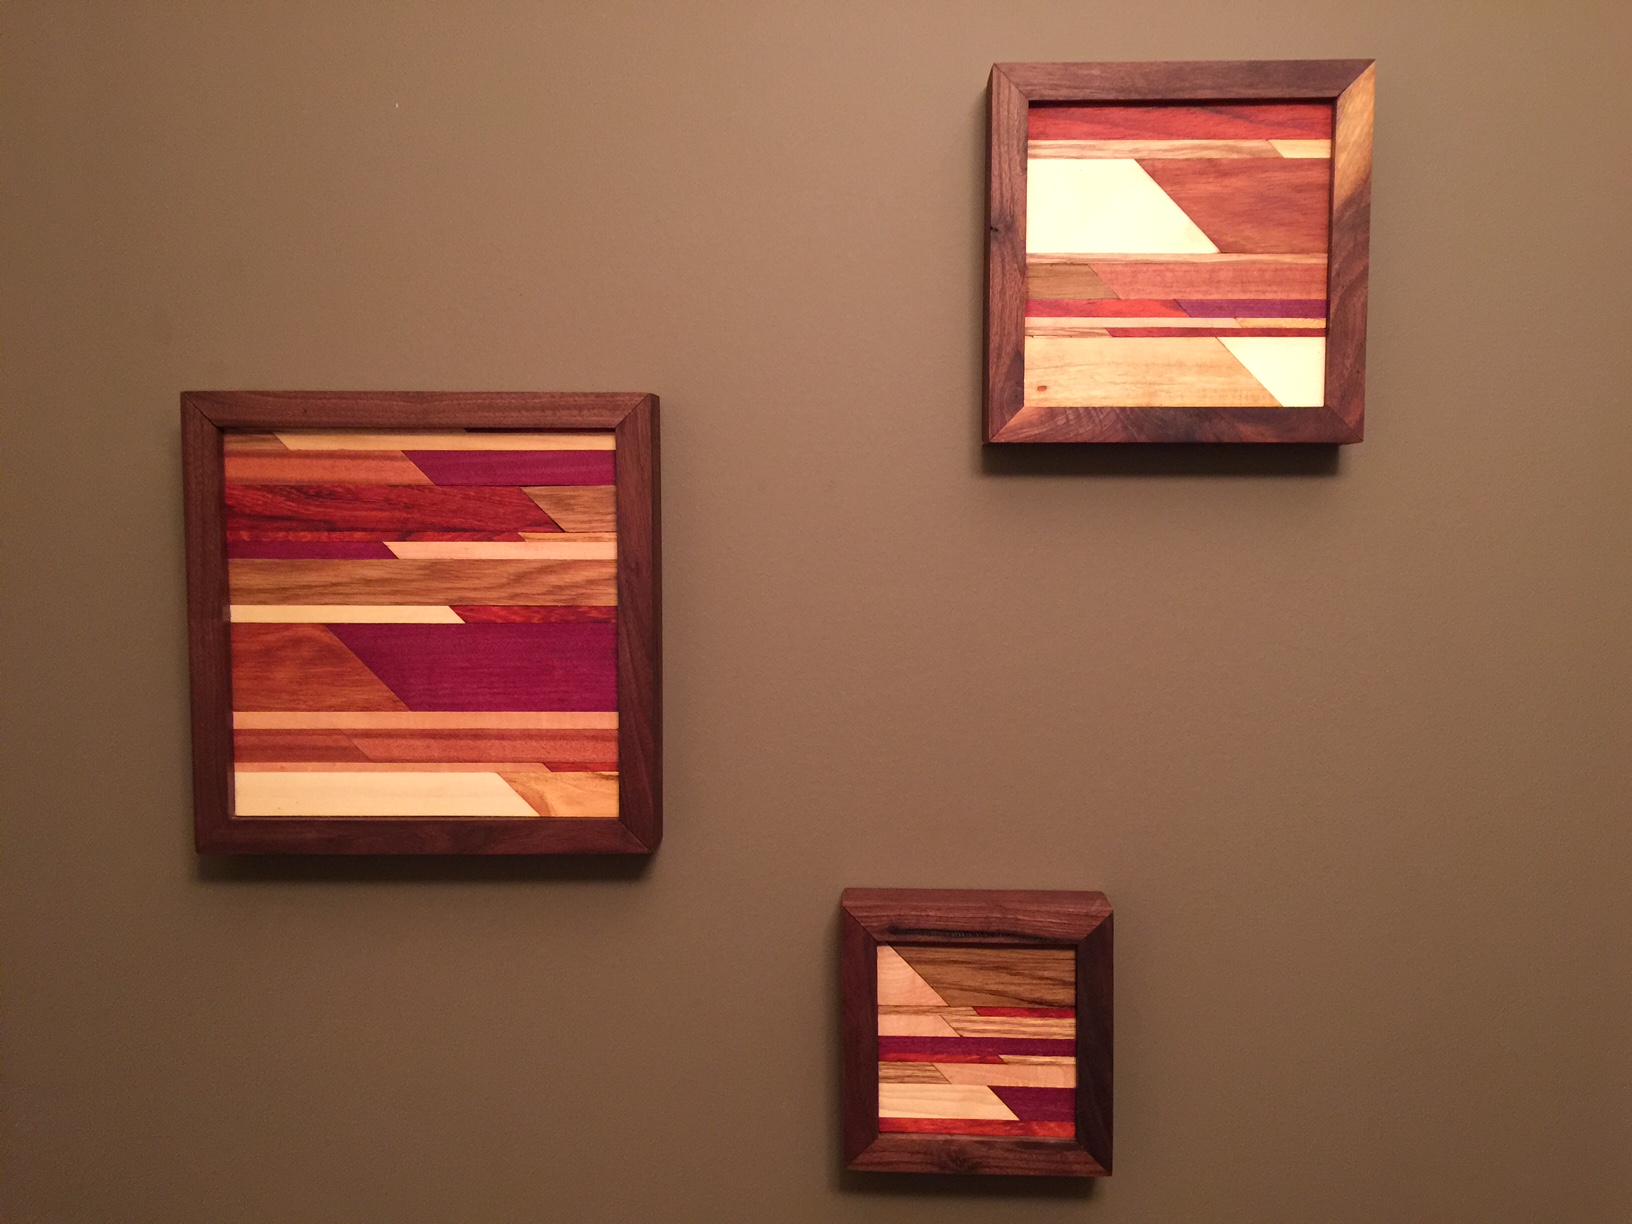
Wall Art
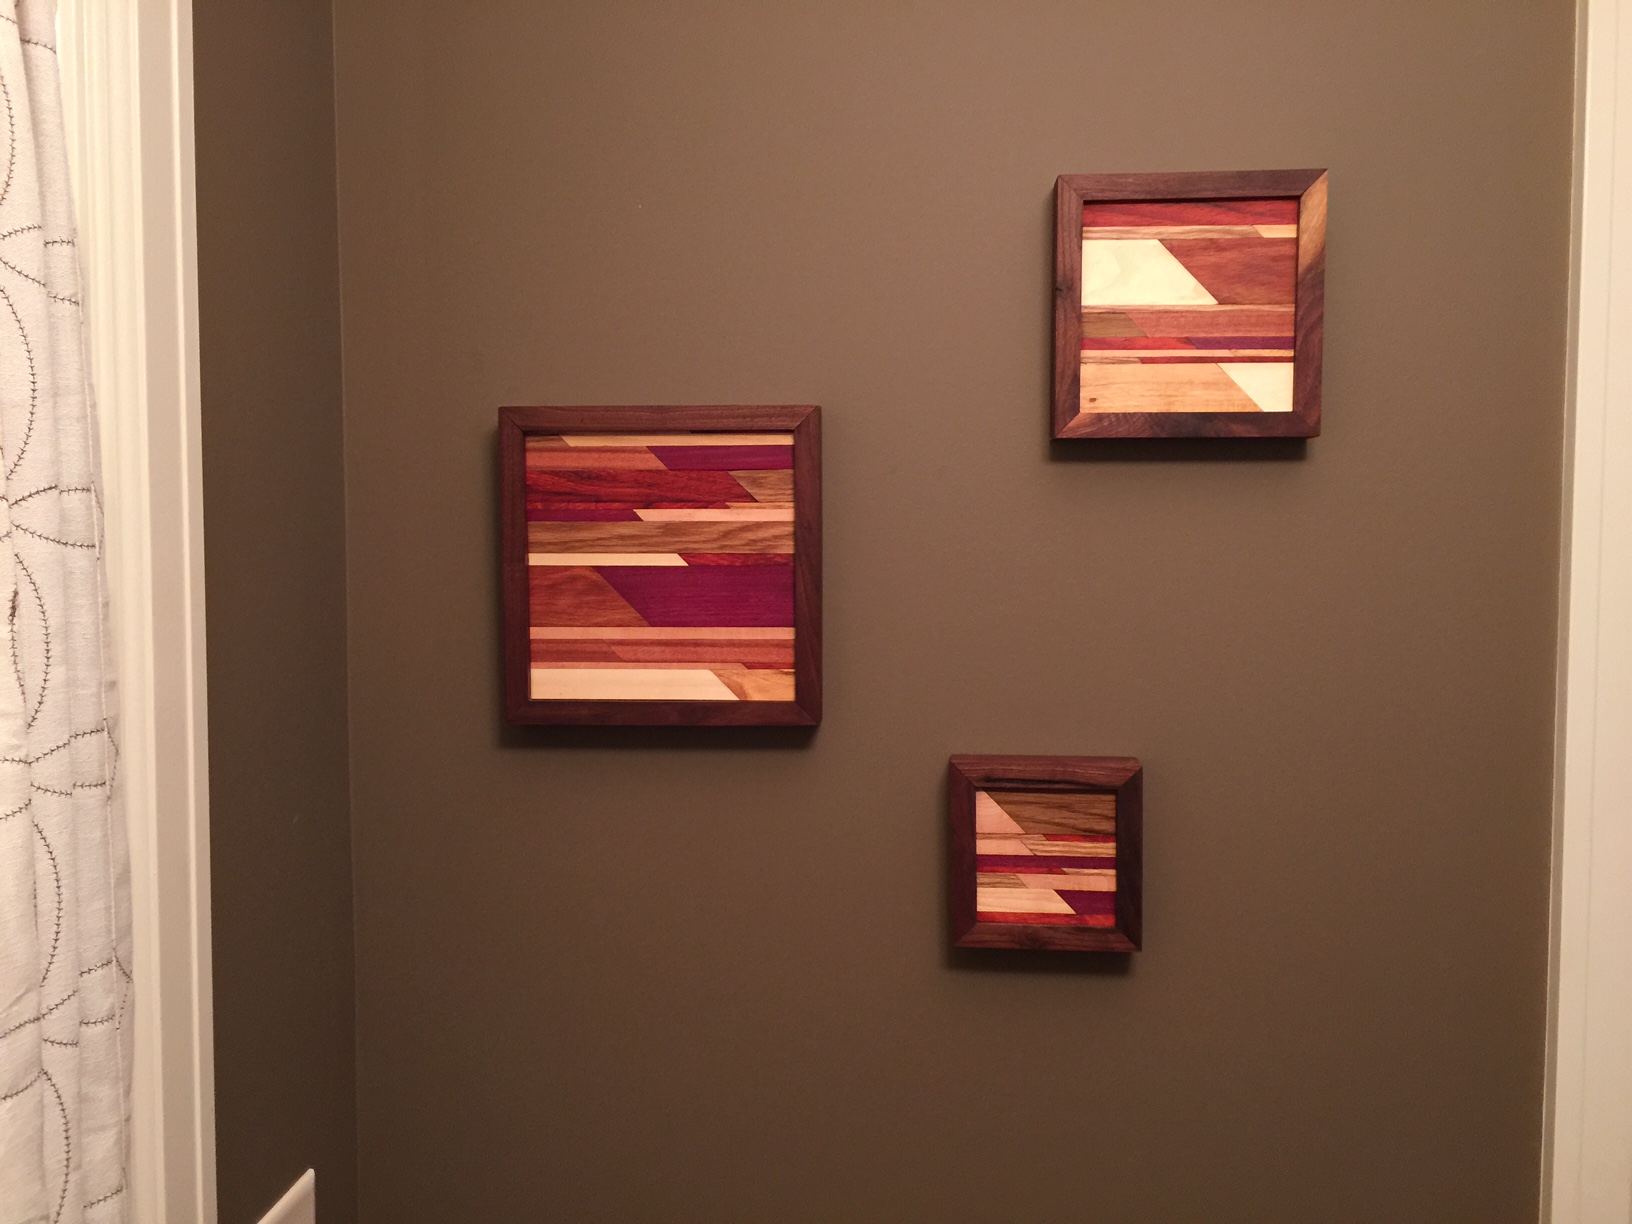
I saw a post on Fixthisbuildthat.com about making wall art. It looked super cool so I thought i would give it a shot. My wife loved the first one so I made two more per her request. These are pretty easy to do if you have a table saw and a miter saw.
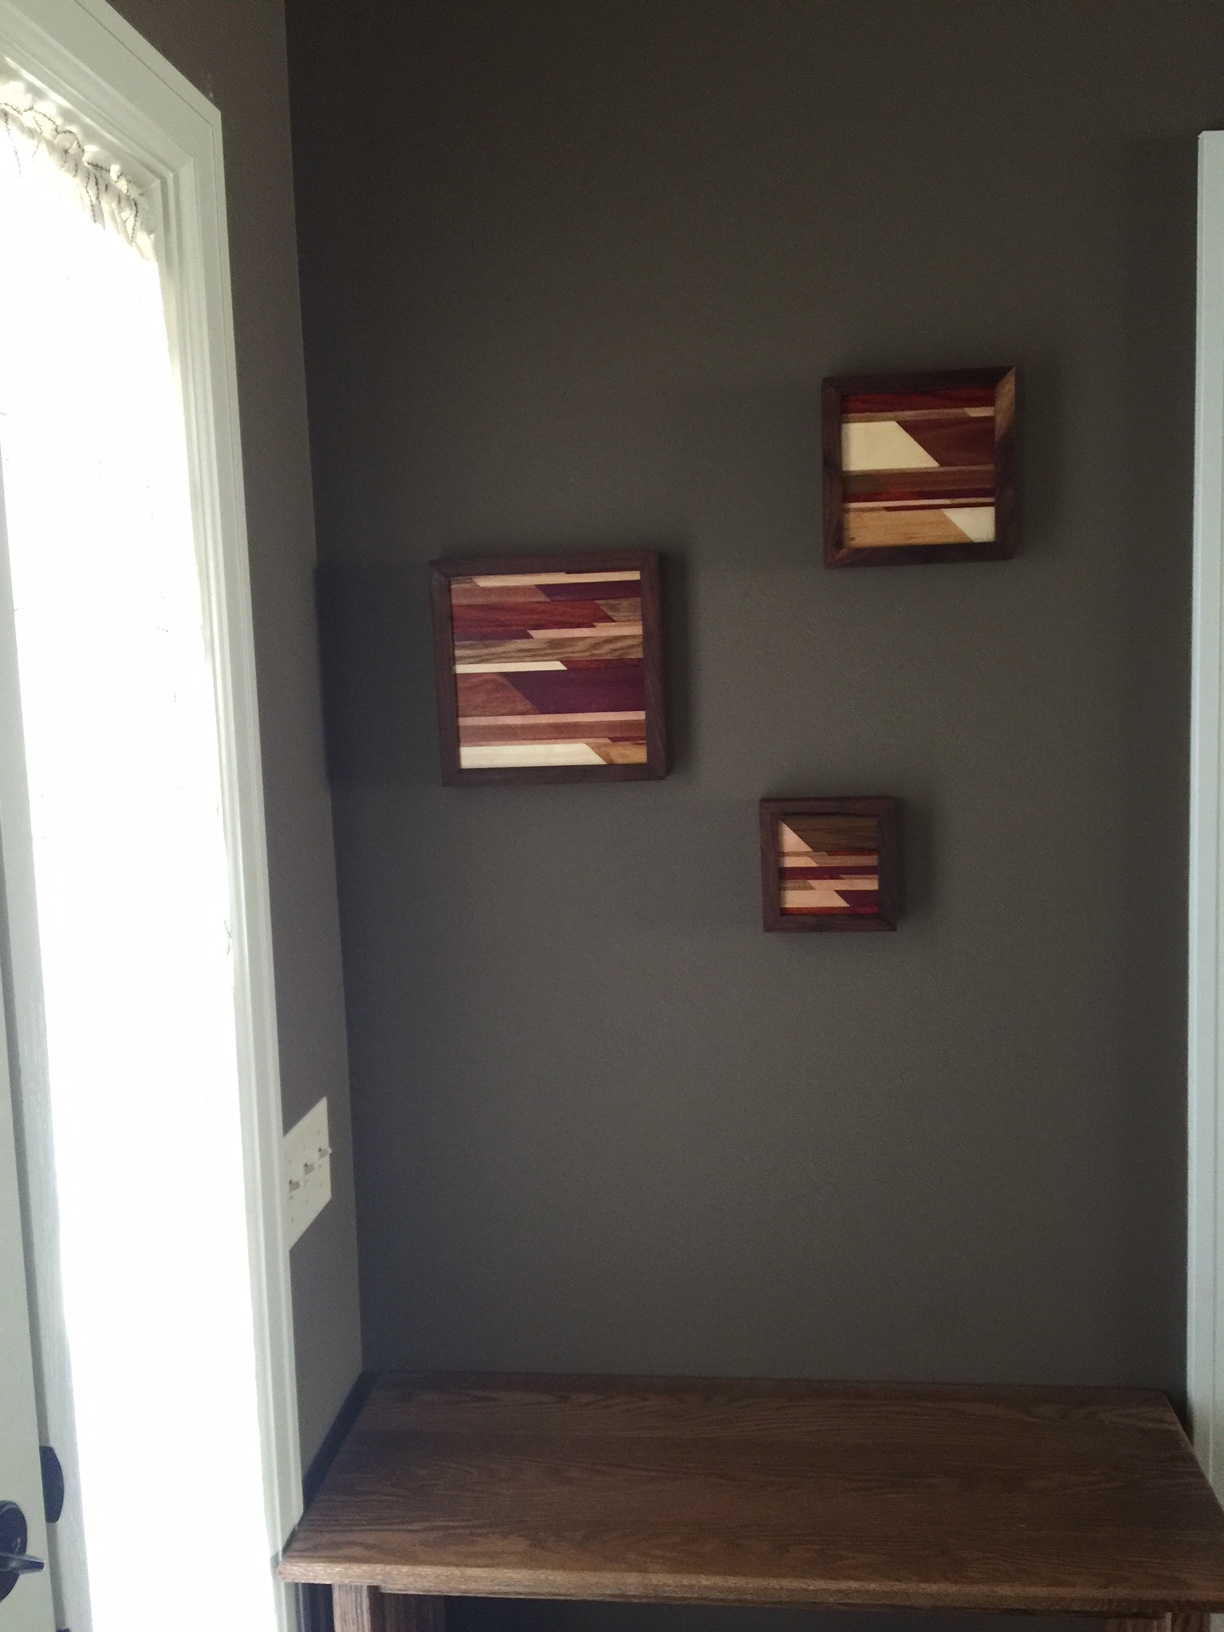
Estimated Cost
I spent 34 dollars on wood shorts at my local hardwood store. I have read that you can get hardwood scraps form cabinet builders and lumber yards if you have any close by. May be worth a shot maybe you could do these for free. I had walnut from a previous project so I did not buy the walnut or it may have been a little more.
Estimated Time Investment
Afternoon Project (3-6 Hours)
Finish Used
I used mineral oil to give the wood a nice pop.
Recommended Skill Level
Beginner
Waterfall Console
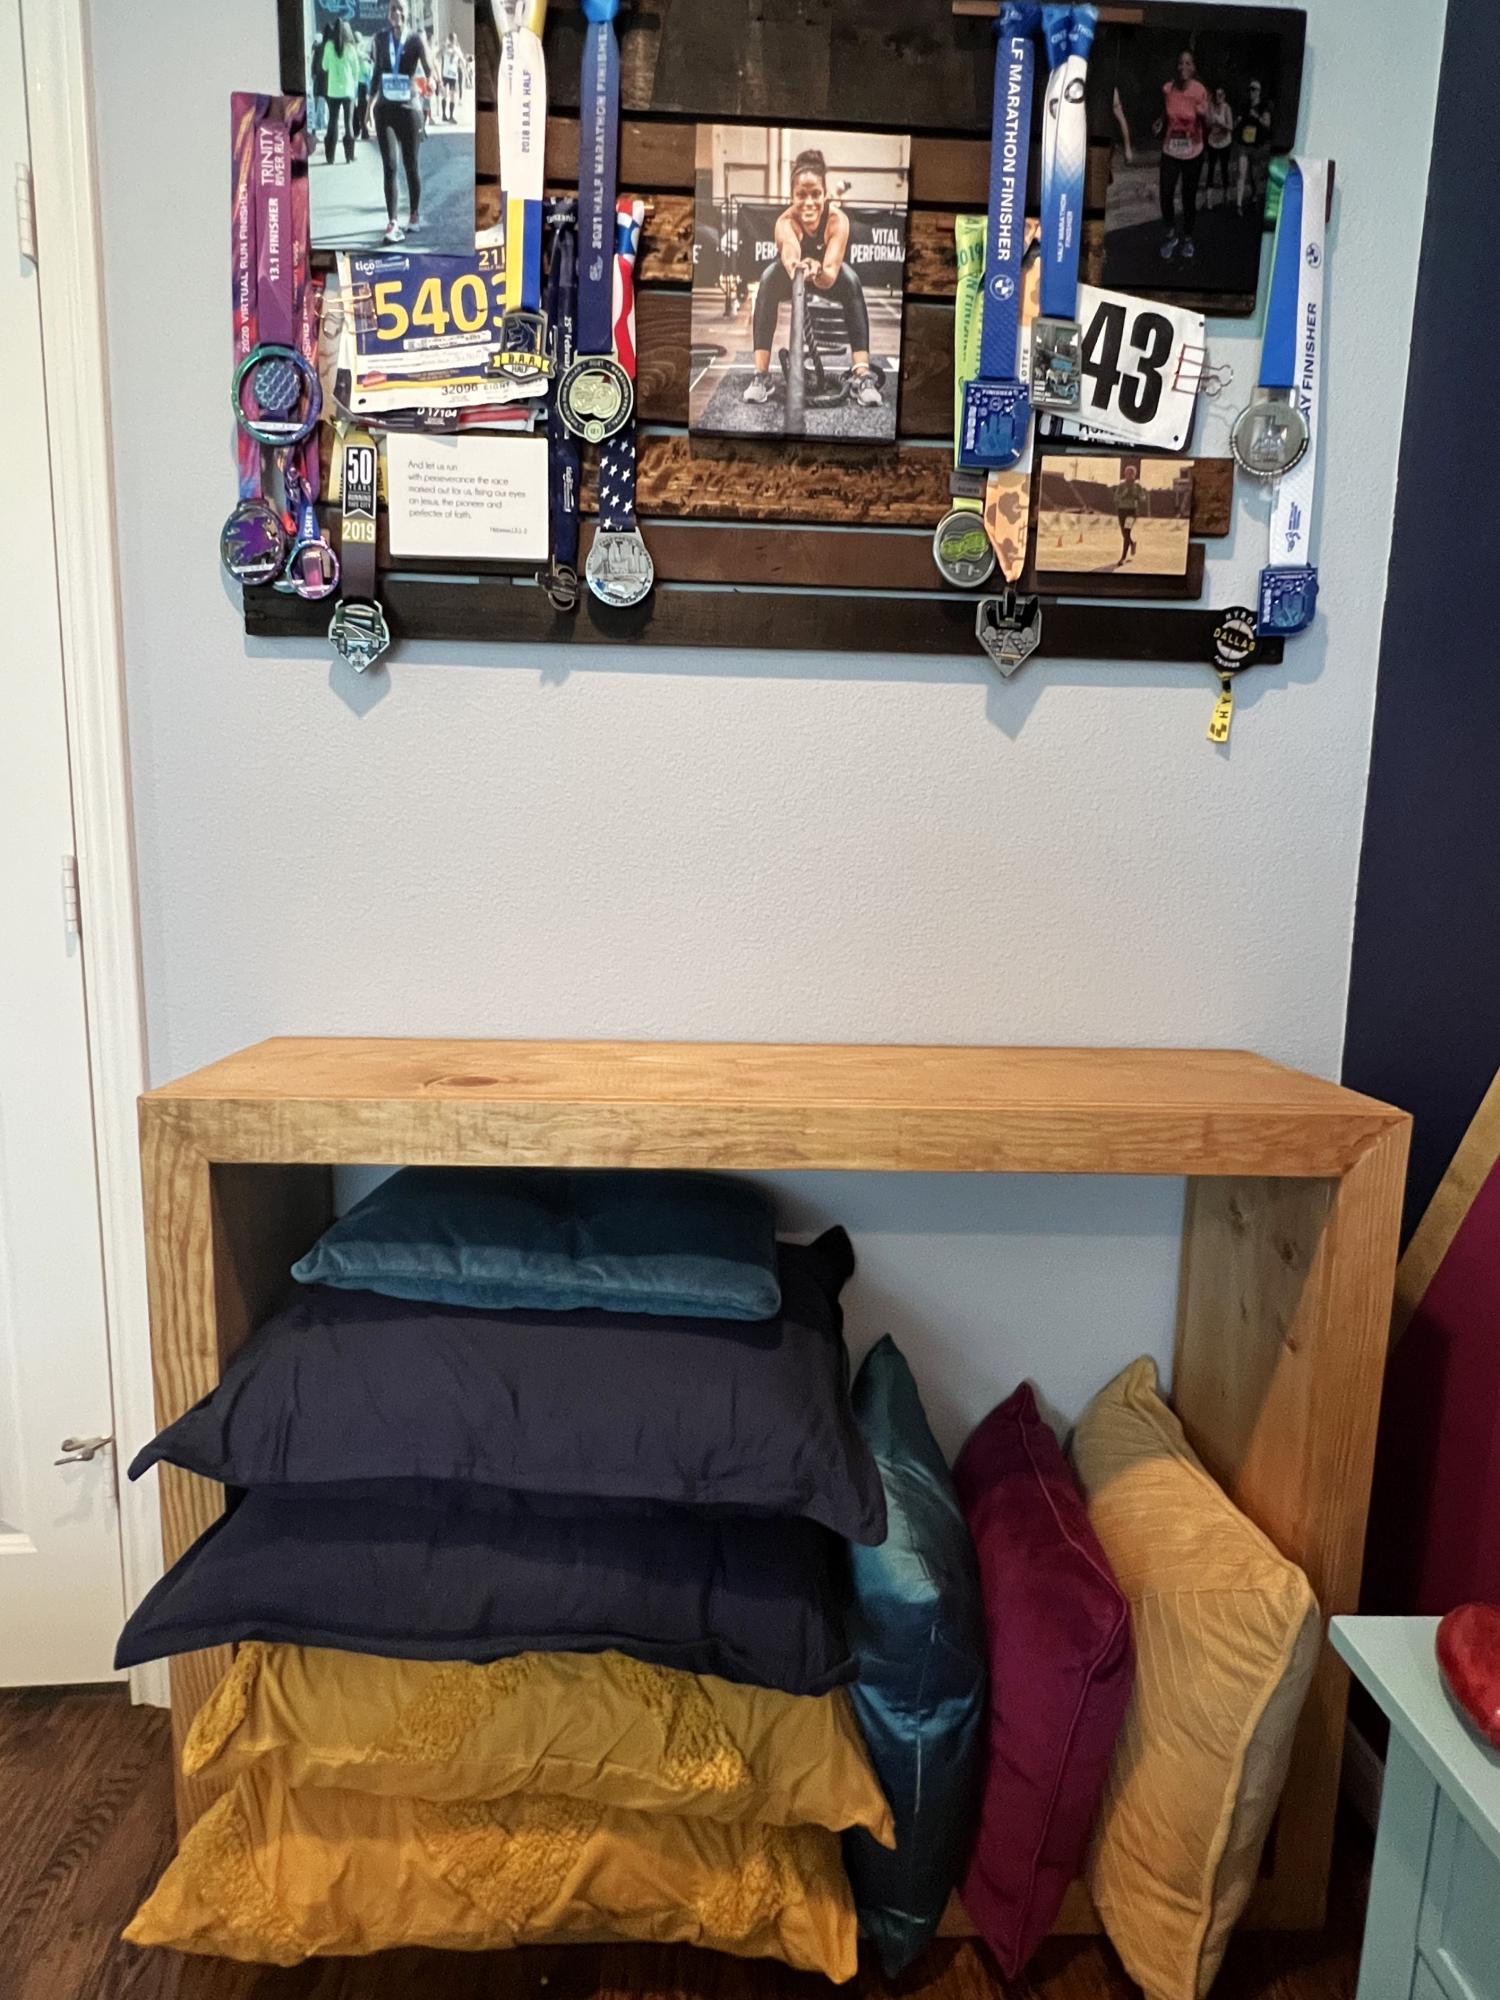
This is the 52 inch waterfall console. I fell in love the it and thought it might be a great way to store my bed pillows when they aren’t in use. I modified it to be shorter and taller, to fit my space and needs. This was my first time using a kreg jig and brad nailer… tutorials on those would be great, but I figured it out! And I’m so excited I did - this is a game changer for my building projects!
Ashlie Alaman
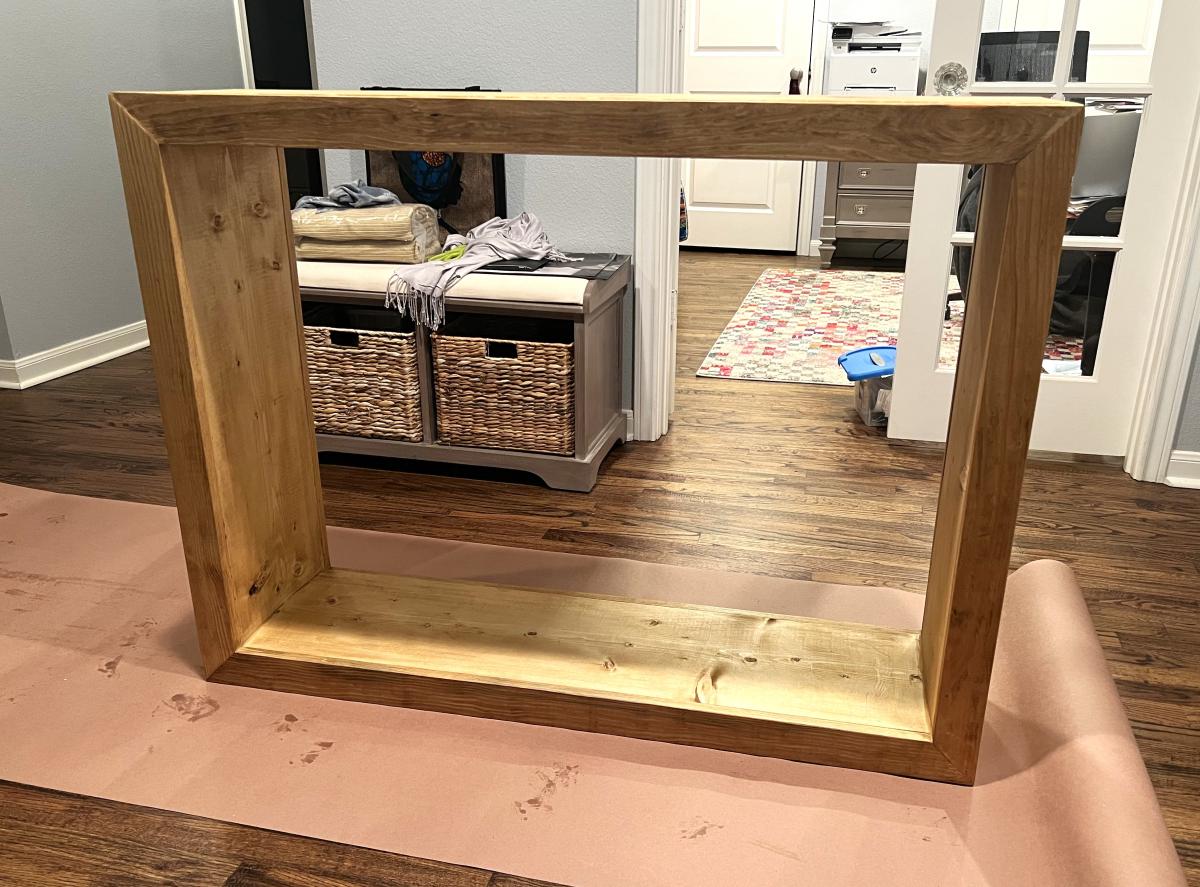
Built from Plan(s)
King Sized Headboard
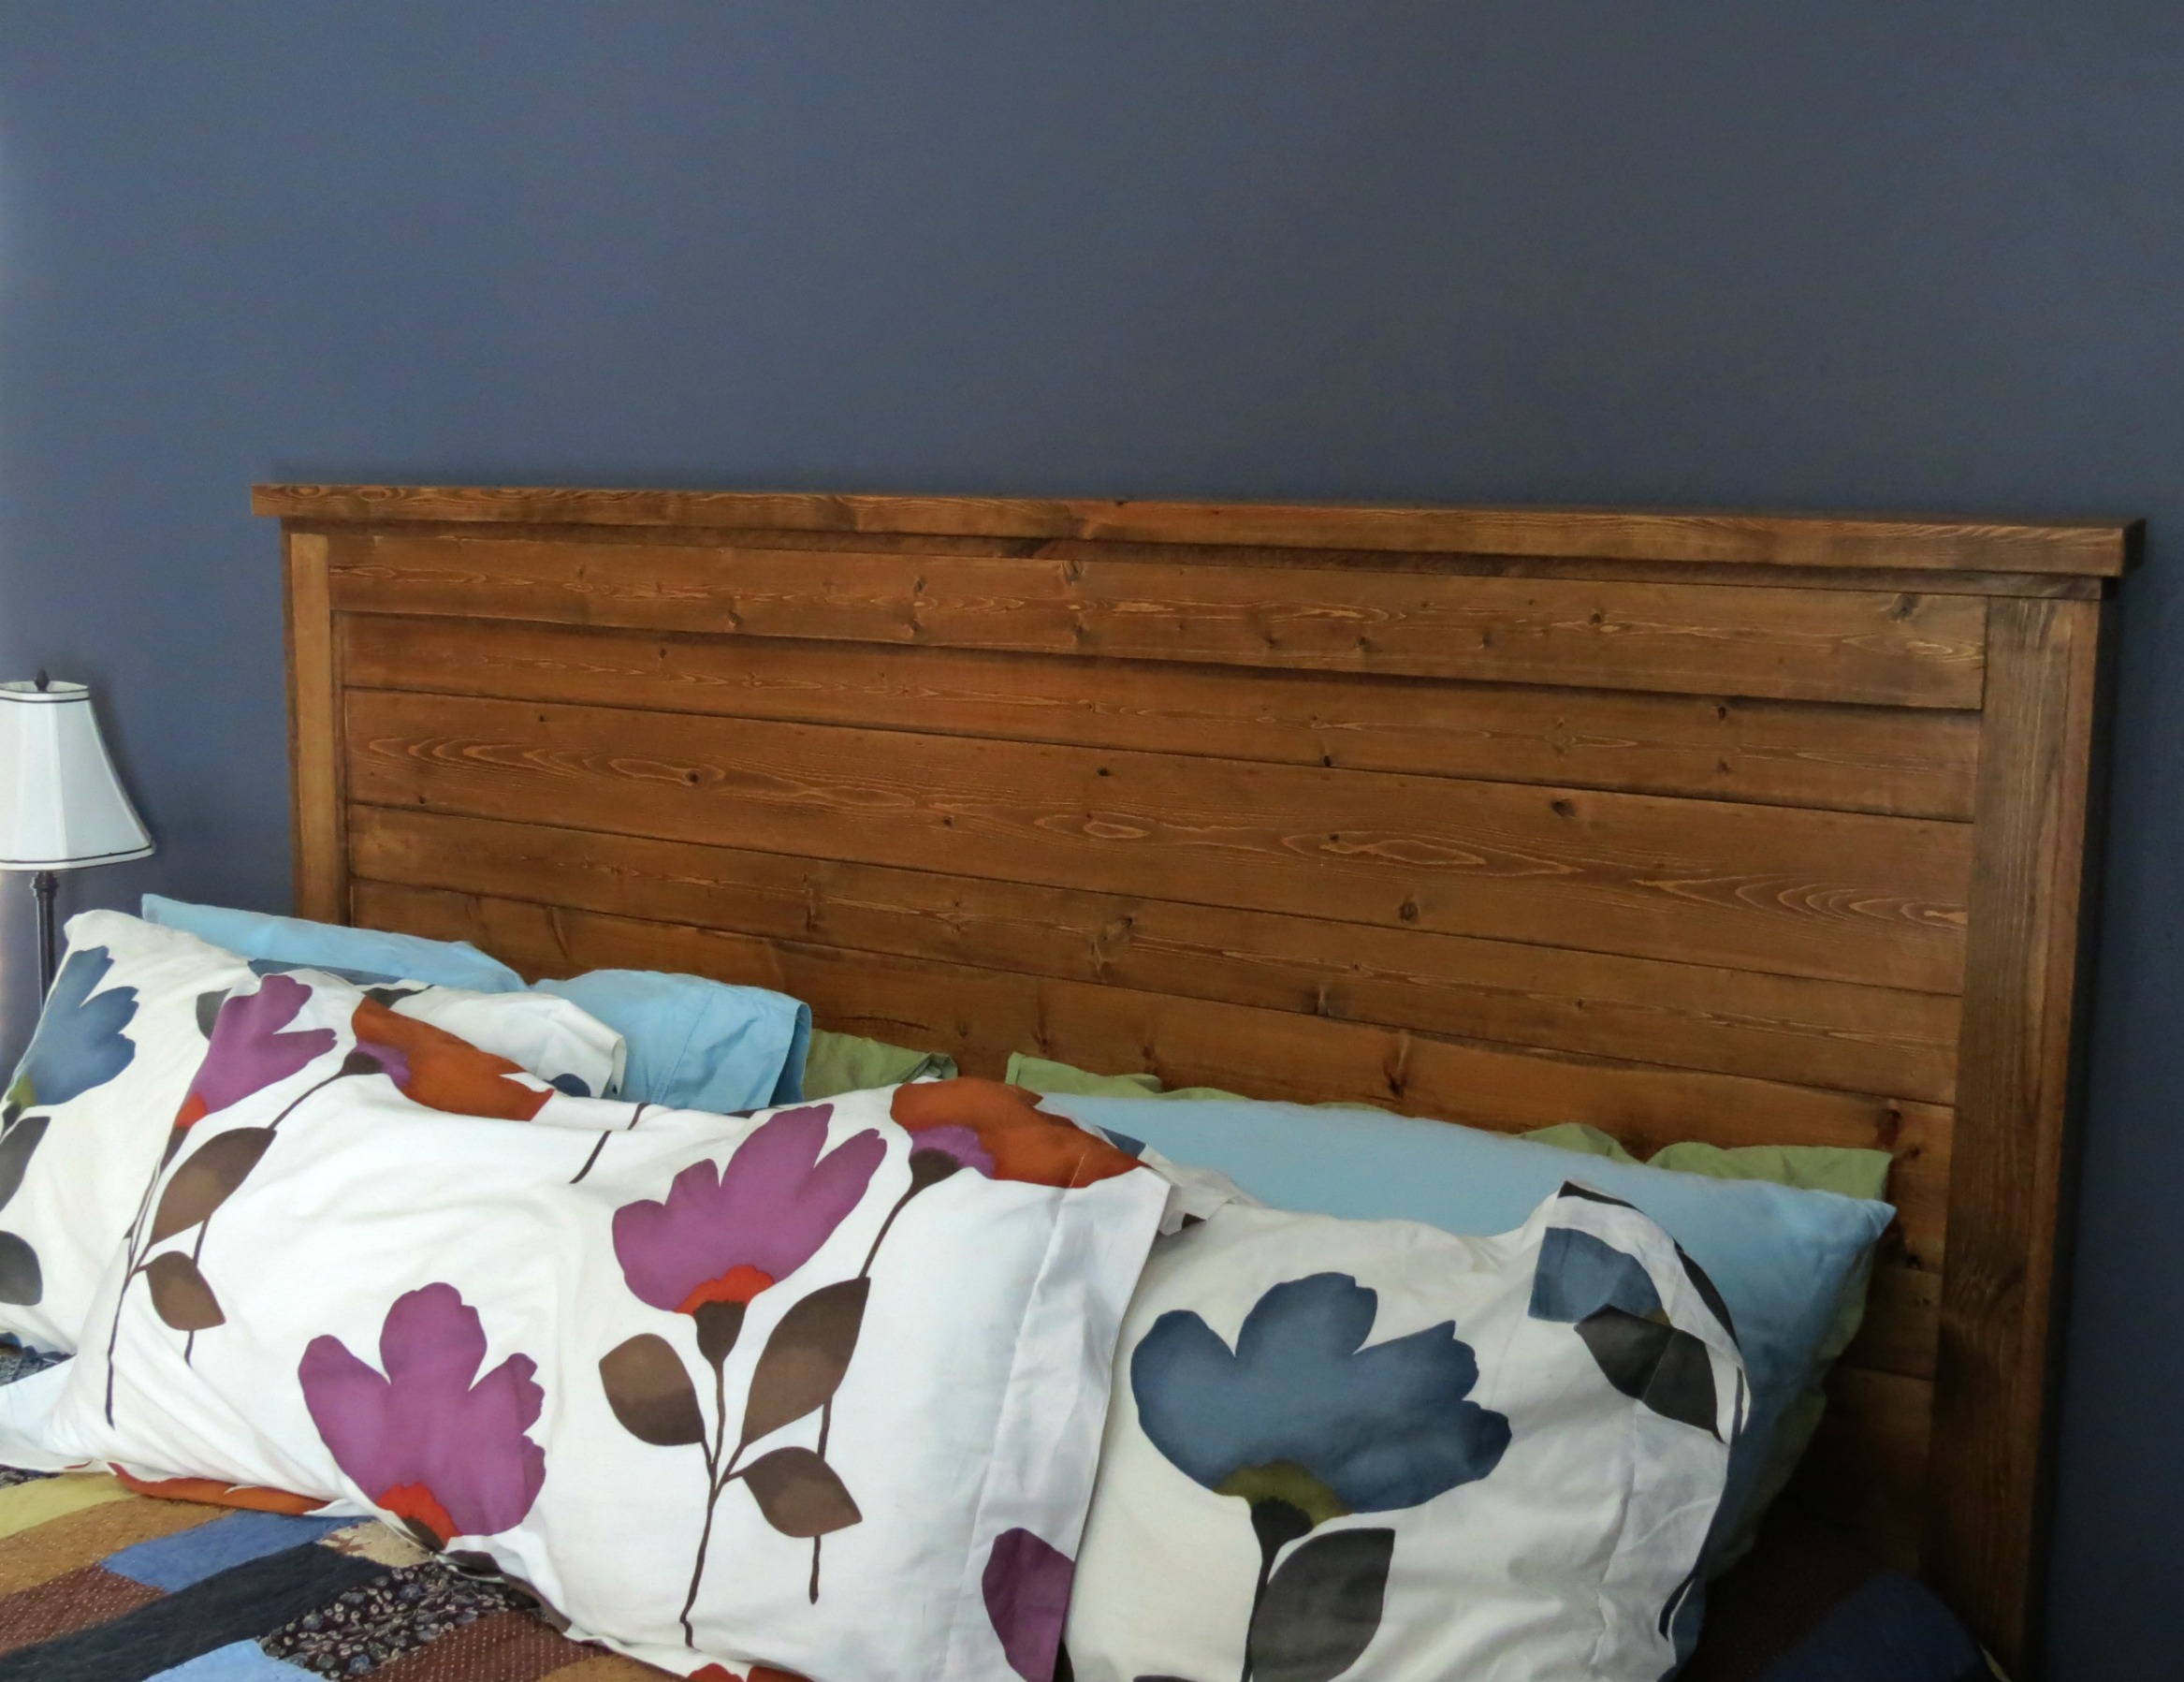
I did not edit this project, except the original project plan called for the bed to be turned sideways, I made this with the bed facing the right original way. The longest part of this project was waiting for the stain. It is not included in the estimated build time.
Built from Plan(s)
Estimated Time Investment
Day Project (6-9 Hours)
Finish Used
Minwax Provincial
Recommended Skill Level
Beginner
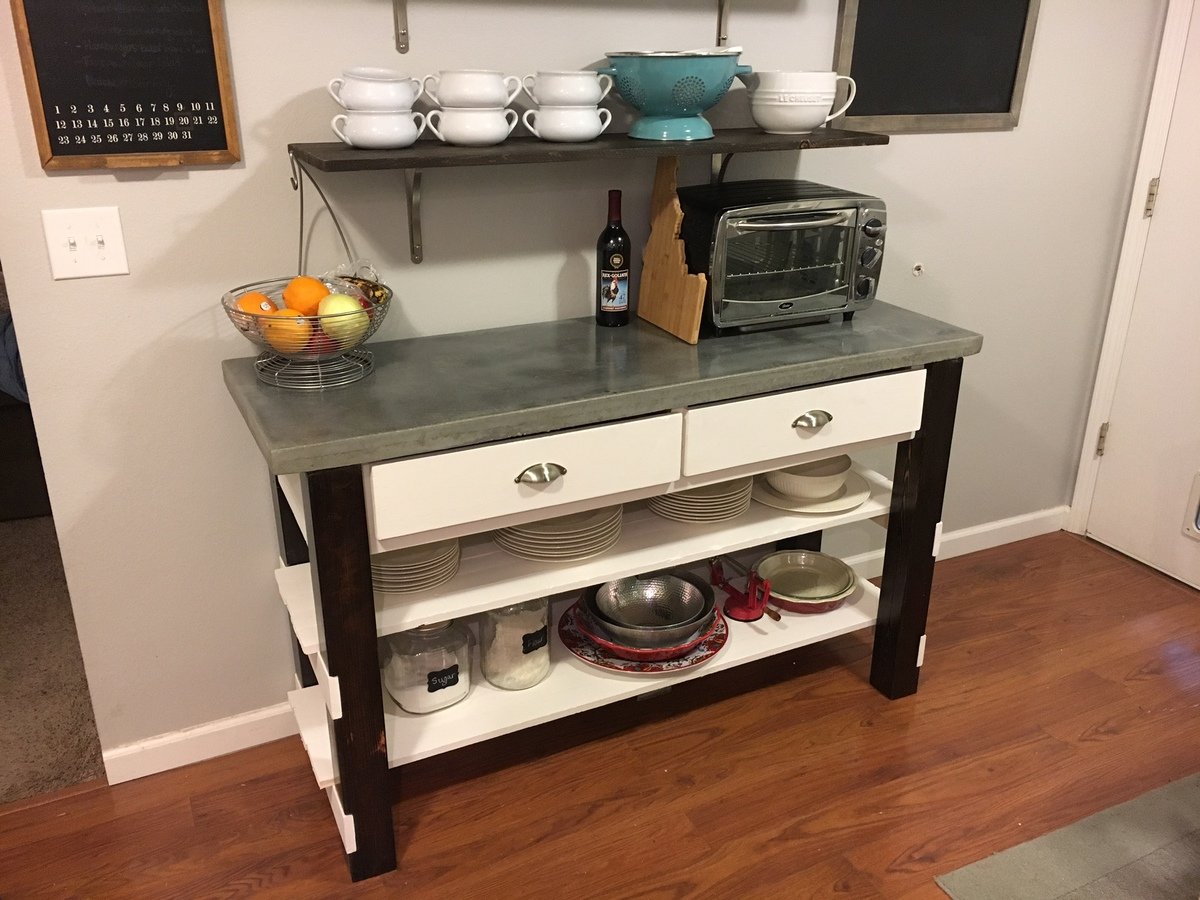
Concrete top variation

I used the plans to build my island, but I'm using it more like an extra counter. I reduced the depth by about 4 inches so it would fit in the space better. I did all my cuts with a circular saw, and I can recommend using a table saw and/or chop saw to get straighter cuts. The gem of the island is the concrete countertop. I poured 2 bags of concrete reinforced by rebar, darkened with a charcoal colorant. This was an experiment to see if concrete countertops would work for our whole kitchen. Success!
Estimated Time Investment
Week Long Project (20 Hours or More)
Finish Used
white chalky paint, 2 coats of wood stain on legs + 2 coats of clear coat poly, 3 coats of sealer for concrete + wax layer
Recommended Skill Level
Intermediate
Comments

40 Farmhouse table and "20" dollar farmhluse side tables
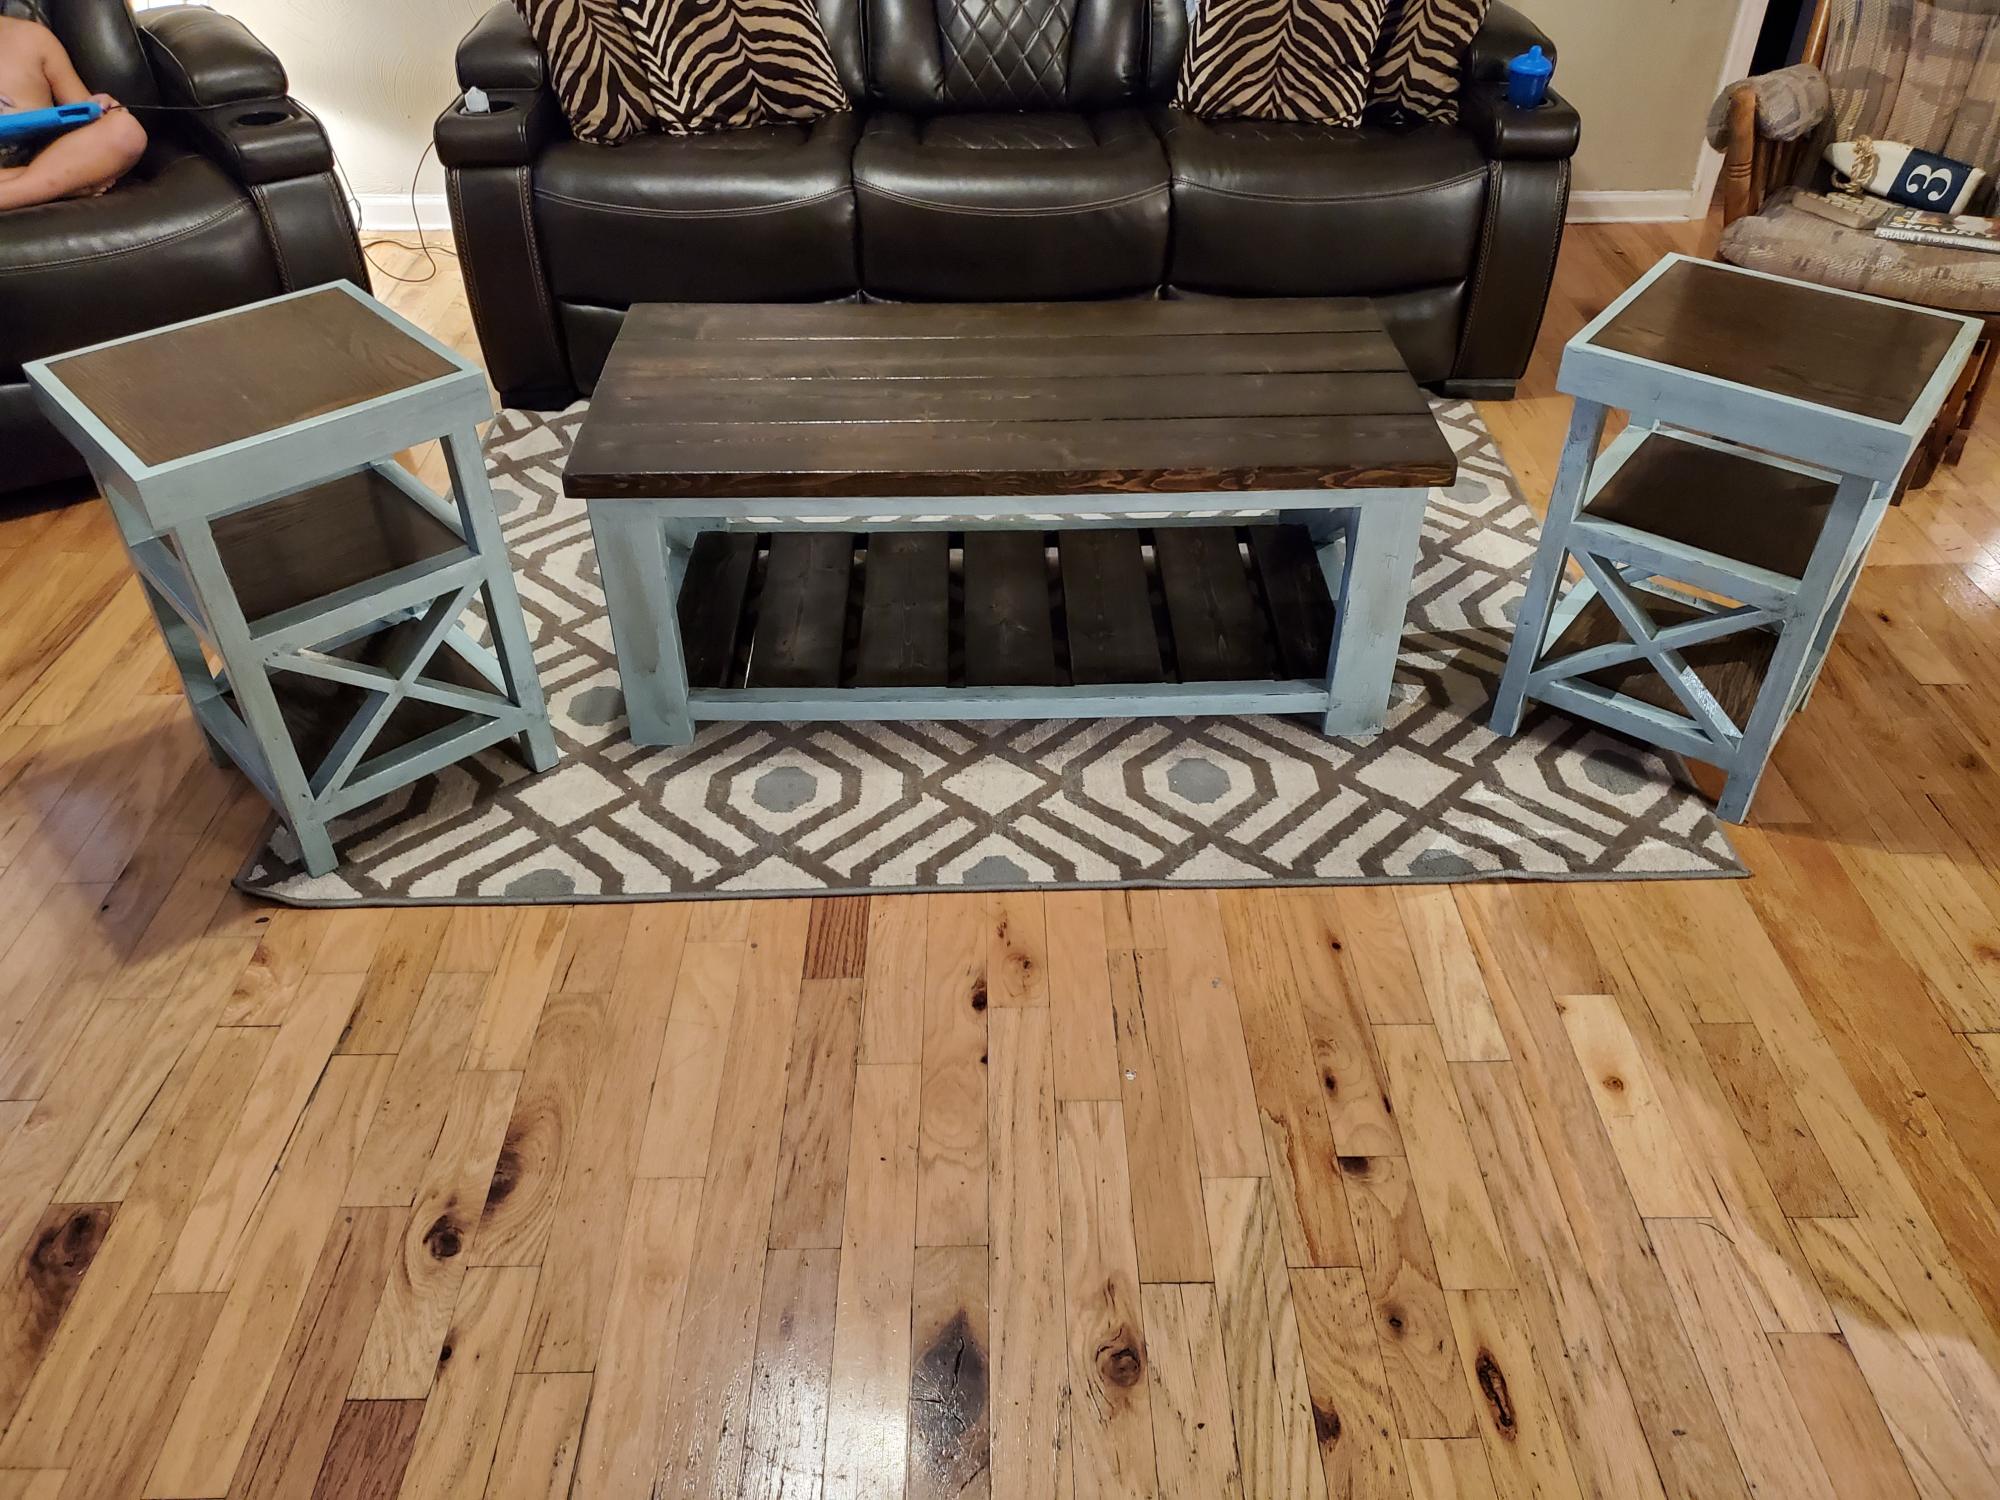
Built this awsome 40 dollar farmhouse table and matching set of side tables. Original plane was 20 per table but I went with oak plywood so more luke 40. All in all nice little table once thwy were all finished.
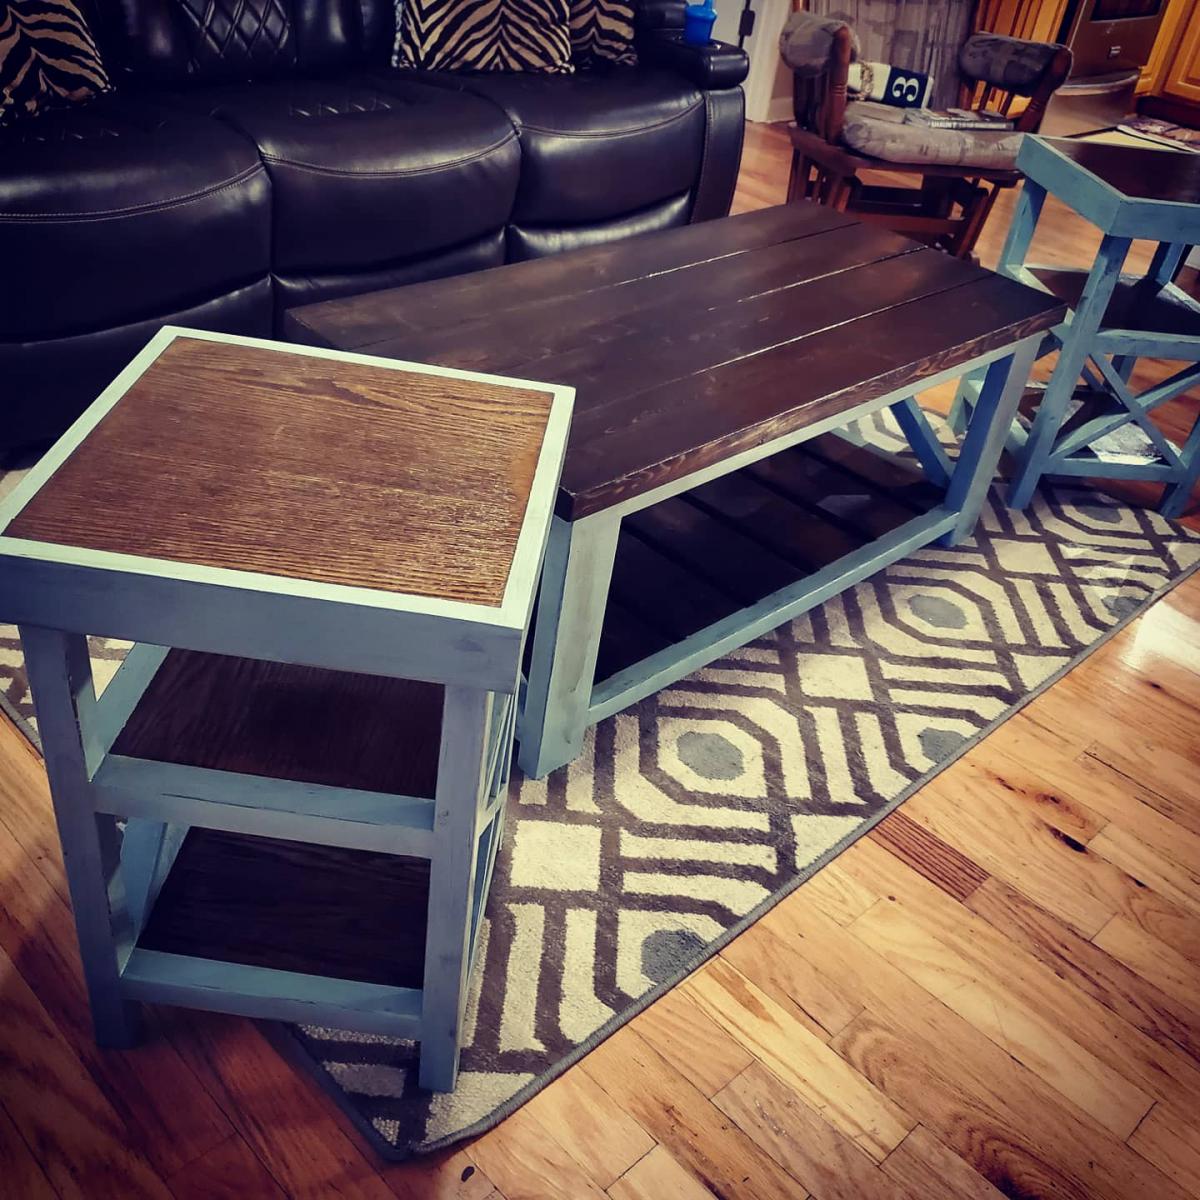
Built from Plan(s)
Estimated Cost
80-100
Estimated Time Investment
Weekend Project (10-20 Hours)
DIY Bookshelf and Side Table
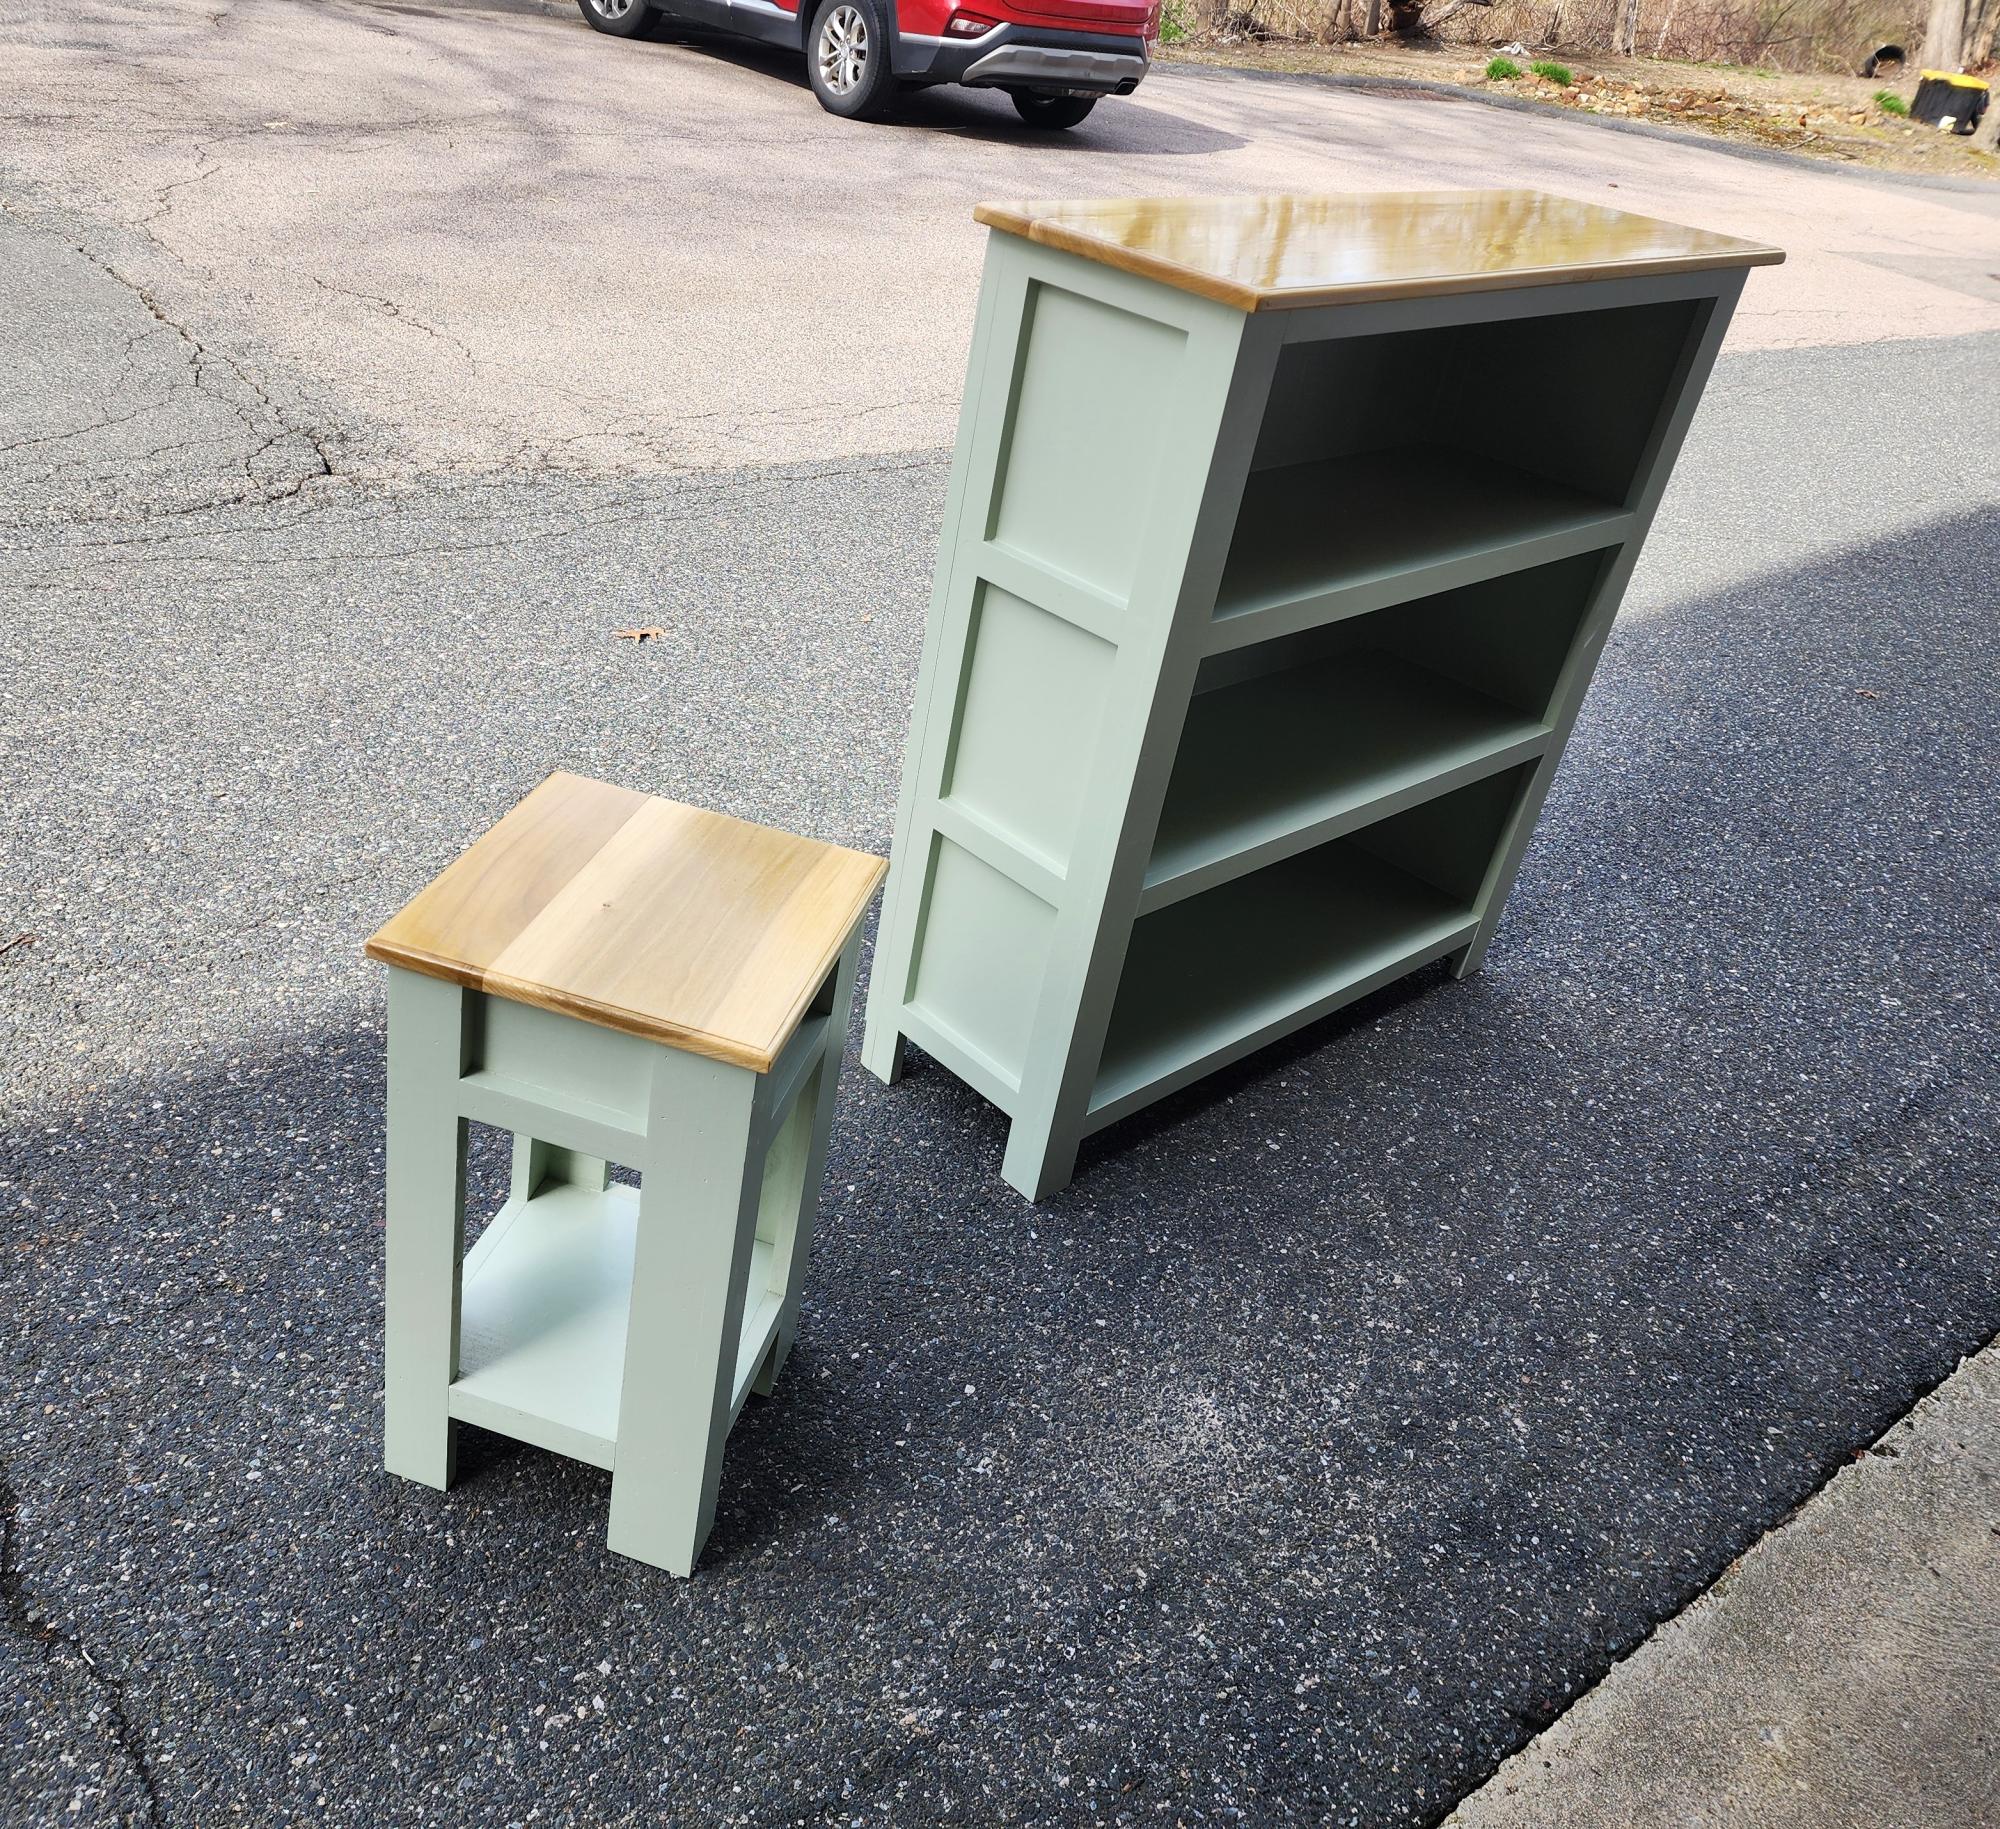
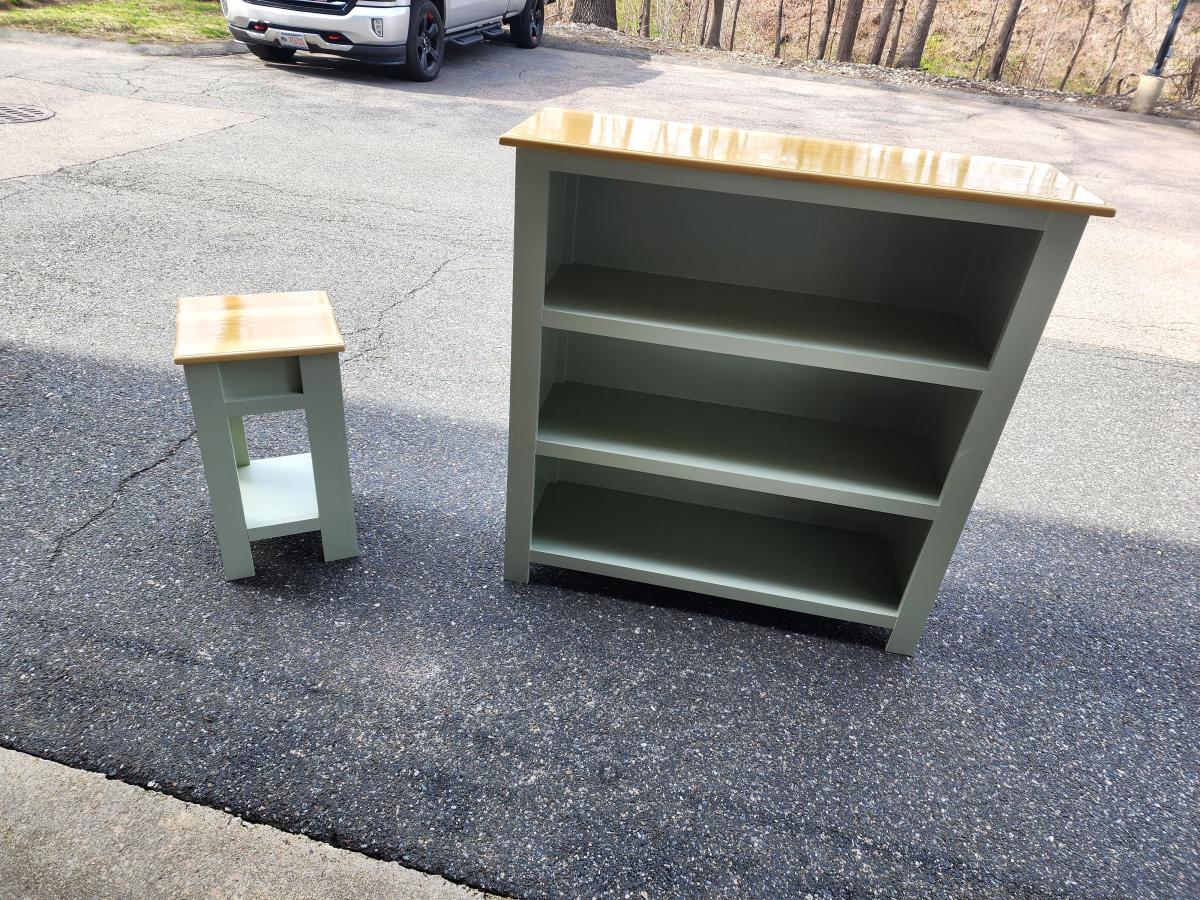
Madethe framed three shelf bookshelf with plans from Ana White. It was a gift for new baby in the family. I added a matching side table I designed based off Ana's plans! I used poplar 3/4" plywood, pine trim and poplar top for both pieces. Used Sherwin Williams Emerald trim paint in light green. Love the way these turned out!
Ray Bruhn
Built from Plan(s)
Farmhouse Table (Rustic Table)
My mom has been addicted to Pinterest for a while now, so eventually she was led to this site. To make a long story short, she asked me to build her a dining room table similar to the Rustic Table design, but just a bit beefier, and with custom dimensions to fit the family's needs. I used 2x8's (8 feet long) for the table top, 2x4's for the apron/skirt, and 4x4's for the legs. This thing is a monster. I'm assuming it weighs close to 200 lbs. I beat the legs up with an old golf club, and scratched them up pretty good with screws.
This was my first time attempting something of this caliber, and I am really pleased with the results. The best part is that my mother LOVES it, and I now look like the greatest son in the world to all of her friends on Facebook!
Estimated Cost
$160
Estimated Time Investment
Week Long Project (20 Hours or More)
Finish Used
Sanded: 120 grit then 220 grit
Stain: Minwax Special Walnut (Brushed)
Finisher: Minwax Paste Finishing Wax (Rubbed in with a rag, then buffed off 20 minutes later).
Stain: Minwax Special Walnut (Brushed)
Finisher: Minwax Paste Finishing Wax (Rubbed in with a rag, then buffed off 20 minutes later).
Recommended Skill Level
Beginner
Comments
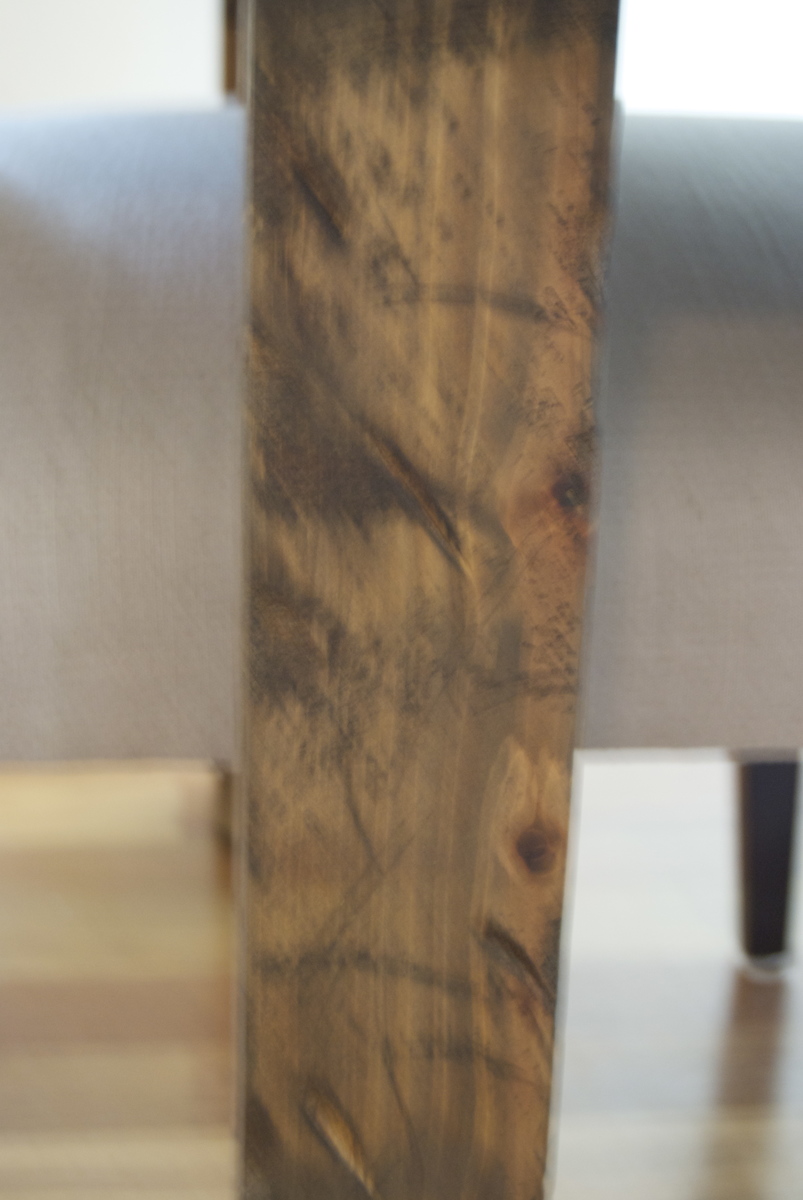
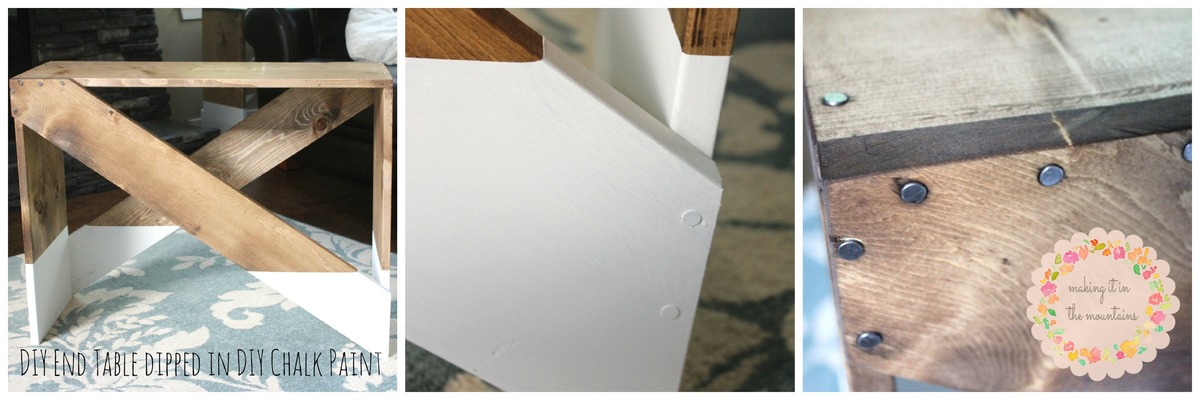
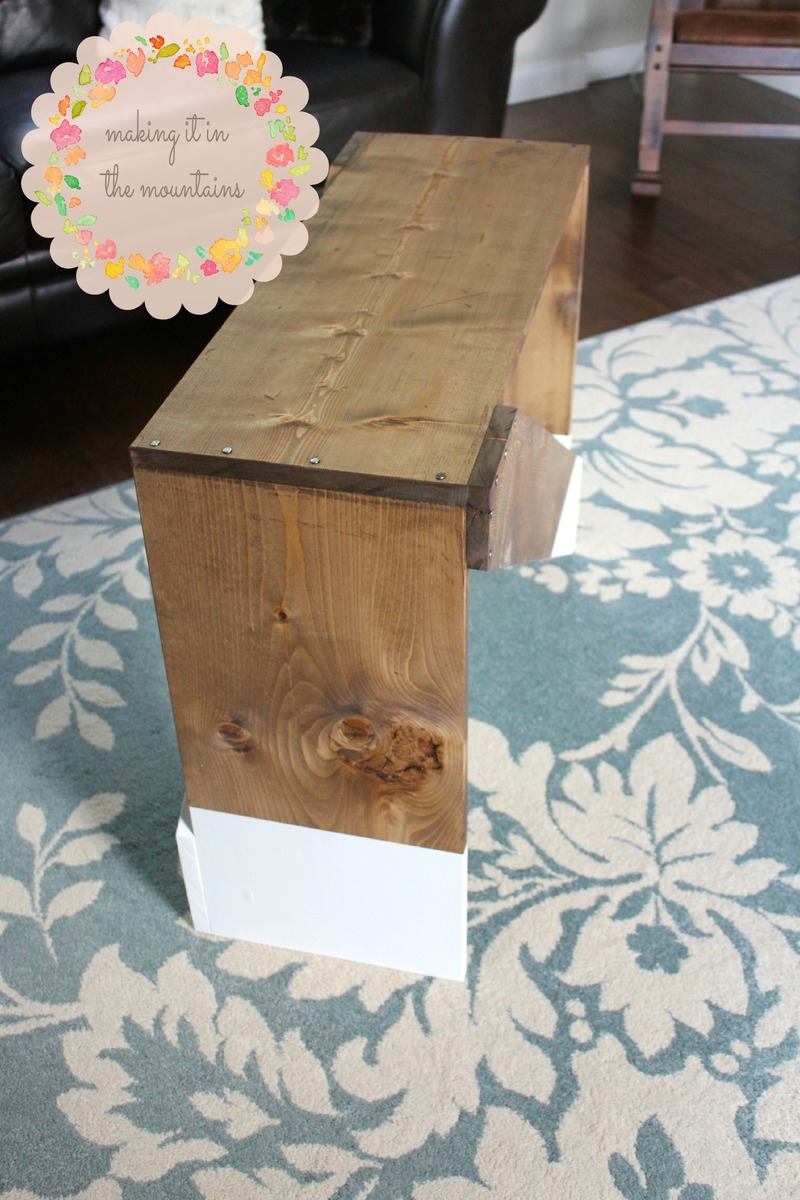
DIY Paint Dipped End Tables
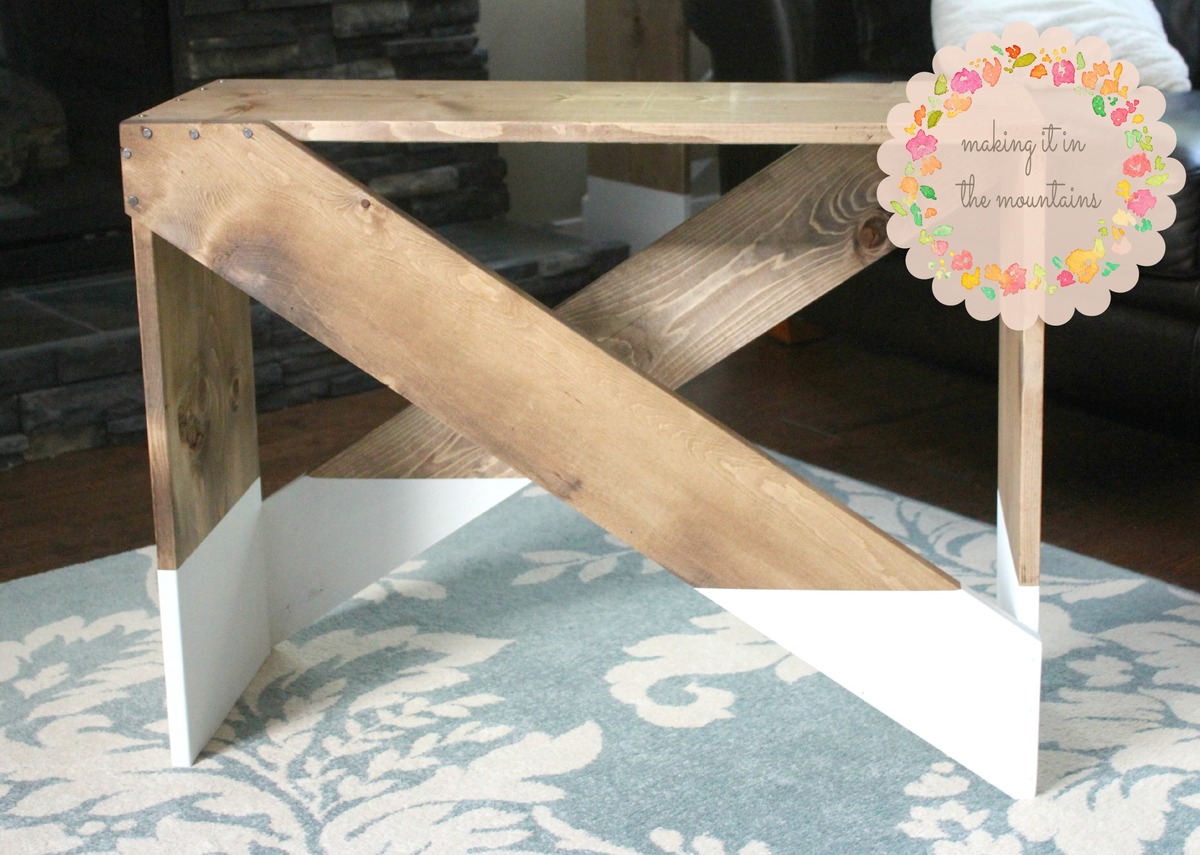
Some super quick and rustic DIY End Tables dipped in homemade Chalk Paint!
Built from Plan(s)
Estimated Cost
$25
Estimated Time Investment
Afternoon Project (3-6 Hours)
Finish Used
Stained with Minwax's Special Walnut and painted with homemade chalk paint.
Recommended Skill Level
Starter Project
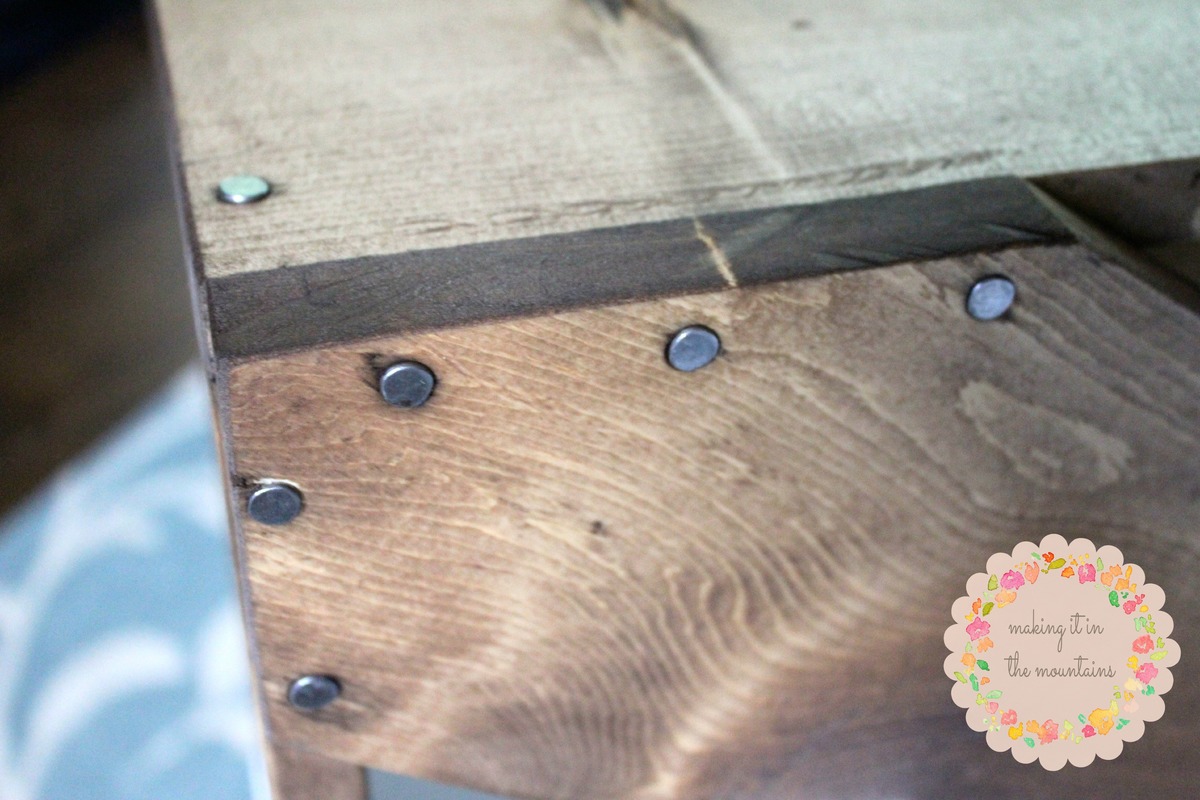
Farmhouse Potting Bench
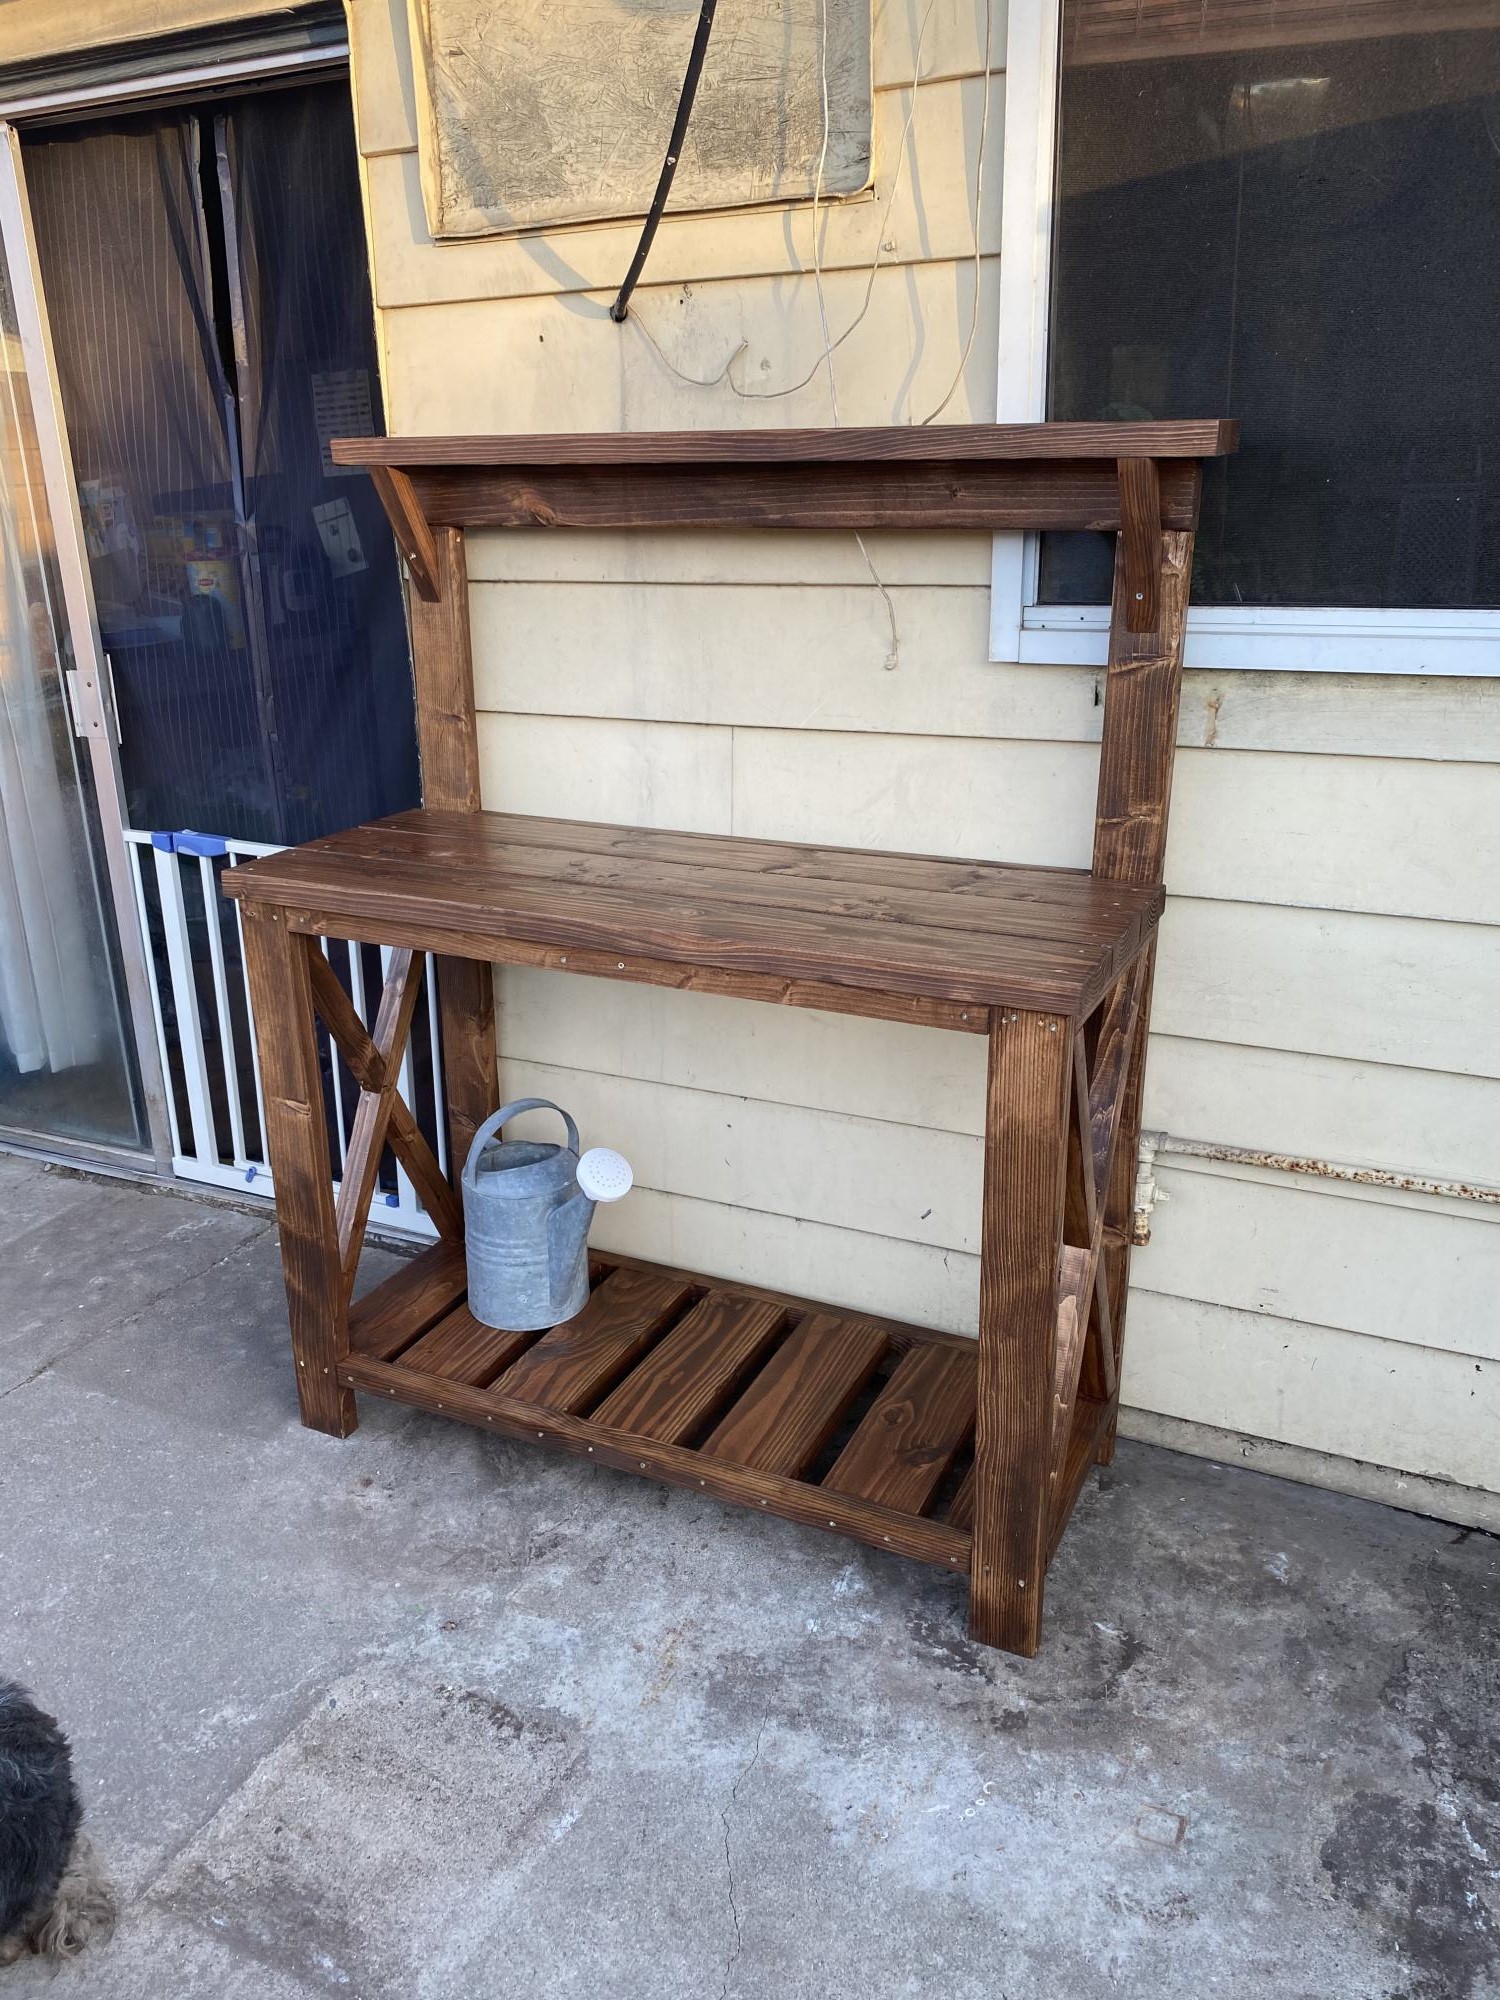
Saw this video and shared it with my fiancé. She loves plants and really wanted something like this. It took me a couple of hour to build. I stained it and sealed it over two days to be nice and weather resistant. She loved it. I added some suppor on the top because she wanted the shelve a bit higher on the top. I made a little change to it. This is my first Ana white project and i look forward to doing some more.
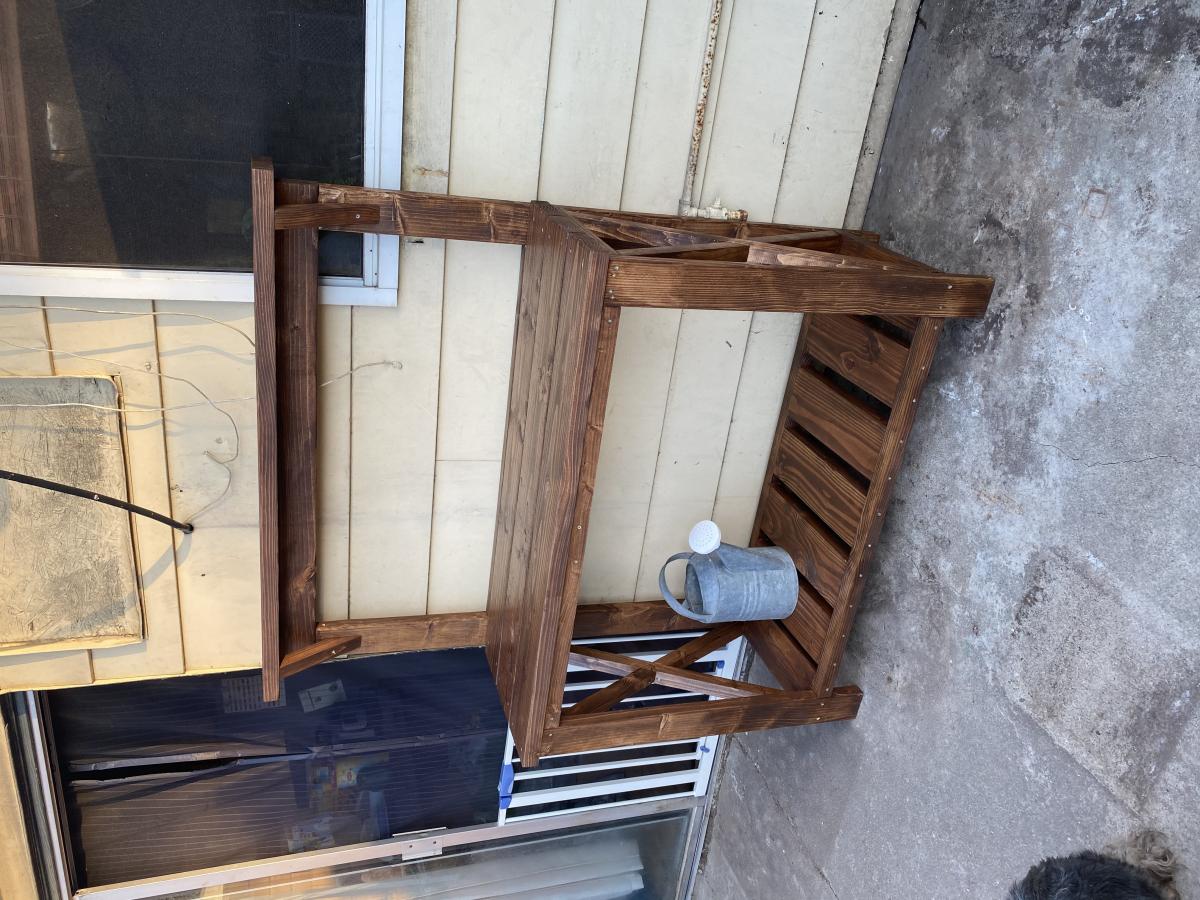
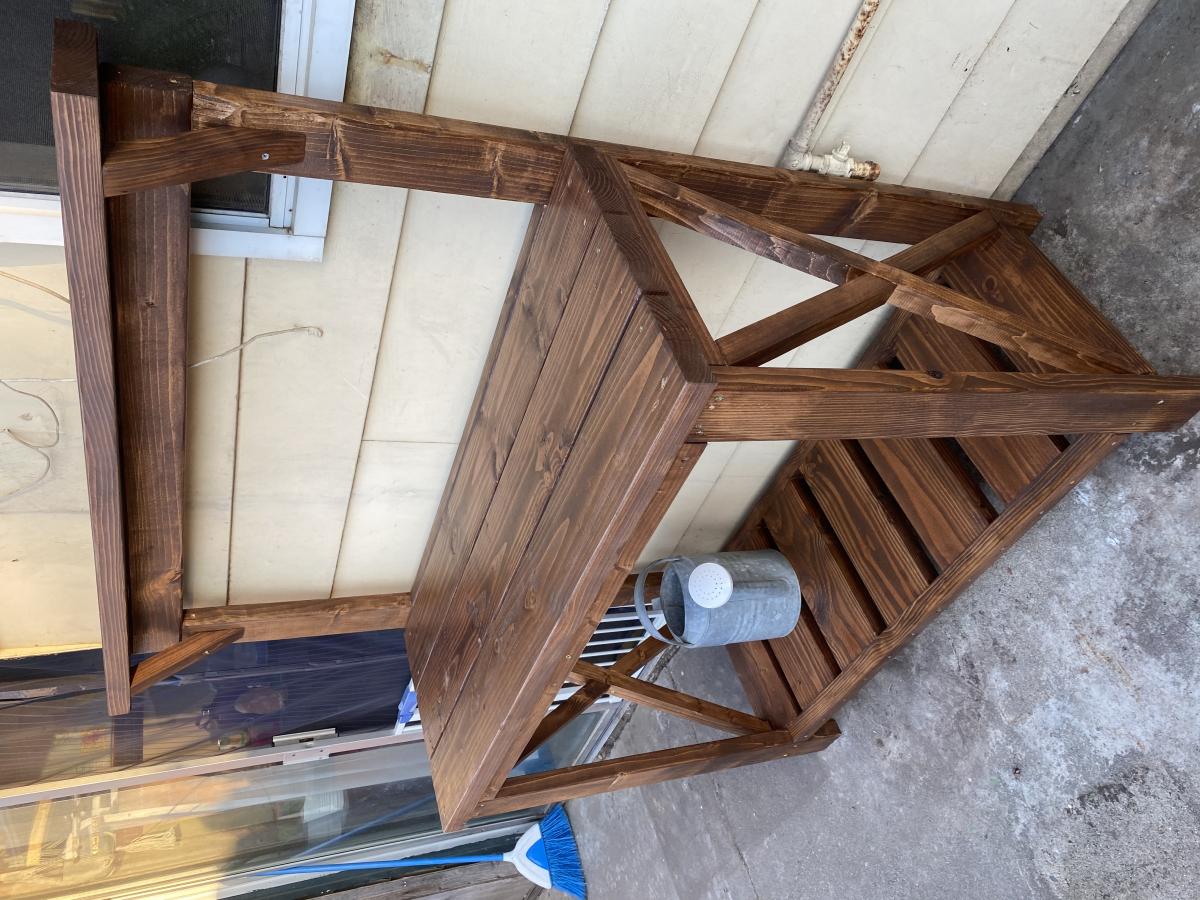
Built from Plan(s)
Estimated Cost
60.00
Estimated Time Investment
Afternoon Project (3-6 Hours)
Finish Used
Varathen special walnut and a clear waterproofing sealer
Recommended Skill Level
Beginner
Outdoor Covered Seating
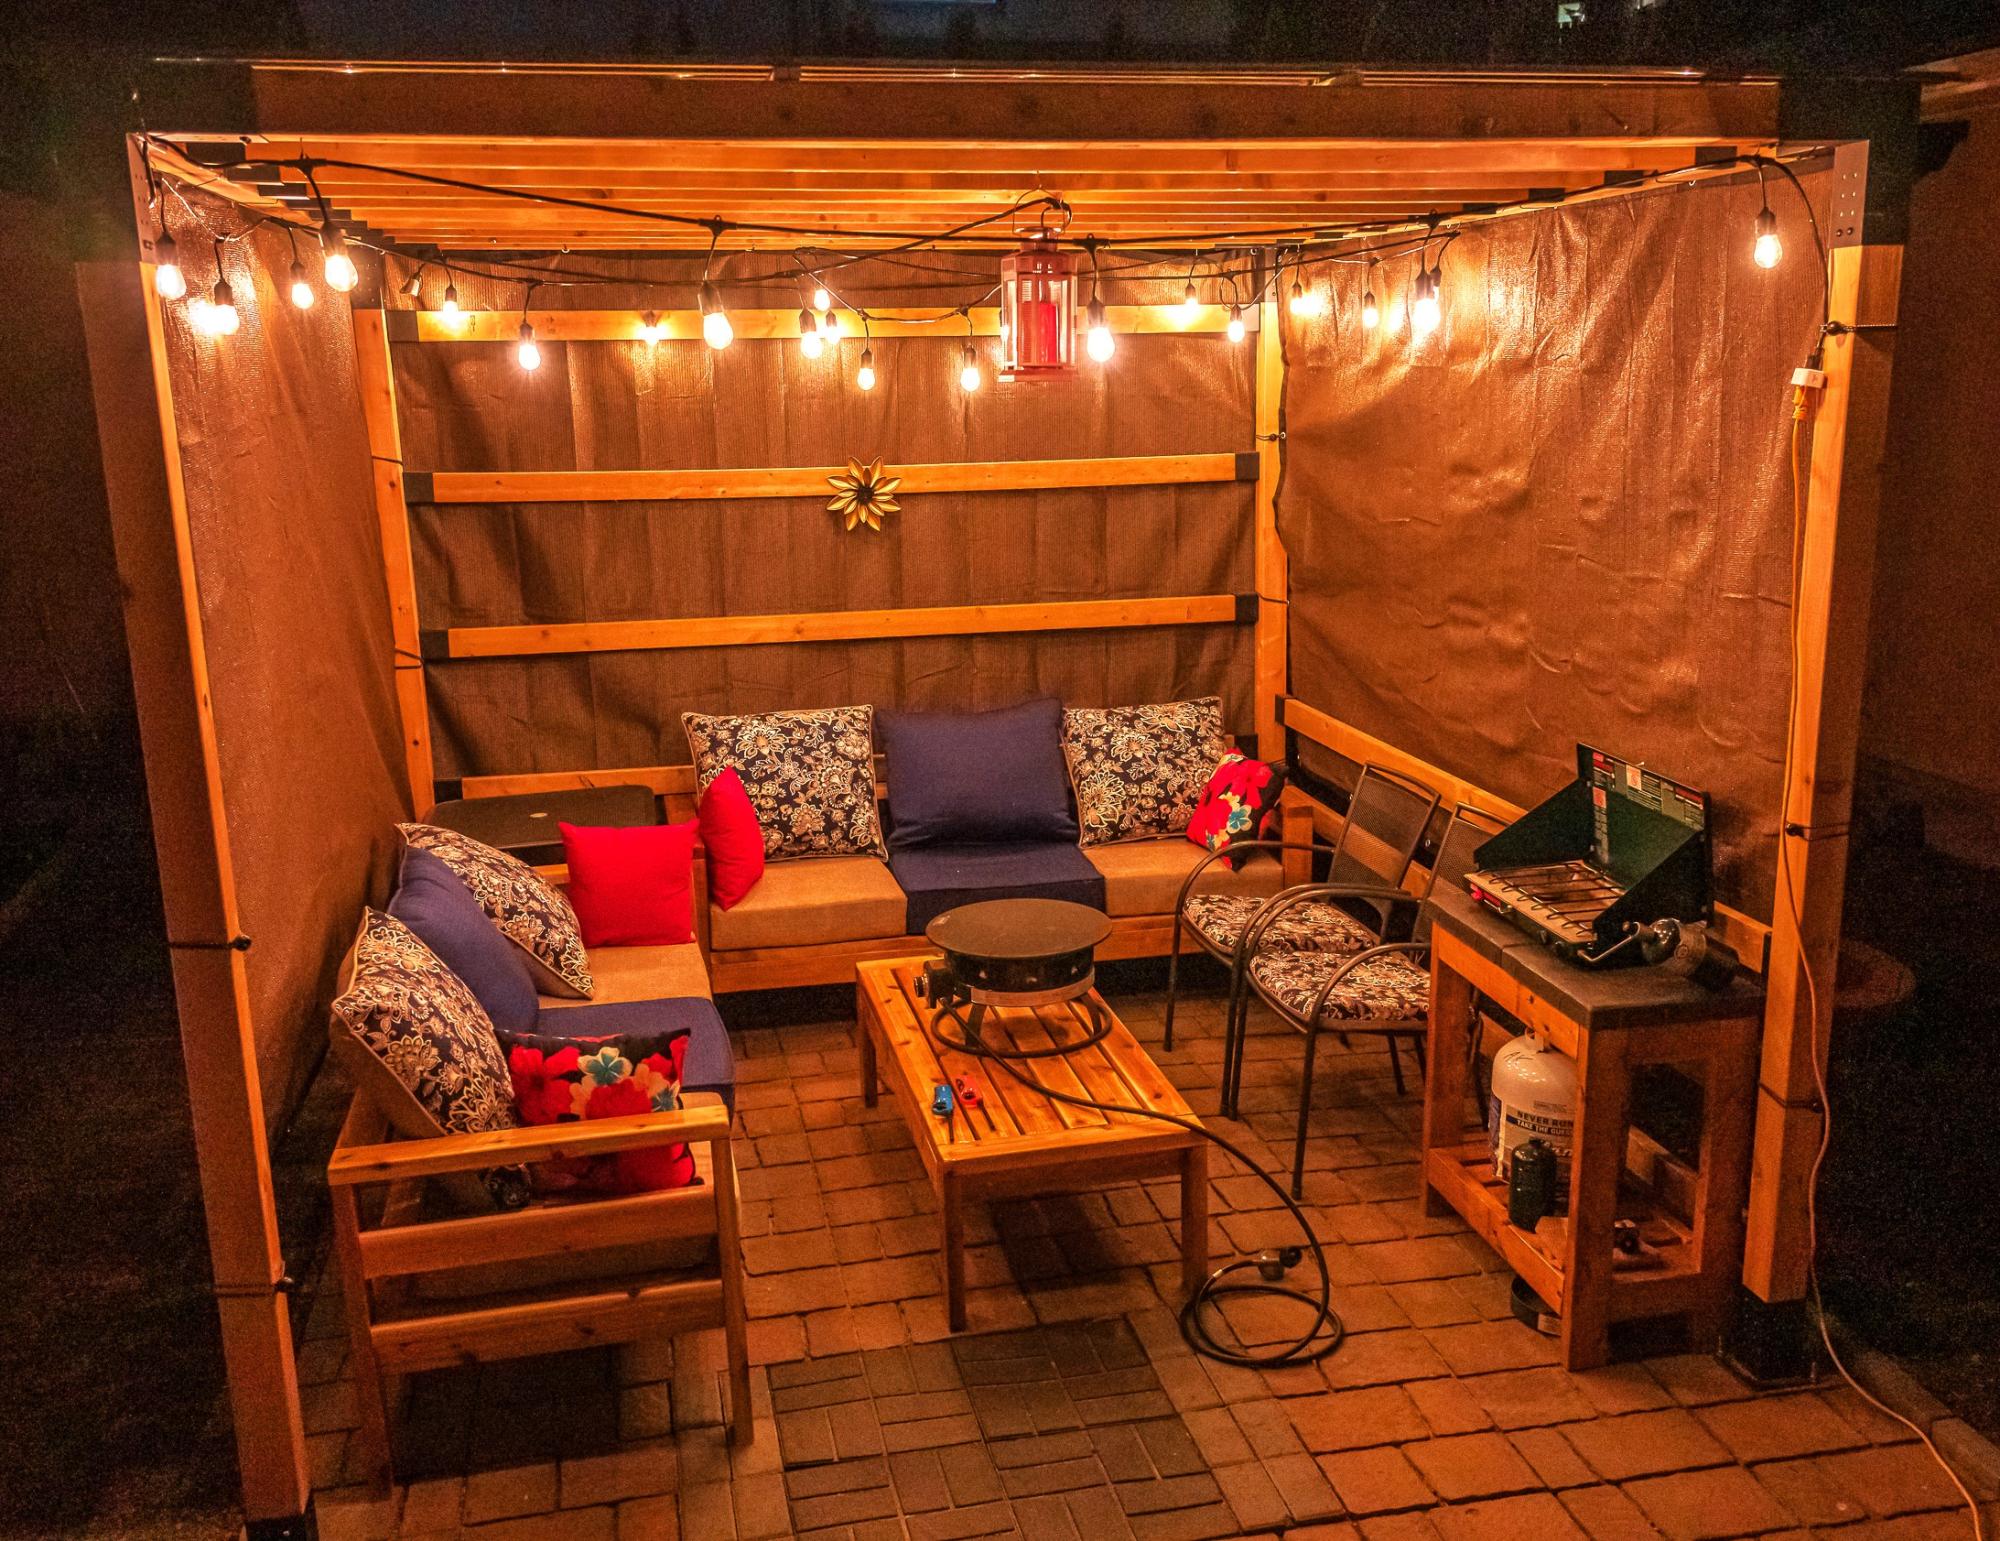
I built two 3 person outdoor sofa's and a coffee table as per your plans. It is sitting nicely inside the pergola we build last fall. I built a grill table too, to match the others. Thank You.
Built from Plan(s)
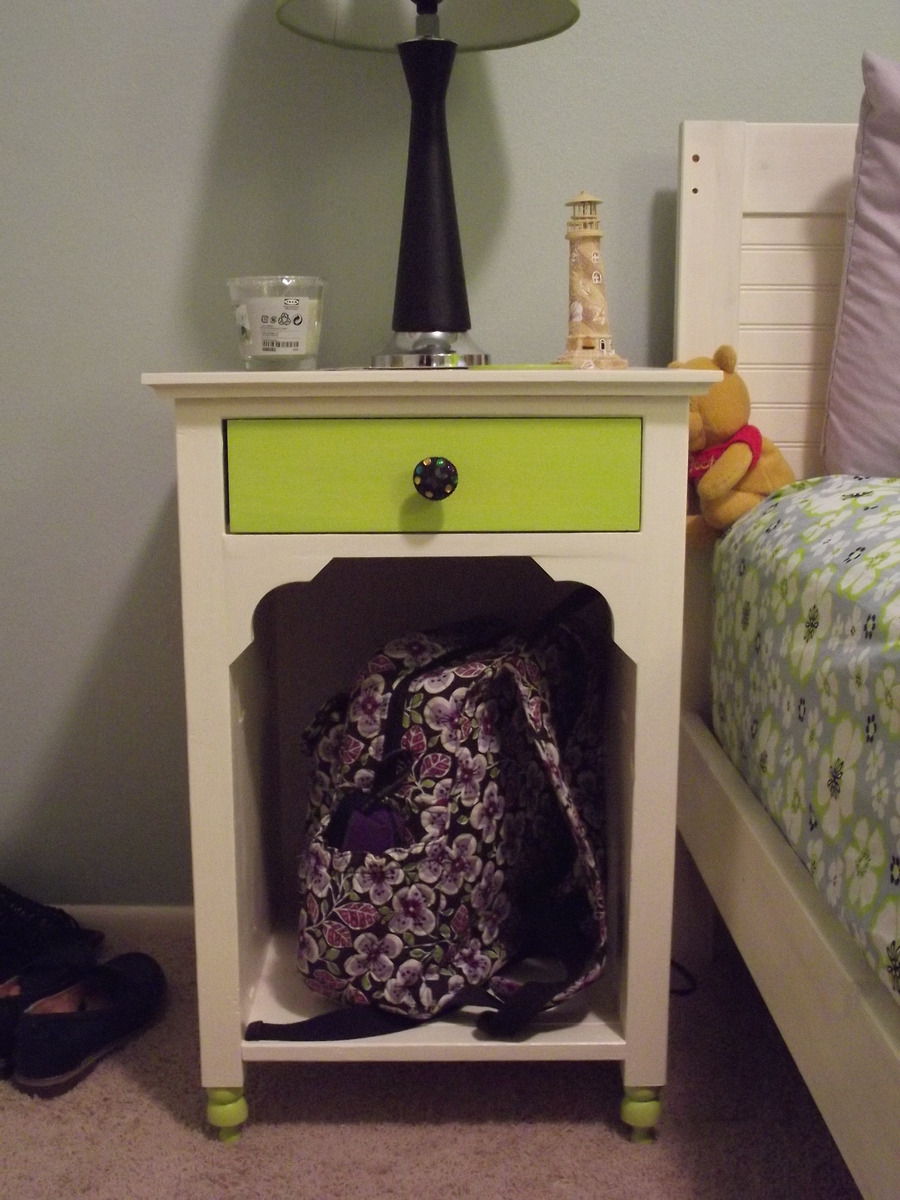
My Julia Nightstand
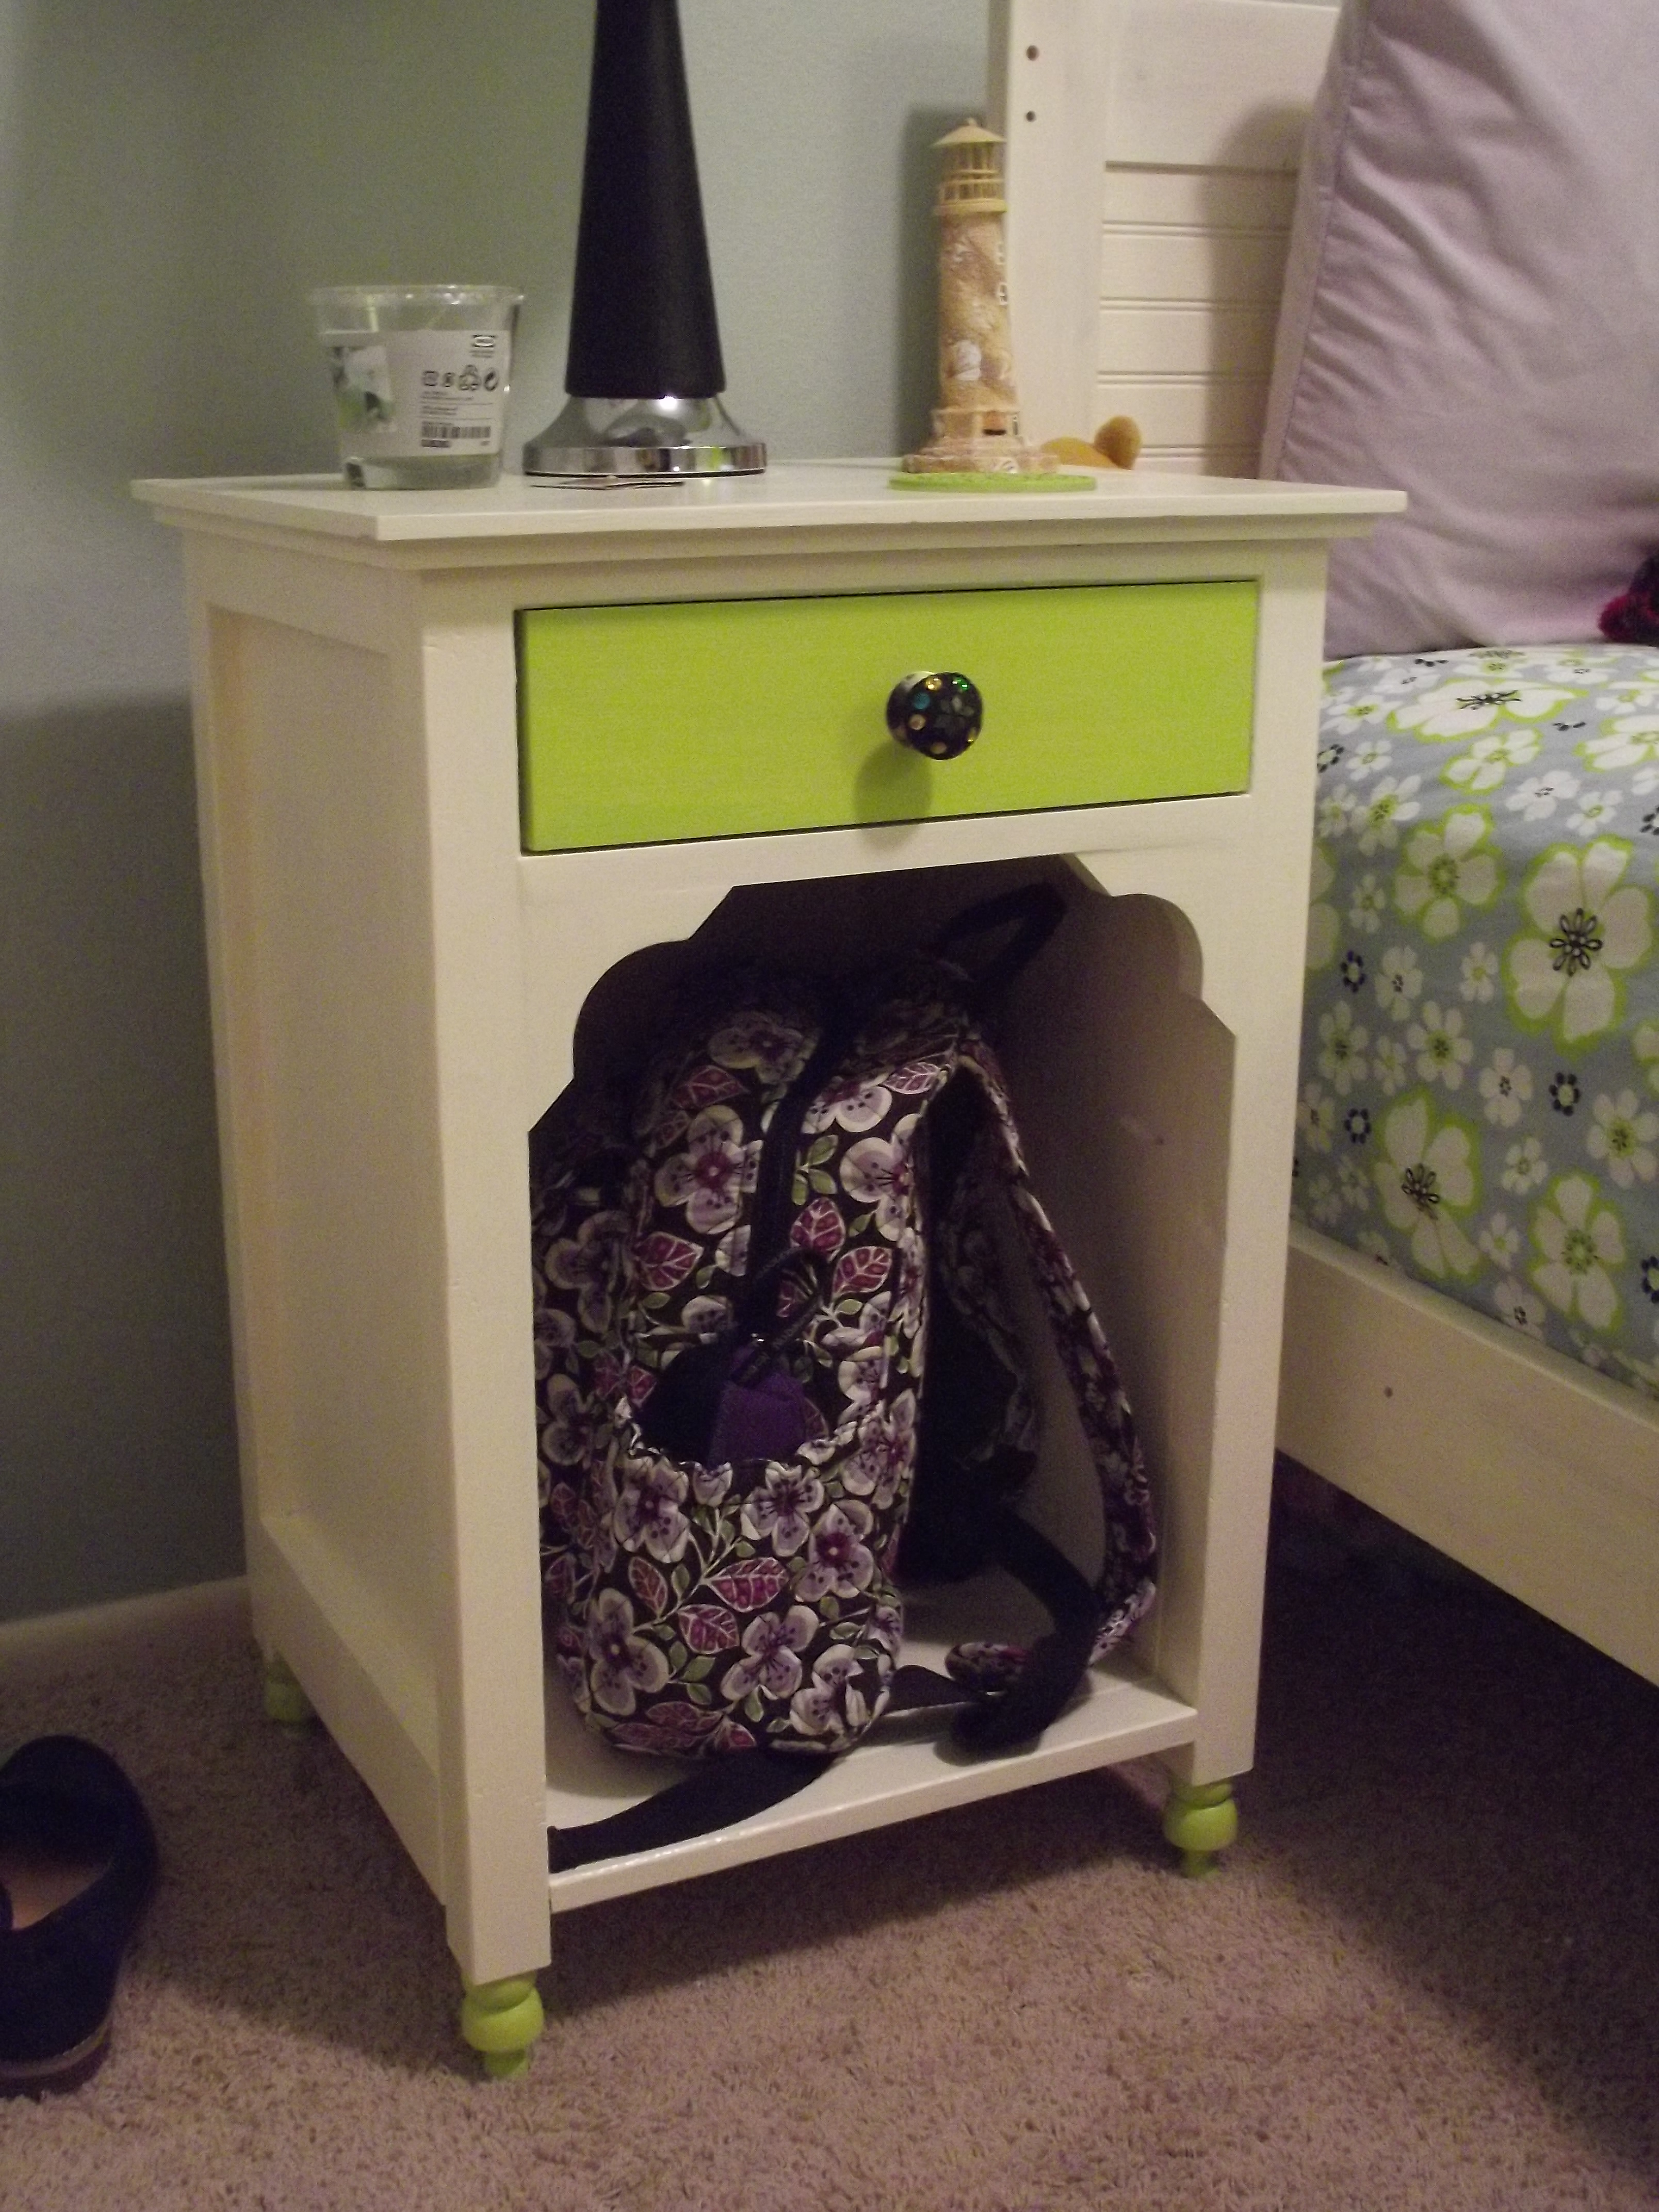
This summer my wife and I remodeled our oldest's bedroom. I found this nightstand on Ana's website, and my wife fell in love with it. I had to make it! I noticed there were no brag posts for the Julia, so I felt that I had to contribute as a thank you for finding these plans. Thanks Ana!
Built from Plan(s)
Finish Used
Cream colored Paint, and Lime colored paint
Recommended Skill Level
Beginner
Comments

Picnic Table
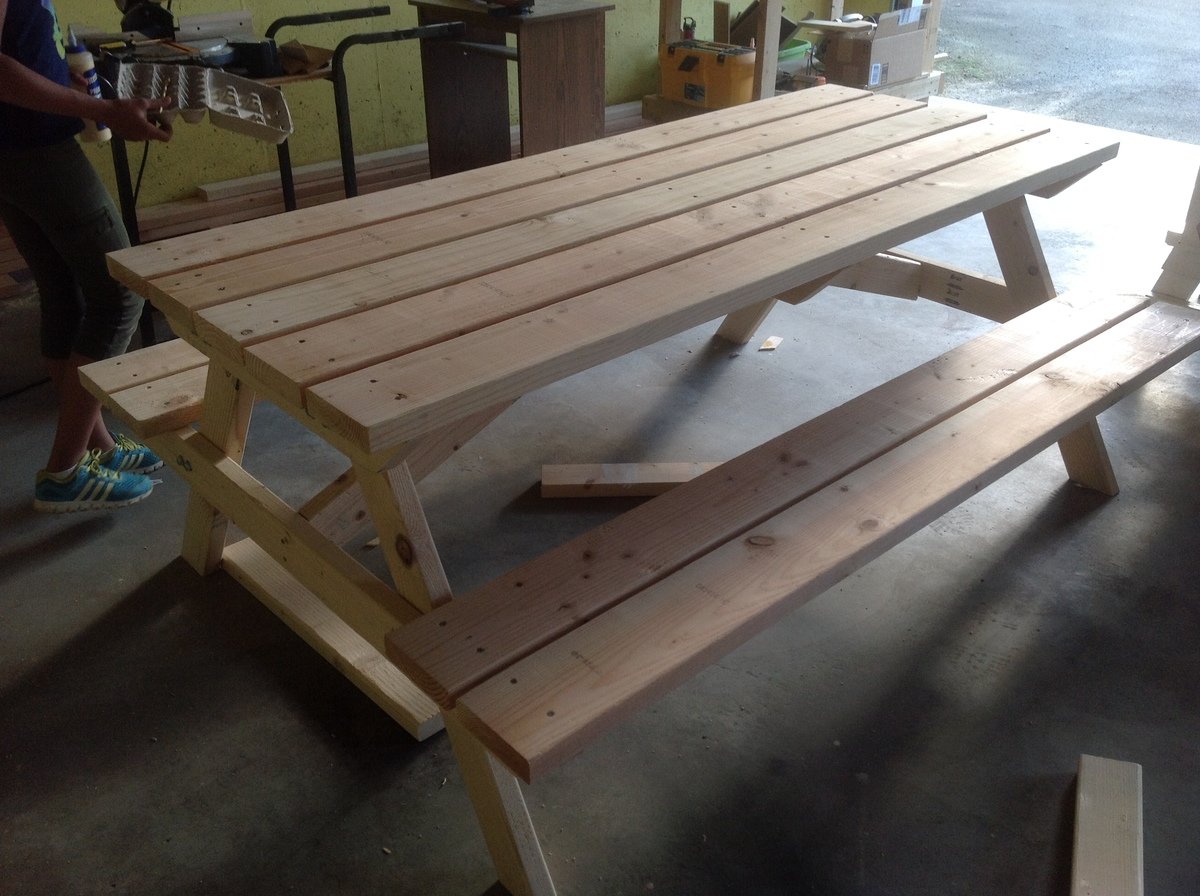
Wanted to kick start my summer projects with something that would not take too long. So I built this picnic bench for a friend over the last weekend. Thank you Ana for the plans.
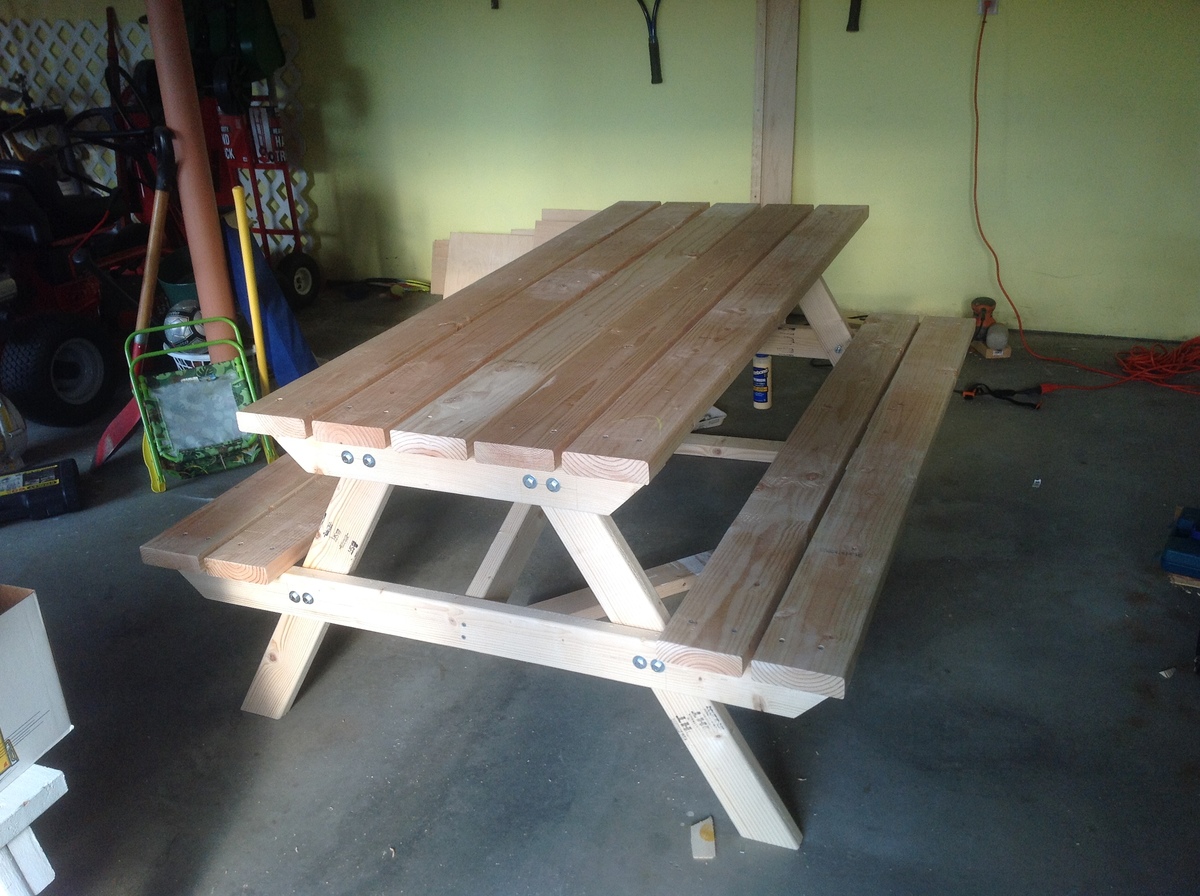
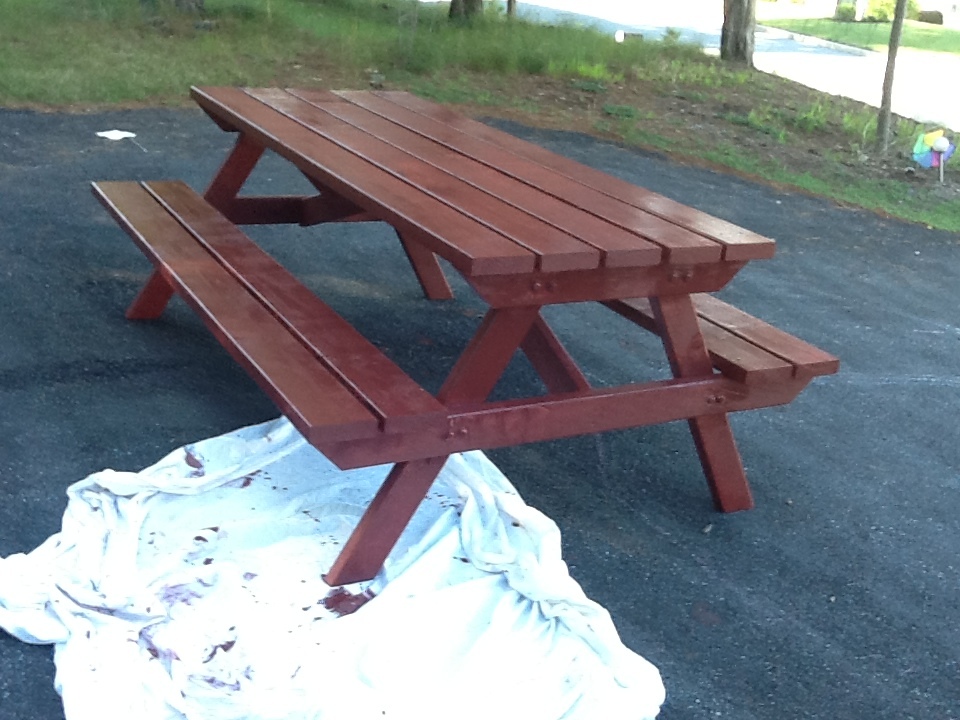
Built from Plan(s)
Estimated Cost
$150
Estimated Time Investment
Day Project (6-9 Hours)
Finish Used
Benjamin Moore Red Barn Stain
Recommended Skill Level
Starter Project
Comments
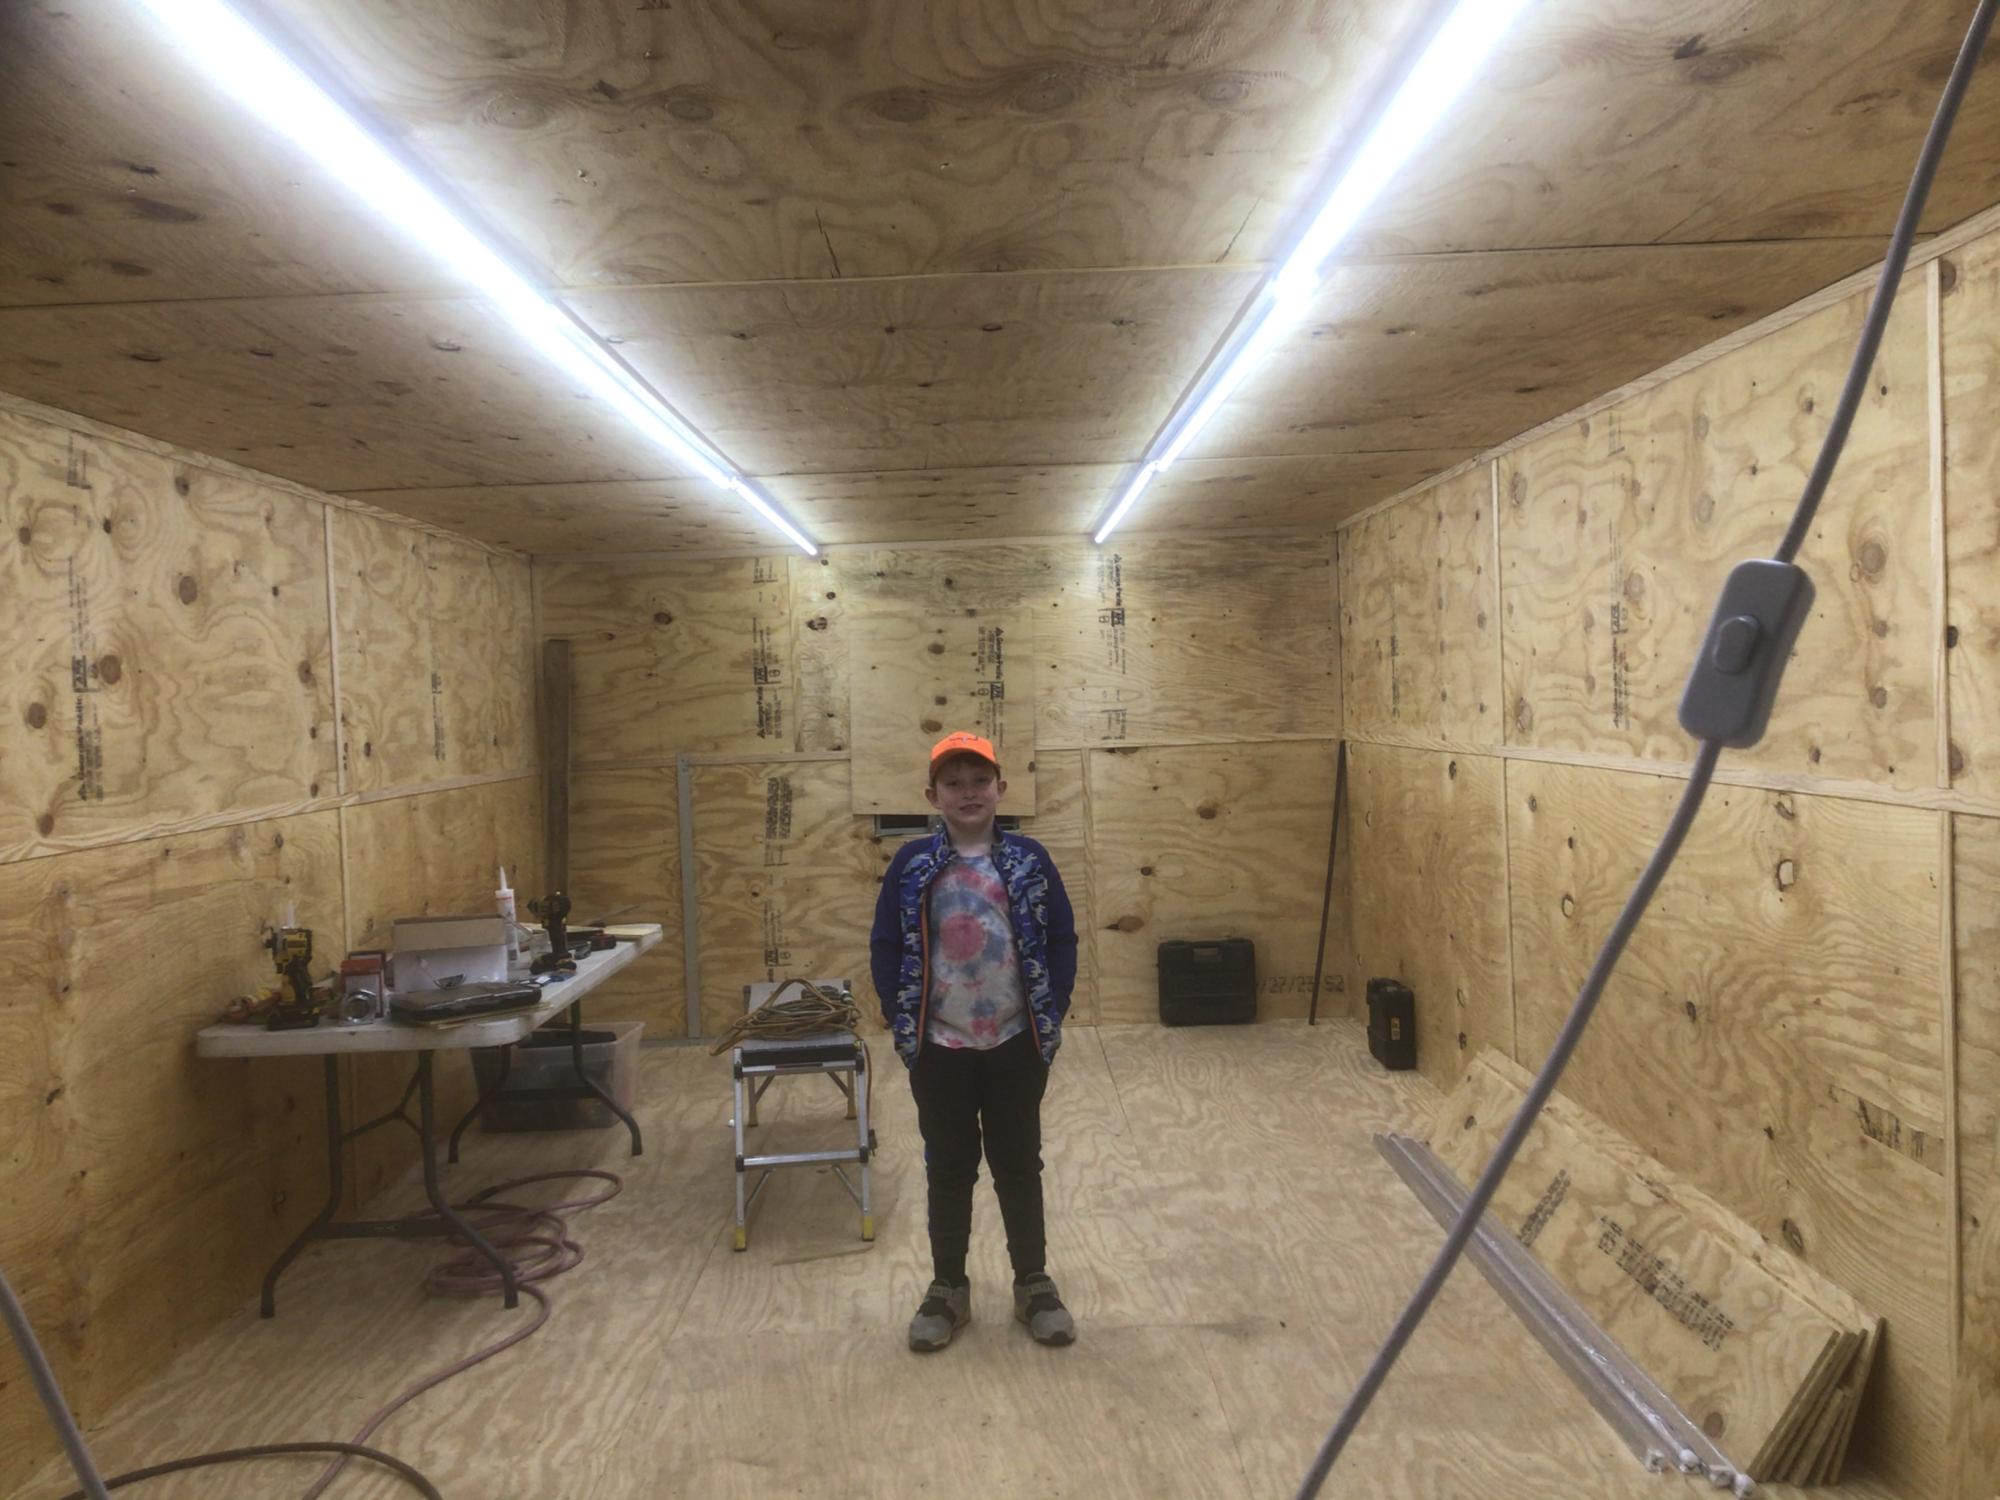
Craft Table/Sewing Desk

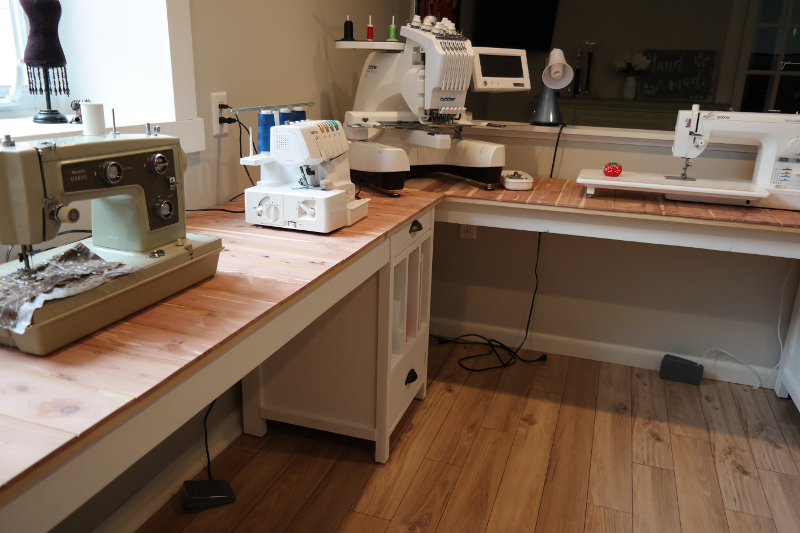
Built from Plan(s)
Estimated Cost
$250
Estimated Time Investment
Week Long Project (20 Hours or More)
Finish Used
Paint (sigh)
Recommended Skill Level
Beginner
Comments
Sun, 07/05/2020 - 08:42
Lovely workspace with the new sewing tables
Lovely desks/space! And the sewing machines look like they're going to bring hours of fun! What kind of wood did you use for the tops? Did you route it to make it tongue and groove?