2x Outdoor Chairs
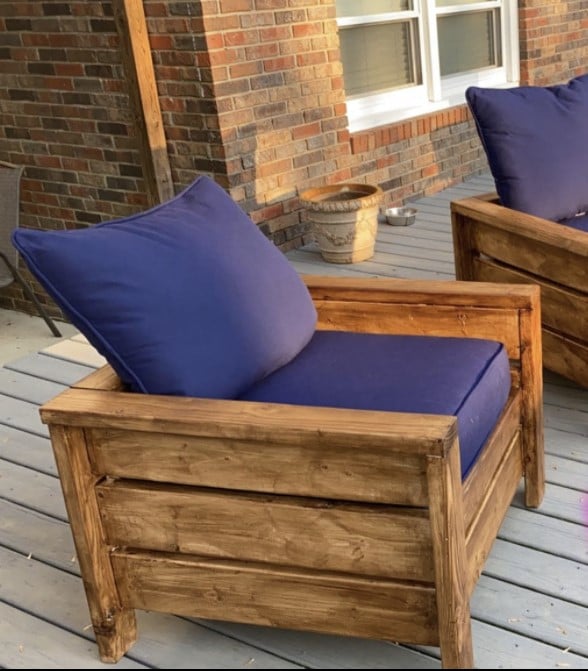
Outdoor chairs turned out beautifully! Love Ana’s easy to follow plans.
Paige Kimbrell
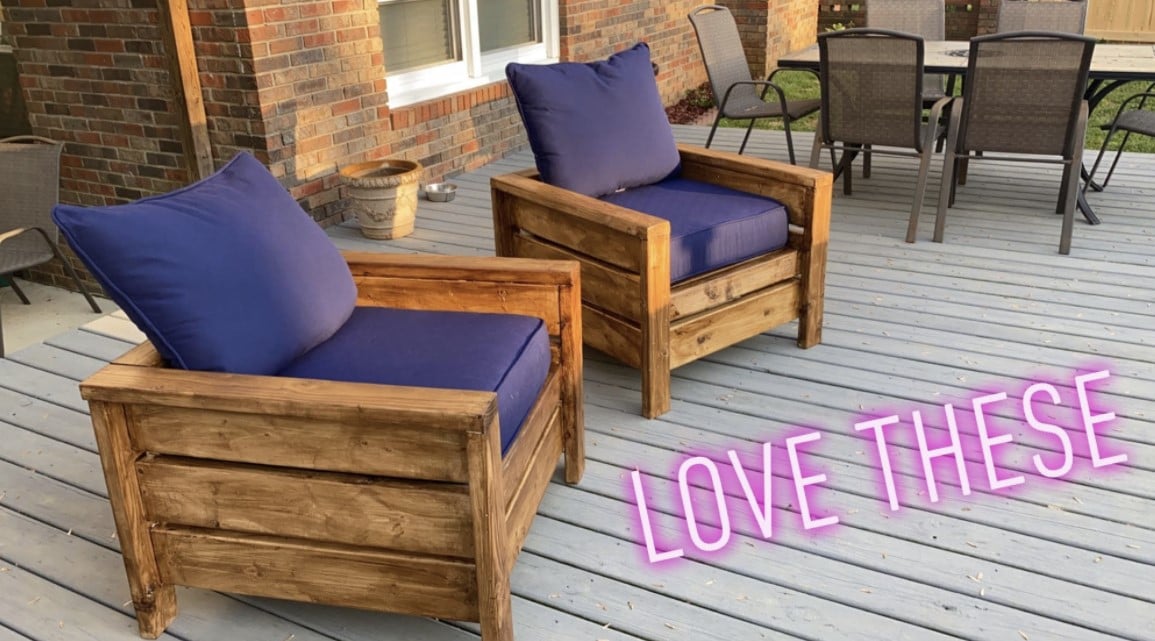
Built from Plan(s)
Outdoor chairs turned out beautifully! Love Ana’s easy to follow plans.
Paige Kimbrell
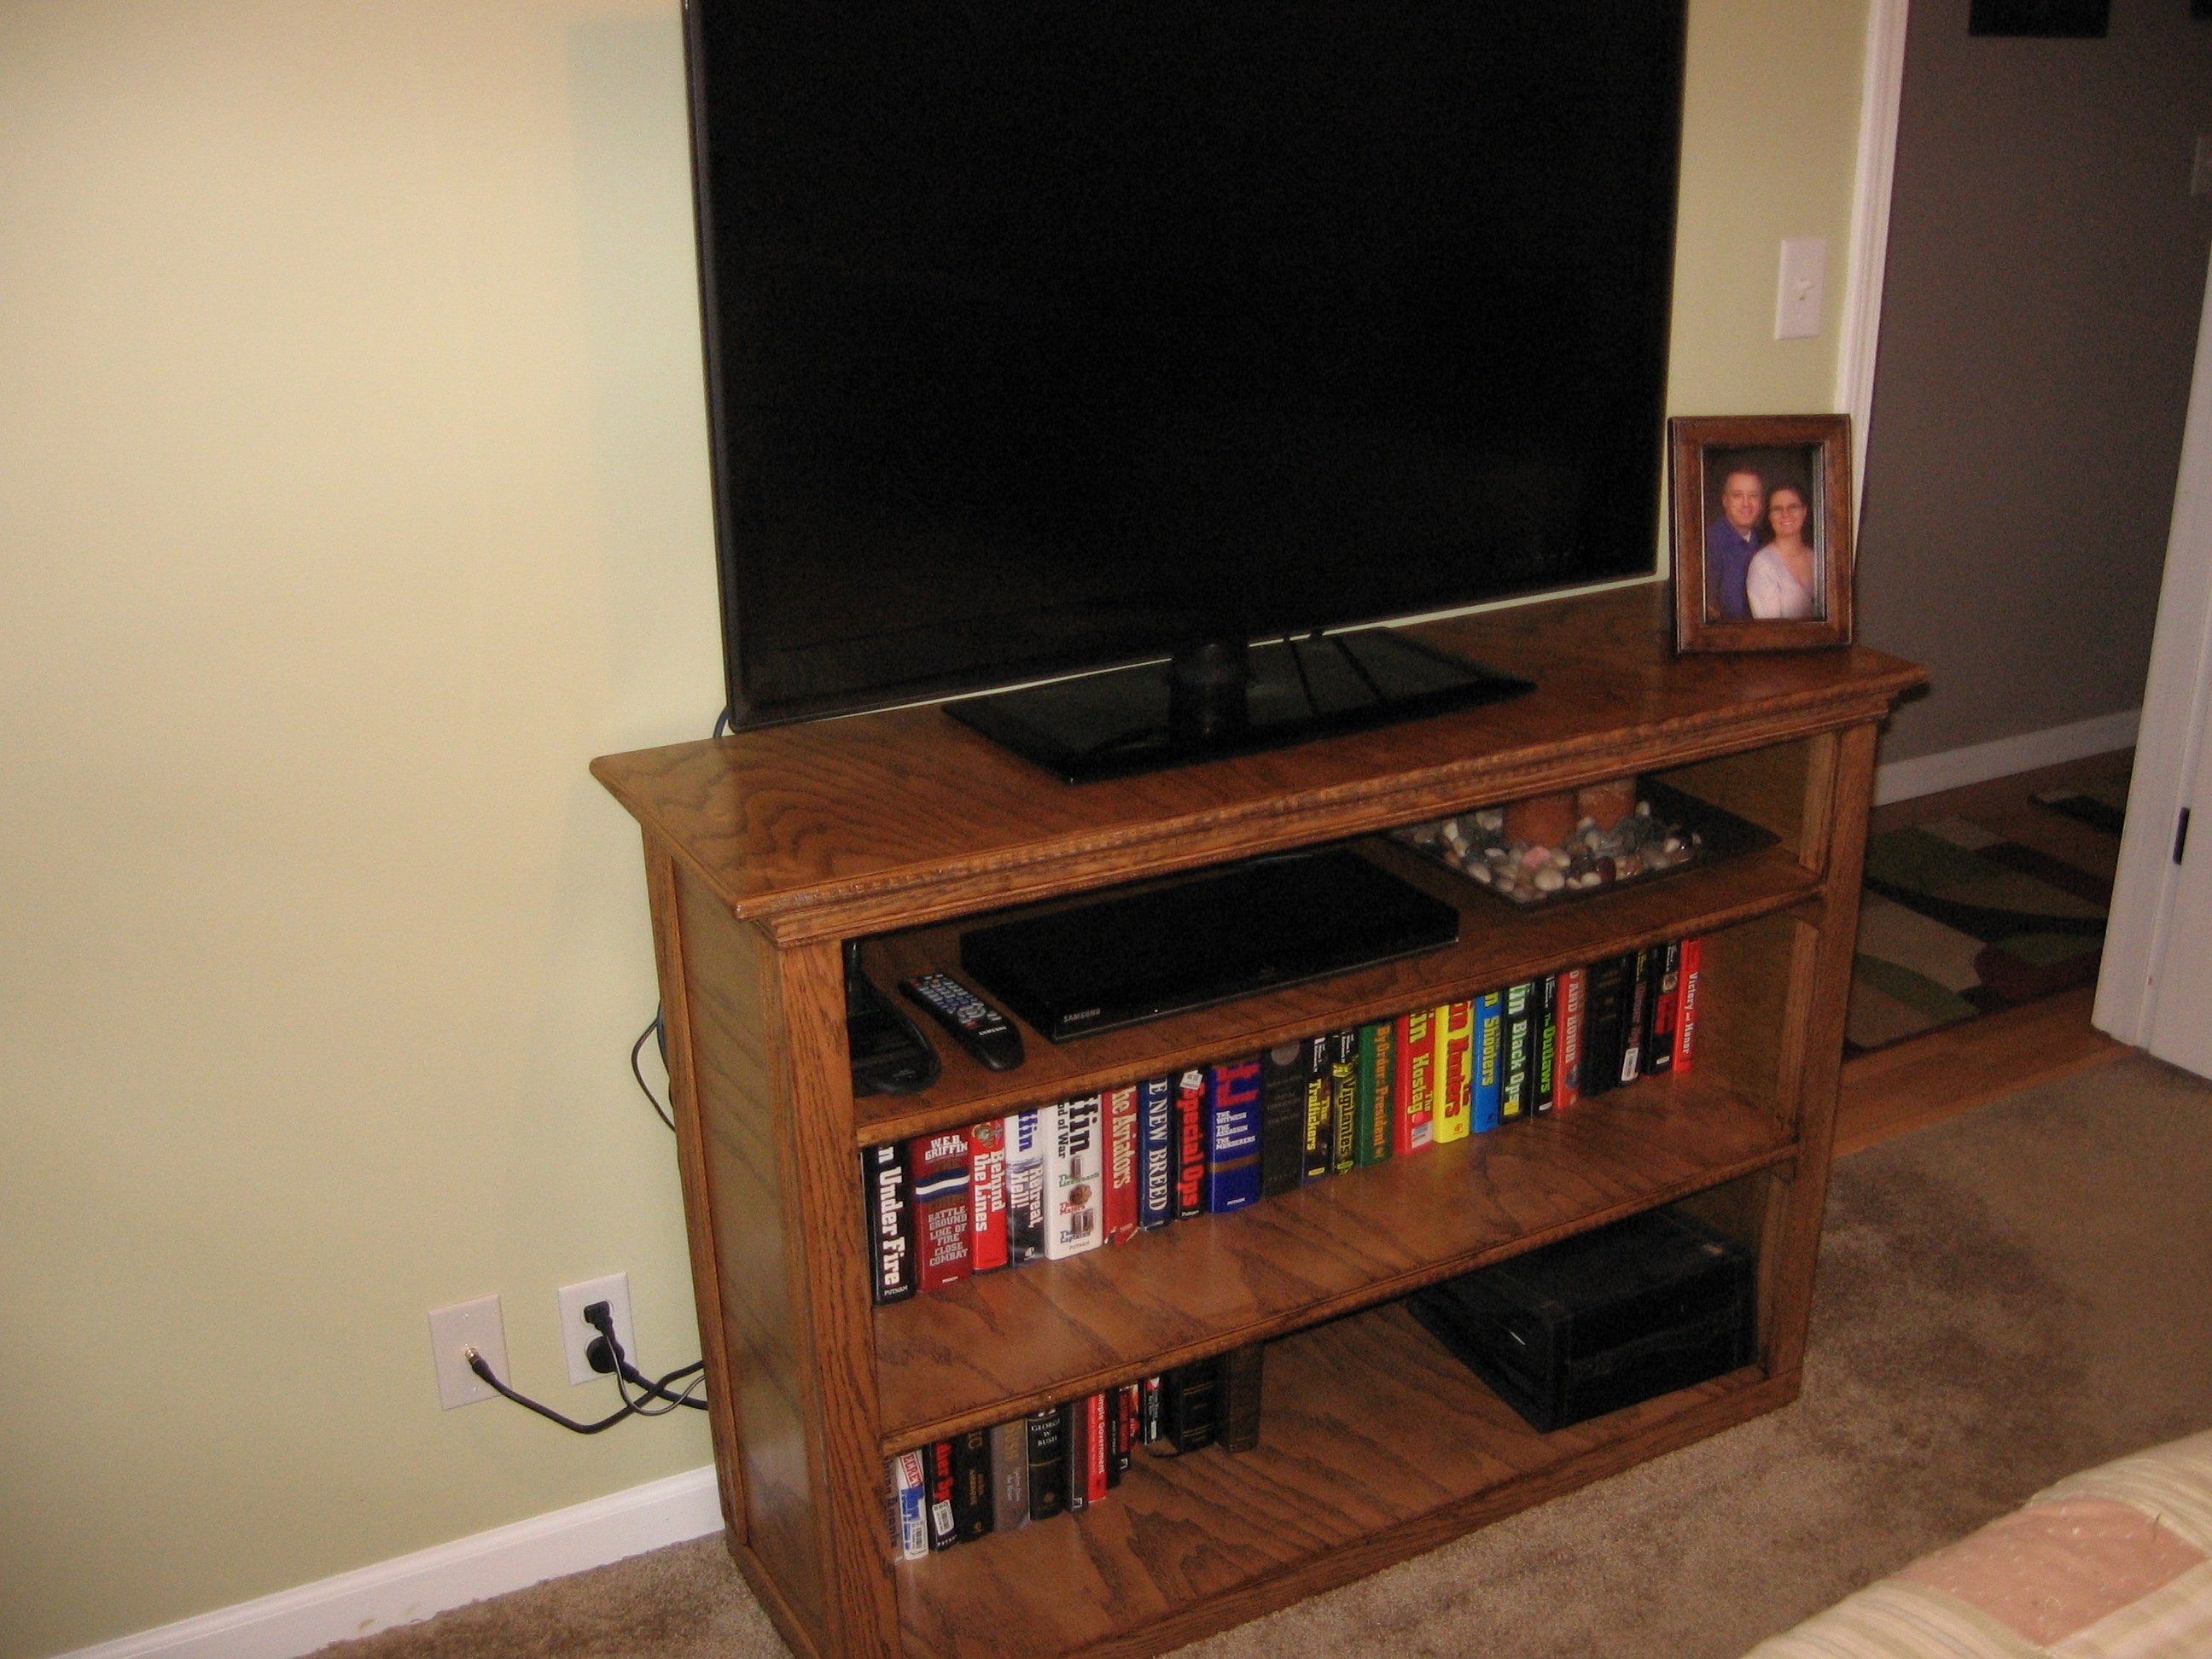
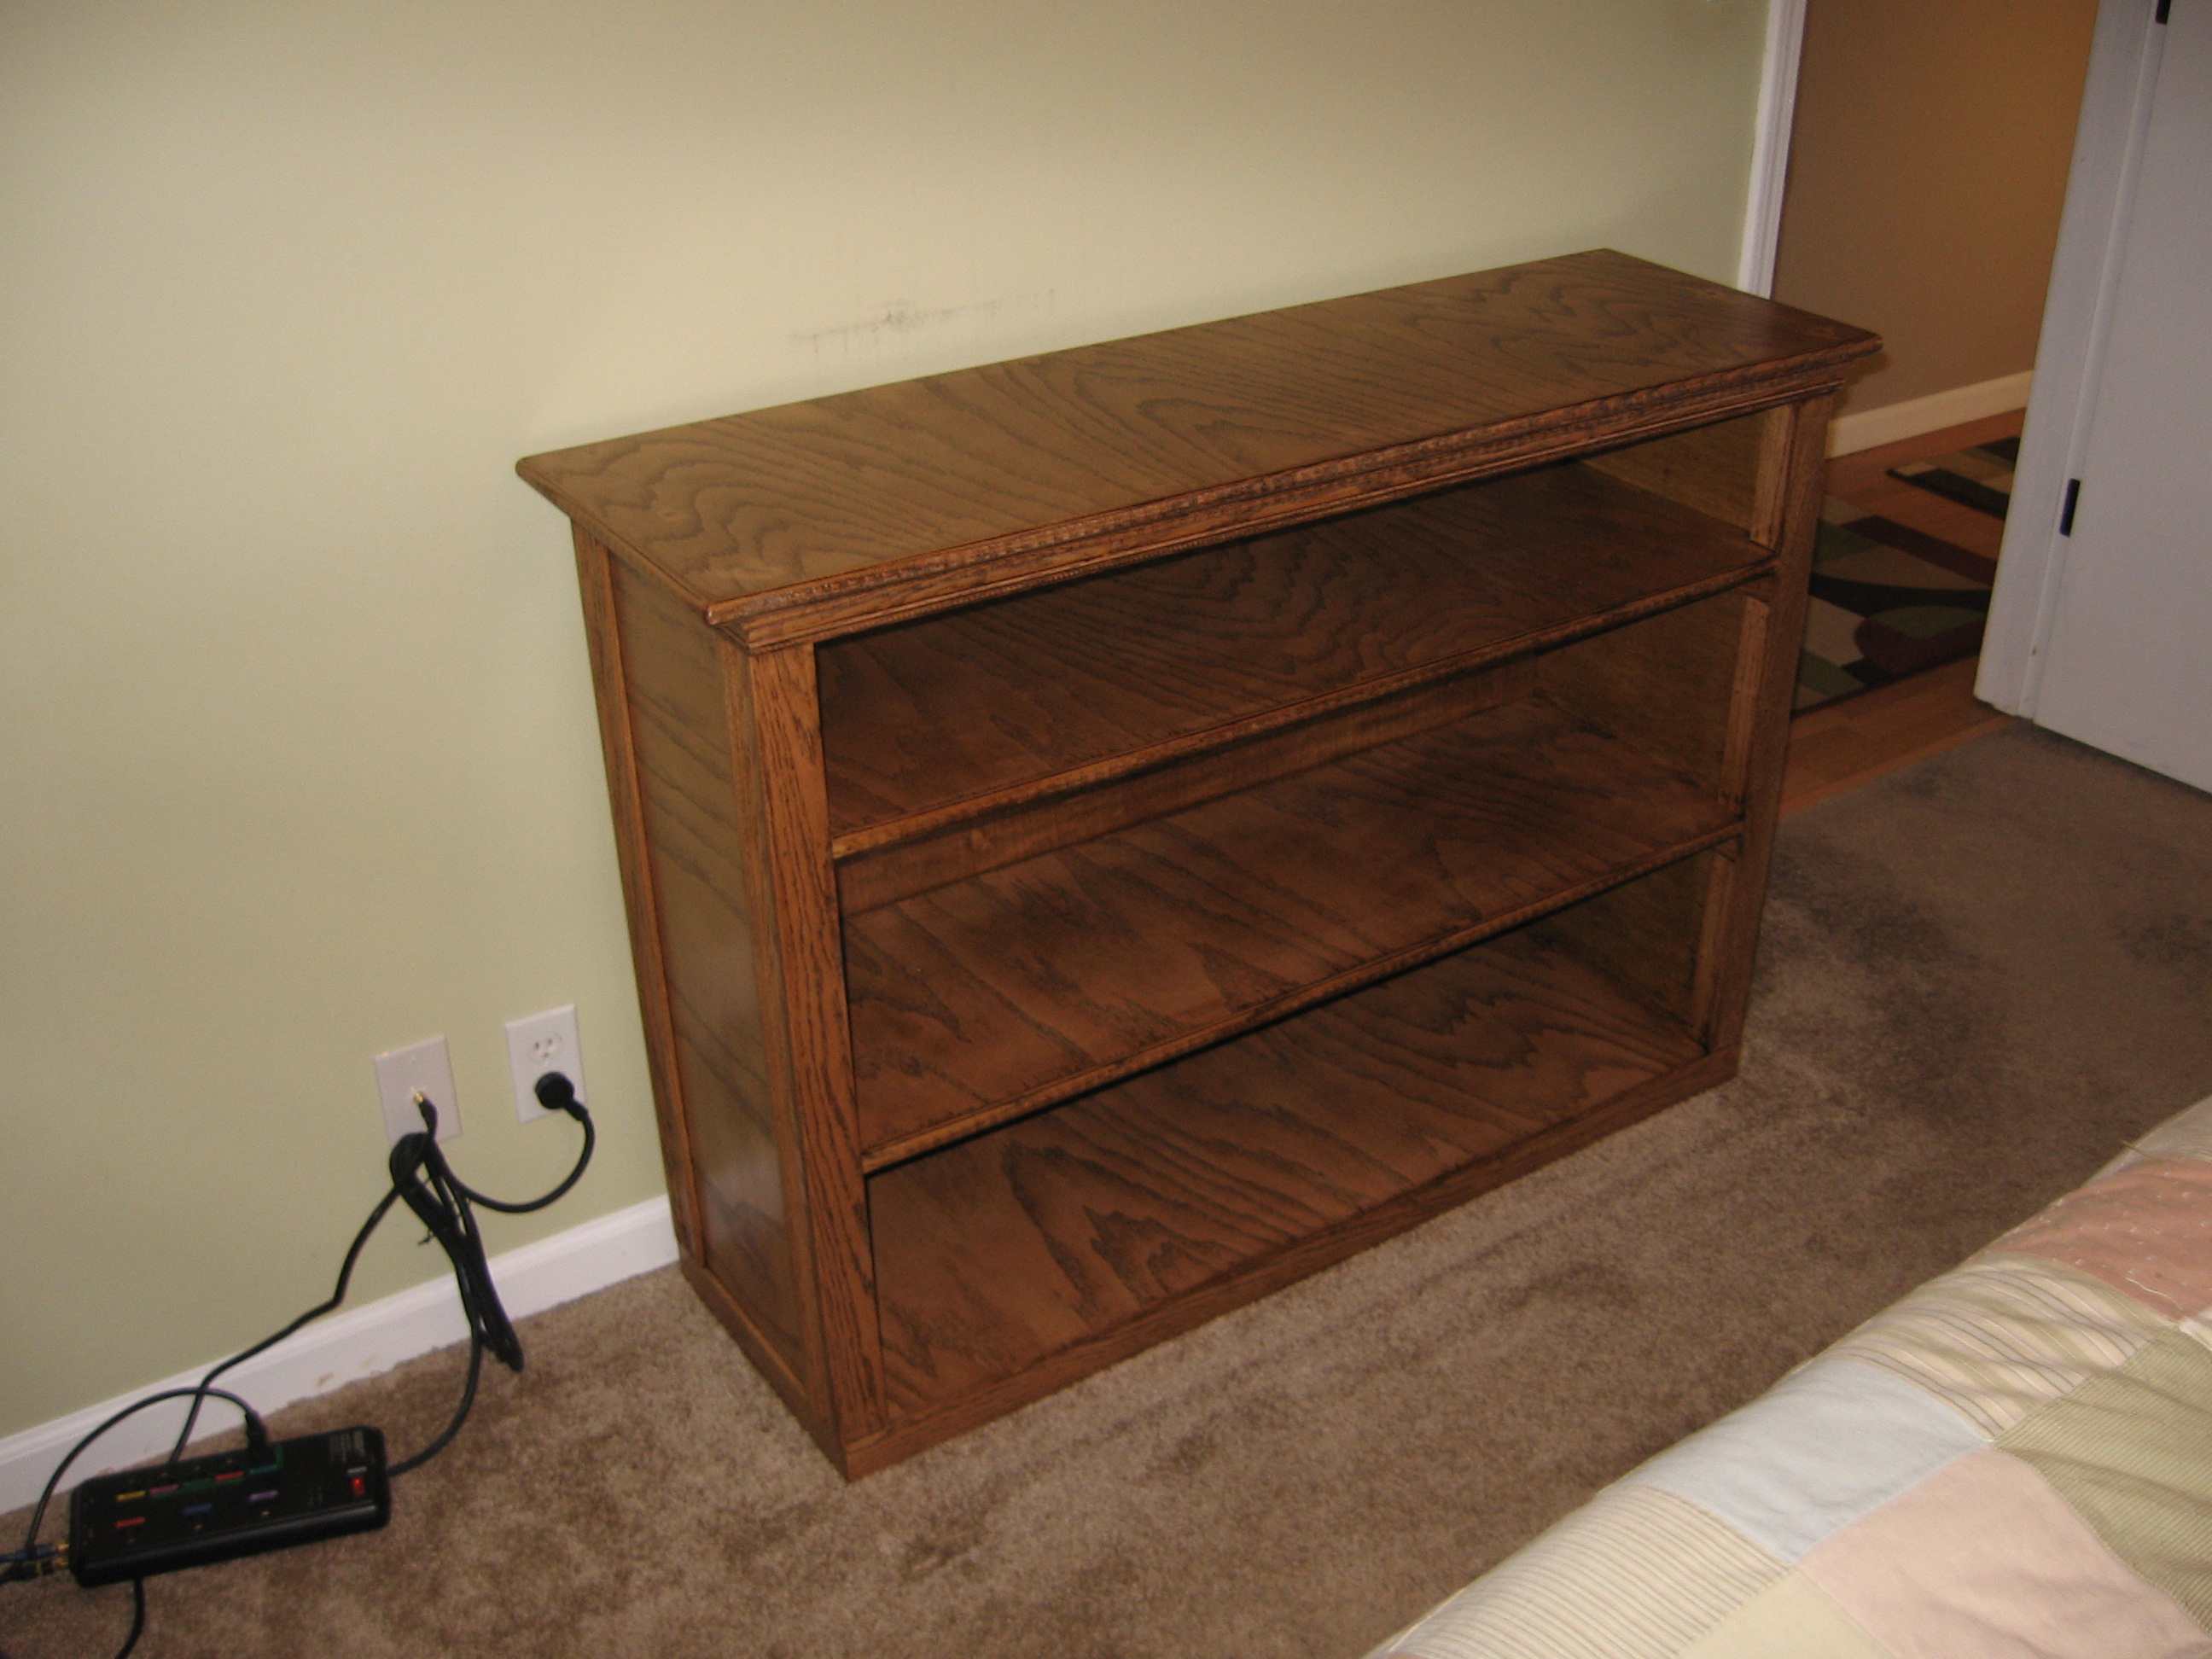
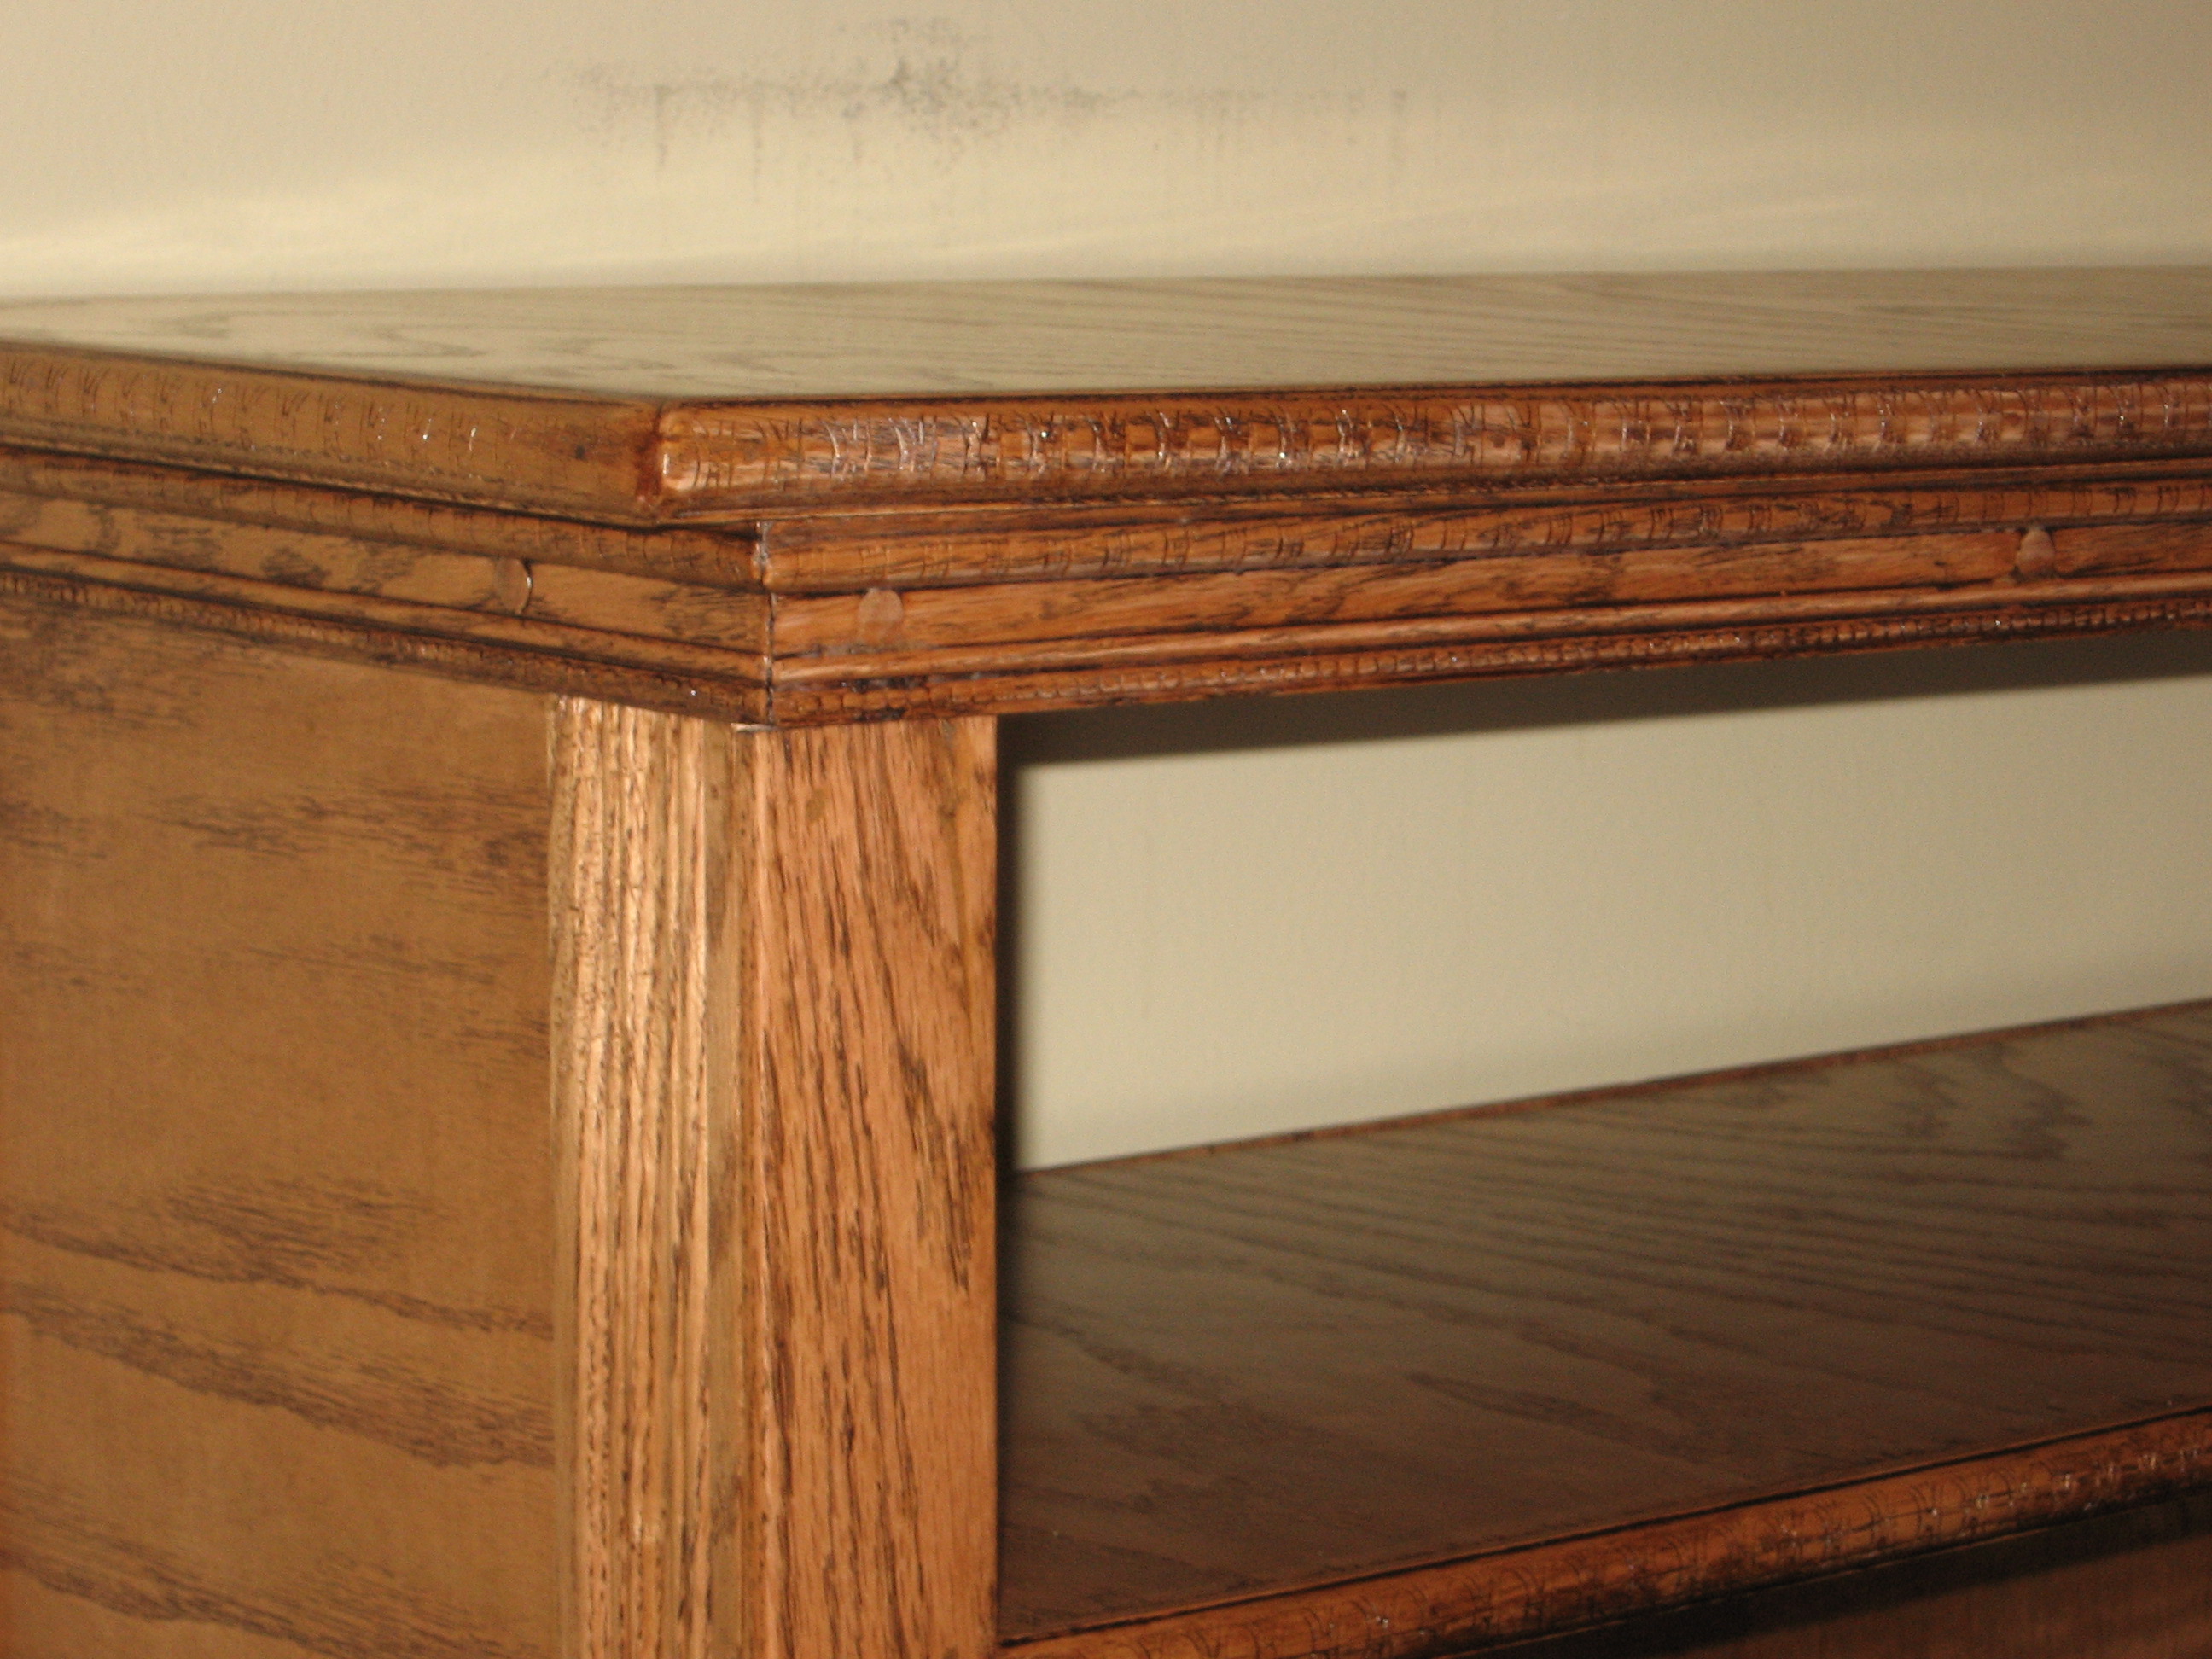
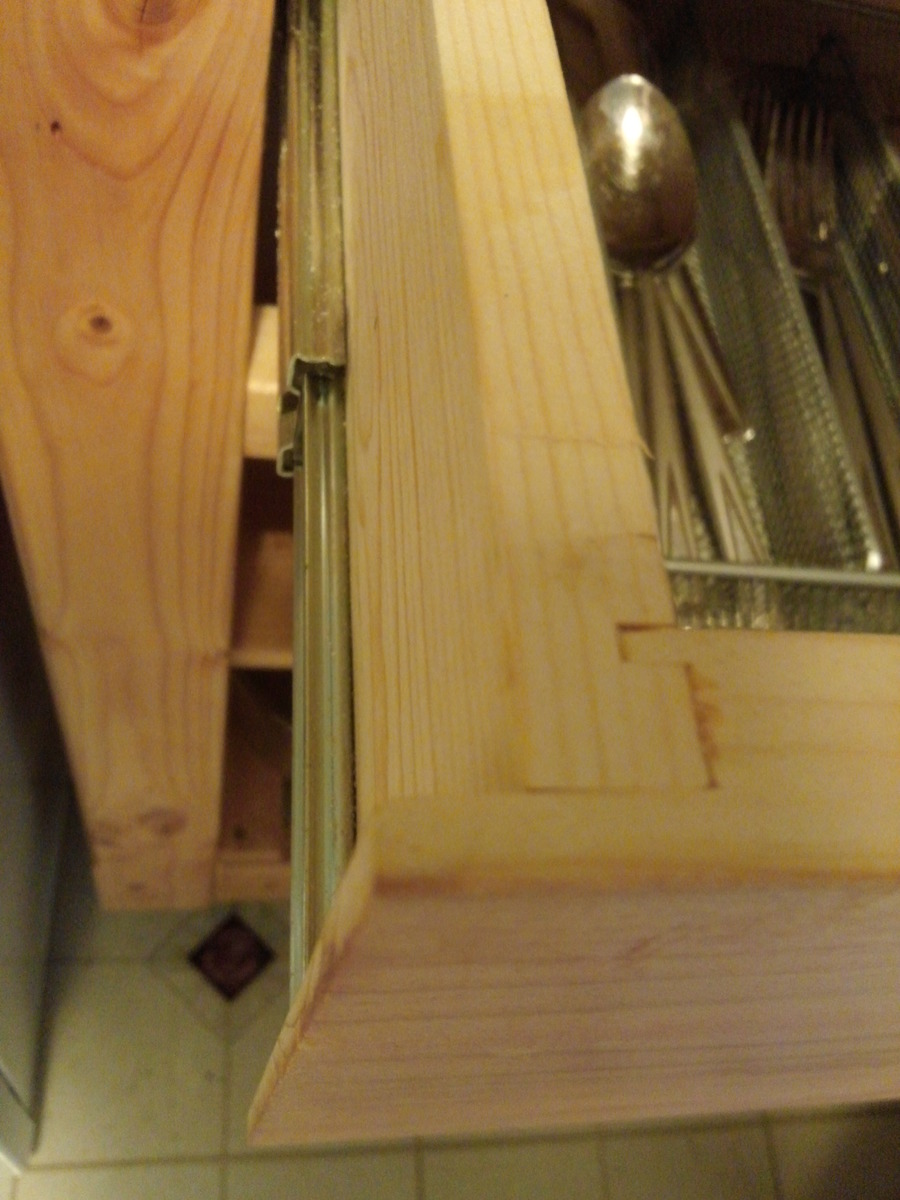
This is a television stand/bookcase I built at the request of my wife. I used red oak plywood, red oak lumber, and the backing is 1/4" birch sheeting. It is put together with trim nails, wood glue, and countersunk wood screws. I used wood plugs to fill the screw holes. I marked it as intermediate due to the miter cuts on the trim.

Tue, 02/21/2012 - 09:59
This is a nice looking TV stand! Is there any way you could do a sketch up of it?
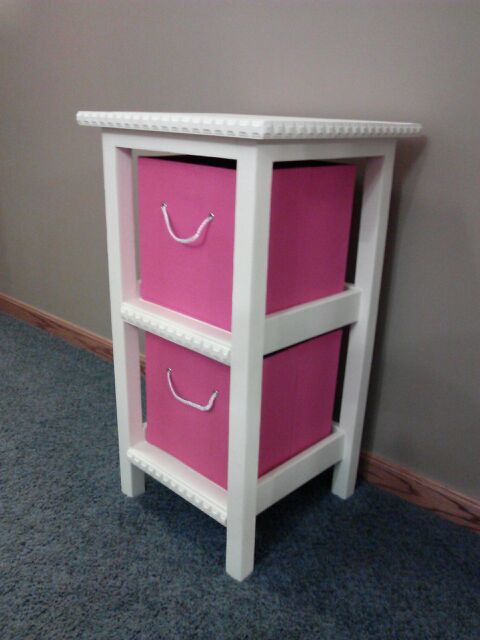
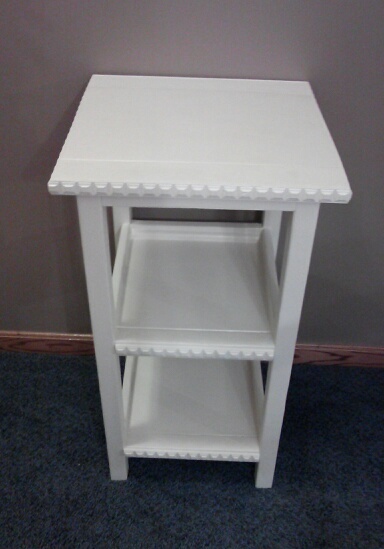
I built this and then ordered storage baskets that fit to the size. I built it exactly to the plan except I did not make the top flush to a back wall and I added decorative trim. I think adding trim really adds a nice look to this project.
The tower was super easy to build and took hardly any time. The most time was spent on the finishing work (sanding and painting).
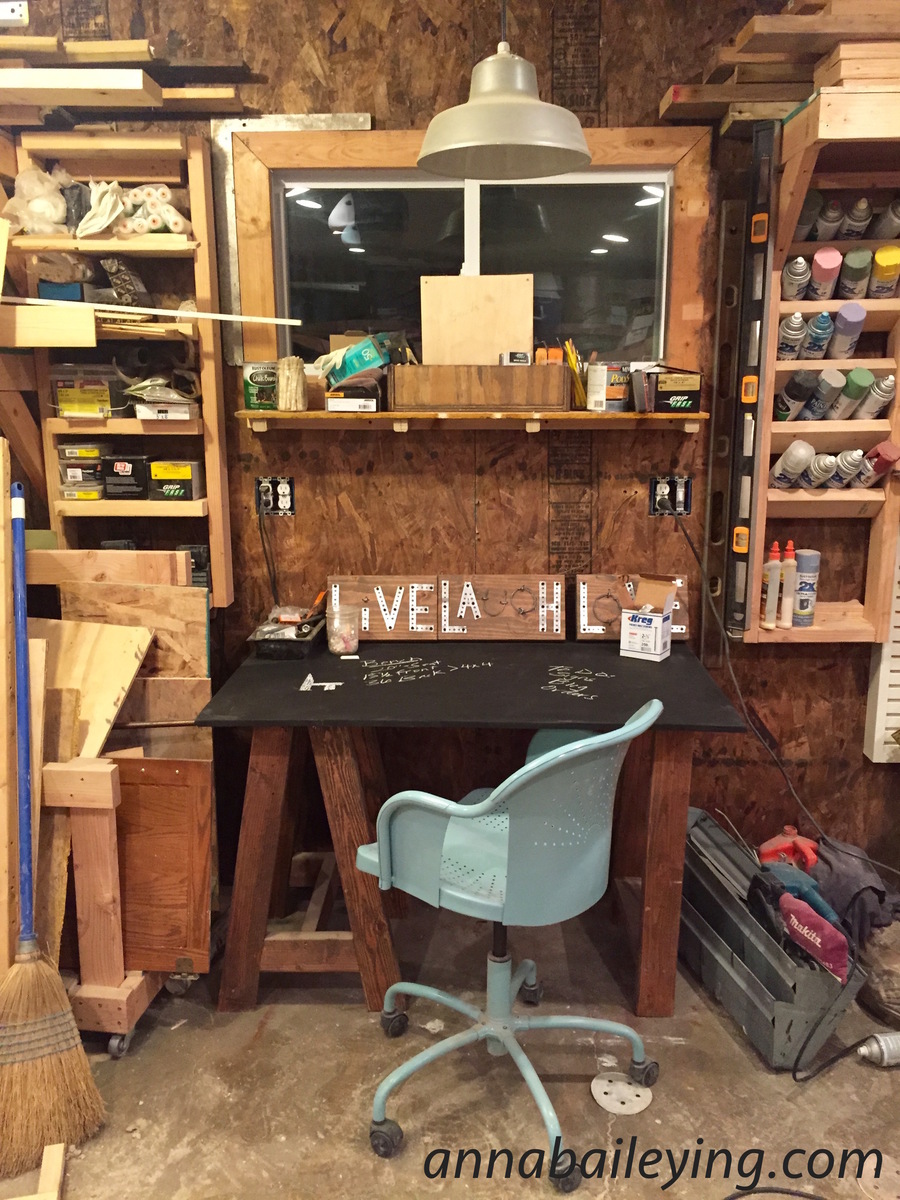
I needed a new desk for my office workspace in the garage. I wanted something inspired, and that would BE inspiring to me as I sit at it. So, I made this chalkboard surface woodworking planning desk with mismatched legs. I love that the legs are mis-matched. LOVE IT. IT would make type a people squirm, but me. Nope, I love it. I quick made some set of sawhorse legs, and a box leg. Attached a 3/4 piece of plywood cut the the size I wanted. Stained the legs dark brown, and rolled on 3 coats of chalkboard paint on the top. Boom!! And the best part of this design, when it gets messy, I just sand it down. And clean it up again with chalkboard spray paint.
Build exactly from the plans. Stained in dark walnut.
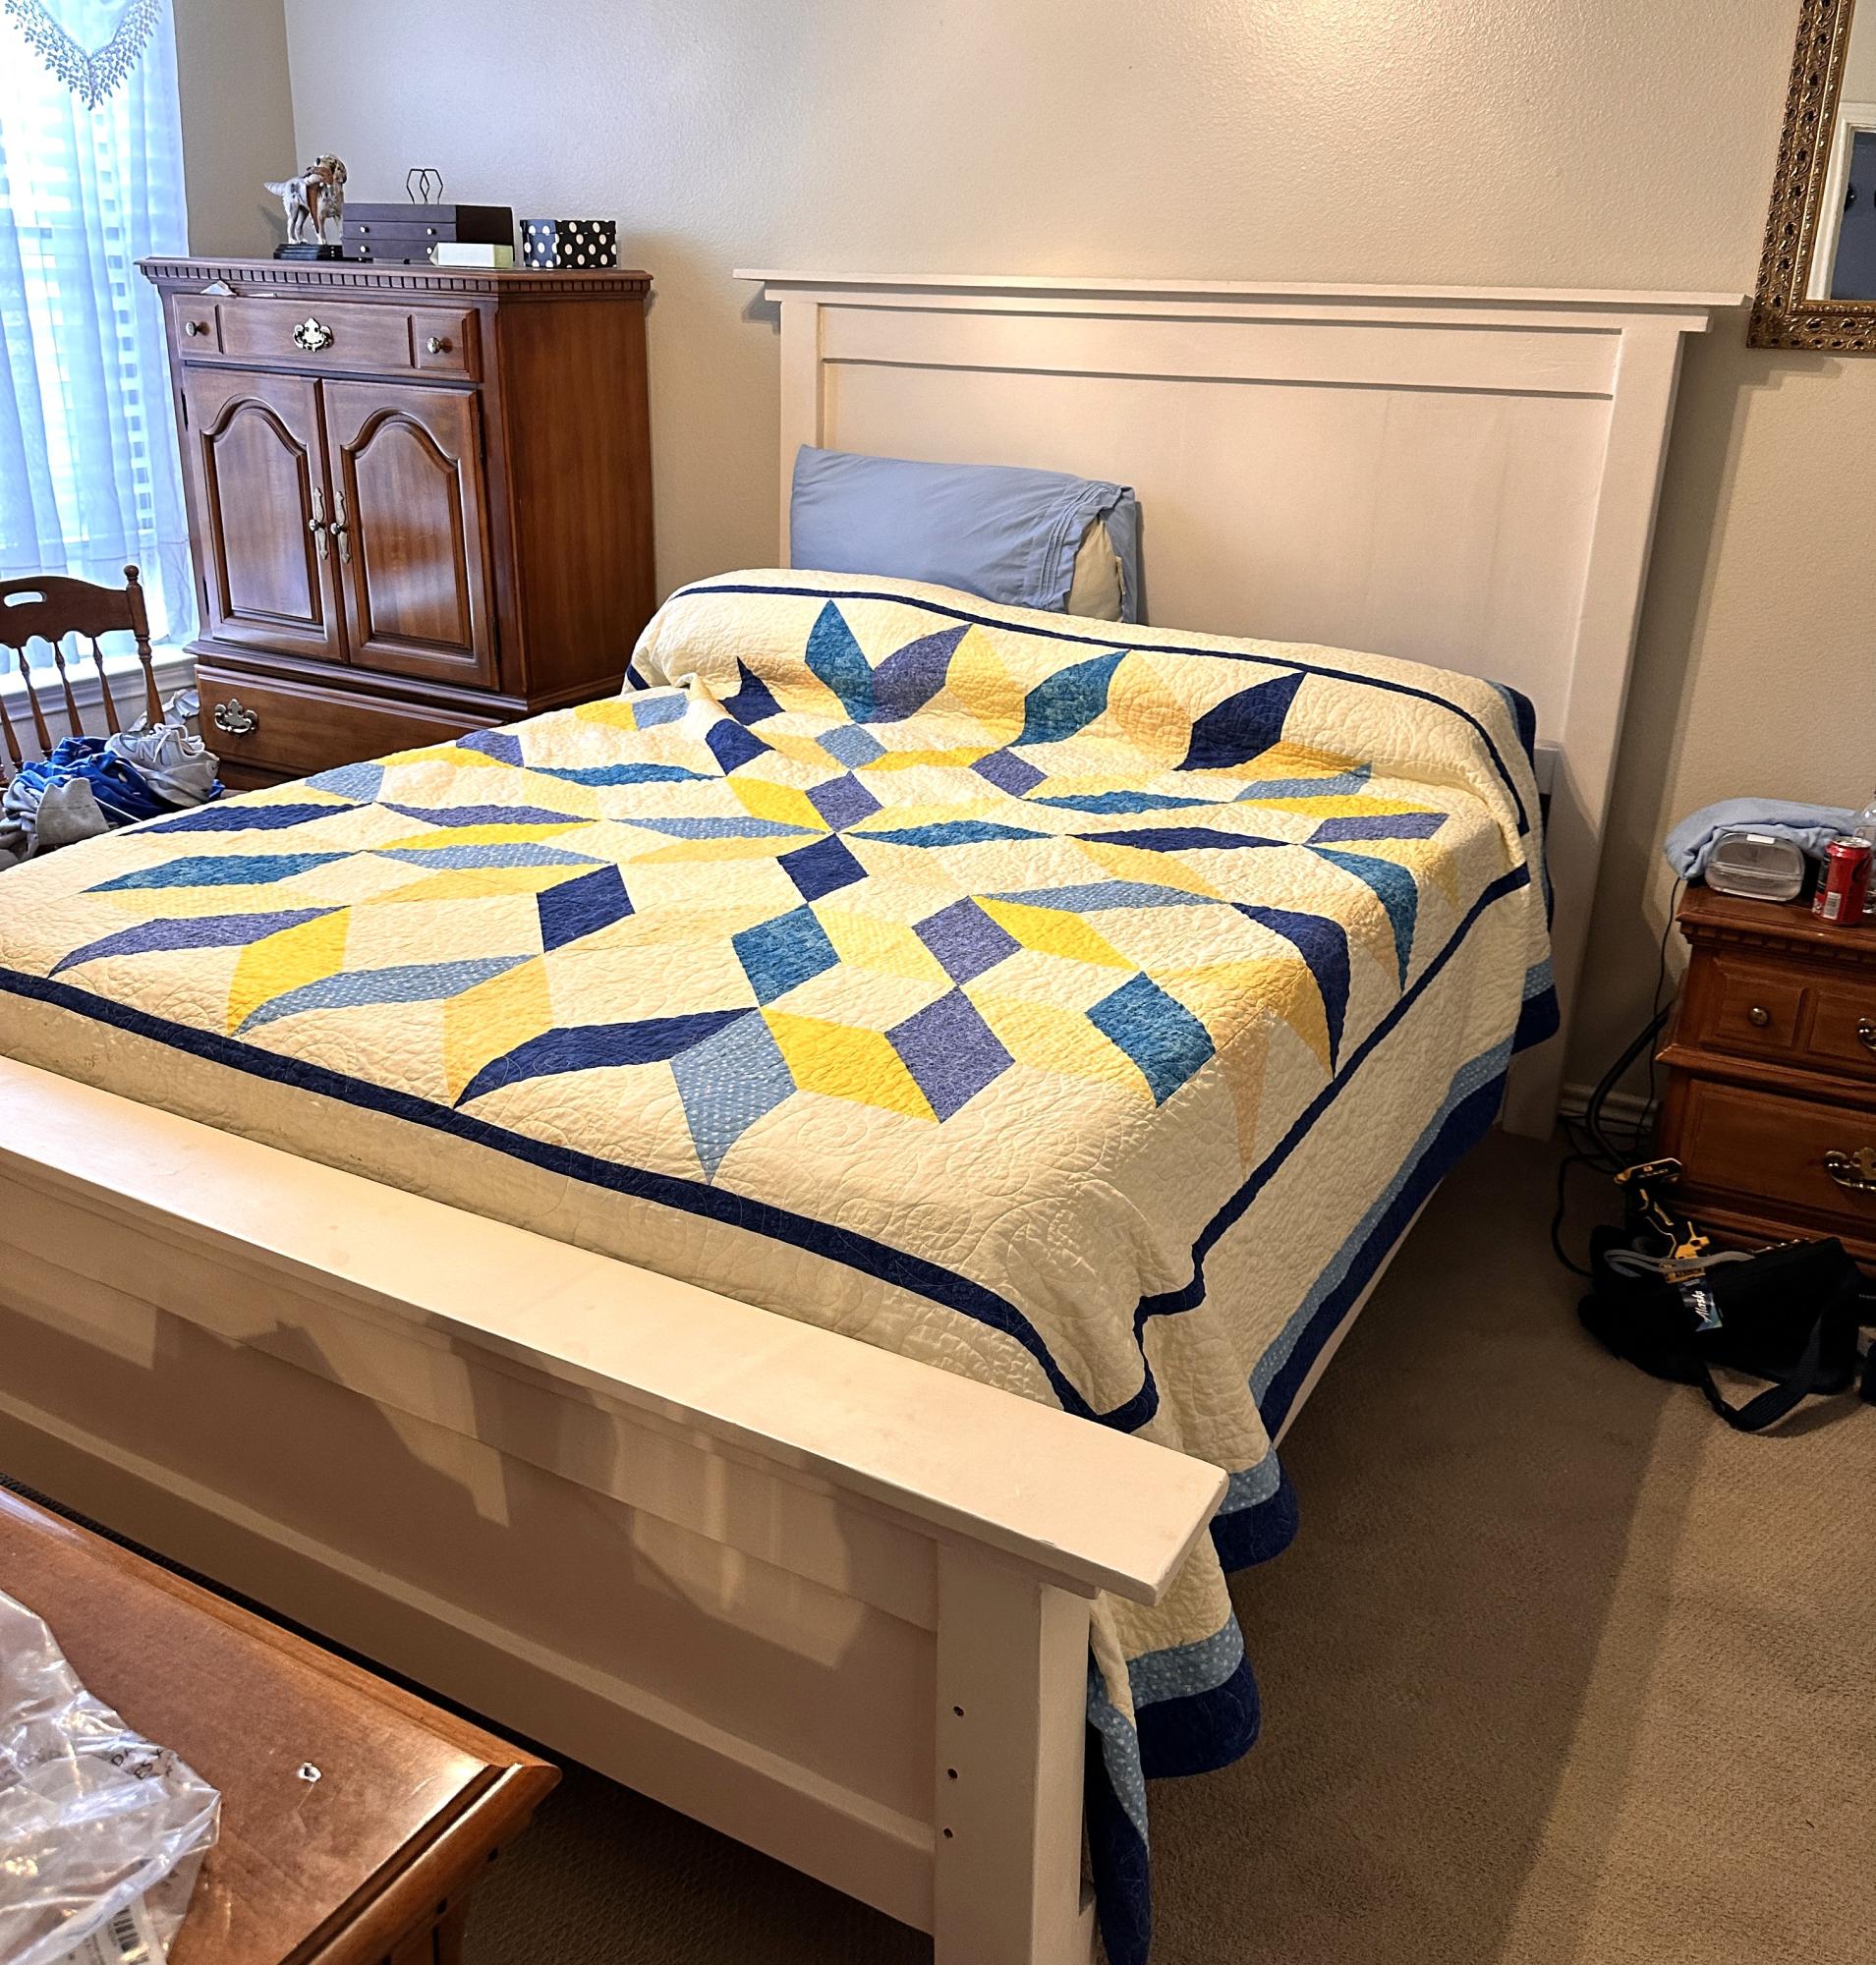
Built mom a queen sized bed when she decided to downsize. It was lots of fun to build.
Laura Hatfield
Built this over a couple of week nights. I used the basic bookshelf plans available on this site.
It was fun!
I do have a couple of observations though:
1- Sand all pieces of wood BEFORE you cut them, to the desired lengths! Make sure the wood is nice an smooth. So much easier to do with big pieces, that can be balanced on a good support! Especially important when using the cheapest pine available!
2- Take your time, double check measurements, and follow the assembly directions. (Yes.. I made a mistake on the assembly part... at least it's on the back, and no one can see it)
I did change the width to fit my wall space, and I did add adjustable shelves (1 fixed shelf, to help hold the whole thing square). (I used a piece of peg board to place the holes for the shelf supports). Pretty neat! I also added a couple of extra shelves. (I still needs some paint) I needed the extra storage for organizing the stuff we need in the family eating area.
I also changed up the top finishing details. I mitered the corners, and layed the 1x2's flat, offset by .75 of an inch. It gives a nice look.
For our 2 1/2 year old granddaughter.
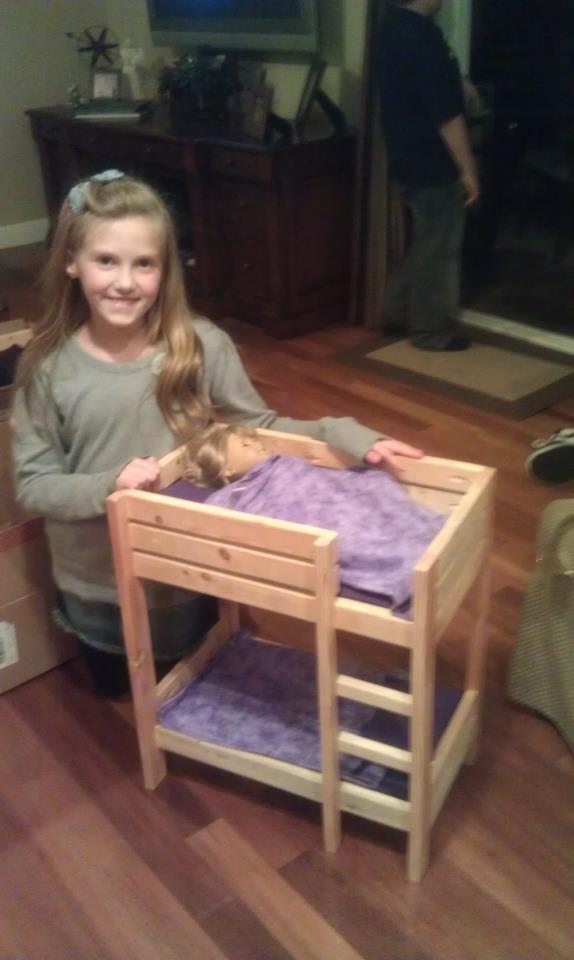
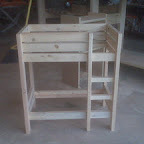
I fell in love with the darling bunk bed built by so many of Ana's readers. Since seeing it I've made several for my granddaughter, neighbors, and friends. What I've learned is that although they're cute, they take almost as much time as a full sized bed!


Mon, 02/20/2012 - 18:54
I love the beds. My child wants one so badly. I like yours better then the one American Girl makes.
Fri, 02/24/2012 - 20:48
That's a sweet thing to say. Evidently, others feel the same; I can't make enough of them! They're really pretty easy to make, I hope you try your hand at it!
Mon, 05/28/2012 - 17:27
Hi, I see you've made the Ana-White doll cradle from this post. The link to the pattern for the doll cradle appears to be missing as it is a dead link now. Do you know how I might obtain the pattern? Thanks so much
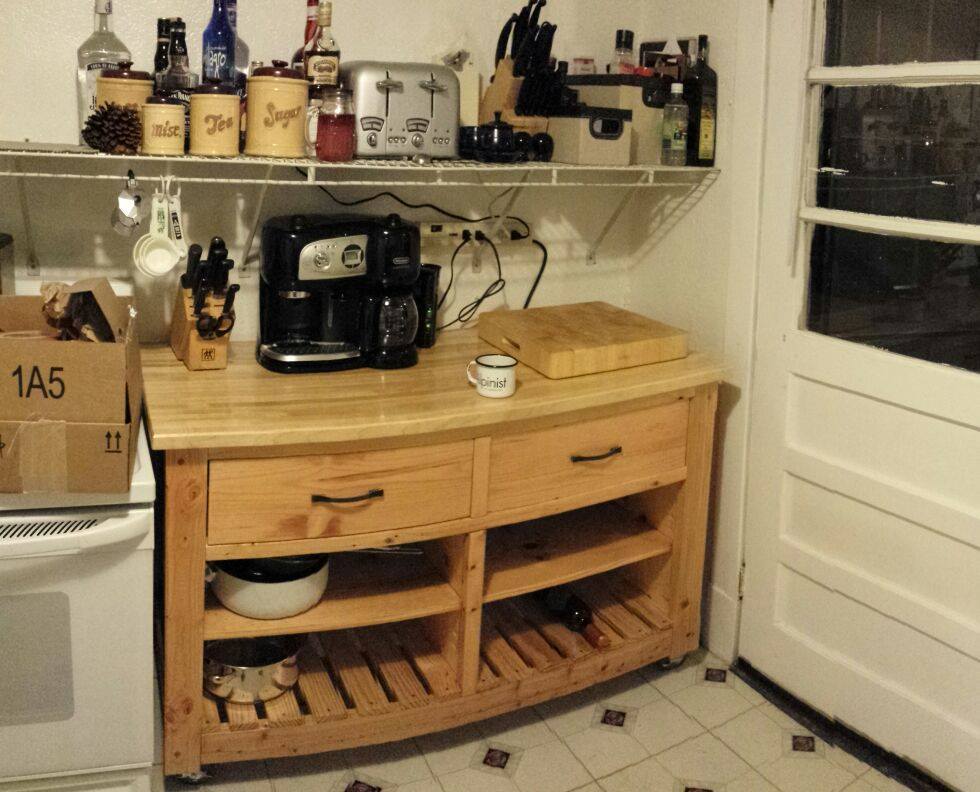
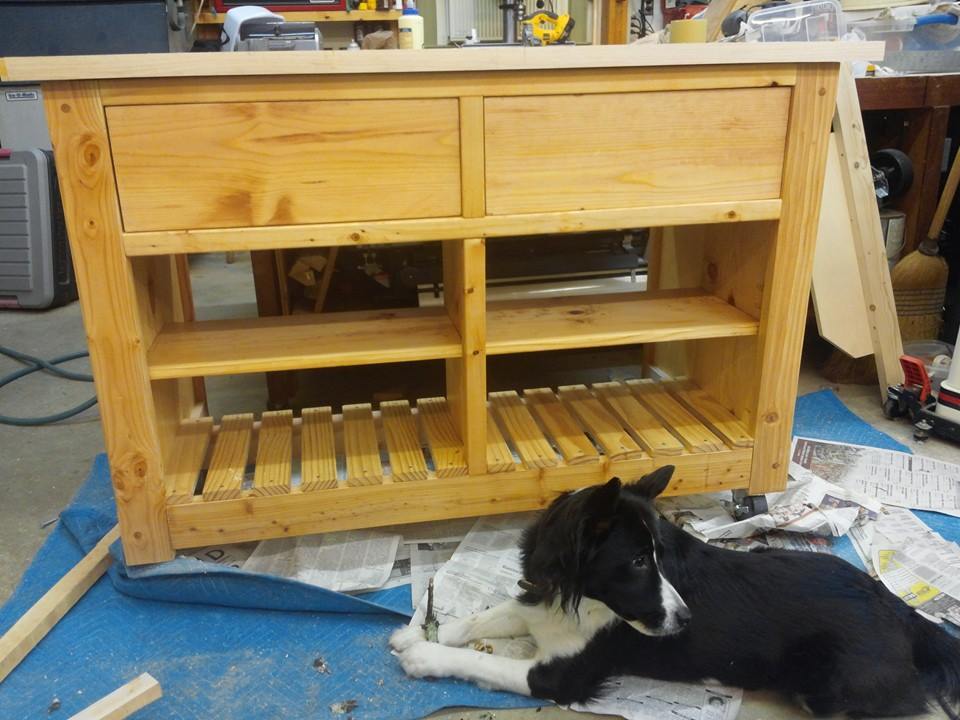
We constructed the Rustic Kitchen Island with a few modifications. My dad, president of the Norm Abrams fan club, built fantastic drawers using rabbet joints and fashioned a maple cutting board top. We also chamferred the edge of the top and the leg ends, very easy and adds a beautiful touch. We finished the cutting board top with "Salad Bowl Finish" which facilitates food prep.
This was a Christmas present for my boyfriend, he is in love with it! I watched him play with it like a little kid for hours after opening it. Thank you, Ana, for your great plans! (Also, Santa brought me your book for Christmas so I will be sharing many more completed projects!)
This was my very first project in the workshop. I was able to complete most of it on my own, which is why I rated it a "beginner" project. However, construction of the drawers using rabbet joints and prepping the maple for the top were considerably more difficult.

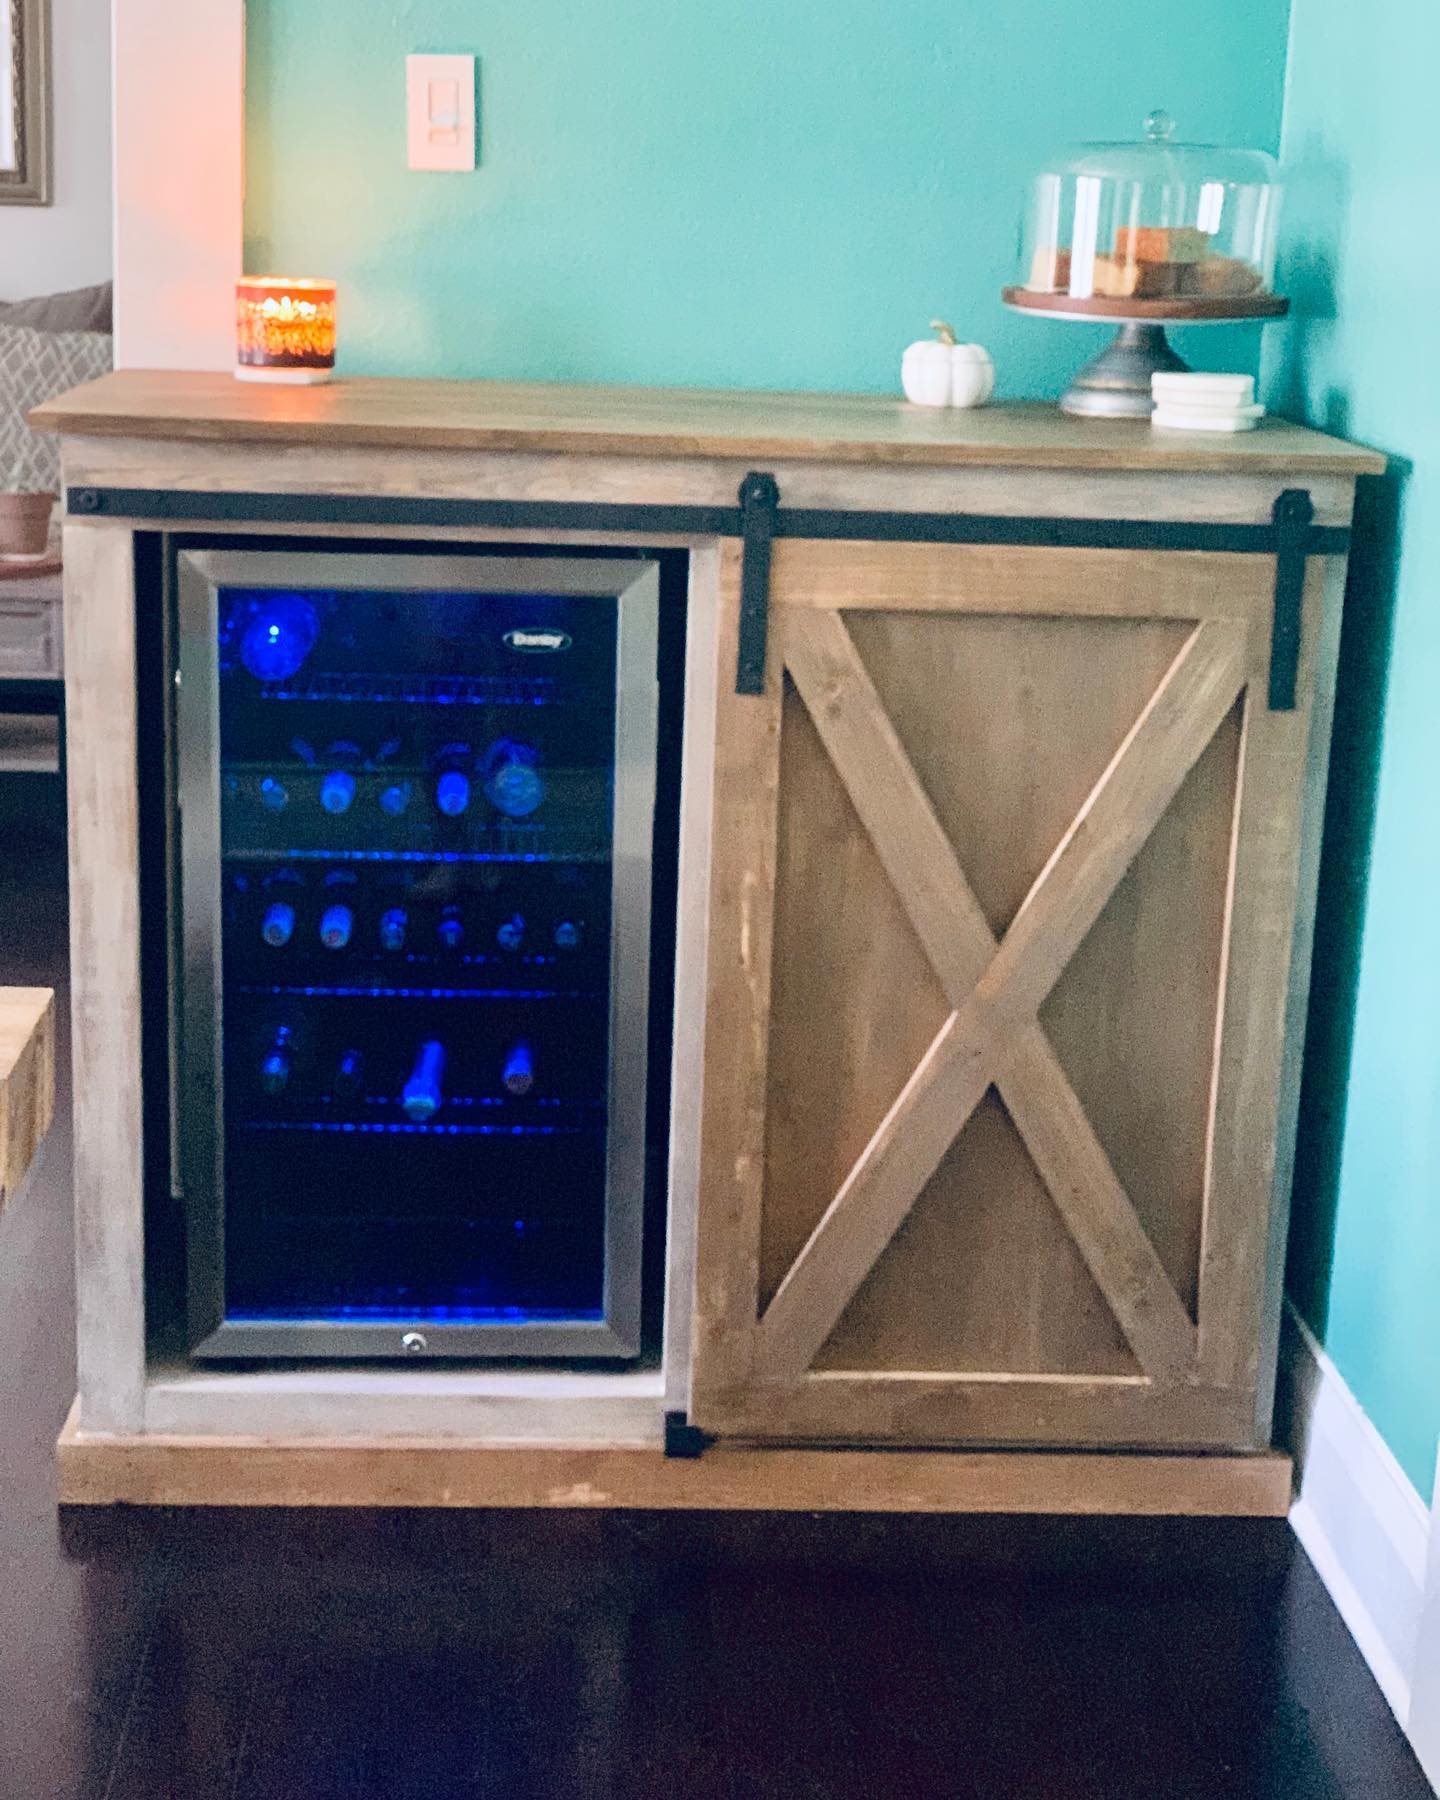
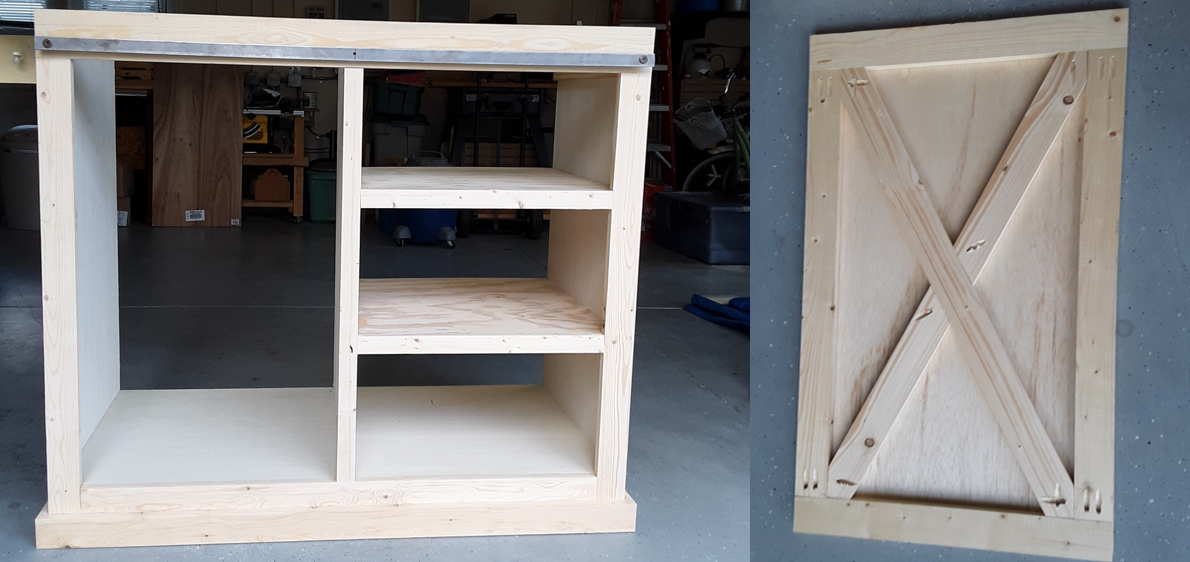
My wife and I built this Refreshment Console as a birthday present for our daughter. She had previously purchased a beverage refrigerator and wanted us to adapt it inspired by your barn door console project. Thus, we modified your plan to accommodate the height of the refrigerator. Also, she wanted three shelves with a closed back on the right side of the cabinet. Simply plan adjustments were all that was needed.
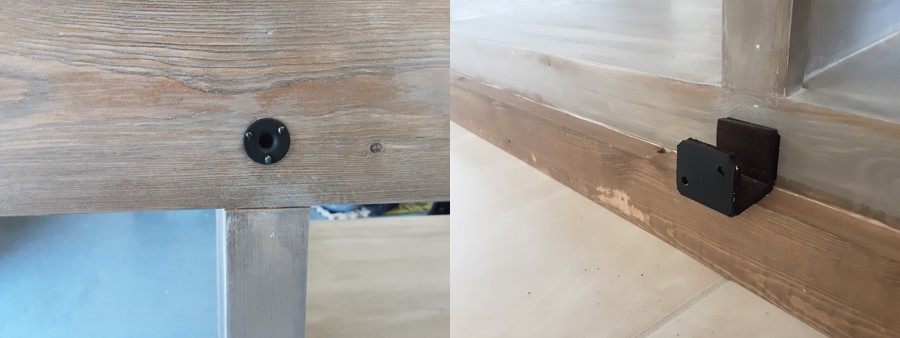
Using your plans, material list and excellent video we were able to construct the barn door rails and hangers using 1 ½ inch fender washers which sandwiched three 1-inch fender washers. The metal bar was sized to fit the top of the cabinet and connected to the top trim board using spacers, washers and bolts. As we decided to place a middle support for the bar, we added a t-nut into a center plywood partition so that we could use the same bolts, spacers and washers to support the rail.
As we were following a rustic theme, we decided to add the X Braces to the barn door and used a project panel board as the top. The barn door is guided at the bottom using a simple U shaped metal bracket that we lined with felt for a smooth glide.
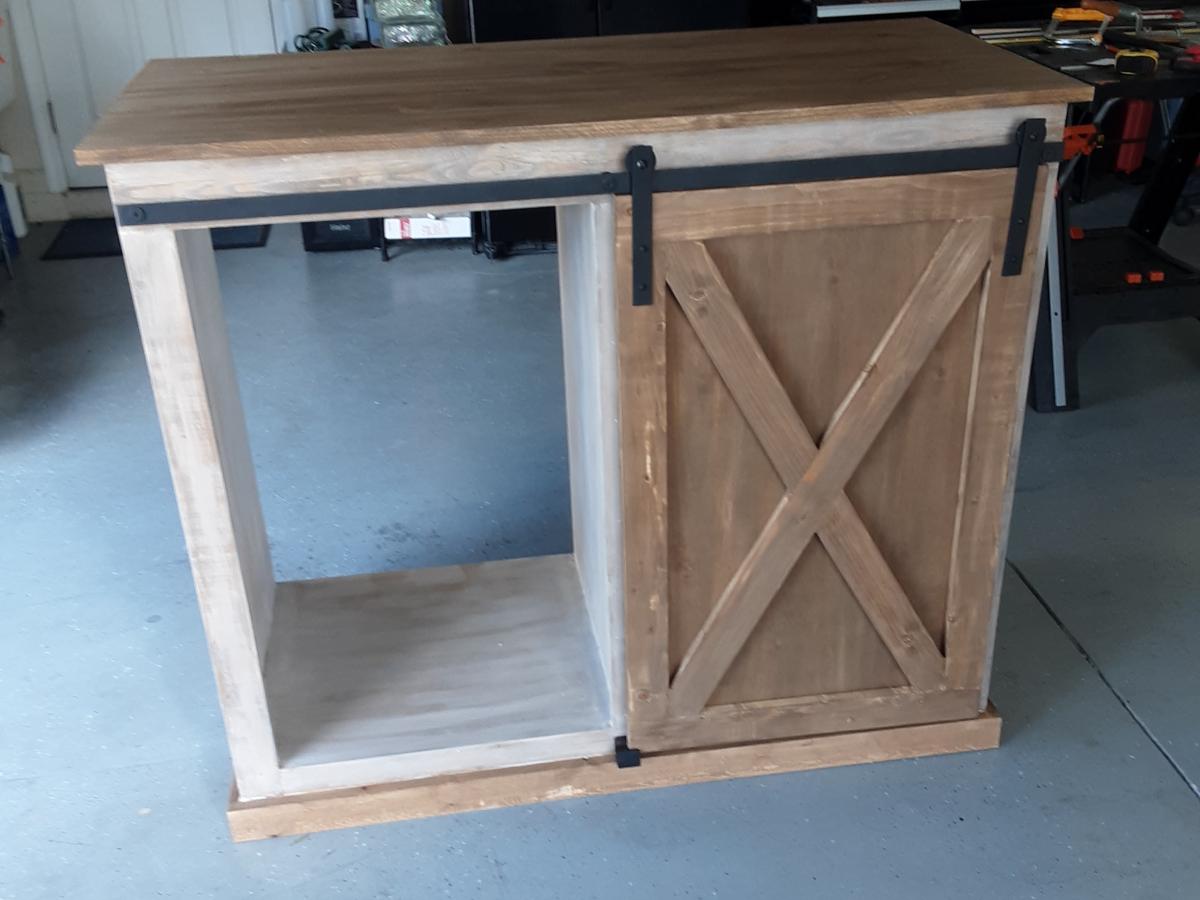

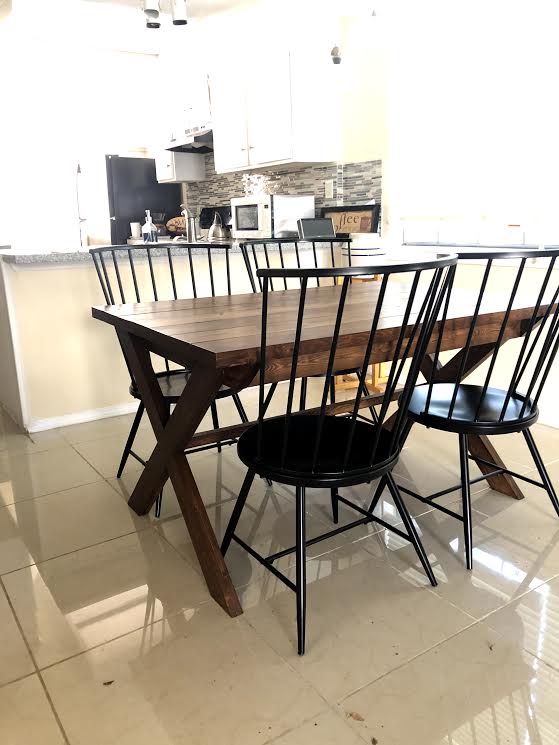
It was easy to make and we decided to paint it instead of stain. It goes perfectly with our mid century modern home!
F. Kimmel
This project took us about a day. We made 15. Other then an incident where my boyfriend almost shot my father in the foot with a nail gun (accidently of course lol) it went pretty well. Way better then the paper and mismatched ones that I had before!!
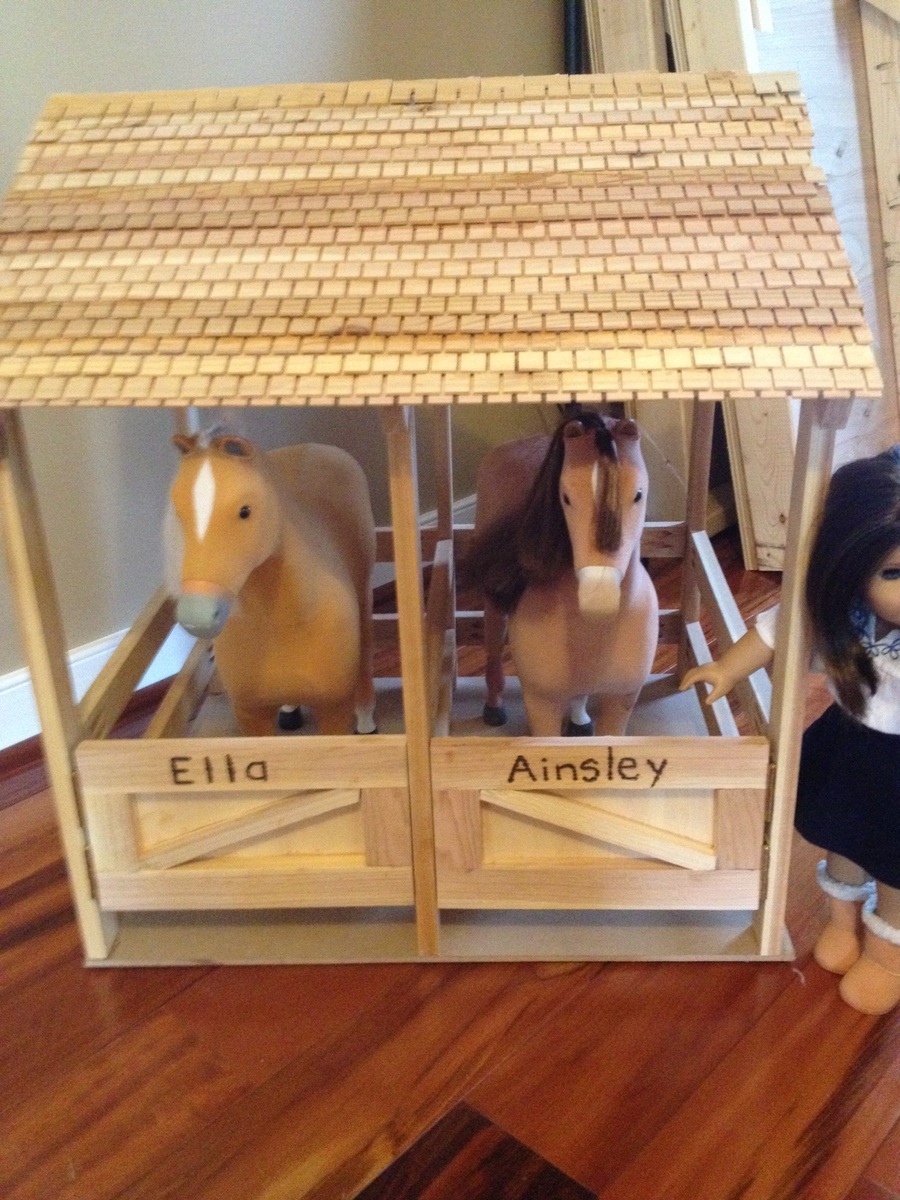
My two dauirlghters wanted a stable to protect their beloved American Girl Doll Horses.
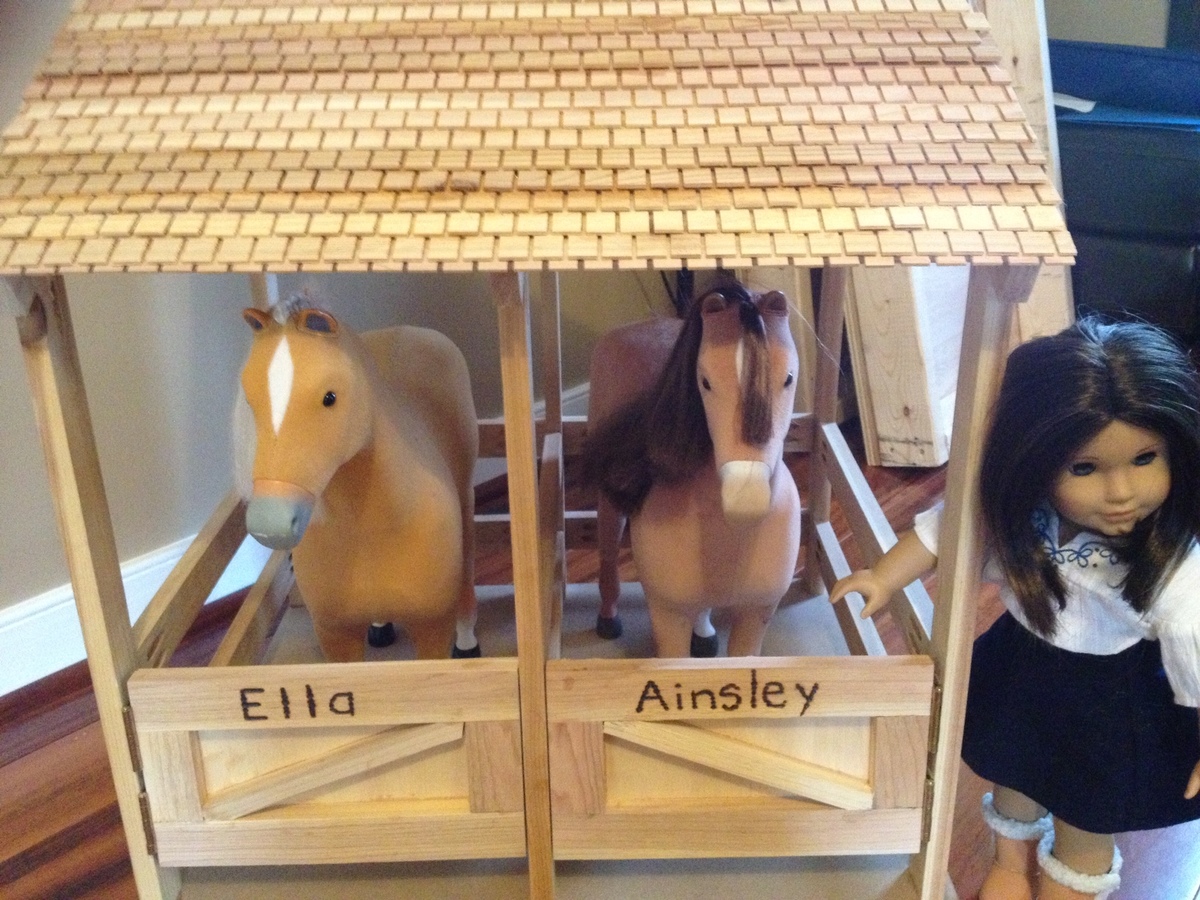

Sun, 10/18/2015 - 19:55
Hello Scott,
The links provided for the AG horse stable does not work or exist. I probablly cannot create one like you did because I don't have wood working tools but if you have the pics available somewhere I may be able to do a rough version for my daughter. It pains me to buy a horse she wants knowing she won't use it much but it's on her xmas list! :)
Christina
Mon, 10/19/2015 - 08:38
Here's Ana's plans
http://ana-white.com/2012/12/plans/horse-stables-american-girl-or-18quo…

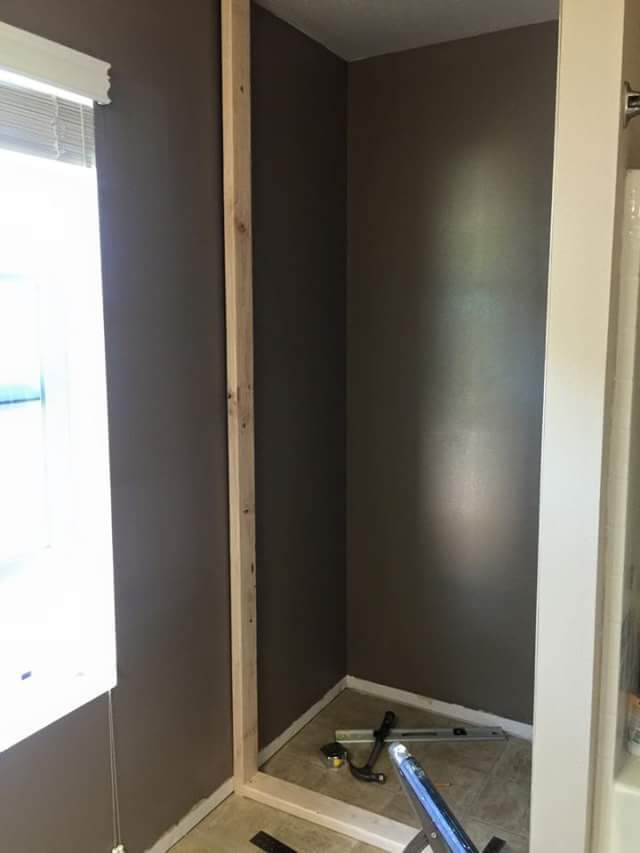
My niece had an area in her master bathroom that she wanted to make into a closet. Since she is very interested in woodworking I was happy to assist her on her first project. It was a challenge as one wall was out of plum by 1.5 inches but we managed to successfully address the problem.
The project turned out very nice and now my niece has a large closet with lots of storage space. But we also created a monster as she has definitely caught the woodworking bug! Her birthday is coming up soon and all she wants are tools!

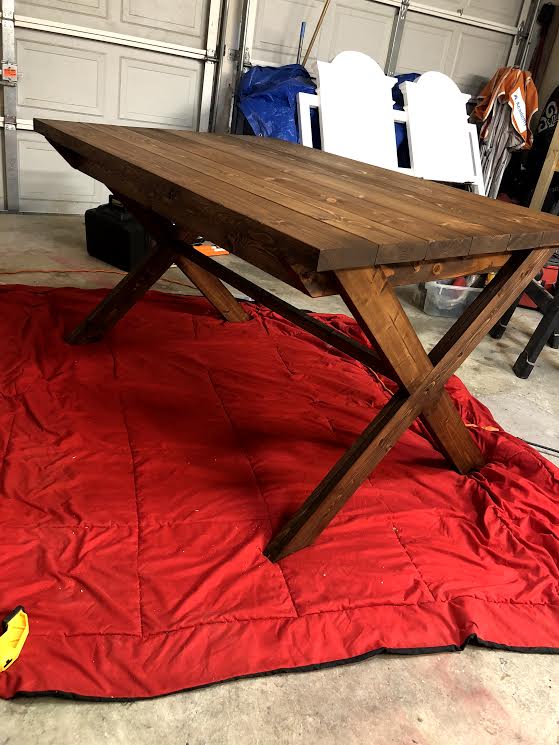
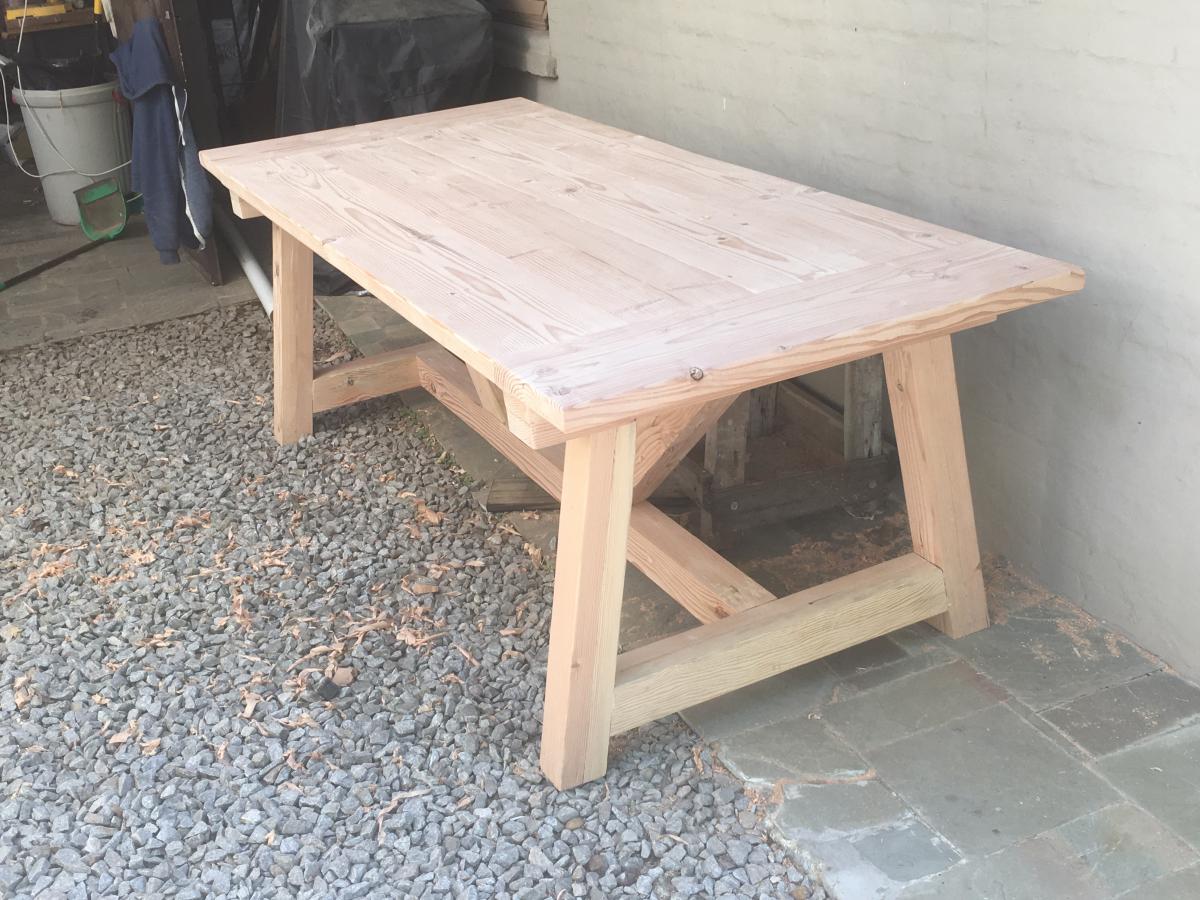
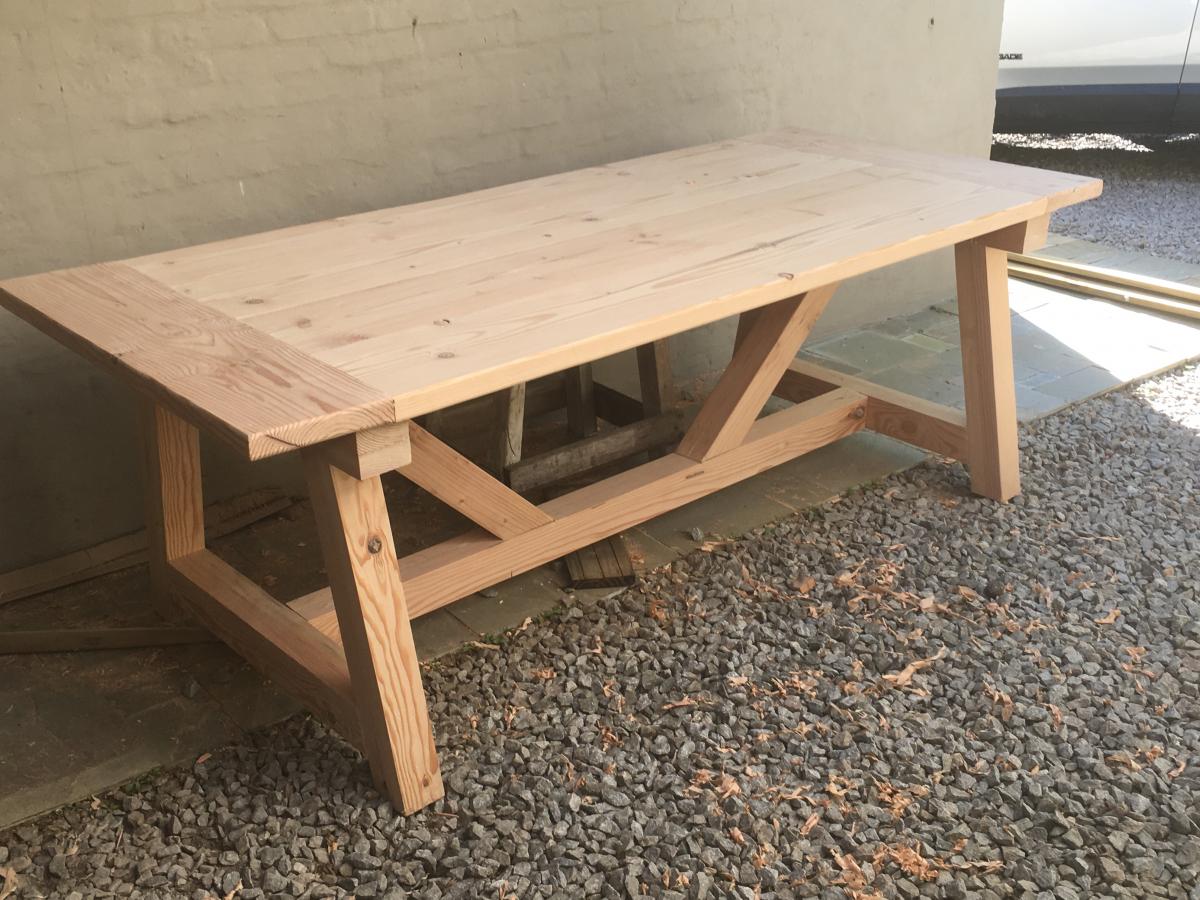
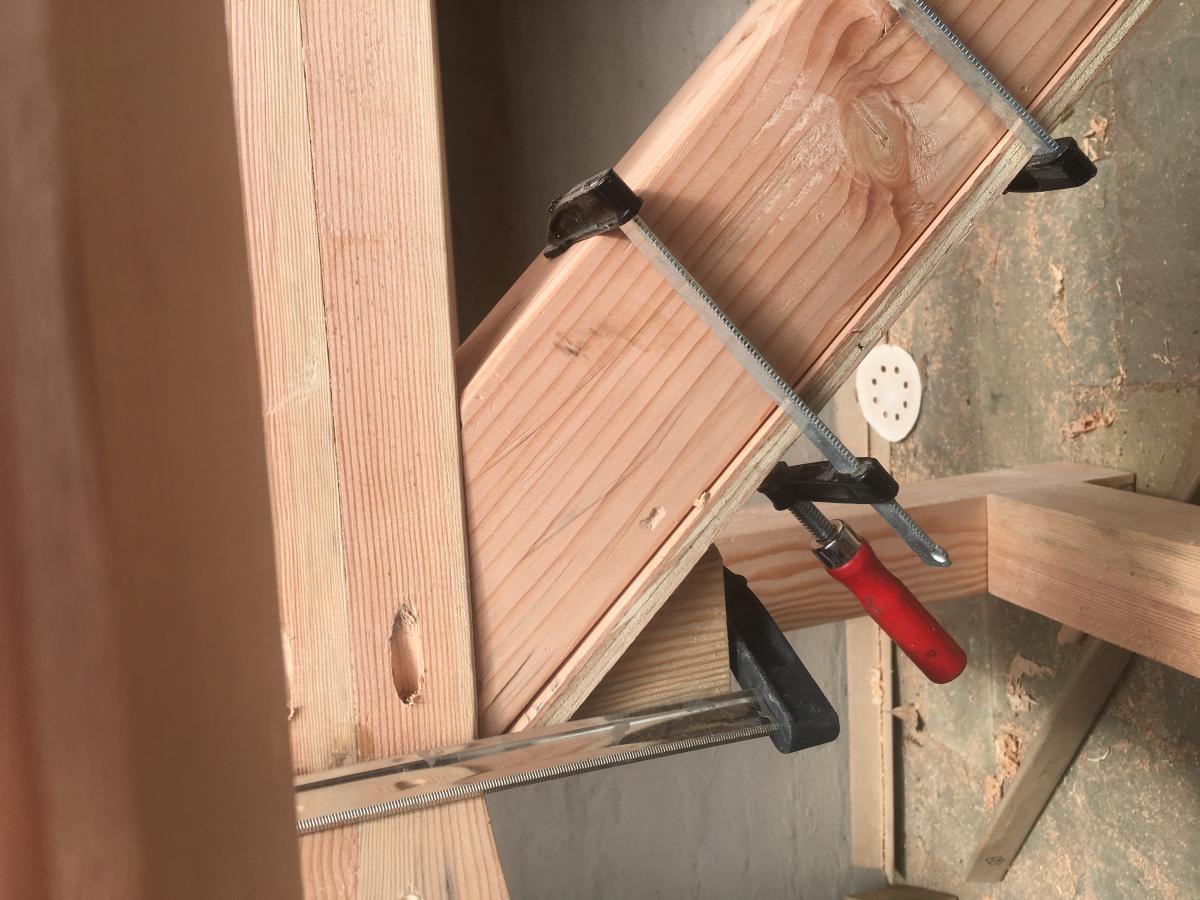
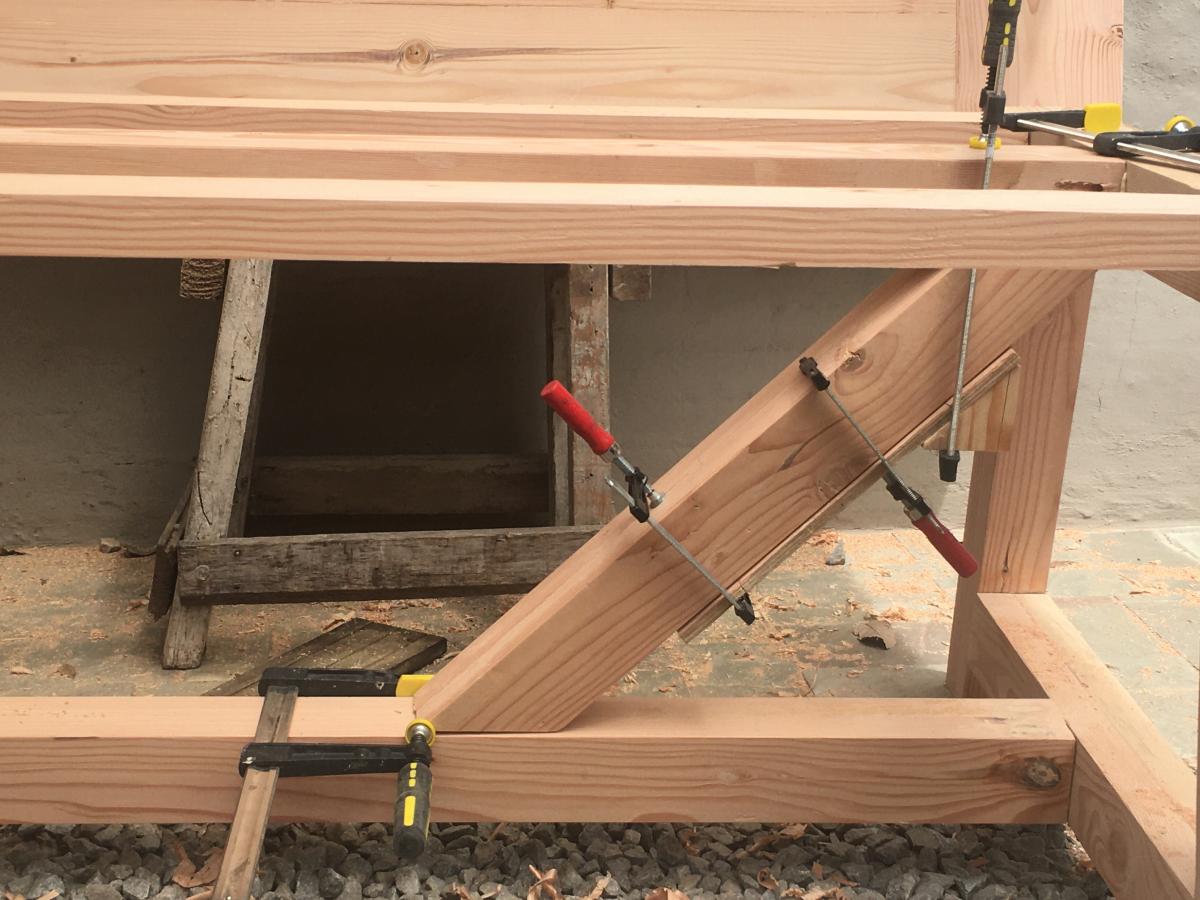
I just finished this table for our new house at the beach; I did a small modification at the moment of fixing the breadboards; besides the pocket holes I also used dowels for extra strength. If someone sits on the front of the table it could be a problem.
Another detail I included,is a simple way to clamp the diagonal pieces, much more firmly than with tape.
I am quite happy with the results, I will now finish the table with lacquer.
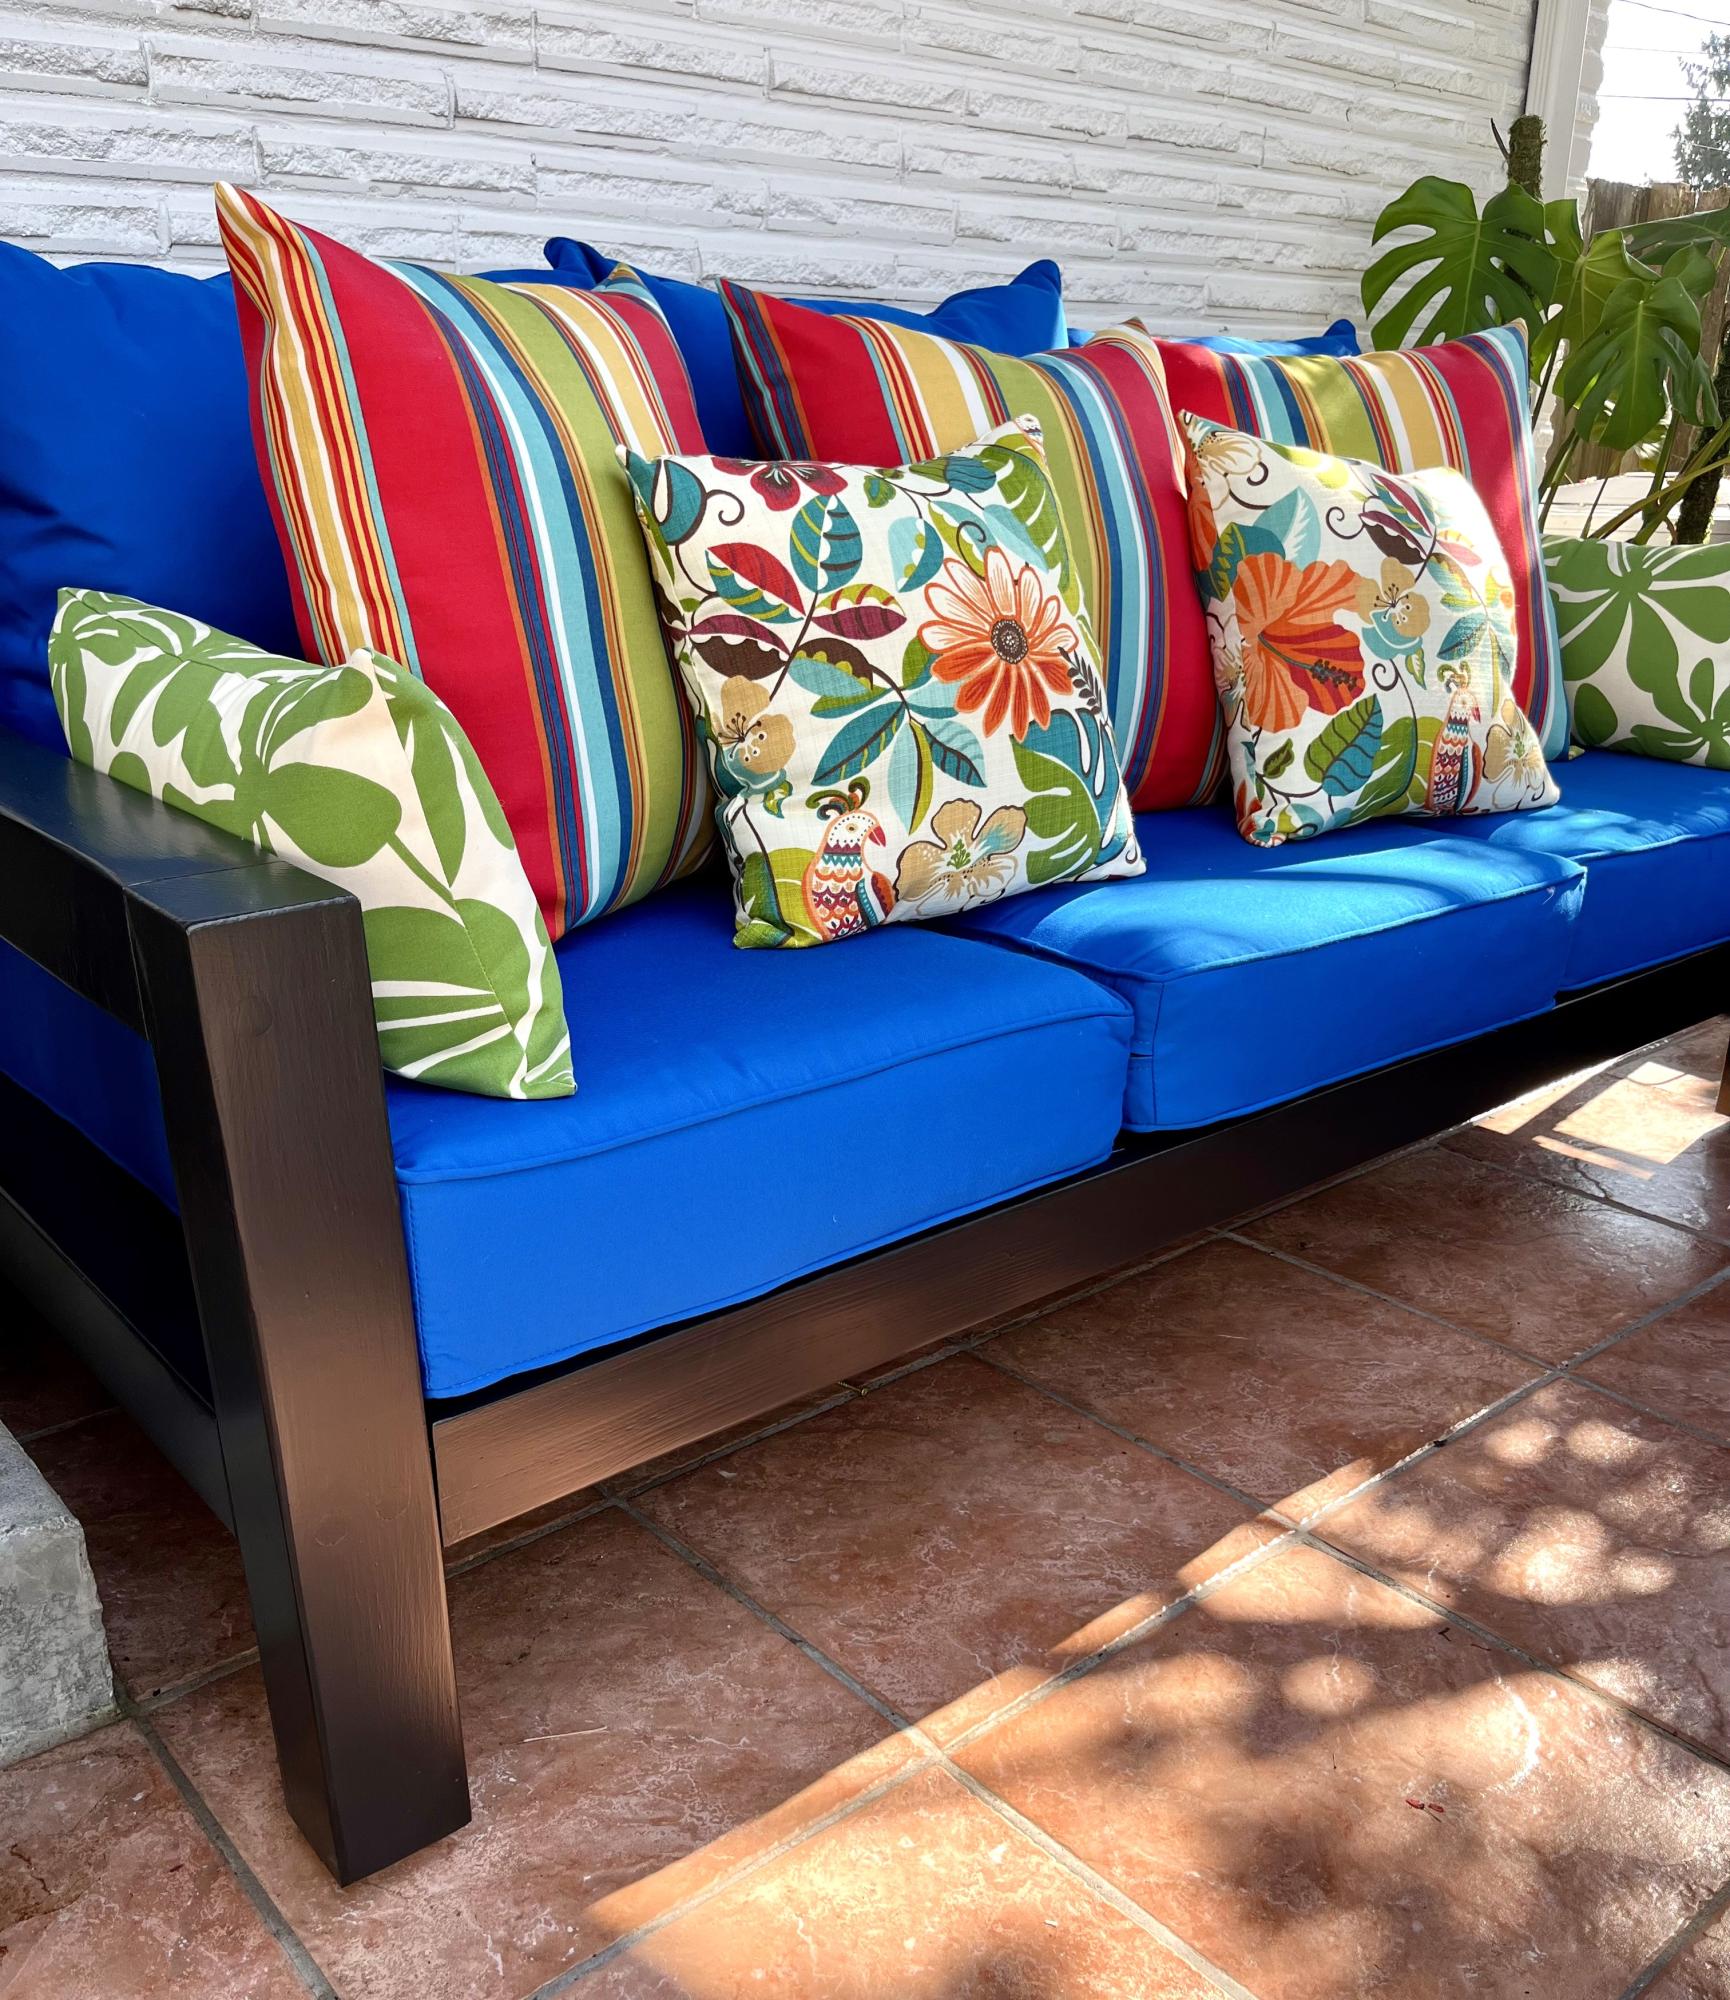
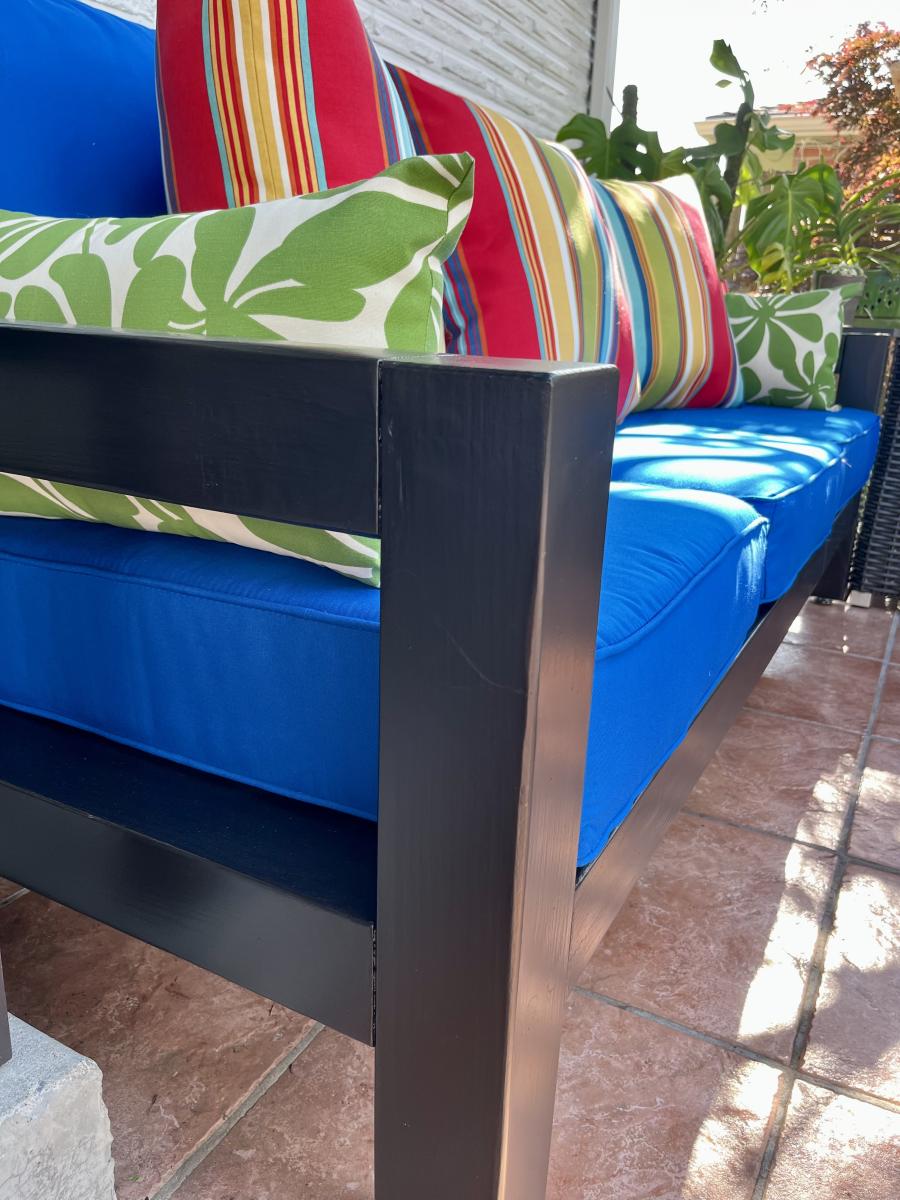
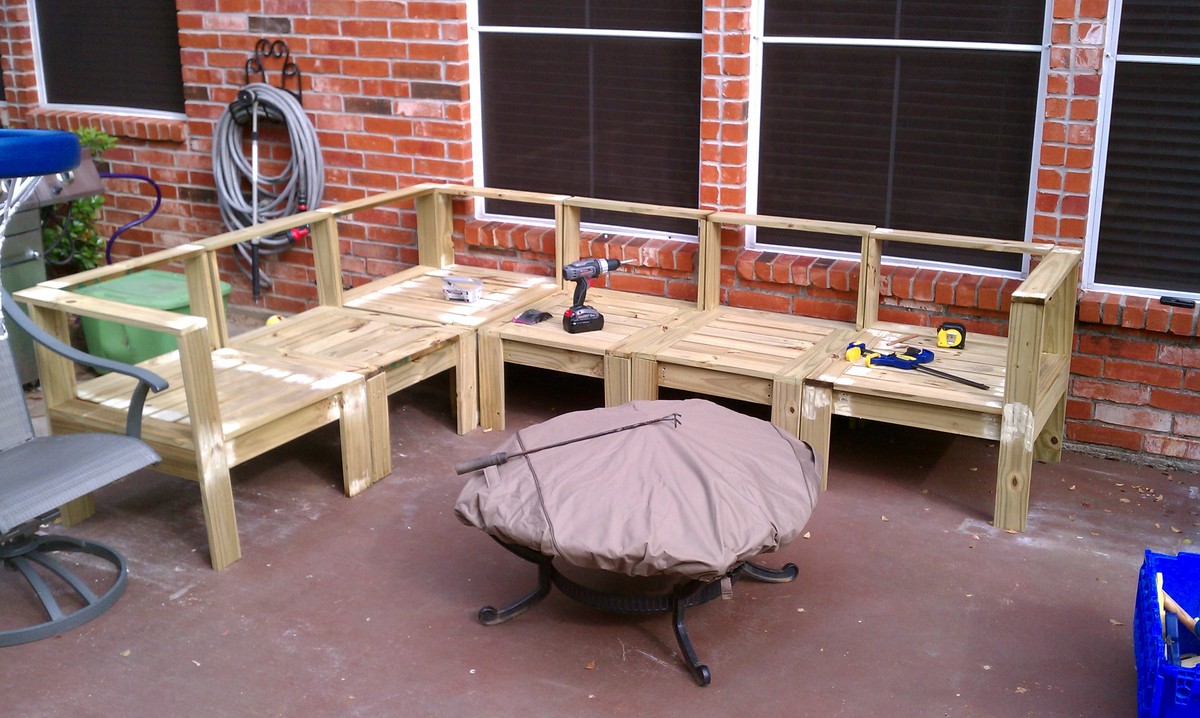
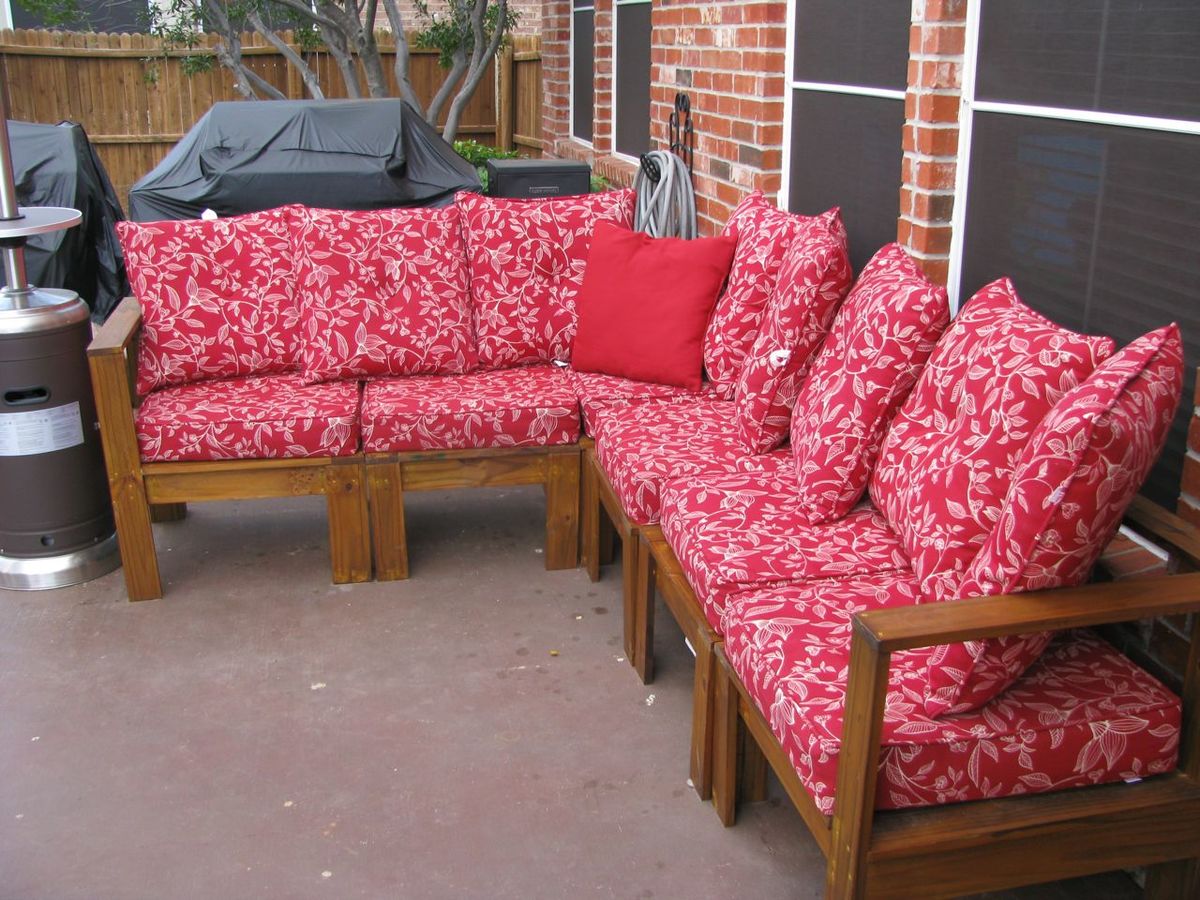
I have been wanting outdoor seating by my pool forever but couldn't afford anything I liked. When I came across Ana White's plans for the outdoor sectional I knew I had to build two. They are just what I was wanting and cost under $200. It took my brother & I one afternoon to buy the supplies and put it all together. Since this furniture is outdoors 24/7, I had to caulk the seams & paint the whole thing. That process took two days. The biggest expense was of course the cushions from Home Depot that Ana White recommends for this sectional. I have to admit, they are well worth every penny. They look amazing! Can't wait to spruce them up with some throw pillows.
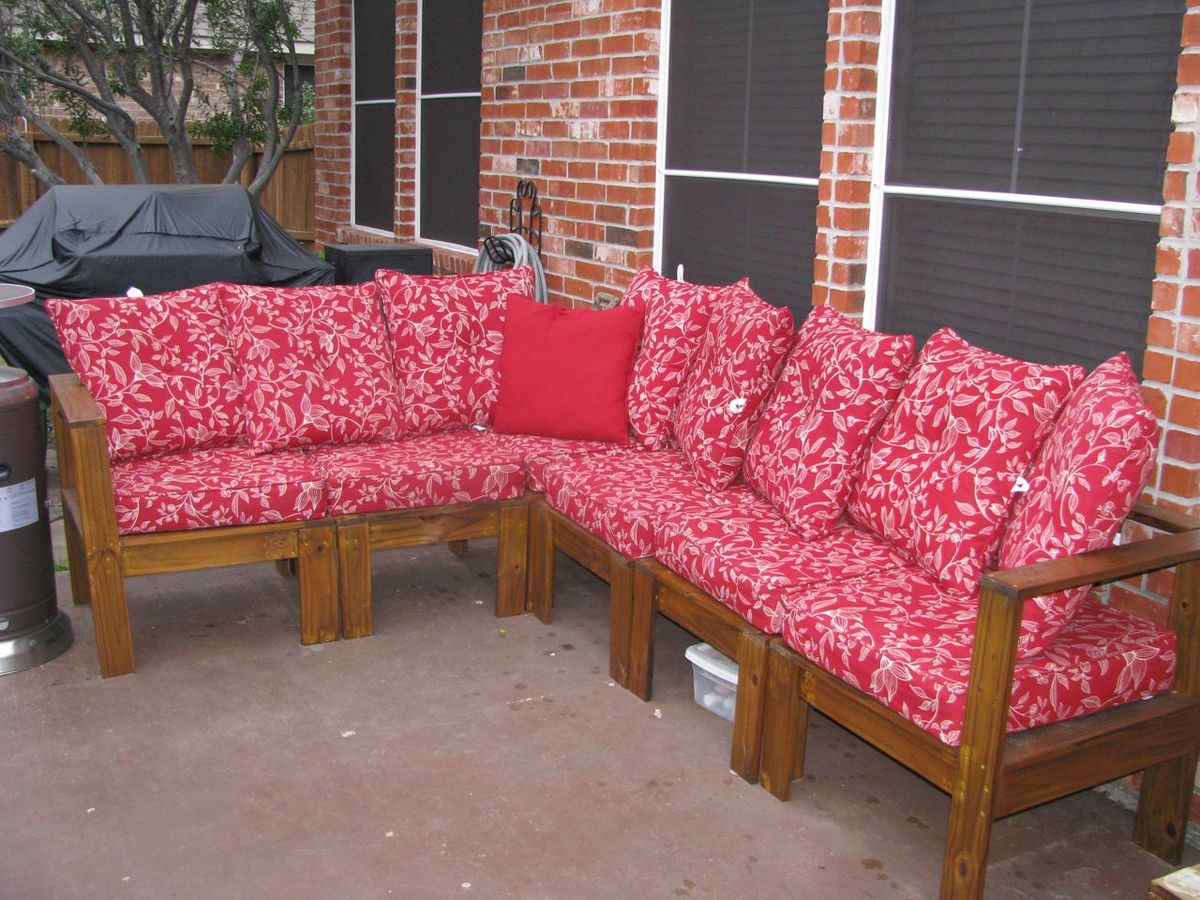
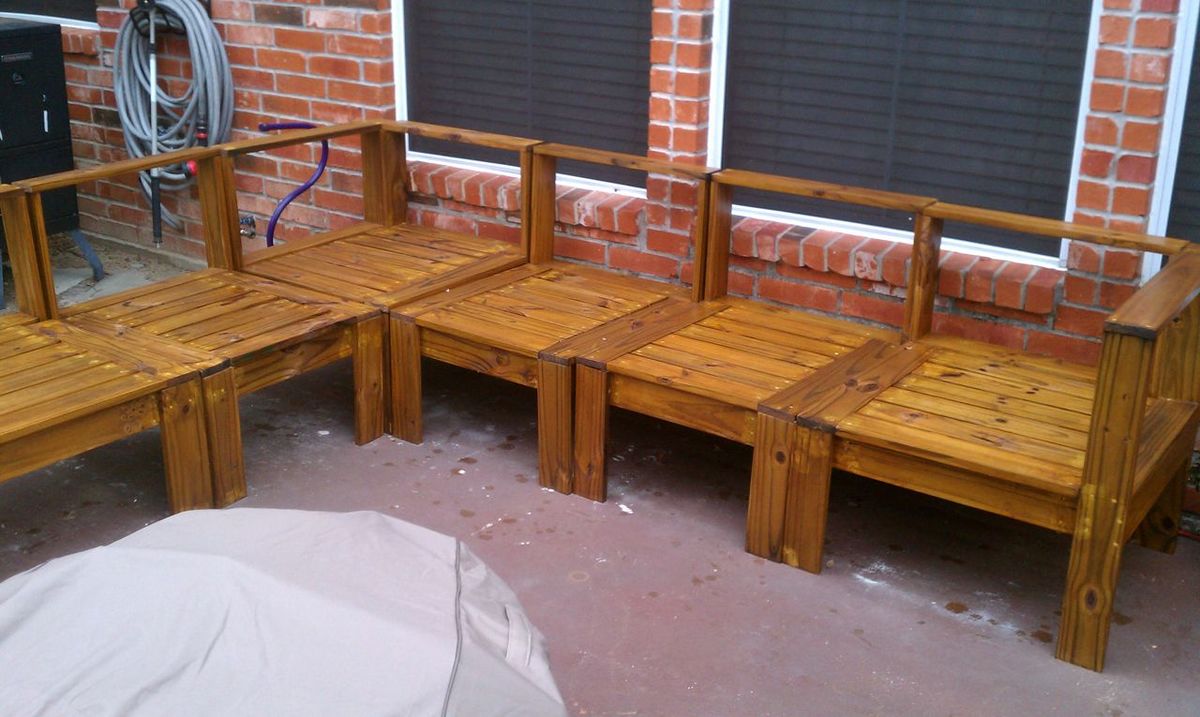
We built this sectional for approximately $700. The wood and supplies cost about $200. The cushions were the most expensive, about $500. We wanted 24 inch wide and 5 inch thick cushions that were well made. I ended up ordering them online from Wal-Mart. The project could have taken about one day, but due to work and kids, it took us about a week.
Fri, 03/02/2012 - 04:50
This is just gorgeous! Great job! I really LOVE the red cushions contrasting with the wood.