Community Brag Posts


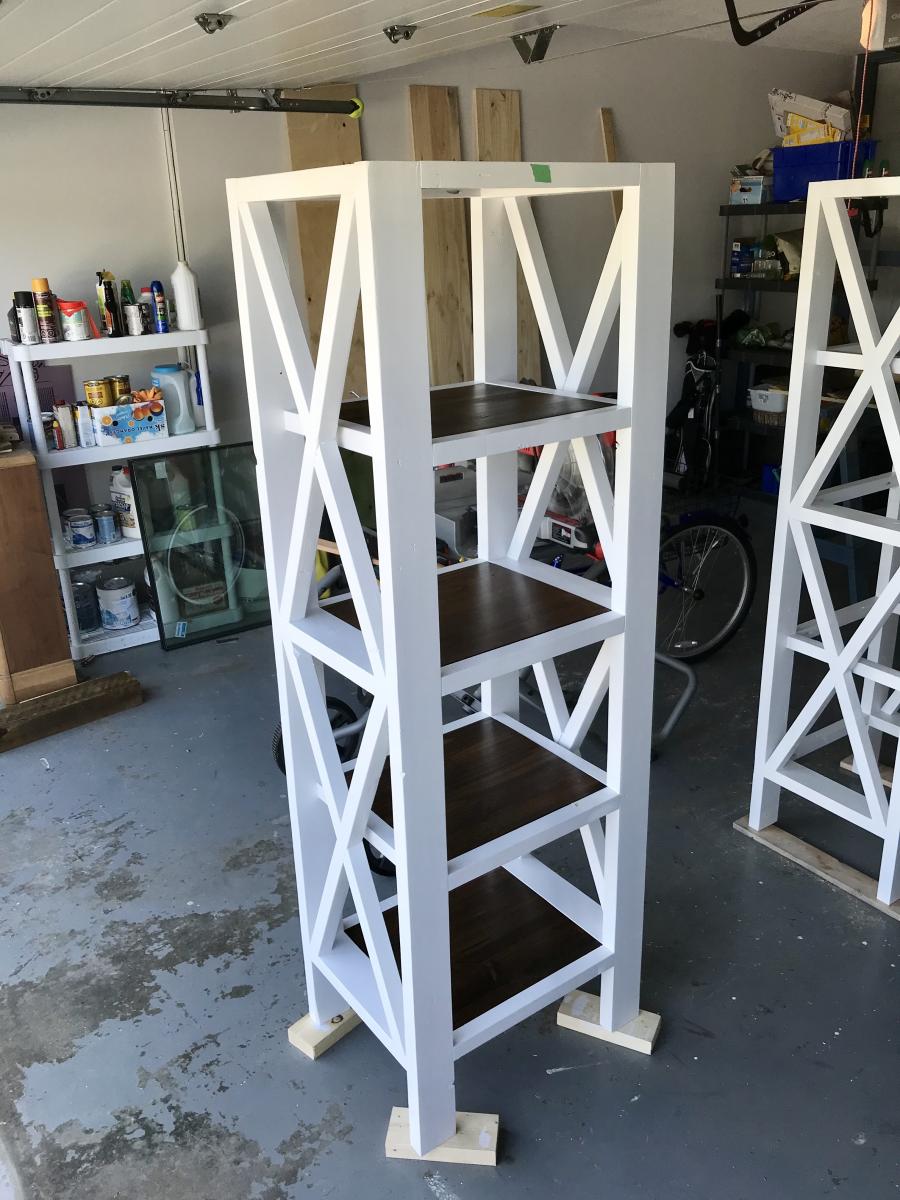
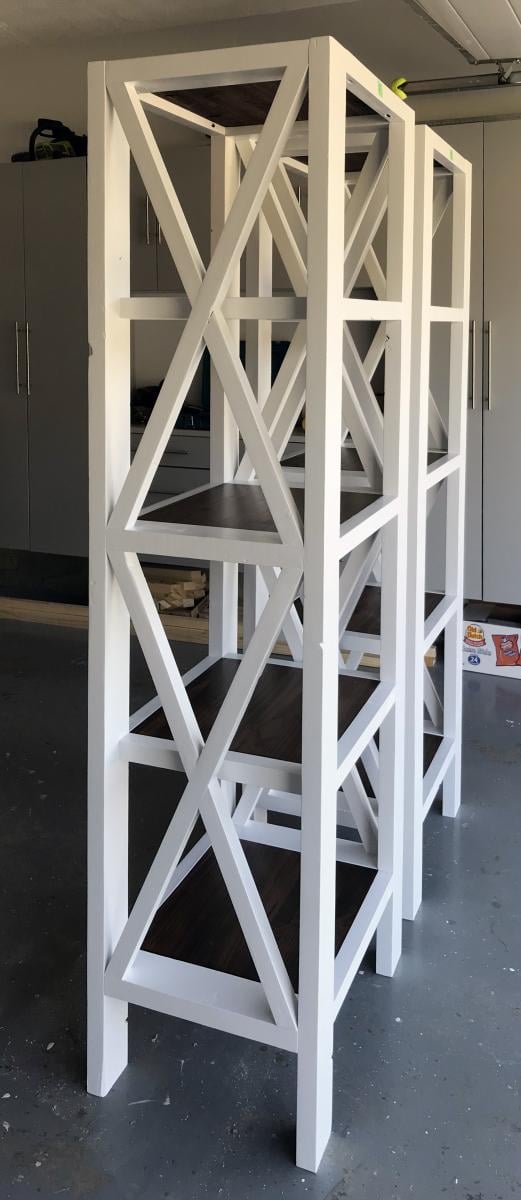
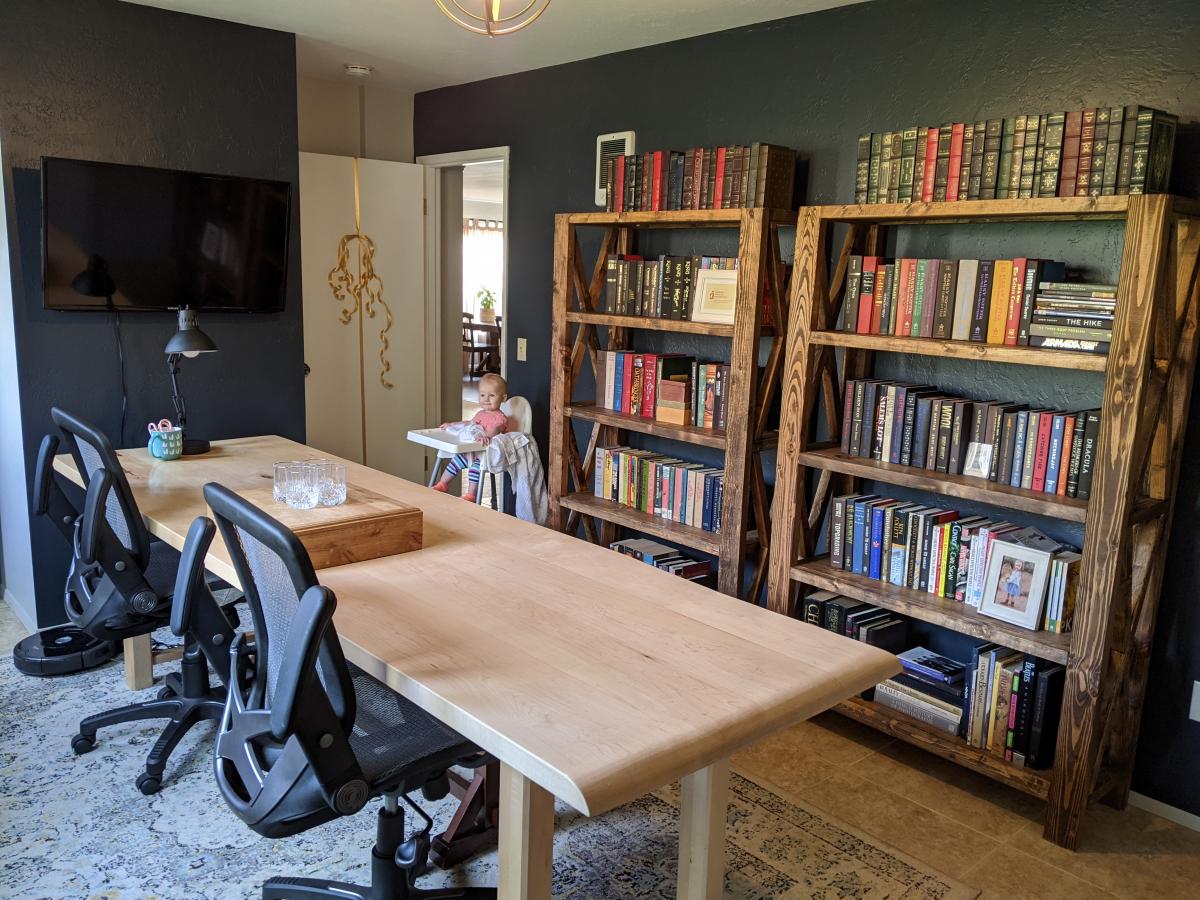
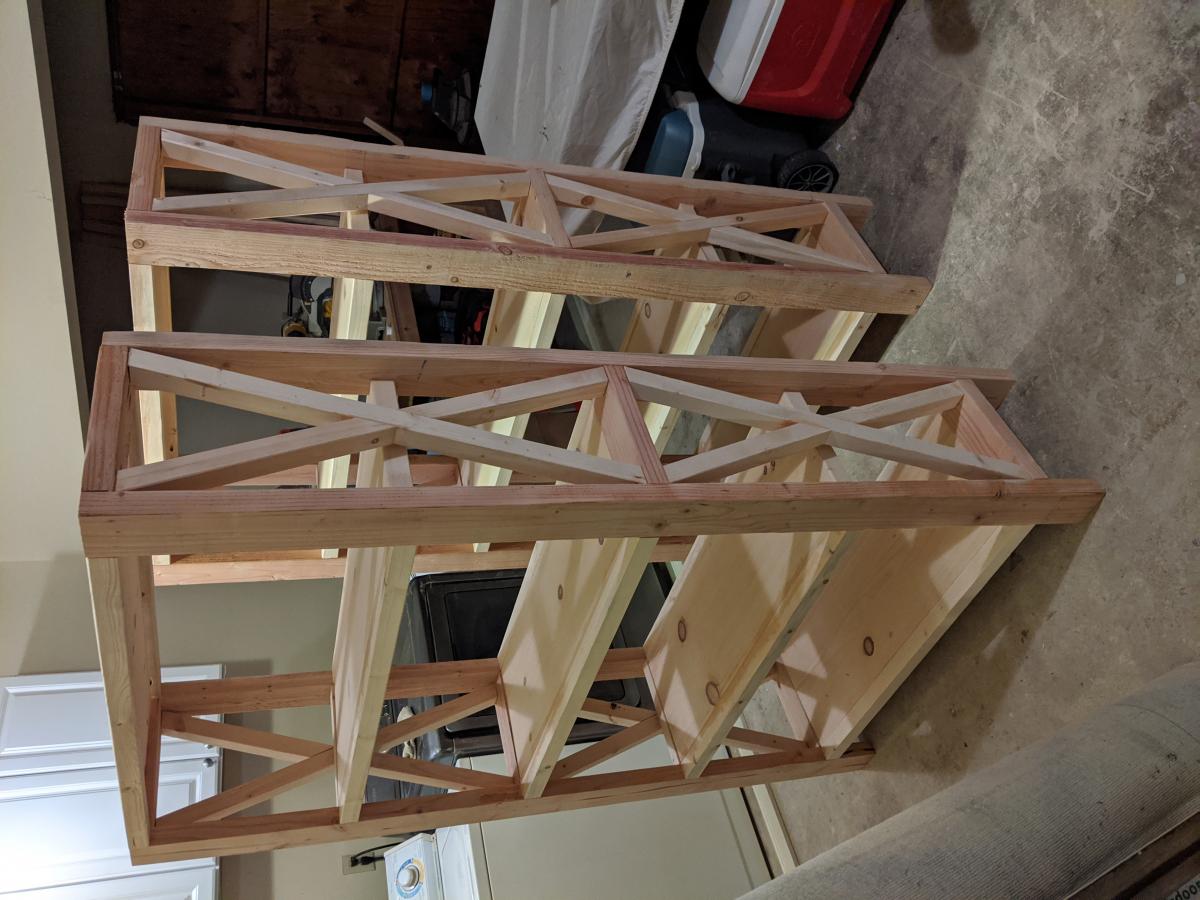
Rustic X Tall Bookshelves
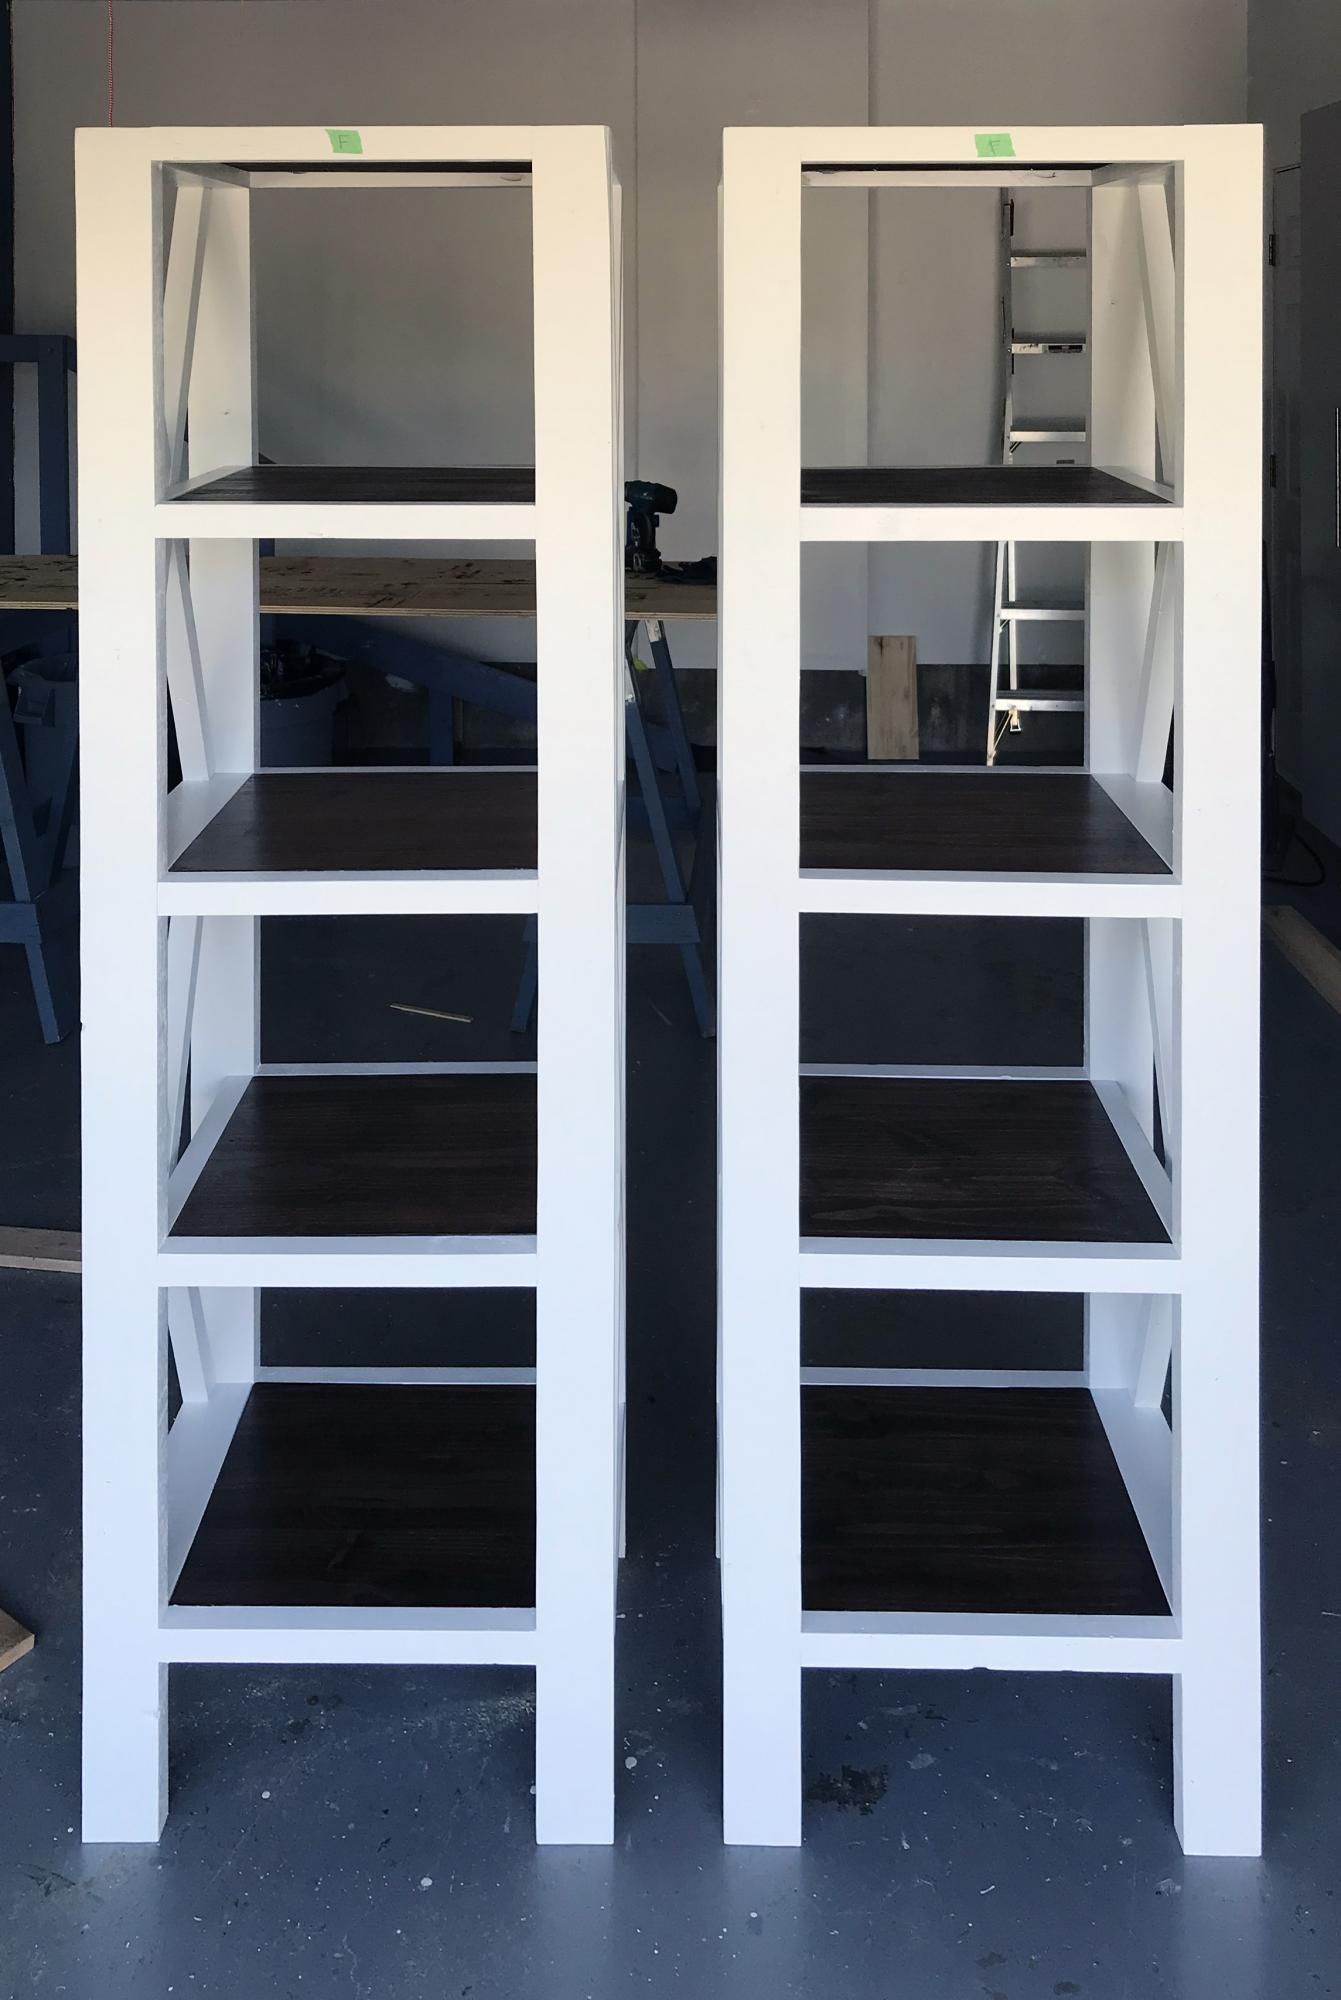
A friend wanted these bookshelves to match the Farmhouse X Desk but she wanted them narrow so they would fit in a small office. This was a very challenging and at times frustrating build getting everything to fit and getting the X's correct but in the end they turned out very well.
Built from Plan(s)
Estimated Cost
$75
Estimated Time Investment
Week Long Project (20 Hours or More)
Finish Used
The wood was painted with a white cabinet paint and the shelves were stained with Varathane Kona.
Recommended Skill Level
Intermediate
Comments

Tall Rustic X Bookshelves
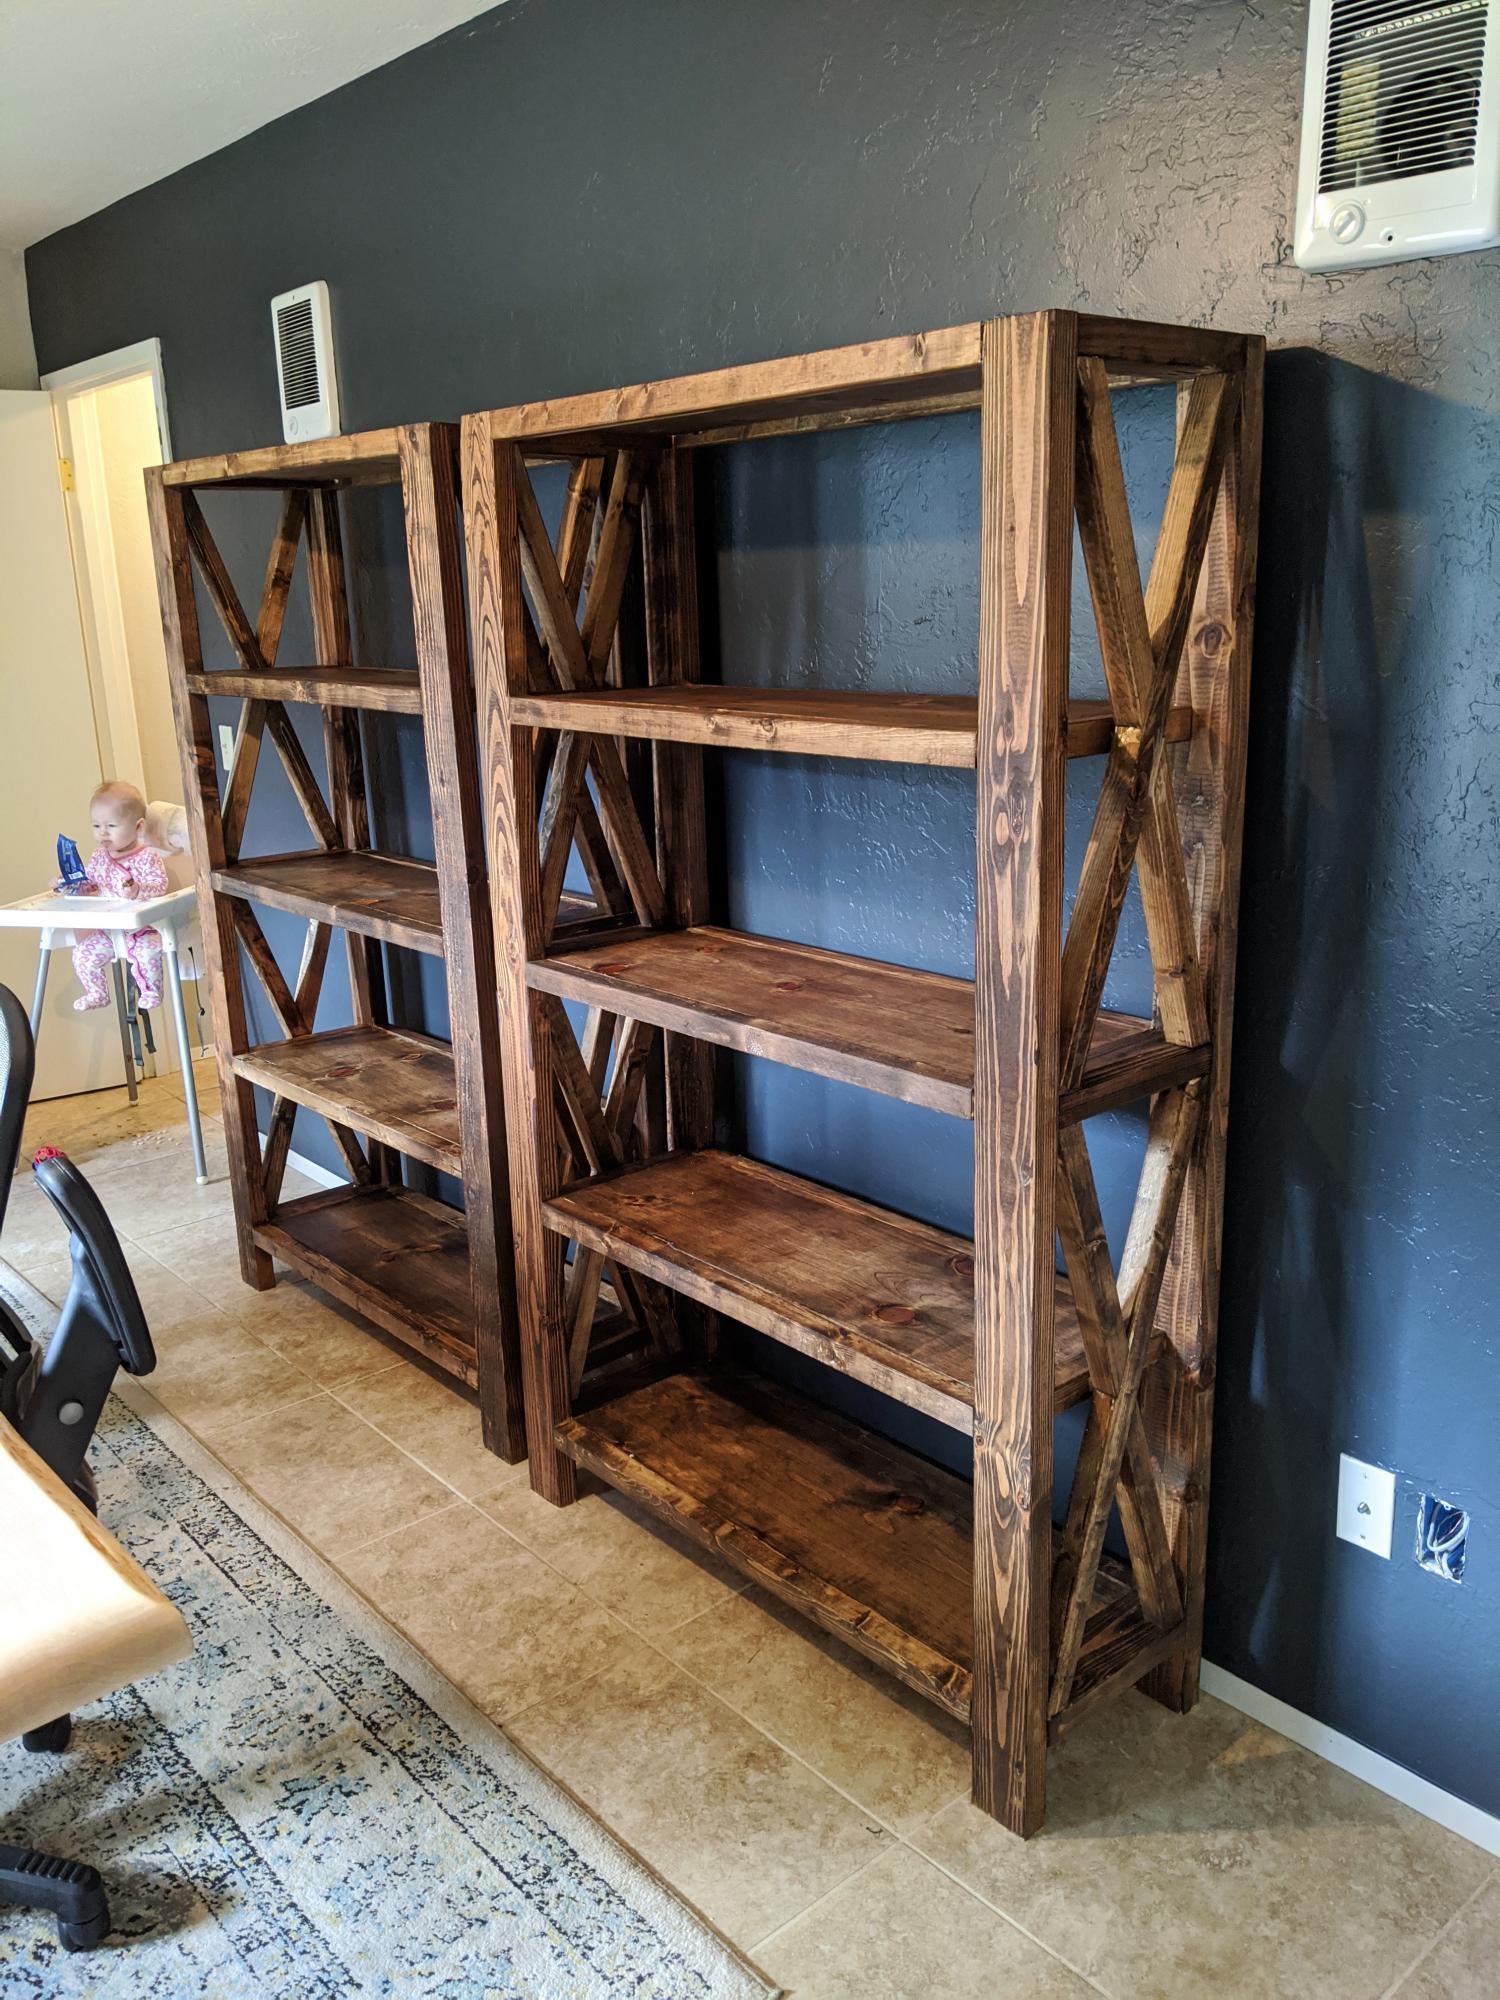
I followed the Rustic X Tall Bookshelf plan to make a set of bookshelves for my husband for Christmas! It was my second ever woodworking project. The plan was really easy to follow and so fun to make! I ended up using an additional shelf piece on the very top for a more modern spin on it. I also bought a pocket hole jig to use on this project. I'm happy with how it turned out!
Built from Plan(s)
Estimated Cost
$75 per shelf
Estimated Time Investment
Weekend Project (10-20 Hours)
Finish Used
MinWax English Chesnut Wood Finish and Paste Wax
Recommended Skill Level
Intermediate
Folding workbench
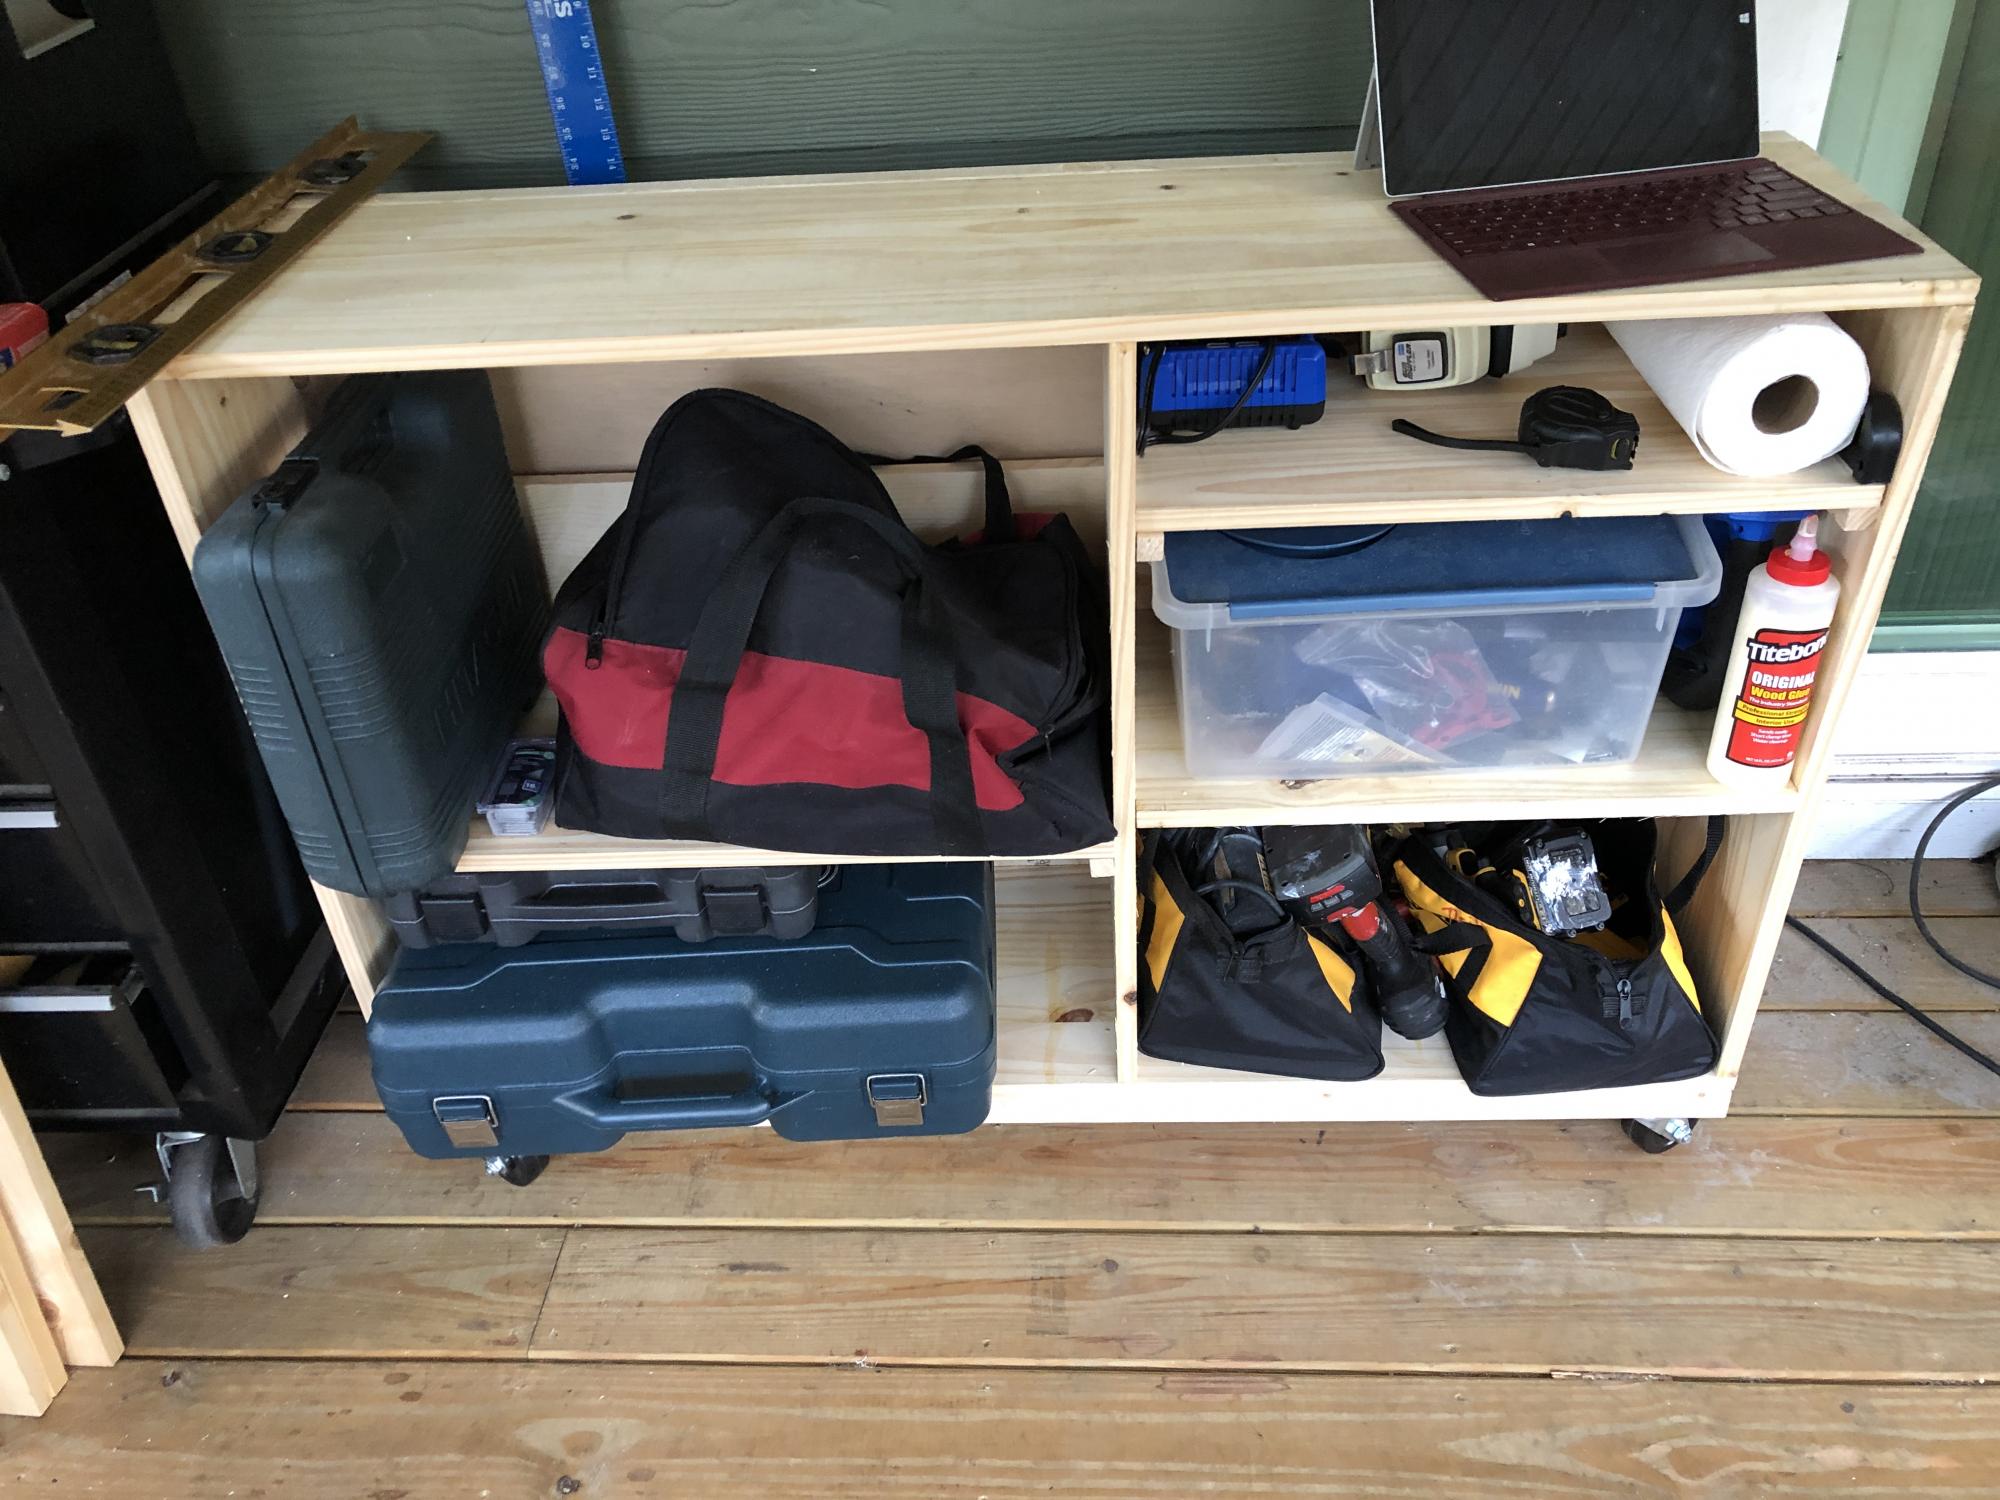
We do not have a garage yet, so this size works great to push out of the way when not being used and pull out for a workbench and also to extend the table top for the saw. The plans were easy to follow and easy to modify. I added a base made of 2x4’s to make it sturdier since it will be moved across a deck vs a level floor. I also added some boards behind the shelf to keep things from falling out the back and adjusted the height to match the table saw top. Next up will be a router table stand to replace the camping footlocker.
Built from Plan(s)
Estimated Cost
$100
Estimated Time Investment
Afternoon Project (3-6 Hours)
Recommended Skill Level
Starter Project
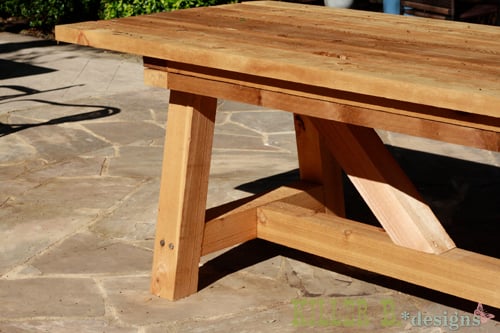
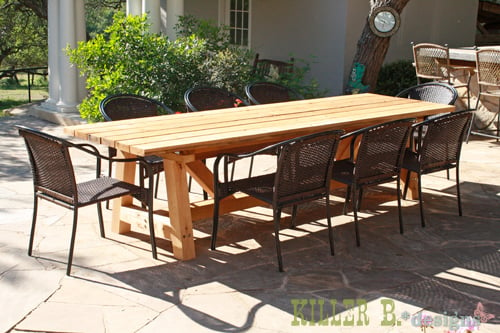
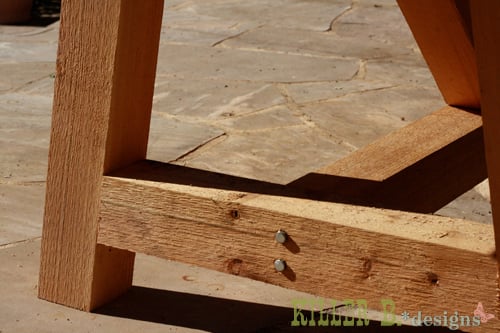
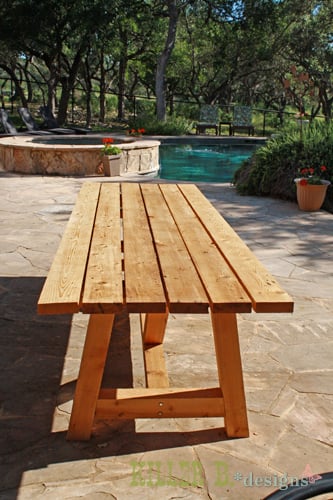
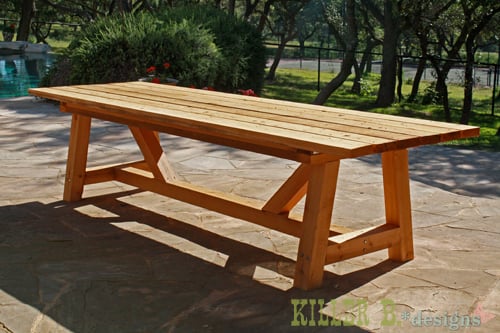
10 foot long Provence Table with 4x4's
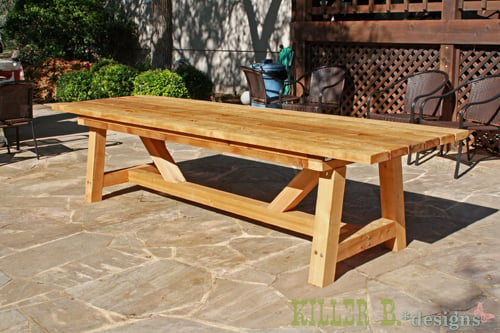
My mom was looking for a new outdoor table, and asked me to come up with something. I found the link for these plans (http://www.thedesignconfidential.com/2011/04/free-diy-furniture-plans-t…) to knock off Restoration Hardware's $4000 Provence Beam outdoor table. Overall I liked the plan, with the chunkier look of the 4x4's. But there were a lot of errors in the diagrams, and the finished height is 34" which is ridiculously tall for a table. So we took it apart and cut the legs back down to change the finished height to 30". We chose rough-cut cedar for it's look and outdoor properties, not wanting to use treated lumber for a dining table. We couldn't find 2x10's like the plan, so we substituted seven 2x6's just like Ana's plan, but left a 1/2" gap in between so water can drain and not pool on top and rot the wood. Also, since we were working with 4x4's for the legs, we chose heavy duty lag bolts instead of screws to join them together. I love the finished look they give. Overall it's a sturdy, yet lightweight table that my mom loves and has already used for entertaining!
Built from Plan(s)
Estimated Cost
$230
Estimated Time Investment
Day Project (6-9 Hours)
Finish Used
outdoor sealer
Recommended Skill Level
Advanced
Comments

Wed, 04/25/2012 - 10:02
Thank you!
Thanks Brook! It was so much fun to build. I put my dad and husband to work while I was the "project manager" ;)
My very FIRST build!! LOVE IT!!

My husband is deployed and I just decided to start building, to keep my mind busy. I built this table & benches, sanded, stained it & had it in my nook in just 6 days!!! I worked on it every night when the kids went to bed. Thank you Ana White!! :) I will be using this site quite a bit to keep me busy!
Built from Plan(s)
Estimated Cost
$140
Estimated Time Investment
Week Long Project (20 Hours or More)
Recommended Skill Level
Beginner
Comments
Tue, 02/25/2014 - 00:56
your very welcome
Thank you for the idea, i am definitetly going to use your design on a future project of mine.
Tue, 02/25/2014 - 00:56
your very welcome
Thank you for the idea, i am definitetly going to use your design on a future project of mine.
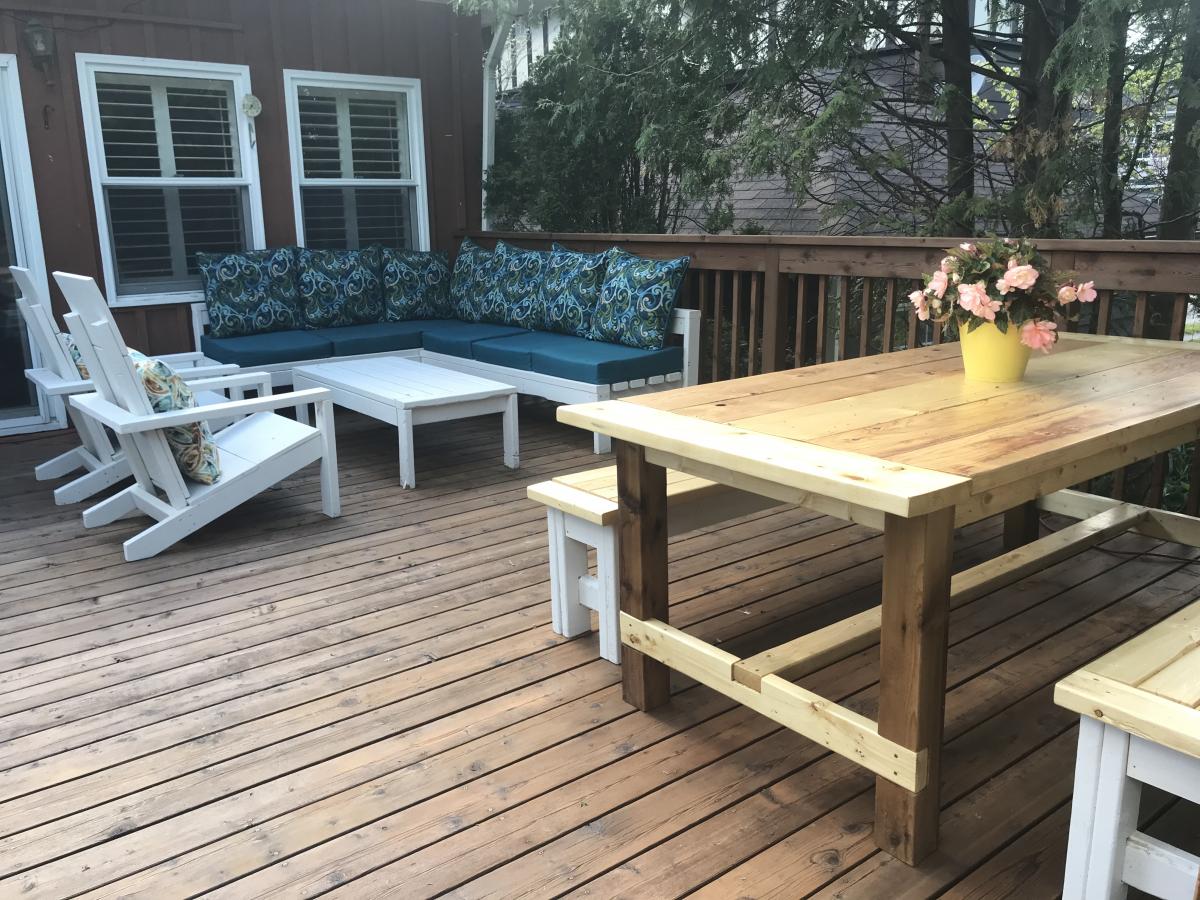
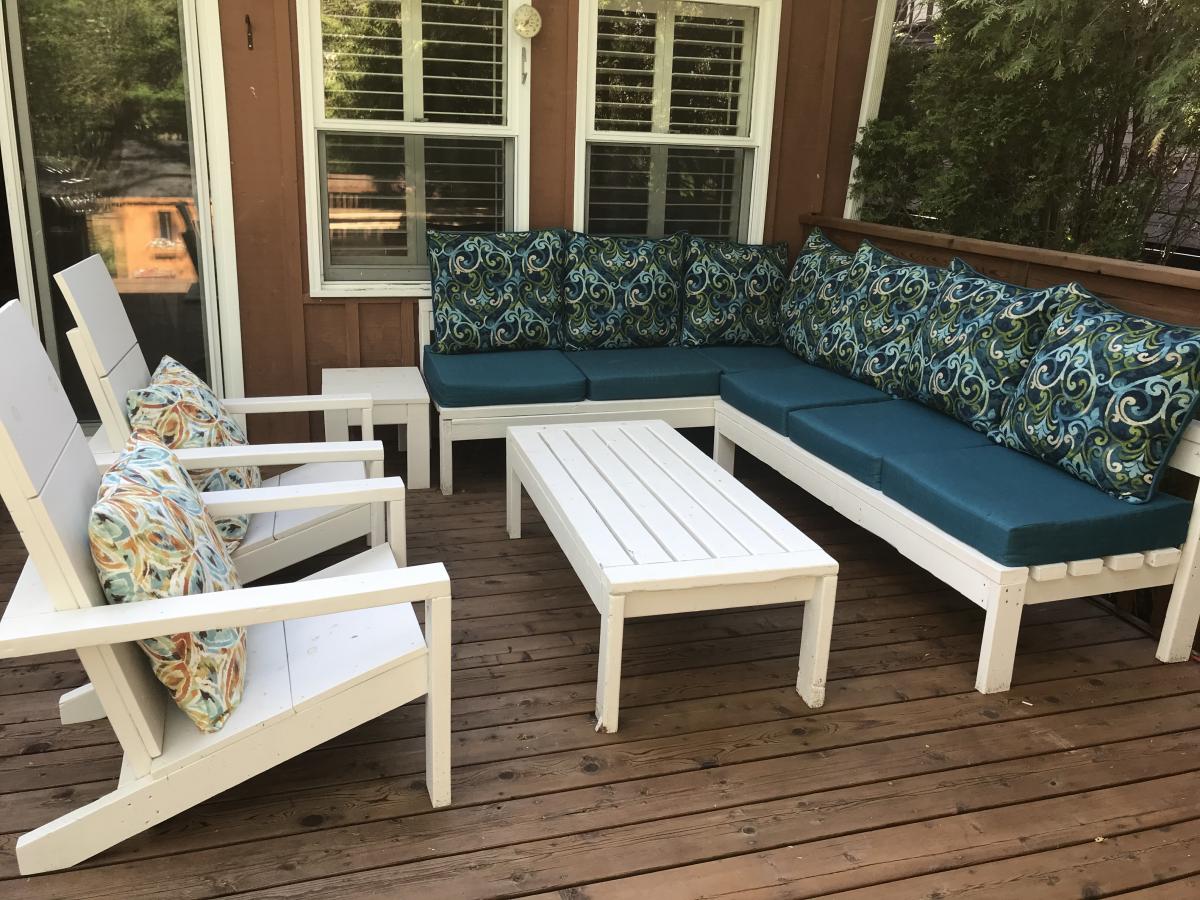
Family Back Deck COVID19 Project Facelift

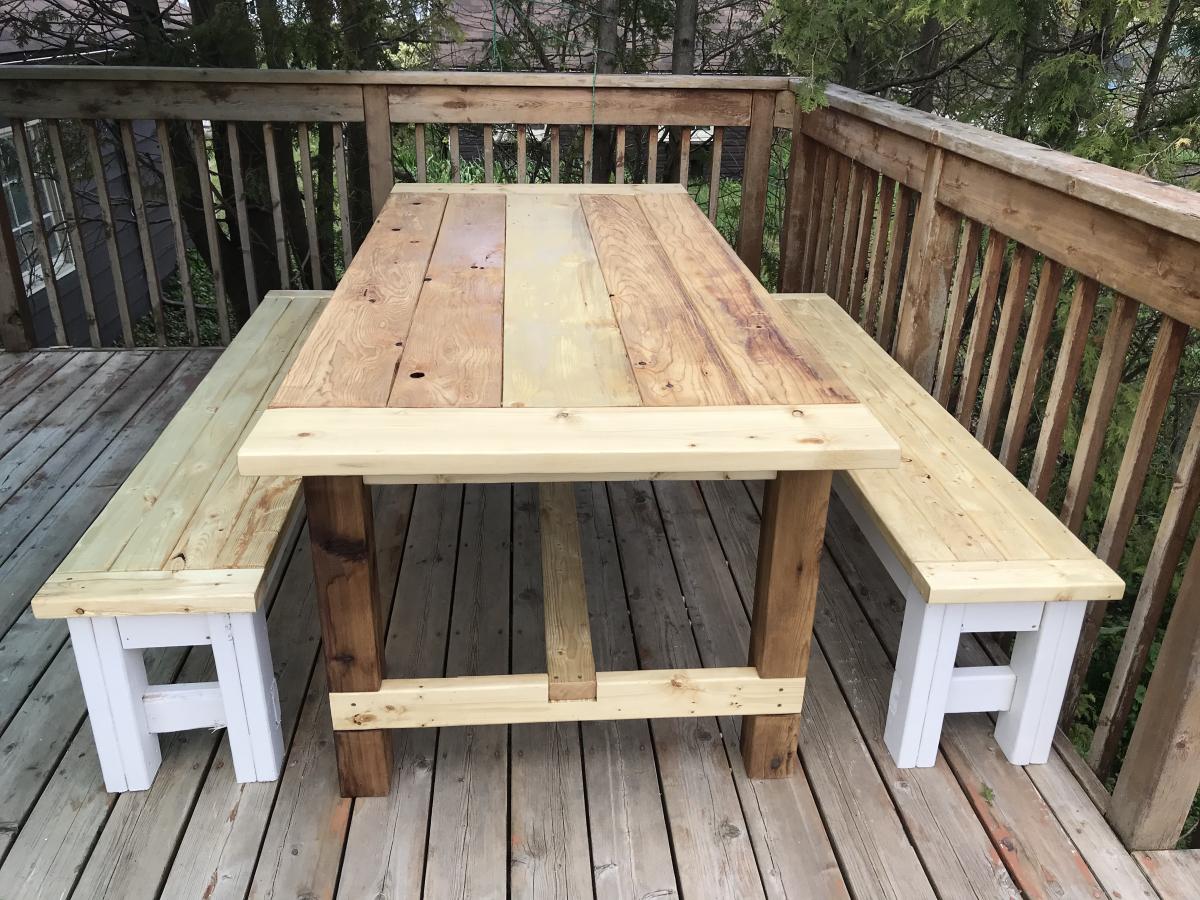
Thank-you so much Ana White! We took on our back deck as a family COVID19 “homeschool” two weekend project! Why just build a sectional sofa when you can build a sectional sofa, coffee table, farmhouse table with two benches, two Adirondack chairs and a side table that the 11 year old designed and built himself! Mission accomplished, he’s a builder for life.
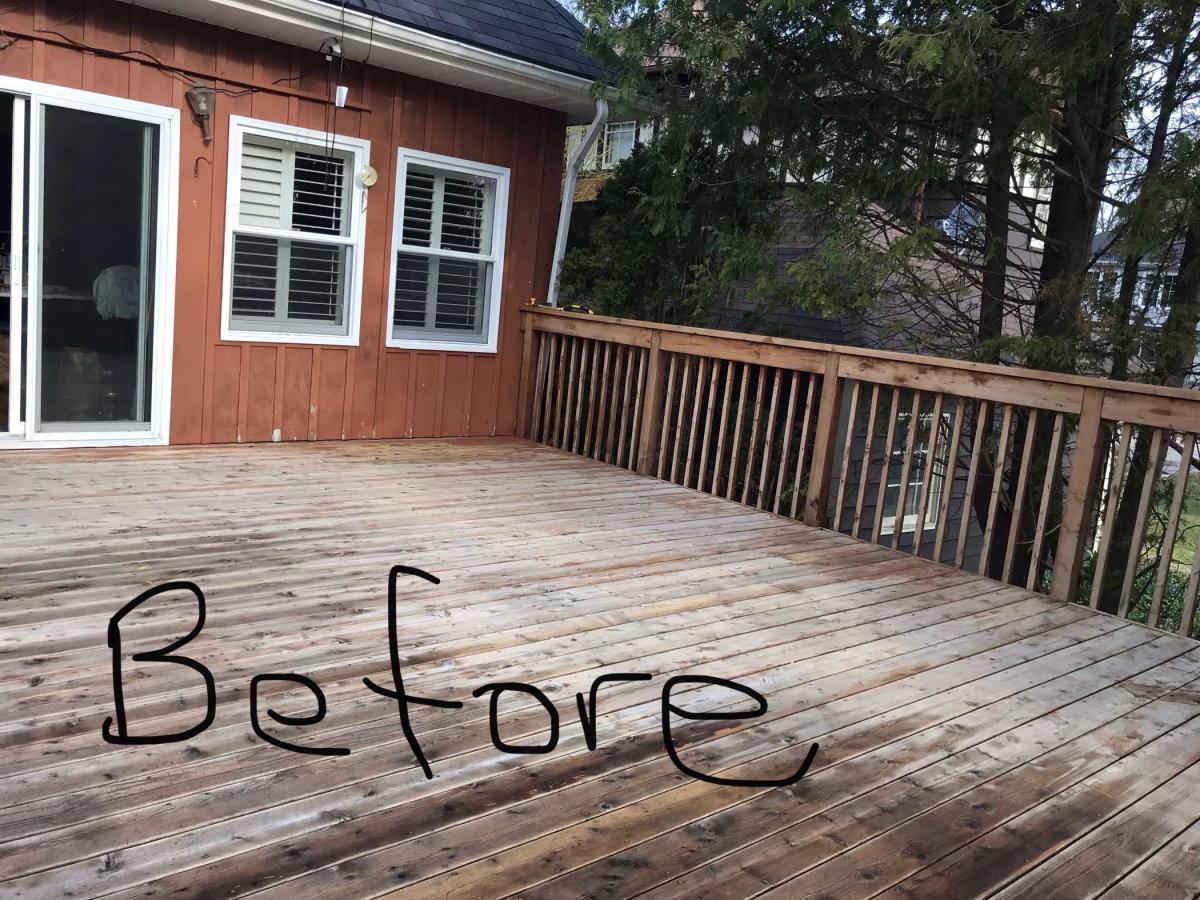
Our deck was brutally neglected and the boys had had some exposure to power tools and small builds. We decided that the best way to remedy the situation was to set up a family build all at once so that the tools are out and then put back away after the build is complete!
The plans were easy to follow and incredible! Thanks again so very much!
Built from Plan(s)
Estimated Time Investment
Week Long Project (20 Hours or More)
Finish Used
Stained the sofas, chairs, coffee and end table with outdoor solid stain. Used the same solid stain on the bottom of the farmhouse table benches, and outdoor oil based spar varnish on the farmhouse table and bench tops. Finished the look by refinishing the deck with Behr Penetrating Oil finish in Chocolate and cushions from Lowes for the sofa. Adirondack chair cushions were sewn by myself with Sunderland fabric leftover from front porch, cushion inserts from IKEA.
Recommended Skill Level
Beginner
Storage Daybed
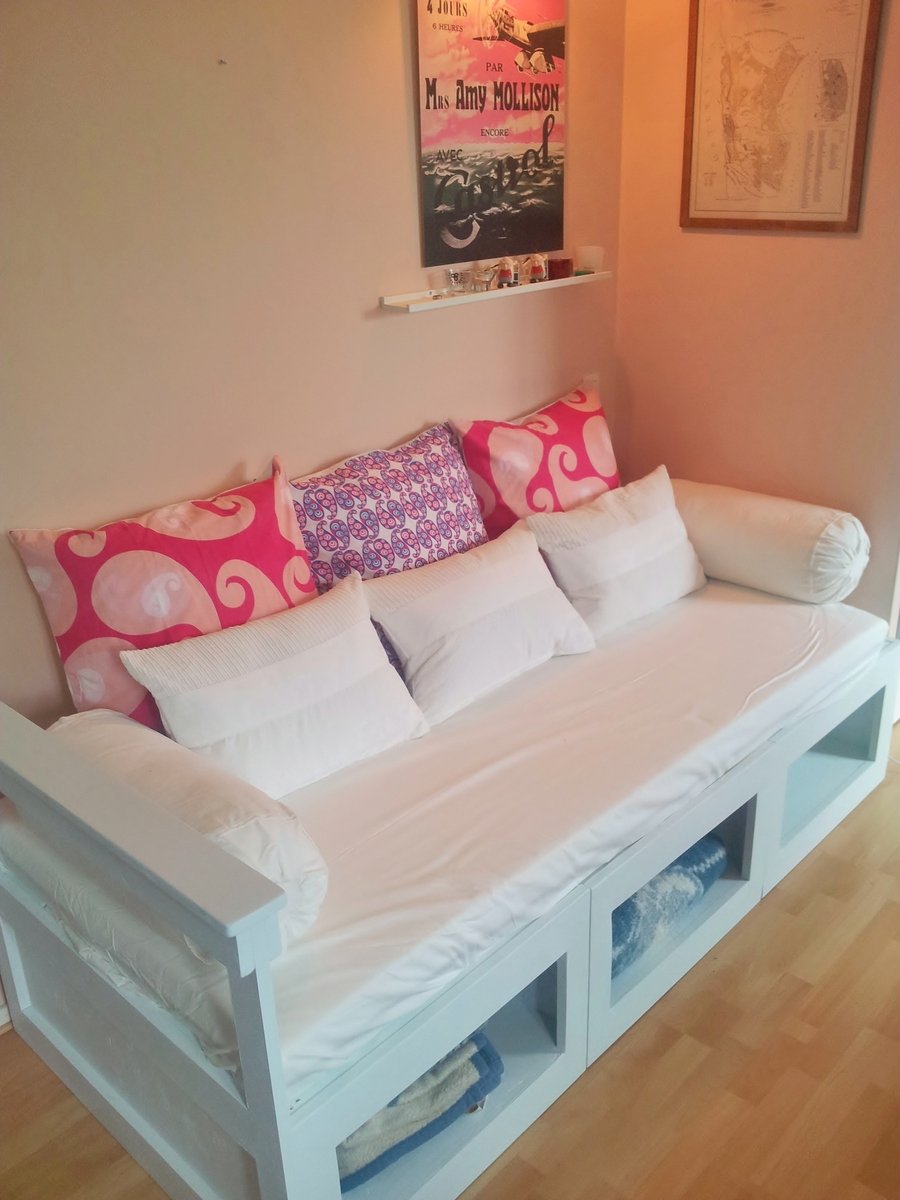
This is the 3 box storage daybed, as you can see I added an armrest on one end as it sits in a corner.
Tips for building this project: Buy a decent circular saw, I used a cheap one and really regretted it. Square your timber, I ended up squaring my timber using a sander, which wasn't as easy as it sounds. Check you measurements, the bottom of one of my boxes was a little short because I didn't double check the measurements and I ended up having to fix it with an extra piece of timber. 2 or 3 saw horses are a real help and lots of clamps.
I used the cutout outline from the link below but had to convert it all to metric since I live in Sweden, also a standard single mattress here isn't as wide but longer then the one used in the linked project. I didn't take this into account and ended up having to buy an extra piece of plywood.
http://ana-white.com/2009/12/plan-stratton-daybed-as-request-by-you.html
I got the single mattress and the pillows from IKEA.
This was a lot of fun and I look forward to spending many hours relaxing on my new daybed.
Built from Plan(s)
Estimated Time Investment
Week Long Project (20 Hours or More)
Finish Used
white paint
Recommended Skill Level
Beginner
Comments
Thu, 08/09/2012 - 10:48
I Feel Your Pain
Nice job on the daybed, I like that you got through all your "dilemmas".
Your saw's bevel function (hopefully it has it) might be nicer than mine but you can try to adjust it.
I have a $50 dollar skil saw and my only complaint is how difficult it is to set the base plate 90 degrees to the blade. I even take care to set the circular saw between two 2x4 when not in use so that setting it on the ground doesn't change the angle of the foot plate to blade. I can cut 90 degrees with a speed square as a guide, but I can't adjust the saw right.
I will be starting assembly of my first furniture project with the wood I cut two days ago. I will see how the pieces go together.
Best of luck on your next project!

Sat, 08/11/2012 - 06:27
Thanks, I'm pretty pleased
Thanks, I'm pretty pleased with it. Yes that was one of my problems as well, trying to get the base plate set at 90, I found that if I leaned on it too much it flexed a bit which isn't good. Also by the end I had a pretty blunt blade or I was getting pinching or something thing because the plywood had some shocking edges with splintering. What I would really like is a proper saw table, but for now that's just a dream. Good luck on your project.
Wed, 08/21/2013 - 10:50
Armrest
Hi there! I was hoping that someone on here had added the armrest! Would you be willing to post a pic of the end of the bed so that I can see how you configured it? Im goint to be starting this project soon for my daughter, and need to strategize some armrest ideas for hers.
Thanks so much!!
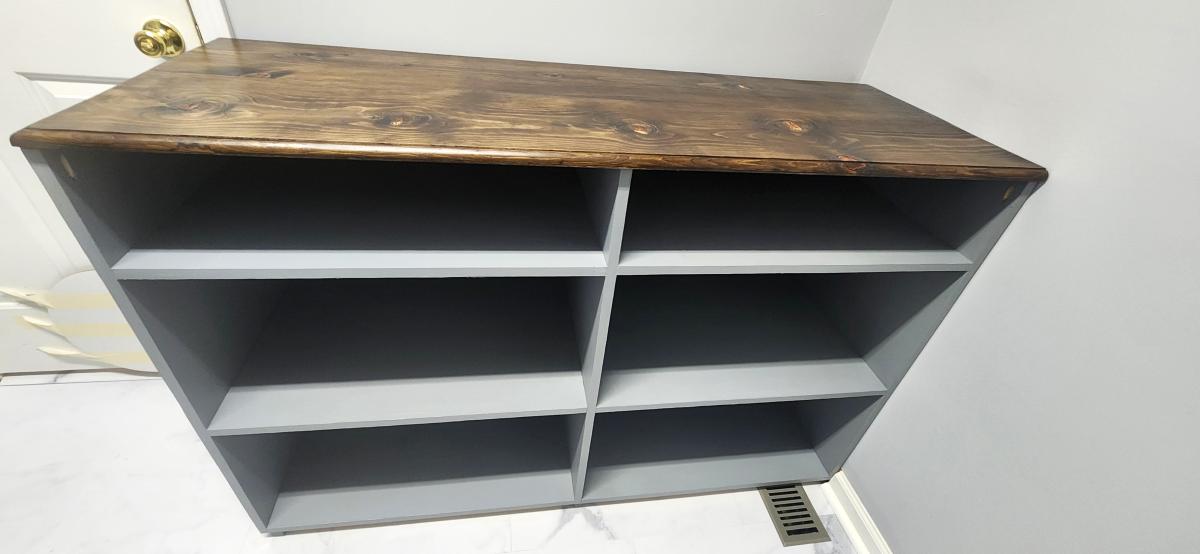
DIY Laundry Basket Organizer
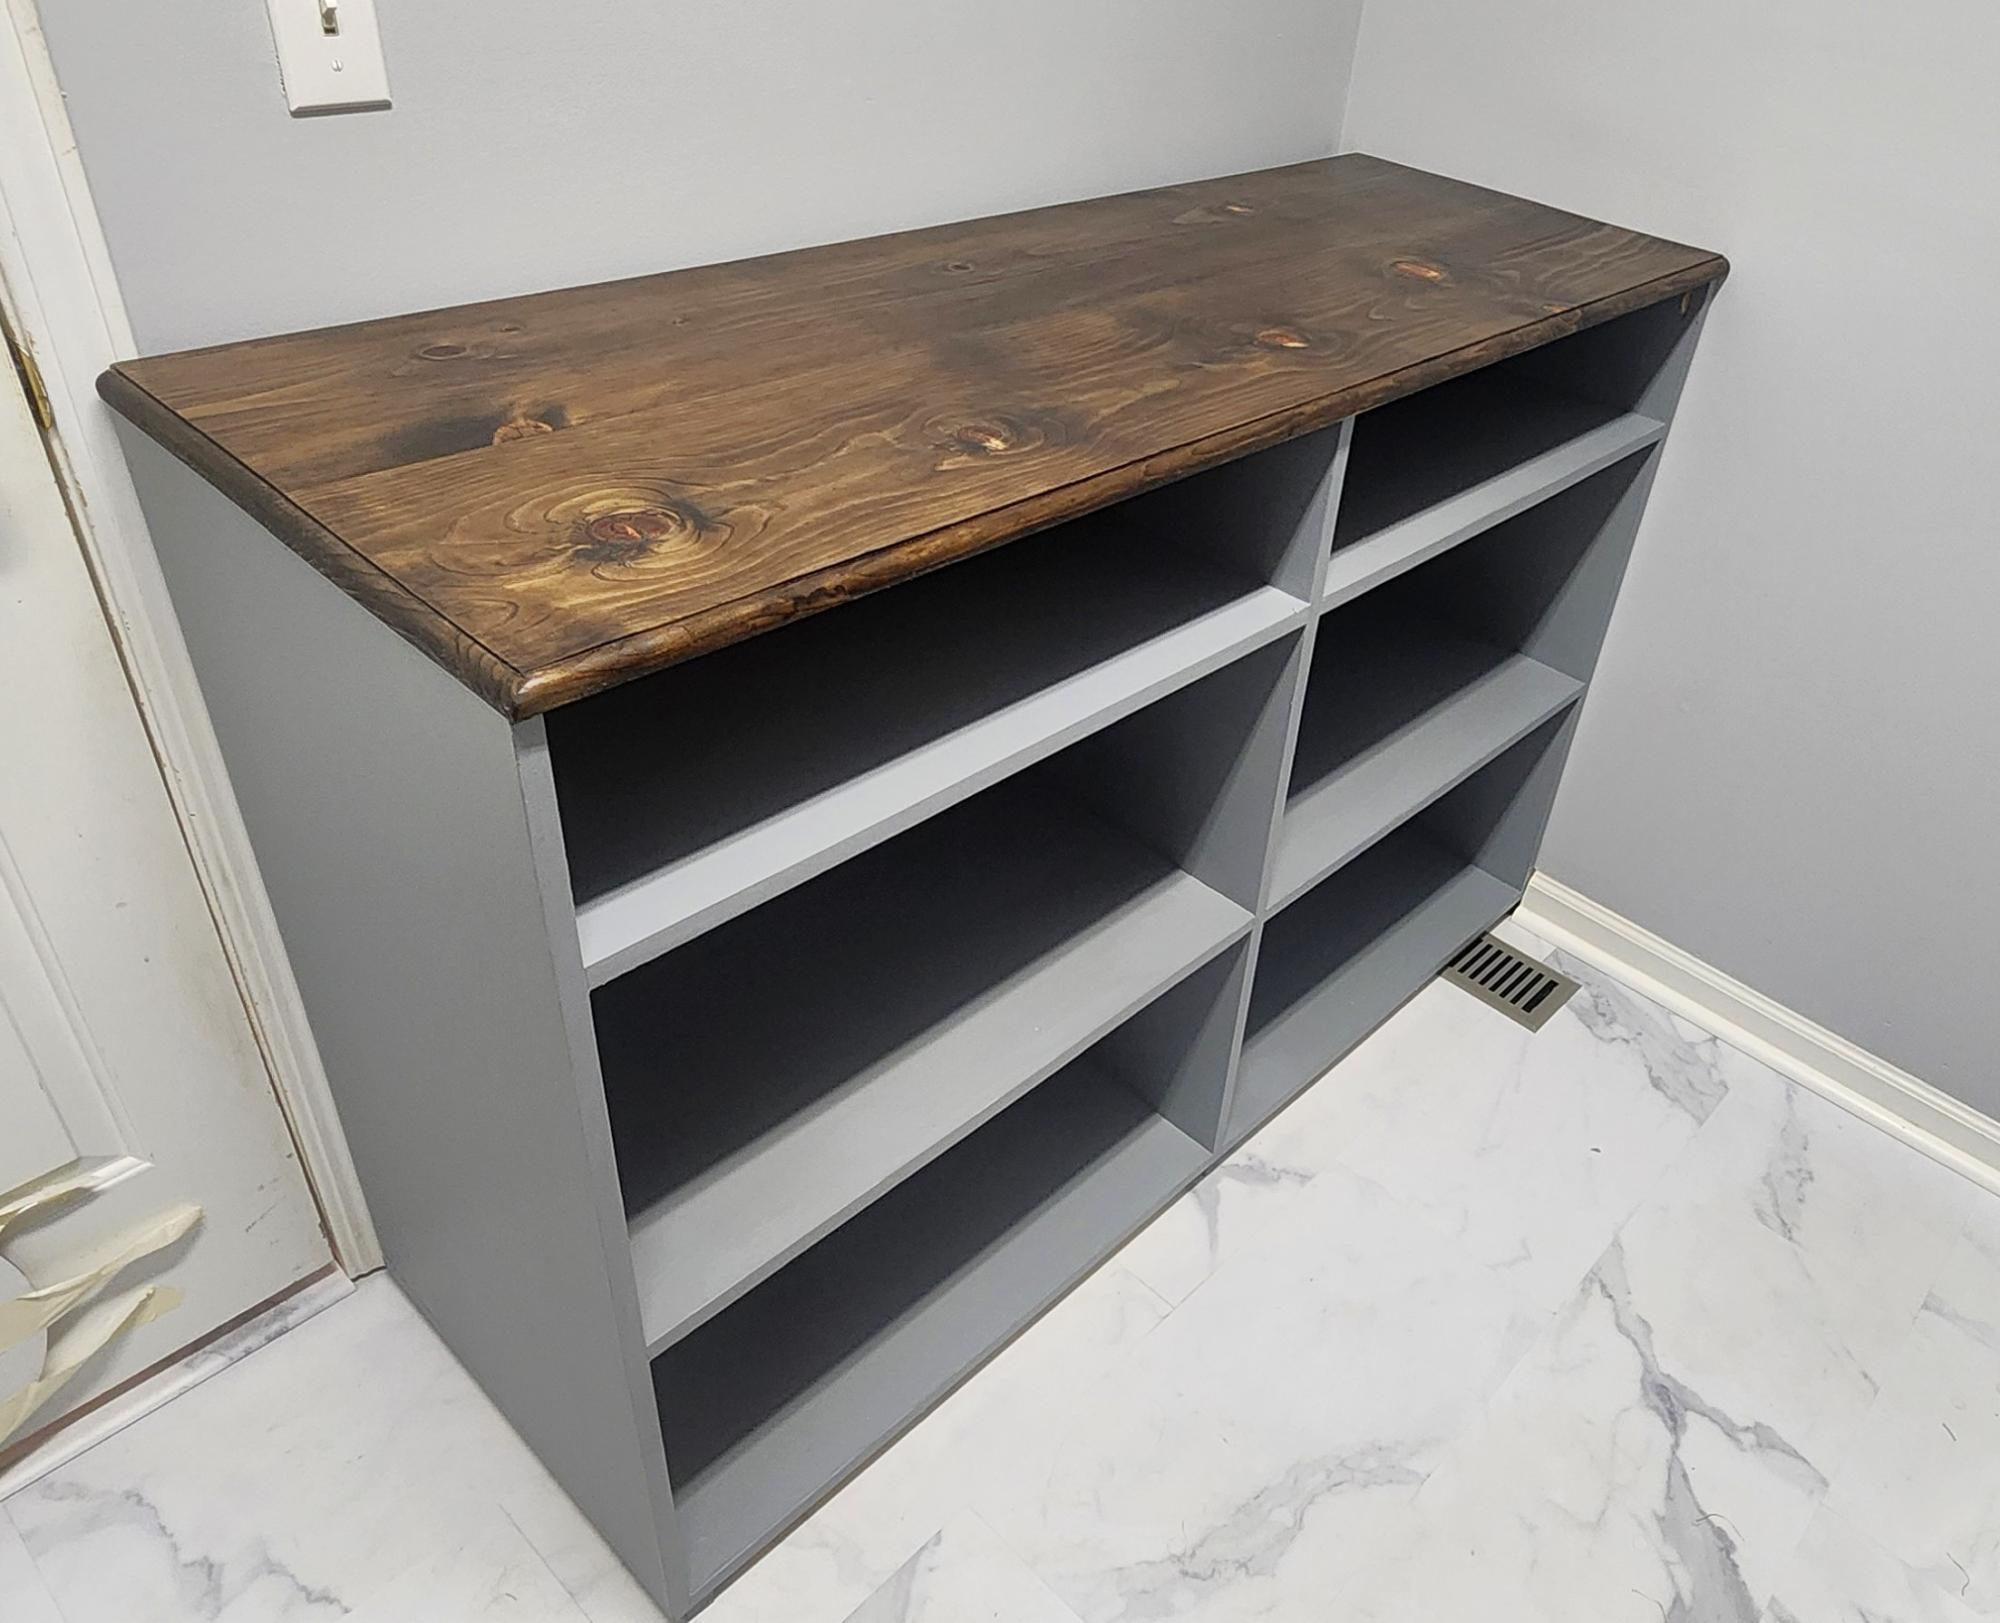
This was a modification to an Ana White design and another brag.
Designed on sketchup. It holds 4 laundry baskets sideways. Because I wanted it to be counter height I have a 6 inch shelf.
3/4 reconditioned plywood for the base assembled using Kreg pocket screws.
The top is a low cost pine 11.5 wide.
I jointed them using a 14 inch hand plane. First time for that. Cut the top to 22 inches wide.
Prestain conditioner. Minwax dark walnut stain and 6 coats of minwax poly wipe on.
Attached using Kreg screws.
Randy Eby
Built from Plan(s)
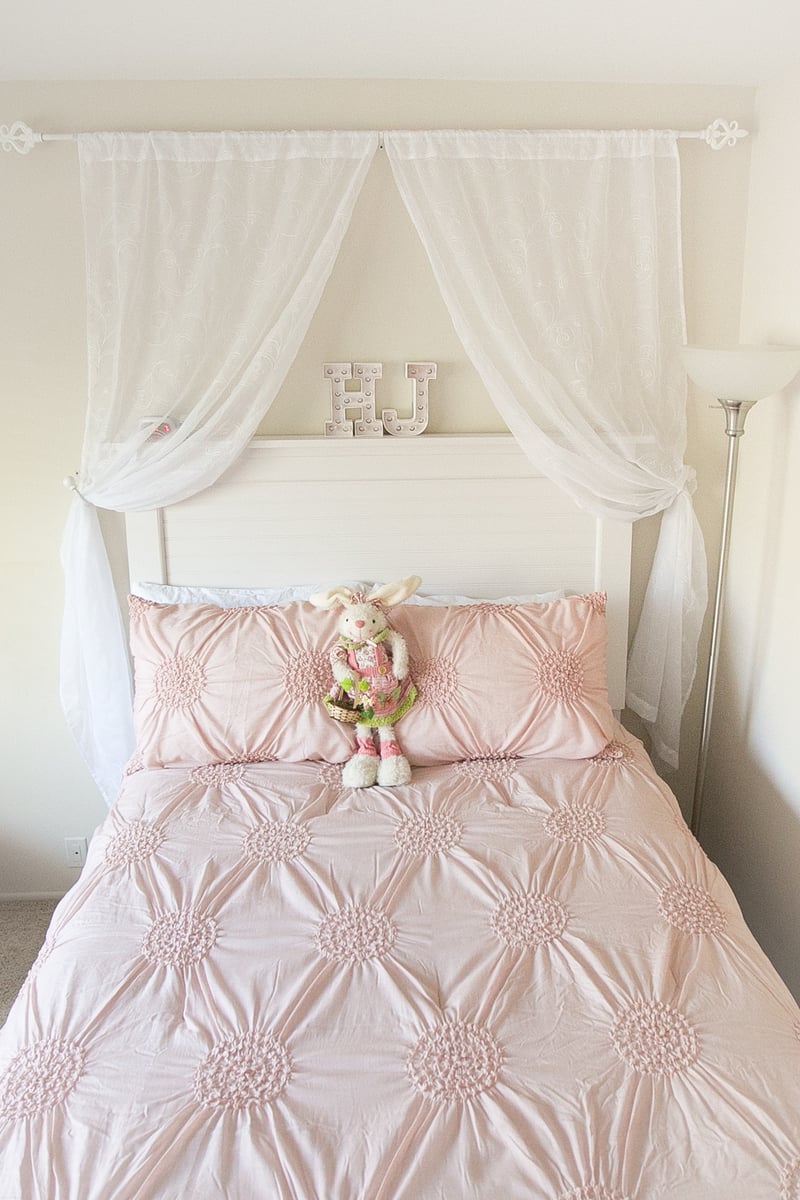
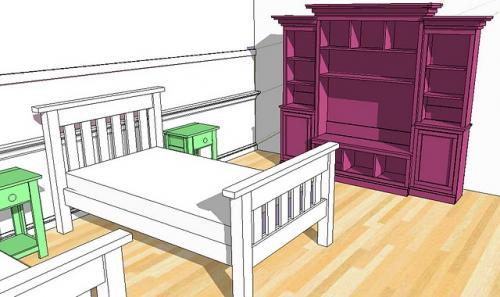
Pottery Barn Style - Full Size Headboard
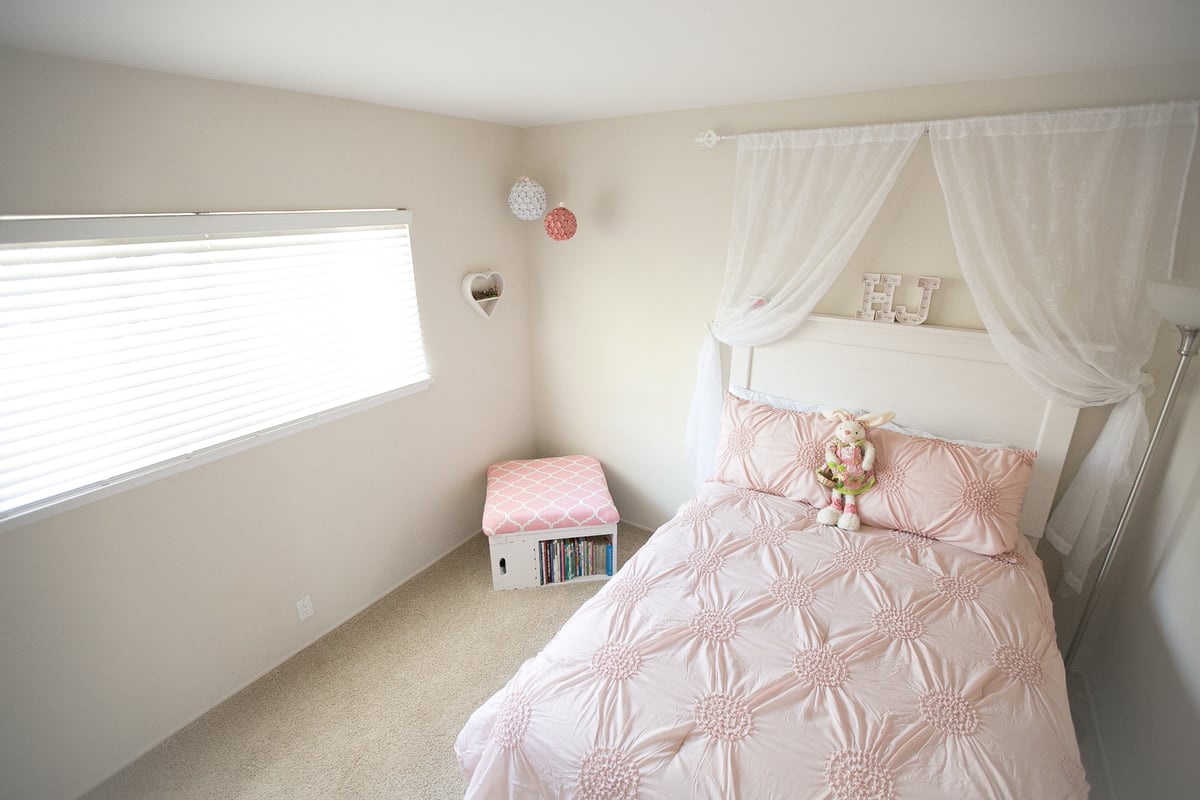
My very first big project! My 6 year old daughter was in need of a new bed and a room makeover so I decided to build her a headboard which then turned into a whole new room!!!
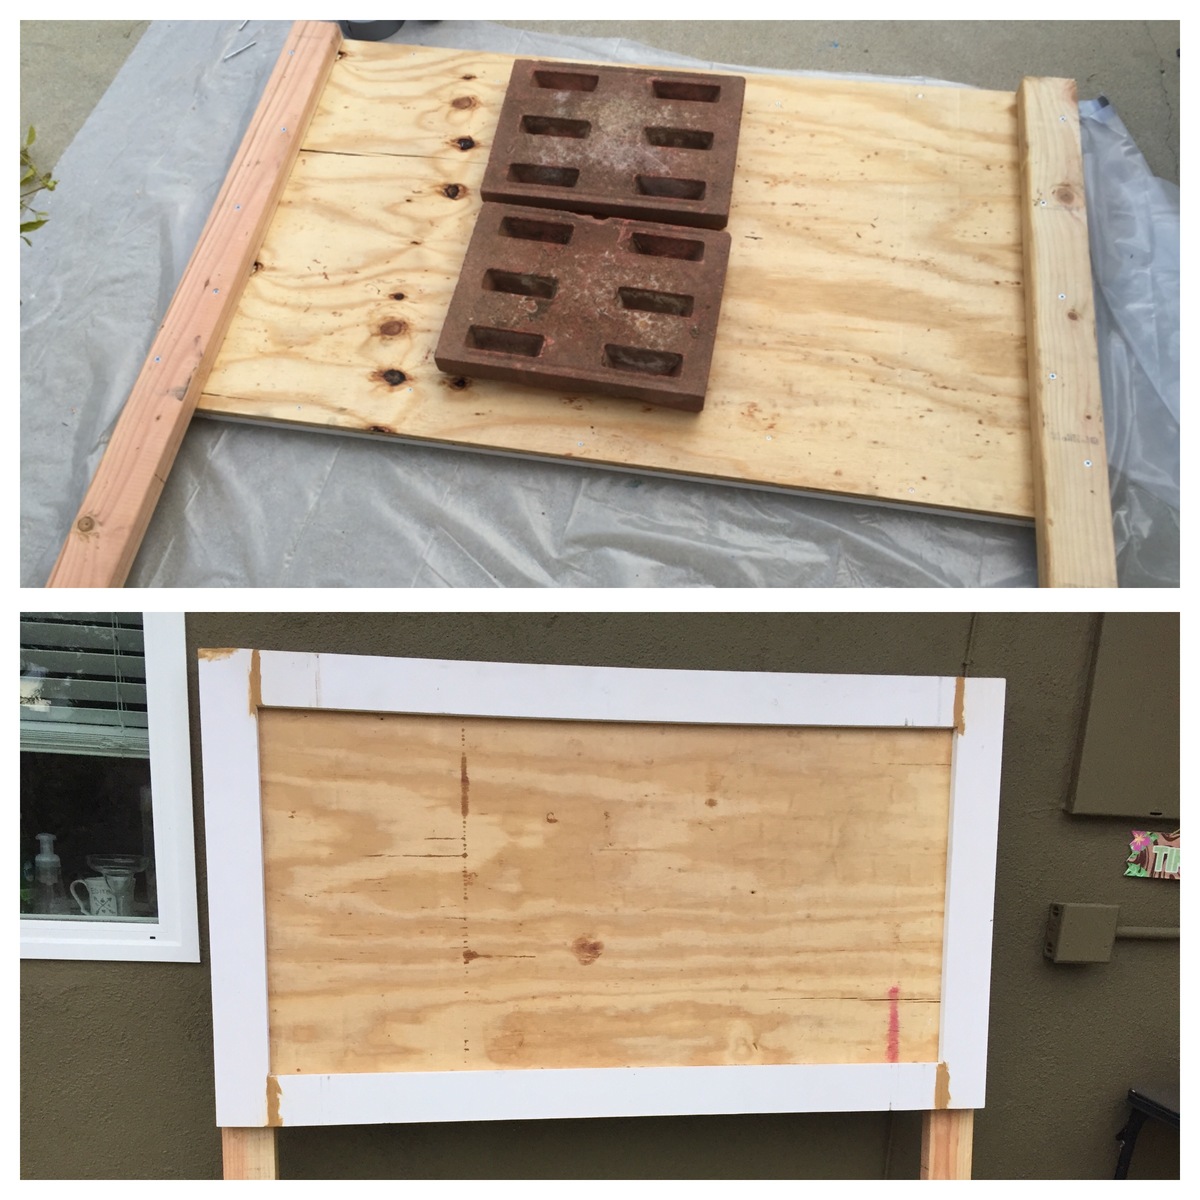
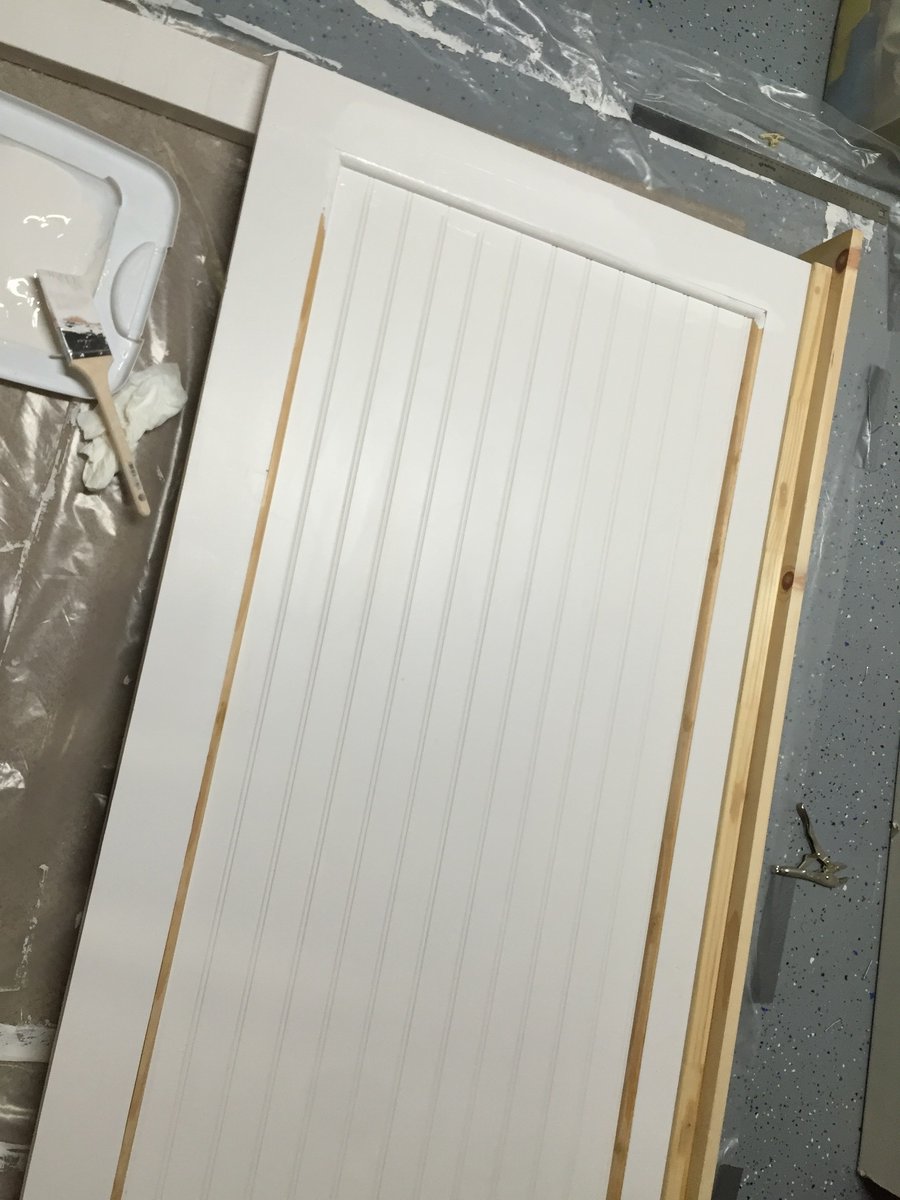
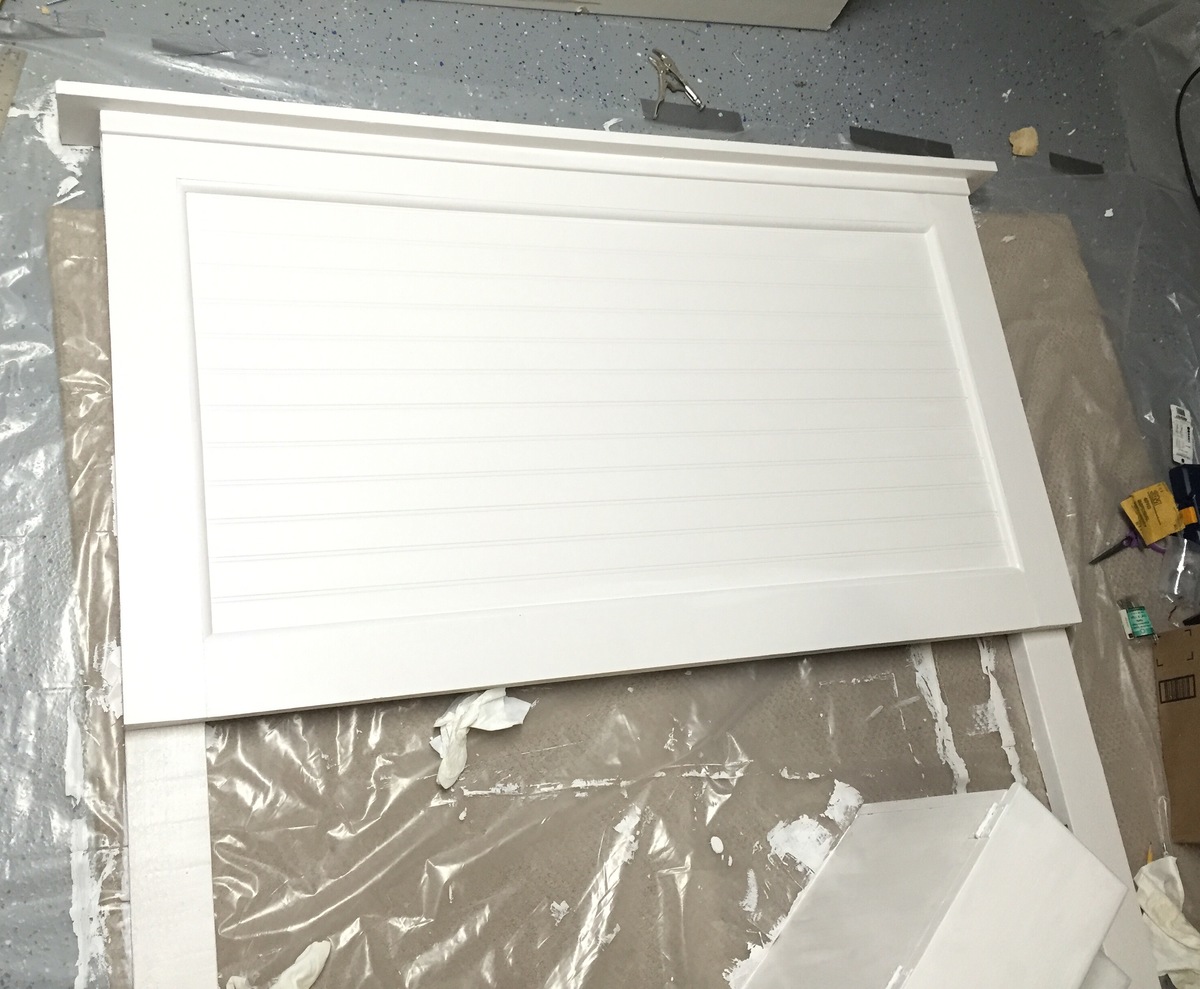
I really wanted it to it to have some dimension to it so I added some moldings and a mini shelf to the top of it. I basically just designed it myself, based on what some of the $1000+ pottery barn ones look like and spent hours at the hardware store finding the perfect moldings.
For the main backboard I used plywood, however to keep it light I used a sheet of molding and added a round edge to make it seamless.
My my daughter was so excited Mommy built her whole room.
Estimated Cost
$150 The Moldings added cost but can be made for less than $100 without it. But why would you??? It looks SO much better!!
Estimated Time Investment
Day Project (6-9 Hours)
Finish Used
Behr Semi Gloss
Recommended Skill Level
Beginner
Comments

In reply to Beautiful! by Ana White Admin
Sun, 10/16/2016 - 23:50
I am so excited!!! And fully
I am so excited!!! And fully addicted to your site. Thank you so much! You're an inspiration!!!
2x4 outdoor sofa sectional

Still needs stain and cushions. Will post finished product once complete.
Built from Plan(s)
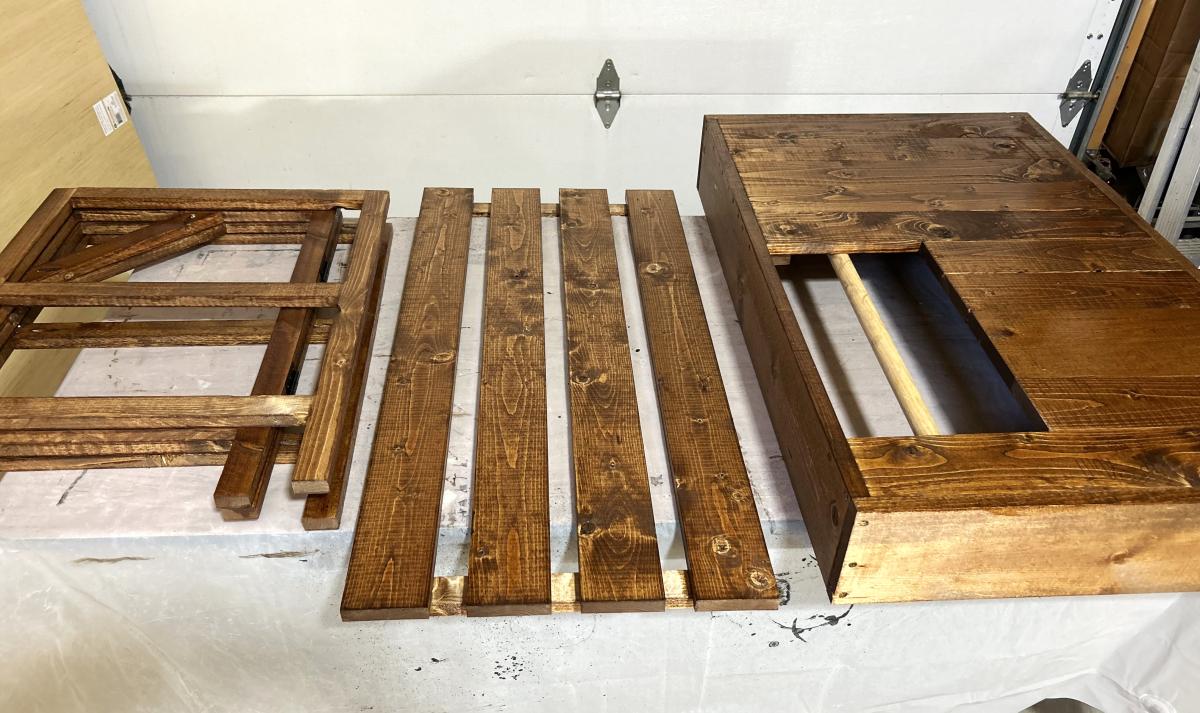
Collapsible Table for Craft Fairs
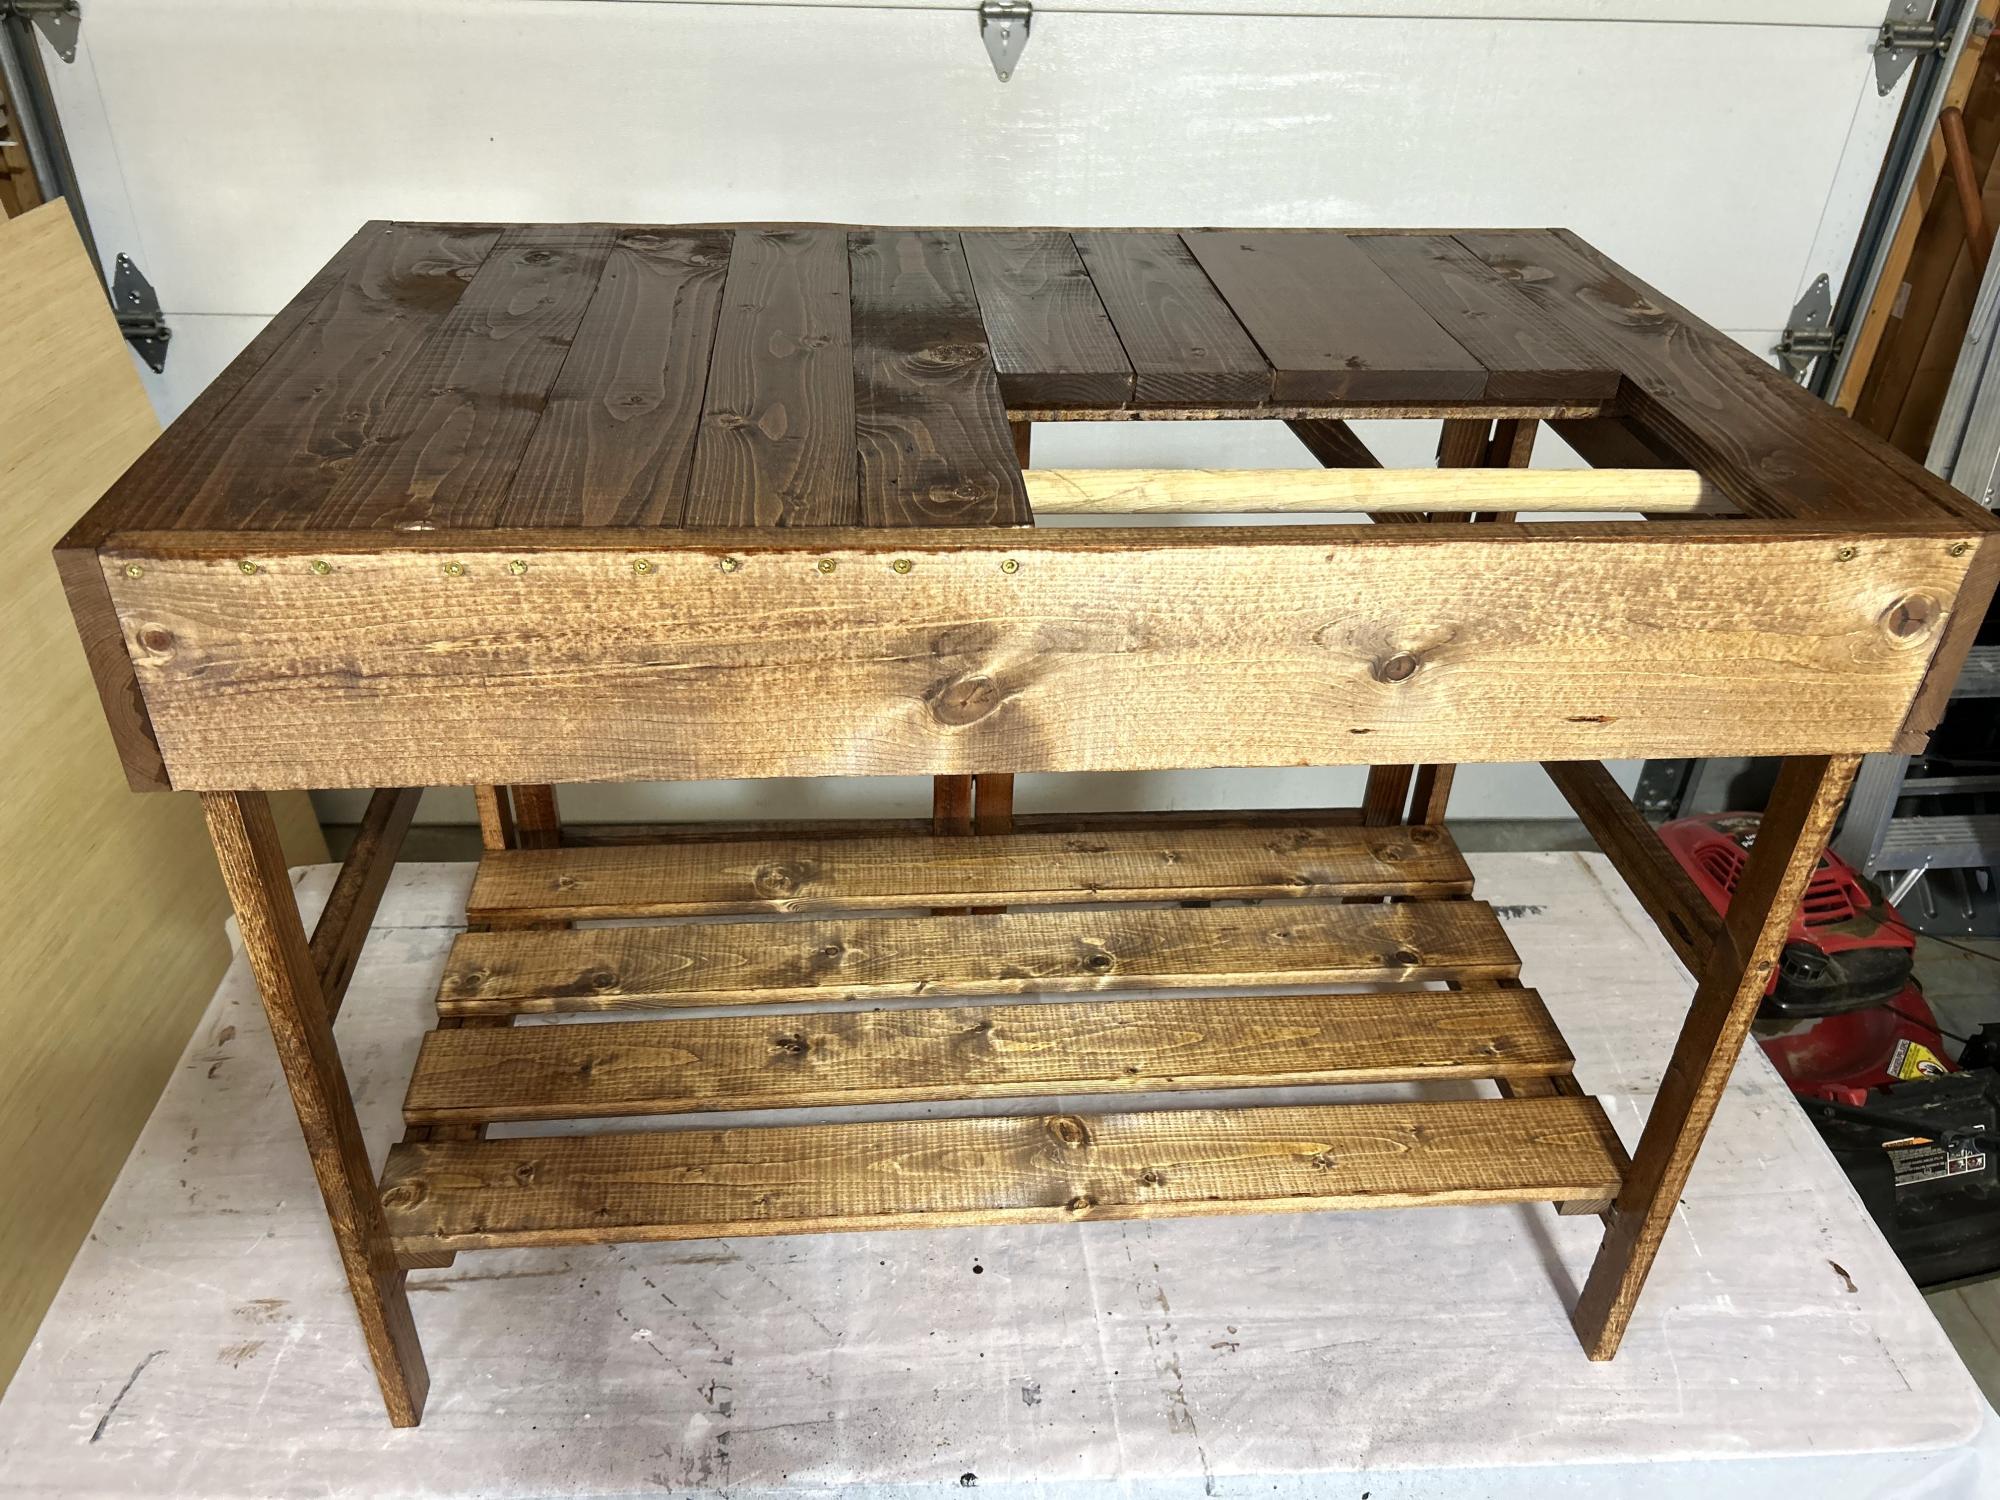
My wife wanted a collapsible table for her craft fair sales. I put a wooden dowel in the opening for her to drape packing paper over and hooks on the sides for gift bags. Easy plans to follow and it turned out great!
Todd Martens

Built from Plan(s)
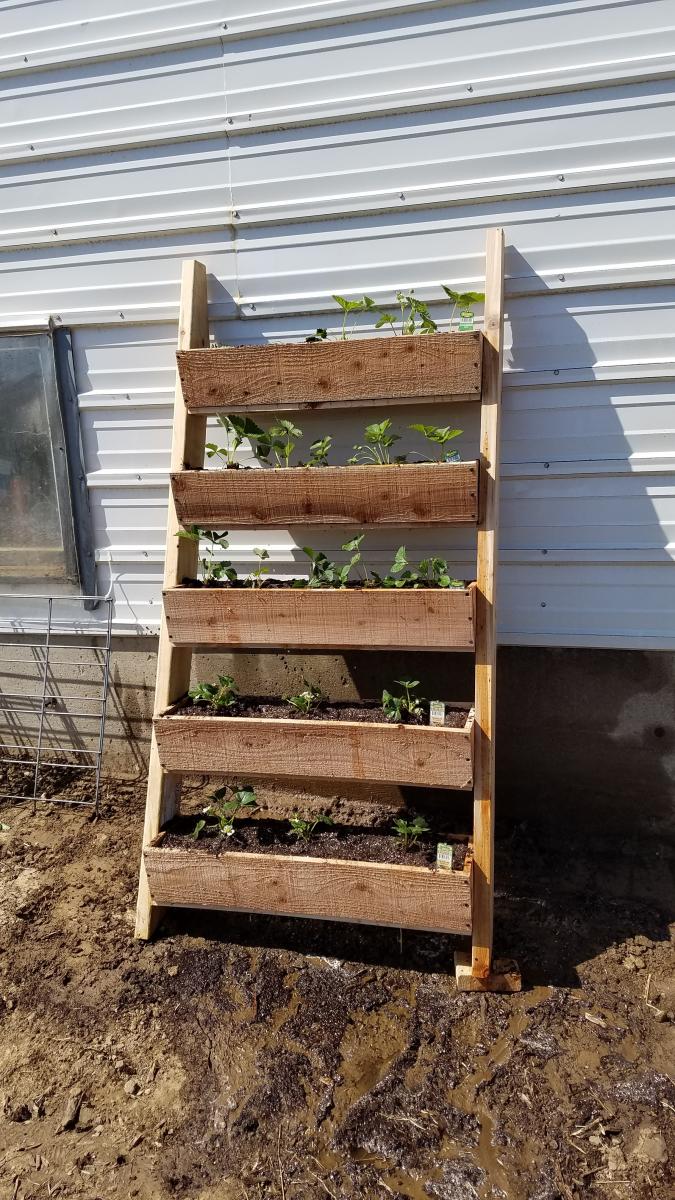
Vertical Garden Planters
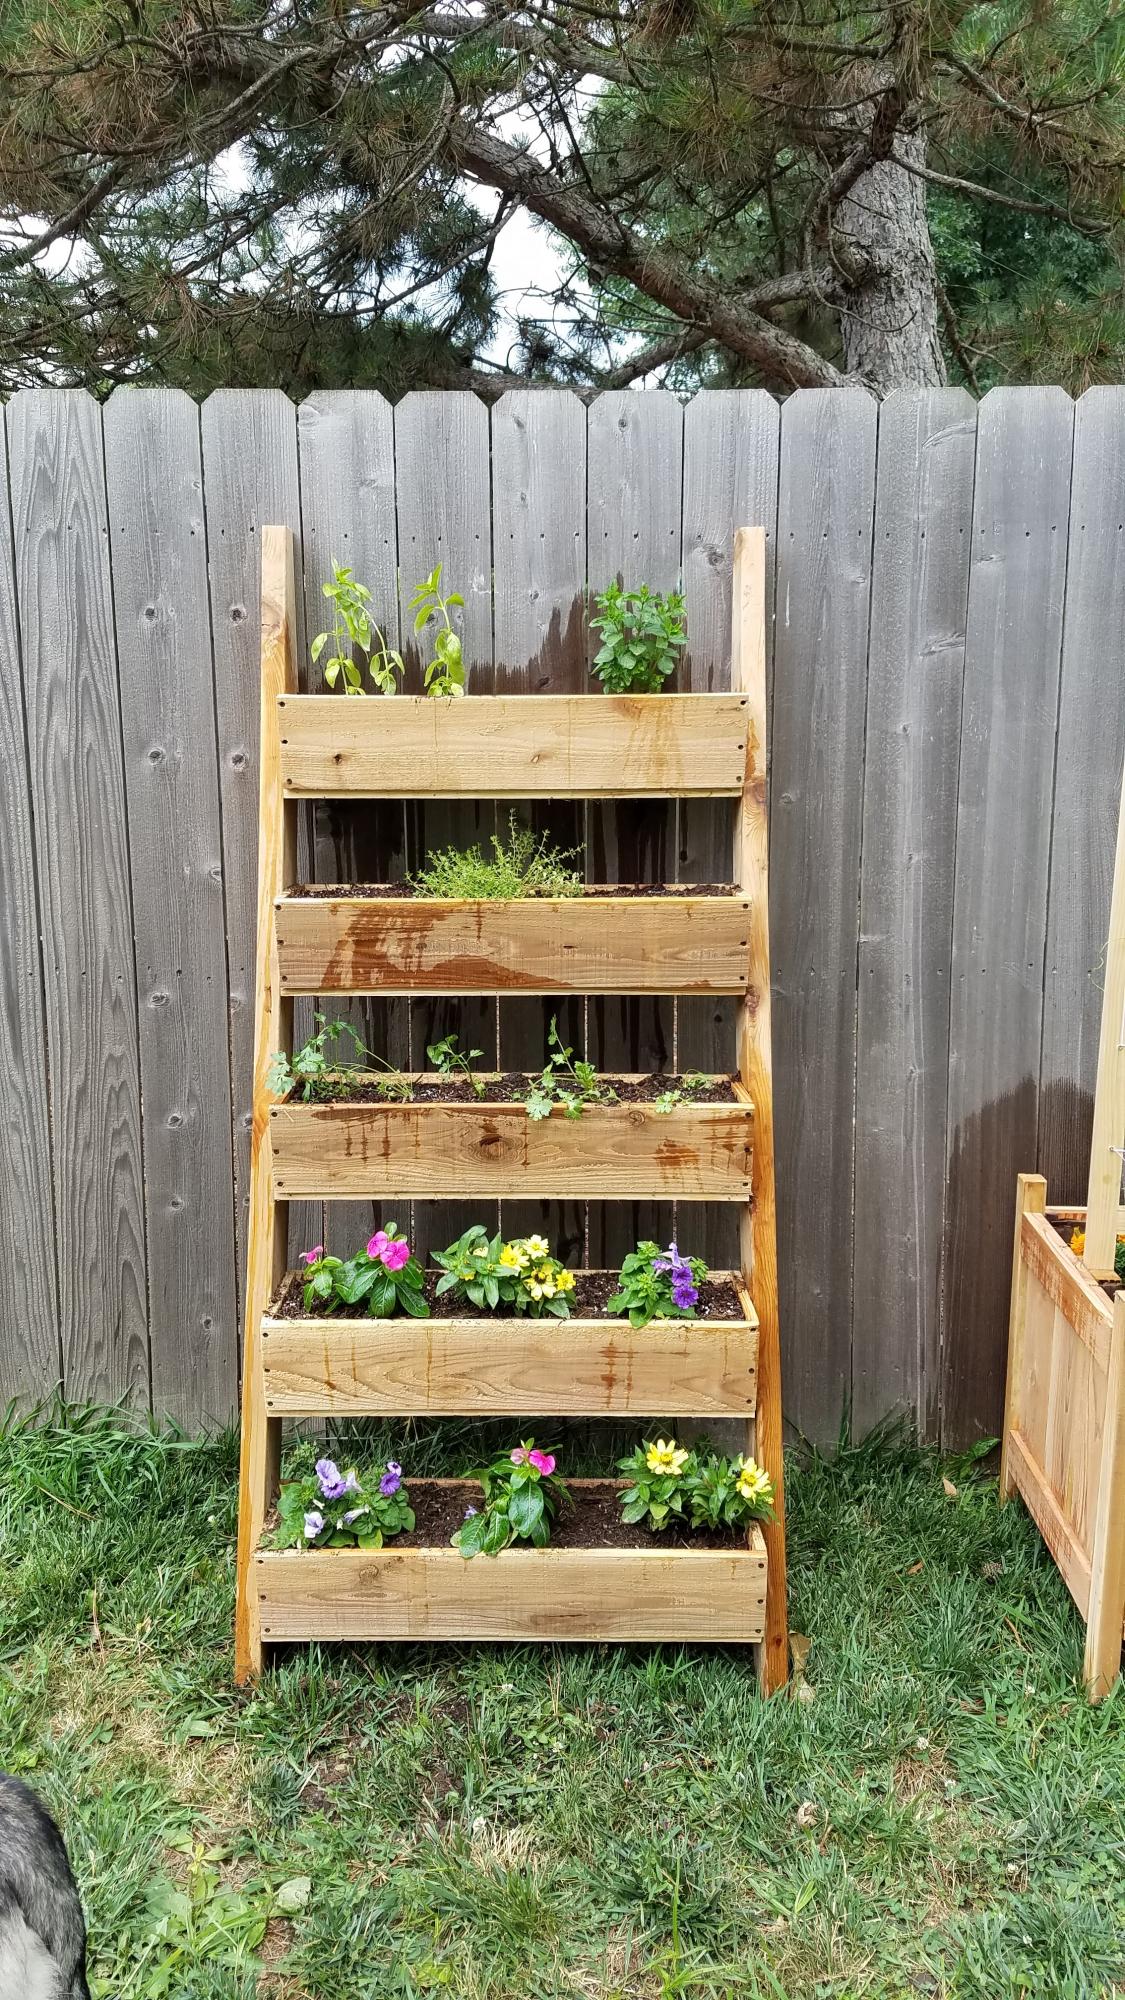
Made two of these this spring. One for strawberry plants, and one for herbs and flowers. Made according to plans.
Built from Plan(s)
Estimated Cost
$20 each
Estimated Time Investment
Afternoon Project (3-6 Hours)
Finish Used
None
Recommended Skill Level
Beginner
Folding Work Bench

First build.
The plans and cut list were a tad off but I made a saw guide a cut it down from 36 to 24 after assembled.
I had HD do all my cuts but have since done my own!


Built from Plan(s)
Estimated Cost
Not sure bought tools, wood and hardware at same time ($160)
Estimated Time Investment
Afternoon Project (3-6 Hours)
Finish Used
None
Recommended Skill Level
Beginner
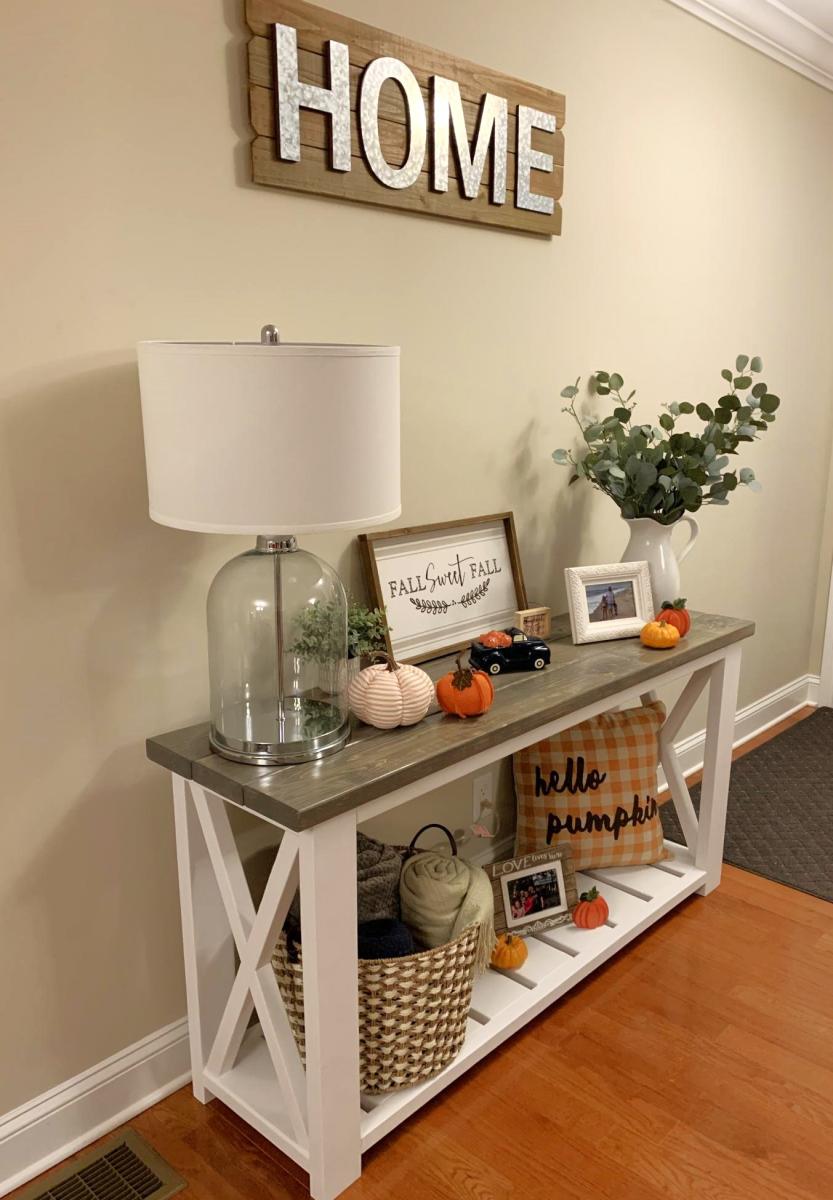
Gray Farmhouse Console Table
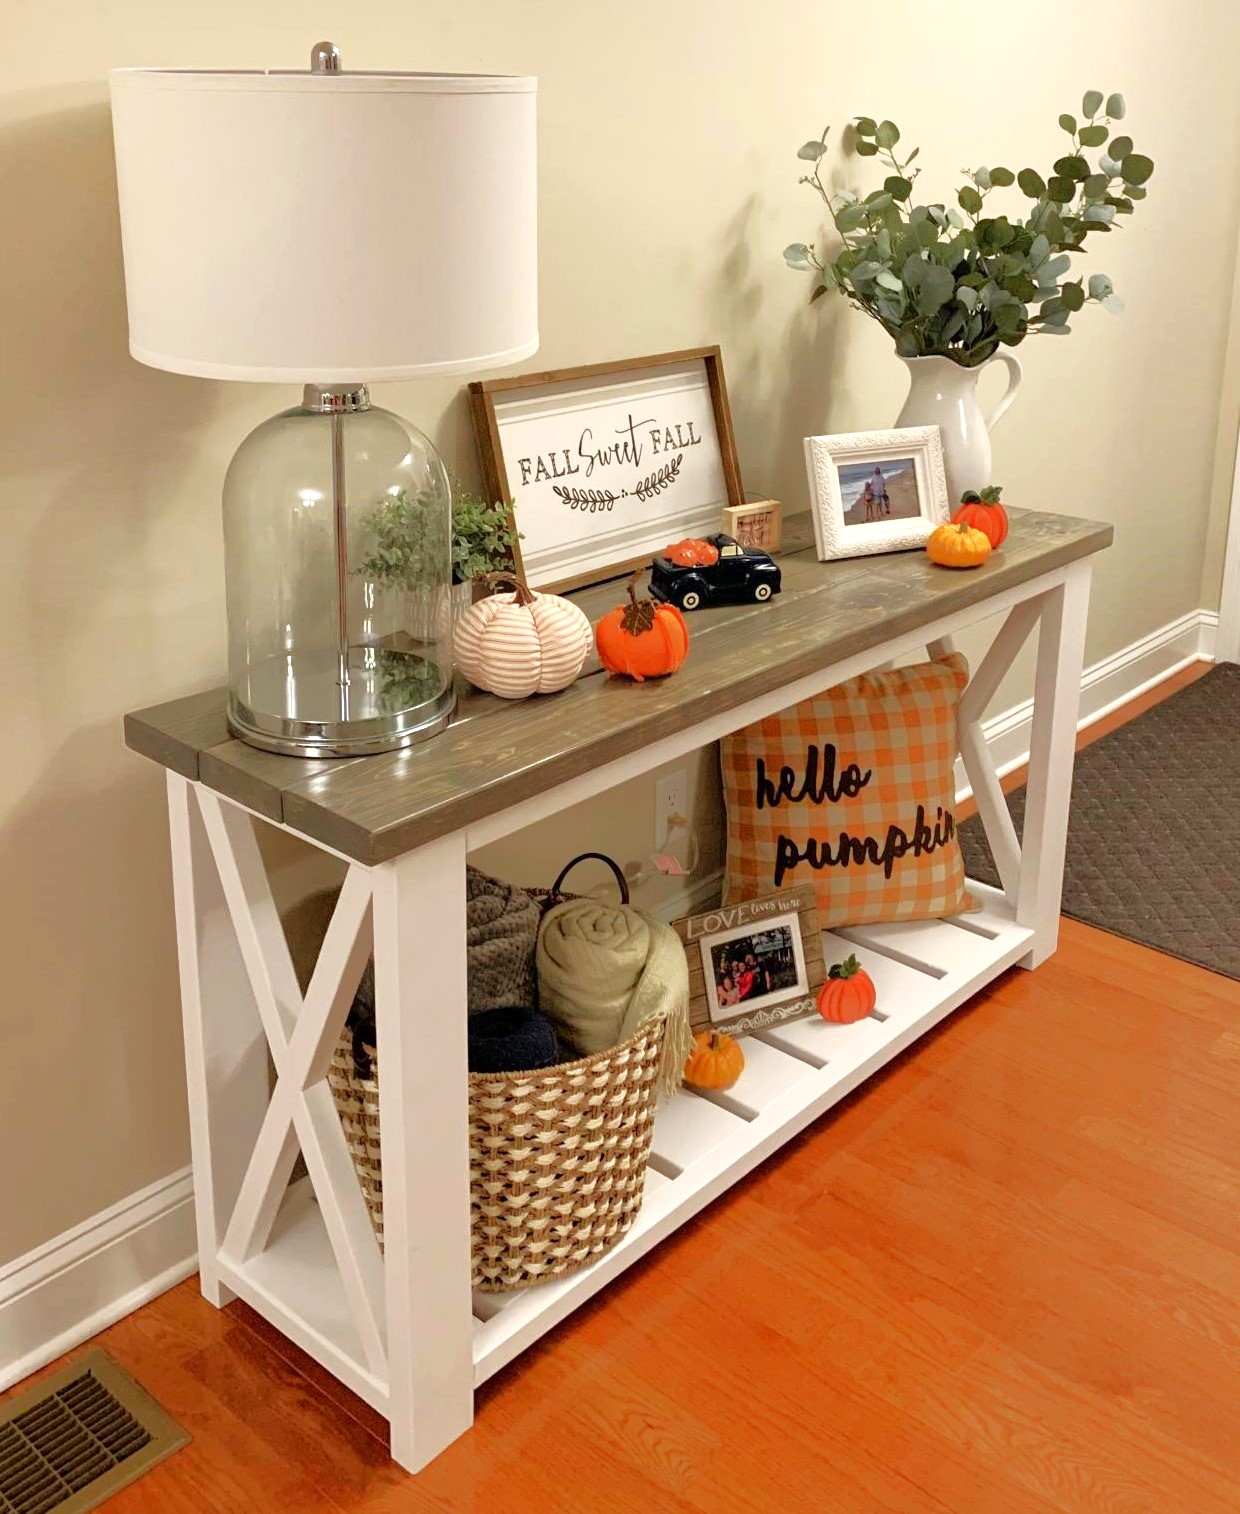
Happy Fall Y’all. Love the Gray / White Farmhouse Colors. I can share the plans I modified for this build if anyone wants to build their own .
Built from Plan(s)
Estimated Cost
$50
Estimated Time Investment
Day Project (6-9 Hours)
Finish Used
Gray Stain, White Paint
Recommended Skill Level
Beginner
Comments
Sat, 08/22/2020 - 08:33
Plans for console table
Hello could you please share the plans for me. Want to duplicate your awesome work.
Sat, 08/29/2020 - 12:33
Perfection!
I believe this is JUST what I came here looking for! Please share the plans and dimensions. :)
Sun, 10/25/2020 - 14:31
Hello! I’d like the plans &…
Hello! I’d like the plans & dimensions for this as well! Thank you so much! Turned out AMAZING!
Thu, 06/17/2021 - 17:40
This is exactly what im…
This is exactly what im looking for. Can you please share your plans 😍
Sun, 08/08/2021 - 15:36
Hi Ana can you please share…
Hi Ana can you please share your plans for this with me? Thank you
Wed, 10/13/2021 - 19:36
Can you please share the…
Can you please share the plans with me? Thank you!!

Mon, 01/31/2022 - 03:50
Plans for Grey Farmhouse Table
Lovely build. I would love to receive the plans for this particular project please? Thank you!!
Seasonal And Holiday
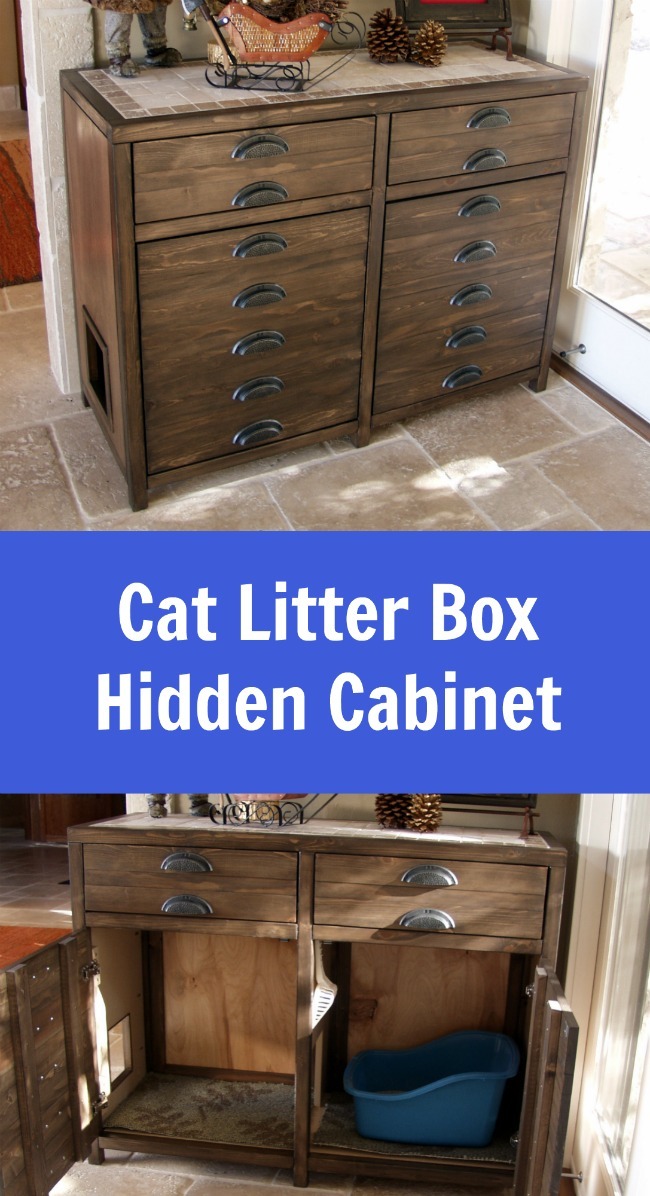
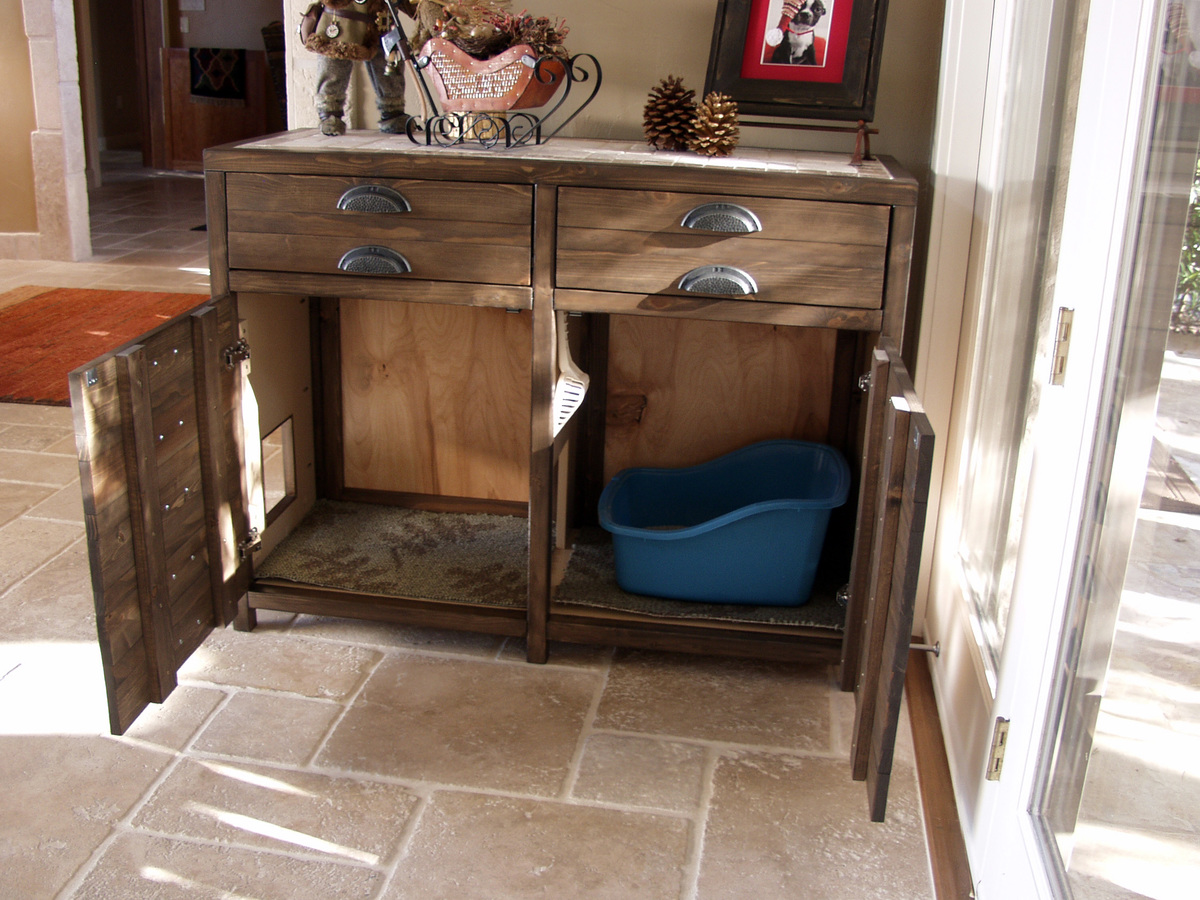
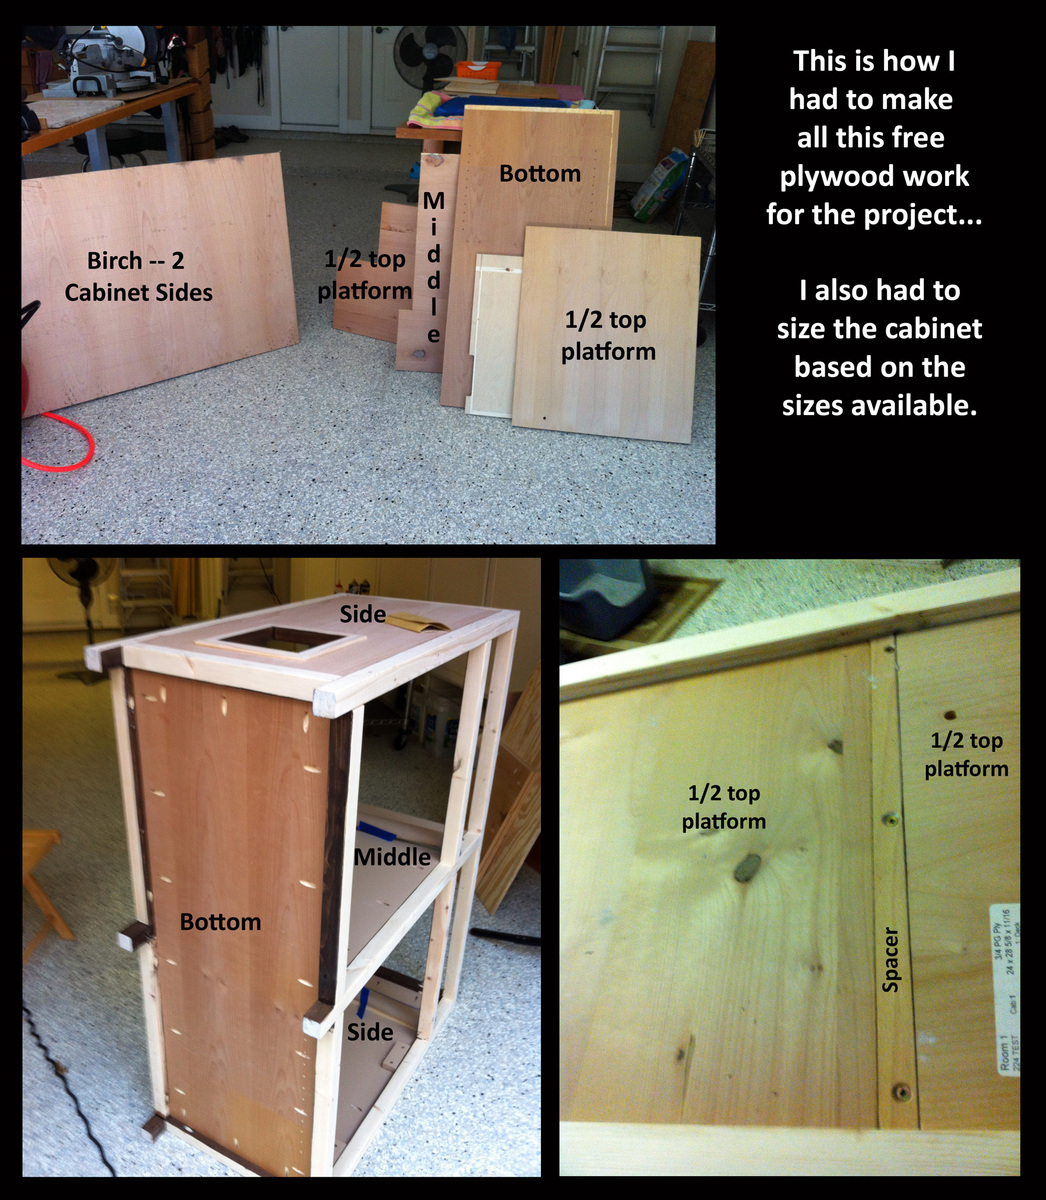
Printer's Console or Sneaky Litterbox Cabinet? Cat Litter Box Cabinet
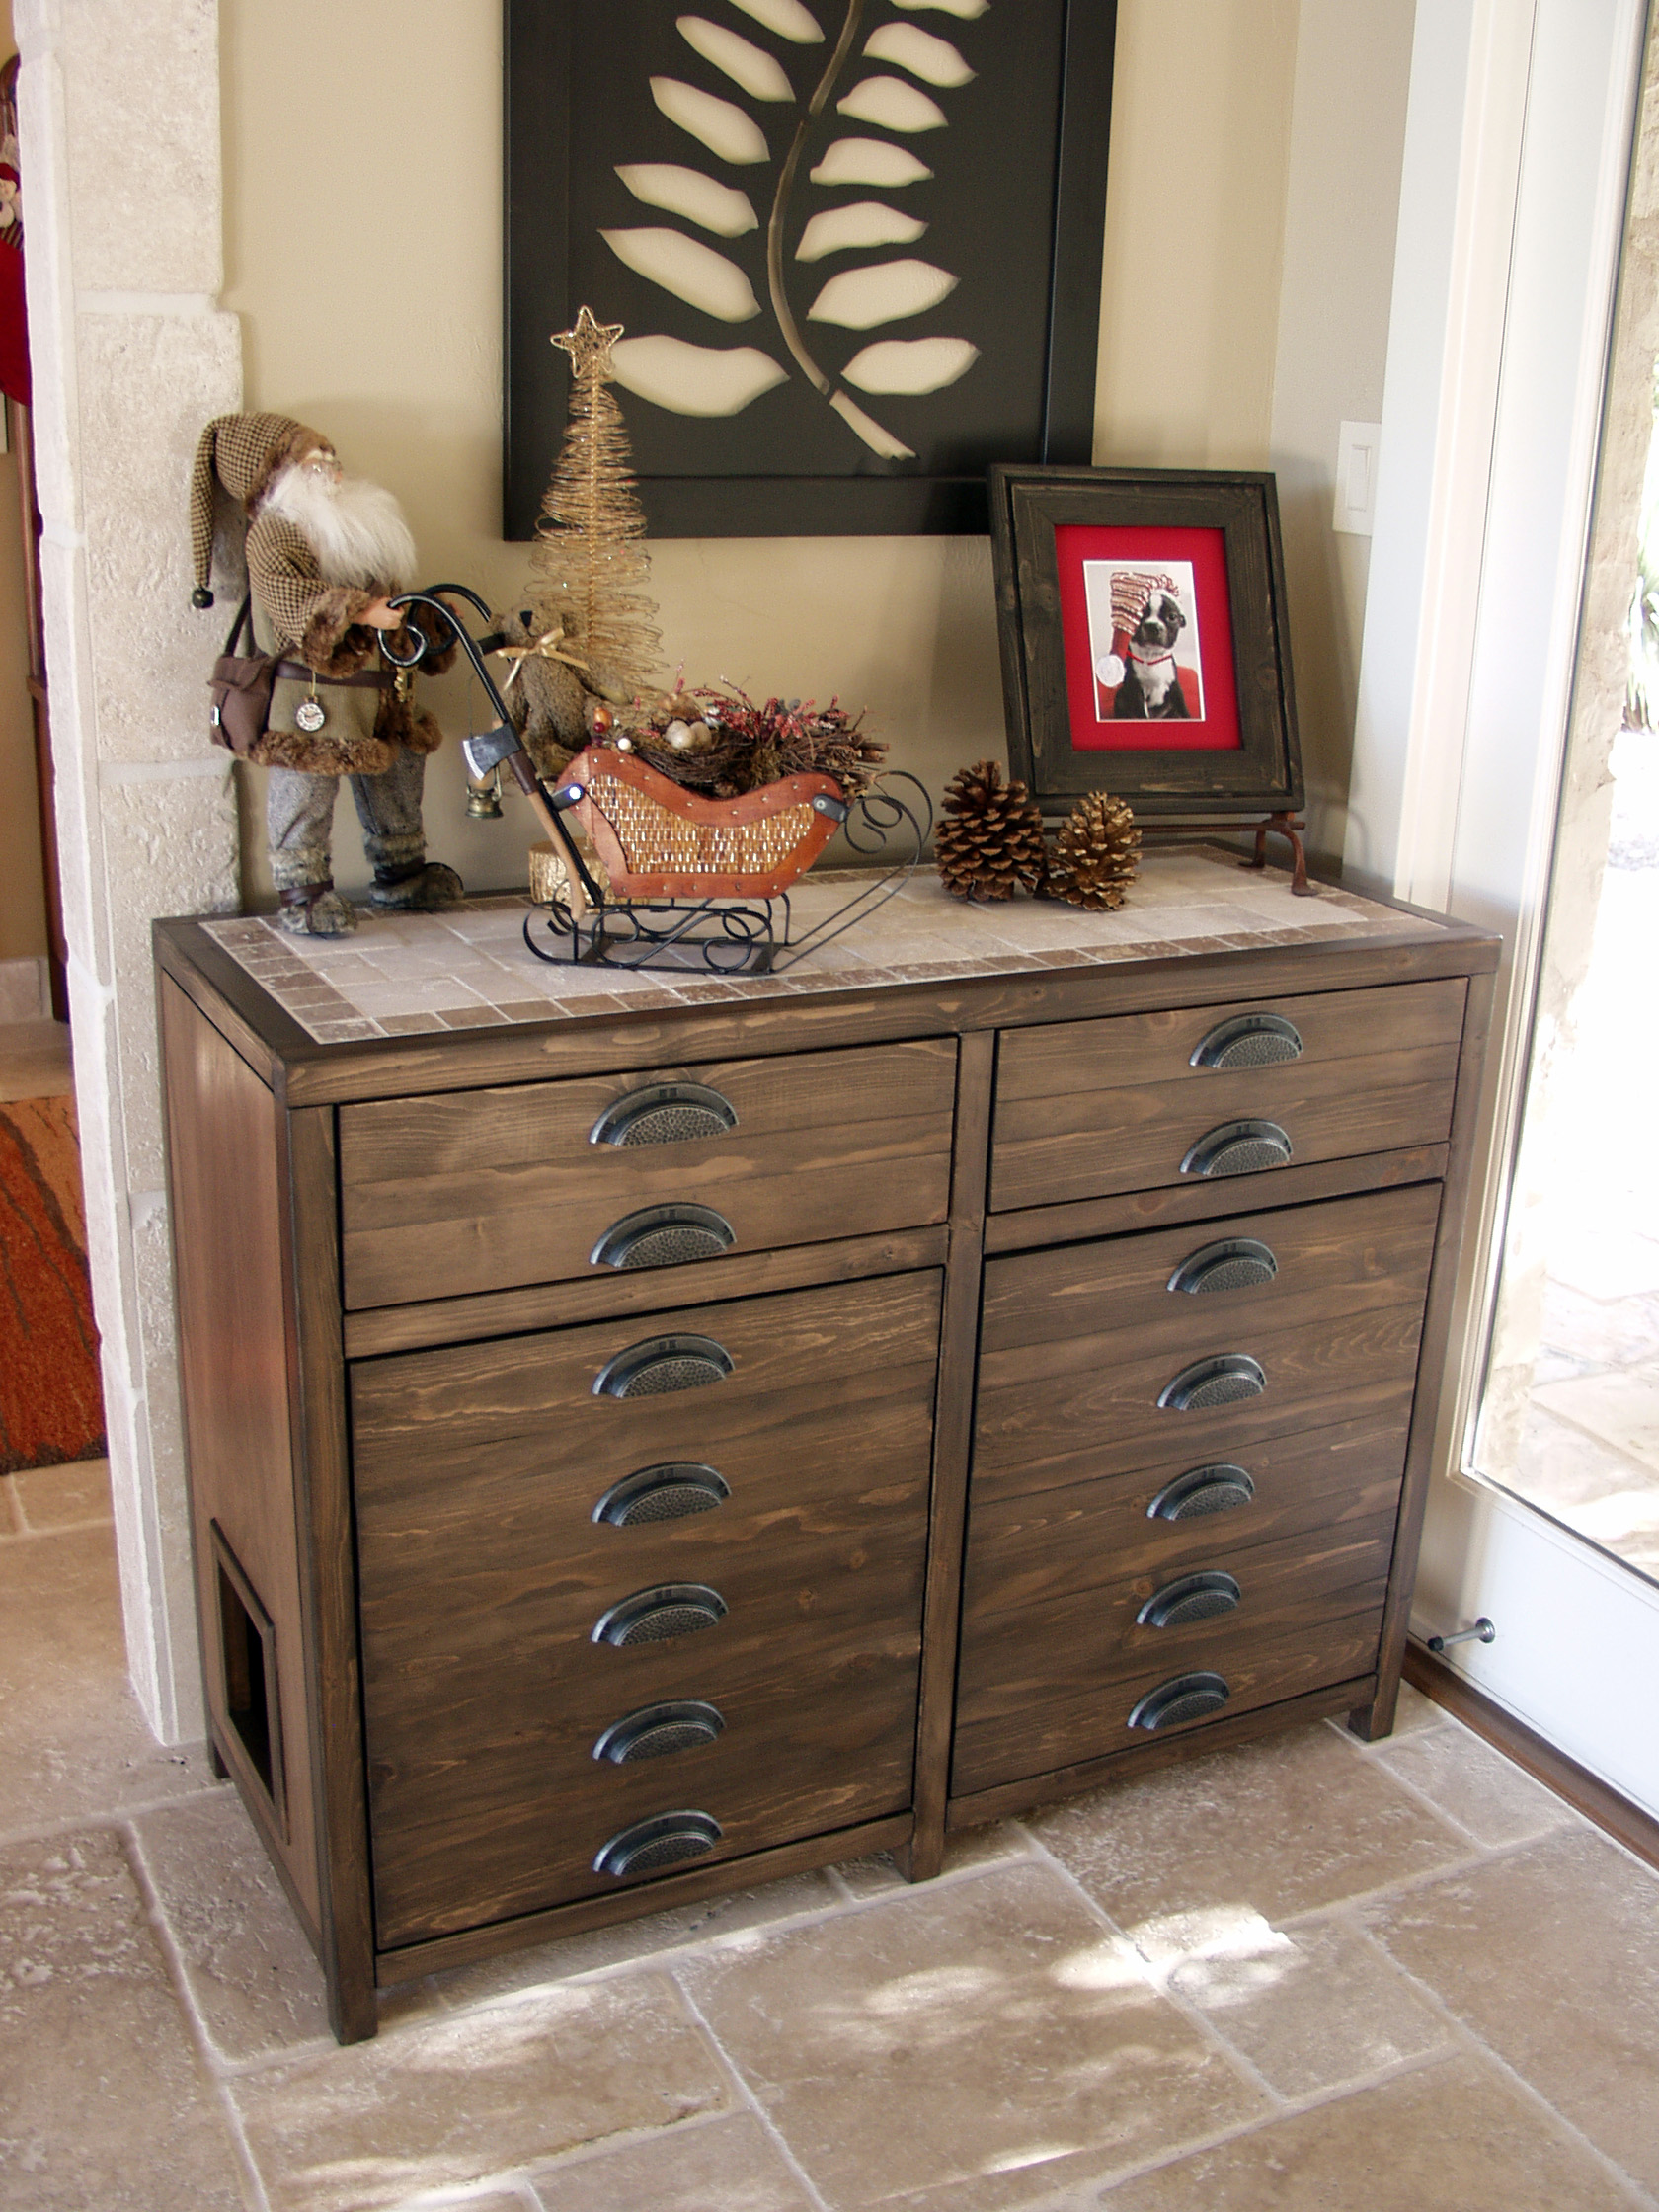
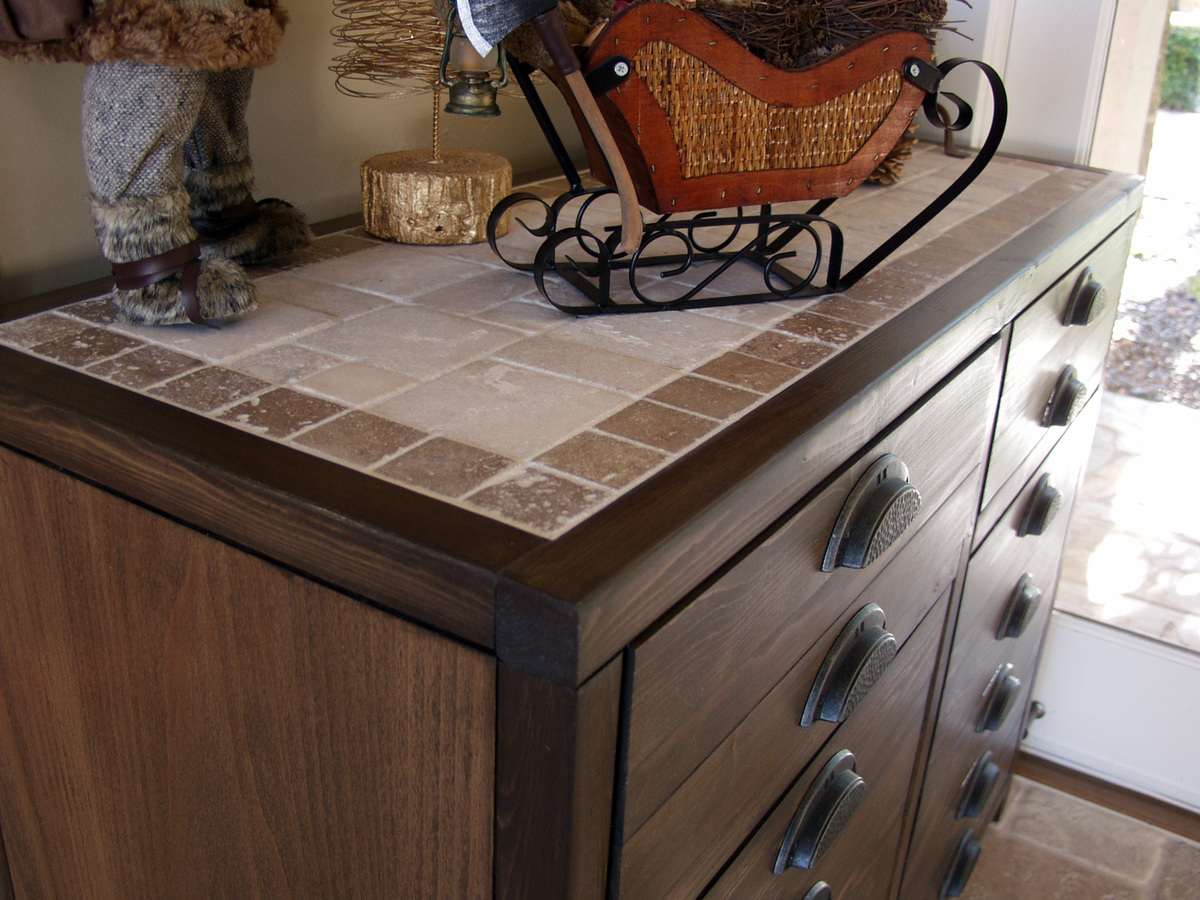
I had been wanting to build something to hide the litterbox for a long time. When I saw the Printer's Console plan, I knew this was the perfect plan for a cat litter box furniture. I loved that Jen Woodhouse's version was completely modified to her bar plan, so I thought I could modify for my litterbox idea. I modified the plans on size, as I was trying to use a bunch of mis-matched plywood. I also modified it to include a cat door, a cat passageway on interior panel, a vent on the back behind one of the drawers, and the stone top. I built a frame on the back to house the backing as an inset piece, as I didn't want it to be seen at all. I learned a very important lesson during this build. Not all 1x3s are created equal. Once I got my doors assembled, they were too big for the opening. I couldn't shave off the tiny amount needed, and couldn't make anything work short of starting over with 1x4s, sawing off a small amount, and cutting down the # of "drawers" (and handles). I wanted the inside to be fully finished (because cat pee on raw wood would not be good!). I had to finish certain "planes" prior to putting the thing together. I used kitchen and bath paint on the inside floor and sides for easy cleanup. The stone was carryover from construction on our house 12 years ago. The handles were an amazing deal @ $1.81/each .


Built from Plan(s)
Estimated Time Investment
Week Long Project (20 Hours or More)
Finish Used
Minwax Wood Conditioner, followed by a mix of American Walnut & Onyx Minwax water-based Stain. 3 Coats of Old Village Gel Varnish. On inside, I used a kitchen/bath paint.
Recommended Skill Level
Intermediate
Comments
Sun, 11/25/2012 - 09:51
That is a fantastic idea and
That is a fantastic idea and the table top is beautiful.

Mon, 11/26/2012 - 09:38
That is the most beautiful
That is the most beautiful litter box I have ever seen!
Mon, 06/17/2013 - 12:23
So we are not crazy!
Love your use of the buffet. Our family has discussed making a piece of furniture like this for our smaller dog. Nice to see someone has done it! Our big dog has scheduled feedings but our little dog would prefer to be a free feeder. Poor thing chokes down his food in our pantry listening to our big dog breathing under the door waiting for him to finish. When he is done we open the door and the Big, greedy dog bolts in looking for left overs. A family member has to wait patiently for the little dog to finish so he can escape the pantry. I really don't want a doggy door in my pretty swinging bi-fold doors to my pantry which is also access to our kitchen.That would be a pain to have to keep closed all day. But this buffet idea is super cute! Thanks for the inspiration.
Fri, 01/09/2015 - 22:01
tile top
I know this is an old post, but I'll ask anyway
I love this piece and am in the planning stages for ours. Thank you for sharing!
I am Wondering how you went about the table top. Did you install a 3/4 ply on top but not flush, allowing room for mortar and tile? If so how much room did you allow for the tile/mortar? 1/2 inch? How did you keep the surface of the tile level and uniform? Lastly, did you seal the tile with anything when you finished?
Aesthetically, the tile top really sets this piece off and I really want to make my own.
Thanks
Seasonal And Holiday
Treehouse bed with slide
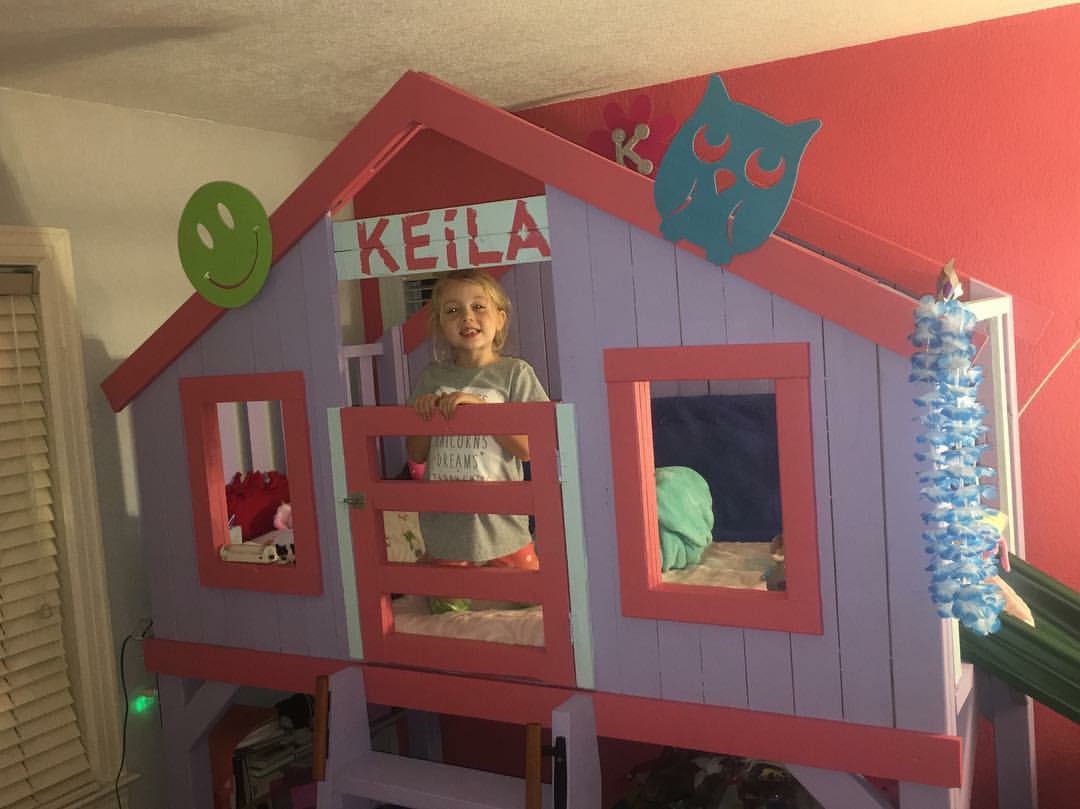
I built this for my daughter Keila. She loves it and her friends do too! Took me one day. I painted the entire bed in deck paint. It completely eliminated all
Splinters!!! I added the slide, a USB plug, cup holder, and fan.
Built from Plan(s)
Estimated Cost
350.00
Estimated Time Investment
Weekend Project (10-20 Hours)
Finish Used
Deck paint to cover all splinters. Slide was 75.00 extra found at a discount overstock supply house. I had to cut off two feet for it to fit in a 11x11 room
Recommended Skill Level
Intermediate
Adirondack Minnie Mouse
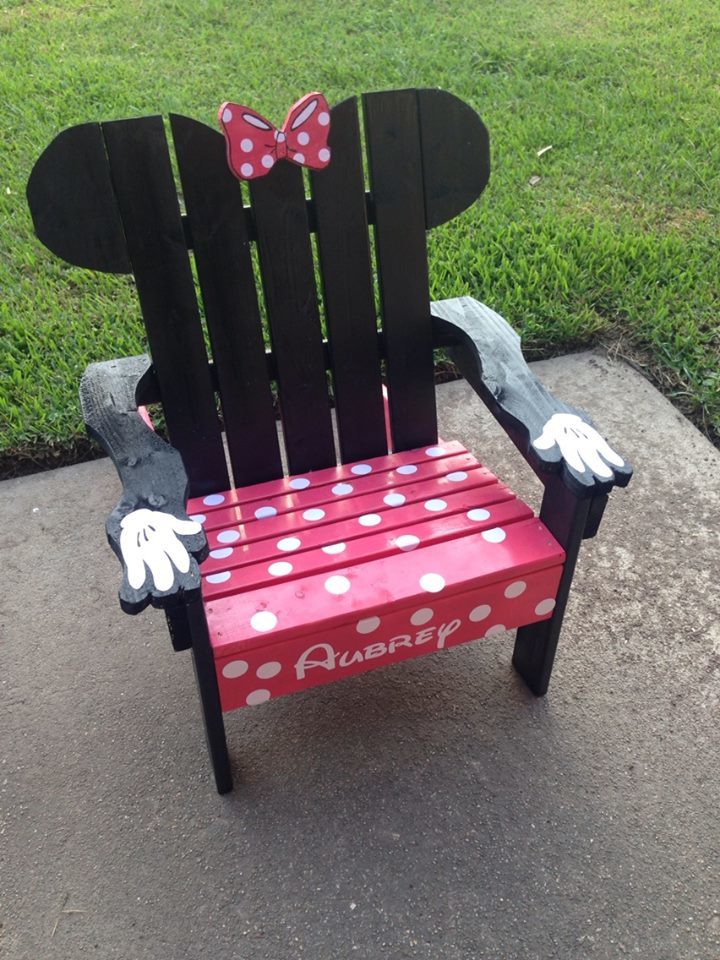
My daughter is into everything Minnie Mouse right now so I figured, why not!
Built from Plan(s)
Estimated Cost
$15
Estimated Time Investment
Afternoon Project (3-6 Hours)
Finish Used
I used stickers for the white details, but my daughter promptly peeled them all off. I suggest paint.
Recommended Skill Level
Beginner
Comments
Tue, 04/28/2015 - 12:04
Is there any way to get the
Is there any way to get the plans for the minnie mouse chair? Would love to make this. I can open the plans for the basic adirondack chair, but not the minnie mouse one.
Thanks!

Sun, 07/24/2016 - 18:30
I am not able to download the minnie mouse chair plans
I am not able to download the minnie mouse chair
plans, can someone please assist?
Stocking Stand
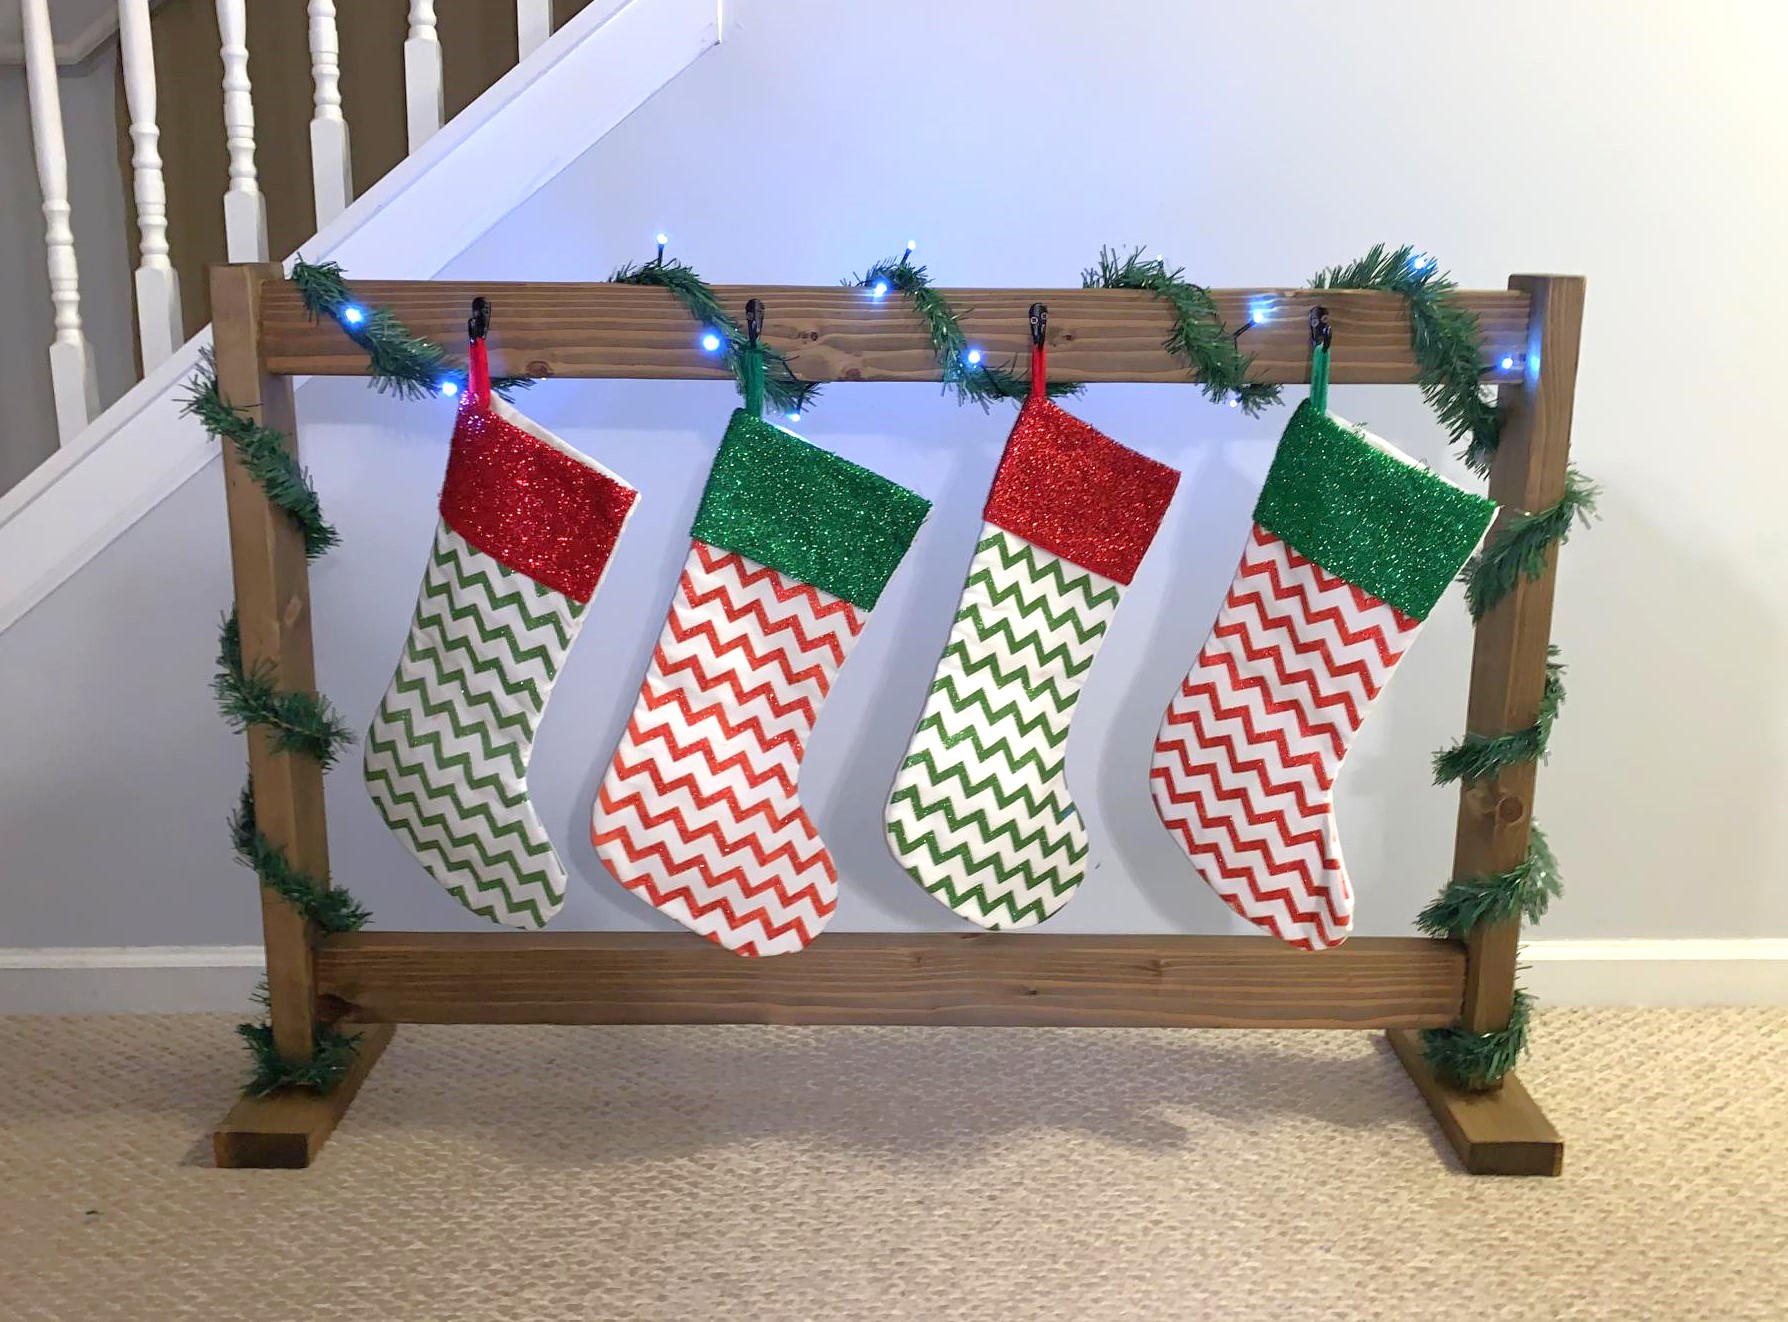
So fun! Directions were easy! Can also be used as Backpack hanger if you put a little bit longer feet on them. I bought the metal hooks from Walmart.
Built from Plan(s)
Estimated Cost
$18
Estimated Time Investment
Afternoon Project (3-6 Hours)
Finish Used
Jacobean Minwax stain
Recommended Skill Level
Starter Project
Comments
Seasonal And Holiday
Bathroom Storage Tower
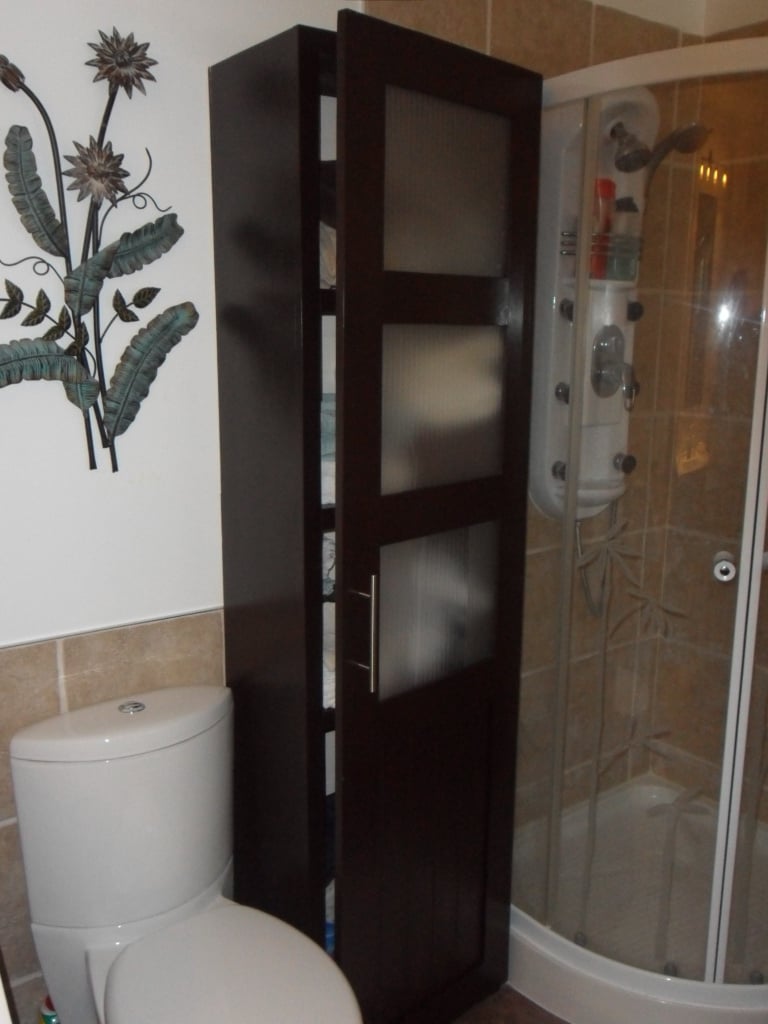
I loved the look of the Craft room Storage tower but modified to suit my wife's bathroom theme/decor. The inside back (MDF beadboard) is painted a milk coffee color to lighten it up. The door inserts are plexiglass, which was more expensive than glass but with 2 boys 6 and 2 it is well spent, and the MDF beadboard. Covered the plexiglass with self-adhesive film for glass on both sides to hide the towels inside. This project took me about 12 hours to complete but over a 3 month period, mostly spent on finishing the project with my boys underfoot or at 12-2am. YIKES!!! If i keep this up she will want to buy instead of letting me build.
Price List:
wood: $100
Stain/Paint: left over from house reno. would have been $15 stain $20 Varnish 30$ quart of paint
Handle: $7
Hinges: $4 basic style
I wanted to use Eurostyle hinges but opted to buy the Kreg system instead of Forstner drill bits.
Will be building another just different dimensions for laundry room makeover.
Built from Plan(s)
Estimated Cost
100$ CDN for lumber everything is more expensive in Canada
Estimated Time Investment
Weekend Project (10-20 Hours)
Finish Used
Saman's waterbased stain Chocolate Varnish applied
Recommended Skill Level
Starter Project
Comments
Sat, 01/26/2013 - 12:18
Thanks! It was my first
Thanks! It was my first furniture building project! I did a huge reno that i did on my house but that is construction and 1/8th in isnt as big of an issue as in furniture.
Mon, 01/28/2013 - 20:45
I've been wanting to build
I've been wanting to build something similar for my bathroom! Yours turned out great. It inspires me to get to work!
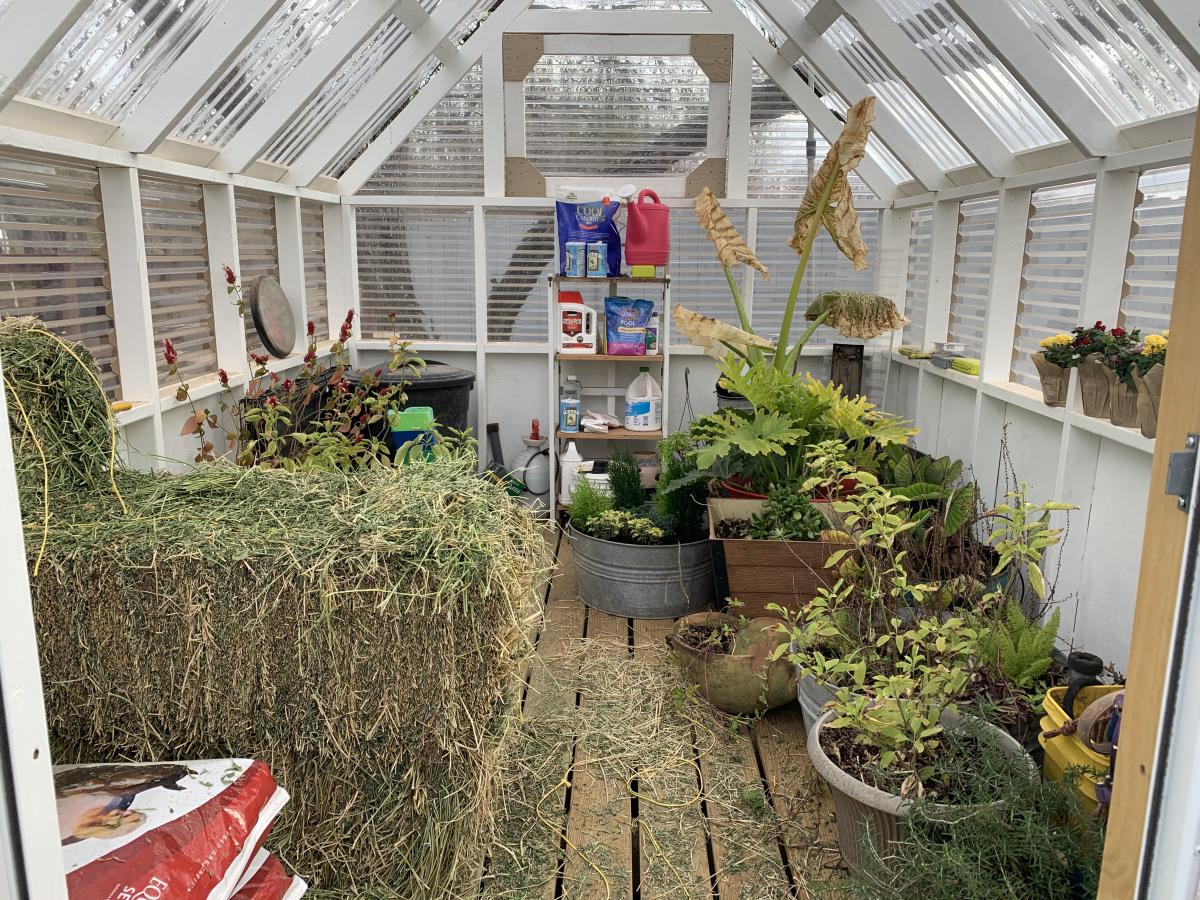
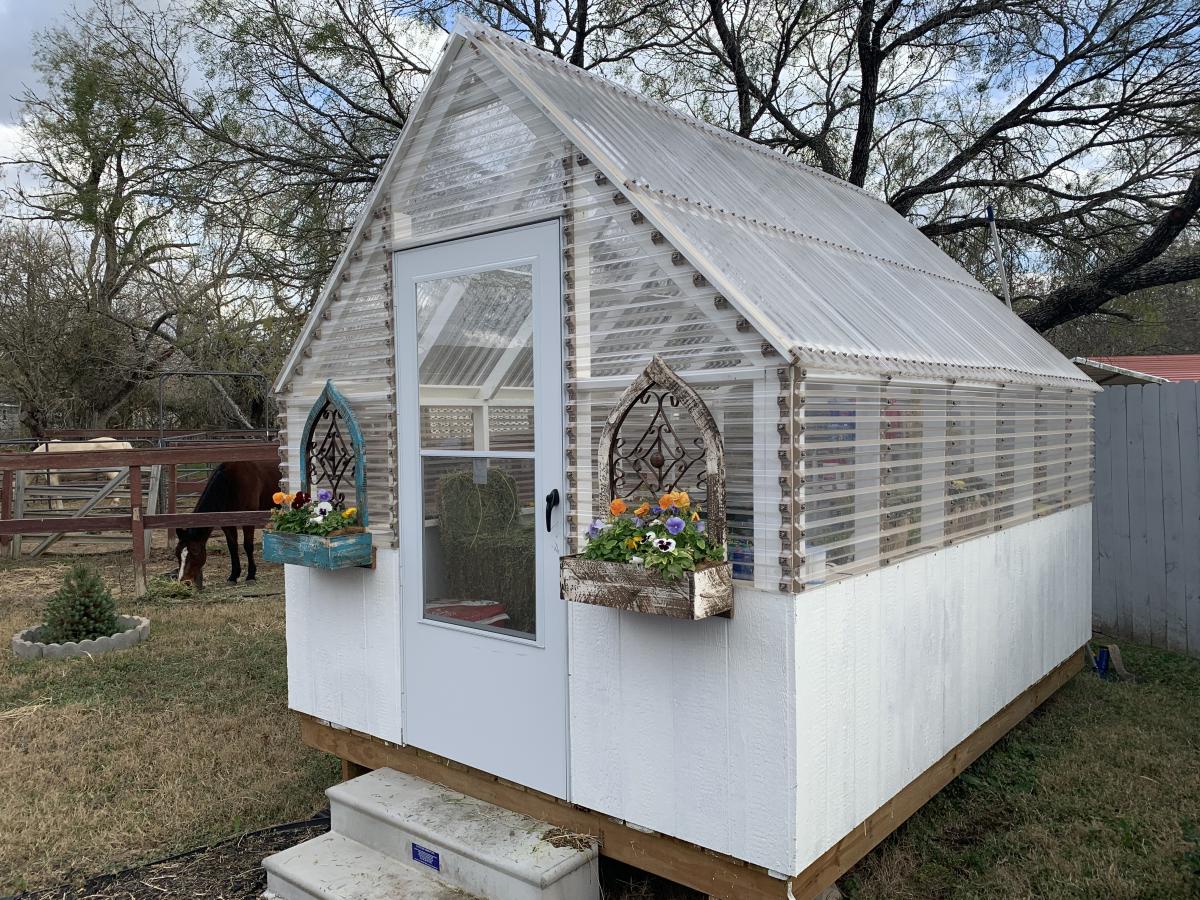
SMALL GABLE ROOF GREENHOUSE
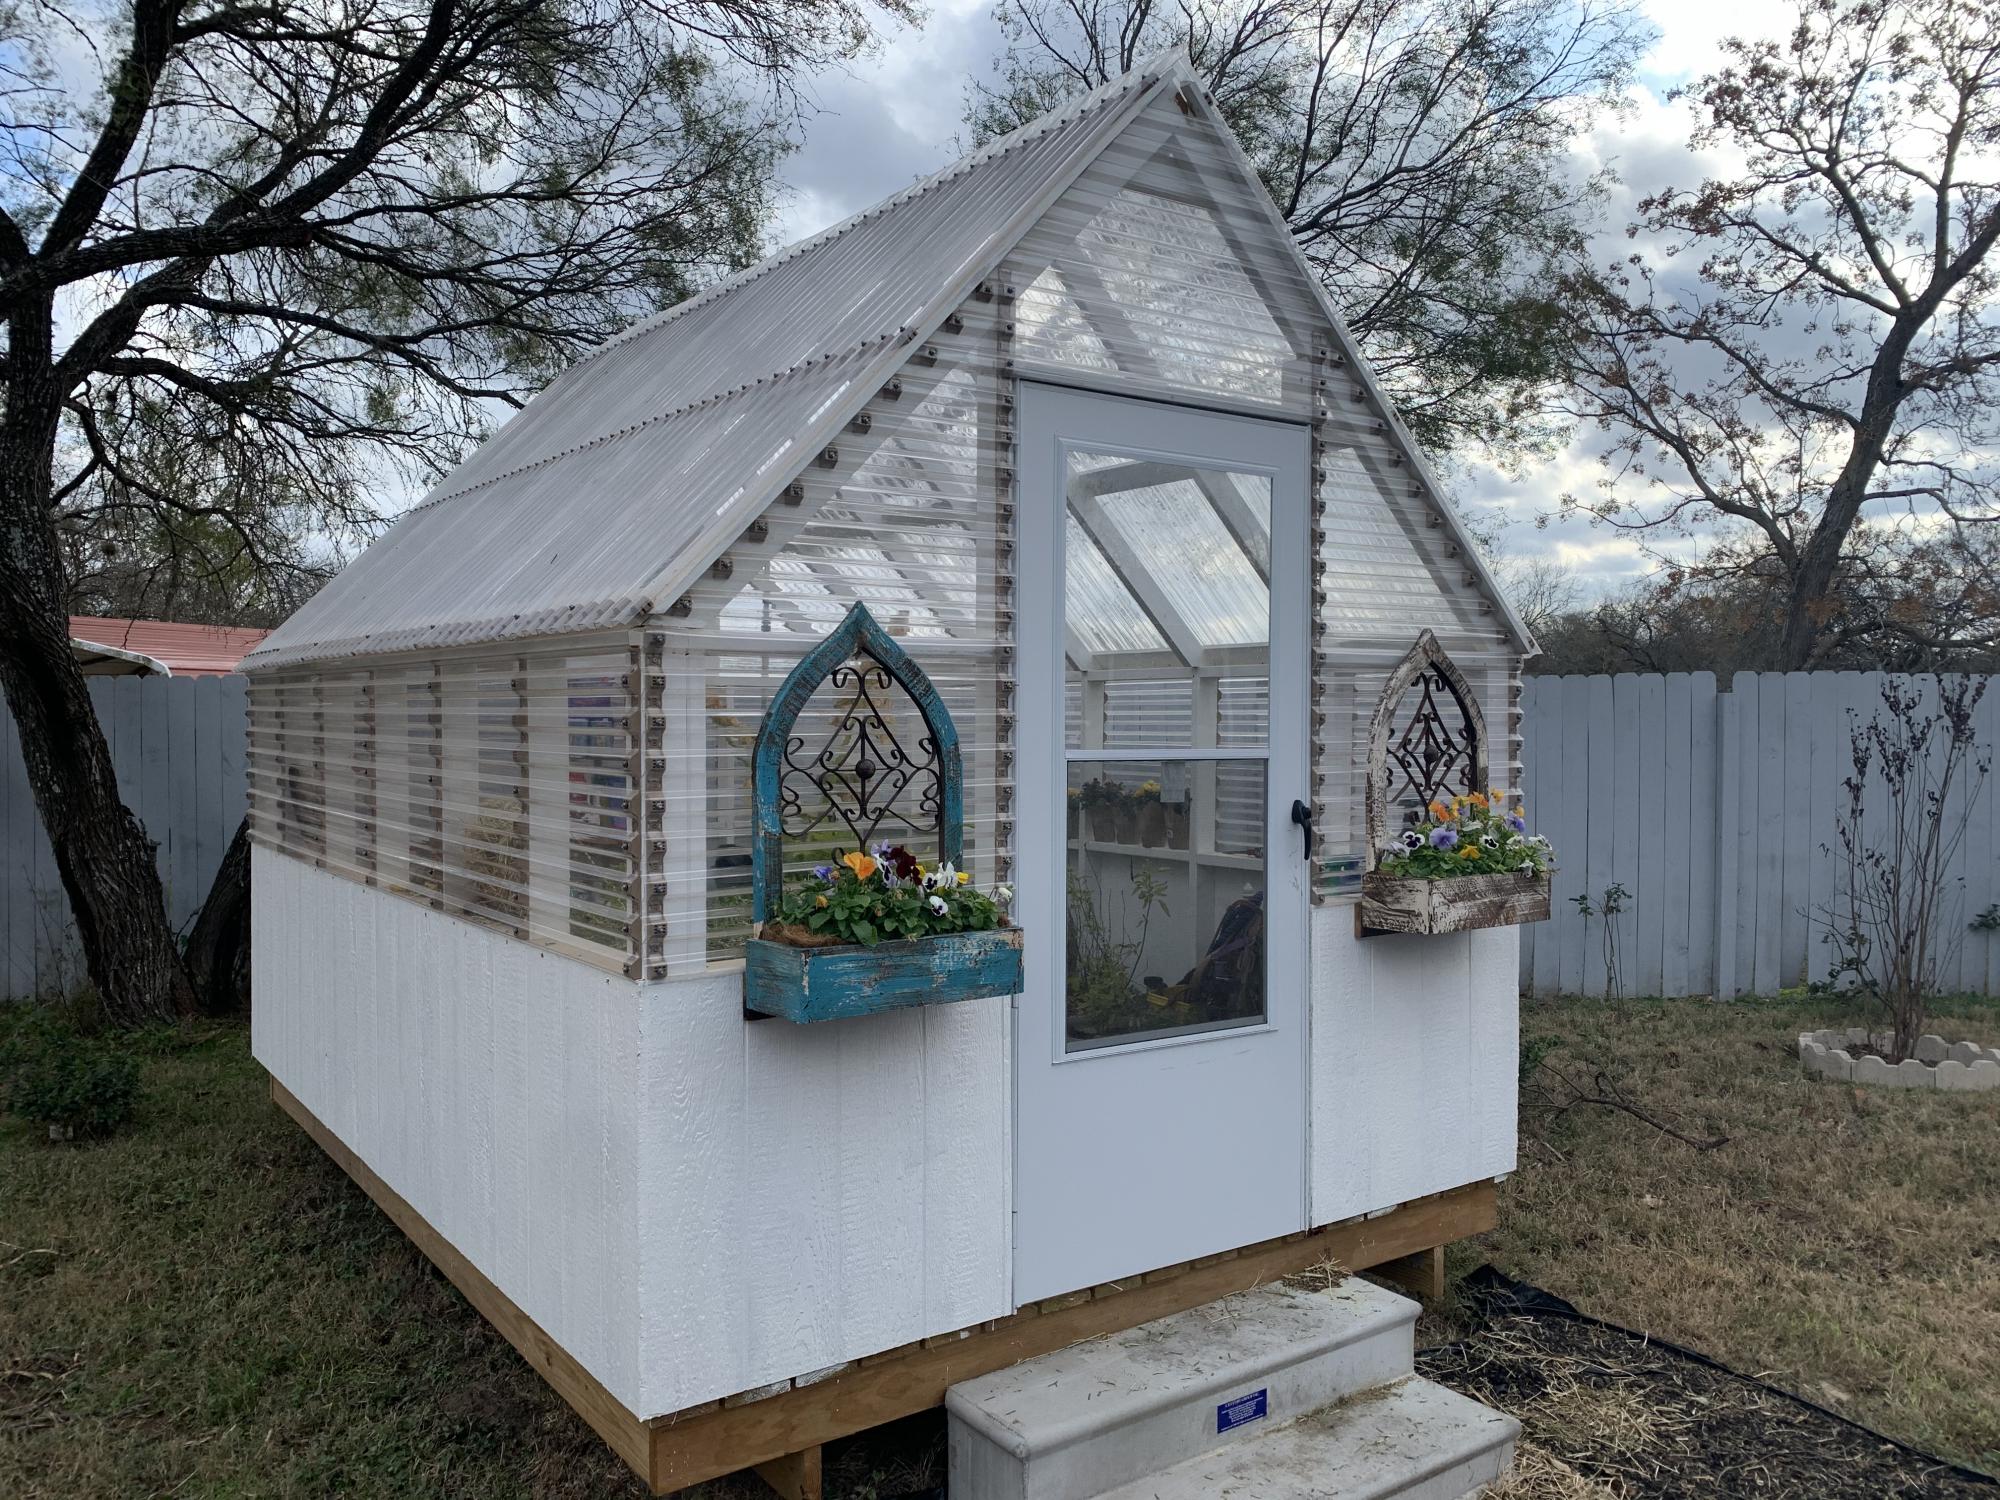
I was planning on building a greenhouse some time next year but I just happen to see this by chance and fell in love with it. I've always built from my own designs but when I saw this I decided to purchase the plans. I couldn't be more happy with it. Right now its doubling as a feed room. I wanted a solid foundation so I build a floating deck to mount the walls on. The deck added quite a bit to the total price.
Built from Plan(s)
Estimated Cost
$1384.94
Estimated Time Investment
Week Long Project (20 Hours or More)
Finish Used
Paint
Recommended Skill Level
Advanced
Comments
Wed, 12/23/2020 - 09:52
Just beautiful!
Love that you're able to double it as a feed room, great job on this build!