Square Outdoor Table with Built-in Seating
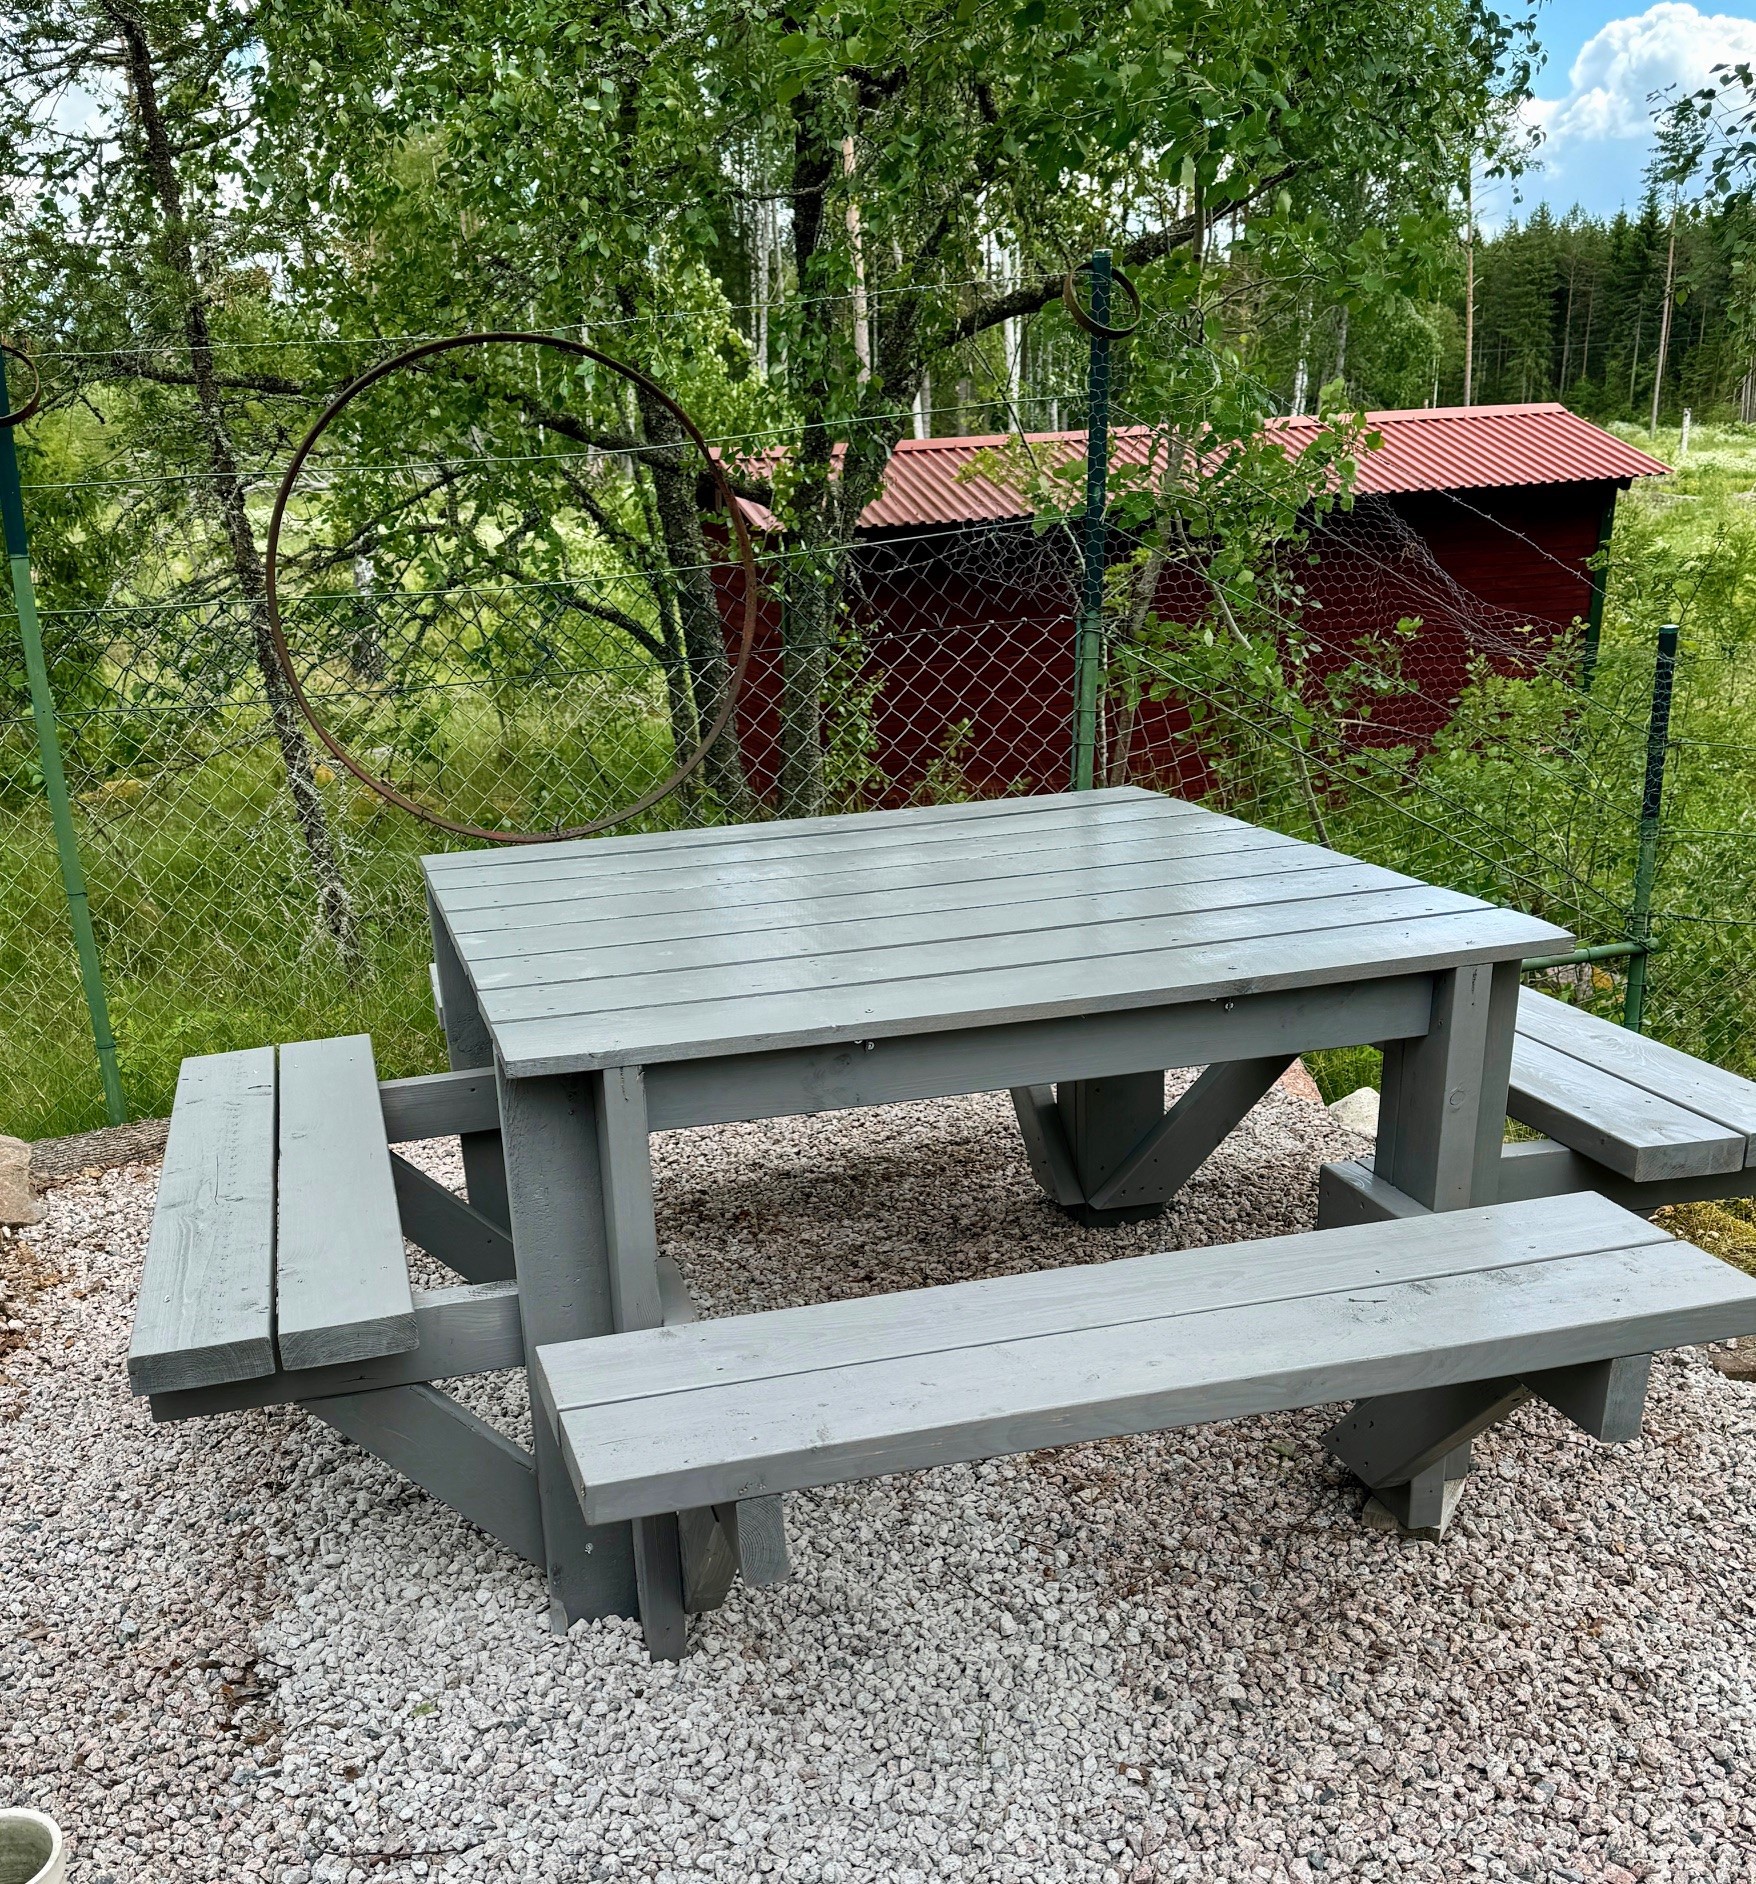
My first Ana White project, so fun to build. Now standing at my summer place in Sweden, ready for a whole summer of picnicking.
Marie Stana
Built from Plan(s)
My first Ana White project, so fun to build. Now standing at my summer place in Sweden, ready for a whole summer of picnicking.
Marie Stana
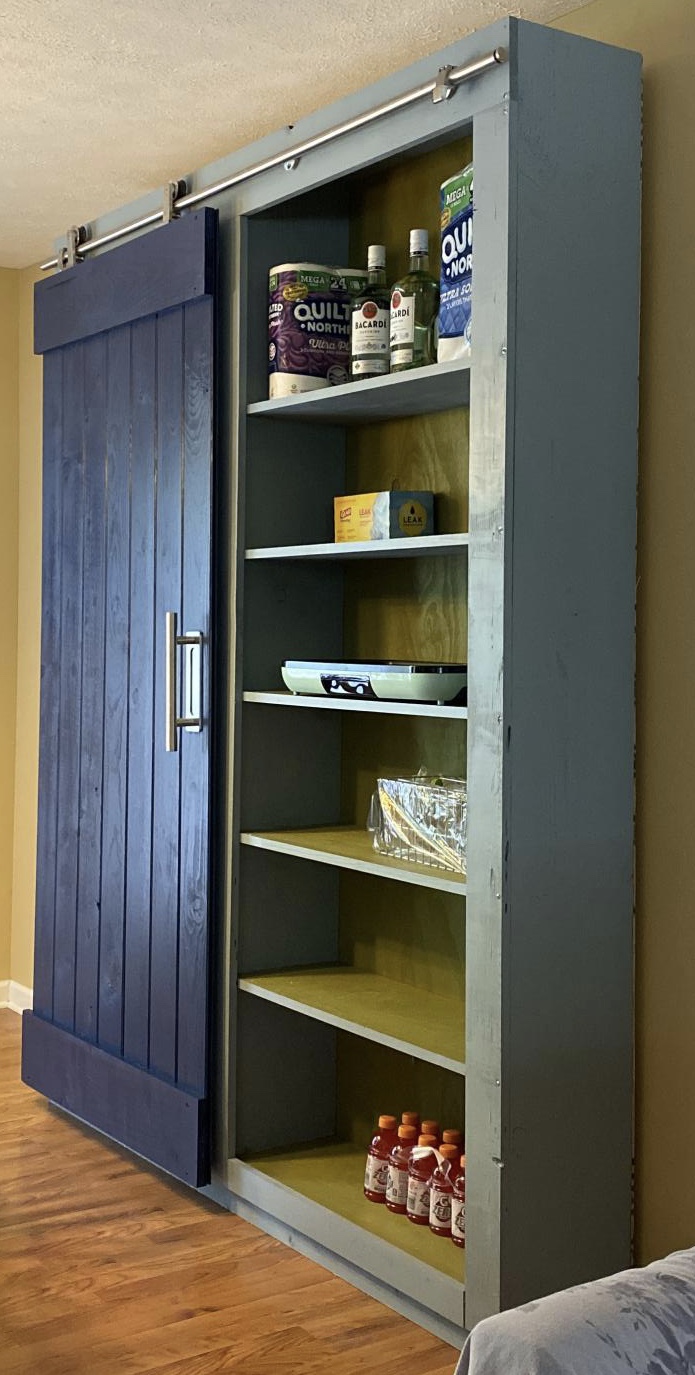
We didn’t have much storage space in our little galley kitchen. Imagine how excited I was to find this plan on my favorite site.
This was my first build using my new circular saw. For previous projects, I’d take both the shopping list and cut list to Lowe’s and have them cut the wood. This time, I made all my cuts. I was nervous but love how it turned out.
I anchored it to the wall because with the barn door and the hardware weight, it felt a little front heavy.
We used the same color as our kitchen cabinets (AH13 Salty Dog) and then selected coordinated colors for the body (AH18 Debonair) and shelves (AH15 Rural Green).
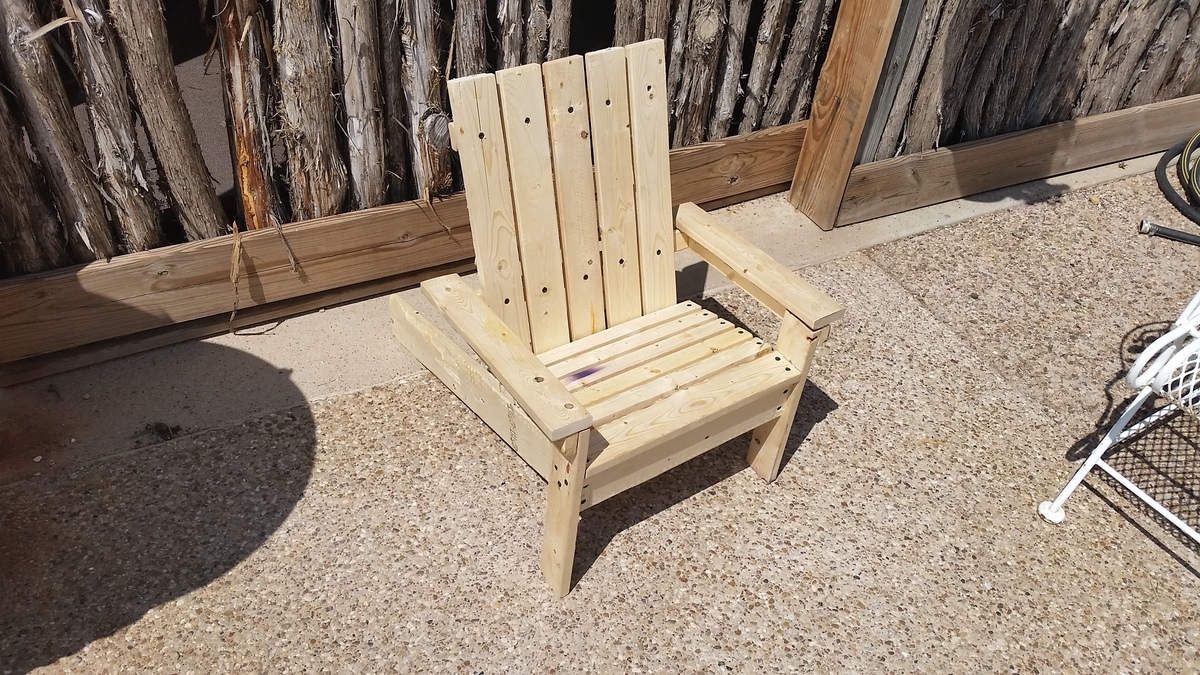
Isaac is 14. He built his baby sister a chair inspired by Ana! He builds things almost daily!

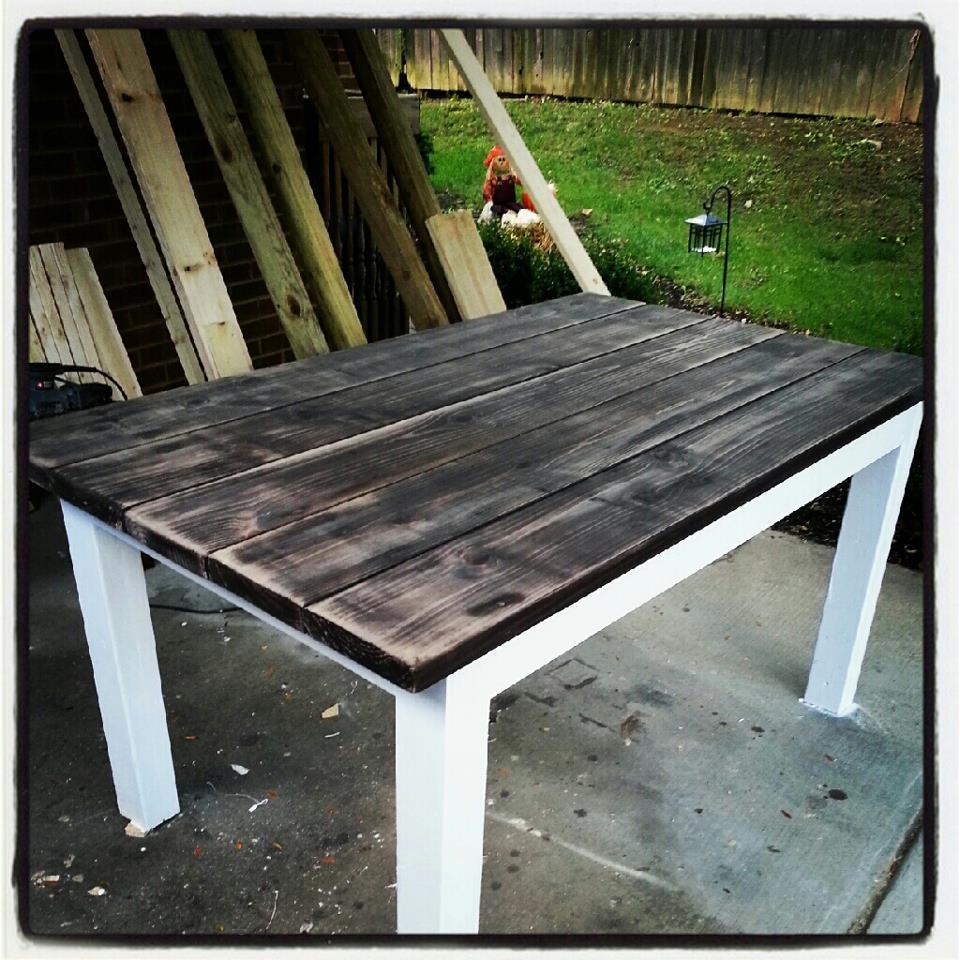
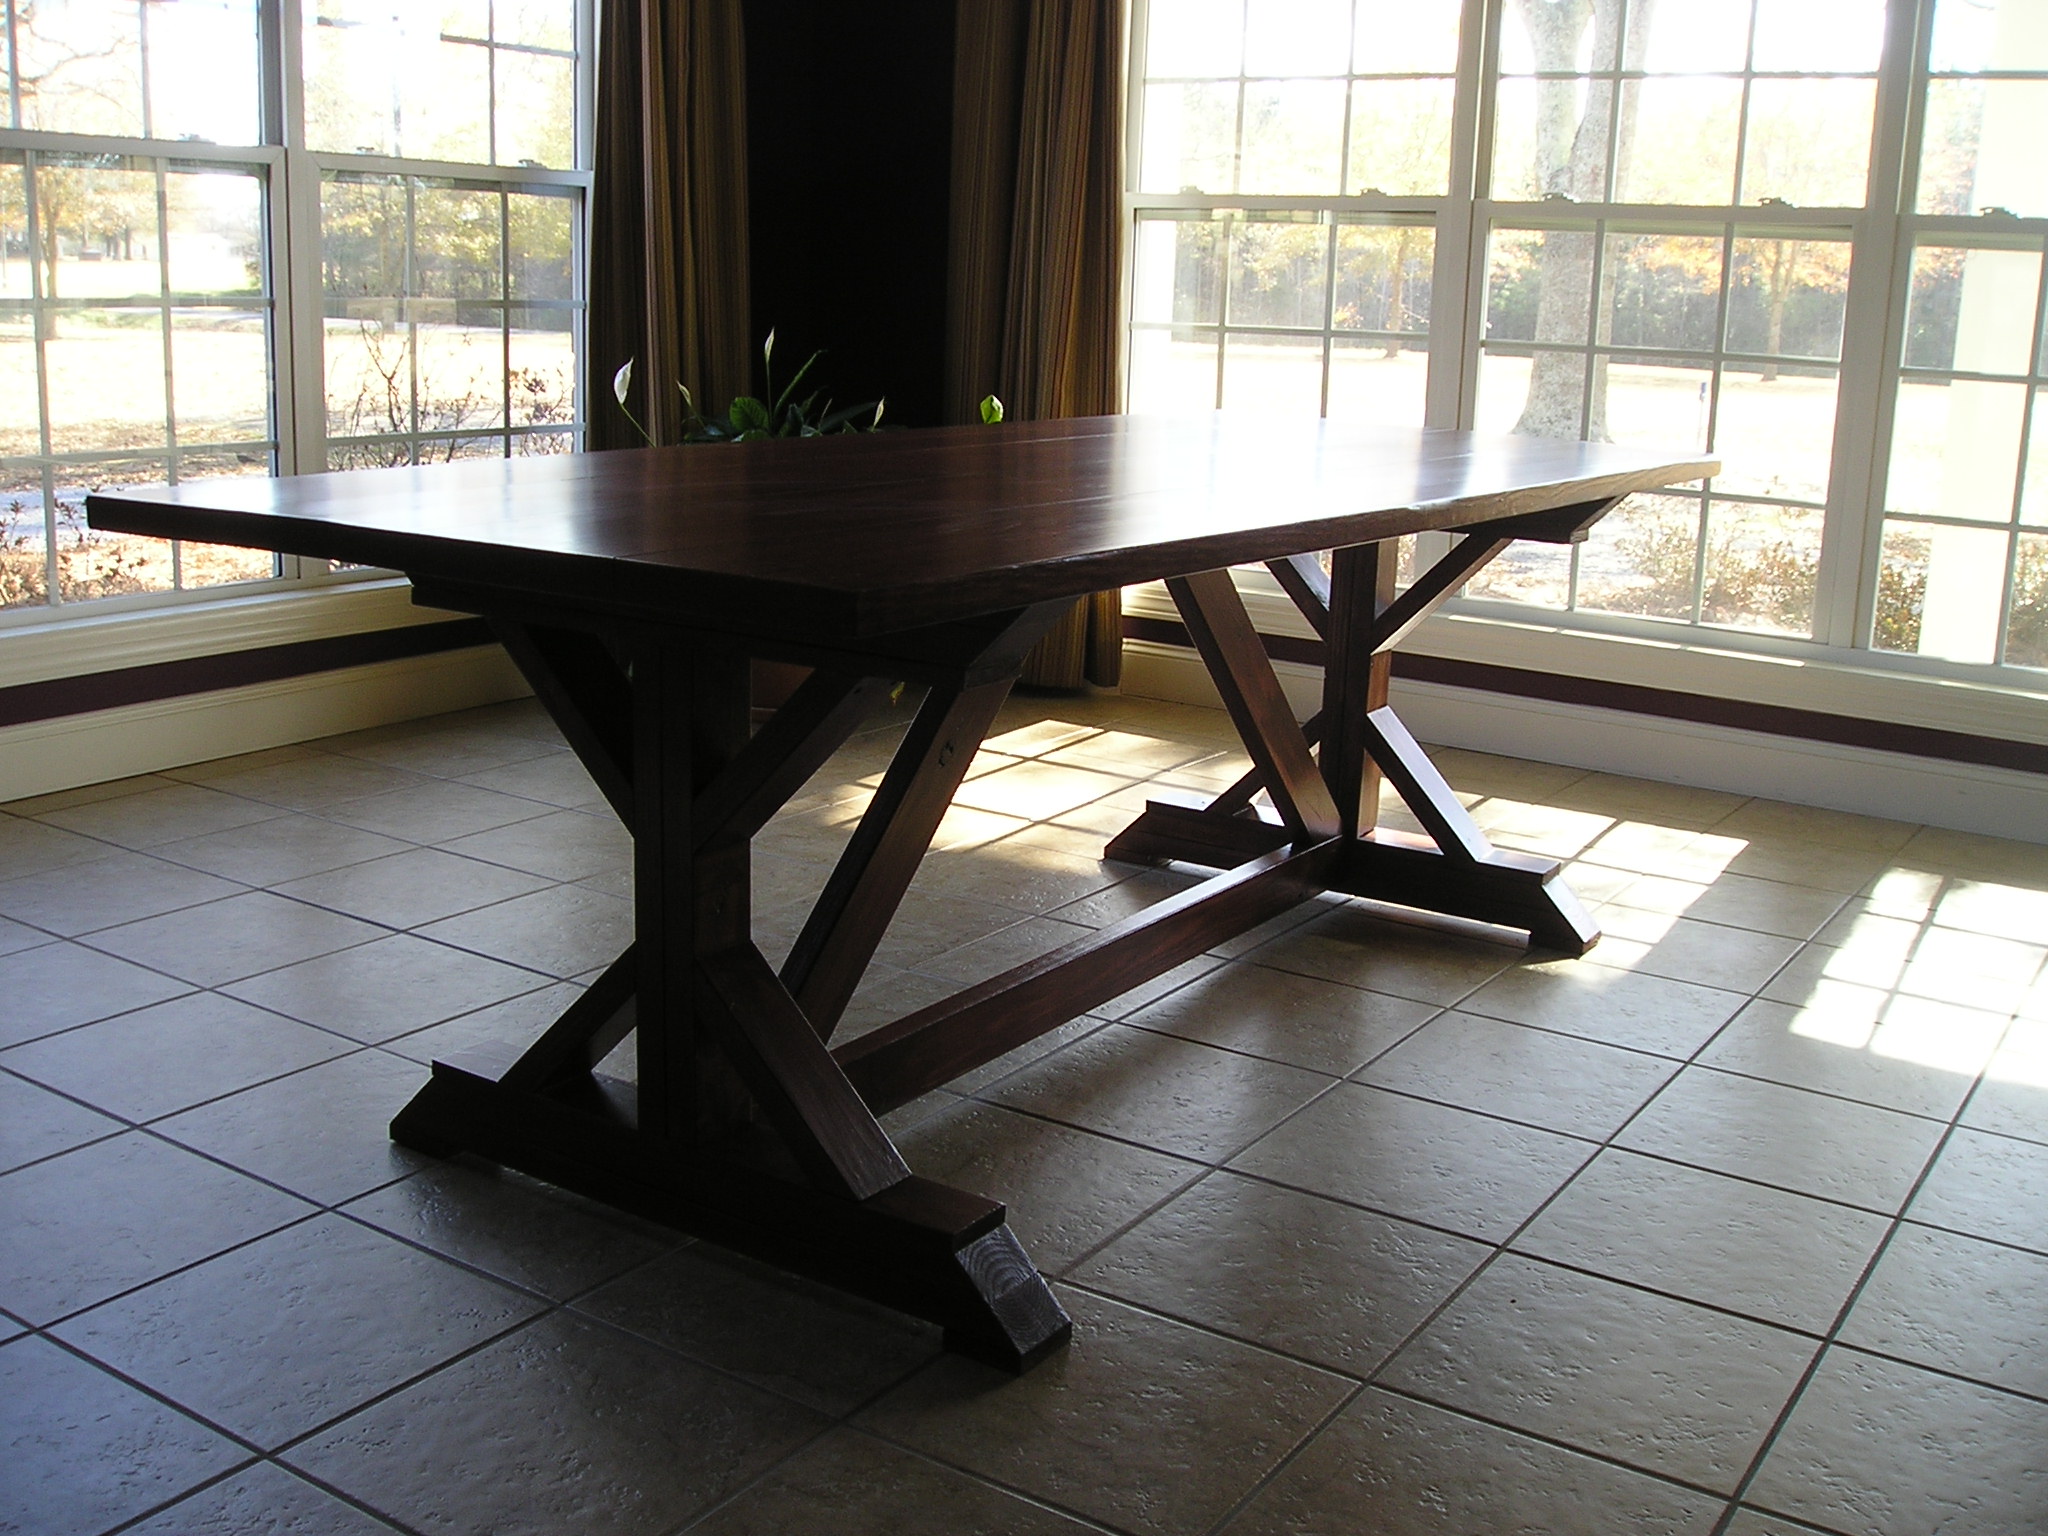
After I built my table (the farmhouse/tryde), my sister wanted a table for her new home. She had looked online and found a table that someone had refurbished from an old table, and put a new top on it..
So once she described it to me, I got started. I again used 2x4s glued/screwed together for the legs. Then I got 2x8 and start putting them down. Since these are such big boards, you have to be extremely careful not to get ones that aren't straight. If they are warped, they will make your table wobbly once you screw them down. After I finally got past that, I began staining.
For the distressed-ish look, I used Rustoleum's water-based Kona stain. I stained each board and then use a wire brush to "scruff" the boards up a bit. From there, I sanded the tops with a combination of 60 grit and 220 grit. I used Rustoleum's matte-finish poly to give it a very soft feel and look.
This table compares best with the farmhouse.
Mon, 10/15/2012 - 14:48
I'm sure you can build it to come apart. This particular one, no. I made another where the top will come off as a one solid piece, but this top is screwed in each individual piece.
Now you could unscrew everything and screw it all back together, but then you would have to make touchups to the paint and stuff. I use white caulk to fill the seams from the base of the table to the table top, and to the legs to the base.

I am so excited about Ana's new book, I love it! This is my first project from her book and I am planning to do many more.
This was a fun build, the angles were not bad, except for the top angle on the two sides, I had trouble getting it on my miter saw, because the board was so long...
It all worked out in the end and my kids and I are really enjoying having it!
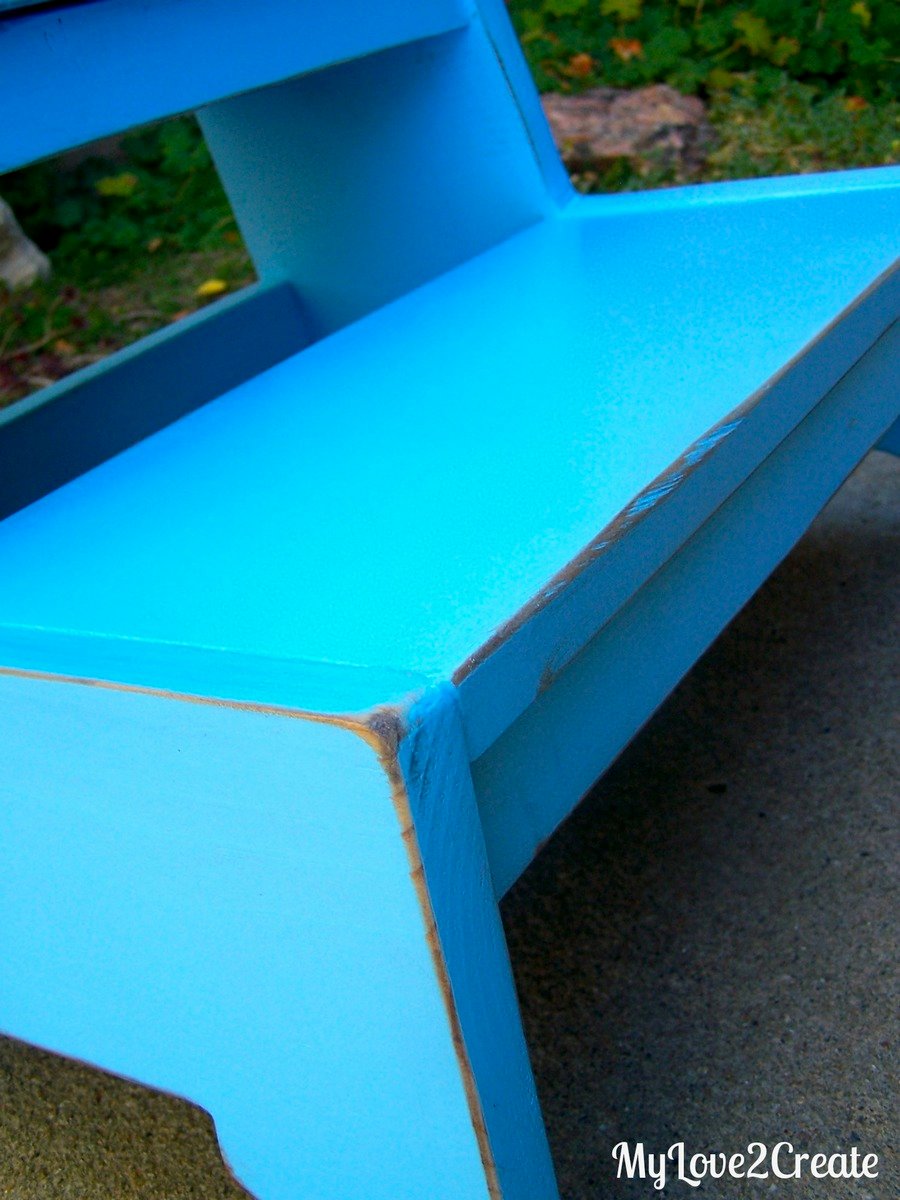
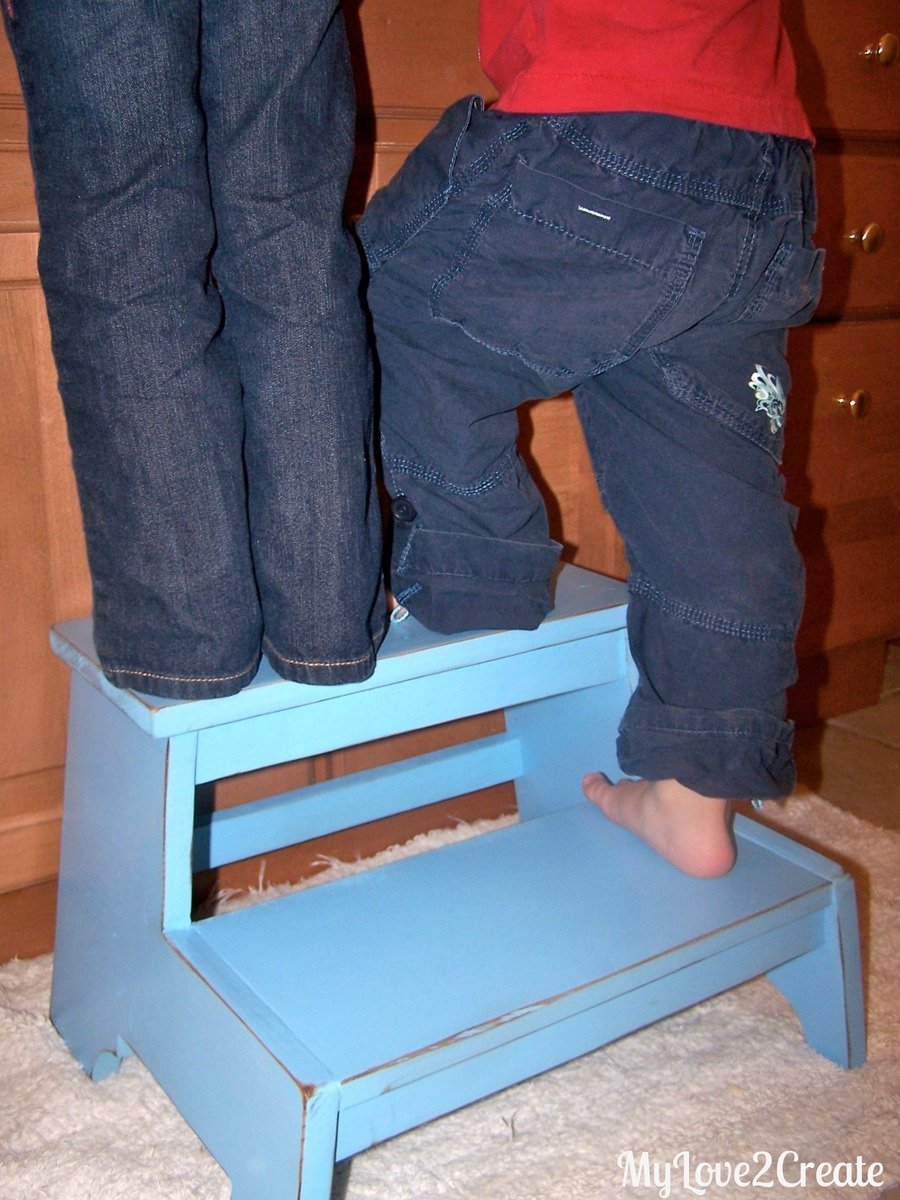
You can get more information on the build and finish at my blog:
http://mylove2create.blogspot.com/2012/10/vintage-step-stool.html
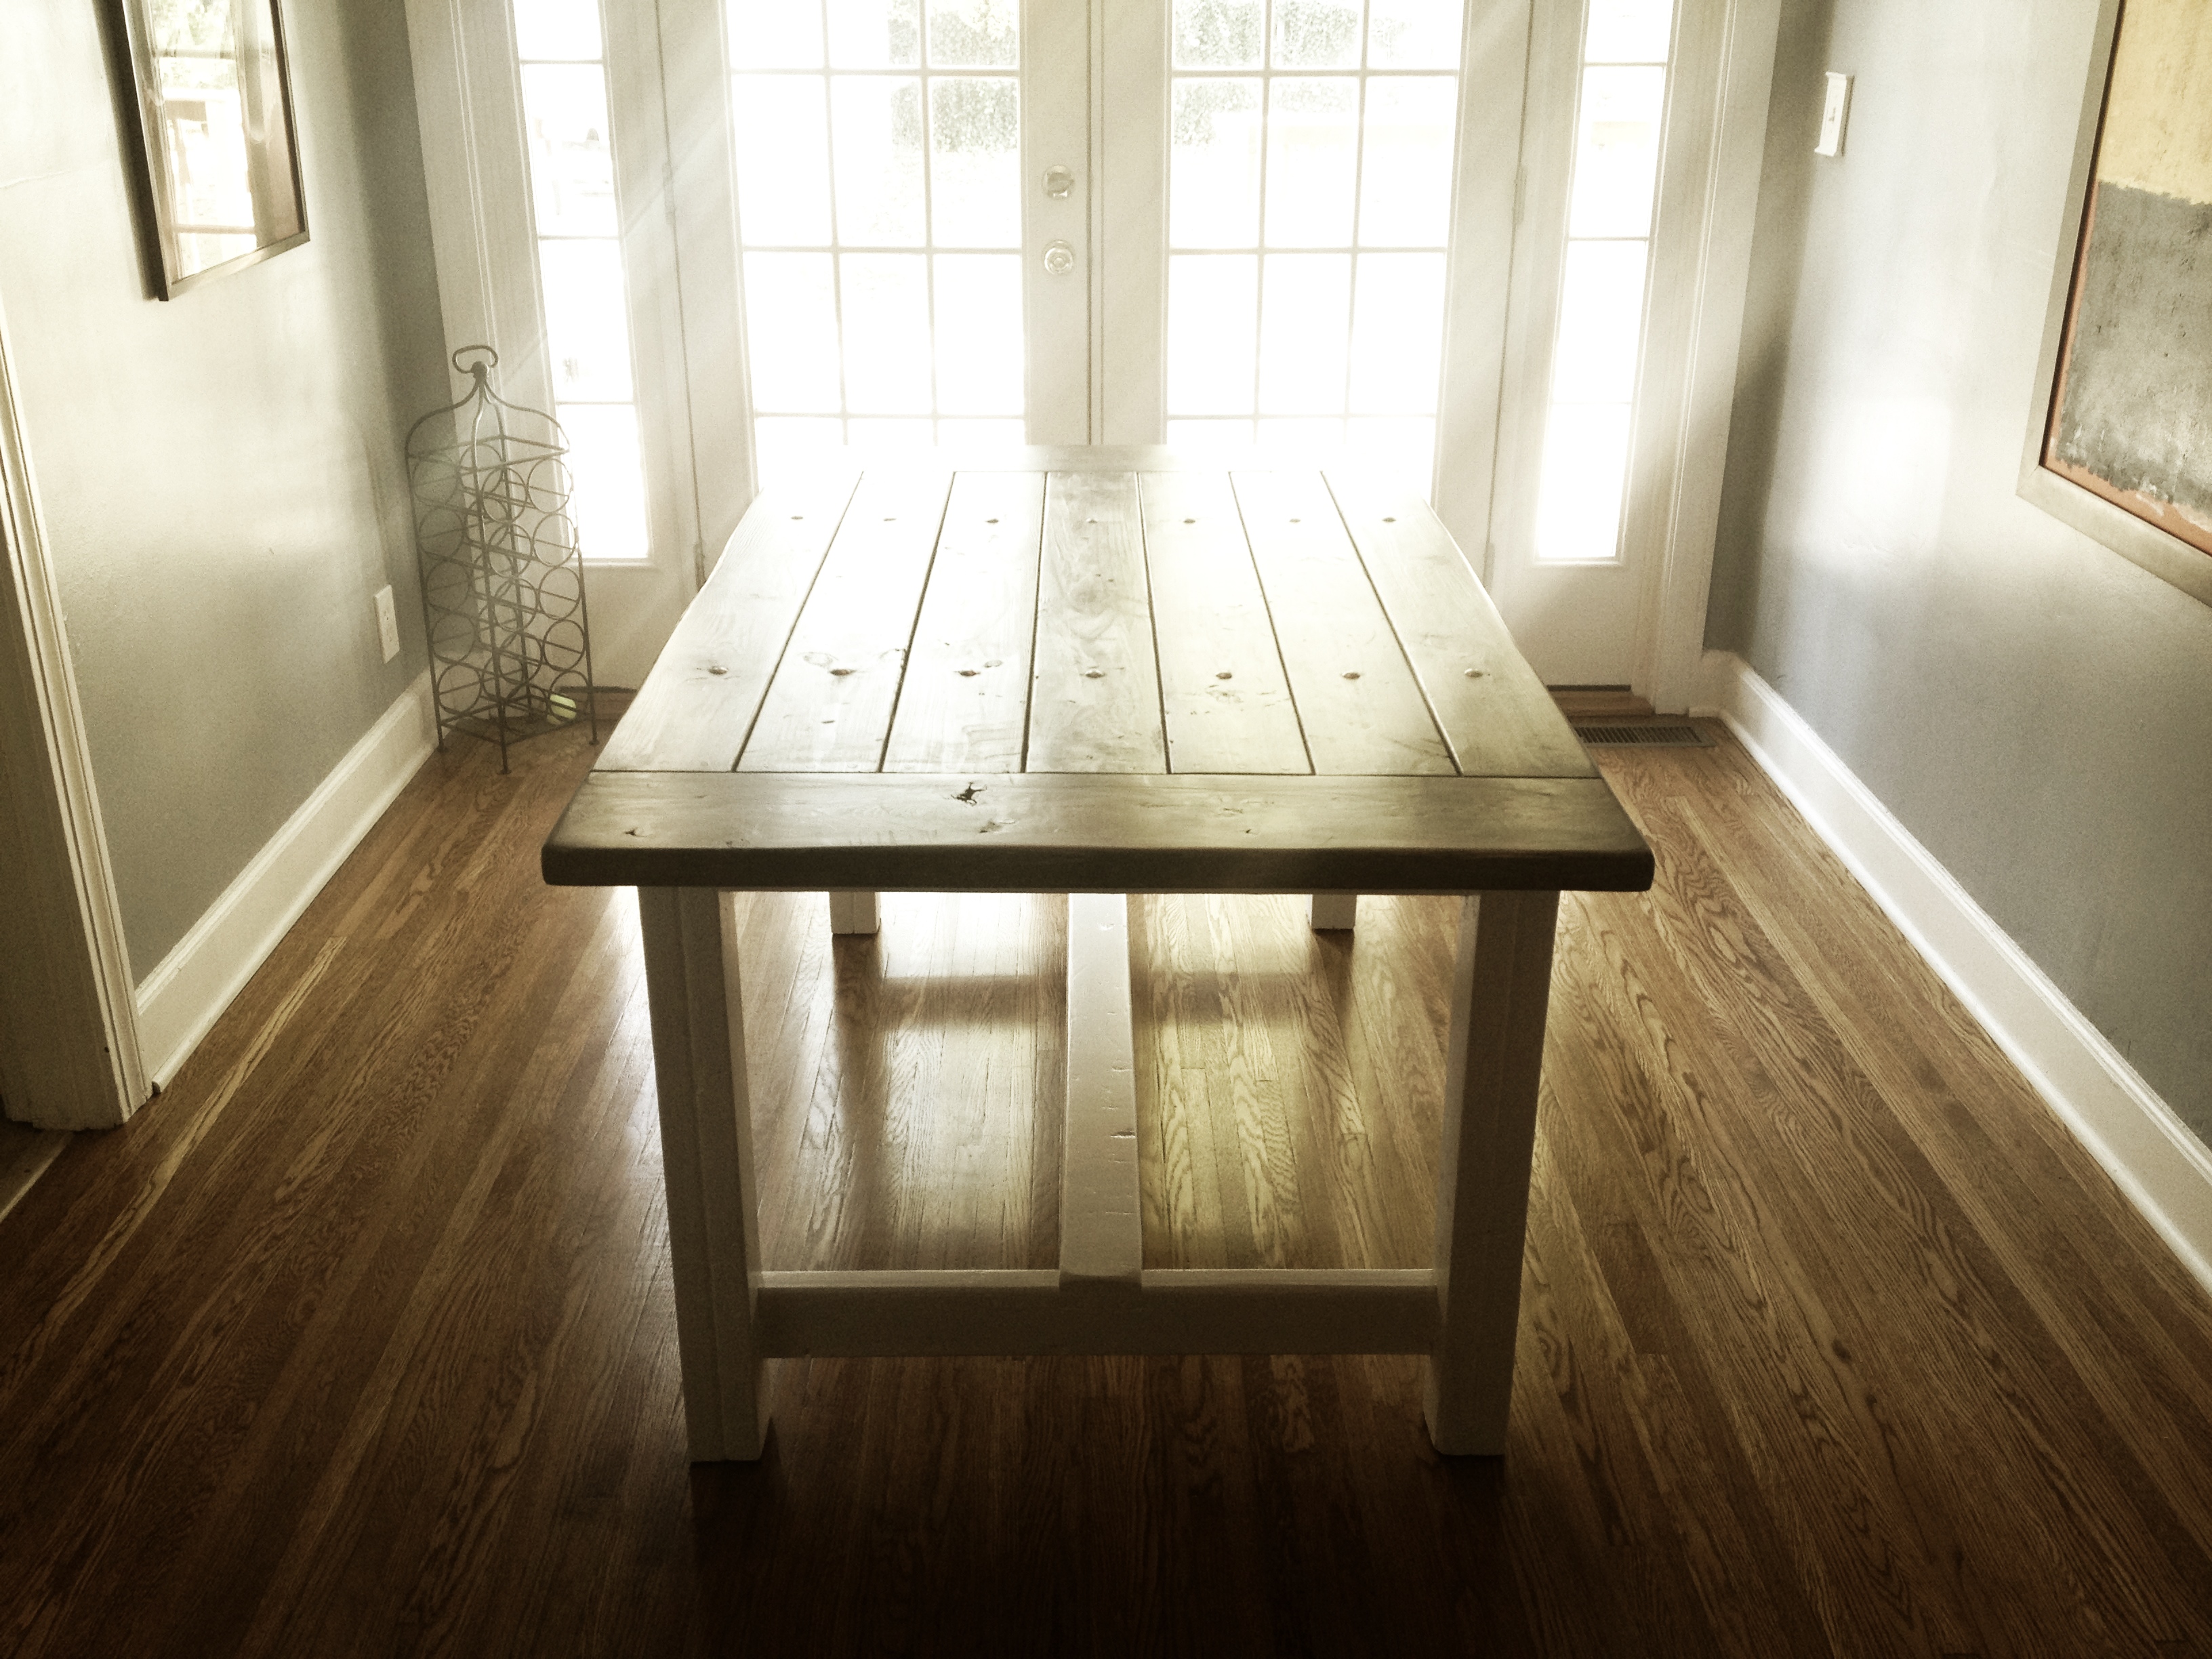
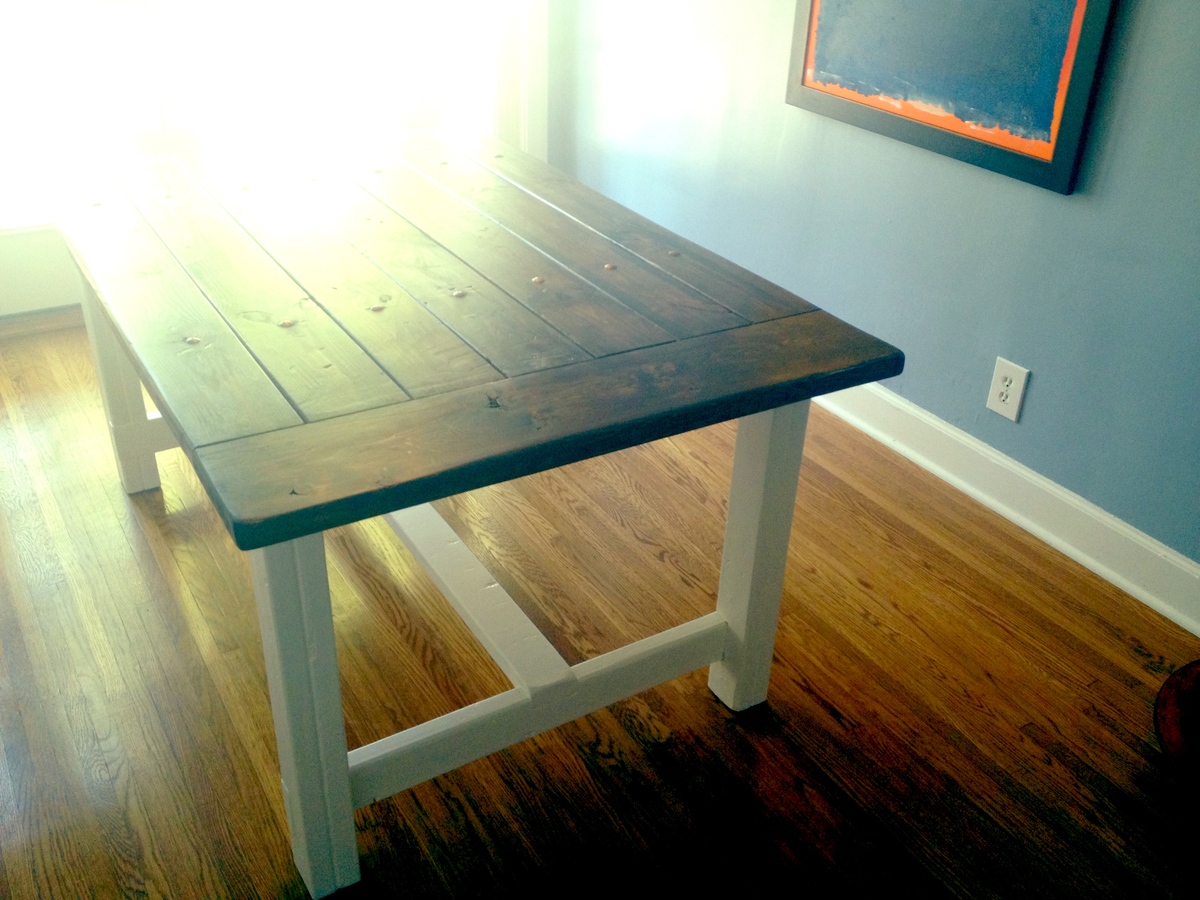
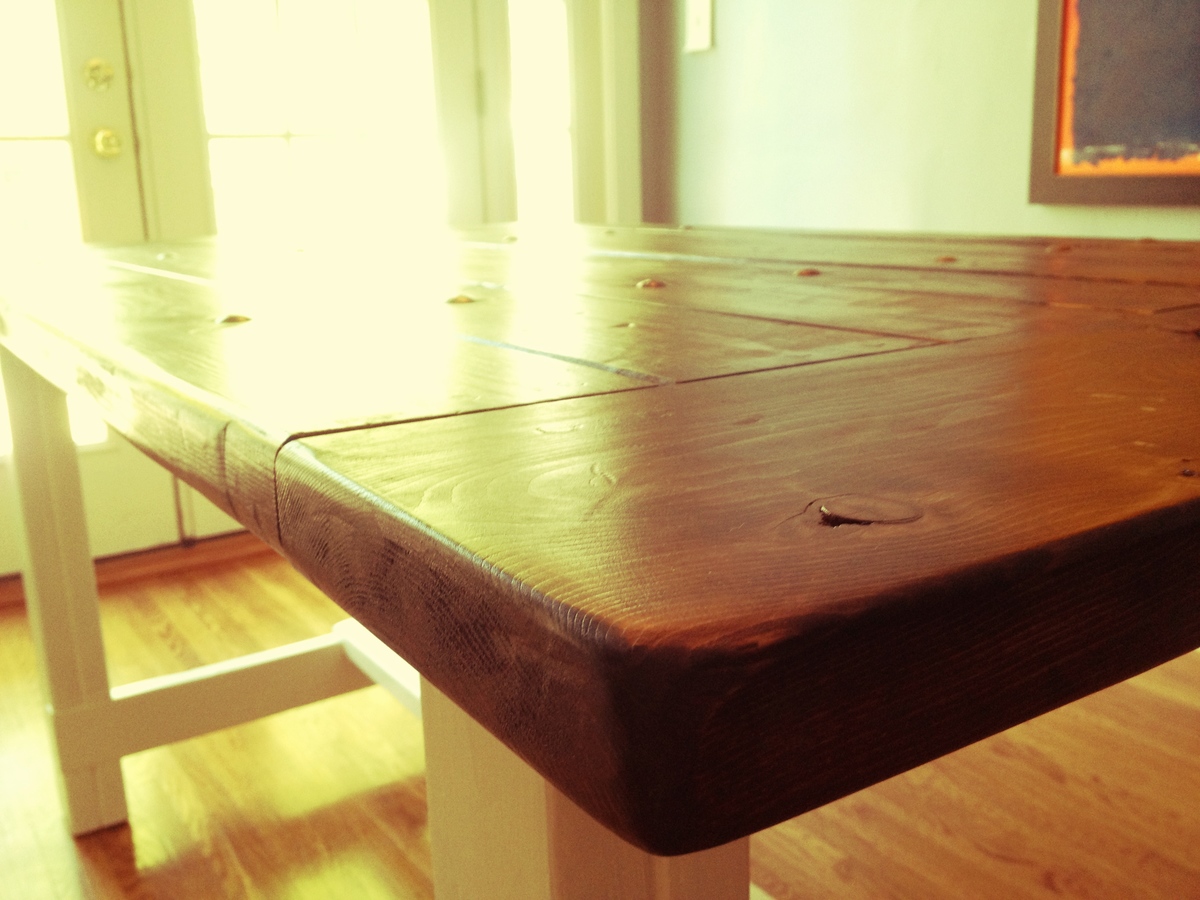
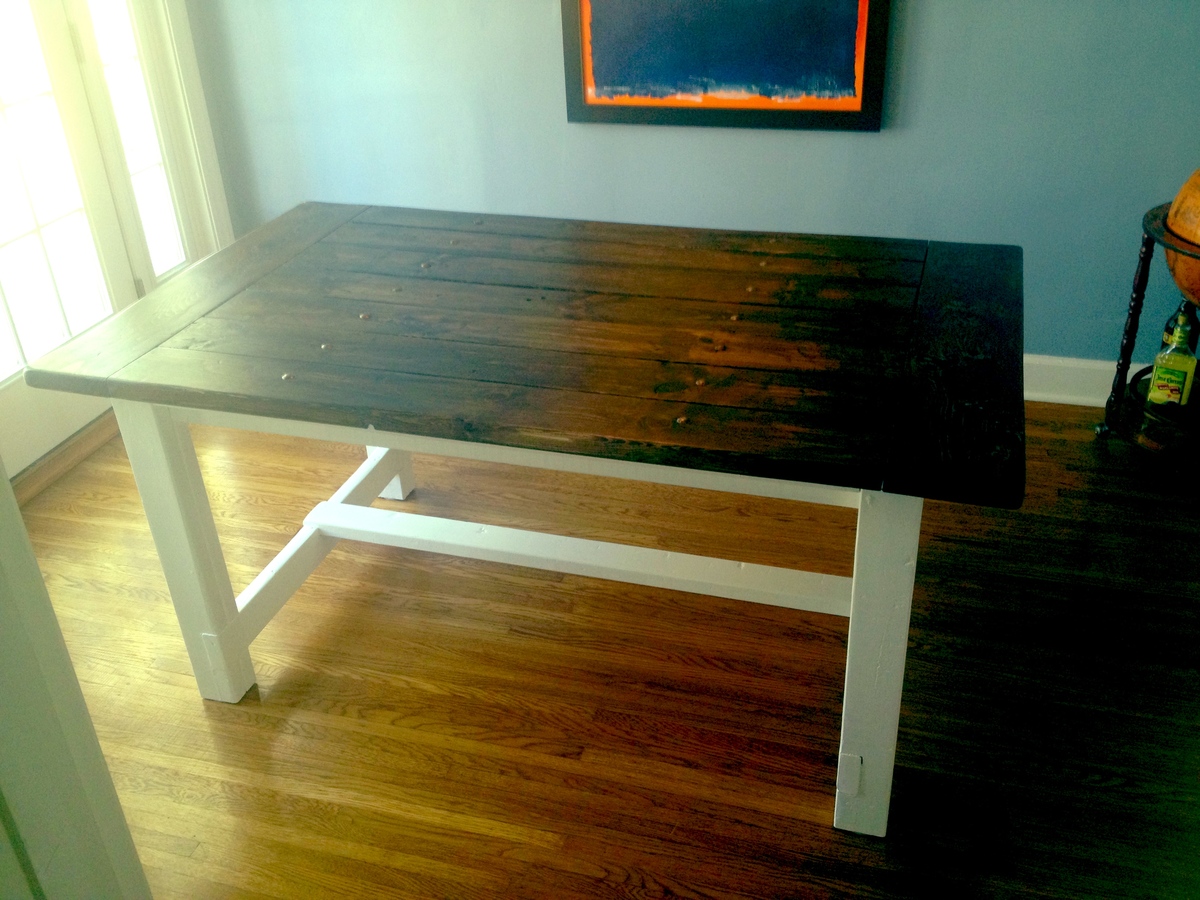
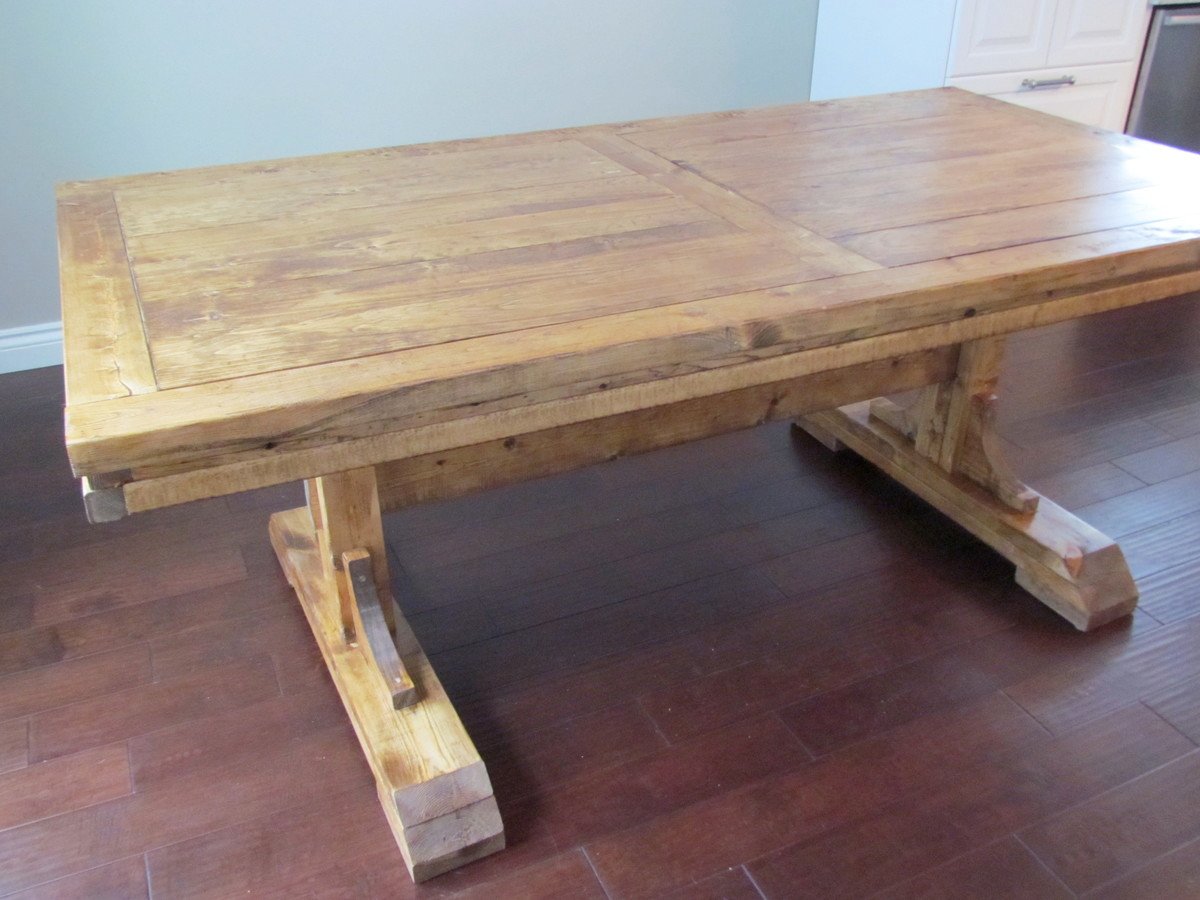
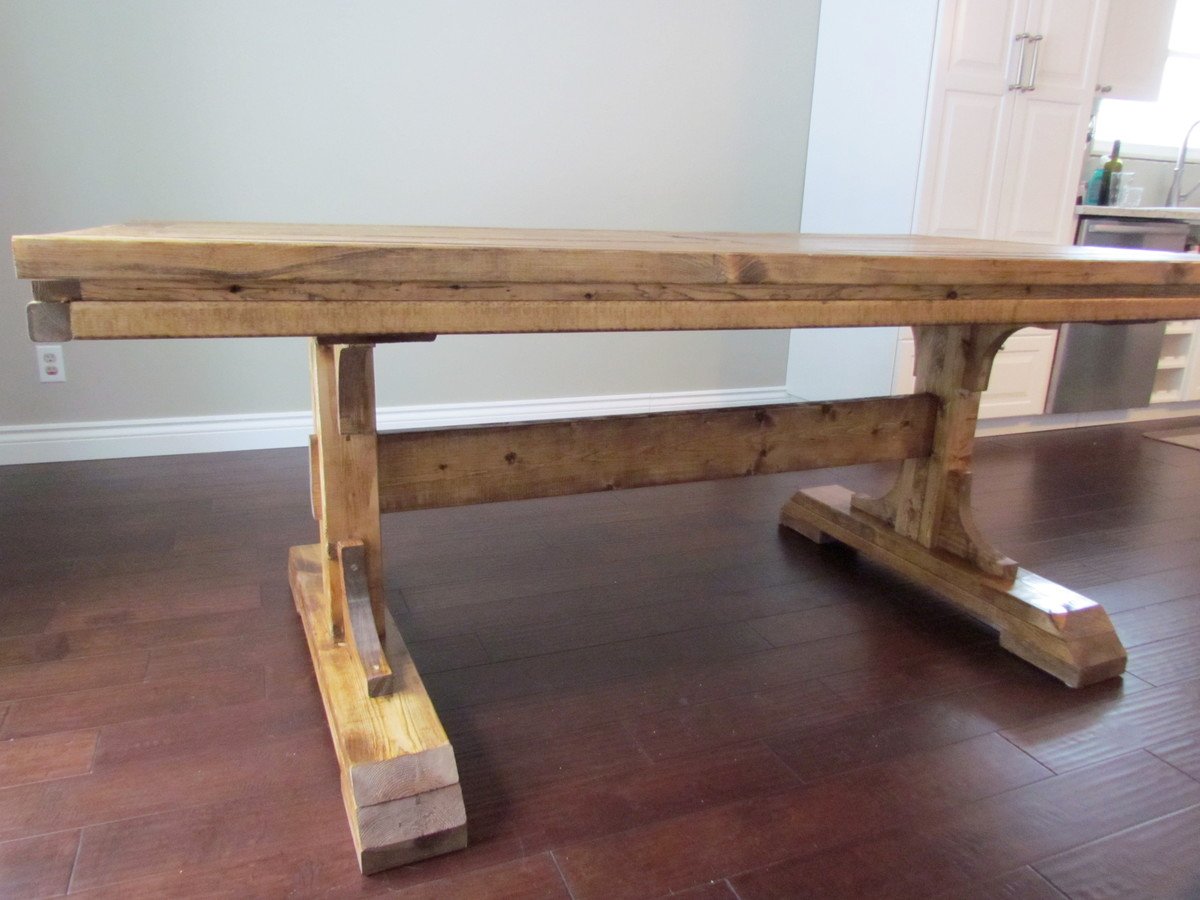
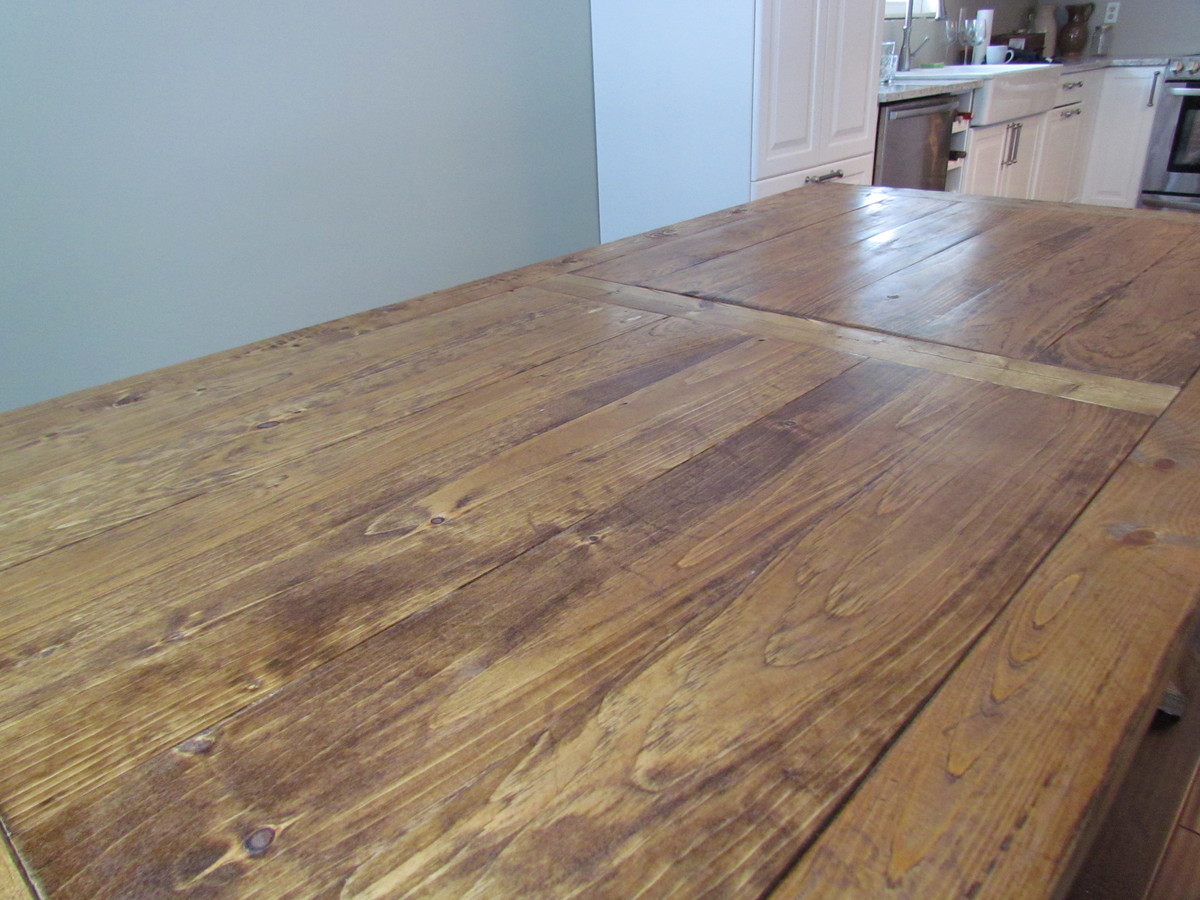
This was a week-long project. I love this site because there are so many original tables to get great ideas from! I chose the Farmhouse table plans because of its simplicity and beautiful lines. The length of the table was a little much for my room, so I shortened it a touch. Dark walnut for the stain and Satin Ultra Pure white for the legs to match the trim in my house... a real beauty! Have fun with yours!!!
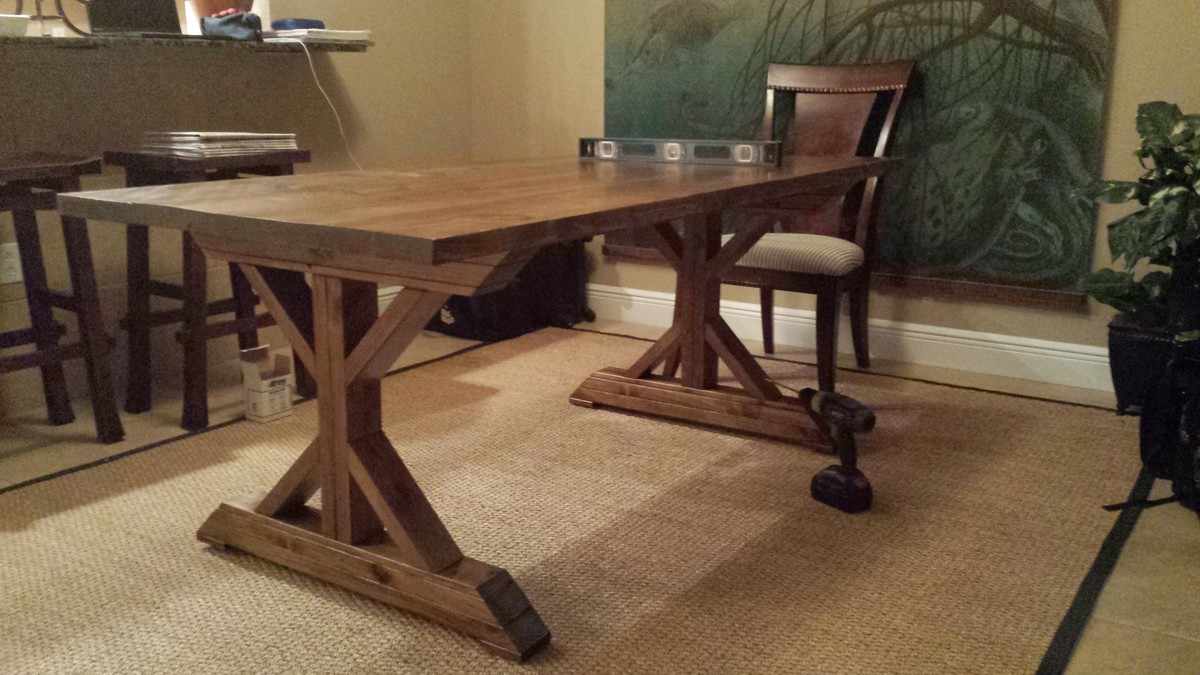
Made the table 6 feet long to better fit the space. Made it 2 years ago, just now getting around to post it, but it has held up well in our vacation rental.
New to woodworking, first Ana-White plan. Changed the dimensions a little to fit our living room decor. Bottom shelf is 2x8's. Ground through the learning curve but pretty happy with the end result. Hand distressed the project. Kreg jig made it much easier. Love this site and looking forward to building new projects!
Tue, 09/09/2014 - 07:32
Hello!
I'm looking to scale this project down for my living room as well - do you mind sharing your final dimensions?
Thanks!
Tue, 09/09/2014 - 08:37
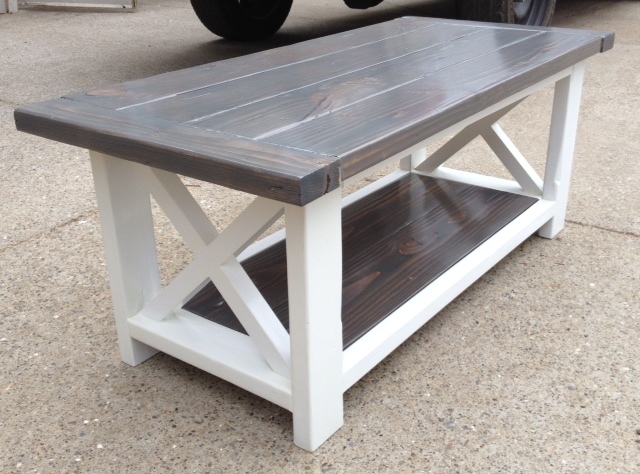
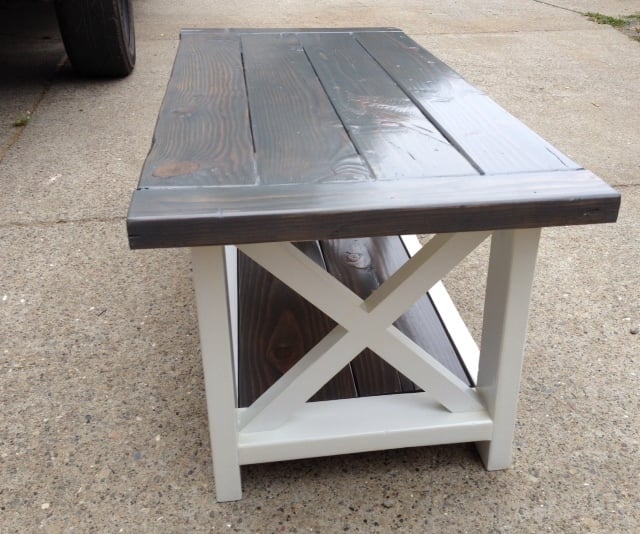
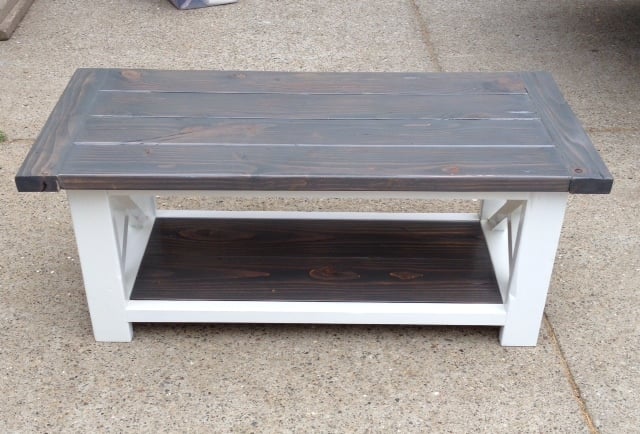
Top surface: (4) 2x6's cut 42" long - which will be 22" wide;
Breadboards: (2) 2x4's cut 22" long - Top surface becomes just shy of 49" in overall length;
Bottom surface: (2) 2x8's cut 36" long;
White frame: 18" wide to the very outside edges,
43" long to the very outside edges,
Hope that helps.
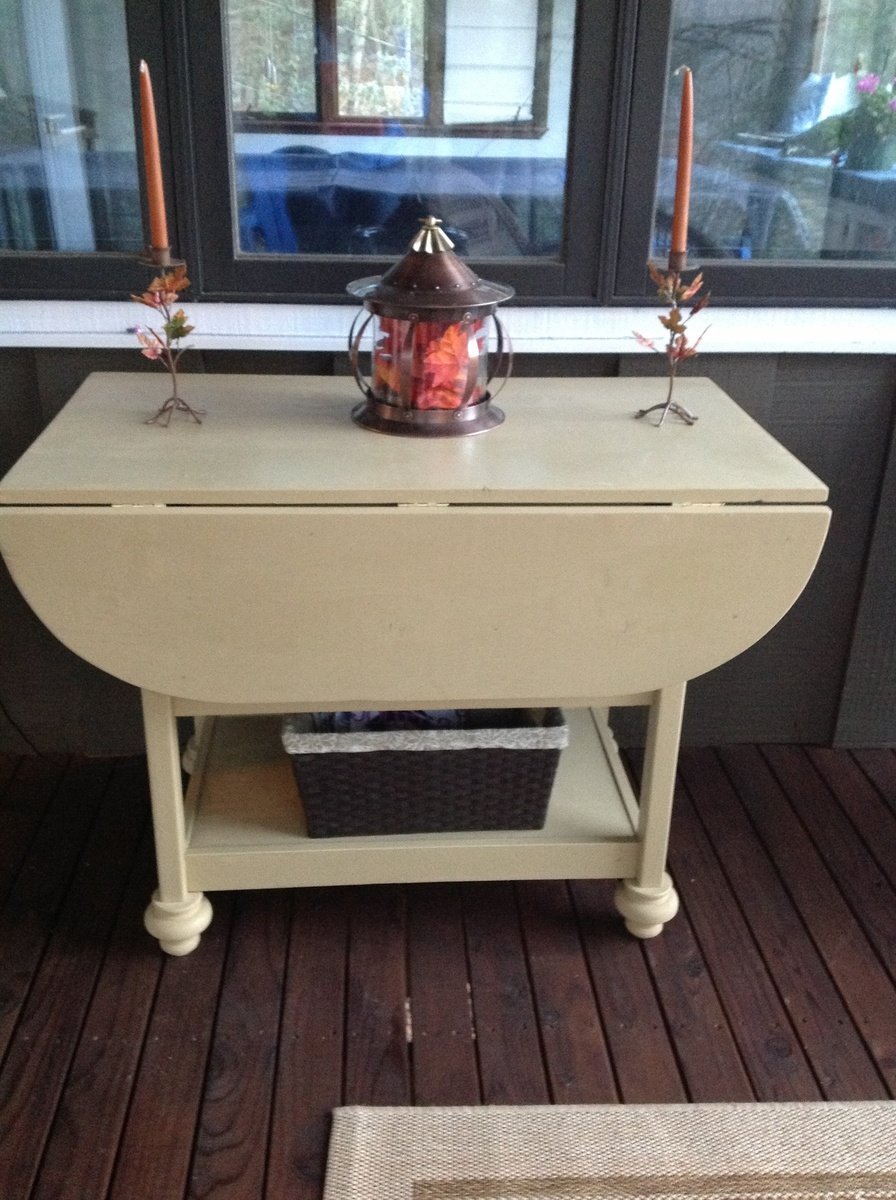
This table is perfect for our screened in porch at the lake house. Everyone seems to gather there so we have rockers and casual seating. When we want to eat out there we just open the table and move it to the center.
Thu, 11/29/2012 - 04:22
NCLimo...you do really excellent work. I shy away from curves because my jig saw has a mind and GPS of its own. And to build this table in an afternoon is amazing. I would probably take several days. Keep the projects coming and offer any advice you can throw my way.
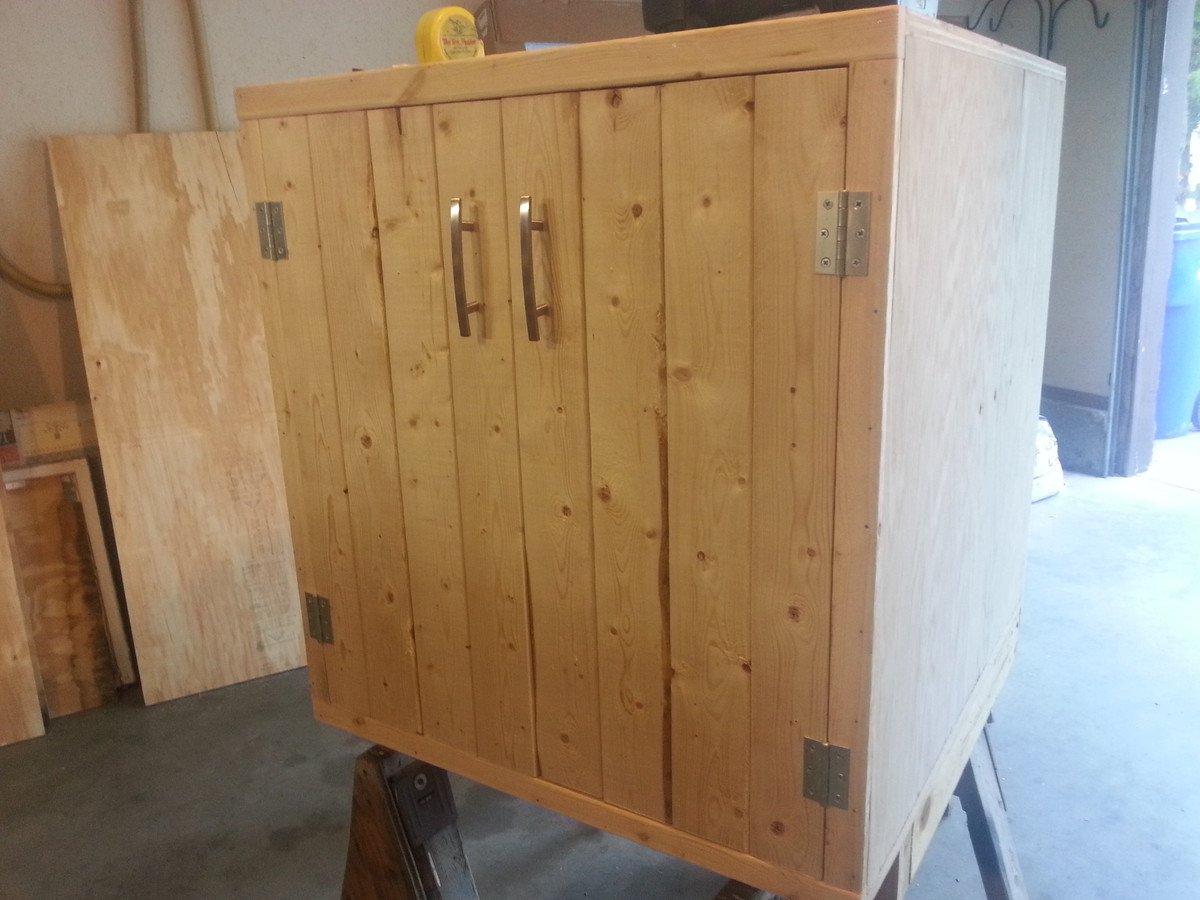
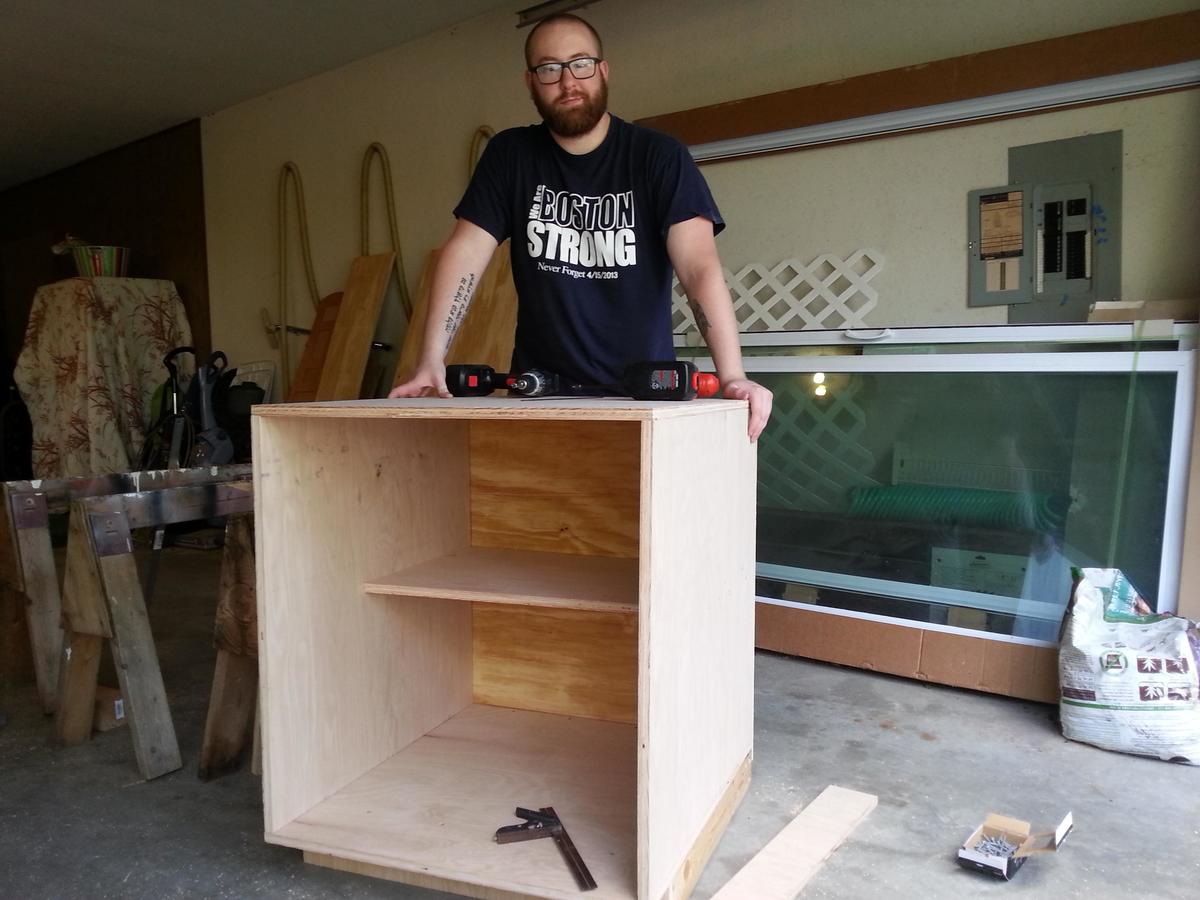
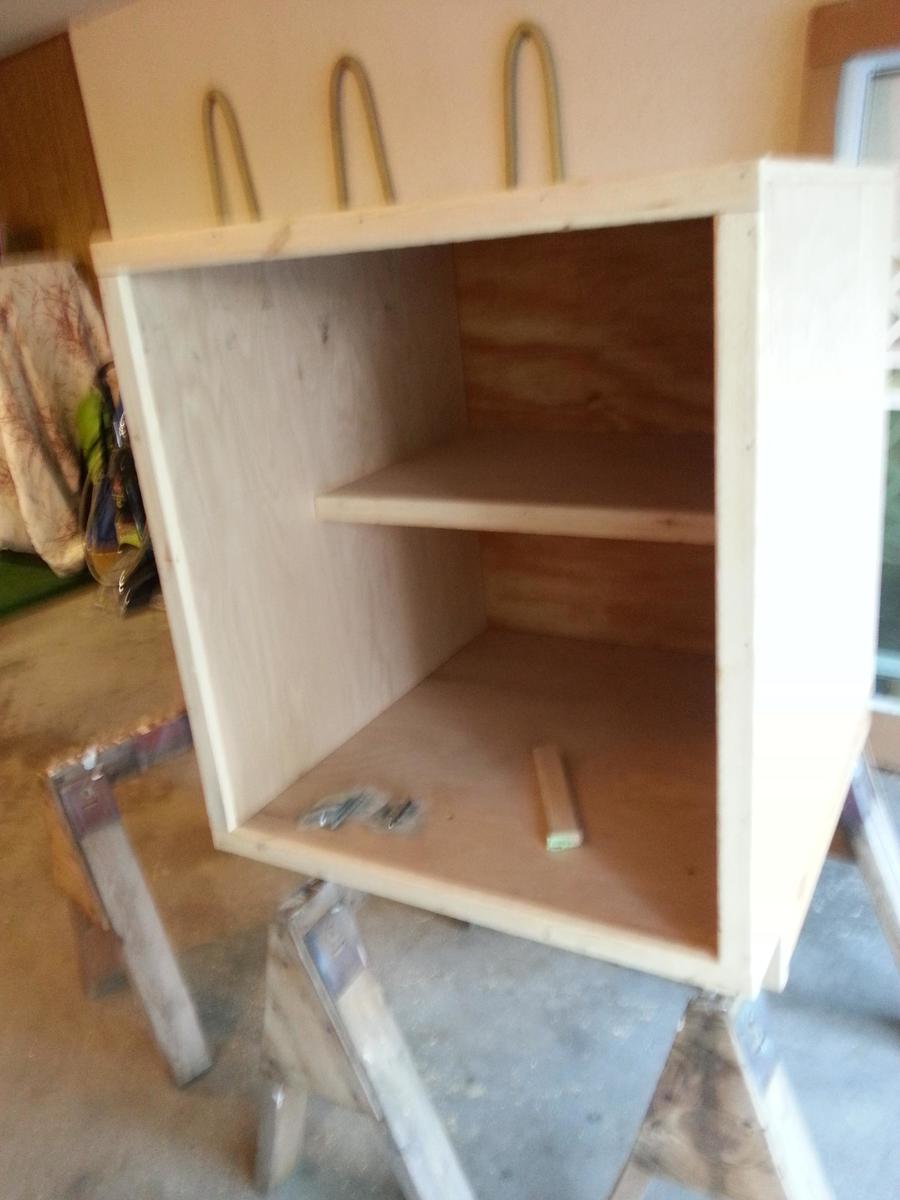
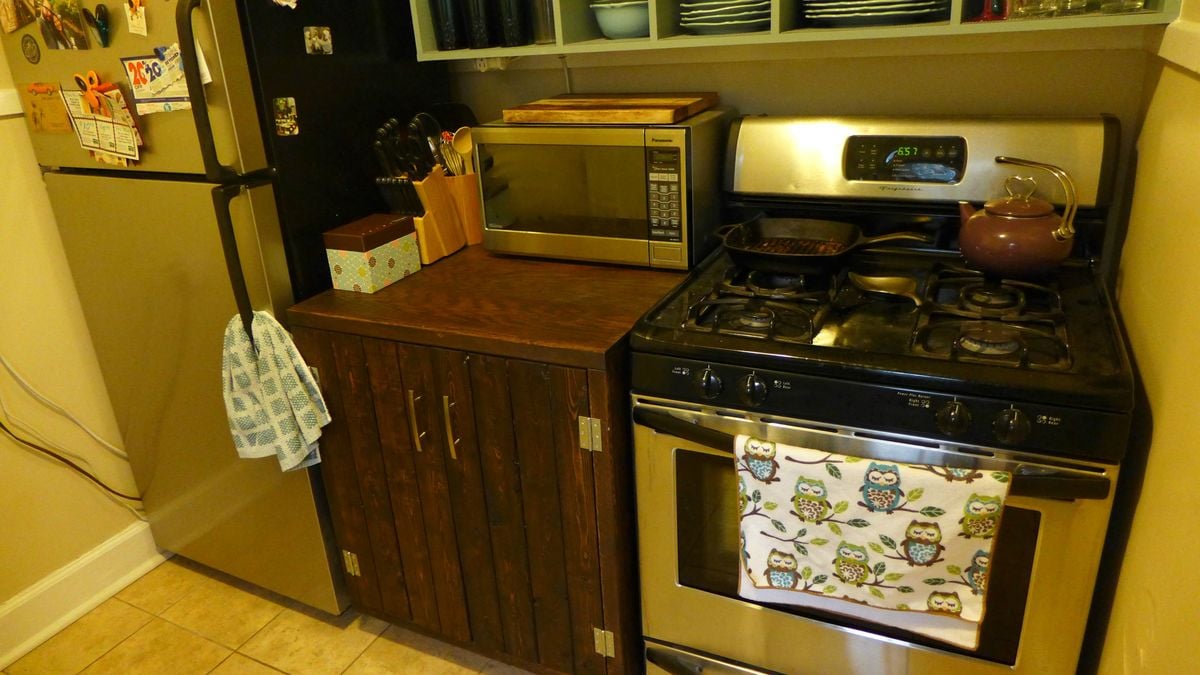
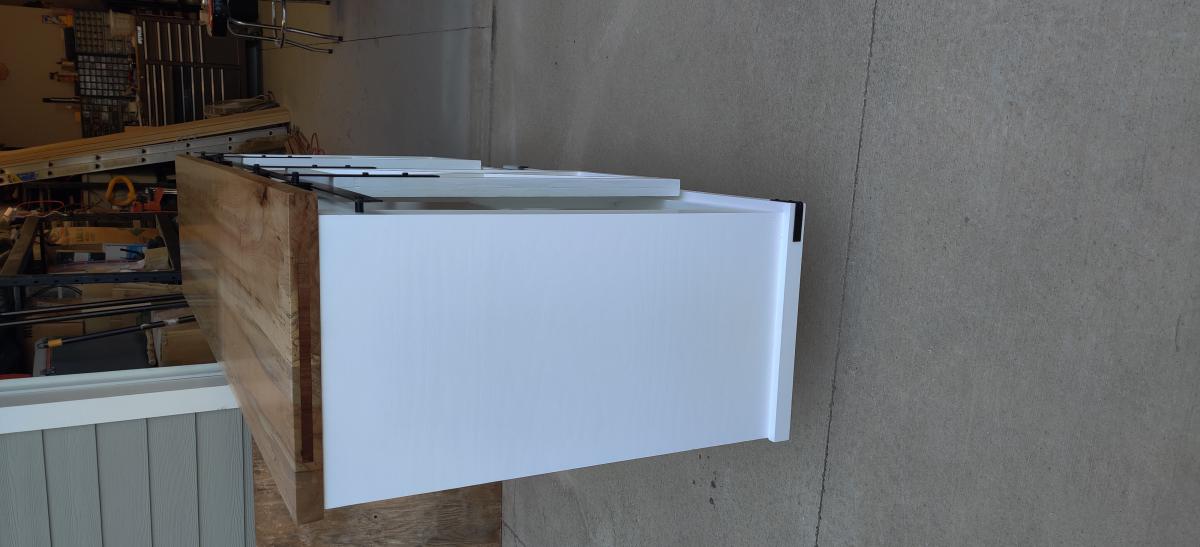
Made this cabinet to go between the fridge and stove in my kitchen. I based it on the Emerson plans (although heavily modified) because I love the looks of that buffet. Came out huge and quite square (its about the size of a washing machine), and it holds soooo much. Great to have that much extra storage in the kitchen.
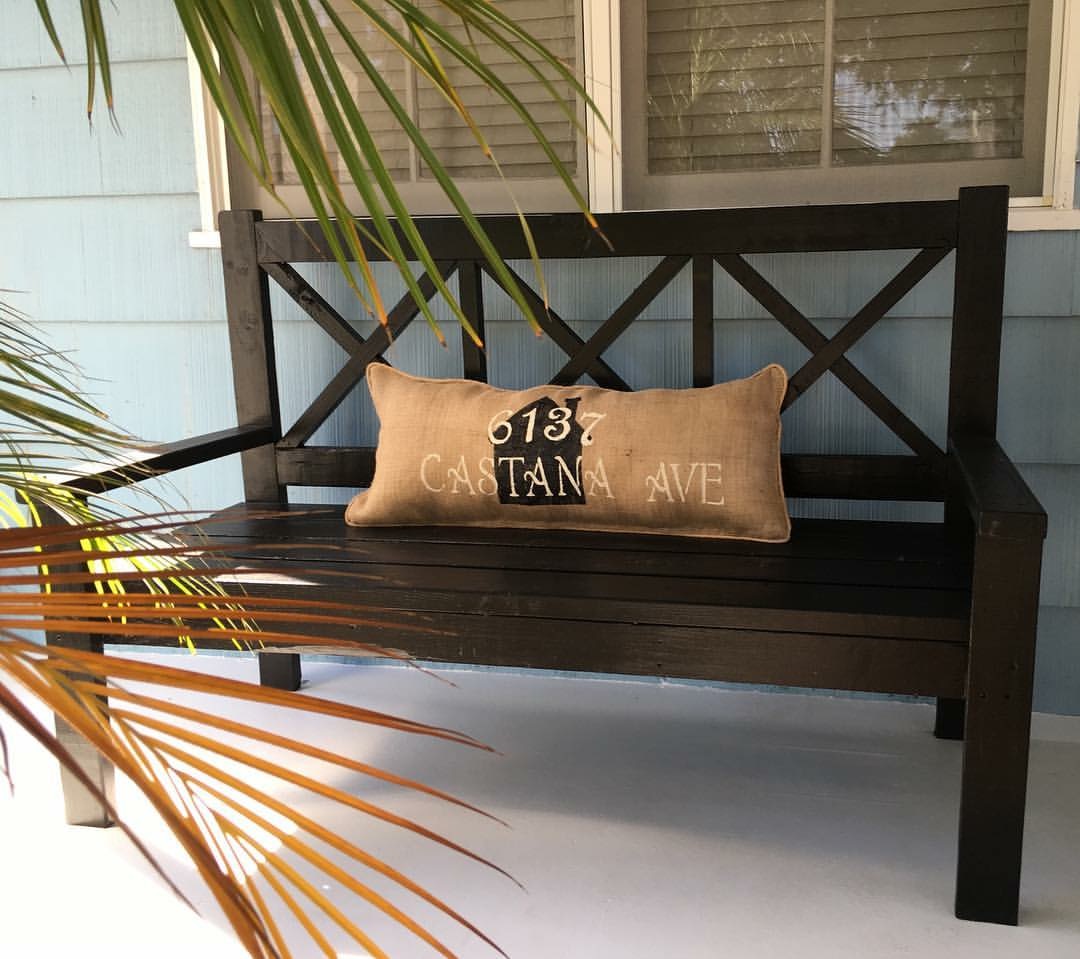
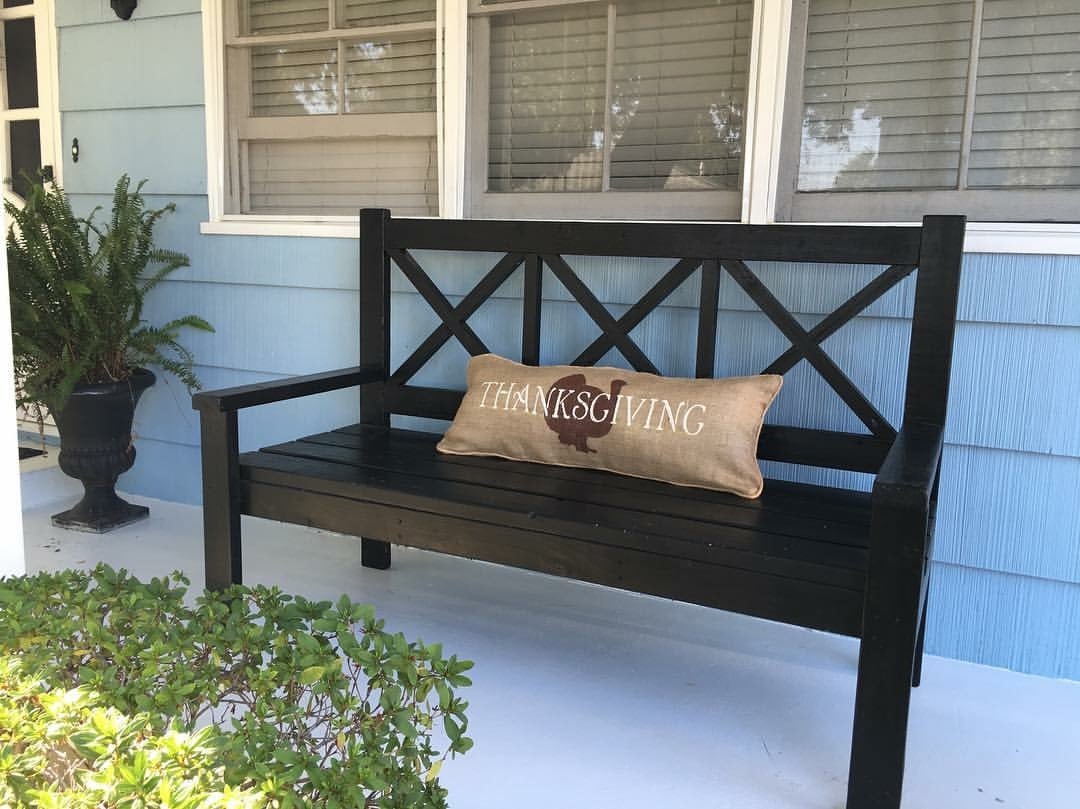
We built 2 XLarge Porch Benches,they where easy to build & look fabulous! Best part was it was a fraction of the cost if I were to buy these new!!! Thank you Ana!!!
-Sandra
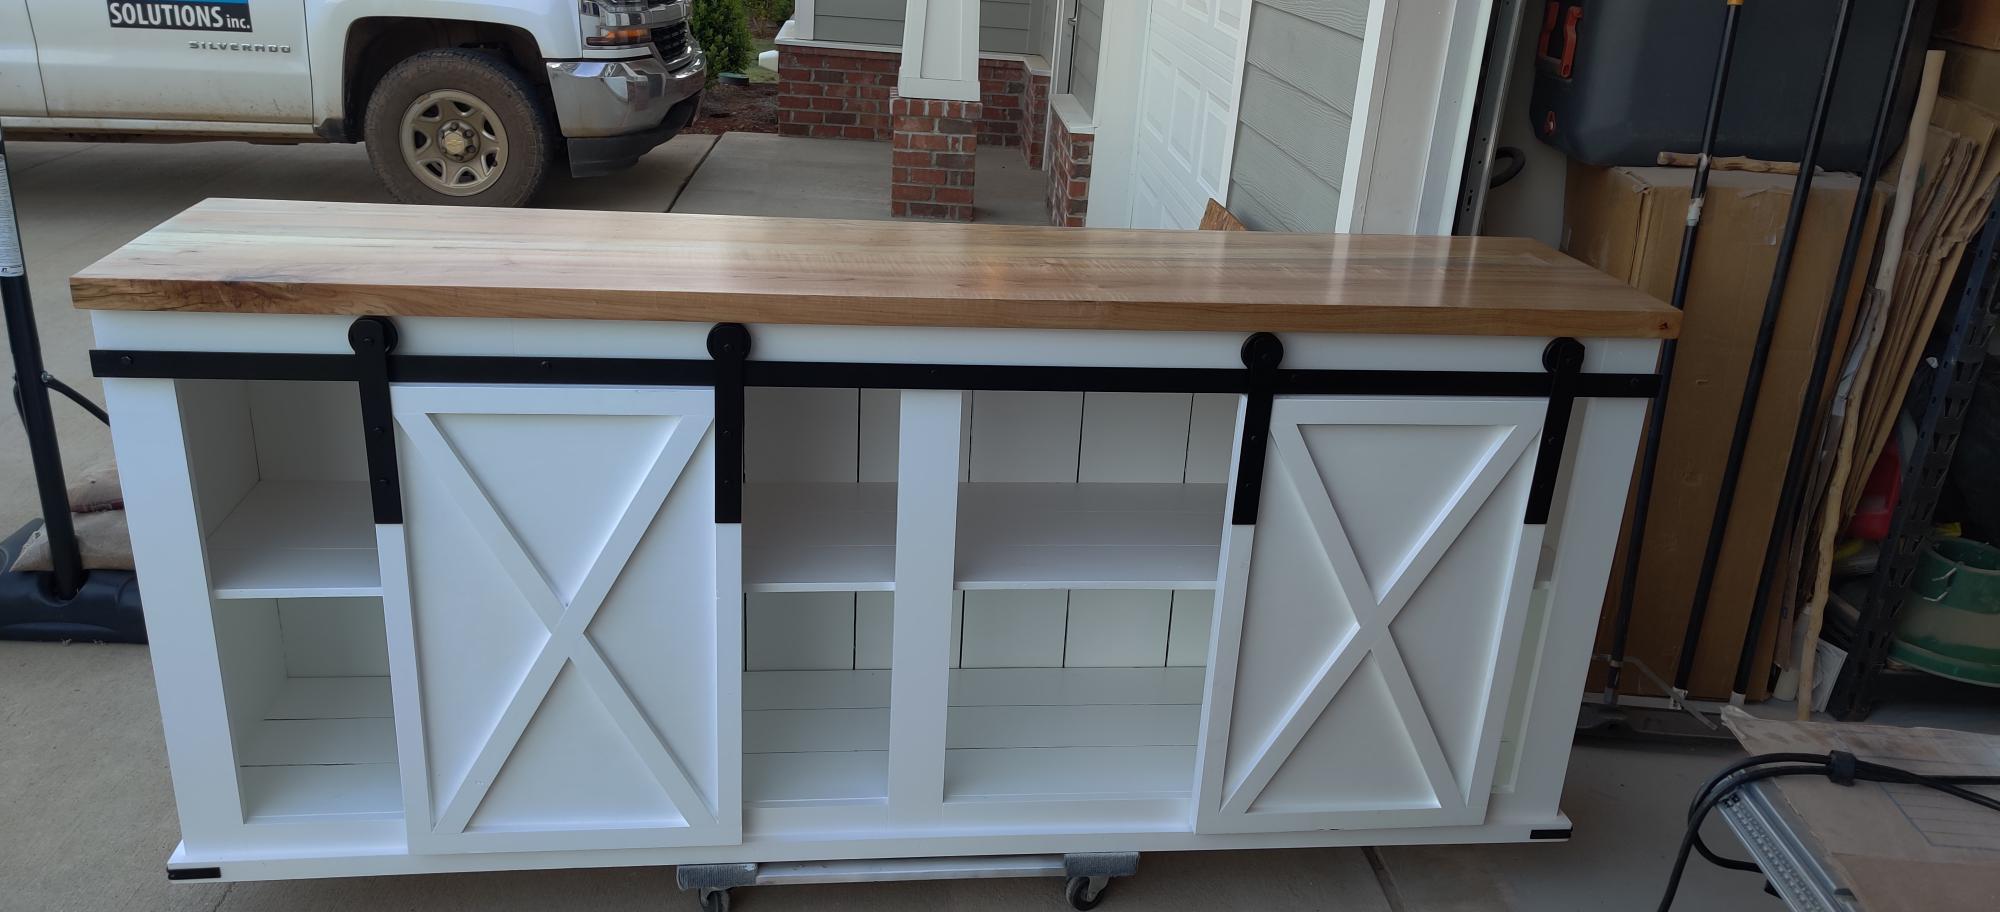
I really liked the idea of making a TV console for our house. I used your plans as a guide and then added a few features to it. I made all of my rail system hardware vs. ordering a kit. I also added some Walnut accent inlays on the ends of the table top.
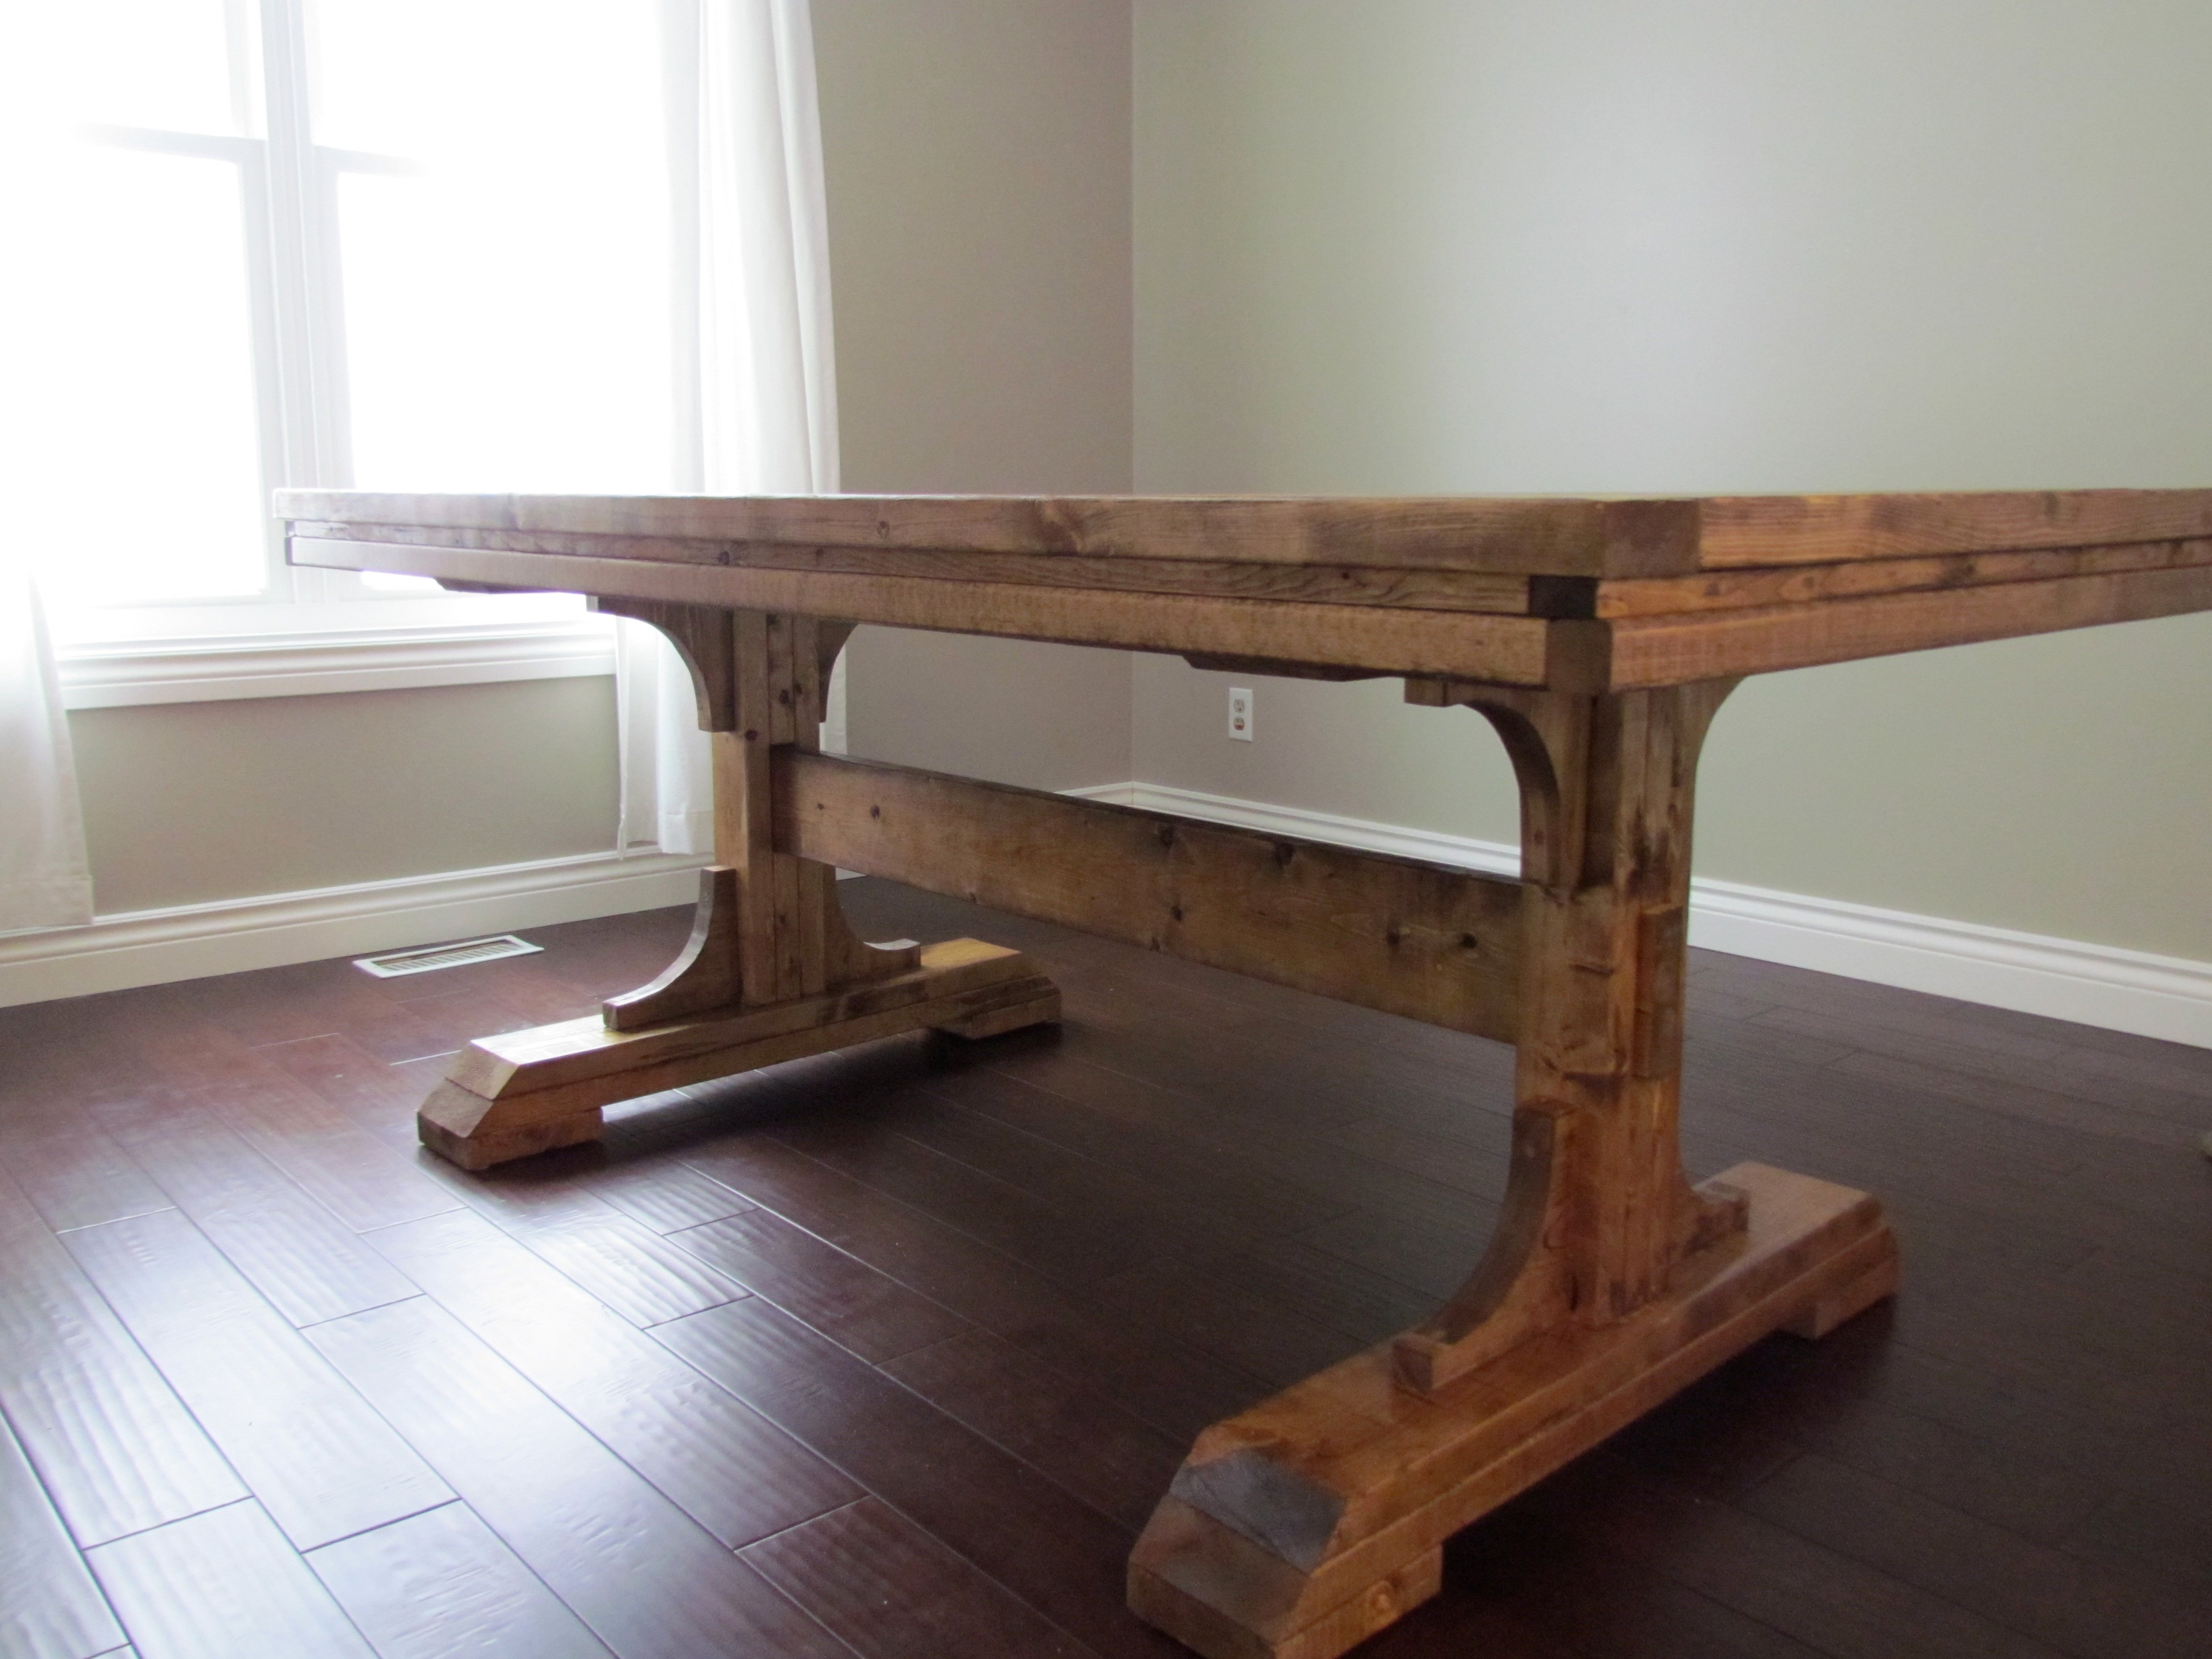
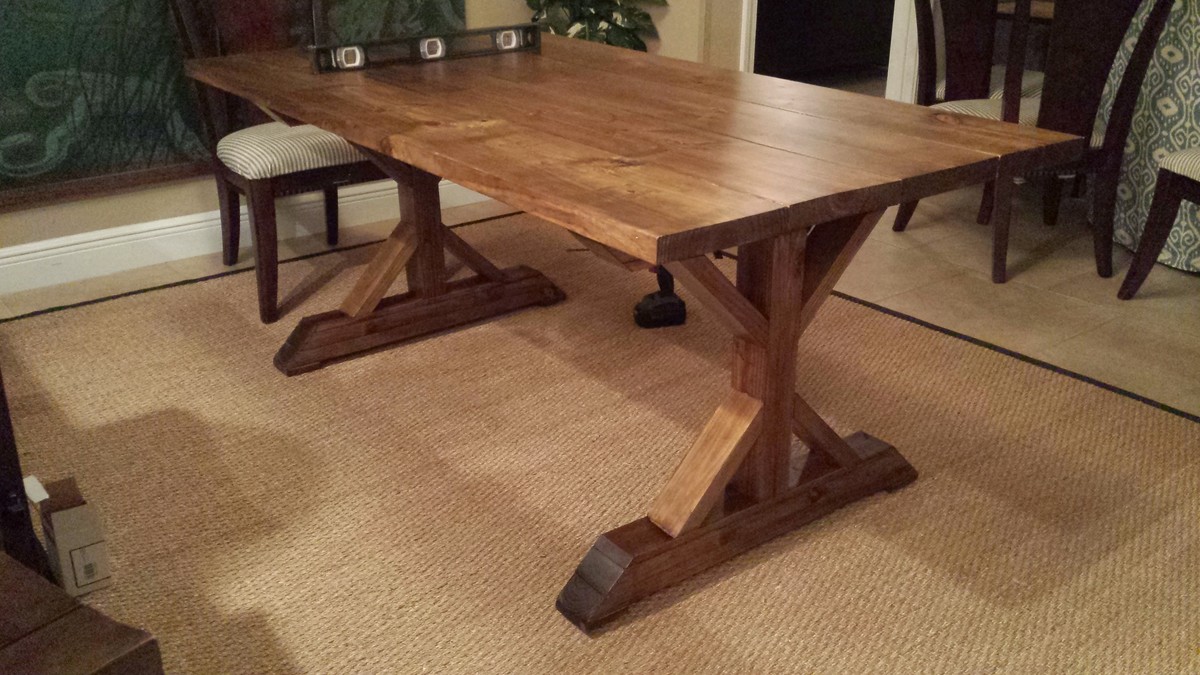
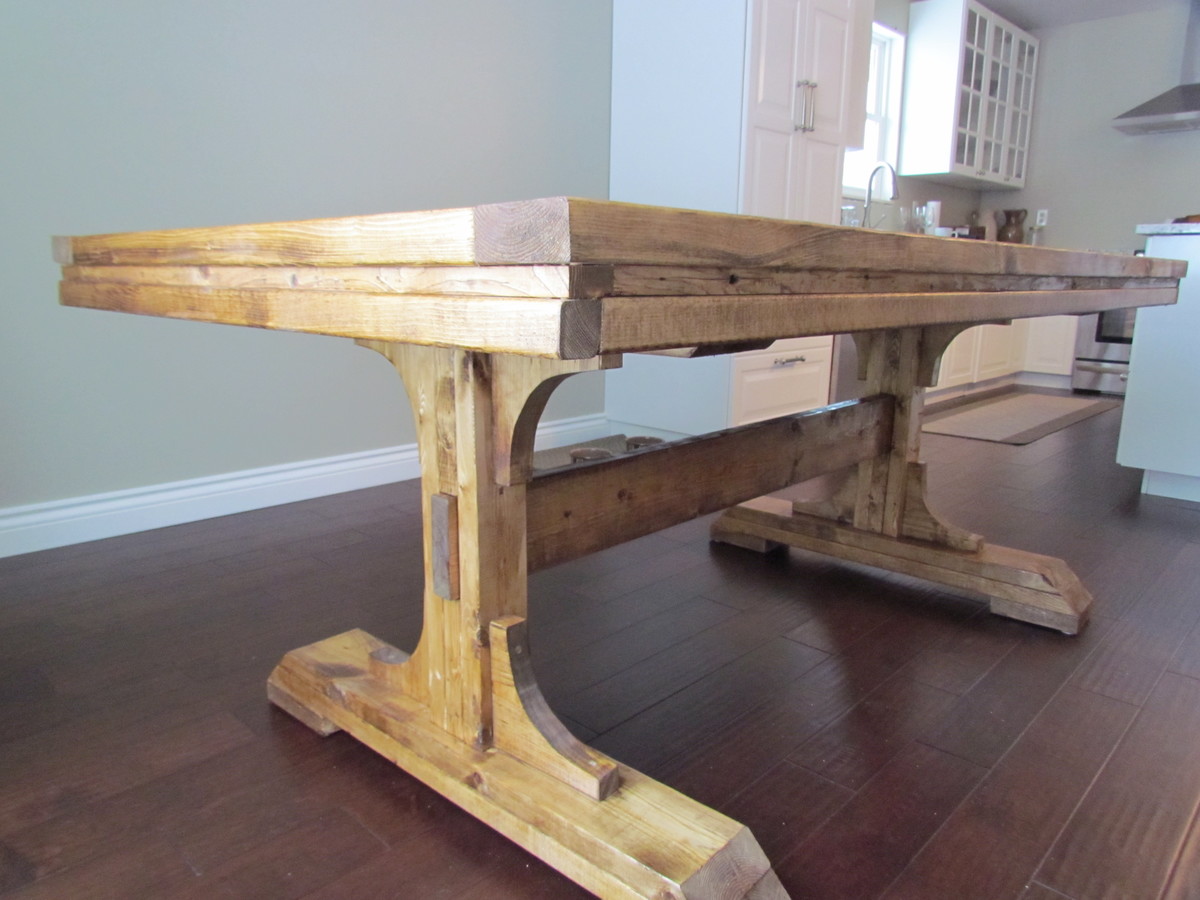
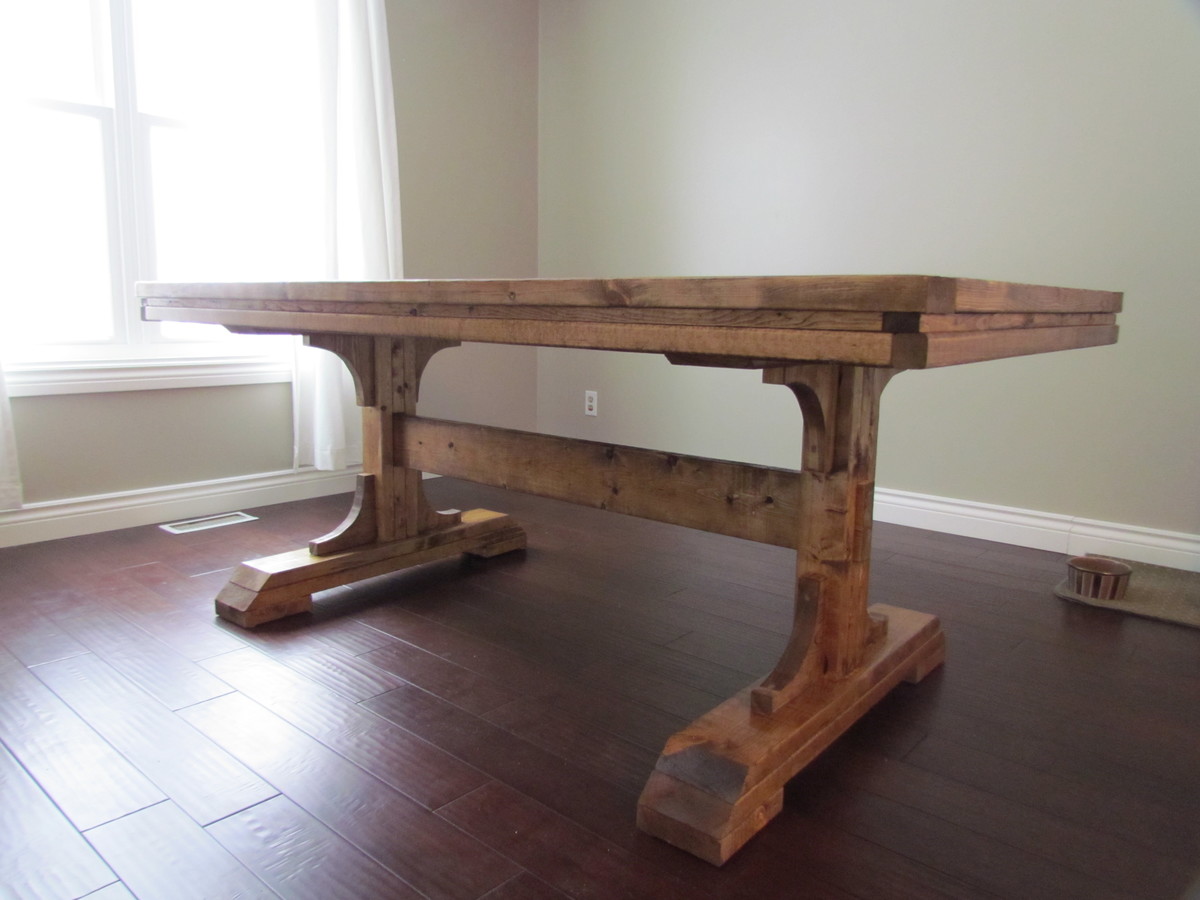
My hubby took the plans from the Triple Pedestal Farmhouse Table and altered it to make it just over six feet. It is perfect and accommodates our smaller dining area space.
Fri, 02/15/2013 - 07:23
hi! could u post/share how he altered this from the larger plan? love it!
Wed, 10/09/2013 - 10:09
I love this. I planned on reducing mine to 6 feet. Do you have the altered plans? Thanks.
Wed, 10/09/2013 - 10:14
Hi. I went to martha.anna blog. This is the comment she posted on the dimensions.
From martha.anna:
I've had many emails and inquiries about the dimensions of this table. So, here's what I've been sharing with everyone...
Our dining room is 11 x 10 and there is a lot of room around it to fit in a hutch and still walk around easily. (Just for size reference.)
The overall length of the table is 6' 4.5". It is such an odd measurement so that the strips of board (1x6) on the tabletop would look in proportion. They are 33" long (the 1x6).
The beam across the bottom is 55.5" from outside edge to outside edge and my husband left 1/2" showing.
The pedestals are 10.5" from the end of the table.
Phew! I hope all of the information helps everyone out there! :)
Sat, 11/16/2013 - 09:27
Hi there what would the revised materials needed list be? Also did u notify the benches? Do u have the dimension on that? My step dad is building this for me it's my job to get plans and supplies. Thank you for your help I appreciate it!!
Mon, 01/13/2014 - 14:20
Oh my. After several months I'm able to get all the material needed to do this table. I did the legs a couple of months ago. Now it's time to complete the rest. Hopefully, I can do it in a day's time - hopefully :).
Fri, 01/12/2018 - 09:04
Ill be making this table whcih is in the same design as the original triple pedestal table but Ill be making it smaller. Are you able to give me the measurements for this modified table? Do I make my top first and then the pedestals? I feel like if I make the same pedestals, then Im forced to make this a 40" wide table, and I only want it about 35-37".
Thanks!
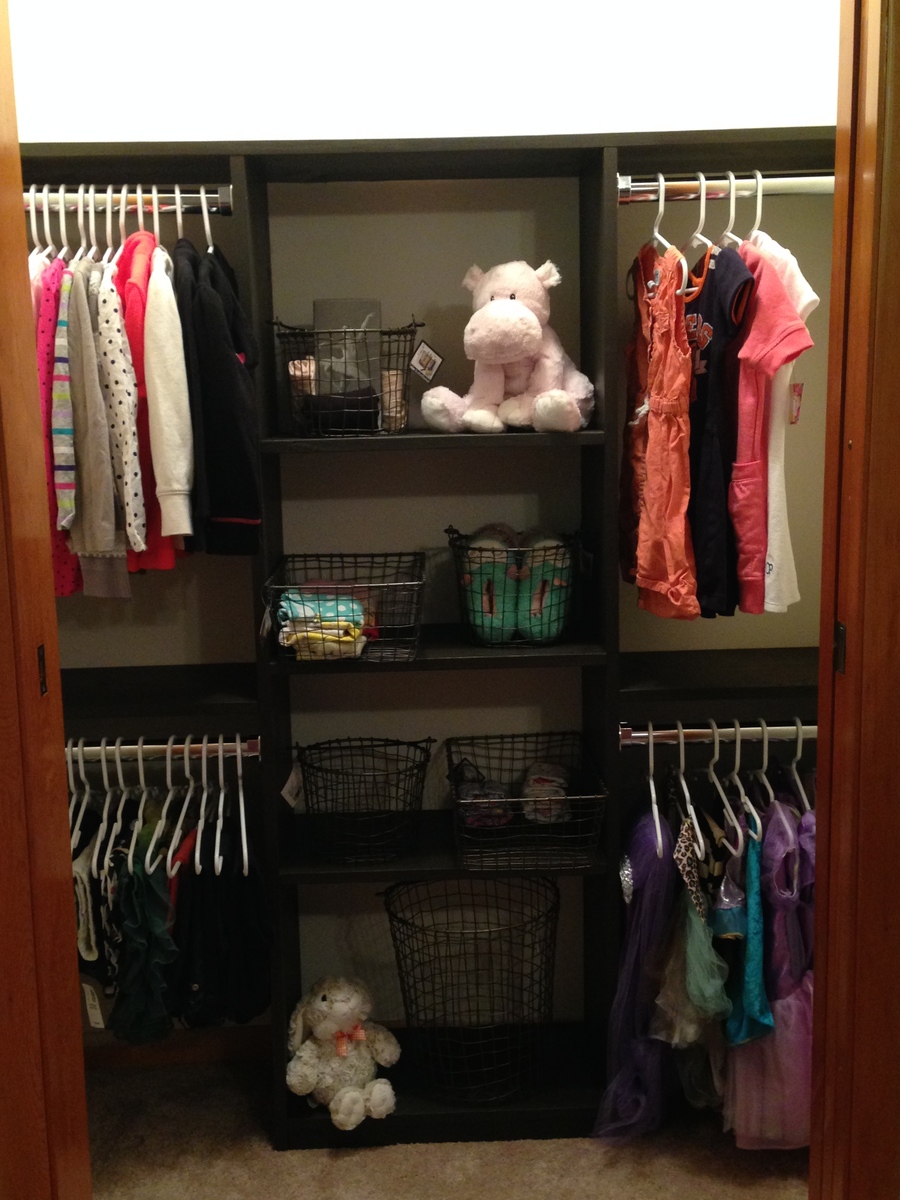
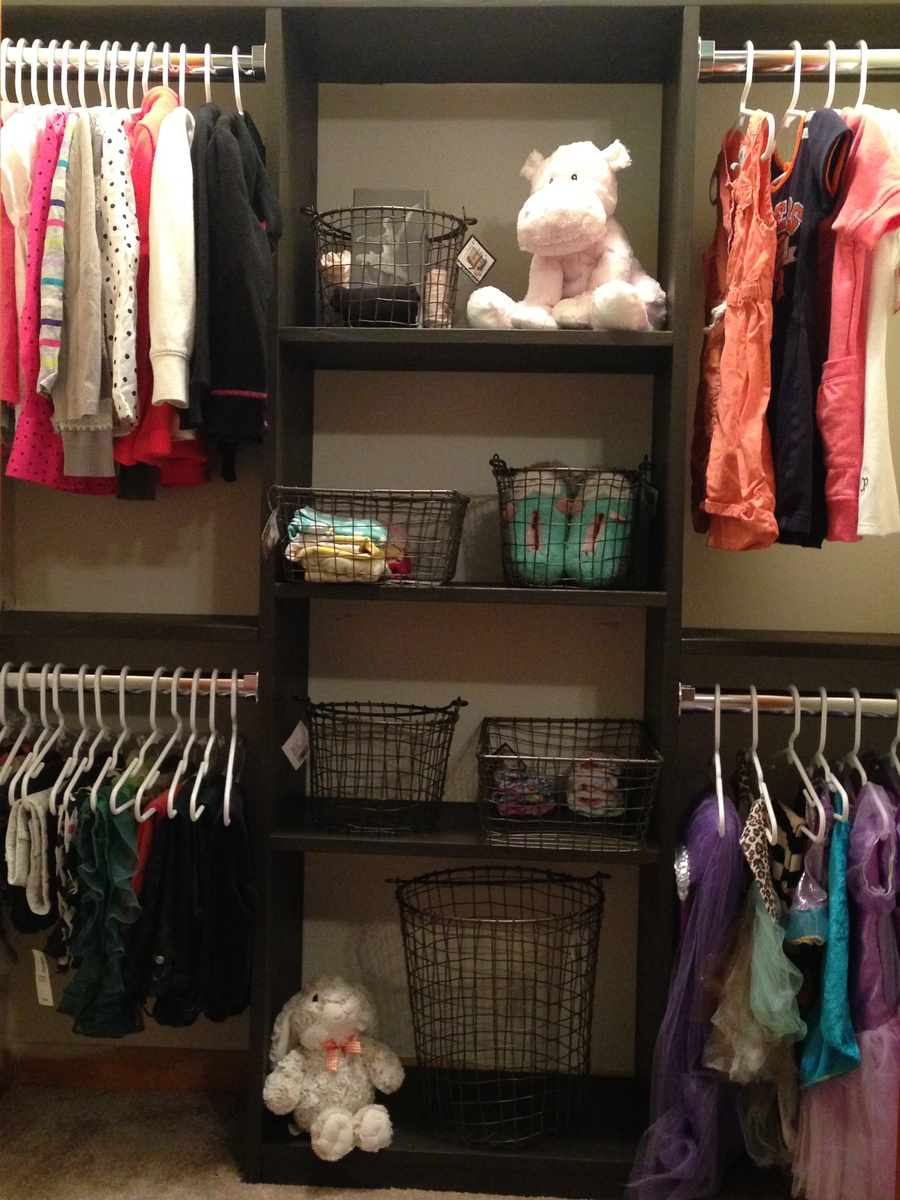
Thank you Ana! The Just My Size Closet was the perfect solution to my little girl's closet. I had recently found myself in a daily battle with my three year old. She wanted to be independant and dress her self. I desperately wanted her to stop getting a step stool and yanking her clothing off of the hangers. The yanking resulted in a dozen or so half handing shirts, a pile of broken hangers, and a mother daughter show down first thing in the morning and last thing at night. Enter the Just My Size Closet !!! The plans were super easy to follow, WAY less expensive than the ready made customizable units at the hardware store, and hubby had it whipped up in half an afternoon! The design is thoughtful and will grown as her needs change. :) We are all very pleased with the result. Instead of melt downs (both her's and mine), my little girl is taking pride in being able to hang up her clothing and dress herself. She makes everyone who visits come in her room to see her new closet. It is adorable :) Thanks Again!!

My wife was upset that we didn’t have a mantle in the living room of our new home a d I said, “no problem!”
I mimicked one of the brag post on this webpage. I used 1x4s and luan for my back. The seat is 2x4s with a project panel stained and polyurethaned. I am grateful for people sharing their wonderful projects on this site for inspiration.

This project was so easy and it looks awesome!!!!
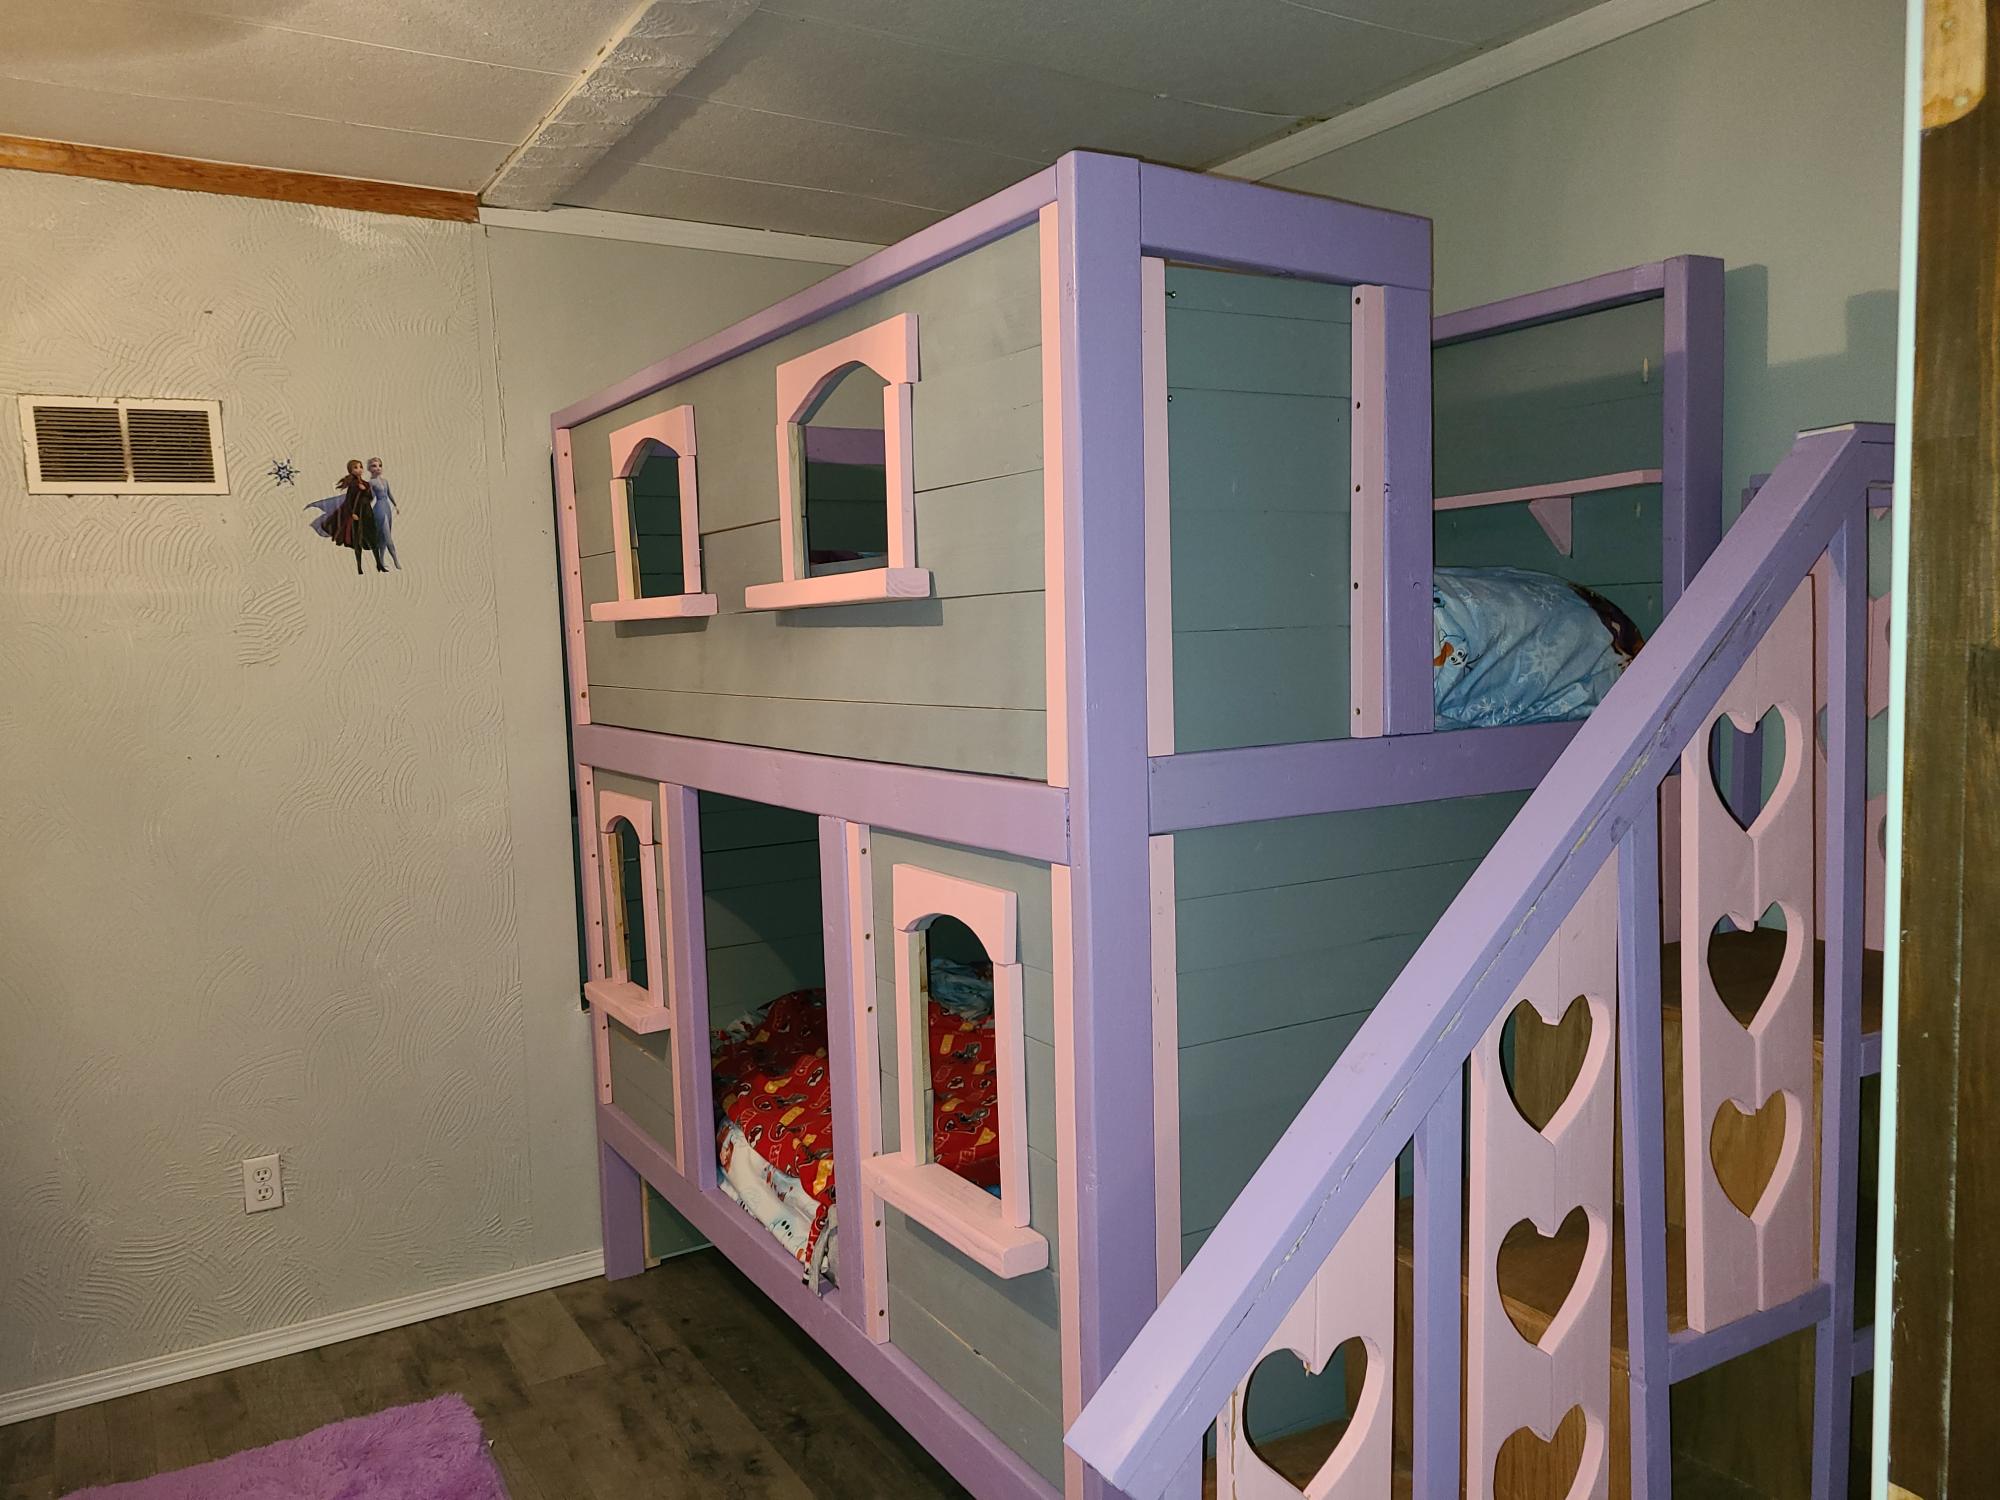
found plans for the "sweet pea garden bunk beds" on this site. Here is our take on them they came out so awesome.

I loved this plan when I first saw it. I did make mine with metal that was 36 inches for the legs, it was the length available at my local hardware store and it also allows me to have plants on two levels and still be high enough for sunlight (unplanned bonus).
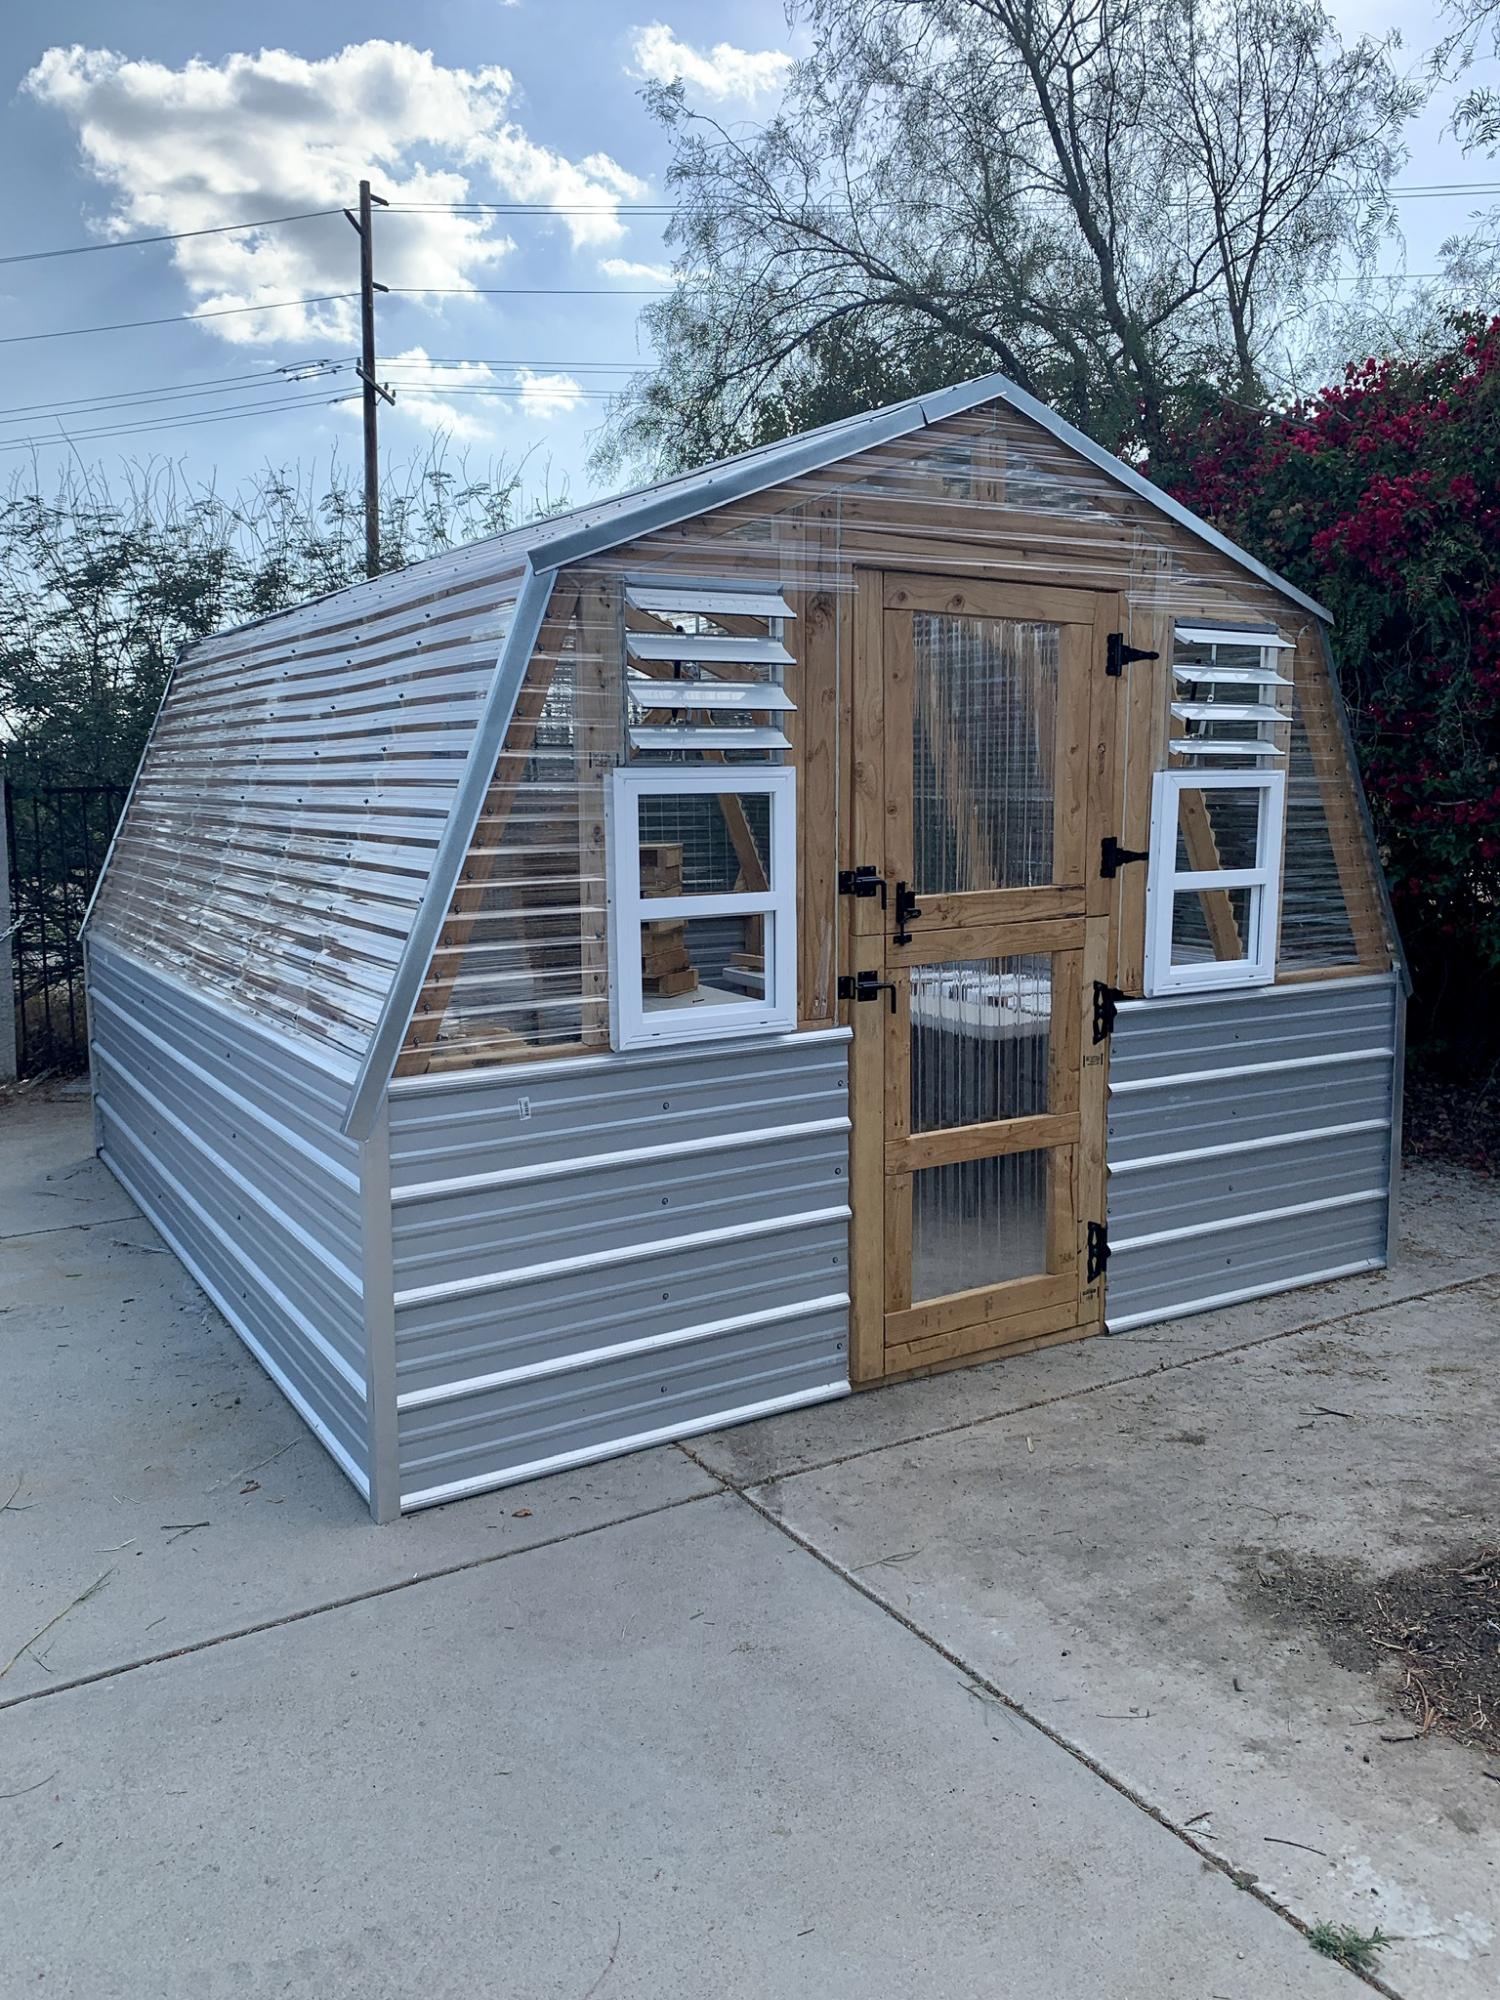
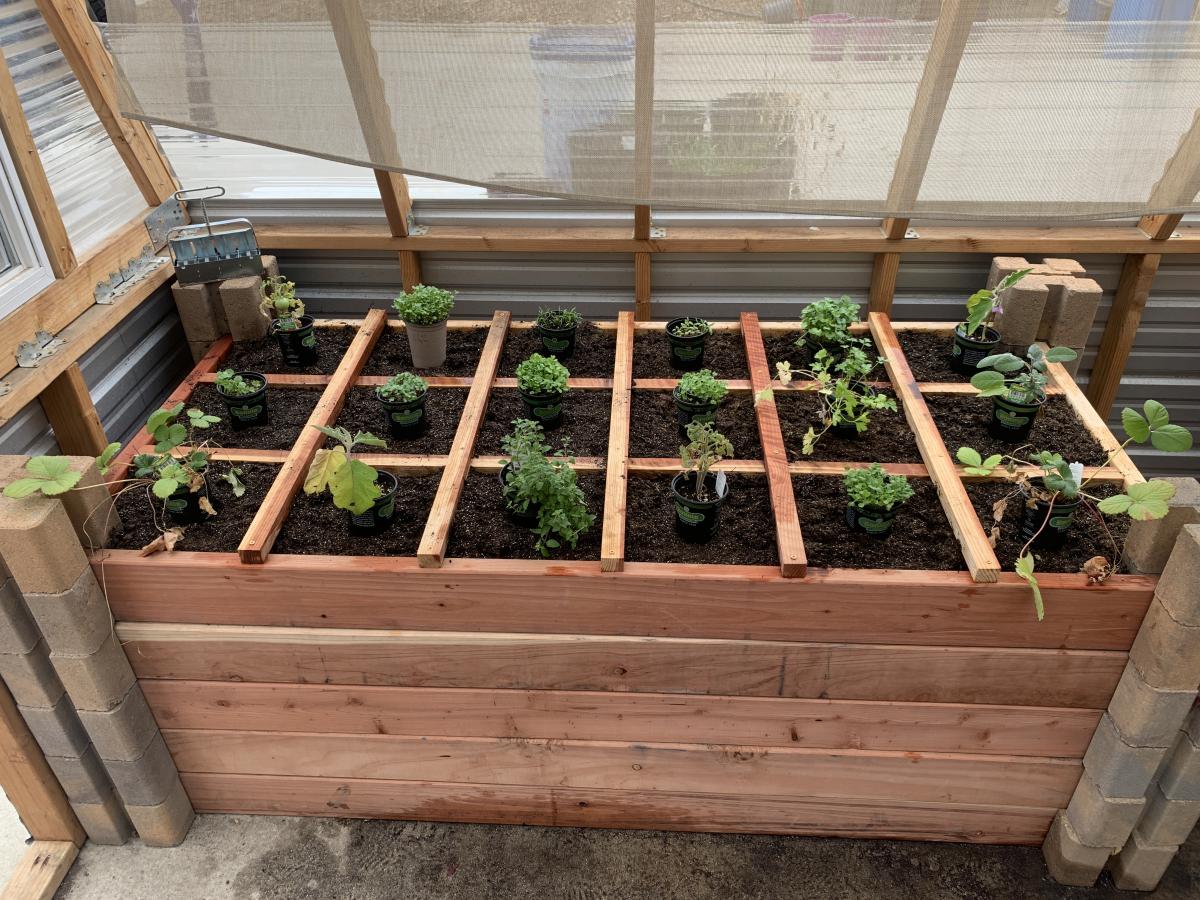
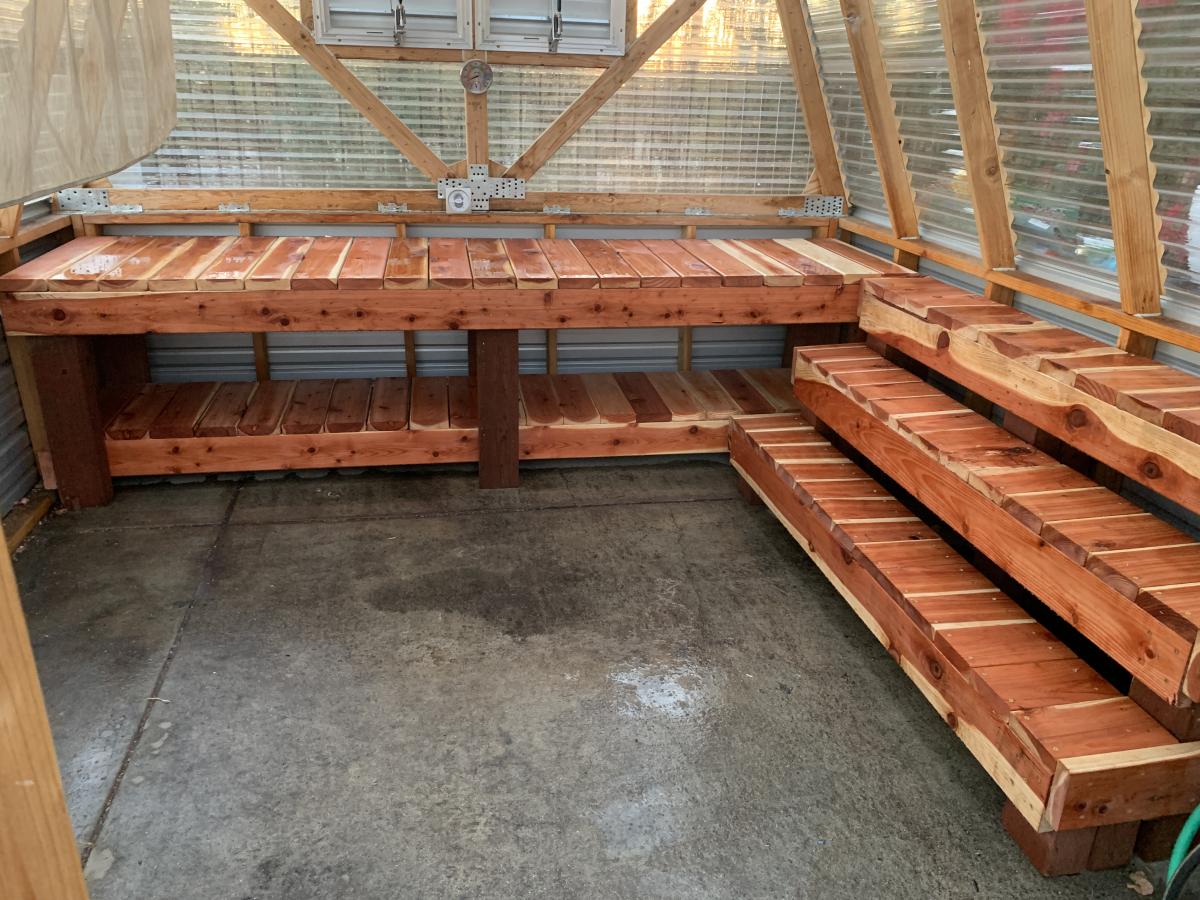
We made some modifications to the greenhouse to include a bench with three levels, a working bench and a square foot garden. We also put it on concrete to keep all the weeds out from the bottom as well.
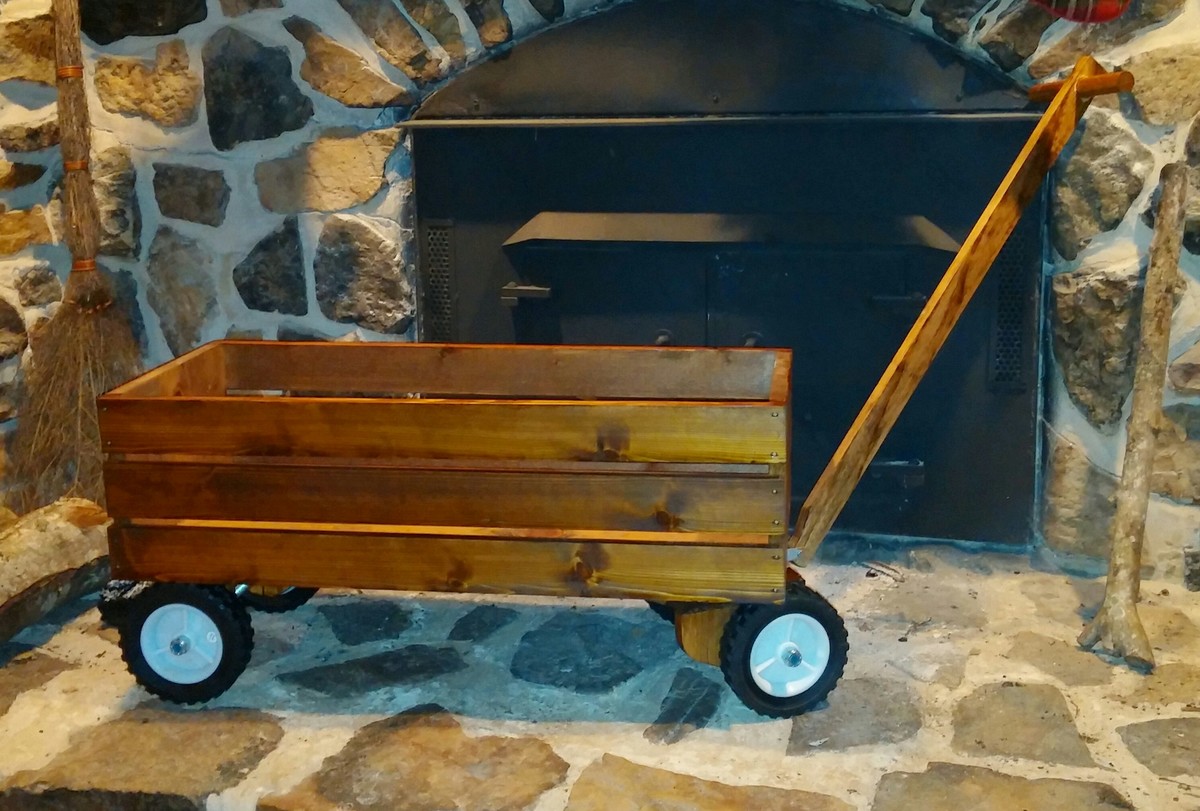
This is a variation of the wood wagon design http://ana-white.com/node/13430. I wanted old 2 year old to be able to use it in the lawn so I changed the wheels and steering over to a more traditional wagon wheel. We will be giving to him for Christmas. I had a lot of fun building this for my son. I hope he loves it.

Mon, 12/14/2015 - 12:41
Love the plans. I would, however, like to follow the modified plans to make it suitable for outdoor/grass areas. If any one could help me with that I'd be very grateful.
