Lovely

The plans were simple to follow and made an awesome headboard! Just what we wanted! All pieces were finished prior to assembly. Built a simple box frame for the mattress to match. Love the result! Thank you Ana!
I copied Ana’s fireplace insert design. So easy and looks amazing.
It’s my favorite so far.
Thanks Ana!
Al
See post on blog: http://www.atouchofarkansas.com/2012/05/icoffee-table.html
This was my first "build" and was a lot of fun. Very quick and very easy. I'm so happy with how cute it turned out!
My brother recently became a homeowner and asked me to build him a dining table for his new (and first) house. He picked out the Farmhouse Table plan from the site and I spent a few weekends building this table for him. The most time consuming part of the project was sanding and applying the stain & polyurethane.
Project was quick and easy
I had fun with this project. I needed a long and narrow desk for my son's room, and this was perfect. It was sooo easy. I used countersink drill bit and filled in with wood filler. I sanded to smooth it out and make soft edges. I stained first with a black cherry stain, then spread teal paint around (was inspired by a lot of rustic wood and teal pieces that I saw at homegoods), then coated it with kona miniwax stain to darken it up. I put a clear polyurethane finish on it to protect it. Super easy and I love it. Got all of my wood for under $30.
Simple and easy to build from plans provided
My wife wanted storage for dress up clothes and I wanted to make better use of the space it would take so I made it double as a puppet theater.
Beautiful farmhouse bench by Leila Adams
I made this bed for my 6 year old daughter. I loved Anna's Loft Bed plans, but she wanted a bigger play area underneath. So I modified the twin loft bed plans to fit a queen mattress. I also added extra supports for the mattress, and I used PureBond plywood on top of the supports for the mattress to sit on.
That's the Farmhouse Toddler Bed underneath. My younger daughter inherited her big sister's twin bed, so the toddler bed was put to use in the new "playhouse."
Wed, 02/09/2022 - 15:31
We’ve been looking for exactly this!! Can you share your modified plans and the list of lumber and supplies needed?
Sun, 09/02/2012 - 12:45
I think it's great that you modified it to a queen! I live a studio and NEED something like this. Could you share the modifications? It looks beautiful = )
Sun, 09/02/2012 - 20:58
The changes I made were:
End planks cut to 63"
Top back guard and front and back rails cut to 87"
The top guard rails on ends cut to 66"
I measured for the mattress supports and the front guard rail after the rest was completed.
You should also measure for the bookcases after the rest is completed, but each of mine wound up being about 31" wide.
Everything else was pretty much the same.
Hope that helps.
Thu, 11/01/2012 - 08:24
This is wonderful - I've been looking to make something like this for an urban efficiency (adult) apartment! Thanks so much for sharing your modifications!
Mon, 07/29/2013 - 14:08
Will the height of the bed allow for adults to stand under it? If not what modifications should be made to make the height fit a standing adult? (the highest being 6'1" male) Thanks! =D
Ok I decided to construct my very first project - a small outdoor table that would look a bit ancient mostly because the need for it in my house has been screaming since I could remember. I would selfish to say that I did it alone but I got a bit of help from my hussy. I'm happy that the kids love it and all struggle to have lunch on it.
I had been wanting a patio sofa for a long time and while googling prices for the 1,000th time I found a link to Ana White's wonderful website. I can't say how grateful I am to Ana White. The fact that she puts all of these plans online for free and asks nothing in return speaks to her character and what a kind and generous person she is. Helping people build things and helping them learn at the same time! Anyway, I followed the plans explicitly and purchased the cushions at Ikea.
This was my first attempt at this desk and all things considered it turned out pretty well. I glued the top and shelves together instead of using pocket screws. I then stained the top and shelves expresso and used the expresso stain over the white paint on the base and then wiped it off to give it an aged look.
I pretty much followed the plans exactly as provided. The folding brackets I used are supposed to be heavy duty and able to handle up to 100 lbs. per pair of brackets. We'll see how they do. If needed, I might add the 2x2 or 2x4 braces I've seen many others do on here. It's nice to finally have my mitre saw off of my workbench.
These are the brackets and wheels I used.
https://www.amazon.ca/gp/product/B08PVFJ87Y/ref=ppx_yo_dt_b_asin_title_…
https://www.amazon.ca/gp/product/B093FQVV8P/ref=ppx_yo_dt_b_asin_title_…
Got my new Kreg Jig, picked up a brand new master kit on craigslist for half the normal price! The table went together beautifully and the chairs were simple as well!
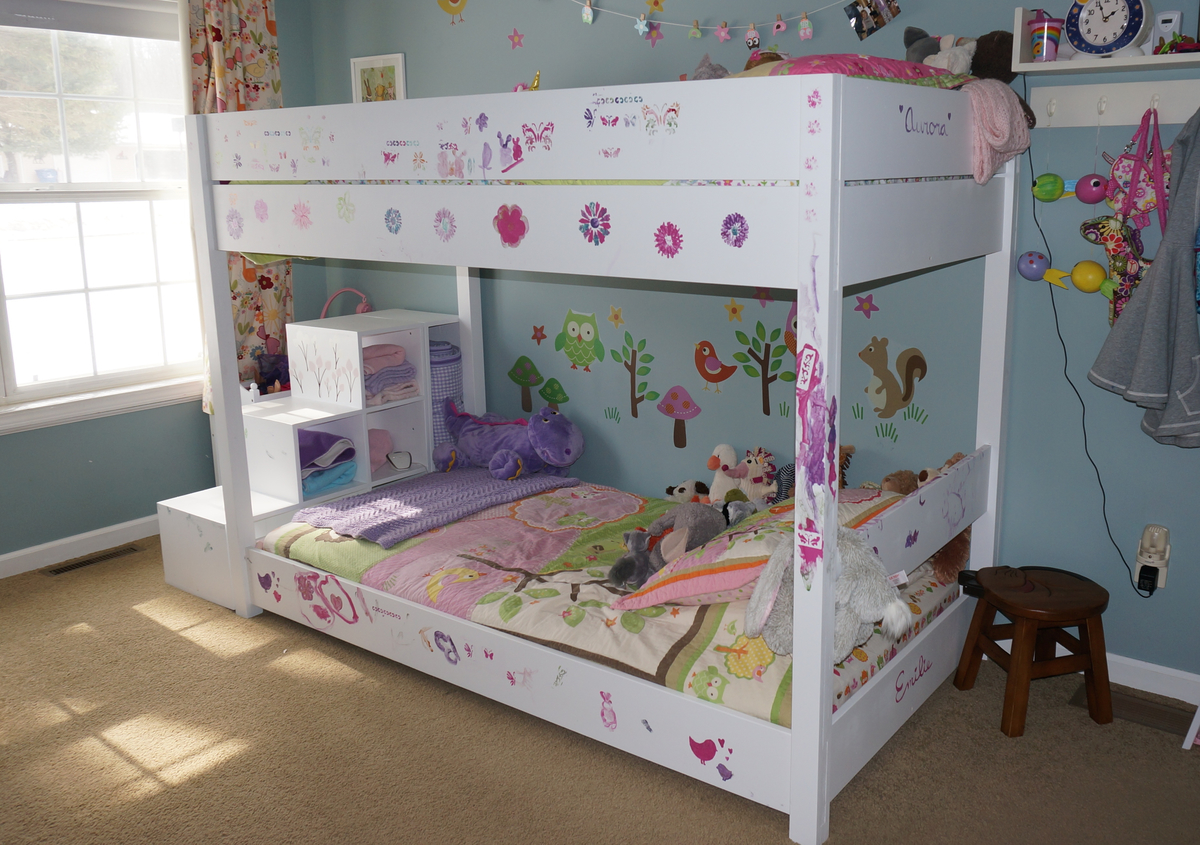
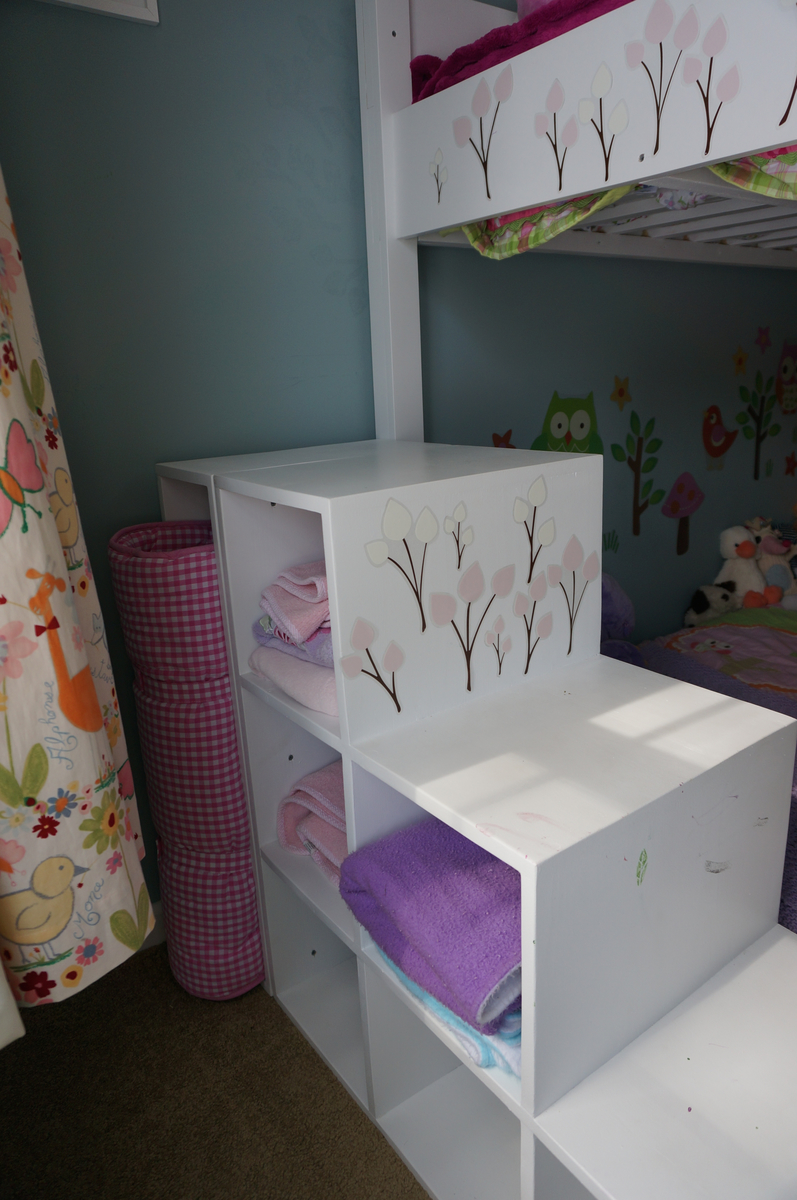
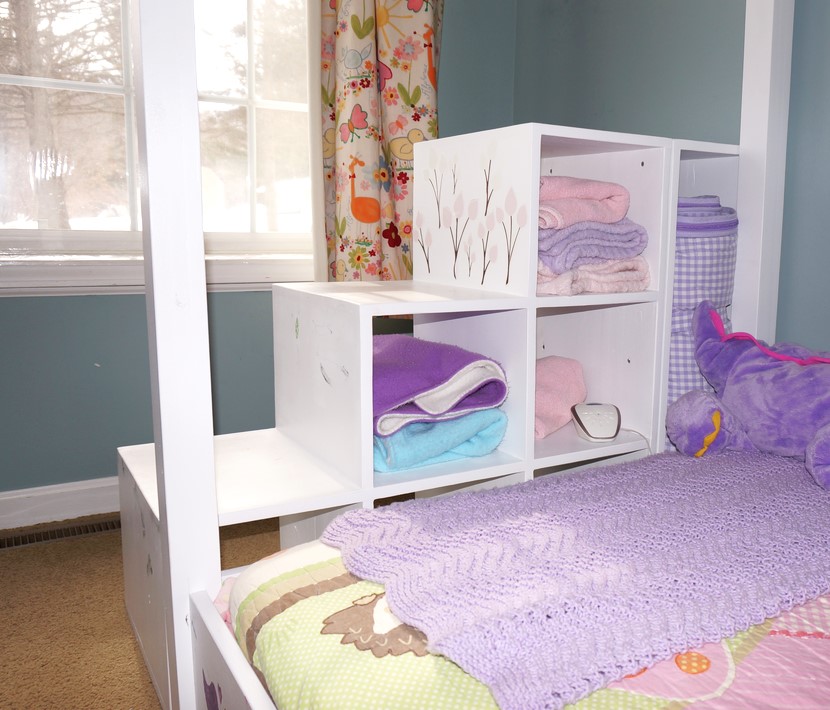
My husband and I searched at least a hundred plans to find a simple bunk bed for our girls and Ana's Loft bed was a perfect base plan with a few changes. We wanted a lower bunk, top and bottom, since our girls are young (ages 5 and 2.5). The youngest just moved from the crib so by putting the bed lower we are able to skip the side rails. Overall we cut 10 inches off the height of the original loft bed plan and still have plenty of room in the lower bunk. I can sit up comfortably on the lower bunk and the youngest can even stand. We went with another 8 inch board for the top bunk rail, it was simpler then the rail with cap but achieved the same overall rail height. We knew we didn't want a ladder in their room because our 2 yr old is fearless. So for the stairs my husband just ended up winging it, loosely basing them on the Storage Stairs plan, creating basic cubes so we can still let light in and have storage. We also didn't want the steps to be high up in case the girls fall from them, which is more common then them falling off the top bunk. At 32 in. high (the bunk is 61 in) both of them can still climb in the top bunk without issue. At first the steps didn't have the tall "cube" at the back but the platform just wasn't that big so the long cube was an add on and gave it the perfect size and heft. We couldn't be happier with how it turned out. Thanks Ana for your awesome blog and the great plans that you post. My husband also built the original play kitchen and it is amazing! I'll have to do another post with pics of that.
Rustic x consol table Weathered.
These bookshelves are modified from the Extra Wide Console Bookcase Plans from your website. They were constructed using 3/4 inch plywood for the bookcases, 6” MDF boards for the cup cubbies, and 1/2 inch plywood for the shelves. Purchased a jig from Rockler to drill the 1,000+ shelf holes and built the rolling ladder from oak using the plans and parts from Rockler. What began as a plan for a simple bookcase morphed into selling the dining room furniture and converting the room (which we had only used once in over 2years) into a library that we enjoy every day!