Community Brag Posts

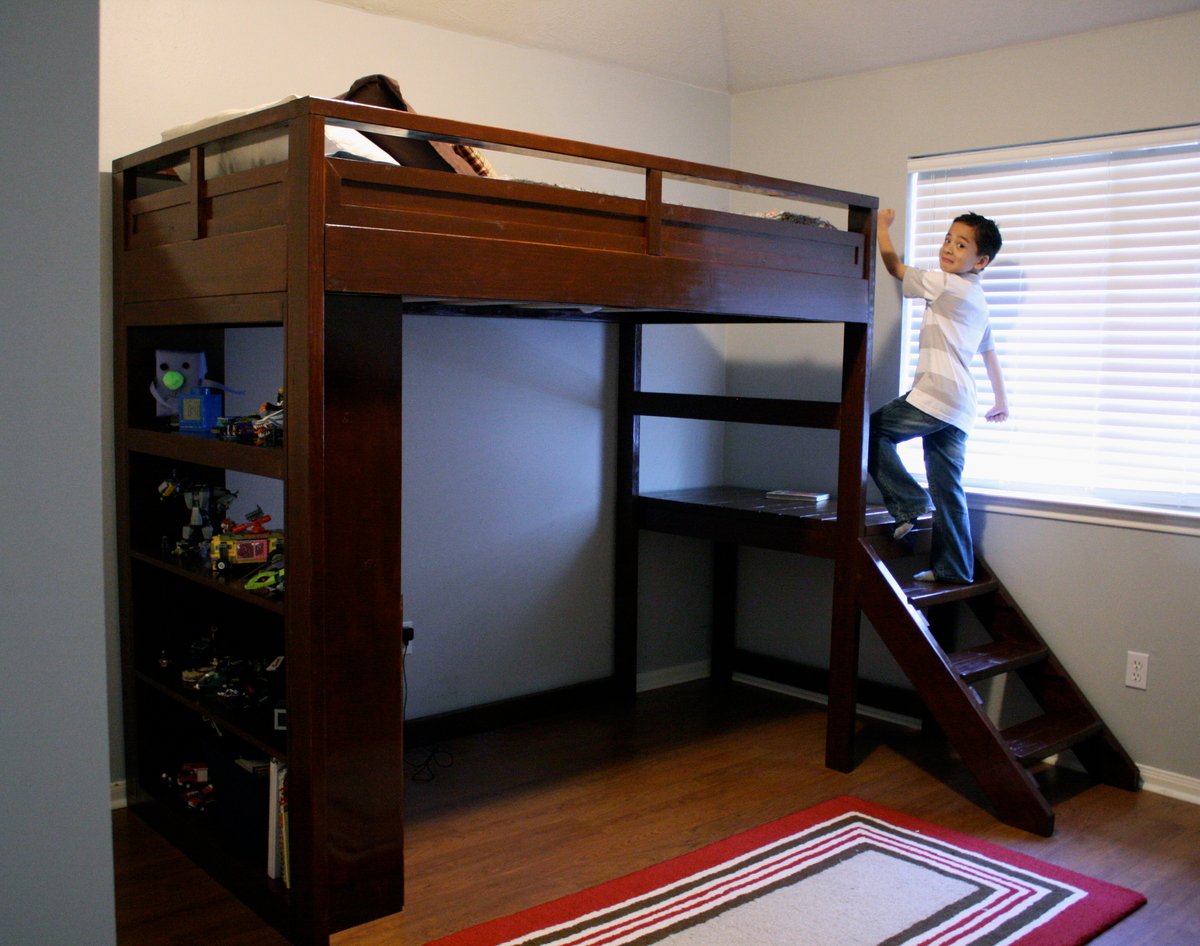
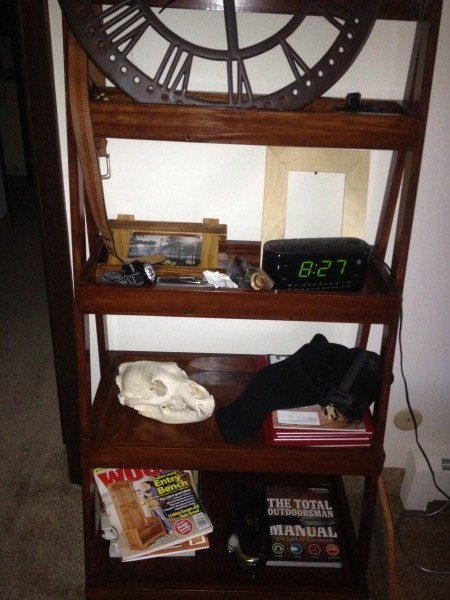
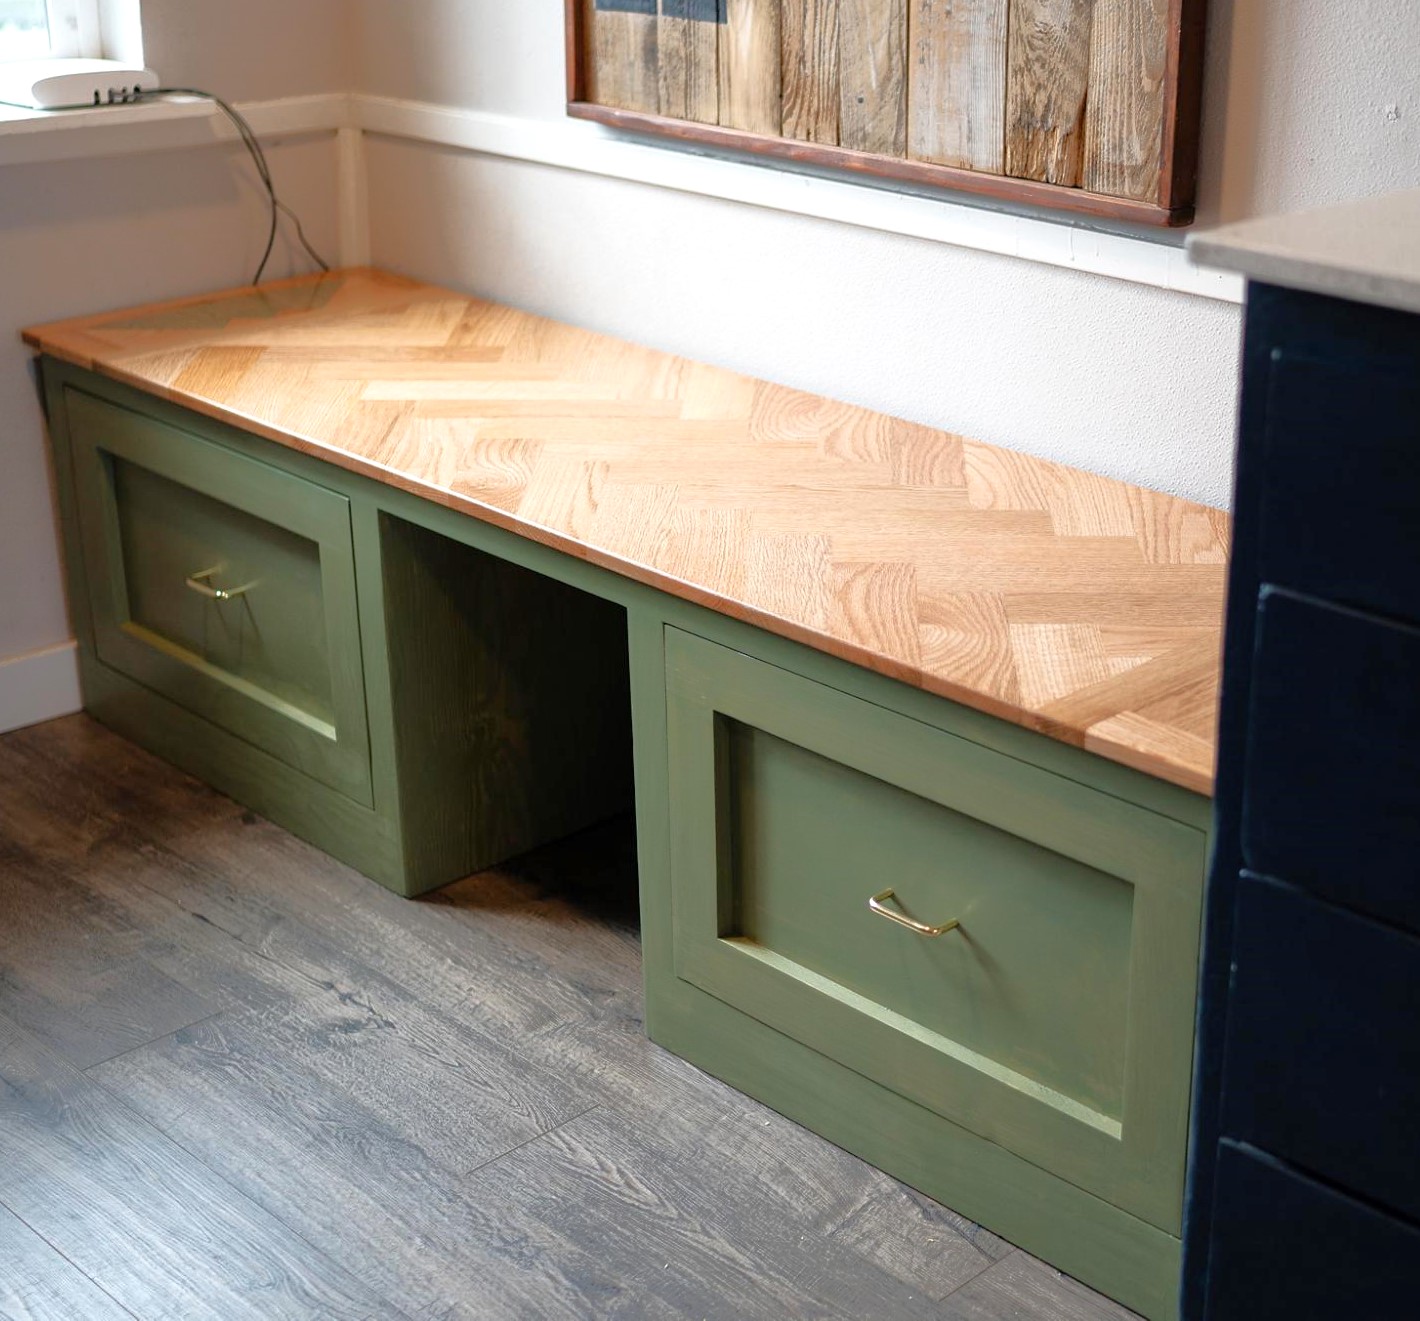
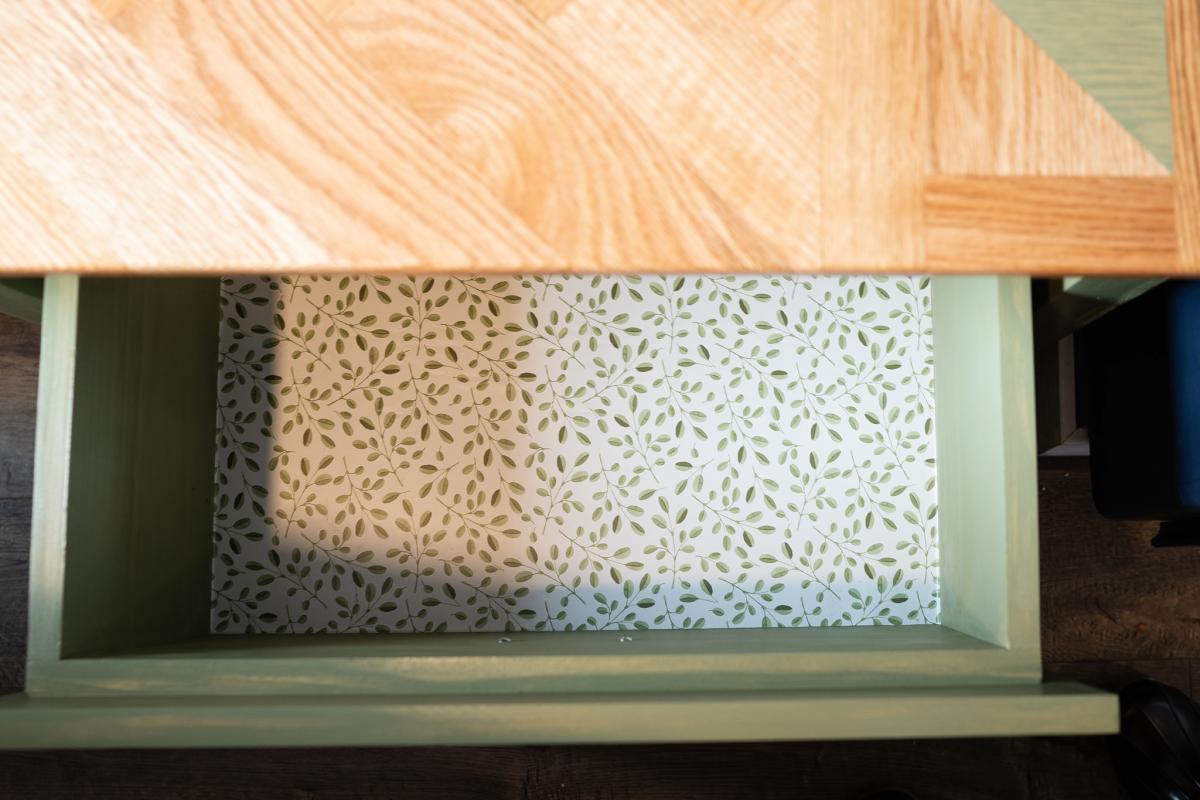
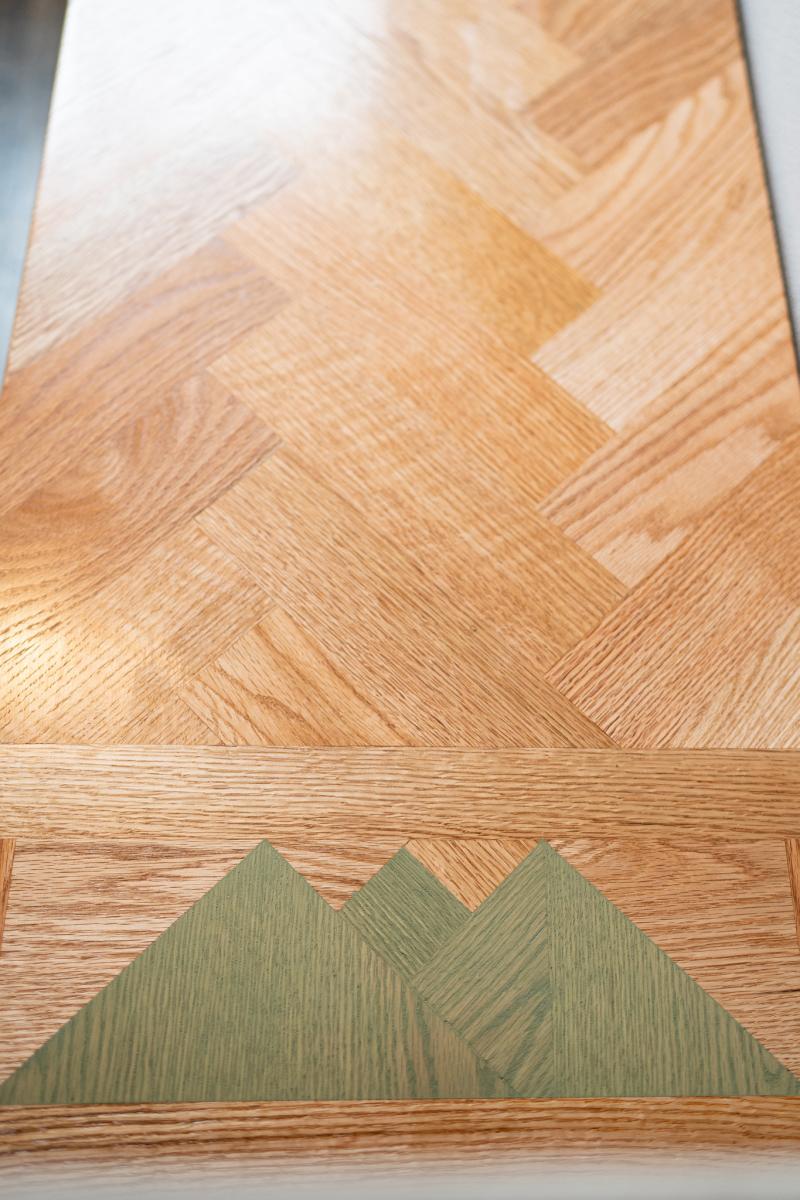
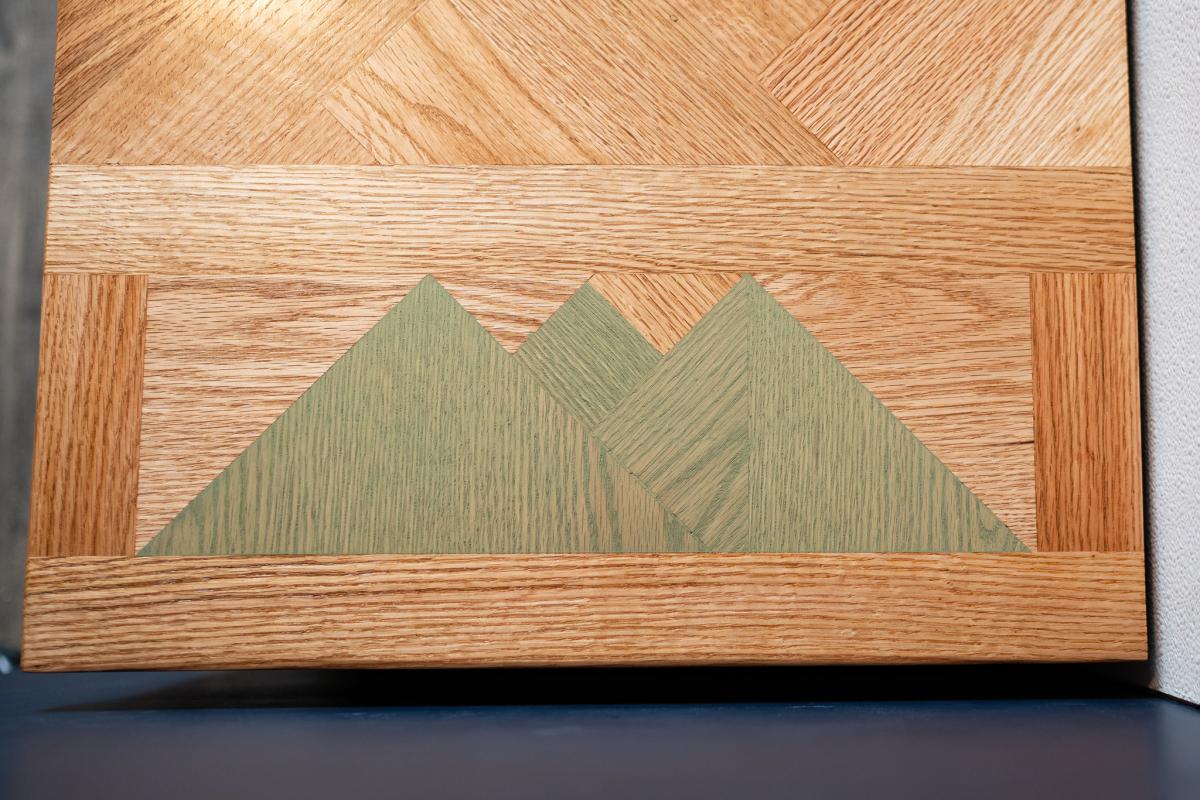
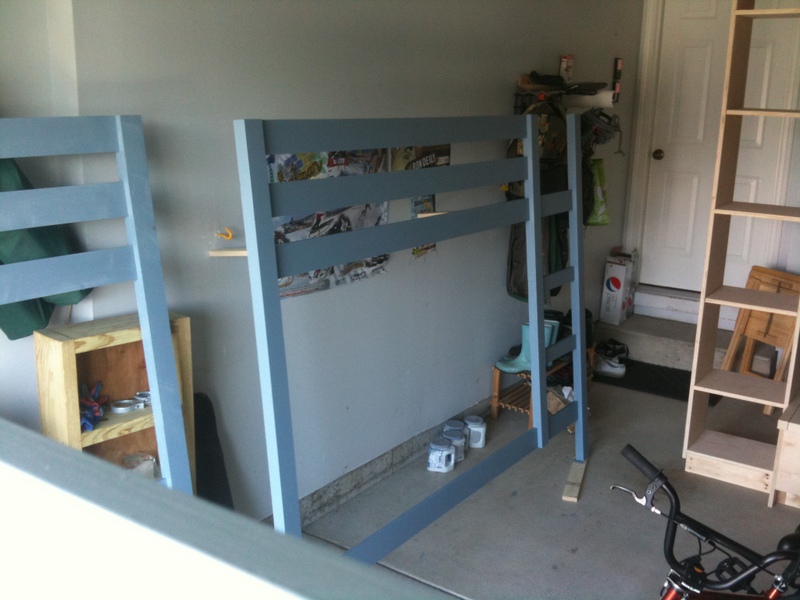
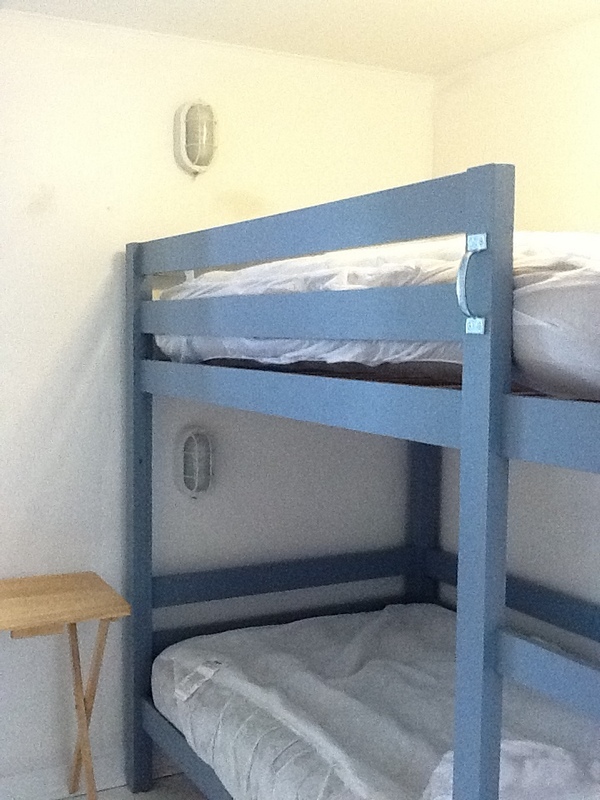
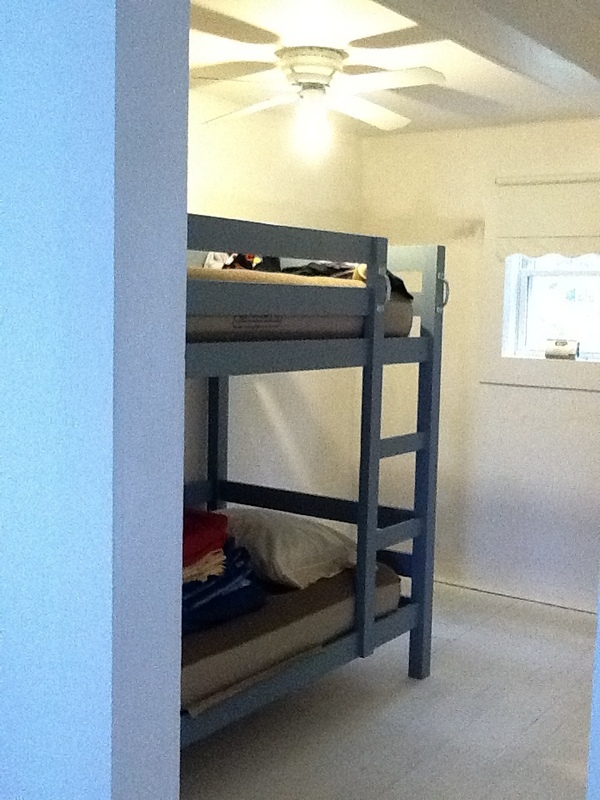
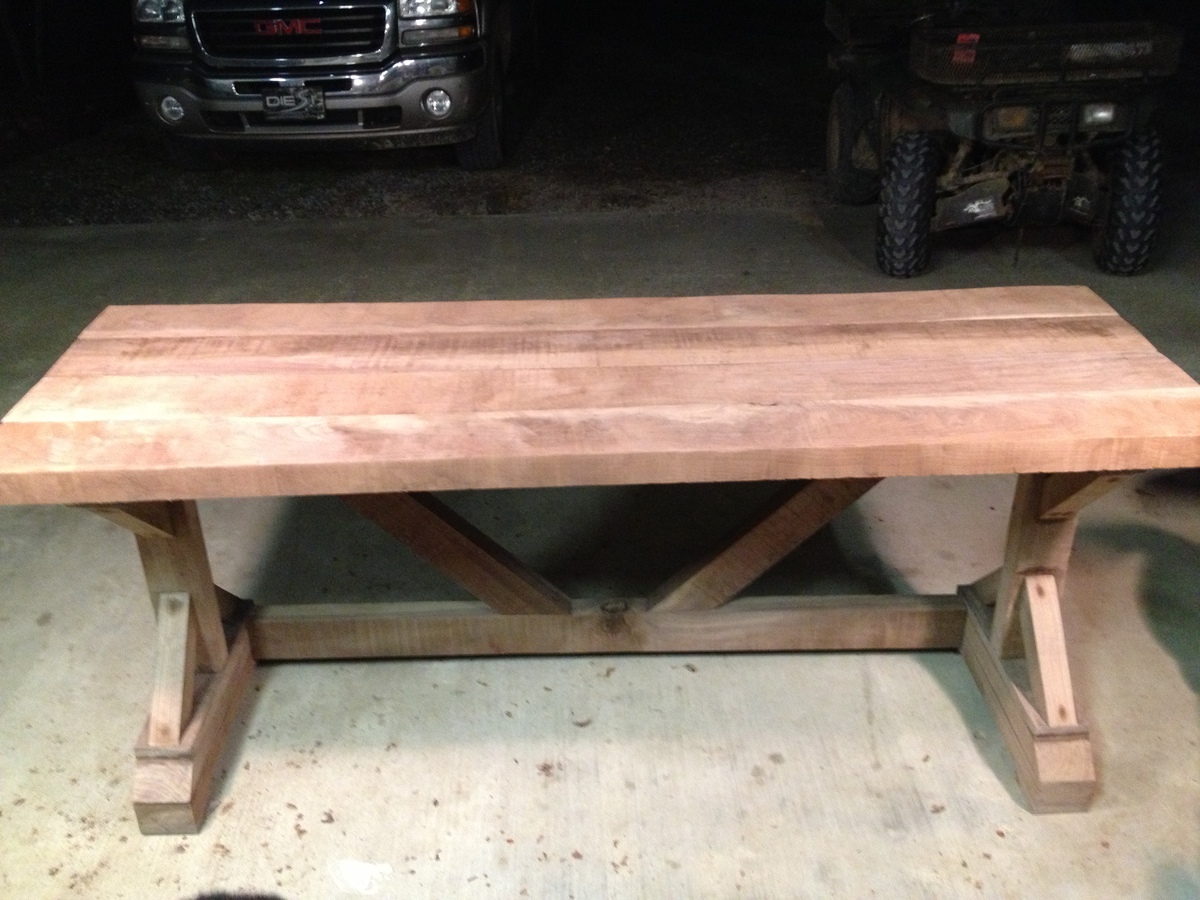
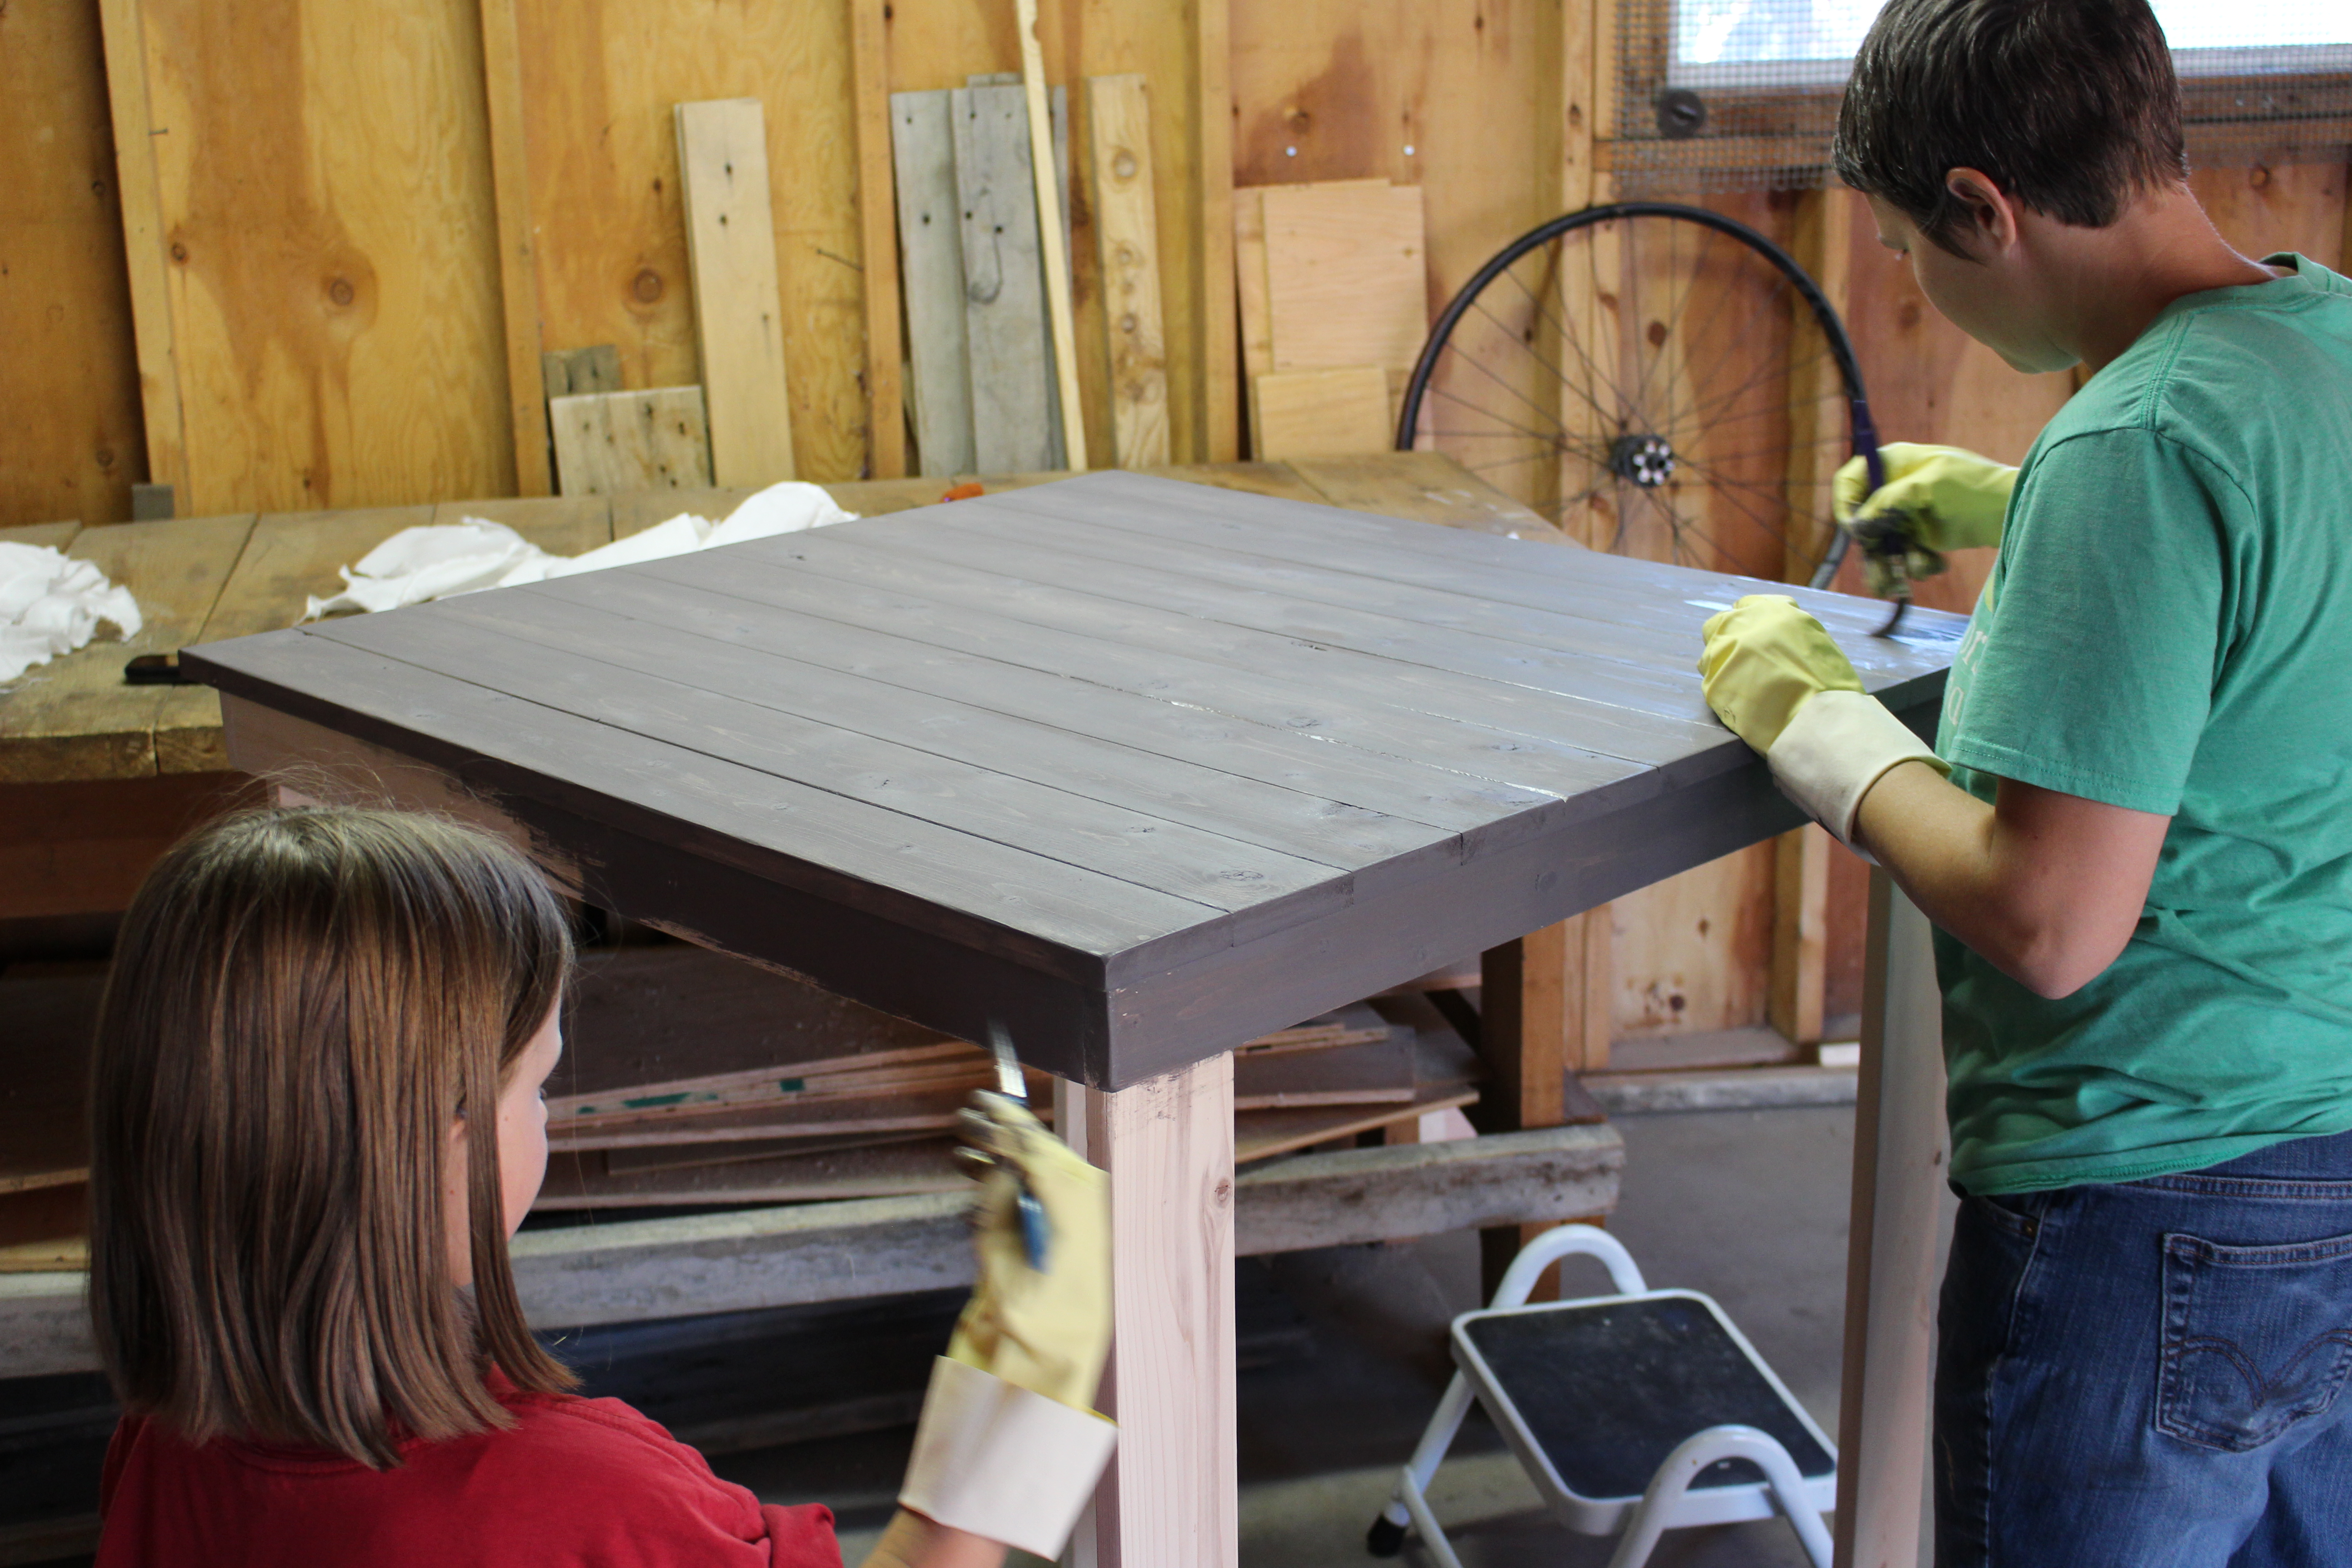
Camp Loft Bed w/ Stairs

Submitted by marievilla on Sun, 01/27/2013 - 14:22

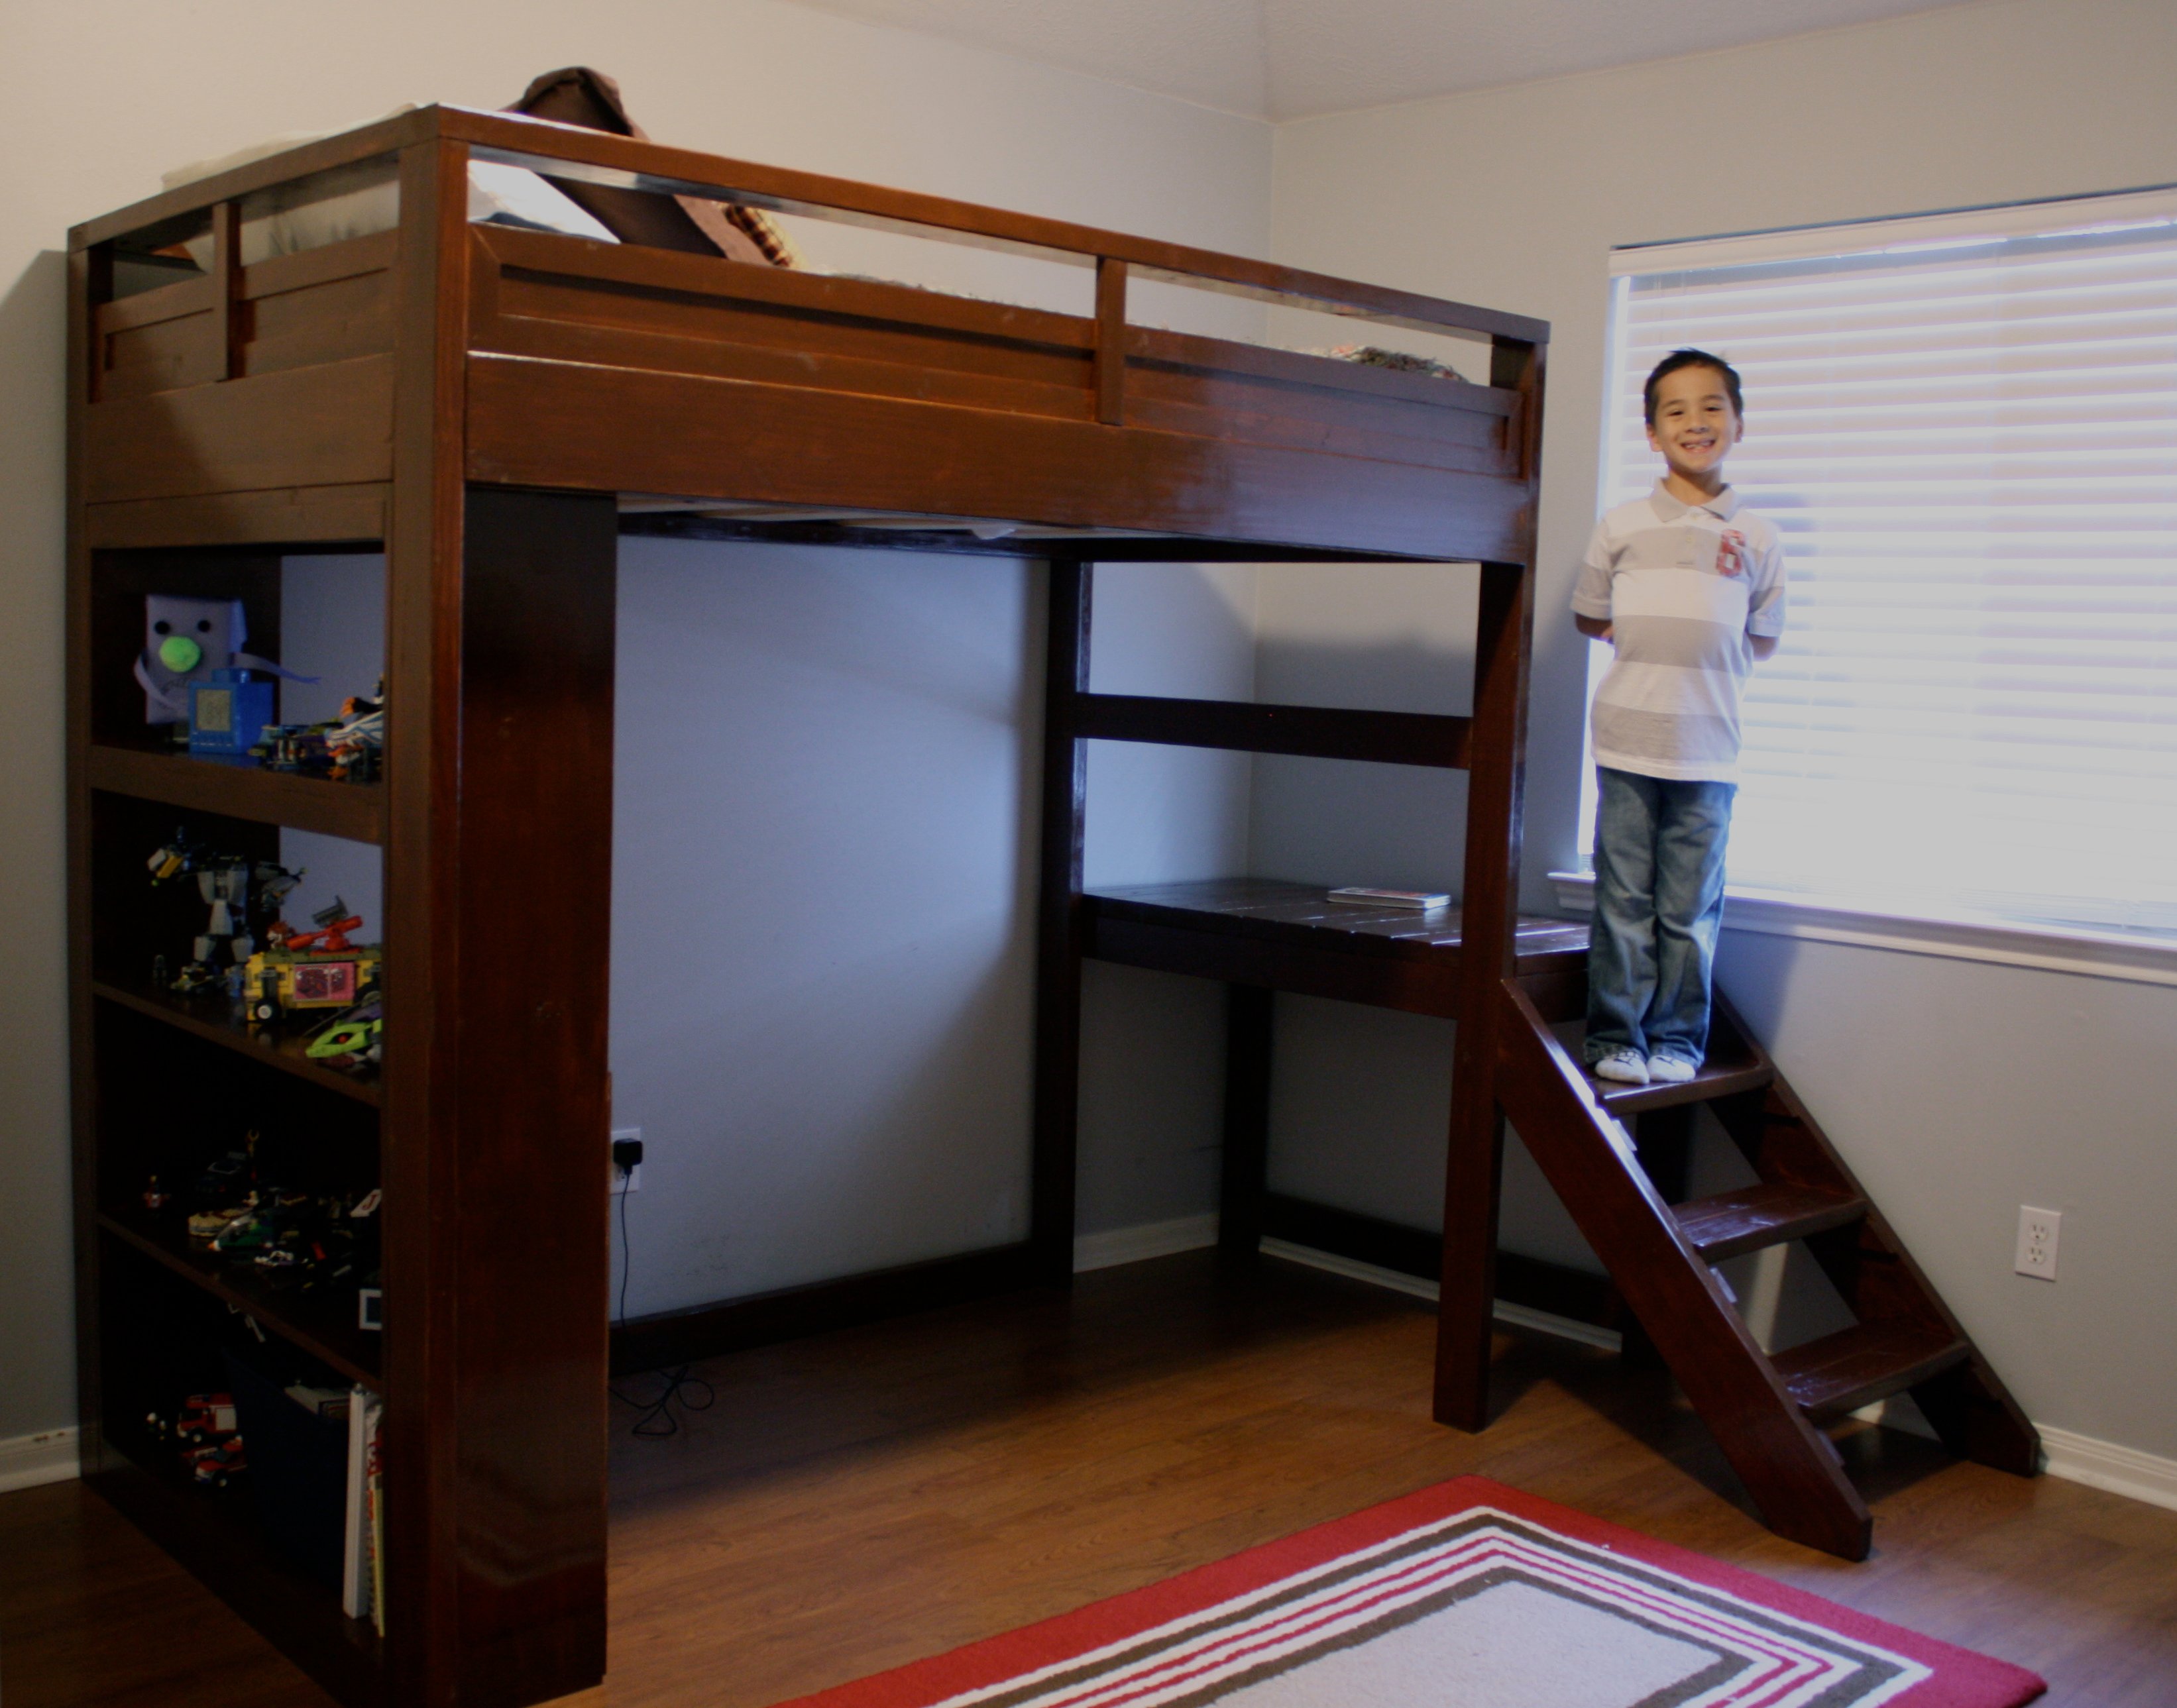
My husband built this bed for our son by combining 2 of the plans from here. The Loft bed and the Camp Loft Bed w/ stairs. We knew we wanted to build a loft bed for our son but liked the idea of the platform w/ stairs so it wouldn't block his window. We also wanted to incorporate a bookshelf for his growing collection of Legos to display as well as books, etc. The next project to add to this will be the desk for underneath. I'll add pictures when we build that. Instead of using 2 x 4's for the top rails of the bed, he improvised and created his own version of a panel for the top. I love how it turned out!

Estimated Cost
$200
Estimated Time Investment
Week Long Project (20 Hours or More)
Finish Used
Fully sanded the furniture down, then applied 1 coat of Minwax American Chestnut Polyurethane & Stain in One Gloss Finish. After allowing it to dry overnight, we applied a second thinner coat.
Recommended Skill Level
Intermediate

Comments

bxrsnkds

Mon, 06/10/2013 - 22:25

absolutely love this, just what I would like to have for my son! Thanks for the inspiration :-)

CandiD

Mon, 07/01/2013 - 05:14

Just love this, I'm hoping to do something similar in a full size for my 9yr old daughter. She feels a bit sketchy with a ladder so the stairs will be better and I love using my Kreg jig so not having to piece together the supports sounds good to me!

ladder shelf

Submitted by DanGraves on Wed, 11/26/2014 - 09:17

I have made several of these now and love them.

Built from Plan(s)
Estimated Cost
$20.00
Estimated Time Investment
Afternoon Project (3-6 Hours)
Finish Used
I used paint on one and stain on the others.
Recommended Skill Level
Starter Project

Comments

Split drawer built-in bench with oak herringbone top

Submitted by GeekAthair on Sat, 12/19/2020 - 10:17

My second take on Ana White's mudroom bench design. This time I went with a split drawer design to provide room for the power outlet on the wall behind it and made my first attempt at a custom herringbone pattern for the benchtop. The frame is made out of douglas fir and the benchtop is made out of reclaimed red oak. The herringbone pattern is accented by two geometric mountain ranges (Minwax Antique Jade wood stain), signifying our placement here in the Pacific Northwest, nestled between the Olympic and Cascade mountain ranges. The benchtop was finished with 3 coats of Minwax Fast-Drying Polyurethane (semi-gloss). I'm very happy with how it turned out and plan to make a similar benchtop to replace the one in our dining room once I clear my plate a bit :)

Built from Plan(s)
Estimated Cost
450
Estimated Time Investment
Week Long Project (20 Hours or More)
Finish Used
Minwax Fast-Drying Polyurethane in Semi-Gloss
Minwax Woodstain in Antique Jade (for the mountains as well as the frame and drawers)
Recommended Skill Level
Intermediate

Comments

DIY Kitchen Cabinets

Submitted by papabear. on Thu, 01/30/2025 - 08:04

Using your plans I built new kitchen cabinets, both upper and base. I may have modified them slightly but without them I would have not been able to do them. Thank You - Paul Burgess

Bunk beds that transport when needed

This bunk bed project was absolutely perfect for a small cottage bedroom for our son. We selected this plan when noticing that this could essentially be built as 4 flat sections and easily transported.

We were able to construct the bunk beds prior to owning the cottage and were then able to move in and bolt together.

Estimated Time Investment
Day Project (6-9 Hours)
Finish Used
Interior latex paint.
Recommended Skill Level
Starter Project

Comments

Sirocco

Fri, 03/19/2021 - 01:12

The best way to shop on the internet and get one dealership to beat another’ price.main thing is only pay the cash no extra. I just only share the website which you find the best and also lowest price on a new car review toyota tundra

From a pile of wood to an beautifull extendable x leg dining table and benches

Submitted by mobe00 on Sat, 11/29/2014 - 05:18

My girl wanted a long sturdy extendable x-legged dining table and benches for our big family and guest for our new house. Extendable from 2,5 meter to about 5,2 meter. Sorry for the picture qualities. Can post pictures later when the table is placed in the new house. Right now its in the basement waiting to be moved ;)


Estimated Cost
Norwegian prices are not the cheapest ones. but from NOK to US dollars its about $300 for the materials. made out of 2x6 and 1.5x4
Estimated Time Investment
Weekend Project (10-20 Hours)
Recommended Skill Level
Intermediate

Comments

FARMHOUSE TABLE AND MATCHING BENCHES

Submitted by dking1157 on Sat, 03/04/2017 - 08:14

Using the plans for the farmhouse table, I took them and modified a bit and this is what I have come up with...so far... many more projects to come!

Built from Plan(s)
Estimated Cost
300
Estimated Time Investment
Weekend Project (10-20 Hours)
Recommended Skill Level
Beginner

Toy Box - Christmas Gifts

I built these using the plans found on here for my niece and nephew for Christmas this year. They turned out a lot better than I expected.

Built from Plan(s)
Estimated Cost
$200-$300
Estimated Time Investment
Week Long Project (20 Hours or More)
Recommended Skill Level
Intermediate

Comments

fancy x desk

Submitted by jamesryan9 on Fri, 02/01/2013 - 01:31

I chose to make this great looking desk out of Walnut wood. So, obviously its not the $55 dollar fancy X desk that Ana White has posted, but it does share the same design. We were looking for a heavy, sturdy, and large desk for our office and I simply added linseed oil to bring out the natural beauty of the Walnut wood. Thank you so much Ana for giving me the tools I needed to complete this project. Feel free to email me or message me if you have any questions, comments, or suggestions. jamesryan9259@gmail.com. Thanks

Built from Plan(s)
Estimated Cost
$400
Estimated Time Investment
Weekend Project (10-20 Hours)
Finish Used
I applied Linseed Oil and followed the directions on the back. I let it soak into the wood for 5-10 min and wiped off the excess with a cloth. I sanded some areas very fine and reapplied the linseed oil in certain places until I found the look I was searching for.
Recommended Skill Level
Intermediate

Combination of the Emme Twin Bed and Farmhouse Storage Bed

Submitted by Anonymous (not verified) on Tue, 03/07/2017 - 20:25

I used elements of both the Emme Twin Bed and Farmhouse Storage Bed to create this perfect bed for my daughter. Thank you so much for your fantastic plans Ana!

Estimated Time Investment
Weekend Project (10-20 Hours)
Finish Used
We used a soft pink paint/primer in an Eggshell finish. I applied two coats of paint and sanded between coats.
Recommended Skill Level
Beginner

Modern Farmhouse Queen Bed Project in Texas. First time Making a bed

Submitted by Anonymous (not verified) on Mon, 12/28/2020 - 05:55

This was a lot of fun to build and not very difficult with the right tools.
The only thing I changed was adding a 2x6 to the top cap instead of the 2x4. I like the look.

Honestly, the thing that took me the longest was picking out the straightest lumber off the shelf. lol

The painting was a different subject lol. I painted a dark gray and after not liking it I decided to give it a light gray wash for the weathered look I was going for. I love it! Thanks, Ana for the inspiration!

I would say anyone with a passion for making things, how to read a tape measure and attention to detail can make this bed fairly easily.

AJ in Texas

Built from Plan(s)
Estimated Cost
$175
Estimated Time Investment
Day Project (6-9 Hours)
Recommended Skill Level
Intermediate

Comments

Shoe Crates

I saw someone's brag where she used this plan for shoe storage. I thought it was a great idea. It sure lets me clean the floor better, just roll it out of the way, clean, roll back. It is so much better than the shoe rack that occupied the space before with such piles of shoes that it was arduous to clean the floor at all. Next month I will take care of the second shoe rack for my own shoes.

It was so simple, I loved making them. Grandpa and I had fun. The best part, you can make them quick because the don't have to be perfect. And Grandpa's nail gun made quick work of all the attached boards. All boards were also glued and sanded.

Ana your site gave me the confidence to solve my own furniture problems with custom solutions. Thanks, I can't wait for my next project.

Estimated Cost
$100 for 2.5 carts
Estimated Time Investment
Afternoon Project (3-6 Hours)
Finish Used
Polyurethane, 2 coats
Recommended Skill Level
Starter Project

New Kitchen Table

We recently moved from a 530 sq ft rental house to a 1700 sq ft rental house. The one kitchen table that we had in the little place was needed in our library/craft/homeschool room so I needed something knew for the kitchen. My 8 year old daughter helped a lot (she loves using the Kreig Jig). 

I love how this (my second wood working project ever!) came out. 

Thanks for making it so easy to create beautiful and custom furniture for me and my family! 

Estimated Cost
$100- $150 and that includes all the tools/supplies I needed to purchase (pocket-hole jig, pocket-hole screws, etc.)
Estimated Time Investment
Weekend Project (10-20 Hours)
Recommended Skill Level
Beginner

Comments

KaoticKrafter

Fri, 12/05/2014 - 17:31

This is my first brag post. Any tips on why the photo is sideways and there are weird links in odd spots?

Thanks!

Tina

earthbybike

Fri, 12/05/2014 - 19:59

When my photos posted sideways, I used microsoft paint to rotate and saved as a new photo.  This seemed to solve the issue.

Mostly Made With Reclaimed Materials

Submitted by Anonymous (not verified) on Thu, 03/09/2017 - 19:05

I made these nightstands with reclaimed siding and fir flooring, and scrap wood from a remodel they will ultimately furnish. I found the matching knobs for $1 each at a building materials salvage yard.

Built from Plan(s)
Estimated Cost
Not sure
Estimated Time Investment
Week Long Project (20 Hours or More)
Finish Used
I used Fast Dry Semi Gloss Interior Varathane. It's water clean-up and has a blue label. I wish I'd used some light stain to warm the color of the wood a little. I like to use the semi gloss and remove the last imperfections in the finish with 0000 steel wool. In the end the finish is closer to satin.
Recommended Skill Level
Beginner

Coffee Table Train Table

Submitted by michlynn11 on Thu, 12/31/2020 - 09:02

First build was a train table for Christmas for my 3 children. They loved it! And I love that it has a top and can be closed. I also painted the base and secured the track to the bottom plywood so we don’t have train pieces everywhere. I used 1” screws from underneath and we can take them off in the future if they want to start building their own tracks. Hope this brings years of fun for the kids!

Built from Plan(s)
Estimated Time Investment
Week Long Project (20 Hours or More)
Finish Used
Whitewash with Select Walnut
BM Wrought Iron
Recommended Skill Level
Beginner

Triple Pedestal Farmhouse Table

Putting this table together was a lot of fun! We knocked off about two feet from the plan so that it fit in our modest dining area. Many of my saw blades were replaced at some point during this project in favor of sharper and cleaner-cutting replacements, so we spent quite a lot making sure we didn't end up with a giant splinter of a table. You can see from one of the photos how poorly I chose some of the wood (the 2x2 is like a cork screw), so I had to replace a few pieces. Still, I think I could have replaced all of those tools altogether and still spent less than this table would have cost at the store.

Something I learned during finishing: I knew beforehand that wood glue didn't stain, but I didn't realize that even the residue of wiped-up glue will keep the wood from taking stain. When the matching bench is made later on I'll be sure to sand all of the places where glue might be hiding, invisible. The stain color generally wasn't quite what we imagined and the legs seem to have taken it differently than the top, but when the word "Farmhouse" appears in the table style, you can chalk all of those imperfections up to its "rustic" style. For that I am grateful.

The poly dried a bit rough, but a fine sanding sponge smoothed it out and also gave it a little bit of that greywashed RH look. Win-win. We wound up putting "Flor" tiles underneath the table to give it some contrast since it ended up resembling our floor color a bit too closely. Now we actually have a dining area, instead of just a table.

It took about a week and a day (I started Saturday morning and we finished it the following Saturday night). Fortunately our ten-month-old can sleep through just about anything. I'm glad it's done now and we can enjoy it!

Built from Plan(s)
Estimated Time Investment
Week Long Project (20 Hours or More)
Finish Used
Rust-Oleum Early American, Minwax Clear Matte Polyurethane
Recommended Skill Level
Intermediate

Simple Modern Outdoor Sectional

Submitted by jdwarns on Mon, 12/08/2014 - 13:03

So glad these plans were posted so that I could build my own outdoor sectional.  I built two armless and two corner/end pieces.  I used cedar with American Walnut stain and clear/satin spar urethane.  I purchased the cushions online.  They only had 24x24"; so for the back cushions, I used a seam ripper to open the cushion, cut the foam and extra fabric, and re-sew.

Estimated Cost
500 including cushions
Estimated Time Investment
Week Long Project (20 Hours or More)
Finish Used
American Walnut water-based stain
Clear/Satin spar urethane
Recommended Skill Level
Beginner

Comments