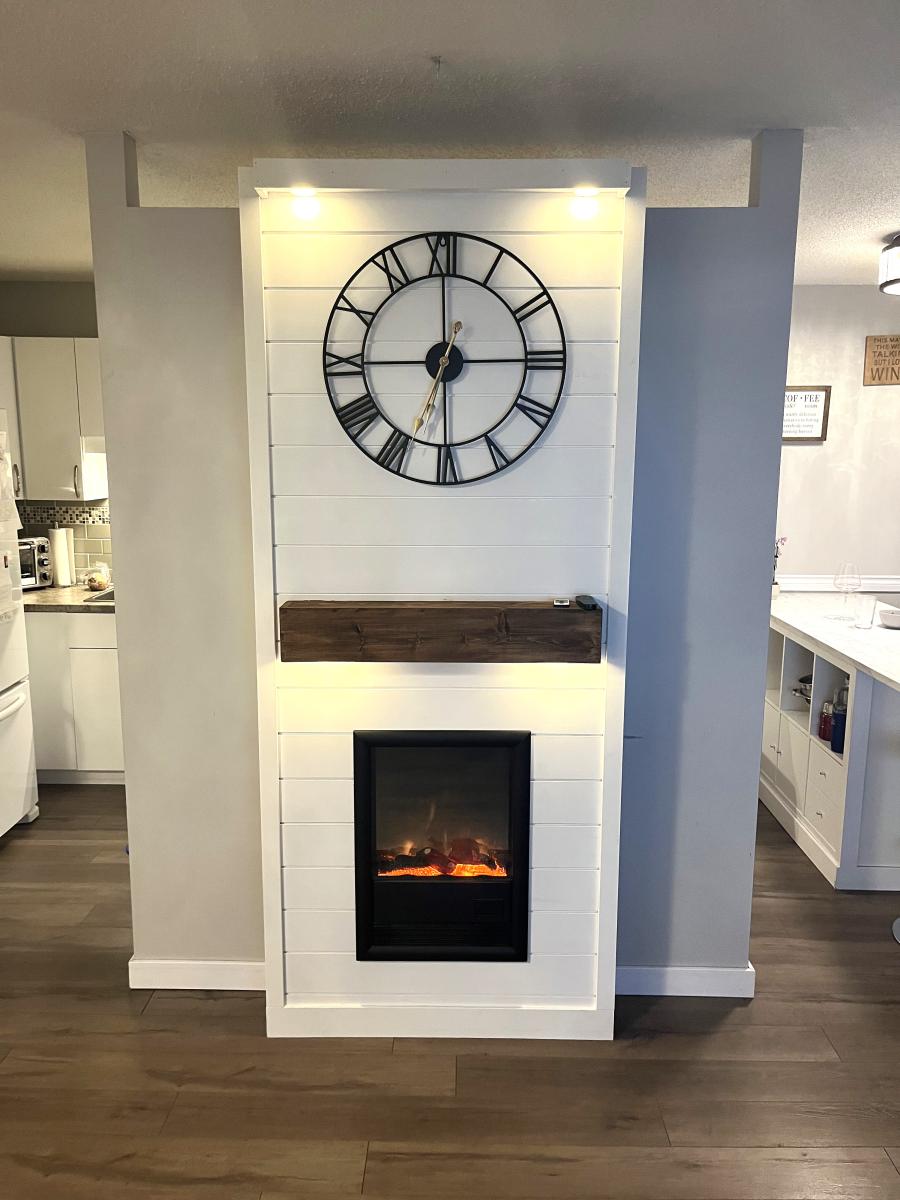
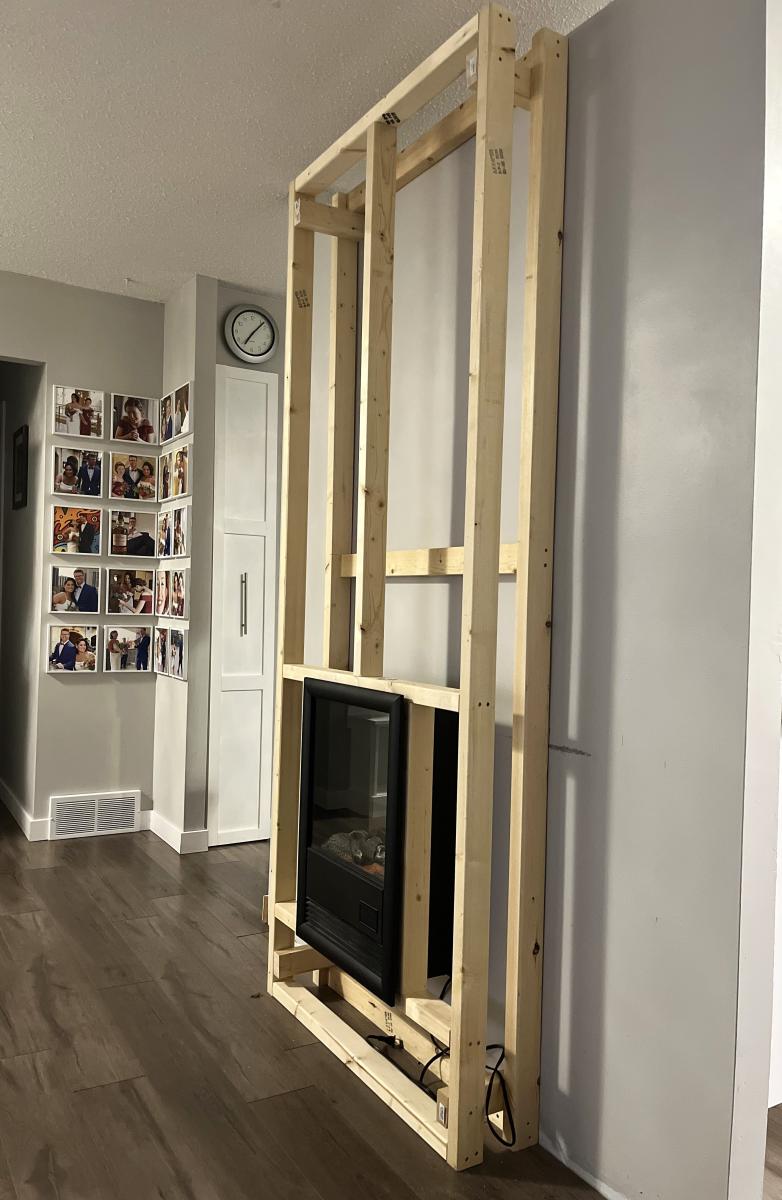
Small Shiplap Fireplace Wall
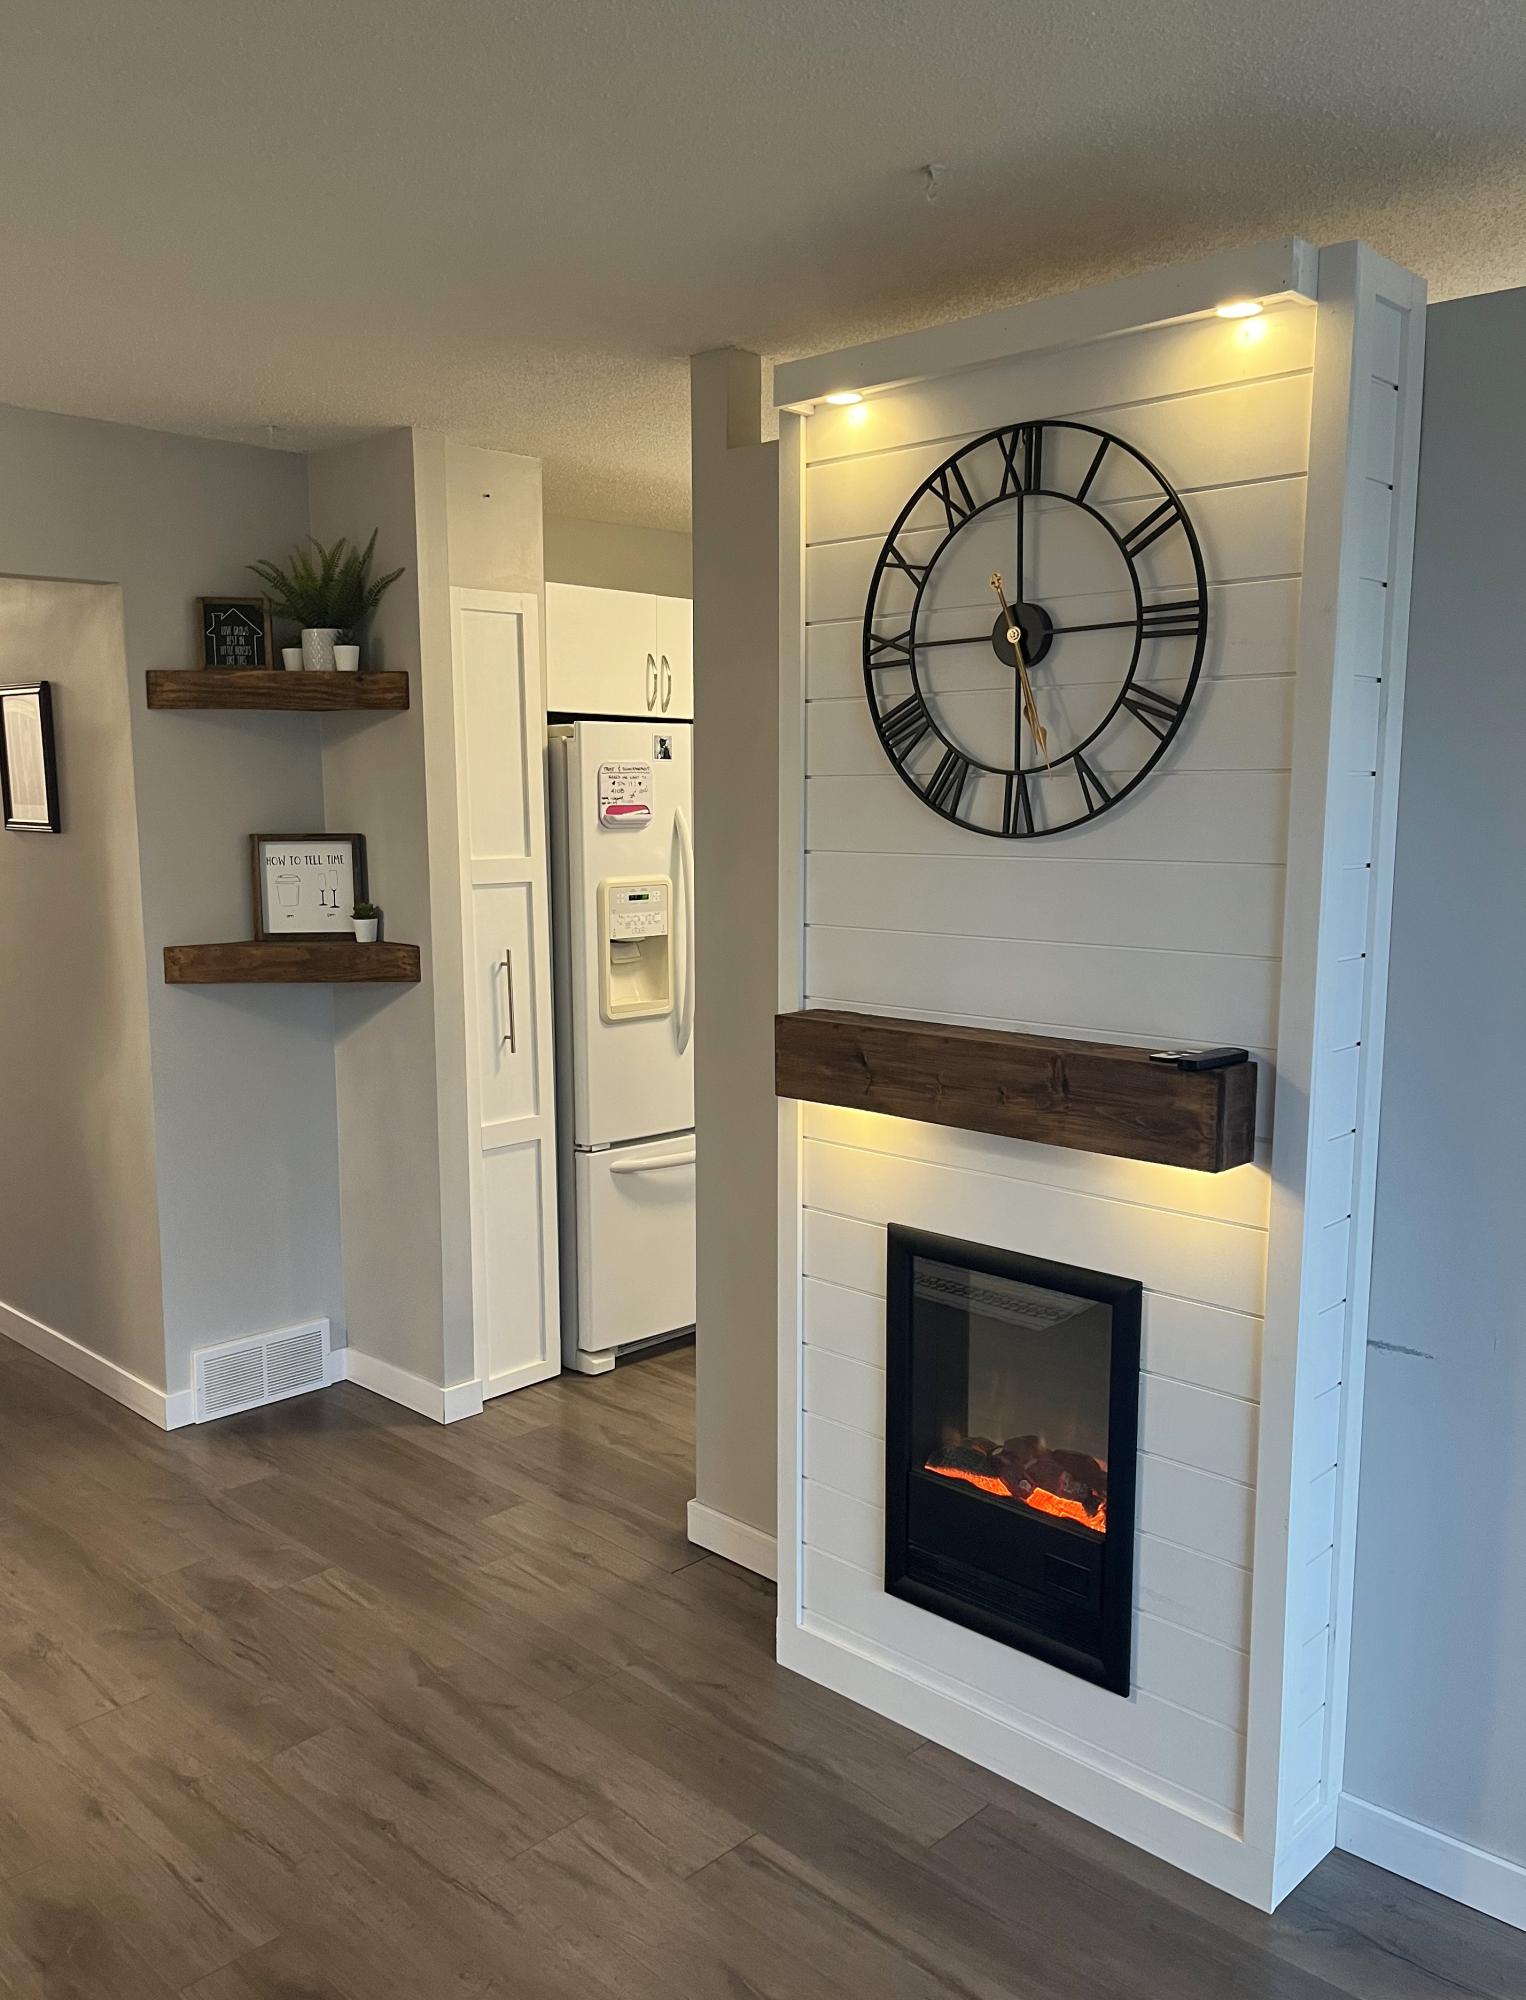
I copied Ana’s fireplace insert design. So easy and looks amazing.
It’s my favorite so far.
Thanks Ana!
Al
Built from Plan(s)
I copied Ana’s fireplace insert design. So easy and looks amazing.
It’s my favorite so far.
Thanks Ana!
Al
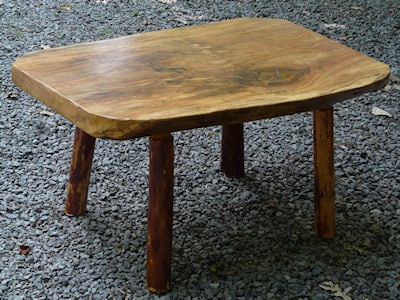
See post on blog: http://www.atouchofarkansas.com/2012/05/icoffee-table.html
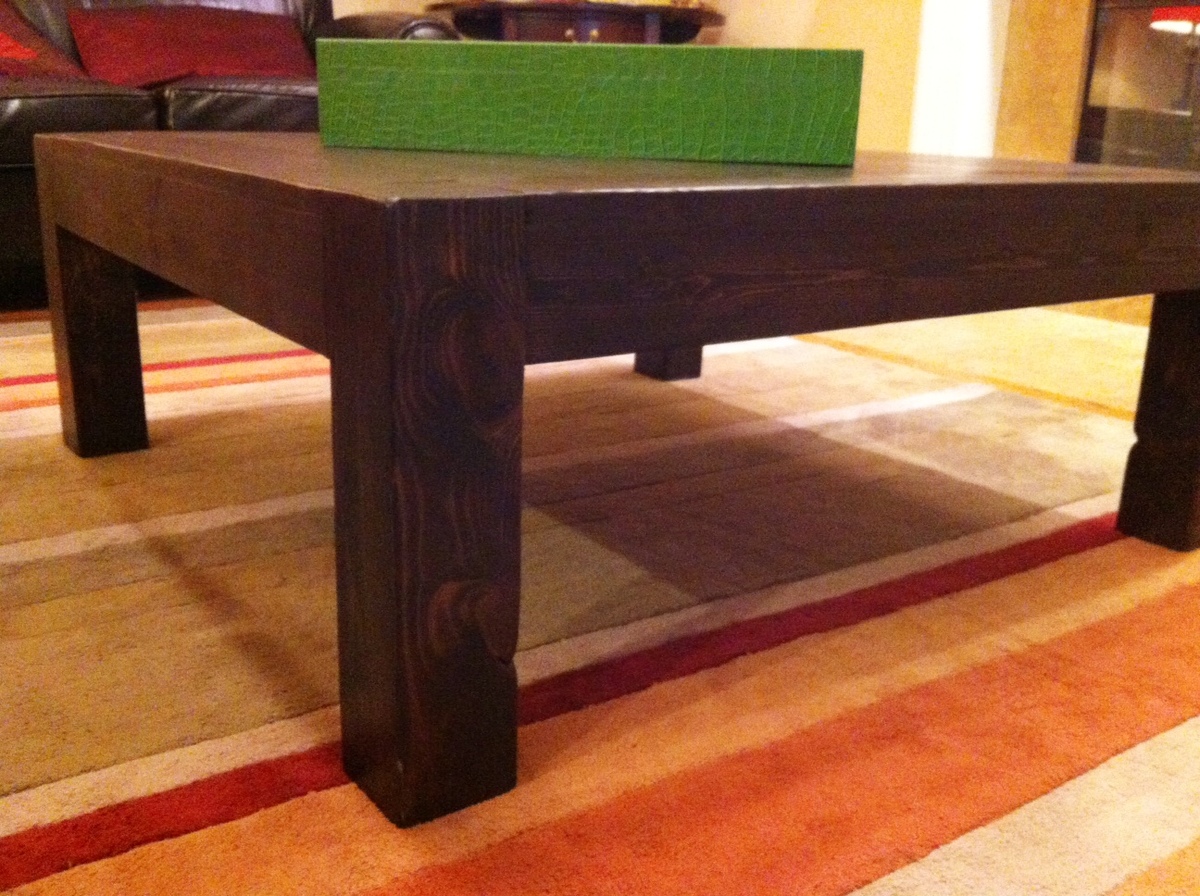
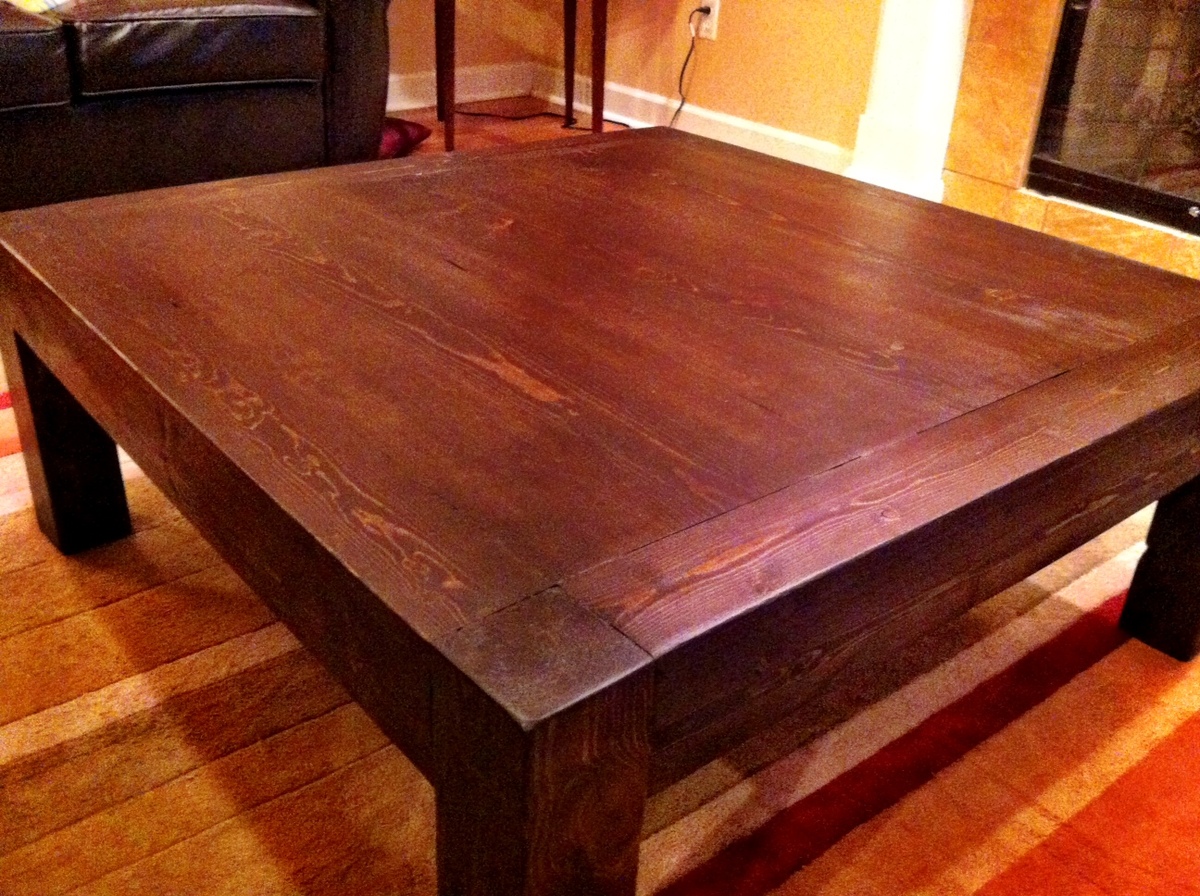
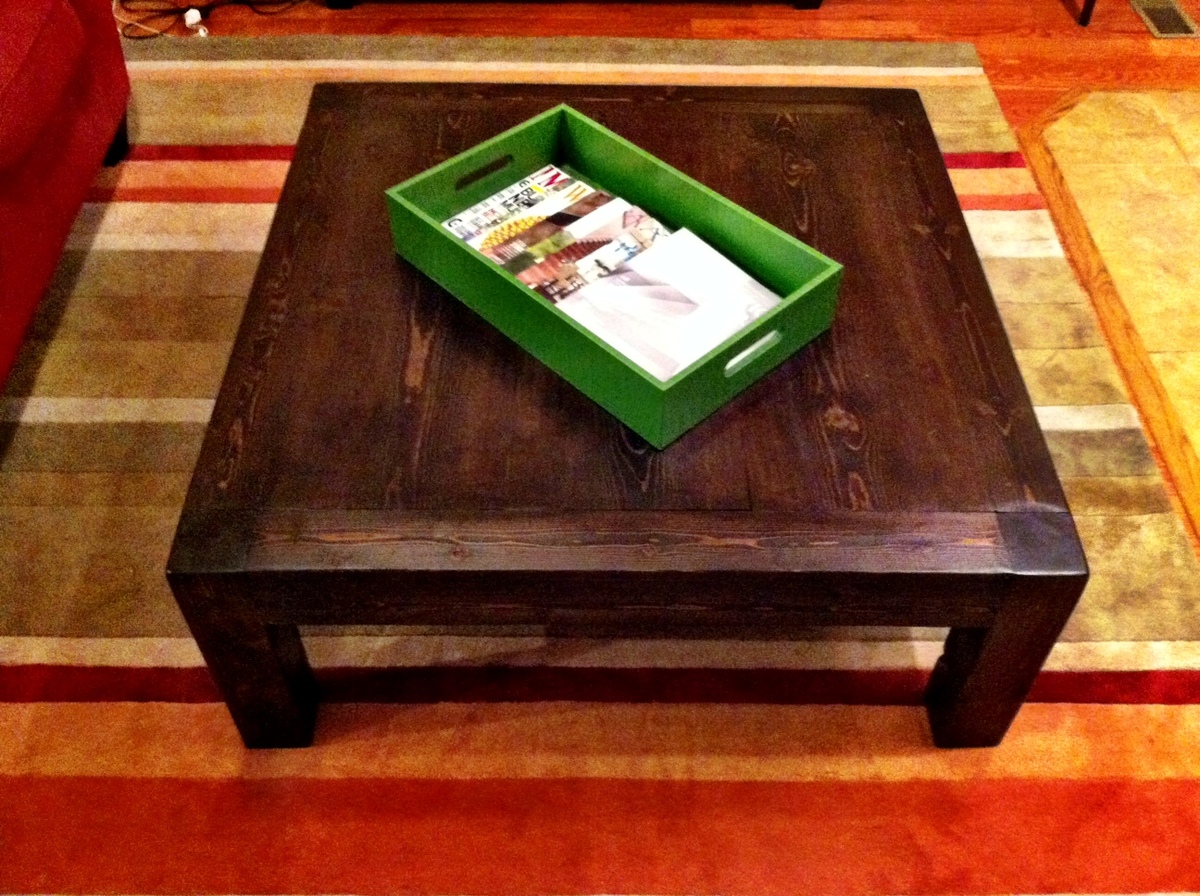
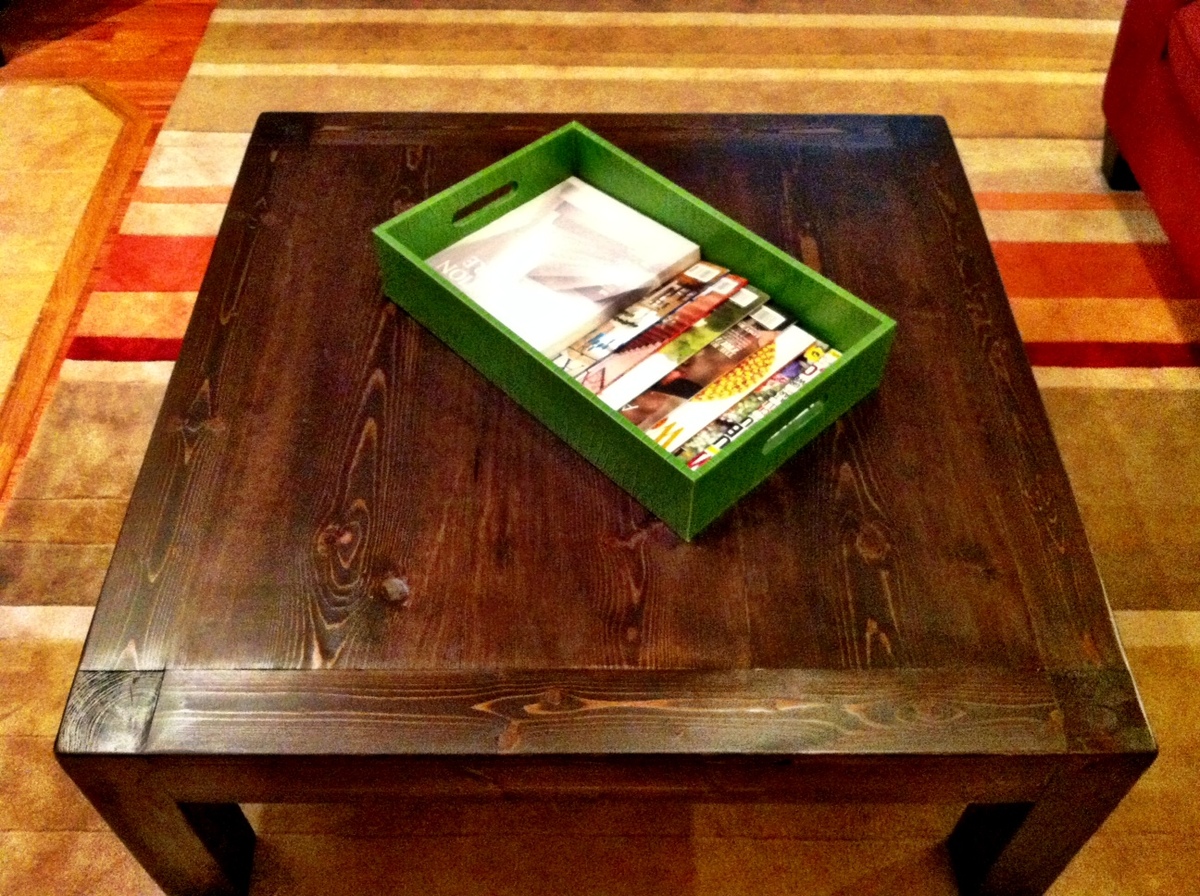
This was my first "build" and was a lot of fun. Very quick and very easy. I'm so happy with how cute it turned out!
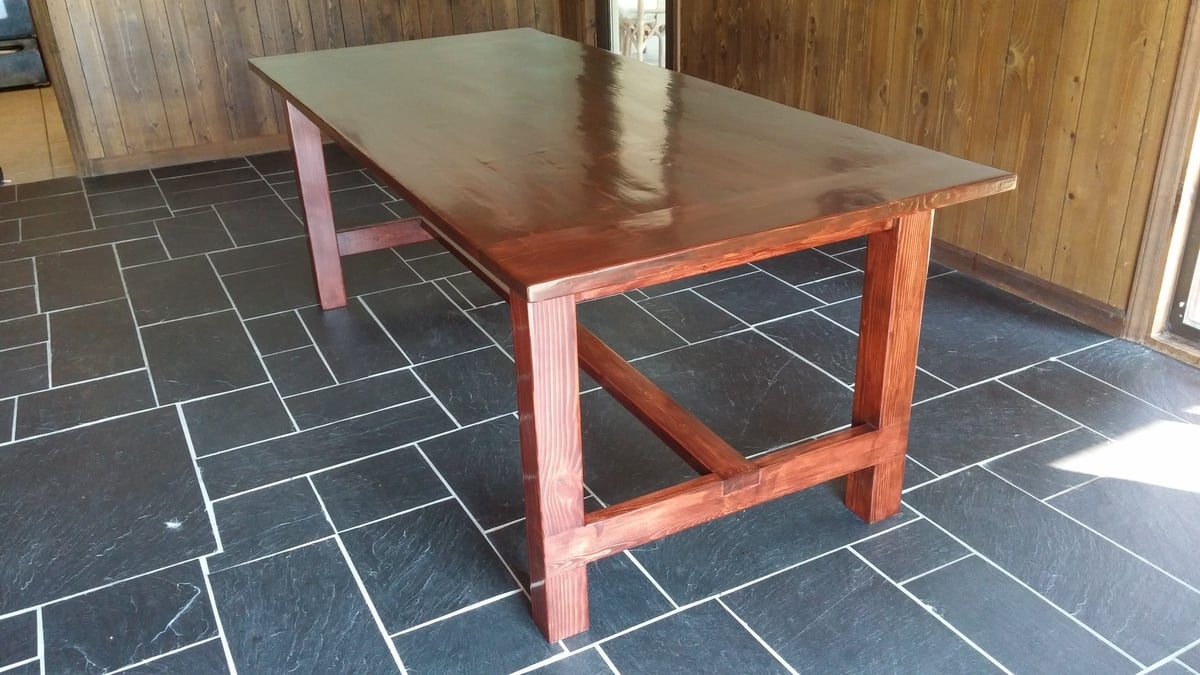
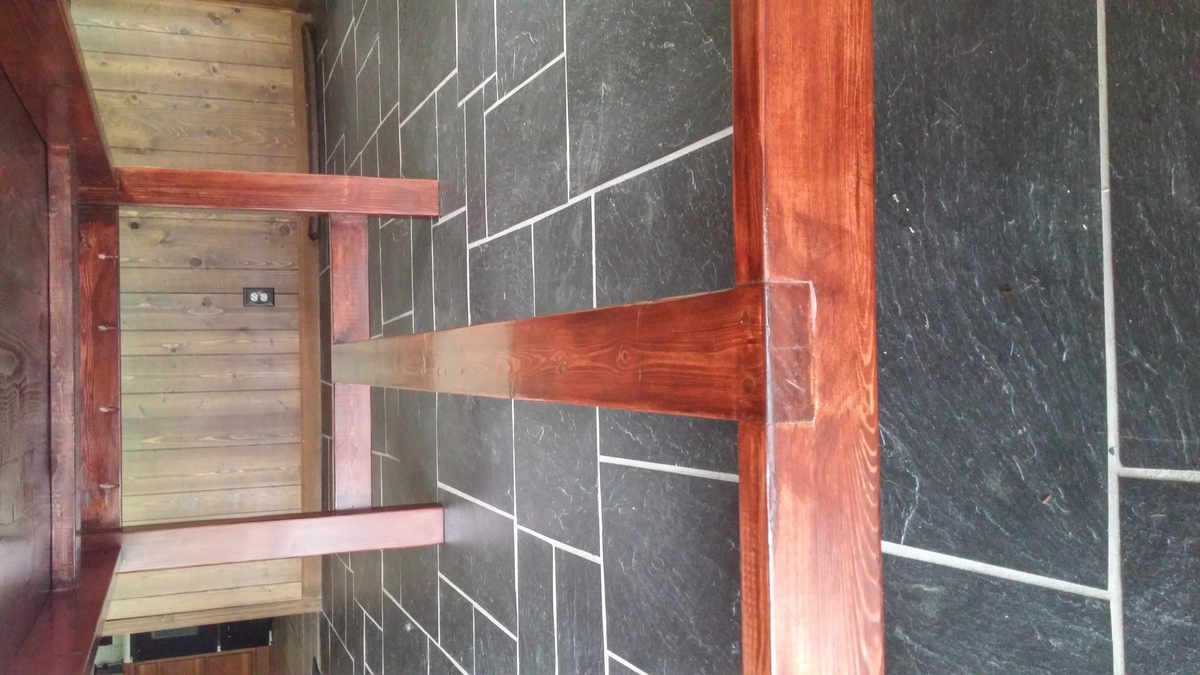
My brother recently became a homeowner and asked me to build him a dining table for his new (and first) house. He picked out the Farmhouse Table plan from the site and I spent a few weekends building this table for him. The most time consuming part of the project was sanding and applying the stain & polyurethane.

Project was quick and easy
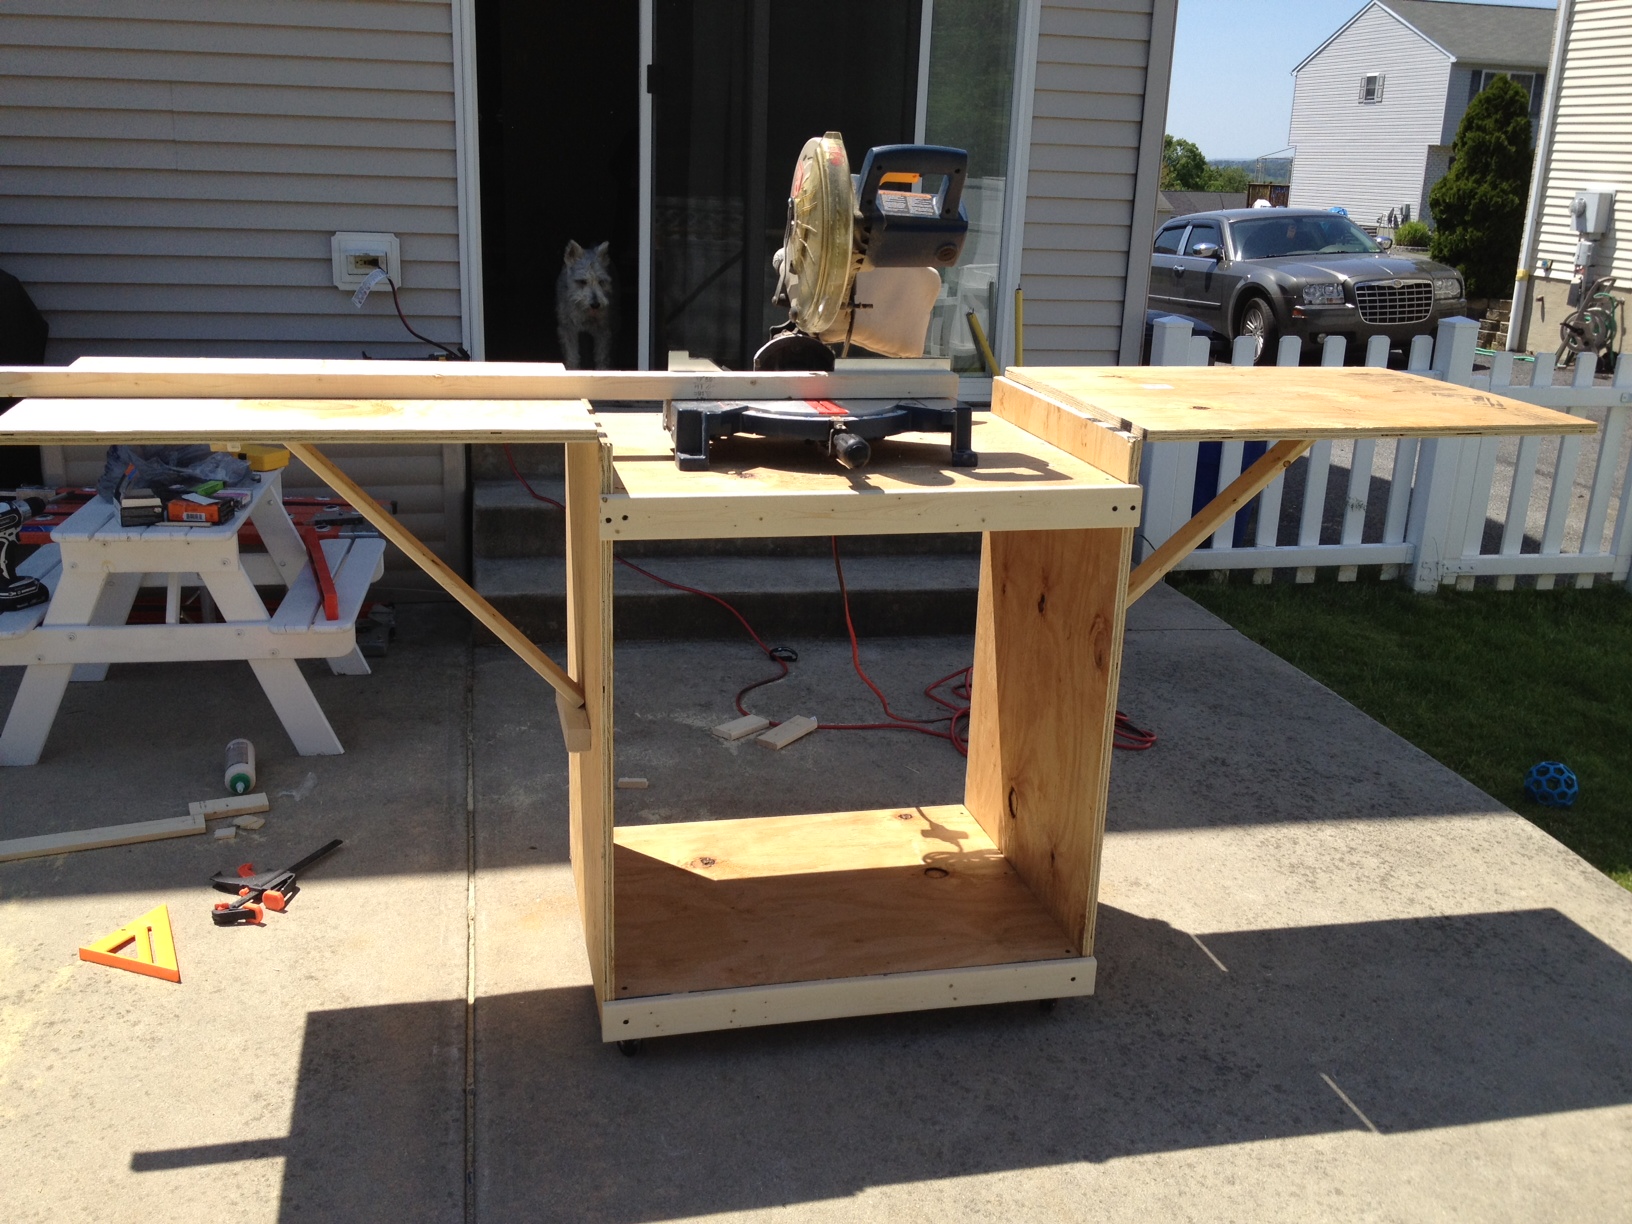
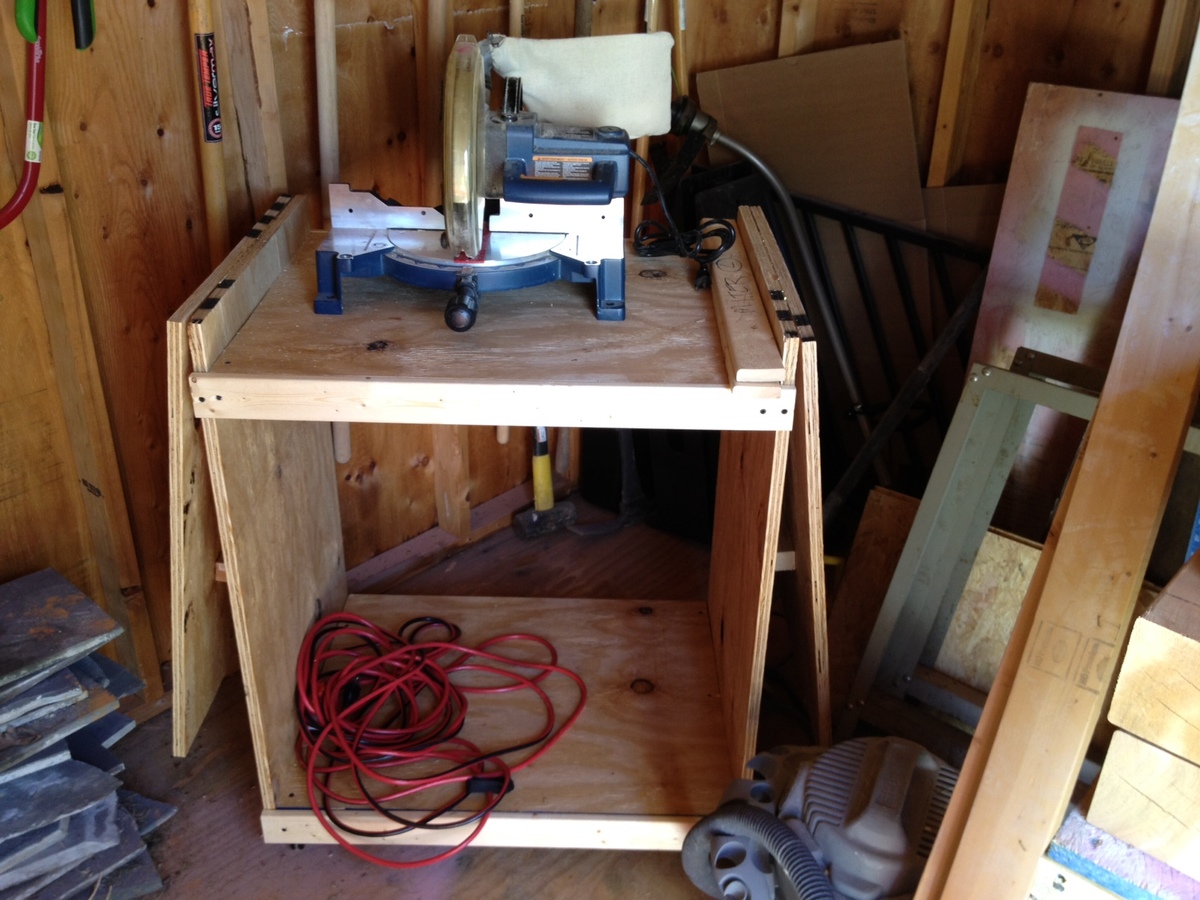
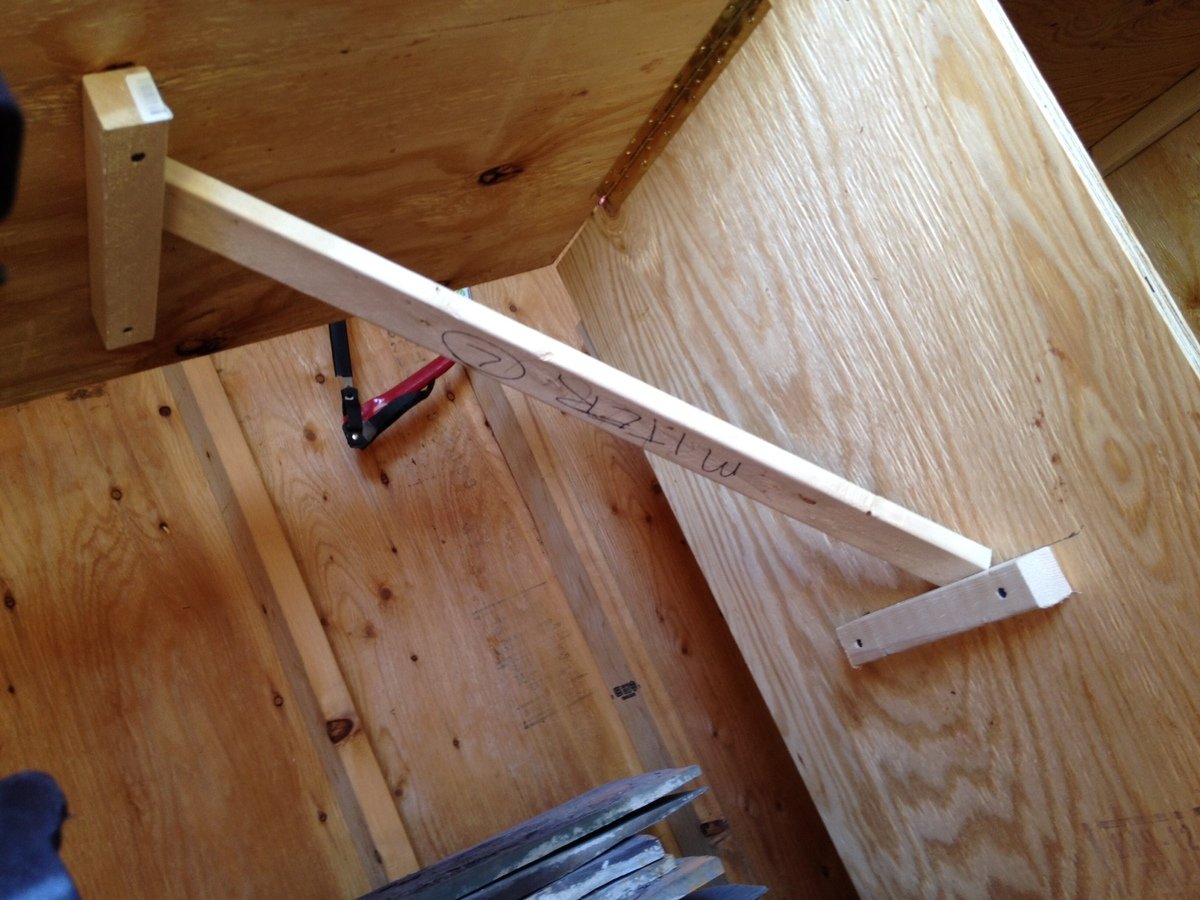
Coped the design almost to the "T." I loved this design because I only have a small shed to work out of and this stand for my miter saw was much needed.
The major difference between the original and my design are the folding arms. I was working within a very small budget and couldn't afford the fancy folding arms so I was able to do a little creative thinking and decided to go with a removable piece of 1x3 that is wedged under the arms with a block installed on the "leaf" and the main table. I used the old pythagorean theorem to figure out how to make it a level 45 degrees. With a little playing around I have both arms completely level and the stand is perfect!! I am excited to get some other projects on the way now that I have somewhere other than the ground to work with my miter saw.
I didn't use any pocket holes, but am picking up a Kreg jig set from someone this upcoming week and am looking forward to putting that into some use on my next projects!
Fri, 05/18/2012 - 18:26
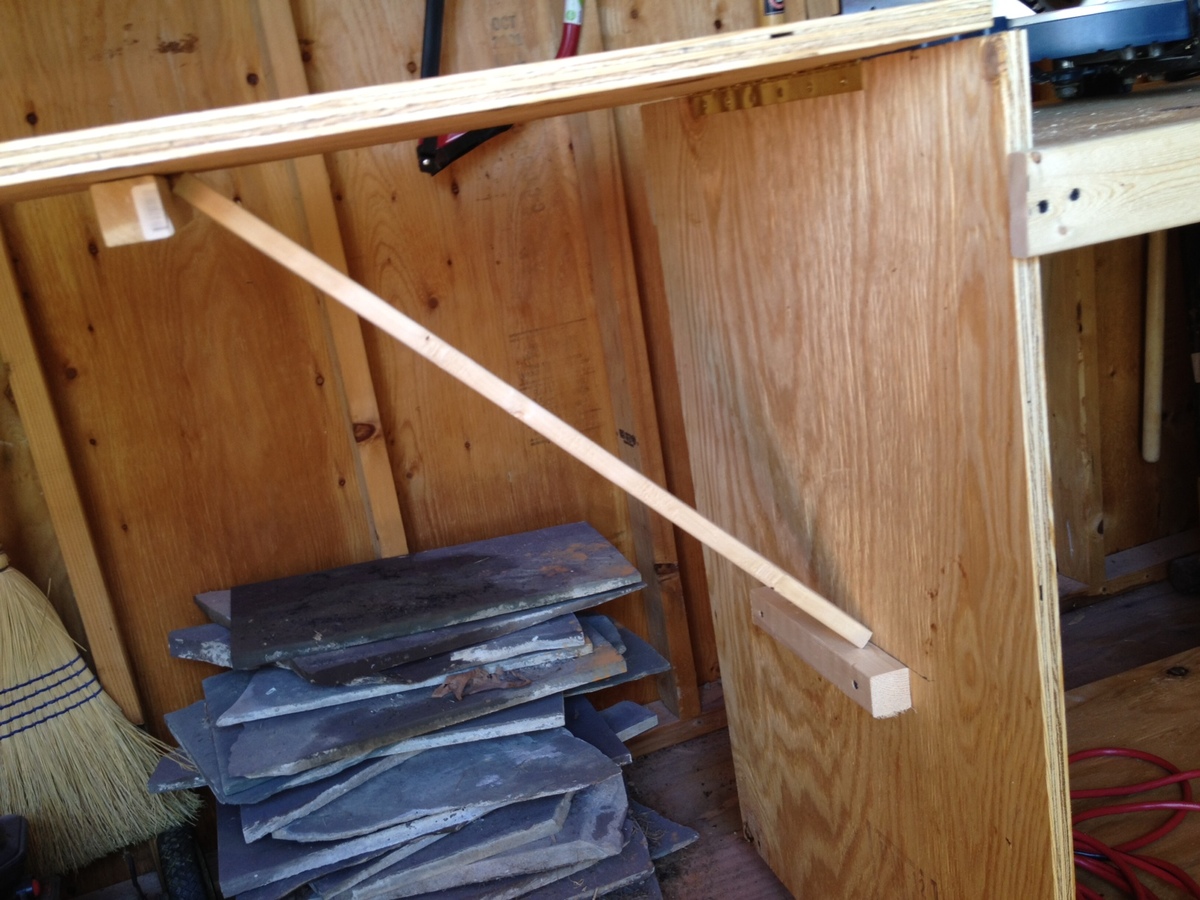
What a great way to save some money! If you have time, could you add a close up pic of how the 1x3 fits on the folding arm to hold it? Cute dog!
In reply to Nice modification! by Crystal @ 29 R… (not verified)
Sun, 05/20/2012 - 11:25
Added a few pics, let me know if you want any others!!
Fri, 05/18/2012 - 19:04
I would like to see a close up too if possible. I am wanting to make the saw cart plus two more carts with the middle flush with the top so I can push the two together to use for a workbench. How much weight do you think your sides can hold the way you set them up?
In reply to I would like to see a close by stephanier (not verified)
Sun, 05/20/2012 - 11:28
I honestly am not too sure how much weight it would hold. I havent seen any bowing or pushing yet. I have used this so far to cut a piece of 4x4 12ft long made of cedar for my next project and didnt have any problems. I think if I need more weight holding strength, I think I would just change out the 1x3 and maybe use a 2x4 in there. I am also not a 100% sure how much weight the hinge can hold, maybe someone else reading these posts can be a little more helpful as far as that goes.
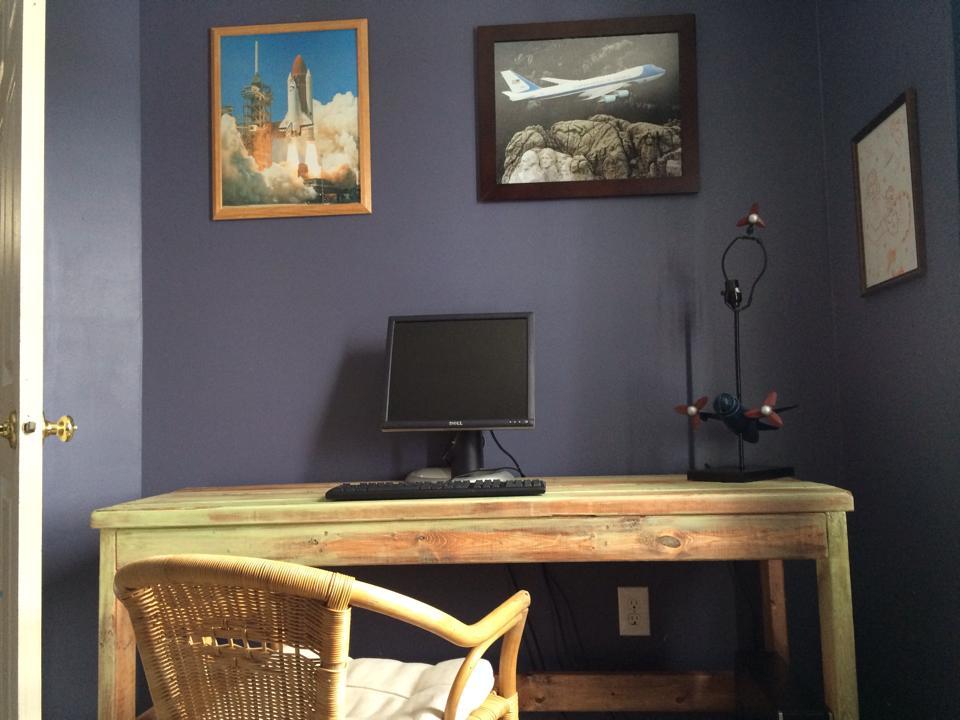
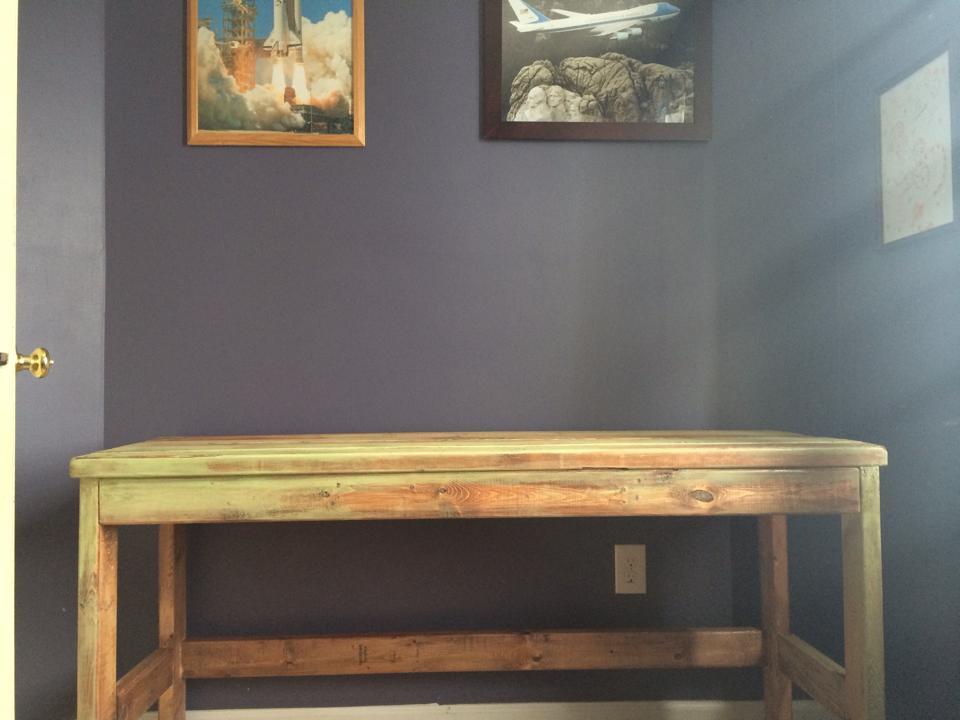
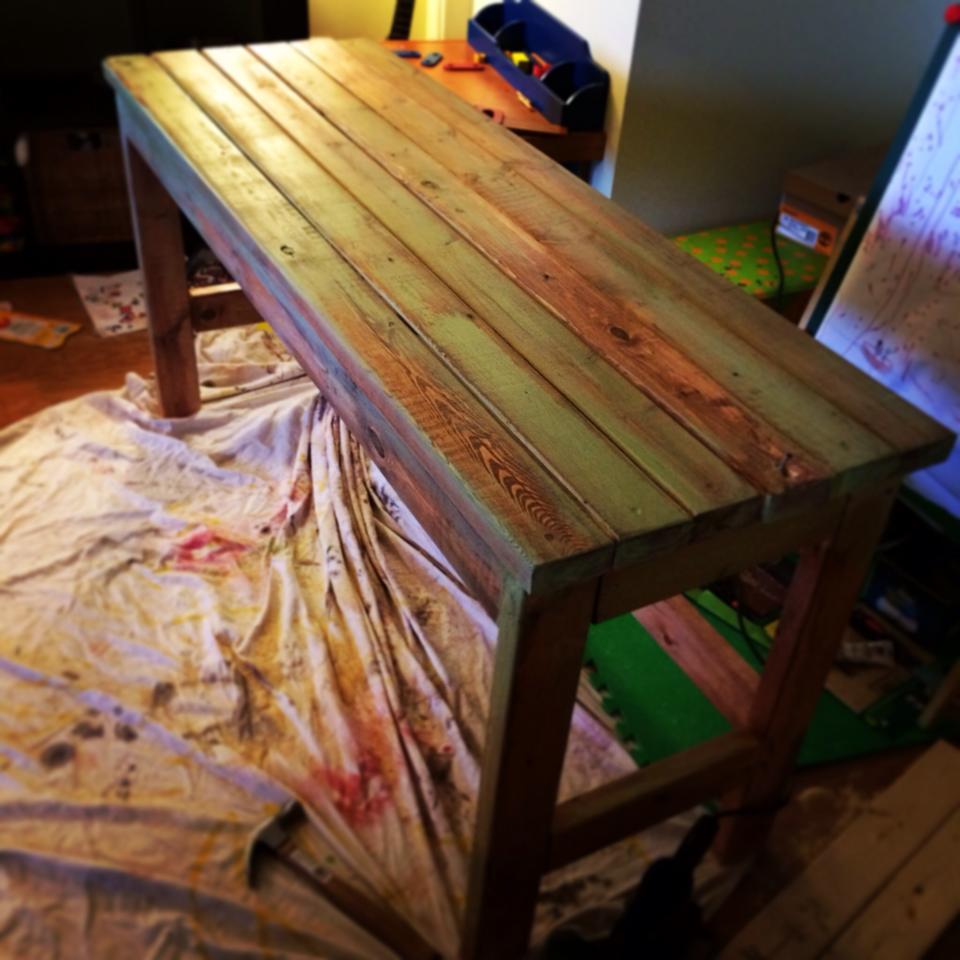
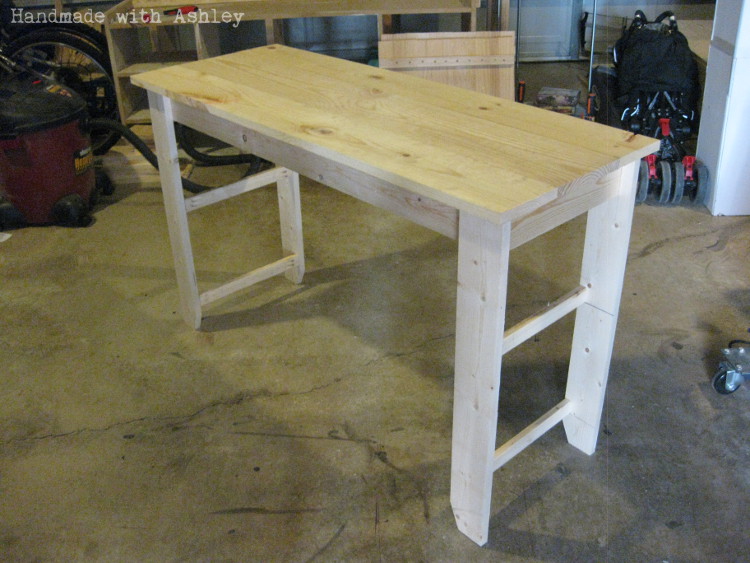
I had fun with this project. I needed a long and narrow desk for my son's room, and this was perfect. It was sooo easy. I used countersink drill bit and filled in with wood filler. I sanded to smooth it out and make soft edges. I stained first with a black cherry stain, then spread teal paint around (was inspired by a lot of rustic wood and teal pieces that I saw at homegoods), then coated it with kona miniwax stain to darken it up. I put a clear polyurethane finish on it to protect it. Super easy and I love it. Got all of my wood for under $30.
Simple and easy to build from plans provided

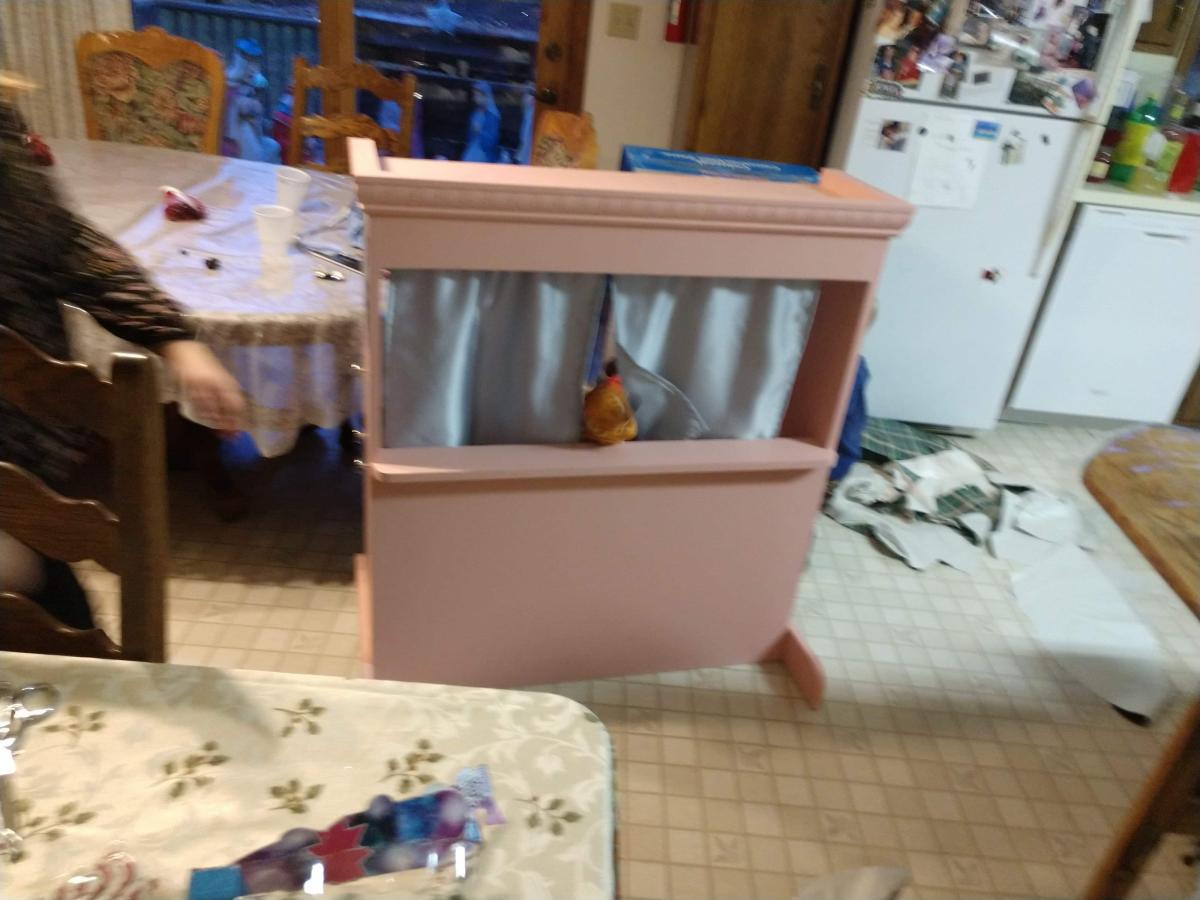
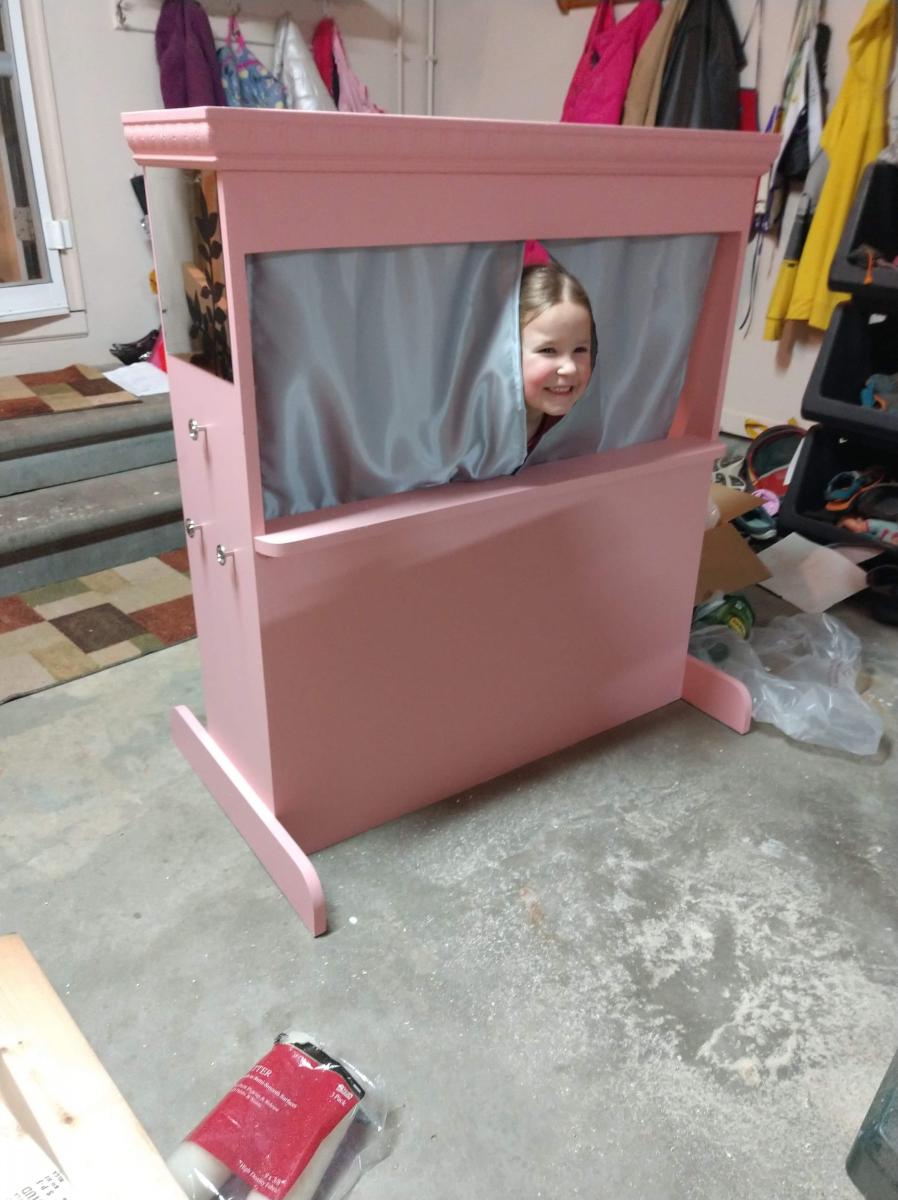
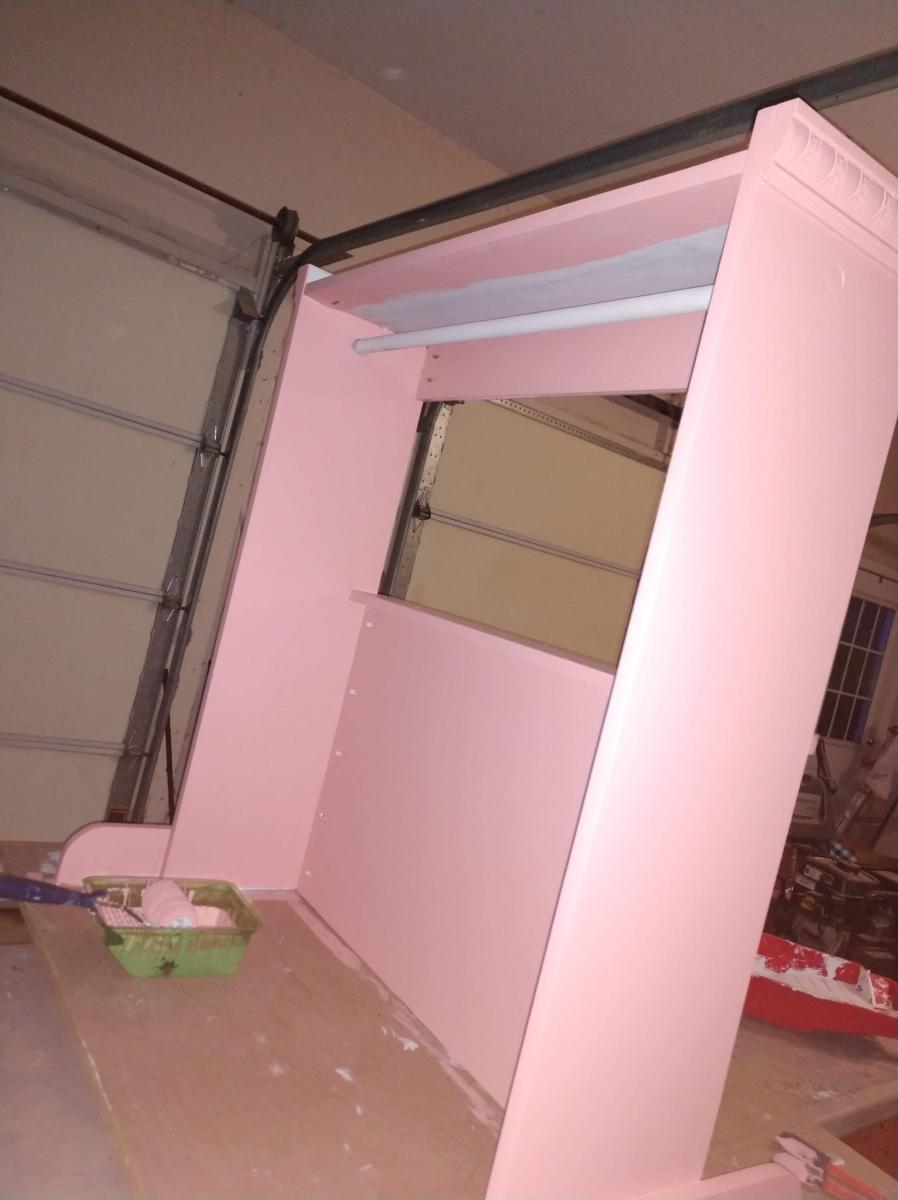
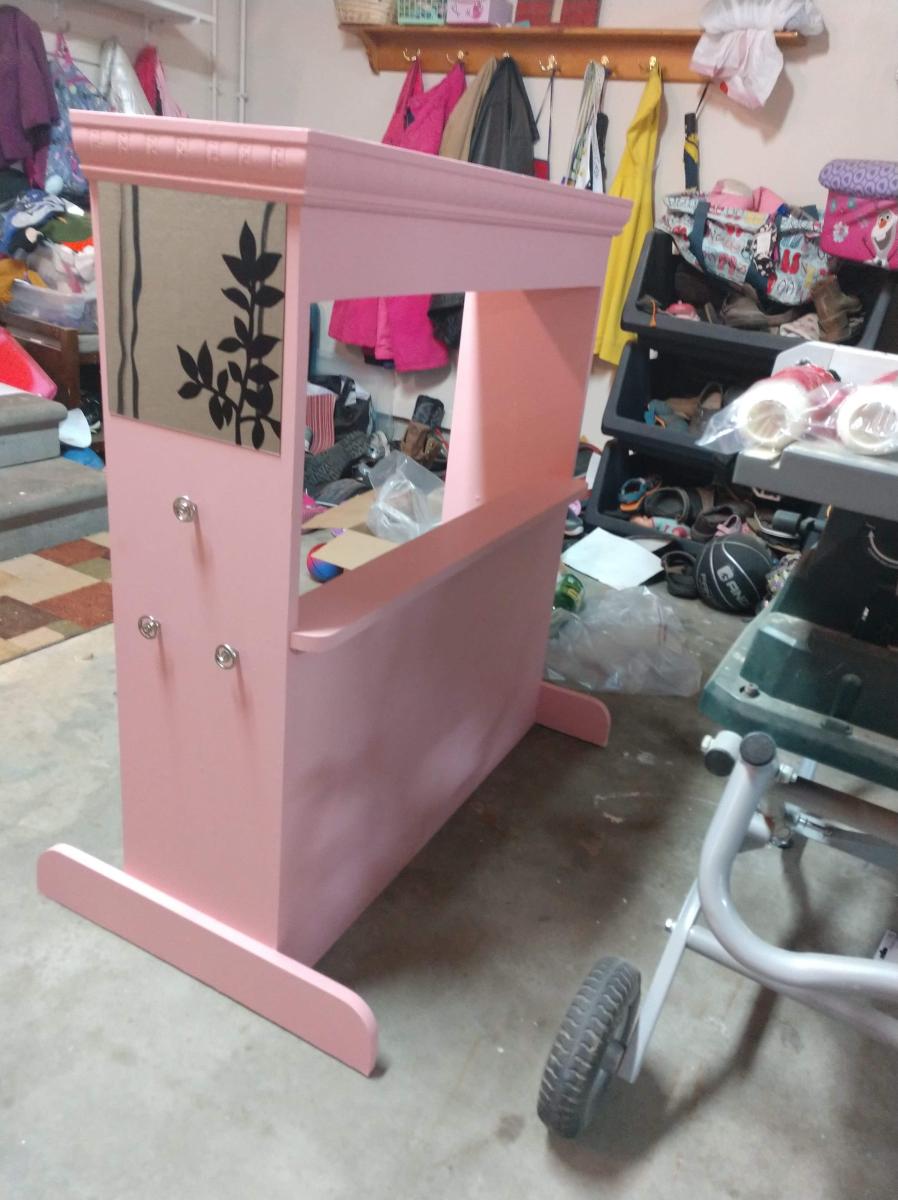
My wife wanted storage for dress up clothes and I wanted to make better use of the space it would take so I made it double as a puppet theater.
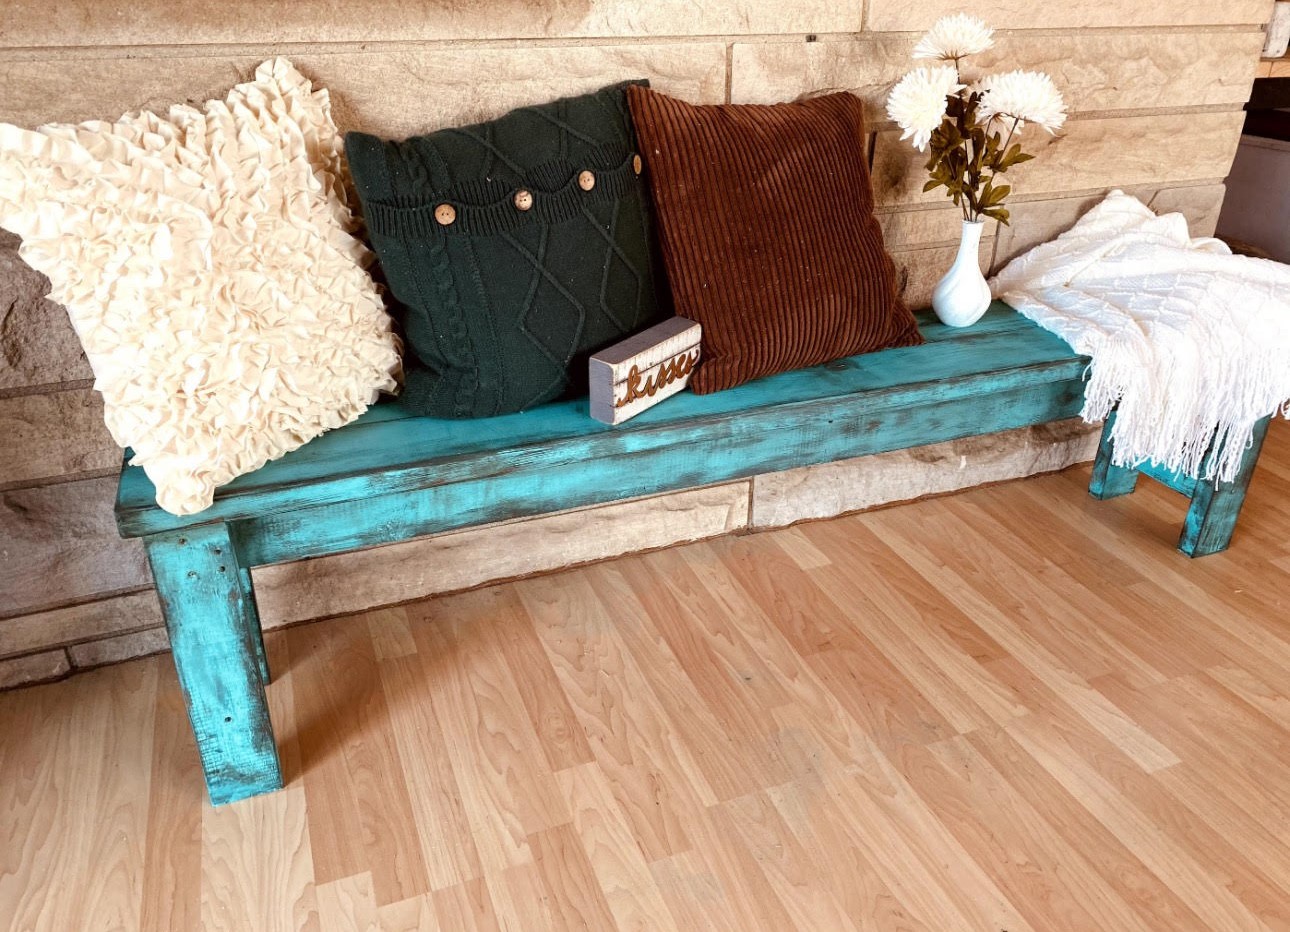
Beautiful farmhouse bench by Leila Adams
Ok I decided to construct my very first project - a small outdoor table that would look a bit ancient mostly because the need for it in my house has been screaming since I could remember. I would selfish to say that I did it alone but I got a bit of help from my hussy. I'm happy that the kids love it and all struggle to have lunch on it.
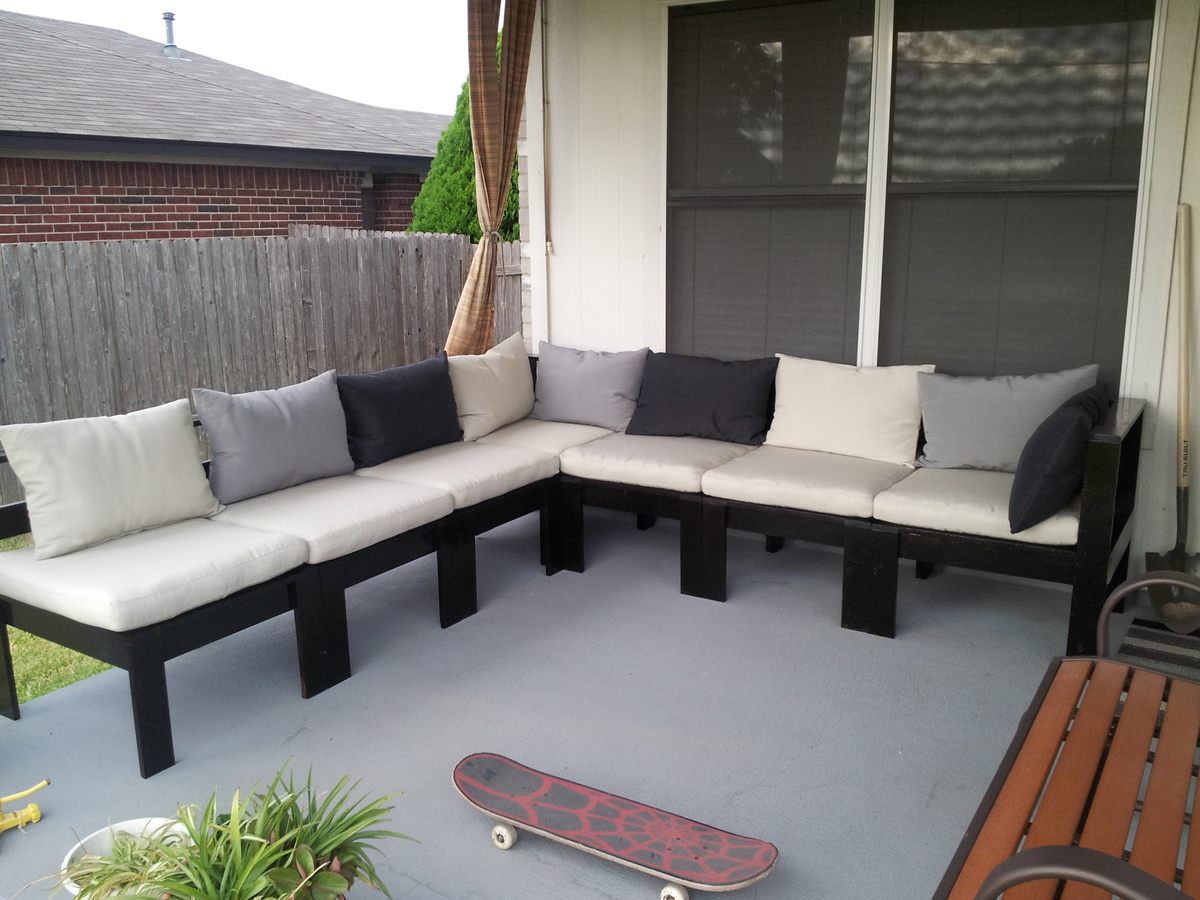
I had been wanting a patio sofa for a long time and while googling prices for the 1,000th time I found a link to Ana White's wonderful website. I can't say how grateful I am to Ana White. The fact that she puts all of these plans online for free and asks nothing in return speaks to her character and what a kind and generous person she is. Helping people build things and helping them learn at the same time! Anyway, I followed the plans explicitly and purchased the cushions at Ikea.
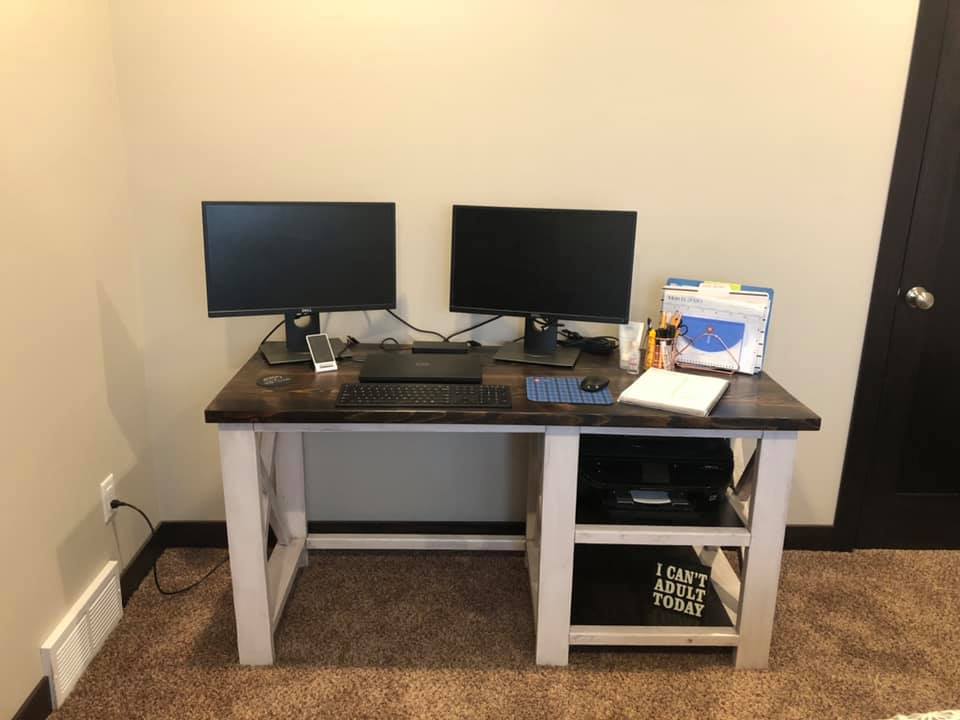
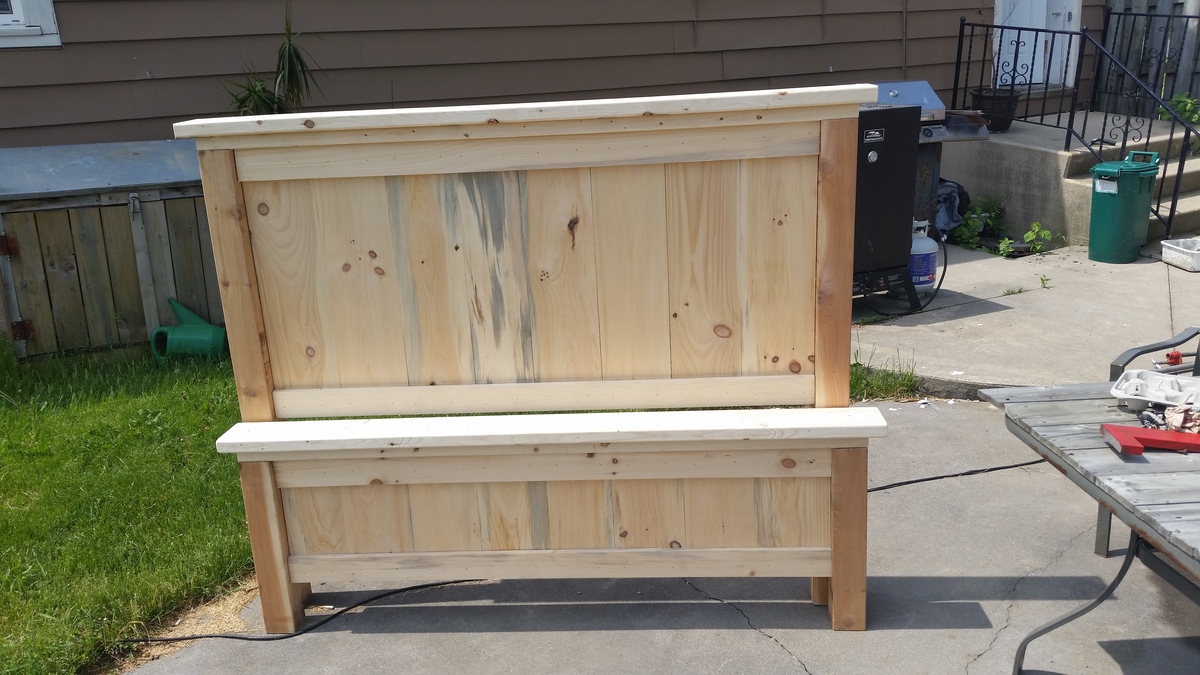
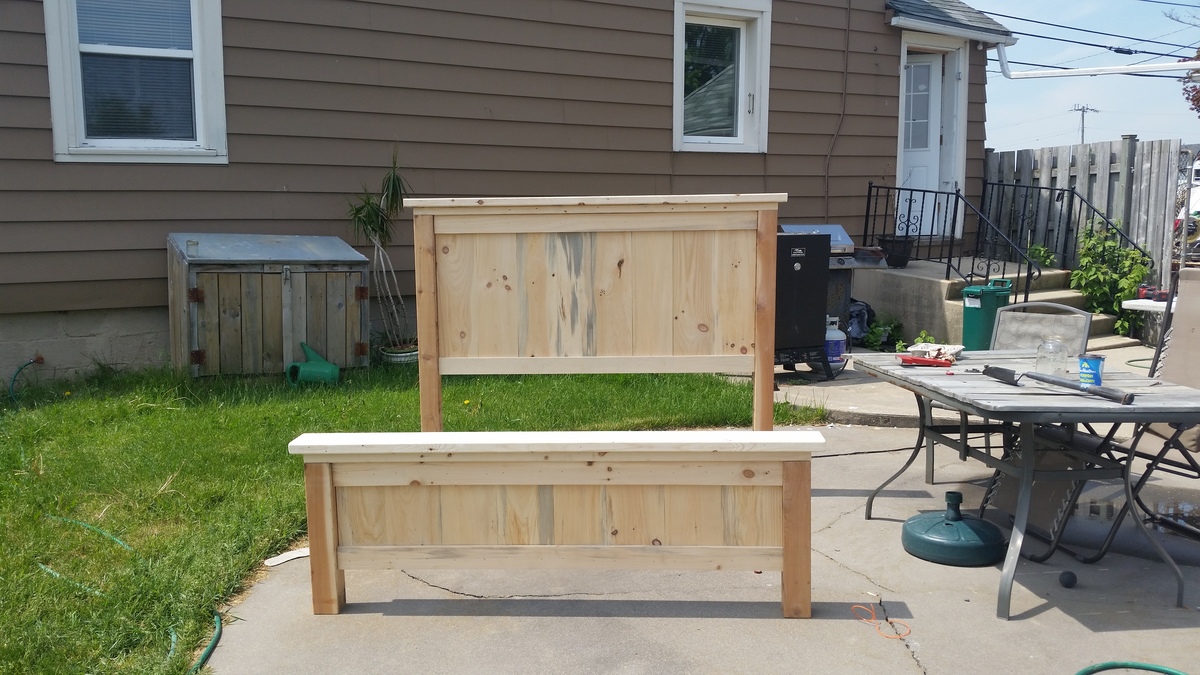
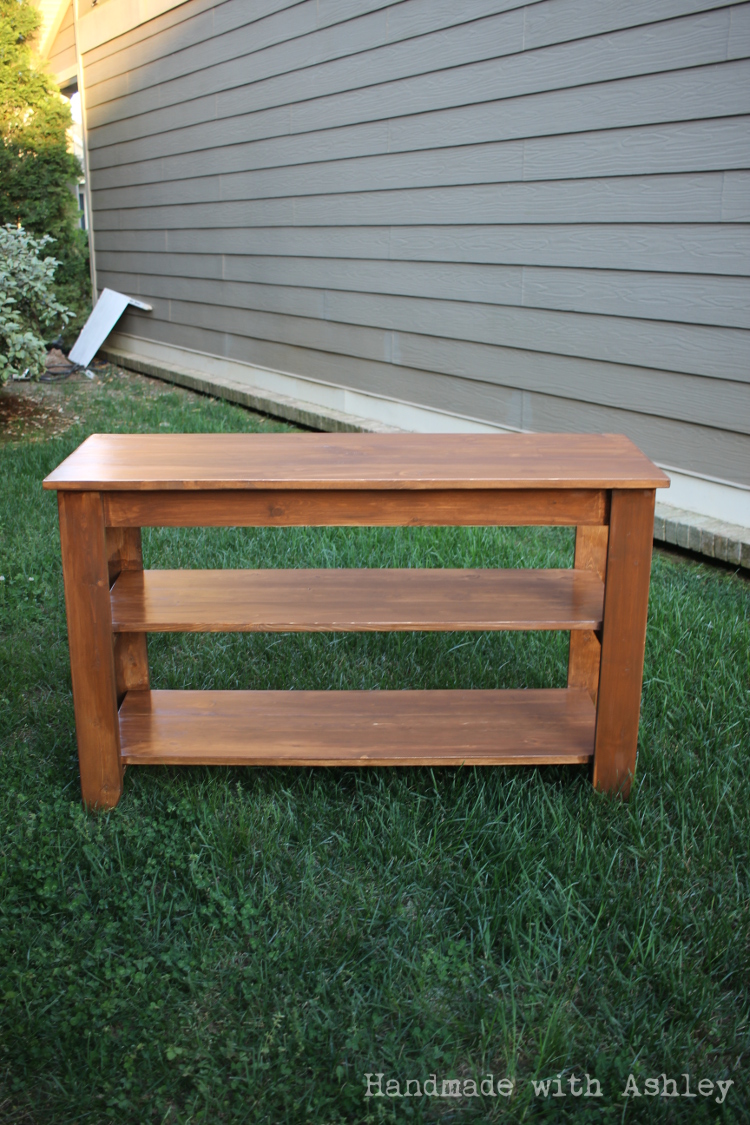
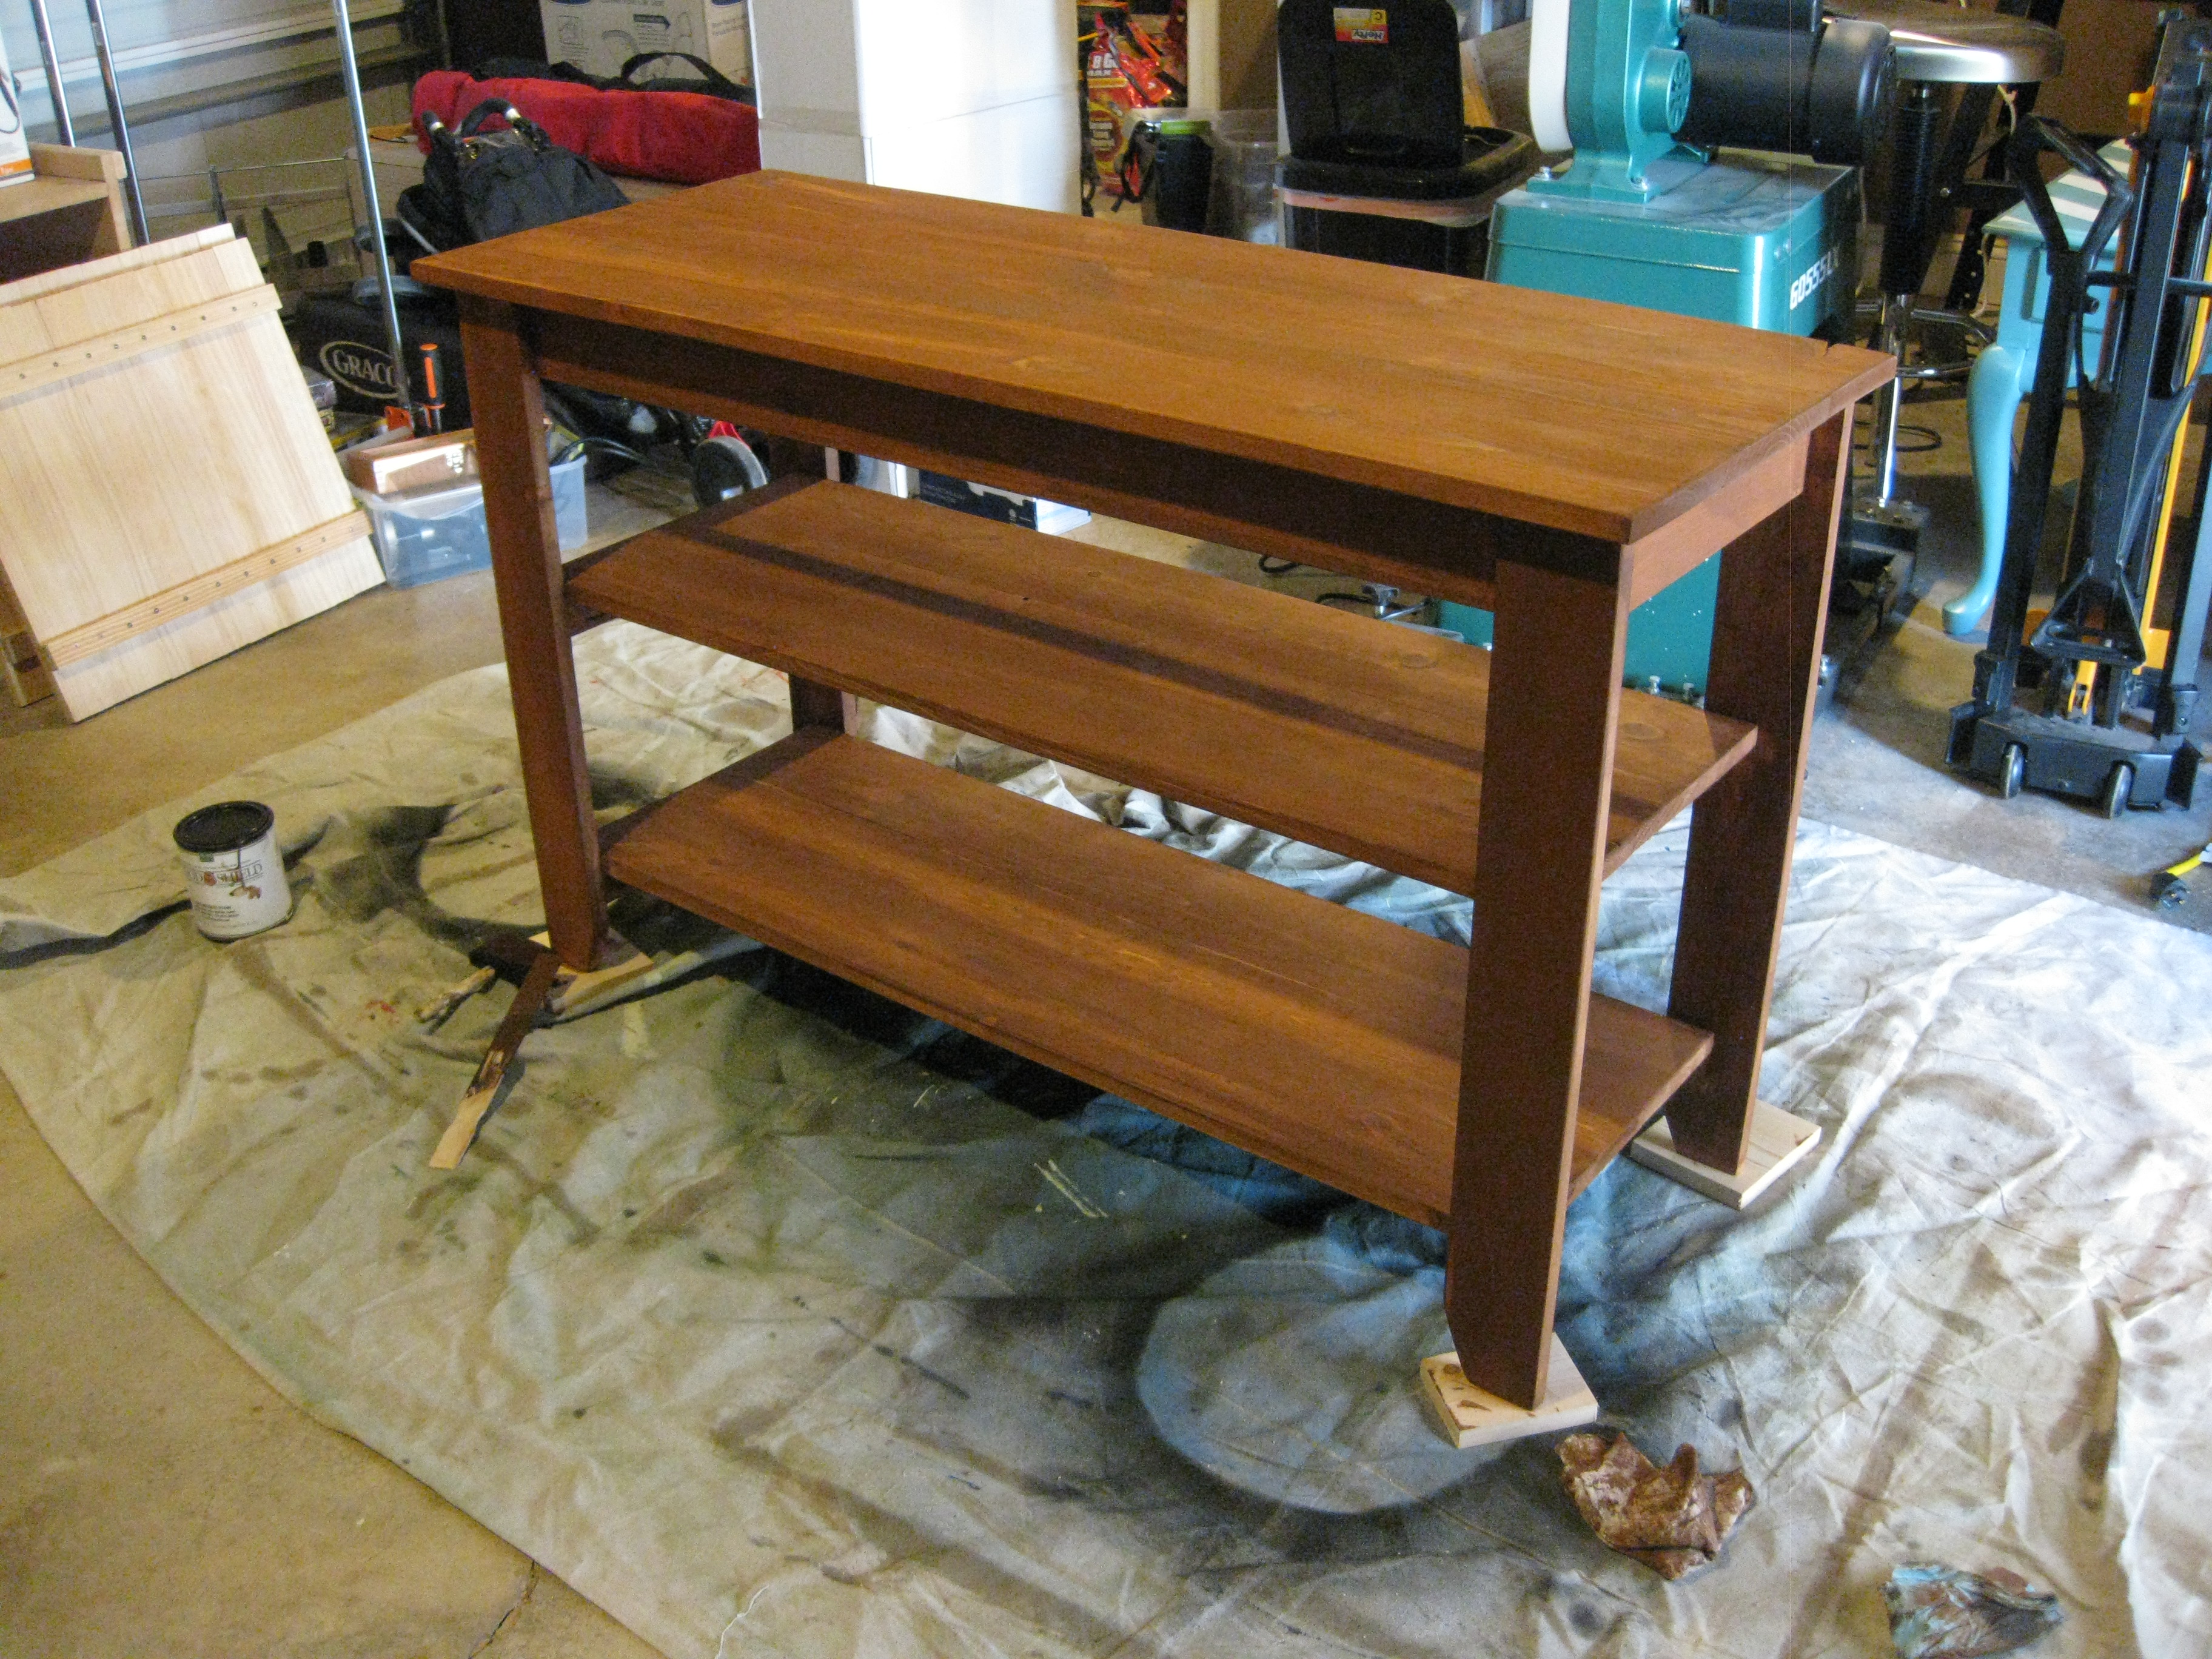
This was my first attempt at this desk and all things considered it turned out pretty well. I glued the top and shelves together instead of using pocket screws. I then stained the top and shelves expresso and used the expresso stain over the white paint on the base and then wiped it off to give it an aged look.
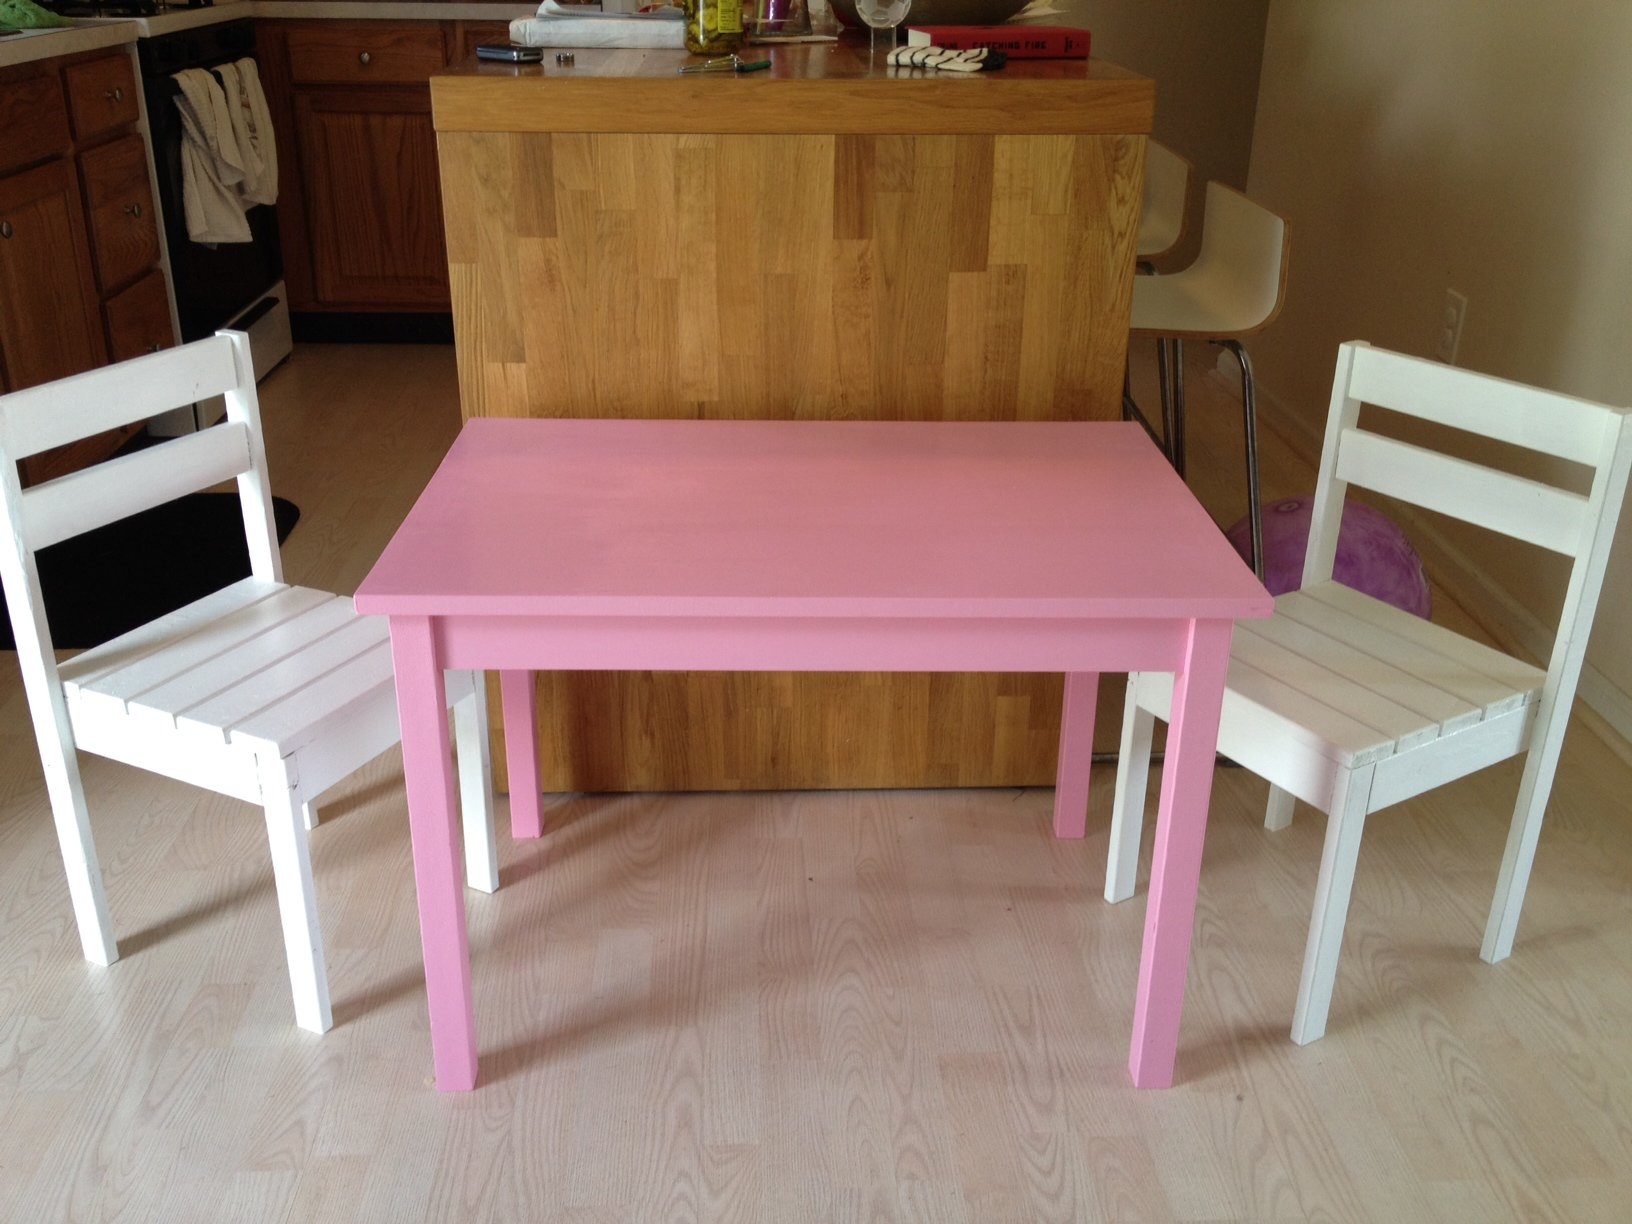
Got my new Kreg Jig, picked up a brand new master kit on craigslist for half the normal price! The table went together beautifully and the chairs were simple as well!
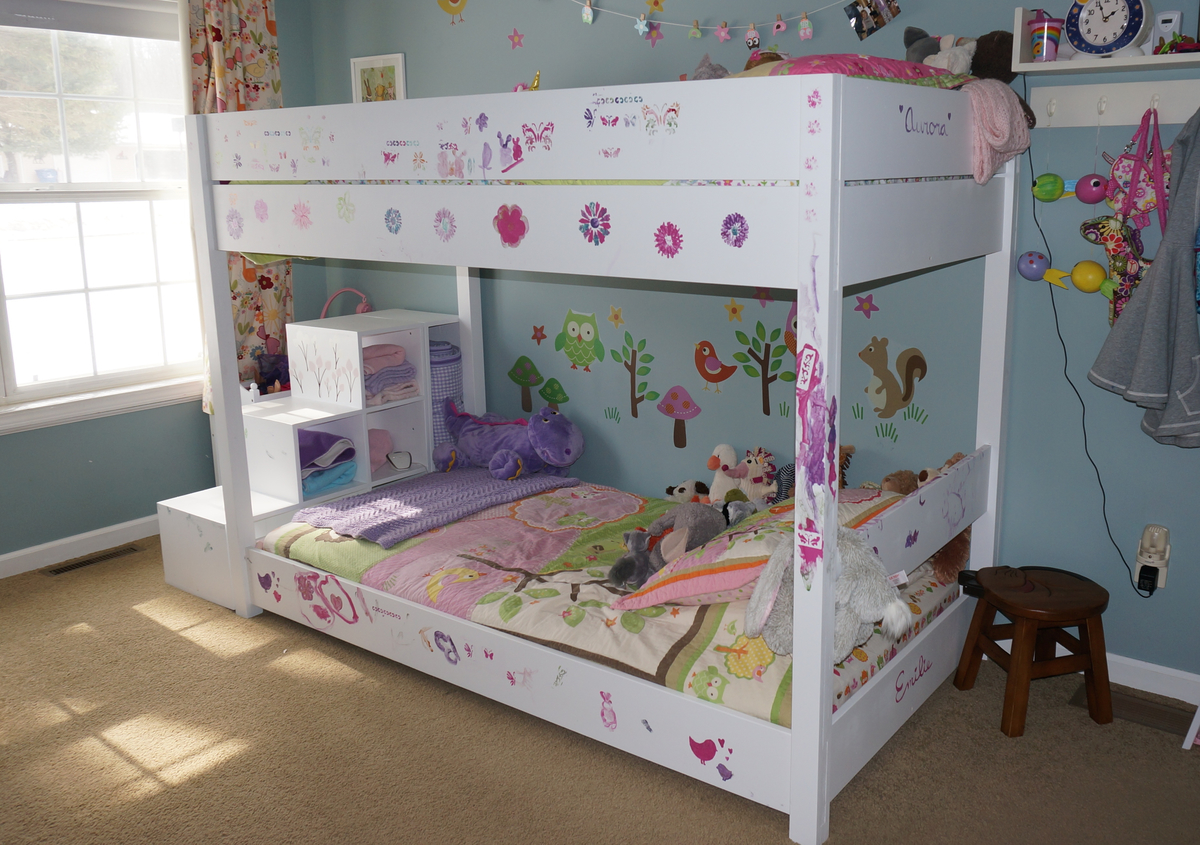
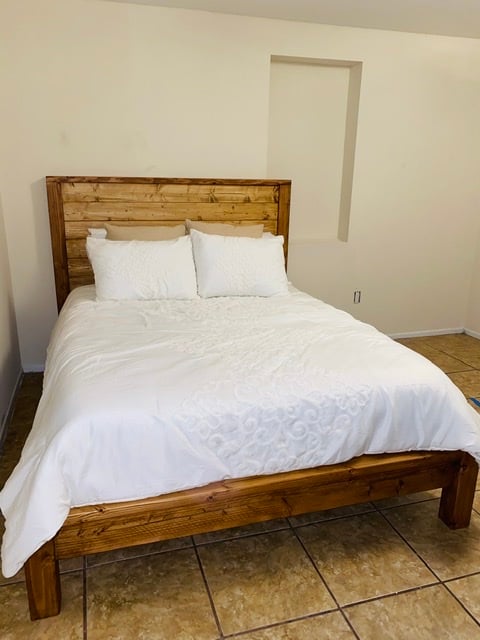
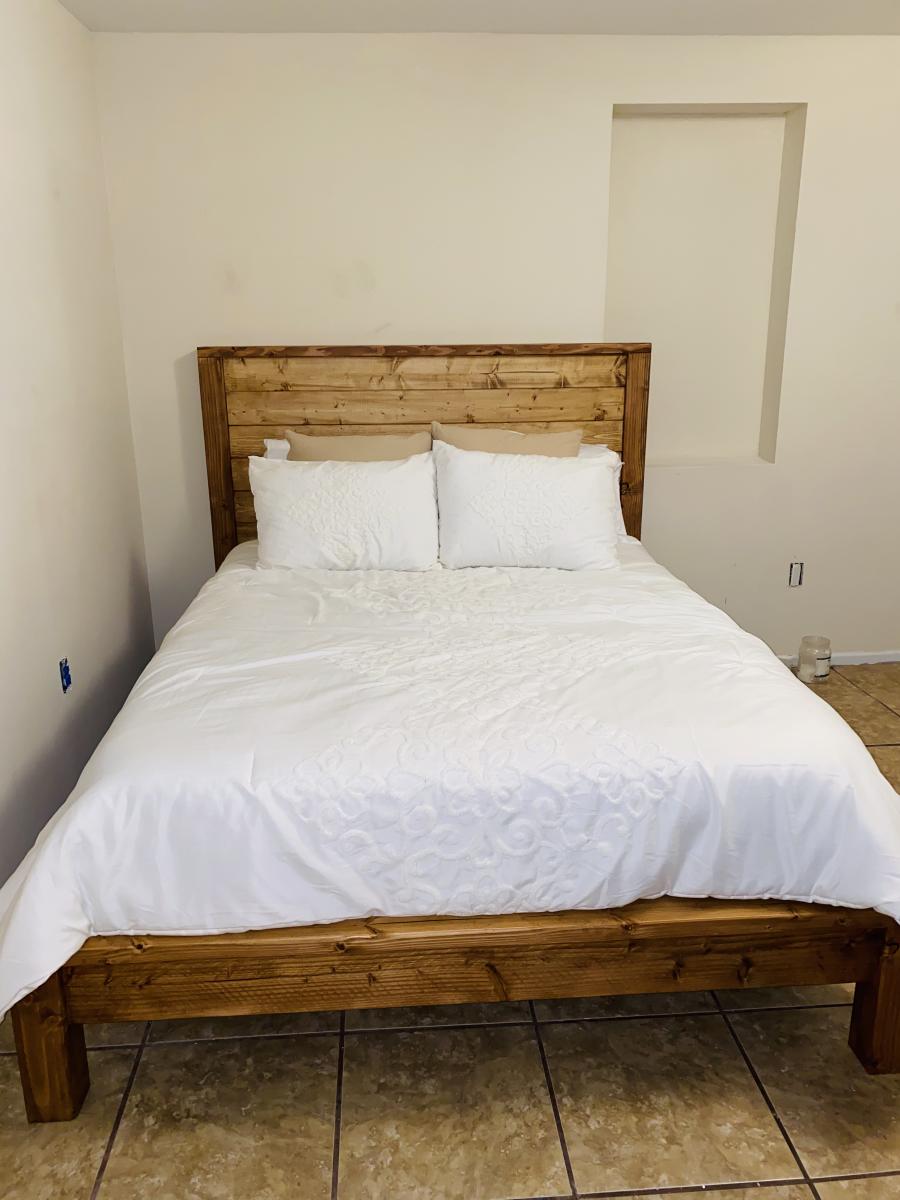
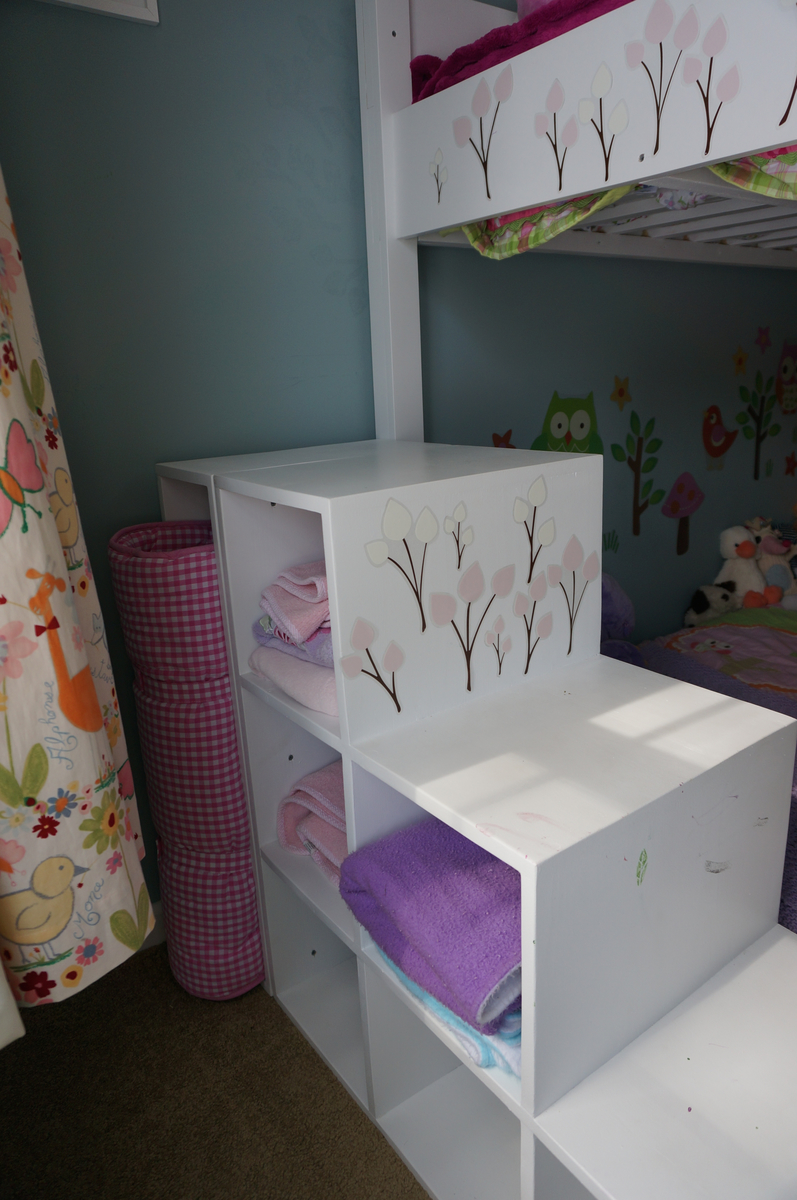
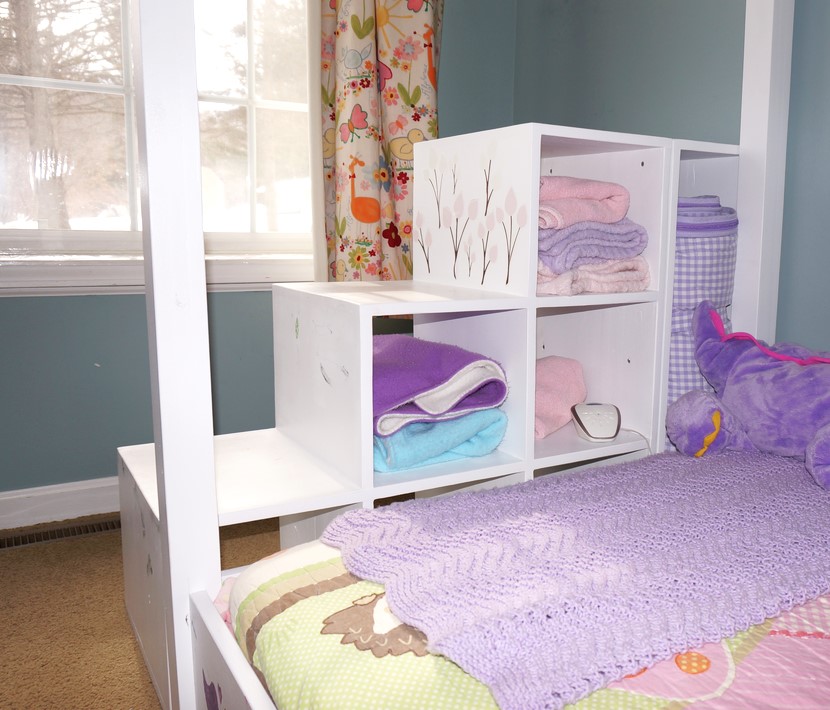
My husband and I searched at least a hundred plans to find a simple bunk bed for our girls and Ana's Loft bed was a perfect base plan with a few changes. We wanted a lower bunk, top and bottom, since our girls are young (ages 5 and 2.5). The youngest just moved from the crib so by putting the bed lower we are able to skip the side rails. Overall we cut 10 inches off the height of the original loft bed plan and still have plenty of room in the lower bunk. I can sit up comfortably on the lower bunk and the youngest can even stand. We went with another 8 inch board for the top bunk rail, it was simpler then the rail with cap but achieved the same overall rail height. We knew we didn't want a ladder in their room because our 2 yr old is fearless. So for the stairs my husband just ended up winging it, loosely basing them on the Storage Stairs plan, creating basic cubes so we can still let light in and have storage. We also didn't want the steps to be high up in case the girls fall from them, which is more common then them falling off the top bunk. At 32 in. high (the bunk is 61 in) both of them can still climb in the top bunk without issue. At first the steps didn't have the tall "cube" at the back but the platform just wasn't that big so the long cube was an add on and gave it the perfect size and heft. We couldn't be happier with how it turned out. Thanks Ana for your awesome blog and the great plans that you post. My husband also built the original play kitchen and it is amazing! I'll have to do another post with pics of that.
Rustic x consol table Weathered.

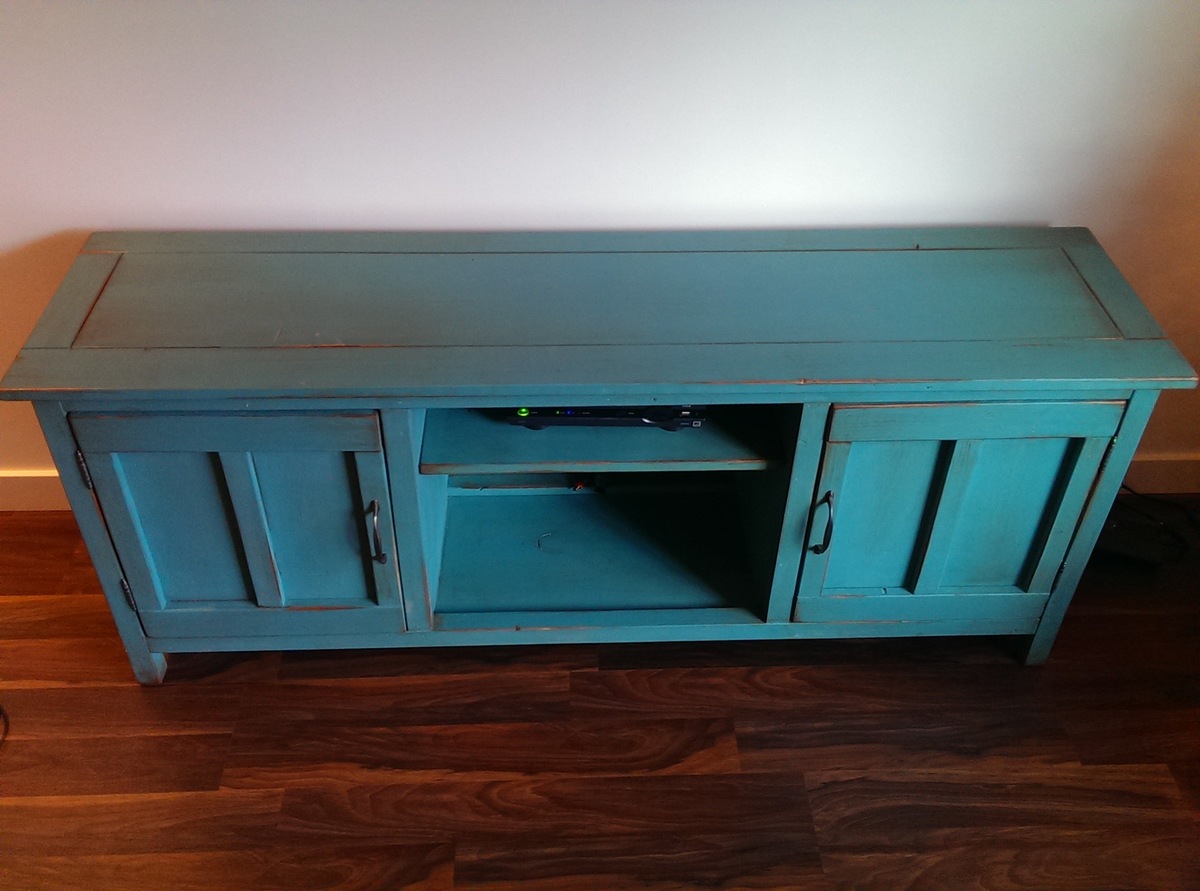
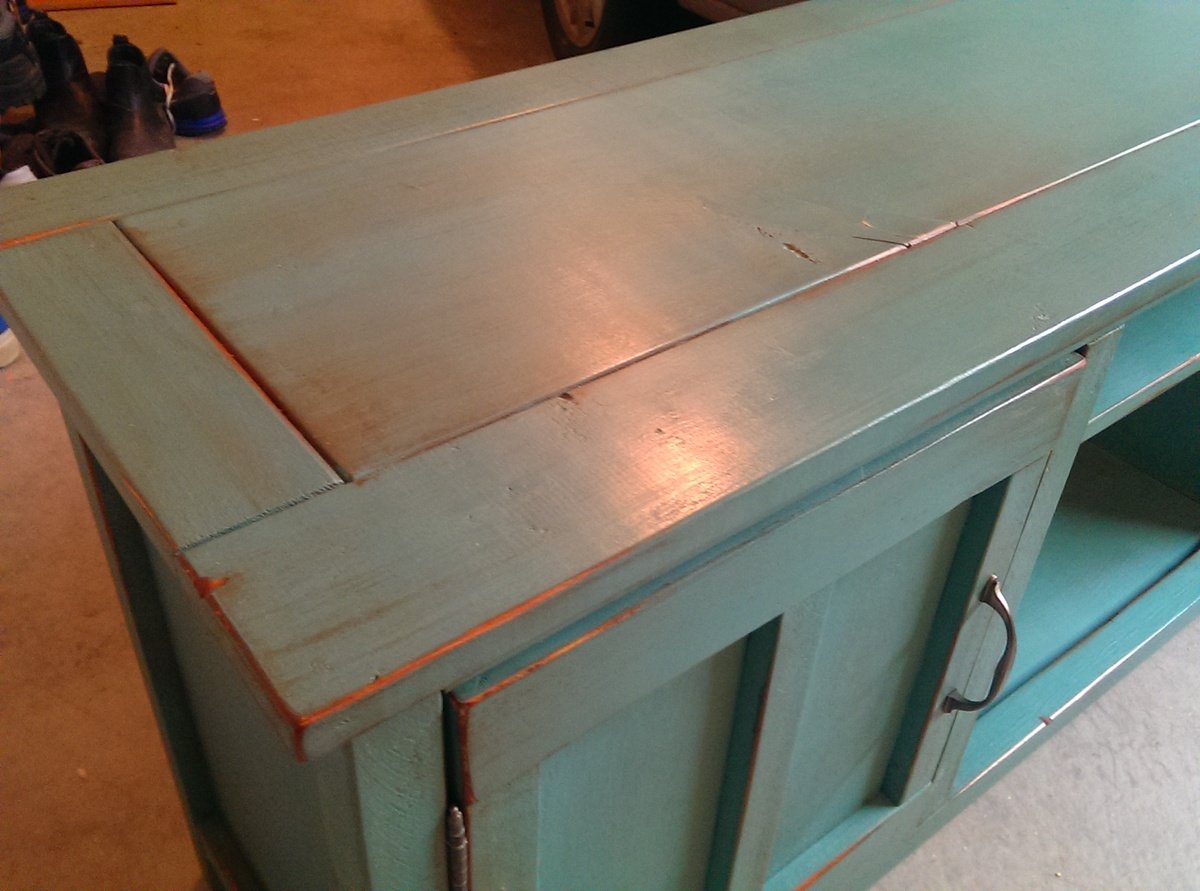
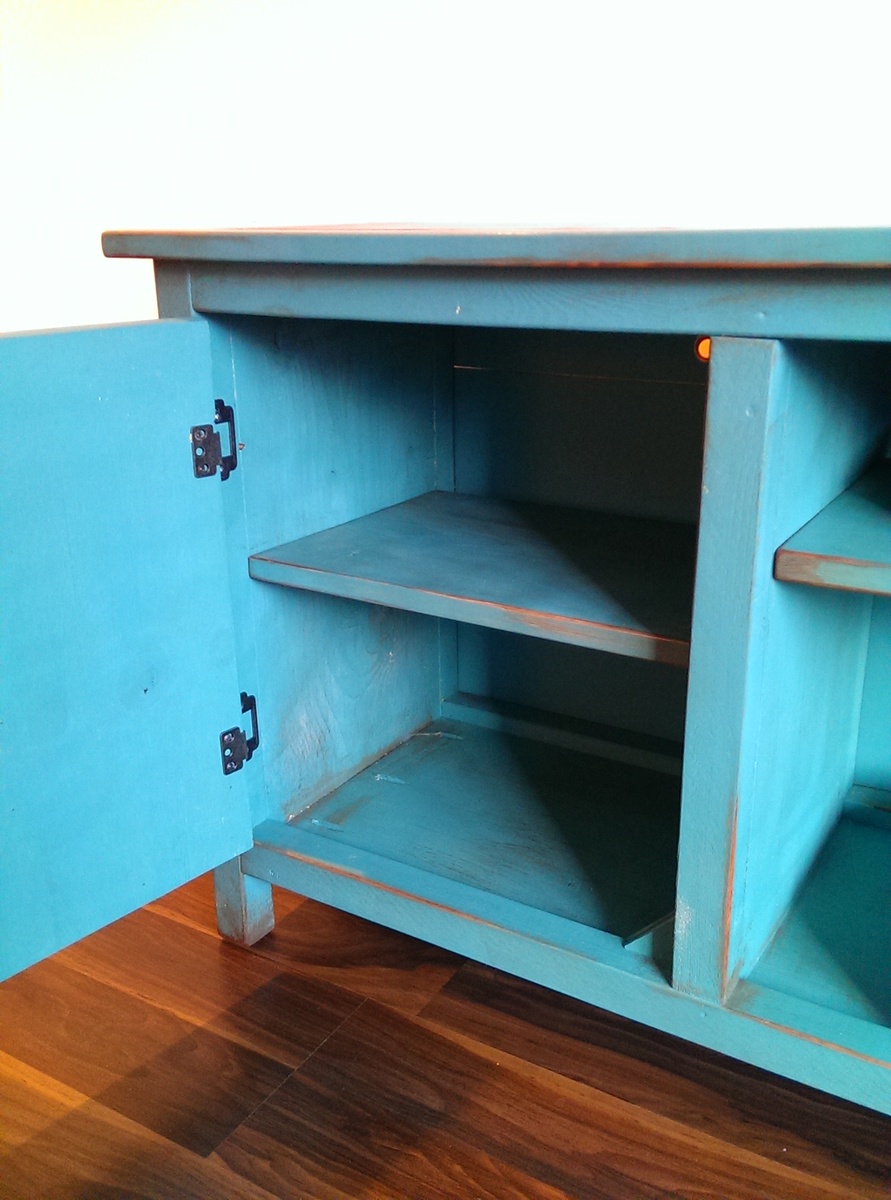
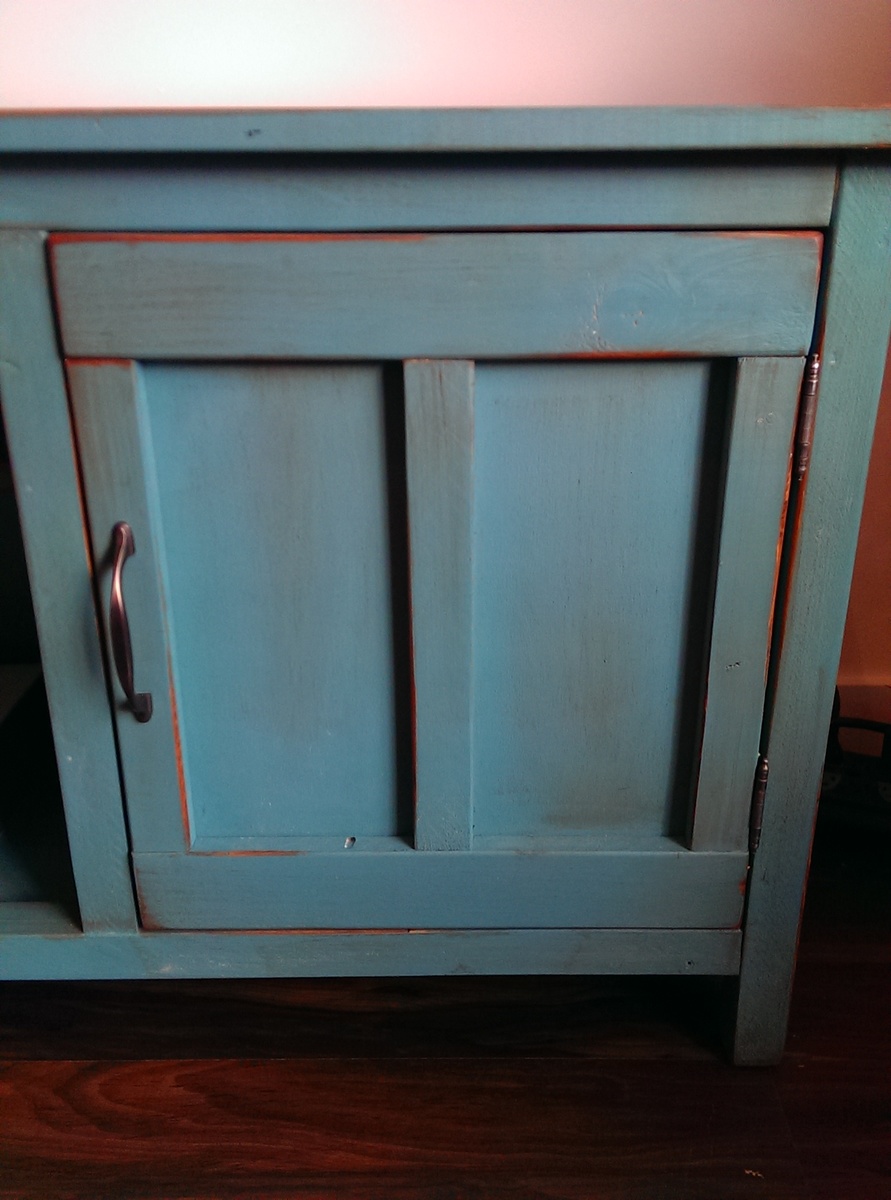
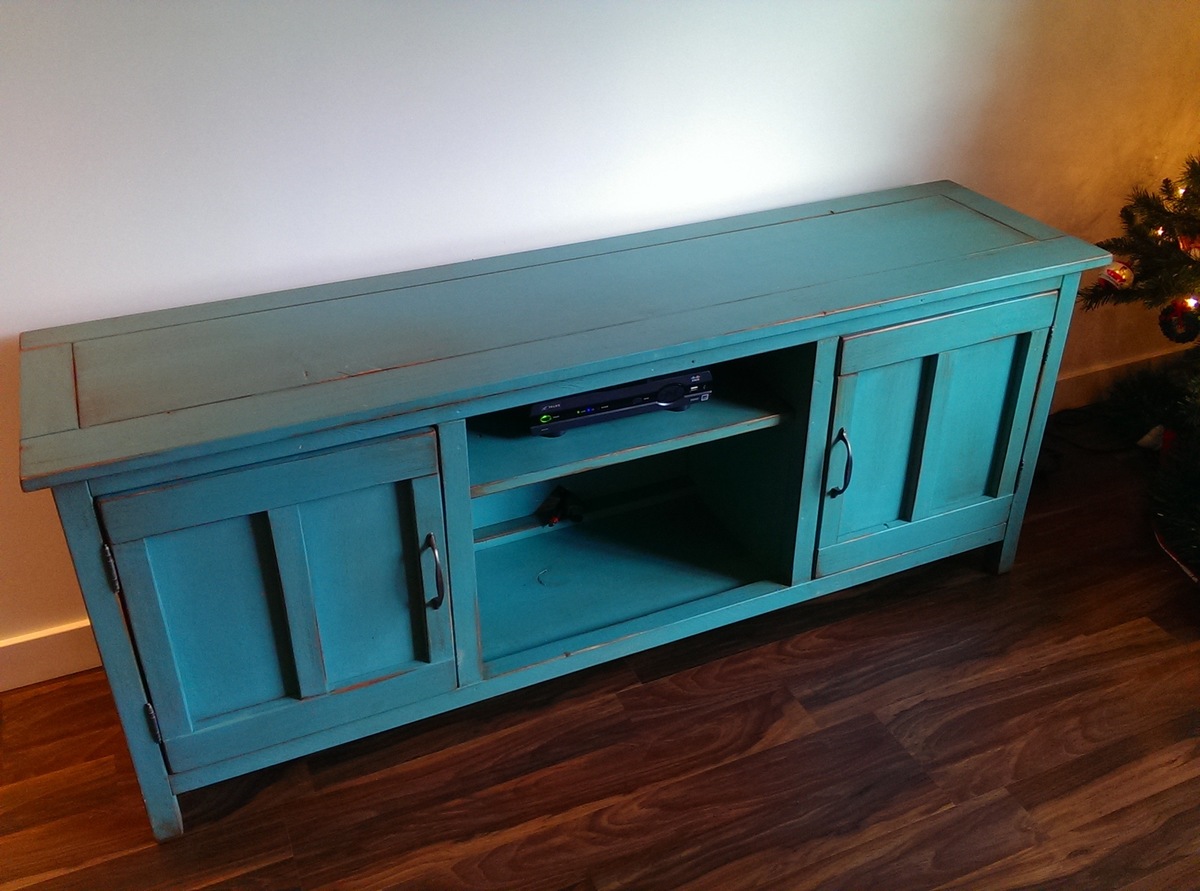
My first furniture Build. My wife wanted rid of our old bookshelf turned TV console. I saw this online and went for it. Finished it with a serious splash of color. We love it so much we decided to go with teal as our primary livingroom accent color. Pretty proud of this little guy. Thanks for the great design!
Fri, 03/14/2014 - 20:13
Beautiful! I love the color and the finish. Great job!
Mon, 01/04/2016 - 14:39
Looks gorgeous!!! Going to build one of these soon - love how you finished yours.
I had a friend make a request for a console table. We came up with this design to fit her space and needs. It was a pretty easy build.

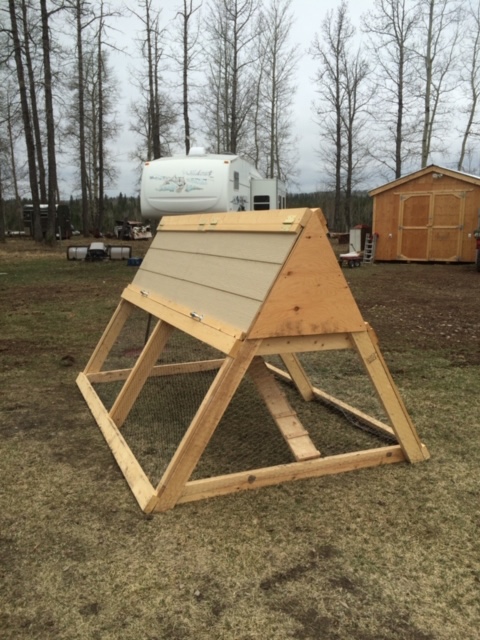
I built this chicken coop/tractor a few years ago, for my cousin. I loved the ease of the plans and the build, and she loved the hens in her backyard!
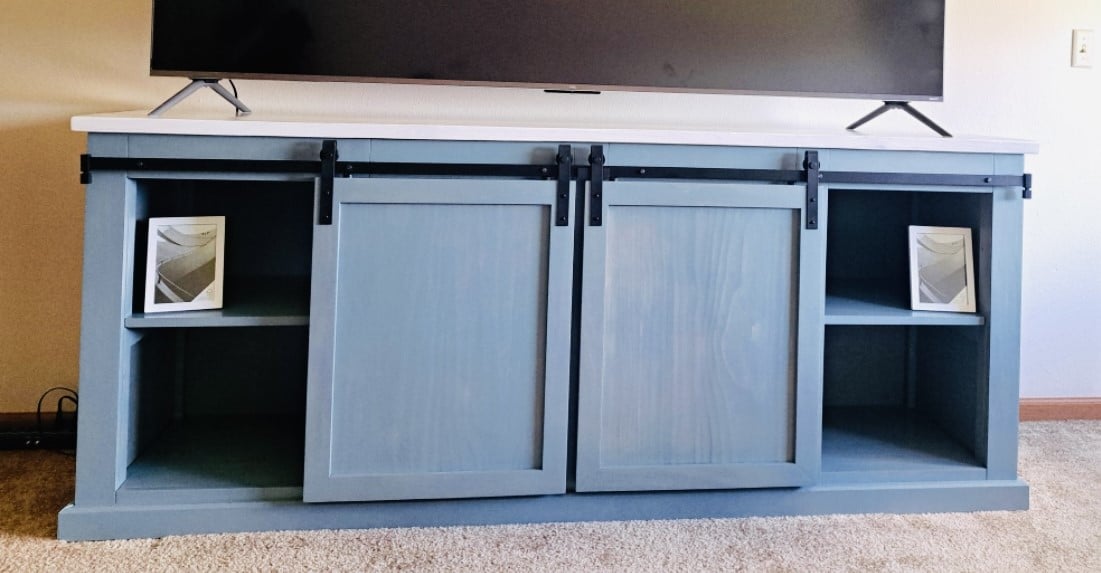
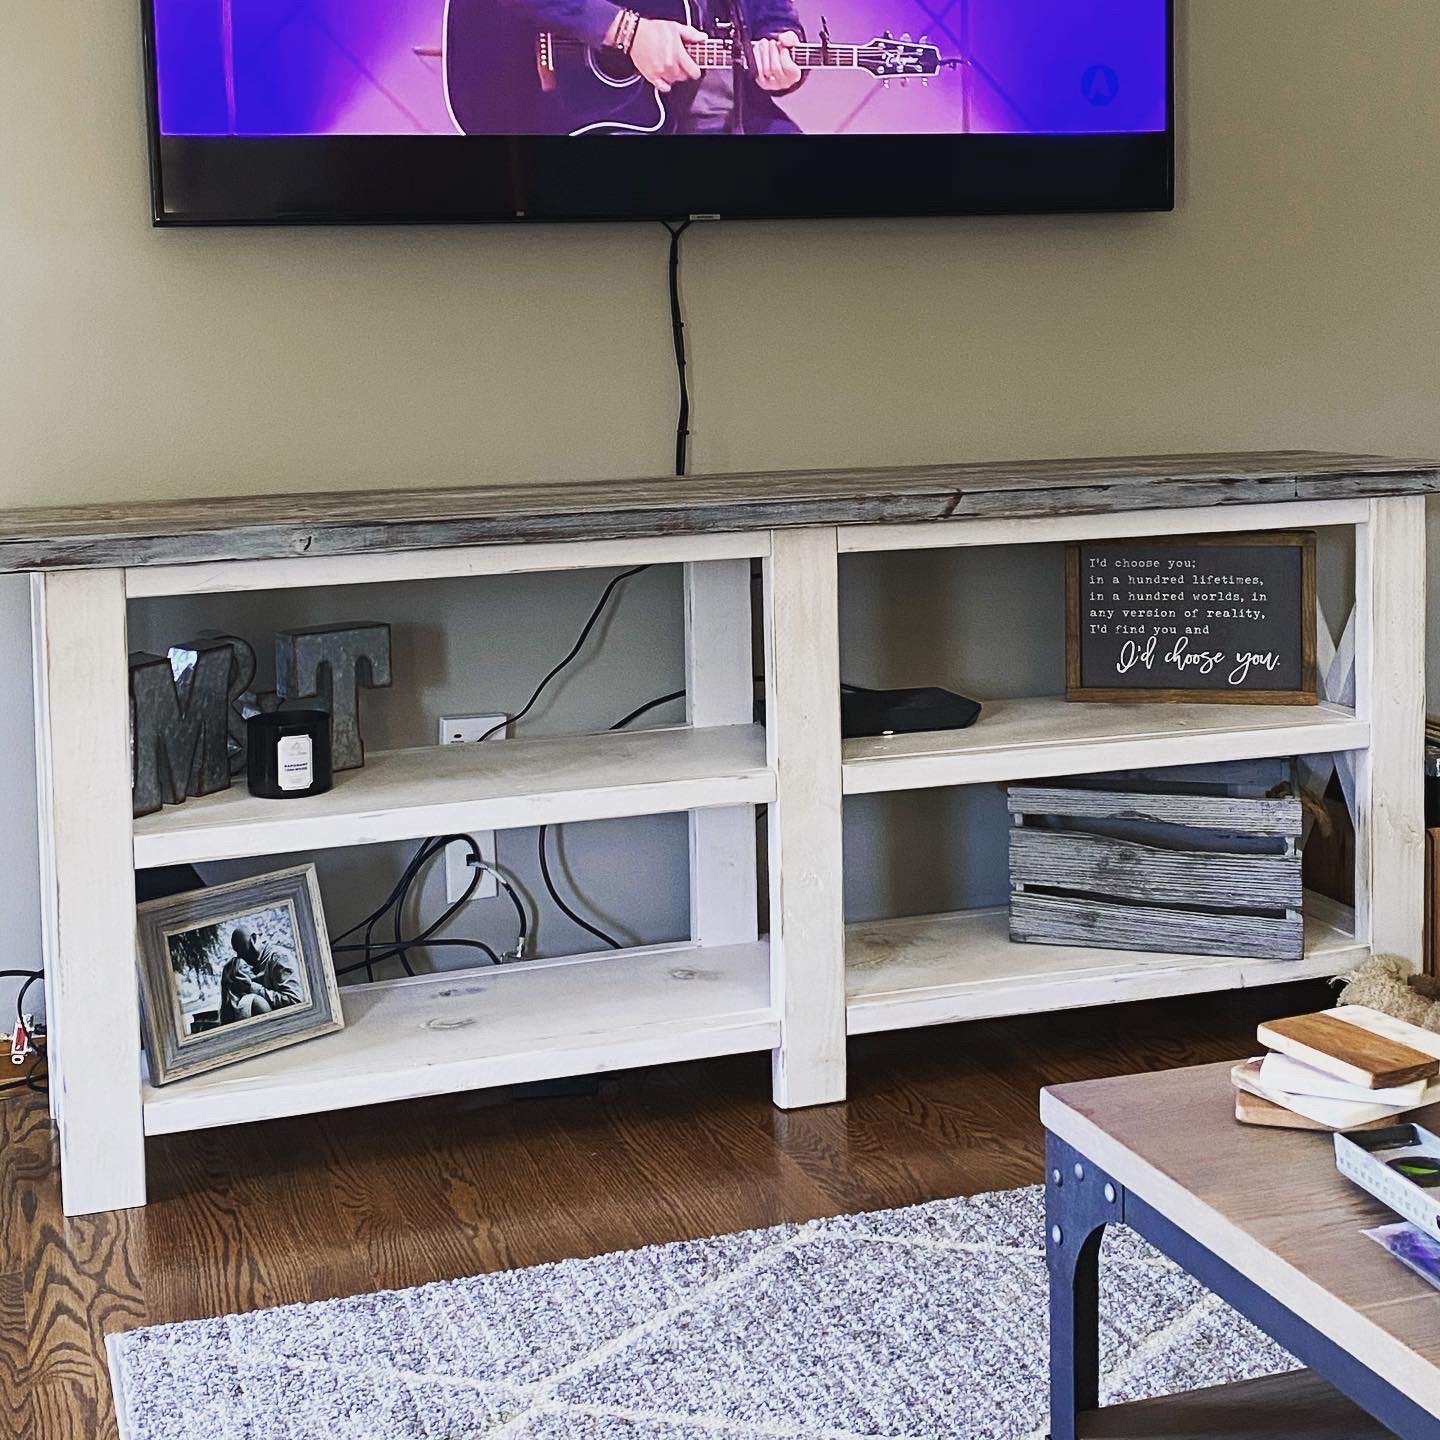
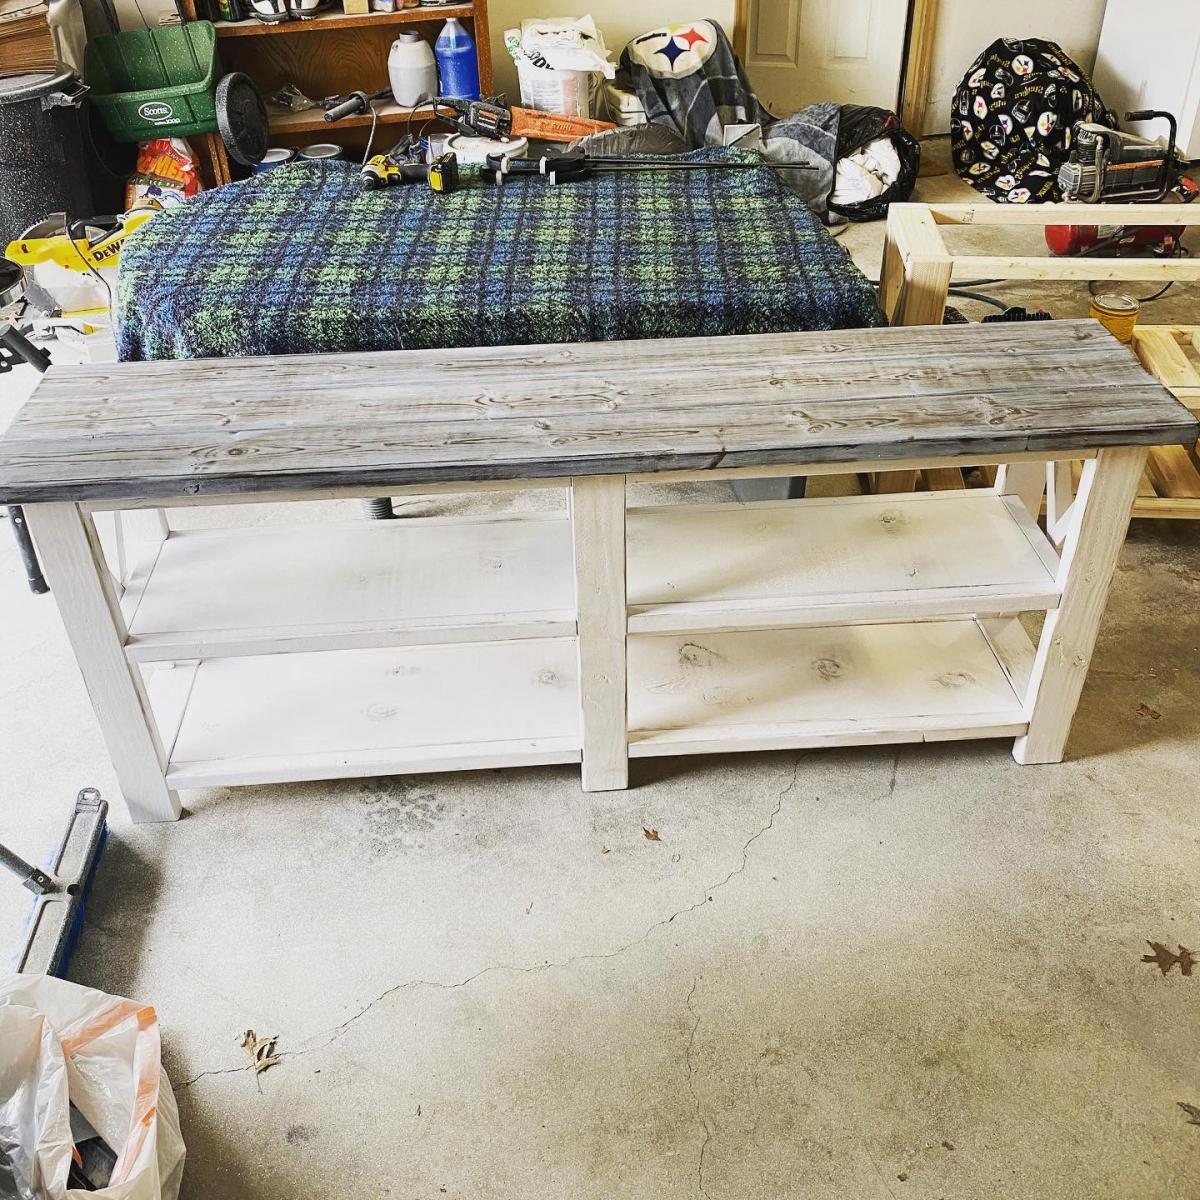
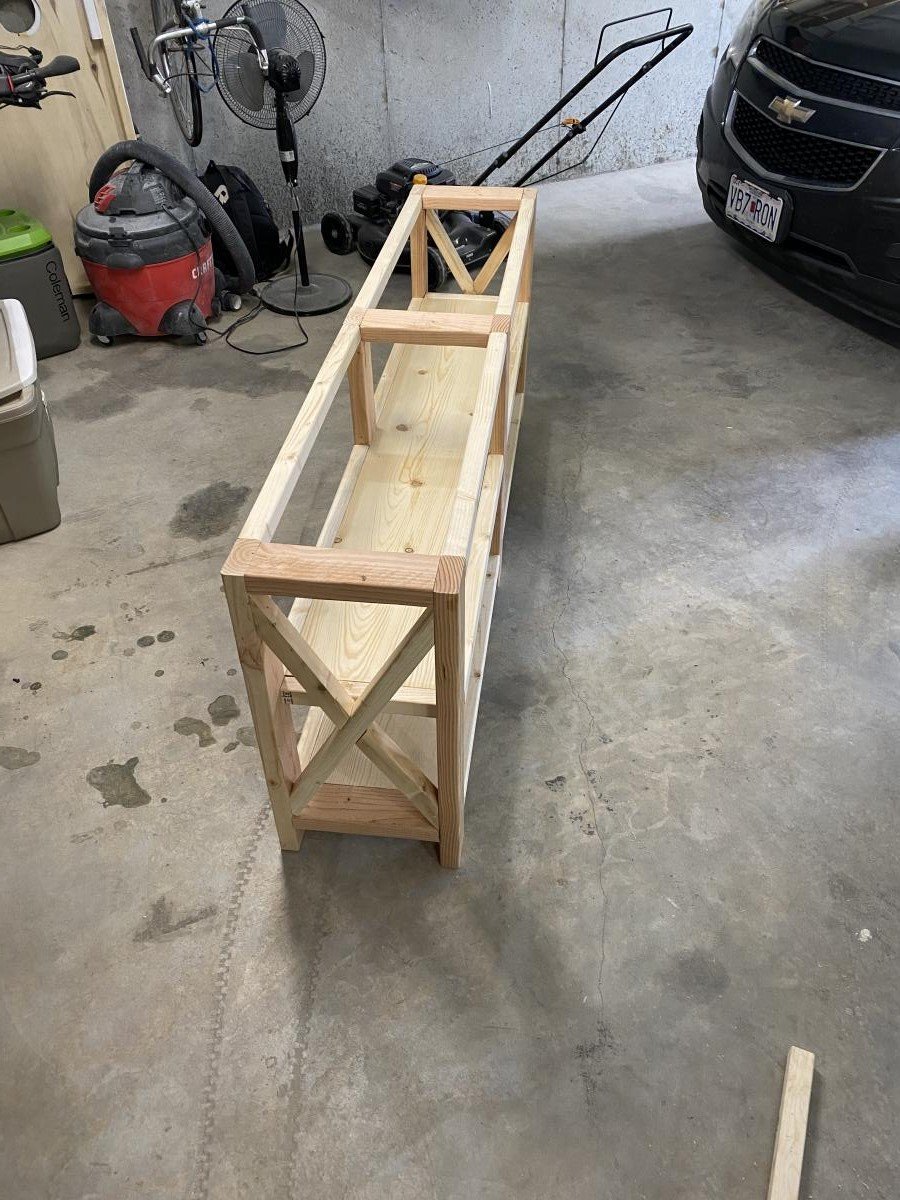
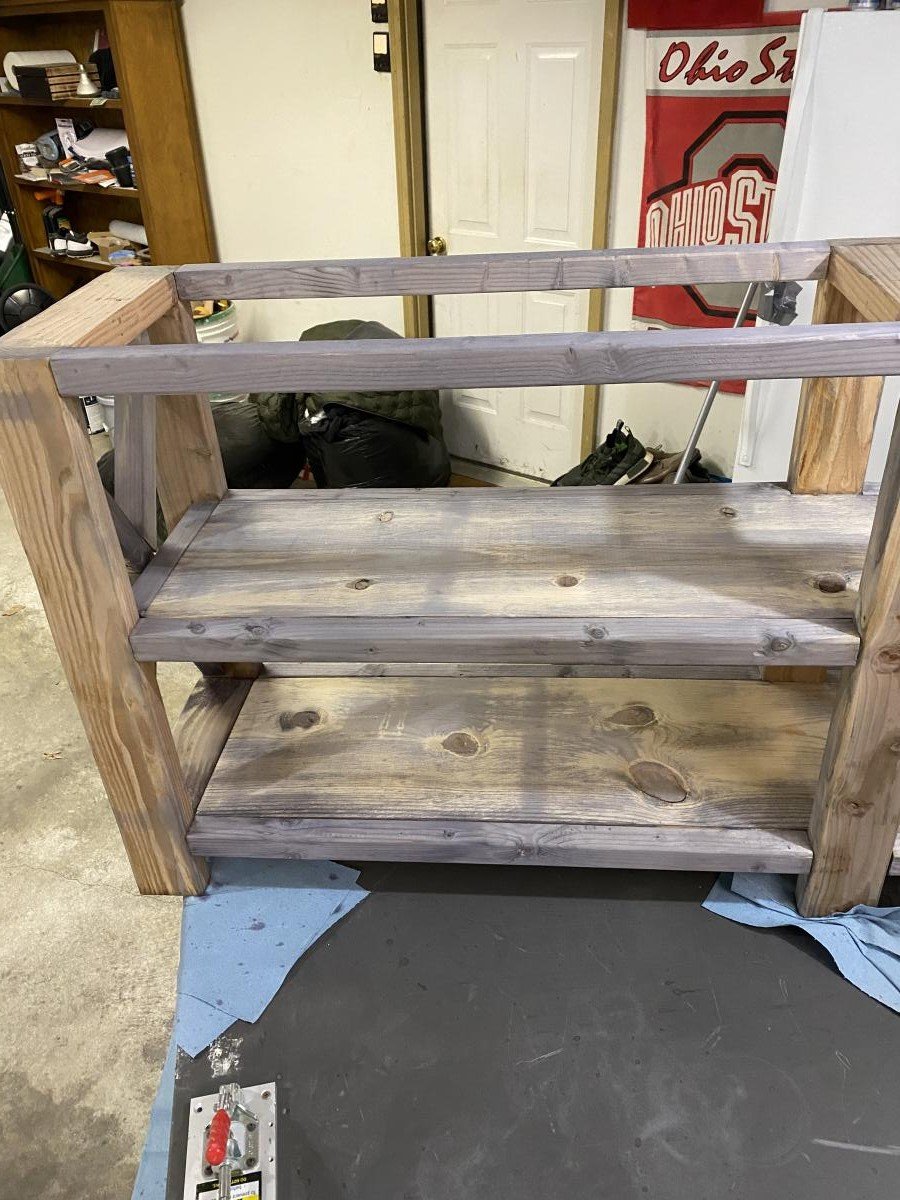
Our grandson needed a tv stand for his new apartment. They liked the plan from your website and this is our version.
Steve Mawhorter
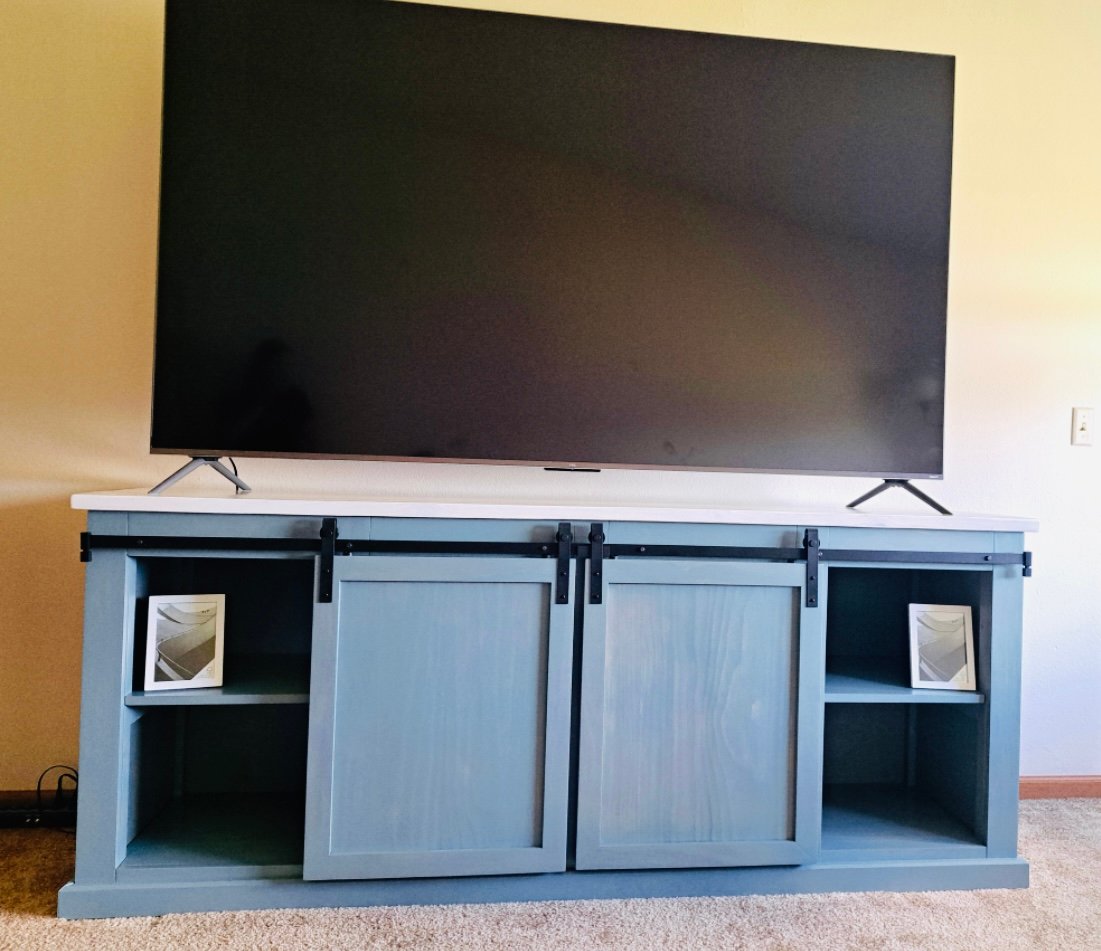
Sat, 11/18/2023 - 13:31
Love your finish choice, it looks amazing! Thanks for sharing.
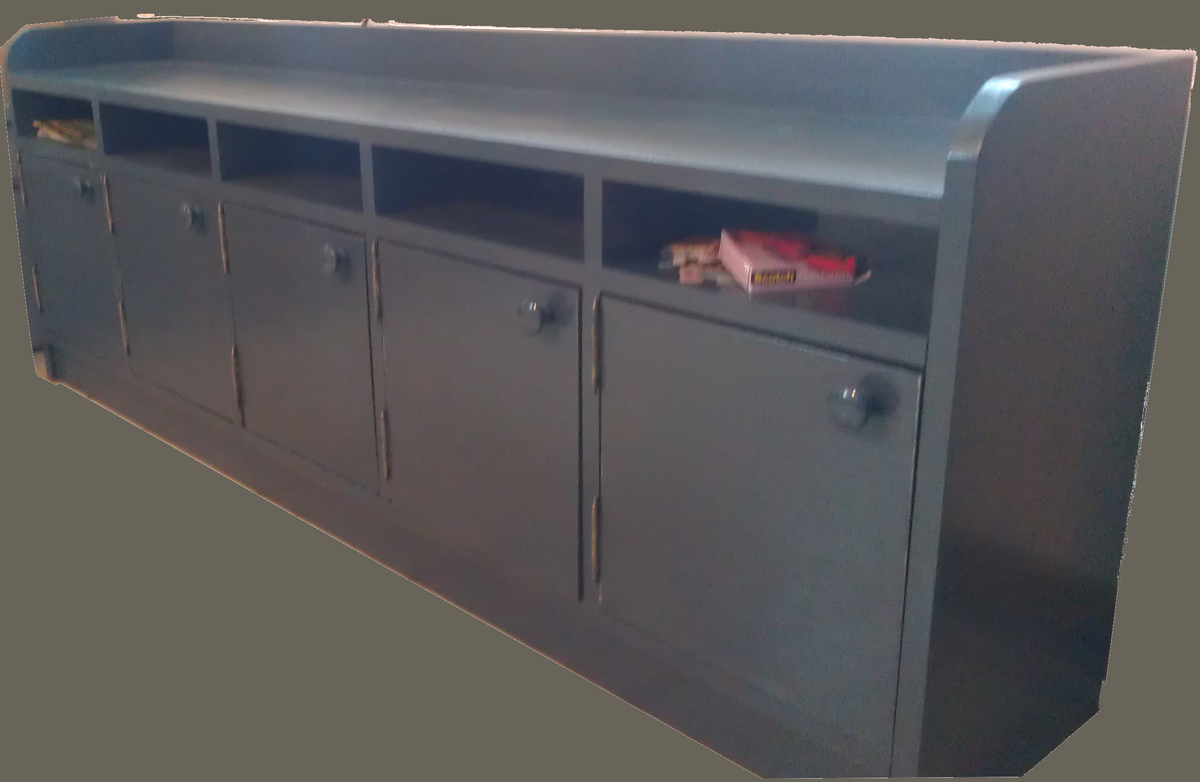
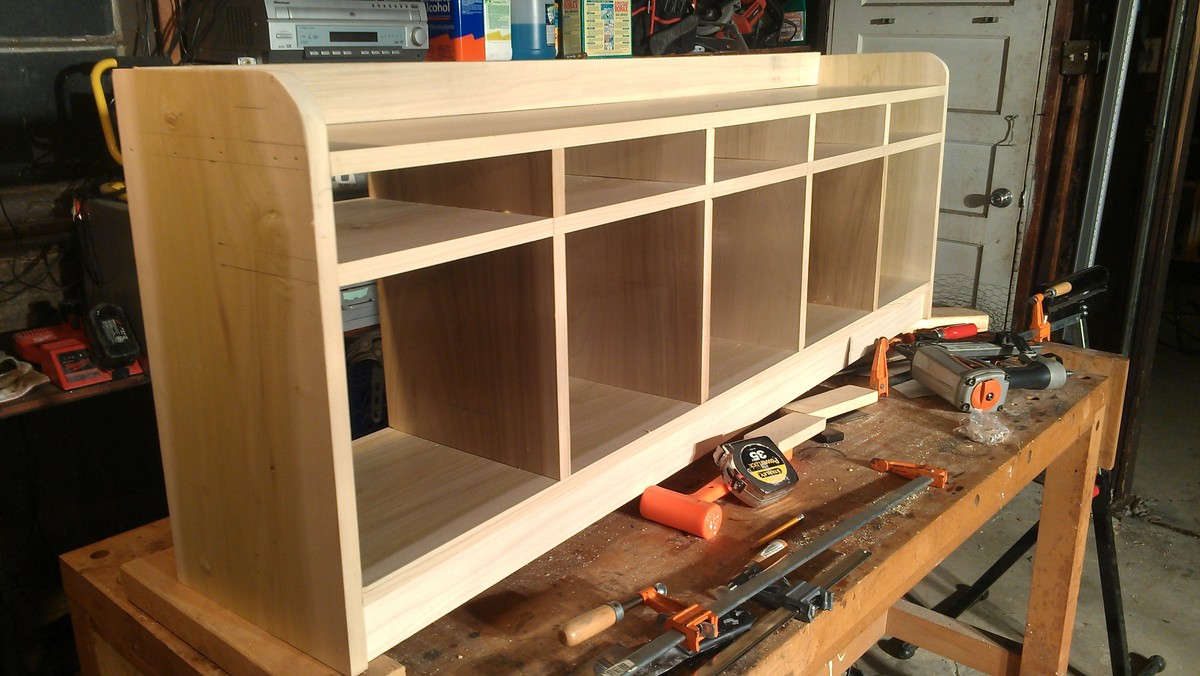
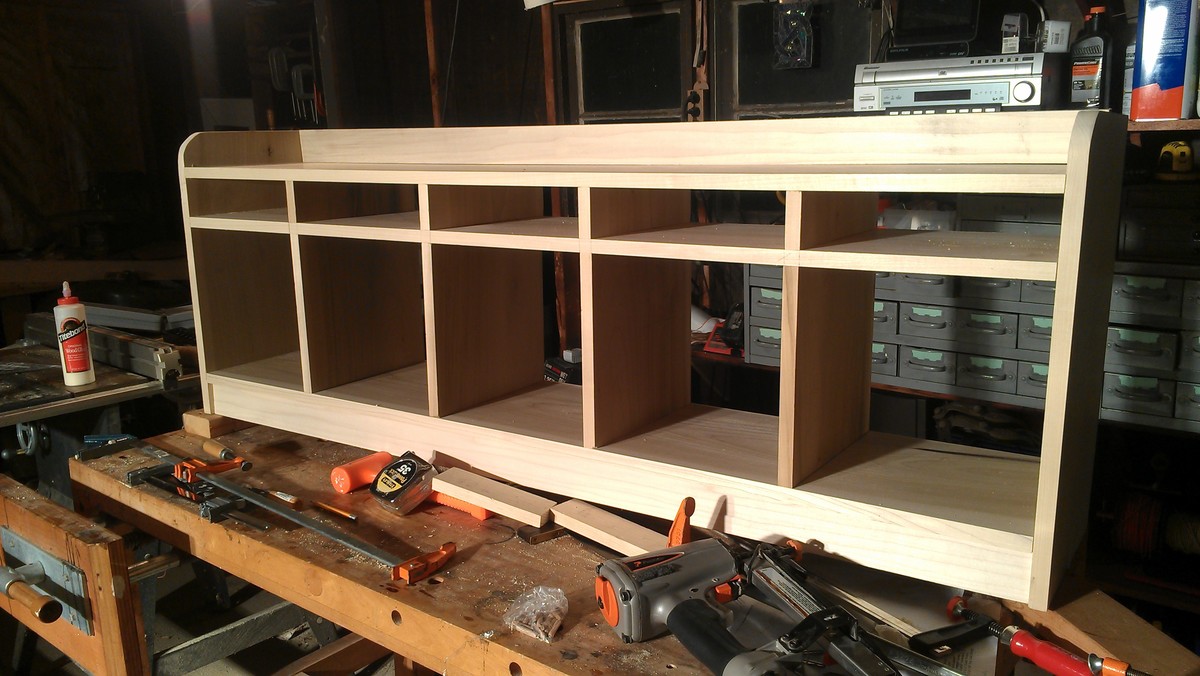
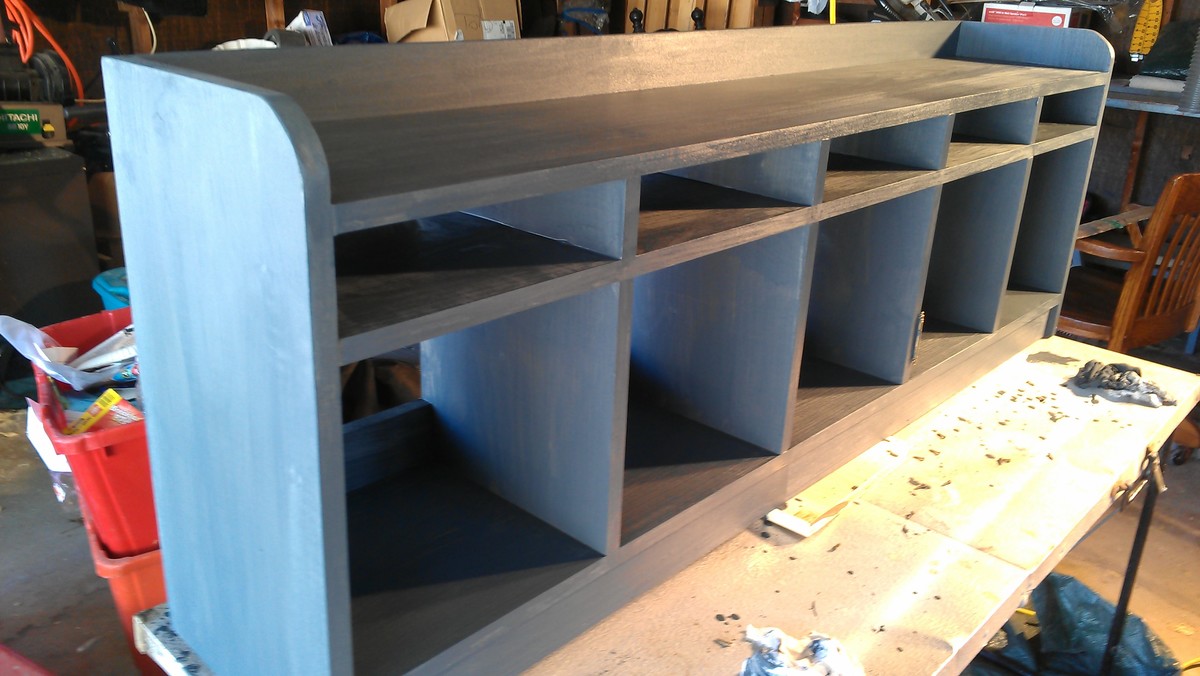
We saw this cubby bench and thought it could work for us... but there's 5 of us.
So we redrew the plans to add two more cubbies.
I also like the idea of being able to hide everything, so we put doors on.
The issue I had was cutting 1x12 material with the chop saw. Cutting with the circular saw (even with a guide) can sometimes leave you with an "almost" square edge. Even with a 12" saw you can not make the cuts on a 1x12. You need a sliding saw for that.
One option is to cut the boards over sized by 1/4 in and then use the table saw to get a square edge with the miter gauge or rip fence.
I only worried about this due to putting doors on the cubbies. It's your using baskets you don't have to be so exact.


Comments
Ana White Admin
Thu, 10/26/2023 - 19:09
Love your fireplace wall!
Looks great scaled down! Thank you for sharing.