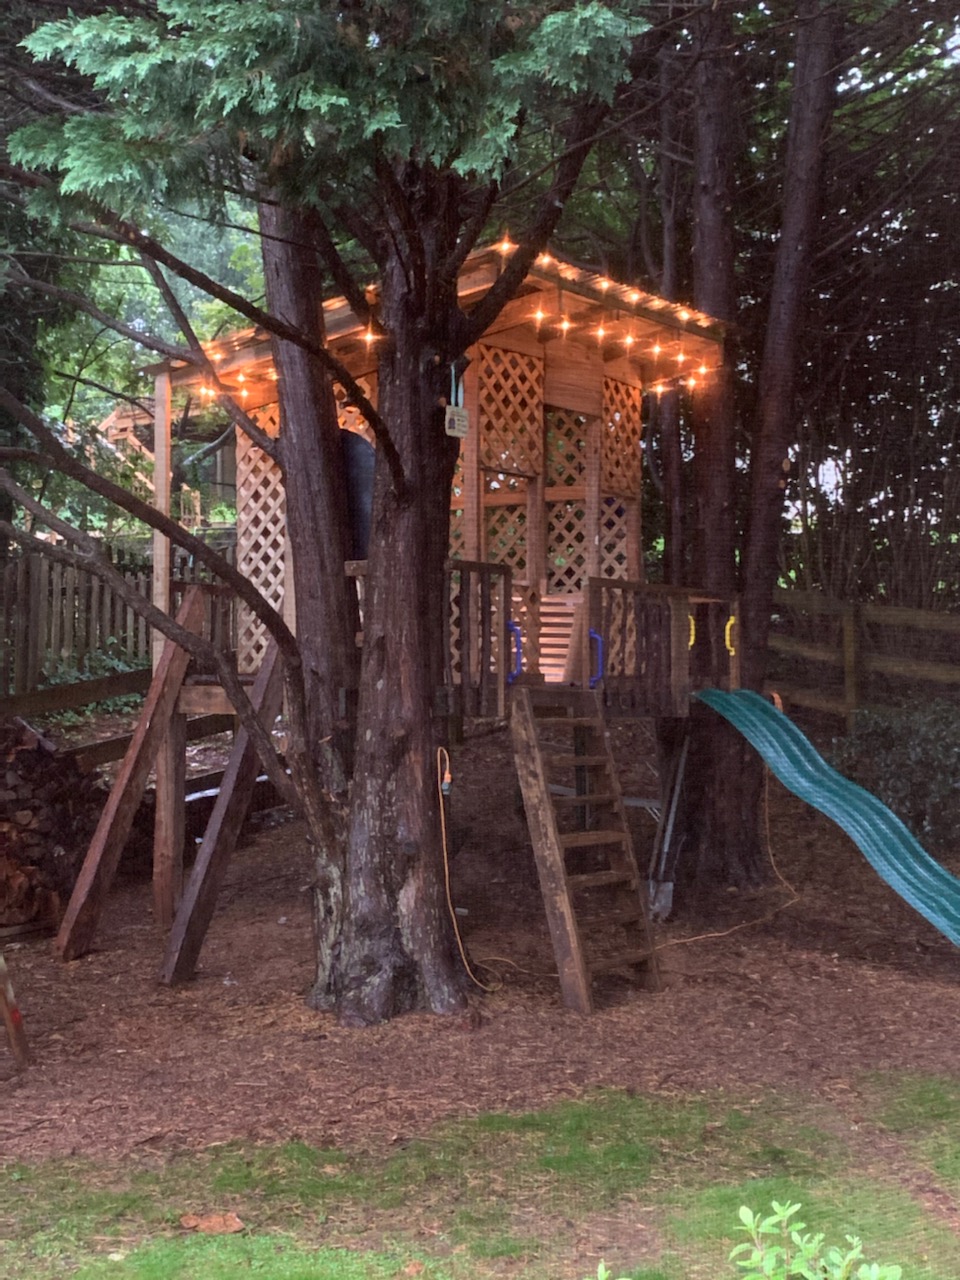
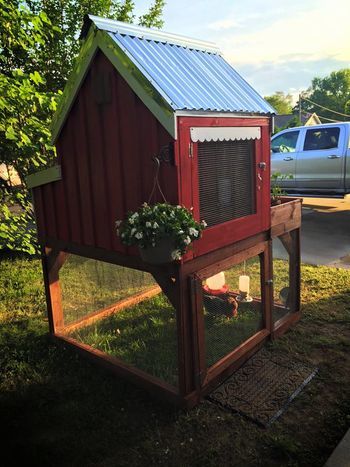
Connie's coop

http://www.backyardchickens.com/a/connies-coop
I built this and posted it on 6/8/15 on backyardchickens.com and it has been "pinned" a few thousand times since then...

http://www.backyardchickens.com/a/connies-coop
I built this and posted it on 6/8/15 on backyardchickens.com and it has been "pinned" a few thousand times since then...
Have 3 granddaughters; 3, 2 and 6 months, so far 😉 Saw your treehouse video and made a modified version of your triangle platform using the trees I had available. Kinda went over the top a bit, but give you all the credit. Repurposed mostly old deck PT wood and rough hewn beams from neighbors.
Thanks!
Bill Magyar
Duluth GA
Our two boys are really starting to get into Legos so we knew we needed a place for them to play (especially after repeatedly stepping on Legos--ouch!). My husband designed this simple plan after looking at some expensive designs online. He cut a small notch out of the top so legos can be pushed into the storage container. We just used a simple under bed storage box, which is great because it is large and holds a ton of legos.
This was my first ever project. I initially intended to use it for office storage but it ended up taking its place in the kitchen - and proving most useful for storage there too!
Stained with Minwax Jacobean. Thank you for the plans!
Thanks to Ana's plans for the attached garage shelves, we've managed to change 12' of garage space into 60! A quick trip to the local Home Depot and following the included instructions, these SUPER easy shelves were perfect for our needs. Thanks, Ana!
We found your great plans and site online. My son, Michael made 6 Garden Benches for his Eagle Scout Service Project and donated them to the local Master Gardener’s Association.
They turned out beautiful!
Thank you for sharing your plans. We’re looking forward to building more of your projects!
The Taylors
Mom's Fancy Farmhouse in California King, Glazed.
I used the headboard measurements from the original plan, and the width/length measurements from the California King plan. My first plan was to distress (above picture) and I loved it, but when I brought it downstairs it didnt really match... So I repainted and Glazed :) Not to bad for buying my first "power tool" less than a month ago!!
I'm homemade woodworker. This is my first job!
Thu, 06/19/2014 - 21:49
Very nice looking! I really like the blonde stain.
I built this for fun and my sister ended up wanting it. Therefore I never stained it as she has her own style. Hopefully I can update it when she stains it.
Wanted new nightstand but also wanted so shelving for pictures and stuff. Saw a picture on here and google images and decided to make it my own.
I didn't use any plans but the Outdoor Ottoman comes really close. Needed an end table to go with our Outdoor Sectional that my husband and I built. While he was at a ballgame I whipped this up. Still have to sand and stain this as well as the sectional, but will probably do it as a winter project. We bought the 1x4s a while ago when we bought the 2x4s for the sectional so I wasn't exactly sure of the cost. I think I used 2 1/2 pieces of 8' lengths. Who would have thought a couple of years ago that so many of us would have attempted to build furniture and then even without a plan now and then?! Ana rocks! :)
This is our first build. Instructions were easy to follow but we didn't go much on the bottom center drawer runners!
I love the second layer of slide out drawers we use for the printer , paper and electronic gadgets!
Wed, 06/25/2014 - 05:37
Love this. What great mods and you even tackled drawers for a first build?! I'm too chicken and still haven't tried. Especially love how you used slide outs in the middle. Clever!
Inspired by Ana's Flip down wall art desk. It has different dimentions since wall space was limited. I used a magnet as a lock, added upholstered back, dowel for storage and extended the bottom part to add some strength. It is very handy!
Thu, 09/22/2016 - 09:06
Very cool, love the upholstered back! Thanks for bragging your project!
Love these plans for the farmhouse table comsole
Porch sectional all done. Just need the fire pit.
After the high of finishing my first build (http://ana-white.com/2012/08/farmhouse-table-rustic-table), I was quick to find my next fix. My mom was so impressed with the table, she trusted me to build her another piece of furniture for our very empty new home. She liked the look of this coffee table, so I adjusted the dimensions to meet her needs and away I went. It was pretty fun and not too difficult. It was a little more time consuming that I had anticipated, but that was mostly due to the two different finishes on the legs/apron and the top.
I cannot believe how easy and inexpensive it was to get the Pottery Barn look for SO MUCH less!
We used Ana's plans for her Tiny House shelves and the only real difference was that we decided to use slightly thicker wood. We stained the wood espresso and painted the brackets Albaster by Sherwin Williams.
The longest part of this process was the staining because the sealer took quite a bit of time to dry before being handled, but this was overall a very simple project with not a lot of effort. It just requires patience!
We couldn't be happier and it was MUCH cheaper than the custom shelves we had quoted!
Thanks Ana!
Golf Locker. We love it!
An Outdoor Wooden Cooler is the perfect way to accent any deck, patio, or garage. Can be made from Cedar, Pressure Treated, Cyprus, etc. Sizes can vary from small 28 qt coolers to Large 120 qt coolers capable of holding hundreds of drinks. These coolers can be themed for your favorite sports team, favorite hobby, or anything of your choice. Engraving or wood burning is available.
Fri, 08/31/2012 - 09:52
Well, actually, two. My beer loving son-in-laws would love this, and Christmas is coming! Do you happen to have any "step-by-step" directions you'd be willing to share? I can figure out the dimensions but it would be really helpful to read - or see - the components and how you put it all together.
Thanks for sharing!
In reply to I want to make one of these by sgilly
Fri, 09/28/2012 - 11:43
I had to make a new page because of some password issues. Thanks for comments. I have no plans yet, I've built so many it's sort of muscle memory now. Shoot me an email at adamscheetz87@hotmail.com and perhaps I can help.
Sat, 09/01/2012 - 10:59
I want to make one too. Is the lid tricky at all?
Fri, 09/28/2012 - 11:41
I had to make a new page because of some password issues. Thanks for comments. I have no plans yet, I've built so many it's sort of muscle memory now. Shoot me an email at adamscheetz87@hotmail.com and perhaps I can help.
And no, the lid style I like is nothing more than some tongue~n~groove boards cut to length, attached with pocket holes and nailed to the lid frame. Tongue~N~groove is optional of course, you could just use regular boards.
Thu, 03/14/2013 - 21:08
I don't mean to hijack Adam's great build, but I have some step-by-step plans available for a cooler I built with a similar style. It has a 2x2 frame with old fencing facing. For those of you looking for plans/tutorial http://www.killerbdesigns.com/rustic-cooler-a-how-to/
Thu, 05/07/2015 - 07:20
My husband used a similar design to Adam's but made it a double. :) He also added wheels and a bottle opener/cap catcher. Great work Adam!
http://purposefulproductions.blogspot.com/2015/04/diy-wood-drink-cooler…