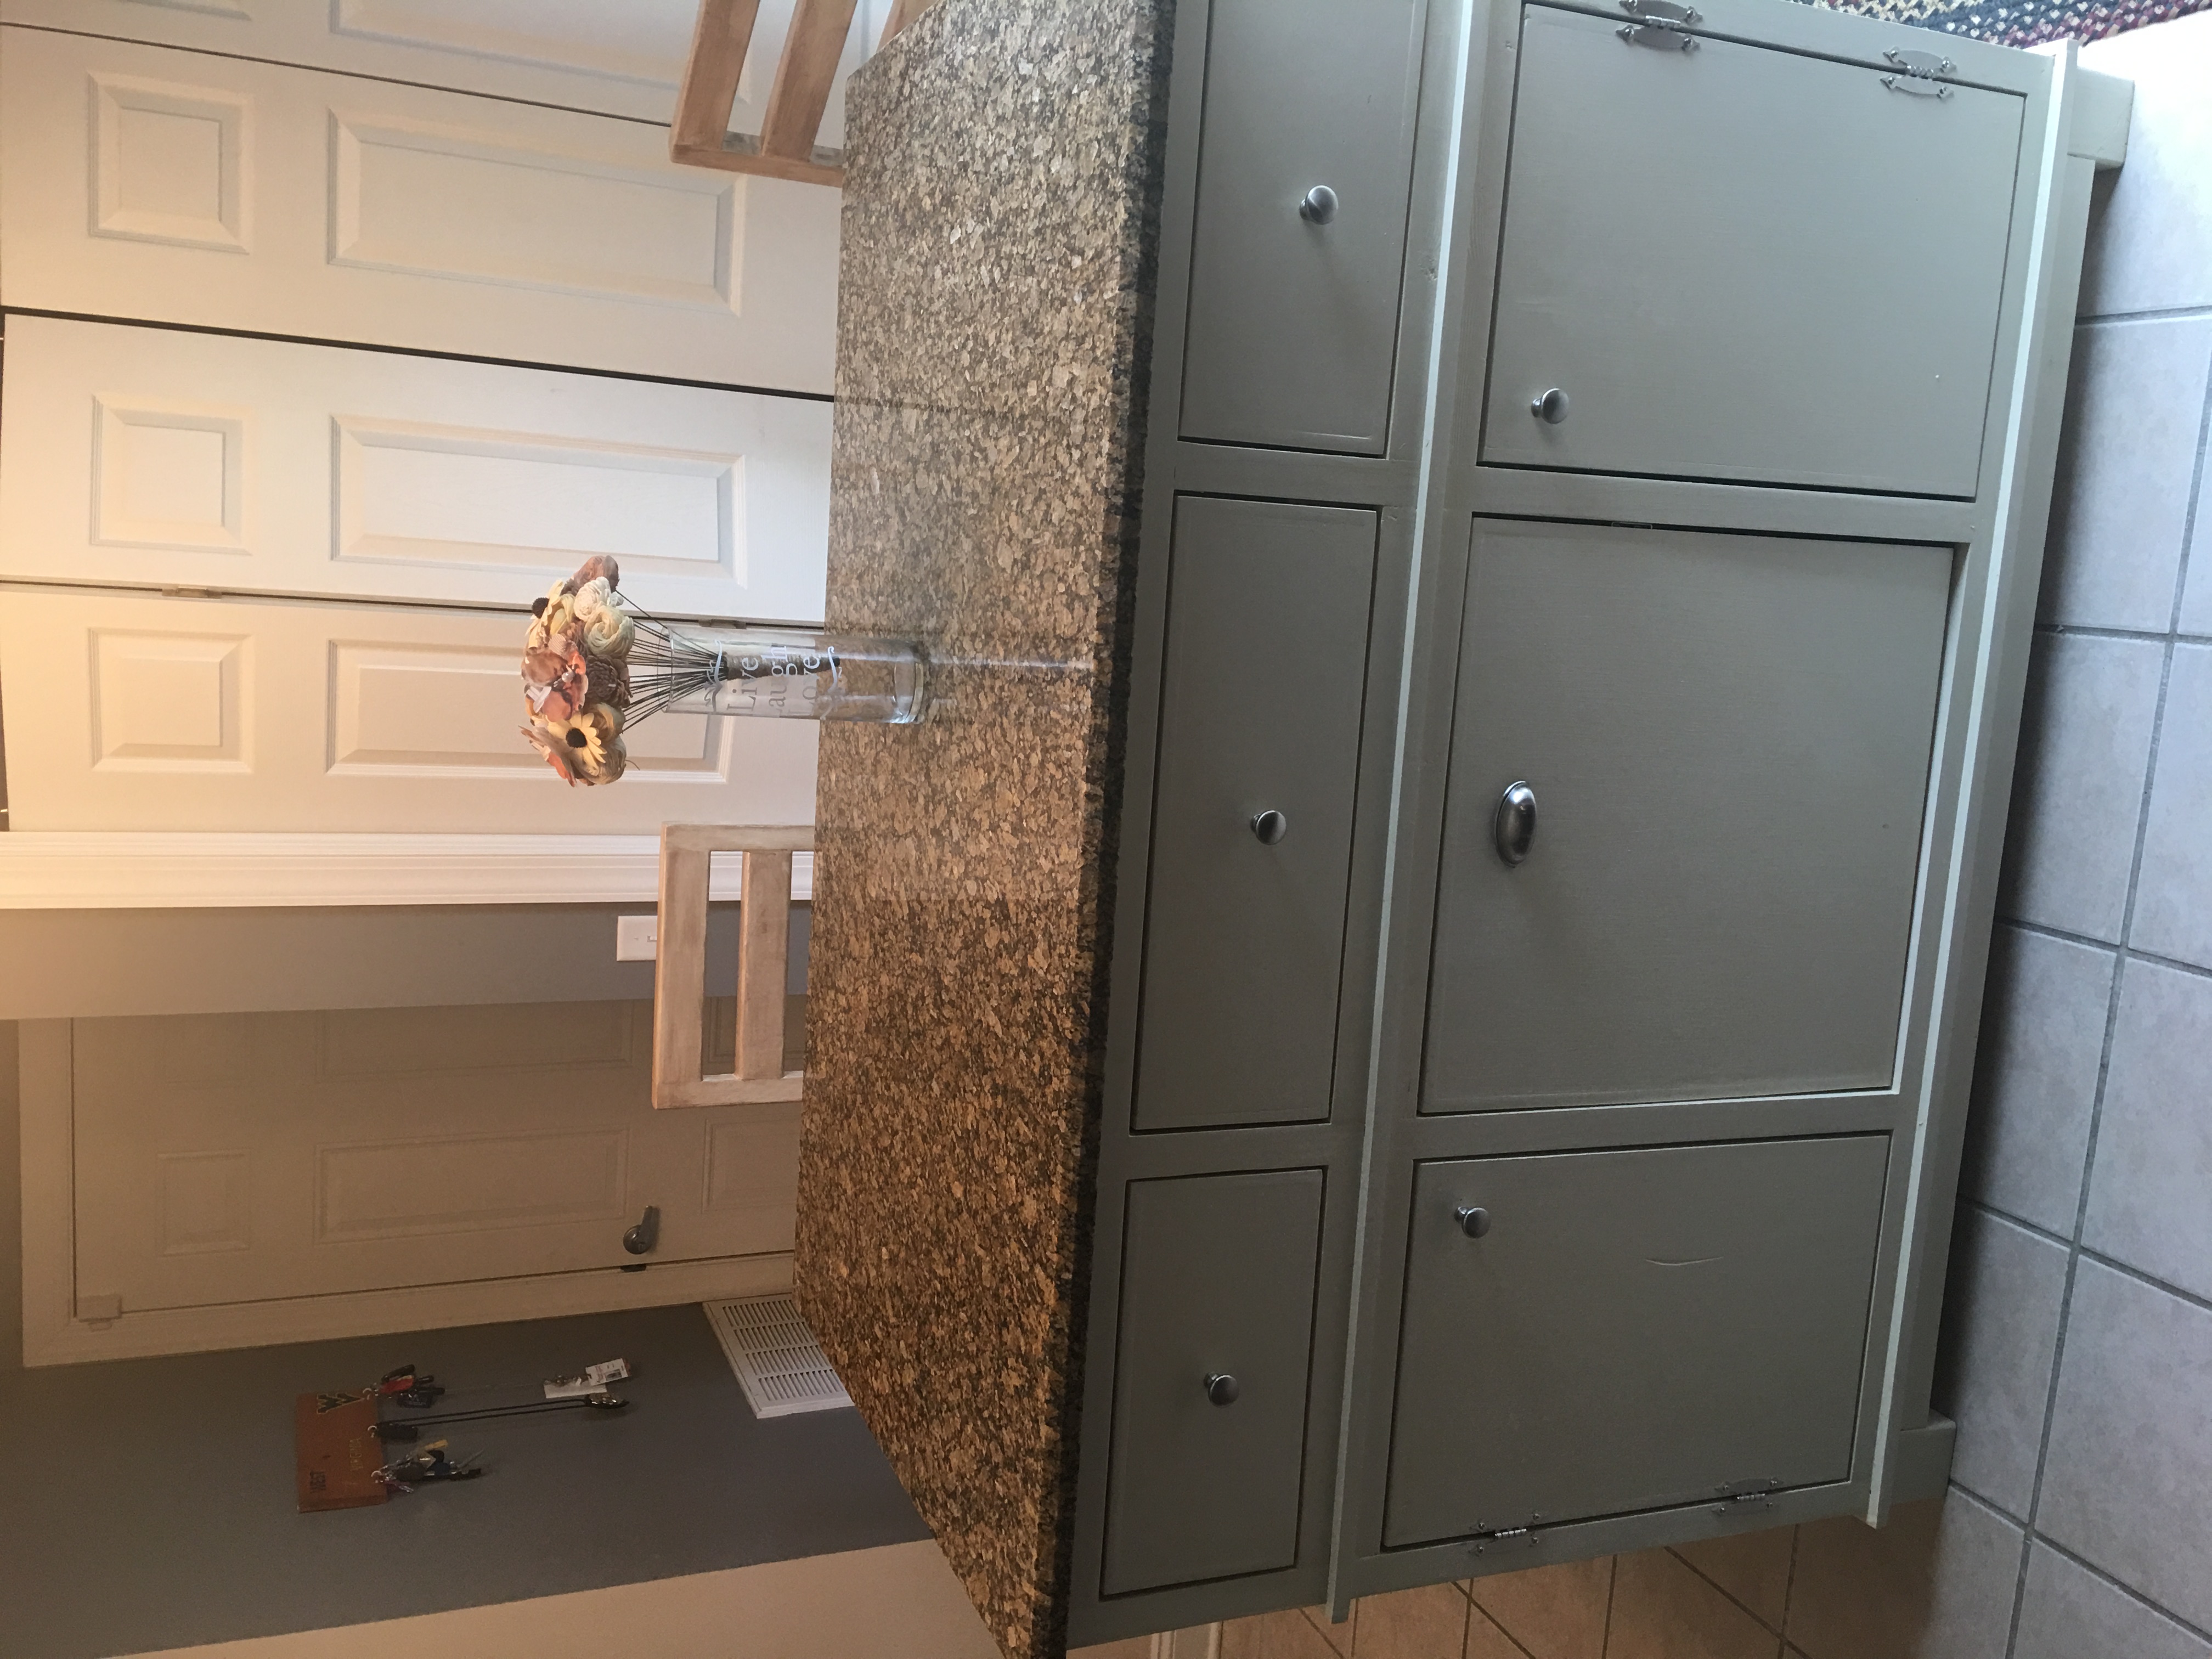
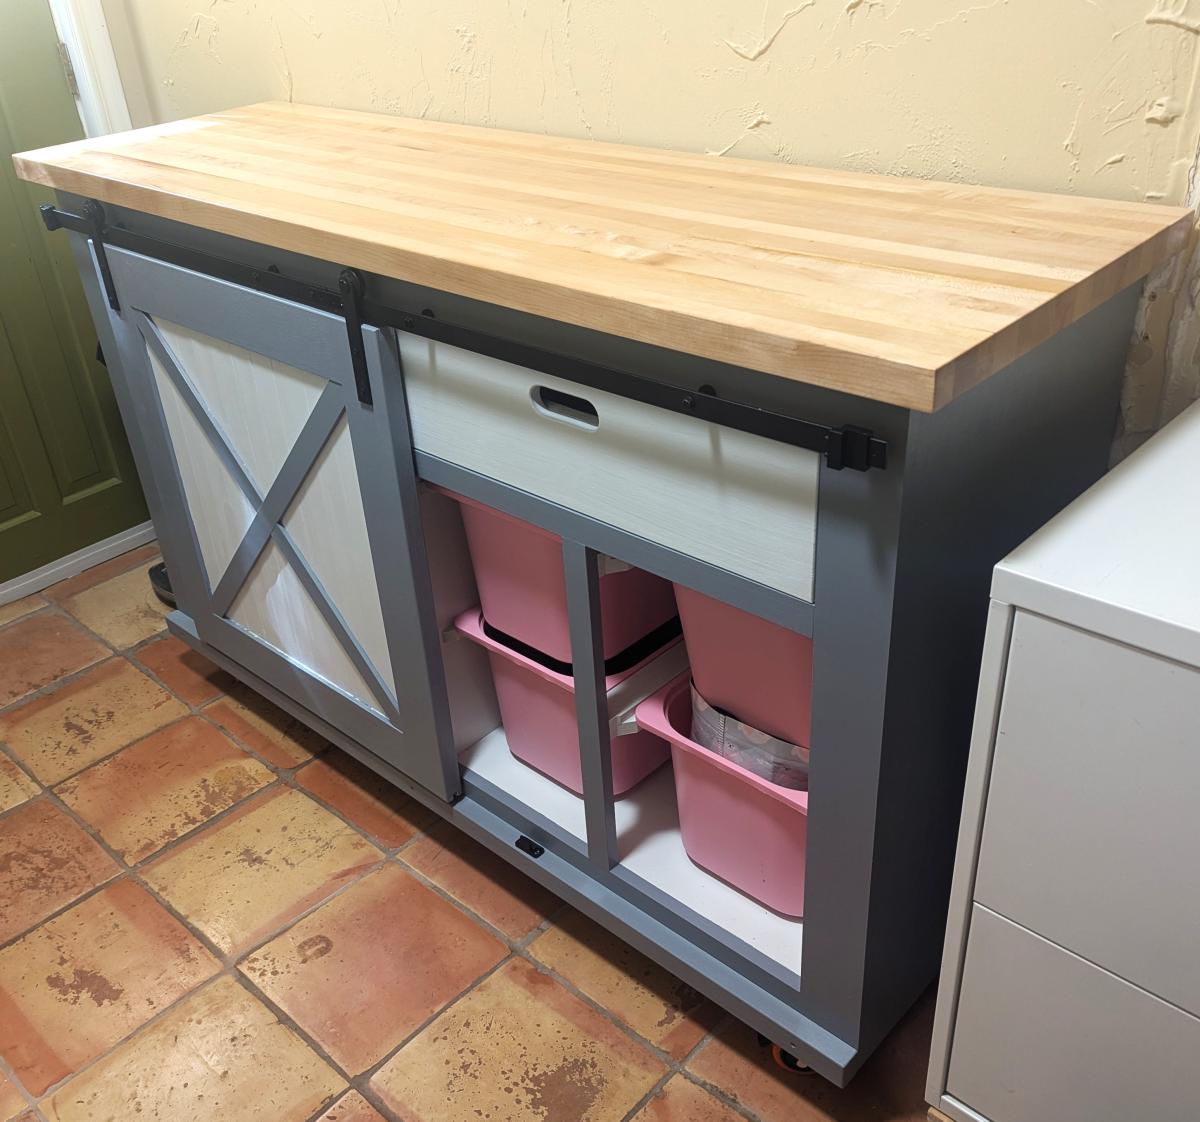
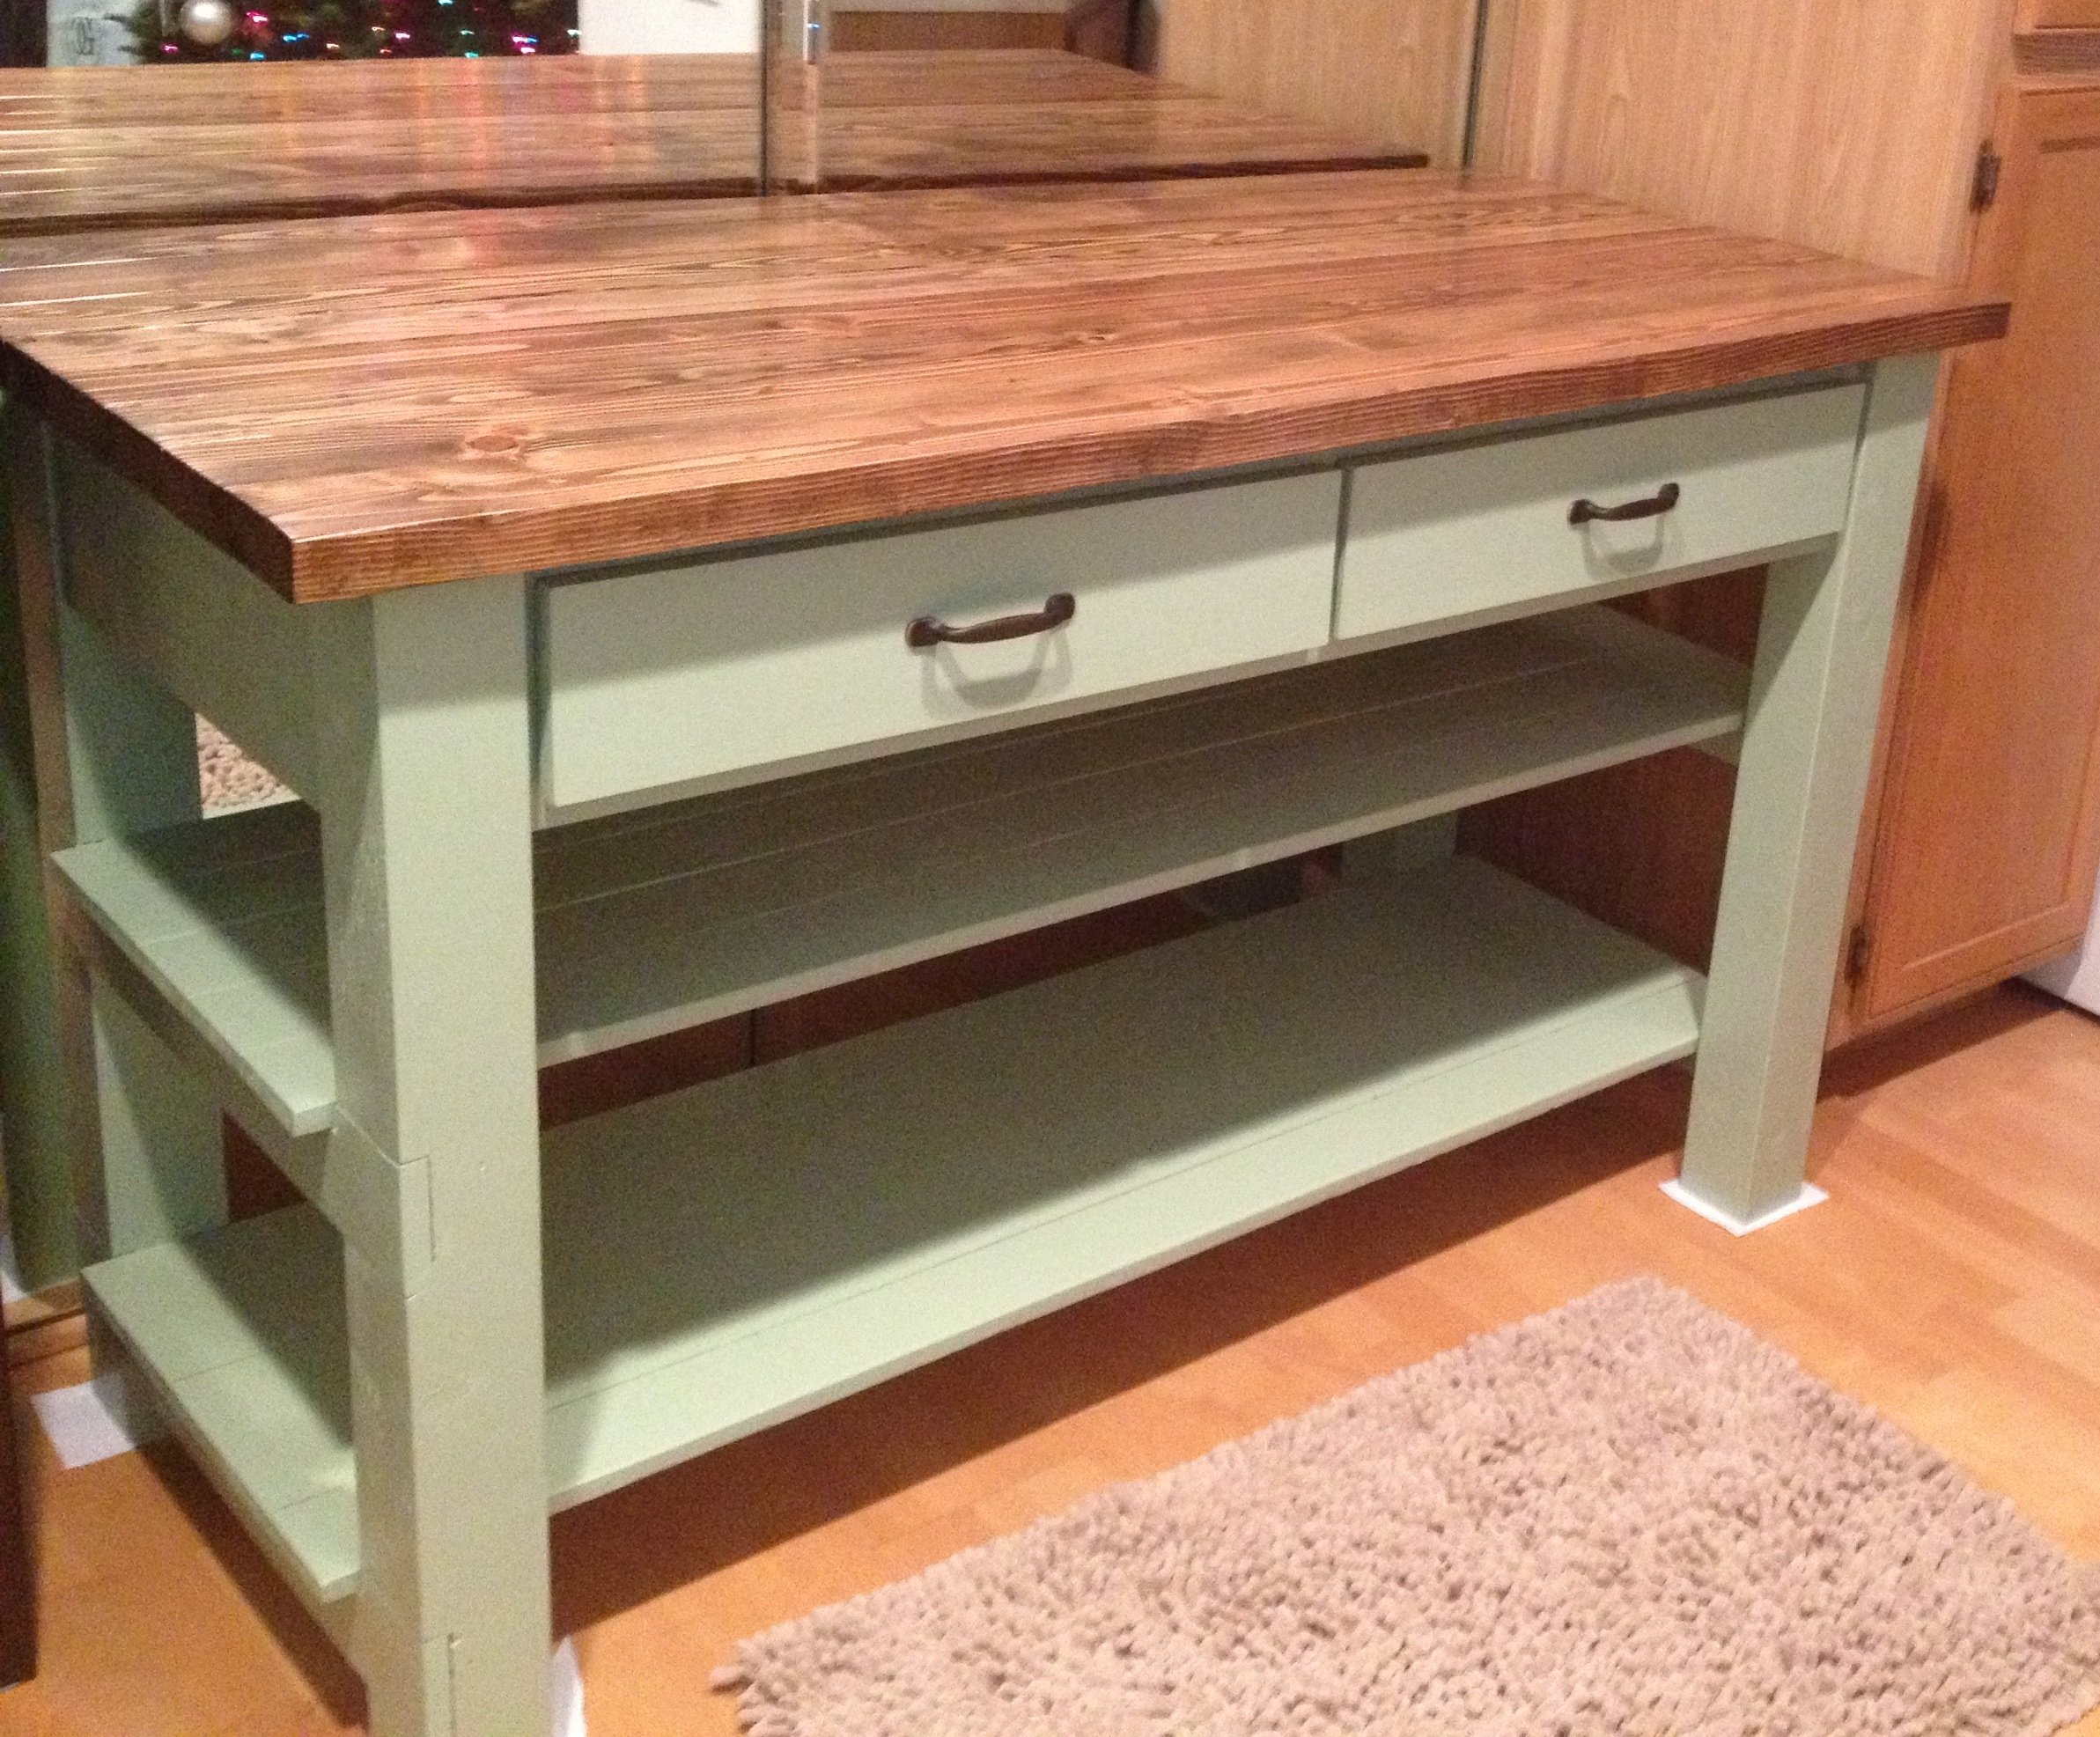
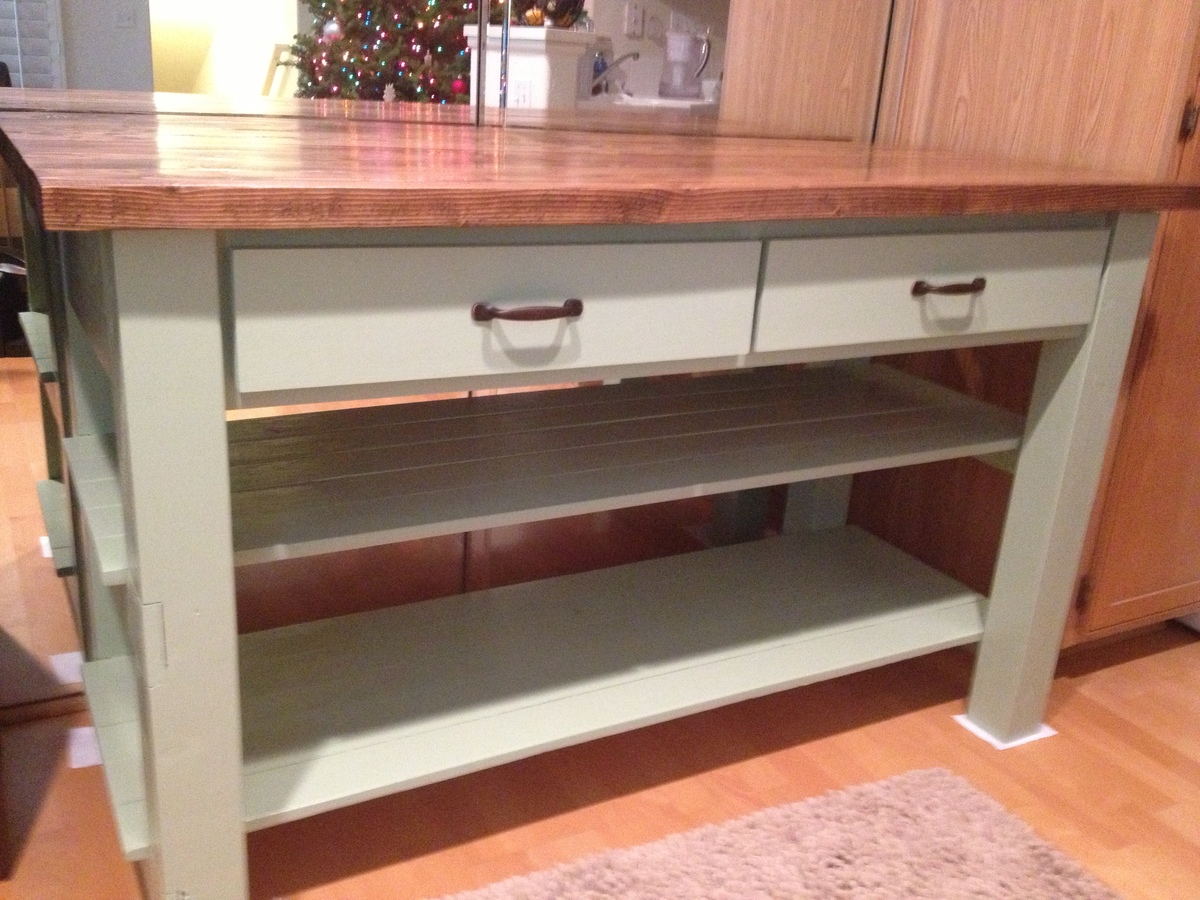
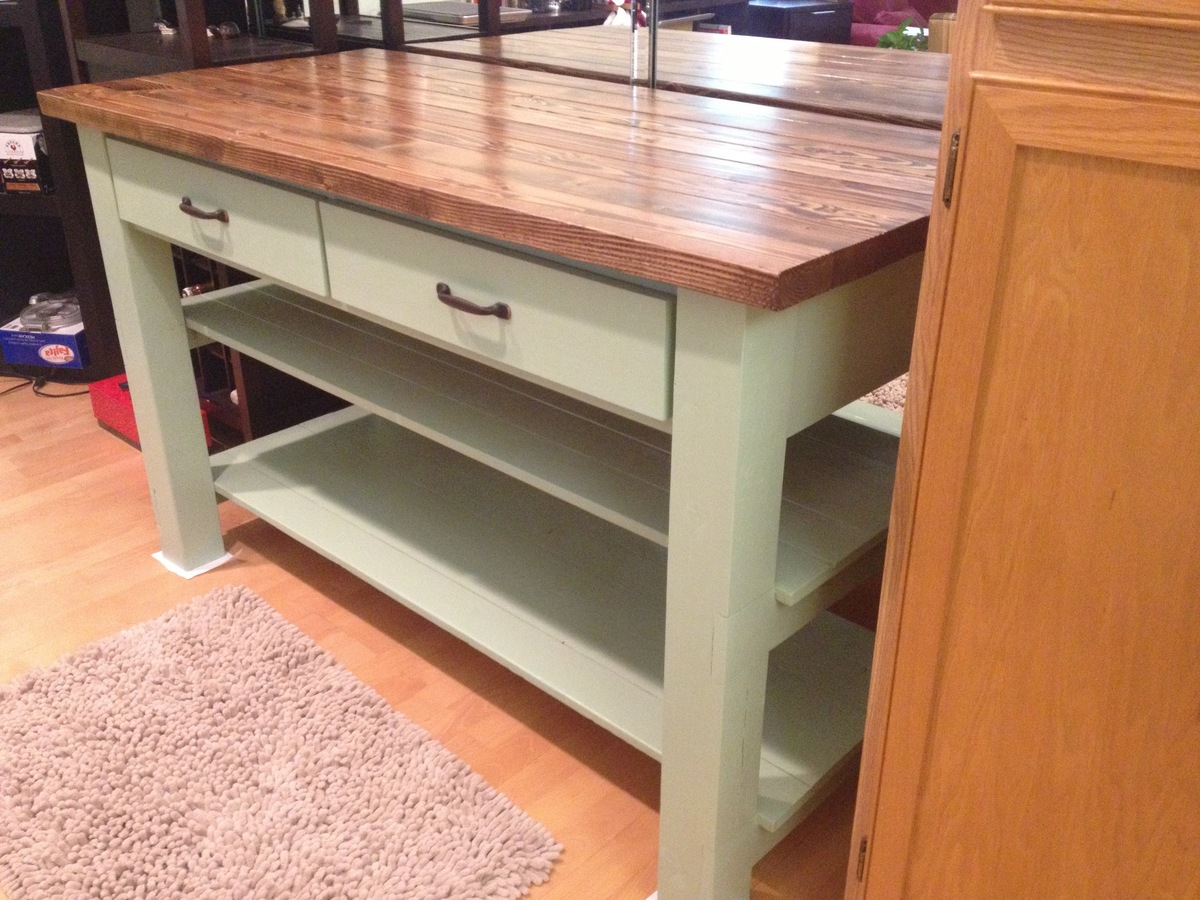
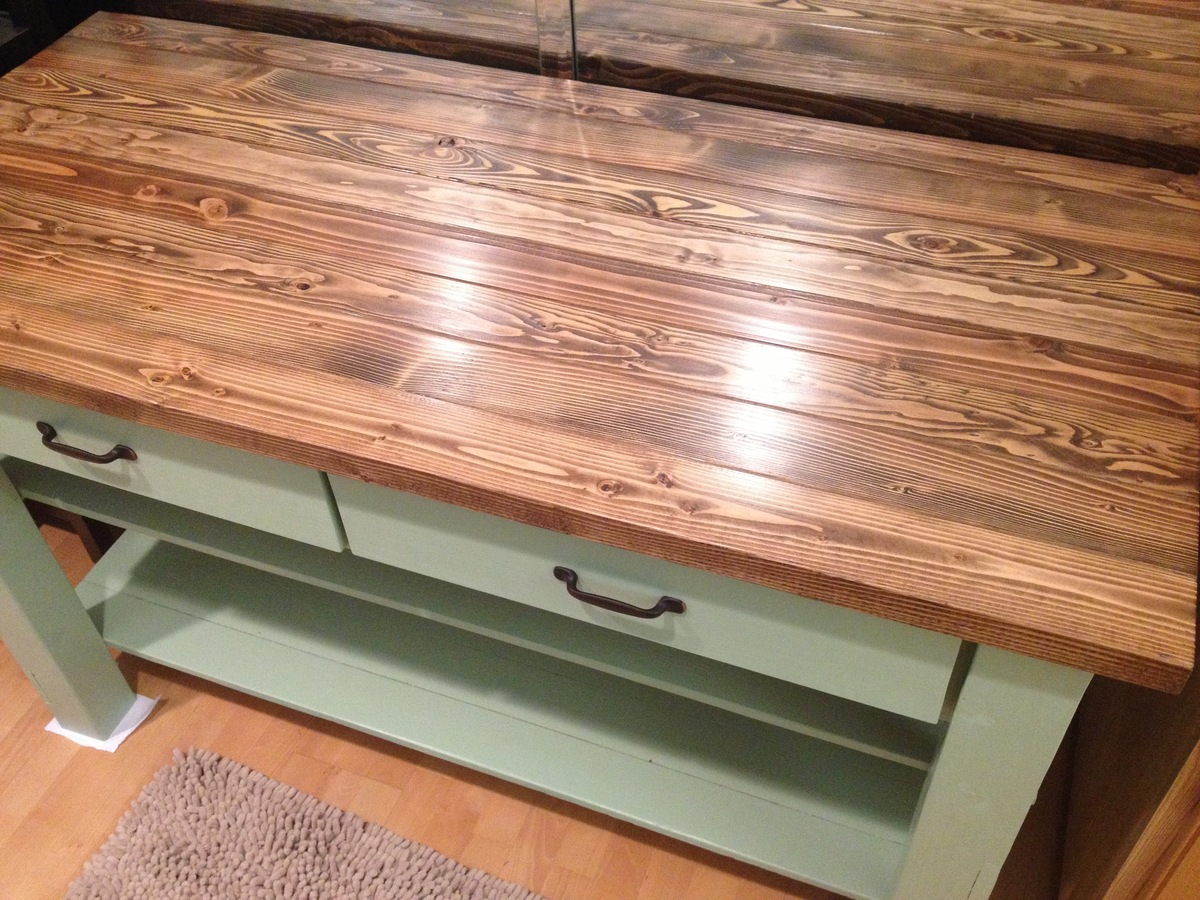
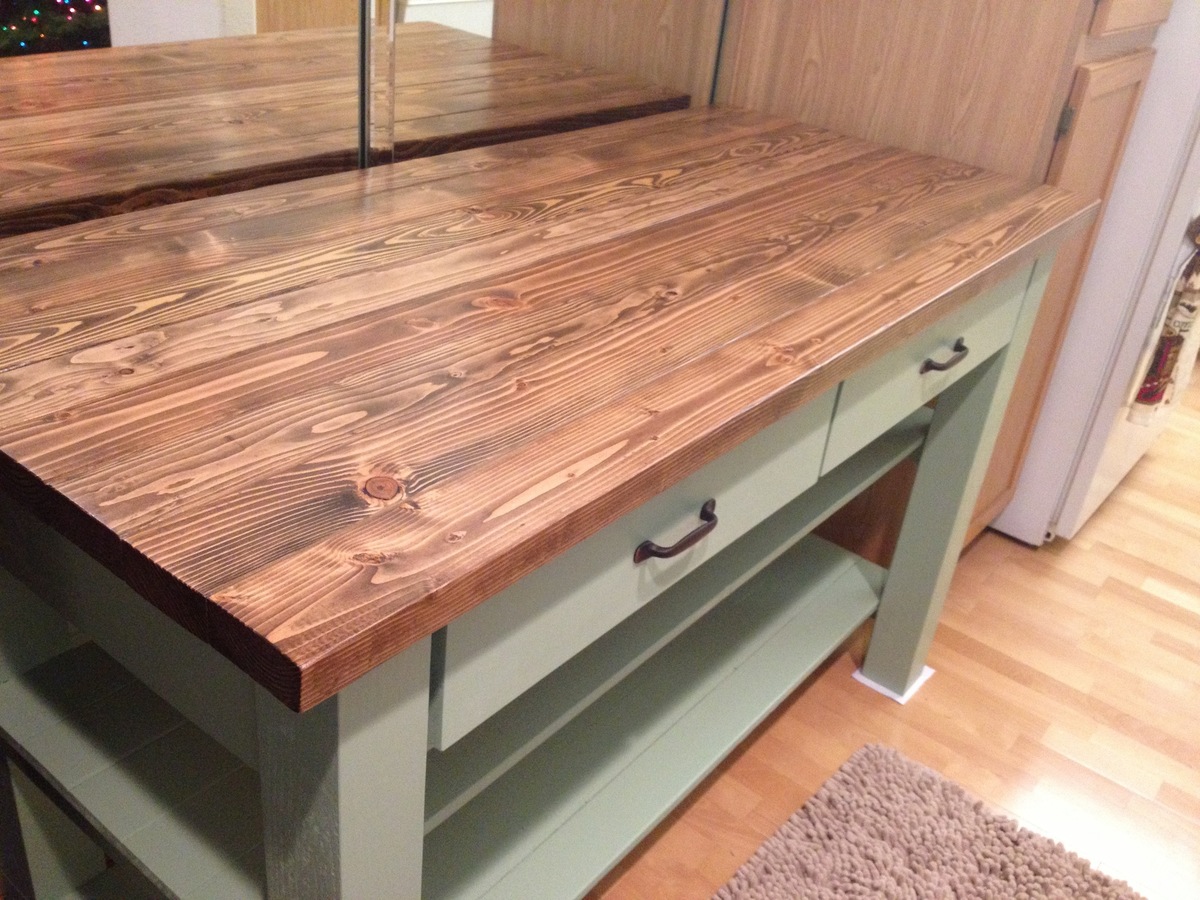
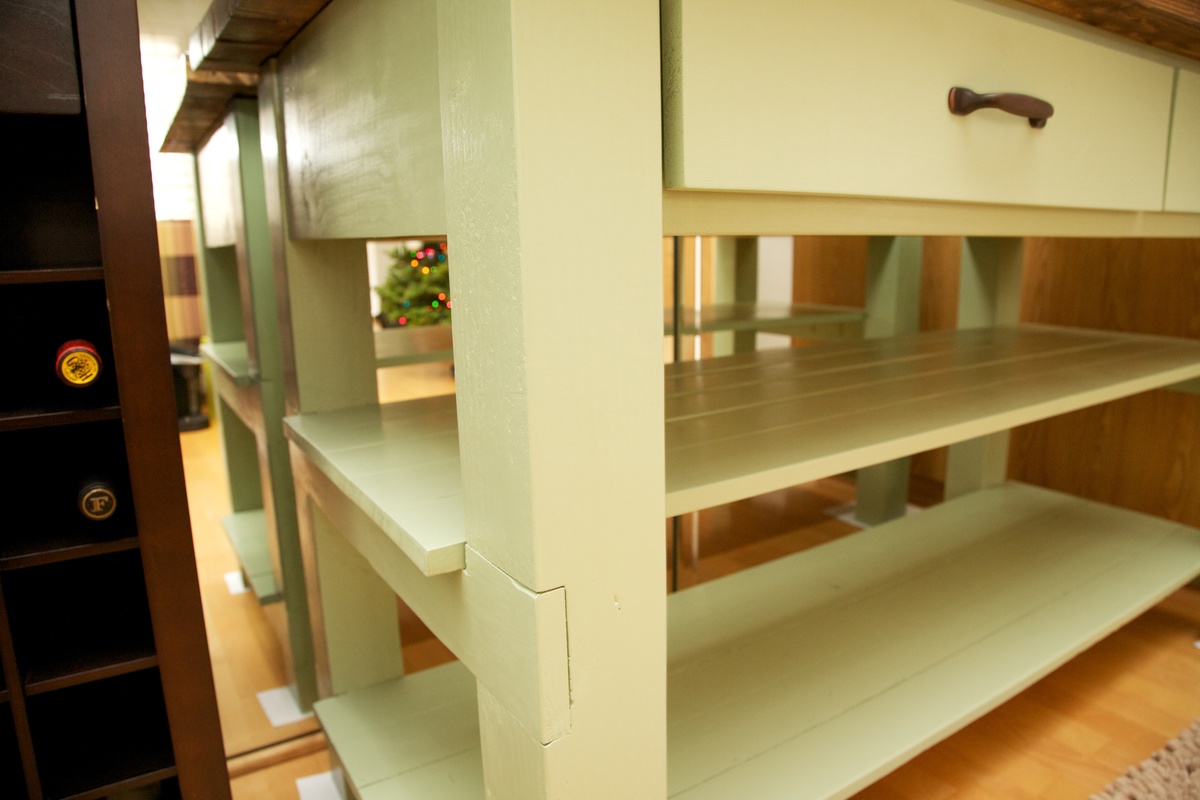
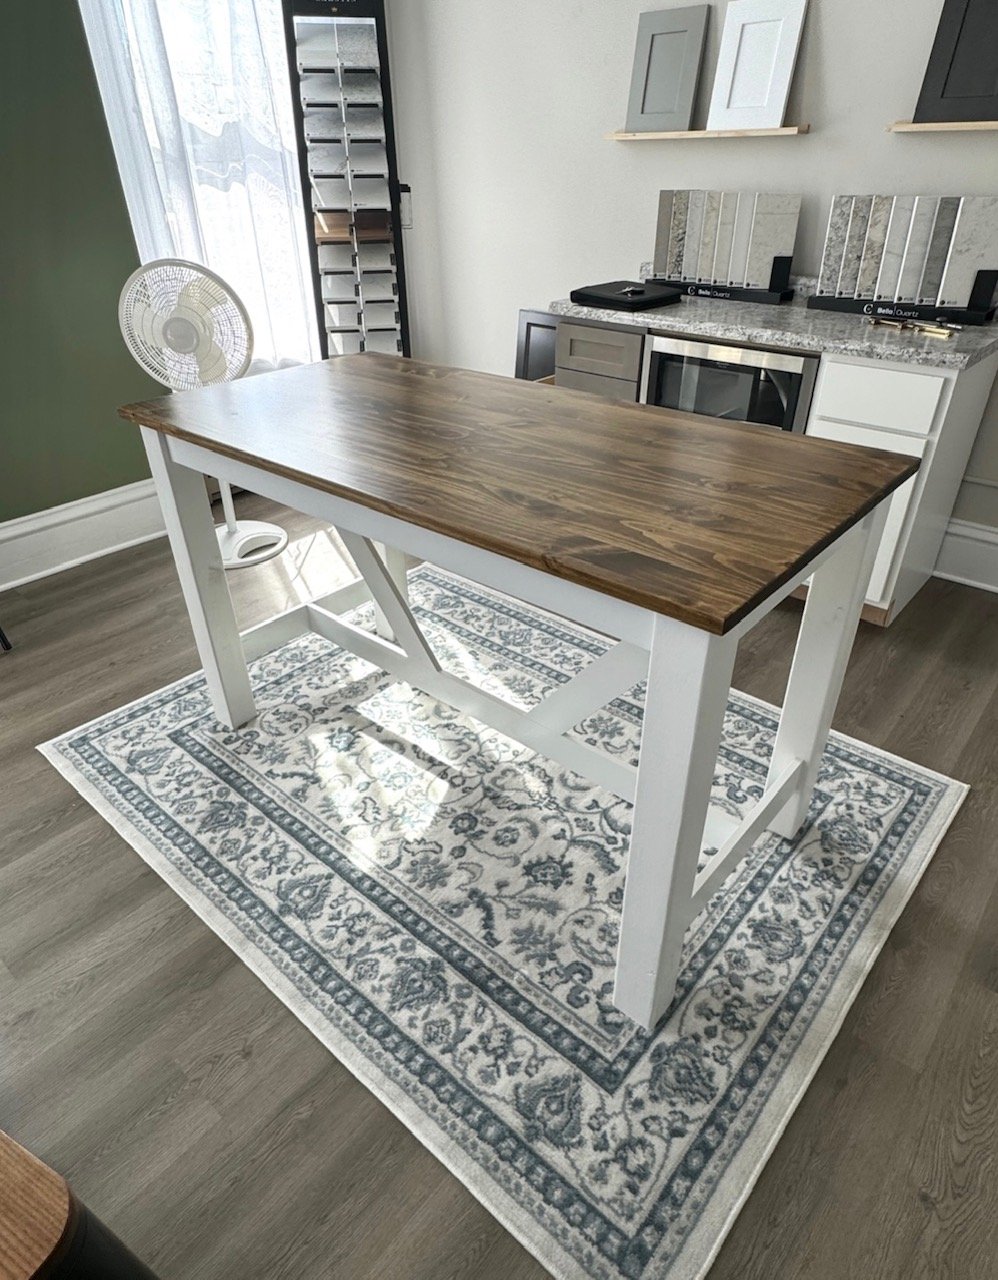
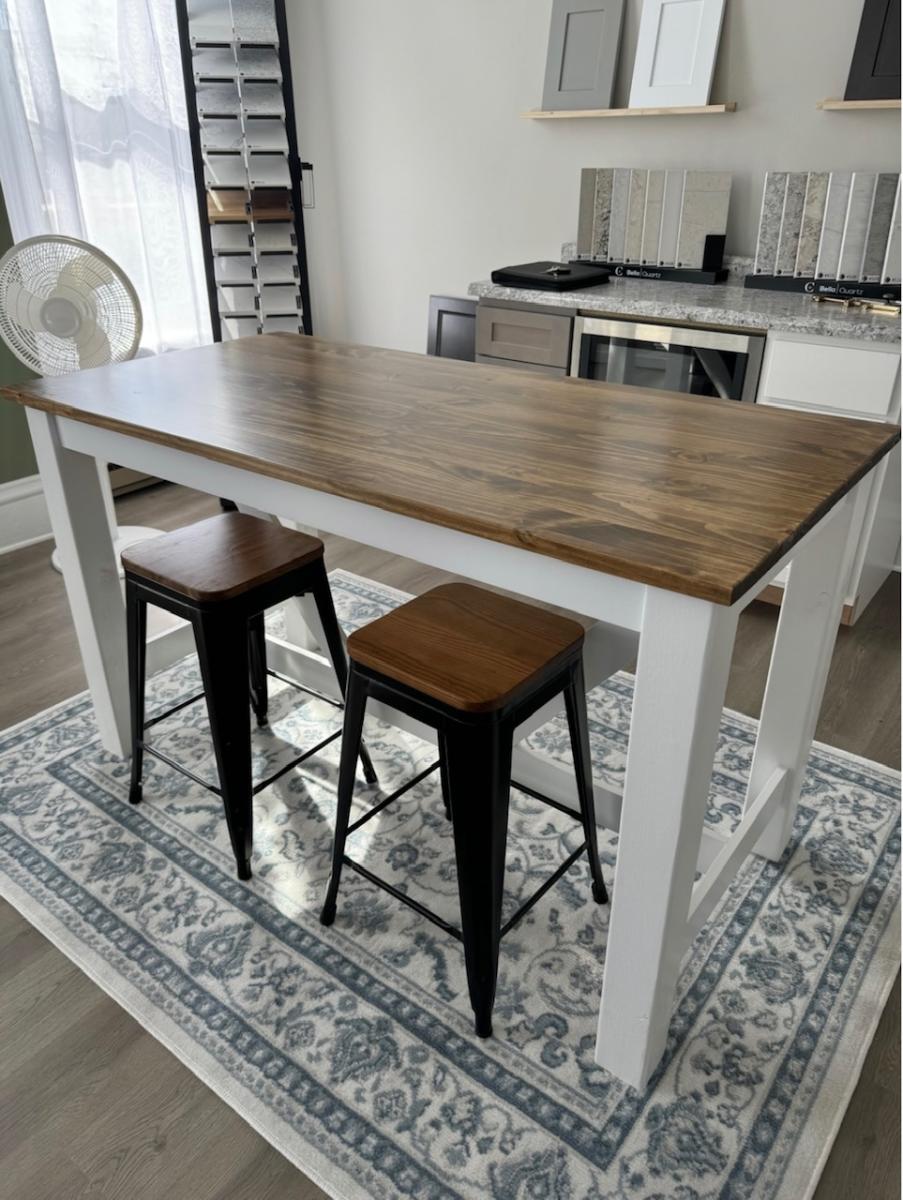
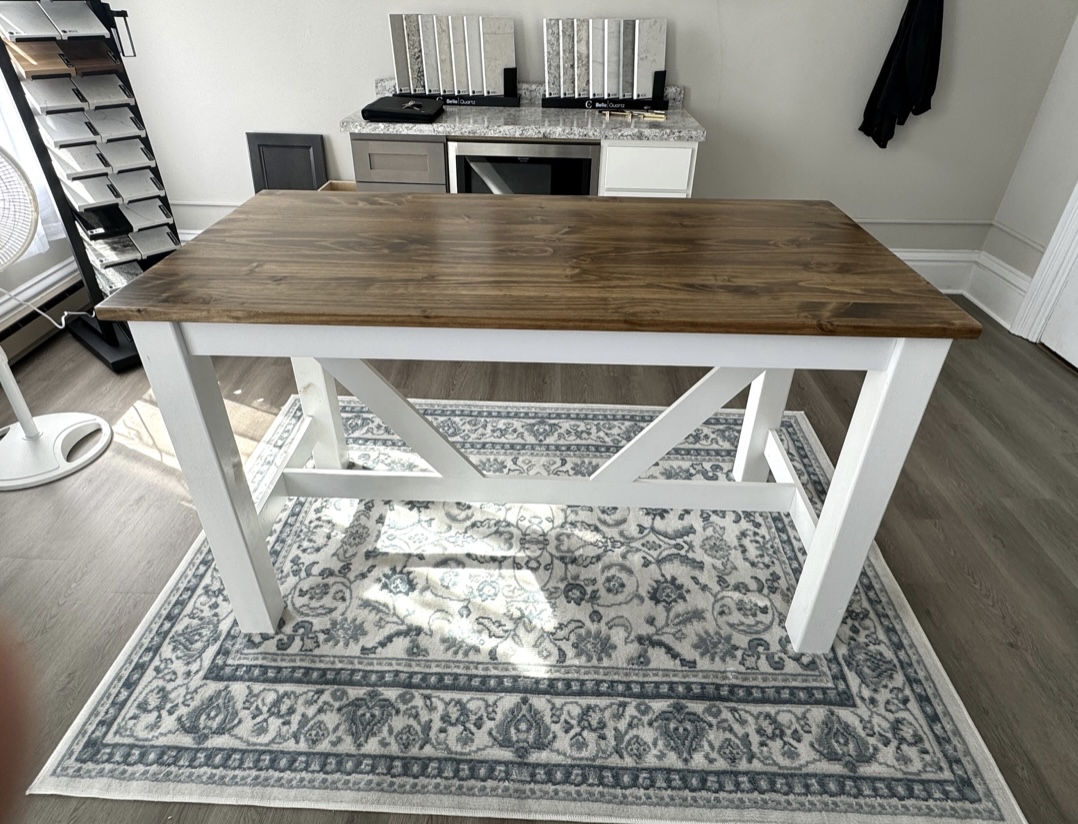
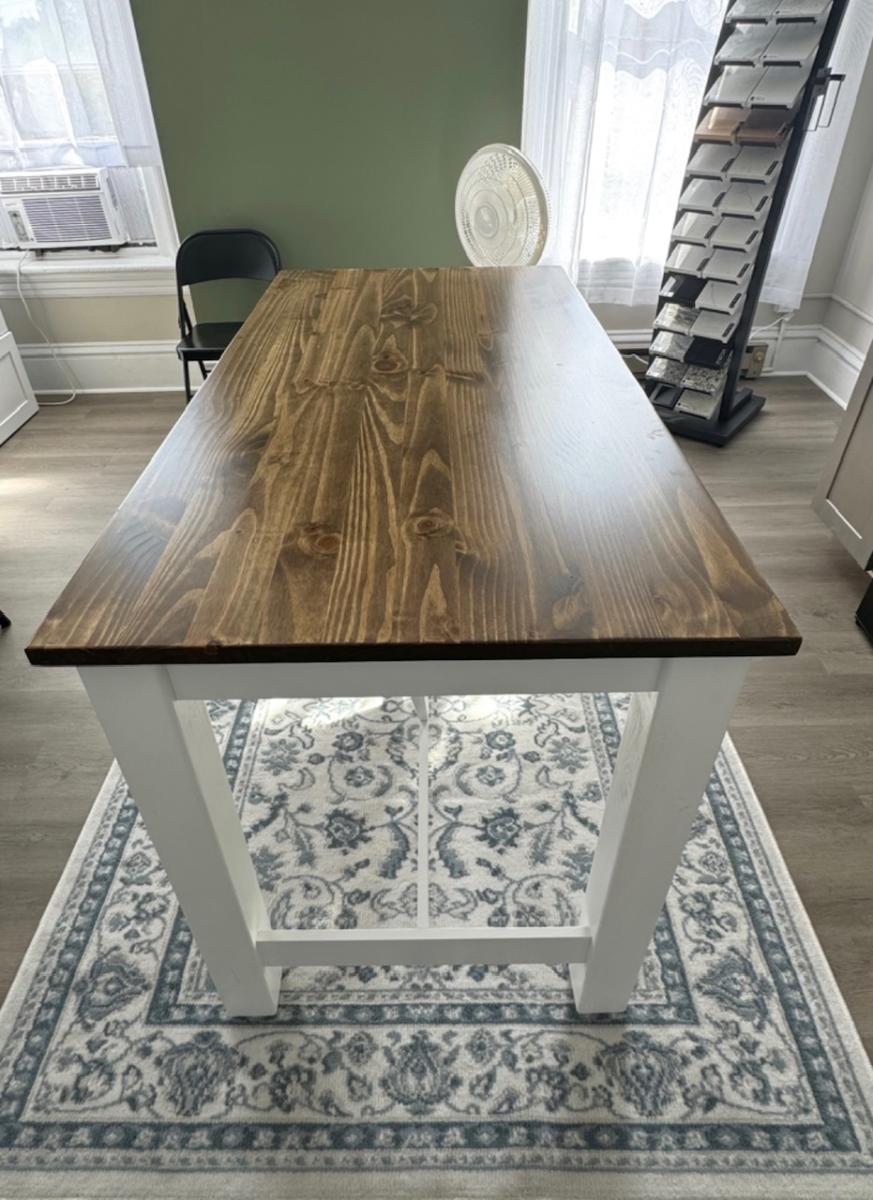
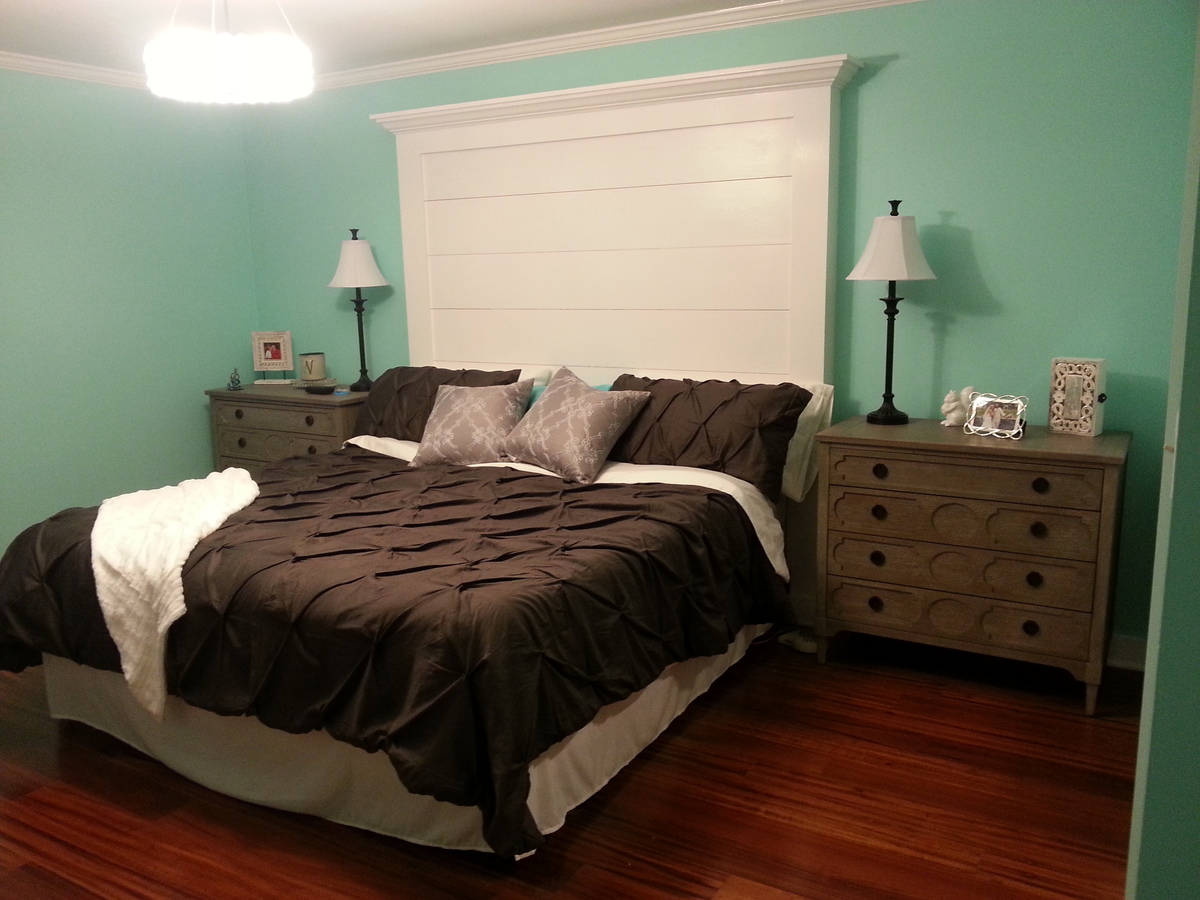
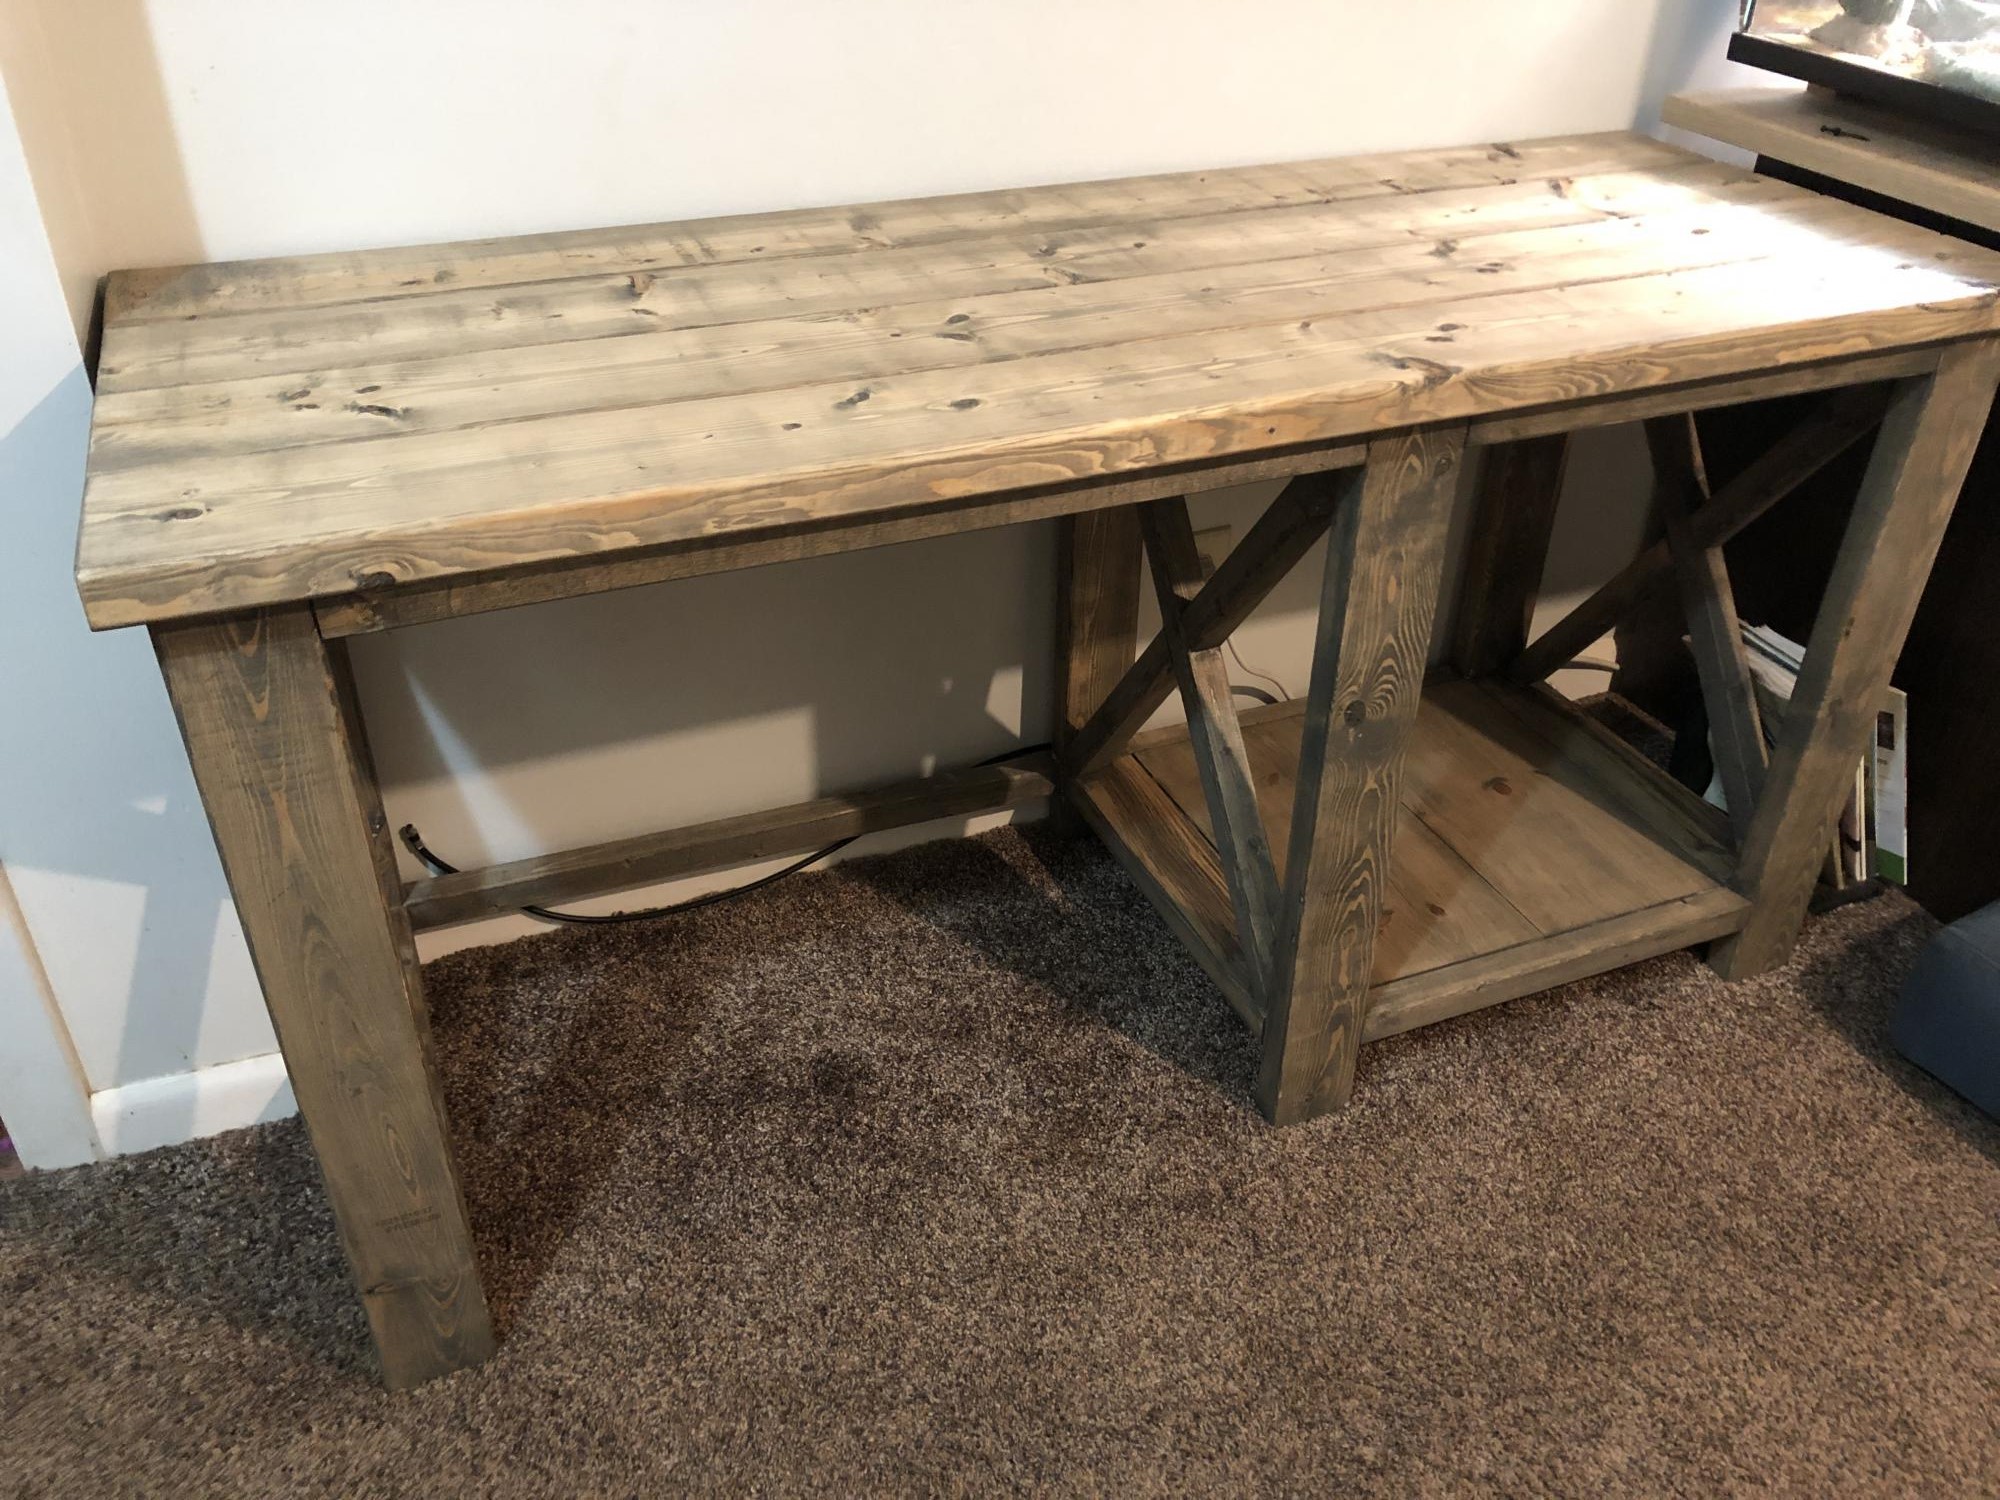
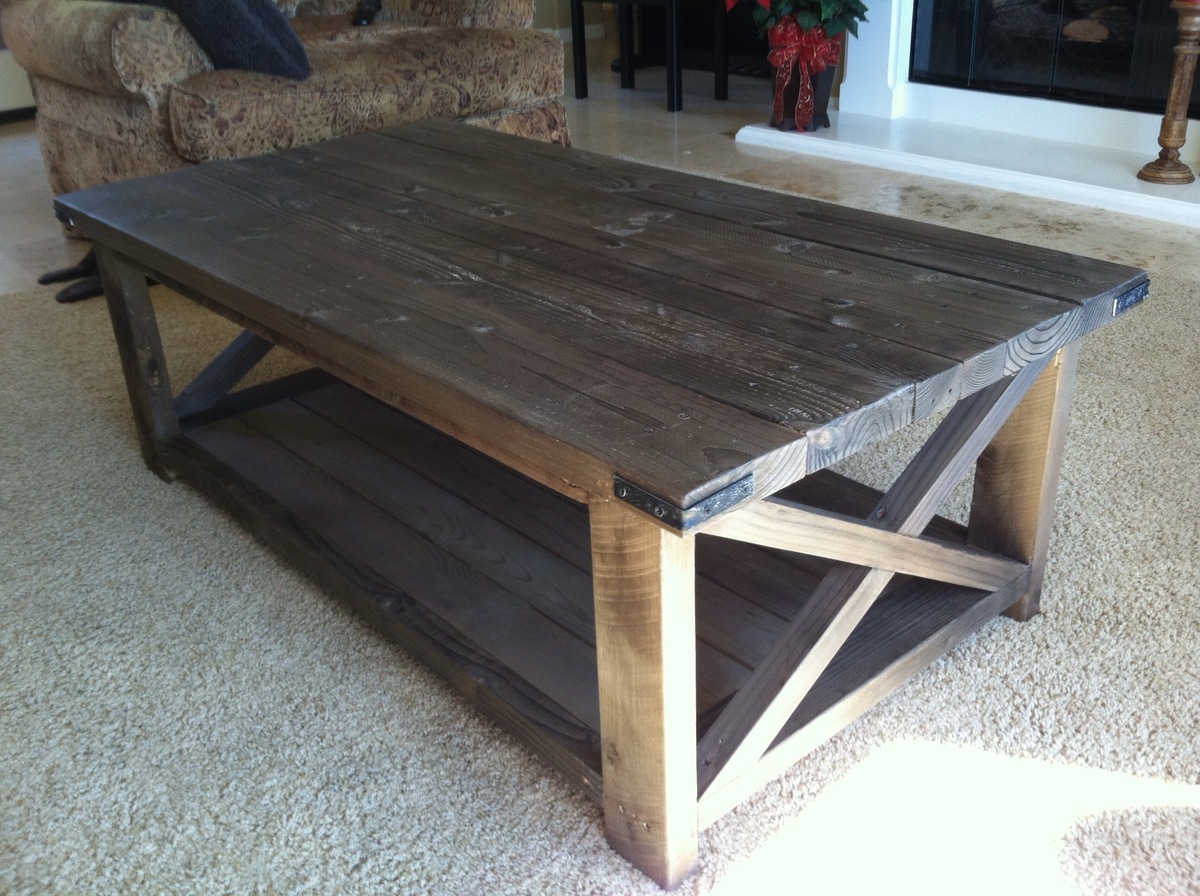
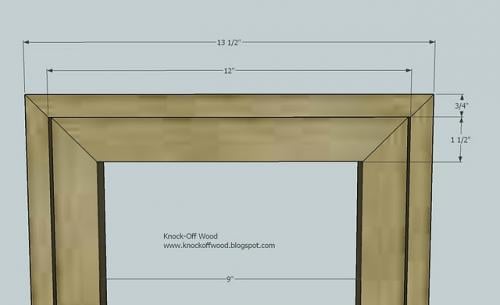
Community Brag Posts

Kitchen island

Submitted by Anonymous (not verified) on Fri, 12/30/2016 - 11:27

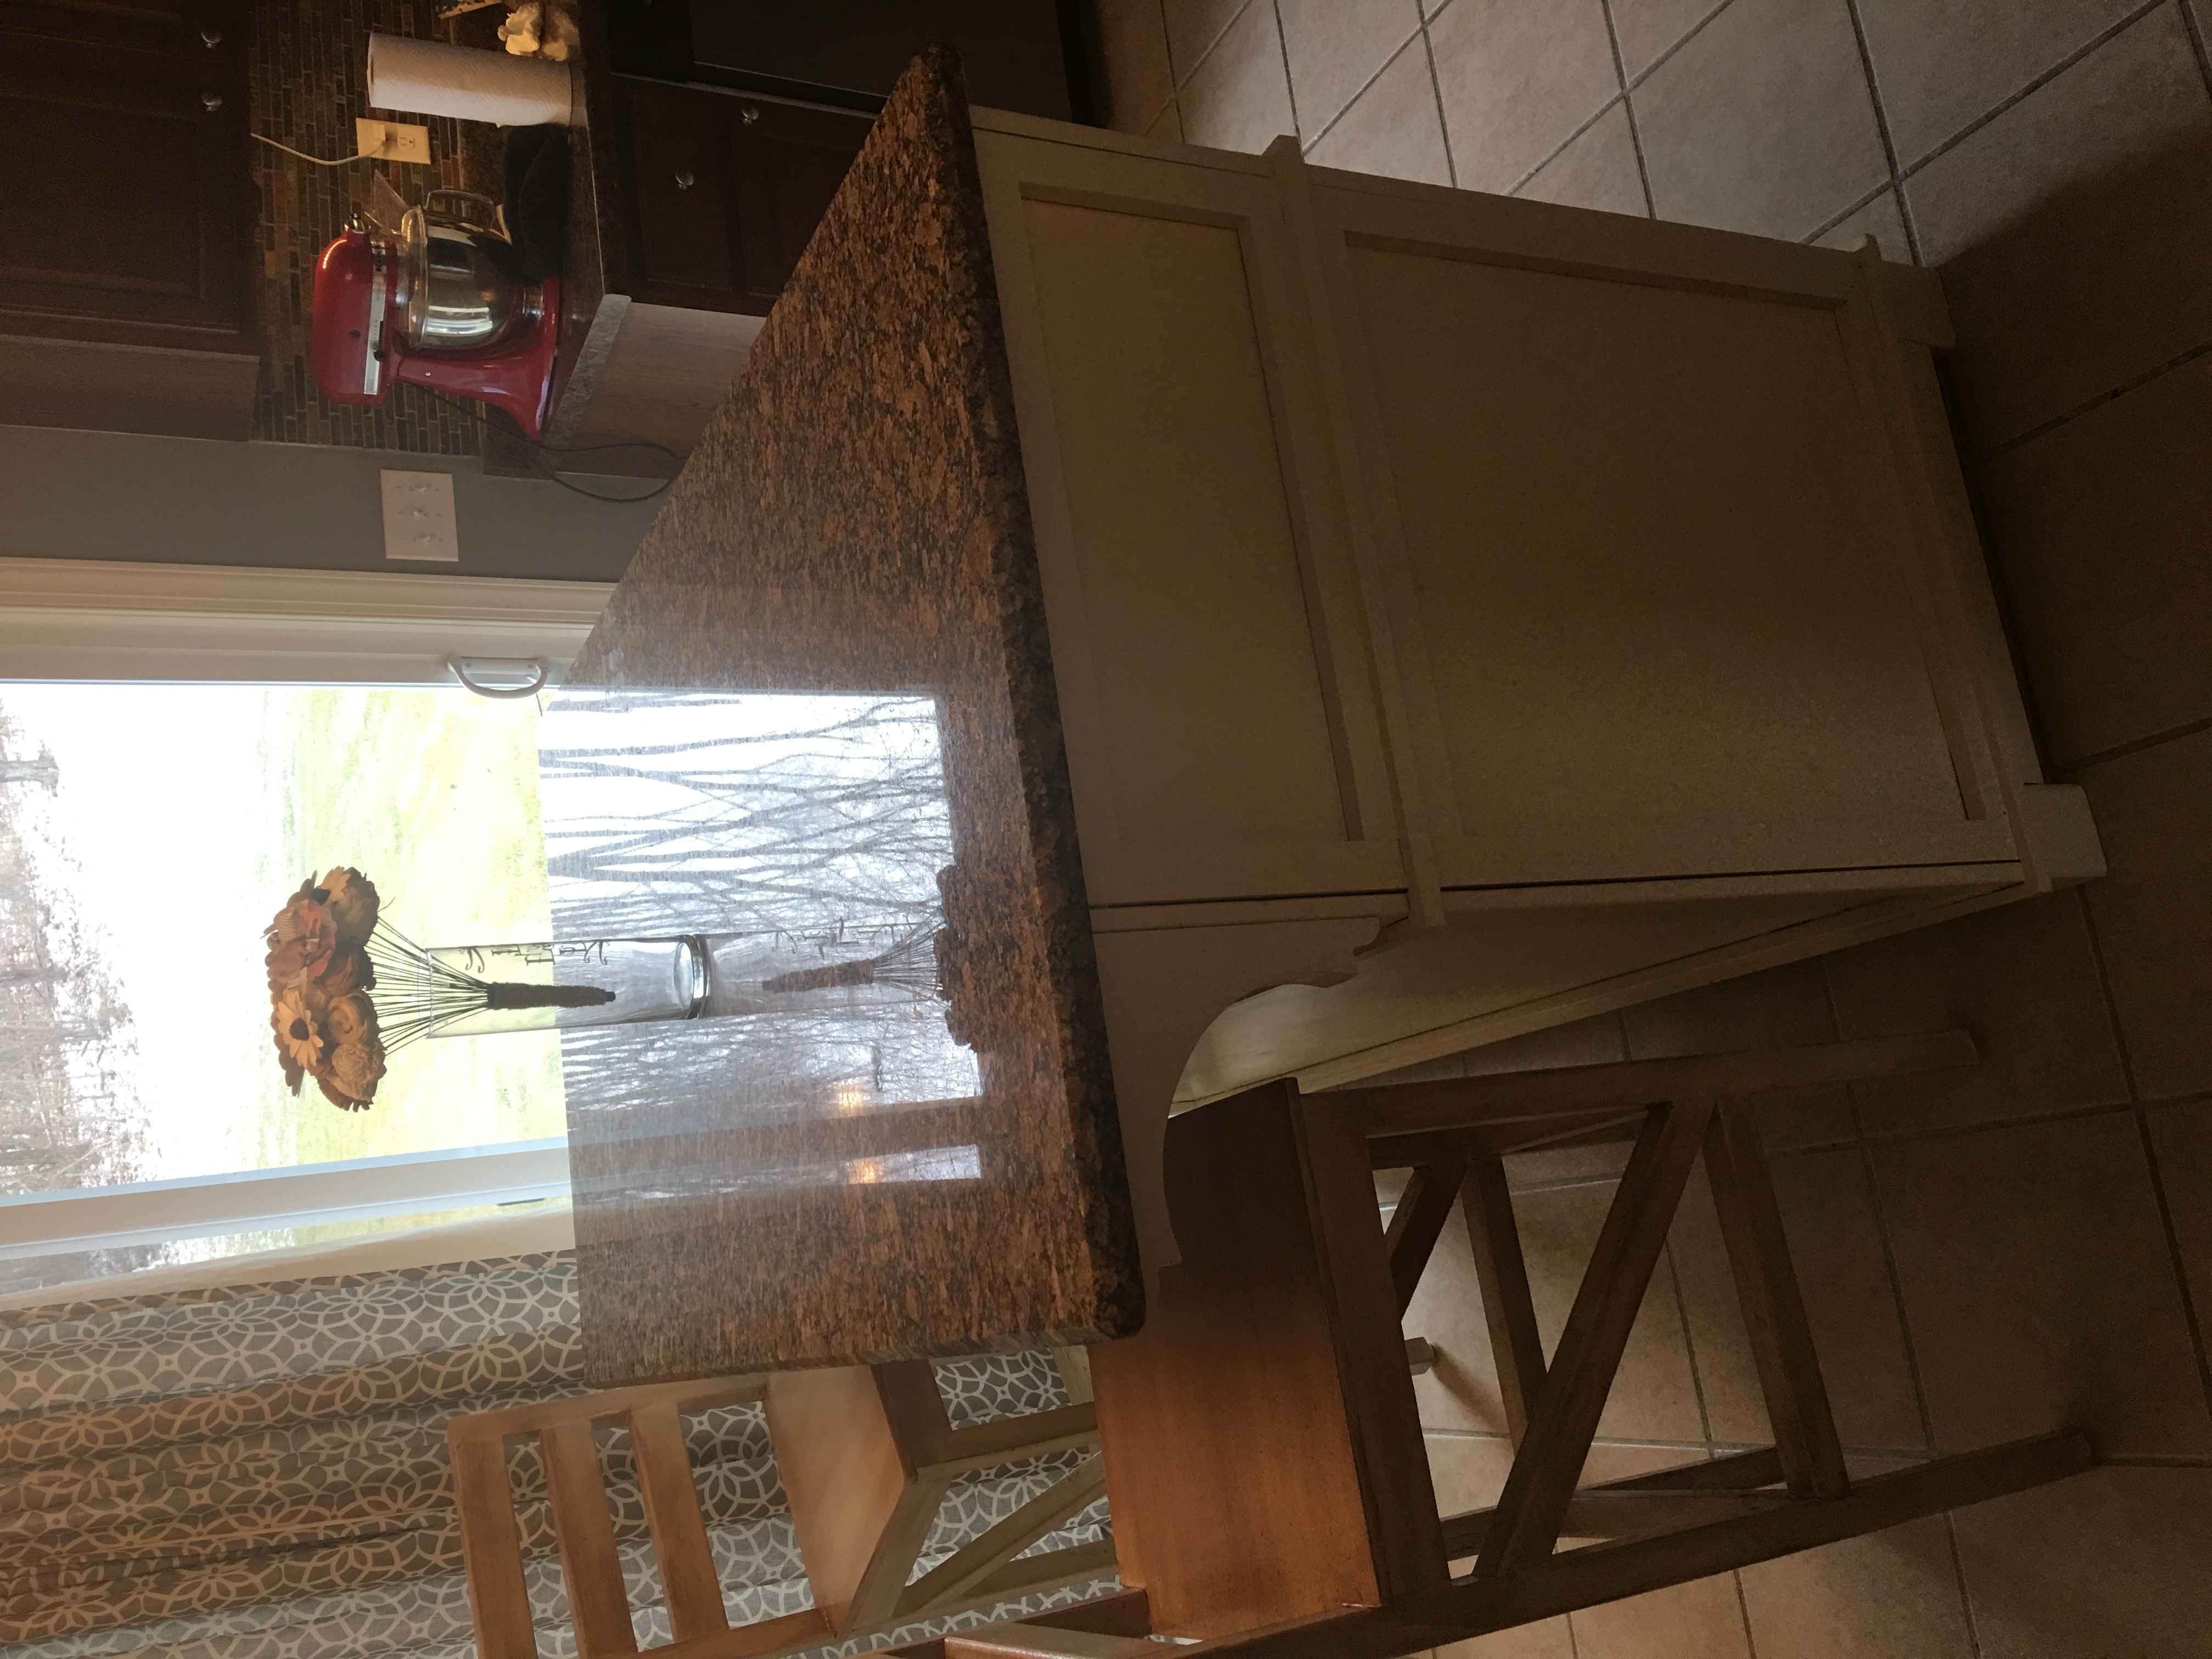
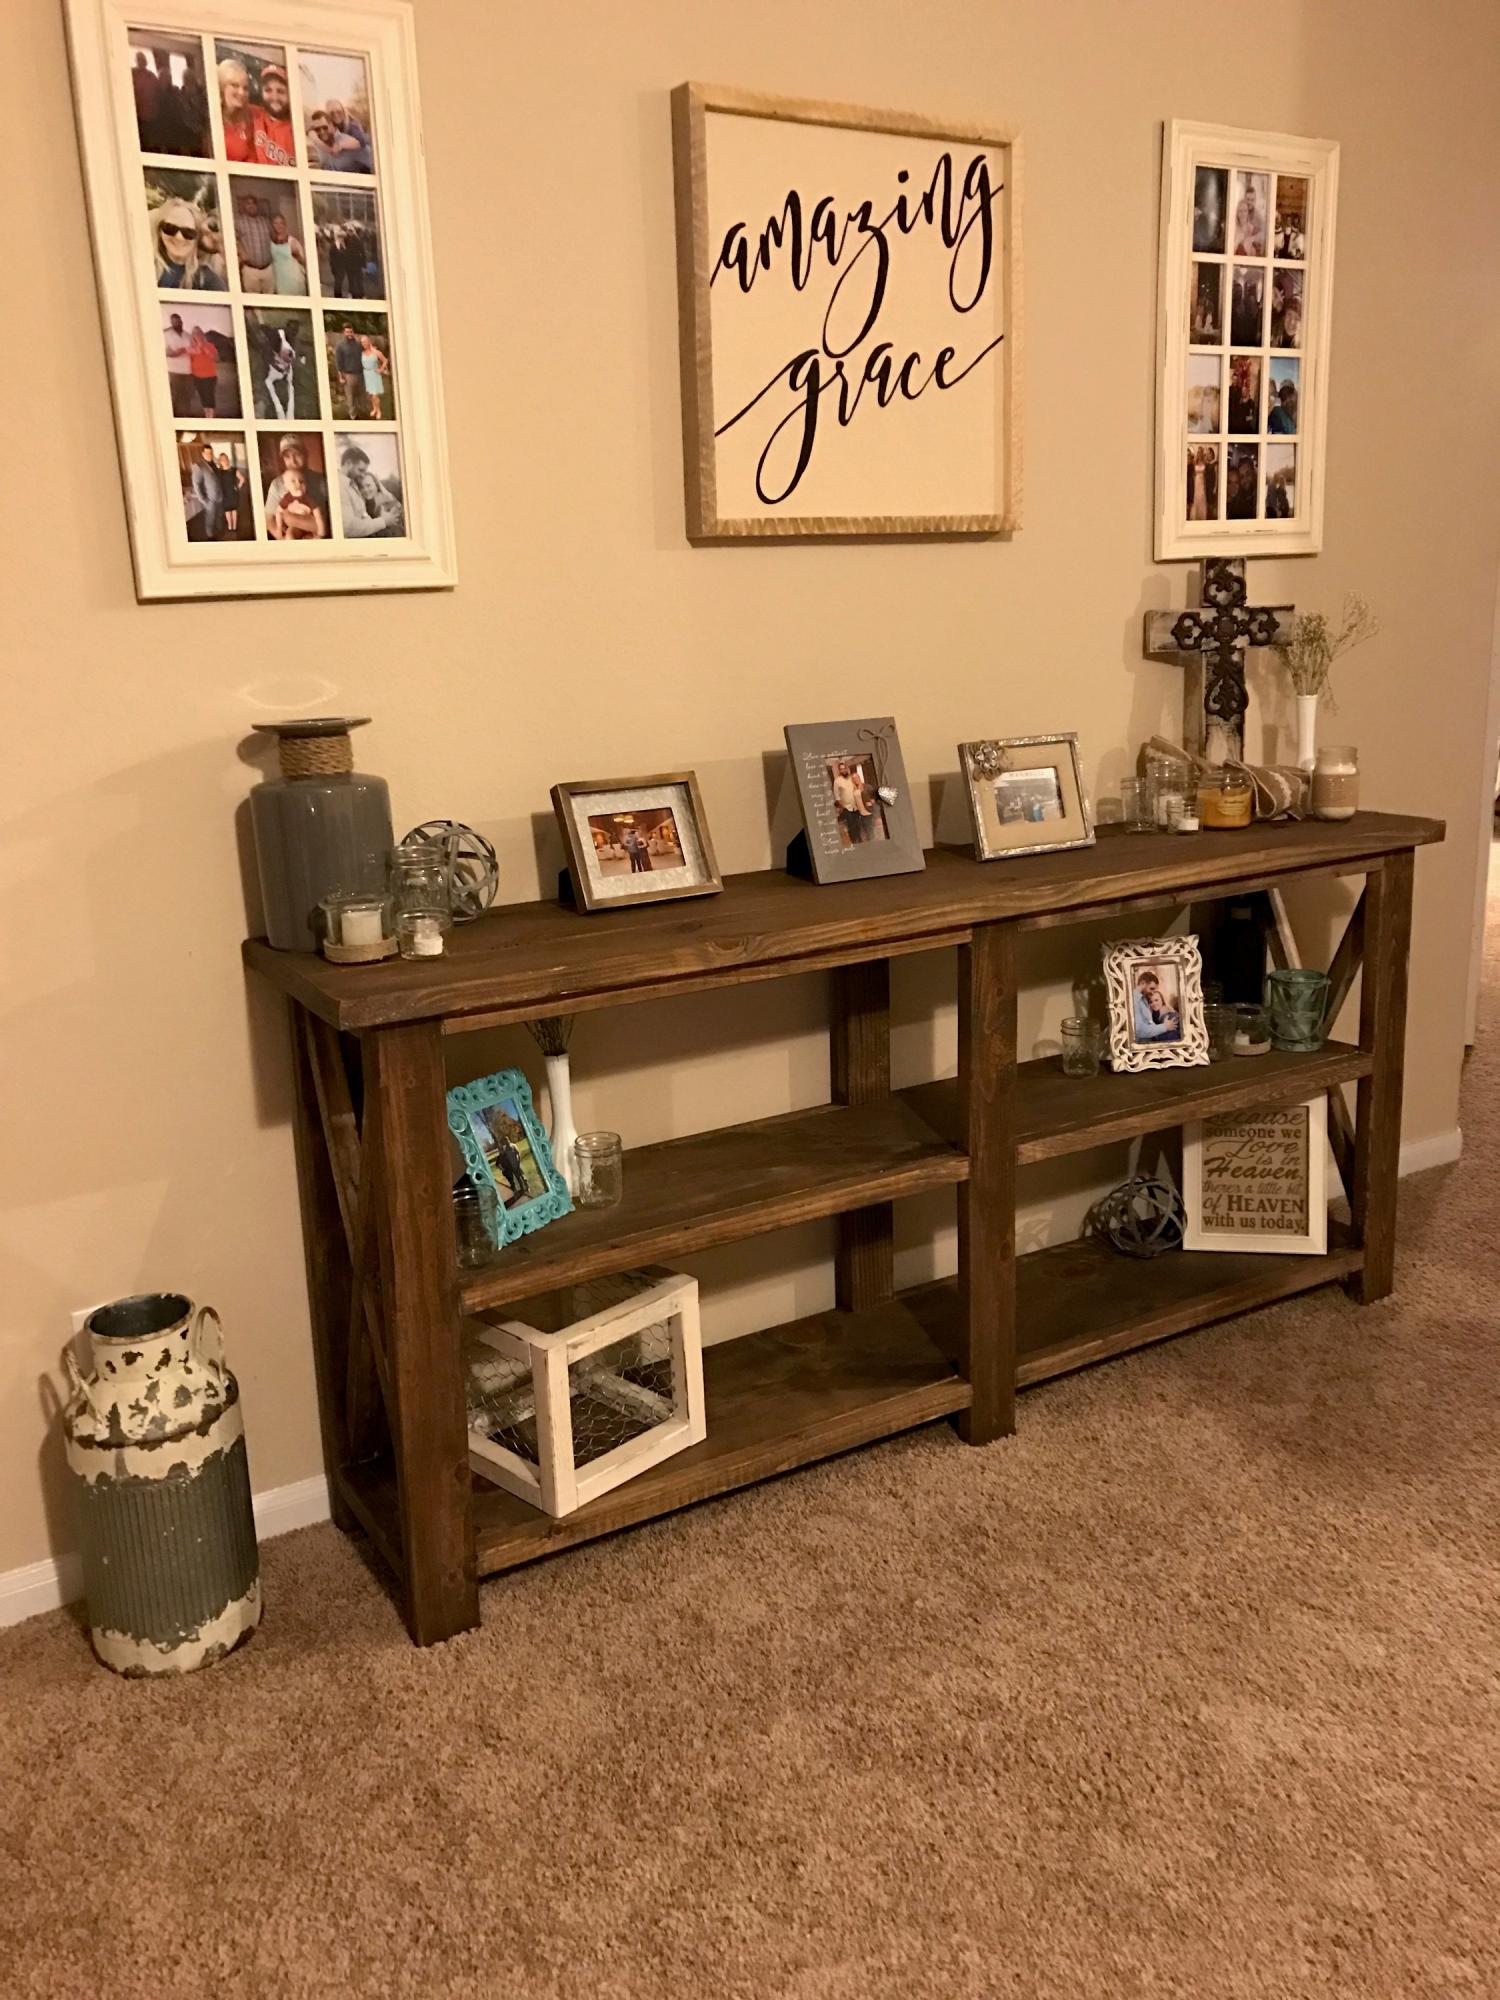
Weekend project worked out well. Also made the tall bar stools also found on Ana White! Topped with a granite countertop. In the middle, I went with a double trash can sliding cabinet. 

Estimated Time Investment
Weekend Project (10-20 Hours)
Recommended Skill Level
Advanced

Comments

Adding a hutch to a desk

Submitted by kristen on Thu, 11/29/2012 - 17:05

I bought a desk and chair for my daughter on Craigslist awhile back, but it did not include a hutch. I decided to add one and recently completed it...in addition to painting the desk a fresh white and then repairing the chair, painting it, and recovering the seat!

The hutch build was pretty straight forward and I used a Kreg Jig to assemble most of it. I built it to sit on the desk (not attached) but I included a cleat at the top to screw a couple of 3" screws into the wall studs to keep it in its place. It's nice and sturdy. I plan to add some puck lights under the bottom shelf soon.

The Lego house isn't quite up to Momplex standards :)

Estimated Cost
Around $75--with lots of extra for building other things
Estimated Time Investment
Afternoon Project (3-6 Hours)
Finish Used
Two coats primer and one coat of white semi-gloss paint.
Recommended Skill Level
Beginner

Christmas Tree Shelf

Submitted by Anonymous (not verified) on Mon, 01/02/2017 - 05:48

Ana, Thank you so much for the plans for yoru Christmas Tree Shelf. My niece is a huge fan of the Christmas all year round and now that she has her own place it was a perfect fit. I edited the bottom area so it woudl be able to sit on a table, she is currently in an apartment and does not want to attach much to the walls. Added the boards in the back of the two compartments so it can later be hung, and also predrilled holes in the shelf bottoms in order to crew in eye hooks to hang ornaments from if she likes.


CtL

Built from Plan(s)
Estimated Cost
$15
Estimated Time Investment
Weekend Project (10-20 Hours)
Recommended Skill Level
Beginner

Leaning desk

Submitted by Anonymous (not verified) on Sun, 09/13/2020 - 10:28

Love this desk and the plans are so easy to follow. Perfect for a small space.

Built from Plan(s)
Estimated Cost
$50
Estimated Time Investment
Weekend Project (10-20 Hours)

Kitchen Island

Submitted by grant862 on Sat, 12/01/2012 - 19:05

Stuck to the plan as described, but I used my Kreg jig to use pocket holes where I could. I used 1x4s for the shelves and joined them together with pocket holes. This made it much stronger. Without joining these boards, the shelves are kind of flimsy, not sure how much weight they could support without some type of support system. I added an extra 2x4 to the top, this made it overhang about an inch on the front and back. I used 20" drawer glides. Also, I notched out the side supports for the 1x4 shelves 3/4" so the shelves sit flush with the side supports.

Built from Plan(s)
Estimated Cost
150
Estimated Time Investment
Week Long Project (20 Hours or More)
Finish Used
Sanded, then painted bare wood with 2 coats of paint, color was one of the pottery barn 2012 colors. I filled in the joints between the 2x4s for the top with stainable woodfiller, then sanded for like 2 hours with 80 grit, then finished off with 220 grit eventually, then I did 2 coats of Minwax Special Walnut stain. I topped that with 3 coats of Minwax Polycrylic Satin.
Recommended Skill Level
Beginner

Comments

maculpepper

Fri, 12/27/2013 - 12:35

Just had someone build this for me, I'm wondering what paint color is on the bottom of yours? It looks great with the stain you chose!

Jamison

Sun, 03/15/2015 - 17:00

Great table! I'm currently building a similar kitchen island and was debating going the cheaper route of utilizing 2x4s instead of making a butchers block. How did the wood filler between the boards work out for you as a flat surface? Has it cracked at all? Thanks in advance!

Quick Pallet Board Stands

Submitted by sraper2 on Mon, 09/15/2014 - 21:05

Last week I picked up a few pallets while I was at Ace and made these cute stands with some of the wood today.  I spray painted a few cans and threw some flowers in them and have a beautiful centerpiece for my Farmhouse table!  I built both of these in about 10 minutes.

Estimated Cost
$Free.99
Finish Used
Lightly sanded and sprayed with a sealer
Recommended Skill Level
Starter Project

Farmtable and Bench

Submitted by purdyc on Wed, 01/04/2017 - 06:37

Ana

This is a farmtable that i made from your plans, along with the bench also made from your plans.  Turned out pretty good, worked on it mostly on the weekends.  Christmas present for my son and daughter-in-law.  Your website is full of great ideas and plans, thank you.

Chuck

Estimated Cost
For bench and table est $300
Estimated Time Investment
Week Long Project (20 Hours or More)
Finish Used
Minwax Walnut Stain
Recommended Skill Level
Beginner

Brookstone Desk “Farmhouse Style”

Submitted by boneill on Tue, 09/15/2020 - 16:48

Gray / White Brookstone Desk “Farmhouse Style”. Super fun desk build . I went with a soft close set of drawer slides for a nice drawer closing . I used pocket holes to attach the table top but for the rest I followed the plans. I’ll be uploading a video step by step how to build this to my Instagram (bryan_oneill907). Link below .

Built from Plan(s)
Estimated Cost
$150
Estimated Time Investment
Weekend Project (10-20 Hours)
Finish Used
Gray / White.
Recommended Skill Level
Intermediate

Farmhouse Queen

Submitted by LacyLou on Wed, 12/05/2012 - 16:25

This bed was made from fence scraps and leftovers and one pallet. The only pieces I bought were the 2x6's! I love how it turned out!

Built from Plan(s)
Estimated Cost
50
Estimated Time Investment
Weekend Project (10-20 Hours)
Recommended Skill Level
Beginner

Comments

Fun and Easy Desk Project

Submitted by dadto3kids on Thu, 09/18/2014 - 15:33

I truly enjoyed using these plans to make this project mostly because I made it with wood that I got from a friend and reclaimed from other projects.  The top of my desk is made with reclaimed 3/4 X 5 1/2 that wanted to curl and twist when I glued them together but after sanding and finishing they came out great and add a lot of character to the overall project.

Built from Plan(s)
Estimated Cost
$20 for stain and polyurethane
Estimated Time Investment
Weekend Project (10-20 Hours)
Finish Used
Minwax Dark Walnut and Minwax Satin Polyurethane
Recommended Skill Level
Starter Project

King Size Headboard

Shiplap inspired headboard.

Estimated Cost
$75
Estimated Time Investment
Day Project (6-9 Hours)
Finish Used
Semi Gloss White Umber
Recommended Skill Level
Intermediate

Rustic X desk

Submitted by Anonymous (not verified) on Thu, 09/17/2020 - 16:47

Great desk, easy build and very solid.

Only issue with the plans was not enough 2x4 (unless I cut it wrong).

Built from Plan(s)
Estimated Cost
$80
Estimated Time Investment
Afternoon Project (3-6 Hours)
Finish Used
Smoke stain
Recommended Skill Level
Beginner

Rustic X Coffee Table

Submitted by aross1000 on Sun, 12/09/2012 - 13:16

To build my Rustic X coffee table I went about it as cheap as I could. I found all of my wood either through crap piles at lumber yards or from free wood piles on craigslist. The interesting part was trying to find the pieces for the top which I had to improvise with the two 2x3 pieces in the middle of the four 2x6's also instead of using the two 1x42x12 pieces for the bottom shelf I could not find what was asked for so I used a few 1x4's which worked out great. The only other change I made to the plans was to change how the X's attached to the main frame. The original plans wanted the X's to butt up against the sides while I cut them to be flush with the top and bottom of the frame.
The only things that I purchased were the bracers, steel wool and vinegar and tea for the stain, and the screws. The only tools I own are a measuring tape and a pencil, luckily I have a friend with a full woodshop who helped me out. I followed the instructions on http://thefriendlyhome.blogspot.com/2012/07/how-to-oxidize-wood.html to make the stain. I left a wad of steel wool in white vinegar (about 2/3 of a pasta sauce jar full) for about 5 weeks. After all the cuts had been made and the table put together I sanded it by hand and then stained it. After the stain had dried I waxed the surface with Minwax paste finishing wax. I would love to enjoy my table but for lack of room in my 160 foot dorm room I've had to leave it in a friends apartment for now.

Estimated Cost
Since I found all my wood, I only payed for the stain and screws so roghly $30
Estimated Time Investment
Weekend Project (10-20 Hours)
Finish Used
http://thefriendlyhome.blogspot.com/2012/07/how-to-oxidize-wood.html
I followed this website almost exactly. I left my steel wool in for about 5 weeks. I used an earl grey tea and put on 2 coats for the whole table except for the lighter pine which made up the bottom shelf in which I put on 3 coats, I now wish that I had put on four or five to get the colors closer, these ended up lighter than the rest of the table. I did not sand the table after I applied the tea. After the tea dried I then applied the oxidizing agent to the entire piece. I put on a second coat of oxidizing agent to the bottom shelf which did not seem to make a huge difference. After this had dried I took a old rag and the minwax finishing paste and went to town on the top. I put on two coats for the top and just a single coat everywhere else (CAREFUL THIS STUFF IS POWERFUL APPLY IT IN A WELL VENTILATED AREA) oh and you might want to work out for a good month if you are planning on buffing by hand, I was sore! When I was done with this I let it dry and brought it inside to show it off. To my dismay I woke up the next morning to discover that my little brother and his friends had spilled something on the table that ruined the stain, this was extremely disappointing, but I took it back out and resanded the stained part and reapplied the tea, oxidizing agent and wax. The redone spot ended up close to the rest of the table but no one else could tell because it is supposed to look rustic. My other frustration was that my friends burnt a candle in a glass jar on the table which kind of burnt a half ring on the table top, but again it just adds to the rustic look I guess.
Recommended Skill Level
Intermediate

Comments

Pamela M. (not verified)

Mon, 12/10/2012 - 15:47

Your coffee table looks awesome, and it's so great that you were able to get free/cheap lumber. I wanted to share a little info that I learned about the vinegar stain. I used it on a picture frame and wanted a little more weathered look. I had read that lemon juice will reverse the oxidation, and sure enough, it did just that. I ended up with a beautiful frame with streaks of natural wood through it, where I brushed on some lemon juice. Perhaps your brother and friend spilled lemonade or other citrus drink that reversed the oxidation.

Industrial Shelf

Submitted by aclayton on Sat, 09/20/2014 - 16:00

I took the plans for the indutrial cart and modified them just a little. I needed a shelf, not a cart, so I left the casters off and I made mine 4 feet tall and 5 feet wide. I just had the guys at Lowes cut some 2x12x10's in half for me and the metal angles were already 4 feet long, so I didn't even have to cut them! 

Built from Plan(s)
Estimated Cost
I spent about $70 for the lumber, angles, and wood stain
Estimated Time Investment
Afternoon Project (3-6 Hours)
Finish Used
I coat of Minwax "wheat"
Recommended Skill Level
Starter Project

Comments

jpskitts

Thu, 11/06/2014 - 11:41

You did a fantastic job and I love the stain color you used!  Just wondering if you have had any issue with the shelves bowing or sagging in the middle?  I am looking to build two of these to hold books in my living room.  Nothing too heavy... just curious to see how they are holding up.

Rustic X console table

Submitted by Anonymous (not verified) on Sun, 01/08/2017 - 19:17

Built this for my wife. Had to modify the dimensions. She wanted it to be 36" tall and 80" long.

Estimated Cost
~$70
Estimated Time Investment
Weekend Project (10-20 Hours)
Recommended Skill Level
Intermediate

Email Me
Free Plans

Get new plans sent right to your inbox for free!

    We won't send you spam. Unsubscribe at any time.