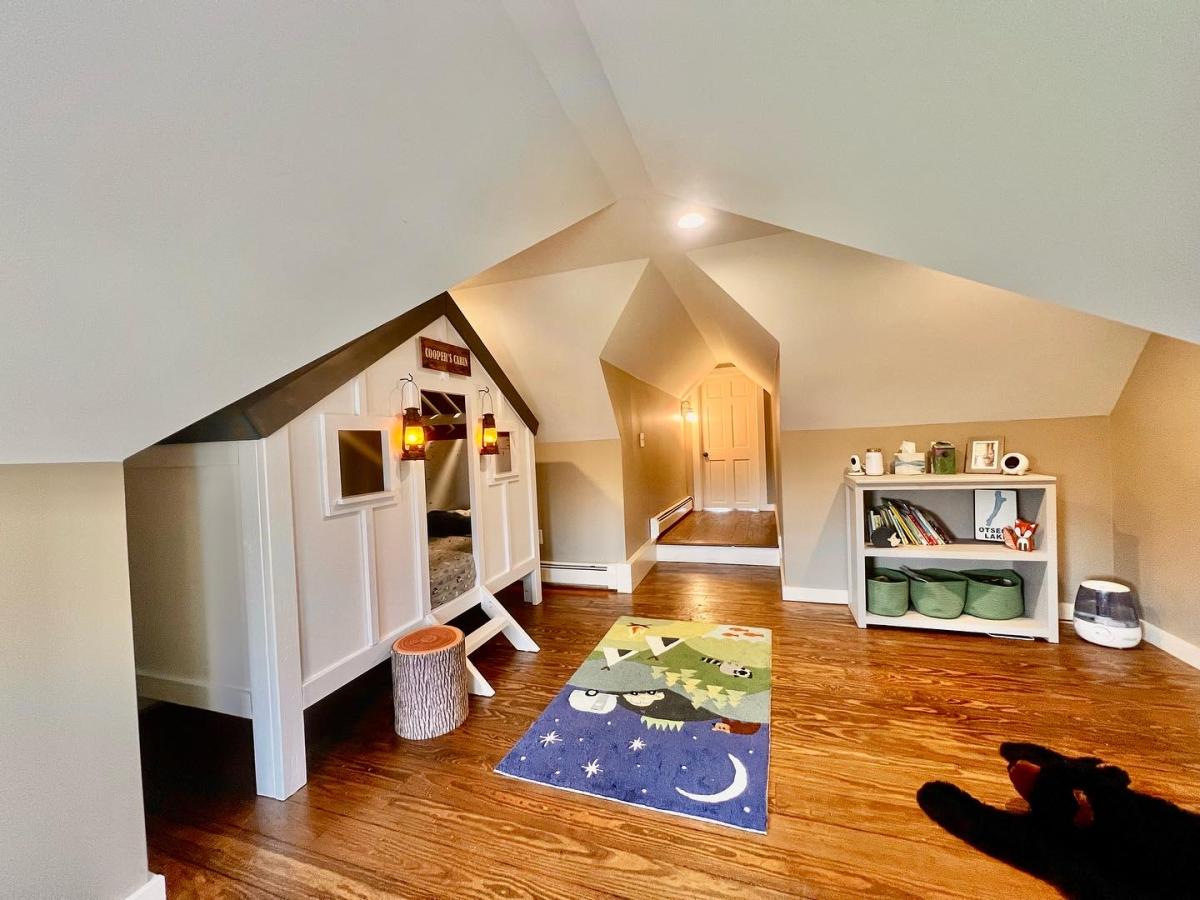
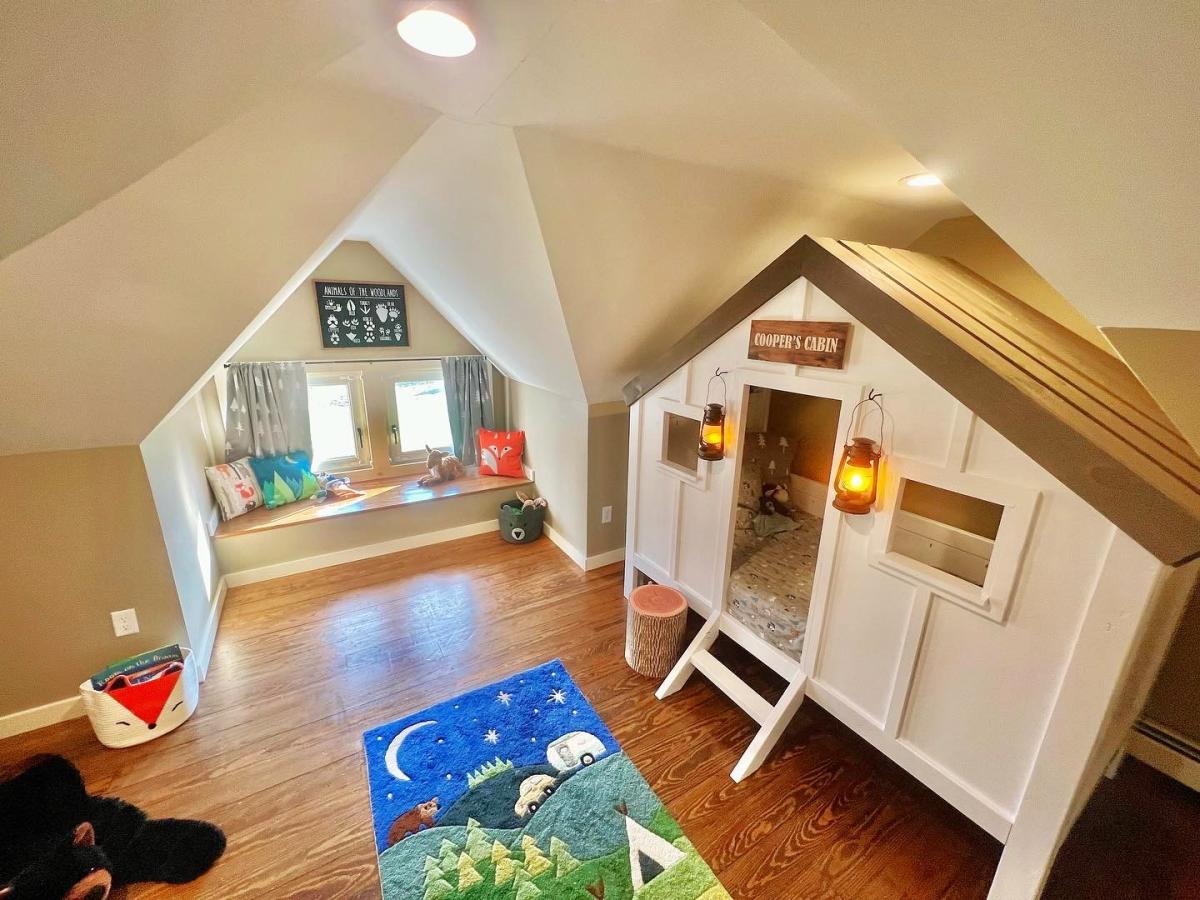
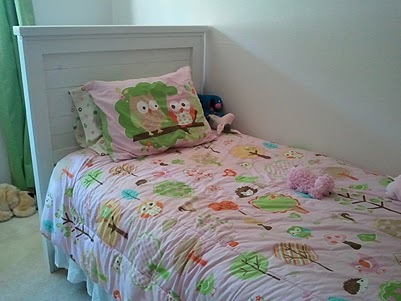
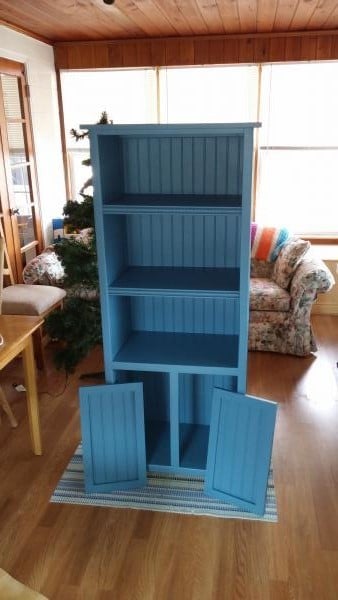
Cabin Bed
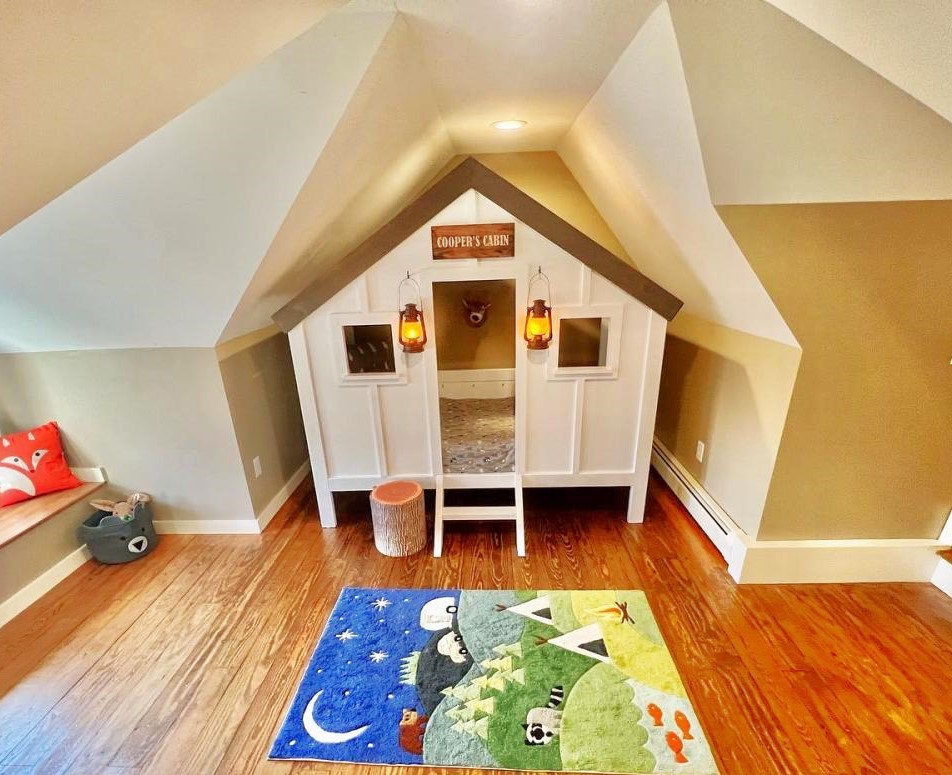
Cabin Bed for toddler. Alternate take on the Jen Woodhouse bed. Built to fit the space
Built from Plan(s)
Cabin Bed for toddler. Alternate take on the Jen Woodhouse bed. Built to fit the space
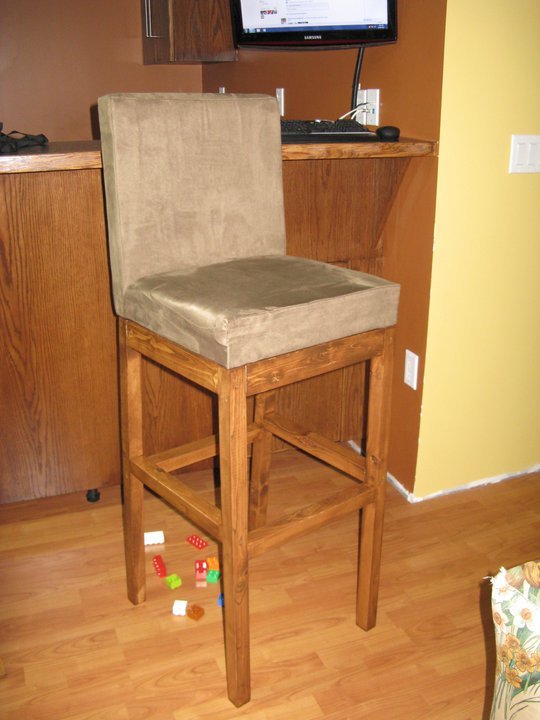
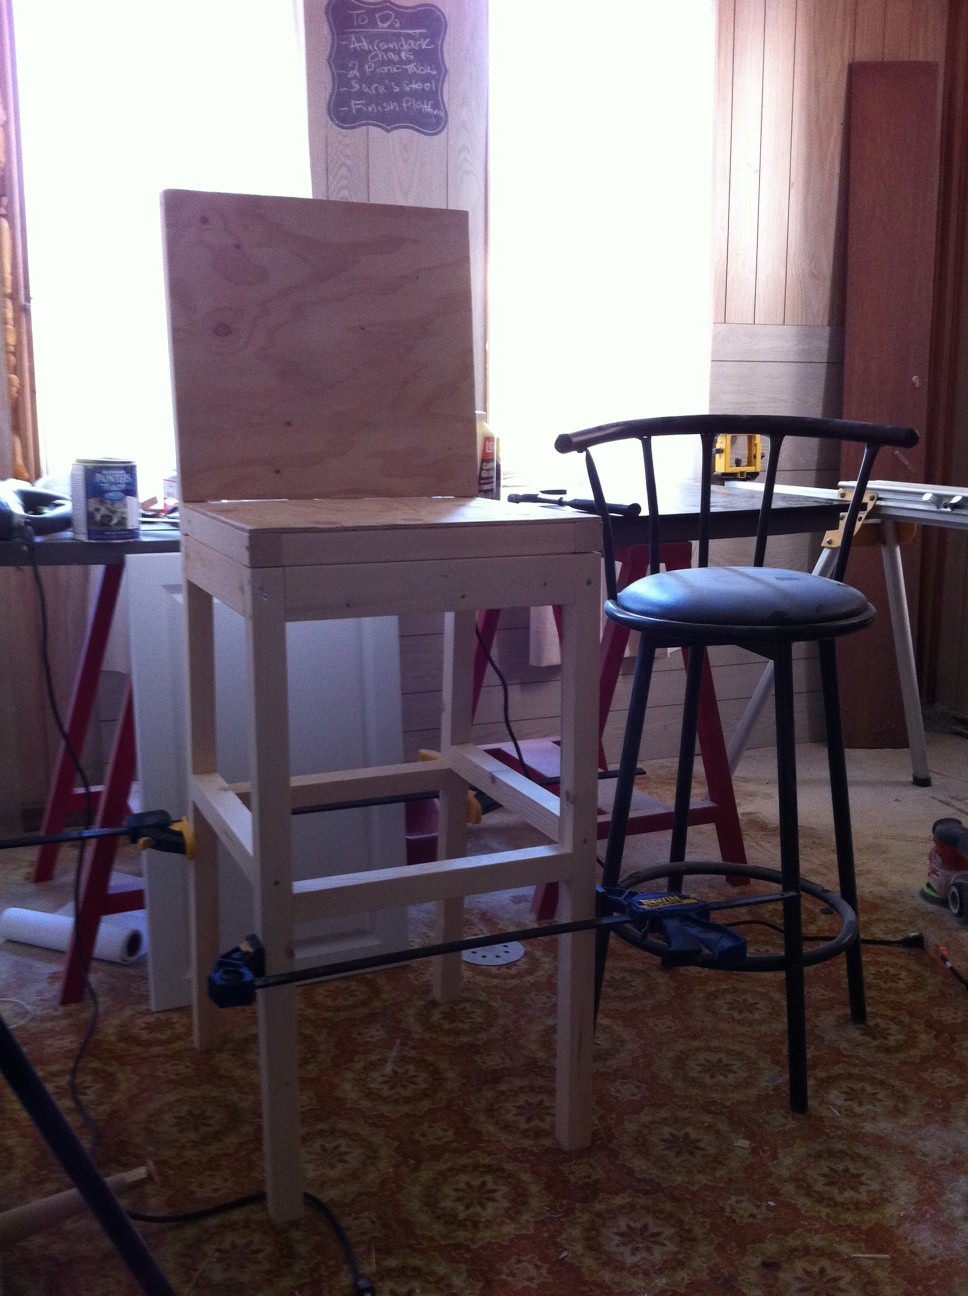
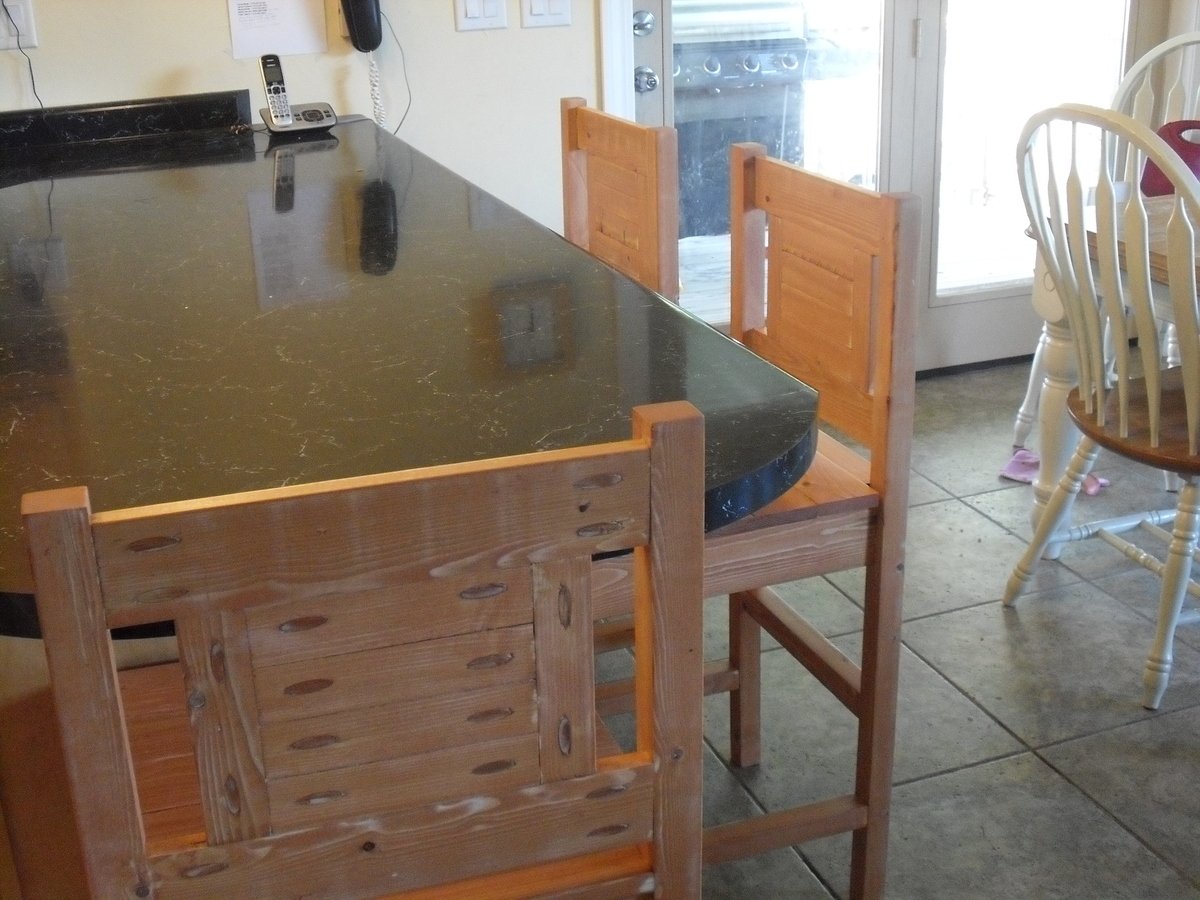
My sister needed an extra tall stool for the bar her husband built, so I adjusted the Parson Chair plans to make them fit. I included the Sketchup model that I used in my blog post.
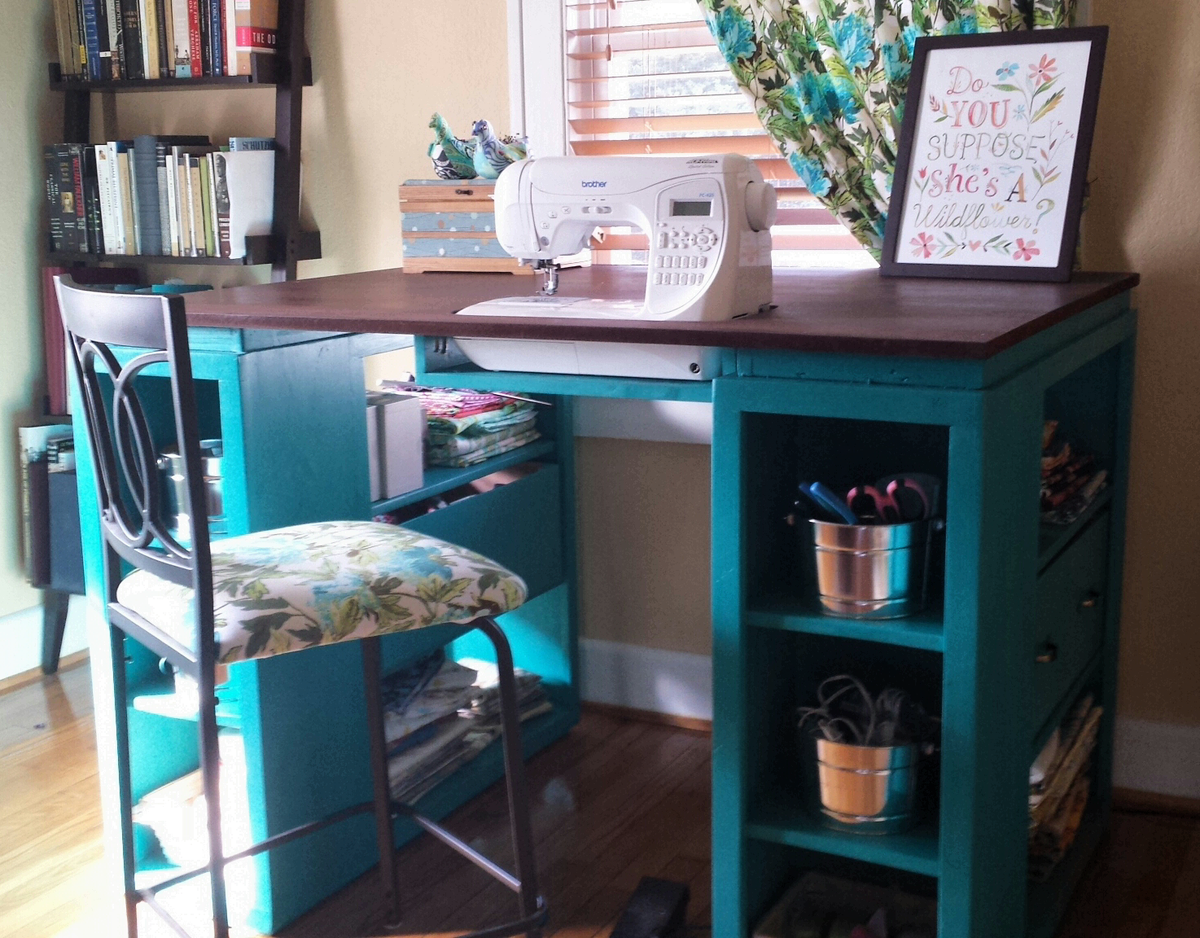
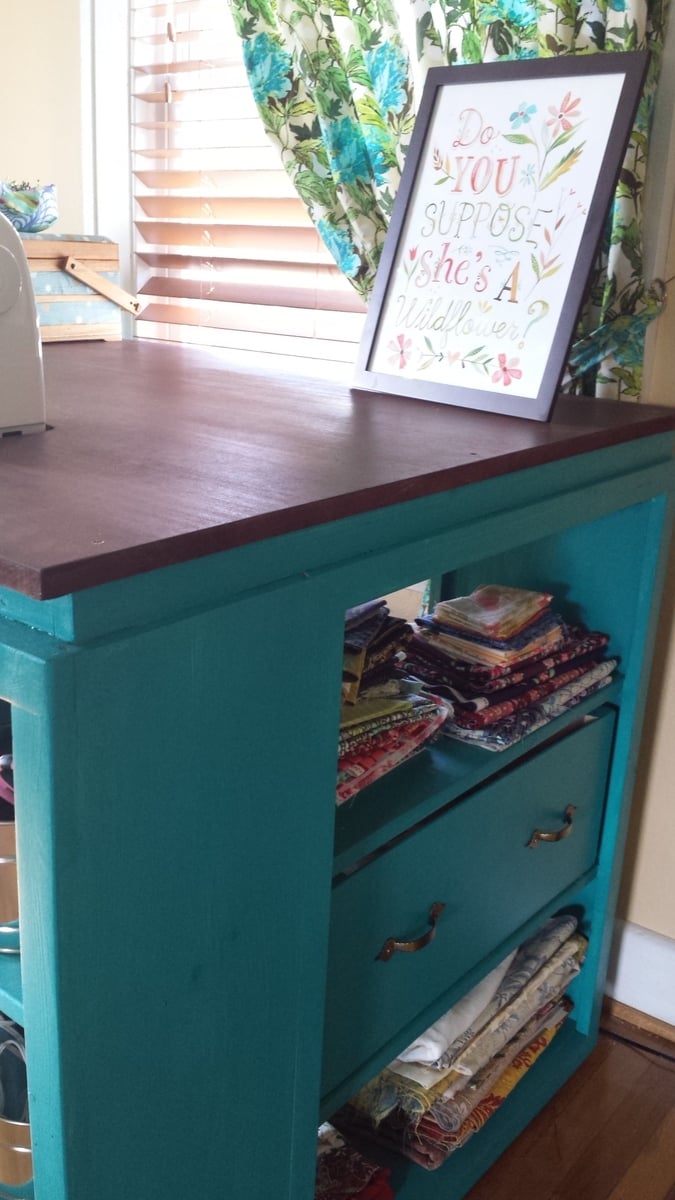
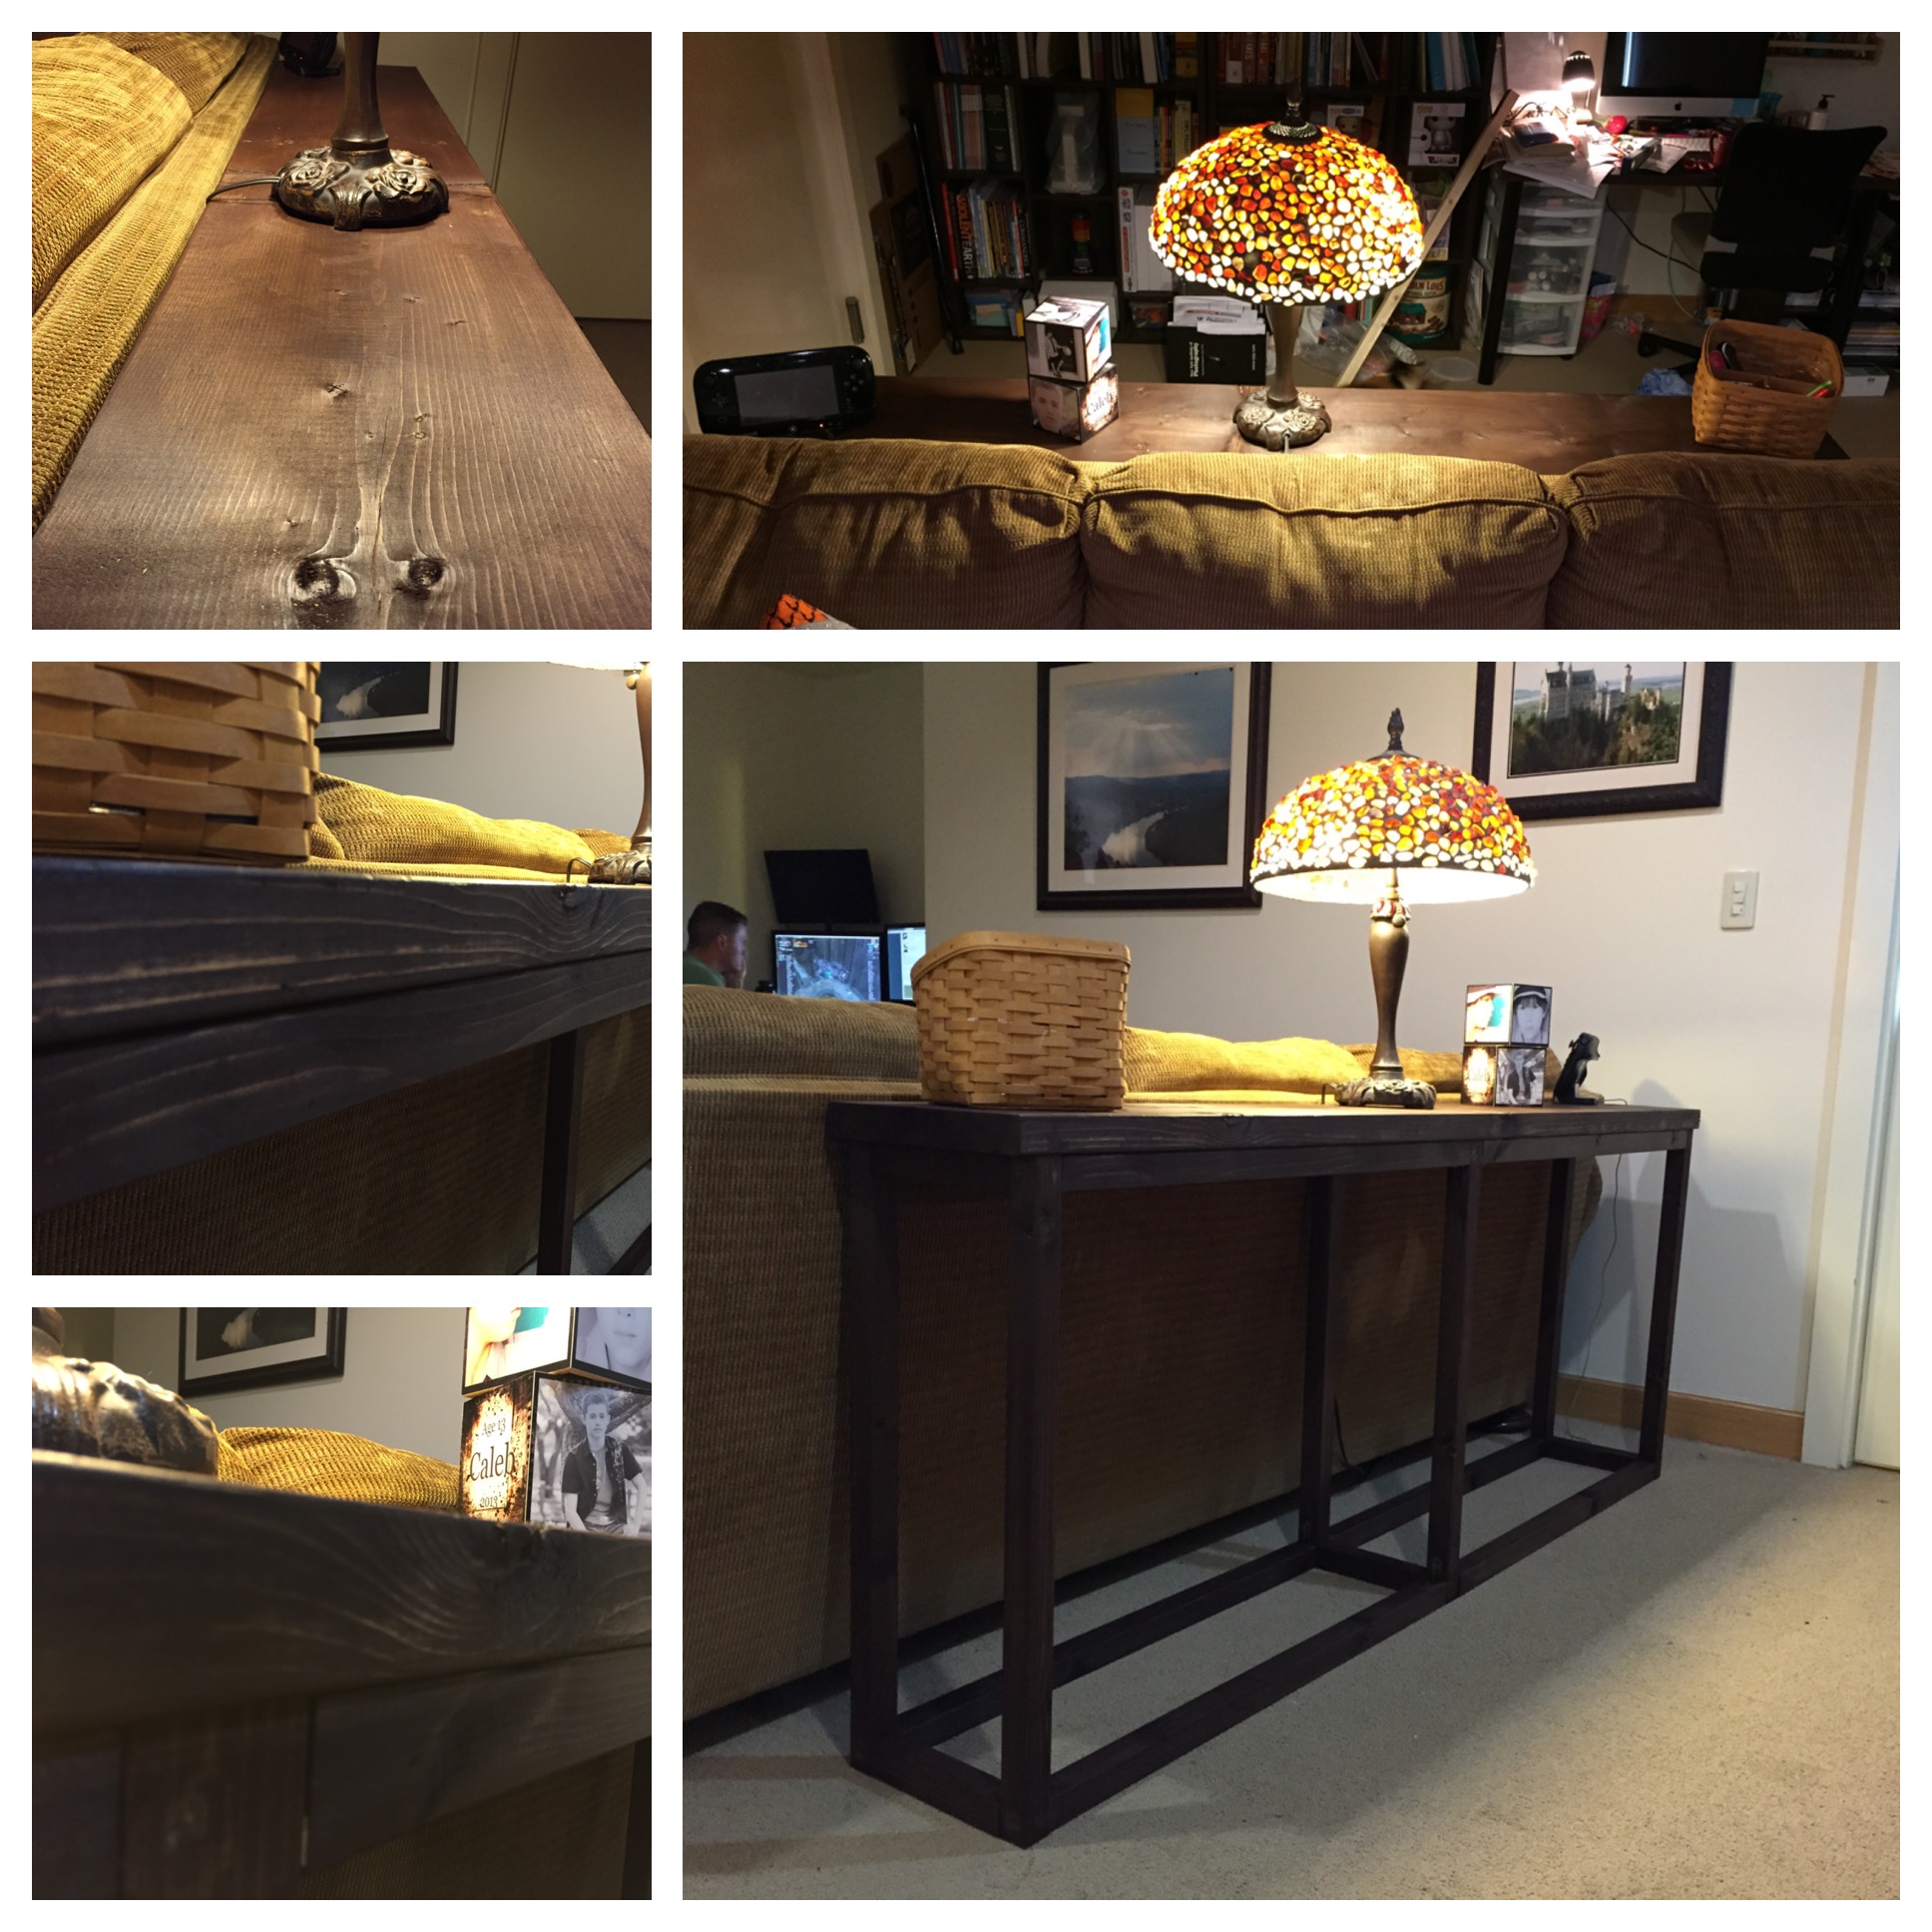
I have been looking at sewing furniture for years, but the prices always made my jaw drop. I have a small craft room, so I needed a table that could also triple as a cutting table and fabric storage. Thank you so much to Ana White for this plan! I built exactly to the plan in The Handbuilt Home, and it's the PERFECT size.
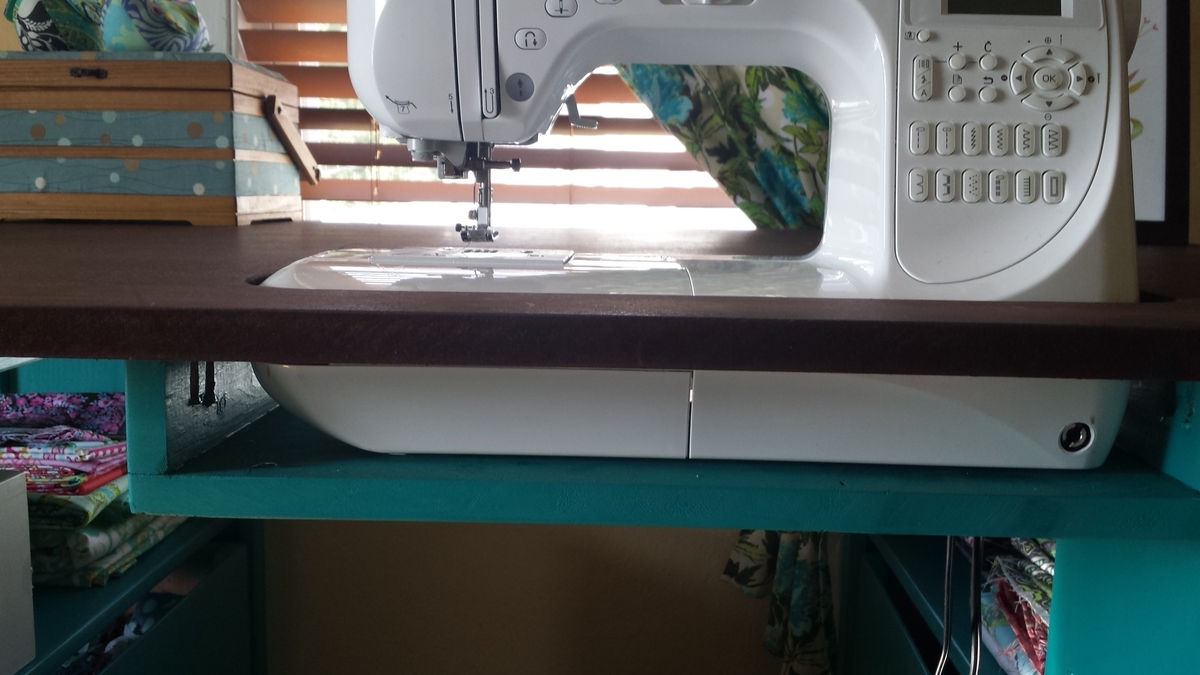
So the sewing machine can sit flush with the top, making working on big sewing projects way easier, I traced the outline of my machine on the MDF and cut it out with a jig saw. Then I built a small shelf using a 1x12 scrap and 2 1x3 scraps. Putting the 1x3s on top of the 1x12 made the shelf 3.75 inches deep, which is exactly the depth I needed. I attached it to the underside of the tabetop using a pockethole jig and screws.
I built 2 boxes using 1/4 inch plywood, and installed drawer pulls on them, giving the illusion that the table has 2 drawers built in. This is where I keep my ugly stuff--interfacing and fabric scraps.
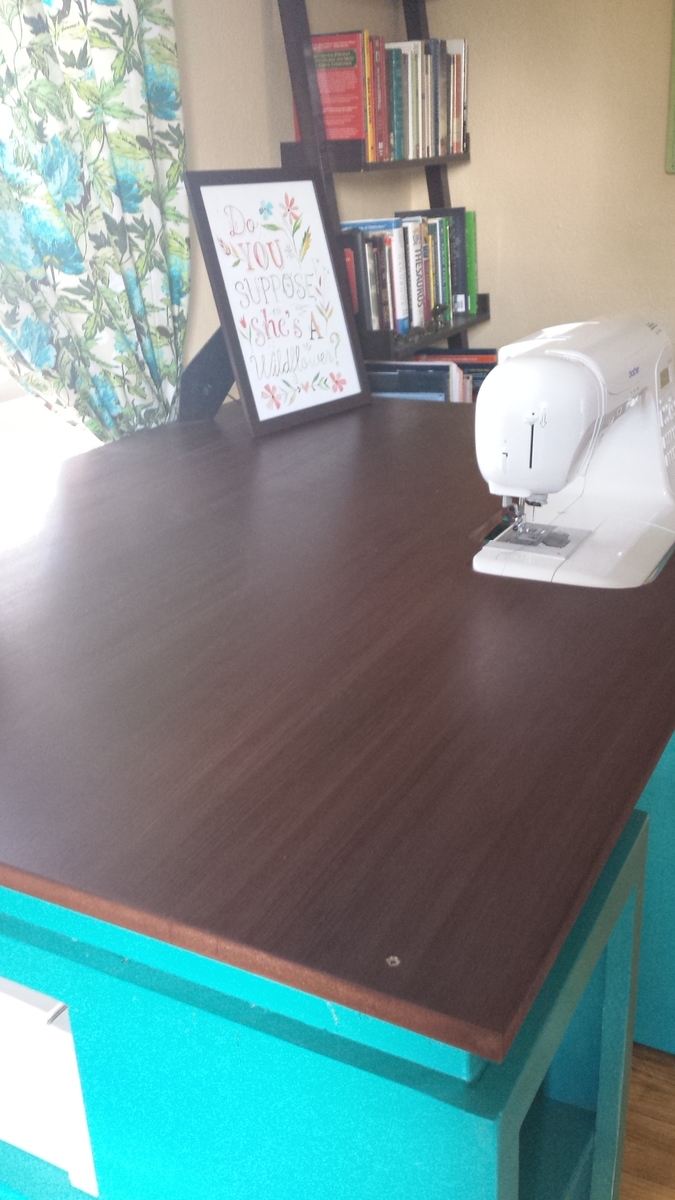
I got the color scheme for the table from the entryway console plan in The Handbuilt Home. In order to make the MDF top look like it had a wood grain, I applied mahogany gel stain with an old washcloth in very thick strokes that spanned the length of the tabletop. It soaked in and lost the "grain" look in some places, but the majority still looks like wood. I did have to apply several coats of polyurathane over the stain; the MDF has a prickly texture that grabs fabric and makes it hard to feed through the sewing machine.
My only complaint is that I didn't quite think through the fact that seating is bar height and I'm 5'7". It's a little difficult to reach my sewing machine pedal. I may build a small stool for the pedal to sit on so I don't have to half sit/stand to sew.
This is the first woodworking project I've done alone from start to finish: from going to Lowe's and picking out the wood, to cutting the wood with a circular saw, assembly, and finishing. (My fiance did carry it up the stairs for me. :) )
I'm so in love with this table! And now to finish the quilt I started 6 months ago....

Mon, 09/23/2013 - 07:40
I really like your colors! And that drawer idea is so clever! Nice work!
Val
artsybuildinglady
Mon, 09/23/2013 - 15:22
I love this idea!! I too have wanted a sewing table for a long time but the prices of them take my breath away. I may have to make myself one! Thanks for the inspiration!!

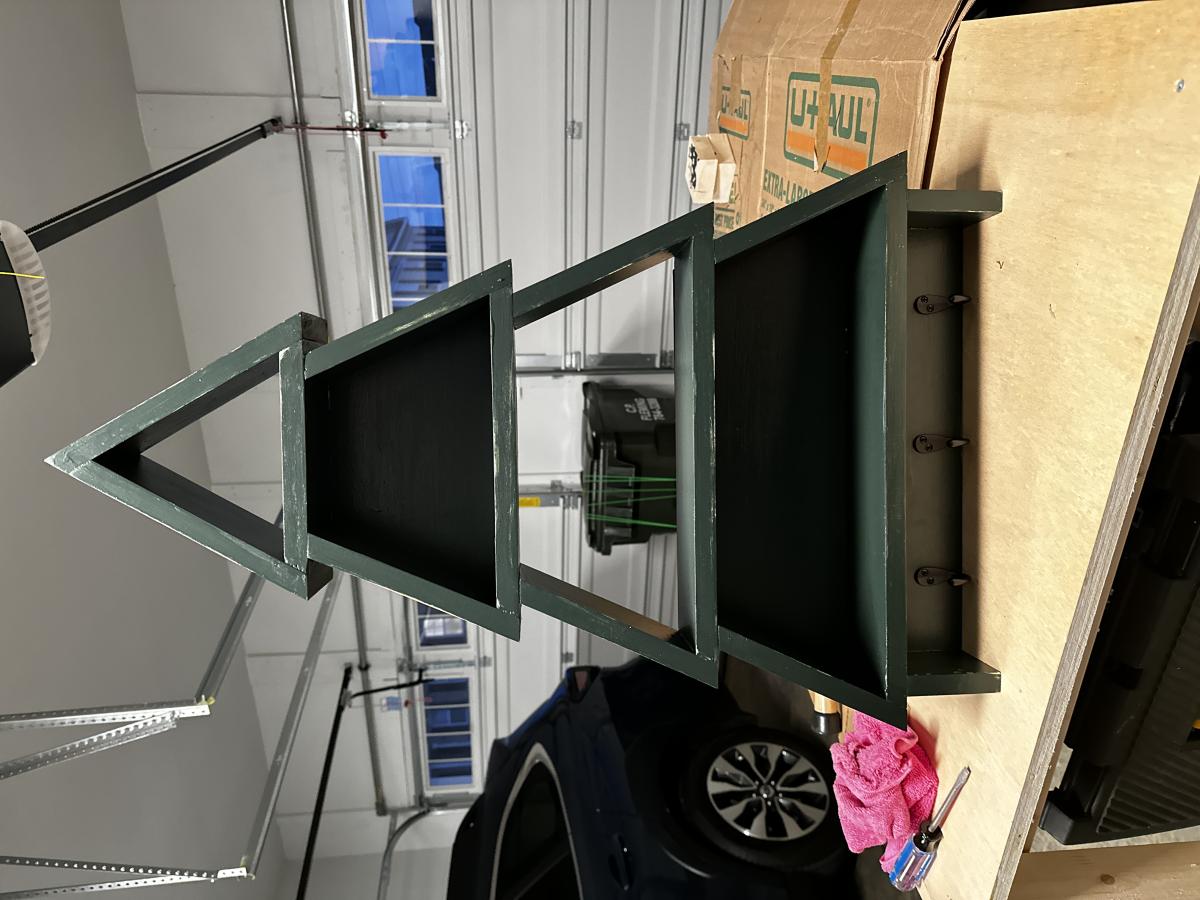
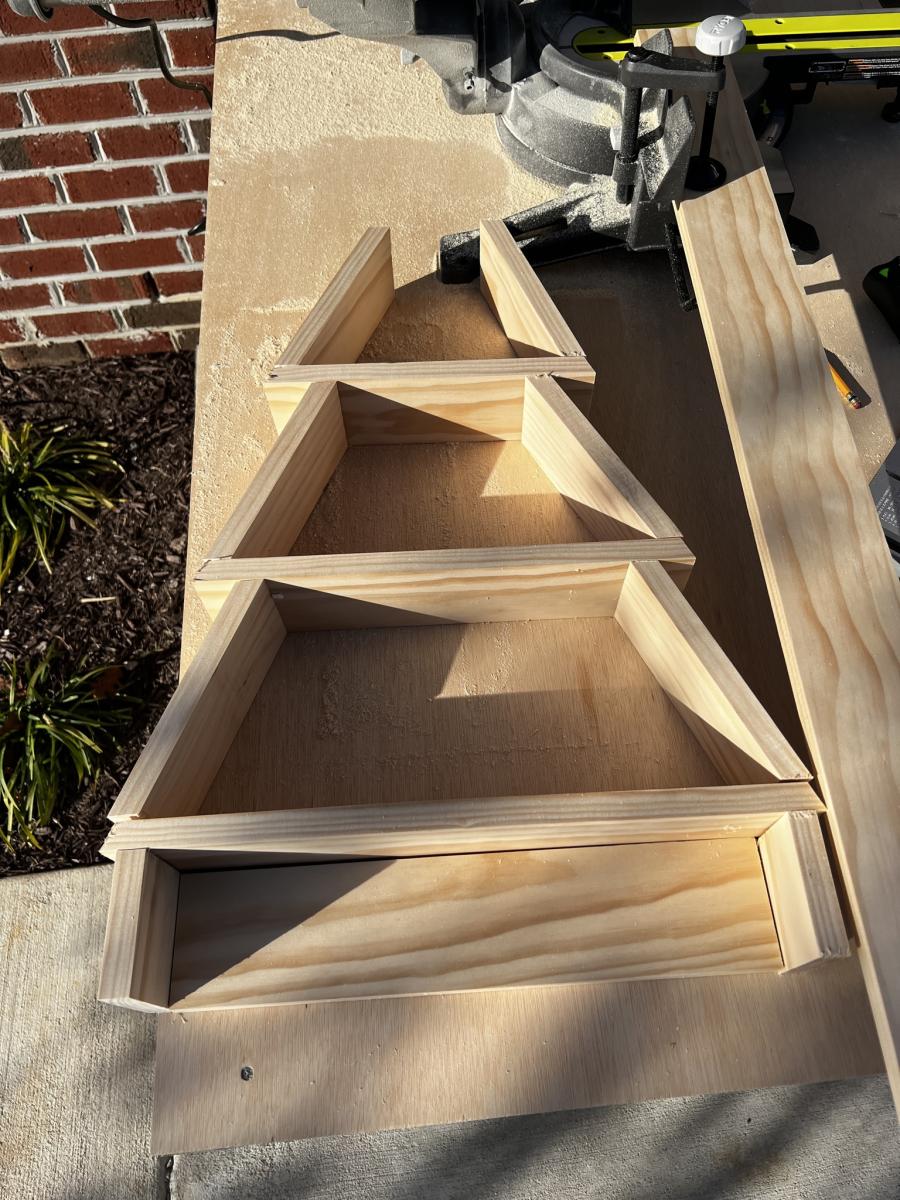
I made this Christmas tree shelf using the plans here.
I modified it by adding on two shelves so that it could accommodate the 6 hooks I needed for my family's stockings. I also hot glued a string of lights to the perimeter. This is serving as our Christmas tree due to space constraints, so I wanted it to be "fancier" and more like an actual tree.
I think I did ok for my first real build and my family seems to really like it.

Sun, 12/06/2015 - 18:37
You did awesome!!! It looks great and I love how you just made the tree larger to accommodate your needs. Great job! Love the lights!
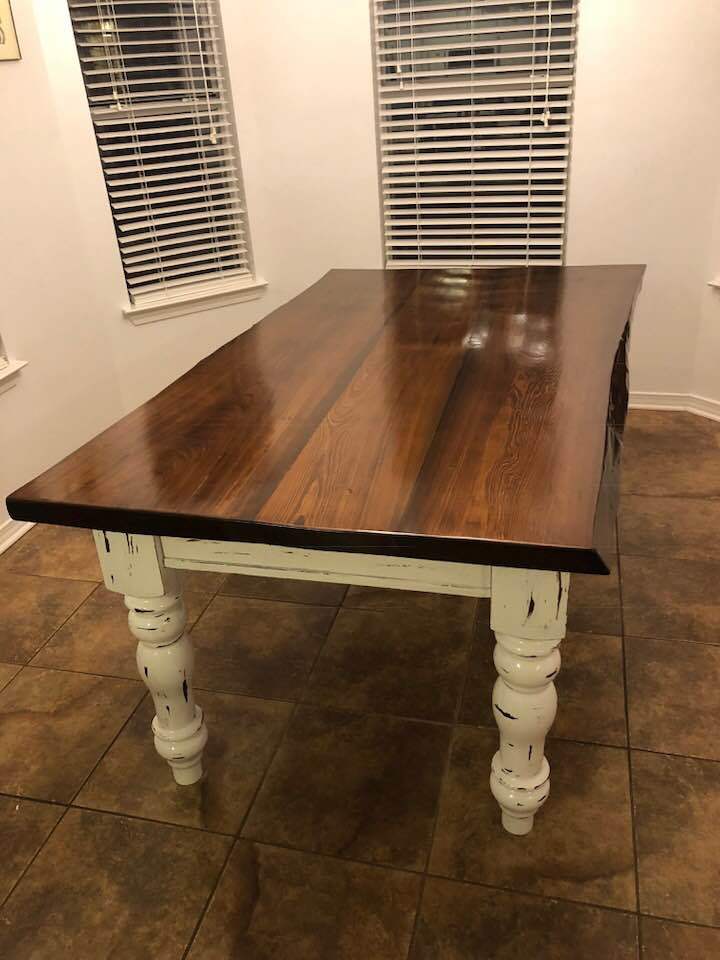
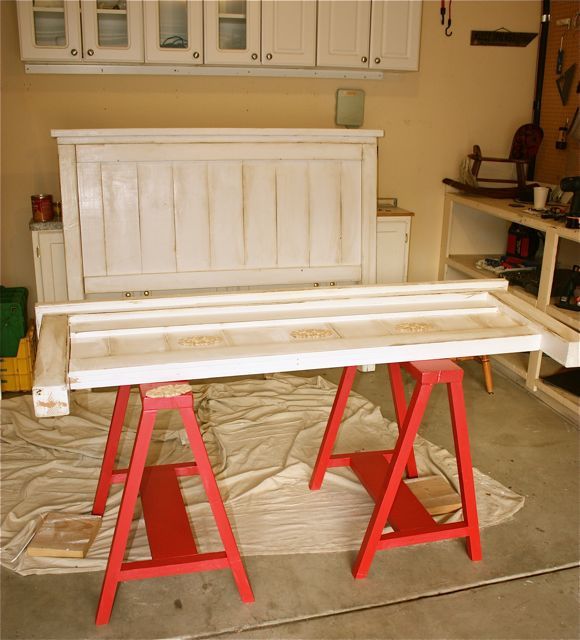
I used the basic plan as described on the website. I did differ on the tabletop and the legs. I used 3 slabs of 300+ year old cypress grown and milled locally here in Mississippi. I also kept the live edge on the outside boards. I bought my legs from 59Design. They were identical in everyway but about $15 cheaper per leg. :)
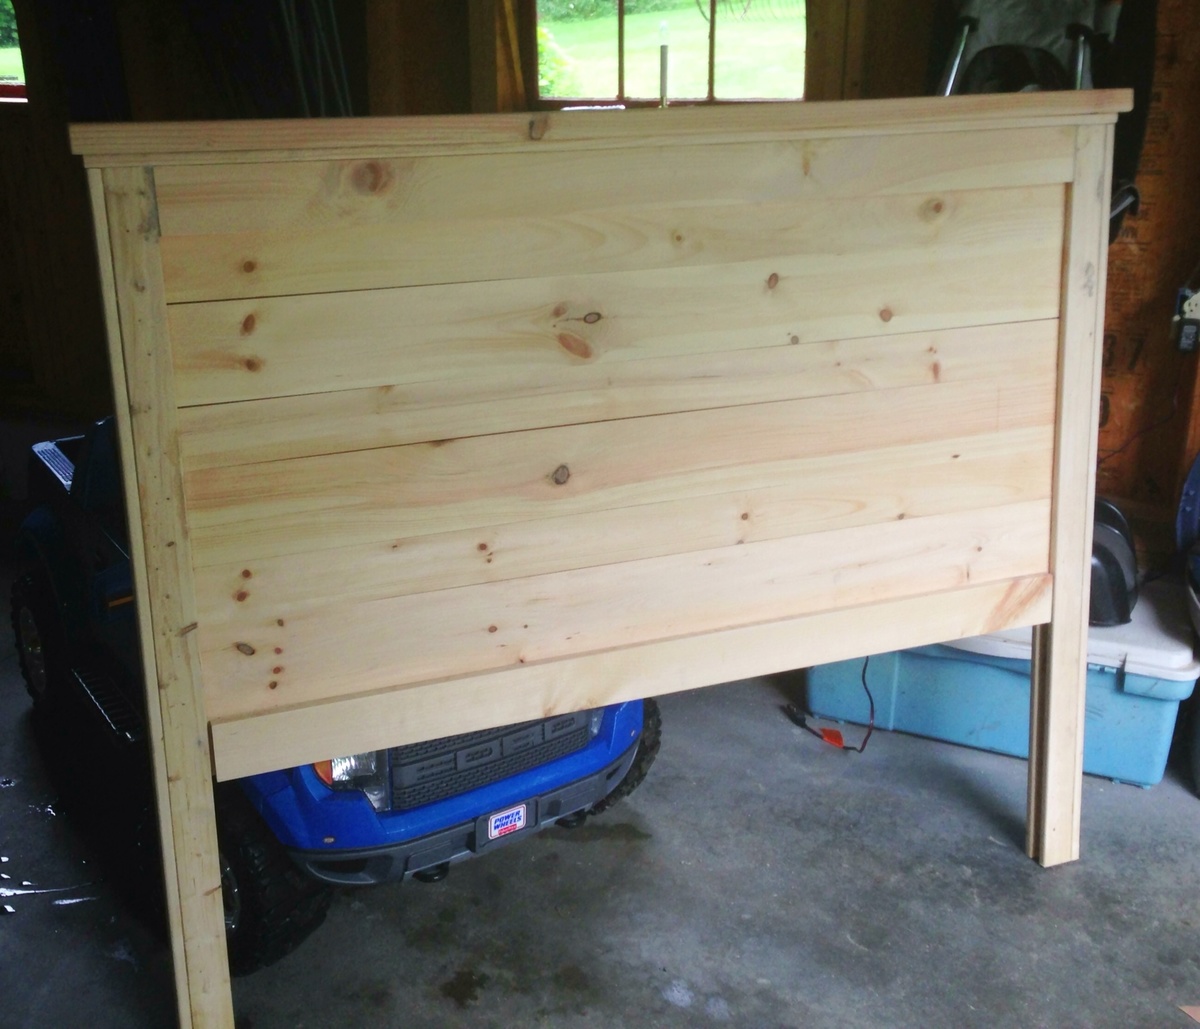
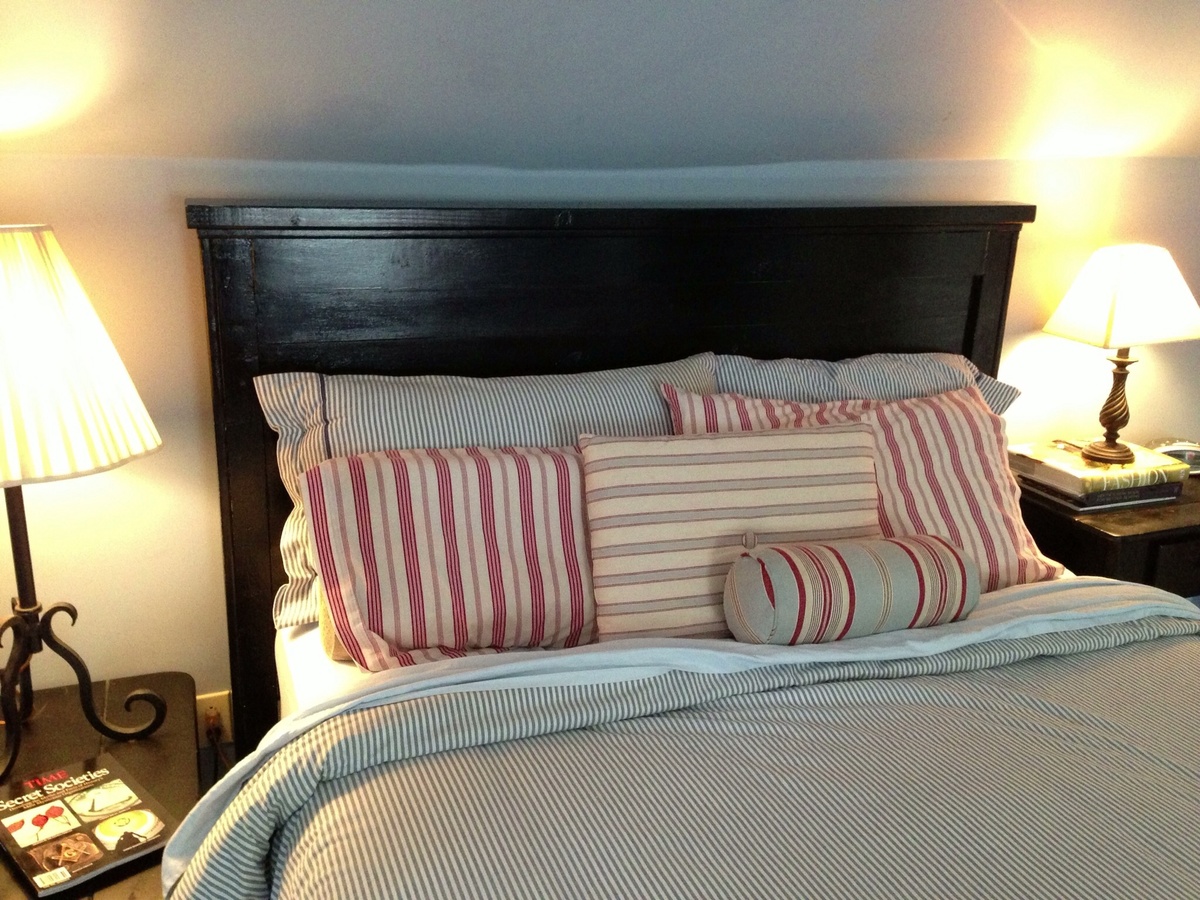
I built two of these headboards over Labor Day weekend for my girls.
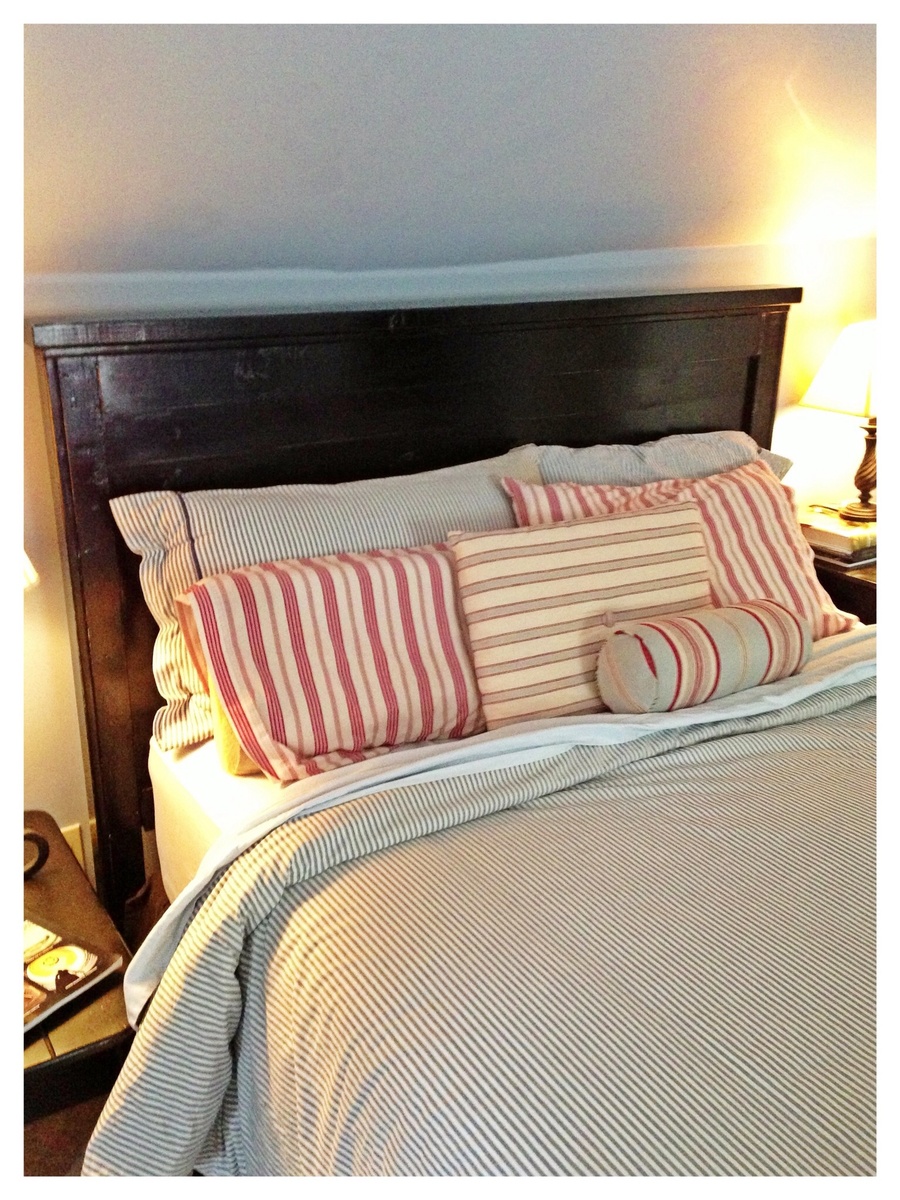
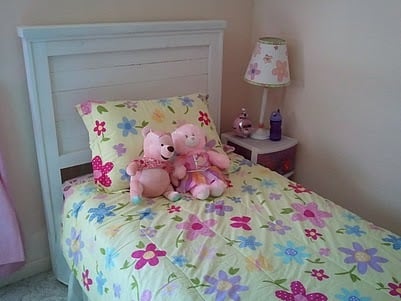
After looking through the Handbuilt Home longingly many times, I took the plunge with this simple headboard. I've never built anything from wood, but my main hobby is sewing so I'm good at following directions. I followed the plans exactly and I love how this came out! I used a nailer and glue for all the construction. I recommend this project for beginners! I chose to paint my headboard black to blend with my other furniture.
Now I'm already onto my next project, with a Kreg Jig in hand, the modern craft table from Ana's book. Thank you, Ana for sharing your plans and inspiring people to try building! I feel my skills and confidence increasing with each project!

Wed, 09/25/2013 - 11:06
I've got the wood in my garage, marked for cutting this project out! Yours looks fantastic. You will love your Kreg Jig! It's one of my all-time favorite tools.
I'm a better plumber than a carpenter.
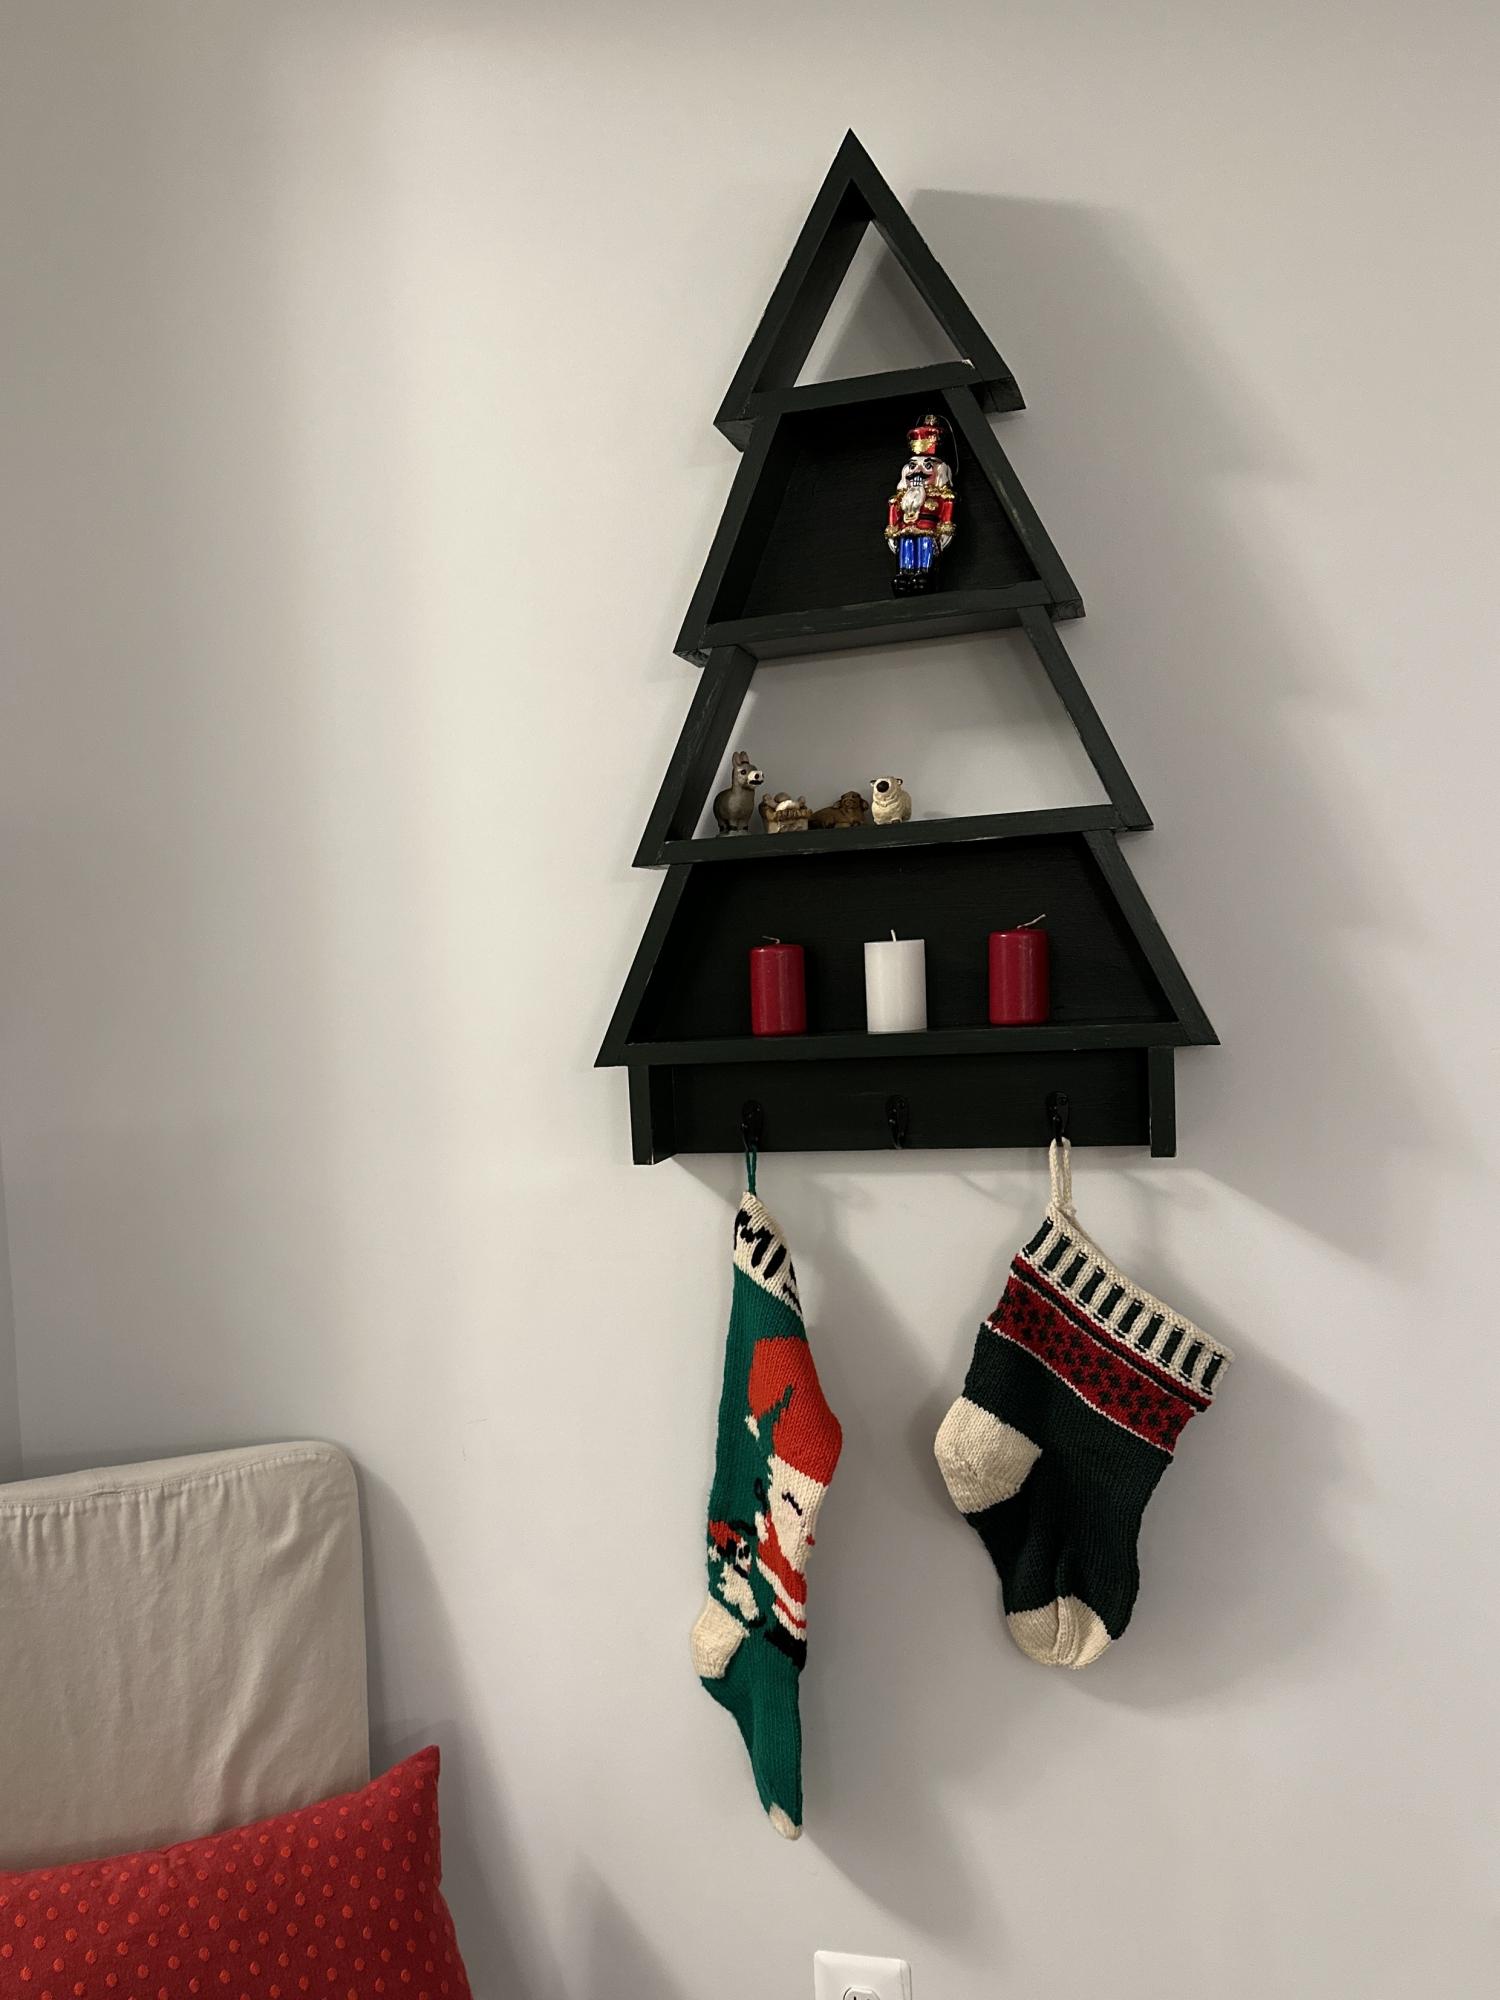
What a merry addition to my Christmas decor. I was drawn to this project because I wanted to use my new miter saw and to practice cutting angles & piecing together with great precision. It’s a bonus that I needed a place to hang stockings.
The directions were clear and helpful. It is forgiving if you don’t get boards aligned perfectly. That provided a great confidence boost for this newbie.
The stain is Minwax Austin Field solid. It was my first stain experience and it took me a while to get a smooth and consistent finish. But I love the tone.
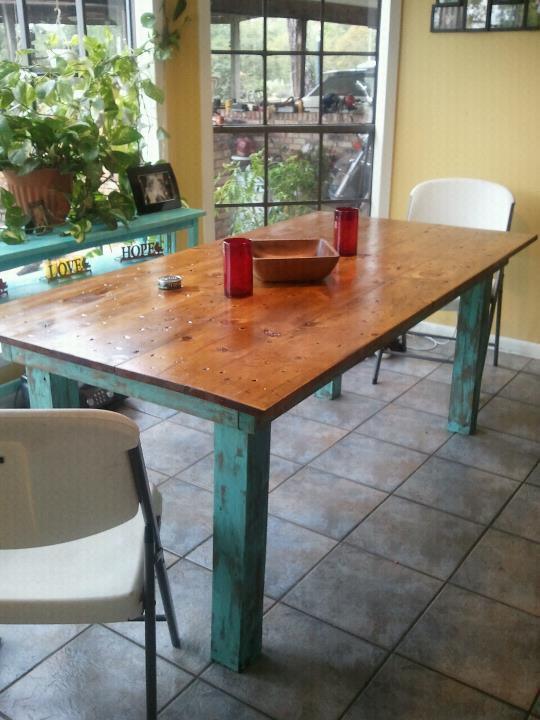
I ran across Anas website in search for the perfect table, My boyfriend and I just moved in together and have gotten kinda excited about making his home our home. I thought about building a table that would be big enough for the whole family (my children and his)I wanted it to be special and mean something to us as it would be our first peice of furniture together. I was searching the web and run across this website with the exactly what I was looking for, rustic, homey, used and special... I got home showed Steve and we went right to the store to buy supplies, He had this table build within 1 hour and I went to work with the finishing touches. WE BOTH LOVE IT!!! we since collected 6 old chairs (not matching of course) and I am in love with our dining area! Thanks Ana for this wonderful website you so graciously share with us! Now we are planning our bed. It will be a farm house bed ofcourse!!! Cannot wait! Pictures will follow!
Fri, 09/09/2011 - 18:28
I have been wanting to build this table. Yours turned out gorgeous! Love the color of the legs/frame! Beautiful job!
Thu, 10/06/2011 - 17:54
What is the exact name of the color on the legs? I love the color, I tried using a turqouise on a bench and it doesn't look like this one....Thank you:)
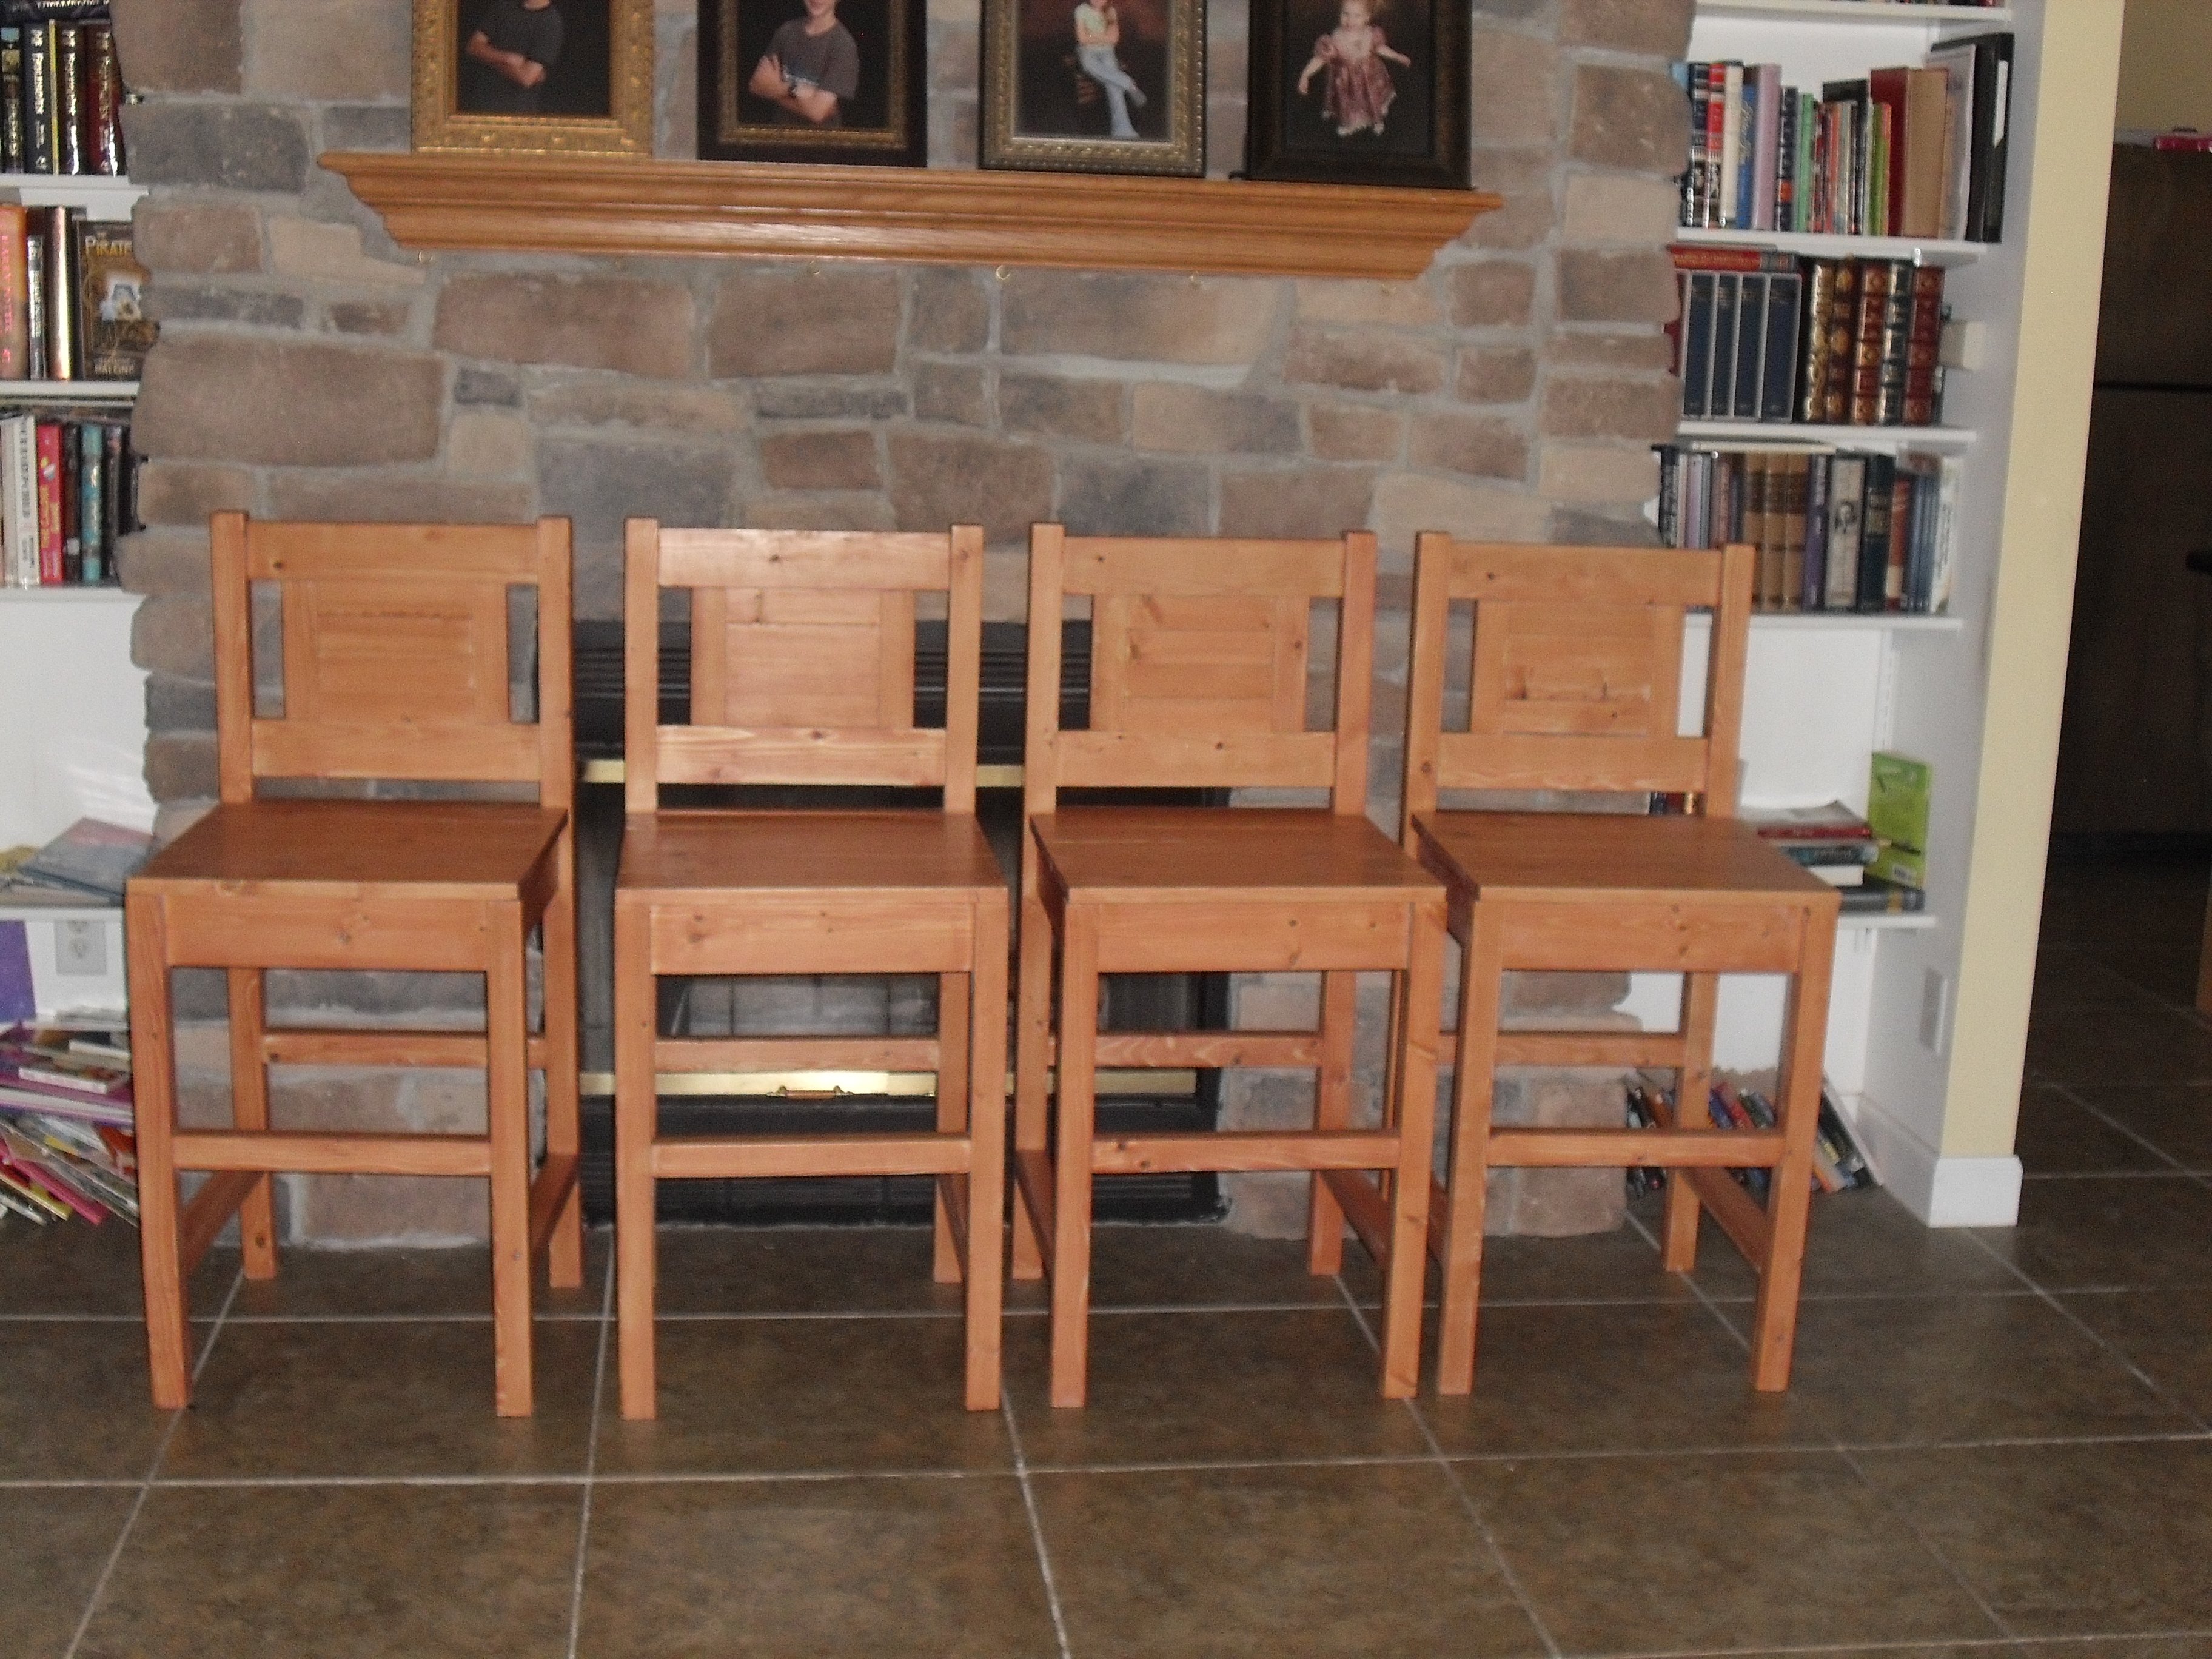
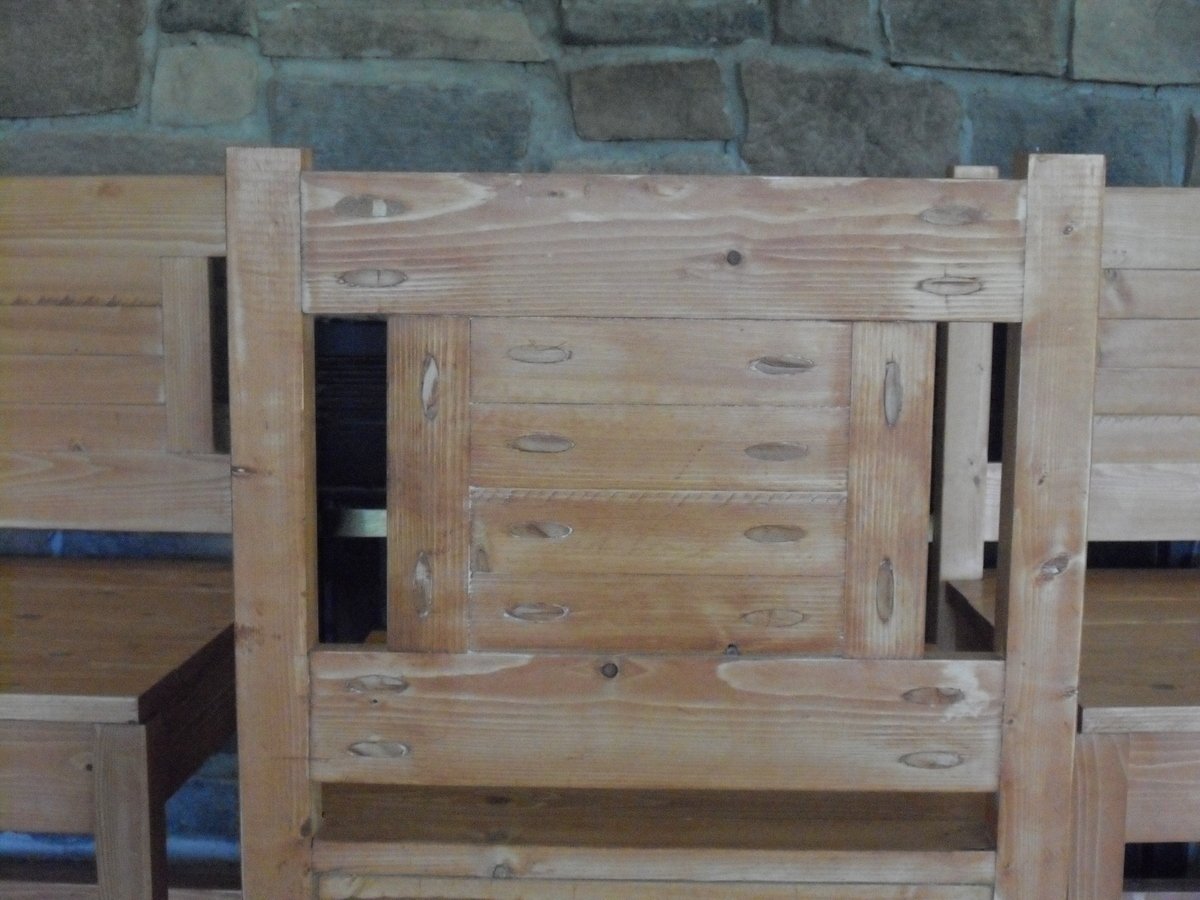
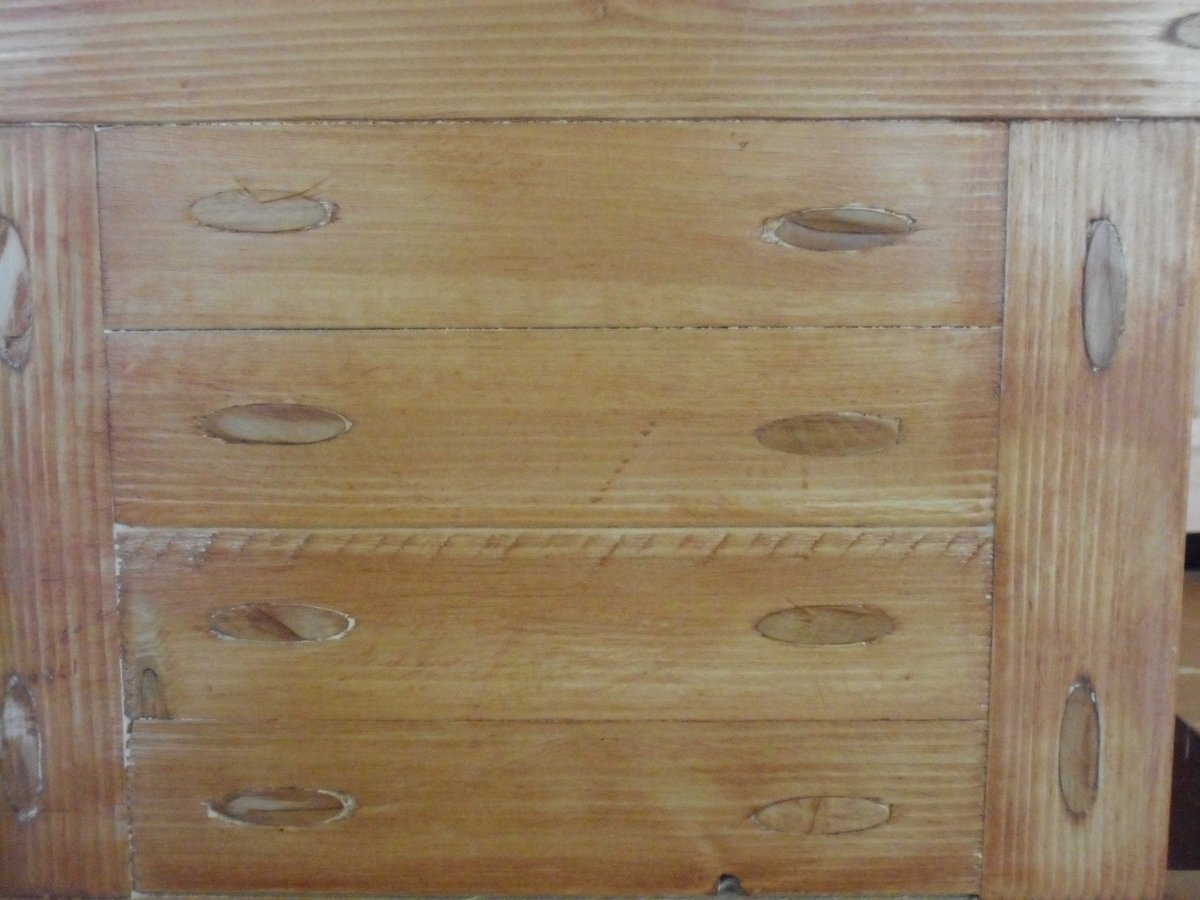
My sixteen-year old son took this on as a summer project and built four bar stools. He did a great job! We lowered them by 4 inches from the plan specs to fit under the counter. He used a Miniwax Colonial Maple finish. This project took a lot of Kreg Jig screws and plugs - almost 100 of each. They are very comfortable and beautiful.
This is the first piece of furniture we've ever built and we are hooked. We used a 2x12x6 for the top and 1.5x1.5 for all the support. We just measured the height of our couch and away we went. This table is so sturdy and fills a need in our home. My husband and I enjoyed spending the afternoon putting this together. I did a color wash on the wood instead of stain. We came in well over the price point, but that is due to where we live.
This project was simple and my husband didn’t have any issues following the plan. We did have to use an extra 2x4, because we didn’t cut the long pieces first. Cut the long pieces first, use the end pieces to make the smaller ones. :)
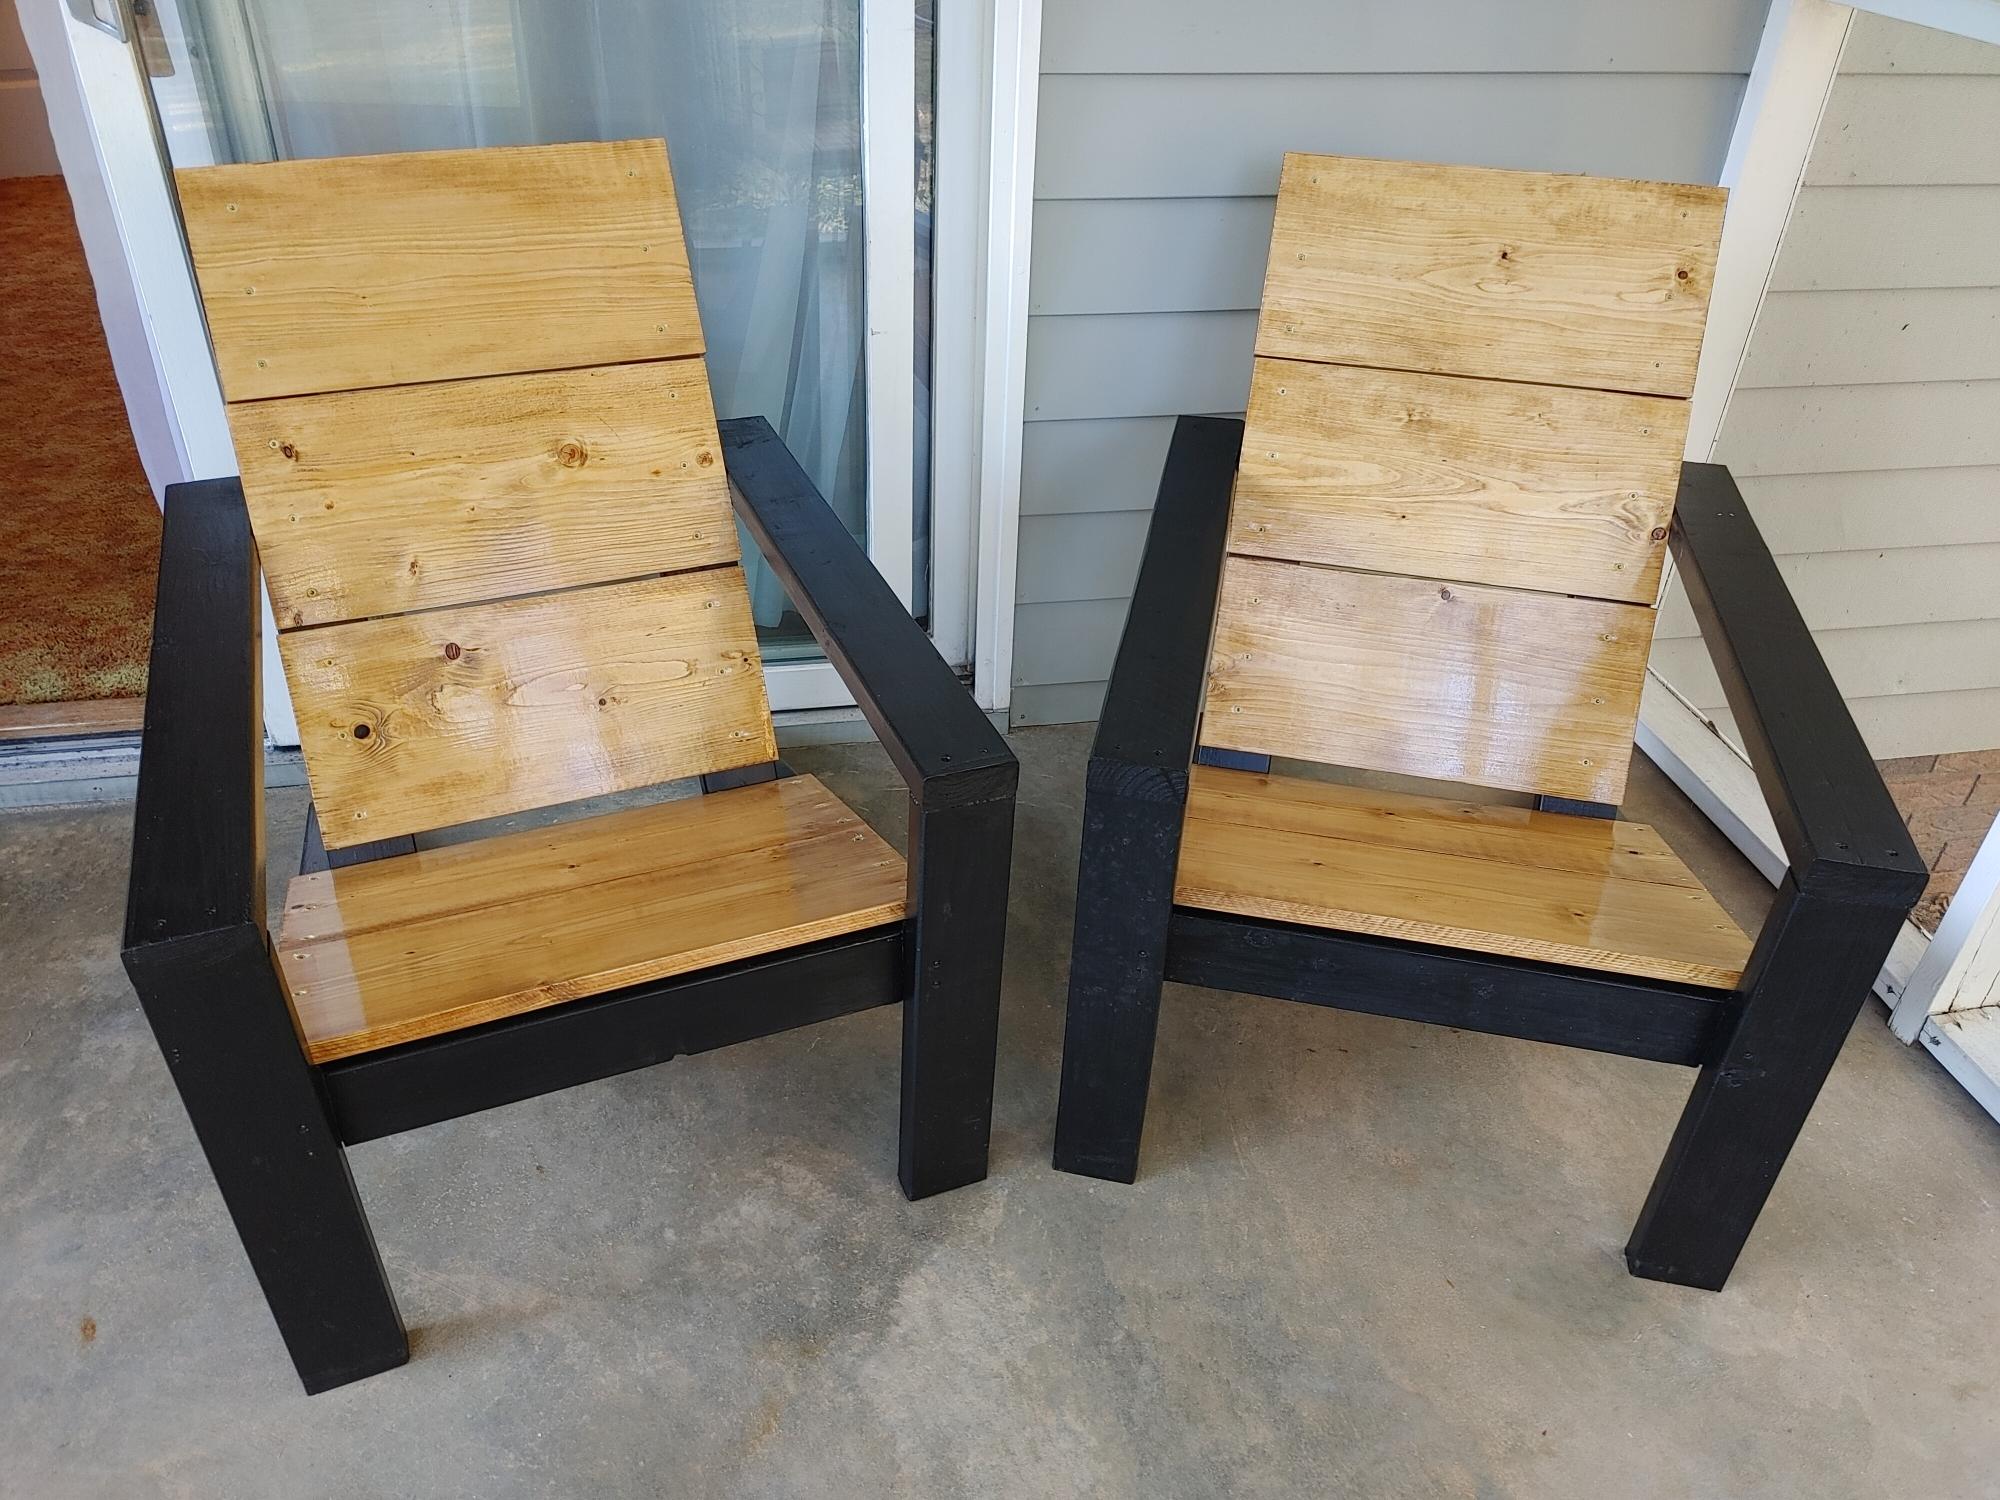
Built these for my Father-in-laws birthday
Thu, 12/29/2022 - 10:03
Love your choice of finish on these, they look fabulous! Thank you for sharing.
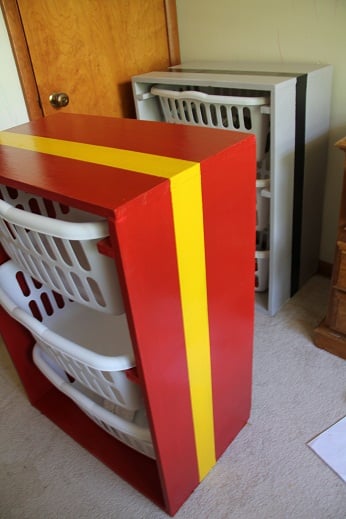
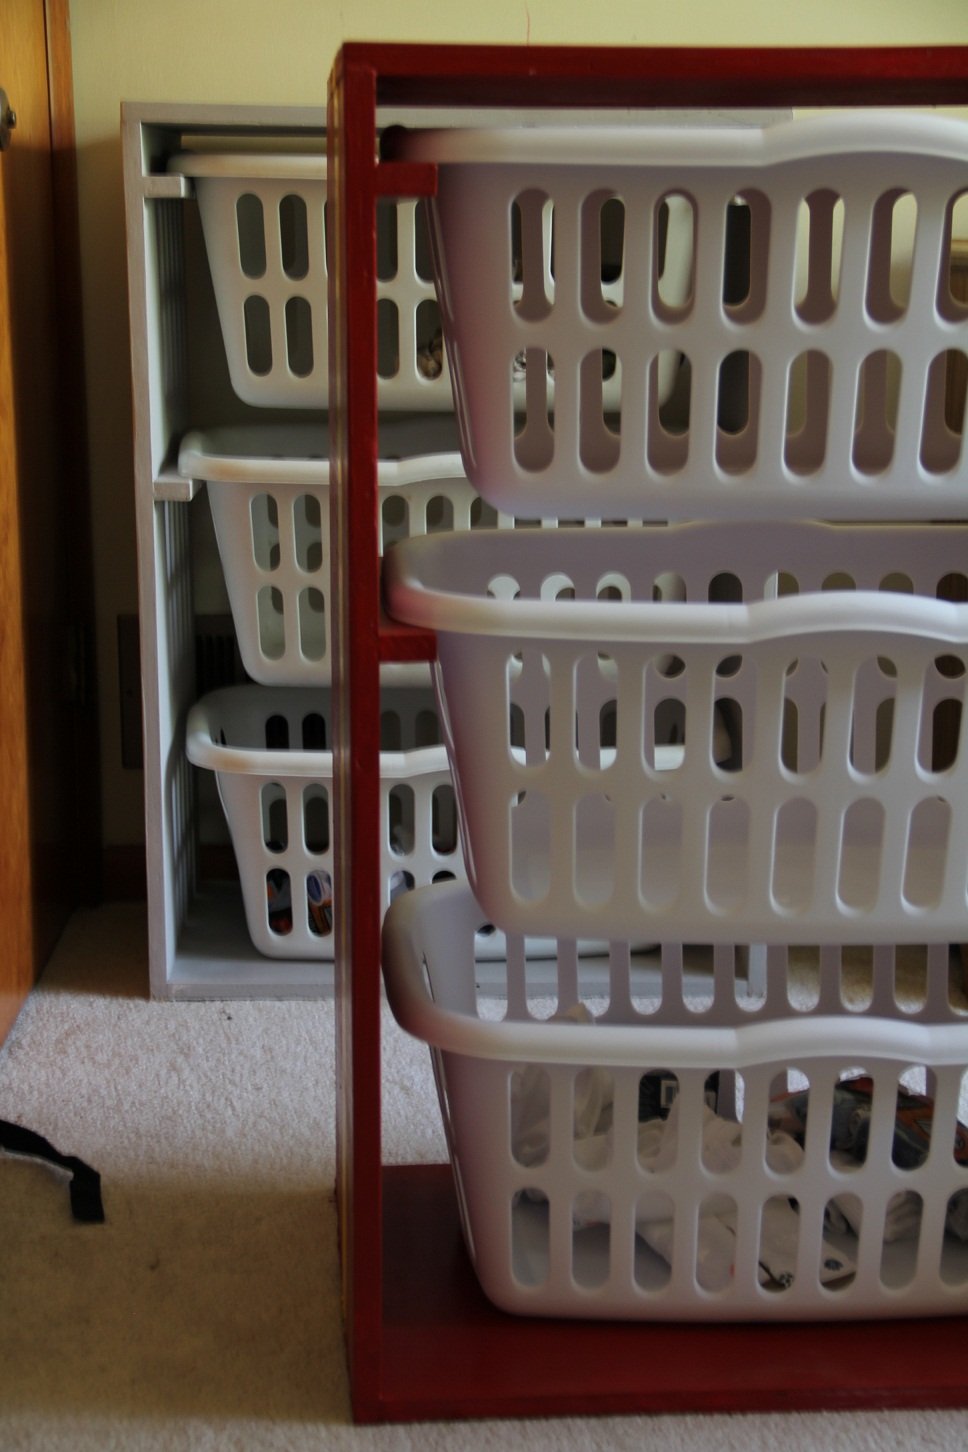
I was reading a book called "ADD Friendly Ways to Organize Your Life", and one thing that stood out to me is that people struggling with ADD RARELY are able to fold and put away their laundry. Well, with 3 little boys (ages 5, 4 and 2)and being a single mama, this is amplified for me. One of the suggestions the book had was to give up the though of folding clothes and get colorful baskets to throw the clothes into once they came out of the drier. . . I immediately remembered seeing these, and I thought, "PERFECT!!!!"
I've made for 2 out of the three boys, but will make for myself and the youngest soon. The older boys now have their own dresser; shirts on top, pants in the middle, socks and underwear on the bottom. Now all I have to do is sort straight into the baskets and put away! Problem solved!
I didn't put the backs on these, mainly because I was being cheap, and they seemed sturdy enough without. I may add backs at a later date if needed.

Wed, 09/14/2011 - 20:31
I tried to make mine without backs and they just fell instantly. I had to seriously beef them up to avoid throwing away all the wood.
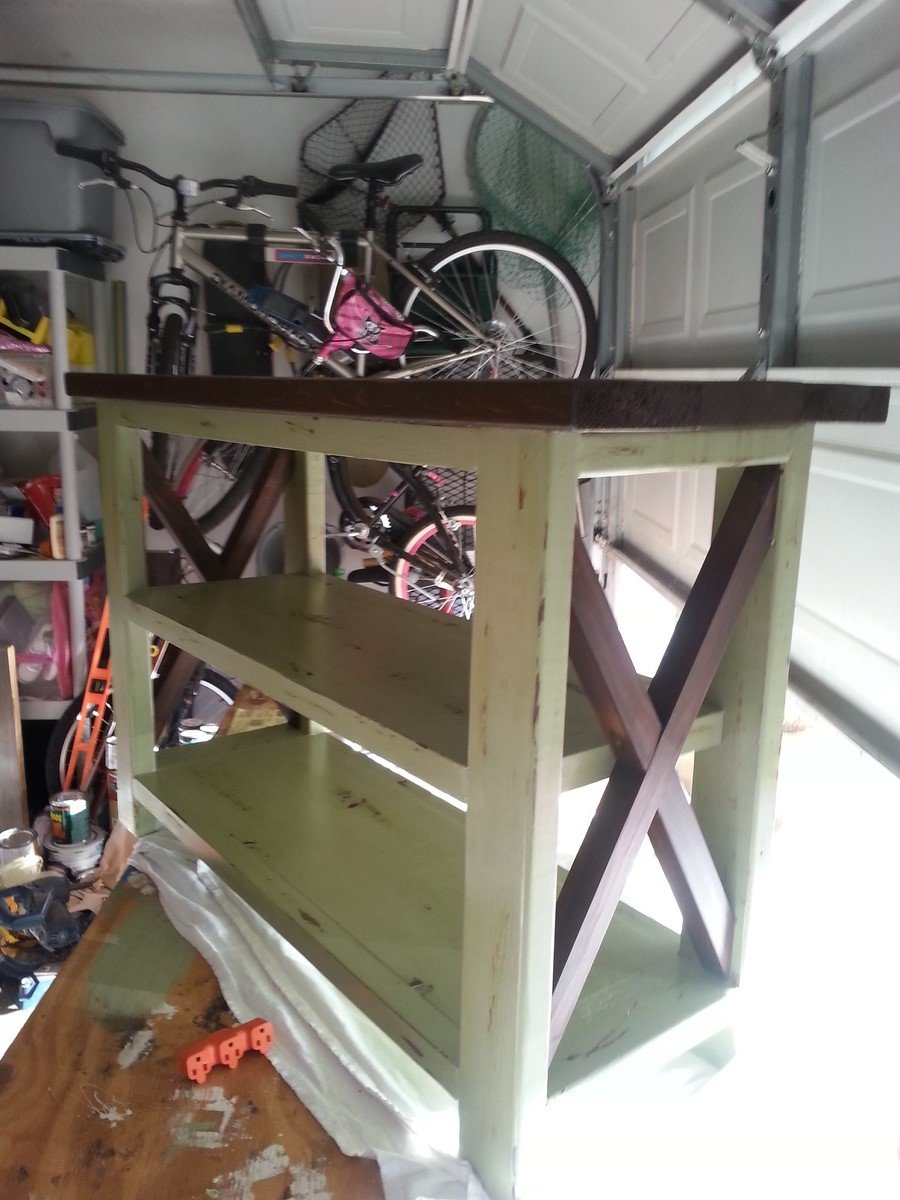
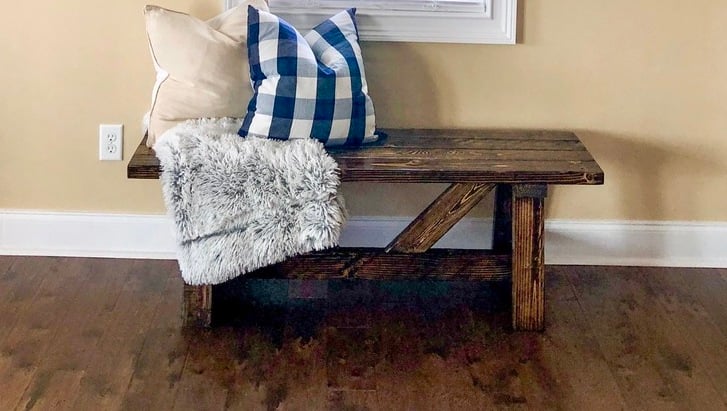
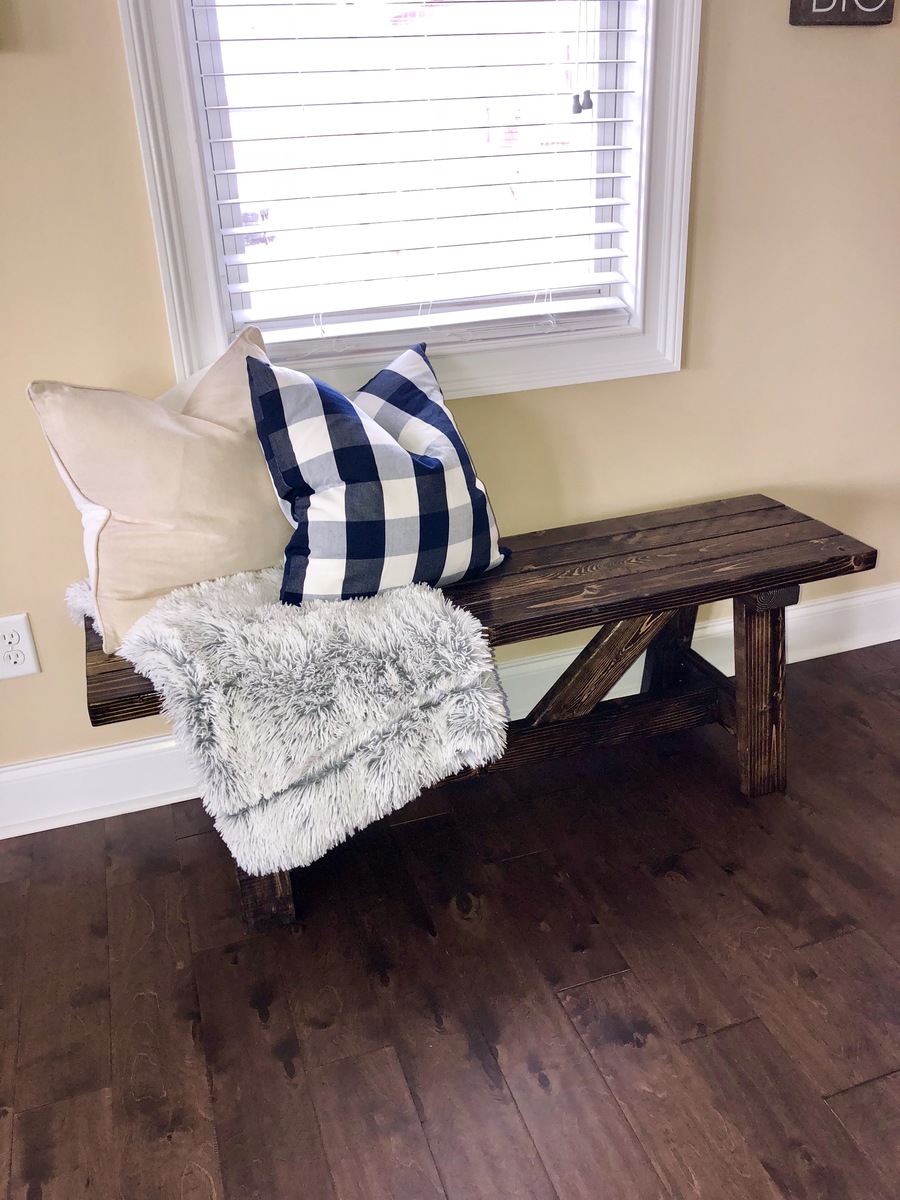
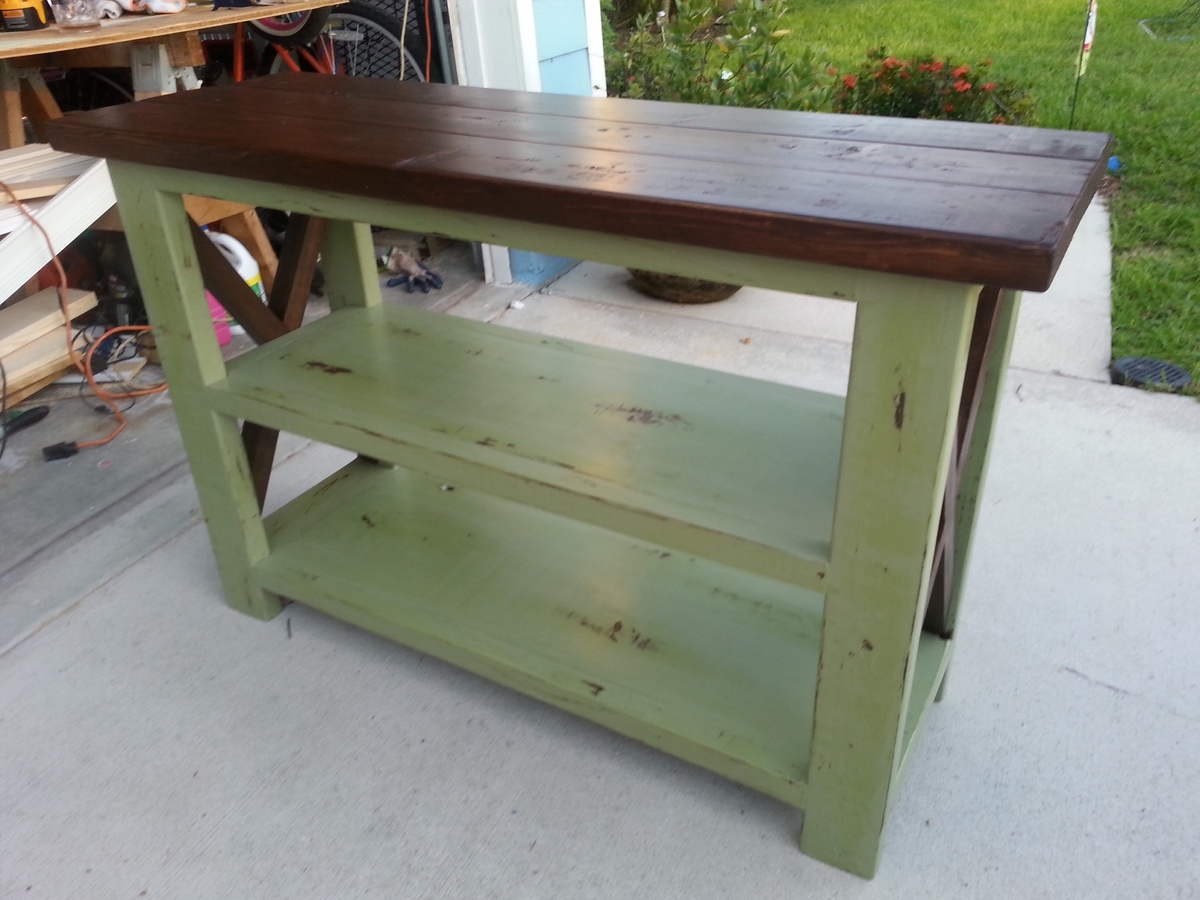
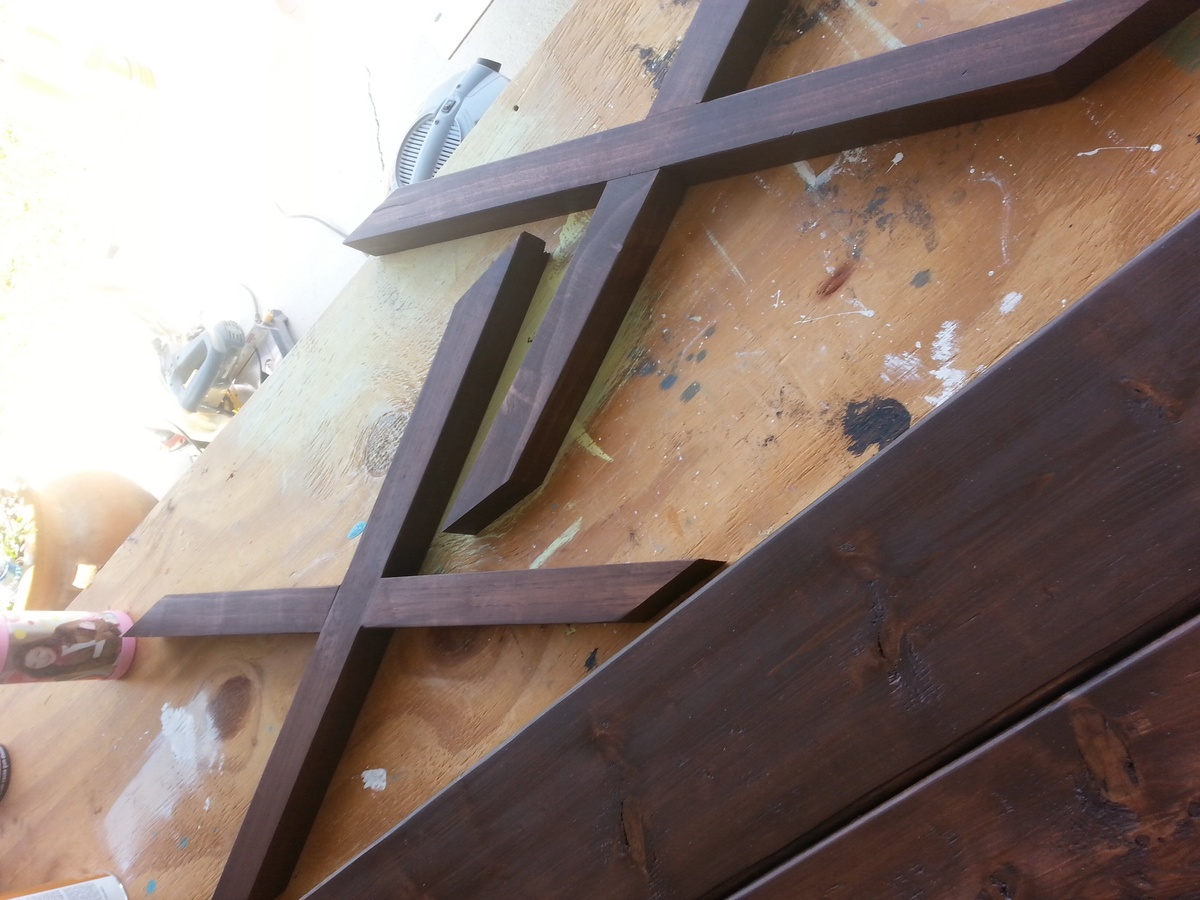
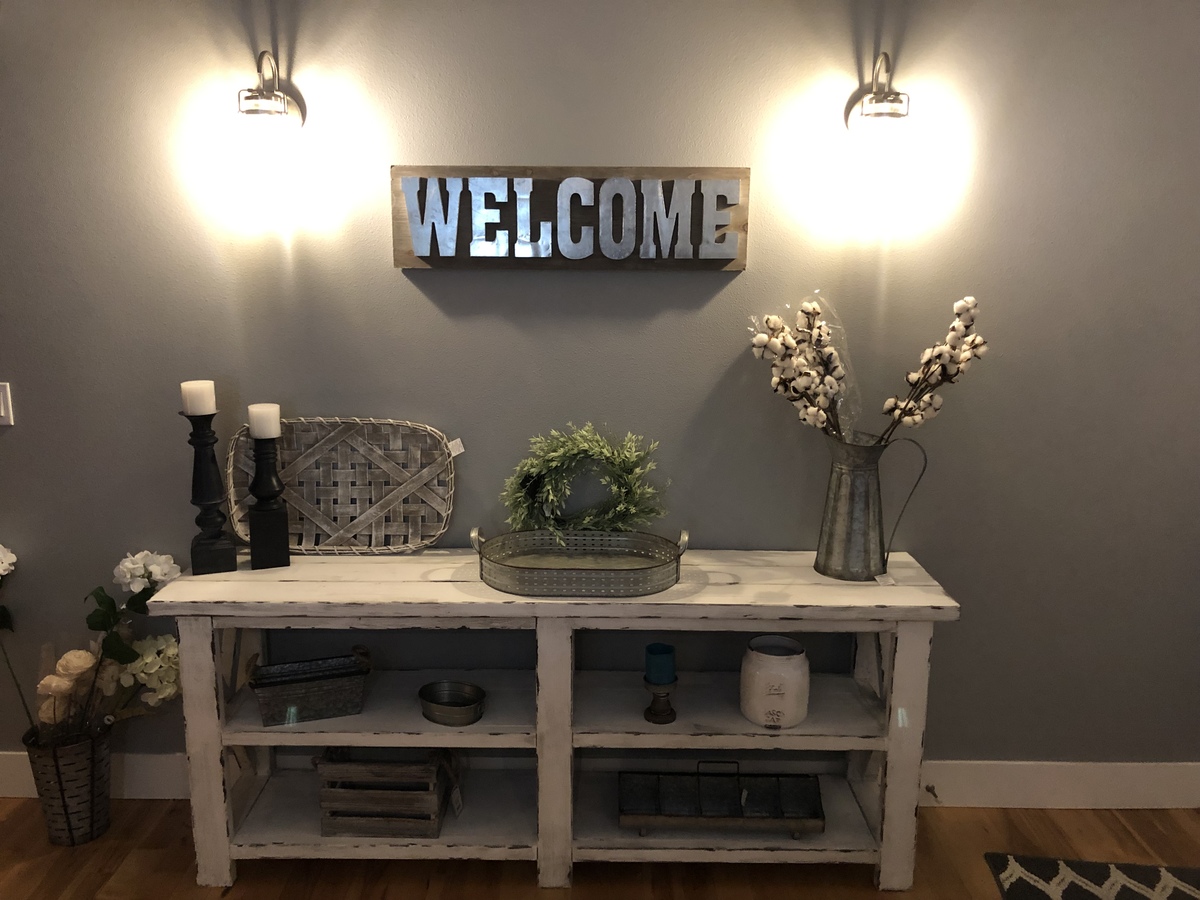
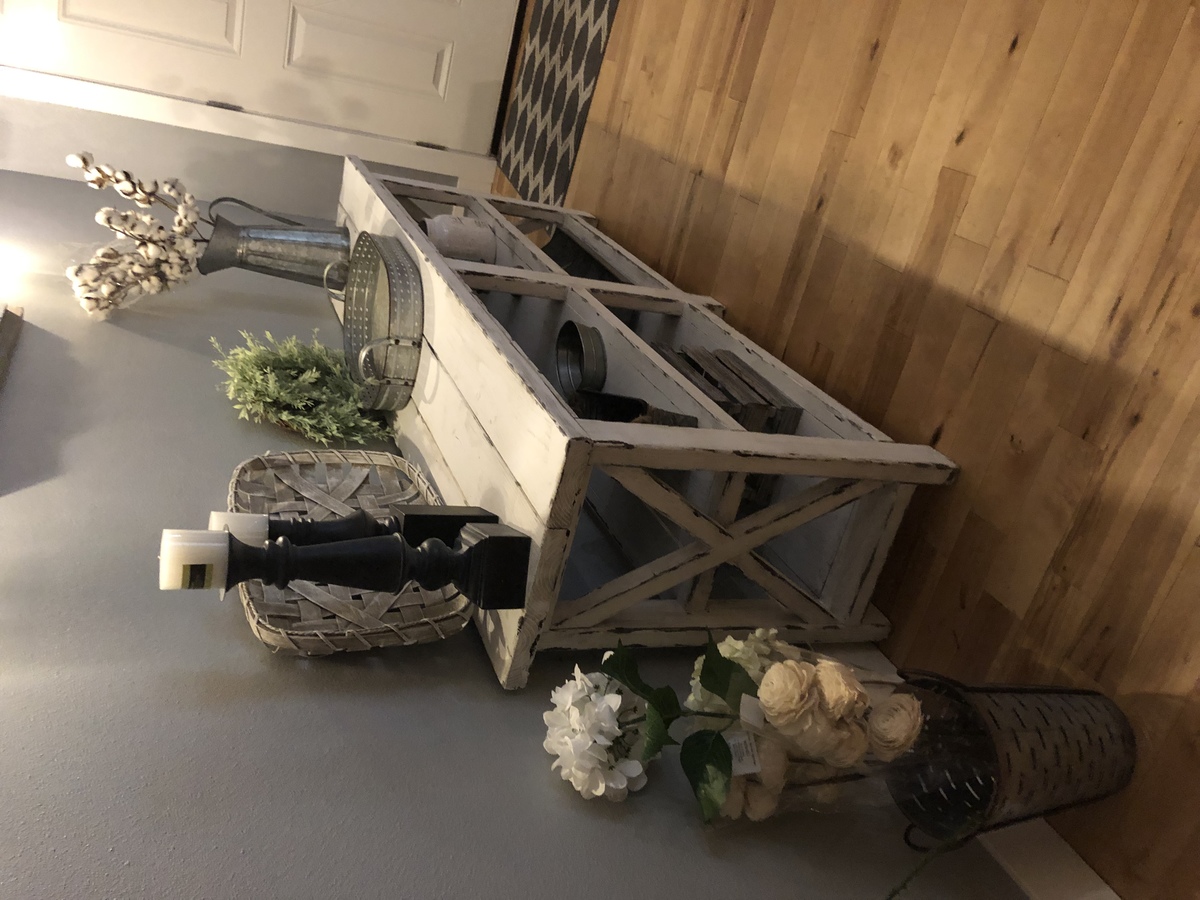
Really like the plan for this table, just not enough space. So I decided to shrink the overall length to 45 1/2 and then just adjusted from there. Stained the entire project and painted the base. After some sanding to distress, I poly coated the entire project. Staining the top and the X's to match was my wife's idea. It came out great. This was only the second thing I have ever built, and I have to say the Kreg Jig made it fun, rather than frustrating and stressful. My first project was from the adirondack table plan, it came out great too. So glad I found your site!
Mon, 09/30/2013 - 09:29
The finish on this is absolutely perfect. I built the workbench console table for my dining area a few months ago. Really like how it turned out, but have been considering selling it and building this to go in its place. This may push me in that direction again. Excellent job.
Tue, 10/08/2013 - 17:33
I used varythane dark walnut stain on the entire project and then painted over with glidden flat in a sage green. Once I 220 sanded the entire project, which aged the green, and took the paint down to stain in areas, I coated twice with varythane polycrylic.
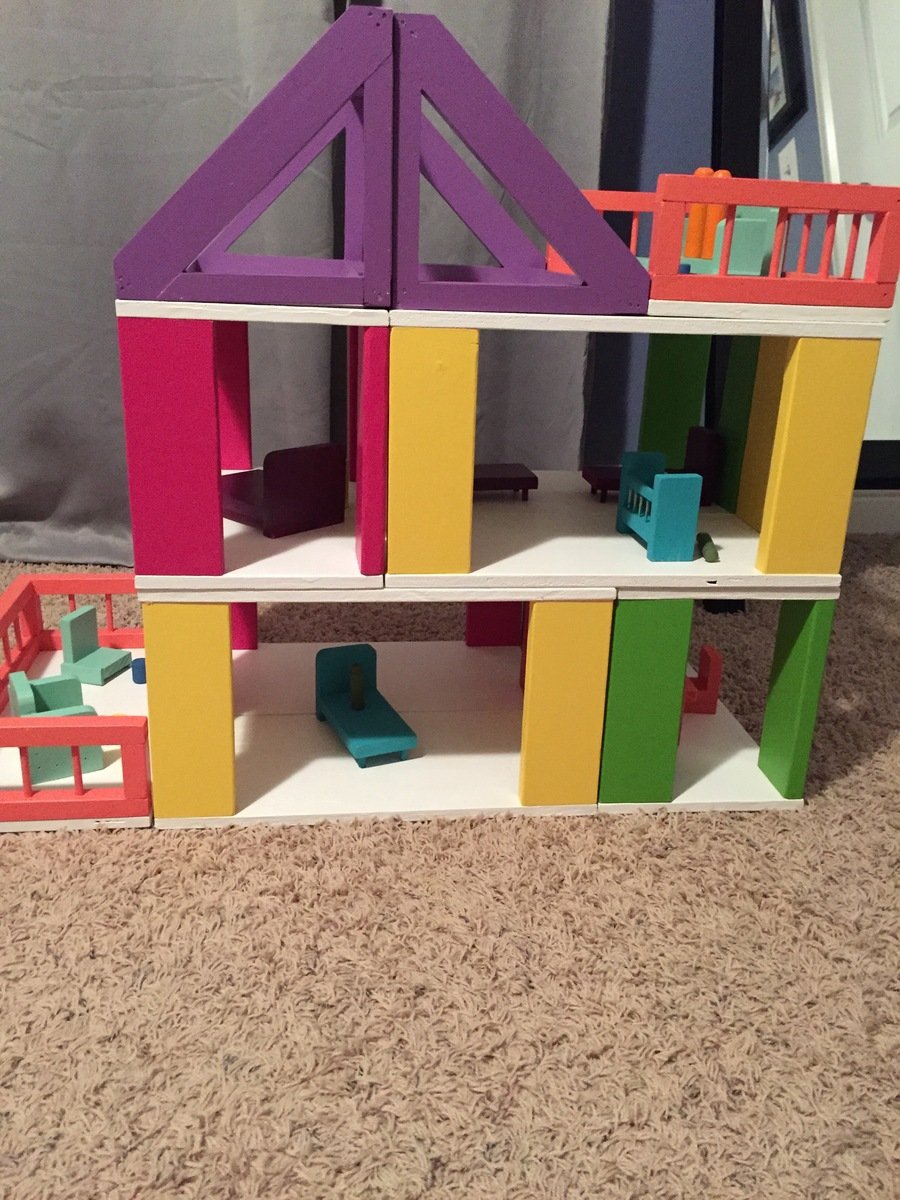
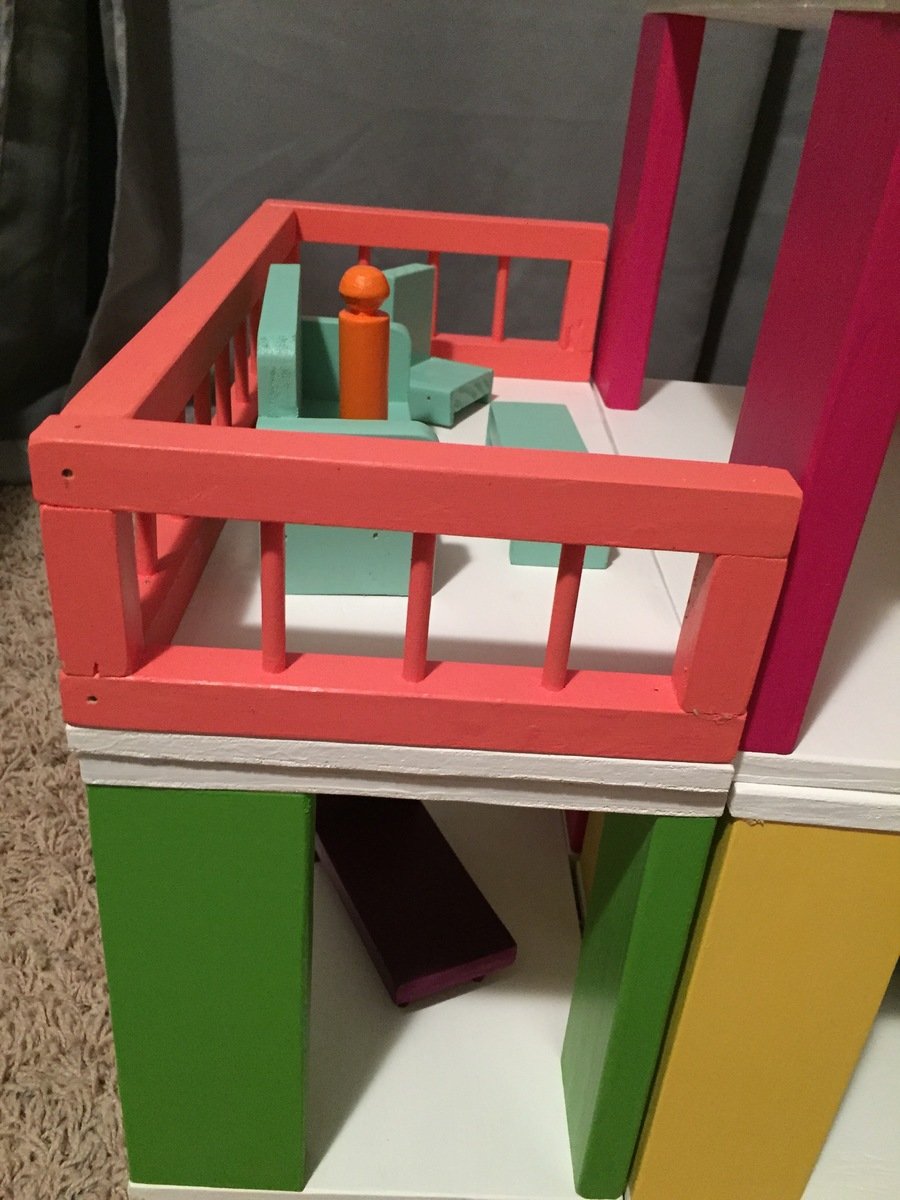
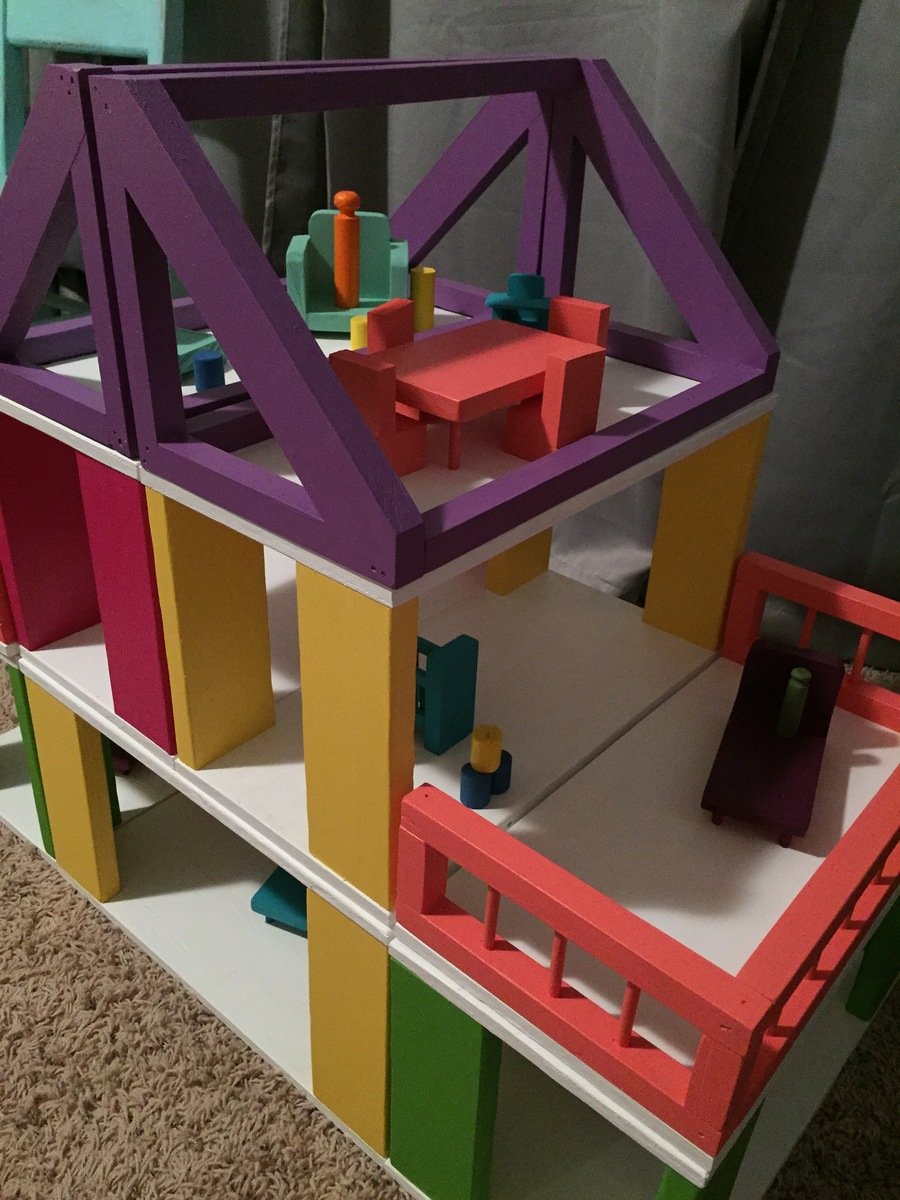
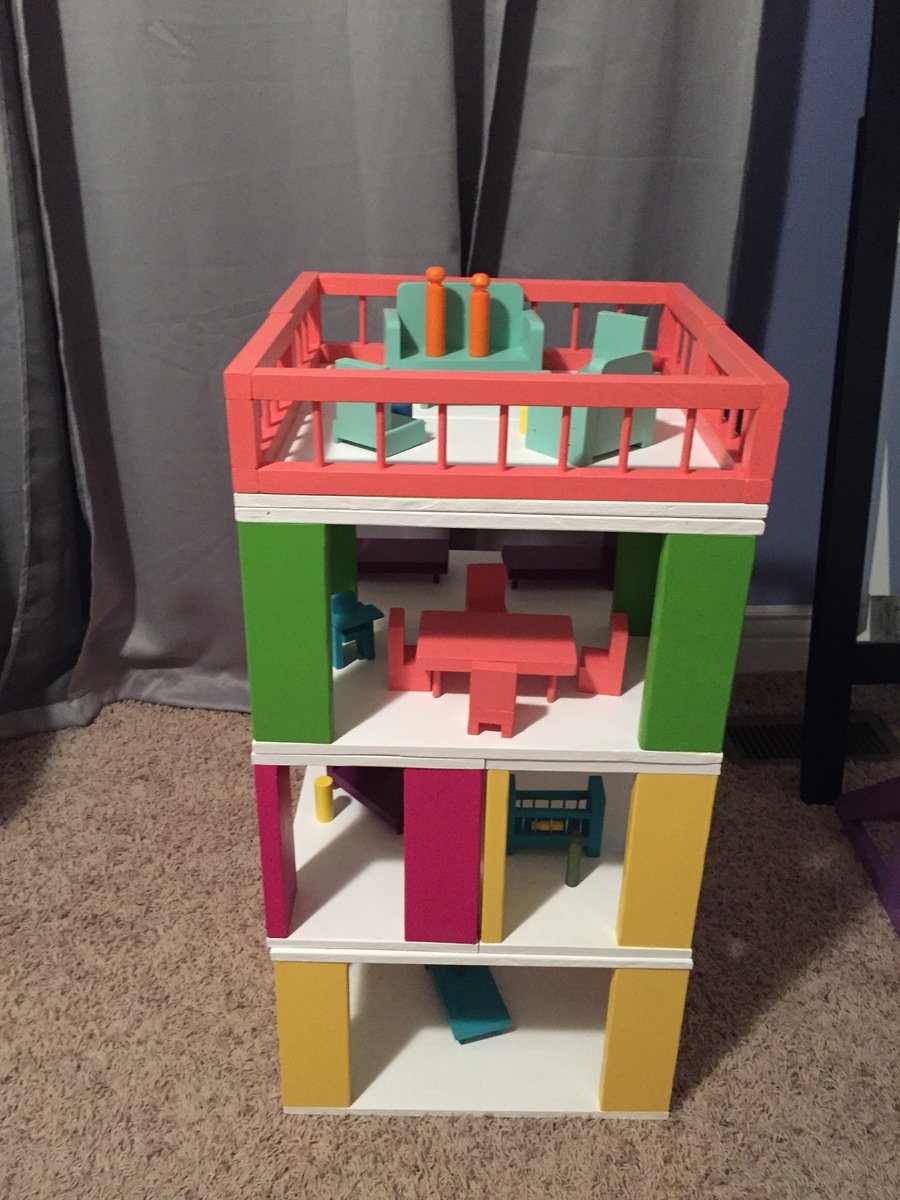
A joint effort between my dad, my husband and I! I love the way it turned out! The painting was a little time consuming but totally worth it. Cannot wait for my daughter to see this on Christmas morning. My dad even made a little crib and highchair, which are just adorable!
Adjusted the dimensions to make it smaller. I used scrap plywood and mdf for the base. I used oak for the top. I routed the top instead of using edge trim. I added a USB charging outlet on the table top that plugs into an outlet.
This was my first in not just painting but actually building what I was about to craft!!!! I messed up a few times but had a blast and have already started my next build :)
Tue, 10/01/2013 - 12:28
This turned out great! I love it in your space!!! Thanks for sharing.
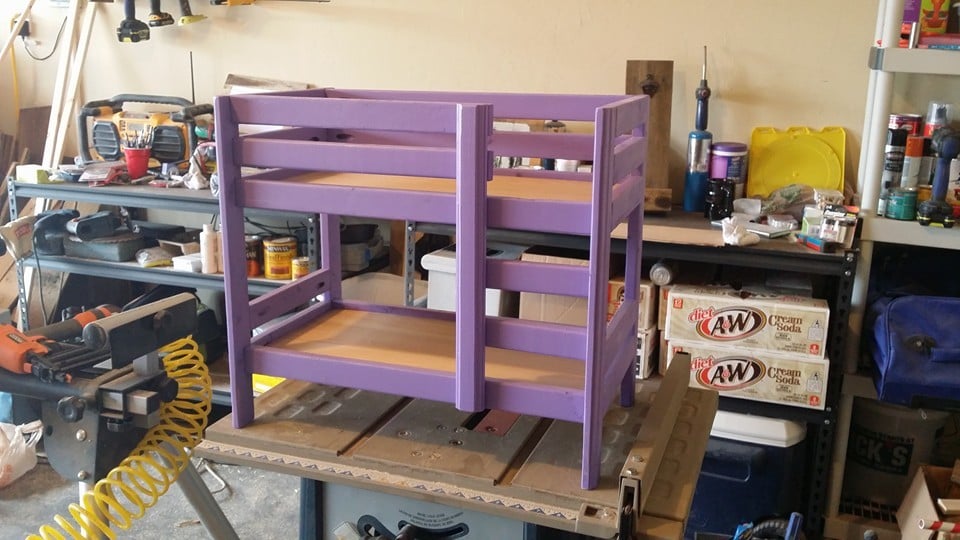
Here's my version of the plans. Not a big difference but i used triangle supports for the mattress instead of strips of 1x1.

Comments
Ana White Admin
Sun, 11/20/2022 - 12:35
Oh my!!!
This is so adorable, love how it fits the space perfectly! Thanks for sharing.