Community Brag Posts
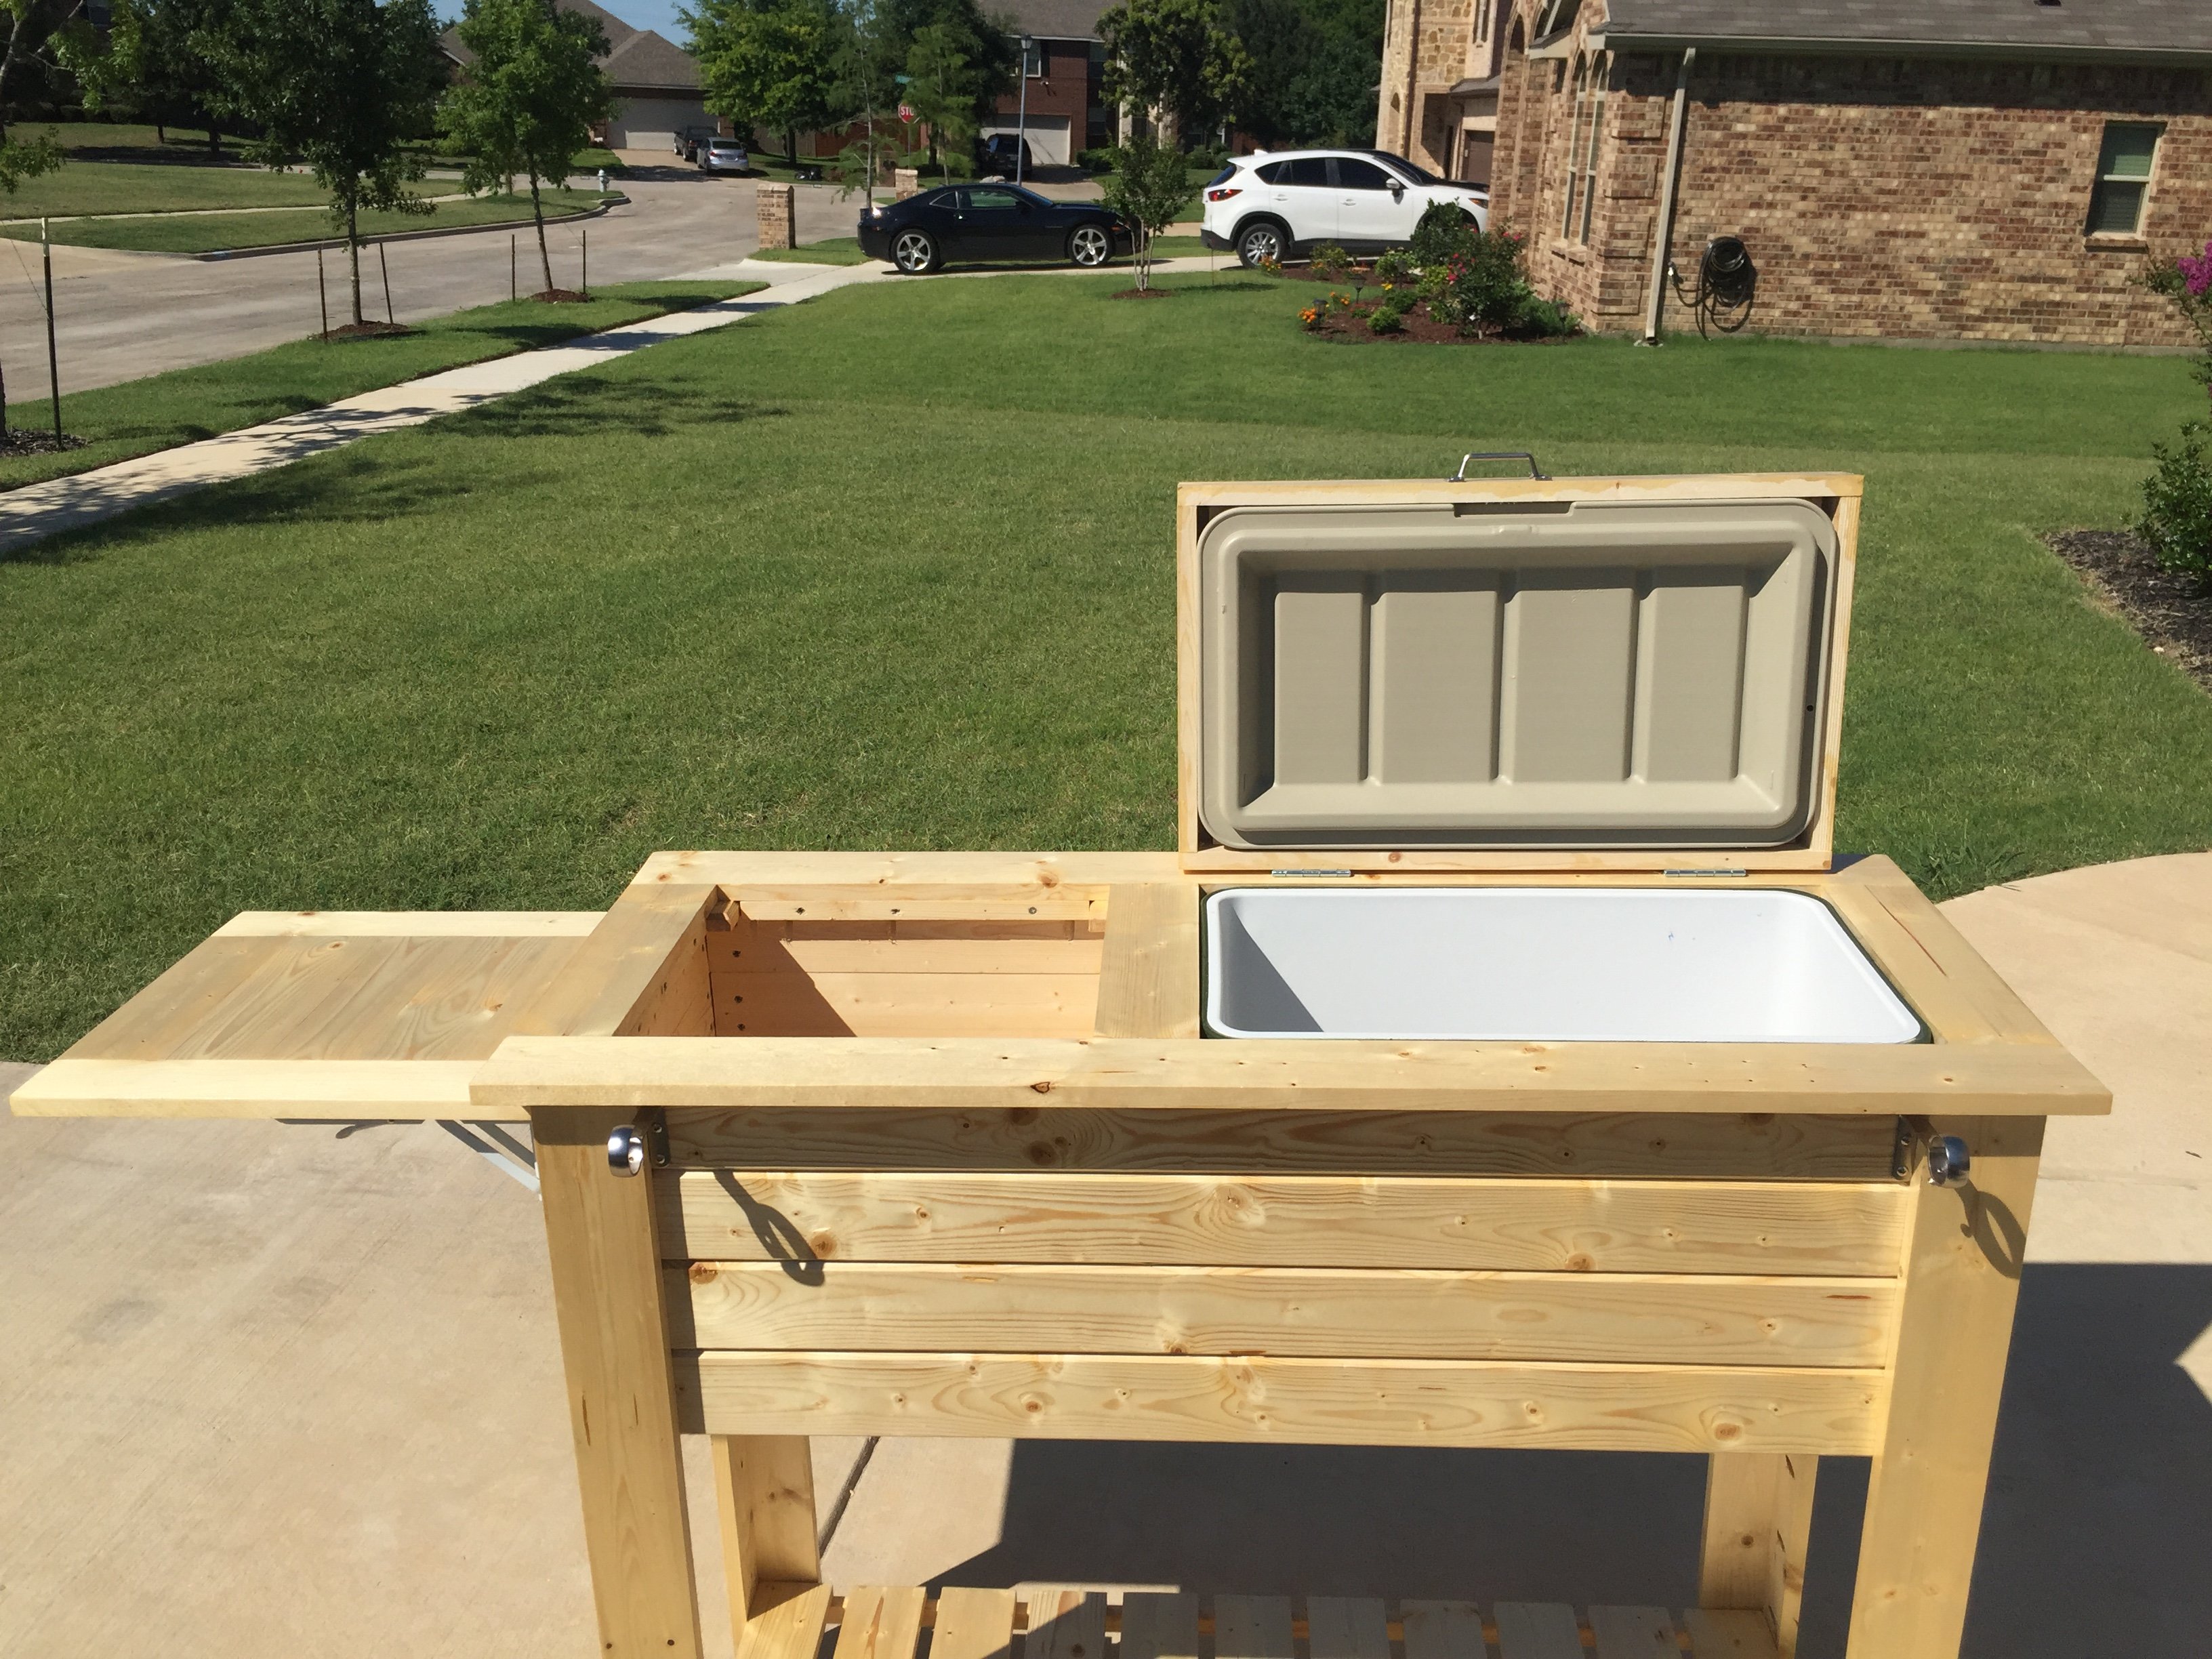
Patio cooler/Grill cart!

Great project! I'm new to wood working and have been looking for simple but challenging builds. Needless to say this fit the bill... This grill cart was a great starter build and ultimately became a Father's Day gift! My Pops loved it!
I did add a couple of custom pieces: a foldable table top extension and towel bar... things Dad will undoubtedly need as he's an outdoorsman who loves to BBQ!
Thanks for the idea/design plans!


Estimated Cost
$150
Estimated Time Investment
Weekend Project (10-20 Hours)
Finish Used
Semi-gloss spar urethane (3 coats)
Recommended Skill Level
Beginner
Comments
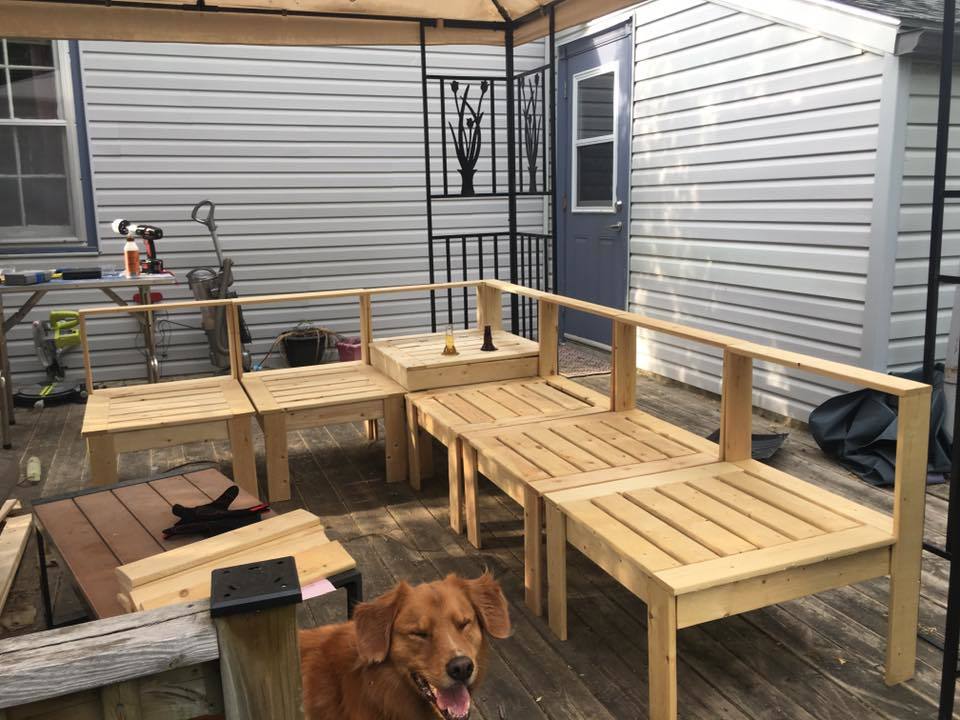
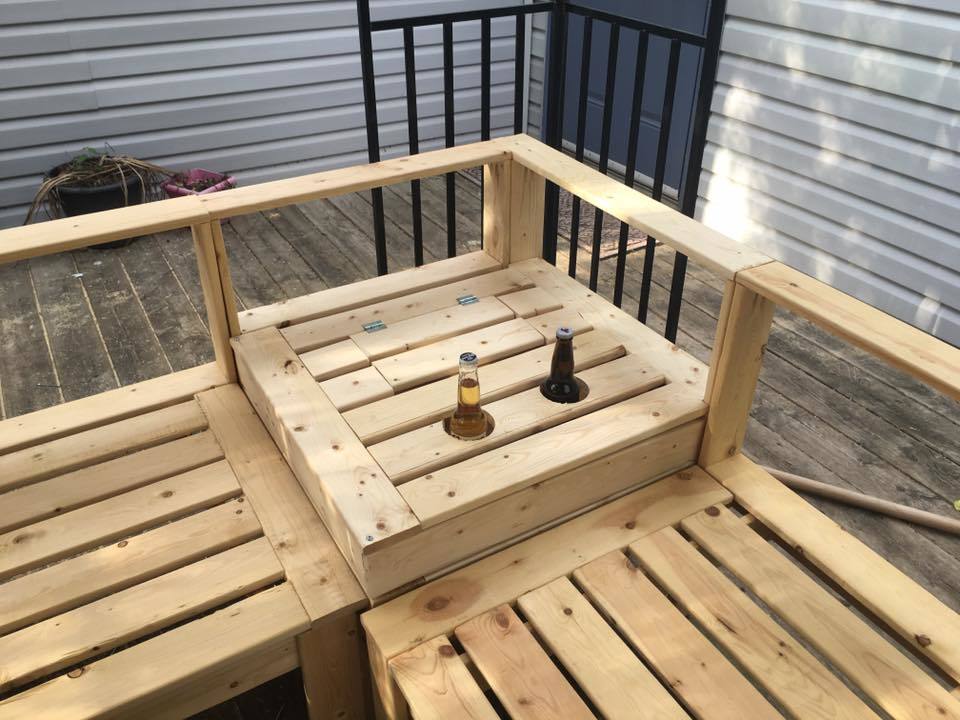
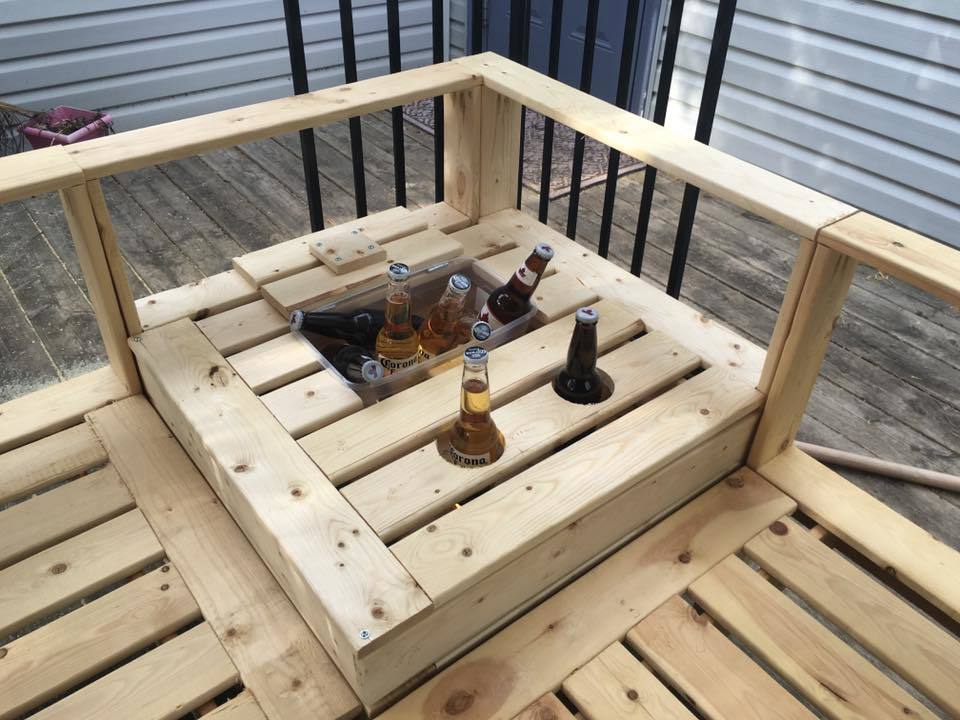
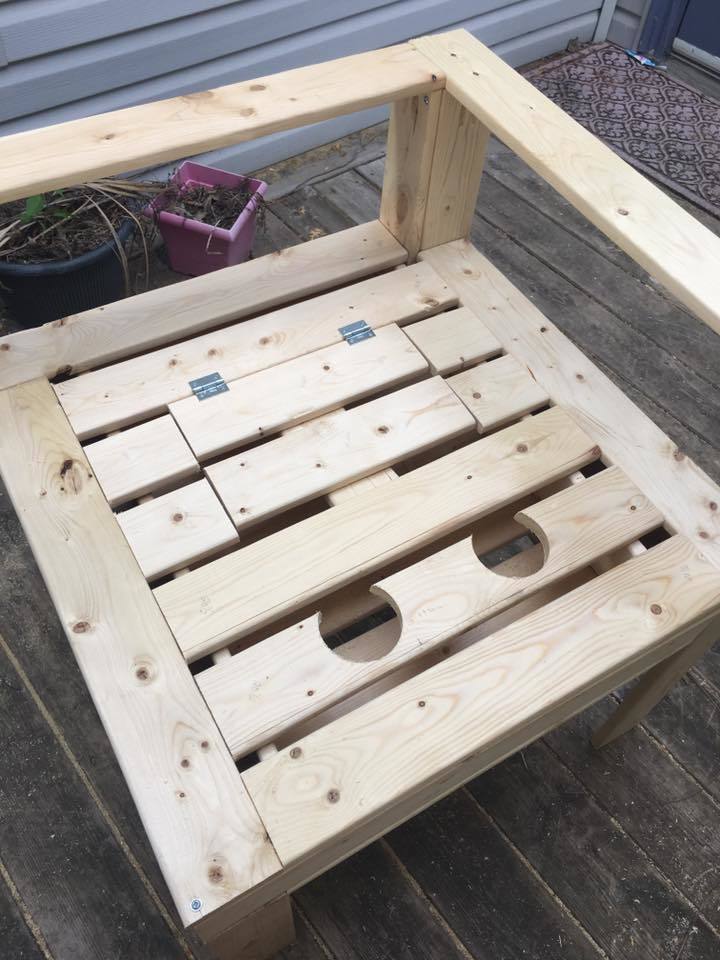
Outdoor Sectional

I had so much fun building this! I got a little creative with the corner section and decided to make it a table. I built a small hatch so that I could put in a container for ice and cold beer. When the hatch is not in use, the container can be removed and the hatch can be closed to provide more table space. I also added drink holders!
Built from Plan(s)
Estimated Time Investment
Week Long Project (20 Hours or More)
Finish Used
none yet
Recommended Skill Level
Beginner
DIY Barn Style Greenhouse

I’ve built the greenhouse for your plans, but I love it.
Built from Plan(s)
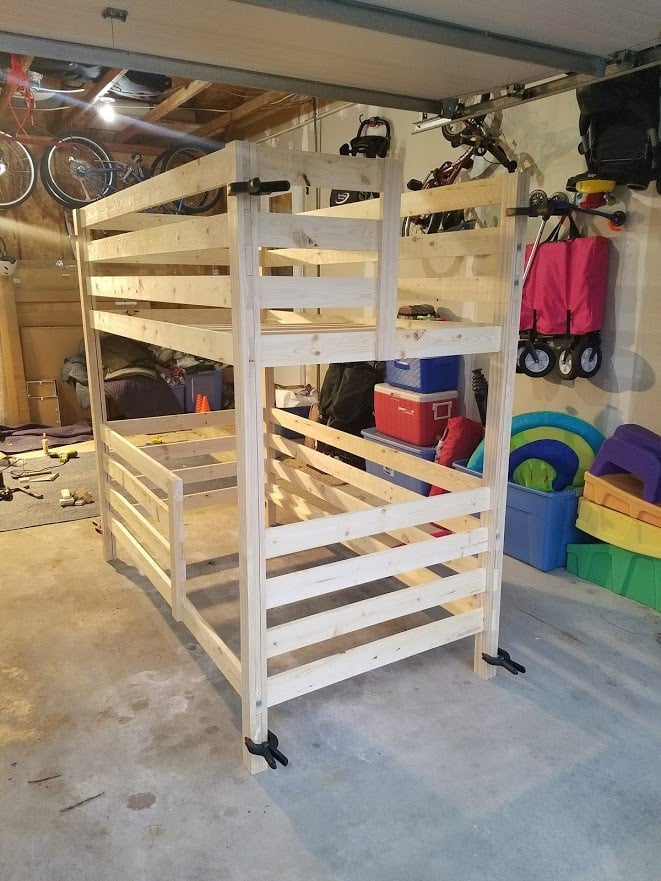
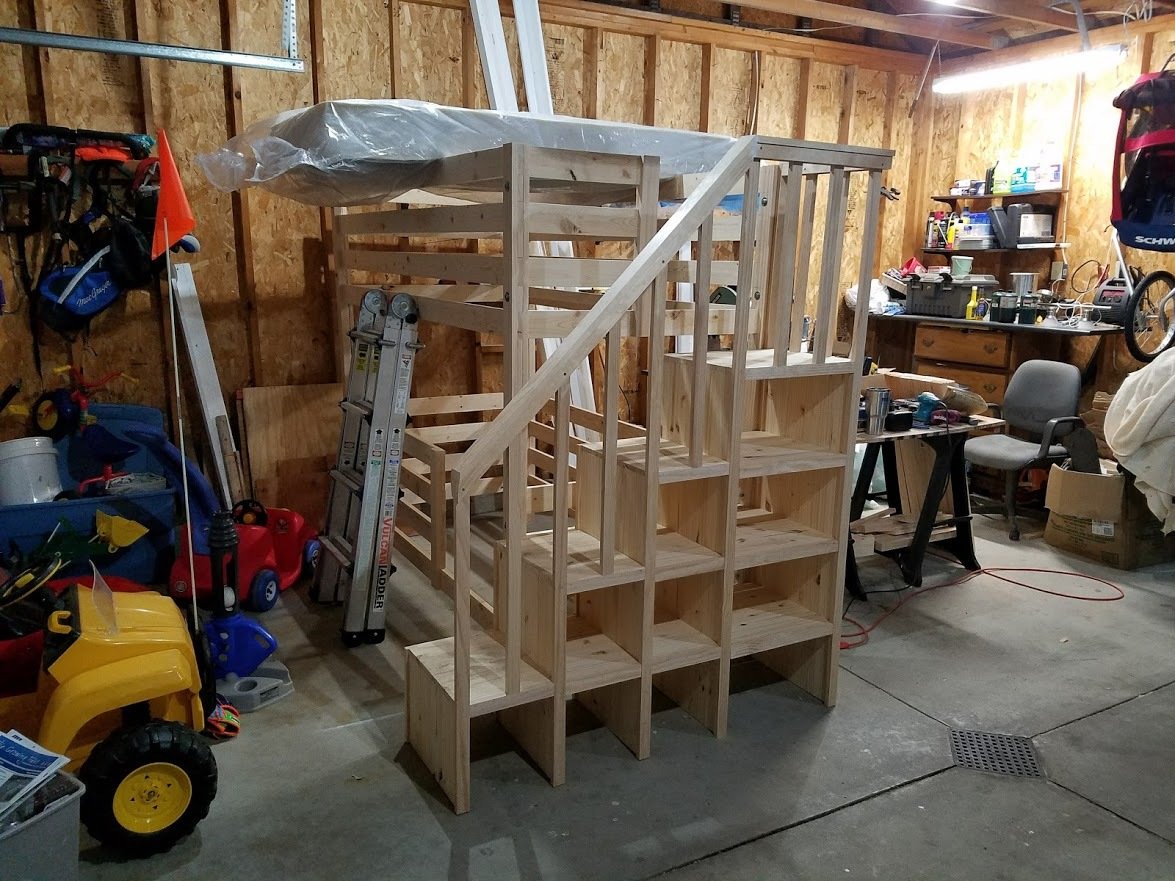
Classic Bunk Beds Re-Imagined With Stairs
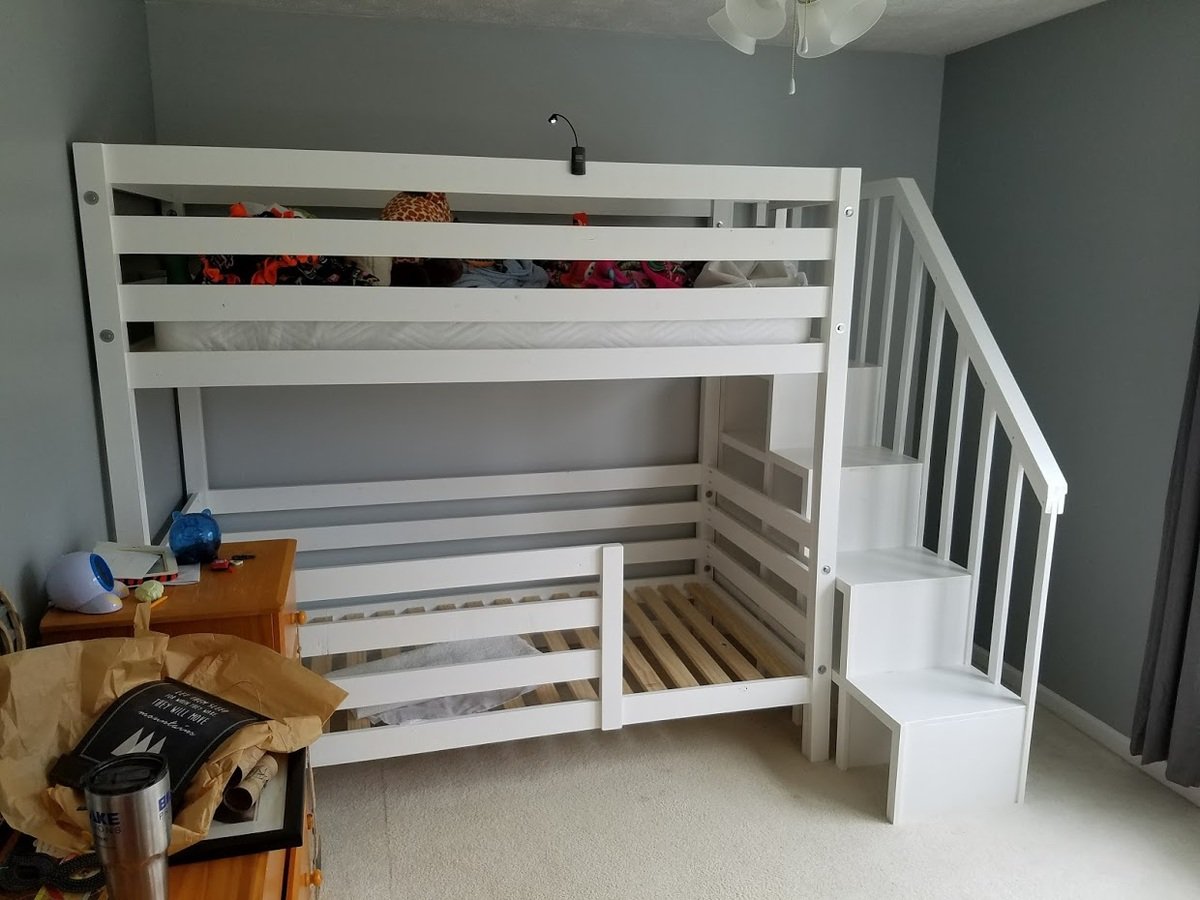
I modified the plans for the Classic Bunk beds by making them 74" tall instead of 63" and added a fourth slat all the way around to add more protection from potential falls. I created one opening in the front for my youngest to get into the bottom bunk, and built slats about 2/3's across the front to act as a gaurd rail. I created another opening on the side for my oldest to get into the top bunk with stairs instead of ladders to again prevent falls. I had to modify the Sweet Pea stairs to accomodate for the extra height in the bunk beds, simplified the railings, and I created each cubby to be big enough to use cloth storage totes that were 11x11x11. Sanded the whole bed and stairs so the corners and edges were all rounded and smooth, and put two coats of white Deck and Porch paint to stand up to the the boys running up and down. I used brackets to secure the stairs to the bed, and sixteen 3" bolts to bind the bed together. Precut and drilled 17 slats for each bed seperated them 2" apart. Spent a few hours every night during the week measuring, cutting, glueing, drilling and assembling the bed and stairs. Spent an entire weekend sanding and painting. Very happy with the way these beds turned out. Overall cost of the project including the paint was around $400.


Built from Plan(s)
Estimated Cost
$400
Estimated Time Investment
Week Long Project (20 Hours or More)
Finish Used
Porch and Deck Paint
Recommended Skill Level
Beginner
Comments
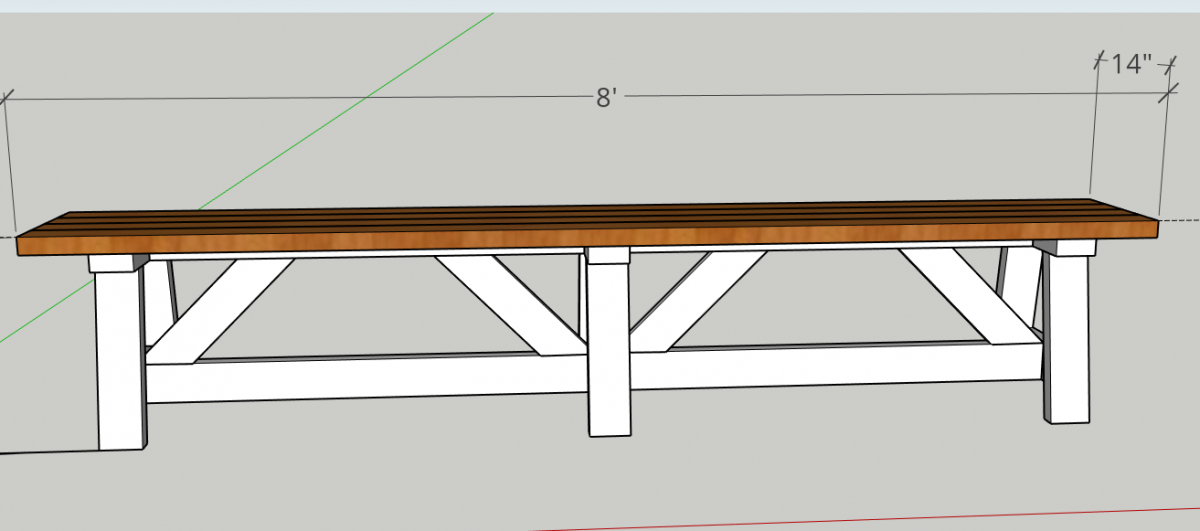
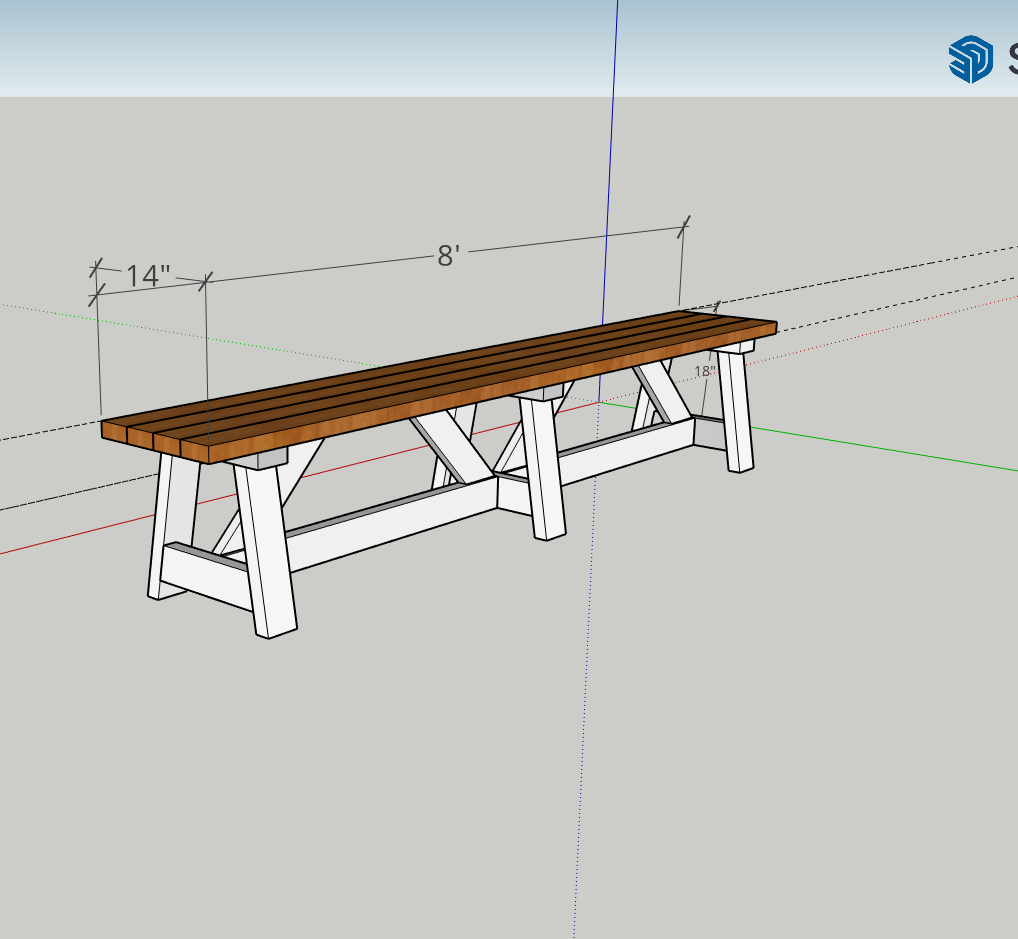
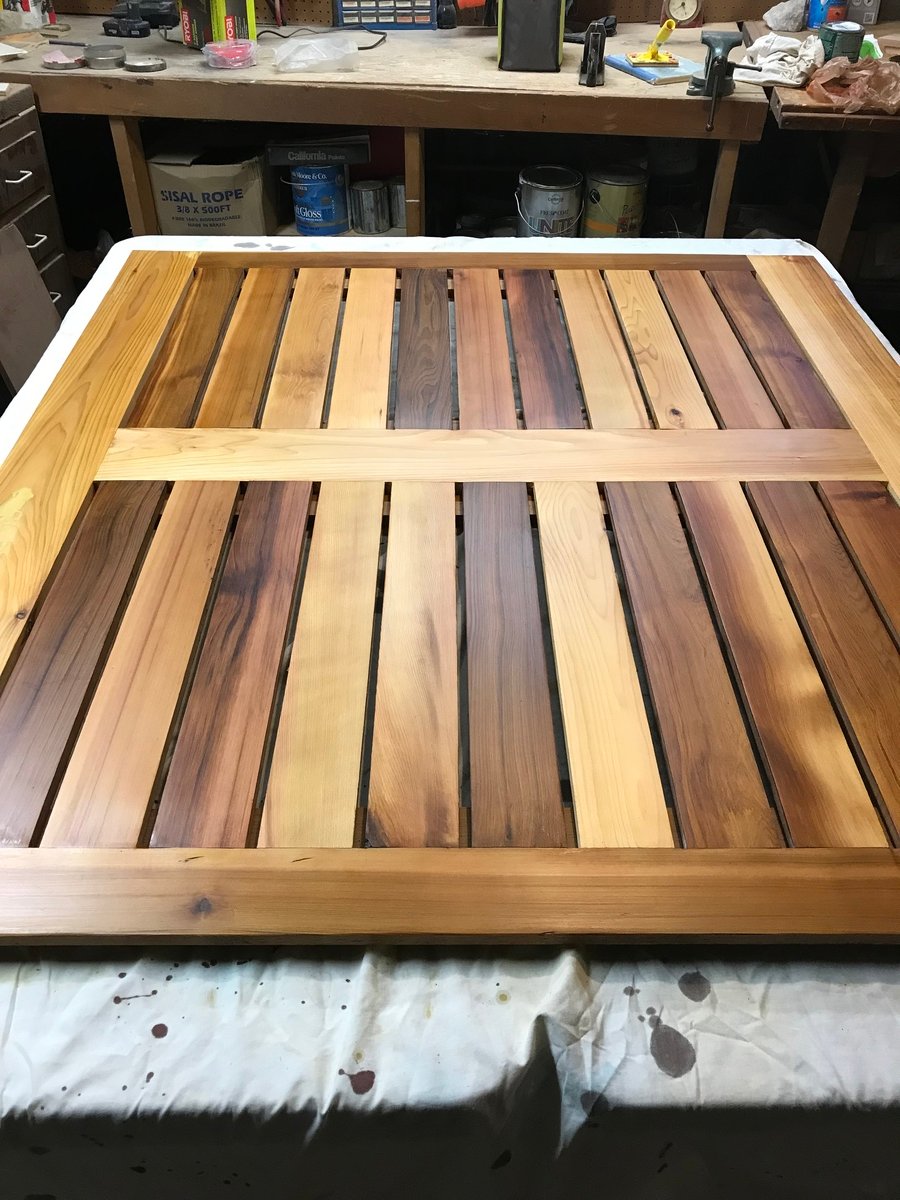
8 foot long truss style farm bench

I had a friend that loved the 48" long truss style farm bench. However, she wanted one 8' long. I modified the "2X4 Truss Style Farm Bench" and came up with this design. As you can see, she want a very specific stain color combination.


Built from Plan(s)
Estimated Cost
$80
Estimated Time Investment
Week Long Project (20 Hours or More)
Finish Used
stains and Minwax Polycrylic
Recommended Skill Level
Beginner
Comments
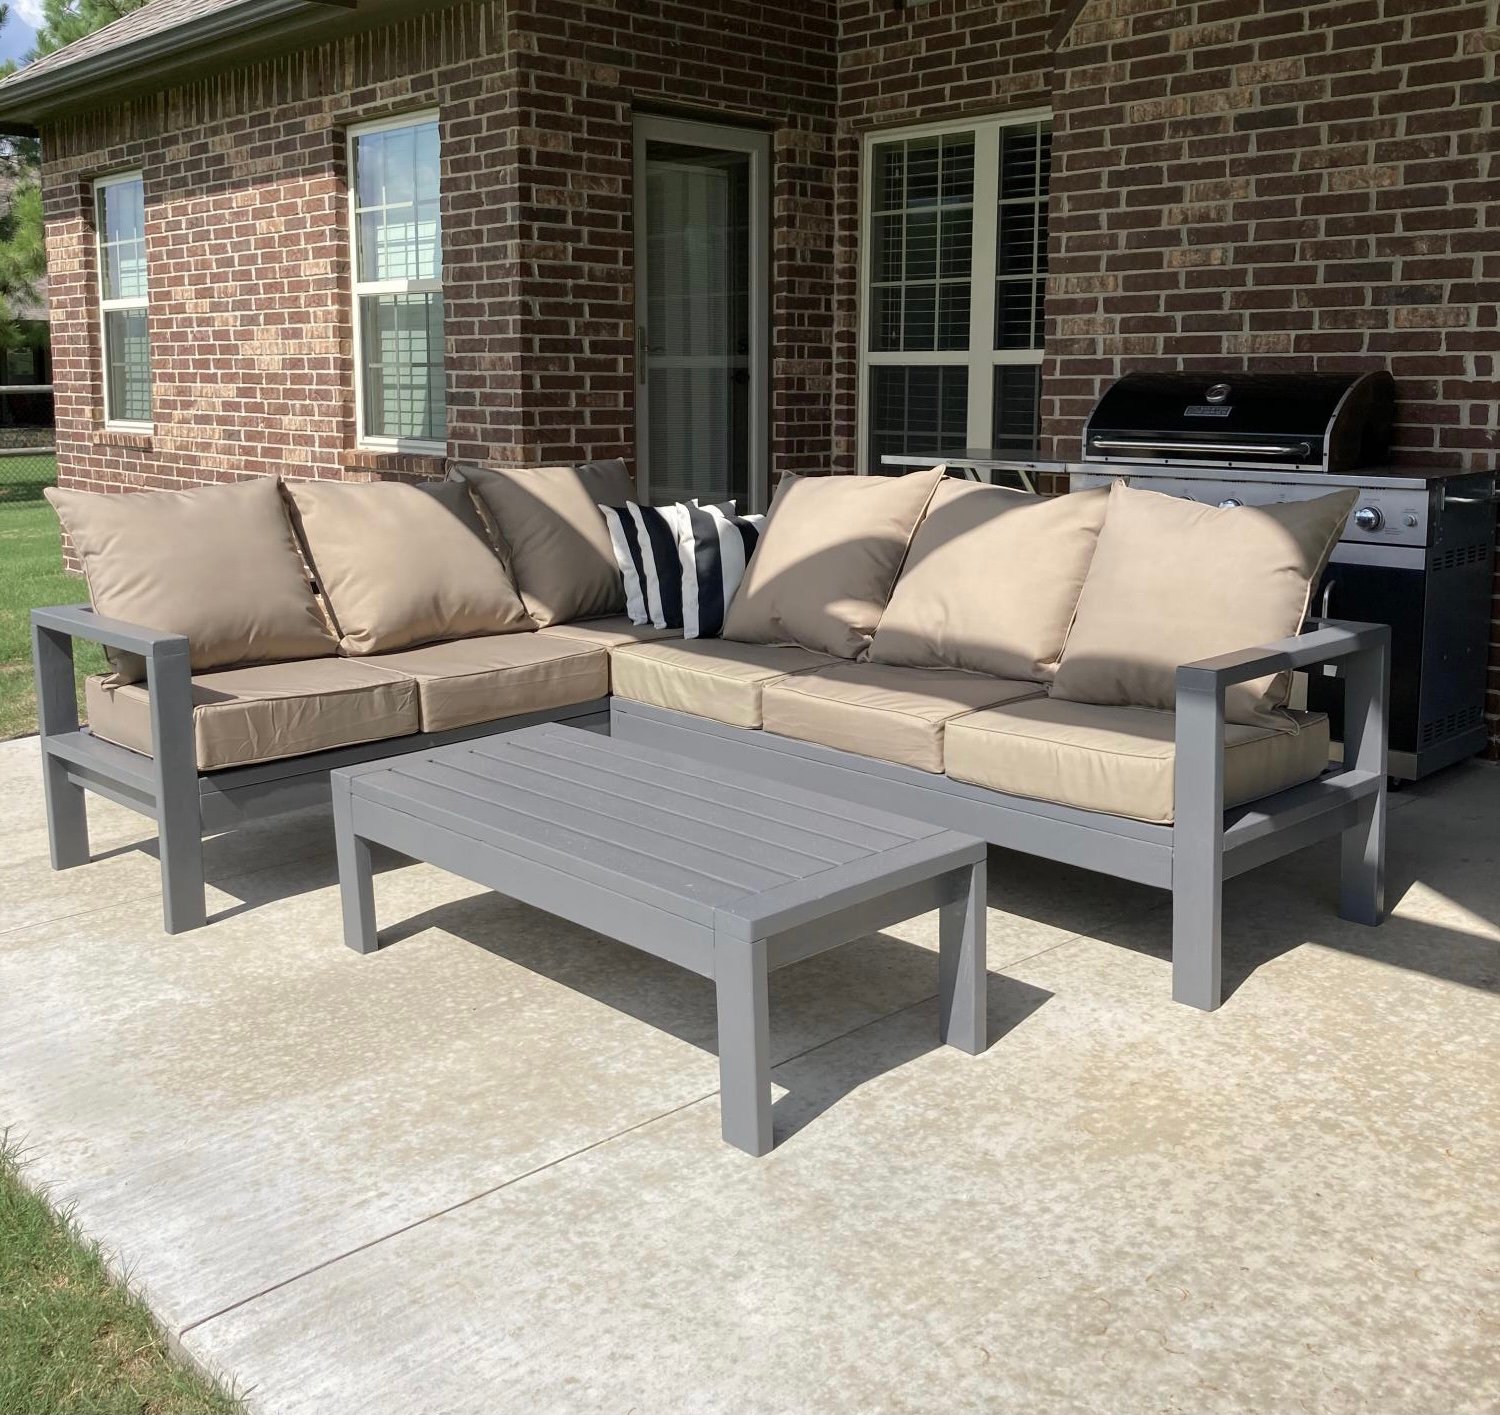
2x4 and 2x6 Chairs and Couch

I used the Modern Outdoor Chair from 2x4s and 2x6s plans and slightly modified then to make a 3 seater couch. My cushions(most expensive part) were 24 in x 24 in and purchased from Lowes for $40 per seat. The couch is 79 inches in total length. I also dropped the seat down to the lower level to allow more room for my cushion backs to sit further down into the seat.


Built from Plan(s)
Estimated Cost
$400
Estimated Time Investment
Weekend Project (10-20 Hours)
Finish Used
Thompsons Waterseal Teak Oil Walnut Semi-Transparent
Recommended Skill Level
Beginner
Cedar Outdoor Sofa

Two projects that I recently built for my wife and my daughter. My wife wanted a tea bar and a beach vibe, my daughter wanted an outdoor couch so it is made out of cedar. They both loved them.
Todd Springer
Built from Plan(s)
DIY Wood Outdoor Chair

Finally have a lawn chair that won't blow away in the MatSu Valley wind.
Built from Plan(s)
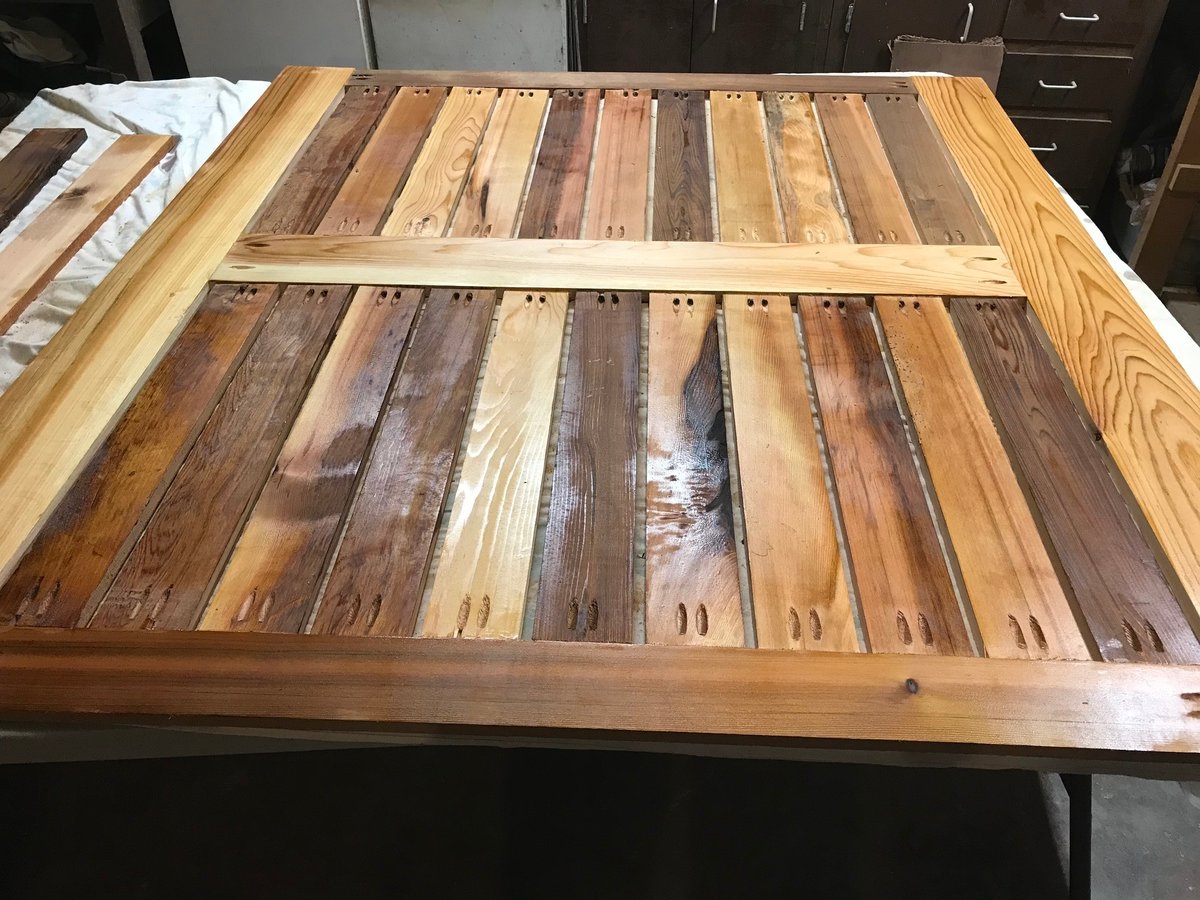
Simple Outdoor Table

Modifications to the simple outdoor table plan thanks to Finn’s dad.


Built from Plan(s)
Estimated Cost
$200 -Found a place that had Cedar shorts “B quality”, but very few knots for an unbelievably cheap price. I ran all to boards through a planer to start and saved a bundle.
Estimated Time Investment
Week Long Project (20 Hours or More)
Finish Used
3coats Spar Urethane. I’ve heard the Spar doesn’t hold up well, so would have used something rlse if I knew that at the beginning.
Recommended Skill Level
Intermediate
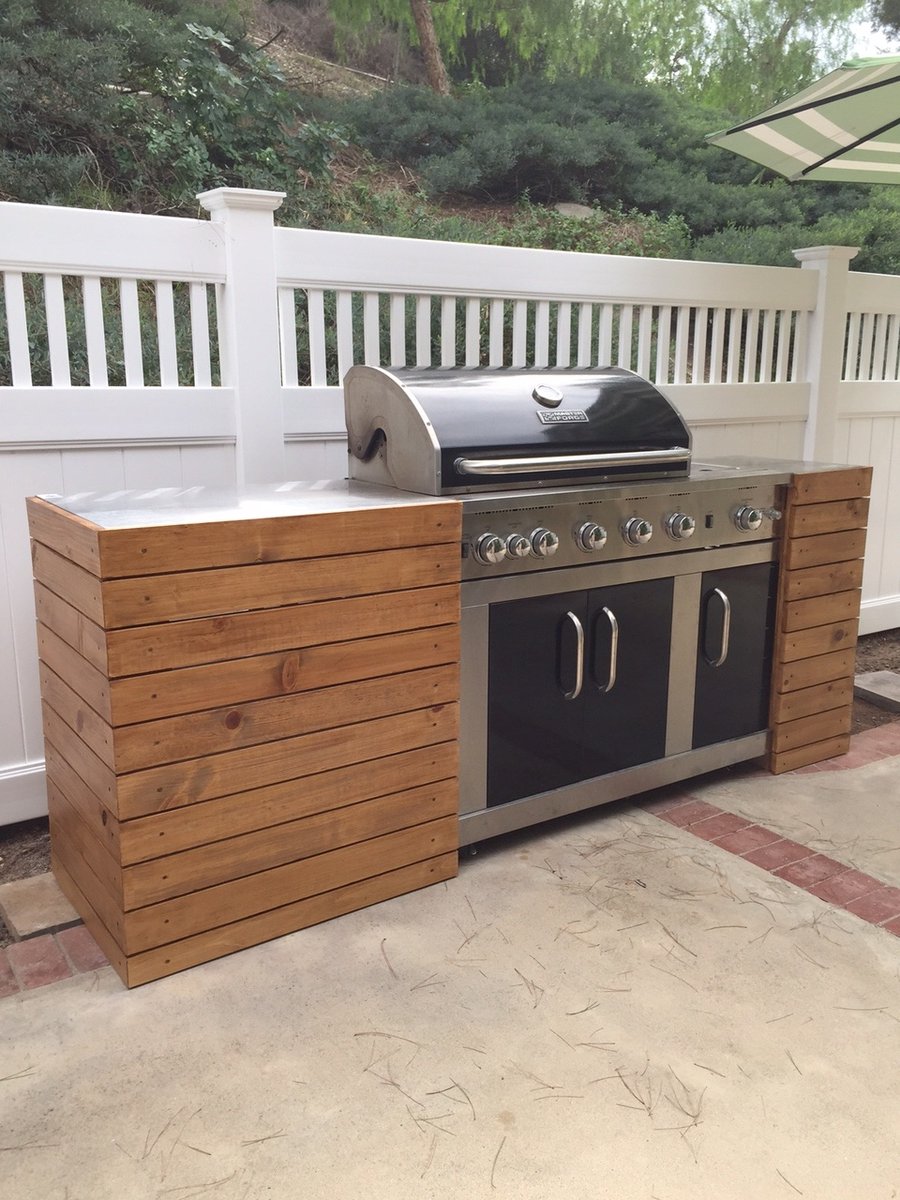
Barbecue/BBQ Quick Built-in

This was just a standard BBQ with an attached folding table. I used a combo of Ana's plans to add a little character and style to the BBQ and it made a huge difference in not only the BBQ, but also the backyard.
Estimated Time Investment
Weekend Project (10-20 Hours)
Finish Used
Golden Oak
Recommended Skill Level
Beginner
Comments
Mon, 05/23/2016 - 12:29
BBQ Built In
Hello: Very interested in which plans you used to build the BBQ Built In. Thank you.
Wed, 06/08/2016 - 09:22
BARBECUE/BBQ QUICK BUILT-IN
Hello dbryant1977, please share the plans. Also, what's brand/model of BBQ? Very nice.
Thu, 04/09/2020 - 18:27
This is my guess on the…
This is my guess on the plans used! https://www.ana-white.com/woodworking-projects/diy-grill-island-featuri…
Fri, 08/30/2019 - 09:50
Are there plans for this…
Are there plans for this project or at least some pictures from while you were building it?
Thu, 04/09/2020 - 18:27
This is my guess on the…
This is my guess on the plans used! https://www.ana-white.com/woodworking-projects/diy-grill-island-featuri…
Wed, 04/22/2020 - 15:52
Can you provide us with the…
Can you provide us with the plans for this? I would love to build one.

Mon, 03/04/2024 - 14:49
Can you provide us with the plans for this?
Hello: Very interested in which plans you used to build the BBQ Built In. Thank you.
Poolside Towel Cabinet from Benchmark Cabinet Plan

My father and I made this awesome poolside towel cabinet using the Benchmark Cabinet plans. A super easy 1 day build and it looks amazing on the patio. Bring on the pool weather!

Built from Plan(s)
Estimated Cost
$60
Estimated Time Investment
Day Project (6-9 Hours)
Finish Used
Chalk paint/Poly topcoat
Recommended Skill Level
Beginner
Great Patio Set
I wanted sturdy seating for my patio. Ana White had the perfect plans for my L shaped seating and coffee table. It was simple to put together and we love it!

Built from Plan(s)
Comments
Glider

The bench was easy to build with great instructions. I had Home Depot make my cuts for this first project and then I went and bought a miter saw and other power tools for future ones. So much fun.
Built from Plan(s)
Estimated Cost
$100
Estimated Time Investment
Afternoon Project (3-6 Hours)
Recommended Skill Level
Beginner
Comments
Mon, 03/14/2016 - 08:35
This looks amazing!
Great work. DId you do anything different to the swing itself? How did you build the frame. I'm looking to do this exact thing for my patio. I don't have anywhere to hang the swing.
Thanks for sharing any info.
Sat, 06/13/2020 - 16:54
For those looking for measurements/dimensions on the legs here
Made the chair and then built the glider frame for it just eyeballing the picture. I can't figure out how to upload a photo of my design, but can try to describe it.
I made mine with a 4x4 on the base of each leg, but a 2x4 would work as well, it was just what I had on hand. The base board on each leg I made 48". From there I put two 48" vertical boards. The vertical boards were centered and from the front edge of the first board to the back edge of the second board. Two 16" boards were then used at the top and bottom of the vertical boards to hold them in place. Cap it off with a 30" board on top of the verticals. This is where you'll attach your eye bolts. I put both eye bolts 3 1/2" back from the front (a scrap of 2x4 works well as a guide). To join the two legs, I used two 52" boards on top of the base 4X4 of the verticals (one in front of the legs and one behind).
Doggy loft bed!

My dog loves to people watch all day while I'm at work and she needed a new bed so I took the plans for the lower platform and modified them so it would stand alone. Took the platform and put it on the bottom so that her bed would sit inside instead of on top where she could more easily fall off.
I tried building without PH screws at first and all I ended up with was a lot of cracked and wasted lumber. Got the PH jig and finished the whole build myself in 2 hours. Sanding, staining, and sealing tomorrow but I'm just so excited about it I had to post now!
Built from Plan(s)
Estimated Cost
With the two sets of lumber, having to buy the jig, hardware, stain, and electric sander it cost me about $130
Estimated Time Investment
Afternoon Project (3-6 Hours)
Recommended Skill Level
Beginner
Comments
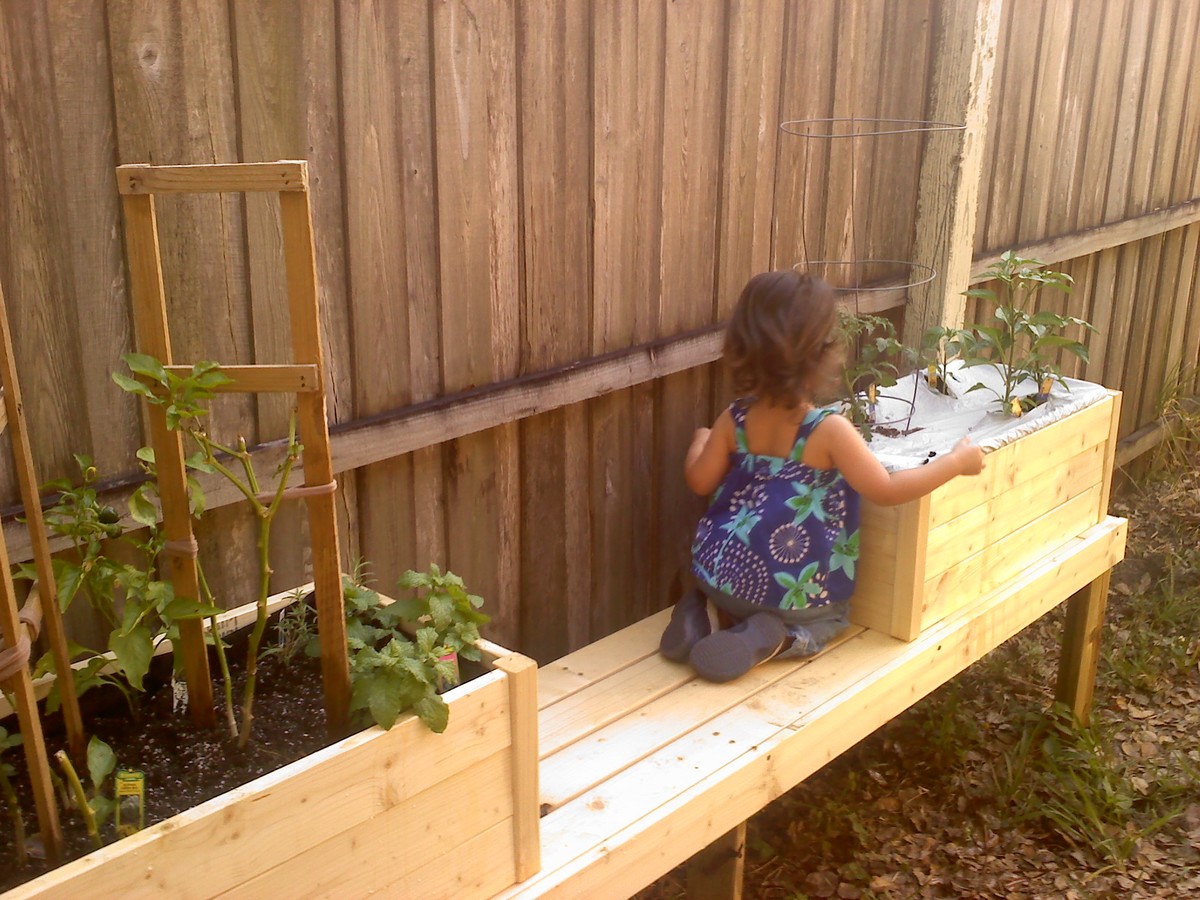
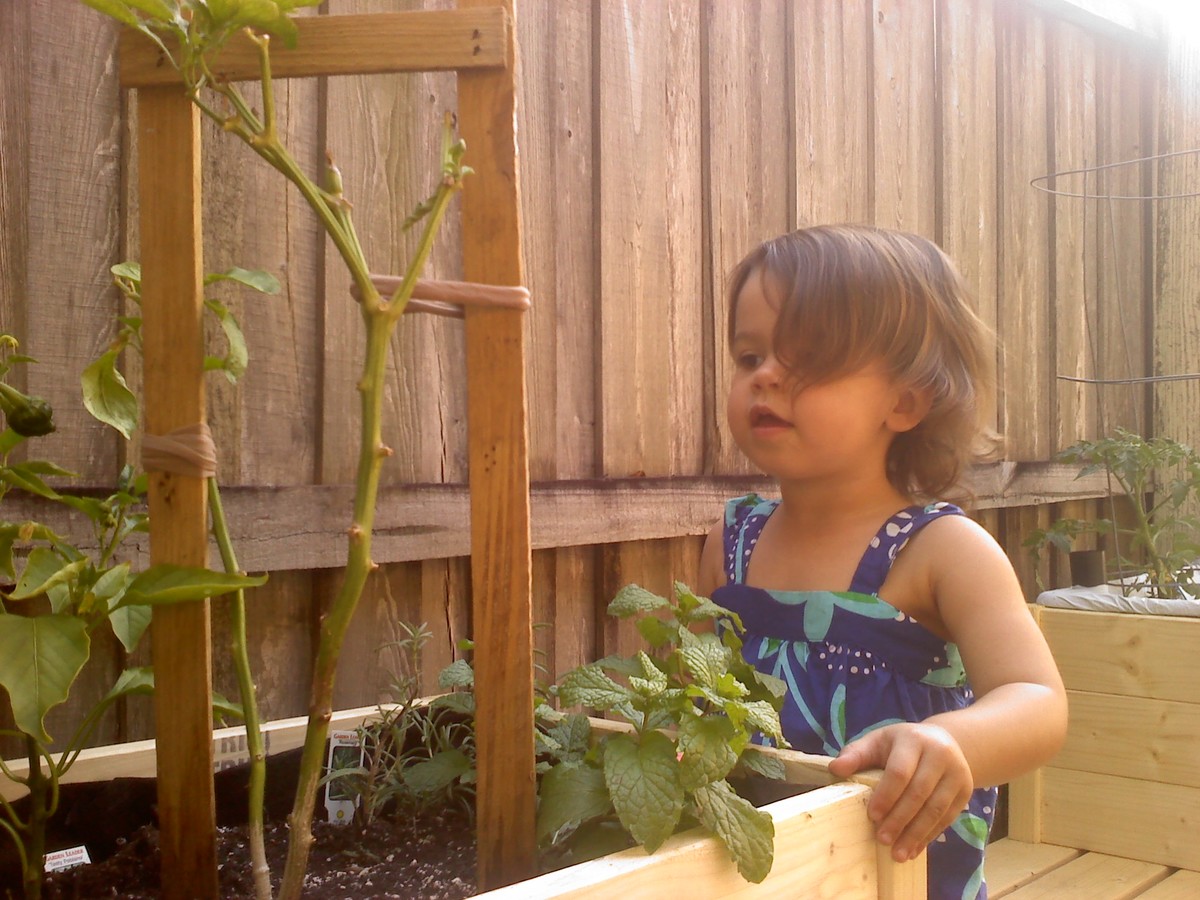
Modified to fit an Earthbox and mounted to a bench

I took the design of the planter and stretched it to accomodate an "Earthbox" (which is 29 x 13.5x 11 inches) to see if I could boost the results of my little garden. Both planters were made the same size so that if I'd like, next season ,I can use two Earthboxes.
The bench was built to keep out bunnies, our Husky, give us a place to put down the bowl when picking from the garden and lastly to give Georgia a place to climb up and get a better view or help. It is made using some treated 2x6's for legs aand support and untreated 2x4's for the actual benchtop.
I'll add a protective finish (and missing trim on both ends) to the bench part later this week when I have some toddler free time at home :)


Built from Plan(s)
Estimated Time Investment
Afternoon Project (3-6 Hours)
Recommended Skill Level
Beginner
Comments

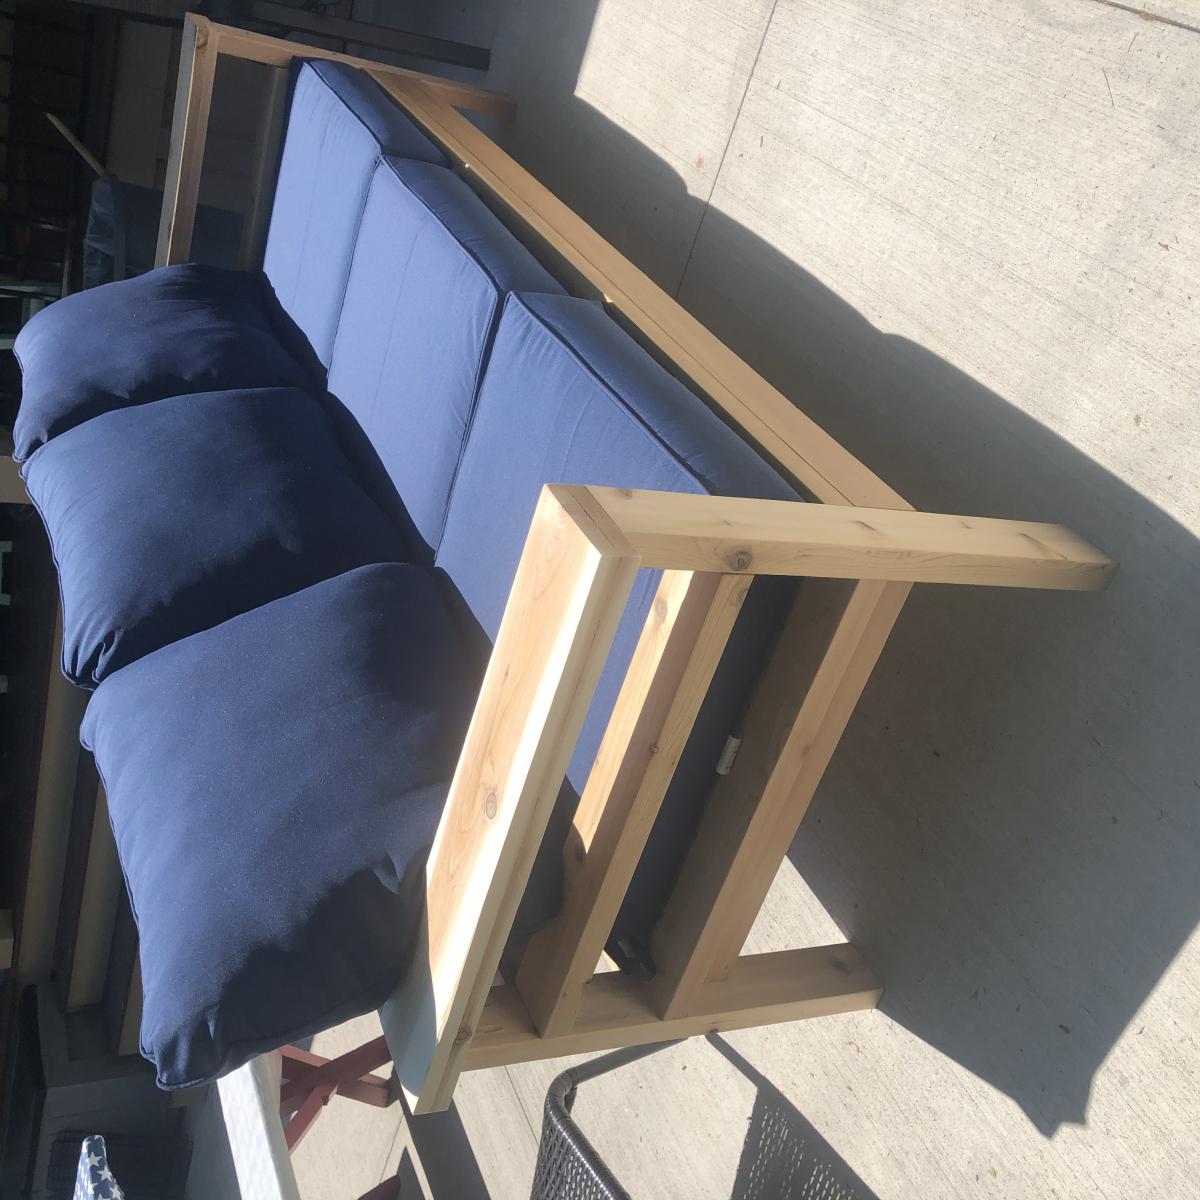
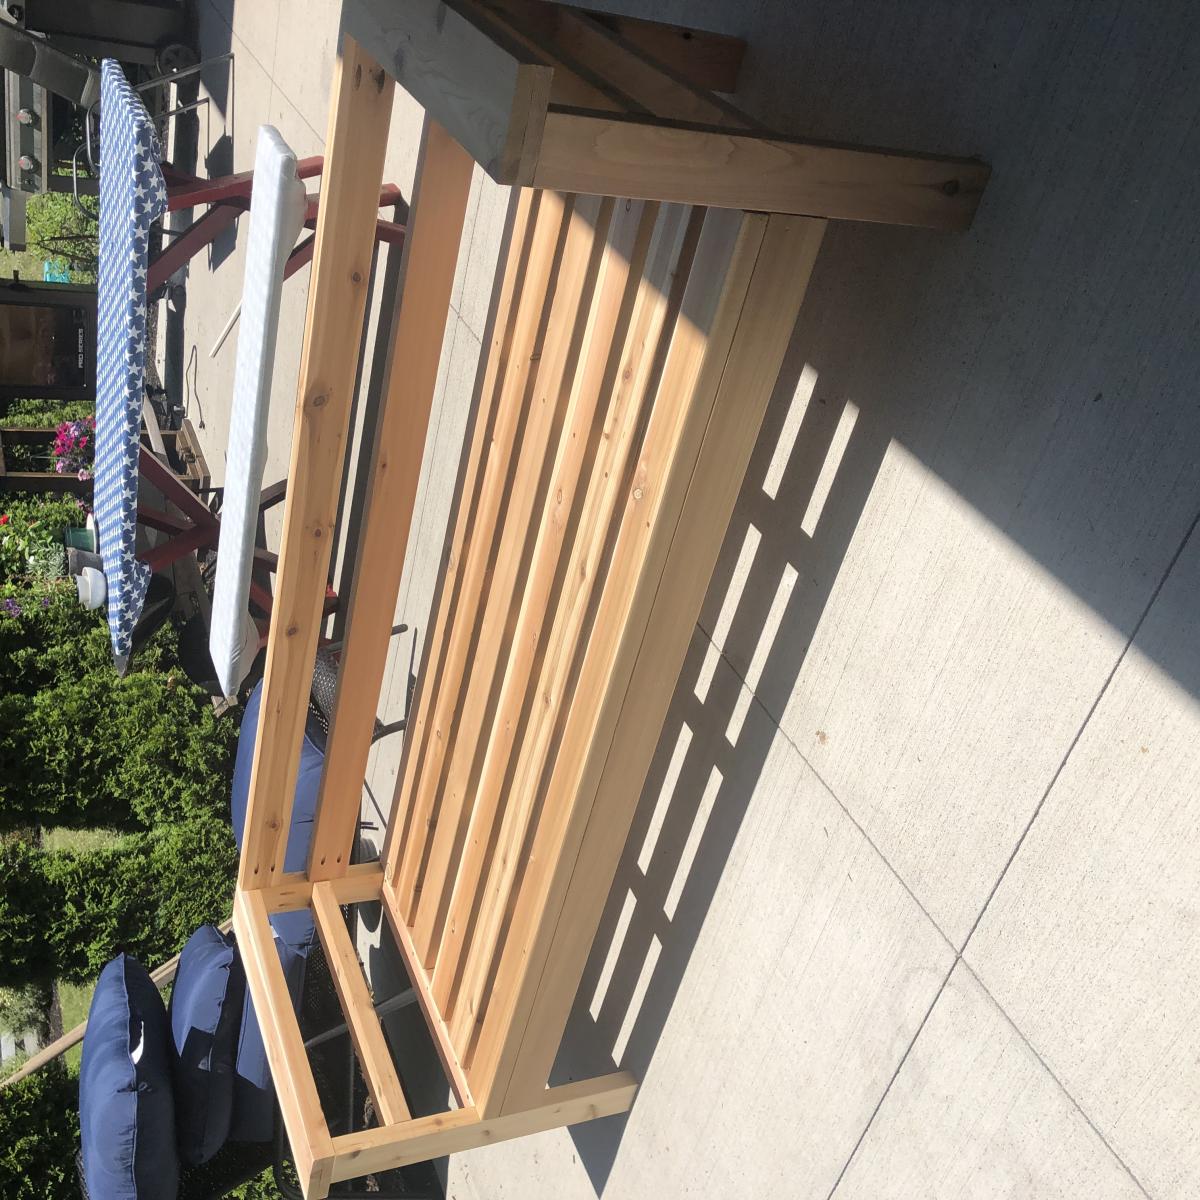
2x4 outdoor couch

I used cedar and added the extra boards so the cushions would stay put. We also made the arms 2x6 boards so we wouldn’t need end tables for the couch. The plans were super easy to follow. I mostly used pocket holes so the screws wouldn’t be visible. Love how it came out! Thank you for the plans, Ana!!

Built from Plan(s)
Estimated Time Investment
Day Project (6-9 Hours)
Finish Used
Nothing yet. Deciding on whether to let it grey on its own
Recommended Skill Level
Beginner
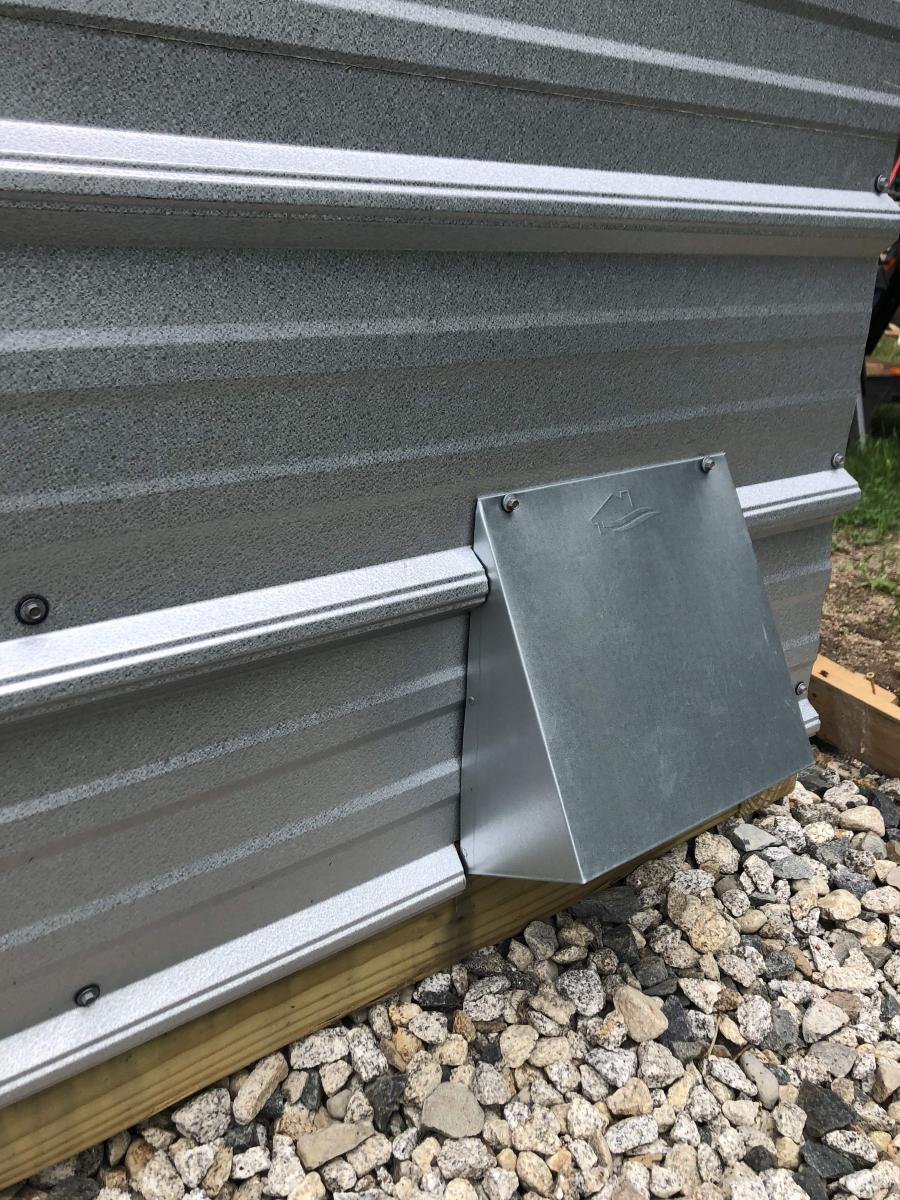
DIY Greenhouse Project -Added elevated raised beds & temp/humidity control

We loved this greenhouse plan from AnaWhite and wanted to be able to grow in 3 seasons so we modified the design to include humidity & temperature control & 18" deep elevated cedar beds inside with 4x4 posts for support and trellis option. We added electricity in order to have a lighted workspace and the ability to put in a circulating fan to control mold and fungus. We added 2 work tables (2x2') on the inside of the door left and right side door in order to do seed trays & store supplies. This was a wonderful project for my husband and my plants inside are doing incredibly well compared to my outside garden beds here in zone 5. Products used:
Foundation
We had a landscape company come and scape/dig a platform and then fill/compact with crushed rock
My husband then used rebar driven into a 4x4 frame in order to secure the frame to the ground and create a base upon which to build the greenhouse
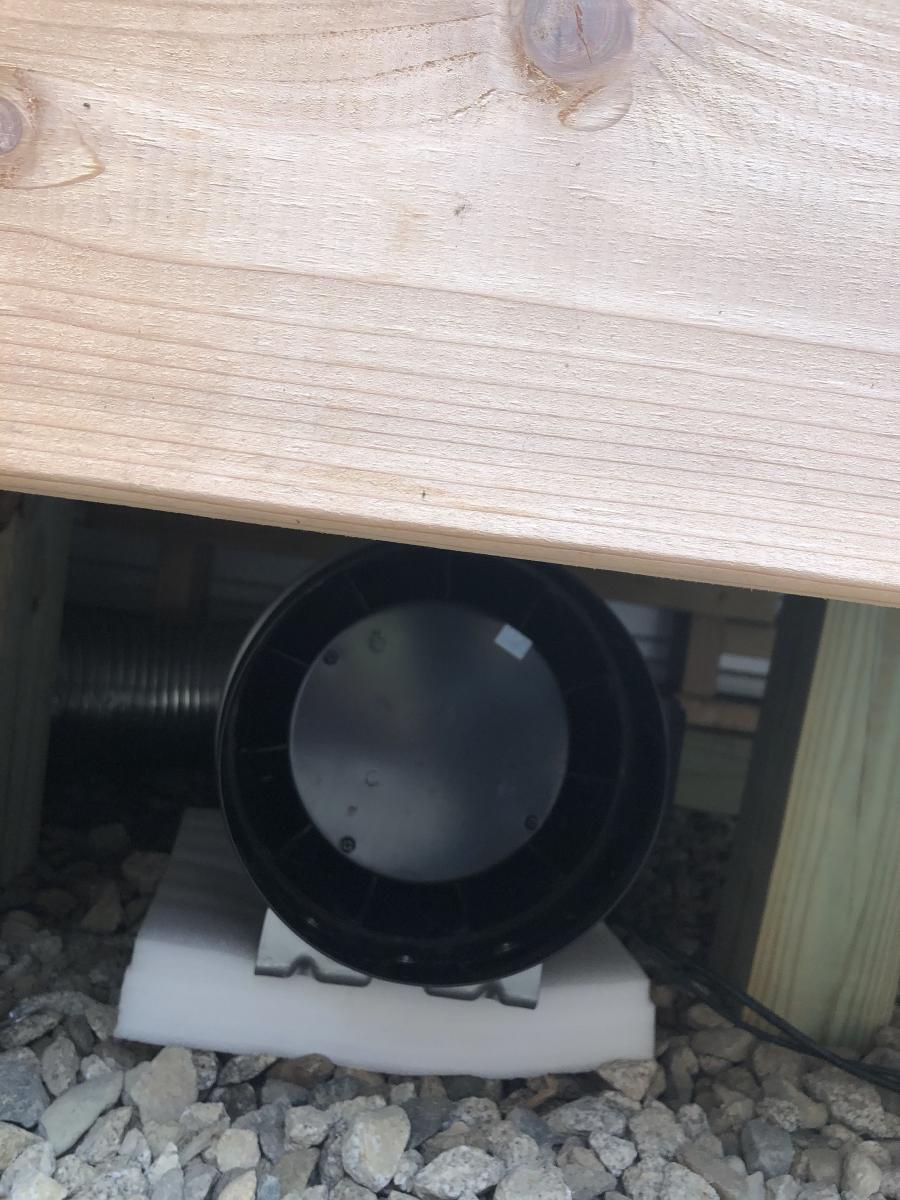
Active ventilation
AC Infinity Cloudline T8 Inline duct fan
Air king range hood wall cap 8" on the bottom outside of the greenhouse wall for air intake + flex 8" duct to the fan itself
Shelter logic autovent automatic shelter vent kits (1 on each side of the front wall) in order to allow air intake from the bottom back of the greenhouse under the elevated beds to flow to the front of the greenhouse and out
Circulating fan- Hurricane wall mount fan 16" - this fan has 3 speeds with tilt function and small mounting bracket
Soil - sourced 3 yards of 50/50 loam/compost from local landscaping supply
60% loam
30% organic compost
10% organic topsoil + perlite
Soil beds
-cedar frame 2 feet wide along sides, 3 feet wide on the back wall
-galvanized metal roofing with holes drilled into it for drainage
-landscape cloth lined


Built from Plan(s)
Estimated Cost
$2000
Estimated Time Investment
Week Long Project (20 Hours or More)
Finish Used
None
Recommended Skill Level
Intermediate
Comments
Wed, 09/09/2020 - 13:09
Thanks for that update! I…
Thanks for that update! I was wondering how to vent this project, as Green houses need the ventilation. Good to know dollar amount also. Great photos.
Wed, 09/09/2020 - 13:09
Thanks for that update! I…
Thanks for that update! I was wondering how to vent this project, as Green houses need the ventilation. Good to know dollar amount also. Great photos.
Wed, 09/09/2020 - 13:09
Thanks for that update! I…
Thanks for that update! I was wondering how to vent this project, as Green houses need the ventilation. Good to know dollar amount also. Great photos.
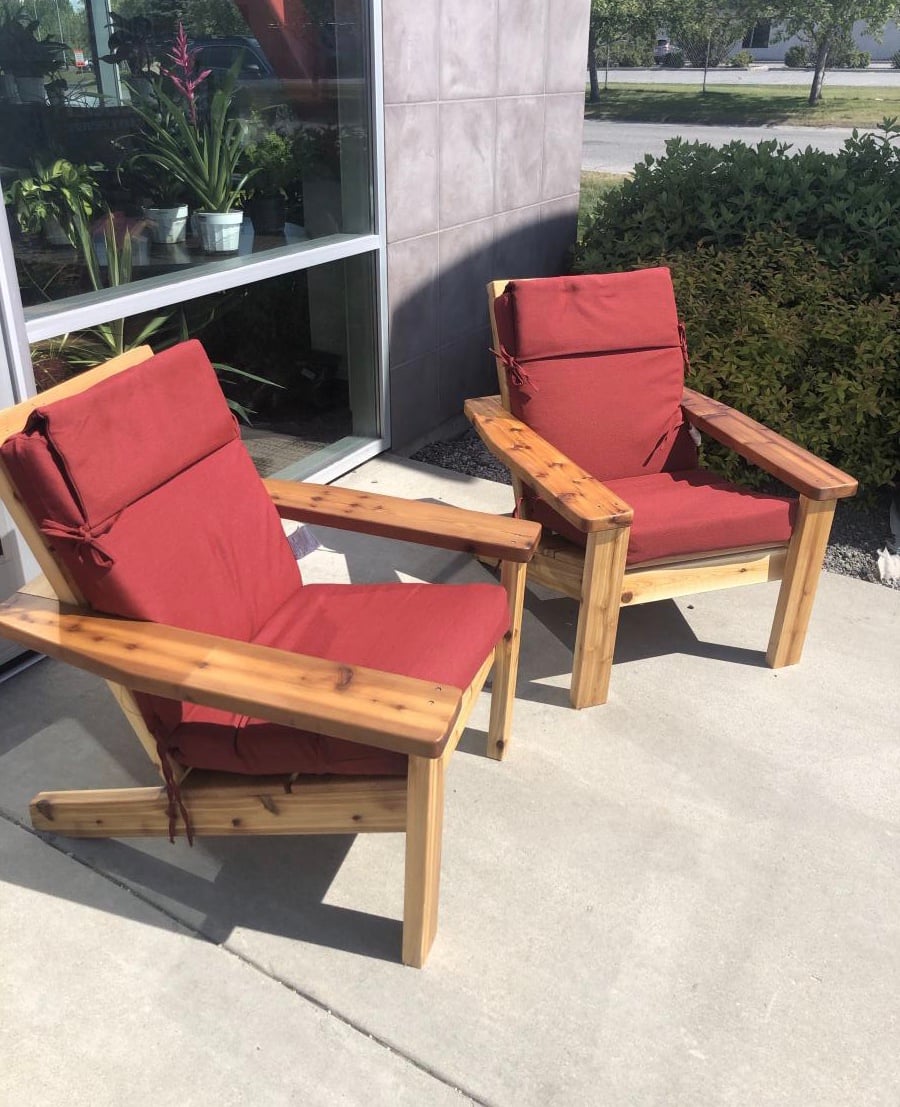
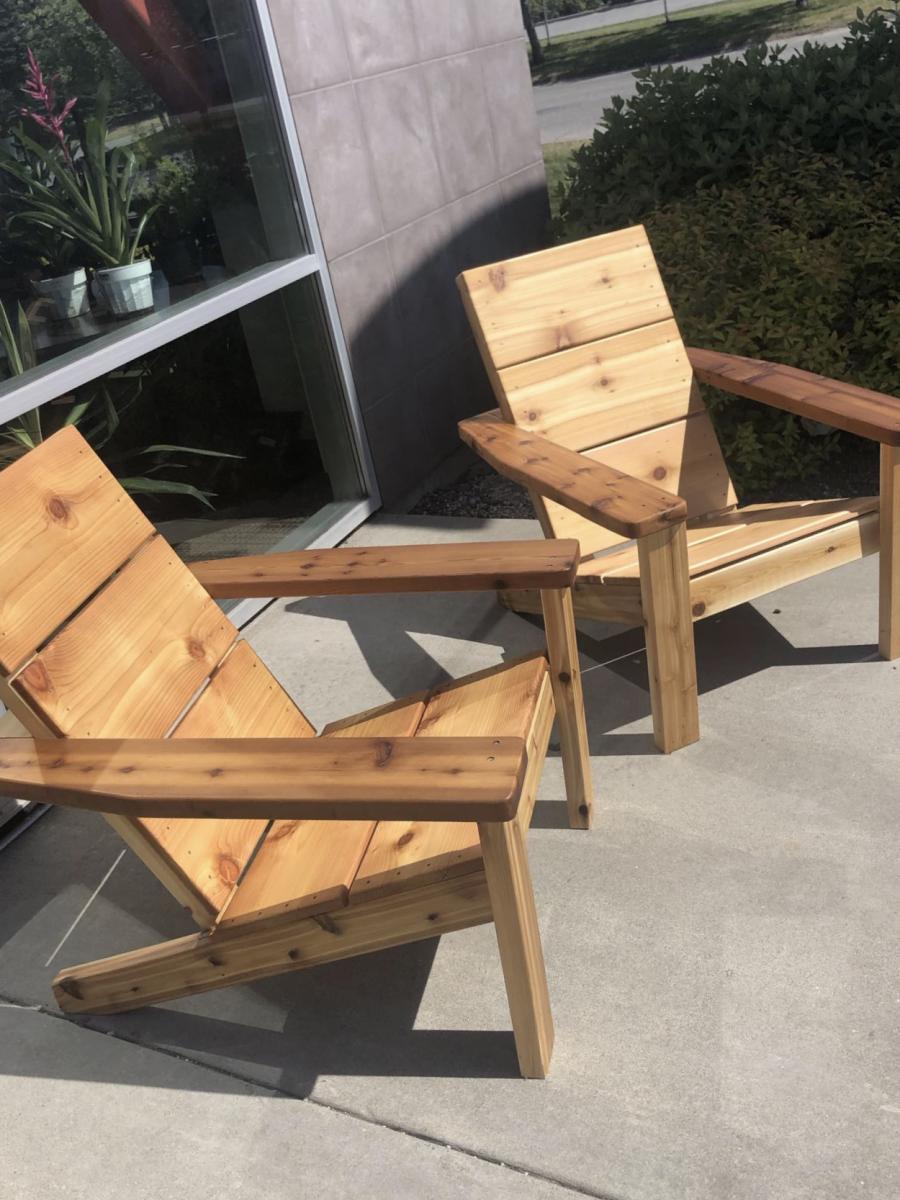
Best Chairs Ever!

I made these modern Adirondack chairs for our business in Anchorage. GREAT and easy to build design by Ana - we upgraded the arms to tapered 2x6 and they're awesome!
Built from Plan(s)
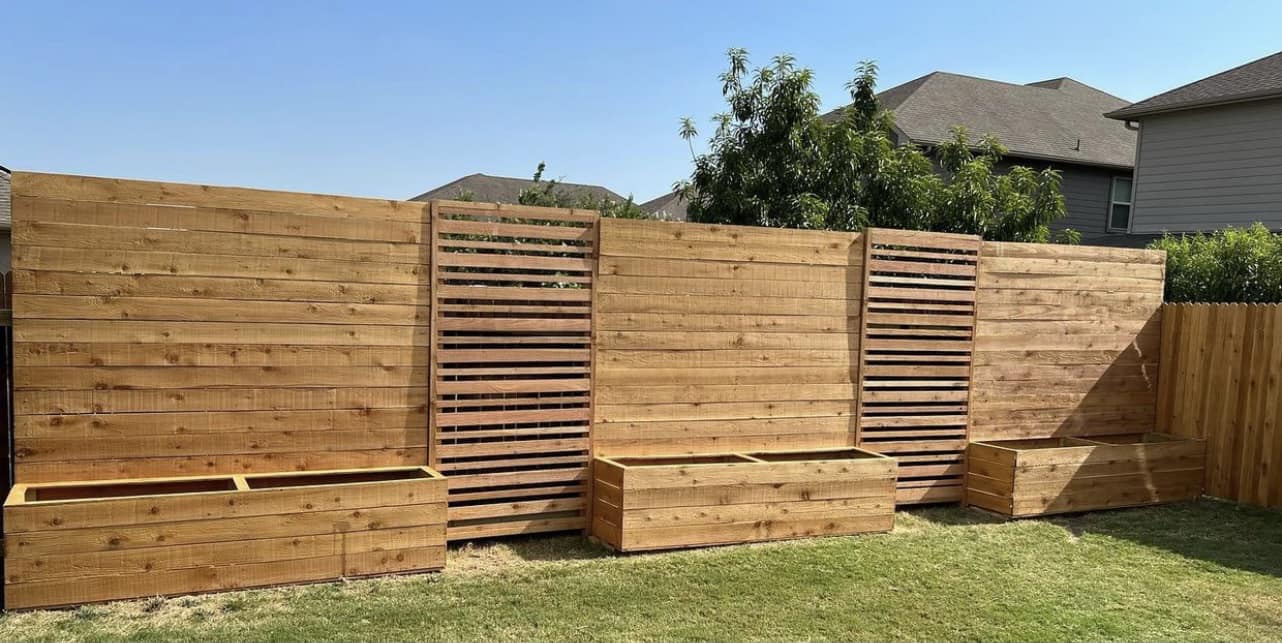
Privacy Planter Fence
Wood Working Apron
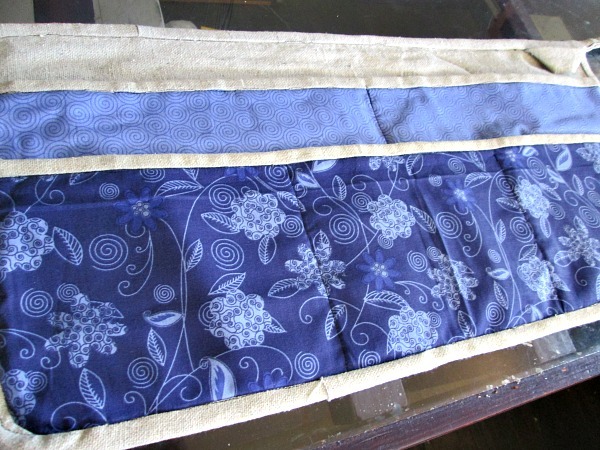
Thank you soo much for the apron plans. I've used a sewing machine about 5 times in my life, and I didn't know what "stitch in the ditch" or bias tape or trim was, but with the plans and some web searching, I was actually able to sew this apron. It took me considerably longer than others, especially because I don't have an iron, pins, or a seam ripper (ripping a seam took me over an hour). Again, thank you sooo much! I hope to never lose my pen and tape measure at the lumber yard again with this handy creation :)
Built from Plan(s)
Estimated Cost
Less than $6
Estimated Time Investment
Afternoon Project (3-6 Hours)
Recommended Skill Level
Beginner
Comments

Sun, 06/15/2014 - 05:27
Looks great!
Great job on the work apron, Yvonne! Congrats on conquering the sewing machine!
In reply to Looks great! by JoanneS
Tue, 06/17/2014 - 00:27
So much to learn
Thank you, Joanne. :) There is so much I want to learn, and for some reason, I feel like I need to learn it all now, when my life is busier than ever. Hah!
In reply to Amazing job by spiceylg
Fri, 06/27/2014 - 10:55
Like a jigsaw :)
Thank you so much. It reminded me of using a jigsaw, and vice versa. :)