Playhouse

A fun project that my girls loved. Through a flat sheet on top for fun!
Built from Plan(s)
Recommended Skill Level
Beginner
A fun project that my girls loved. Through a flat sheet on top for fun!

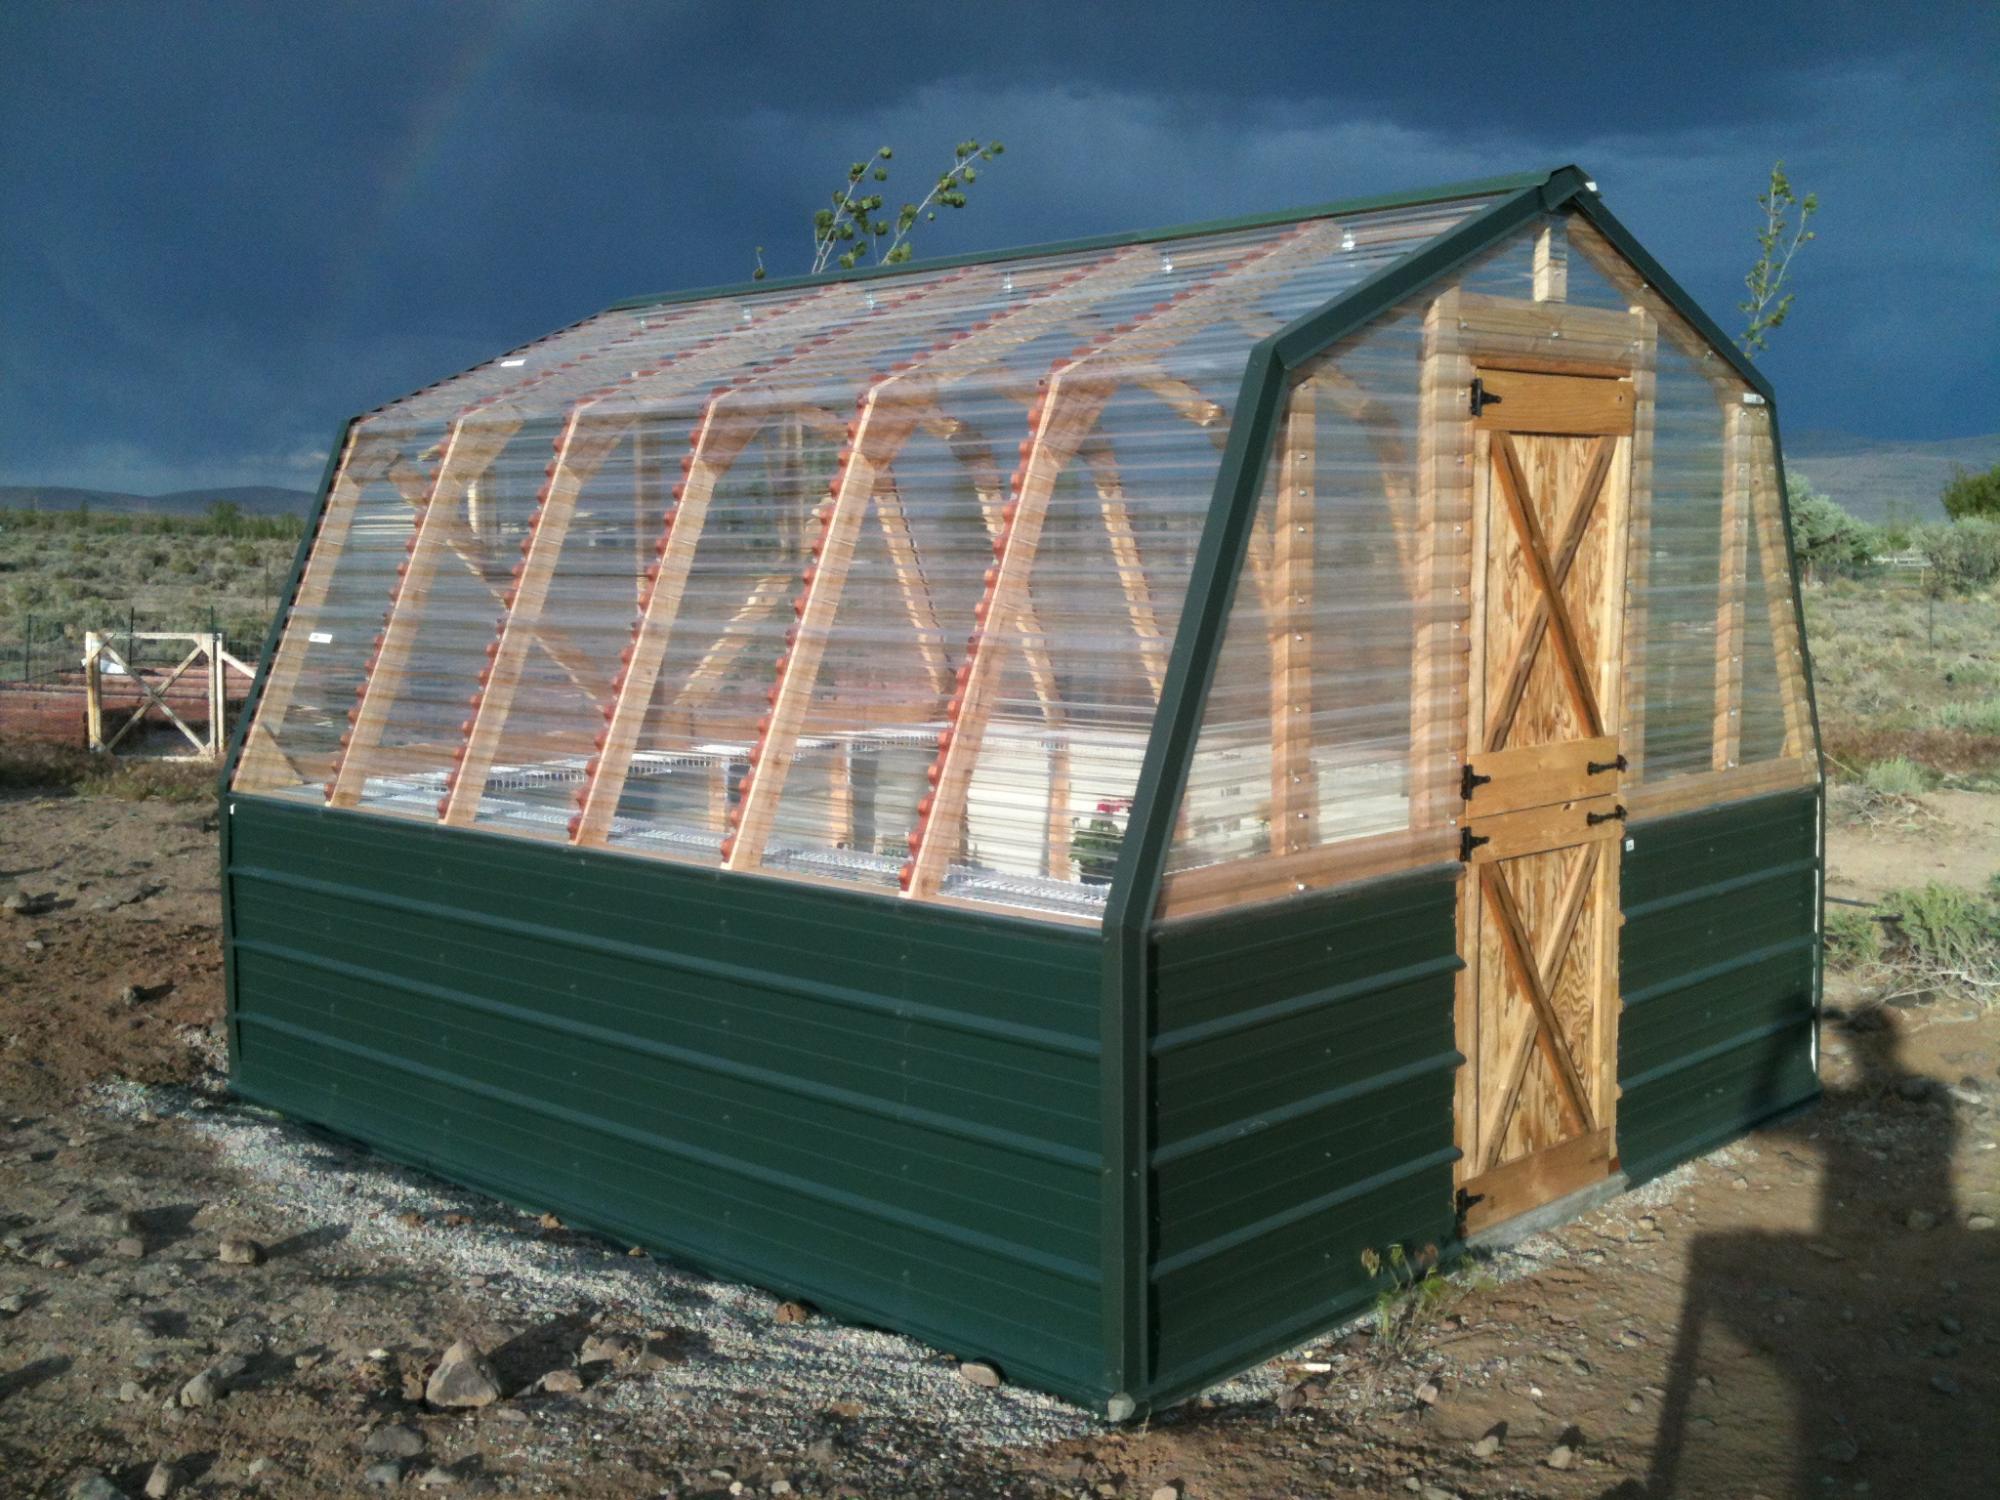
My new garden shed built from your premium plans! I'm 62, never built a shed before, and worked mostly alone. My sons helped with some of the wall and roof sheathing. In the end, I did everything except for the shingling. I painted it to match my house main color and trim.
The video is very helpful - I watched it several times. My major change to the plans was using Simpson Strong Ties and hurricane ties to secure the rafters to the ridge pole and the top plates. Otherwise, I used all other methods. I recommend cutting the front wall sheathing before cutting the panels for the doors. I do not have a trim saw and thought my standard circular saw was too heavy for me to make the cuts like Jacob did.
Tue, 06/13/2023 - 13:57
Really impressive, thank you so much for sharing and good for you to just go for it!!!

I had so much fun building this and has already proven to be helpful. Thanks for the wonderful plans! Can't wait to begin my next building project for this small space.

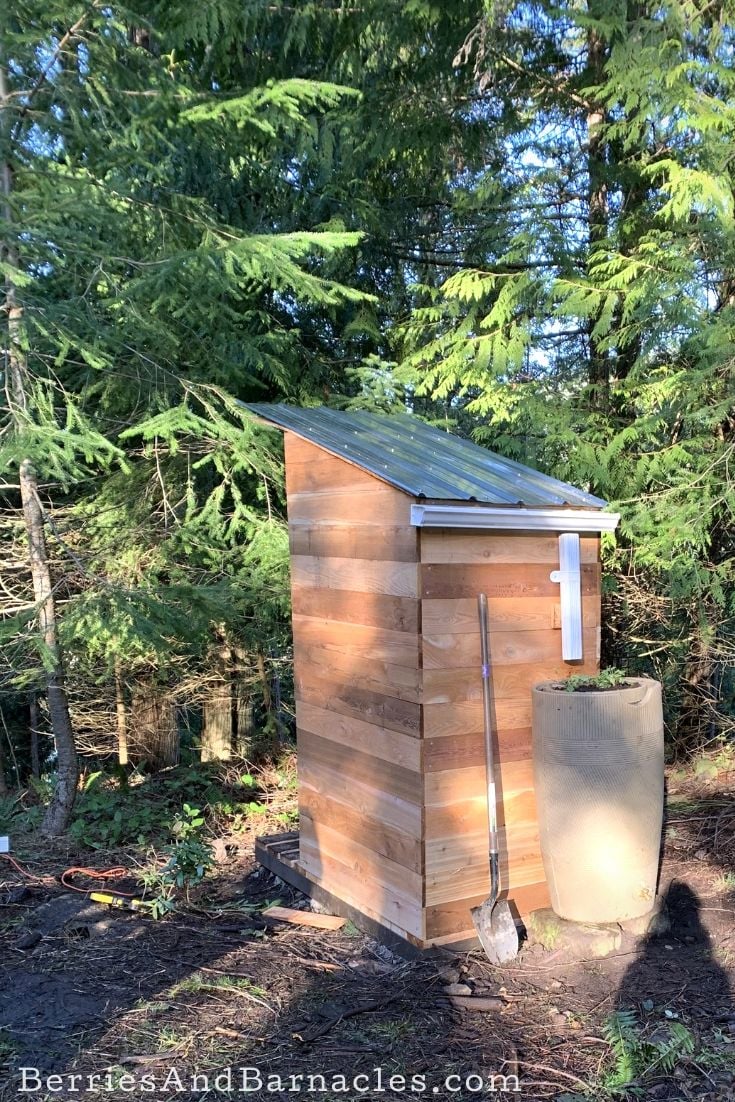
We built this composting toilet as one of the first things we did on our piece of vacant land. (How can you build anything else without somewhere to go when nature calls?)
An eco-friendly design was important to us, so we used cedar fencing instead of plywood. Otherwise, we followed Ana White's simple outhouse plans. It came out perfectly! It even has a rain barrel for hand washing.

This was a fun family project! Thank you!!

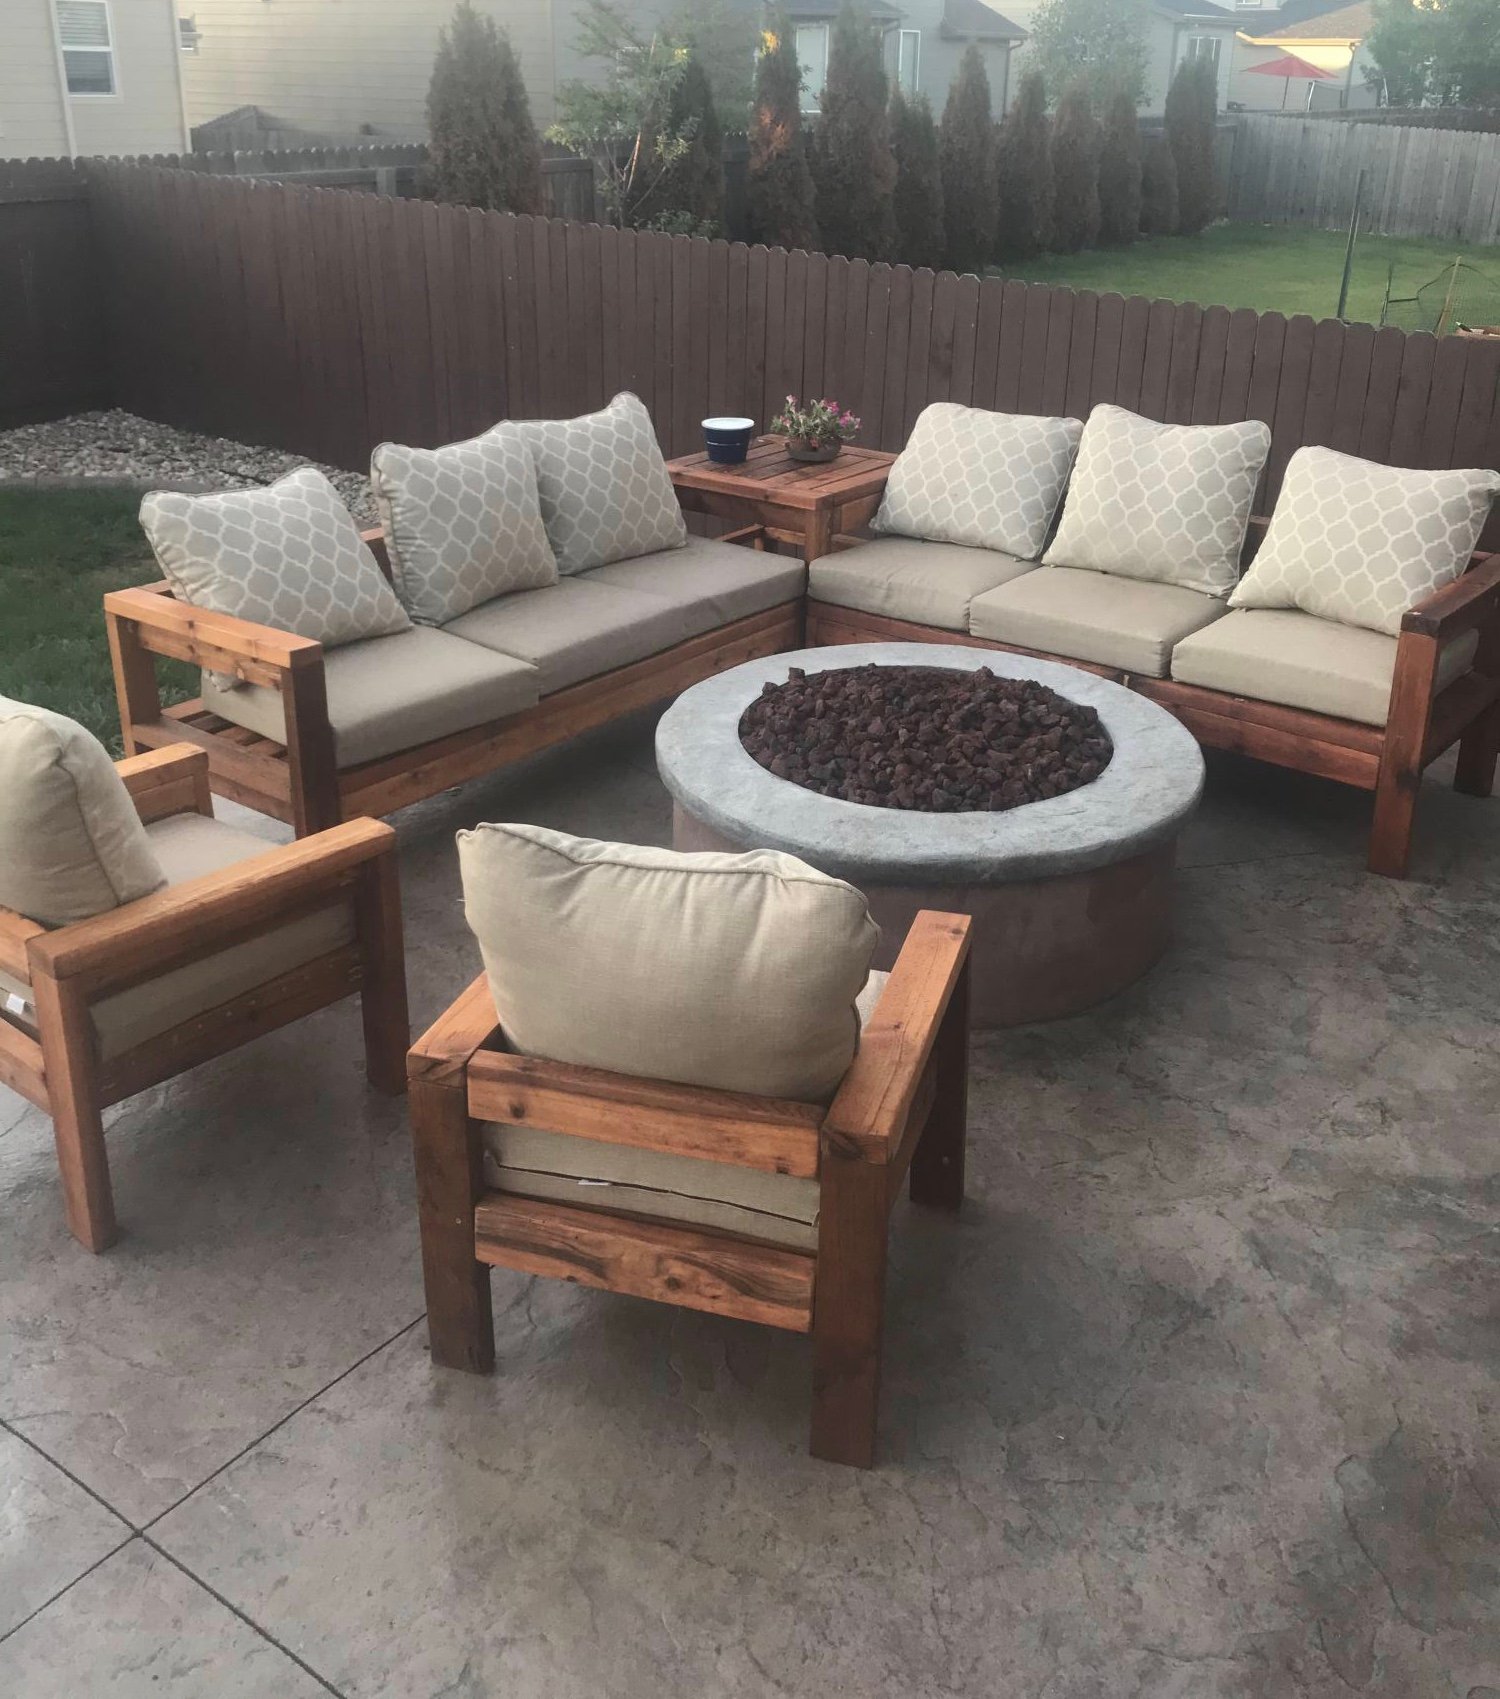
Loved this project. The third one I have completed from Ana’s projects. Took about 3.5 hours to complete both. I used 2x4 cedar. I did add an additional piece on the back of both sectionals as I found the cushions I bought would slip down the back.
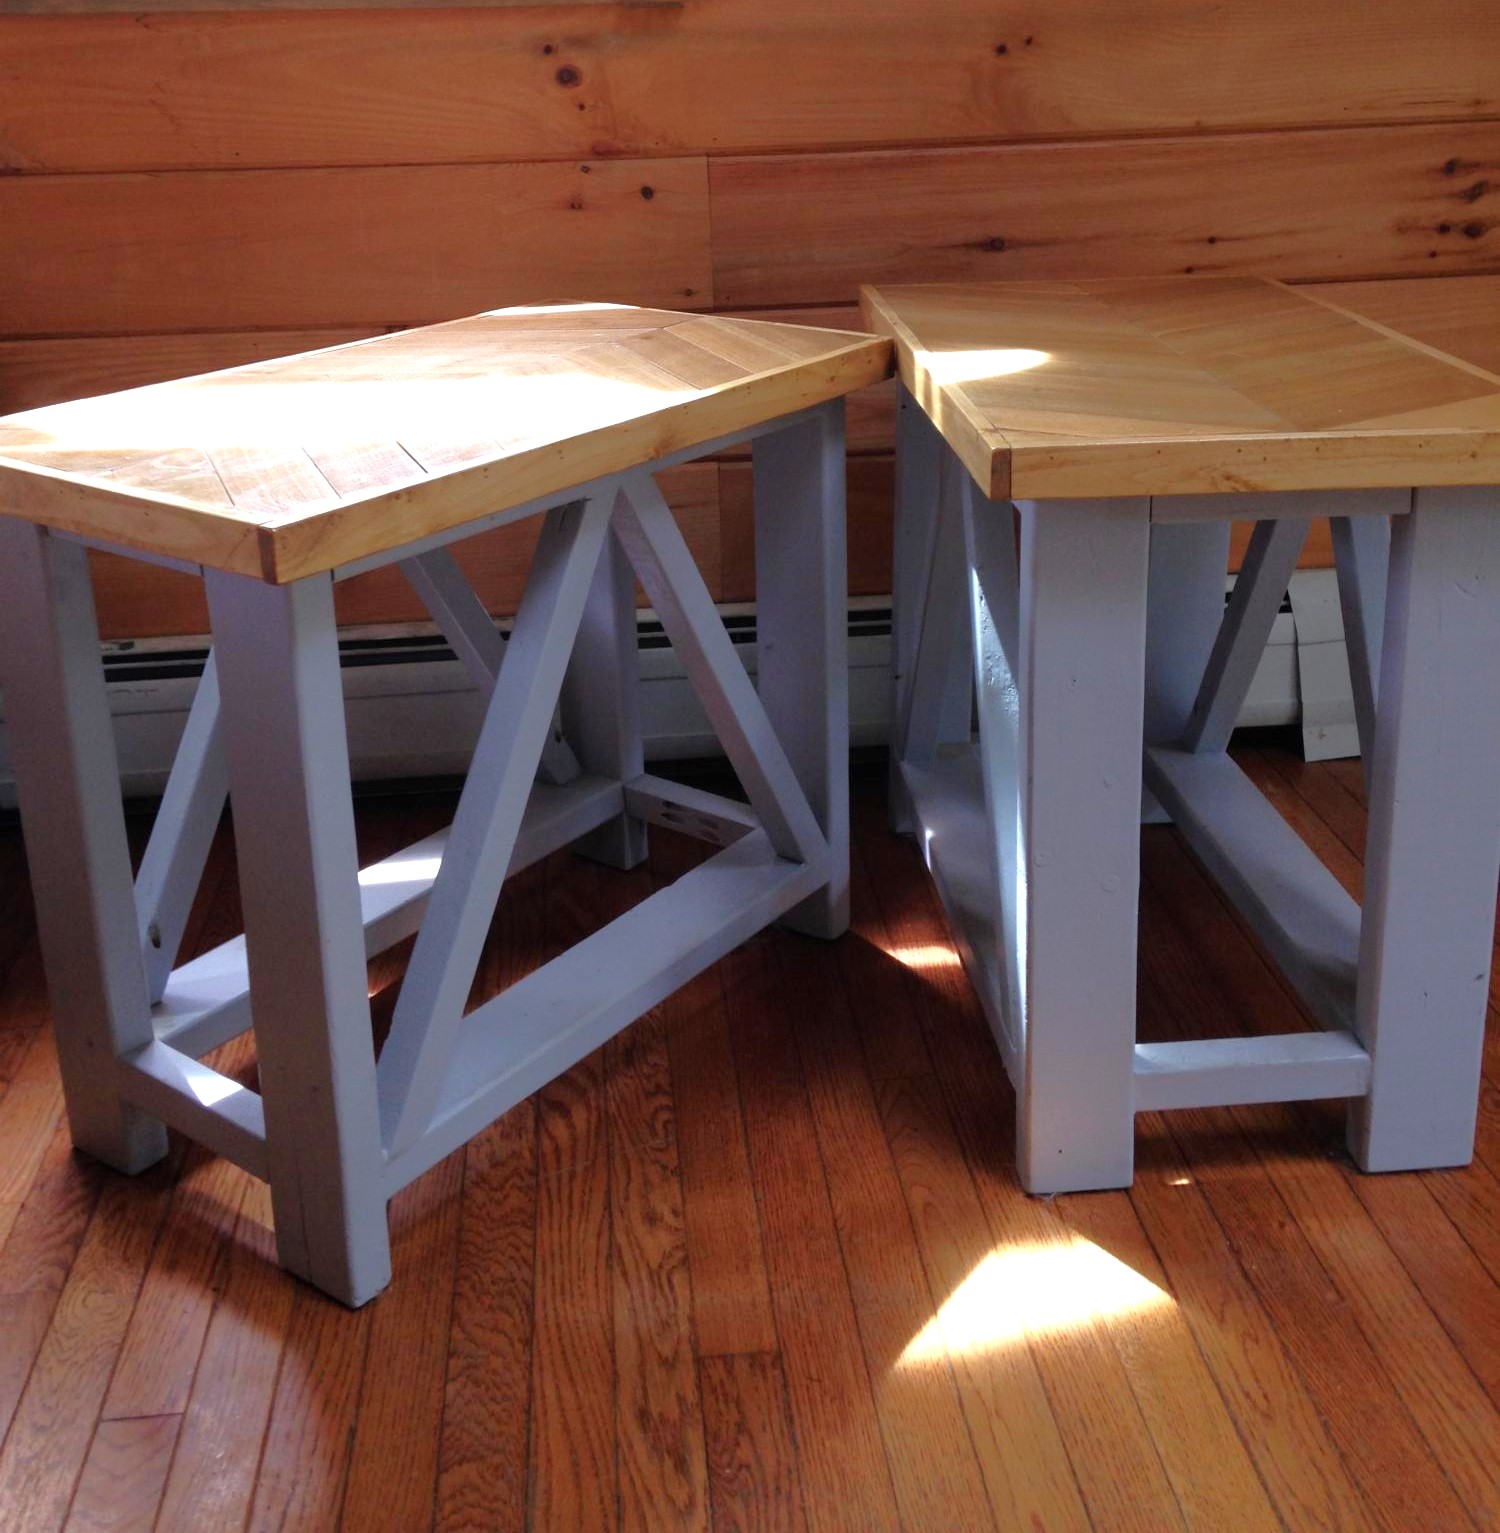
From the rustic X end table plan, I made mine slightly taller and a little more narrow to fit my space. Also decided to do a chevron top


We built the first one about 8 years ago, and then the wind flipped it over and scattered it all over the back part of the property. I then dug footings and anchored the second one down; I was able to save the Dutch Door I made for the first one. Thanks for the plans!!!
Fri, 04/08/2022 - 10:35
That's not going anywhere! Thanks for sharing, it looks amazing!
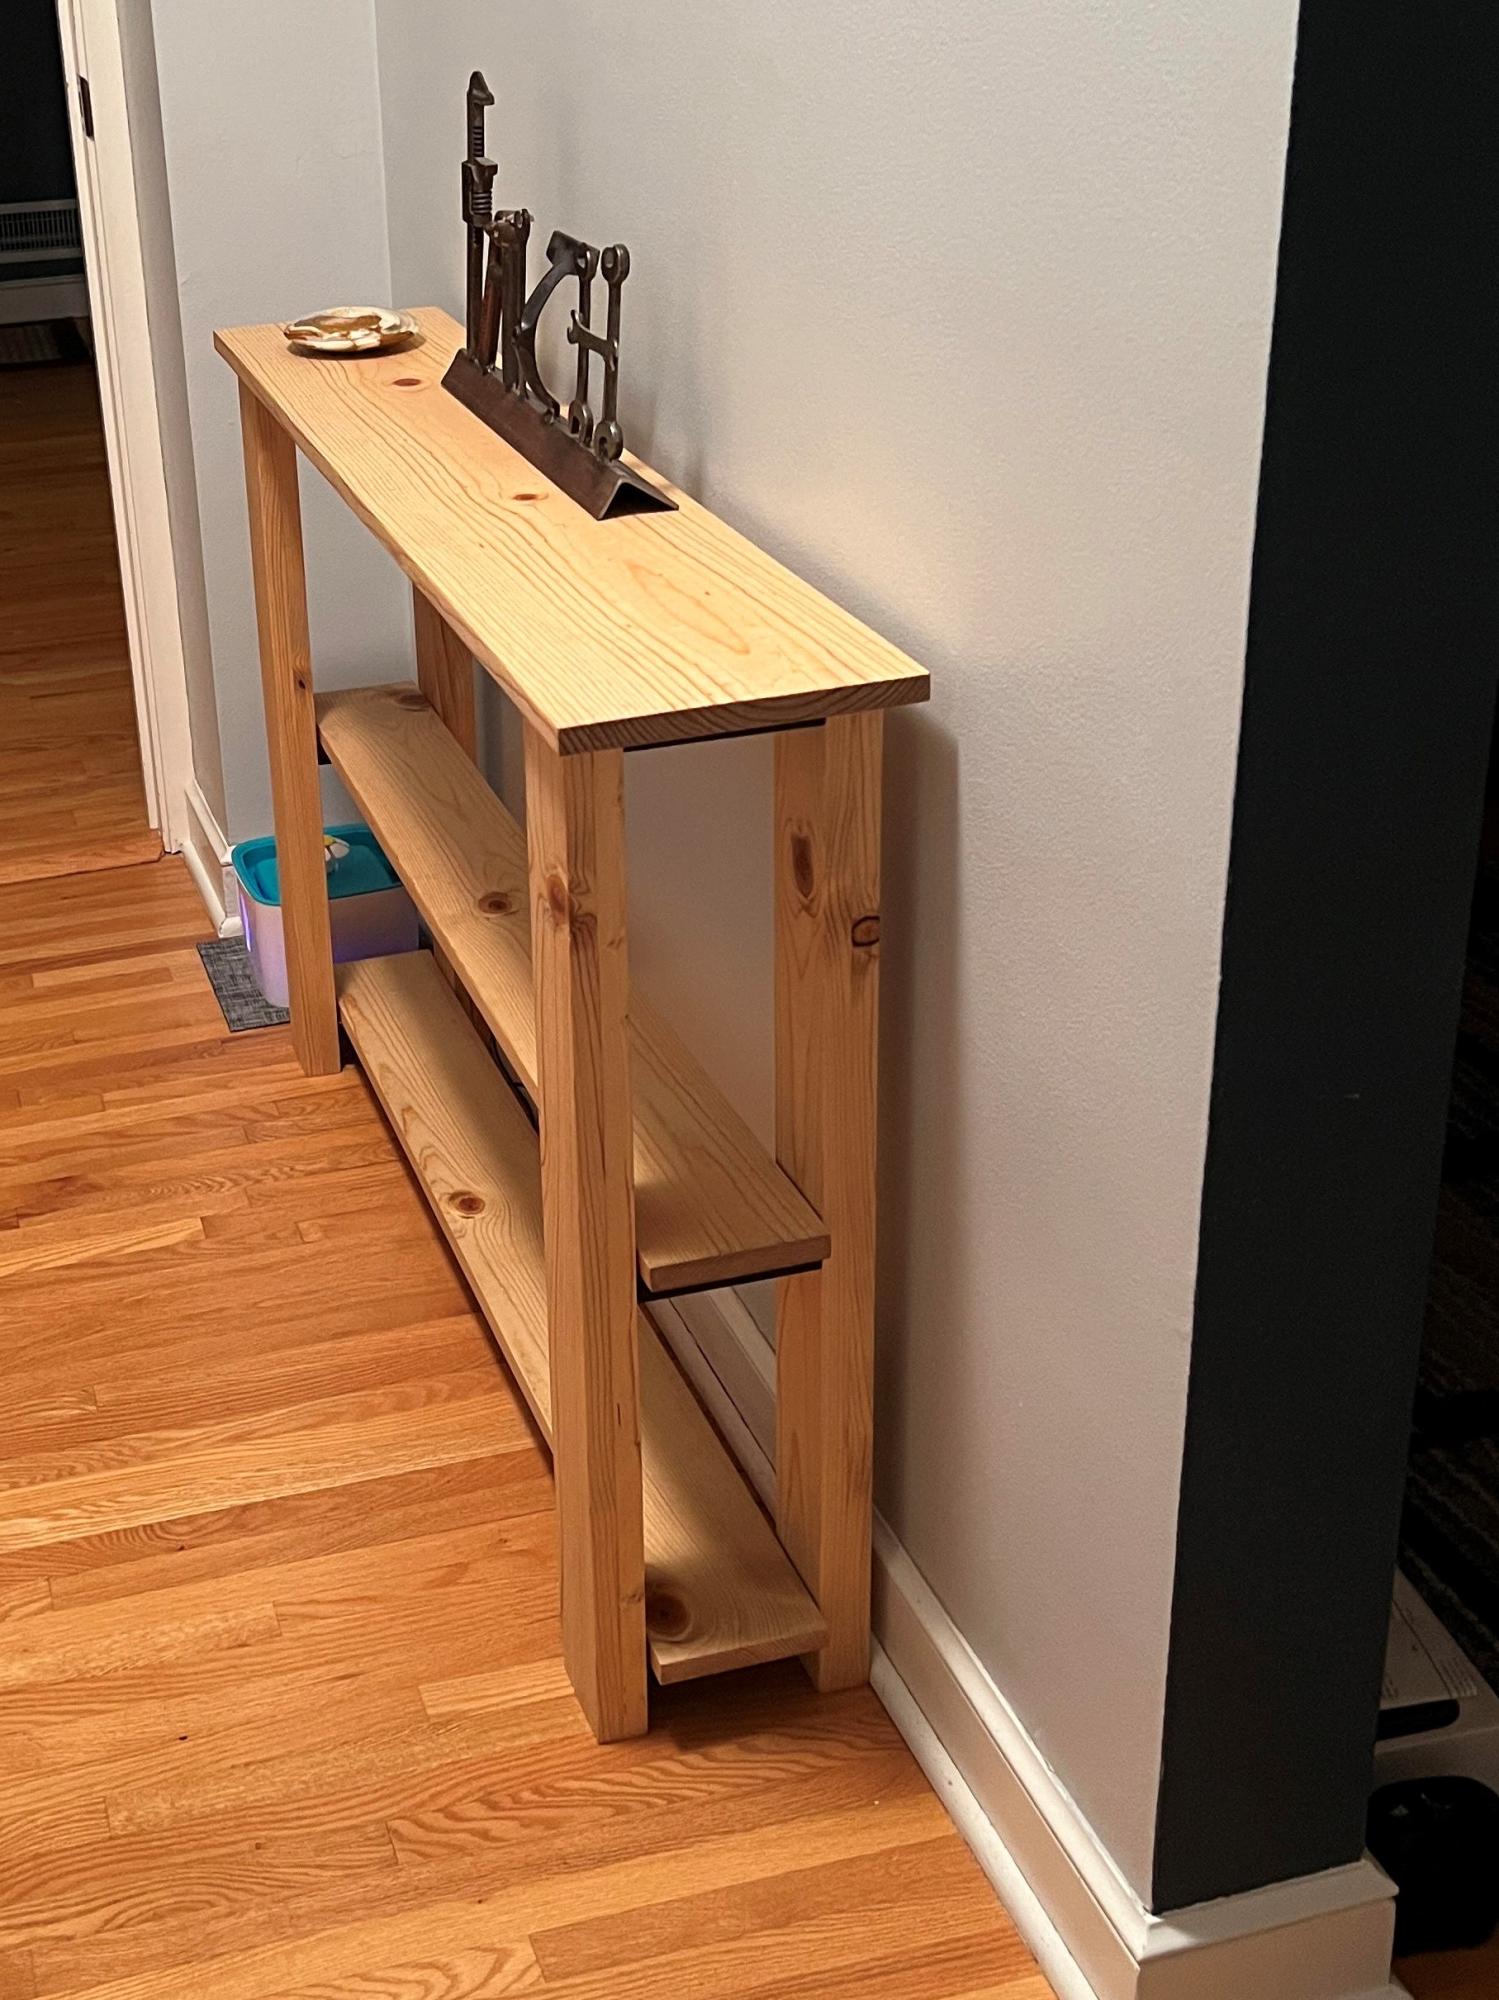
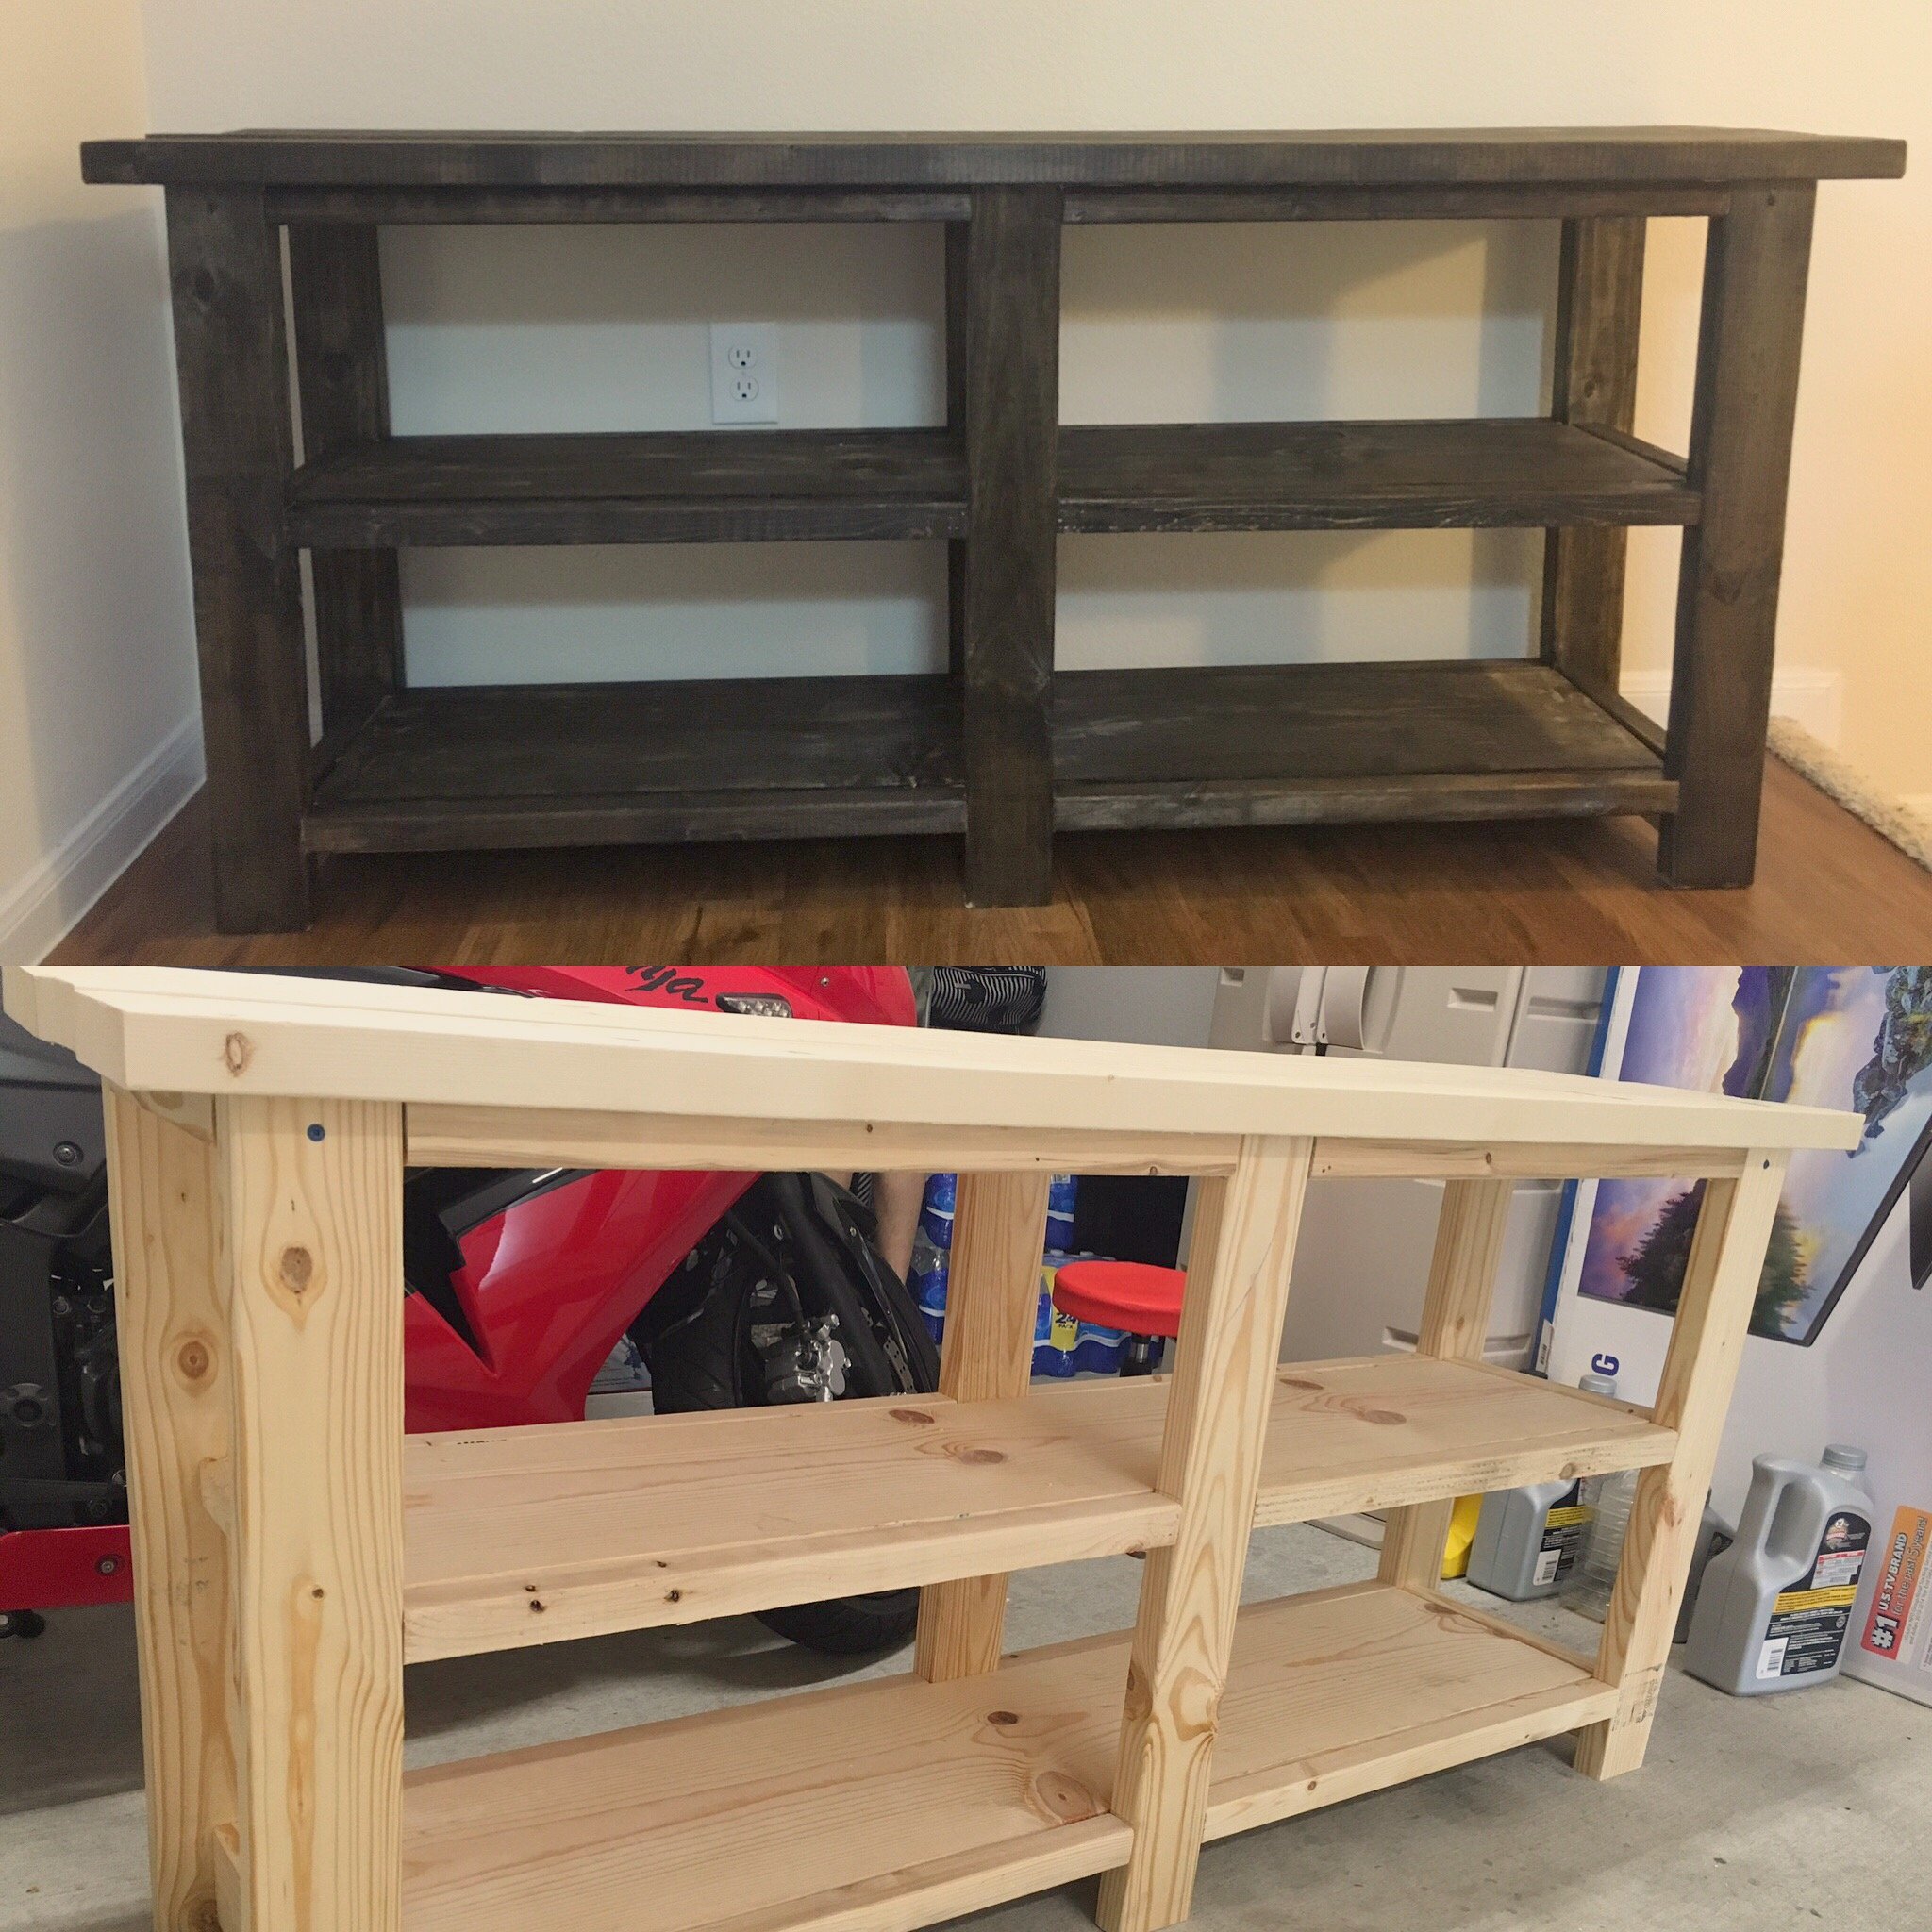
I used dimensional lumber for a little nicer look and laminated two boards for the legs. I used light walnut danish oil to finish. I adjusted the width and got It the perfect width for my hallway.


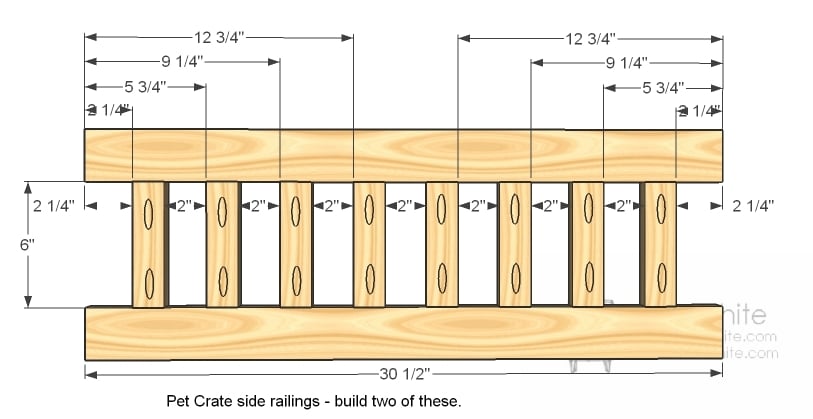
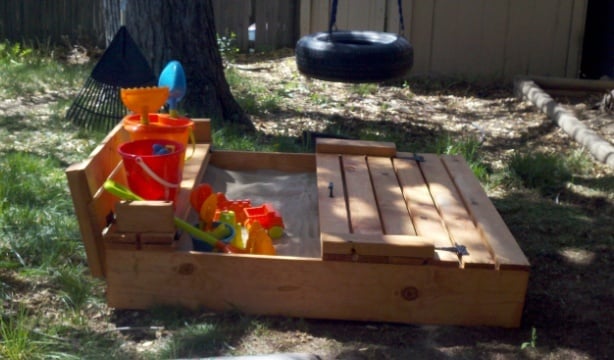
This sand box was very easy to build and it works great. The only thing I would change is cutting the "arm rests" at 7 1/2" instead of 6 1/2". I did that for the second set of arm rests (when I downloaded the plans many weeks ago the cut list was wrong). It made putting that section together a lot easier.
I easily spent more on the hinges (at $5 per hinge x 8 hinges) than I did on the wood itself.
My 1 and 1/2 year old loves playing in it and now I need to build a toy box for him to put all of his sand toys in!

Sun, 04/29/2012 - 00:06
It's been zen-raked! haha.
Those little benches are adorable. I wish I had seen this plan before I built ours.
Mon, 09/17/2012 - 10:29
I just want to say that I asked for my husbands help, and his advice increased the price significantly.
He does not like to paint, and will spend the extra dollar to purchase pressure treated wood. So I sent him with my materials list and the wood he purchsed was $60.00, plus $22.00 for hinges and $10 for a box of deck screws. Actually, I am a artist and had wanted to paint the project to look like a big frog.
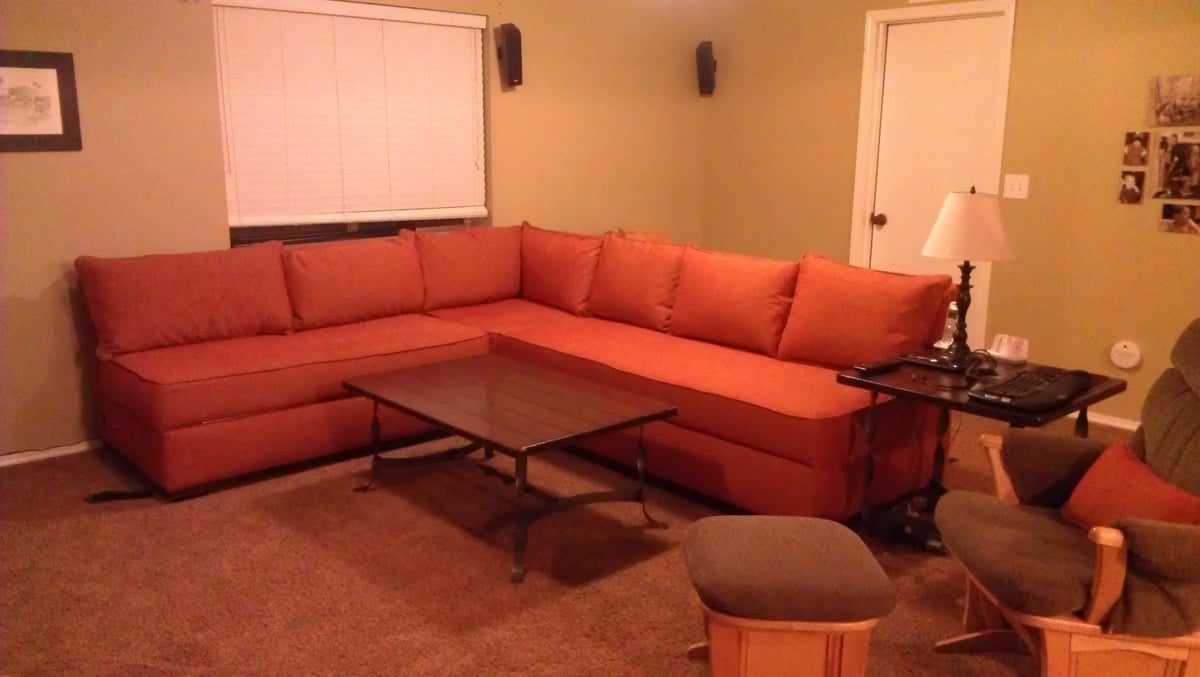
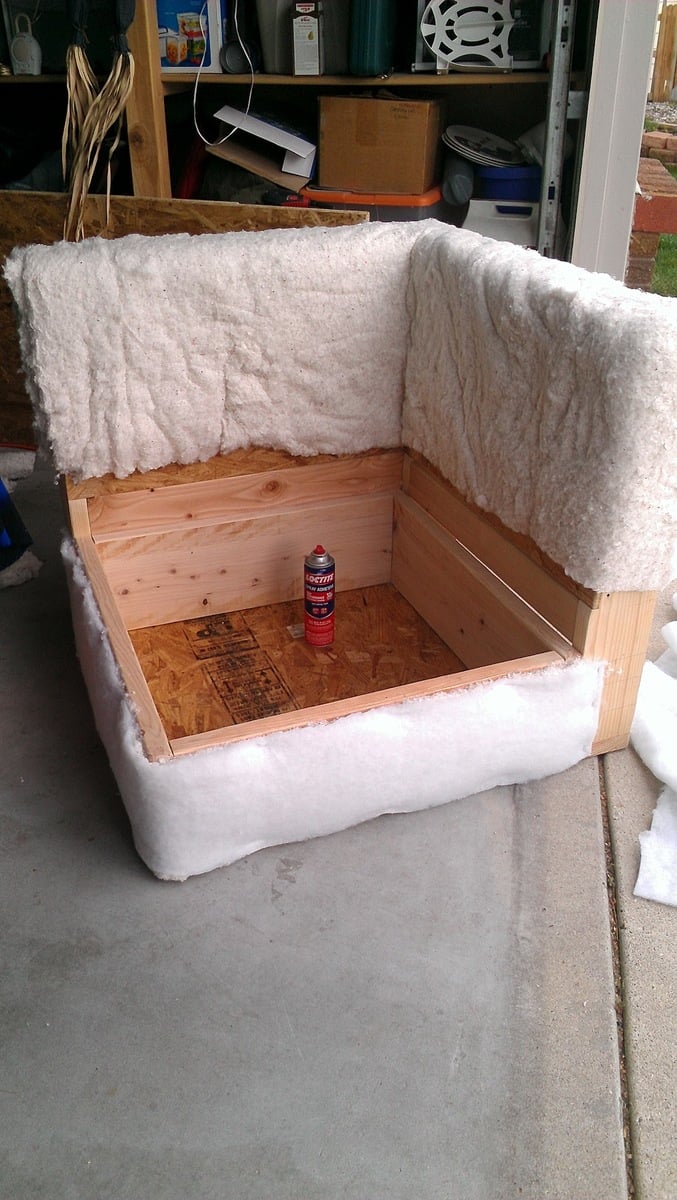
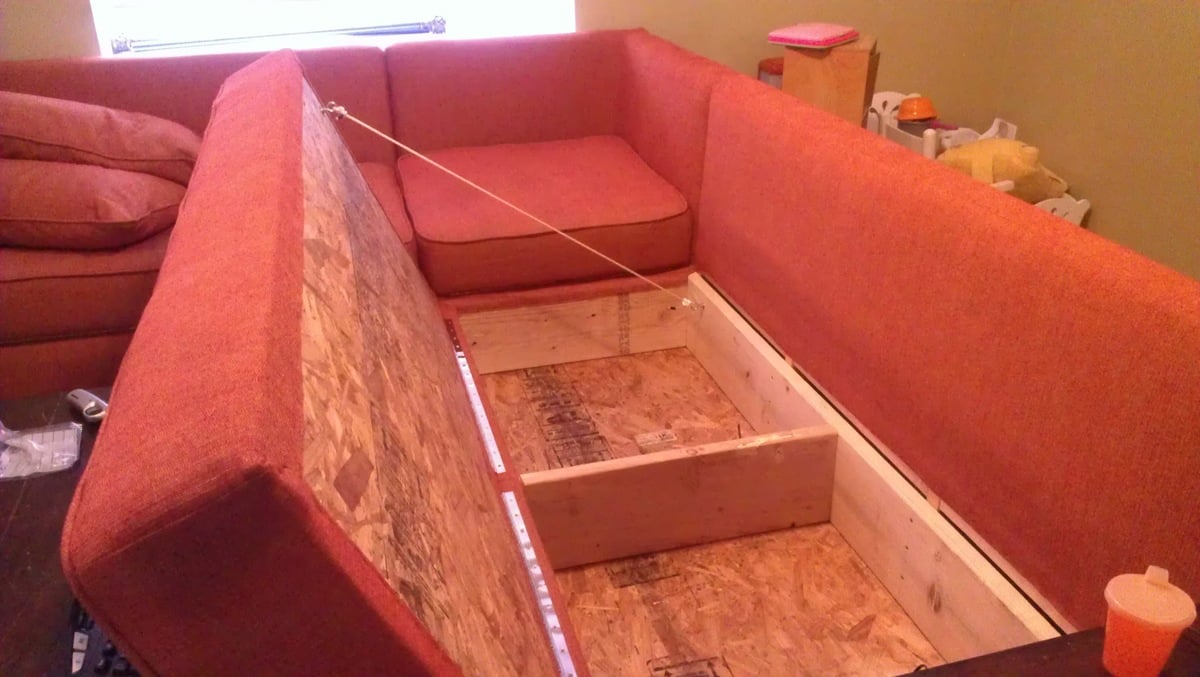
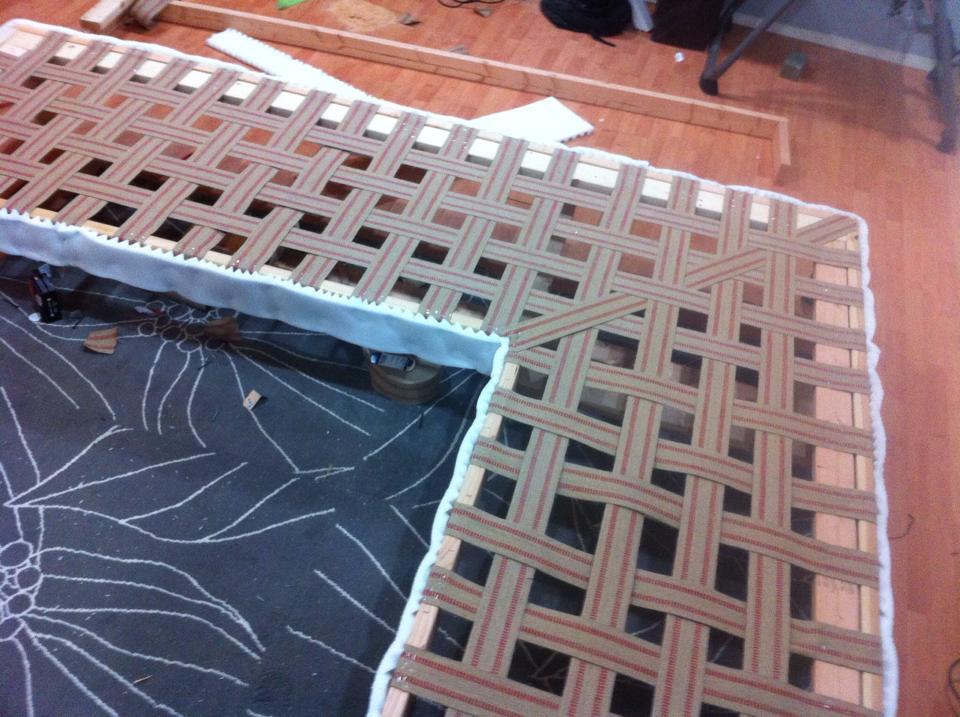
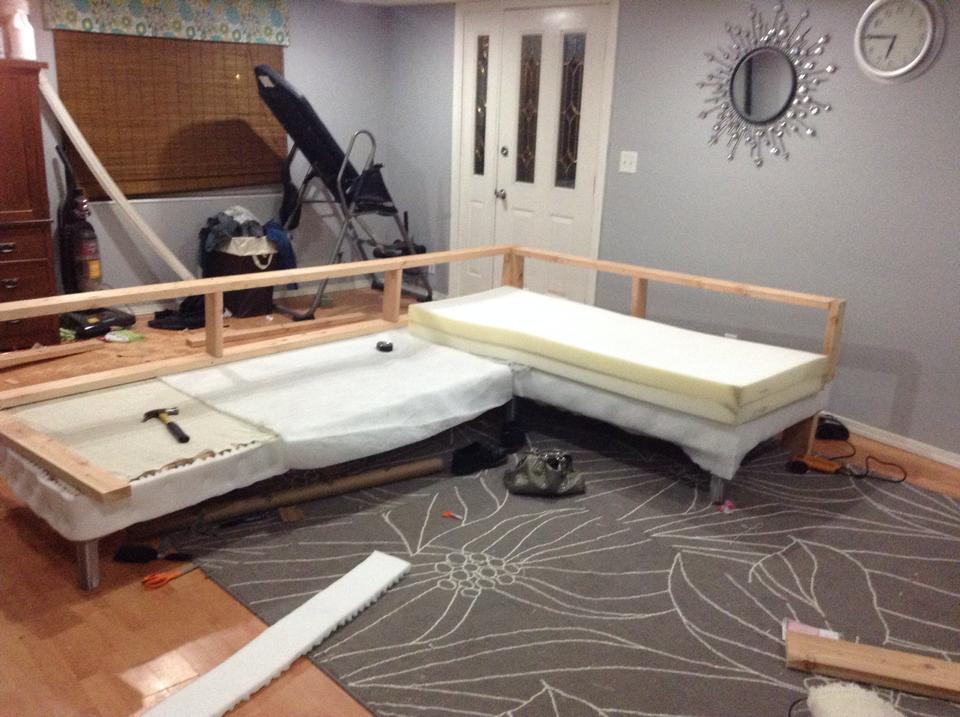
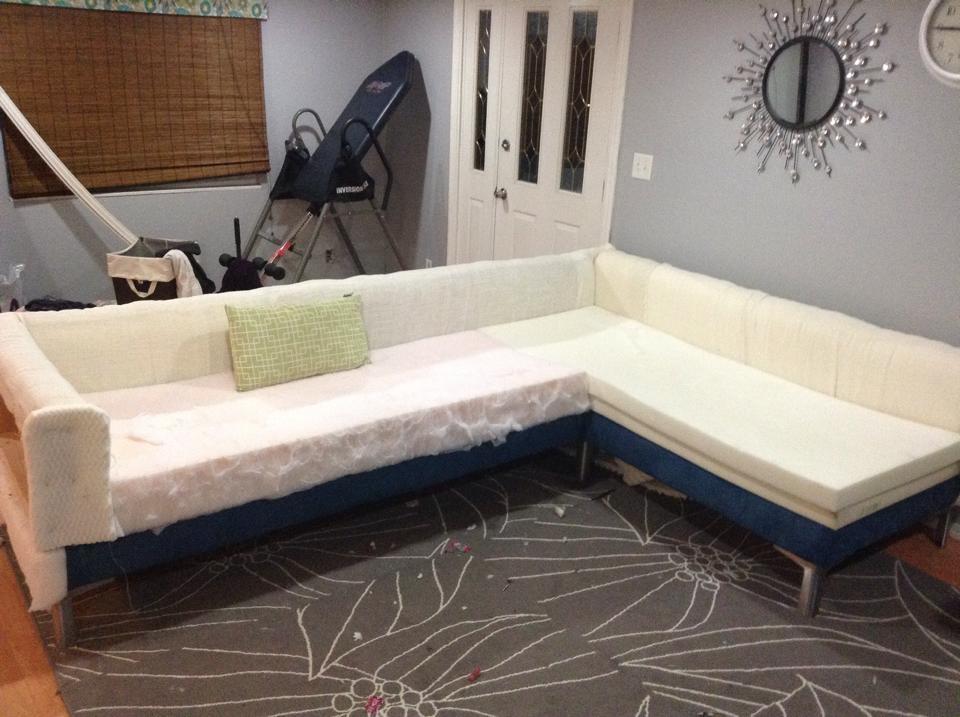
Basically I took Ana's plan and tweaked it to create a diy sofa, a love seat, and a corner piece to make a sectional. All 3 pieces have the same basic design and function (they all have a storage compartment), although the corner piece, because of its placement and the thickness of the seating cushions, doesn't open unless the couch is opened first. We purchased custom cut, 6" thick foam cushions for the seats (we bought the XL-38 foam from https://www.buyfoam.com/, but if we had to do it again, we'd go with the XL-28 as the 38 is VERY firm). We also used upholstery fabric instead of a paint drop-cloth to cover the couches. The foam and upholstery fabric upped the overall cost significantly. Other changes from Ana's plan, I used 15/32" OSB because the 1/4" plywood just felt too flimsy (I'm a large guy). I also added I bolts to the underside of the seat before the foam and upholstery so I could add a stress relief rope to prevent the kids from opening the top and dropping it and ripping out the hinges. I used piano hinges as they seemed to me to provide the most support. Finally, I ended up using 1x2s for the base trim since I couldn't find any 2x2s that were straight and finish-ready, then I added router detailing to provide some visual interest. I used 3" pieces of 4x6 for the feet and added matching router detail. Additionally, I used T-Nuts and bolts to make the feet and base trim completely removable.


Mon, 08/17/2020 - 07:46
It is superb blog and i really appreciate your blog. It is because i always like the informative blogs. You did a great job and thanks for sharing.I am impressed by your post. It contains very informative data and i gain a lot information from it. It is very useful for me. Thanks for sharing and keep on sharing that type of posts.The Mobile App Developer Dubai provides good service you visit here site https://www.mistersaad.com/

After watching Ana White's video on easy garage shelving on FB, I knew right away it was the perfect technique for adding shelves to my laundry room. The project was easy and turned out great! I did the majority of the work by myself, although my Hubby did help me with some heavy lifting at the end (we had to add the shelving before the front frame due to the walls on either side). The shelving unit itself took only a few hours to build. I painted it the following day making it a weekend project. We have considered adding trim to the front to give it a more finished look, but right now, it is serving its purpose. I will definitely use Ana's technique again. It was simple and straightforward! I loved it.


This was my first project building something from this site. I absolutely love it! We didnt add the X's because the miter saw was at my dad's house, which I was kind of sad about, but I think it still looks good. Not too bad for mine and my husbands first build!

I had my nephew build this outhouse for our new 70 acre lot - no neighbours in sight so I had him put in an acrylic window (with a view). I left off the deck and had him put the boards tight together so 'critters' didn't get in as easily. I made a sign for above the door - 'Waste Management' for a touch of humour. The plans were easy to follow and I love it. Thanks, Ana.


Thu, 04/20/2017 - 16:45
So excited to see this one built! Your nephew did a great job, love the window in the back!

We used old dock wood for the surface of our X table for a nice beach house beverage center (sand bar!). We adjusted the size to fit our space (a little longer and wider) and used additional studs for the shelves instead of 1" shelving, glued and PH/PS together. To cut the X pieces I just held the 1x1 on the end of the table where it goes and marked the lines. Then I clamped a guide board at the correct angle on the table saw to make all the cuts, starting a bit long and shaving off until it just fit.
With all the pocket holes and screws I wouldn't consider this a beginner project. Some additional steps and pictures in your description would help also. End result is really nice.


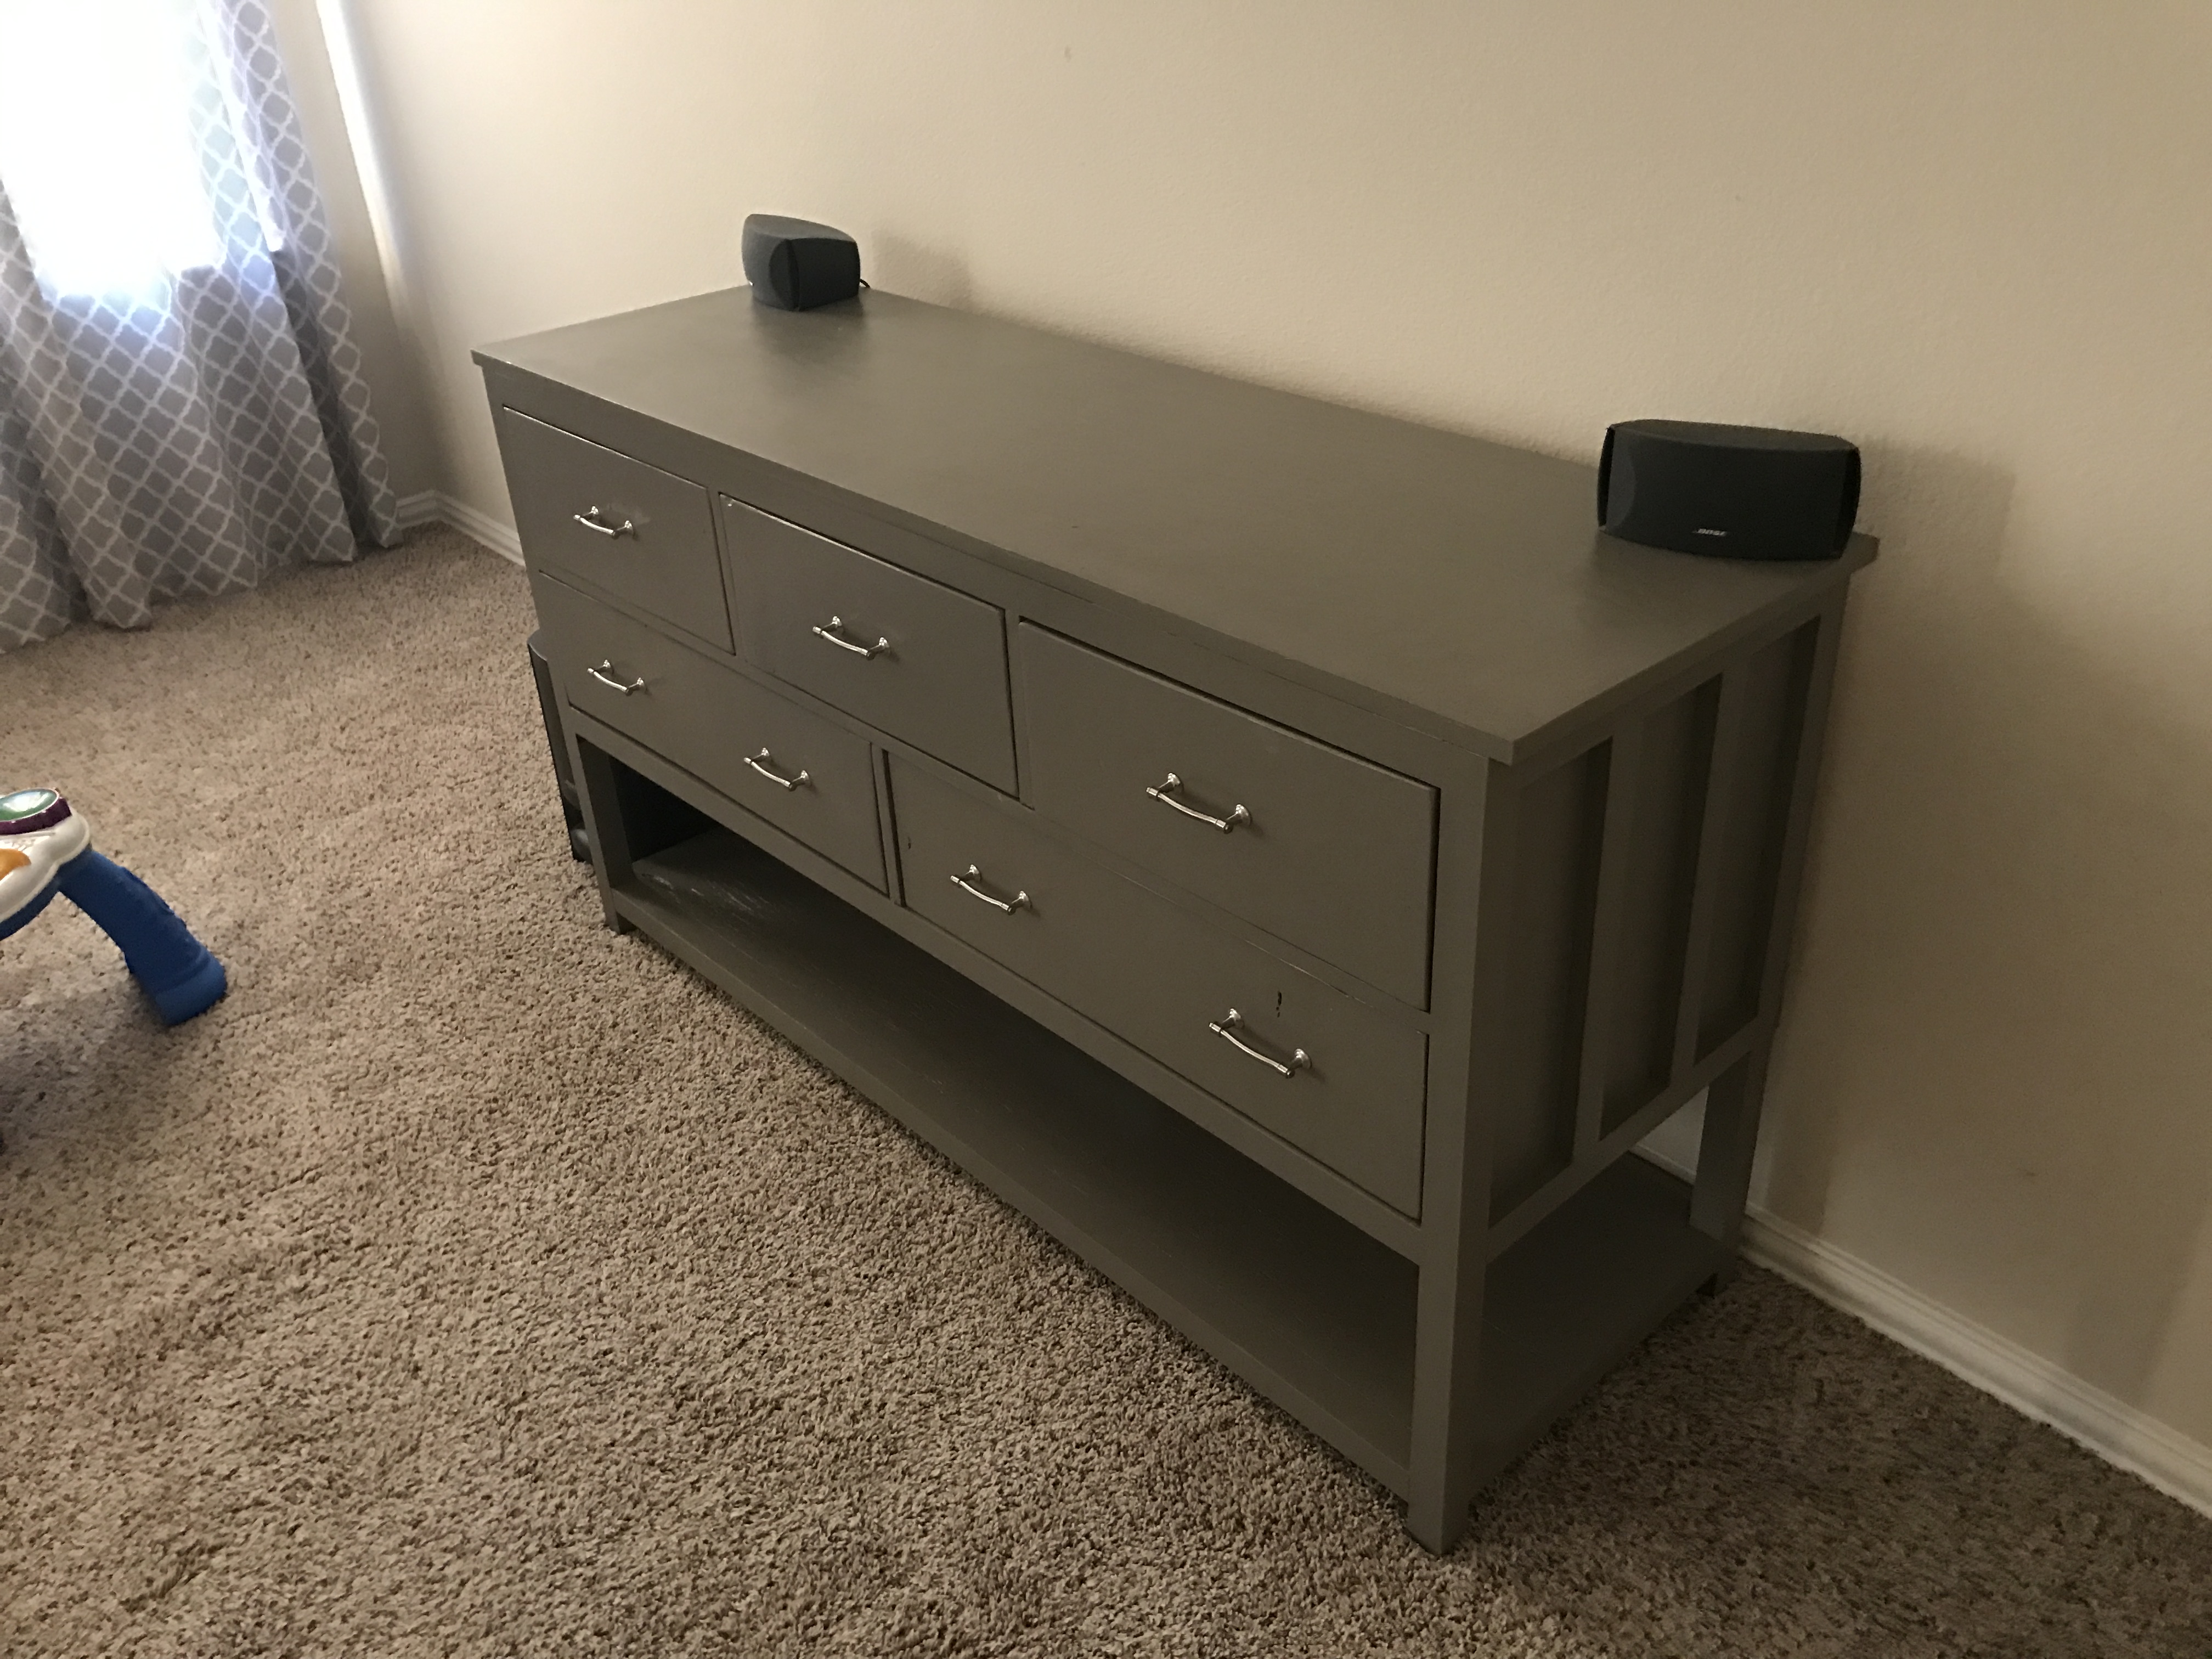
This was the second piece of furniture that my husband and I ever made. We had built a coffee table that had a lift up top so that we could eat dinner on the couch and store all of our board games. Once we tackled that, I thought we could conquer the world (even though the table was pretty basic). So when my now-husband was about to move into his first apartment without a roommate and I saw it as an opportunity to decorate my own place (even though I wasn’t living there). Luckily,he agreed it was time to get rid of his tiny Ikea TV stand that was probably 2ft off the ground and not a great height for a TV, and agreed to build this awesome TV console with me. To this day, it’s still my favorite piece of furniture in our house.
Sat, 11/09/2019 - 14:12
Love this, needing one in my front entry way. How long did it take?
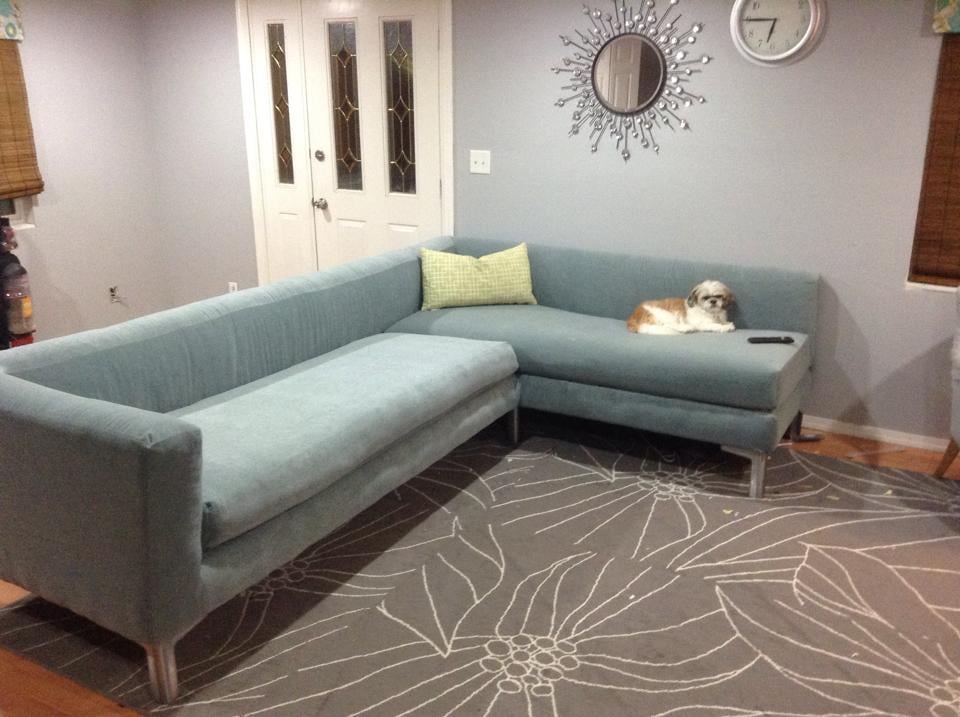
I looked all around my town for a sofa that meet my needs. I wanted something with tall legs, modern lines and fit my living room. I did not have $3,000 to buy one online so I said to myself why not???


Sat, 07/25/2015 - 12:28
You are my hero ! Your modern diy sectional is amazing, love the blue fabric! Thank you so much for sharing! Ana
Mon, 08/03/2015 - 14:52
I've been looking for plans for a big sectional this would be perfect!
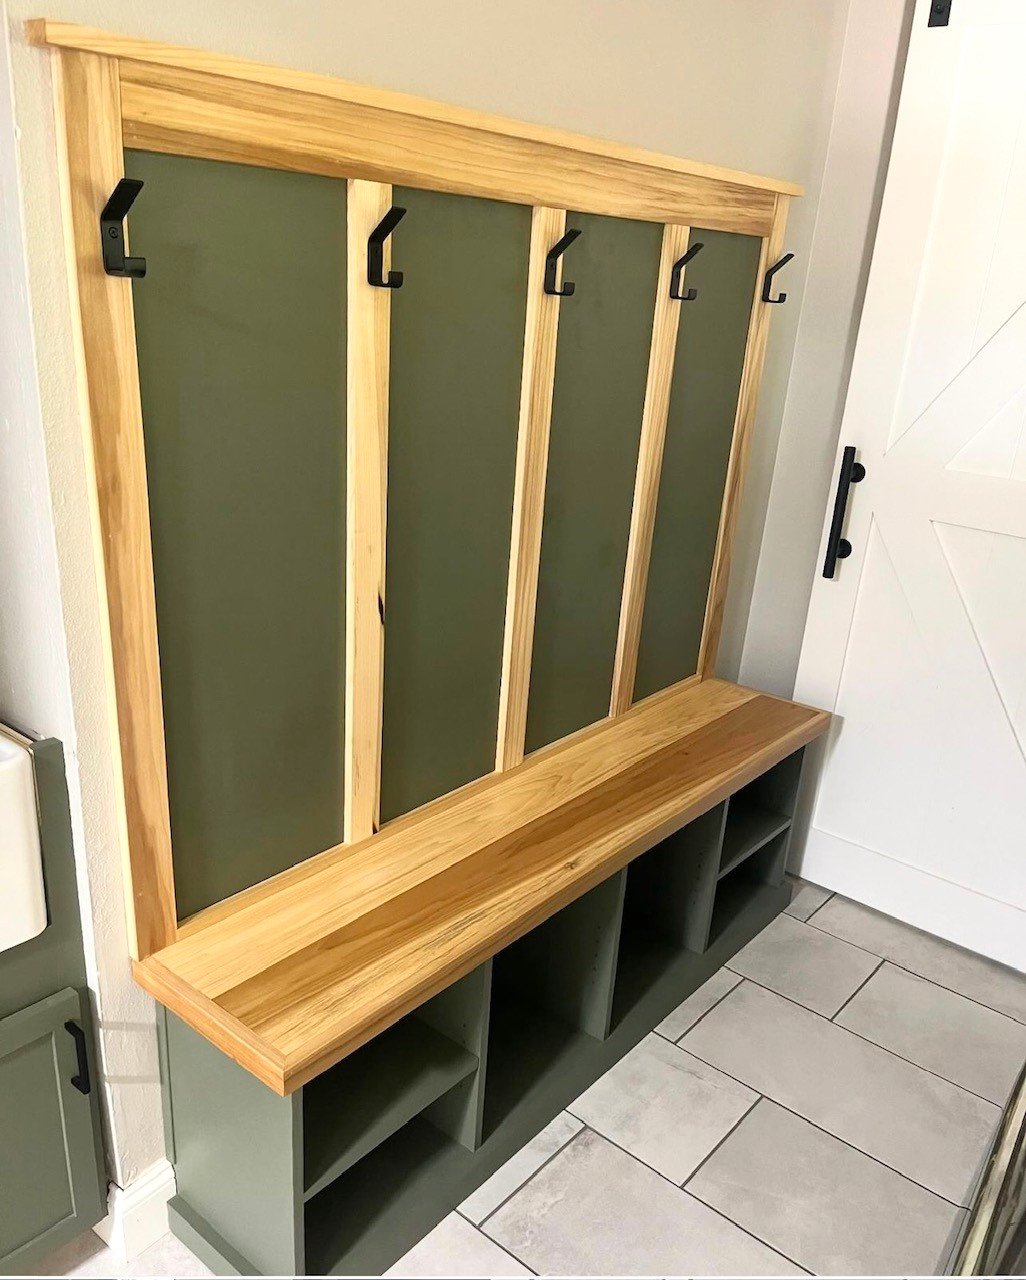
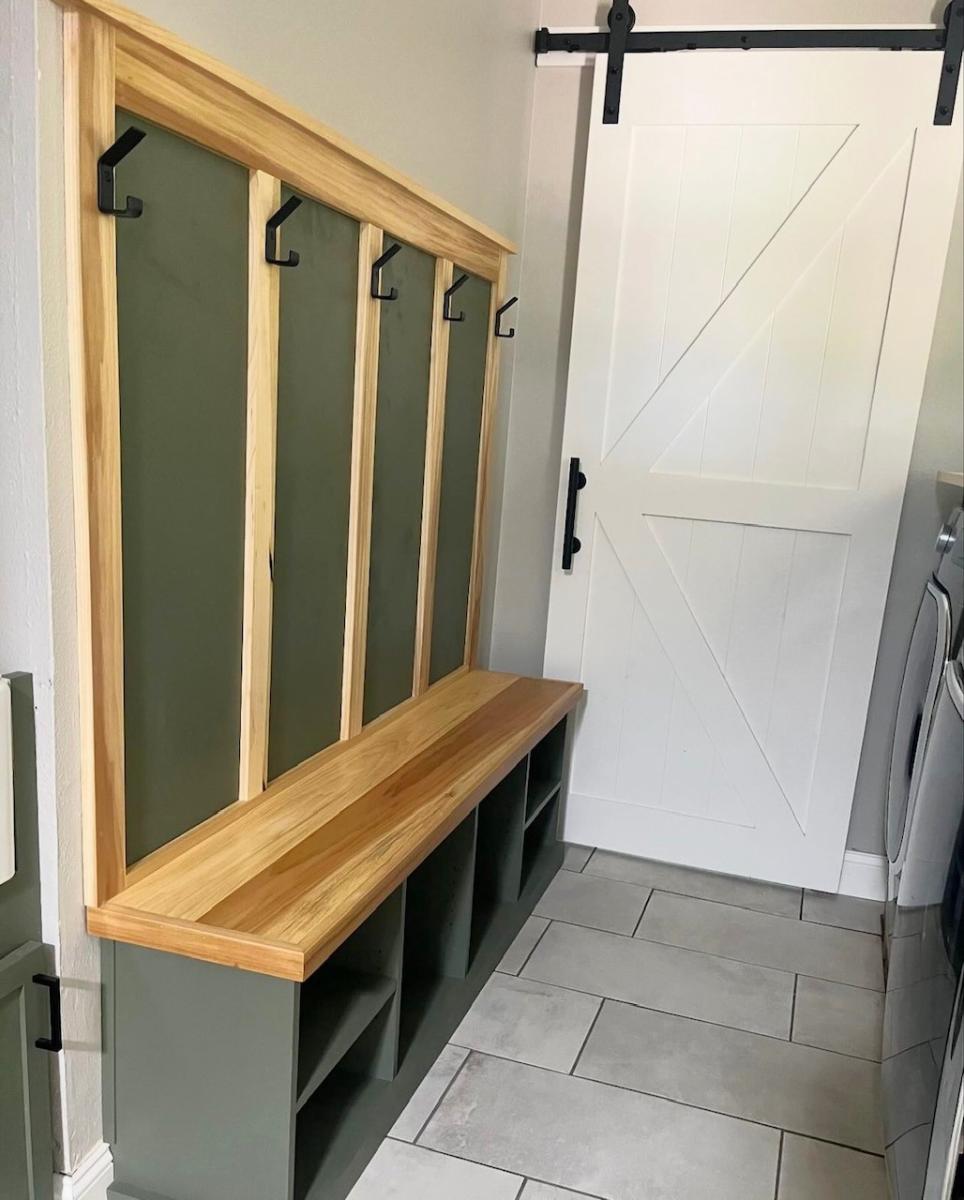
We built this bench using Ana's Entryway Bench Plans. We modified it by adding adjustable shelves for additional shoe storage. We added the back with hooks for coats and backpacks. We’ve made this small space feel so much bigger by adding storage and utilizing the space that is in the room. We can’t wait to finish this project.
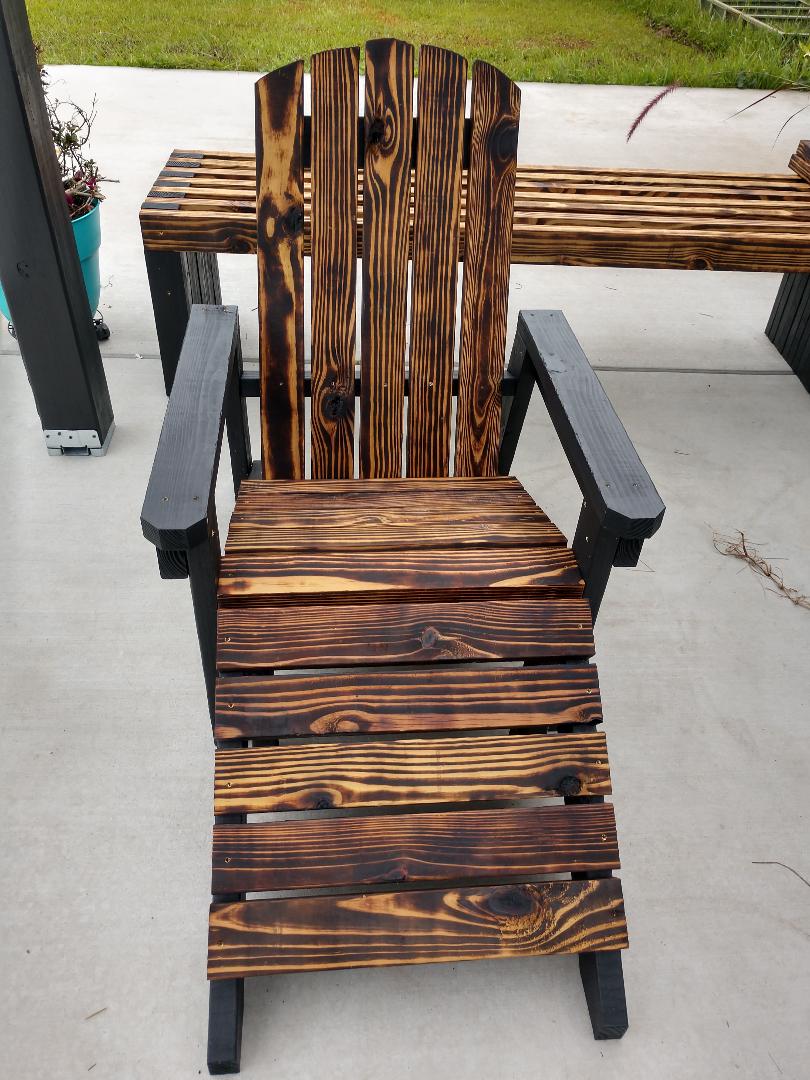
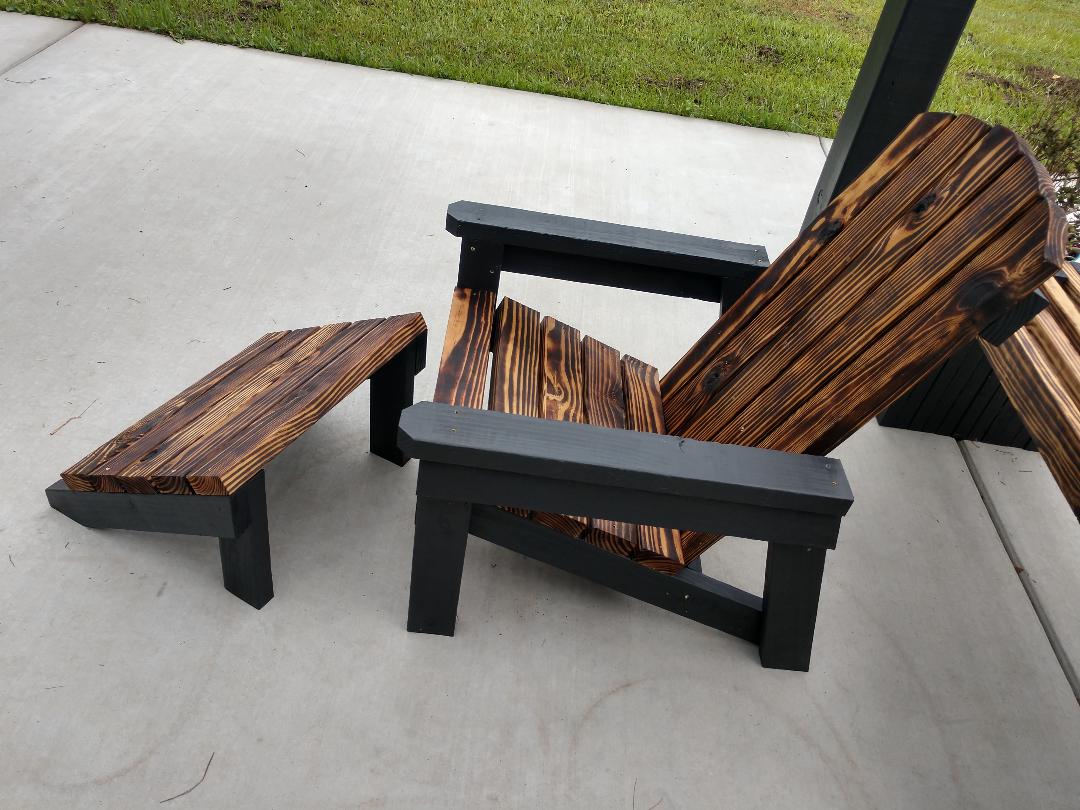
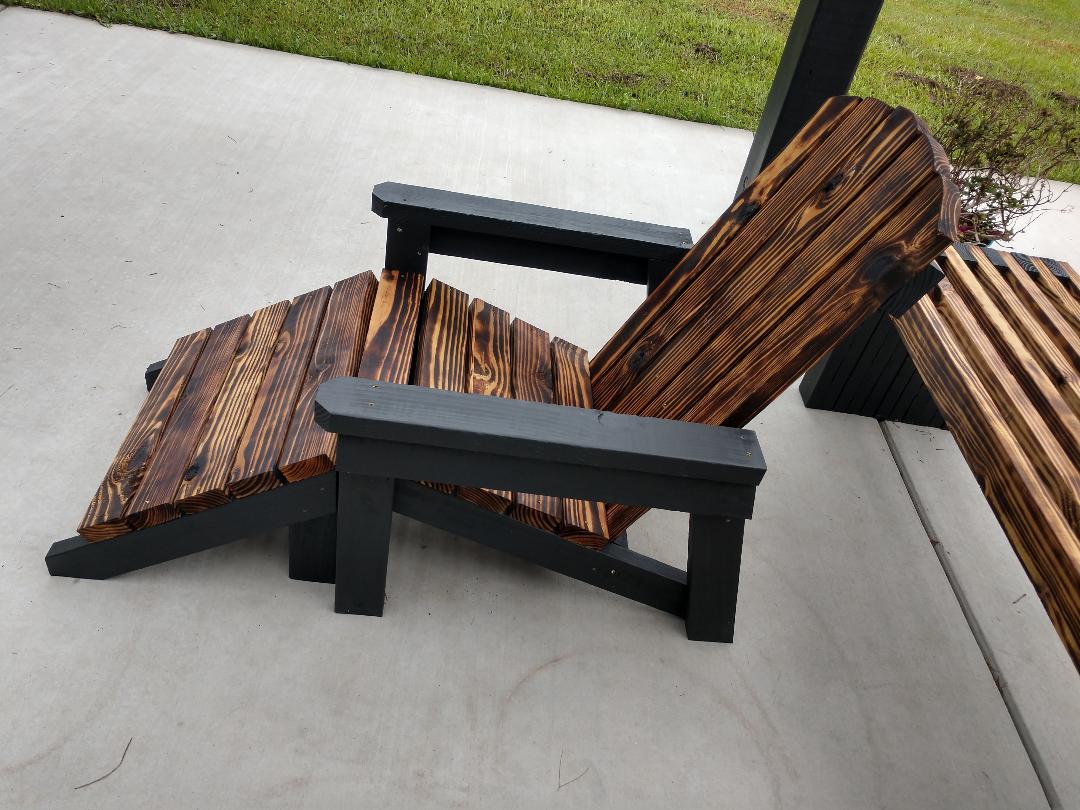
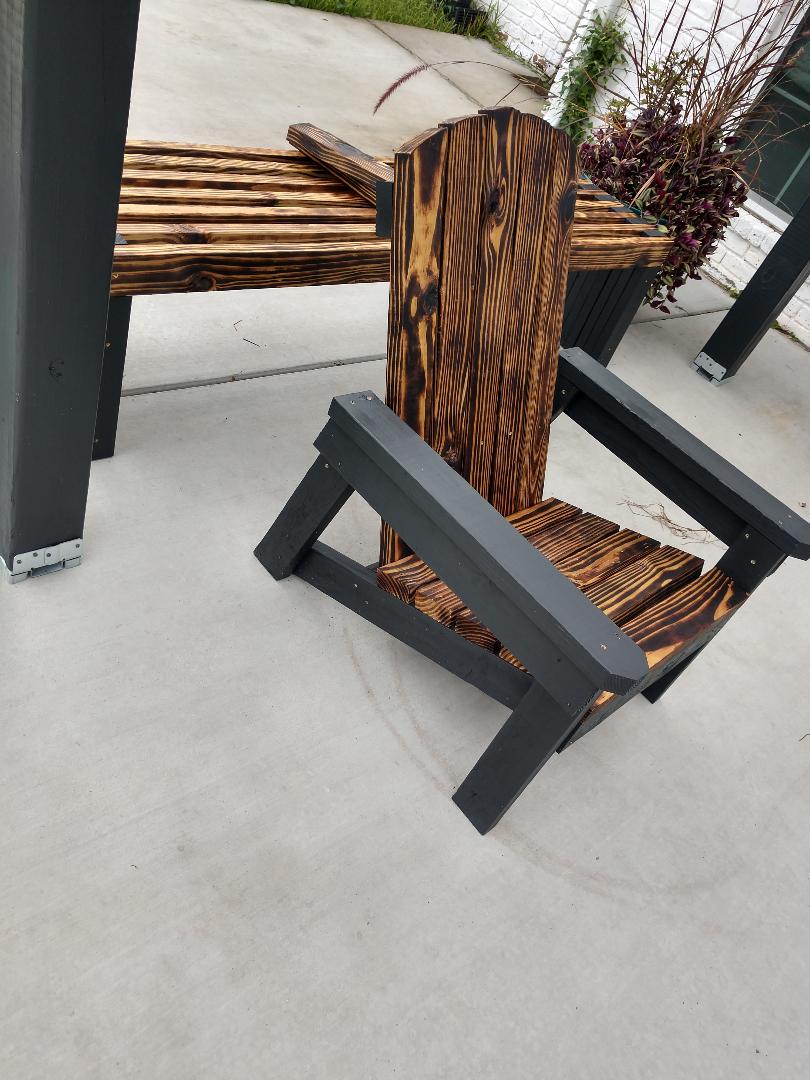
Very easy instructions. I love the way they turned out. I used all 2x4's that I had left over from another project. I burned the top pieces and painted all other pieces. Love your easy instructions. My first time making furniture.
Thanks
Yvette


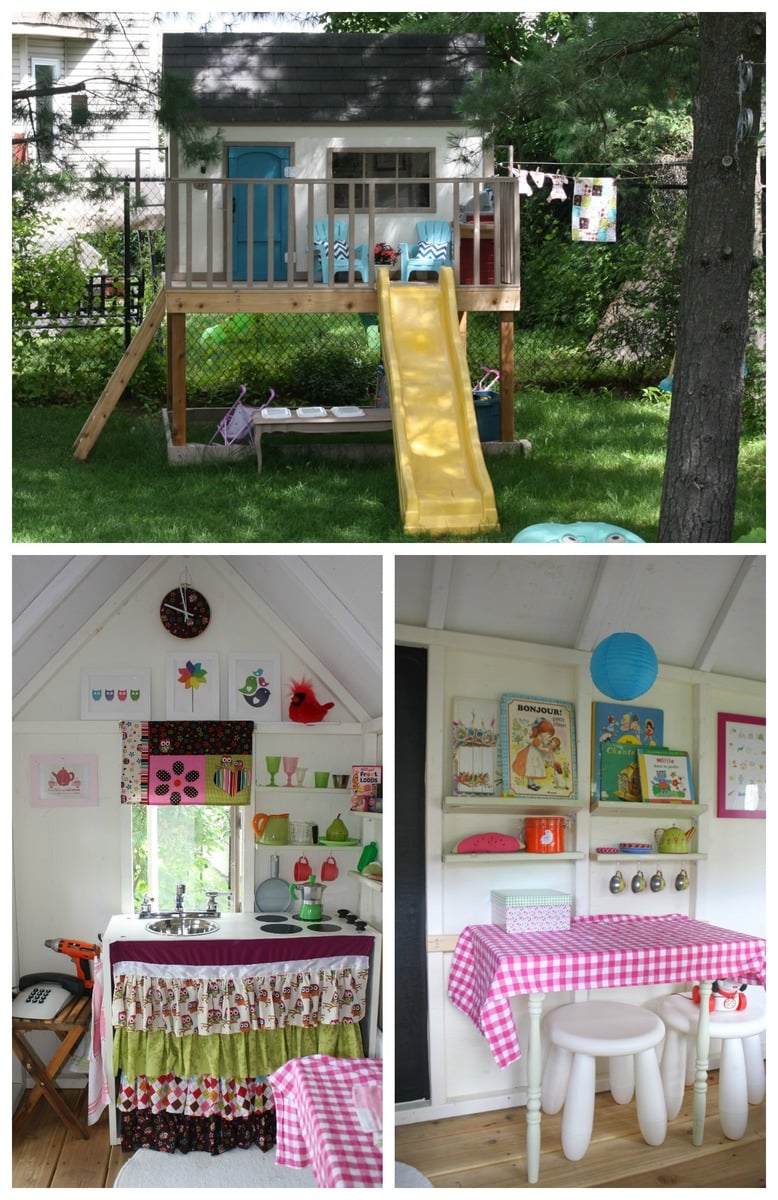
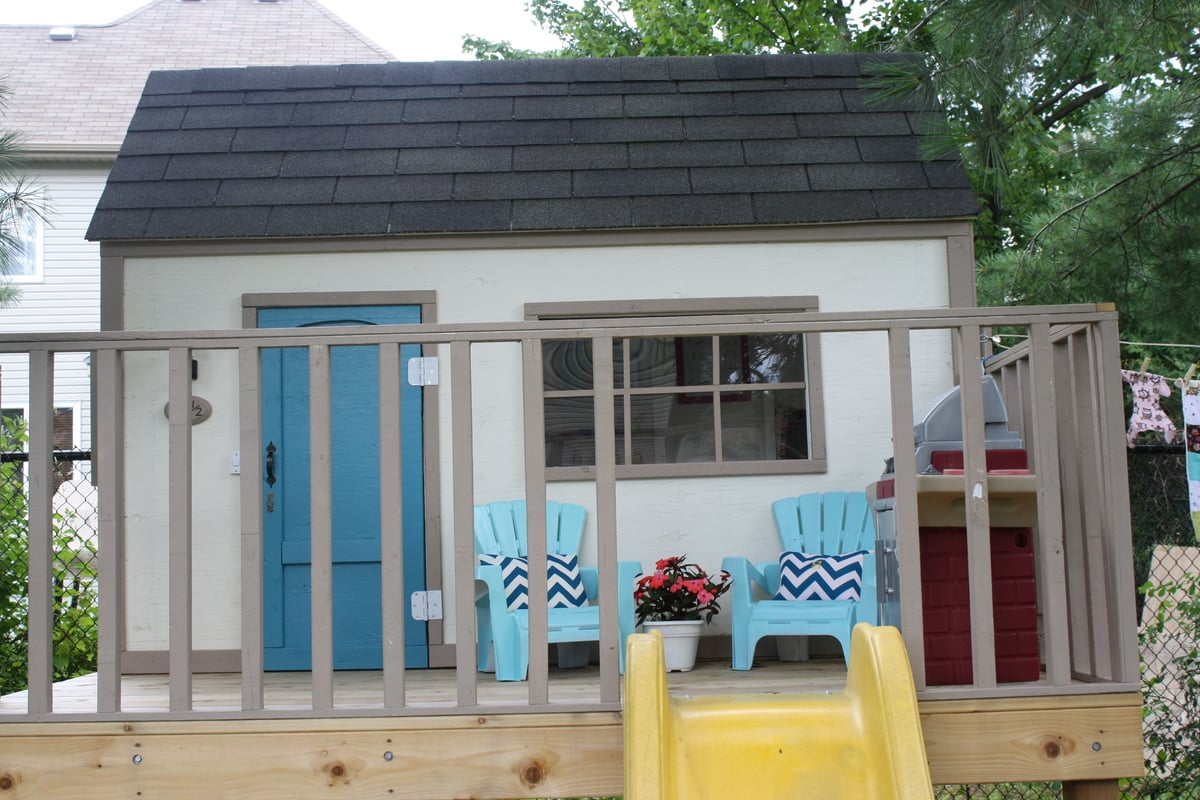
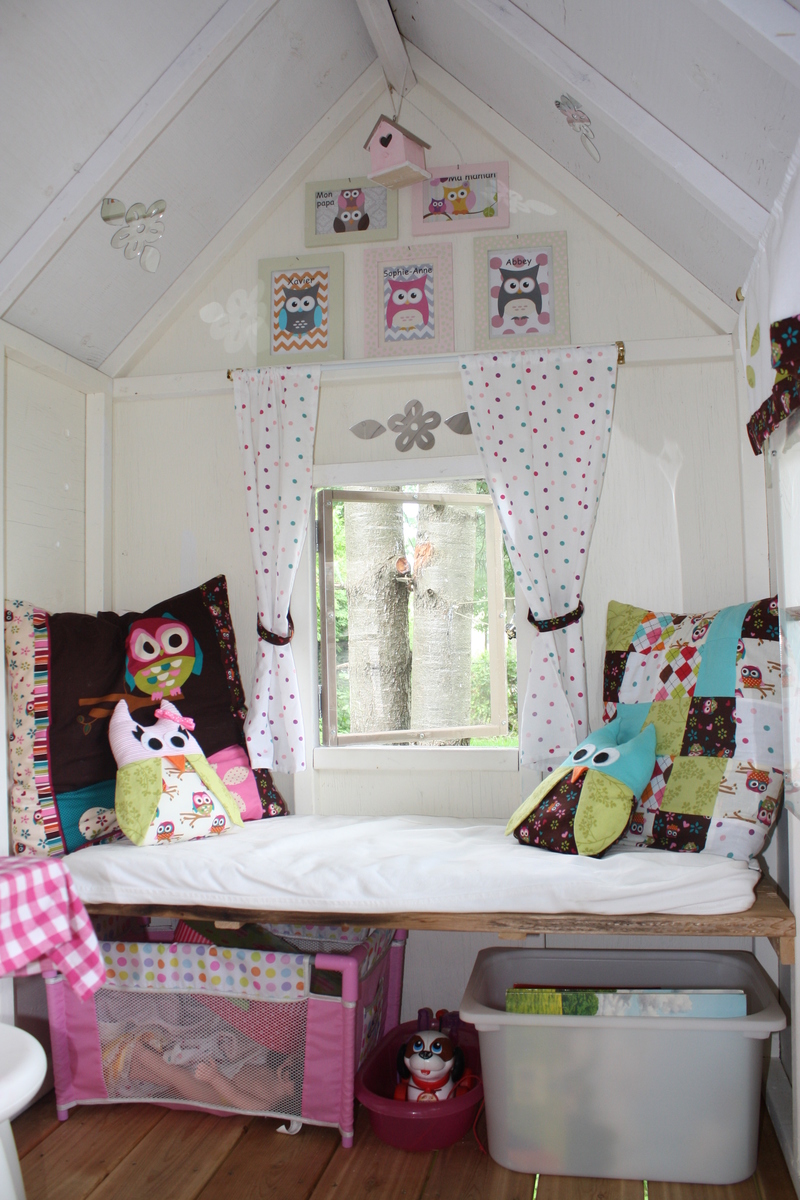
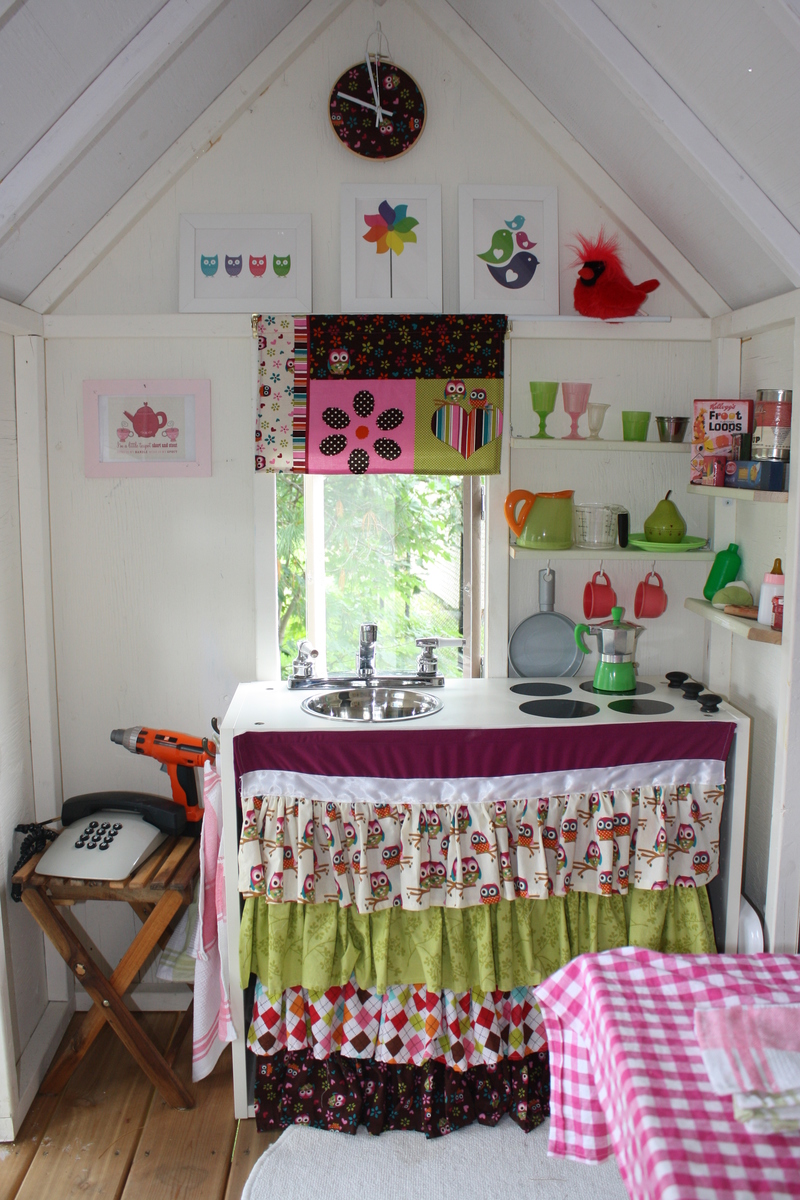
We started this project a few months ago. My husband made most of the construction, and I decorated the inside. We added many little details, including a clothesline, windows with plexiglass, a BBQ, a little kitchen, a doorbell, a solar light, a slide, shelves, a table, a bench, etc. The kids loooooove their new house. The whole project took many many hours, but I am really happy with the results. Thank you so much Ana for the plans!!


Sun, 07/14/2013 - 21:10
Looks like your child has everything they need. Including a phone! I love the bench seat and the pillows with the window. So cool. You put a lot of work into this. Well done.
Thu, 04/03/2014 - 08:23
Love, love it! Couple of questions... how did you attach the walls to the decking and how far apart? How tall is the railing? I'm curious to know the sturdiness of the project overall and my SIL has concerns about the 3/4 roof sheeting over 1/4 walls. Comments please. My son-in-law and I have just started this project.