Community Brag Posts

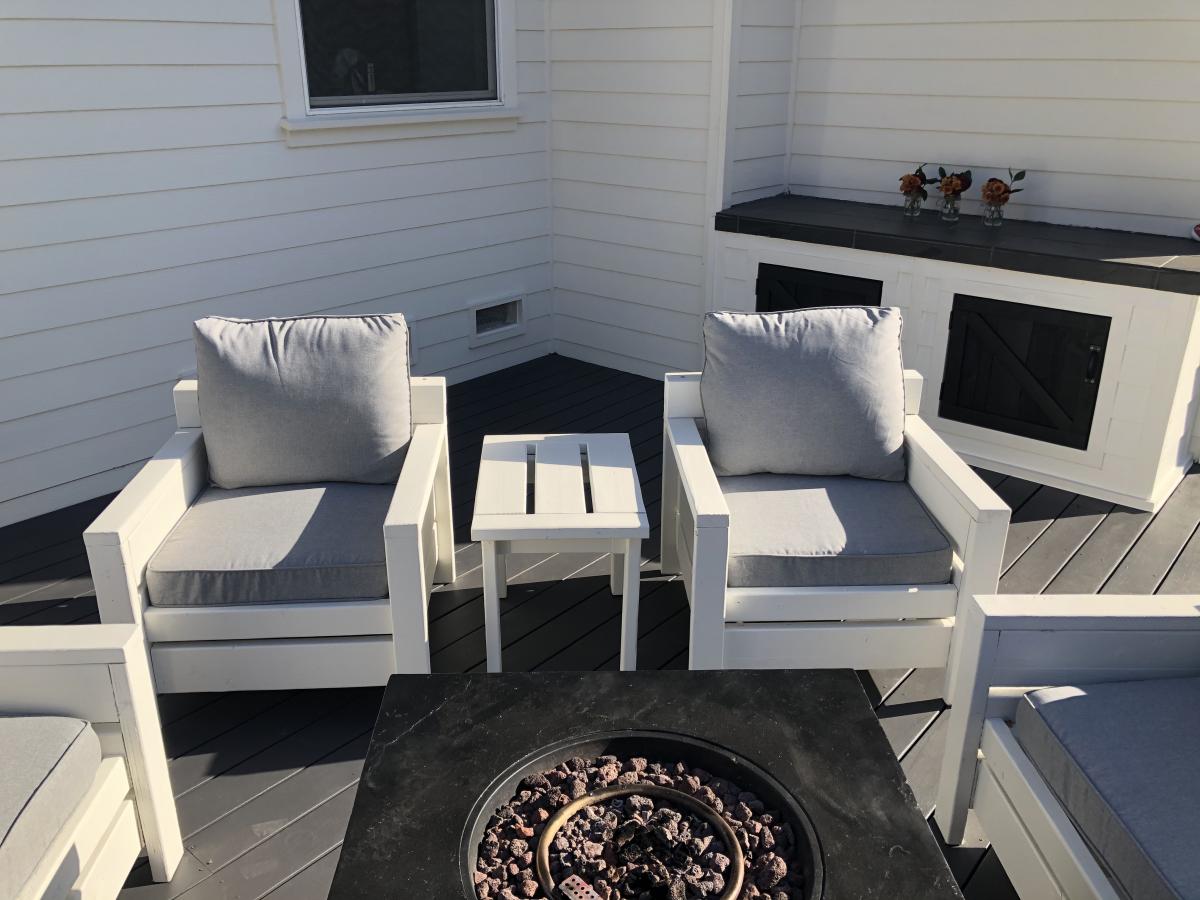
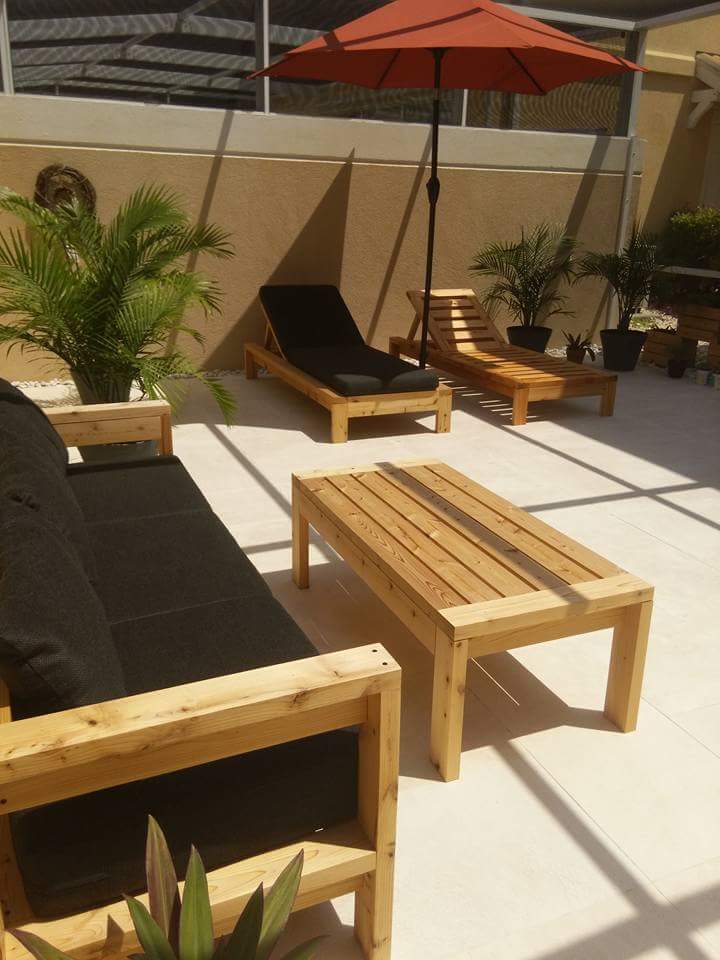
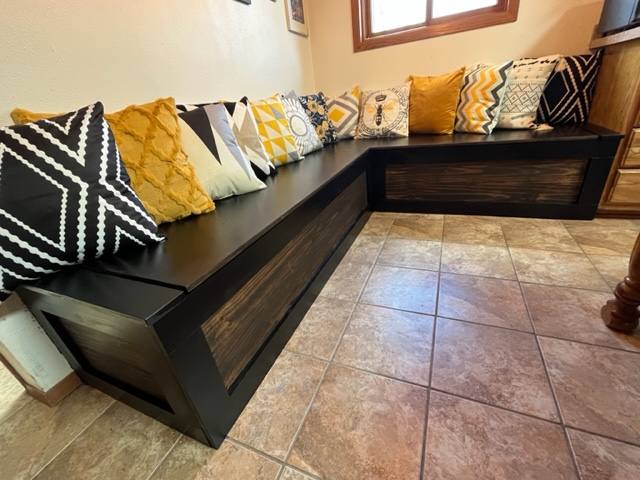
Modern Outdoor Collection

Submitted by Anonymous (not verified) on Tue, 10/27/2020 - 16:06

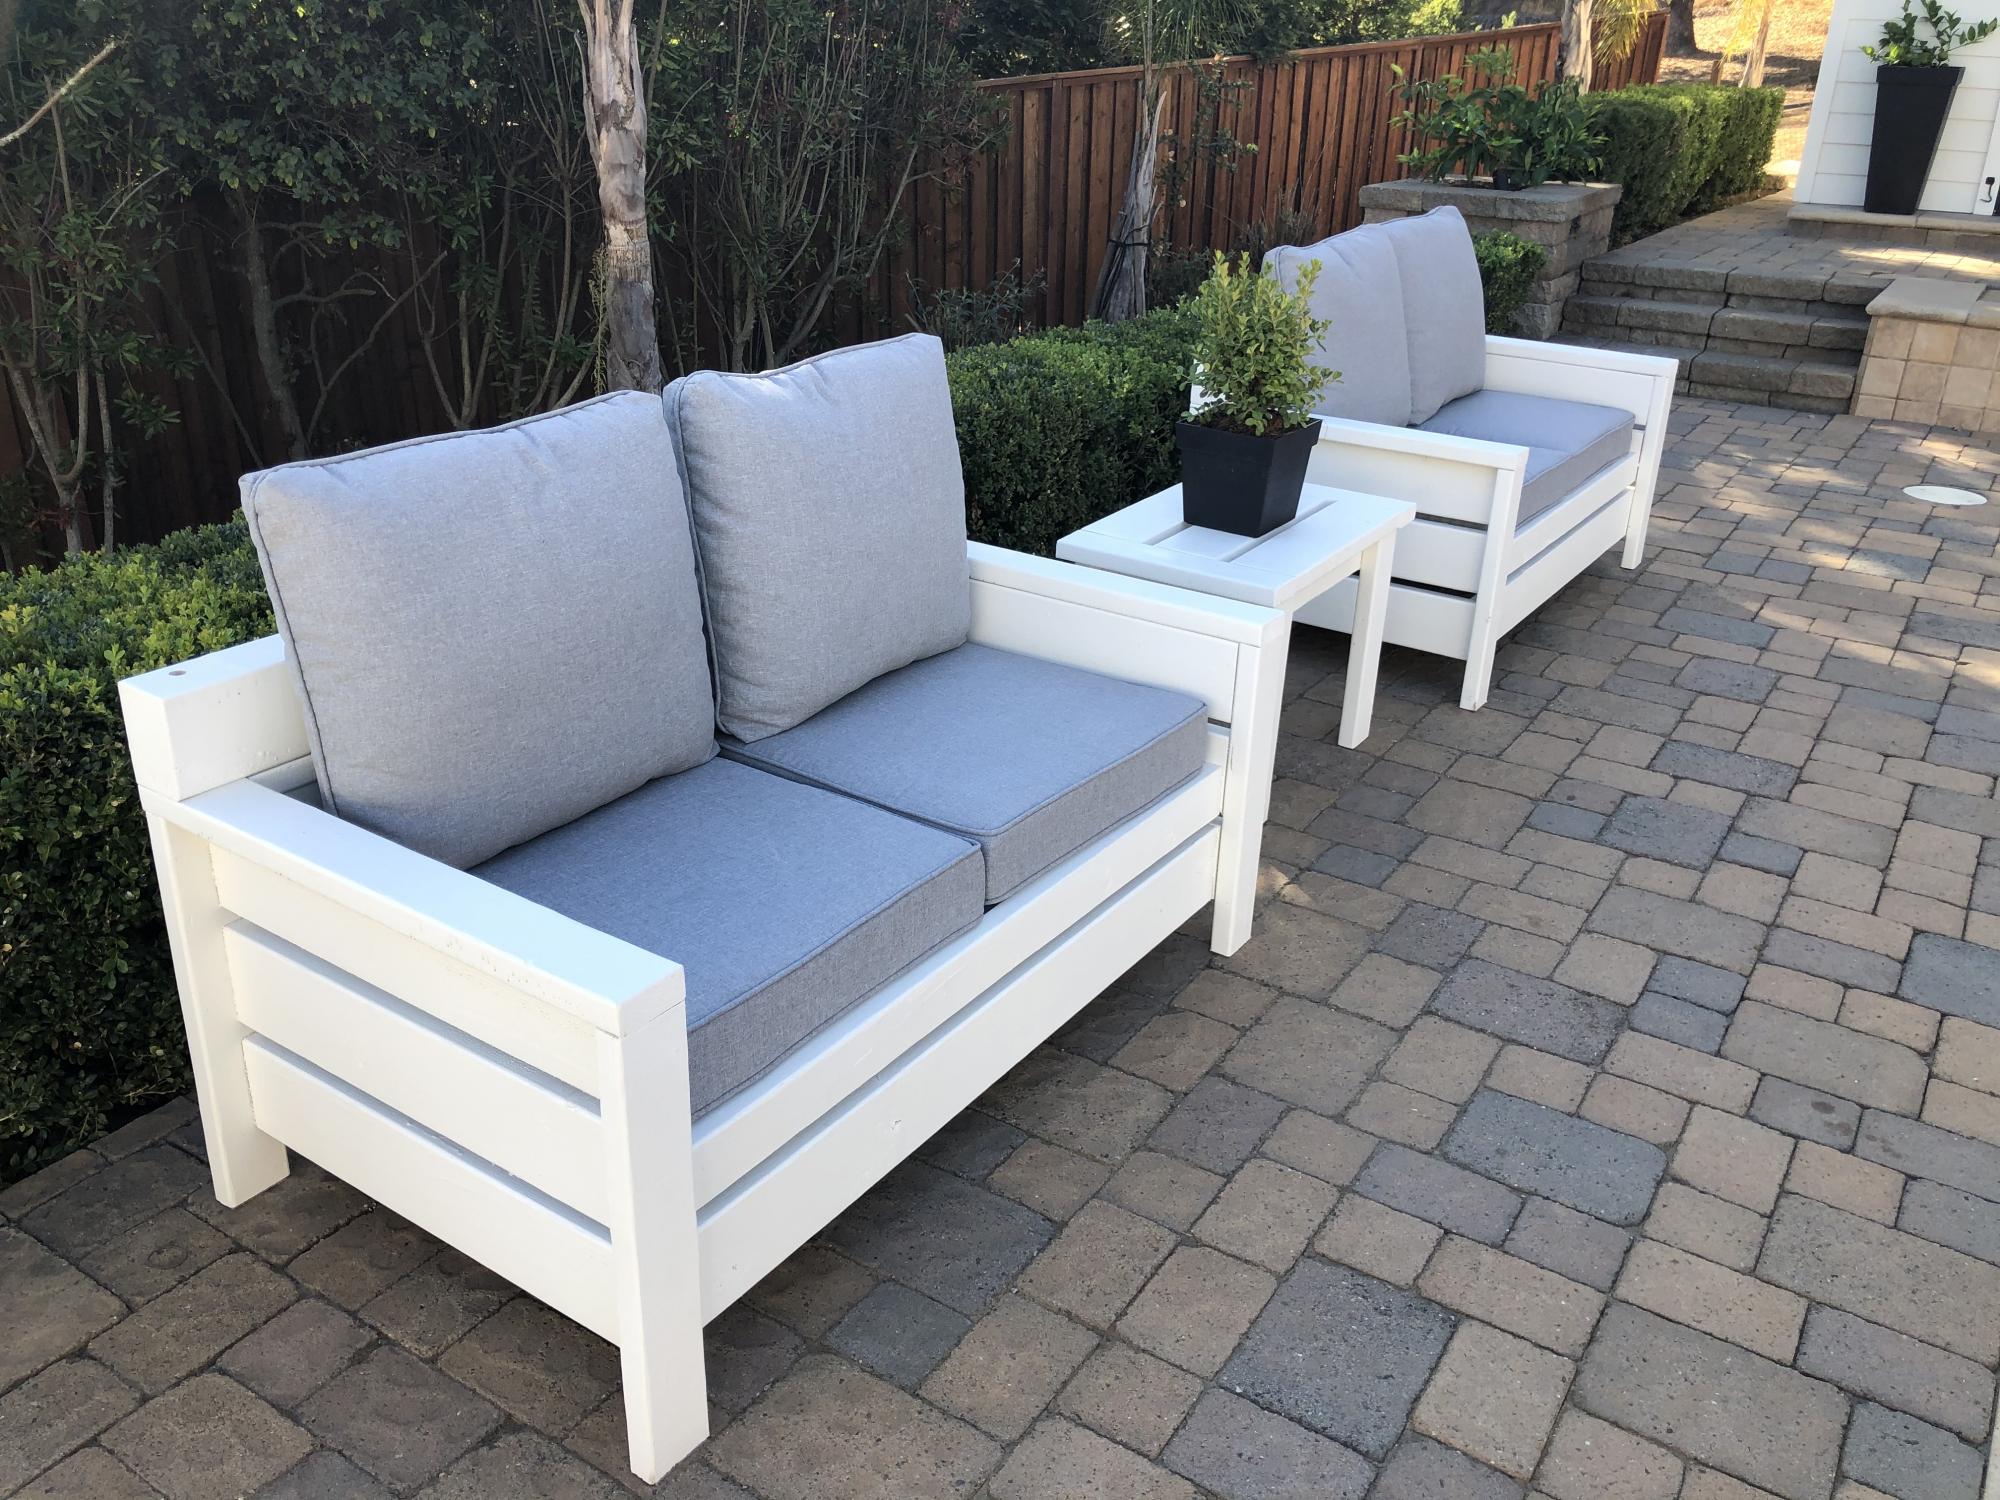
Great plans - thanks so much! Started with two chairs, and kept going...

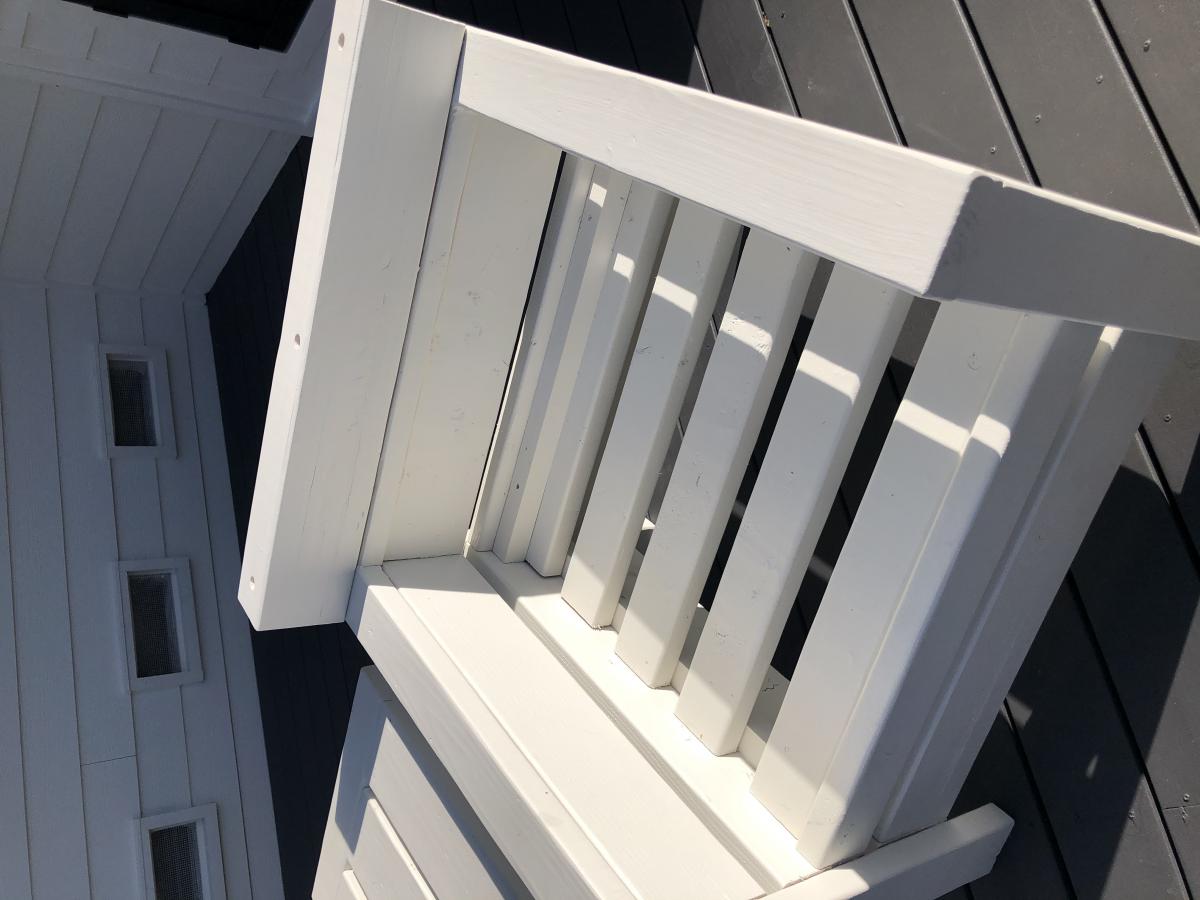
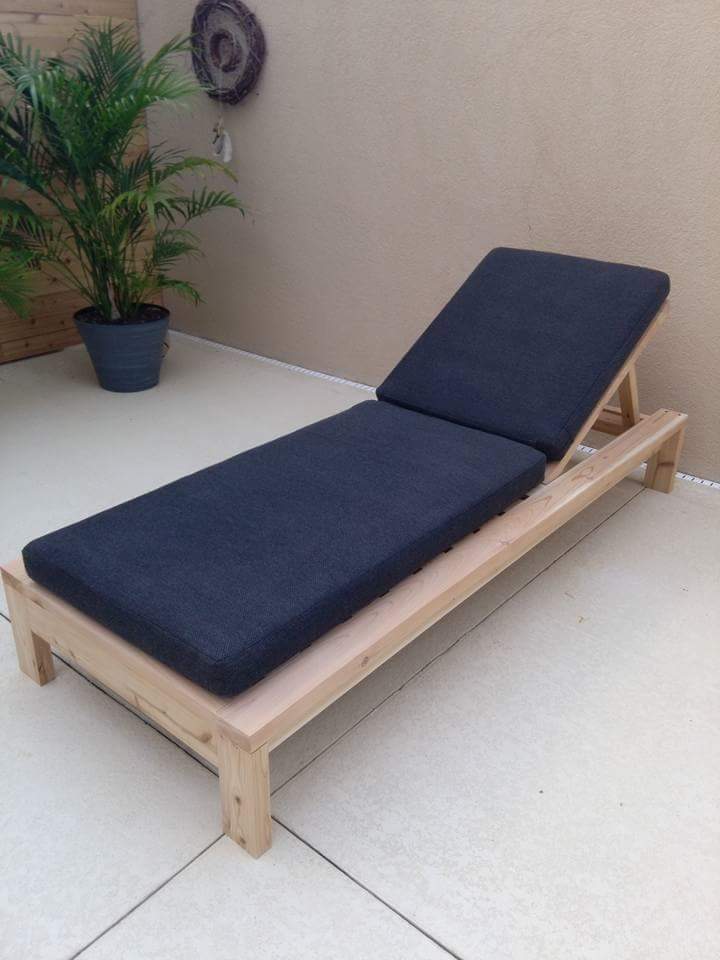
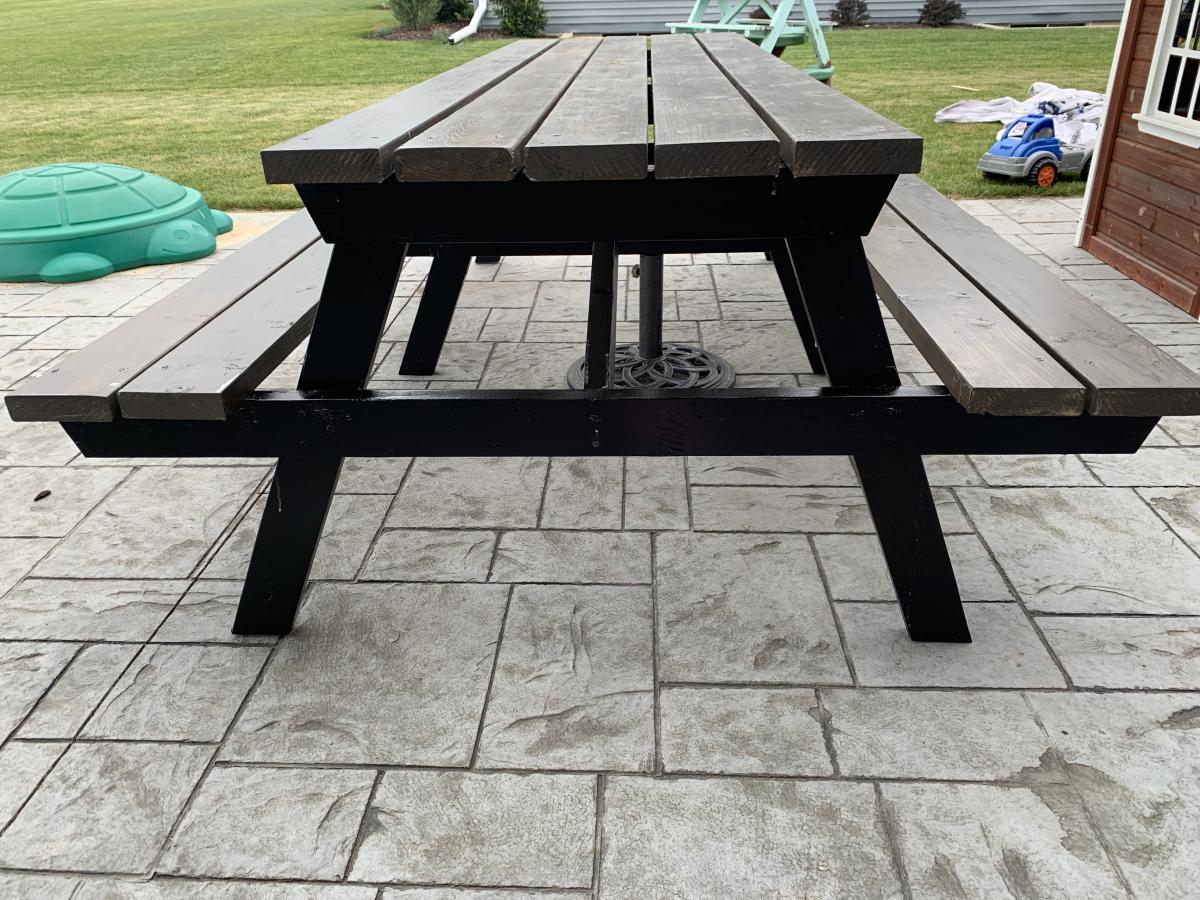
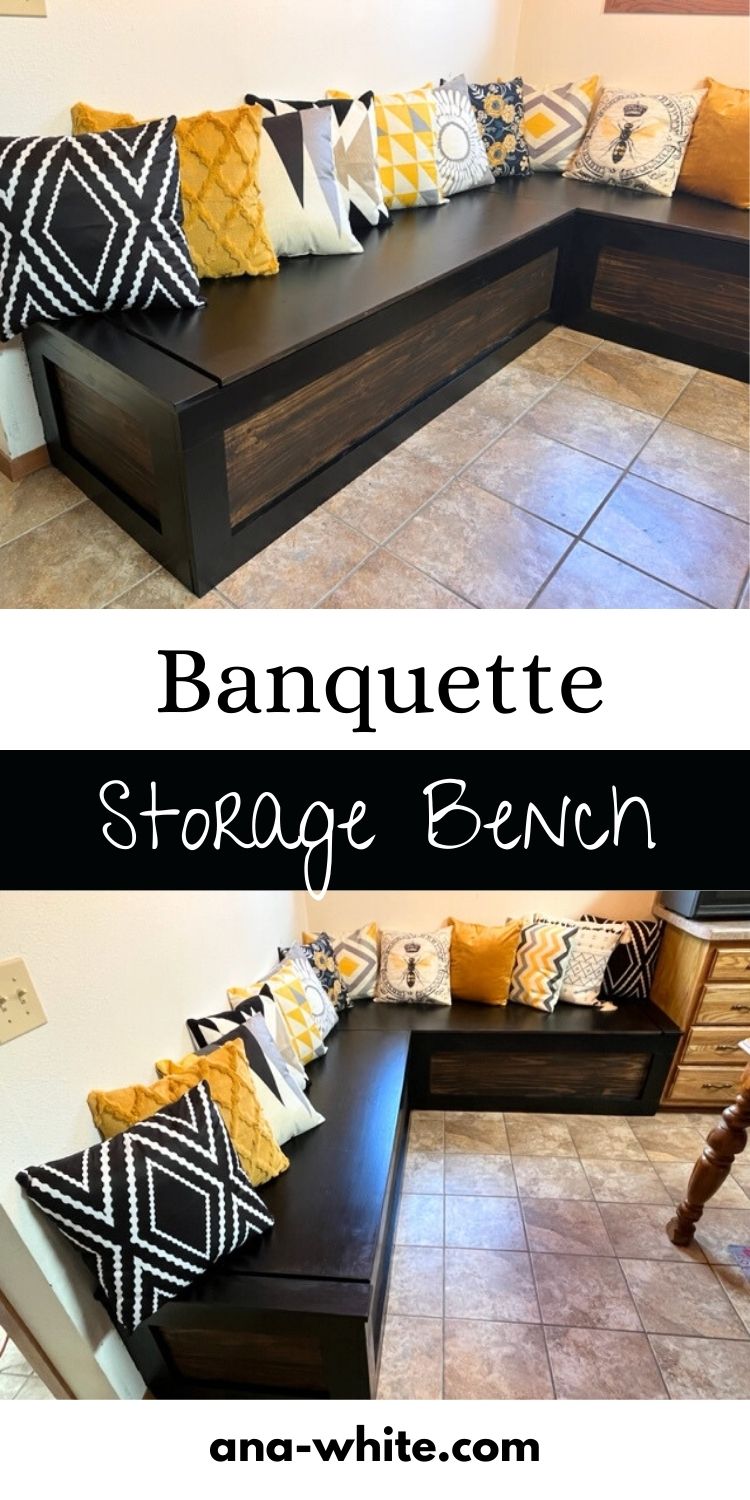
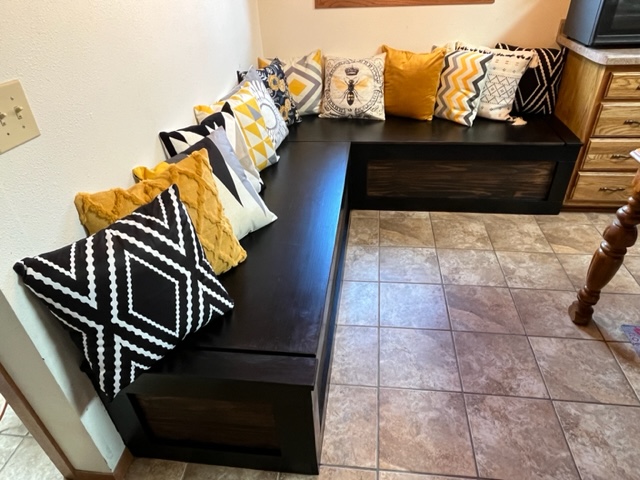
MODS: Once built, we felt there wasn't enough back support, so added a 2x4 then 4x4 on top. Also added a 2x2 in back of the seat bed, so our 25" x 25" seat cushions didn't float around.

Recommend paint gun vs. painting by hand.

Estimated Time Investment
Weekend Project (10-20 Hours)
Finish Used
Two coats of Behr waterproof stain + sealer (BM swiss coffee)
Recommended Skill Level
Beginner

Comments

Seasonal And Holiday

Lee and Beth's Simple Nightstands

Submitted by community-cont… on Fri, 02/25/2011 - 10:39

we’re back with another furniture project. This time we built the Simplest Nightstand. Actually, we had enough lumber that we were able to build two of them! It was a little more difficult than the coffee table and side table, but still wasn’t bad once Lee figured it out. The hardest part was getting the drawer to fit right. The first one Lee built, he didn’t get the drawer bottom square, but the second time around went much smoother. The first time, he cut all of the pieces out at once, but the second time, he cut and fit each piece separately. This proved to be very helpful. For the side pieces, we used plybead instead of plywood, and nailed trim pieces underneath the table top. Also, instead of using two separate pieces on the table top, we used the top off of an old tv tray that we weren’t using anymore. It was the perfect fit, and looks really good! Both tables cost us 50 dollars and took about 6 hours to build both of them. The first table took 4 hours to build, but the second one only took 2! We absolutely love your easy to use plans, and can’t wait to try another one! There’s so many great plans to choose from, we’re not sure what to try next!!

We love our new tables, thanks again for another great plan! We’ll be back!

Read more about Lee and Beth's Projects.

Built from Plan(s)
Estimated Cost
$25 Per Nightstand
Estimated Time Investment
Afternoon Project (3-6 Hours)
Recommended Skill Level
Intermediate

Simple Outhouse

I built this outhouse to go with a dry cabin I'm working on, and also as an emergency backup for my house. I used treated lumber on the base/deck and splurged on T-111 for the siding. I wanted to use greenhouse polycarbonate for the roof, but found a piece of metal roofing in my shed that was exactly the right size so I used that instead. I thought about doing a fancy cutout on the door but ended up going with a half moon because it was easy. I'm thinking about cutting out stars of different sizes all over the rest of the door to let in more light. I'll trim and stain it next summer.

Built from Plan(s)
Estimated Cost
$450 - I used T-111 which is $40/sheet here in Alaska. I also used treated lumber where recommended and stainless steel screws.
Estimated Time Investment
Weekend Project (10-20 Hours)
Recommended Skill Level
Beginner

Comments

CH

Mon, 01/13/2020 - 15:25

WHAT HAPPENS TO THE 'STUFF' THAT YOU DEPOSIT IN THE TOILET?  I DIDN'T READ ANYTHING ABOUT DIGGING A PIT/TREATMENTS, ETC.  PLEASE LET ME KNOW.  THANK YOU!  CH.

Murphy bed

Submitted by bpcooper14 on Wed, 05/08/2019 - 06:09

So I've always wanted to build a Murphy bed.  And by always I mean since I first came across plans here that made it look so simple.  It ended up taking me a while to do because my job has me working 6 days a week so I was only able to work on it for short chunks of time.

I ended up utilizing a few different plans and mashed them together to build a full size murphy bed.  The shelves are the support legs when the bed is down.  The "hinge" mechanism are heavy duty 360 degree seat swivels.

All-in-all it turned out WAY better than I expected with only some minor issues throughout the construction process.  

Next up is a twin xl Murphy bed with a murphy desk attachment that will serve as a craft  table when up.

Estimated Cost
3 - 4x8 sheets of 3/4" plywood ($25 each)
3 - 1x2x8 to wrap the frame ($2-3 each)
1 pack Door Hinge pins to serve as the pins to hold the bed upright ($3-5)
1 pint stain
1 pint shellac
2 - Heavy Duty 360 degree seat swivels ($20)
Screws/nails/etc.

All told, this project probably cost around $200
Estimated Time Investment
Week Long Project (20 Hours or More)
Recommended Skill Level
Intermediate

Comments

modern outdoor lounge chair

Just finished this beauty, entirely made with 2x4, plans were modify to match our outdoor sofa and coffee table. I think our best looking project so far ;) Thank you for inspiring me to build !!!

Estimated Time Investment
Week Long Project (20 Hours or More)
Recommended Skill Level
Beginner

Comments

Seasonal And Holiday

Privacy Planter and Under Deck Storage

Submitted by Anonymous (not verified) on Fri, 08/11/2023 - 11:27

In the middle of a much needed makeover on our back deck! We did not have skirting around the deck and decided that we would like to close it in for extra storage(ladders,compost bin...) and we came up with this little something as a bonus. We are always hosting backyard get togethers and seating is a challenge. Setting up and putting away chairs,ugh. This has been the perfect solution. This was completely an "as we went" plan but the biggest need to know is, heavy duty hinges! (As I said,the deck is getting a makeover so go easy on the appearance:)

Jodi and Matt B.

Built from Plan(s)

Outdoor sectional and coffee table

Submitted by Rynhffr on Mon, 07/06/2020 - 21:06

Loved these plans! Was my first project I tackled trying my hand with a new hobby of wood working to stave off quarantine craziness :-) finished project looked awesome and got me started working on other plans on the site.

**note**
Side table was just sanded and refinished, wasn't built just tried to match.

Estimated Cost
400
Estimated Time Investment
Weekend Project (10-20 Hours)
Recommended Skill Level
Beginner

Simple Outhouse

Submitted by Anonymous (not verified) on Thu, 04/20/2017 - 12:26

I had my nephew build this outhouse for our new 70 acre lot - no neighbours in sight so I had him put in an acrylic window (with a view).  I left off the deck and had him put the boards tight together so 'critters' didn't get in as easily. I made a sign for above the door - 'Waste Management' for a touch of humour.  The plans were easy to follow and I love it.  Thanks, Ana.

Built from Plan(s)
Estimated Cost
Approx. $300 for material and $250 for my nephew's labour.
Estimated Time Investment
Weekend Project (10-20 Hours)
Finish Used
sealer
Recommended Skill Level
Beginner

Comments

8 foot picnic table

Submitted by Abby721 on Sat, 07/18/2020 - 08:40

This picnic table was a quick build and turned out amazing. I modified the center base support by adding an extra table top support and seat support board to the opposite side of the center legs to give the table symmetry to accommodate an umbrella hole. I also shortened both cross supports by an inch to make sure the base wouldn’t be longer than the top boards. The space between the center table support boards and seat support boards is the perfect size to fit a standard umbrella. I used a 1 3/4” hole saw to make the umbrella hole. The build and stain/paint took me about 5 hours but additional time is needed to properly seal the table. I used untreated pine. Treated pine may give the table longevity but it would also add a lot of weight to an already heavy table. This was a relatively easy and quick build and is a great size to fit my whole family plus a couple guests! I’m happy with how it turned out and would recommend this build to anyone looking for a budget friendly and simple patio table.

Built from Plan(s)
Estimated Cost
$75
Estimated Time Investment
Day Project (6-9 Hours)
Finish Used
Varathane Briarsmoke for the top and Rustoleum Canyon Black Satin for the base. Sealed with 2 coats of Varathane Helmsman Spar Urethane
Recommended Skill Level
Beginner

Comments

Seasonal And Holiday

Dog Houses

Our local Habitat for Humanity puts on an annual event where they get folks to restore discarded or worn down furniture and sell them at auction. My wife and I participated last year and this year I was asked to build 4 dog houses and then they were going to let local designers/decorators finish them out.

I figured it would be easy to find a good dog house plan, but I was wrong so I had to come up with my own designs. I did not want to use plywood becauase I wanted them to look good. So I used 1x4's and 1x6's. I built them all just a little bit different, but the same basic design on all 3. Since I am not very good with circular cuts, did not do any fancy 1/2 circle doorways!

There are "after" pictures on the Blog. Thanks for looking!

Estimated Cost
$100 each
Estimated Time Investment
Afternoon Project (3-6 Hours)
Finish Used
I didn't finish them out, but did use screws to attach everything, so filled those in with wood putty and sanded down of course.
Recommended Skill Level
Beginner

Comments

Cindy from Indiana (not verified)

Sun, 11/06/2011 - 16:10

Great job for a great cause!

Modern Outdoor Chair from 2x4s and 2x6s

After a whole year I finally made a second chair! The first one was made a year ago and now my wife can sit outside with me too 😊. Next for the couch!

Comments

2x2 Playhouse Basement Loft Hideaway :)

We loved the idea of making two of the 2x2 playhouses featured on this blog and adding a 17" riser below to add more of a loft feel in our basement.  The riser really adds something special. [We designed the riser ourselves]. 

We resized the houses to accommodate adults as well as children, so the space can be used flexibly as a playhouse, reading space, or just a hideaway for kids and adults alike.  The house as we designed it is 70" tall (5.8 feet).  We also utilized a recessed wall in the basement, so the footprint feels just right for the room.  

After building the frames, we painted them white and custom-designed curtains for them.  We wanted the curtains to feel like walls and define the space. The curtains are attached via buttonholes that we sewed into the finished curtain.  They are looped over small cup hooks screwed into the frame.  

We left the risers in their natural color without stain and simply sealed them using a beeswax and olive oil DIY sealant that I've used on a handful of other projects in the past.

Overall, we feel so happy with this space.  It's just what we imagined it to be.  It feels so special and set apart :).  

Built from Plan(s)
Estimated Cost
~$300-350 for all materials (includes fabric)
Estimated Time Investment
Week Long Project (20 Hours or More)
Finish Used
Beeswax and olive oil sealant on riser, white paint on playhouse frames

Dog Crate with a twist...

Submitted by AlexO on Mon, 05/08/2017 - 19:08

I really liked the Large Wooden Dog crate but wanted the sides to be lower and wanted to make sure there was no easy chew escape.  Not sure if you can see from the photo but the cats have taken over... Will need to make a larger one for the dog!

I followed the plan pretty much other than lowering the panel on the side and replacing the wooden bars with rebar.  The rebar was a bit of a learning curve getting the holes lined up perfectly but I figured it out and I think it came out pretty good!

Used all pine 1x3 and 1x2s.  Picked up a pine panel for the top and the bottom is a 3/4 plywood. Made our own chalk paint for the finish and sealed it with wax.

Oh, forgot, added tongue and groove pine for the back and finished it and the top with Antiguing wax.

Lots of fun and I think I will make a double one next!

Built from Plan(s)
Estimated Cost
Around $100 if you don't count all the practice pieces for the rebar!
Estimated Time Investment
Week Long Project (20 Hours or More)
Finish Used
Chalk paint and antiquing wax
Recommended Skill Level
Intermediate

Pet Stairs

Submitted by alli2410 on Tue, 03/13/2018 - 06:26

I needed sturdy stairs for my 2 60lb dogs.  My bed is 33 inches from floor to top of mattress.  So, this is my very first project completed by myself!  Custom size pet stairs 24inx24inx24

Estimated Cost
$40-50
Estimated Time Investment
Afternoon Project (3-6 Hours)
Finish Used
Minwax polyshades Espresso gloss (3 coats)
Recommended Skill Level
Starter Project

Comments

Petite Planters for the Potager

Submitted by JoA on Mon, 08/19/2013 - 06:23

After building a large planter from Ana's plans and my salvaged fence wood I thought 2 smaller planters for the entrance to our kitchen garden would be nice. The complete instructions are on my blog, Let's Face the Music. Jo

Built from Plan(s)
Estimated Cost
$12 each
Estimated Time Investment
Day Project (6-9 Hours)
Finish Used
Benjamin Moore Exterior Semi-gloss in Bunker Hill Green over exterior primer.
Recommended Skill Level
Beginner
Seasonal And Holiday

The Boy's Bed

We had the Upside-Down bed from IKEA for our little guy, but my husband continued to complain on how he had to "crawl" into the bed. Okay, scrap that. No problem. I just searched Ana's plans for a nice bed I could make. And add a trundle. There you go.

I did modify the height of the headboard, as I plan on moving Jack to an upstairs bedrooms that has slanted walls. I wanted this bed to fit in any configuration, so I had to take 10" off the headboard. Also, due to the impending moving, I wanted the bed to easily be taken apart. So I attached the side rails with surface mounted keyhold brackets from Rockler Woodworking. They work great.

Estimated Time Investment
Day Project (6-9 Hours)
Finish Used
I love to distress and antique furniture, but to my husband's delight, I just decided to paint this bed. I used Sherwin William's Regatta. I first put on two coats of primer and then 3 coats of the paint. I did want to use my nifty Wagner spray gun, but we were having really rainy weather and I couldn't set up outside. And because I'm impatient, I just decided to brush it in the garage.
Recommended Skill Level
Beginner

Comments

Guest (not verified)

Mon, 08/29/2011 - 07:51

Great job! I am hoping to make two of these for my boys and would love to have the trundles. Could you give the specs on that? Thanks!

debandtom25

Wed, 08/31/2011 - 17:42

The specs will be different depending on the size mattress you have -- what I mean by size is height. I just used a foam mattress that was only 5 inches high. I wanted the mattress to fit bigger than the sides of the trundle, so I might have made it just 4 inches high (not including the wheels underneath). I made sure I had about 1.5" of clearance total between the headboard and footboard to move the trundle in and out.

Just make sure you take into account how thick your mattress is, the widths of your boards and the height of your wheels. Give yourself a little room for bedding and you should be all set.

Guest (not verified)

Mon, 11/21/2011 - 10:06

The bed looks awesome! The hubby and I are gonna attempt to make one just like it (with the shorter headboard as well). I also have a 5 inch mattress for the trundle. The questions I have are: 1) How much space did you leave between the floor and the bottom of the trundle? 2)What is the distance between the floor and the bottom of the side rail? 3) did you use the 1x10 for your side rail? (we are going to be using a 1x8 instead). 4) Did you order your casters from Rockler as well, or find them at a home improvement store?

Thanks so much, in advance!

debandtom25

Wed, 11/23/2011 - 11:58

1. The sides of the trundle are not flush with the bottom. The bottom (that the bed rests on) is about 2" higher than the side rails. This allows room for the wheels and about an 3/4: between the floor and the side rails. This measurement will all depend on the size of the casters you get and how much room you have beneath your bed for the trundle.
2. As mentioned above, there is about 3/4" between side rail and bottom of floor. Like I said before, it's total preference and how much room you have to work with.
3. I did use a 1X10, mainly because I like the look of the wide board.
4. I got the casters from HD or Lowes (can't remember).

Hope this helps!

Guest (not verified)

Sun, 01/29/2012 - 23:15

I love this and am going to make for my sons bed but I didn't see what you used to attach the sides to the base...unless I just didn't see it. :-) Did you use "L" brackets?

Saadia (not verified)

Sun, 03/25/2012 - 12:30

Hi, I was just wondering how you adjust the cleats when you are using the rockler brackets? I plan on using 2 x 8 for the siderails so there isn't enough room to fit the bracket and cleat along the edge. Did you have to shorten your cleat by just a little bit?

KAD050209 (not verified)

Fri, 08/17/2012 - 23:32

I was wondering if you could tell me how many inches the gap is from the bed to wall (where you have the bed horizontal against the wall)? Just trying to get an idea; my daughter is young and don't want her falling between the gap at night :) Thanks ahead of time!

In reply to by KAD050209 (not verified)

debandtom25

Wed, 09/05/2012 - 20:16

The gap is about 3.25". I remember one of the first nights that Jack slept in his bed he fell in the gap. I wasn't expecting that at all. We just stuffed the extra bed pillows in there at night. We don't even remember to do it anymore and he's never fallen in again.

Full size loft

Submitted by Anonymous (not verified) on Tue, 10/01/2019 - 18:46

Built a full size loft bed for my kids but wanted something safer than having them climb up and down a ladder so used the Camp Loft Bed plans to add the platform and stairs. It is much easier for the kids. Going to finish by covering the platform and stairs with carpet.

Estimated Cost
180
Estimated Time Investment
Day Project (6-9 Hours)

Comments

Modern slatted bench

Submitted by Whimwhams on Mon, 06/27/2016 - 11:51

I made this for my sister the day before her house warming party. It was a pretty easy build. I used wood glue and 2" nails. Using a nail gun, this came together pretty quickly. I do wish that I had wide enough clamps to hold everything in place while it dried, because there were a few gaps due to some imperfect boards. I used 104" stud length boards, so I only need to purchase 7 instead of 9. this was enough to make the cuts for the top and both leg pieces from each board. the price was the same and we had limited space in our van for boards, so this was a better option for us. I used a sprayer hooked up to an air compressor to apply the stain and was able to get in between the slats fine with this method, brushing over it as I sprayed. Luckily I chose the same color as her deck not knowing, so it matches great. Now I need to make one for myself! :)

Estimated Cost
$40
Estimated Time Investment
Afternoon Project (3-6 Hours)
Recommended Skill Level
Starter Project

Farmhouse Style Toy Box / Blanket Chest

Submitted by Anonymous (not verified) on Tue, 01/17/2017 - 11:17

I built this for my daughter after Christmas sinse she had the living room covered in toys. The dimensions are 37" x 18" x 20" 

Estimated Cost
$75
Estimated Time Investment
Weekend Project (10-20 Hours)
Finish Used
Watco Danish Oil - Medium Walnut (2 coats) with a light sanding between coats with 220 grit, I allowed 24 hours between each coat to dry. To protect the surface I used water based polyurathane matte finish (3 coats) with a light sanding - 400 grit.
Recommended Skill Level
Beginner

Comments

jwelch

Wed, 01/18/2017 - 13:06

Great job! Can you share more about how the legs were constructed and joined? Was this project based on Ana White's "Simple" toy box plan? Any info appreciated.

jgreaff

Tue, 01/09/2018 - 05:51

HI Anna, 

Can you provide more pictures or instructions on how you assembled this toy box? i want to make one just like it! 


Thanks!

apezz

Wed, 03/10/2021 - 16:31

Looking at the wall panels they look like the long edge of each panel has a small bevel cut on it. This gives each panel edge a more pronounced or well-defined edge? Is this true? Was it done with a router?