Community Brag Posts

Chicken Coop with Run

Submitted by Jen Marzen on Fri, 06/17/2011 - 02:10

My husband and I live on a small hobby farm and are growing/raising a lot of our own food. We decided to venture into working with chickens. We wanted to start out small so we got 6 chickens and needed a home for them. We found a kids play house one day while shopping and got the idea of modifying it into a chicken coop with a run. We took off with this idea and with quite a bit of modification and some extra building materials we were able to raise it up in the air and attach a run so our chickens would have a nice home to protect them from preditors and the emements and not to mention one that looks good in our yard!

Built from Plan(s)
Estimated Time Investment
Weekend Project (10-20 Hours)
Finish Used
Cedar deck stain and white outdoor house paint
Recommended Skill Level
Beginner

Comments

Heather Dalton (not verified)

Tue, 02/21/2012 - 19:08

Are the plans available? I have Black Copper Marans and Lavender Ameraucanas and I really need to separate the LAs from the BCMs and this would be perfect!

madrona (not verified)

Tue, 02/28/2012 - 10:21

I'd also love the plans!
Great job - it's beautiful!

guest (not verified)

Tue, 02/28/2012 - 10:22

I'd also love the plans - thanks!

Eliza B (not verified)

Thu, 05/31/2012 - 10:02

Can you please post the plans you used? I have 4 week old chicks that need a coop. Thank you very much.

Jen Marzen

Sat, 06/02/2012 - 15:22

Sorry guys there are no plans for this coop. My husband and i just "winged it" and built it without any plans.

It is a play house that we found at Mills Fleet Farm and we modified it to make it a chicken coop. We put together the play house based on instructions from the box (with a few of our own modifications to make the window on the ground etc.) added some chicken wire to the doors and bay window, added some 4x4 "stilts" and a floor to get the house in the air, and constructed a frame around it with 2x4's and wire fencing to make the run

Sorry I dont have any plans to give you guys!

Seasonal And Holiday

Garage Shelving - Some minor mods to Ana's great basic plan

My father-in-law and I knocked this project out in about 5 hours including the trip to the lumber yard. You've got a great basic design here! A few modifications we made:

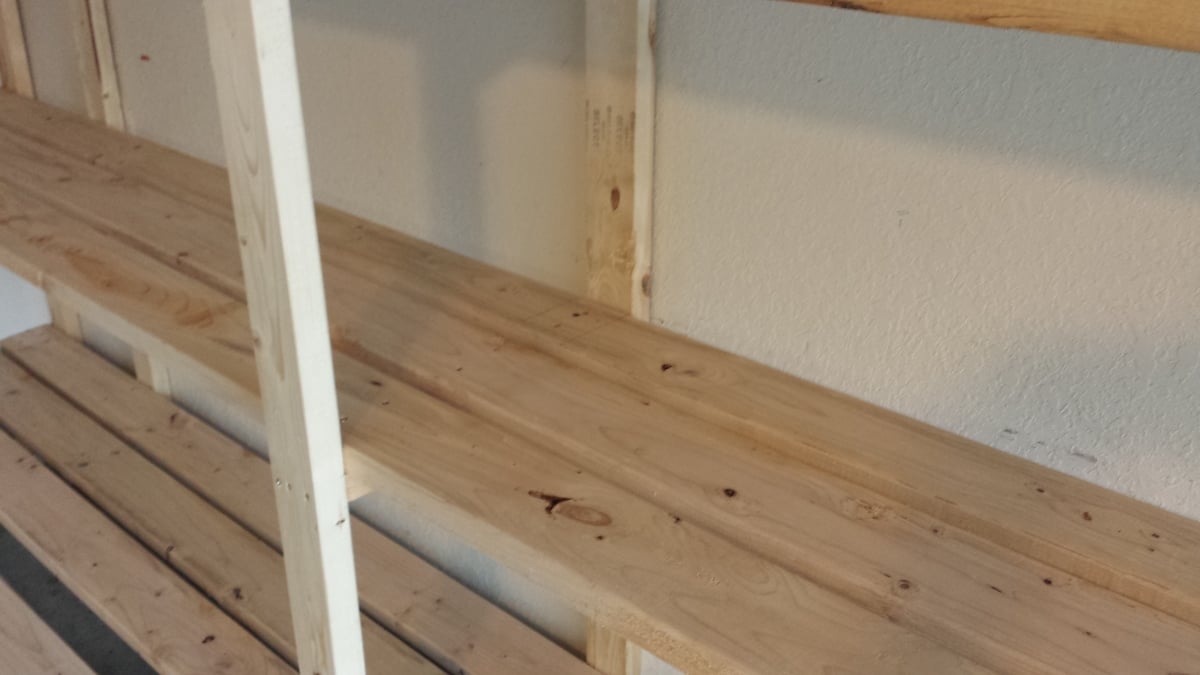
1. I thought the depth of the shelves in the original plan was a little too shallow so I used 3 2"X6"s instead of the 4 2"x4"s. That made the shelves 1 1/2" deeper. Although 2"x6"s are obviously more expensive, the overall cost for the project didn't change much because we only had to use 3 boards per shelf instead of 4. This also reduced the amount of screwing and made it easier to position the shelf boards without taking measurements since we only had one middle board to deal with (instead of 2 with the 2"x4"s). We just eyeballed the spacing of the middle shelf board as we worked.

2. Since our garage has a 10' ceiling, I decided to go 8' tall with the unit. This allowed us to add a 5th shelf.

3. Some oversized tubs can be 18-20" high or more so I varied the height of each shelf -- 24" at the bottom, then 20", 18" and 16". There's approx. 24" available between the top shelf and the ceiling.

4. Due to the position of the garage door track, I had to notch out a couple feet at one side. The end support piece is only 6' high.

5. Since many storage tubs can be 16-18" wide, I made sure that there was at least 54" between 3 of the vertical support structures. This will allow us to store 3 tubs side-by-side and maximize storage. You might notice that I have two vertical supports that appear to be very close together near the back wall. I did this so I would have something on that side to attach more shelving to on that short wall where the garage door opener is. 

The only cuts we had to make for this entire project were for the 18 1/2" 'braces' or support pieces on the vertical ladder structures. The shelves are either 14' or 12' (top shelf only) and the vertical 2"x4"s are either 8' or 6'. Most lumber yards will carry these lengths in either 2"x4"s or 2"x6"s. 

We didn't use any wood glue, and I admit this may come back to haunt me. However, to get a good fit and eliminate gaps, I used clamps I already owned to squeeze the boards together before adding the screws. Everything feels very solid and sturdy to me. 

Because of the extra height compared with the original plan, I was worried about it possibly tipping over (we have a 10-year-old who likes to climb frown) so I made sure that 3 of the supports are lined up with the wall studs. After leveling the entire unit, I plan to anchor it to the wall using 3 1/2" screws.

So for about $187 in lumber and maybe $20 in construction screws, I've got 76 feet of STURDY shelving that should accommodate hundreds of pounds! Not a bad investment at all...

 

Estimated Cost
$187 lumber + $20 construction screws
Estimated Time Investment
Afternoon Project (3-6 Hours)
Finish Used
None right now, but my wife wants to sand it and apply marine varnish to give it a shiny, yet still unfinished, look.
Recommended Skill Level
Beginner

Comments

Sturdy Workbench Sink

Submitted by Anonymous (not verified) on Mon, 05/01/2023 - 09:57

Used sturdy workbench plans with 2x6 cedar top for outdoor sink. Turned out much better than I expected!!

Built from Plan(s)

Comments

The Gíaffe TV Stand

Submitted by Anonymous (not verified) on Thu, 02/06/2020 - 09:55

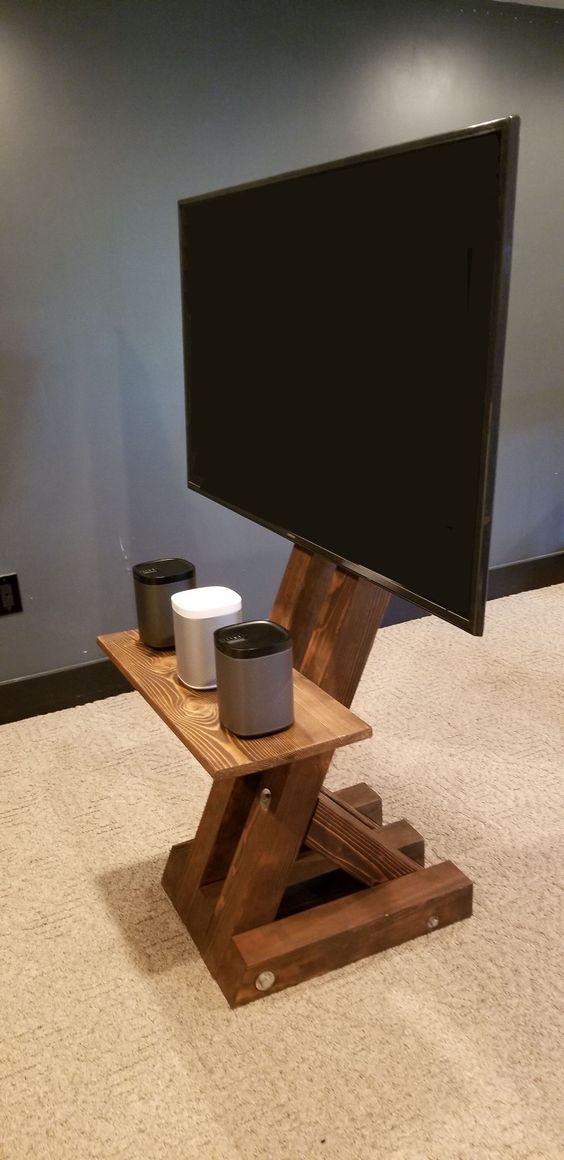
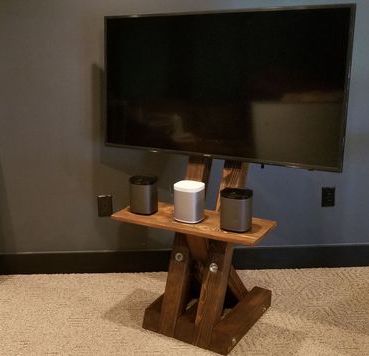
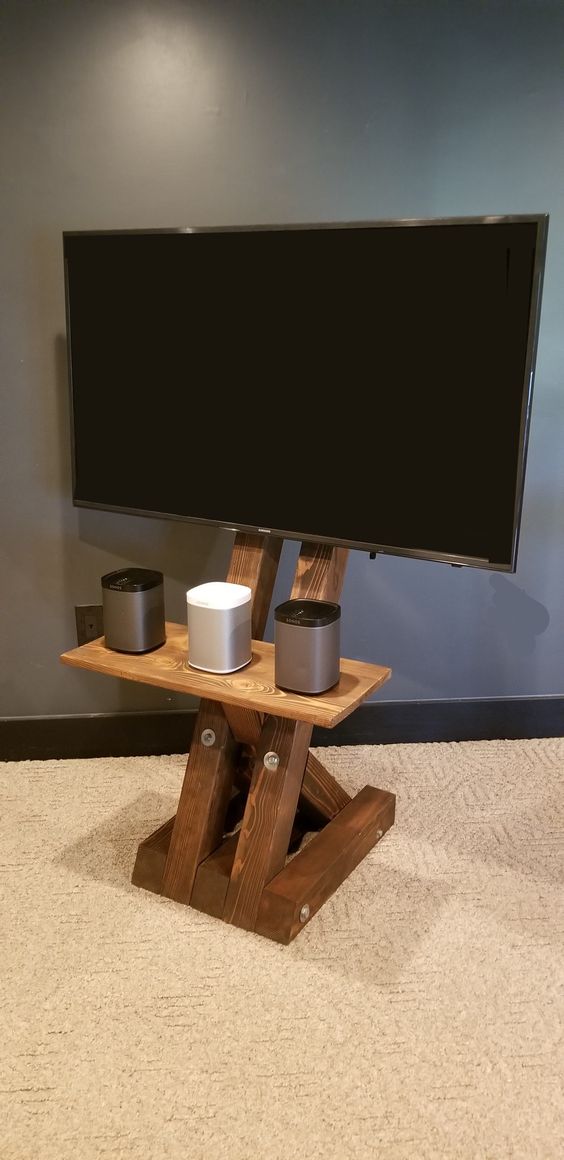
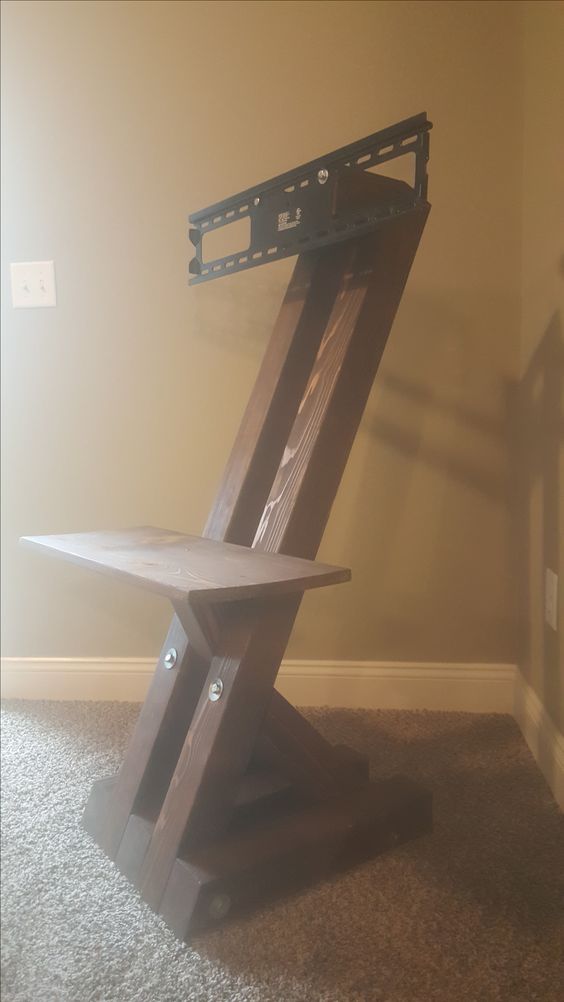
The Gíaffe Free Standing TV Mount. Handcrafted and engineered to use its center mass to deliver strength and balance for tv sizes 30-60". Display your television without detracting from your home's decor. The Gíaffe Free Standing TV Mount is the perfect solution and its rich finish will be perfect for any house/office room.

Estimated Cost
$109
Estimated Time Investment
Day Project (6-9 Hours)
Finish Used
Stain - Dark Walnut - Varathane - 2 Coats
Finish - Water Based Polyurethane - Varathane - 3 Coats
Recommended Skill Level
Intermediate

Comments

Catio heaven

Submitted by bhoppy on Fri, 09/04/2020 - 15:43

Ana doesn’t have a plan for a catio but she does for a playhouse and a cedar shed made from 2x2’s. I sort of combined my knowledge from making her plans over the last 10 years and came up with this for my cats. It was fun to make!! My baby kitten is loving it. I used garden fencing and stapled it to the outside and pocket holes for the walls. I made each wall individually like the playhouse then connected them once in place.


Estimated Cost
$250
Estimated Time Investment
Week Long Project (20 Hours or More)
Finish Used
Cabot semi transparent outdoor deck and fence stain. ($9 oops section)
Recommended Skill Level
Intermediate

Comments

Wifey

Wed, 06/09/2021 - 12:36

Thank you for sharing! My daughter wants a cat for her birthday but it can't be inside due to our son's allergies. Roaming outside isn't really an option because we have coyotes. We are going to use one of these in combination with an underground electric fence.

Seasonal And Holiday

Lee and Beth's Simple Nightstands

Submitted by community-cont… on Fri, 02/25/2011 - 10:39

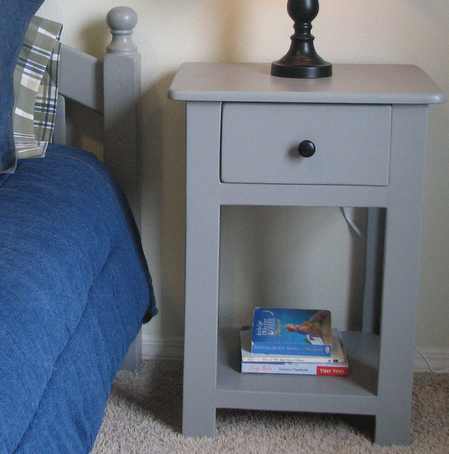
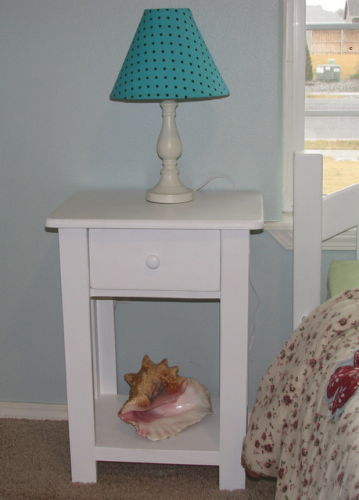
we’re back with another furniture project. This time we built the Simplest Nightstand. Actually, we had enough lumber that we were able to build two of them! It was a little more difficult than the coffee table and side table, but still wasn’t bad once Lee figured it out. The hardest part was getting the drawer to fit right. The first one Lee built, he didn’t get the drawer bottom square, but the second time around went much smoother. The first time, he cut all of the pieces out at once, but the second time, he cut and fit each piece separately. This proved to be very helpful. For the side pieces, we used plybead instead of plywood, and nailed trim pieces underneath the table top. Also, instead of using two separate pieces on the table top, we used the top off of an old tv tray that we weren’t using anymore. It was the perfect fit, and looks really good! Both tables cost us 50 dollars and took about 6 hours to build both of them. The first table took 4 hours to build, but the second one only took 2! We absolutely love your easy to use plans, and can’t wait to try another one! There’s so many great plans to choose from, we’re not sure what to try next!!

We love our new tables, thanks again for another great plan! We’ll be back!

Read more about Lee and Beth's Projects.

Built from Plan(s)
Estimated Cost
$25 Per Nightstand
Estimated Time Investment
Afternoon Project (3-6 Hours)
Recommended Skill Level
Intermediate

modern outdoor lounge chair

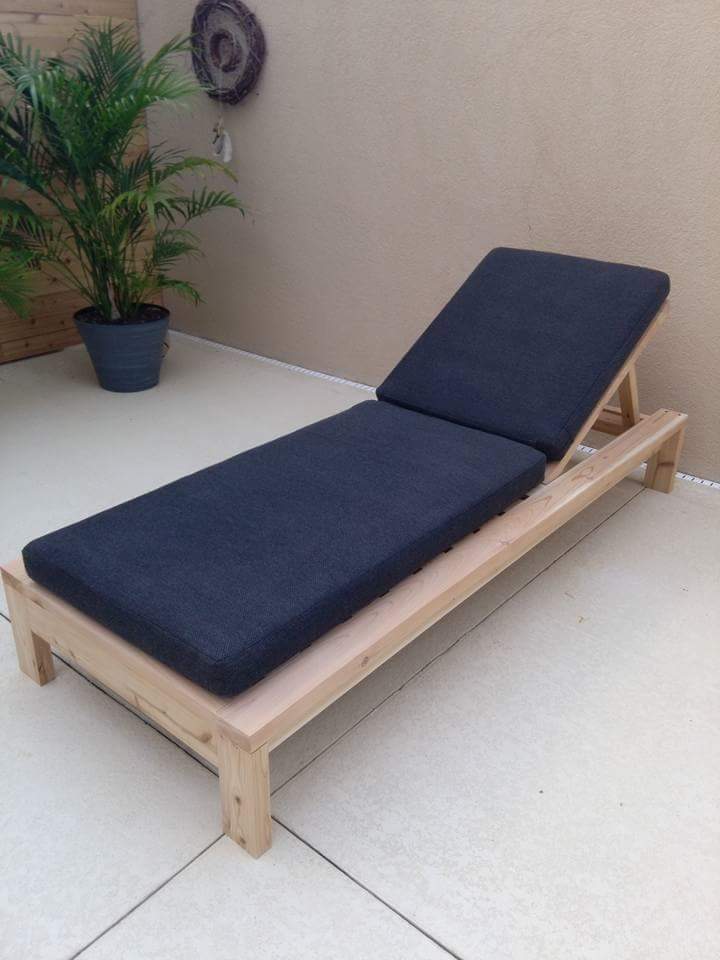
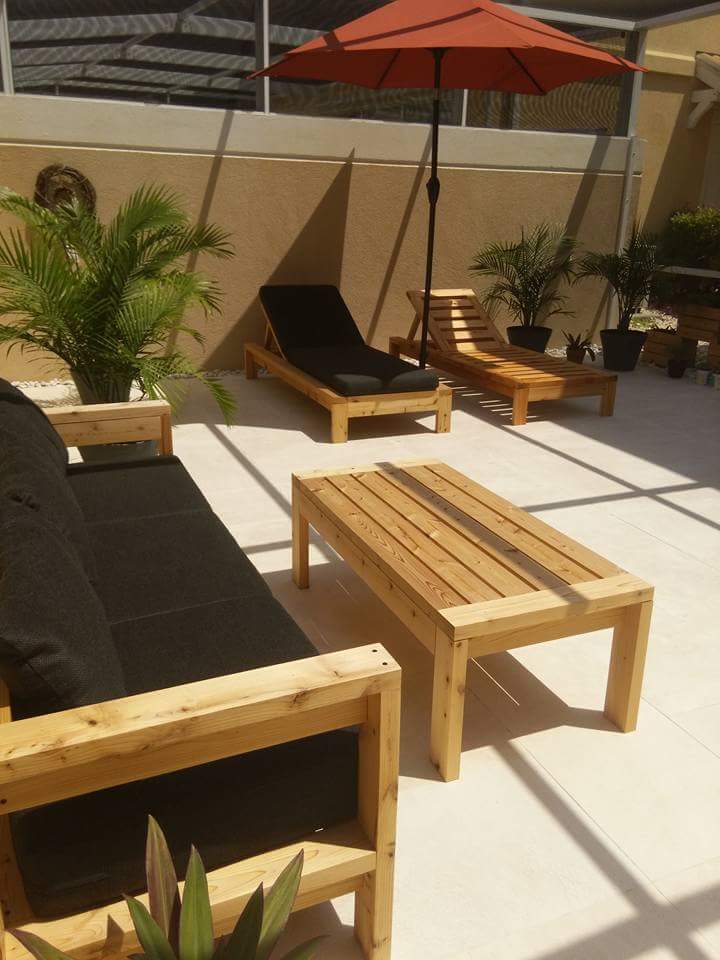
Just finished this beauty, entirely made with 2x4, plans were modify to match our outdoor sofa and coffee table. I think our best looking project so far ;) Thank you for inspiring me to build !!!

Estimated Time Investment
Week Long Project (20 Hours or More)
Recommended Skill Level
Beginner

Comments

Seasonal And Holiday

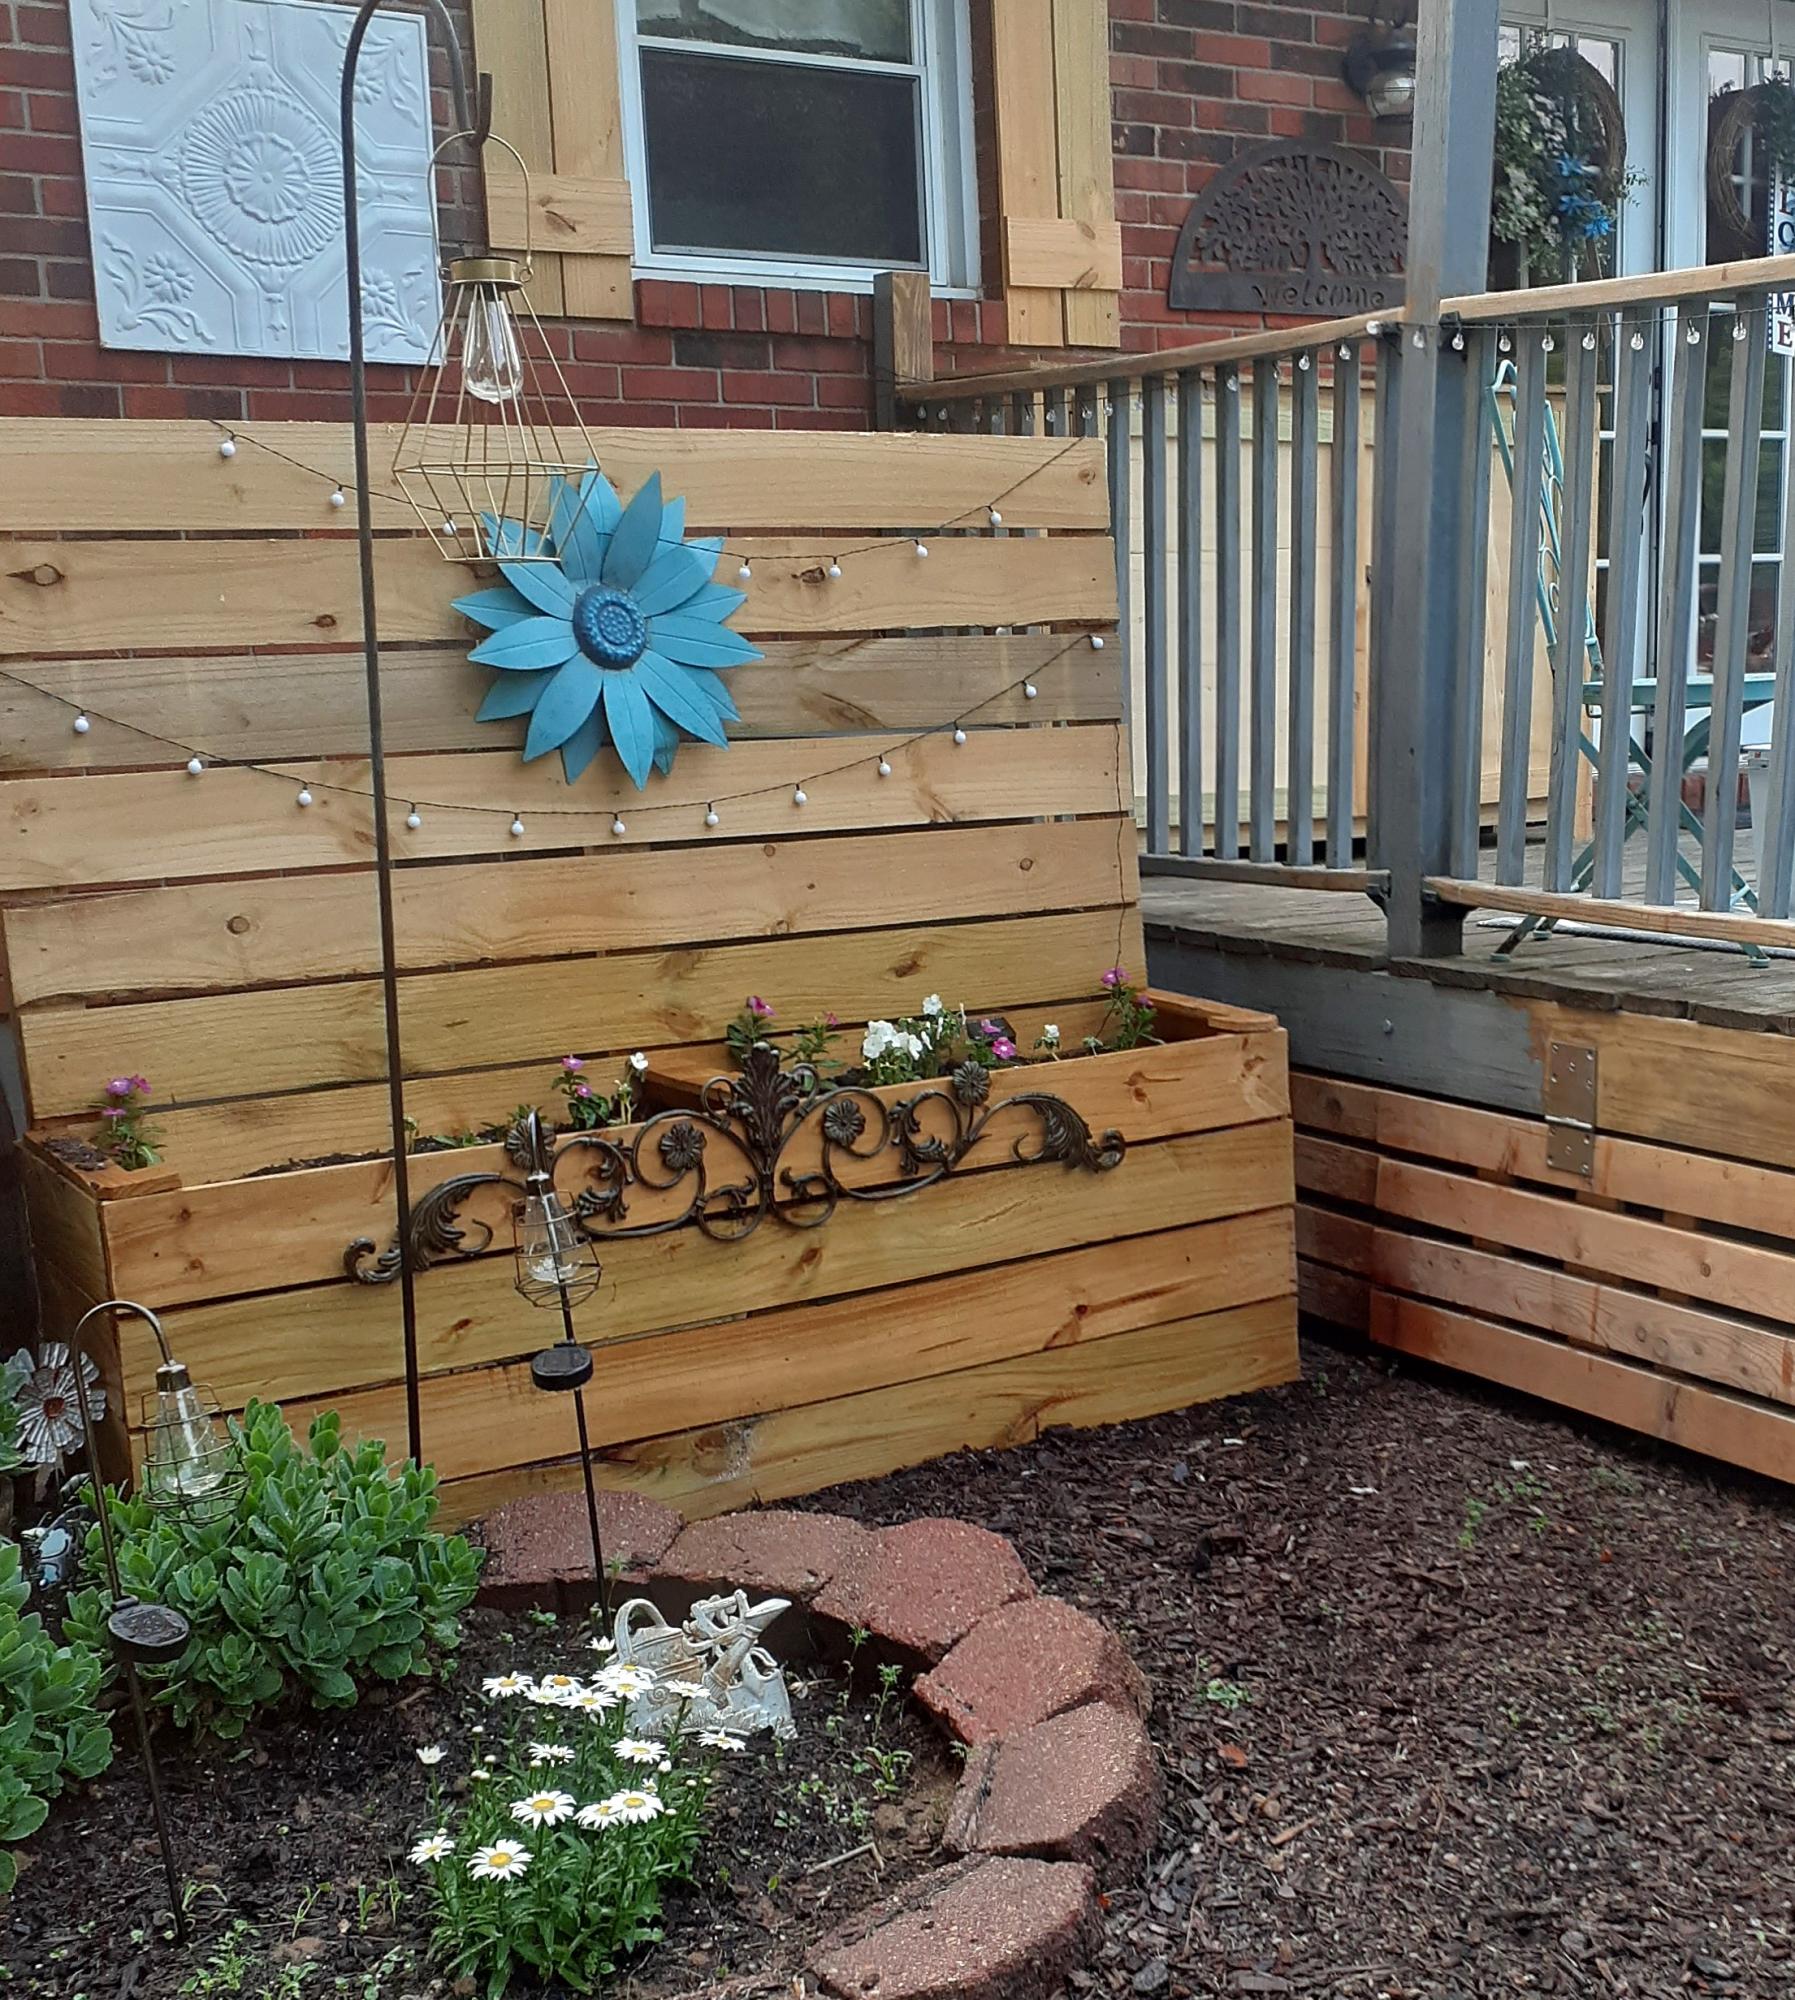
Privacy Planter and Under Deck Storage

Submitted by Anonymous (not verified) on Fri, 08/11/2023 - 11:27

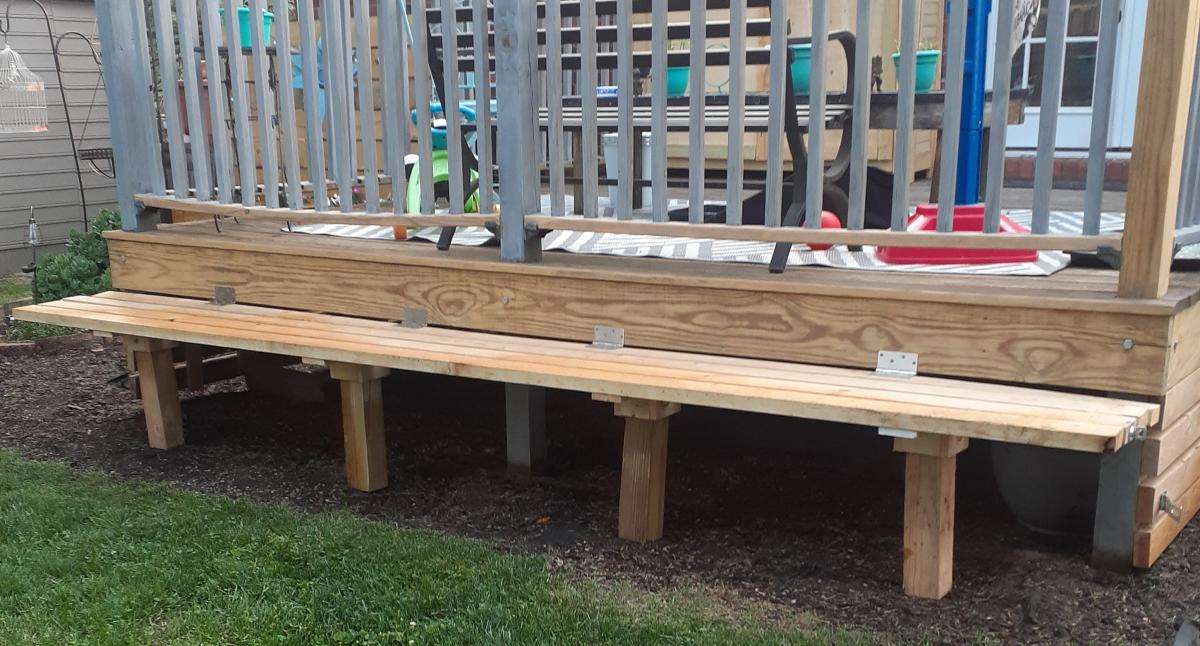
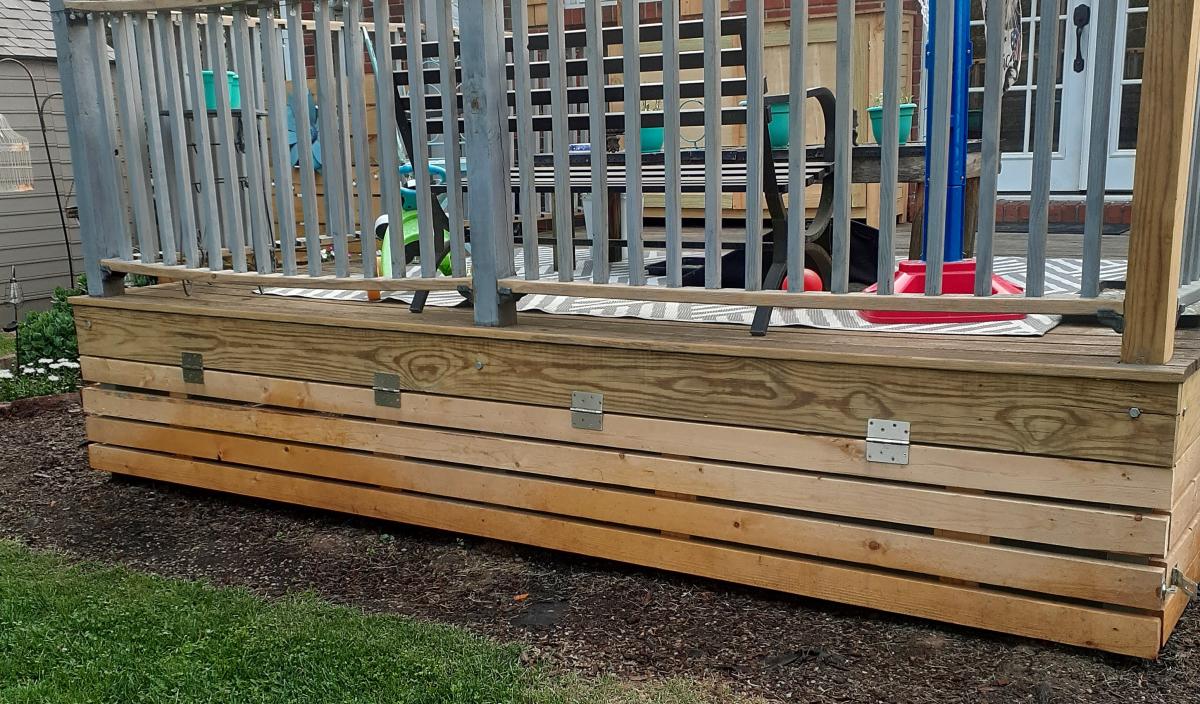
In the middle of a much needed makeover on our back deck! We did not have skirting around the deck and decided that we would like to close it in for extra storage(ladders,compost bin...) and we came up with this little something as a bonus. We are always hosting backyard get togethers and seating is a challenge. Setting up and putting away chairs,ugh. This has been the perfect solution. This was completely an "as we went" plan but the biggest need to know is, heavy duty hinges! (As I said,the deck is getting a makeover so go easy on the appearance:)

Jodi and Matt B.

Built from Plan(s)

Outdoor sectional and coffee table

Submitted by Rynhffr on Mon, 07/06/2020 - 21:06

Loved these plans! Was my first project I tackled trying my hand with a new hobby of wood working to stave off quarantine craziness :-) finished project looked awesome and got me started working on other plans on the site.

**note**
Side table was just sanded and refinished, wasn't built just tried to match.

Estimated Cost
400
Estimated Time Investment
Weekend Project (10-20 Hours)
Recommended Skill Level
Beginner

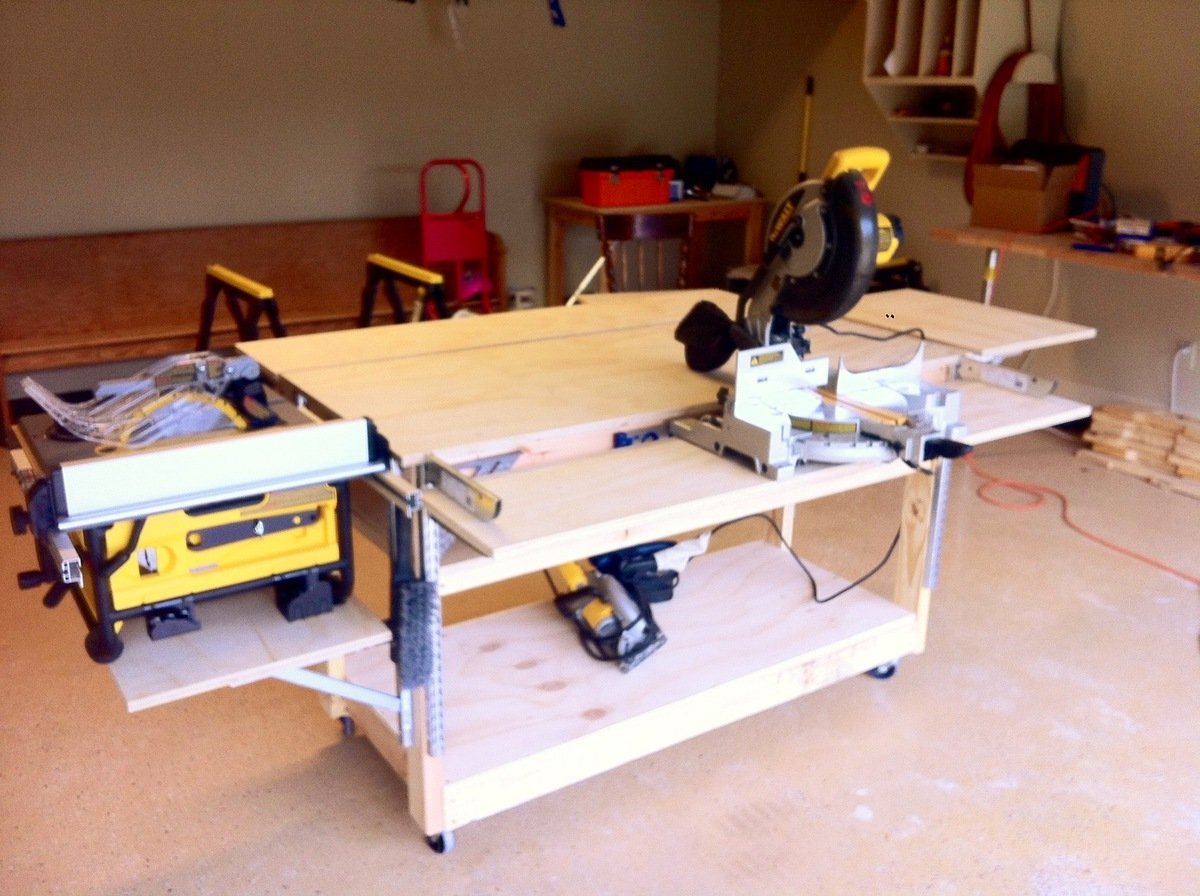
Do-It-All Mobile Workbench

Submitted by JL Hurst on Wed, 11/28/2012 - 11:02

The need for a proper workbench in my garage/shop is a must, but. So is space! I already have a fold down workbench I’ve made with ¾ inch pipe & a door, but. I just need something that can handle all my tools. So, I stumbled upon these plans from the Family Handyman & couldn’t find a reason why this wouldn’t work in my shop. It has room for storage, can easily accommodate my tools & most importantly fold up to store. Easy to build too! Make sure you read all the plans first as some of the materials could be pricey, but well worth it. Technically it’s taken 2 months to build this bench, as I operate on a firefighter/teacher’s budget & during the holiday season no doubt. I ordered all the shelf standards & brackets through Amazon, $210.00 for those alone, but they hold so much weight to support your tools I figure it’s worth it. The rest materials (wood, screws) were purchased at Home Depot for around $150.00. The plans called for ¾ inch ply & it was $45.00 per sheet. However they did have a smaller thickness for $22.00 per sheet & was only a 1/32 inch thinner. I plan on topping all my surfaces with some ¼ inch tempered hardboard later on so I knew it would work. That also left me adjusting my screw size to mount my brackets. Due to the reduction in thickness of the plywood all my #8-1 inch screws needed to be adjusted to ¾ inch so to not screw through the ply. I also hit the molding isle to nab some pieces to use as furring strips to use under the shelves before attaching the brackets. This way I can sand each strip to match before mounting to make sure it lined up flat with the center top. One more thing; where it says “drill 1/8 inch hole in brackets make sure you use 1/8 inch pop rivets. I barrowed a pop rivet gun & was handed some rivets as well. Popped two & they had to be trashed because the rivet size turned out to be 5/32. So I stepped up in drill bit size & it all worked out. As I said, I’ll be topping it with some ¼ inch hardboard. I also plan to run it’s own electrical with an outlet on each post. I hope you all enjoy & this can help!

Estimated Cost
$350.00
Estimated Time Investment
Weekend Project (10-20 Hours)
Recommended Skill Level
Beginner

Comments

Rusty Cottage

Thu, 11/29/2012 - 07:03

This is by far the best workbench I have ever seen!!! Thanks for sharing. And excellent choice of table saw and miter saw.

JL Hurst

Thu, 11/29/2012 - 14:59

If I had it to do over I'd had gotten the contractor grade portable saw from Dewalt. The smaller version I have is the same 10" saw, but. It's maximum rip capasity is only 16. The other will at least rip a sheet of ply in 1/2.

Thanks for the kind words on the bench! I hope everyone that may find this valuable will. The plans came out of a 2005 issue & were hard to find on the internet.

uniquetrio2000

Thu, 07/04/2013 - 18:28

I love this work bench and would love to build it but i cant find them. Could you post them or email them to me please. uniquetrio2000 [at] gmail [dot] com

phantom1

Tue, 06/02/2015 - 05:39

I built this bench 3 years ago and I couldn't be happier. The portability, space savings and functionality make it wonderful!

StepFar

Mon, 01/08/2018 - 14:44

Am I missing the actual plans for this. I downloaded the pdf but it doesn't have the build plans apart of it.

Outdoor Sectional

Submitted by nikkiice on Sat, 05/28/2016 - 17:40

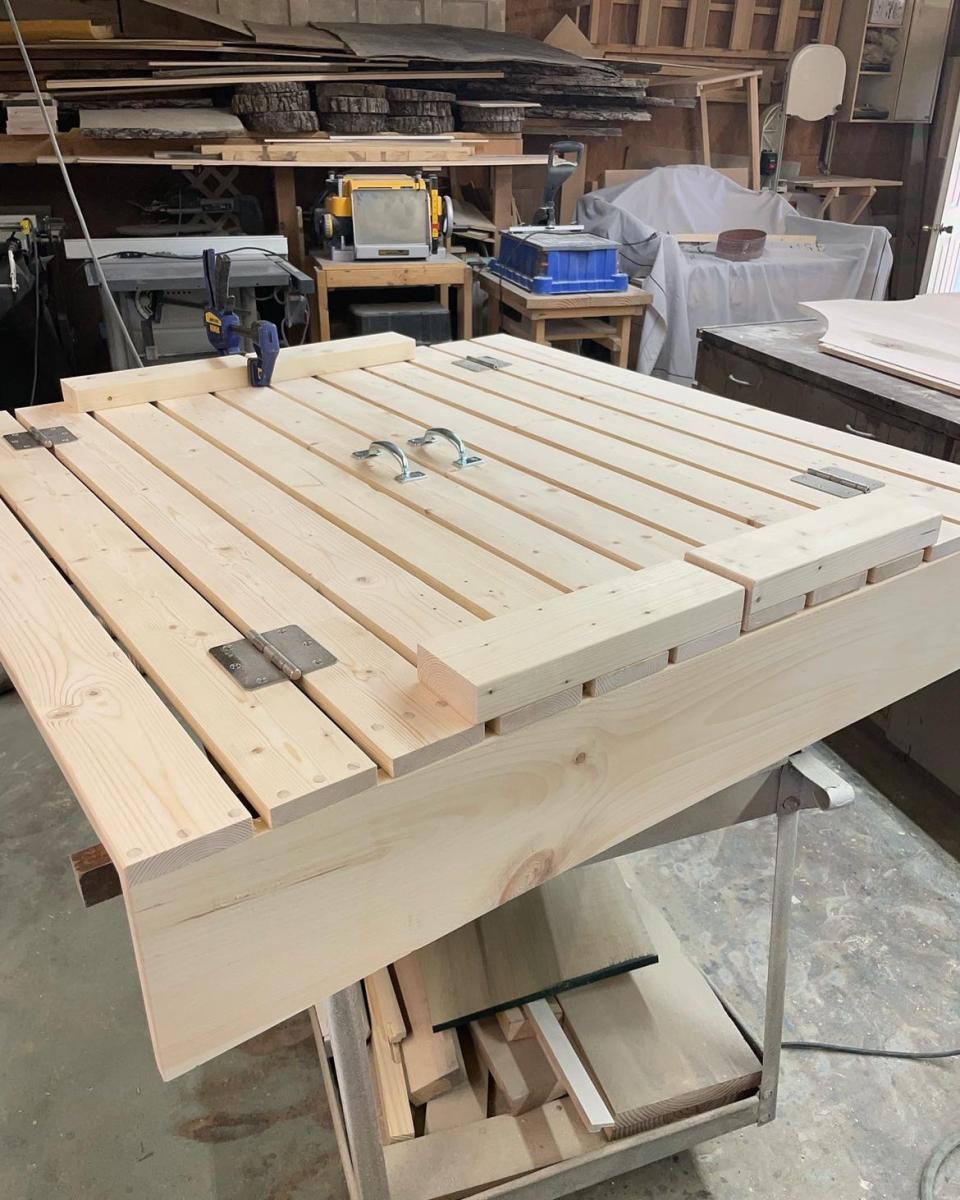
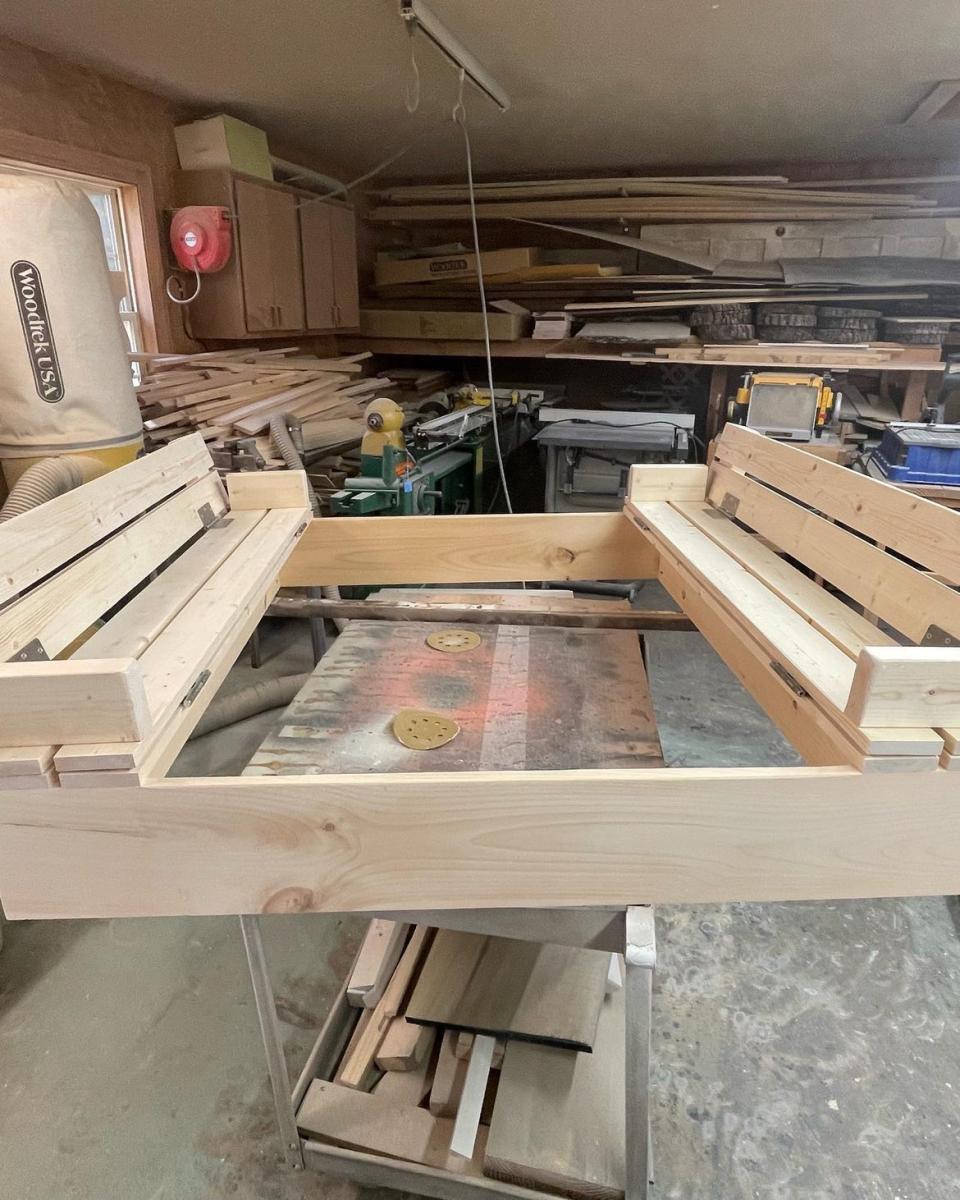
I had so much fun building this! I got a little creative with the corner section and decided to make it a table. I built a small hatch so that I could put in a container for ice and cold beer. When the hatch is not in use, the container can be removed and the hatch can be closed to provide more table space. I also added drink holders! 

Estimated Time Investment
Week Long Project (20 Hours or More)
Finish Used
none yet
Recommended Skill Level
Beginner

Modern Outdoor Chair from 2x4s and 2x6s

After a whole year I finally made a second chair! The first one was made a year ago and now my wife can sit outside with me too 😊. Next for the couch!

Comments

2x2 Playhouse Basement Loft Hideaway :)

We loved the idea of making two of the 2x2 playhouses featured on this blog and adding a 17" riser below to add more of a loft feel in our basement.  The riser really adds something special. [We designed the riser ourselves]. 

We resized the houses to accommodate adults as well as children, so the space can be used flexibly as a playhouse, reading space, or just a hideaway for kids and adults alike.  The house as we designed it is 70" tall (5.8 feet).  We also utilized a recessed wall in the basement, so the footprint feels just right for the room.  

After building the frames, we painted them white and custom-designed curtains for them.  We wanted the curtains to feel like walls and define the space. The curtains are attached via buttonholes that we sewed into the finished curtain.  They are looped over small cup hooks screwed into the frame.  

We left the risers in their natural color without stain and simply sealed them using a beeswax and olive oil DIY sealant that I've used on a handful of other projects in the past.

Overall, we feel so happy with this space.  It's just what we imagined it to be.  It feels so special and set apart :).  

Built from Plan(s)
Estimated Cost
~$300-350 for all materials (includes fabric)
Estimated Time Investment
Week Long Project (20 Hours or More)
Finish Used
Beeswax and olive oil sealant on riser, white paint on playhouse frames

Dog Crate with a twist...

Submitted by AlexO on Mon, 05/08/2017 - 19:08

I really liked the Large Wooden Dog crate but wanted the sides to be lower and wanted to make sure there was no easy chew escape.  Not sure if you can see from the photo but the cats have taken over... Will need to make a larger one for the dog!

I followed the plan pretty much other than lowering the panel on the side and replacing the wooden bars with rebar.  The rebar was a bit of a learning curve getting the holes lined up perfectly but I figured it out and I think it came out pretty good!

Used all pine 1x3 and 1x2s.  Picked up a pine panel for the top and the bottom is a 3/4 plywood. Made our own chalk paint for the finish and sealed it with wax.

Oh, forgot, added tongue and groove pine for the back and finished it and the top with Antiguing wax.

Lots of fun and I think I will make a double one next!

Built from Plan(s)
Estimated Cost
Around $100 if you don't count all the practice pieces for the rebar!
Estimated Time Investment
Week Long Project (20 Hours or More)
Finish Used
Chalk paint and antiquing wax
Recommended Skill Level
Intermediate

Cedar Outdoor Sofa

Submitted by Anonymous (not verified) on Mon, 05/06/2024 - 13:17

Two projects that I recently built for my wife and my daughter. My wife wanted a tea bar and a beach vibe, my daughter wanted an outdoor couch so it is made out of cedar. They both loved them.

Todd Springer

The Boy's Bed

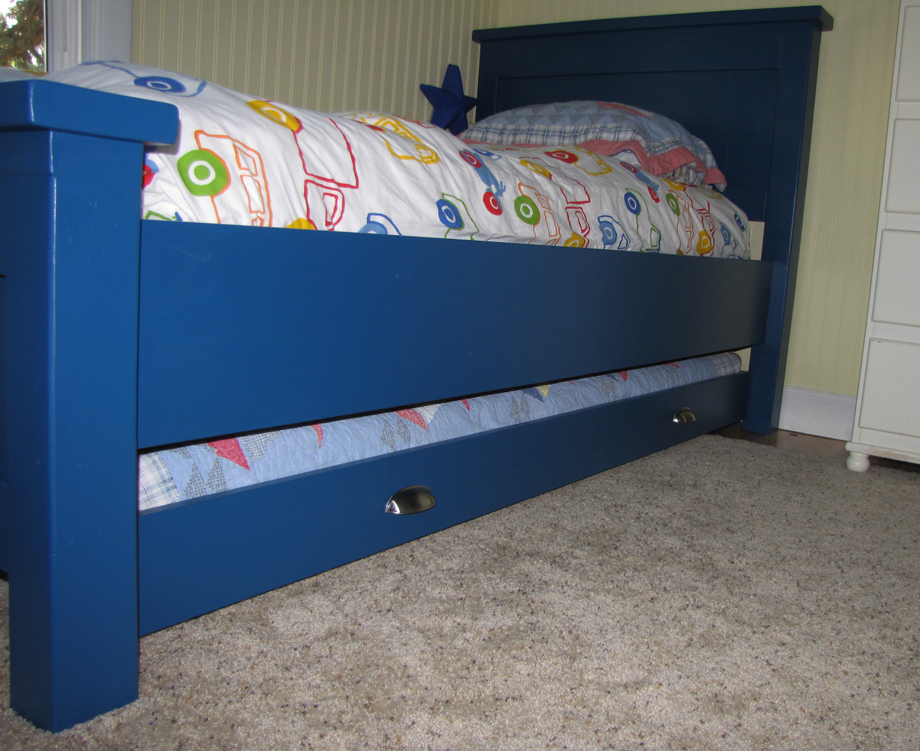
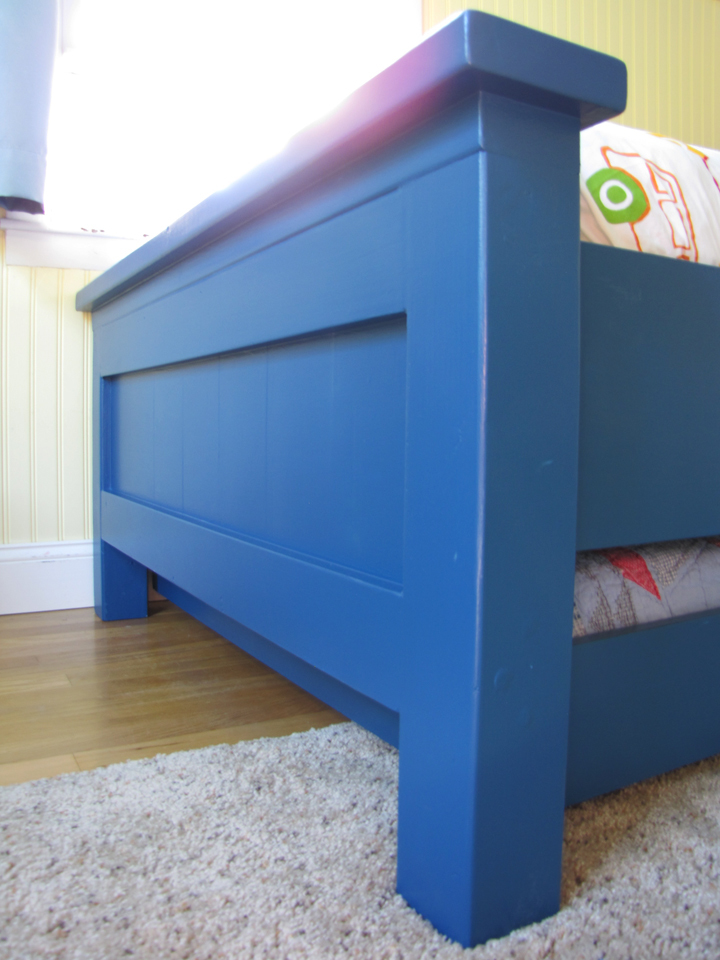
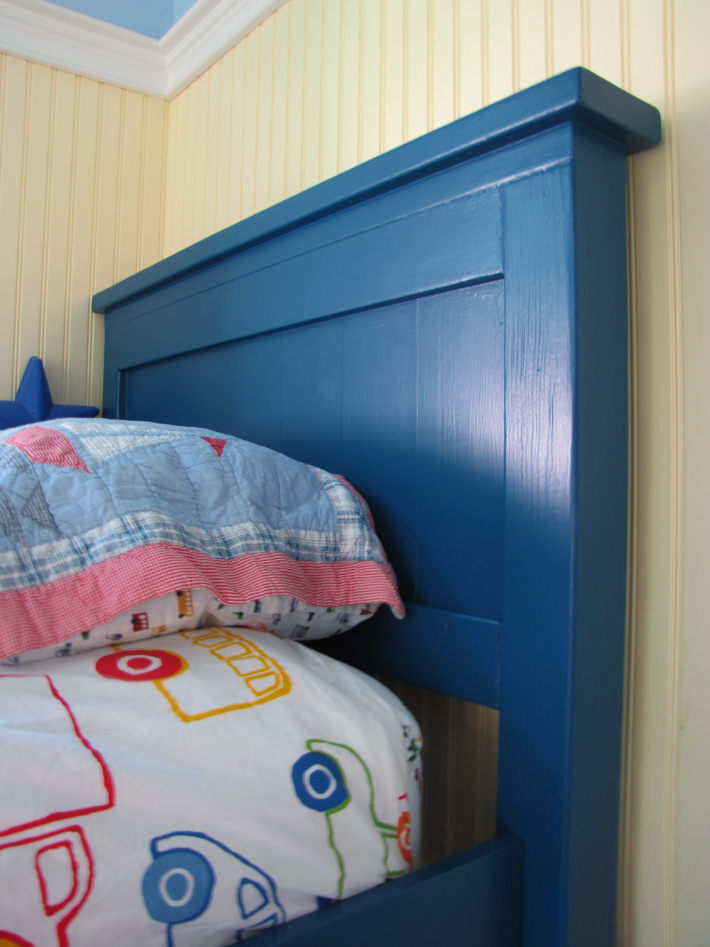
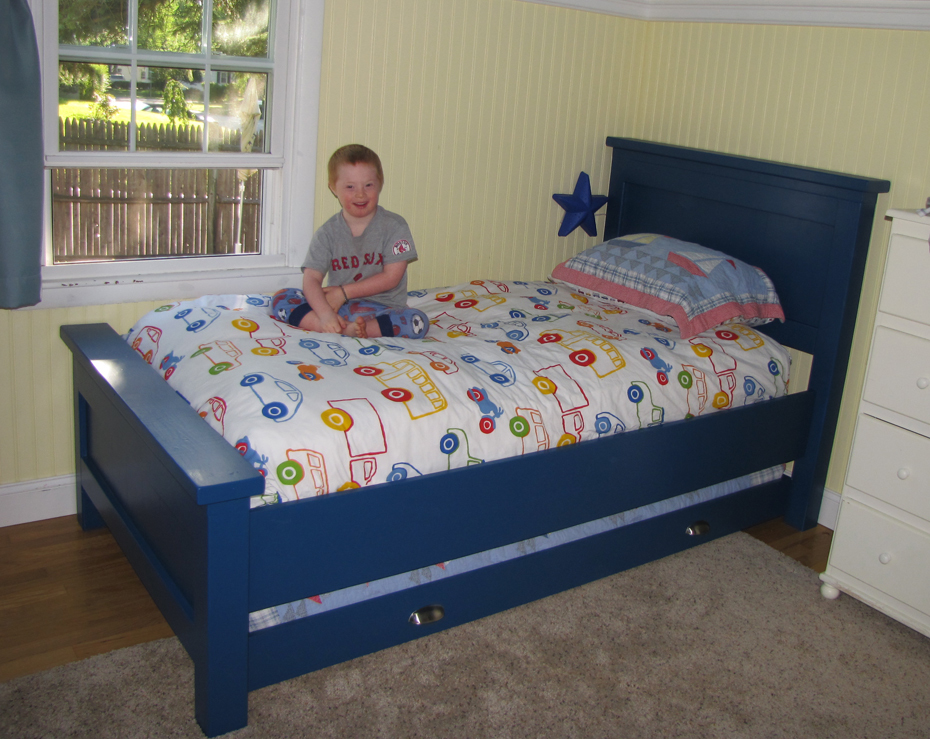
We had the Upside-Down bed from IKEA for our little guy, but my husband continued to complain on how he had to "crawl" into the bed. Okay, scrap that. No problem. I just searched Ana's plans for a nice bed I could make. And add a trundle. There you go.

I did modify the height of the headboard, as I plan on moving Jack to an upstairs bedrooms that has slanted walls. I wanted this bed to fit in any configuration, so I had to take 10" off the headboard. Also, due to the impending moving, I wanted the bed to easily be taken apart. So I attached the side rails with surface mounted keyhold brackets from Rockler Woodworking. They work great.

Estimated Time Investment
Day Project (6-9 Hours)
Finish Used
I love to distress and antique furniture, but to my husband's delight, I just decided to paint this bed. I used Sherwin William's Regatta. I first put on two coats of primer and then 3 coats of the paint. I did want to use my nifty Wagner spray gun, but we were having really rainy weather and I couldn't set up outside. And because I'm impatient, I just decided to brush it in the garage.
Recommended Skill Level
Beginner

Comments

Guest (not verified)

Mon, 08/29/2011 - 07:51

Great job! I am hoping to make two of these for my boys and would love to have the trundles. Could you give the specs on that? Thanks!

debandtom25

Wed, 08/31/2011 - 17:42

The specs will be different depending on the size mattress you have -- what I mean by size is height. I just used a foam mattress that was only 5 inches high. I wanted the mattress to fit bigger than the sides of the trundle, so I might have made it just 4 inches high (not including the wheels underneath). I made sure I had about 1.5" of clearance total between the headboard and footboard to move the trundle in and out.

Just make sure you take into account how thick your mattress is, the widths of your boards and the height of your wheels. Give yourself a little room for bedding and you should be all set.

Guest (not verified)

Mon, 11/21/2011 - 10:06

The bed looks awesome! The hubby and I are gonna attempt to make one just like it (with the shorter headboard as well). I also have a 5 inch mattress for the trundle. The questions I have are: 1) How much space did you leave between the floor and the bottom of the trundle? 2)What is the distance between the floor and the bottom of the side rail? 3) did you use the 1x10 for your side rail? (we are going to be using a 1x8 instead). 4) Did you order your casters from Rockler as well, or find them at a home improvement store?

Thanks so much, in advance!

debandtom25

Wed, 11/23/2011 - 11:58

1. The sides of the trundle are not flush with the bottom. The bottom (that the bed rests on) is about 2" higher than the side rails. This allows room for the wheels and about an 3/4: between the floor and the side rails. This measurement will all depend on the size of the casters you get and how much room you have beneath your bed for the trundle.
2. As mentioned above, there is about 3/4" between side rail and bottom of floor. Like I said before, it's total preference and how much room you have to work with.
3. I did use a 1X10, mainly because I like the look of the wide board.
4. I got the casters from HD or Lowes (can't remember).

Hope this helps!

Guest (not verified)

Sun, 01/29/2012 - 23:15

I love this and am going to make for my sons bed but I didn't see what you used to attach the sides to the base...unless I just didn't see it. :-) Did you use "L" brackets?

Saadia (not verified)

Sun, 03/25/2012 - 12:30

Hi, I was just wondering how you adjust the cleats when you are using the rockler brackets? I plan on using 2 x 8 for the siderails so there isn't enough room to fit the bracket and cleat along the edge. Did you have to shorten your cleat by just a little bit?

KAD050209 (not verified)

Fri, 08/17/2012 - 23:32

I was wondering if you could tell me how many inches the gap is from the bed to wall (where you have the bed horizontal against the wall)? Just trying to get an idea; my daughter is young and don't want her falling between the gap at night :) Thanks ahead of time!

In reply to by KAD050209 (not verified)

debandtom25

Wed, 09/05/2012 - 20:16

The gap is about 3.25". I remember one of the first nights that Jack slept in his bed he fell in the gap. I wasn't expecting that at all. We just stuffed the extra bed pillows in there at night. We don't even remember to do it anymore and he's never fallen in again.

John Deere Tractor Bunk Bed

Submitted by Veronica P on Sun, 07/06/2014 - 16:43

With another baby boy arriving in August, my one and three year olds are moving to a "big boy" room. My oldest decided he wanted a bunk bed and as they both are obsessed with tractors, when I saw the "John Deere Tractor Bunk Bed" plan, I was sold.

We would be needing a twin sized bunk bed though not a toddler. I used the classic bunk bed plans and simply modified them to suit our needs. I moved the ladder to the front, added a rail on the bottom bunk and added a small ladder to the side for my one year old to climb into the bottom bunk.

Once the the frame of the bed was complete, I added the tractor accessories. A couple of storage cubby shelves with fabric baskets for toy tractors which act as stairs up to the ladder and make the tractor bucket at the front. Also, the wheels which are made from joined 1x6s as I find plywood hard to sand and paint to the quality of finish I like. A cab & roof from 1x4s framed together. A side mirror that I decoupaged a picture of another tractor on. I used push lights for the headlights as well as a reading light above each bed (they're on timers so they'll turn themselves off). A steering wheel (play equipment access from toys r us). Also, I built and mounted by the head of both beds a "flat wall book holder" so they would have somewhere to store a few books.

My boys and I are fairly new to building so I spent a lot of time planning and measuring to ensure it would all come together in the end. It paid off because it all went smoothly (even with "help" from my boys). It's not perfect but they're very happy with the result. We also built a John Deere themed "Just my size closet" and even finished with over a month to spare before the new baby arrives! :)

Just want to say a quick thank you to Ana both for the amazing plans and also the inspiration to take on these projects. The time spent with my boys building as well as the resulting treasures are priceless and I would have never realized what we were capable of had I not stumbled upon your website and been so inspired by you and everything you've accomplished. Thank you!

Estimated Cost
$550.00
Estimated Time Investment
Week Long Project (20 Hours or More)
Finish Used
John Deere Green paint (home depot was able to color match a toy tractor), marigold yellow and black and polyurethane.
Recommended Skill Level
Beginner

Comments

Ana White Admin

Mon, 07/07/2014 - 12:13

I love this, such a great build and eveything came together perfectly! Thanks for sharing!

spiceylg

Thu, 07/10/2014 - 19:12

What an incredible build! I agree with Thriftygirl, I love all of the details!

carongirls

Tue, 09/30/2014 - 05:35

I am in the process of copying your bed right now. Just mine will be a toddler loft bed. Thank you for the ideas!

busymomof3

Thu, 10/09/2014 - 14:12

I am new to this and I was wondering were to find the measurements for the twin size bed?  I would love to make this for my boys!!

Veronica P

Mon, 11/03/2014 - 07:48

Sorry for the slow response to those requesting plans. For main structure of the bunk bed, I used Ana's "Classic Bunk Bed" plans. For all of the add-ons, I made up my own plans. I'm pretty low tech so unfortunately they're just pencil & paper plans but I'd be happy to scan and email them to you if you're interested. Just message me and I'll send them your way. :)

MartyC

Wed, 01/28/2015 - 14:08

Hi Veronica, Well done fantastic job! Two little men who want to move in together because of a new addition on the way. Their request though is a John Deere Bunk Bed! would be grateful if you could forward on your plans if you have time, Kindest regards.

tkdiver1

Tue, 05/26/2015 - 18:13

These are just what my grandsons need. I would love your plans.

Thank you

tkdiver1

Tue, 05/26/2015 - 18:14

These are just what my grandsons need. I would love your plans.

Thank you

Mimi64

Sun, 09/06/2015 - 10:06

Dear Veronica,

Our grandson, 6 years old, will absolutely adore this bed.  He loved riding on Grandpa's real JD tractor.  Please send me your plans for the attachments.  They are just darling and I could not do any better.  Thanks for your generosity!

bmeche

Fri, 09/13/2019 - 21:11

Hi Veronica. My 3 year old just loves the tractor bunk bed. I was wondering if you would mind sending me the plans you have. It would be greatly appreciated. My email is [email protected]   

Thanks in advance 

MyMaw

Wed, 10/16/2019 - 17:56

If you're still sharing, we would love a copy of your add-ons plans. 

Thanks,

MyMaw and PawPaw

Veronica P

Tue, 12/16/2014 - 07:21

I just emailed those plans. There should be nine attachments. Please let me know if you don't receive any of them.

cnejones

Thu, 12/18/2014 - 21:51

Could you please email me the plans for this project my son would love this

Veronica P

Tue, 01/06/2015 - 08:21

Hello all. I've tried emailing plans to all those who've requested them. I had some trouble attaching the files as they were large so if you didn't receive them, please let me know and I can resend. Thanks

Alwardt2708

Tue, 01/06/2015 - 11:53

Hi Veronica. I did not receive an email. Woul you have time to try again? If you email me your address I can send you my fax number if that's easier too. Thank you so much! I can not tell you how much I appreciate your dedication to this! [email protected]

Farmhouse Style Toy Box / Blanket Chest

Submitted by Anonymous (not verified) on Tue, 01/17/2017 - 11:17

I built this for my daughter after Christmas sinse she had the living room covered in toys. The dimensions are 37" x 18" x 20" 

Estimated Cost
$75
Estimated Time Investment
Weekend Project (10-20 Hours)
Finish Used
Watco Danish Oil - Medium Walnut (2 coats) with a light sanding between coats with 220 grit, I allowed 24 hours between each coat to dry. To protect the surface I used water based polyurathane matte finish (3 coats) with a light sanding - 400 grit.
Recommended Skill Level
Beginner

Comments

jwelch

Wed, 01/18/2017 - 13:06

Great job! Can you share more about how the legs were constructed and joined? Was this project based on Ana White's "Simple" toy box plan? Any info appreciated.

jgreaff

Tue, 01/09/2018 - 05:51

HI Anna, 

Can you provide more pictures or instructions on how you assembled this toy box? i want to make one just like it! 


Thanks!

apezz

Wed, 03/10/2021 - 16:31

Looking at the wall panels they look like the long edge of each panel has a small bevel cut on it. This gives each panel edge a more pronounced or well-defined edge? Is this true? Was it done with a router?

Simple Outdoor Table

Submitted by Kingsamui on Tue, 07/24/2018 - 17:24

Modifications to the simple outdoor table plan thanks to Finn’s dad. 

Built from Plan(s)
Estimated Cost
$200 -Found a place that had Cedar shorts “B quality”, but very few knots for an unbelievably cheap price. I ran all to boards through a planer to start and saved a bundle.
Estimated Time Investment
Week Long Project (20 Hours or More)
Finish Used
3coats Spar Urethane. I’ve heard the Spar doesn’t hold up well, so would have used something rlse if I knew that at the beginning.
Recommended Skill Level
Intermediate