Community Brag Posts

Farm House Table

Submitted by tedwarm on Fri, 05/29/2015 - 05:50

I used local Colorado beetle killed pine. I based the table on Anna's Farm House Table plans. I used the bread ends to create pull outs for 11 inch extensions on each end.

Estimated Cost
$350, not counting the planer that burned out during the milling of the wood.
Estimated Time Investment
Week Long Project (20 Hours or More)
Finish Used
seven layers satin wipe on poly, two layers finish wax using steel wool
Recommended Skill Level
Intermediate

Last minute Christmases gift. Bunny hutch.

Submitted by jlsomers on Sat, 12/23/2017 - 14:27

Thank you Ana for the plans. Our daughters dolls needed some pets and this project was the perfect home for her New bunnies!  I can't wait for her to open this gift Christmas morning. 

Estimated Cost
Used all scrap wood
Estimated Time Investment
Afternoon Project (3-6 Hours)
Recommended Skill Level
Starter Project

4 in 1 Entrepreneur Stand

Submitted by jkjackson on Thu, 12/23/2021 - 19:55

I LOVE the hot cocoa stand but wanted to make it “year round”. So I also created accessories for lemonade, fireworks and snow cone stands. The signs are reversible. They are made of metal and attach with magnets. The banners also attach with magnets. There are hot cocoas, gingerbread cookies, peppermints, lemonades, iced cookies, a cake plate, fireworks, smoke bombs, bottle rockets, sparklers, snow cones and a snow cone holder that flips over to become a crate.

Comments

Bunk Bed plans

Submitted by mgibson on Tue, 06/02/2015 - 13:23

Easy project for making bunk beds. Plan was very easy to follow!

Estimated Time Investment
Week Long Project (20 Hours or More)
Recommended Skill Level
Intermediate

Love these end tables!

Submitted by TheMrsS on Wed, 12/27/2017 - 22:48

I loved this project! I had been wanting a new set of end tables for a while and I came across these plans and was in love! I altered them just a smidge by raising the bottom shelf a little so I could fit a vaccuum/broom under it more easily, but other than that I left it as is! For the decorative hardware, I used L brackets and large upholstery nails/tacks...you can find them in most craft stores...I picked mine up at Hobby Lobby.

Built from Plan(s)
Estimated Cost
$50
Estimated Time Investment
Weekend Project (10-20 Hours)
Finish Used
I used a coat of pickling stain, and then a watered down latex paint to 'wash' over it to give the finish a subtle layered effect. I used Varathane Matte Poly on top.
Recommended Skill Level
Beginner

Queen Platform Storage Beds

Submitted by Anonymous (not verified) on Sun, 12/26/2021 - 13:01

My husband and I made two Queen Platform Storage Beds for our "Carriage House" apartment. They are a beautiful and functional upgrade! Thank you Ana for sharing your plans!

Comments

Rustic X console

Submitted by dsteinberg on Mon, 06/24/2013 - 06:55

This was my first project from ana white. Thank you for making such great and easy to follow plans! I will be making the matching coffee table next!

Built from Plan(s)
Estimated Cost
120
Estimated Time Investment
Weekend Project (10-20 Hours)
Finish Used
- brushed on black tea
- Stained with steal wool #0000 dissolved in vinegar for 3 days.
- Sealed 3 times with Vermont Natural Coatings wipe on polywhey satin

Recommended Skill Level
Beginner

Comments

Sypher2109

Mon, 07/08/2013 - 10:16

Was the color of the table brown like that after just the oxidation process or did it turn brown like that because of the Vermont Natural Coatings Polywhey?

The reason I ask is we're trying to decide between the wax finish, which we love, or the more protective and durable PolyWhey.

dsteinberg

Mon, 08/12/2013 - 12:43

Sorry for the late reply. I hope this advice is still useful for you. I figured I would have got an email if someone replied to my brag post. I just changed my settings so I will get emails in the future.

After the oxidation process It was a fairly dark brown. At this stage the colouring was not even everywhere so I used 220 grit sandpaper on a sanding block to lighten the colour and even it out. I sanded fairly lightly. After applying the Polywhey the colour did not change much. It is hard to describe as I am not a very artistic person, but it definitely made the colour richer and more pleasing to the eye after applying the Polywhey. As for the Polywhey, it is oderless and very quick and easy to apply. I put on 3 coats. I hope that helps. Let me know if you have any other questions.

Kitchen Table

Submitted by dcdorey on Sat, 06/06/2015 - 10:32

Simple farmhouse table

Estimated Time Investment
An Hour or Two (0-2 Hours)
Recommended Skill Level
Beginner

Rustic x side table

Submitted by Nellie1217 on Sat, 12/30/2017 - 08:38

It was a fun and easy build. I did the oxidation finish for the first time on this project and am really happy with how it turned out. I also added washers to the lag screws on the legs to make it stand out a little more. 

Built from Plan(s)
Estimated Time Investment
Weekend Project (10-20 Hours)
Finish Used
First I applied a strong brew of black tea to the wood let that dry then went over it with the Vinegar/steel wool oxidation treatment. Let it dry for 24 hours then sanded it to give it a more rustic look. Then I Top coated it with a flat finish poly.
Recommended Skill Level
Beginner

Library Cart - First Build

This is my first build from ana-white.com and it was a success. I am glad that I started out with a beginner project as my carpentry skills were a bit rusty but eventually everything came back to me, the step by step plans certainly helped! According to my daughter, I am the best mom ever!

The dragonfly/butterflies I found at Hobby Lobby for 67 cents a piece, what a steal!

Built from Plan(s)
Estimated Cost
$30.00
Estimated Time Investment
Afternoon Project (3-6 Hours)
Finish Used
Ultra White Satin Finish
Recommended Skill Level
Starter Project

Farmhouse Table

Submitted by JeremiahT on Tue, 06/25/2013 - 18:55

Table was built using refinished tops from an old table/bench set. Cedar was used for the base of the table and benches. Also created two half-size benches that can be used to add seating at the table, or moved to the living room when additional seating is needed there. Finished with mahogany stain and several coats of clear gloss polyurethane.

Estimated Time Investment
Week Long Project (20 Hours or More)
Finish Used
Minwax in " Mahogany" and clear gloss poly also by Minwax
Recommended Skill Level
Intermediate

Comments

Art cart

Submitted by Ericagrace on Mon, 01/01/2018 - 14:36

Art cart!

i used furniture glide feet instead of wheels. I put the plexi on hinges. All scrap materials except for hinges. 

Built from Plan(s)
Estimated Time Investment
Afternoon Project (3-6 Hours)
Recommended Skill Level
Beginner

Turntable Console

Submitted by Anonymous (not verified) on Sun, 12/26/2021 - 16:00

Hi Ana and family,
A couple of months ago I contacted you to see if you had a video on how to build a Turntable/media console out of 2x4s with a picture for inspiration. I did get feedback and it really helped. Thank you so much for always being available to help.

Comments

My new yellow cubby shelf

Submitted by kylihoot on Sun, 05/01/2011 - 11:59

Totally lovin' my new cubby shelf. I painted it bright yellow, but I may paint it a more nuetral color after noticing it does not math anything haha! This is a super sturdy shelf...LOVE IT! Thanks ANA!

Built from Plan(s)
Estimated Cost
$30
Estimated Time Investment
Afternoon Project (3-6 Hours)
Finish Used
Primer and Satin Paint. I sanded it with 120 grit, then primed and painted with two coats each.
Recommended Skill Level
Beginner

Adirondack Table/Stool

Submitted by Geoffrey on Thu, 06/27/2013 - 12:16

I built this using scrap 2x2s and 1x4s that I ripped down to the appropriate sizes. Also instead of using pocket holes I counter sunk the screws and filled with wood filler.

Built from Plan(s)
Estimated Time Investment
Afternoon Project (3-6 Hours)
Finish Used
Painter's Choice key lime
Recommended Skill Level
Beginner

Comments

Tryde Coffee Table Variation

Upgraded the original to fit the style of our living room. Just a few dollars more in wood. Changed the frame setup as well.

Very busy so I only have time to do a little bit at a time so I have no real idea how long it really took to build. All I know is the finishing took the longest: 2 coats black painted lower with 2 coats stain on the (custom color) and 2 coats polyurethane on the top piece.

Built from Plan(s)
Estimated Cost
$103
Estimated Time Investment
Week Long Project (20 Hours or More)
Finish Used
Min wax Jacobean and red stain mix. Polyurethane topped.
Black paint on lower.
Recommended Skill Level
Intermediate

Rustic Kitchen Island

Submitted by Knathu121 on Fri, 01/05/2018 - 19:59

I used the Rustic Kitchen Island plans to build this. I made my own modifications making the draw and the shelves the entire width of the unit. I also used 1x2’s behind the X’s to give it more of a barn look.

Estimated Cost
$100
Estimated Time Investment
Weekend Project (10-20 Hours)
Finish Used
I used a white satin enamel from Lowe’s on the body and the top I used Minwax weathered gray and then rubbed ebony in lighty over it.
Recommended Skill Level
Advanced

Comments

Barn door cabinet

Submitted by Anonymous (not verified) on Sun, 12/26/2021 - 18:55

Was able to customize this to fit my wine fridge!

Built from Plan(s)

Comments

Office makeover

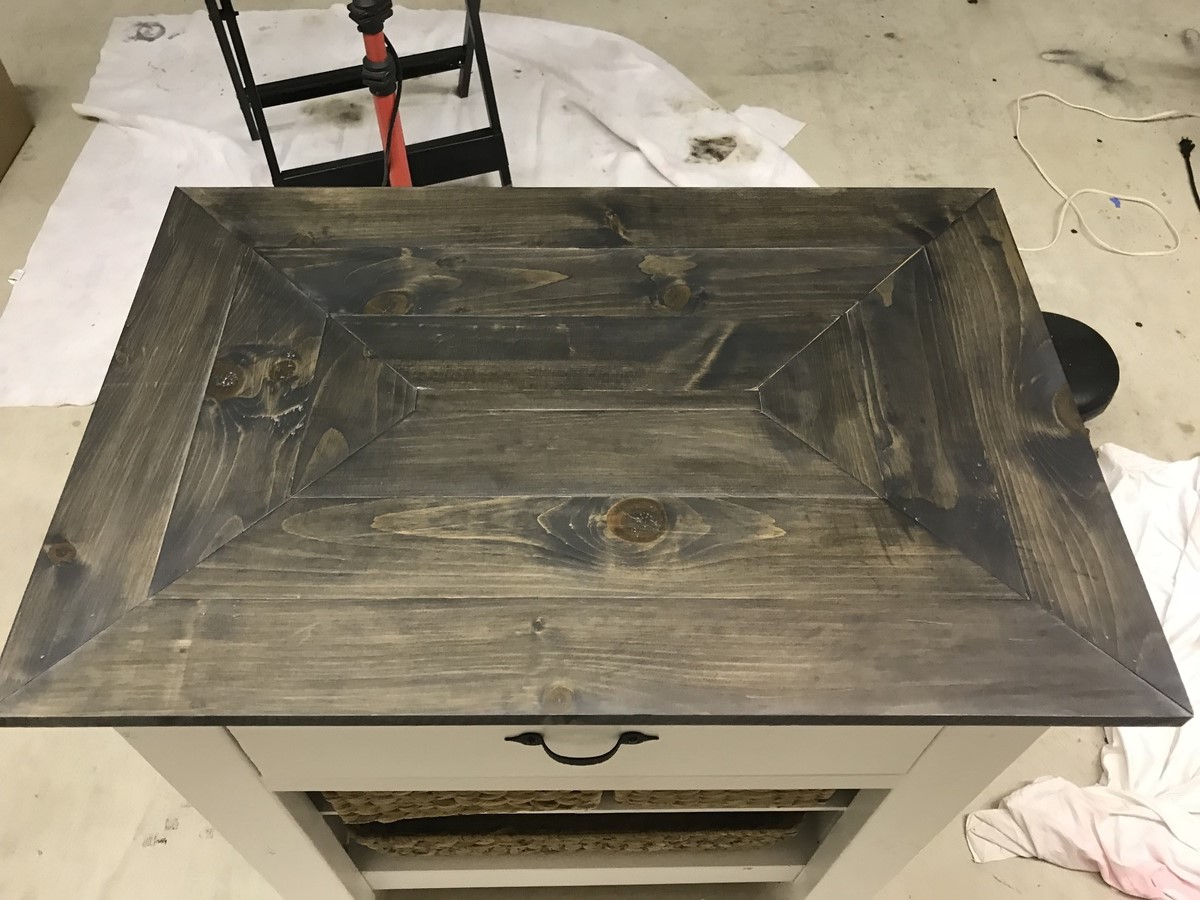
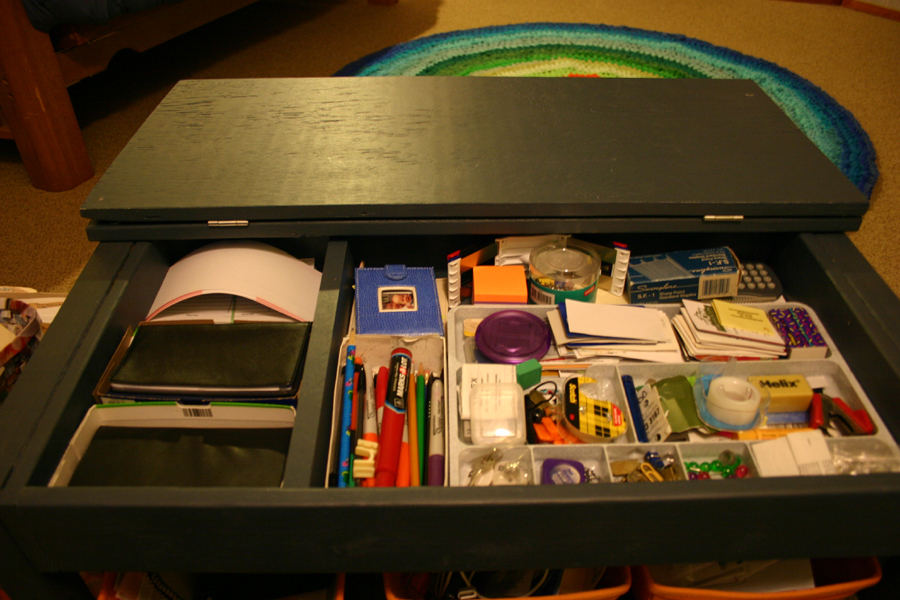
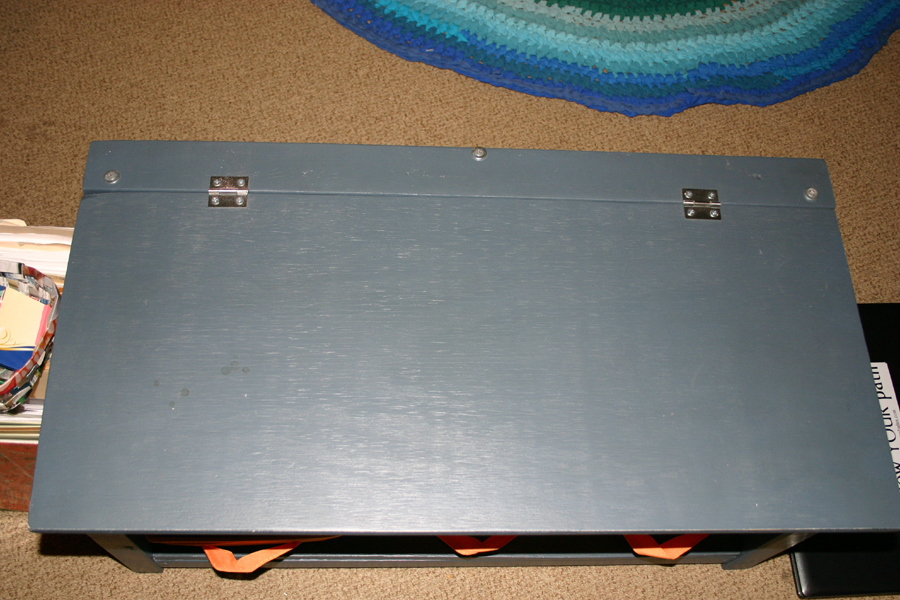
It was time for an office makeover(at home). Sitting on the floor makes for a strong back and works those core muscles, so it was time to change things up. About a year ago or so I modified Ana's Flip Top Storage Bench / Coffee Table for my husband to use as a desk, as he needed to sit on the floor due to a back injury. Now it was time for mine. I instead modified Ana's Scrap Lap Desk. and it was truly built of scraps, with the exception of the hinges(which is odd, because I always have hinges lying around!)
I made the desk larger, and adjusted the height to fit me. I also omitted the side boxes and instead added a shelf on the bottom. Construction was simple and straightforward. Primed with whatever primer I had around, and even painted with a can of oops paint. The edges were lightly distressed, and will naturally distress even more, I am sure.
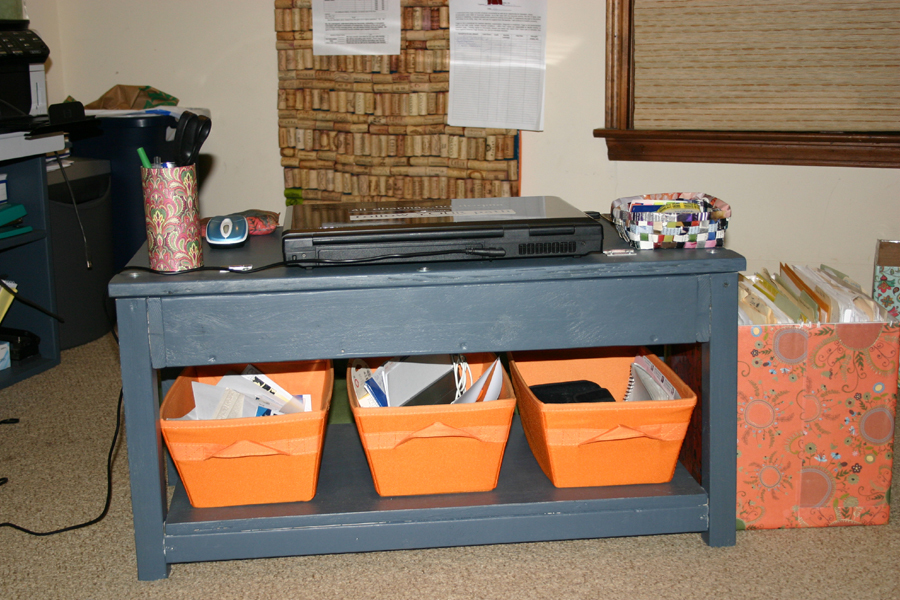
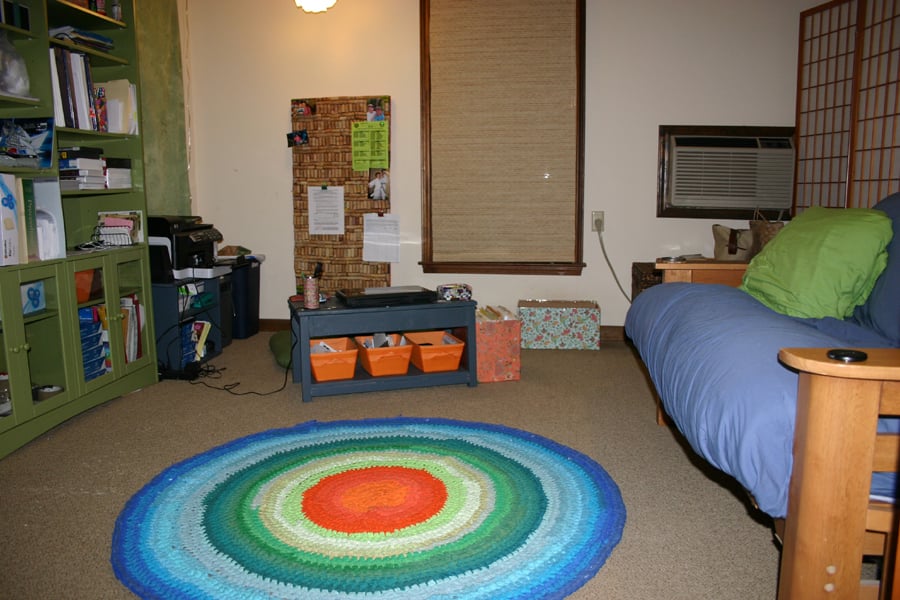
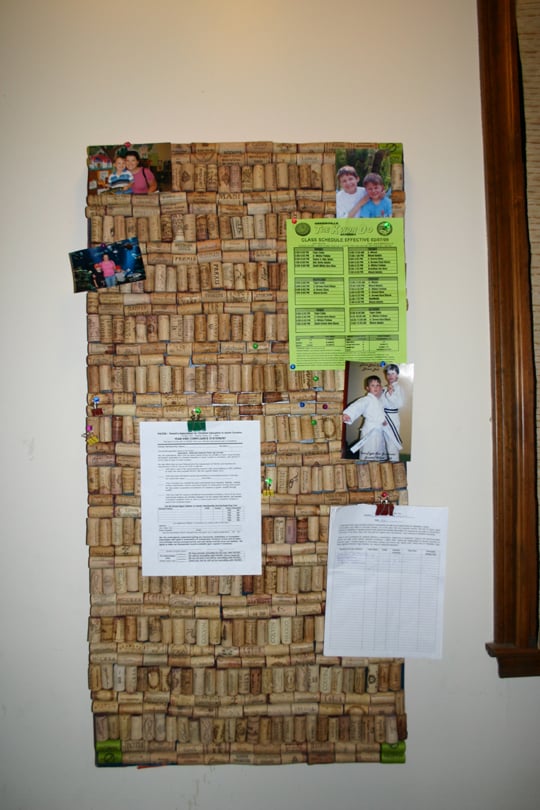
I had a green bookcase already, and the orange bins with I got on clearance at blue some time ago, and suddenly my color scheme was set--in the 70s. But I like it, as I need more color in my life. The printer stand I cobbled together out of scraps as well--essentially a box. A few boxes covered in paper, a rug from old tshirts, and two light fixtures-one a polyhedron from milk jugs, and the other a flower pot from the bullseye store, and I am set. Oh, and I finally got around to making my corkboard from all of the wine corks I've collected throughout the years. Or some of them, anyway.

Built from Plan(s)
Estimated Cost
free
Estimated Time Investment
Afternoon Project (3-6 Hours)
Recommended Skill Level
Beginner

Raised Cedar Bed

Submitted by NitePagan on Sun, 06/30/2013 - 08:27

I built cedar raised beds out of cedar decking, 3 pieces 5/4" x 6" x 8', actual dimensions were 1" x 5.5" x 8', plus 1 - 2 x 4 cedar. I made 48" x 96" boxes. I cut 1 of the cedar deck pieces into 2 - 48" long pieces. For the corners, I cut the 2 x 4 into 8 - 5.5" long pieces. I then screwed 2 of the 2 x 4 pieces together to form a 4 x 4 block. I used these as the inside corner to screw the decking to. The total cost was $60 to build 2 cedar beds. The other option would have been to make them double height, by cutting the 2 x 4's 11 inches long. This is more expensive then the boxes Ana did, but I could not find cedar fence slats, they appeared to be Northern White Pine which would have deteriorated quickly. I obtained the lumber from Lowes.

Estimated Cost
$60.
Estimated Time Investment
An Hour or Two (0-2 Hours)
Finish Used
No Finish.
Recommended Skill Level
Beginner