Community Brag Posts

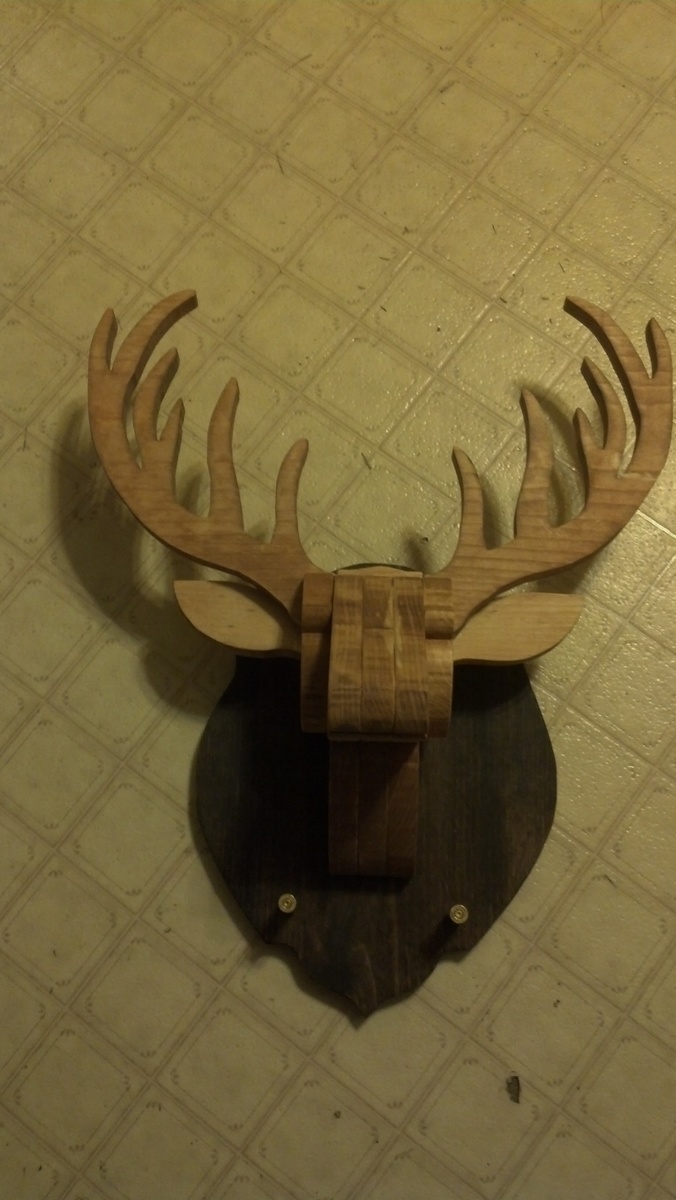
White Tail Deer Head Mount Plaque

Submitted by jere7782 on Mon, 01/28/2013 - 01:39

I did this project for my father's birthday this February. Any ideas to improve it let me know. I hand drew the plaque on the back. I used some old brass when I went hunting in the past.

Estimated Time Investment
Day Project (6-9 Hours)
Finish Used
I used the natural wood stain on the head and a darker stain on the plaque. It took me about 6 hours to do whole project. I had to cut out each peice on a scroll saw.

Have fun and be careful.

I do have plans if people want them.
Recommended Skill Level
Intermediate

Comments

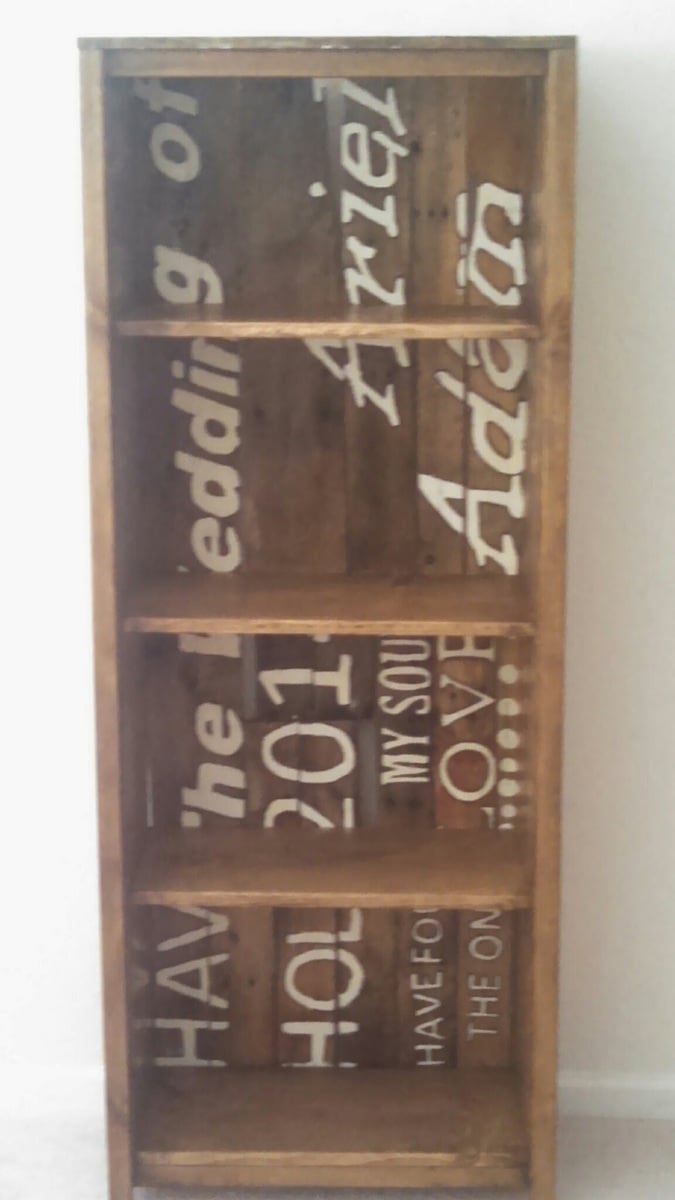
Gift Bookshelf from Wedding Wall

Submitted by pondrider on Wed, 11/26/2014 - 10:57

This project followed the plans at http://ana-white.com/2012/03/plans/kentwood-bookshelf with a major customization twist. The backing is actually made from a photo op wall I built for our daughter’s wedding. The wall was ten feet tall the bookshelf backing is from some of the lettering boards.   

Estimated Cost
Plans call for about $75.00
Estimated Time Investment
Weekend Project (10-20 Hours)
Finish Used
Sanding, Stain and Poly.
Recommended Skill Level
Intermediate

Comments

Ana White

Wed, 11/26/2014 - 12:25

I love how you reused a piece from your daughters wedding!  What a great idea!

Drop Leaf Kitchen Island

Submitted by Boab on Wed, 03/01/2017 - 19:01

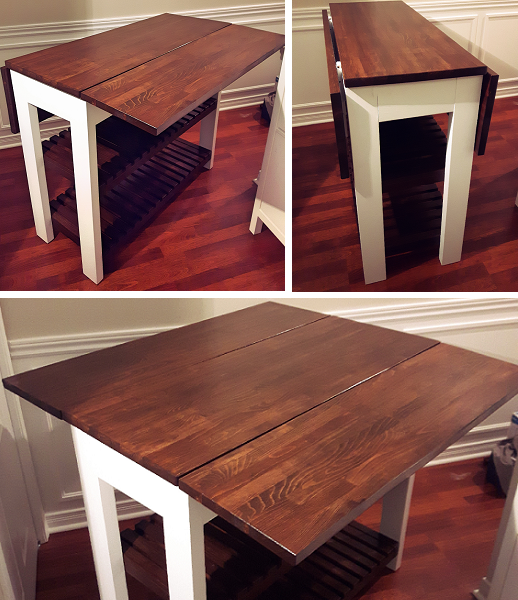
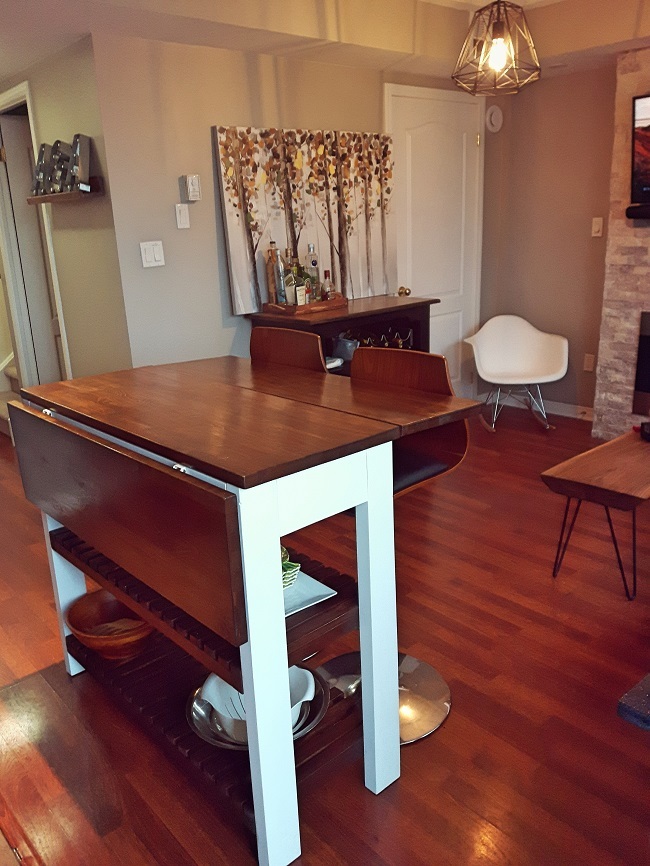
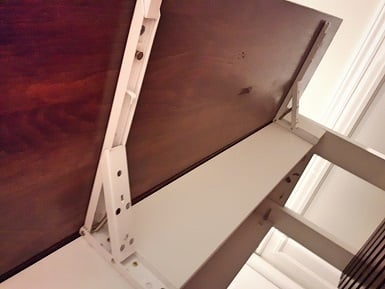
When I recently moved into a space with a kitchen and living room attached, I quickly realized that I wouldn't have room for a full size dinner table. I had seen extendable kitchen tables but none fit the bill, I was looking for something more compact. I also liked the idea of a bar / island with storage underneath, and I had noticed some had a drop leaf on 1 side which would be useful – but why not have 2 leafs for more dining space? When I decided to build my own table to fit these requirements it was difficult to find any plans out there, especially with drop leafs. Through lots of experimenting and research I finally built what I had envisioned: a kitchen island / bar with cart storage and two folding table leafs which expand to about 31/2 feet squared of eating / drinking area. I went through this trial and error process so you don’t have to, find more pictures and instructions here: http://bacheloronabudget.com/diy-drop-leaf-kitchen-island-cart/

Estimated Cost
$250
Estimated Time Investment
Weekend Project (10-20 Hours)
Finish Used
-Minwax Special Walnut Stain
-Minwax Wipe-on Poly
-White Paint (I used Rust-oleum Linen White)
Recommended Skill Level
Beginner

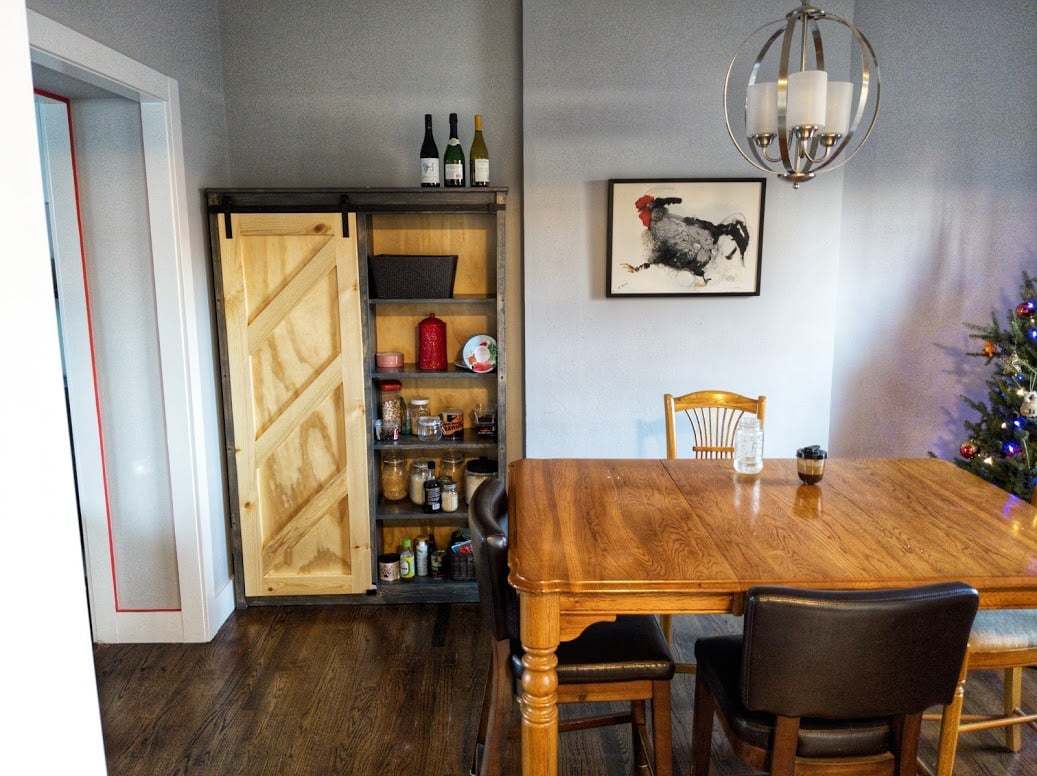
Barn Door Bookcase/Pantry

Submitted by Anonymous (not verified) on Sun, 12/20/2020 - 15:31

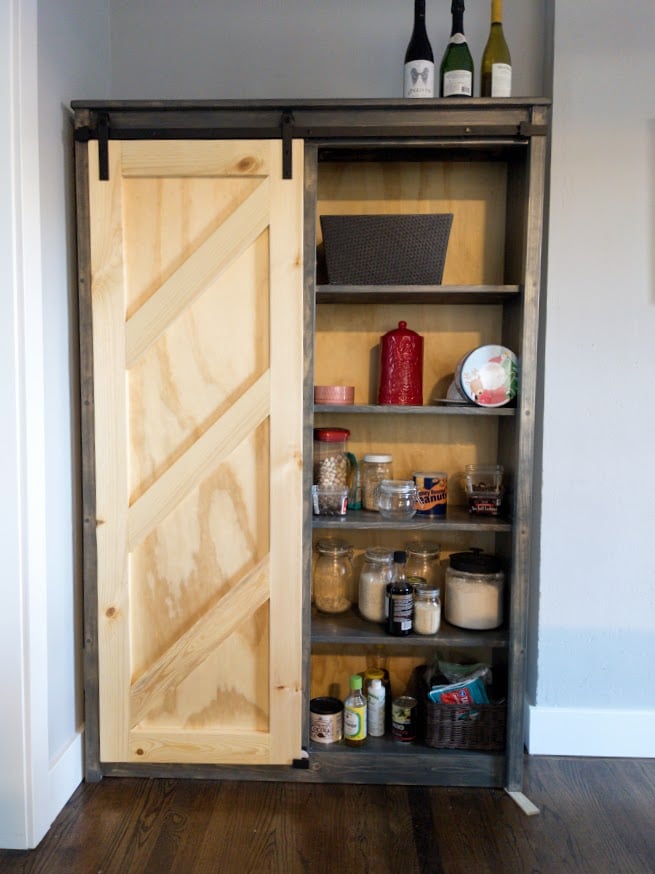
Despite relatively high ceilings, we have a small, pantryless kitchen and needed more shelf space. Couldn't be happier with how this turned out. Besides taking off 2 inches in width to make sure it would fit in the space, I followed the measurements exactly.

Made just one modification with the instructions involving the face frame. I first assembled it together per the instructions, but it was just not lining up with the carcass well at all when I went to attach it. Before the glue got too dry, I made the quick decision to take the face frame apart and just apply the individual pieces of it one at a time to the carcass. I figured this could maybe leave some very small gaps where the face frame pieces joined each other, but that seemed better than what it would look like leaving it as is, with almost no section flush with the carcass. This ended up being the absolutely right choice. Everything was very very close to flush and there ended up being virtually no gaps. If I ever built again, I would do the same and attach each piece like that.

My only other struggle was at the very end attaching the barn door hardware. Nothing wrong with the hardware or the instructions, I just ended up installing the rail too high up on my first attempt. Because this piece has a top that slightly overhangs and gives that nice little lip, it means there is a maximum height which you can't go above when installing the rail hardware. If you go too high, like I did, the rollers that are attached to the door will physically not fit on the rail, b/c that lip will be in the way. This might be very obvious to most people but I thought I'd mention it. Once things clicked, I just had to get some new measurements and redrill the holes a bit lower(but not too low b/c then you will have a gap!).

I decided to leave the door natural wood after seeing someone else's finished piece posted here and given how dark my stain was, I also left the plywood back panel natural. It's still a bit light now and it may even take 2 or 3 years, but I know pine can do a decent job darkening up.

Lastly, I did put a whole quart of satin polyurethane on this over 5 coats. Each coat but the last was cut with %50-%25 paint thinner applied with a foam brush. Yes it did take a long time but seeing it up close, it was absolutely worth it. I would recommend it for anyone making this project.
Built from Plan(s)
Estimated Cost
$350
Estimated Time Investment
Weekend Project (10-20 Hours)
Finish Used
Varathane wood stain mix. Half "weathered gray" half "Carbon Gray." Five coats Minwax satin polyurethane.
Recommended Skill Level
Intermediate

Comments

Triple Pedestal Farmhouse table with metal accents

Submitted by Blutskus on Wed, 01/30/2013 - 06:46

We followed the plan exactly as instructed, but instead of cutting the arch accents out of wood, we simply attached decorative shelving brackets to the legs.

Estimated Time Investment
Week Long Project (20 Hours or More)
Finish Used
We painted the table with black tea and steel wool, vinegar solution; for the stain and finished it with wipe on polyurethane.
Recommended Skill Level
Intermediate

Comments

Joni

Thu, 01/31/2013 - 07:31

Your table looks awesome, particularly with your L-brackets. Would you mind sharing where you got the L-brackets?

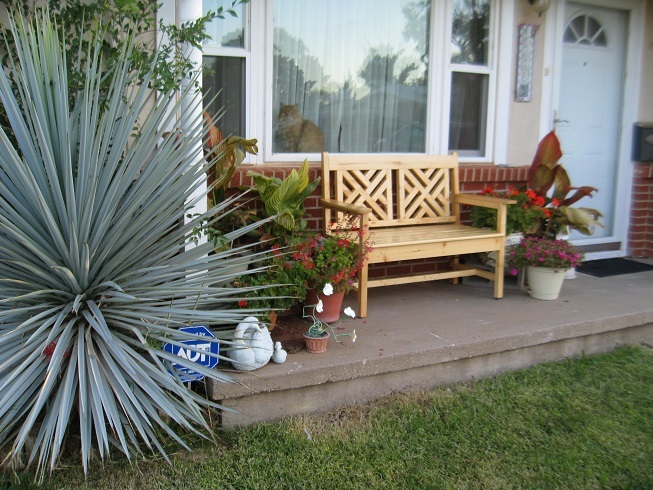
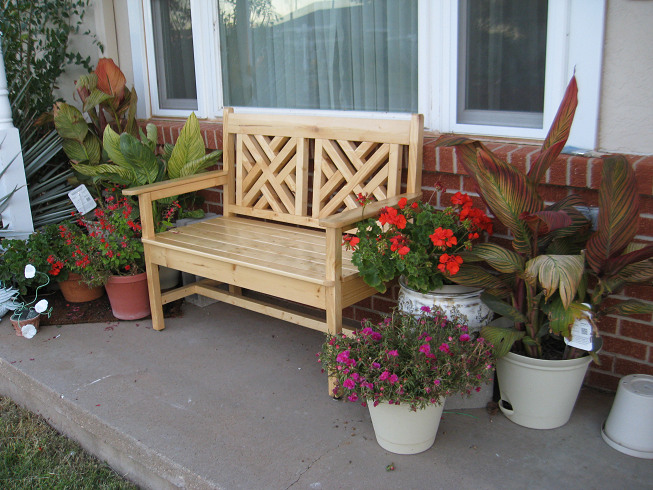
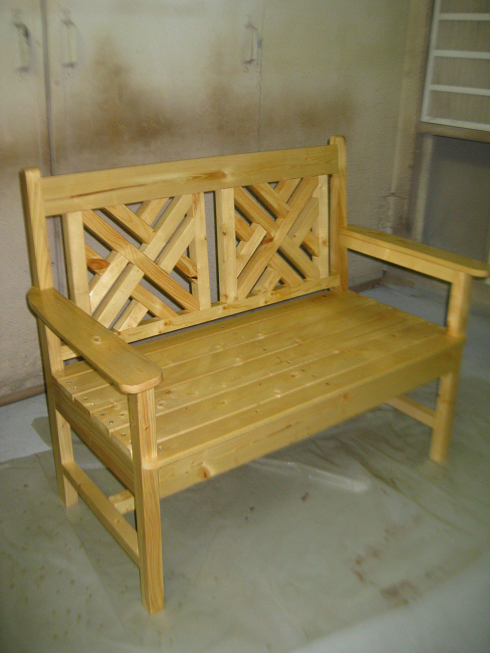
Woven Back Bench

This took approximately a week to build, but was fairly simple.  Drew arm rests freehand and applied 3 - 4 coats of Helmsmen.

Built from Plan(s)
Estimated Cost
$20
Estimated Time Investment
Week Long Project (20 Hours or More)
Finish Used
Helmsmen (3-4) coats
Recommended Skill Level
Beginner

Comments

earthbybike

Sat, 12/06/2014 - 12:27

I built this at the local college woodshop and I am very happy with how it turned out. Our comminity is so very lucky to have a community college that has a wood shop and a huge spray booth. (Wood Shop 1 & 2 as well as Cabinet Building 1 & 2)

Seasonal And Holiday

Great storage

Submitted by Anonymous (not verified) on Sun, 03/05/2017 - 18:35

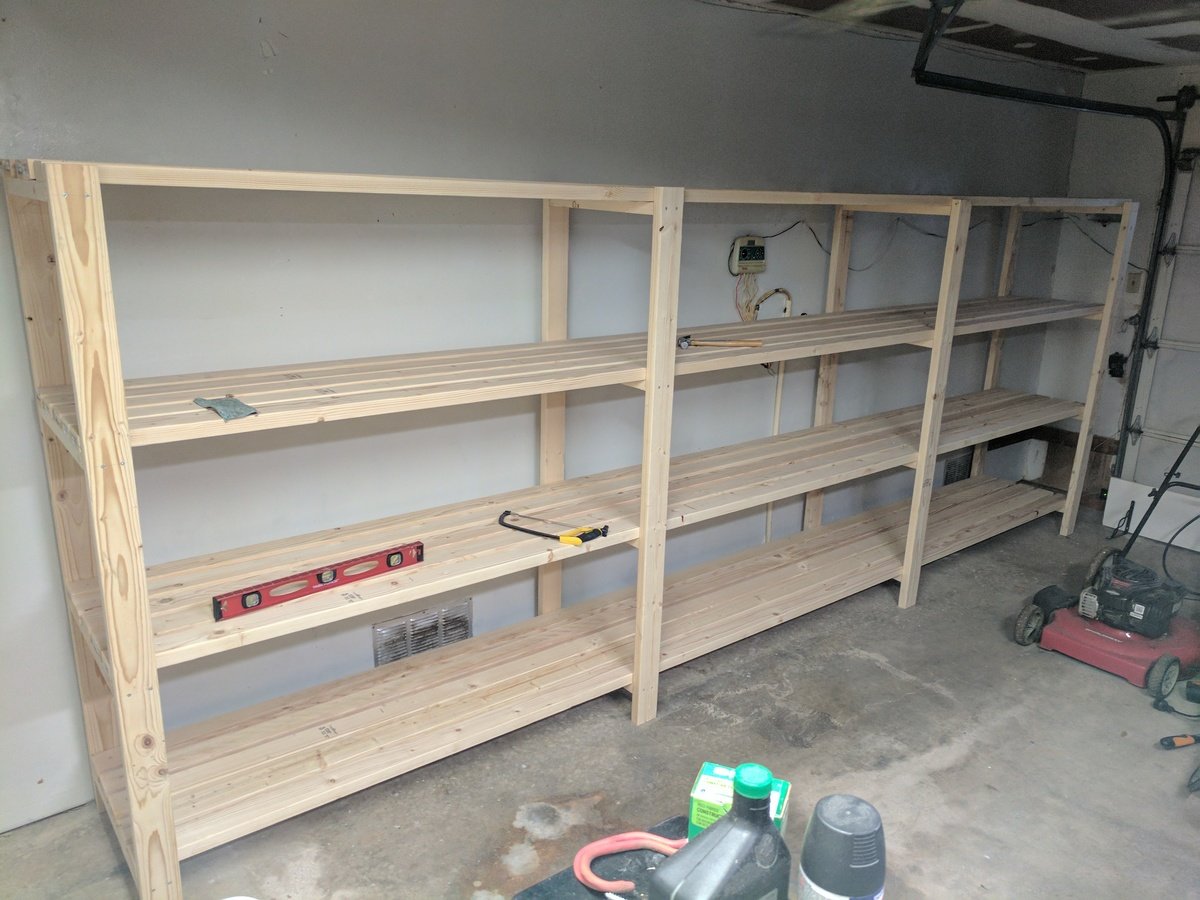
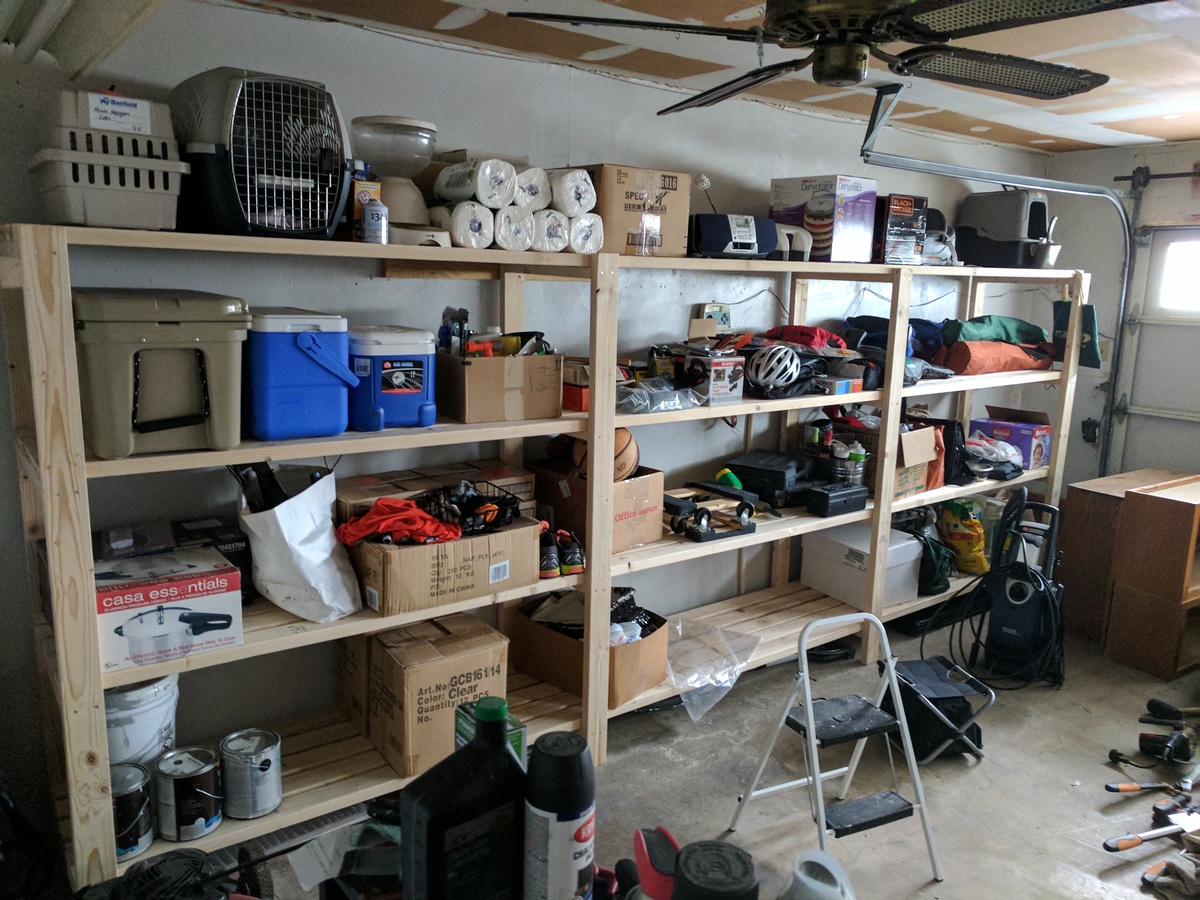
I made my shelves 16 ft by 6ft by 2ft - added another plank to each shelf to increase the width. I compensated for the slope along the garage wall by offsetting all the screw-in points in the front legs half an inch. This thing is HEAVY.


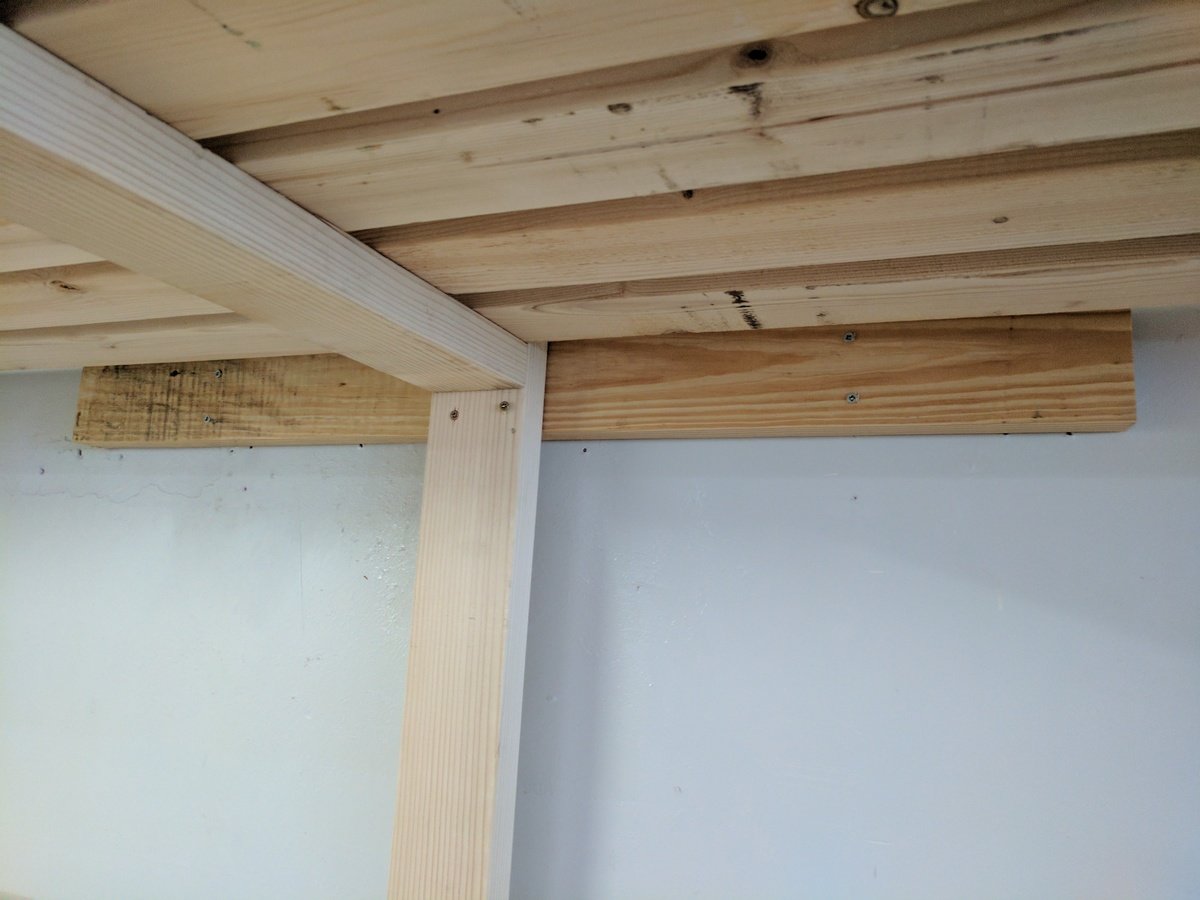
I anchored the unit to the wall by securing 2 scrap 2x4s to the studs - 1 at the 2nd set of legs and 1 at the far right legs - and screwing the unit legs into the 2x4s. This way, I didn't have to line the unit up precisely with the studs.

Estimated Cost
$190 lumber
Estimated Time Investment
Day Project (6-9 Hours)
Finish Used
None/natural
Recommended Skill Level
Starter Project

Potting Bench

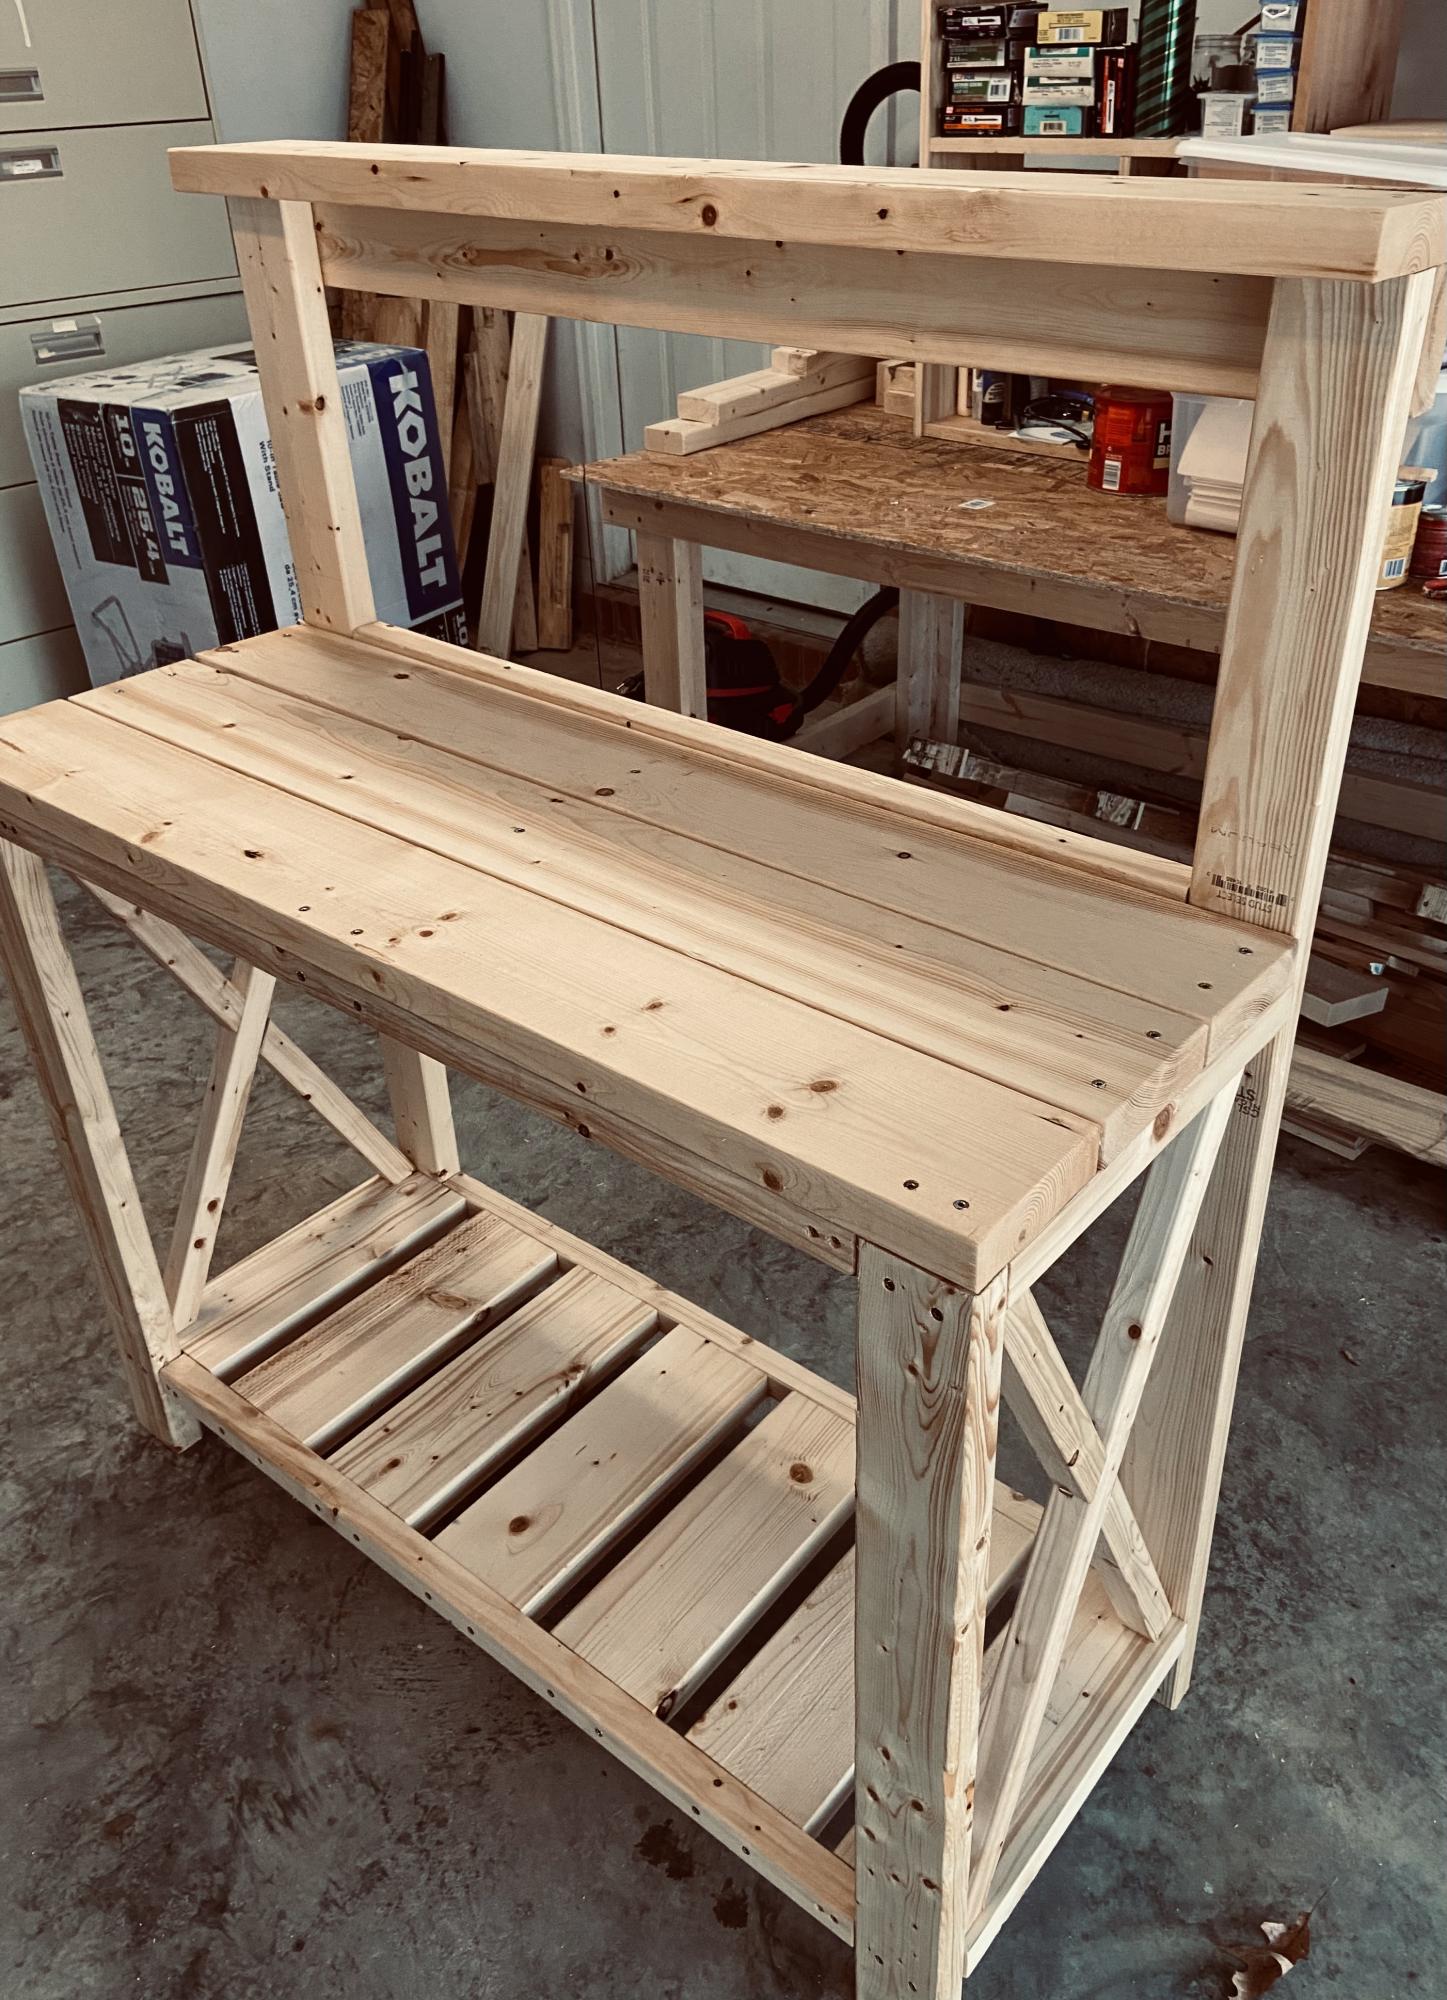
I am a complete newbie to anything woodworking. I just turned 60 and used a drill for the first time about 9 months ago. Thanks to Anna and her plans and videos, I have developed some some self confidence in this art and absolutely loving it.

Farmhouse coffee table and king size bed is next.

Thank YOU Anna!!! You totally rock!!!!!!!!

Estimated Time Investment
Day Project (6-9 Hours)
Recommended Skill Level
Beginner

Comments

Plant Stand

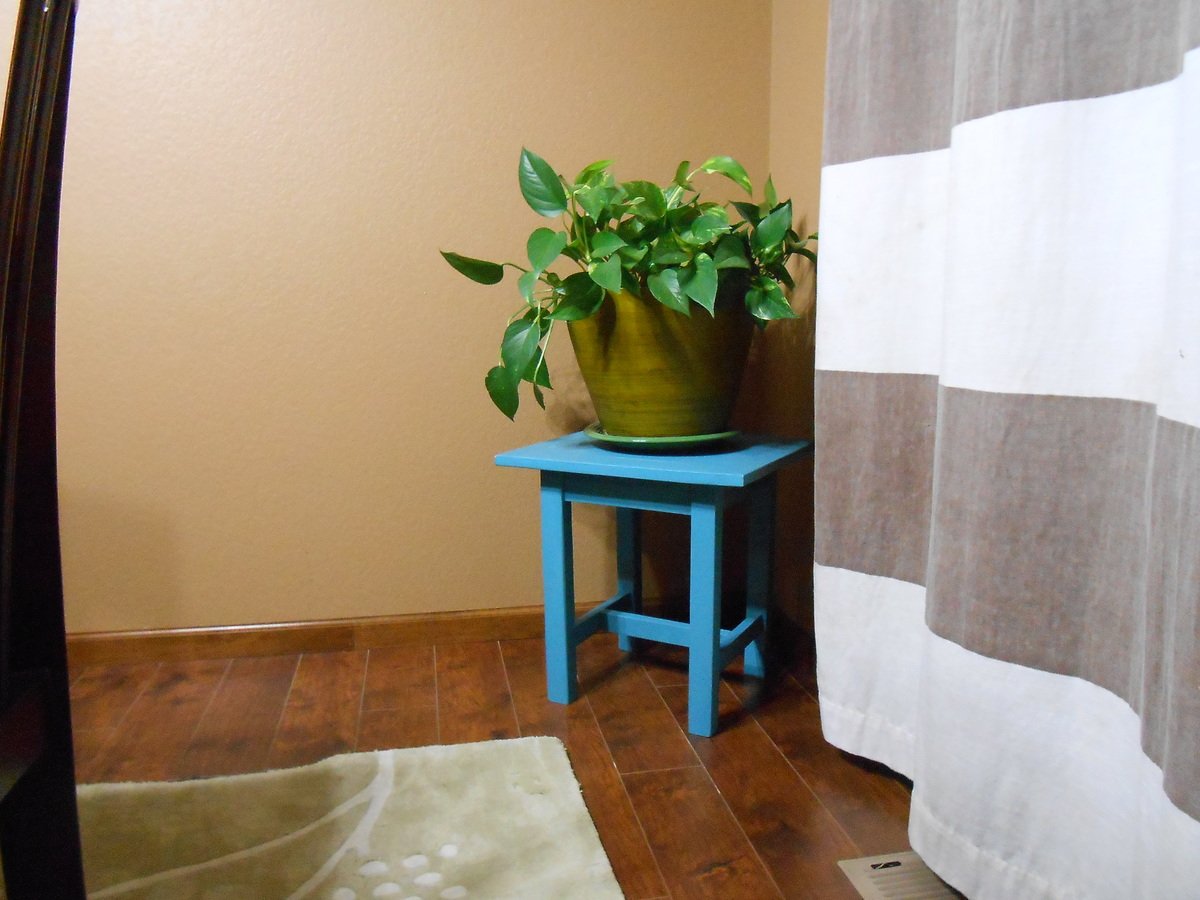
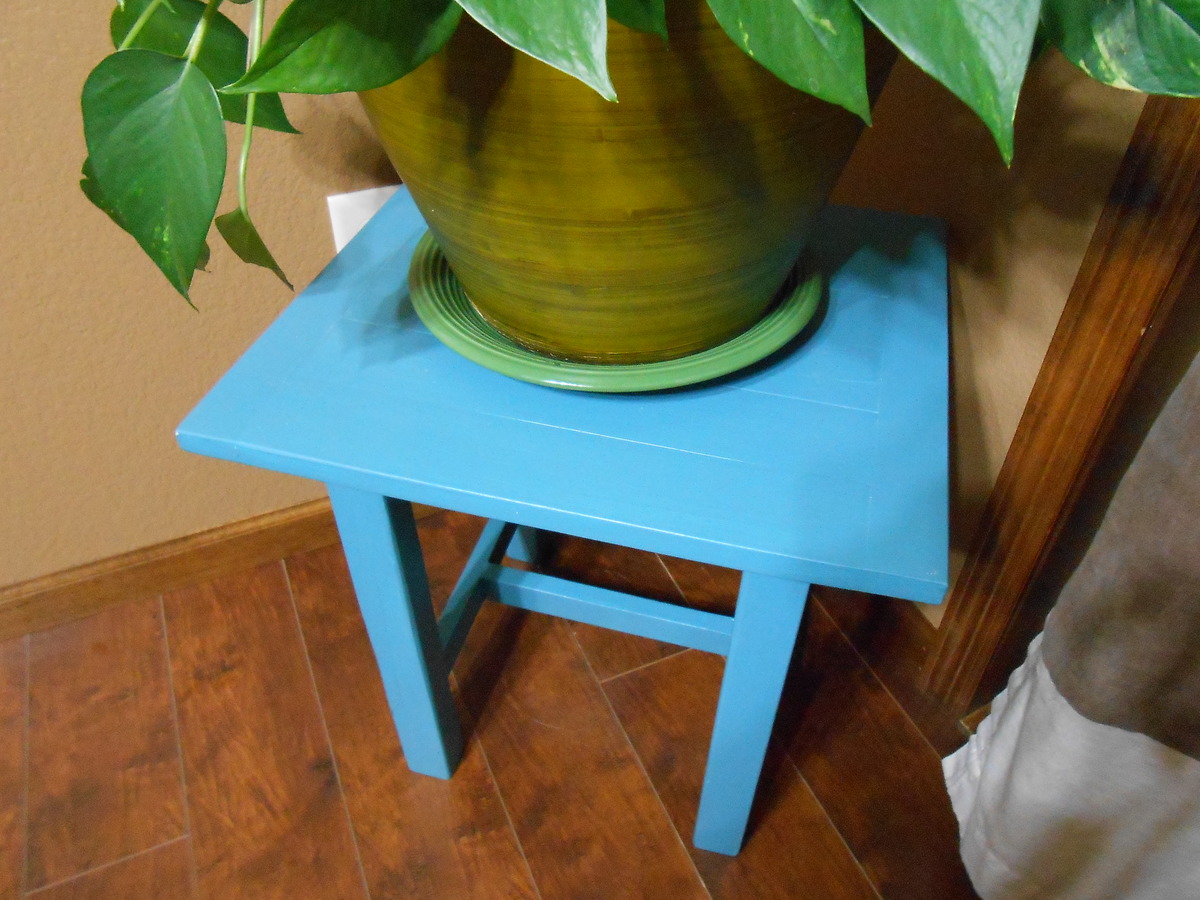
I made this plant stand using the adirondack stool plans. I did not leave spaces between the boards on the top, and I added breadboard ends.

Built from Plan(s)
Estimated Time Investment
Afternoon Project (3-6 Hours)
Finish Used
Paint
Recommended Skill Level
Beginner

Mater Chair for a child.

Submitted by justjeff52 on Mon, 12/01/2014 - 13:44

This is a chair I made from the Super Easy Adirondack Chair plan from your website.

Estimated Cost
$75.00
Estimated Time Investment
Weekend Project (10-20 Hours)
Finish Used
paint
Recommended Skill Level
Intermediate

Comments

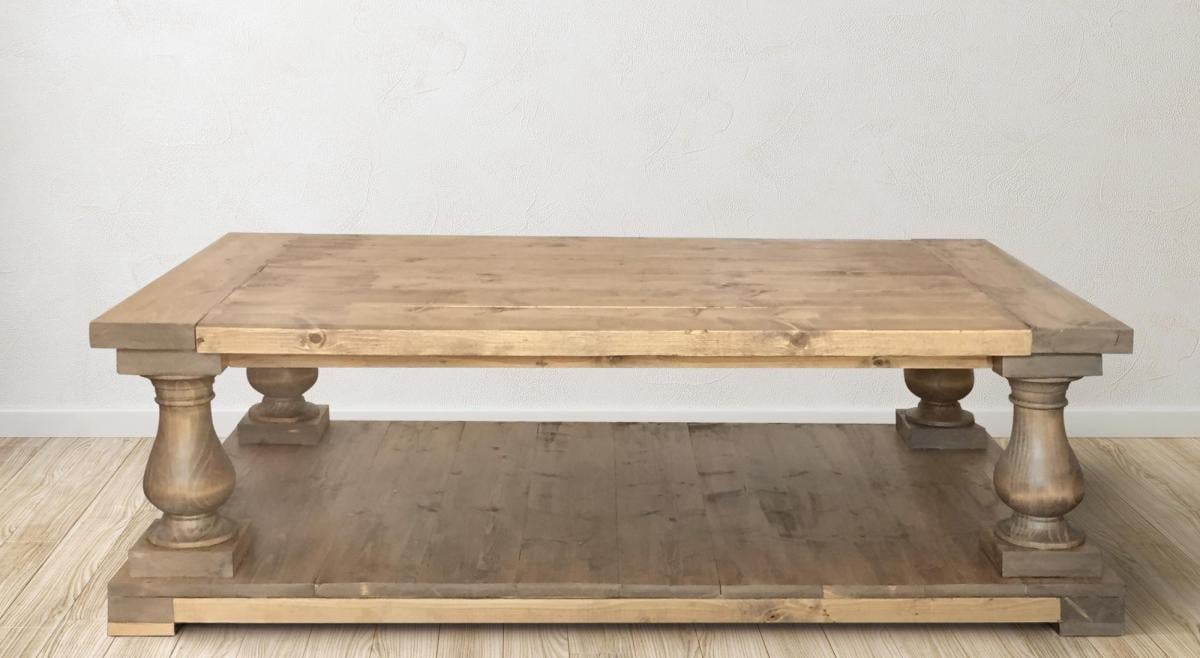
Balustrade coffee table

Submitted by mandi10uga on Wed, 03/08/2017 - 05:36

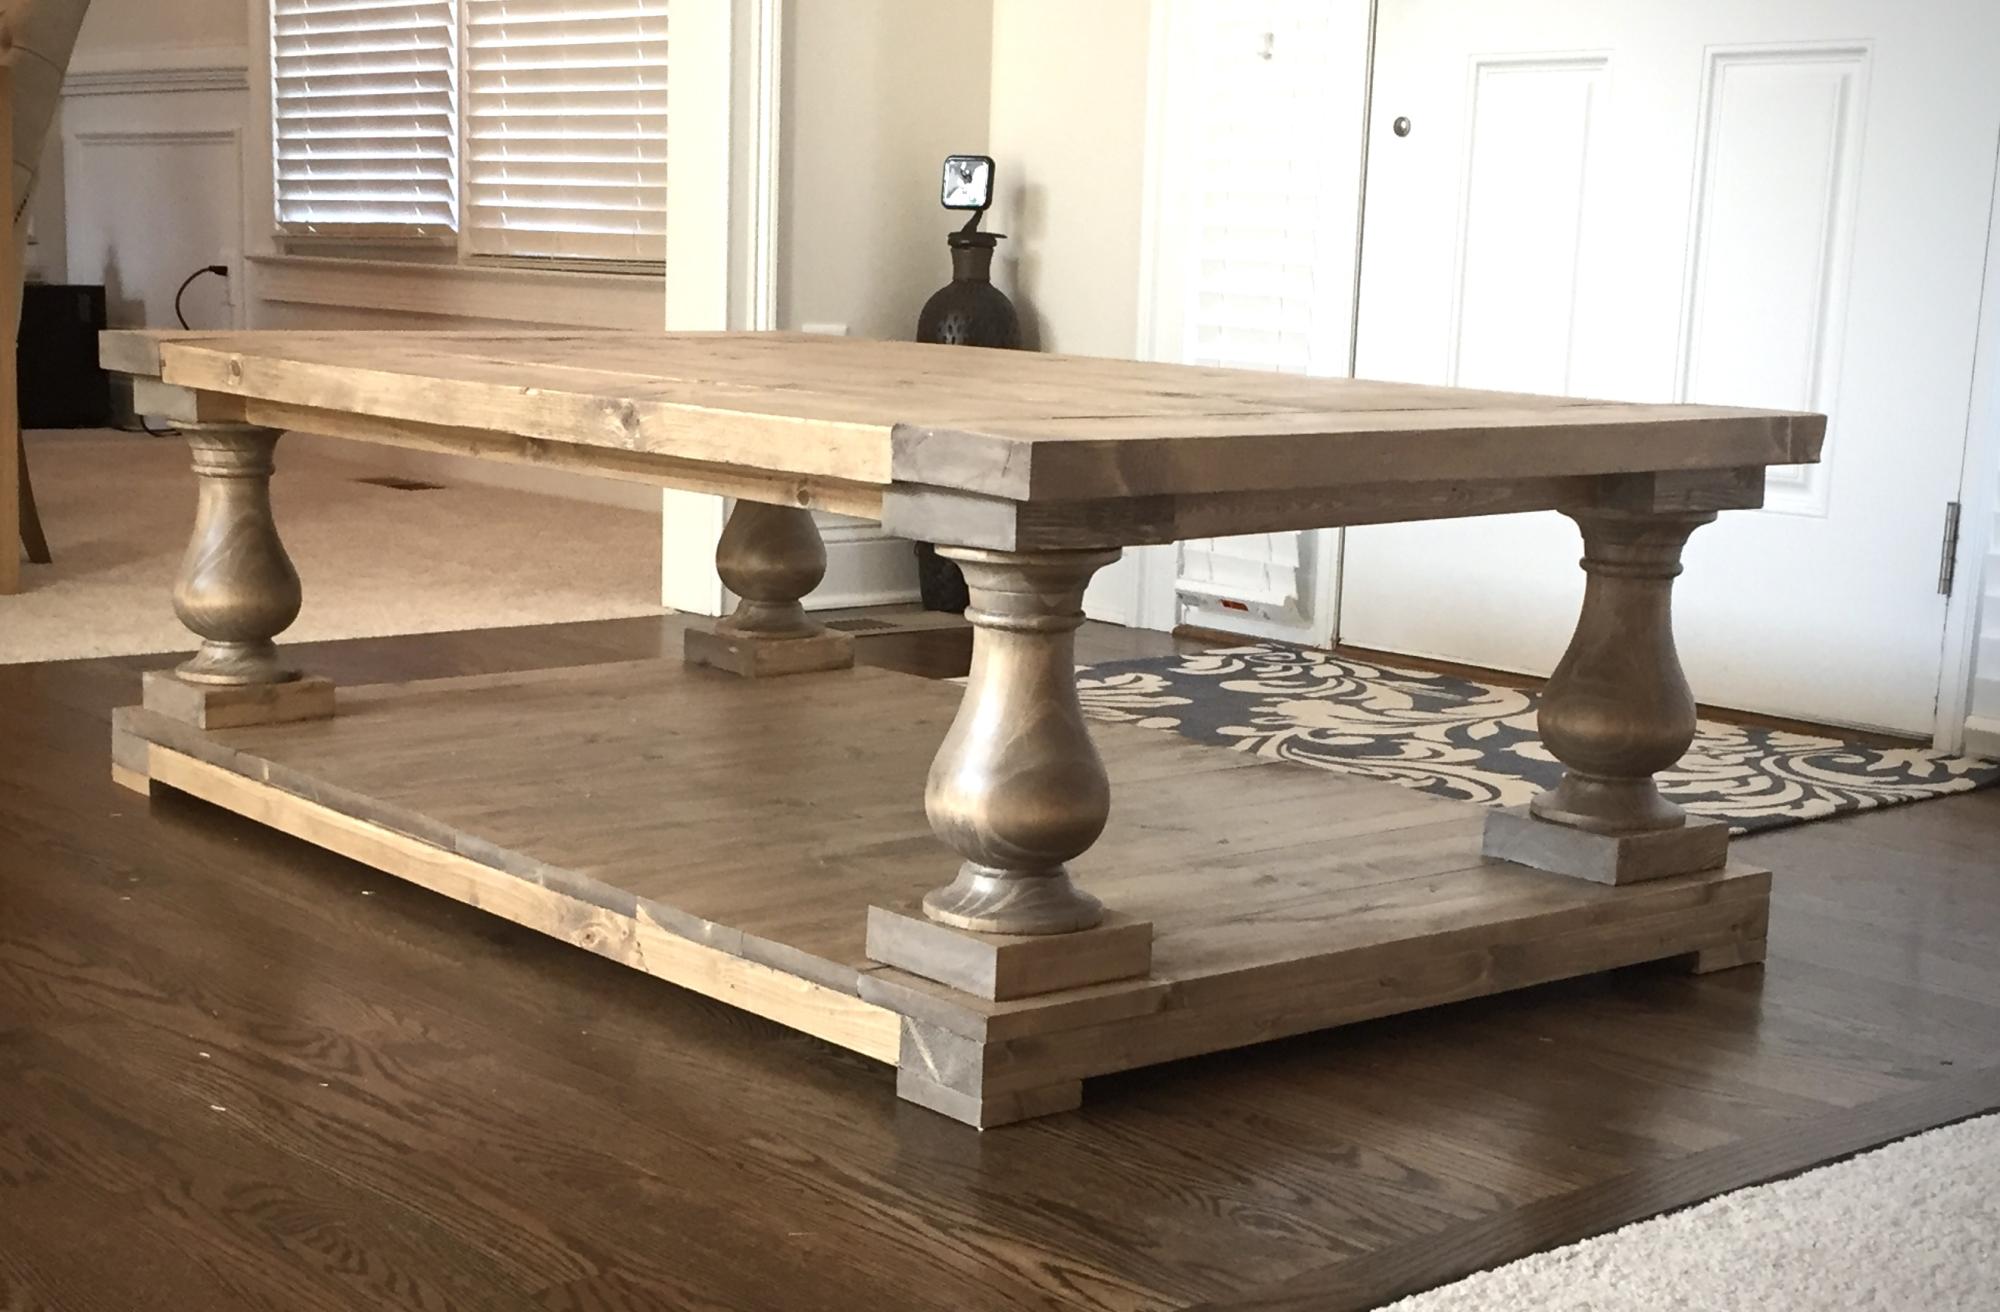
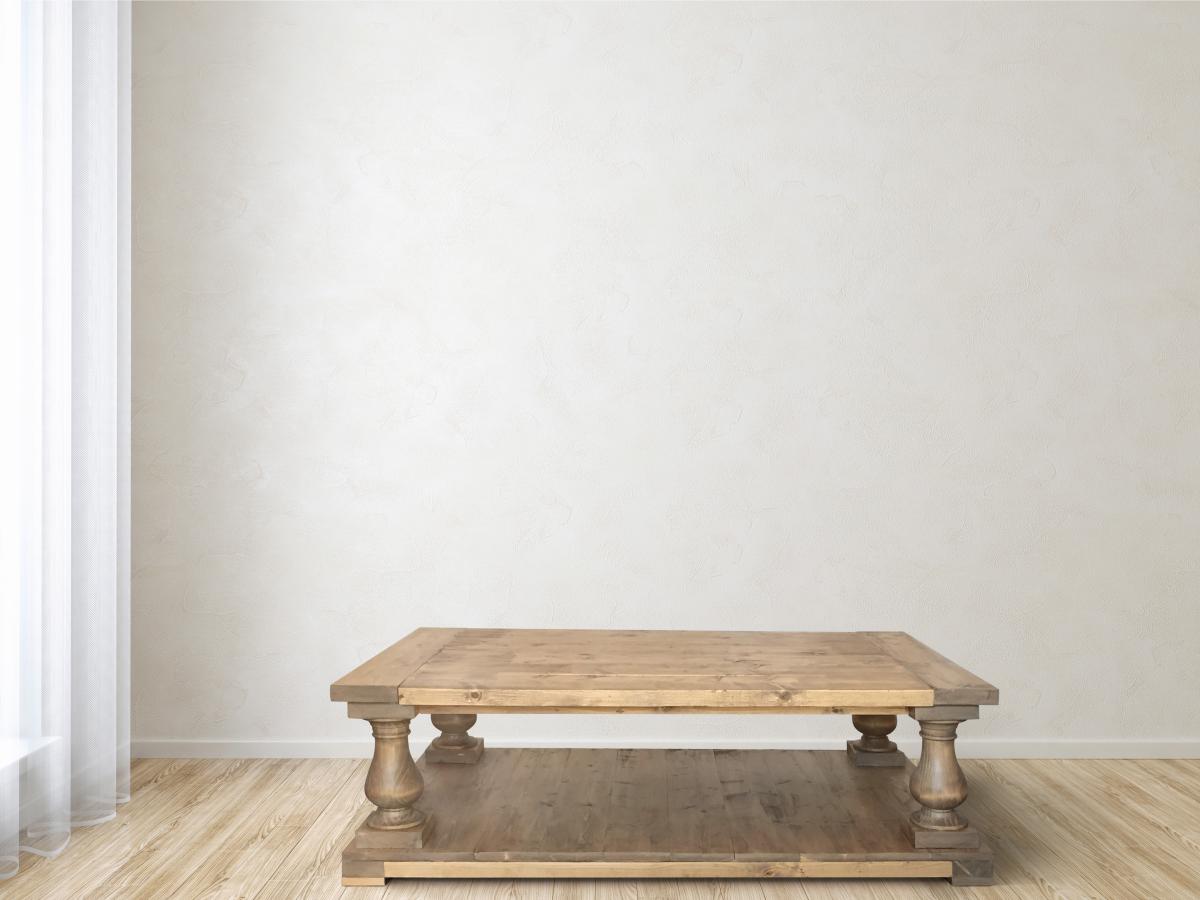
Made from plans, no modifications. I've made it twice, once in a weathered natural look and once with a darker stain. 

Built from Plan(s)
Estimated Cost
$300
Estimated Time Investment
Day Project (6-9 Hours)
Recommended Skill Level
Beginner

Comments

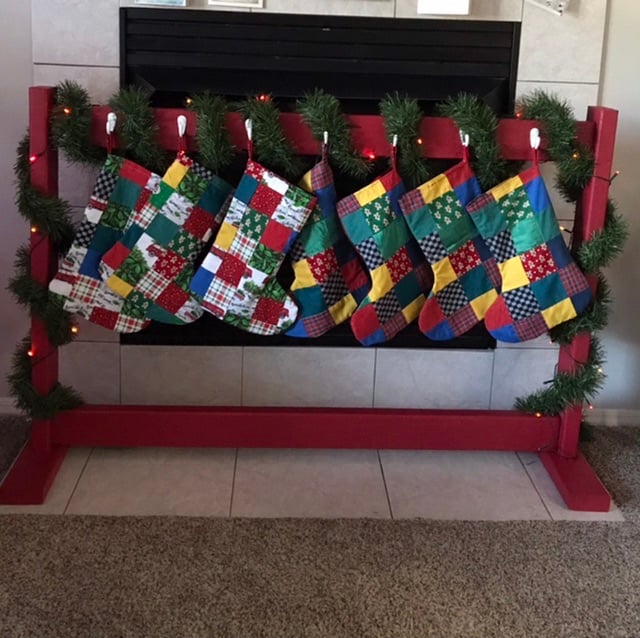
Christmas Stocking Stand

Submitted by Anna-M on Mon, 12/28/2020 - 09:27

I wanted to show you the stand we made this year, using your plans. It was a big hit! I made the base pieces 15” long for added stability since we put 7 hooks on it and plan to add more to the “backside” as our family is growing.
Thank You for sharing !

Built from Plan(s)

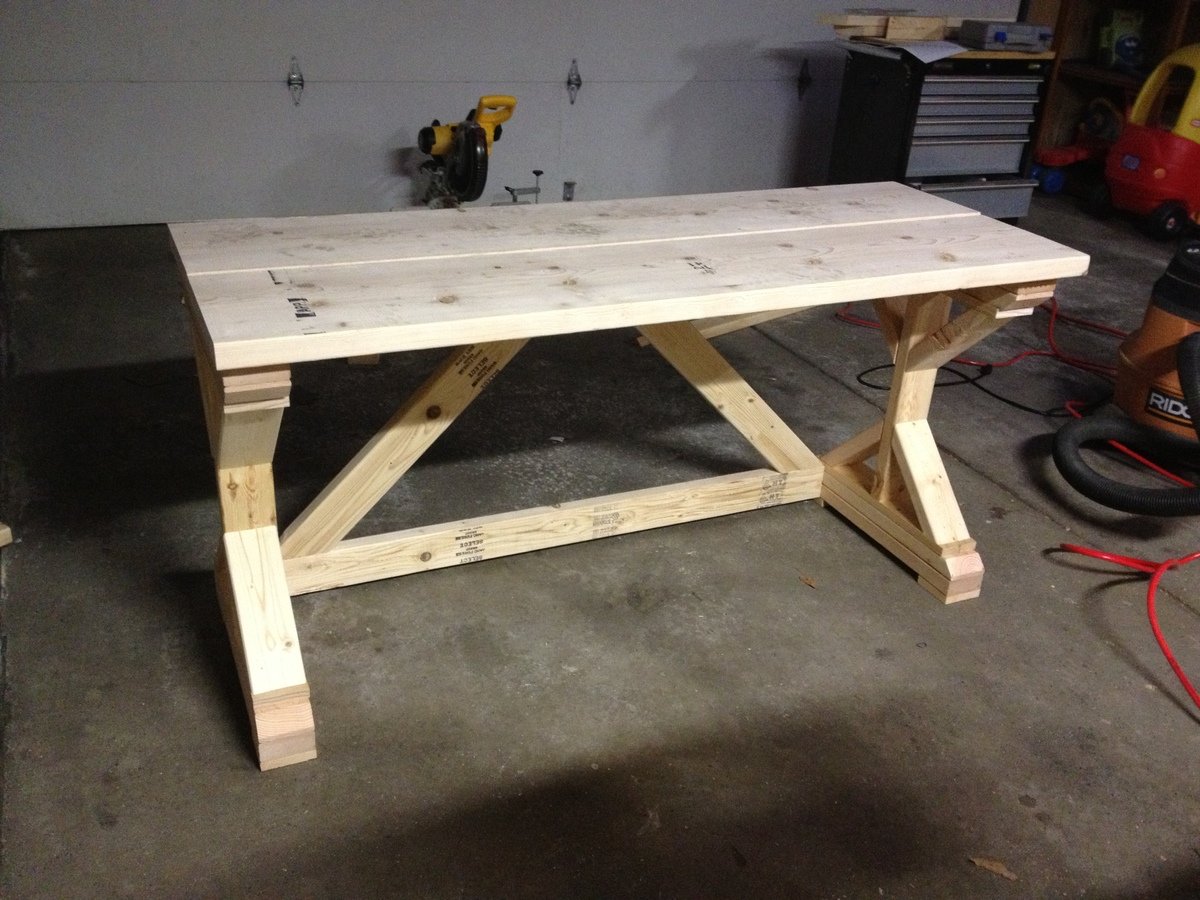
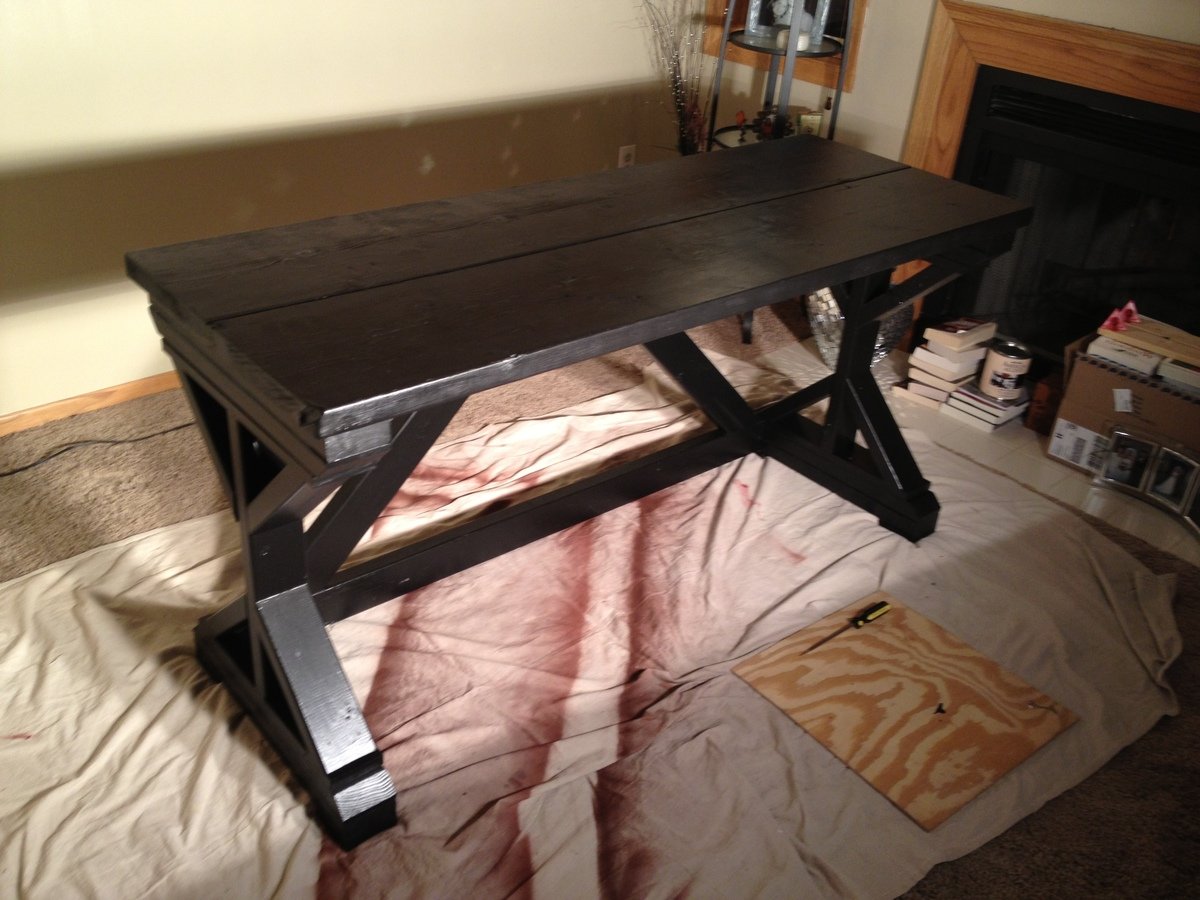
Fancy X Desk

Here is the 95% completed Fancy X Desk. The plans were very easy to follow. I would call it an intermediate level project simply because of the angle cuts. I had to reduce the size a little to fit our space. Built it in an afternoon and then applied one coat of primer and two coats of black paint. I have to wait until it is a little warmer outside to apply the poly as I didn't want to do it inside and my garage is about 30 degrees. I haven't figured out what it cost me to build but I feel comfortable saying it was hundreds less than it would have cost to buy at retail. Very excited about the result.

Built from Plan(s)
Estimated Time Investment
Day Project (6-9 Hours)
Finish Used
Paint
Recommended Skill Level
Intermediate

Comments

tgreen

Sun, 07/13/2014 - 15:12

I like how you made this shorter, could you tell me how long you made it, and what the length of the 45 degree supports at the back are? I assume you had to shorten the due to shortening the length, but I can't figure how out long they should be.

Thanks! I'm really excited to start this!

Media Cabinet

Submitted by charae22 on Sat, 12/06/2014 - 19:02

I fell in love with a Printer's Collection media cabinet at the Pottery Barn, but I couldn't afford the $$$ price tag. So I decided to build it myself. Theirs was made out of pine but I made mine out of birch. It wasn't very hard to build, it just had a lot of pieces.  I made 3 pieces, the center being 3 sections, and 2 shelf sections on the ends.  I thought it turned out great and fits our space perfectly.

Estimated Time Investment
Week Long Project (20 Hours or More)
Finish Used
3 coats of Minwax English Chestnut, sanding sealer, Minwax Gel Stain Hickory (as a glaze), Minwax polyurethane in satin.
Recommended Skill Level
Intermediate

Comments

Linda7

Sun, 12/07/2014 - 17:07

Charae22, this is verympressive work! Your build looks like a piece one would find in a fine furniture store for a few thousand dollars. You have built something that will surely be a family heirloom. 

smitsukod

Fri, 01/16/2015 - 16:53

Hi Charae22,

I love this version!! I am trying to find all the plans to make the media cabinet, but I am wondering if you wouldn't mind sharing your plans for your media cabinet?

Mimi's Faux Mantle

Submitted by Anonymous (not verified) on Fri, 03/10/2017 - 04:53

Built this using Anna White's "MIMI'S FAUX MANTLE" but instead of using crown molding I elected to use STONE TILES in neutral tones and finished the surround and mantle in white giving the piece a nice soft appeal.  The building plans were easy to follow and took about 2 days to complete the whole process (because of drying times) not to mention how reasonable the cost was.  I already had the tiles,  adhesive, and paint from left over projects.

Estimated Cost
Cost was more than reasonable. I already had the tiles ,adhesive, and paint. Total cost was approximately $66.00.
Estimated Time Investment
Day Project (6-9 Hours)
Finish Used
I used Behr White Semi-Gloss Enamel paint purchased from Home Depot (I had the paint from a previous project). Use any tile of your choice since these were left over tiles I had on hand. When tiling use an appropriate tile for the space and glue with tile adhesive. I let mine sit overnight and grouted it the next day using a sanded grout in Bone (purchased from Home Depot) #832.
Recommended Skill Level
Intermediate

Fancy X Farmhouse table - painted!

Submitted by bettenmv on Tue, 02/05/2013 - 11:57

First project from Ana White, and loved it! Building more as we speak. We loved this table but wanted it in painted finish. We chose to fill in some of the gaps to make it look a little more finished. Very happy with the result!

Built from Plan(s)
Estimated Cost
90 dollars not including one time purchases of Kreg, nail gun, etc.
Estimated Time Investment
Weekend Project (10-20 Hours)
Finish Used
white paint and brown glaze
Recommended Skill Level
Beginner

Comments

orangesugar

Tue, 02/05/2013 - 12:12

This table is gorgeous! Do you have any more information on the paint treatment, wood you used etc....

bettenmv

Tue, 02/05/2013 - 18:44

Thank you! It was our first attempt at a glaze. We shortened the table length wise and then used 3 2x10s instead of 4. For the finish we painted the table Navajo White Behr color from home depot. We then mixed about 1 part of a Minwax espresso stain with 4 parts of Behr Faux Glaze. Then we just rubbed it on with rags and waited a little bit and rubbed it off.

Jamaunzie

Wed, 02/06/2013 - 15:29

WOW Extremely nice I am from Arizona and the color you have chosen is just perfect nice job and finish congratulations on being the proud owners of a Very Beautiful Table

wannabuildit

Mon, 02/18/2013 - 17:39

Great job! Beautiful finish. I have yet to build anything, but this is my favorite plan from Ana White and I will be starting it as soon as the weather cooperates :/
Nicely done!

worrow

Wed, 06/05/2013 - 18:58

Nice job, I just finished mine and followed plans 90% of the way. I altered the legs to look beefier. I have not finished mine yet. I spaded the top and will be using it outdoors so unsure what I want to do for the finish. But thanks for sharing.

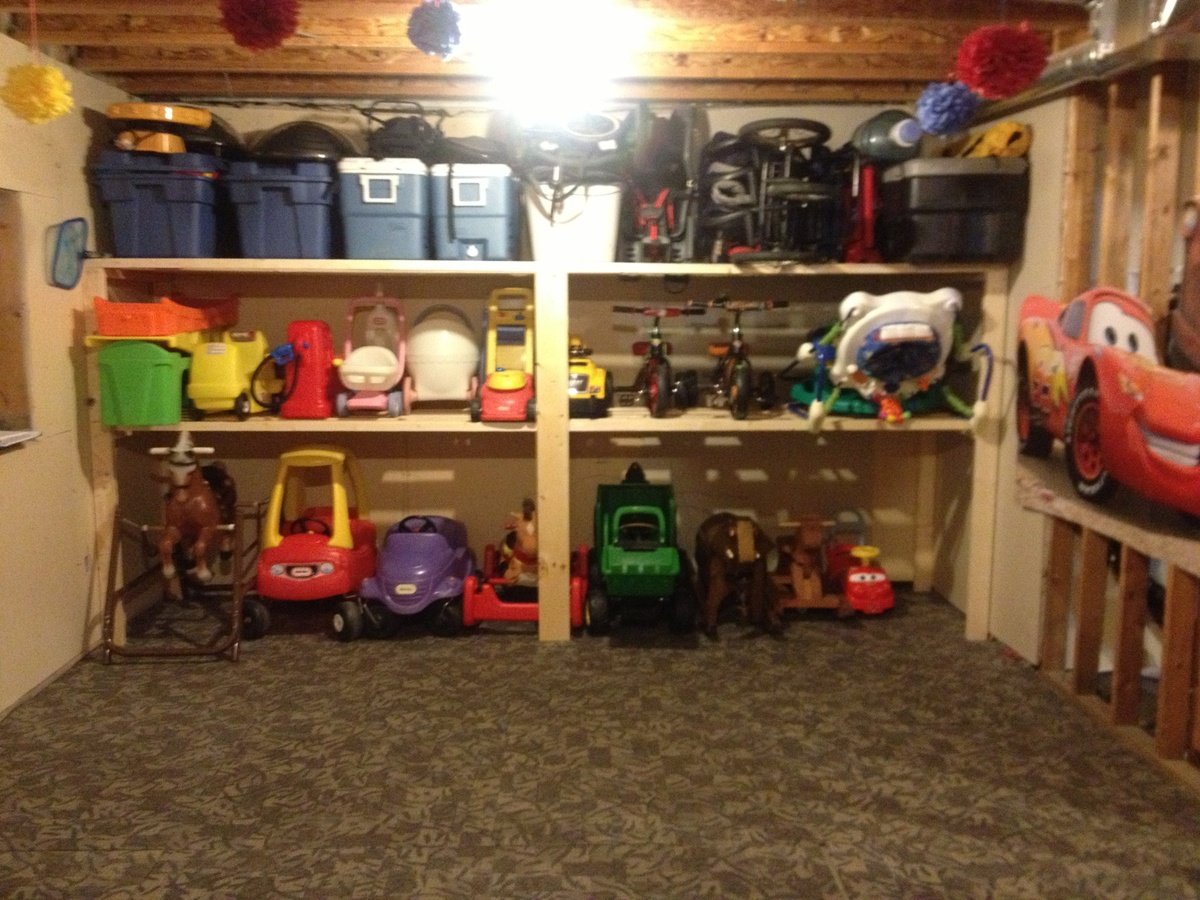
Economical Basement Shelving

Submitted by Veronica P on Tue, 12/09/2014 - 07:17

I needed something to get the camping stuff, toys, strollers and everything else organized and up off the floor of our unfinished basement so my boys can ride their trikes inside over the winter. This was perfect! Just changed it slightly (made it deeper) to accommodate some larger items. Thanks again Ana!

Estimated Cost
$100
Estimated Time Investment
An Hour or Two (0-2 Hours)
Finish Used
None
Recommended Skill Level
Starter Project

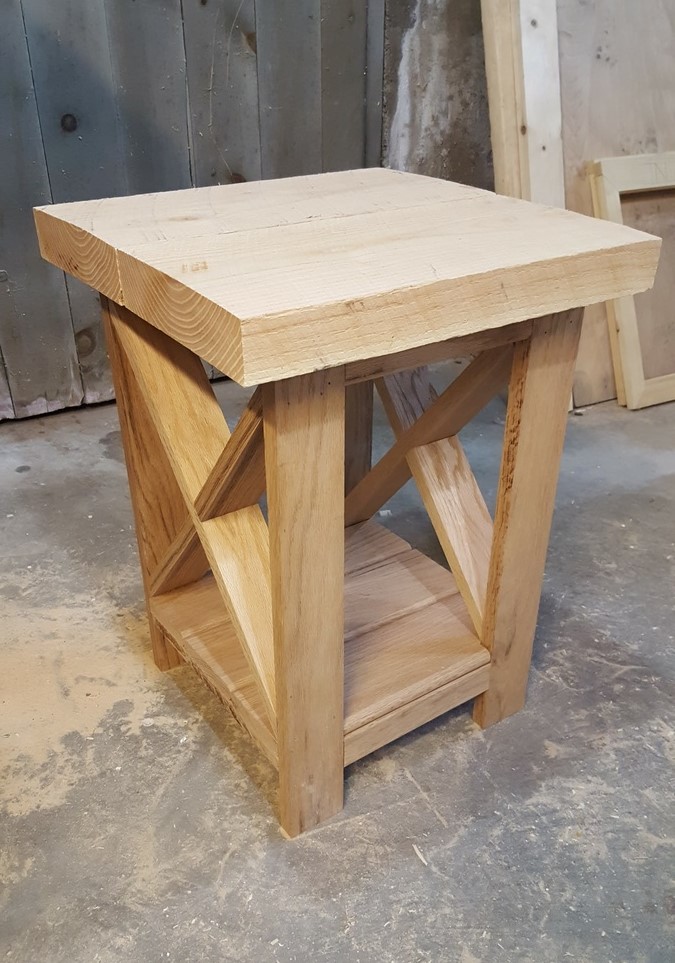
Oak end table

Submitted by Anonymous (not verified) on Sun, 03/12/2017 - 14:49

Made from some scrap oak I had. Made to fit the 2" thick oak top that a co worker was going to throw away...couldn't let that happen!

Recommended Skill Level
Beginner

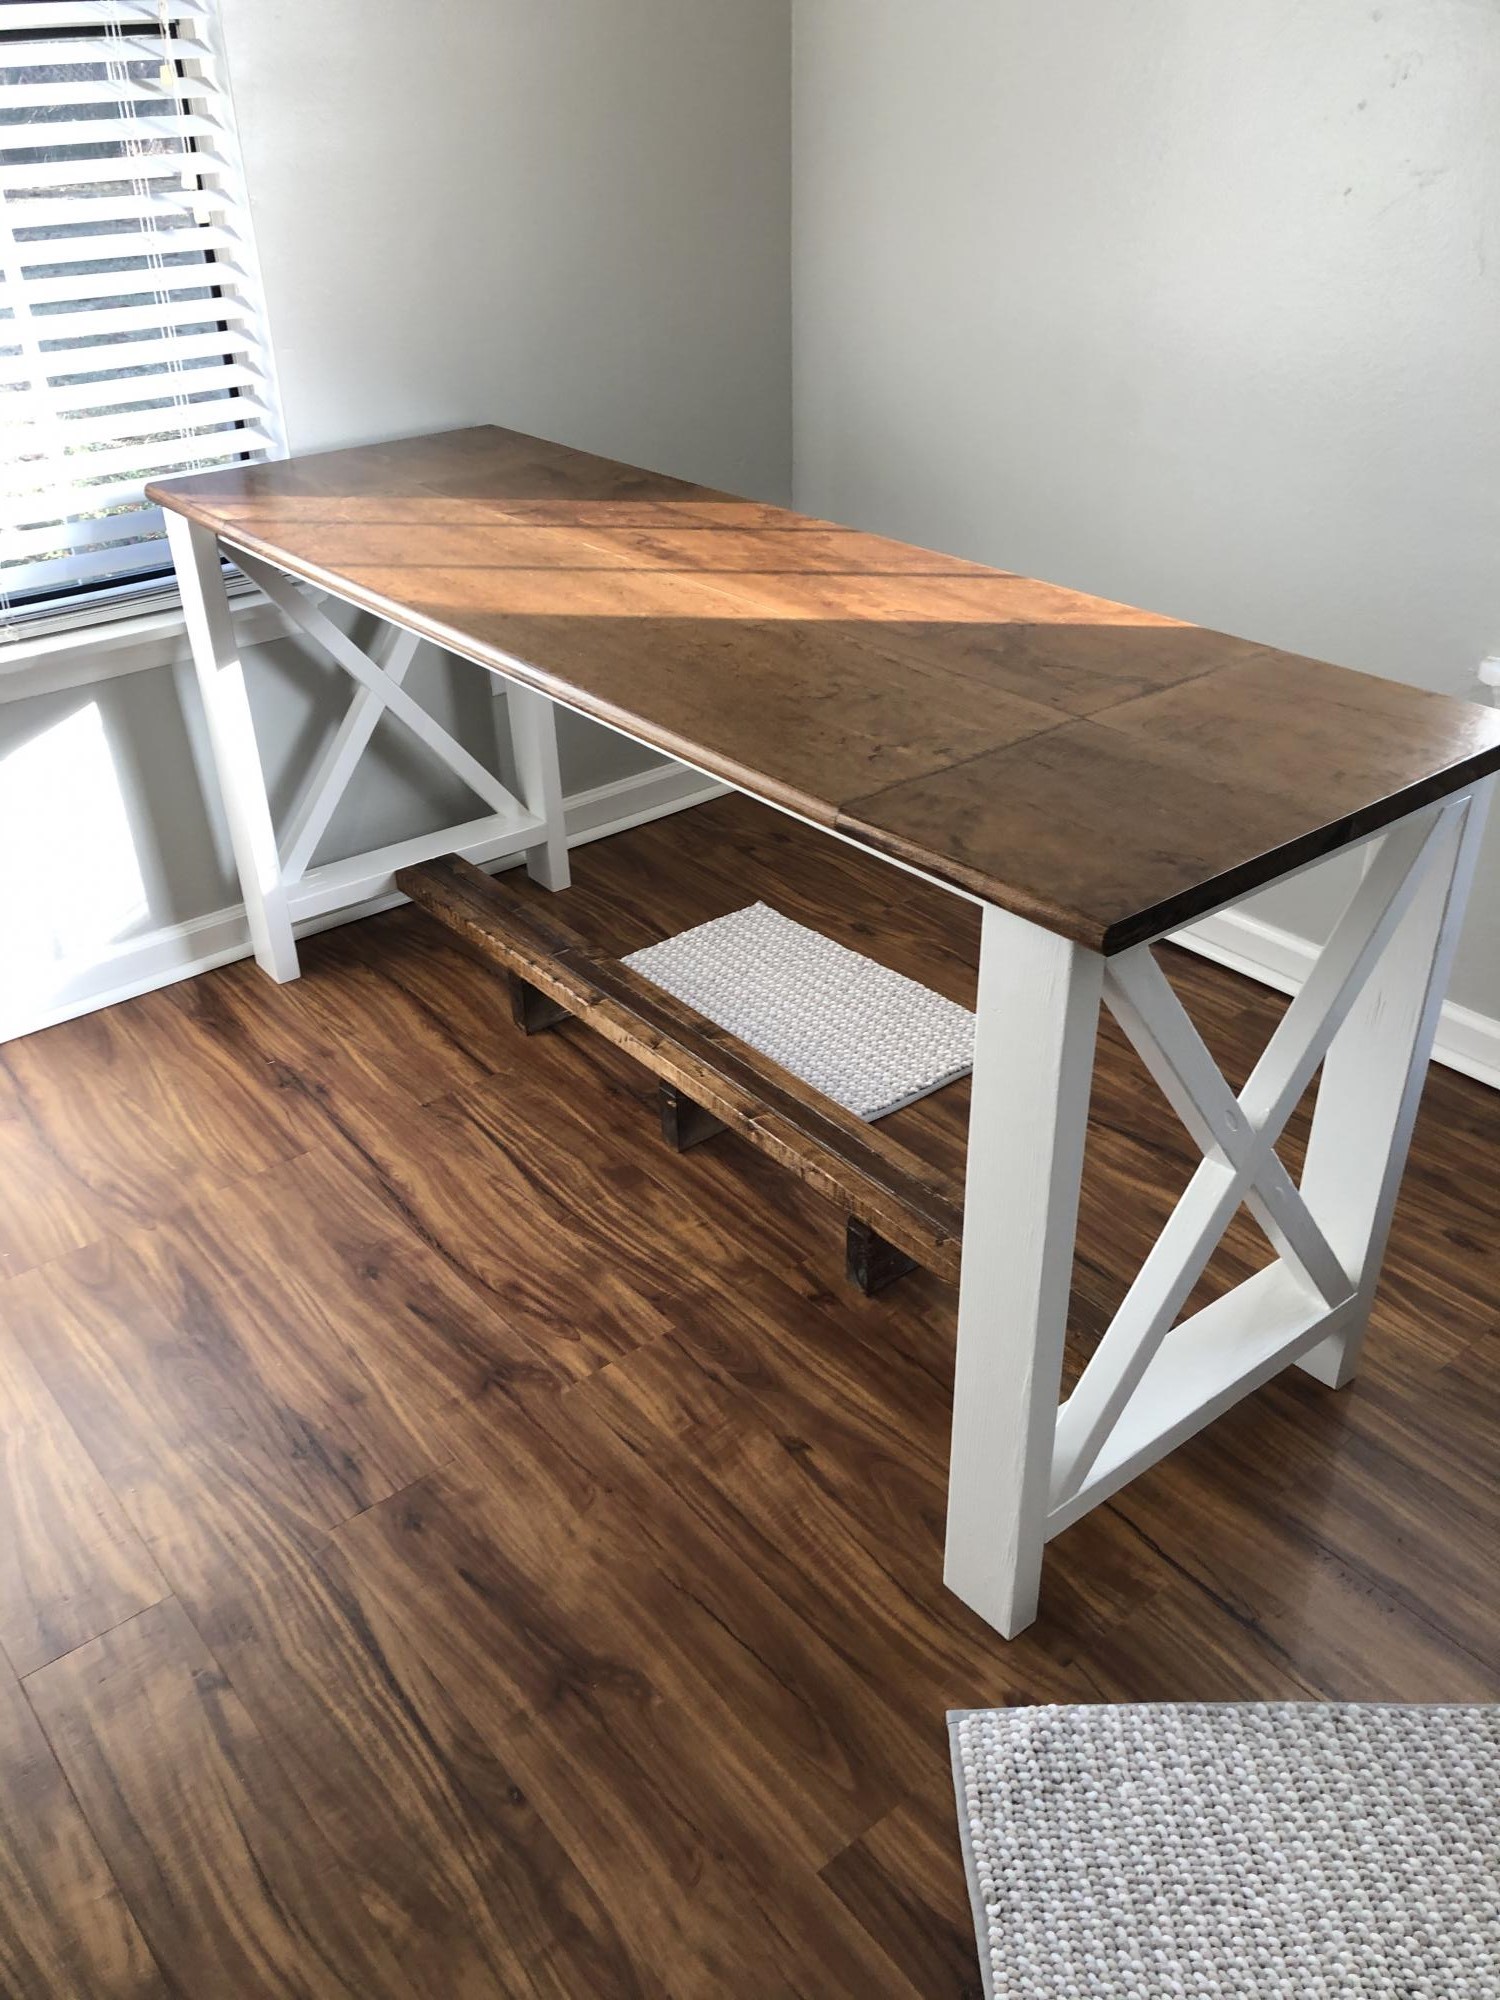
My very first wood project- 6 foot farmhouse desk with modifications

Submitted by Thersha on Sun, 01/03/2021 - 15:48

I needed a 6 foot desk, but could not find one online that I liked that was within my budget.. I decided to make this desk and modified it to a 6 foot with a foot rest in the middle so I can have both sides functional and have a spot to put my feet up... I also added 8 shaped fasteners to attach the top to the base.. I was so inexperienced when I started this project that I had to watch videos on how to use a drill and the pocket hole jig...So if I can do this, anyone can, Thanks Ana for inspiring me!! I am on fire to do so many more... !! I need so much more tools now!!!

Estimated Time Investment
Week Long Project (20 Hours or More)
Finish Used
Used American stain by MinWax
Recommended Skill Level
Starter Project

Comments

Rustic Console Table

Submitted by amac on Thu, 02/07/2013 - 19:39

We had to narrow the width of the table so that it would fit in a hallway. We distressed it..a lot and then washed a stain over the paint. Soooo pretty and rustic. Love your website!!!

Finish Used
Paint and then stain rubbed over the paint.
Recommended Skill Level
Beginner