Greenhouse
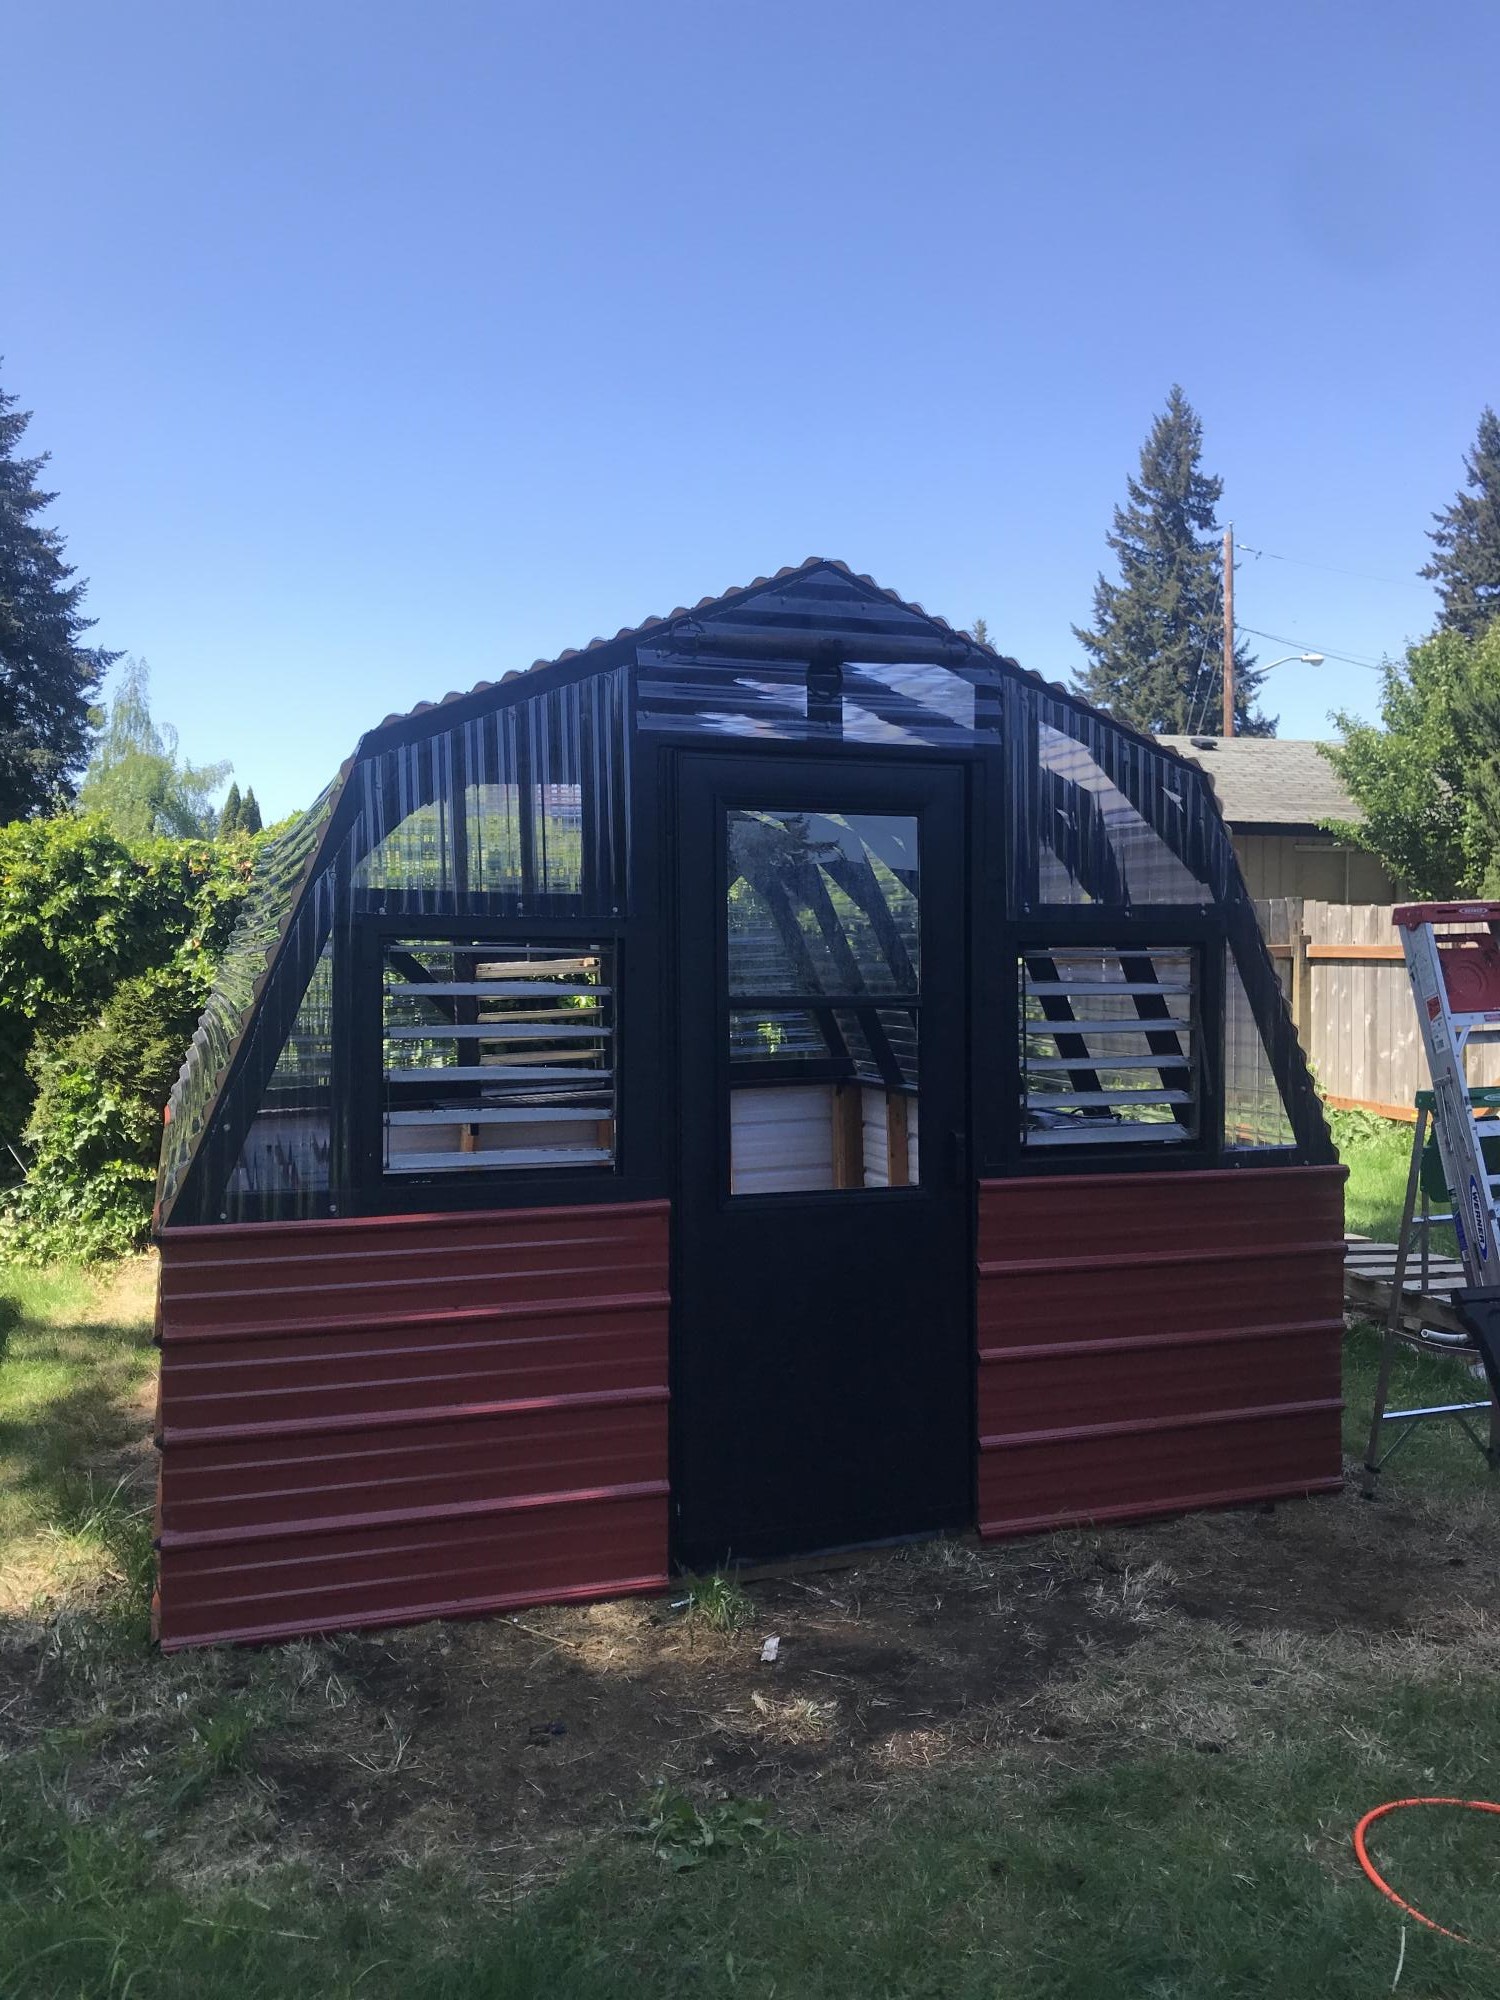
Build this greenhouse using your plans, by myself over 2 weekends. Turned out great!
Built from Plan(s)
Build this greenhouse using your plans, by myself over 2 weekends. Turned out great!
It isn't perfect, but it's beautiful and made with love!
Tue, 07/12/2011 - 20:59
Same question! That is a beautiful finish; I'd love details on how you achieved it!
Tue, 08/23/2011 - 12:37
I'd also like to know what stain you used, this is absolutely gorgeous!
Fri, 09/30/2011 - 04:31
This is EXACTLY what I was hoping to do with the table we just built. Would you be willing to share your finishing process here? Beautiful job.
Tue, 10/18/2011 - 14:18
Im dying to know what the name of the color of stain you used for your table. It's beautiful! The color of the white part would be nice too:)
Fri, 11/18/2011 - 14:03
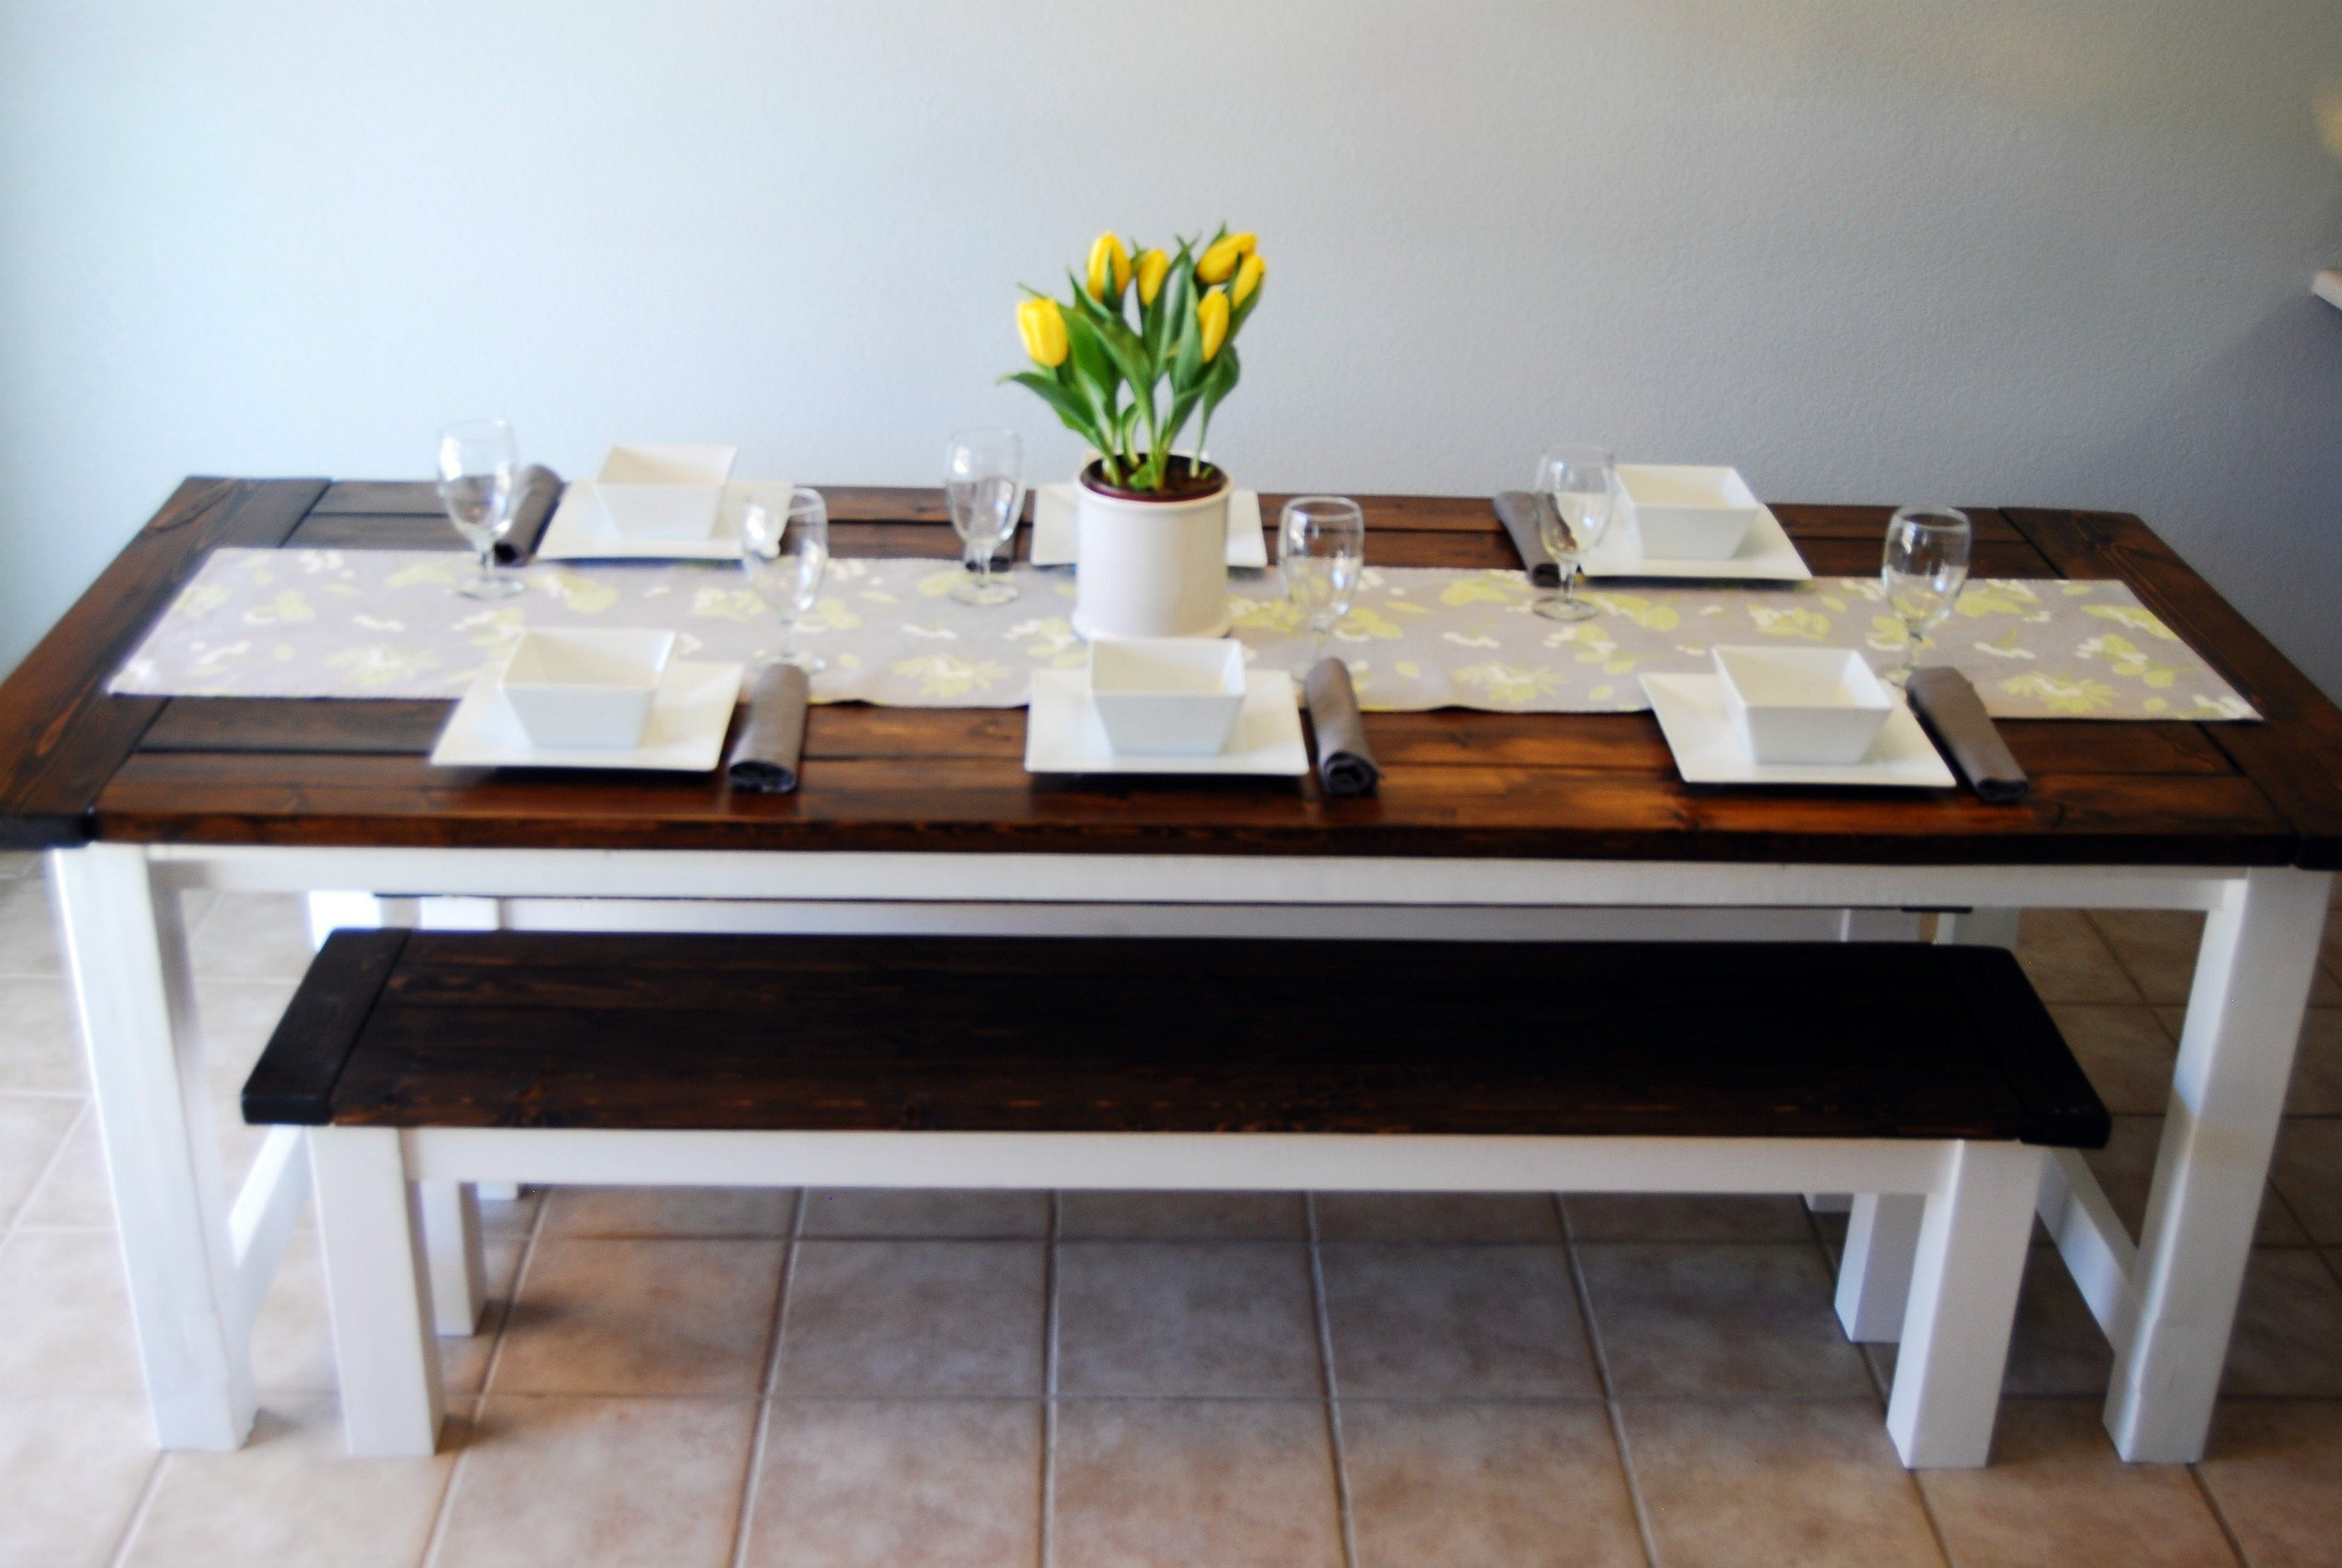
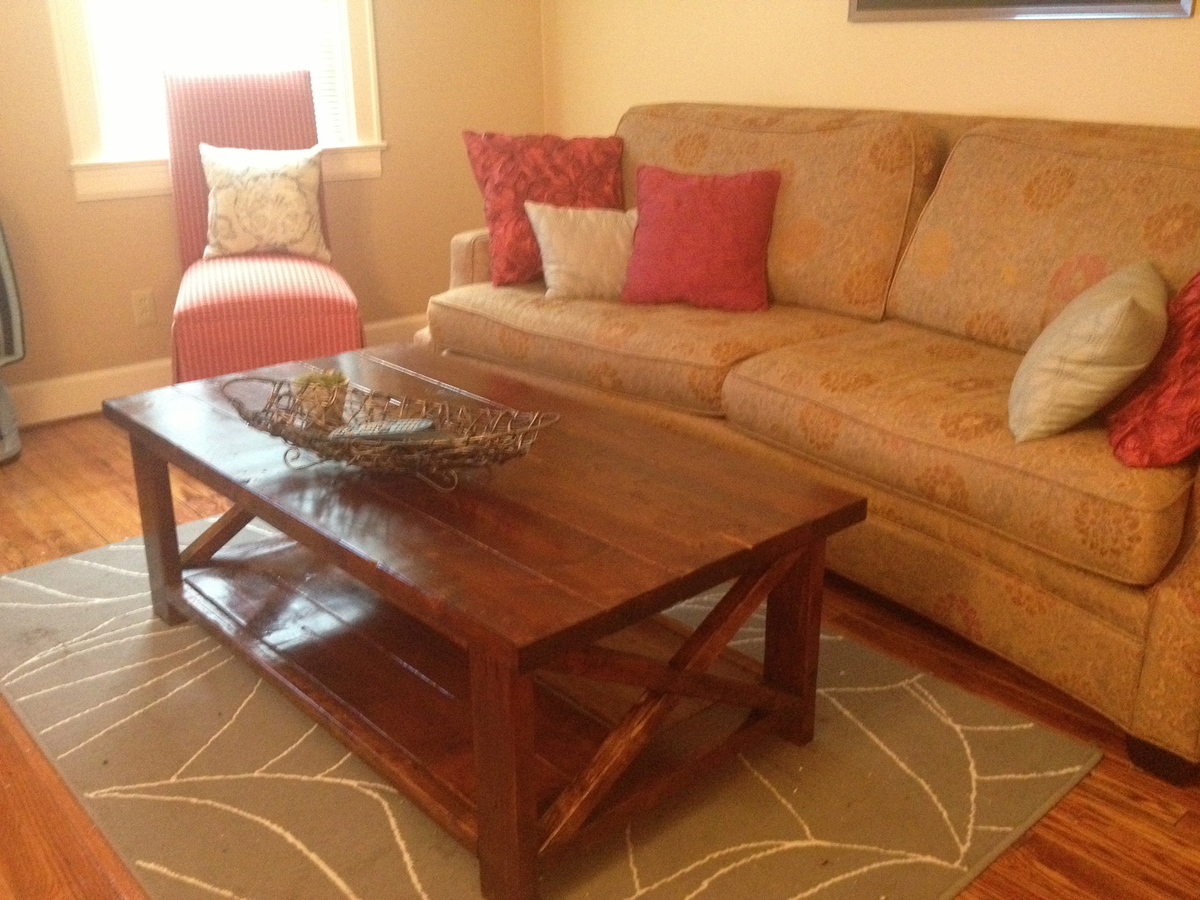
Thank you so much for all your compliments! I apologize for not responding to your questions sooner, I never realized I had comments on this post! I used MinWax stain in Dark Walnut and three coats of MinWax Fast-Drying Polyurethane in Satin finish to seal the stain. For the paint, I just used some white, satin Olympic no VOC paint right off the shelves at Lowe's. It was left over from painting my house. To date, I have not sealed the paint and I may not bother since it's holding up just fine. As far as my "technique" is concerned, I just followed Ana's tips about sanding between coats. I applied the stain and poly with a small white sponge roller. I used a paint brush for the legs since I feel like I get better results, even though it takes a little more time.

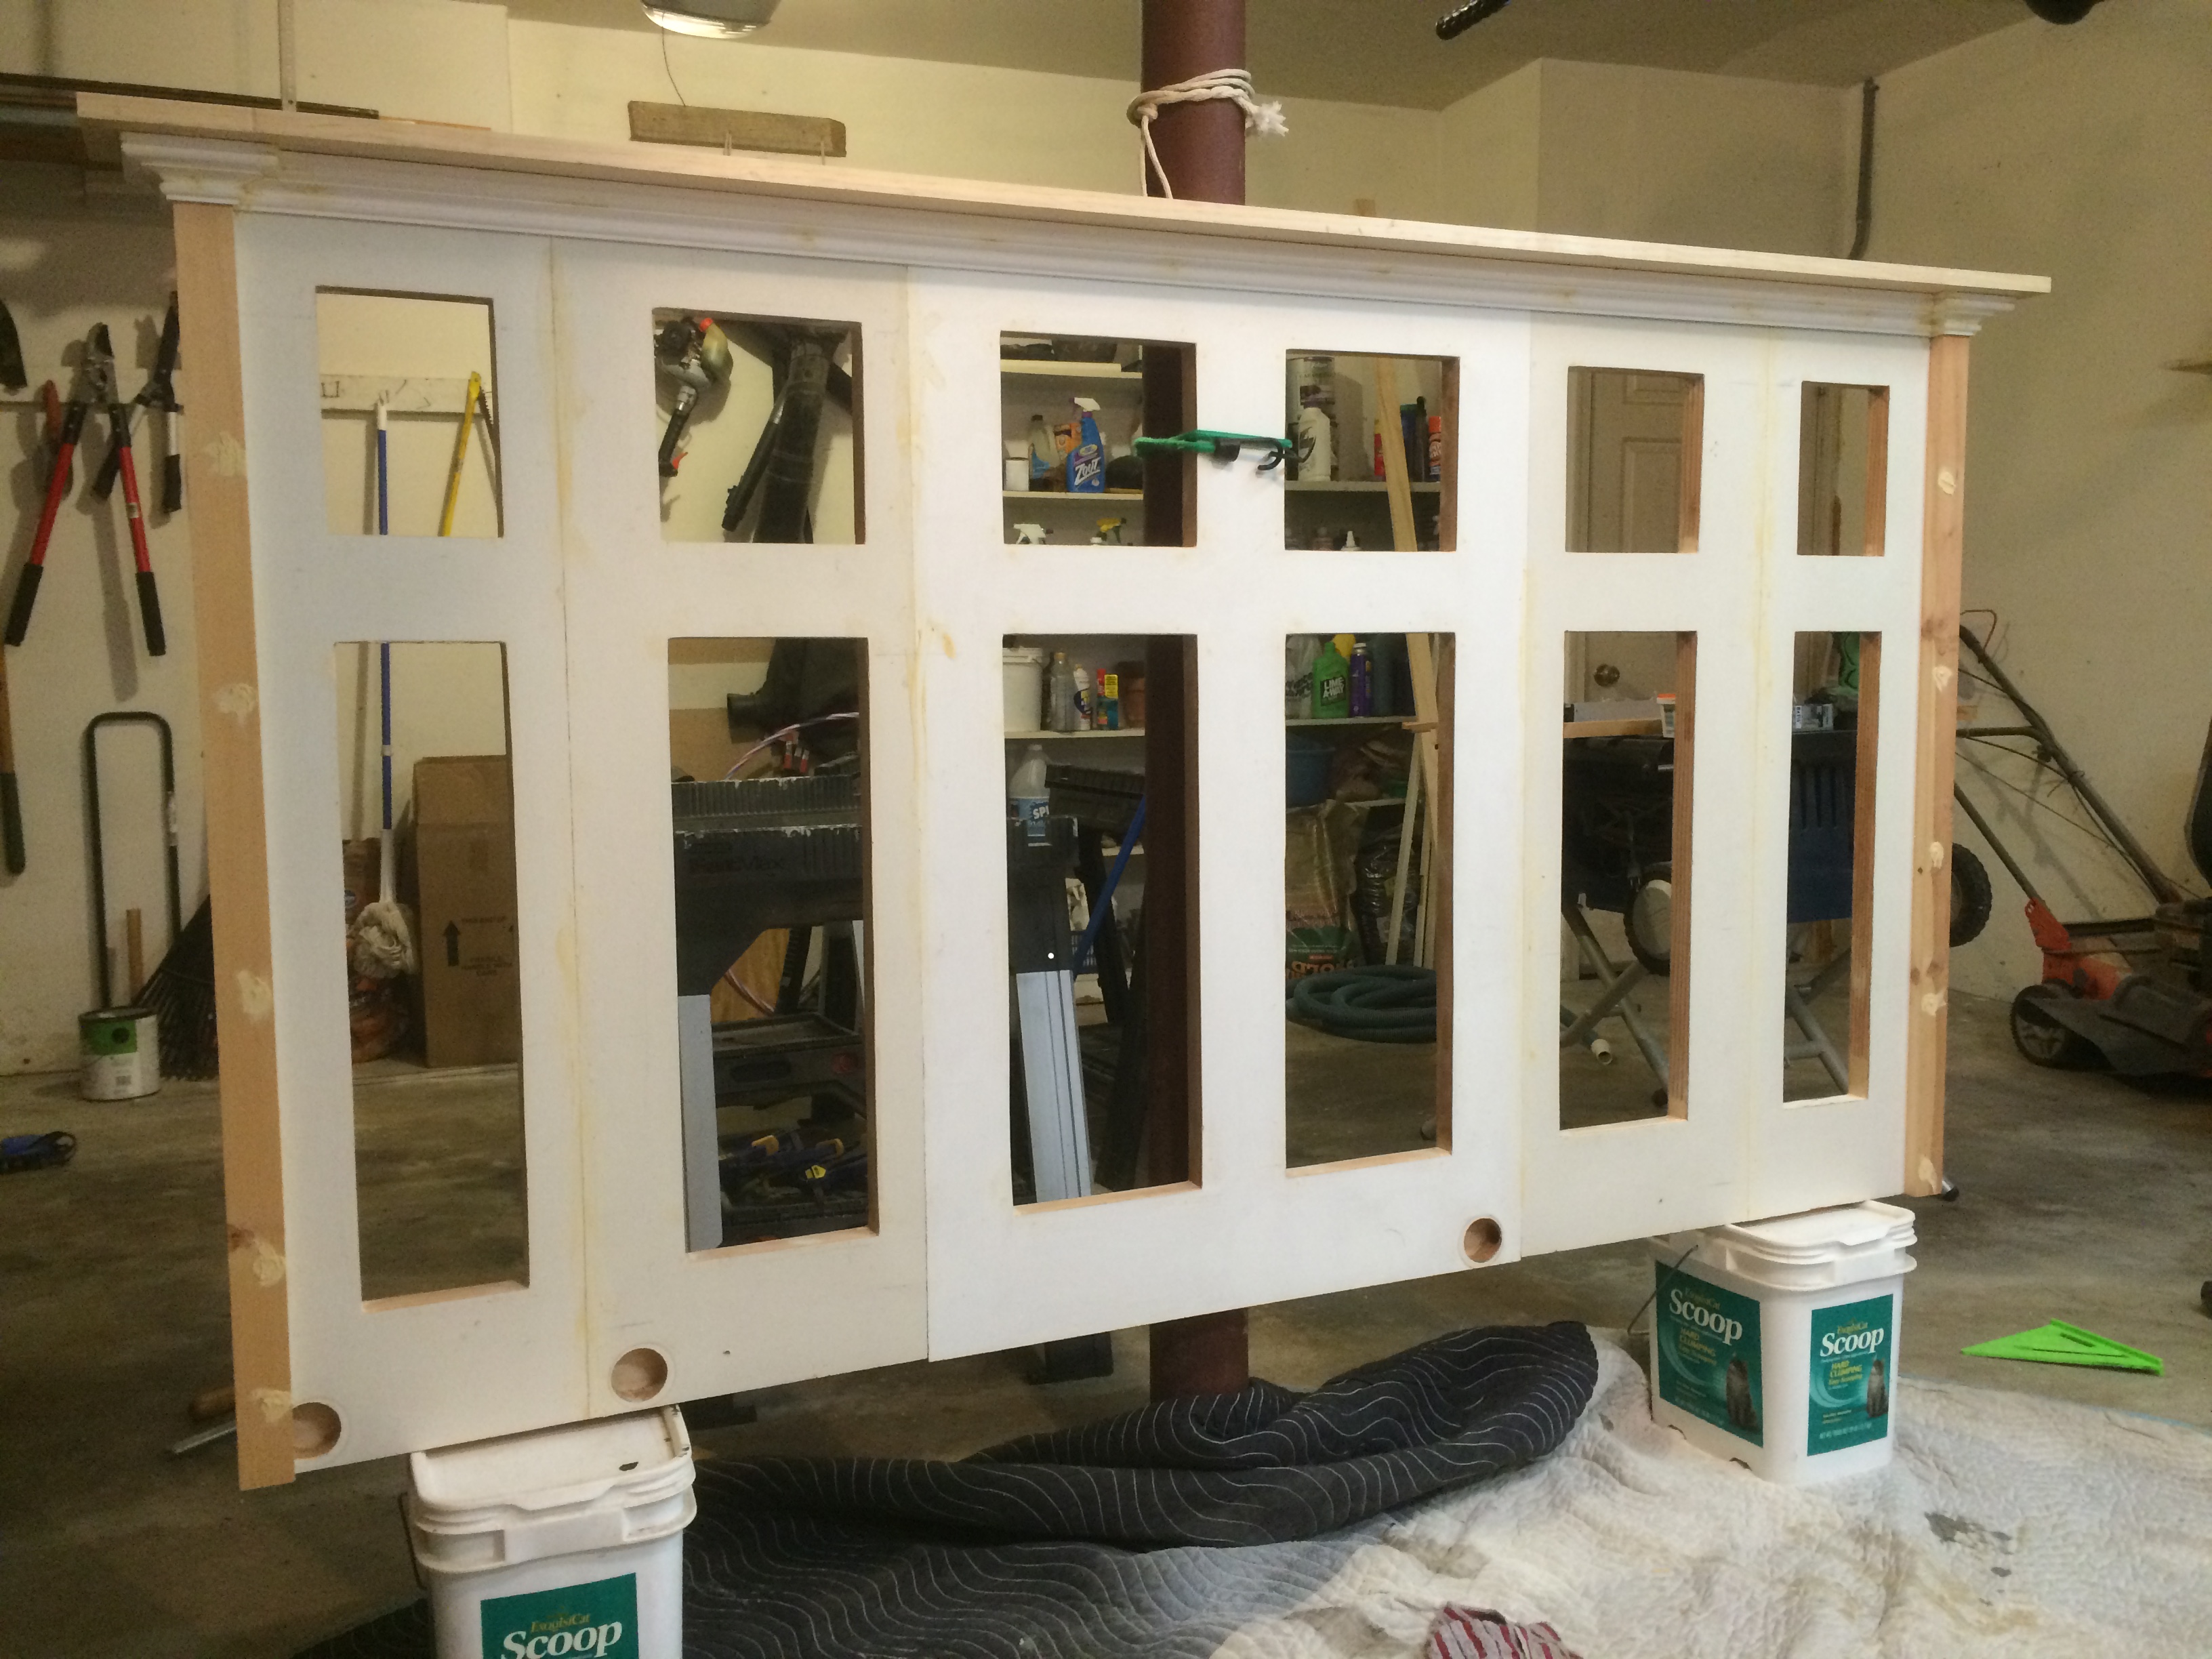
There's lots of versions of headboards made from doors. We wanted ours to let light in and still be able to open/close the windows. Since the doors were hollow-core the cutouts had to be re-inforced after cutting out those sections. Also, this was made from 3 different sized doors so 2 of the 3 had to be cut in half from top to bottom moved to the outsides to retain symetry.


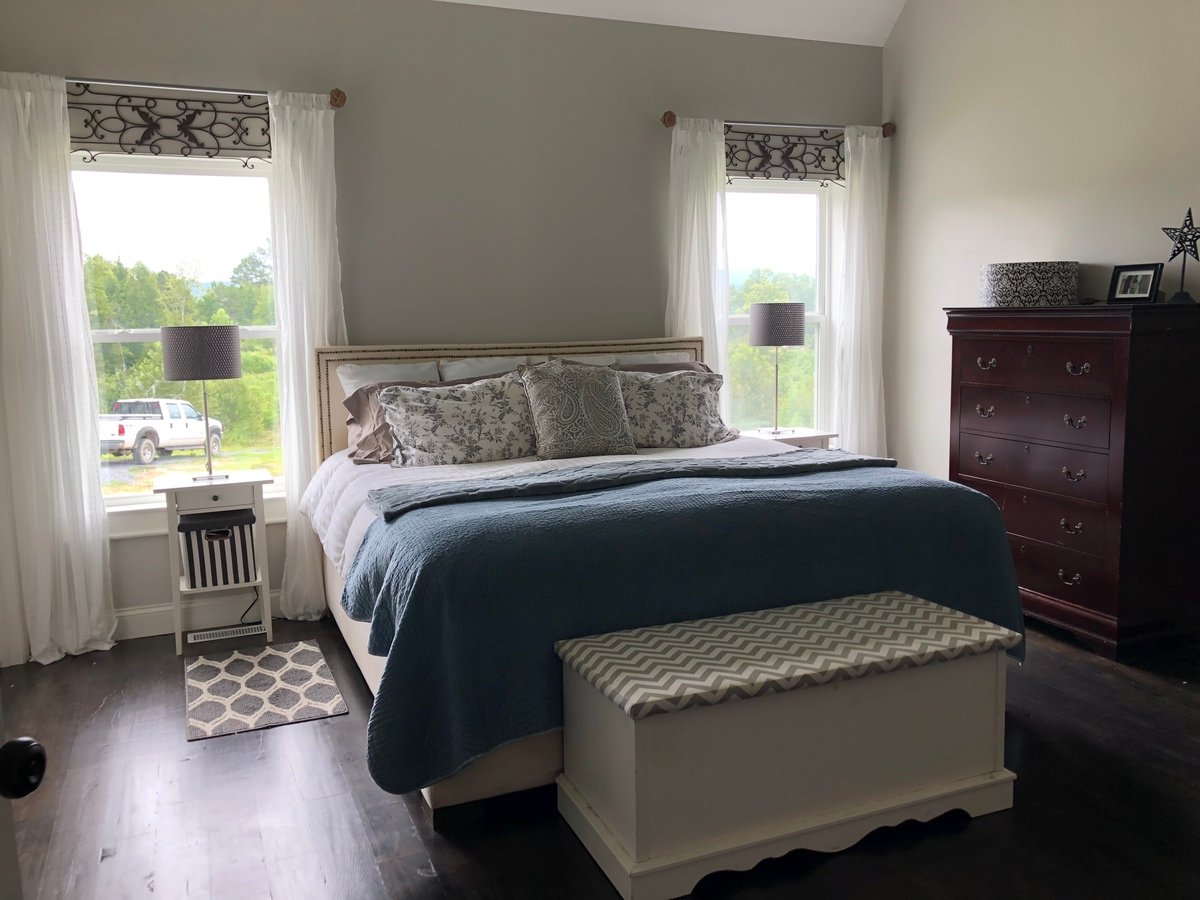
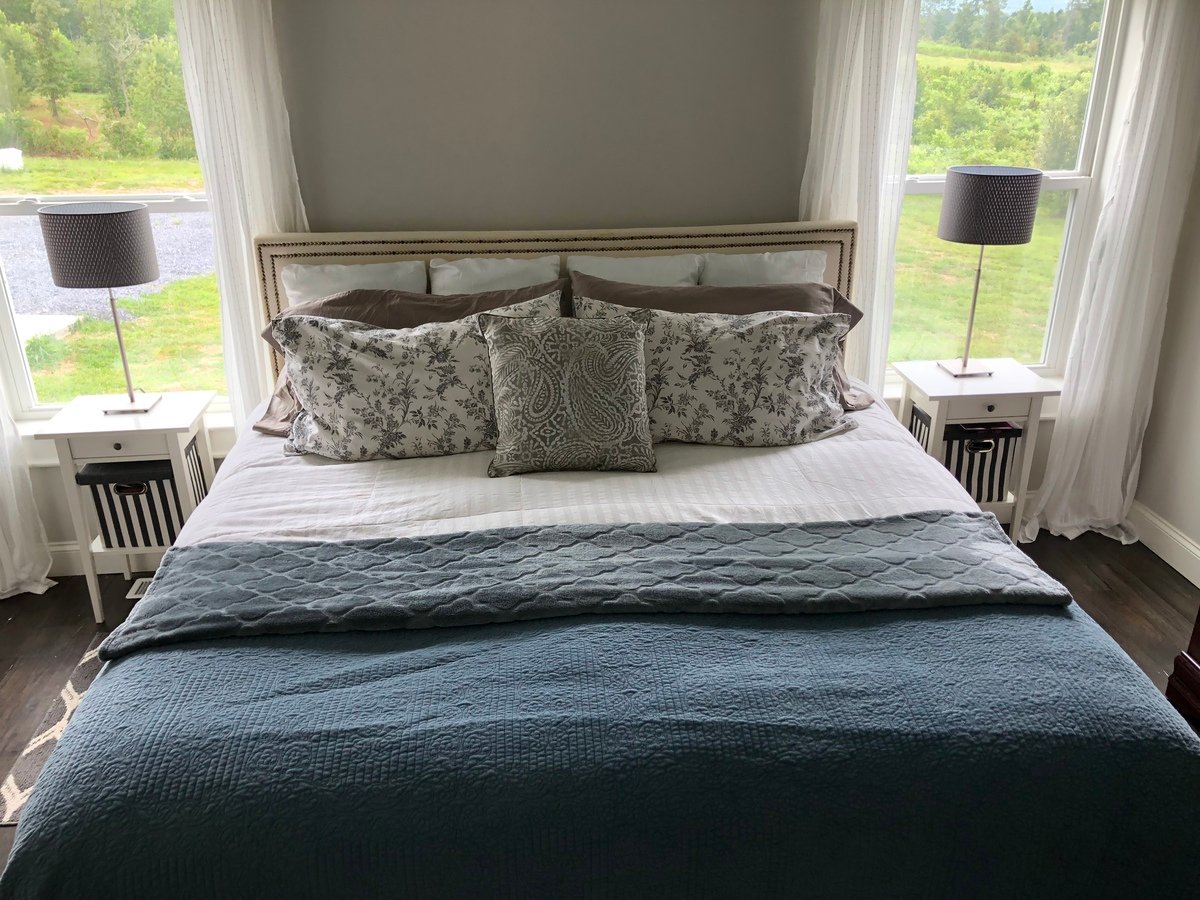
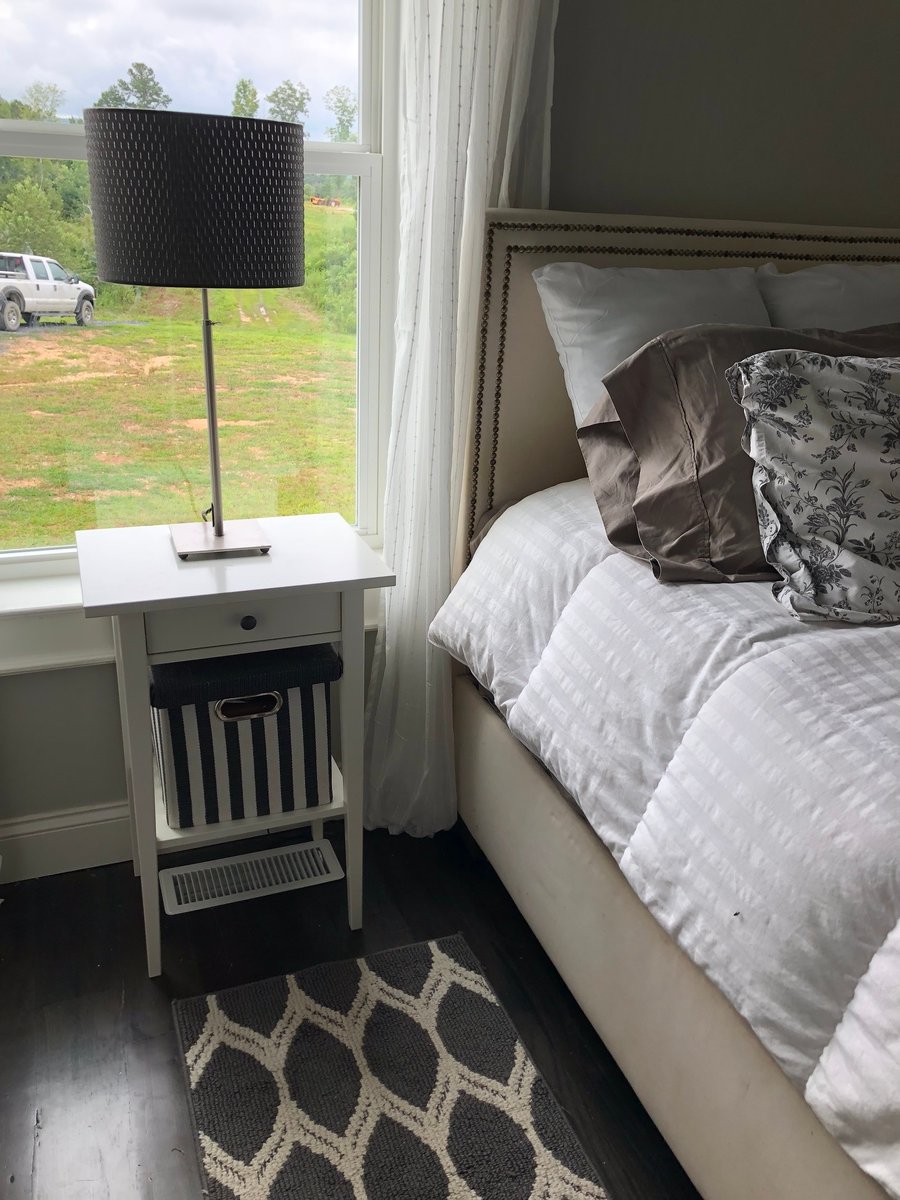
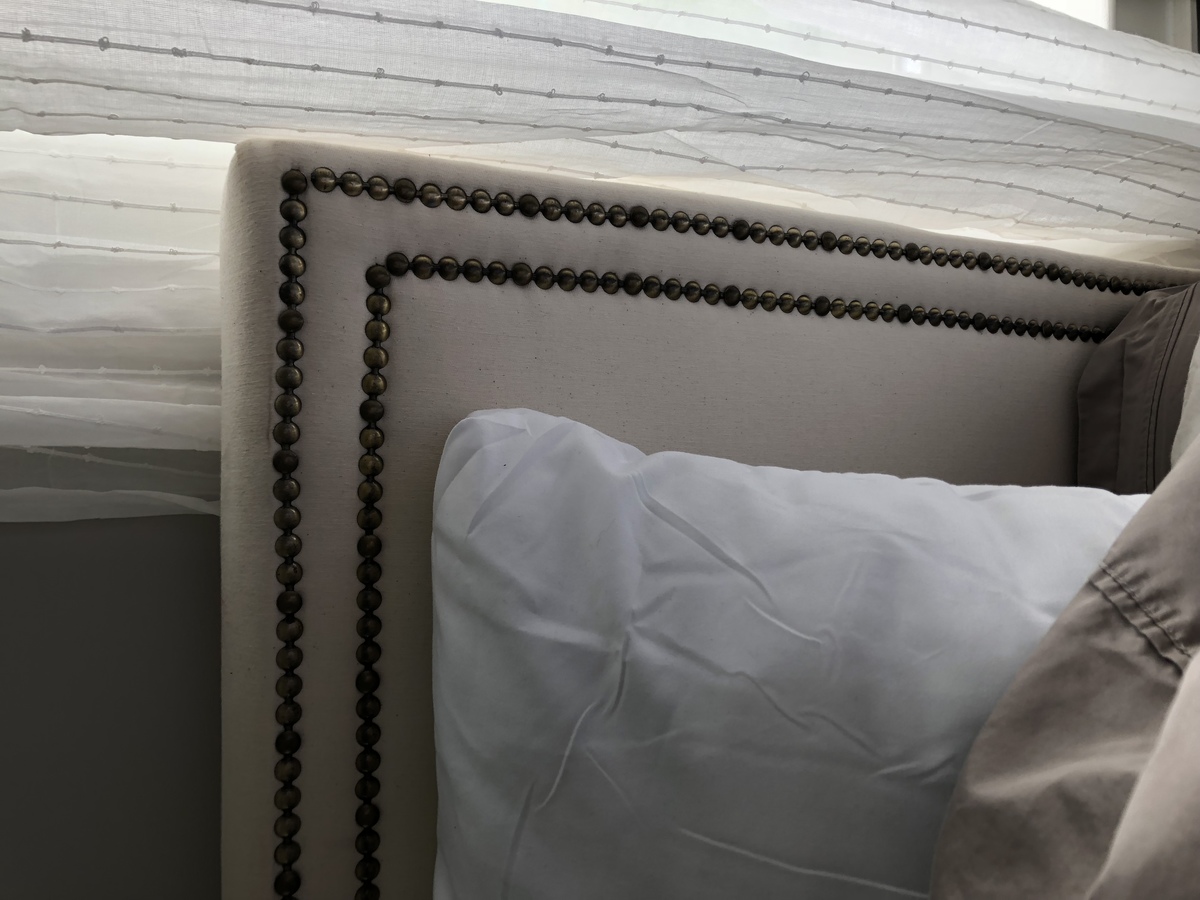
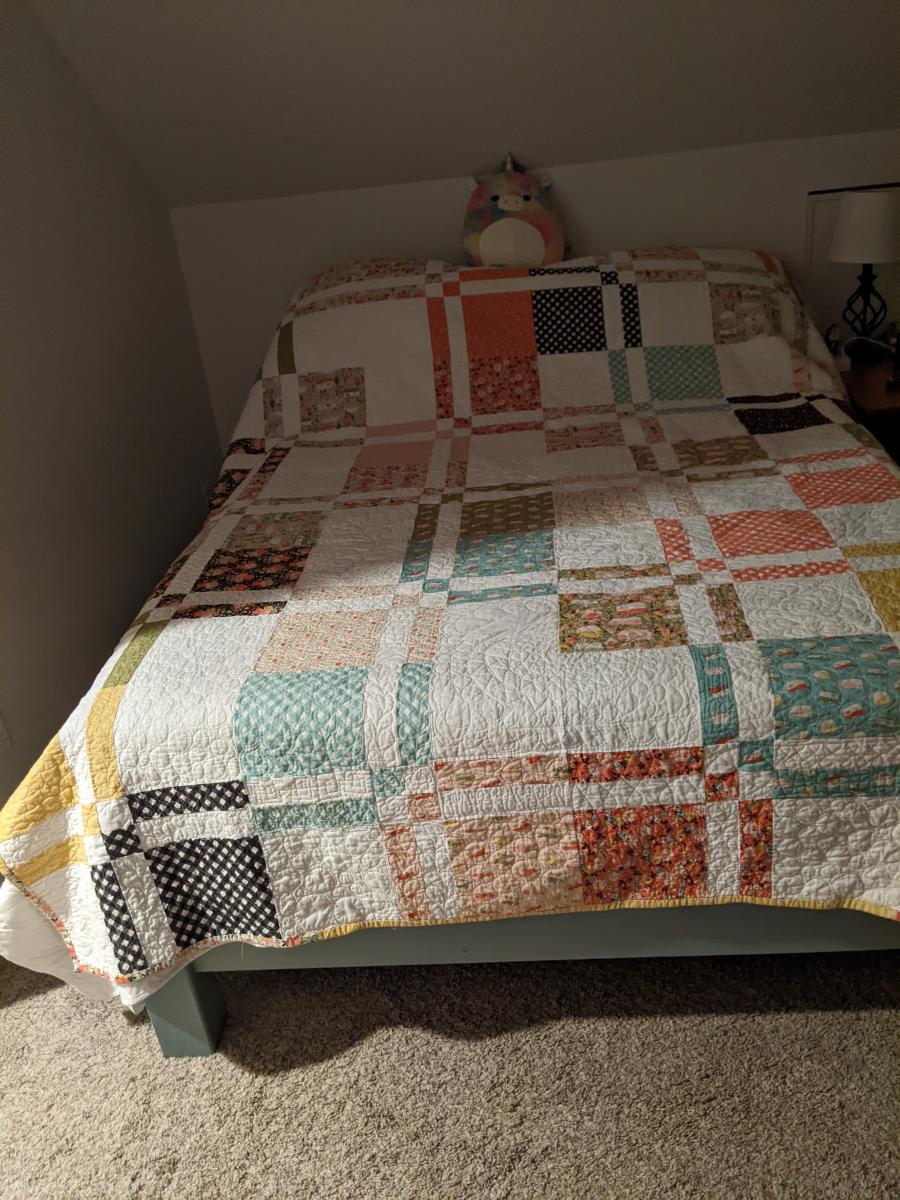
I followed the plans but modified for a king size. I upholstered my bed in a linen colored upholstery fabric and added the nailhead trim to the headboard. This is the most sturdy bed I have ever owned. I don’t know if I will ever be able to buy from a store again!!

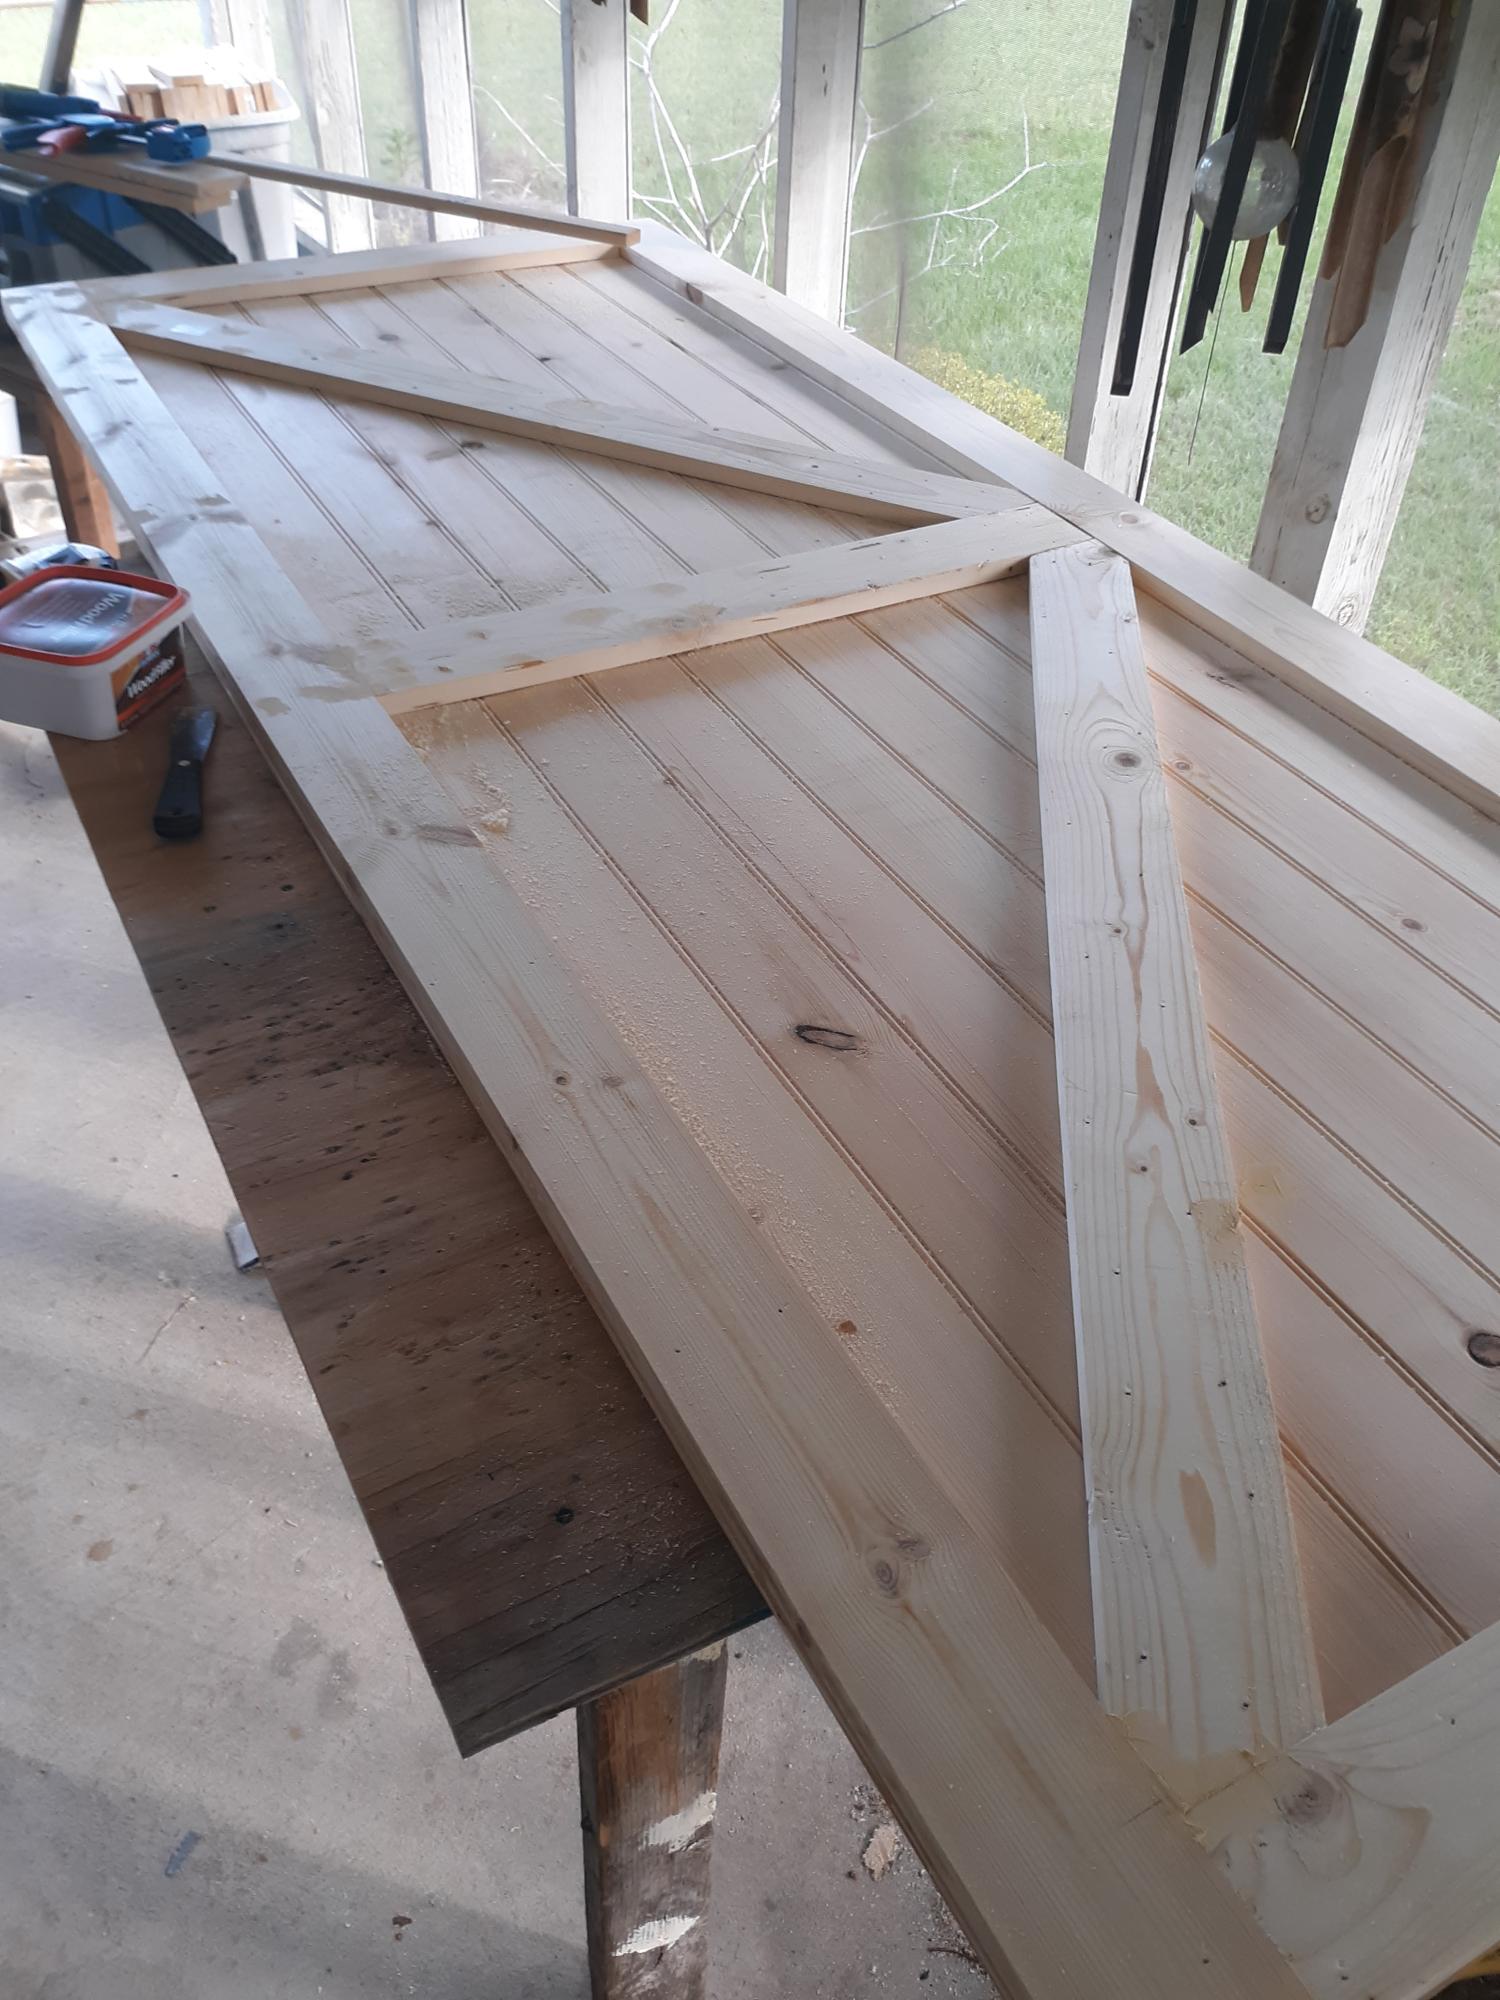
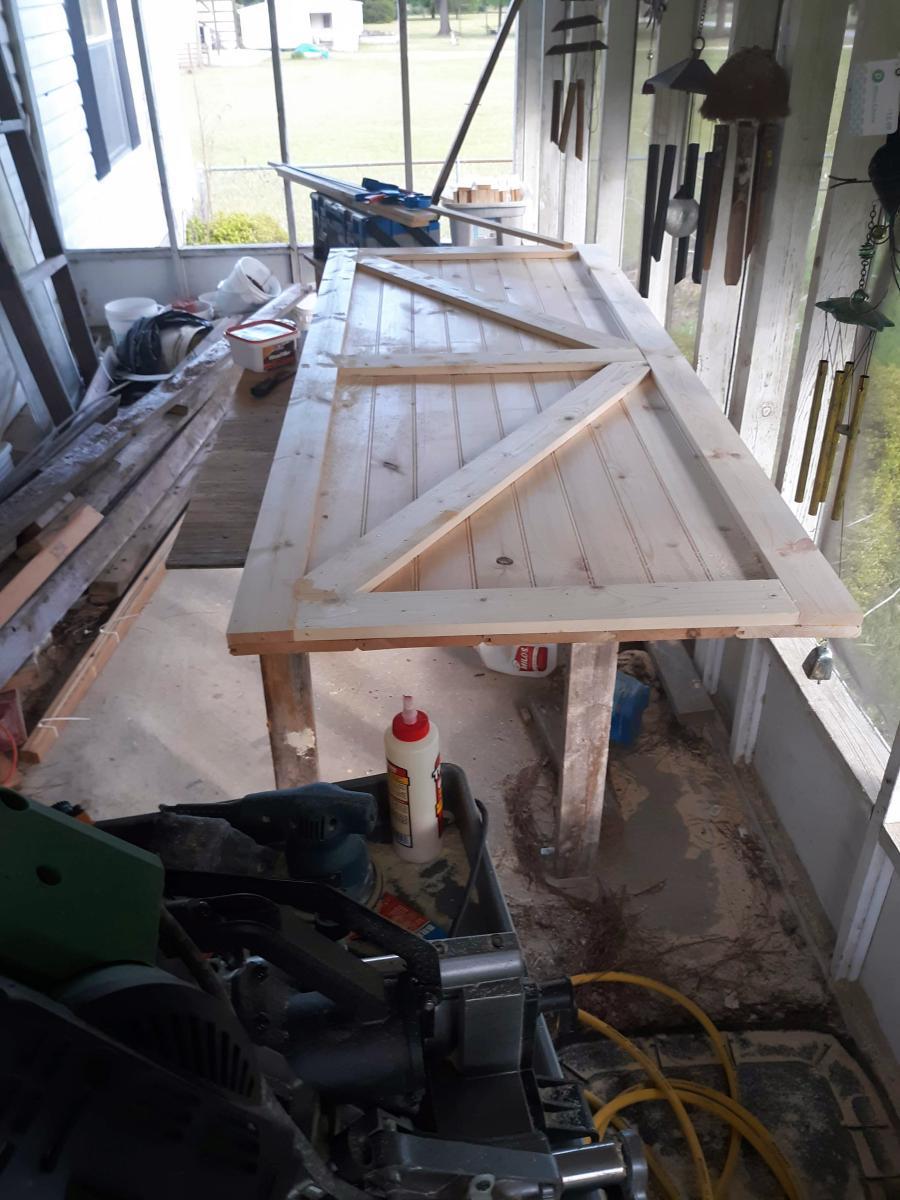
After completing the farmhouse bed, I decided that the closet door had to go. Using the same basic idea of materials, tongue and groove pine and 1x4 square edge boards. I'm very pleased so far as the door came together really well, again the lumber quality that the big box stores have is,less than ideal. Need to do my final sanding before adding a whitewash finish and matte clear poly and the hardware!
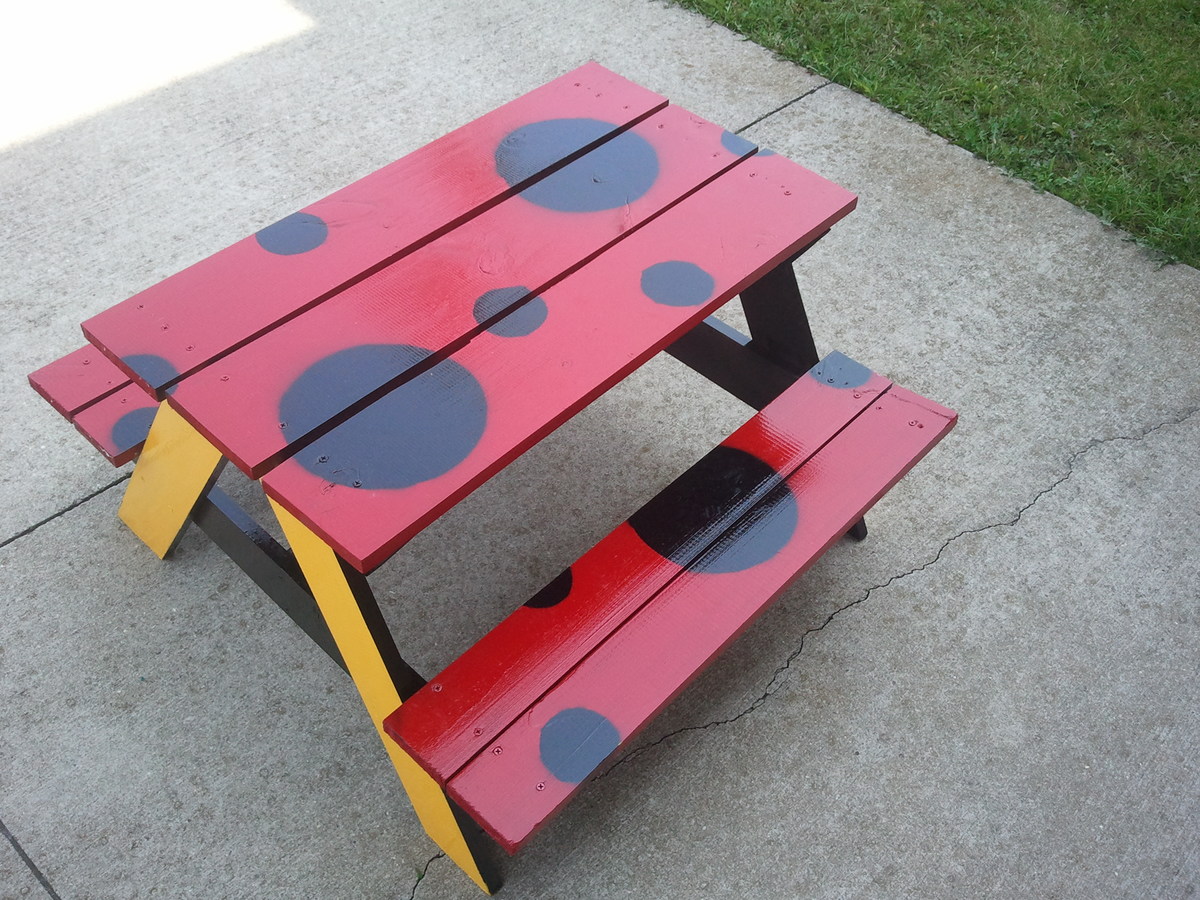
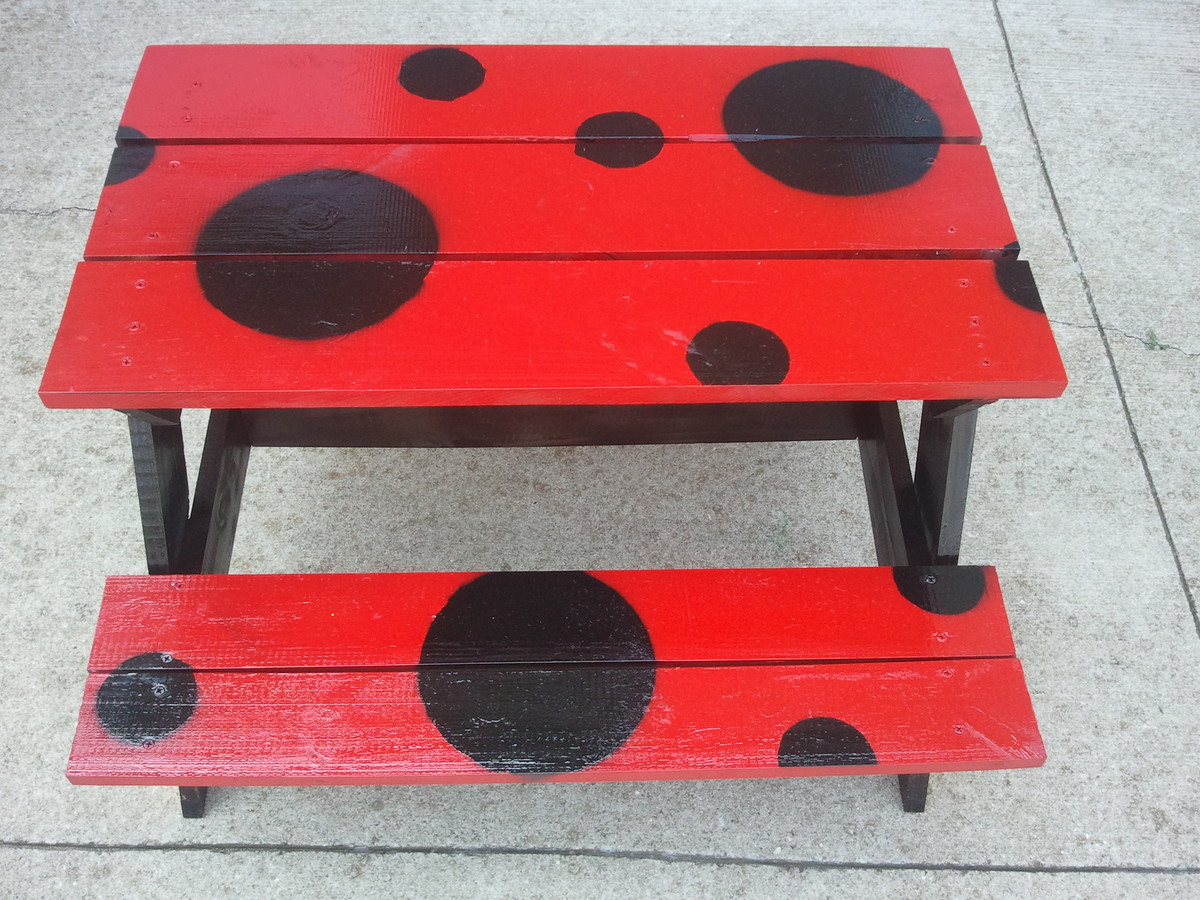
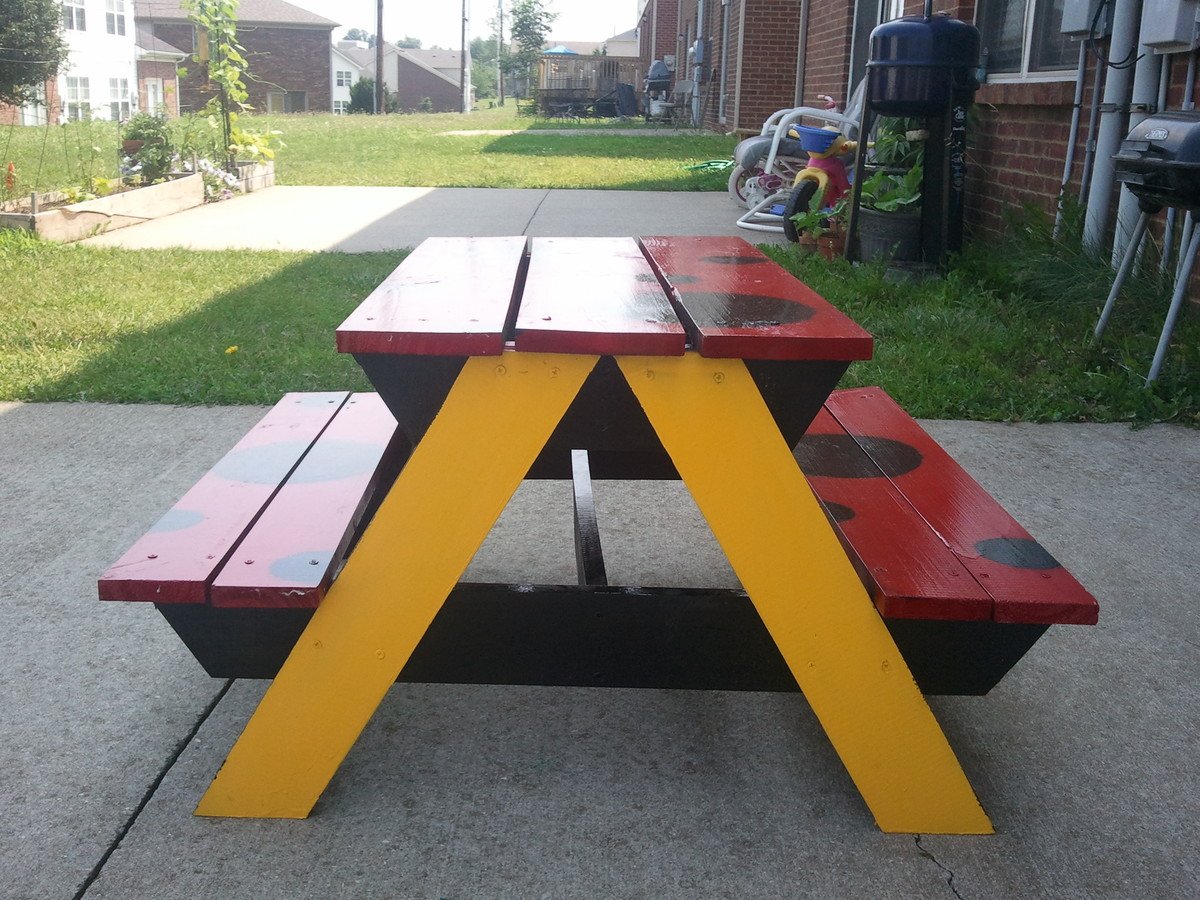
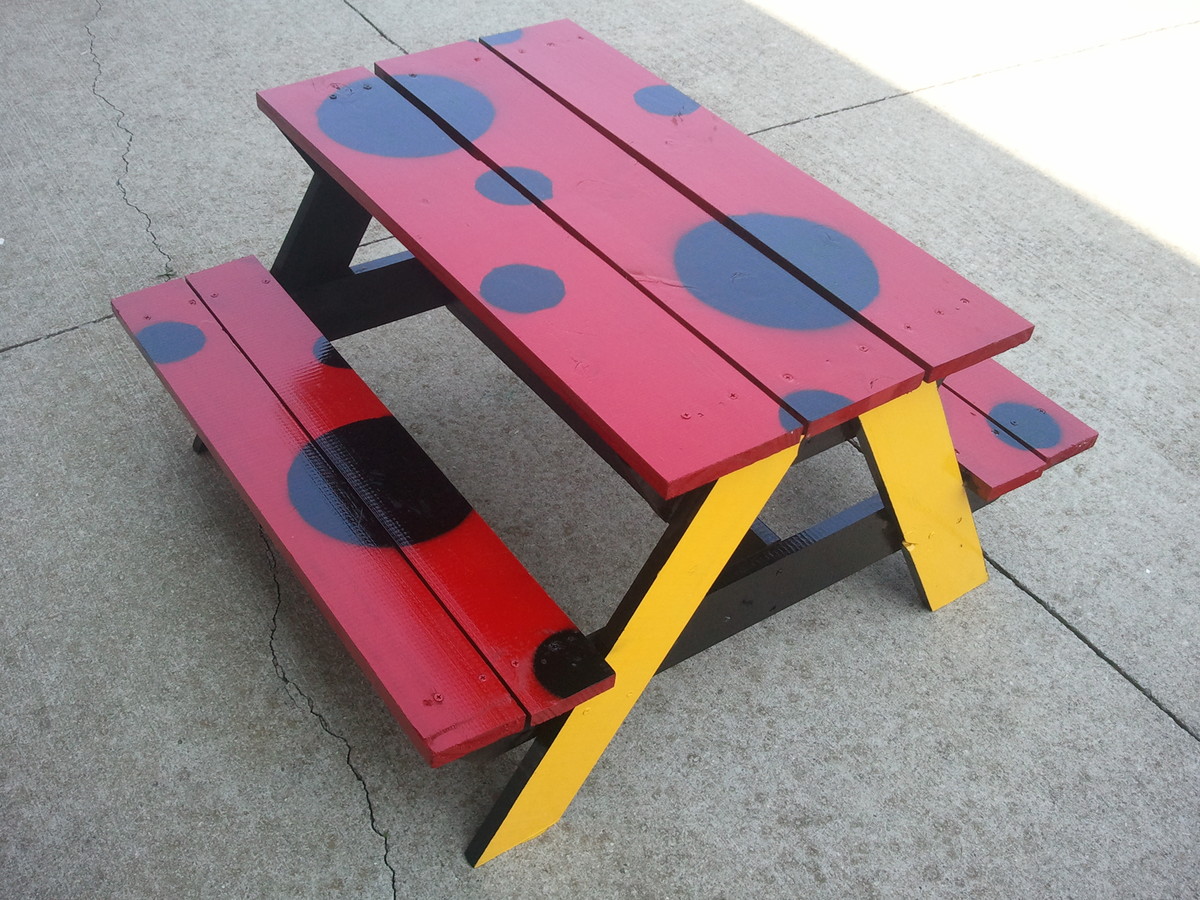
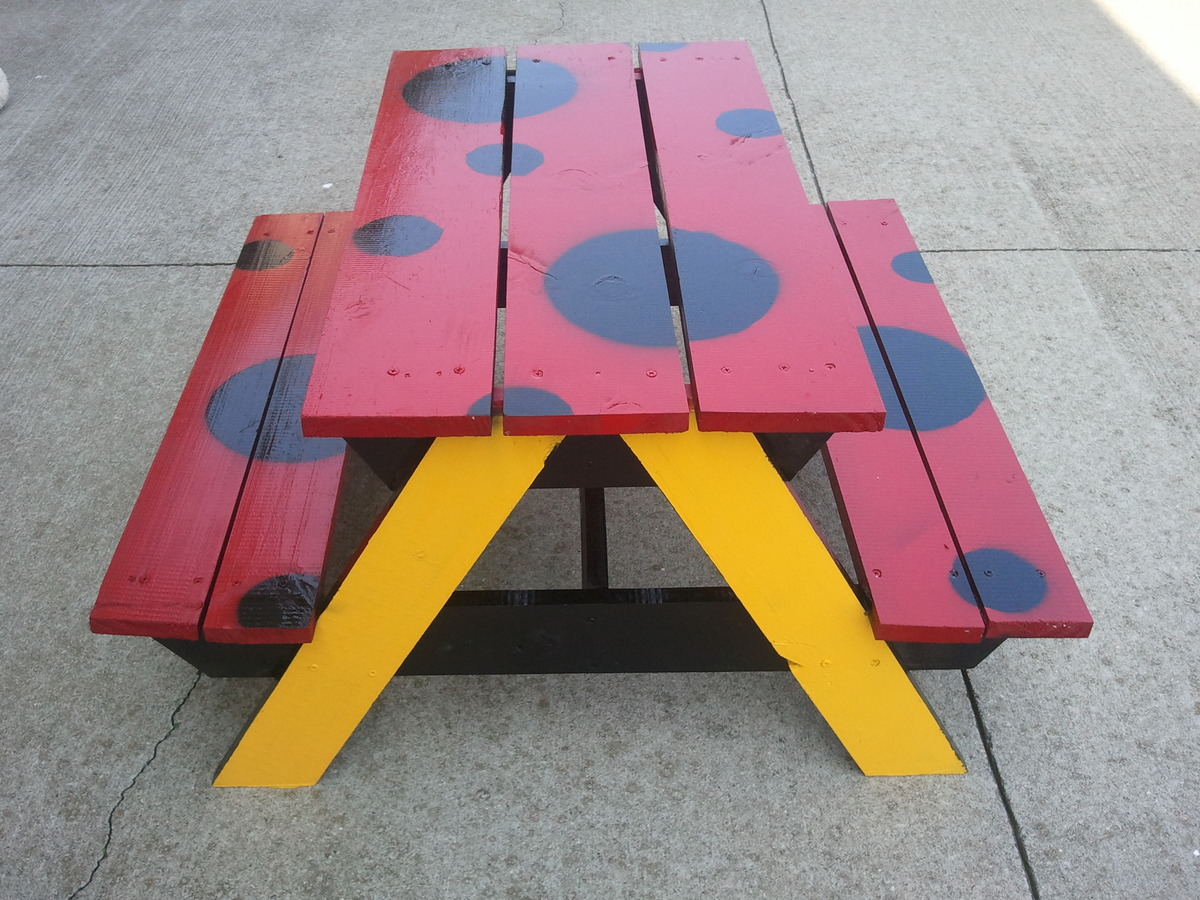
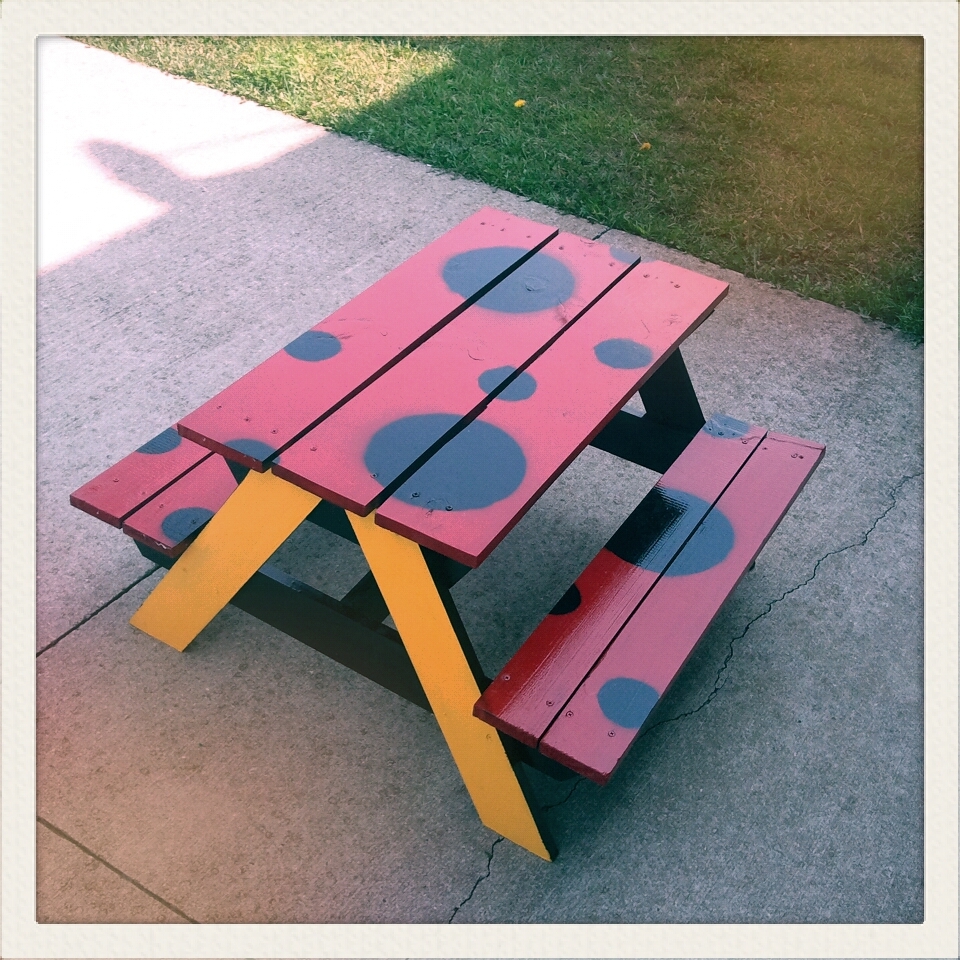
This was my first try with an Ana White plan. It was tons of fun, and my husband came up with an awesome paint design. Here it is:
It came out looking pretty good. We followed the plans. Treated entire area with a pre-stain conditioner. Then applied 3 coats of Minwax PolyShade. Voila!


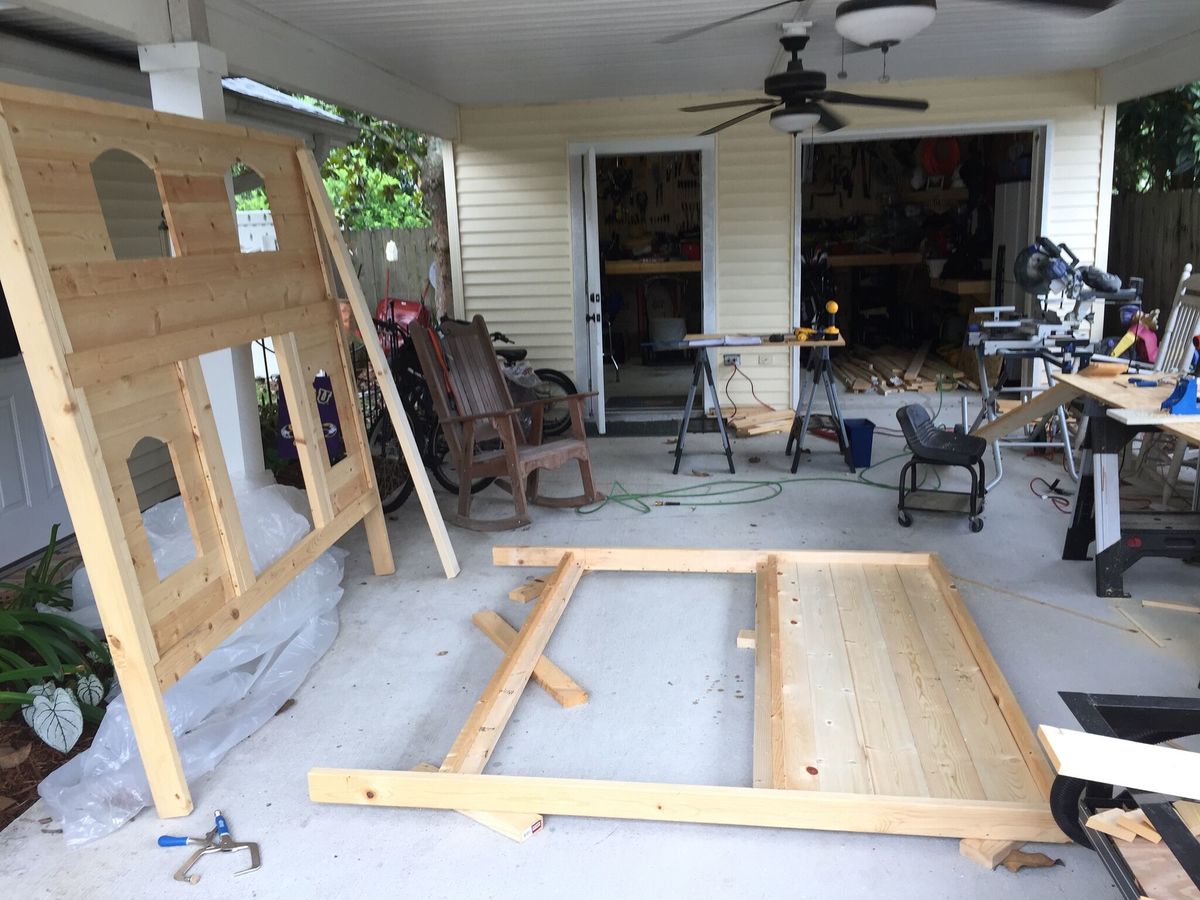
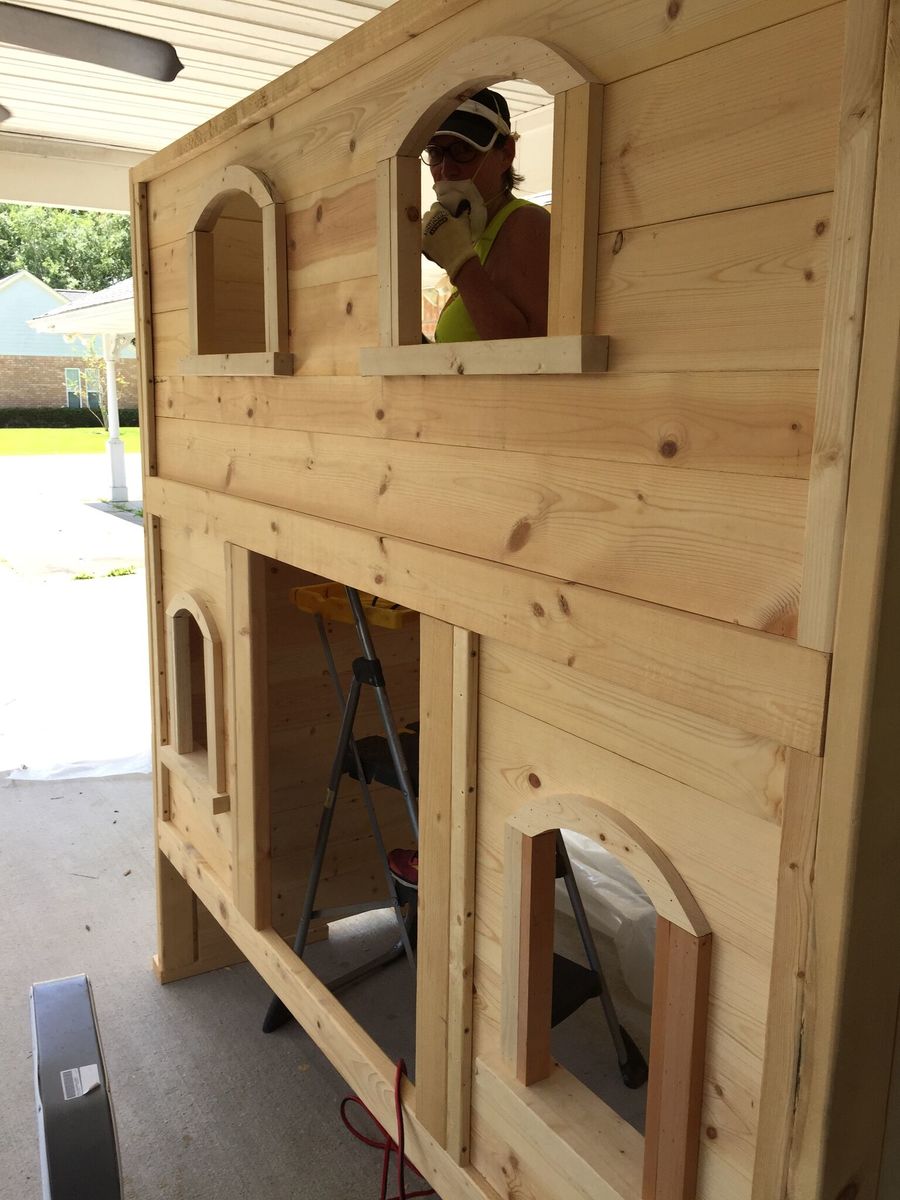
I spent the last 8 months building 2 bunk beds from the Ana White site. This little girl sweet pea version for my granddaughters and a cabin version for my grandsons. This took alot of time but their smiles made it all worth it. I am thankful for the website and plans you provided. It allowed someone like me to build something that my granddaughter loves and hopefully will remember forever. Many, many thanks!!!!

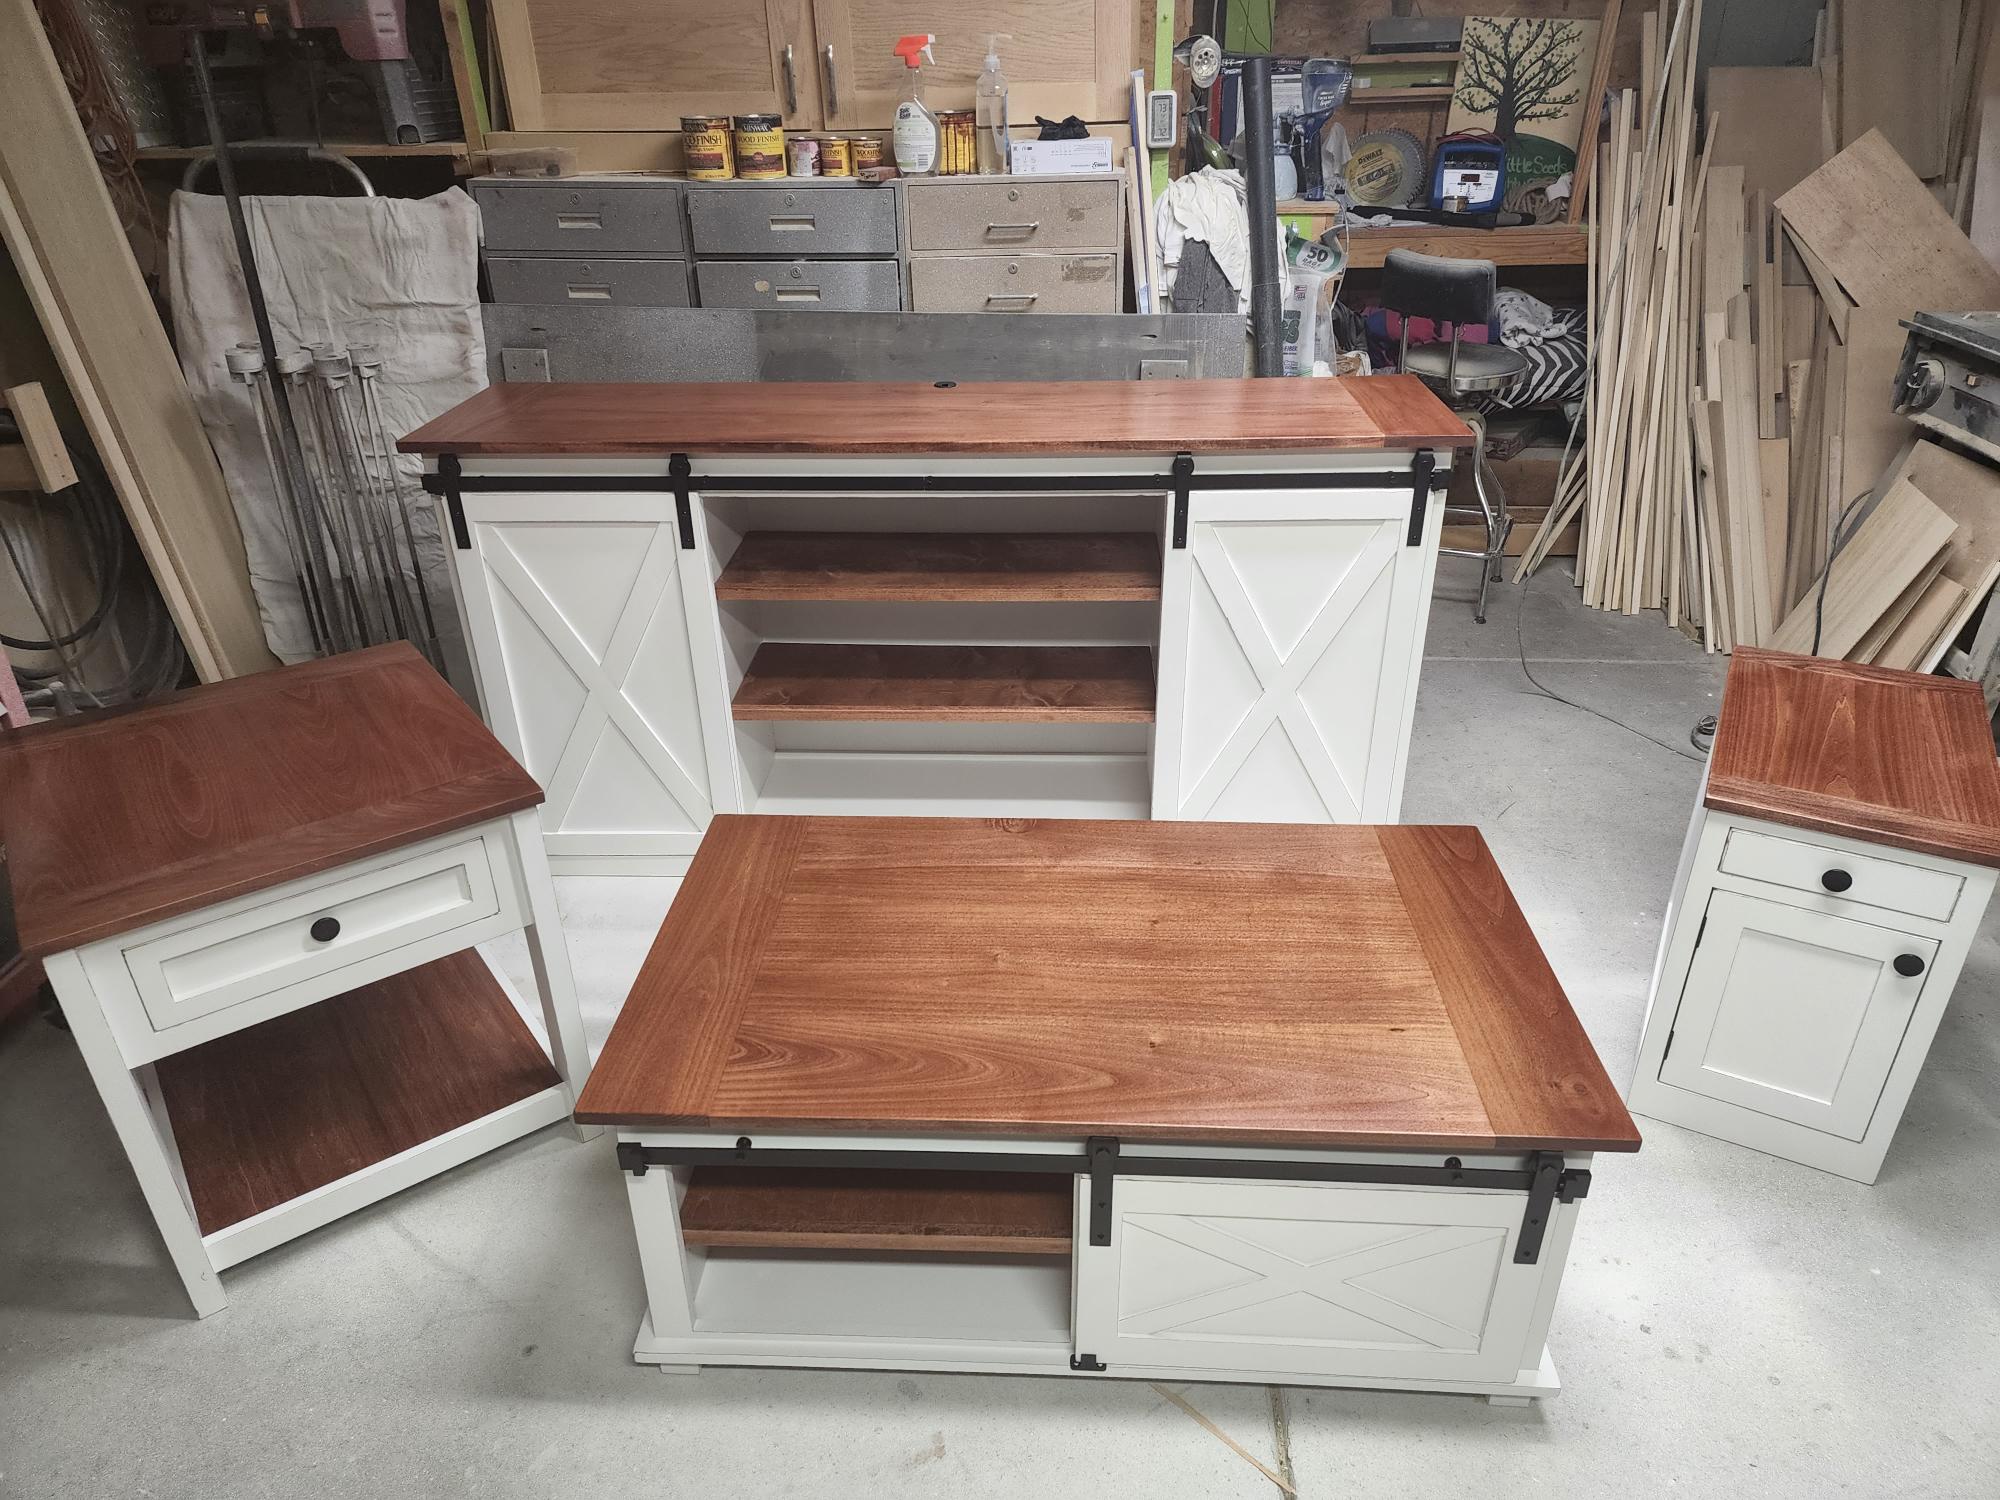
Been a while since I had time to actually build anything worth posting about! My wife wanted some items for her Kindergarten classroom this year, so built several items, most inspired by the Farmhouse family.


Sat, 06/12/2021 - 11:23
I am moving from 15 and half years of third grade to a first year of first grade. I NEED tables for my kids. I plan on building my own. I am building mine as a "2 seater." Would you please share the dimensions of these student tables? I love the teacher desk too. I built something similar for my home.
I had to move quickly from Washington to Ohio for a job ( which I've since quit!). I flew here in January, with two suitcases. I ordered a nectar mattress and needed a frame. Built it, stained it vintage blue, love it!
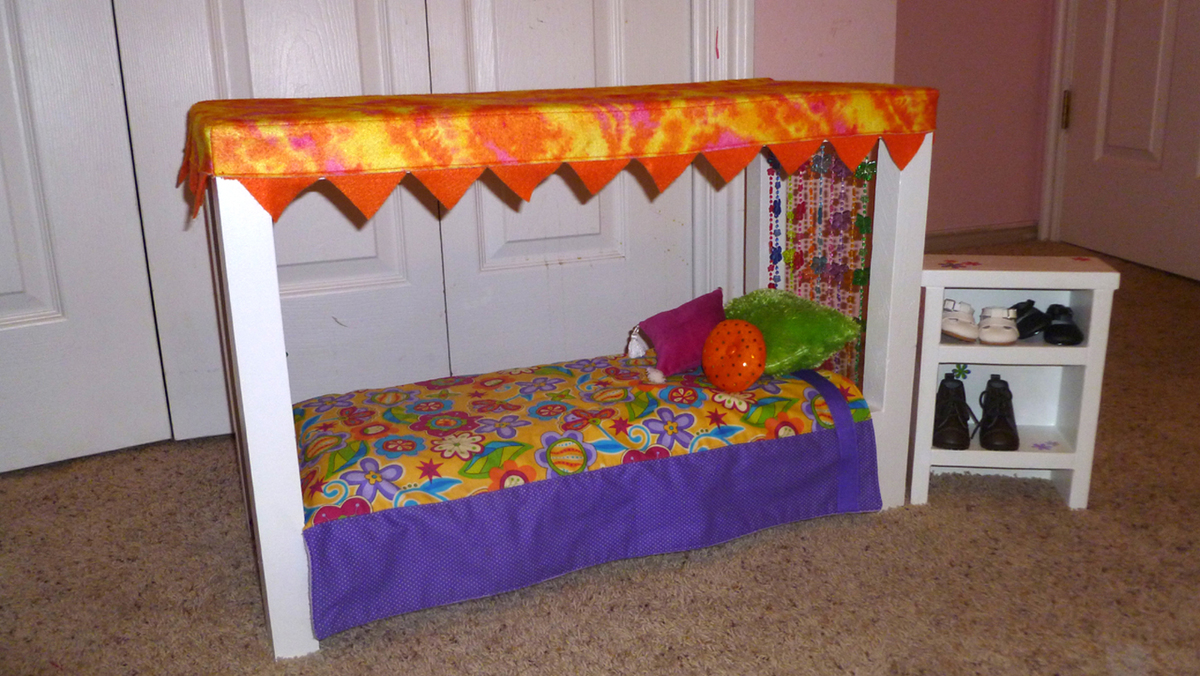
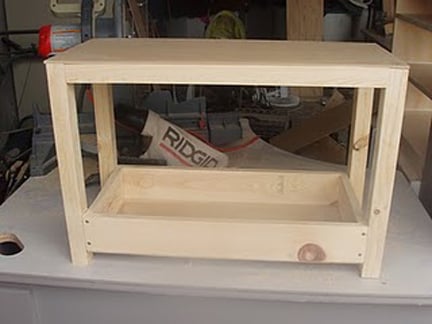
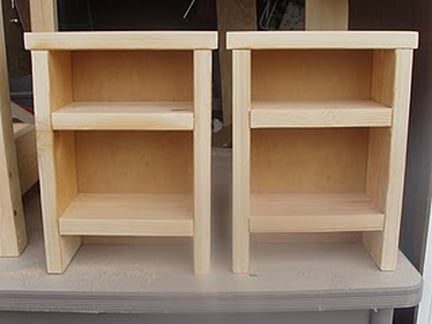
I built 2 canopy doll beds and matching nightstands for my neighbors. I modified them by flipping the plans over, raised the top shelf and turned the bunk into a canopy. I wish I could take credit for the fabulous sewing skills but that is my friends talent!
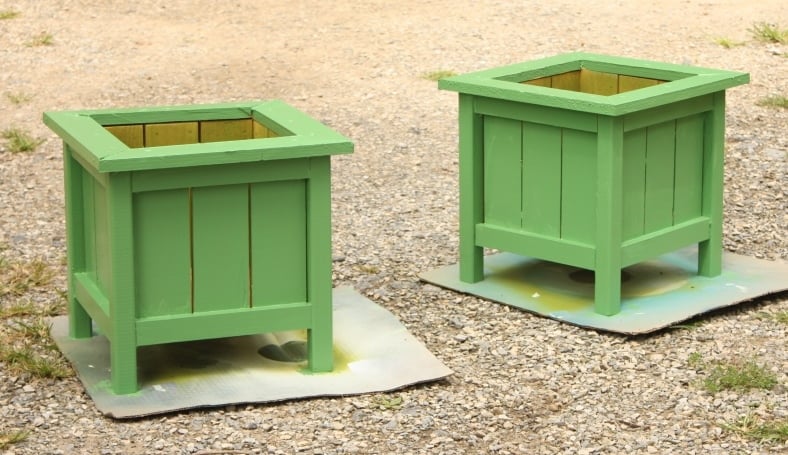
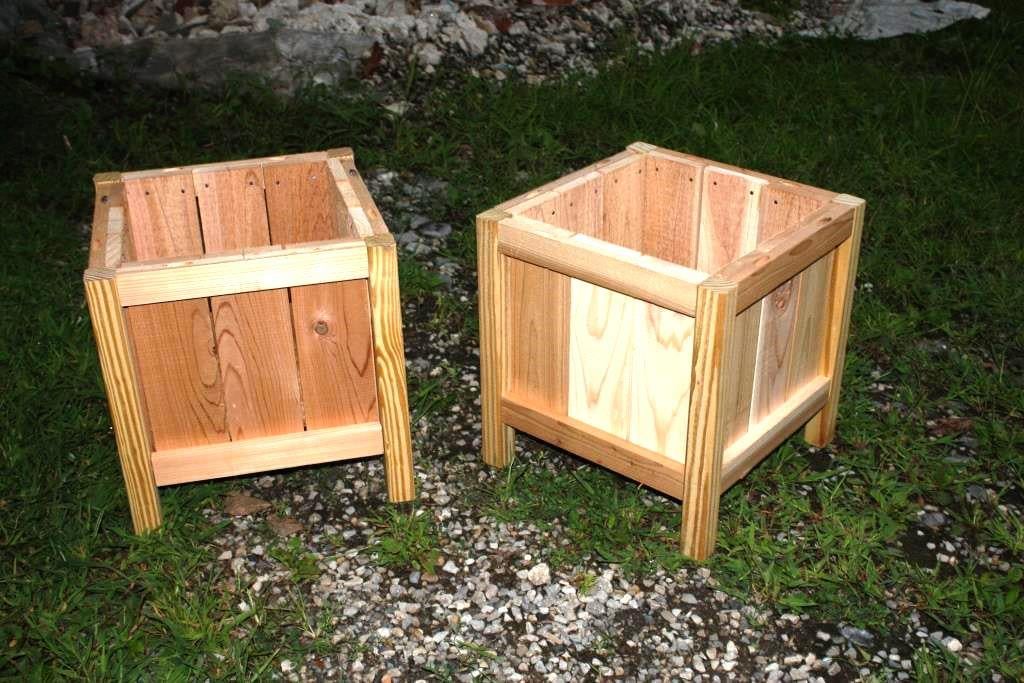
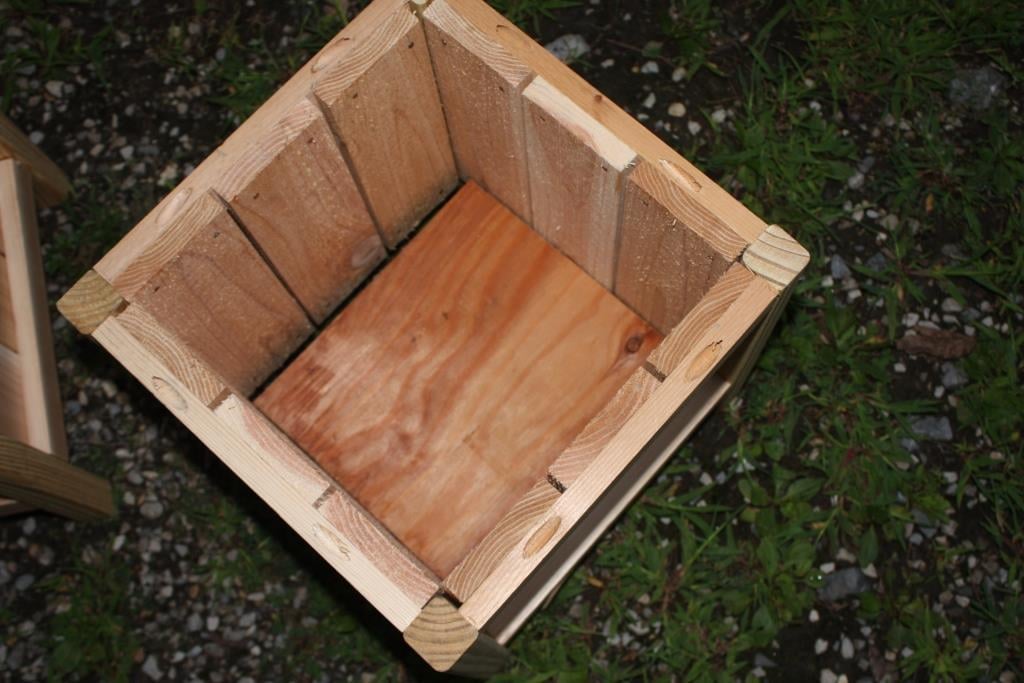
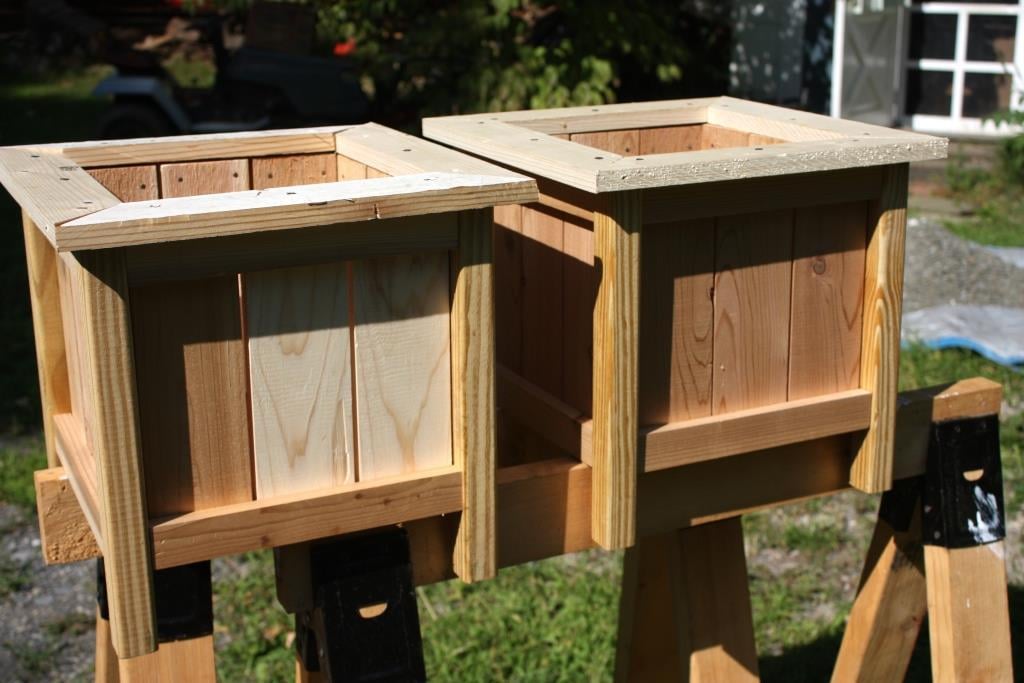
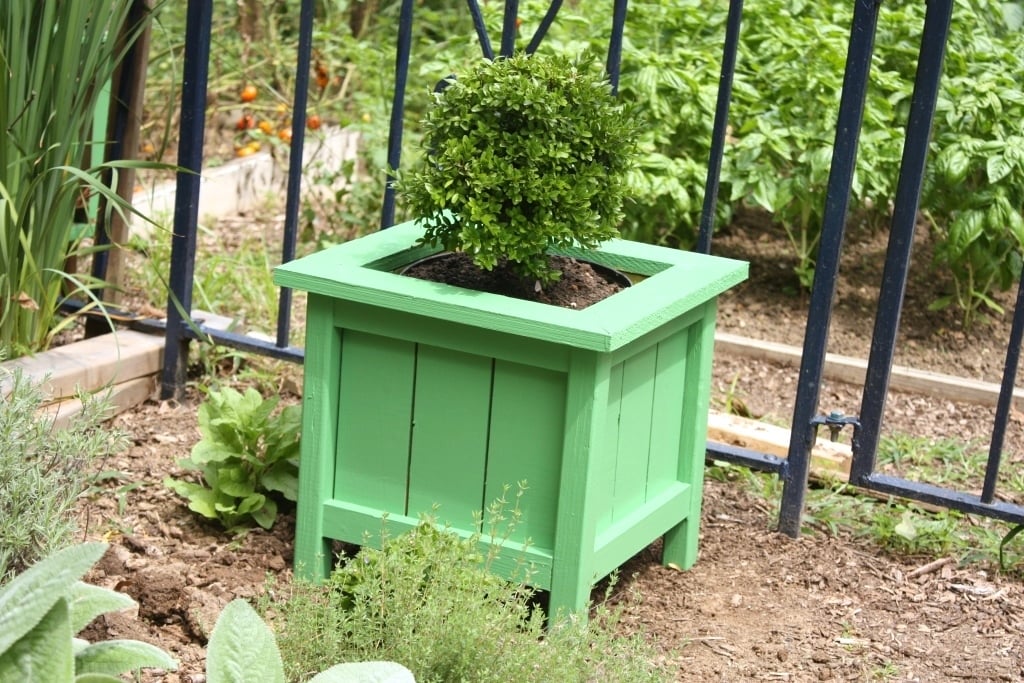
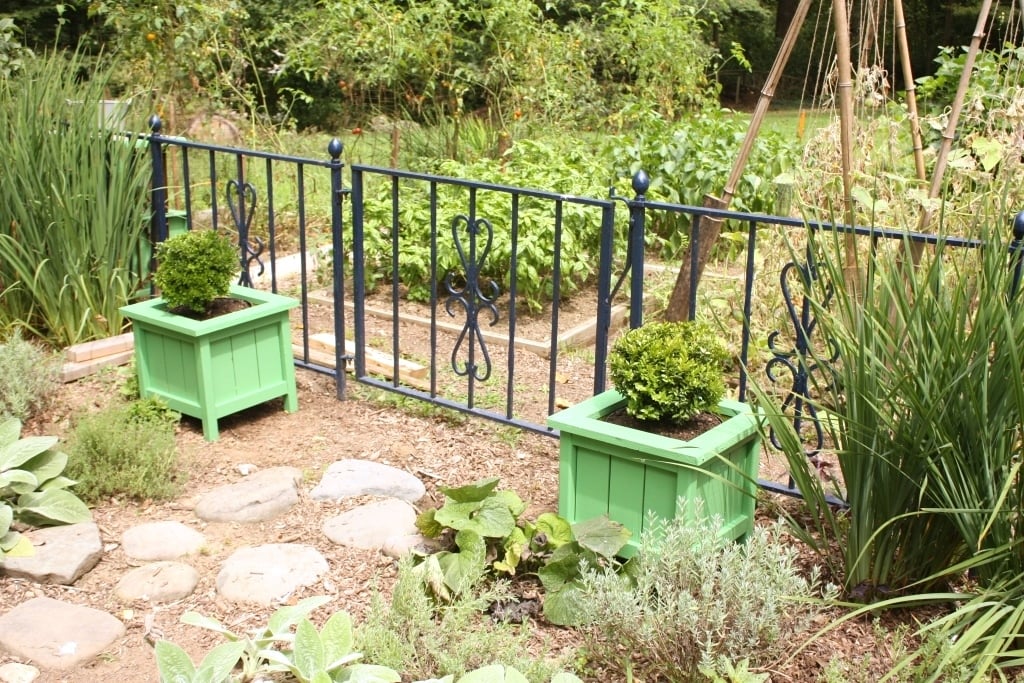
After building a large planter from Ana's plans and my salvaged fence wood I thought 2 smaller planters for the entrance to our kitchen garden would be nice. The complete instructions are on my blog, Let's Face the Music. Jo
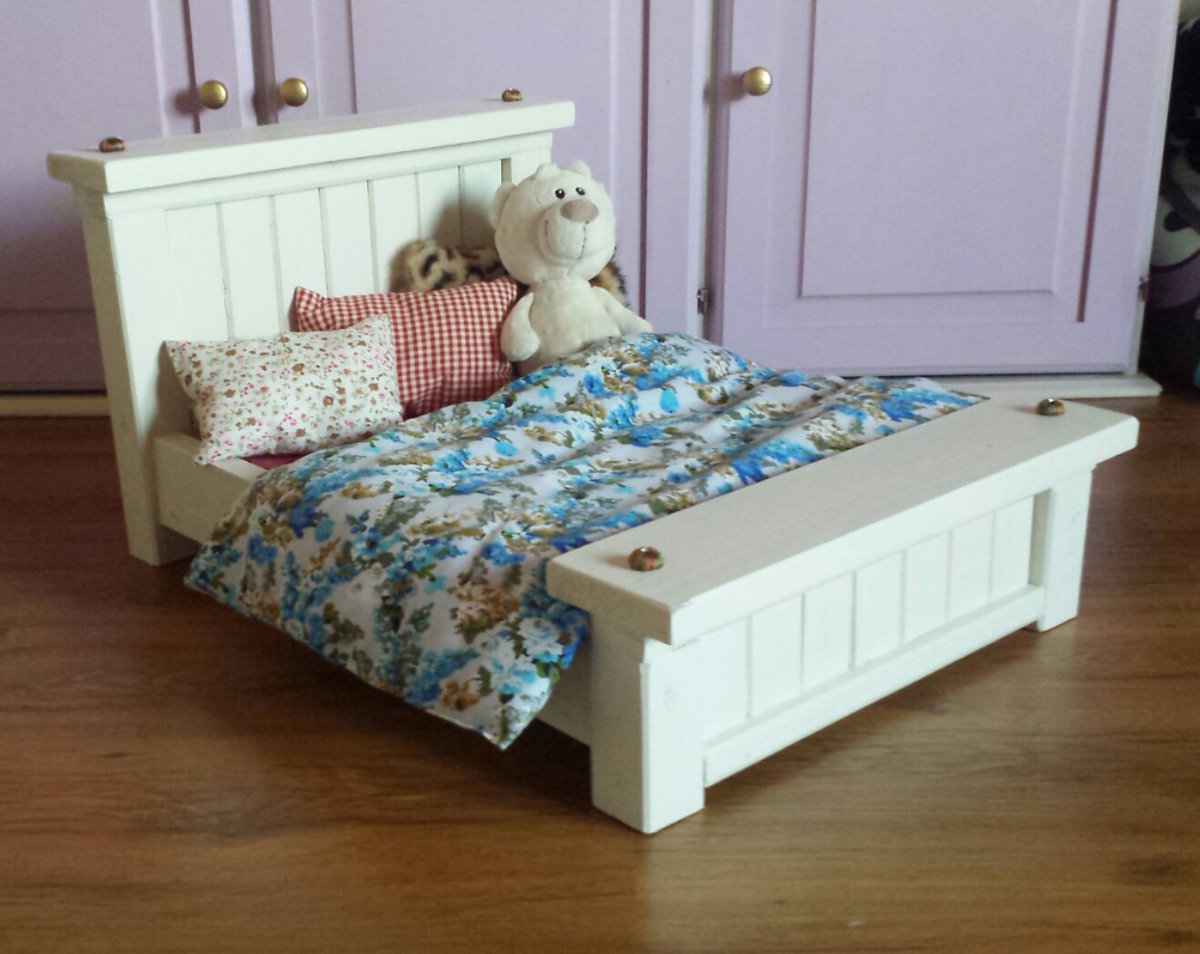
I made this dolls bed with my daughter, and she really enjoyed it :-) Had to do some adjustments from Inch to centimenters before I started. Thank you for a great site!
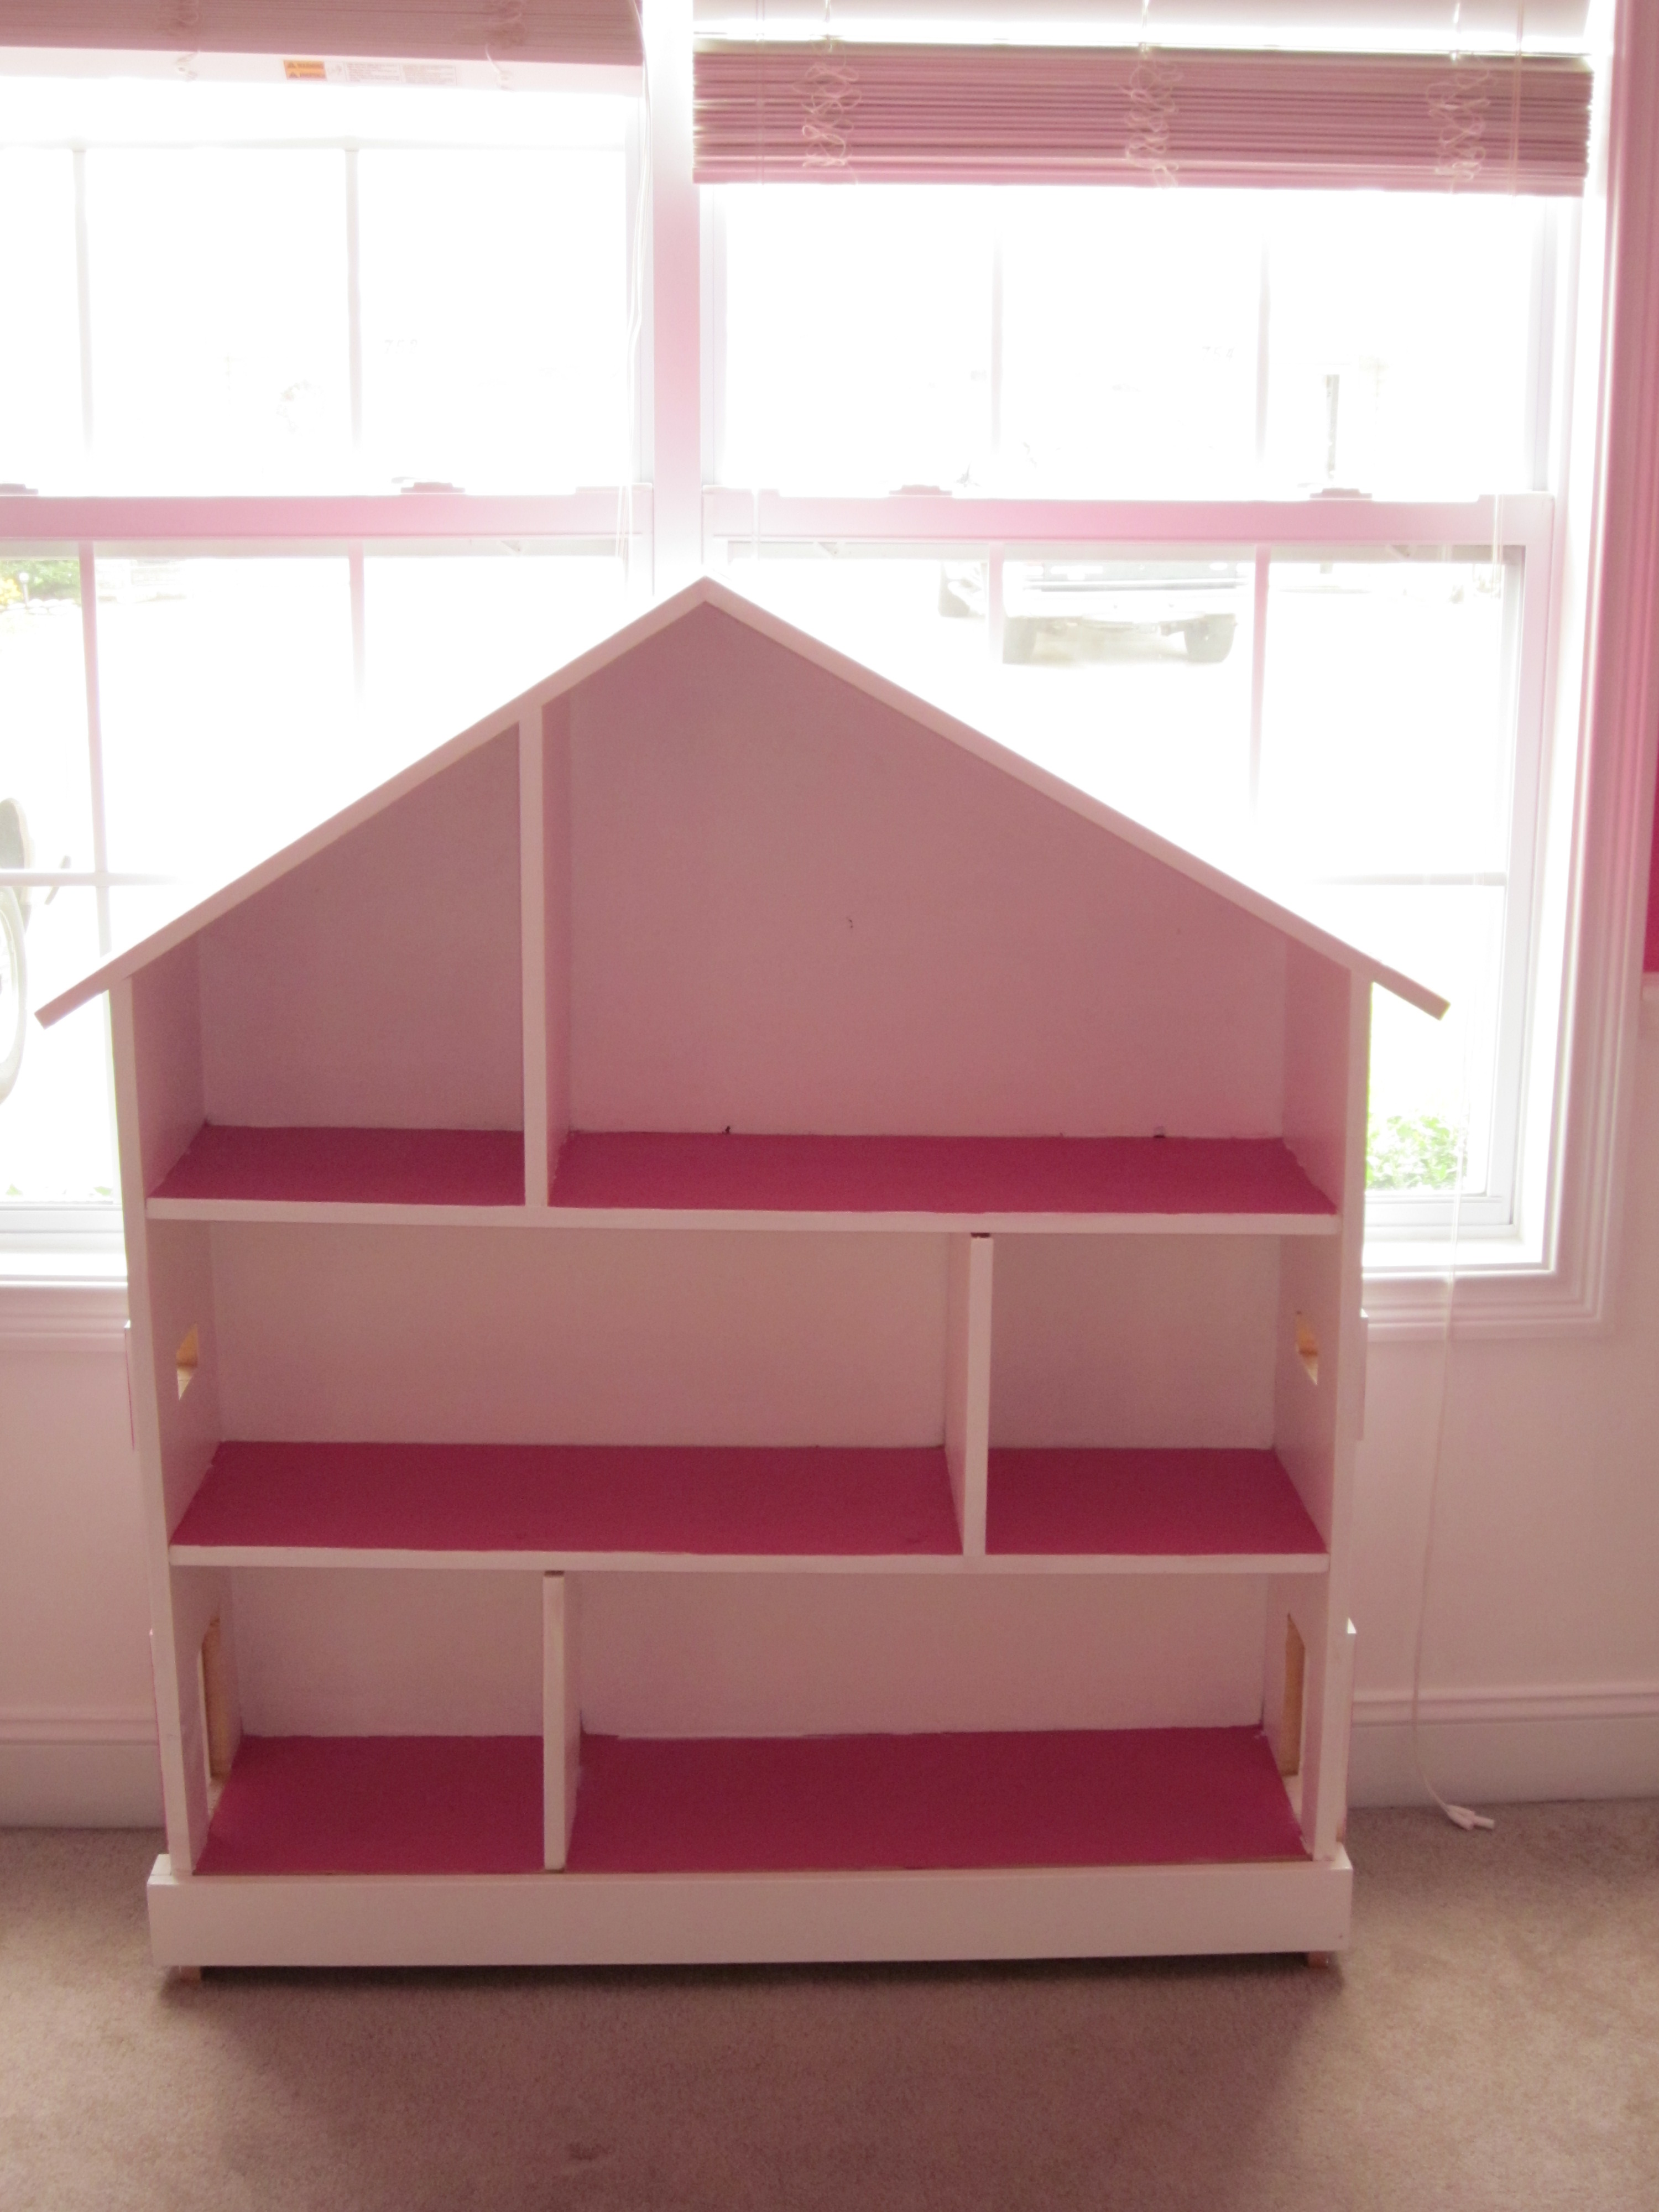
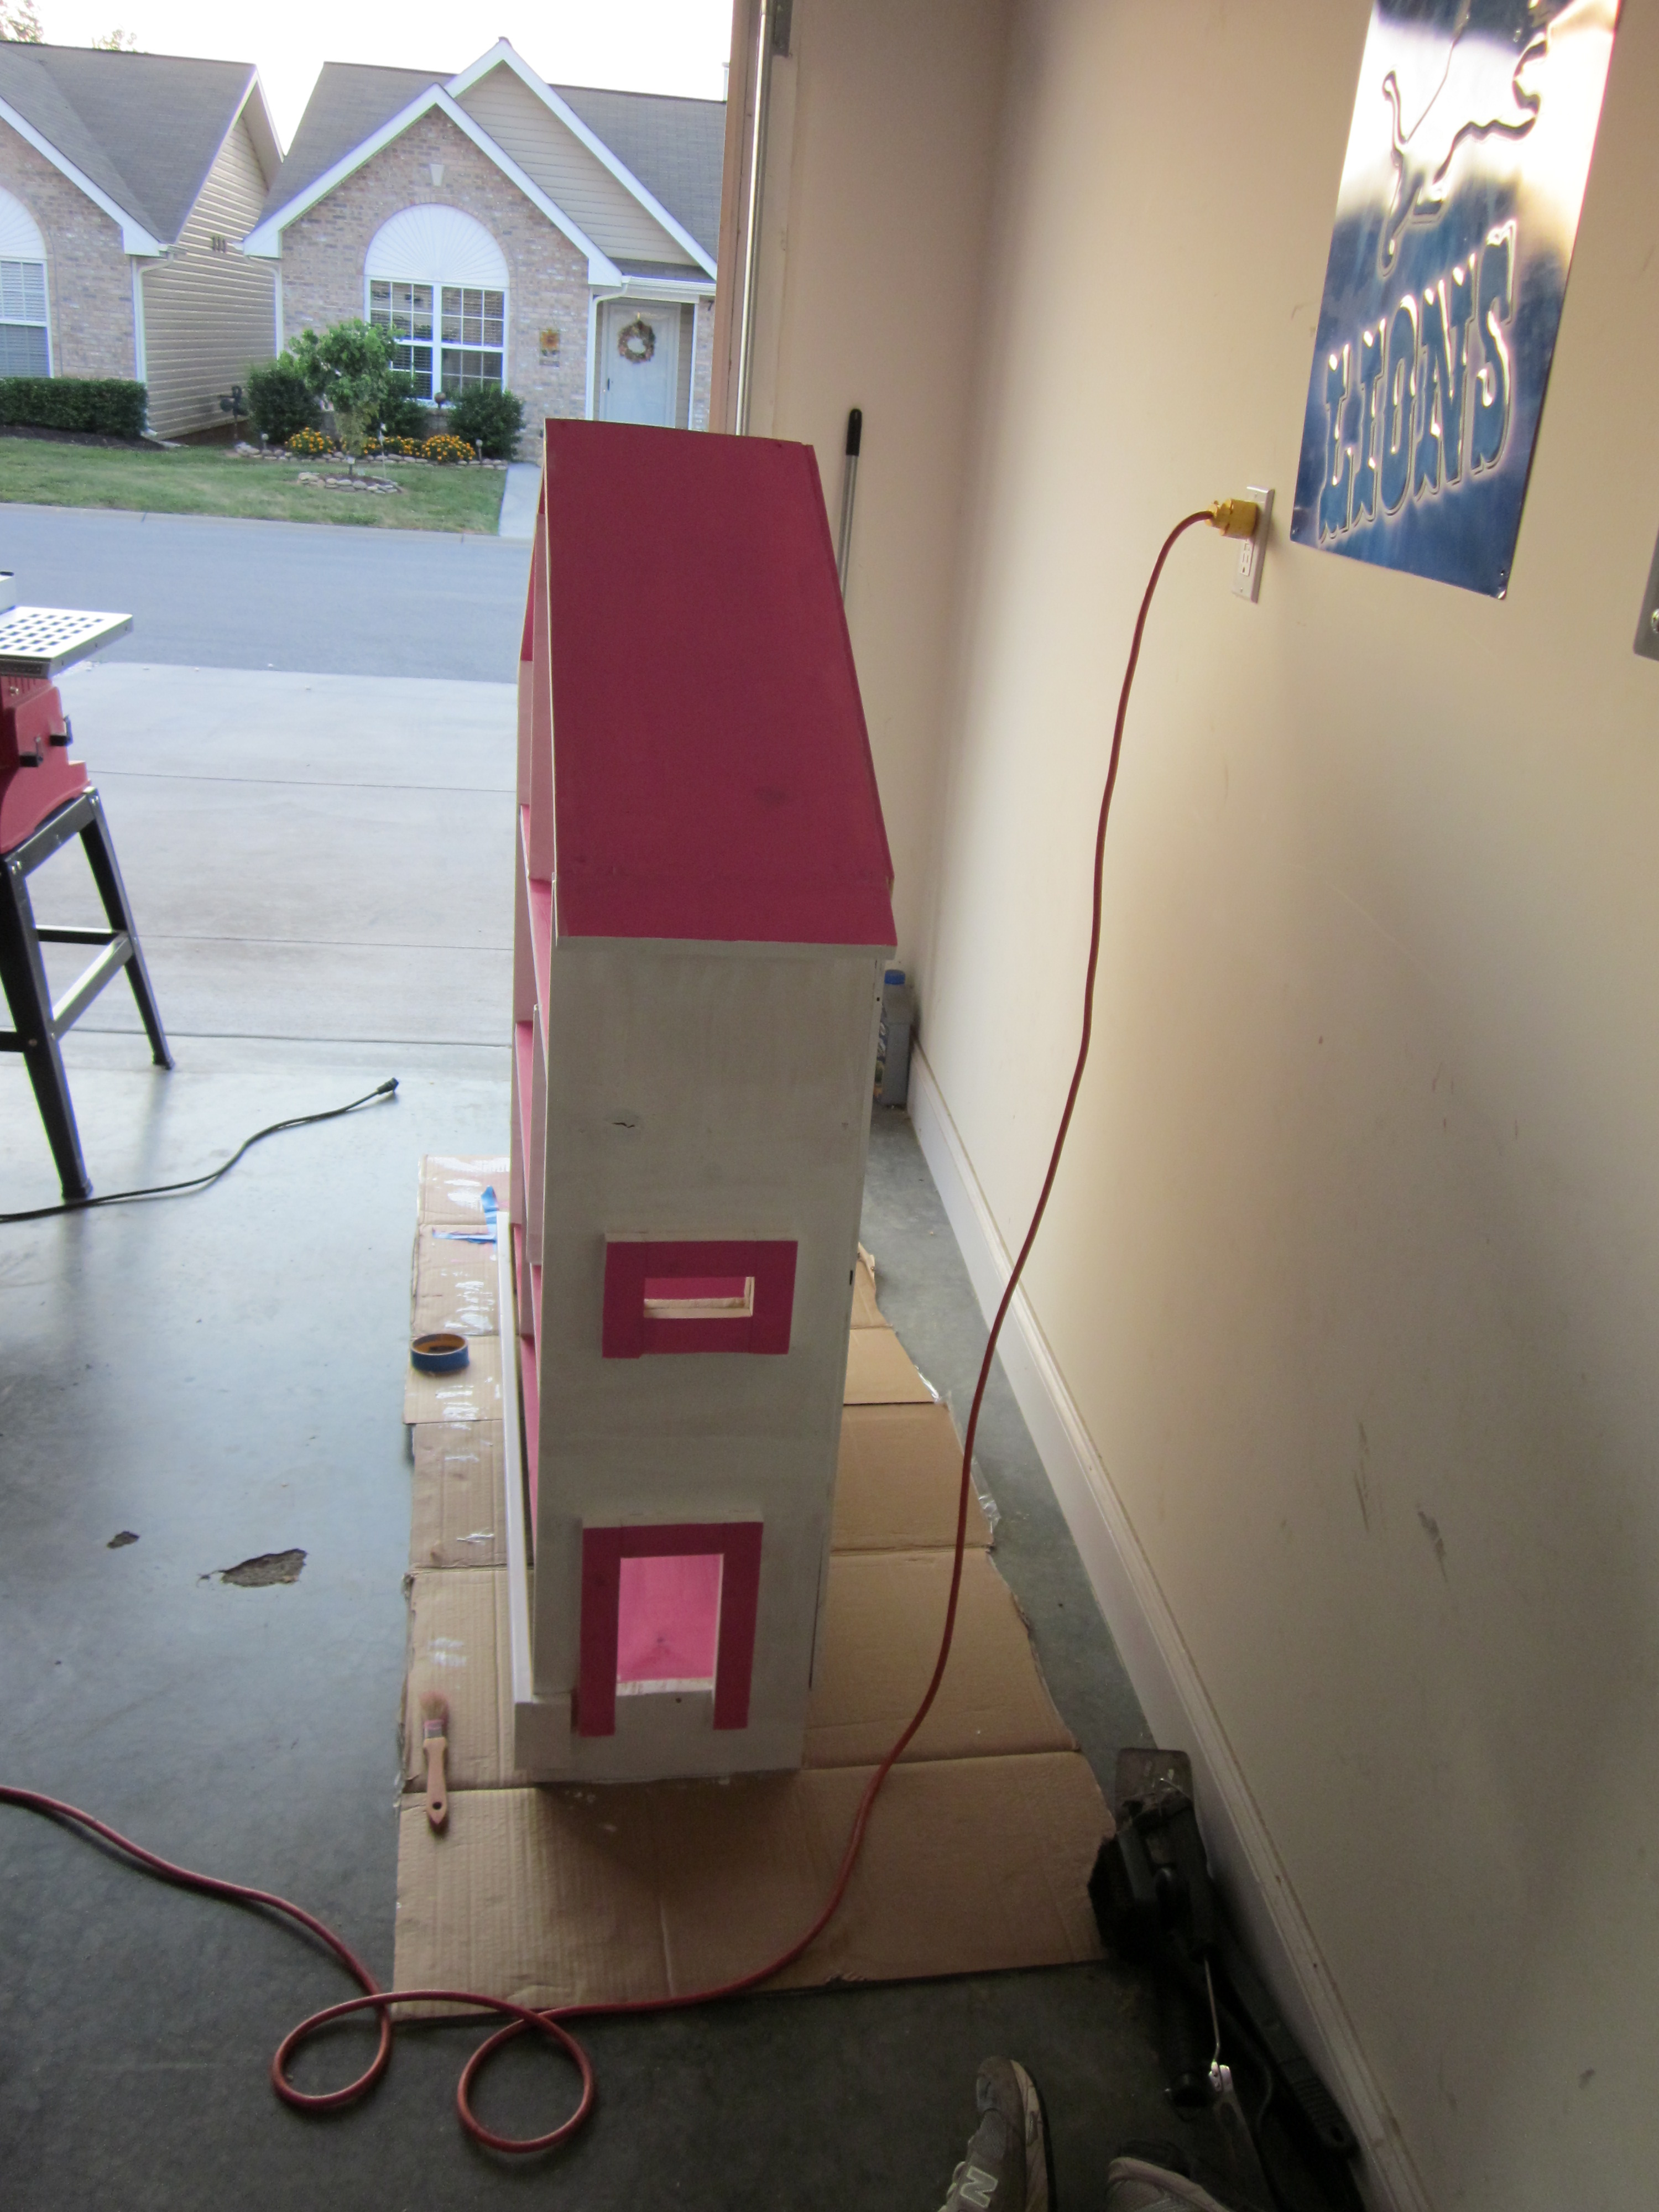
I used the 6 Cubby plans and just started tweaking. First was the plan to just do 12 cubbies, then decided to just put in adjustable shelves for aethetic purposes and not having it look too "Boxy" After that decided it would look better with doors too.
as for the shelf on top, I used the cubby bookshelf plans and just made it wider to match the width of the doors and then decided to also make it adjustable shelving as well. (used the kreg shelf pin system.)
Overall turned out pretty good. I am making a even bigger one for my other room.
We're having a baby girl, and this was the perfect project for me. For my first project, I am pretty pleased with it.

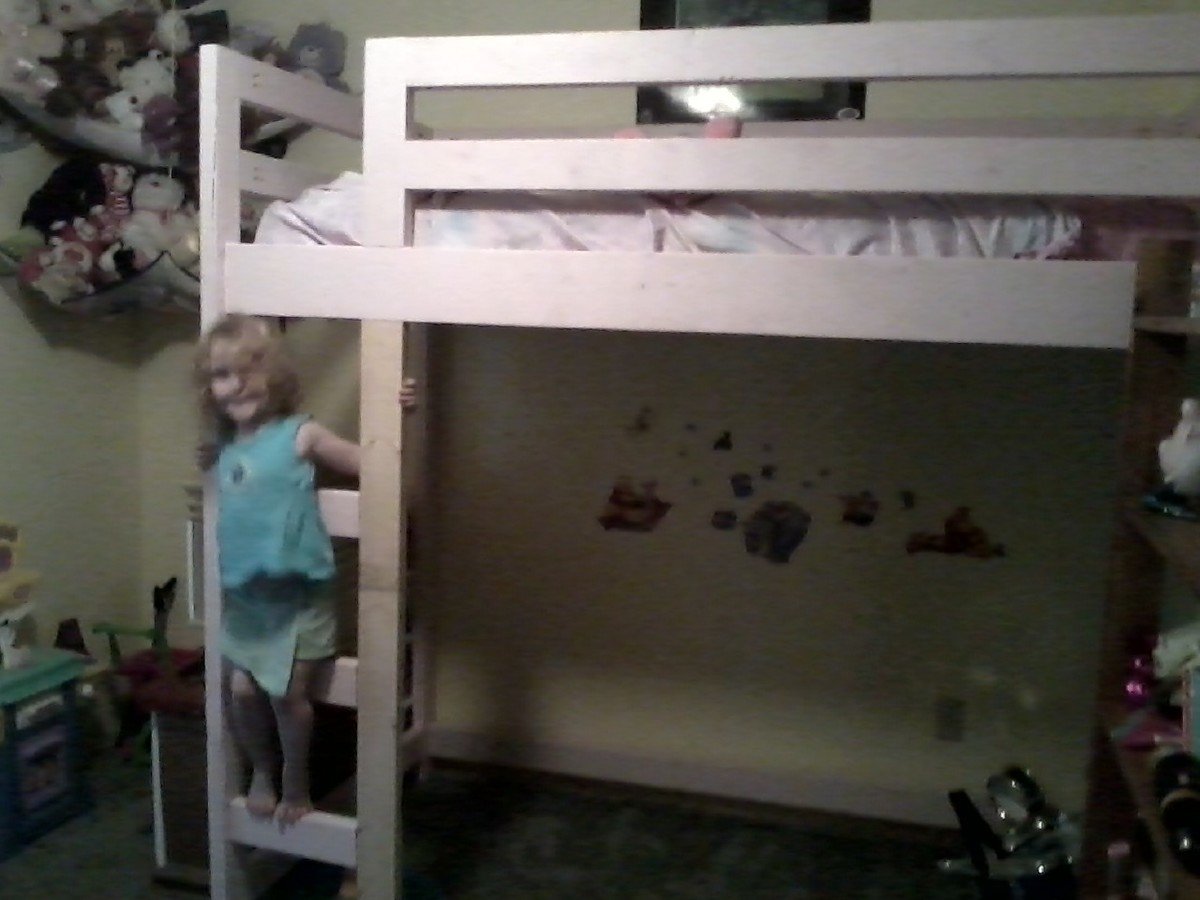
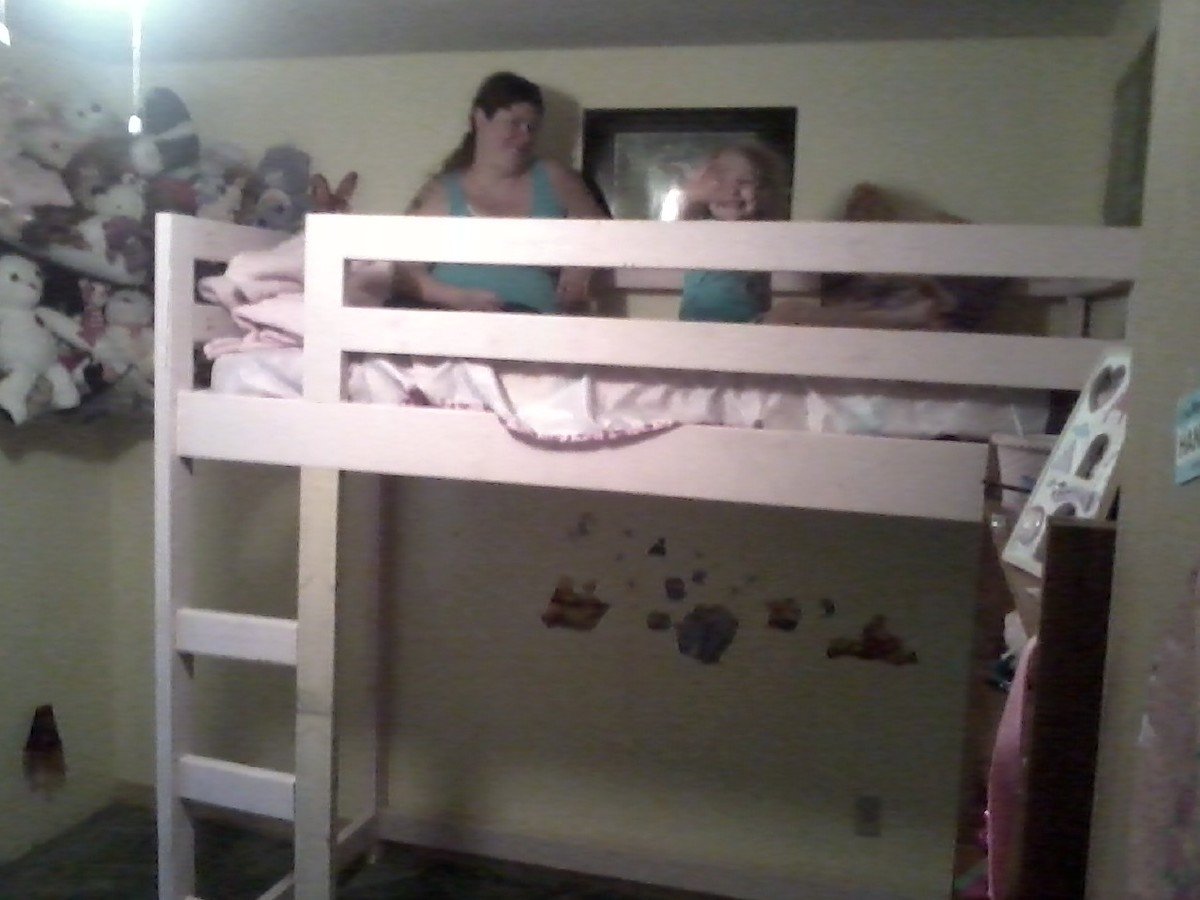
I decided to make this bed when my little girl decided that she didn't want a little girl bed (toddler size) and wanted a big girl bed. Because of the size of her room and the fact I wanted her to be able to move the bed to a different wall if she wanted to in the future I added a front ladder rather than on the end. I also added 6 inches extra clearance under the mattress and 2 inches to the side railing height so she could have a pillow top mattress in the future.
As you can see in the second picture I was up there with Hannah so I know it can easily handle the weight.
In Ana's description it talked about the kids playing by themselves and not wanting to come out of the room. Well it's the truth. Hannah has been in there the majority of the time since we finished it yesterday afternoon. The first words out of her mouth this morning were "Momma thank you for making my new bed." Made all the work so worth it!
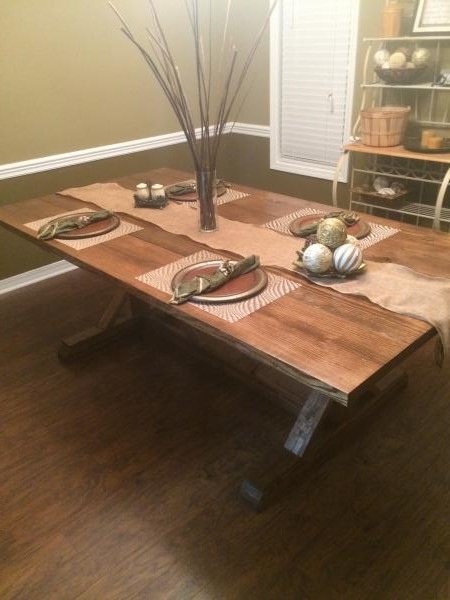
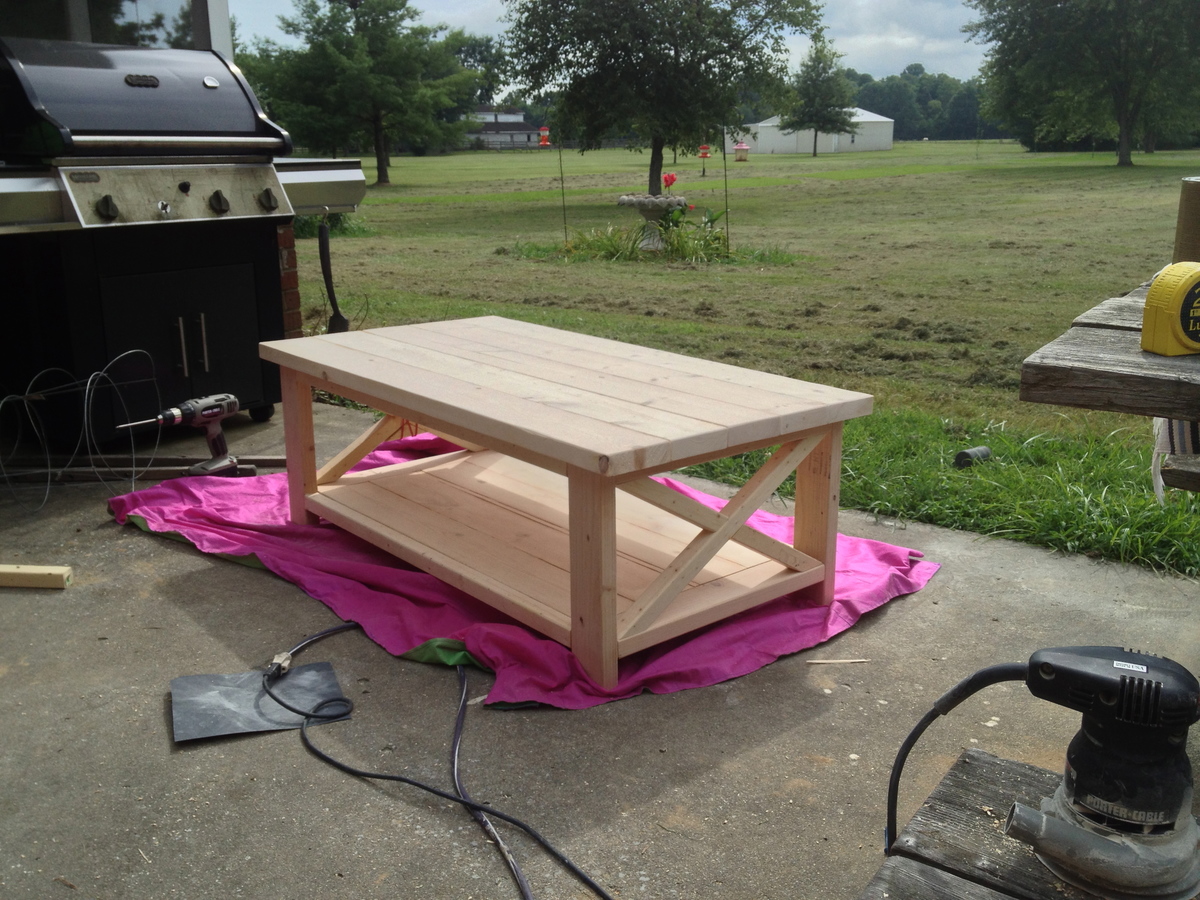
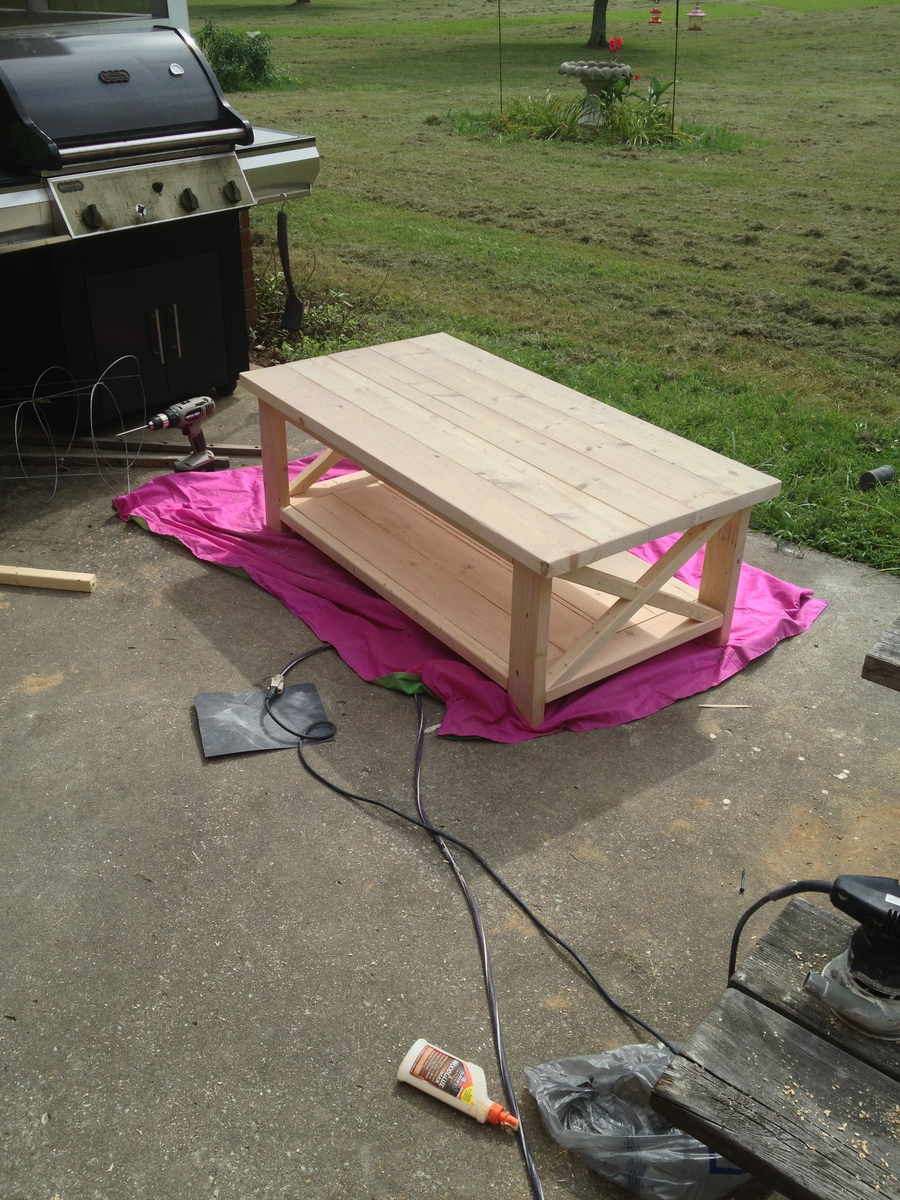
7ft Fancy X farmhouse table
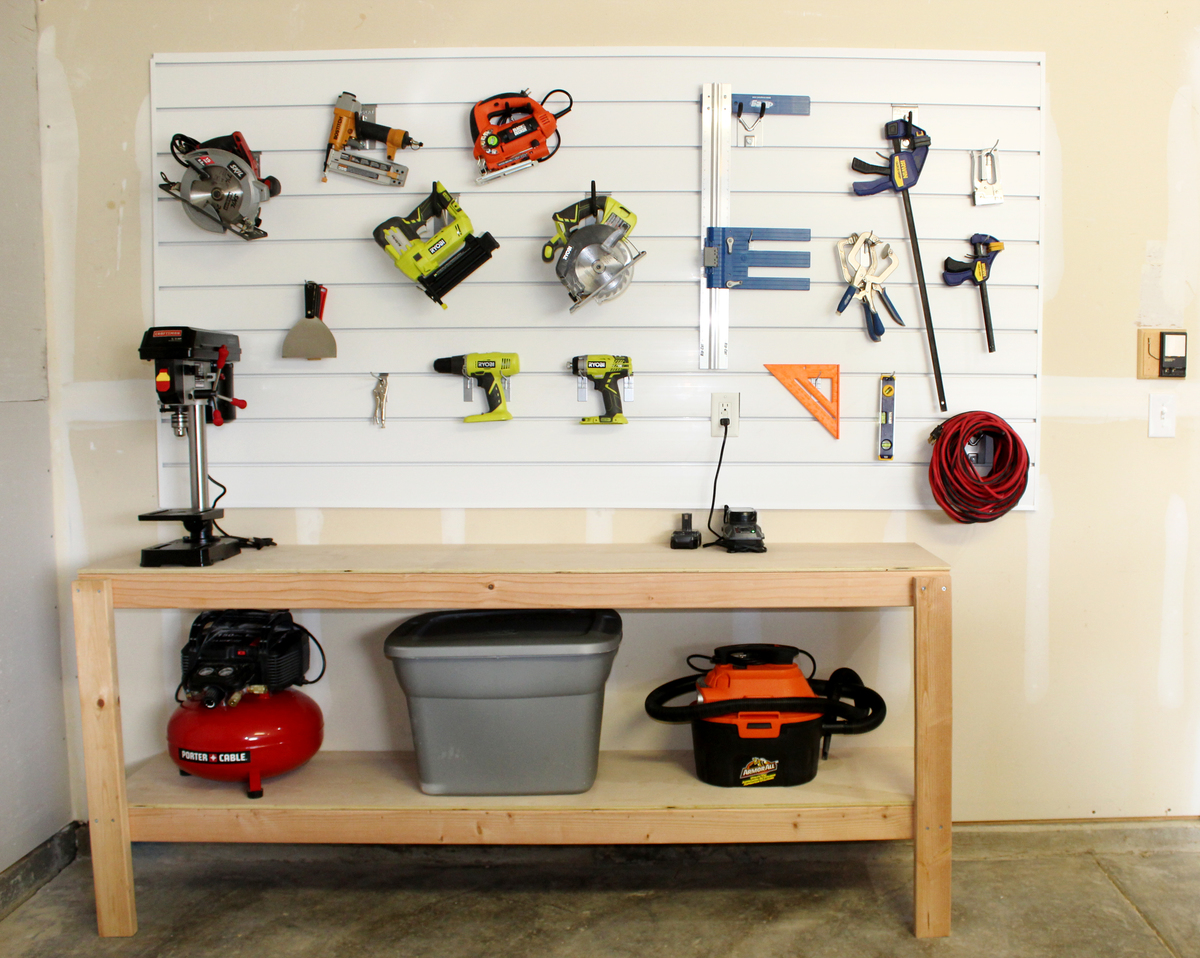
I created shelving and a workbench space for my garage. The plans were simple to use and the shelving ended up being sturdy and level!
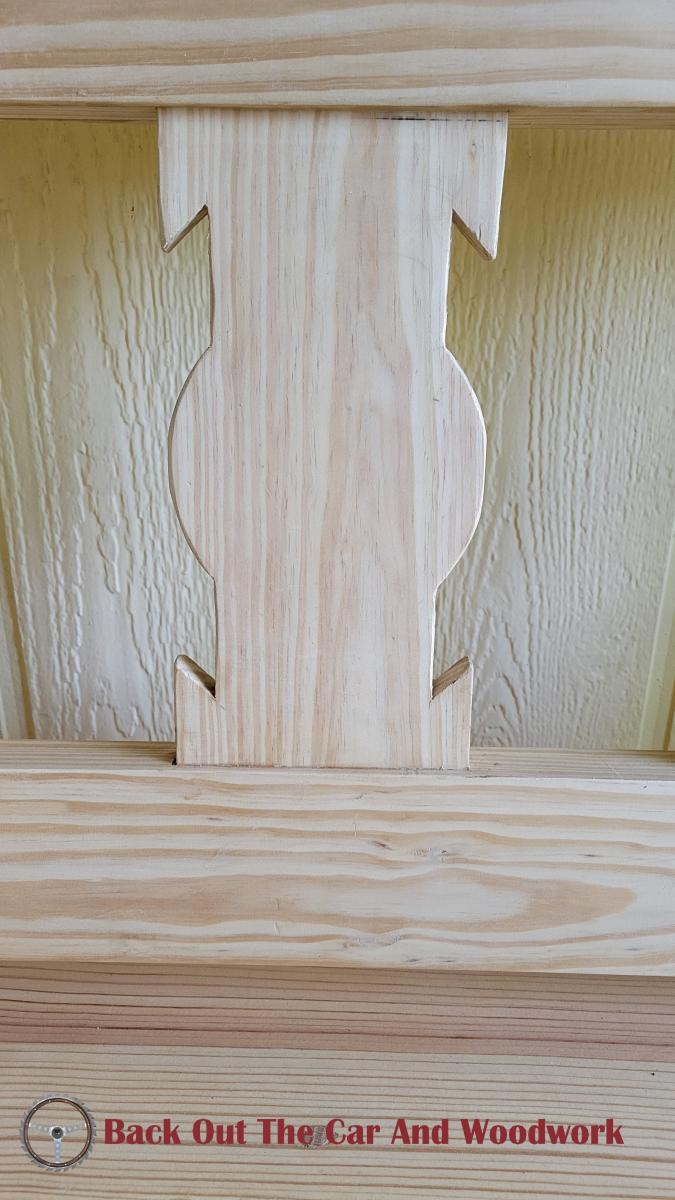
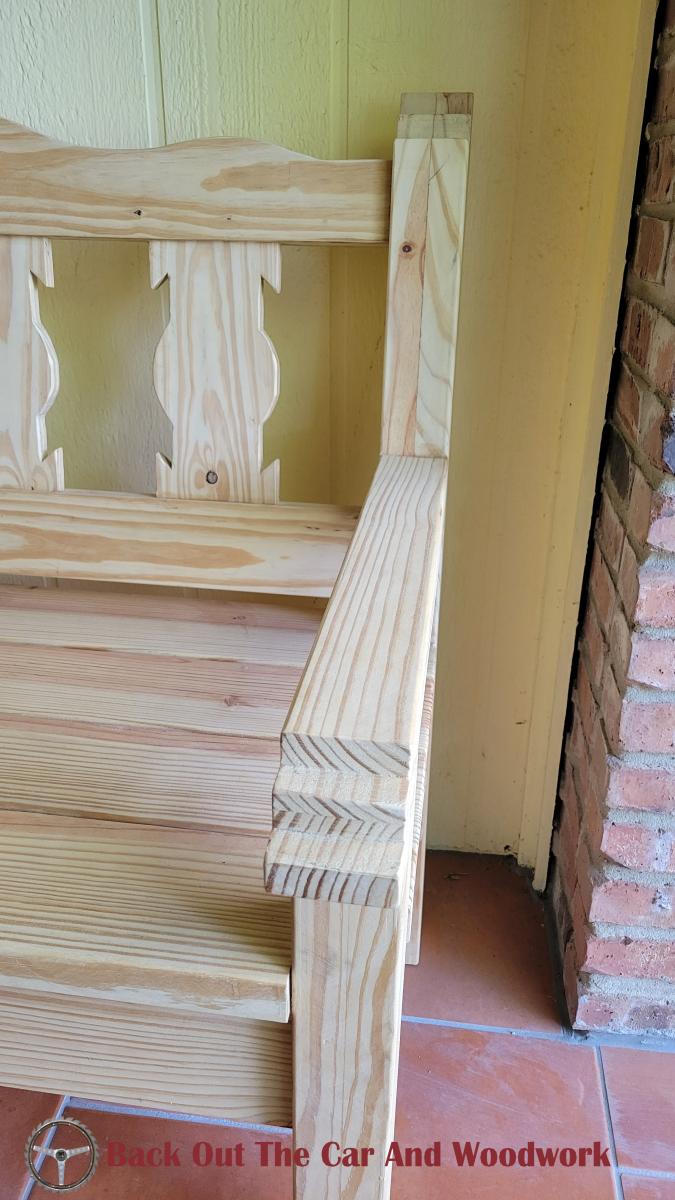
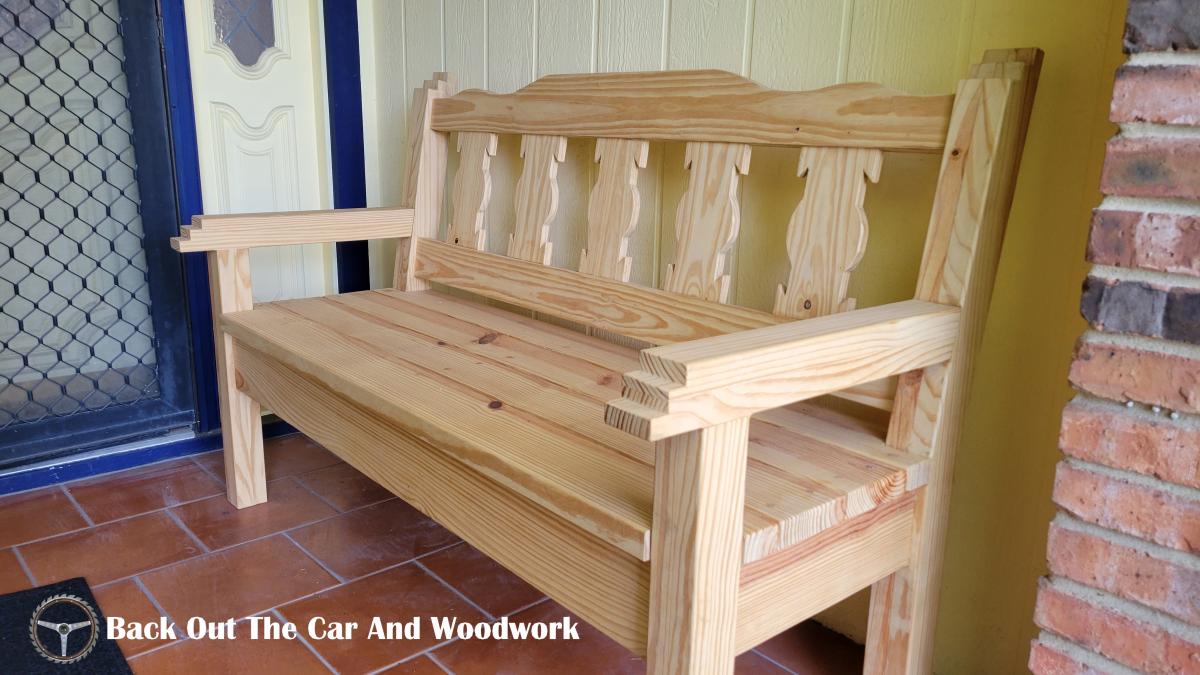
We visit Santa Fe and surrounding areas every summer.
I love all the hacienda furniture but wasn't willing to pay designer prices for the good stuff or deal with transporting it home. I took pictures all over the place, narrowed down the design features, and made my own.
Check out my 4 part video series of the construction on my youtube channel (link below).
You can even see me play some guitar at the end of part 4.
Fri, 06/17/2022 - 07:38
That is so awesome, good for you! Thank you for sharing:)
Comments
Ana White Admin
Fri, 05/06/2022 - 07:40
That's amazing!
Wow, this looks so good, love the color combo! Great work, thank you for sharing:)