Potting Bench Project
![](/sites/default/files/Finished%20Potting%20Bench.jpg)
Fun project indeed! Just make sure its all square every step of the way.
Thanks, I look forward to perusing some more projects!!
Fun project indeed! Just make sure its all square every step of the way.
Thanks, I look forward to perusing some more projects!!
this was an easy project and so practical. I saw the "other" version of this and wondered where $70 worth of time and materials went. This cost me $7 and about an hour and a half. I love making something that I've seen for a fraction of the cost, and this site makes it so easy.
Great, simple plans and exactly what we needed for a planter box. A great use for scrap lumber or leftover lumber. The finished size is very practical. This is our second Ana White project. Garage shelving project was as simple and successful.
I had a friend that loved the 48" long truss style farm bench. However, she wanted one 8' long. I modified the "2X4 Truss Style Farm Bench" and came up with this design. As you can see, she want a very specific stain color combination.
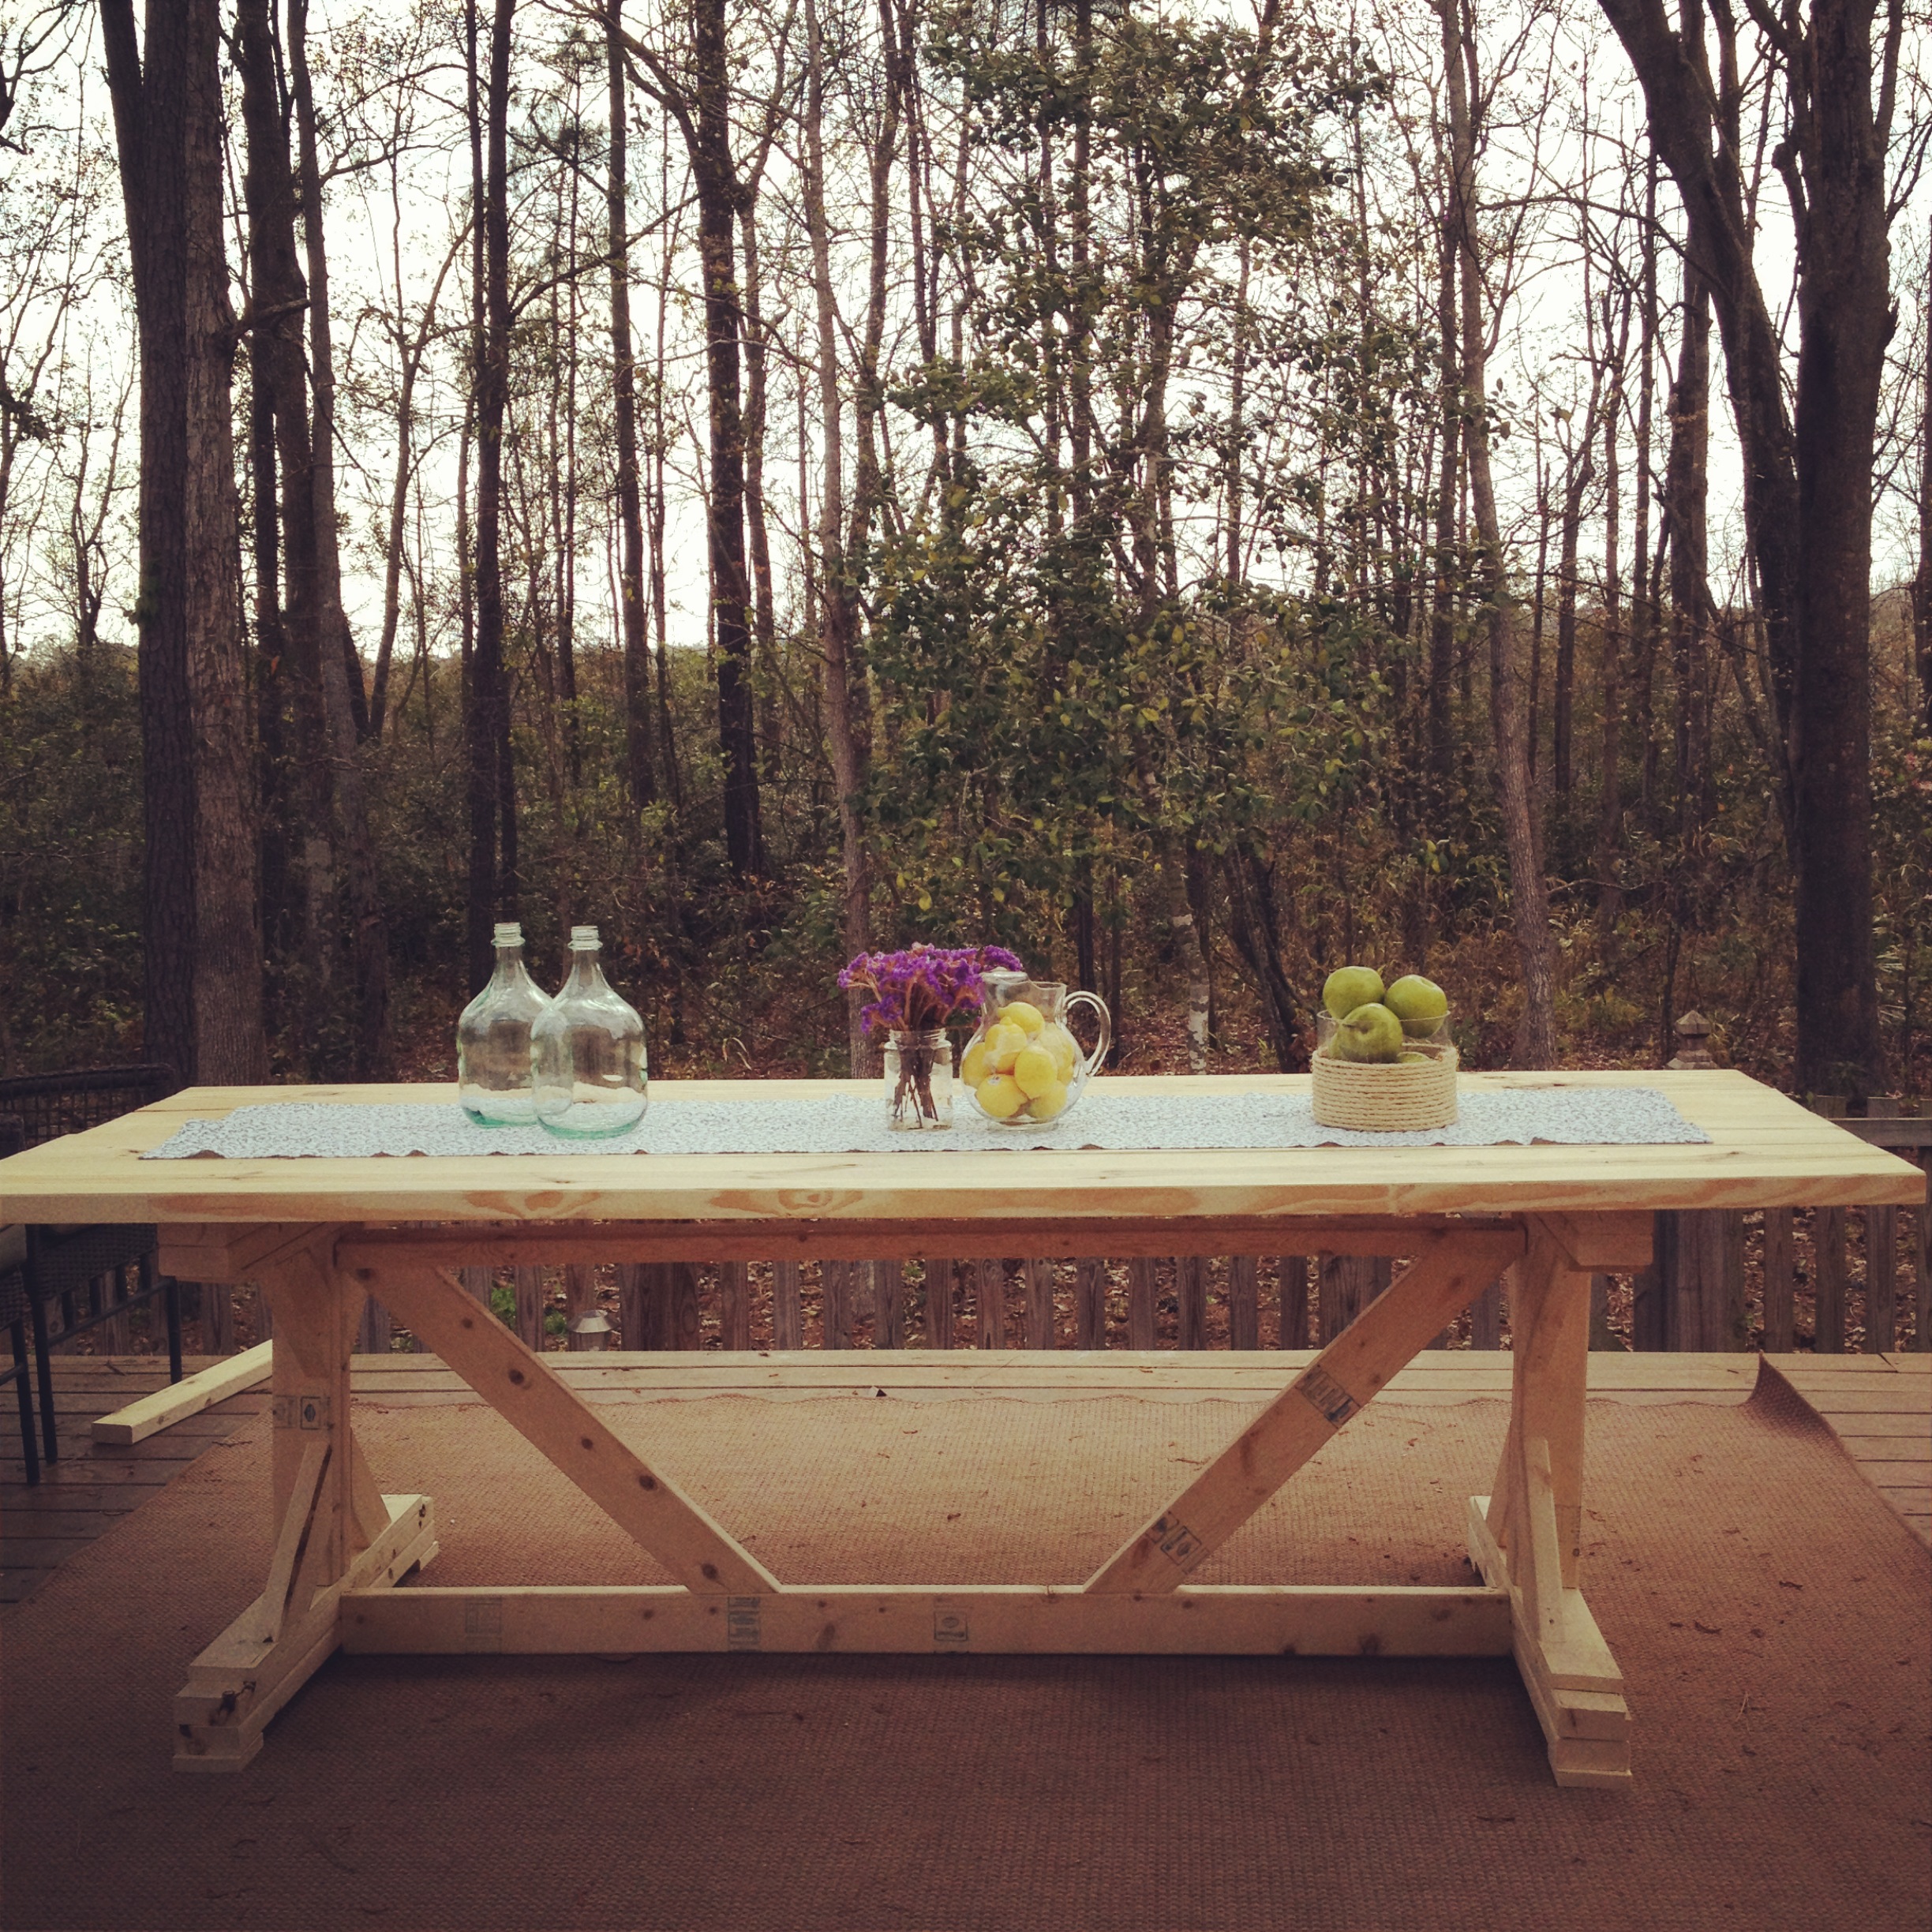
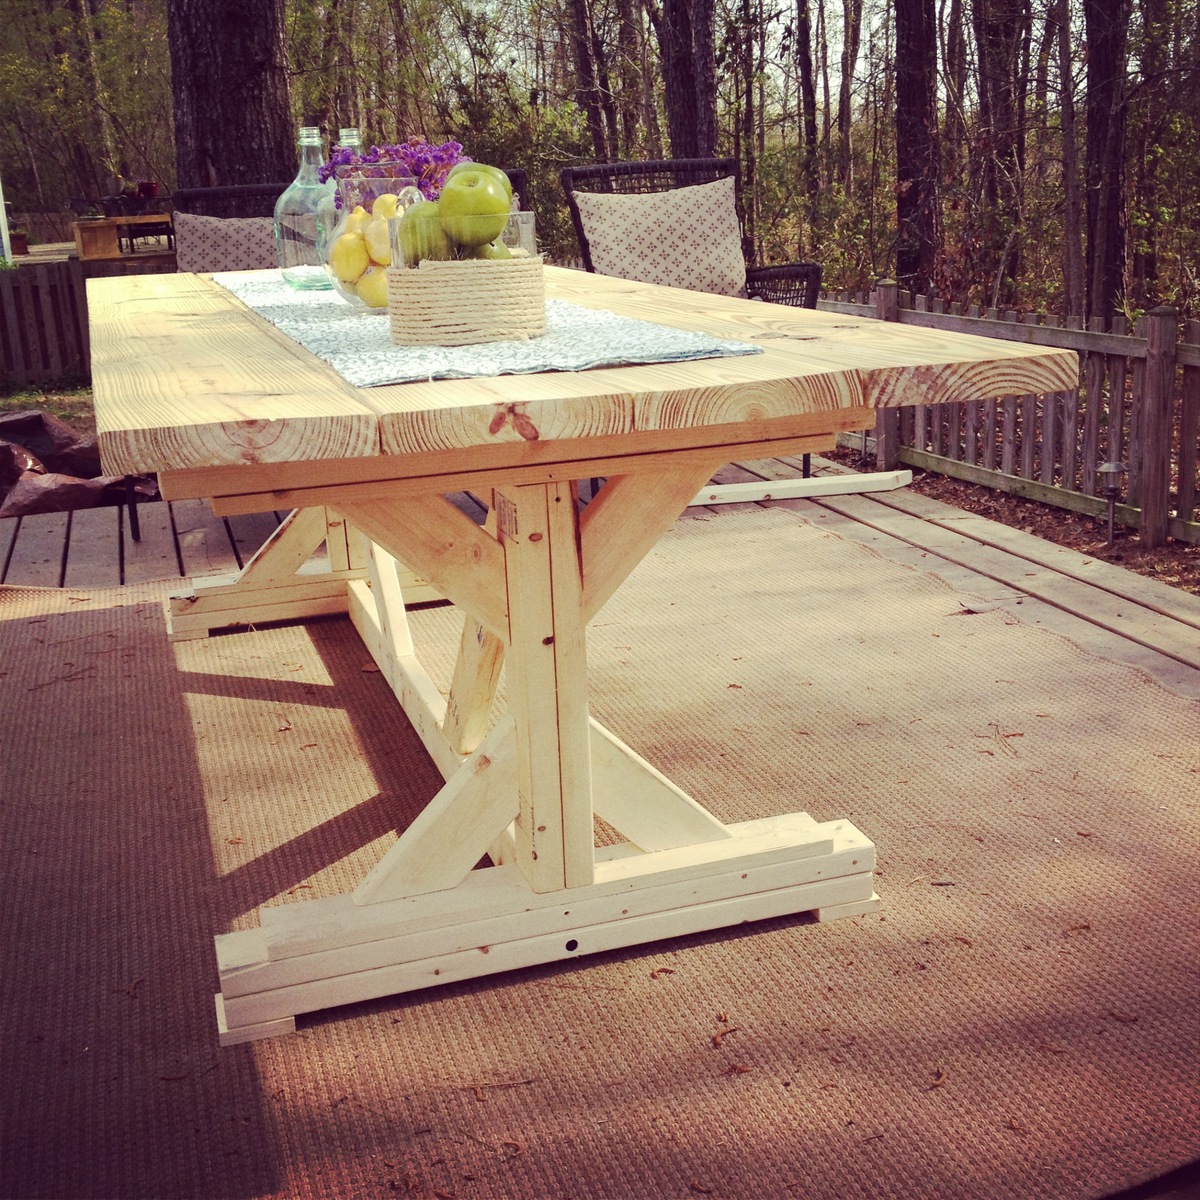
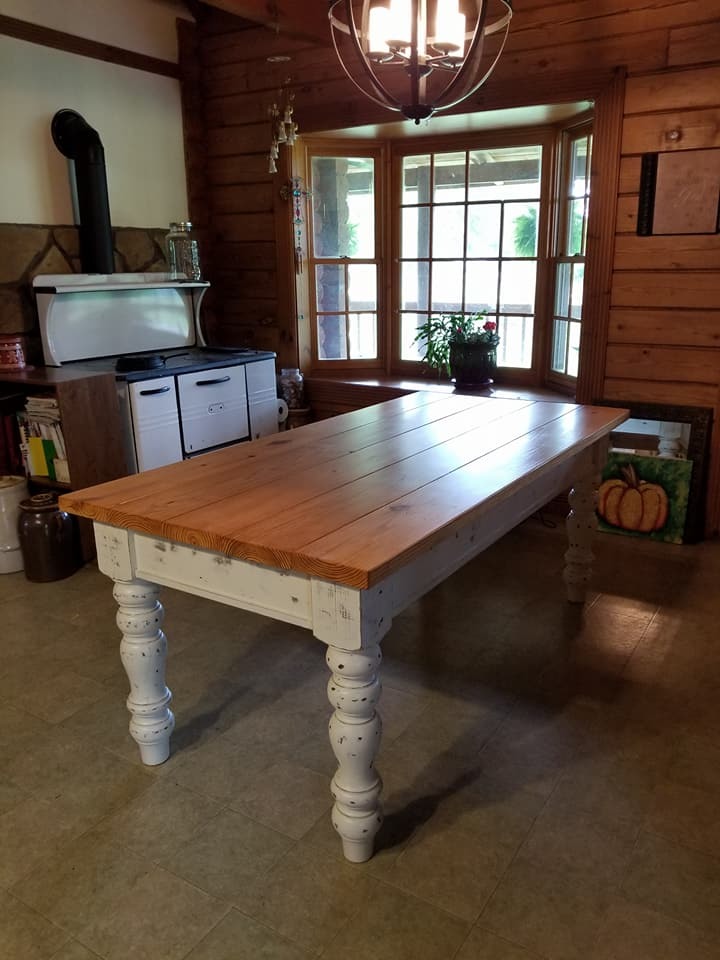
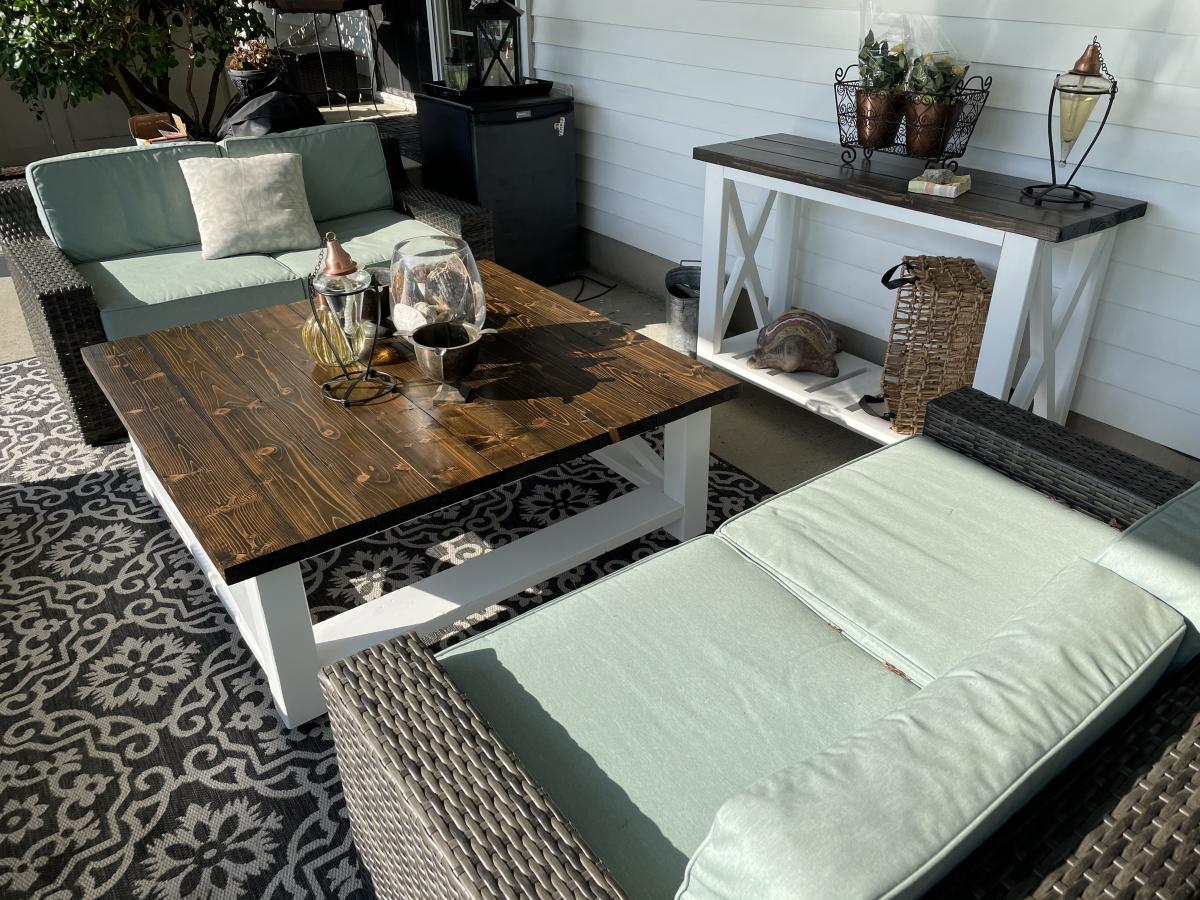
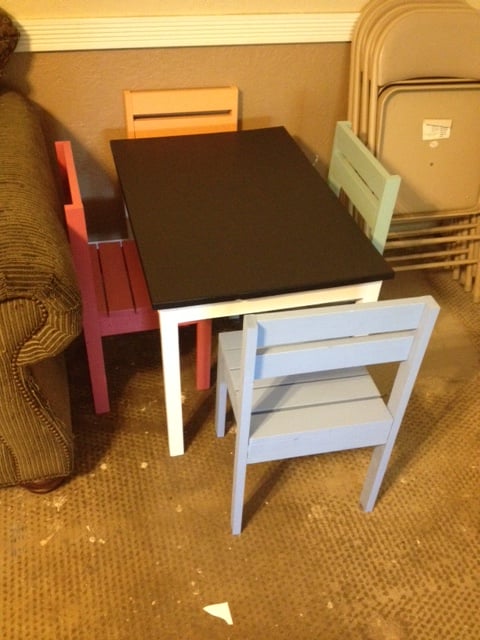
After weeks of being shown every DIY project on Interest by my lovely wife, like most men, I cracked! What seperated me from these other guys??? NOTHING! Haha, so I took a trip to Home Depot, got my supplies and went to work.
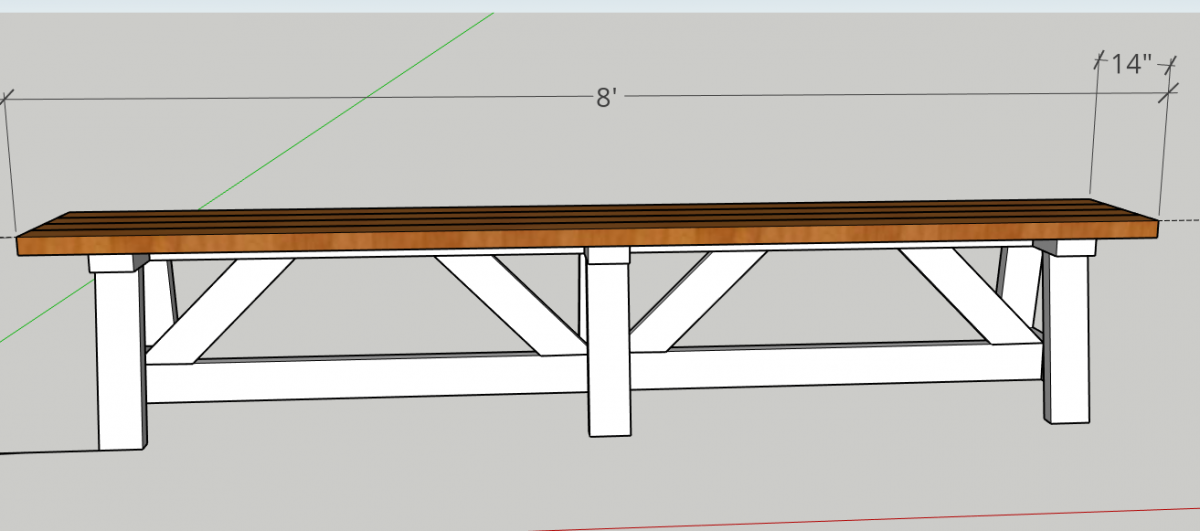
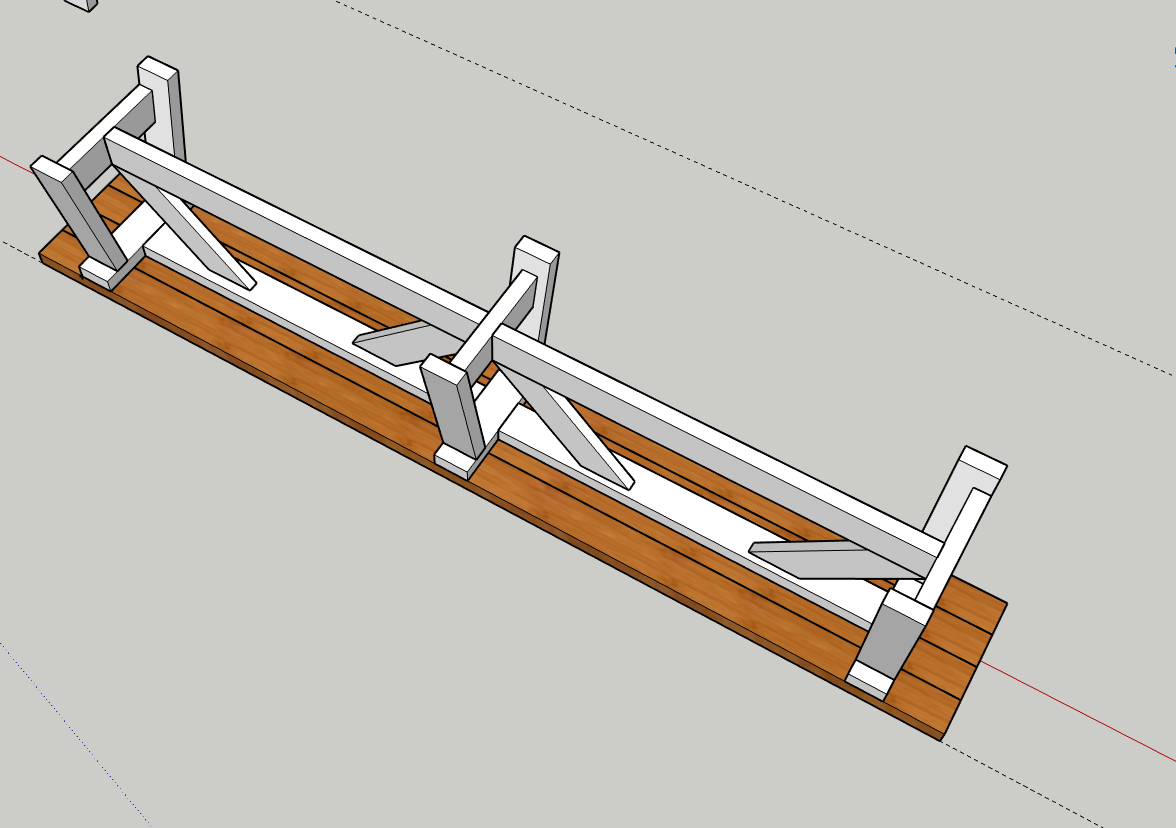
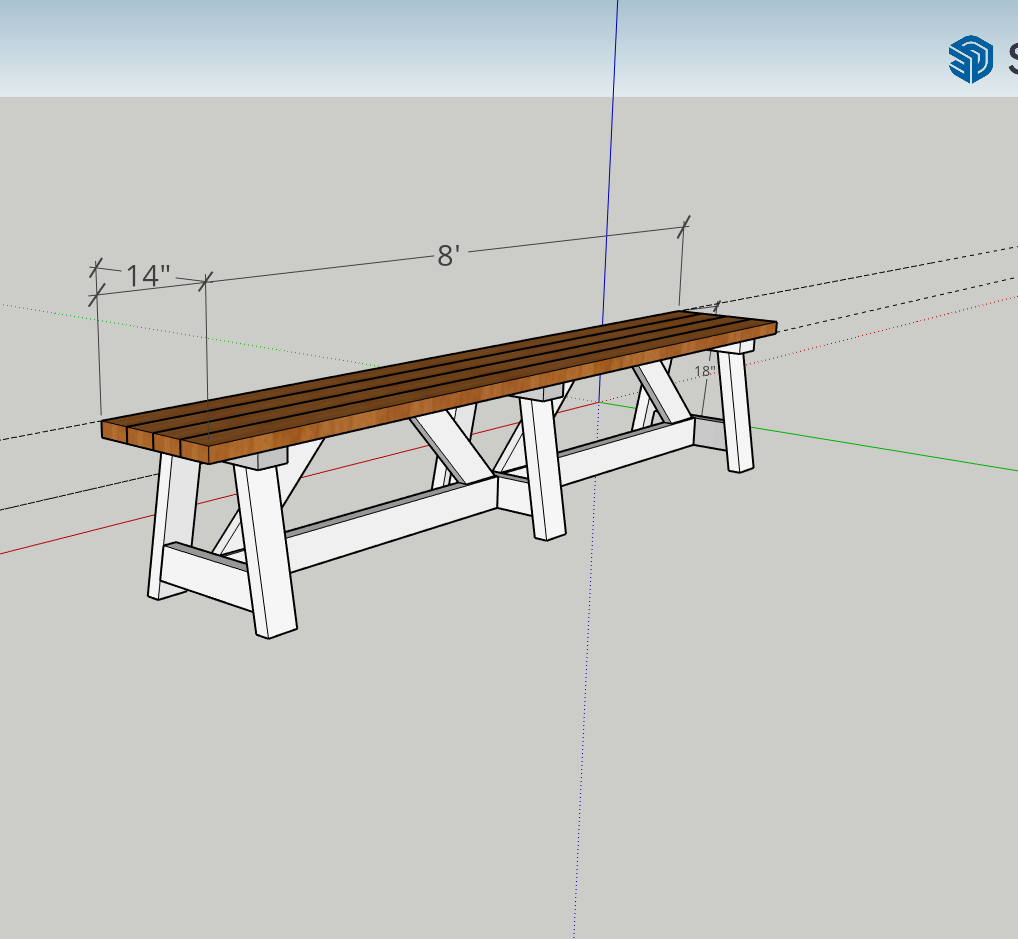
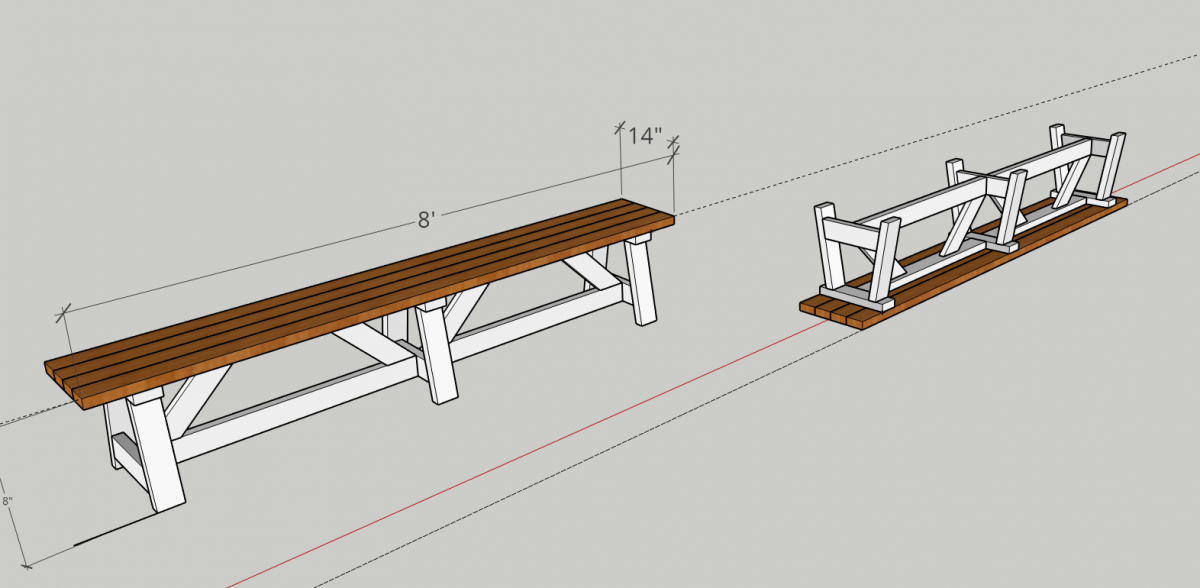
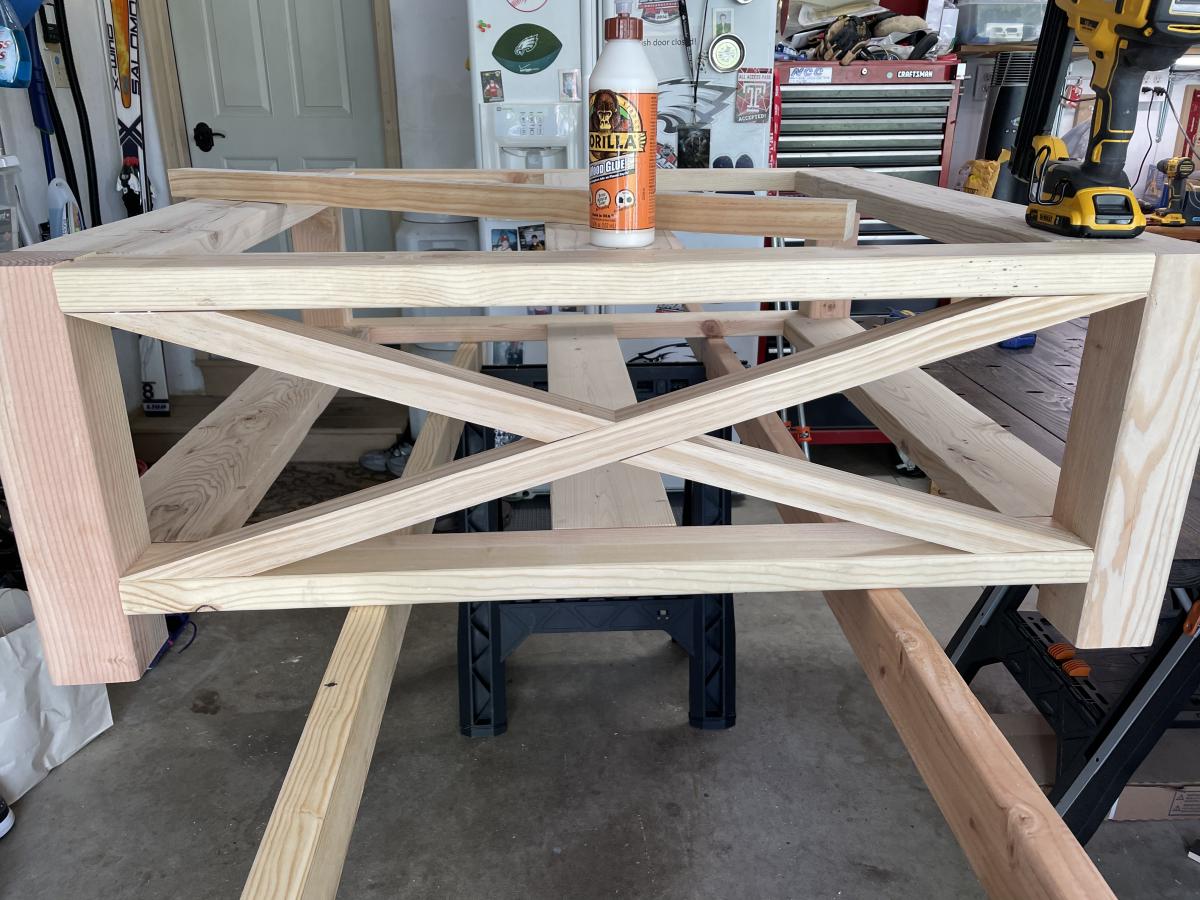
The assembly and construction was relatively easy, I have a background in construction so I was taught the motto of "measure twice, cut once." This served me well during this project as I did not need to get additional lumber for careless mistakes.
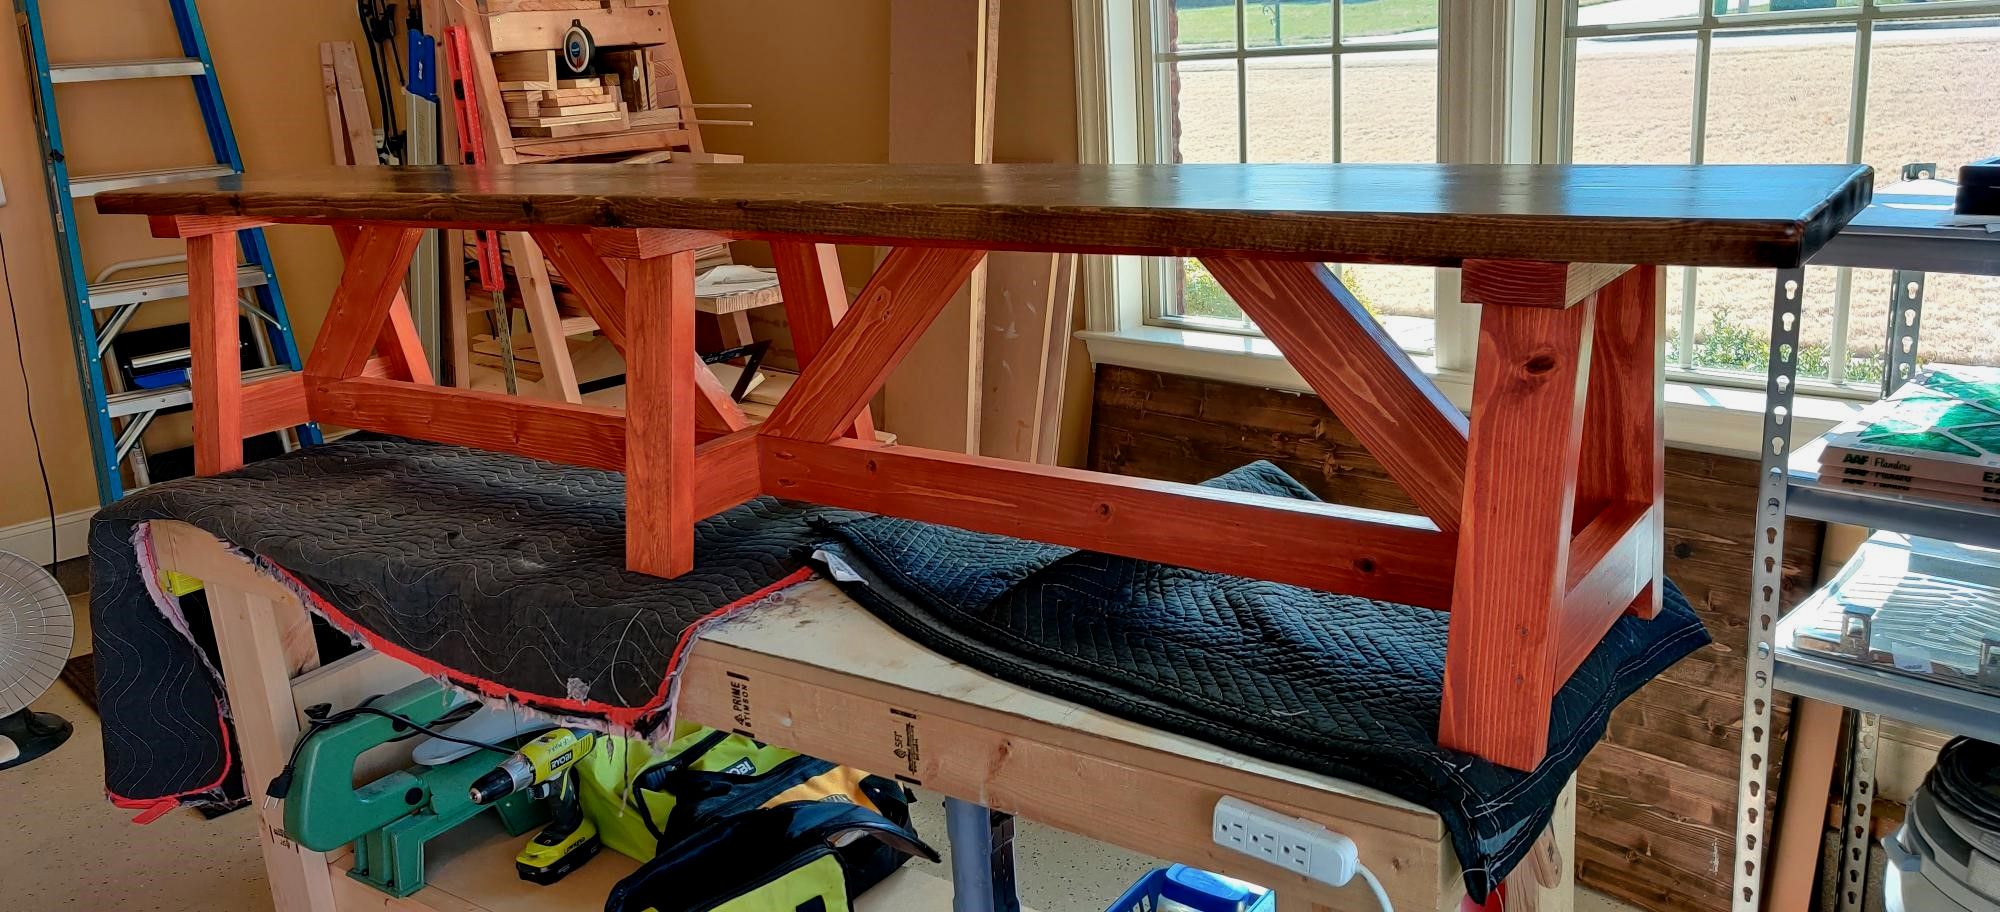
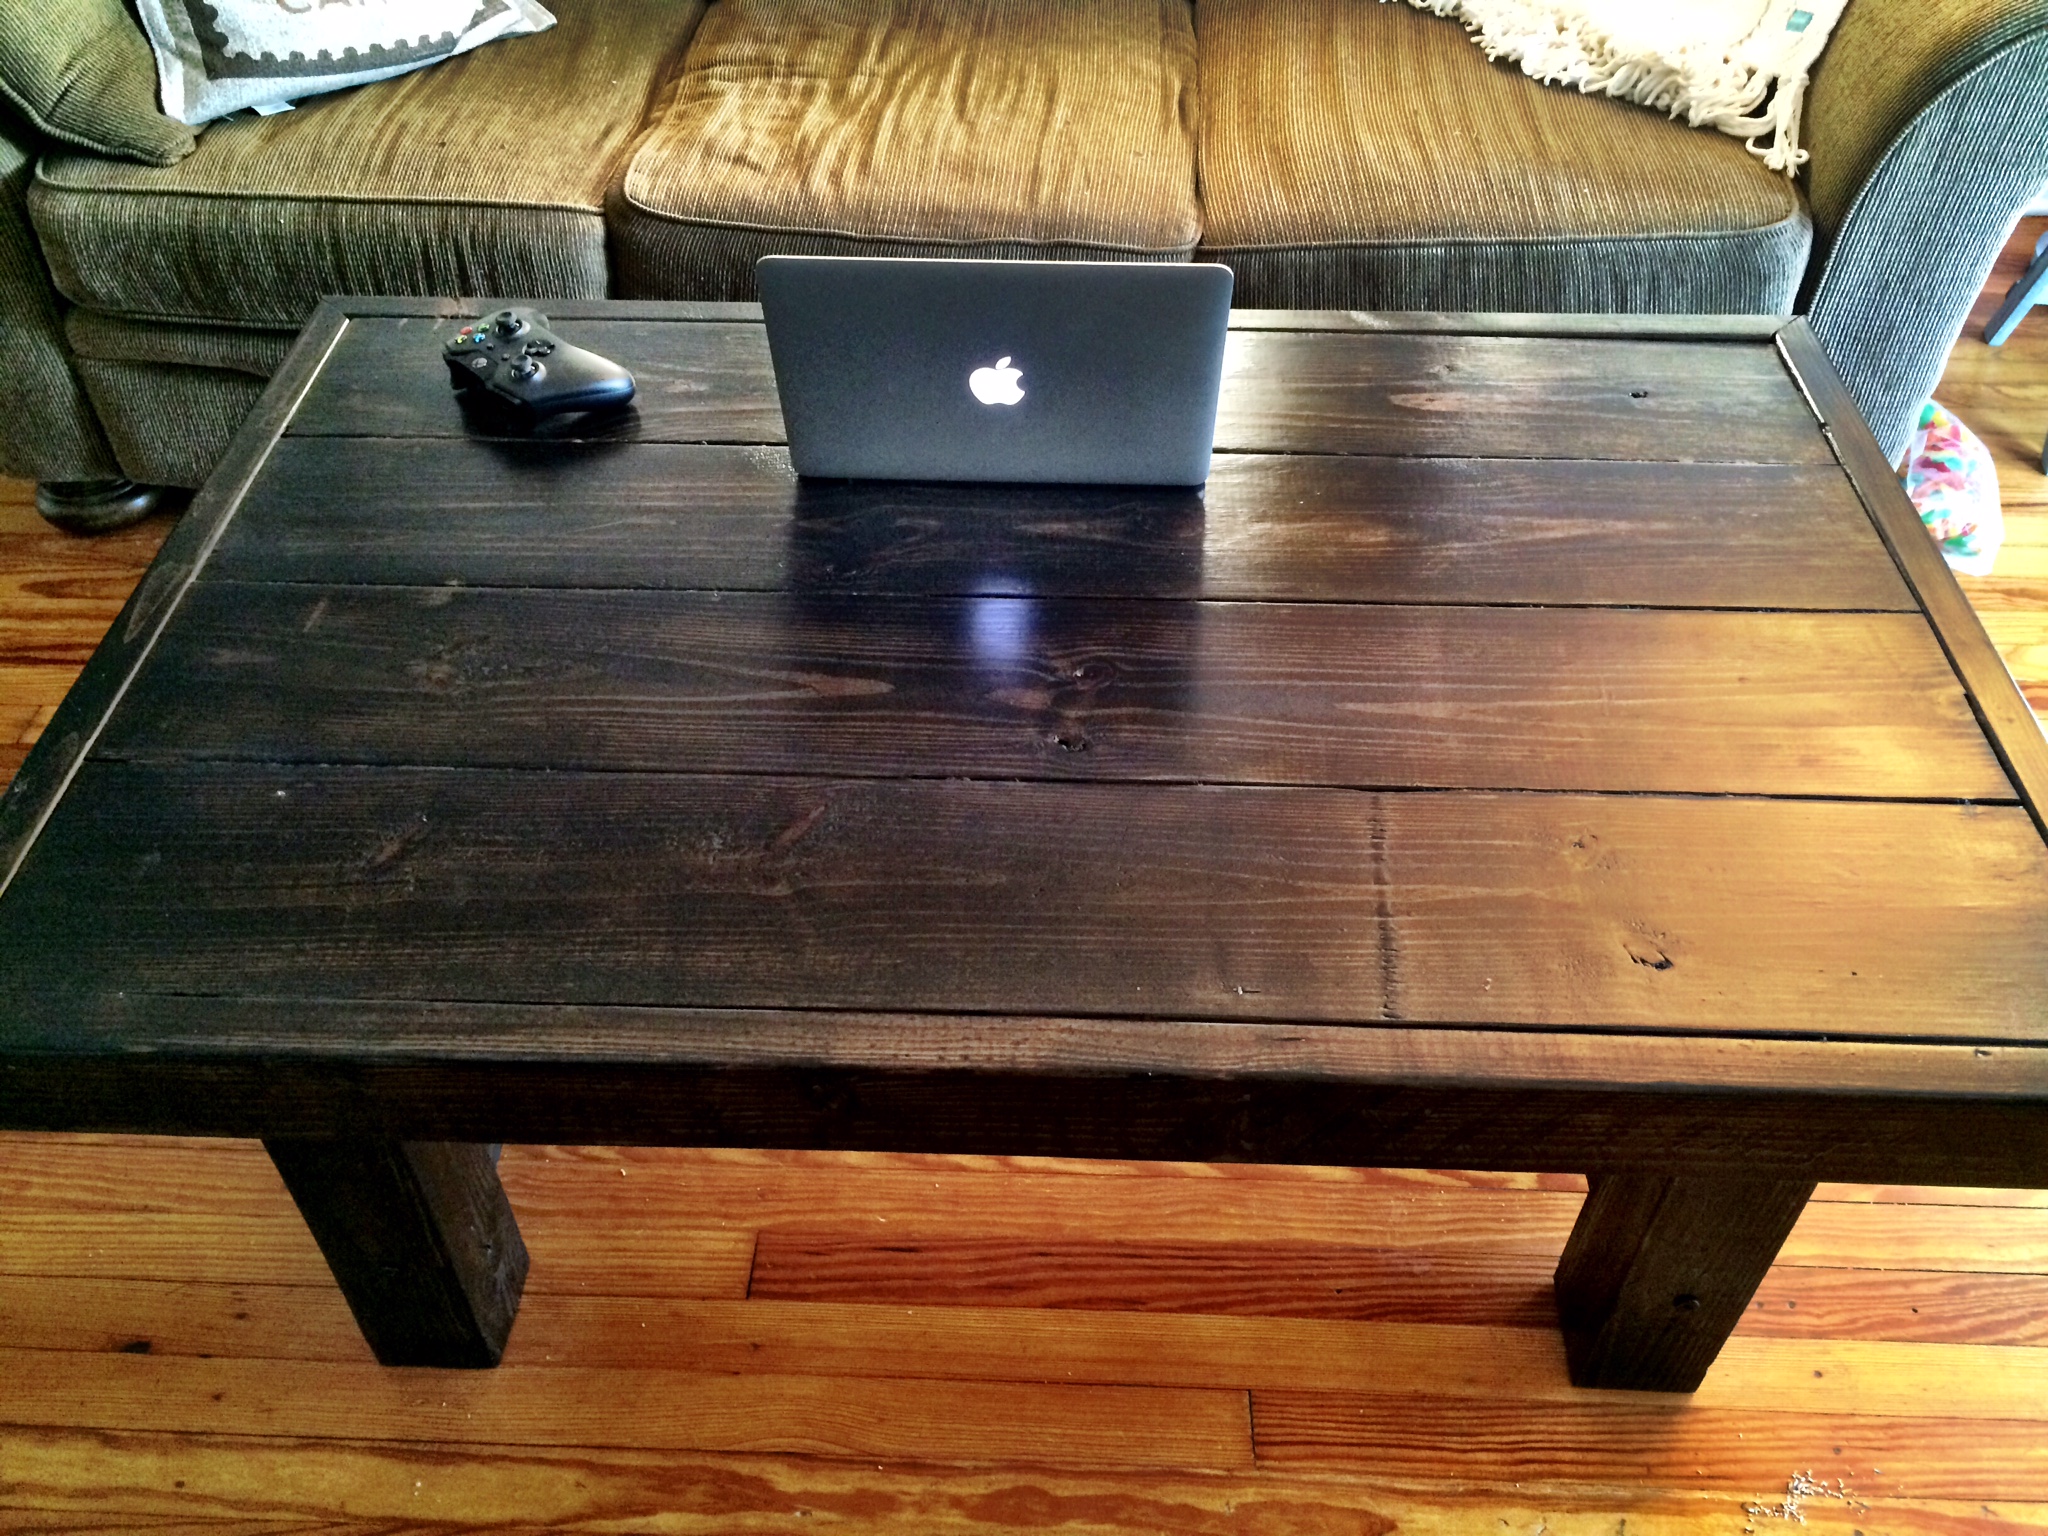
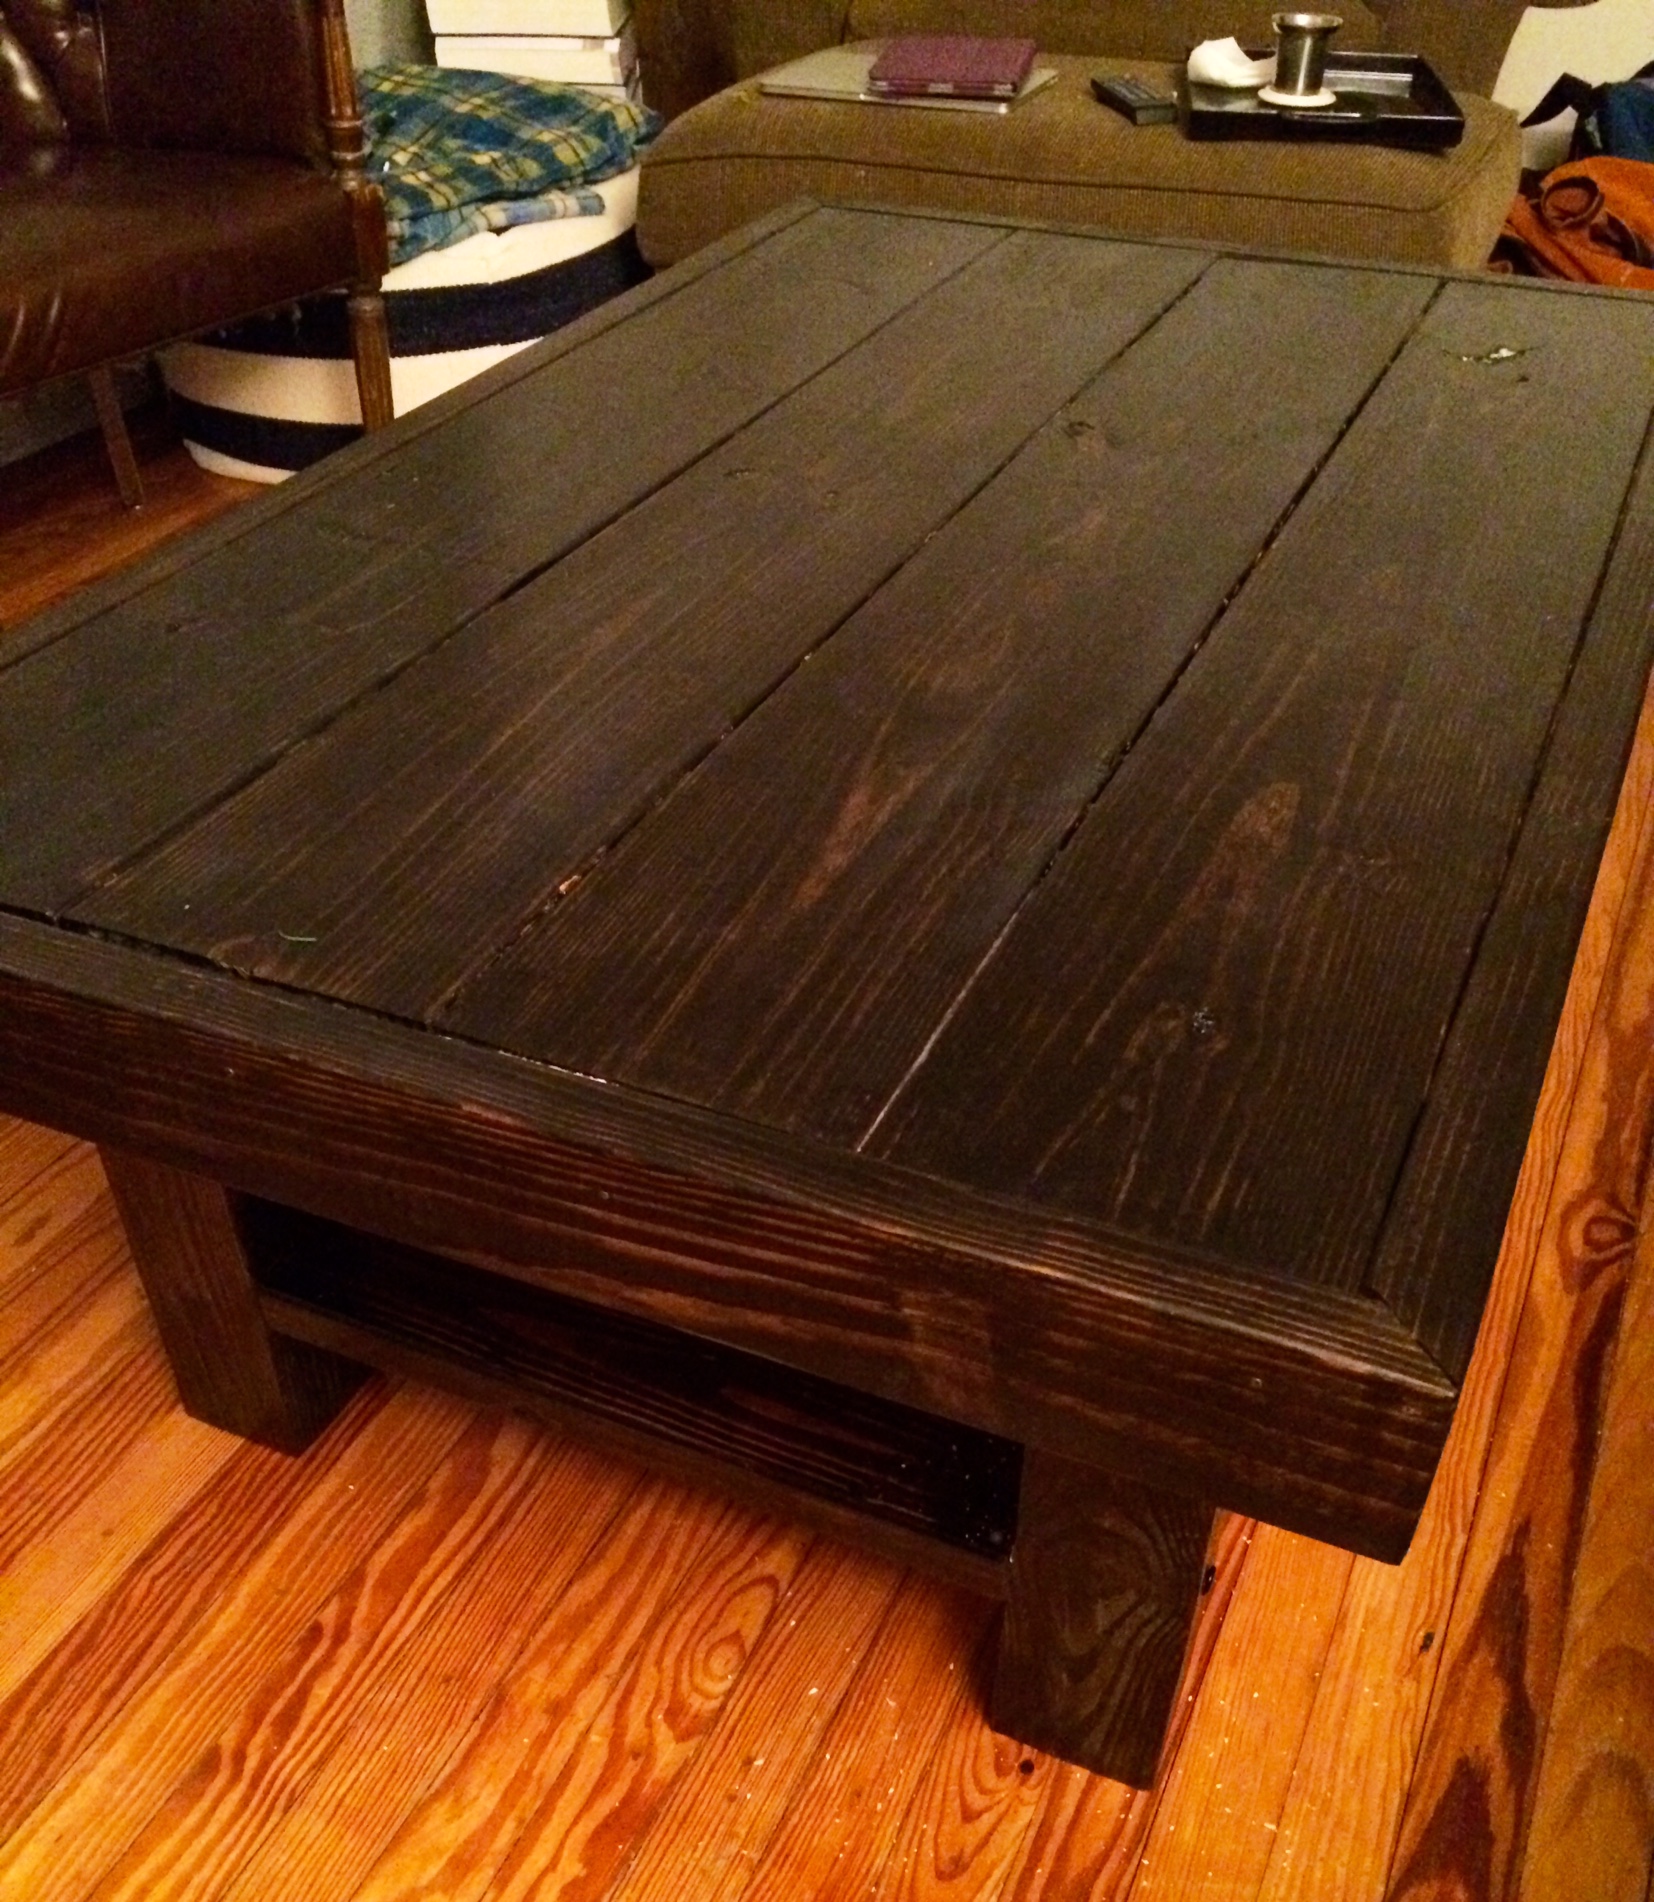
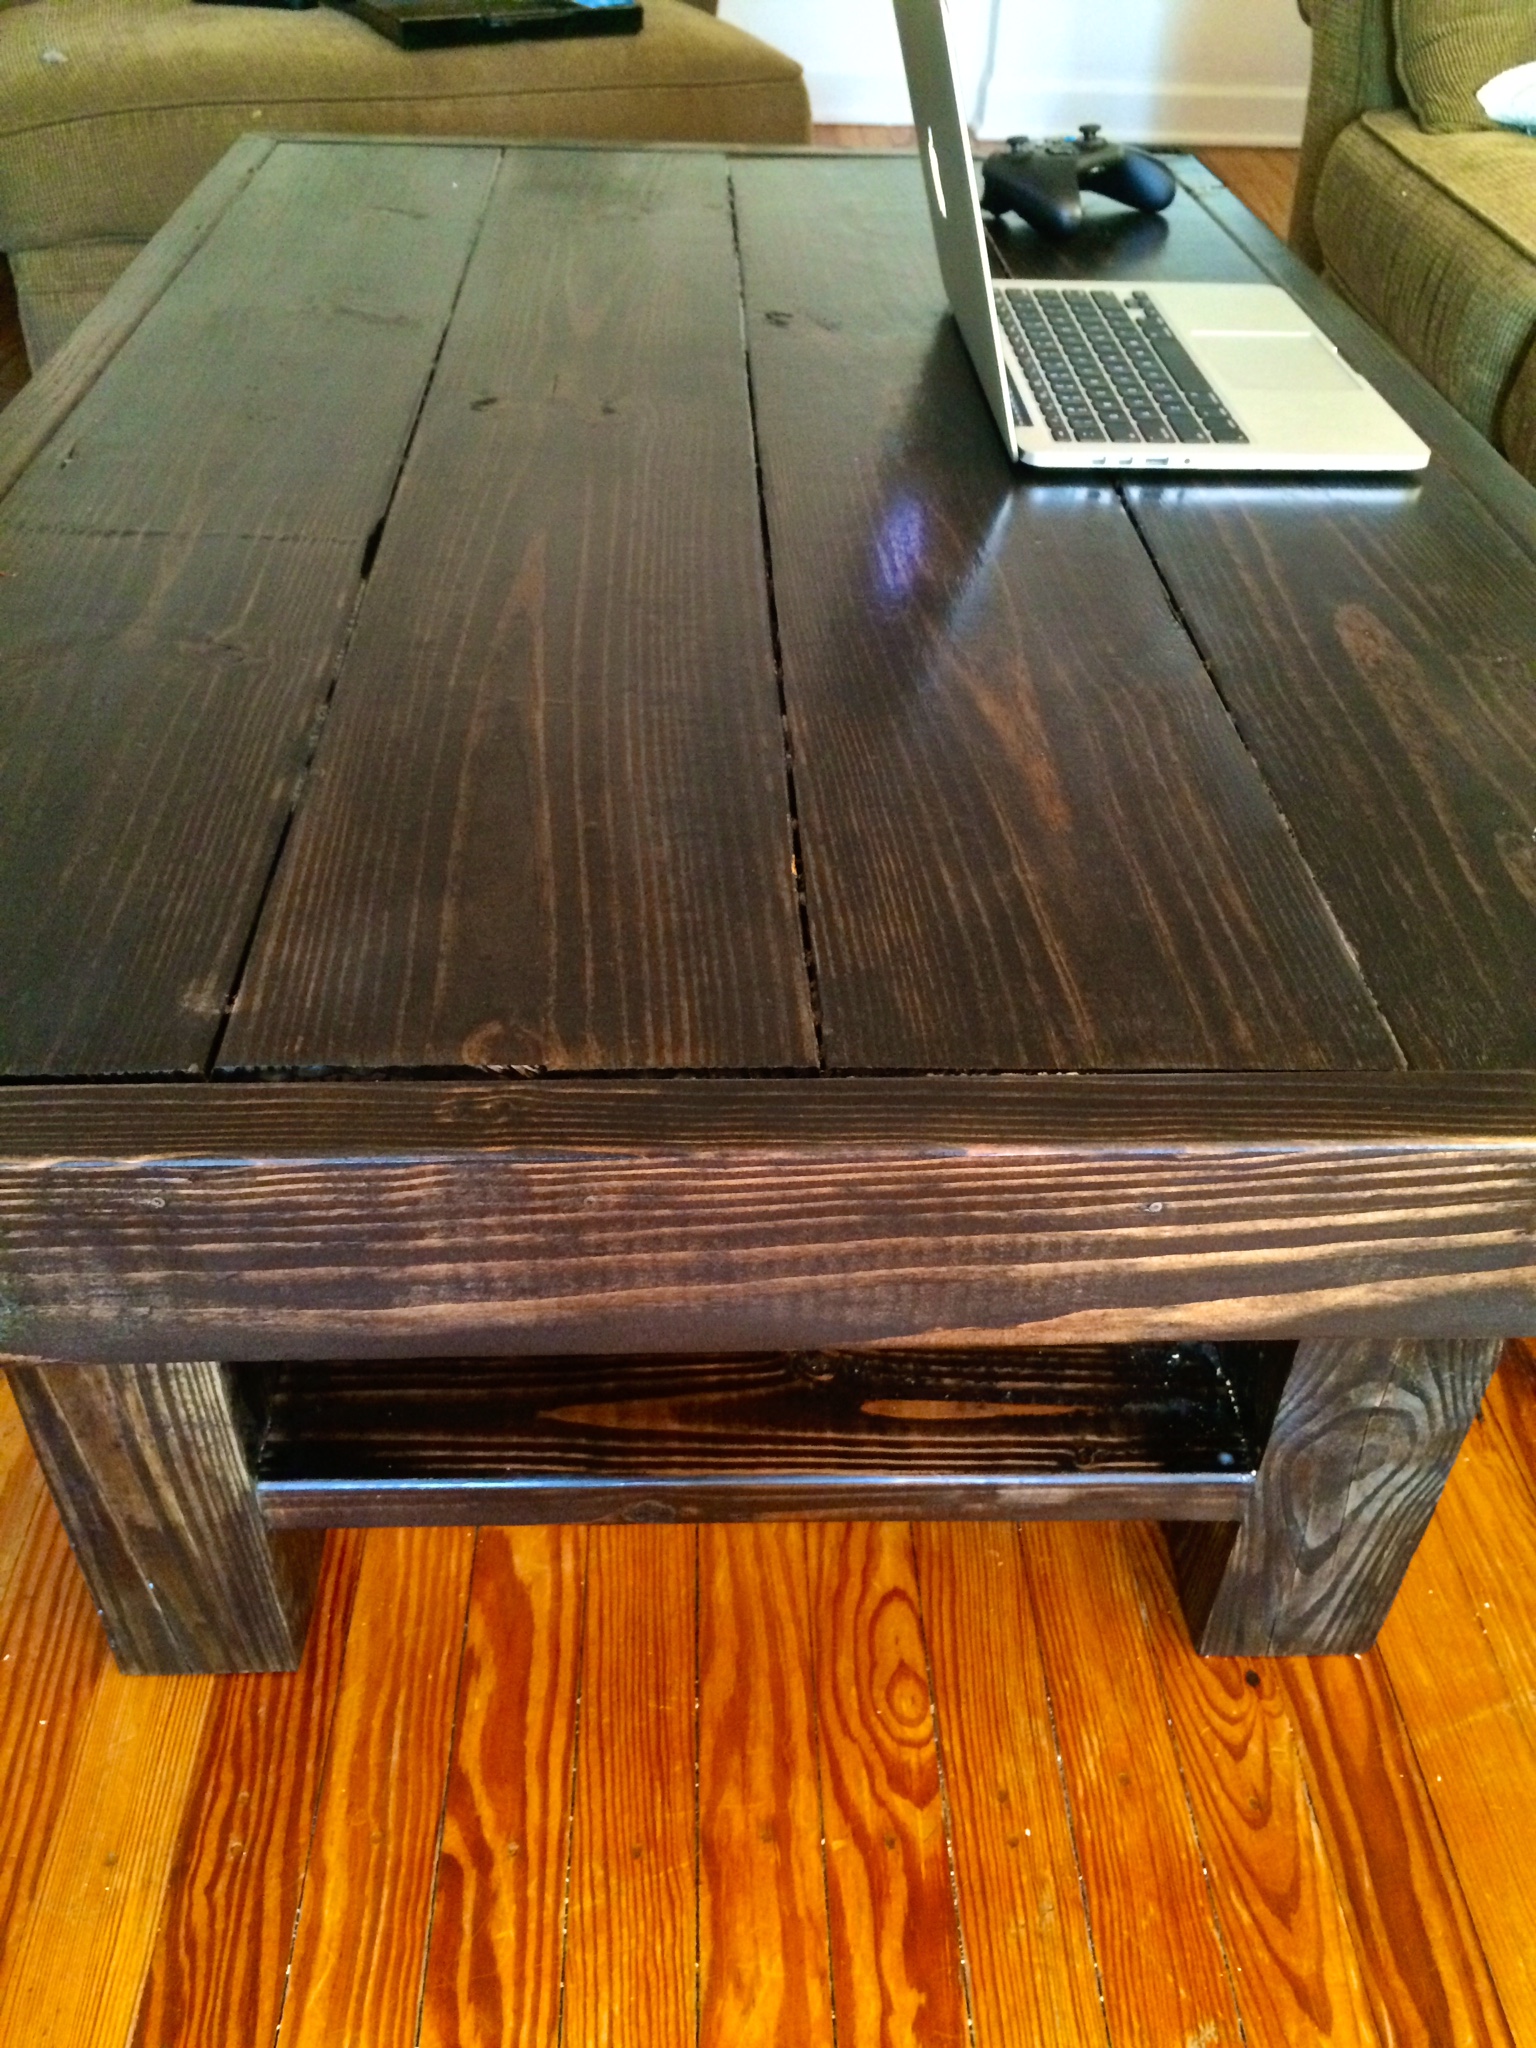
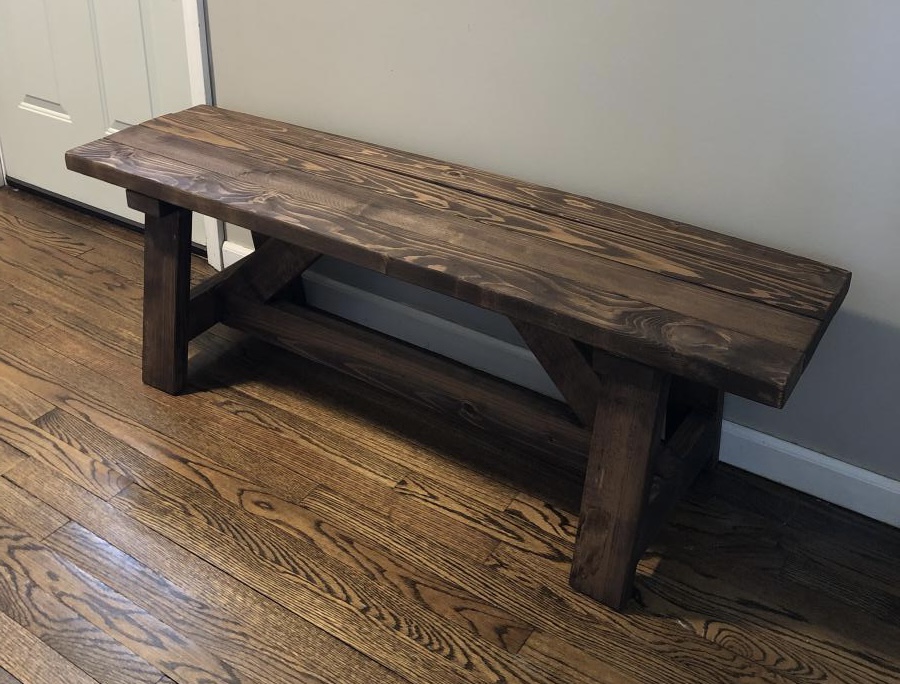
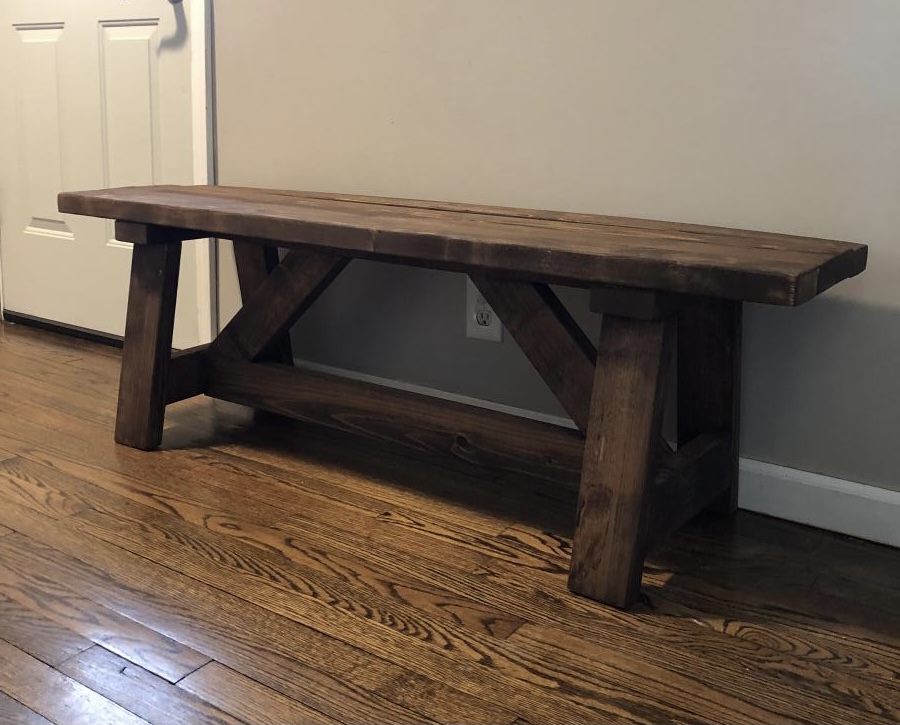
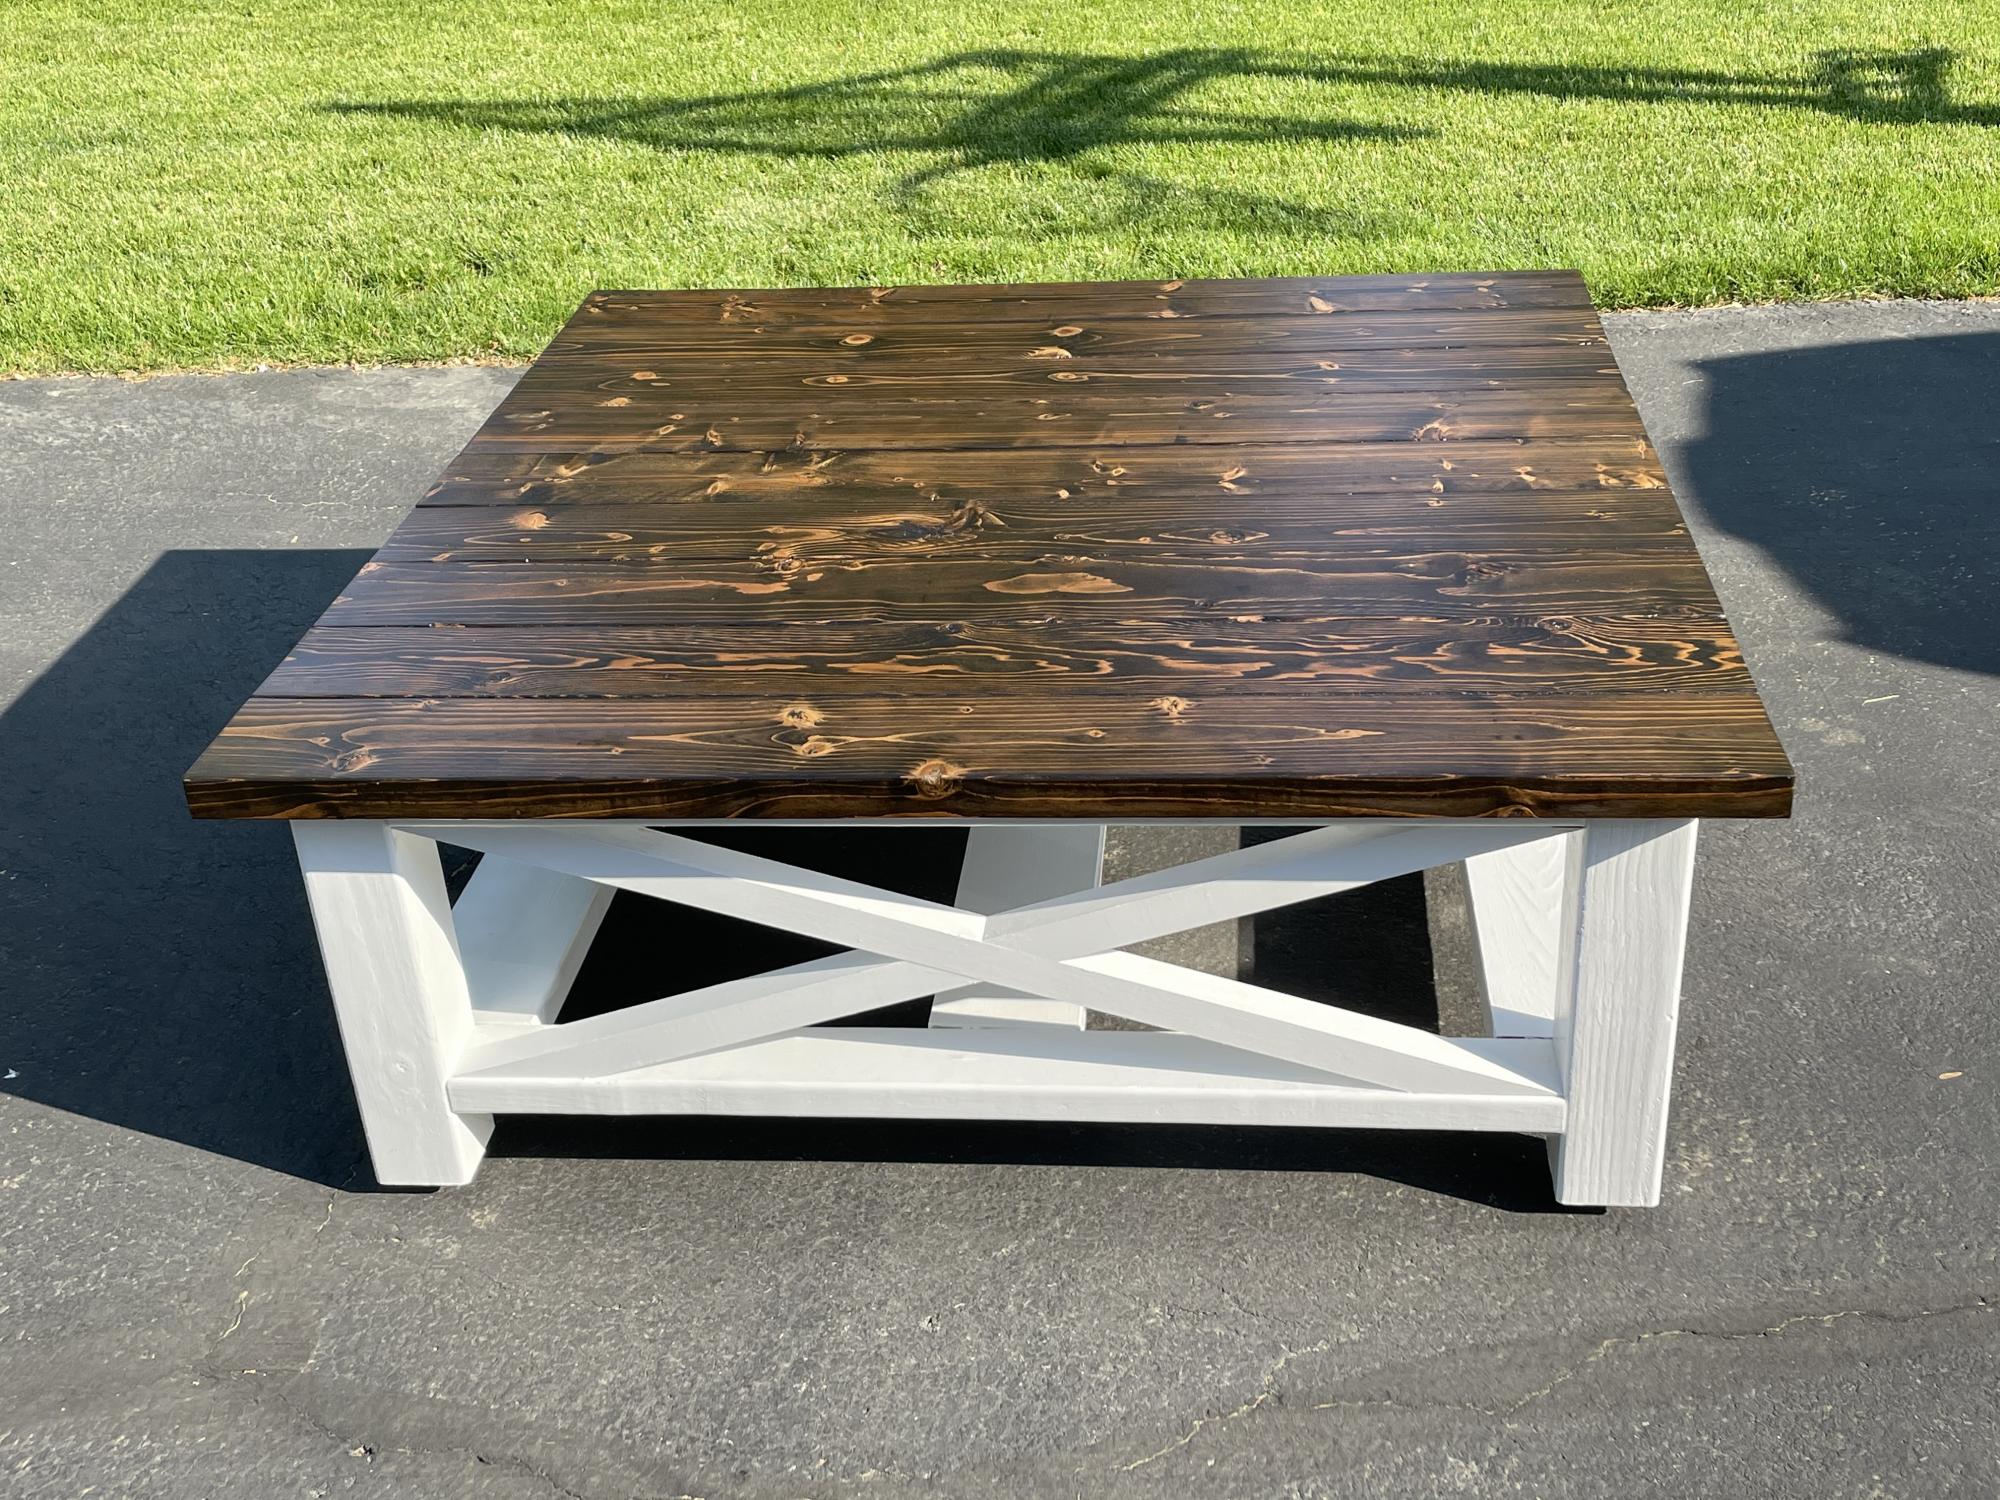
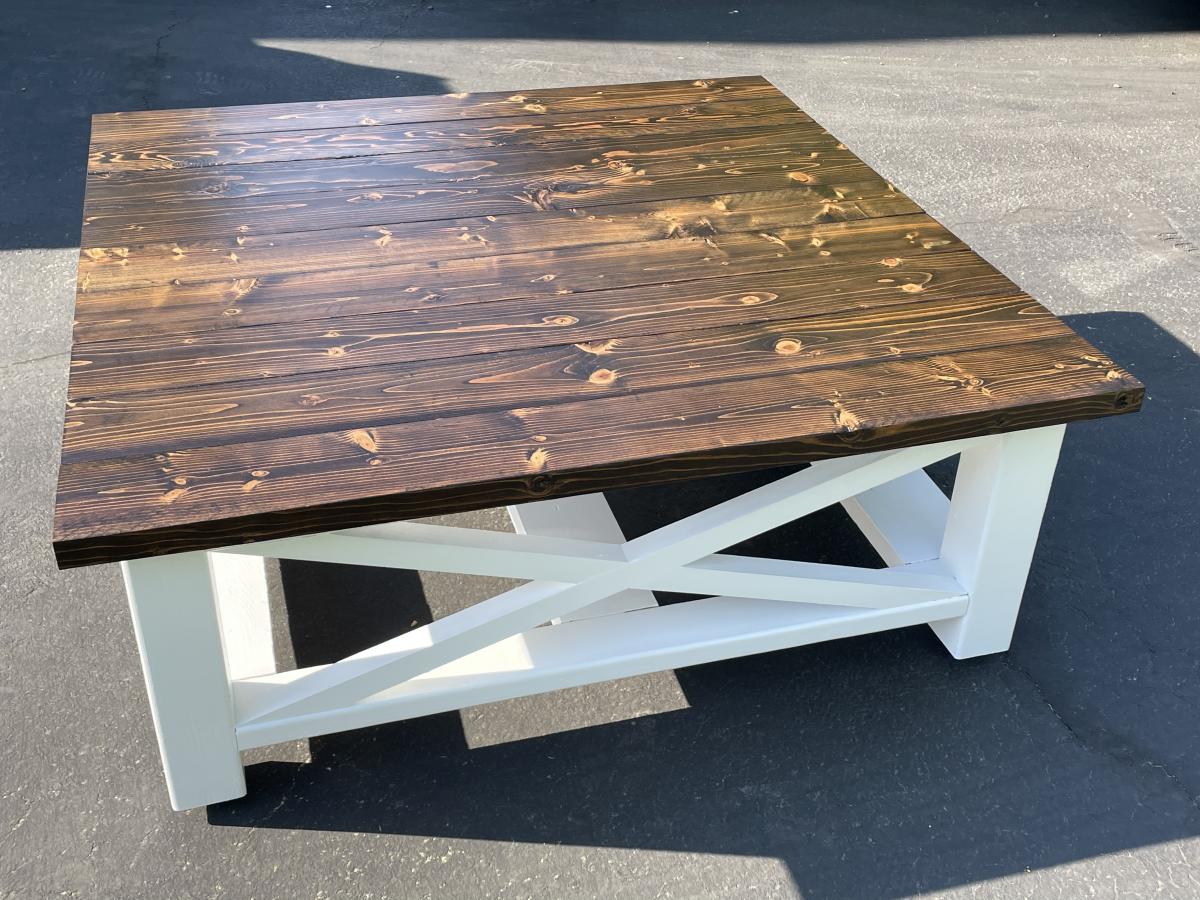
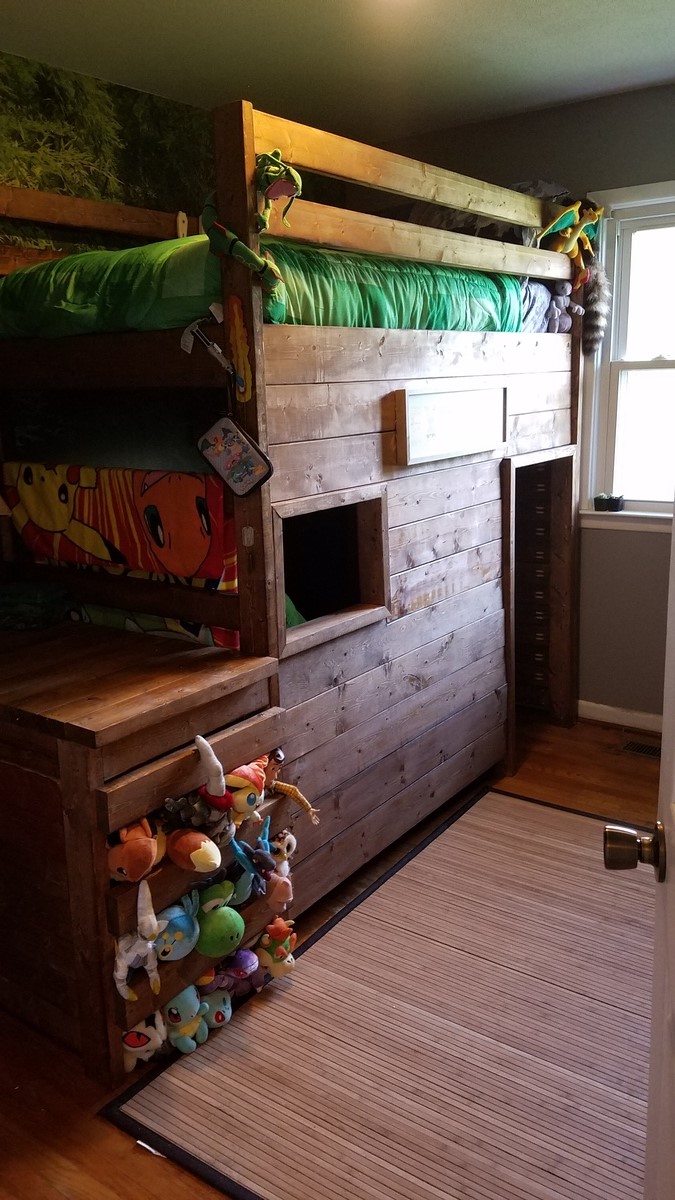
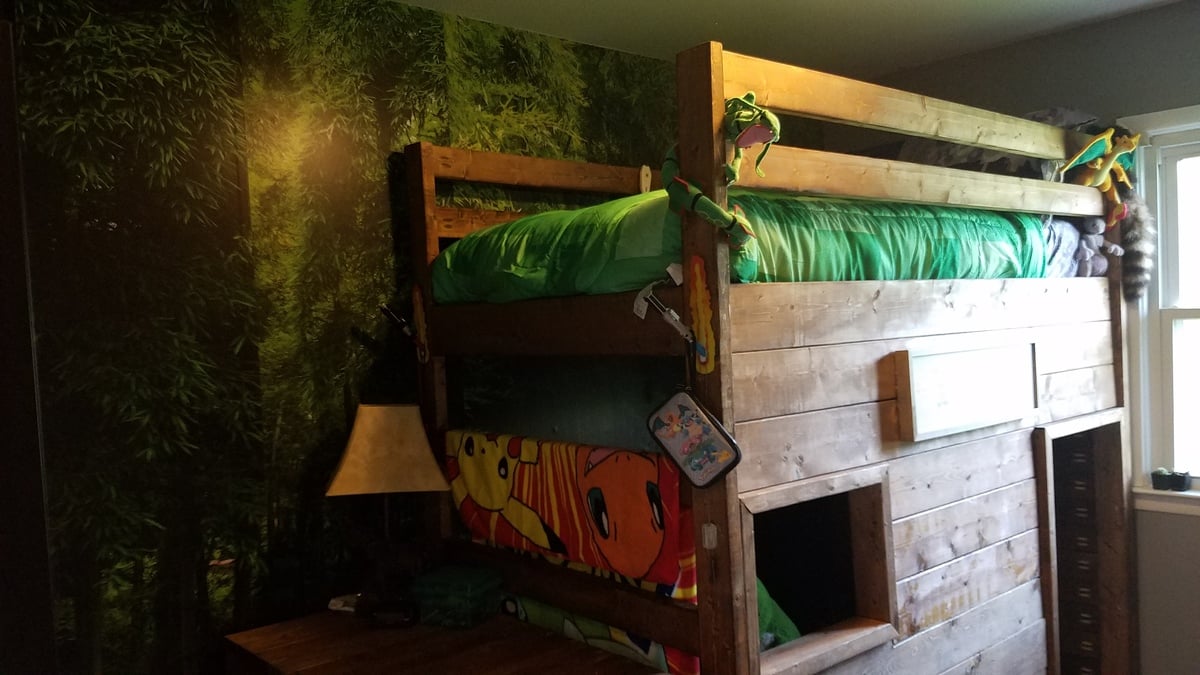
After the table was put together, I went to work with the sanding/distressing of the table. I wanted it to have a reclaimed barn wood look to it; So out came the nails, screws, chains and blowtorches. This was probably the most fun!
After the distressing was to my liking, I went to work prepping for stain. Two coats of dark walnut Minwax later, we were looking like a real table! Anyhoo, prep for poly, apply two coats, and Bazinga! New kitchen table......that looks really old. Lots of fun to build and will last a long time! Thanks Ana!
Tue, 03/26/2013 - 14:14
Beautiful! Can't wait to see the bench(es) you're going to build to go along with this awesome table - right? :-)
This was my first solo wood project I have done without my dad, now that I have moved across the country. It was a great intro to woodworking, and I definitely learned a TON. I did this with a generic "tool set" I got for christmas a few years ago, all battery powered.
Note to other beginners:
- Circular saws that are battery powered may not have the juice to cut through those 2x8's, which led me to have some uneven cuts.
- Careful with the wood glue. If it leaks out between the boards it can be a B**** to clean up and will cause some issues with staining down the road.
Long story short: Love this project, super happy with the turnout even with some imperfections! Has me bit by the DIY/Woodworking bug!
These plans were very easy to follow and the end result is beautiful. Thank you so much!
I loved making this bench - only 5 2x4s. I used premium studs, sanded before building, wood glue/countersunk screws and filled them in. Used English Chestnut stain and I’ll add polyurethane to ensure longevity. My first build - the trusses/supports weren’t the right size, somehow we’re short? So I cut those out twice. It’s OK because I had excess anyways! Nice snug fit now.
I really liked the Large Wooden Dog crate but wanted the sides to be lower and wanted to make sure there was no easy chew escape. Not sure if you can see from the photo but the cats have taken over... Will need to make a larger one for the dog!
I followed the plan pretty much other than lowering the panel on the side and replacing the wooden bars with rebar. The rebar was a bit of a learning curve getting the holes lined up perfectly but I figured it out and I think it came out pretty good!
Used all pine 1x3 and 1x2s. Picked up a pine panel for the top and the bottom is a 3/4 plywood. Made our own chalk paint for the finish and sealed it with wax.
Oh, forgot, added tongue and groove pine for the back and finished it and the top with Antiguing wax.
Lots of fun and I think I will make a double one next!
Used Ana's plan for chairs, coffee table, sofa and lounger. Stained and clear coated. Wife is happy. What can be better!
With Spring Break here (I'm a teacher), I decided to conquer my biggest conquest yet: building furniture
Sun, 03/31/2013 - 20:48
This is Awesome, I plan on making this in the next few weeks , myself. It looks so professional. I love that you used the ticks, I too am a do it myselfer and I do all those un professional terms. Who really cares what you call it, as long as it is square ( I learned that term, meaning it needs to fit correctly or you will have a lop sided table.) :) Thanks for the confidence that i need to conquer this one.
Wed, 04/03/2013 - 05:53
It's beautiful! And that view you have from your yard? I could only wish haha
Sun, 04/07/2013 - 05:18
For a first project you did great. I can just hear it now. Here is you very soon: "Honey I am going shopping. I think I will just browse around Big Orange for a while." You'll be coming home from all the wonderful sales with clamps, jigs, saws, blades, and drills showing off how much you saved. DIY is an addiction. By the way I have my own terms also but they cannot be repeated in polite company. On another note I asked the 11-year old girl what the first word is in a carpenters dictionary? Her answer "OUCH."
Wed, 10/22/2014 - 10:34
I have the same problem with measurements. The secret I have found is getting a tape measure with the breakdown already on it. It has been a lifesaver for me. Good luck!
Over a year ago my wife Rebecca and I decided that our two oldest children would love to have bunk beds. They are close in age and already share many toys, so sharing a room made sense. Plus we had to make room for our third child that was on his way!
We searched for bunk beds and found that those within our budget were made of low quality plywood. We were concerned about the safety of potential bunk beds and whether they could withstand our boys’ roughness. Quality bunk beds, on the other hand, were easily above a thousand dollars which was way beyond our budget. We were pretty bummed that we could not find our kids a suitable bunk bed within our expectations.
Then Rebecca suggested: “You could build them one.”
Hmmmmmm. It was an interesting statement from my wife, perhaps even a challenge. A challenge that I immediately immersed myself into. Mission accepted!
What I did differently:
6'x3' Farmhouse table. Top is made of 2x8's, stained with MinWax natural oak. Legs are 5"x5" "husky" legs found on Etsy.com. Side aprons are 1x6 pine. The base has a basecoat of mahogany stain, covered my antique white milk paint and distressed with an orbital sander.
I was hoping to get the same "old world chipped paint" finish that Ana did on one of her tables, but I couldn't get it to replicate. But I'm still happy with the results.
Last summer we got a new terrace and definitely need new outdoor dining furniture.
My hubby built this because of the original inspiration of the one on your site. The Vanity Hutch with recessed lights. So thankful to have had the original photo and plans to work from. I love how it came out. The countertops are concrete.
Love, love, love the ideas on your website. Thanks so much!
Mon, 02/16/2015 - 13:16
This is really awesome! It looks really beautiful in your bathroom!
Made these chairs for my 1 year old to use as she is learning to stand and climb!
Used the plans here to make the table. Modified the dimensions slightly to fit my space by re-drawing the plans in AutoCAD 3D.
Due to the size and weight of this table (48" square), I upgraded the legs to 4 x 4s. I swapped out the 2 x 2 runners for 2 x 4s.
Added stainless steel adjustable feet to the legs for leveling. Wanted to keep the wood up off the ground since this table sits on my back patio.
Amazon link for feet:
https://www.amazon.com/gp/product/B08VRPCDNL/ref=ppx_yo_dt_b_asin_title…
This was my first real build!! I did it simultaneously with the elementary trestle desk, land of nod bookshelf, rolling cubbie stools and hanging bookshelf! My son wanted the ladder vs the steps and was thrilled with the hammock made out canvas drop cloths:) I made a simple bed box for chalk and cups of water at bedtime and just screwed it in to the top 2x4! the build was easy...however the assembly took my daughters help! It took me about 3 hours to build the bed and I stained it with general finishes java gel stain! It was so much fun and I am so addicted!! I will submit brag posts for the other builds soon!
Fri, 04/05/2013 - 17:18
What a lucky guy. All the builds came out fantastic and I love the added touch of the hammock. The post-it: priceless!
I made the one with the different color chairs and chalkboard table top first.
I then made the batman set for my nephew.
I recommend using 2x2's for the legs on the chairs like another bragger does, the 1x2's weren't sturdy enough for my kiddos.
Thanks for the plans!
Started with the regular loft bed, and added 10 inches to the height. Then I made a ladder instead of stairs to save room. Enclosed it, then added the finishing touches. Link to the process and my son's reaction is below.
-John
Comments
Ana White Admin
Thu, 04/15/2021 - 09:53
Looks fantastic!
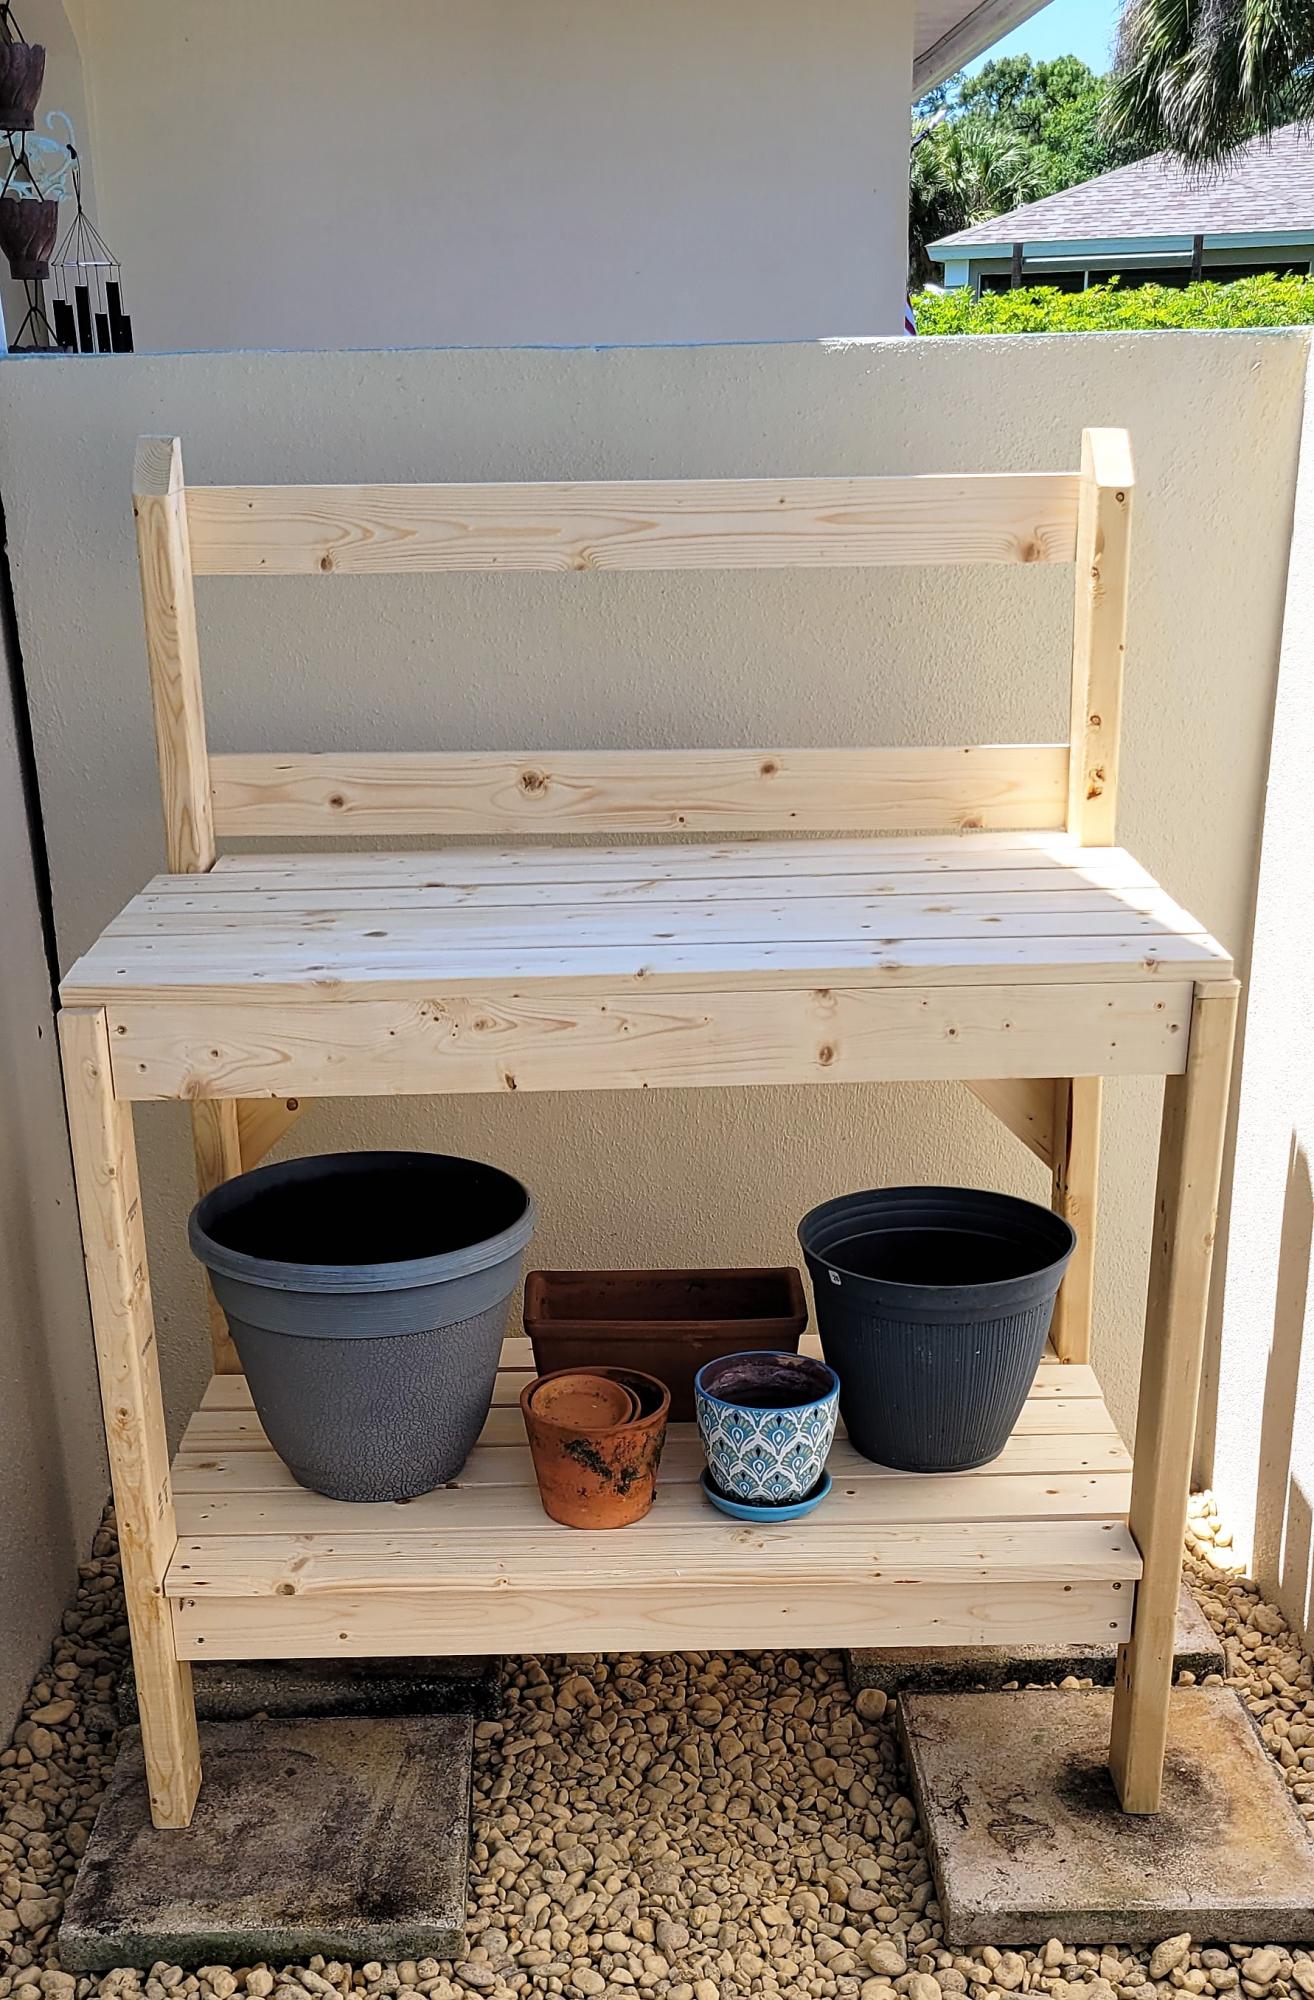
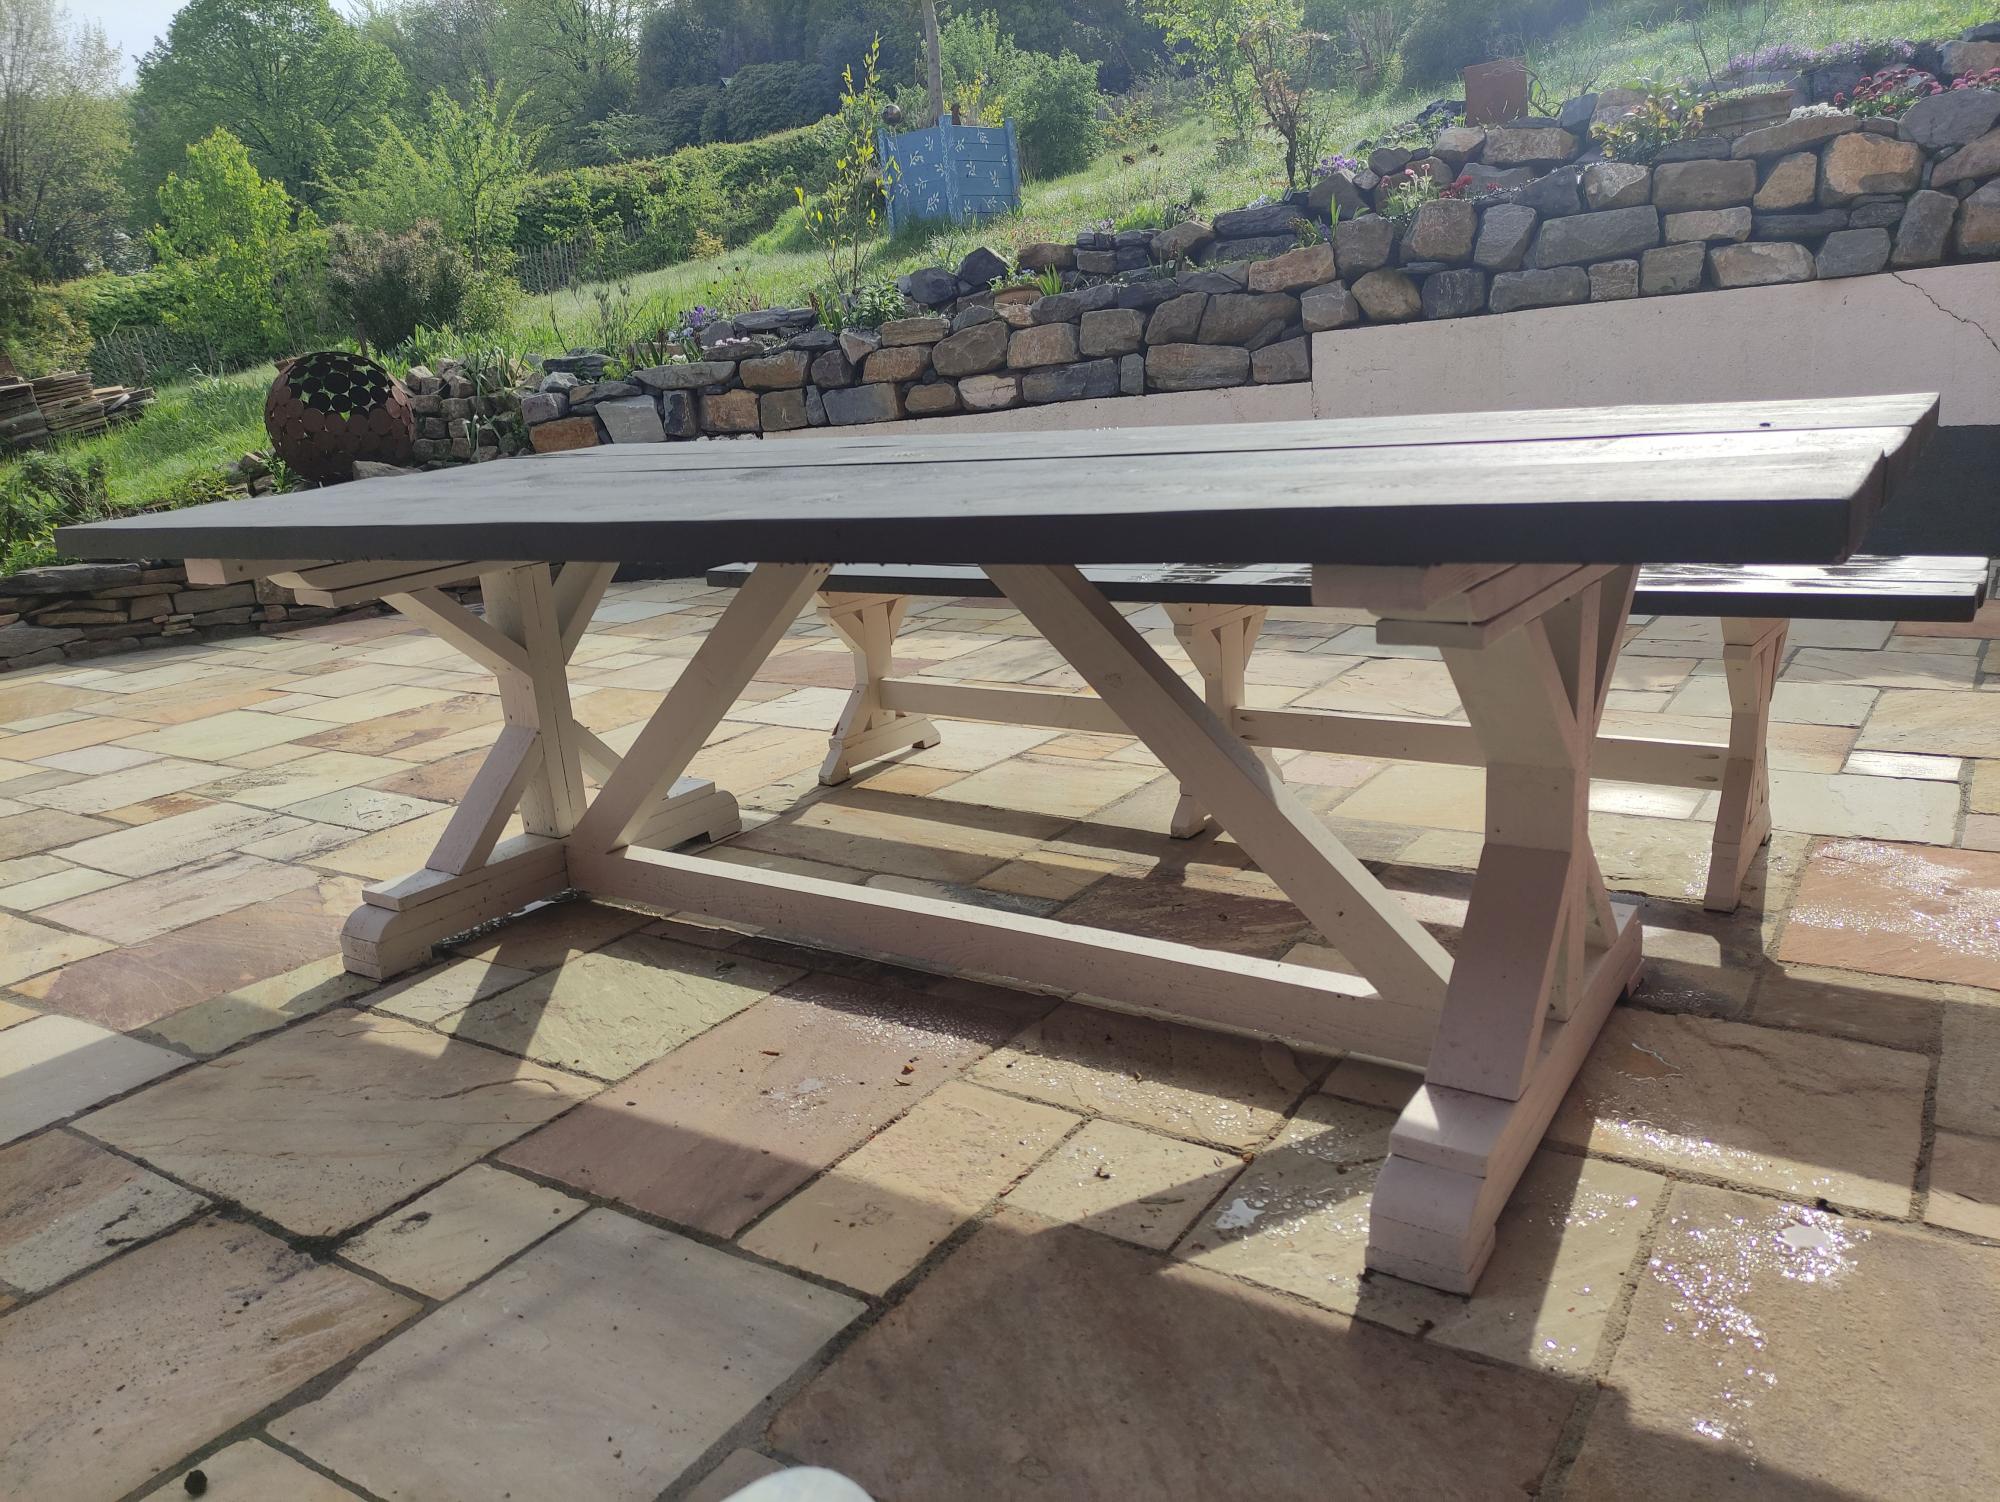
Time to get planting, awesome build!