Community Brag Posts

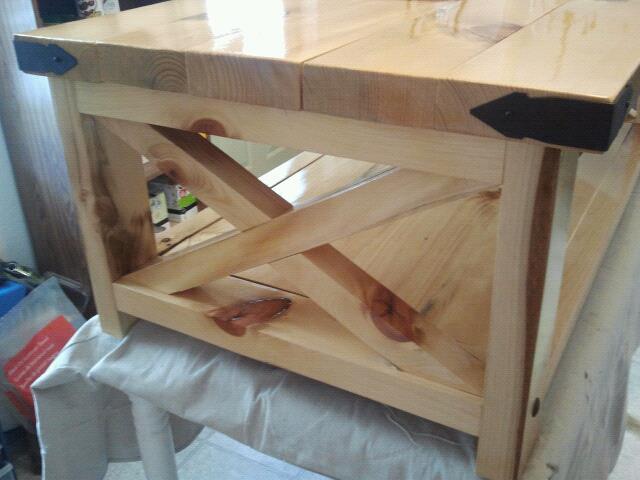
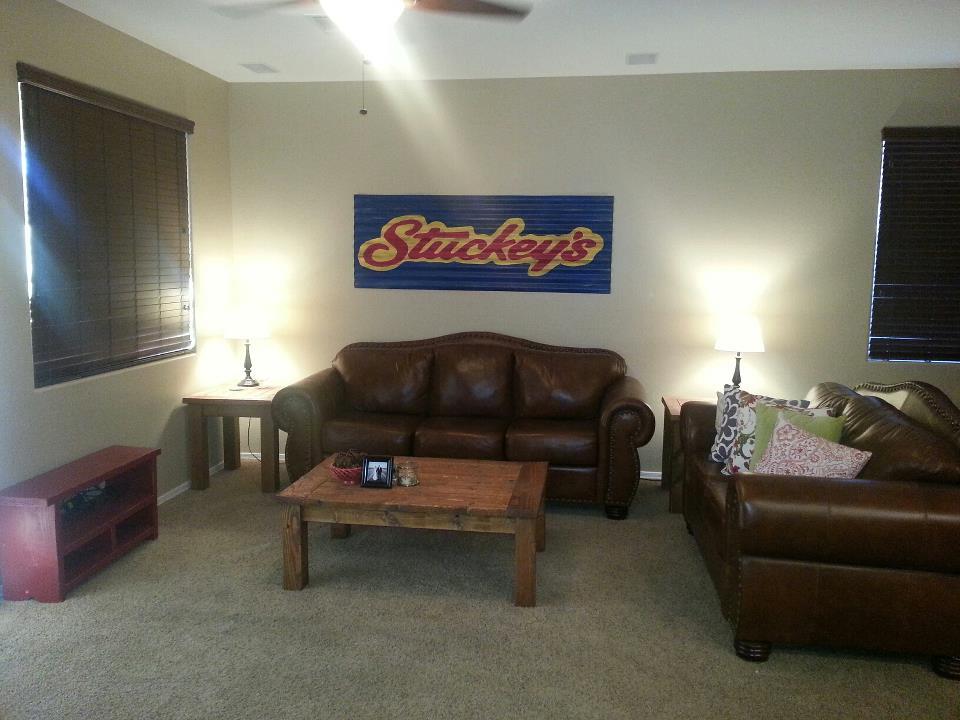
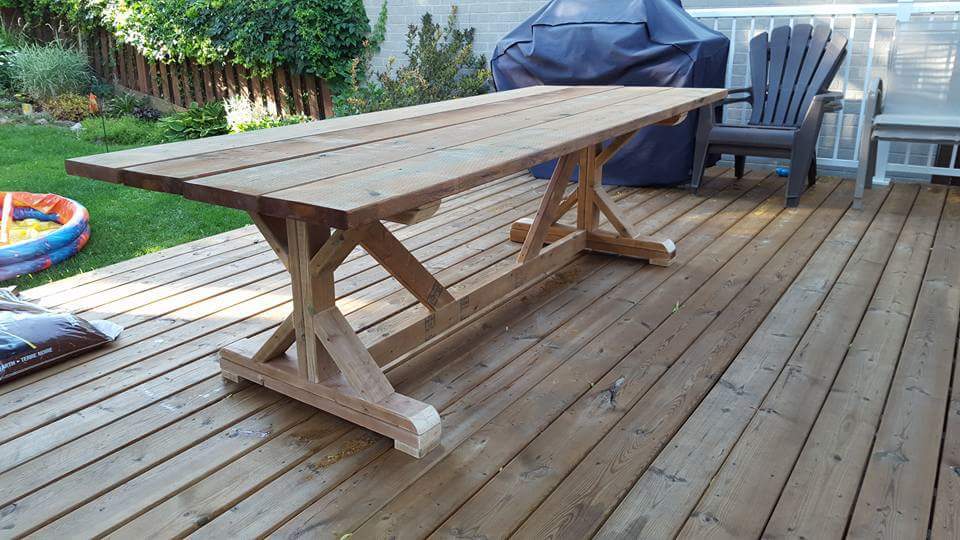
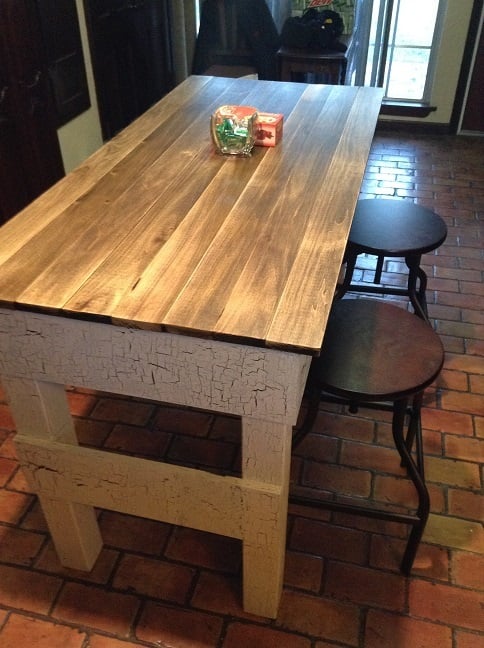
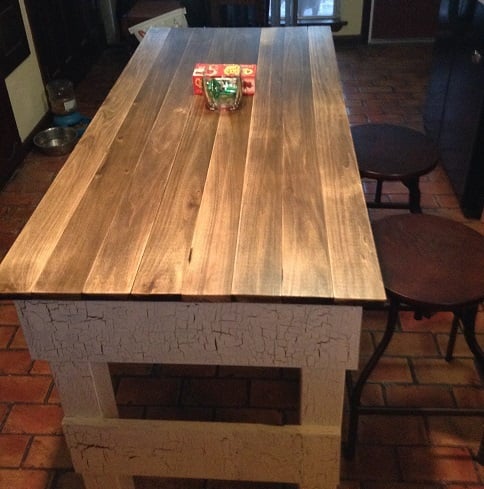
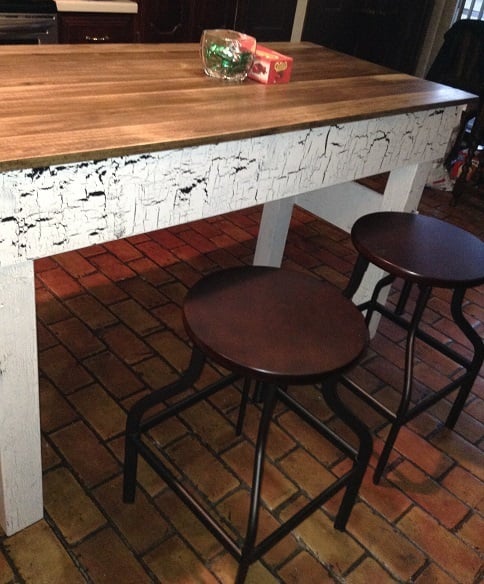
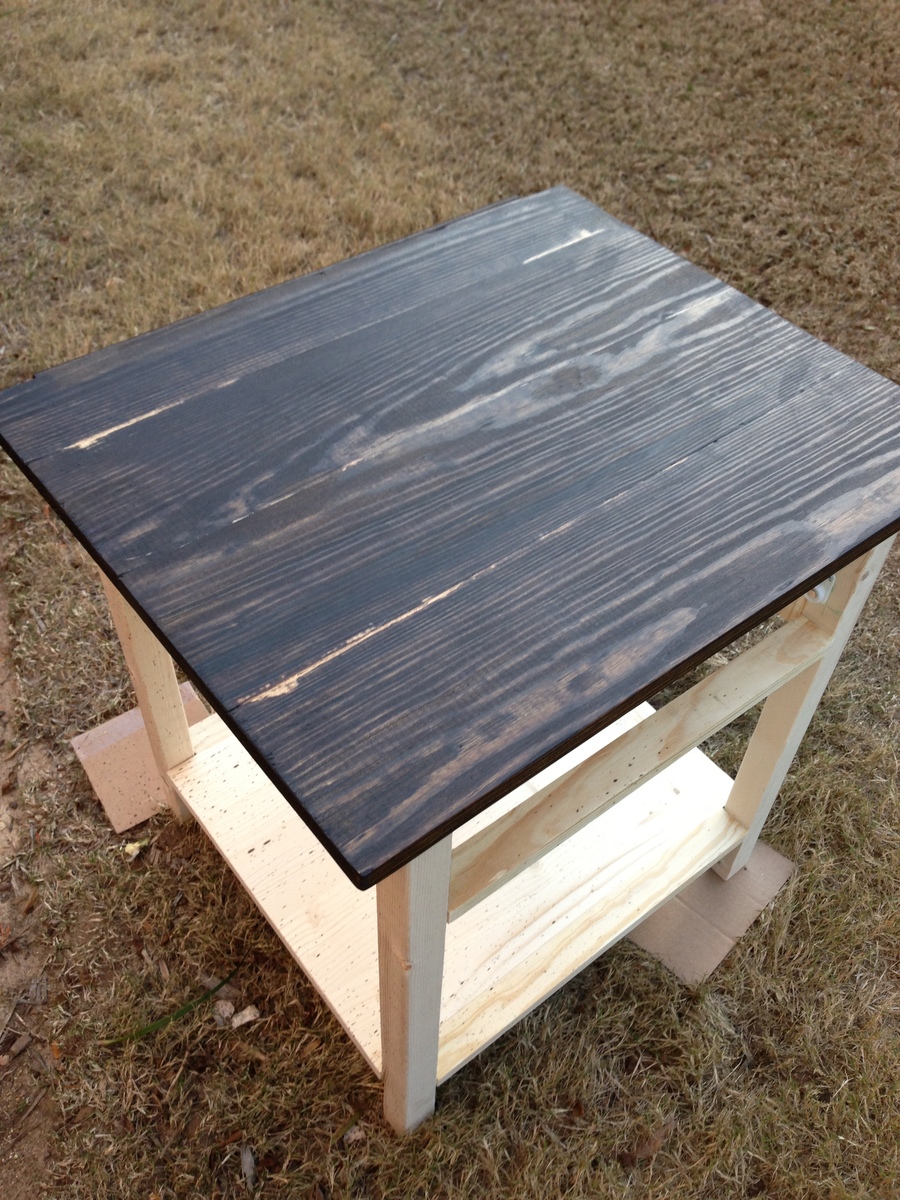
Natural Look of Rustic X Coffee Table

Submitted by aleeman27 on Mon, 01/21/2013 - 19:01

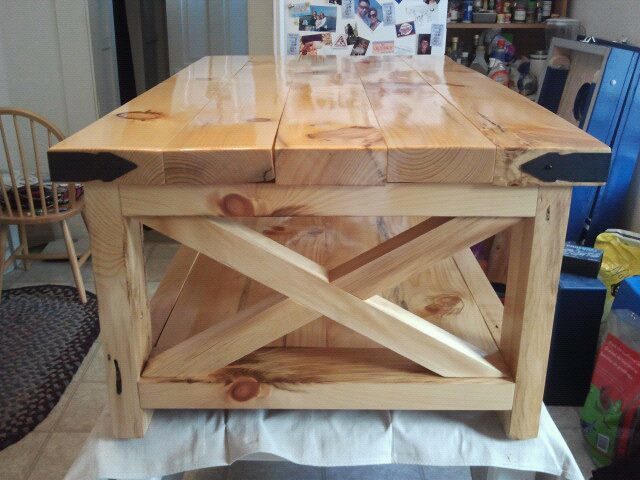
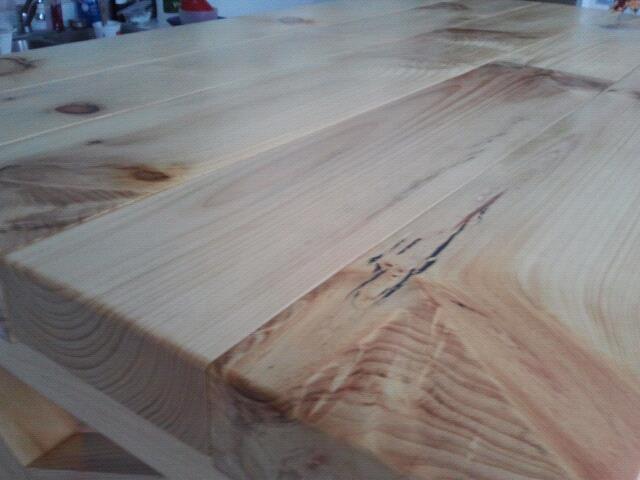
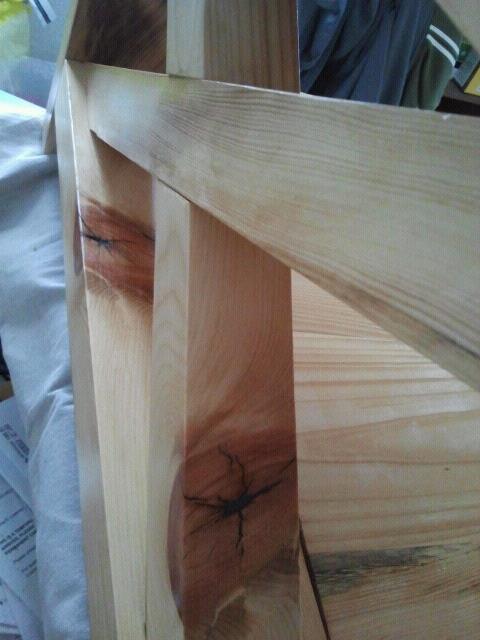
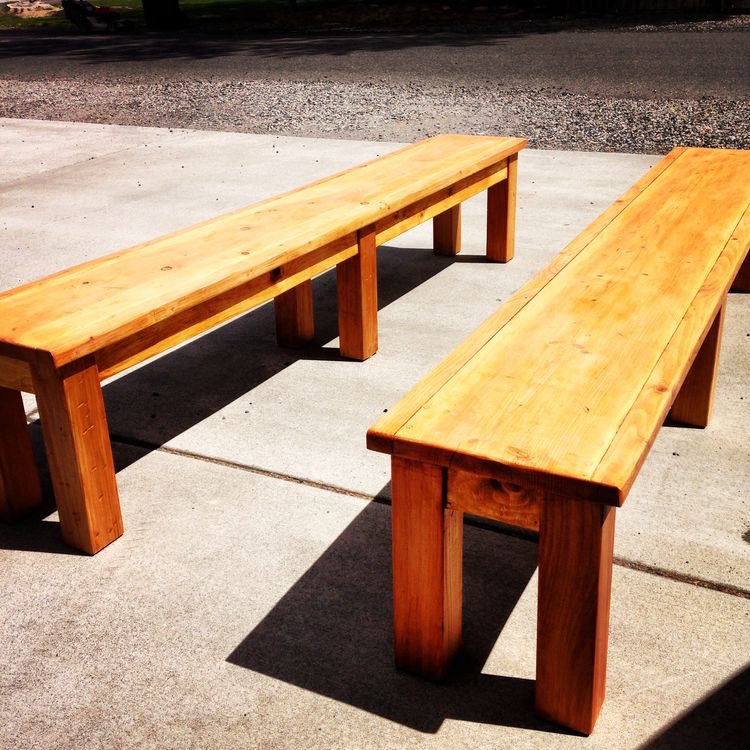
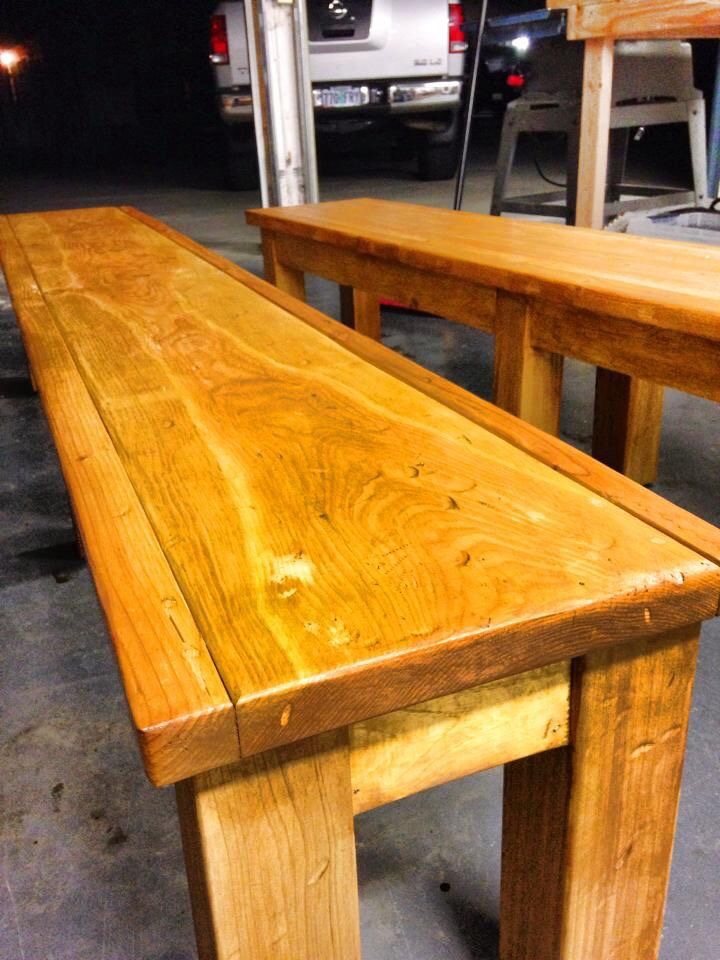
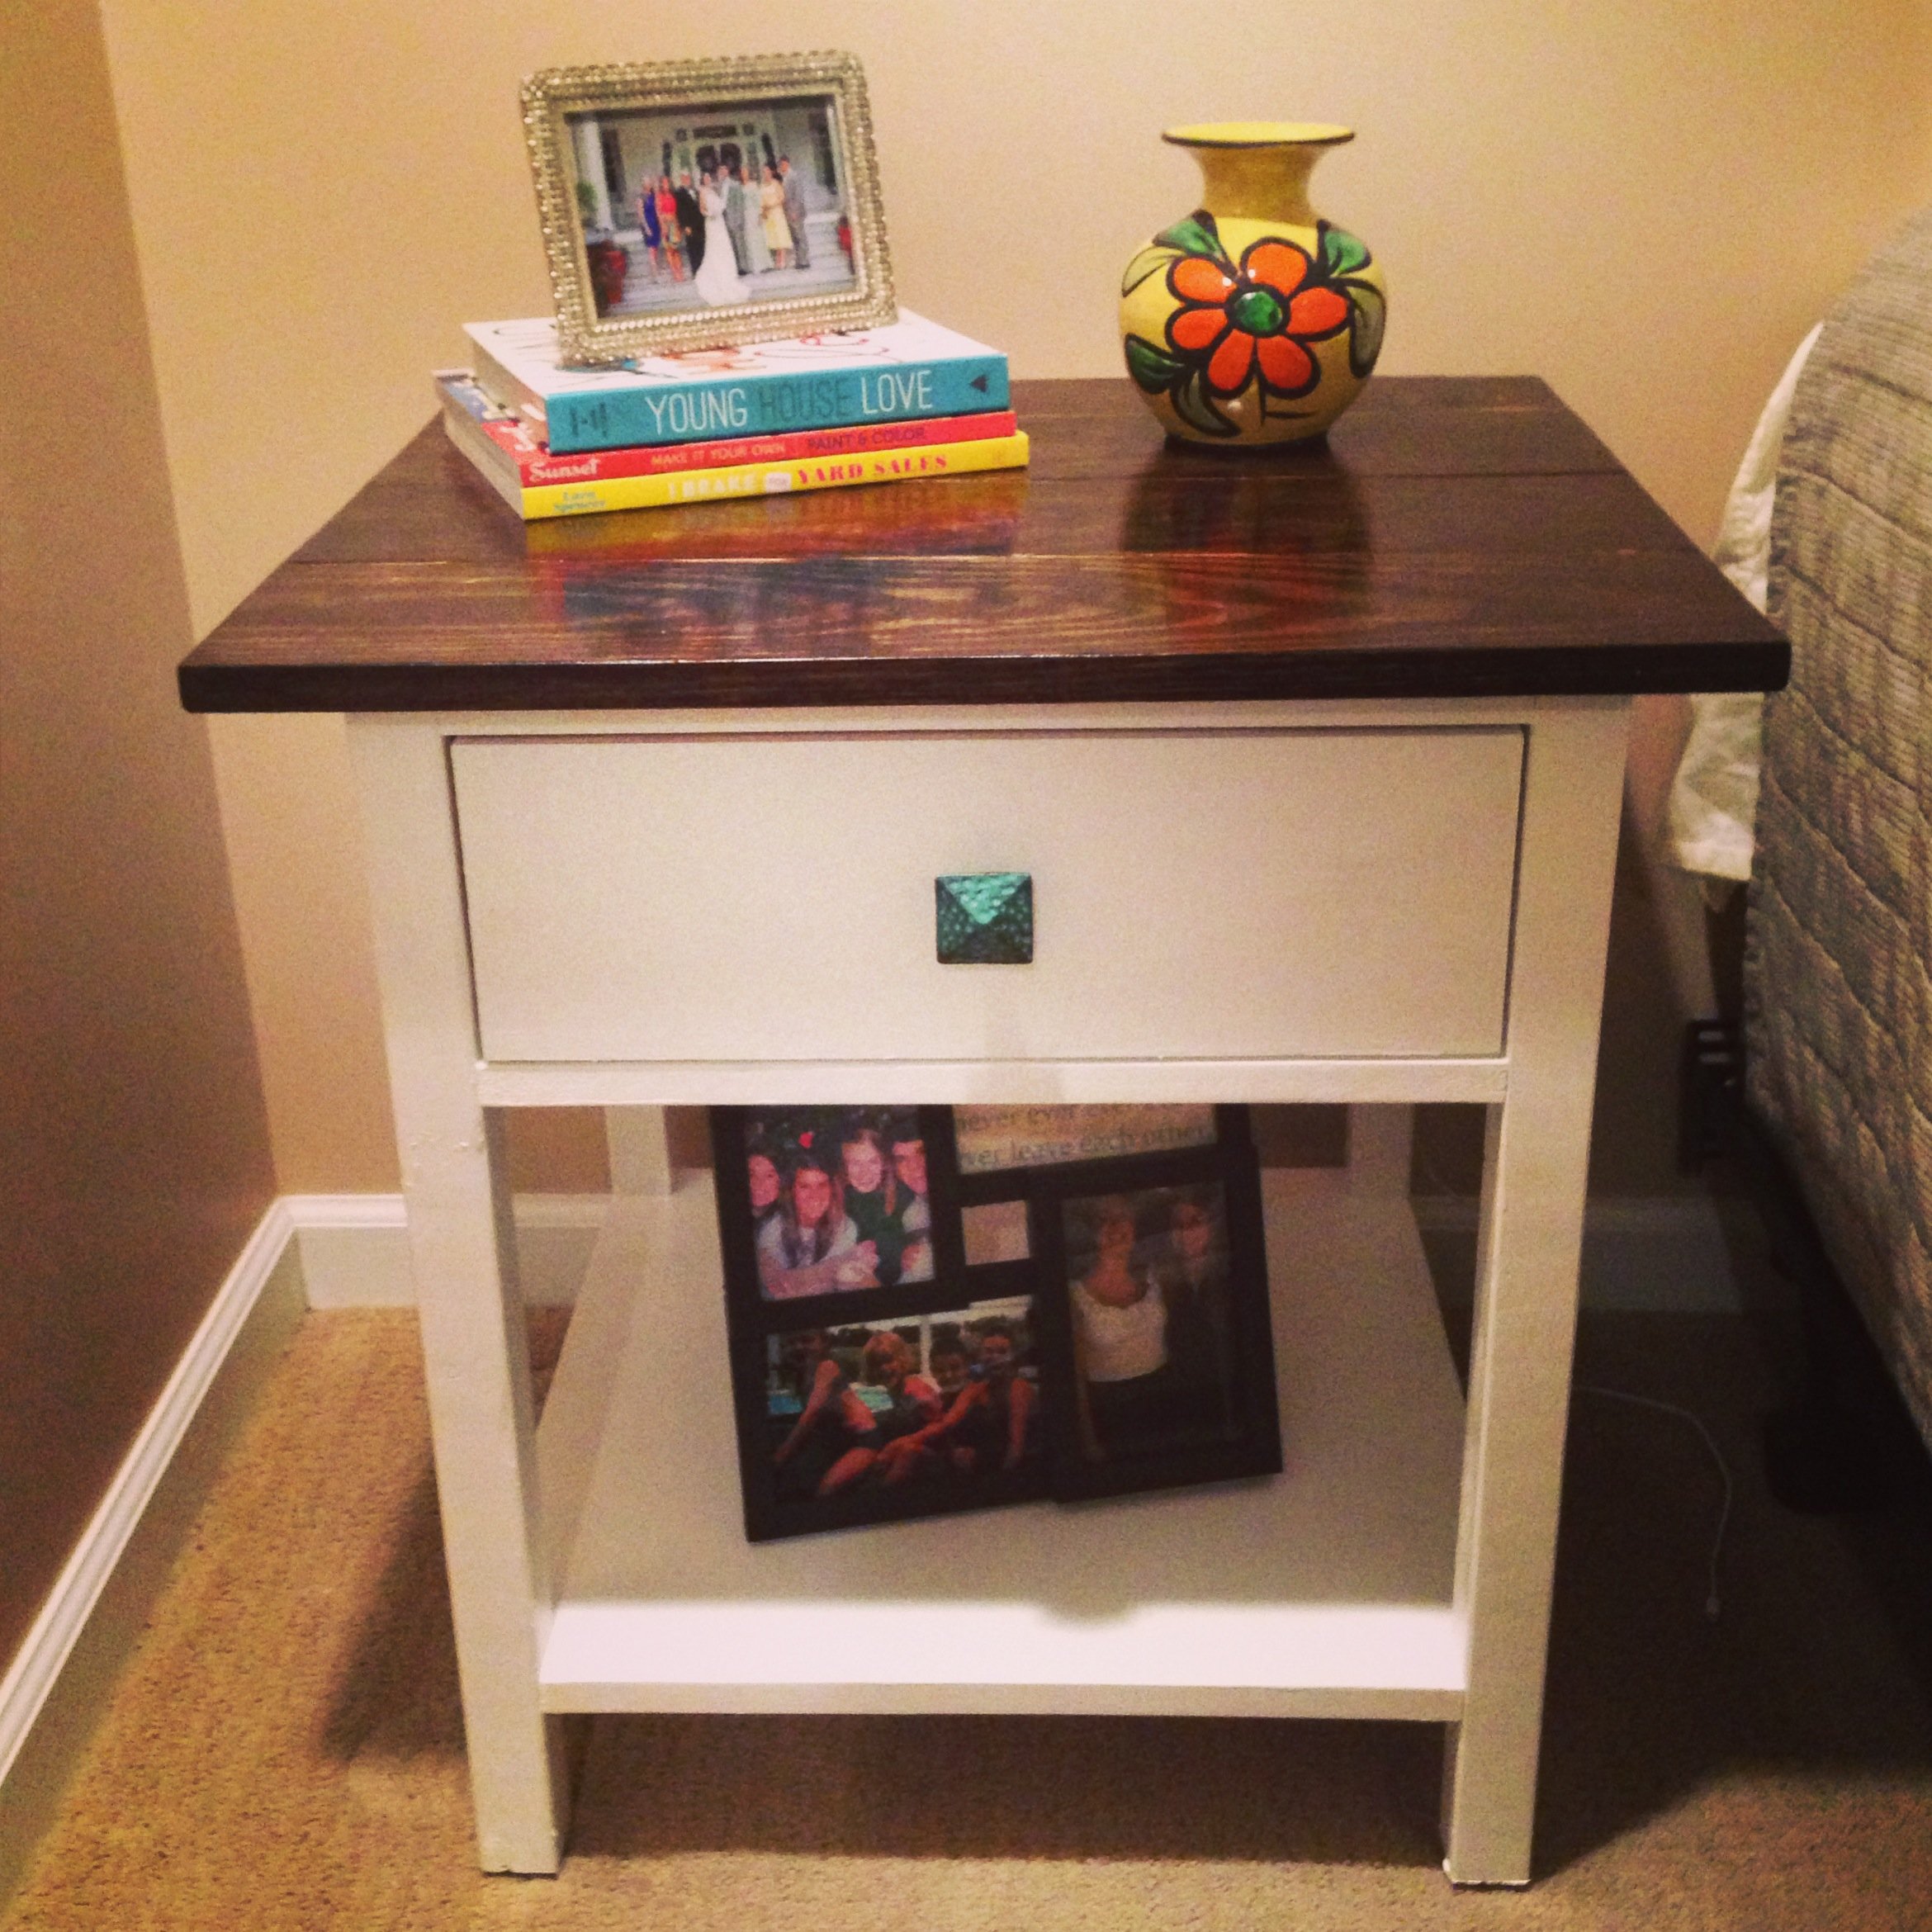
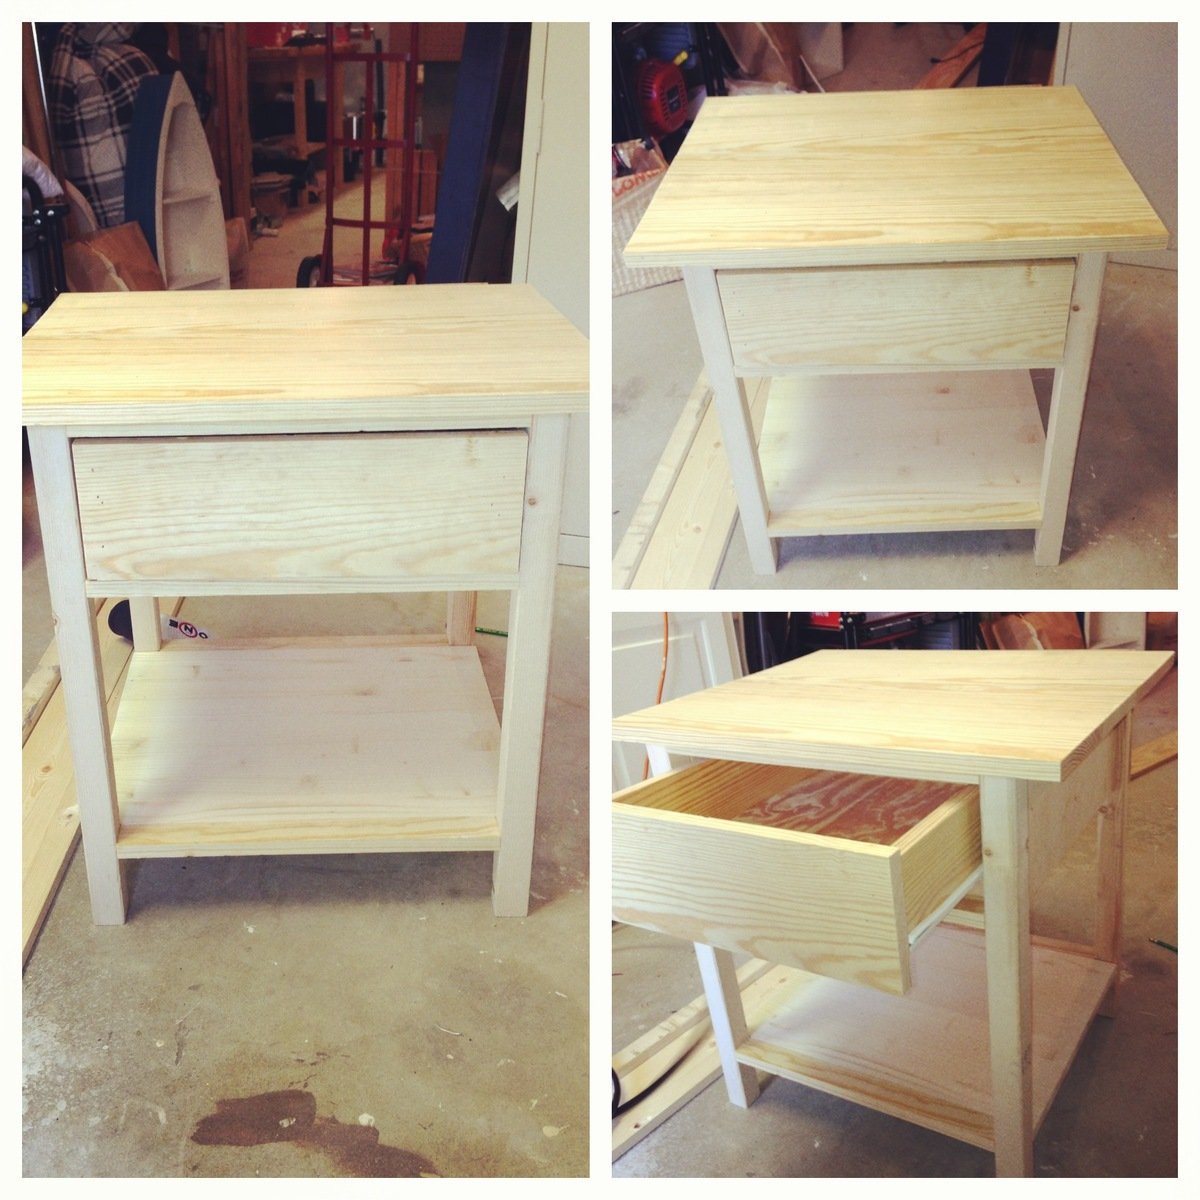
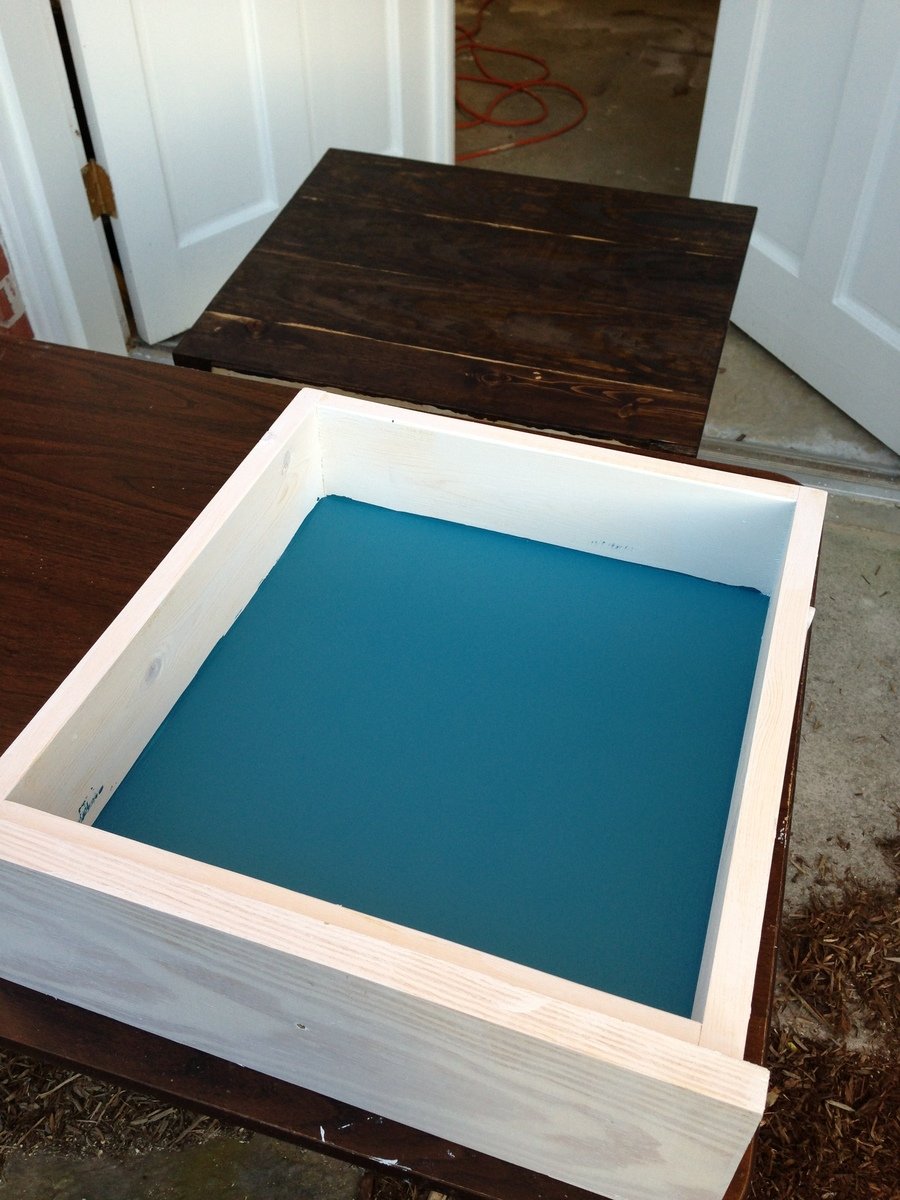
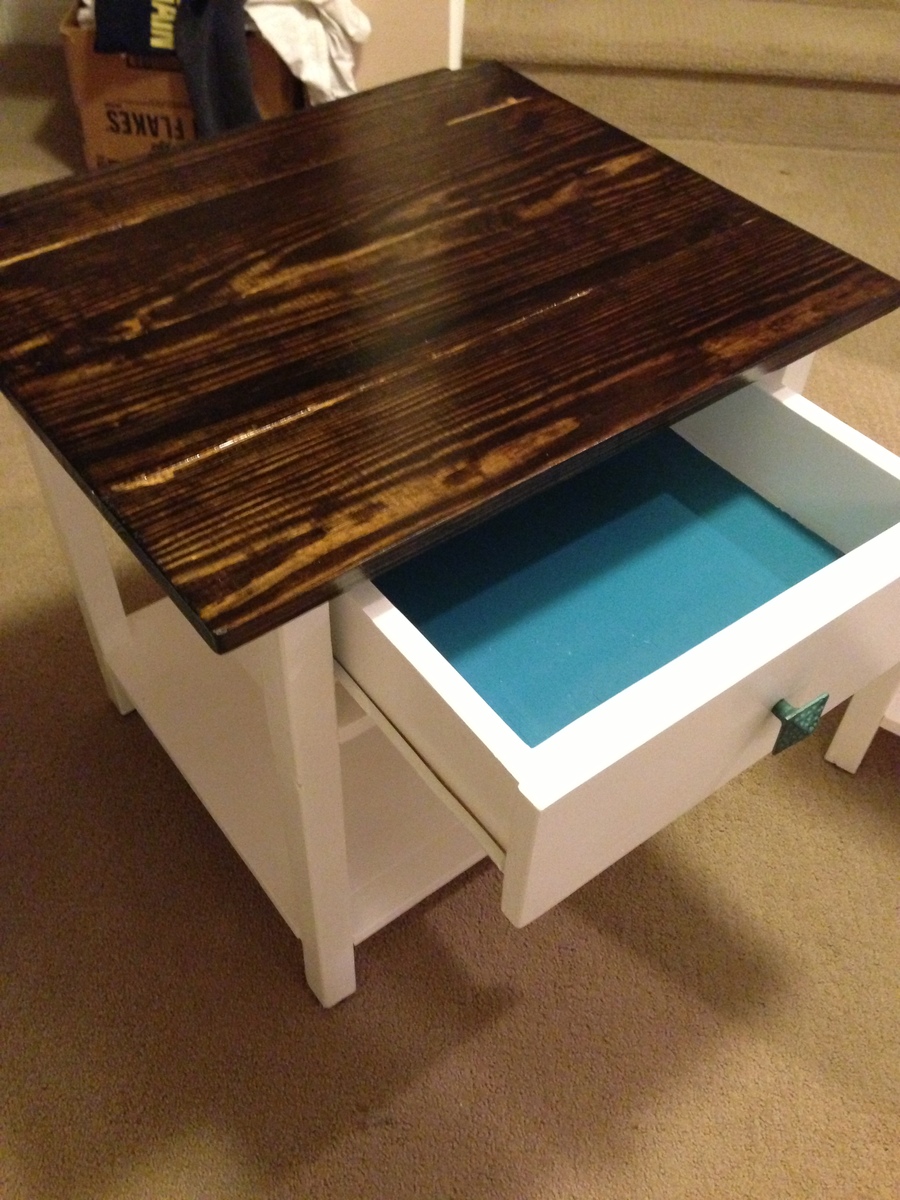
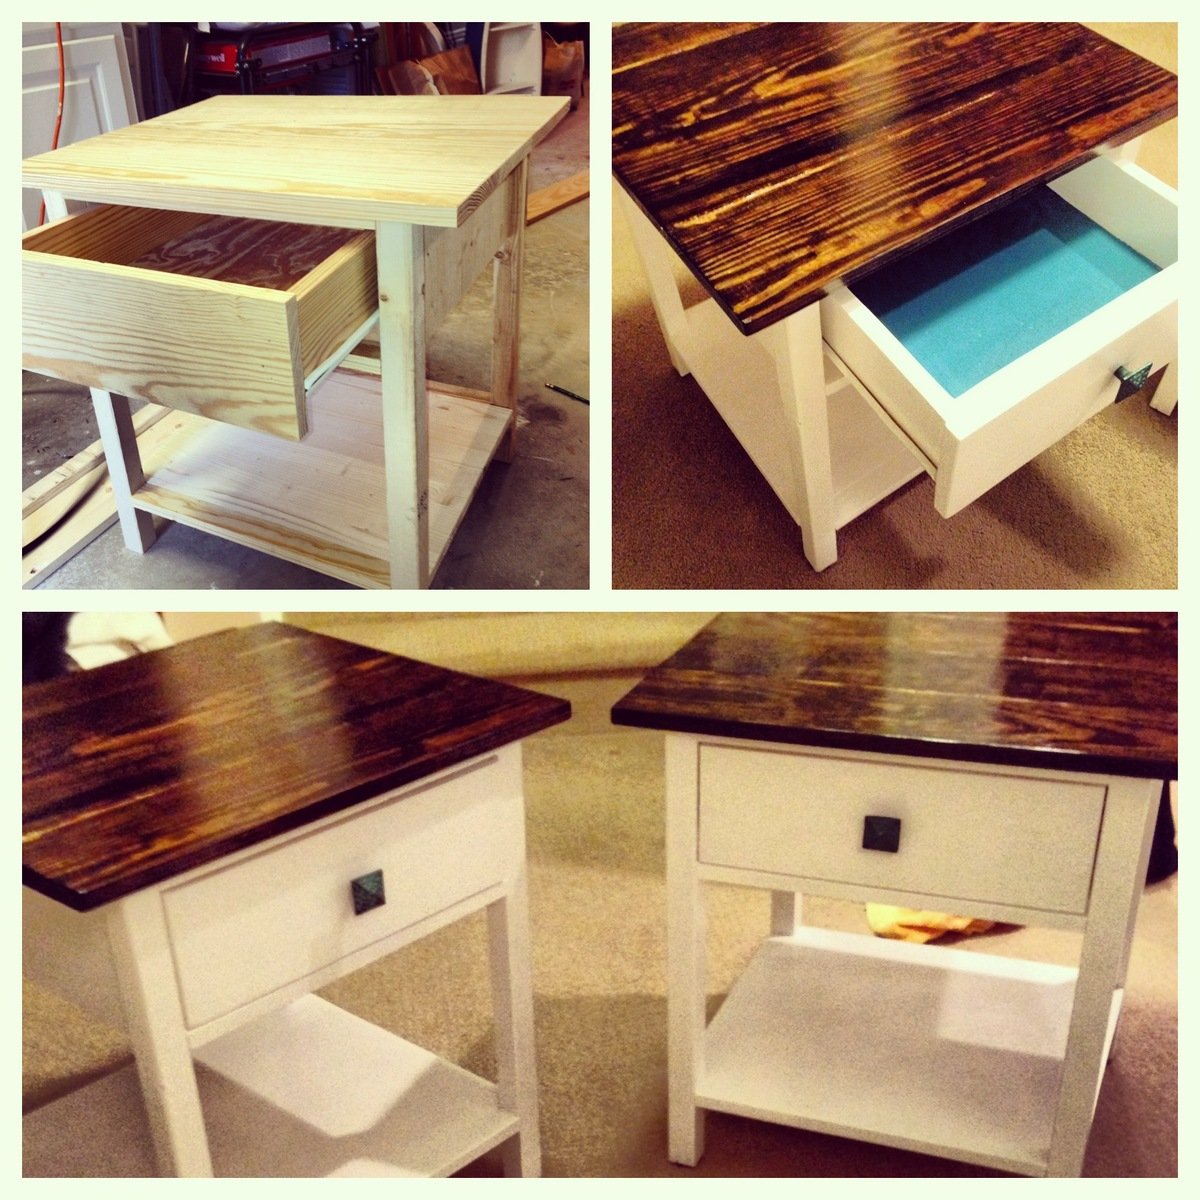
This is my first real woodworking project. This is my version of the Rustic X coffee table. Was made from raw lumber, not what you normally buy at a lumber store. Made of White pine. It wasn't planed either haha. That took me lots of extra time sanding and evening things out. But I do love the knots! After everything was assembled, I used an ebony wood filler in some of the cracks around the knots or any slight splits to add more to that rustic look. I sure to love the fact I made that decision! After that set up for a few hours, I used a natural stain. Only one coat. I sealed it with about 4 coats of glossy polyurethane. I definitely made some mistakes and learned from them. Although, I have to say the Kreg jig is my most favorite tool! If you don't have one, GET ONE! Best invention ever. I am actually onto my second project. I am making the matching end tables out of the same wood, same tree, so they will all be identical. I cant wait to get them all finished and displayed in my living room!

Built from Plan(s)
Estimated Time Investment
Week Long Project (20 Hours or More)
Finish Used
Cabot Natural Stain with glossy polyeurethane. make sure you use the finishing sponge in between each coat to get that super smooth mirror shine
Recommended Skill Level
Intermediate

Comments

rhettar

Mon, 01/21/2013 - 20:18

You did a beautiful job for your first project, I love the finish. I love my Kreg jig too, it was my Christmas present to myself. I used the little single jig to build a project, man what a difference the upgrade makes!

andrew gonzalez (not verified)

Tue, 01/22/2013 - 17:20
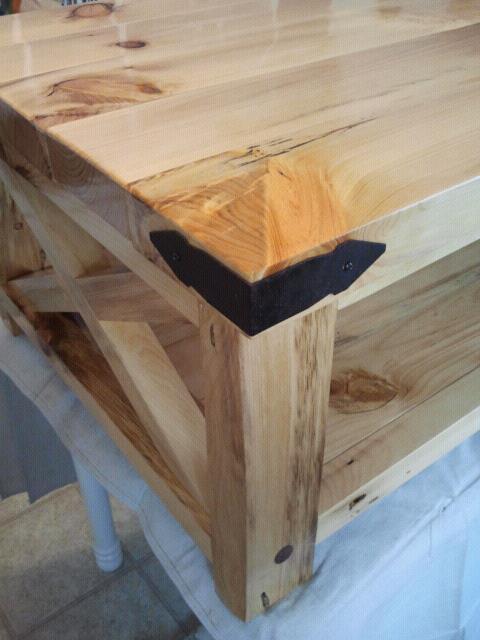
were did you get the corner brackets? i have been looking everywhere thanks in advance

jwilson

Wed, 03/19/2014 - 03:02

Did you use an oil based or water based poly on the top of the table?

Triple Printer's Cabinet/Media Console

Submitted by shawndye on Sun, 11/16/2014 - 17:13

We used the plans but slightly adjusted them. We added a piece of lattice to the inside of the cabinet for a door stop, and left out the center drawer and made a shelf instead for our cable box and internet. The second photo compares it to the Restoration Hardware piece that costs upwards of $1400. Total I spent just under $400. We bought the hinges and cabinet pulls on overstock.com.

Estimated Cost
$400
Estimated Time Investment
Week Long Project (20 Hours or More)
Finish Used
Minwax polyshades in satin black
Recommended Skill Level
Intermediate

Comments

Kitchen cabinets

I took an old storage closet and turned it into a kitchen so that we could rent out our downstairs using Ana's basic cabinet plans altering them to fit my space. I really liked that she used 2 x 6's for the base of the cabinets and it worked out perfectly for the toe kick. 

Estimated Cost
$300 for materials and paint
Estimated Time Investment
Week Long Project (20 Hours or More)
Finish Used
exterior primed with zinsser oil based primer, top coat is oil infused furniture paint white on top, medium gray on the bottom. The inside of cabinet is clear shellac + water based polyurethane.
Recommended Skill Level
Intermediate

Kid's Country Bench

I made the kids bench with 2x rather than 1x because i'm a pretty big guy and wanted to be able to actually sit on this and not be worried. This was my first woodworking project since middle school.

Estimated Time Investment
Afternoon Project (3-6 Hours)
Finish Used
left over red paint
Recommended Skill Level
Beginner

Entryway Lockers

My husband and I built this based on the braden entryway system with a few modifications. Love it!

Estimated Time Investment
Weekend Project (10-20 Hours)
Recommended Skill Level
Intermediate

Comments

King size farm bed

Submitted by rburmania on Thu, 02/23/2017 - 18:55

A gorgeous king size farm house bed. Created for a customer. If you are interested please check out our Facebook page, R&L Custom Creations of West Michigan

Estimated Cost
$350.00
Estimated Time Investment
Week Long Project (20 Hours or More)
Finish Used
Provincial minwax stain
Recommended Skill Level
Advanced

2x4 Modern Adirondack Chair and Loveseat

Submitted by SofiaTaz on Sun, 12/06/2020 - 12:51

We loved the Modern Adirondack Chair pattern so much that we adapted it to have a matching love seat. It turned out beautifully!

Estimated Cost
$200 CAD
Finish Used
Dark walnut stain
Recommended Skill Level
Starter Project

Comments

My first build!

Submitted by Hokulani1 on Fri, 01/25/2013 - 09:47

Hailey Platform Bed - Queen size

This was my first furniture build! I am very pleased! My husband was too! :) I learned some things along the way. It took longer than I had hoped, but I kinda expected it since it was my first project. I made a classic rookie mistake.....I ran out of wood by not planning ahead. I didn't calculate the slat spacing (and the plans don't specify) before I started them and I had already finished laying 75% of them. I wasn't about to go back, pull 'em all up and redo the spacing. So, I went out the next day and picked up some more wood. Not a big deal, at least I know our butts won't fall thru the cracks! :) So, how do you like the two-toned staining? It was such a pain to stain it after it was put together! After doing a few slats, I realized how silly that was to spend all that time and waste my stain when the bottom is ALWAYS covered. Ya know what I mean?! So, I stoppped, let it dry, and put it in the room. I already had the headboard. It was a cheap find on Craigslist. I just stained it to match the frame.

So, the other learning aspect was where to place the screws. I don't have a Kreg jig. I used a countersink bit for every screw and had to place them on the outsides. The plans are designed for Kreg jig users. Got plenty of practice using the drill, changing bits, countersinking, etc.! We don't have one of those quick change thingy's. It's on my list the next time I hit up Lowe's!

I love the new bed frame! It was so nice to get off the cheapy metal thing that's so noisy. And nice to get rid of the boxspring! We are sleeping soundly now. Lots of compliments on it too! Project 1 finished and looking forward to my next one! Thanks Ana. :)

Built from Plan(s)
Estimated Cost
I don't remember!
Estimated Time Investment
Day Project (6-9 Hours)
Finish Used
Rust Oleum Kona Stain - one coat
Recommended Skill Level
Starter Project

Comments

Entrance bench. Mudroom

Submitted by Anonymous (not verified) on Sat, 02/25/2017 - 20:13
Entrance Bench with shoe rack on the left side. Should have made the show rack ~1-2inches wider (currently 11.5")
Built from Plan(s)
Estimated Cost
300$
Estimated Time Investment
Weekend Project (10-20 Hours)
Finish Used
Polyurethane water based
Recommended Skill Level
Beginner

doll horse stable

Submitted by troy h on Sat, 01/26/2013 - 18:35

Followed the plans, a decopage floor and roof, and a sign for the stable.

Estimated Time Investment
Afternoon Project (3-6 Hours)
Finish Used
none
Recommended Skill Level
Starter Project

Comments

Done!

Submitted by handymanny on Tue, 11/25/2014 - 16:58

Thanks, Ana! My main recommendation is to give more details on how to connect the three separate pieces. I ended up using two 3/8" carriage bolts on each side of the headboard and four 5/16" carriage bolts across the footboard. I also made the 2x6 slats in the frame such that my mattress is "countersunk" since we have such a tall mattress. Otherwise, the design and instructions were great. 

We used Silk Pillow mate paint from Home Depot, and then did some distressing (but not much!) and went over with American Paint Company brown glaze (sponge brush with a old white t-shirt to customize the darkness).

I spent more than Ana's impressive $120, but definietely kept all my expenses under $400. Worth every penny! 

-Mike

Built from Plan(s)
Estimated Cost
$300-$350
Estimated Time Investment
Week Long Project (20 Hours or More)
Finish Used
Silk Pillow Latex paint and American Paint Co. brown glaze. (If I were to do it again, I would use chalk paint or milk paint instead of latex... easier to get the distressed look)
Recommended Skill Level
Intermediate

Comments

Farmhouse X Table

Submitted by Shugh on Tue, 02/28/2017 - 10:38

I really enjoyed making this plan.  Only disappointment was the red stain finish I chose, live and learn.

The plans were helpful and accurate!! 

Another thing I goofed up on and learned was on the 45's on the legs, I cut along the length instead of the width at first, wasted a 2x4 lol That was a good lesson to learn though.  Shouldn't happen again any time soon...

Built from Plan(s)
Estimated Cost
A lot of cost was in the stain and poly not shown here... wood cost was pretty low, around $100 if I remember rightly.
I'm working on the matching bench next, got the wood last night for $35 (Cdn)
Estimated Time Investment
Day Project (6-9 Hours)
Recommended Skill Level
Beginner

Custom rolling cabinet

Submitted by AKMan279 on Wed, 12/16/2020 - 09:39

I built this custom cabinet with locking casters to use to reload shells and store ammunition.

Finish Used
Linseed oil on maple top and just polyurethane on rest of cabinet.

Our version of the Rebecca Media Center

Here is our version of the Rebecca Media Center. We love it!! It provides so much storage and since it's only 11 3/4 inches wide it does not take up a lot of space. Thank you so much Ana for these plans.

Estimated Cost
$400-$500
Estimated Time Investment
Week Long Project (20 Hours or More)
Finish Used
White paint and poly
Recommended Skill Level
Intermediate

My modified Michaela's Kitchen Island

I wanted to build my Wife a kitchen island and we settled on the Michaela's Kitchen Island design. I made it without the bottom shelf and bought a couple of spin top stools from Pier One. 

Ana, thanks for your awesome website that has inspired me to get into wood working. Thanks for sharing your knowledge, experience, and passion with the rest of us.

God bless,
Jody & Glenda Knowles

Built from Plan(s)
Estimated Cost
$100
Estimated Time Investment
Weekend Project (10-20 Hours)
Finish Used
I used Minwax Polyshade "Espresso" for the top. For the bottom I used Modern Master's Crackle Finish along with an ebony latex base, and antique white latex top finish (the crackle medium is used between the top & bottom coat). I also gave the top a couple of extra coats of Minwax Polyshield.
Recommended Skill Level
Intermediate

Comments

The Long Bench

Doug Fir Long Benches for dining room table

Estimated Time Investment
Weekend Project (10-20 Hours)
Recommended Skill Level
Intermediate

Vintage bar stools

Submitted by bunchsc on Wed, 01/30/2013 - 20:31

Really enjoyed building these stools. This is the most difficult project I have attempted yet from your plans. Next, I am going to build a farmhouse headboard / footboard. I really enjoy browsing through all of your wonderful plans.

Estimated Time Investment
Weekend Project (10-20 Hours)
Finish Used
Primed, spray paint brown, apply vaseline to desired distress locations, paint antique white, when dry rub with wet cloth until desired effect, poly.
Recommended Skill Level
Intermediate

Faux Mantle

Submitted by nikkirumm on Sun, 11/30/2014 - 12:04

The joys of military life is constant moving and rarely  having a mantle to hang stockings on. Problem solved with Mimi's Faux Mantle and it'll come with us next time we move. This was my husband's second build that I teamed up with him on. We're both pretty excited about how it turned out. 

Estimated Cost
$100 excluding stain, nails and screws
Estimated Time Investment
Day Project (6-9 Hours)
Finish Used
Mixwax Polyshades in Mission Oak
Recommended Skill Level
Beginner

Comments

JoanneS

Sun, 11/30/2014 - 13:02

Looks Marvelous!  Love the trim, and the finish is awesome.  Great job on this build!

Seasonal And Holiday

Extended cubby bench

Submitted by Anonymous (not verified) on Mon, 03/06/2017 - 15:53

Basically went off the design of the 3 cubby storage bench but extended to about double size. Took me a while to rework all the dimensions but luckily it worked out. I also extended the sides and back up 2 inches to accommodate a cushion (at some point) 

Built from Plan(s)
Estimated Time Investment
Weekend Project (10-20 Hours)
Finish Used
Valspar Whispy white sample from Lowes
Recommended Skill Level
Beginner

Farmhouse Bedside Tables 2 toned

Submitted by lolli020 on Sat, 02/02/2013 - 14:17

This was my husband and I's first building project. The plans were very easy to follow, with exact dimensions and lists of materials needed. We are really pleased with how they turned out and are about to build a matching king size Farmhouse bed to go with the Farmhouse bedside tables.

The pocket hole jig was optional, but it definitely helped make the finished product much more sturdy and professional looking. Since that cost about $100, it raised the total price of the tables, but now we can use that on any project. We highly recommend it!

We built both of these in about 2 weekends.

**Also, the plan we followed was for the bedside table in Ana White's published book of plans. It may differ from the plans that this post links to**

Built from Plan(s)
Estimated Cost
$120
Estimated Time Investment
Day Project (6-9 Hours)
Finish Used
-Dark Walnut Minwax Stain for the tops of the table- 2 thin coats, that soaked into the wood for 15-20 minutes each time before wiping excess off
-Polyacrylic clear gloss on top of the stain- 2 thin coats applied with a paintbrush

-Kilz stainblocking waterbased primer
-Clean White Valspar semi-gloss latex paint- 1 quart- paintbrushed and foam roller

-Teal paint for inside the drawer

-Oil rubbed bronze and teal drawer pulls from Hobby Lobby
Recommended Skill Level
Beginner

Comments

rhettar

Sat, 02/02/2013 - 19:06

This turned out beautiful! I already started cutting the wood for mine and will hopefully get it finished by tomorrow (with the exception of the finish). I just love this nightstand and I now have all new bedroom furniture for under $300. Again, you did a beautiful job!