Community Brag Posts

Dog Bunk Bed

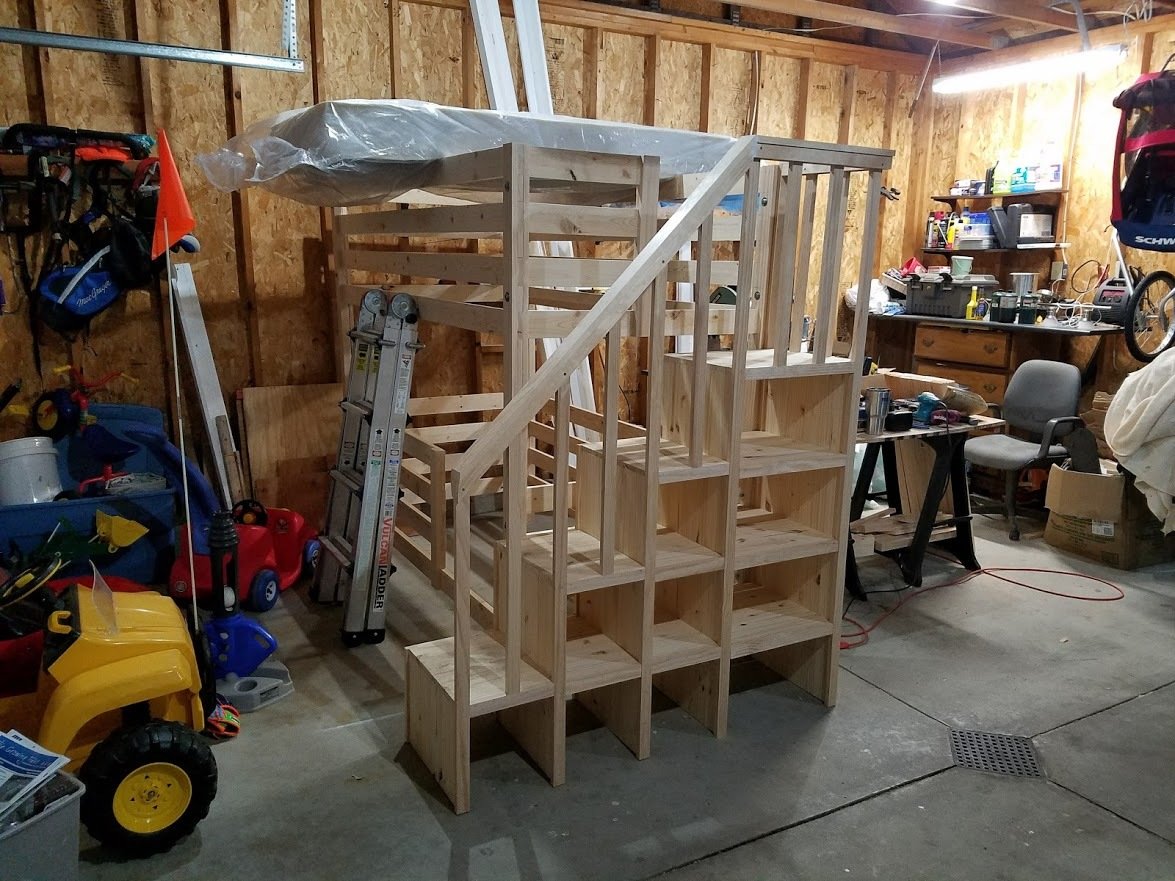
We’ve been looking around for some plans for a doggy bunk bed for a while now, but couldn’t find anything that we liked so I decided to build it from scratch. This is a huge bunk bed that was built based on the size of our larger dog’s bed which is 44 x 35. This was pretty simple to build although the stairs we’re quite challenging as I have never done them before so if I can make it, anybody can.

I must stress that before I found Ana’s website about 6 months ago I could barely cut a piece of wood straight. Over this time I have made several things based on the easy to follow plans on this website which ultimately gave me the confidence to go it alone and build this bunk bed. Friends and family are shocked at some of the furniture I’ve made and some don’t even believe I made them and think I’ve bought them from IKEA. My wife has got a list of furniture she wants to make now including a TV console, an armoire and a twin bed for one our daughters. Every spare second I have now is spent is making furniture and I LOVE it.

For anybody who has never built anything and is apprehensive to do so I would just say, do it. Grab what you need and dive right in. You may get frustrated and scream a bit at first, but the reward at the end is well worth it and each project you do will get easier and easier. Be warned though. The better you get, the more people will pester you to make things for them.

Thank you, Ana.

This was made using cheap 1 x 3 and 1 x 4 furring strips for the railings and bed slats, 2 x 4s for the posts and 1 x 10 board for the stairs.

Estimated Cost
$75 - $100
Estimated Time Investment
Weekend Project (10-20 Hours)
Finish Used
I haven't sanded or finished this yet as we are still deciding on what to do with it.
Recommended Skill Level
Beginner

Comments

Farmhouse Table 1

Used the plans here to make the table. Modified the dimensions slightly to fit my space by re-drawing the plans in AutoCAD 3D. Added stainless steel adjustable feet to the legs for leveling. Wanted to keep the wood up off the ground since this table sits on my back patio. Amazon link for feet: https://www.amazon.com/gp/product/B08VRPCDNL/ref=ppx_yo_dt_b_asin_title…

Built from Plan(s)
Estimated Cost
$220.00
Estimated Time Investment
Weekend Project (10-20 Hours)
Finish Used
Minwax Espresso Stain on top
Minwax Satin Polyurethane on top
Sherwin Williams Exterior Latex Paint - White on base
Recommended Skill Level
Beginner

Comments

Storage Captains Bed

Submitted by Anonymous (not verified) on Fri, 09/16/2022 - 05:03

So this was a really fun project from start to finish, I wanted a storage bed with a place for my son to showcase his Super Hero collection!

Estimated Cost
300
Estimated Time Investment
Week Long Project (20 Hours or More)
Finish Used
Paint
Recommended Skill Level
Intermediate

Comments

Four station desk (PB inspired)

Submitted by monty742 on Sun, 03/15/2015 - 08:58

I really liked the PB mega desk, but I didn't want to spend $1600 on it.  After seeing someone's post here (a couple years ago...) asking for plans on that desk, I decided to do it myself.  I took these two plans and made 4 base units.  They are 18" square at the top and 34" tall.  I used 2 IKEA table tops connected underneath for the top, to make a total height of 36" - counter stool height.  I constructed them a little differently than the plans, but no matter how you make them, the idea is the same.  The plan is to take them apart and make 2 desks once everyone is too old and cool to do homework/artwork together.

Estimated Cost
$500
Estimated Time Investment
Week Long Project (20 Hours or More)
Finish Used
Kitchen and Bath finish paint (2 coats) - it's a little shinier than eggshell (I only used it because I had 2 or 3 gallons extra at home :) then 2 coats acrylic top coat matte finish.
Recommended Skill Level
Intermediate

Comments

monty742

Sat, 08/15/2015 - 04:33

Just seeing your comment...sorry for the delay!  I got the stools and the light fixture at a Ballard Backroom (outlet) store near me.  3 of the stools ended up being about $40 each with the sale they had at the time, and the 4th was $60? - bought at a later time than the first 3.

AlisaH

Wed, 11/04/2015 - 07:40

How did you connect the table tops from the bottom so that the tables were secure together? I'm curious what's the best way to do this. Since two of the four seats will be where the seam is, I want to make sure I secure it properly so it's not wobbly. Thanks so much.


monty742

Sat, 01/09/2016 - 05:06

I'm just seeing these latest comments for the first time, so you may have long finished this project already!  The tops were surprisingly sturdy but I did reinforce them.  I placed the tops on the floor upside down and screwed some metal brackets (about 12" long each) across the joint in four places.  I just screwed them in through holes already in the brackets.  This wasn't the most stable because those tops are particle board and don't hold screws very well...  But since it was already pretty sturdy, I figured it would do.  It has been fine, even with standing on the top (kids who get up there and me hanging the light fixture above).

Once the tops were joined, I placed the bases so there was about a 1" overhang on the top.  To hold the top in place, I used small pieces of wood screwed to the underside of the top at the inside corner to act as a placement stop.  The top is pretty big and heavy even though they are IKEA tops, so they don't have a tendency to move or slide at all anyway.  I'm going to try to figure out how to post another picture of the braces and corner stops...we'll see if I can do it!  Let me know if you have any more questions...again, sorry I didn't see this in a more timely manner!

Pmprdwife

Sat, 01/02/2016 - 05:55

Is the photo above the Pottery Barn version or your product result?  I'm trying to figure out the dimensions for the drawer and shelf configurations.  Thanks!  BTW, I'm totally addicted to your style and personality...my husband loves the productivity inspiration I've received. :-)


monty742

Sat, 01/09/2016 - 10:17

Hi!

I'm glad you like the desk!  The one in the picture is the one I built, not the pottery barn one!  My dimensions were a good bit different than the PB desk - square bases instead of rectangular and counter stool height instead of desk/table height.  So, I have no idea if I have my plans for this anymore, so I went and measured it again for you!  

So each base is 18" x 18" square and 34" high so that with the 2" top the total height is 36".


Each base was made of oak plywood that made with 3 sides, a top and a bottom.  All edges were rabbit joints (3/8" deep in thickness of boards and probably 3/8" wide - not 100% on width of rabbits).  It's kind of a pain to do rabbit joints if you don't have a dado blade for your table saw, so you could use pocket hole screws instead.  I glued and nailed these joints with a finish nailer, I believe.  

I figured a diagram with measurements would be easier than trying to write descriptions...so I'm adding another pic with the dimensions outlined.  Drawing is NOT to scale, so sorry about that!  I really need to learn to use SketchUp.  Let me know if you have any questions!  

Monty742

monty742

Sat, 01/09/2016 - 07:57

Hi!

I'm glad you like the desk!  The one in the picture is the one I built, not the pottery barn one!  My dimensions were a good bit different than the PB desk - square bases instead of rectangular and counter stool height instead of desk/table height.  So, I have no idea if I have my plans for this anymore, so I went and measured it again for you!  

So each base is 18" x 18" square and 34" high so that with the 2" top the total height is 36".


Each base was made of oak plywood that made with 3 sides, a top and a bottom.  All edges were rabbit joints (3/8" deep in thickness of boards and probably 3/8" wide - not 100% on width of rabbits).  It's kind of a pain to do rabbit joints if you don't have a dado blade for your table saw, so you could use pocket hole screws instead.  I glued and nailed these joints with a finish nailer, I believe.  

I figured a diagram with measurements would be easier than trying to write descriptions...so I'm adding another pic with the dimensions outlined.  Drawing is NOT to scale, so sorry about that!  I really need to learn to use SketchUp.  Let me know if you have any questions!  

monty742

Thu, 07/28/2016 - 14:13

No you can't buy them from Ikea.  I bought the table tops from Ikea, but I built the bases.  The dimensions for the bases are in one of the additional pictures with the post if you want to see them!

treverandamber

Mon, 10/10/2016 - 07:41

What are the total dimensions of the table top? Thinking of building something like this, but want to make sure it will fit in my space.

Simgre81

Thu, 12/28/2017 - 07:00

Are these just slide in drawers, or did you use some sort of hardware to have them slide in and out?

Farmhouse Dining Room Table

Submitted by SaraLodise on Mon, 04/27/2015 - 06:18

Farmhouse dining room table built for my mom. Unstained.

Table top is 2" White Pine Boards, legs are cedar, and everything else is whitewood studs. Left the leg assemblies and stretcher board unattached for the two hour transport to Charlotte.  Attached them with screws and some glue upon arrival. Loved the plan and finished in two days!

Estimated Cost
White Pine 2x8s = $183
Cedar 4x4 = $48
Whitewood studs = $10
Screws/filler/plugs = $25
Estimated Time Investment
Weekend Project (10-20 Hours)
Finish Used
Unfinished
Recommended Skill Level
Intermediate

Workbench

Submitted by Anonymous (not verified) on Sun, 11/22/2020 - 05:47

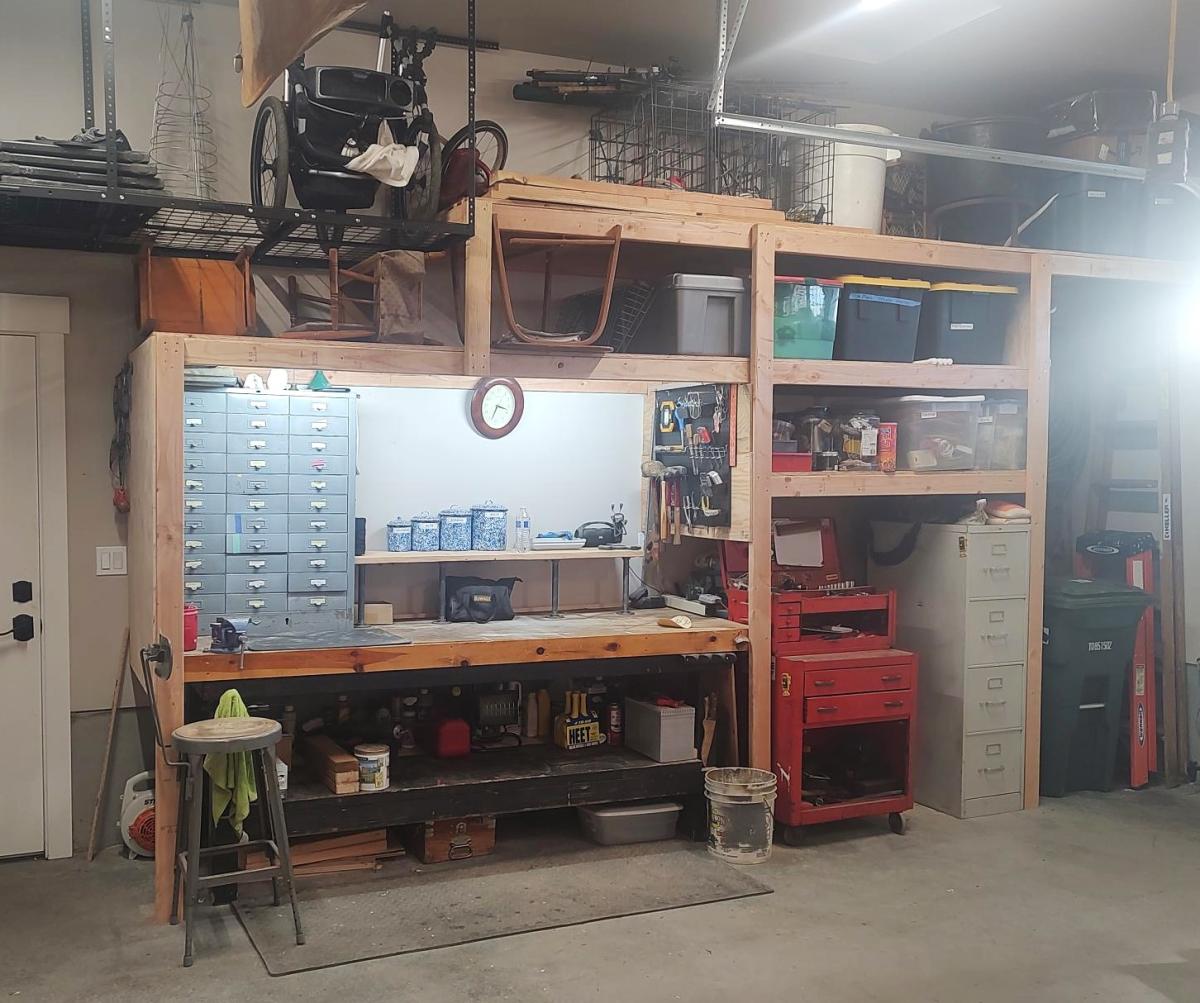
Thanks for the simple plans Anna, they worked out great!. I resized the table to make maximum use of the material, still within the same quantity you specified in your plans. I glued the legs along the lengths of the table, and kept the table top and shelf screwed in, for easy dismantling, if necessary.

Finally I added pop down heavy duty wheels allowing me to move the table (not shown in this pic) easily. When the wheels are not being used they pop up, making the table very stable. The height of the table is about 1/2” lower than the table saw, making it an ideal outfeed table as well.

Great design, and fun build.

Estimated Cost
Cn$148 (went with a finished 3/4” 4x8’ ply board)
Estimated Time Investment
Day Project (6-9 Hours)
Finish Used
None
Recommended Skill Level
Intermediate

Comments

Laundry Station

Submitted by Anonymous (not verified) on Mon, 02/27/2017 - 10:03
We followed these plans, but instead of building two cabinets, we combined them with one side in the middle. We also used pine planks on top. The sides are painted with chalk paint, and the top is finished in dark wax. 
Built from Plan(s)
Estimated Cost
$200
Estimated Time Investment
Afternoon Project (3-6 Hours)
Recommended Skill Level
Beginner

Comments

Spices!

We had these spices in a cabinet, which were impossible to see stuff in the back. This was a perfect solution.

Now, we also had more spices then we know what to do with, so we added a second rack at the bottom of the door as well. I just adapted the plans to be 30 inches tall to accommodate the size of the lower portion of the door. This was accomplished by removing the 1st and 3rd measurements for shelves, and using the remaining for an extra tall shelf.

I also only used a finish nailer (and wood glue),to assemble, in combination with a brad nailer to hold the back plywood on.

I also chose not to include the dowel buttons on the end, and did not cut the dowels to length; they were inserted all the way through and trimmed off with a Japanese pull saw (get one, you will LOVE it), then fastened through the front with the finish nailer, then sanded flush.

I also elected not to paint to finish the piece and leave the natural wood.

Built from Plan(s)
Estimated Cost
$33, including the extra shelves.
Estimated Time Investment
An Hour or Two (0-2 Hours)
Recommended Skill Level
Starter Project

XL Modern Craft Table

I modified this plan so I could have 4 total work areas. Total Size: 48" x 96"

Built from Plan(s)
Estimated Time Investment
Weekend Project (10-20 Hours)
Finish Used
White paint to match walls and trim (SW Alabaster)
Recommended Skill Level
Intermediate

Comments

briannamcelfresh

Tue, 09/08/2020 - 19:42

Is there anyway you can share these plans with me!? I drew out some plans for an identical table but I think my cuts may be off! It would be so helpful.

King Farmhouse Bed

Submitted by Anonymous (not verified) on Tue, 10/01/2019 - 21:30

Fun weekend project to build together. We are loving the fresh look to our master bedroom.

Estimated Cost
350
Estimated Time Investment
Weekend Project (10-20 Hours)
Finish Used
General Finishes Snow White milk paint with Satin Topcoat
Recommended Skill Level
Intermediate

Comments

Patrick’s Router Table

Submitted by Anonymous (not verified) on Thu, 06/18/2020 - 14:44

As a beginner woodworker I was searching for a router table project and came across this one. I constructed it entirely out of birch plywood. I will admit is was a challenge for me as I had never done drawers before. The biggest challenge was the small drawer for bit storage. I used a Rockler table top and it worked perfect. Overall I’m pleased with the way it turned out and have already used it in several projects

Built from Plan(s)
Estimated Cost
$200
Estimated Time Investment
Week Long Project (20 Hours or More)
Finish Used
Linseed Oil
Recommended Skill Level
Intermediate

Kentwood Bookcase

A great plan that was so easy to follow!  My hubby and I had a great time building this, even though it took us about a year from start to finish, actual work time on this project was not huge.  The Kreg jig was brilliant and made everything so easy.  

Estimated Cost
I would put the estimated cost at around $400 AUD. Looking back at the project I'm sure we could have cut costs by buying recycled timber.
Estimated Time Investment
Weekend Project (10-20 Hours)
Finish Used
Dulux Whisper White Semi-Gloss
Dulux Colour matched Turqoise Low Sheen
Recommended Skill Level
Beginner

Comments

Batmobile full Bed

Submitted by bbcarey on Mon, 08/03/2015 - 10:12

My son had a 'lightning Mcqueen' toddler bed- but we needed to get him into a little bigger bed.  We had a spare full bed, and Batman is his current favorite... Since there aren't Batman full race car beds- time to start planning and building from sketchup!  Took me about 2 weeks of evenings (after the kids go to bed) and about $110 in materials.  The model is available in the sketchup warehouse at:

https://3dwarehouse.sketchup.com/model.html?id=u6b750a53-37a4-4d52-9d31…


For the wheel covers I ordered online at Amazon for $25 for a set of 4.

For the Wheels both HD and Menards make a 18" wood table top for ~$7 that I just cut the middle out  with my router to fit the wheel covers.

The slats to hold the bed (made to fit both box spring and mattress) were just 1x4 pine boards from menards.

The body was made from 3/4 MDF, though you could of course use plywood. 

I used a projector to project the image from sketchup onto the board to get it transferred- else it would have been 50+ pages if printing..

For the logos I just used a minila folder as my stencil and cut out the logo.  Needed to touch up the 'tabs' to hold the logo in the circle after pulling off the stencil.

Estimated Cost
$115
Estimated Time Investment
Week Long Project (20 Hours or More)
Finish Used
High gloss Latex paint.
Recommended Skill Level
Intermediate

Comments

In reply to by Ana White Admin

bbcarey

Fri, 01/29/2016 - 21:18

I give you credit when people ask how I got started in woodworking because until I found your site and my first project (library cart) then 2 helper stands for my kids and other friends kids and it just went on from there. The skils taken from this site and learning Sketchup have brought a lot of nice furniture to our home as well as a sense of confidence to me!! Thank you!

MoxieMan13

Sat, 09/12/2015 - 19:10

My son really wants this and I promised him that I would make it.  Do you have a PDF or anything of the outline of the batmobile?  Thanks! 

Woodlandfox

Sun, 02/21/2016 - 14:29

Thank you so much for the greatest idea ever!  We stumbled on this and believe it will be the perfect next bed for our son, however, we cannot download any of the files.  Do you have a PDF of the measurements or any other form you can upload so we can make this bed?  Thanks in advance!  Great work!

SDonahue9807

Tue, 12/06/2016 - 07:23

I apologize if I am just missing this, but... do you have step by step instructions on building this bed? I see the pictures of each part and its corresponding dimensions, but I cannot located instructions on assembling the bed. 


Thanks!

Modern Craft Table-Aqua

Submitted by beingbrook on Sun, 01/15/2012 - 15:16

Love the Modern Craft Table! It has lots of storage space and tons of workspace on top. We used pine for the shelves and plywood for the top and edged the top with pine.

There is a spot for two counter stools at the opposite ends of the table which is perfect to give kids their own spot to craft/color.

Built from Plan(s)
Estimated Cost
$150
Estimated Time Investment
Day Project (6-9 Hours)
Finish Used
Primed and Painted with Two coats of Behr's Woodwind Springs. Top has two coats of polycrylic.
Recommended Skill Level
Intermediate

Comments

Guest (not verified)

Sun, 01/15/2012 - 20:10

I love this table but I wonder how do you use it to sew with? or do you sew on this table?

beingbrook

Sun, 01/15/2012 - 20:24

I don't use this table to sew on. My craft room also has a sewing table that we built using the narrow farmhouse table plans. I use this to craft on and to cut fabric out.

Guest (not verified)

Mon, 01/16/2012 - 10:03

the whole room is beautifull. how many of the other pieces of furniture were built using Anna's plans?

Guest (not verified)

Mon, 01/16/2012 - 10:03

the whole room is beautifull. how many of the other pieces of furniture were built using Anna's plans?

mebohn

Mon, 01/16/2012 - 12:06

This table is fabulous and I'm really in love with the color! Thank you for sharing. So many new ideas for my room now!

mebohn

Mon, 01/16/2012 - 12:06

This table is fabulous and I'm really in love with the color! Thank you for sharing. So many new ideas for my room now!

Lis West

Mon, 01/16/2012 - 17:32

You won't believe this...but today I was shopping for the wood to make the Modular Craft Table, but I did not buy the wood because I was trying to tweek the plans to change the "cubbies" and size. So, I came back to this sight and here is this craft table that would be much better. I want to make it table height rather than counter height so I can sit down and sew at it. I also want to be able to drop the back 12 inches of the table if I do not need it and so it will fit better in my room, wheels on the bottom to pull it out easily so I can extend the 12 inch table when needed. I love what you have done!

Cindy from Indiana (not verified)

Tue, 01/17/2012 - 11:36

You did a fantastic job on this project! Love the way it looks and the color!

Great job!

Ricci (not verified)

Sat, 01/21/2012 - 07:00

I love this table, but I can't seem to find the directions to make it. Can you point me in the right direction to find it?

Joe (not verified)

Wed, 01/25/2012 - 17:24

Is there a reason you can't sew on this (from what I gathered from a previous comment)? I want to build something for my wife's craft room and love this, but she will need to sew as well. Help?

Brook @ BeingBrook (not verified)

Wed, 01/25/2012 - 17:32

Joe,

It would be hard to sew at this table because the table is counter height. You wouldn't be able to reach the foot peddle to run your sewing machine. You could alter the plans to fit a spot that could hold the peddle foot. I sew on a different table in my craft room and use this for cutting fabric and general crafts.

Brook

Guest (not verified)

Wed, 01/25/2012 - 19:26

at one time I had my sewing machine in a spot that was counter height. I used a wood box to put the foot peddle on. One of anna's steep stool plans or the bathroom platform for kids plan might be good to build with this. It was also nice when I was sewing small pieces that needed lots of ironing to stand and sew at the counter.

Guest (not verified)

Wed, 02/01/2012 - 14:25

I have a modern sewing machine (within last 5 years) and I routinely sew at counter height with no problem. I prefer it because it really helps my back. I cannot wait to make this!

Guest (not verified)

Fri, 02/24/2012 - 22:36

Joe,
I think it would work to mount the foot pedal on the inside of the shelf area. She would use her lower outer thigh to depress the pedal while seated.

Angela Preimesberger (not verified)

Tue, 05/08/2012 - 07:47

I love this table! I'm with Brook and don't sew on mine. Height issue is easily worked around - main issue is usually back support. Sewing at a huge workstation tends to leave you feeling unsupported and sitting on a stool (I have a nice wide comfy one from Target) leaves your back unsupported so you usually slouch (bad! bad!). I sew at my smaller desk in a good supporting chair and use my table for everything else. I use this table for a true work area including cutting. I have an Accuquilt Studio and that sucker is HUGE and heavy!

Michele Crane (not verified)

Mon, 11/12/2012 - 11:22

I just talked my fiance' into building this for me to use as a desk. I need a desk for my work from home position where I can store everything as well as have a large area to spread things out. I loved this the moment I saw it and talked him into building it for me. Can't wait to post the pictures when it is finished.

bbawol

Wed, 12/12/2012 - 16:47

I was wondering if you could tell me where you got the chair from? It looks like it pairs very well with this table and I would love to get one for my wife for her table I just finished.

nkliegel66

Thu, 02/28/2013 - 16:15

My husband made this FABULOUS Craft Table for me last weekend, it turned out PERFECT! Thank you so much for posting this with such detailed directions....

What do you have in your galvanized pails? What do the labels say?

Thank you!

Mary's sewing table

Submitted by Anonymous (not verified) on Mon, 12/23/2019 - 20:52

Built using your sewing table as the base idea. Pine cabinet, drawers and drawer fronts. The top is Hickory, poplar and red oak. base top dimension is 30x30 and folds out to 30x90. Mary will get this as a surprise on Christmas day. Cabinet and to is Varathane 3x. Casters are from Woodcraft and drawer slides are Hickory Hardware.

Built from Plan(s)
Estimated Cost
250.00
Estimated Time Investment
Week Long Project (20 Hours or More)
Finish Used
Varathane 3x
Recommended Skill Level
Intermediate

Comments

Another cube bookcase

When I find clothes I like, I buy more of the same. Apparently this habit applies to furniture, too. This fall I built two cube bookcases for my 8 year old's bedroom. Last weekend, I built another, this time for my 6 year old. What can I say? The first two worked out so well I needed another!

For this bookcase, I had the lumber (at least the big boards, not the 1x2s) cut at Lowe's. The cuts were precise and square -- everything I want in a cut!

Just as I did with the first two bookcases, I used the Kreg Jig to put this one together and then I topped it with 1/4" MDF, attaching mitered cove molding underneath. At some point this winter I realized that my miter saw was out of square. I'm not good at fixing mechanical things, so my husband did me the favor of squaring the saw for me. Wow, what a difference! My cuts are so much more precise now that the saw is square again. Whew!

One change I made from the first two cube bookcases I built was in the finish. Instead of building and then finishing, I painted the surfaces that would end up on the inside of the bookcase before assembling the whole thing. Last time it was a bit of a nightmare getting into all the corners and inside tops of each cube. Painting the inside ahead of time was much simpler. Once the unit was put together, I sanded and painted the outside, touched up the inside, and then added two coats of poly to both the inside and the outside.

Built from Plan(s)
Estimated Time Investment
Weekend Project (10-20 Hours)
Finish Used
Ralph Lauren "Aged Mint" paint in a flat finish followed by two coats of satin polyurethane. I sanded lightly in between all coats.
Recommended Skill Level
Beginner

Pantry Spice Rack

Submitted by SaraLodise on Tue, 08/06/2013 - 13:35

Love this simple plan! I took down a wall in my kitchen and, when cleaning out the cabinets, I found crazy amounts of spices. With this it's so easy to see all of them and find the one you want.

I did shift the shelves to make two 3 1/2" shelves and this made the bottom shelf 9" for some taller things. I found that I could not fit my shorter spice containers in the very top shelf due to the hanging board in the back of it. The hanging board may have been thicker than used in other's builds.

Built from Plan(s)
Estimated Cost
$30
Estimated Time Investment
Afternoon Project (3-6 Hours)
Finish Used
Primer & some left over interior paint from previous house owners.
Recommended Skill Level
Starter Project

Comments

OptimusGoof

Sun, 01/11/2015 - 12:55

I love how you shifted things around to accommodate for the bottom taller items. I need something exactly like this so I can tame the wild animal that is my pantry. Thank you for the inspiration. Great build!

RandyW

Sun, 01/11/2015 - 14:46

Is that a solid door? If not, how did you anchor it?

Modern Farmhouse Side Table

Submitted by Anonymous (not verified) on Wed, 12/18/2019 - 10:21

I always love warching woodworking but felt so inspired to do it myself when i watched your videos. I decided to make the modern farmhouse table but using stain and paint I already had. While I followed all the instructions, my 1×10 ended up being a 1x12 (incorrectly labeled) and threw the design off a little bit. I had to modify the plan to accommodate the larger size but I love the end result just as much! Thank you so much for sharing your videos and plans.

Estimated Cost
$40
Estimated Time Investment
Day Project (6-9 Hours)
Finish Used
Varathane stain in ebony and diluted white Behr paint
Recommended Skill Level
Beginner
Back