Chicken Coop
Great for a small flock of 5 or less.

Built from Plan(s)
Great for a small flock of 5 or less.

Thank you! You've helped me look like a true carpenter who knows what he's doing! My whole family is impressed with my woodwork lately, and now I'm addicted. I've done your seesaw, bar table and stools plus the treehouse in 2 weeks. Thank you for sharing your plans!


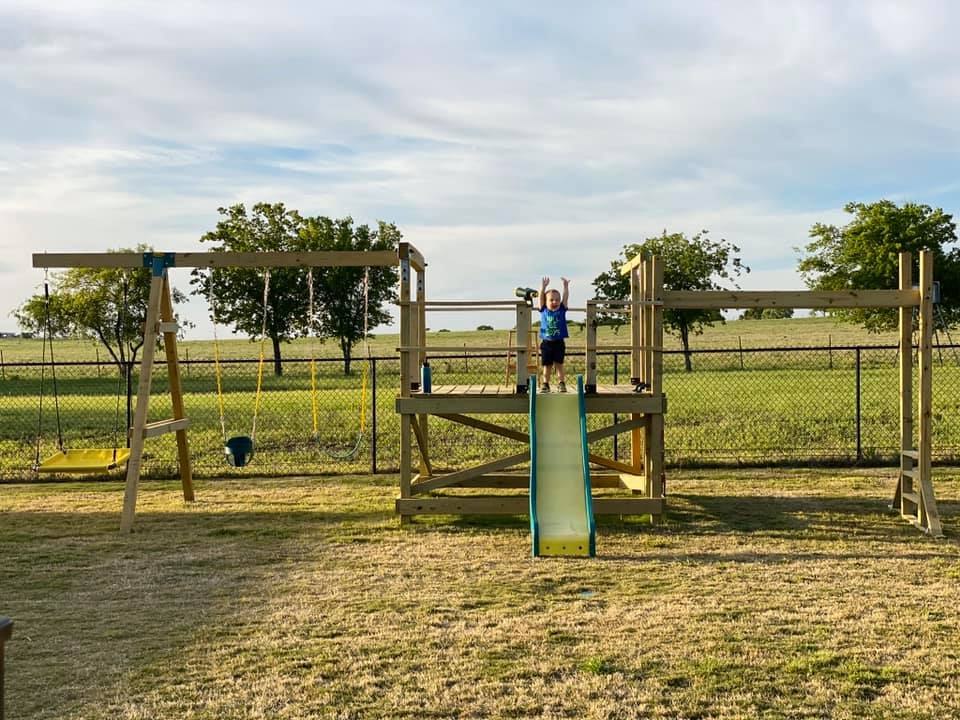
We are used to seeing our grandson every weekend but during the 2020 COVID quarantine we were unable to do so. Instead, we filled our time building him a swing set for our backyard. He loved it!! We are going to add more to the swing side but the hardware I want isn't available right now (apparently there is a lot of swing set building going on during this time). I look forward to many years of playing on this with our grandson and hopefully additional grandkids in the future... Our cost was pretty high mainly because our first round of lumber came from a local lumberyard that was willing to deliver within a few days (big box was going to take several weeks) and they had what is supposed to be higher end lumber (not sure I am convinced of that)....also, i chose some pretty expensive hardware (brackets) just for the added security.....


They were simple to make and the plan was easy to follow. The only modification I made was adding the 1x3 topper in place of the longer legs sticking out of the top.

Fri, 07/19/2013 - 06:36
Adding these to my to-do list for spring (yes, I plan ahead). I'm thinking of elevating and elongating them to fit around a bay window.

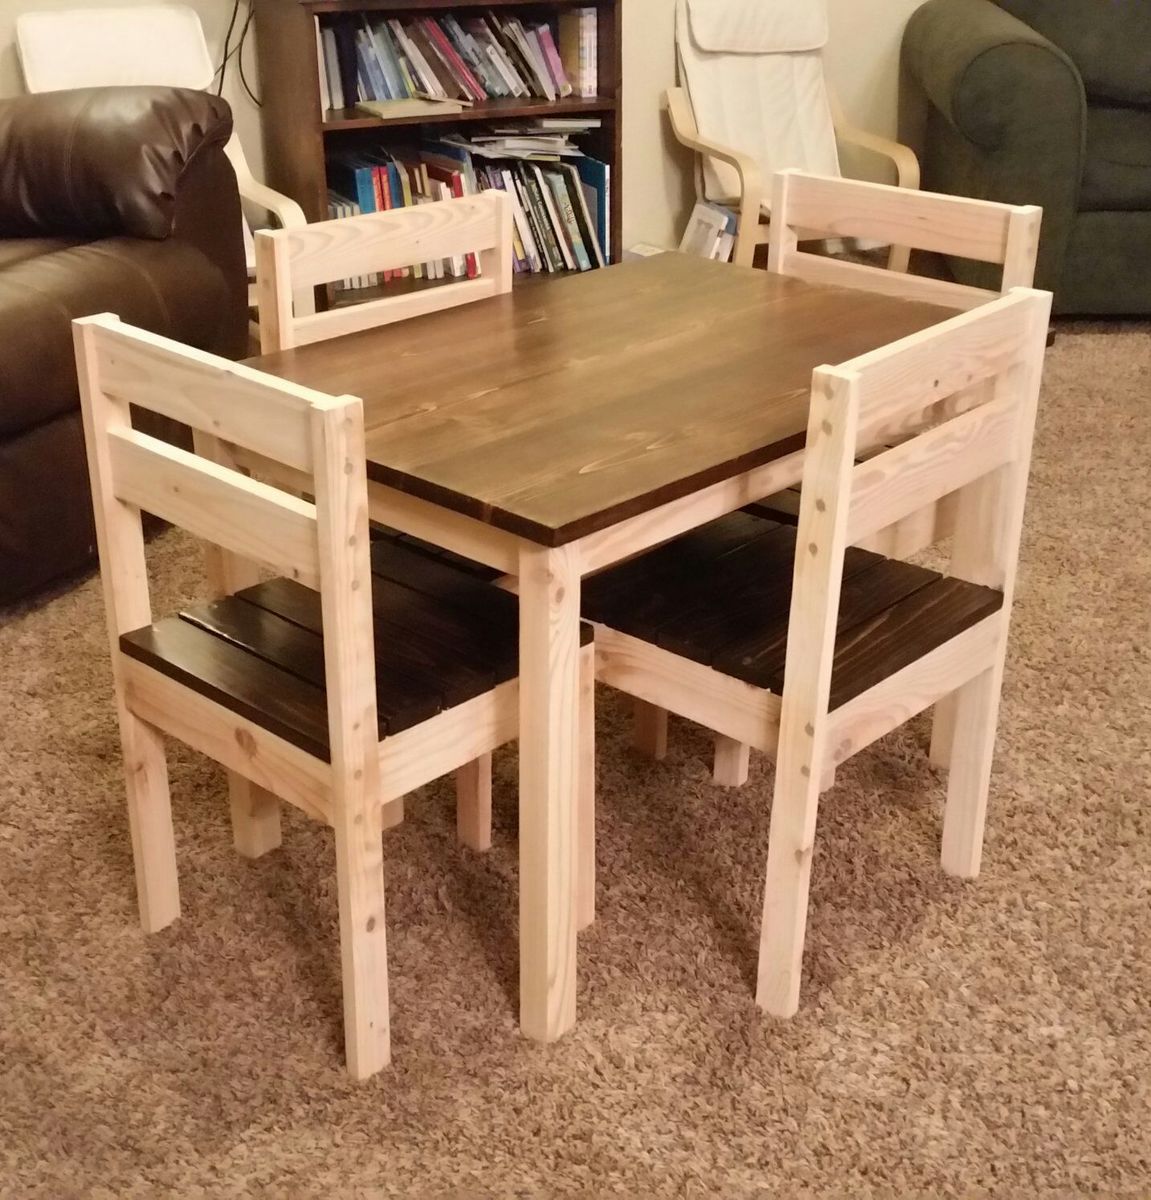
I recently had a workshop built and I have been trying to now work on the furniture for it. My first project was this workbench inspired by the plans "garage workshop workbench". I added drawers on each side and will probably end up adding a shelf in the open area as well after letting my kids finish decorating the top. It's already a nice addition and I may build a smaller version for my garage. I added casters and have the option to roll the table around or have it stationary.
Tonie

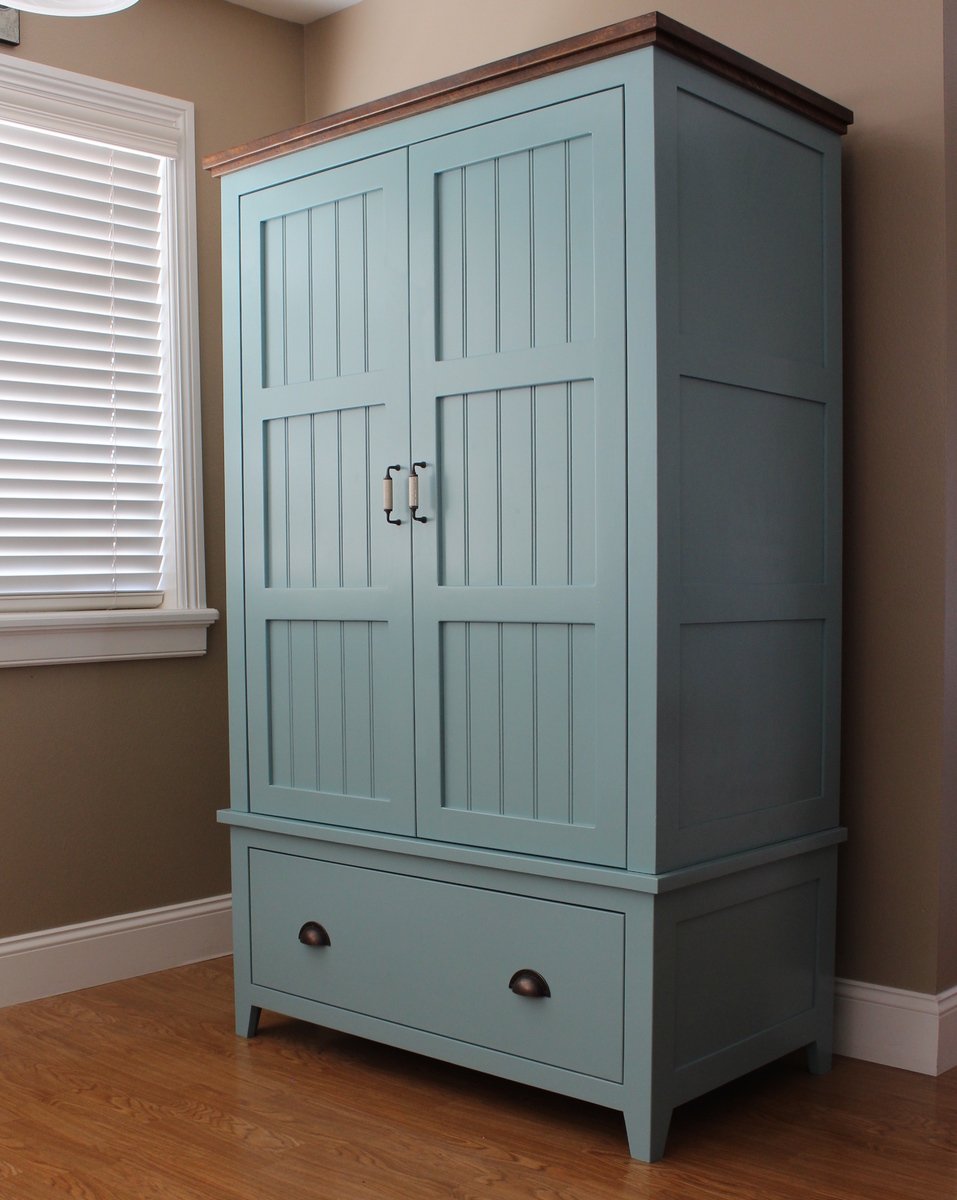
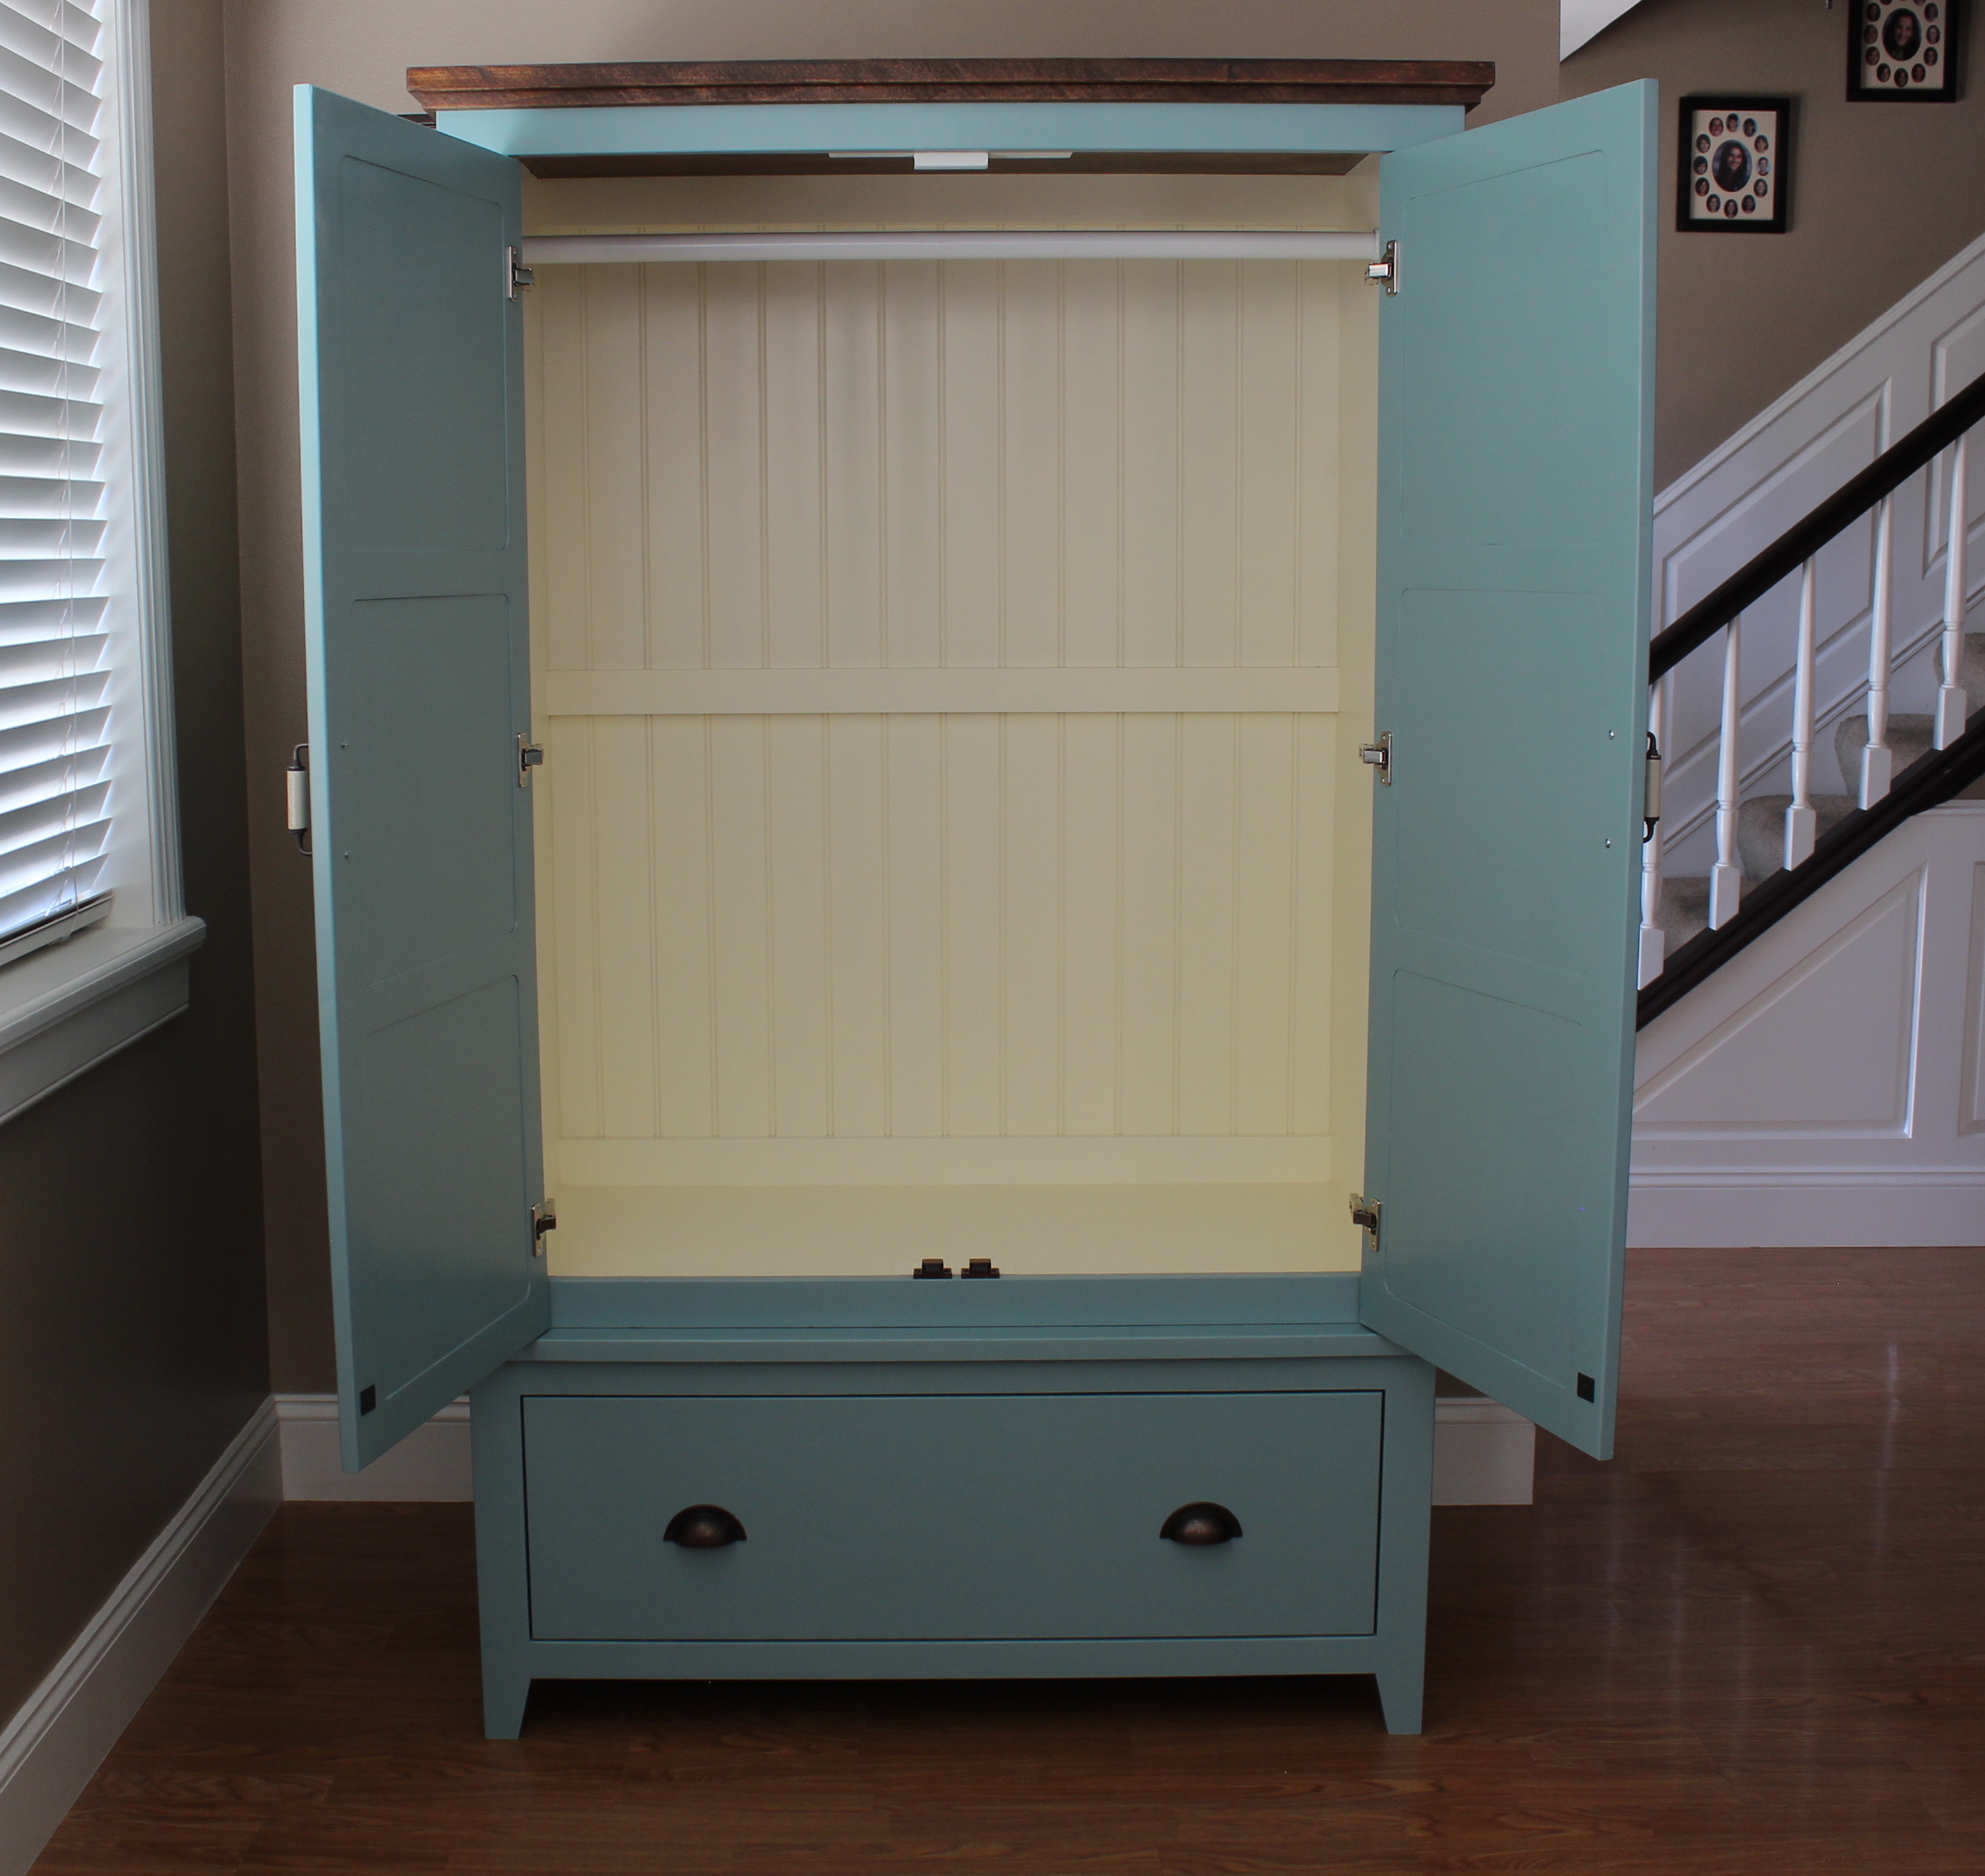
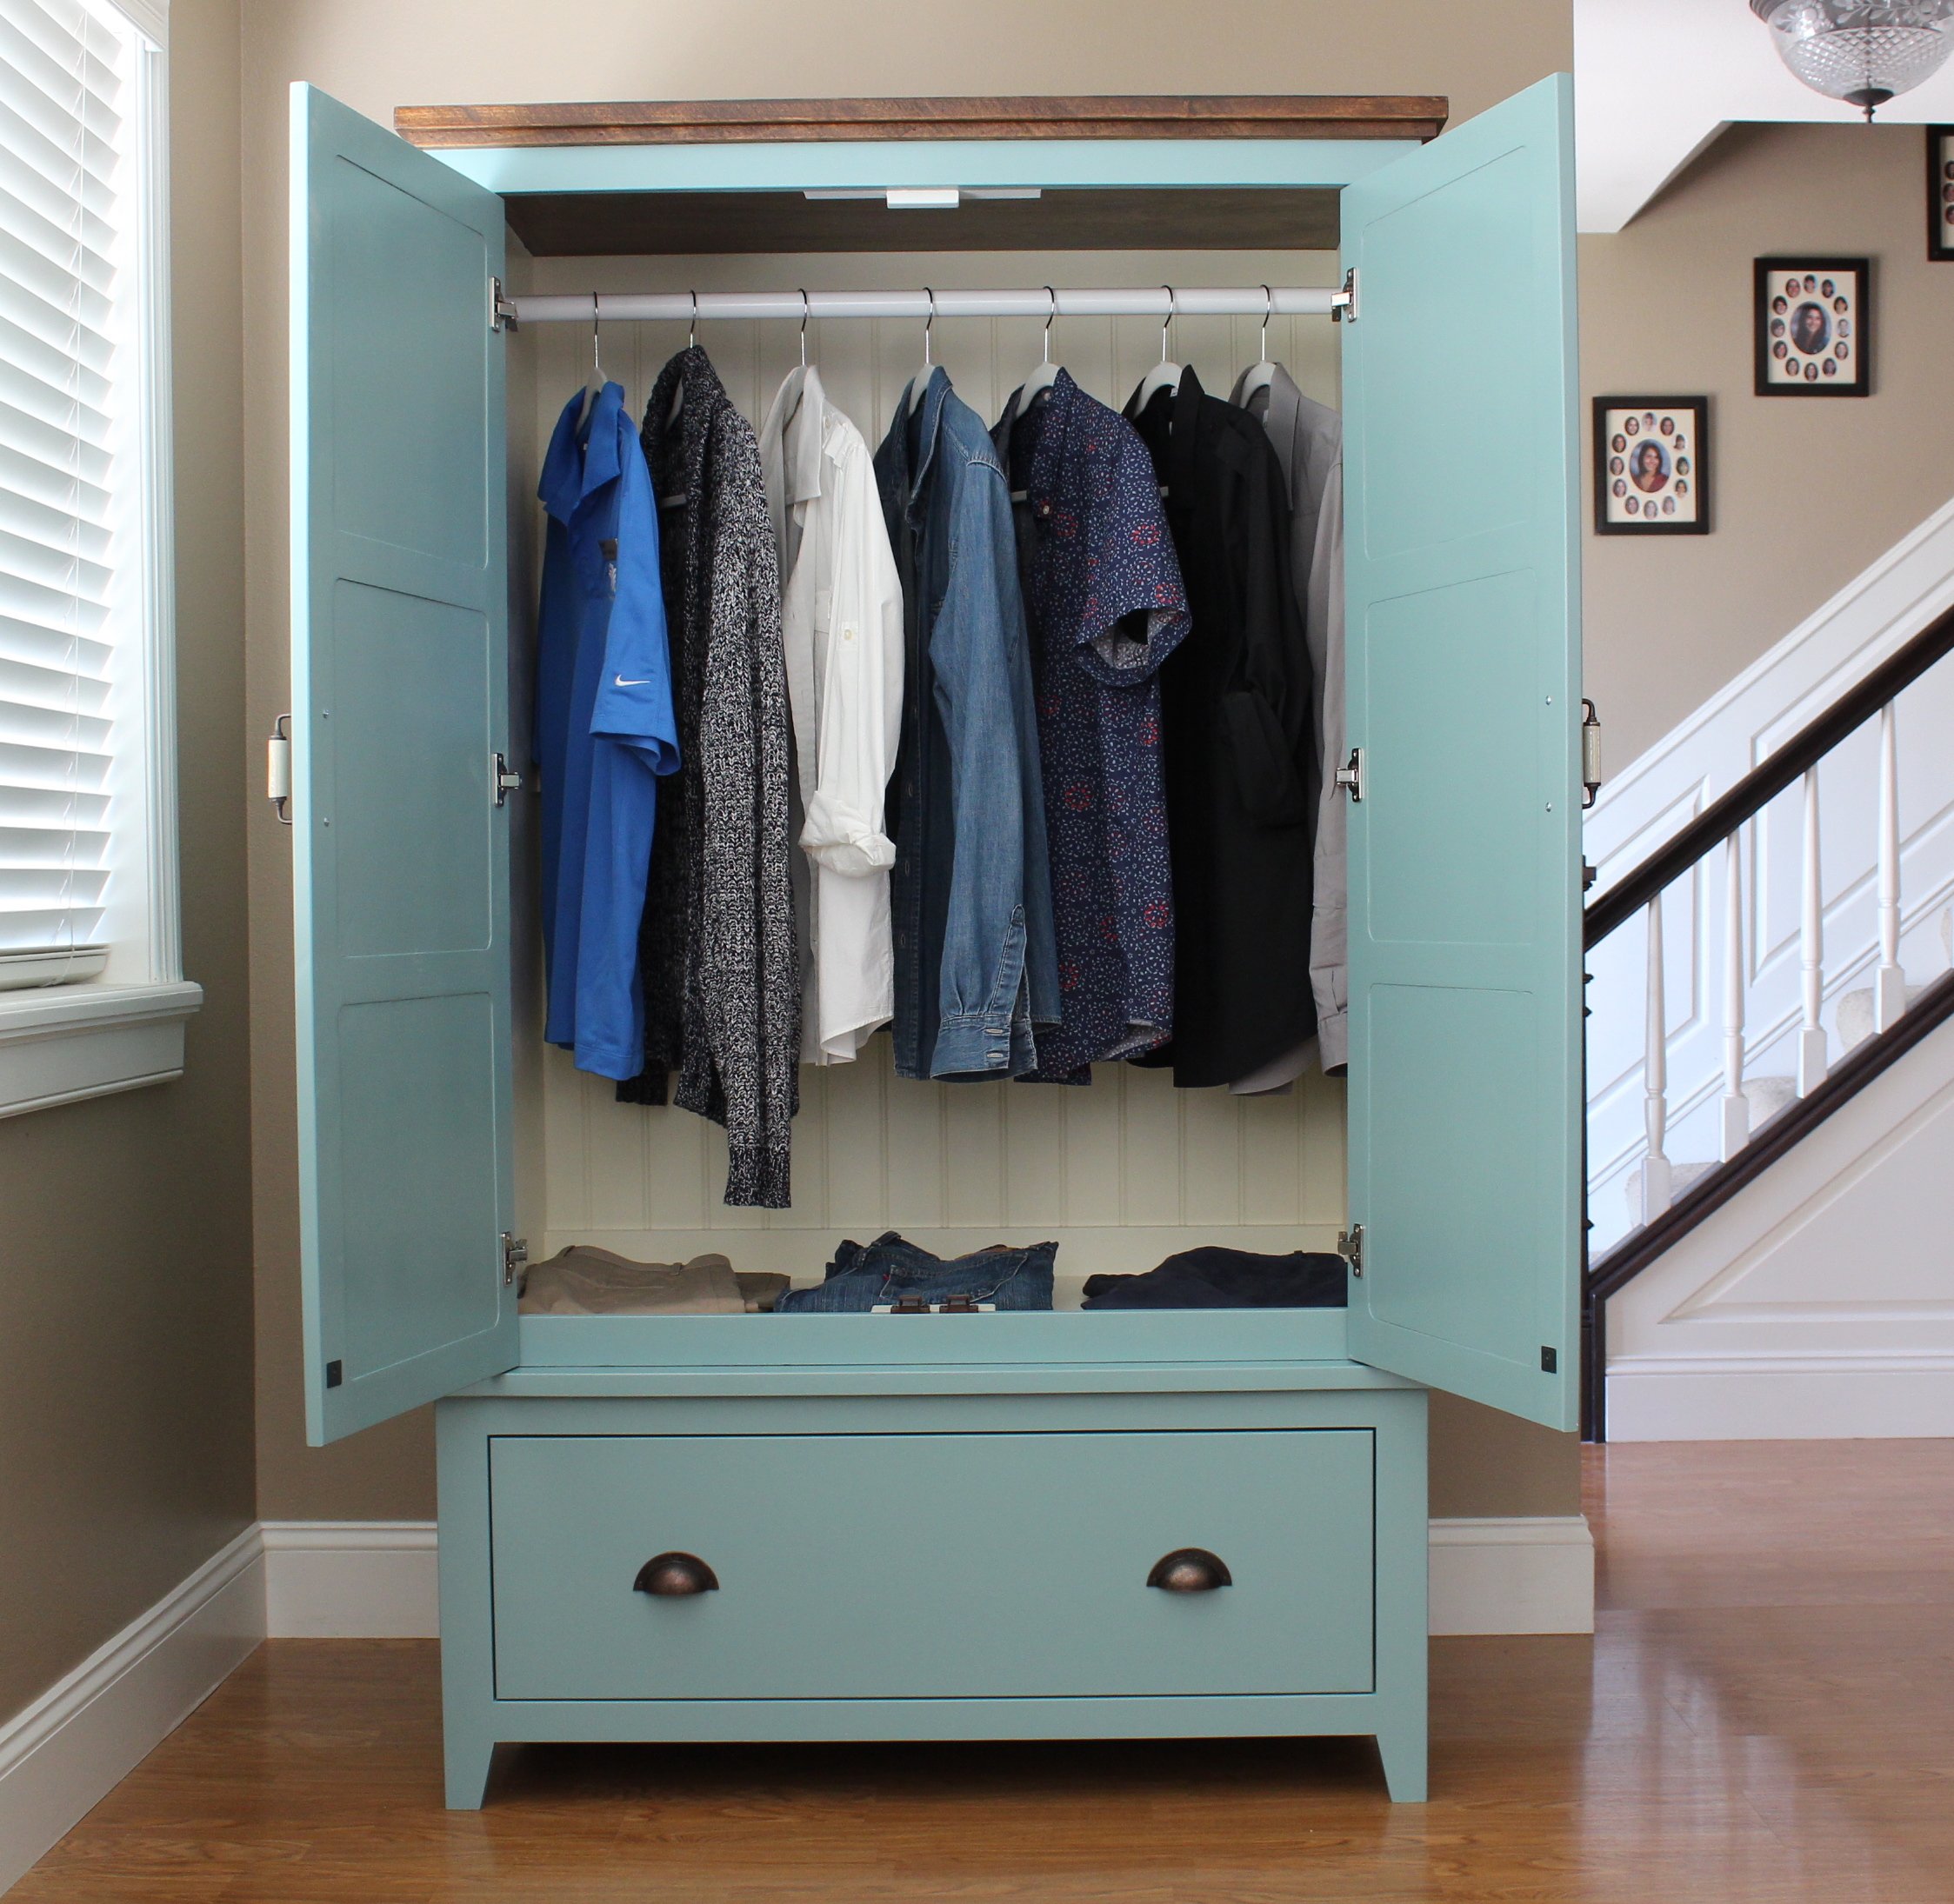
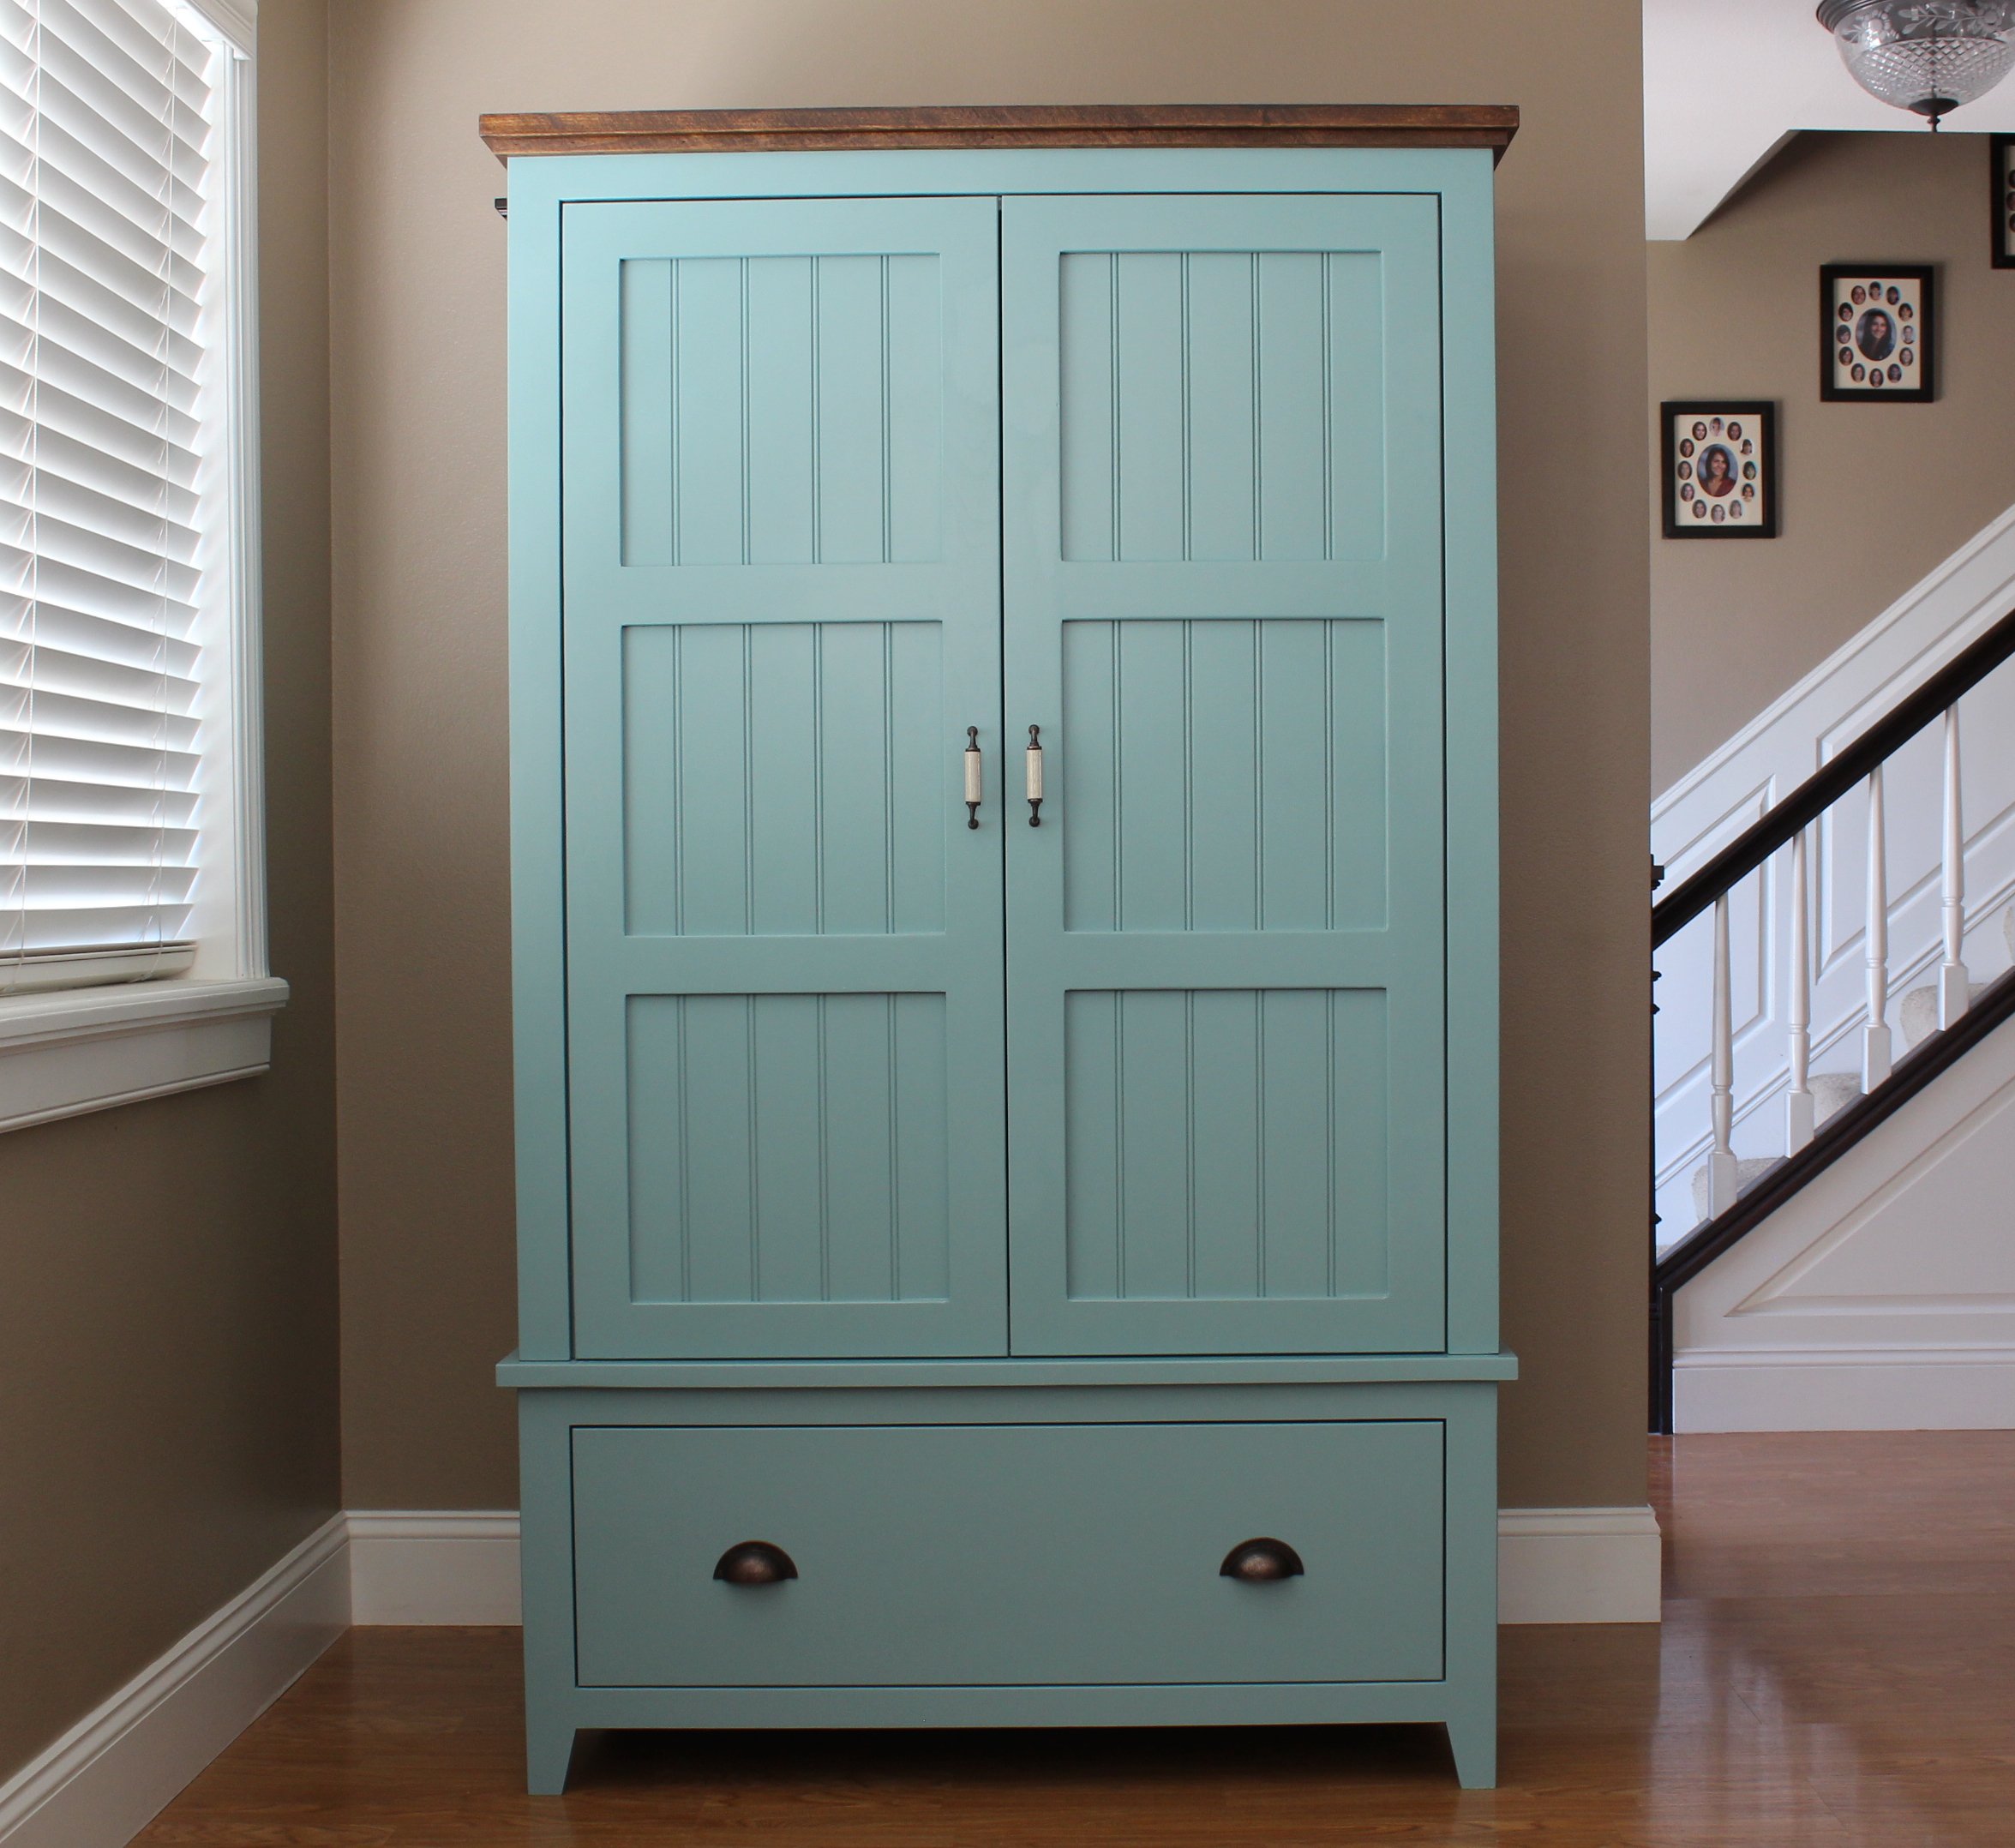
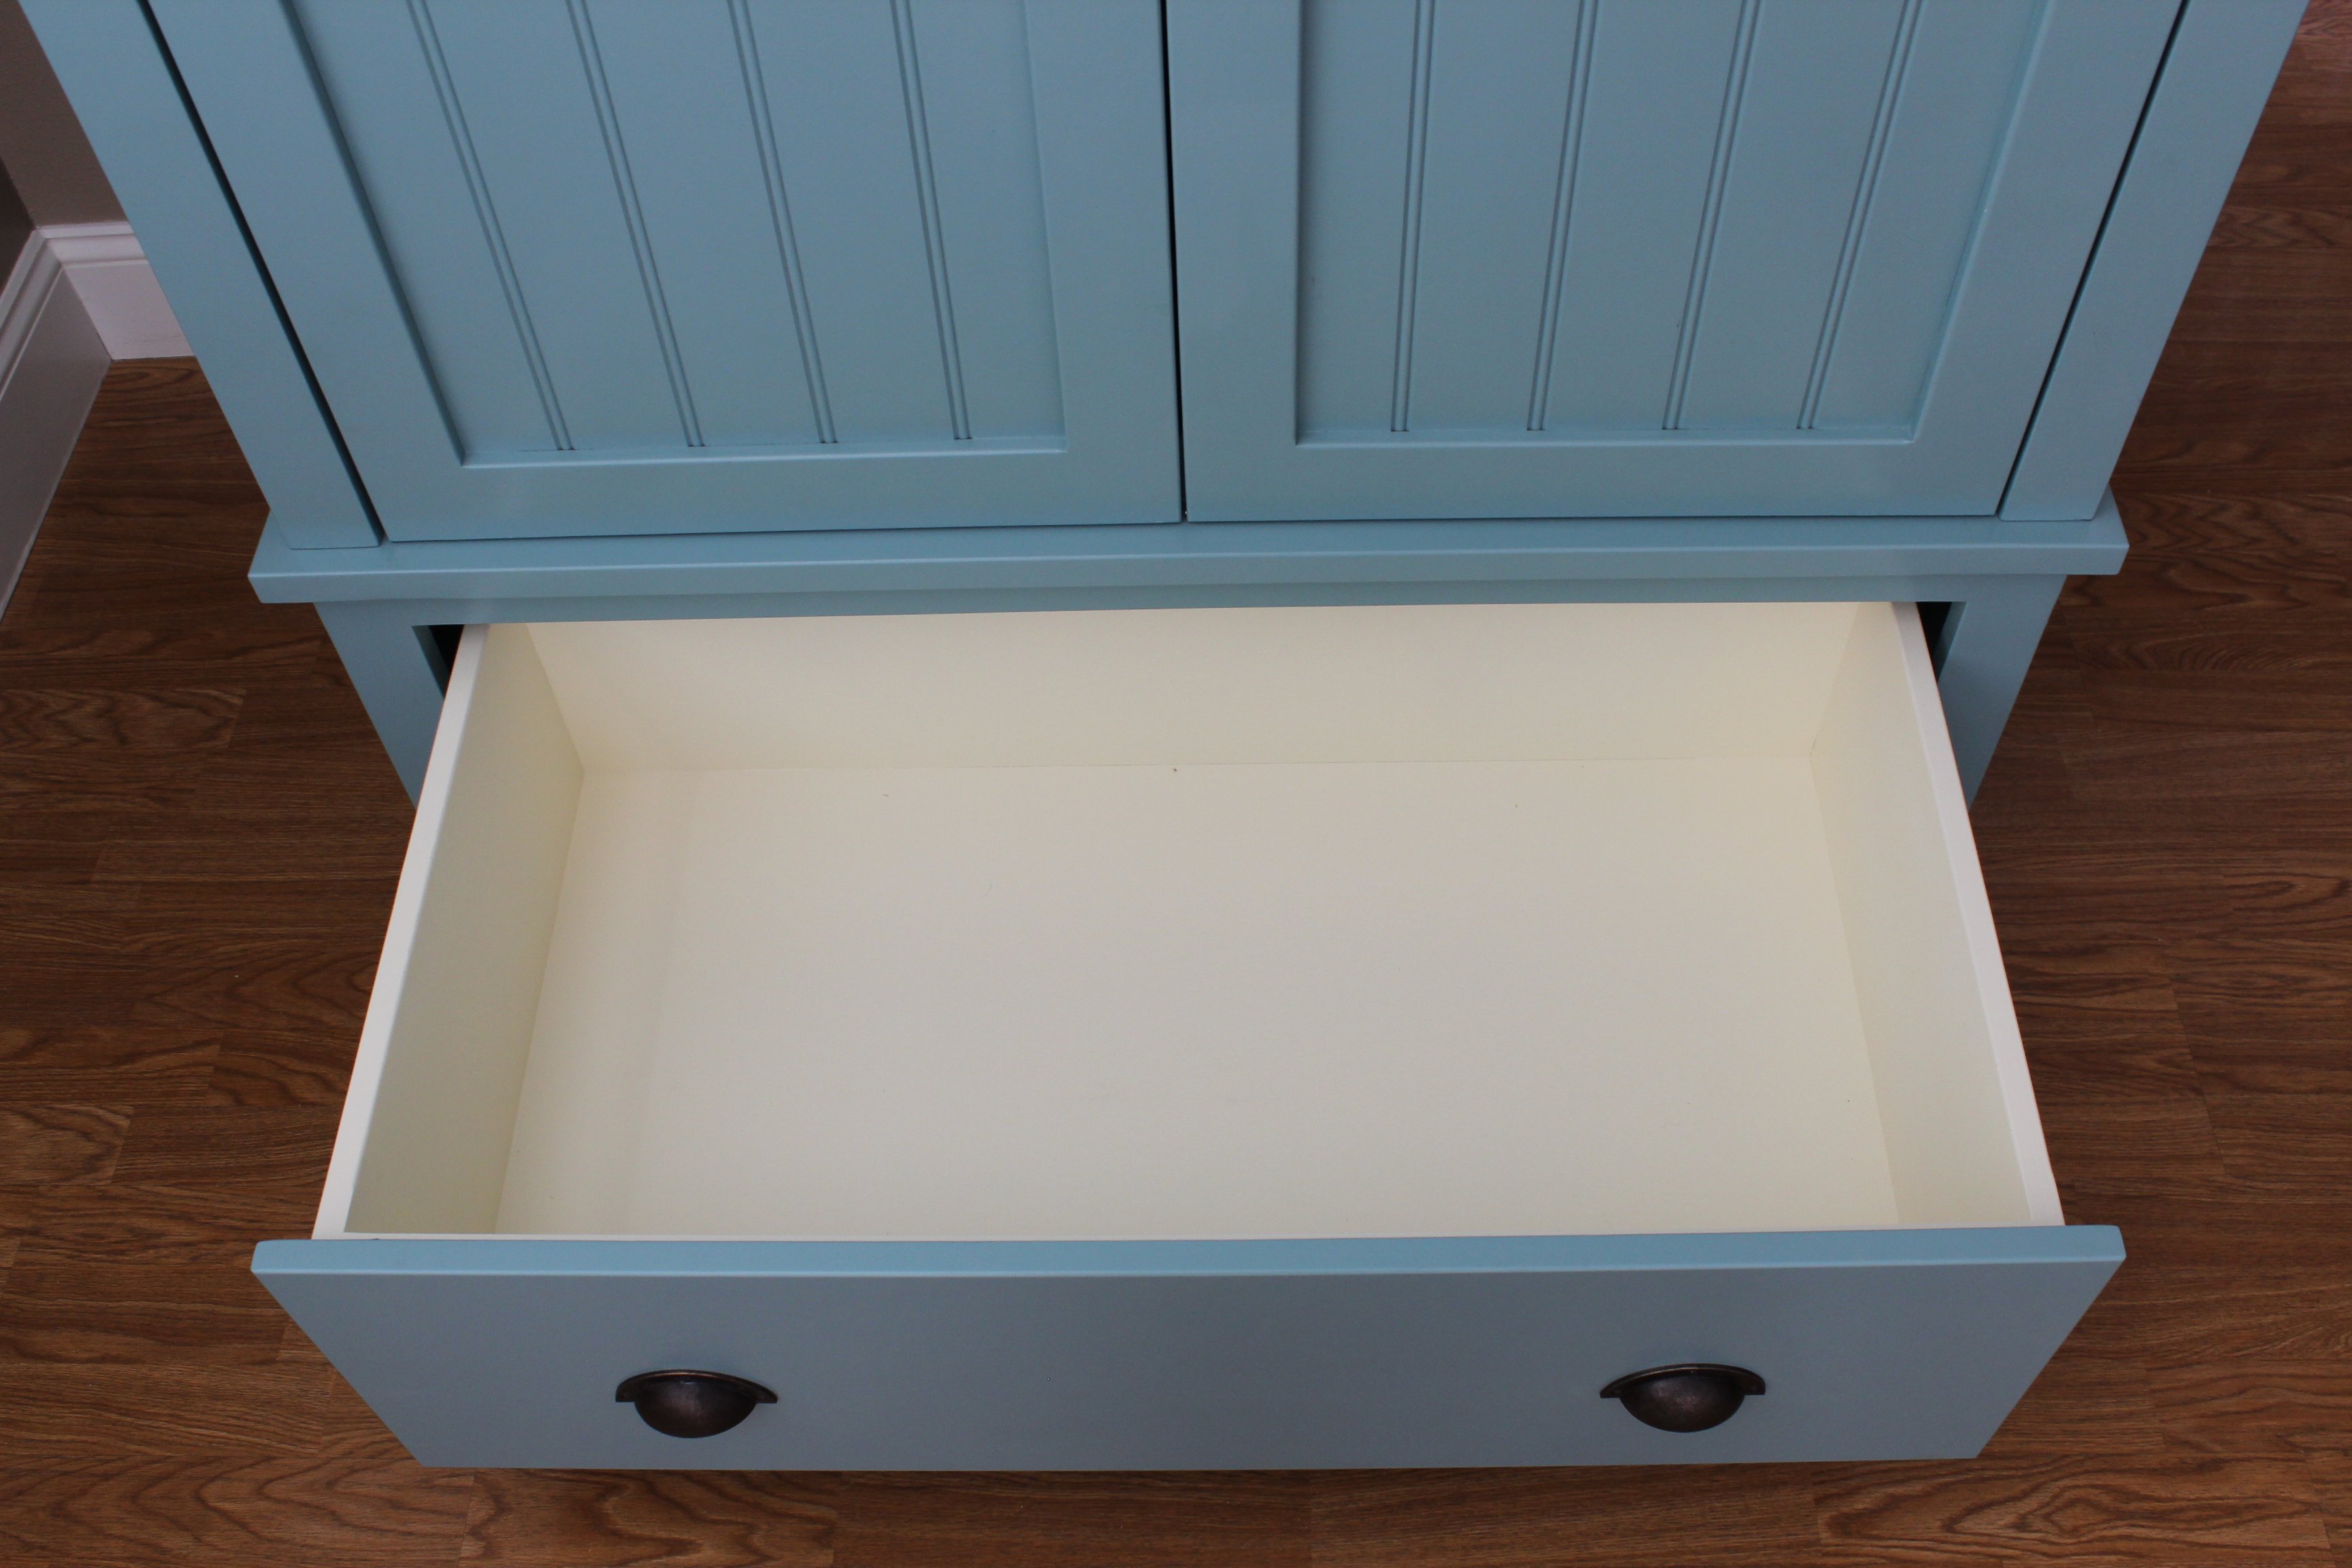
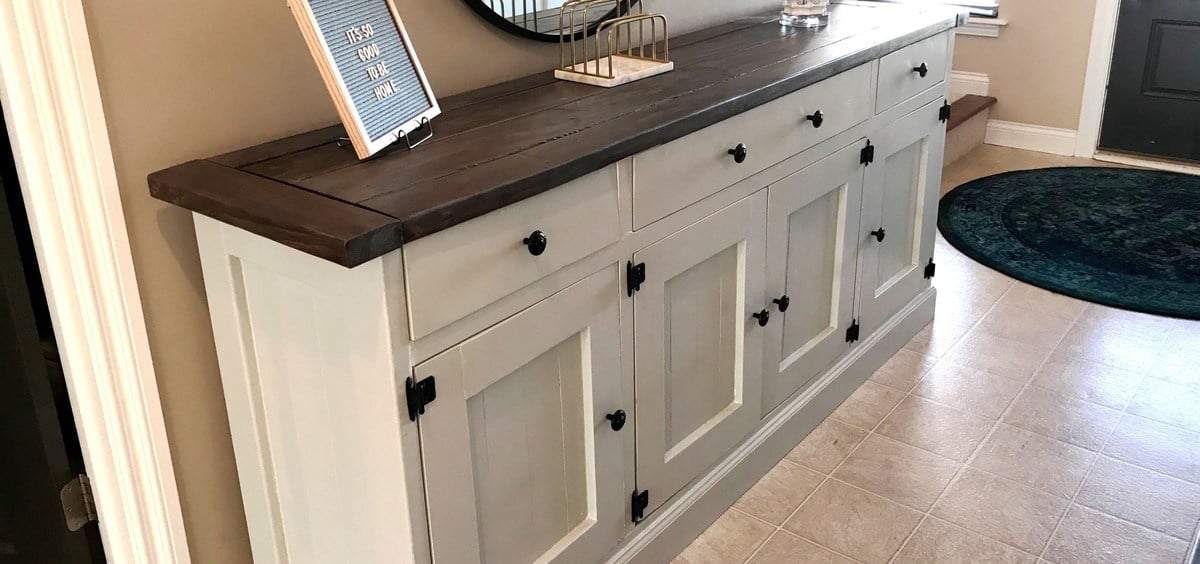
This is probably one of my favorite pieces I have built. Challenging but fun. I built it as two separate sections, an upper and lower cabinet to make it easier to carry indoors. I added a full-extension drawer below for storage. The two-toned paint combination did take a lot of extra time. Because I used an airless spraying to paint I had to tape and cover each section separately.


Fri, 03/06/2015 - 10:43
WOW it looks awesome the extra time spent on the painting was more than worth it looks spectacular. I bet you also could make a great profit selling this Wardrobe either on line or in a consignment shop, if I had the need for one and the money I would defiantly buy one!!

Sat, 03/07/2015 - 18:55
I love all the attention to detail. Great job! I especially love the color selection. How did you achieve the look of the top stained piece?
In reply to I love all the attention to by handmadewithash
Mon, 03/09/2015 - 22:01
Hi Ashley,
The top was built separate, stained, varnished and then attached to the painted wardrobe. :)
- Brad
Sun, 03/08/2015 - 07:36
This looks awesome! I love the the paint finish and it your profession work

Mon, 03/09/2015 - 17:30
I agree this is your best so far...which is hard to say b/c all your projects are amazing! I love the style, the paint colors, the stained top, and the hardware!
In reply to Beyond Beautiful by TwoCuteKids
Mon, 03/09/2015 - 22:02
Thank you so much! :)
Sat, 03/19/2016 - 15:06
It looks really great!
I have fallen in love with it the second I saw it and somehow I am now convinced that I need a new wardrobe ;)
I guess you don't have plans for the wardrobe laying around - but would you mind doing a fast sketch (just a simple one on paper) with all the measurements noted? I would be thrilled to try building it myself in the summer.
Greetings from Germany!
Sat, 03/19/2016 - 15:07
It looks really great!
I have fallen in love with it the second I saw it and somehow I am now convinced that I need a new wardrobe ;)
I guess you don't have plans for the wardrobe laying around - but would you mind doing a fast sketch (just a simple one on paper) with all the measurements noted? I would be thrilled to try building it myself in the summer.
Greetings from Germany!
Tue, 07/18/2017 - 05:43
Are there plans used for this beautiful piece? I do not see any links. Help please!! I absolutely need to make this armoire :) :)

Fri, 01/03/2020 - 08:09
Anyway I can get plans for this beautiful piece?
Mon, 01/03/2022 - 05:53
Love this wardrobe! Are there plans available to build it?
Thank you.
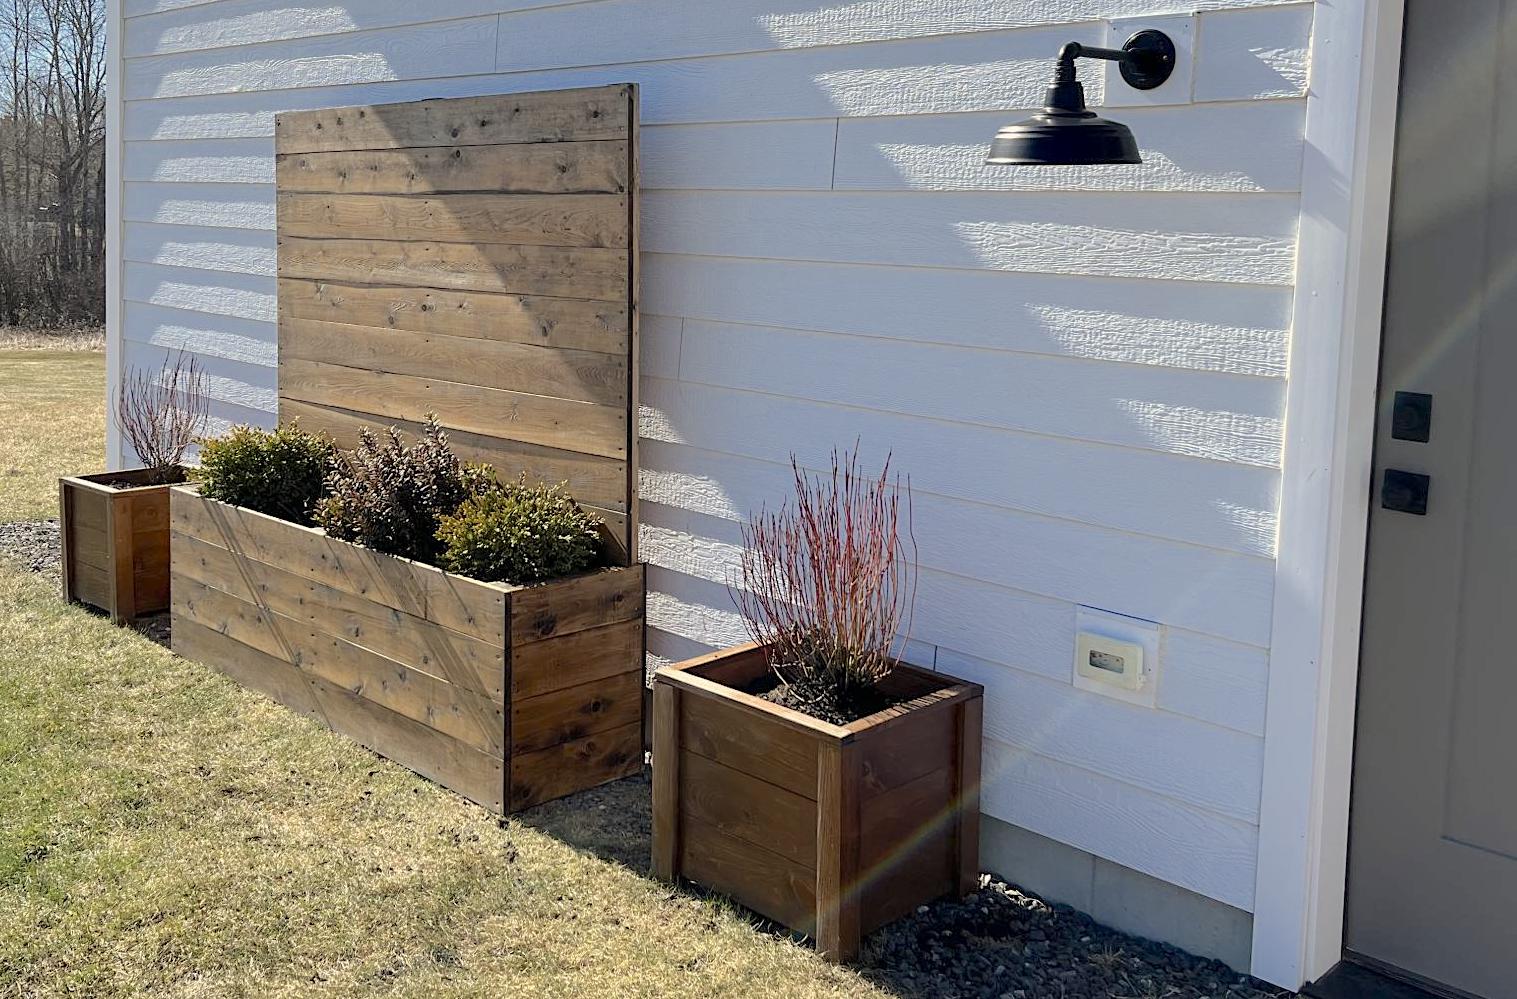
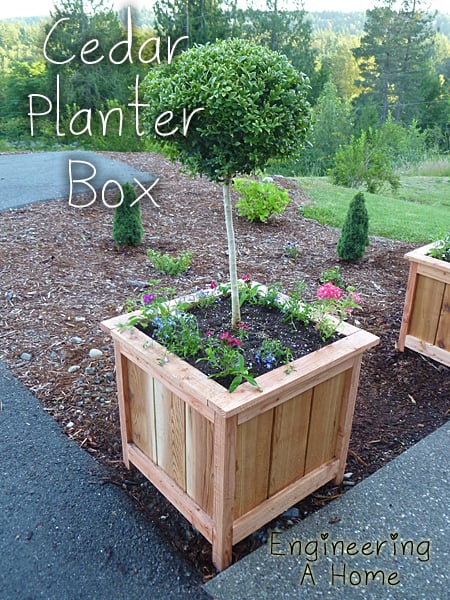
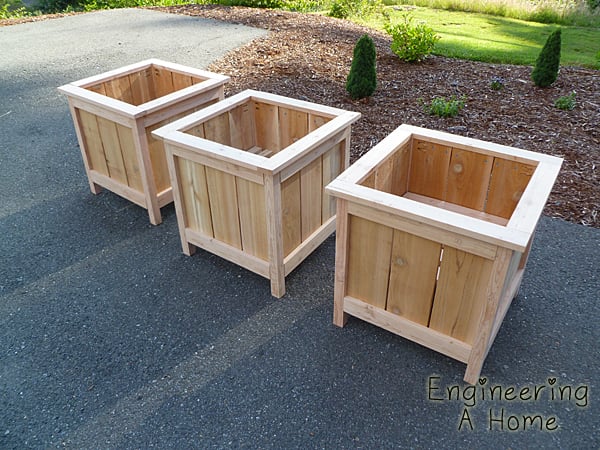
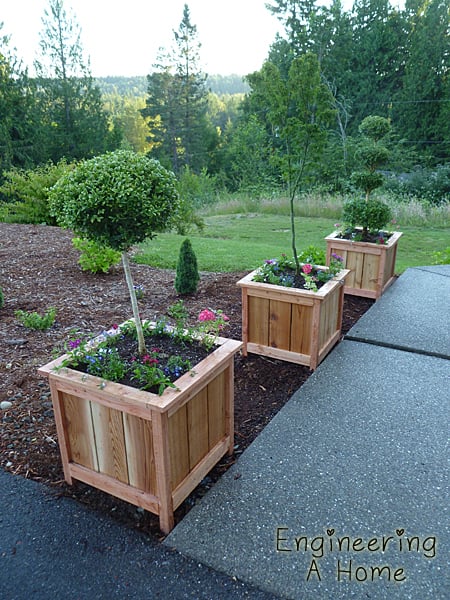
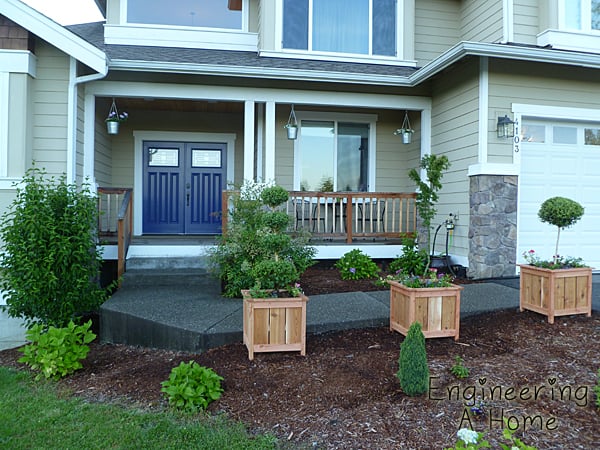
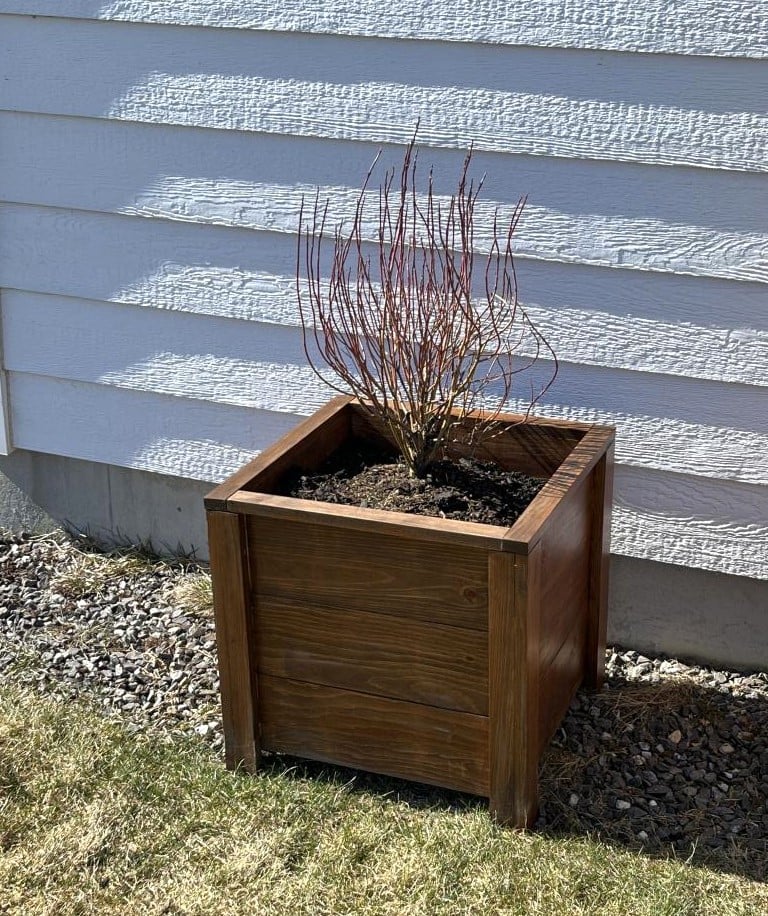
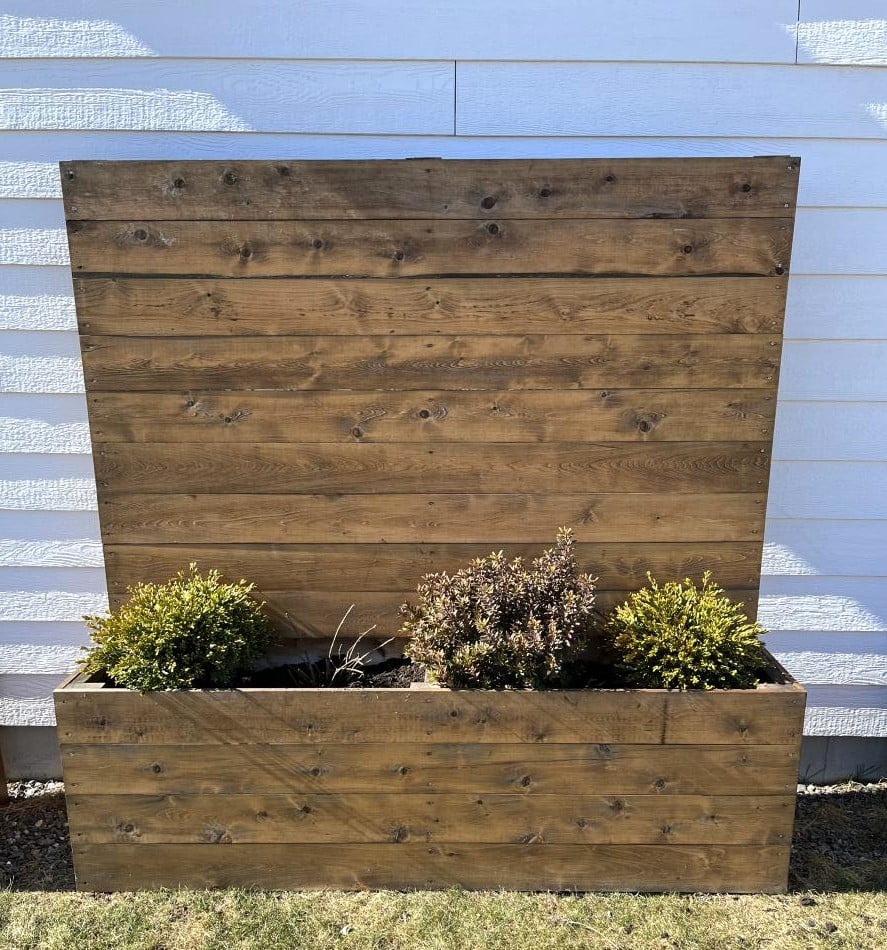
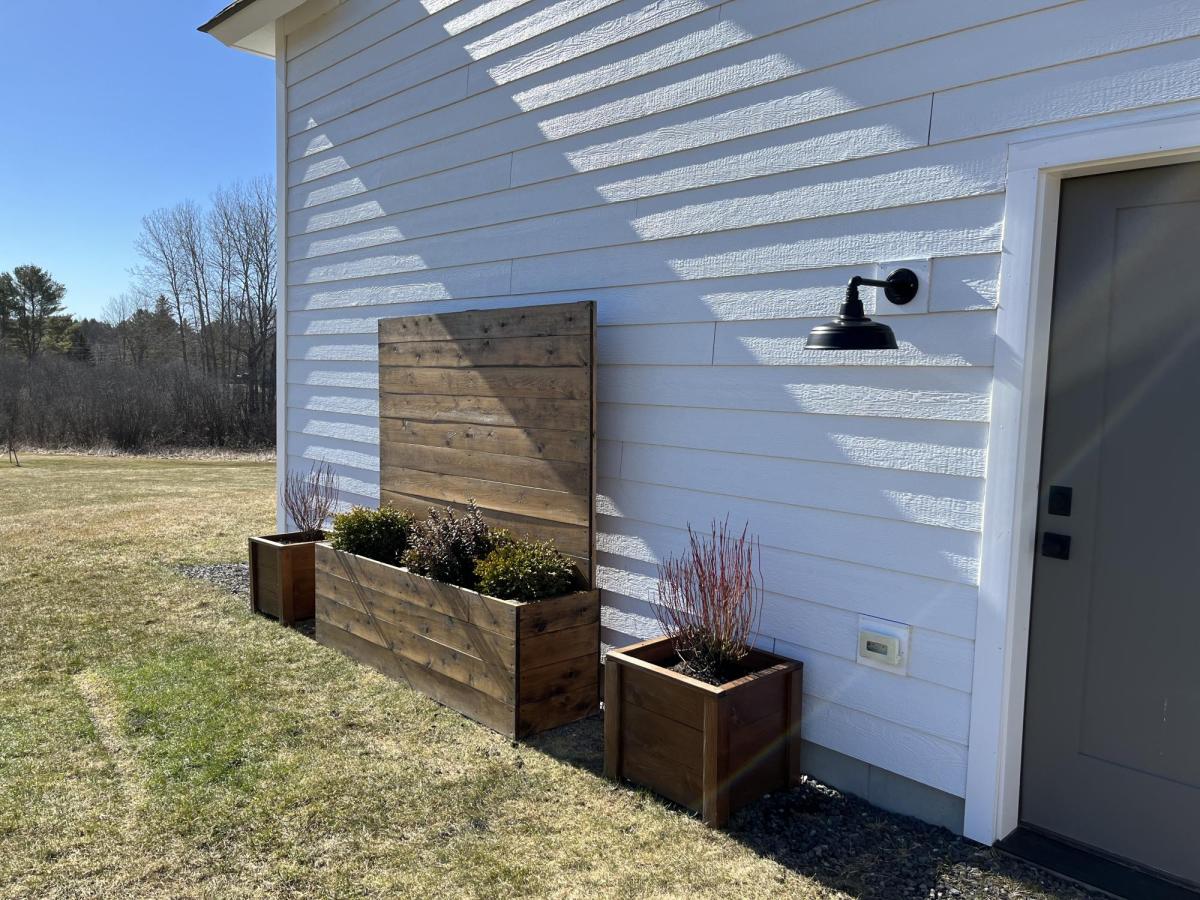
These planters are exactly what we needed to warm up this blank siding! The smaller planters are made from pine, the larger from cedar.
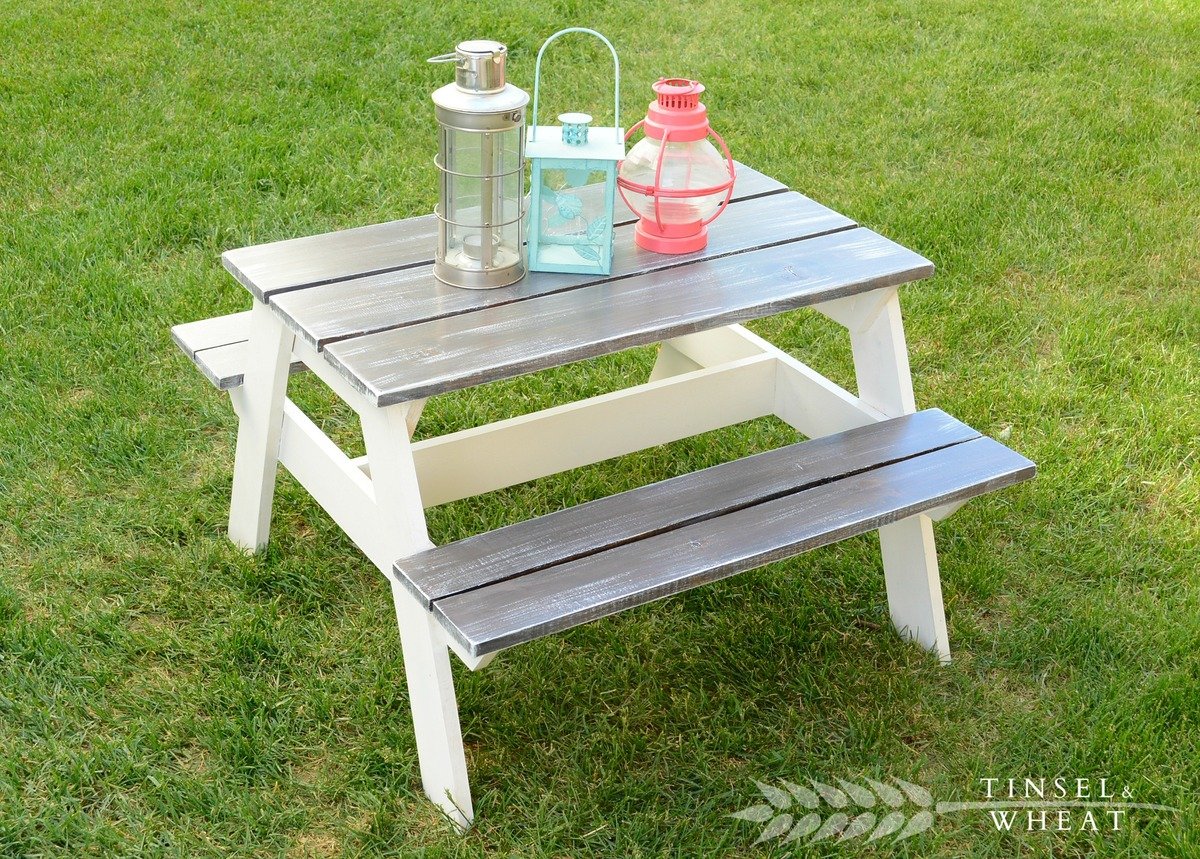
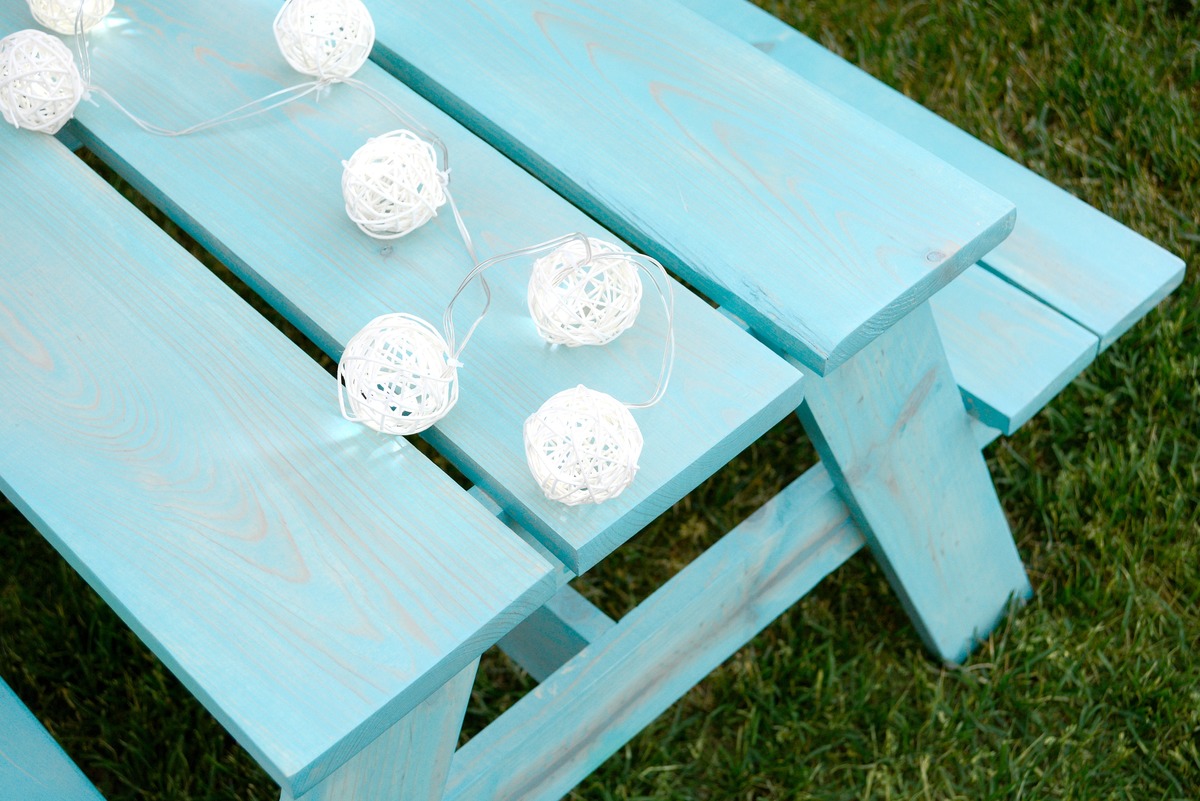
My first truly functional build! I love how it turned out, but even more importantly my kids are loving it - we are literally using it for every possible meal and snack right now. Perfect summer project, and bonus - we get to keep all the eating messes outside!

I built this for my wife for an anniversary present. She had wanted a garden bench for some time but the ones that she wanted were between $500-$700 which is ridiculous for this type of bench. So, I did a search on here for garden benches but there weren't really any plans for them and the few brag plans were not really the type of bench I was looking for. I printed off a few pictures of benches that I liked and got to work. The front and back legs a 2x6 and a 1x6 glued together and then cut to be straight. I wanted something thicker then just a plain old 2x6. If I had to do this again though, I would have just glued 3 1X6's together. The reason being, is that 1x6's usually do not have a rounded edge and a 2X6 does. So needless to say when you glue them together you have a nice little gap on either side. Without a table saw to take this off, its pretty difficult to get a straight cut. But I ended up getting it right after sweating for a few hours in the garage. The bench stands 36 inches high, 48inches wide and about 18 inches deep. The seat height is right at 18in also.
In the unfinished pictures I actually had the depth being 24 inches. After sitting on it though it was just way to deep. So I pulled it apart, made the adjustments and its now much more comfortable to sit in.
If anyone has any questions or wants more details feel free to drop me a line!
Thanks!


Fri, 06/19/2015 - 13:32
Yes I think thats what they came out to be. yes the cross pieces are 2x4 and the slats are 1x4's

In reply to back legs by smz1919
Fri, 06/19/2015 - 13:34
I glued a 2x6 and a 1x6 together to get the thickness. Now that i have a table saw and a jointer this entire process would have been much easier but after getting it to look like one solid piece i just outlined the slant i wanted and cut it using a jig saw.
Fri, 06/19/2015 - 20:17
So the back slats are just glued in place right? I wonder if it would be easier to use a biscuit joiner or not
Sun, 10/23/2016 - 17:46
Wed, 05/26/2021 - 08:32
Hi Nathan
Love the look of the bench. Would you have a list of material requirements. I intend to make a bench like this and would like to know the measurements of the top back spar (the shaped one).
Here in the Uk our timber yards do not always supply the same cuts as the US so I need to have some idea of the pieces I need
Many thanks

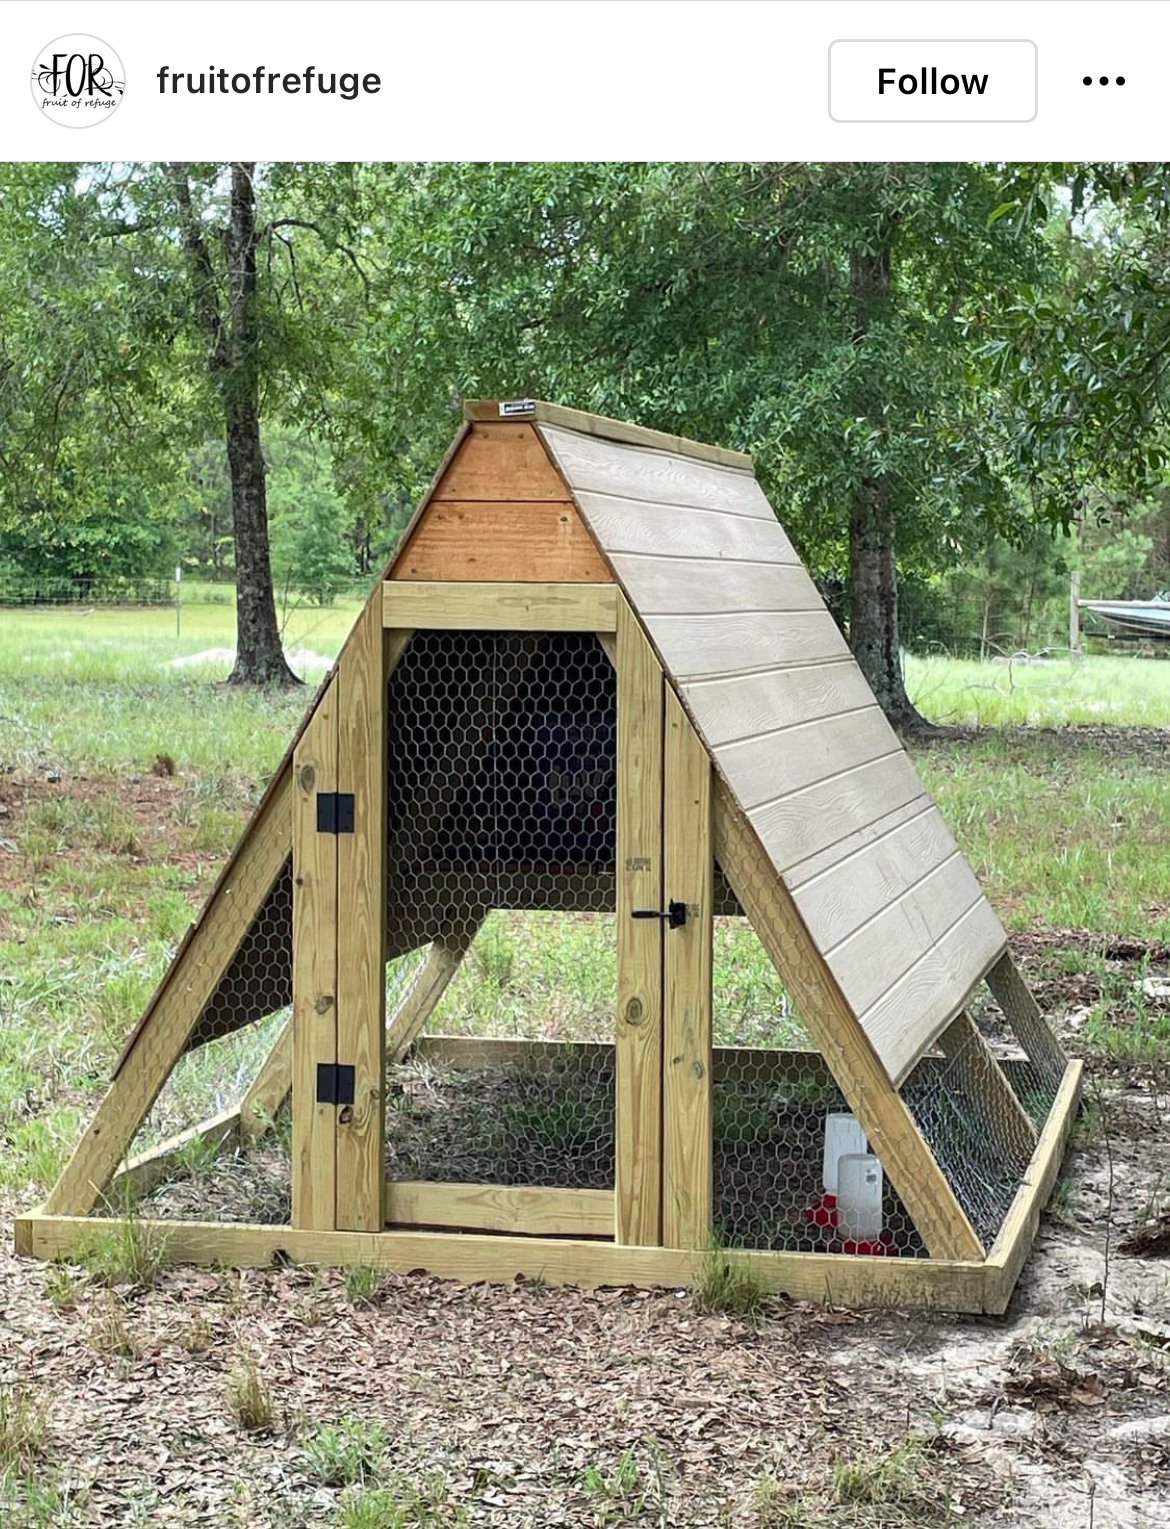
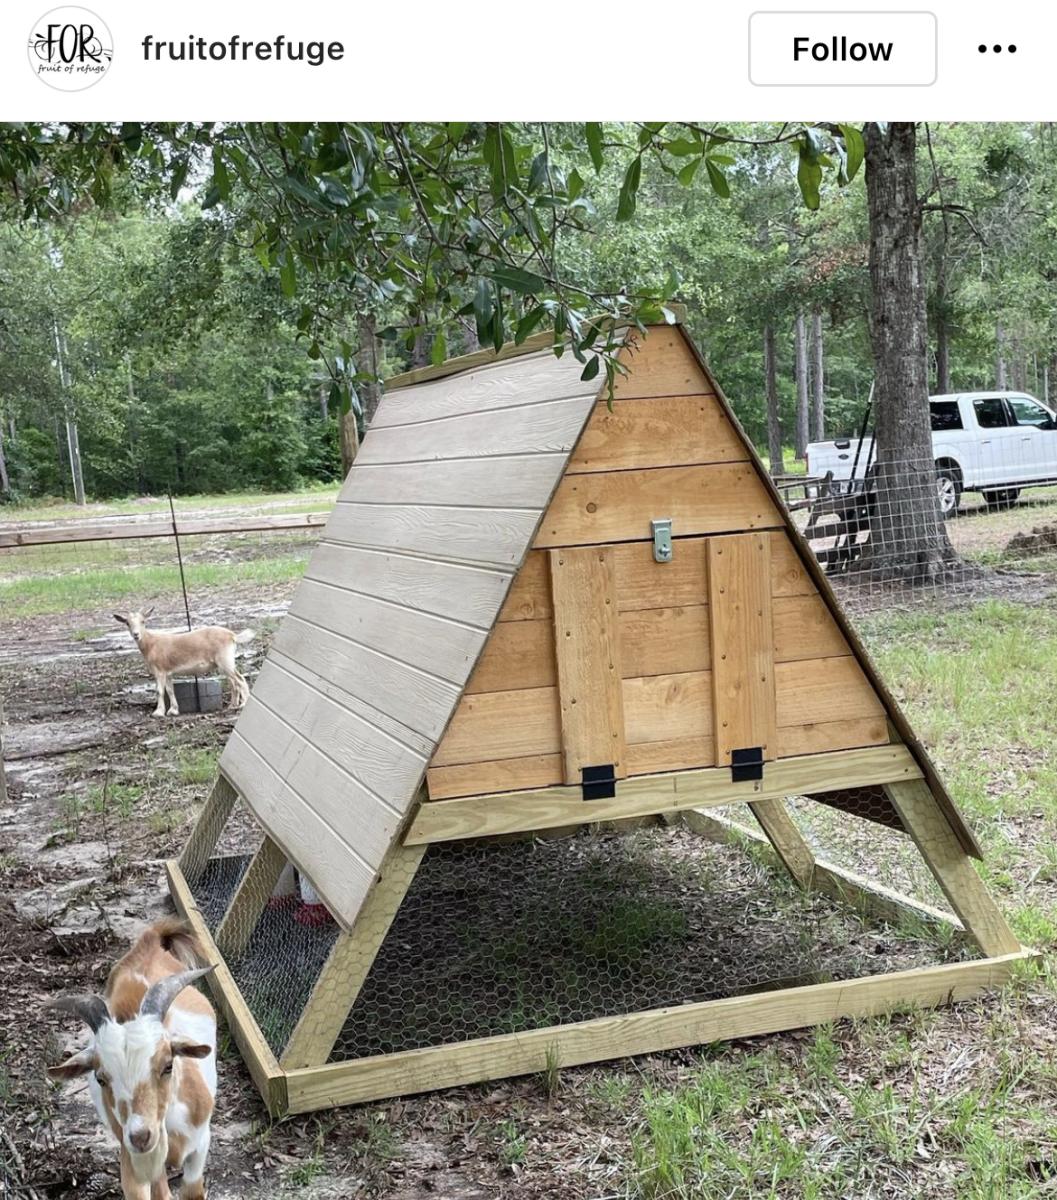
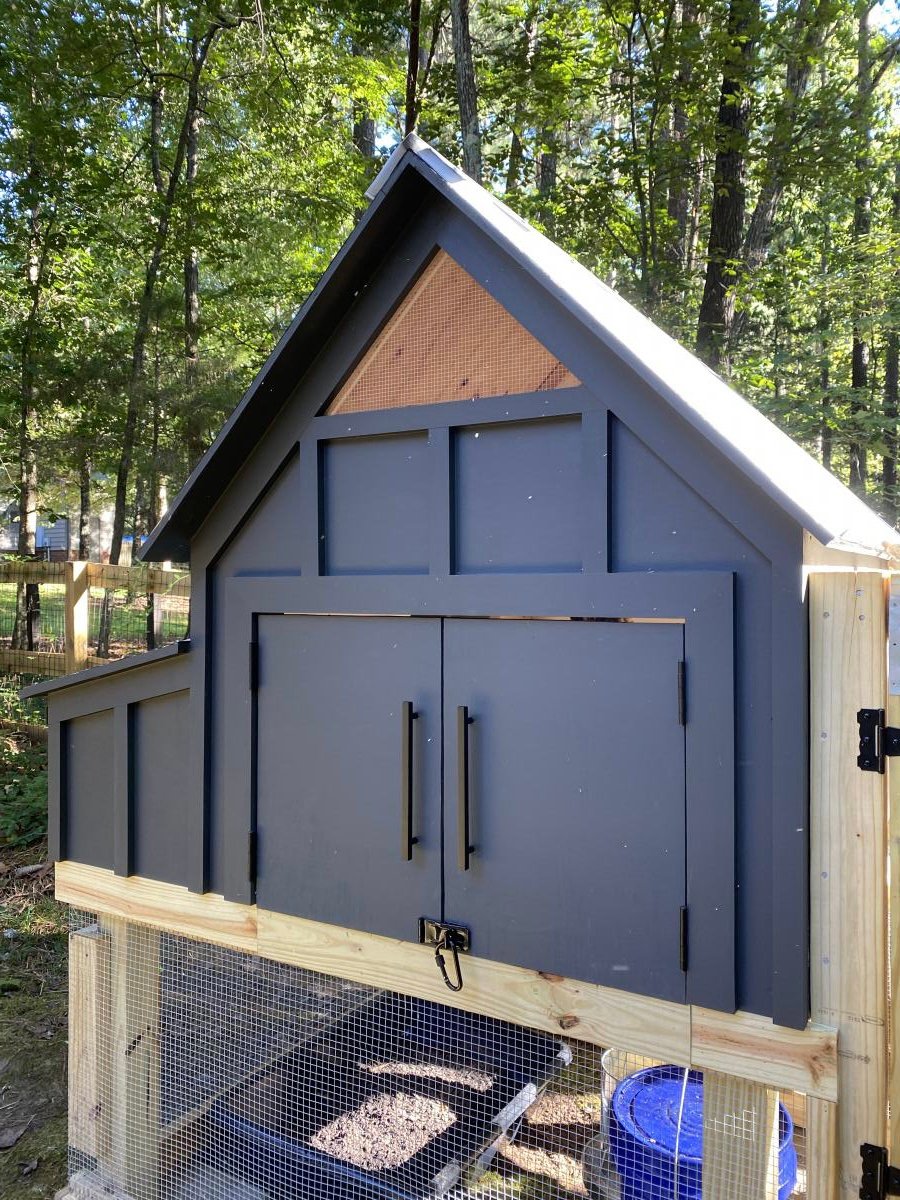
We took some creative liberties on the Williams Sonoma inspired coop posted here. Because we don’t get a whole ton of sun in our backyard, we eliminated the herb garden planter and instead built a longer run. We also made the coop a bit wider to accommodate for the inevitable chicken math. And, you’ll notice the vent both shaped differently and is a bit higher. This was to increase air flow, avoid the dreaded draft, and to lend a more Scandinavian vibe. We also decided to place the chicken exit on the outside wall to allow for more living space under the coop itself. The project took about a month to complete, dedicated to only working weekends. And, it was very much over budget! Who knew wood is so expensive?! But overall, the outcome was even better than I expected. The chickens love it and I don’t mind looking at it!
P.S. this was a pretty advanced project. The fractions alone had me yelling “uncle!” Thankfully my husband is pretty handy, and my father-in-law (career in the construction industry) had a few pointers, so they took the lead in executing. I chose the paint colors and suggested the deviations from the original blue print. ;-)

Wed, 11/18/2020 - 12:55
Thank you! Yes, I suppose everyone is wanting wood for home improvement projects now that we're not leaving the house! Also, I didn't mean to post a picture of my son and his friends. Am I able to delete?
Thu, 01/14/2021 - 07:43
does this roof have the same angle as the 'Small Chicken Coop with Plans'? It seems to be 'less steep'. Wanting to start this project next weekend and trying to get my mind wrapped around everything!. Thanks.
Wed, 03/16/2022 - 09:53
Do you have a run side photo? I am thinking about adding more run onto mine.....
Great little project. Finished just in time for Thanksgiving.
Andy
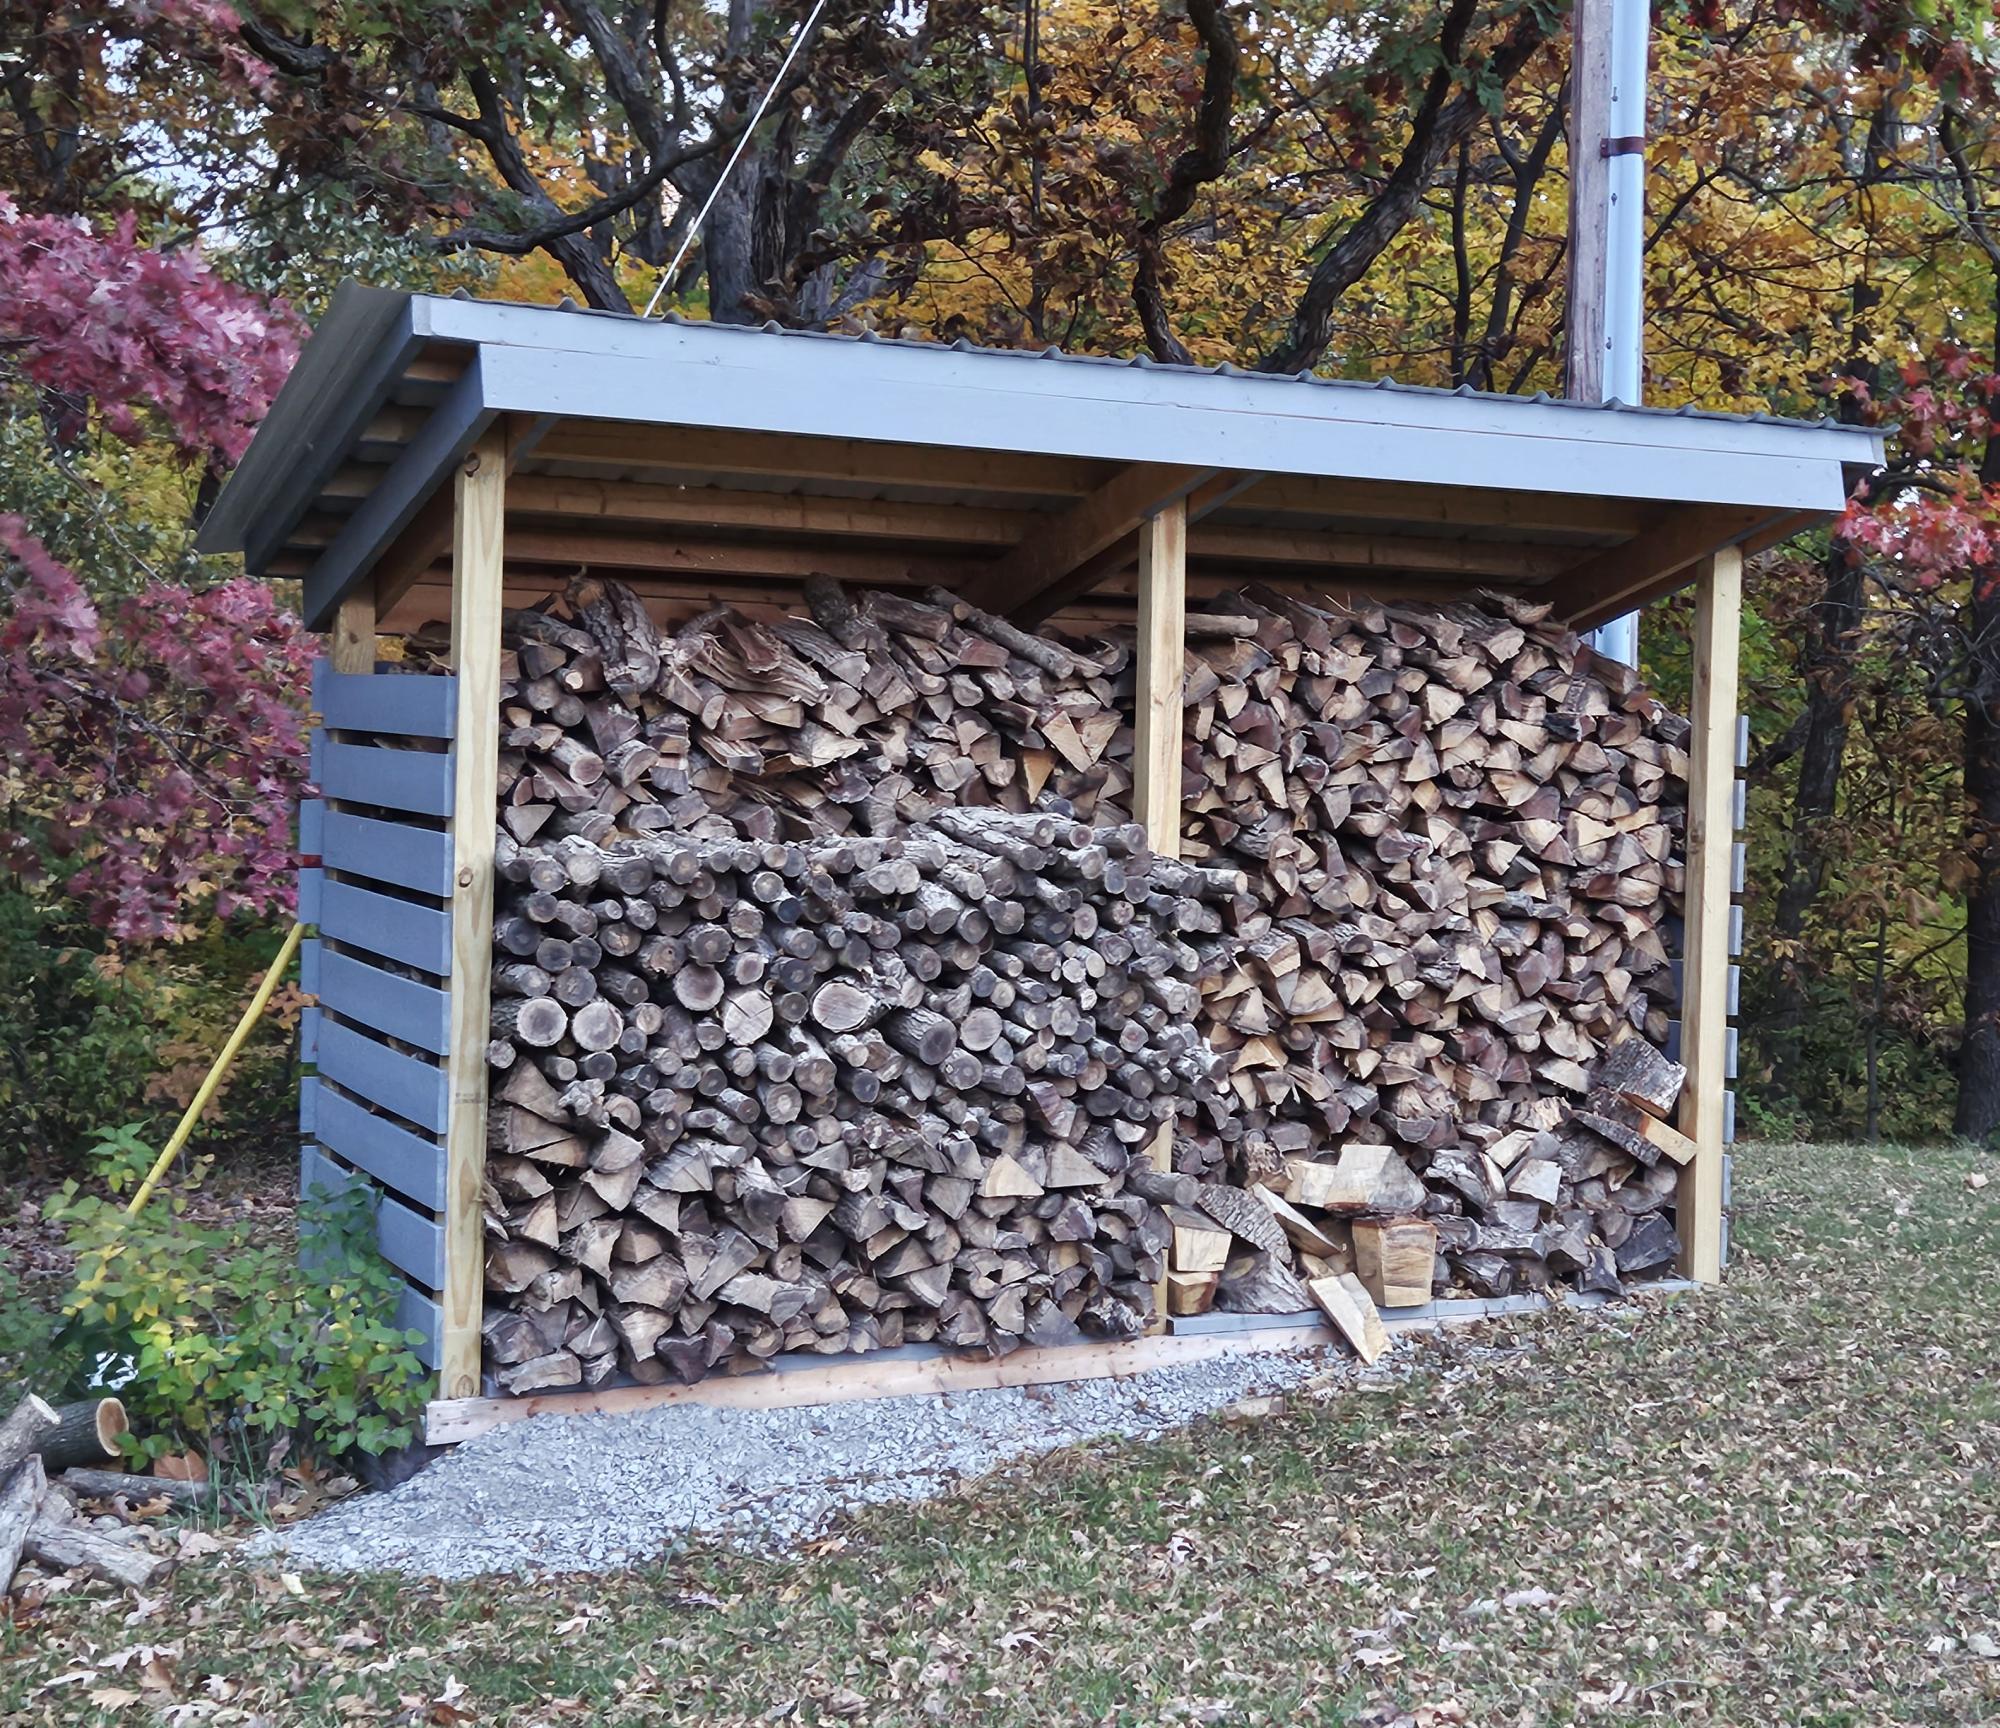
I am a mathematics teacher in Central IL. I teach a class called Geometry in Construction. I had my math students build this wood shed in pieces at the school, then I brought it home and put it together with a few of my son's friends. The students enjoy a math class that gets to go to the wood shop to apply their math skills to a wood working project. I am proud of my students hard work and dedication.
Shari Bruyn (I'm old, so I do not have Instagram or a blog page. lol)

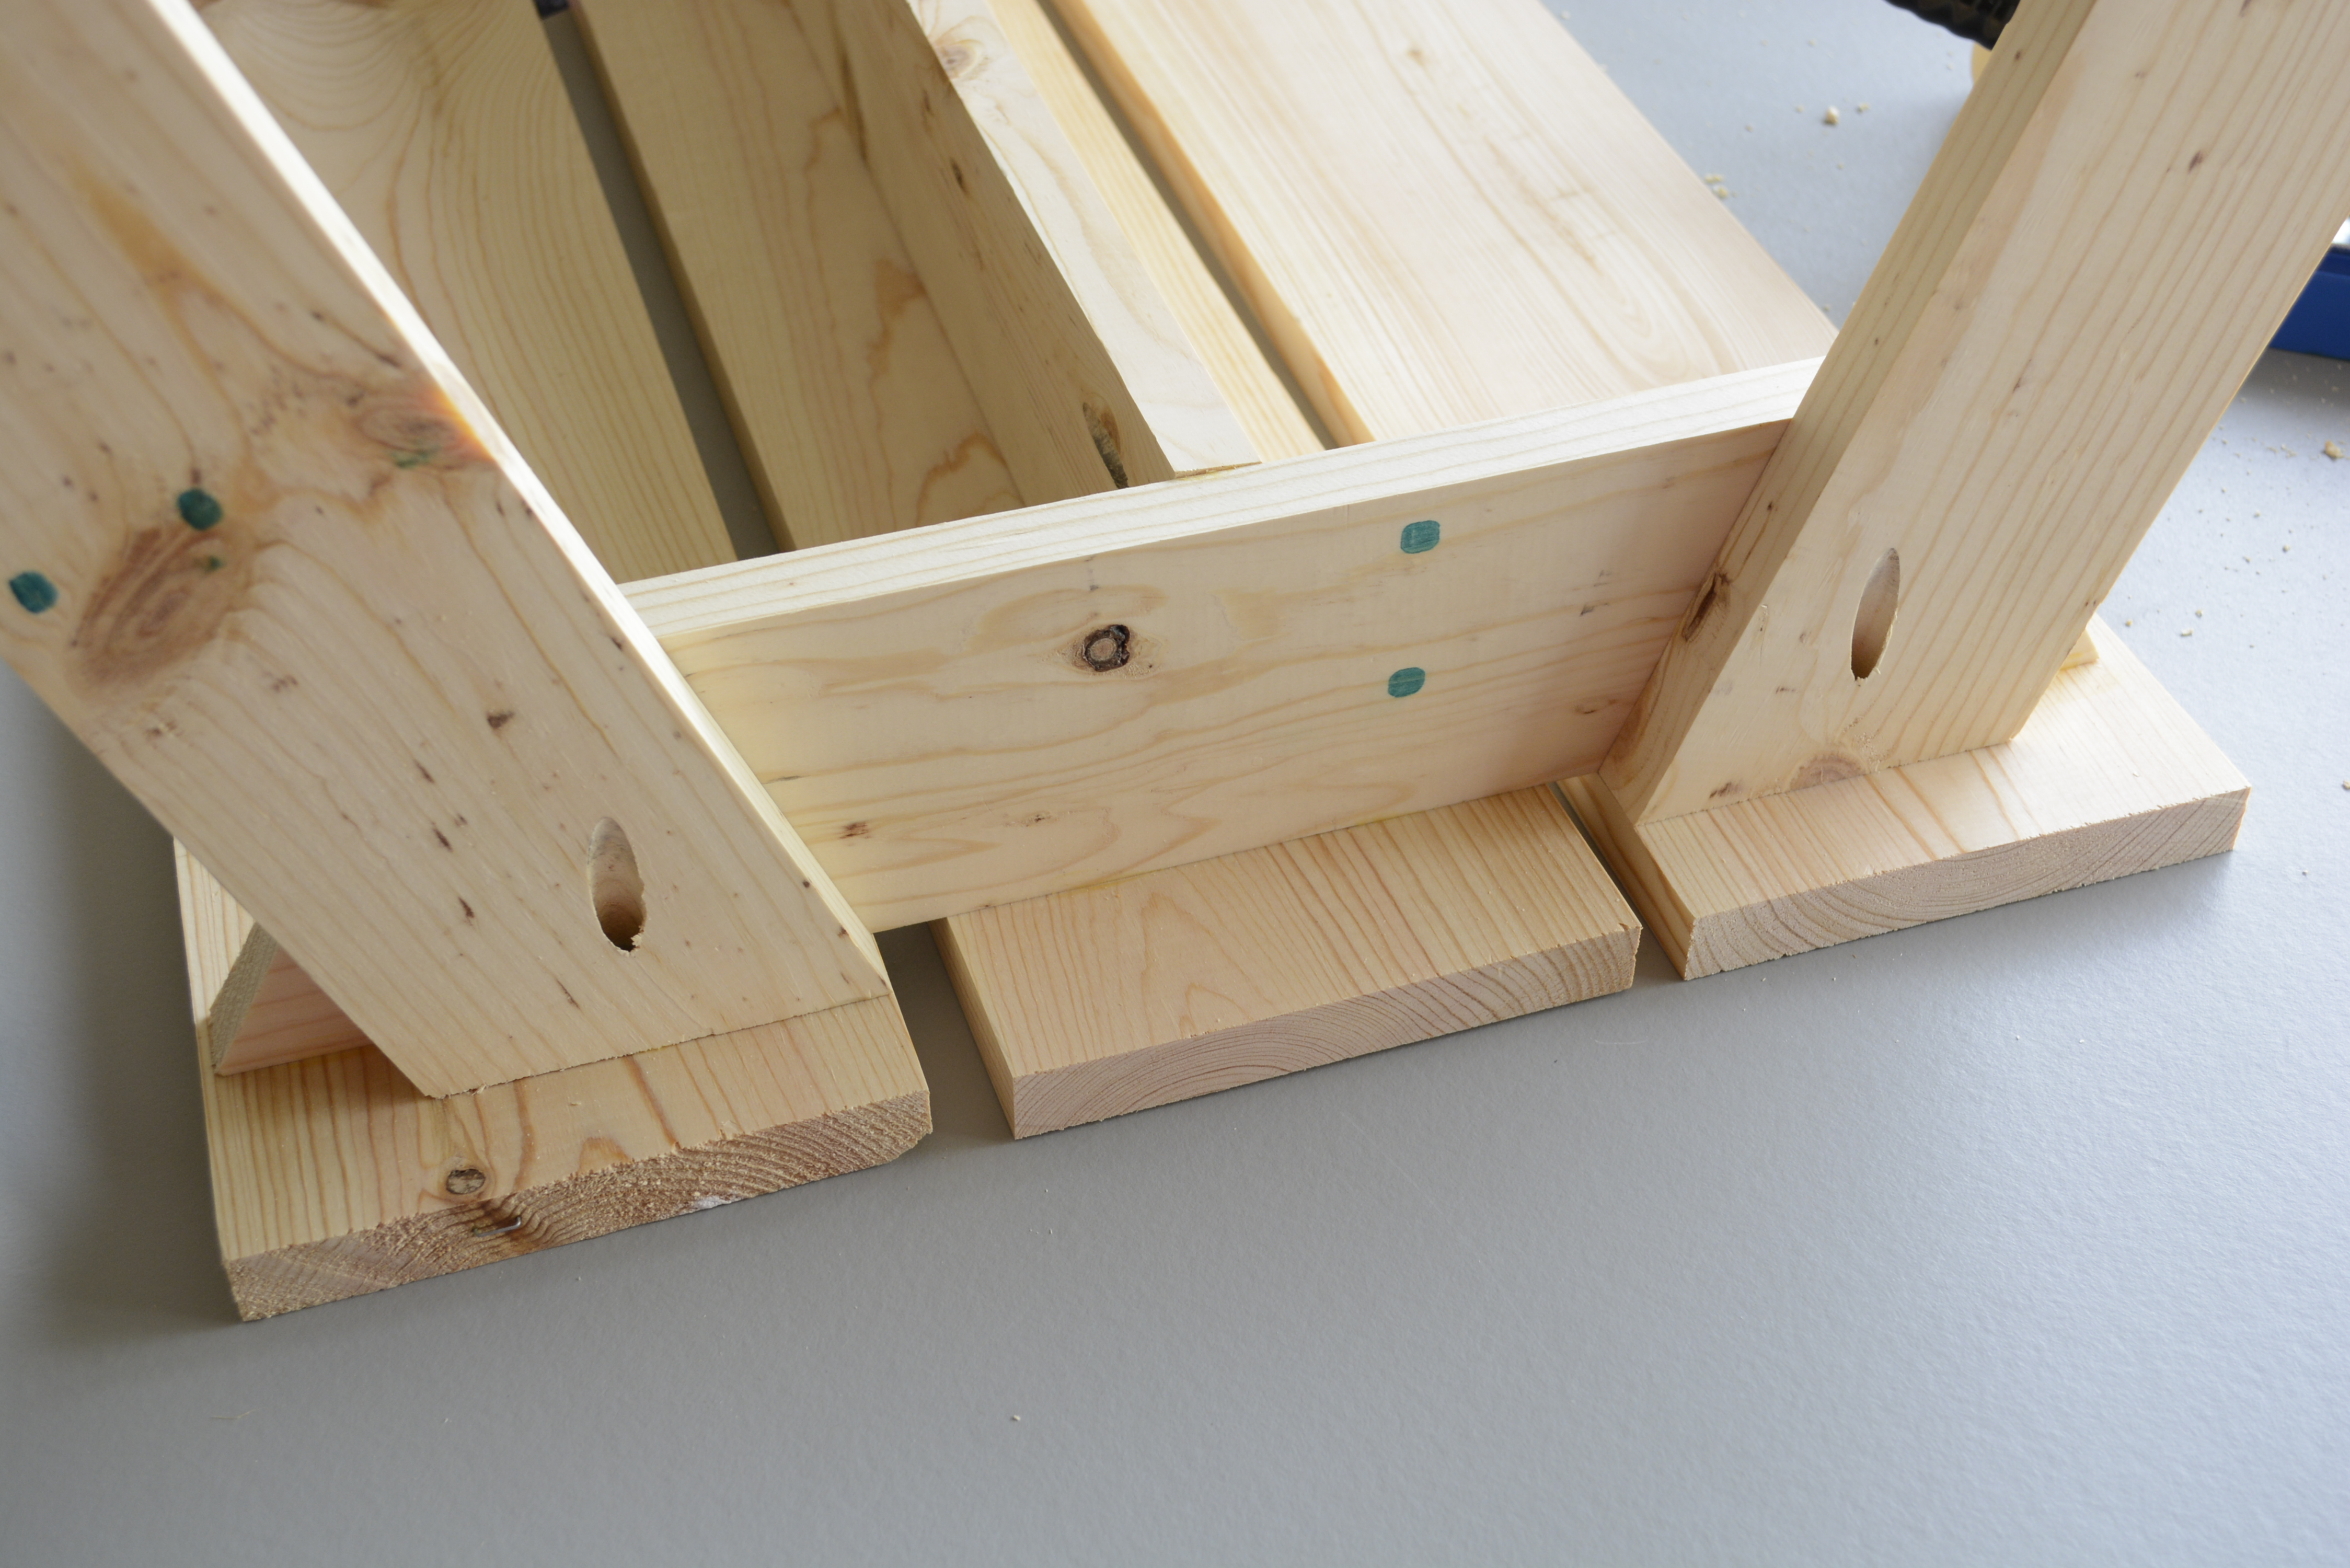
I built a big kids see saw using 2x6's all around with a 2x8 seat. The center post is 30"h.


Plan modified to be built on stringers due to hight.
Fri, 07/07/2023 - 15:22
Do you have an illustration or instructions on the exact modifications you used for this project?
Got the plans on here had a little trouble with the angles on the seat but overall looks good and was easy to follow the plans
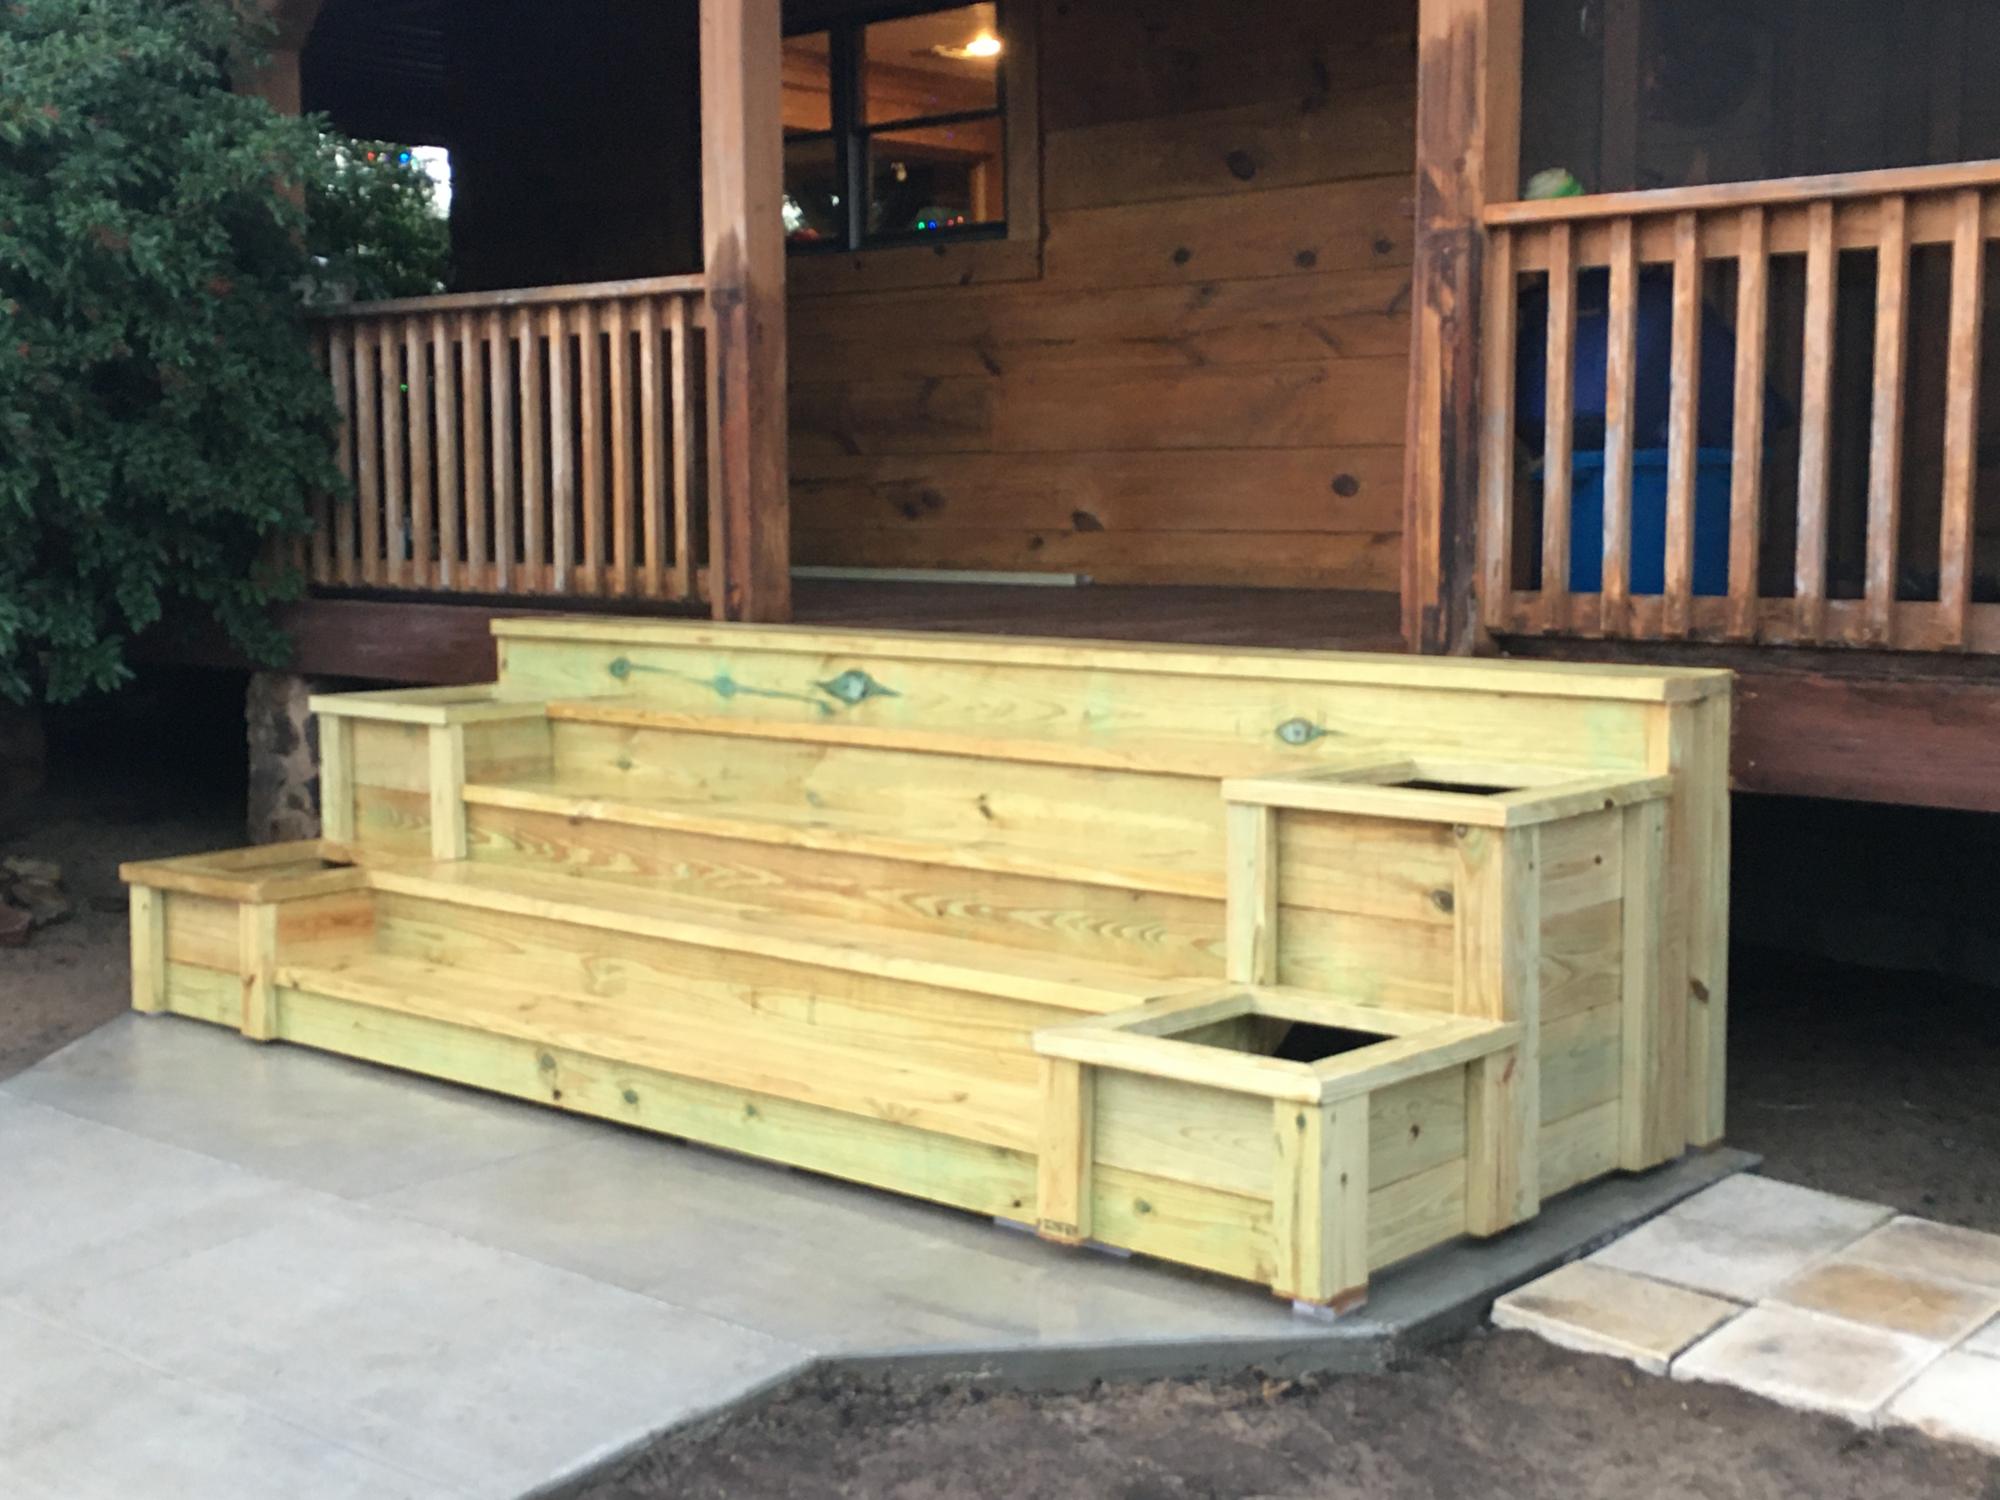
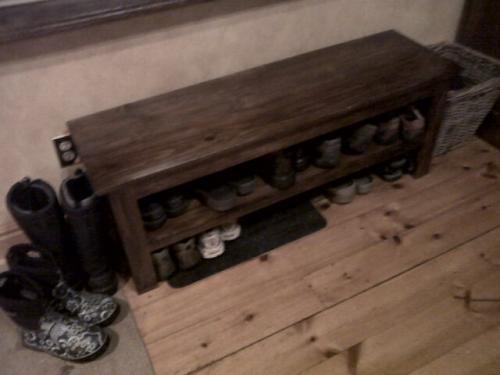
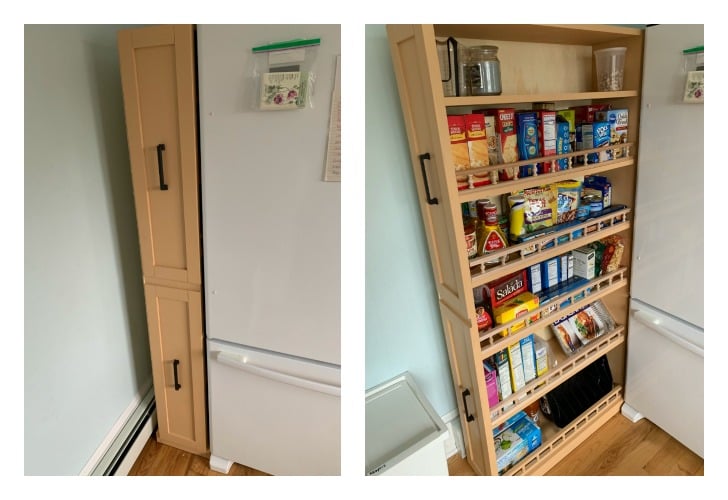
I've officially stopped stalking and started building! First project a modified spa bench. Still have to stain it, but it already makes the big pile of shoes by the door look neater! I'm a hands-on person and not afraid of power tools (got a band saw for my birthday!) but it's still a challenge building a piece of furniture. I've already learned lots of do's and don't do's for next time!
Thanx a bunch for your site, Ana! It definitely gets the mind plotting great projects to come!
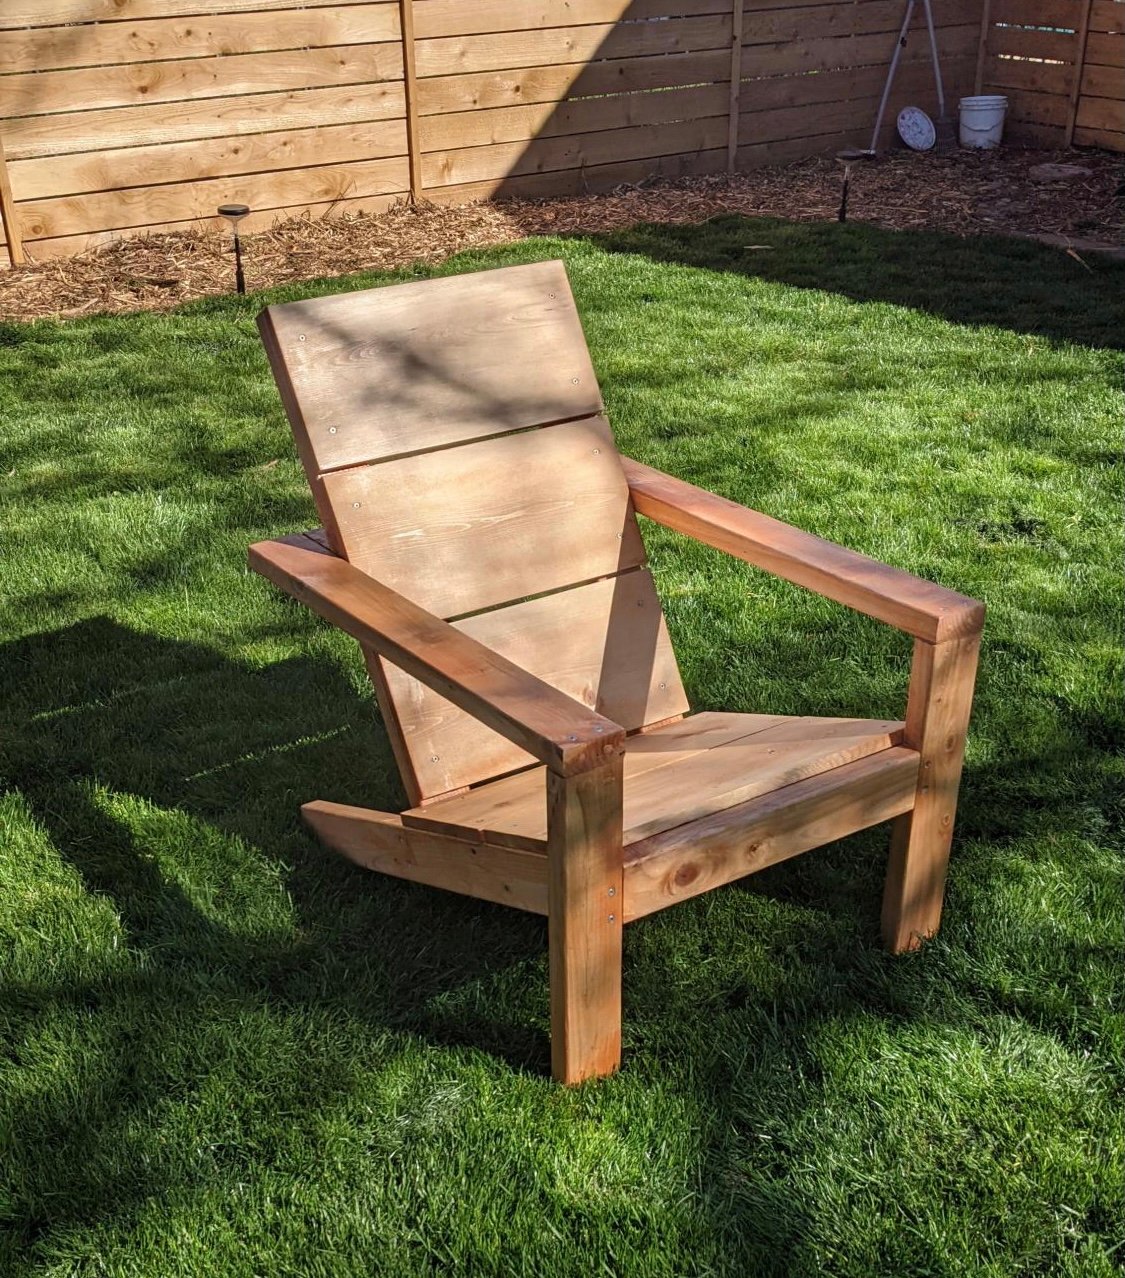
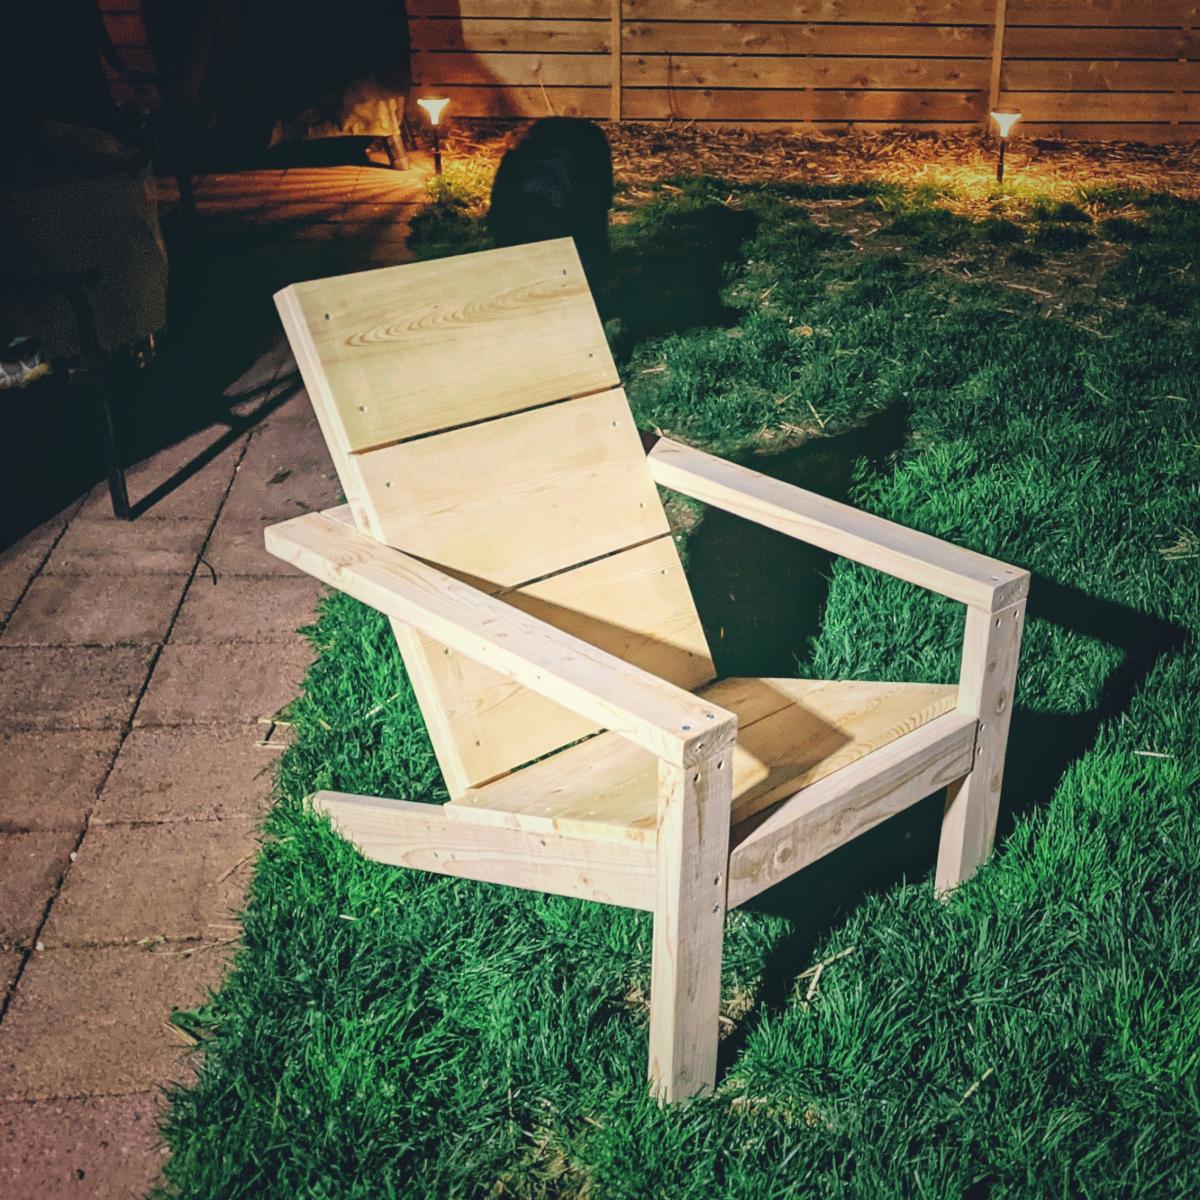
I've made 2 of the Modern adirondack chairs. Really enjoyed the plans and the video for help as I'm new to woodworking. I look for new plans all the time to see what I might build next
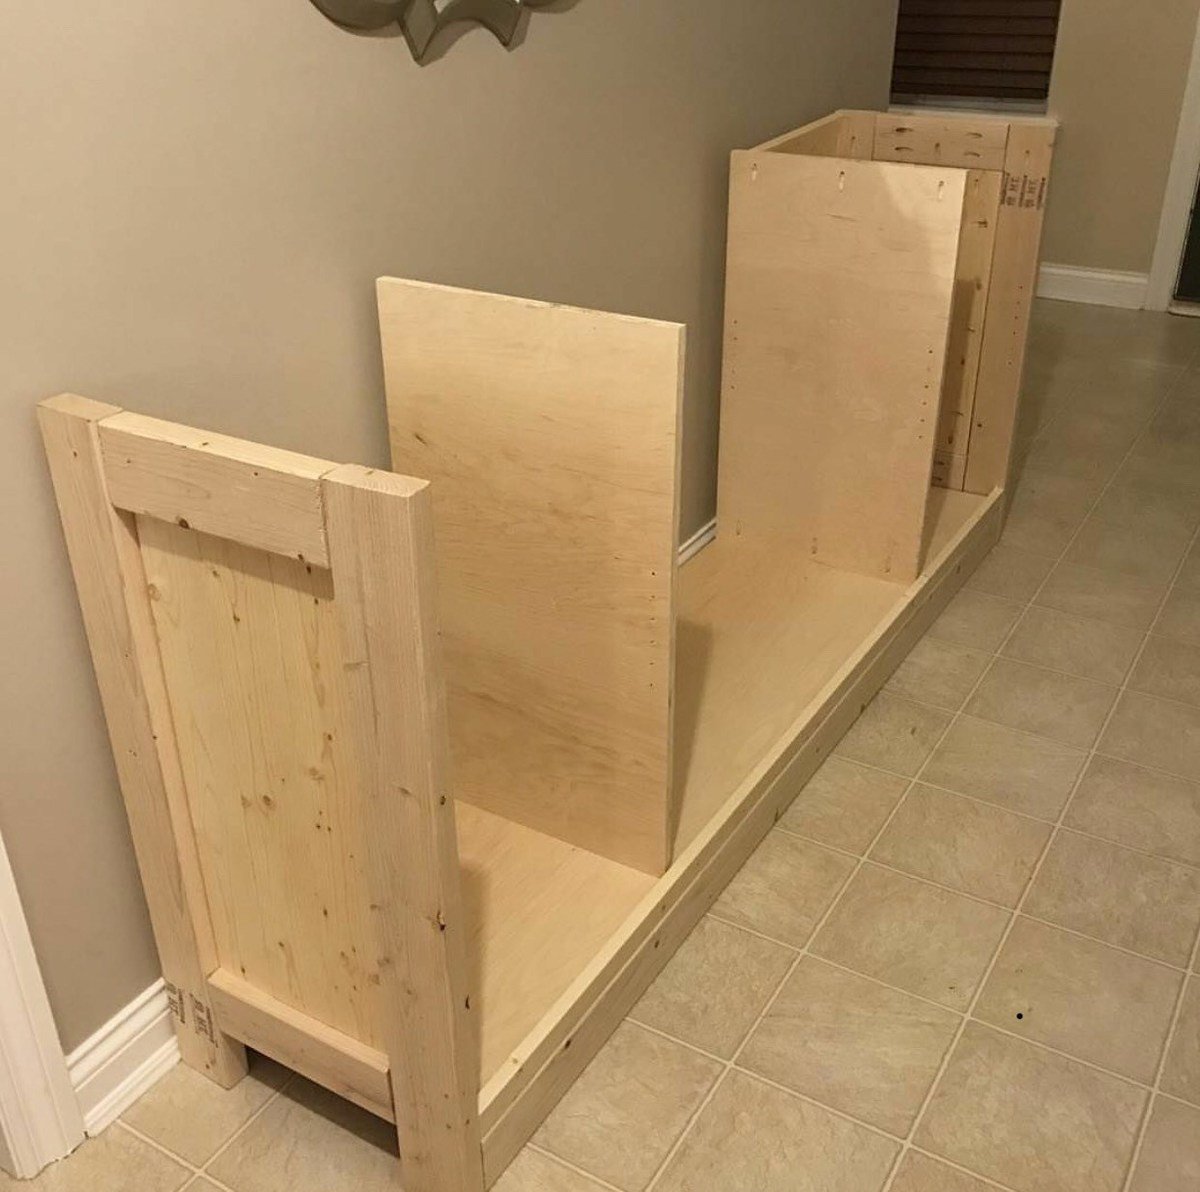
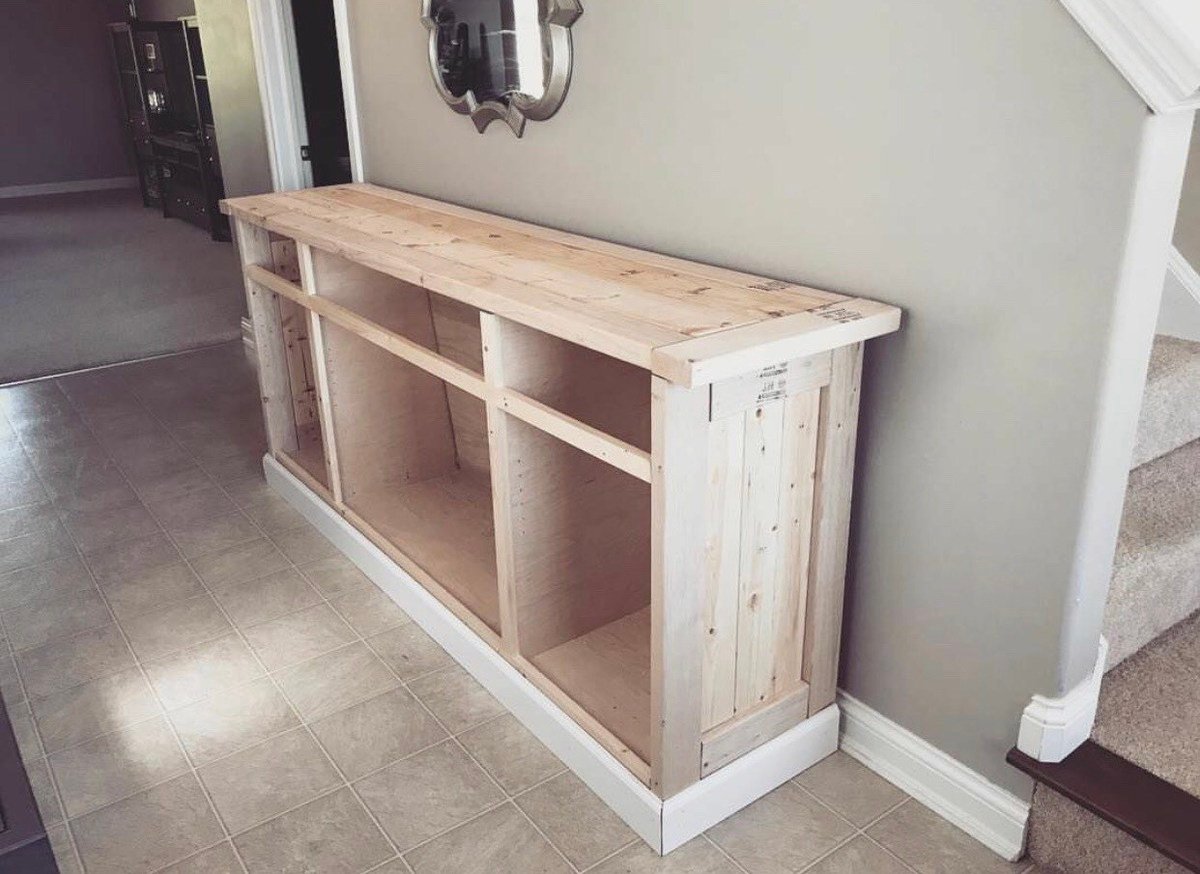
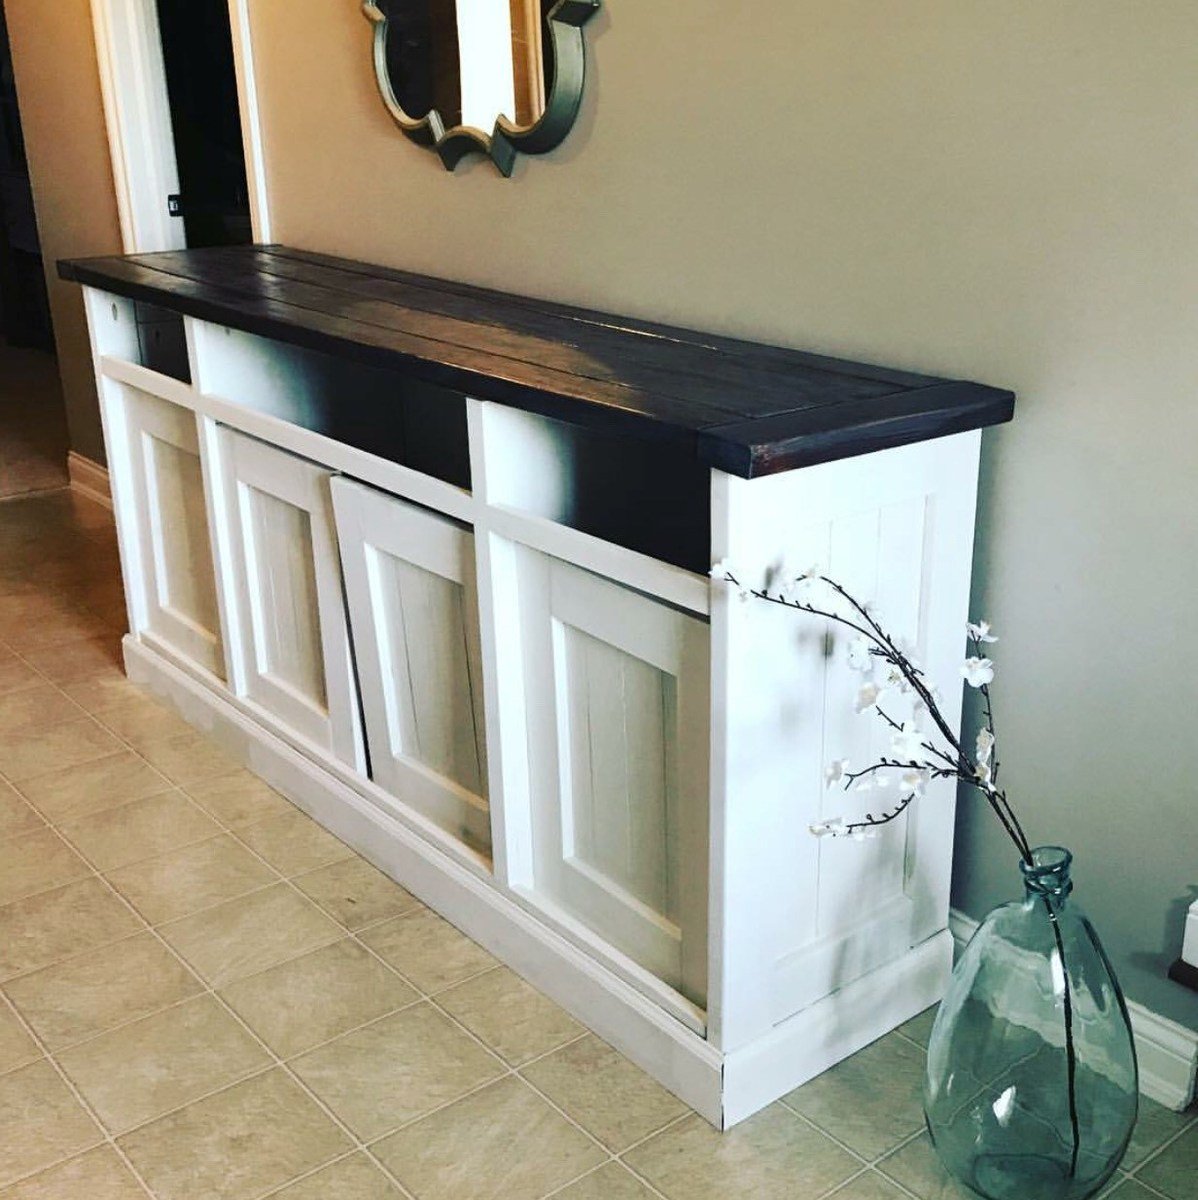
I worked on this project over the course of a few months, and I absolutely love the result! I posted all the info at my blog: http://www.designatedspacedesign.com/2017/10/01/a-rustic-sideboard/
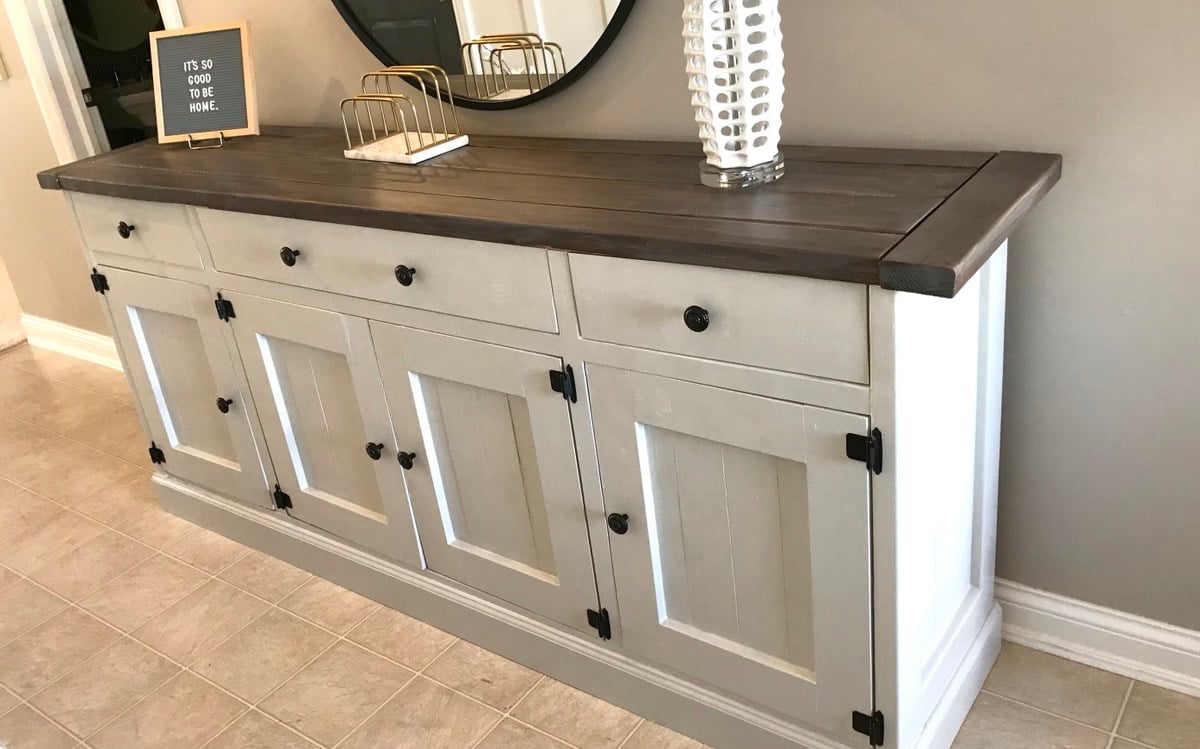
Made my wife happy!

Mon, 05/06/2019 - 10:22
Hi Mike this is a fantastic project! Just fabulous!

We had some leftover granite from an outdoor kitchen build and wanted to maximize the use of it. We loved the look of a rustic table from Pottery Barn and set out to find something that was asking the same aesthetic. I came across the Jilly and Mia workbench console and thought it would work great with some minor modifications. I shortened the overall length and height, went with some heavy duty casters to support the weight of the granite, and reinforced the cross beams that would support the 3/4" plywood sheet and granite. I went with cedar for this build since it was outdoors and I'll finish it with a clear sealant.


Comments
Ana White Admin
Sun, 07/10/2022 - 18:01
Nice Coop!
Looks great, thanks for sharing your project!