DIY Greenhouse
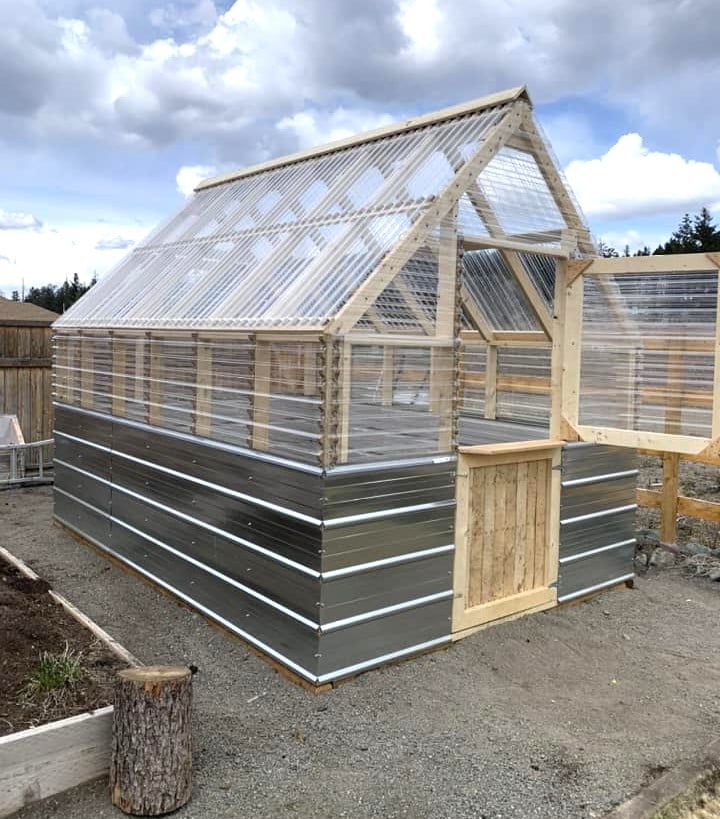
DIY Greenhouse by Trenton Kirby on Facebook!
Built from Plan(s)
DIY Greenhouse by Trenton Kirby on Facebook!

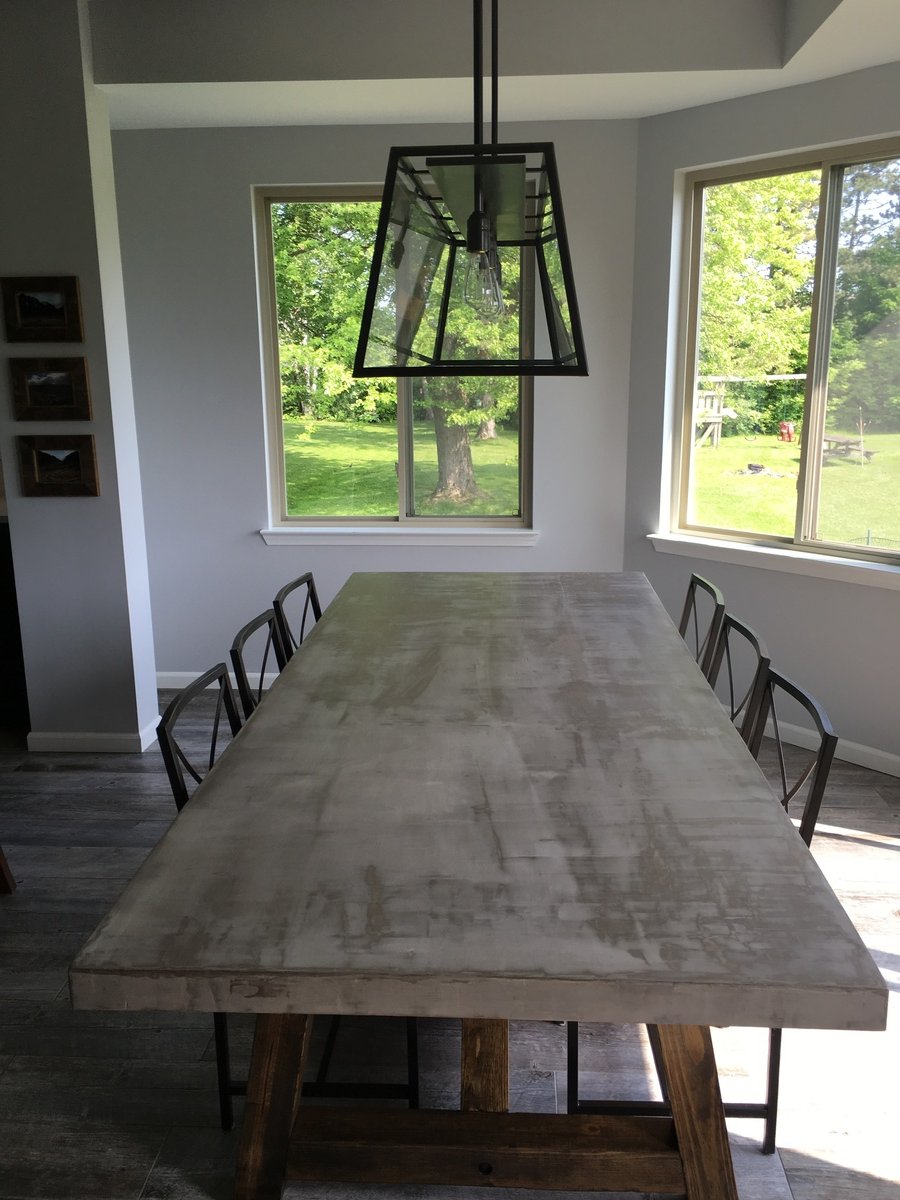
I had so much fun building this! I got a little creative with the corner section and decided to make it a table. I built a small hatch so that I could put in a container for ice and cold beer. When the hatch is not in use, the container can be removed and the hatch can be closed to provide more table space. I also added drink holders!


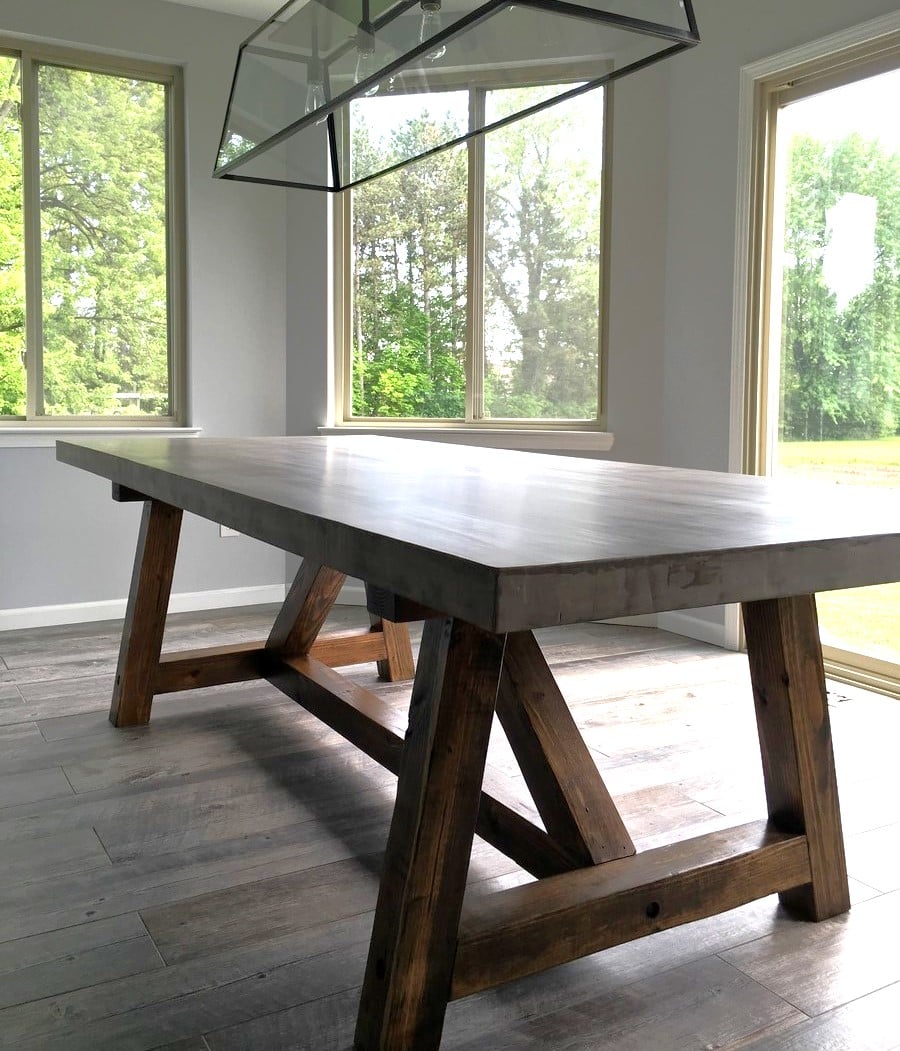
Instead of a wood top I used 2x 3/4" sheets of plywood plus 1/2" backer board to create a thicker top and used Ardex feather finish cement in 4 coats sanded and finished with Mexeseal sealant, recommended 4 coats of semi-gloss plus 2 coats of satin to get a matte finish (recommended by manufacturer) I followed the concrete countertop blog from "Young House Love" but used a different sealant when I contacted the safe coat manufacturer and they recommended their Mexeseal product.
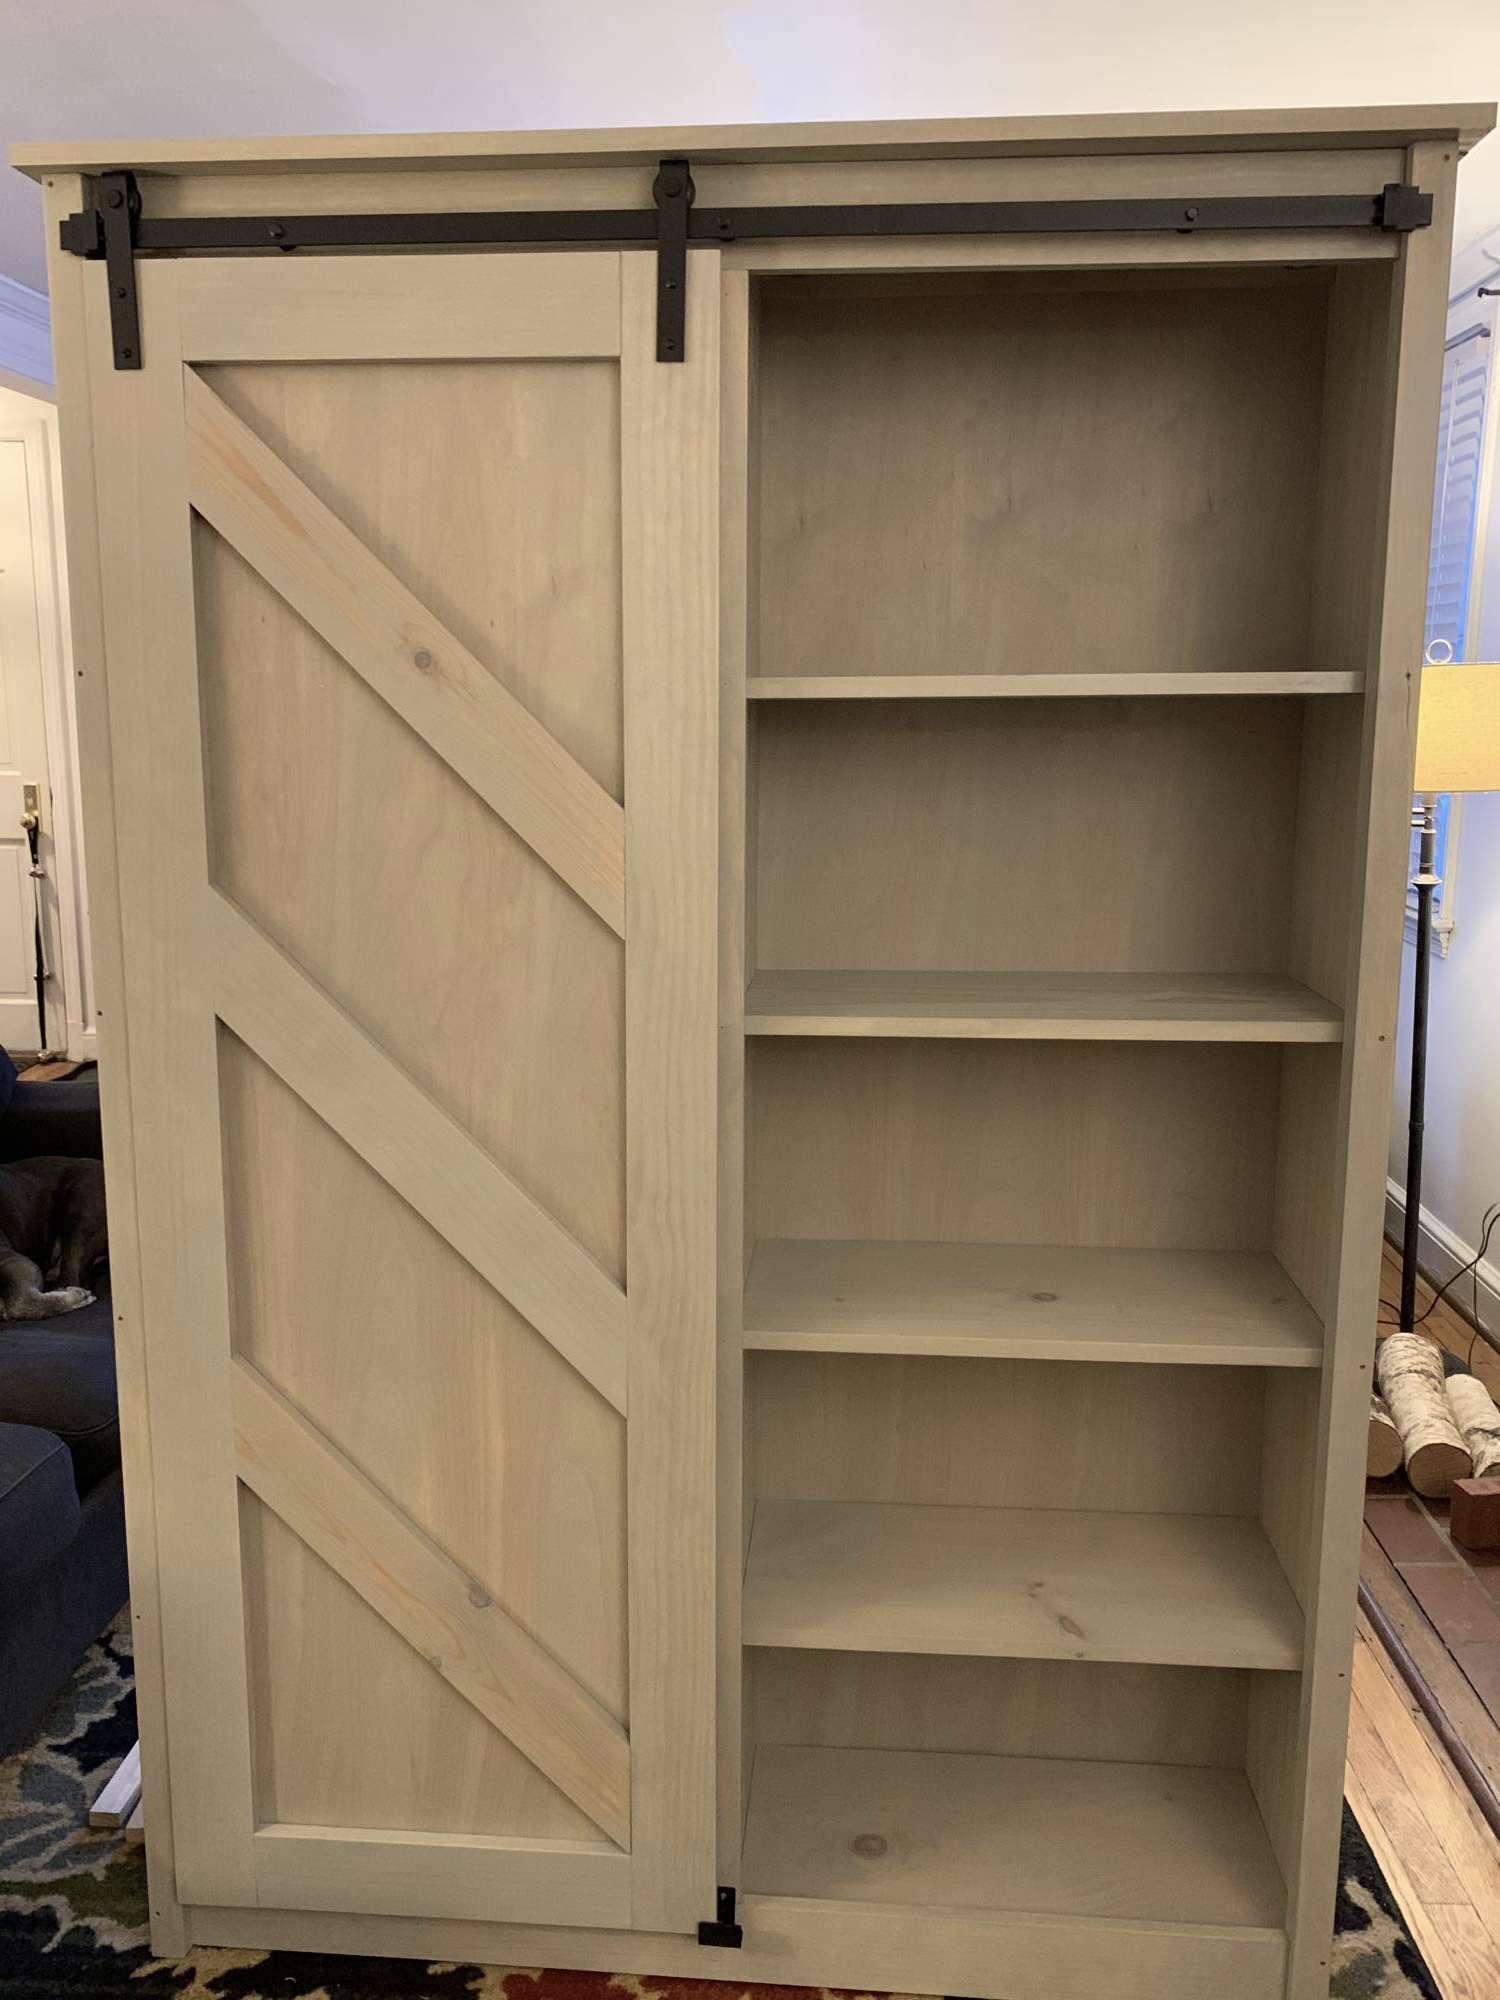
This took a lot of time and money but I like the way it looks. We have 4 kitchen cabinets and one drawer and no room for more so storage is tight.
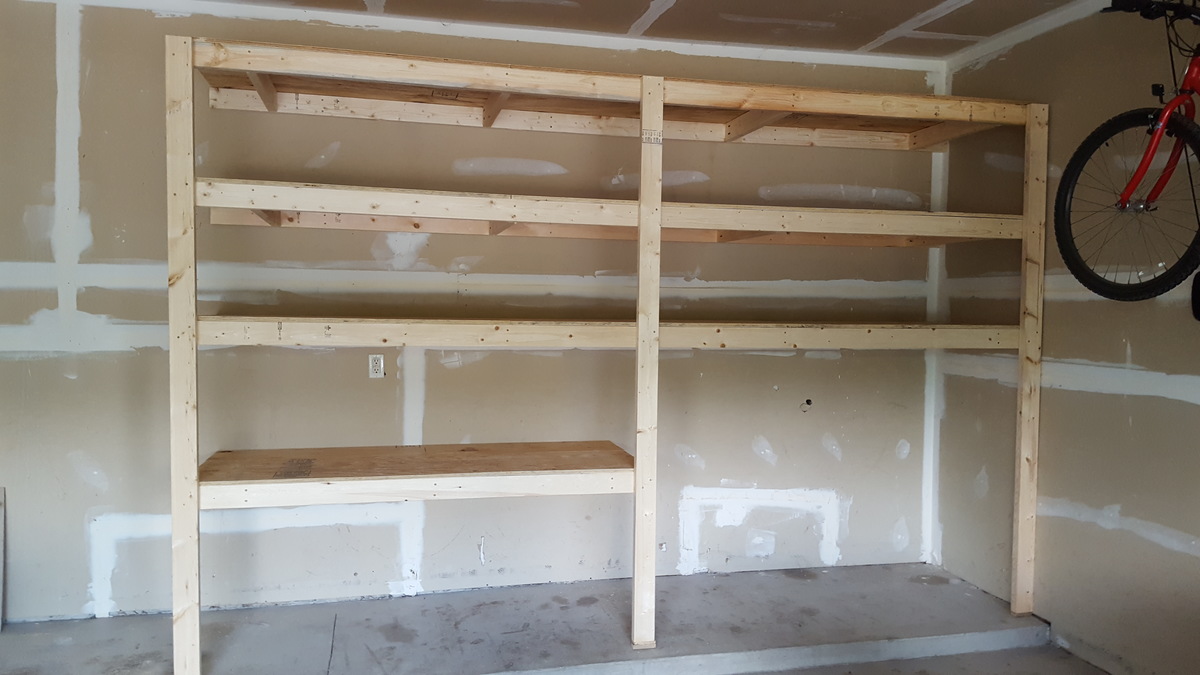
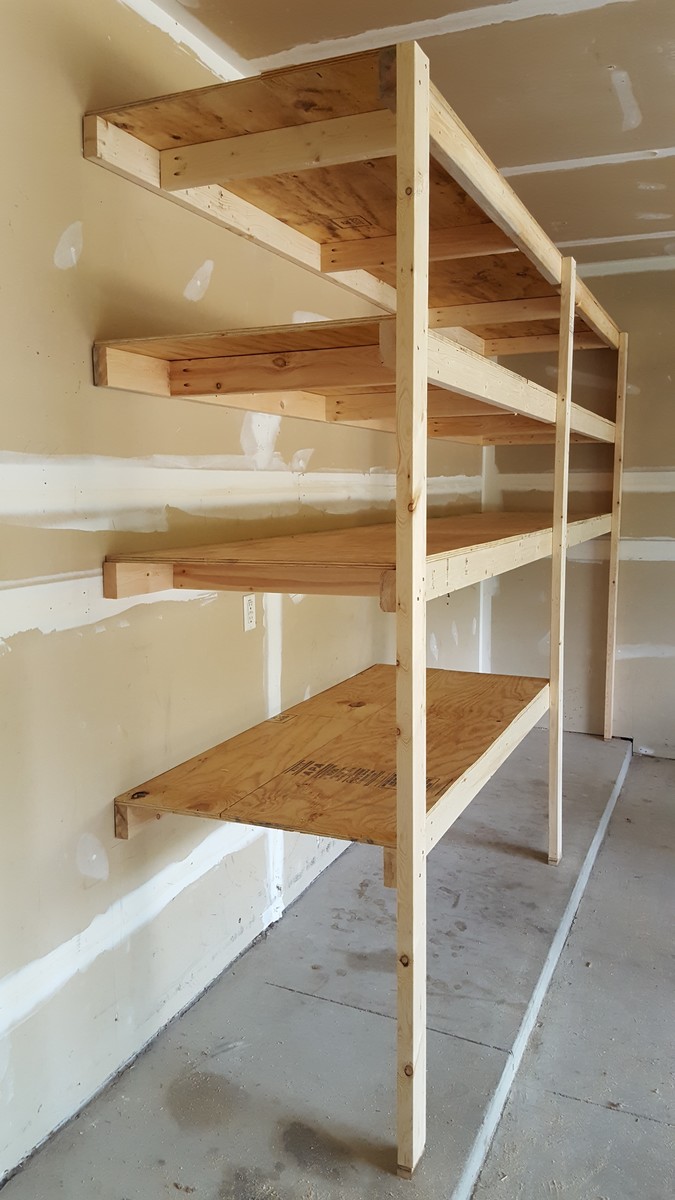
I am a beginner diy'er and this was one of my first projects. Also it was my first time using the Kreg jig and I loved it! My shelving system was around 8 feet tall, 12 feet wide and 30 inches deep. I added some extra cleats to support my deeper shelves (30") and also used thicker (5/8") plywood. This was a fun and easy project to do! Thanks so much!
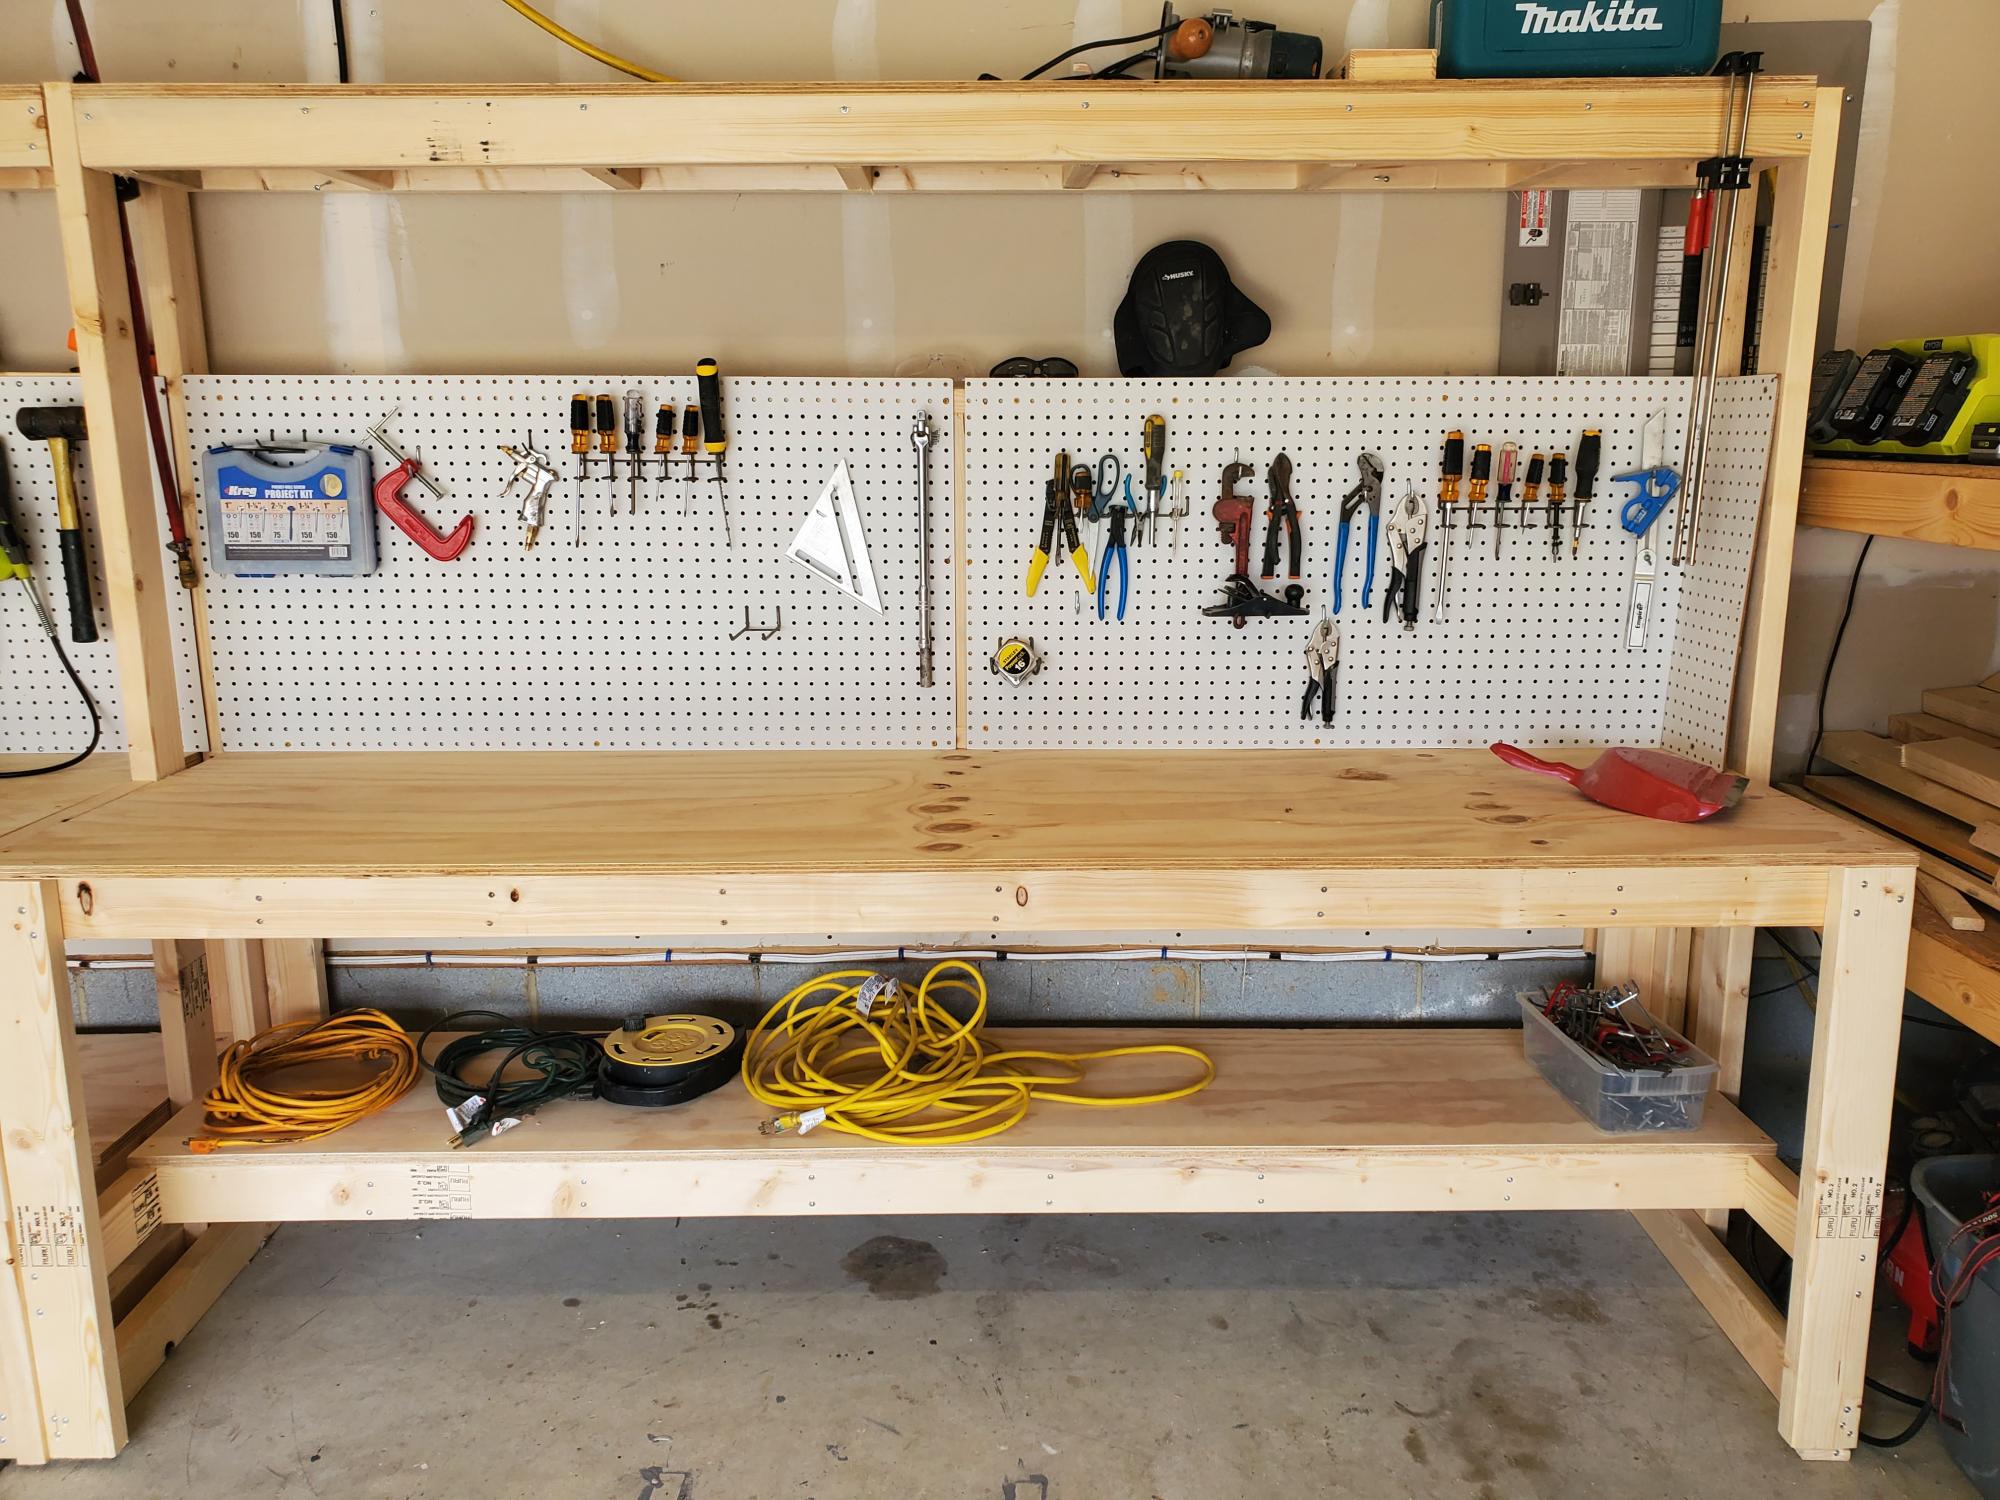
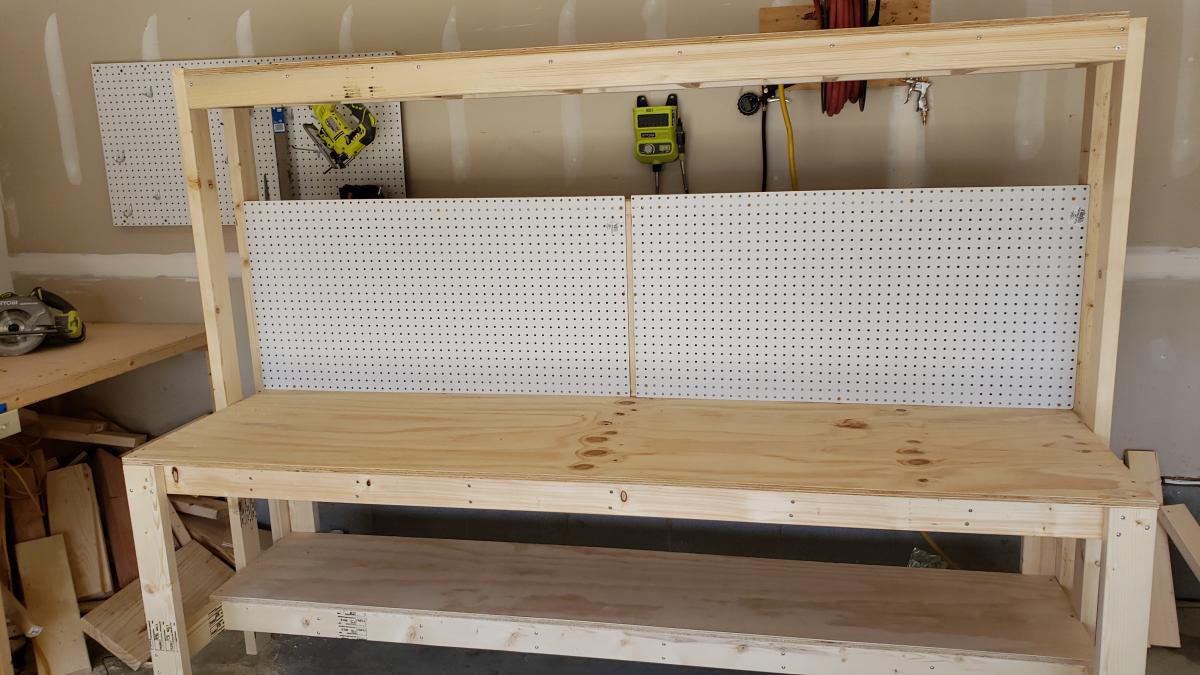
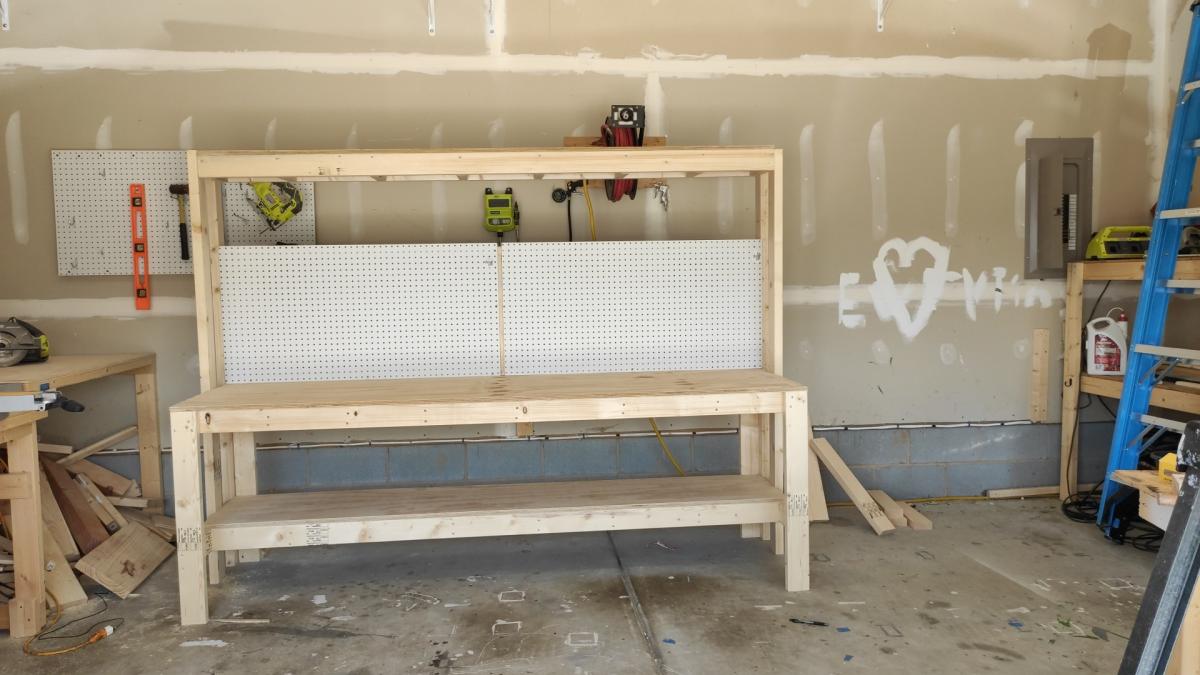
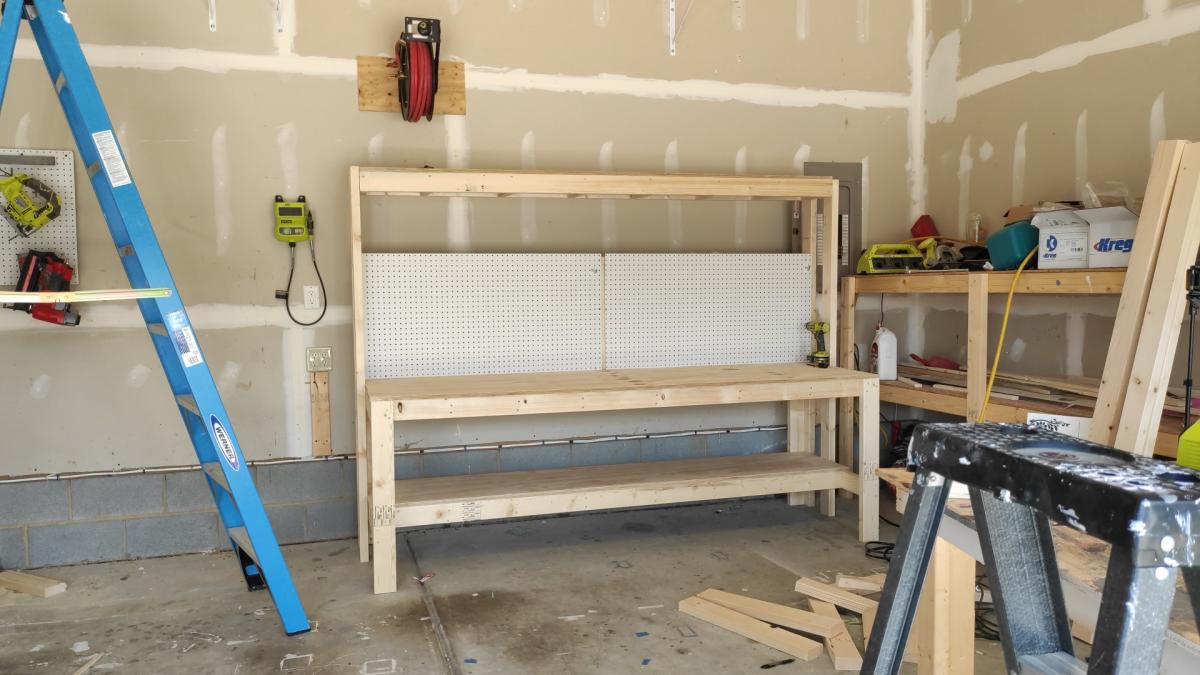
I made a workbench for my garage it was pretty easy. I also made an instructional youtube video if you want to learn how to make it. #diy #workbench #bench
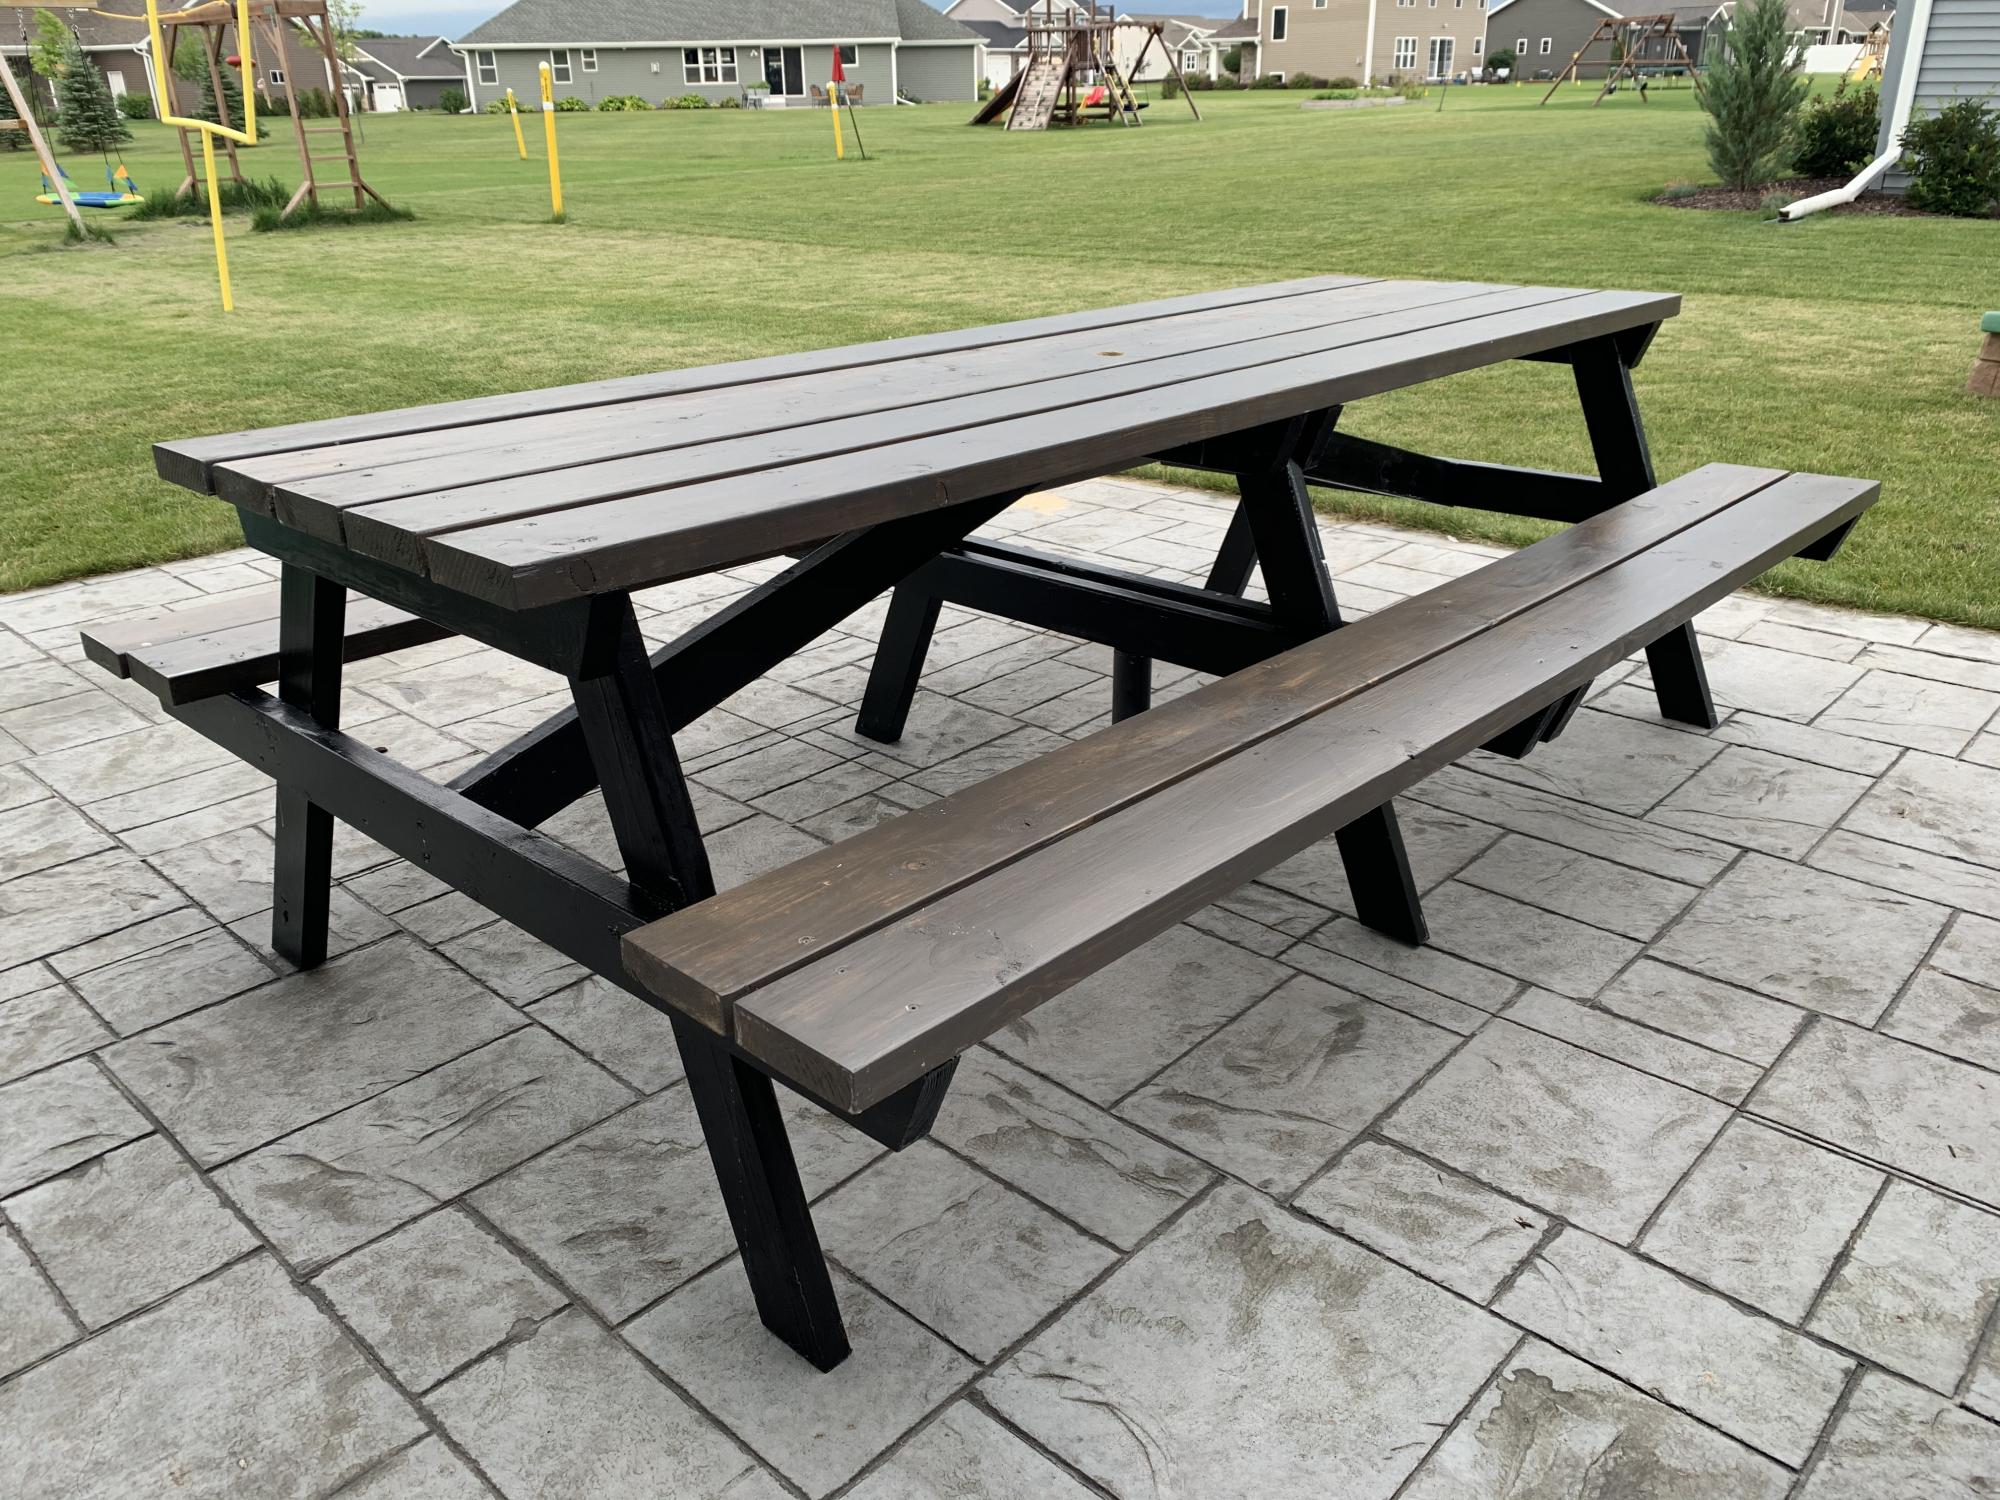
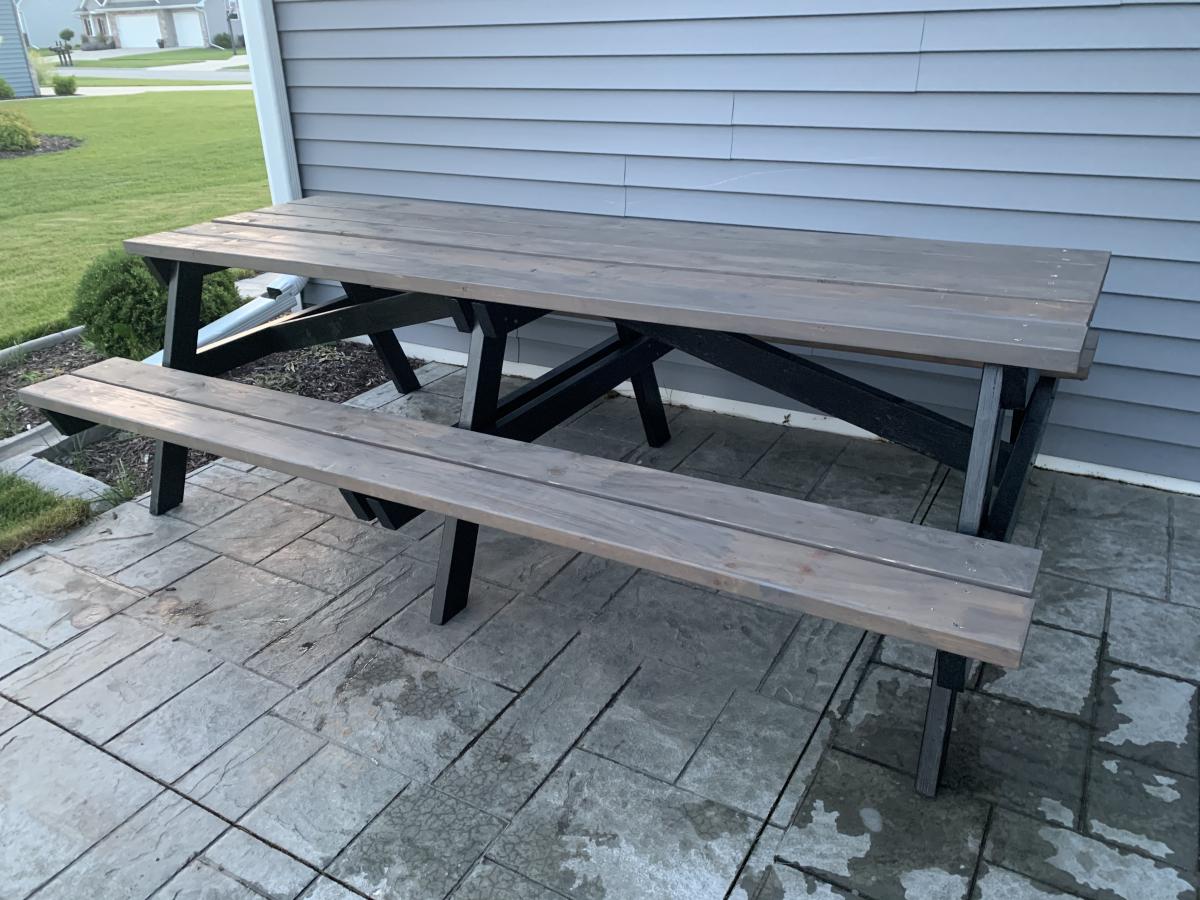
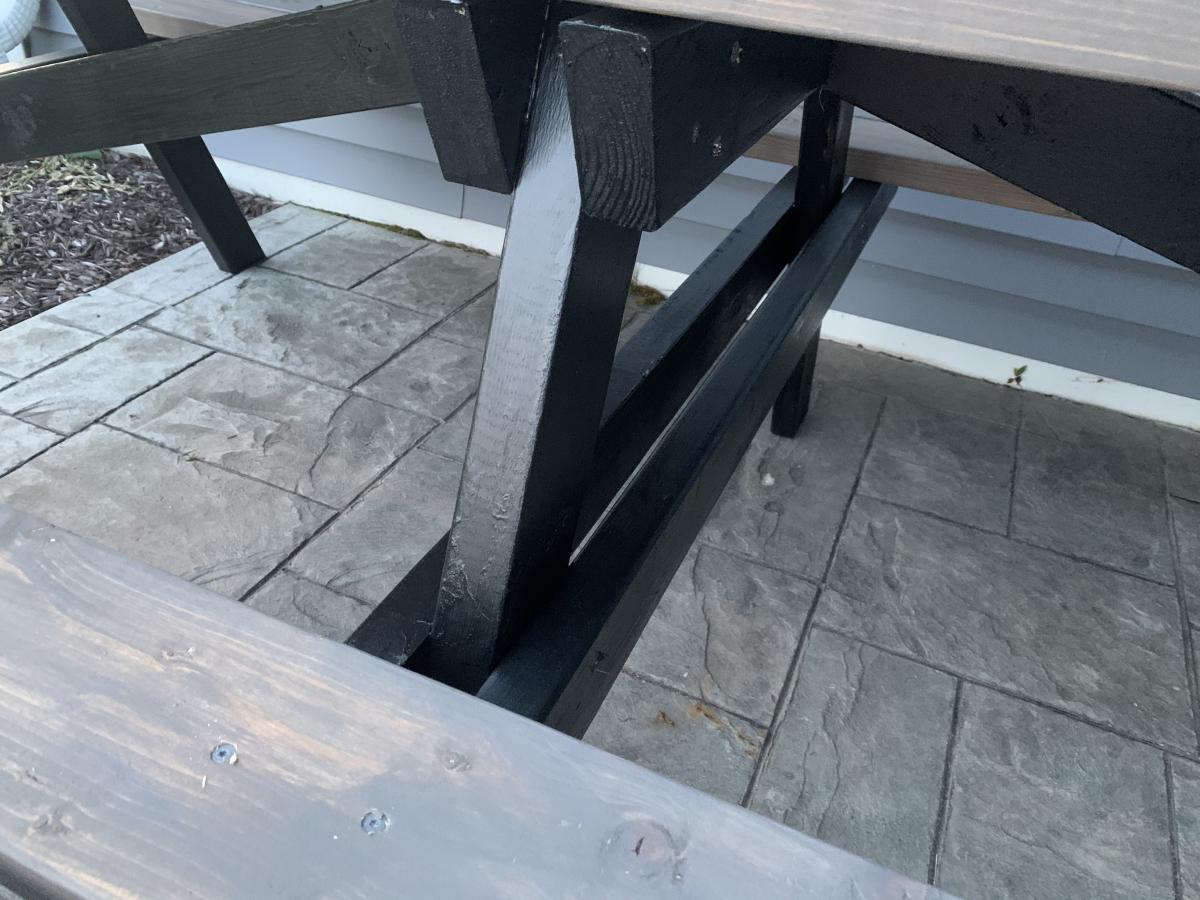
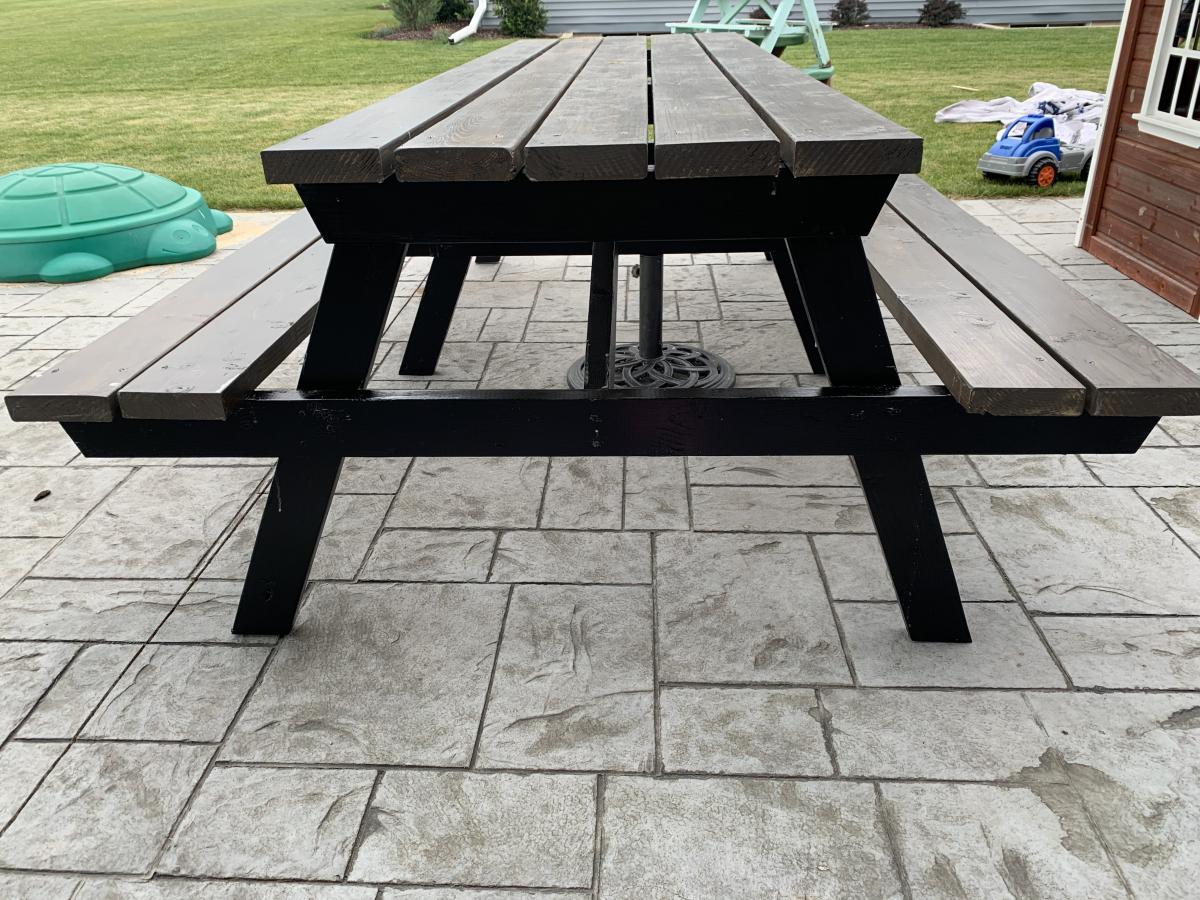
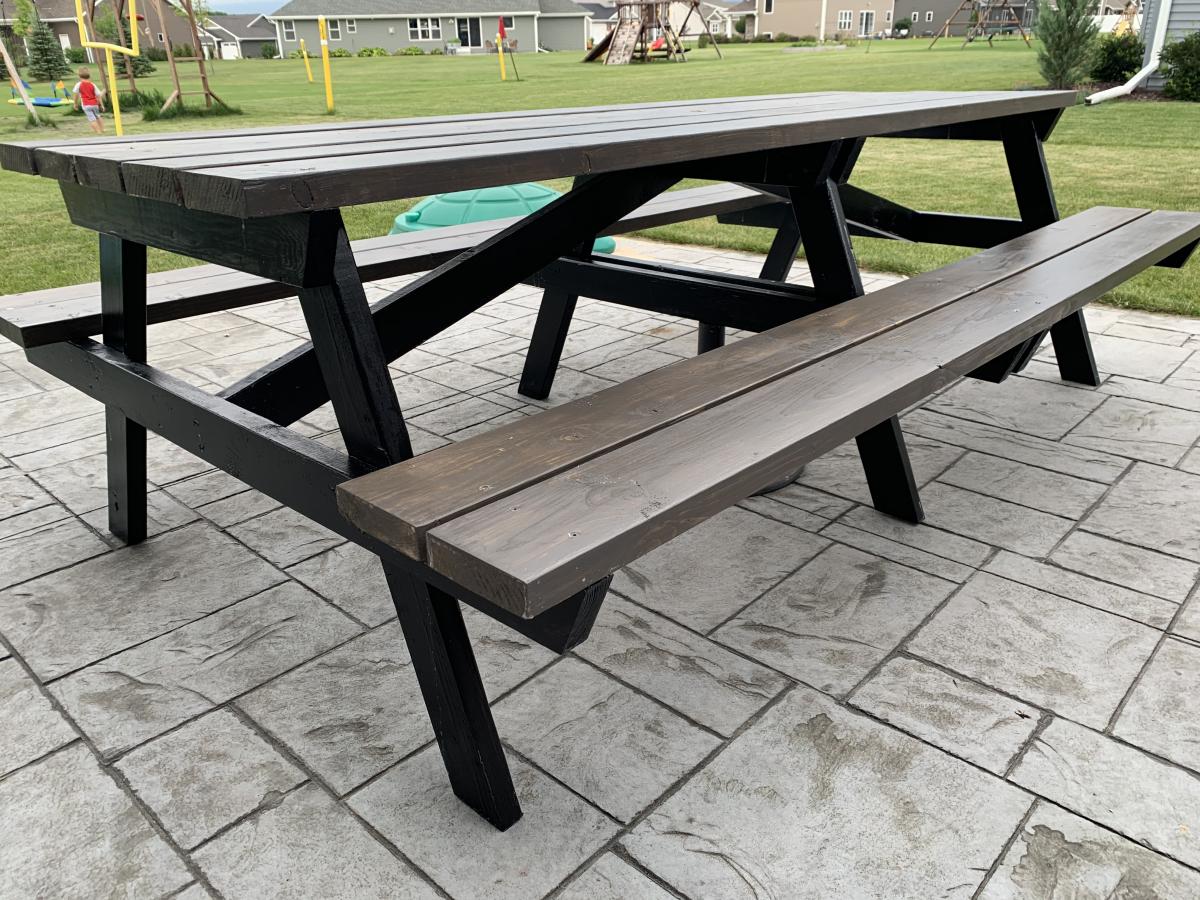
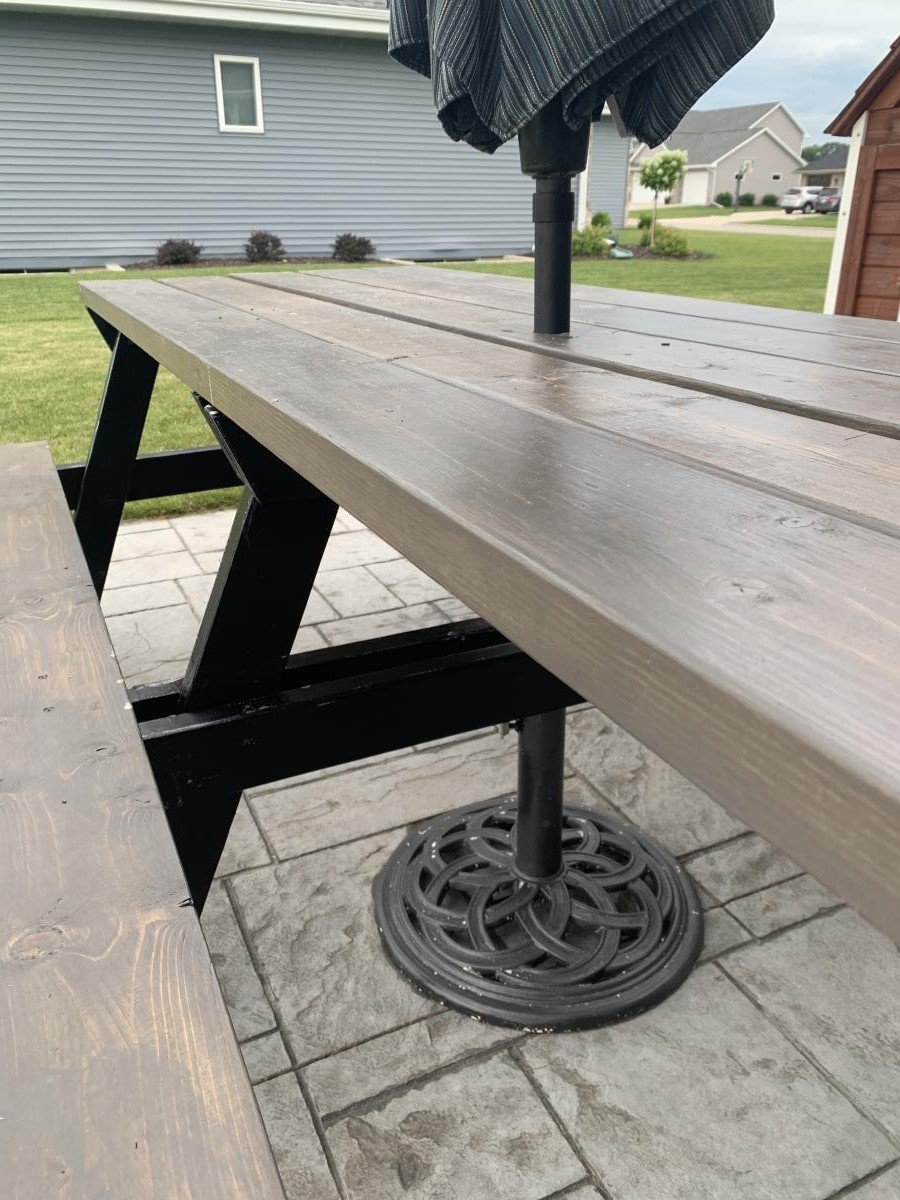
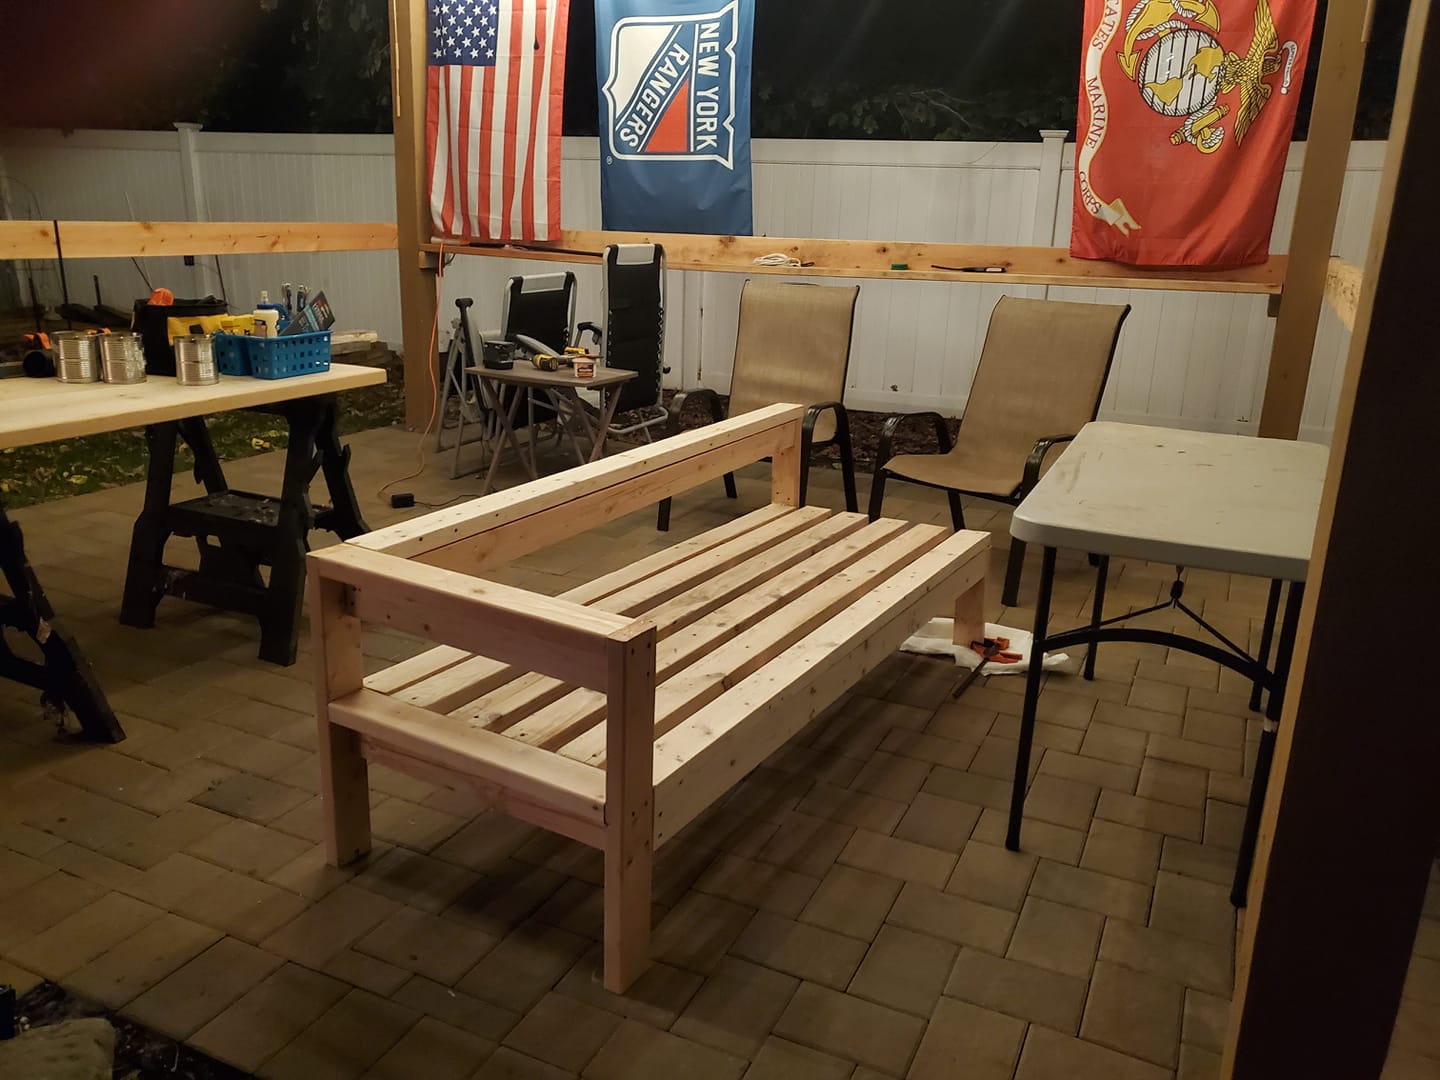
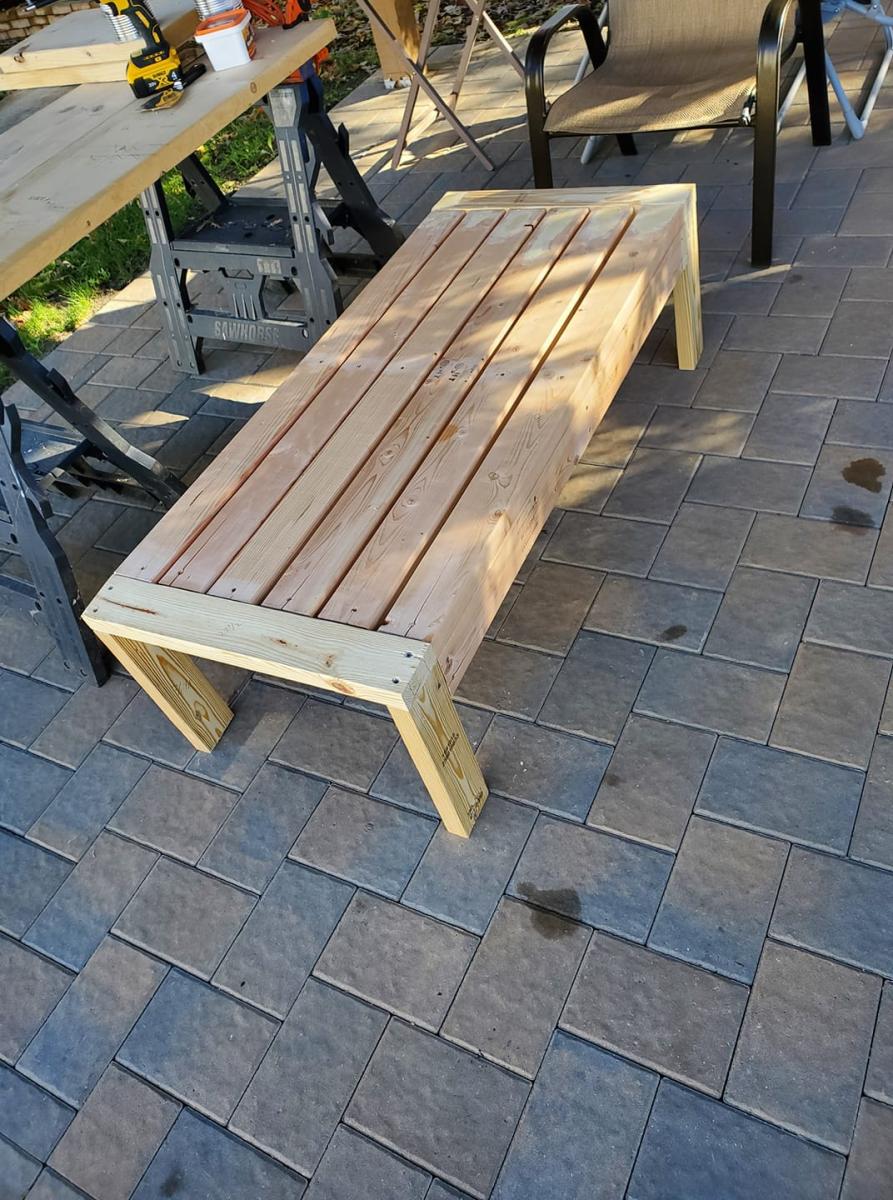
This picnic table was a quick build and turned out amazing. I modified the center base support by adding an extra table top support and seat support board to the opposite side of the center legs to give the table symmetry to accommodate an umbrella hole. I also shortened both cross supports by an inch to make sure the base wouldn’t be longer than the top boards. The space between the center table support boards and seat support boards is the perfect size to fit a standard umbrella. I used a 1 3/4” hole saw to make the umbrella hole. The build and stain/paint took me about 5 hours but additional time is needed to properly seal the table. I used untreated pine. Treated pine may give the table longevity but it would also add a lot of weight to an already heavy table. This was a relatively easy and quick build and is a great size to fit my whole family plus a couple guests! I’m happy with how it turned out and would recommend this build to anyone looking for a budget friendly and simple patio table.

Sat, 07/18/2020 - 13:17
Thank you Abby!!! Your picnic table turned out amazing, I love the added umbrella modification!
Couldn't find anything that would fit my area and this seemed to work out perfect. Almost done with the other side. I will post pic of finished products.

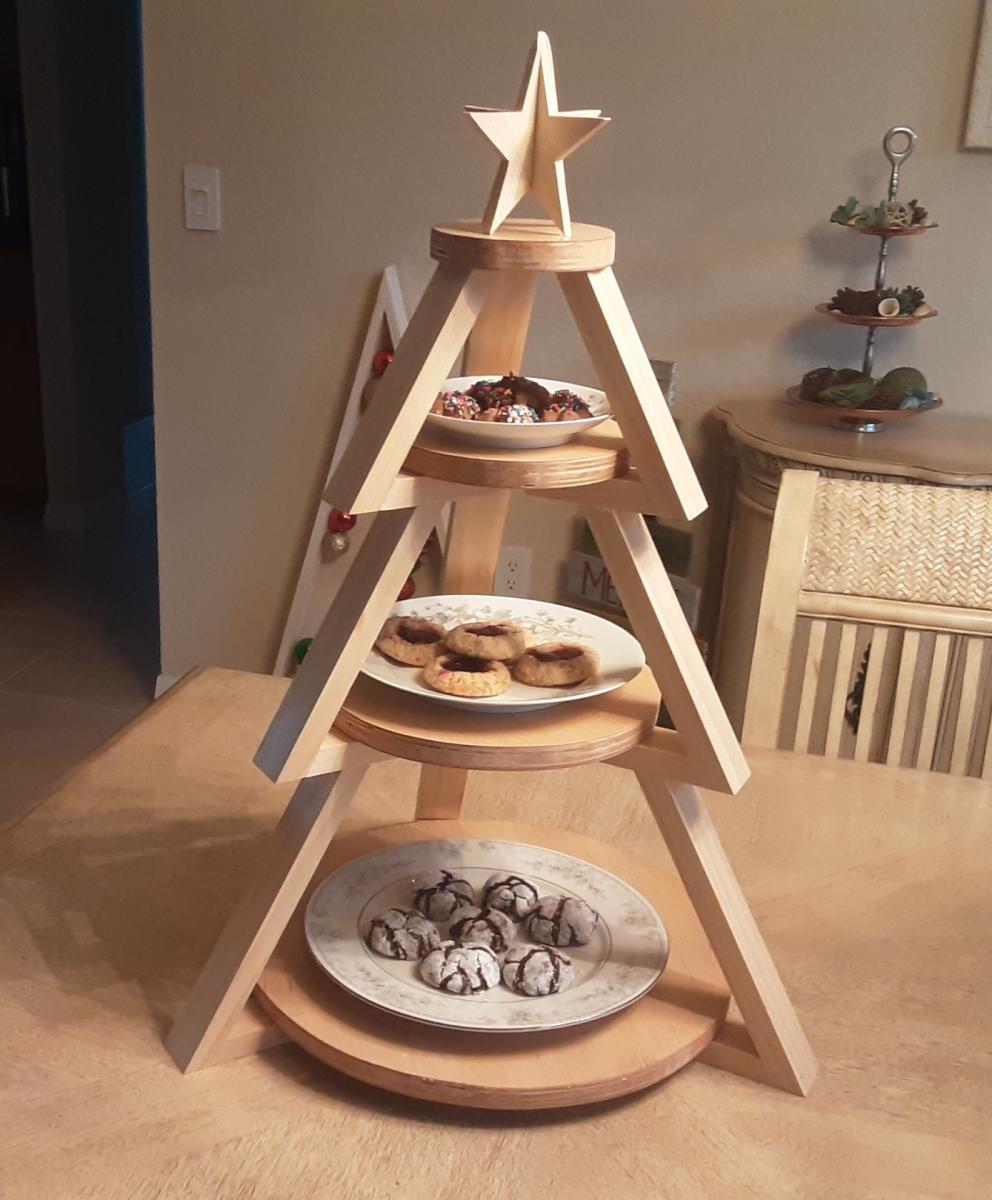
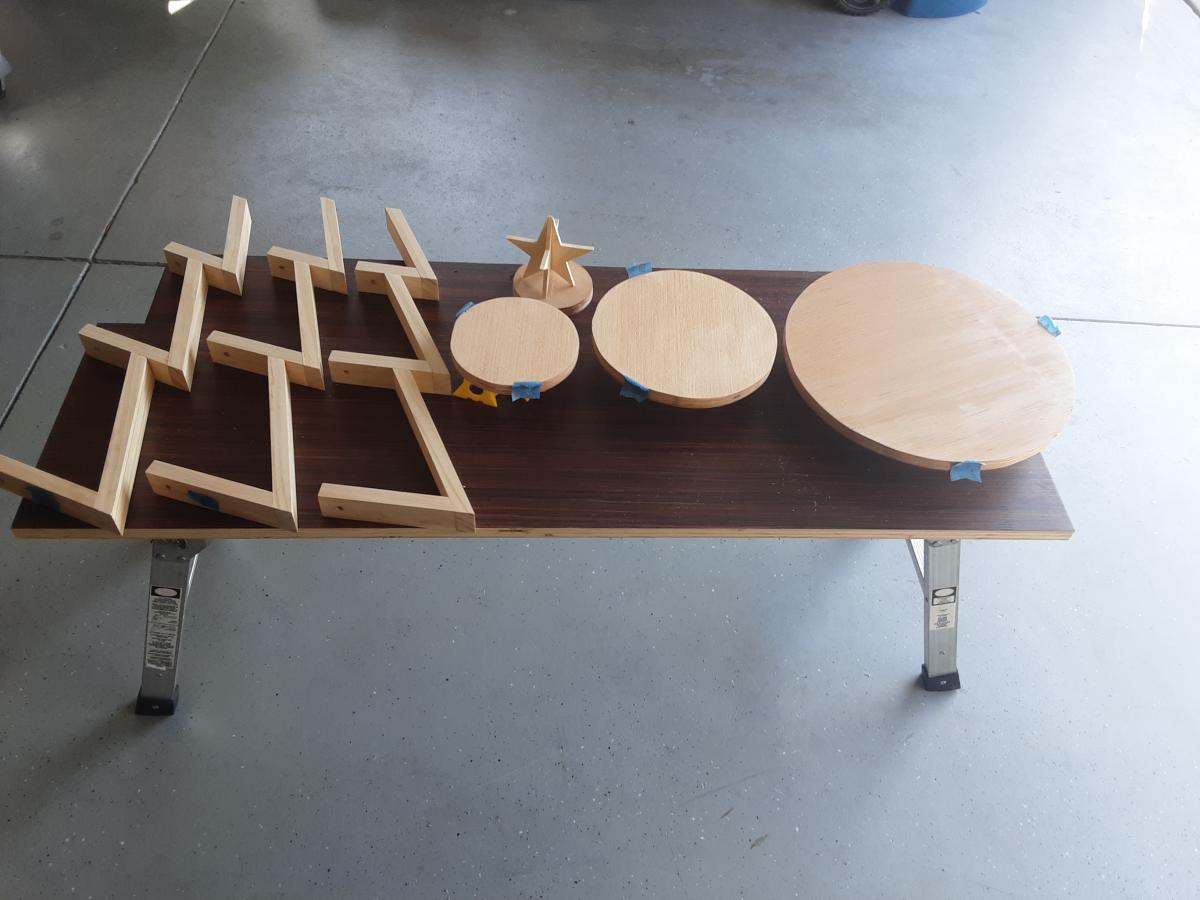
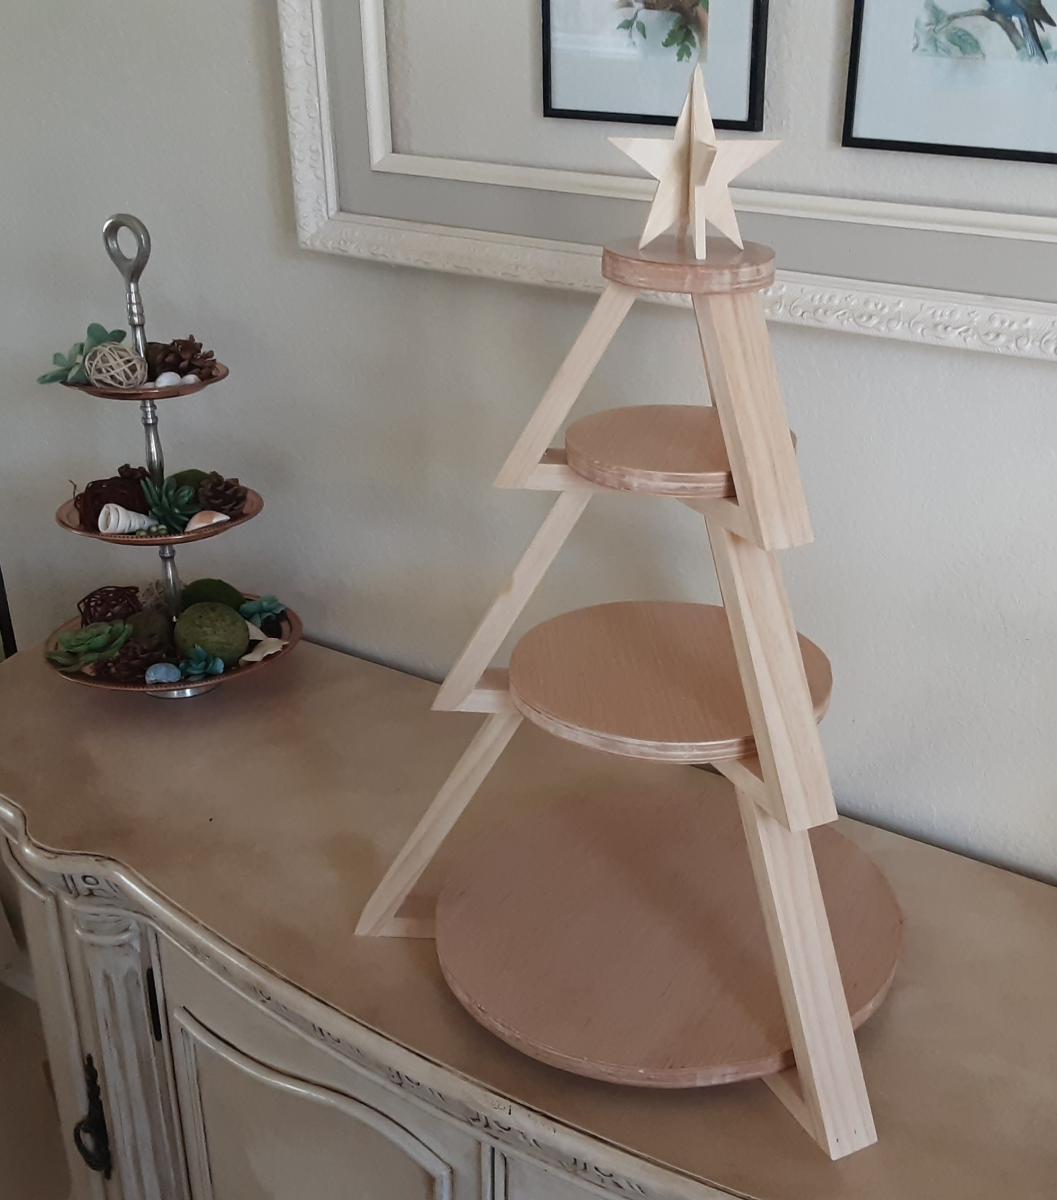
Inspired by Shara of Woodshop Diaries, created this 3 tier tray for displaying cookies for Santa. Added a 3 dimensional star as the topper and simply followed the excellent photos and schematics on Shara's website.

Used part of the Ultimate Roll Away Workbench with Miter Saw Stand to just build one of the roll-away workbenches to work with my miter saw and table saw. I'm very happy with how it turned out.


Sun, 04/28/2024 - 12:57
Hi, I am planning on getingt a dewalt 10 inch table saw as well. I am wondering what you did to adapt it for extending the rails with the fence? Curious if there were more photos. I would very much like to adapt my station to be similar to yours. Thanks. .
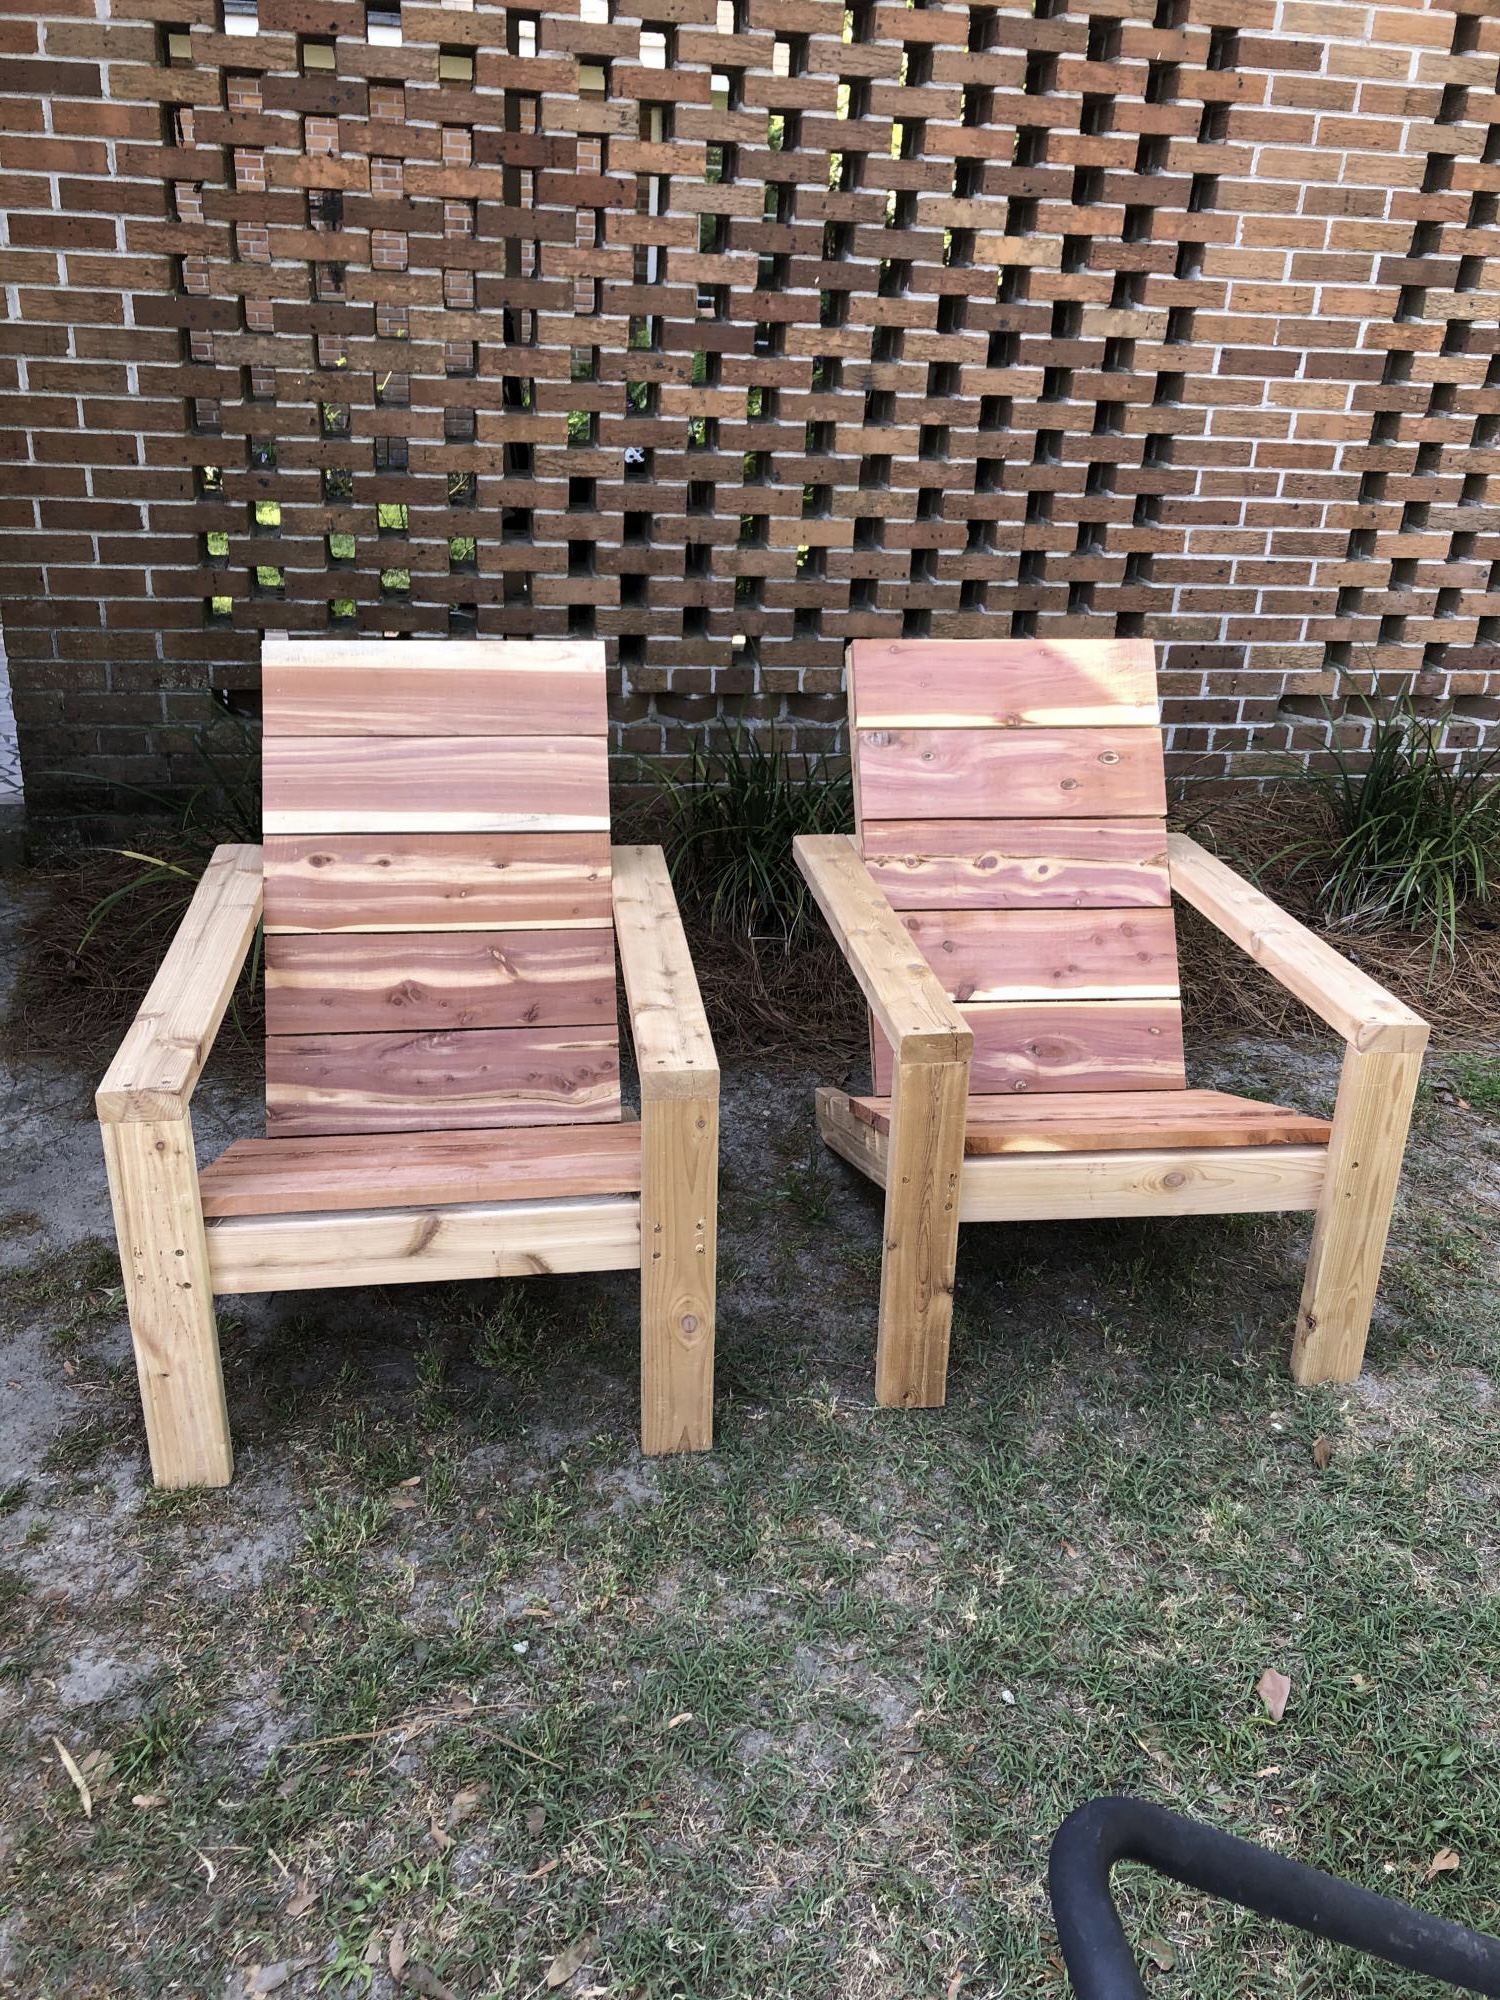
After a cabin remodel I had some left over 1X6 red cedar that I wanted to use and these chairs looked like a great project. After buying some white cedar 2X4's , here's my first 2. Thanks for the plans.
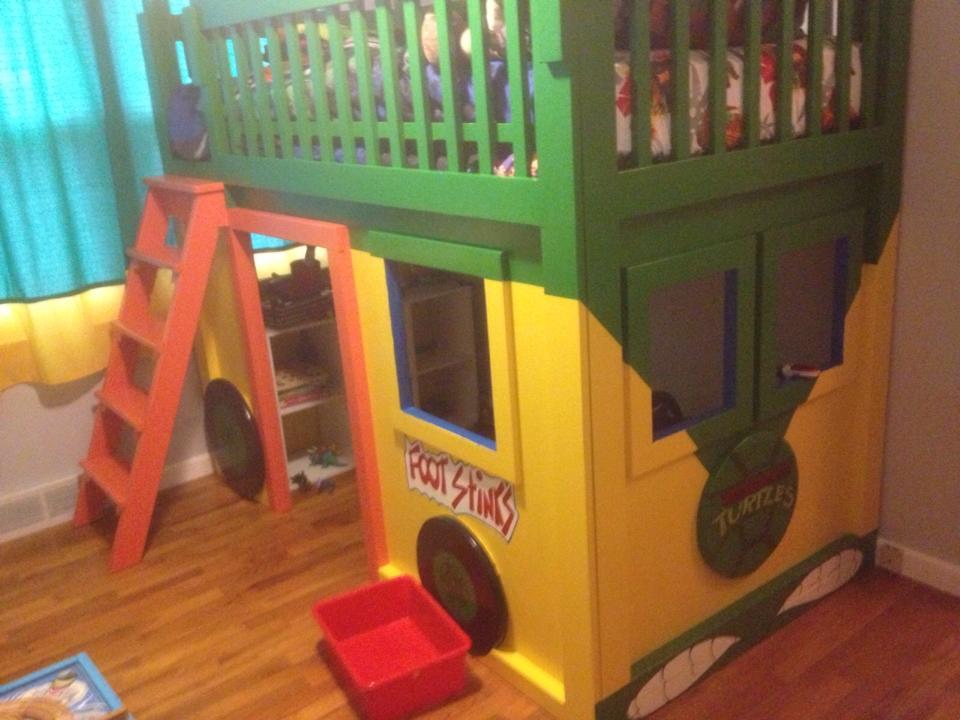
For this project, we followed the plans for the Firetruck Bed and also modified them a bit to fit our needs in the room. From start to finish, this project took two weeks to complete and cost us roughly $200 to build and $100 to paint. We were lucky though in that nearly everything we needed to purchase was on special or sale.
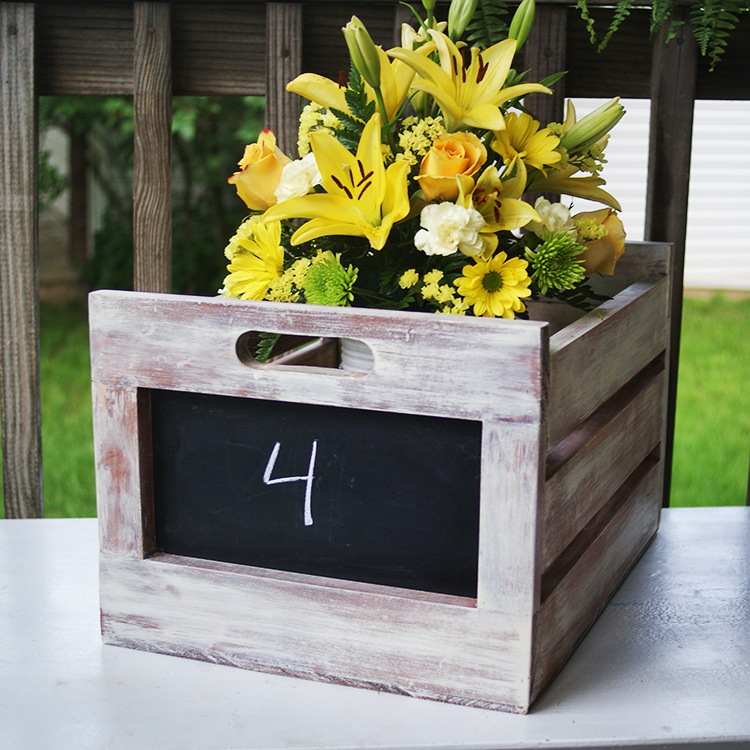
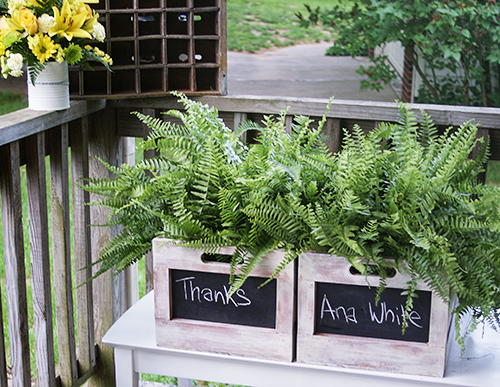
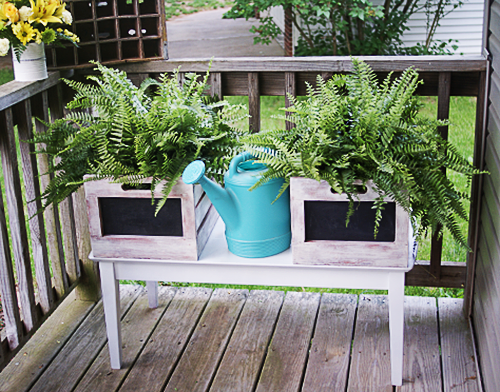
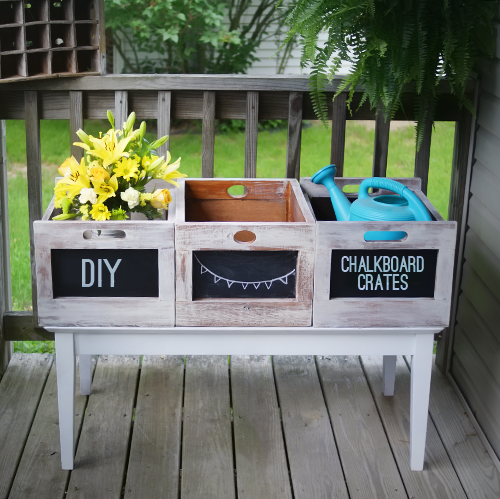
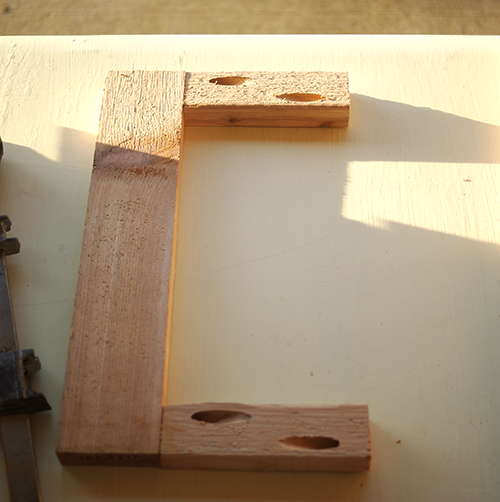
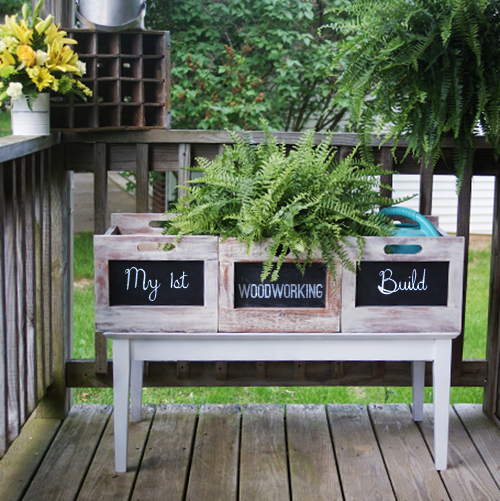
I made 3 crates using Ana Whites Chalkboard Produce Crate plan. It was my first woodworking project, was totally doable, and has created a monster. The middle crate in the photos was the first one, and I added extra 1x3s on the sides because I thought I didn't want the gaps between the side boards. Changed my mind for the second 2. I wanted a chippy finish so I stained with glaze and burnt umber by Golden, followed by a topcoat of dry brushed Titan Buff. I sealed with CeCe Caldwell Aging Wax.

Thu, 08/29/2013 - 18:29
These are beautiful. :) You did a fantastic job!
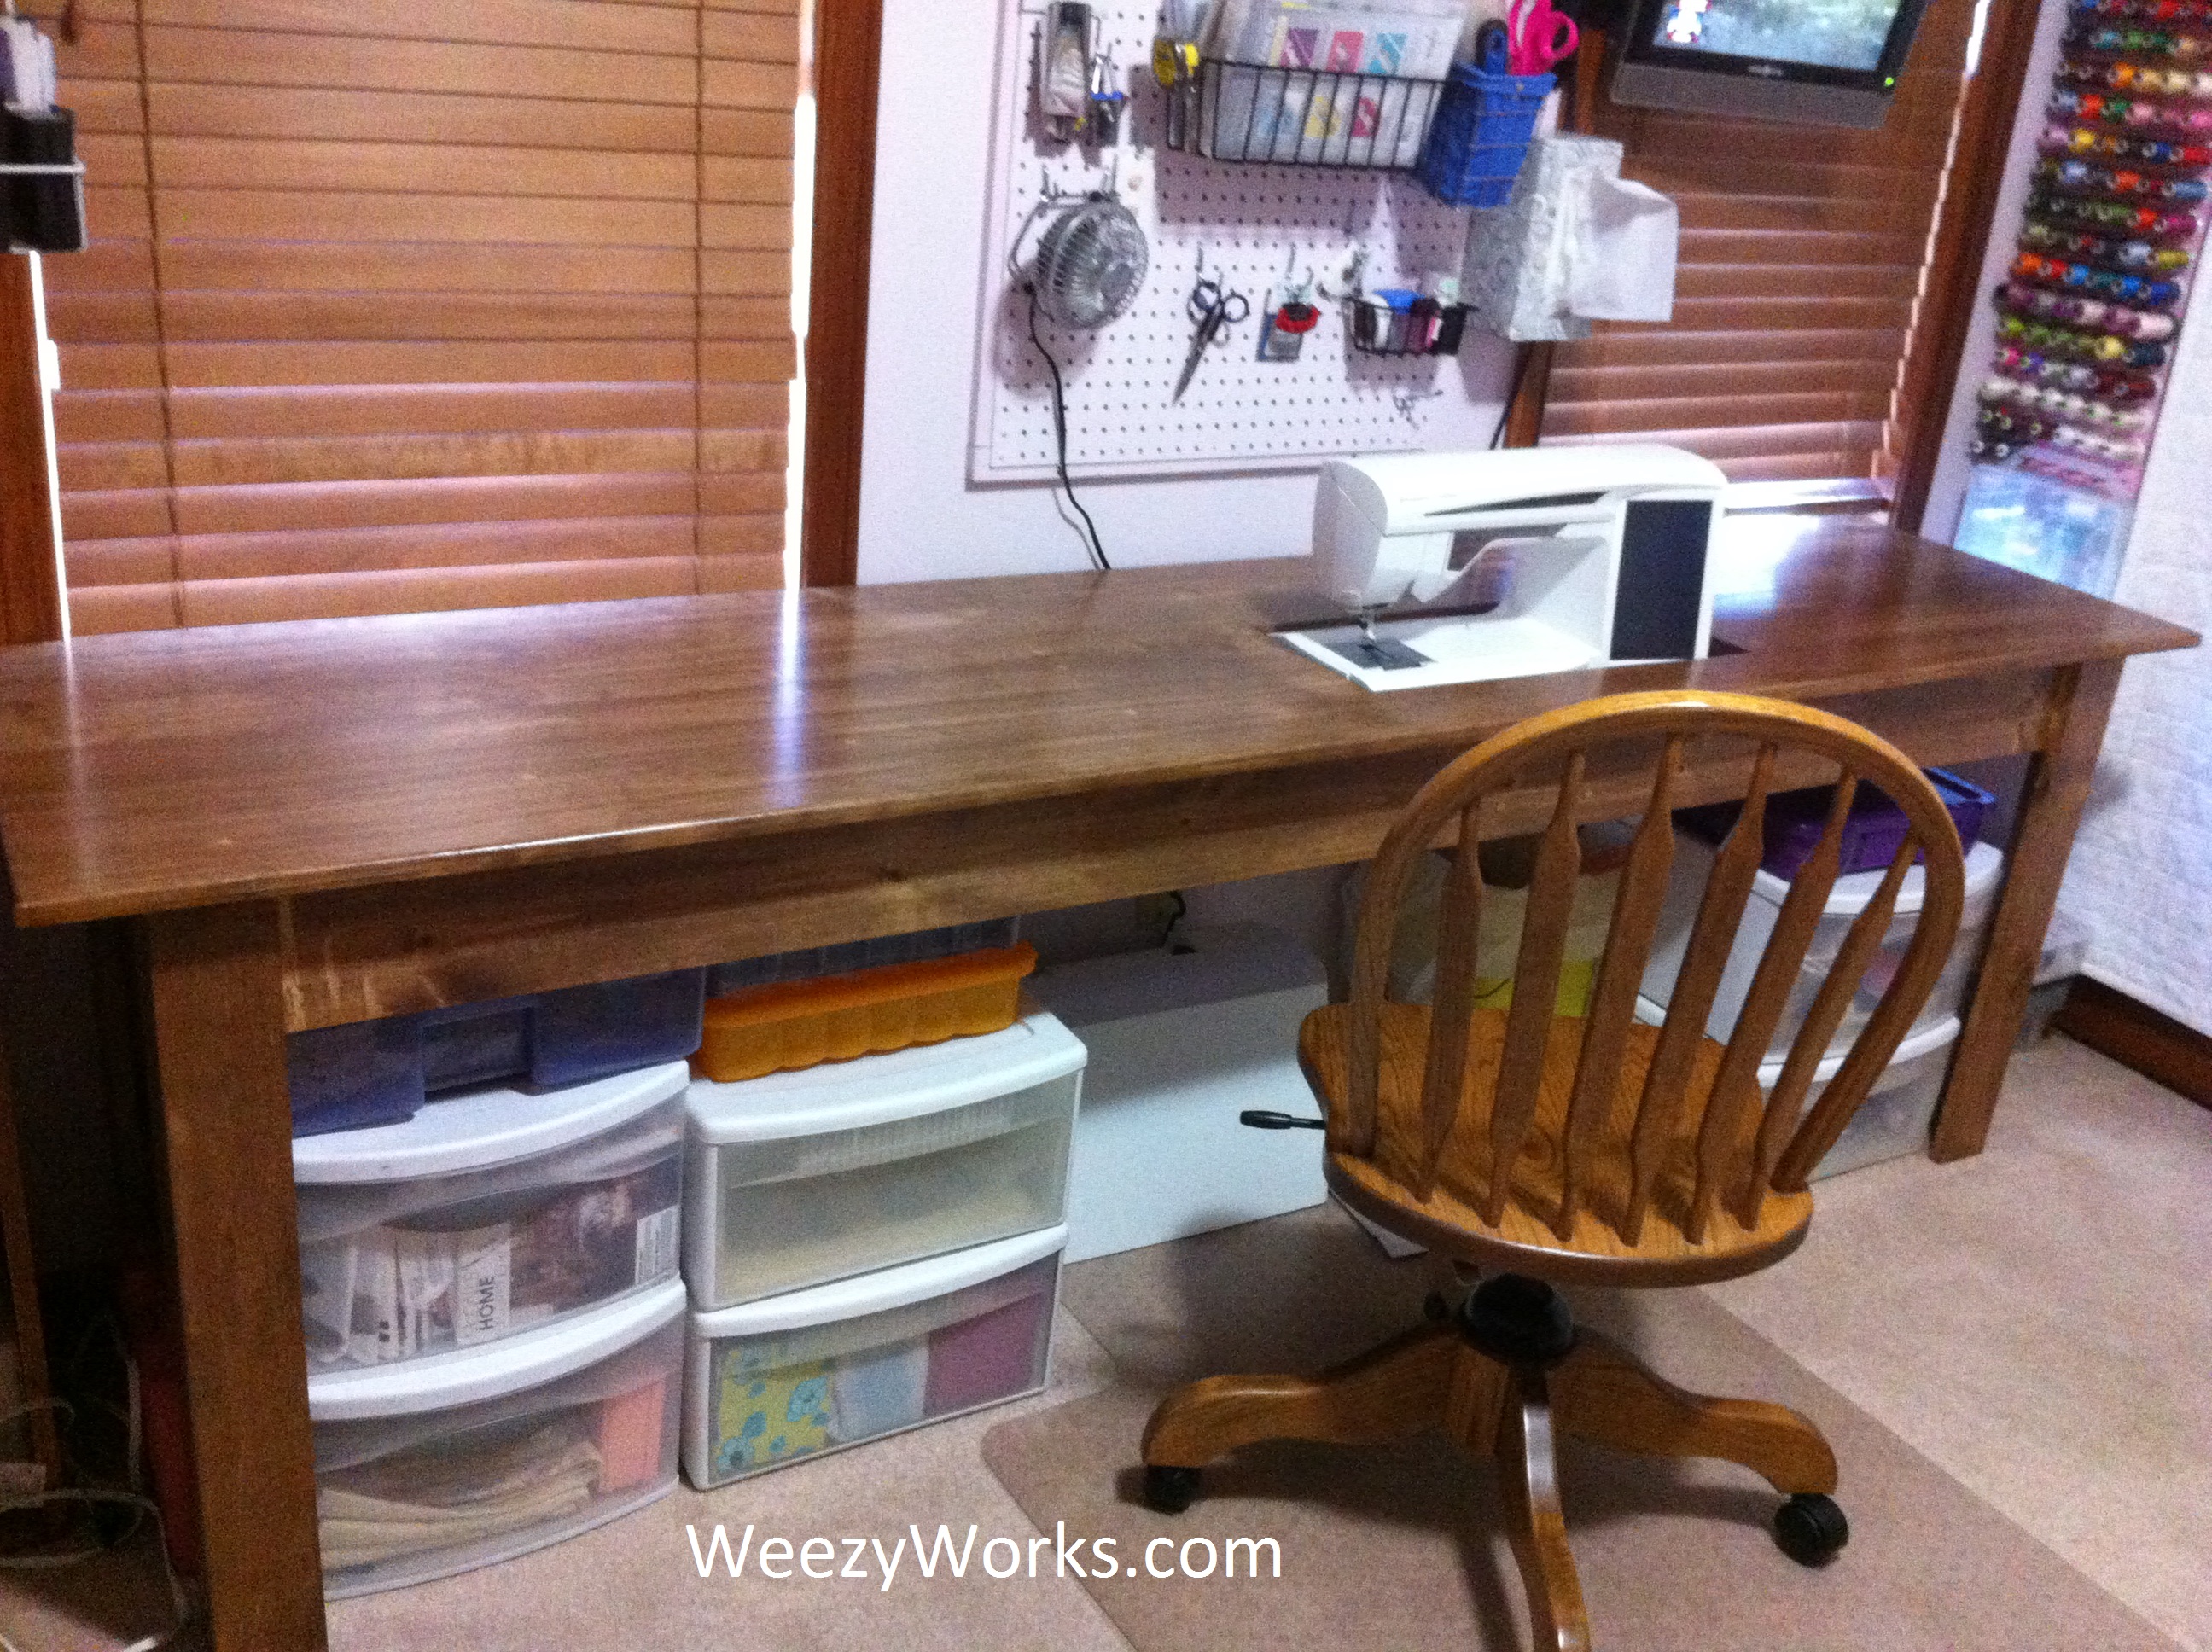
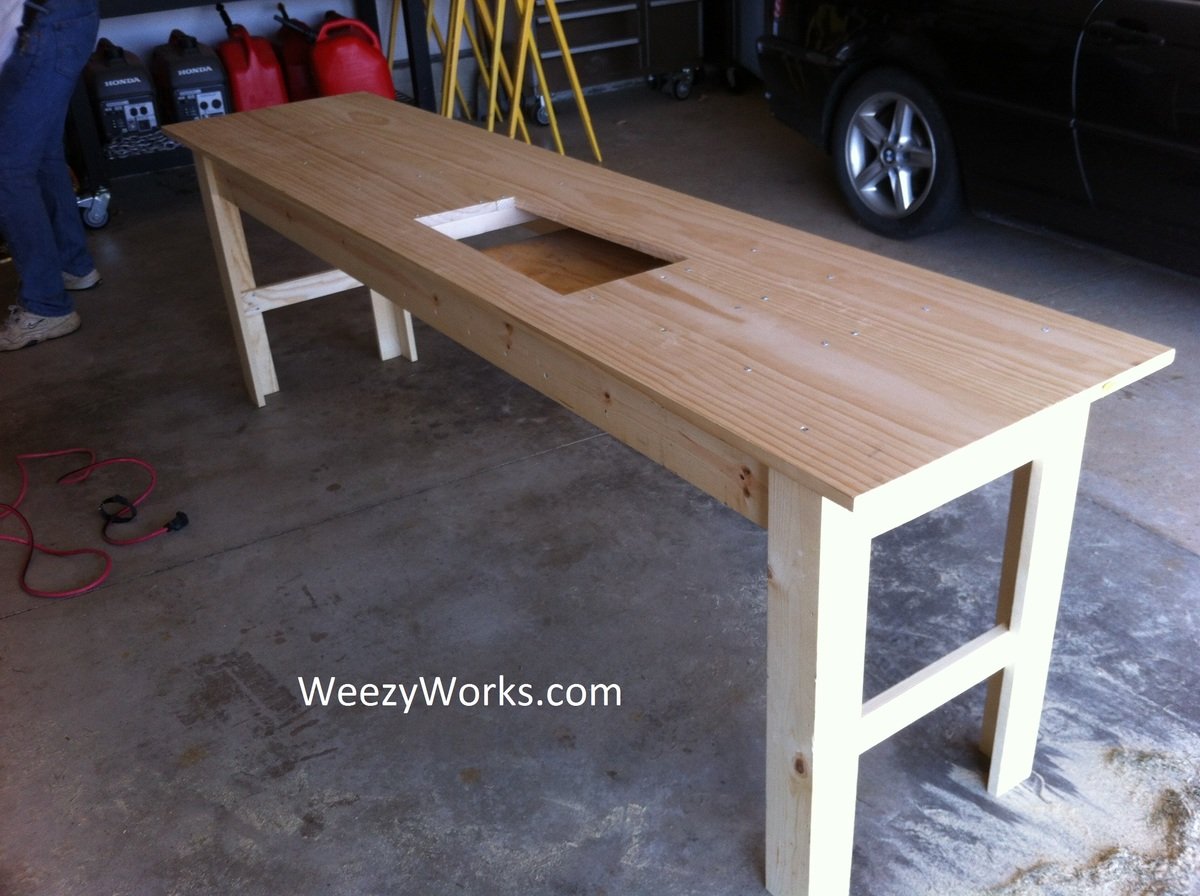
Ive been looking for a sewing table to fit my space. but found none for less than $500 and they were quite small. I found a post at quiltedcupcake.com that linked me to another blog, linking me here. I modified the plan to be about 2 feet wide and cut a hole to fit my sewing machine. There is a support in the bottom to hold my machine level with the tabletop. When I make this in the future, I will splurge on a fine hardwood. This plan was easy to build and looks great! Just what I was looking for :D
Sat, 09/15/2012 - 16:38
Thank you! This project was very easy to build and would be very easy to make in a smaller size. I'm so glad I did it, free motion quilting is so much easier with this table.
Wed, 08/26/2020 - 07:13
Good morning Ana,
Where can i get the plans for this table.
Sun, 09/16/2012 - 10:11
Now, I've just got to make it! I love to free motion quilt and that would make it easier. With each baby I've had my quilting space has diminished (of course it's worth it) but now I think I will reclaim some space ;)
Tue, 02/26/2013 - 14:14
Cannot seem to find the plans for this project. Please post them.
In reply to Plans Please by SinKitty71
Tue, 02/26/2013 - 17:40
I used the plans for the narrow farmhouse table (search in the plans tab) and made a few modifications for my sewing machine.
Thu, 06/20/2013 - 12:27
What size boards did you use for the top of the table?
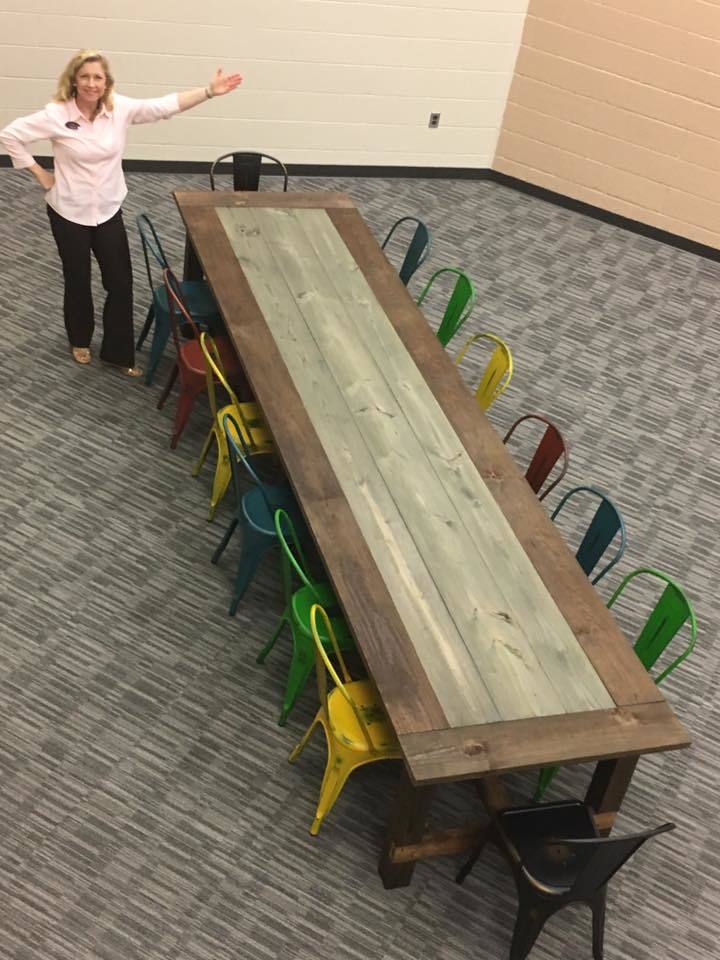
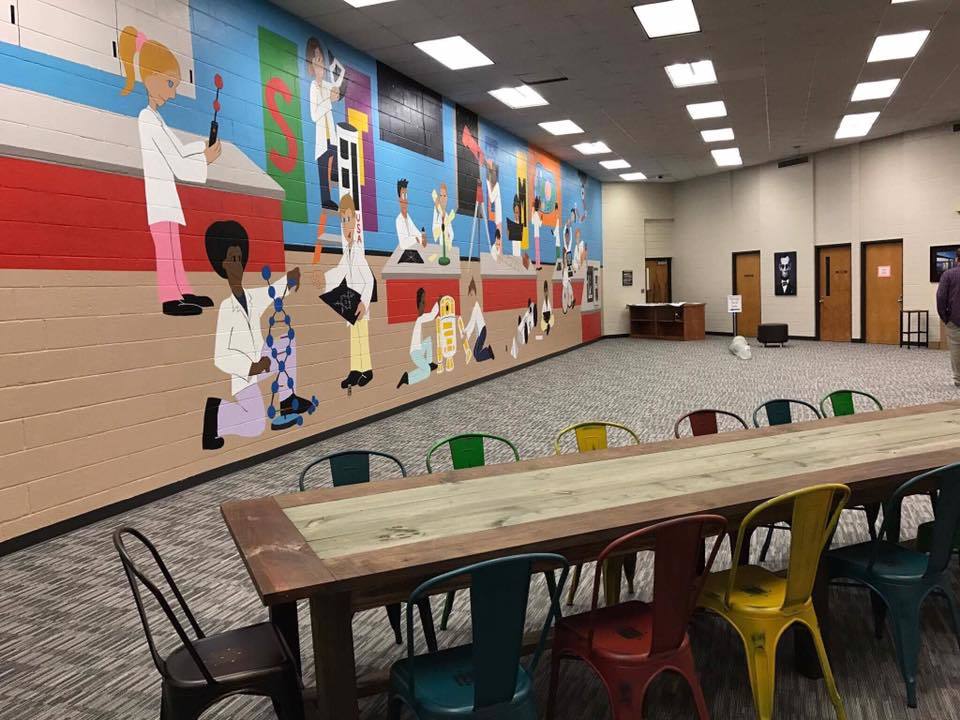
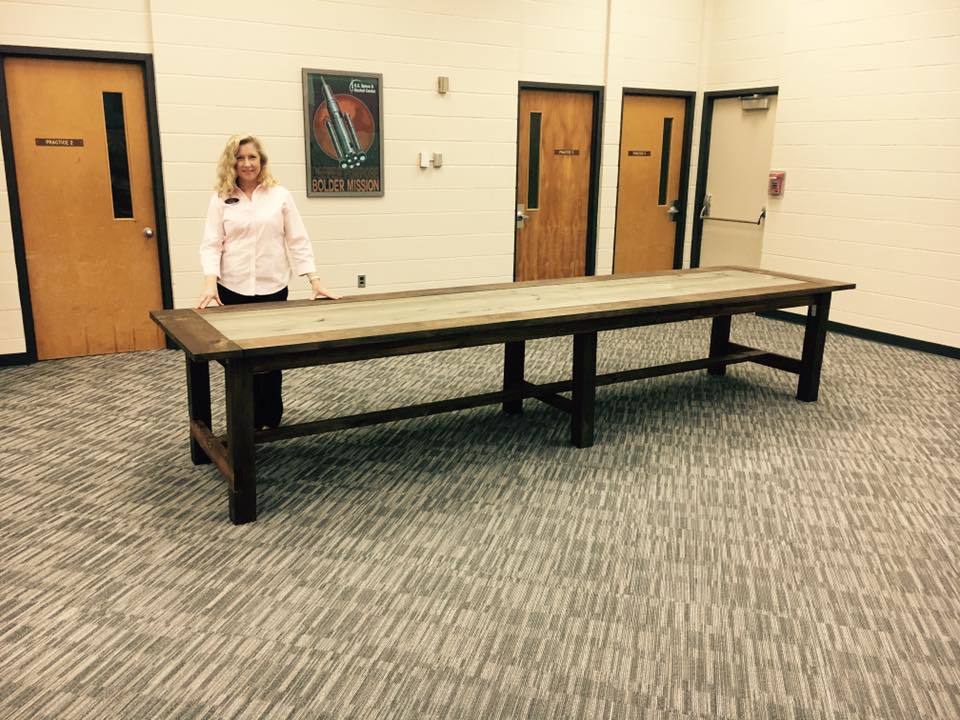
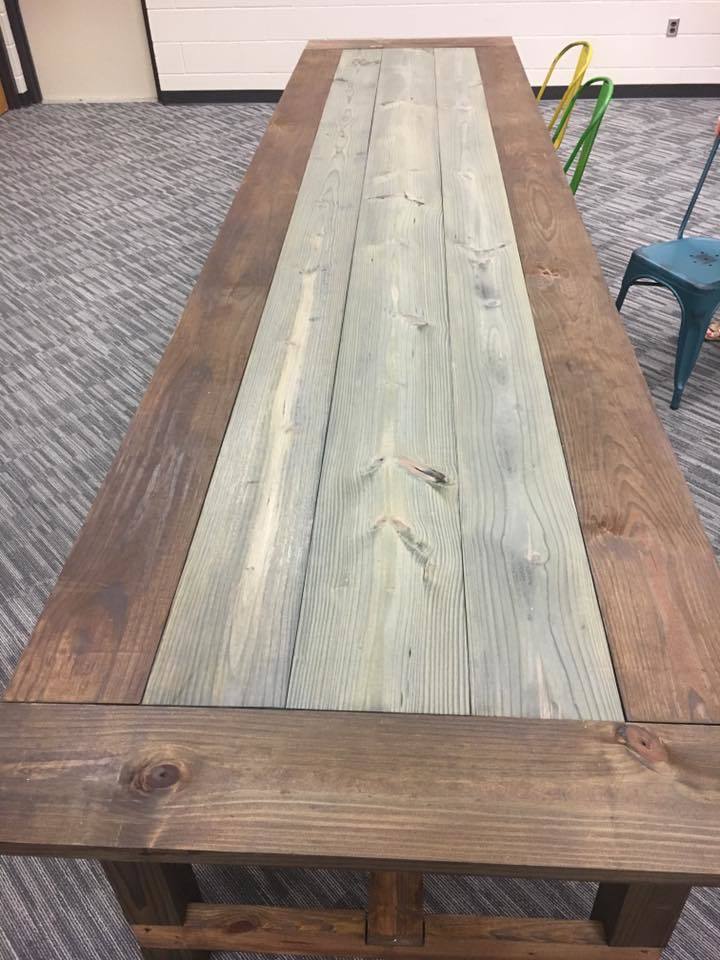
I am not a carpenter, I do not even have a tape measure. I got tasked by my leadership dothan class to build a farmhouse table for the academic dream room which is part of the Bright Key Program. Which is being renovated at Honeysuckle Middle School. Found your plans and got inspired. One glitch they wanted this table to be able to sit fourteen chairs. So I had to make a few adjustments like increasing the main boards to twelve foot. Because of your plans, many urban middle schoolers will have a place to get tutored considering cafeteria tables are so expensive. I am a believer of your plans. The positive feedback I received was well worth my time and would not of been a sucess without your plans. I did mine with pocket holes as well.
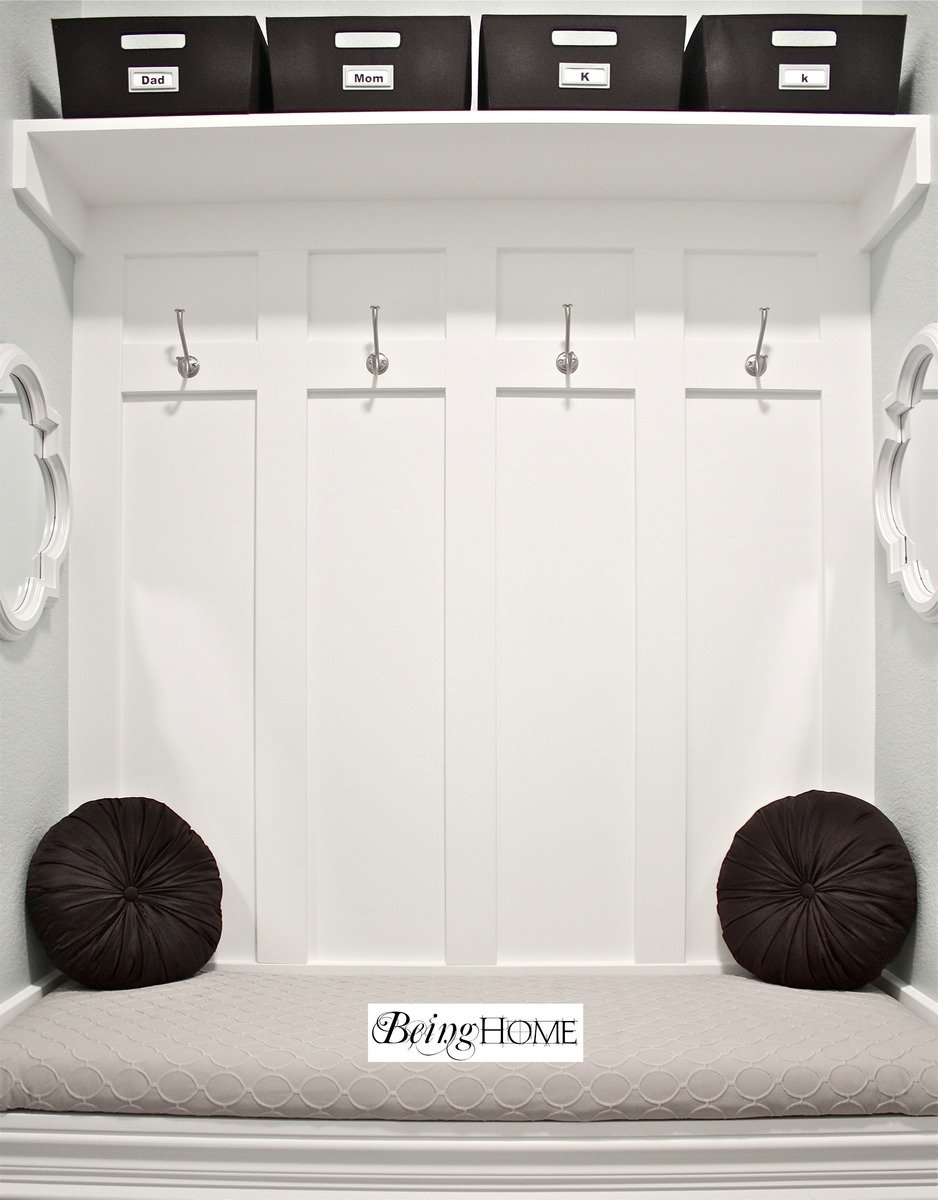
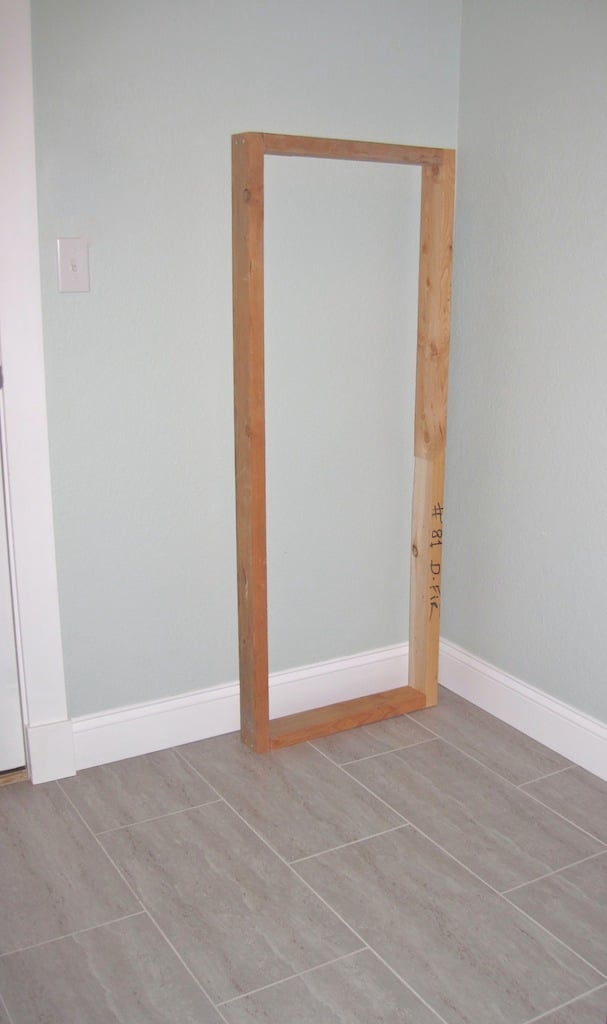
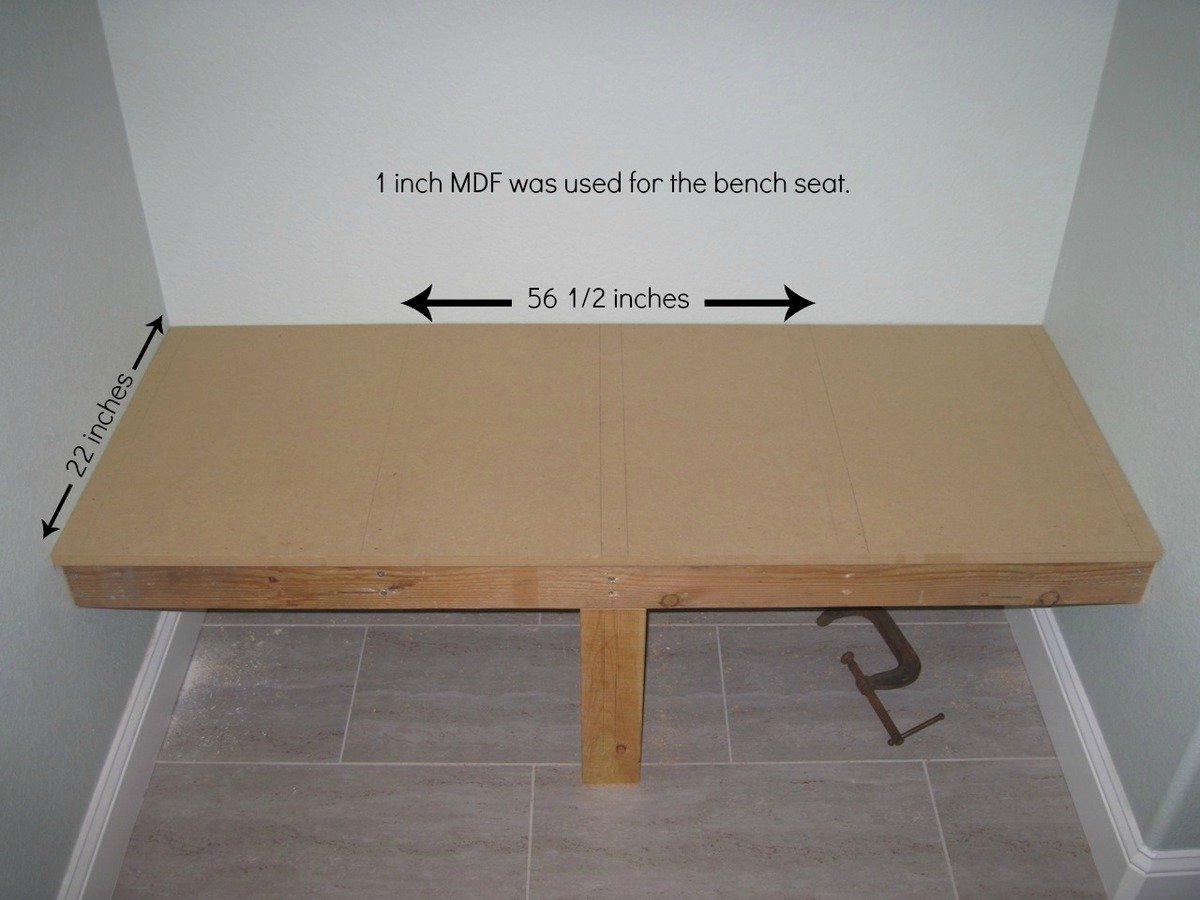
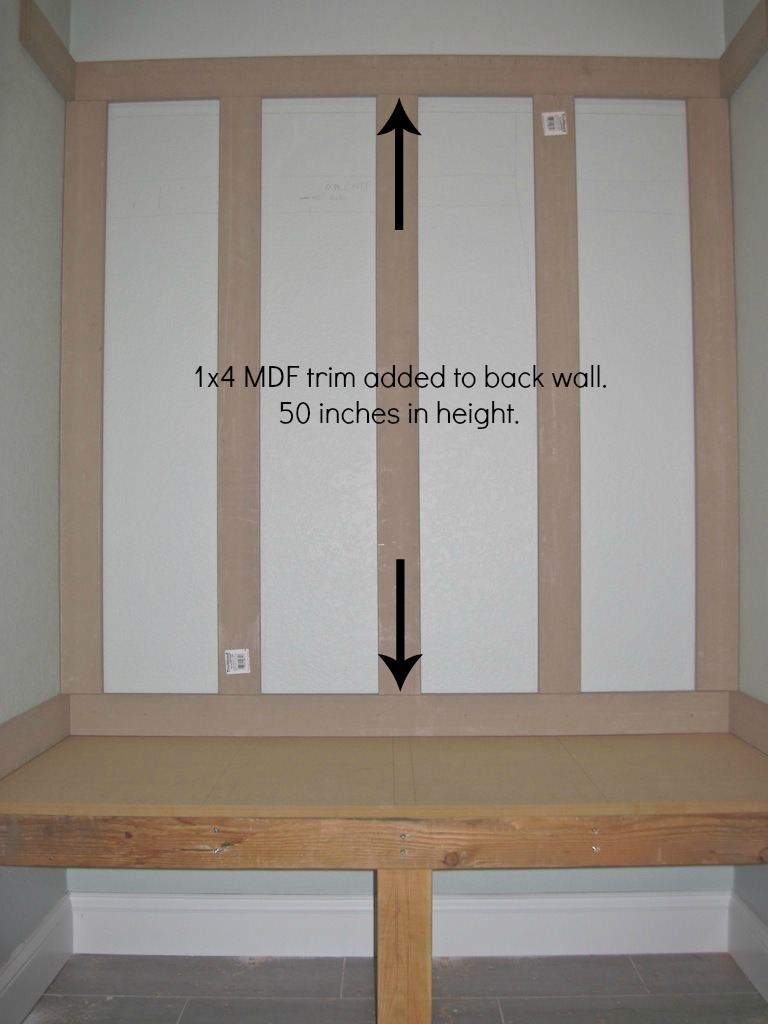
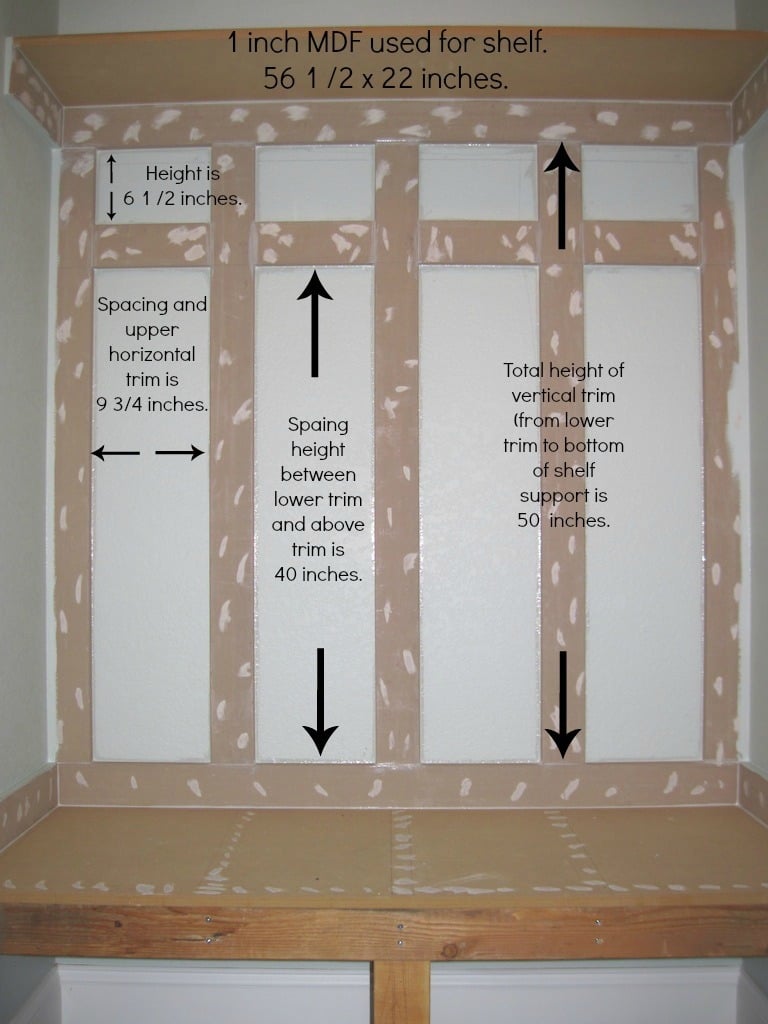
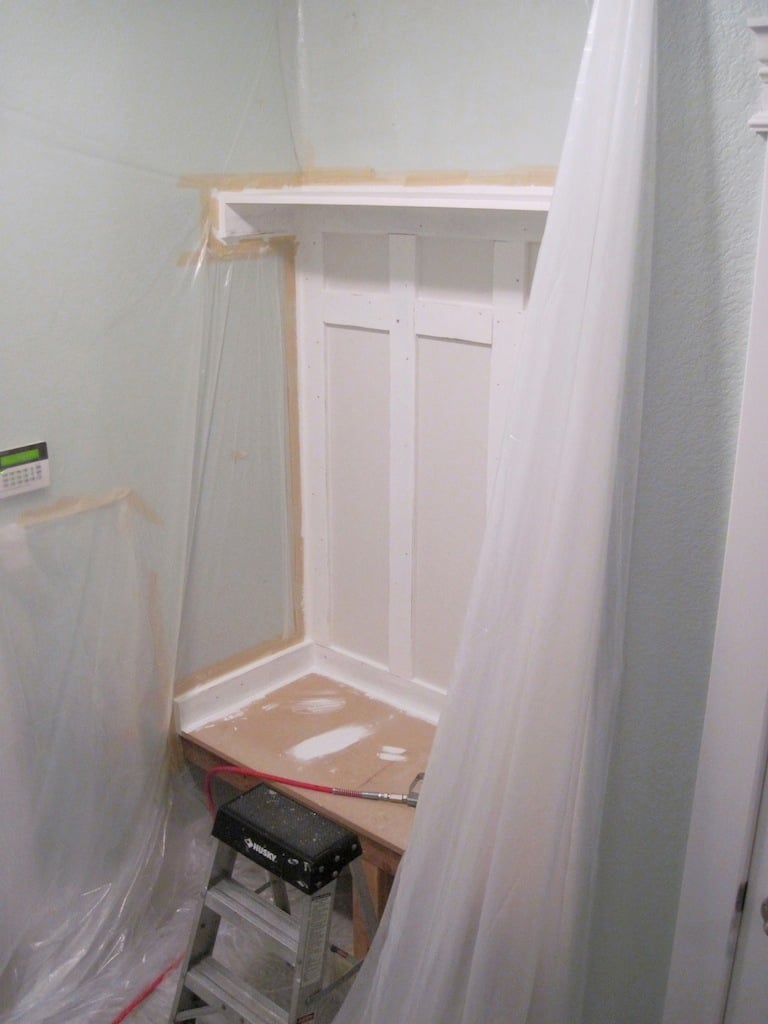
With much needed seating in the mudroom, an unused space (nook) was used to build a mudroom bench and shelf. No plans were used. I basically looked on-line and mentally drew up an idea of how I wanted the final product to look.
There were some setbacks such as not like the knock down textured walls (after partially painting the bench). I ended up covering the textured walls with hardboard and repainted.
A bench cushion was made for added comfort and style.
Complete tutorial for the bench is here and the bench cushion tutorial is here.
Thank you.
Julie
Thu, 05/16/2013 - 13:48
Thank you so much for the idea and plan. I used it to turn an extra laundry room that we have off of our garage into a much needed mudroom. The most challenging project I have ever done before is hanging blinds. But with your help and some from the Home Depot employees, I did it! Our family is more than happy with it. Thanks!!!

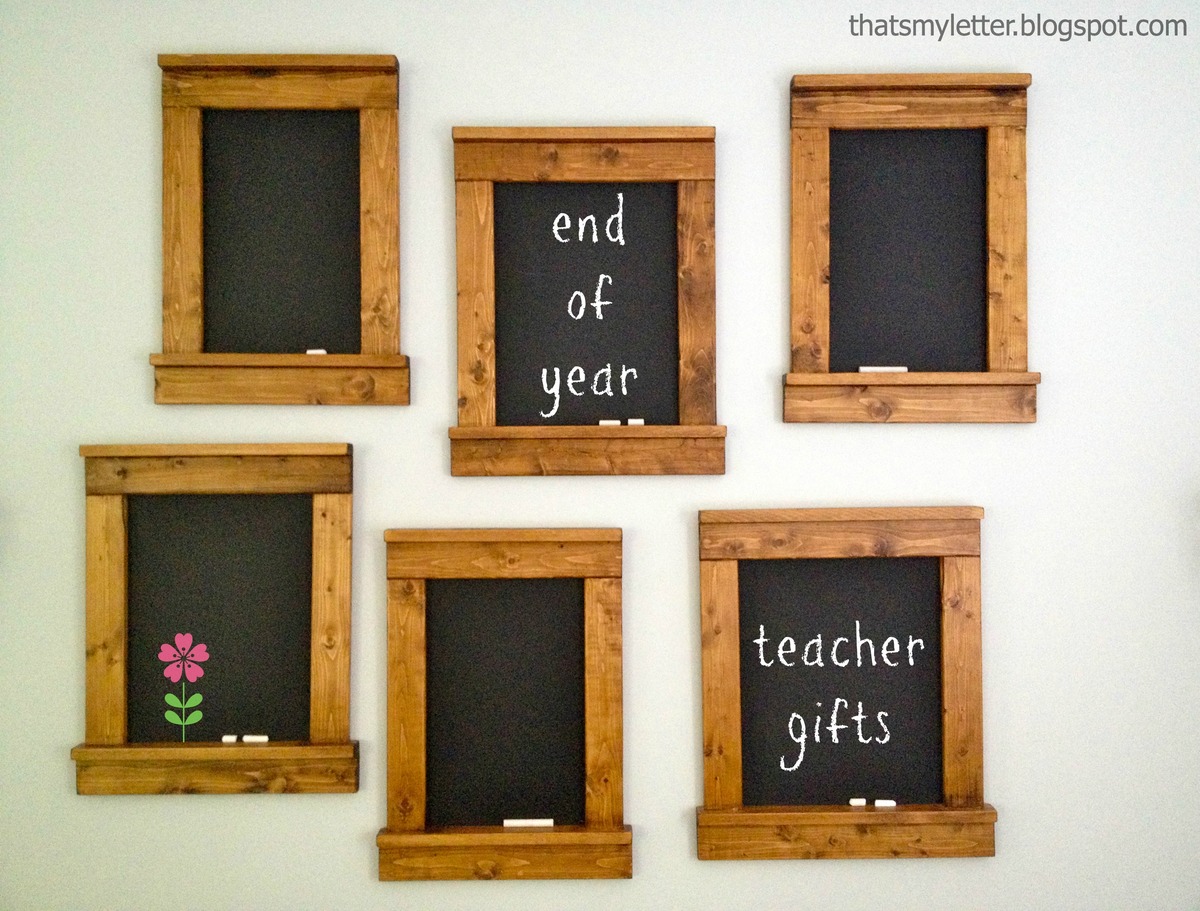
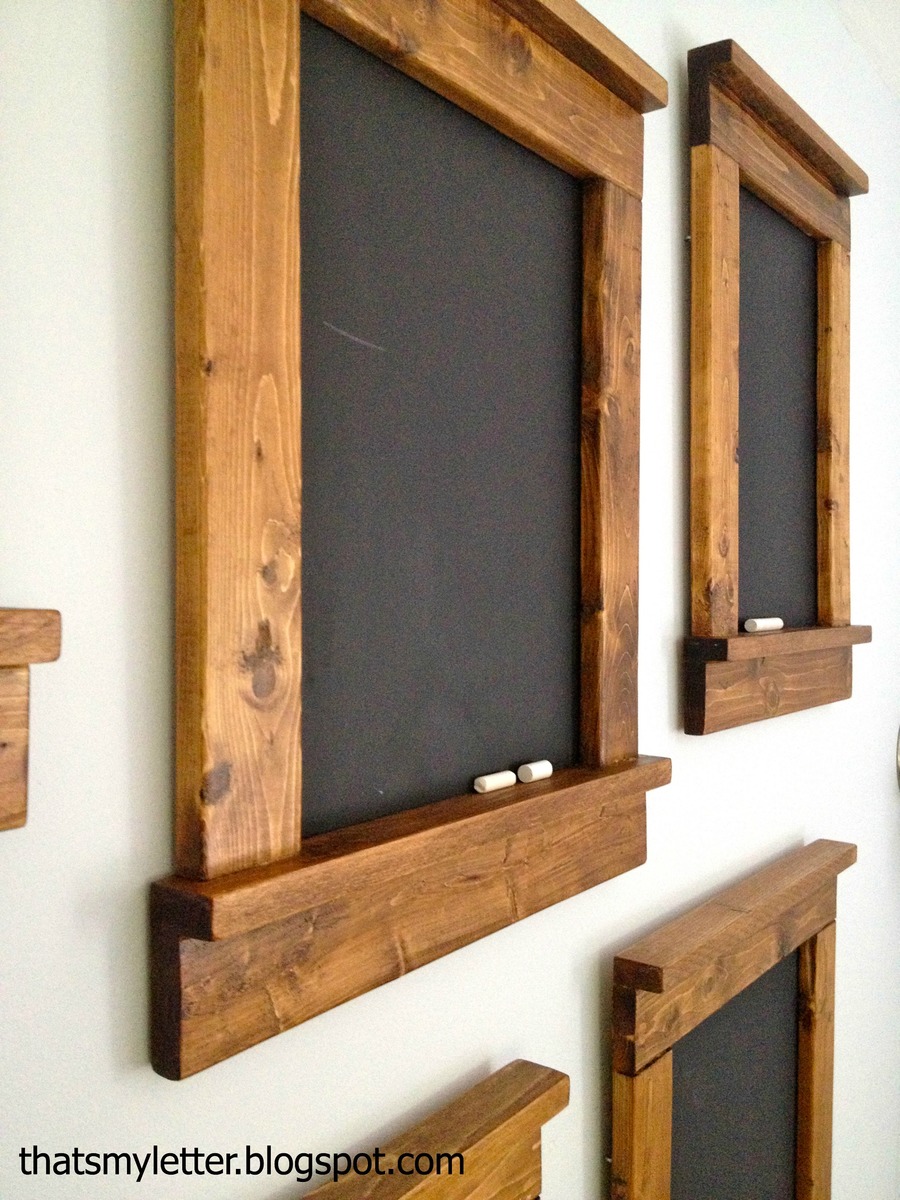
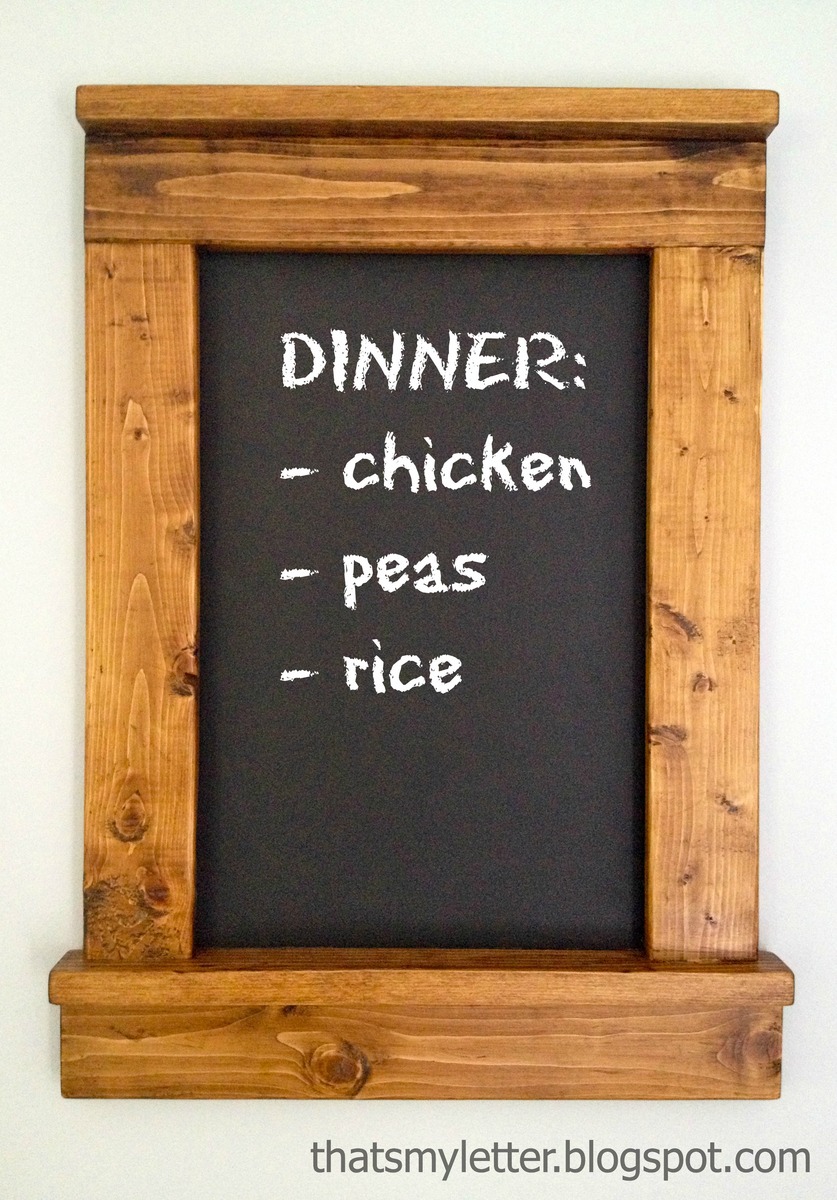
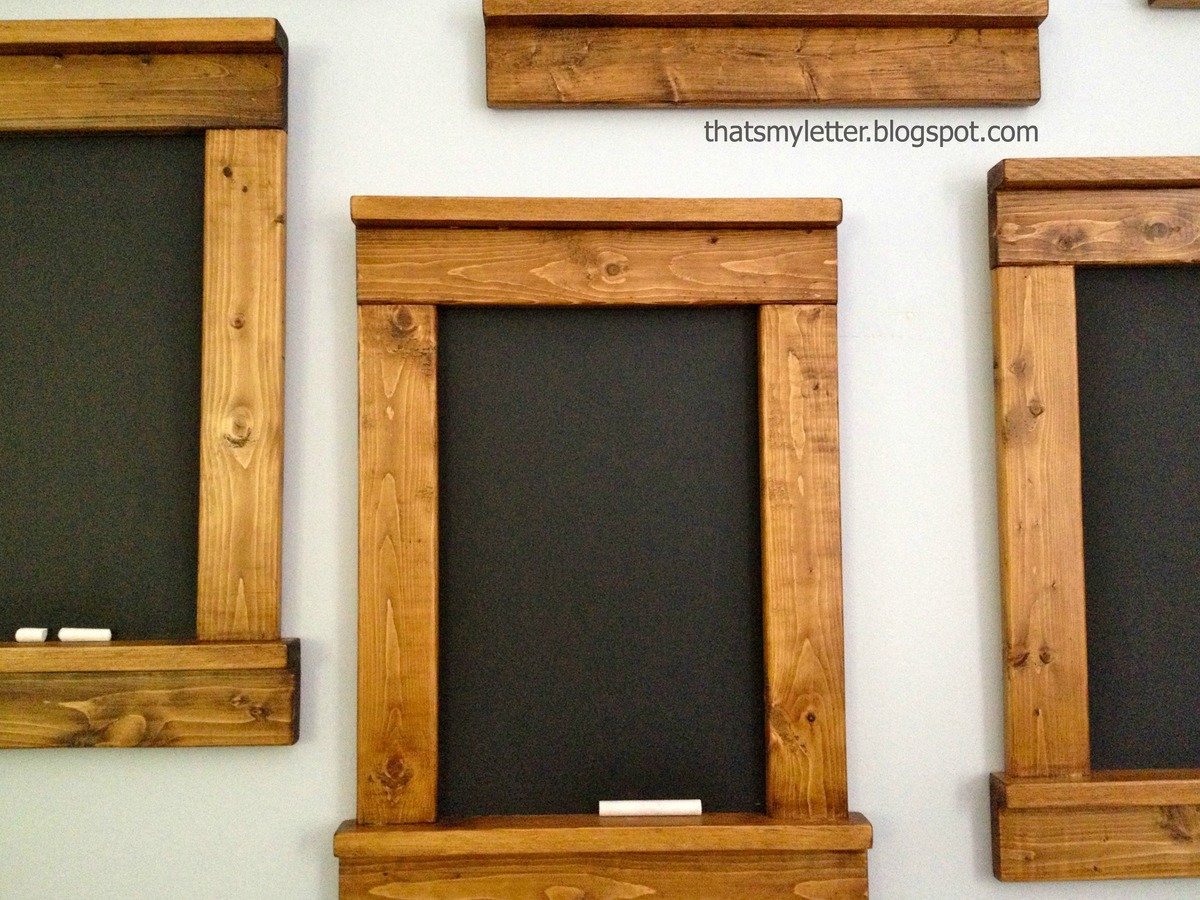
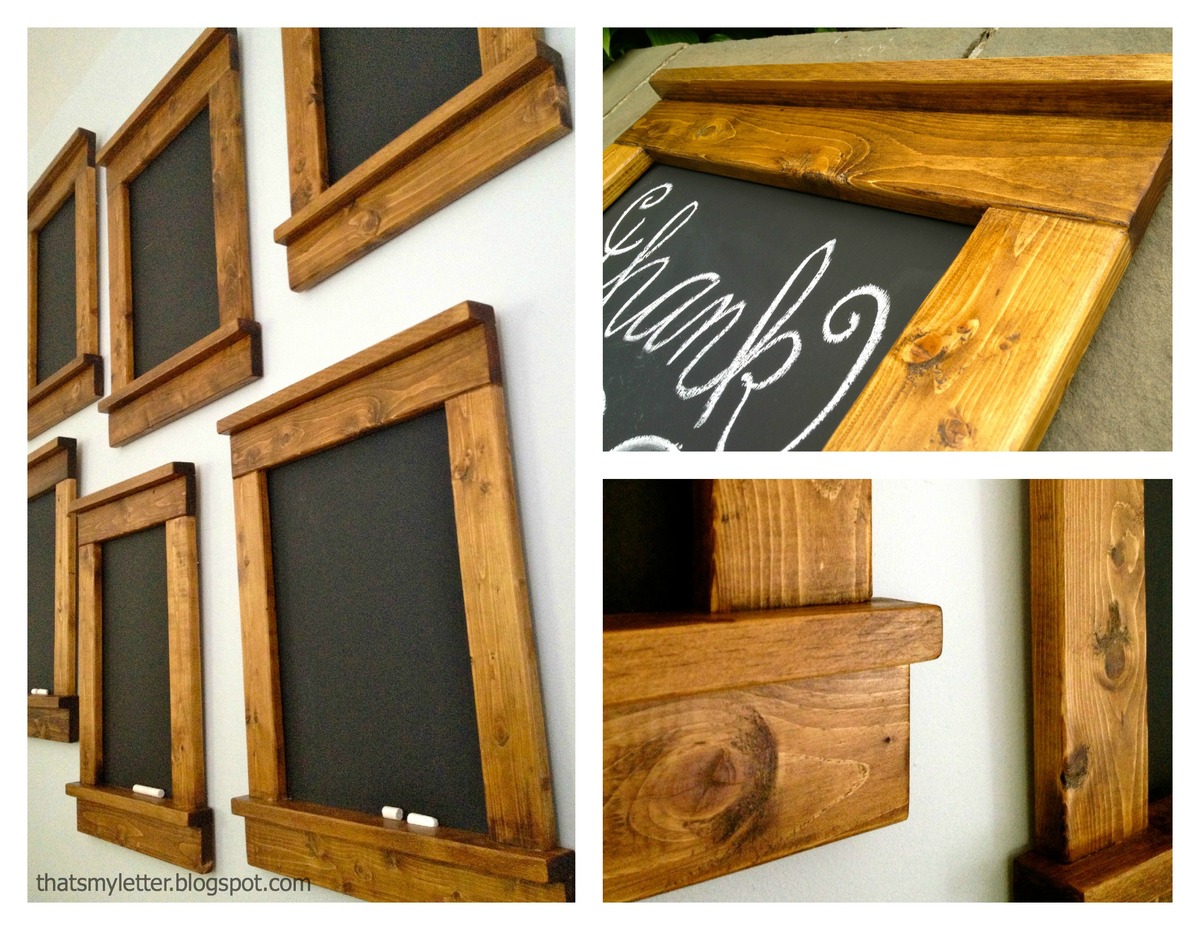
An easy end of the year teacher gift - framed chalkboards. I made these using furring strips and 1/4" plywood for about $5 each.
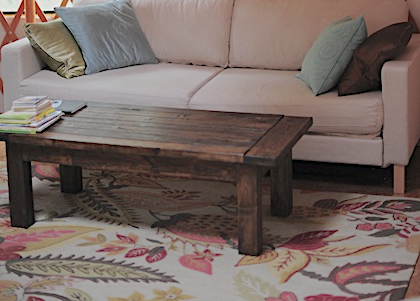
We made the Tryde Coffe table using 100% reclaimed wood
Sun, 06/26/2011 - 13:38
Also wanted to say I LOVE YURTS!!!! I want one! :) Fantastic idea for accomodation.
Mon, 06/27/2011 - 19:25
How do you like the yurt??? The table looks terrific!
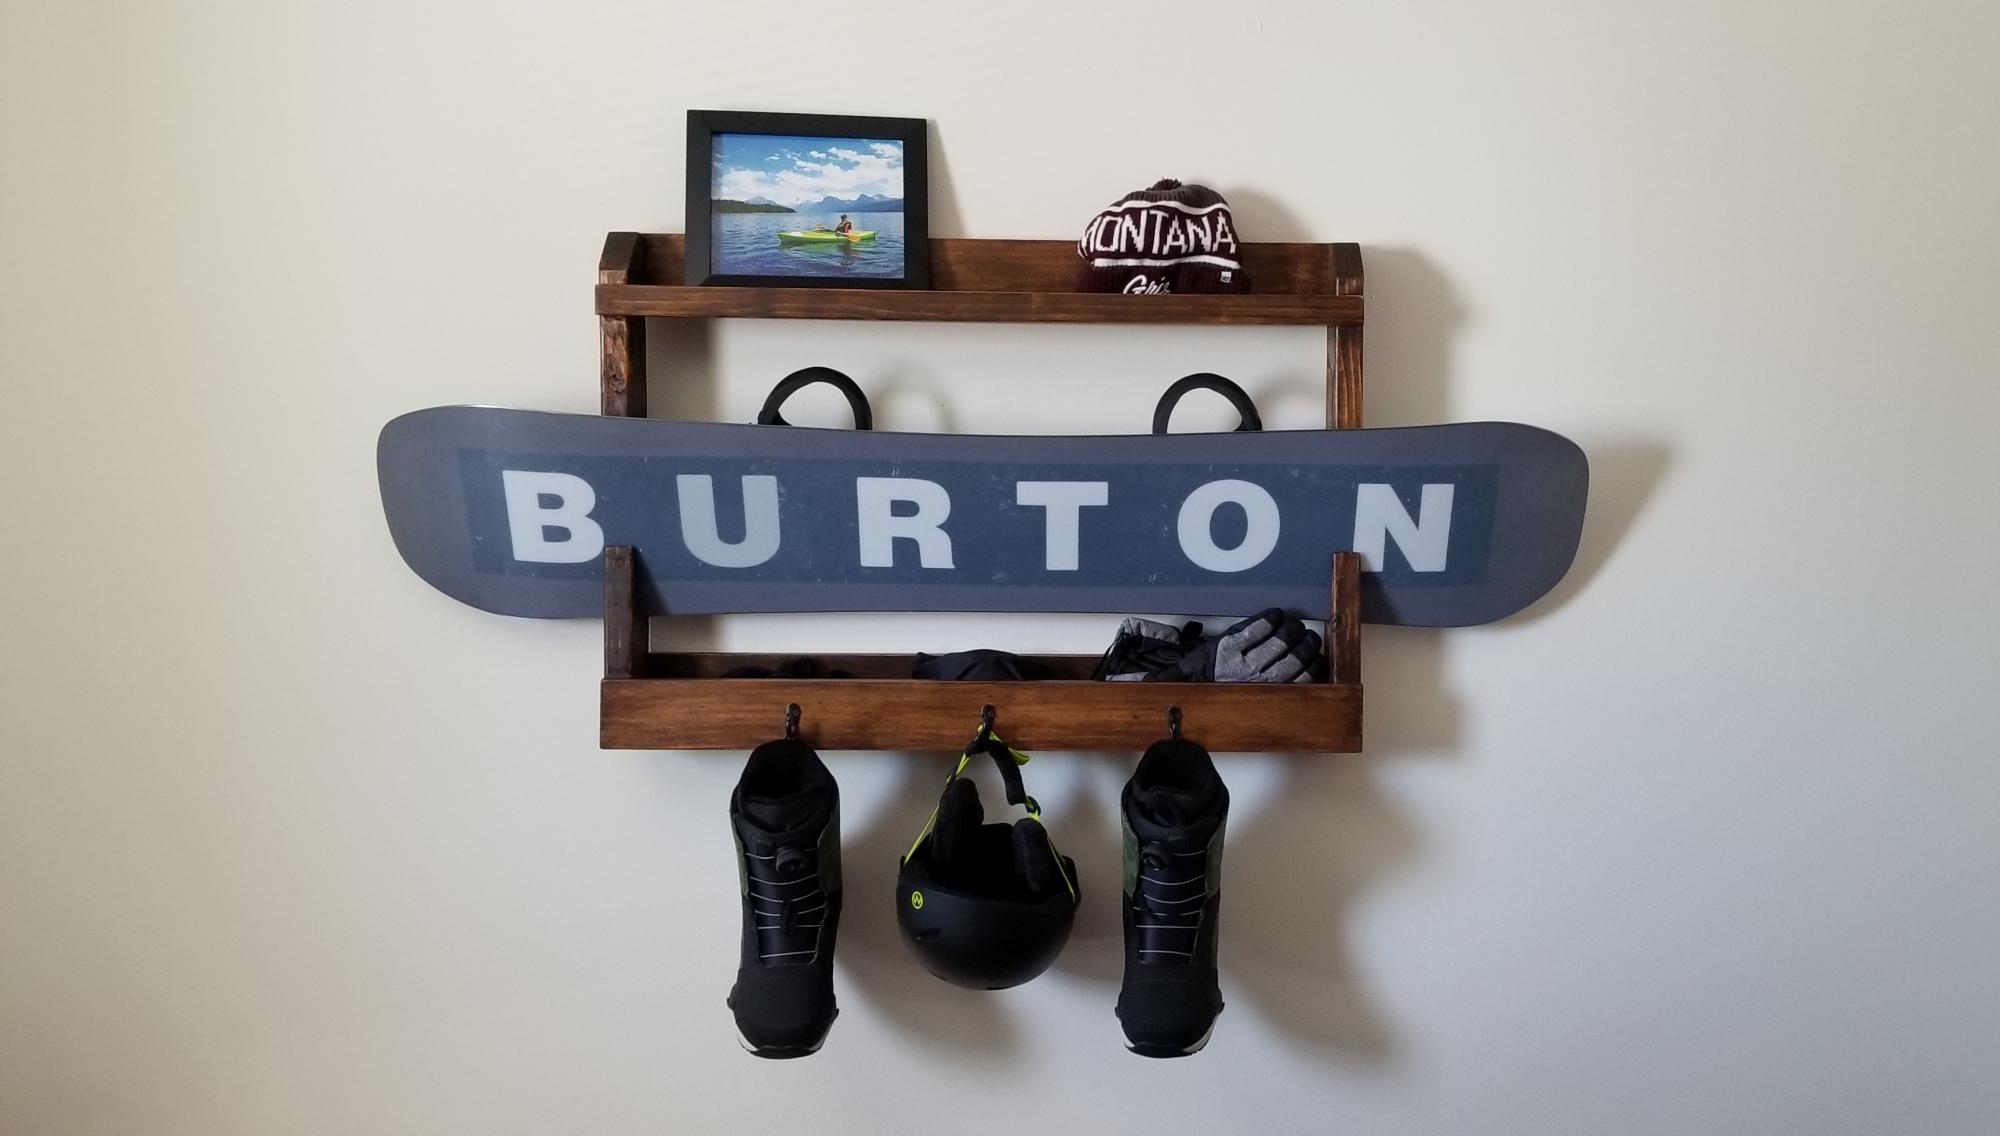
My son wanted a way to display his snowboard, so I modified the pallet display rack plans to fit his snowboard. It's constructed with 2x4s for the sides and 1x4s and a 1x2 for everything else. The 2x4s have an angled notch cut out so the snowboard can slide in and out. I built a top and bottom shelf to display pictures, as well as provide storage. The hooks are great for hanging boots, gloves, etc. He loves the way it came out.
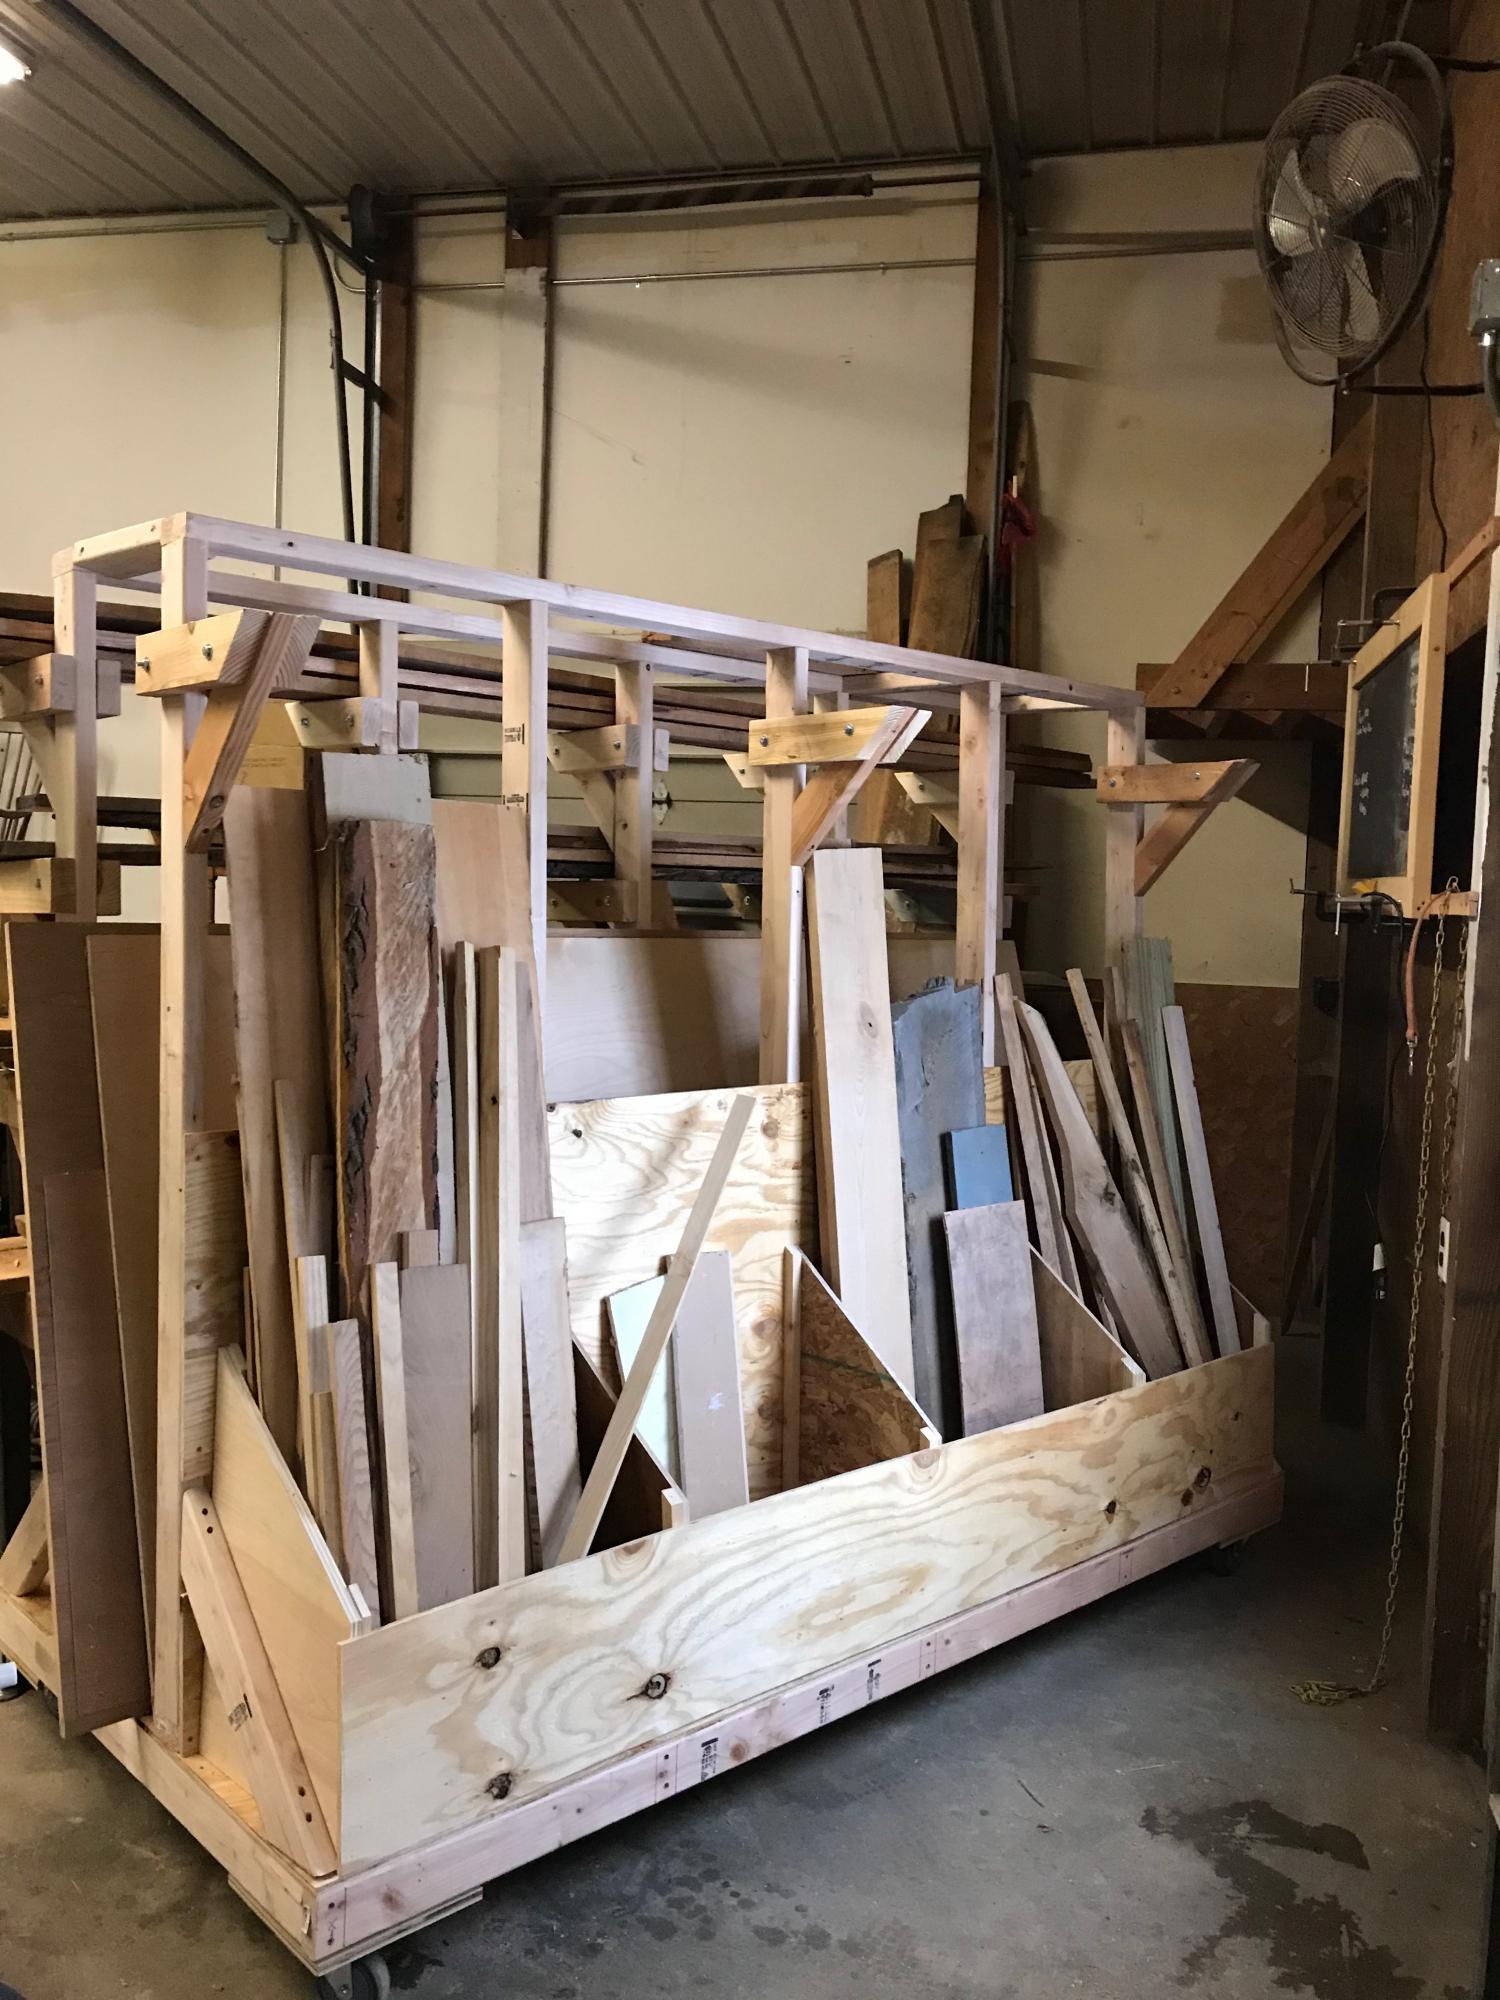
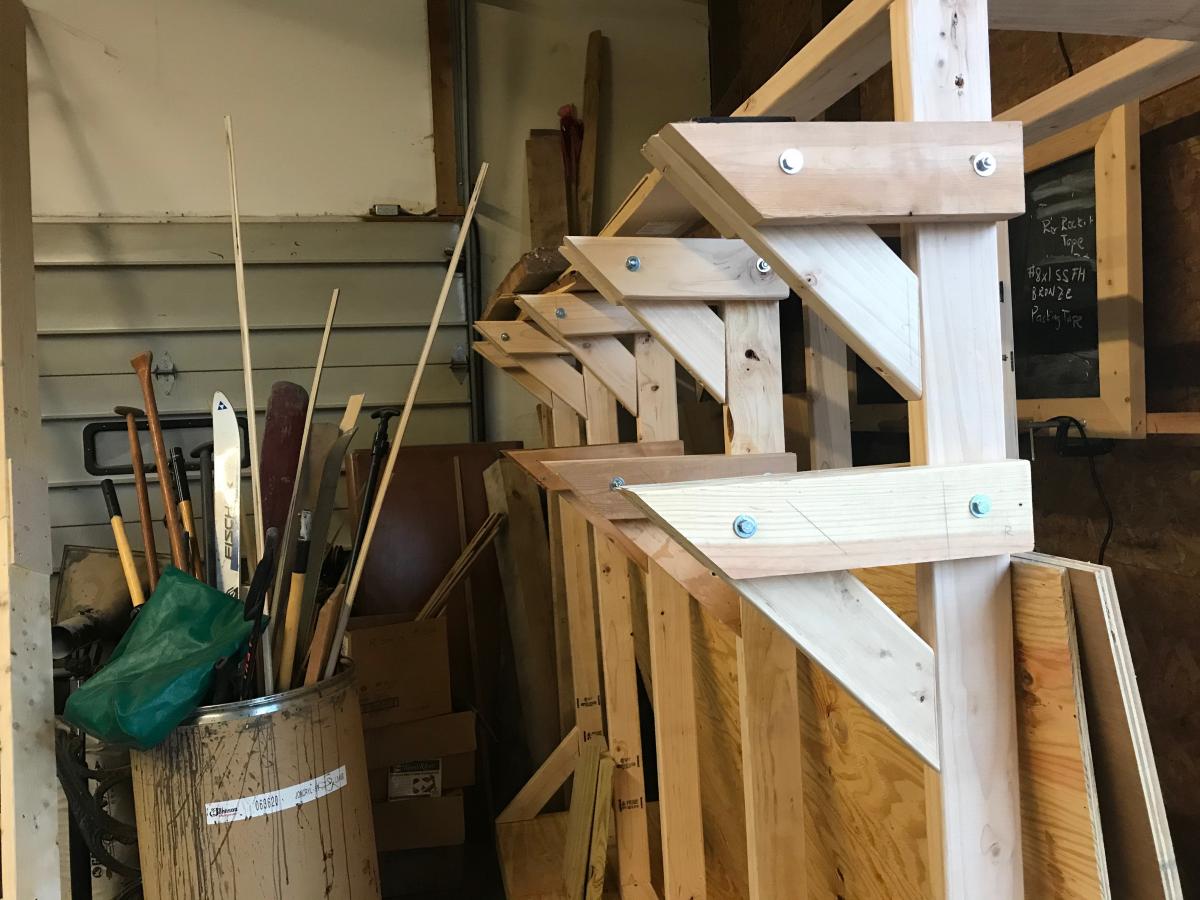
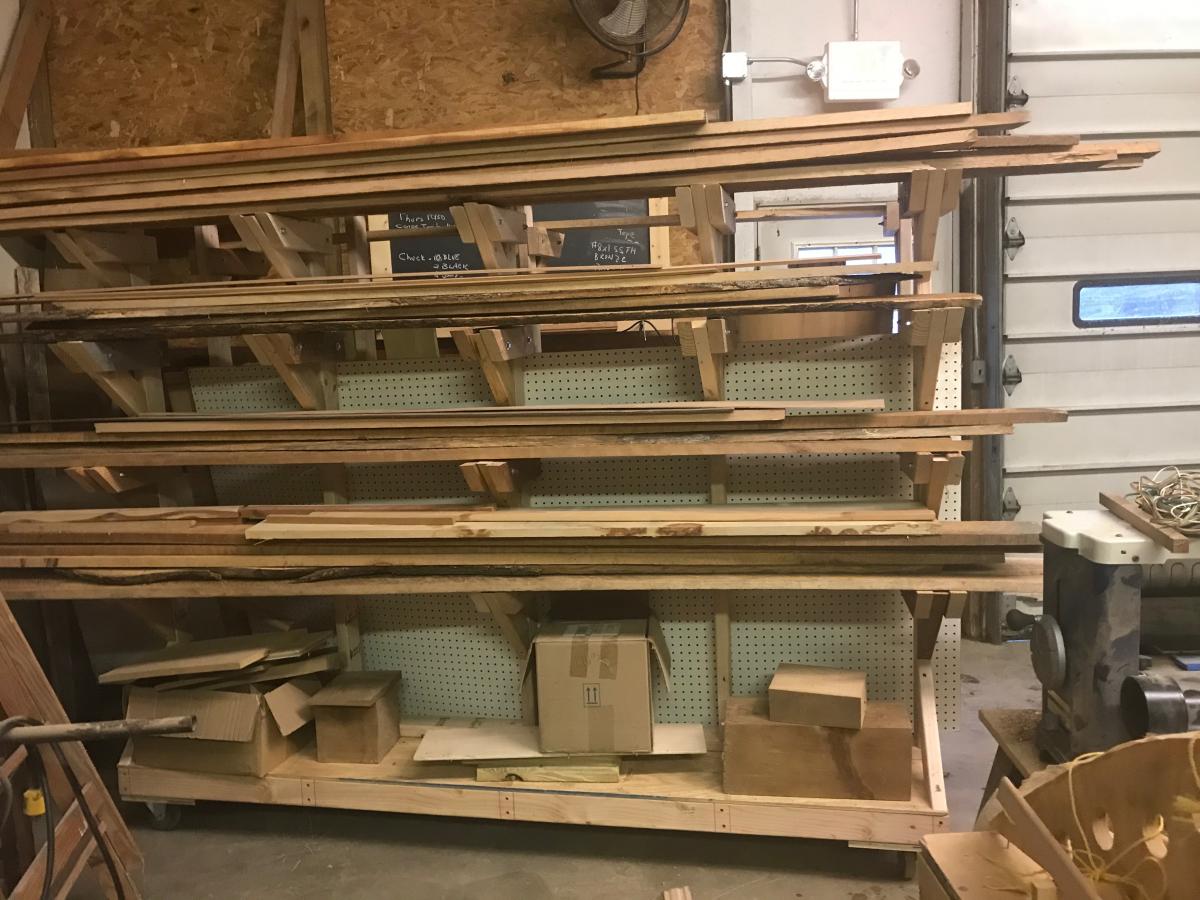
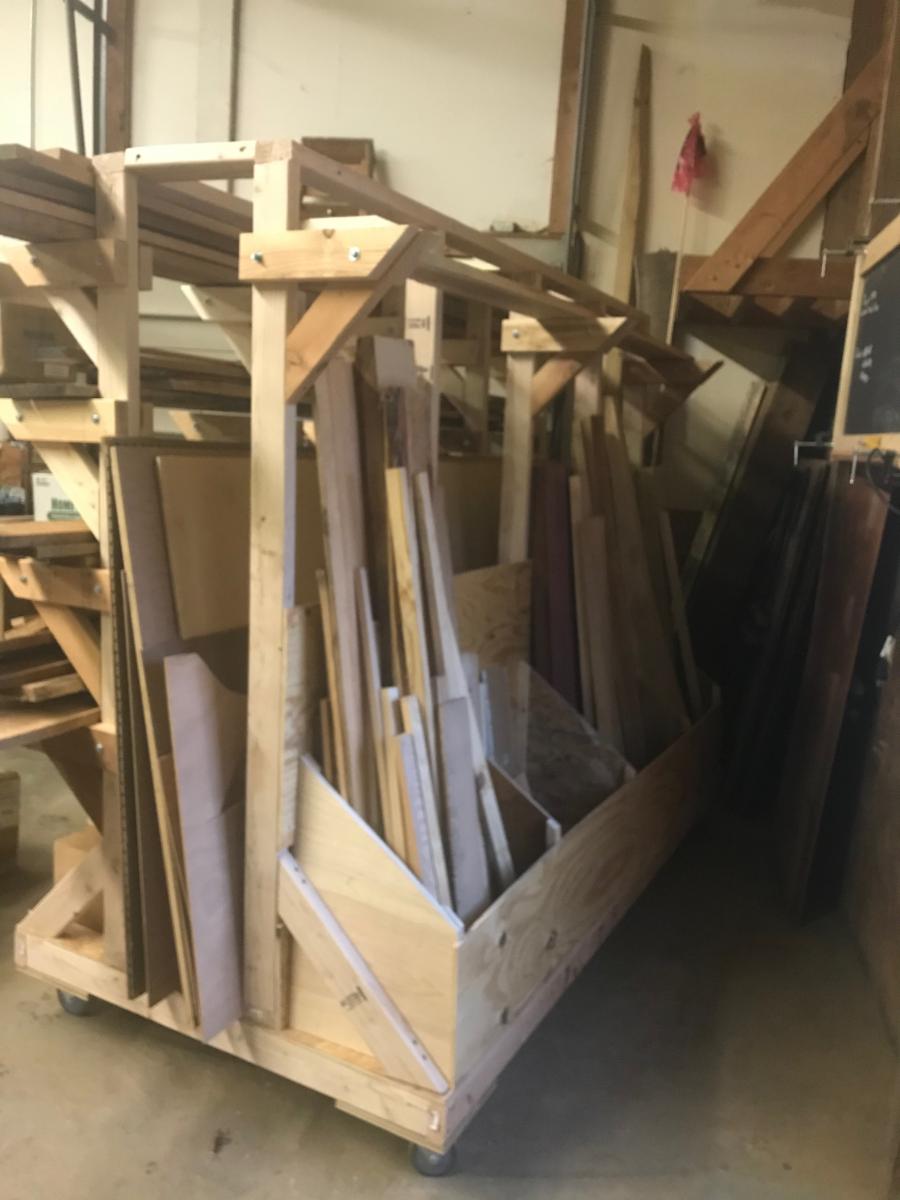
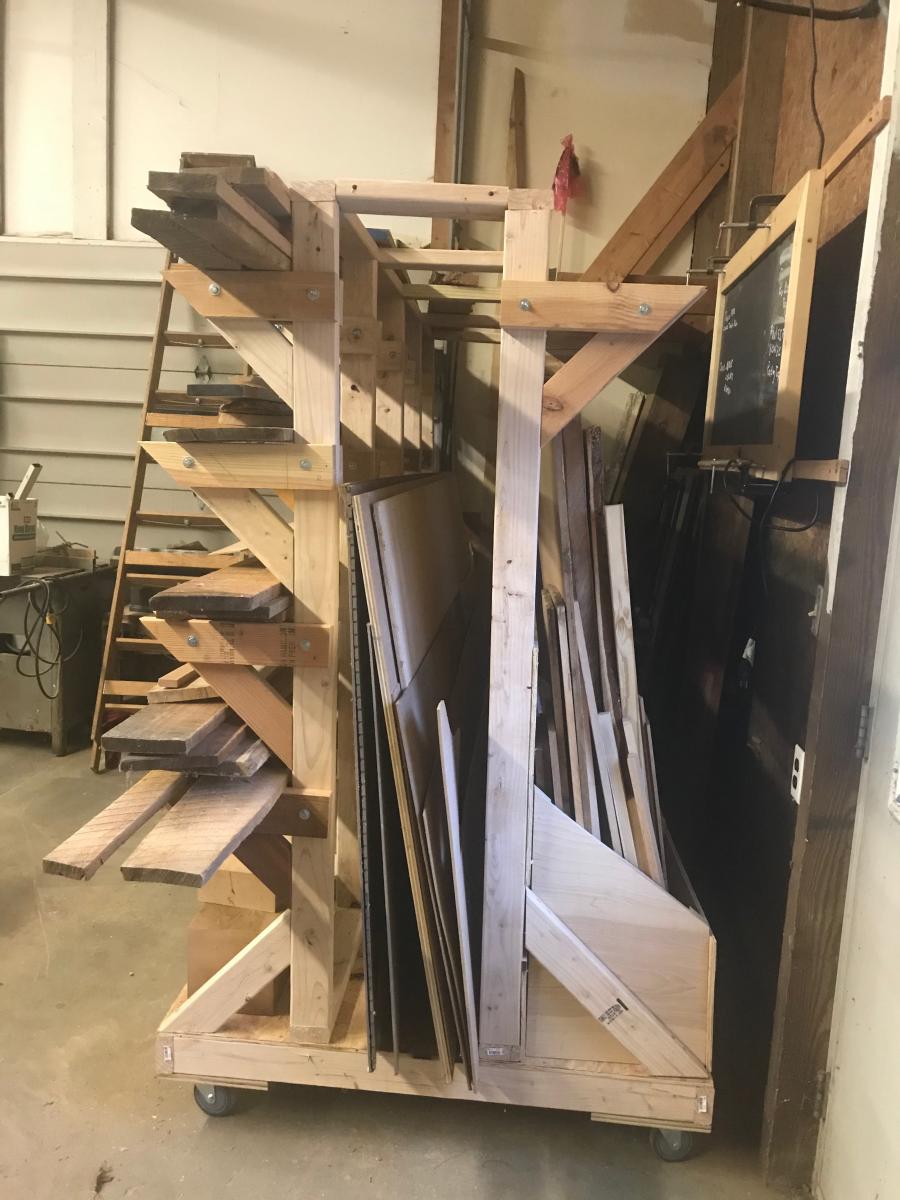
I followed the plans for the wood storage rack pretty closely. The shelf brackets made from 2x4's are quite sturdy. The entire rack is easy to move around on the 4 inch casters. This project took about 4 days to build and was well worth the time and money. All my wood is in one place now- sheets, long boards and short boards. Everything is easy to find and my shop is a lot neater, now.
I'm only moderately handy and these were fun and pretty easy.
Learned a lot and got better as I went along.
I found ways to make it as cheap as possible, probably did all three projects for 150 bucks.