Laundry bins
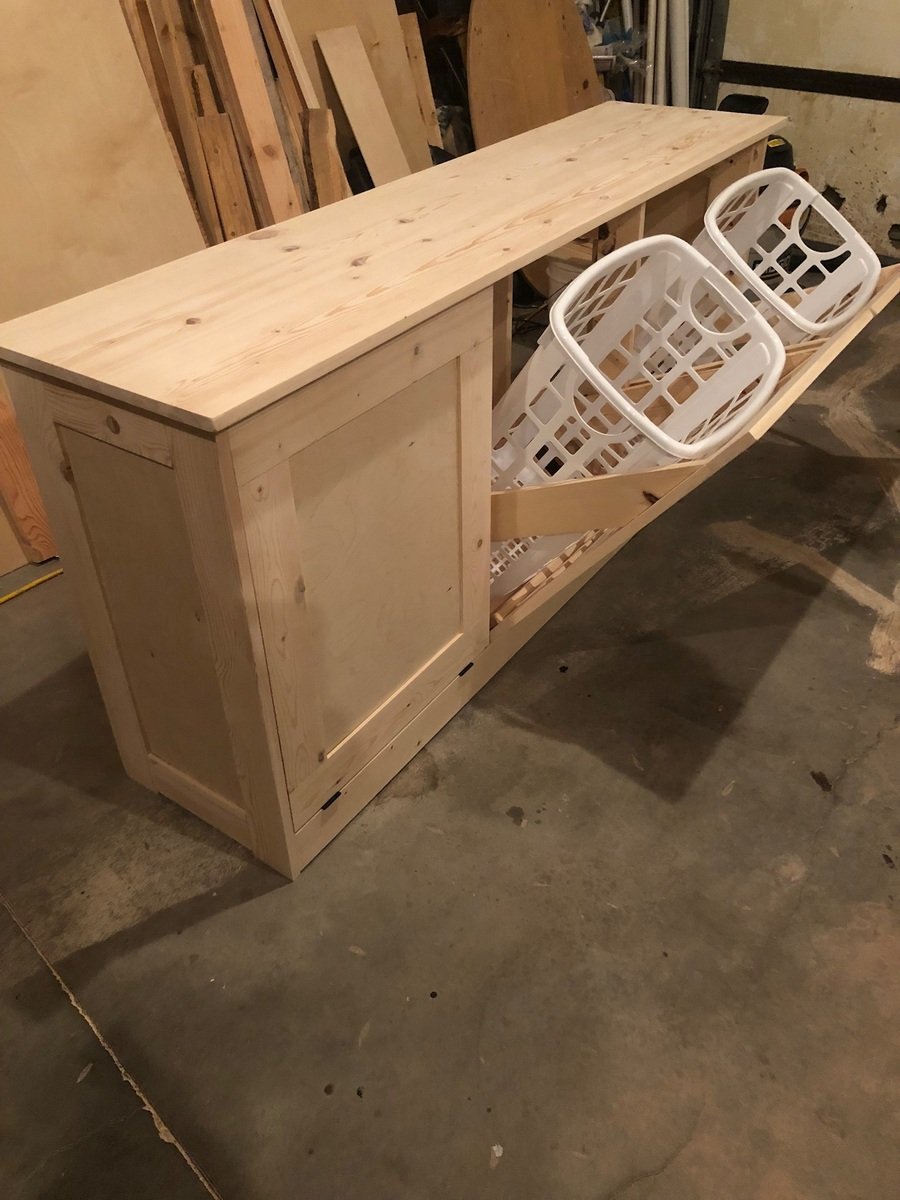
This was a build from a picture and made to fit into a space we have in the laundry room. Used the Kreg jig for much of it.

This was a build from a picture and made to fit into a space we have in the laundry room. Used the Kreg jig for much of it.

This build was also a lot of fun! I made an extra brace to hold the wait of two sitting on the bench. Thanks again Ana for your plans!
David Marks

I built this for my daughter after building a ladder shelf for my kids bathroom. It took more time to install and adjust the drawer slides and paint the project.

Sat, 09/07/2019 - 03:32
Hi mltdblack
Really nice finish on the cabinet.
It looks like there’s molding on top of your mirror.
Did you buy a mirror with a frame or buy molding and put it on over the mirror?
What molding did you use an how did you secure it?
What size mirror did you use? Thanks
Fri, 01/07/2022 - 14:14
I am so sorry. This is the first I am seeing your question. The mirror came with a frame and I carefully nailed thru the frame to attach with my 18 gauge nailer. I bought the mirror at Lowe’s and I believe it was 15.5” x 50”. Also, I used full extension soft close drawer slides.
I wanted to change up the style of this table and make the base chunkier! So I opted to use 2x6s instead of the 2x4s
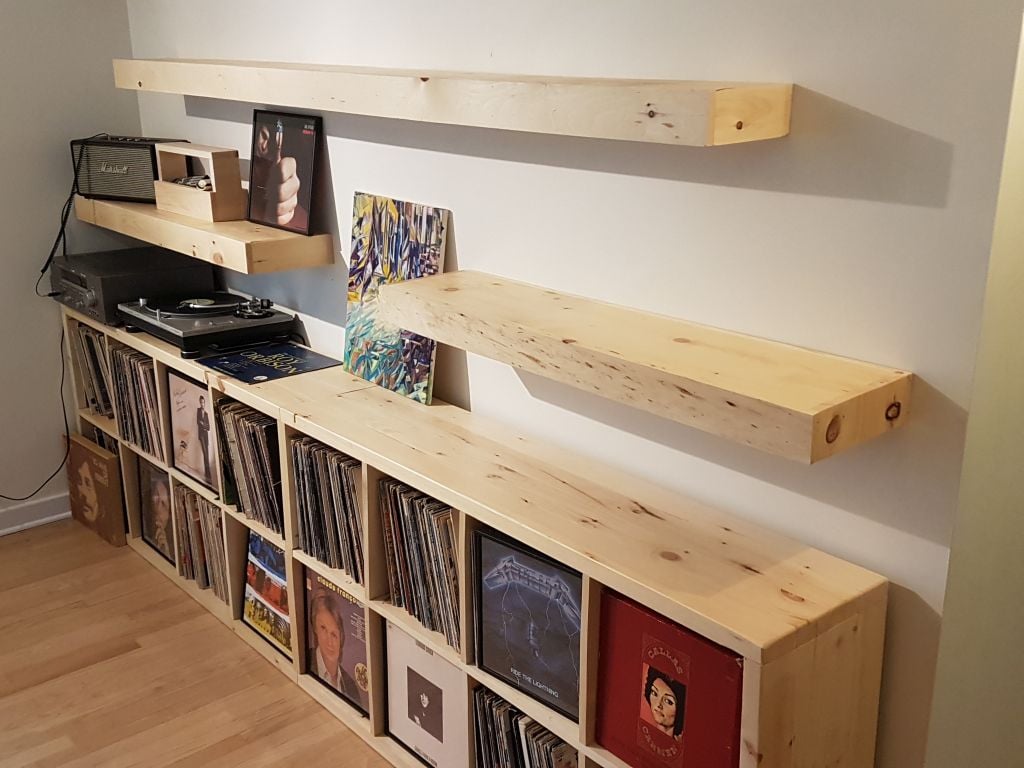
I love Ana Whites's site. I go to it all the time when I have project ideas. The Video tutorials, combined with plans, is just amazing. Plus, the brag pages of people that have done projects from what they found here. Thank you Ana.
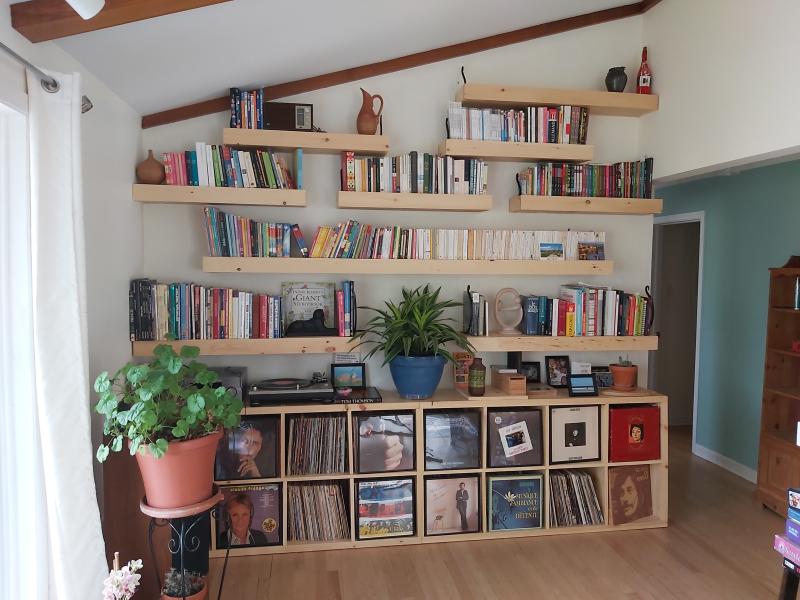
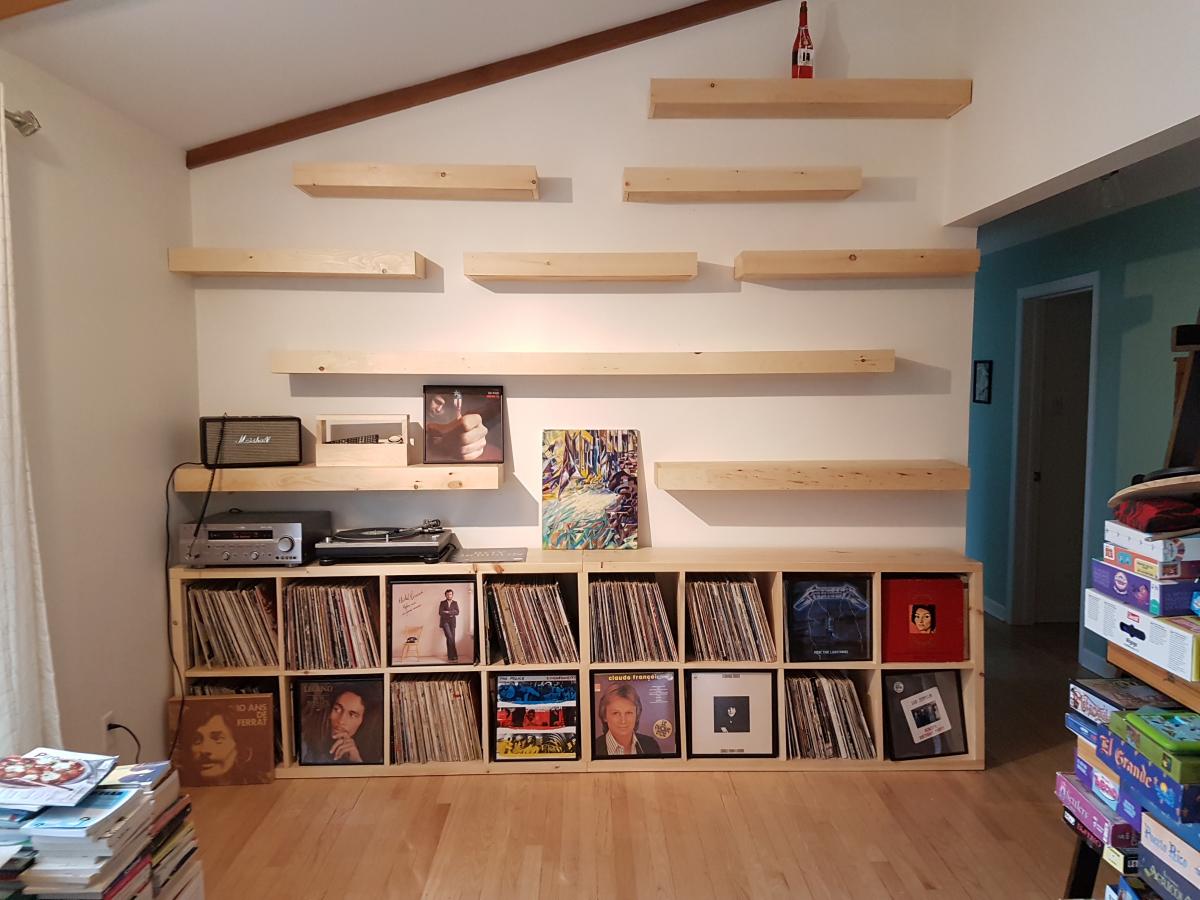
The floating shelves part was from Ana's site. The other part was done using my own plans (I used SketchUp to draw them)
My wife added the books, plants, and decorations, and I finally opened the dusty boxes that contained my insane LP collection. The experience has nothing to do with steaming music, it is far more complete.
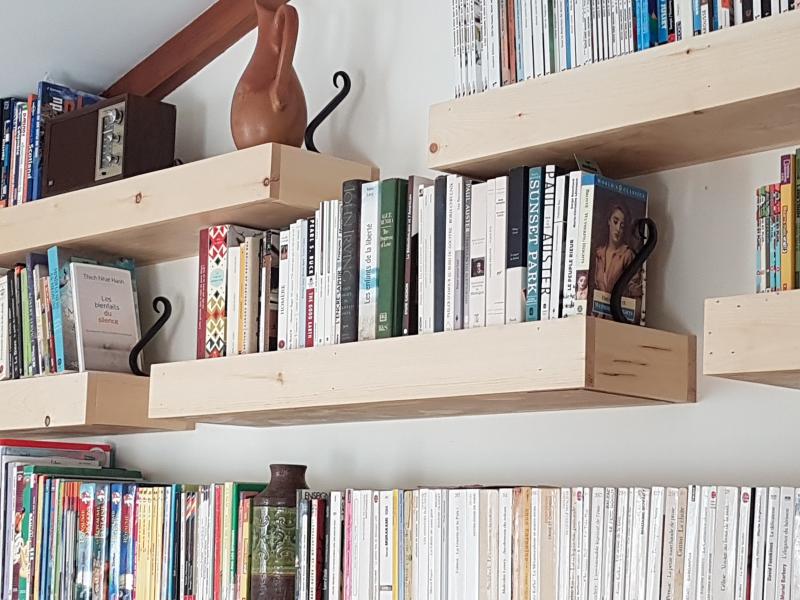
I used plant-lantern brackets to prevent books from falling from the sides of the shelves. All done, this is great.
I would like to change the main picture, but I get strange messages from the site when I do this.
Mon, 05/20/2024 - 08:23
Wow, this is such an inspiring project! I can relate to loving Ana White's site for DIY ideas and tutorials. It's amazing how you've combined her plans with your designs using SketchUp. Adding plant-lantern brackets to prevent books from falling is a brilliant touch. I remember how I wrote a story about how I did something similar. I used https://essays.edubirdie.com/personal-statement-writing because I wanted to write a motivating story. And there I was able to get help from professionals. I understand the frustration with wood costs right now; it’s great that you still went ahead with the project despite the expense. The effort and time you invested, especially with the multiple coats of stain, really show your dedication. Thanks for sharing this – it's motivating me to start my DIY project soon!
This was our first build and it was quite a big project to take on to start with. We had so much fun and learned so much along the way.
Our biggest lessons were to hand pick our wood and make sure we get the straightest pieces possible. We had to wrestle some wood to make this bed work! Clamp everything especially when using large bolts as the pieces would pull apart from each other. We even used a ratchet strap at one point becuase our small clamps weren't cutting it. I'm sure there's a better way and we'd love to hear about it but we made what we had work. We also had to figure out how to attach the side rails and at what height. We ended up using 3 4-inch screws on each end to screw them into the posts.
We love this bed not only because it was a labor of love but because its such a solid beautiful piece.
Sun, 03/01/2020 - 11:29
Very nice! I love the lighter wood too, but my wife likes the darker stain, so we compromised in the middle for the finish. Why arethe post always so red? I can appreciate the natural tendency of nature to add color, but the 4*4's are always red-er in color. Do they always use a different pine or certain part of the tree for those?
Mon, 01/18/2021 - 11:27
I believe the posts are actually Douglas fir and not pine judging by the look and color of the grains.
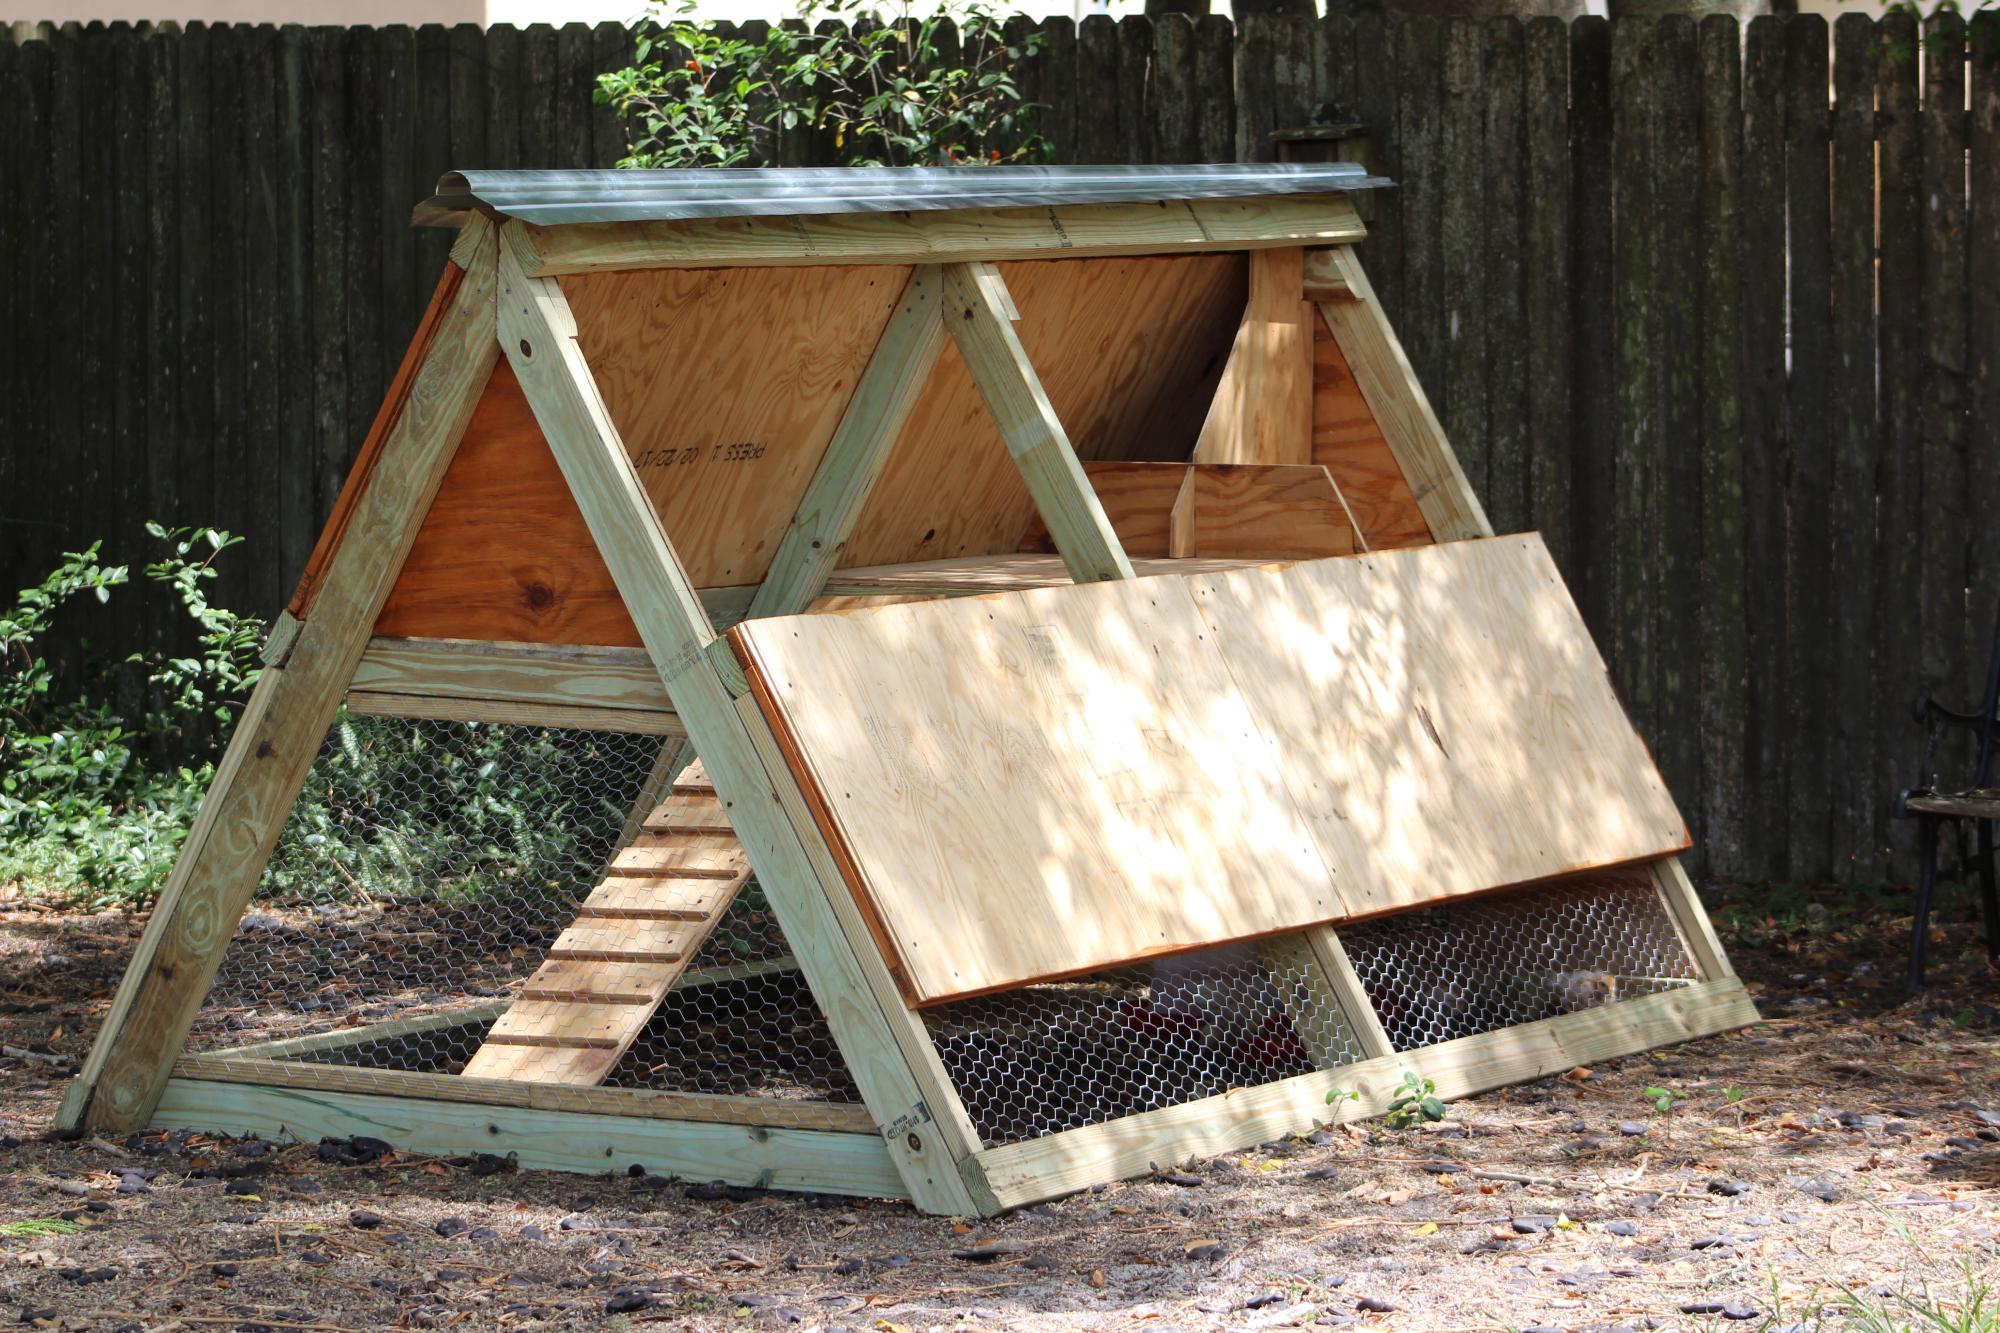
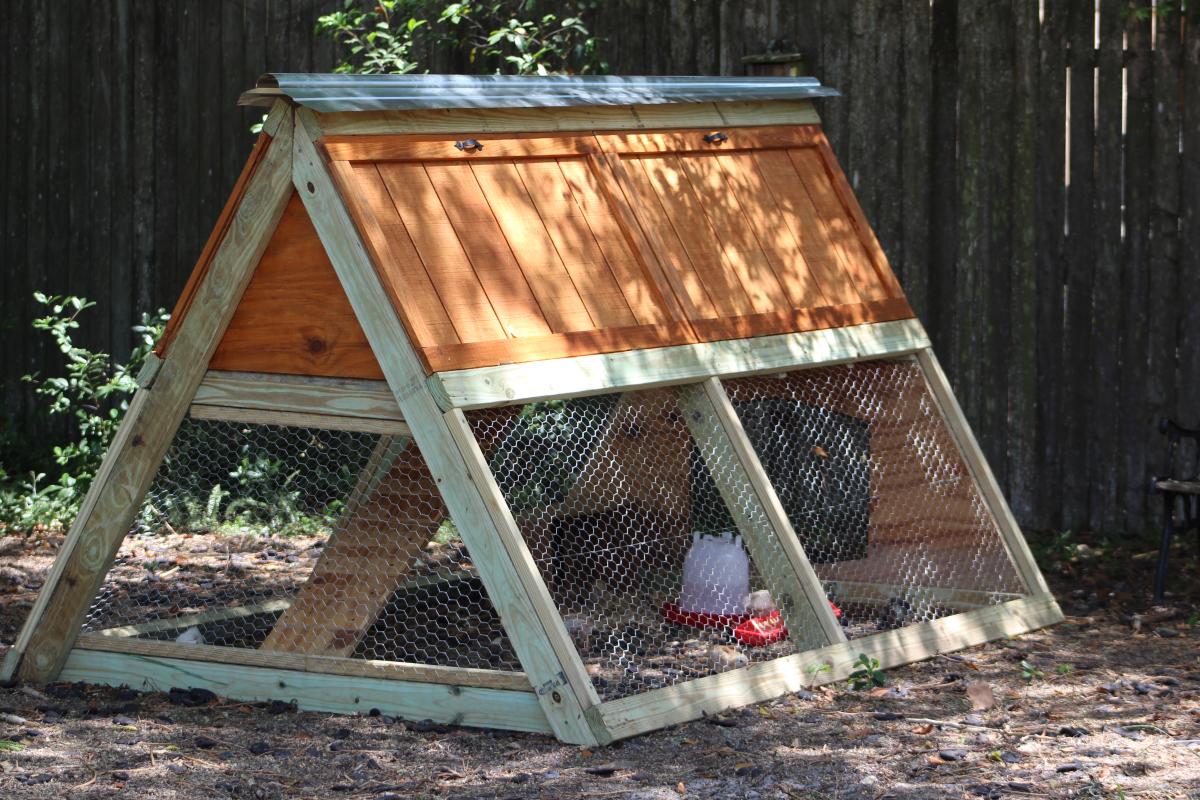
Thanks for the free plans. I did have to make modifications for the doors. i hid the hinges to give it a clean look. i used cedar for the trim and Plywood Siding Panel T1-11 4 IN OC (Common: 19/32 in. x 4 ft. x 8 ft.; Actual: 0.563 in. x 48 in. x 96 in.) for the doors. i used a metal flashing for the roof so it will vent.
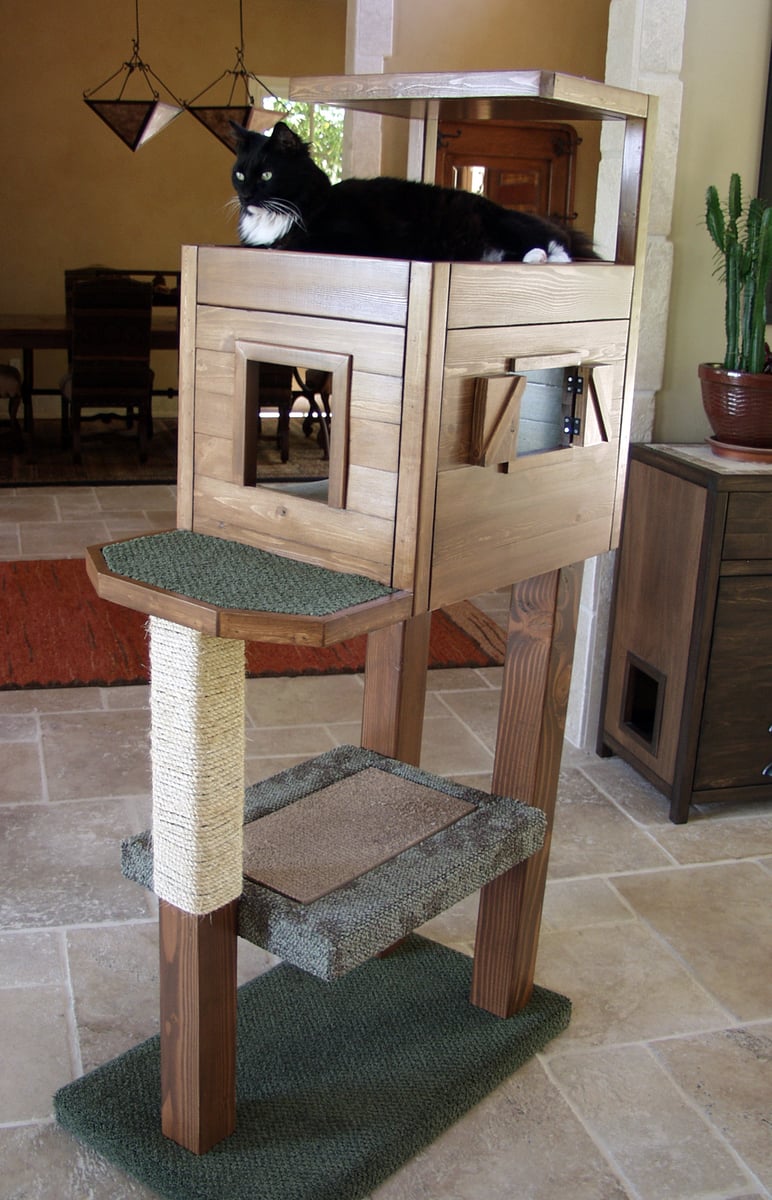
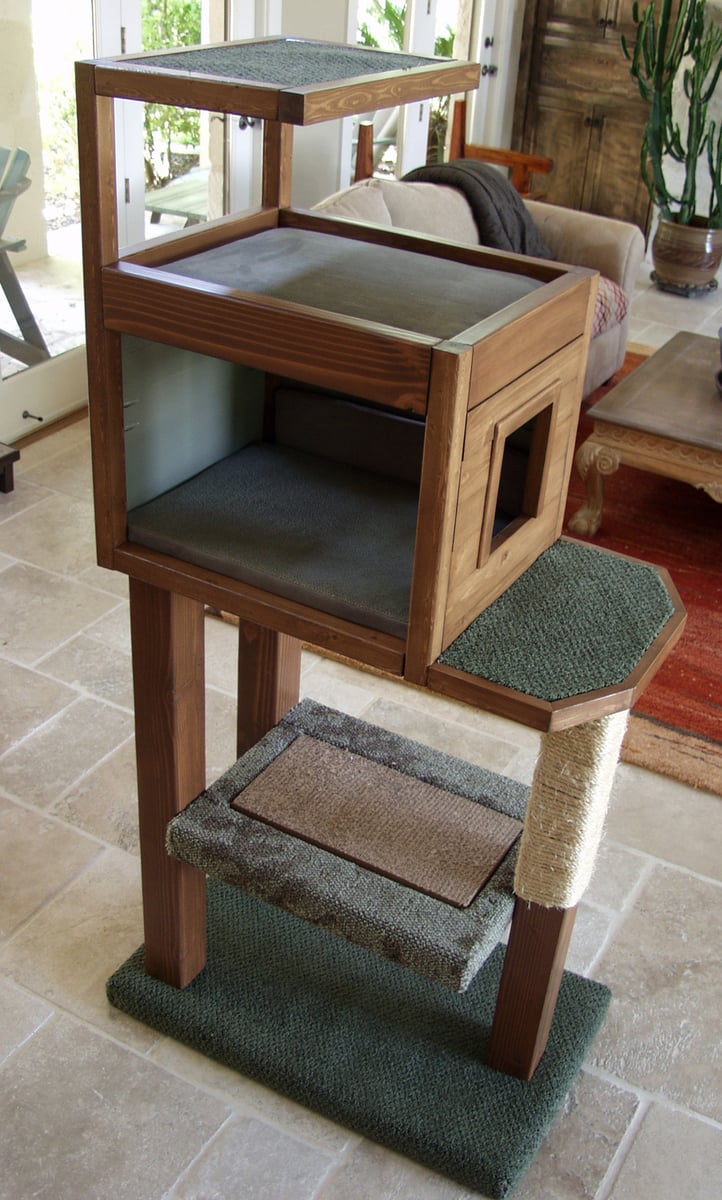
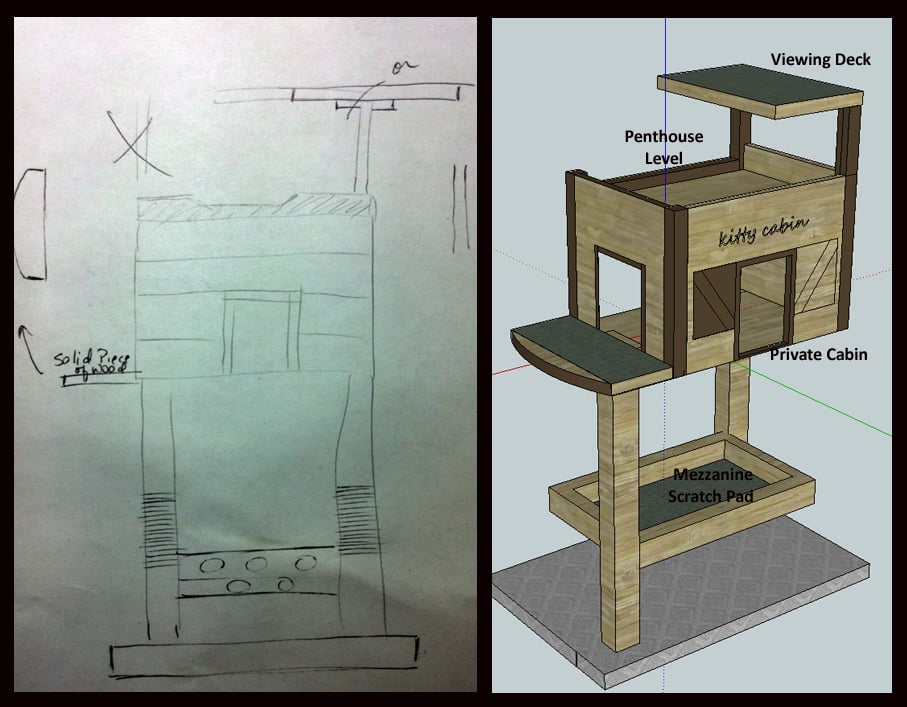
I always wanted a cabin-type cat tree where my cats could crawl in and feel safe, but still have a great view of the birds out of a window. I tried to draw my vision on paper, but that had a hideous result. Learning Google SketchUp (at least the basics) was an absolute necessity. I could never have built this without drawing it in 3D first, and seeing how the boards would connect, etc.
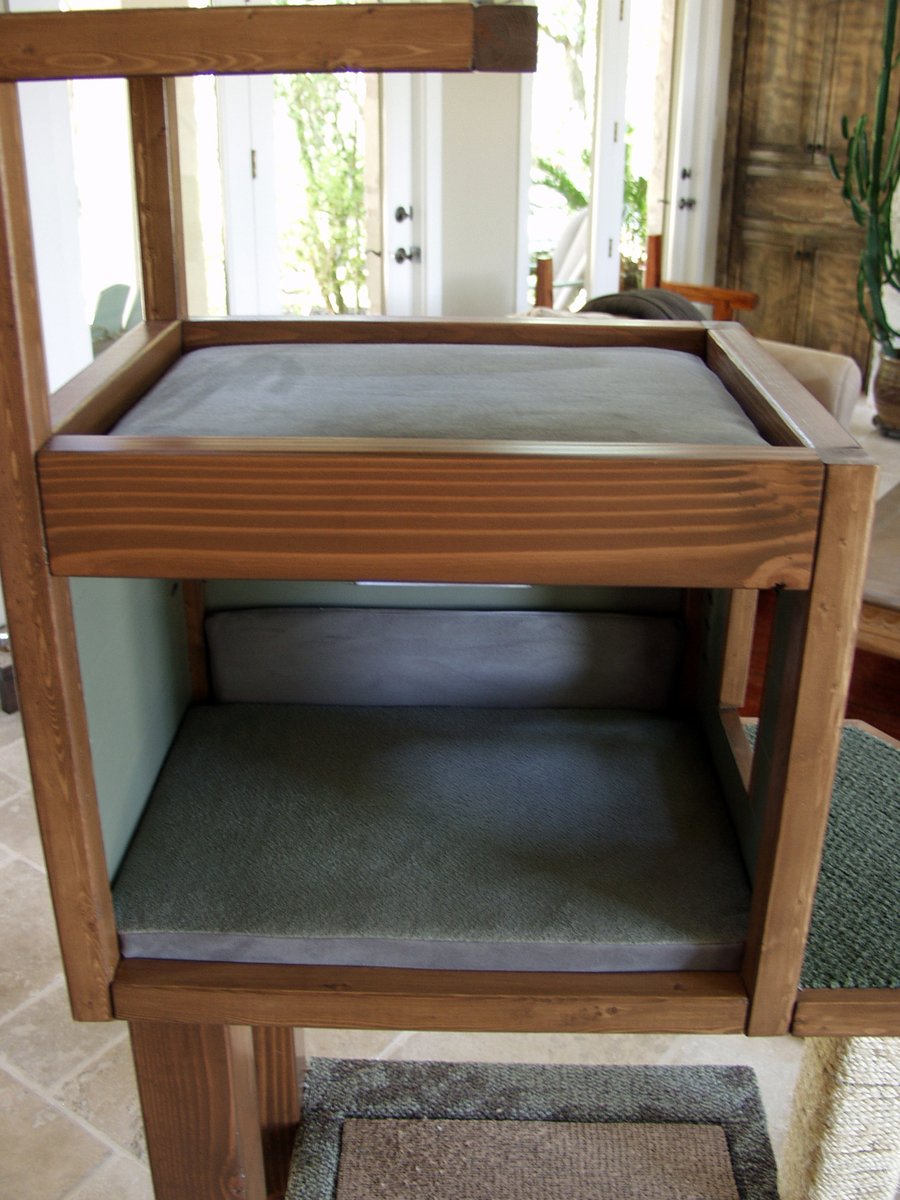
For the scratch pad, I built a frame out of 2x4s on top of plywood, covered it with carpet, and dropped the standard size scratch pad in place. This is the cat's favorite feature. I put barn doors on the window with tiny hinges so that I can close for added privacy. The tree sits against a window so that the back side is totally open. I made cozy zippered cushions for the platforms (that can be taken off and washed). I covered the carpeted areas with spare carpeting.


Fri, 07/12/2013 - 09:36
Would you mind sharing your dimensions for this? It is absolutely beautiful!
Sun, 08/25/2013 - 08:10
Do you have the plans somewhere? I really want to build this (even got the okay from the hubby!) but I don't think I could do it without some serious guidelines...
Fri, 08/30/2013 - 15:55
First, sorry for the late notice; I just happened to look and saw the comments/questions.
I don't have plans...all I have is a google sketchup diagram that I created as a guideline for my construction (which is included in the photos), which is not to scale. Actual measurements are:
* Base (green carpeted base): 33.5" x 19"
* 4x4 legs: 35" tall
* 'Mezzanine' scratch pad level: 22" x 17.5"
* Mid-level base: 18" x 32"
* Enclosed cabin: 18.25" x 22.5" x 17" high
* Highest point: 56"
This has turned out to be a fantastic hit with the cats. They use all 5 levels, but the scratch pad and cabin are their favorite spots. If you need anything else or additional pics, please contact me.
Fri, 08/30/2013 - 18:15
Thanks for the dimensions, Joni! I'm trying to learn SketchUp so I can draw up my own plans, also. If I can't figure it out, I'll hand it off to my 12 year old, who is a pro at it (go figure). I know my cats will love it if I can manage to get it built!
Fri, 09/27/2013 - 10:15
I used your pictures and diagram Joni and made one for my friend for her cats! I used 2x4's for the cabin which makes this thing so heavy but so sturdy! It holds my 60 lb child without budging... here's a pic of it almost done. My friend was not finished wrapping the posts with sisel rope though.
https://www.facebook.com/stephanie.brooks1975#!/photo.php?fbid=10151788…
Thu, 10/31/2013 - 14:30
Bhoppy -- I looked at your cat tree on facebook. It's awesome! The sturdiness of it shocked me too. And I was initially worried that my cats might knock it down!!
The worst part of building it was getting that lower scratch pad level on straight with the 3 posts. I'd never want to do that again!
Thanks for sharing, Joni
Fri, 01/02/2015 - 01:18
Funny, almost every time I'm looking for ideas or inspiration when I want to build something, I end up back on this site. I was searching for pictures of cat trees and this was the only one that made me say "Holy crap, that's EXACTLY what I want!" My cat will love it!
Mon, 04/27/2020 - 20:41
Not sure if anyone is still around to see this, but I fell in love with this tree the second I saw it. Wondering if anyone created a detailed plan and might have it handy or possibly a detailed sketchup and wouldn't mind sharing the save file?
In the event nobody has either... I'm planning on having someone else build this for me as I don't have the tools nor skill to do it myself. I have a few questions:
1. The tree base/platform, what's a good recommended thickness?
2. The platform for the scratchpad... is there any certain reason it's so much thicker compared to the other platforms?
Thanks.
Sun, 09/12/2021 - 11:51
Reverse engineering this project, using just 2x4s. None of the photos show the undersides. How are the plywood pillow bases attached for the top and bottom of the cabin? and the base of the top viewing platform?
Sun, 09/12/2021 - 16:42
There are no Minwax water based stain colors with those names that I can find.
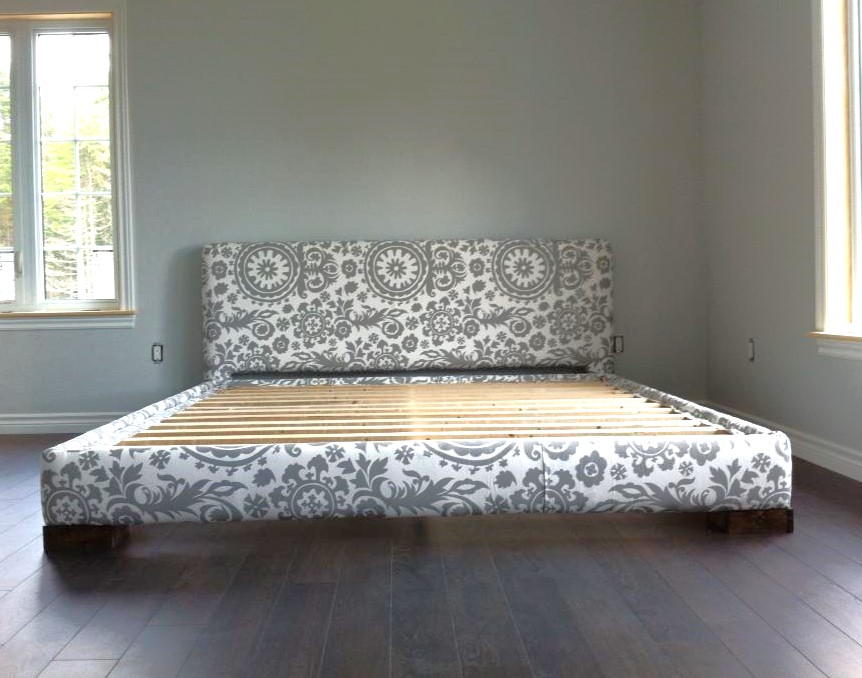
I used the plans from Ana excepted converted the measurements to fit a King. Our mattress comes in on July 3 so I'm praying that it fits! This was our first project and we cannot wait to do more!!
Tue, 06/25/2013 - 14:52
Thanks so much! I purchased it from fabric.com. I actually ordered a bunch of swatches first before I chose :)
Fri, 06/28/2013 - 17:51
That's really awesome! Well done! The Suzani print fabric was a nice choice :)
Tue, 04/13/2021 - 21:40
This is very cool! What size & type lumber did you use for the slats?
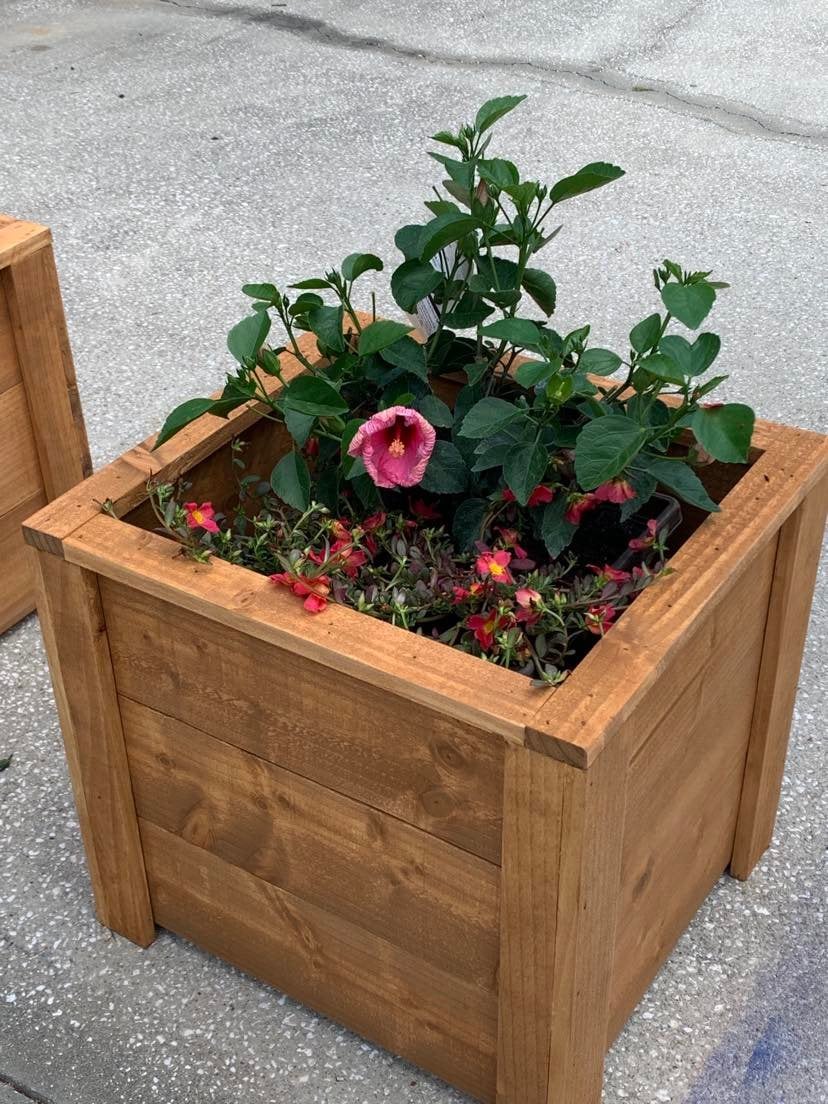
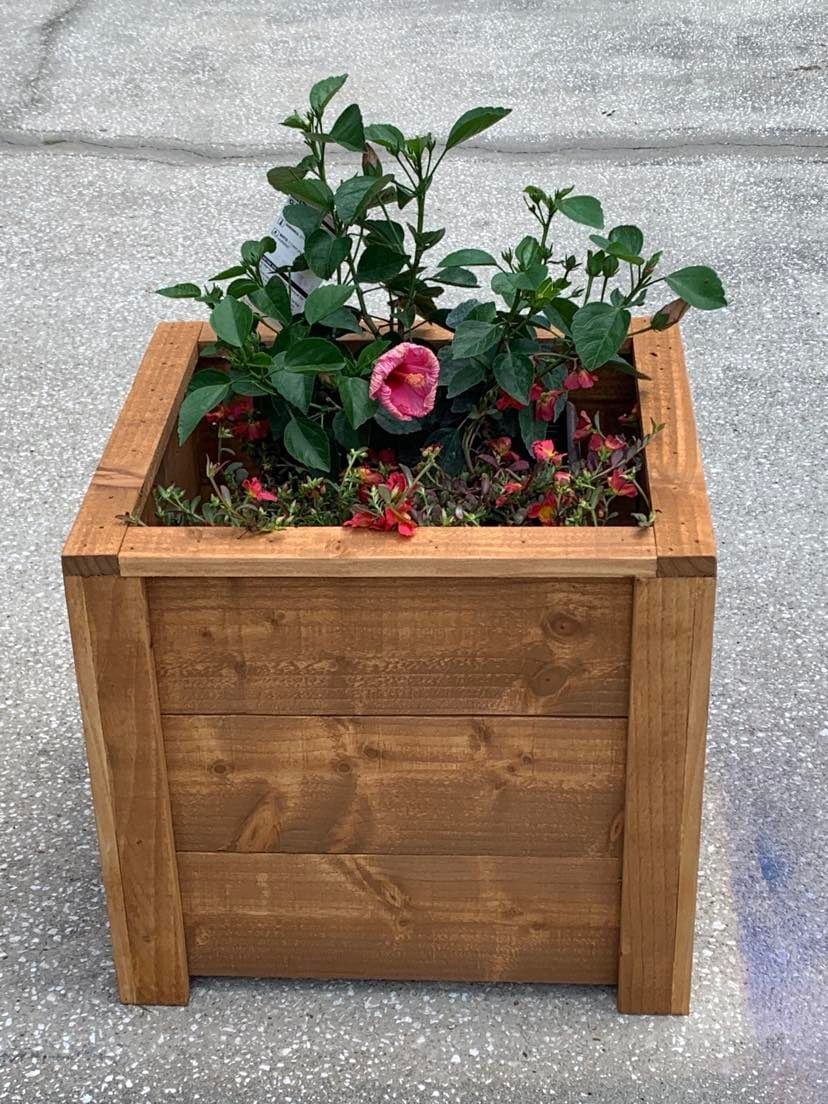
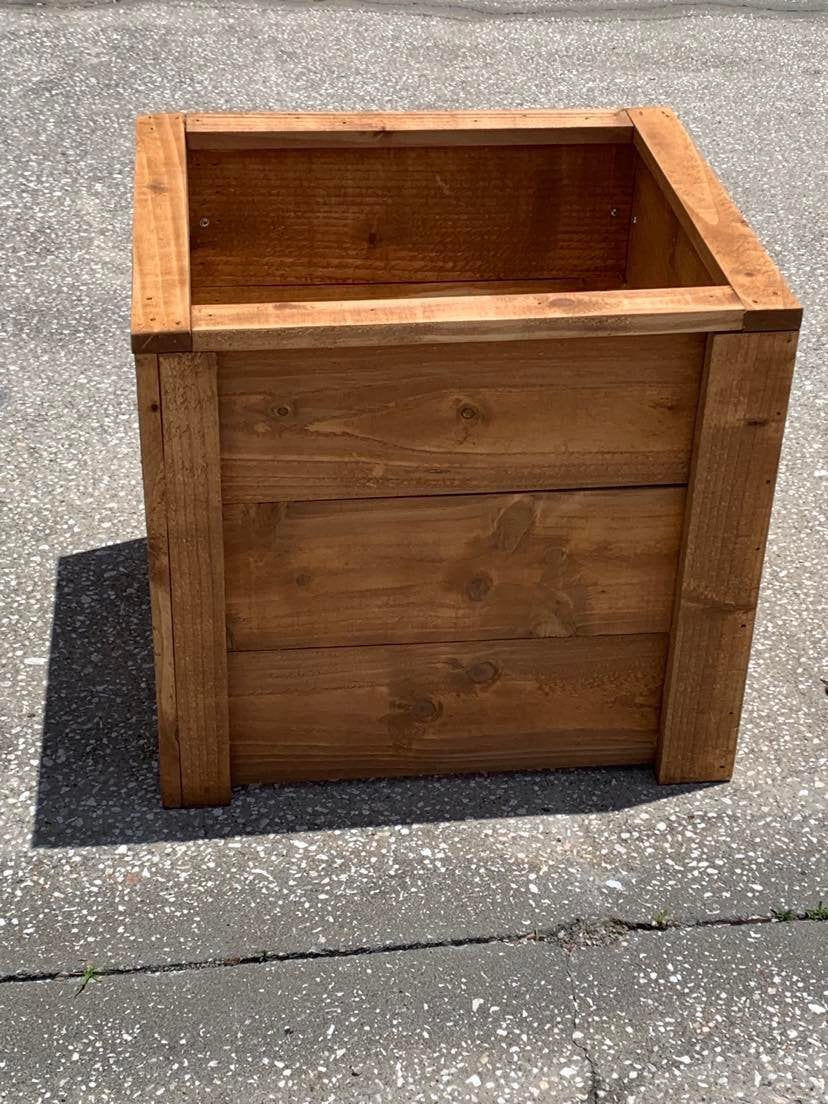
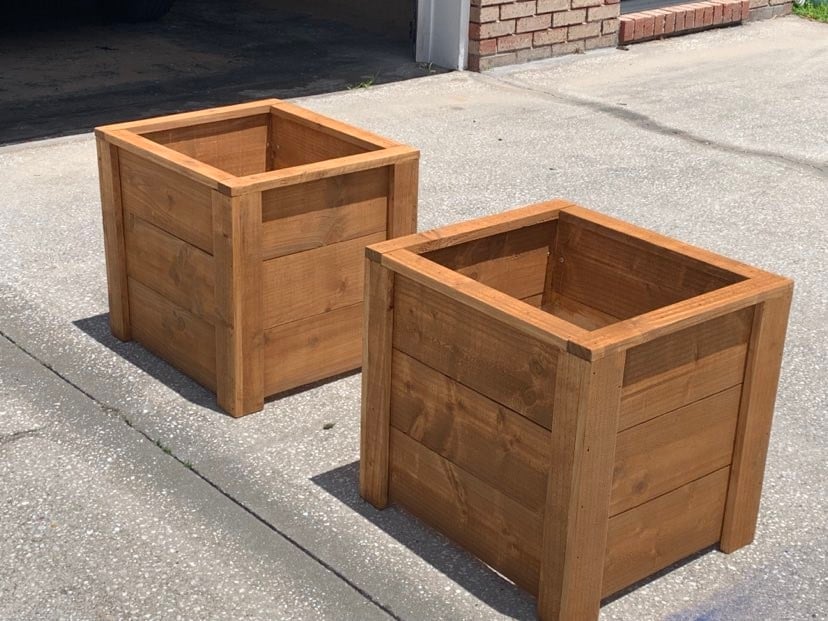
Thanks Ana, I built your planter box, actually built 2 of them, one for each mom. The were a huge hit and I already have people asking me to build them one.
So loved building this planter box. Thanks for all you do for your fellow woodworkers!
Dale G
Callahan, FL
Tue, 05/10/2022 - 07:05
Love these, wonderful idea for a mother's day gift, thank you for sharing!
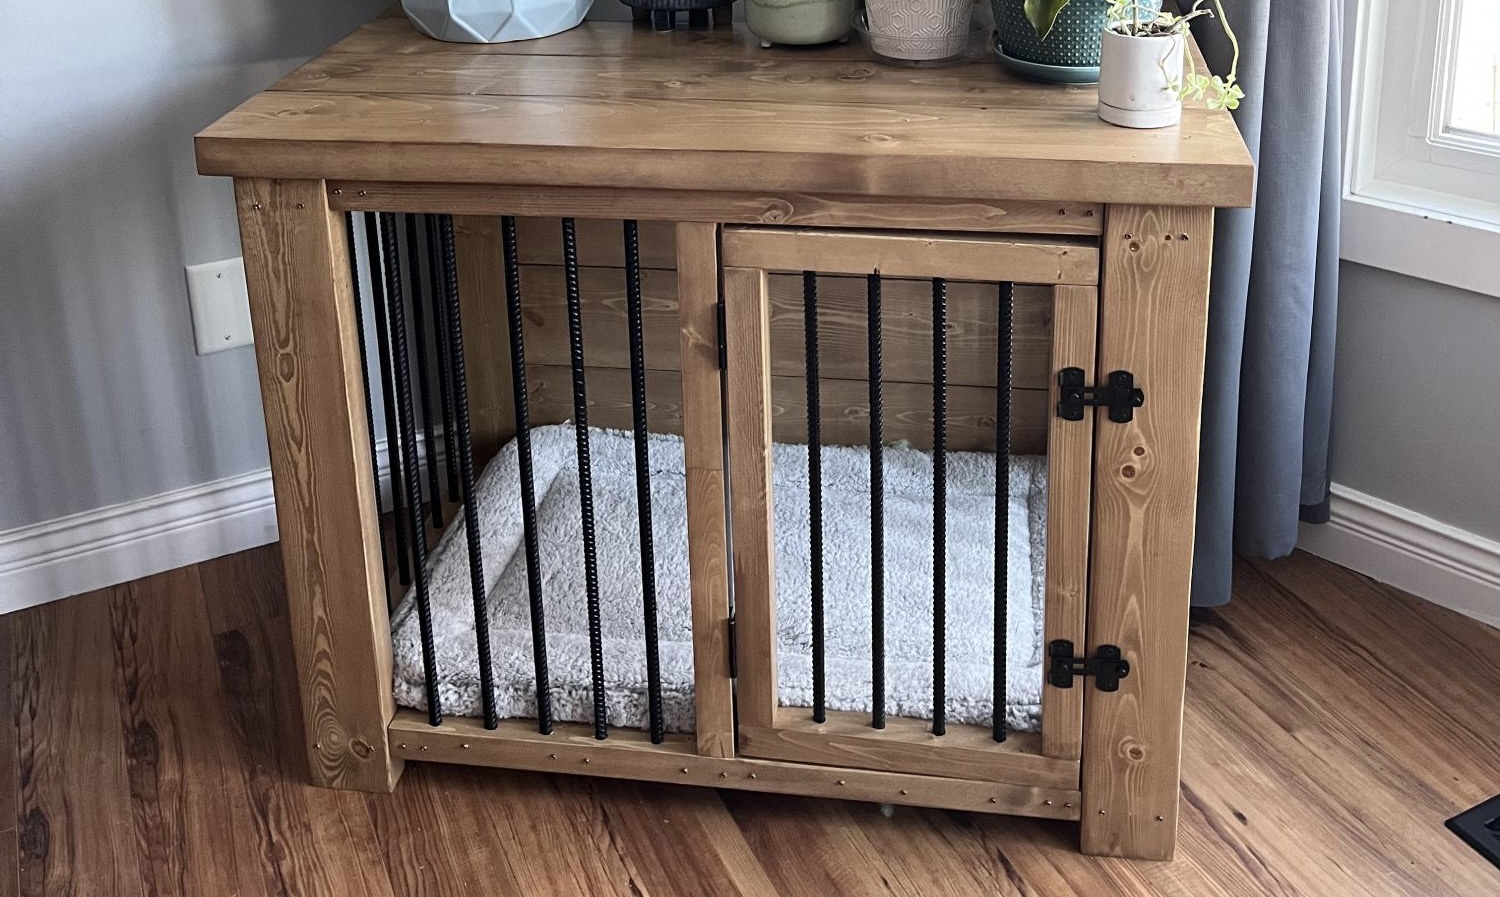
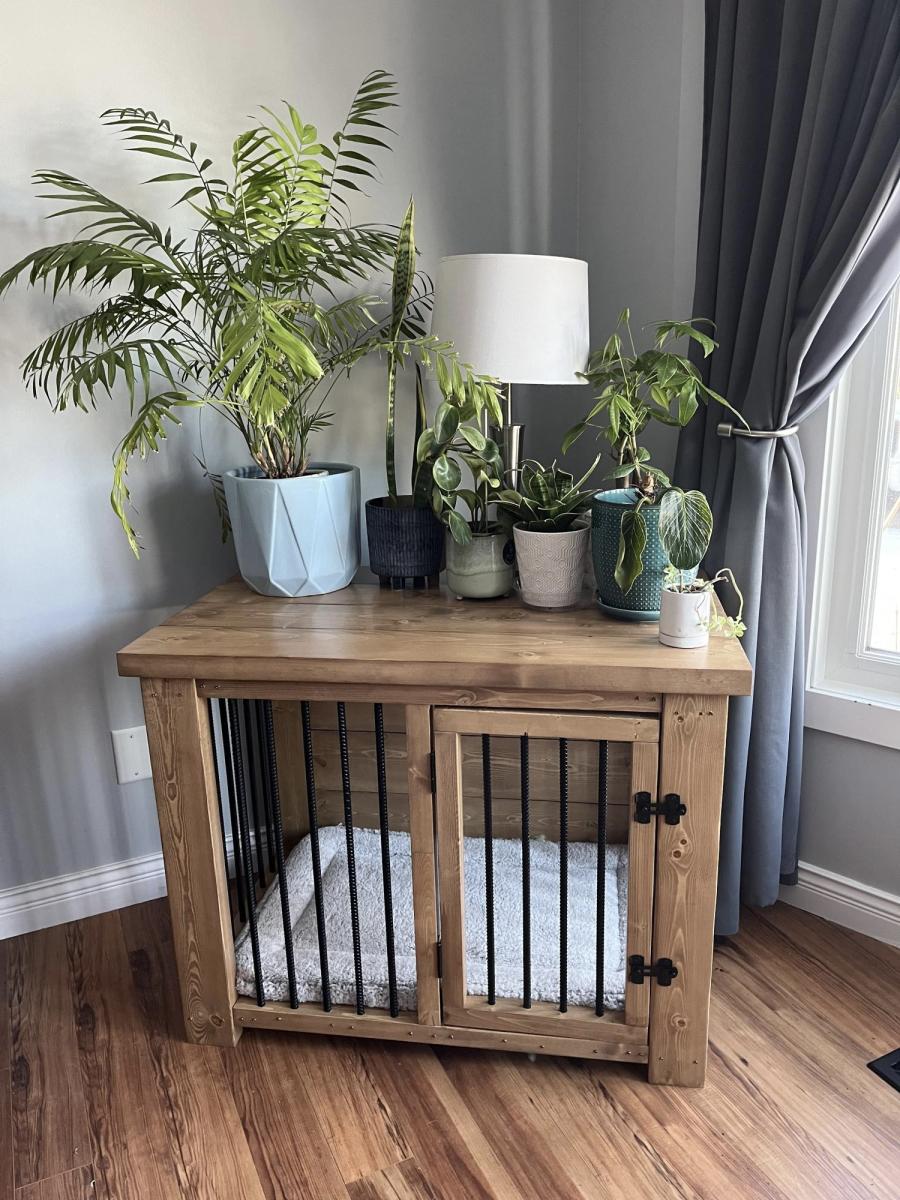
In January, I came across your plans for the farmhouse, coffee table. I made it, and loved it! I had been wanting a new spin on kennels for our dogs. And thought your coffee table transformed into a dog kennel would be perfect, and they are!!
Fri, 03/03/2023 - 11:53
Love the look, thank you so much for sharing!
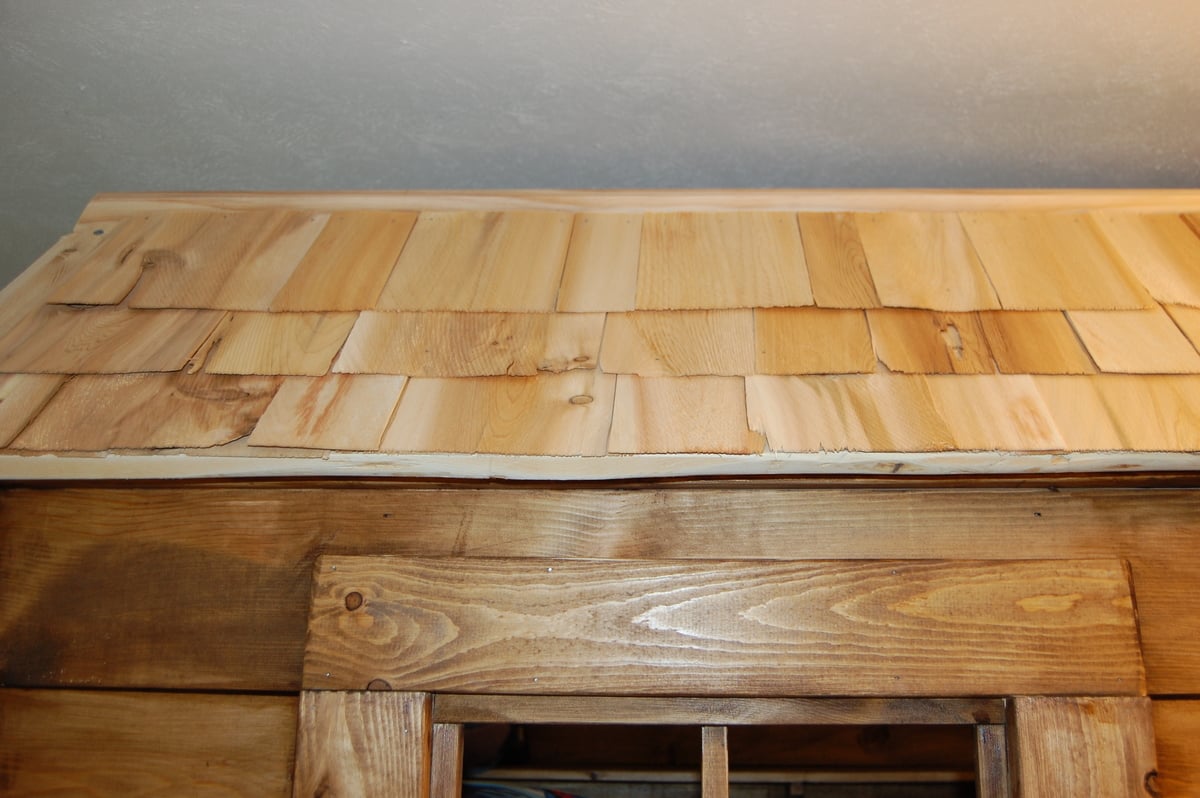
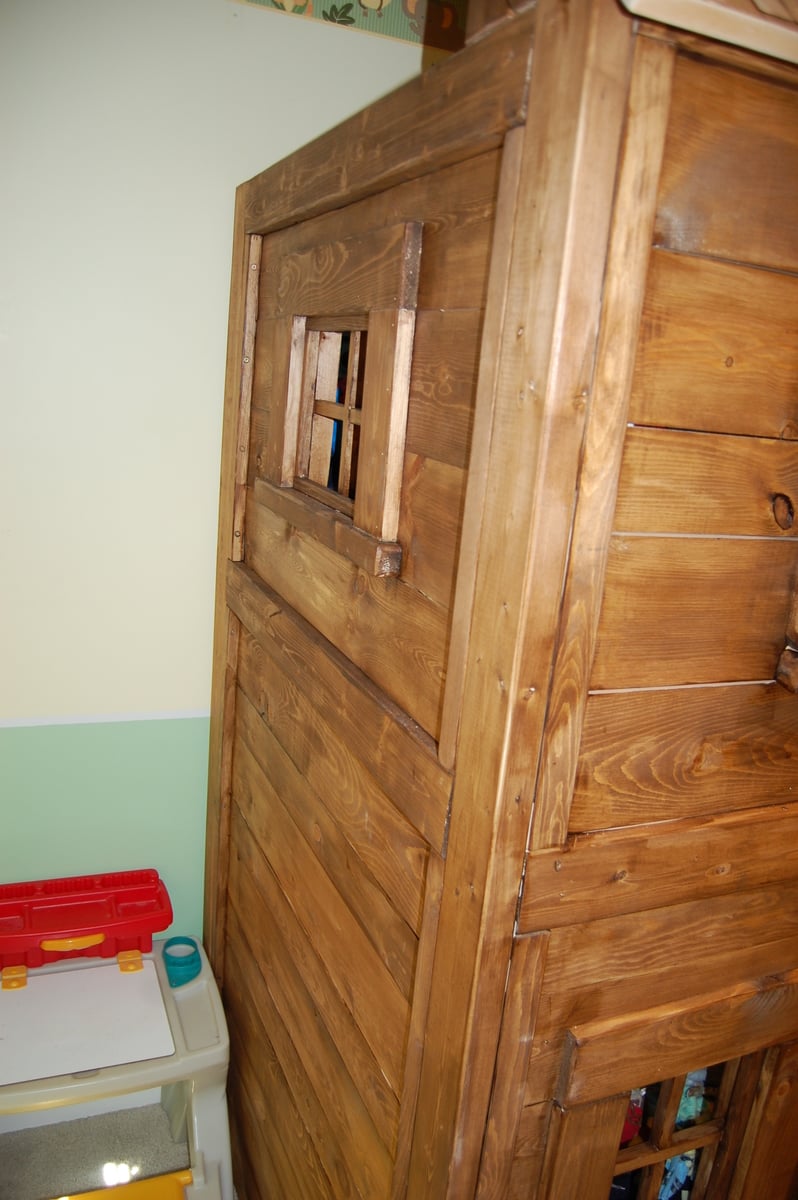
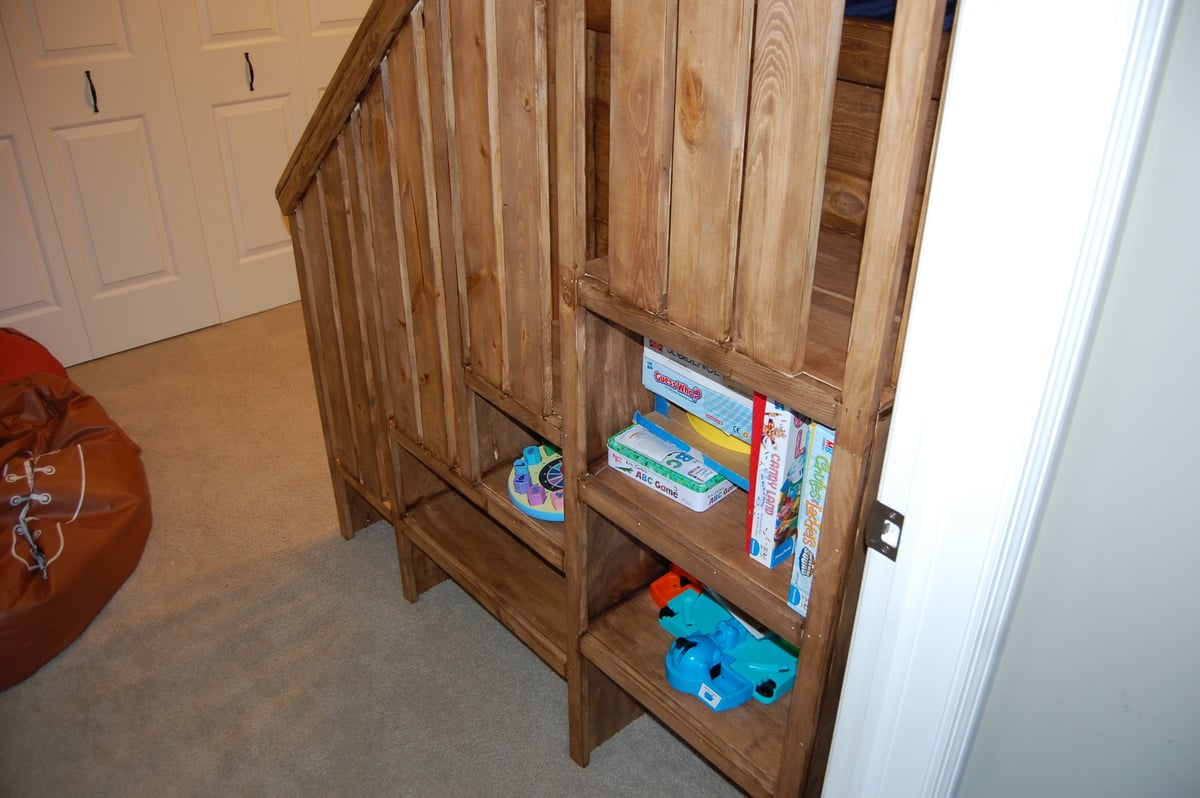
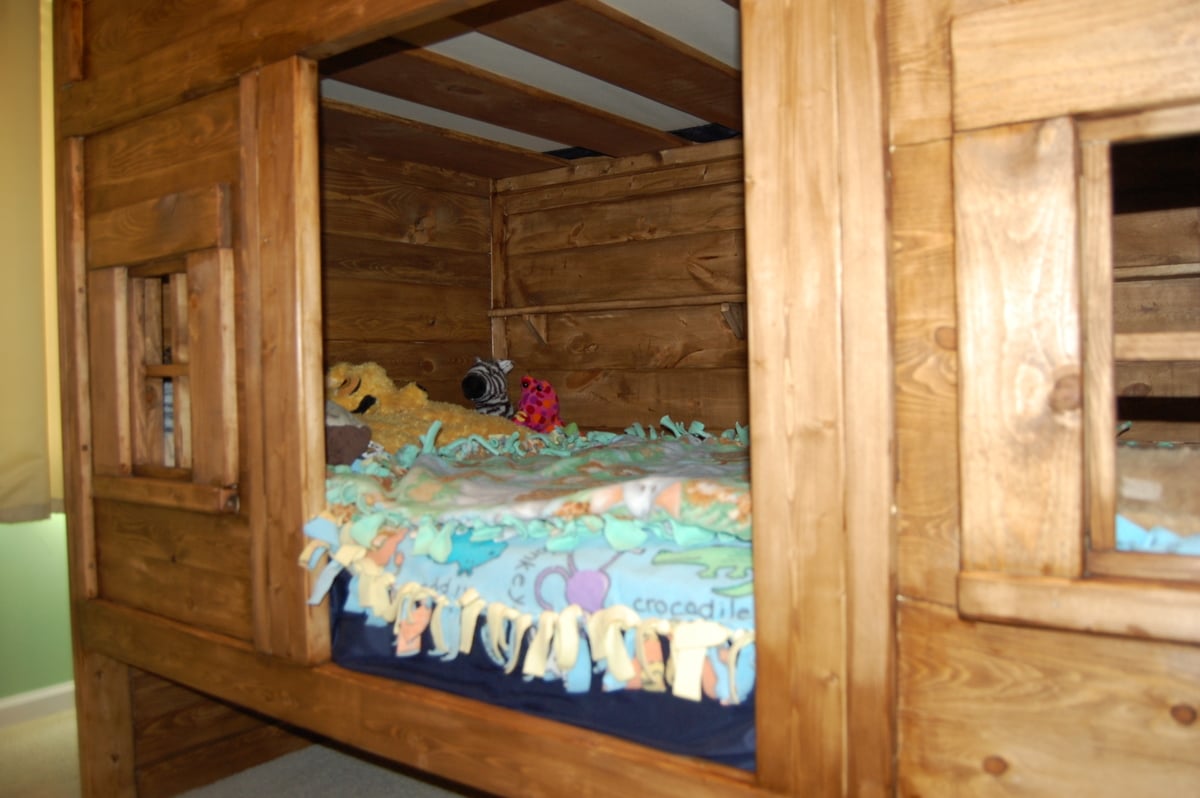
This took me and my father a few weekends to complete simply because that is all the time I had to work on it (was the weekends). We put a lot of effort into it and made sure everything was neat and safe. We modified the original plan a bit to give some more boy feel to this bed, and we added window bars to keep my children from climbing out of them. You know boys! We also added a window on the far side of the top bunk. We should have added one to the bottom too since it is so dark, but he likes it anyway! If you want to see some step by step photos, you can go to http://www.facebook.com/media/set/?set=a.10151477424866465.1073741825.5…
P.S. The estimated cost was for the bed only, not the mattresses or stain

Sun, 03/17/2013 - 14:53
My daughter walked in and said.....AH! I wanna sleep on the top! HAHA. Good job
Sun, 03/24/2013 - 08:08
I love this! You did a fantastic job. I think the stain makes it look great!
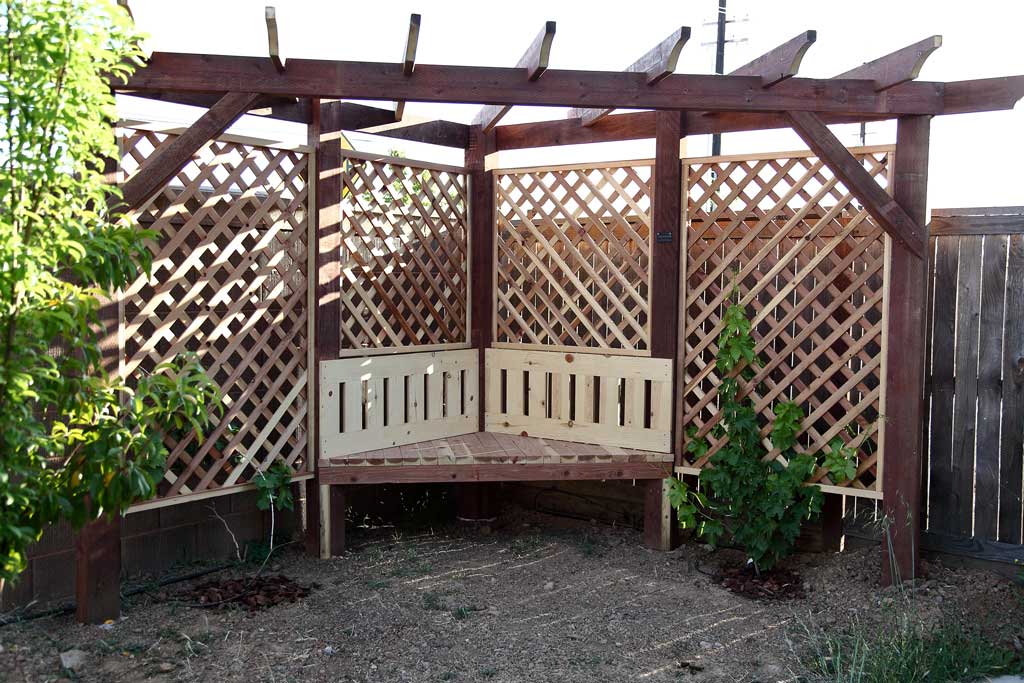
My brother-in-law planted a small grape plant in his backyard and wanted a trellis structure behind it for the grapes to climb on. He asked me to design and build it in the corner of his garden. After going through some designs, we decided to go with a corner arbor. When the project was complete, I created PDF plans on how to build a DIY Corner Arbor with a Bench that includes a trellis for the grapes to grow on.
See my website for additional pictures and how I've built it, TheDIYPlan.com
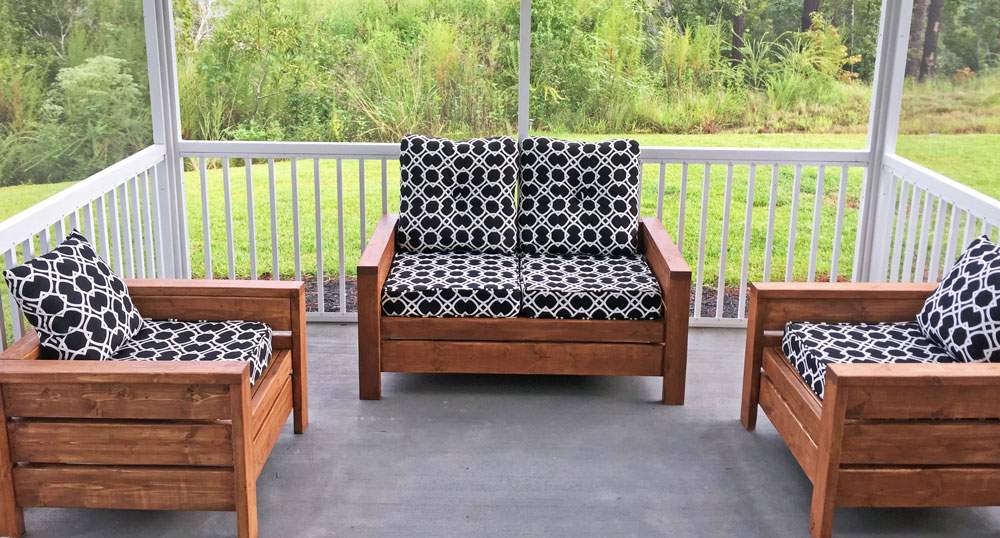
Built the 2 chairs according to the plans, and then modified it for a bench that's 48" (our cushions are 23.5 x 23.5). Worked really well!

This was a fun family project! Thank you!!
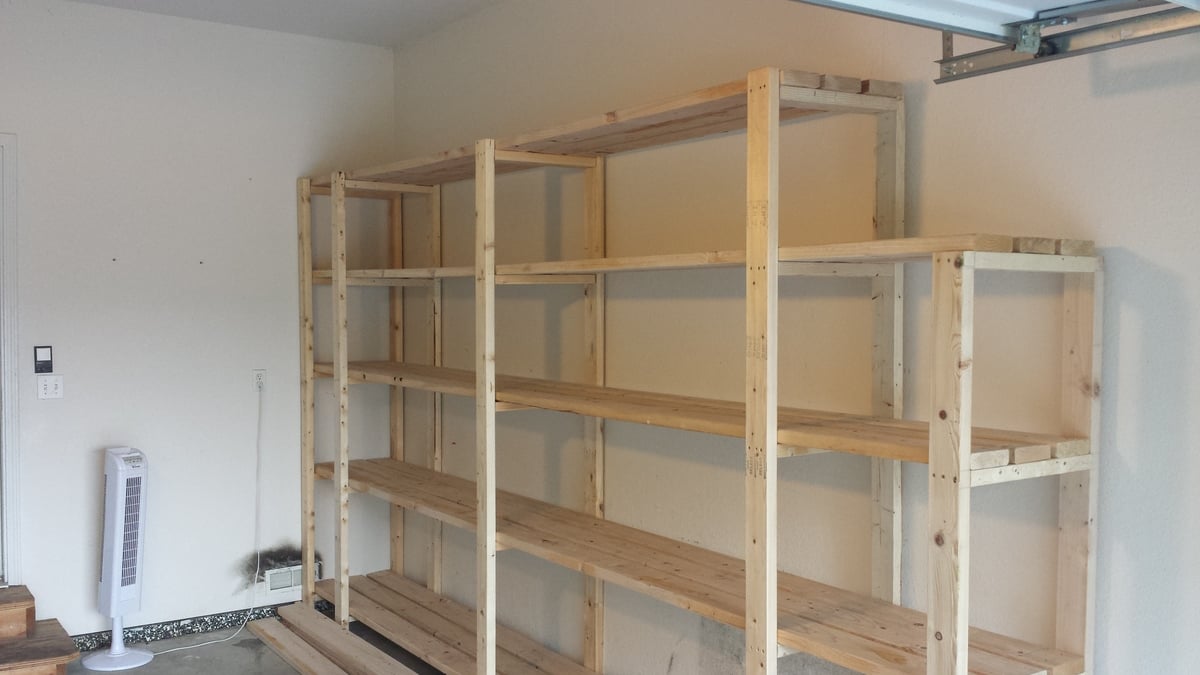
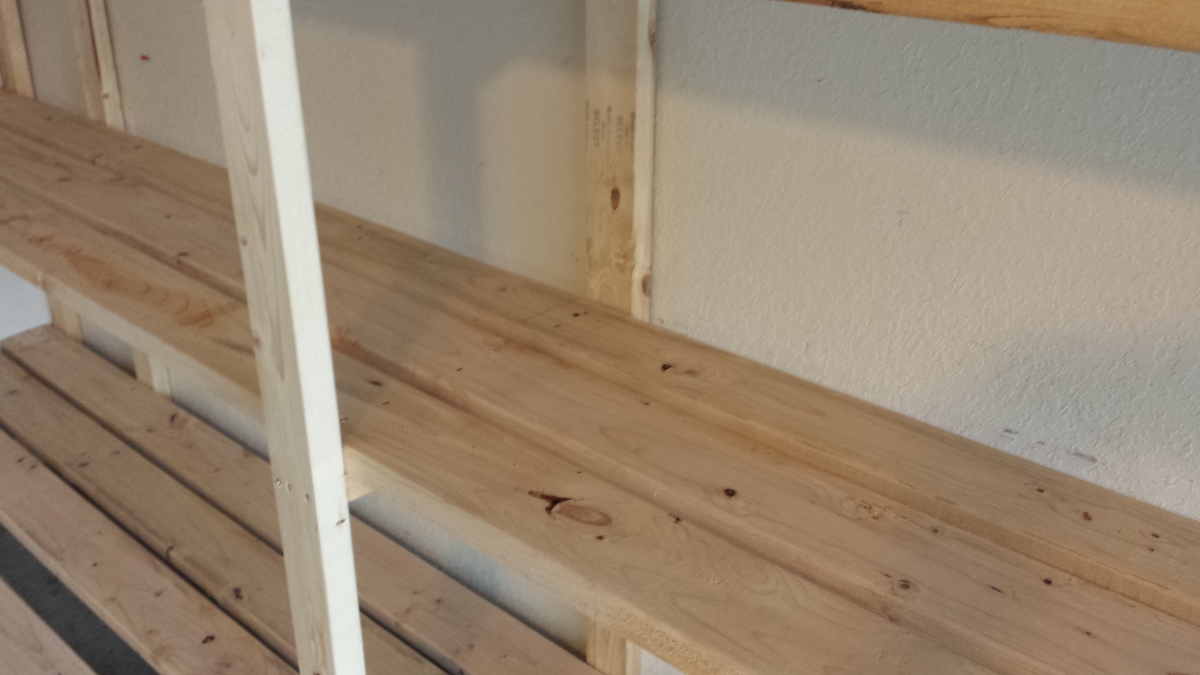
My father-in-law and I knocked this project out in about 5 hours including the trip to the lumber yard. You've got a great basic design here! A few modifications we made:
1. I thought the depth of the shelves in the original plan was a little too shallow so I used 3 2"X6"s instead of the 4 2"x4"s. That made the shelves 1 1/2" deeper. Although 2"x6"s are obviously more expensive, the overall cost for the project didn't change much because we only had to use 3 boards per shelf instead of 4. This also reduced the amount of screwing and made it easier to position the shelf boards without taking measurements since we only had one middle board to deal with (instead of 2 with the 2"x4"s). We just eyeballed the spacing of the middle shelf board as we worked.
2. Since our garage has a 10' ceiling, I decided to go 8' tall with the unit. This allowed us to add a 5th shelf.
3. Some oversized tubs can be 18-20" high or more so I varied the height of each shelf -- 24" at the bottom, then 20", 18" and 16". There's approx. 24" available between the top shelf and the ceiling.
4. Due to the position of the garage door track, I had to notch out a couple feet at one side. The end support piece is only 6' high.
5. Since many storage tubs can be 16-18" wide, I made sure that there was at least 54" between 3 of the vertical support structures. This will allow us to store 3 tubs side-by-side and maximize storage. You might notice that I have two vertical supports that appear to be very close together near the back wall. I did this so I would have something on that side to attach more shelving to on that short wall where the garage door opener is.
The only cuts we had to make for this entire project were for the 18 1/2" 'braces' or support pieces on the vertical ladder structures. The shelves are either 14' or 12' (top shelf only) and the vertical 2"x4"s are either 8' or 6'. Most lumber yards will carry these lengths in either 2"x4"s or 2"x6"s.
We didn't use any wood glue, and I admit this may come back to haunt me. However, to get a good fit and eliminate gaps, I used clamps I already owned to squeeze the boards together before adding the screws. Everything feels very solid and sturdy to me.
Because of the extra height compared with the original plan, I was worried about it possibly tipping over (we have a 10-year-old who likes to climb ![]() ) so I made sure that 3 of the supports are lined up with the wall studs. After leveling the entire unit, I plan to anchor it to the wall using 3 1/2" screws.
) so I made sure that 3 of the supports are lined up with the wall studs. After leveling the entire unit, I plan to anchor it to the wall using 3 1/2" screws.
So for about $187 in lumber and maybe $20 in construction screws, I've got 76 feet of STURDY shelving that should accommodate hundreds of pounds! Not a bad investment at all...
I finally completed the last piece to my customized simple two-toned outdoor collection...an outdoor kitchen sink!!! It still needs a couple of touch ups... but more on that later. This is by far my favorite and easiest project to date. We plan on using this as a grill caddie/garden station. This will eventually go onto a 24x12 deck up against our kitchen window (The indoor and outdoor sink will be against each others backs). I decided to go with the Sturdy Workbench plans for the base mainly because of the weight. We wanted something that's going to be difficult to move since it will be hooked up to outdoor plumbing. I used treated 2x4's for the base, cedar 1x4's for the top. I bought the bar sink for about $70. I also used a Kreg Jig to screw in the cedar slats from underneath so the screws won't be visible from the top. FYI - Wait a couple of weeks before you paint soaking wet treated wood. The green chemical from the 2x4 is starting to leak through my white paint. I'll have to go and prime/paint it again when it finally dries. Other than that, it came out 10 times better than I could ever imagine.
I decided to try and use the plans on Ana's site but with a twist. I wanted to limit myself to using only pallets. I think it turned out great! I can't upload all the photos because they exceed the maximum size limit. If I was able to you could see how each chair is slightly different and has a lot of character. I finished them with a waterproofing oil which I highly recommend over other finishes.
Mon, 04/10/2017 - 08:51
This is exactly what I'm looking for !! Fantastic build and re-purposing is always better.

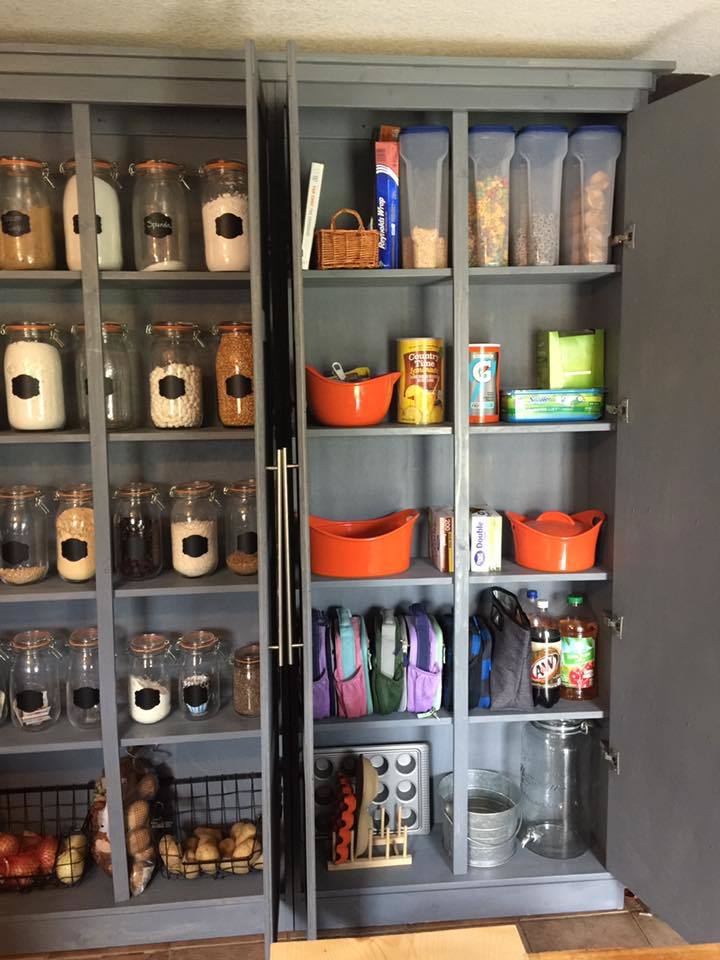
I modified the origianl plans by making the cabinet taller. I also built 2 cabinets and trimmed them both together to make it appear as if it is 1 giant cabient. It measure over 7 feet tall and just over 6 feet wide. I did add an additional 1x2 brace in the center of the cabinet to help support. I also cut an additional 1x4 to use a brace when anchoring it to the wall. I also chose to add an additional 2 trim pieces to each door because they are much taller than the original plan doors.


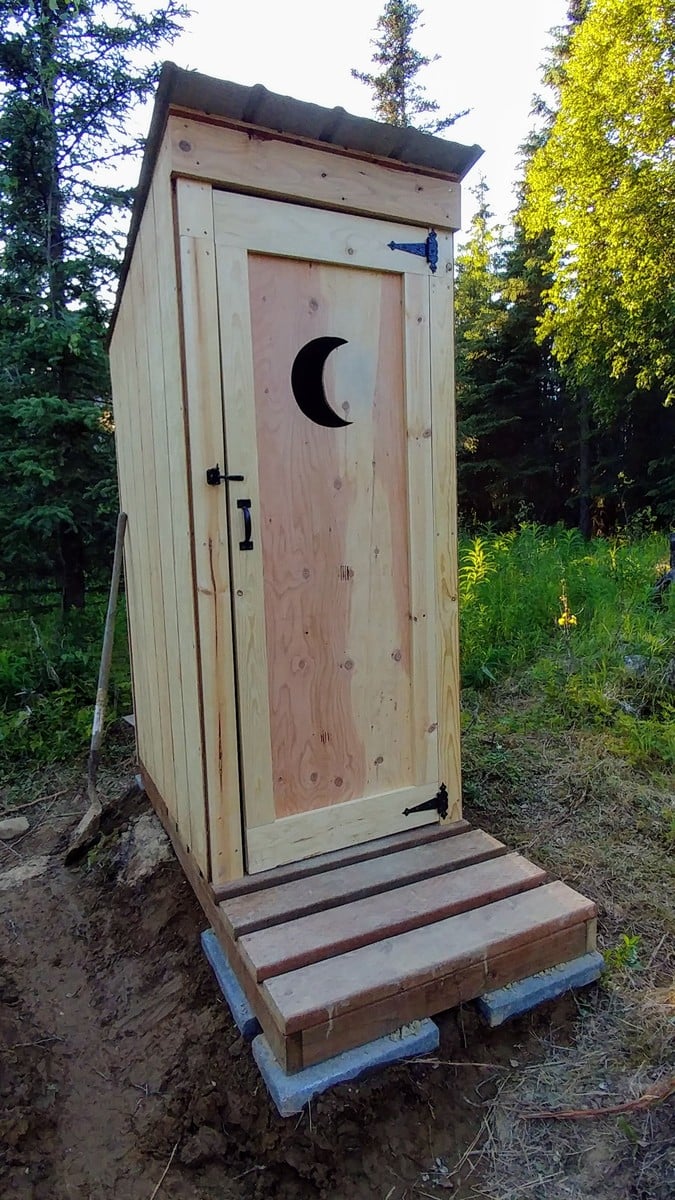
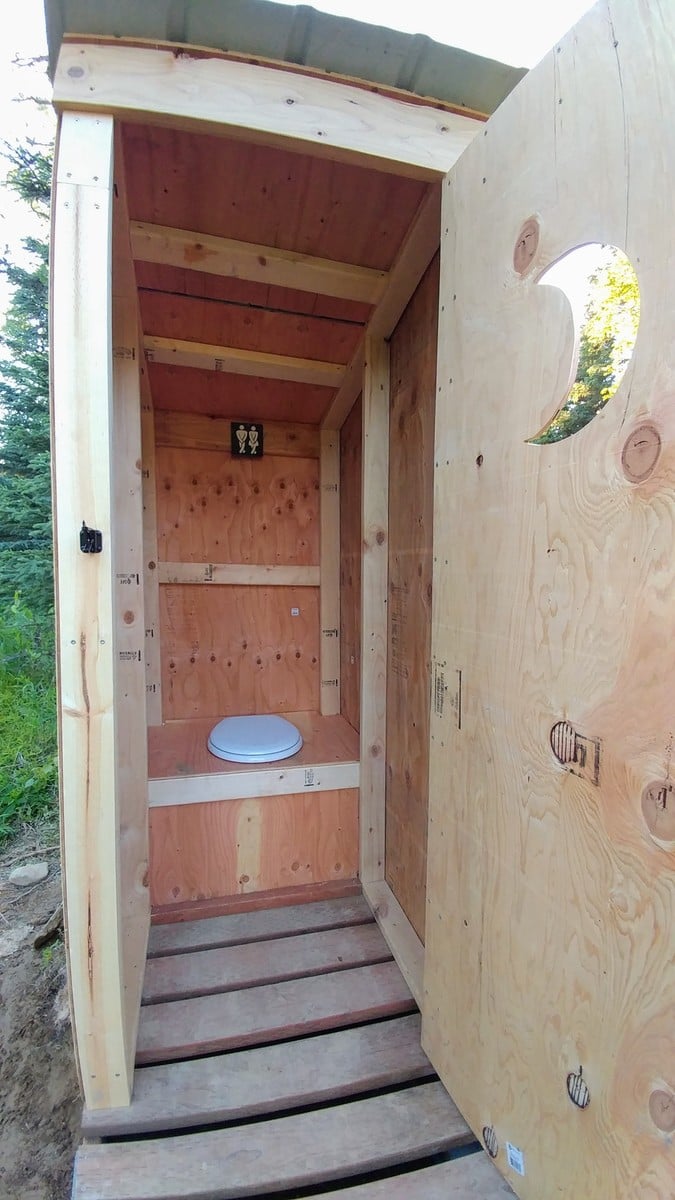
I built this outhouse to go with a dry cabin I'm working on, and also as an emergency backup for my house. I used treated lumber on the base/deck and splurged on T-111 for the siding. I wanted to use greenhouse polycarbonate for the roof, but found a piece of metal roofing in my shed that was exactly the right size so I used that instead. I thought about doing a fancy cutout on the door but ended up going with a half moon because it was easy. I'm thinking about cutting out stars of different sizes all over the rest of the door to let in more light. I'll trim and stain it next summer.

My son chose to make a workbench for his high school theater for his Eagle Scout project, and selected the Ultimate Roll Away Workbench with Miter Saw Stand as the basis for the project. The theater teacher wanted pegboard for tool storage, so we extended the rear legs on each workbench and notched the top to allow them to pass through. We built two frames from 1x3s to fit inside the rear legs, then put a pegboard inside each one.
To secure the extended legs, we added a riser shelf from 1x8s. We put a storage station for drills at one end of the riser shelf.
We also made all the cart shelves adjustable and added an adjustable shelf under the miter saw, and added lighting and power strips.
We left out the panels at the end of the workbench to allow access to the shelves there without having to remove the carts. Once we had constructed it, we added a brace at each end of the workbench to better support the outside front legs.
This plan was the perfect one for the theater, giving a stable work area for the miter saw and allowing for tool and materials storage. The carts can be rolled around to where a work surface is needed. This will come in handy for years of set construction in the theater. So proud of my son and all the leadership and hard work he put into this project!


Mon, 10/18/2021 - 11:54
WOW, that is absolutely amazing, thank you so much for sharing this story!
Comments
Ana White
Tue, 06/05/2018 - 14:52
Amazing DIY Laundry Bins Sorter Cabinet
Awesome laundry sorter! Can't wait to see the paint/stain!
Thanks so much for sharing a brag post - much appreciated!
Ana
thecrazyrican
Wed, 08/18/2021 - 11:47
Like it
Very nice... DO you have the plans for this build???