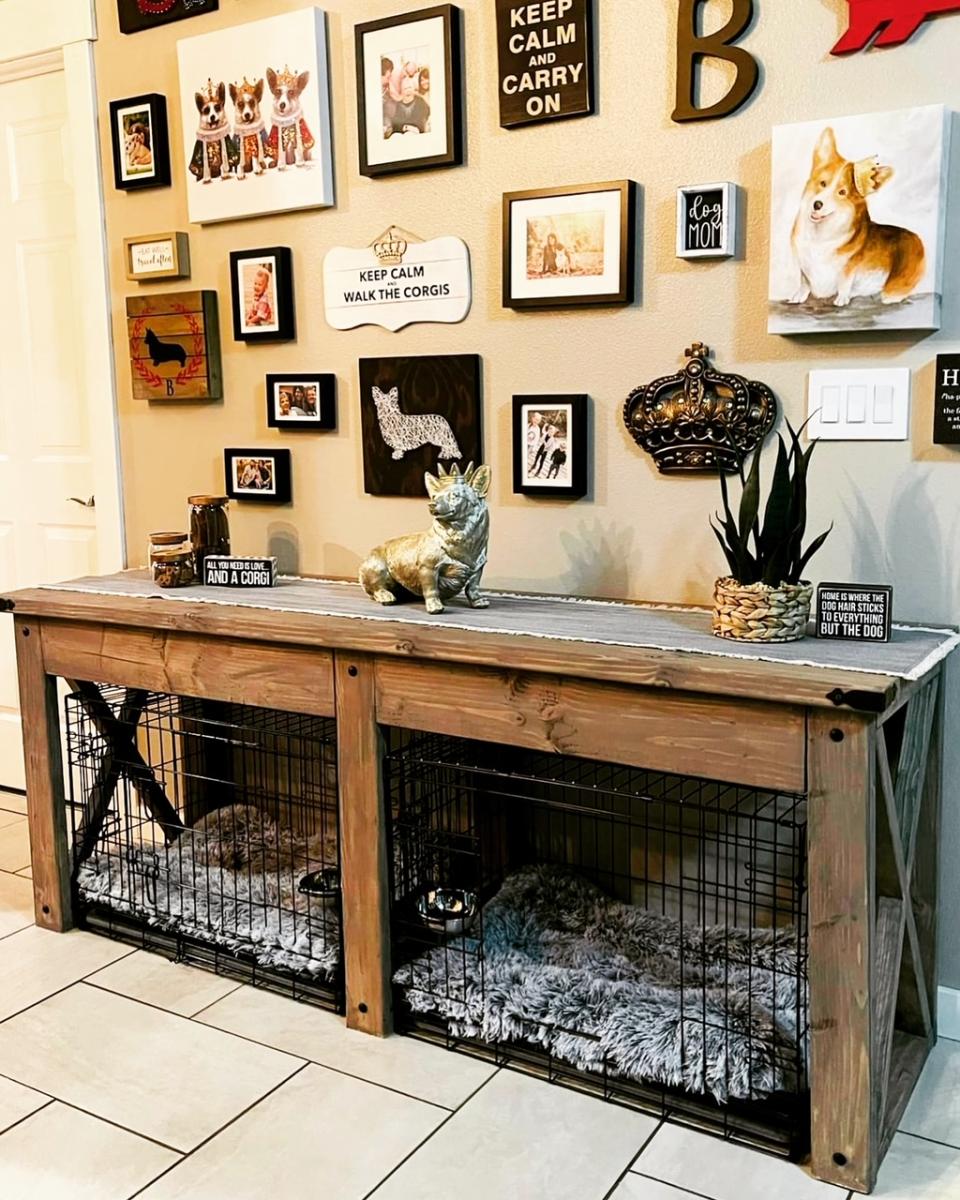
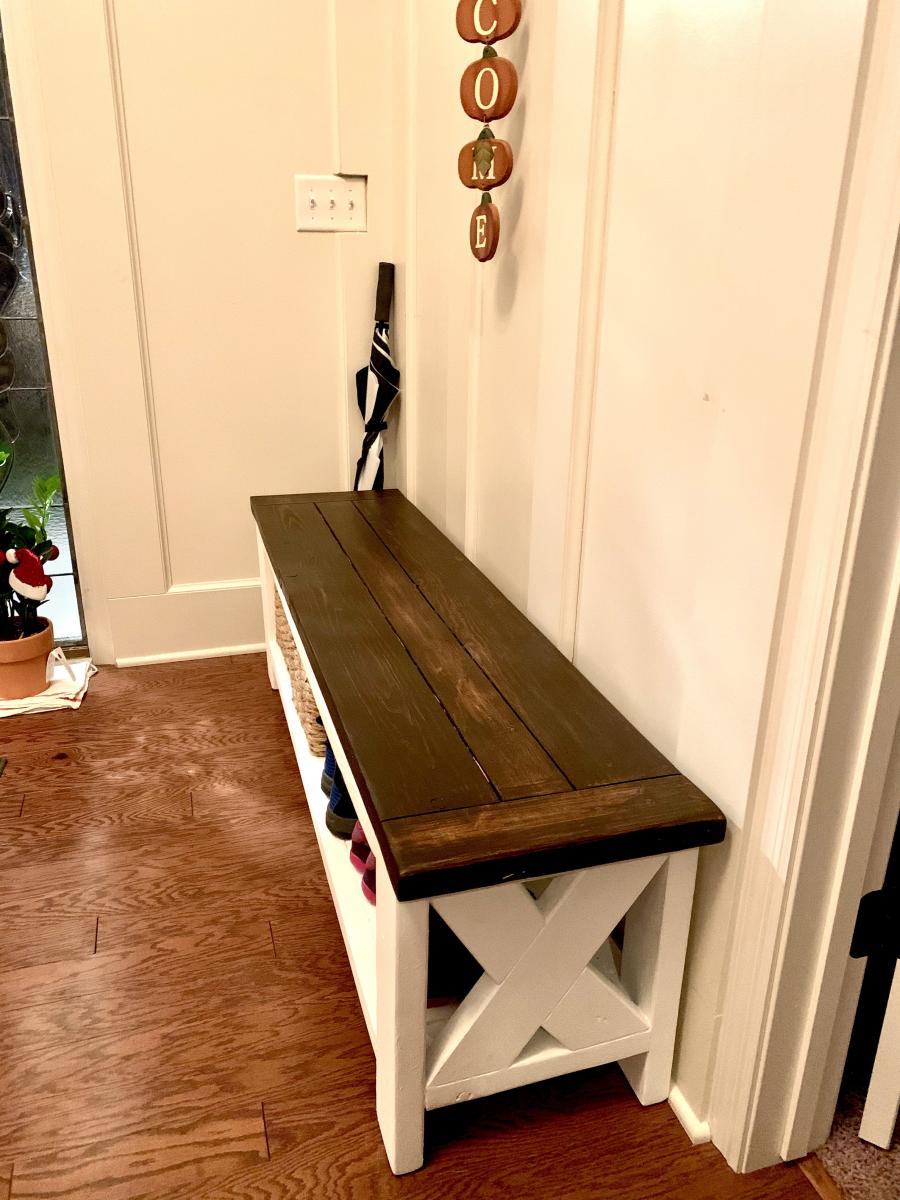
Wire Dog Kennel Console Surround
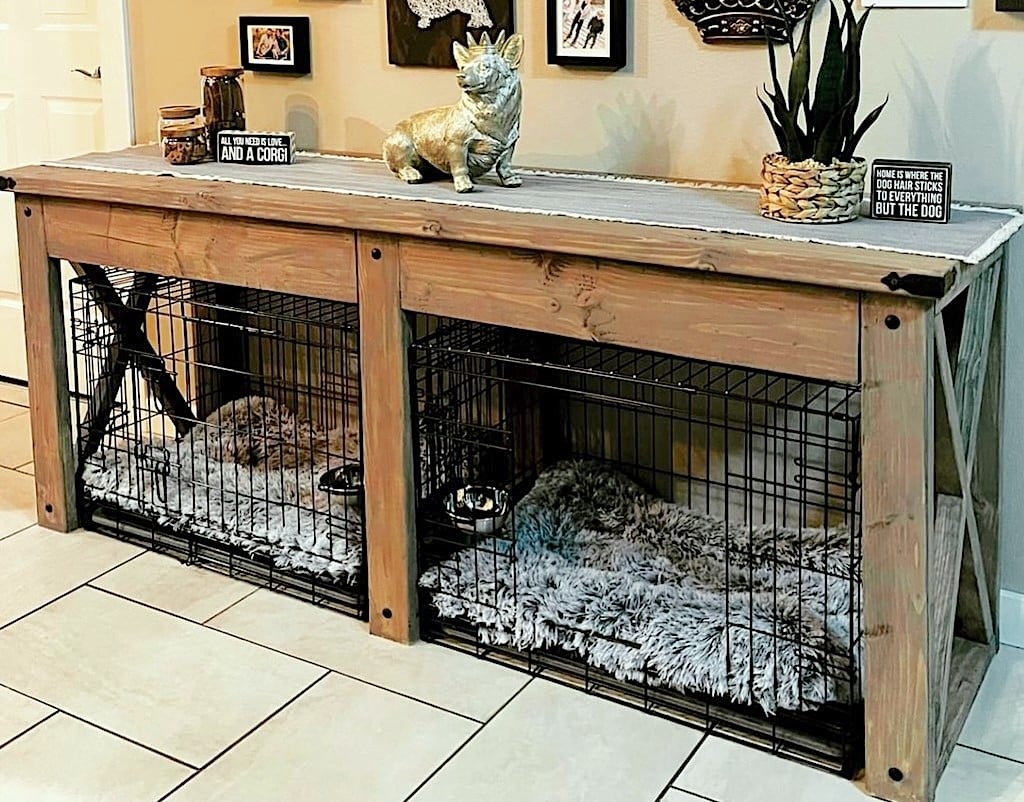
"I modified the Farmhouse X Console to become a surround for my dog crates. Thanks for the project plan!"
Sheena
Built from Plan(s)
"I modified the Farmhouse X Console to become a surround for my dog crates. Thanks for the project plan!"
Sheena
I modified a couple of plans I found on this site. If anyone is interested in instructions or cut list, I can post it later.
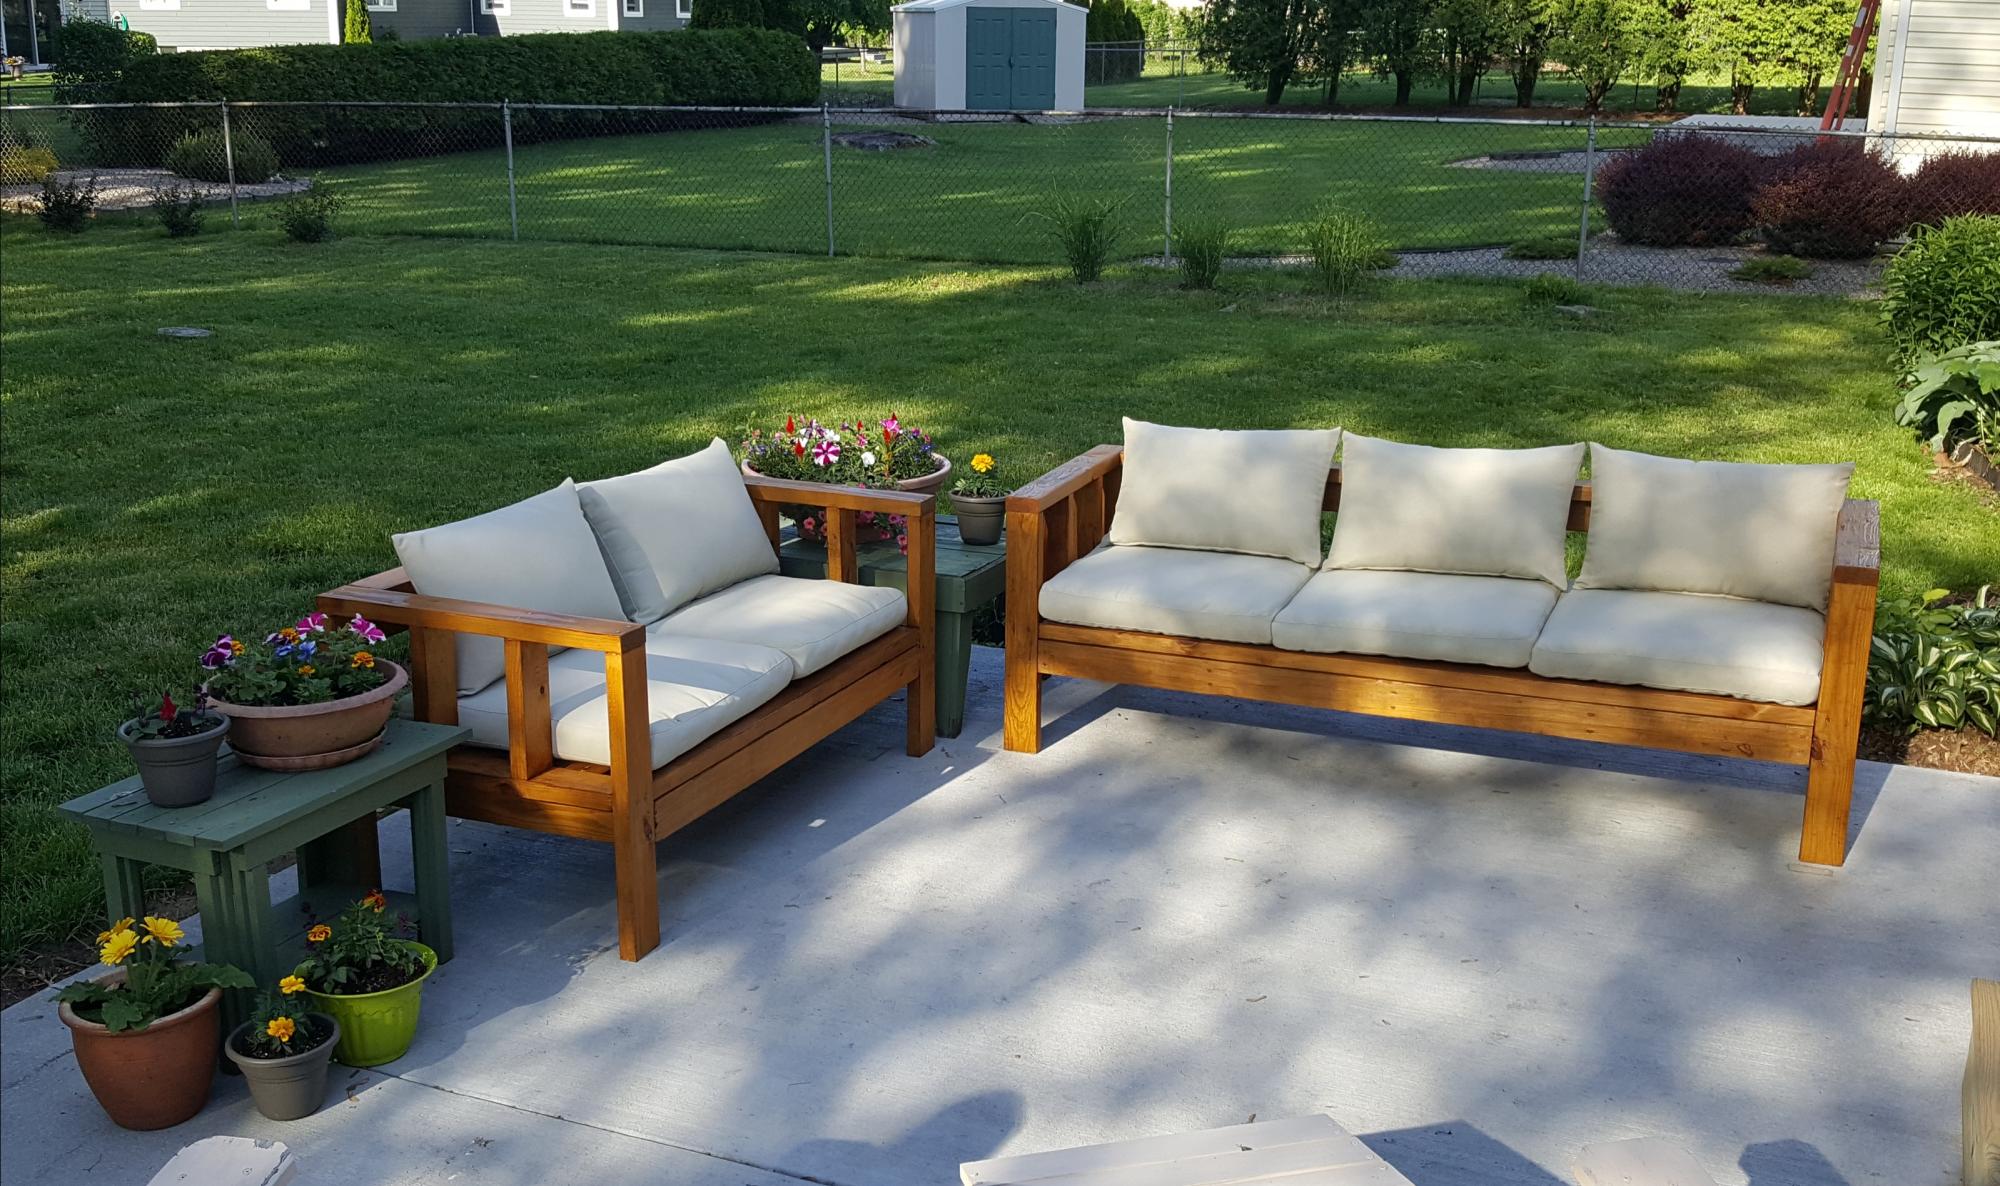
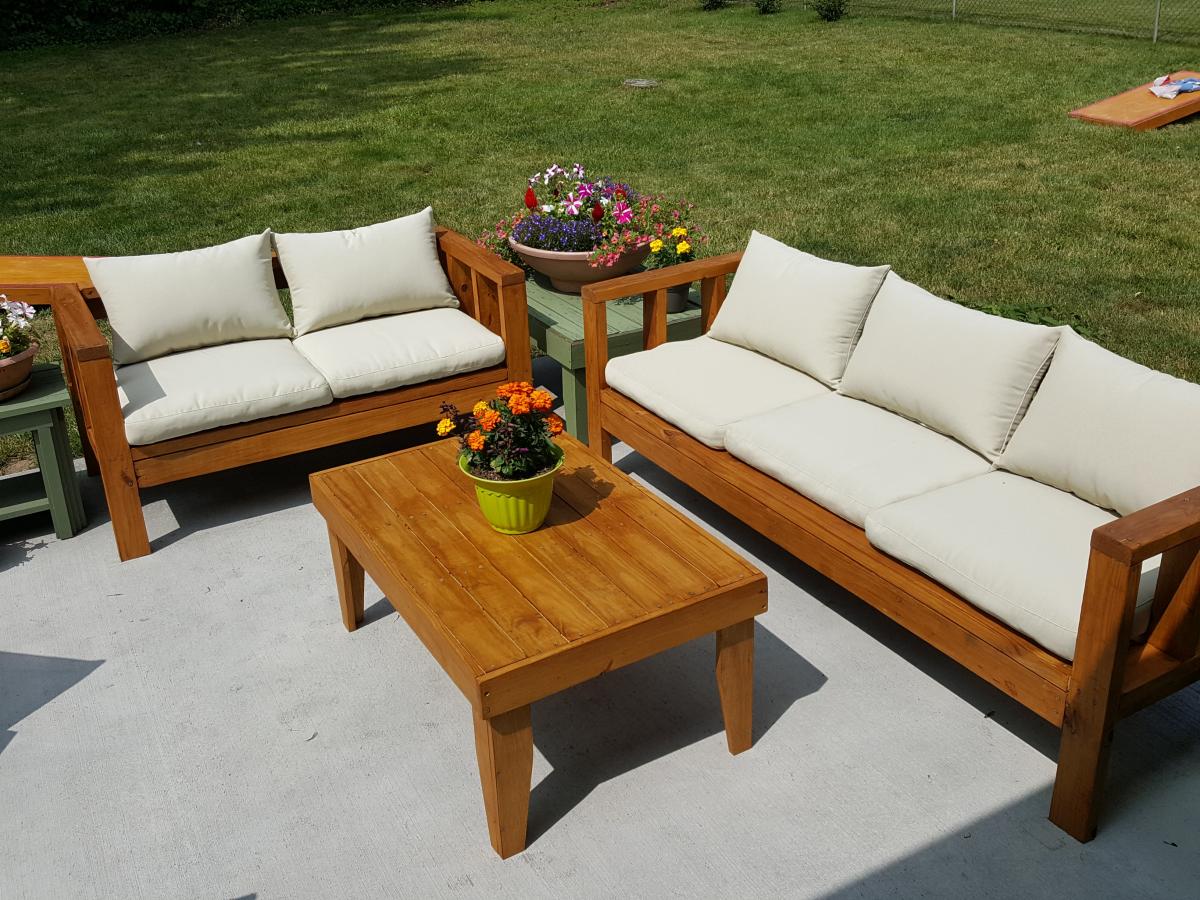
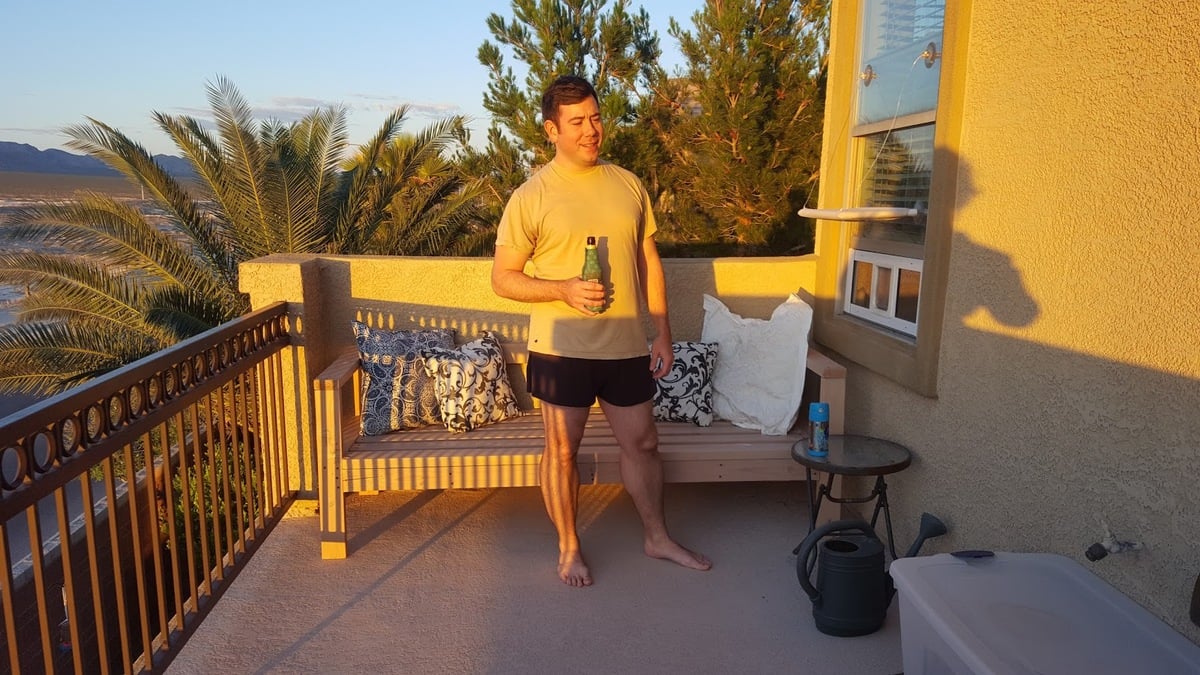
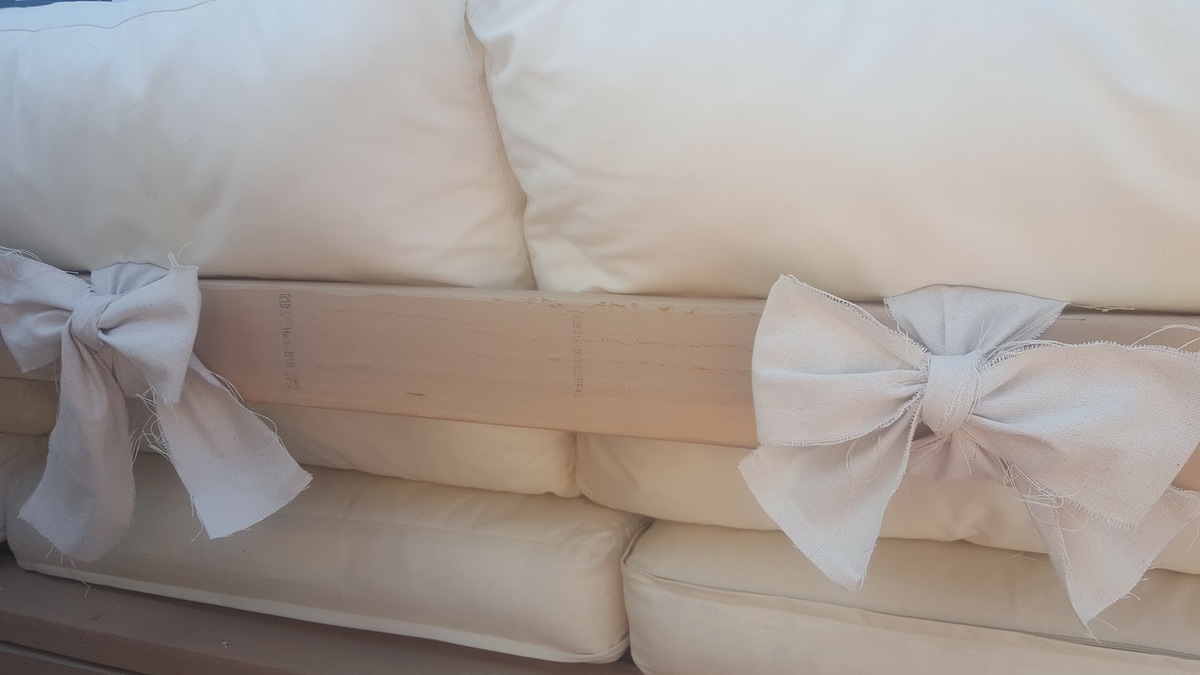
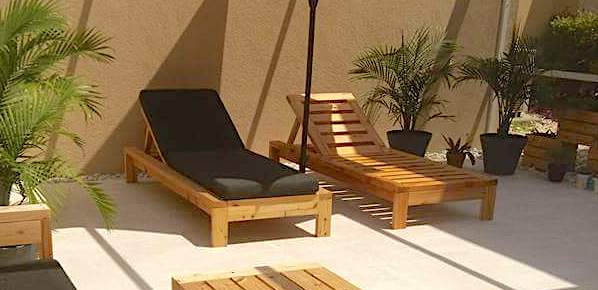
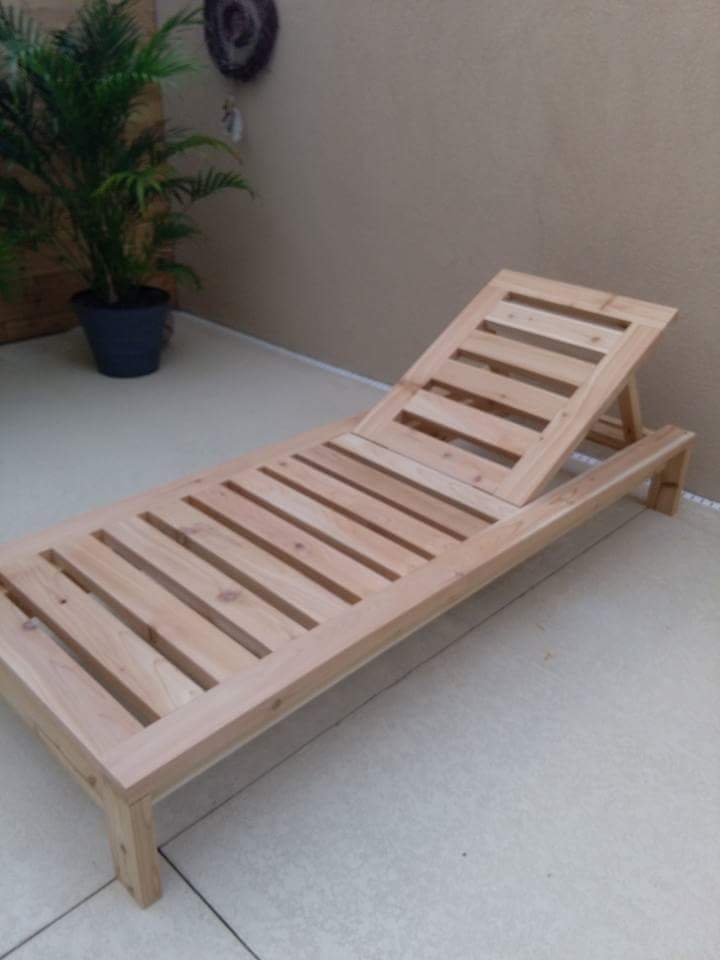
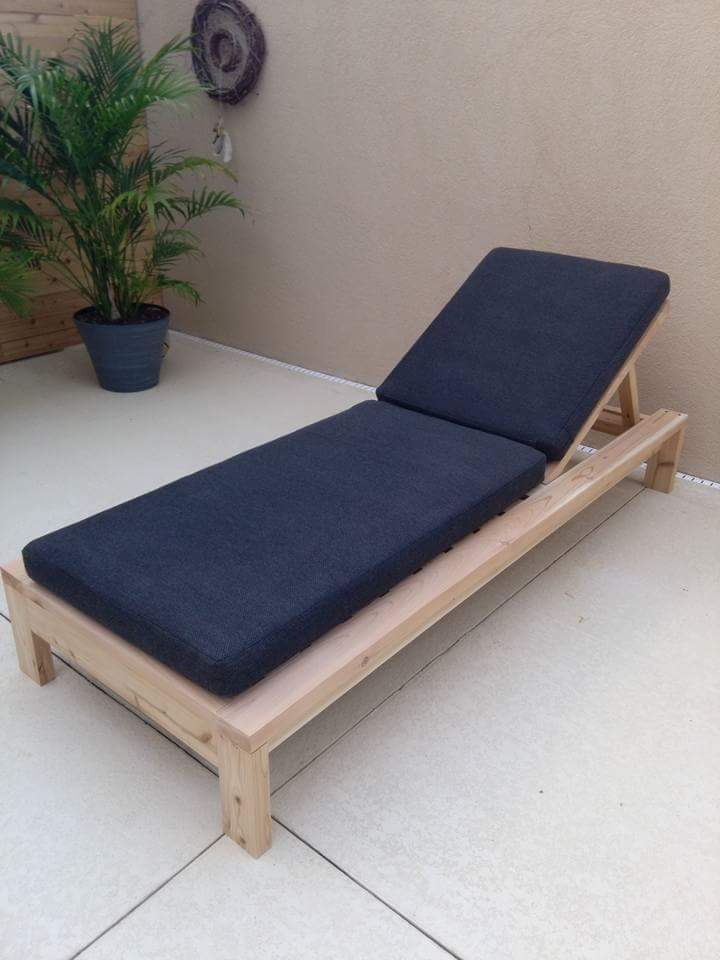
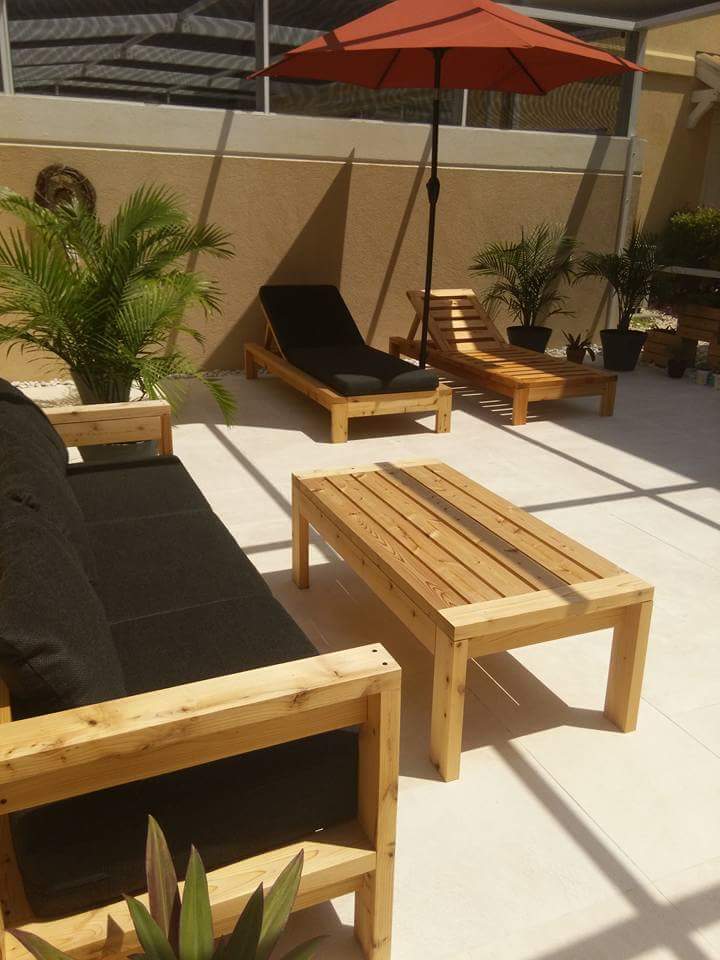
I decided for my patio a love seat/sofa combo would work better than the sectional. It was easy to make both and modify the plans to have arms at both ends of the pieces.
Getting inexpensive cushions was a challenge. I ended up getting IKEA HÅLLÖ cushions. I added more foam to the back cushions as was suggested in another post since the IKEA cushions were a little flimsy and tend to fall through the back of the sofa. I might add some bigger cushions at some point
Wed, 07/10/2019 - 17:06
I want to try this as soon as we get into our house.
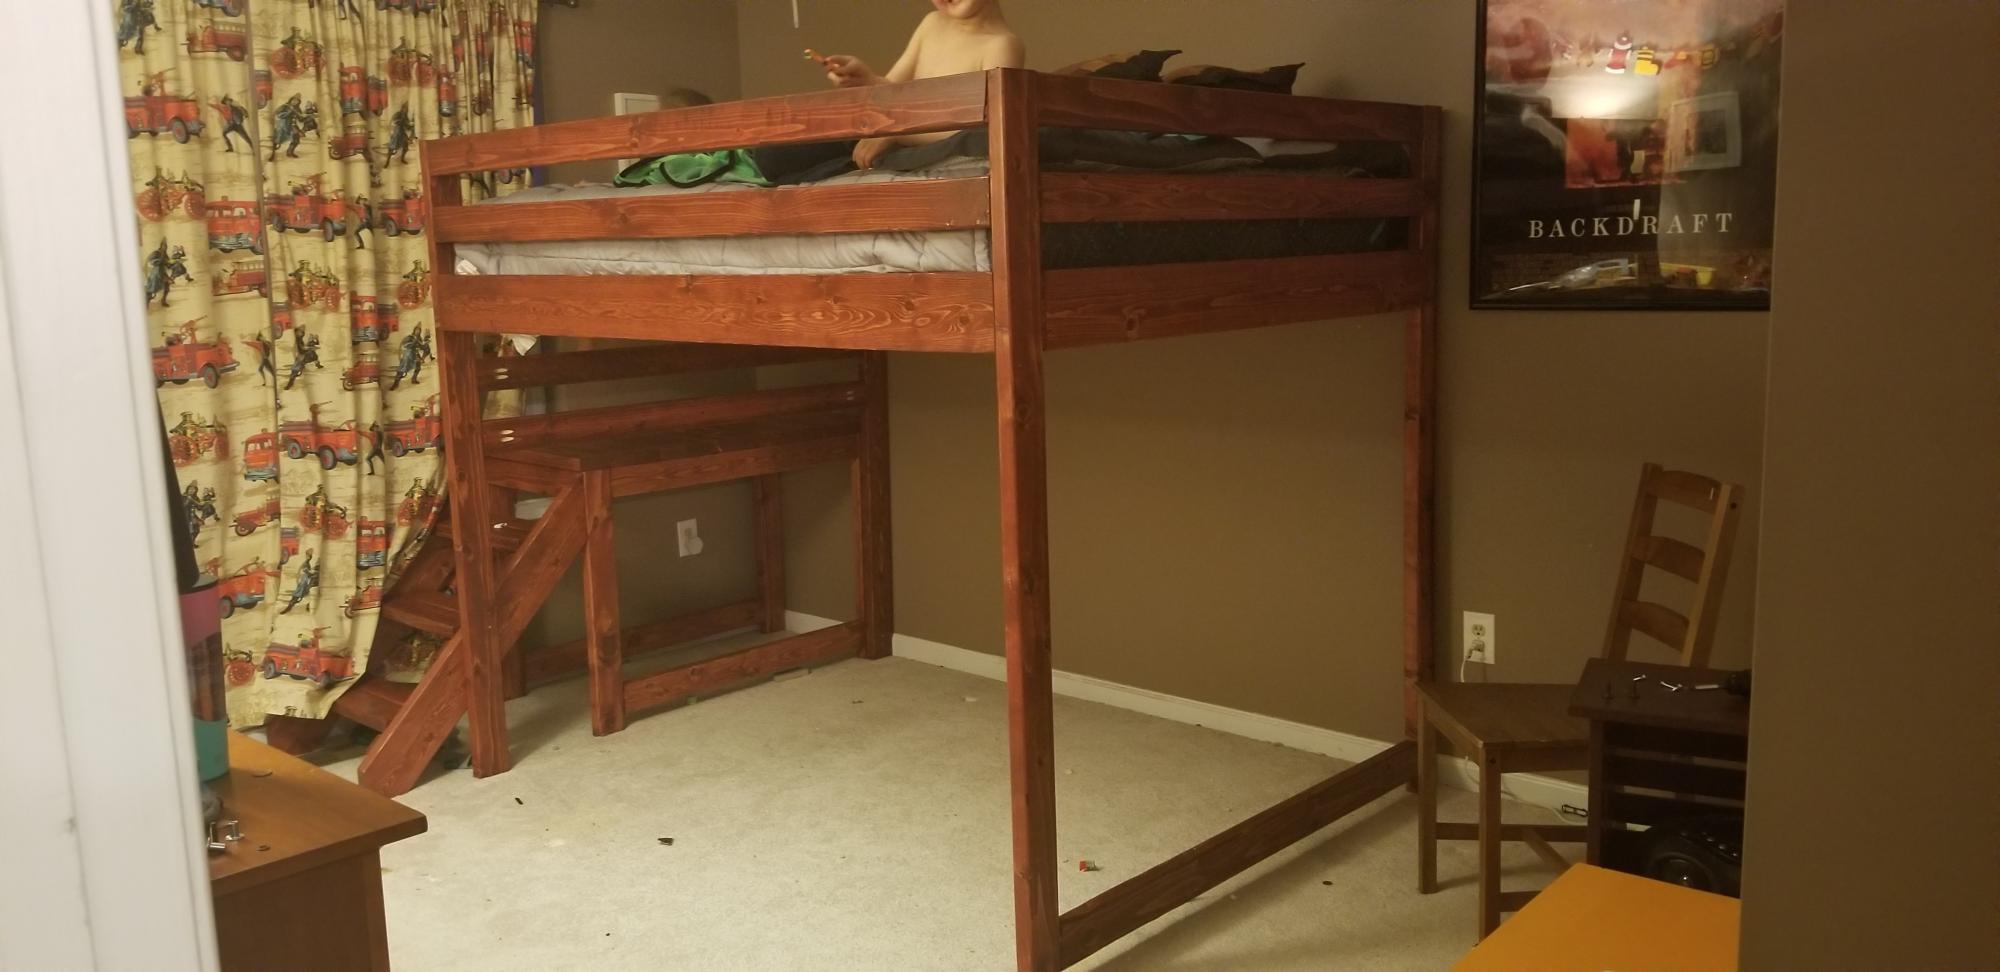
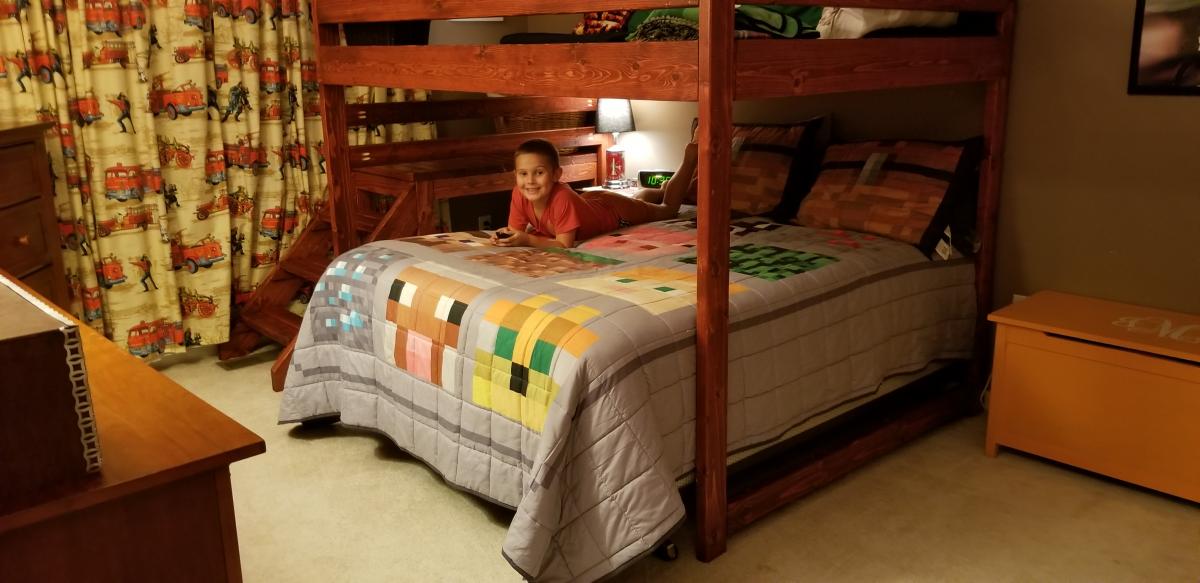
Initially, I made this loft bed so my son would have more room to play on the floor, but what I found out was that he was playing in his bed and sleeping on the floor. About 3 months after having the bed in his room, we put his bed underneath, on a frame, and I put plywood and wood looking wall paneling on the bottom to make a floor. We moved the twin mattress from the floor to the loft, so now he has a place to play with his friends.

Mon, 07/11/2022 - 14:26
What adjustments did you make to the slats. I’m wanting to build a slightly oversized full loft bed for my daughter. The extra space is for a reading chair and maybe shelves. Dimension would be ~100 x60. I’m nervous about the slats spanning the 60 inches and what I need to modify from the junior loft instructions
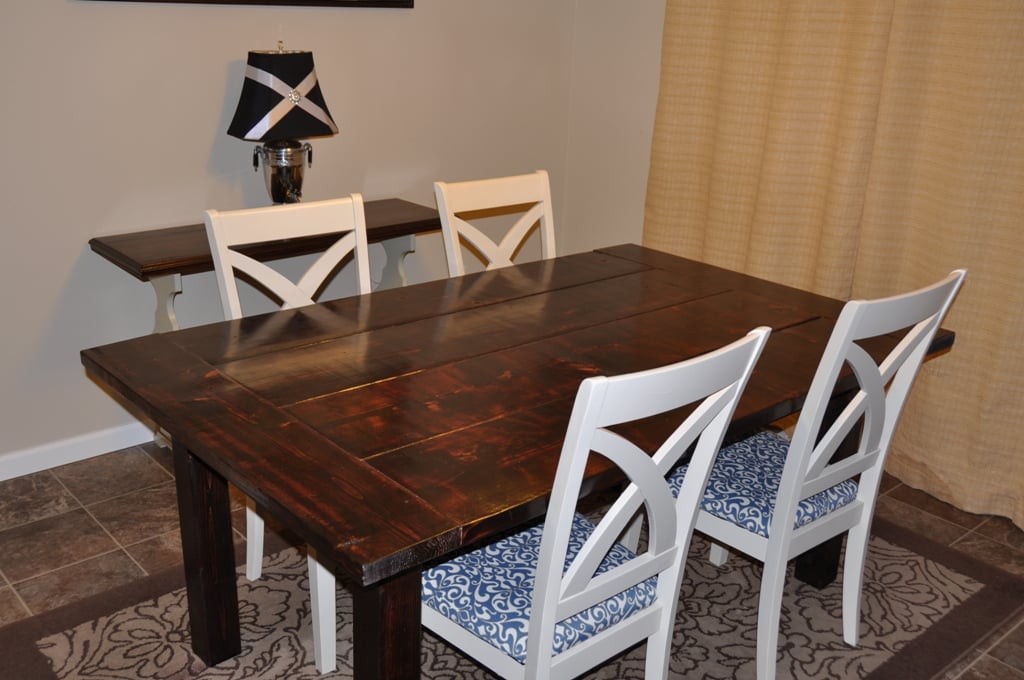
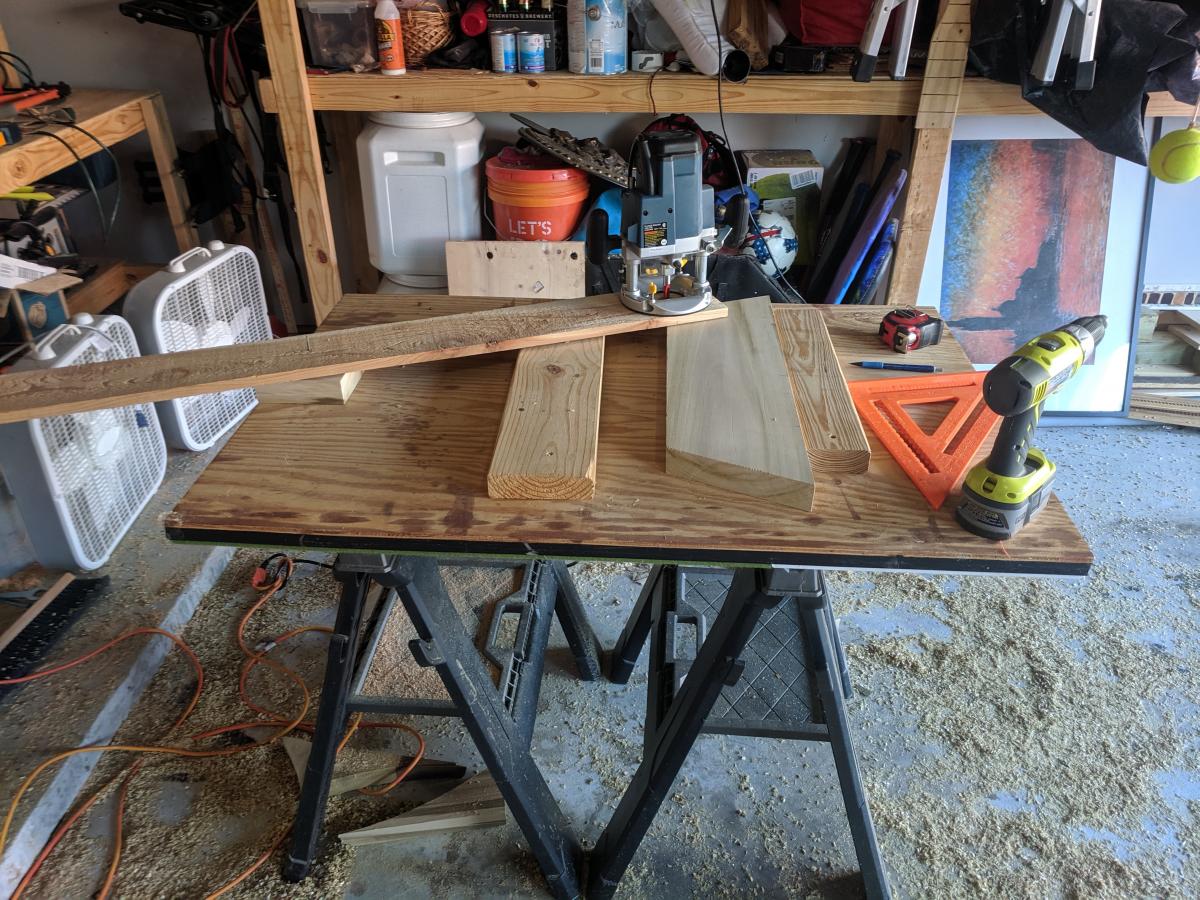
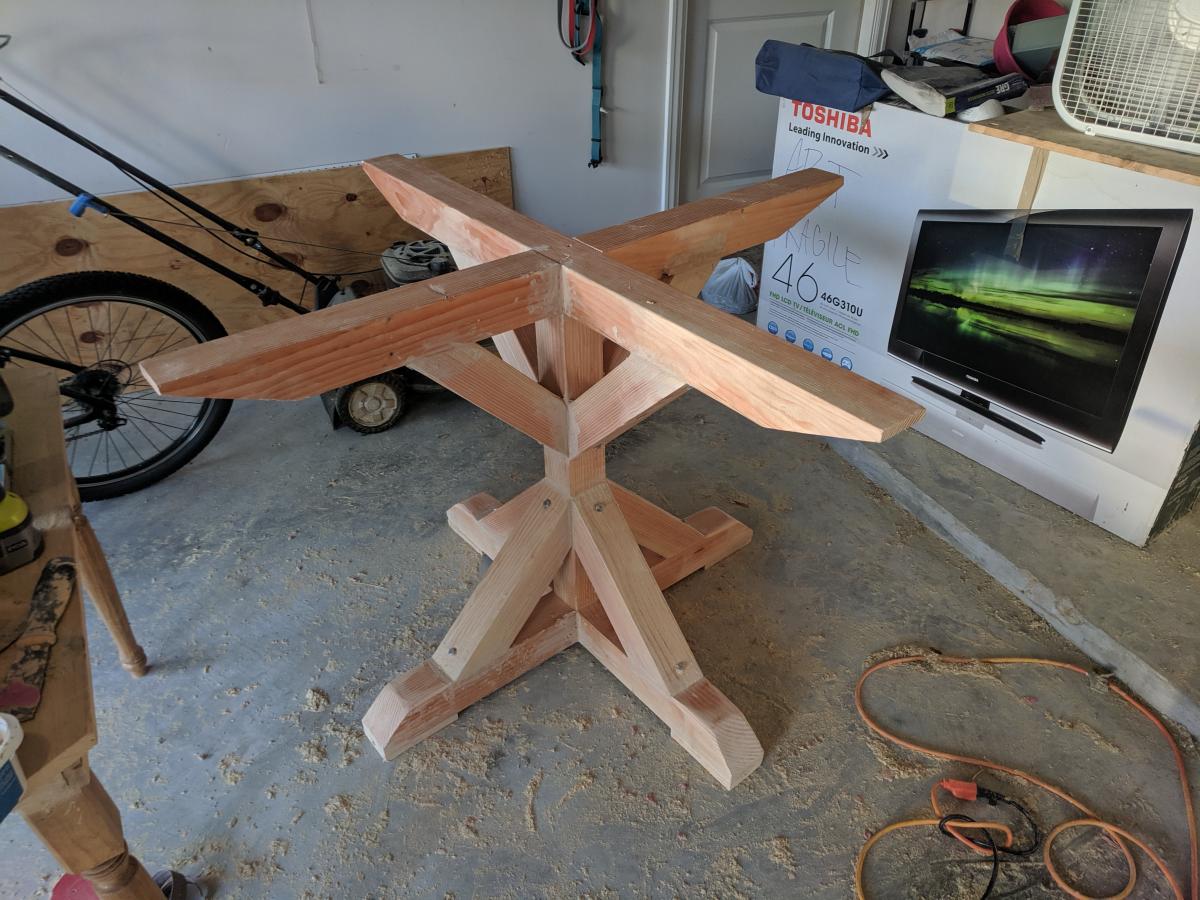
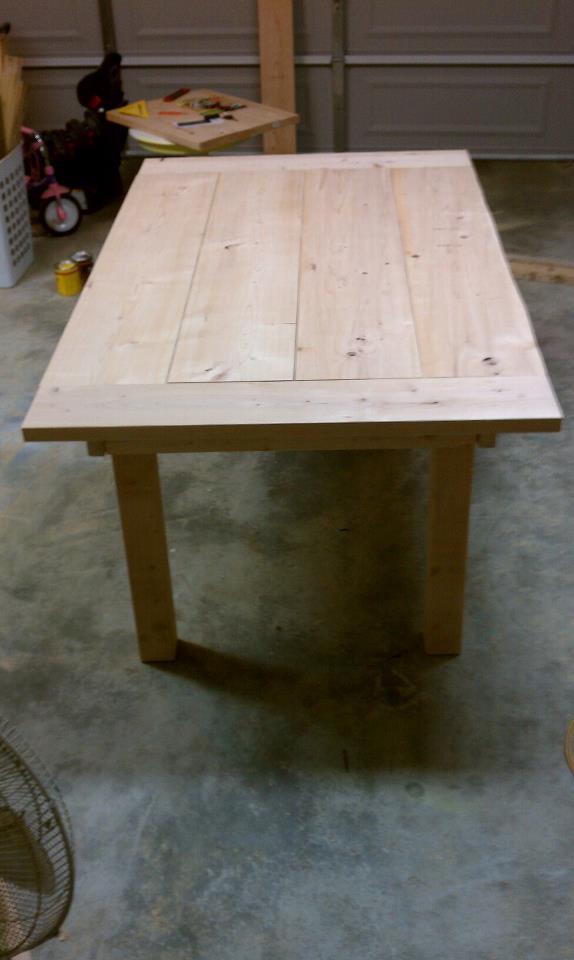
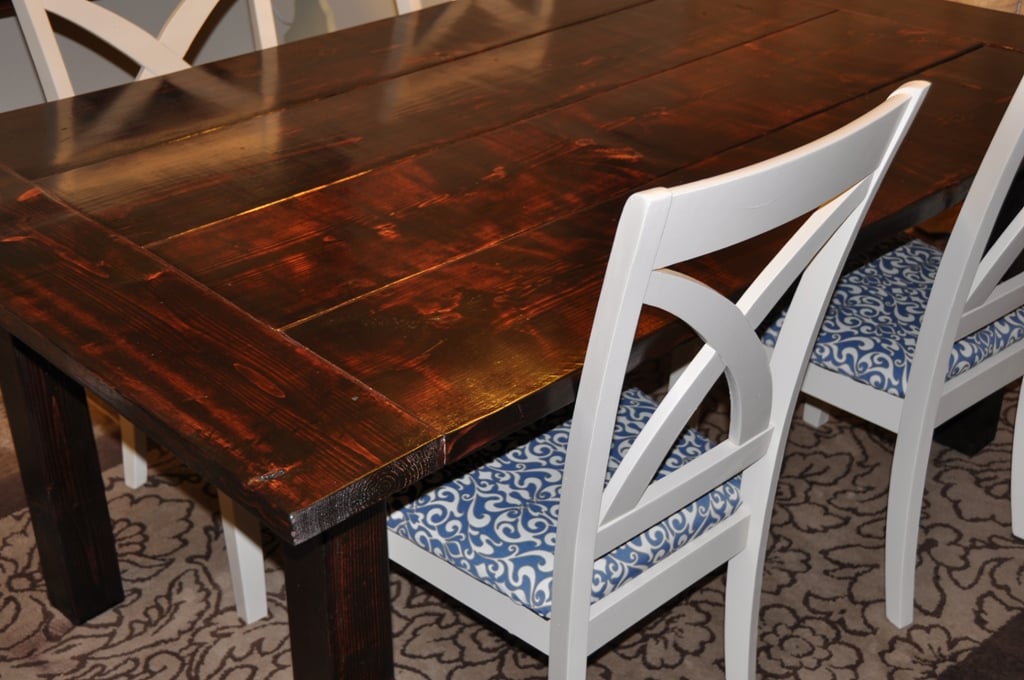
So I went off most of the specs on this table except I didn't want the brace on the bottom. Instead we braced it under the table with extra 2/4s. The longest part of this was the staining and poly due to it being cold as heck in Washington.

Sat, 04/21/2012 - 21:03
Hello,
I love you table! It is beautiful. I too would like to build this table without the brace at the bottom. could you maybe add some photos of how you did the bracing??
thanks!

In reply to details about the bracing under the table by Janelle Kay (not verified)
Fri, 04/27/2012 - 08:45
It's actually pretty easy, I took an extra 2x4 and braced it on the table top right against the table legs. It makes the table really sturdy.
Mon, 05/14/2012 - 12:32
I have been looking for a table that I like and that won't break my pocket. Haven't found one so I want to build this. Can you tell be the measurements of the wood pieces that I need. Thank you I would really appreciate it.
Fri, 05/18/2012 - 08:41
All the measurements I used are on the link below. This is a pretty easy build as long as you have the right tools. The only difference with my table I didn't use the leg braces like the plan states, I braced my legs right under the table so you wouldn't be able see the braces.
http://ana-white.com/2012/02/plans/farmhouse-dining-table
Mike
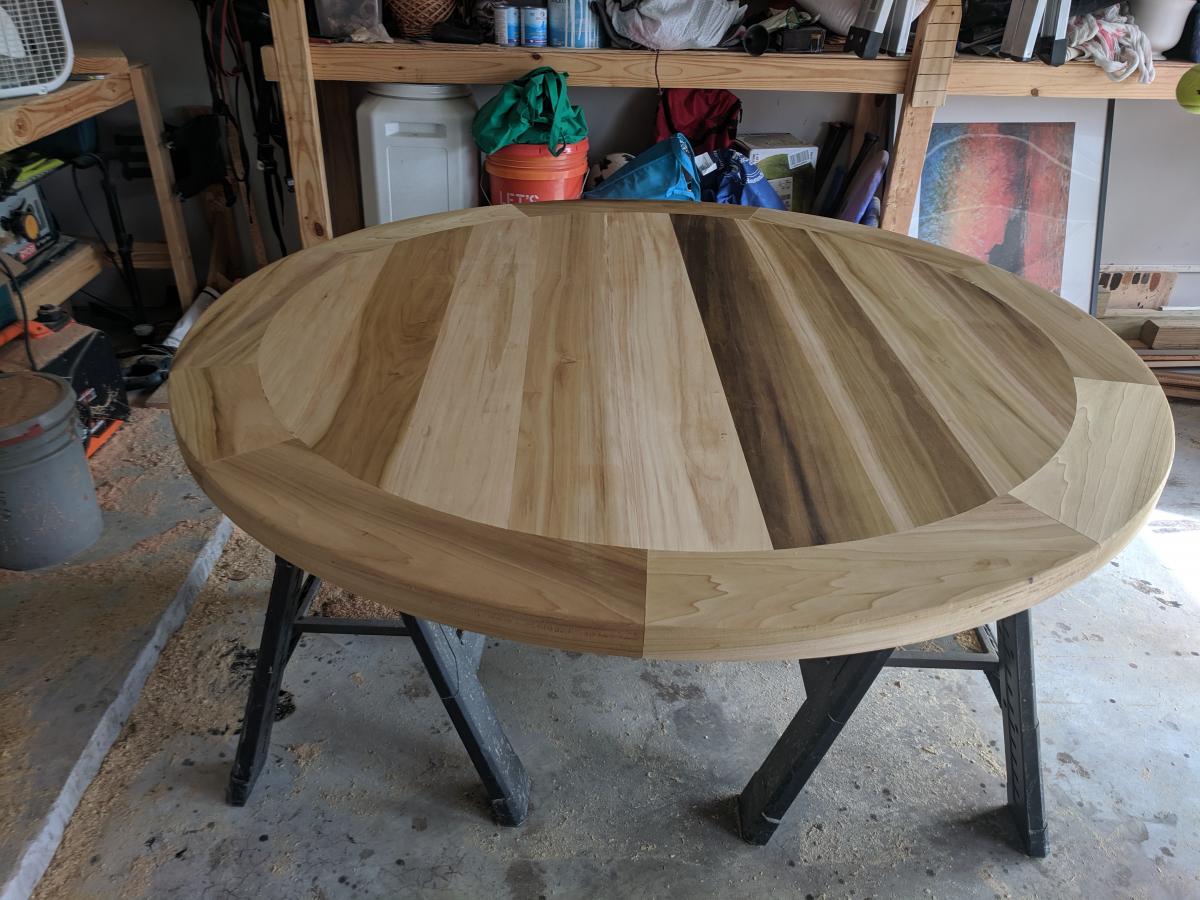
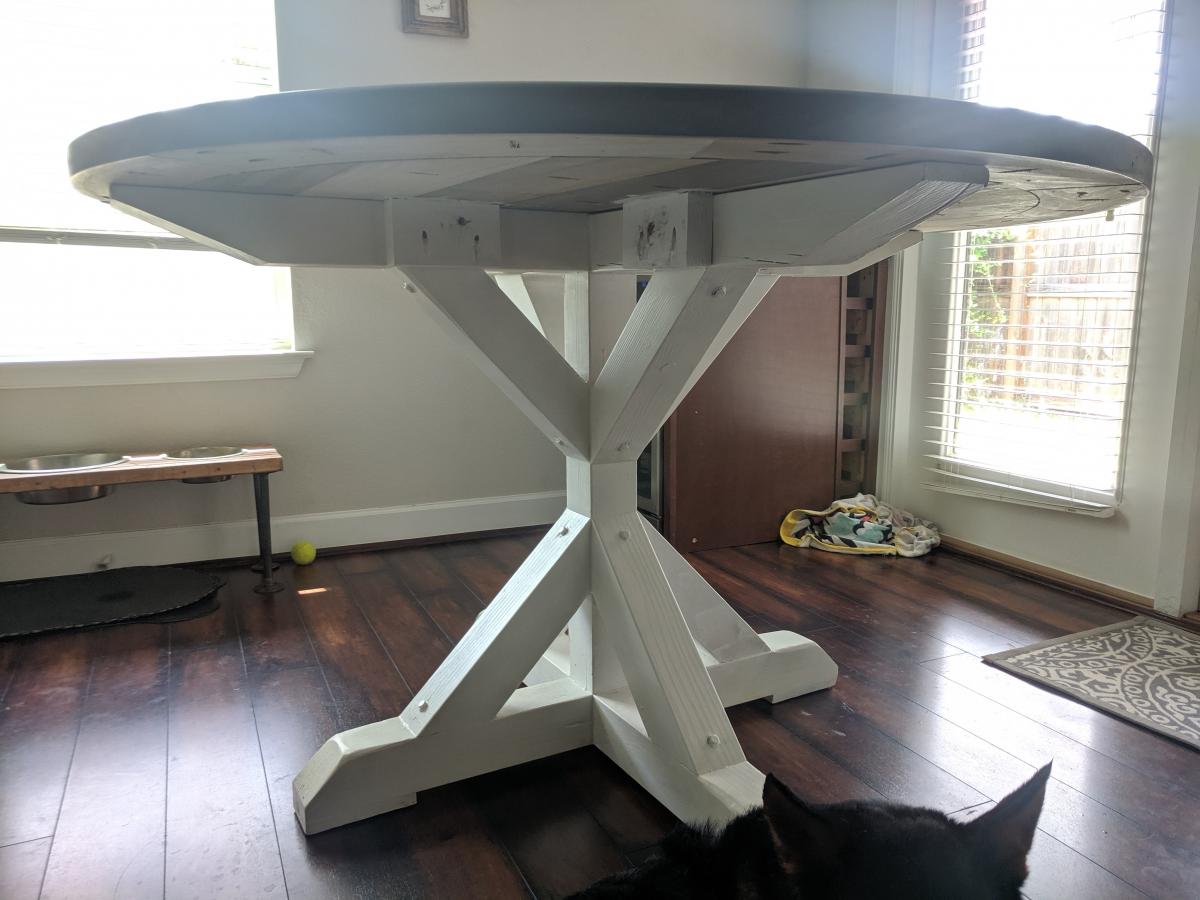
Made 2 changes to the plans which was using a 2 x 4 as a center top board to add some variety to the board width and also decided to go with breadboard ends which also used 2x4
Thanks for the plans!
My front closet was transformed into a mudroom. Hidden storage is a genious idea. Thank you Ana!!! It wasn't easy though.
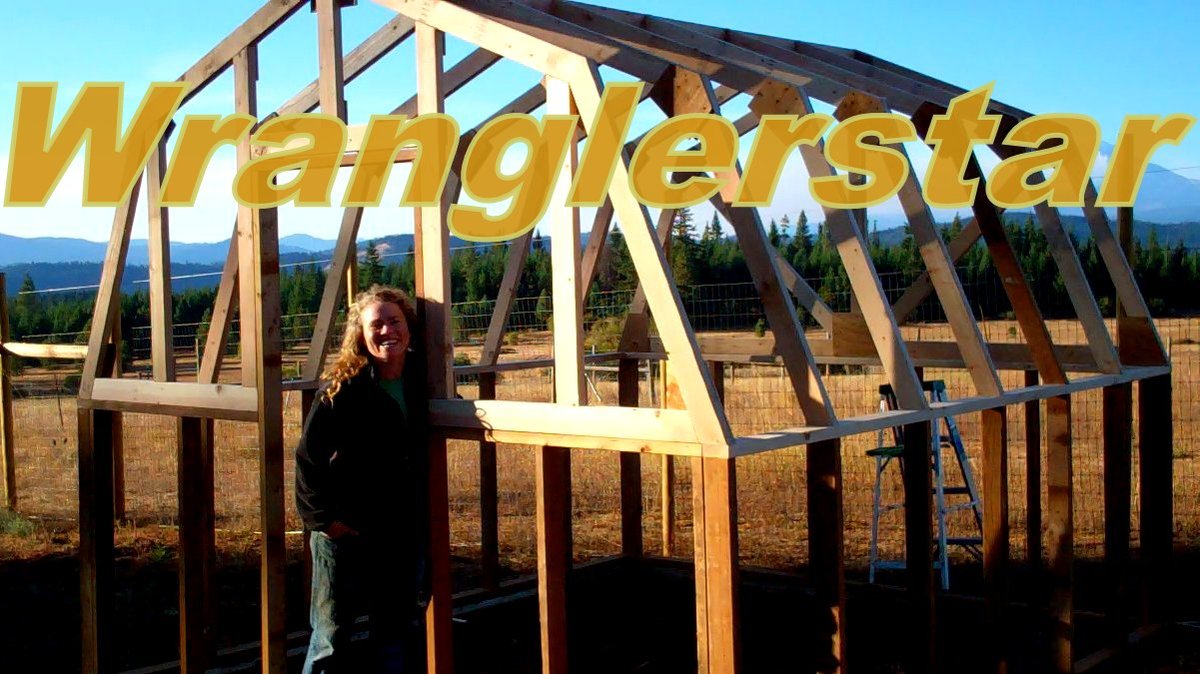
Thank you Ana for the excellent plans. We have been talking about this for months and are excited finally have a greenhouse. We live in the mountains and this will help extend our growing season. Please tell Ram thank you from the Wranglerlerstar family.
Sat, 08/31/2019 - 12:34
Did you extend the base height? I want a greenhouse to enclose trees that do not do well in the winter and I think I would like to raise the base height a foot or so.
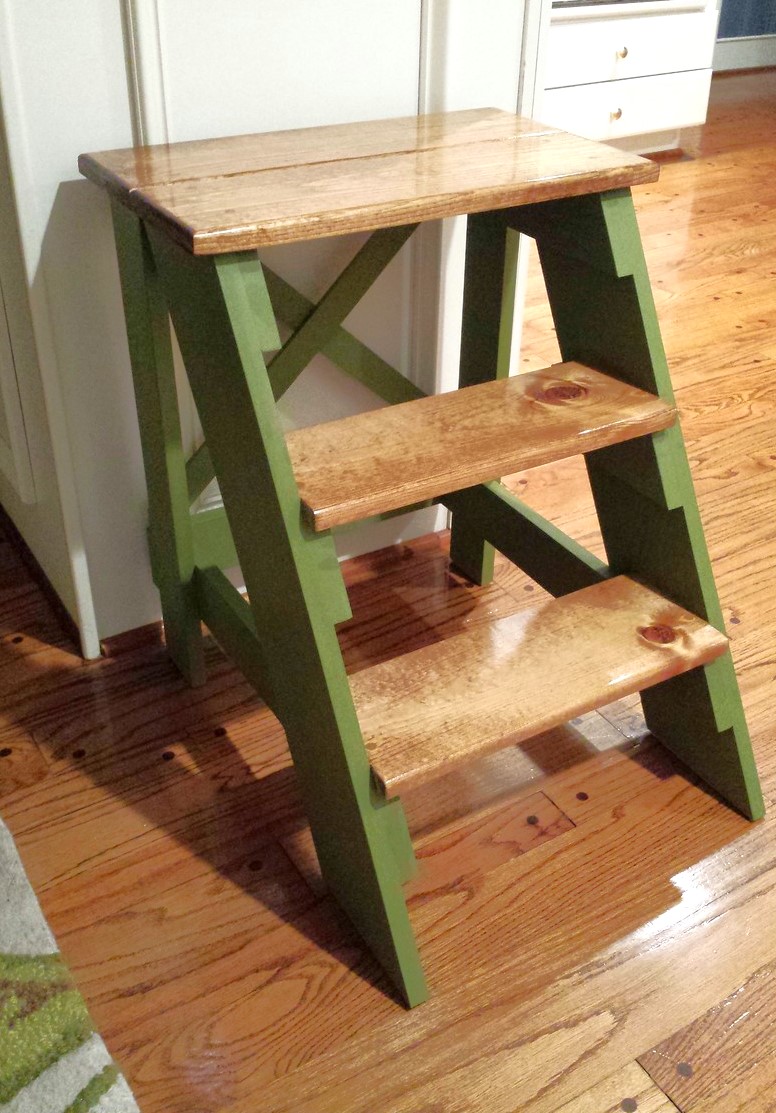
Did the multi-finish on the step stool. On the steps, I used the Minwax Pre-Stain Conditioner, followed by Minwax 'Early American' stain and then Minwax clear gloss polyurethane. The rest of the stool was painted with DIY chalk paint. The paint is 1 cup flat paint (Valspar Jungle Thicket) mixed with 1/3 cup plaster of paris and 1/3 cup water. The chalk paint portion was finished with the Minwax Finishing Paste Wax and gave the flat paint look a nice sheen.

Ana doesn’t have a plan for a catio but she does for a playhouse and a cedar shed made from 2x2’s. I sort of combined my knowledge from making her plans over the last 10 years and came up with this for my cats. It was fun to make!! My baby kitten is loving it. I used garden fencing and stapled it to the outside and pocket holes for the walls. I made each wall individually like the playhouse then connected them once in place.


Wed, 06/09/2021 - 12:36
Thank you for sharing! My daughter wants a cat for her birthday but it can't be inside due to our son's allergies. Roaming outside isn't really an option because we have coyotes. We are going to use one of these in combination with an underground electric fence.

We made these toy chests for baby shower gifts. We followed the plan for the most part. We skipped the notching on the front of the chest, and opted to upholster the top. I added names to the front as well to personalize them a bit as well. Overall, it went pretty smooth, once we got going. The plans were clear and easy to follow. This was our first build off of plans from Ana-White, and I think they turned out pretty nice!

Tue, 11/04/2014 - 08:47
Such a sweet gift - made with love I can tell. Great job!

I modified the origianl plans by making the cabinet taller. I also built 2 cabinets and trimmed them both together to make it appear as if it is 1 giant cabient. It measure over 7 feet tall and just over 6 feet wide. I did add an additional 1x2 brace in the center of the cabinet to help support. I also cut an additional 1x4 to use a brace when anchoring it to the wall. I also chose to add an additional 2 trim pieces to each door because they are much taller than the original plan doors.


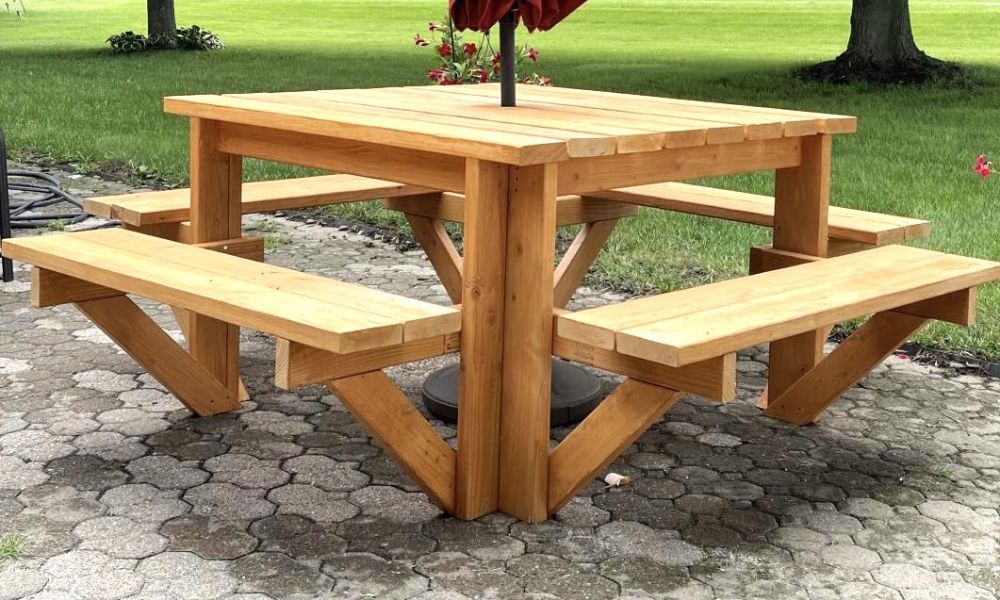
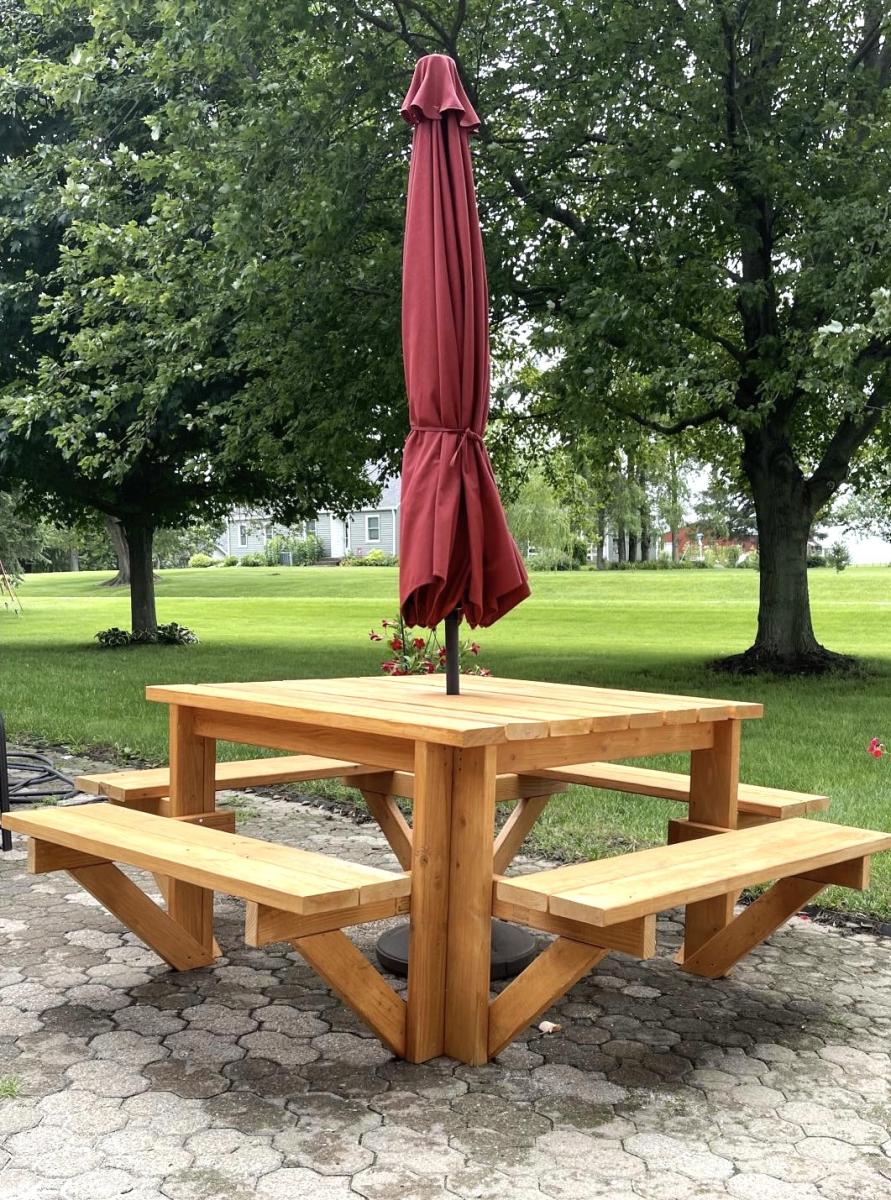
This was a great summer project. The table looks great and it was any easy build. Doesn’t get any better than this. I added a hole in the center of the table for my umbrella and used the longer screws for more frame stability.
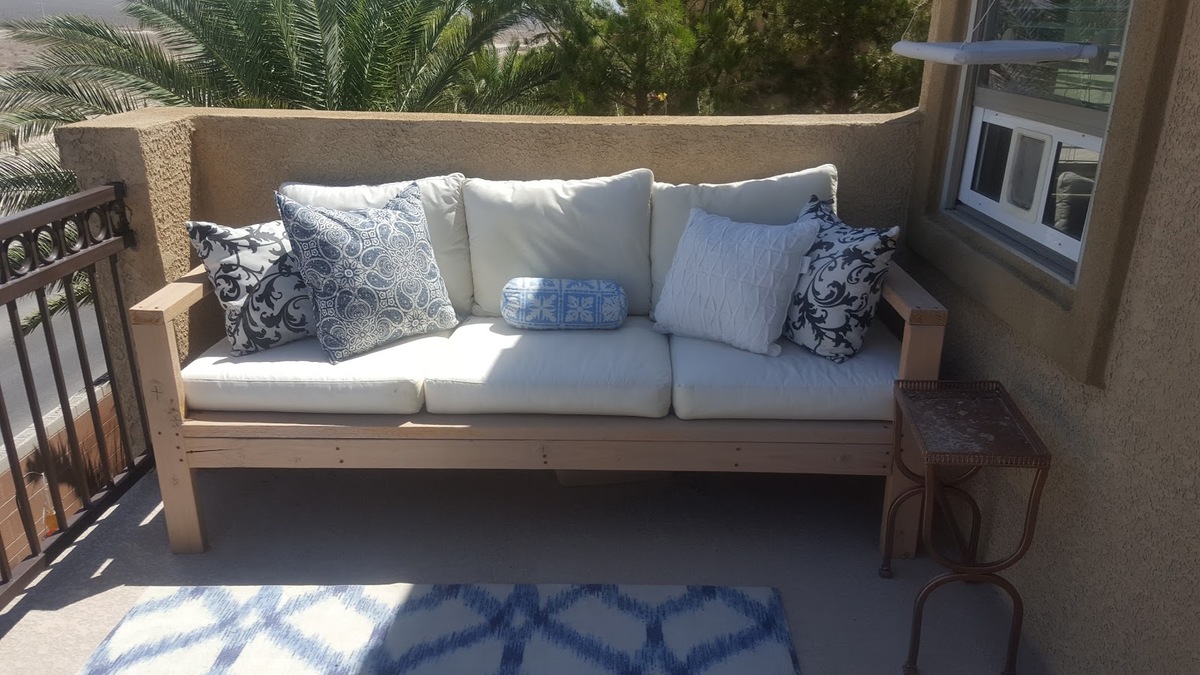
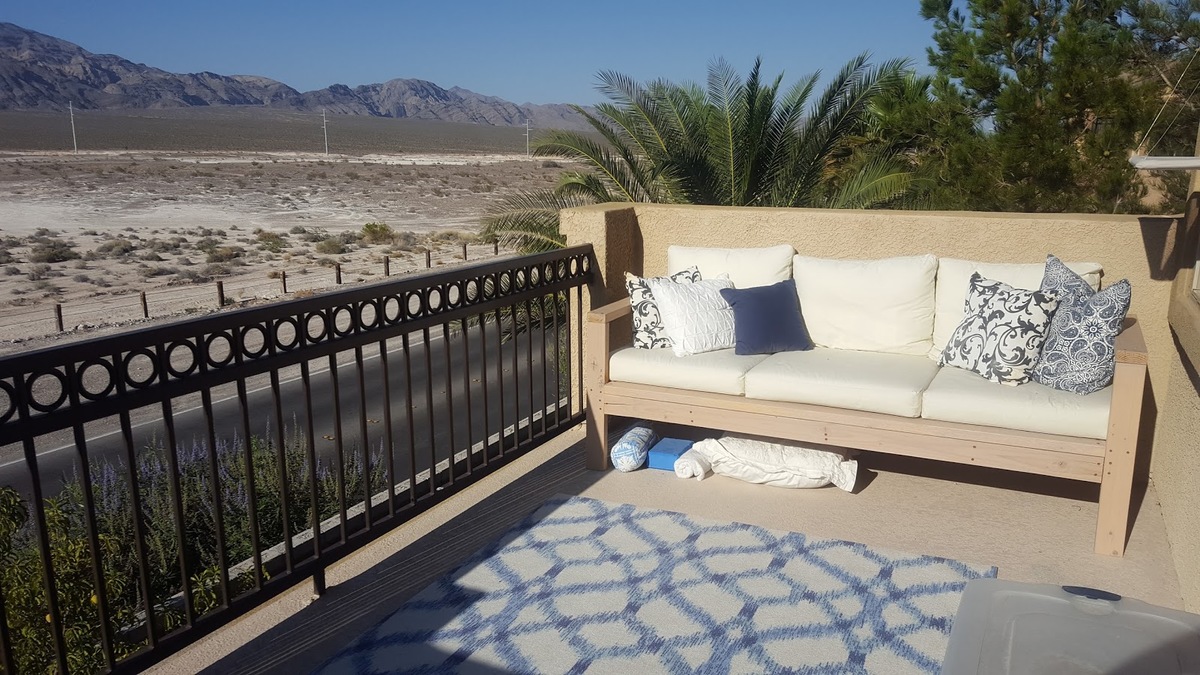
Decided to build Ana's outdoor sofa for our Master Balcony and love the results. I was a bit impatient to finish the build and therefore did not take the time to use pocket screws for a more finished result, (which I will do next time). Regardless, I love how the sofa turned out and would reccomend for anybody to build. The cheapest outdoor cushions I could find were from Ikea and we spent around $160.

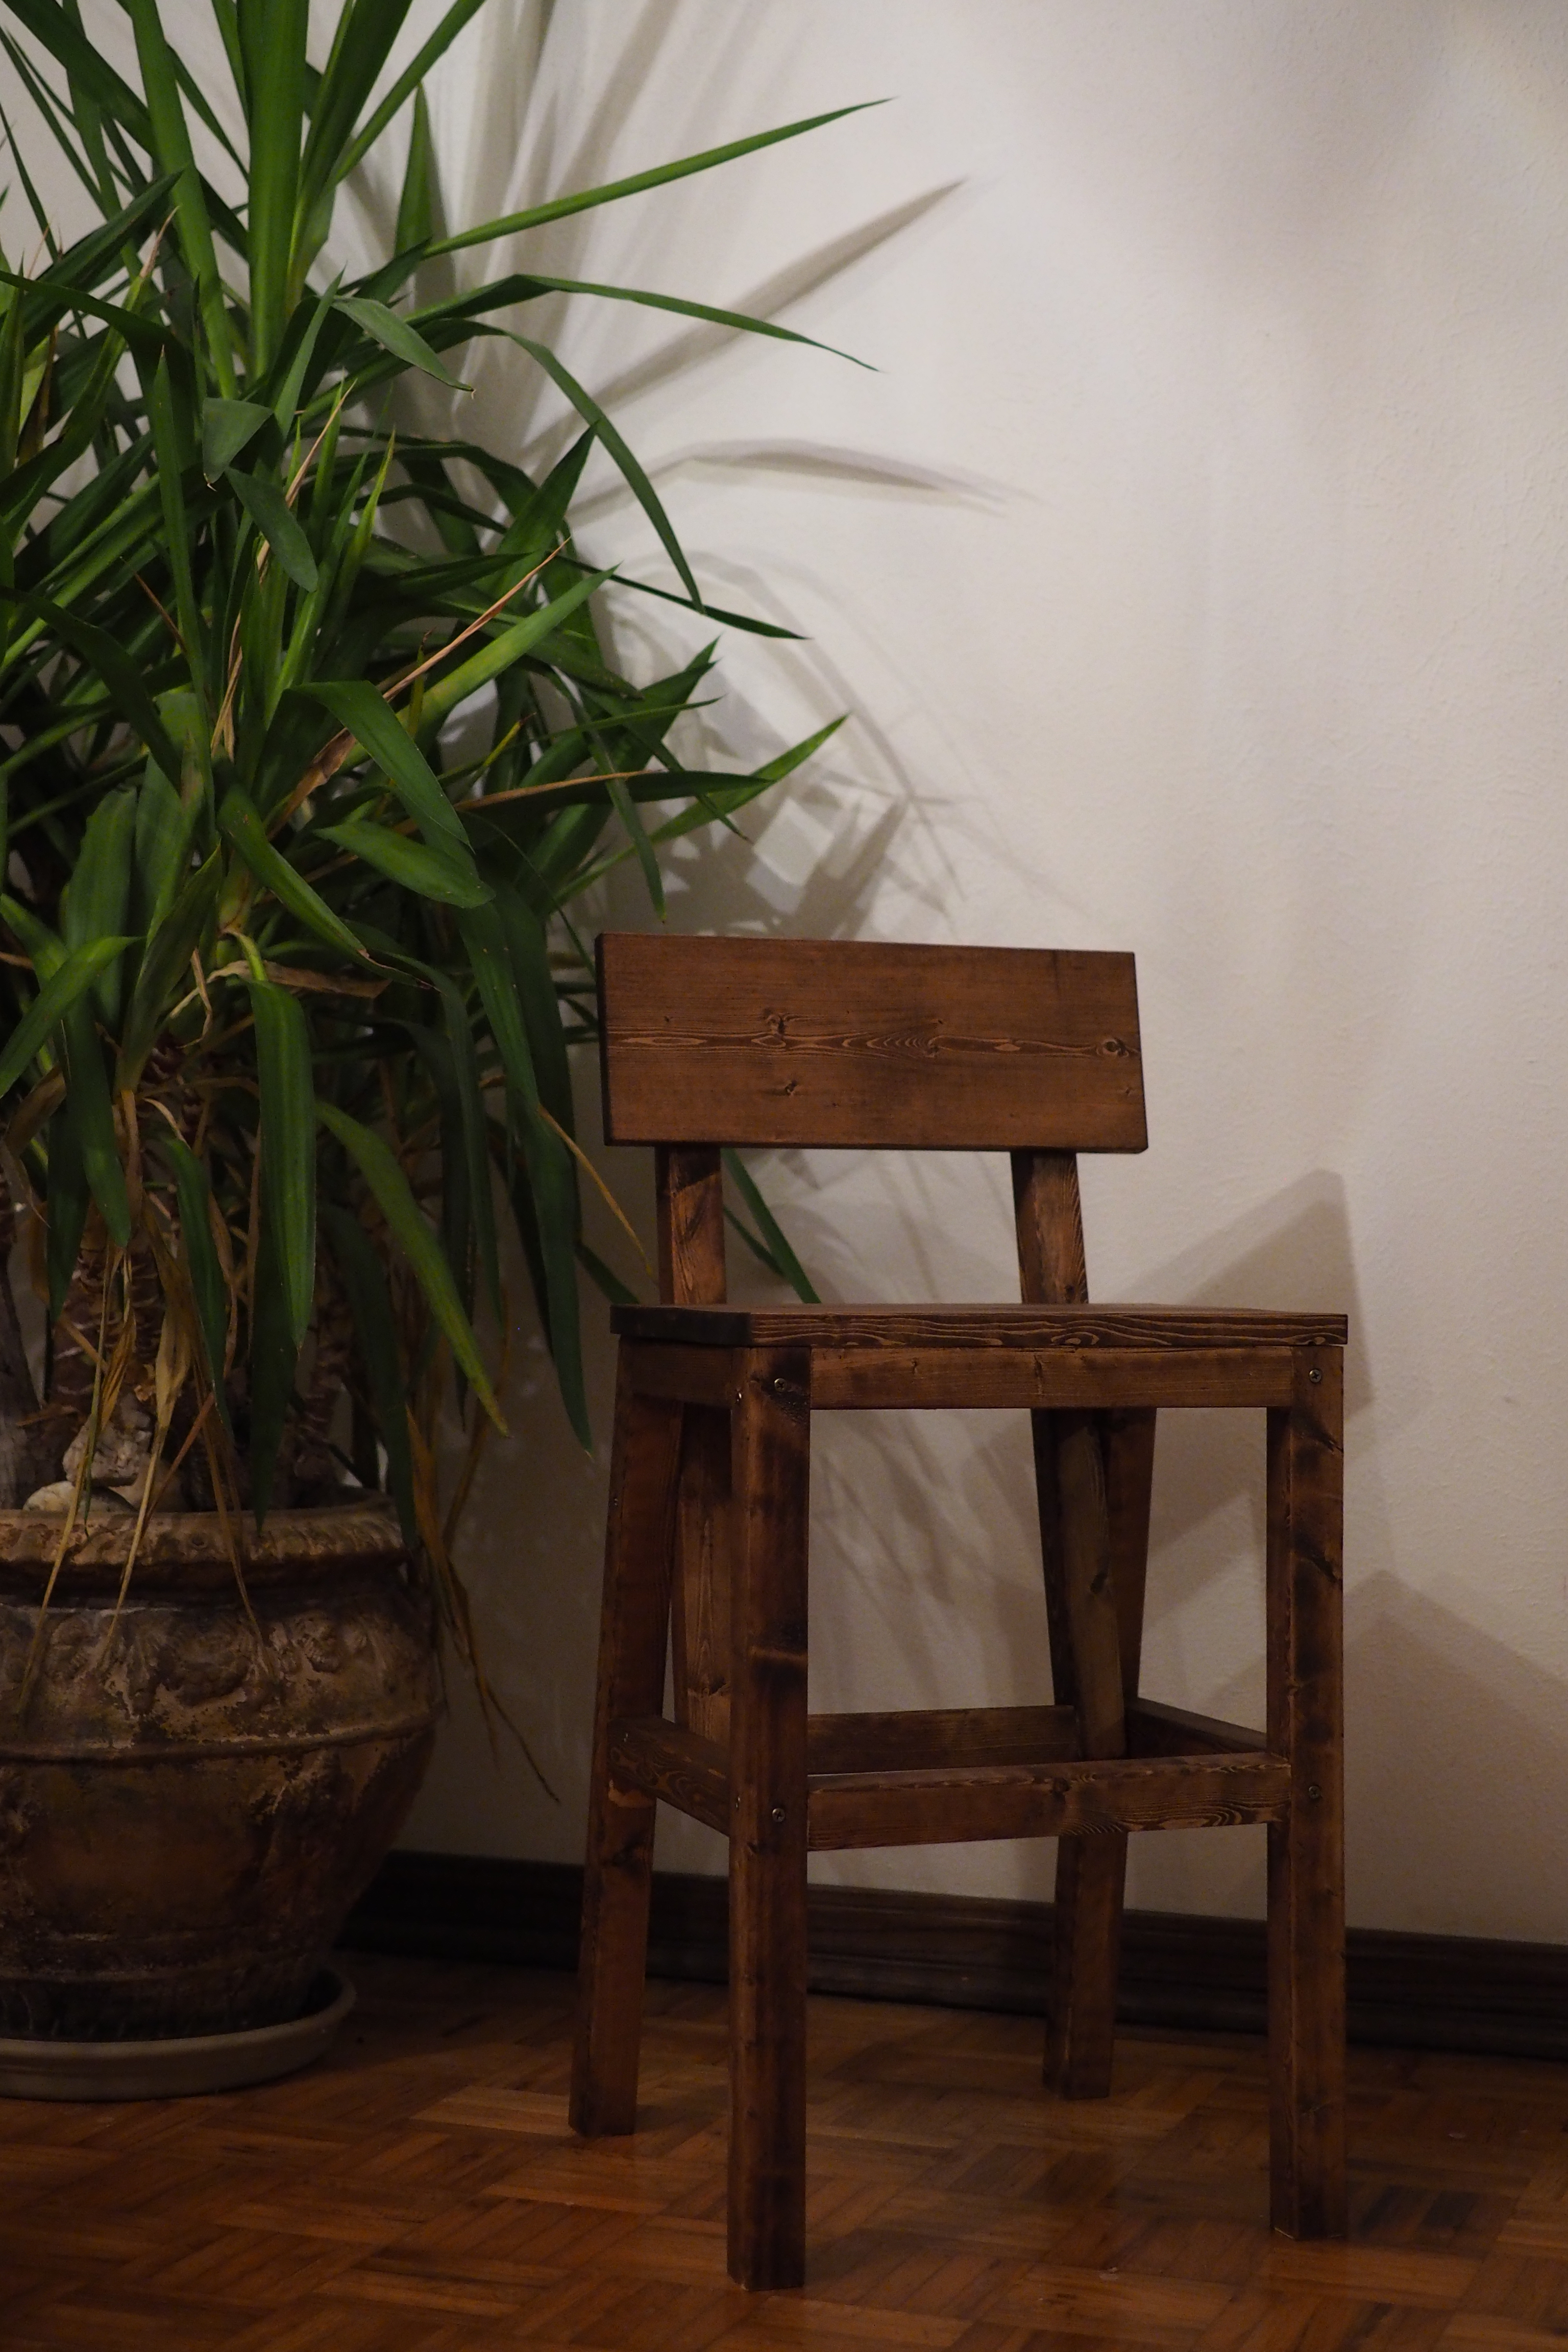
I made this chair for my almost three year old and it is perfect for him to reach the dining table.
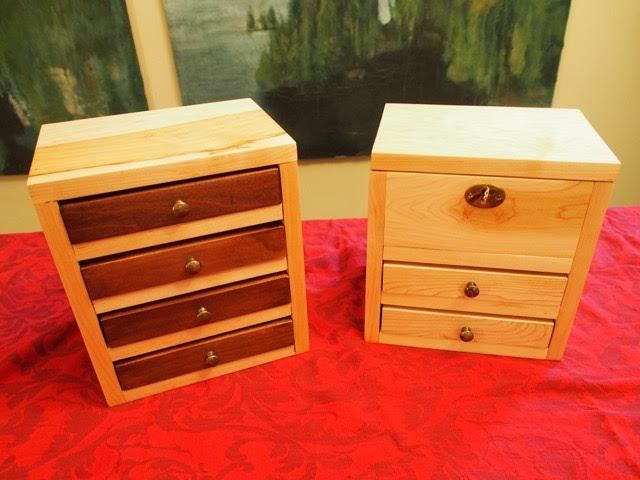
I made these boxes for my daughters for Christmas. I used maple, and I rabbeted the drawers and backs so that the plywood would sit flush. On the first box, I attempted to join with dowels, but as a novice, that didn't work well, and I converted to a few countersunk screws. On the second box, I used glue and nails as the plan suggested, which was much better. Installing the box hinges and lock was the most finicky part of the project.
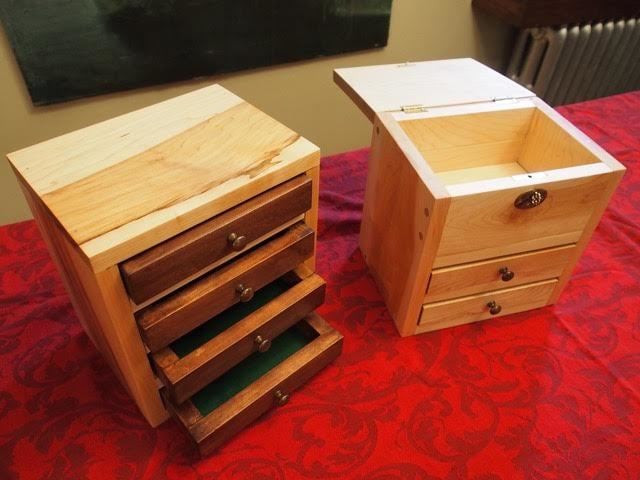
Wed, 12/02/2015 - 16:51
Thanks so much. This is high praise from a master builder. Thank you for the plans. Yvonne
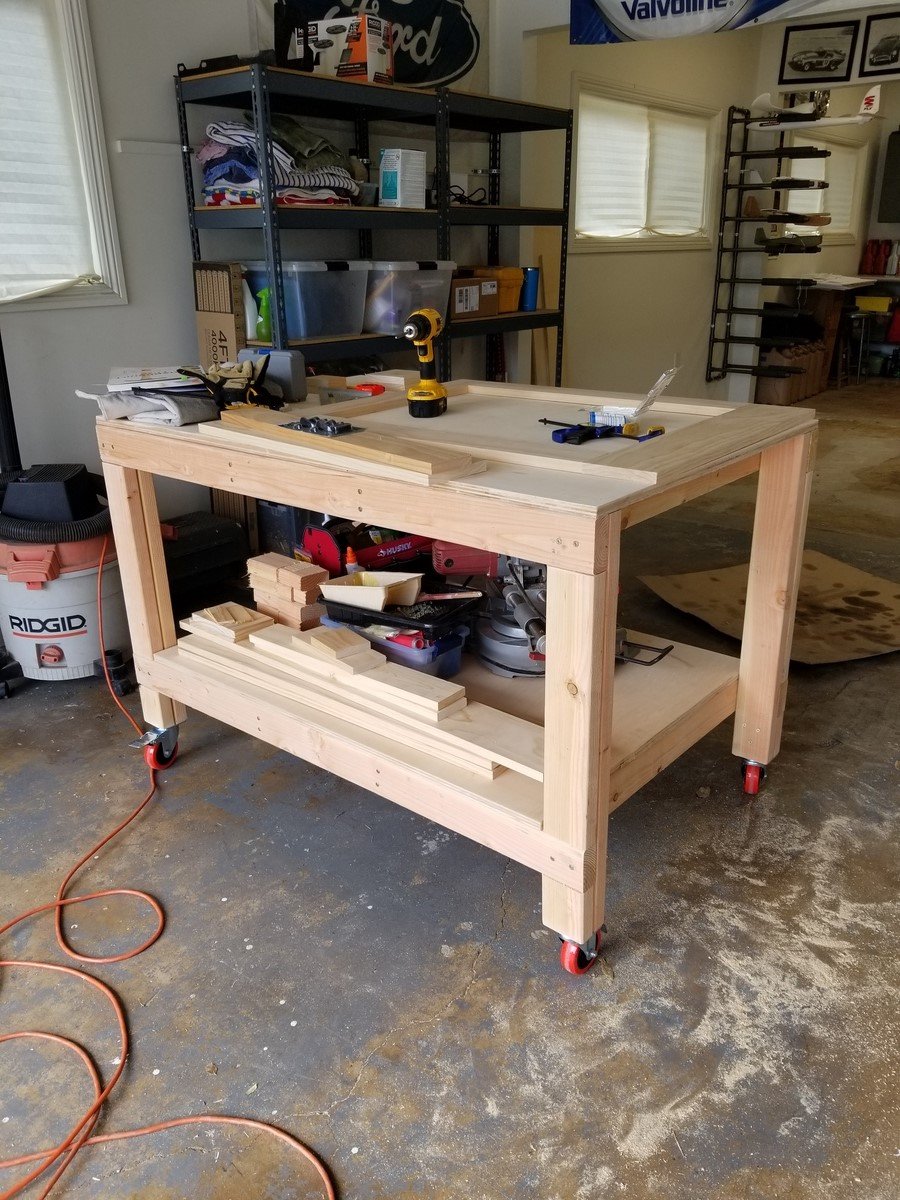
I love this workbench! I added casters so I can move it around the garage, outside, wherever it's needed. I just took 4 inches off the bottom of the legs. My hubby is admiring my handy work and planning on making one for himself.
Wed, 01/25/2023 - 14:31
Love this with the casters! So beautiful. I'm new here and wondering at what point you took 4 inches off the legs. Did you build the table and then just cut off the legs? Or did you adjust the measurements of the cuts? Thanks in advance! :)
Mon, 01/30/2023 - 02:32
The overall height of a 4-inch caster wheel is a little over 5 inches with the mounting bracket, so that also needs to be taken in to consideration. 2nd photo shows the overall dimensions, but to me the bracket and brake area appear to be a bit more than 1.03 inches. https://amzn.to/3DkMKzB
I think the best bet would be to have and measure the overall wheel height, prior to measuring and cutting the lumber.
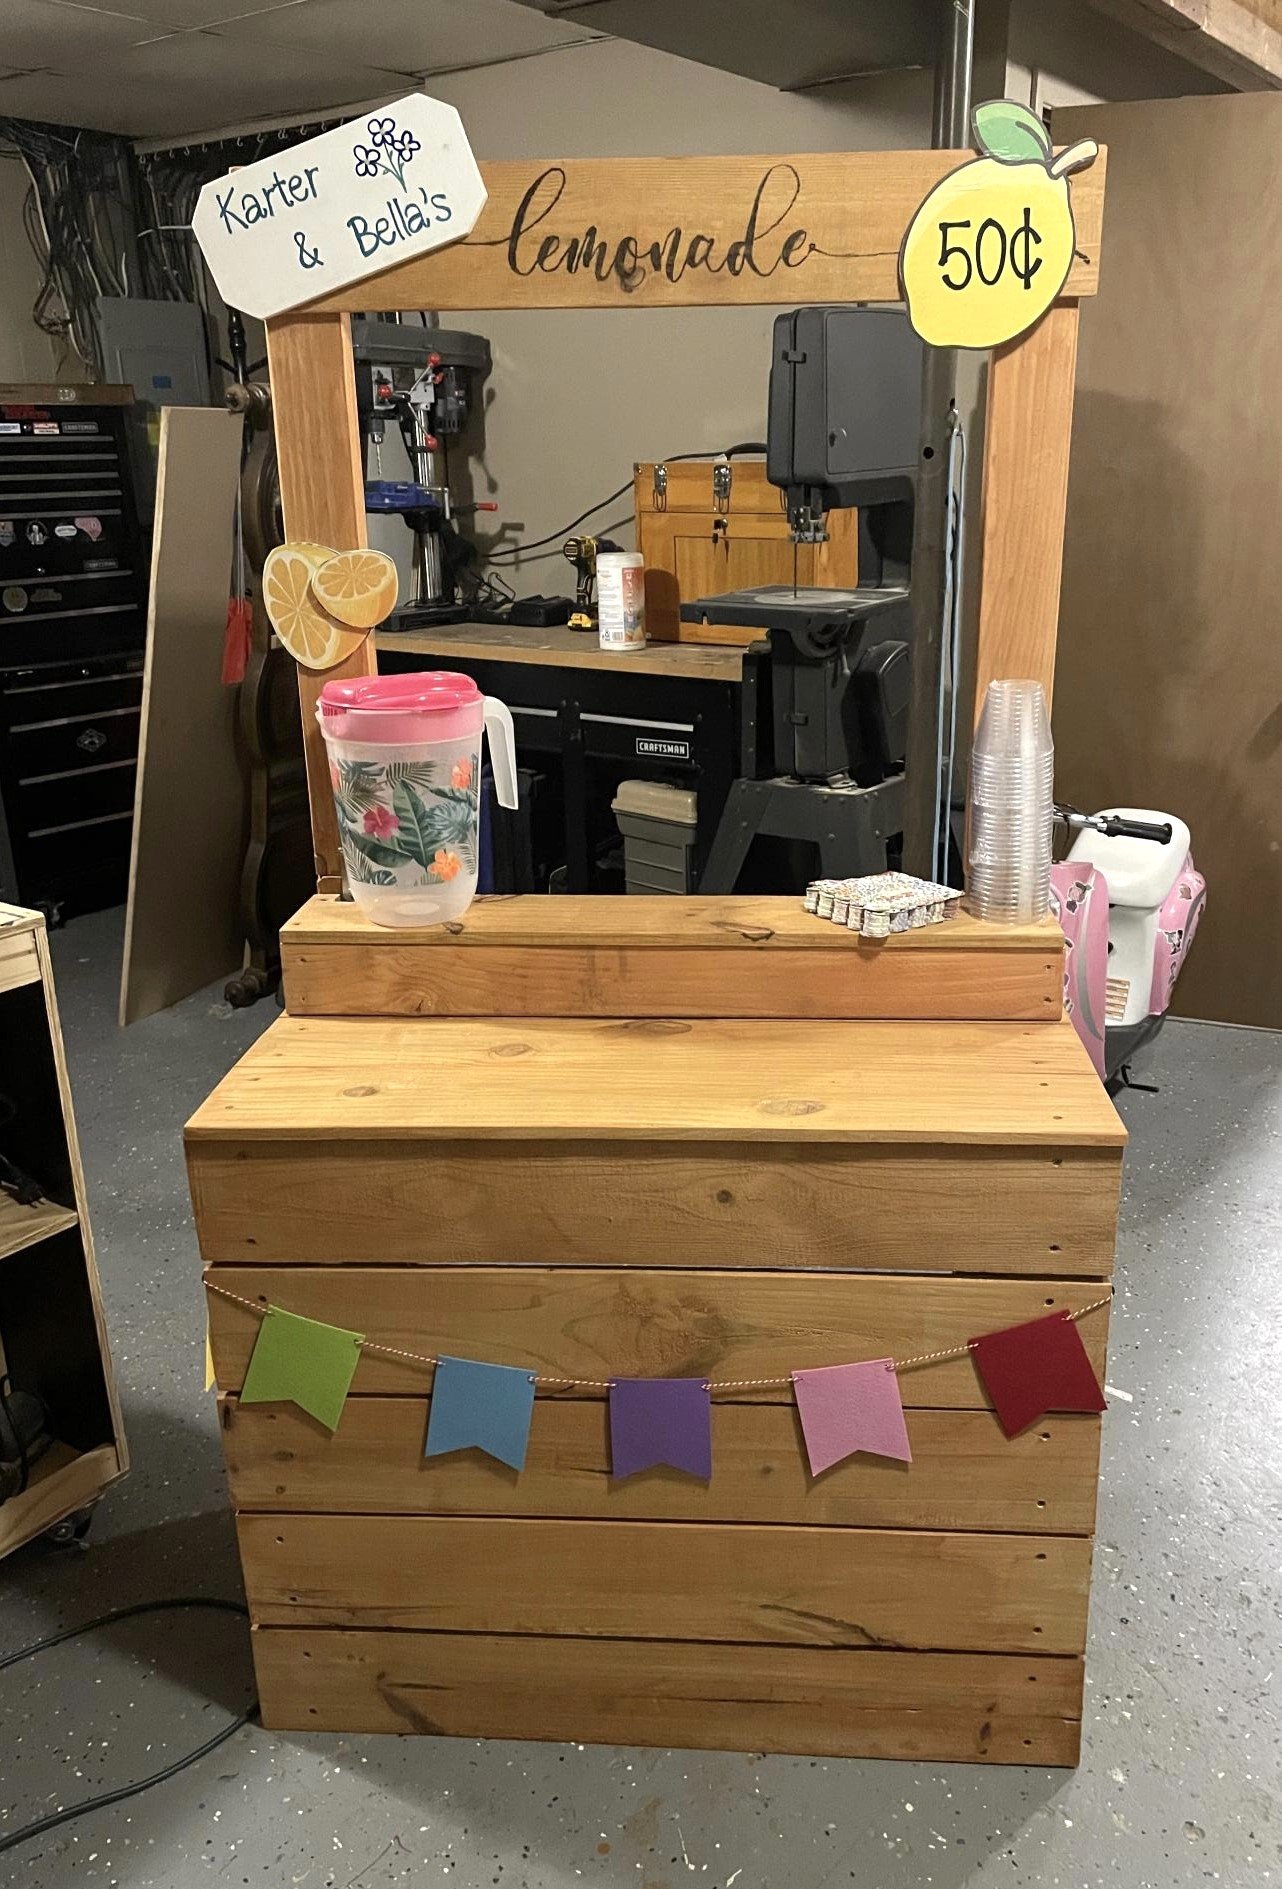
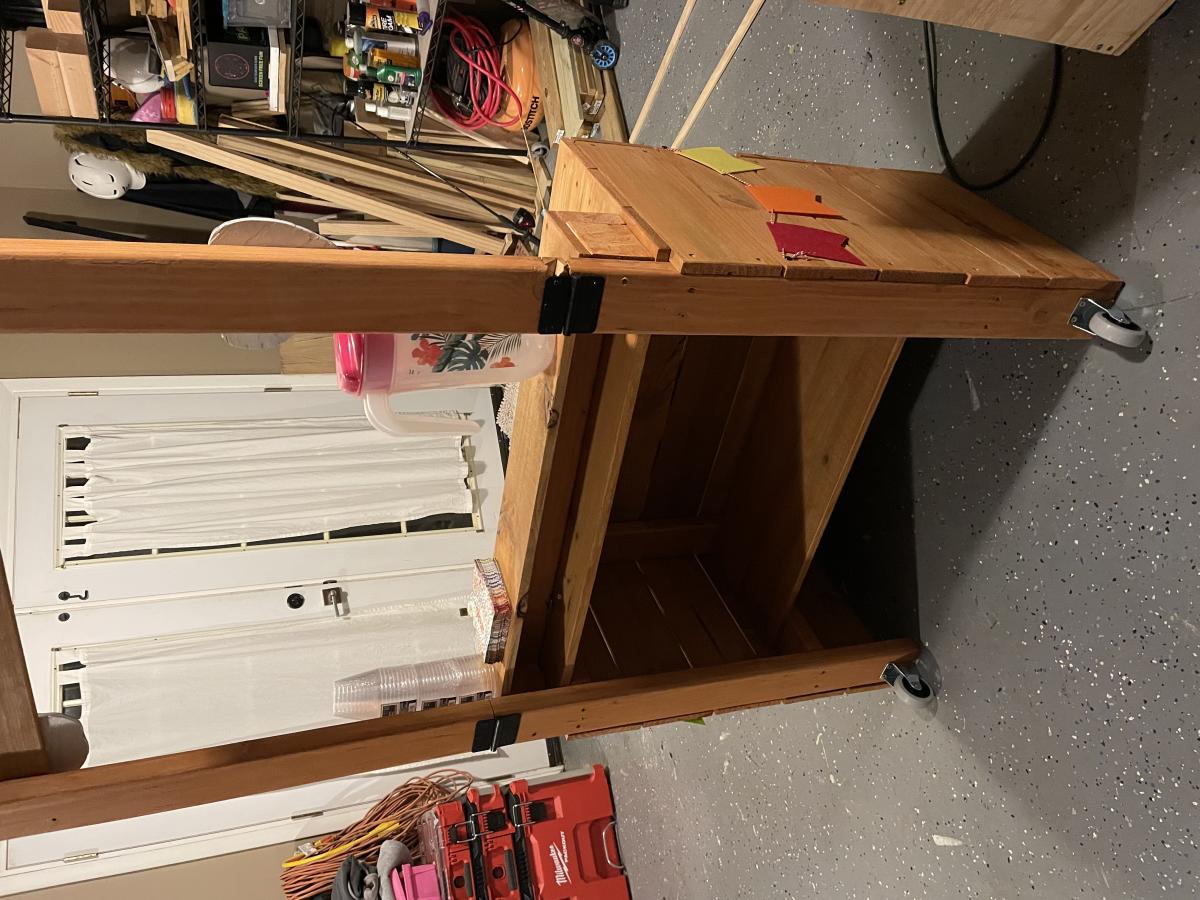
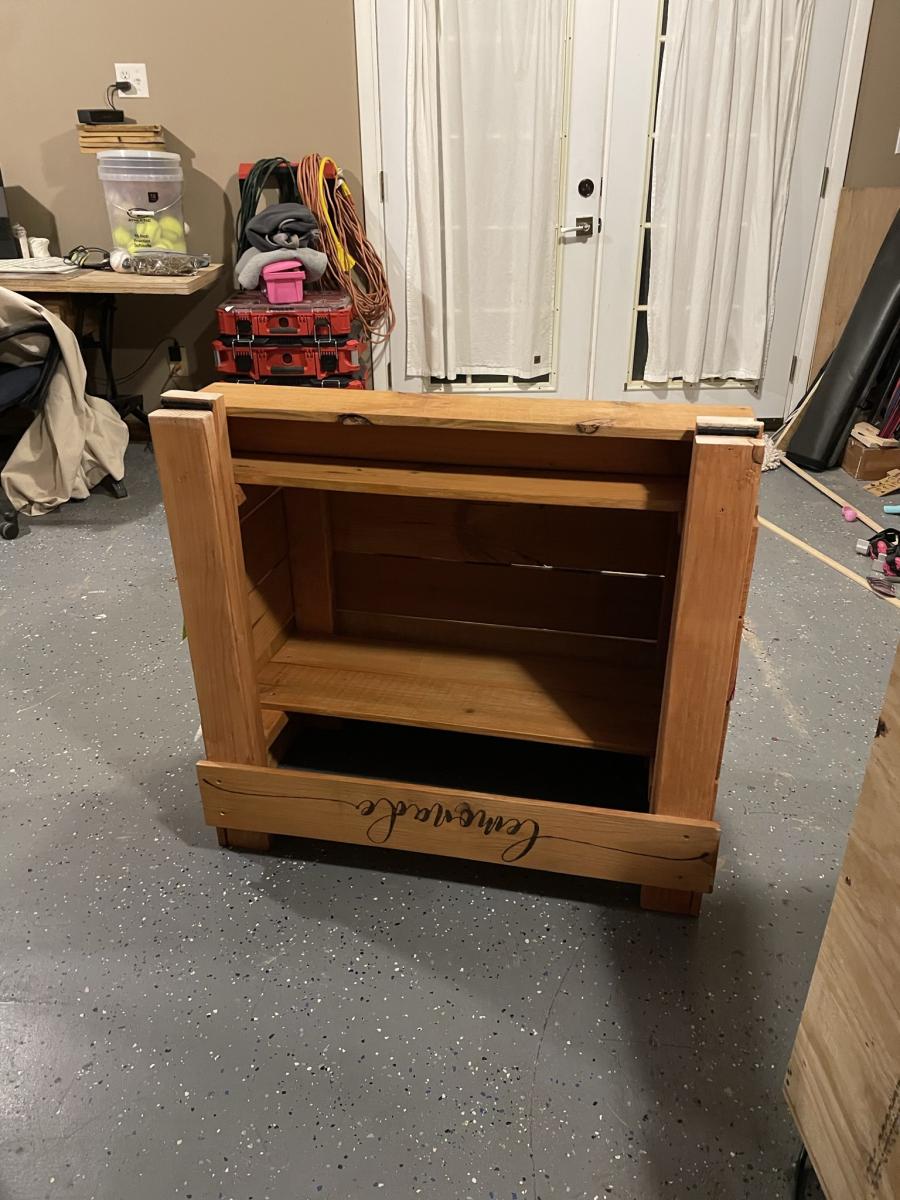
My granddaughter wanted a lemonade stand and it had to be easily portable. I used Ana White’s plans, made it a little taller (30” counter height, 65” total height), added hinges so the top drops down, and wheels on the back side so you can tilt and pull it behind you like a suitcase. Added a hook for a cutting board and hooks for a bungee strap to hold the cooler, pitchers and supplies inside while you haul it. A sign for her and sissy, some painted wood decor and we’re all set. Just add lemons!
Tue, 06/13/2023 - 08:58
So many great additions, I'm sure your granddaughter is thrilled!!! I'd love to see photos of her working it, if you'd like to share! [email protected]
Thank you for sharing!
Just finished this beauty, entirely made with 2x4, plans were modify to match our outdoor sofa and coffee table. I think our best looking project so far ;) Thank you for inspiring me to build !!!

In reply to Very nice! by Ana White Admin
Tue, 03/01/2016 - 18:13
Little by little I am transforming my ugly concrete patio with no view in Zen garden...
Tue, 03/01/2016 - 18:15
Little by little I am transforming my ugly concrete patio with no view in a Zen garden...
Tue, 03/01/2016 - 18:16
Little by little I am transforming my ugly concrete patio with no view in a Zen garden...
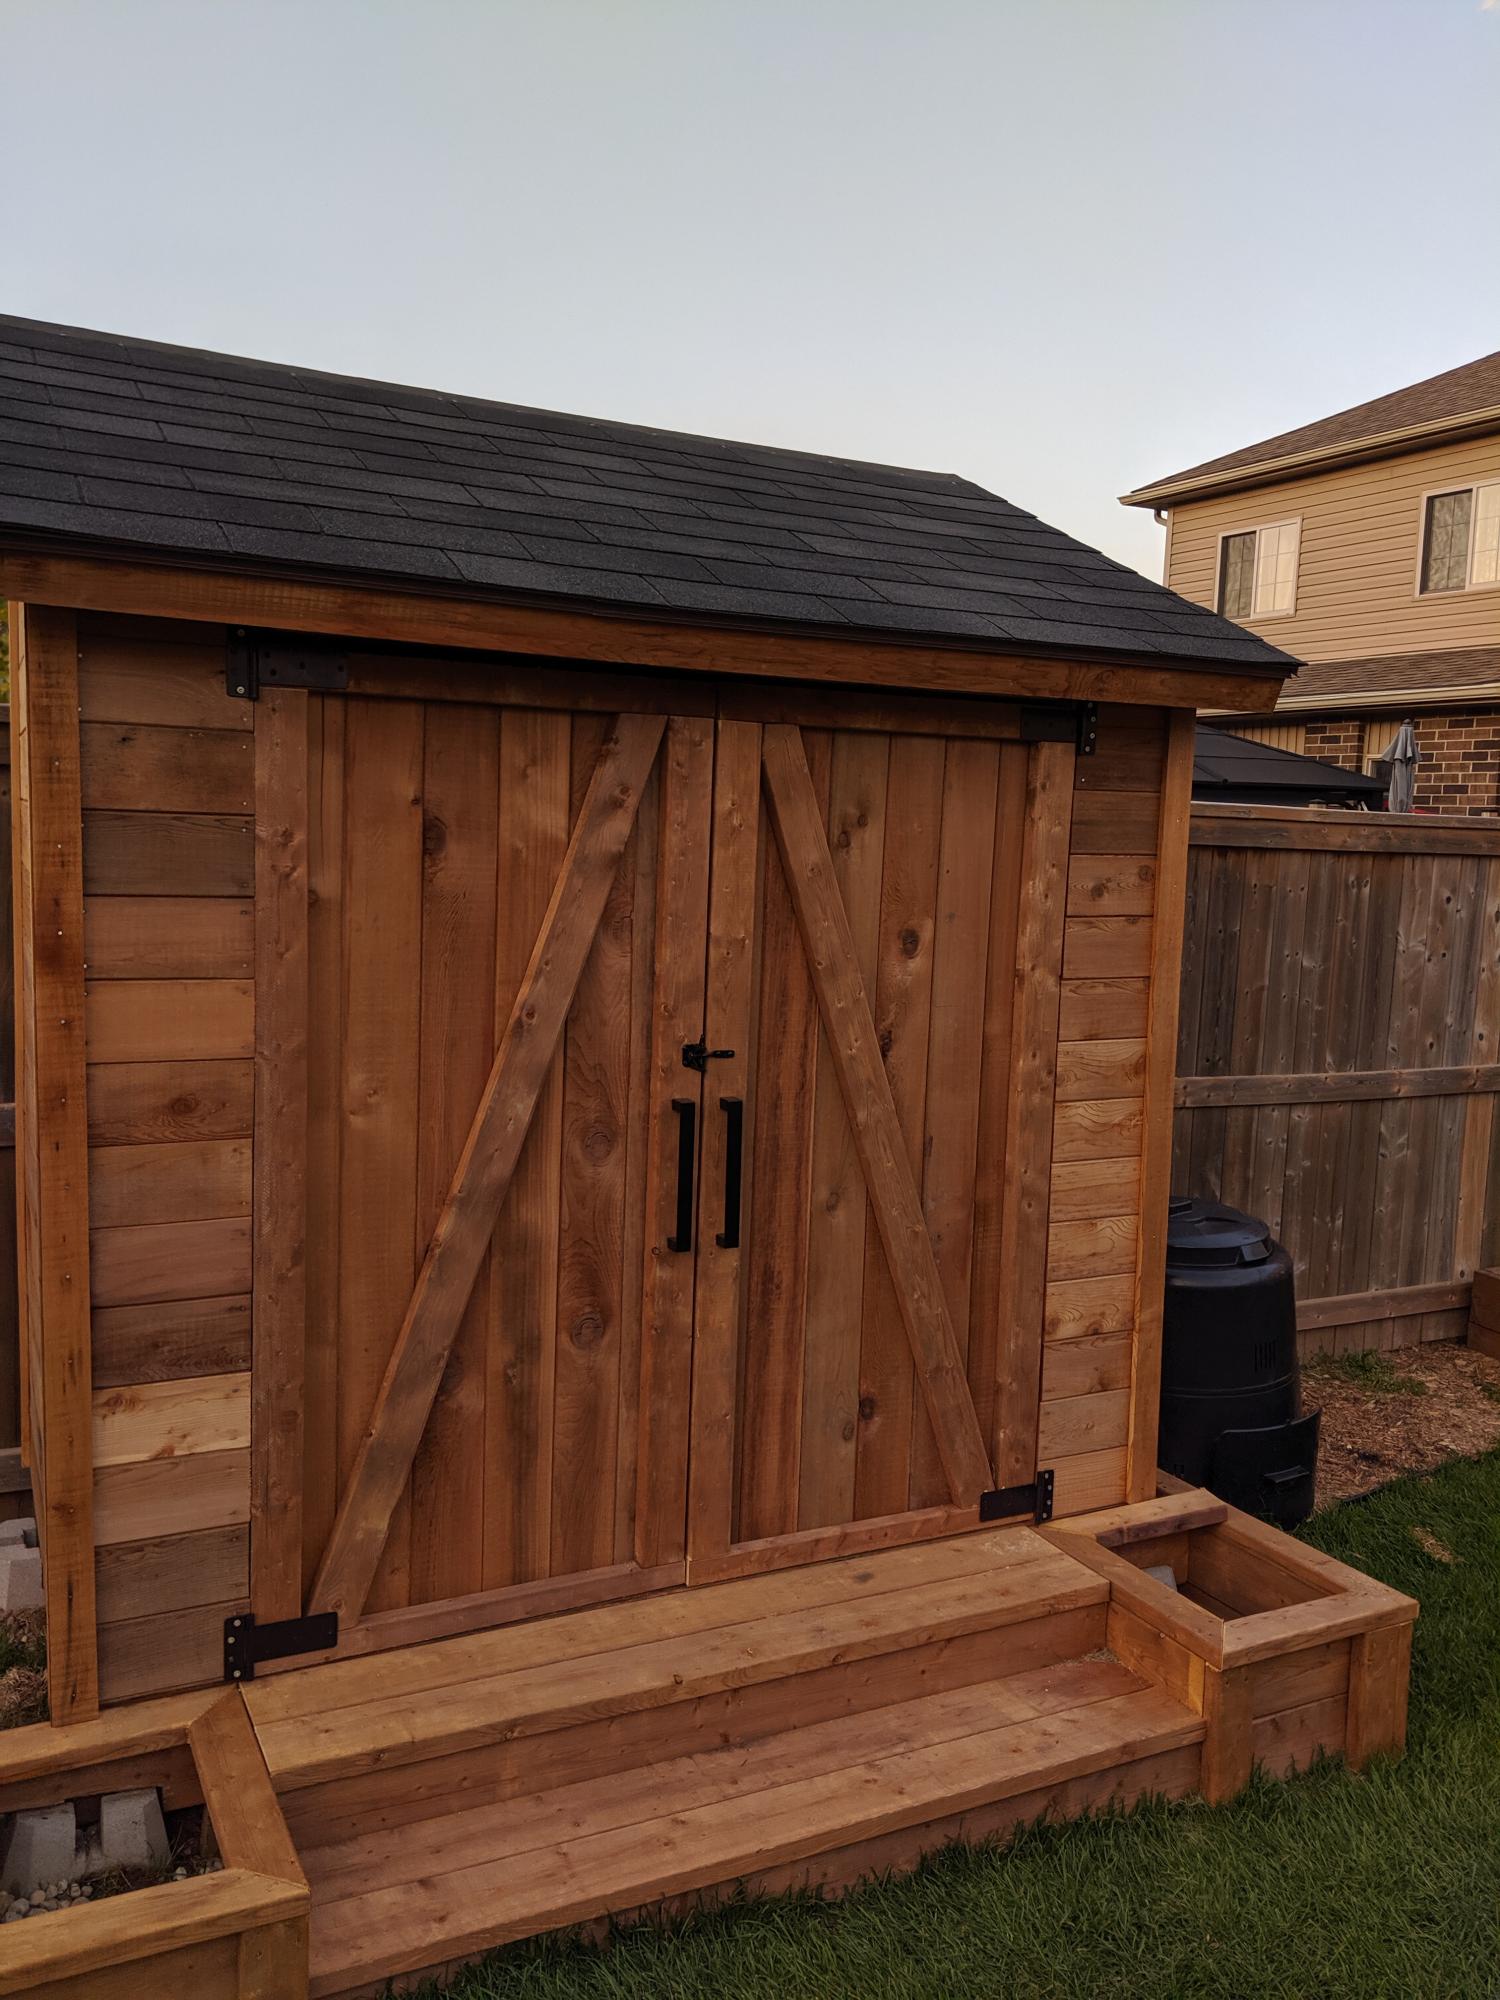
Cedar shed with planter box stairs. Both plans modified slightly to fit my needs. Siding is tongue and groove cedar. All other wood is brown pressure treat. Planter box stairs were sized and positioned to hide cement posts. Sorry for only one photo. Finally finished and ran out of time with good weather here in Canada. Will post more with weather permits. Thanks again for your plans. I've also built night stands and a farmhouse dining table.
Not sure if I linked the proper stairs plan. Was https://www.ana-white.com/woodworking-projects/outdoor-planter-steps-or…

Sat, 11/21/2020 - 18:14
This shed is beautiful! what were the end dimensions of your shed?
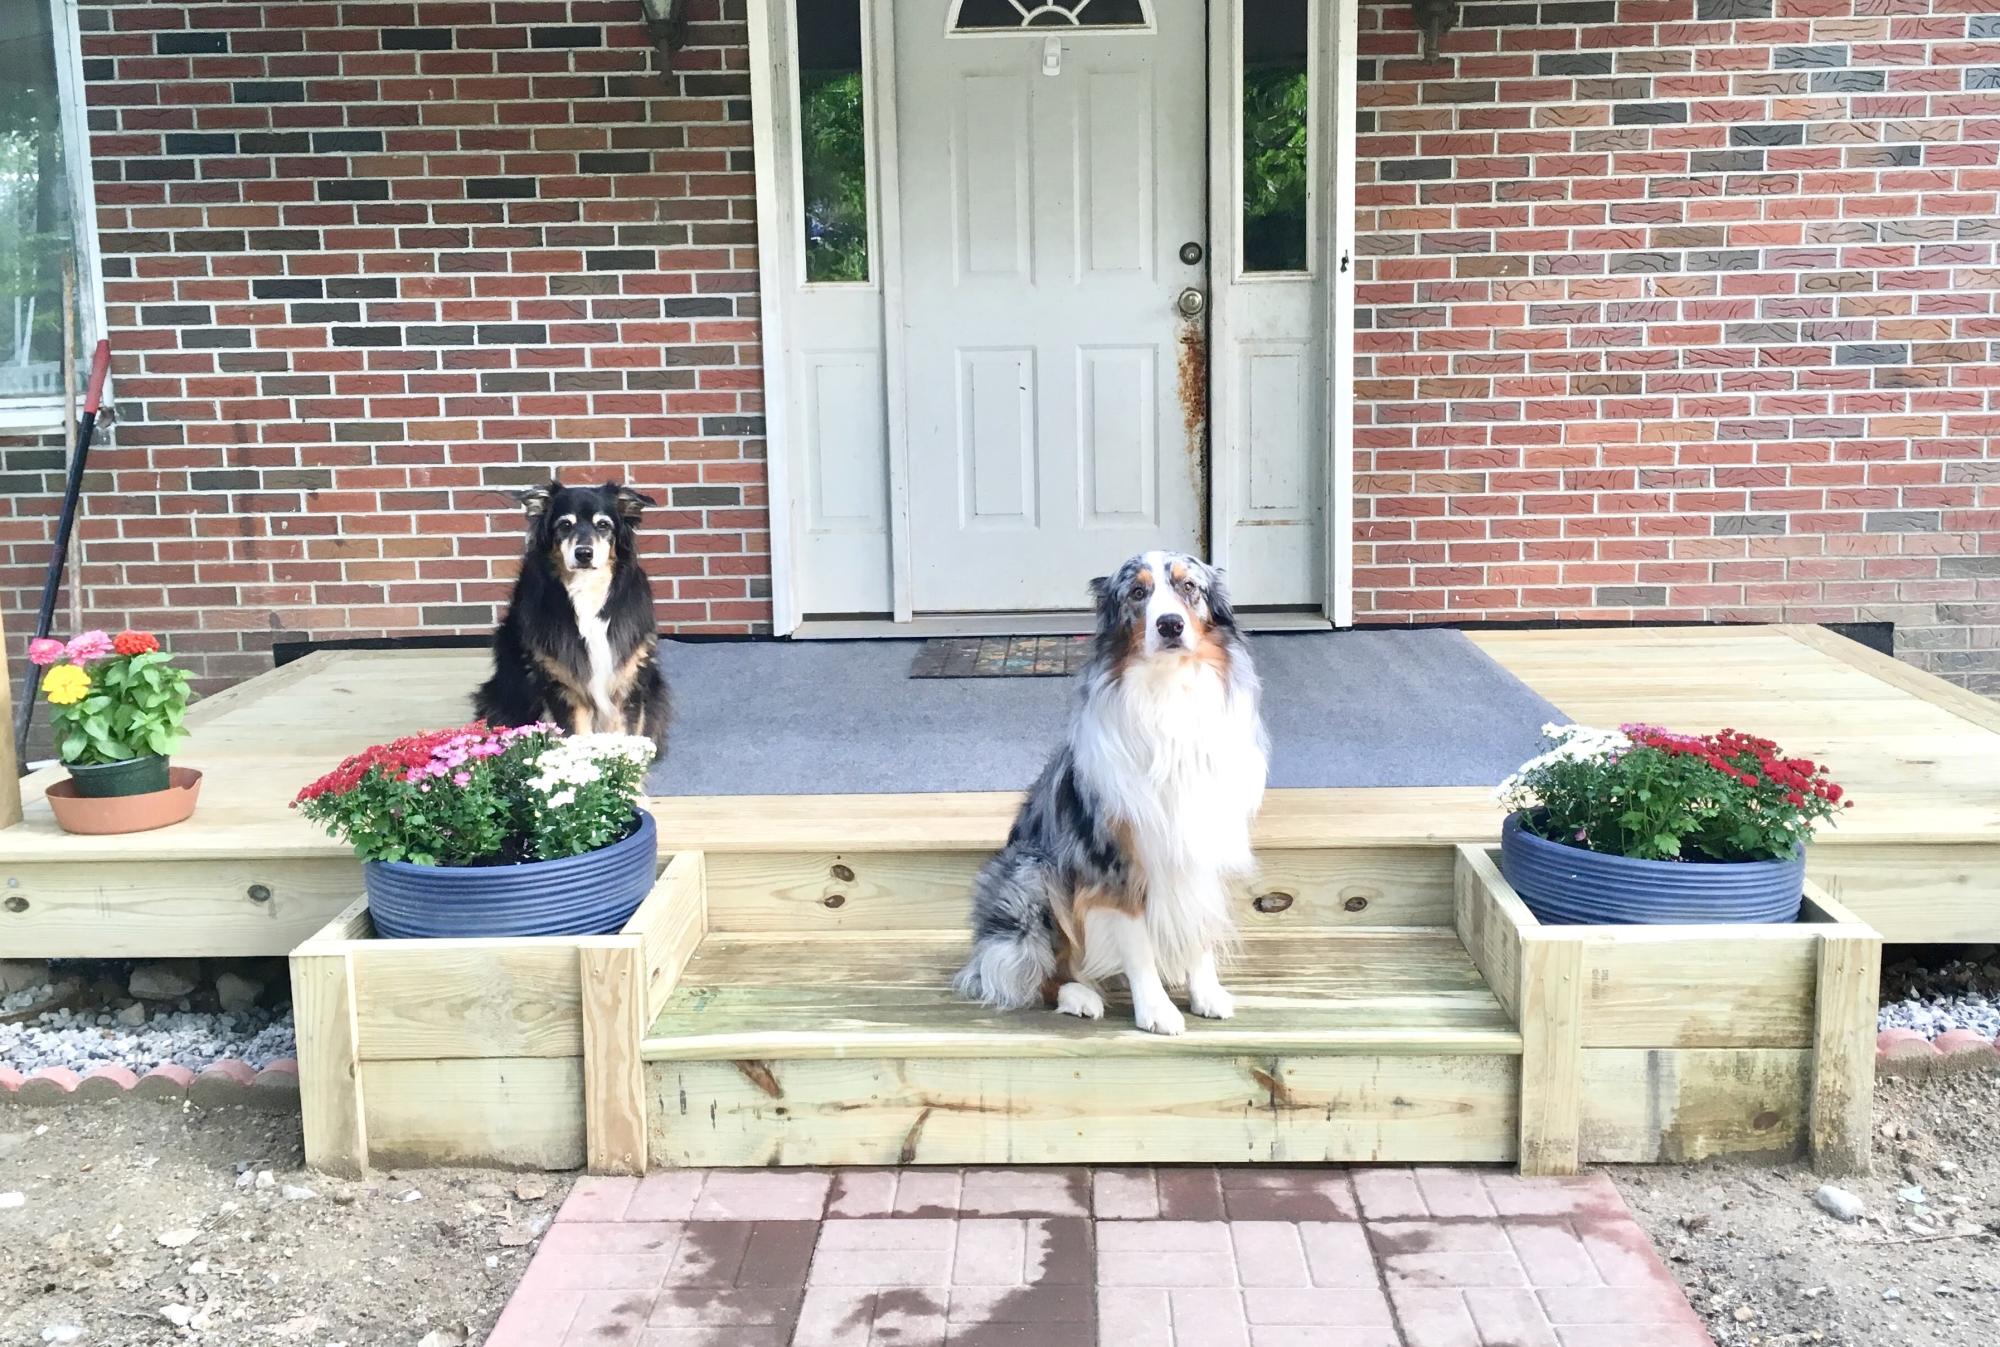
I love how sturdy and beautiful these planter steps turned out! They were easy to build and work perfectly with the new deck/front porch I built this summer. I only needed one step and I used the same 1x material for the top of the step as I did the deck. I just added a couple more supports for the 1x material, as it isn't as sturdy as 2x6's. Thank you so much for the wonderful plan!
