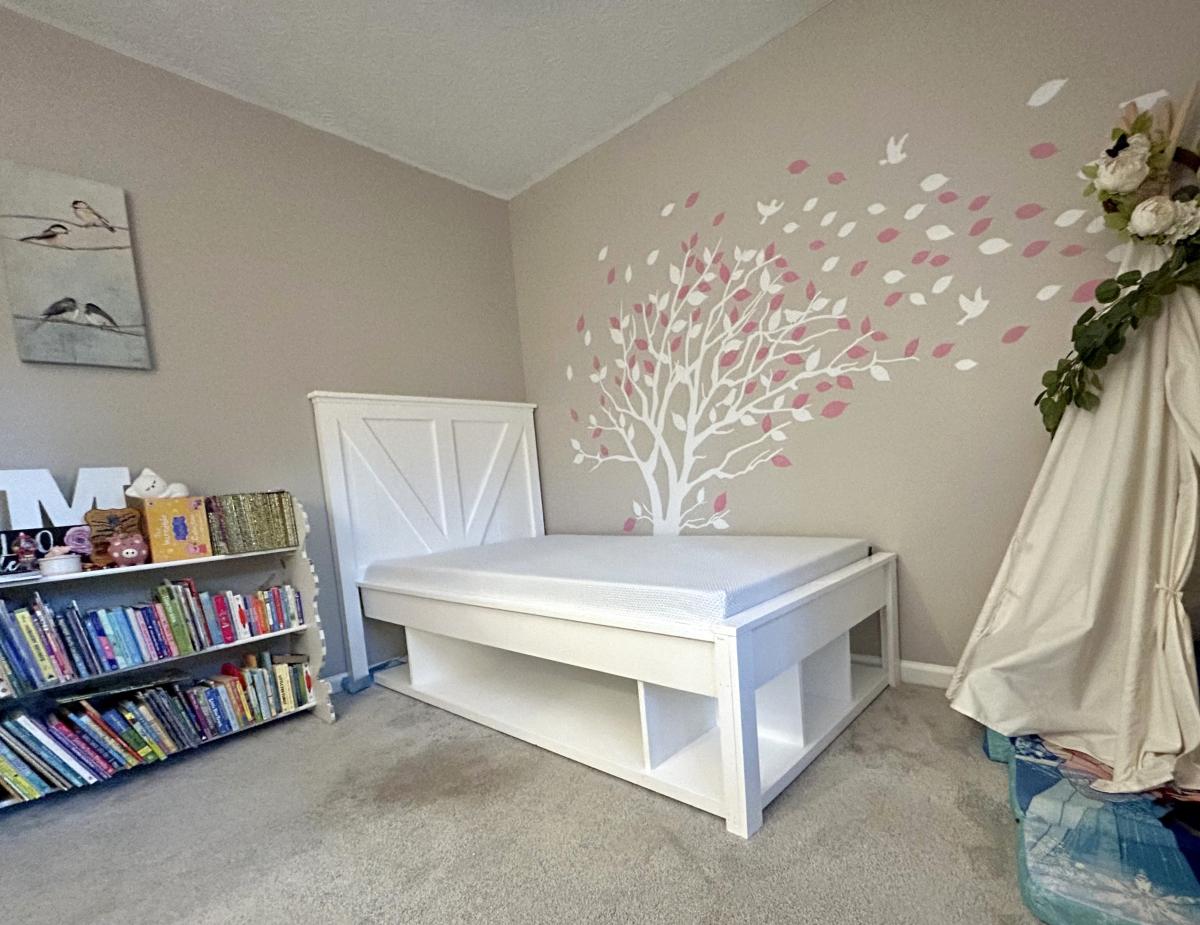
Storage Bed for Girls Room
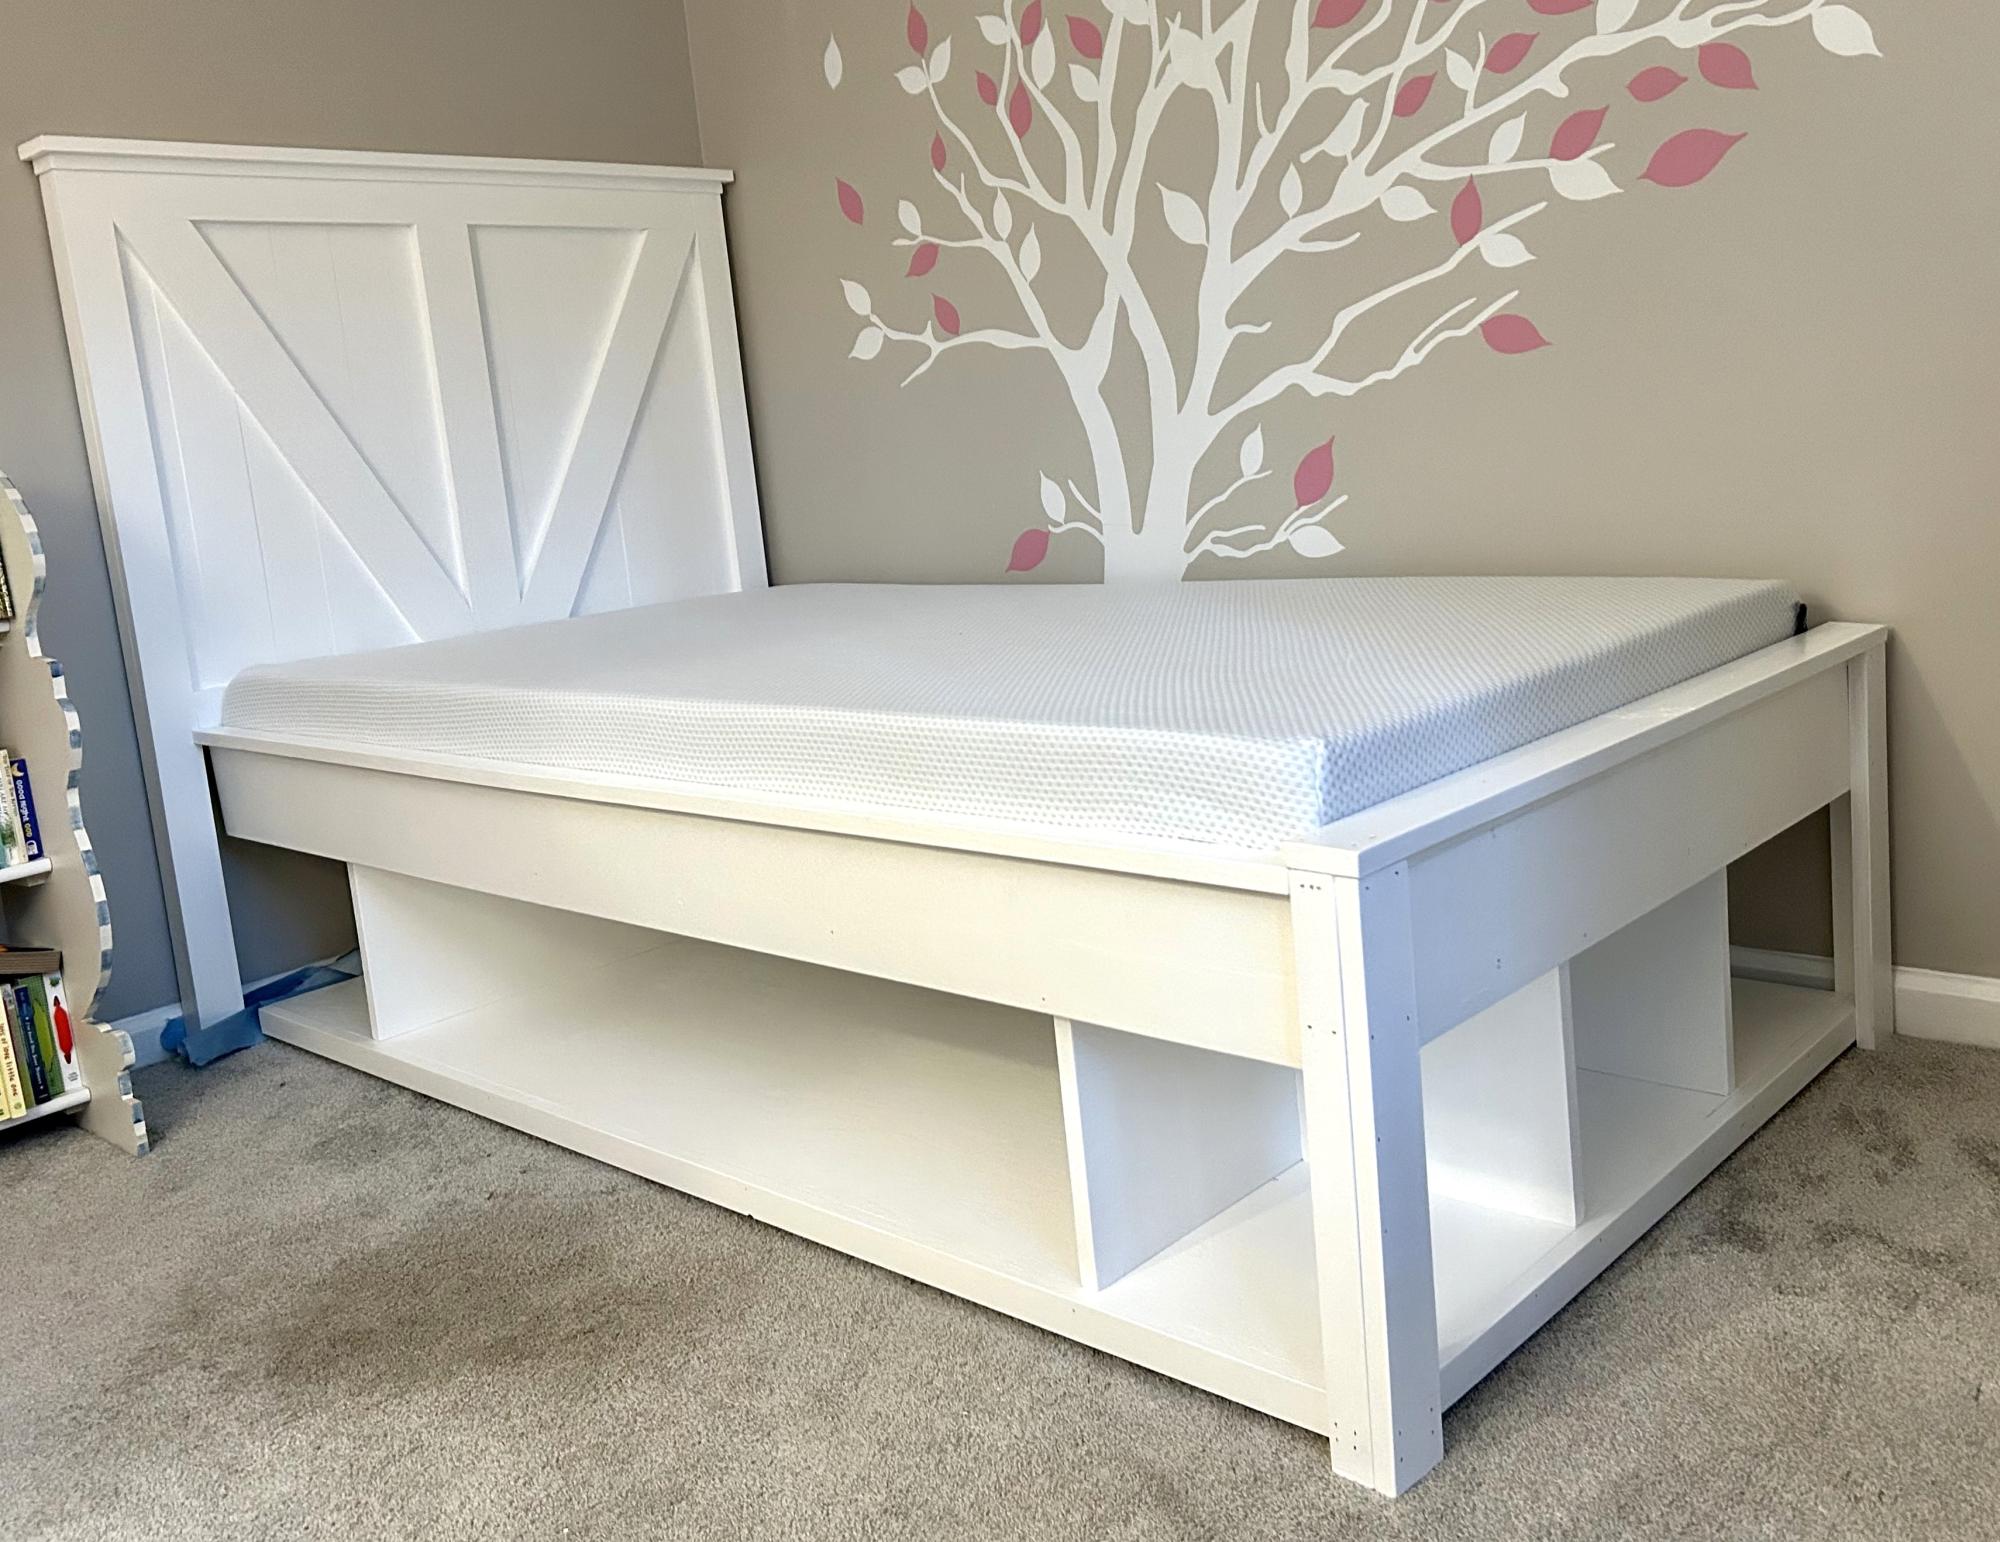
Love this build! We decided to flip the head board pieces because our daughters initials are MNW and we thought it looked more like a M and a W this way.
Built from Plan(s)
Love this build! We decided to flip the head board pieces because our daughters initials are MNW and we thought it looked more like a M and a W this way.
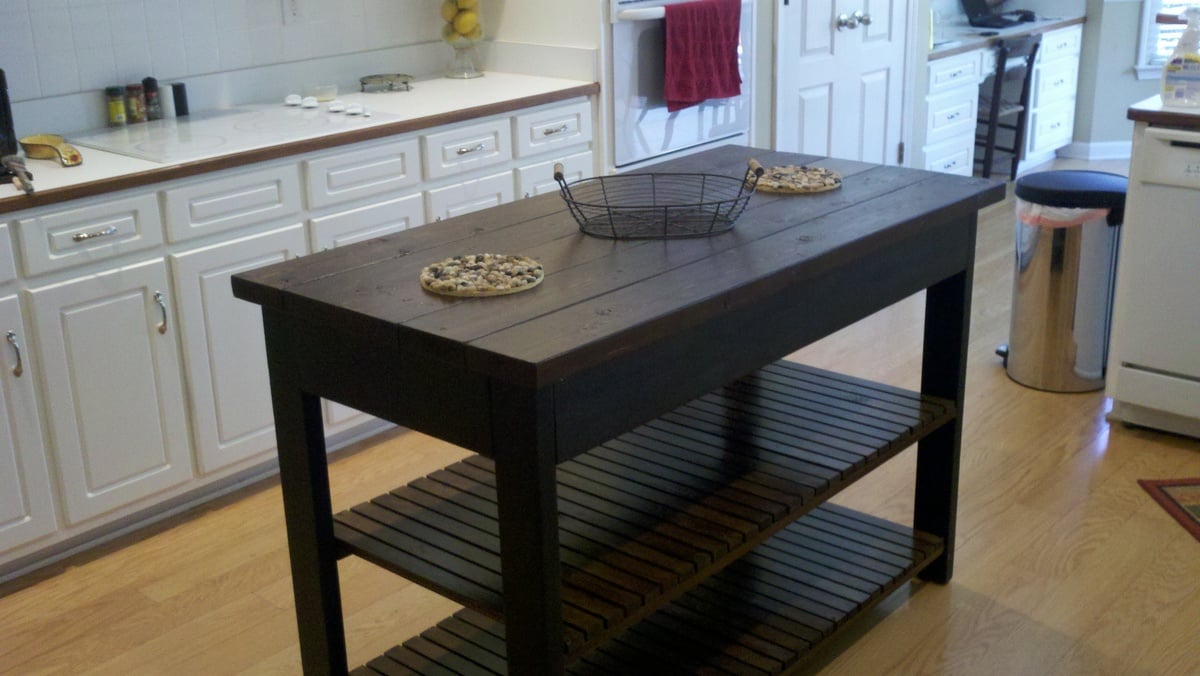
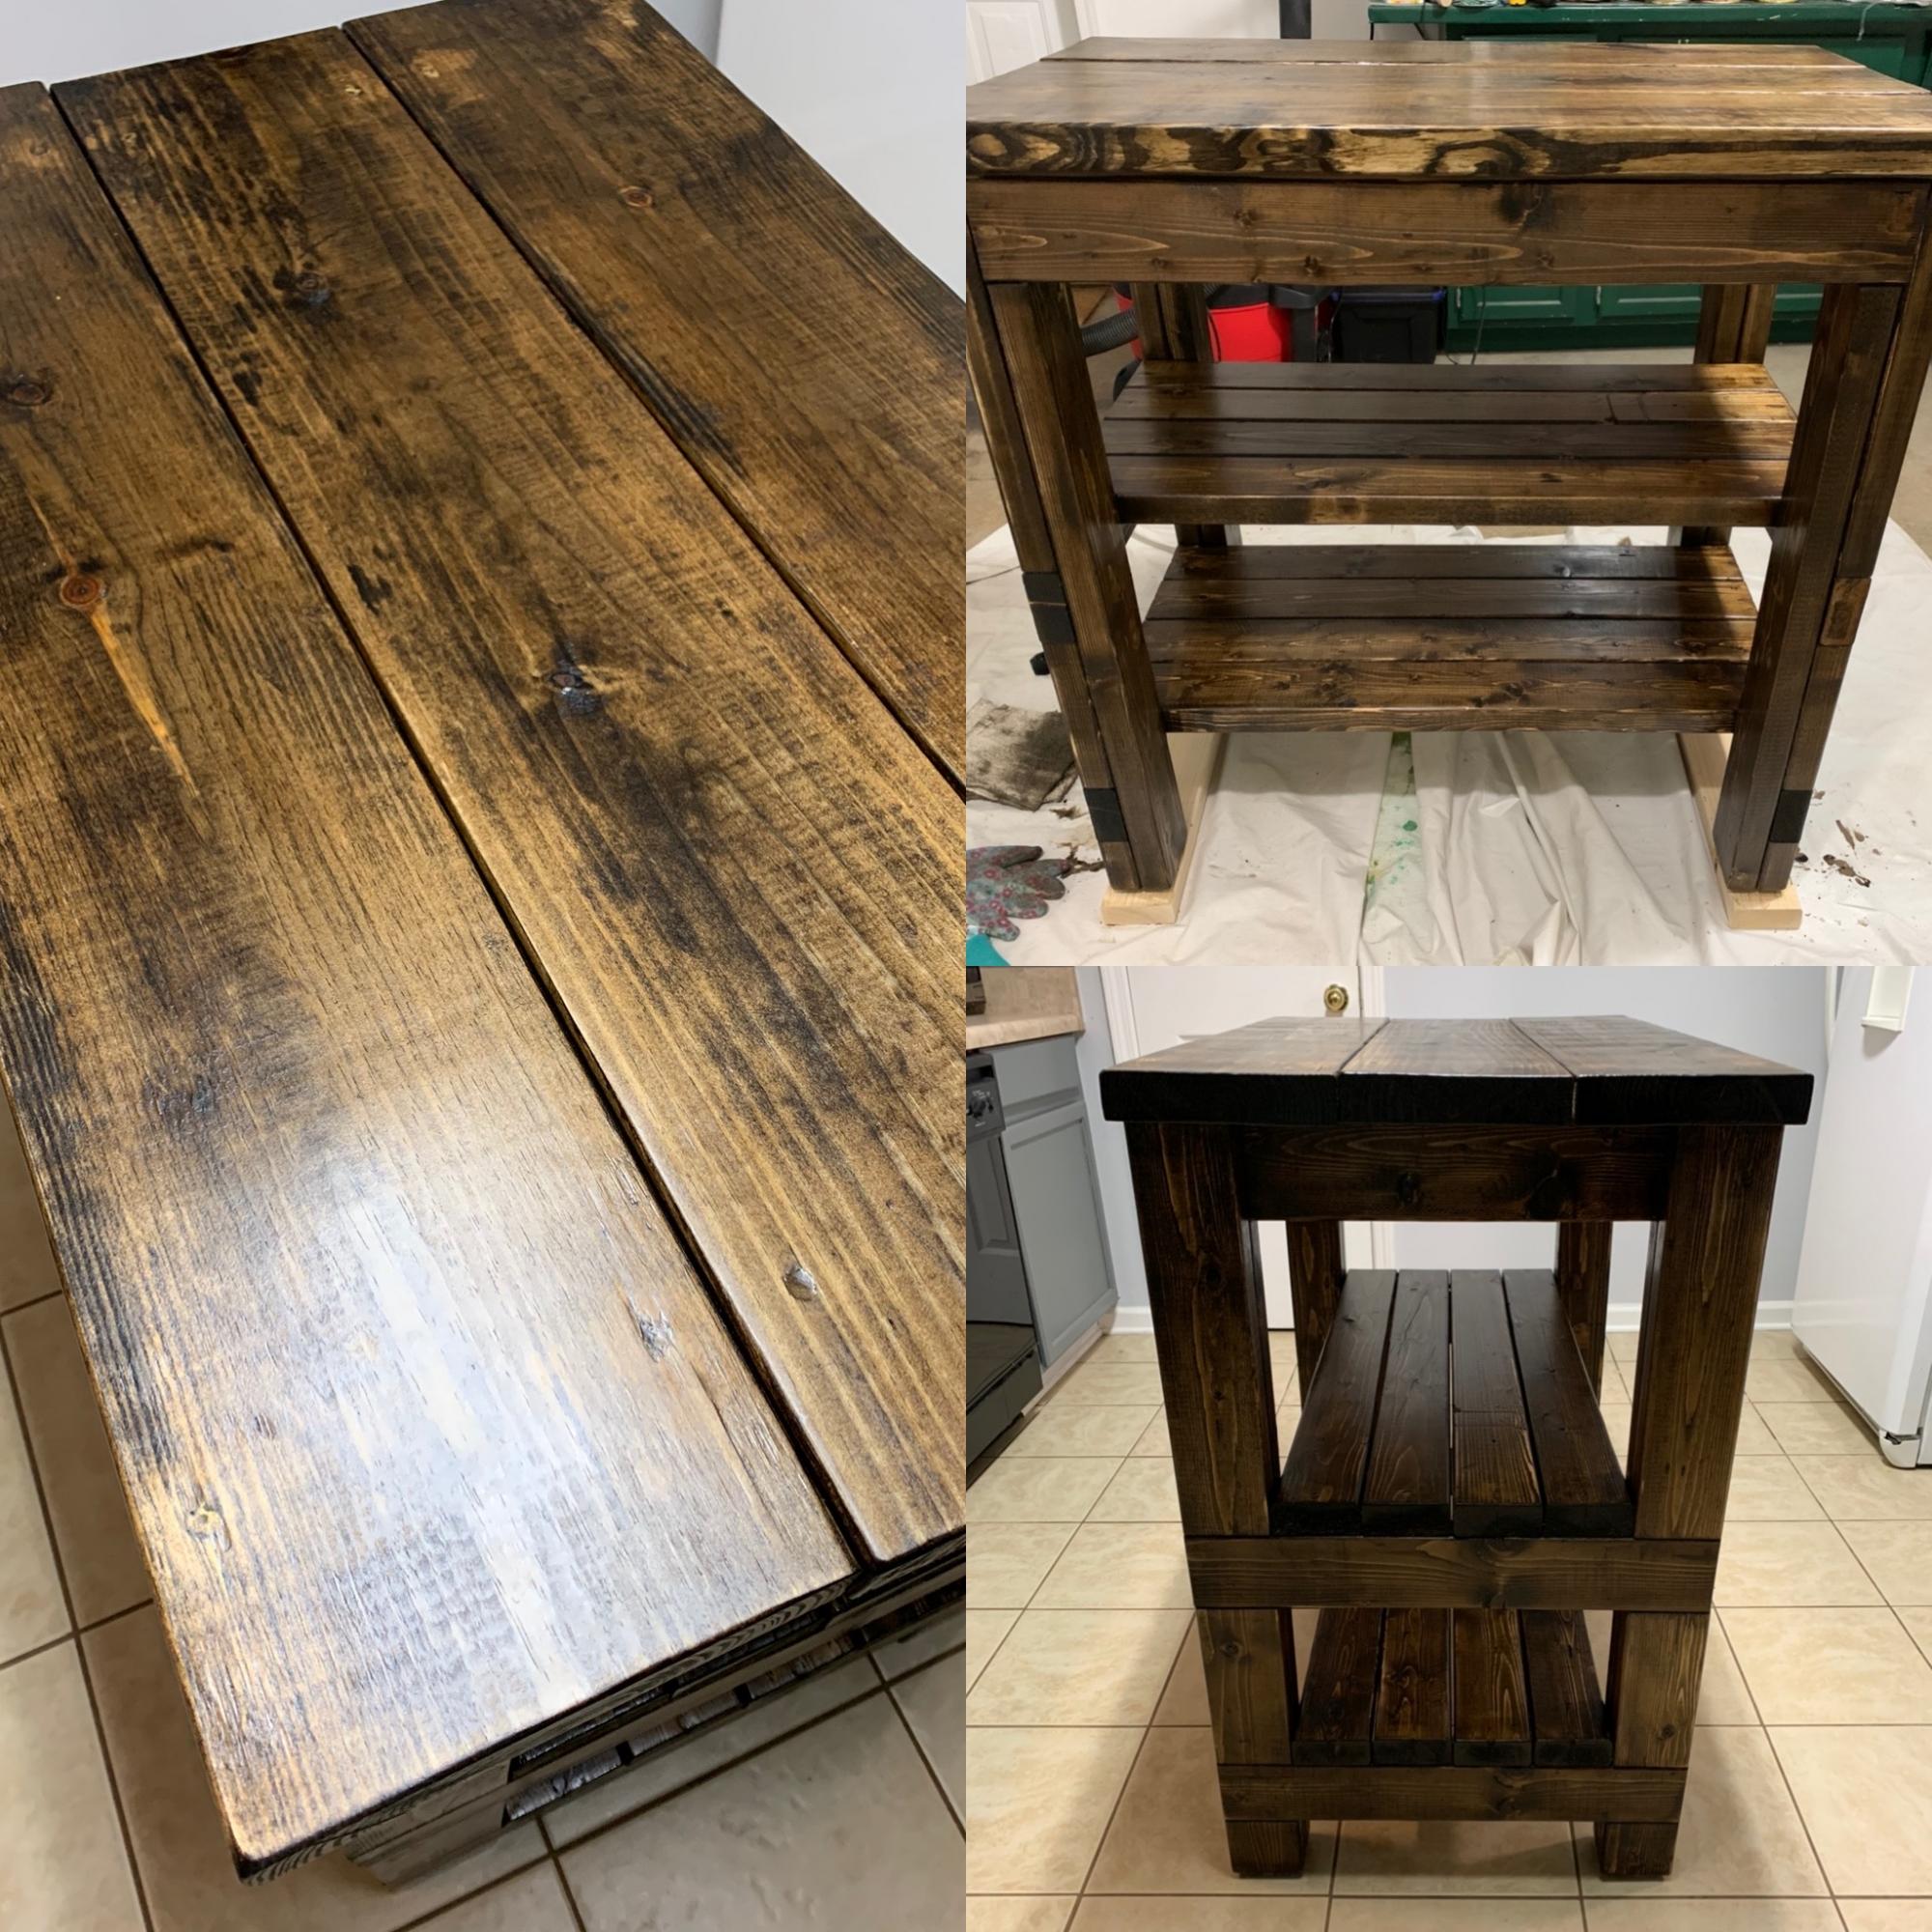
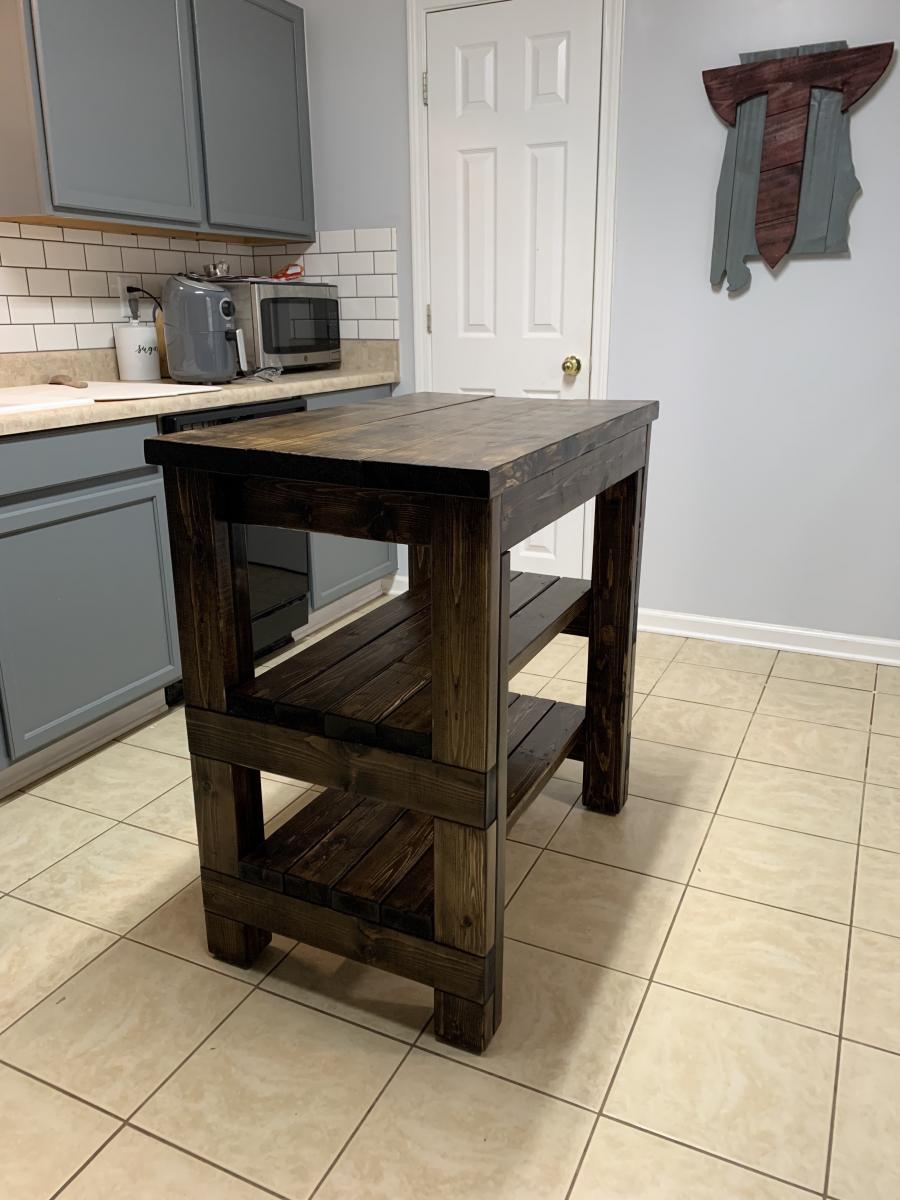
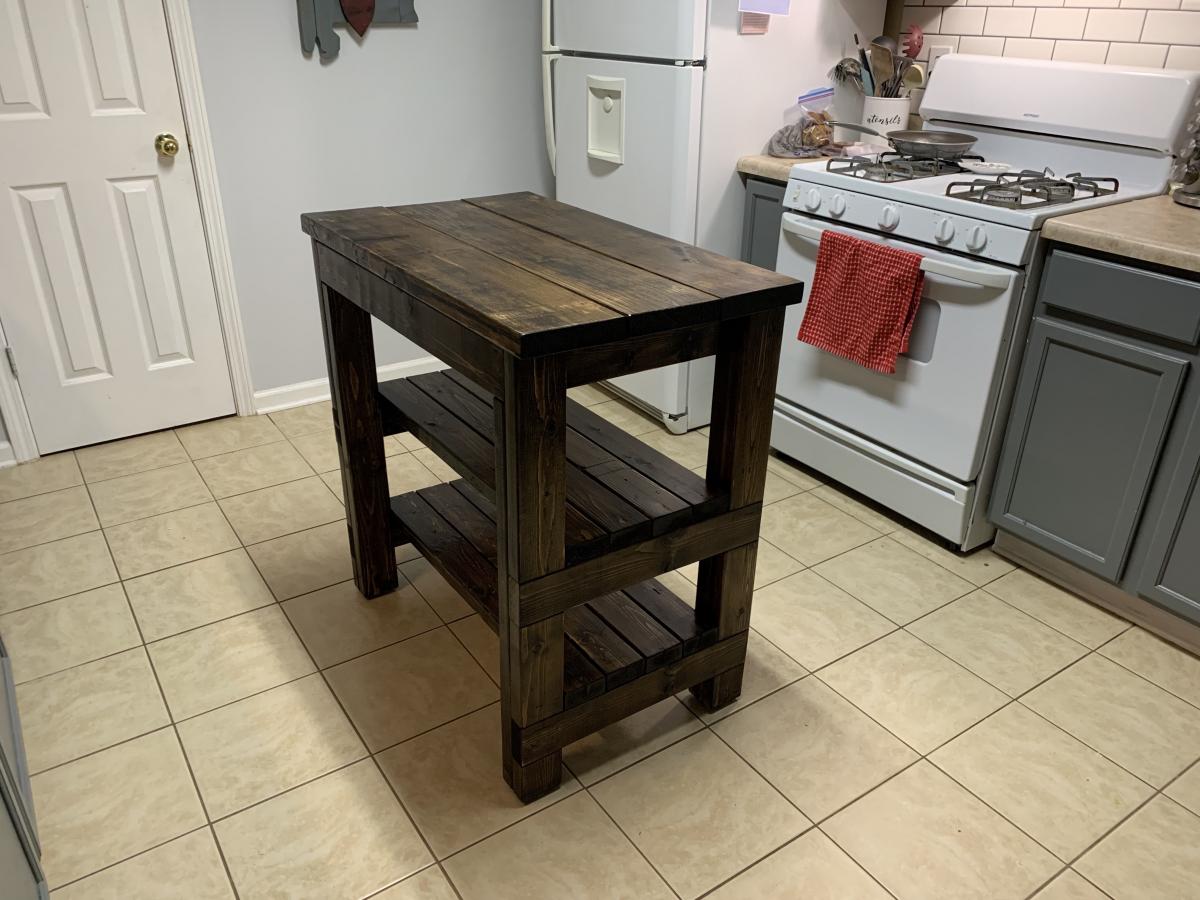
An easy to build and very sturdy kitchen island. My father and son constructed the island itself. I stained and painted the island. The construction was relatively easy. Painting and staining were easy, but time consuming because of dry times.

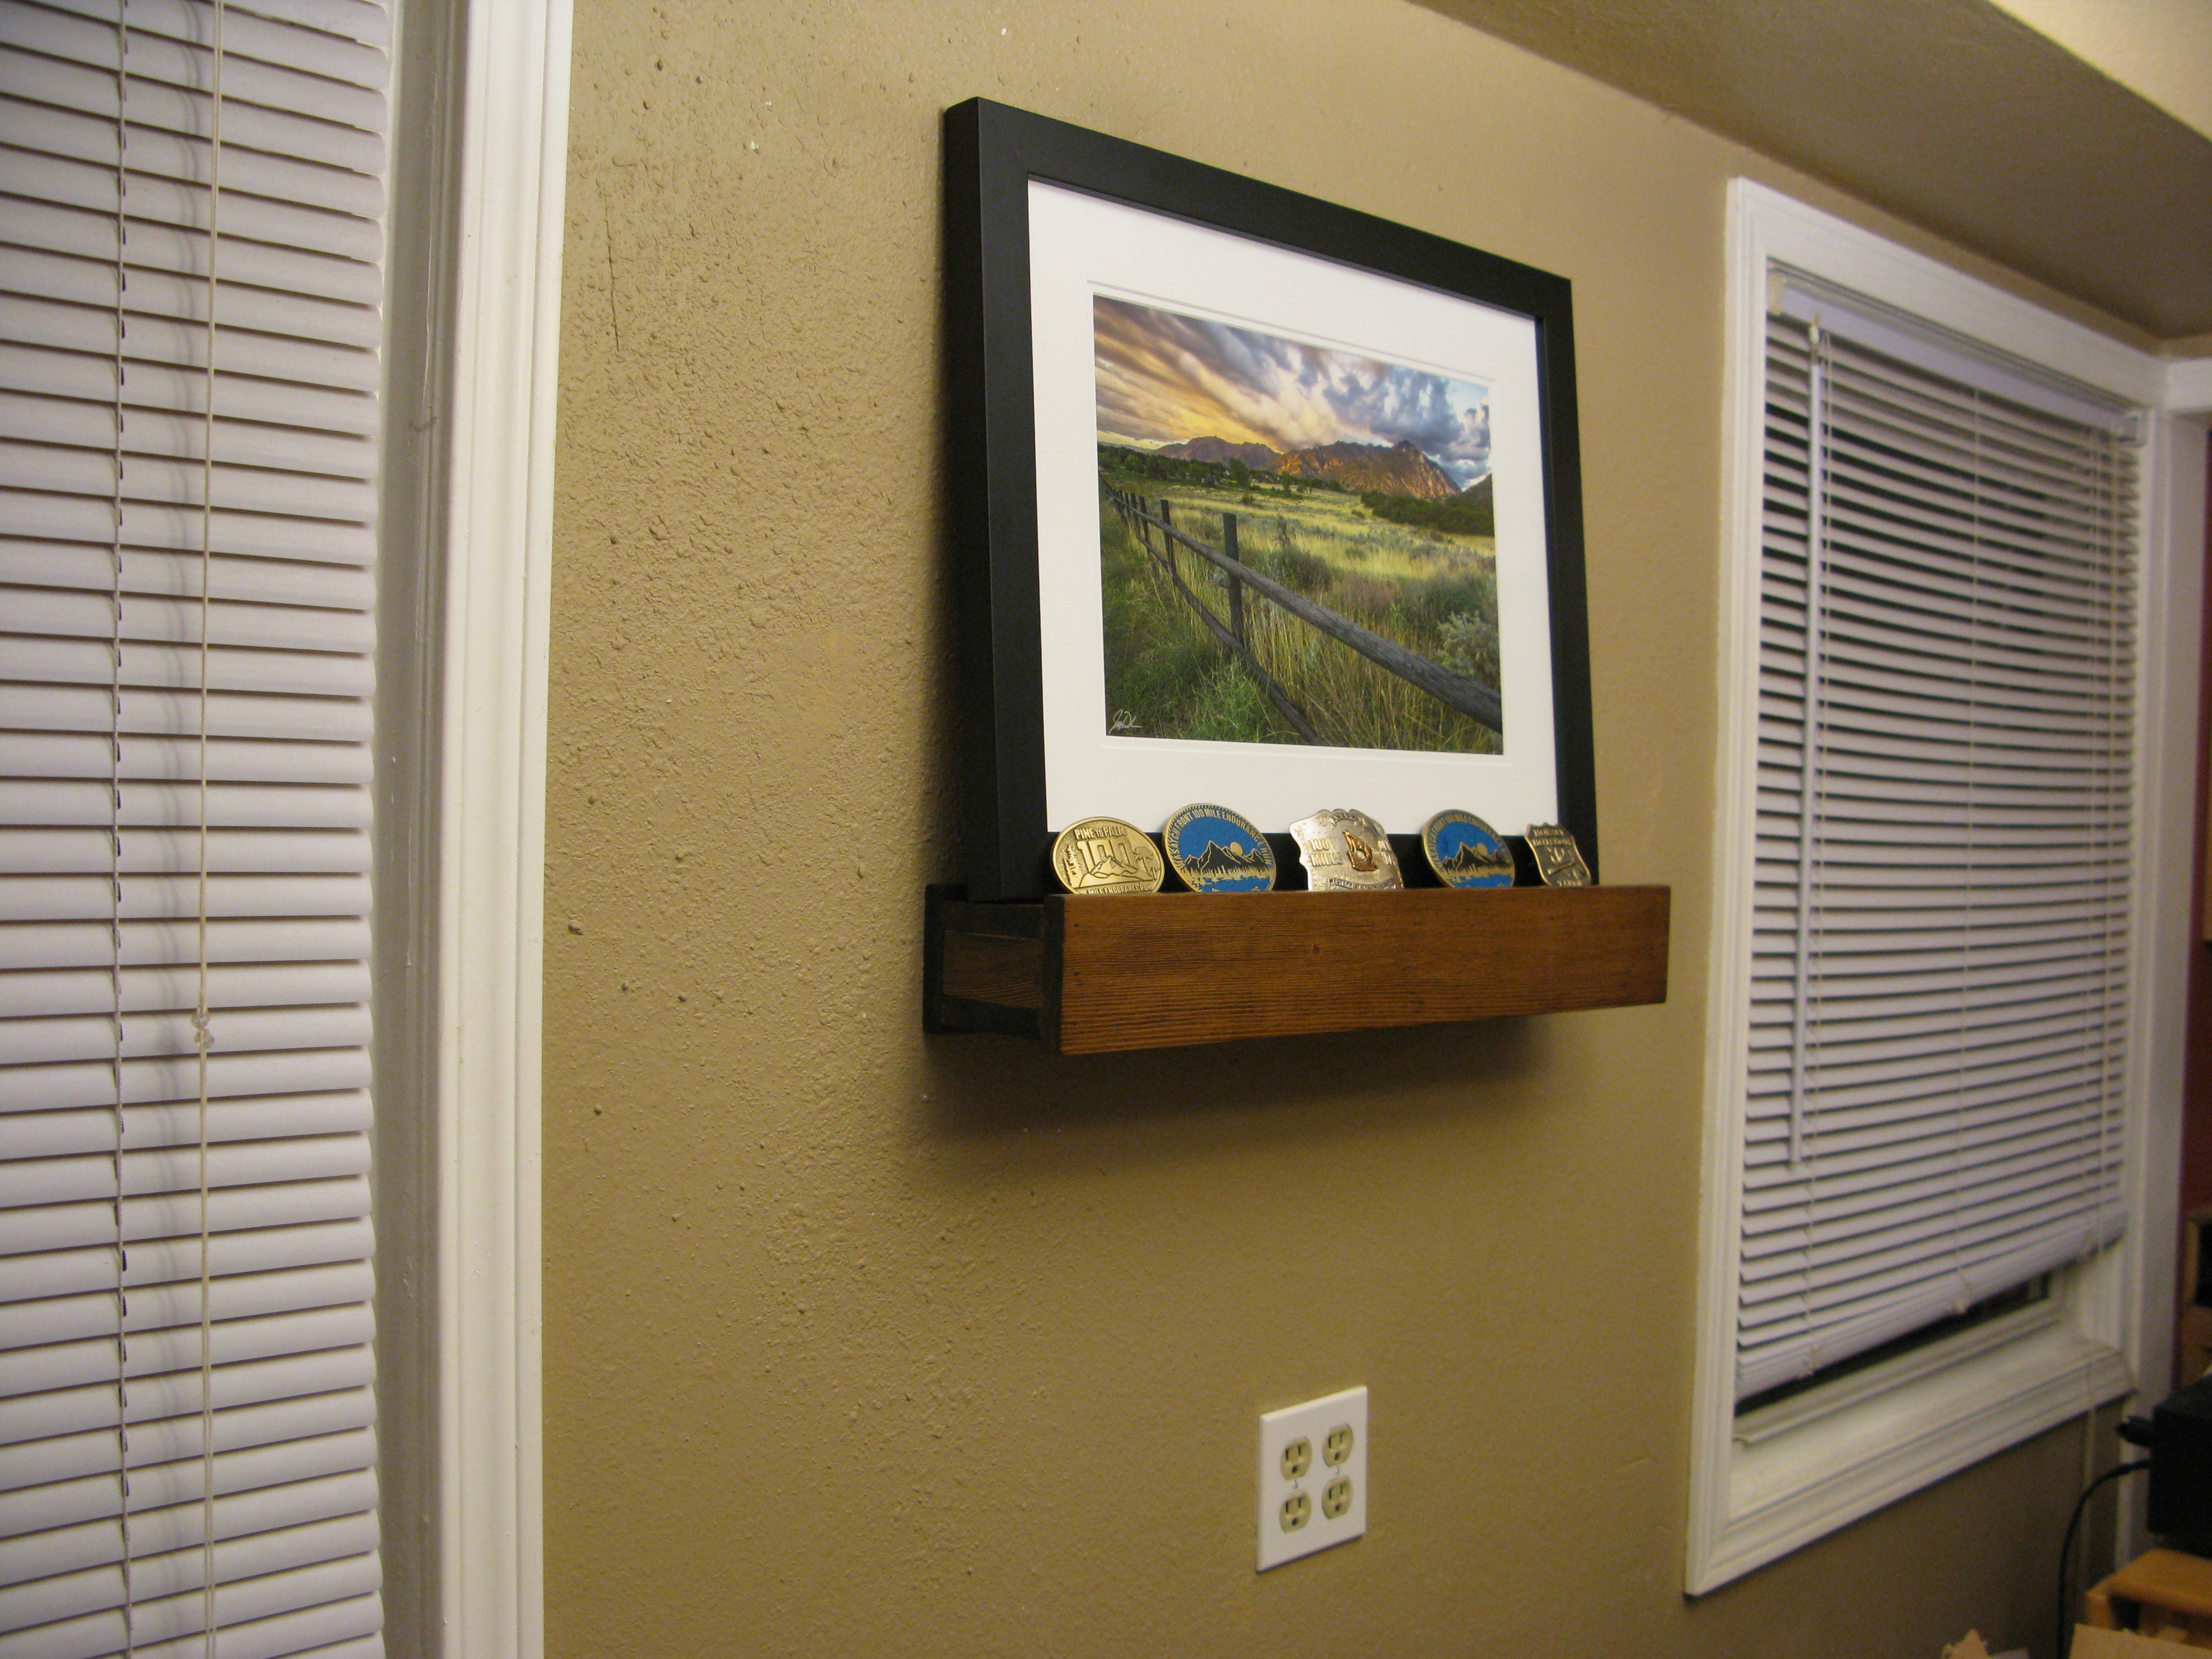
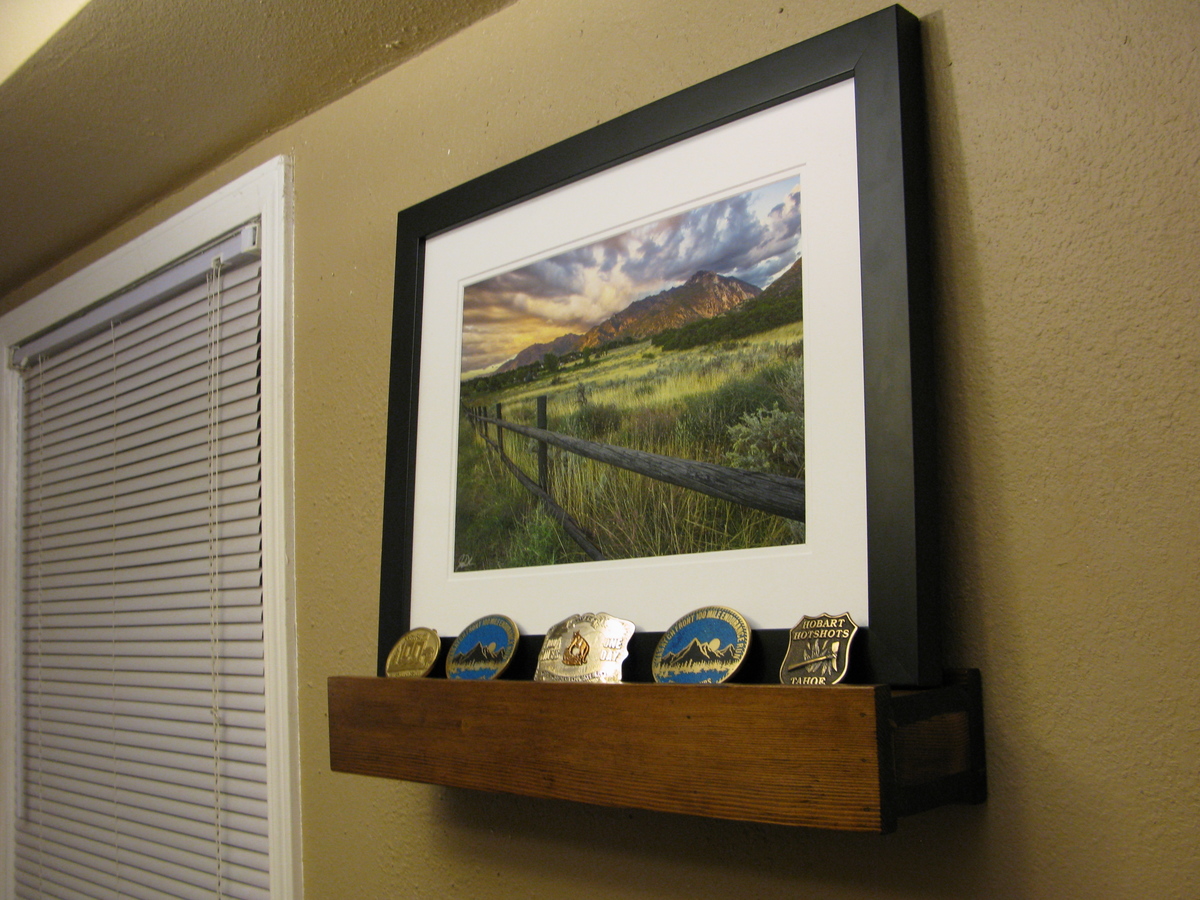
This was my first project since shop class in 7th grade (20 years ago)! Picked this beautiful shelf as a Christmas present to my husband to show off his hard-earned trophies from his ultramarathons (100+ miles of running). Next time I would make it a bit longer, and use end grain on the sides for a more even color. Came together easily, and can't wait for my next project! Picture is from Jay Dash Photography, of the Wasatch Mountains in Utah.
My husbands second build and it turned out AMAZING! The plans were great!
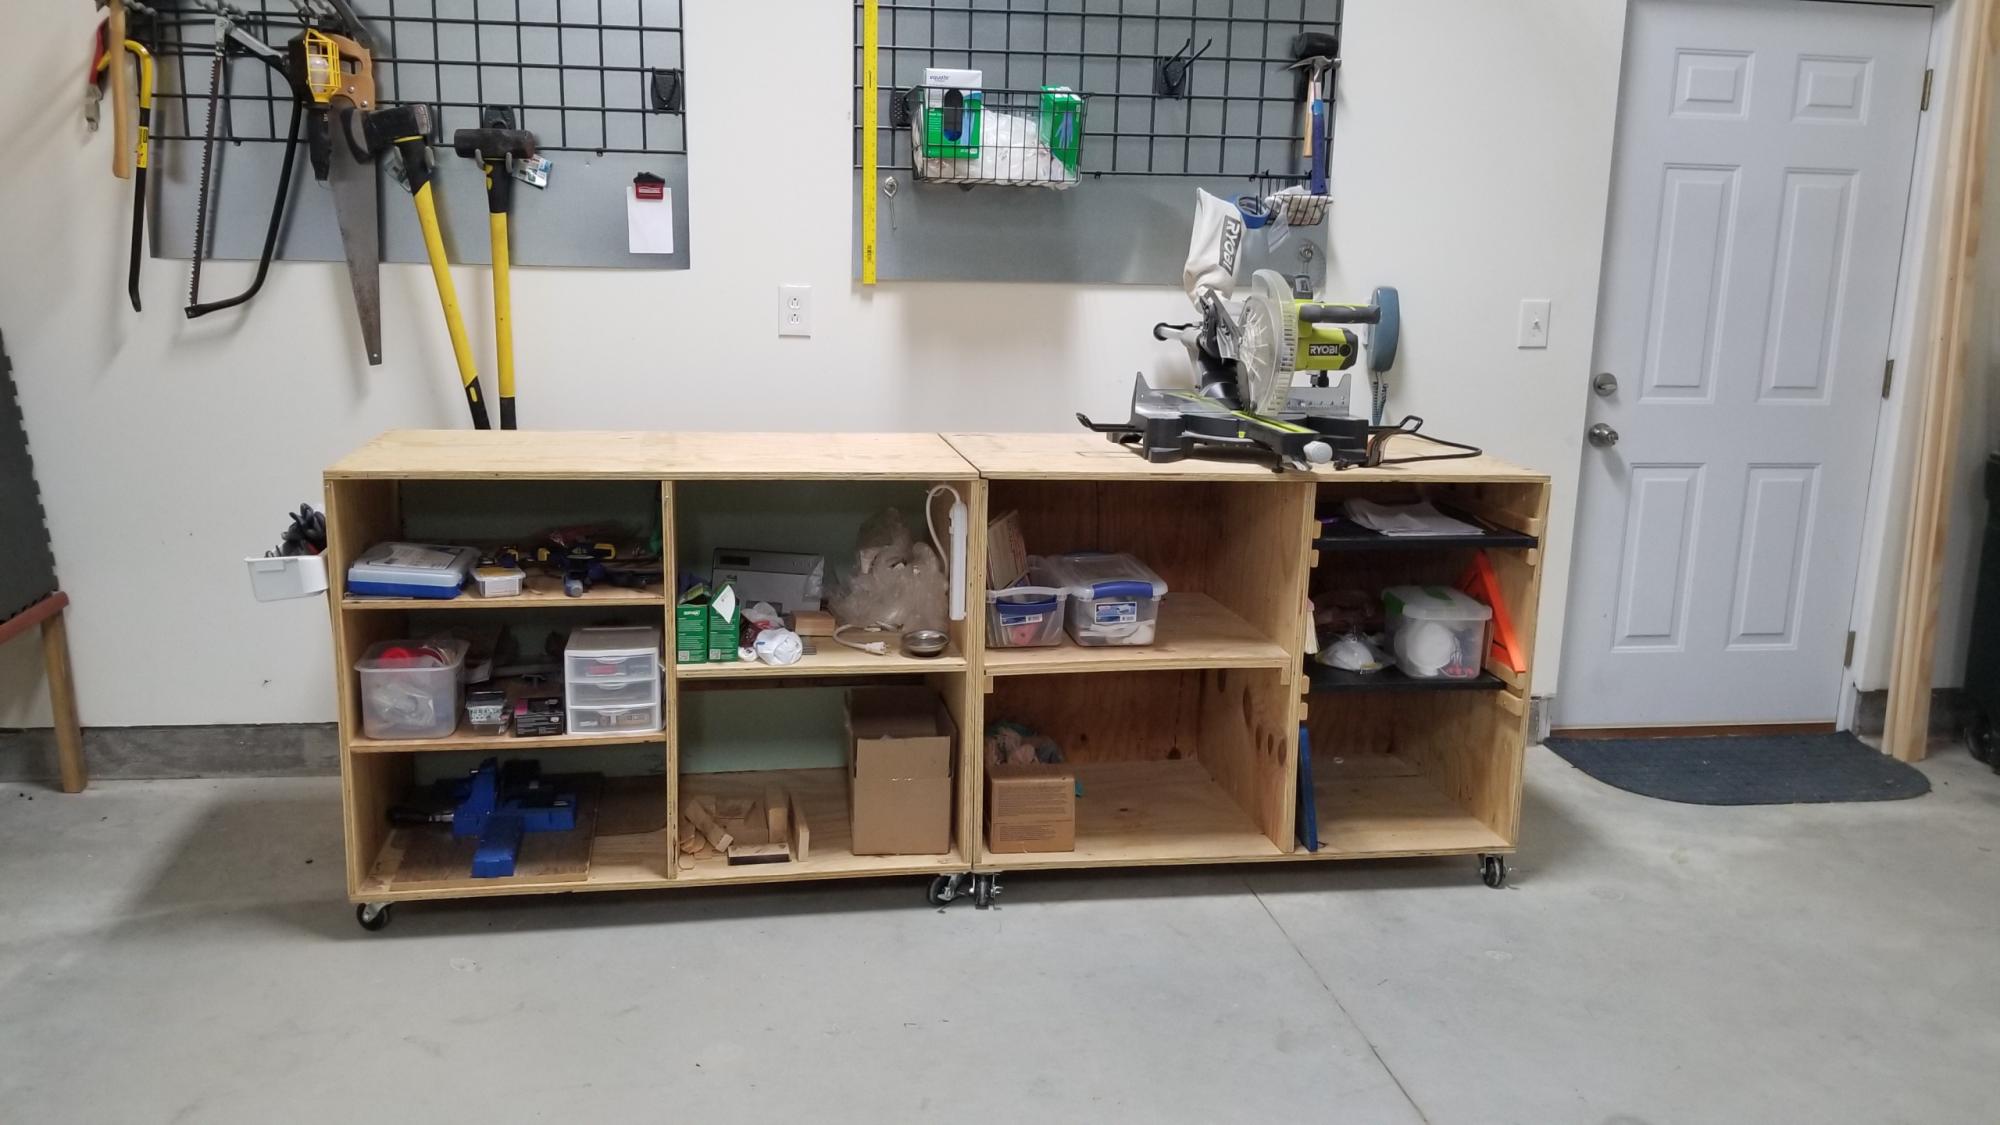
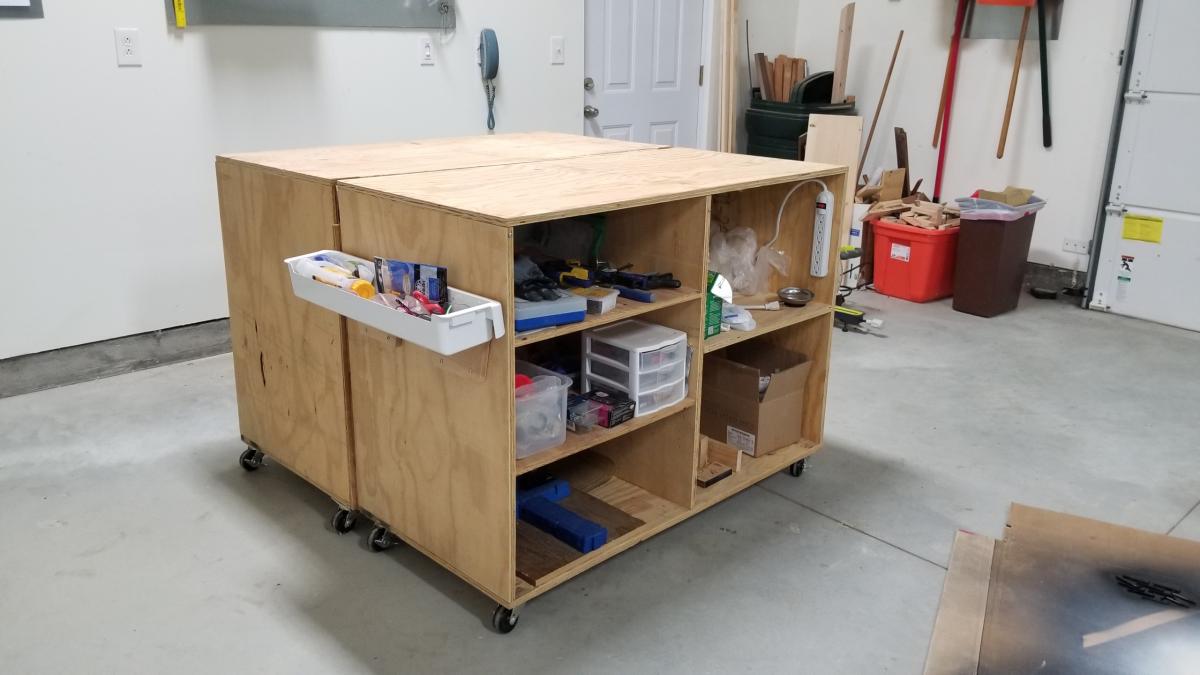
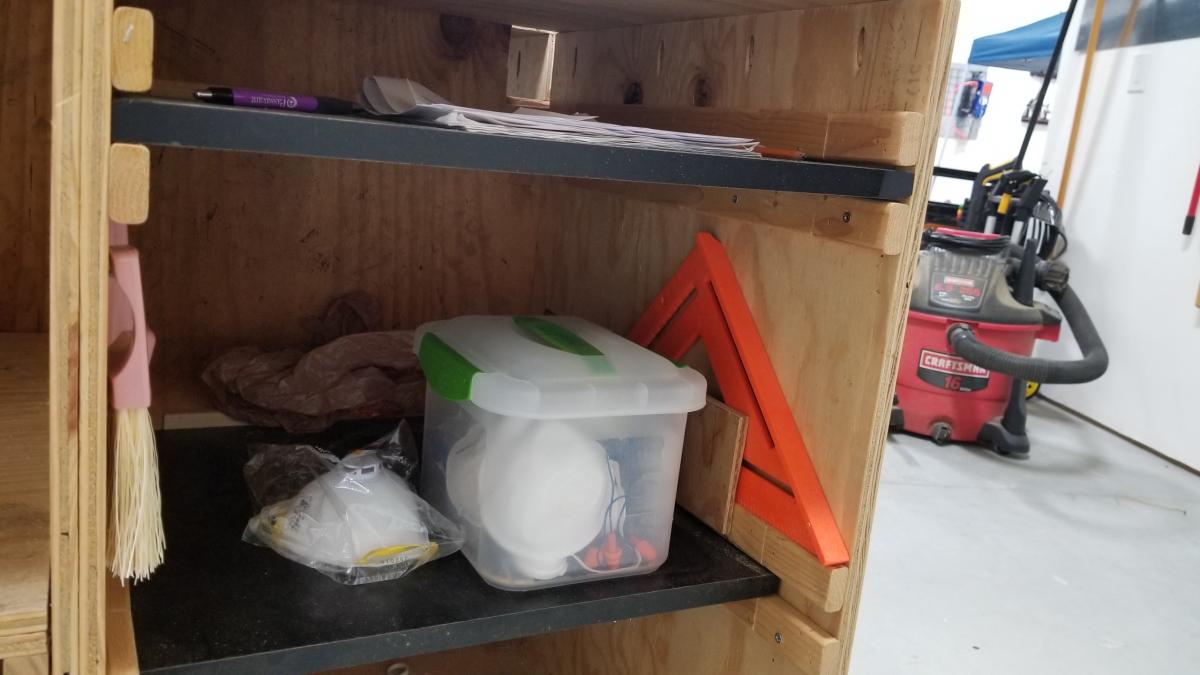
A few years ago I ran across Ana's plans for the Ryobi Dream Workshop with the rolling carts. They have been the most useful item in the garage. I customized them by using some scrap lumber to build some simple slide out shelves, attached a power strip to the inside of the cart, added hooks to hold various tools and added a removable container to the outside edge to hold items (safety glasses, pencils, scissors, glue, etc) that I want to keep close by but not on the work area. Thanks for the plans, Ana!
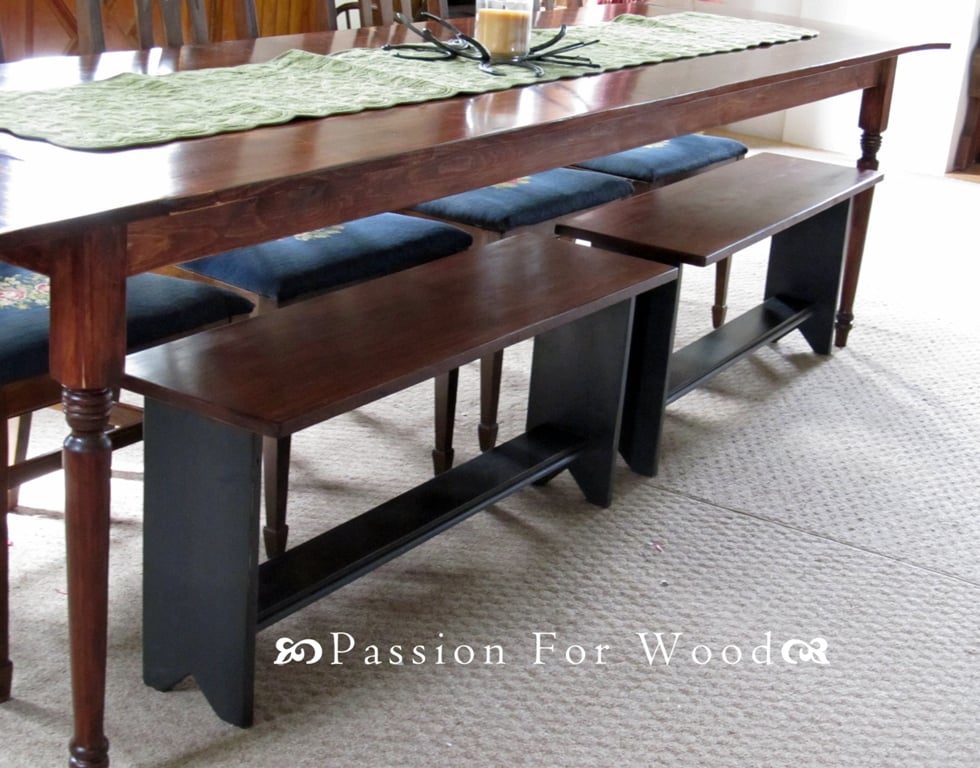
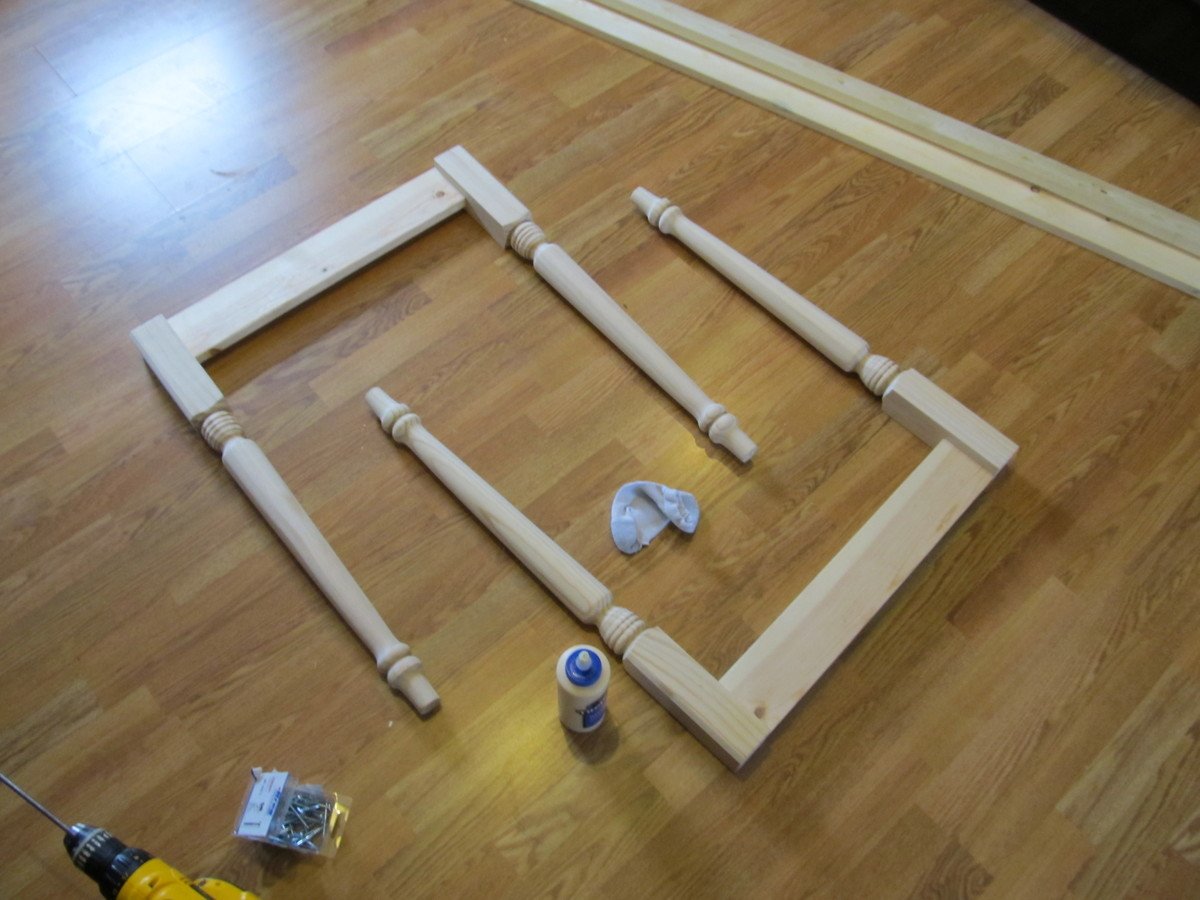
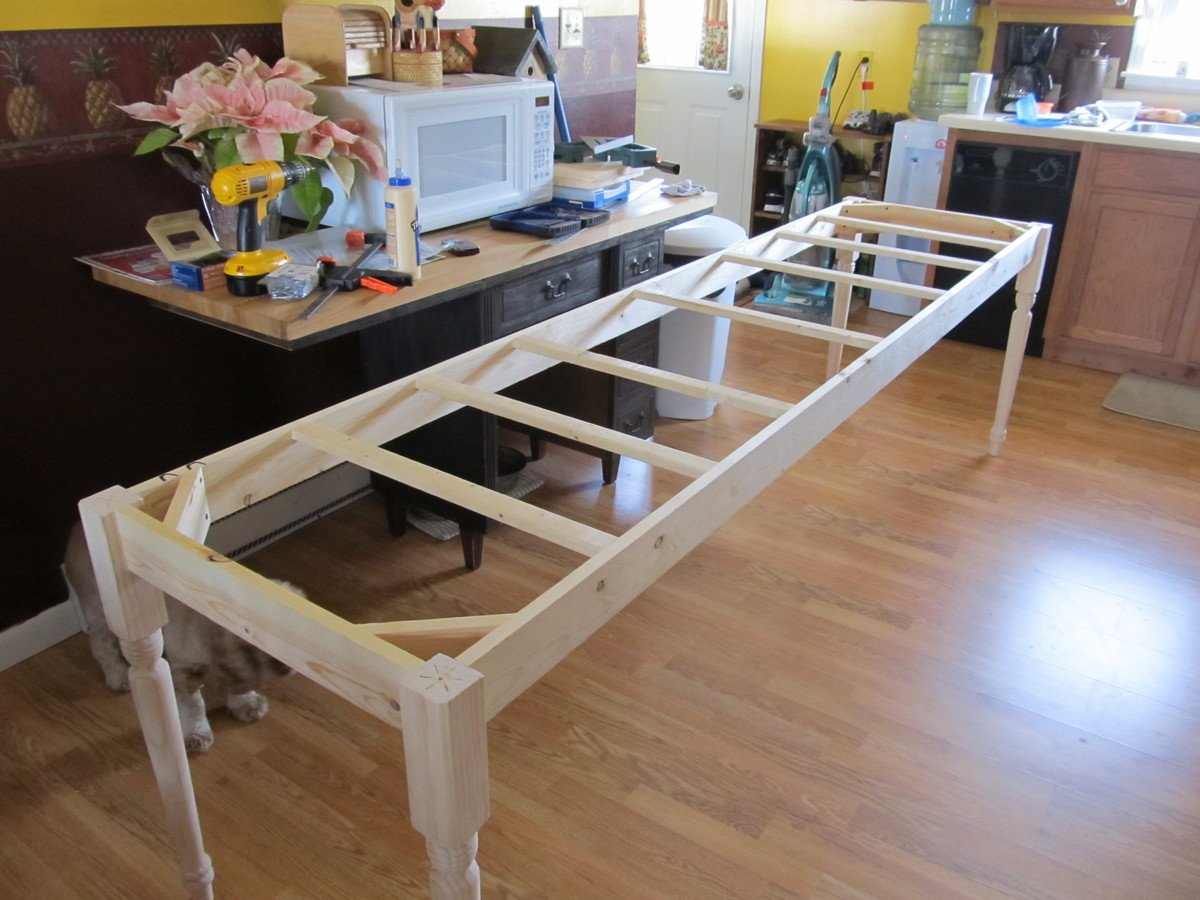
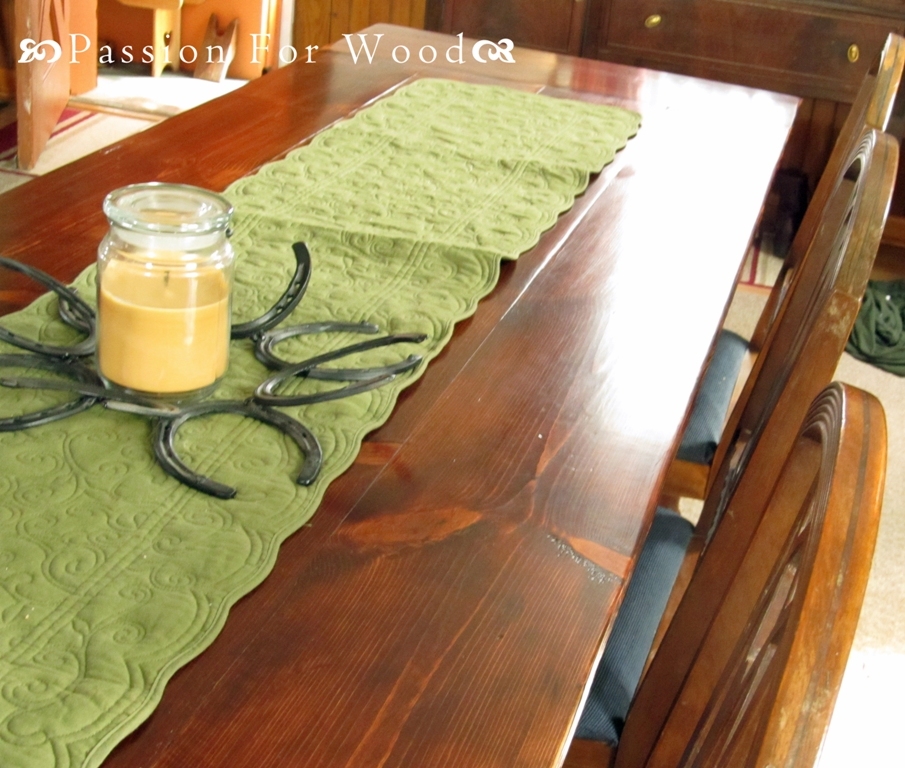
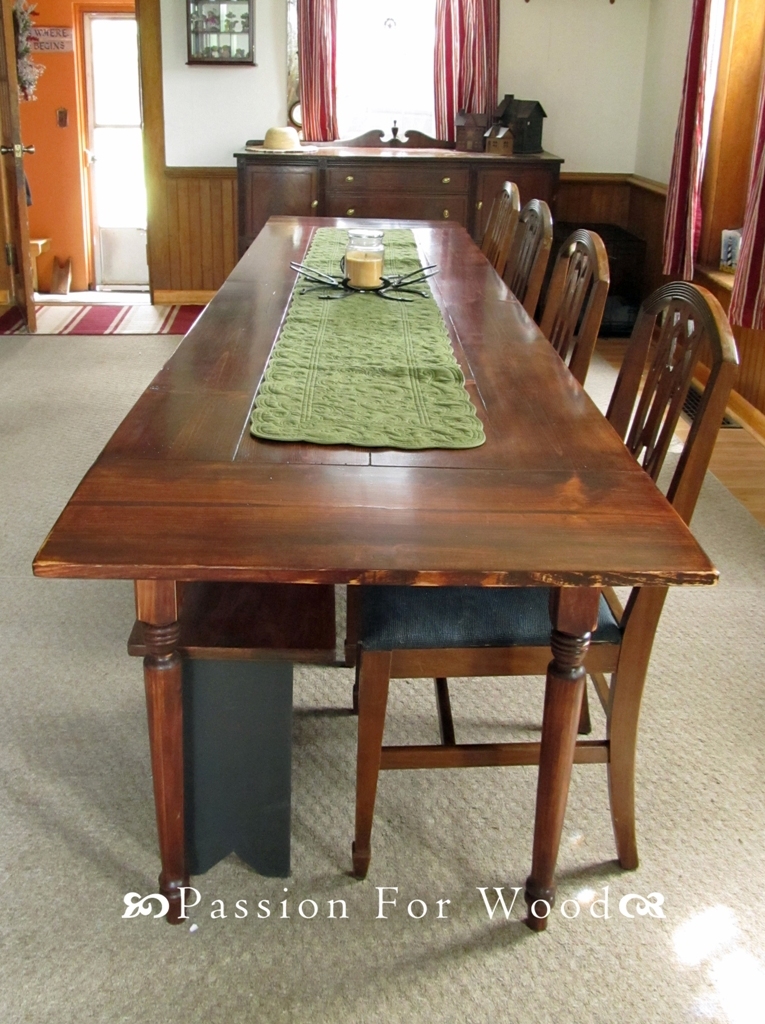
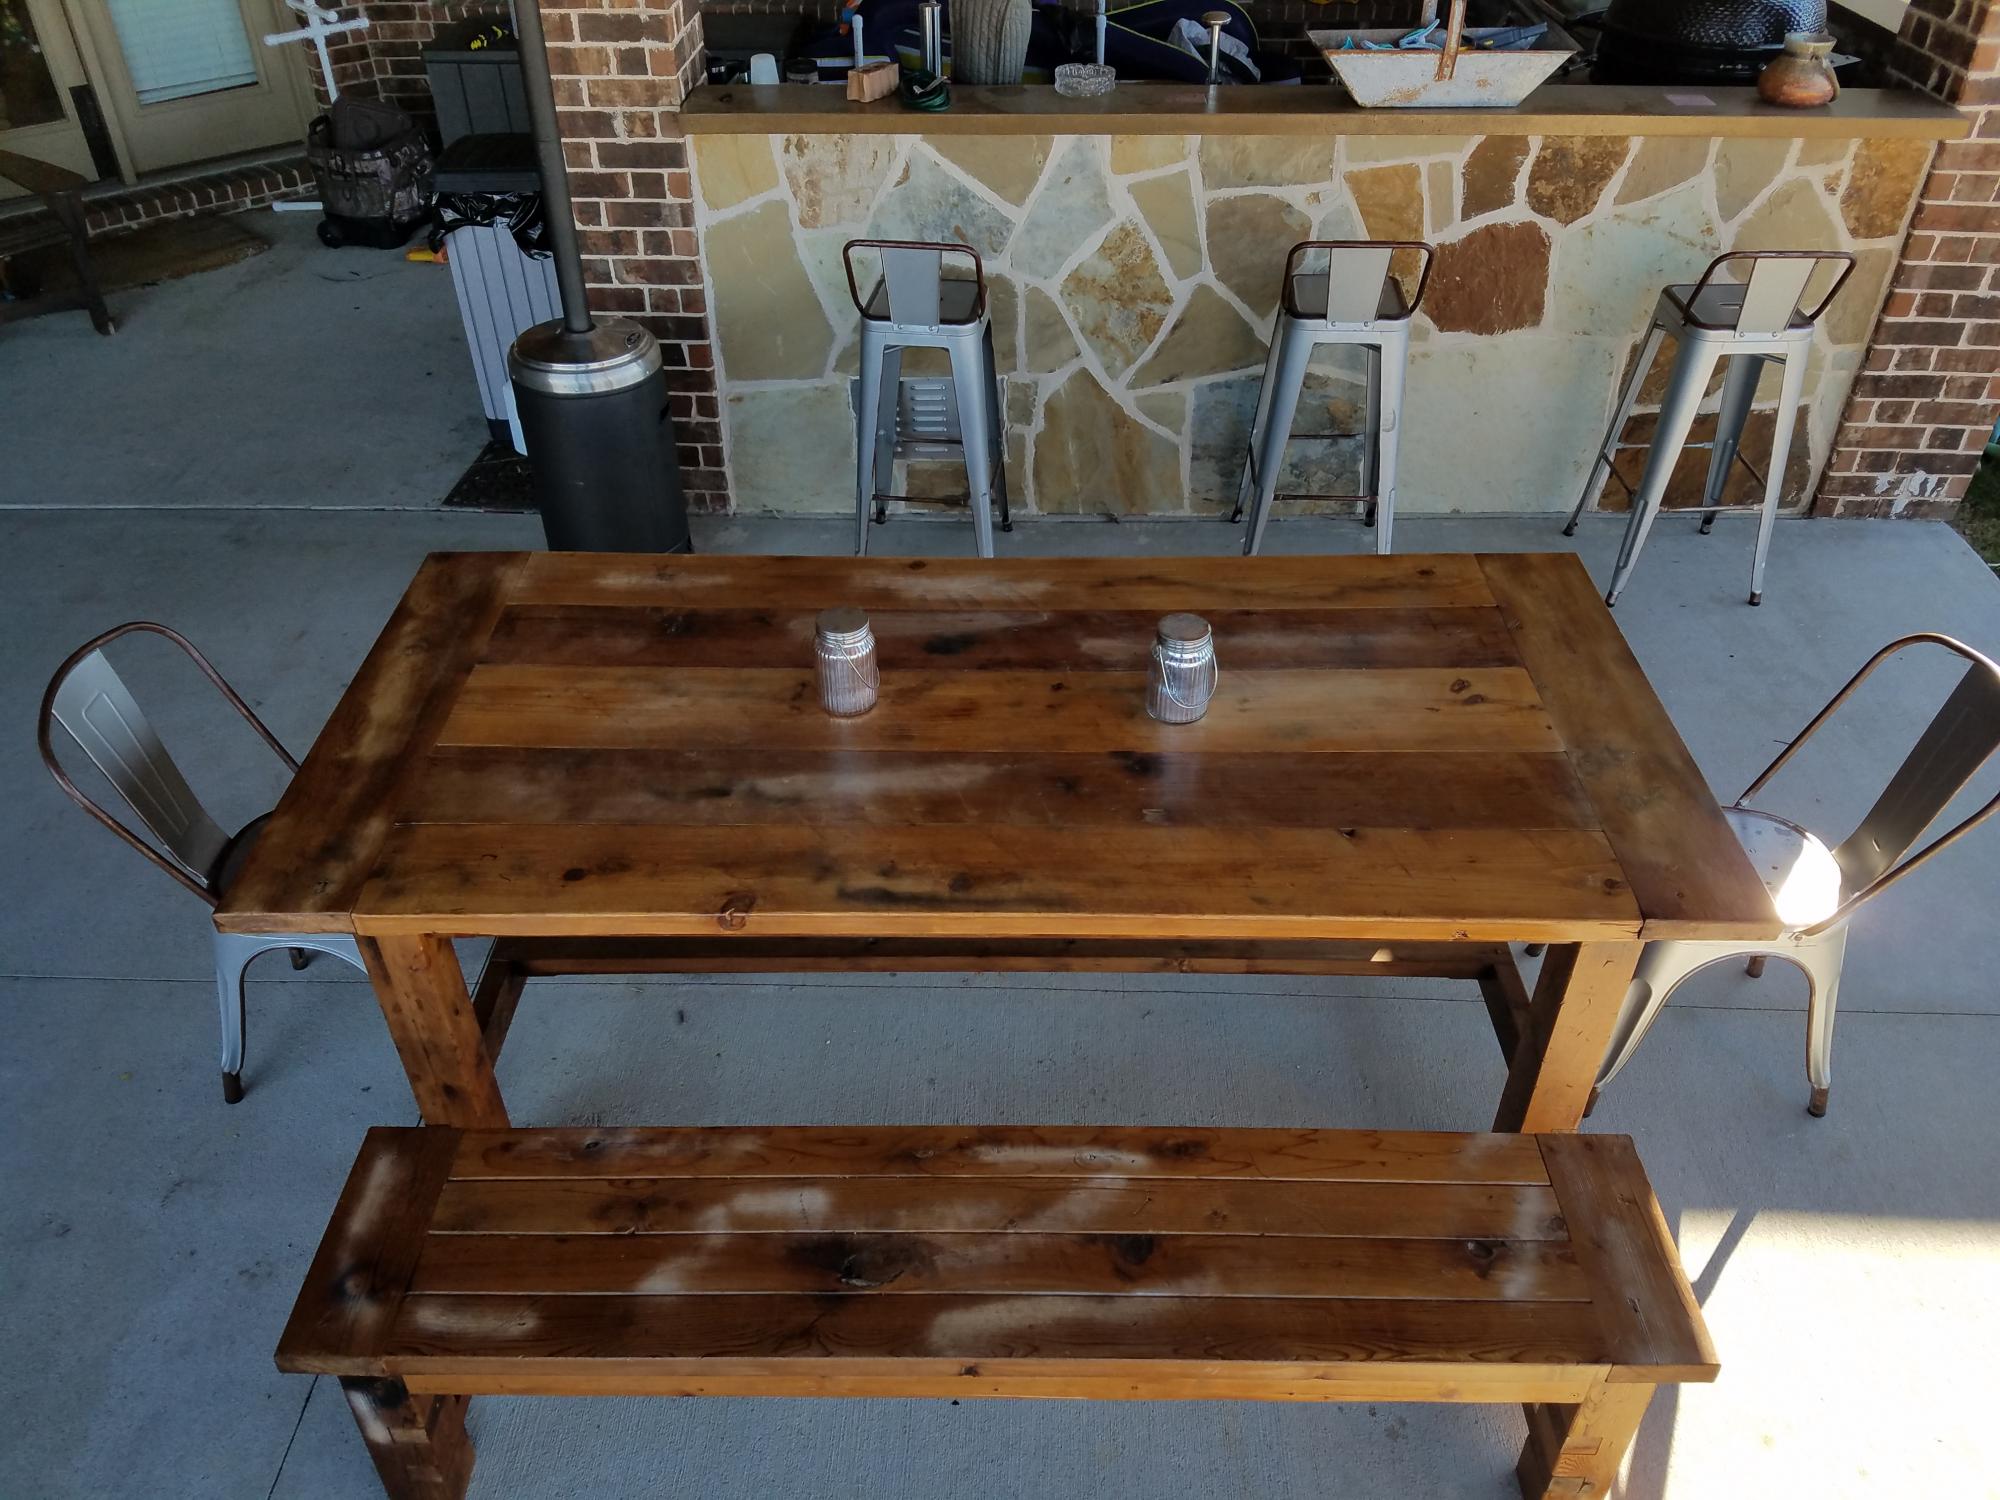
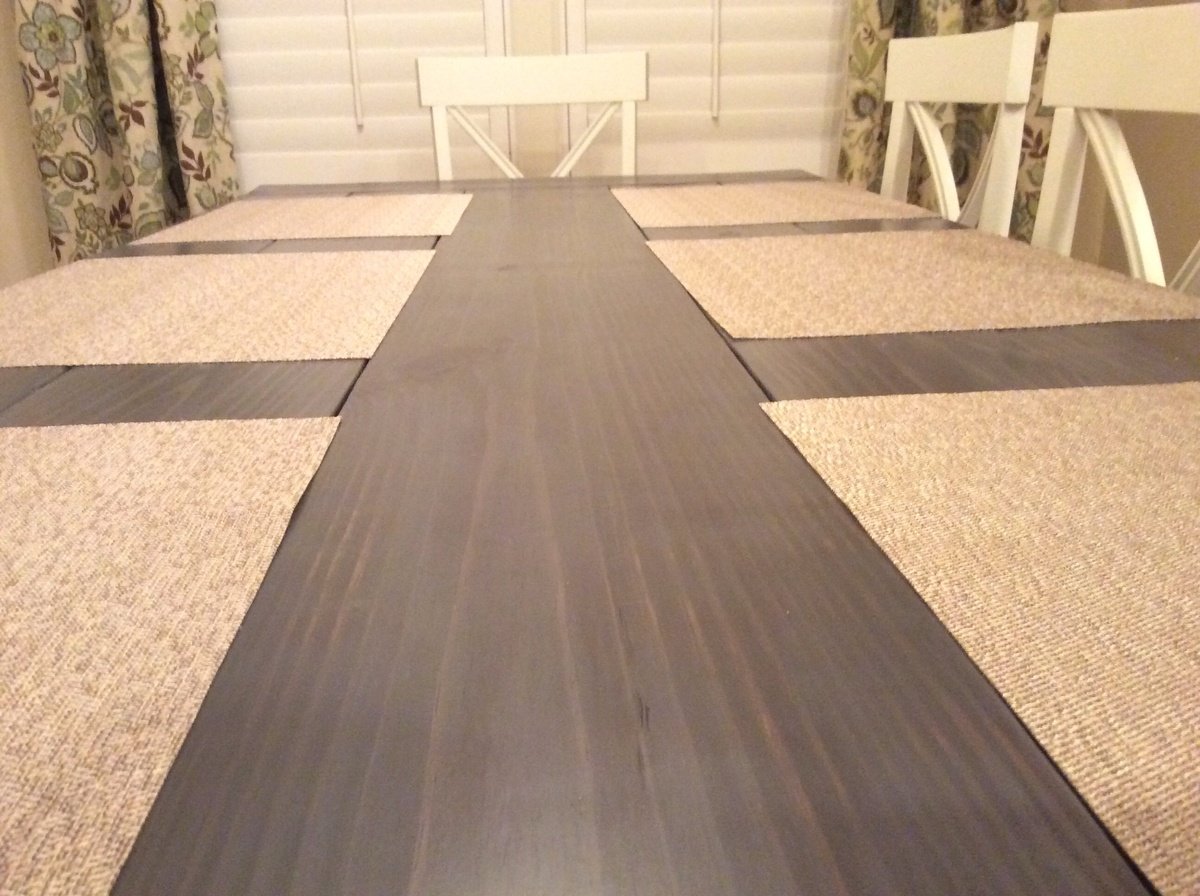
I worked up the plans in my head for about a year before my mother finally got around to having me build her 10 foot farmhouse table. That's right, this bad boy is TEN FEET LONG! And it was one of the simplest things to construct!. I used 8 foot 1x8's for the length of the table (used 4, making the table 29" wide) and 1x12's for the breadboard ends. We also splurged and purchased turned legs for $15 a piece at Blue. It really made the table extra special. Totally cost, with finishing supplies came in under $150.
Things I would change if/when I do a table of this size again:
1) I would never make a BB end so large again. I would stick to a 1x6 or smaller. With such a large size we worry about children putting too much pressure on the ends.
2) I will make the legs removable. It was a bear trying to get this table into the house. Thankfully the width was just narrow enough!
3) I won't tackle this in the winter months! Construction of the table took only a few hours but finishing in freezing temps took weeks waiting for warm-ish temperatures.
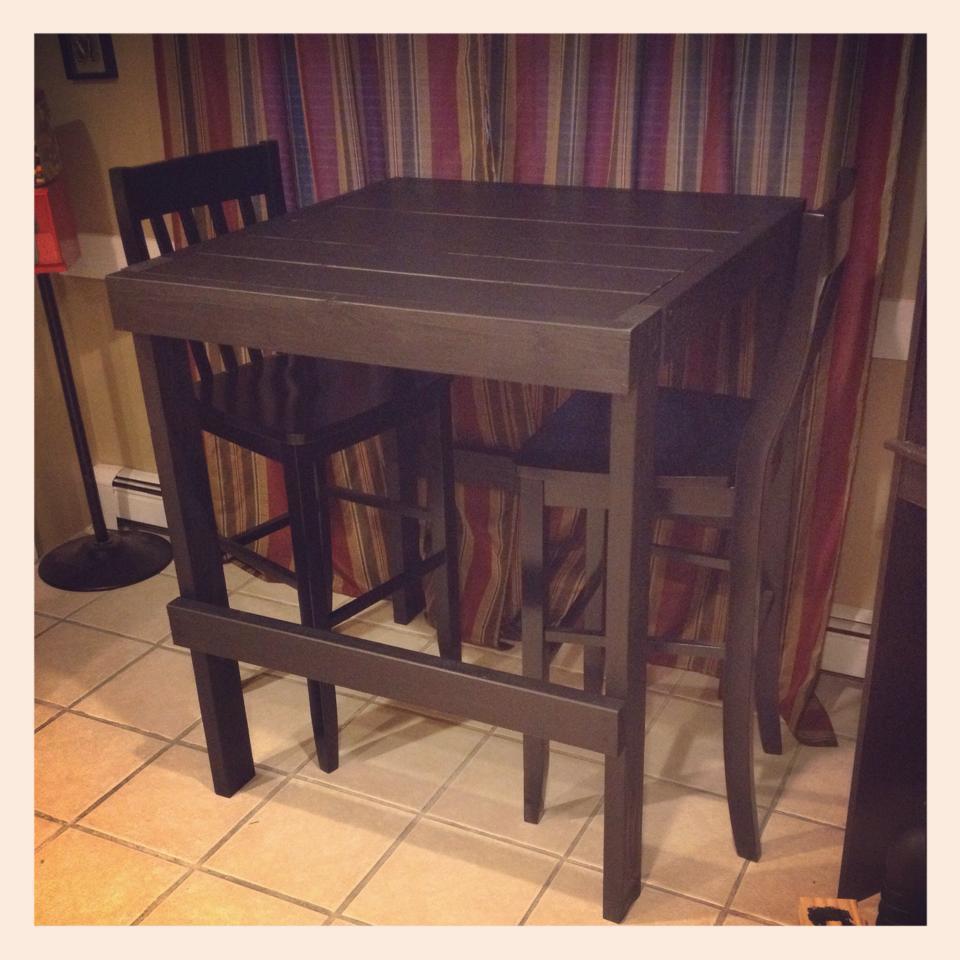
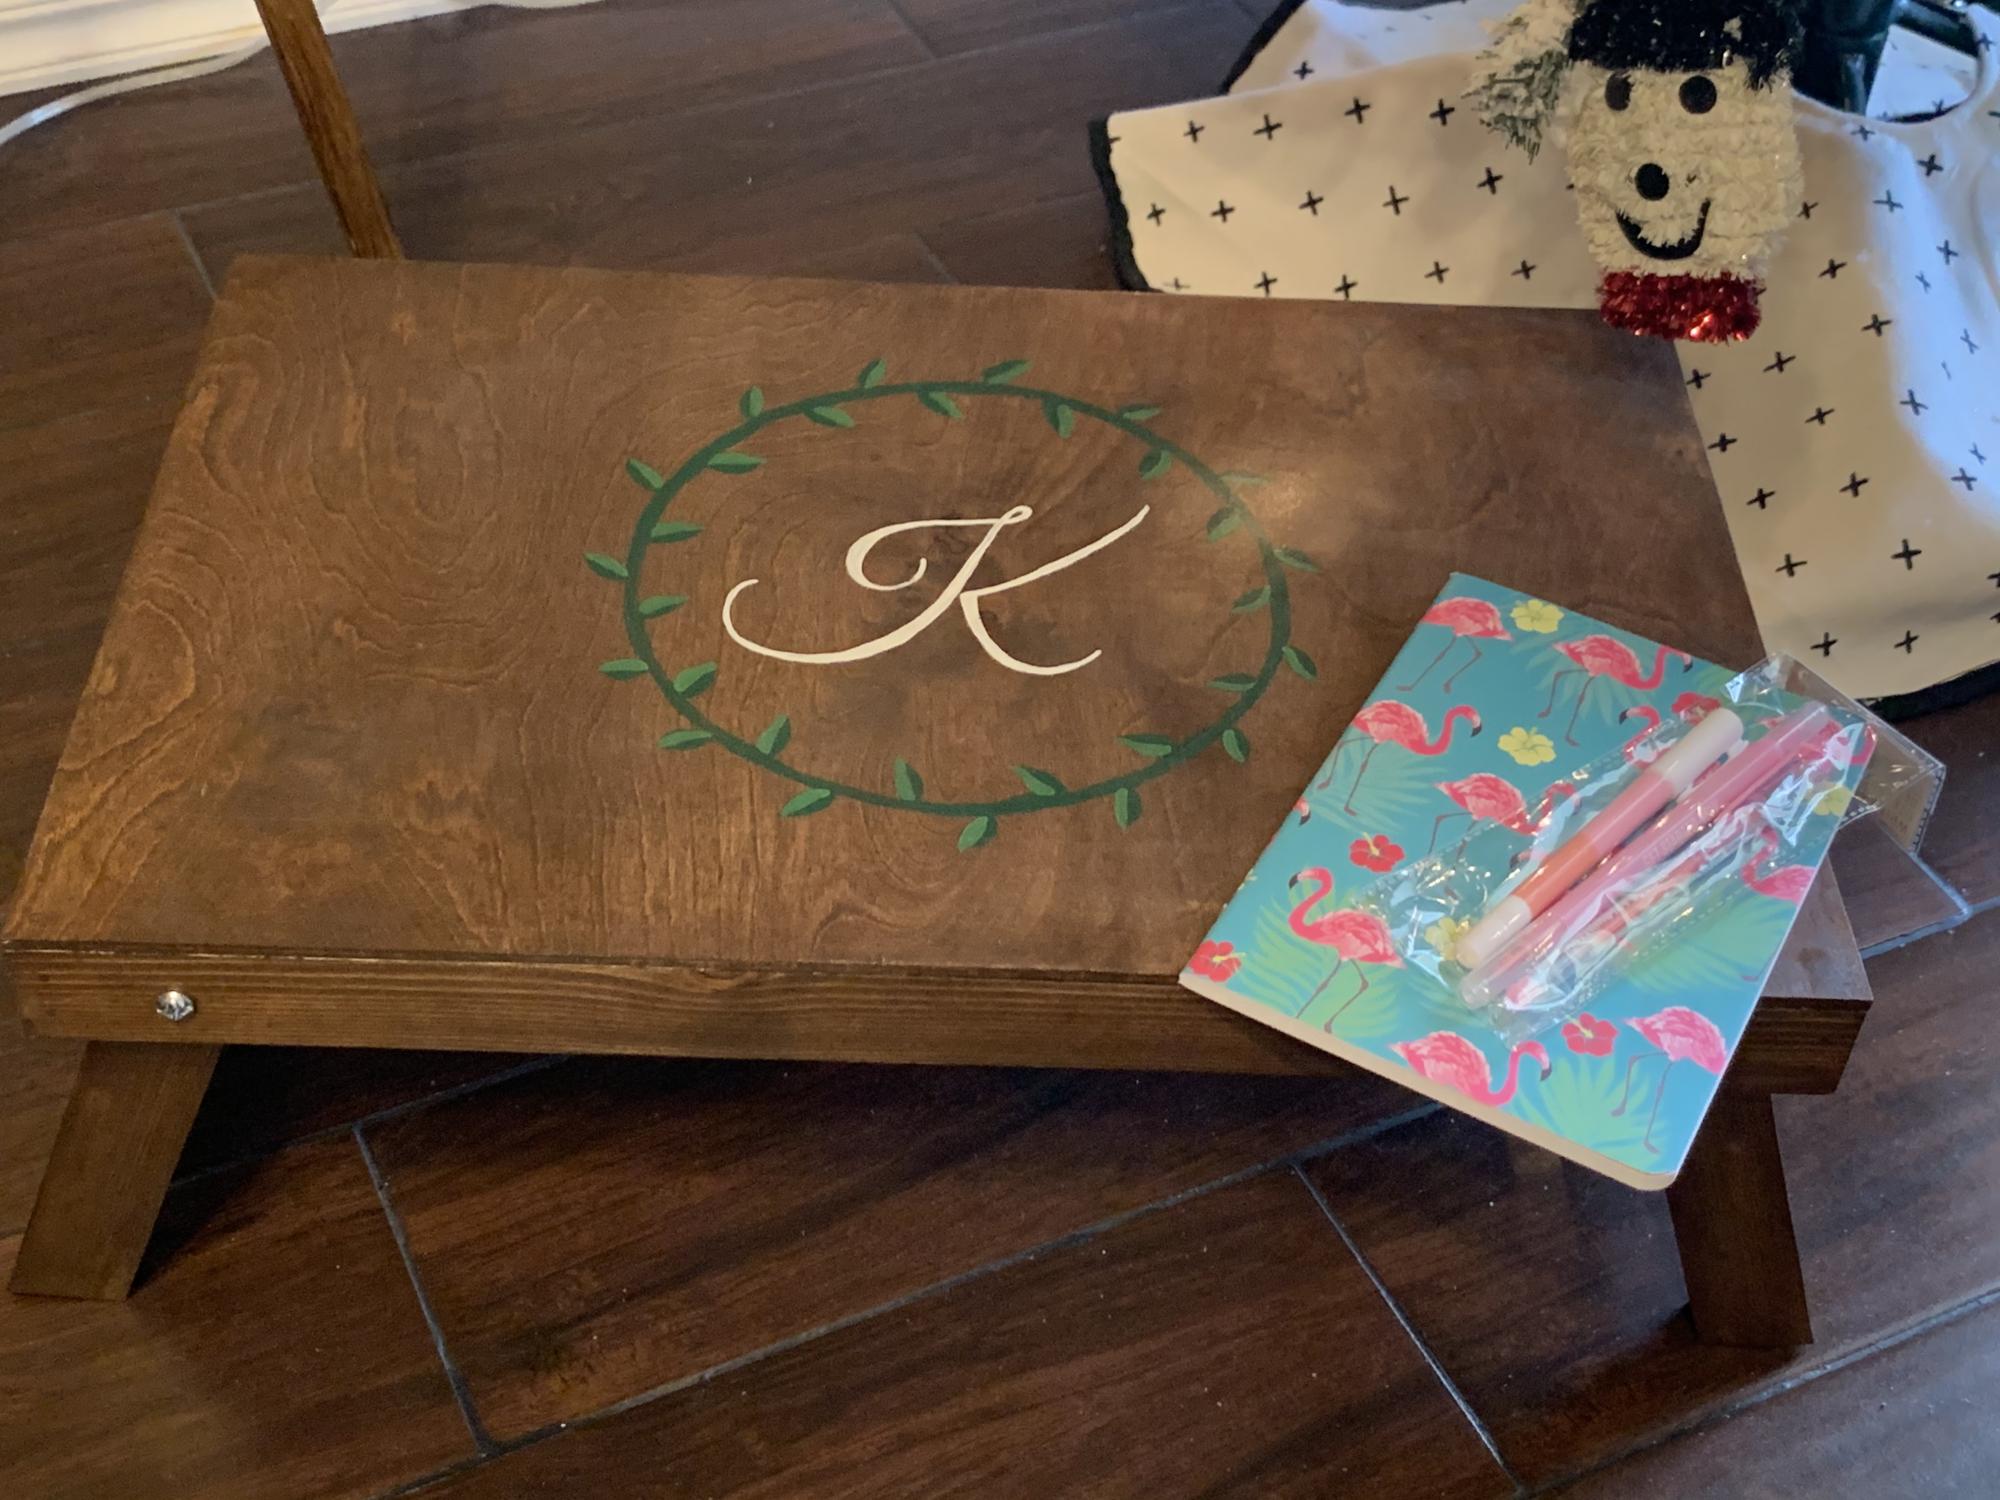
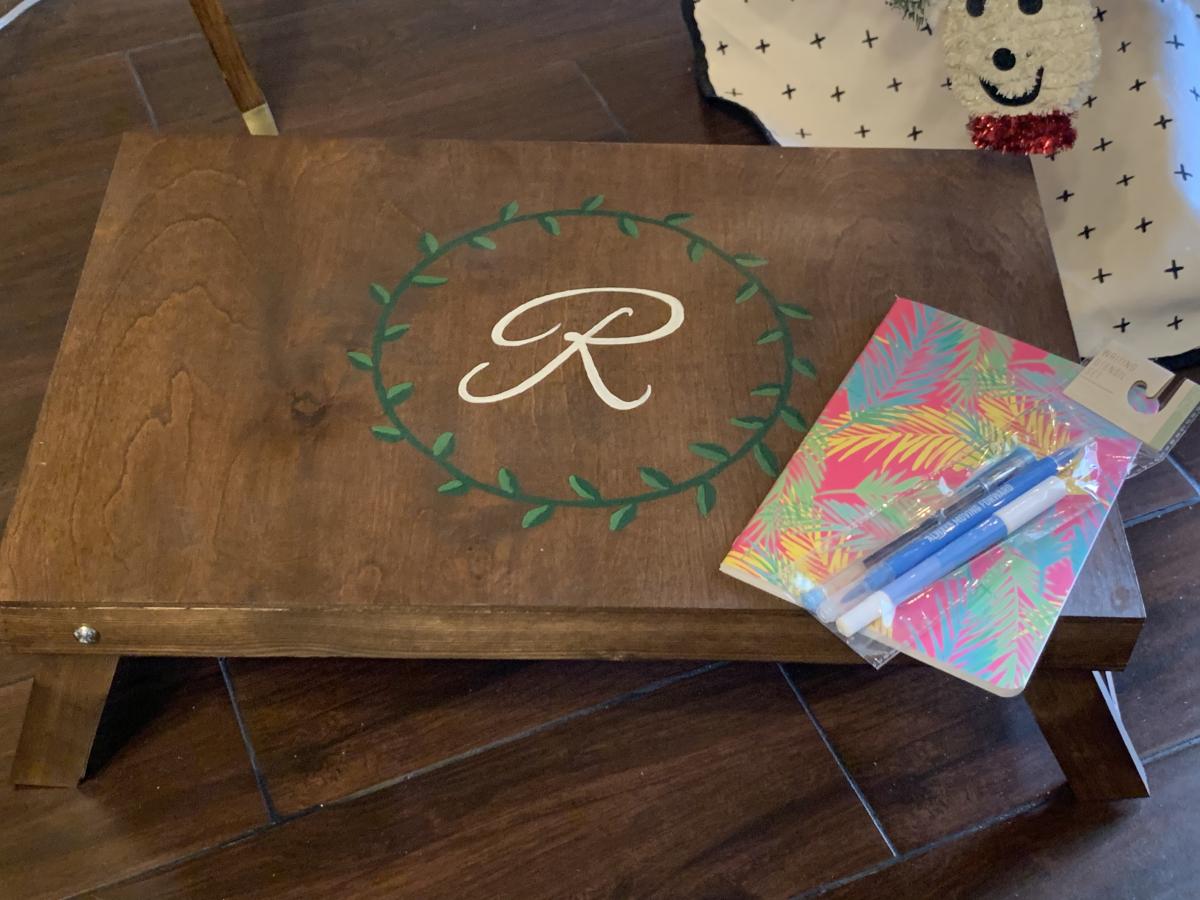
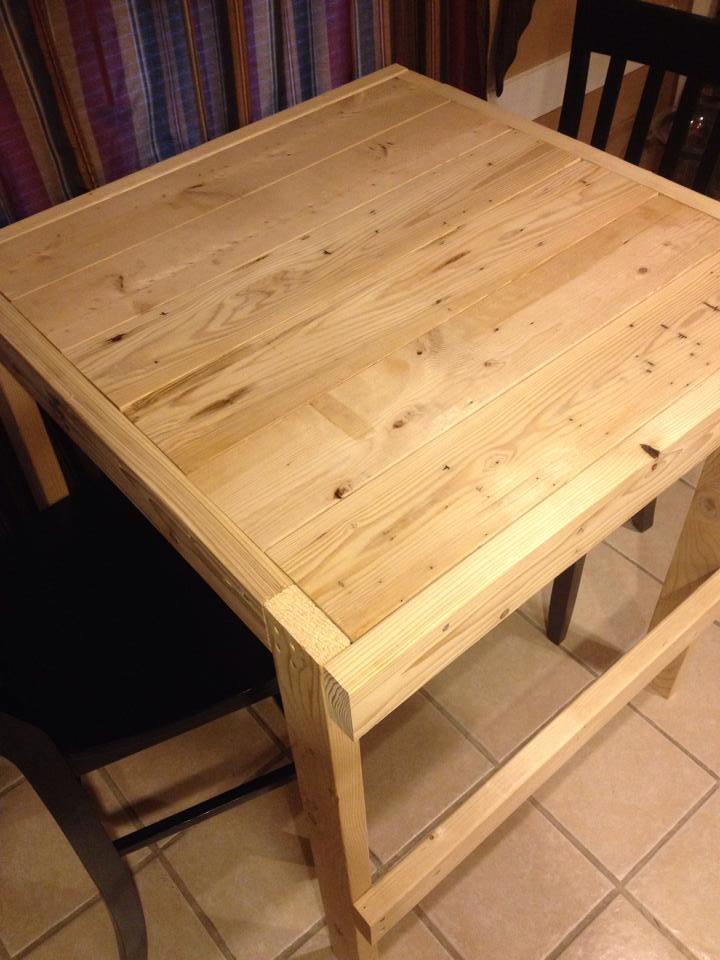
I modified this pattern to use with tall bar stools I already had. I built it 42" high and added a foot bar along the bottom for added stability since it's tall. The foot bar is only across the front and back so the stools can still slide in on the sides.
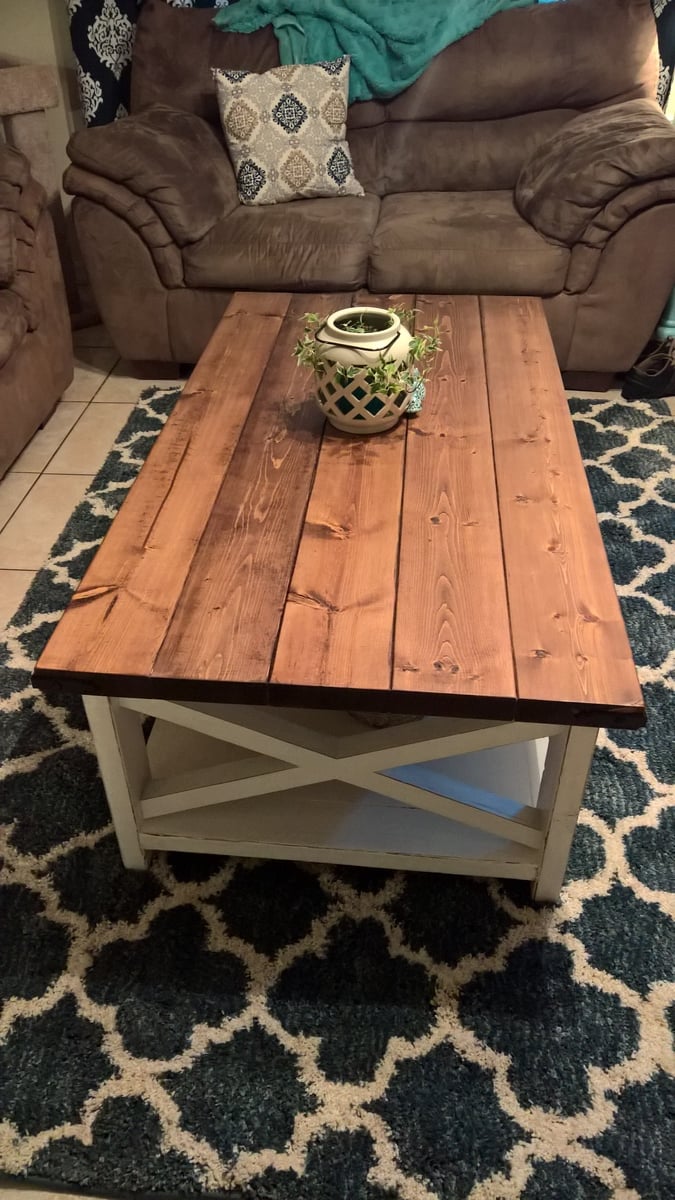
This table is exactly what I was looking for and I couldn't be any happier with how it turned out.


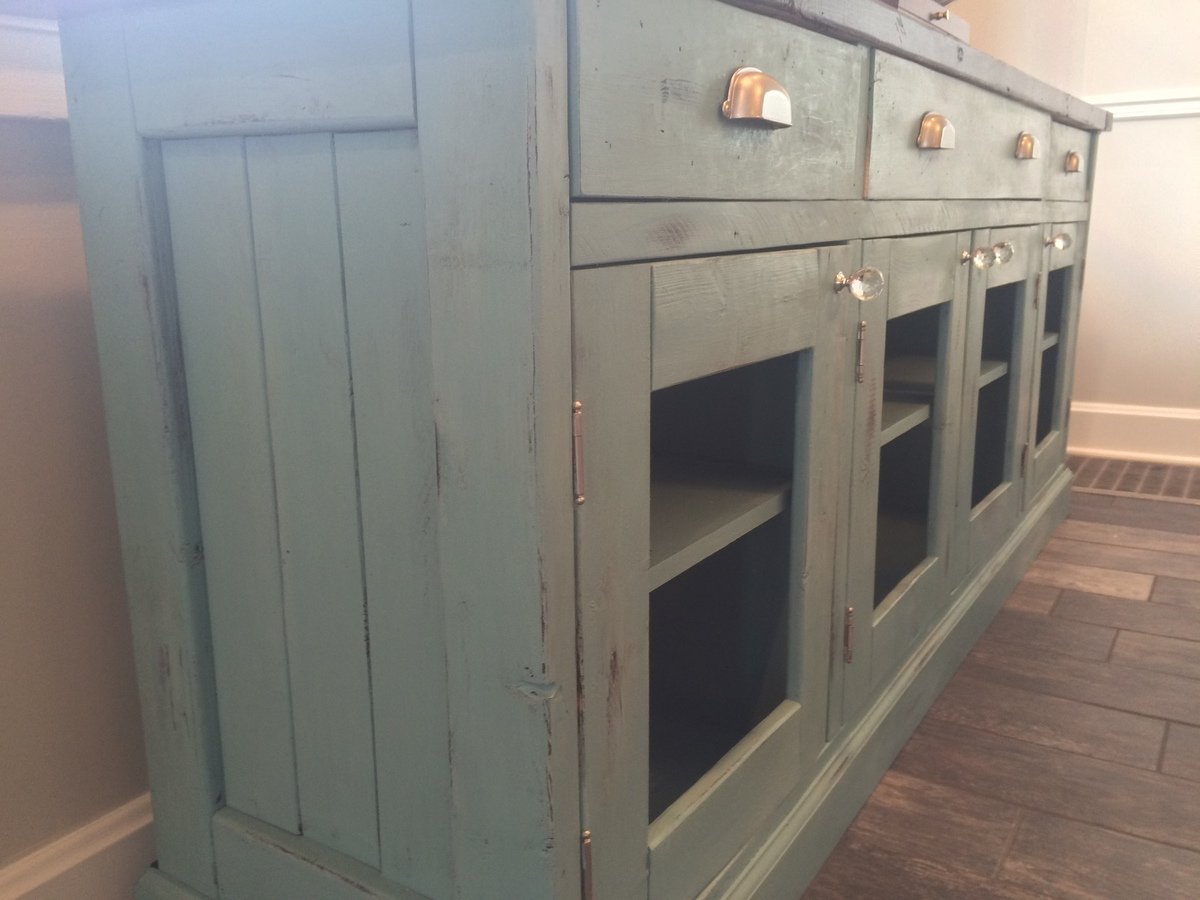
This sideboard buffet took me several months to complete mostly because I have little kids and had to have my husband home to give me the time I needed! The hardware and paint was the most expensive piece. I first stained it with kona stain then painted it with ASCP in Provence. I still need to put the wire mesh in doors but I'm still searching for options:-) This was my first project with drawers and it was not easy!
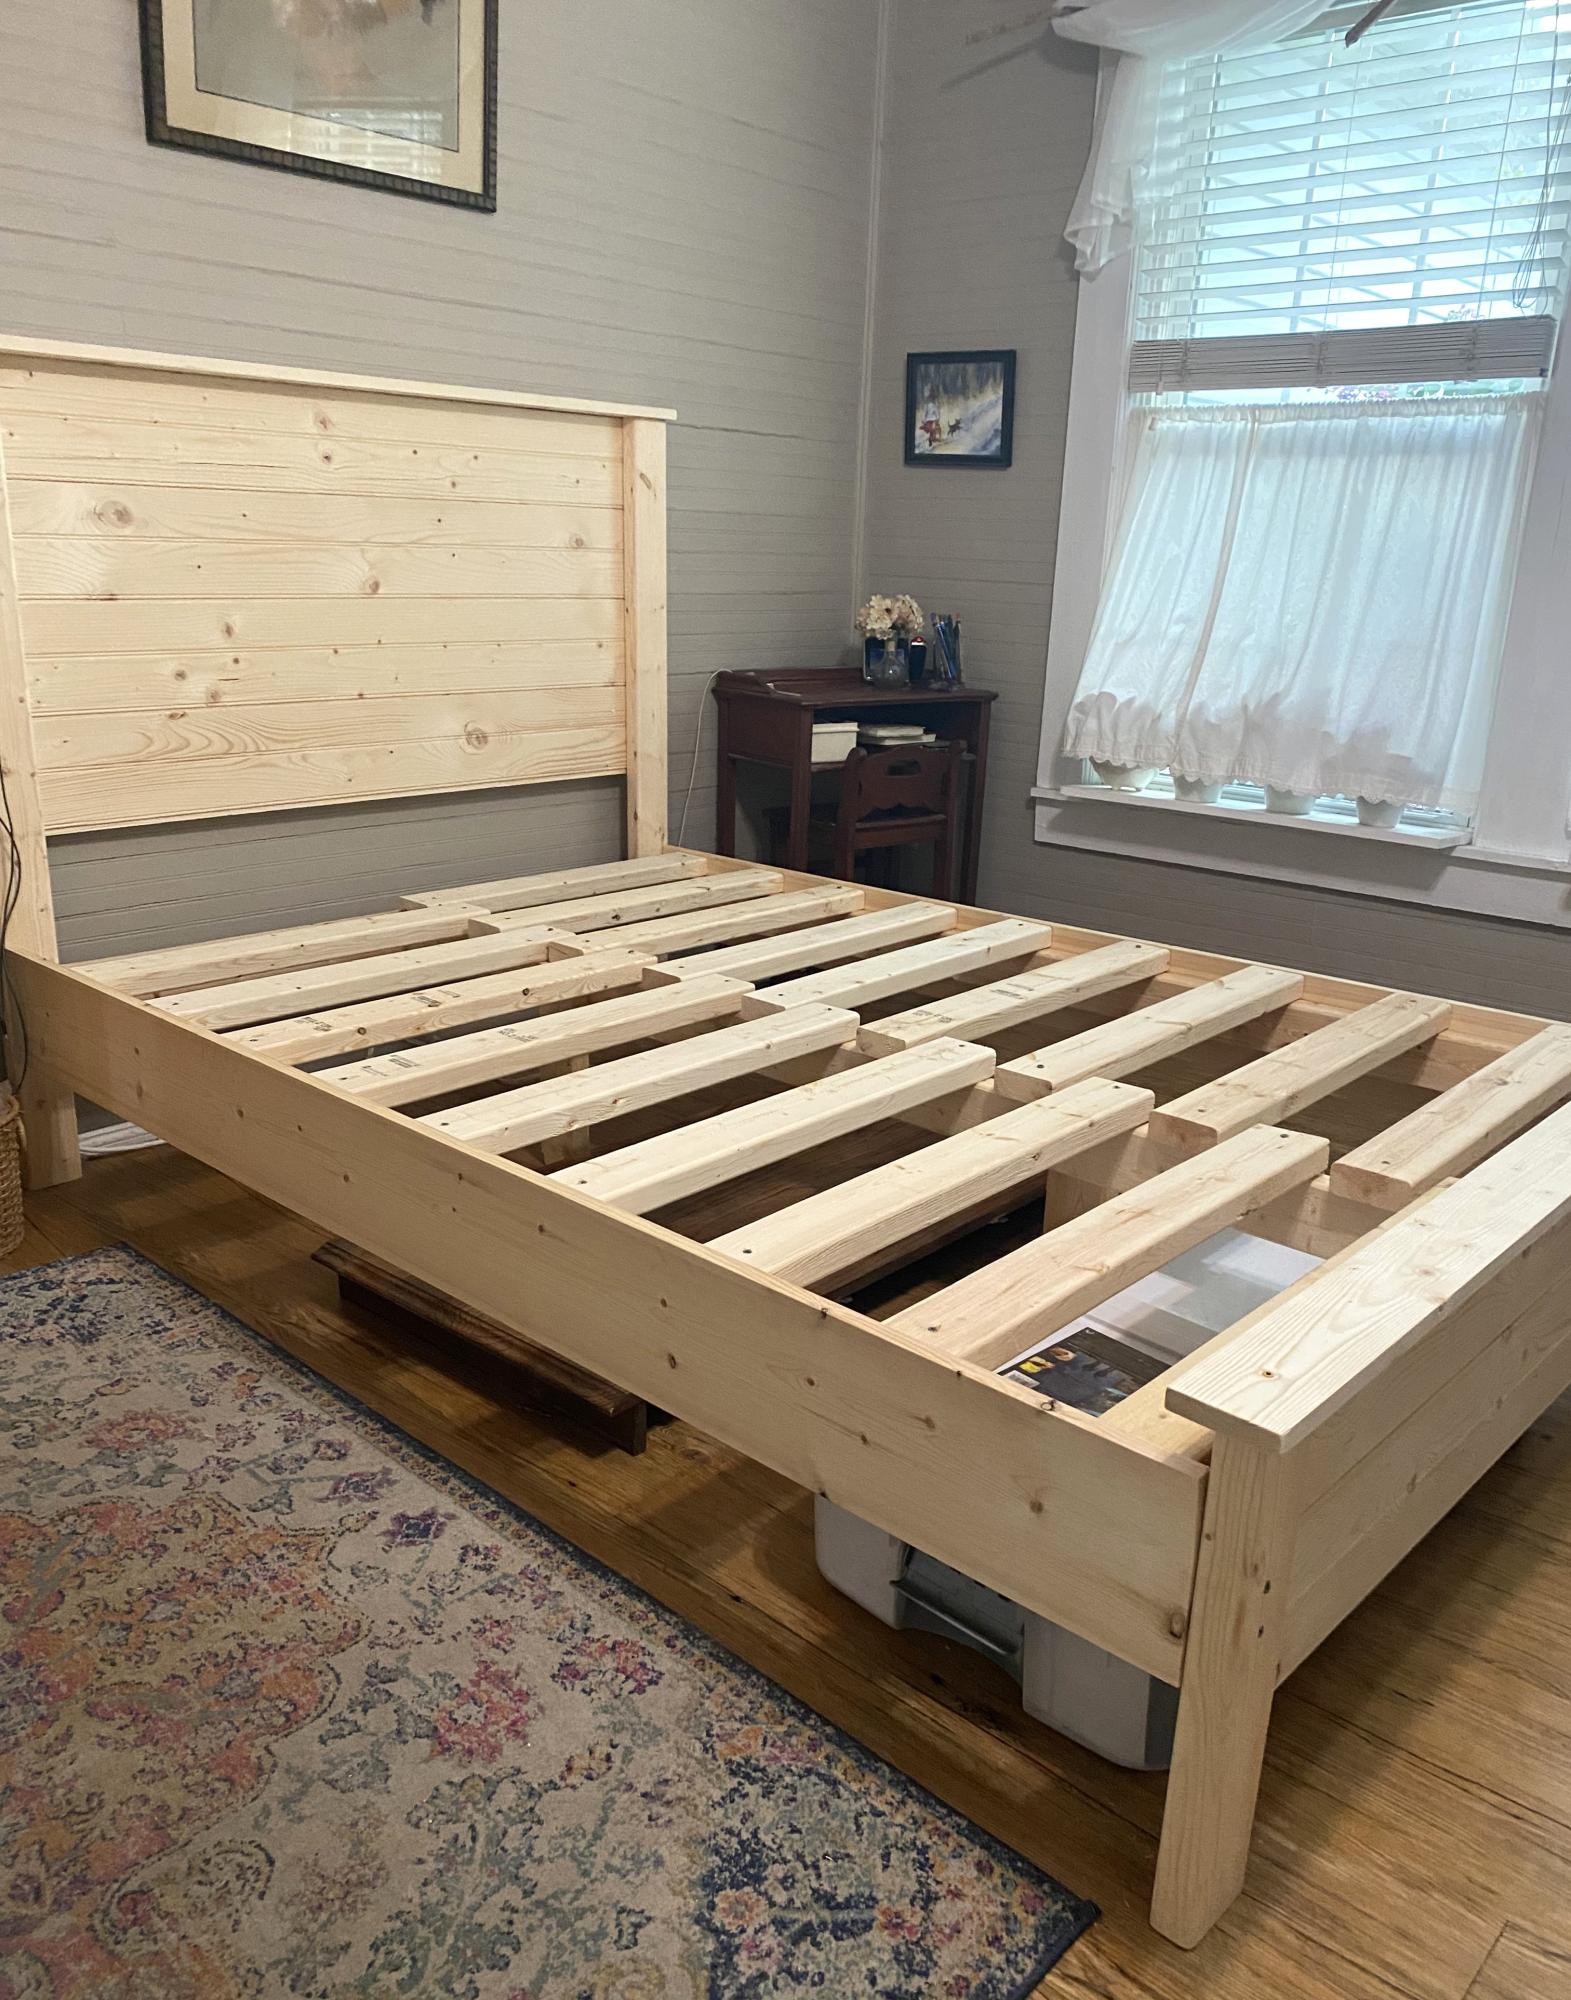
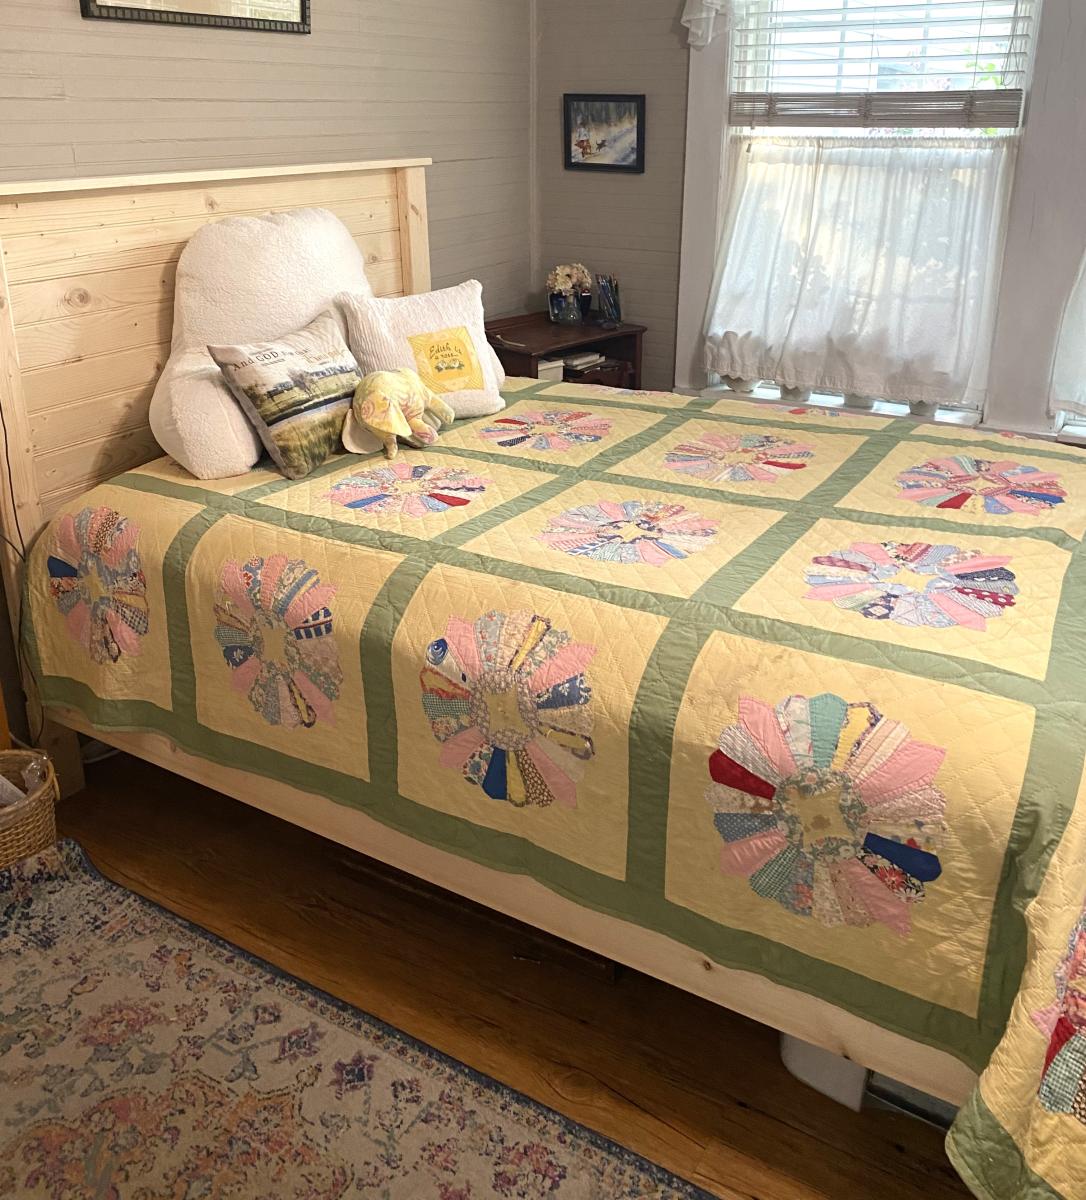
For a while I’ve been wanting to build a bed. I had two days free this week so I began. I actually completed it in about 6 hours. First time doing this size project. Plans were SO easy to follow. Thank you Ana
I LOVE IT! And am motivated to do more.
Edith, SC
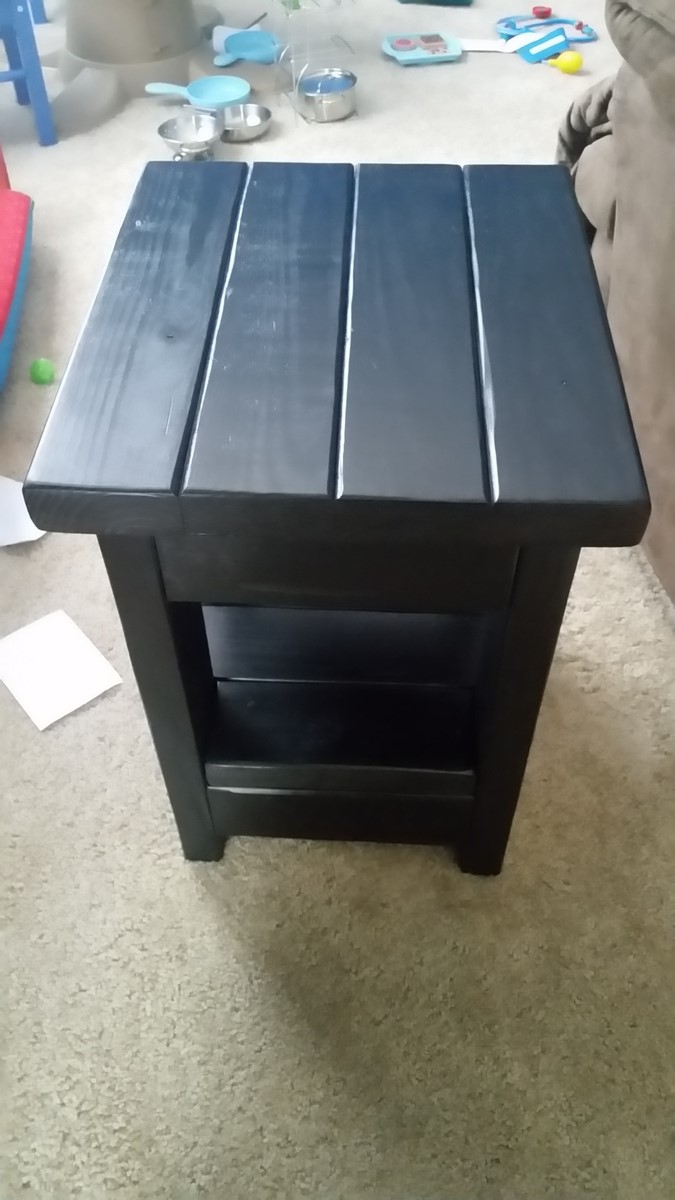
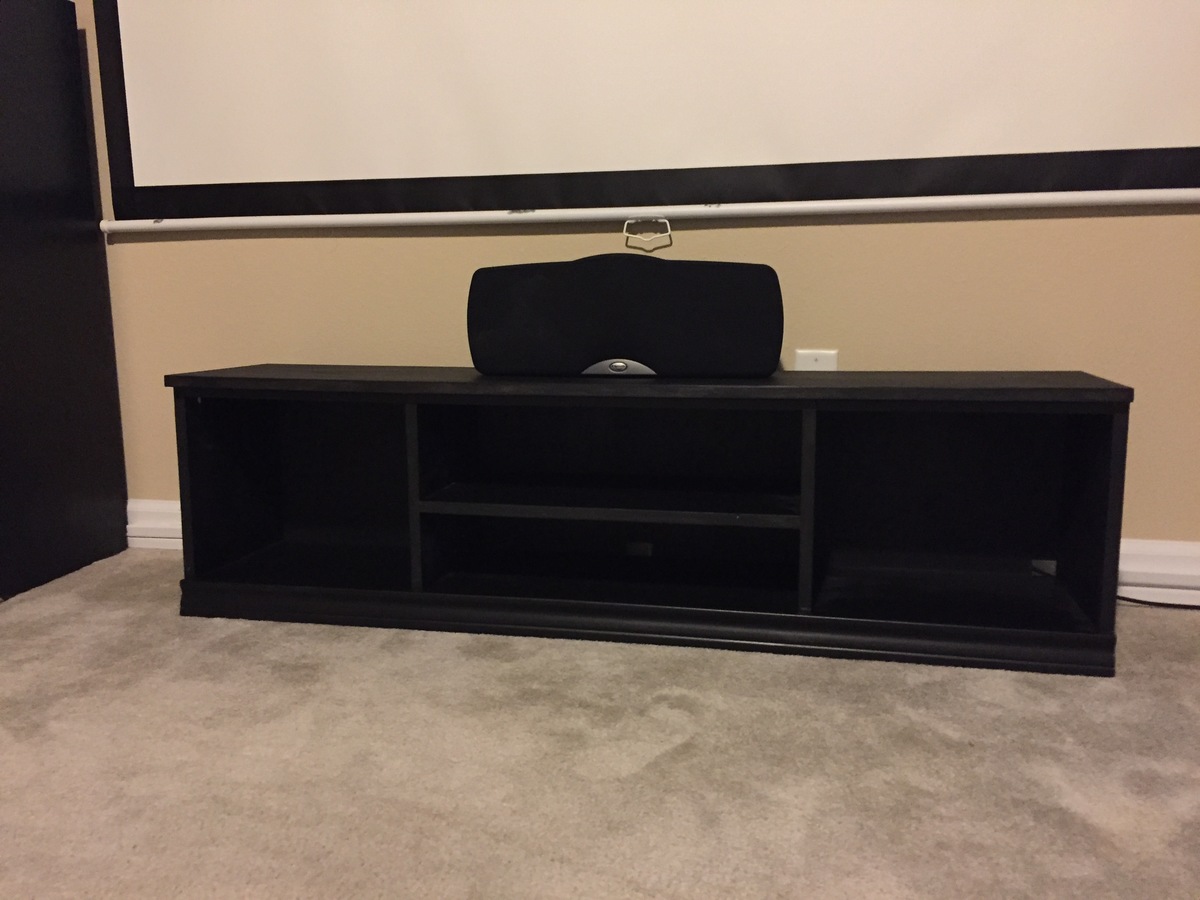
I found it to be a bit too big to be an end table, but it is a nice piece of furniture! Would be a good TV stand if our TV wasn't wall-mounted. Very nice!
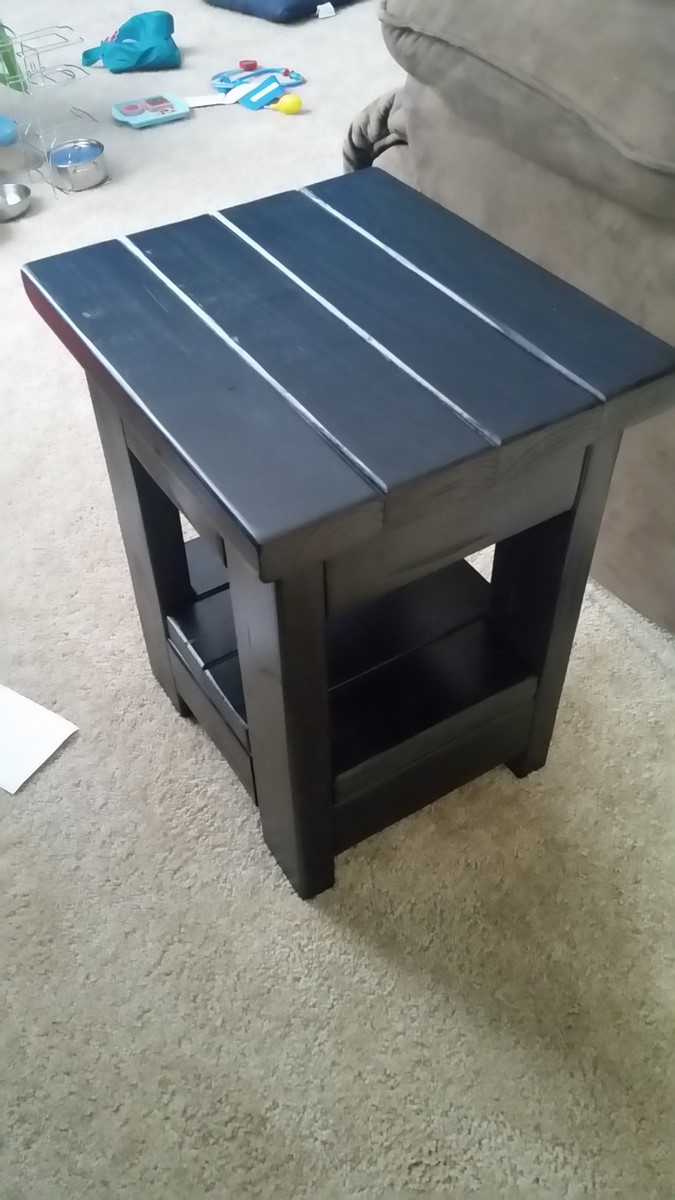
I made a smaller version of the Tryde End Table with Shelf. I made 2 of them from 6 2X4's
Mon, 05/25/2020 - 06:27
Love this! Do you have the dimensions of the pieces for this one?
I used rough cedar instead of pine. And a hand held planer to knock off the rough. The faux finish started with various blunt and sharp object beating in random patterns. Then a blow torch, white spray paint wiped off after a few seconds. Then a natural stain with polyurethane.

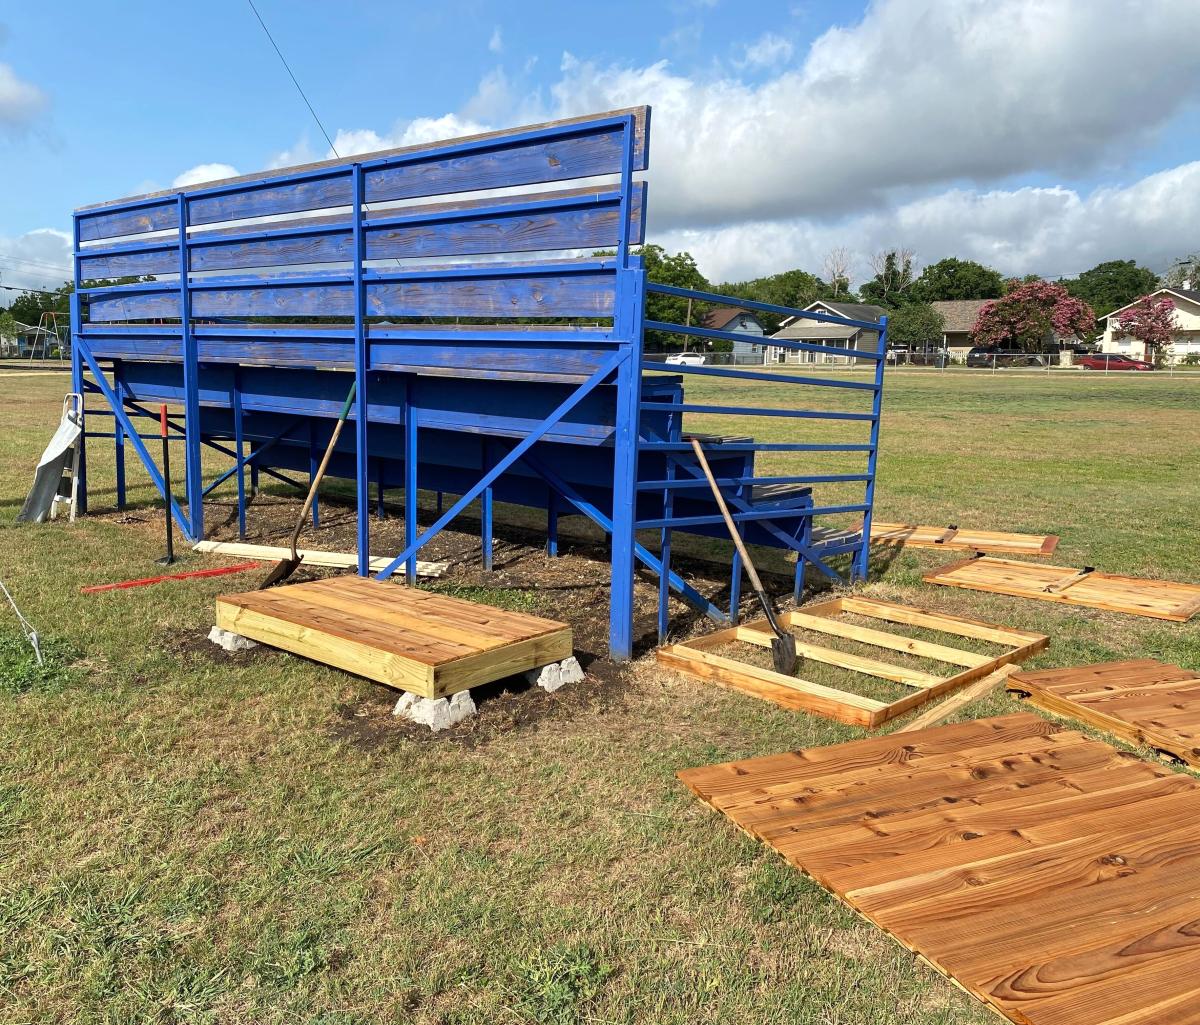
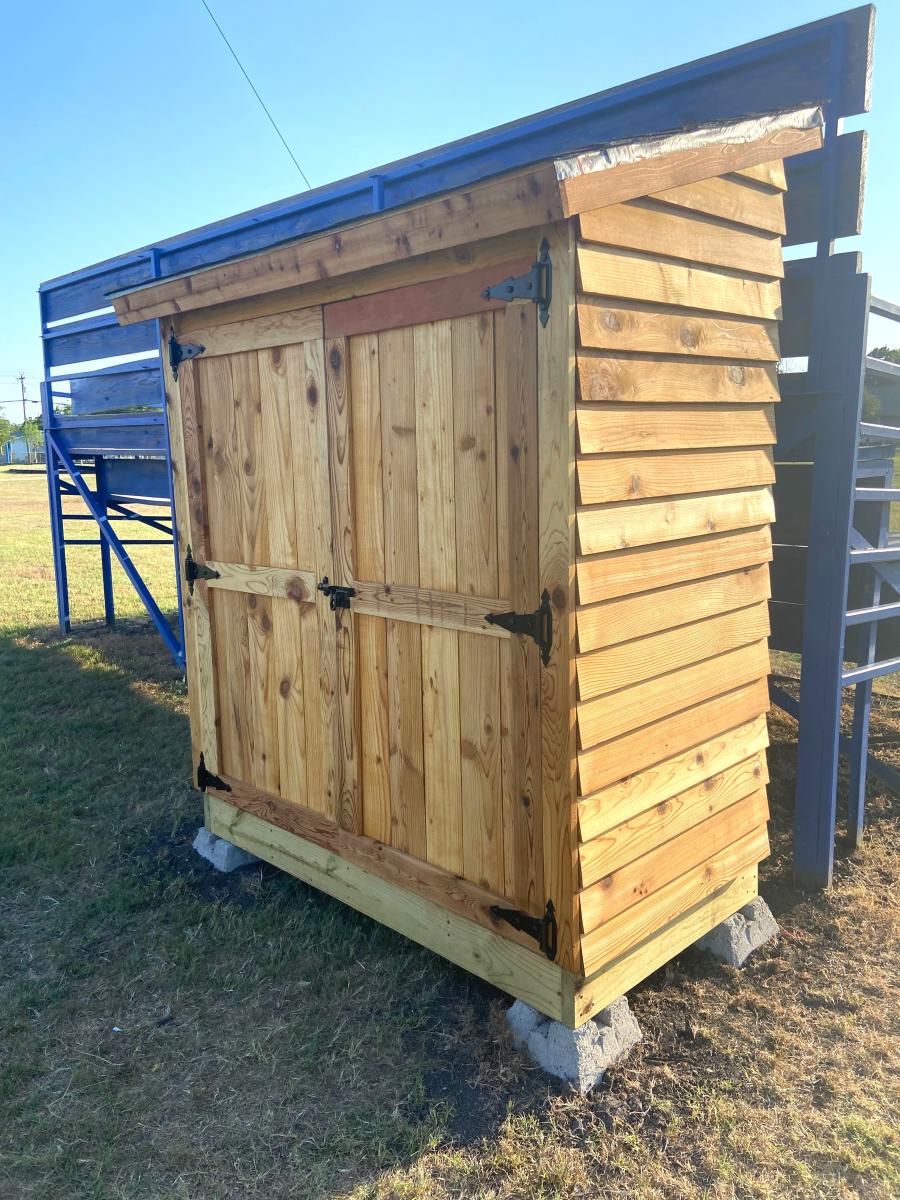
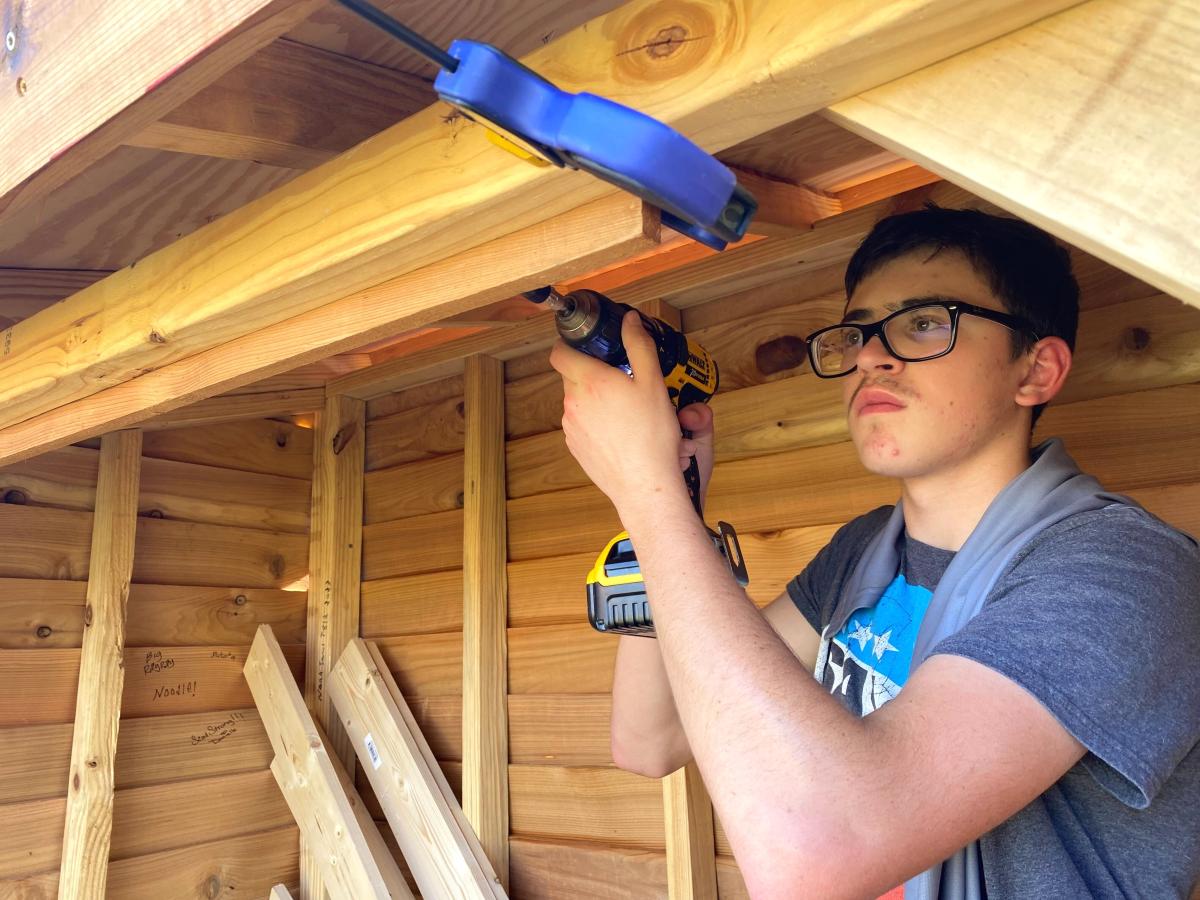
My son used your plans to help students at his old elementary school for his Eagle Scout Project. He was able to adjust the plans to meet the school's needs. Local Austin Texas news did a report on it. Thank you for the inspiration!
https://www.fox7austin.com/news/boy-scout-builds-shed-stocks-it-with-re…
Robert Saul
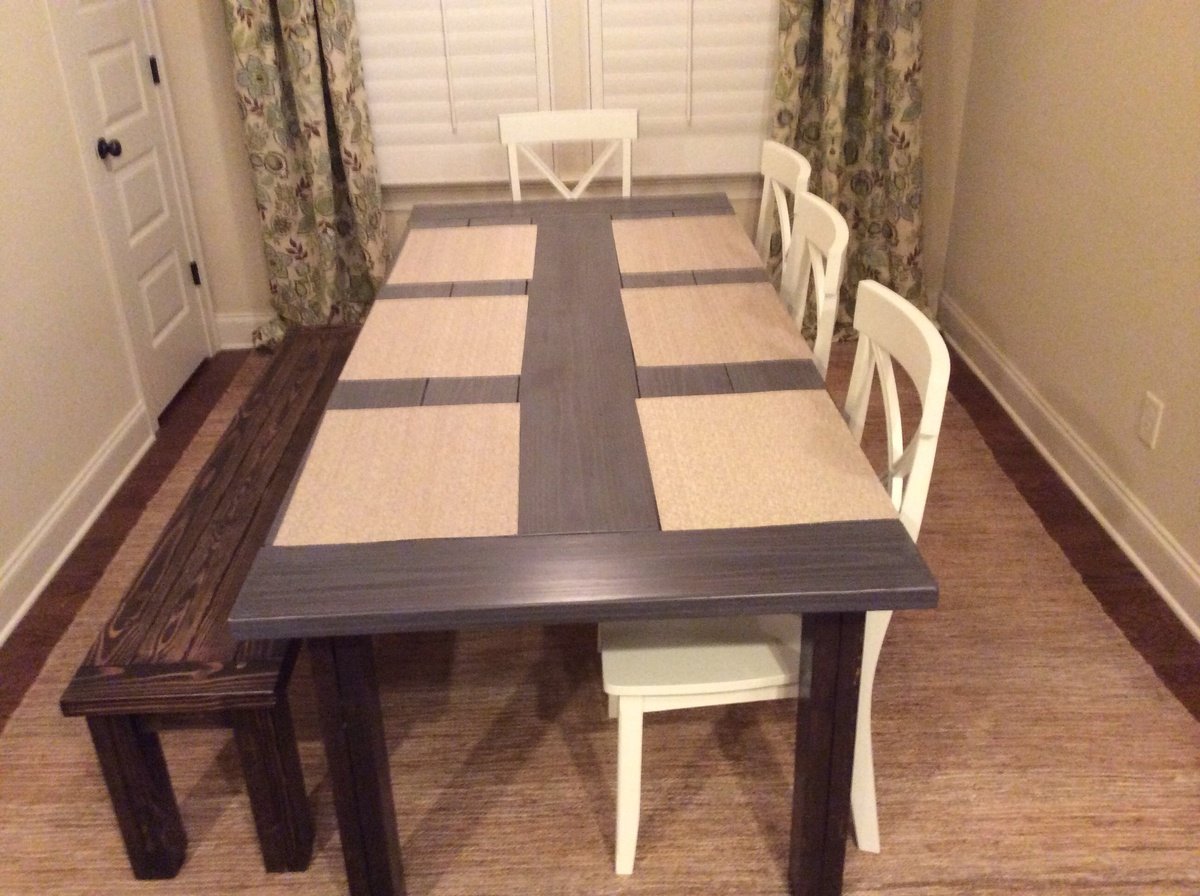
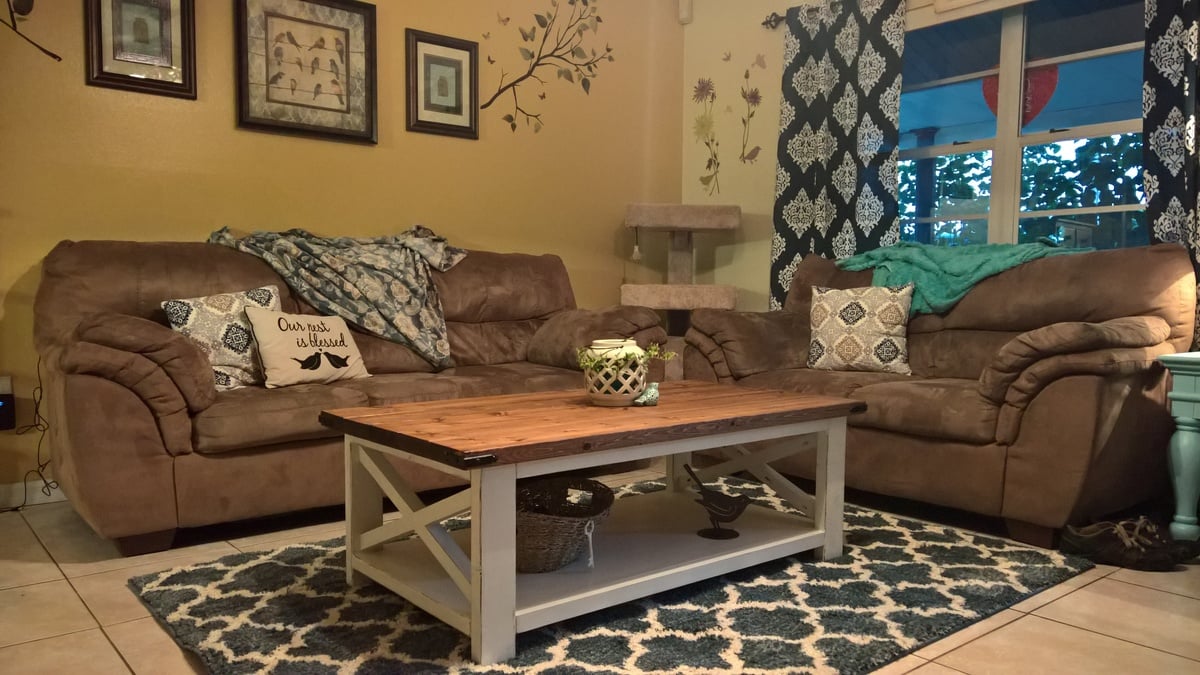
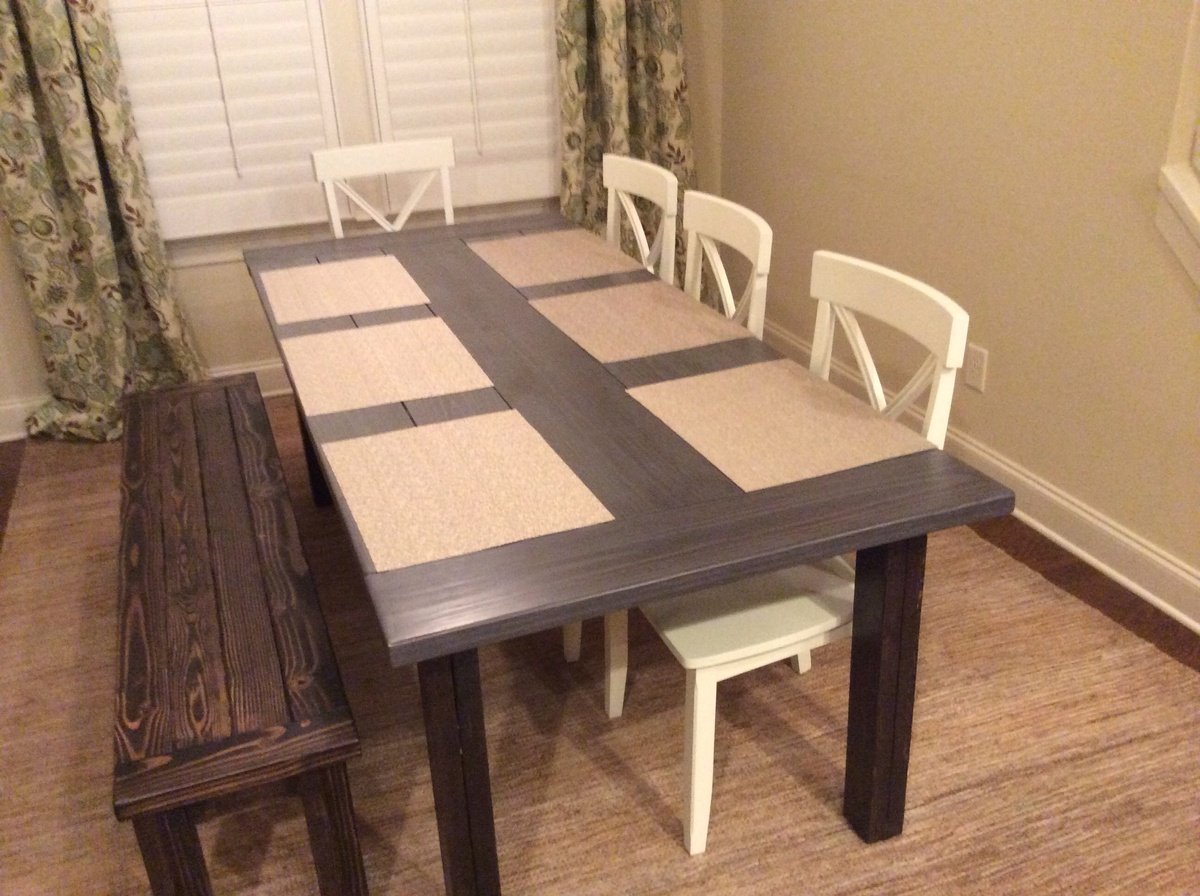
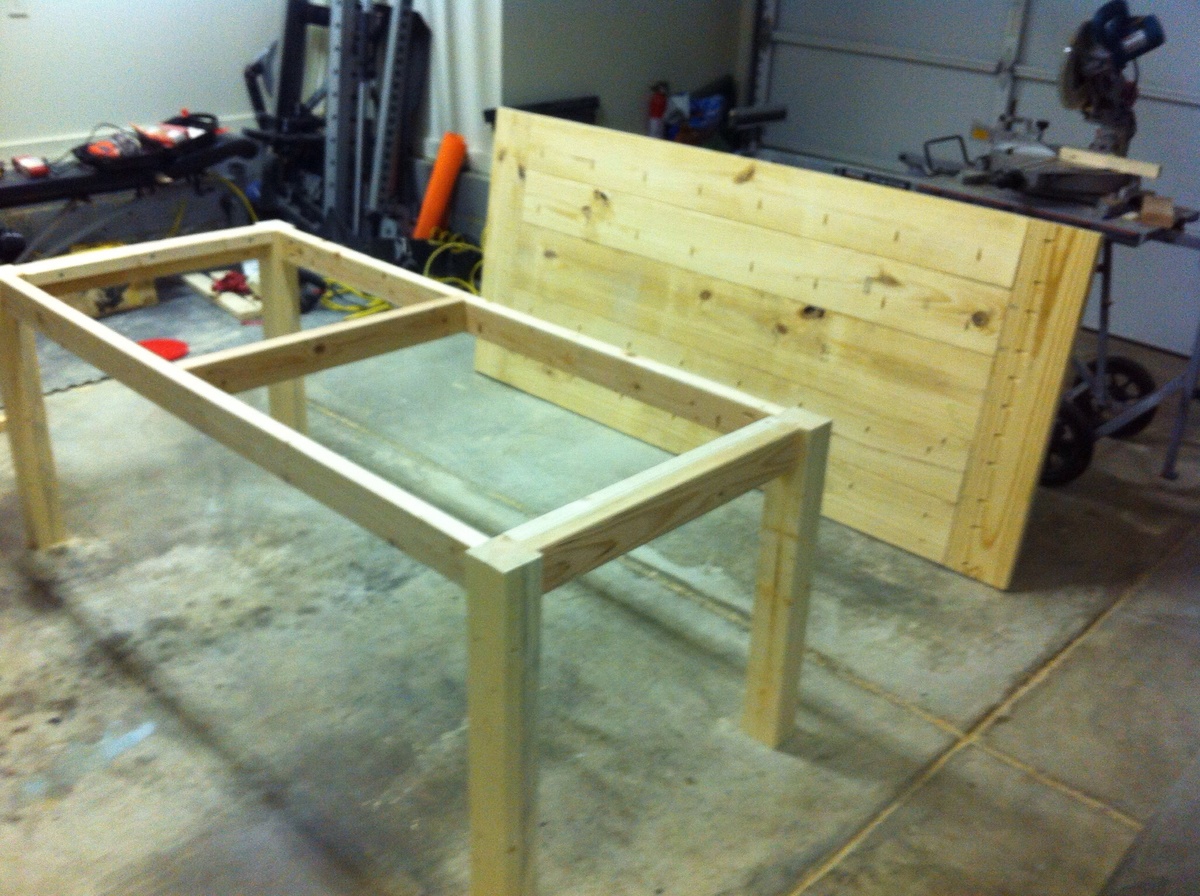
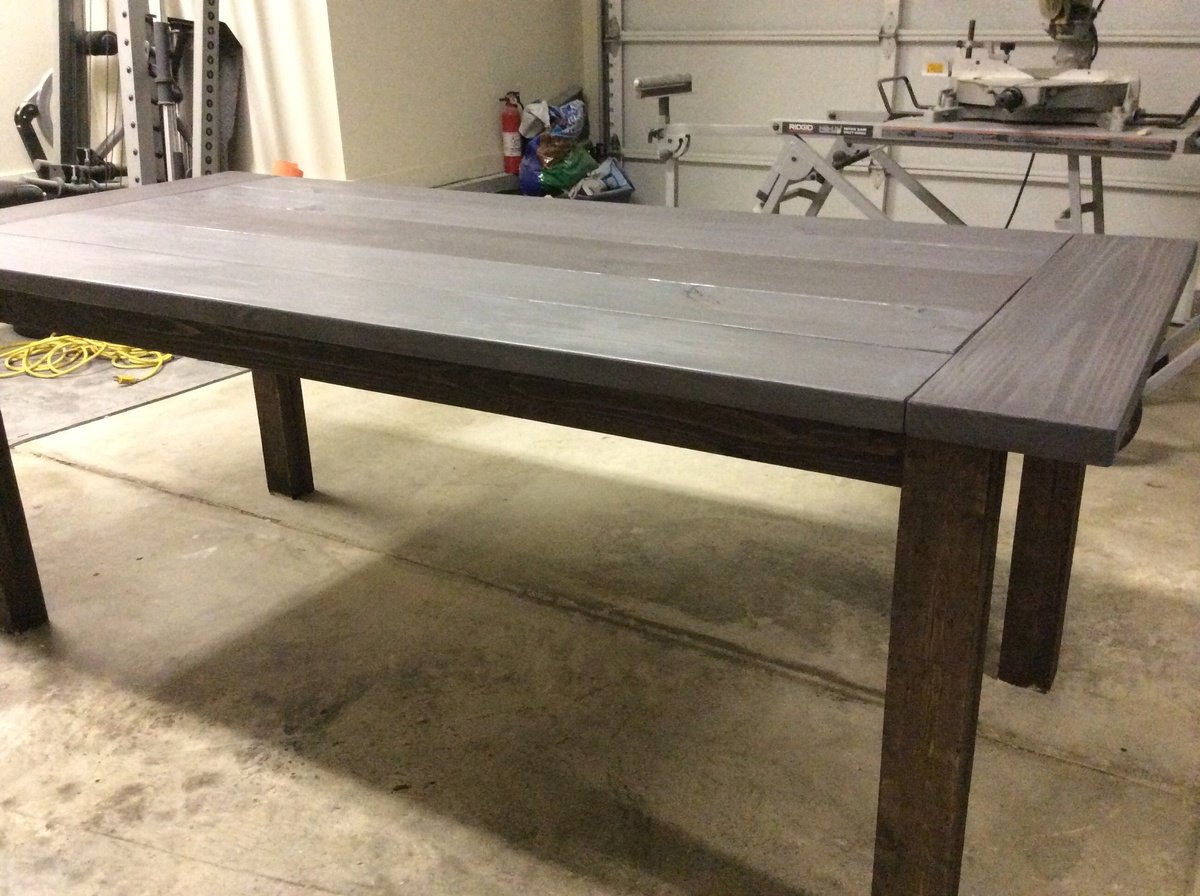
I finished this project a few weeks ago, and it started to keep me busy during the Christmas break. My wife had wanted a new dining room table and this was pretty easy to build after the X Console Table.
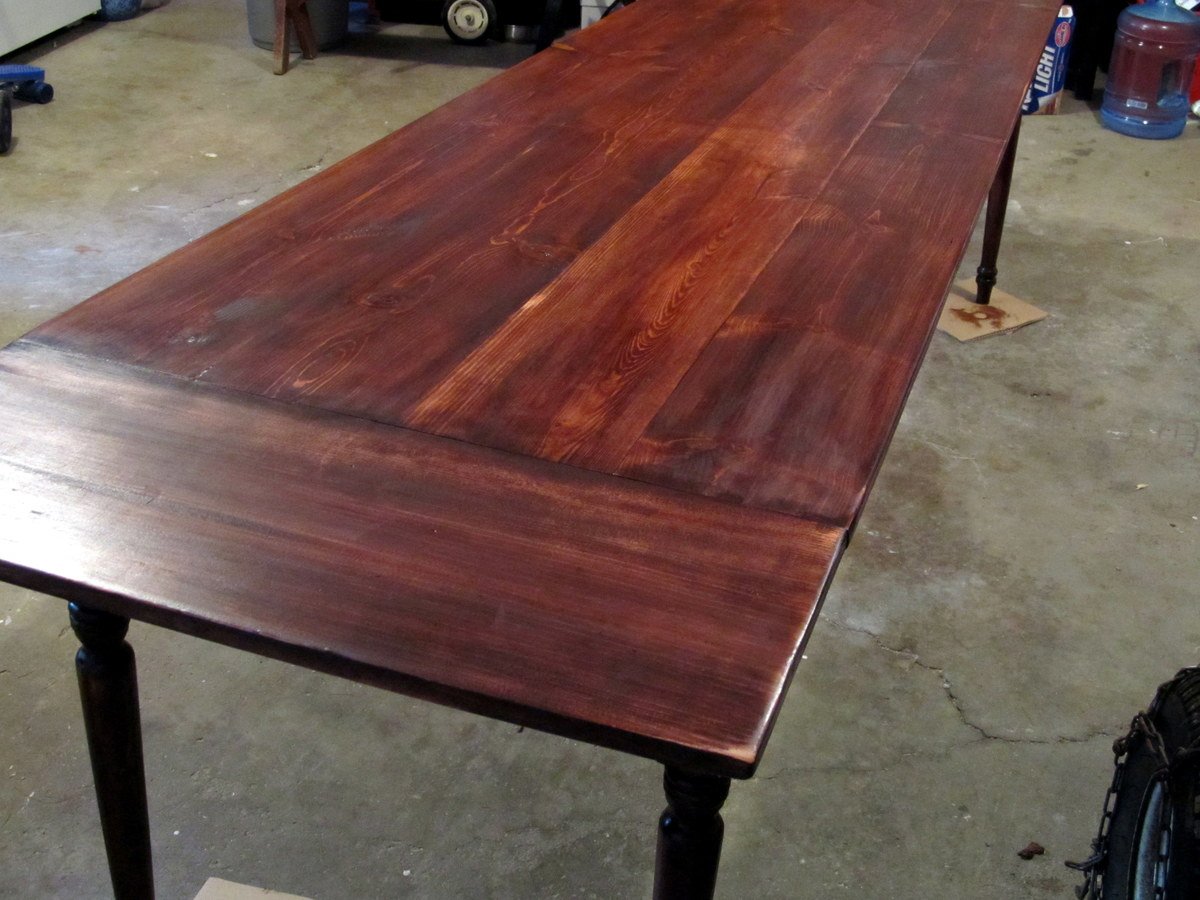
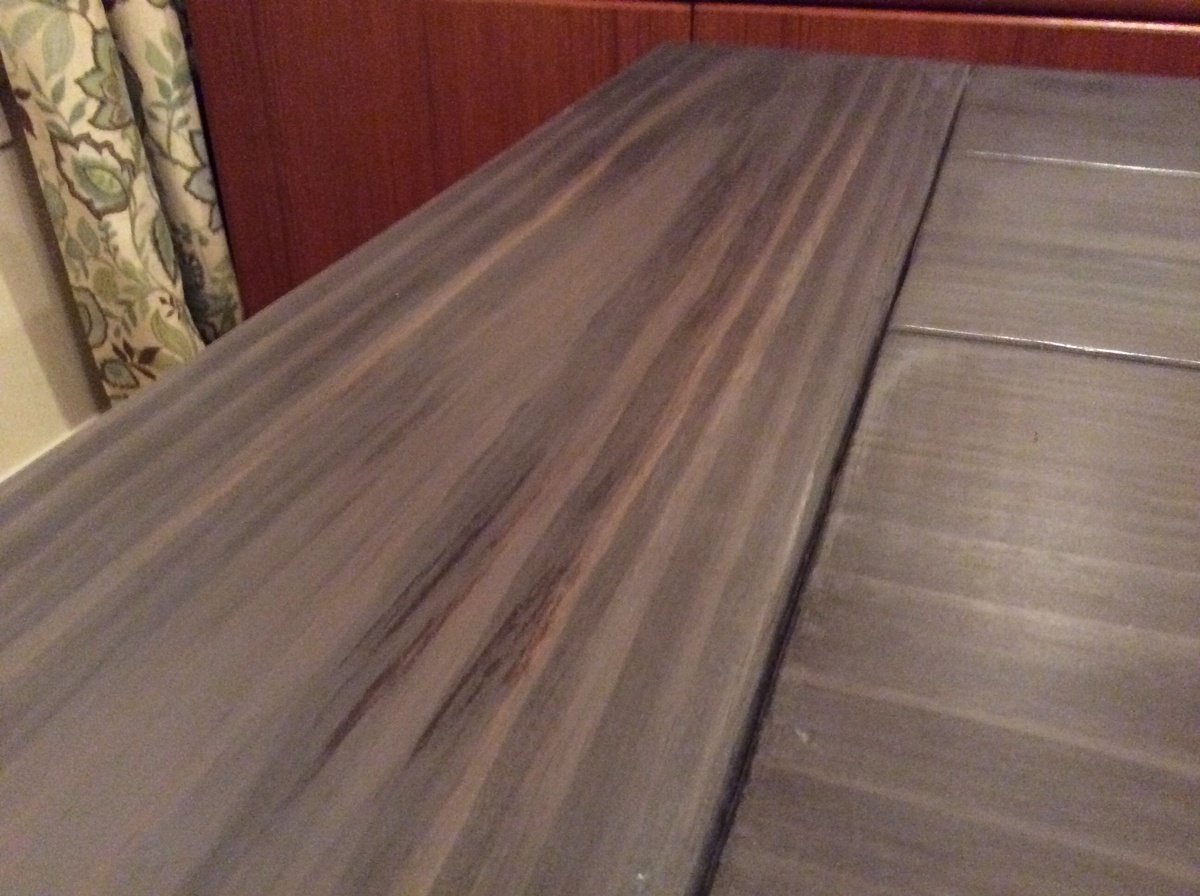
For the stain, it was a combo of Rustoleom Kona down first, and put it on darker on the middle plank and bread board ends. After that I did a few coats of Minwax Weathered Gray, and then a few coats of poly.

Mon, 01/20/2014 - 12:27
I'm curious to find out where you found the white chairs, I have the same ones in black and have been wanting to rep ain't them.
Slightly wider and not as deep as the original plans to match the other furniture in the room.
This was my first handmade project and it was really simple and easy to modify the measurements to the size I needed. I was able to cut and assemble everything by myself in about 2 1/2 hours.
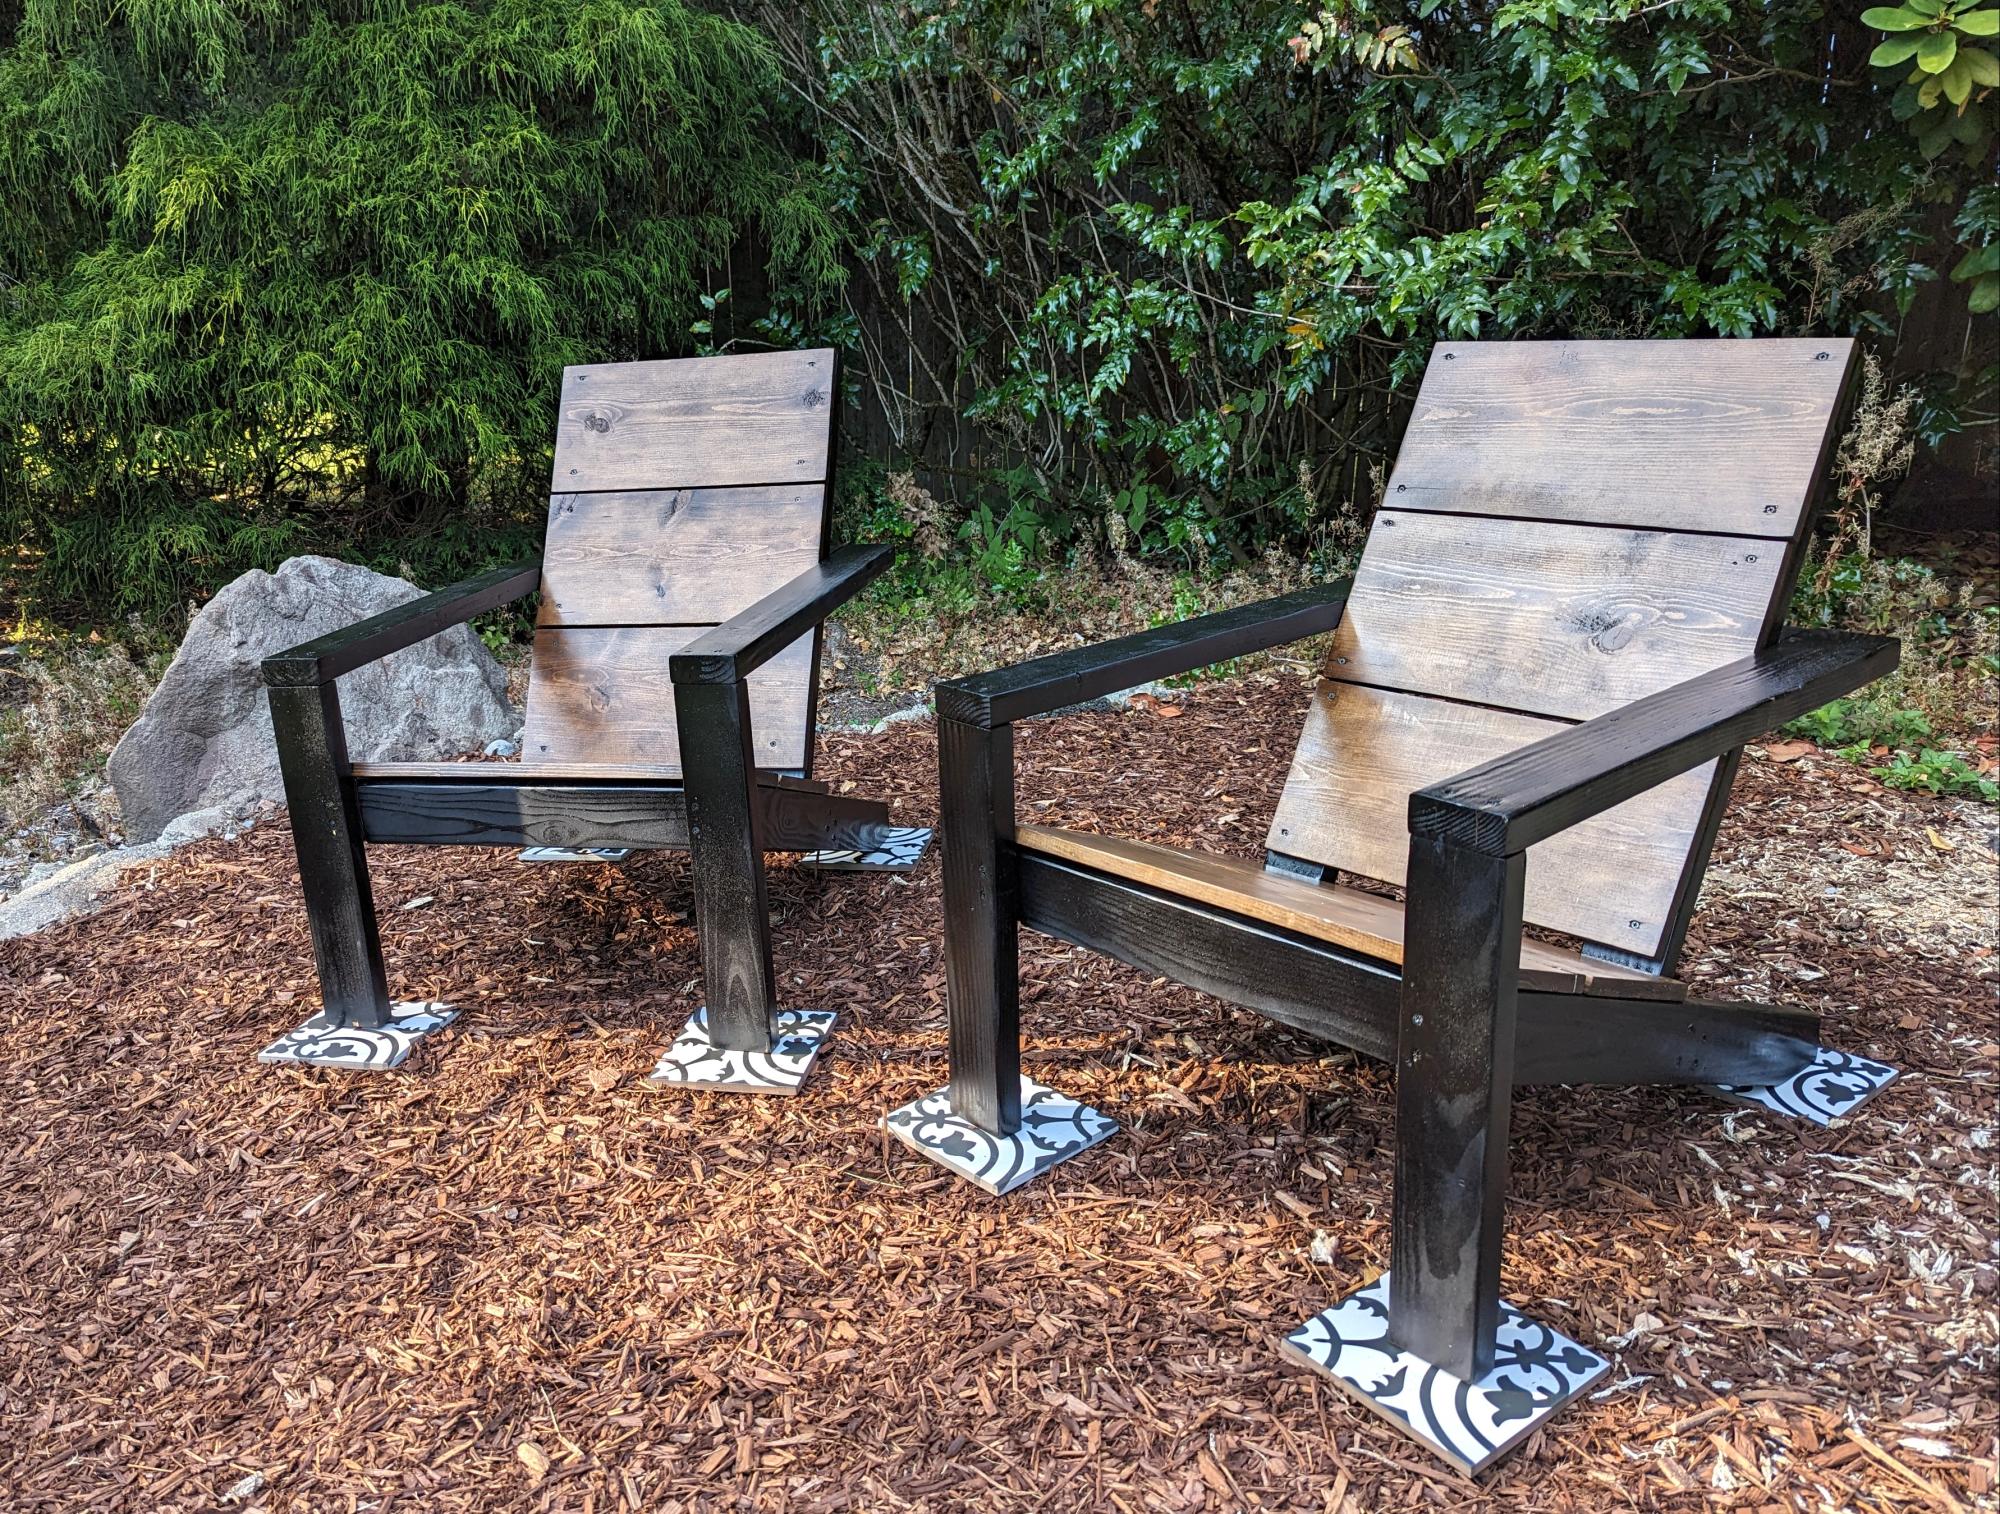
I built these this last weekend, super easy to follow the plans and they turned out great!
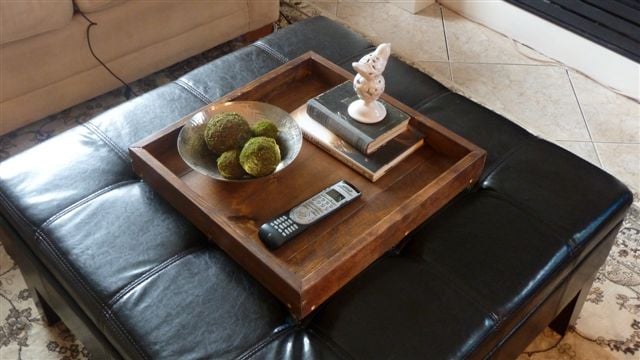
I have a large, square ottoman in my family room that looked empty and I didn't have anywhere to put a drink. The cheapest tray I could find that was large enough was $80 and it was damaged! So I slapped some boards together, and this is what I got. I love it! I joined a few boards together for the bottom, using my Kreg Jig, and attached a frame of 1x3's around the perimeter (I mitred the corners).
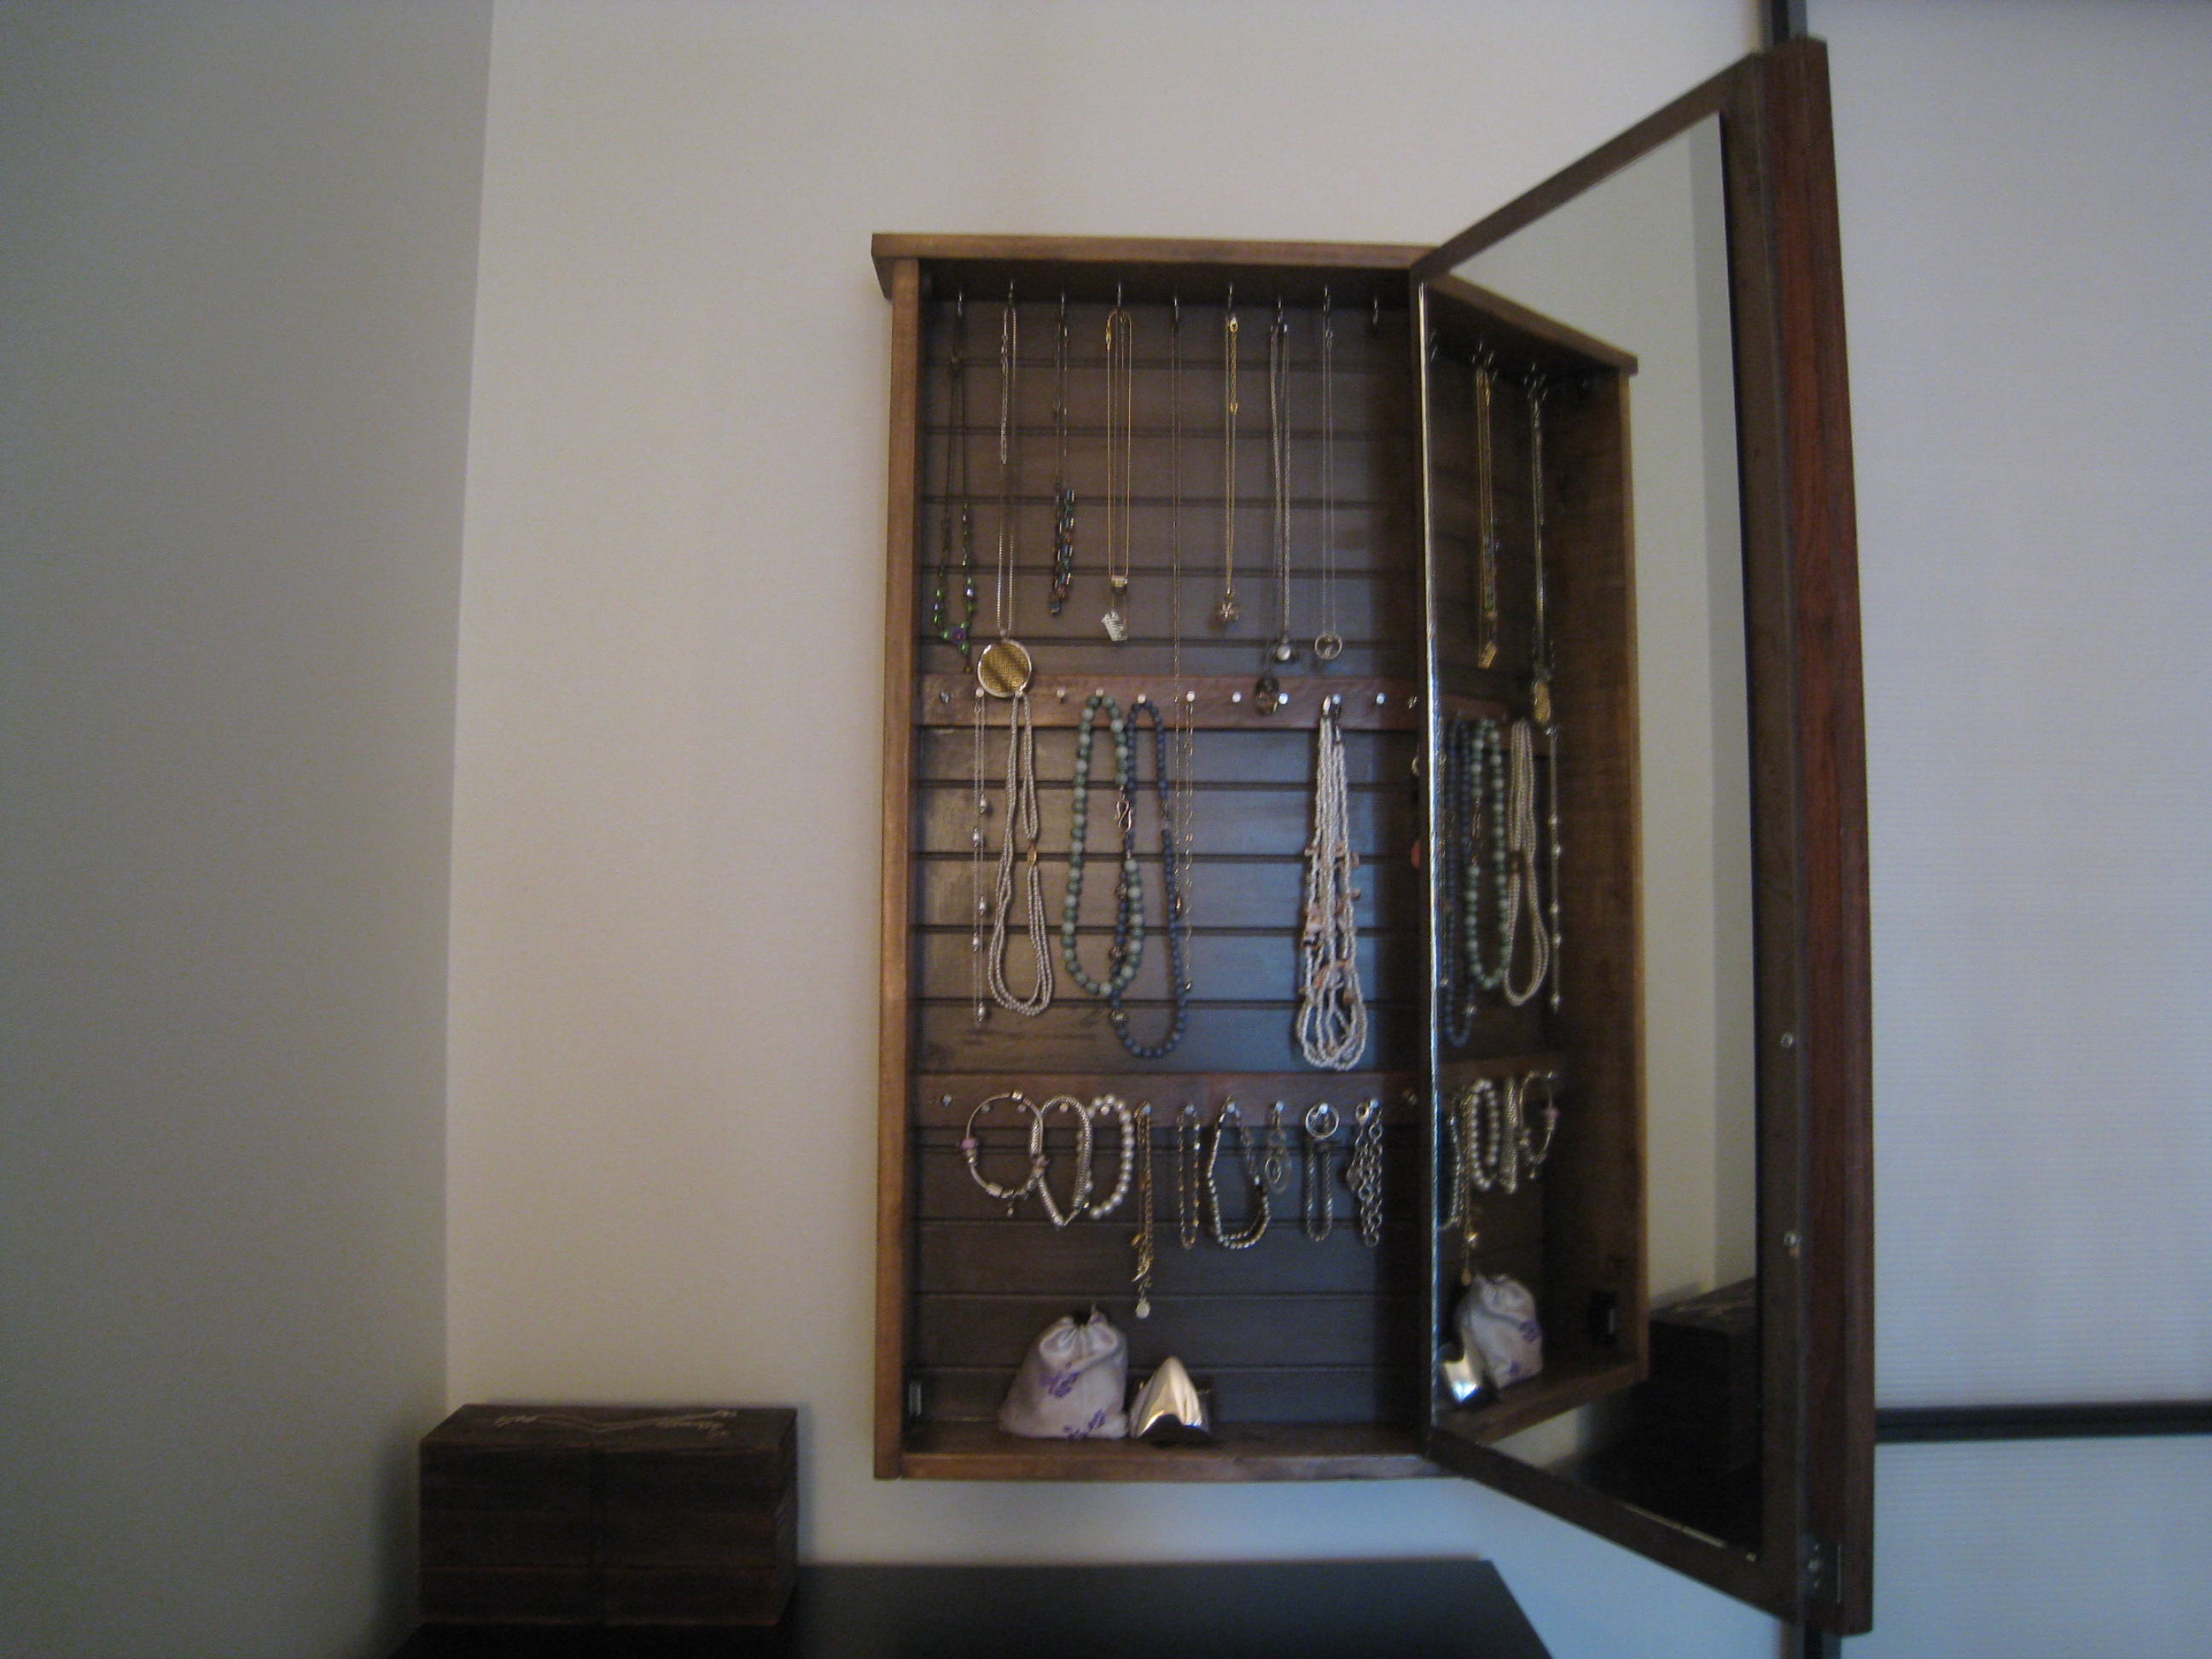
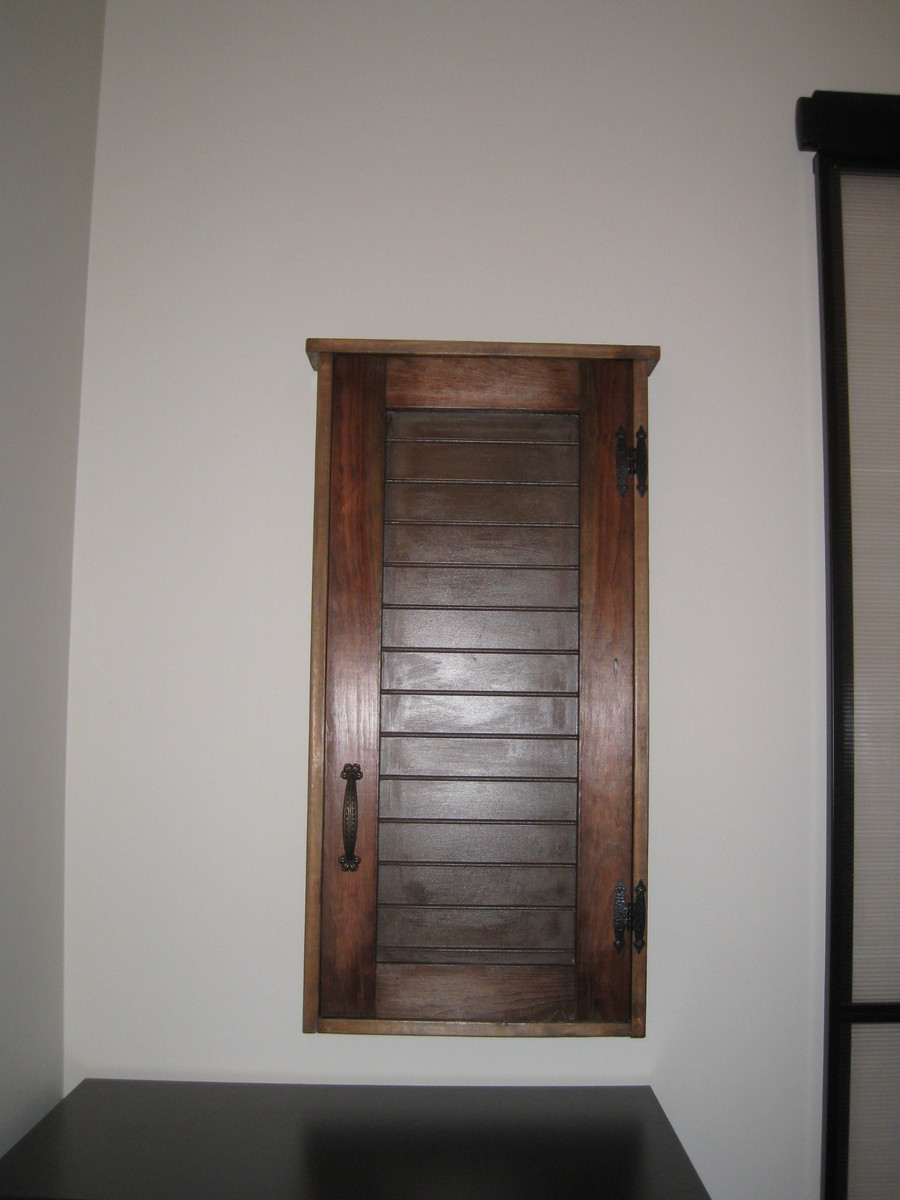
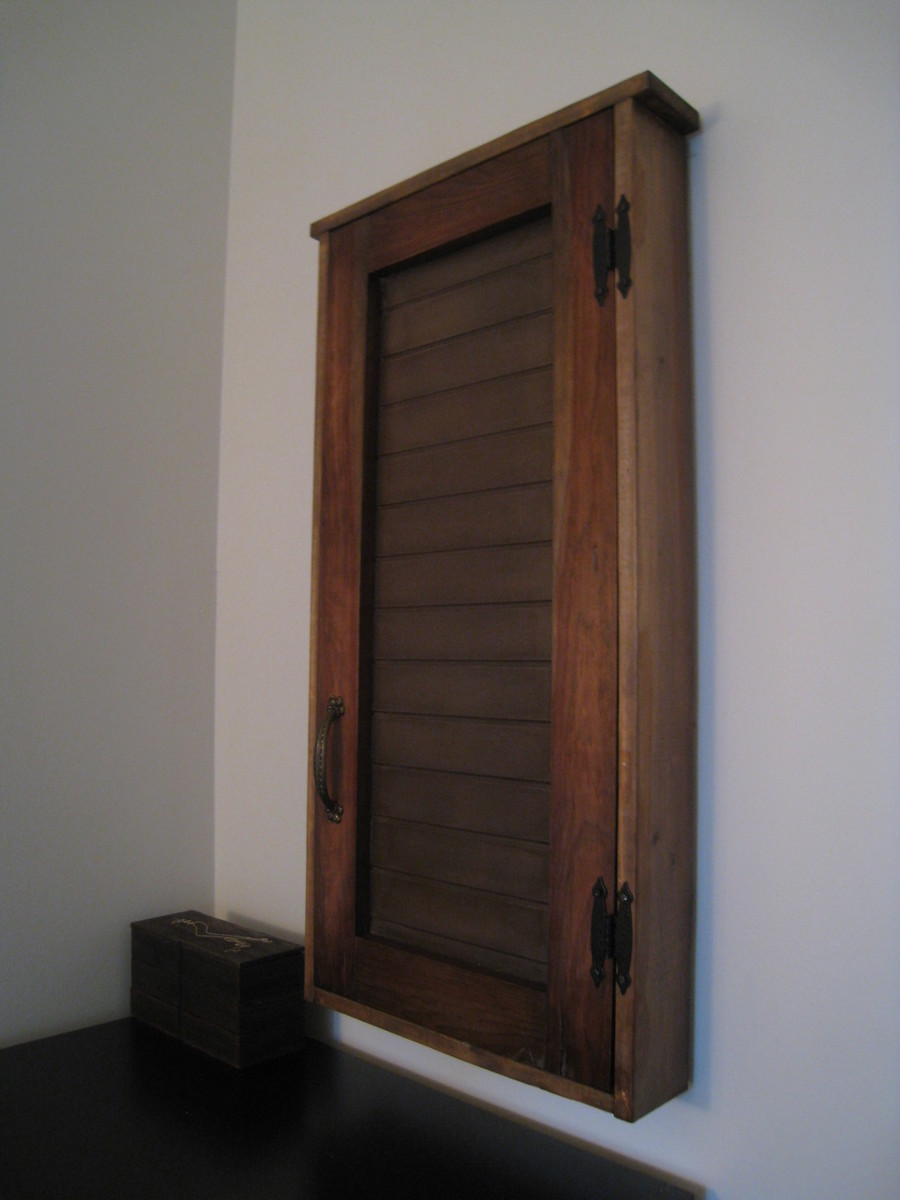
Modified the original plan a bit.
- Instead of using a wire door I used a board instead to give it a more closed look.
- Attached a mirror to the inside of the door
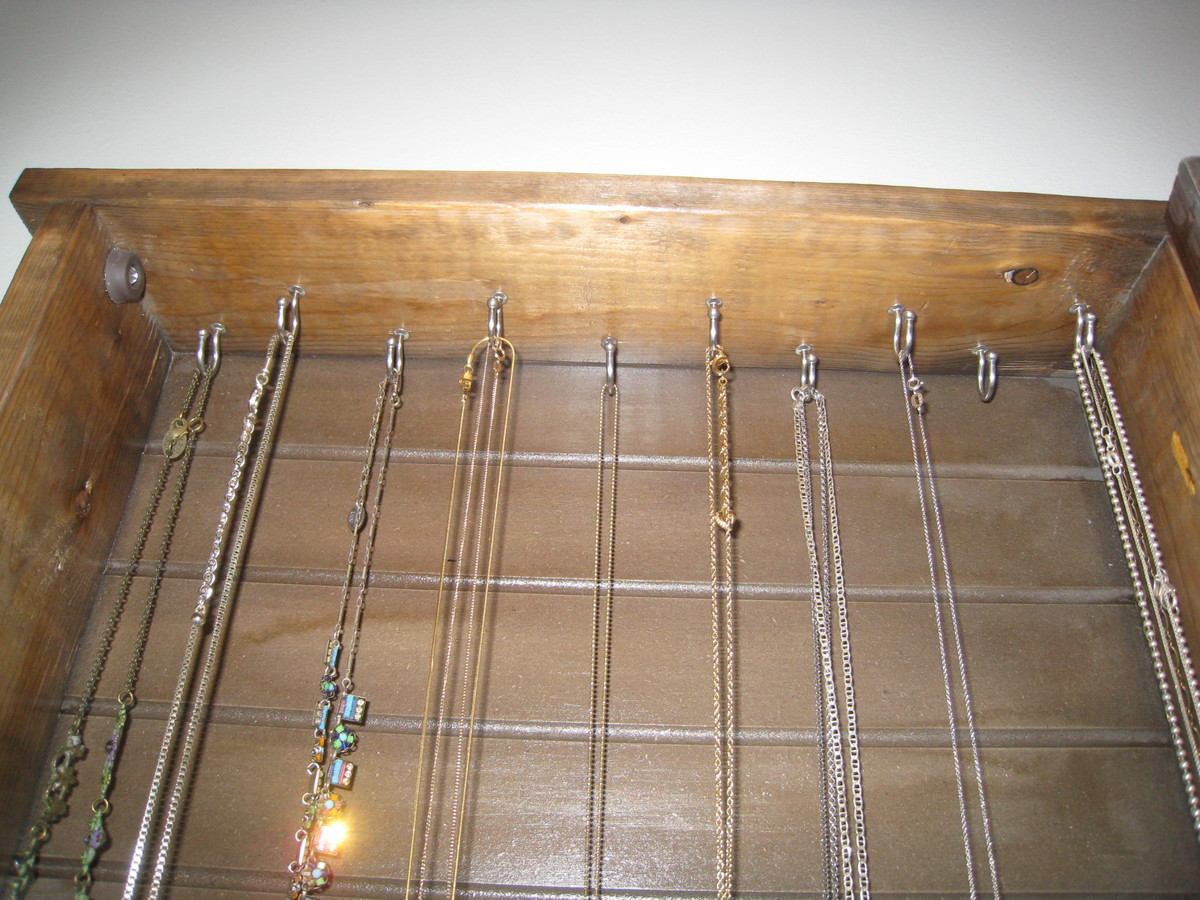
- Attached lots of hooks on the top piece of wood to hang more necklaces
- added a magnetic catch at the bottom and a rubber stopper at the top to ensure the door closes evenly and holds
- attached to dry wall with 4 toggle bolts


Thu, 01/23/2014 - 09:15
Wow, did you ever do a great job on this project. The tea stain looks good!
Val @ artsybuildinglady.blogspot.ca
Thu, 01/23/2014 - 15:25
I've been wanting to build one of these for a long time now. Yours looks great. What a great idea to put a mirror on the inside of the door!

Thu, 01/30/2014 - 09:41
I'm actually building one for my wife right now, but was stuck on how I wanted to design the door. Your design is very cool. Can I ask what you used for the back and door...is is just wainscoating? And what did you apply to support the mirror on the inside of the door?
Thanks in advance!
Thu, 01/30/2014 - 10:01
I am glad you like my design :-)
To support the mirror I used a combination of mirror tape
http://www.homedepot.com/p/Erias-Home-Designs-Mirror-Mounting-Tape-Squa…
and adhesive
http://www.homedepot.ca/product/lepage-pl-610-mirror-adhesive/827654
http://www.homedepot.ca/product/lepage-no-more-nails-all-purpose-clear-… (I used this one, it says not for mirrors but it didn't ruin the backing at all. The one above is probably safer to use)
As for the the back and the door, to be honest I don't remember the name of the board. I think I got it at home depot or maybe lowes. It came unstained and it was pretty thin. I cut it down to size for both. Sorry I can't be more help there. I did just check the home depot and lowes websites and couldn't find the exact panel. I am sure if you go and show them a picture they will be able to find it. The panel was around $15.
Let me know if you have any other questions!! Post a link here to yours when you are done, I would love to see it.
Fri, 01/31/2014 - 07:46
Excellent feedback, thank you! I found some small sheets of wainscoating at Lowes for around $10, and it's more than enough to do the job.
I'm heading to Home Depot after work today to pick up these other items so I can finish out this project. I figured if I delay long enough it will make a great Valentine's Day present.....
I'll be sure to post pics once completed. Thanks again!
-Brian
Fri, 01/31/2014 - 07:47
Excellent feedback, thank you! I found some small sheets of wainscoating at Lowes for around $10, and it's more than enough to do the job.
I'm heading to Home Depot after work today to pick up these other items so I can finish out this project. I figured if I delay long enough it will make a great Valentine's Day present.....
I'll be sure to post pics once completed. Thanks again!
-Brian
Fri, 01/31/2014 - 07:51
Great Idea. I hope she already has enough Jewellery to fill it...:-)
Fri, 01/31/2014 - 07:51
Great Idea. I hope she already has enough Jewellery to fill it...:-)

Fri, 01/31/2014 - 08:24
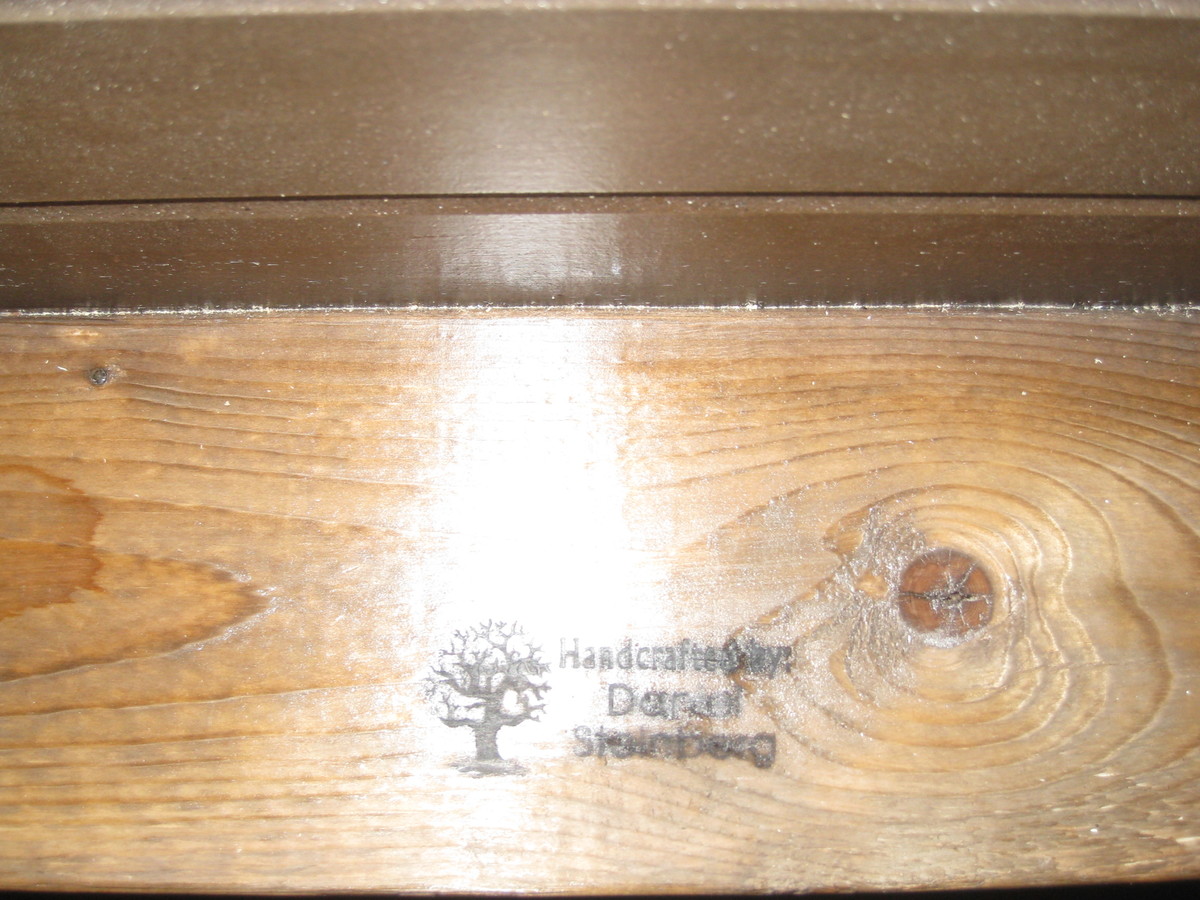
This looks beautiful! What did you use to add the "handcrafted by" personalization on your project? That is a very nice addition. Great job!
Fri, 01/31/2014 - 08:35
Thank you Joanne!
I used a custom brander. I bought it from this company as a ready to Brand package
http://www.brandingirons.com/oscommerce/product_info.php?products_id=82
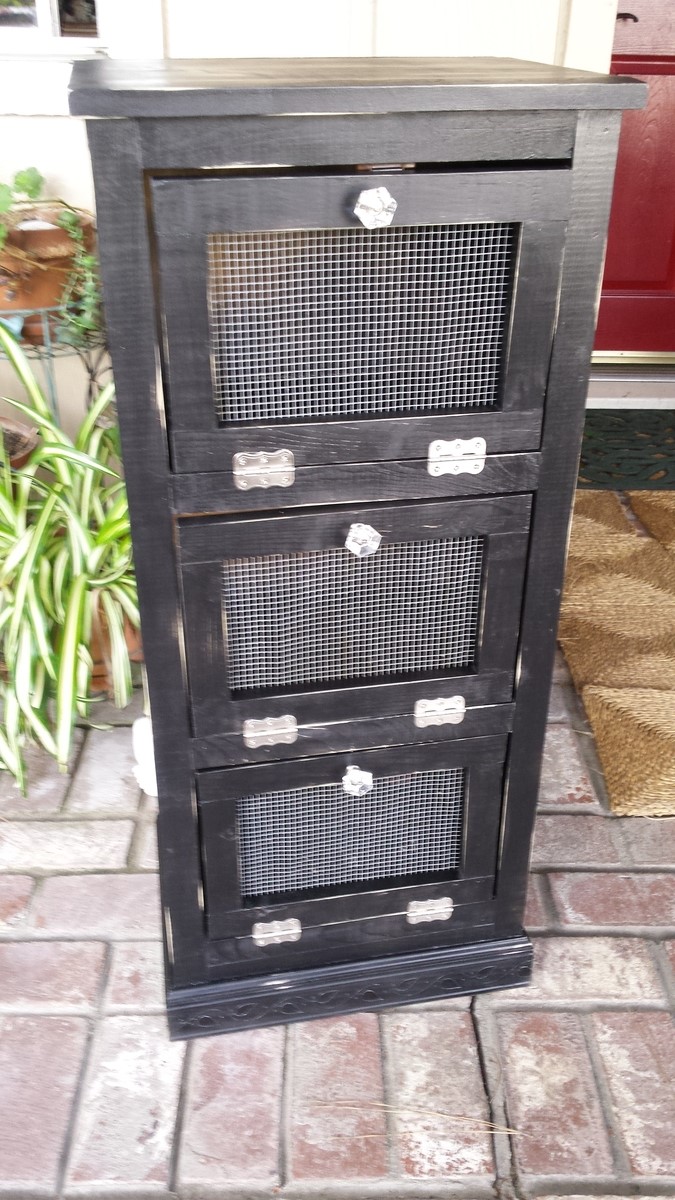
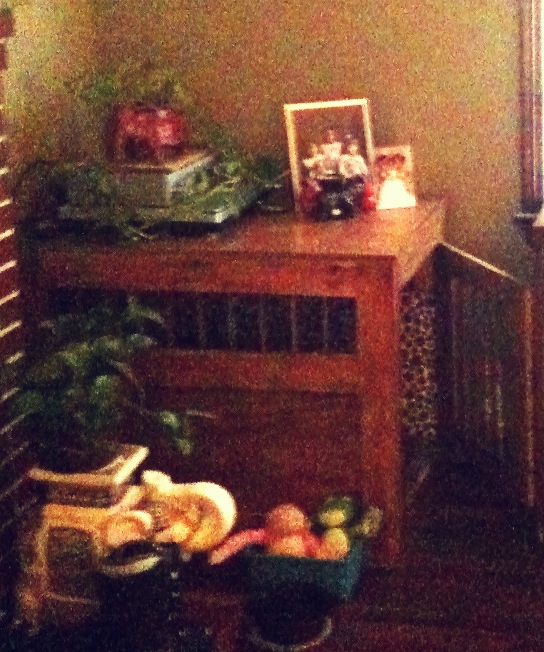
Vegetable bin chalk painted and hand distressed.