Community Brag Posts
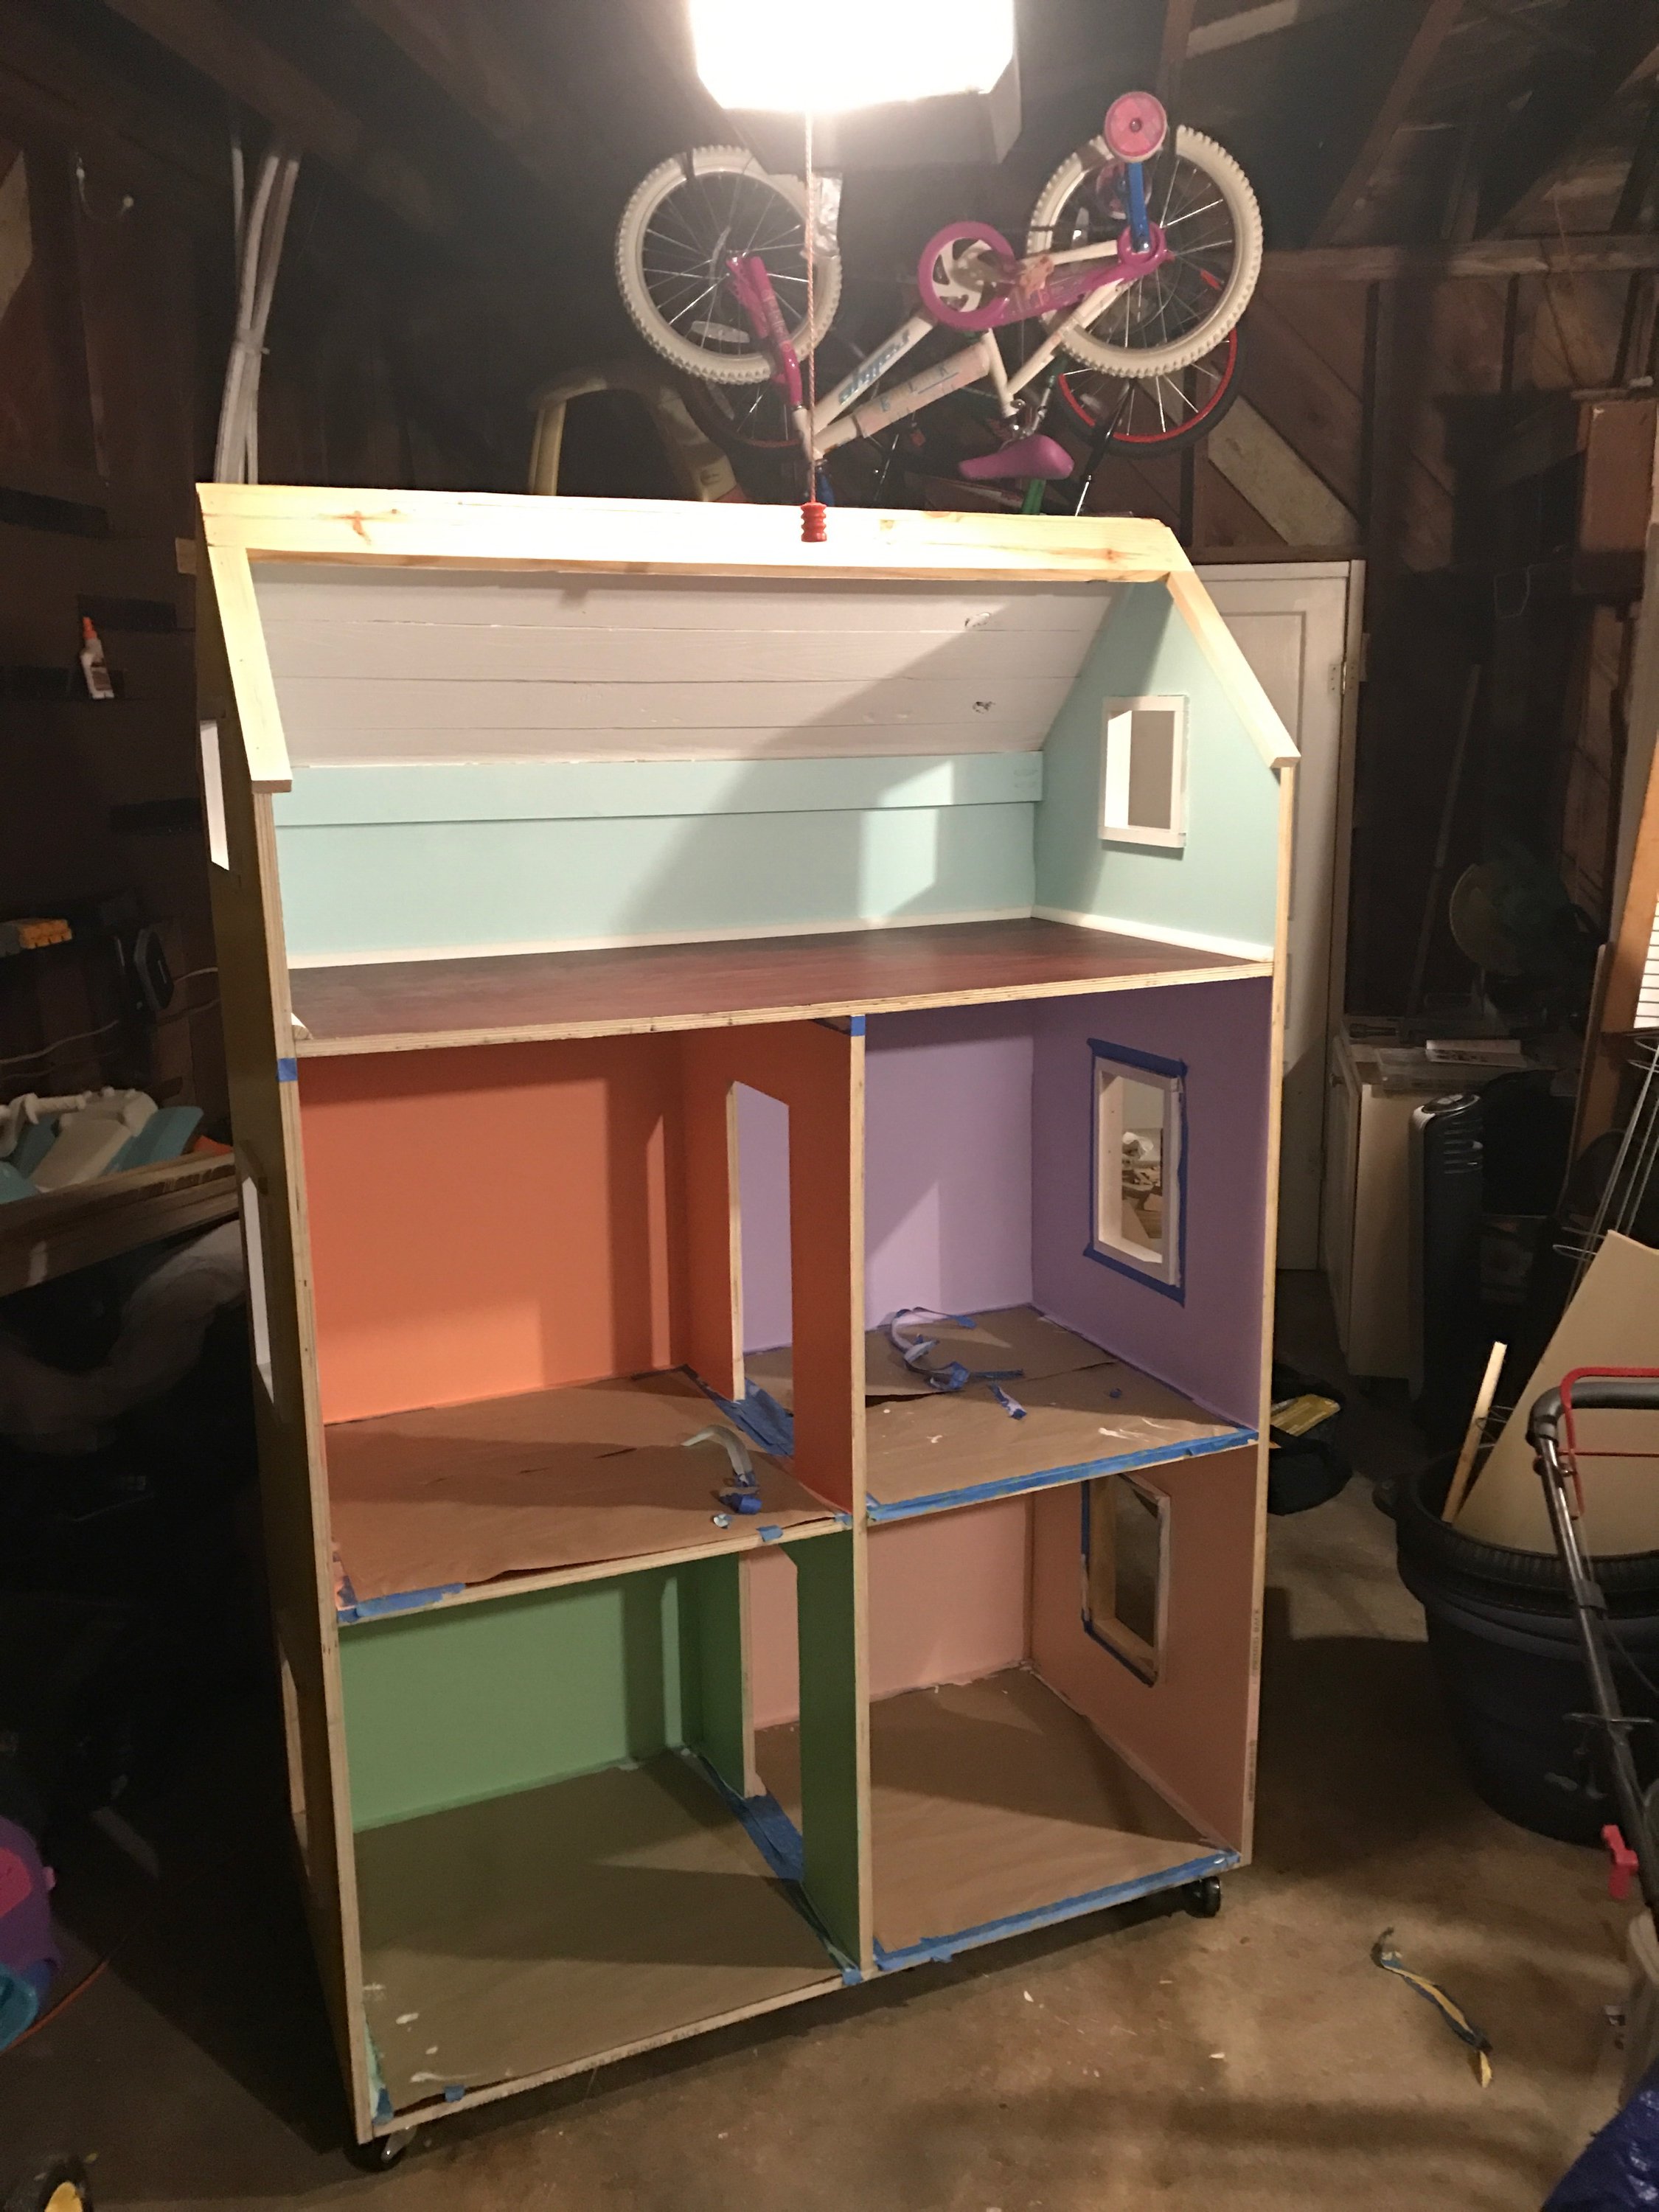
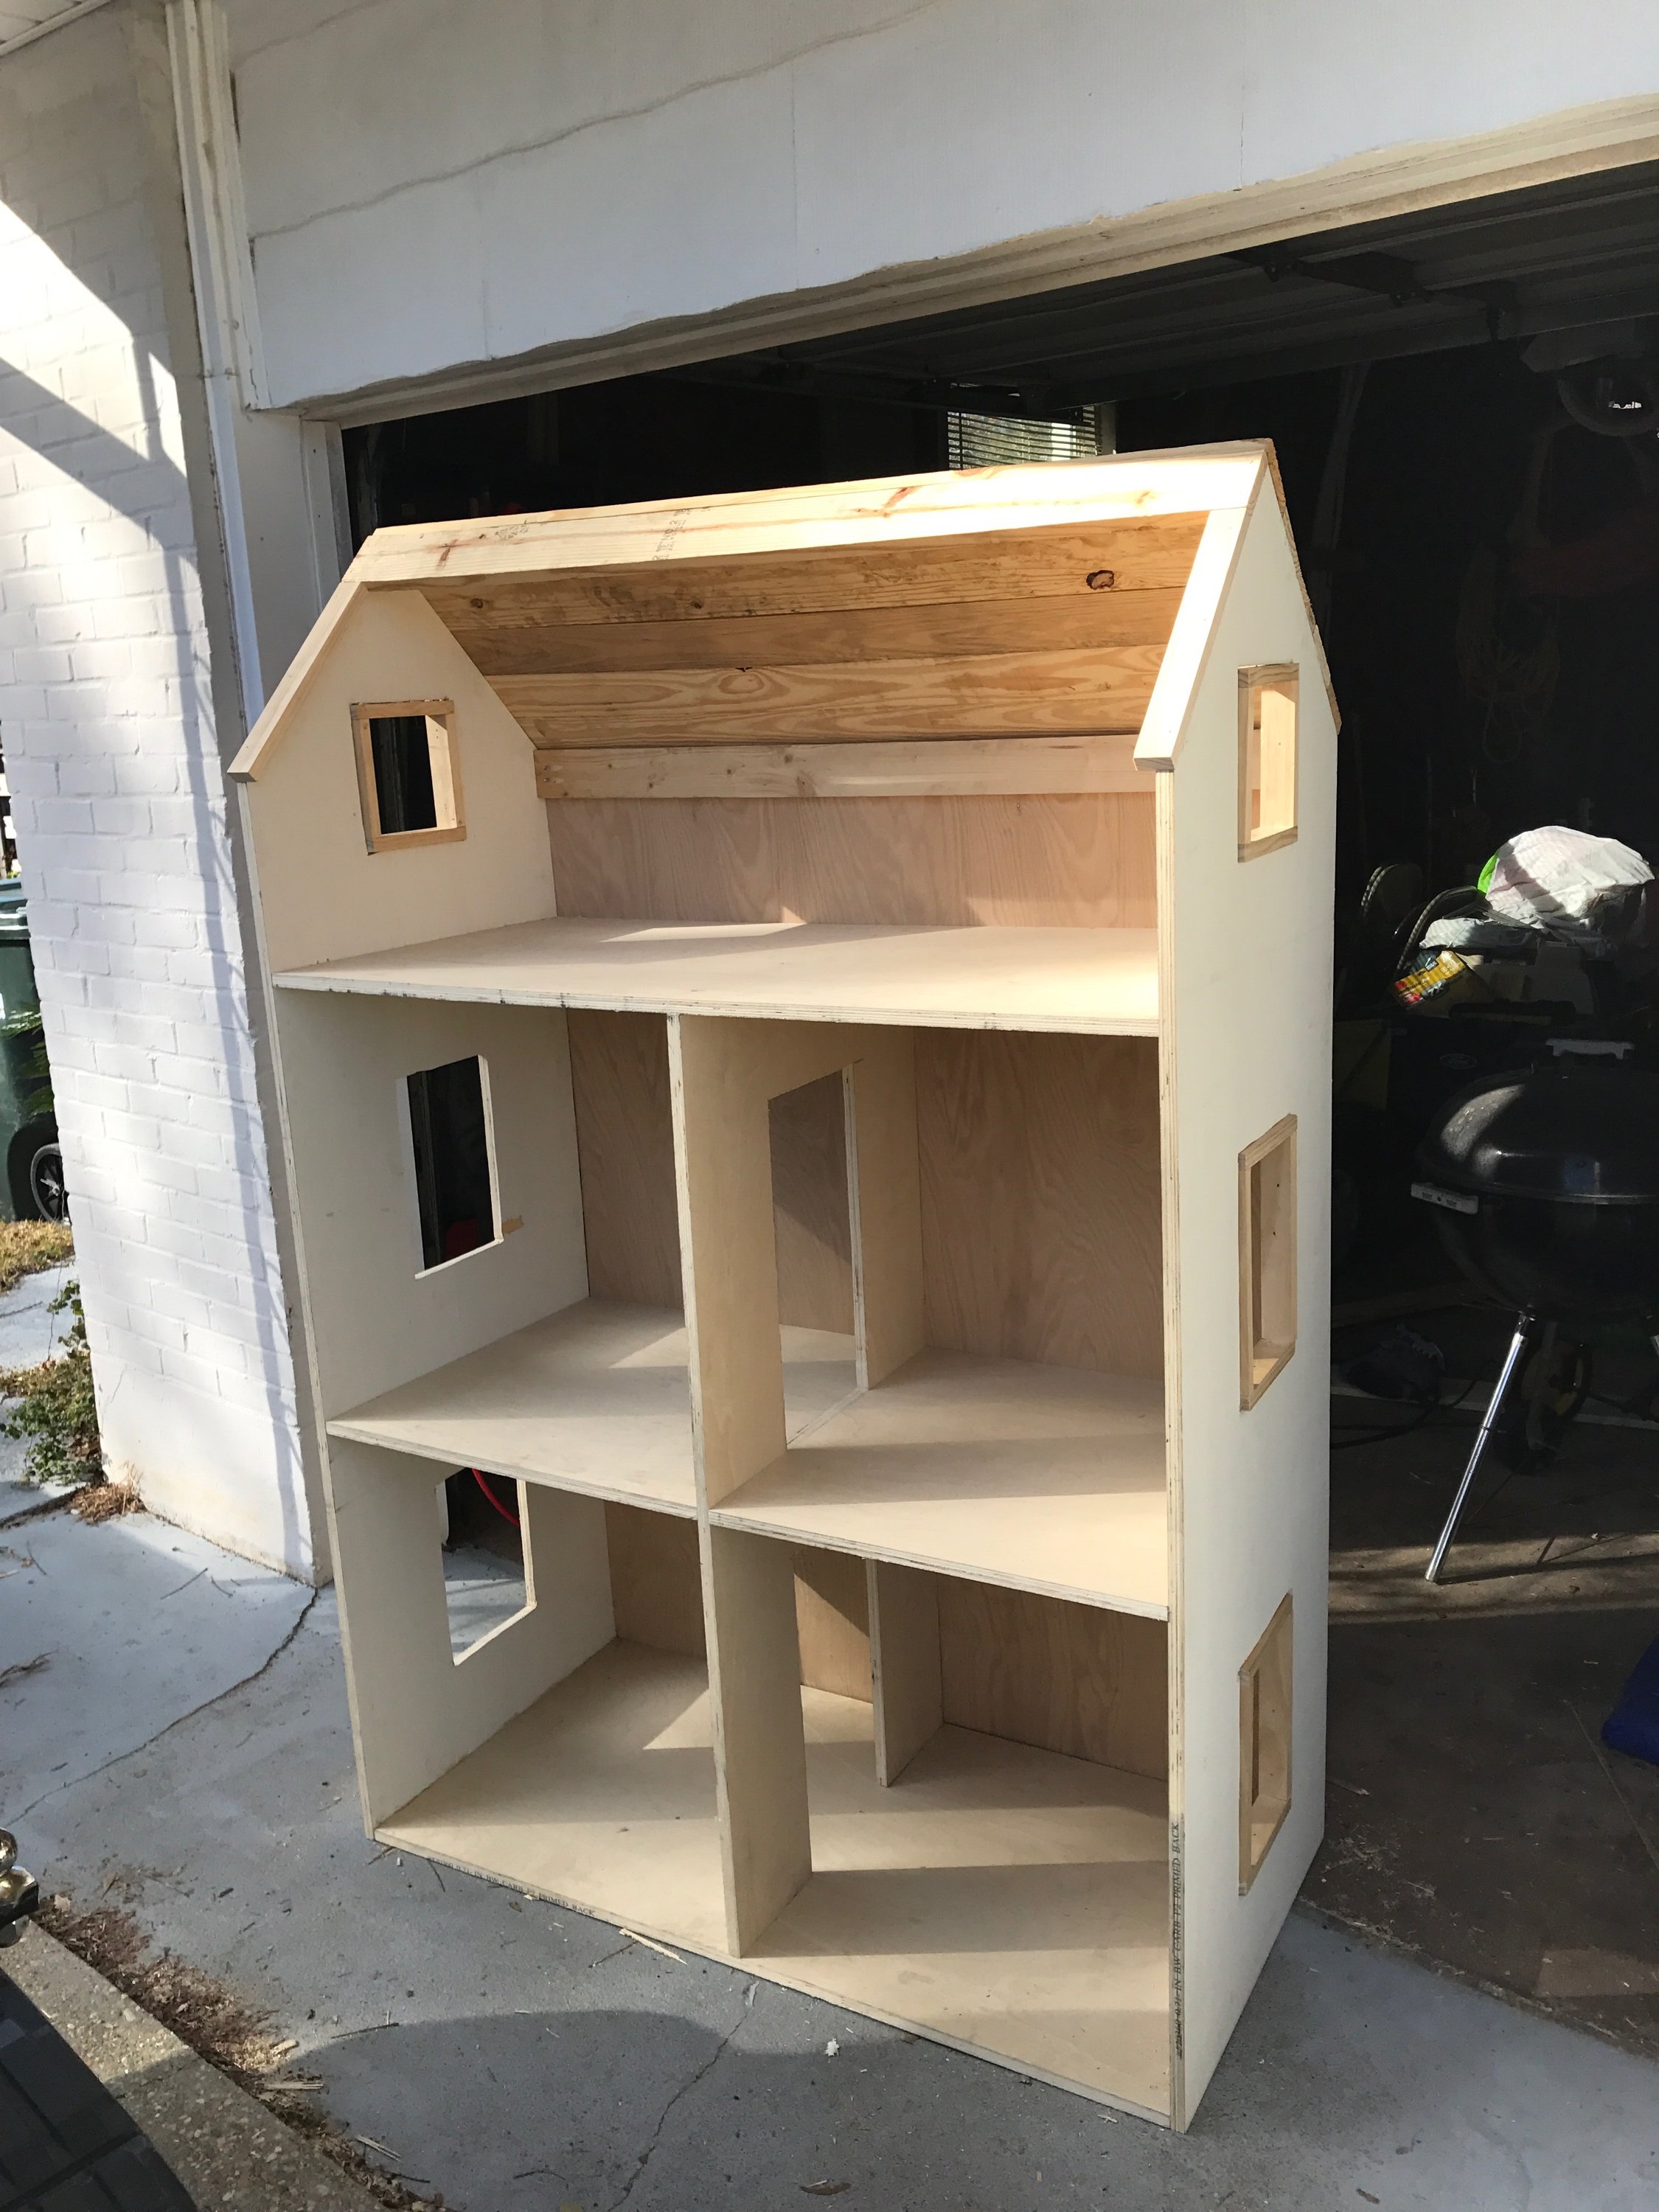
She's only been asking for 3 years (Doll House)
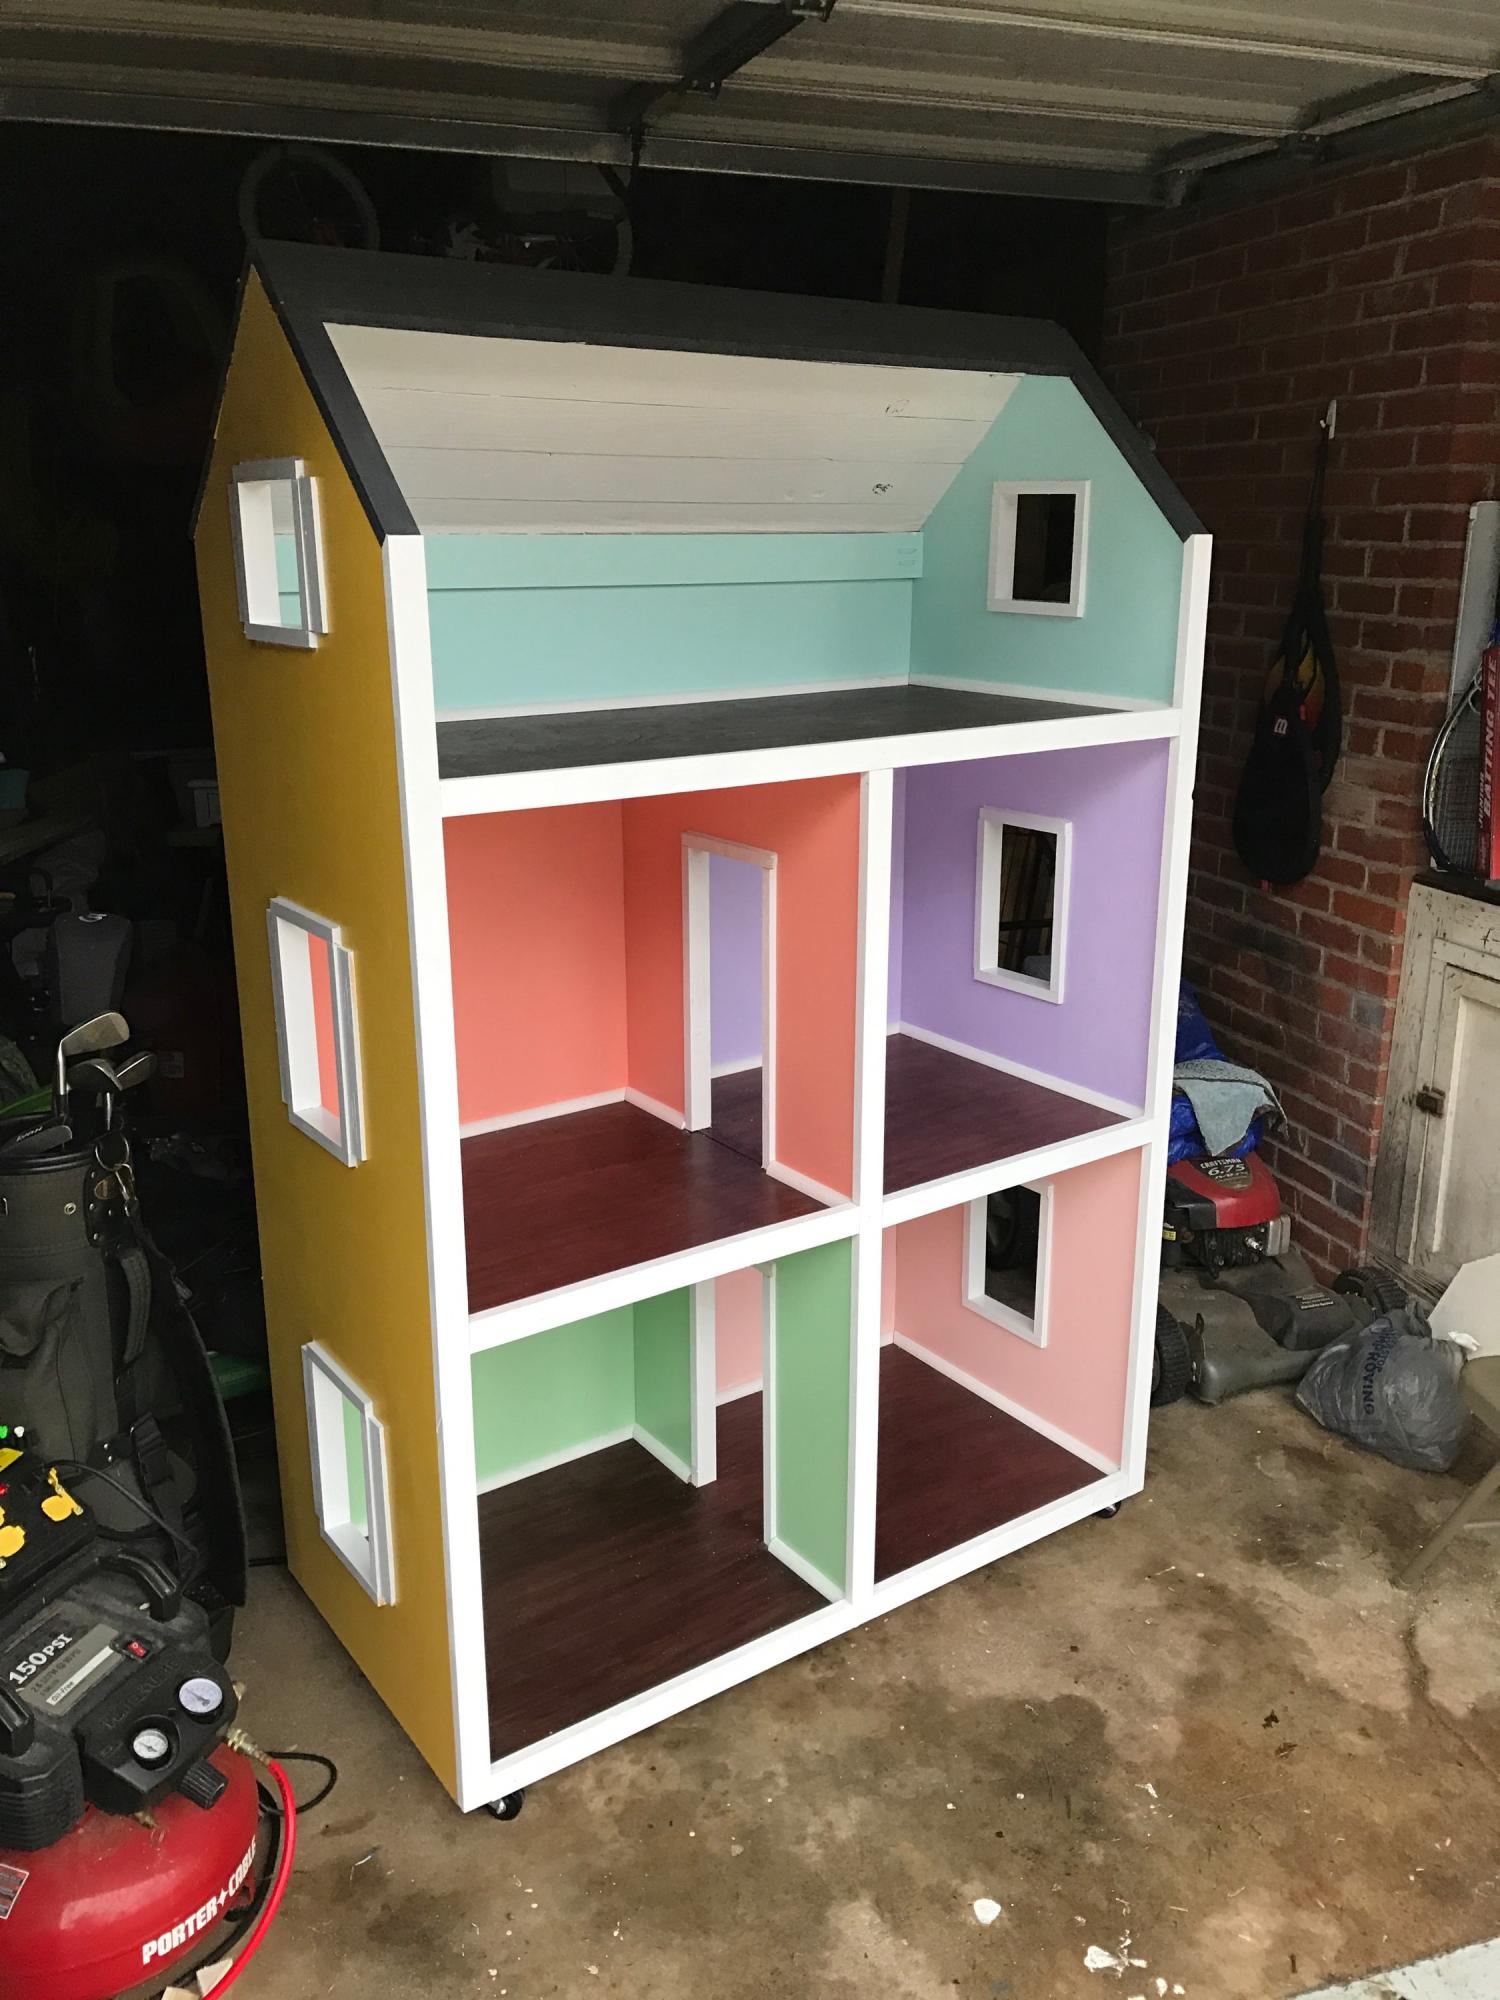
My Daughter has only been asking for a Doll House for like 3 years. This Christmas her uncle is giving her her very first American Girl Doll, so I figured it was about time to get on that doll house. I couldn't be more thrilled with the results. Such a great plan and easy to follow. Thank you so much.
Built from Plan(s)
Estimated Cost
$250-$300
Estimated Time Investment
Weekend Project (10-20 Hours)
Finish Used
Used a Cherry Stain on the floors.
Recommended Skill Level
Intermediate
Kitty Tree Condo
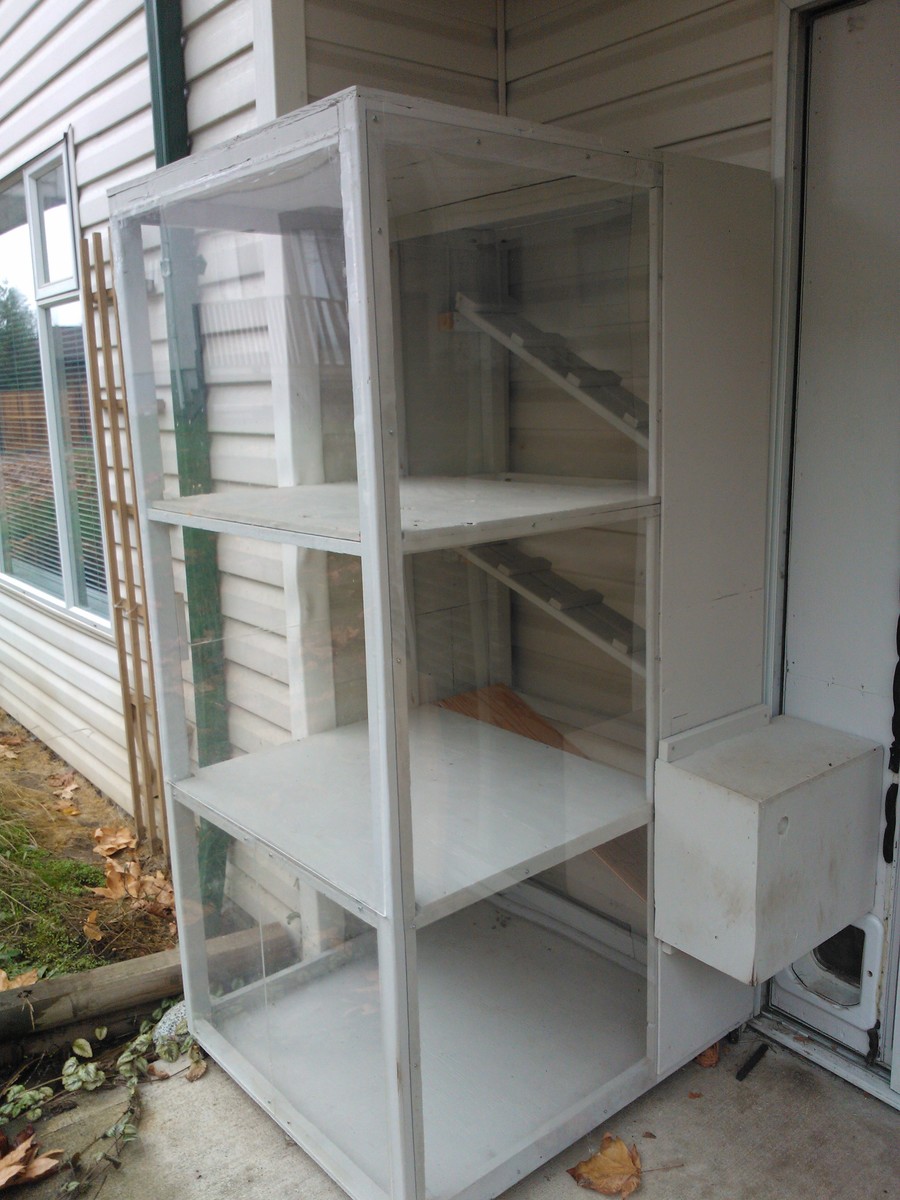
I adapted the simple Kitty Tree plan to make an outdoor sunroom for my cats. They are locked inside when I'm away, so this was a way for them to get some fresh air. They can access it via a tunnel, visible on the side as a grey box that butts up against the panel for the cat flap.
It's 36"X30" and 68" high.
The walls are made of plexiglas and I made the interior ramps by cutting up a set of wooden shelves.Plexiglas is expensive, but I salvaged some that was slightly scratched and going to the landfill. Otherwise, it would have cost me well over $100.
The frame was built using a Kreg jig, which is now my new favourite tool. I also added some casters so it can be rolled away from the wall for cleaning.
I found the Kitty Tree plan to be easy and versatile.
Estimated Cost
$25 for lumber and plywood, $15 for exterior paint, $150 for plexiglas
Estimated Time Investment
Weekend Project (10-20 Hours)
Finish Used
Exterior latex. a mis-tint I got for cheap.
Recommended Skill Level
Intermediate
Comments
Wed, 11/14/2012 - 07:39
Very innovative. How did you
Very innovative. How did you ventilate it for them to breathe?
Mon, 11/19/2012 - 06:42
The plexiglas is not quite
The plexiglas is not quite large enough to cover the space between the posts so there is a 1/8" inch gap around many of the edges.
Also the back is open. When it's away from the wall, I can lean in to clean it. So, it's not at all airtight.
Mon, 11/19/2012 - 06:45
One could use a wire mesh
One could use a wire mesh instead of plexiglas to save money. It would look okay, especially if painted, but I splurged on the plexiglas because it does look nicer than wire. I wanted to prevent complaints from our immediate neighbours if they thought a wire cage was an eyesore.
Mon, 11/19/2012 - 07:04
Fun!
Your cats are going to love this. Once the birds (thinking about swallows) figure out they can swoop by quickly without harm, the birds are going to love it too. You could even put a bird feeder nearby to make it more interesting for the cats to look at.

Fri, 11/23/2012 - 20:41
I Love the idea of the bird
I Love the idea of the bird feeder! It would be like watching Tom and Jerry cartoons! Lol
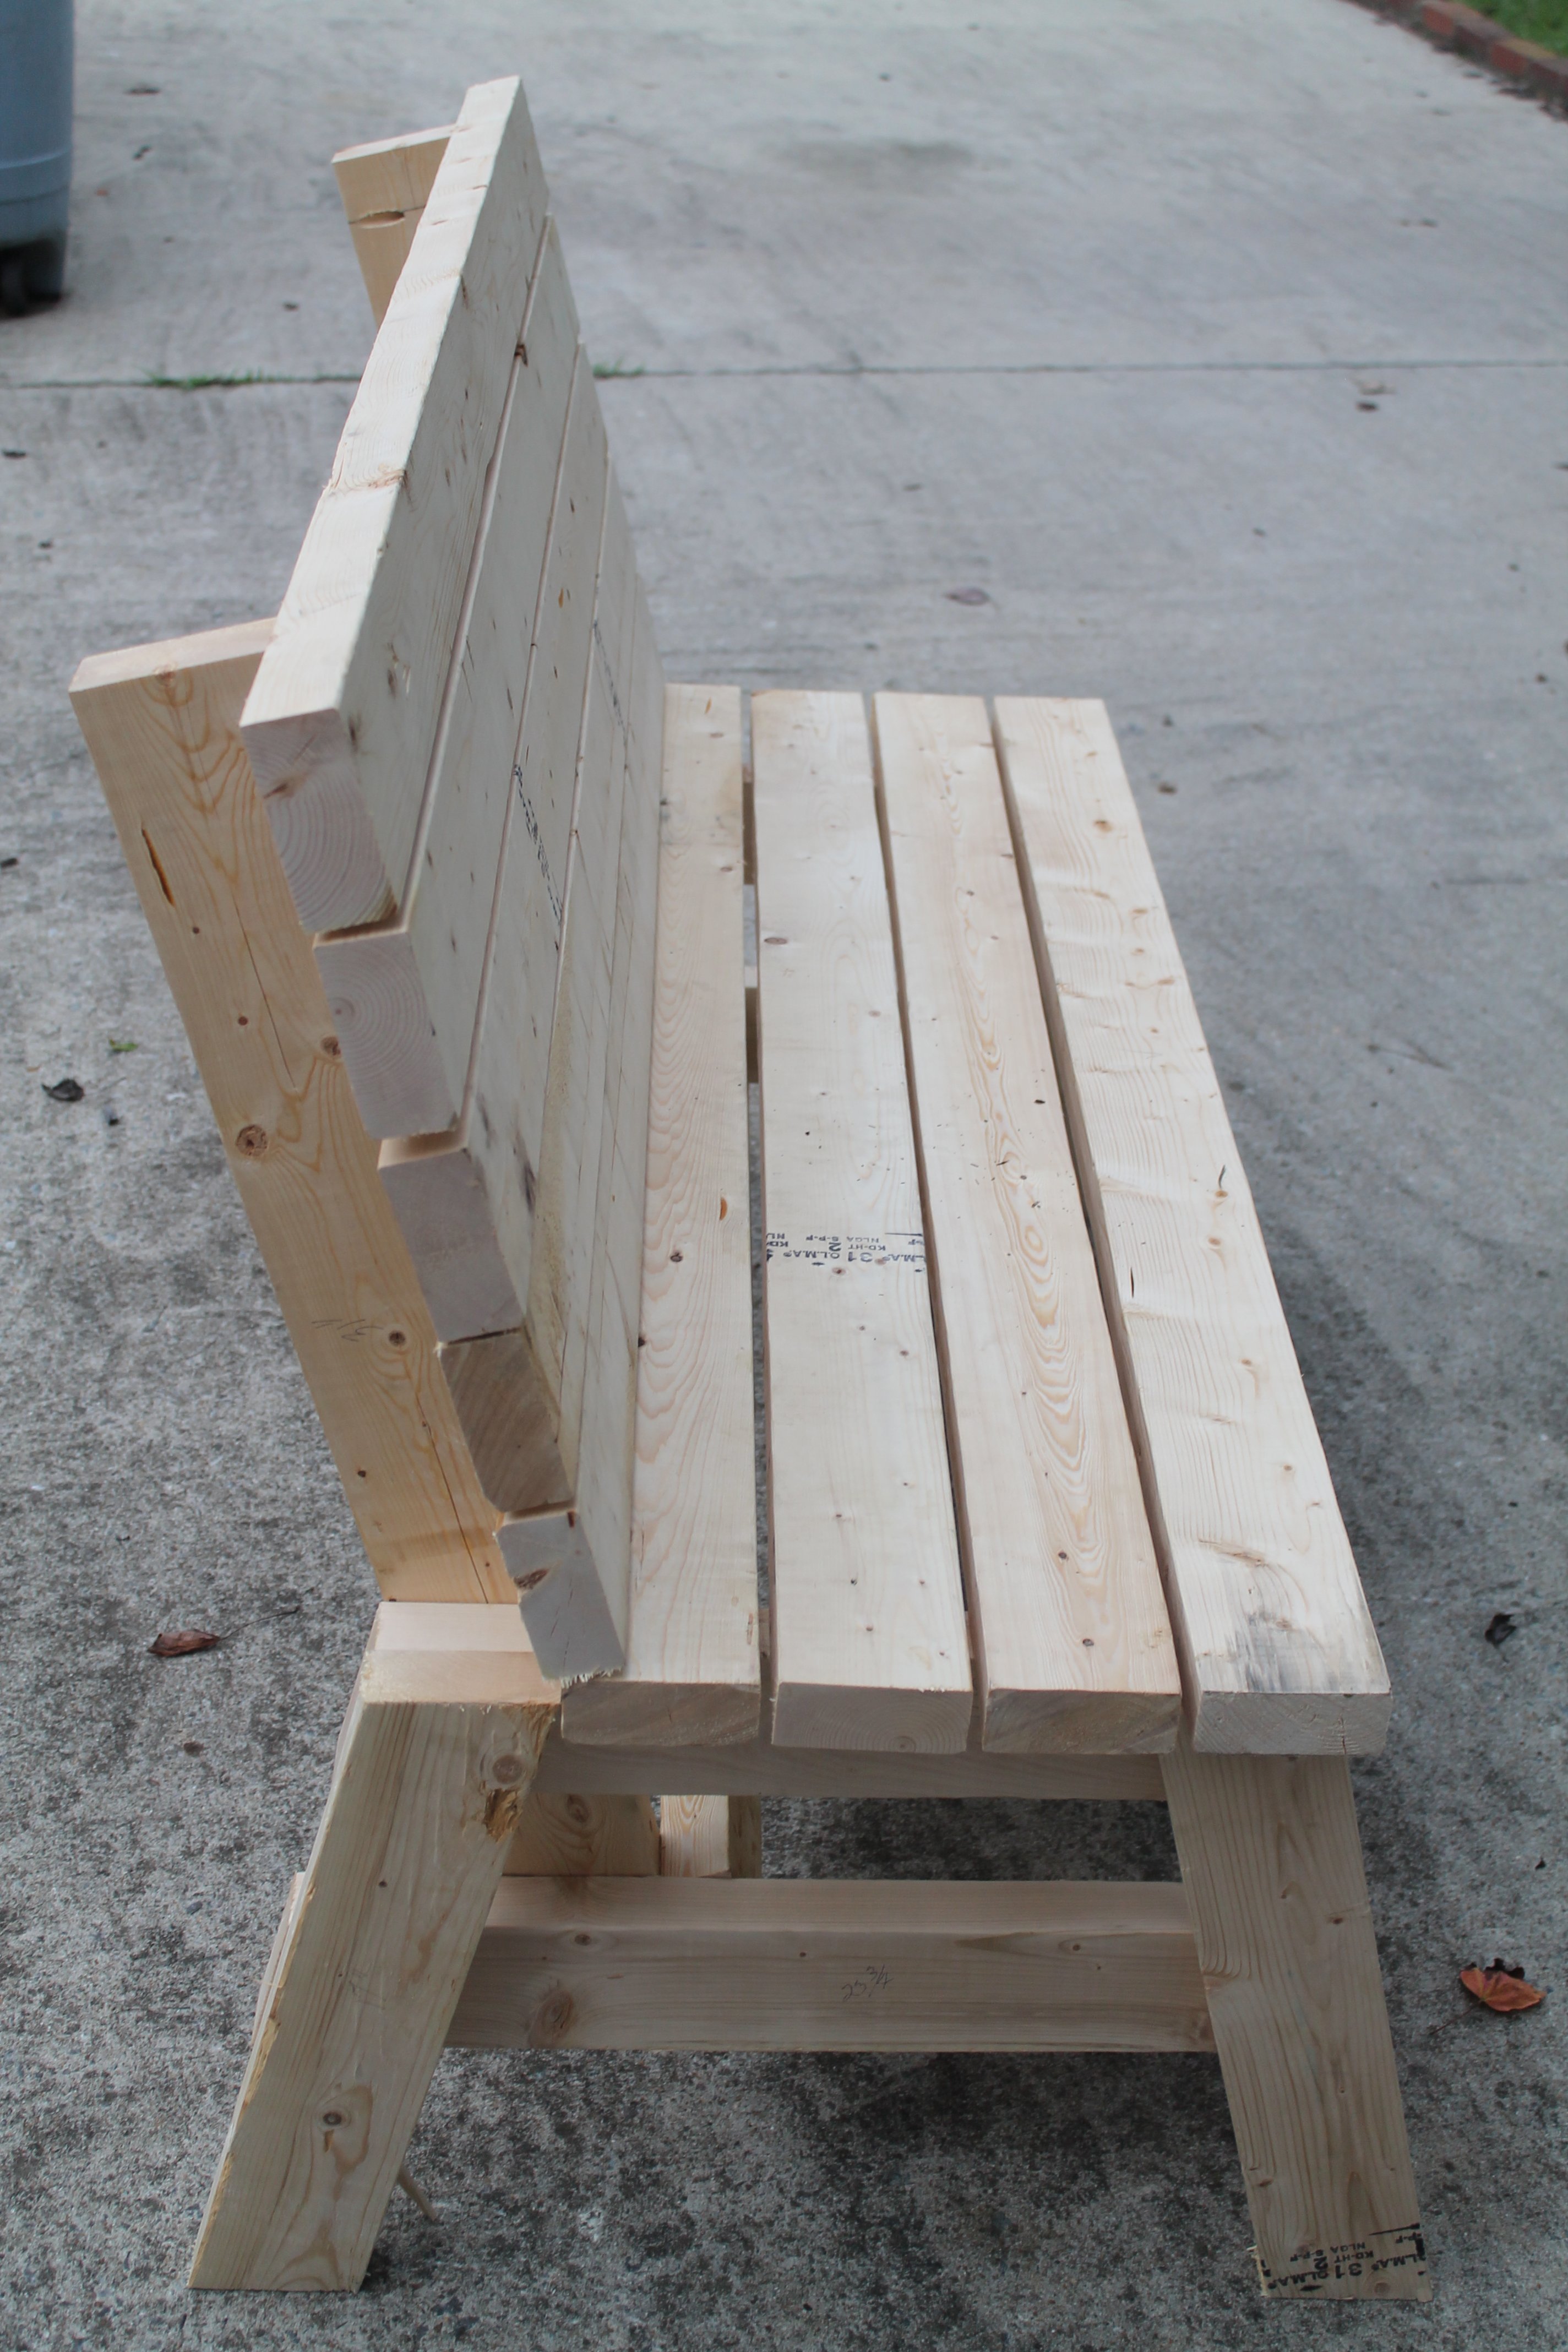
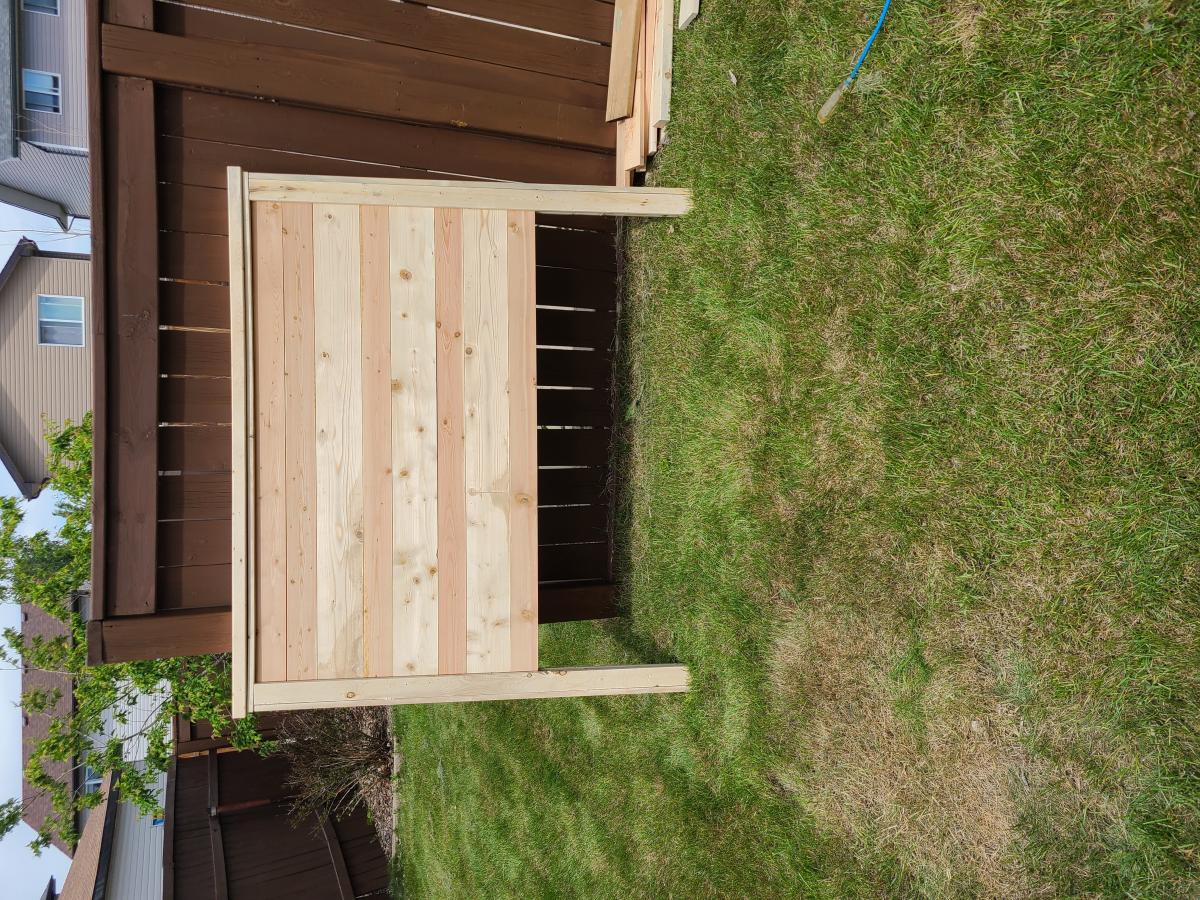
Simple 2x4 Bench

I made this in an afternoon. Loved this project. It is made with 2x4's using a Kregs Jig and mitre saw (plus additional tools like a drill and square). This was my frist time using the Kregs Jig and I am sold!!
The free plans were taken from another website. They are very detailed and there is even a video (I recommend it as he gives a great tip for making sure the back stays equal/level to each other before putting the back on). Even though you can build this by yourself, I did have help for the heavier sides once they were assembled. I plan to build the additional side table soon and finish them both with sanding and staining when the weather seems less iffy for rain.
If you are looking for a good beginner project that doesn't take forever or have complicated steps, this is your project.
Built from Plan(s)
Estimated Cost
Around $50
Estimated Time Investment
Afternoon Project (3-6 Hours)
Recommended Skill Level
Beginner
Farmhouse Style Toy Box / Blanket Chest
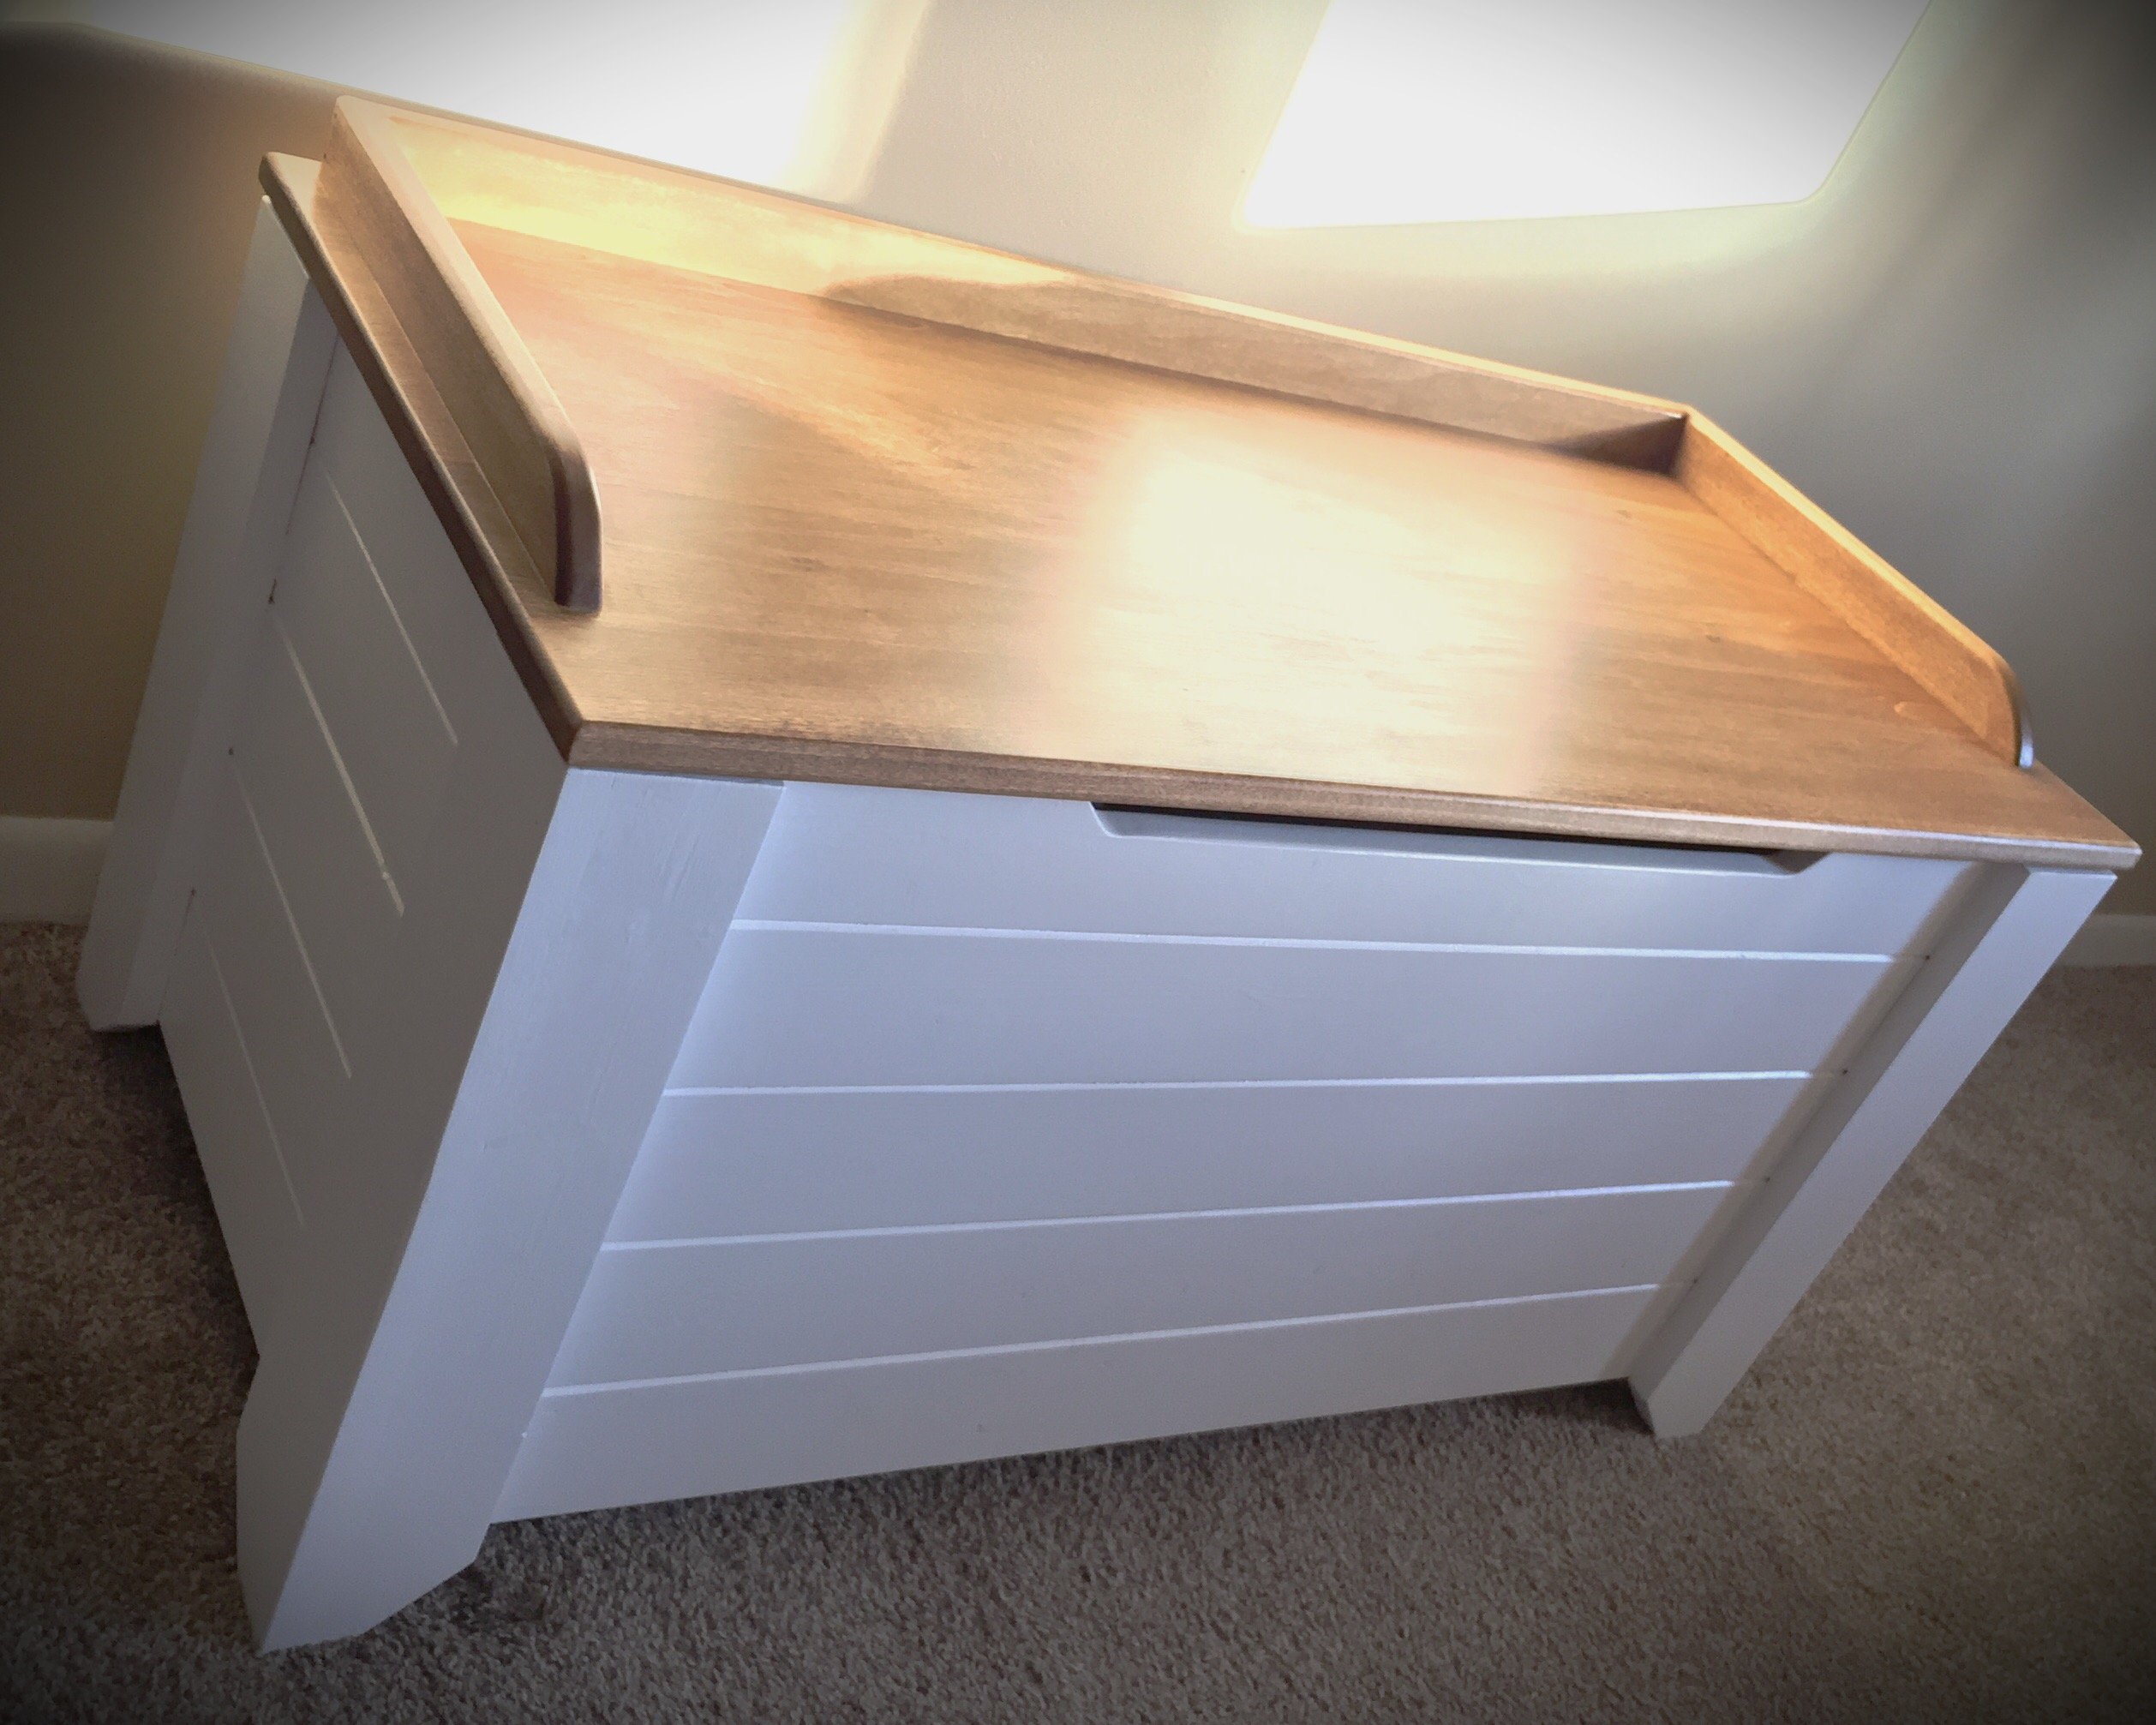
I built this for my daughter after Christmas sinse she had the living room covered in toys. The dimensions are 37" x 18" x 20"
Built from Plan(s)
Estimated Cost
$75
Estimated Time Investment
Weekend Project (10-20 Hours)
Finish Used
Watco Danish Oil - Medium Walnut (2 coats) with a light sanding between coats with 220 grit, I allowed 24 hours between each coat to dry. To protect the surface I used water based polyurathane matte finish (3 coats) with a light sanding - 400 grit.
Recommended Skill Level
Beginner
Comments
Tue, 01/09/2018 - 05:51
More details!
HI Anna,
Can you provide more pictures or instructions on how you assembled this toy box? i want to make one just like it!
Thanks!
Wed, 03/10/2021 - 16:31
Pronounced panel edges
Looking at the wall panels they look like the long edge of each panel has a small bevel cut on it. This gives each panel edge a more pronounced or well-defined edge? Is this true? Was it done with a router?
Living Room Set RusticX
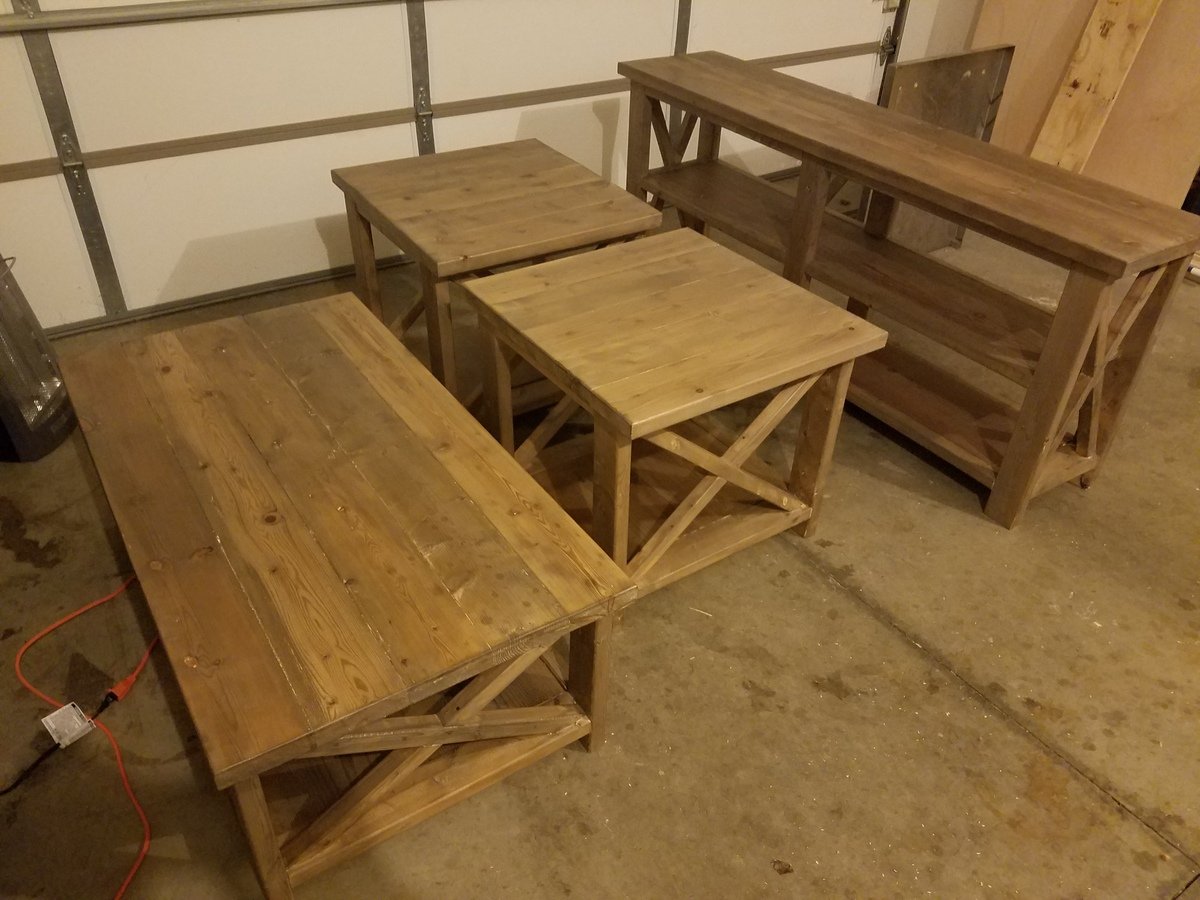
RusticX living room set with a tea/steel wool-vinegar treatment and a paste wax finish.
Built from Plan(s)
Estimated Time Investment
Week Long Project (20 Hours or More)
Finish Used
Minwax Natural Paste Wax Finish
Recommended Skill Level
Beginner
Farmhouse entry table - 4' by Dennis Larson
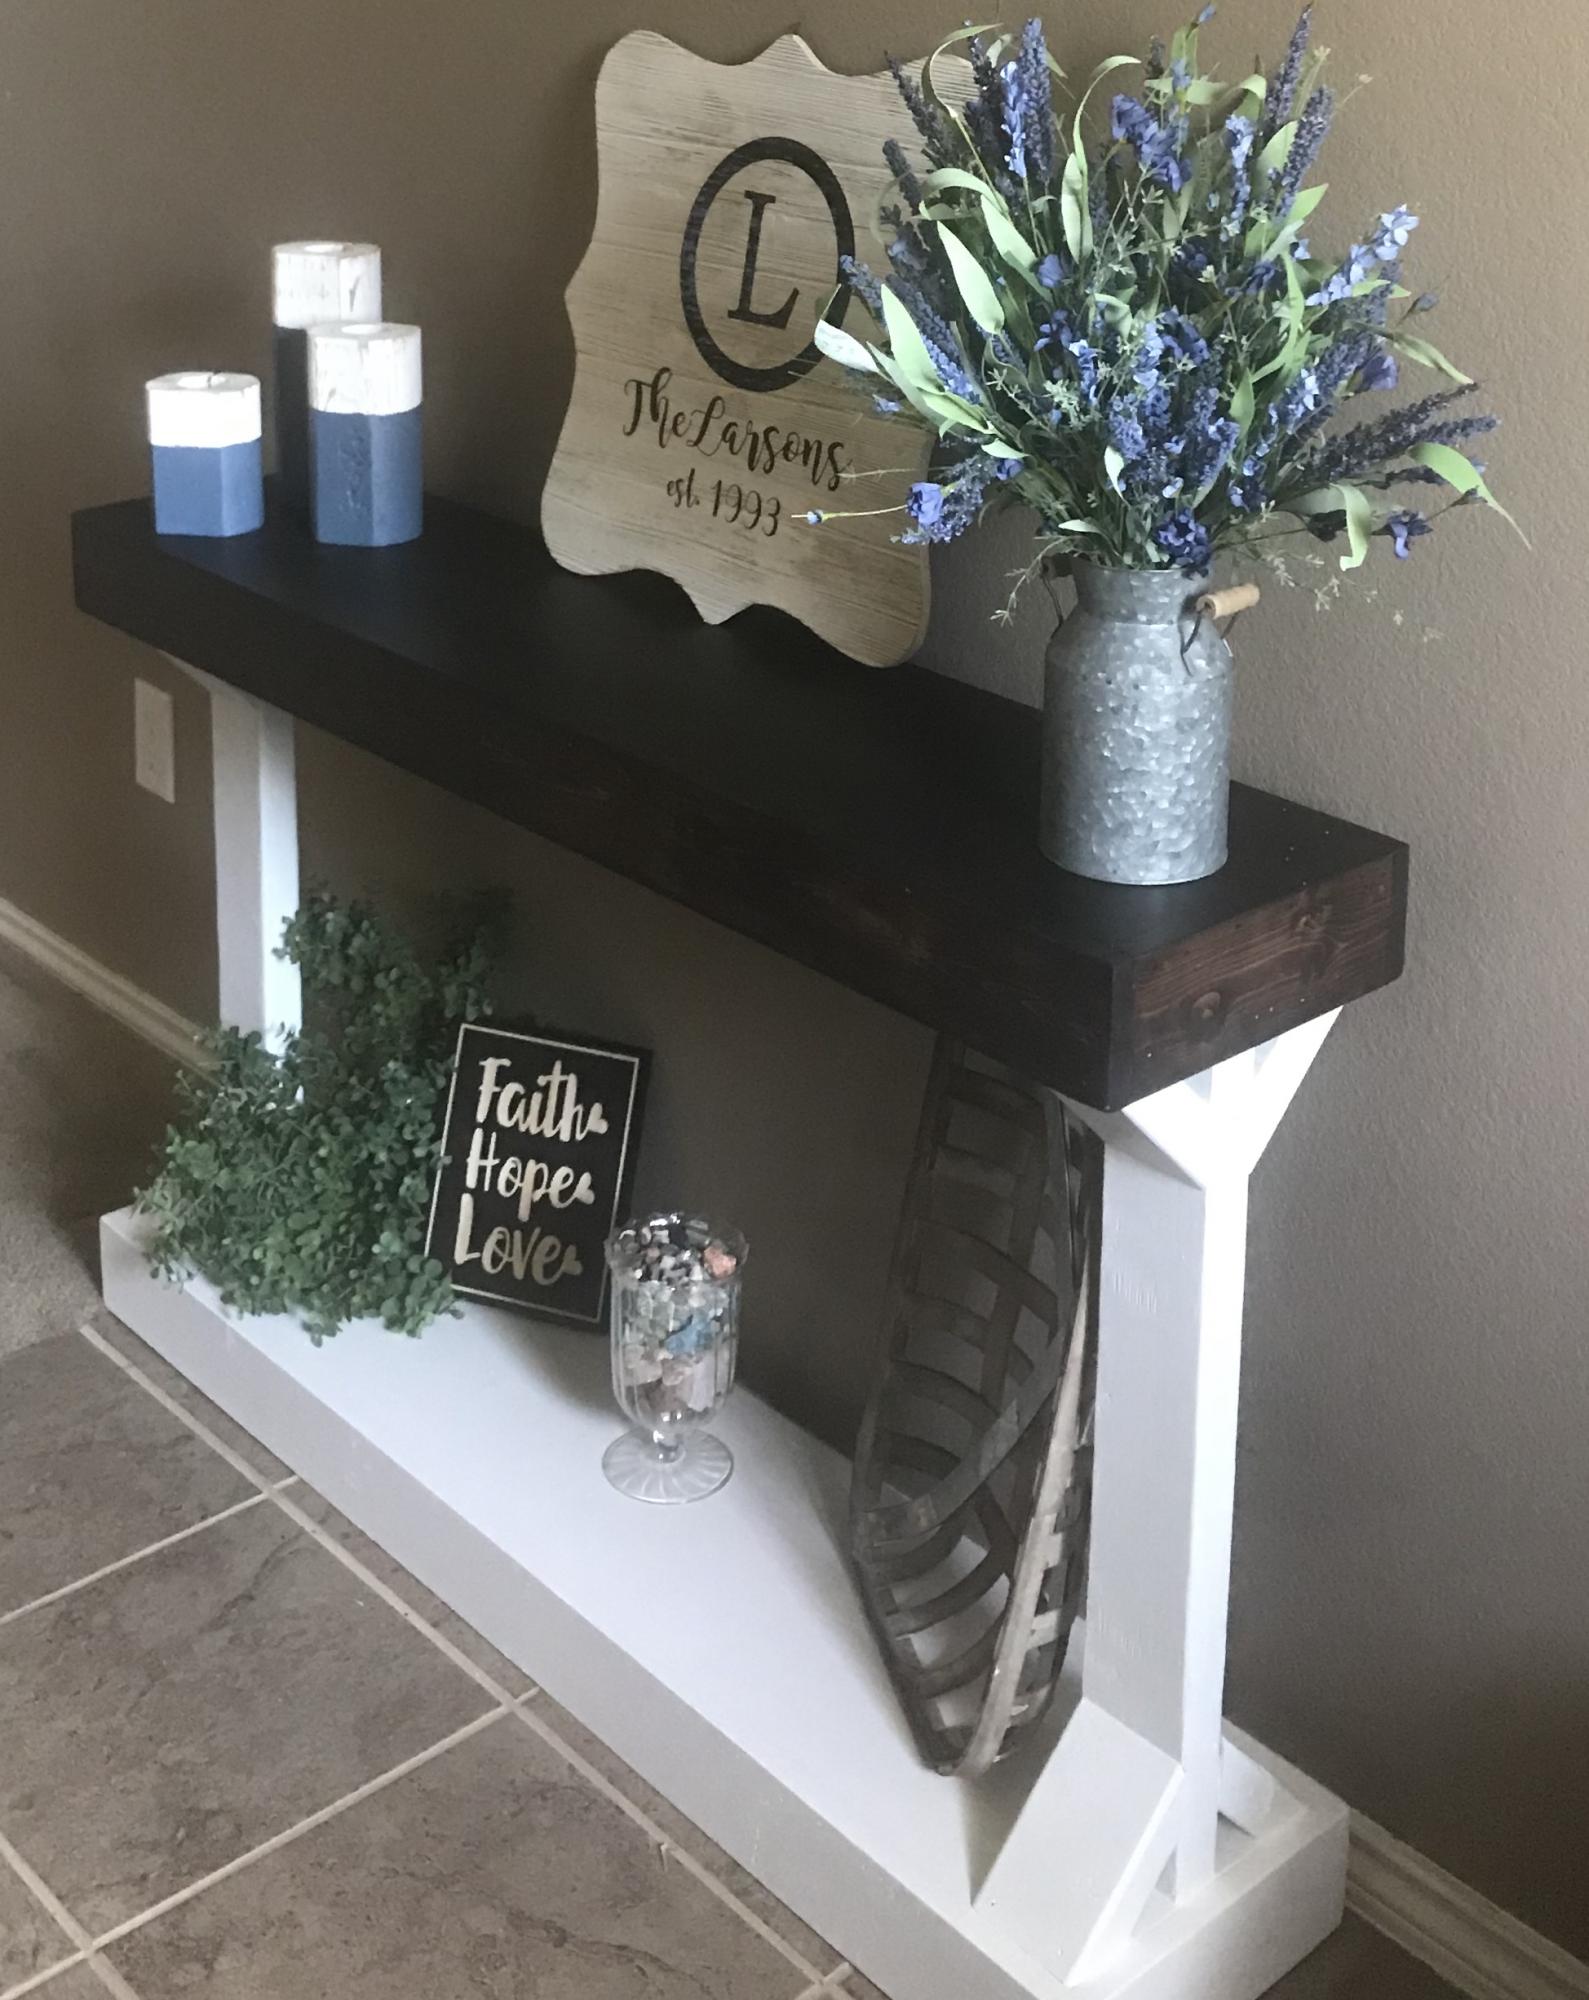
Fun weekend project for an entry redo. Adjusted plan to 4' length to fit the space.
Built from Plan(s)
Estimated Cost
$100
Estimated Time Investment
Day Project (6-9 Hours)
Finish Used
General Finishes oil based gel stain (Java) for top, white Kilz paint
Recommended Skill Level
Beginner
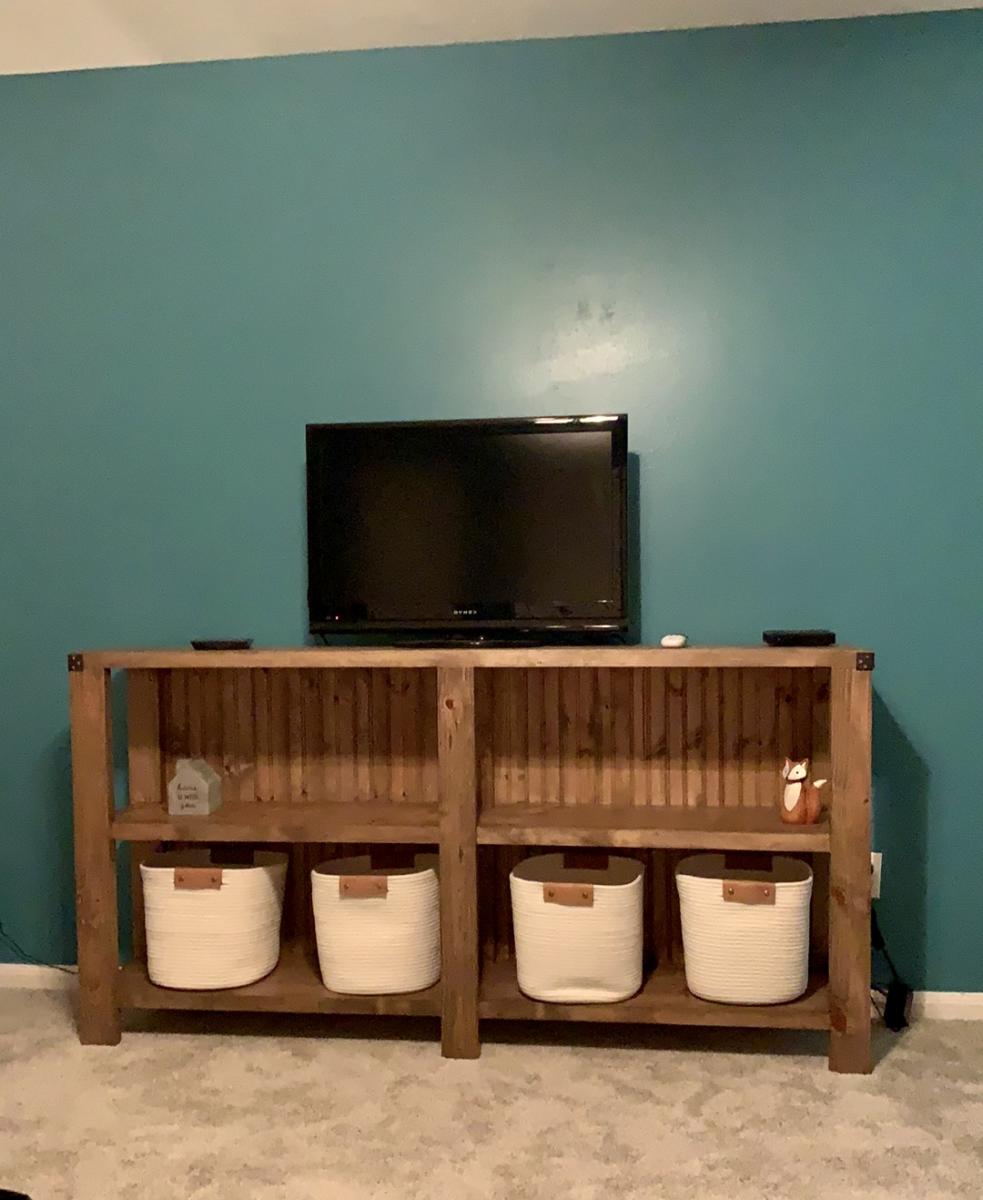
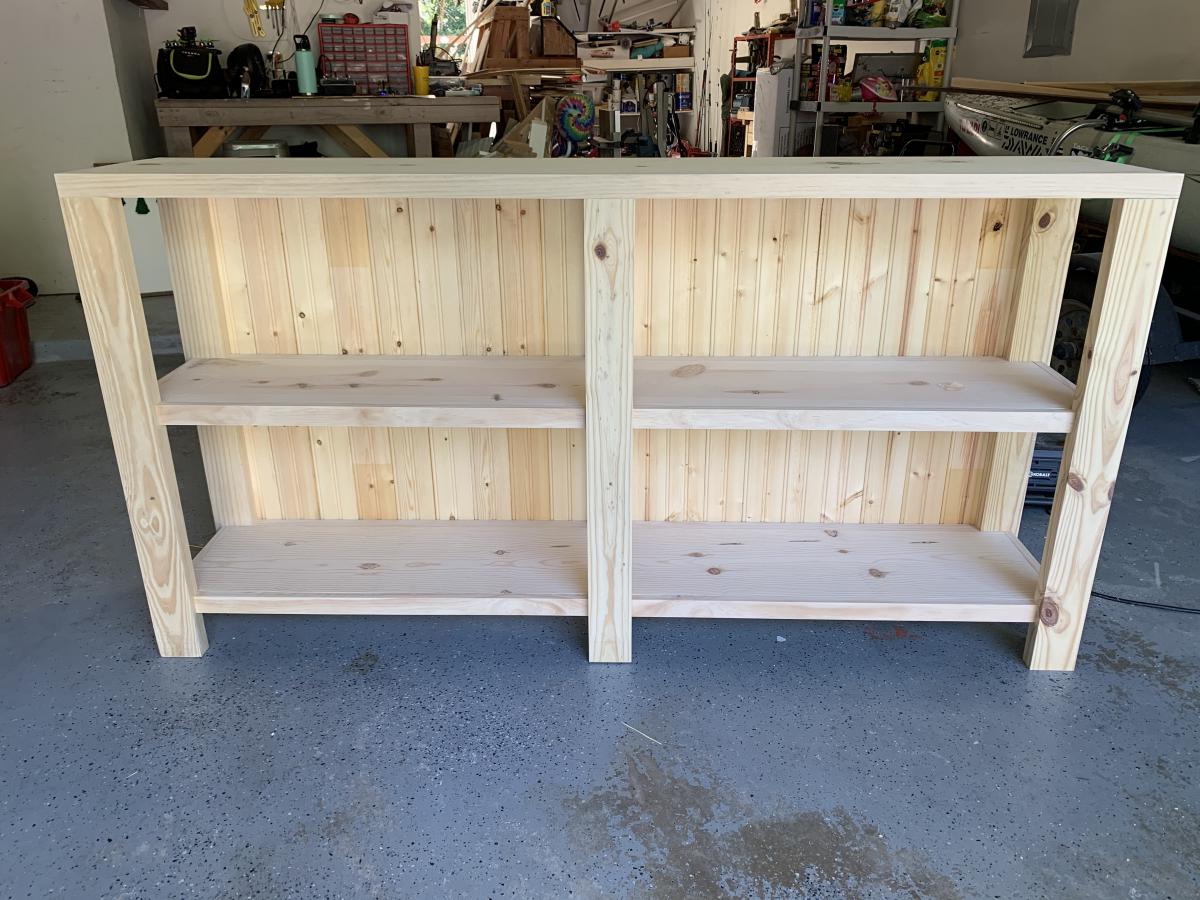
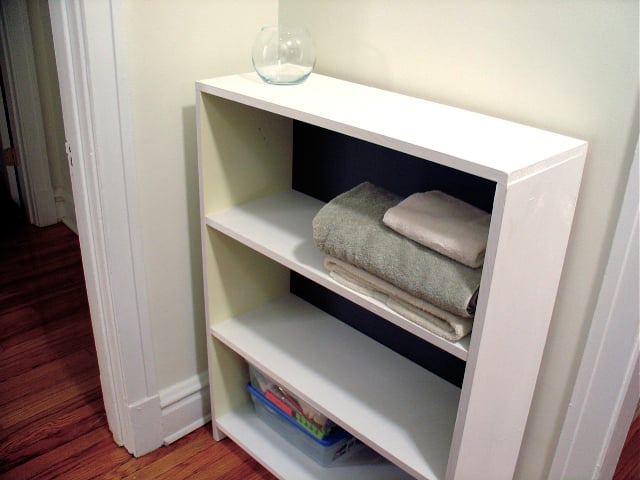
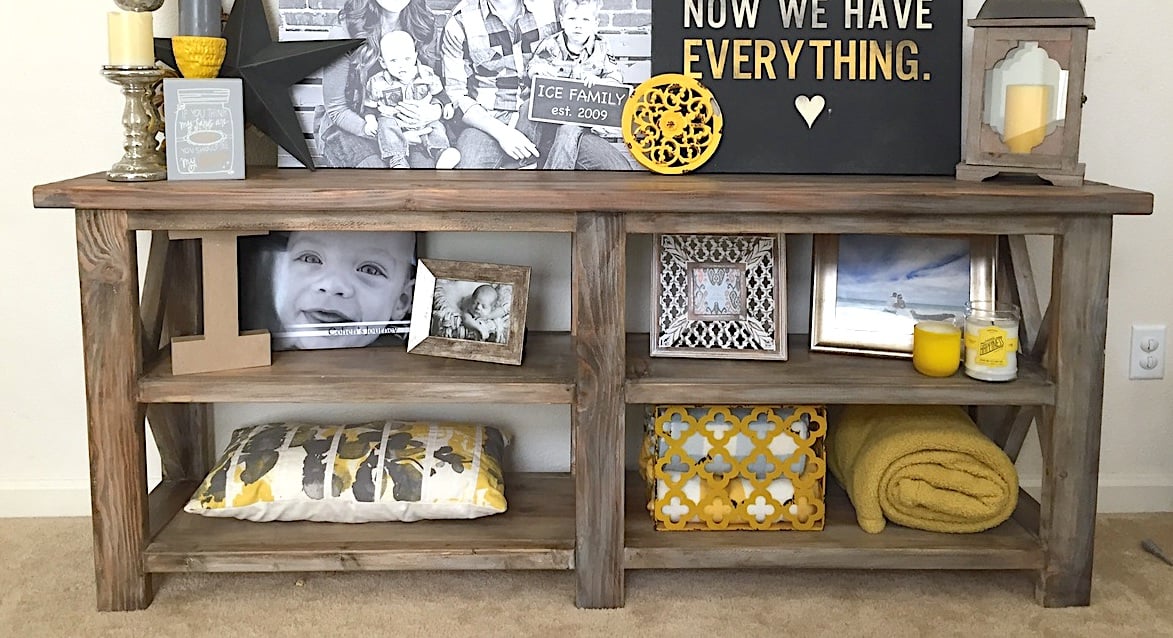
Henry bookshelf - modified
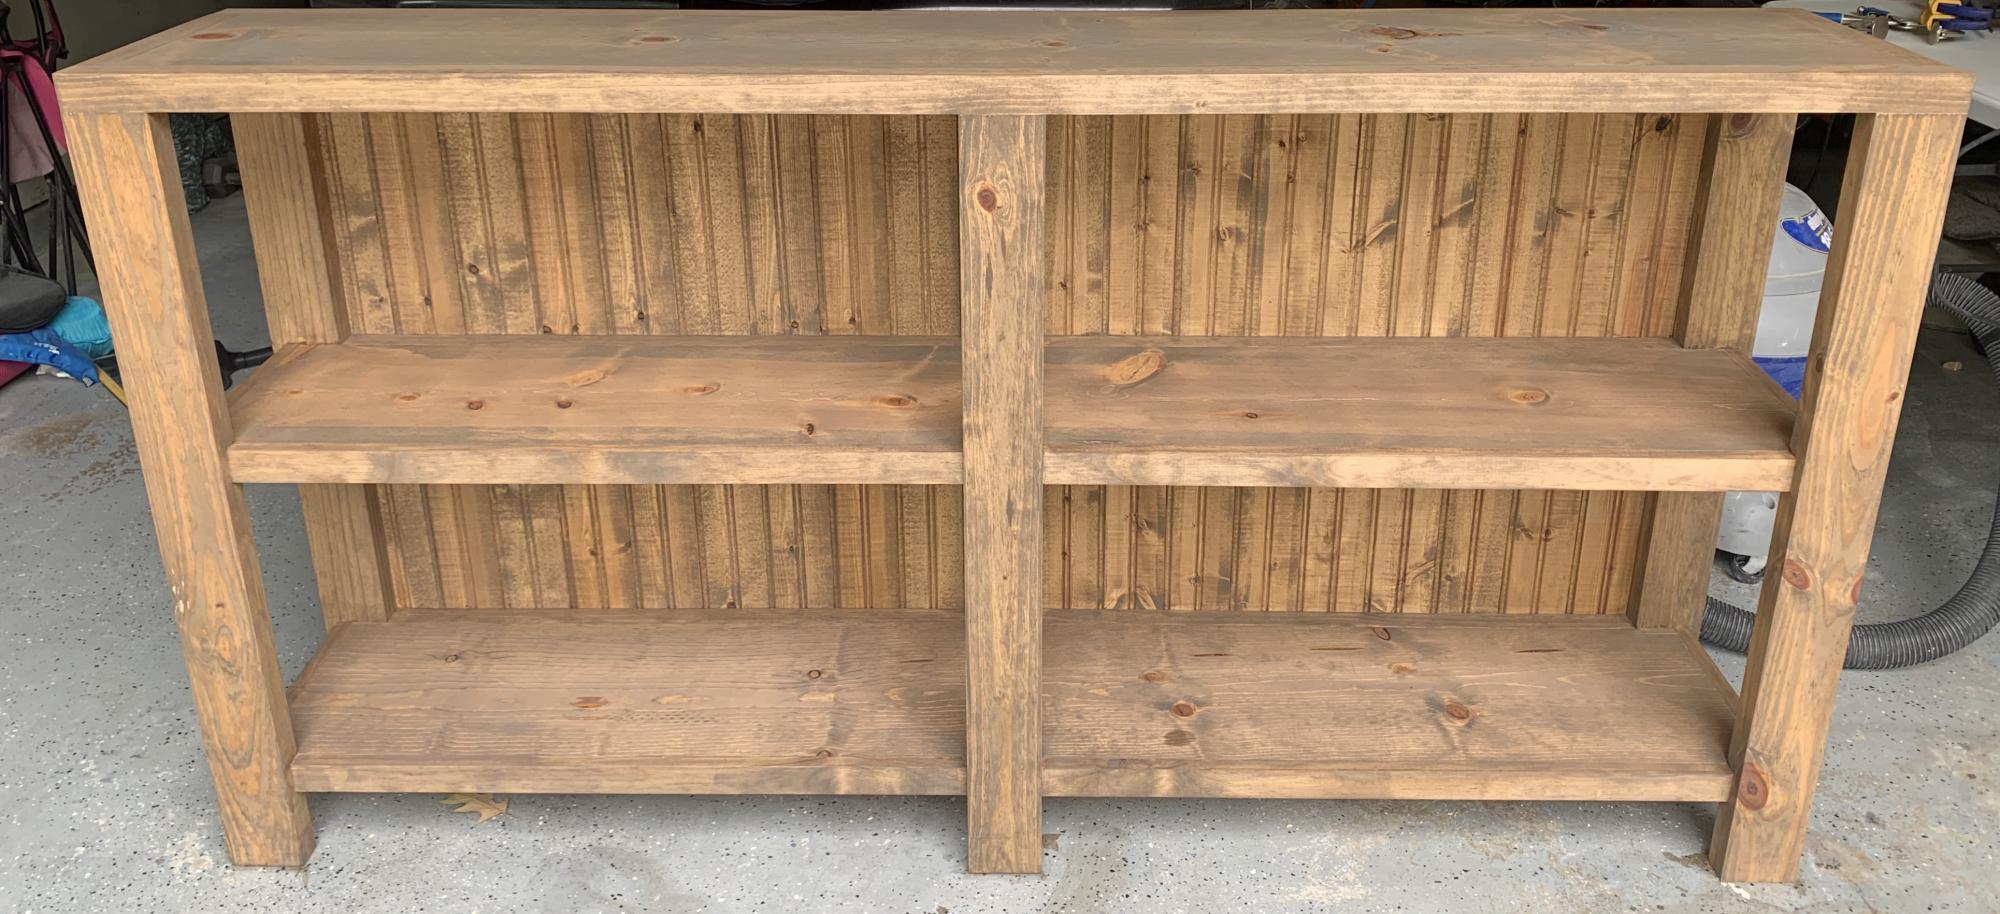
I loved the look of the Henry bookshelf, but I was looking for a longer, shorter bookshelf — so I modified the plans and created this version. It stands a little over 3ft tall and is 6ft long. I chose tongue and groove bead board for the backing and mixed two different stains to achieve the hint of gray. Finished it off with a satin poly.
-Whitney R. , Houston, TX
Built from Plan(s)
Estimated Time Investment
Weekend Project (10-20 Hours)
Finish Used
3 parts miniwax early american to 1 part miniwax gray and finished with miniwax satin polyurethane.
Comments
Closet Shelves
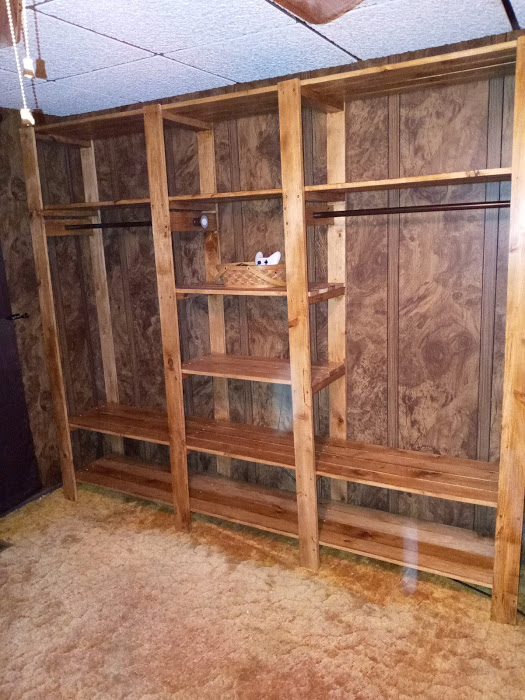
So I was complaining to my wife that our one closet in our bedroom was becoming too cluttered. She asked me to build her one. I told her that if she found the one she wanted me to build, then I would build it. She found this one and so I built it for her. Let me just say that she is very happy with it and it came out very great. I did find a couple of shower curtain rods that were brown to used instead of the iron pipe. It made the whole project cost around $80.
Built from Plan(s)
Estimated Cost
$80
Estimated Time Investment
Weekend Project (10-20 Hours)
Recommended Skill Level
Beginner
Comments
Sat, 11/07/2020 - 11:42
Excellent!
So happy that worked out for you and your wife, thanks for sharing:)
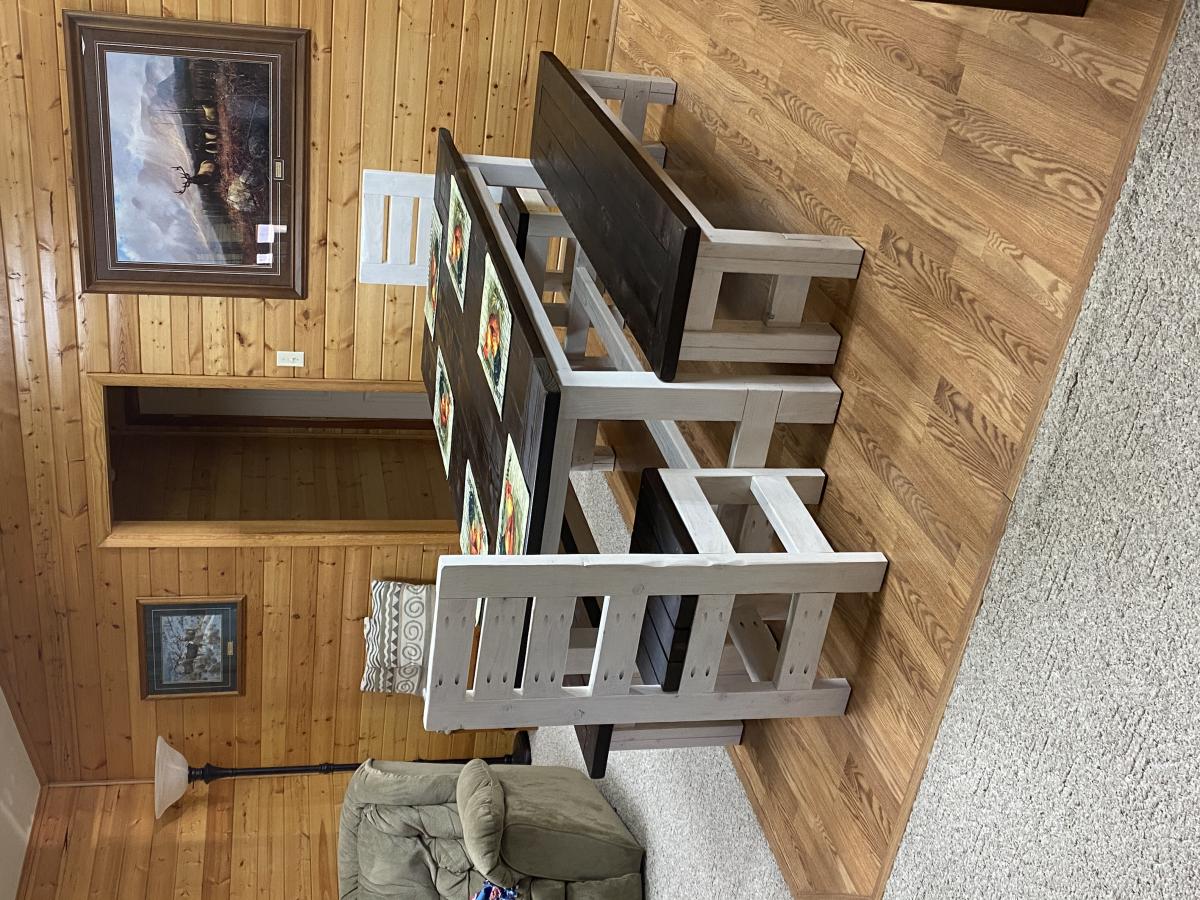
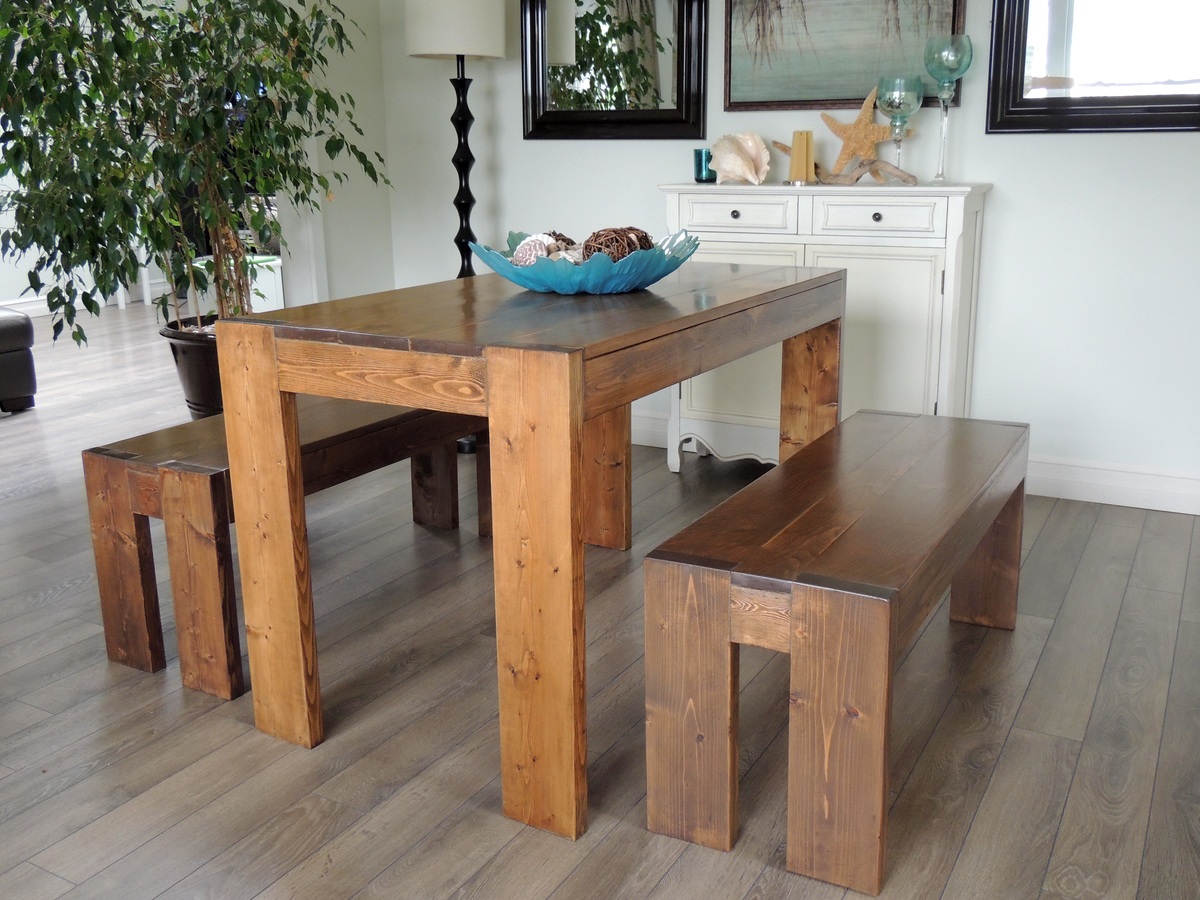
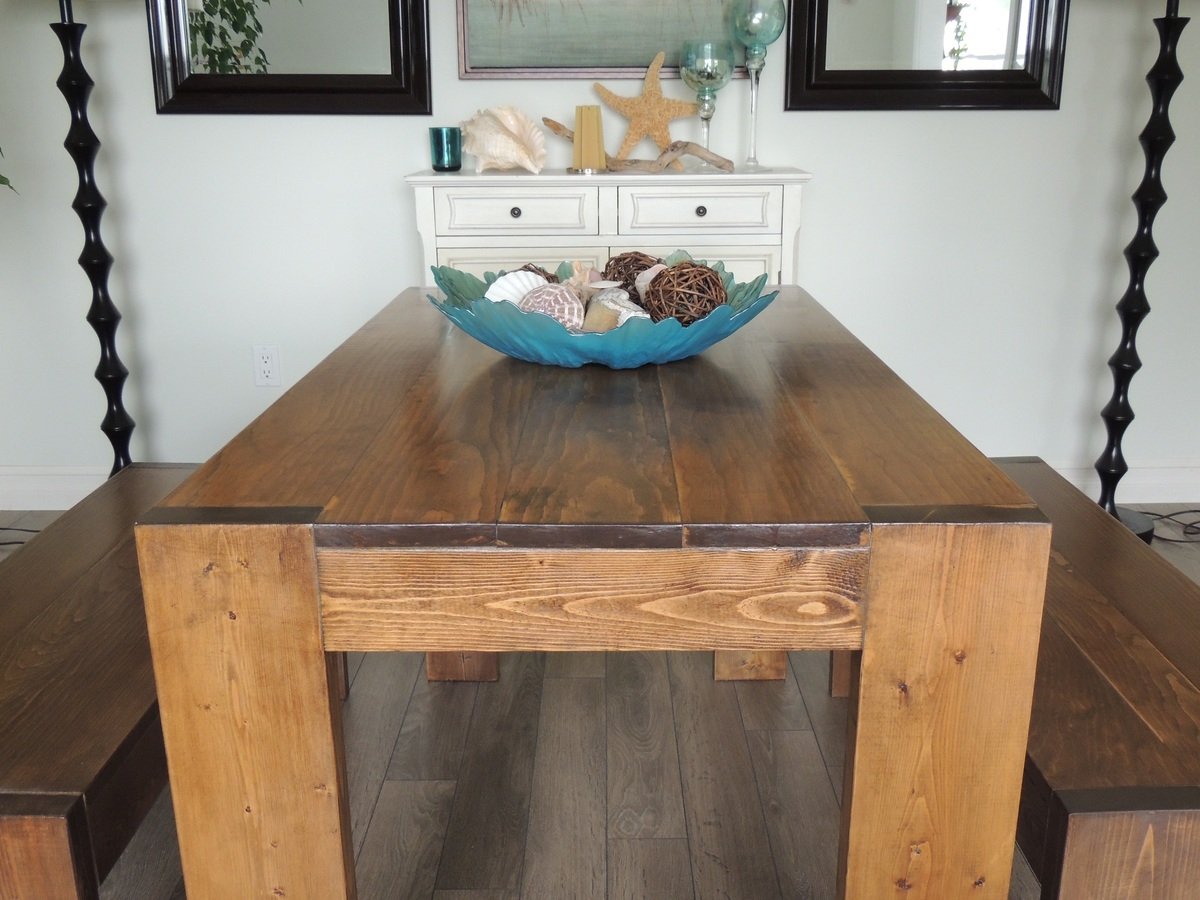
Farmhouse Table Set
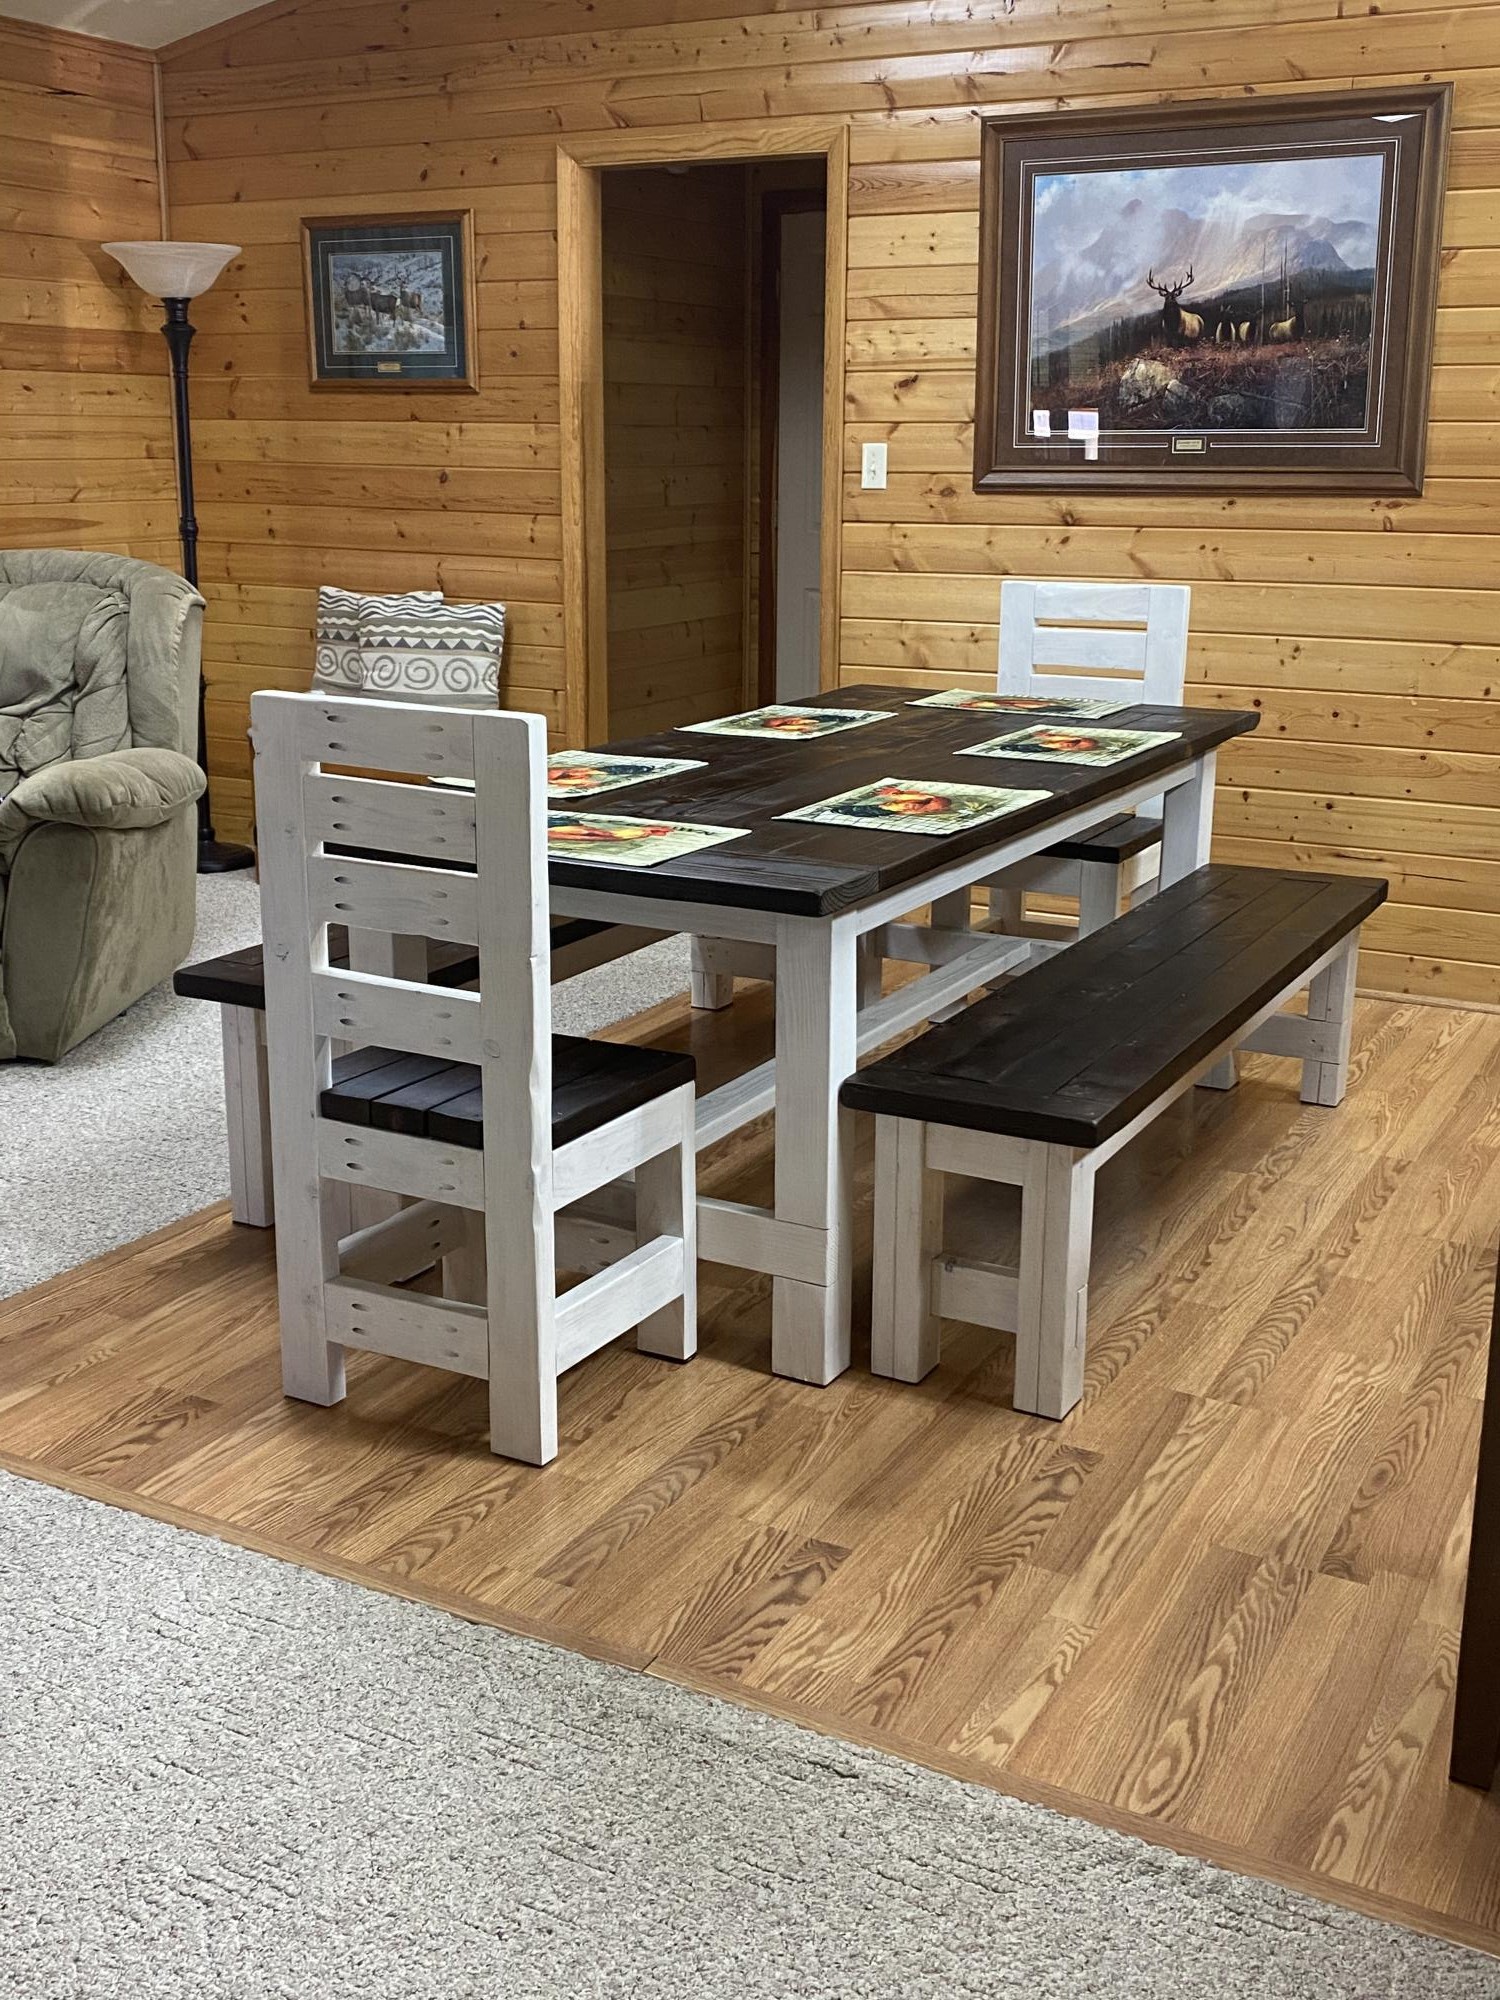
Finally finished this table, chairs and benches. Benches don’t slide under the table so I’m going to build another modified set and use these for outdoor sitting or something similar. Turned out great and love the look.
Built from Plan(s)
Estimated Cost
$500
Estimated Time Investment
Week Long Project (20 Hours or More)
Recommended Skill Level
Beginner
Comments
Large Wood Pet Kennel End Table
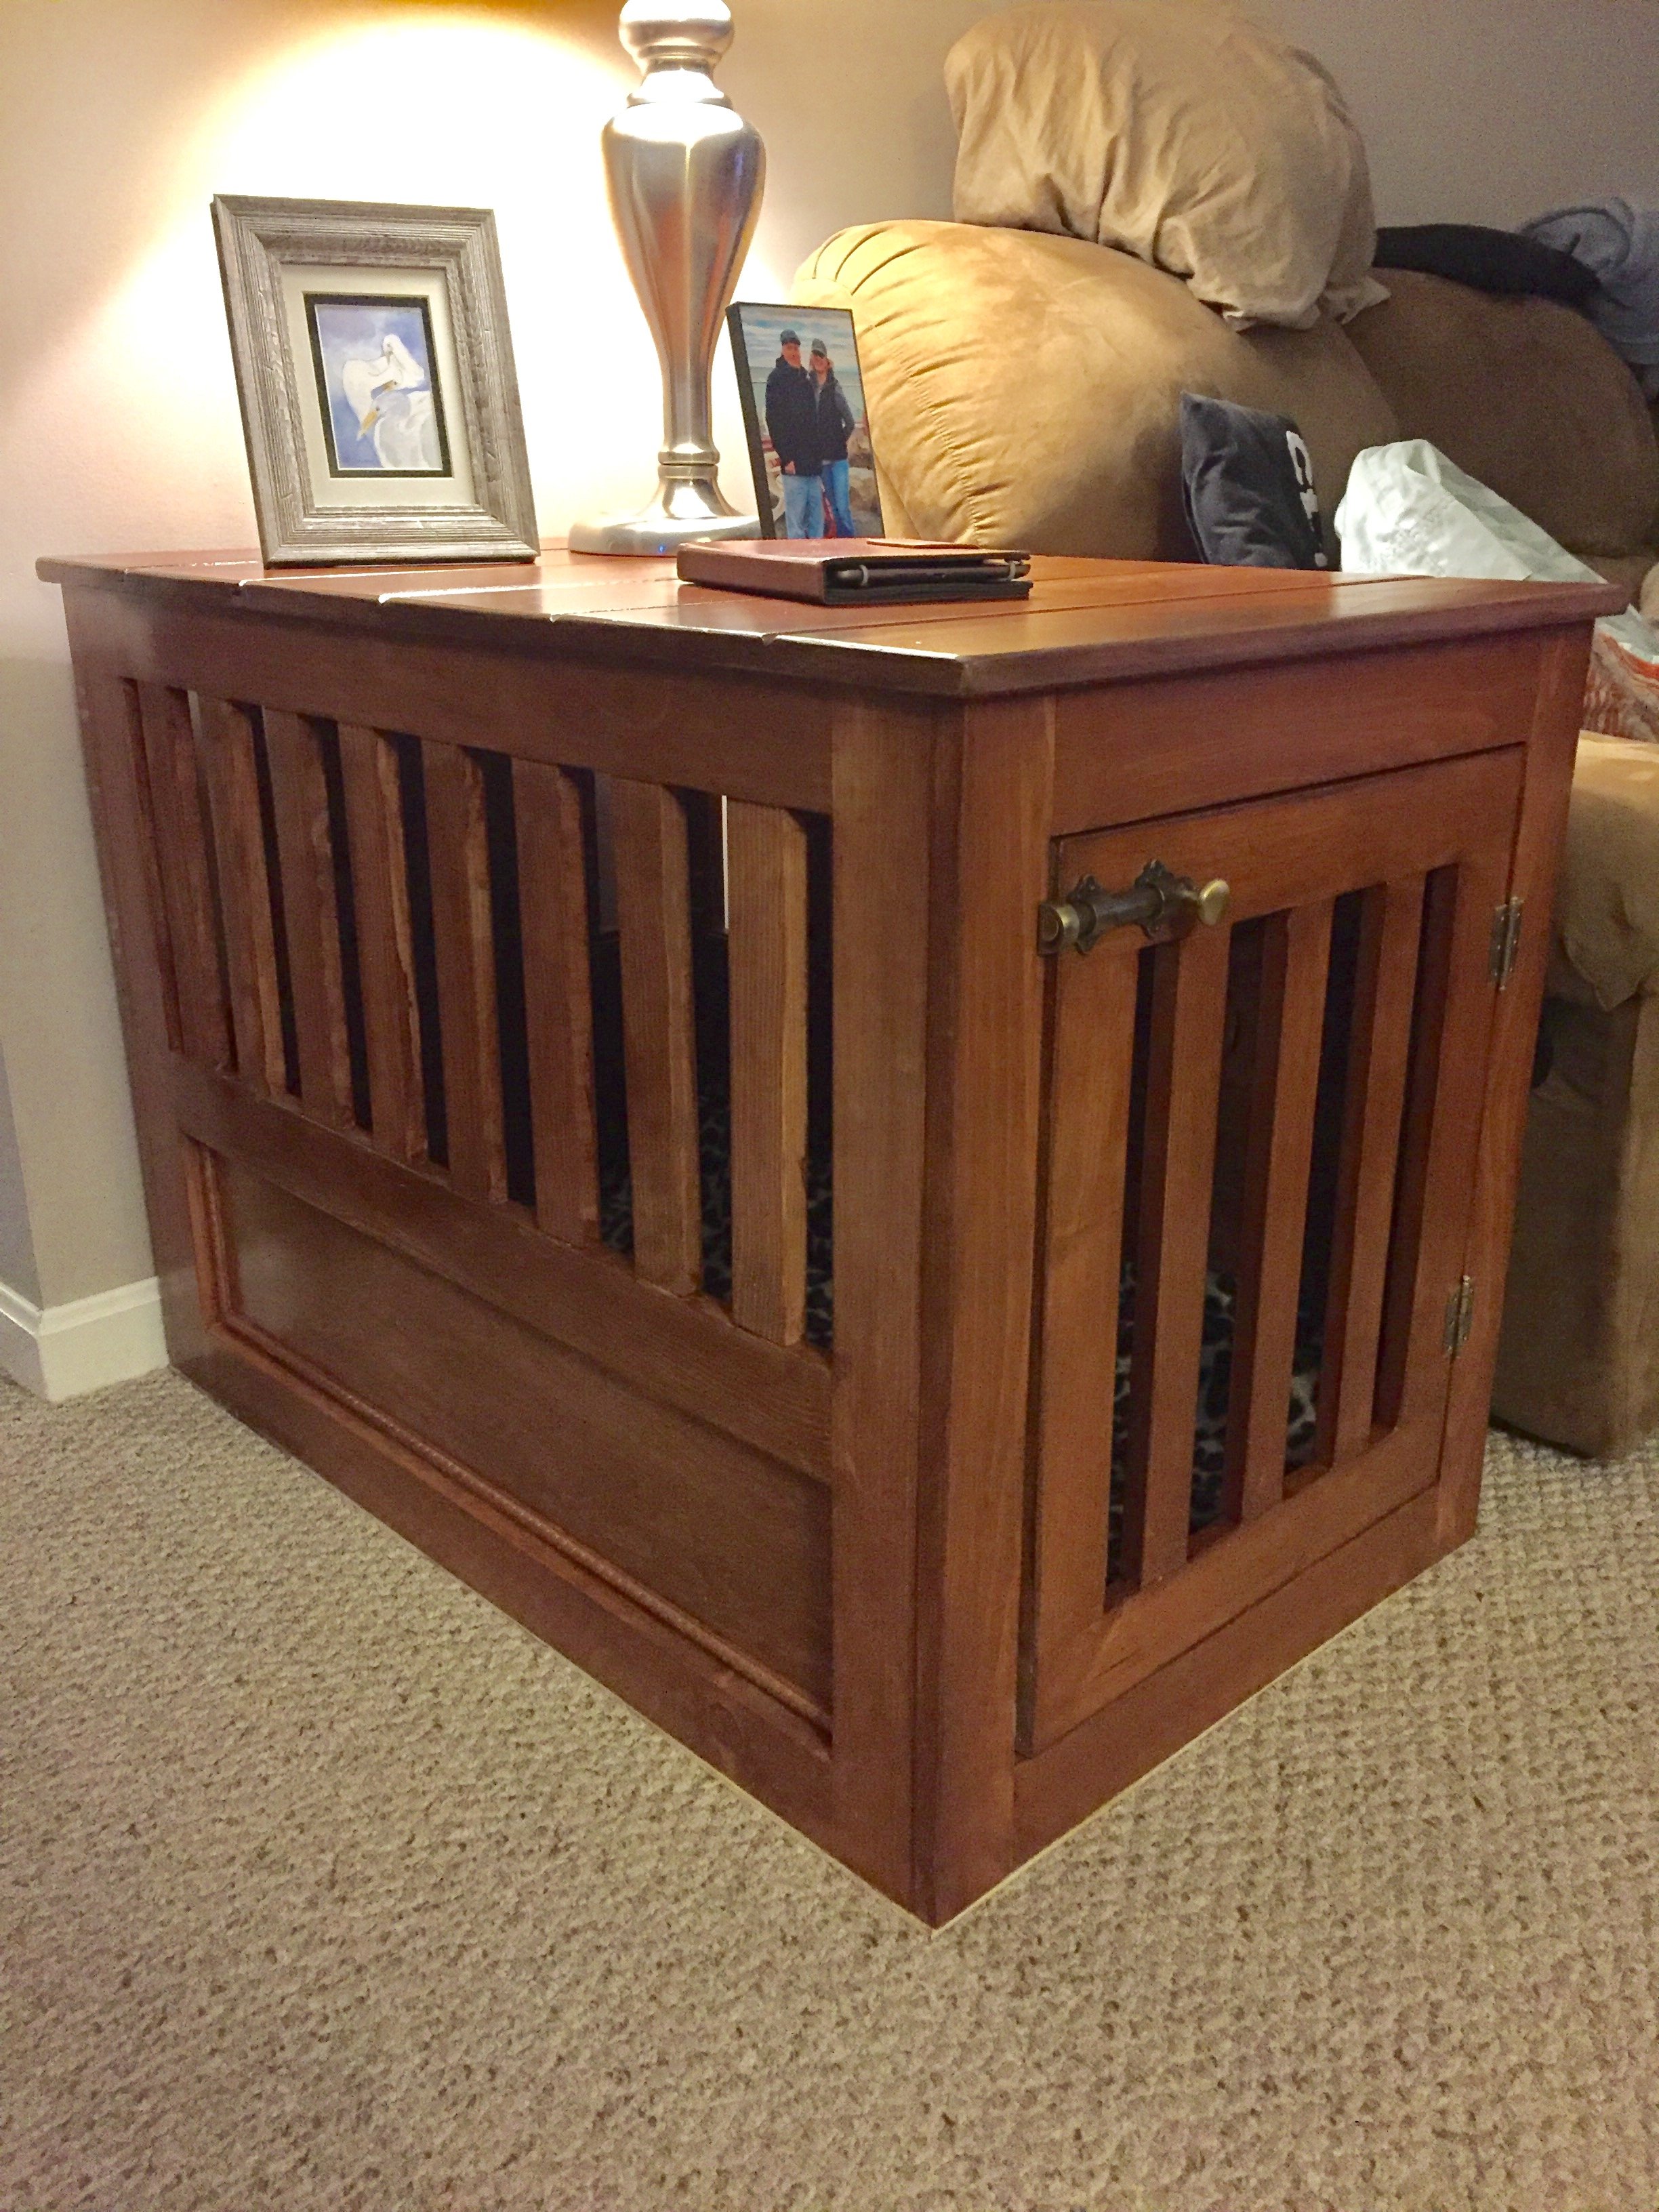
I used the plans provided. I made a small change to the windows and made the bigger.
Built from Plan(s)
Estimated Cost
$140
Estimated Time Investment
Weekend Project (10-20 Hours)
Finish Used
Water based stain with water based sealer.
Recommended Skill Level
Beginner
Modern Farm Table
This was my third project. The building is now getting very easy, it's the finishing that's the hard part. For some reason the wood wasn't taking in the stain very well even though I followed the right steps. Condition, sand, and then stain. In the end after many applications I was or I should say my sister who I was making it for was happy. I had to modify the size to make it fit in her space.

Built from Plan(s)
Estimated Cost
I really have to start keeping track, I didn't. Maybe between 150 and 200 with all the stains.
Estimated Time Investment
Weekend Project (10-20 Hours)
Finish Used
I used minwax conditioner before sanding and minwax stains. Special walnut,weathered oak, and pickled oak. I started with the special walnut followed by a coat of weathered oak then the pickled oak. I wasn't happy with it at that point so I put another coat of sw and honestly I lost track. When I was finally happy with it I put a top coat of minwax spar urethane.
Recommended Skill Level
Beginner
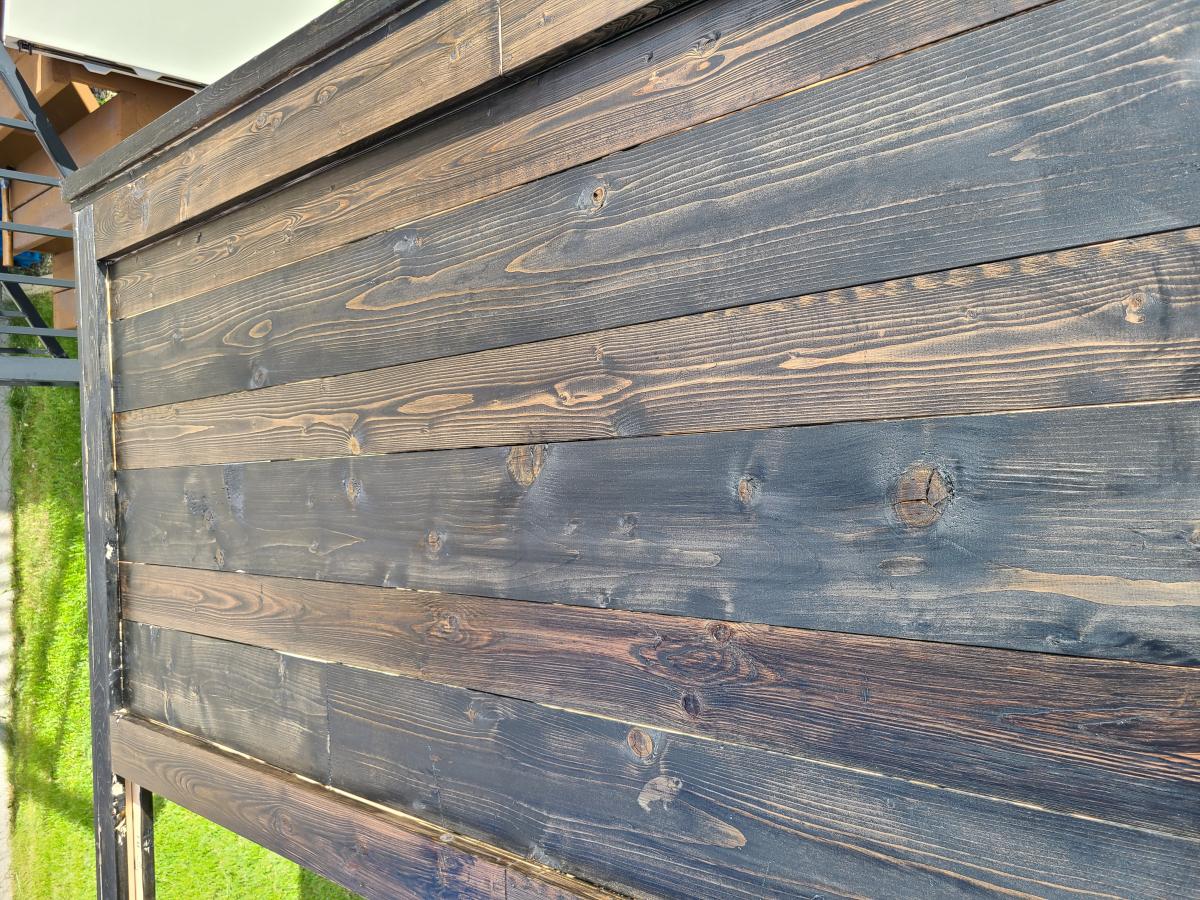
Headboard
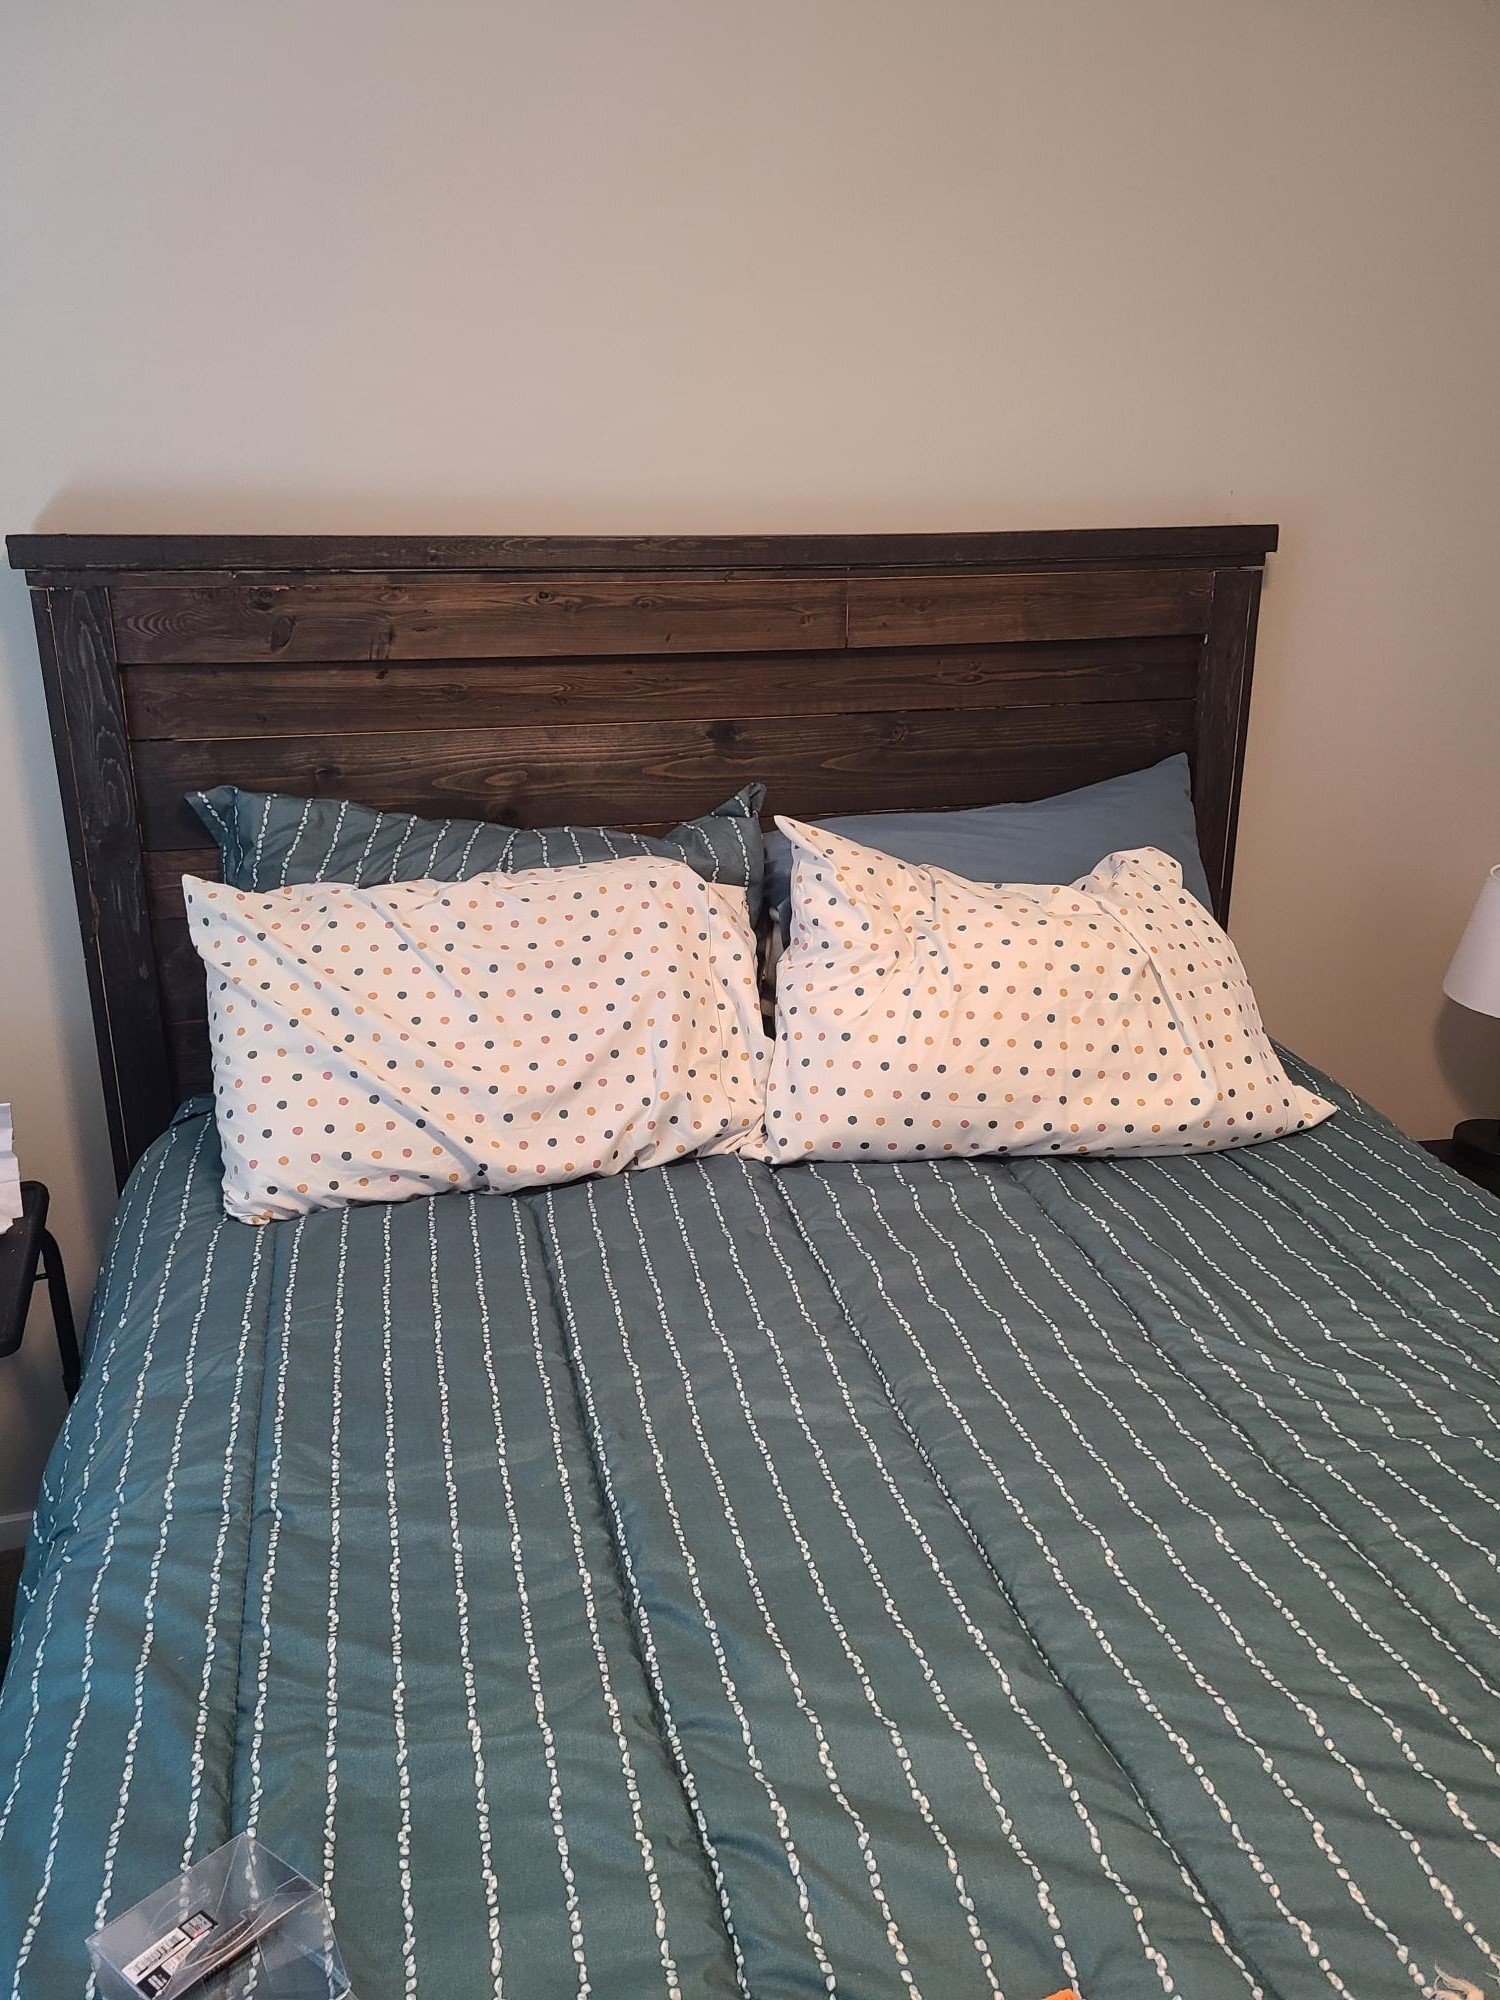
My parents just moved into an apartment and needed a headboard. I had some time off work so I made them one. I'm still a beginner (and probably always will be); this project was perfect for me. I used new wood, miter saw, hammer and nails. Took me about three hours total. Epresso stain. My parents love it! Thank you so much for the plans Rob
Built from Plan(s)
Recommended Skill Level
Beginner
Comments
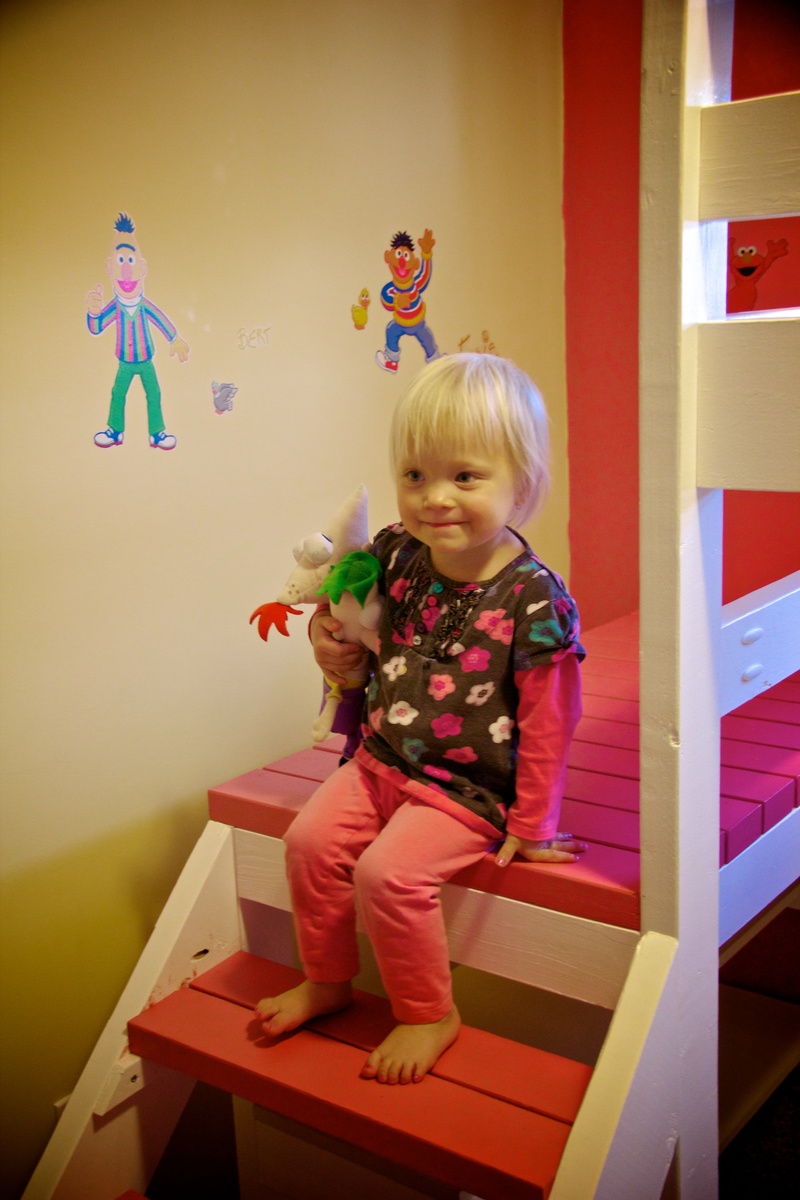
Camp Loft Bed for the Little Lady
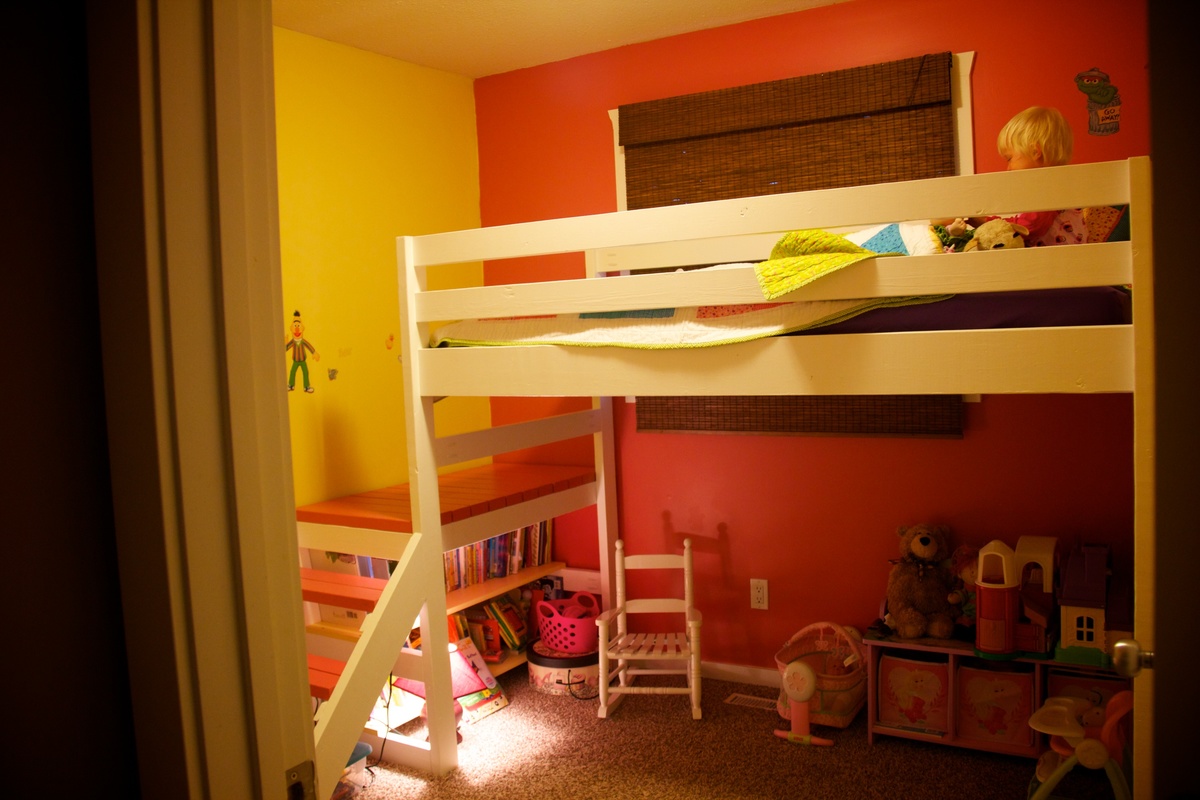
I came across the Camp Loft Bed on Pinterest a couple of months ago. My daughter was still sleeping in a crib, but I knew that she would need a big girl bed by summer. Since her room is small (inside walls measure just under 9'x9'), i thought a loft bed would be ideal.
I have NEVER done a DIY. I don't even own tools. But my step-dad is very handy, so I asked him to be my consultant and helper to tell me if I was doing things the wrong way! Fortunately, he was able to lend me a miter saw, some aluminum saw horses, and the odd screw (when I seemed to run out).
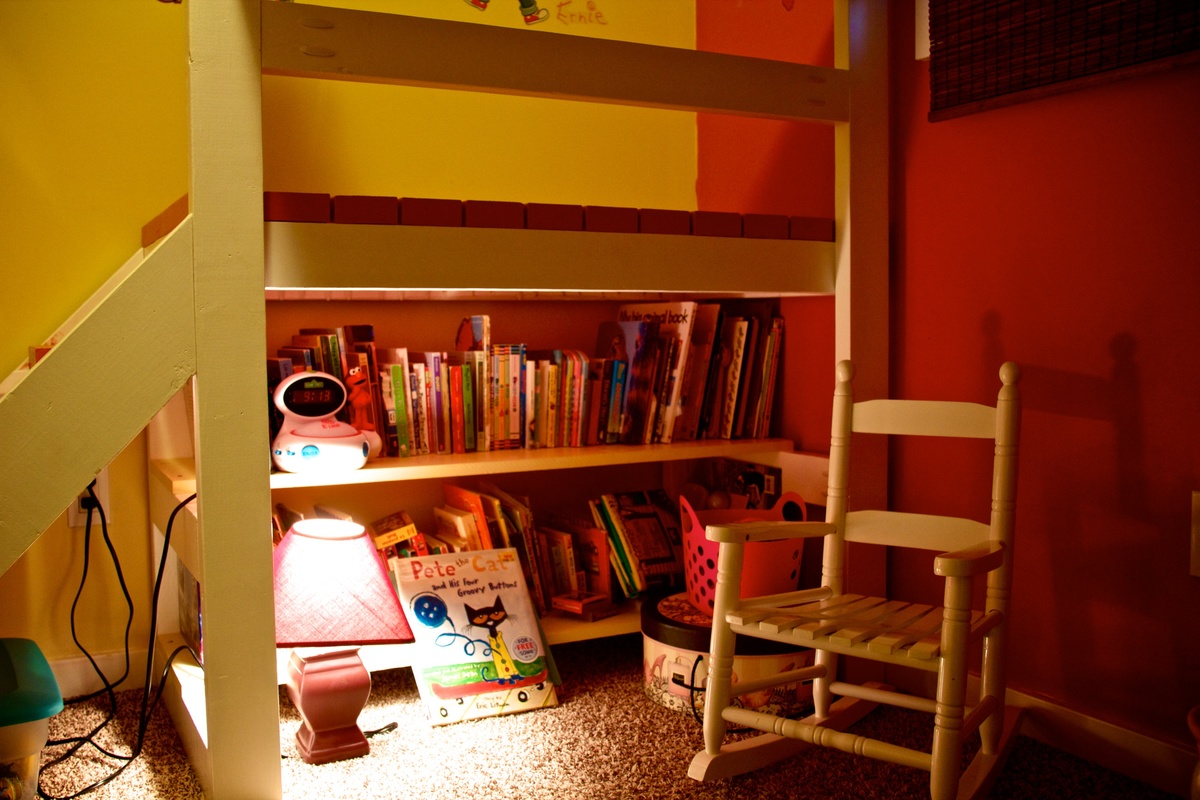
From start to finish, this was a 7 day project. I used construction grade spruce for my lumber, which cost me just shy of $100. I also went back the next day and bought a couple more 2x4s to make two shelves under the platform, which was another $30. I then pre-drilled with my new favourite tool the Kreg, and proceeded to sand, prime, and paint all of the pieces before assembly. With assembly being in my daughter's room, and having nice fresh paint on her walls and carpeted floors, I did NOT want to be finishing the bed in there, but there was no way I could move it into her room completely assembled. I did all the finishing BEFORE assembly.
Sand, prime, sand, paint, paint, paint. That process took three days, obviously not the entire day. Painting goes relatively quickly, but with boards, you paint one side, let dry, roate 90 degrees, paint, let dry, etc. I also had to work a couple of days in between as well. I went with Benjamin Moore Aura paint and that required three coats. I used to some leftover pink and yellow for the platform and shelves, but if I consider the cost, the paint set me back another $100.
I also had to order in the proper screws and I bought some of the white Kreg plugs to cover the exposed holes. Hurray for amazon! Even selecting the free shipping, the screws arrived within 4 days.
Assembly day:
My step-dad and I worked from 10:30-1:30. By this time, the bed and platform were completely assembled and in place. My daughter, however, needed to nap, so I put her down in her brother's bed, and we took a couple of hours off for lunch!
We then worked from 5-8:45 pm building the stairs, cleaning the room, measuring and screwing down the slats for the mattress, then making the bed and getting it ready for sleep. It seemed like a much longer day because in between, I had to run out and pick up a twin mattress, some extra screws, help my son play his new Skylander game, and deal with three kids trying to "help" with construction!
All in all, I am very pleased with the bed, with the plans, and with my first DIY. My kids are all in love with the bed and we spent a lot of time shooing them out of the room while we tried to assemble it.
Tips:
If I were to make this bed again (if my sons have their way, their beds are next!) I would not paint the wood, opting instead for a stained more natural look. I love the colours for my daughter, but what a pain all that painting and rotating the boards was. Paint was also a more expensive option for finishing.
That being said, if I do paint, I will NOT paint the ends of the boards that will be joined via pocket holes. In some cases, the boards were just a smidge too long to fit and we had to take the back to the saw and shave off the layer of paint in order for the board to fit.
I also opted to buy firm twin mattress as opposed to the plush ones. The plush mattresses add a lot of height and I was worried about my daughter having a bit too much fun up there and possibly tipping out from a high mattress. Stick to thinner mattresses on loft or bunk beds!

Built from Plan(s)
Estimated Cost
$250
Estimated Time Investment
Week Long Project (20 Hours or More)
Finish Used
Benjamin Moore Aura paint
colours: white, glamour pink and cornsilk (for the two shelves)
colours: white, glamour pink and cornsilk (for the two shelves)
Recommended Skill Level
Starter Project
Vegetable storage with slide out trays
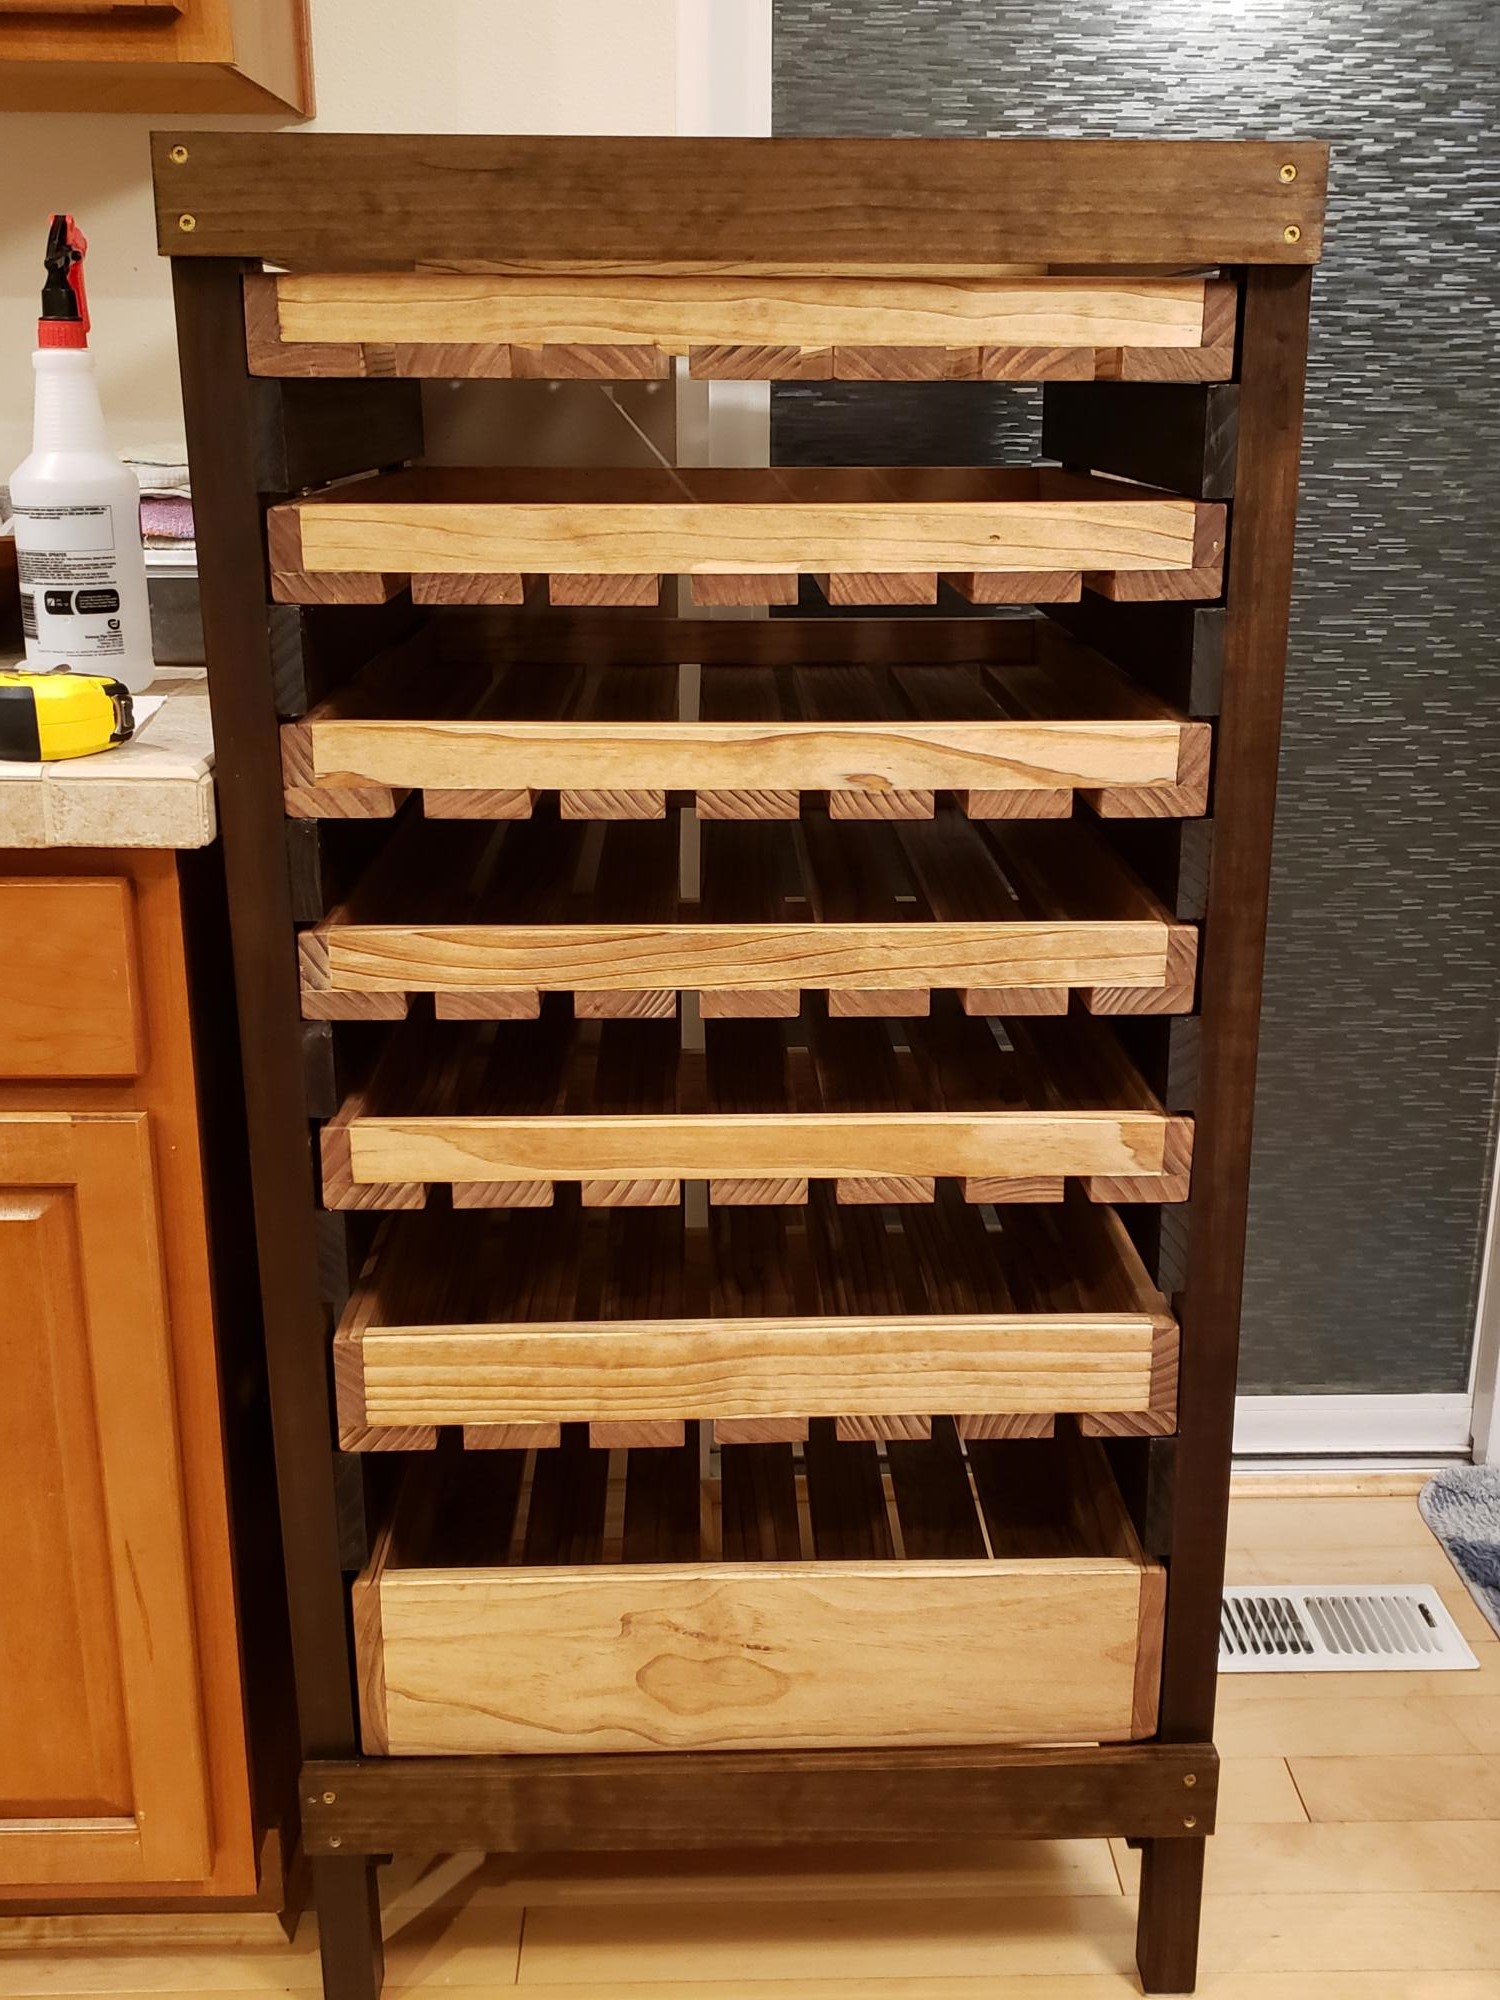
Been wanting to build this for awhile. Now I know why the plan pics are all unfinished! I modified the plans slightly to allow for 2 slightly larger trays on the bottom and allow for robotic vacuum to clean underneath.
Built from Plan(s)
Estimated Cost
$350
Estimated Time Investment
Week Long Project (20 Hours or More)
Finish Used
Danish oil in medium walnut for trays. The frame was a water based dye, gel stain in dark walnut, and waterlox.
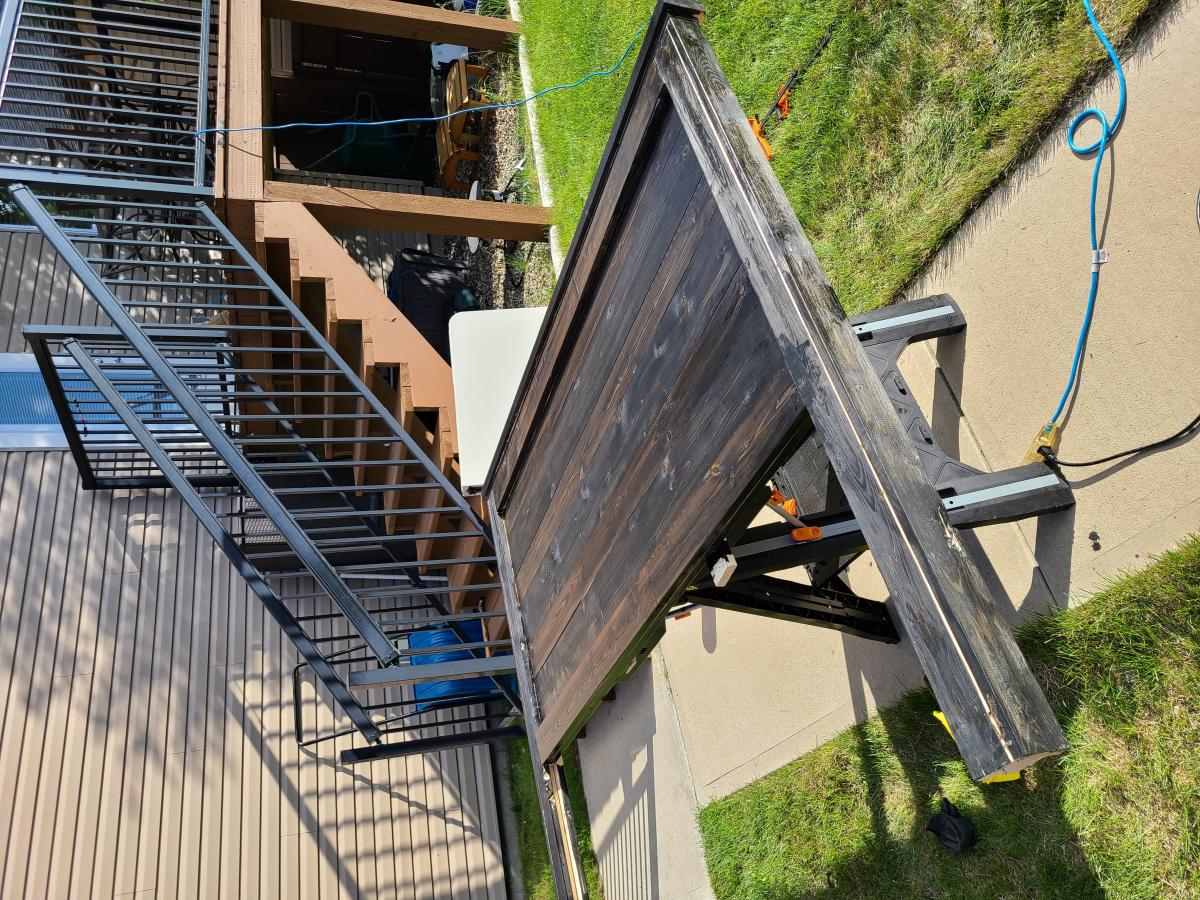
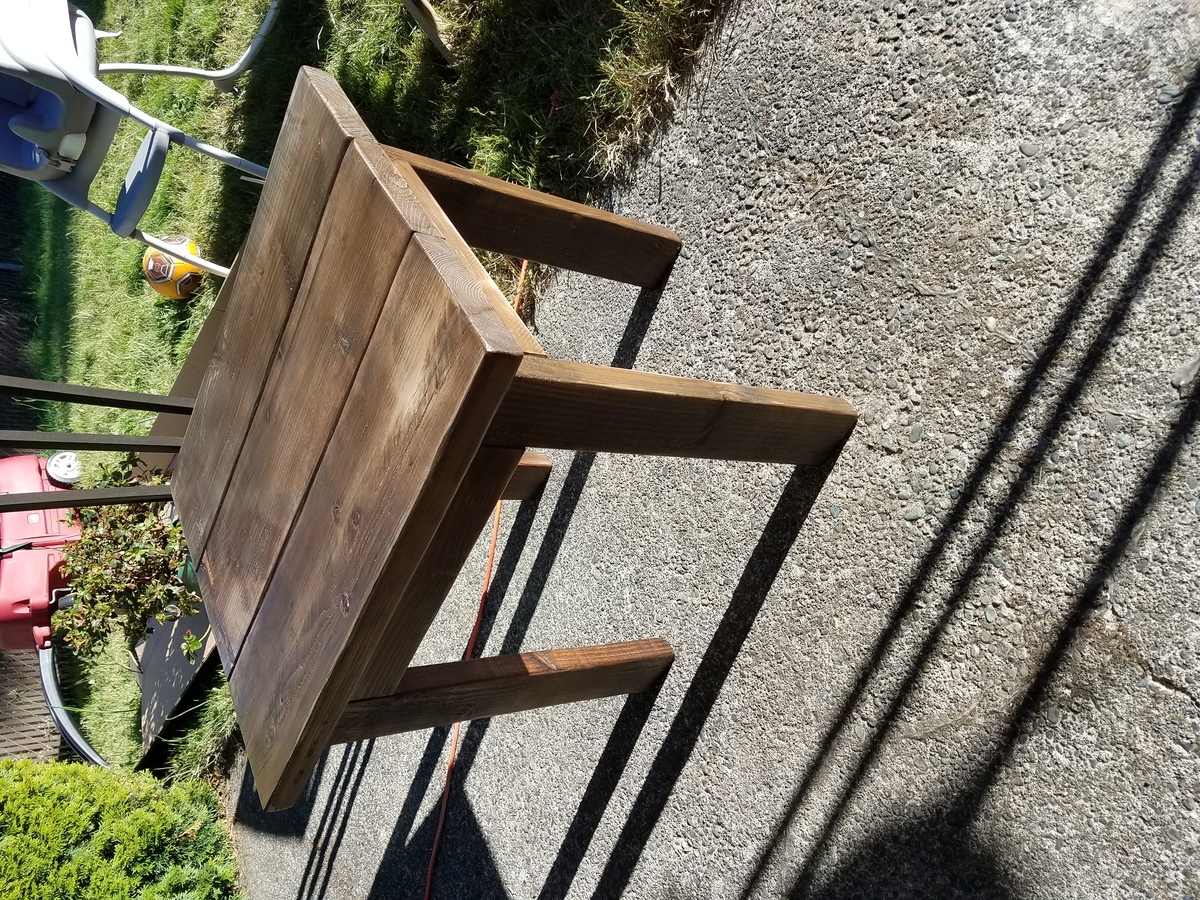
Farmhouse Patio Table
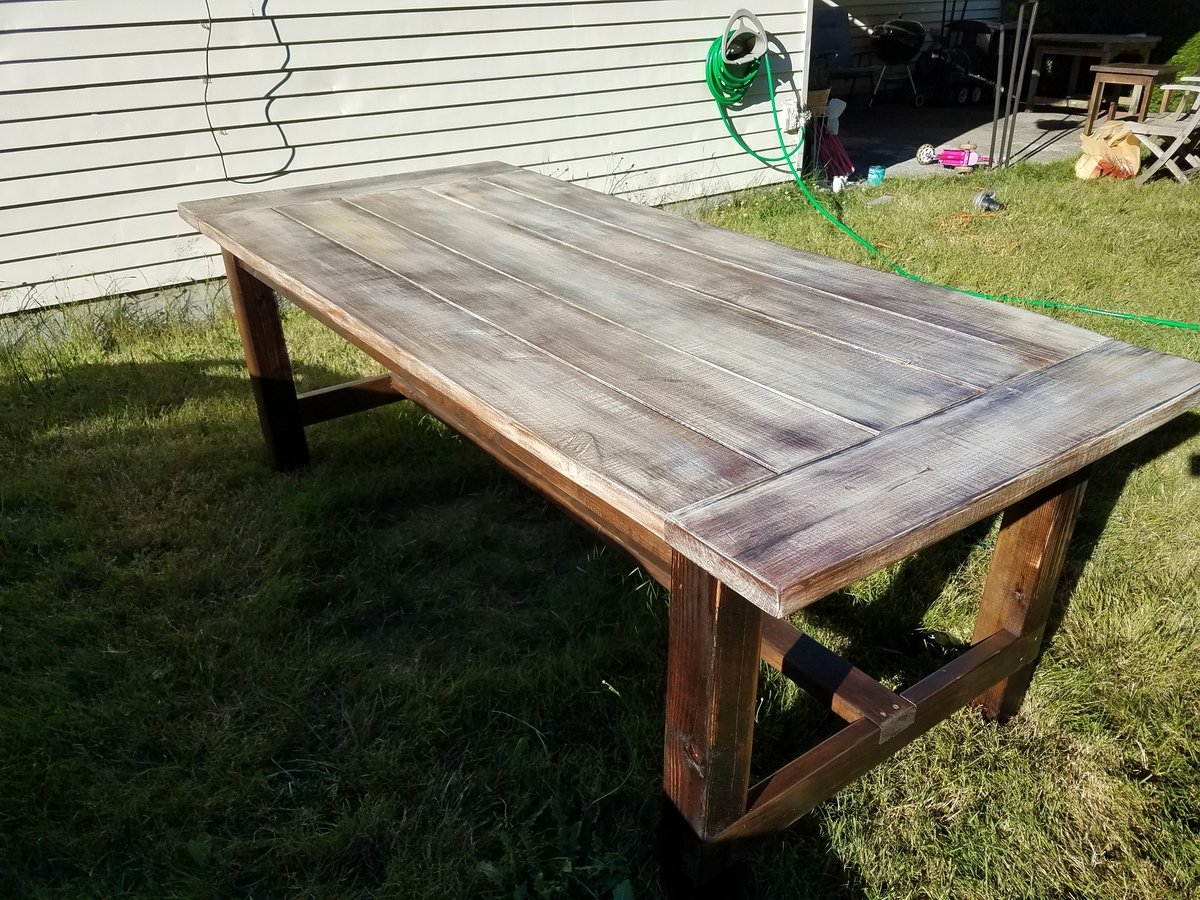
I liked the plans, and the table came out beautiful. Only issue is that there isn't much support for the bread board ends. Don't try to move the table by lifting up on the ends. May need additional bracing in the future. Was able to make a side table with the leftover pieces and an extra 2x4. Love it.
Built from Plan(s)
Estimated Cost
Under $100 for farmhouse table and matching side table.
Estimated Time Investment
Weekend Project (10-20 Hours)
Finish Used
Dry brushed white on top, with a tea and vinegar stain over it. Clear polyacrylic top coat.
Recommended Skill Level
Intermediate
Wide Short Pine 1x12 Bookshelf
This was my first project ever, and while there are a few things I could have done better (don't judge the imperfections!) the shelves still came out beautifully. I followed Ana's plan exactly, painting the backboard a charcoal grey before attaching, and the shelves themselves white with light lemon yellow on the inside-sides. If I were to make these again, I would want to sand the shelves down more and use a higher gloss paint or sealer. The matte finish is more difficult to clean when it gets dusty, which happens pretty quickly!
Built from Plan(s)
Estimated Time Investment
Afternoon Project (3-6 Hours)
Recommended Skill Level
Starter Project
Hall Tree Combo
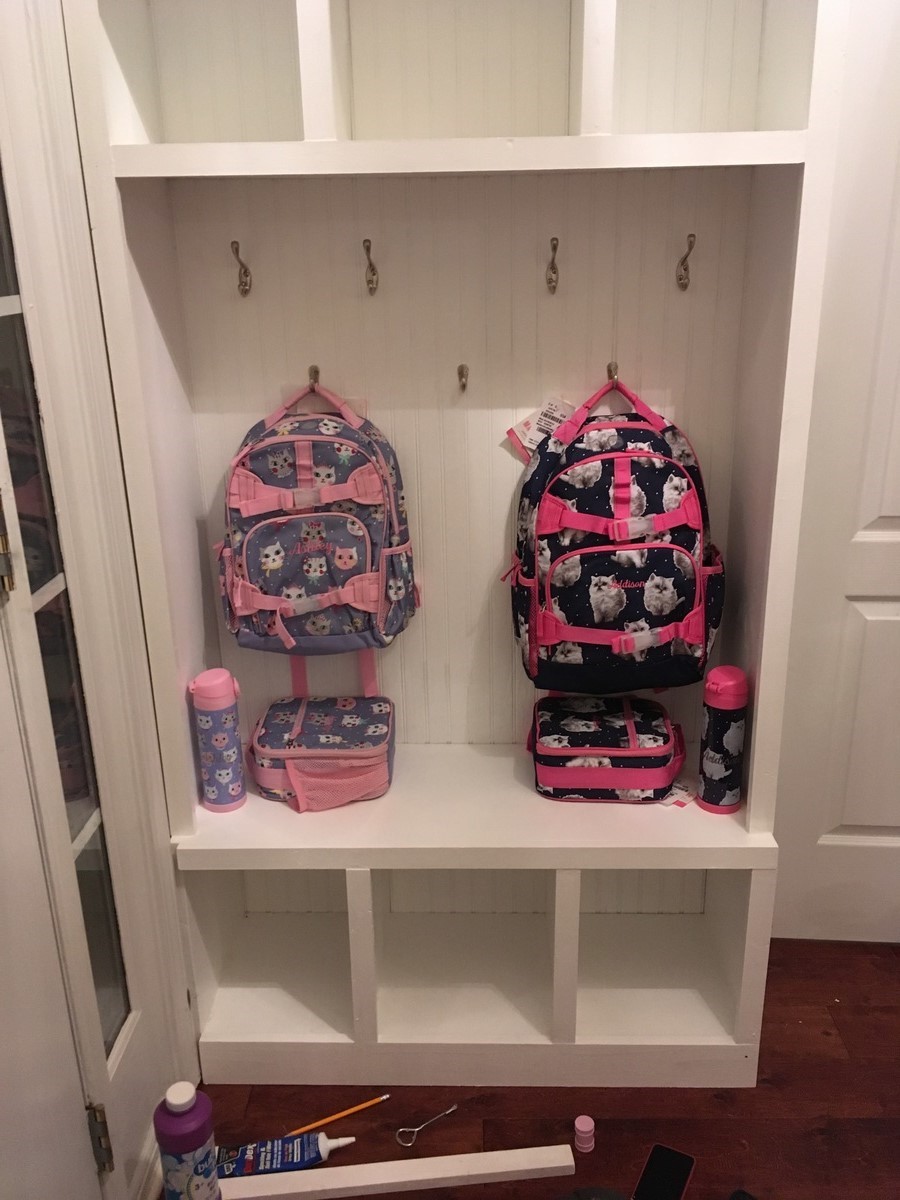
I started with the Fancy Hall tree plan, but decided to add cubbies to the top. This is the first "real" thing I have ever made. I could only work on it every other week, so it took longer than expected. Thanks for the plans!!
Built from Plan(s)
Estimated Time Investment
Week Long Project (20 Hours or More)
Recommended Skill Level
Beginner
Amazing Farm Table and Benches
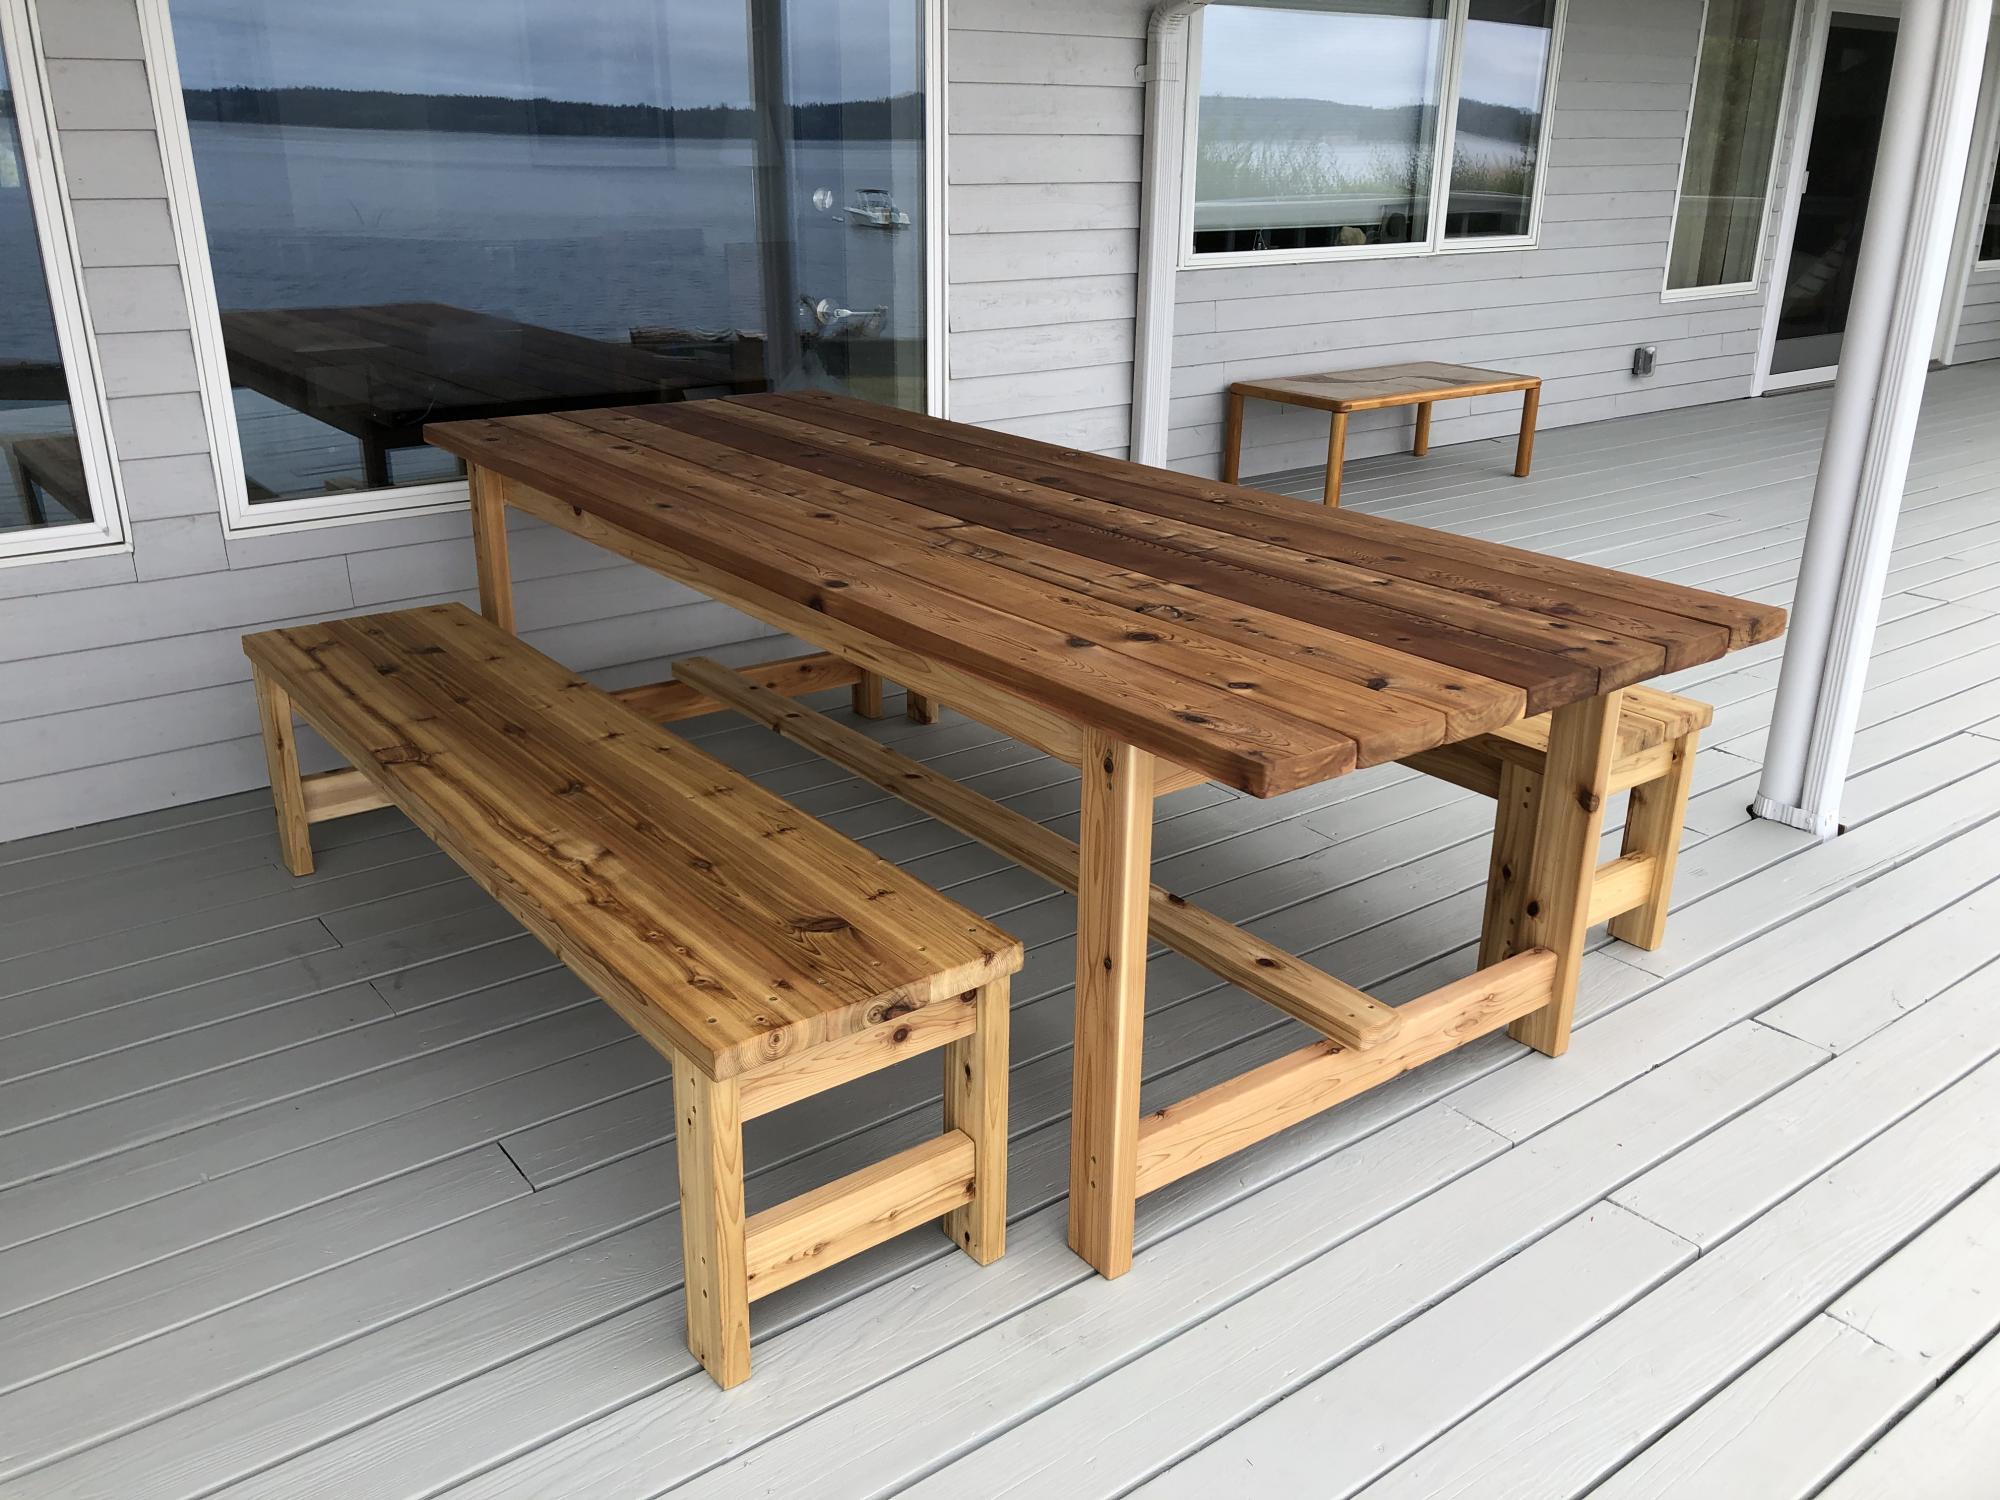
Built this deck dining table and benches from Lowes cedar, and the results way exceeded my expectations! The plans were so well written, it was easy to slightly modify (made both table and benches wider and longer) and the build was very simple. The clear directions helped give me the confidence to do this and we have got so many nice compliments. There was nothing this sturdy and simple even available to buy. I even built a coffee table and bar table after modifying the plans a bit. Thank you Ana!
Comments
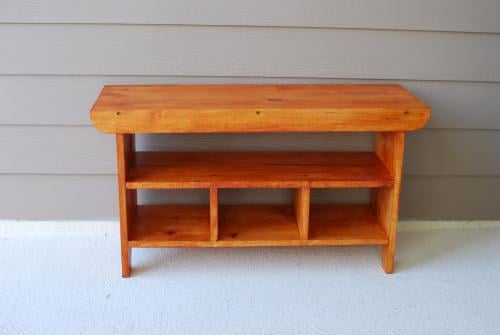
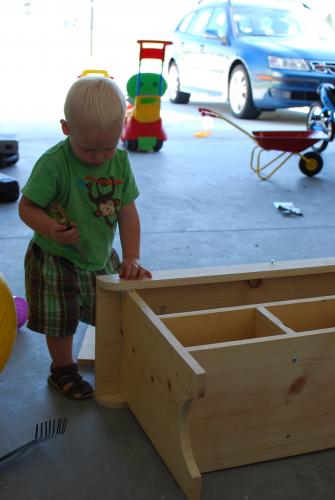
Kids Country Bench
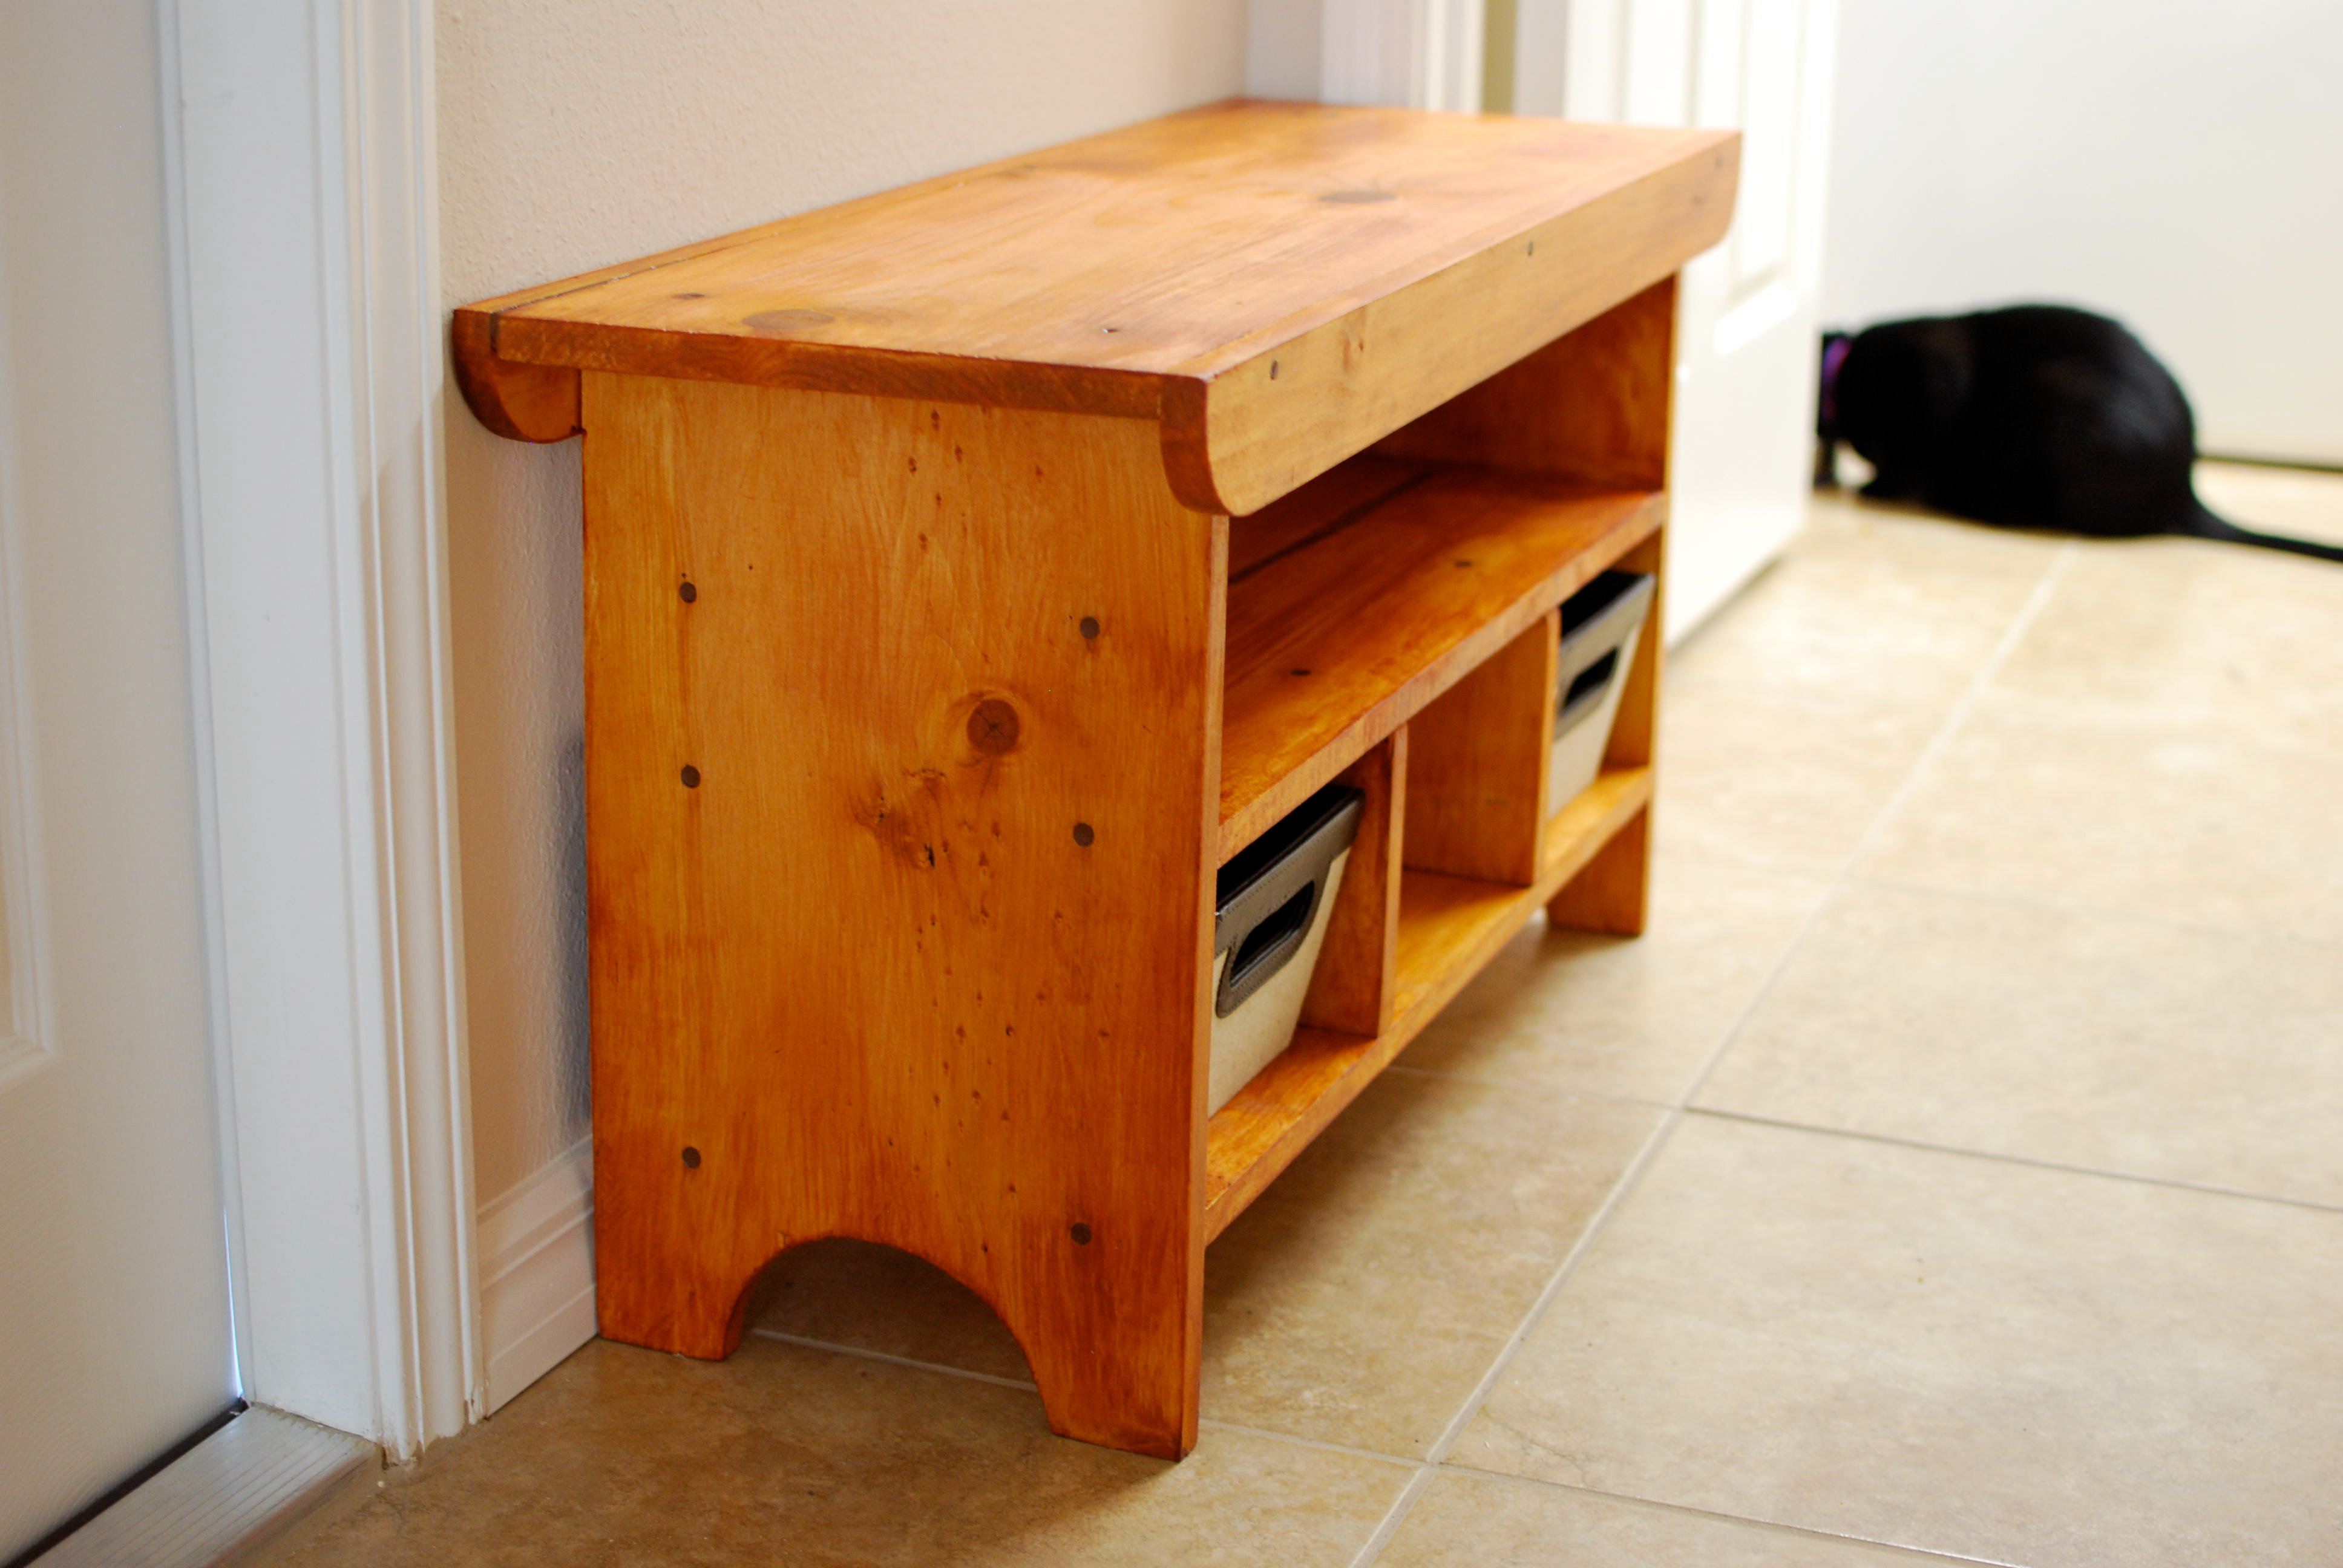
Hi! I made the Kid's Country Bench for my first ever woodworking project. Making this bench was the first time I've used a jigsaw (purchased for this project) and the first time drilling a pilot hole. My husband answered a couple of questions along the way, but I did all the work myself and am so proud. I did change some dimensions to accommodate pretty baskets I wanted to use. This is going to be very helpful for corralling two little boys' shoes in my entry.
Built from Plan(s)
Estimated Cost
$50
Estimated Time Investment
Day Project (6-9 Hours)
Finish Used
I really wanted to stain this and prime and paint later as a last resort, if needed. My concern was the wood putty. I didn't get the "stainable" stuff since I've only heard bad things about it. I got some that would supposedly blend pretty well. You can see that it's too dark for my stain, but I'm ok with that in the end. I think it' makes it look like reclaimed wood or something. You can also see on the end where I drilled two holes in the wrong spot (oops!) despite measuring twice, cutting once. (That doesn't help if you're measuring the wrong number!) :-)
Recommended Skill Level
Starter Project
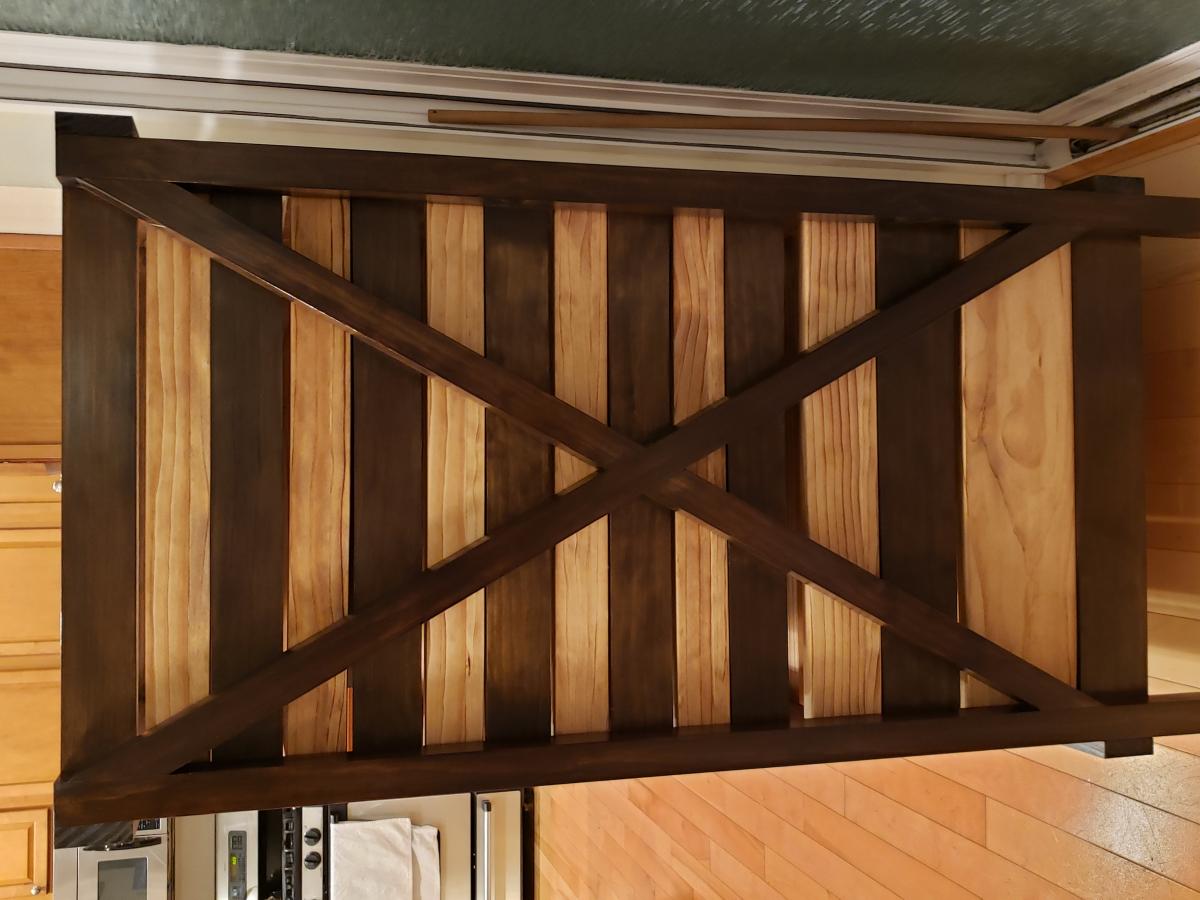
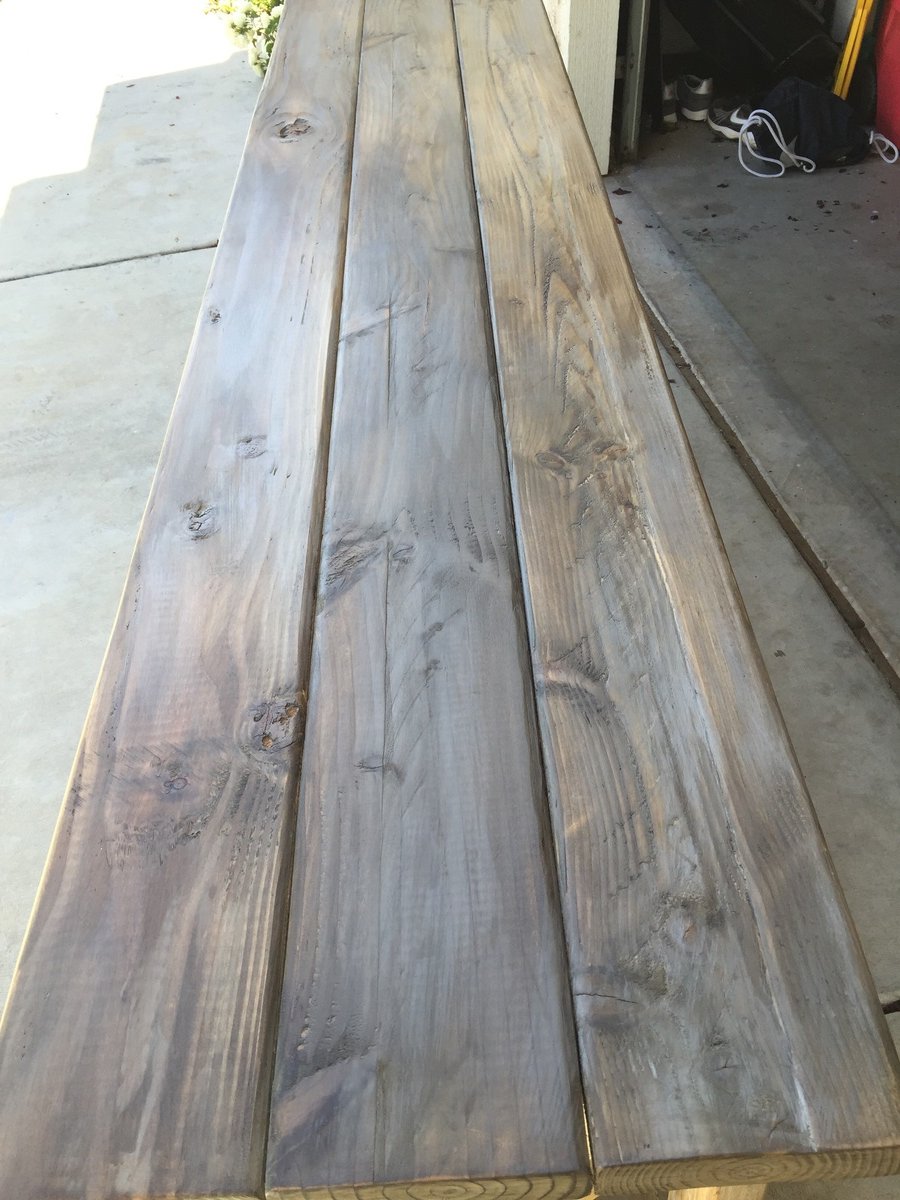
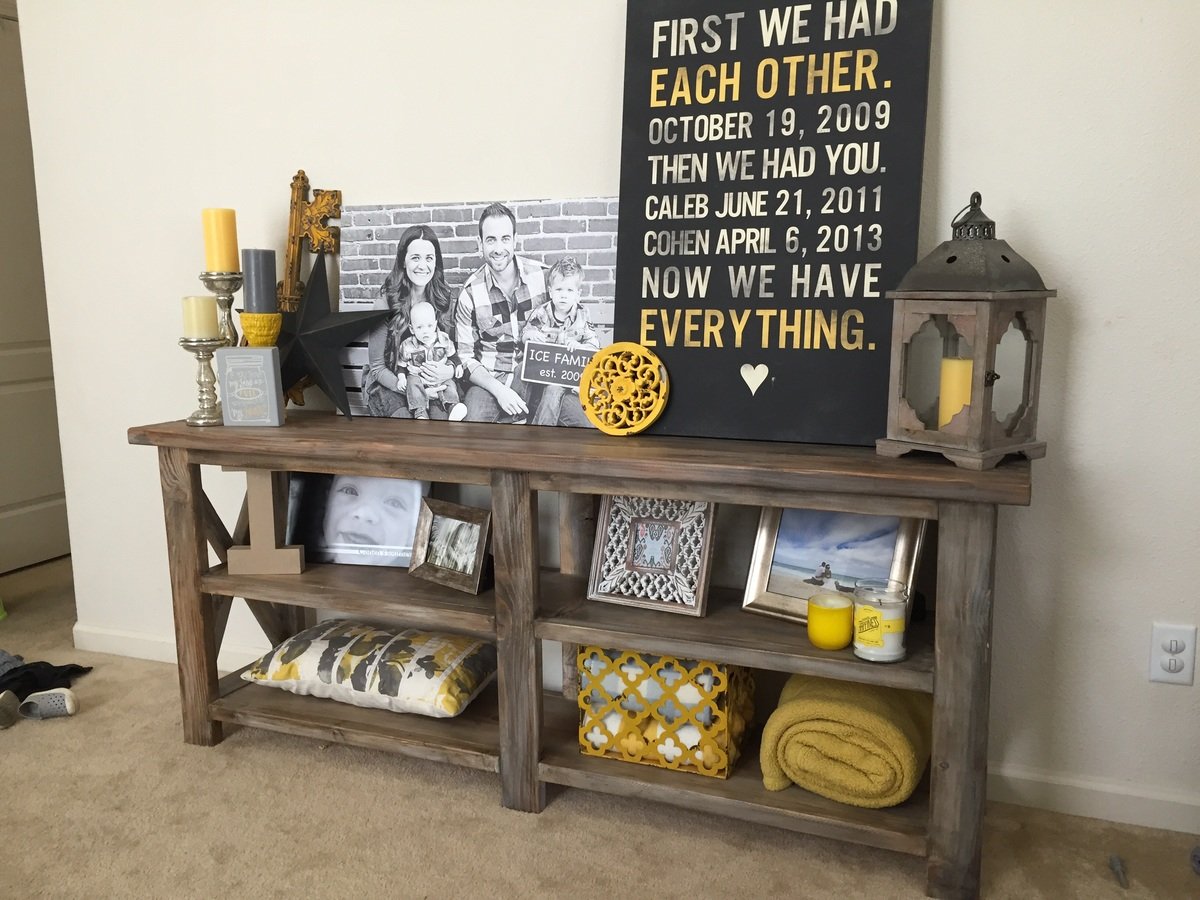
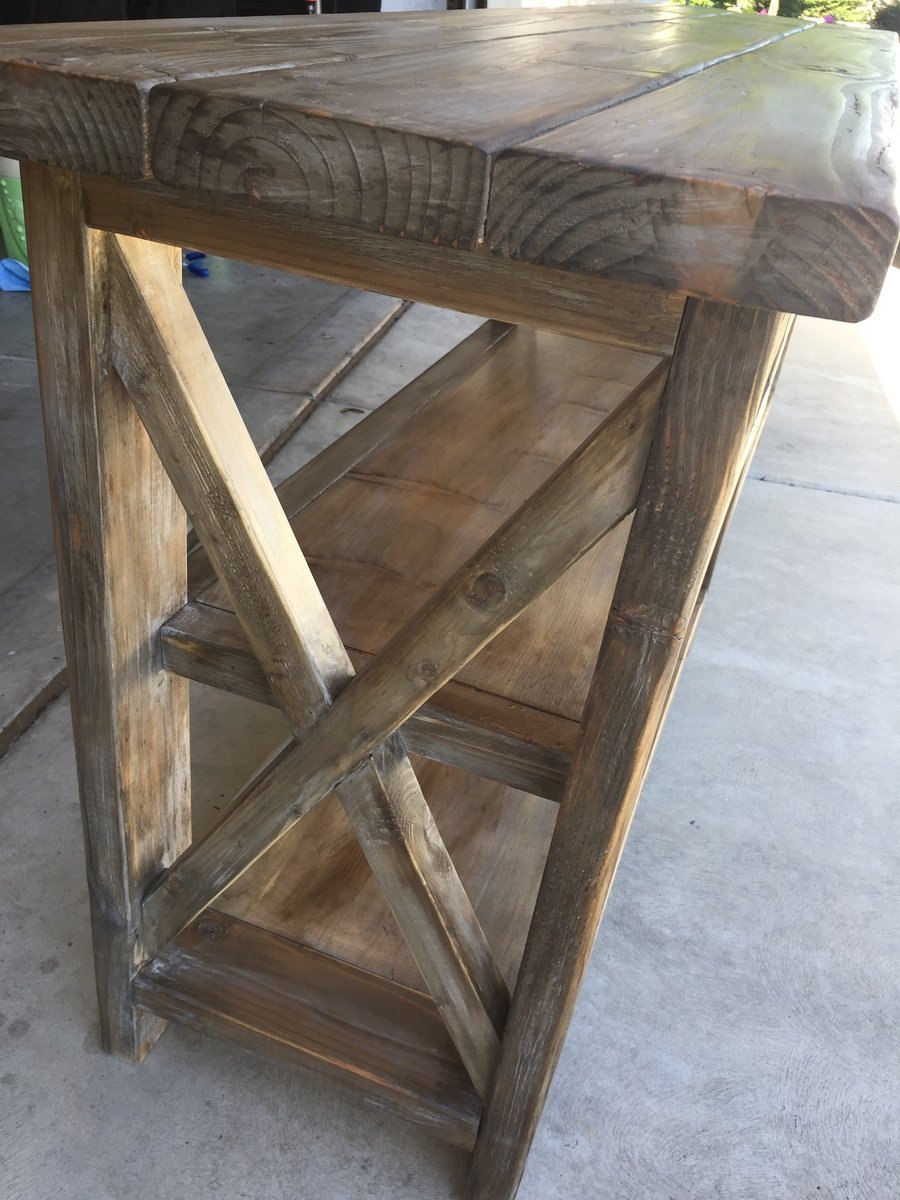
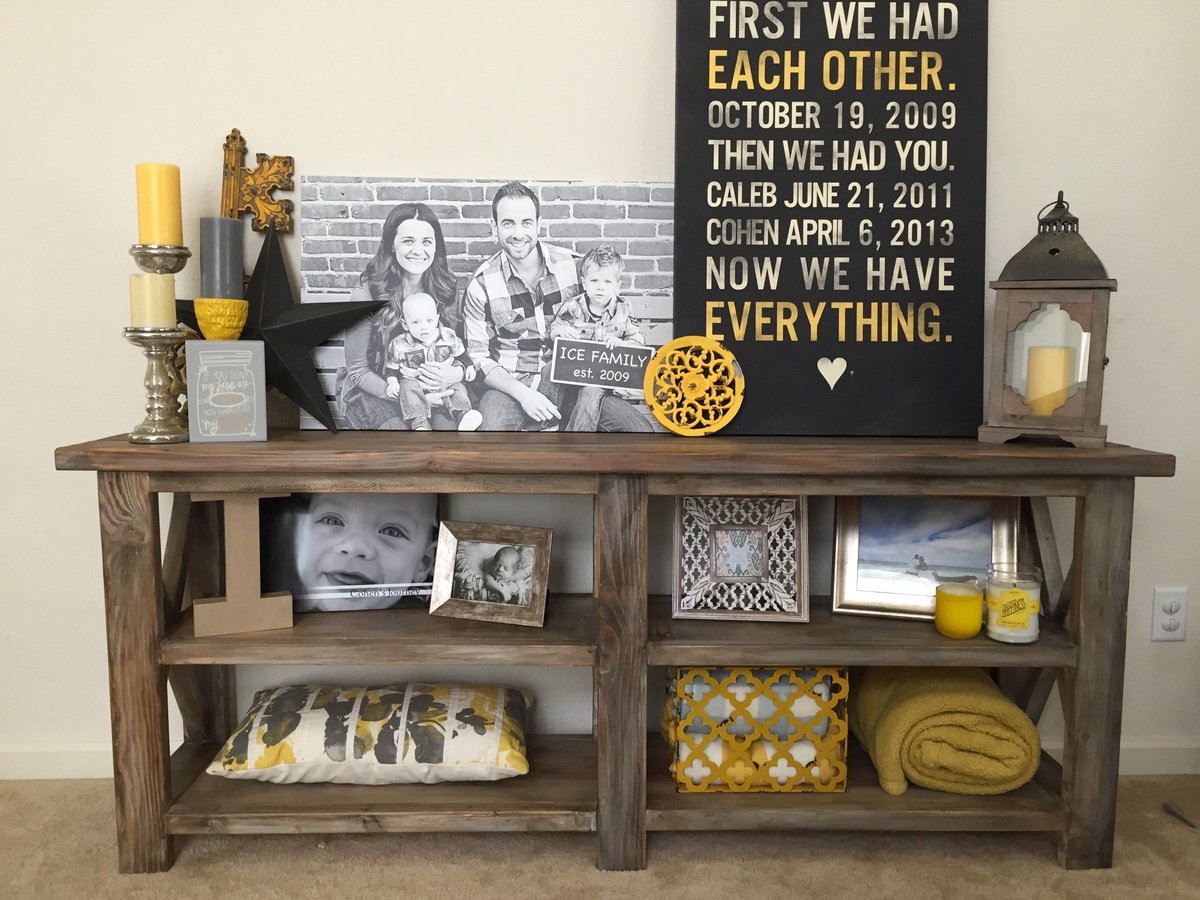
Rustic X Table
Enjoyed this project
Built from Plan(s)
Estimated Time Investment
Day Project (6-9 Hours)
Finish Used
Tea, Steel Wool, White Wash, Dark Wax and Clear Wax
Recommended Skill Level
Beginner
Comments
Mon, 05/04/2015 - 10:16
Love this build and sign!
Thanks for sharing, great job on the decor and finish!
Seasonal And Holiday