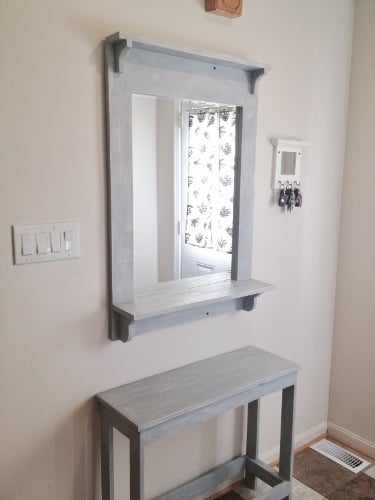
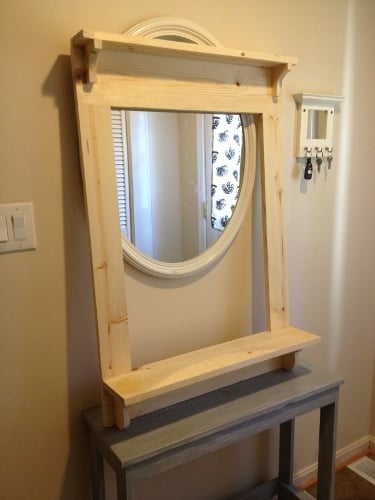
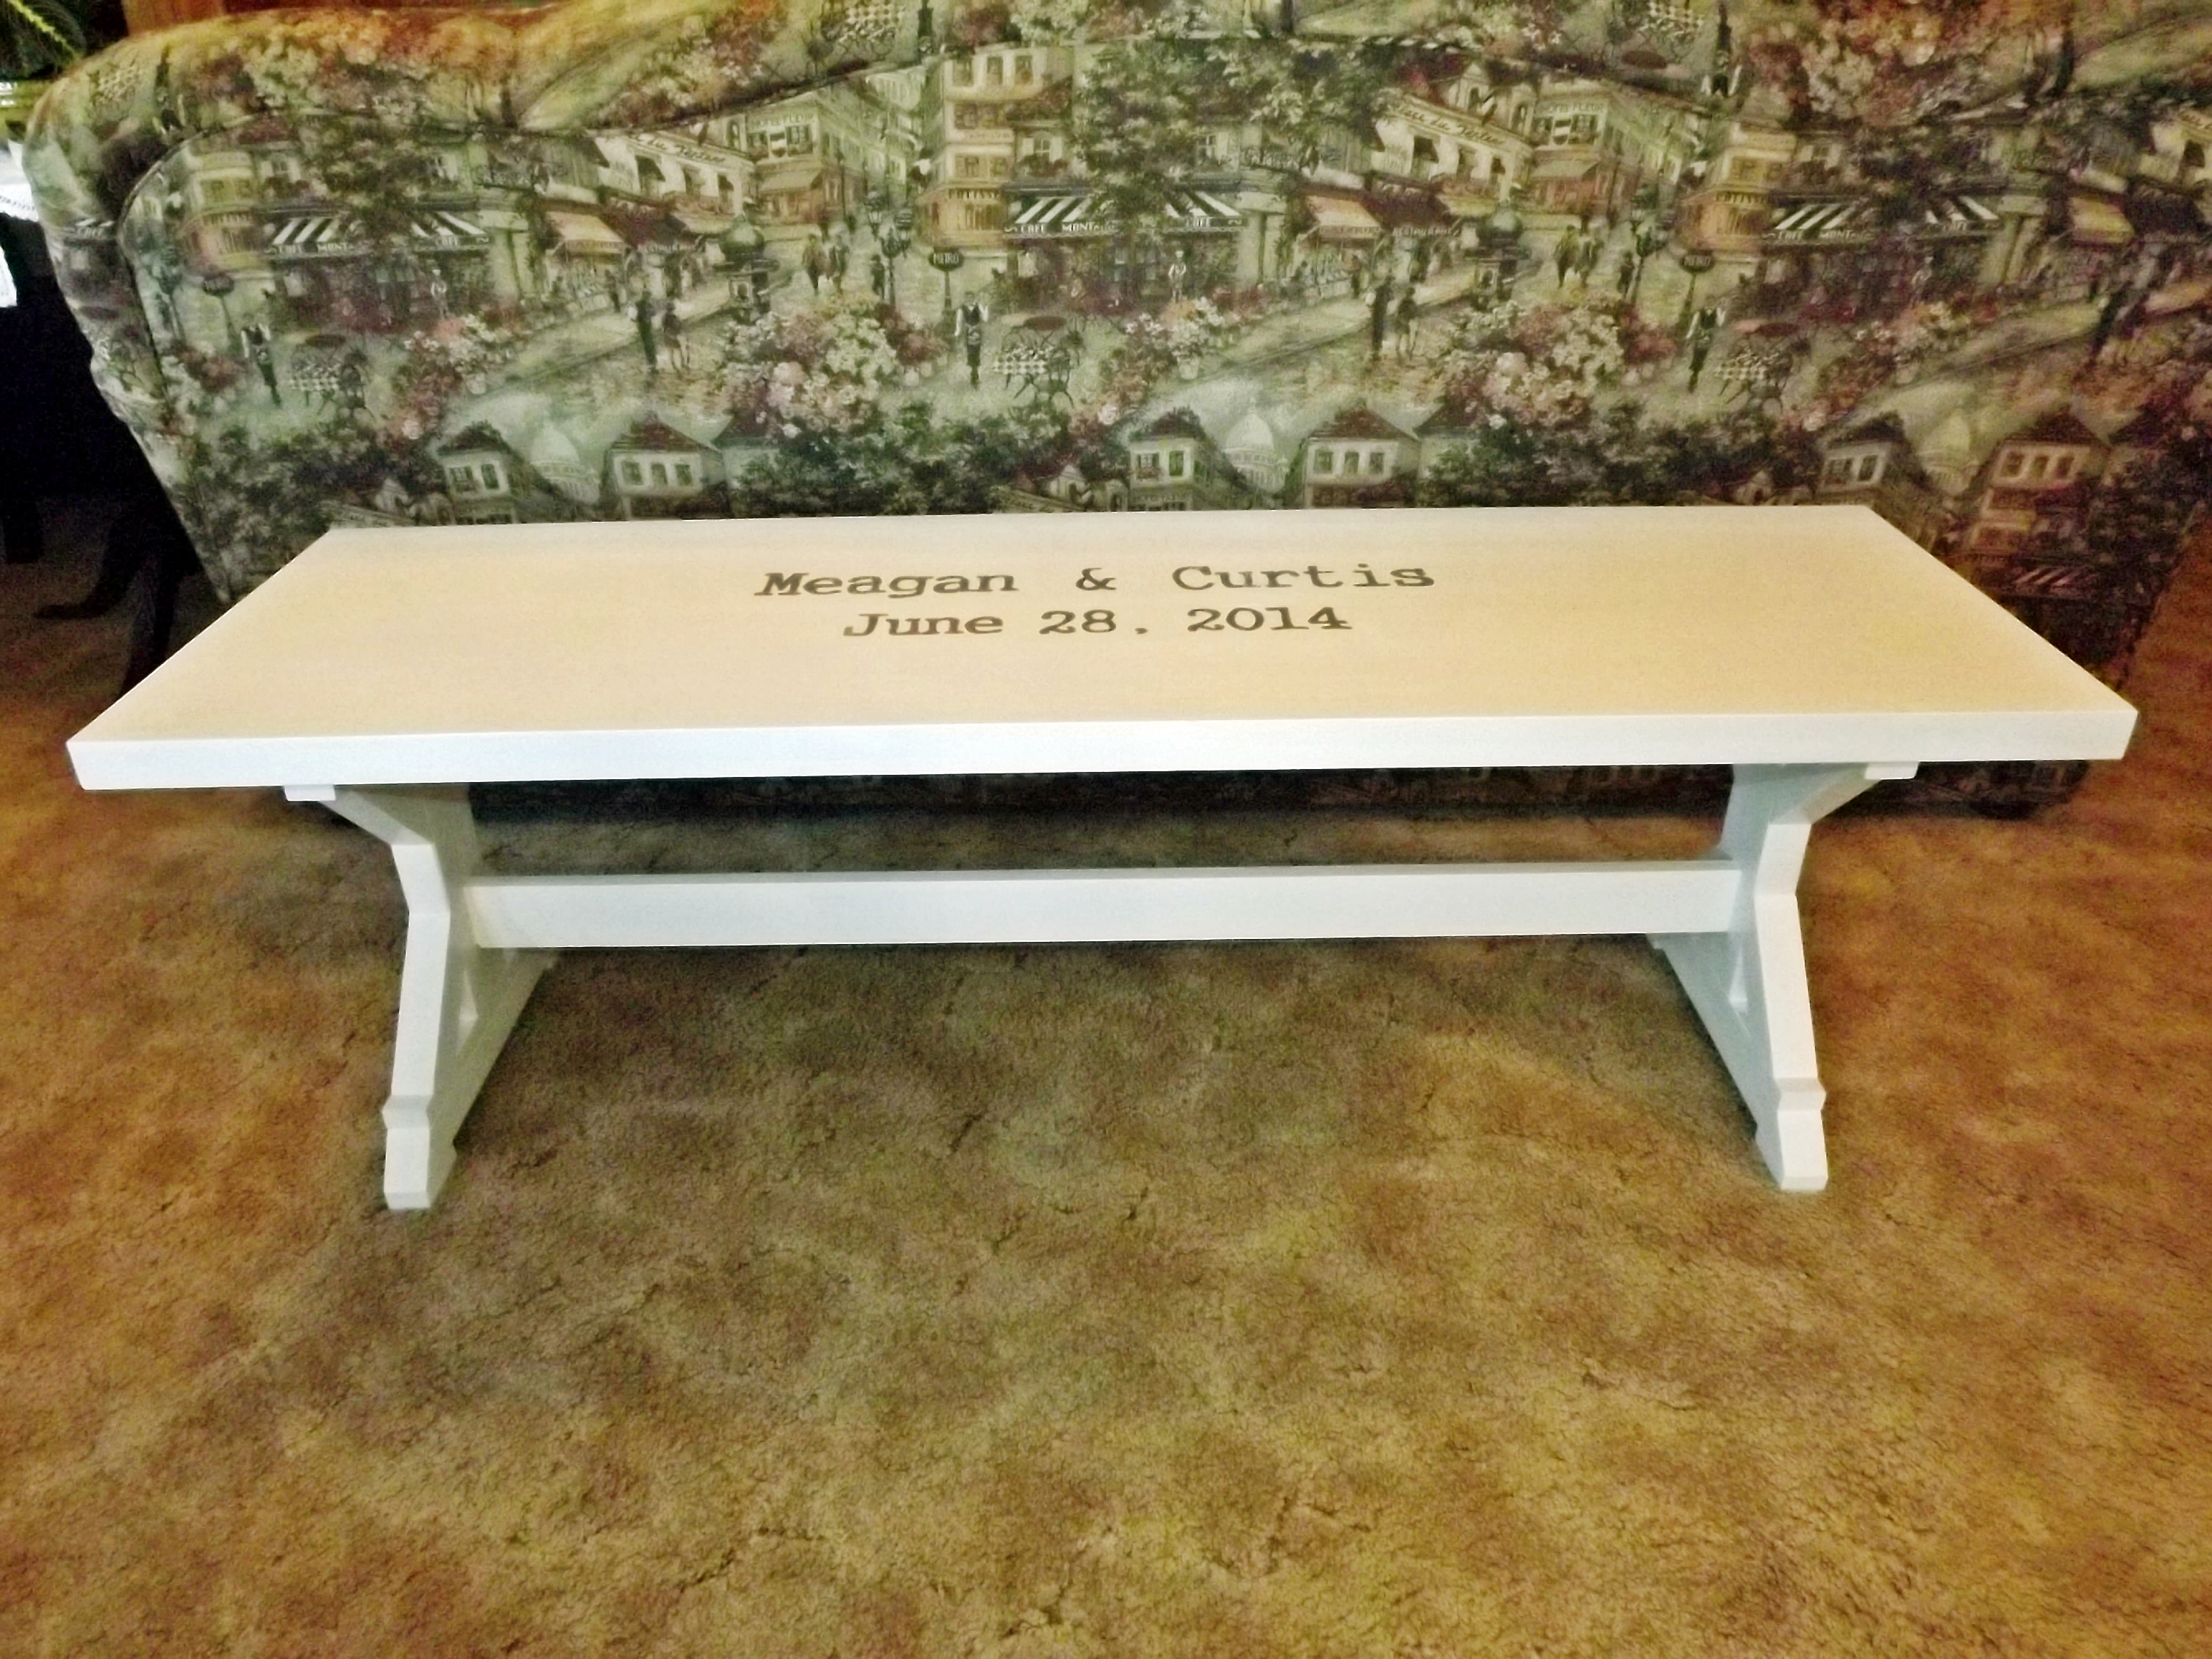
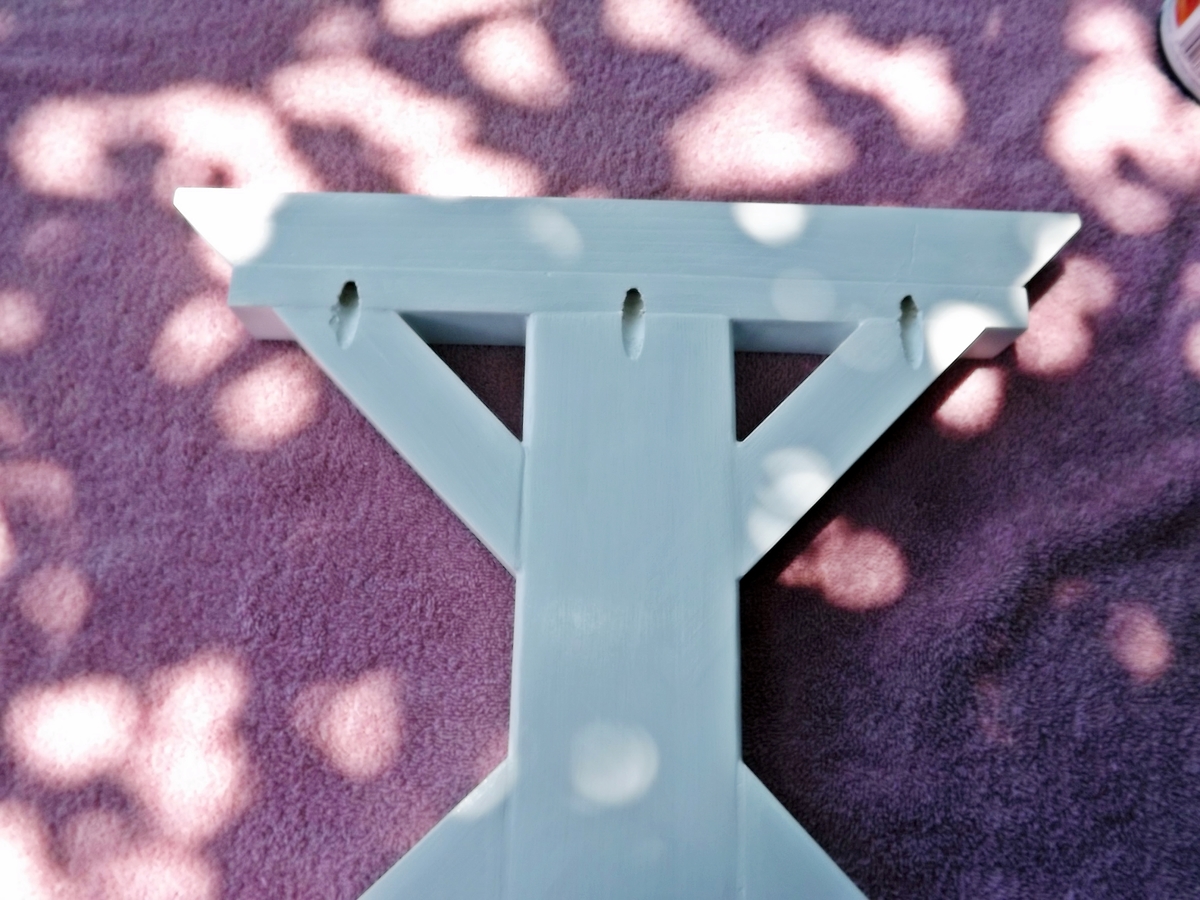
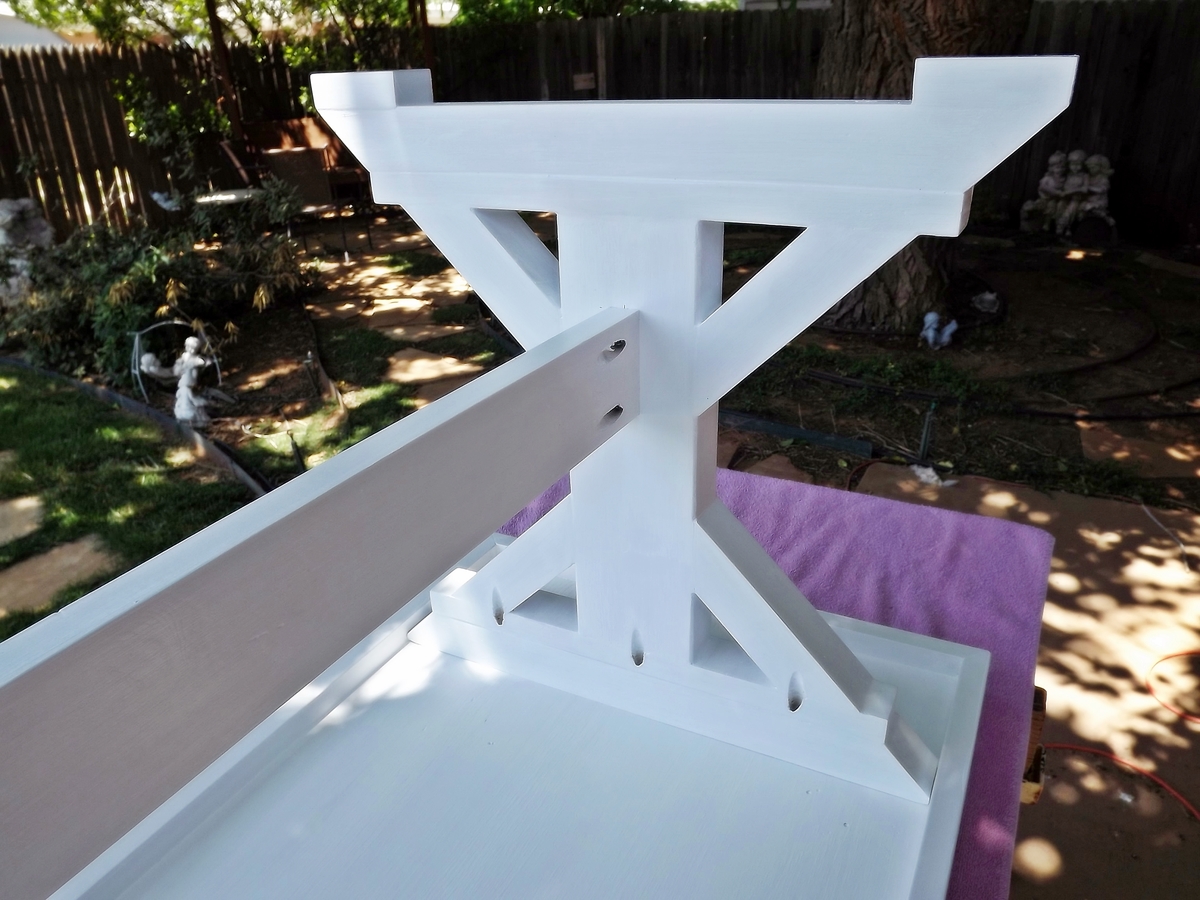
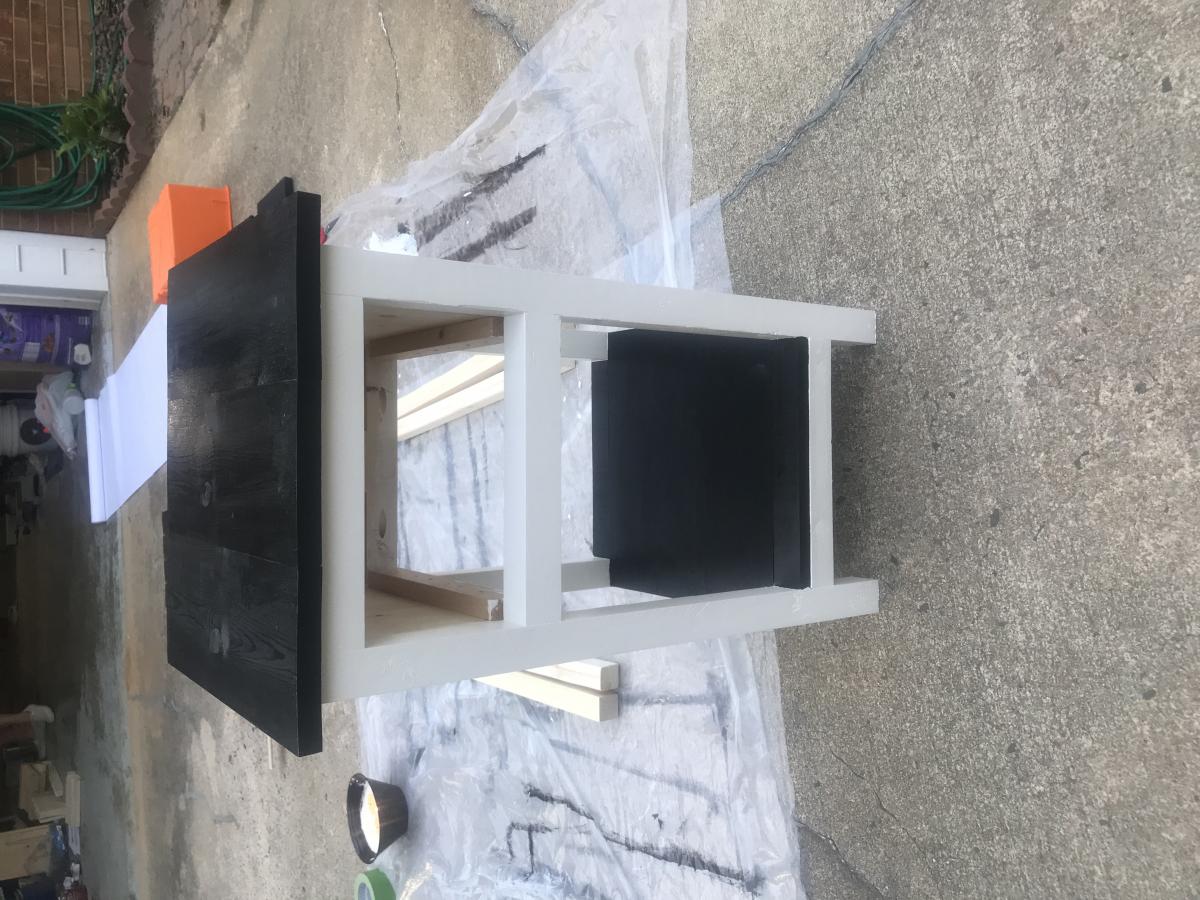
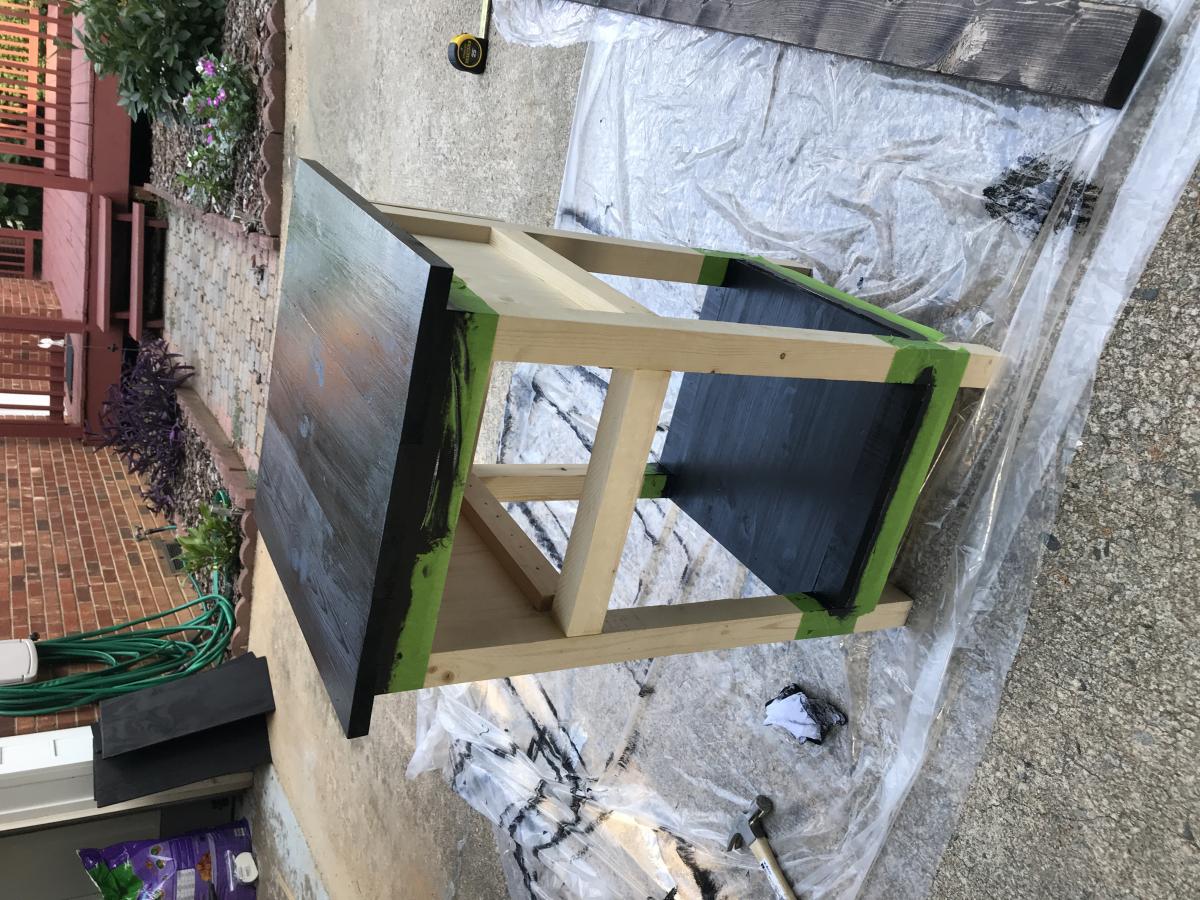
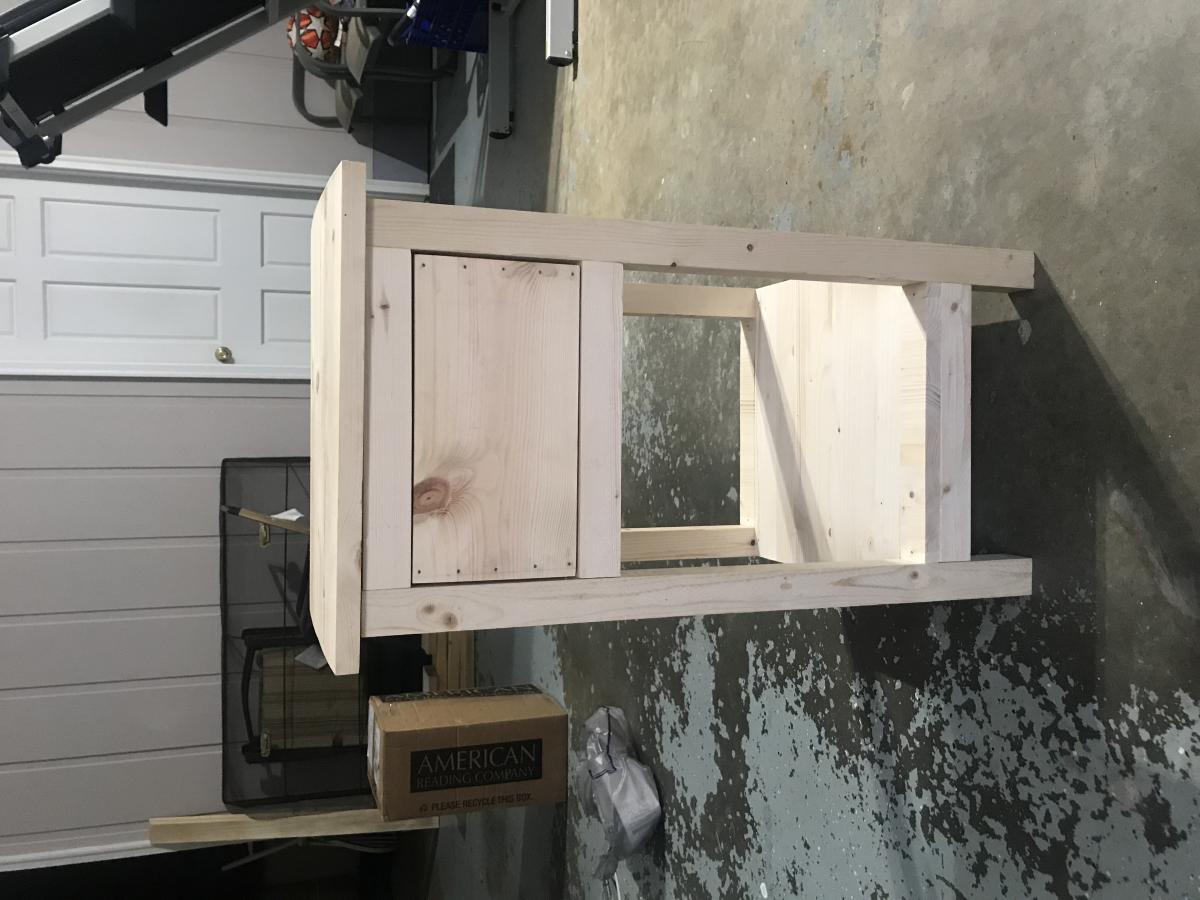
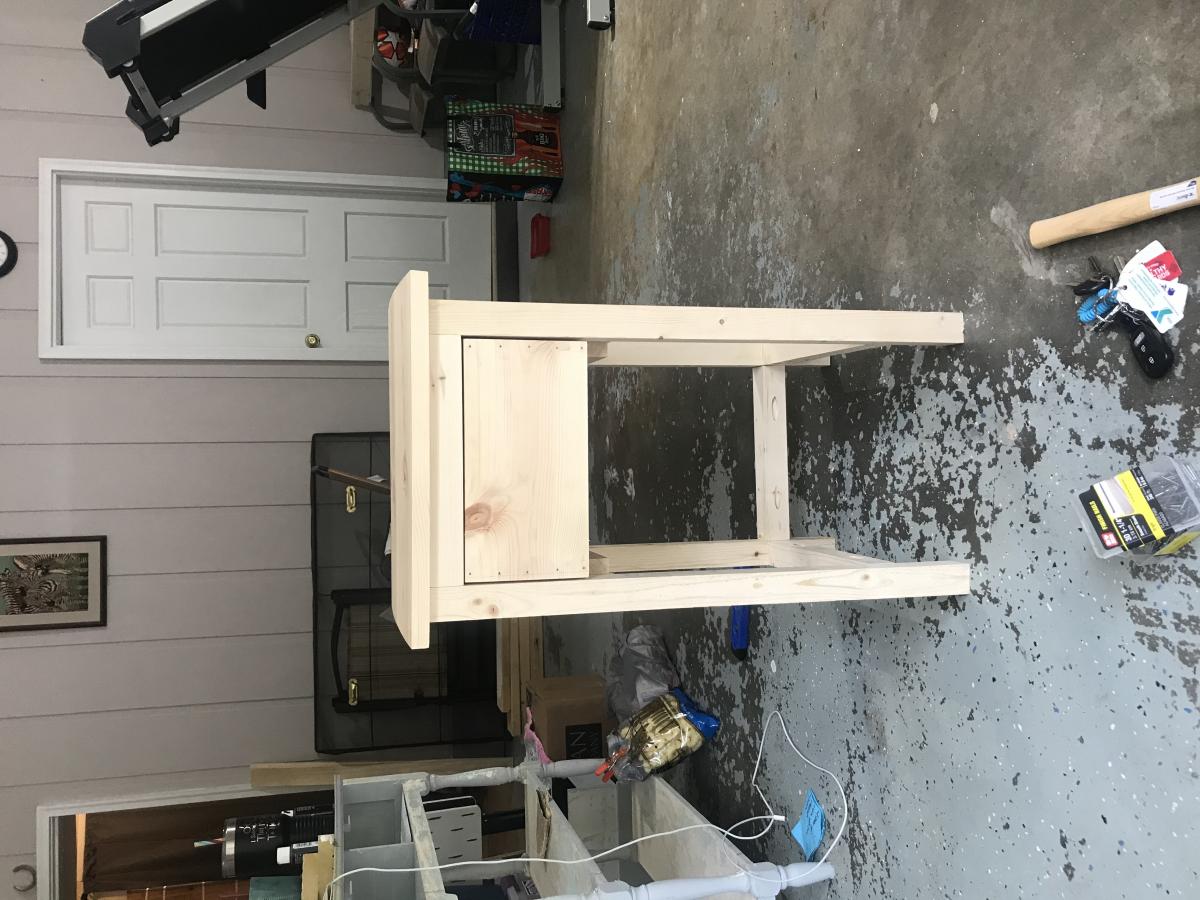
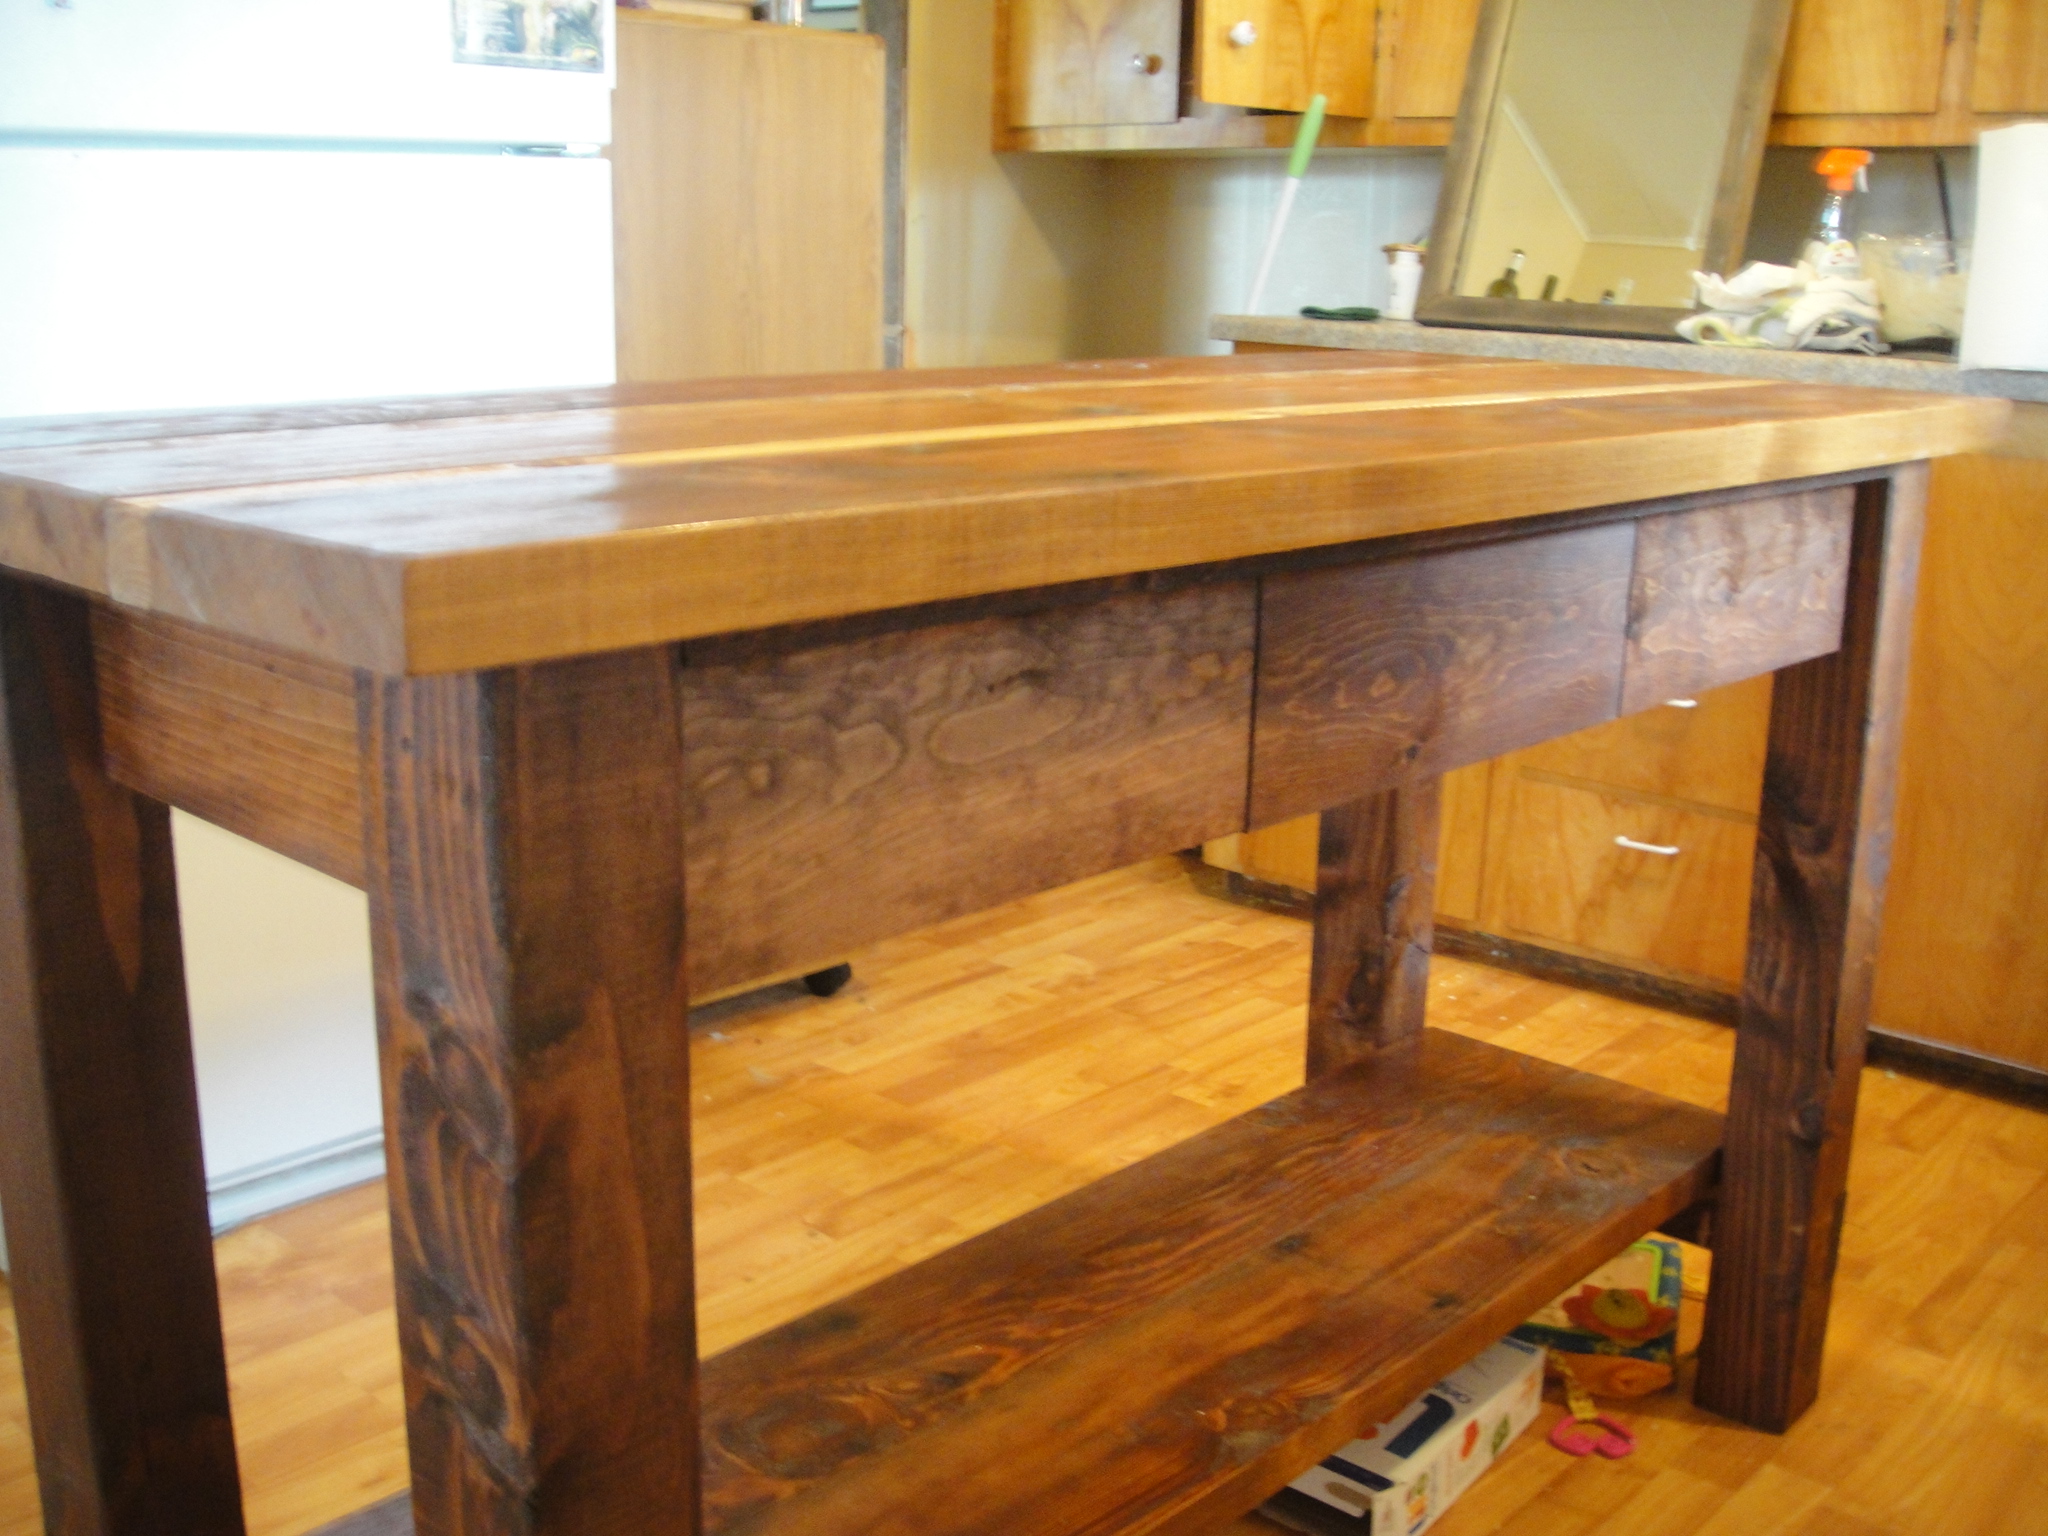
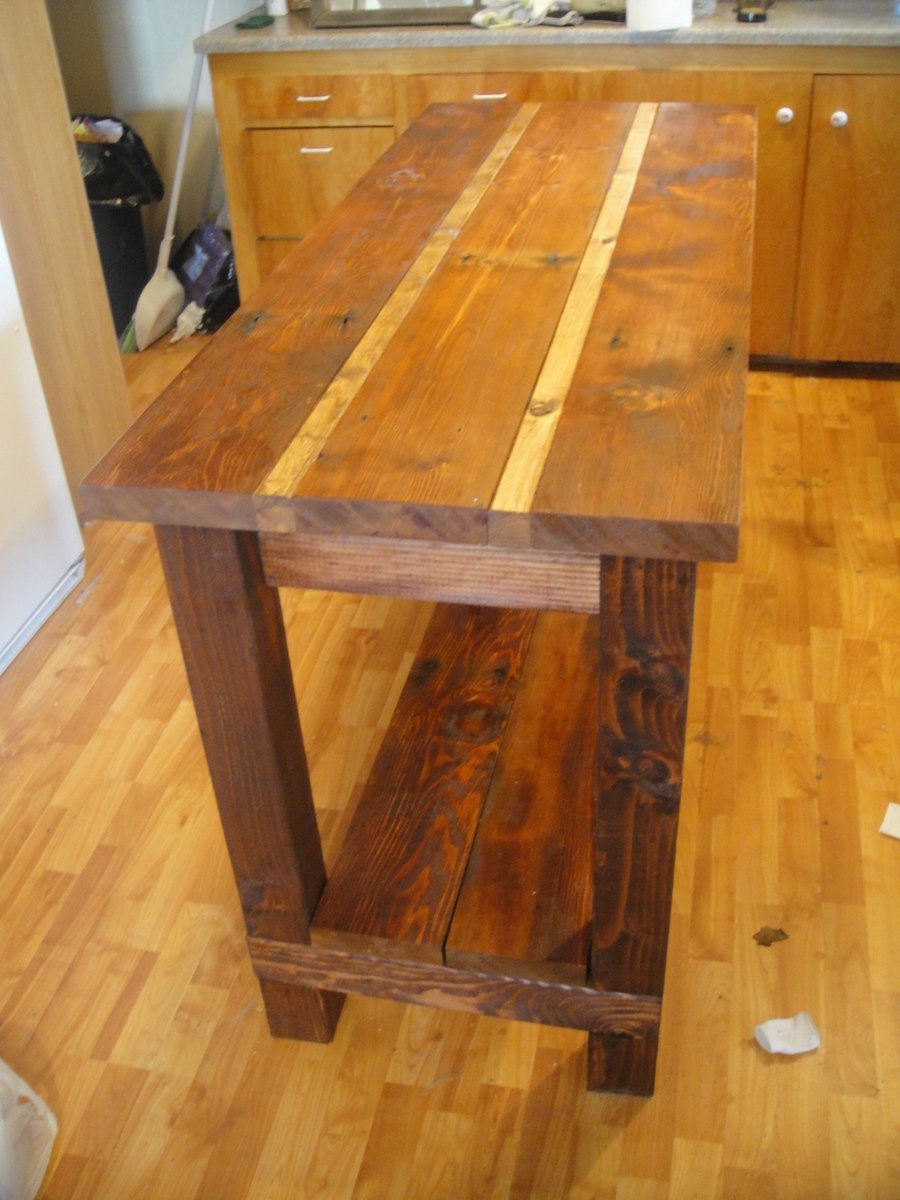
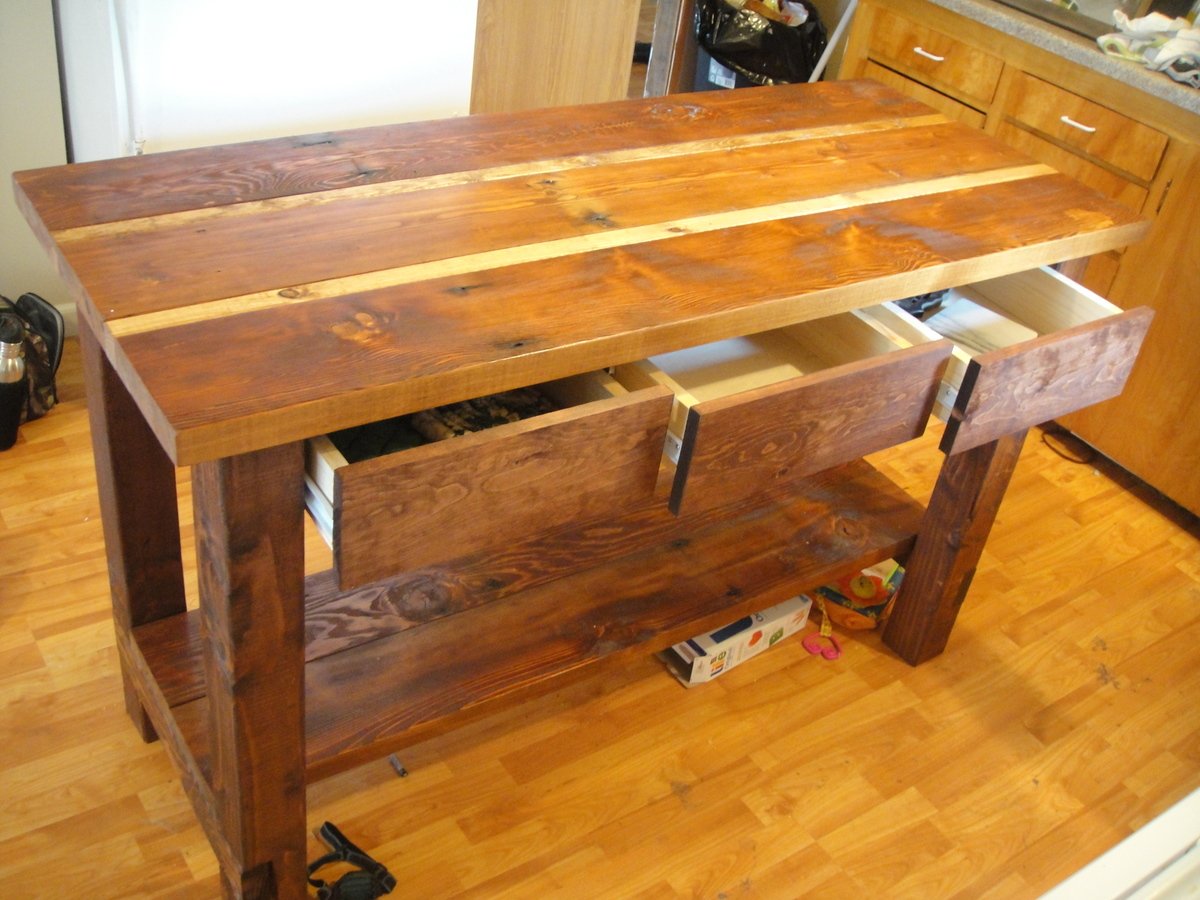
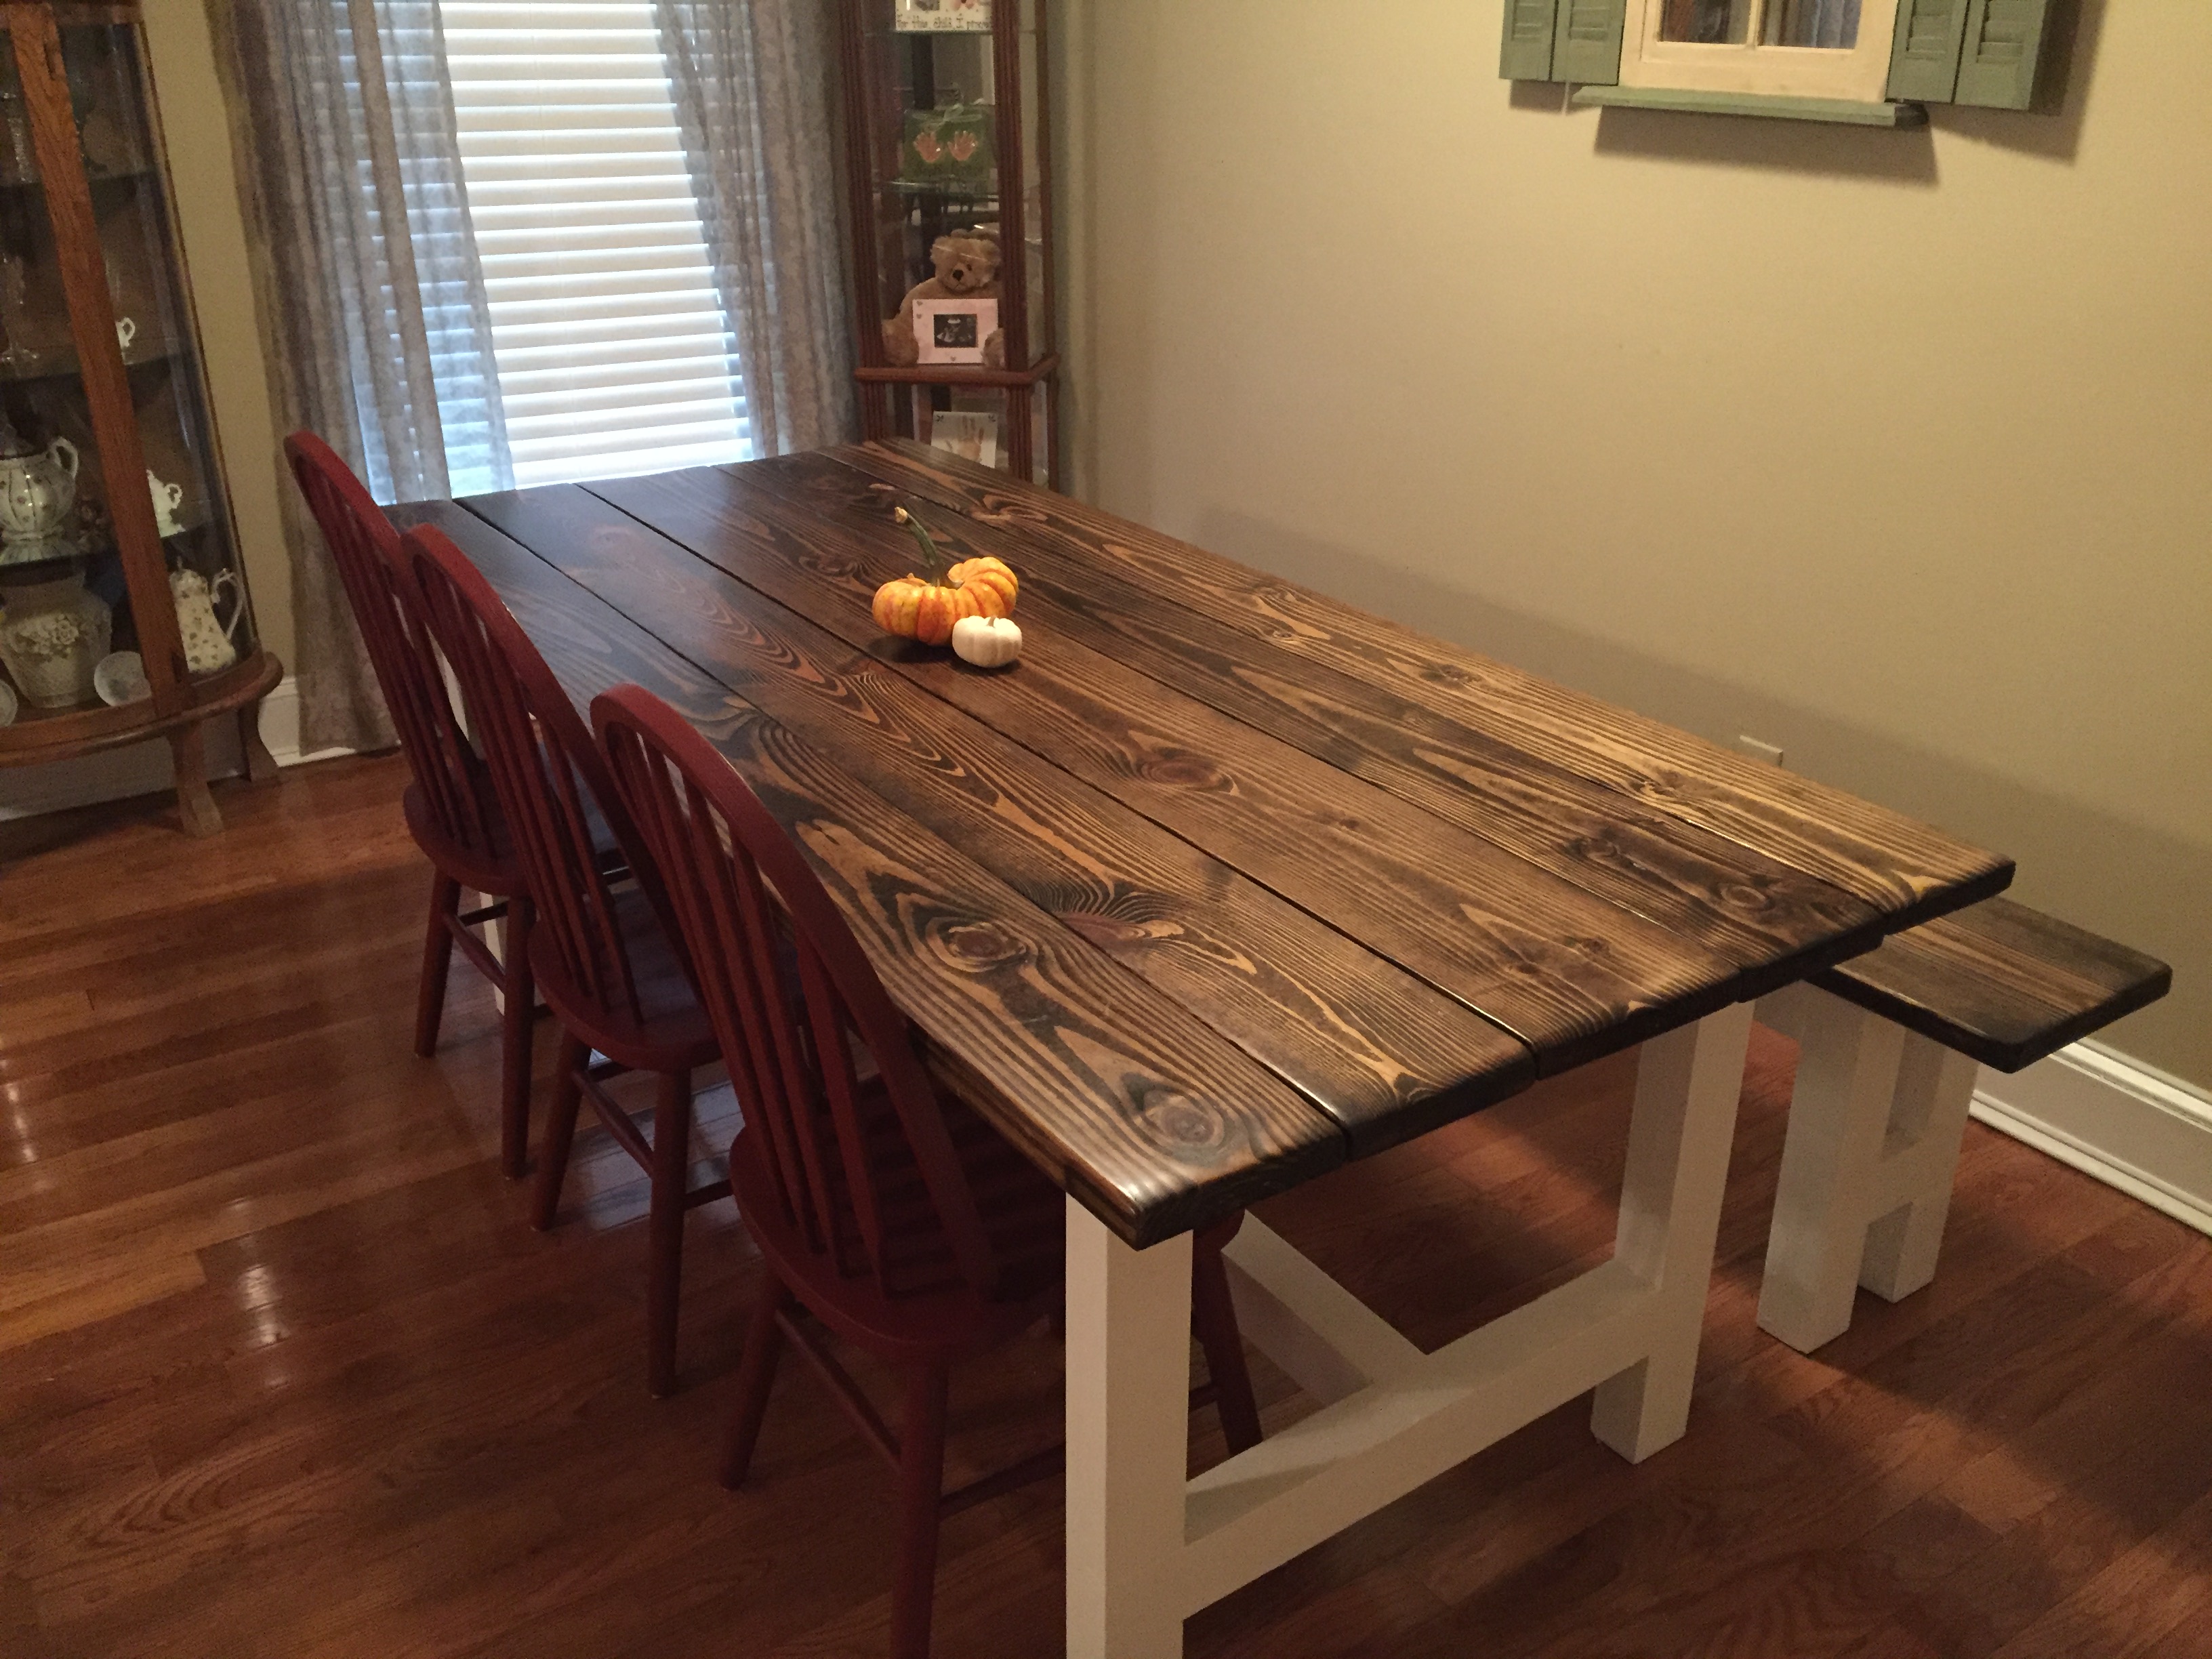
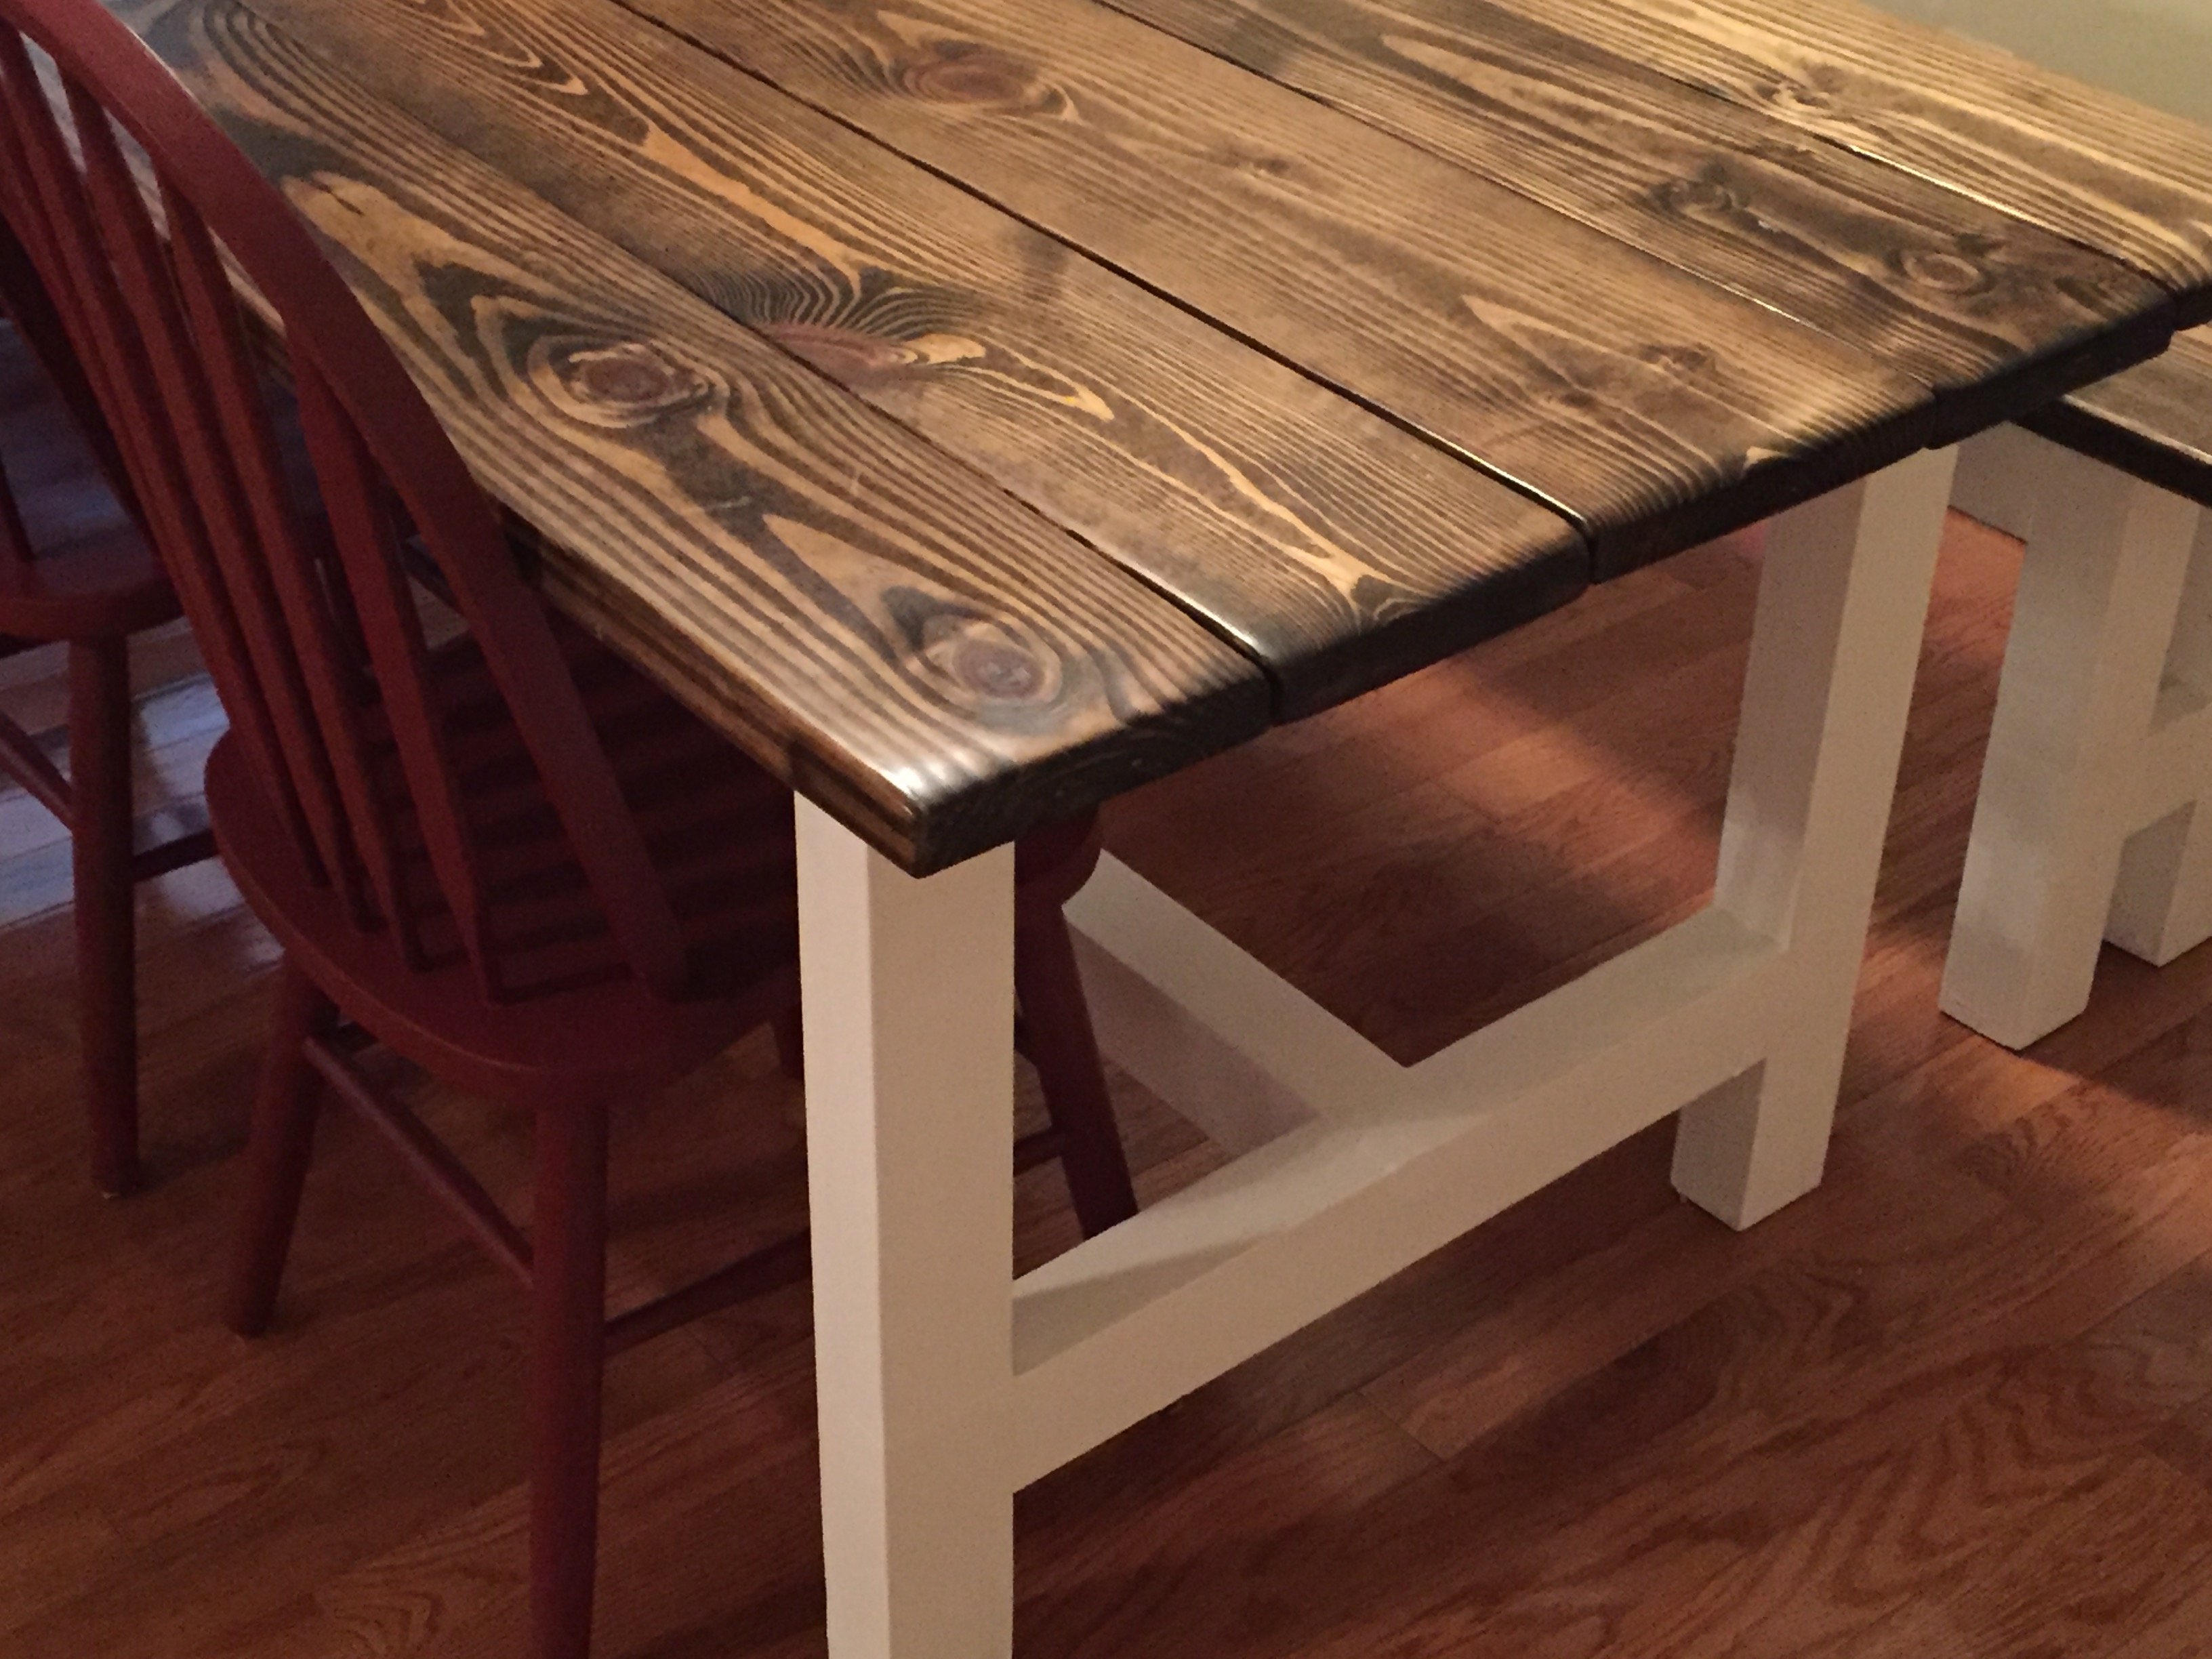
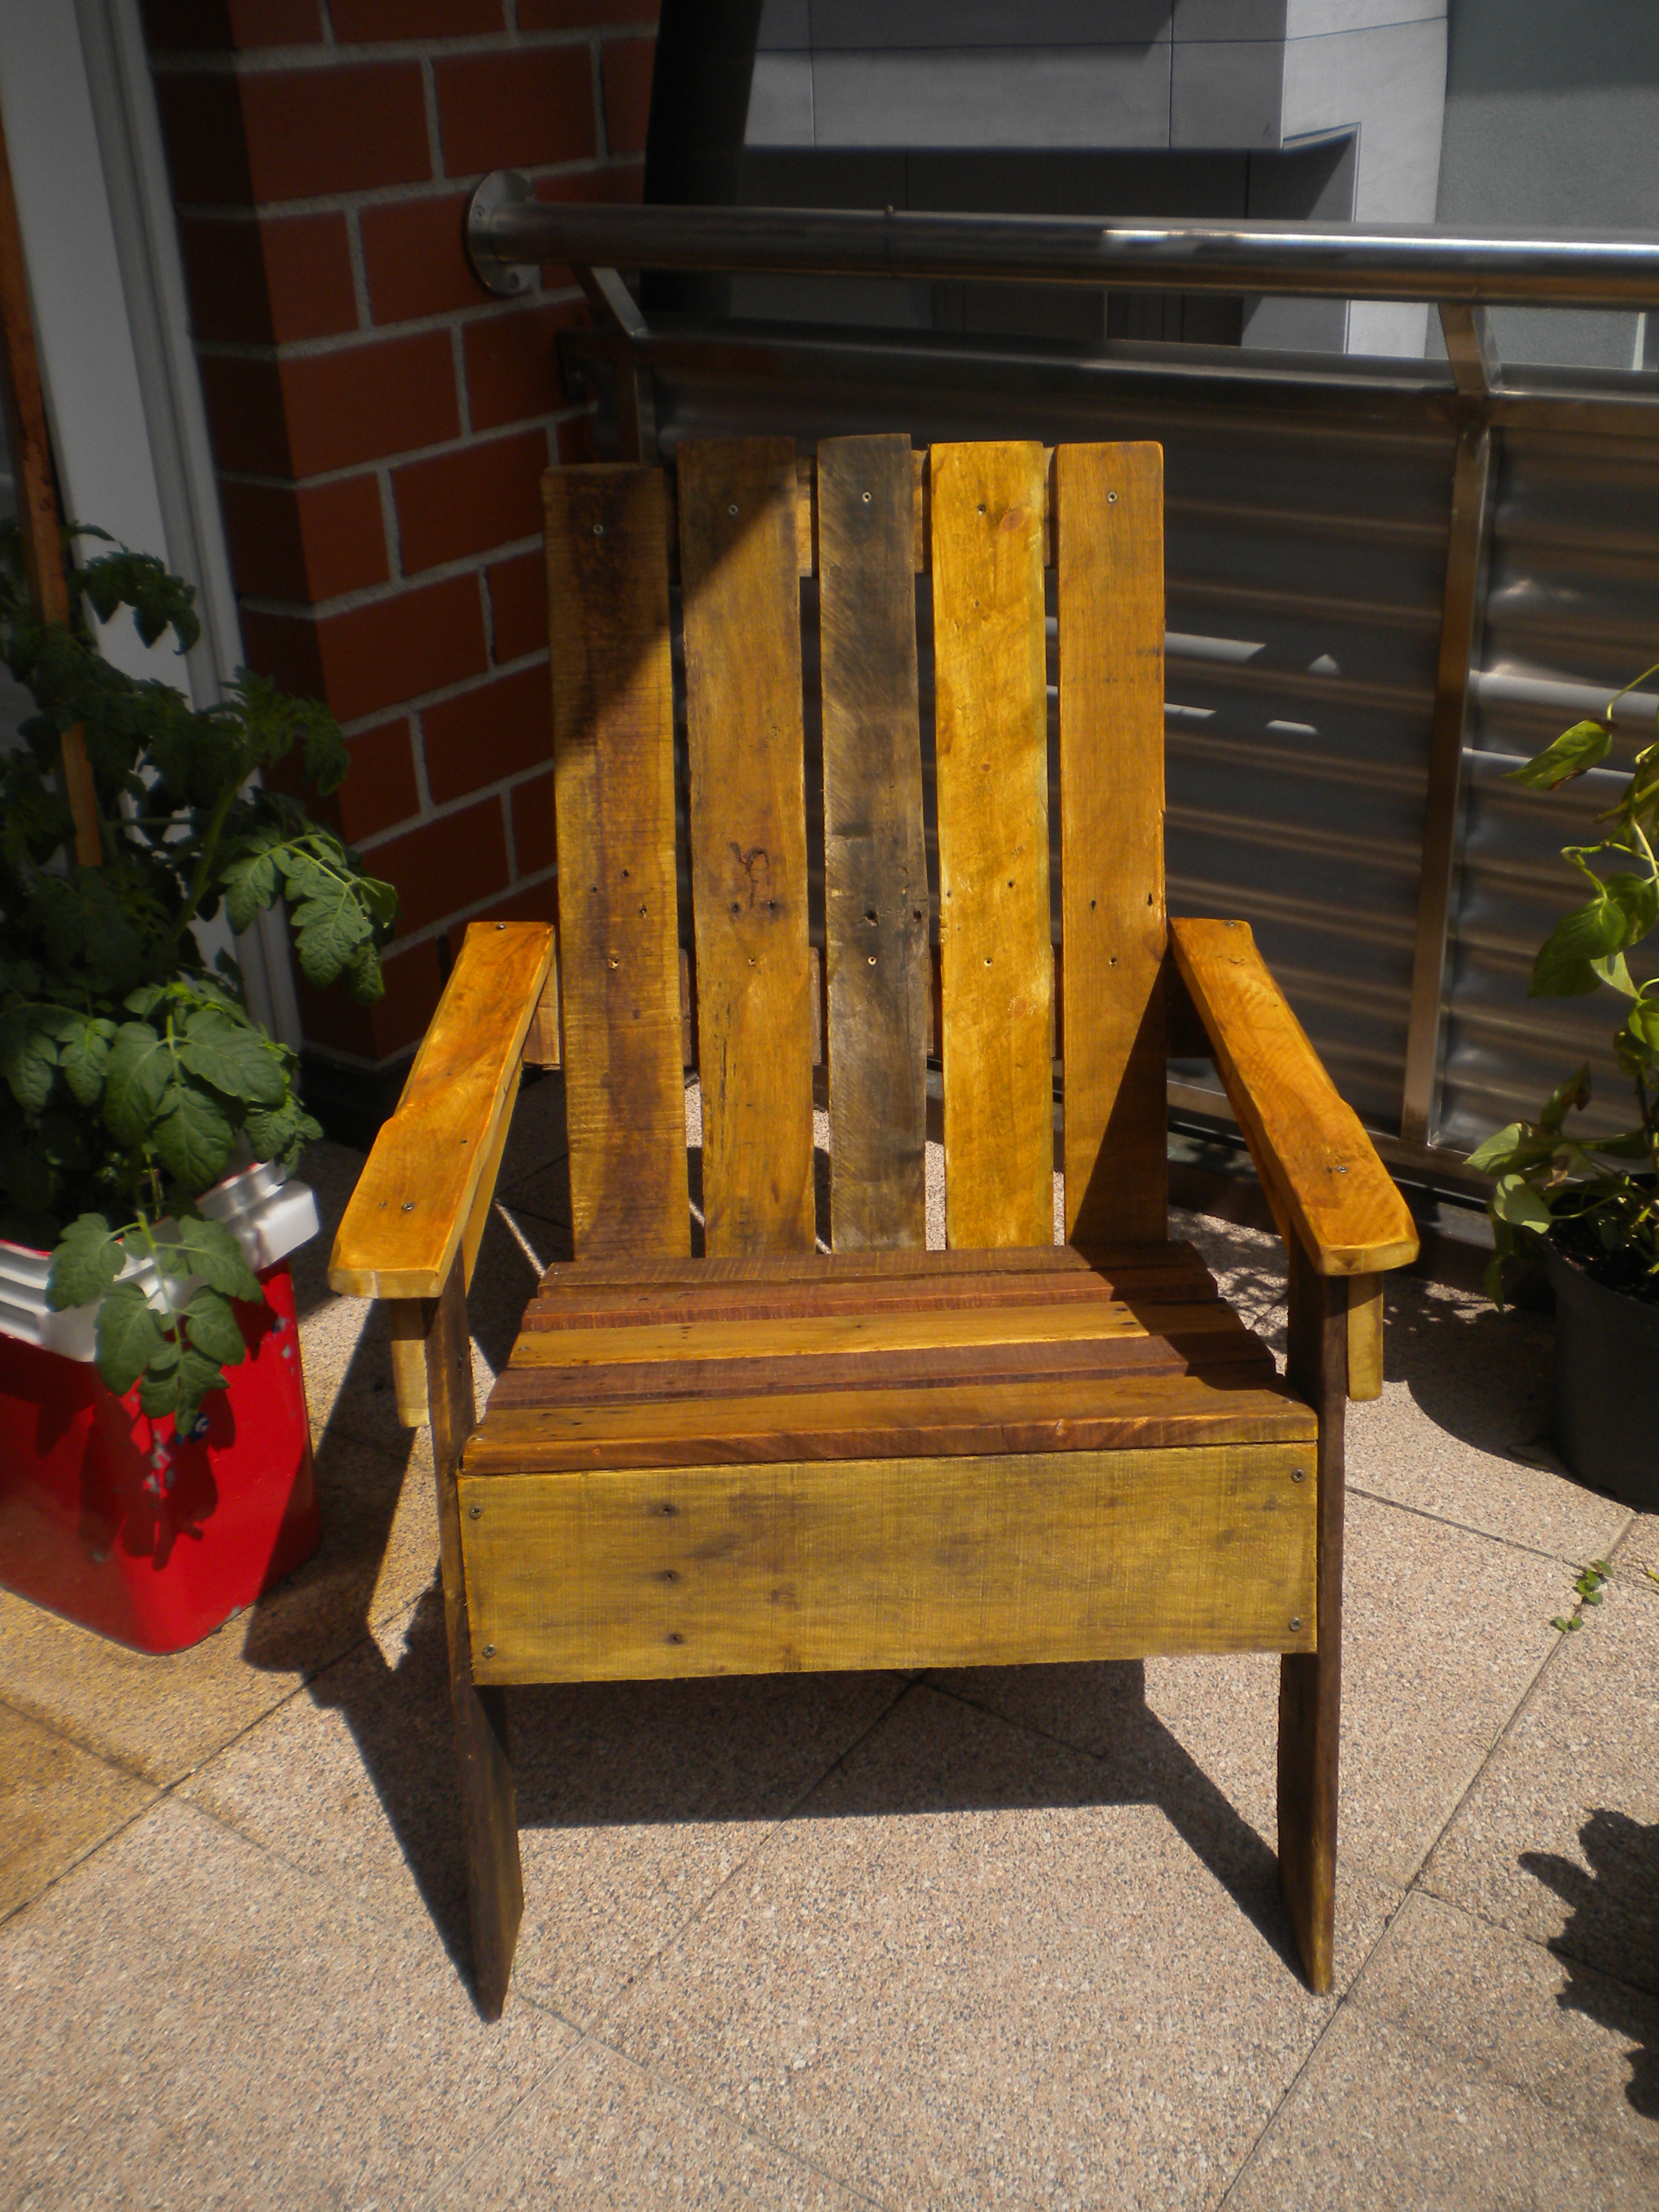
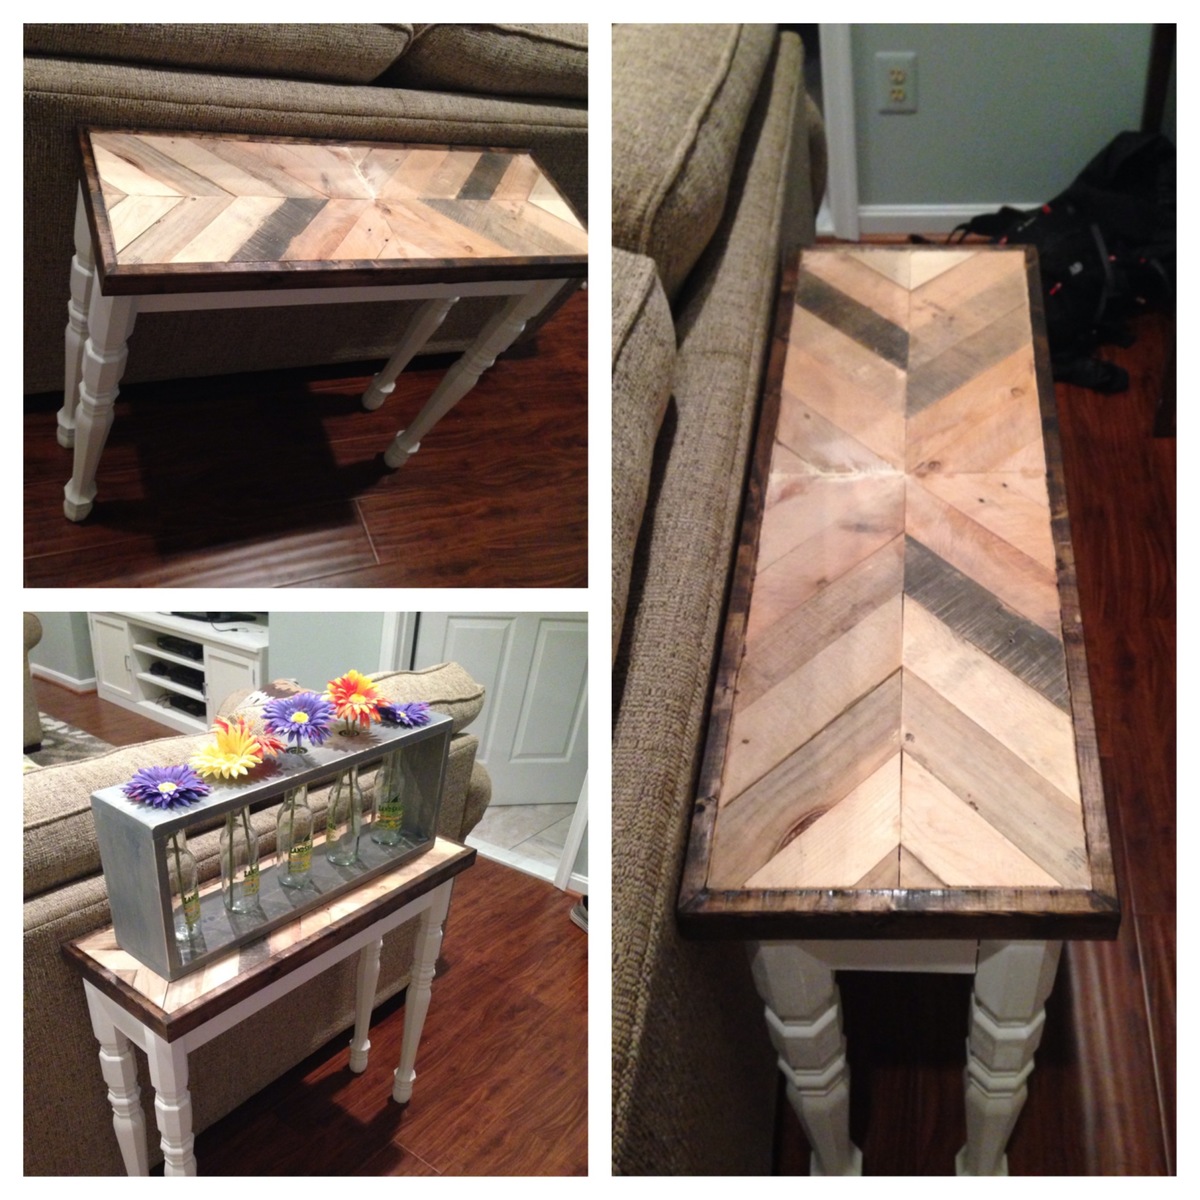
Community Brag Posts

Hallway table

Submitted by Nicto21 on Sat, 08/02/2014 - 16:43

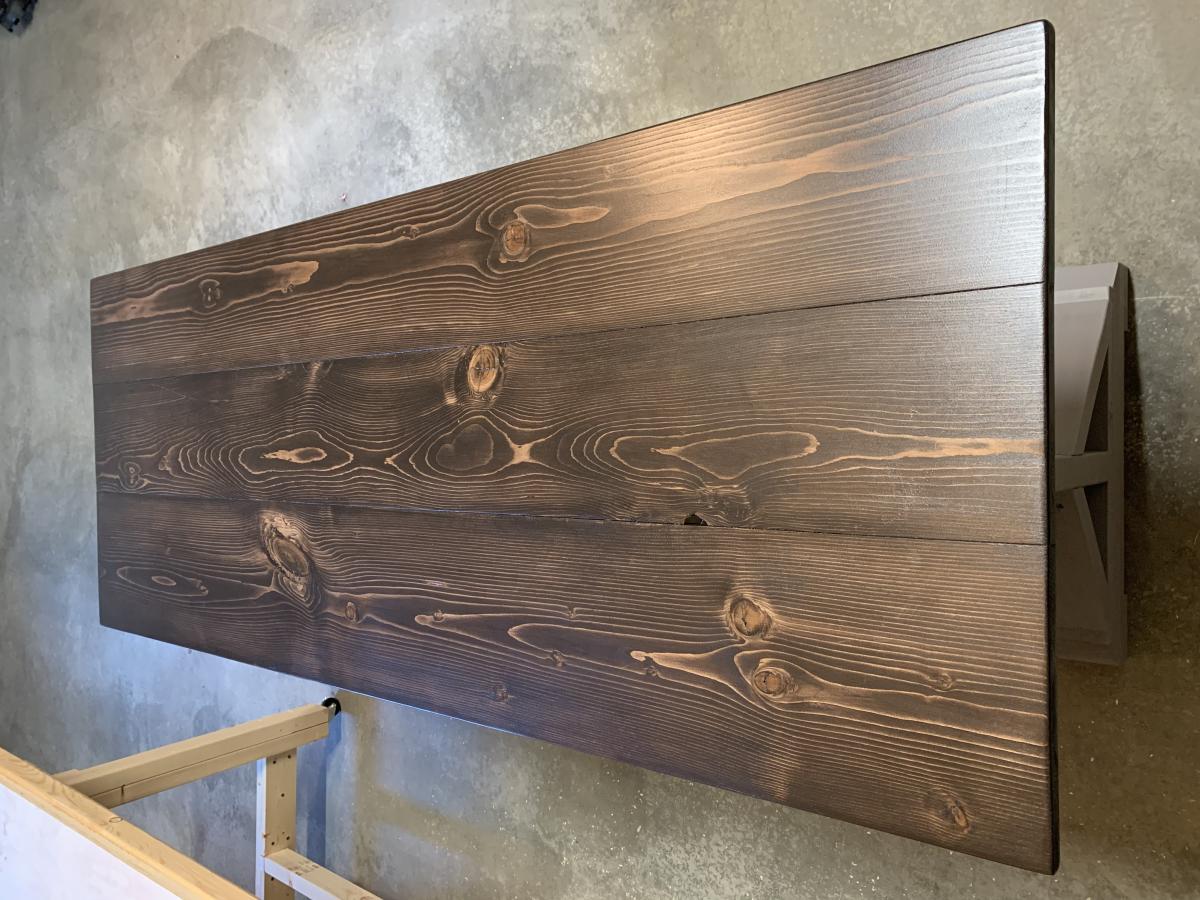
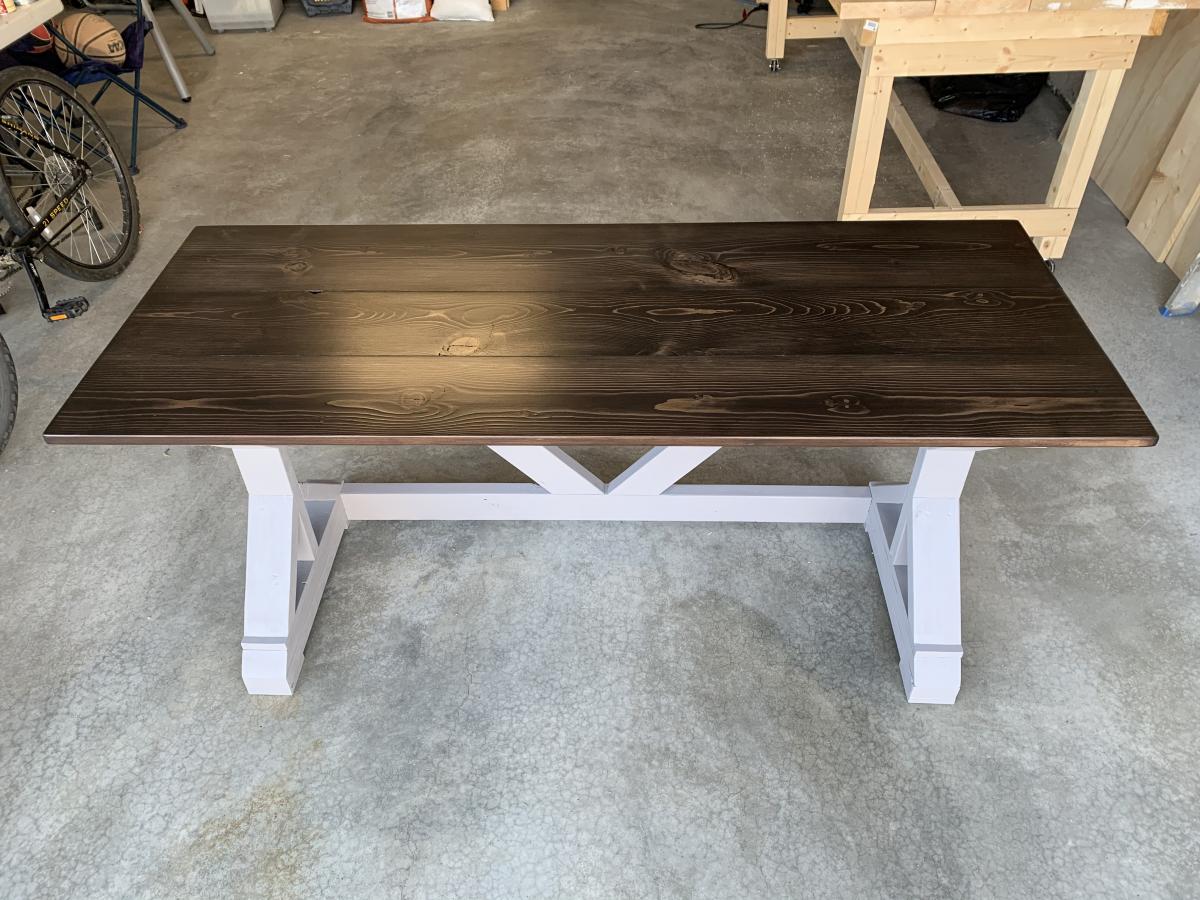
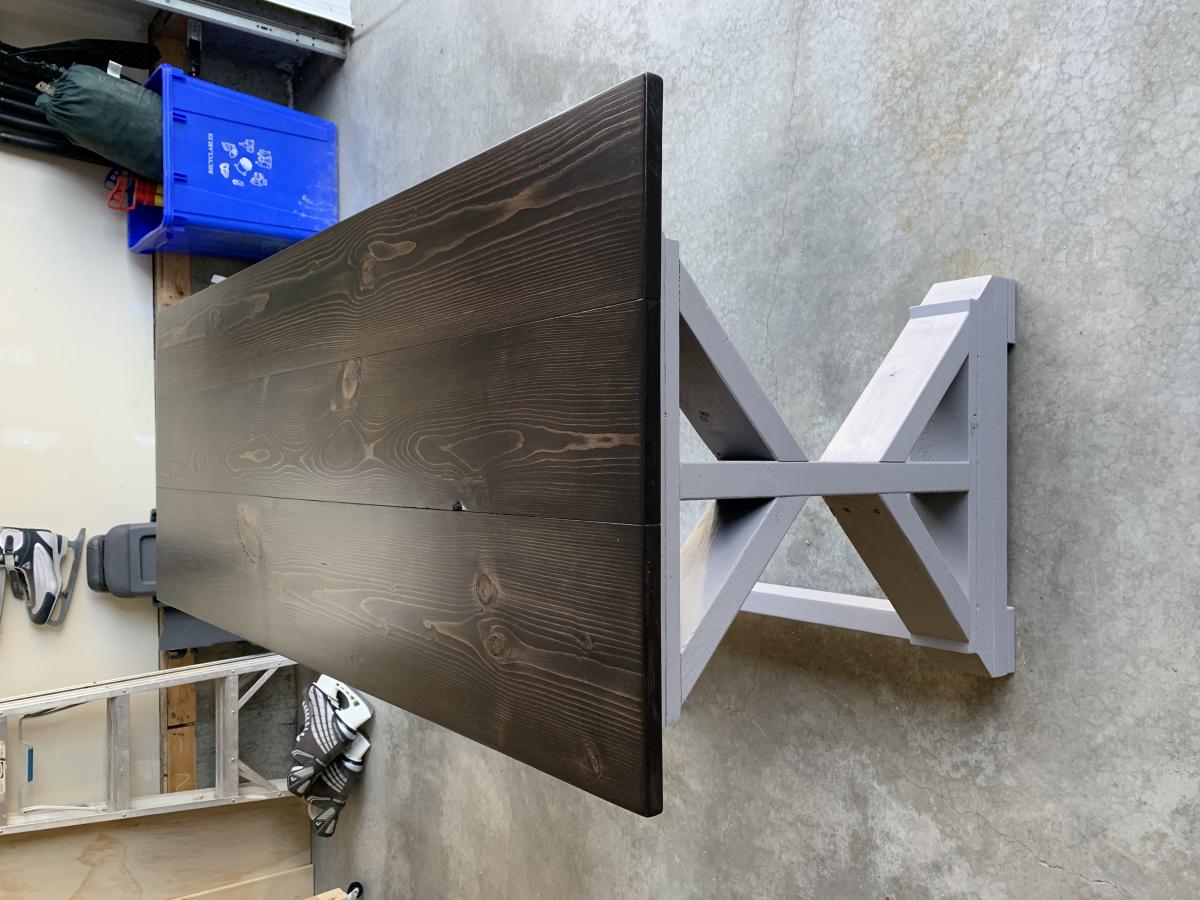
I made this hallway table for my gf's bday. It is really simply apart from taking apart pallets and squaring them off. The project only costs about $40-50, which most of the cost came from the purchasing of the table legs. I angled the pallet boards to be approximately 45 degrees. For this project, I used a table saw to cut, pneumatic brad nailer, tite bond wood glue, kreg jig pocket hole and paint/stain.

Estimated Cost
$40-50
Estimated Time Investment
Afternoon Project (3-6 Hours)
Recommended Skill Level
Starter Project

2x4 shelving unit

Submitted by Anonymous (not verified) on Tue, 11/15/2016 - 12:05

I built your 2x4 shelving to fit a small space in my garage. The unit is really easy to customize and ended up being a perfect fit for my saws. Thanks Ana!

Estimated Time Investment
Afternoon Project (3-6 Hours)
Recommended Skill Level
Starter Project

Loft Bed

Submitted by BPJacobs on Mon, 08/03/2020 - 11:38

Built my first loft bed using these plans! The plans are comprehensive and easy to follow. Excuse the mess under the bed, but that is why we needed the extra space :-)
We also need to touch-up the paint a bit.

Estimated Cost
$200
Estimated Time Investment
Weekend Project (10-20 Hours)
Finish Used
Black furniture paint
Recommended Skill Level
Beginner

Mirror Project from the book!

Submitted by JoanneS on Sun, 10/14/2012 - 05:54

This project is the mirror from page 37 of The Handbuilt Home. I received my copy on Thursday night, built this and painted on Friday, then (impatiently) waited 24 hours for the paint to dry before distressing and hanging it up yesterday afternoon. The mirror was a plain one I found at Lowes for about $20 and attached with mirror clips. I attached to the wall with 2 1/2" screws through the frame into the wall studs. I was going to leave the screw heads exposed for decoration, but now I think I'll add a dab of gray on them to blend them in. This was a super fun project, easy to do. Love the book, and can't wait to build more projects from it! Ana, fab job on the book!!

Estimated Cost
$40
Estimated Time Investment
Afternoon Project (3-6 Hours)
Finish Used
1 coat white paint, 1 coat gray paint (greek column by Ace), after 24 hours, sanded with 220 and some 100 grit sandpaper to distress, then added a coat of soft wax to protect the surface.
Recommended Skill Level
Beginner

Comments

itzann

Sun, 10/14/2012 - 10:19

Very nice! I kind of like the black screw-heads showing!
-Ann

JoanneS

Sun, 10/14/2012 - 14:25

Thanks Ann! This was a fun project. I've been wanting a mirror to match that table since last year, and this one fits just right. My family said they liked the visible screws too, so I'm going to leave them as they are.
:)
Joanne

JoanneS

Thu, 08/29/2013 - 13:57

Ana, Thank you so much! I can't wait to get building on more projects from the book and from here too! You are awesome! :)

YankeeBelle, thank you! How do you make chalk paint? That sounds like a great time saver!
:)
Joanne

Wedding Guest Bench

Submitted by Linda7 on Tue, 08/05/2014 - 16:43

I saw a post some time ago from brookifer86 for a wedding guest bench...I knew I would build one someday. First I'd like to thank Ana for her plans Fancy X Farmhouse Bench, and Whitney at Shanty 2 Chic for the wonderful instructions/pictures for this build. I would also like to thank Brooke at Killer B Design (brookifer86) for the mods to this plan.

This bench had to be able to break into the top and legs as it had to go from Texas to California. That is why I used Whitney's idea for pocket holes to attach the top to the legs. I used 2" screws. Brooke shortened the table with just two legs, and used a project panel for a smoother top for writing. I did, too. She also added a 1" x 2 " board around the edge of the 3/4" panel to beef it up. I used this idea and mitered the corners of the board and filled in the space between the board and the panel to make it very smooth. I sand a lot, and I painted three coats, so this took several days for me to complete.

For signing the top, I purchased fine-tipped oil paint pens. I learned from other brag posts that permanent-type "Sharpie" pens would smear when a finish was applied later. Also, you should use spray poly-acrylic finish to avoid yellowing the white paint.

My dear friend's daughter was thrilled with her surprise, and the guest bench was a hit at the reception. Thanks to all the brag posters - I studied every single one.

Built from Plan(s)
Estimated Cost
$35 (for project panel and one quart paint - other wood was scrap I had on hand)
Estimated Time Investment
Weekend Project (10-20 Hours)
Finish Used
Valspar "Bright White" outdoor paint. three coats applied with a foam brush. Spray top with poly-acrylic to protect the signatures.
Recommended Skill Level
Beginner

My first project from scratch-bar

Submitted by Anonymous (not verified) on Fri, 11/18/2016 - 11:56

My inspiration for this piece was the Grandy Sliding Door Console - I made this piece to fit behind a sofa so adjusted the plans to customize my piece. 

I used plumbers pipe instead of barn door hardware - much more cost effective and still gave me the vintage look I was after.  I stained and distressed the wood and added some hardware! Voila!

I am hooked to your site, stay tuned for more projects! 


Built from Plan(s)
Estimated Cost
Total Cost of lumber - $101.00, Plumbers pipe - $18.00, Handle - $17.00 = $136.00
Estimated Time Investment
Day Project (6-9 Hours)
Finish Used
Painted each board different chalk paint color, white, yellow and blue - added black ring marks and used tools to mark up the top board. Once built sanded piece to desired look and then used antique wax to deepen the colors, finished with furniture polish- minwax!
Recommended Skill Level
Beginner

Fancy X Farmhouse Table

Submitted by cgibbs1637 on Thu, 08/06/2020 - 14:16

Finished this project about a week ago. Super easy directions and such a great look for our dining room!

Built from Plan(s)
Estimated Cost
$75
Estimated Time Investment
Afternoon Project (3-6 Hours)
Recommended Skill Level
Beginner

Counter Top Make-up Storage

Submitted by efmolly on Thu, 08/07/2014 - 09:54

I needed a way to store and organize my make-up without taking up drawer space. It is built very similar to a small dresser, but with no drawer slides.

Estimated Cost
$10
Estimated Time Investment
An Hour or Two (0-2 Hours)
Finish Used
I first stained the frame and drawer boxes with homemade oxidizing solution. Next, I layered gray and white latex paint, then distressed heavily with a belt sander.
Recommended Skill Level
Beginner

Full size farm house bed

Submitted by ttrotter on Tue, 11/22/2016 - 06:44

I found that if you use (16) 1x4's in lieu of the (8) 1x8's as for the panels no cutting is necessary for a standard full size bed.  Worked out wonderfully!

Built from Plan(s)
Estimated Time Investment
Weekend Project (10-20 Hours)
Finish Used
No finish, bare wood.
Recommended Skill Level
Intermediate

My Fancy X-Desk

Submitted by drickstan on Tue, 08/11/2020 - 09:57

I needed a better desk for working from home. I didn't have room for the 6' desk in the plans, so I modified it slightly to be 5'. The only tricky part with that was getting the angles right on the support braces in the back. I think it ended up being around 42 degrees instead of 45. I used a scrap 1X4 as a template instead of trying to measure and cut. I think that helped a lot.

I wanted some character in the desktop so I used 3/4" knotty pine joined with pocket hole screws and sanded it quite a bit. I love how it turned out after applying gel stain and a varathane finish!

Thank you so much for the inspiration, Ana!!

Built from Plan(s)
Estimated Cost
$75 CAD
Estimated Time Investment
Weekend Project (10-20 Hours)
Finish Used
Varathane KONA Gel Stain
Varathane Diamond Finish (3 coats)
Recommended Skill Level
Intermediate

first project

Submitted by gbhein on Sun, 08/10/2014 - 10:25

My very first project, made it for my girlfriends birthday. Did not have time to stain and paint them yet, will add finished pictures.

Estimated Cost
$550
Estimated Time Investment
Week Long Project (20 Hours or More)
Finish Used
none yet, will be staining table and painting chairs.
Recommended Skill Level
Beginner

Farmhouse Nightstand

Submitted by kwigs28 on Fri, 08/14/2020 - 18:10

I have been wanting to replace the nightstands in my master bedroom for quite a while now. I knew I wanted a small drawer and a square finish, but I was having the hardest time trying to find exactly what I wanted in stores. When I found these plans online, I could not have been more excited! I first started with working with an electric saw, but I finished the project using a miter saw which made it so much easier. It also helps in the consistency of the lengths of the pieces you are cutting. Overall not too bad of a project. You will definitely need either some really good clamps or another person who can help you hold some of the pieces in place as you drill holes or screw pieces together. I love that most of the pieces are held together using pocket screws. It made it much easier to paint without having to try to hide all kinds of holes. I am so excited to put these in my room and start using them!

Built from Plan(s)
Estimated Cost
$100
Estimated Time Investment
Day Project (6-9 Hours)
Finish Used
For the shelf and the top of the nightstand, I used Varathane with the Ebony stain, and I did two coats. For the paint I found a white that had a slight grey undertone, so it was not just straight white.
Recommended Skill Level
Intermediate

Outdoor Farmhouse Table

I've been wanting to build an outdoor farmhouse table for quite some time. Getting it to look old with new materials was the idea.Using notches to hold part of the base and experimenting with finishes got the 'rustic' look. I took a few ideas from the Gaby Kitchen Island and implemented my own; it turned out to be a great weekend project!

Built from Plan(s)
Estimated Cost
80
Estimated Time Investment
Weekend Project (10-20 Hours)
Finish Used
Paint, Stain, Poly-acrylic
Recommended Skill Level
Beginner

Comments

Juanita_r

Fri, 10/26/2012 - 23:43

Love the table, especially the finish you used, it looks amazing. just have a question about if it is waterproof...i know it is an outdoor table, but is it protected by a veranda or is it completely exposed to the elements. i want to make one but am hesitant as it will be completely outside! Thanku!

Storage Daybed with Bookshelf Surround

Update 8/2017: This project started with the Storage daybed, which I built in 2014. My daughter is a book lover and I wanted to provide her with more space for her books. I recently added the following plans to the Daybed with Storage Trundle Drawers:

- Twin Storage Headboard Base

- Small Hutch for Storage Headboard

- Cubby Hutch Plans for the Storage Headboard

I also made one extra storage headboard base and added more shelves along the long side of the bed so she could be surrounded by books. There are two additional supports under long bookshelf and I placed them roughly behind each of the trundle drawers.

For the bed (I built two), I opted to use the alternate slat system. I also used 2" caster wheels and added dividers to the drawers--one drawer has three compartments, and the other two drawers were divided in half.

Note: In my main brag photo it looks like the drawers don't close flush... I didn't notice when I took the photo because I was focused on the new shelves. But they do close and line up perfectly!


Estimated Cost
$600 (Fairbanks, Alaska)
Estimated Time Investment
Week Long Project (20 Hours or More)
Finish Used
Minwax Dark Walnut and one coat of gloss polyurethane
Recommended Skill Level
Beginner

Barnhouse X table

This was my next attempt after hte end tables. I used several ideas from different tables to get the finish i wanted. I also had to increase hte length and width slightly to suit my room. Had numerous complements from it and very happy with the finish

Estimated Cost
$150
Estimated Time Investment
Week Long Project (20 Hours or More)
Finish Used
Dark Walnut
Recommended Skill Level
Beginner

Kitchen Island from Reclaimed Wood

My wife found this plan so I decided to tackle it. Spent about $80 in supply's and had some 2x8s from a shed we tore down. Planed them down and made this beautiful piece. Now my wife can't get me out of the kitchen. Sorry for the mess in the back ground.

Built from Plan(s)
Estimated Cost
80
Estimated Time Investment
Weekend Project (10-20 Hours)
Finish Used
Minwax Early American, Minwax Red Oak, and some Poly
Recommended Skill Level
Intermediate

Comments

Cottage Vanity

Submitted by SSGF on Sun, 08/17/2014 - 20:11

Built this for my cottage out of 3/4" birch purebond and pine. I finished by pickling the purebond and painting the pine and then used a laminate countertop.

Built from Plan(s)
Estimated Cost
140
Estimated Time Investment
Weekend Project (10-20 Hours)
Finish Used
Minwax
Recommended Skill Level
Intermediate

Modified Pocket Hole Farm House Tanle

Submitted by Anonymous (not verified) on Sat, 12/03/2016 - 09:59

I took these plans and changed the dimensions to match my dining room and made the cross members out of 4x4's. I wanted the bottom to be bigger, as well as making the top look like used yarn wood planks. Turned out great. It was wonderful to be able to have all the family around the table for Thanksgiving. Thanks Anna for the inspiration. 

Estimated Time Investment
Week Long Project (20 Hours or More)
Finish Used
Dark Walnut Minwax. Satin Polyurethane. Satin White Paint.
Recommended Skill Level
Beginner

The Boys Create!

Submitted by jablk5 on Fri, 11/02/2012 - 22:16

We were able to pick up pallets for free. There were 6 boys aged 10-13 years old. They each took apart 5 pallets. Their pallets with time and patience became two adirondack chairs each. We love the chairs and the boys learned quite a bit. The challenge was that the pallet peices differed in thickness and widths so the boys had to really focus on each piece and the overall look. They look fantastic. The finishes were all different. We are so thankful that Ana has put together such a wonderful website.

Thank you Ana! These boys learned that if they need something, they can make it themselves! They also learned that trash can be a treasure.

Thank you,
Amy

Built from Plan(s)
Estimated Cost
$80 for 12 Chairs
Estimated Time Investment
Week Long Project (20 Hours or More)
Finish Used
The boys chose between outdoor paint, stain, or deck stain finishes.
Recommended Skill Level
Beginner

Comments

Chaise Loung Chairs

Submitted by jgriffin on Wed, 08/20/2014 - 07:24

Very easy and fun project.

Estimated Cost
$60. each not including the cushions
Estimated Time Investment
Weekend Project (10-20 Hours)
Finish Used
Sanded, primed, and used 2 coats of exterior trim paint. I painted all the pieces before assembling for a cleaner finish. Then just touched up the cut ends.
Recommended Skill Level
Beginner

Learning Tower

Submitted by Anonymous (not verified) on Wed, 12/07/2016 - 15:11

This tower is from two or three plans found on Pinterest as well as the plans on Ana White.  The materials are from 2 x 2 or 1 x 5.  Length of legs are 34 inches, all cross members are 17 inches  basically your cutting list is :

Quantity         Size                             Description

4                      2 x 2 x 34                     Legs.  You can change this to taller or shorter.

14                    2 x 2 x 17                     Cross members

3                      1 x 6 x 17                     Safety sides

1                      1 x 6 x 16 7/8              Door (optional)

3                      1 x 6 x 16 7/8              Floor

2                      1 x 2 x 17                     Floor Braces

1 set                                                   Hinges (Optional)

1                                                          Latch (Optional)

1                      ¾ x ¼ x 3                     Door stop (Optional)

Distanced between parts-I used Ana Whites dimensions.

Basic unit.

  1. Cut, sand, rout, sand, to size.Do not rout the floor as yet.Save that for later.
  2. Drill Holes for fasteners on the cross members.I used the Kreg unit for this.Be careful as the 2½ screws can come out on the finished side (the point) if you tighten too much.
  3. For the Safety sides, drill using the Kreg unit.
  4. Finish sanding.I finished with 220 grit.
  5. I stained before I assembled.Worked great.If you are going to spray paint, assemble and paint.See floor assembly now if you are going to paint.
  6. Assemble is easy.Use glue if you want.Fasten 2 cross members to the legs at the top.You now have 4 legs and 2 cross members fastened but do not have cross members fastening all four legs together.They are two separate units.
  7. Now measure for the cross members for the floor and attach.Install the top cross members first and work your way down.
  8. If using the safety sides, attach these.Install the door if you want at this time.I waited unit I finished spraying the finish to install the door.Install the doorstop when you want.
  9. Now attach the remaining cross members to form the basic unit.
  10. Admire what you have accomplished.

Floor Assembly

  1. I did not use the Kreg drill to assemble the floor.I used glue and 1 ¼ inch nails to assemble the floor.
  2. Lay the floorboards on the cross member as if the unit was finished. Scribe a light line on the bottom of the floorboards next to the cross members the floor is sitting on.
  3. Remove the floorboards and turn upside down.Put some glue between the boards and clamp.Lay the braces near the line you drew about 1/8 to ¼ inside the lines.This is important-you must have wiggle room for the floor to wiggle.
  4. Fasten the braces to the floorboards.After the glue dries, check to see that it fits.
  5. Sand, rout and sand the floor.
  6. Stain the floor.


Final Finish

1.         I love rattle can finishes.  Deft is my favorite.  Use what you like.  Take your time.


Estimated Cost
This was from Scrap I collected. Make sure 2 x 2's are kiln dry. I ended up using 2 x 4's that I ripped and cut to size. The safety side were close to free as the big box store had 1 x 6 in their 70% off section. Stain was half price as they were out of the small can. Got a big one for the price of the small one. Can not give a finished price as so much was from scrap, etc. Finish was one can of Deft spray-about $5.00. Screws were Kreg. About $.05 each.
Finish Used
Stain was Honey 272 from Minwax (I love oil stains). Deft rattle can spray. Satin finish. You can use Watco oil finishes as well.

I stained all the wood before assembly. Sprayed with Deft after assembly.
Recommended Skill Level
Beginner