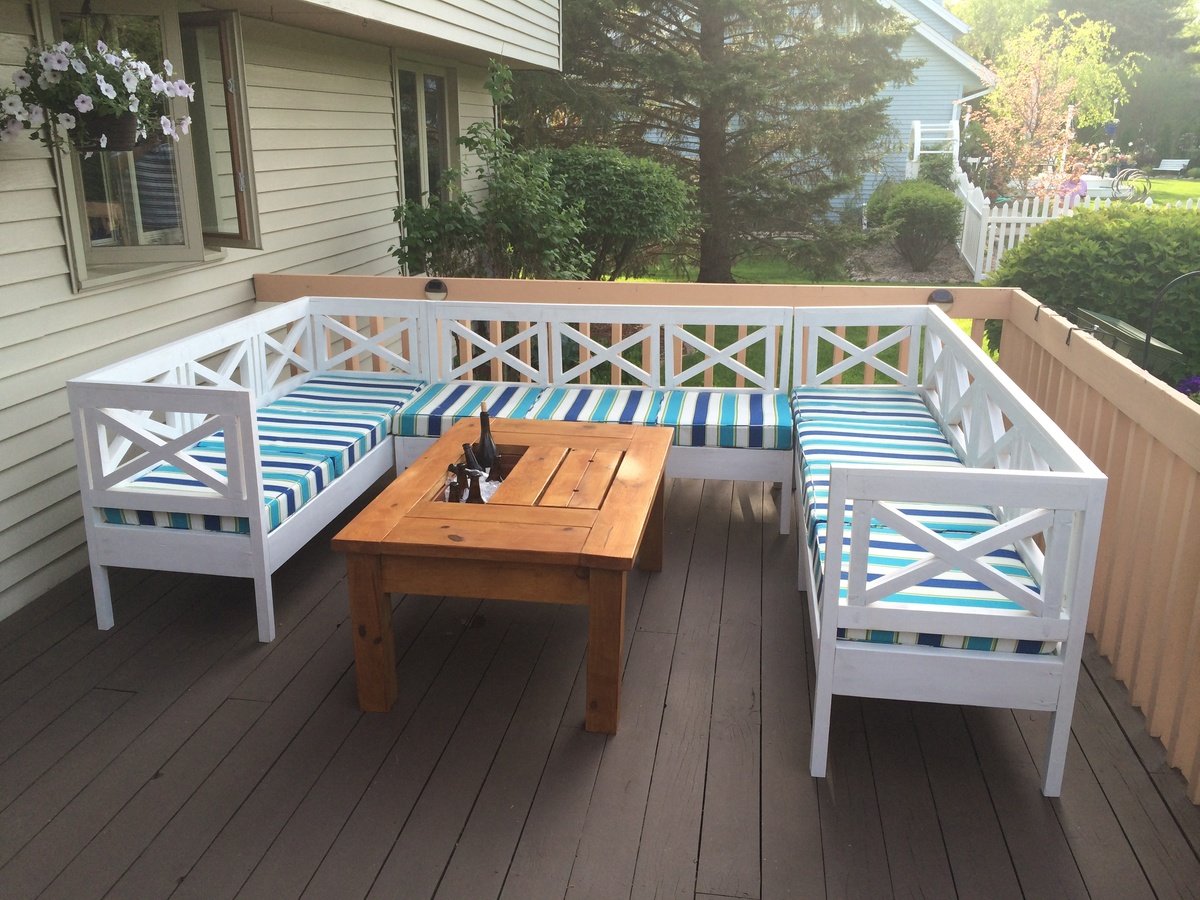
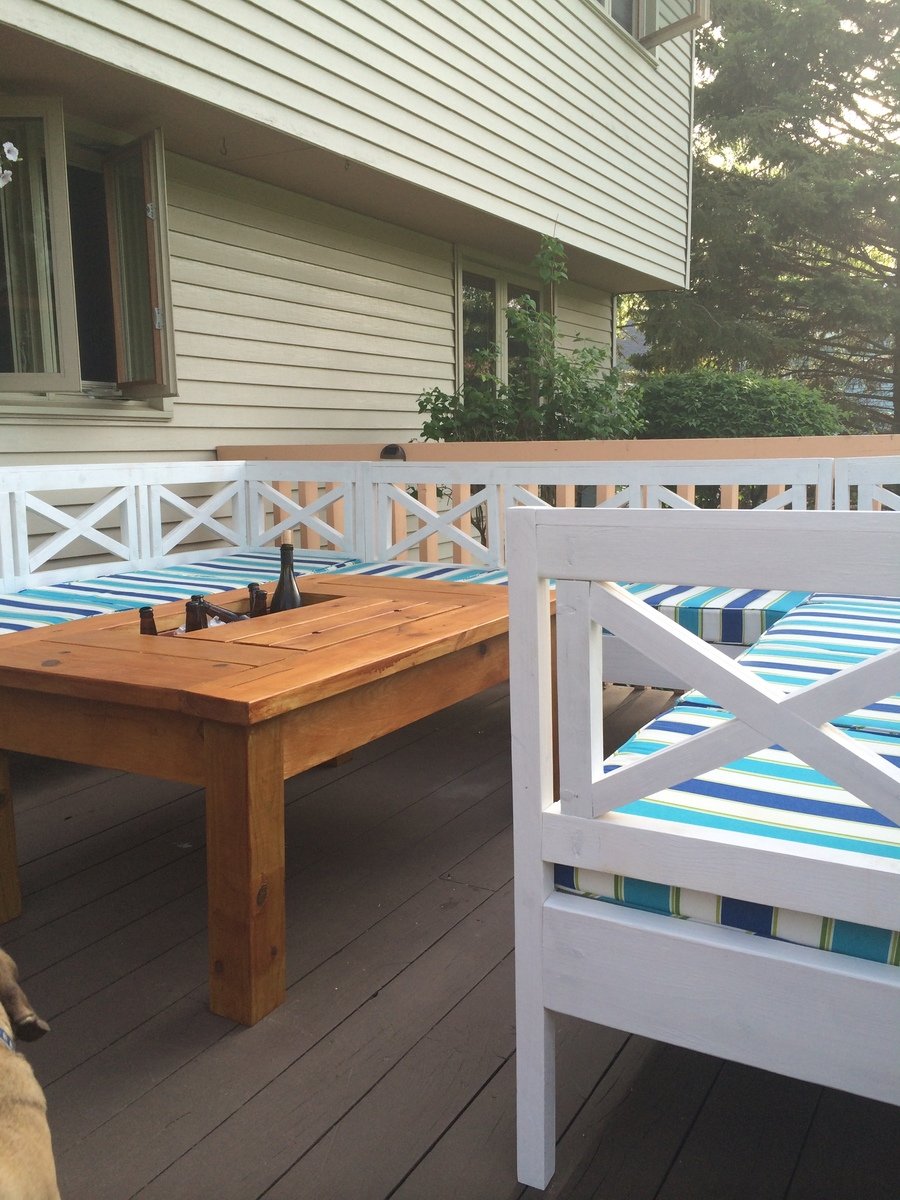
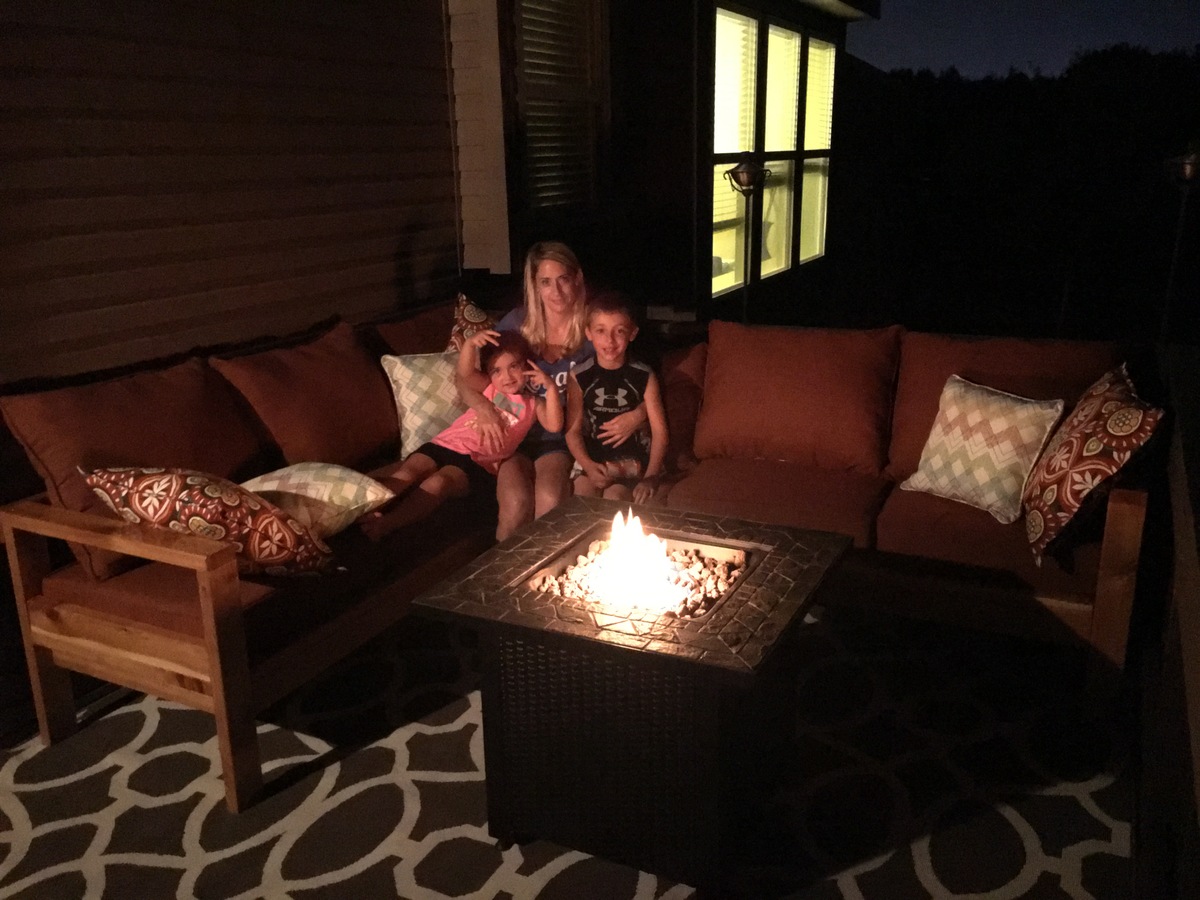
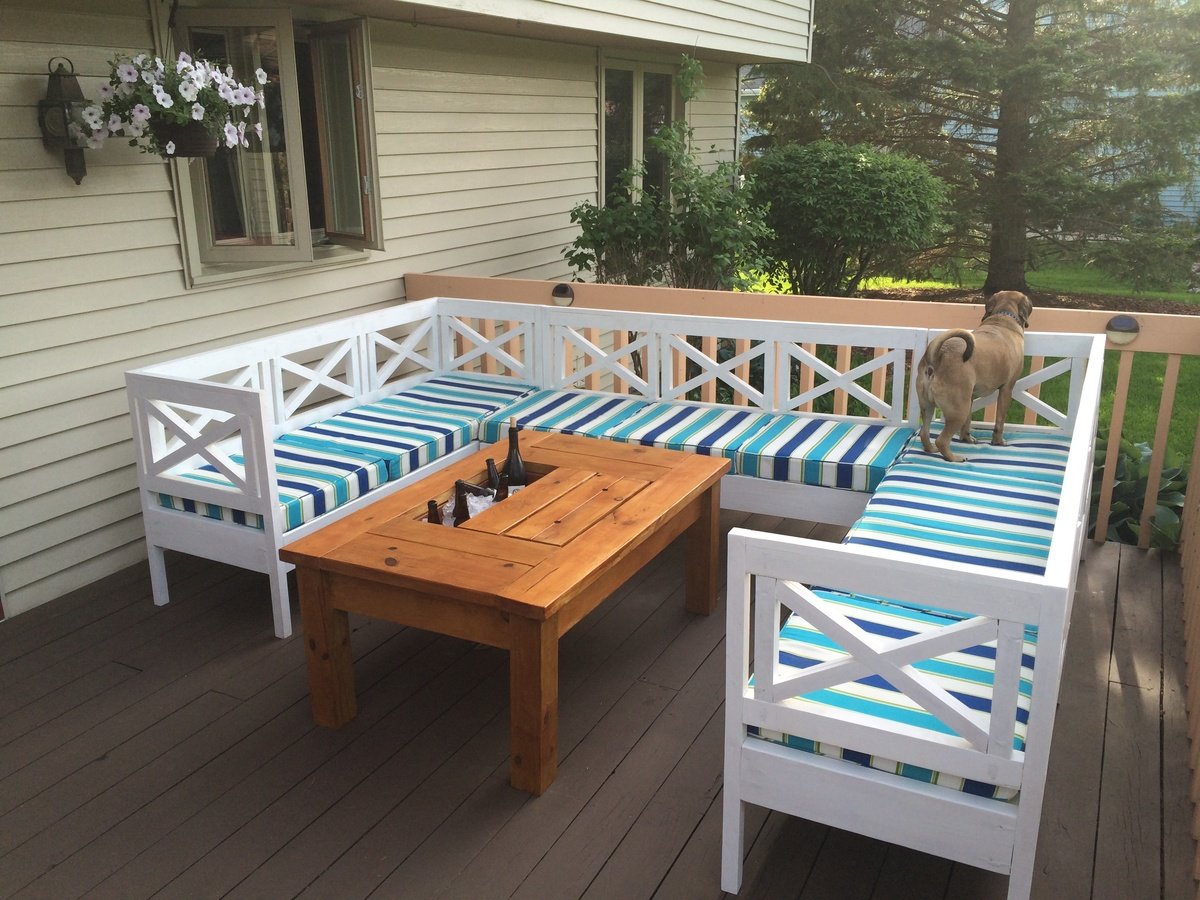
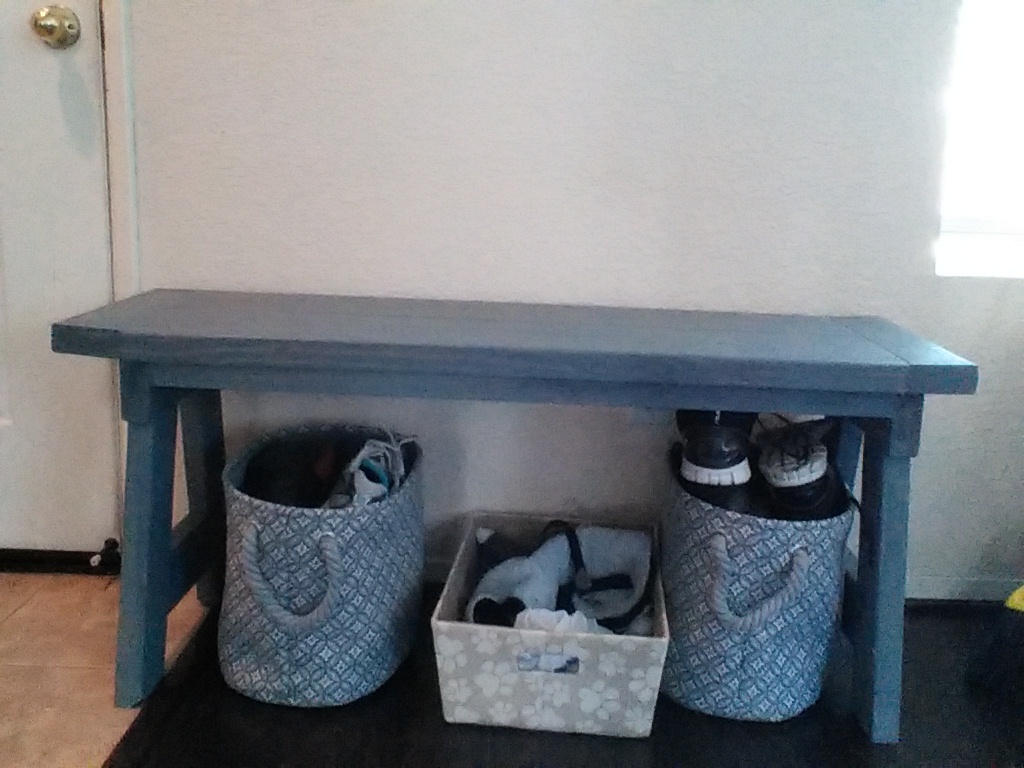
36" sink base cabinet
![](/sites/default/files/image_265.jpg)
A 36" sink base is the center, flanked by two 18" cabinets made by modifying the 21" base cabinet plan.
Here are some of the more structual photos to help people along the way.
I did the head board and foot board using the directions. I used 2 4.5 inch screws on each 4x4 post to secure the 4x4s to the head board.
I used 2 4.5 inch screws to secure the head board to the frame.
I used some brackets I had lying around to secure the footboard to the frame.
I used 0.5 inch partical board to put on top of the frame I put the joists down 0.5 below the side rails so the partical board would sit down and inside.
I used 2x6 boards for the frame with deck brackets to secure it.
I used left over wood from the 4x4 to be cut 10inch each and 2x6 study 3 of those 4x4 to lift the frame up.
for the fourth raiser I used left over wood from the 2x10.
I primed the wood and painted white.
Hopefully these pictures help.
All said and done it was close to 500-600 to build. I did this in Canada where materials can be a little pricier.
Couldn't find anything that would fit my area and this seemed to work out perfect. Almost done with the other side. I will post pic of finished products.
This is a basic console table, aside from the drawer. This was my first time attempting drawer, and it wasn't too bad. The top I put together from a piece of 1x8 and 1x4's using my Kreg jig. It ended up being a bit long, so I trimmed the breadboard ends down a couple inches. For the base I used reclaimed table legs and 1x6's for the aprons. To make the drawer opening, I simply cut out a rectangular hole slightly larger than my drawer box out of the front apron. The drawer box I built out of 1x3's and 1/4in plywood and then attached a piece of 1x4 for the face. Since it was a small drawer, I didn't want to purchase drawer slides for it. I pocket holed some 1x4 stretchers, going from the front to back of the table on either side of the drawer opening. I then screwed a strip of 1x1 to the drawer box horizontally, lined it up to the stretchers and screwed another 1x1 to the stretcher. So basically, I made my own sides using 1x1. I added a bin pull and was done. I feature a few other projects like this on my blog http://pneumaticaddict.blogspot.com .
Restoration hardware style coffee table. We saw a coffee table we liked but didn't want to spend $2000 on. Designed my own and managed to build for $200. Main expense was the $130 for the legs from Osbornewood.com.
Tue, 11/04/2014 - 13:29
I love this, I have been wanting to make a really nice coffee table. I this this is gorgeous!
In reply to beautiful!! by rachelbebop
Tue, 11/04/2014 - 13:35
Thanks for the comment. It is actually pretty easy to make too which is the good part :-)
Fri, 05/13/2016 - 06:18
I went to Osbournewood.com for the legs. All I got was a listing of other companies selling them. The cheapest was $69. How did you get four for $130 or where did you go for that price?
Fri, 05/13/2016 - 06:18
I went to Osbournewood.com for the legs. All I got was a listing of other companies selling them. The cheapest was $69. How did you get four for $130 or where did you go for that price?
Fri, 05/13/2016 - 06:18
I went to Osbournewood.com for the legs. All I got was a listing of other companies selling them. The cheapest was $69. How did you get four for $130 or where did you go for that price?
Fri, 05/13/2016 - 06:18
I went to Osbournewood.com for the legs. All I got was a listing of other companies selling them. The cheapest was $69. How did you get four for $130 or where did you go for that price?
Fri, 05/13/2016 - 06:19
I went to Osbournewood.com for the legs. All I got was a listing of other companies selling them. The cheapest was $69. How did you get four for $130 or where did you go for that price?
I love this table. I modified it to fit my needs.
My first bench ever, i like it
I built this toy box for a friend who just had a baby. I followed the plans, except I used pocket holes for the main box. Instead of the base moulding I used 1 x 4's and carved out the shape with my jigsaw. I also used quarter rounds instead of cove moulding because I couldn't find that.
Ana's plan called for using 8 hinges (I'm not sure on the placement of those). I used a total of 16 to ensure sturdiness. I put two hinges on each corner of the 1x8 piece and a hinge anywhere the corners connected. I used Narrow Utility Hinges (1-1/2" Zinc plated). The pack of 2 cost $2.27 and comes with screws. My biggest regret is not painting the hinges before I put them on. I waited until after screwing them in and it was a pain and makes my paint job look sloppy.
Although I priced this build out, I ended up using wood I already had in the garage. I didn't have enough 1x3 to make the anti-tipping feet so I used a 2x4. I also didn't make the rounded edges, just a few angled straight cuts.
THESE ANTI-TIP FEET ARE A SAFETY MUST, DO NOT SKIP THEM!! I've seen a few commenters say they skipped the anti-tip feet, but for us they were a must. My kid would have easily knocked his tower many times if it weren't for these anti-tip feet!
Couldn't be happier with this build. Totally worth every penny. Hands down my favorite kitchen addition!
Wrote about this on the blog too: http://thehuth.blogspot.com/2014/11/ana-whites-little-helper-tower.html
Not much to say here other than THANK YOU ANA! I built it right to the plan, used plain dimensional spruce for the drawer box, and reclaimed fir for everything else. Had fun using my thickness planer to save many hours on the belt sander.
Just under a year ago, I decided to put together a small project using up a few of my scrap wood pieces I had. This "quick" project ended up sitting half finished in my shop until this past week. I'm on a mission to finish up the remaining unfinished projects I have and this one was higher on the priority list. I based it on the Alexia bench with a couple modifications. The only thing I ended up purchasing to complete it was the drawer slides and pulls.
We made eight of these benches for Christmas gifts this year. It was a lot of fun and we learned so much along the way. We made 5 benches in the standard 30" length, 2 in 36" and 1 42" bench on request.
Suggestion for building: Make jigs so that the legs and side boards are the same size. It doesn't exactly matter if the measurements are a little off from the plan, as long as they are consistent in each bench.
We chose to paint the bottoms off-white and stain the tops for an elegant rustic look. However, we fully stained a couple of the benches as well because we thought they would look best for a few of our family members.
It was hard to tell exactly how long each bench took because we worked on all eight at once when we had free time, but one bench shouldn't take more than an afternoon if you are new.
I also added a picture of the one bench we chose to distress.
Mon, 01/14/2013 - 11:10
Love!Love!Love! these!!!!! I so badly want to make some of these benches, but have too many more important projects to complete first. You did a great job on them. How do I get on your Christmas gift list ;-)
Wanted to give my great-nephew something handmade for his 2nd birthday and hopefully something he can enjoy for years to come. Spent the weekend with my hubby doing this and loved every minute and thrilled with the final outcome
I present the "Castle Loft Bed" with minor modifications. Finished in a "Frozen" theme.
It was time to upgrade my youngest to a "big kid bed" and she was insistent on a frozen bed. After searching for various options we settled on the "Castle Loft Bed" from the Ana White catalog of plans.
We left the slide off, due to available space. Also we changed the steps to be more of a usable toy box/storage and hamper area. I also modified the internal bookcase to have a small "secret" cubby for her "valuables". We also added color changing LEDs to fit the little princess's mood.
I hope you like my rendition and keeps in spirit the DIYers quality.
Loved the design. As I live in the UK finding 1x10 is difficult so I used scaffold boards(6×1) fixing 2 side by side using my nice new kreg pocket hole jig(which is amazing, thank you Ana). I then used a light grey stain applied using a sponge and painted the legs a off-white. Due to having to spend 1 day sanding the scaffold boards it took a little longer, however the construction was quick.
Thank you Ana
Tue, 11/17/2020 - 22:38
Absolutely love this and that you were able to accomplish what you needed! The kreg jig is a fantastic tool, thanks for sharing:)
I shortened this table to fit the space, it works perfectly. Thank you again Ana for your wonderful plans.
I changed the plans some. I started with a large pallet crate used to transport train windows. So with the used palletwood i had to put the boards in sideways and pockethole screwed them together. With going on the cheap iwent with a 1x4 and 1x6 top so i could use the pallet wood. I ended up torching it with a torch to bring out the grain and it looked good with the rustic look of table.i plain to eventually clear it when ohio weather permits. I only had to buy i 8 foot 1x4 and 1 8 foot 2x2. Have less then 15 dollars
Modified the Rhyan Coffee Table plan for a square, 4-foot by 4-foot coffee table. Used poplar 1 x 3s glued together and then planed down to 2.25-inch square for the structural members. The stained wood portions are glue-ups make from Hemlock 1x 6s from Lowe's.
We were looking for bookshelves for our children's bedrooms, but with 3 kids the cost was going to be astronomical. So I found a bookshelf I liked, googled the name and stumbled across Ana's plans. So glad I did!
I improvised on this a bit. I envisioned being able to put small items on the shelves at some point so I made it with solid shelves instead of all 2x4's. Except the stuff I bought for the shelves was so flimsy I had to add the support pieces. Ahh, well. I'm learning. And with the three support pieces (2x4's cut to size) running widthwise, it turned out to be a solid shelf. LOVE this site!! Thank you again, Ana! Next project is a bathroom vanity.
Made based on a picture i was shown,and used the kids andarondac plans on this site
Comments
JoanneS
Sun, 11/02/2014 - 15:16
Fantastic!
These cabinets look fabulous! You did a great job!