Community Brag Posts

Ana White Stocking Stand & Shanty2Chic Stocking Box

Submitted by vprice on Thu, 12/24/2020 - 19:14

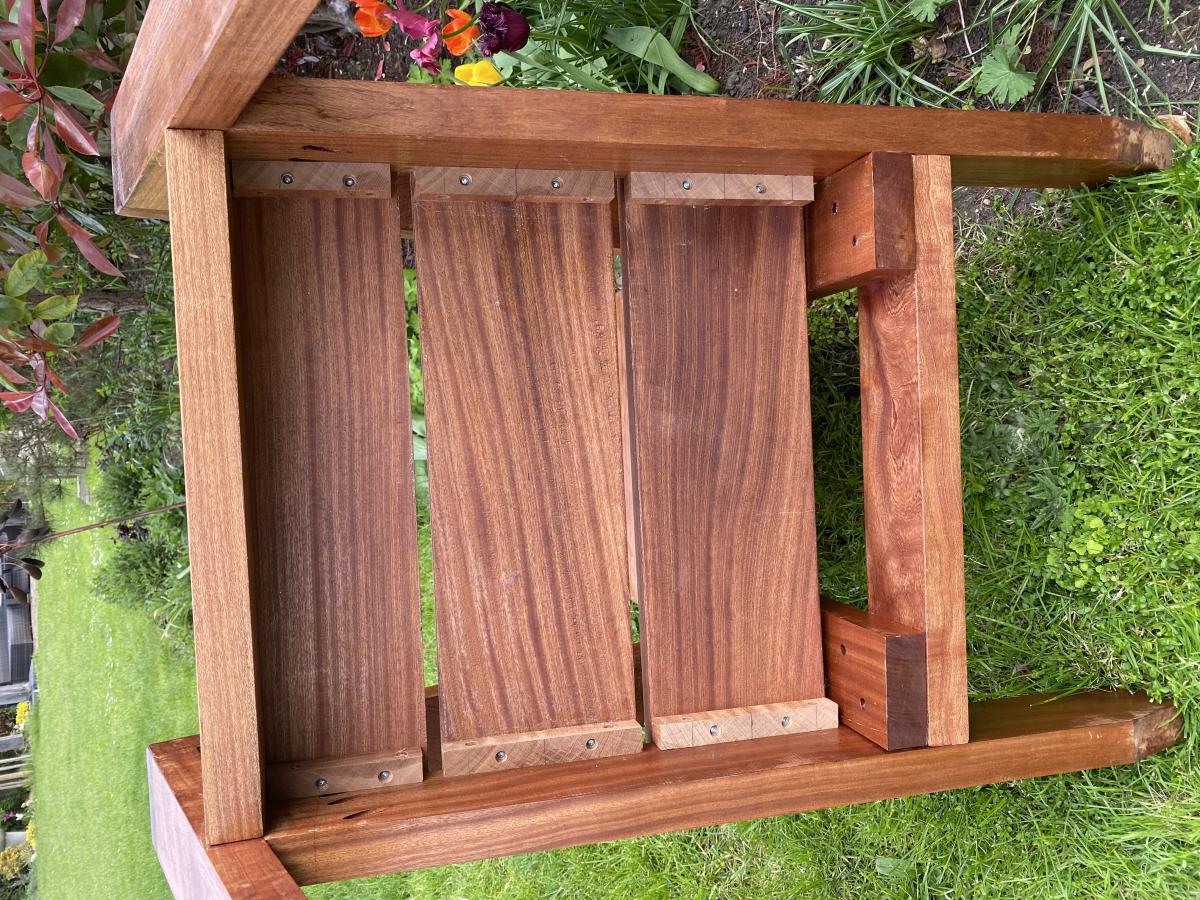
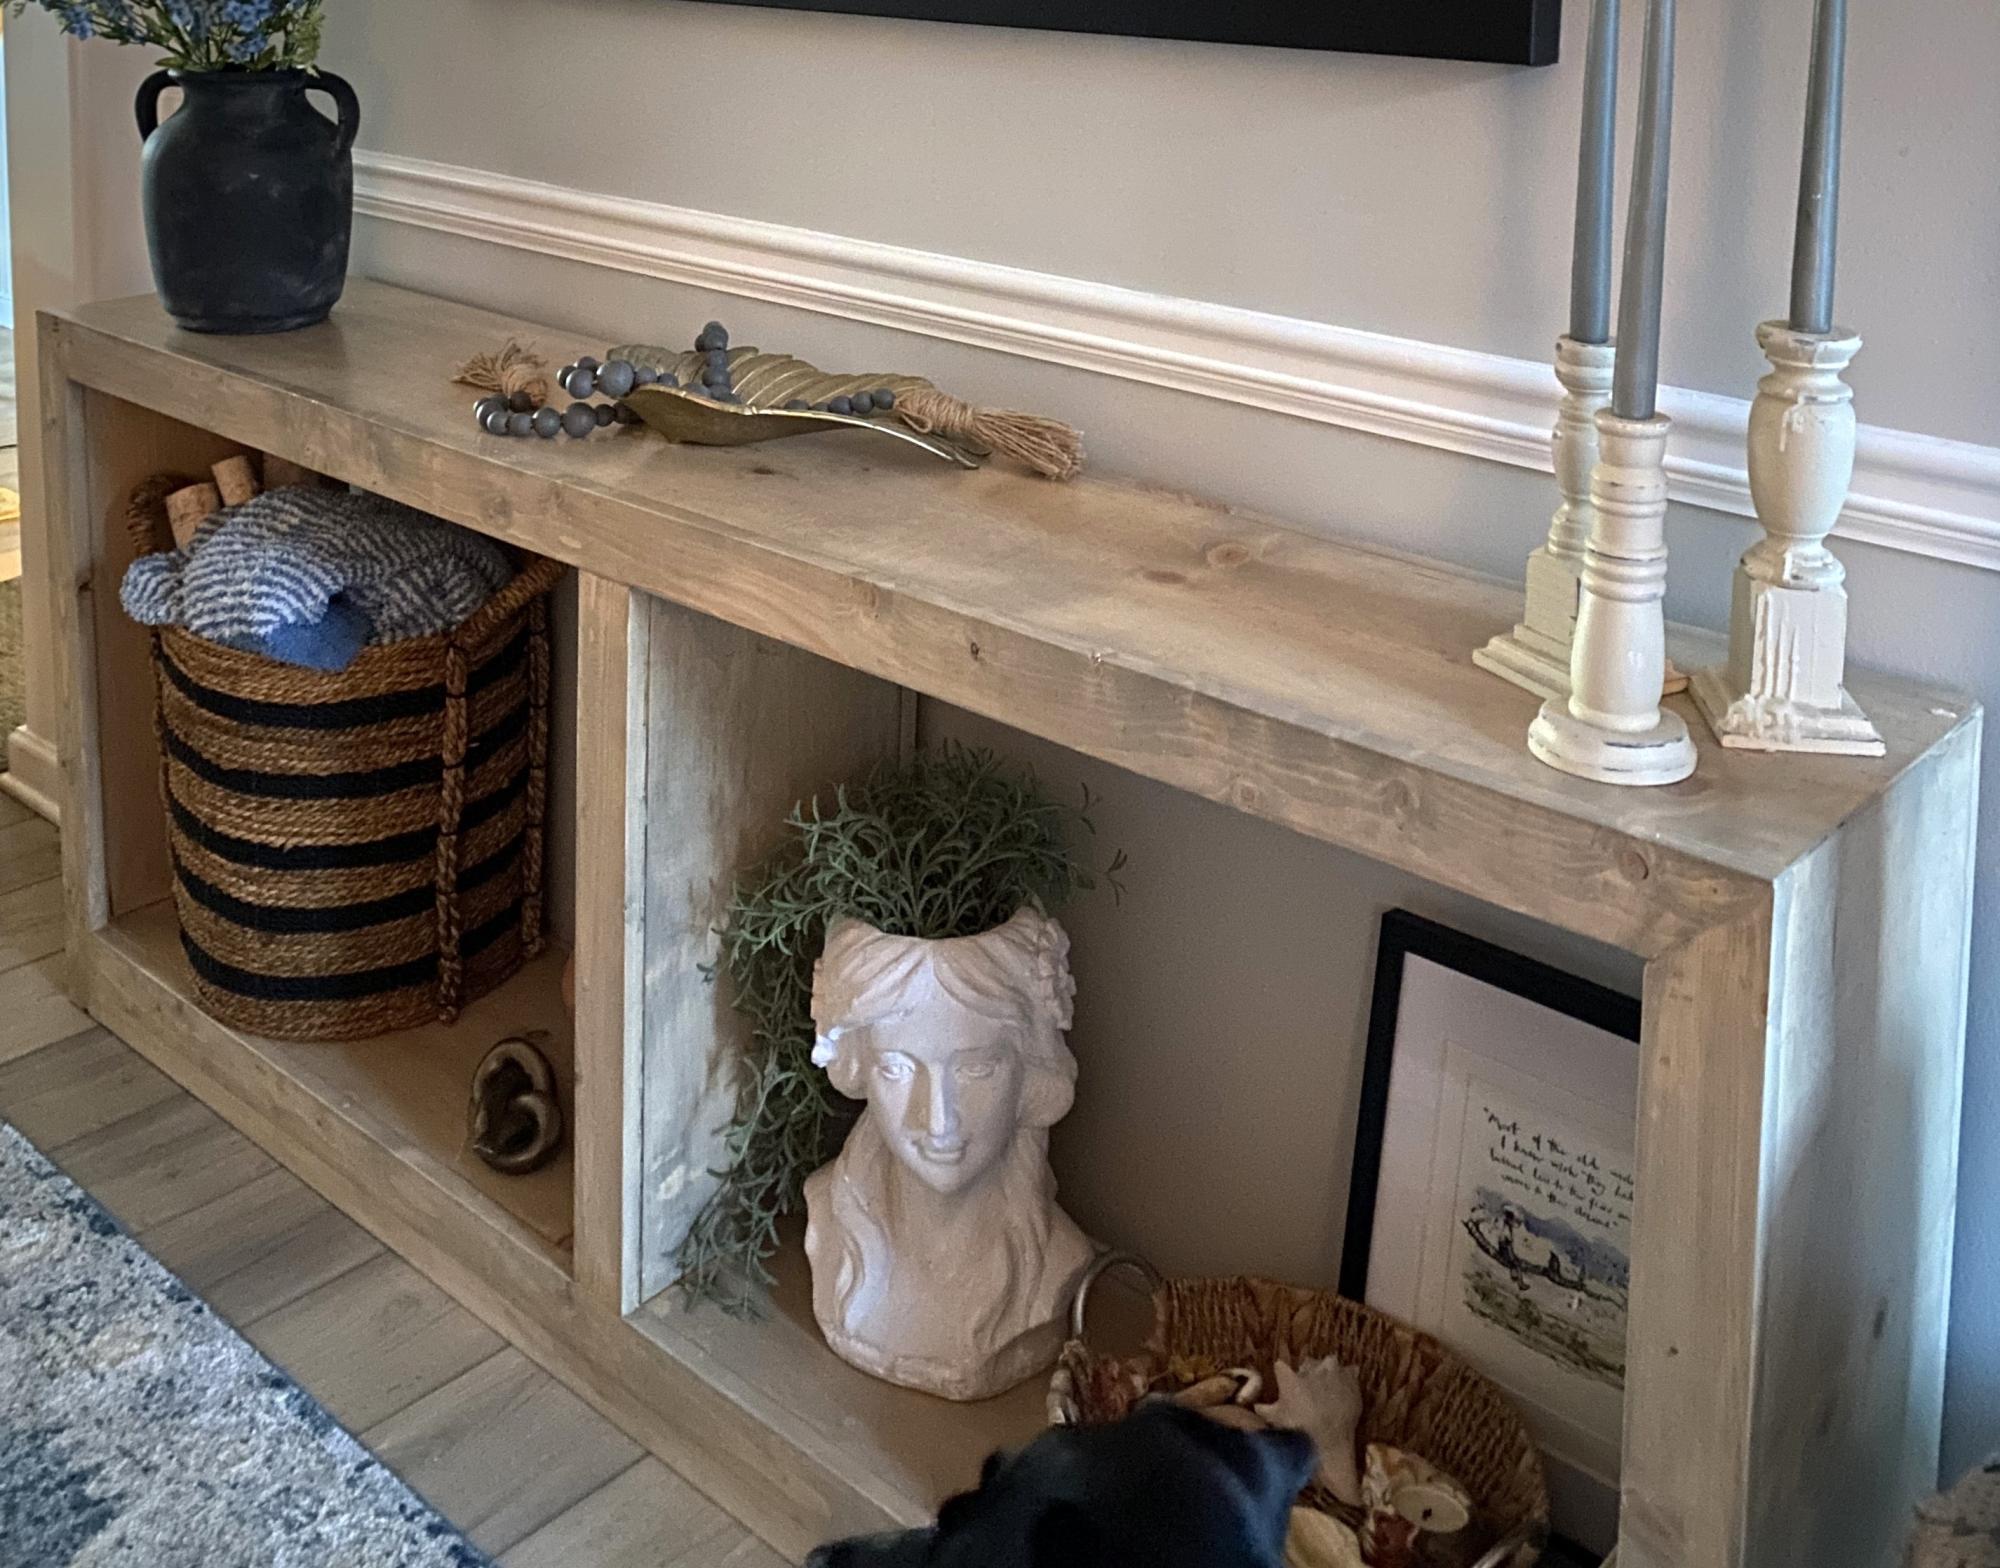
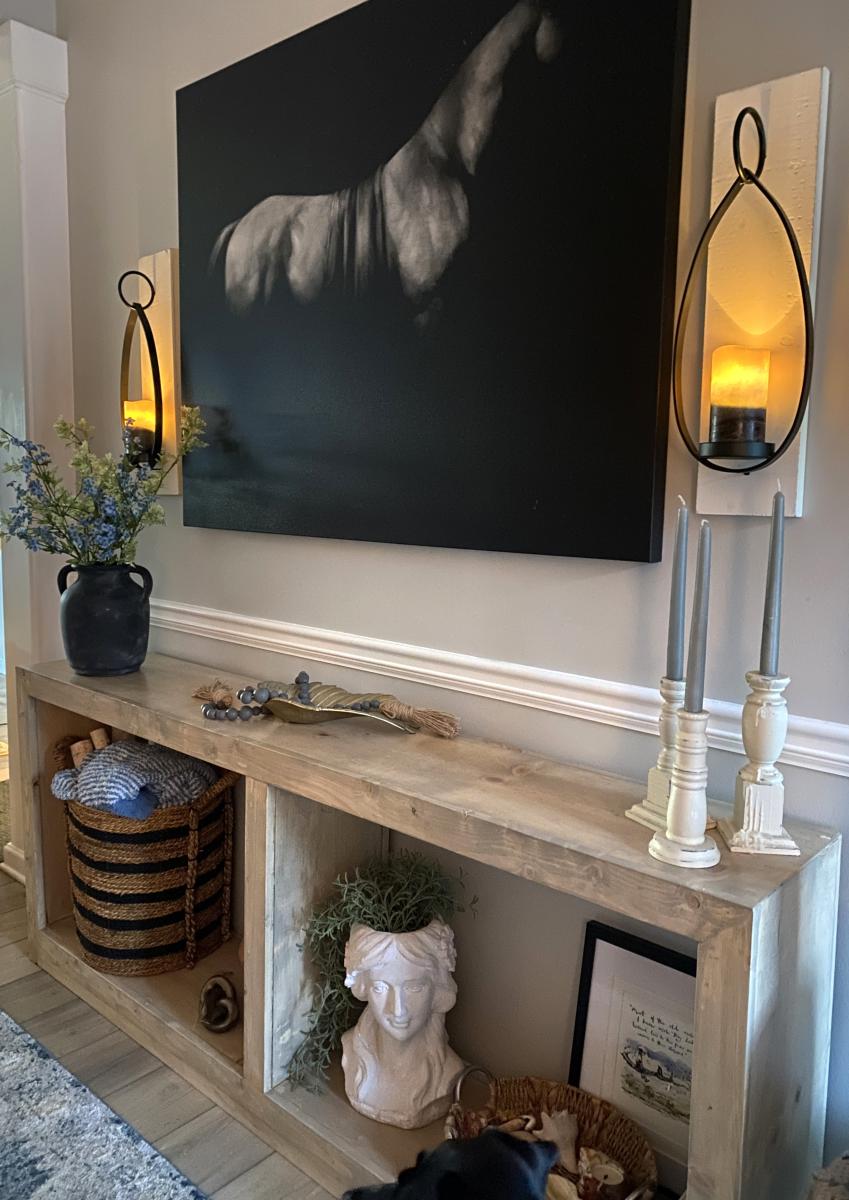
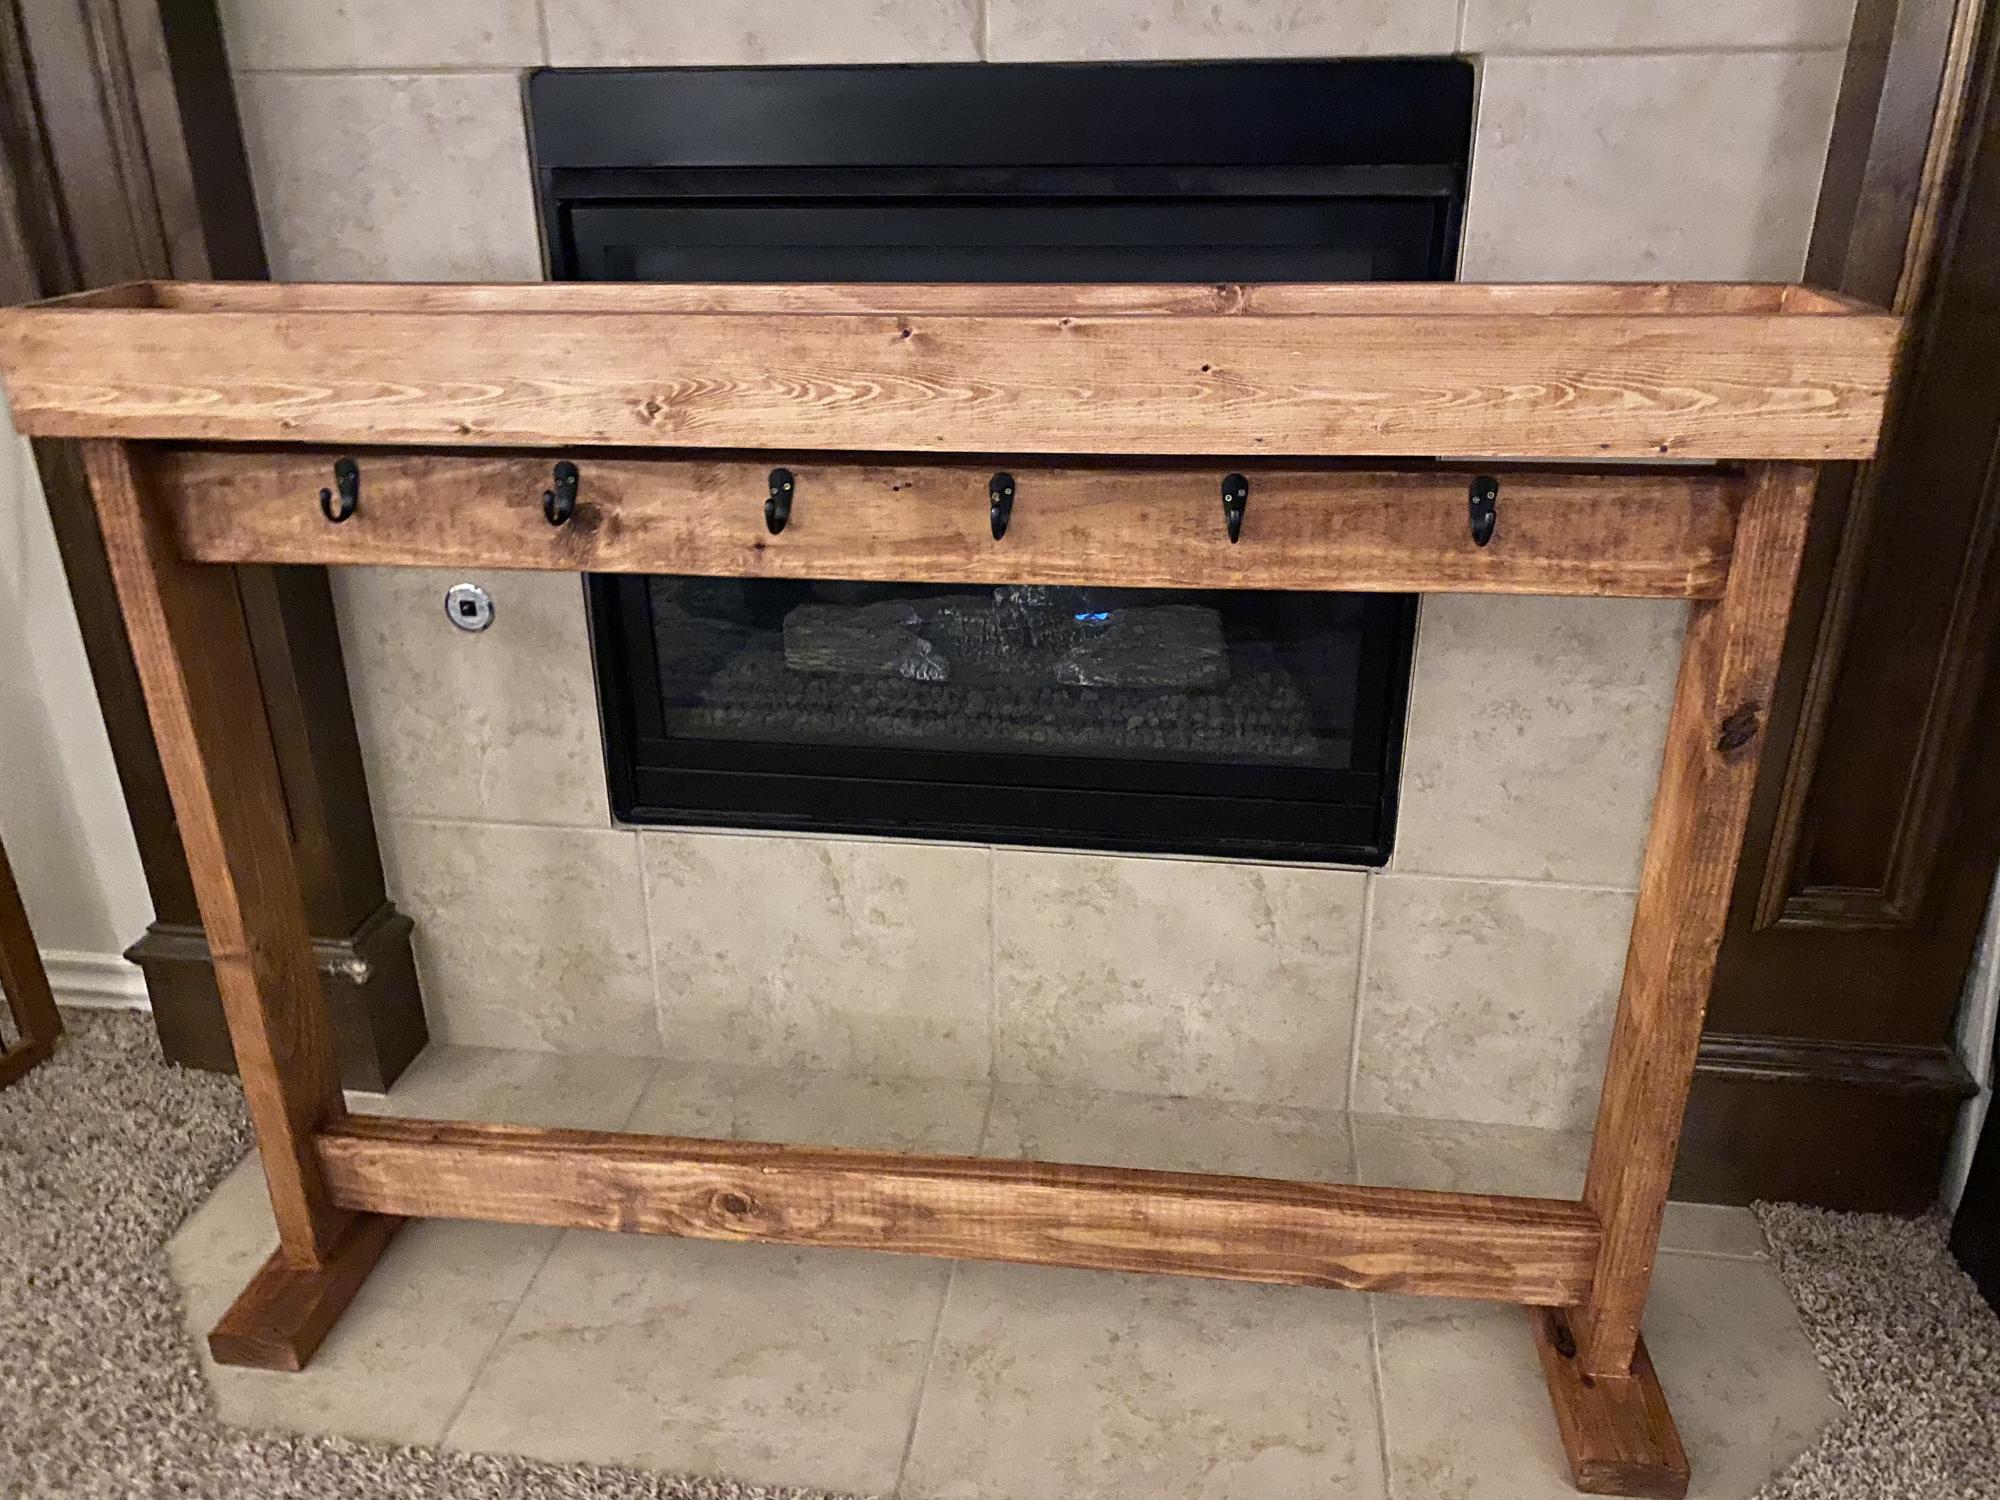
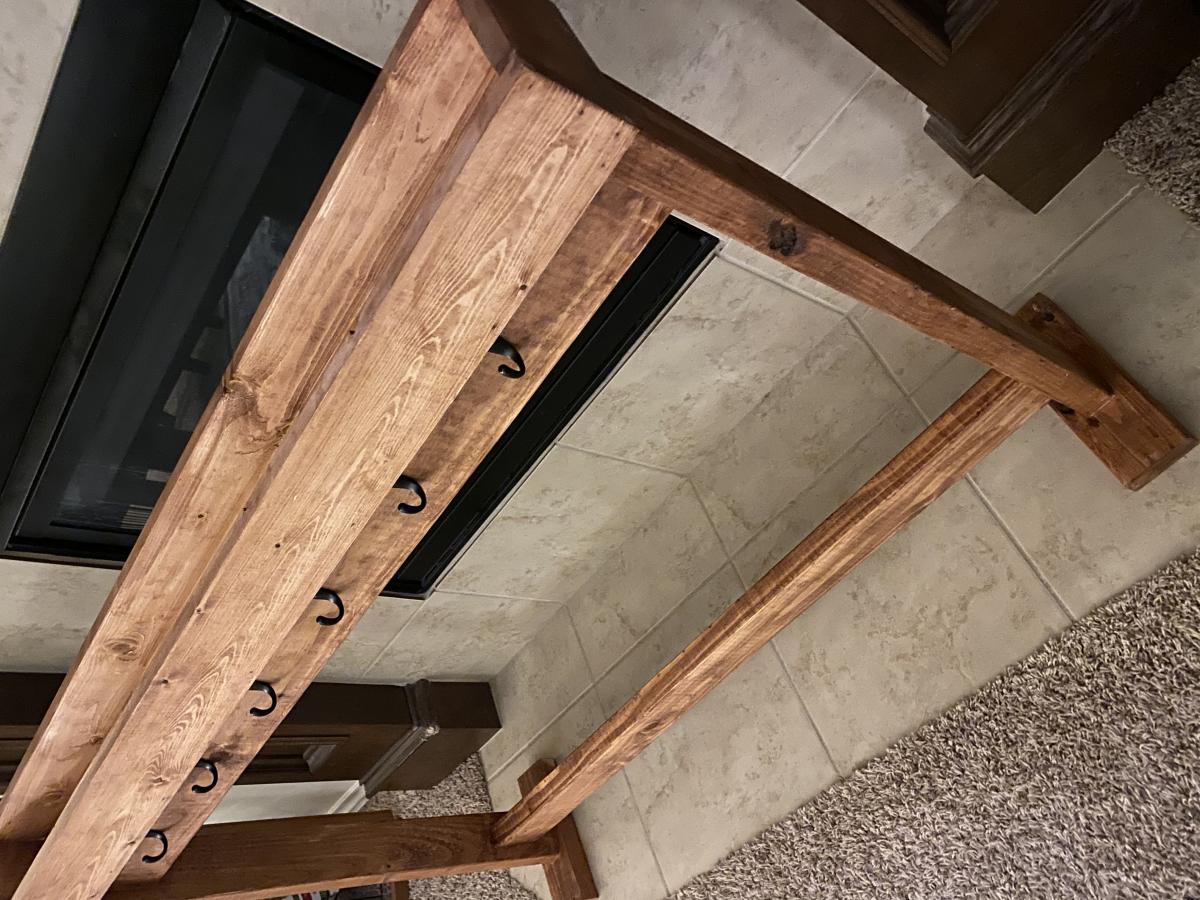
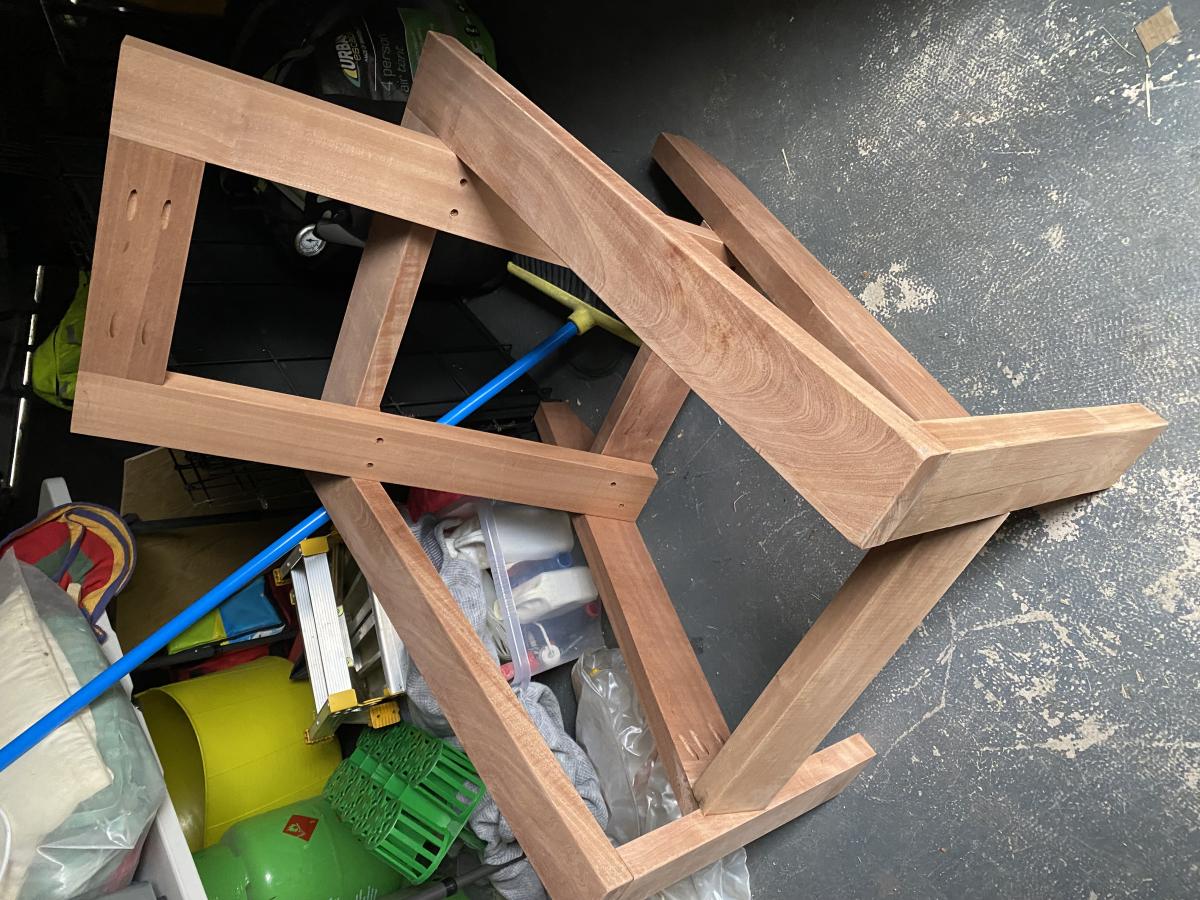
Built this today per request of my daughter because she wanted our stockings hung! I loved the stand Ana made but wanted to be able to use it after Christmas. I saw Shant2Chic built a stocking box and decided to combine my two favorite inspirational builders and came up with this! I hope you like it!

I added a 50” box (monitors Shanty2Chic’s measurements) and screwed it to the top of Ana’s Stocking stand!

Built from Plan(s)
Estimated Cost
$15
Estimated Time Investment
An Hour or Two (0-2 Hours)
Recommended Skill Level
Beginner

Comments

King Headboard w/ Charger and Lighting

Submitted by Malka on Sat, 02/01/2020 - 15:21

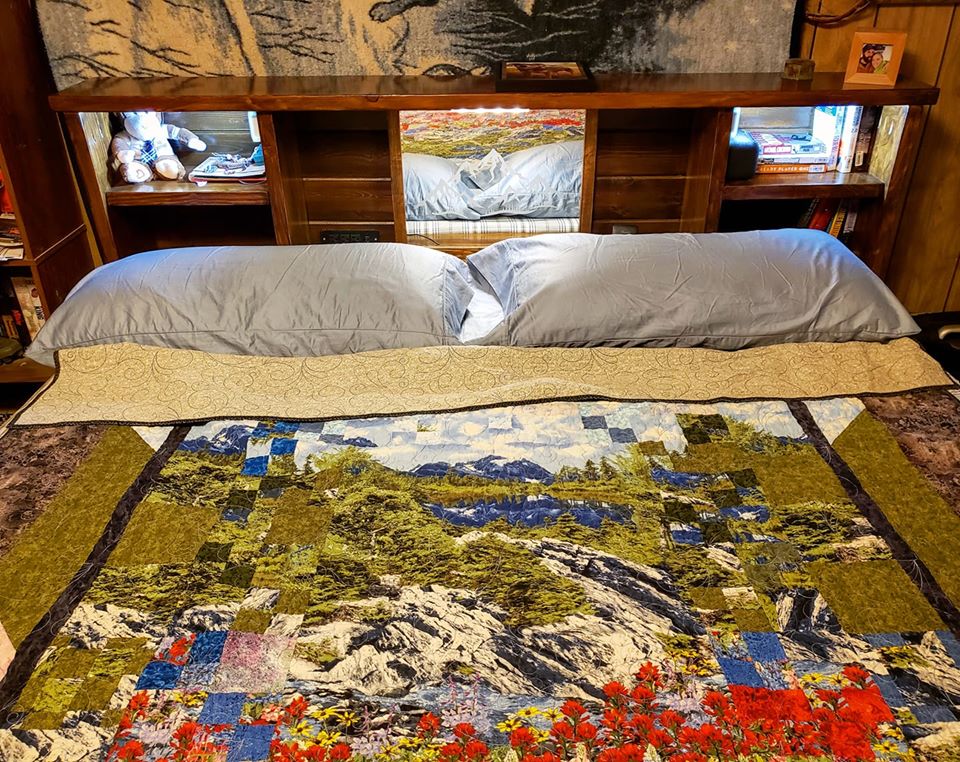
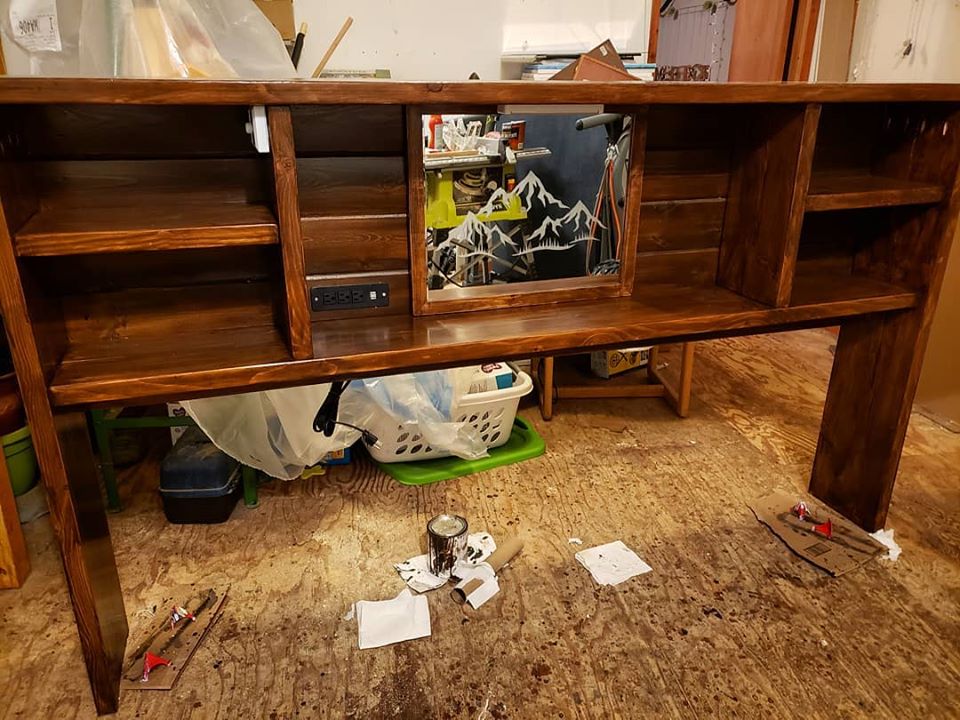
I designed this headboard on the back of a napkin, after we couldn't find one at a box store that met our needs. I used Douglas fir 2x10 for the headboard/shelves and Pine T&G for the backing. My fiance etched a mountain range into an unframed mirror, which I then framed from the scrap fir wood, and stained to match. Also attached an LED Lightbar above the mirror, Dimmer switch LEDs on each bookshelf, and a recessed USB/Plug port. This wasn't the cheapest project with the electrical accessories added, but we now have a custom wooden headboard with bookshelves, lighting and chargers that will last us years and be far beyond anything we could have bought at a big box store for the same cost. 

Estimated Cost
250
Estimated Time Investment
Weekend Project (10-20 Hours)
Finish Used
Varathane Honey
Minwax Semi-Gloss
Recommended Skill Level
Intermediate

wooden cooler stand

Submitted by stealth517 on Sat, 04/18/2015 - 20:48

This is the cooler stand presented by Jenny from Birdsandsaoap. Very easy to build and always ends up with someone asking to buy it or have you make them one.

Built from Plan(s)
Estimated Cost
$120.00
Estimated Time Investment
Week Long Project (20 Hours or More)
Finish Used
Minwax gloss polyurethane.
Recommended Skill Level
Intermediate

Comments

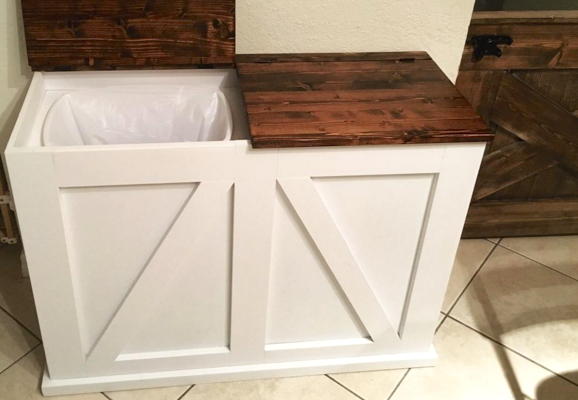
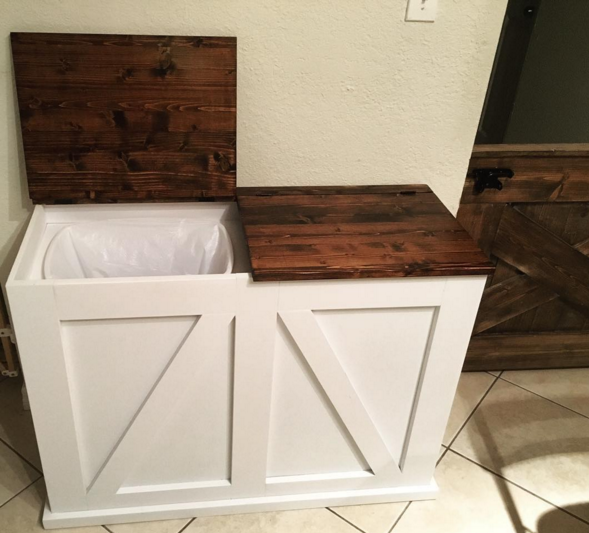
Double Bin Trash and Recycling Bin

Submitted by Anonymous (not verified) on Tue, 02/02/2016 - 12:54

Modified the design a bit to be lift up lids instead of tilt out.

Estimated Cost
125
Estimated Time Investment
Weekend Project (10-20 Hours)
Finish Used
White Painted Base, Dark Walnut stained top
Recommended Skill Level
Intermediate

Comments

Matt712

Sat, 03/07/2020 - 02:29

I’d be grateful for details, plans, measurements for this project. This is an amazing build, nicely done.With green top looks fantastic and complements the white very well.

smbanks75

Thu, 01/11/2024 - 20:31

To everyone asking for the plans, it's a modified tilt out. It states right there under the pics that it was modified and the original plans are there in red, under "Built from plans"

Podium for My Wife's Classroom

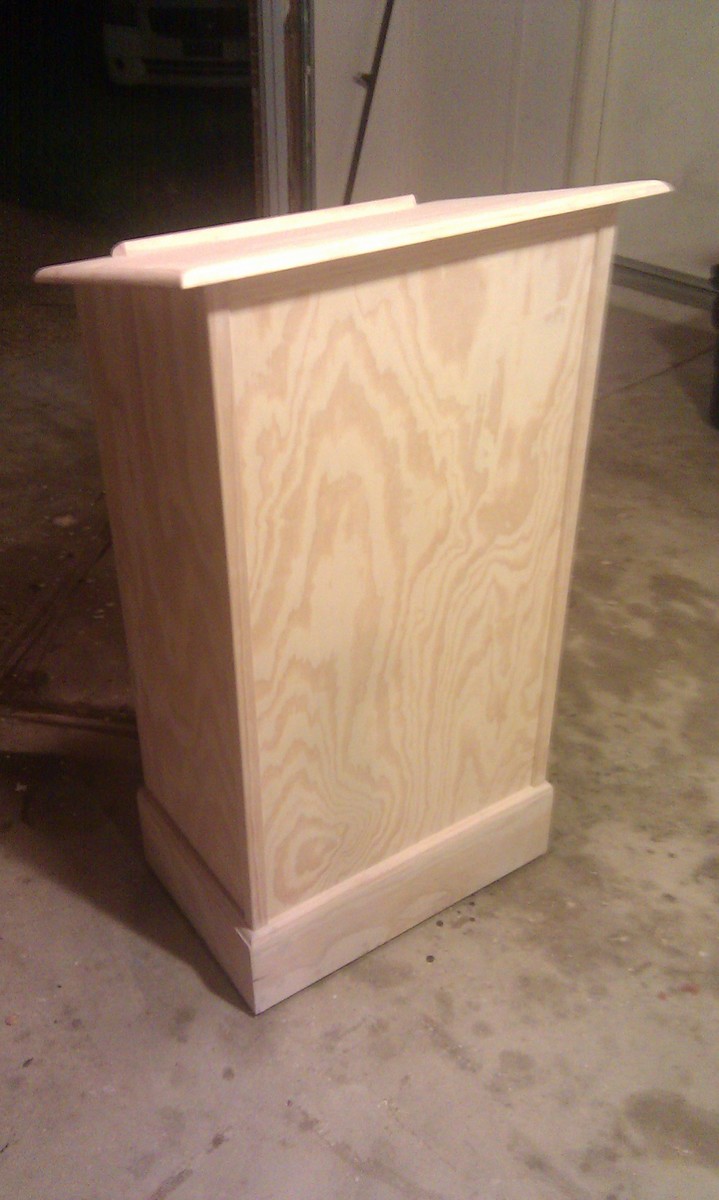
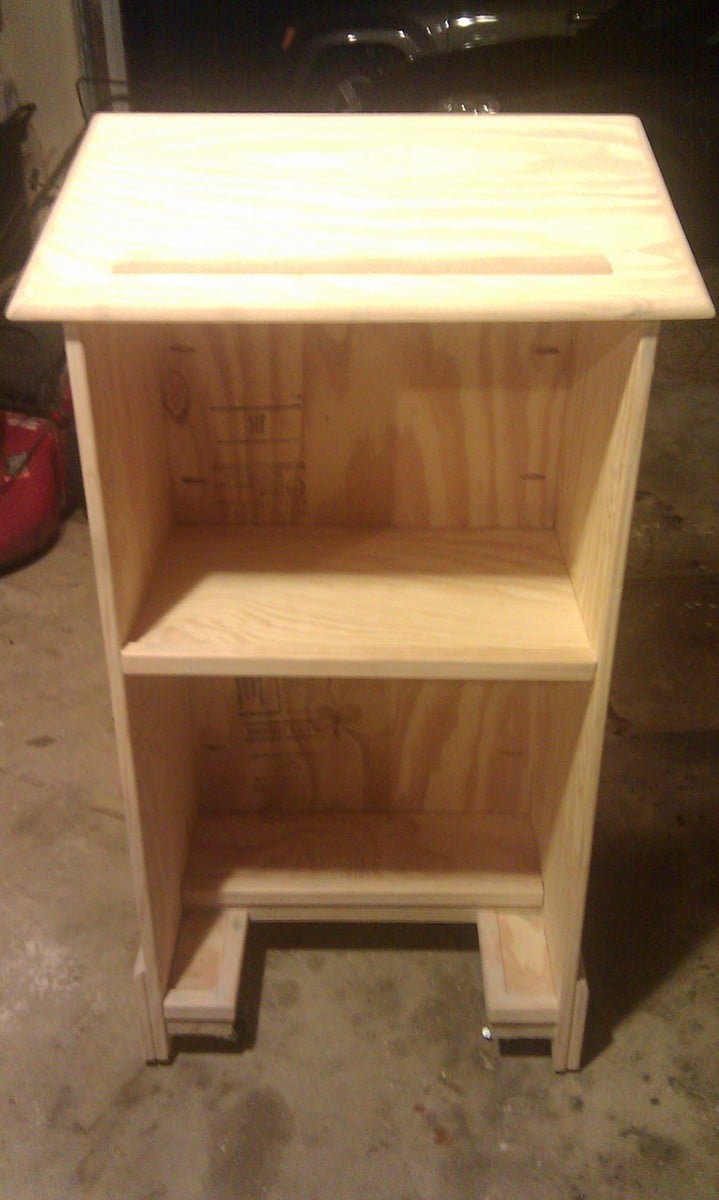
This is my first try at building furniture. I've built larger things in the past like decks and a fort for my nephews, but never furniture. Even though I used the plans to build the main box, I did change up the bottom and added some new stuff. I added wheels to the bottom my wife could easily move it around her classroom. I didn't want to put a square base on it because I thought it might hit her ankles when she was standing close to it. So I sort-of notched it out to give an opening for her feet and I used some scraps to create a short shelf at the bottom. I also added more trim that the plans call for. I cut strips of the pine plywood for the base molding and topped it with quarter round. I used corner trim for the front corners, the self inside and the bottom notched shelf. I also used screen trim for the back of it. I think it came out nice and I've very pleased with it. I used 2 coats of Minwax PolyShades American Chestnut on it.

Built from Plan(s)
Estimated Time Investment
Weekend Project (10-20 Hours)
Finish Used
Minwax PolyShades American Chestnut
Recommended Skill Level
Beginner

Fancy Jewelry Box

Submitted by Matt L on Mon, 06/29/2020 - 19:52

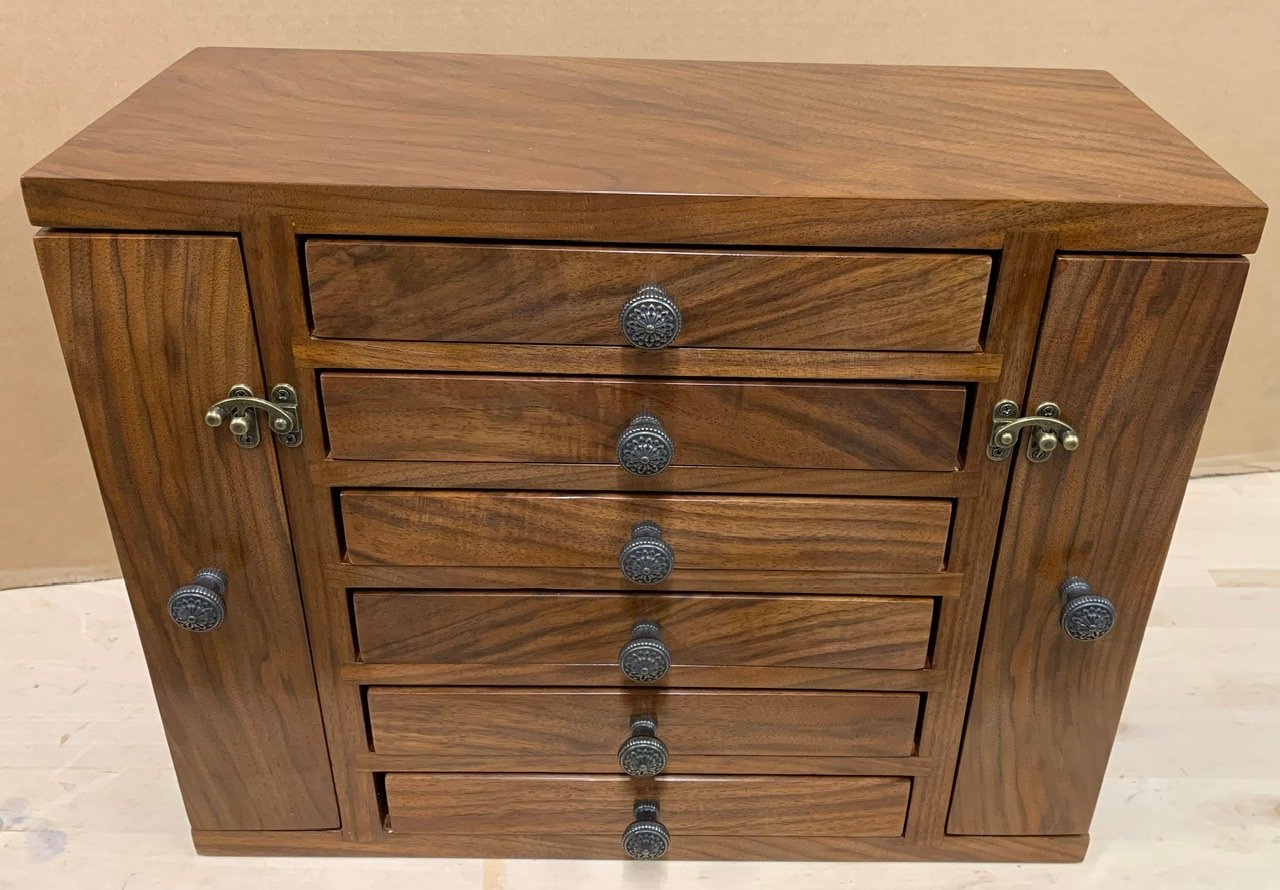
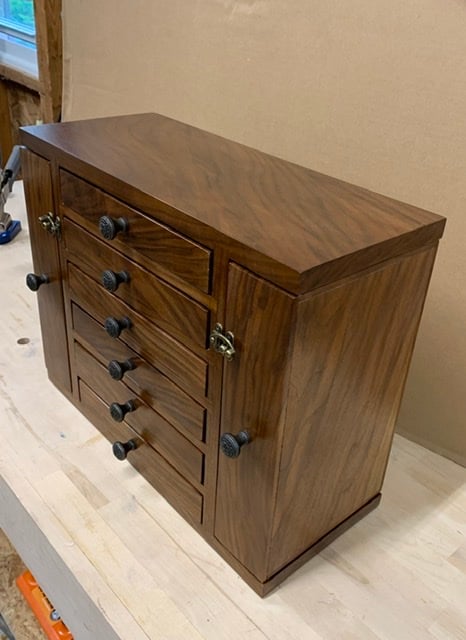
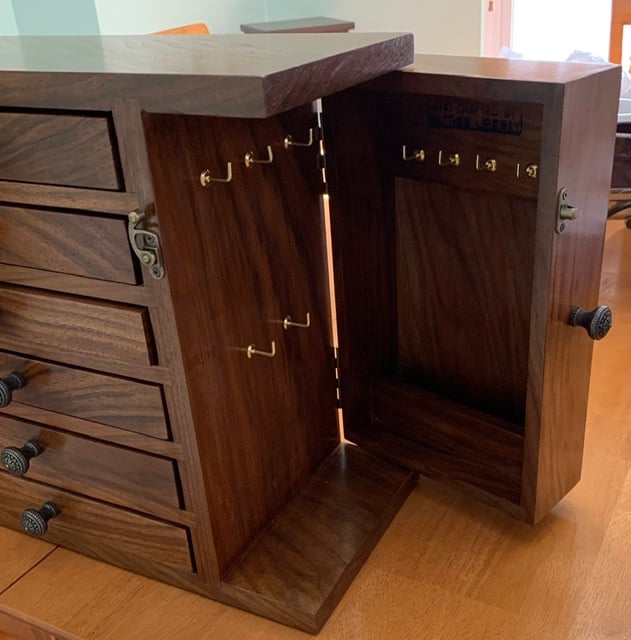
Great plans and a fun build. I made some modifications. My drawers are 1.5” high and 10” long. It allowed for 6 drawers. Overall height is 13.75” and length is 17.5”.

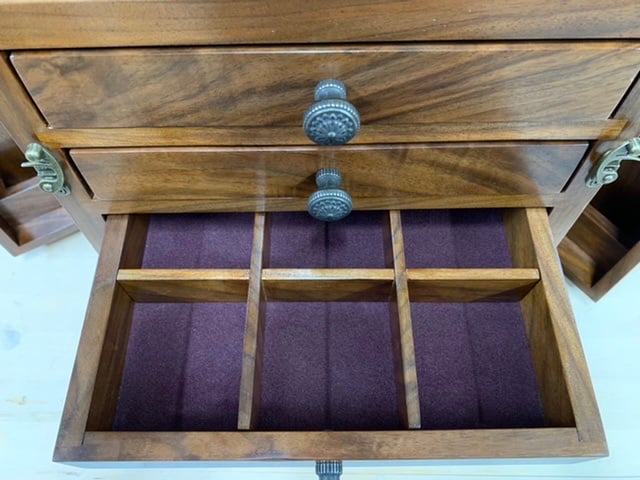
I used rabbits and dados rather than butt joints. There is flocking in the drawers.

Built from Plan(s)
Estimated Time Investment
Week Long Project (20 Hours or More)
Finish Used
Garnet Shellac at a 2# cut. Wiped on. I used 4 coats sanding with 400 grit after coats 2 and 3. I used 0000 steel wool after coat 4. Then I applied Paste wax.
Recommended Skill Level
Intermediate

John Deere Tractor Bunk Bed

Submitted by Veronica P on Sun, 07/06/2014 - 16:43

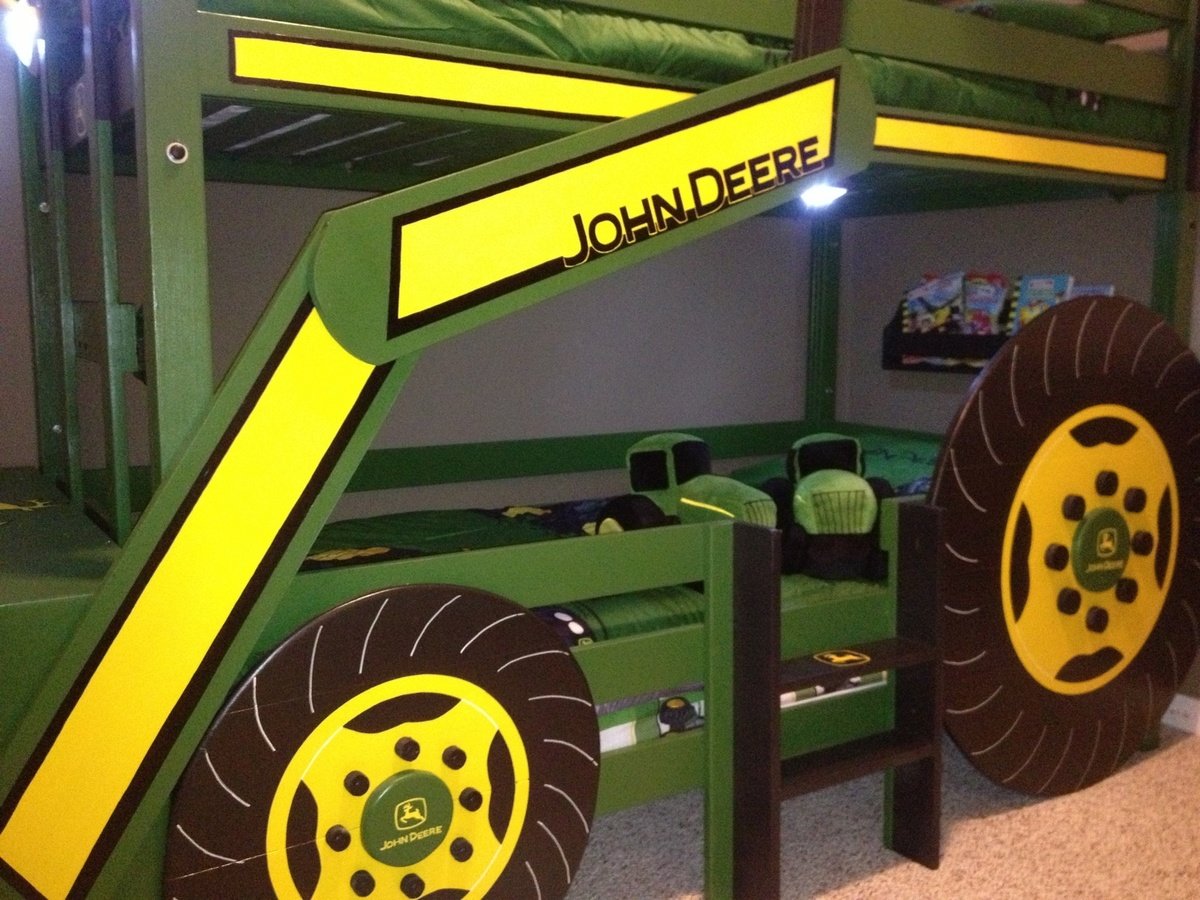
With another baby boy arriving in August, my one and three year olds are moving to a "big boy" room. My oldest decided he wanted a bunk bed and as they both are obsessed with tractors, when I saw the "John Deere Tractor Bunk Bed" plan, I was sold.

We would be needing a twin sized bunk bed though not a toddler. I used the classic bunk bed plans and simply modified them to suit our needs. I moved the ladder to the front, added a rail on the bottom bunk and added a small ladder to the side for my one year old to climb into the bottom bunk.

Once the the frame of the bed was complete, I added the tractor accessories. A couple of storage cubby shelves with fabric baskets for toy tractors which act as stairs up to the ladder and make the tractor bucket at the front. Also, the wheels which are made from joined 1x6s as I find plywood hard to sand and paint to the quality of finish I like. A cab & roof from 1x4s framed together. A side mirror that I decoupaged a picture of another tractor on. I used push lights for the headlights as well as a reading light above each bed (they're on timers so they'll turn themselves off). A steering wheel (play equipment access from toys r us). Also, I built and mounted by the head of both beds a "flat wall book holder" so they would have somewhere to store a few books.

My boys and I are fairly new to building so I spent a lot of time planning and measuring to ensure it would all come together in the end. It paid off because it all went smoothly (even with "help" from my boys). It's not perfect but they're very happy with the result. We also built a John Deere themed "Just my size closet" and even finished with over a month to spare before the new baby arrives! :)

Just want to say a quick thank you to Ana both for the amazing plans and also the inspiration to take on these projects. The time spent with my boys building as well as the resulting treasures are priceless and I would have never realized what we were capable of had I not stumbled upon your website and been so inspired by you and everything you've accomplished. Thank you!
Estimated Cost
$550.00
Estimated Time Investment
Week Long Project (20 Hours or More)
Finish Used
John Deere Green paint (home depot was able to color match a toy tractor), marigold yellow and black and polyurethane.
Recommended Skill Level
Beginner

Comments

Ana White Admin

Mon, 07/07/2014 - 12:13

I love this, such a great build and eveything came together perfectly! Thanks for sharing!

spiceylg

Thu, 07/10/2014 - 19:12

What an incredible build! I agree with Thriftygirl, I love all of the details!

carongirls

Tue, 09/30/2014 - 05:35

I am in the process of copying your bed right now. Just mine will be a toddler loft bed. Thank you for the ideas!

busymomof3

Thu, 10/09/2014 - 14:12

I am new to this and I was wondering were to find the measurements for the twin size bed?  I would love to make this for my boys!!

Veronica P

Mon, 11/03/2014 - 07:48

Sorry for the slow response to those requesting plans. For main structure of the bunk bed, I used Ana's "Classic Bunk Bed" plans. For all of the add-ons, I made up my own plans. I'm pretty low tech so unfortunately they're just pencil & paper plans but I'd be happy to scan and email them to you if you're interested. Just message me and I'll send them your way. :)

MartyC

Wed, 01/28/2015 - 14:08

Hi Veronica, Well done fantastic job! Two little men who want to move in together because of a new addition on the way. Their request though is a John Deere Bunk Bed! would be grateful if you could forward on your plans if you have time, Kindest regards.

tkdiver1

Tue, 05/26/2015 - 18:13

These are just what my grandsons need. I would love your plans.

Thank you

tkdiver1

Tue, 05/26/2015 - 18:14

These are just what my grandsons need. I would love your plans.

Thank you

Mimi64

Sun, 09/06/2015 - 10:06

Dear Veronica,

Our grandson, 6 years old, will absolutely adore this bed.  He loved riding on Grandpa's real JD tractor.  Please send me your plans for the attachments.  They are just darling and I could not do any better.  Thanks for your generosity!

bmeche

Fri, 09/13/2019 - 21:11

Hi Veronica. My 3 year old just loves the tractor bunk bed. I was wondering if you would mind sending me the plans you have. It would be greatly appreciated. My email is [email protected]   

Thanks in advance 

MyMaw

Wed, 10/16/2019 - 17:56

If you're still sharing, we would love a copy of your add-ons plans. 

Thanks,

MyMaw and PawPaw

Veronica P

Tue, 12/16/2014 - 07:21

I just emailed those plans. There should be nine attachments. Please let me know if you don't receive any of them.

cnejones

Thu, 12/18/2014 - 21:51

Could you please email me the plans for this project my son would love this

Veronica P

Tue, 01/06/2015 - 08:21

Hello all. I've tried emailing plans to all those who've requested them. I had some trouble attaching the files as they were large so if you didn't receive them, please let me know and I can resend. Thanks

Alwardt2708

Tue, 01/06/2015 - 11:53

Hi Veronica. I did not receive an email. Woul you have time to try again? If you email me your address I can send you my fax number if that's easier too. Thank you so much! I can not tell you how much I appreciate your dedication to this! [email protected]

Loft bed with bookcase and desk

Submitted by abc1234 on Mon, 12/26/2022 - 08:01

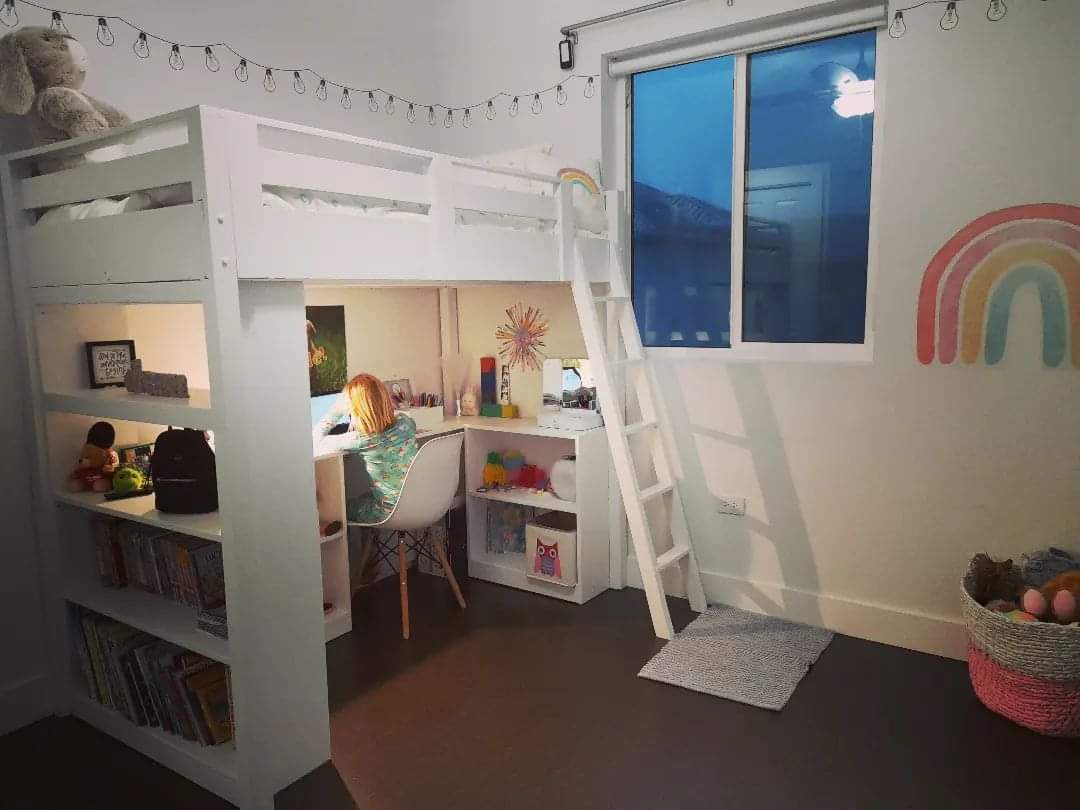
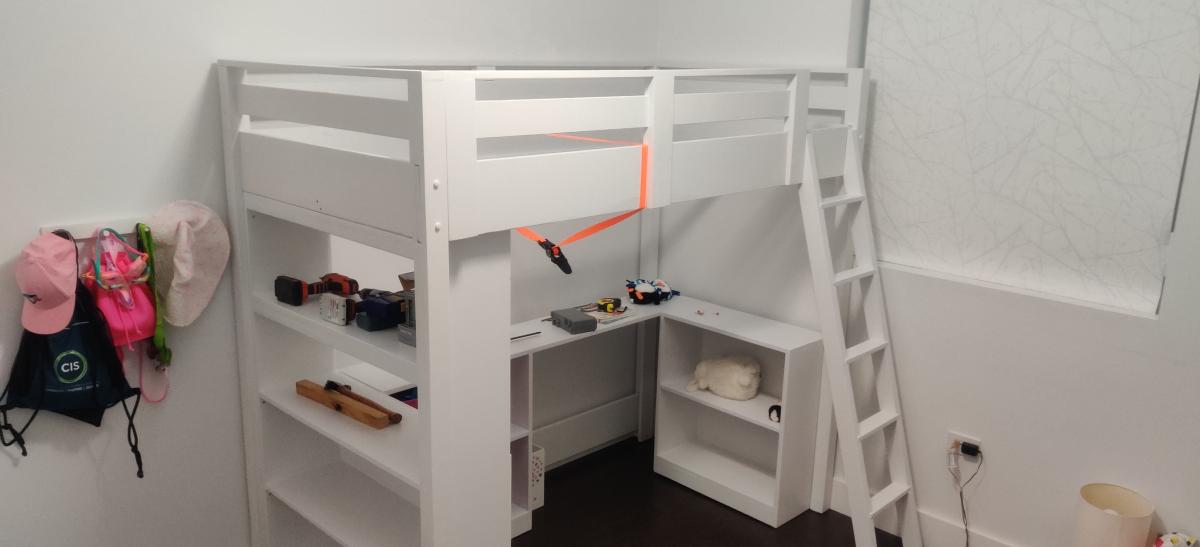
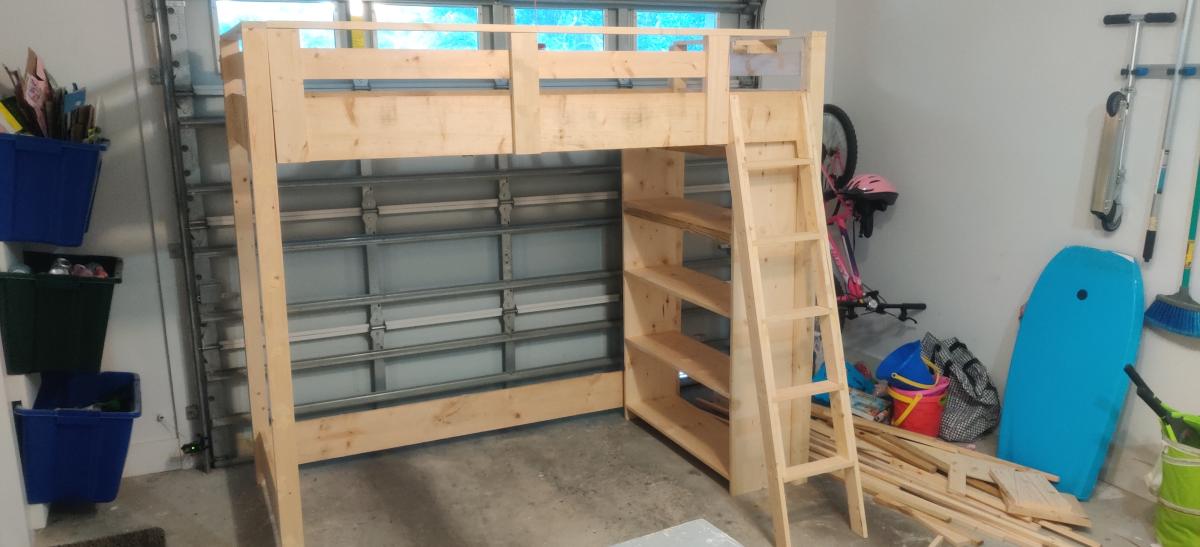
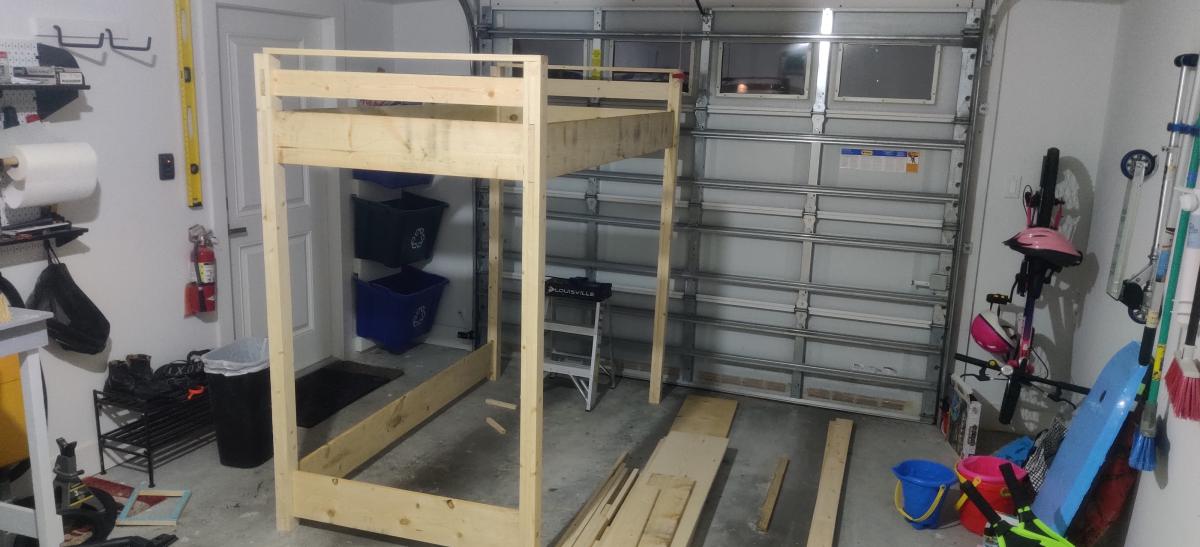
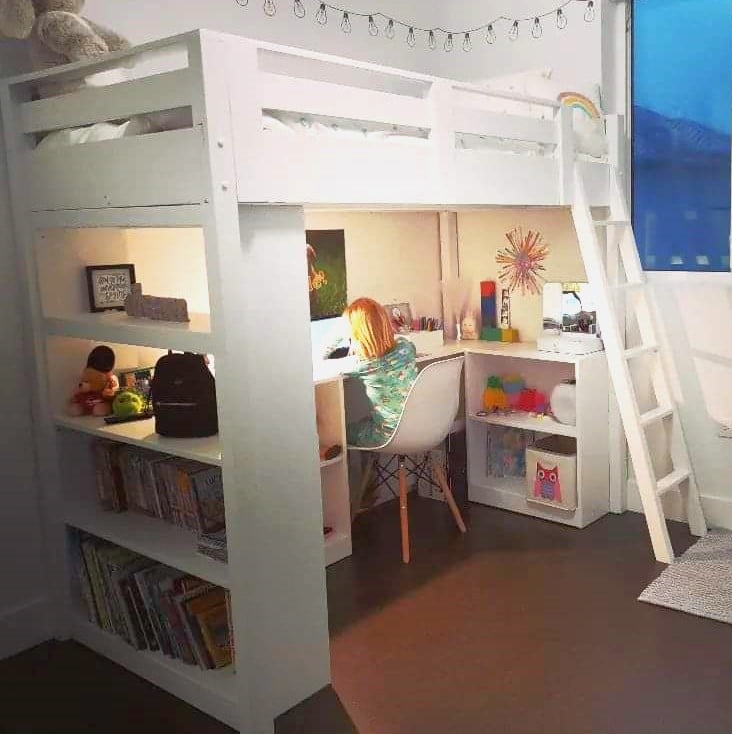
I built this for my daughter and more or less followed the plan without changes. I wasn't able to get hold of 1x3 so had to rip 1x4s which was a little time consuming. In hindsight I would probably increase the depth of the desk as it's a little shallow but not a huge problem.
I primed with two coats of BIN Primer as there were a lot if knots in the wood and I heard this is the best to cover then. It was a lot more expensive but hopefully worth it. Finished with latex semigloss.

Comments

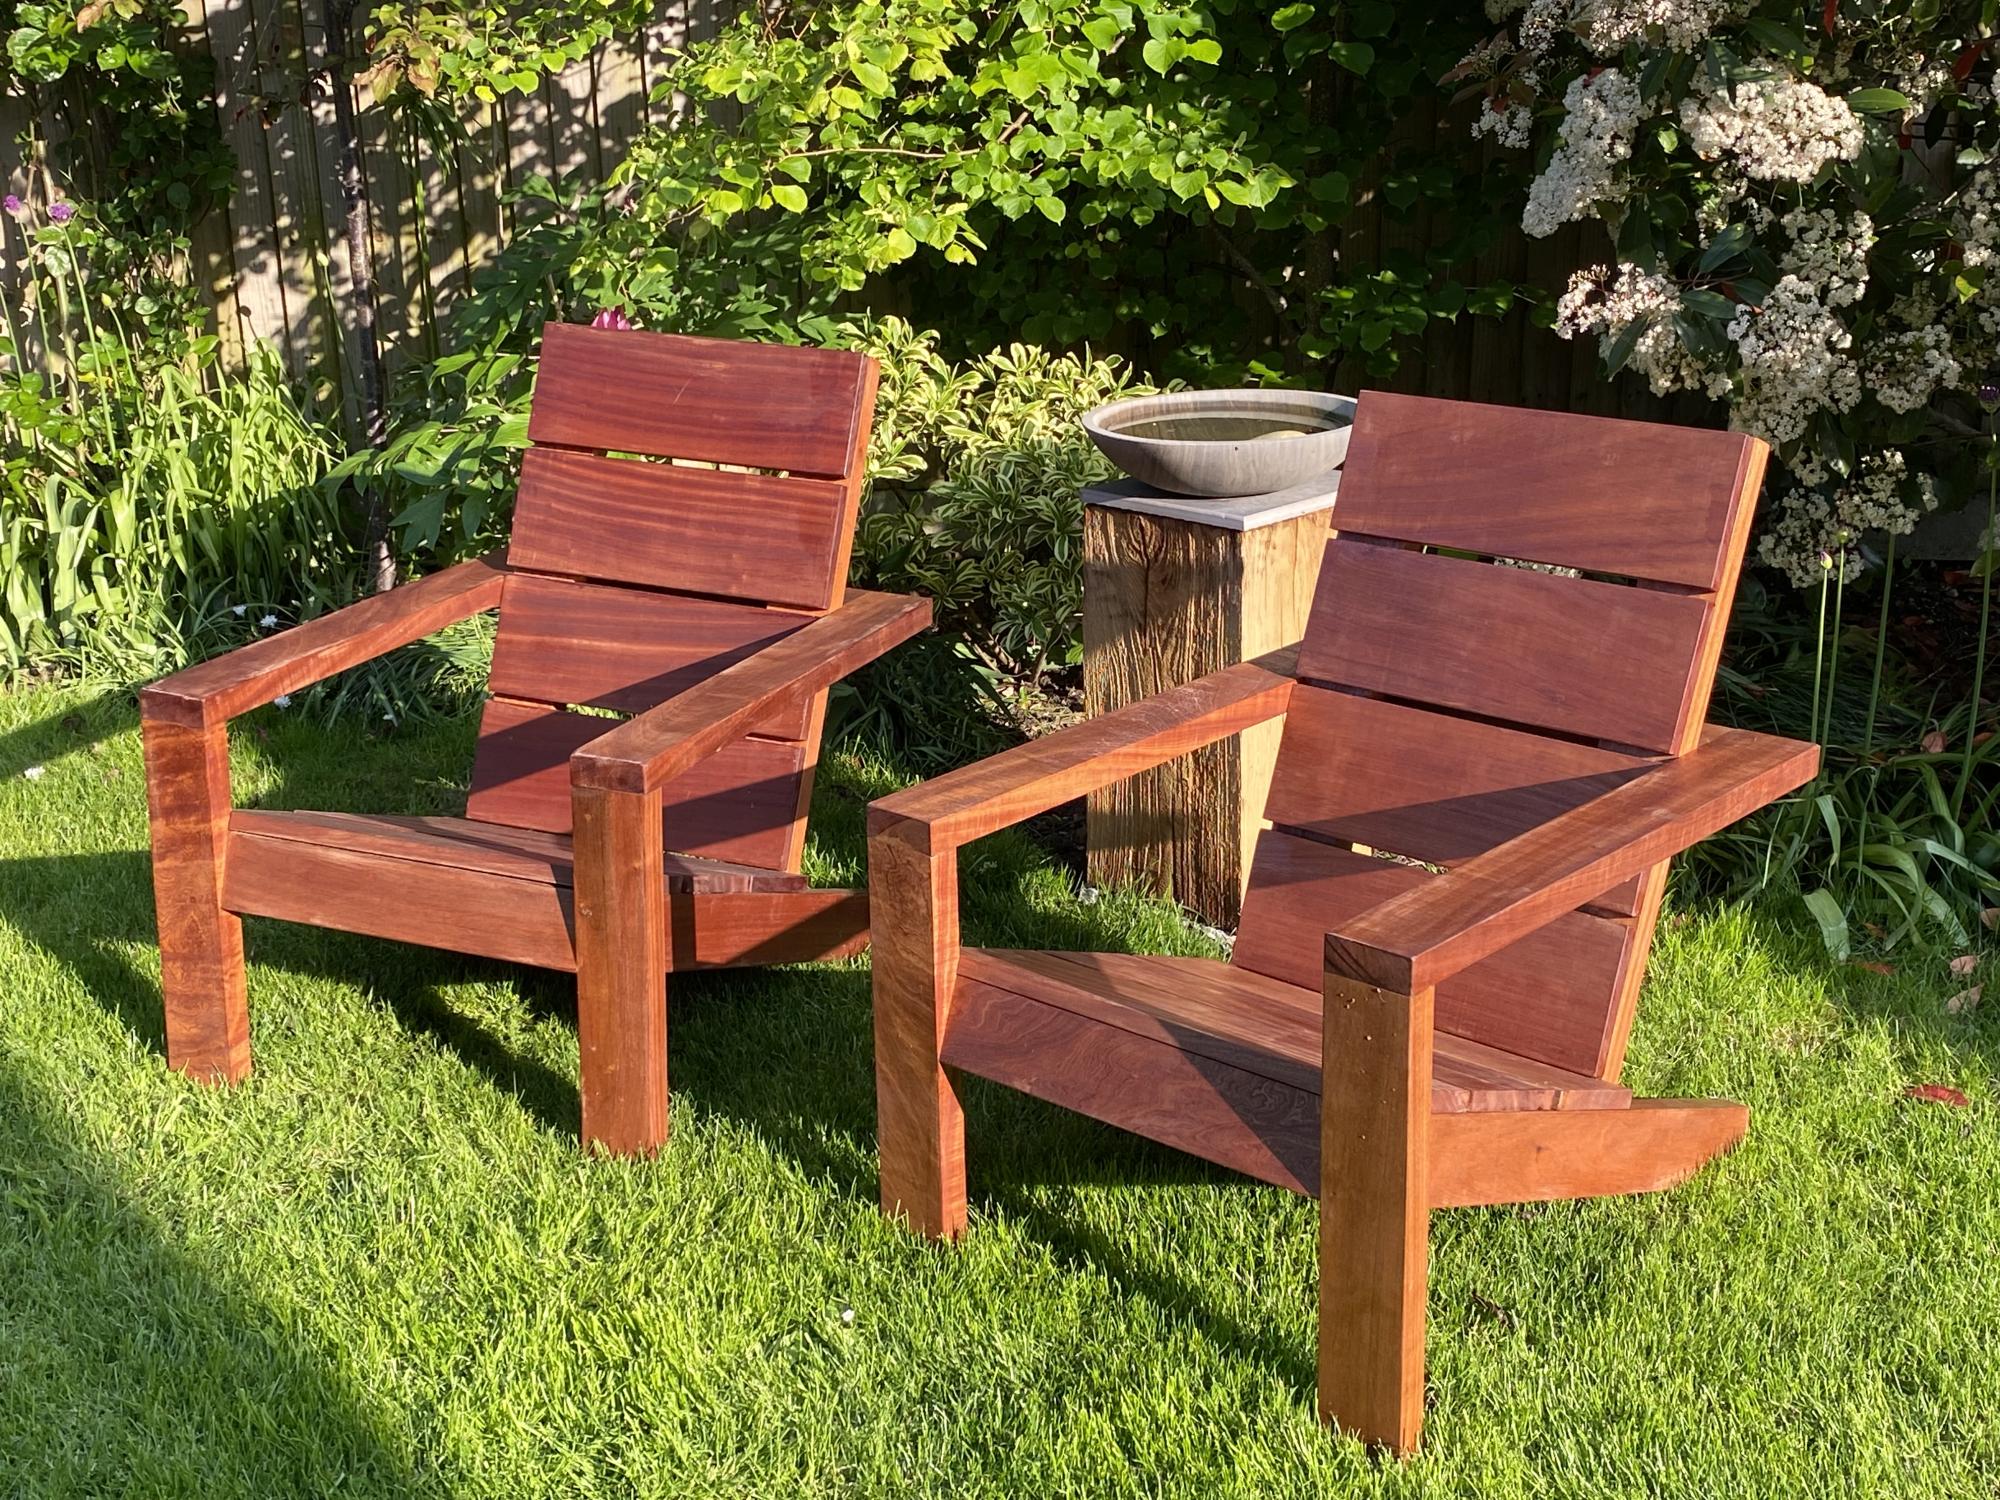
Upmarket hardwood Adirondack

Submitted by Anonymous (not verified) on Tue, 05/16/2023 - 11:33

Loved design so decided on hardwood and no visible screw heads….. took a while but loved the result

Comments

Seasonal And Holiday

Grand Waterfall Console Table

Submitted by Anonymous (not verified) on Tue, 06/27/2023 - 08:48

I used the Grand Waterfall Console plans, but modified them to be 72 inches long instead of 84 inches. Overall, I learned a lot during the process, but wood filler, sanding, stain, and finishing with polycrylic made all the difference in the end. The hardest parts for me were the mitered cuts. I think if I did it again, it would look even better!

Deb

Shoe Dresser

Submitted by Anonymous (not verified) on Sat, 04/01/2017 - 08:26

We used the shoe dresser instructions with some modifications to make it longer

Built from Plan(s)
Finish Used
Stain, polyerthane, chalk paint and wax
Recommended Skill Level
Advanced

Console Sofa Table

Submitted by naomi on Fri, 06/23/2017 - 06:51

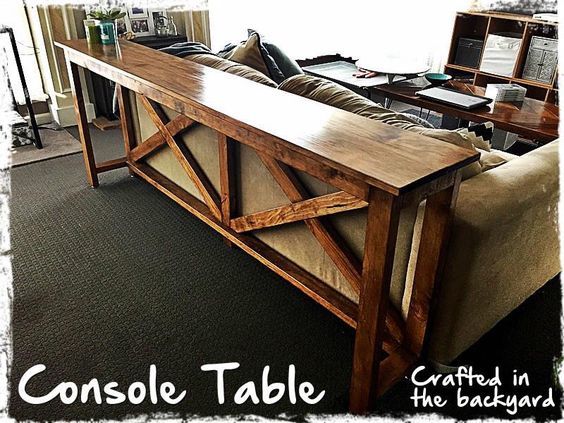
Made from the modified Ana White Rustic X-Console Table.

I made this console table to fit the length of my sons couch. It's about 6 foot long.

It was really easy to make. My only tip is to sand all your timber before assembling. Getting into the tight spots with a sander is quite difficult. I hae now made 4 of these tables and sanding first saves so much time and headaches. The other 3 I have made were painted white and had stained tops. 

Estimated Cost
About $50
Estimated Time Investment
Afternoon Project (3-6 Hours)
Finish Used
Walnut Stain
Recommended Skill Level
Beginner

Comments

kgoss5

Tue, 06/18/2019 - 08:46

Any way you could share your material list/plans ? Thanks 

Playhouse Loft Bed with Stairs

Submitted by Karajoy on Tue, 01/03/2012 - 18:12

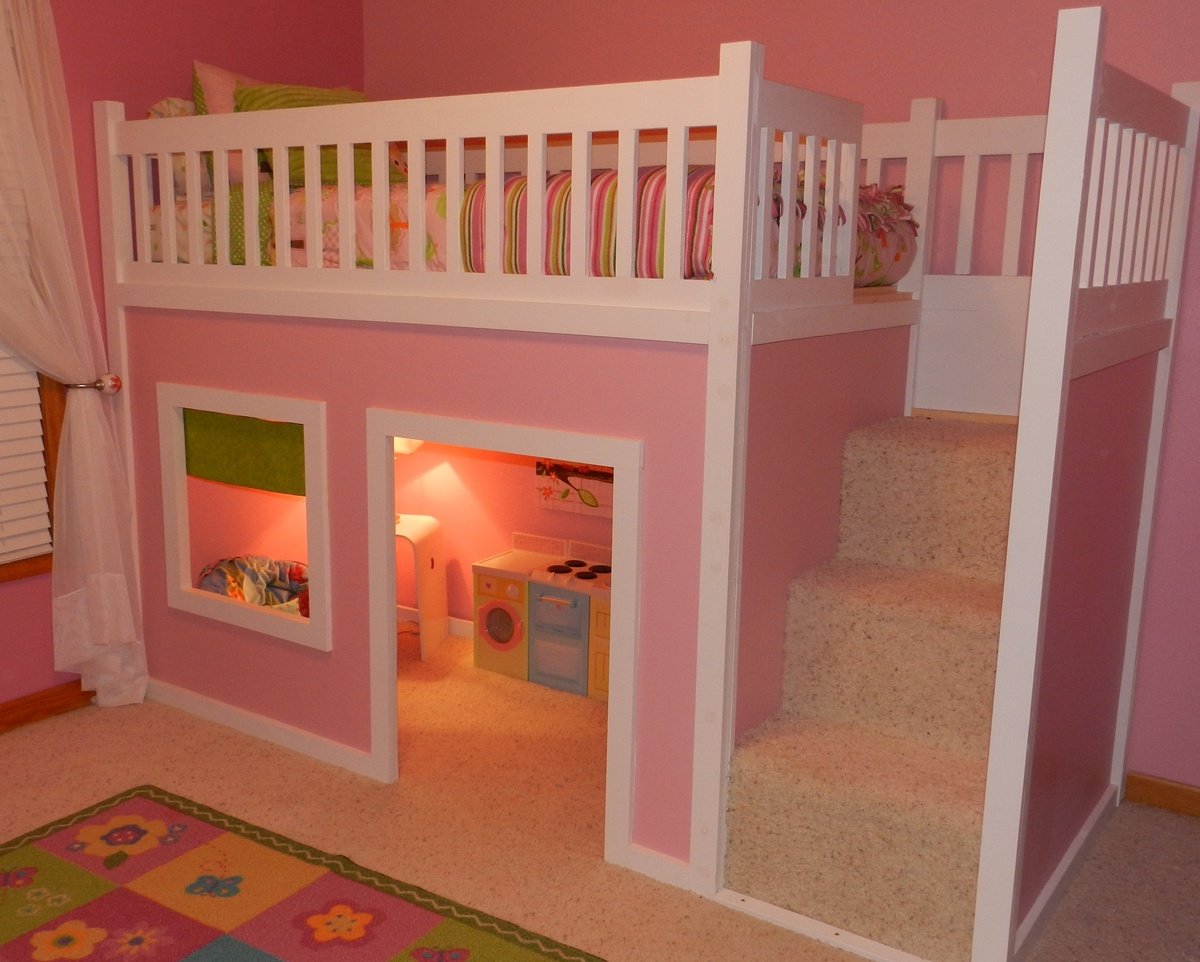
When I showed my husband the plans for this playhouse loft bed on Ana's site, he decided that we needed to build it for our daughter for Christmas. We combined the two plans for the Playhouse & the stairs and modified it slightly to fit our space. We had left-over carpet which we used on the stairs. She absolutely LOVES it!! And secretly, I think her 3 older brothers do, too. Thanks SO much, Ana!!

Estimated Cost
350
Estimated Time Investment
Weekend Project (10-20 Hours)
Finish Used
Paint is BHG Pink Carnation.
Recommended Skill Level
Beginner

Comments

Phillip (not verified)

Wed, 01/04/2012 - 14:17

How can I get a copy of the plans?

Anonymous Coward (not verified)

Thu, 01/05/2012 - 07:16

Philip and Guest -
The plans are free, and click on the links in the post

From Plan: (plans are linked here)

Shameka (not verified)

Tue, 11/13/2012 - 18:29

Hey,
How do I get a copy of the plans for this bed? I would love to do this for my daughter for a birthday gift. I have gone to the section where it says plans but there is no link to click on. Thanks in advance.

Guest (not verified)

Tue, 01/17/2012 - 09:20

I would like to know how to get a copy of the plans for this bed. This is exactly what I want to do in my little girls room but I have not beed able to find plans. Thanks!

In reply to by Guest (not verified)

Karajoy

Fri, 01/27/2012 - 21:44

If you look in the section above, you'll see "From Plan:" There are two links (they're black and don't look like links. You'll need to hover over them). One for the basic bed and one for the stairs.

kelly.abbott (not verified)

Tue, 01/17/2012 - 18:38

I do not see the plans for the playhouse loft bed. Where is it located? Can you email it to me or post the link?

Guest (not verified)

Sun, 01/22/2012 - 11:57

Hi, I was wondering what age group this is best suited for? I can't tell from the size of the pictures, and my daughter is only 2.

In reply to by Guest (not verified)

Karajoy

Fri, 01/27/2012 - 21:38

I would say your 2 year old daughter is a little young for a bed this high. I think general guidelines would suggest waiting until age 6 for lofted and bunked beds, but I think that's being very cautious. Our daughter is just about to turn 4 and she does fine in it.

Cindy from Indiana (not verified)

Wed, 01/25/2012 - 11:29

You did a great job! That looks fantastic!

I'm going to be making this bed within the next month or two for my daughter. She's 4 (will be 5 in April). I know the overall design isn't *that* high off the floor, but my daugter has a tendency to roll out of bed...often. LOL

Do you find the guardrail/slats are high enough to prevent roll offs, or should I add some height to them when I build?

Yours turned out awesome! I can see why your daughter (and sons) love the bed!

Cindy

In reply to by Cindy from Indiana (not verified)

Karajoy

Fri, 01/27/2012 - 21:34

Hi Cindy.
Thanks for your kind words.
We had the same concerns about our daughter rolling or falling out. She is almost 4, but still had rails on her previous bed. We put the slats that the mattress sits on in the very lowest possible position and actually traded twin mattresses with her brother who had a thinner mattress. Her's had a pillow-top and even the extra 2 inches made quite a difference.
There are nearly 9 inches between the top of her mattress and the top of the rails which is plenty to prevent accidental roll-outs, but it certainly wouldn't hurt to add extra if it would make you more comfortable.
Now if we could just keep her from standing up there, I'd feel a whole lot better. lol
Good luck with yours.
Kara

Cindy from Indiana (not verified)

Sat, 01/28/2012 - 07:27

Hey Kara,

Thank you so much for replying! That does make me feel more comfortable that there will be around 9" between the mattress top and the rail top. Not sure yet if I'll add a bit more or not, but it's good to hear how it worked out for you guys. Now I'll be hoping to keep my little dare devil from trying to 'fly' off the top of it and we'll be good to go. LOL

Thanks, again! That was really helpful.

Cindy

Guest (not verified)

Thu, 01/26/2012 - 12:59

Hi! LOVE THIS!!! Am planing on making for my daughter. Any chance there are plans for this in a Full Size bed?

In reply to by Guest (not verified)

Karajoy

Fri, 01/27/2012 - 21:48

I've seen some posts on Ana's Brag Boards of these lofts with full sized mattresses on top. Ana's original plan is a twin bed, but others have modified it to suit their needs. You may just want to search and see if anyone has included their plans for a full. Sorry I can't be more help. Good luck!

Guest (not verified)

Mon, 01/30/2012 - 08:09

I will be making this for my boys. For the guard rail, I will be making it go all the way to the ceiling, since they like to jump off of things. They will get a kick out of it because it will be a "wild animal cage", lol.

In reply to by Guest (not verified)

Karajoy

Sat, 02/04/2012 - 16:14

Love it! It takes the safety issue out of the equation totally. Great idea. I know they'll LOVE it, too.

JessiW (not verified)

Tue, 01/31/2012 - 18:32

That is very nice if you dont mind me asking how long did you make that one... I am wanting to make one for my daughter but I dont have 103 inches that called for in the one plan...

In reply to by JessiW (not verified)

Karajoy

Sat, 02/04/2012 - 16:10

We made our bed to the exact specifications that Ana gave (103"), however, if you need to save space, you could leave the stairs off and opt for the ladder.

Kelly Kelley (not verified)

Tue, 02/07/2012 - 15:42

I tried to get the plans for this bed and I cant seem to locate. Could you help please? Thank you!! What a beautiful bed!!

In reply to by Kelly Kelley (not verified)

Karajoy

Wed, 02/15/2012 - 18:34

Hi Kelly,
There are links to the 2 plans in the "ABOUT THIS PROJECT" section above. Just hover your cursor over the "From Plans:" and the links will change color. They appear black and therefore, don't look like they're linked to anything. They're both there. Good luck!!

Guest (not verified)

Fri, 02/10/2012 - 14:23

I cannot find the plans to this bed. Could you email them to me ? Abby

Guest (not verified)

Fri, 02/24/2012 - 17:03

We were looking for plans to build a loft bed to save space in our 3.5 year old daughters room. My husband found this and we are sold on this idea. She is going to flip when she sees her new bed! Love it!

Amanda D. (not verified)

Mon, 03/05/2012 - 20:01

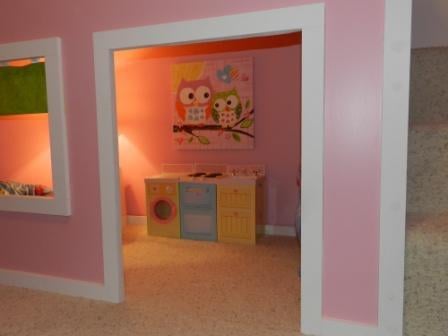
Hi there, I was wondering if you could tell me where you got the fabulous little washer and dryer combo that I see in the photo. I know the sweet owl painting is from target, but I love the little play space you seem to have created! :)

In reply to by Amanda D. (not verified)

Karajoy

Mon, 03/19/2012 - 19:42

The little set inside is from Playskool's Rose Petal Cottage collection. It's a little miniature set and worked perfectly in this space.

Kirstie (not verified)

Sat, 03/17/2012 - 22:52

I LOVE this so much! I love the color scheme as well, we decided to copy the scheme in my daughter's room. I was wondering where you got the curtain from? Did you buy it or make it yourself? It's almost exactly the color of the green paint we bought so I would love to know. Also, I love the washer and dryer too, also curious about that. Thanks!

In reply to by Kirstie (not verified)

Karajoy

Mon, 03/19/2012 - 19:40

Hi Kristie.
I made the little curtain and the little washer/stove/sink set are from the Playskool Rose Petal Cottage collection. Good luck building your playhouse. It's a little girl's dream!!

Guest (not verified)

Wed, 03/21/2012 - 20:27

Hi Kara,
I'm really interested in building two of these for my girls... they caught my attention because they've been asking for a bunk bed and I don't want to do a bunk bed because I hate the idea of struggling to change the bedsheets. Just wondering if it's a hassle with a bed this height.

Yours looks amazing, btw!

Thanks,
Sarah

gabey2329 (not verified)

Tue, 04/10/2012 - 11:18

oh my god i love this it would be awesome for my daughter also. were you able to stay in your budget???? do you think is a safe style for a 3 year old? she would go absolutely nuts!

Guest (not verified)

Fri, 04/13/2012 - 20:17

so beautiful! if i wanted to do this with a full mattress how would i tweak the measurements? i want to do this with a full with the stairs... just so she can be in the bed for a longer period and also the space underneath to be a bit bigger... also if i wanted to make the stairs have a drawer? i really would appreciate alll the feedback if possible because im so far from handy... :-/ and 1 more thing how did u get a light down there?

Veahava

Fri, 05/11/2012 - 18:27

I was wondering if once put together is it easy to take apart? My dad builds houses for a living and was going to make it for my daughter at his house then bring it to mine to set it up

Sharlean (not verified)

Sun, 06/10/2012 - 14:40

My husband and I just finished making this bed with stairs for our 3 year old and he loves it.

Rebeccaguest (not verified)

Tue, 06/12/2012 - 06:41

what age would you reccommend this for?? my son is 3 n a half and i woant to attempt to make this bed, but dont want to spend time and money if i will have to buy him a new bed in a couple of years. i would like it to last a good while. also, like veahava, i was wondering if this was easy to dismantle once put together as i am planning a move in the future, thankyou

winter_baby26

Thu, 06/28/2012 - 07:43

This looks amazing! I'm sure your daughter was thrilled. I can't believe it only cost $350 to build - I have no doubt you would pay significantly more than that if you bought something similar at a store.

Claire_UK (not verified)

Tue, 10/02/2012 - 02:14

This is absolutely divine - you are so talented! I have just found this website and can't imagine I'd ever be able to make something so beautiful. Putting up a shelf is beyond me. Your daughter must be so proud of her little nighttime palace!

Christine N (not verified)

Sun, 10/21/2012 - 20:01

I am trying to get the plans for this bed with the stairs but when I click on the link it doesn't give me the plans. Help, my granddaughter would love love love this. Thank you so much.

Nikki_DivaMomm… (not verified)

Thu, 12/06/2012 - 20:30

I LOVE this bed ! It's exactly what my husband & I are looking for !! With your measurements, is this suited for a toddler mattress or a twin??

Tara Payon (not verified)

Mon, 12/17/2012 - 20:42

Love love love this bed, what size mattress does it use?

cevans81

Wed, 09/11/2013 - 05:11

We made this bed for our daughter and now my son and daughter play with her kitchen and table underneath in the playhouse. Your instructions were so easy to follow and everything matched up perfectly. We did do the ladder due to space but the bed is beautiful. We get so may compliments when people come over and I always tell them about your website. You truly have awesome ideas! I can not wait for the next project and I am sure it will be off your site :-)

kullmann

Mon, 10/07/2013 - 17:26

I love your playhouse with loft bed! How tall is the underneath part? Would you be able to fit a desk underneath? Also, could the plans be adjusted to accommodate a double bed?

THANK YOU!!

Built-in Bookshelves

Submitted by keribeth on Fri, 07/06/2012 - 14:55

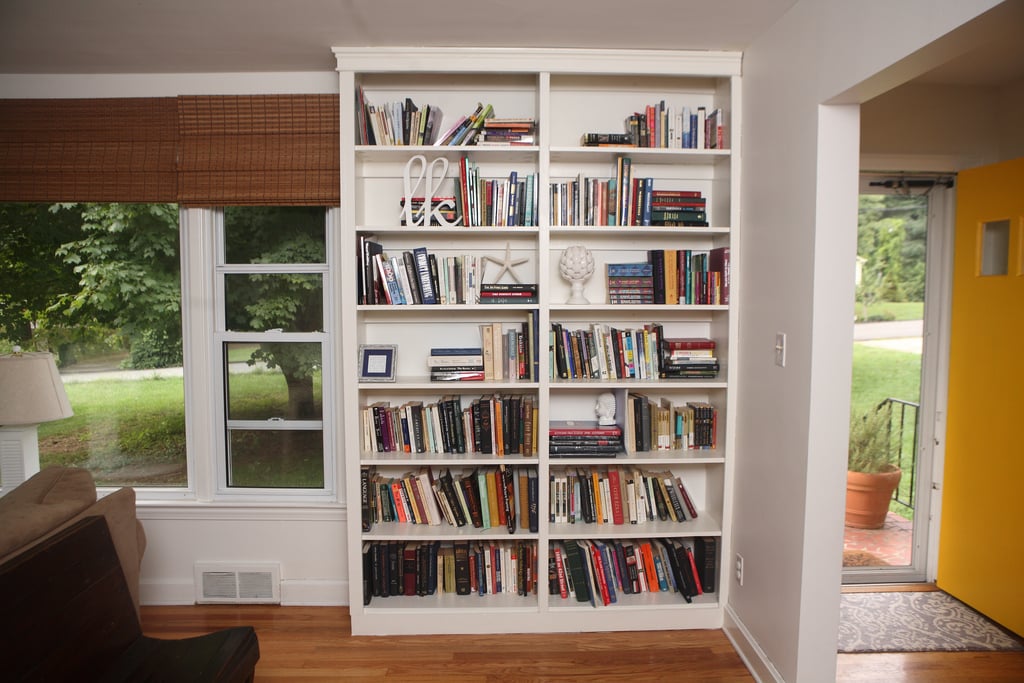
These built-in bookshelves were my first project, and were loosely based on the Willy bookshelf plans, although I changed the dimensions, set them on a 2x4 base, and added trim to the sides and molding on top.

Built from Plan(s)
Estimated Cost
~$120 in lumber
Estimated Time Investment
Weekend Project (10-20 Hours)
Finish Used
Benjamin Moore white dove in advance
Recommended Skill Level
Starter Project

Comments

smoser

Sat, 08/11/2012 - 05:58

hello,

Just wondering how the sides and middle part are built. They look like thicker than 1/2 in.Is it a trim or a 1x2? or did you use some 2x4 too?
I am looking at building a bookcase too but i wanted something more massive than 1/2 in. like yours.
Thanks

Great job!! looks awesome

keribeth

Tue, 08/21/2012 - 05:31

I made the two bookshelves separately so I could move them in my house easier. Each has 1x12 sides (so 3/4" thick), and and that's 1x2 trim over the side and middle.

Thanks!

2x10 Step Stools

Submitted by msyoung22 on Tue, 08/16/2016 - 07:26

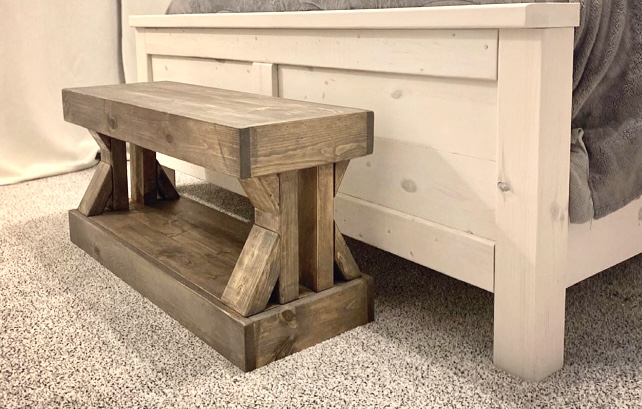
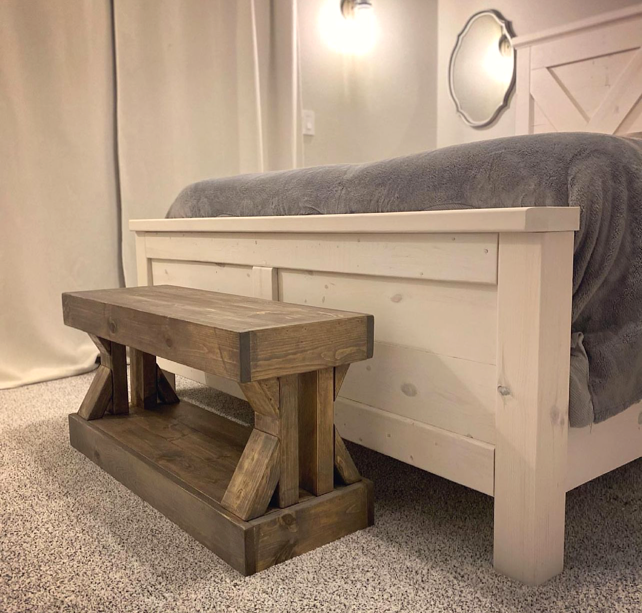
My kids needed a step stool and I had some scrap wood (2x10) left over from a previous project

Estimated Cost
20 dollars
Estimated Time Investment
Weekend Project (10-20 Hours)
Finish Used
Minwax (weathered oak stain)
Minwax polycrylic protective finish
Recommended Skill Level
Starter Project

Comments

kristyzed

Wed, 08/17/2016 - 20:40

These are great.  Can you share dimensions and if there are any angle cuts on the legs?

msyoung22

Thu, 08/18/2016 - 20:12

Thank you! The dimensions are the same as the Ana White "Simple 1x10 Single Step Stool" except I used 2x10's instead of 1x10's like the plans called for. I also used some scrap pallet wood to make a design on the top of the stool. 

- Stool height: 7 1/2" for legs, 1 1/2" for top, and 1/2" for scrap pallet wood; which gives a total height of 9"

- Stool width: 9 1/4" x 16"

- 5 degree angle cuts were made on the legs

Mimi's Faux Mantle

Submitted by adriannew on Fri, 12/07/2012 - 22:06

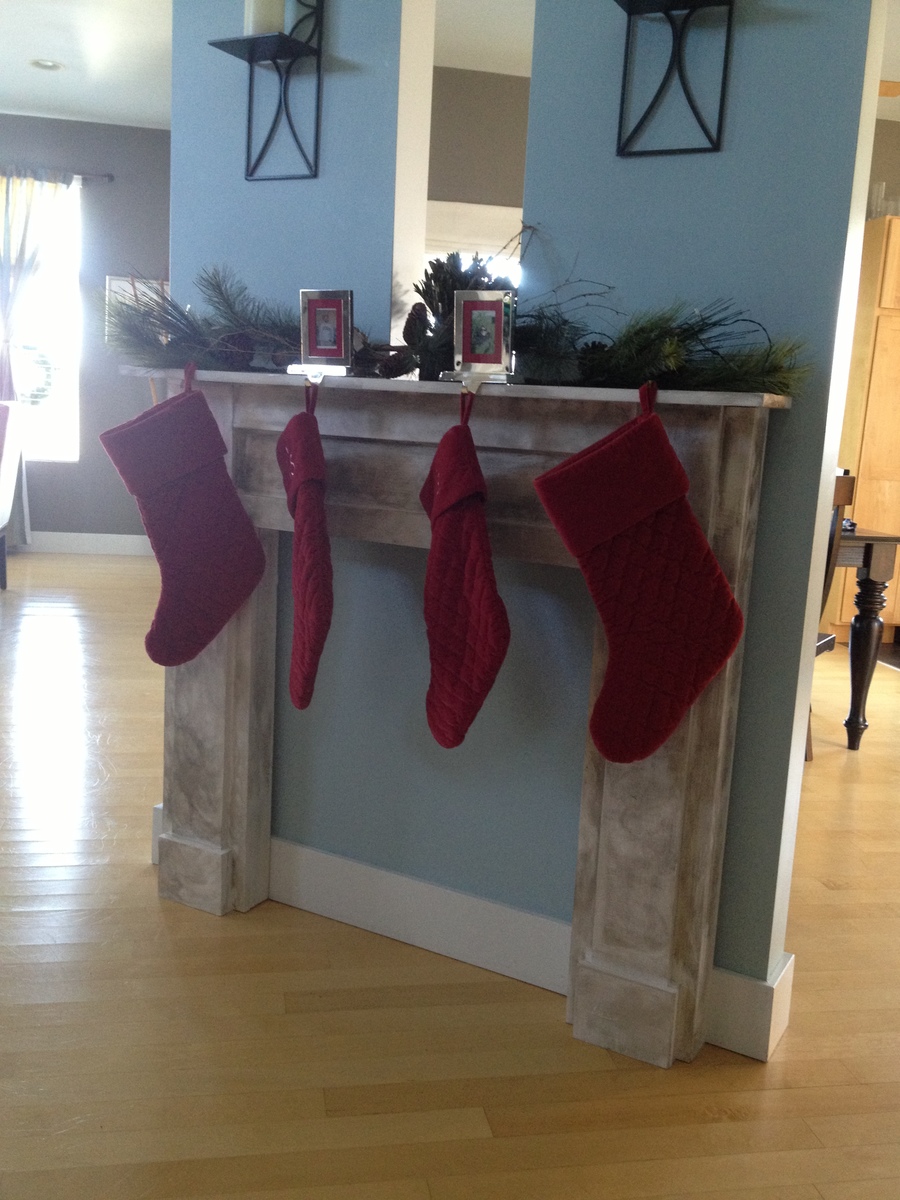
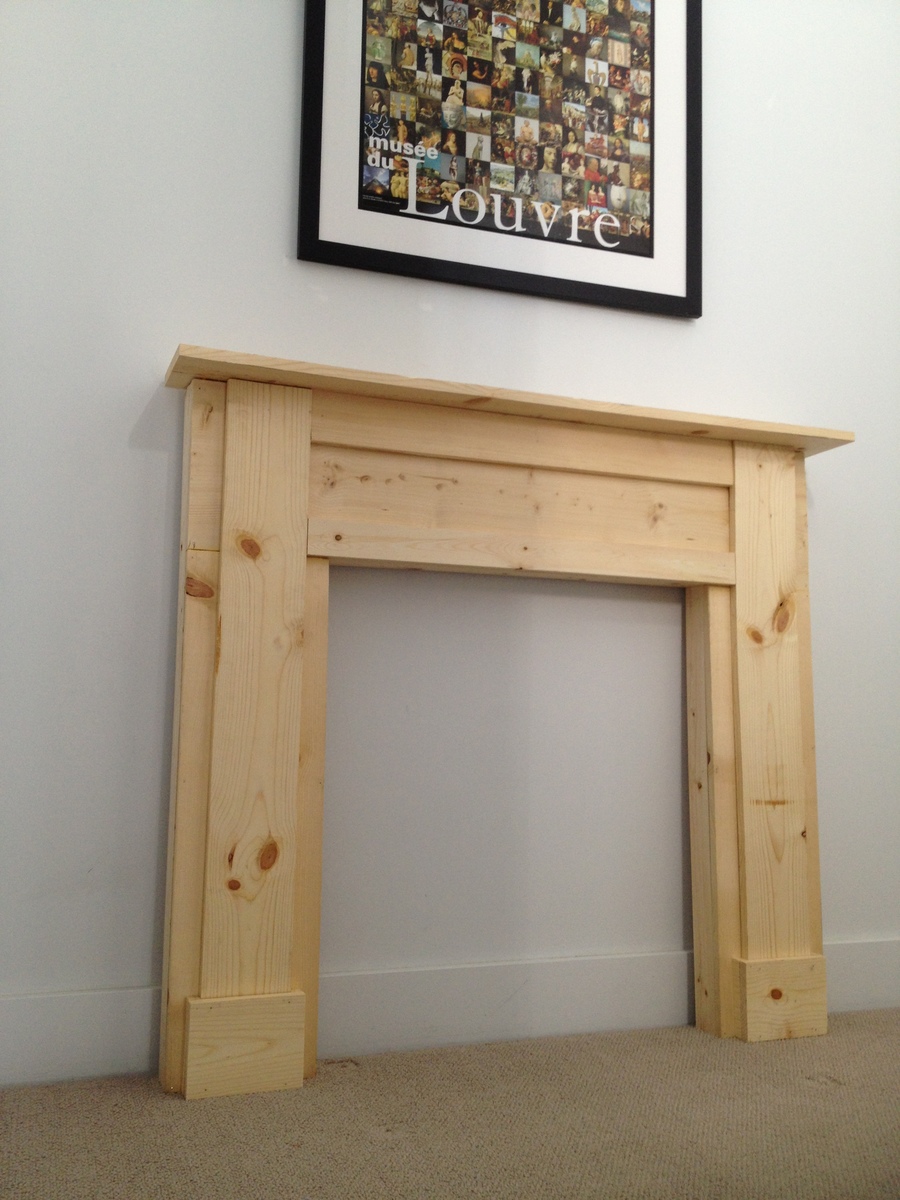
Our home (like many) does not have a fireplace or mantle. So, I decided to build one. Thank goodness for Lowes. They pre-cut all wood for me. I was afraid to use a drill (I'm a rookie), so I nailed all pieces of wood with 1 1/2 inch nails. Wood glue was fabulous prior to using the hammer. I omitted decorative molding too. I think I used too much antique paint, but I can always re-paint it next year. I don't think I'll have the mantle up all year long, but it's great for a Christmas decoration. I hope this gives hope to anyone out there considering this project. If I can do it, YOU can totally do it! Thank you SO much for helping a novice builder like me add something to our home.
Estimated Cost
$80.00
Estimated Time Investment
Weekend Project (10-20 Hours)
Finish Used
antique paint and clear finishing spray
Recommended Skill Level
Starter Project

Comments

Handmade Soap Rack

Submitted by Anonymous (not verified) on Mon, 11/11/2024 - 16:41

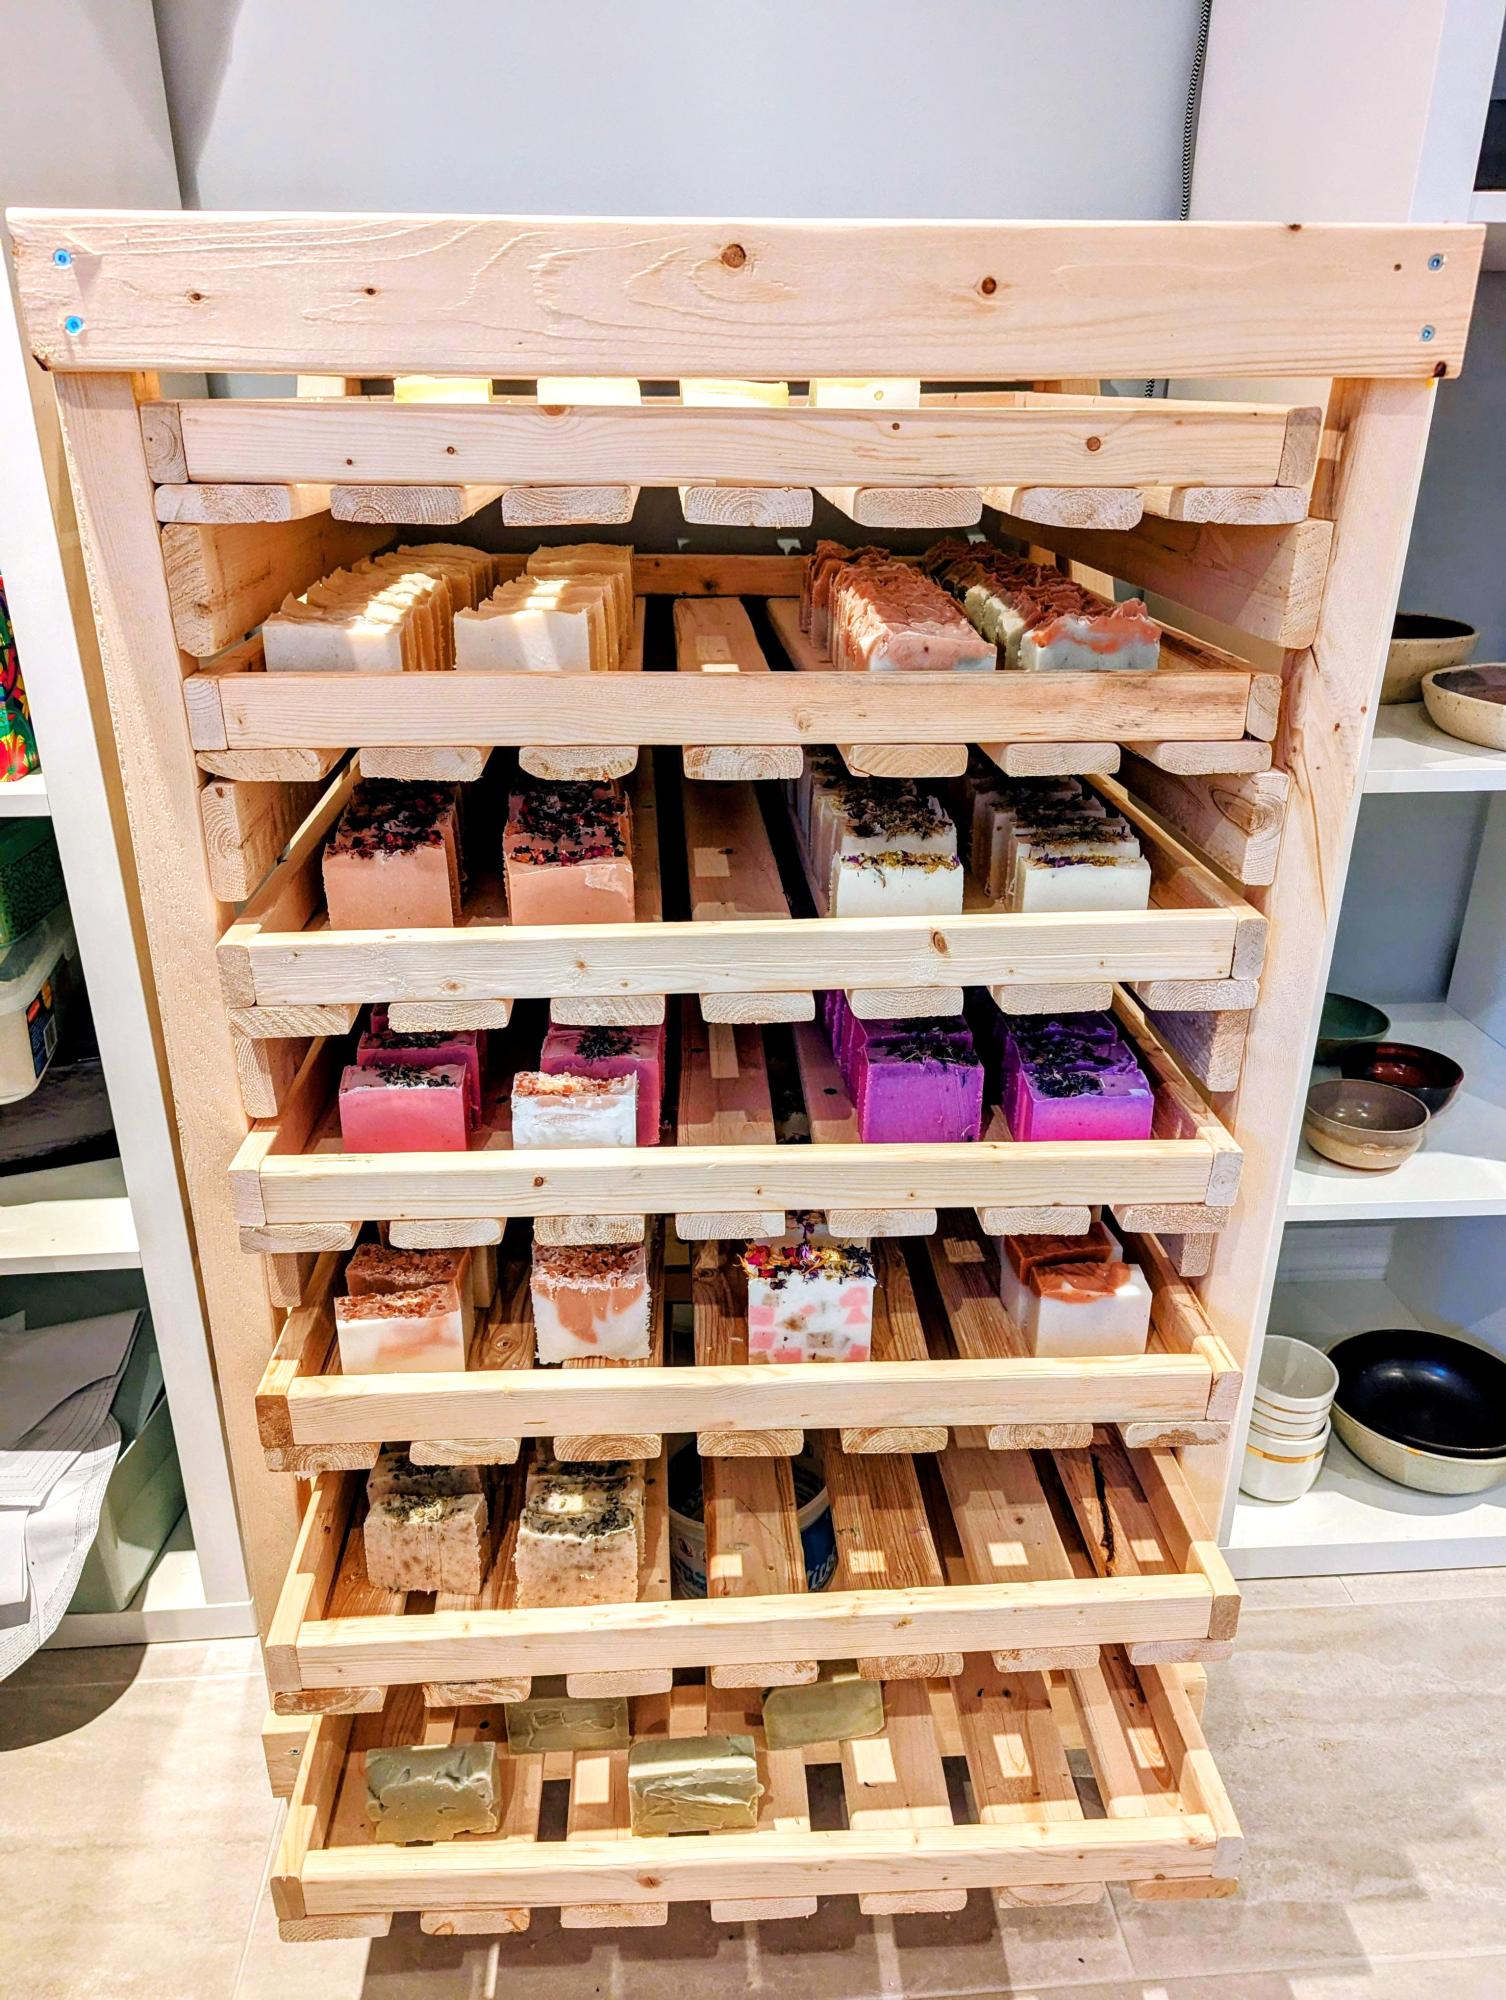
My wife loves handcrafting soap, potery, weaving, etc. She needed a solution to cure her soap and she found your plan. We made a deal : I'll do the project but I'll (finally!) buy a brad nailer. It turned out to be a great project to do for her. The plan is very well explained and the design optimizes the usage of wood. Thank you so much Ana for the idea and the plan! - Martin

Seasonal And Holiday

Gabriel Wall System Hanging Organizer

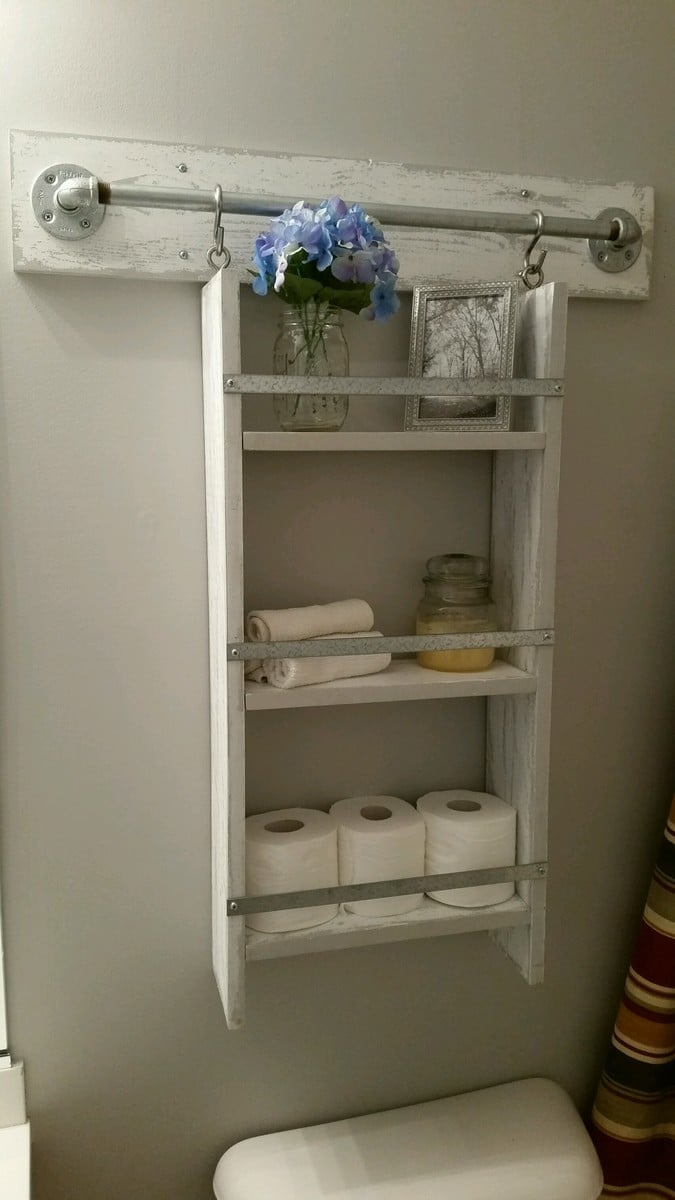
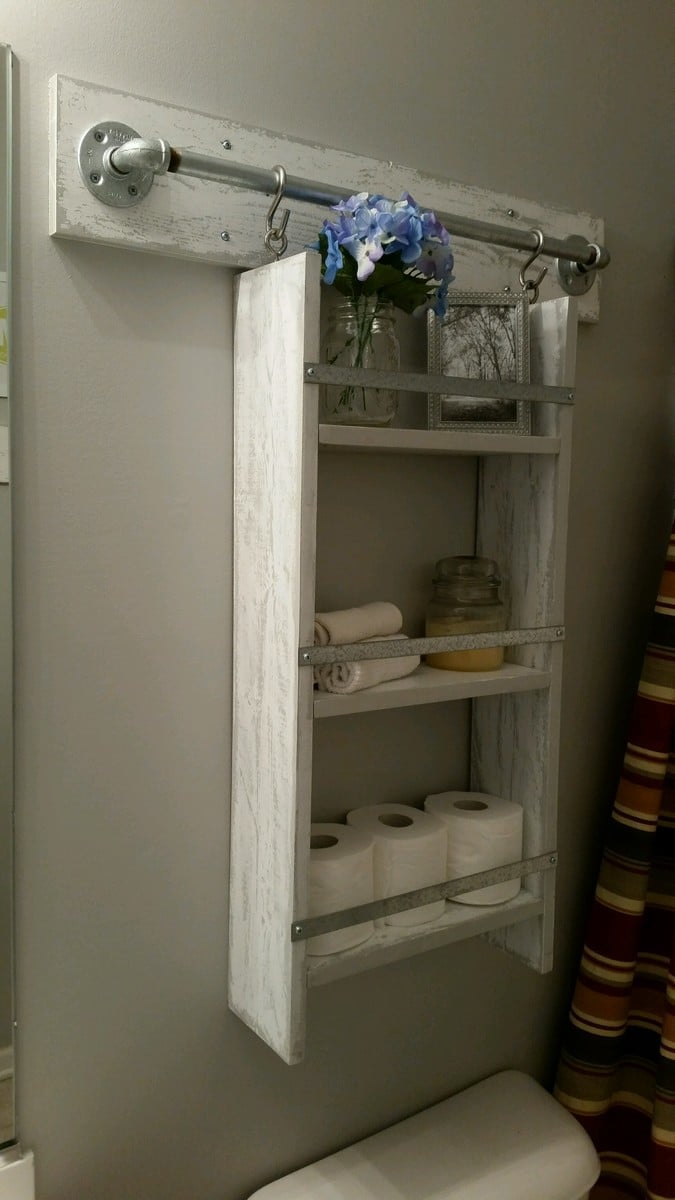
This was a very fun project to build. I pretty much followed the directions that were posted, but I used 1x6's instead of 1x4's because I wanted more storage space on the shelves. I also used 1/2" iron piping instead of 3/4" and am happy with how it turned out. Since the guest bathroom is gray, we didn't want to stain the wood and chose to do an easy to do "weathered" (directions below) look. Now all we need to do is replace the ugly shower curtain!

Estimated Cost
$40 (paint not included).
Estimated Time Investment
Day Project (6-9 Hours)
Finish Used
"Weathered" look – First, paint a gray undercoat of paint and let dry. Secondly, coat the piece with paraffin wax (especially the edges and corners). Next, paint a top coat of white and let dry. Lastly, scrape off the wax (with a razor blade), to your liking, to give it the "weathered" look.
Recommended Skill Level
Beginner

Comments

tgrott

Wed, 03/30/2016 - 06:41

Love the weathered/distressed look you did.  Can you share your technique for the paint job?

tgrott

Wed, 03/30/2016 - 06:42

I;m sorry!! I just noticed that you did share the paint job!  Thanks! :P

tgrott

Wed, 03/30/2016 - 06:43

I;m sorry!! I just noticed that you did share the paint job!  Thanks! :P